
Project Tango - Fiesta ITB'd Track Car, Caged and Carbon'd
 17-01-2011, 09:40 PM
#81
Regular Contributor
Thread Starter

Few pictures to keep you coming back for more:
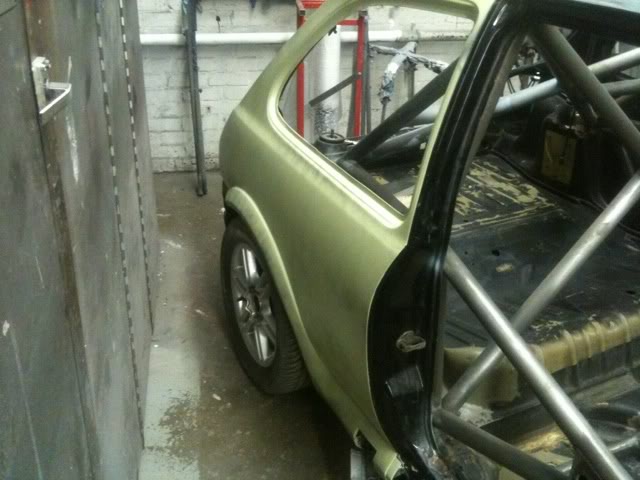
Rear arches primed:
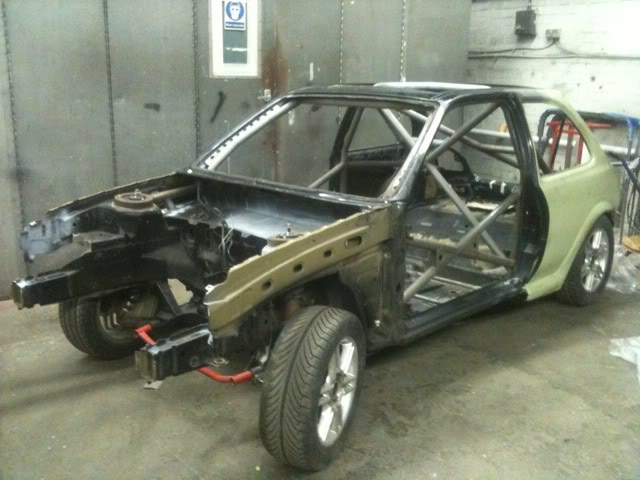
Front end removed, wings off and in the booth getting ready for the inside to be painted:
Thats it for now, more to come this week I hope!
Rear arches primed:
Front end removed, wings off and in the booth getting ready for the inside to be painted:
Thats it for now, more to come this week I hope!
 17-01-2011, 09:50 PM
#83
Regular Contributor
Thread Starter
I'll be in contact in the near future about some powedercoating and other bits when I get the car back if you can assist!
17-01-2011, 09:52 PM
#84
BANNED
BANNED

Always a pleasure, never a chore!!
just give us a shout when you are ready matey, we have moved to our new premises so you may be a little suprised when you turn up
just give us a shout when you are ready matey, we have moved to our new premises so you may be a little suprised when you turn up
24-01-2011, 01:30 PM
#85
Regular Contributor
Thread Starter
Updates? Why ever not...................
Got these through from Brett today, was very excited I must say
Masked up, ready for paint:
So then for the colour coat, all white, yesh!

Am I excited? Hell yeah I am, I'll get down this week to get a better look of it.
Got these through from Brett today, was very excited I must say
Masked up, ready for paint:
So then for the colour coat, all white, yesh!
Am I excited? Hell yeah I am, I'll get down this week to get a better look of it.
25-01-2011, 06:37 PM
#86
Regular Contributor
Thread Starter
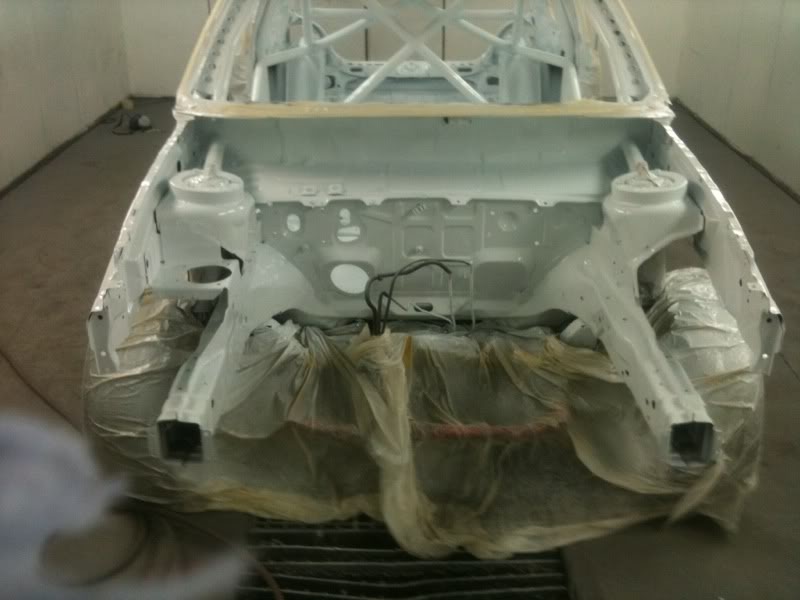
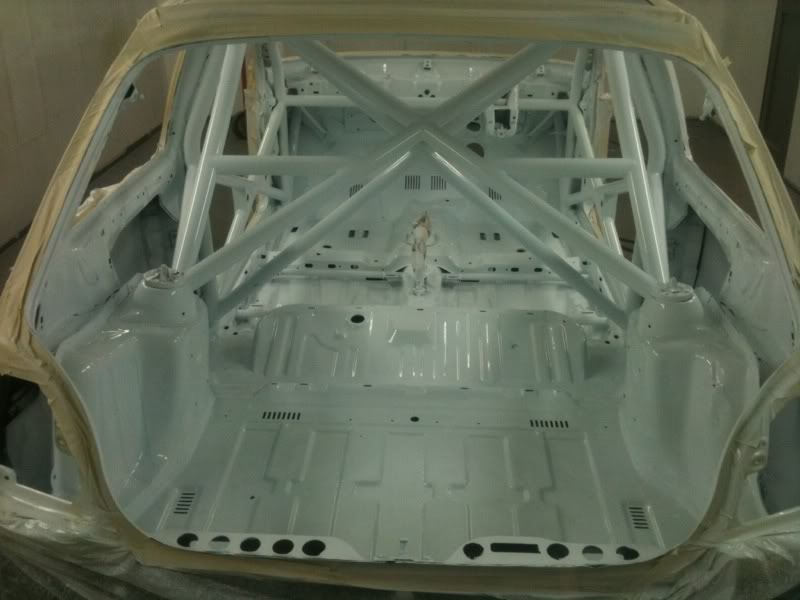
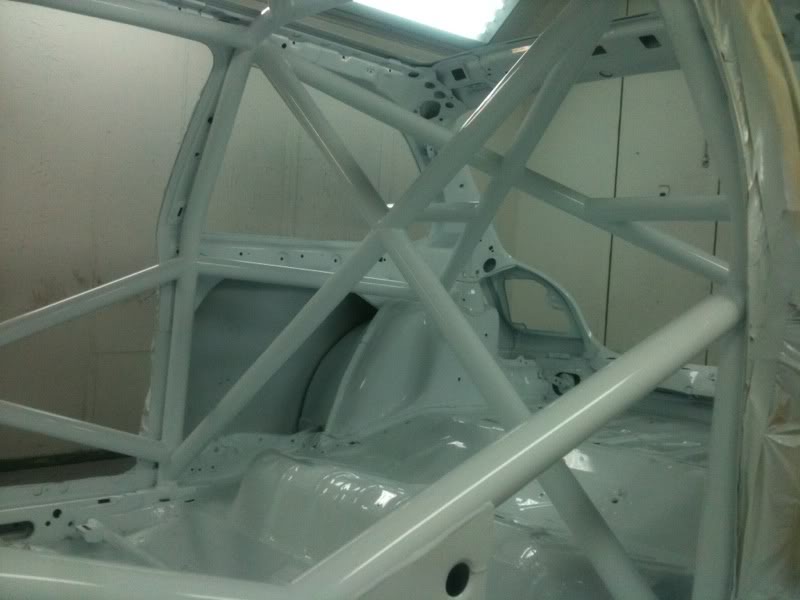
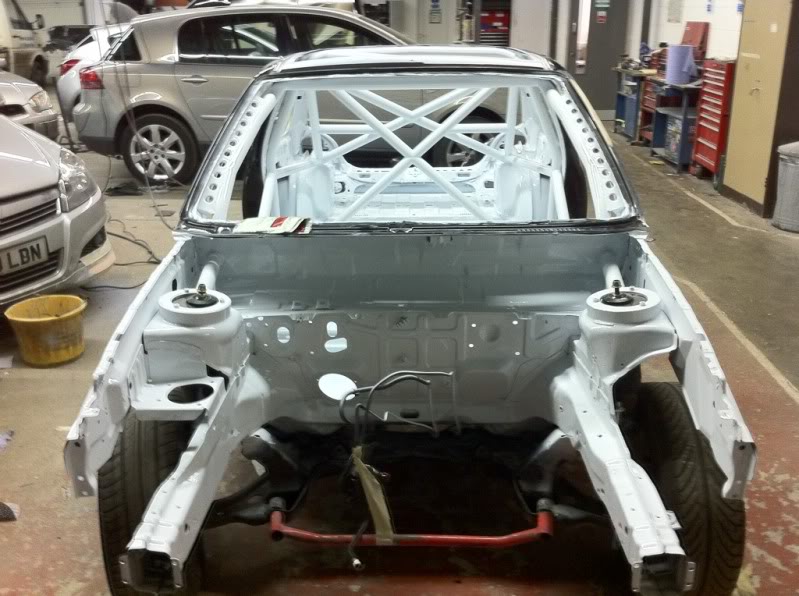
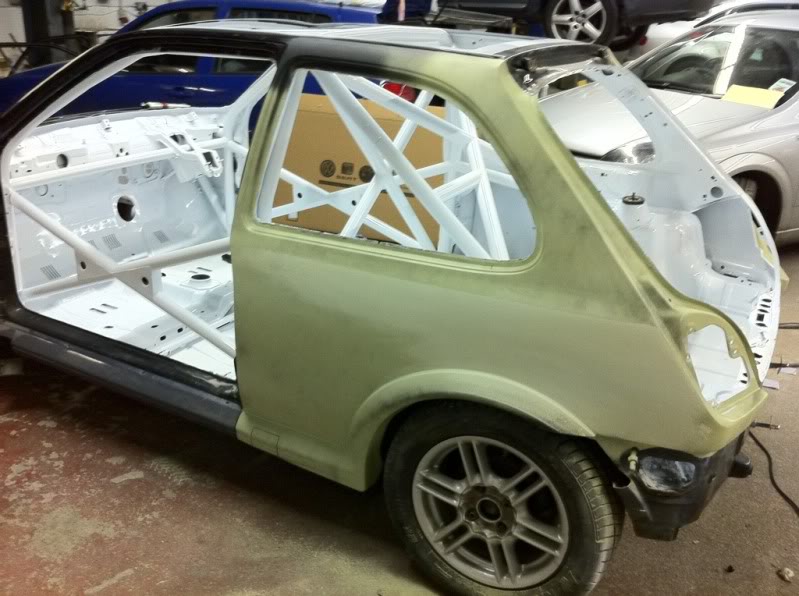
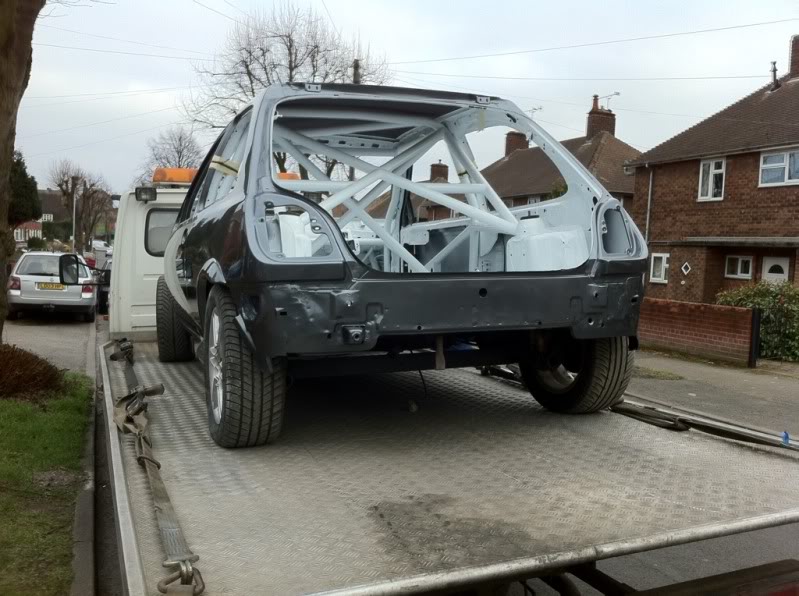
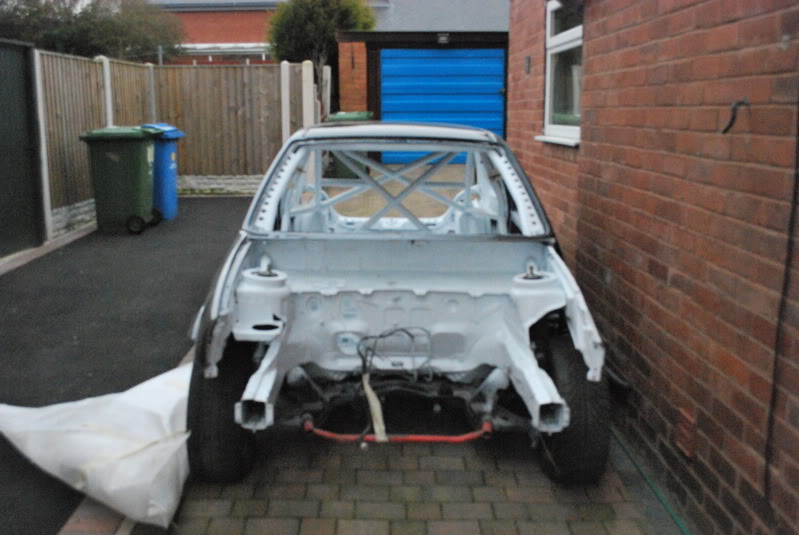
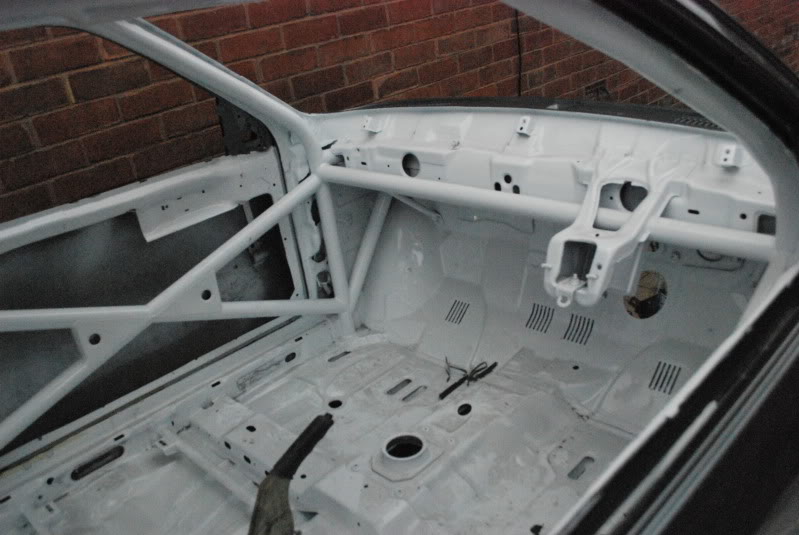
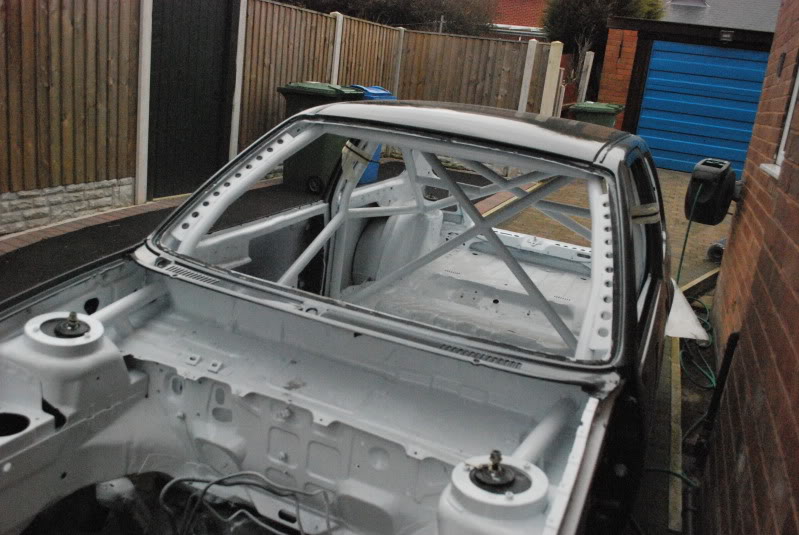
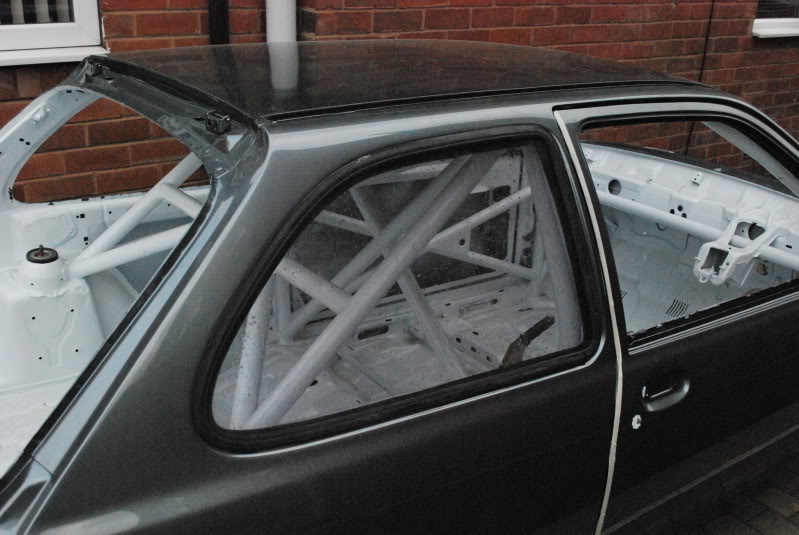
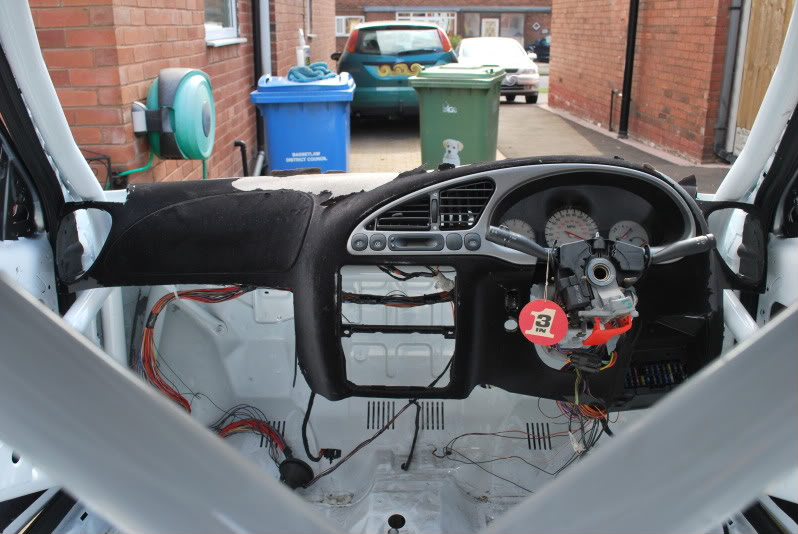
Got a text from Brett today, asking me to come down to the bodyshop to have a look at the interior, he was a bit unhappy with it, and wanted to get my views on it all, pictures do more justice mind:
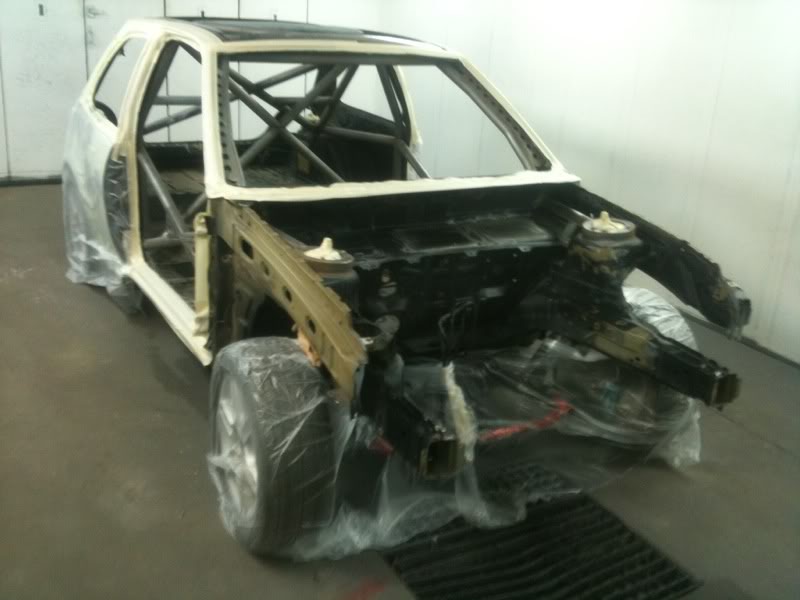
The interior has been done Frozen White, and its fair to say it is very bright:
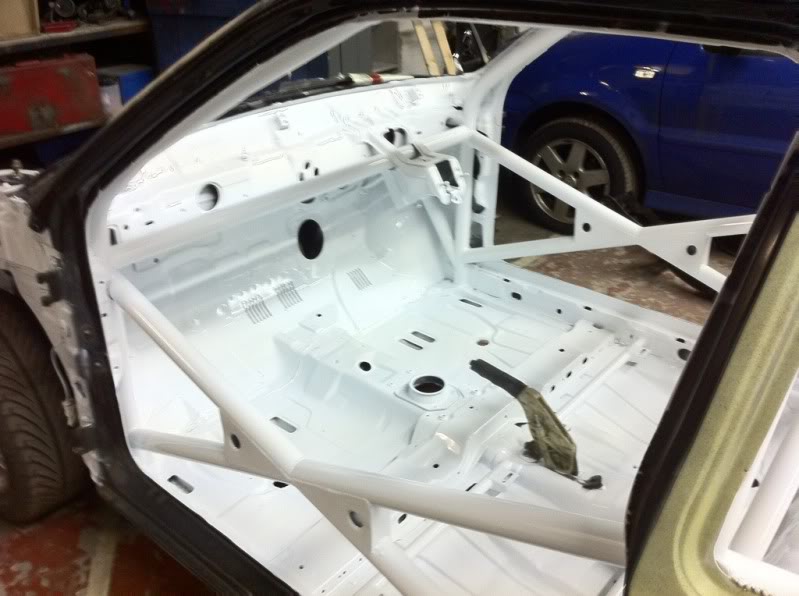
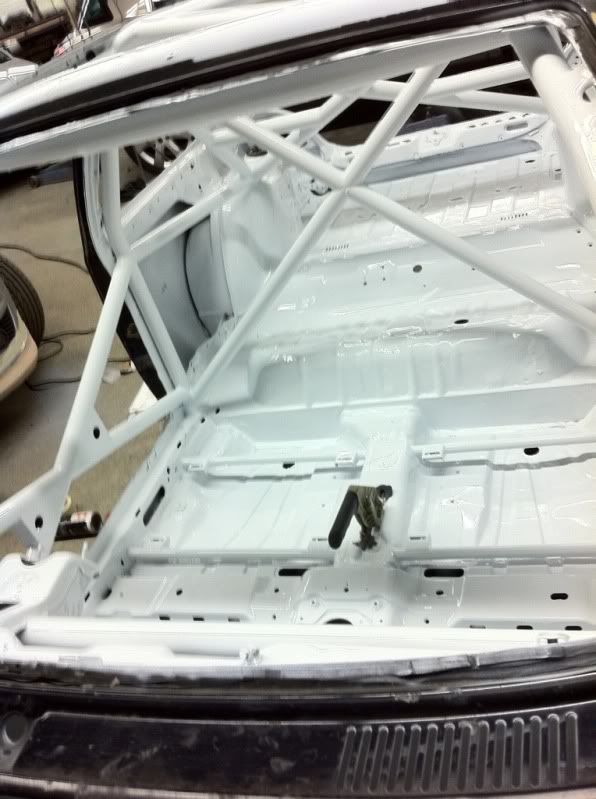
Engine bay has also been painted Frozen White to match it all, and really looks the part:
The interior has been done Frozen White, and its fair to say it is very bright:
Engine bay has also been painted Frozen White to match it all, and really looks the part:
25-01-2011, 06:43 PM
#87
Regular Contributor
Thread Starter
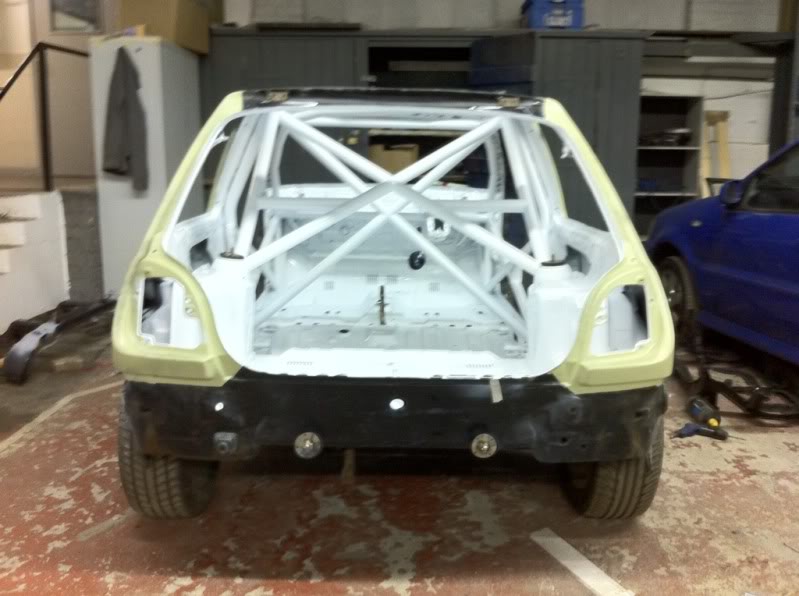
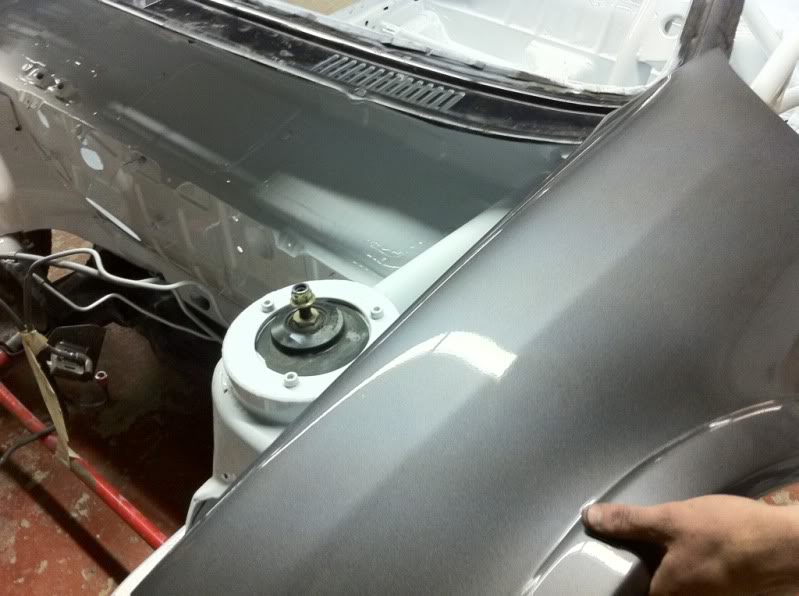
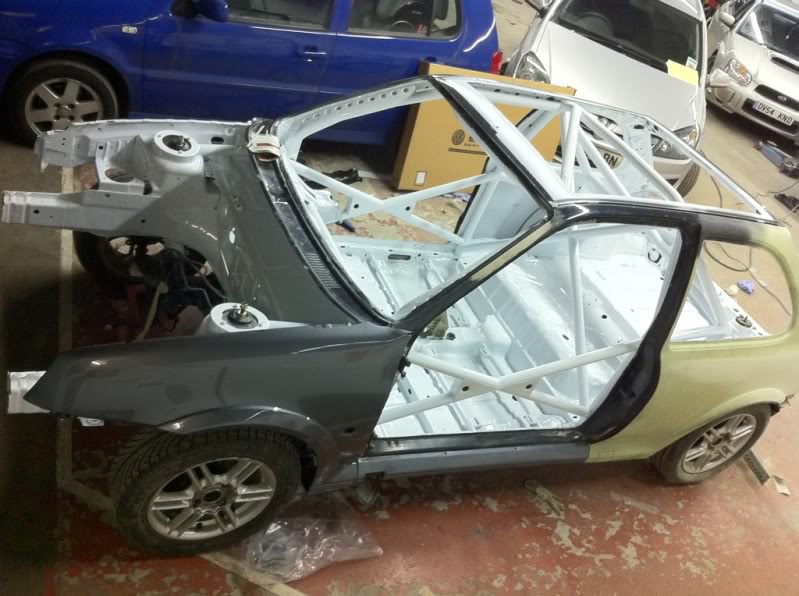
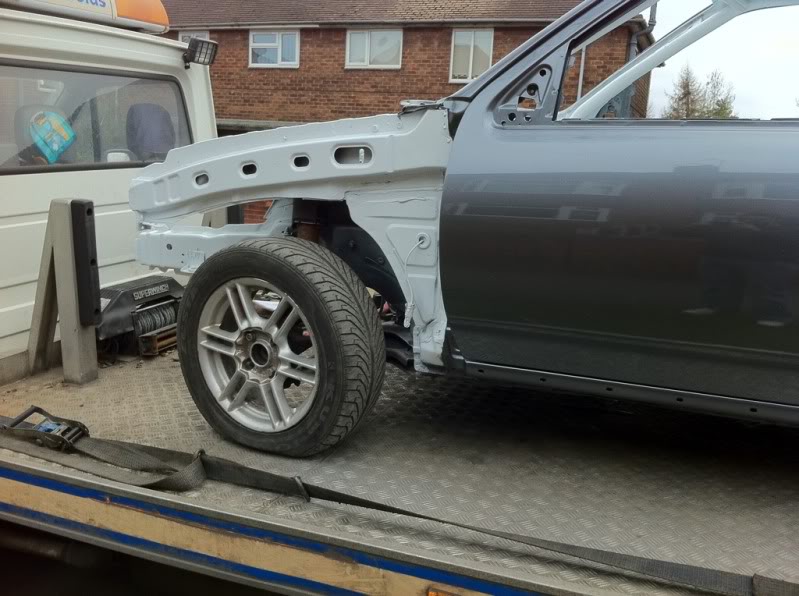
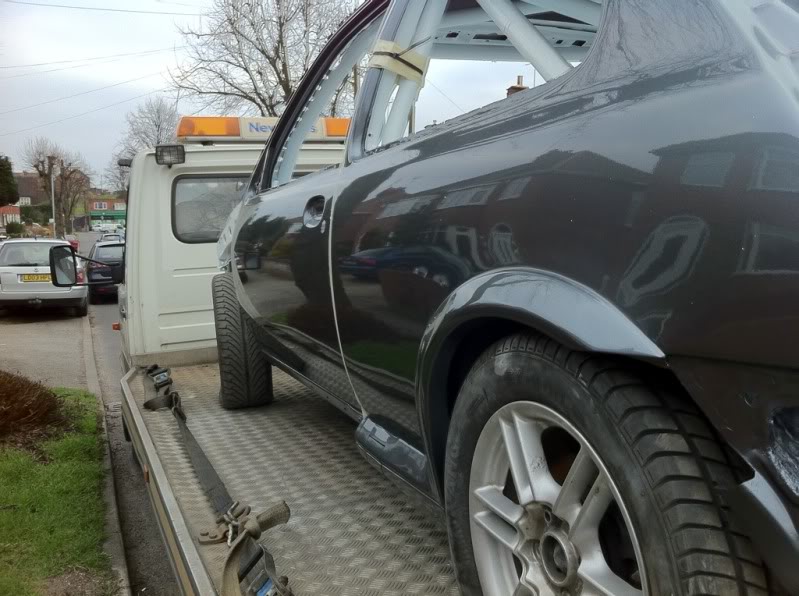
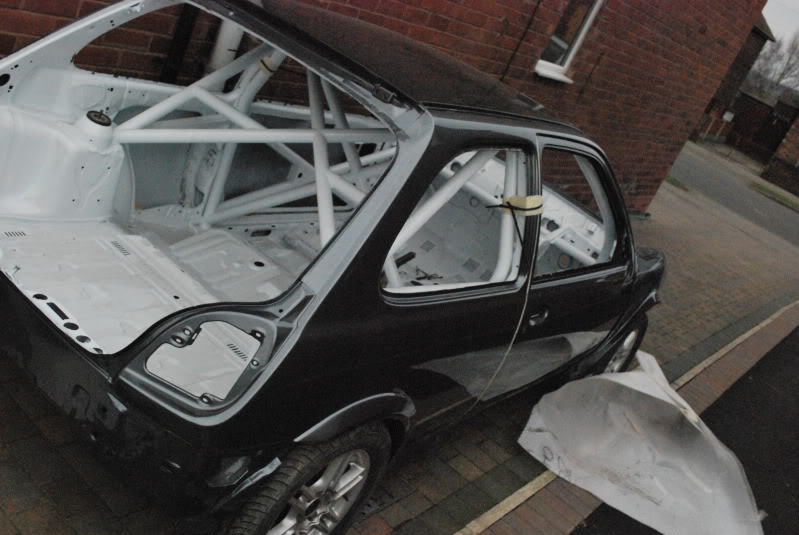
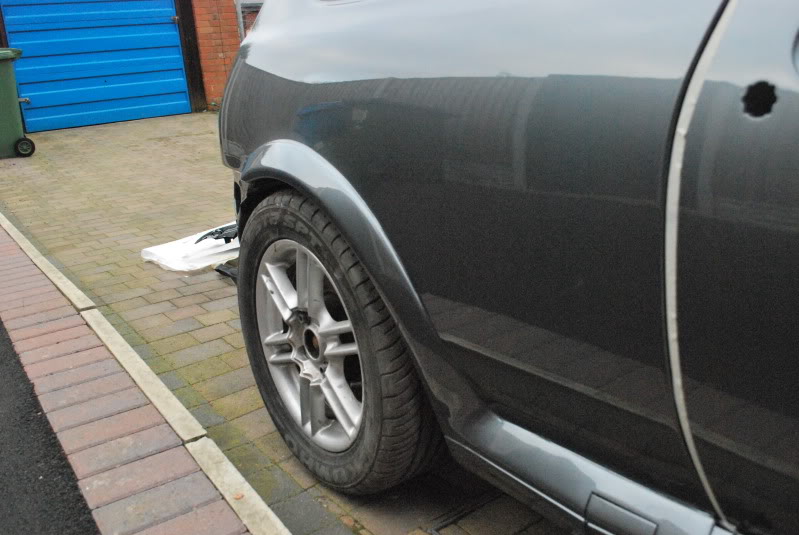
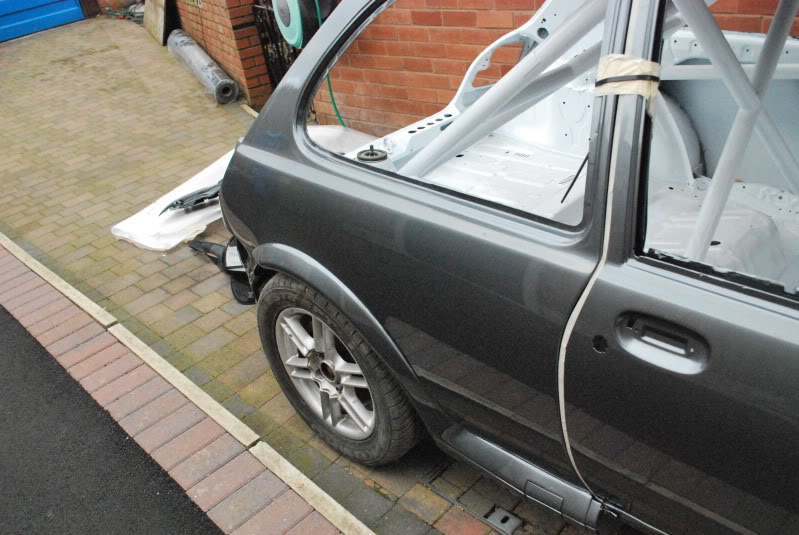
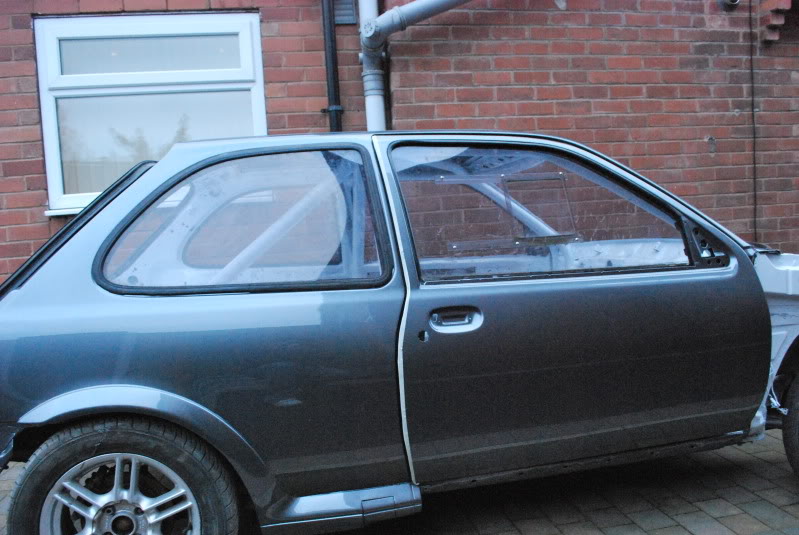
We then offered the wing up, just to get a an idea of how the two colours will contrast:
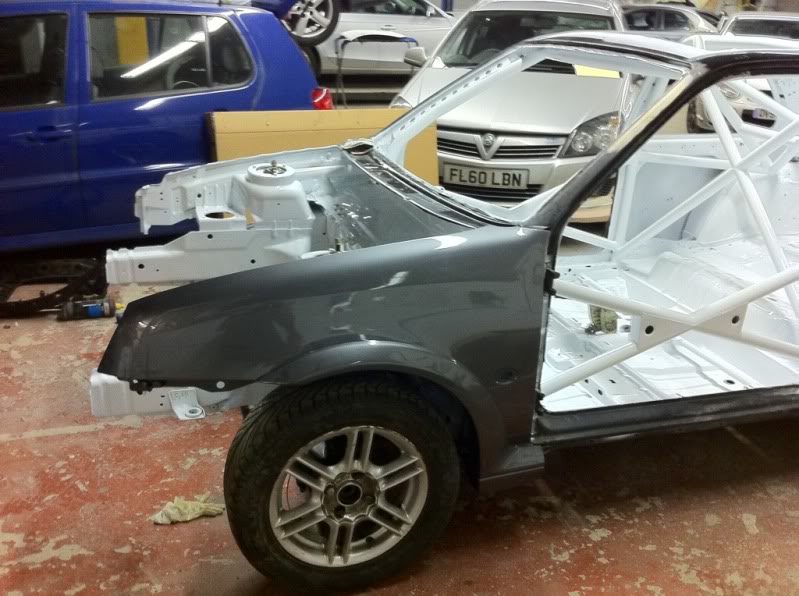
And a better shot of the wing of the light:
Then put the skirt back on to give it a "fuller" view:
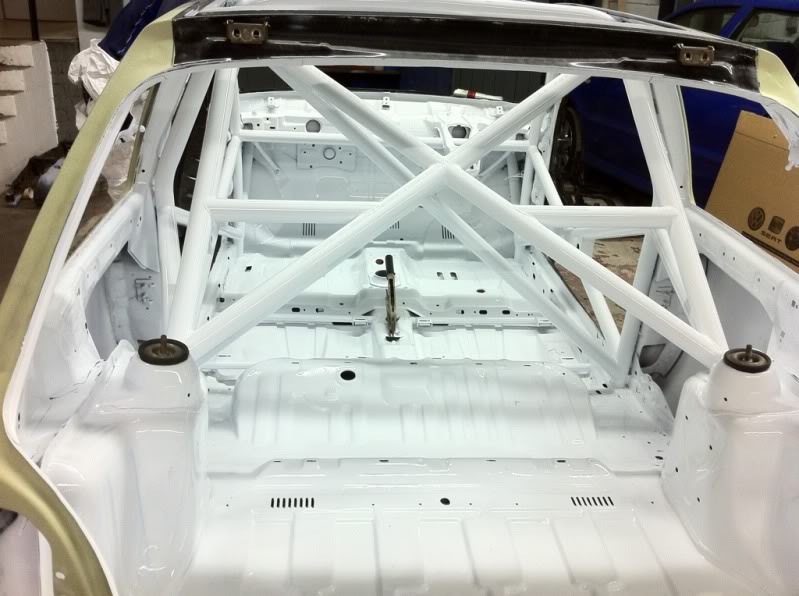
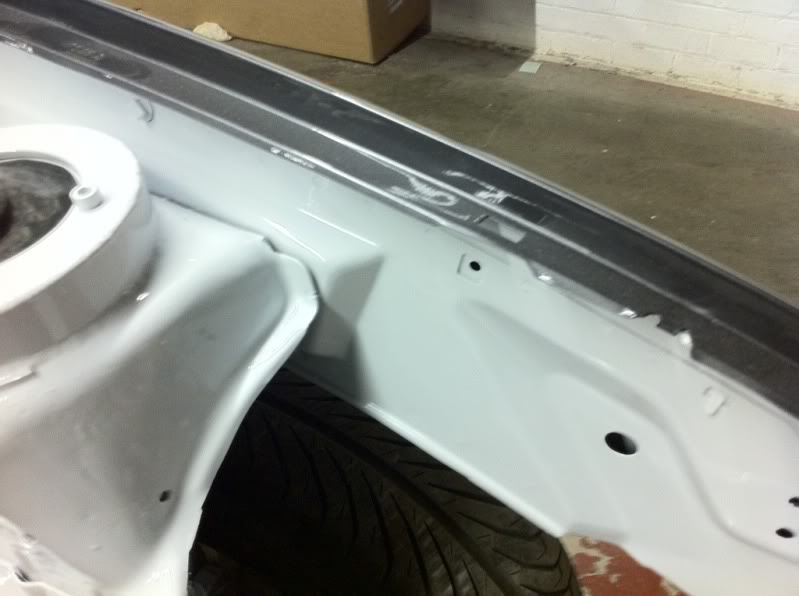
Finally, Brett flatted back the rear arches briefly, just to give me an idea as to how it will be shaped when done:
And lastly, a few parting shots to give an idea as to the overall finish:
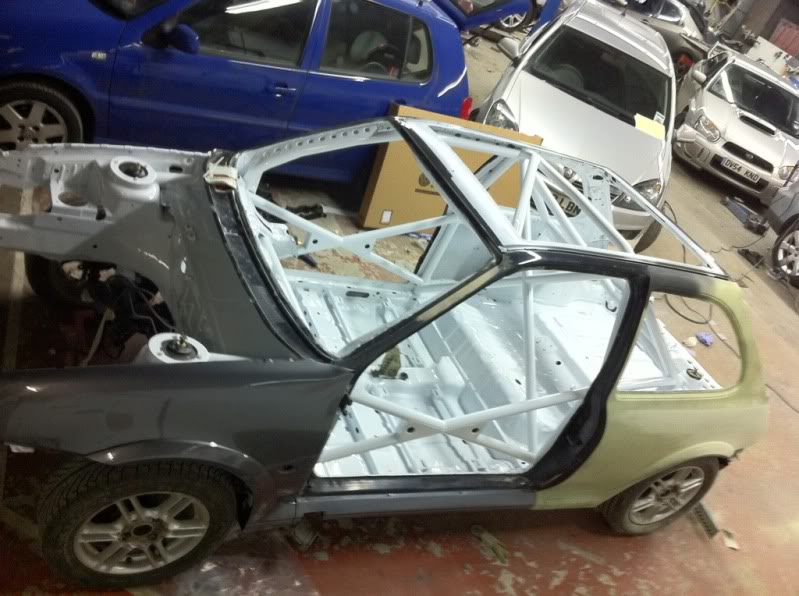
I just cant wait to see all the body painted, carbon roof skin bonded on, and the new carbon bonnet all fitted in place.
Brett highlighted to me a few defects in the paint, however the overall finish of the inside is very good, first time he had painted a car with a cage, he told me never again either!
Massive thanks to him mind for his continued hard work.
And a better shot of the wing of the light:
Then put the skirt back on to give it a "fuller" view:
Finally, Brett flatted back the rear arches briefly, just to give me an idea as to how it will be shaped when done:
And lastly, a few parting shots to give an idea as to the overall finish:
I just cant wait to see all the body painted, carbon roof skin bonded on, and the new carbon bonnet all fitted in place.
Brett highlighted to me a few defects in the paint, however the overall finish of the inside is very good, first time he had painted a car with a cage, he told me never again either!
Massive thanks to him mind for his continued hard work.


 03-03-2011, 06:11 PM
#94
Regular Contributor
Thread Starter
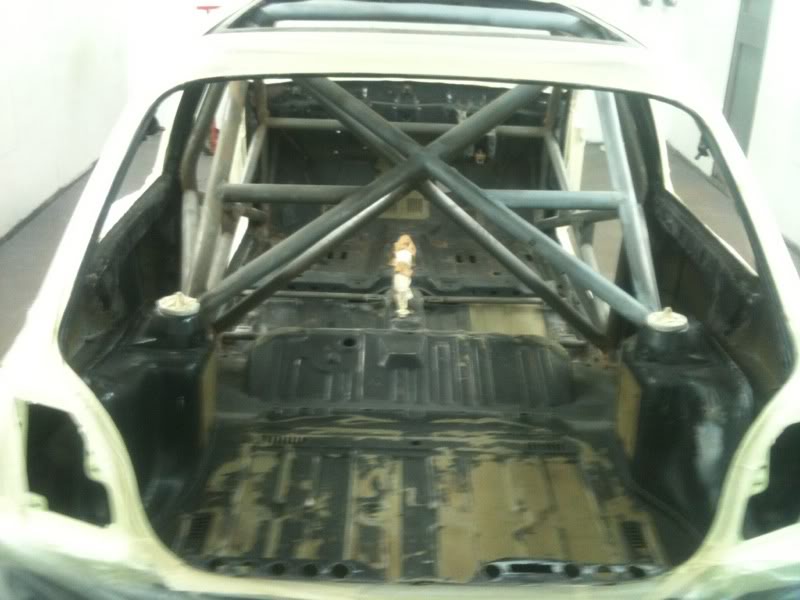
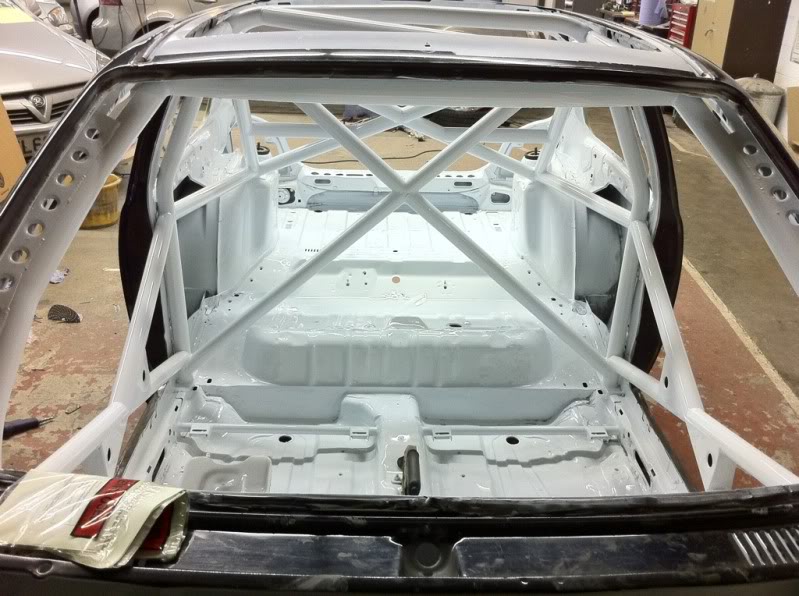
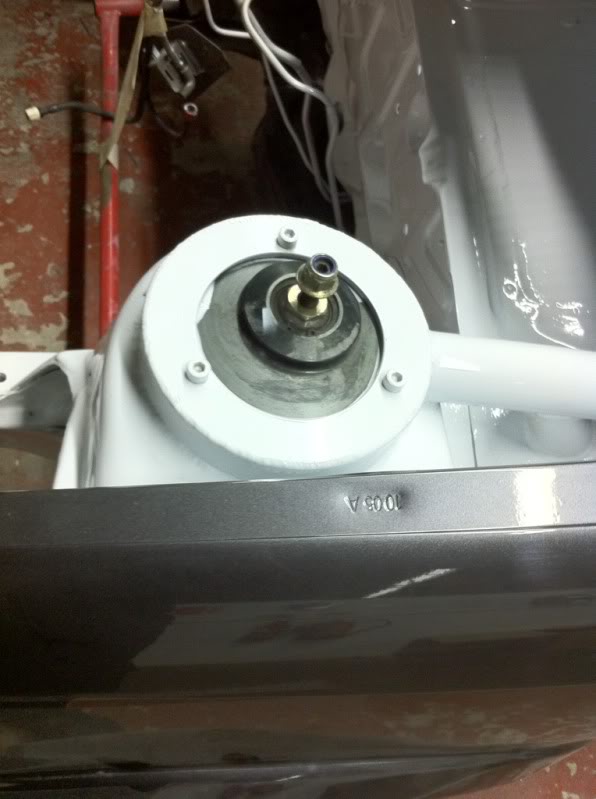
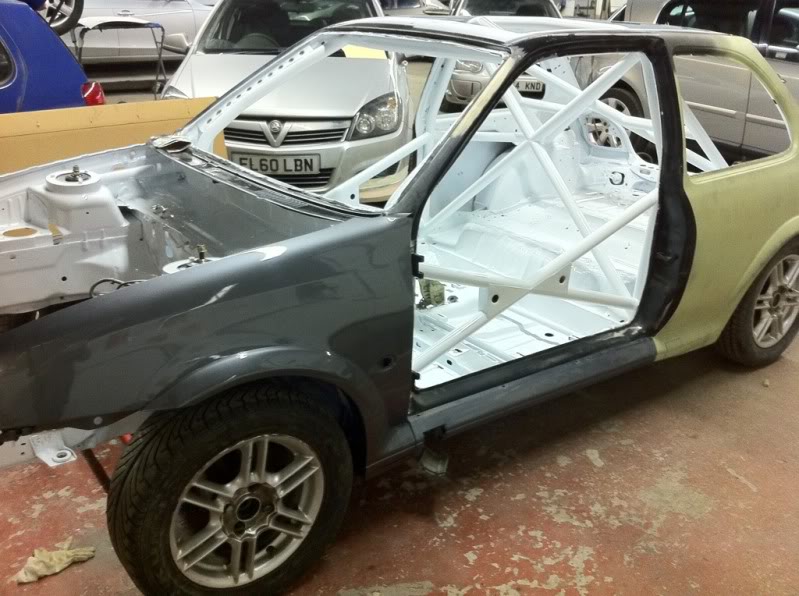
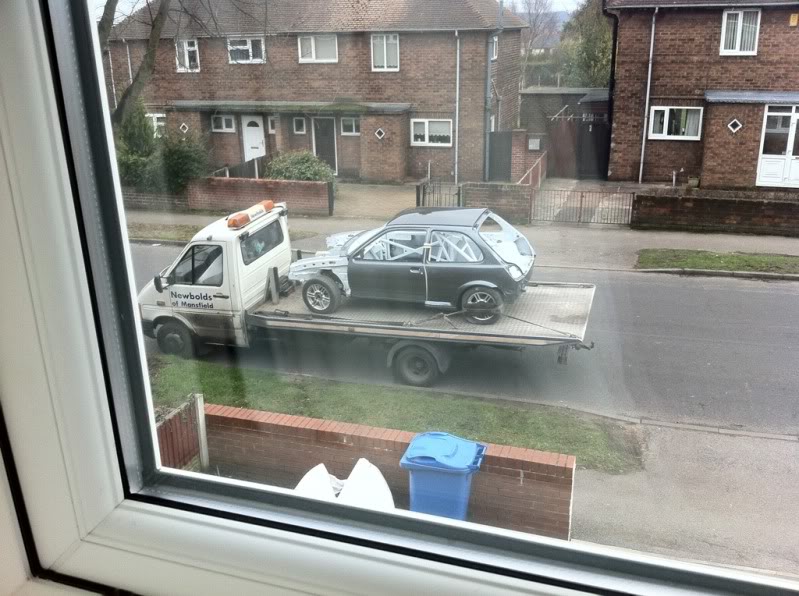
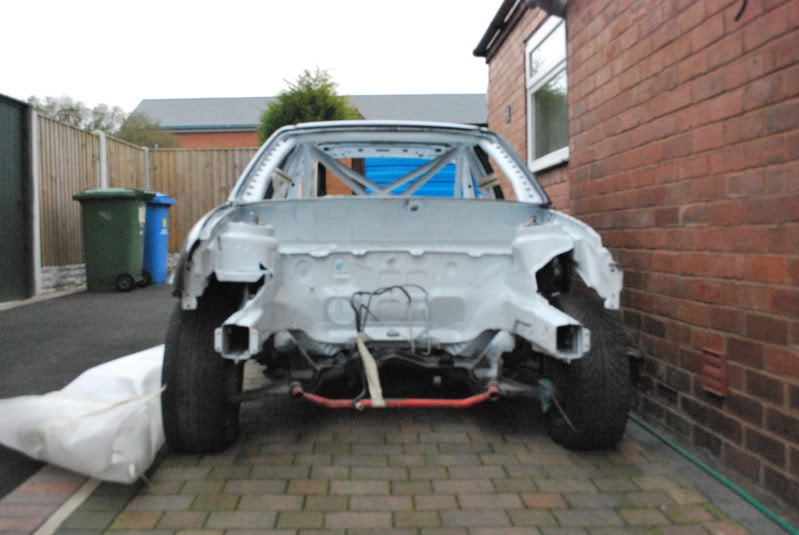
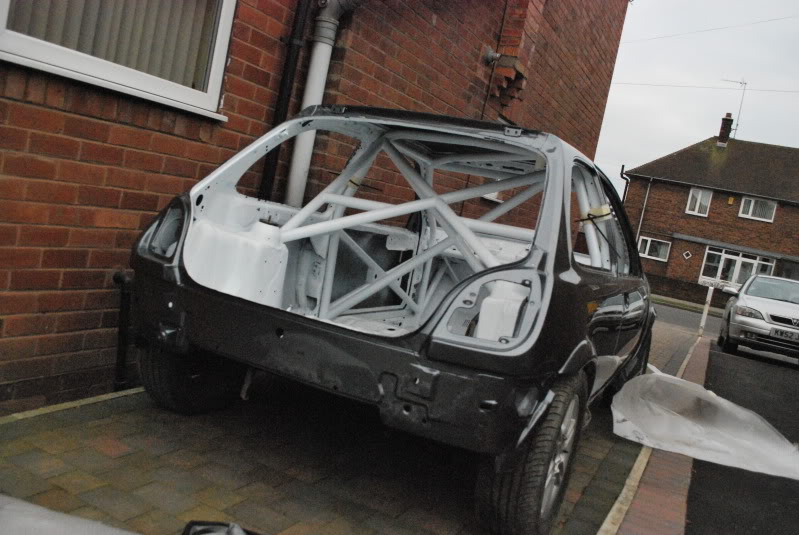
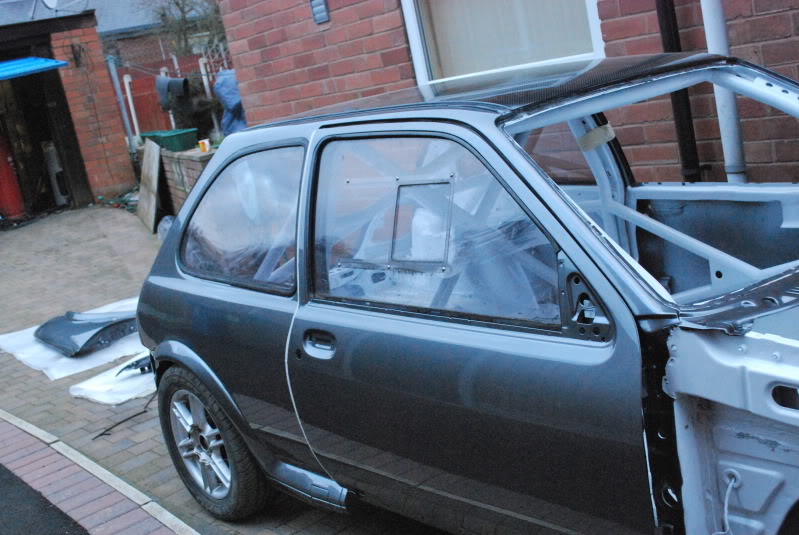
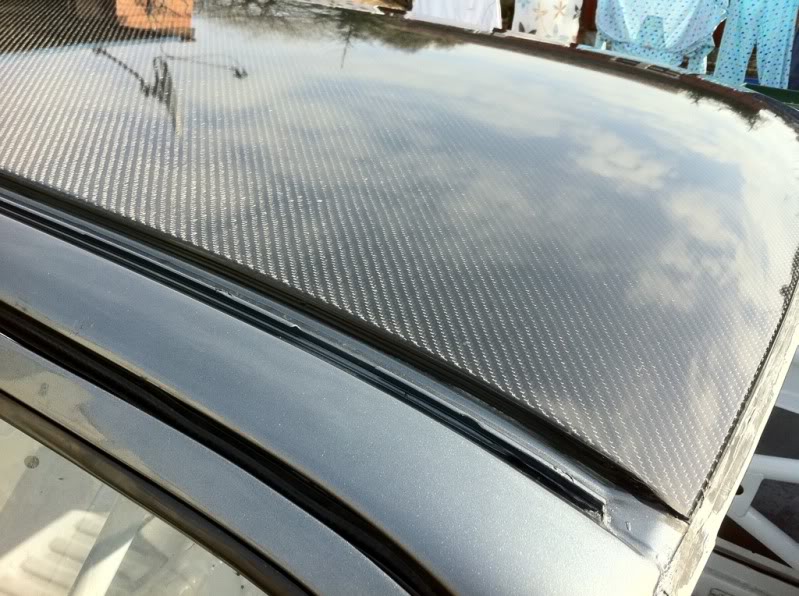
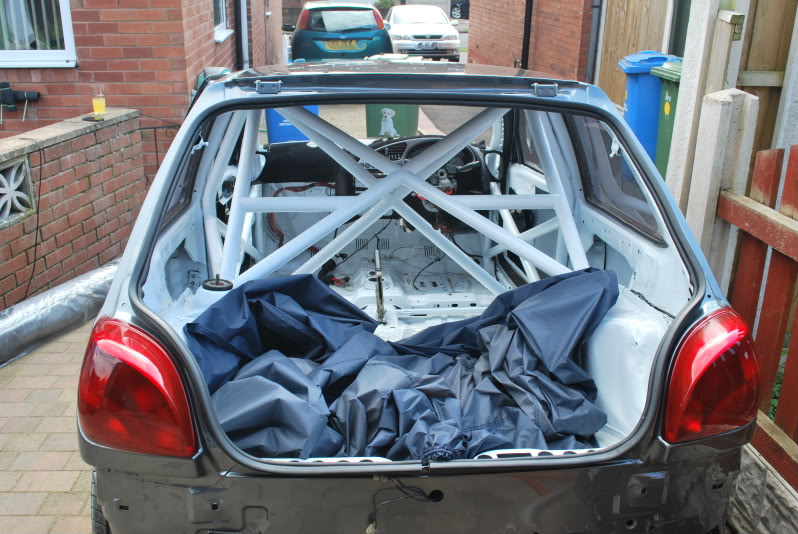
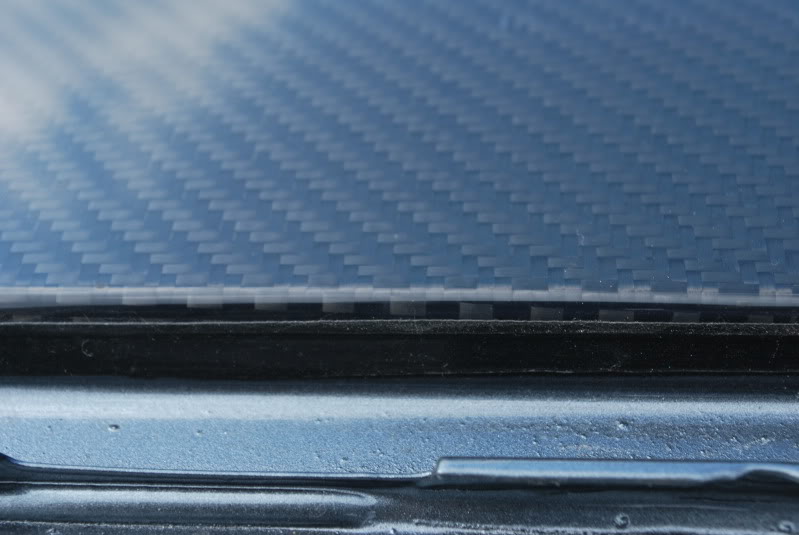
Now for some of the roof:
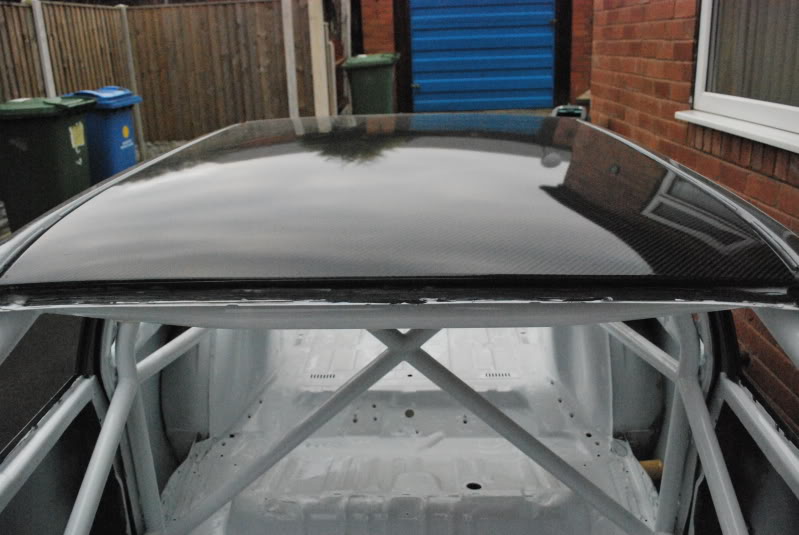

I'm chuffed to bits with it, still a few bits to finish, front panel, bumpers, mirrors, spoiler and tailgate, however now I have the shell I can crack on while I wait another week or so for other bits.
First job is to get it all water tight before it becomes a pond again!
Appologies for the poor pictures, I got a bit too excited and forgot to change any of the settings on my camera!
03-03-2011, 06:18 PM
#95
Regular Contributor
Thread Starter
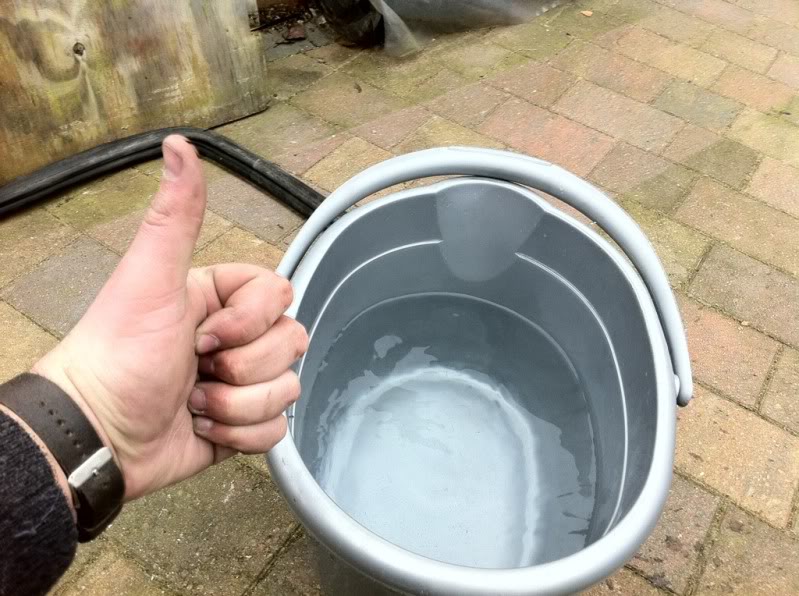
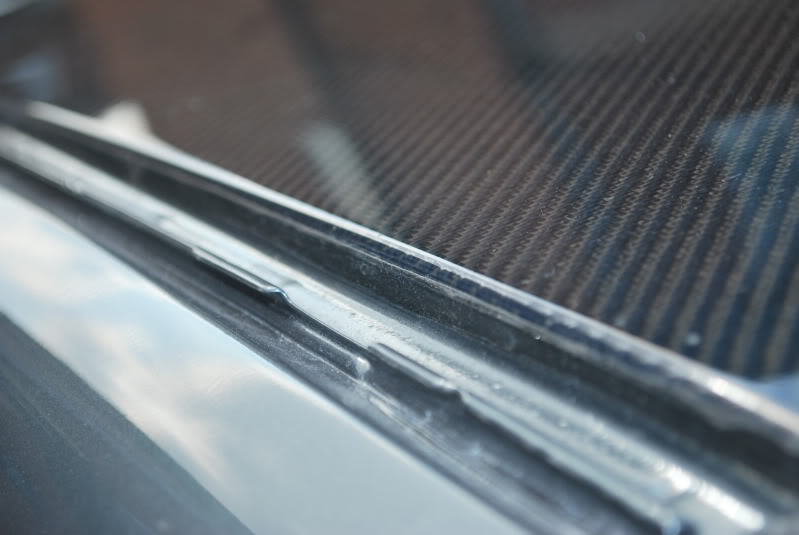
I decided to crack on with getting it water tight, so started off with the rear 1/4 windows:
Was a pain to get the seal on, after wrestling for a while this is all I got:

Solution - bucket of hot water!
And on they went:
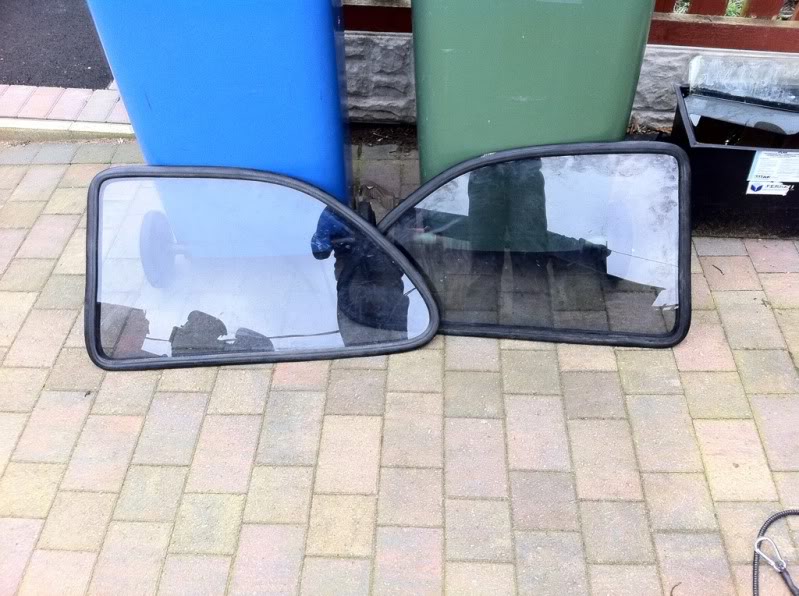
I'd never fitted windows before, so was an experience for me, tried the string method and got some of it done, however was difficult without any helping hands, but I made it in the end, although my finger tips now hurt:
Then managed to find out my front rubbers and get them in place, tried the front polys in place and they slipped in, and stopped in place when they were pushed into the seals, so will leave them like that for now, until I figure a more perminant solution:
And thats as far as I got!
Thanks for reading.
Was a pain to get the seal on, after wrestling for a while this is all I got:
Solution - bucket of hot water!
And on they went:
I'd never fitted windows before, so was an experience for me, tried the string method and got some of it done, however was difficult without any helping hands, but I made it in the end, although my finger tips now hurt:
Then managed to find out my front rubbers and get them in place, tried the front polys in place and they slipped in, and stopped in place when they were pushed into the seals, so will leave them like that for now, until I figure a more perminant solution:
And thats as far as I got!
Thanks for reading.
Last edited by Mark 3D; 03-03-2011 at 07:43 PM.
03-03-2011, 06:57 PM
#96
Irregular Poster
i couldnt work out if you smoothed in the rear arches or not.....going by the front wings, you have...so its a fail! a track inspired car shouldnt have them blending in imo!
other than that, its a lovely touch on that car and love the colour scheme and that cage is awesome!
other than that, its a lovely touch on that car and love the colour scheme and that cage is awesome!
 03-03-2011, 08:16 PM
#98
Seriously Newbie

This is a real cool build, I'v just purchased my first Fiesta Zetec-S as a daily drive so its really cool to see a track-ready car being build!
Love to see it finished, keep it up!
Love to see it finished, keep it up!
 04-03-2011, 07:13 PM
#101
Regular Contributor
Thread Starter
i couldnt work out if you smoothed in the rear arches or not.....going by the front wings, you have...so its a fail! a track inspired car shouldnt have them blending in imo!
other than that, its a lovely touch on that car and love the colour scheme and that cage is awesome!
other than that, its a lovely touch on that car and love the colour scheme and that cage is awesome!
Thanks Brian!
Cheers stranger, miss you
Thanks Sam, appreciate your comments.
08-03-2011, 08:27 PM
#102
Regular Contributor
Thread Starter
Thought I'd add another update for those that choose to read:
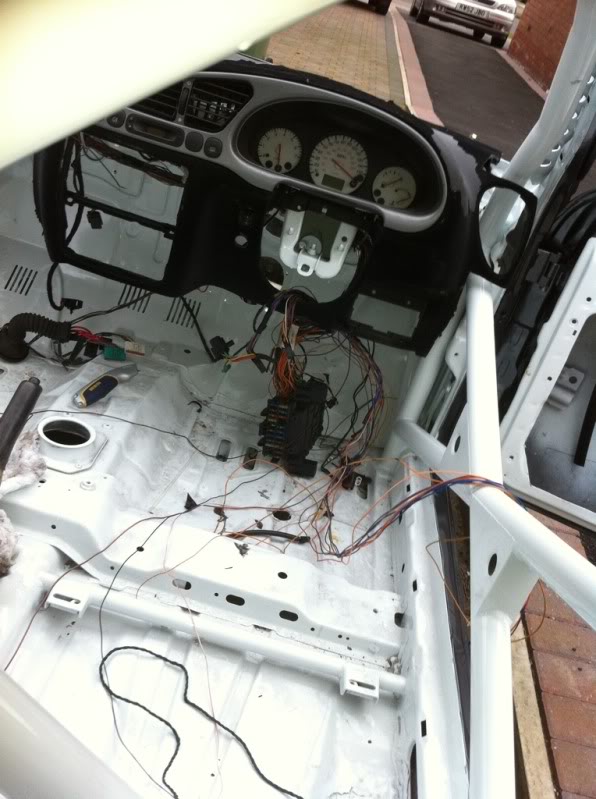
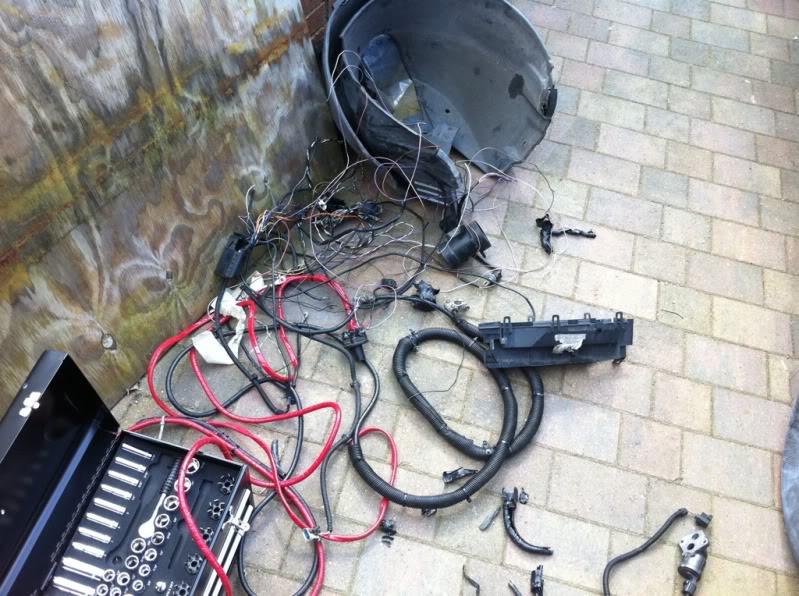
Tackled the wiring loom yesterday, with the help of my old man, so a big thank you to him!
Started out with this:
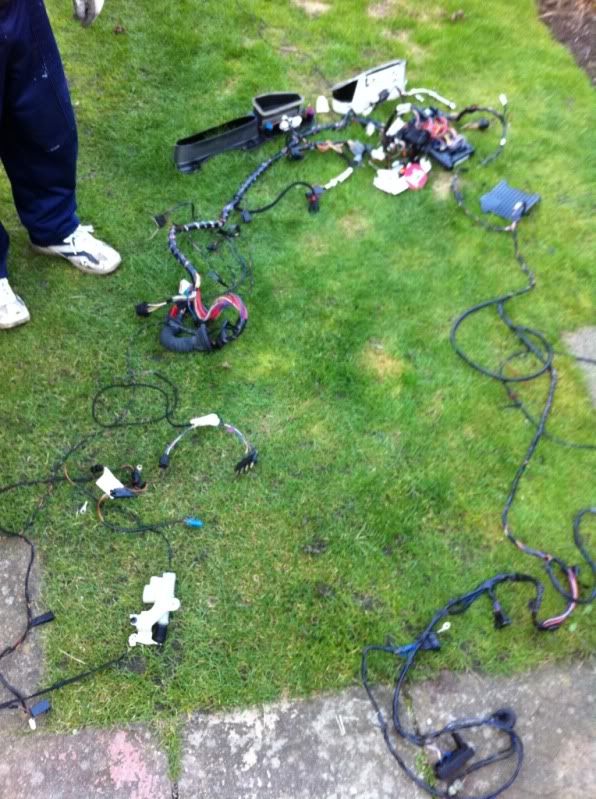
Removed all this:
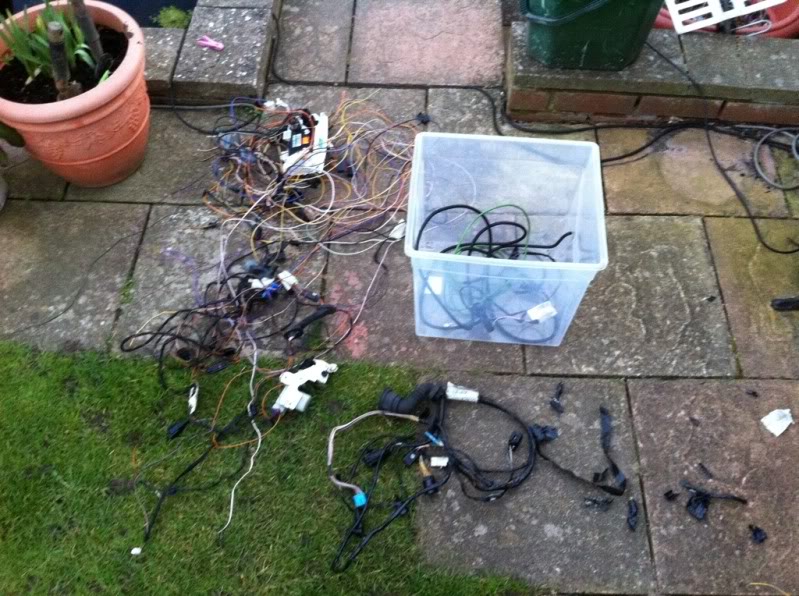
I have removed the heater panel, all boot wiring, interior light, radio and door looms, still suprised by how much is left!
Also fitted the engine mounts and wiper motor, ready for the engine to be mock fitted this weekend, I will be removing it all however before a final fit out, to be powdercoated and such!
Next update to follow on Sat!
Tackled the wiring loom yesterday, with the help of my old man, so a big thank you to him!
Started out with this:
Removed all this:
I have removed the heater panel, all boot wiring, interior light, radio and door looms, still suprised by how much is left!
Also fitted the engine mounts and wiper motor, ready for the engine to be mock fitted this weekend, I will be removing it all however before a final fit out, to be powdercoated and such!
Next update to follow on Sat!
13-03-2011, 11:09 PM
#103
Regular Contributor
Thread Starter
Update time, with lame pictures for good measure!
First up, I threw the wings and bonnet on to have a look, didn't get any decent pics, so they will have to wait, but here's a teaser:
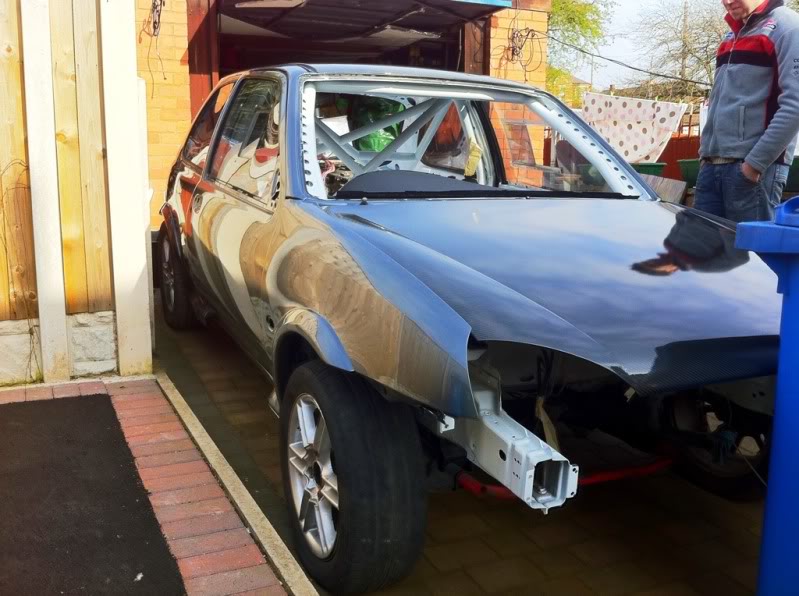
And one of the roof:
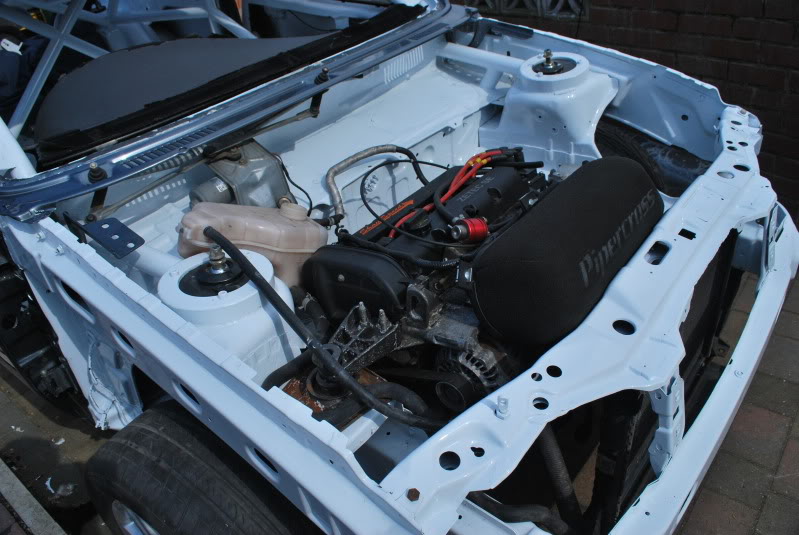
We then prepped the engine by bolting on the box, no clutch or fly, as it'll be coming out for it to be painted:

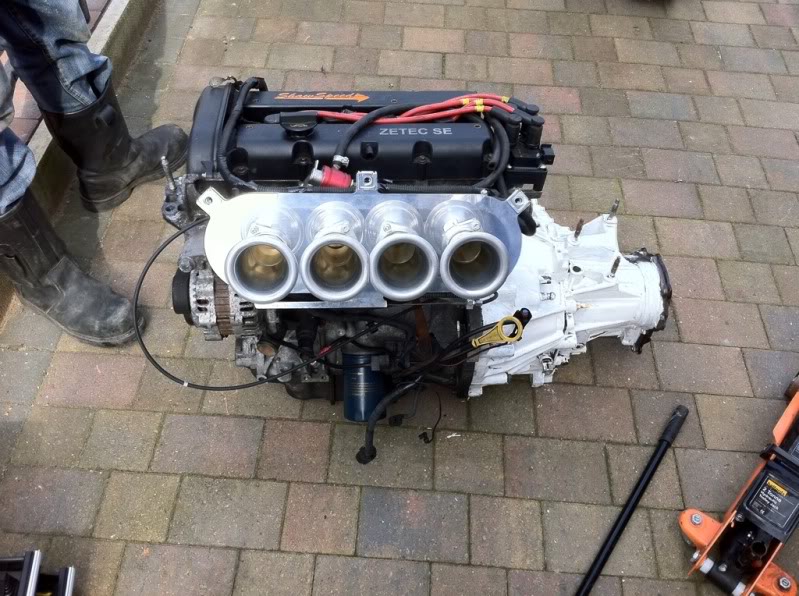
Within 10 minutes, it was in:
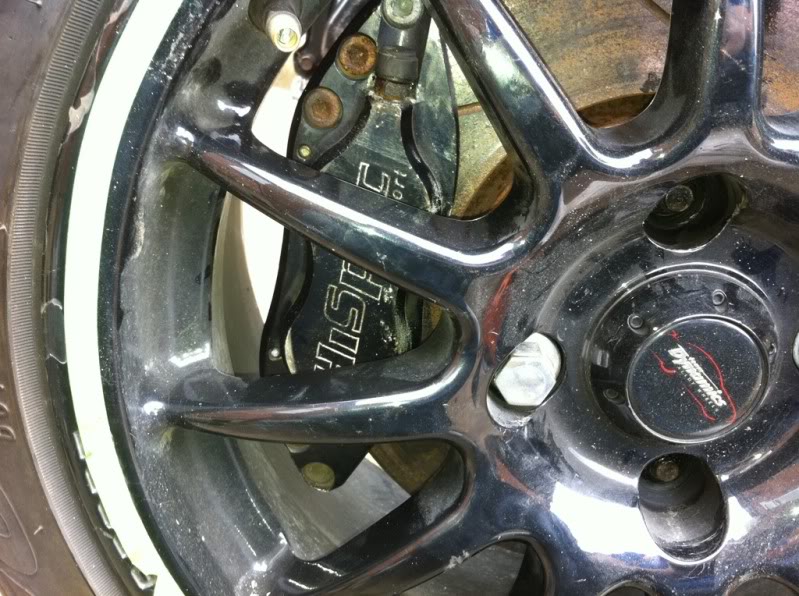
Next job, we fitted the brakes on passenger side, drivers side will have to wait as 1) The bolt for the bracket has sheared and is siezed in 2) I had to drill out a bolt on the other caliper, as head was rounded 3) I am now a bolt missing, but good to see they fit:
Glad I didn't go 300's as it's a tight fit with 280mm:
First up, I threw the wings and bonnet on to have a look, didn't get any decent pics, so they will have to wait, but here's a teaser:
And one of the roof:
We then prepped the engine by bolting on the box, no clutch or fly, as it'll be coming out for it to be painted:
Within 10 minutes, it was in:
Next job, we fitted the brakes on passenger side, drivers side will have to wait as 1) The bolt for the bracket has sheared and is siezed in 2) I had to drill out a bolt on the other caliper, as head was rounded 3) I am now a bolt missing, but good to see they fit:
Glad I didn't go 300's as it's a tight fit with 280mm:
13-03-2011, 11:09 PM
#104
Regular Contributor
Thread Starter
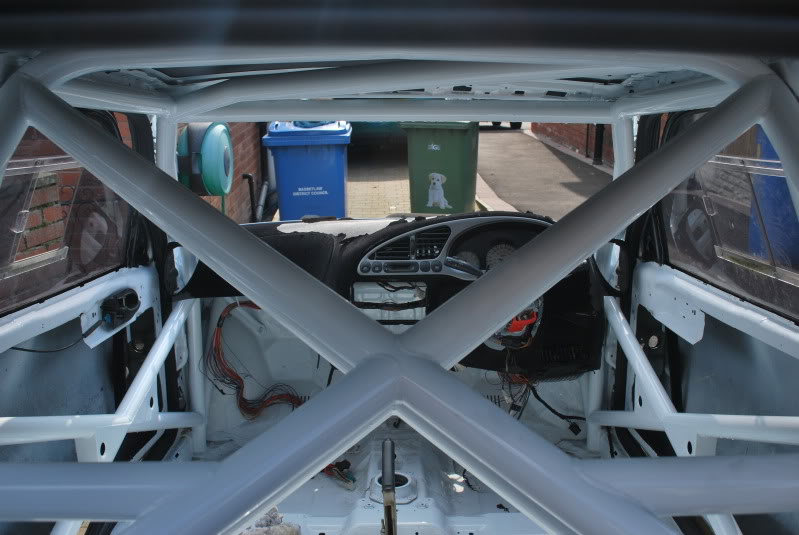
Wiring loom was then fitted behind the dash, and clocks and switches fitted in, although this is still subject to some modifications, nice to see it car like again:
My mate who helped today, is big into his VDubs, so he suggested running the loom down the sill channels for a cleaner look, after some fiddling it was done, and I'm very pleased with the results.
Front drivers side:
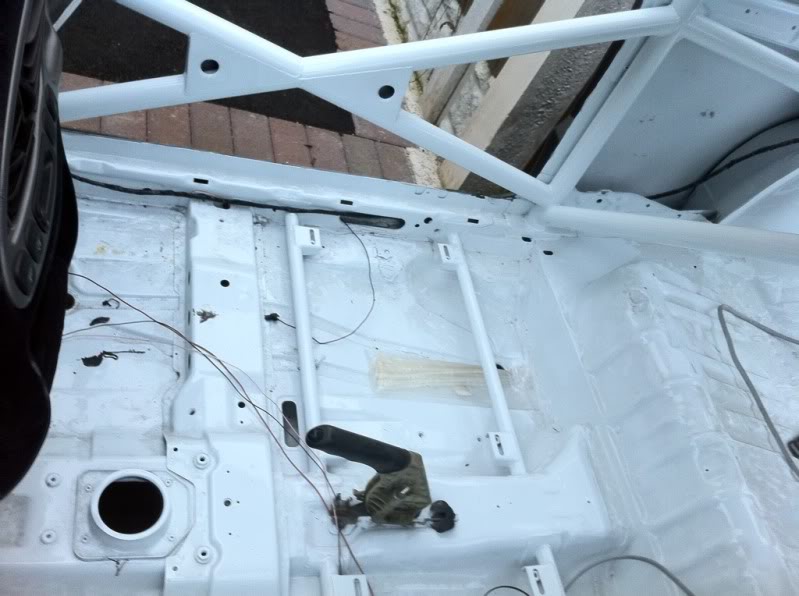
Rear drivers side:
I should probably have explained better, I've removed all wiring that went to boot lid, and also to boot light, and for solenoid, as it's made installation easier, looks neater and saves that bit more weight!
Not bad progress for a days work :woot:
Enjoy!
My mate who helped today, is big into his VDubs, so he suggested running the loom down the sill channels for a cleaner look, after some fiddling it was done, and I'm very pleased with the results.
Front drivers side:
Rear drivers side:
I should probably have explained better, I've removed all wiring that went to boot lid, and also to boot light, and for solenoid, as it's made installation easier, looks neater and saves that bit more weight!
Not bad progress for a days work :woot:
Enjoy!


 23-03-2011, 02:47 PM
#112
Regular Contributor
Thread Starter
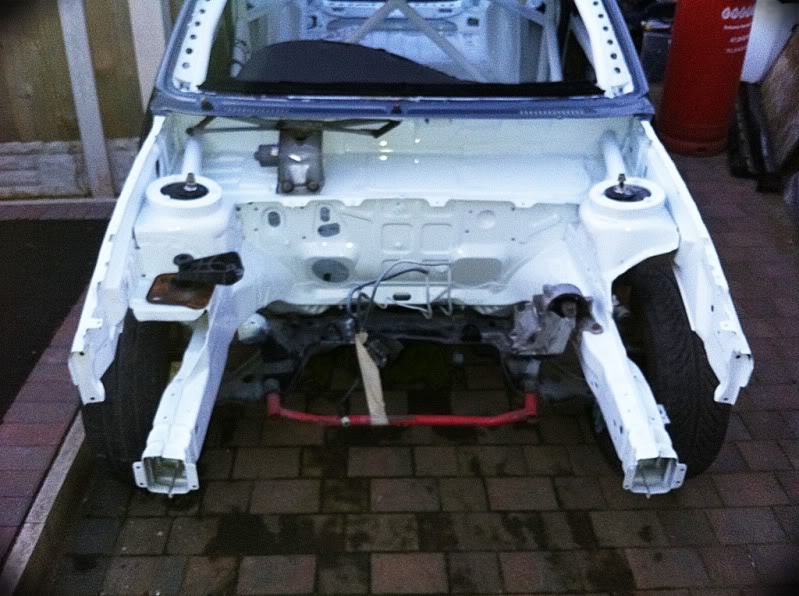
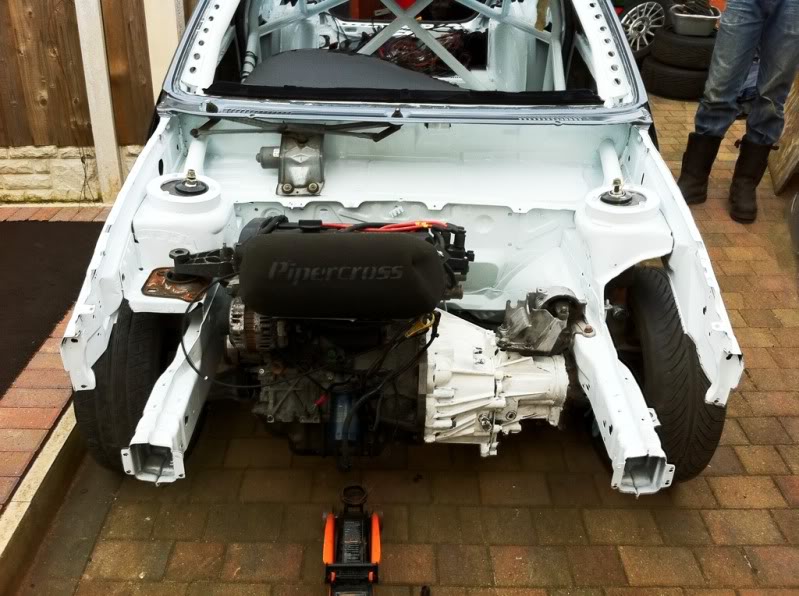
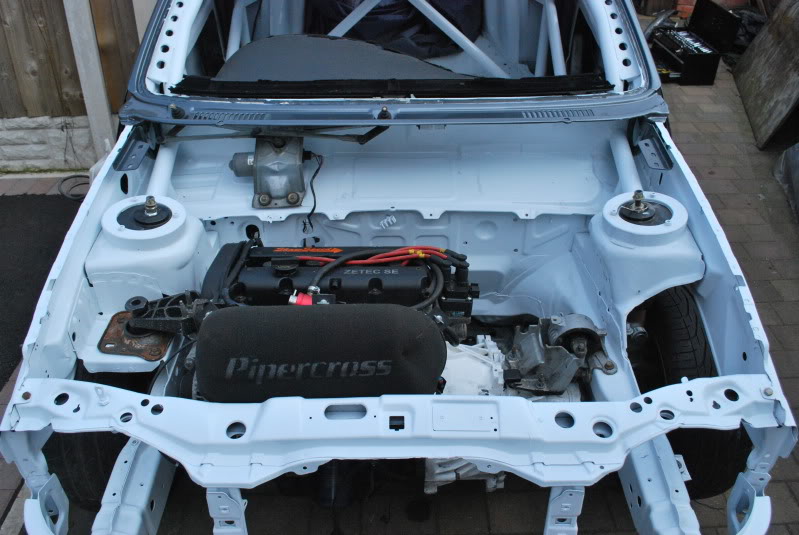
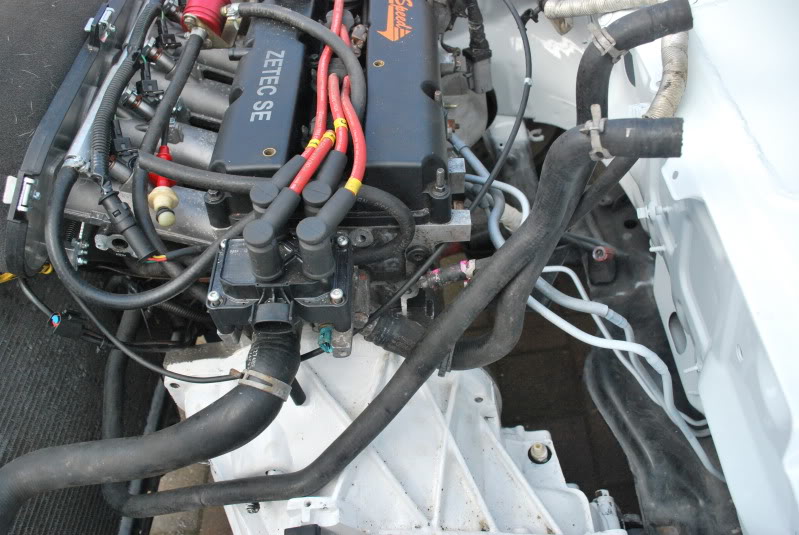
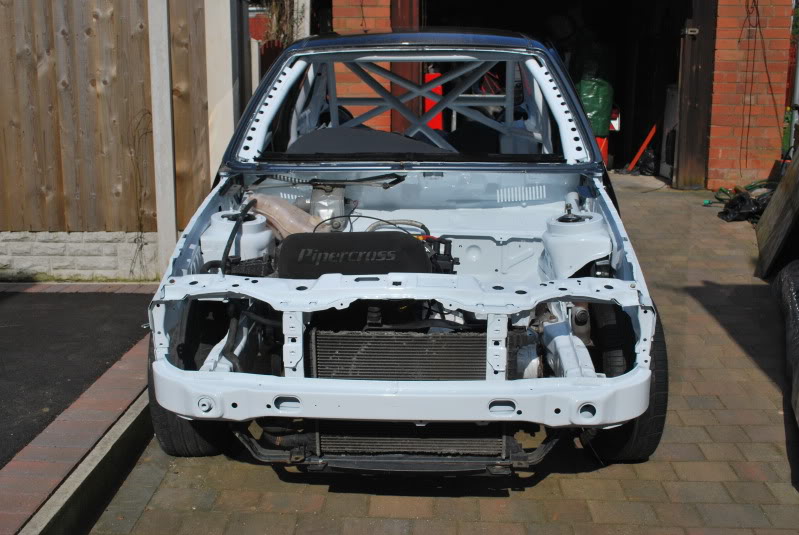
Now time for an update, the front cross member is bolted back on:
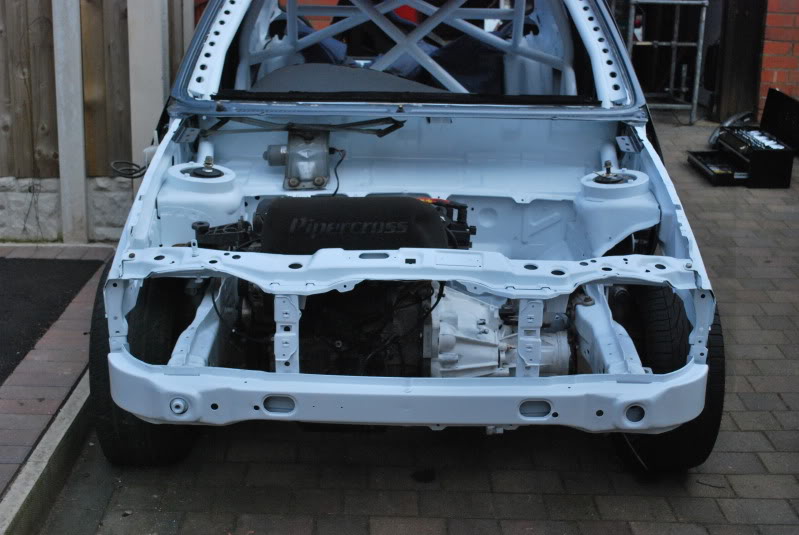
And with the engine in, it leaves me with a slight issue:
The ITB's are quite long, so I either need to drop the engine lower, or go for shorter trumpets, think my only option may be the shorter trumpets, as I dont want to risk smashing the sump. I'll have a head scratch over that one anyway.
Now with the engine in place, the bay looked like this:
So I added some hoses:
23-03-2011, 02:51 PM
#113
Regular Contributor
Thread Starter
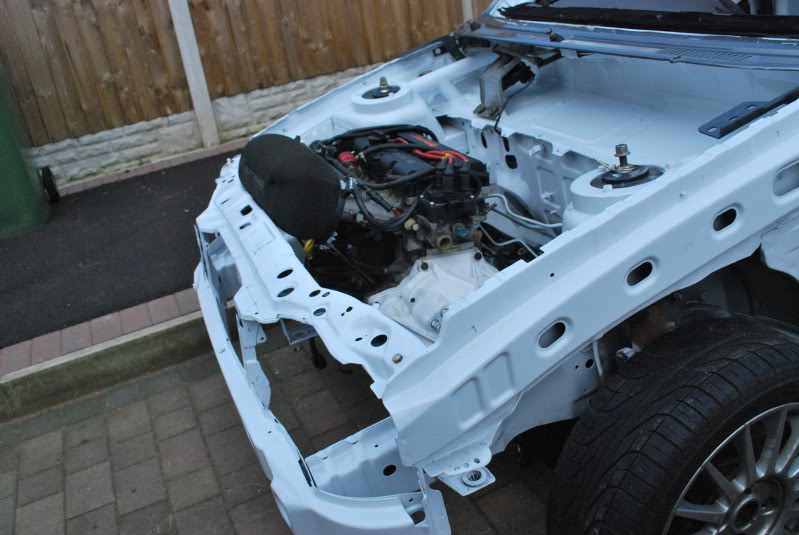
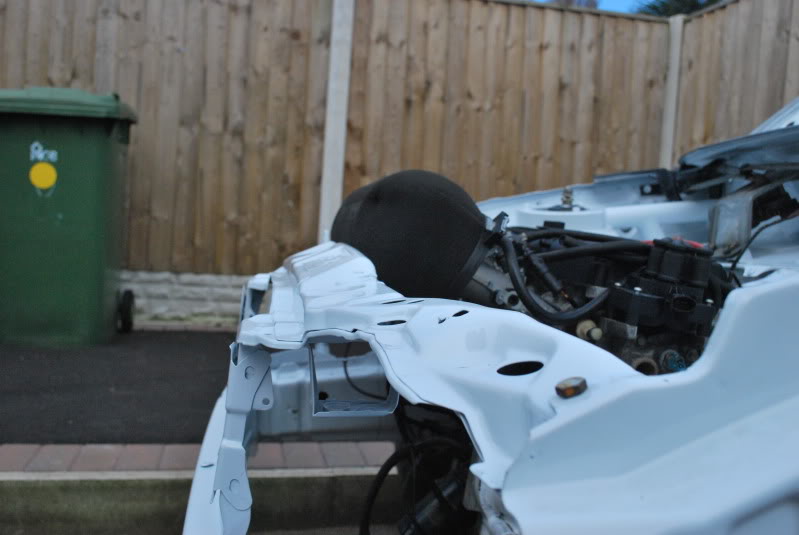
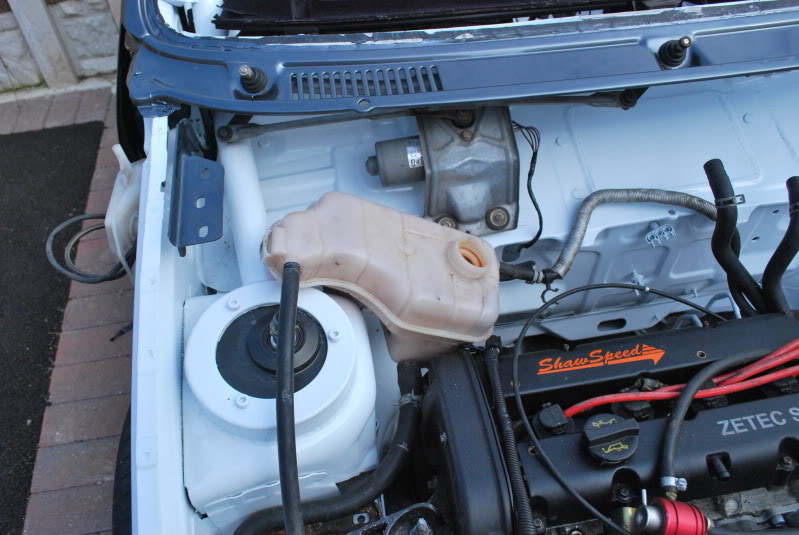
As I wasnt running a heater matrix, the pipes were left like this:
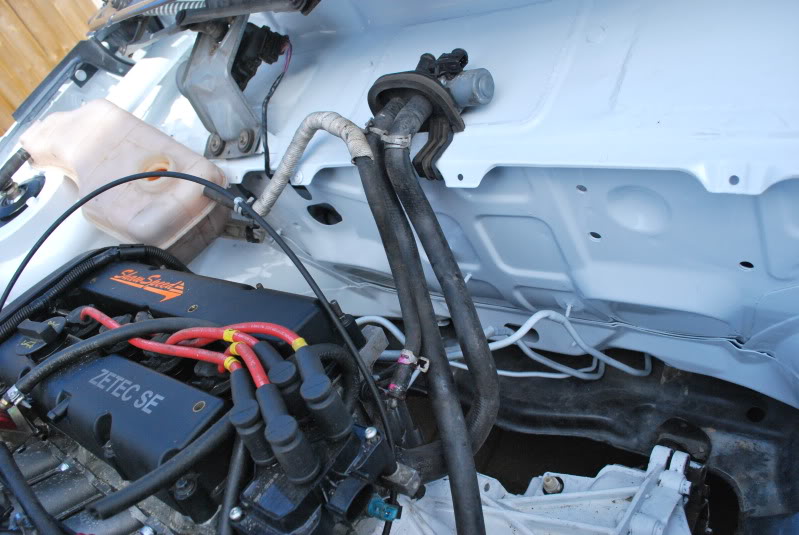
So with some choice cuts, I managed to come up with this as a solution:
With the hoses going on, the rad also went in. I will more than likely be running something different, as this one is small, and also falling apart:
Ideally I will go for one with an inbuilt header tank, as mine is sat here due to the cage and top mounts:
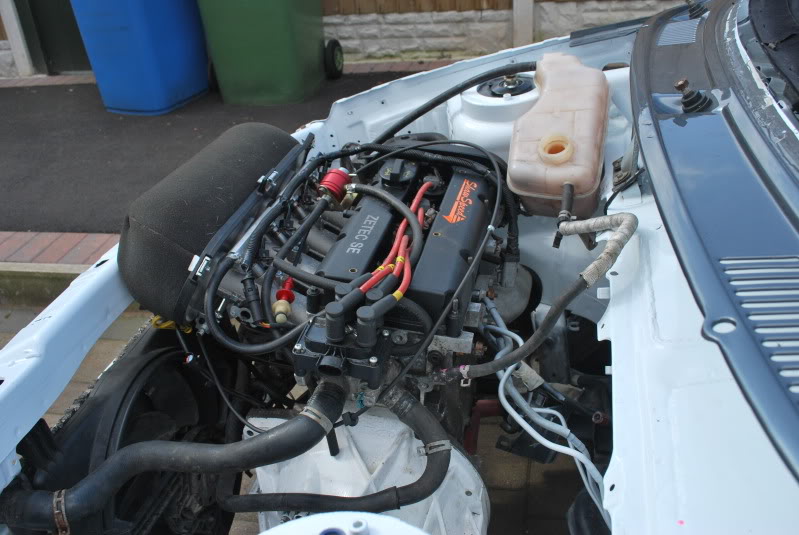
I do need to work out if I need the return coming from above the coil pack, or if this can be blanked off (answers on a postcard please)
So with some choice cuts, I managed to come up with this as a solution:
With the hoses going on, the rad also went in. I will more than likely be running something different, as this one is small, and also falling apart:
Ideally I will go for one with an inbuilt header tank, as mine is sat here due to the cage and top mounts:
I do need to work out if I need the return coming from above the coil pack, or if this can be blanked off (answers on a postcard please)
23-03-2011, 02:54 PM
#114
Regular Contributor
Thread Starter
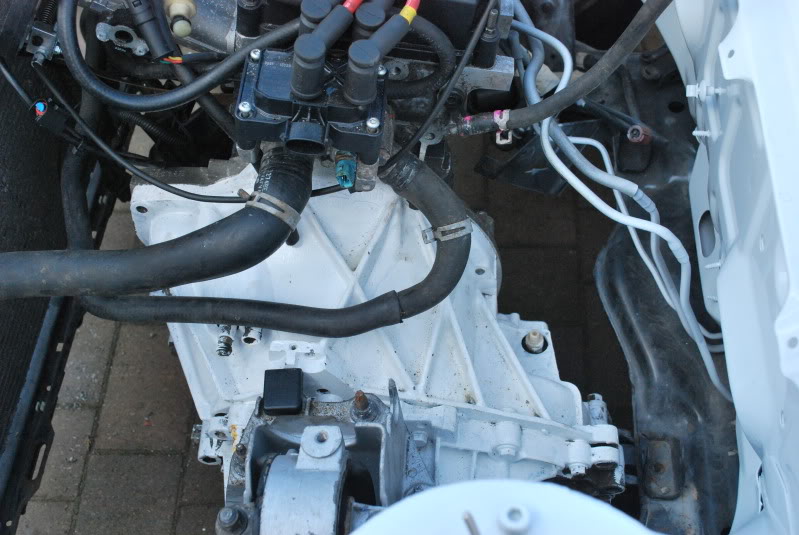
Then made a start on the engine loom, removing this so far:
I may well end up removing all the engine sensors, and running the engine as a standalone on the OMEX ECU, need to speak to Jon about he, and see what he thinks.
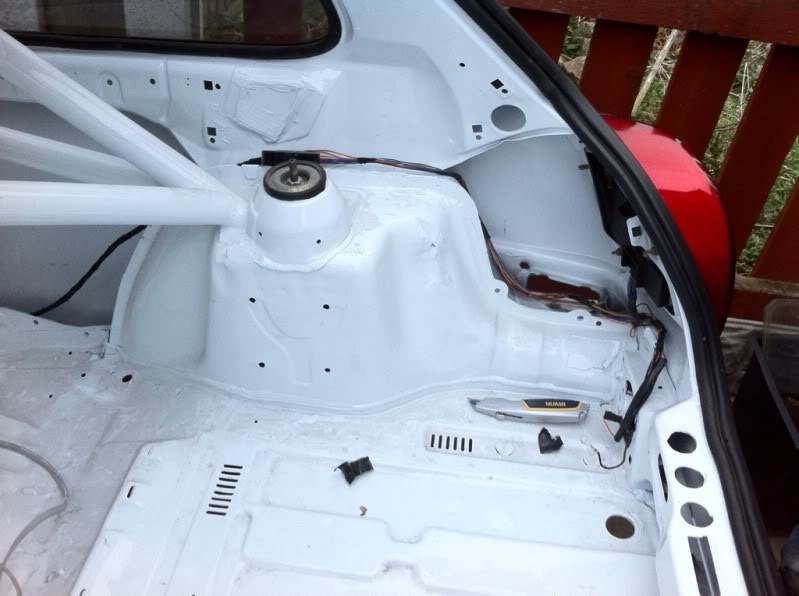
I then did a bit inside, and added the wiper stalks etc:
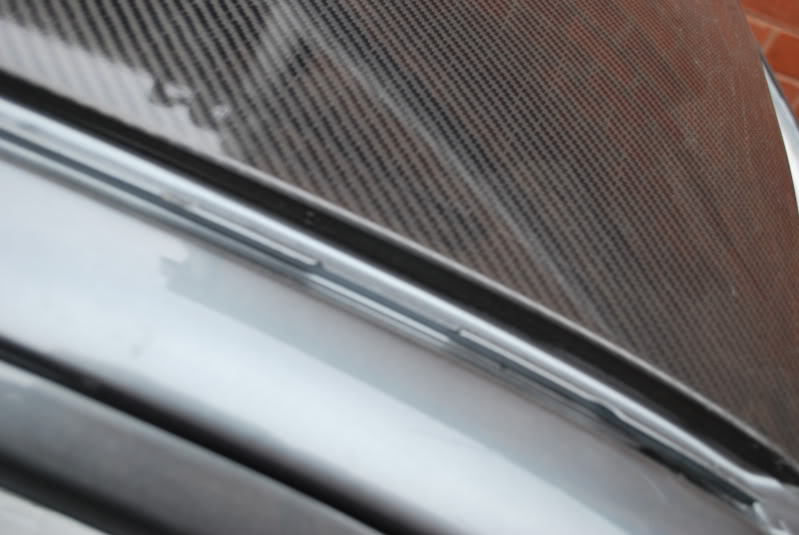
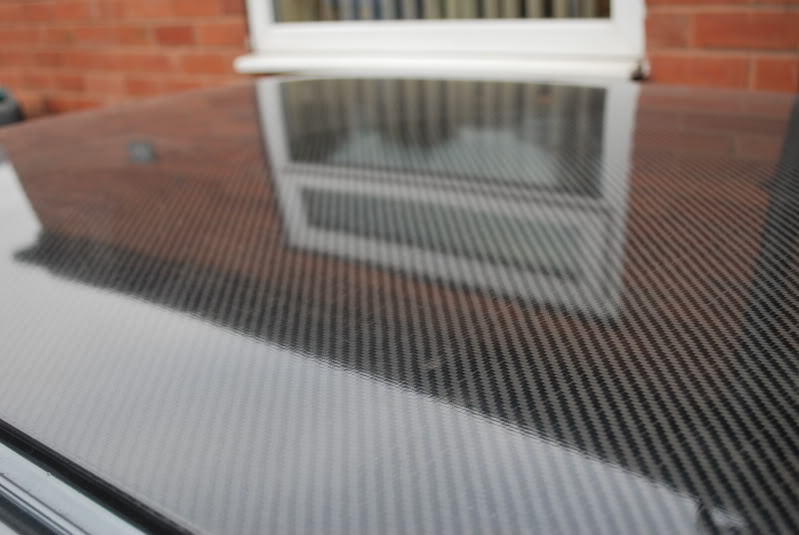
And gave the roof a quick clean for some cheeky pics:
I'm off now to go tinker with the pedal box, not bad so far for a days work!
I may well end up removing all the engine sensors, and running the engine as a standalone on the OMEX ECU, need to speak to Jon about he, and see what he thinks.
I then did a bit inside, and added the wiper stalks etc:
And gave the roof a quick clean for some cheeky pics:
I'm off now to go tinker with the pedal box, not bad so far for a days work!


 26-03-2011, 09:49 PM
#119
Regular Contributor
Thread Starter
Silicon hoses are a "would like", need to decide if it's worthwhile buying a kit, as most won't be used. Still alot to research.
Next job I'm going to look into is brake lines, anyone care to provide some advise?
Next job I'm going to look into is brake lines, anyone care to provide some advise?
26-03-2011, 10:12 PM
#120
PassionFord Post Whore!!

On your header tank problem could you not use a MK2 Astra GTE header placed near the nearside of the engine bay and use a good quality radiator? Of course all dependent on cost.