Mk6 JWRC fiesta cosworth
 16-03-2011, 07:20 AM
#1121
yes just std r/h thread.
the seals are just wiper seals pal, all the oil/gas is in the insert.
The valving may be set up for a heavy car, so your car will just bounce down the road if the compression pressure is wrong, you will never get to the rebound if the bump(compression) is too strong for the weight.
It will just be a try it and see though tbh. you could take advice forever on them and spend a fortune, just fit them and see how they are.
for rebuild etc try AVO.

 30-03-2011, 07:38 PM
#1123
Small update,
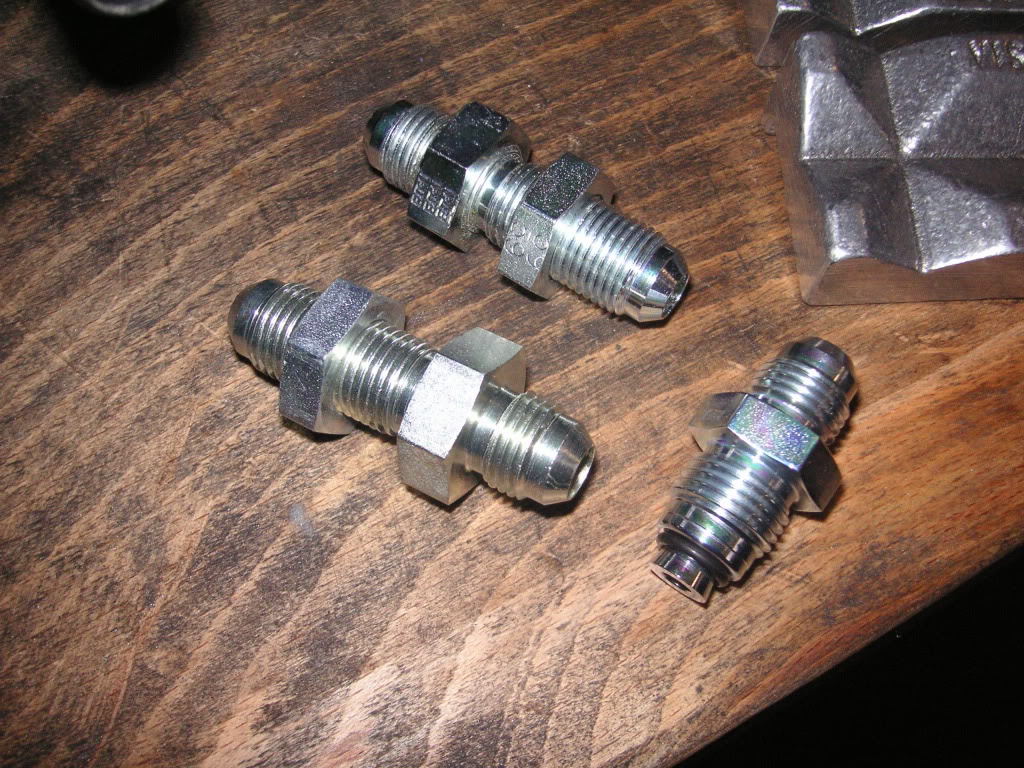
As i am running a citroen/puegeot electric power steering pump rather than the standard cosworth belt driven item it has to be mounted inside the car in the passenger footwell so i want to have the pressure/feed side of the hoses aeroquiped so there is no leaks,
here is the end of the old fitting i cut off the original pump hoses as i was going to weld a -6 adapter to the back of the nut so i keep the original o'ring seal part
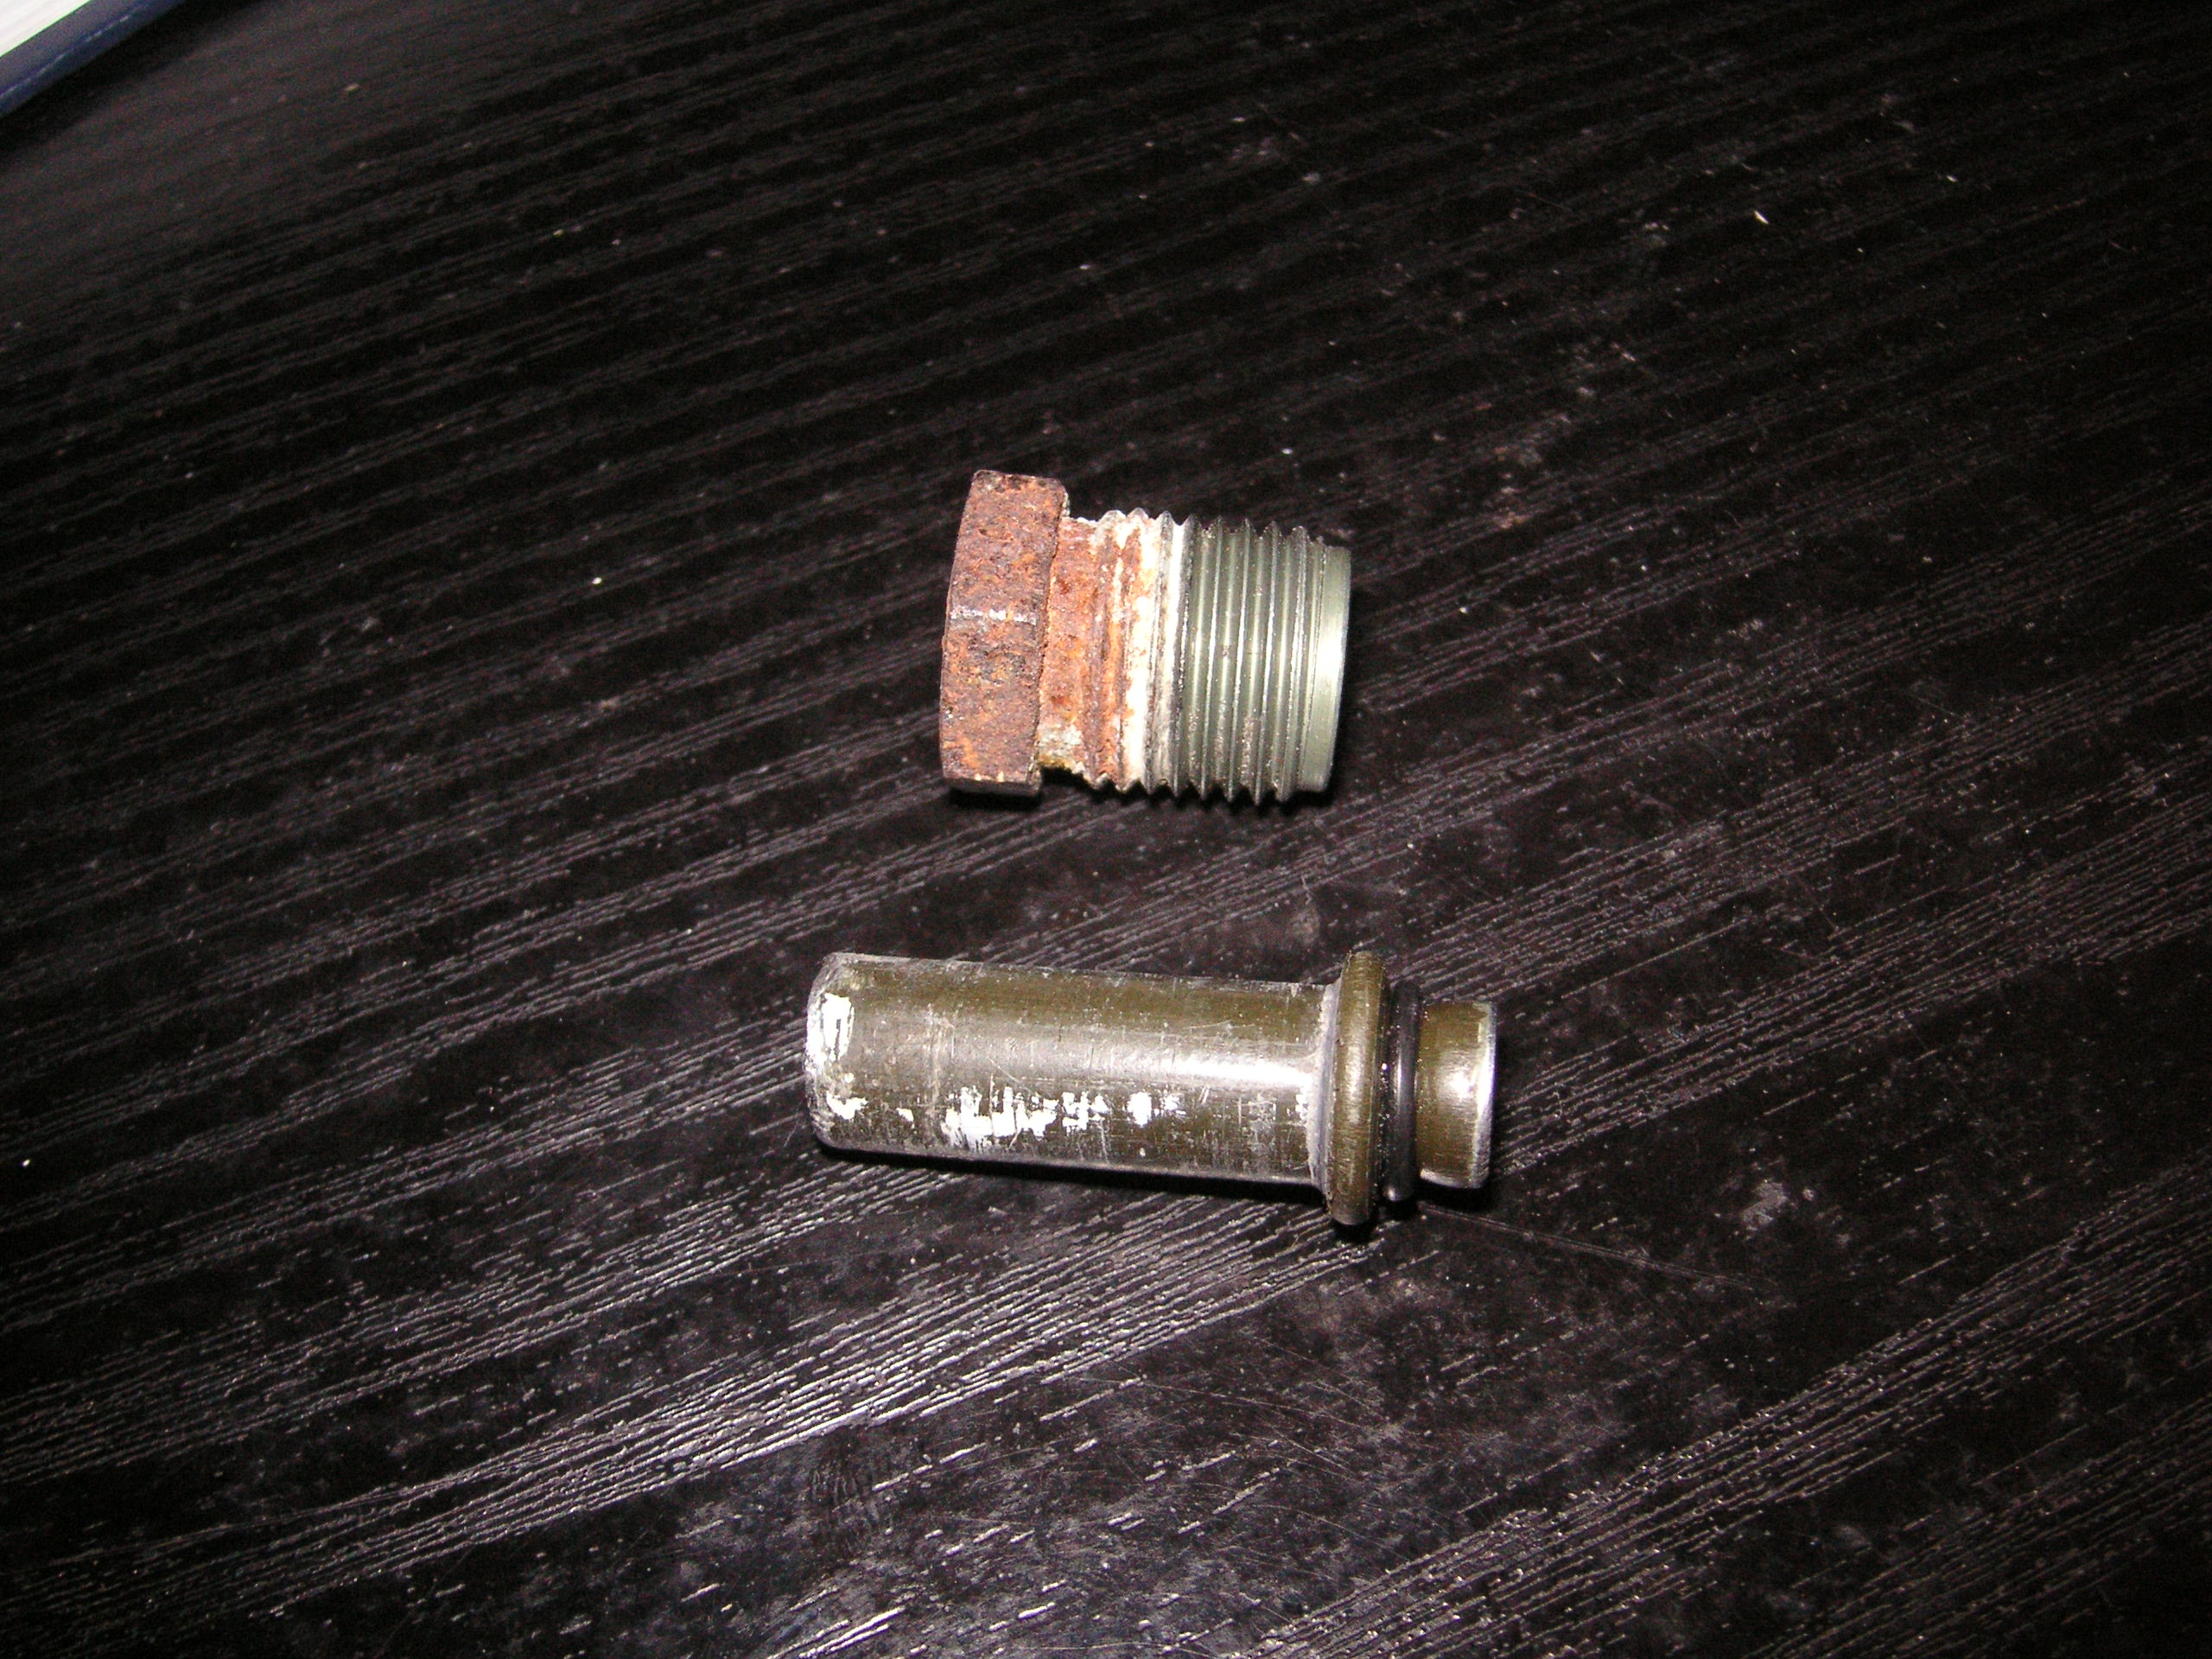
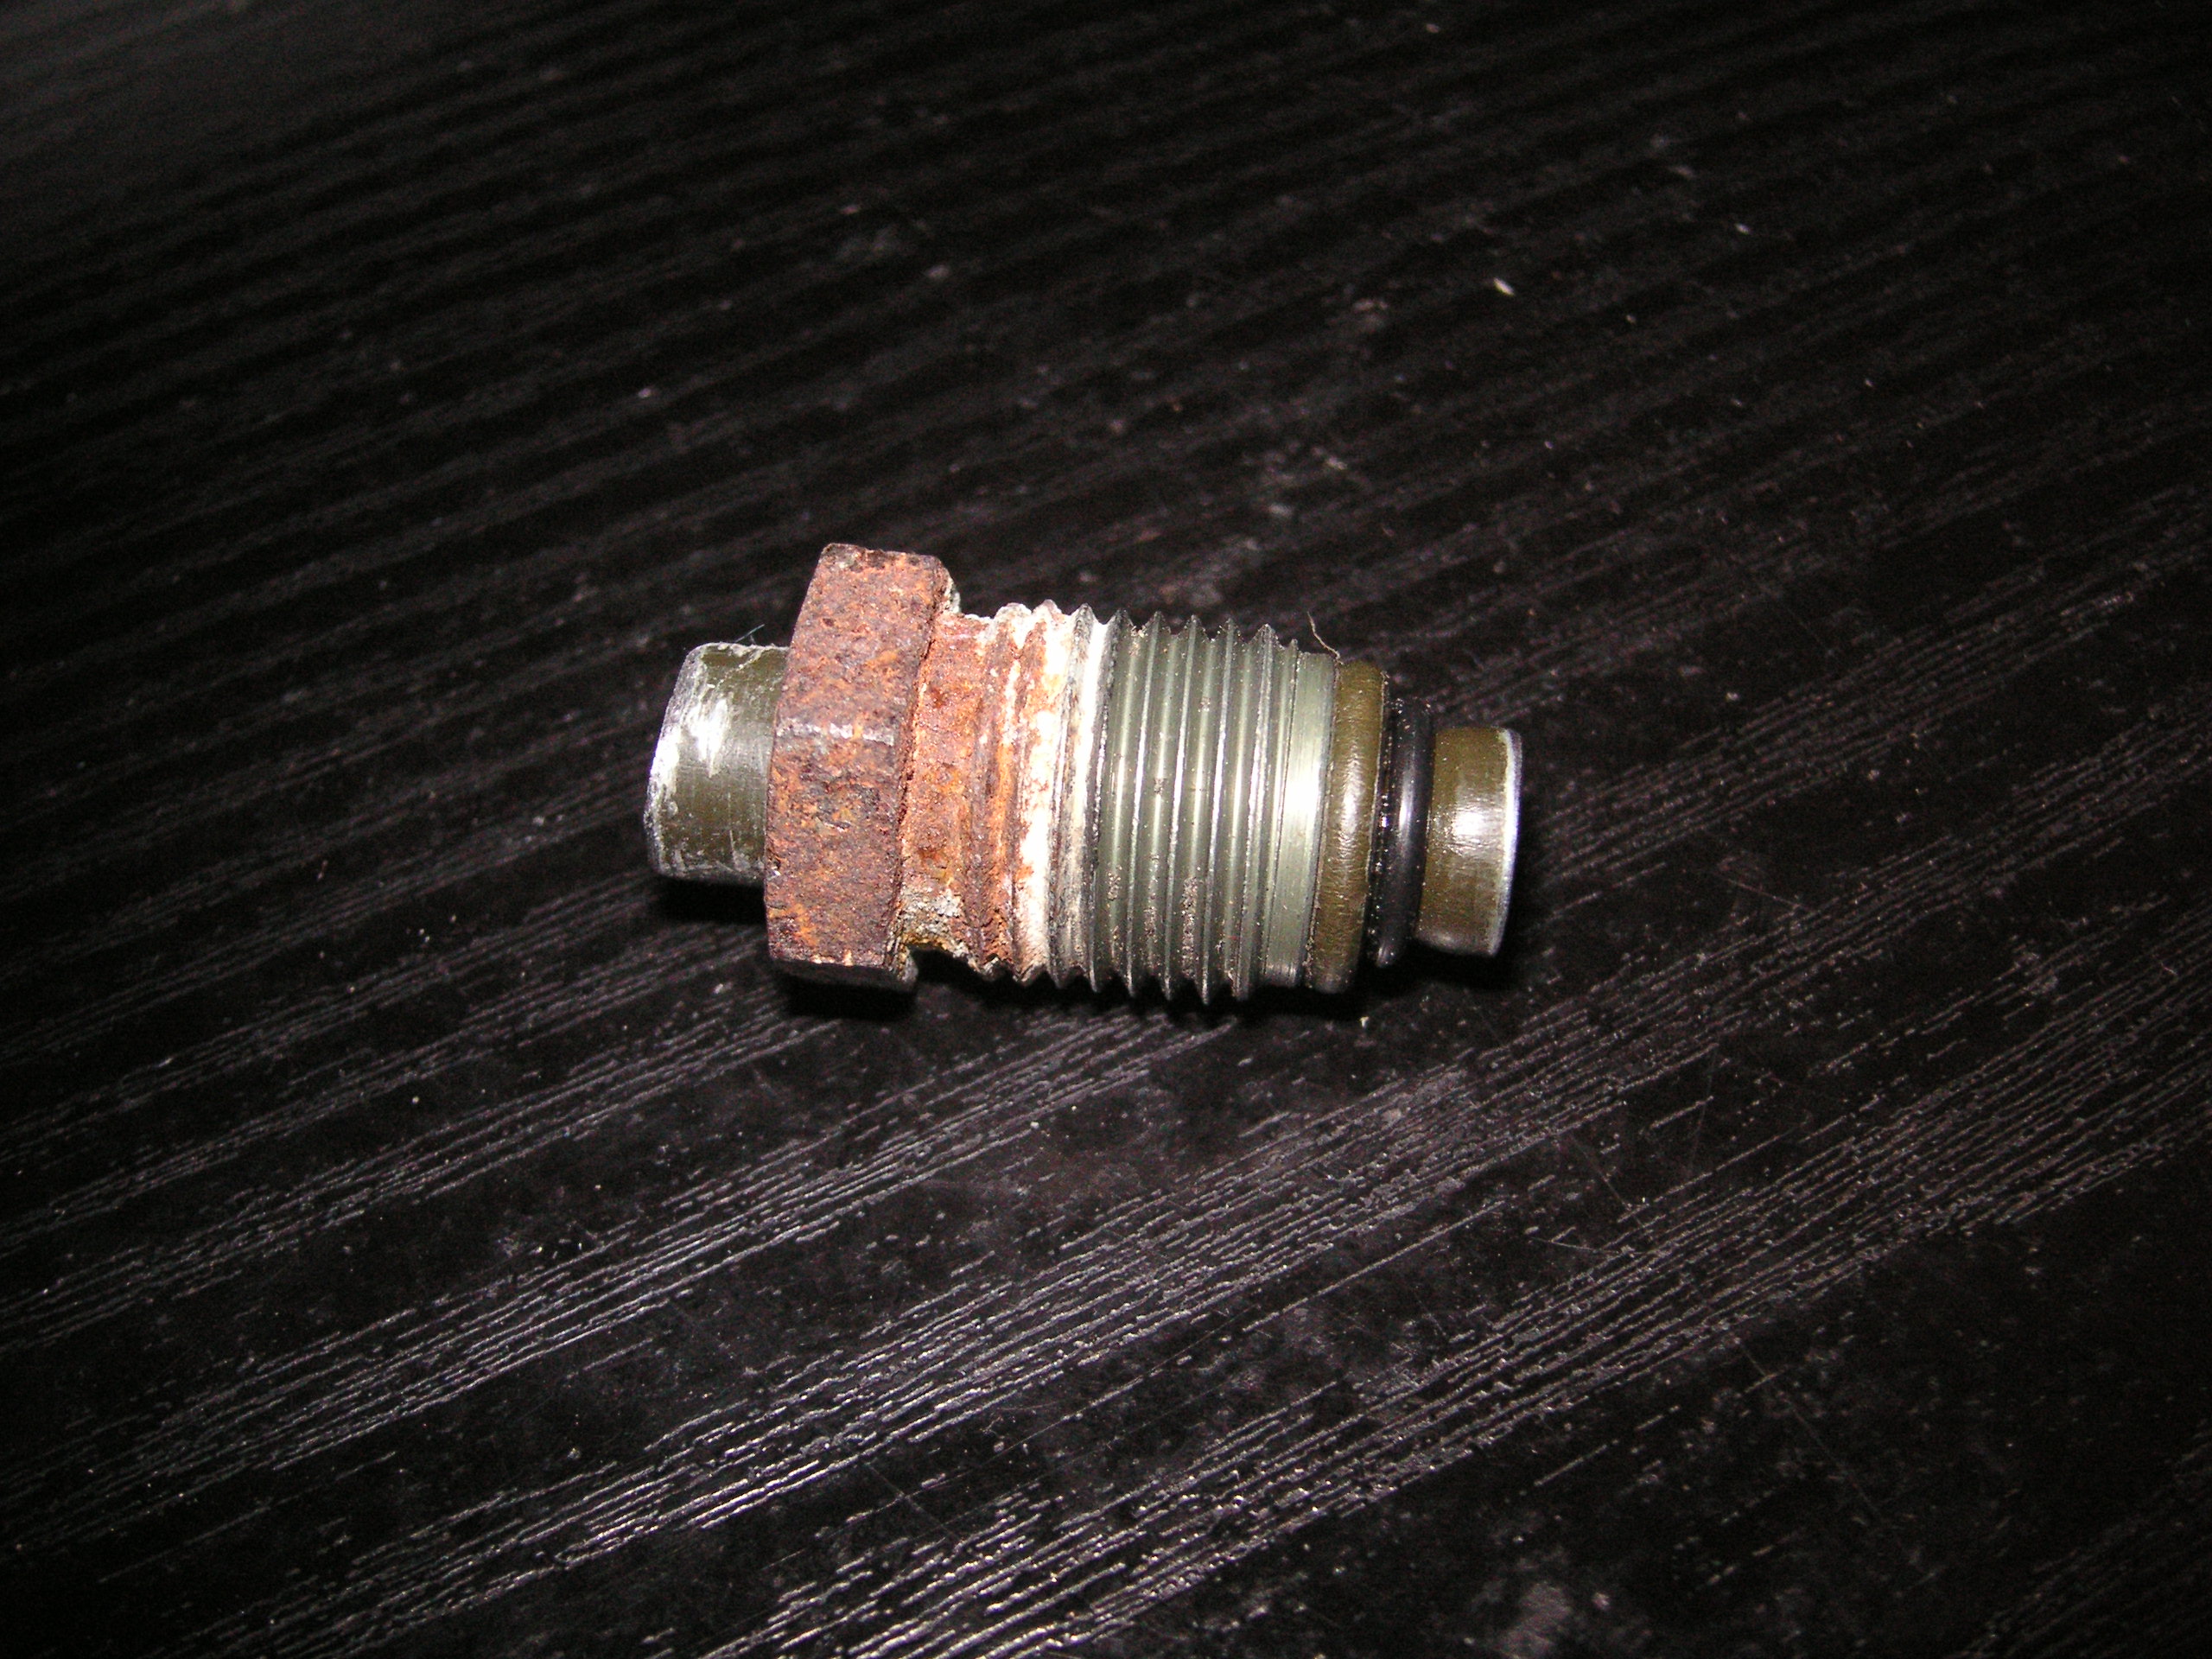
After searching around i found that THINK AUTOMOTIVE sell power steering adapter fittings for the electric pump which is m16x1.5 to -6 so i though that will save me a job and i can just drill the fitting out so the original o'ring tube part will slip inside the new fitting, but when the new fitting turned up it actually already has that part built into it so was well chuffed
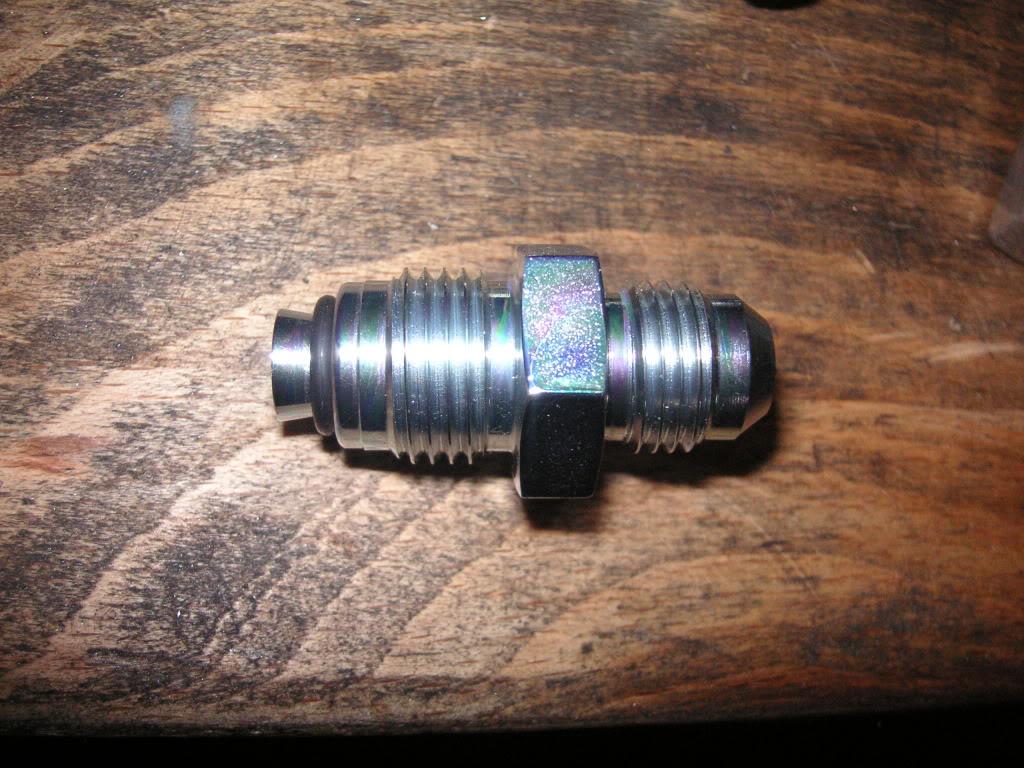
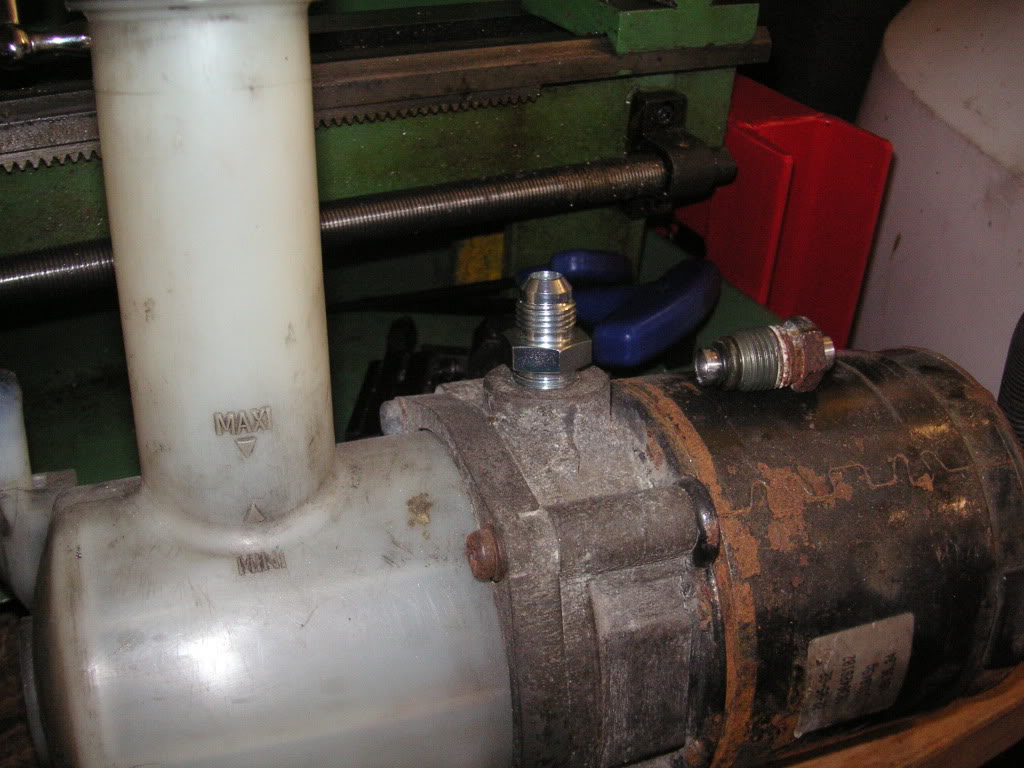
Fitted to the pump
get them from here - second item down
http://www.thinkauto.com/acatalog/On...tric__157.html
Mark @ M K Motorsport is making me new adapters for the 4x4 rack so they are -6 as well but on the return to the pump i will have to push the -6 hose on and use a hose end finisher as the return tube is plastic as there is no pressure on the ruturn.
Picked up 2 more -6 through bulkhead steel adapter to weld in for the feed and return as well
Also me and a freind Karl have been looking into the proper grp a cosworth 4x4 gated baffles, the original 2 piece items. So after studying a load of pics of one Karl done his best and gave it back to me to mod or adapt where needed.
Here's the initial mock up of it and a few random shots

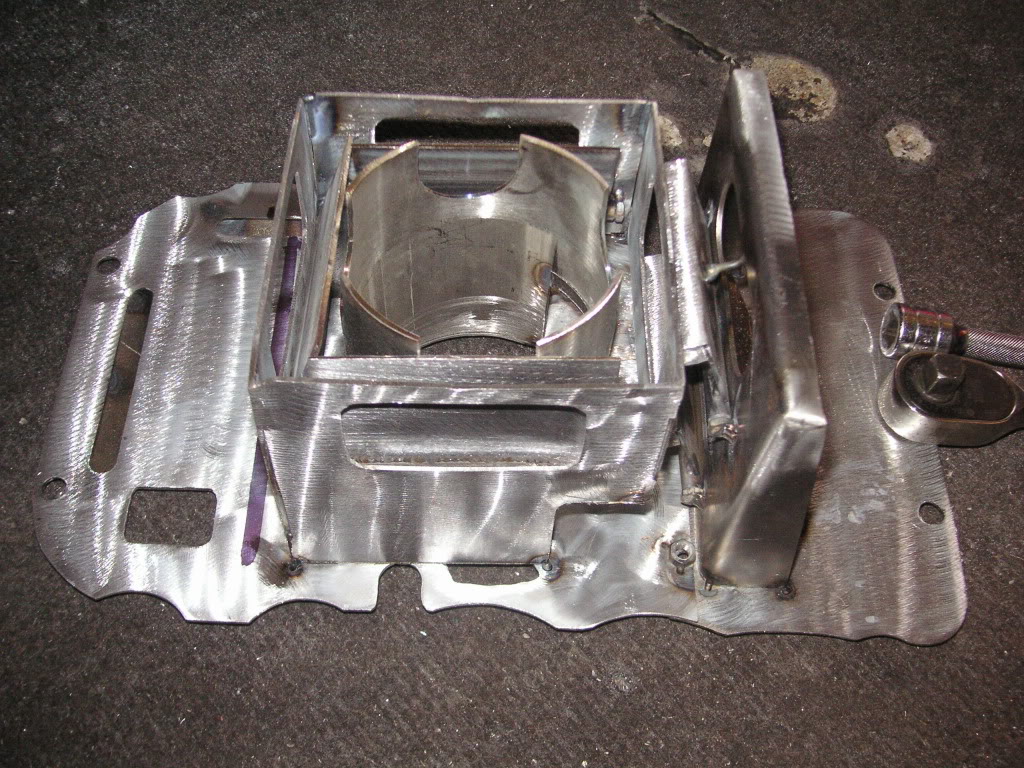
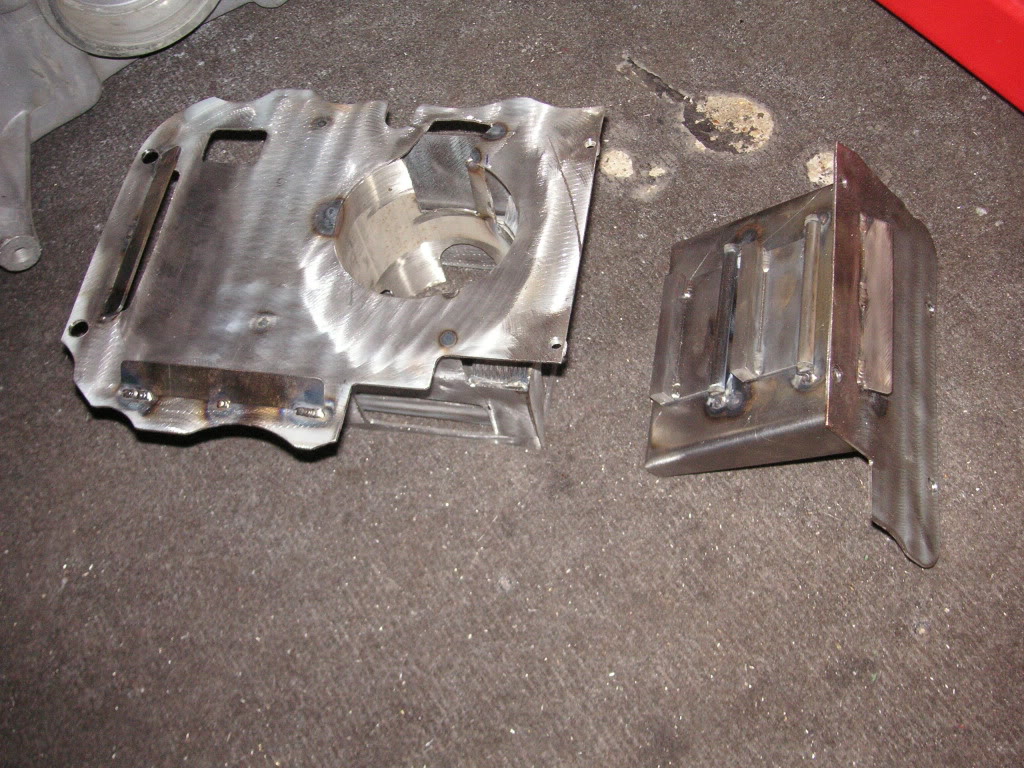
block with main caps and 4x4 pump and strainer fitted to check clearance

a big wing sump on the block with the baffle fitted
And a shot through the block to show clearance around the pick up,
It needs modding so the circular tube with the arches cut out that sits around the strainer/pick up is bigger as it needs more clearance against the cross shaft tube as it hits when fitting the sump, this is not a bit problem with the block on a stand but if the engine was in the car you could never remove or fit sump so it needs sorting,
also making the box with the gates in bigger to give the gates more swing, hopefully i will gave it back to Karl next week and he will adapt to what i have mentioned and we will try it again,
Once these have been checked and we know they fit perfect with no issues they will soon be available for sale but unsure of price just yet, if anyones interested let me know and i will keep you informed
As i am running a citroen/puegeot electric power steering pump rather than the standard cosworth belt driven item it has to be mounted inside the car in the passenger footwell so i want to have the pressure/feed side of the hoses aeroquiped so there is no leaks,
here is the end of the old fitting i cut off the original pump hoses as i was going to weld a -6 adapter to the back of the nut so i keep the original o'ring seal part
After searching around i found that THINK AUTOMOTIVE sell power steering adapter fittings for the electric pump which is m16x1.5 to -6 so i though that will save me a job and i can just drill the fitting out so the original o'ring tube part will slip inside the new fitting, but when the new fitting turned up it actually already has that part built into it so was well chuffed
Fitted to the pump
get them from here - second item down
http://www.thinkauto.com/acatalog/On...tric__157.html
Mark @ M K Motorsport is making me new adapters for the 4x4 rack so they are -6 as well but on the return to the pump i will have to push the -6 hose on and use a hose end finisher as the return tube is plastic as there is no pressure on the ruturn.
Picked up 2 more -6 through bulkhead steel adapter to weld in for the feed and return as well
Also me and a freind Karl have been looking into the proper grp a cosworth 4x4 gated baffles, the original 2 piece items. So after studying a load of pics of one Karl done his best and gave it back to me to mod or adapt where needed.
Here's the initial mock up of it and a few random shots
block with main caps and 4x4 pump and strainer fitted to check clearance
a big wing sump on the block with the baffle fitted
And a shot through the block to show clearance around the pick up,
It needs modding so the circular tube with the arches cut out that sits around the strainer/pick up is bigger as it needs more clearance against the cross shaft tube as it hits when fitting the sump, this is not a bit problem with the block on a stand but if the engine was in the car you could never remove or fit sump so it needs sorting,
also making the box with the gates in bigger to give the gates more swing, hopefully i will gave it back to Karl next week and he will adapt to what i have mentioned and we will try it again,
Once these have been checked and we know they fit perfect with no issues they will soon be available for sale but unsure of price just yet, if anyones interested let me know and i will keep you informed
30-03-2011, 07:43 PM
#1125
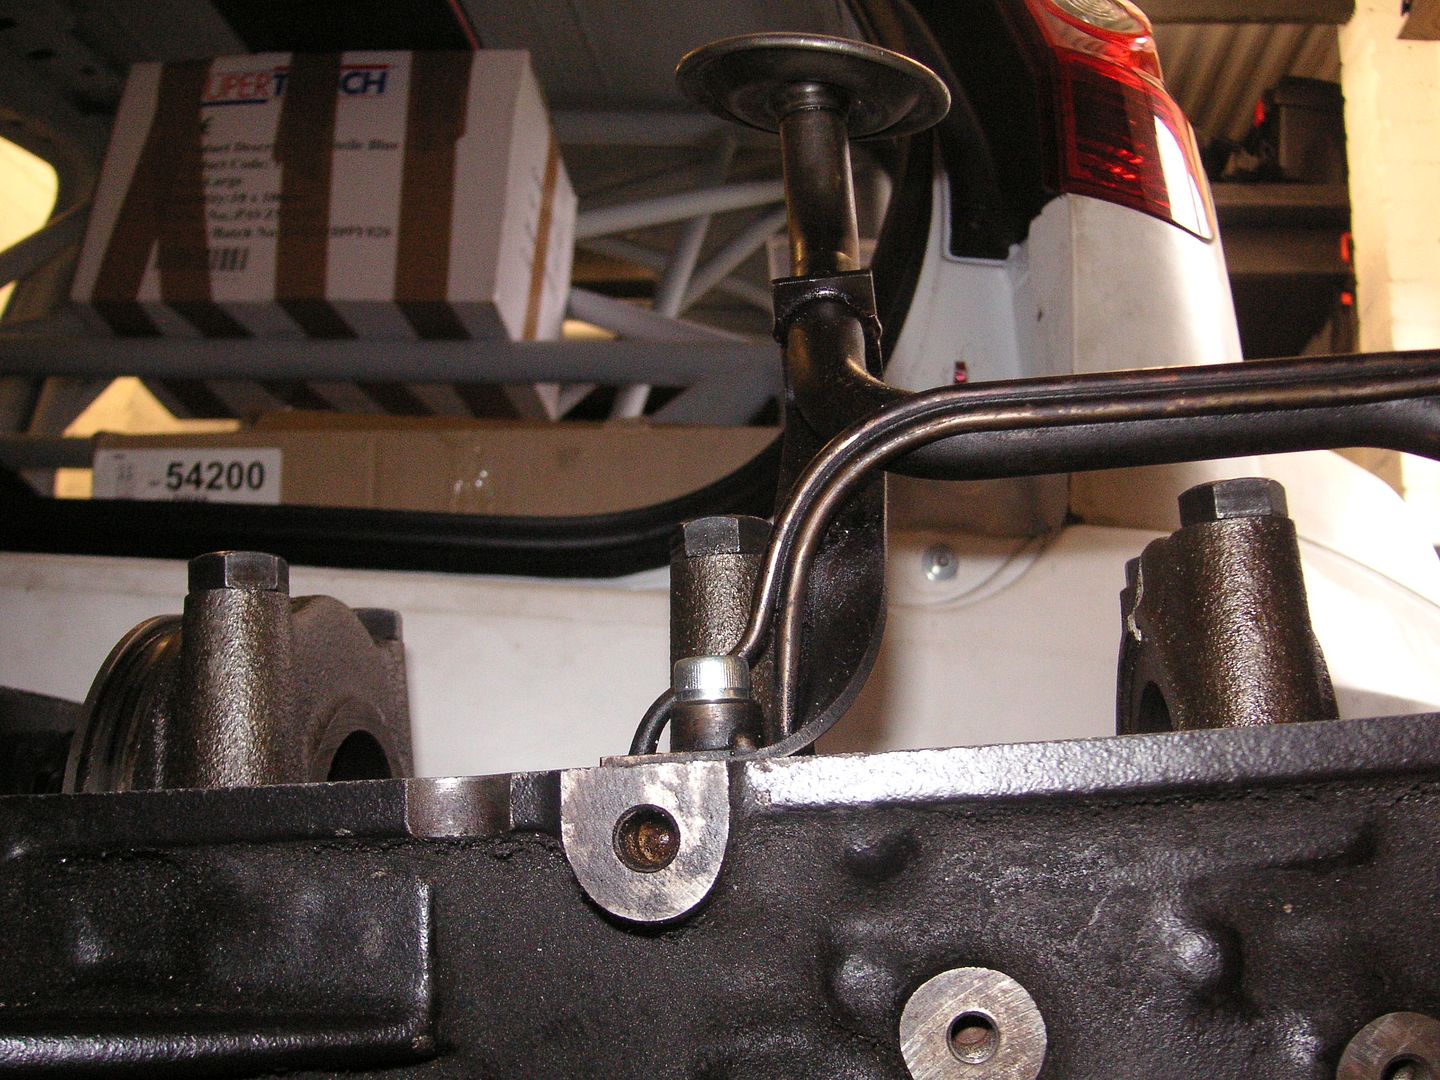
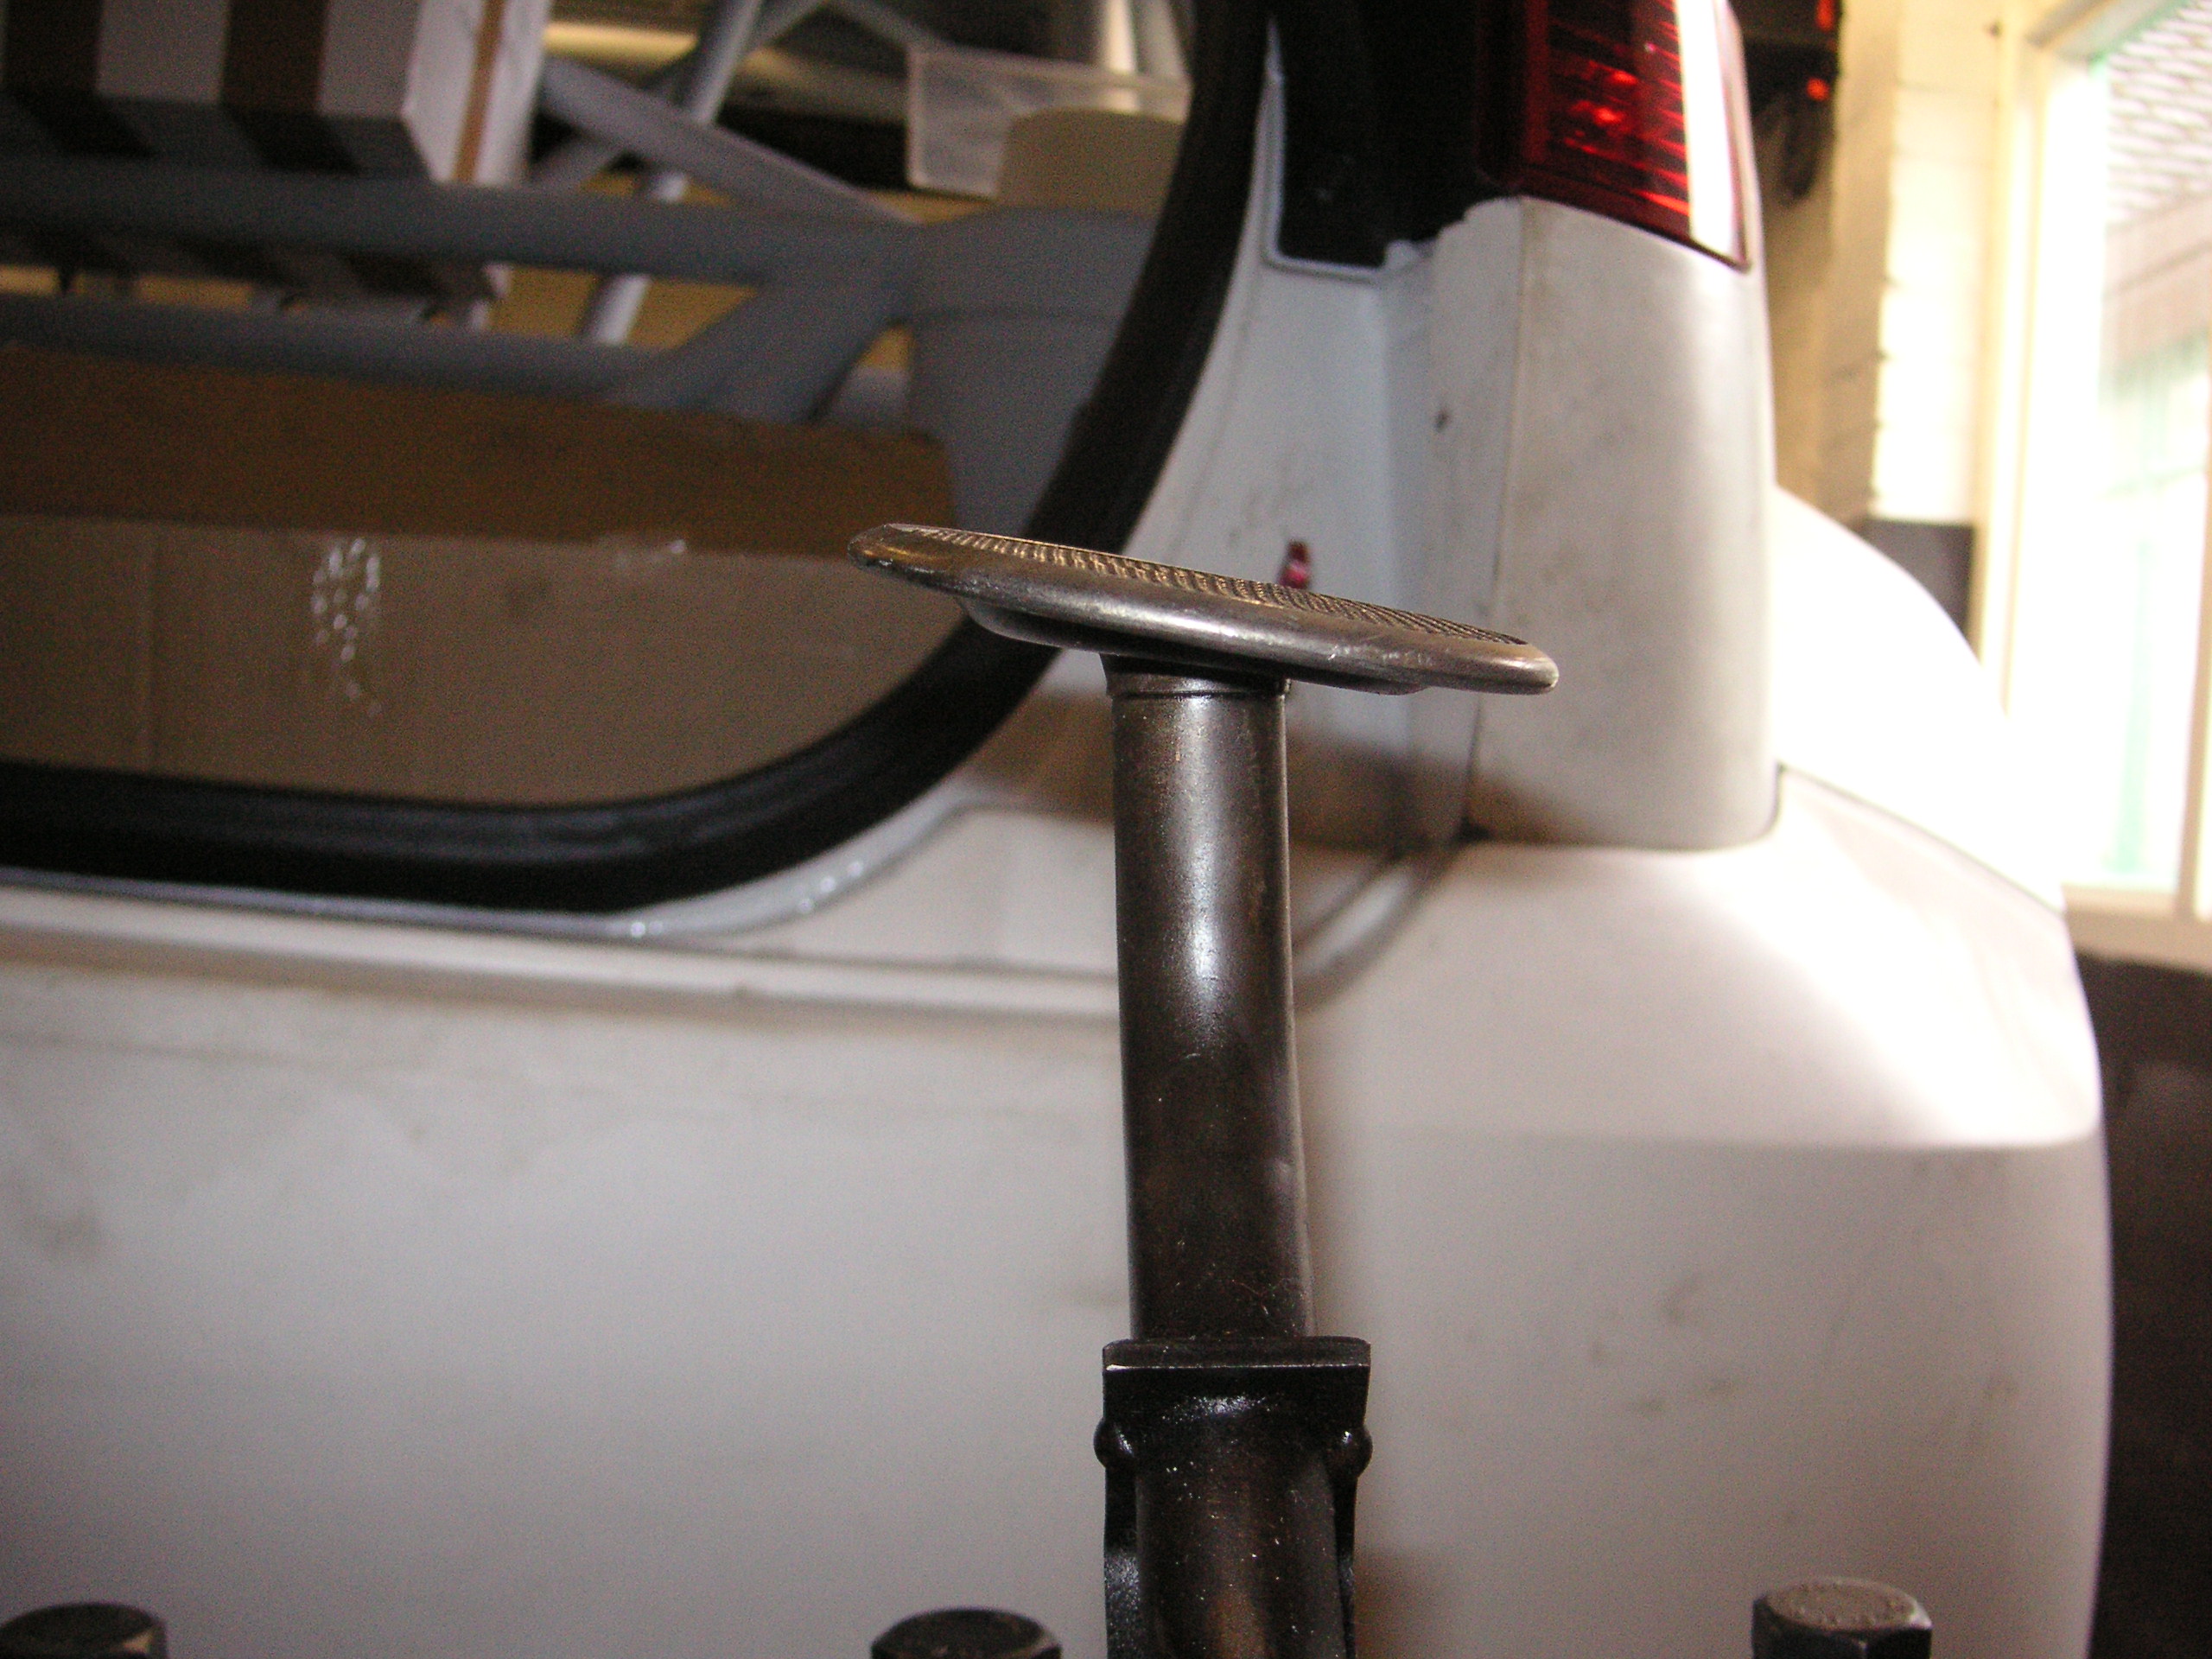
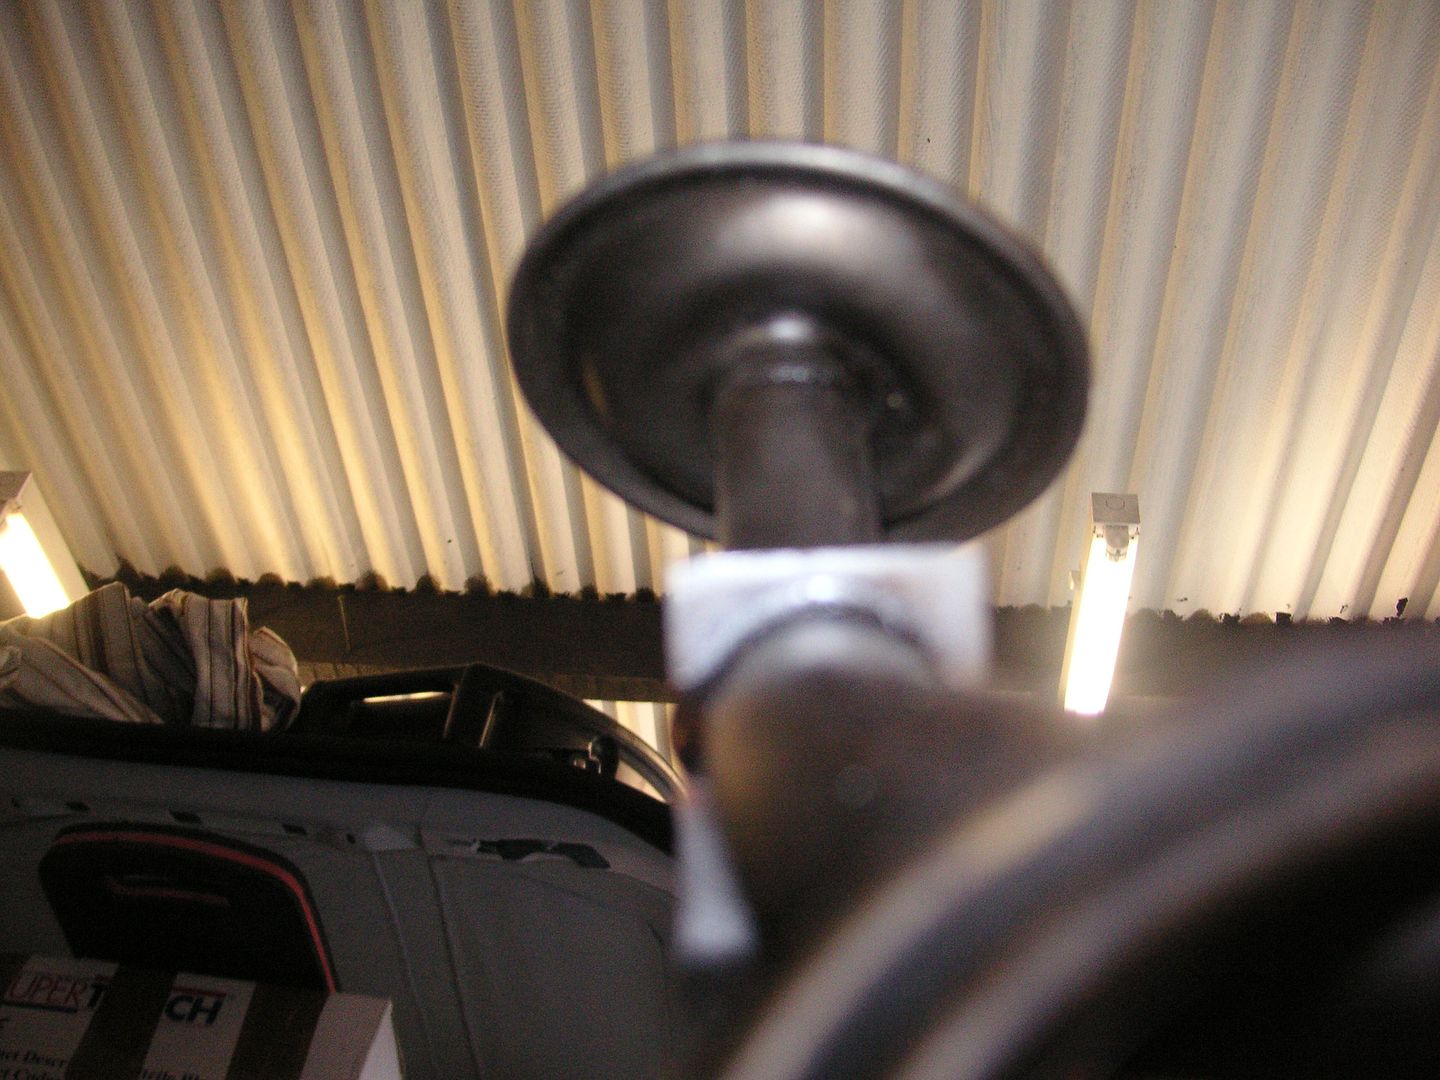
Also can anyone tell me if the strainer is meant to be bent like this or should it be level/flat as i bought this one like this so have no idea and need to be sure as im using it to mock up when fitting the baffle, if its bent i will have to find another one,
If anyone has a 4x4 one going then give me a pm
Thanks
Marc
If anyone has a 4x4 one going then give me a pm
Thanks
Marc
 30-03-2011, 08:37 PM
#1130
Markk/Beefy - cheers guys, think I will source a new straight strainer as if I pull it out it may crease and I don't want to risk any restriction to the oil pump just in case,
So anybody with a 4x4 oil pump pick up / spray bar send me a pm please,
Thanks
Marc
01-04-2011, 07:05 PM
#1132
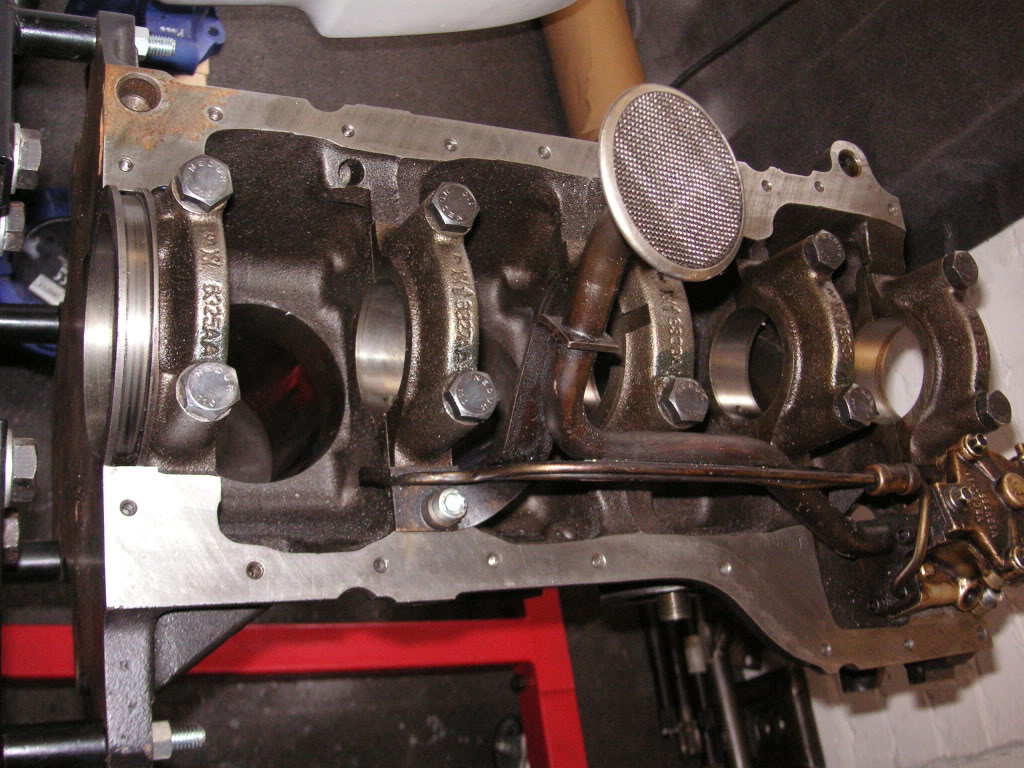
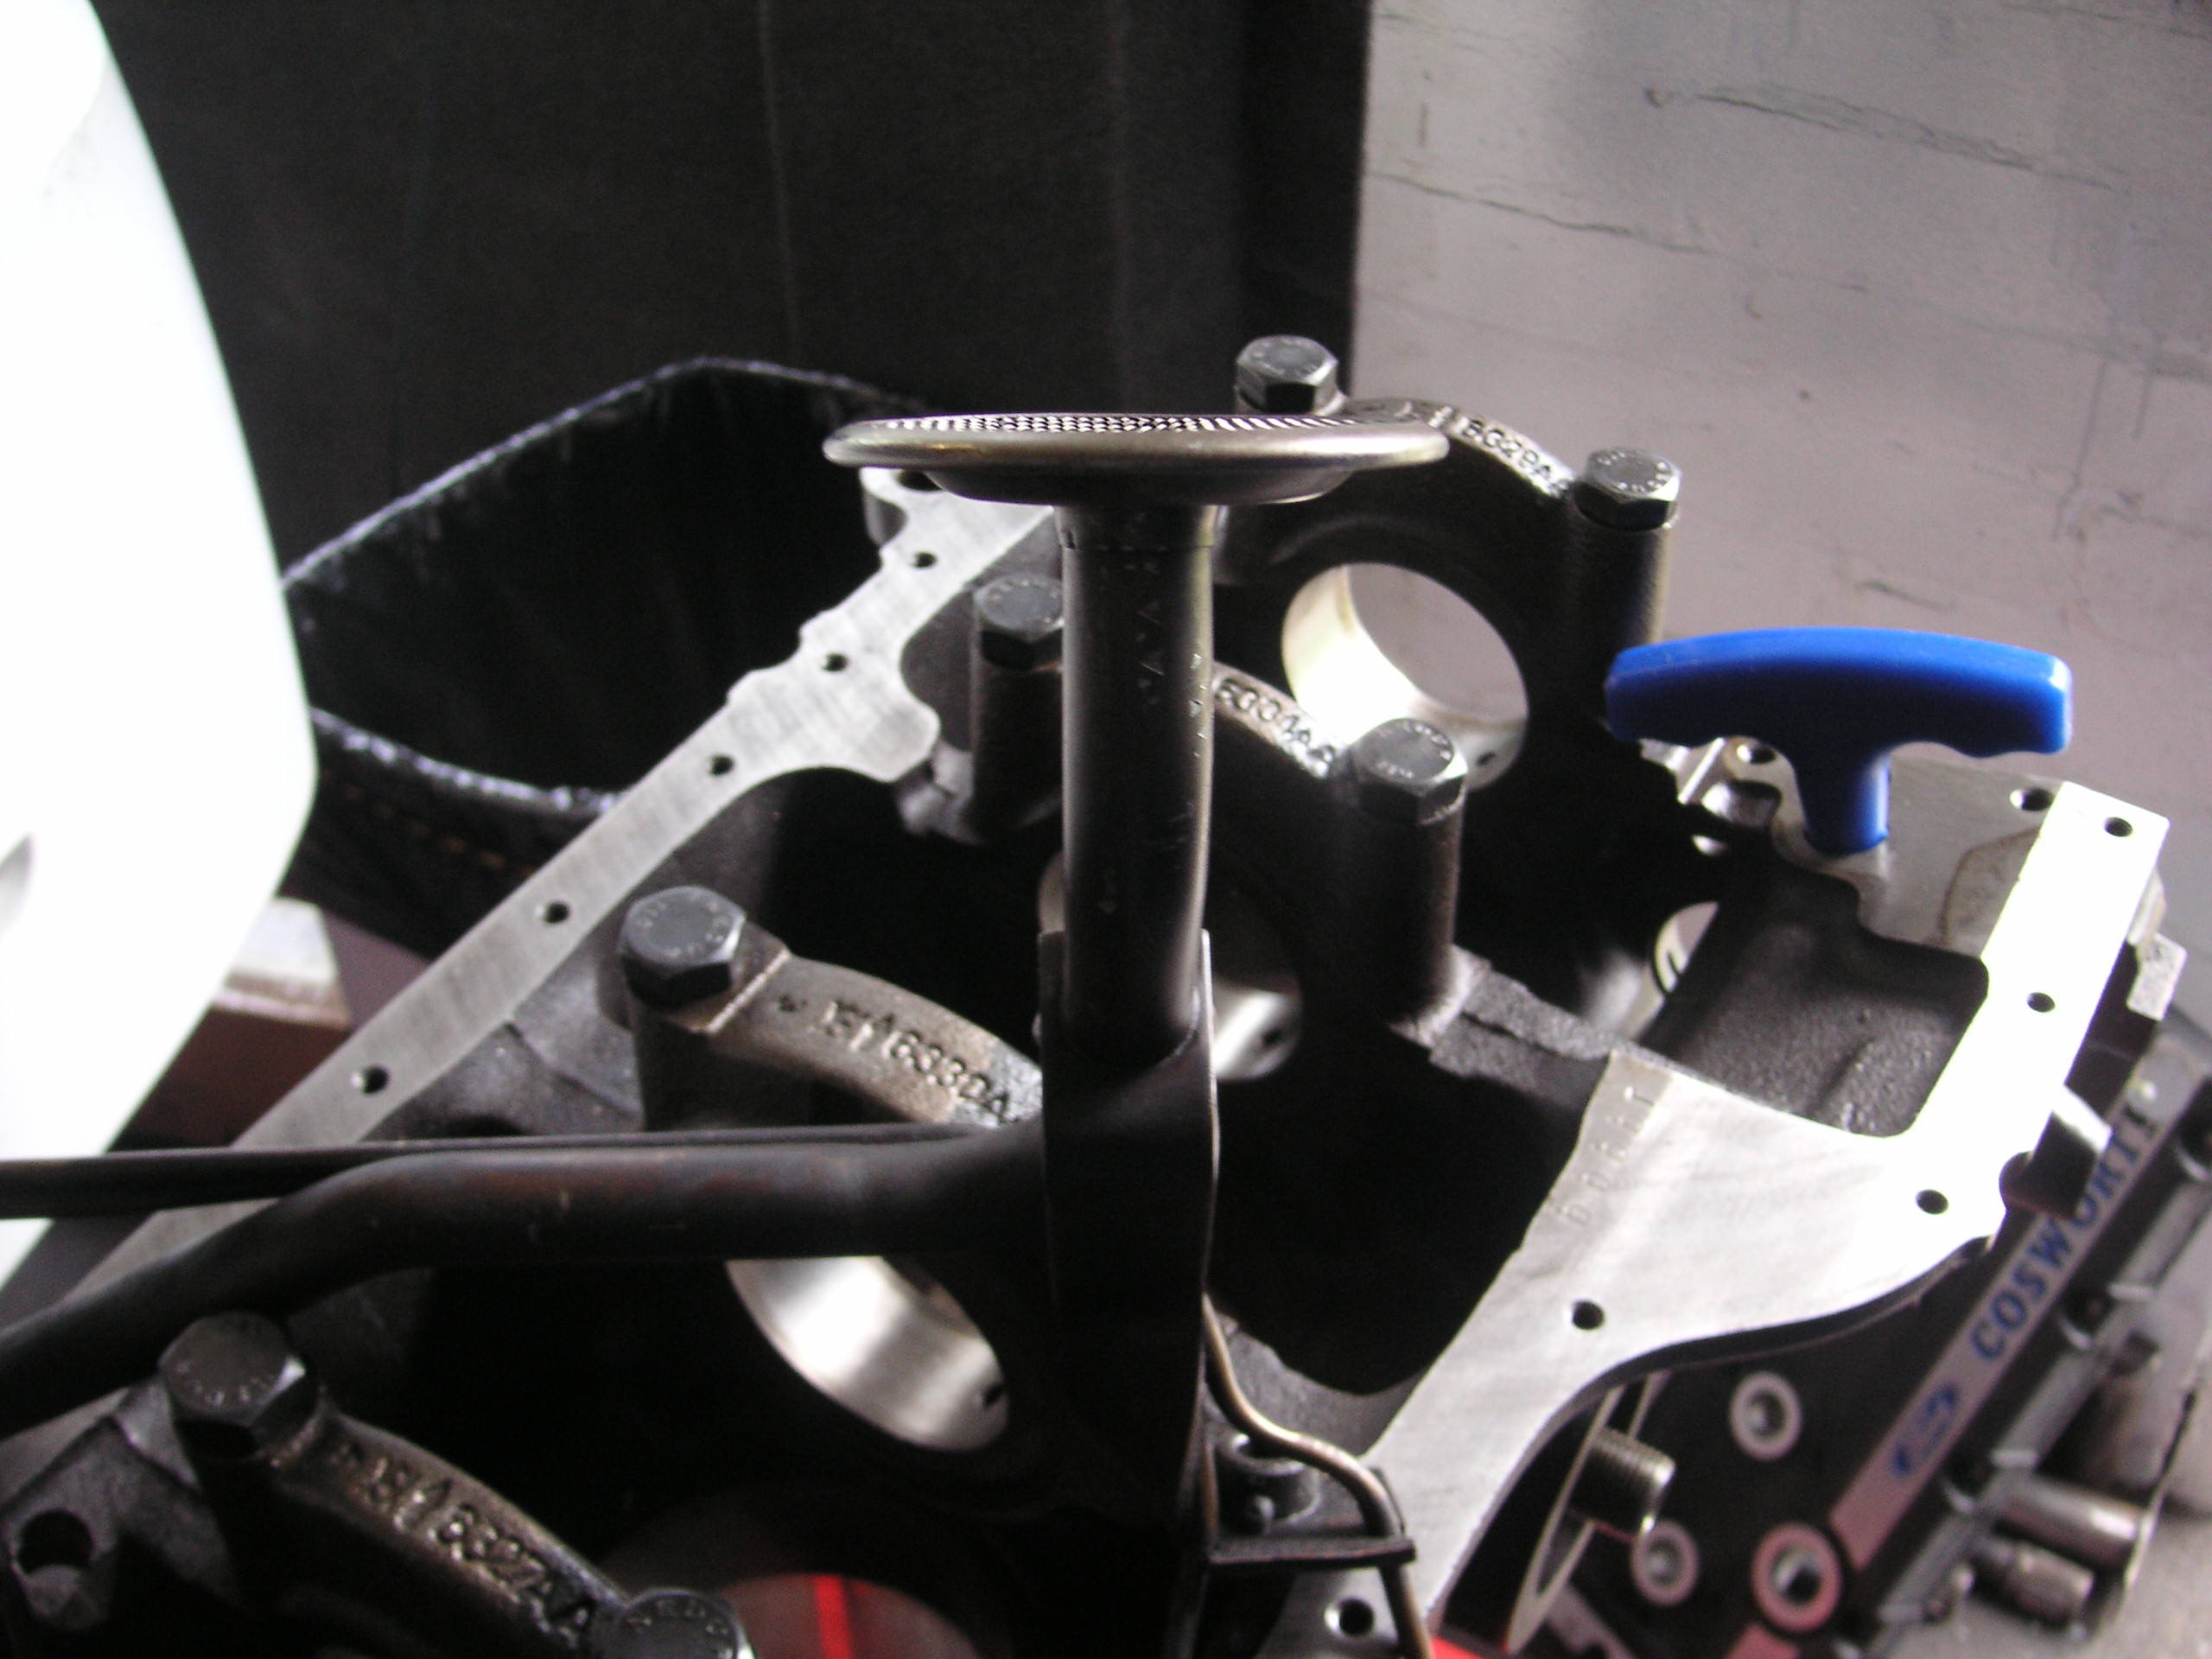
Well i straightened out the oil pick up strainer so thats nigh on perfect so no need to pay out for another one

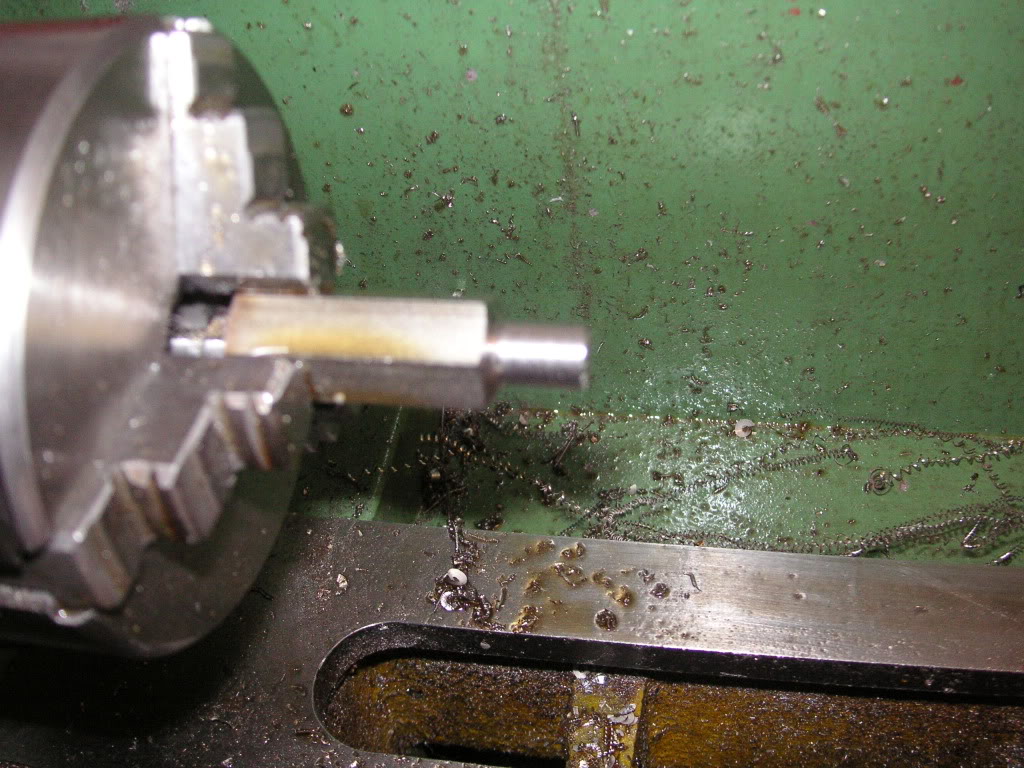
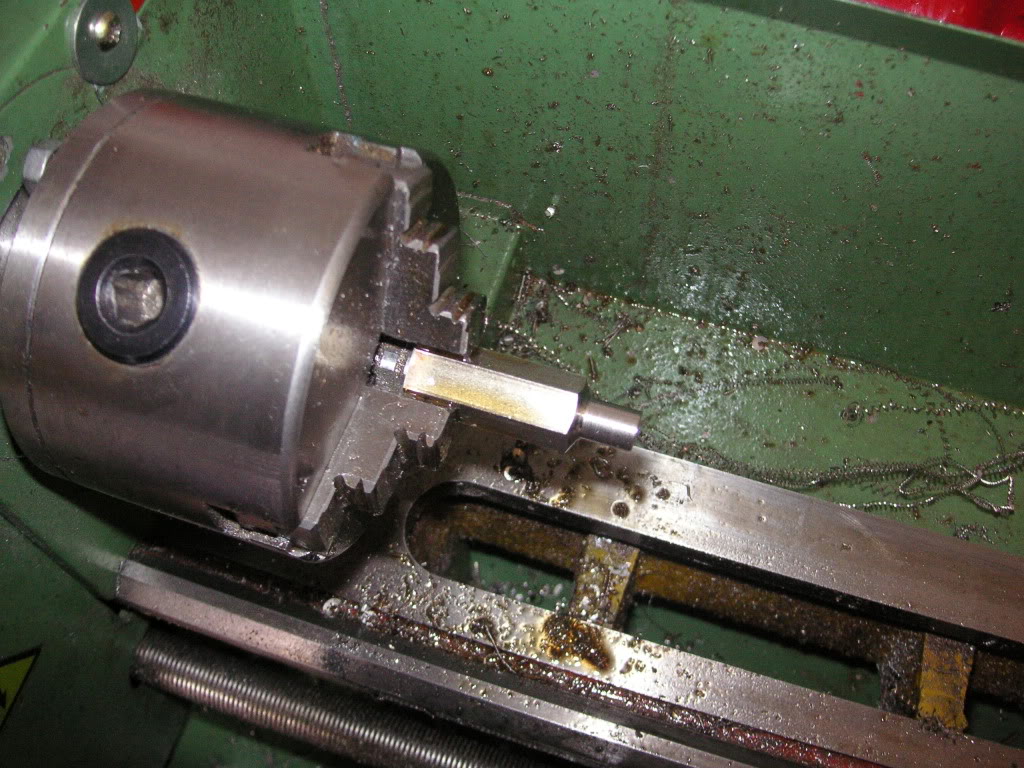
I wont be running a gaitor on the gear lever and didnt like the standard gear nob so i drilled and tapped a puma one that i have had in all my old projects, its a bit battered so will put it on the lathe with a radius tool and give it a light tickle,
stripped down the ford lever and ran an m12 die over the standard rod to suit the gear nob i had tapped previously
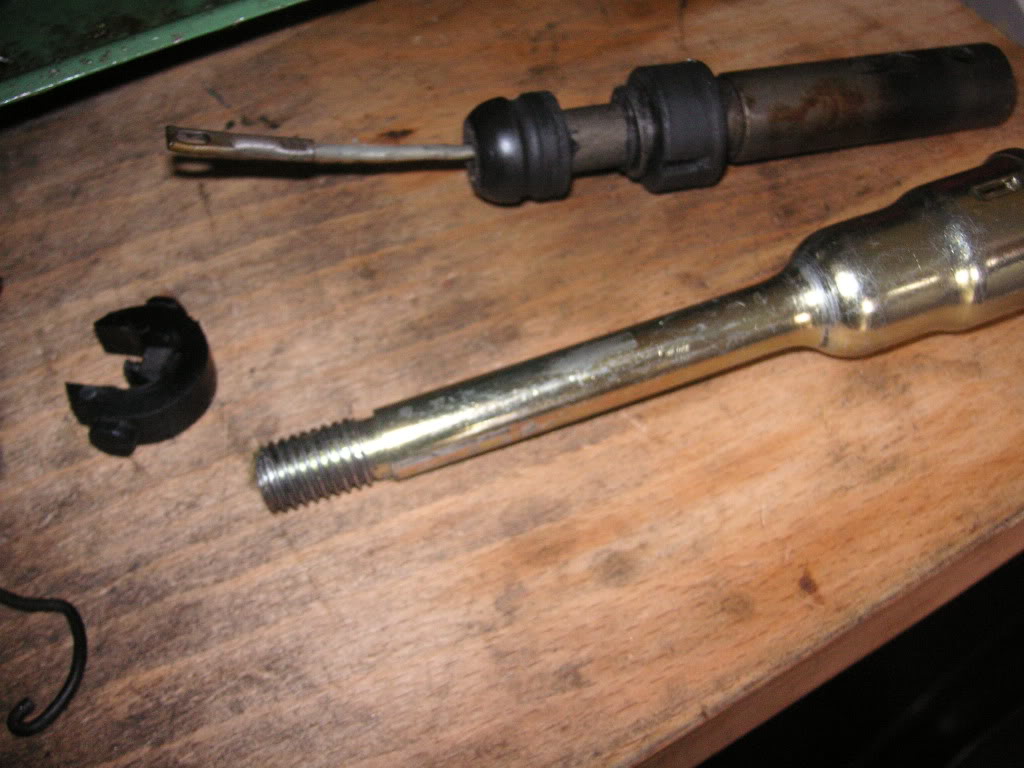
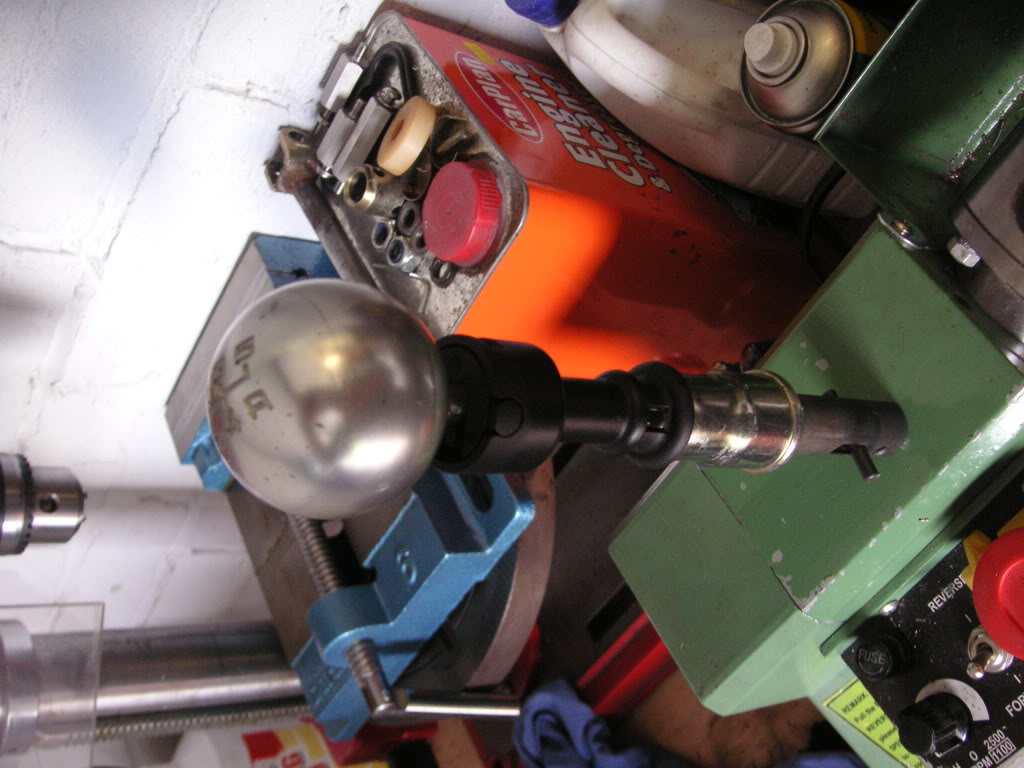
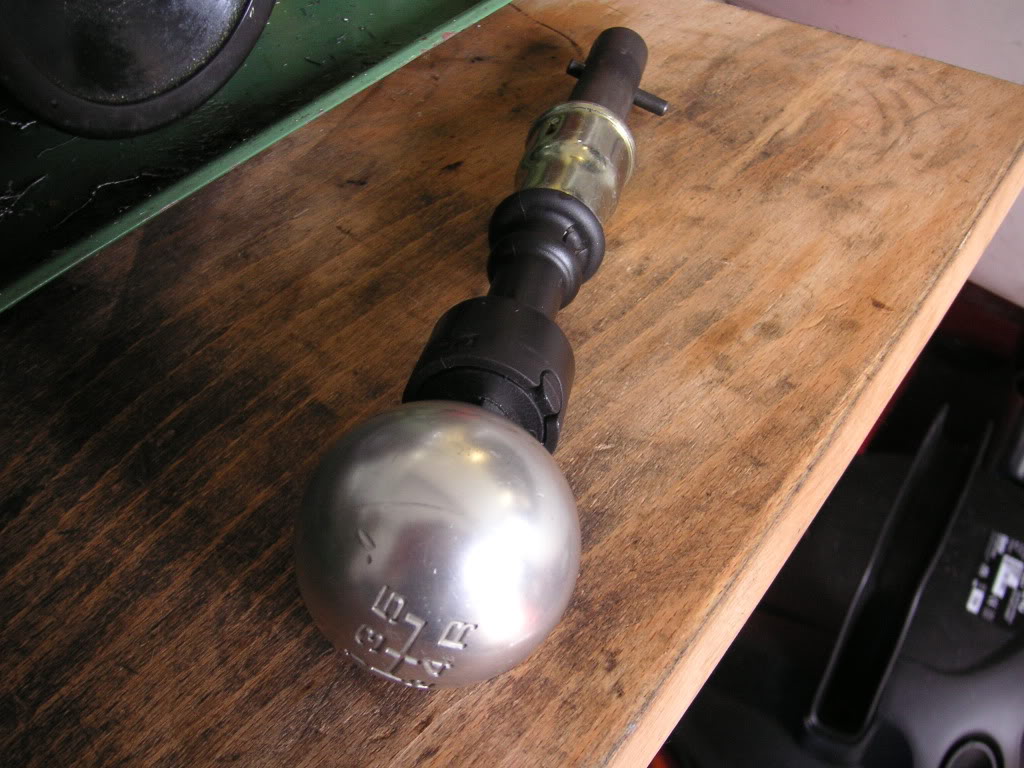
Will suit the stripped out look of the car i think.
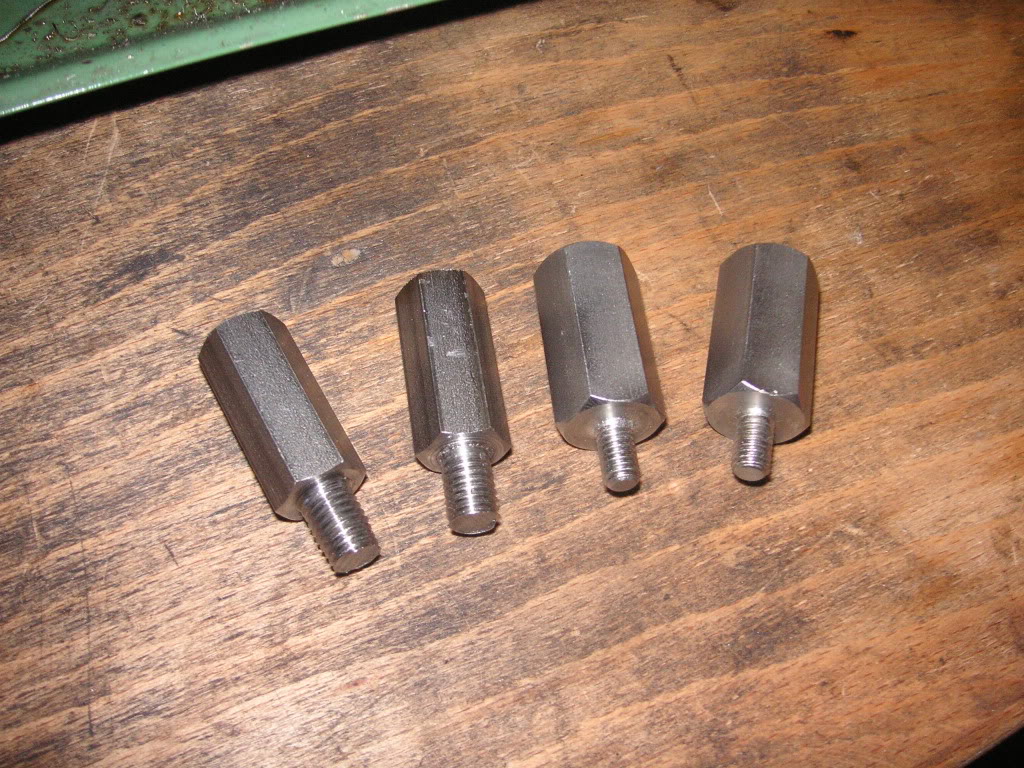
While i was on the lathe i also had to make up some new rocker cover post's to suit my air injector bracket i bought off MK MOTORSPORT as i didnt realise but both the holes in the rocker had been stripped clean out, so turned down a bit of ss hex to 8mm and threaded it and then drilled and tapped the other end to m6 and apart from the fact the hex i have used is smaller they look exactly the same but probably took me 50 times as long to make as mark on his cnc lol
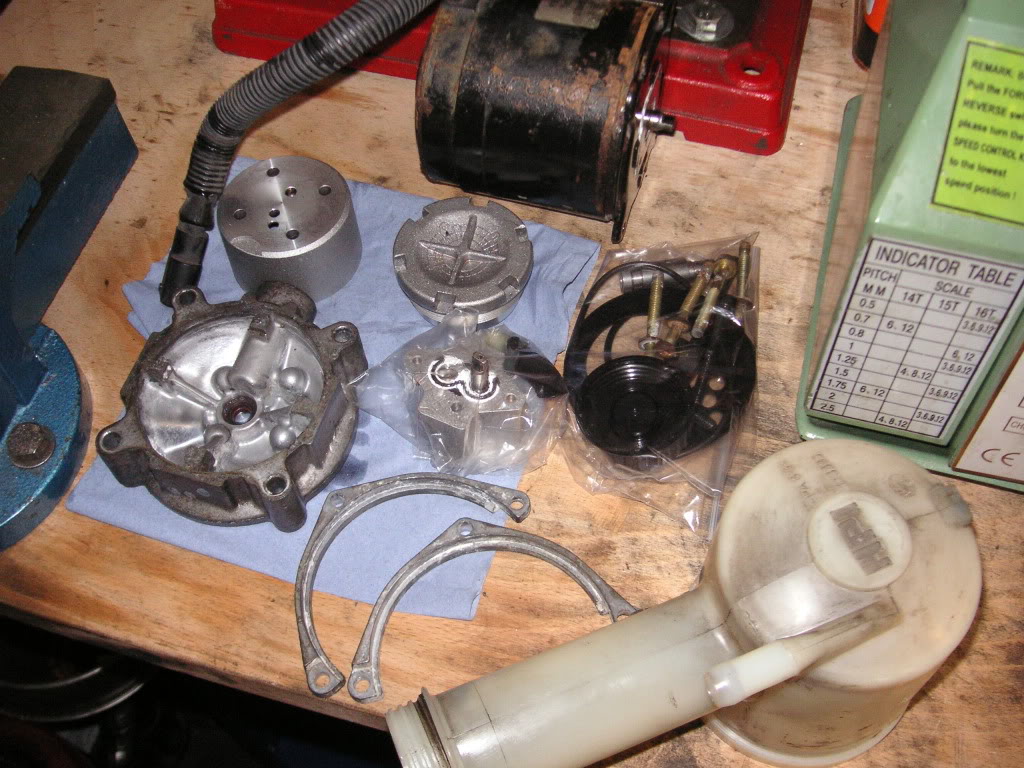
Lastly for todays efforts i stripped down the saxo power steering unit to its bare bones so i can clean it up nice before it goes in the car, just need to get the plastic resevoir part clean and shiny so gonna try the washing machine tablets etc


One day i might just start putting some of this lot back together

I wont be running a gaitor on the gear lever and didnt like the standard gear nob so i drilled and tapped a puma one that i have had in all my old projects, its a bit battered so will put it on the lathe with a radius tool and give it a light tickle,
stripped down the ford lever and ran an m12 die over the standard rod to suit the gear nob i had tapped previously
Will suit the stripped out look of the car i think.
While i was on the lathe i also had to make up some new rocker cover post's to suit my air injector bracket i bought off MK MOTORSPORT as i didnt realise but both the holes in the rocker had been stripped clean out, so turned down a bit of ss hex to 8mm and threaded it and then drilled and tapped the other end to m6 and apart from the fact the hex i have used is smaller they look exactly the same but probably took me 50 times as long to make as mark on his cnc lol
Lastly for todays efforts i stripped down the saxo power steering unit to its bare bones so i can clean it up nice before it goes in the car, just need to get the plastic resevoir part clean and shiny so gonna try the washing machine tablets etc
One day i might just start putting some of this lot back together
Last edited by M K; 01-04-2011 at 07:17 PM.
 02-04-2011, 02:47 AM
#1135
Too many posts.. I need a life!!

Join Date: May 2004
Location: UK
Posts: 964
Likes: 0
Received 0 Likes
on
0 Posts
Dude if you ran a 106 pump (identical to a saxo but for one thing) you could run a external fluid reservoir in the engine bay. Would look far neater imho and worth a look.
02-04-2011, 07:45 AM
#1137
Hi mate i love the pump setup your doing i had a guick look at martins as he has a pump setup in his car . Do you no how much wiring is invoted to get it running or is it just a + / - to get it to work as im very intrested in doing some thing like this on my FOCOS
All so very nice work on you turned parts you have made just one thing to help you out all ways put the job in the chuck as fare as it will go in as it will give it more stability when working on it which all so gives you a better finish better size as its not moving in the chuck and all so less marking to the job there it was held but apart from that Nice job . Its nice to look at these small things and sa i made that and im the only one whith it done that way keep it up
All so very nice work on you turned parts you have made just one thing to help you out all ways put the job in the chuck as fare as it will go in as it will give it more stability when working on it which all so gives you a better finish better size as its not moving in the chuck and all so less marking to the job there it was held but apart from that Nice job . Its nice to look at these small things and sa i made that and im the only one whith it done that way keep it up
02-04-2011, 10:16 AM
#1138
cheers mate,
thanks for the tip
As for the pump set up, yes it is just a positive and negative and that is it, so will just have it on a switch on the dash,
You could even have it running to push the around the workshop with without the engine running
thanks for the tip
As for the pump set up, yes it is just a positive and negative and that is it, so will just have it on a switch on the dash,
You could even have it running to push the around the workshop with without the engine running
03-04-2011, 07:22 PM
#1139
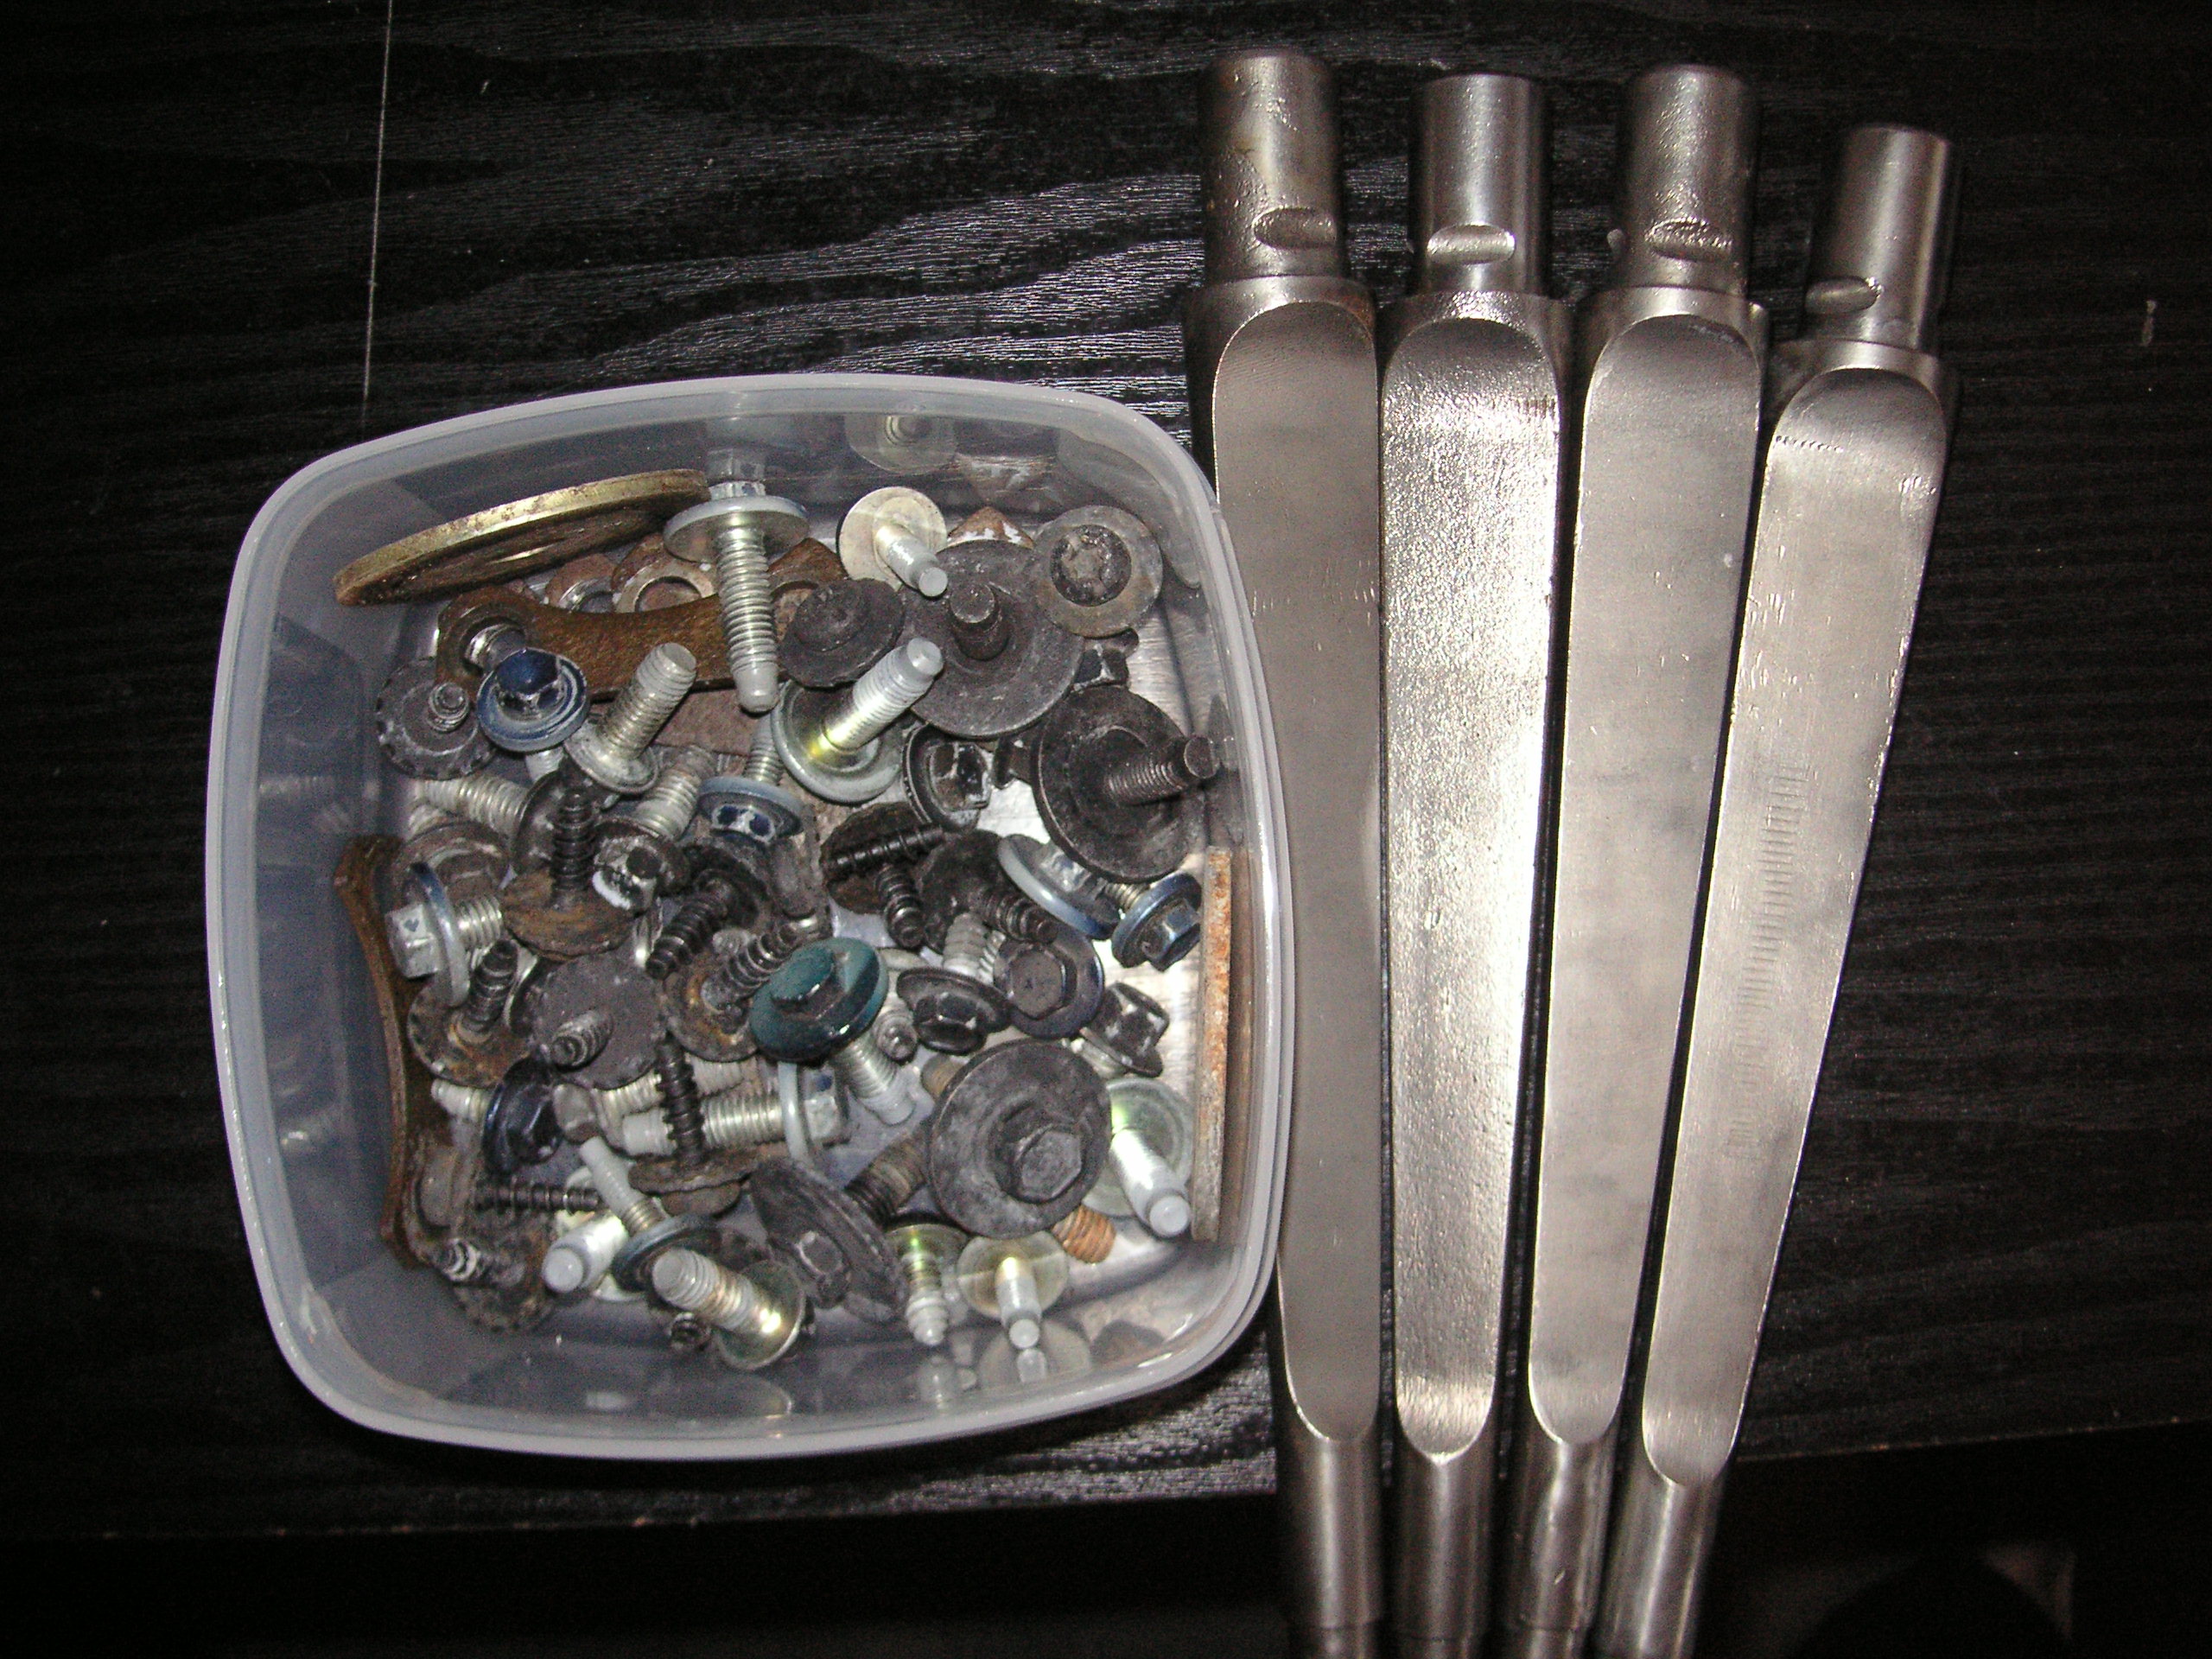
sorted out the parts for powder coating and zinc plating today so 95kg's worth of parts will be on their way to Chris Latham this week
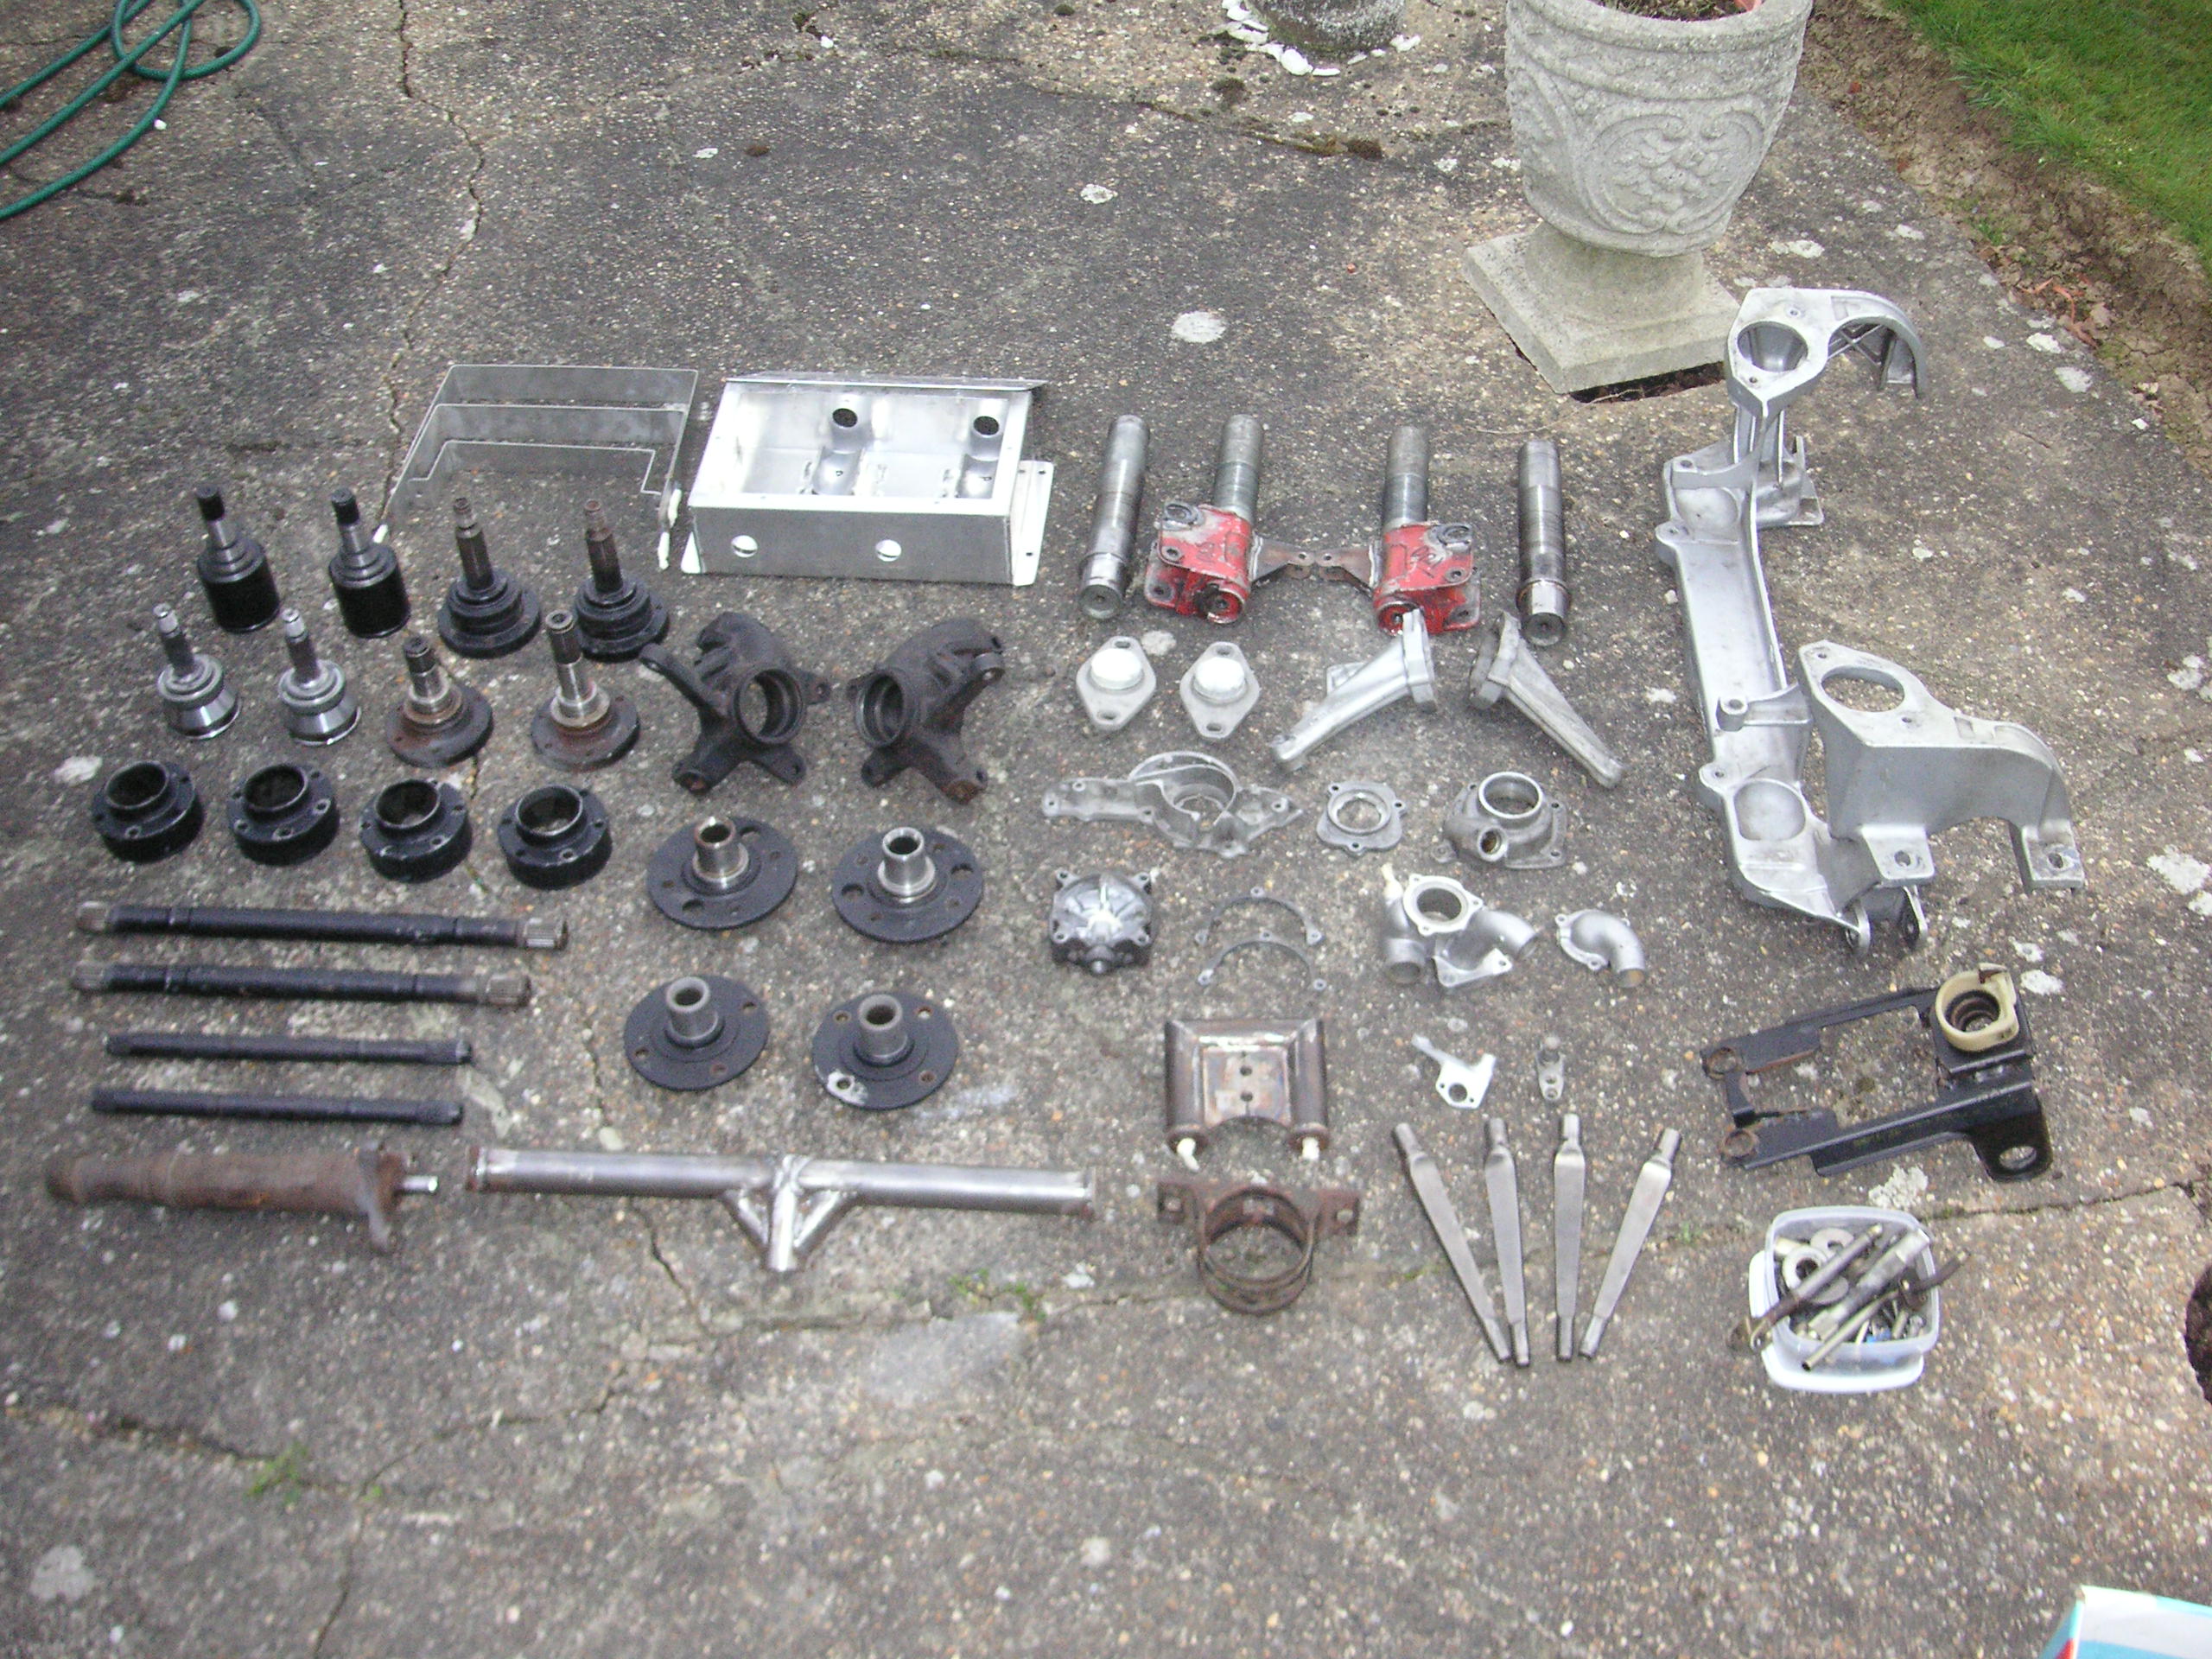
Also while i was at it i got another wrc crank sensor as i sold the last one and quickly modded the crank seal housing so it fits before it goes off for coating and blasting
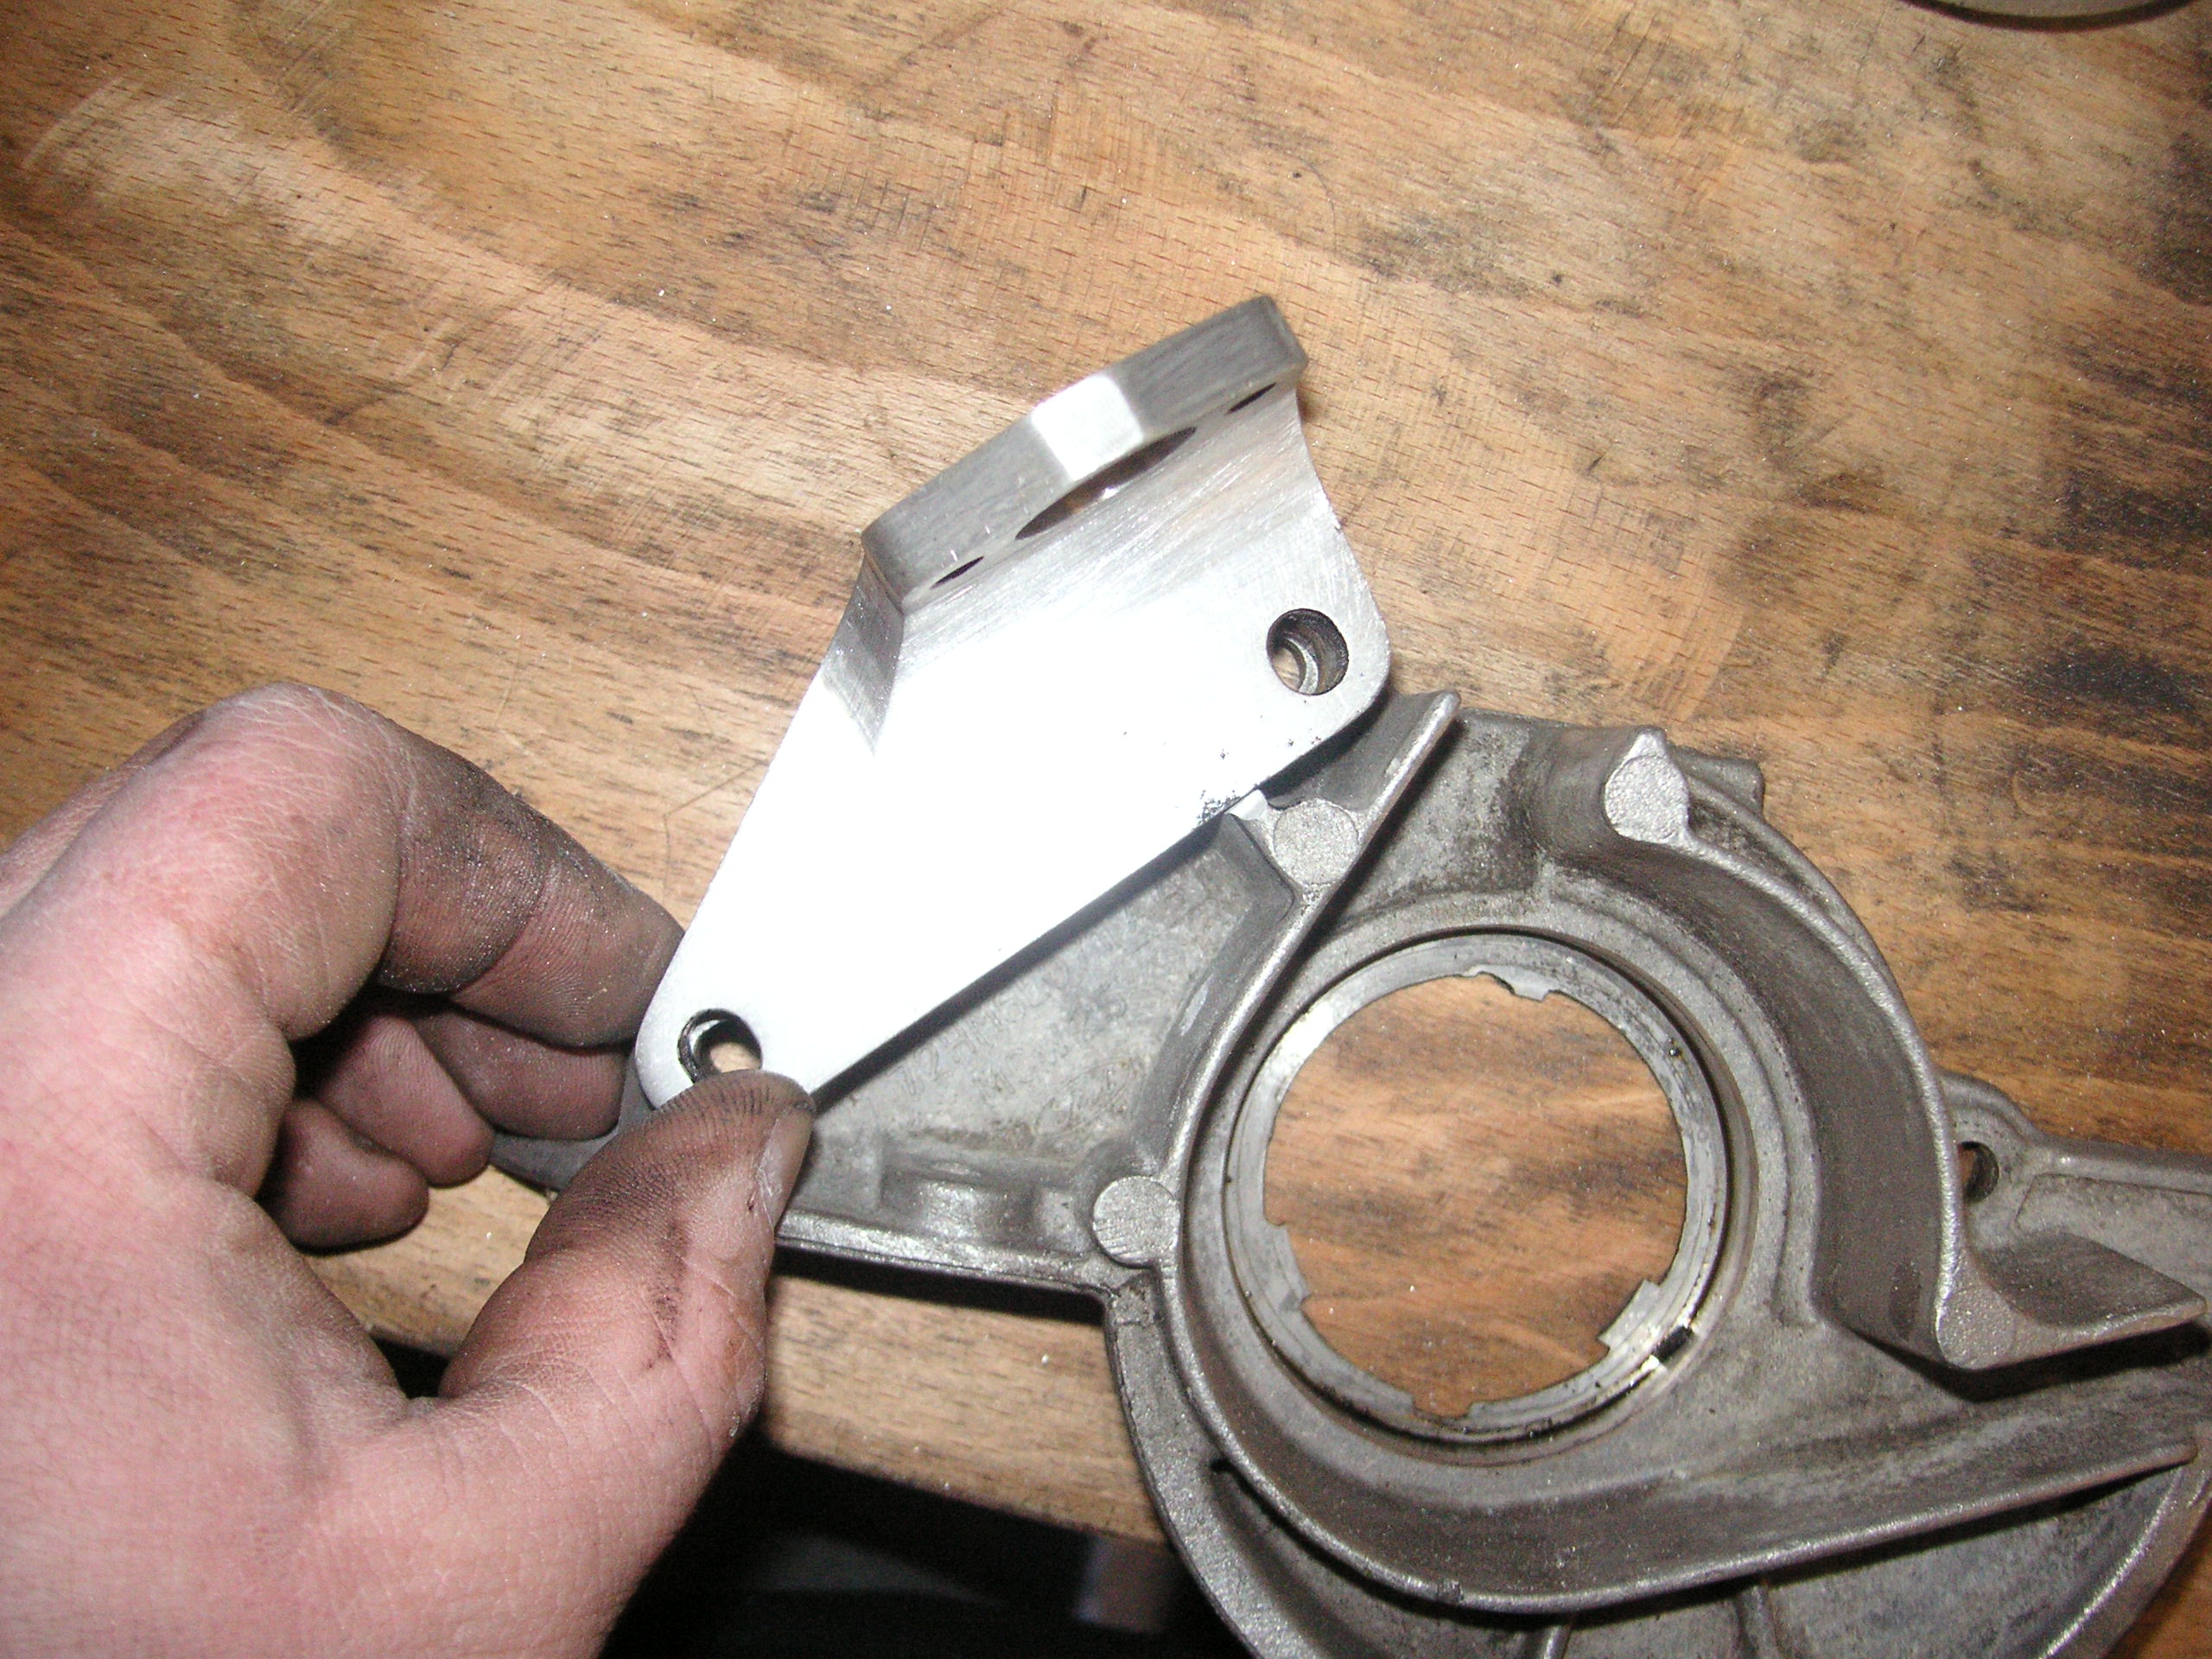
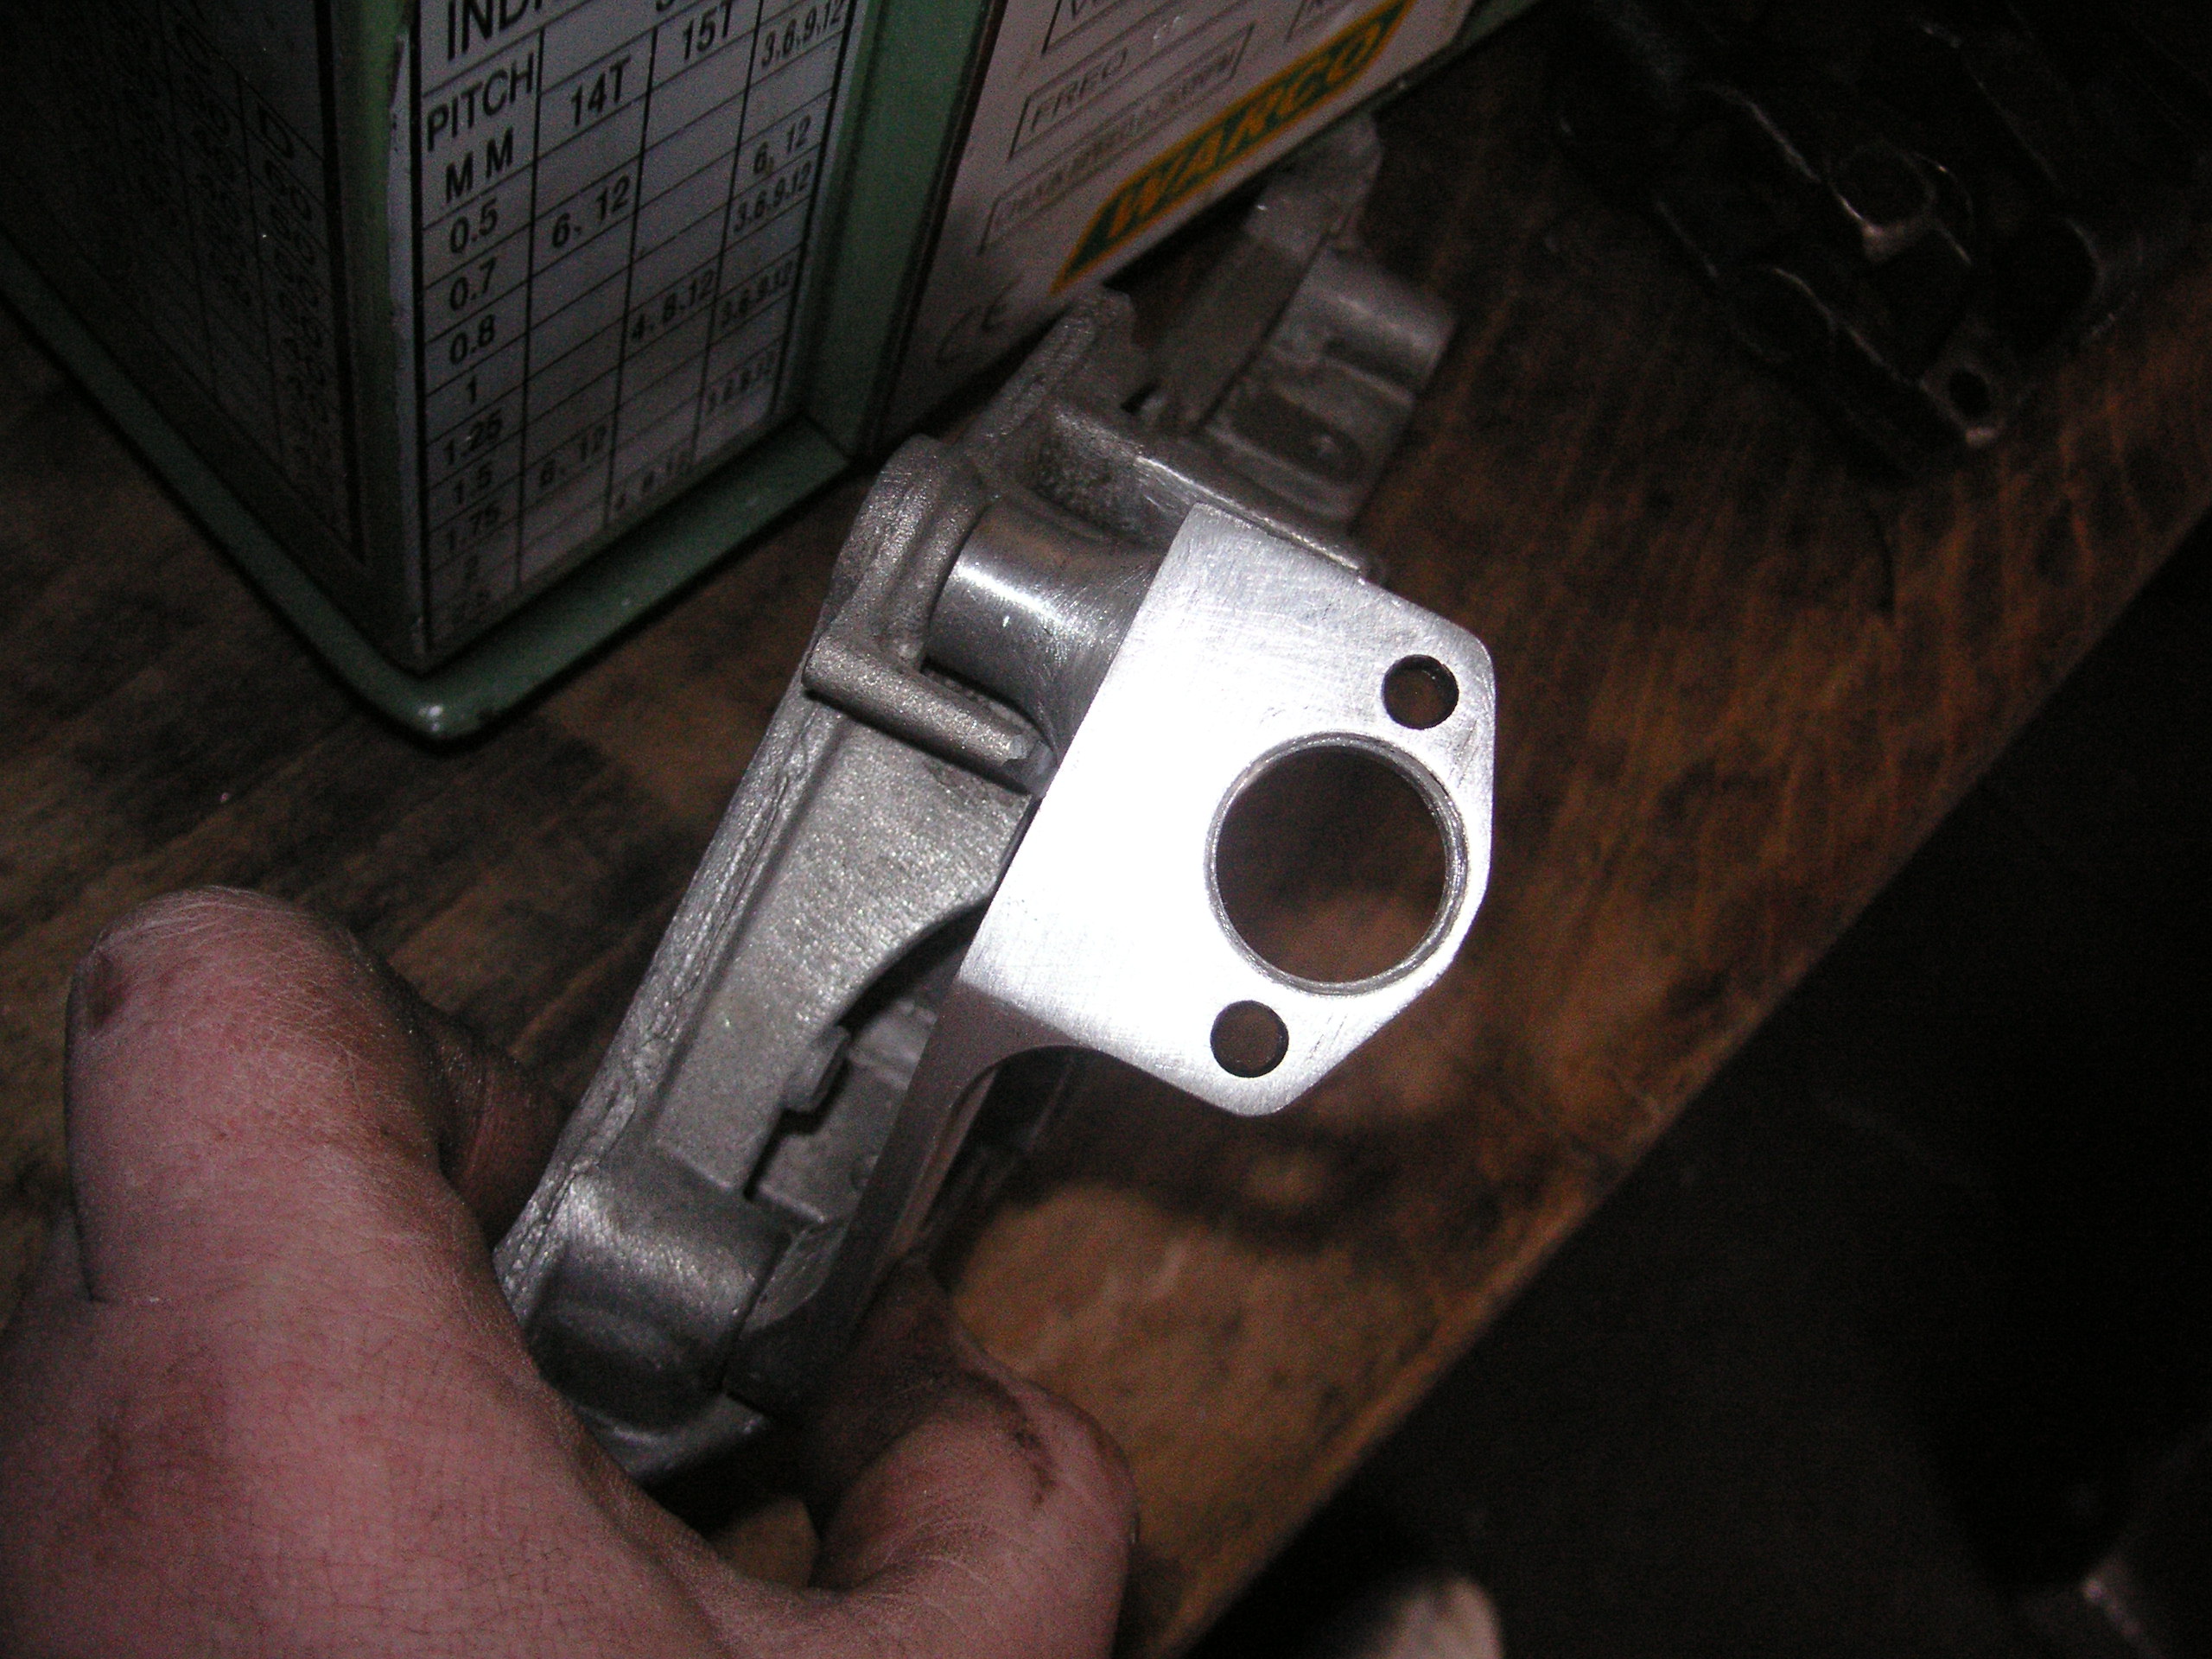
Also while i was at it i got another wrc crank sensor as i sold the last one and quickly modded the crank seal housing so it fits before it goes off for coating and blasting
03-04-2011, 09:21 PM
#1142
Lucifer II - 666
Get the corosion off of those inner bores before it eats in, it's amazing how quick that shit bites in and then blocks only any good for rebore.
 03-04-2011, 09:51 PM
#1144
The block is going to be bored for new pistons anyway but I will wipe it off and smear some grease on it,
Most of the parts are going gloss black, hubs/shafts/flanges etc so it can be wiped clean easily,
Cradle/mounts/thermo housing and other cast parts are going silver and the rest zinc plate,
How much for the gear nob then fudgey
Thanks
Marc
Most of the parts are going gloss black, hubs/shafts/flanges etc so it can be wiped clean easily,
Cradle/mounts/thermo housing and other cast parts are going silver and the rest zinc plate,
How much for the gear nob then fudgey
Thanks
Marc
05-04-2011, 04:02 PM
#1145
Picked up some of the engine parts today
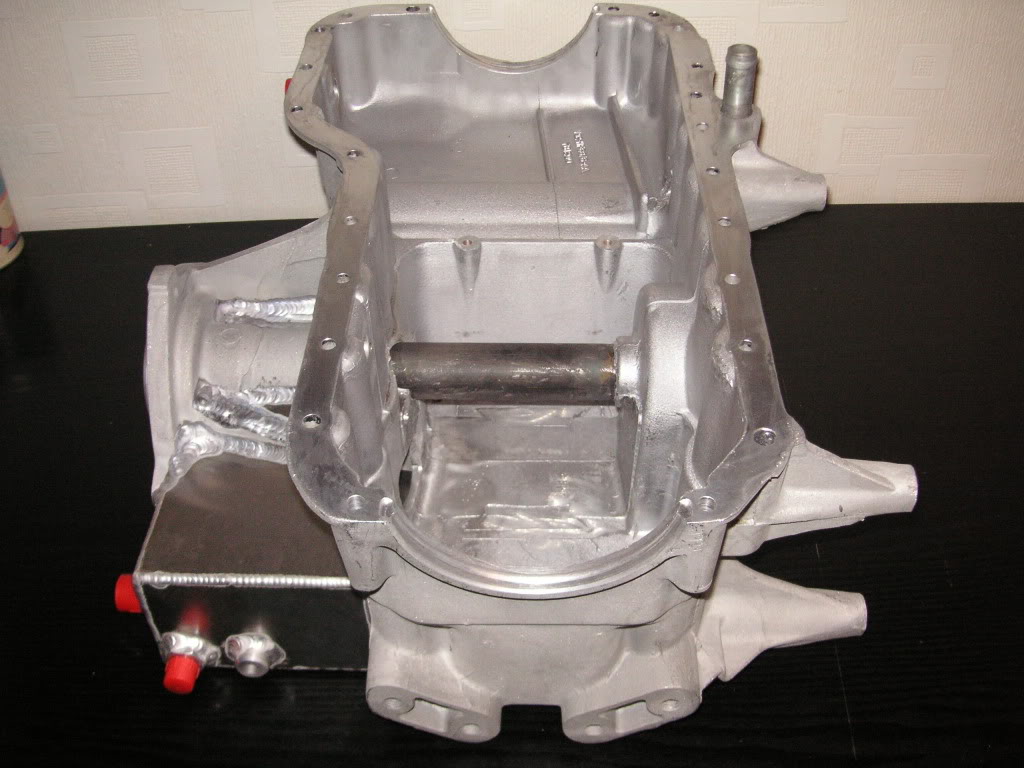
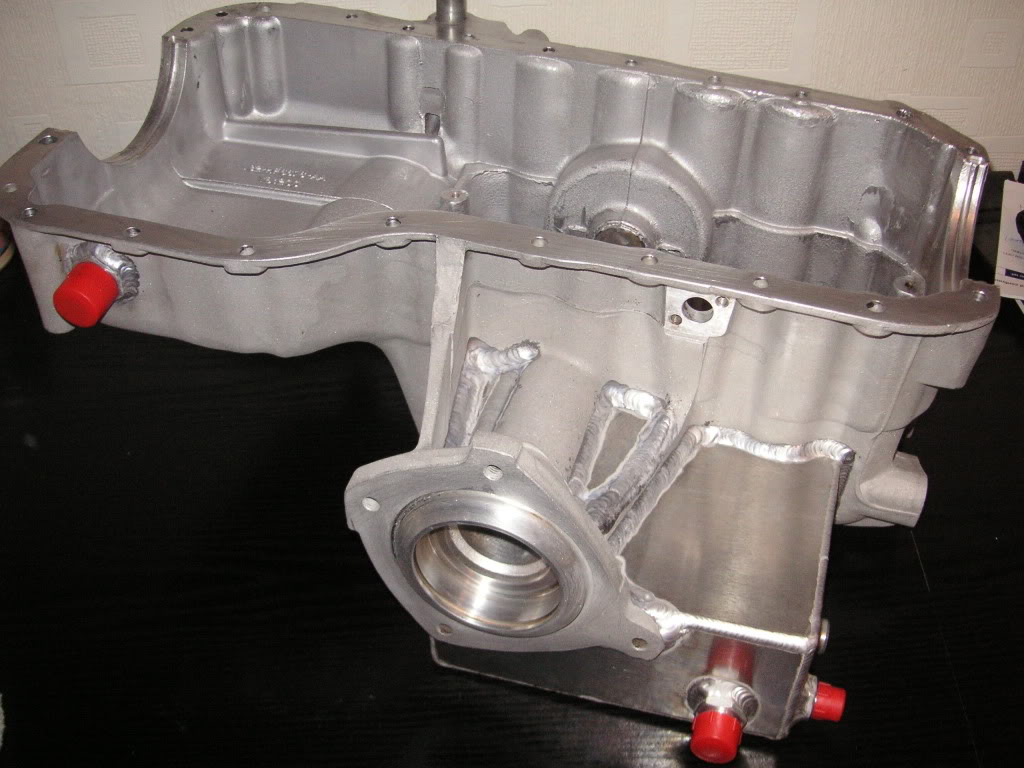
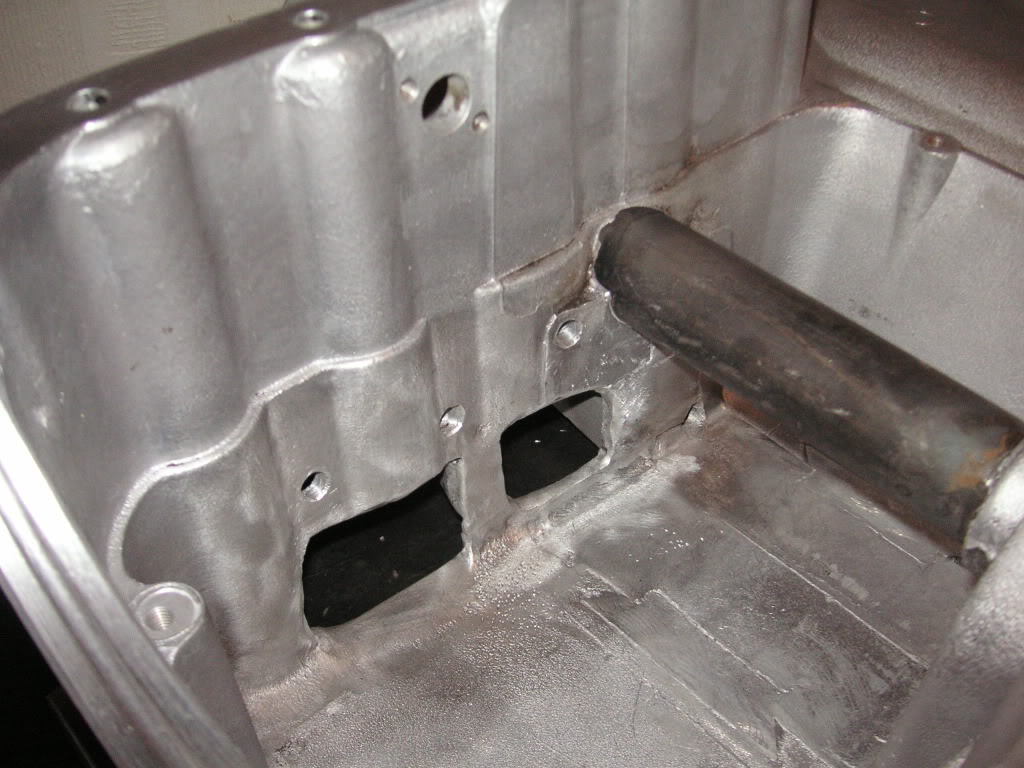
First off i needed another fitting welded to the sump for the wrc breather set up so this was welded on the front left corner for me and tommy also suggested the big wing section was opened right up rather than just a few holes randomly along the bottom, so 2 large squares were cut out and a few 6mm holes put in across the top line to let the air out the big wing,
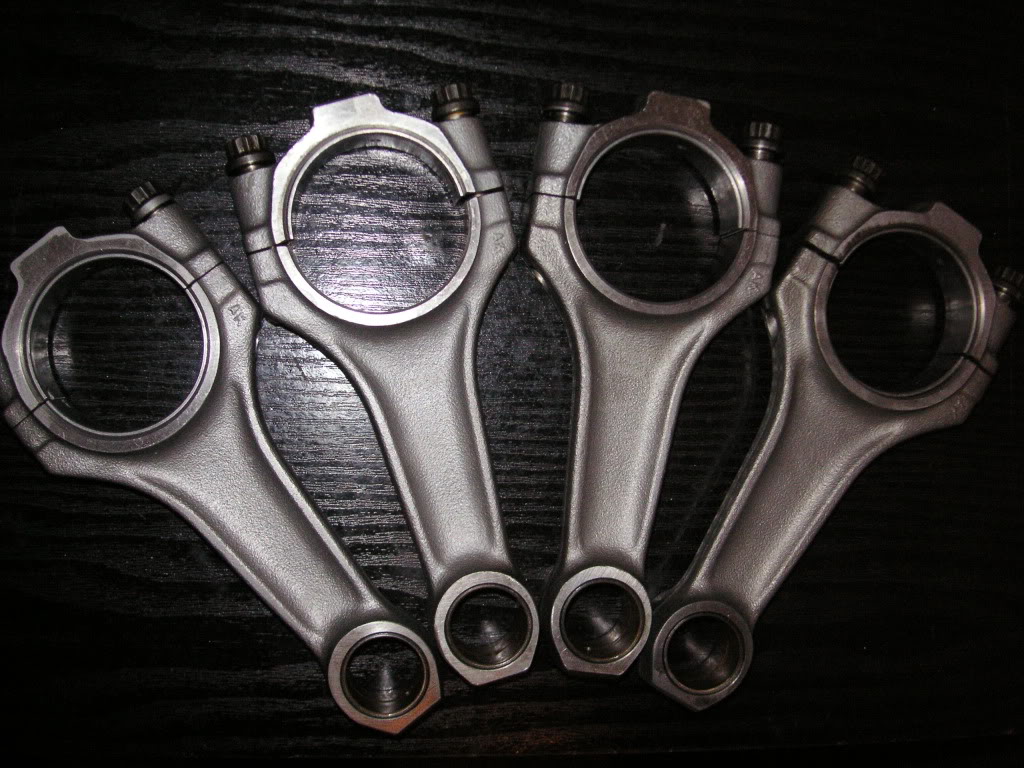
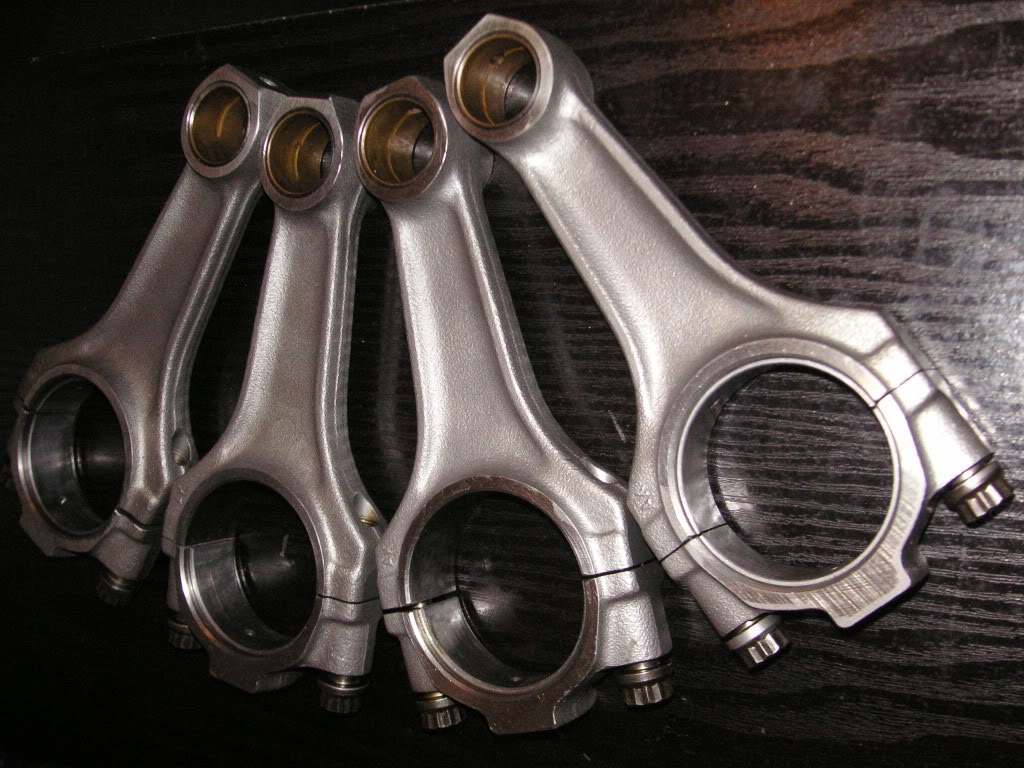
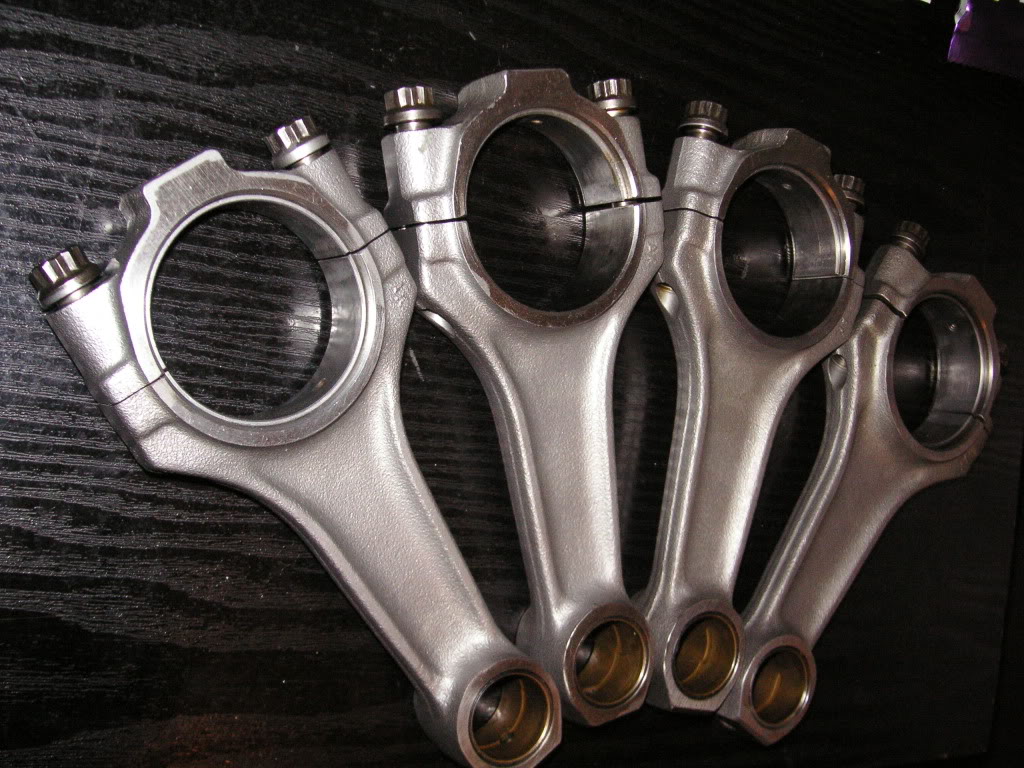
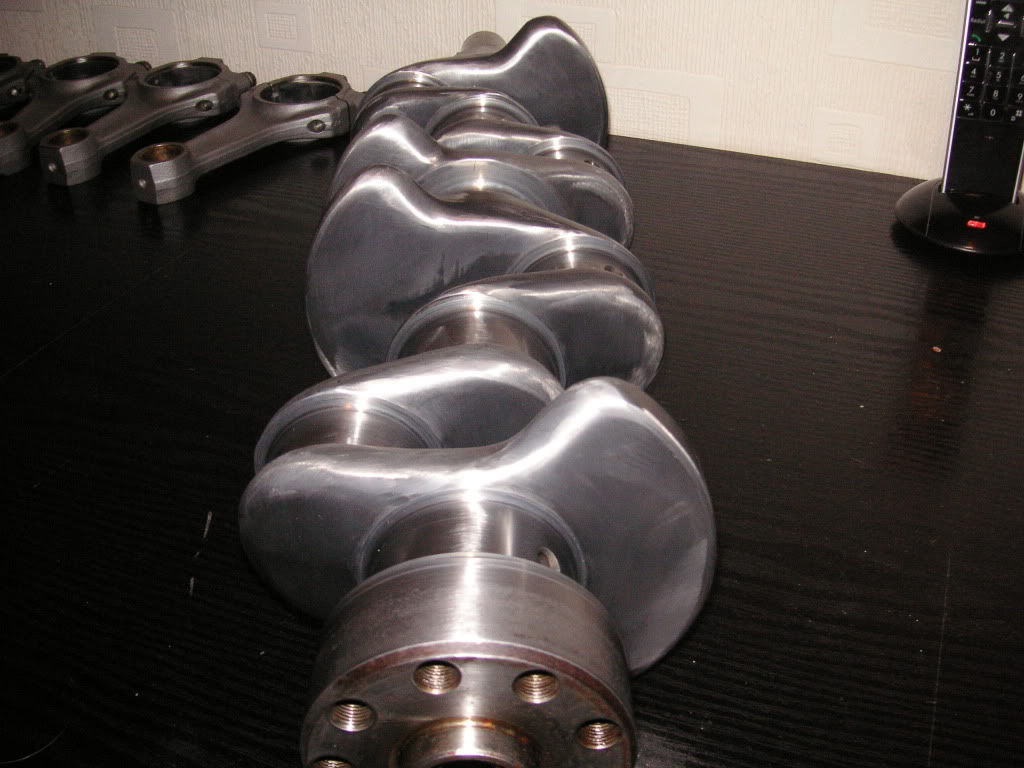
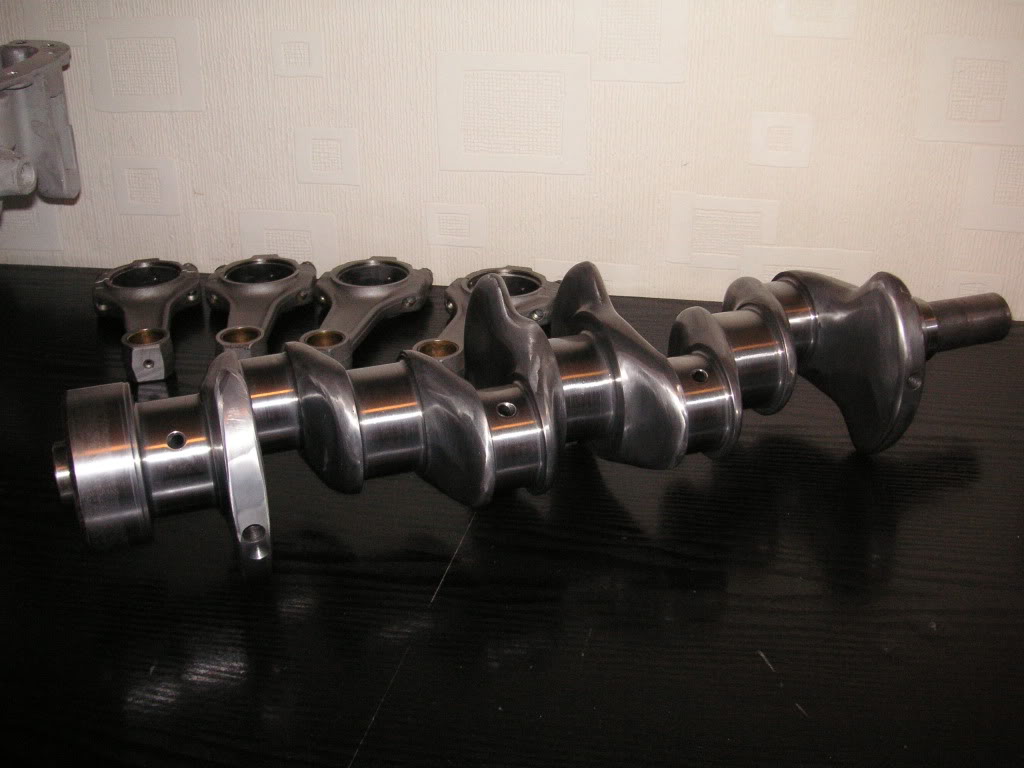
Next up are the con rods, as these are meant to be good for 600bhp all day long i didnt see the point in shelling out for some full on i-beam or h section jobby's but just to give these a bit of treatment they were sent away for shot peening to stress relieve them, doesn't cost much so worth doing i thought, i also have new arp bolts for them,
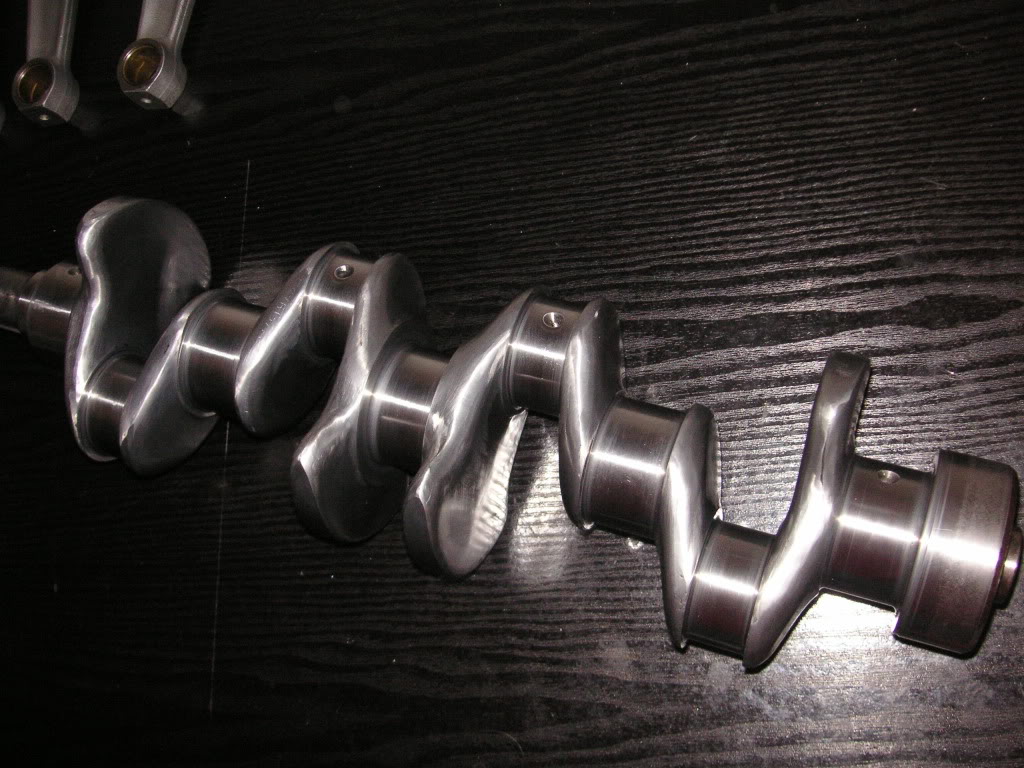
And last to come back was the crank, this was sent away to be fully worked, lightened and balanced, polished, slight knife edge etc
The engine is very nearly ready to go together, just the pistons and bearings to get ordered and the engine is fully finished bar the turbo and injectors
So spec is going to big
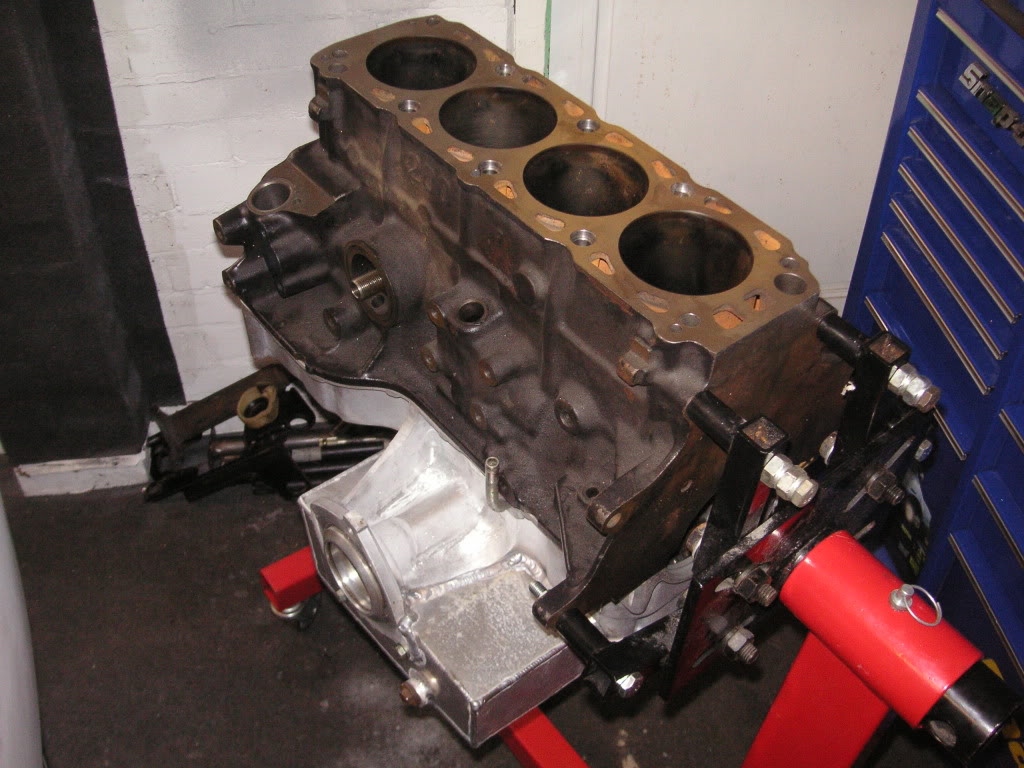
200 block
6 long studs
modded oil return to block not filter
fully worked crank
forged pistons
shot peened rods
high pressure oil pump
all billet pulleys with 36-1 crank pulley for t6
4x4 big wing sump with 2 piece gated baffle
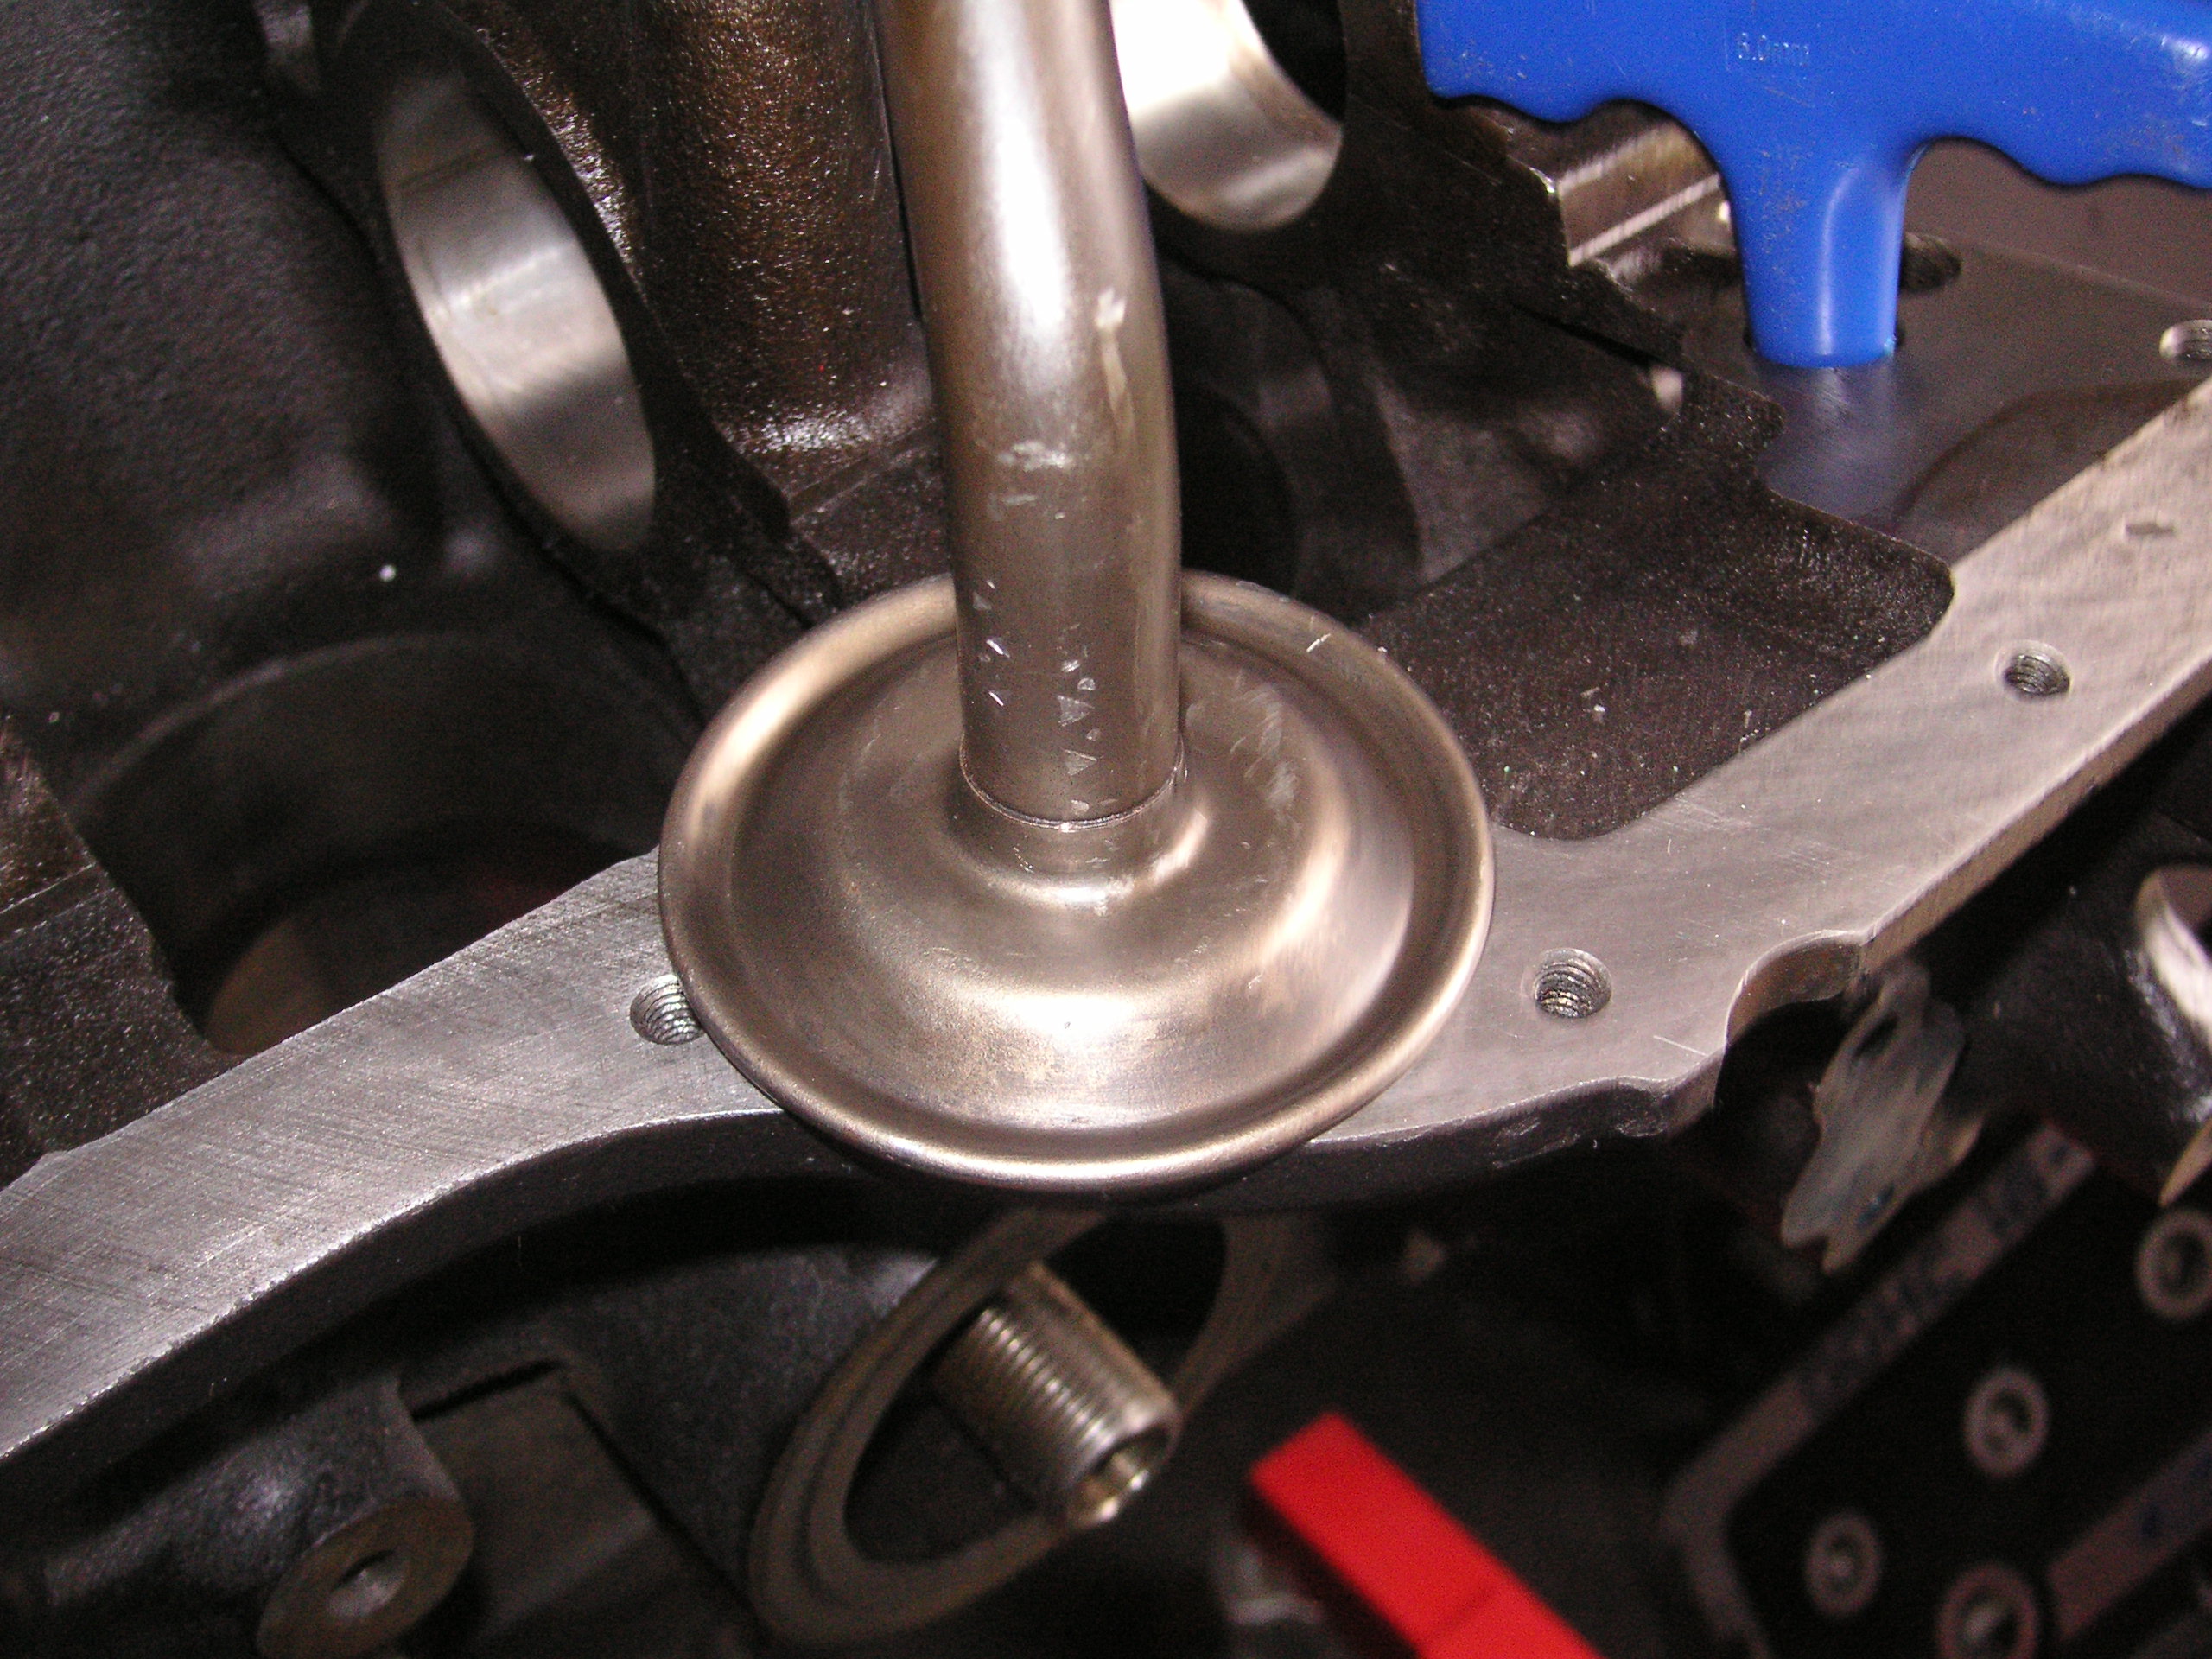
4x4 head
fully ported and polished
double valve springs
high torque FMS cams
grp a cam trigger set up
vernier cam pulleys
t6 ecu and motorsport wiring solutions loom
gt3071r
83lb seimens
2wd exhaust manifold with external wastegate trouser section
tial 44m external wastegate
Hart inlet plenum with 10mm spacer plate
4x4 als throttle body
Should make for some good reliable bhp/torque i think
Will be nice to see the engine built up and finally have a proper finished piece to this never ending puzzle
Thanks
Marc
First off i needed another fitting welded to the sump for the wrc breather set up so this was welded on the front left corner for me and tommy also suggested the big wing section was opened right up rather than just a few holes randomly along the bottom, so 2 large squares were cut out and a few 6mm holes put in across the top line to let the air out the big wing,
Next up are the con rods, as these are meant to be good for 600bhp all day long i didnt see the point in shelling out for some full on i-beam or h section jobby's but just to give these a bit of treatment they were sent away for shot peening to stress relieve them, doesn't cost much so worth doing i thought, i also have new arp bolts for them,
And last to come back was the crank, this was sent away to be fully worked, lightened and balanced, polished, slight knife edge etc
The engine is very nearly ready to go together, just the pistons and bearings to get ordered and the engine is fully finished bar the turbo and injectors
So spec is going to big
200 block
6 long studs
modded oil return to block not filter
fully worked crank
forged pistons
shot peened rods
high pressure oil pump
all billet pulleys with 36-1 crank pulley for t6
4x4 big wing sump with 2 piece gated baffle
4x4 head
fully ported and polished
double valve springs
high torque FMS cams
grp a cam trigger set up
vernier cam pulleys
t6 ecu and motorsport wiring solutions loom
gt3071r
83lb seimens
2wd exhaust manifold with external wastegate trouser section
tial 44m external wastegate
Hart inlet plenum with 10mm spacer plate
4x4 als throttle body
Should make for some good reliable bhp/torque i think
Will be nice to see the engine built up and finally have a proper finished piece to this never ending puzzle
Thanks
Marc
05-04-2011, 05:24 PM
#1146
Advanced PassionFord User
this really is going to a cracking little car mate and i think it will go pretty well with that engine spec , have you thought about going for the gtx30 or gtx35 as they look real good on paper
cheers paul
cheers paul
05-04-2011, 06:37 PM
#1149
I got the spacer when Andrew was dummy fitting the engine in the car when space framing the front end and it was fitted so we knew there would be enough clearance so if its better not fitted then it will be sold on mate
Thanks mate

 05-04-2011, 08:54 PM
#1151
Advanced PassionFord User
there about �1300 from america plus import tax and thats without the exhaust housing but they are interchangable with the gt range so you could use the exhaust housing if you went gt30 then upgraded to a gtx30
cheers paul
cheers paul
09-04-2011, 02:23 PM
#1153
Well all parts that need blasting and coating are now with Chris @ passion restoration products so look forward to seeing them back all shiney and new looking,
I have had a clean up of a few parts,
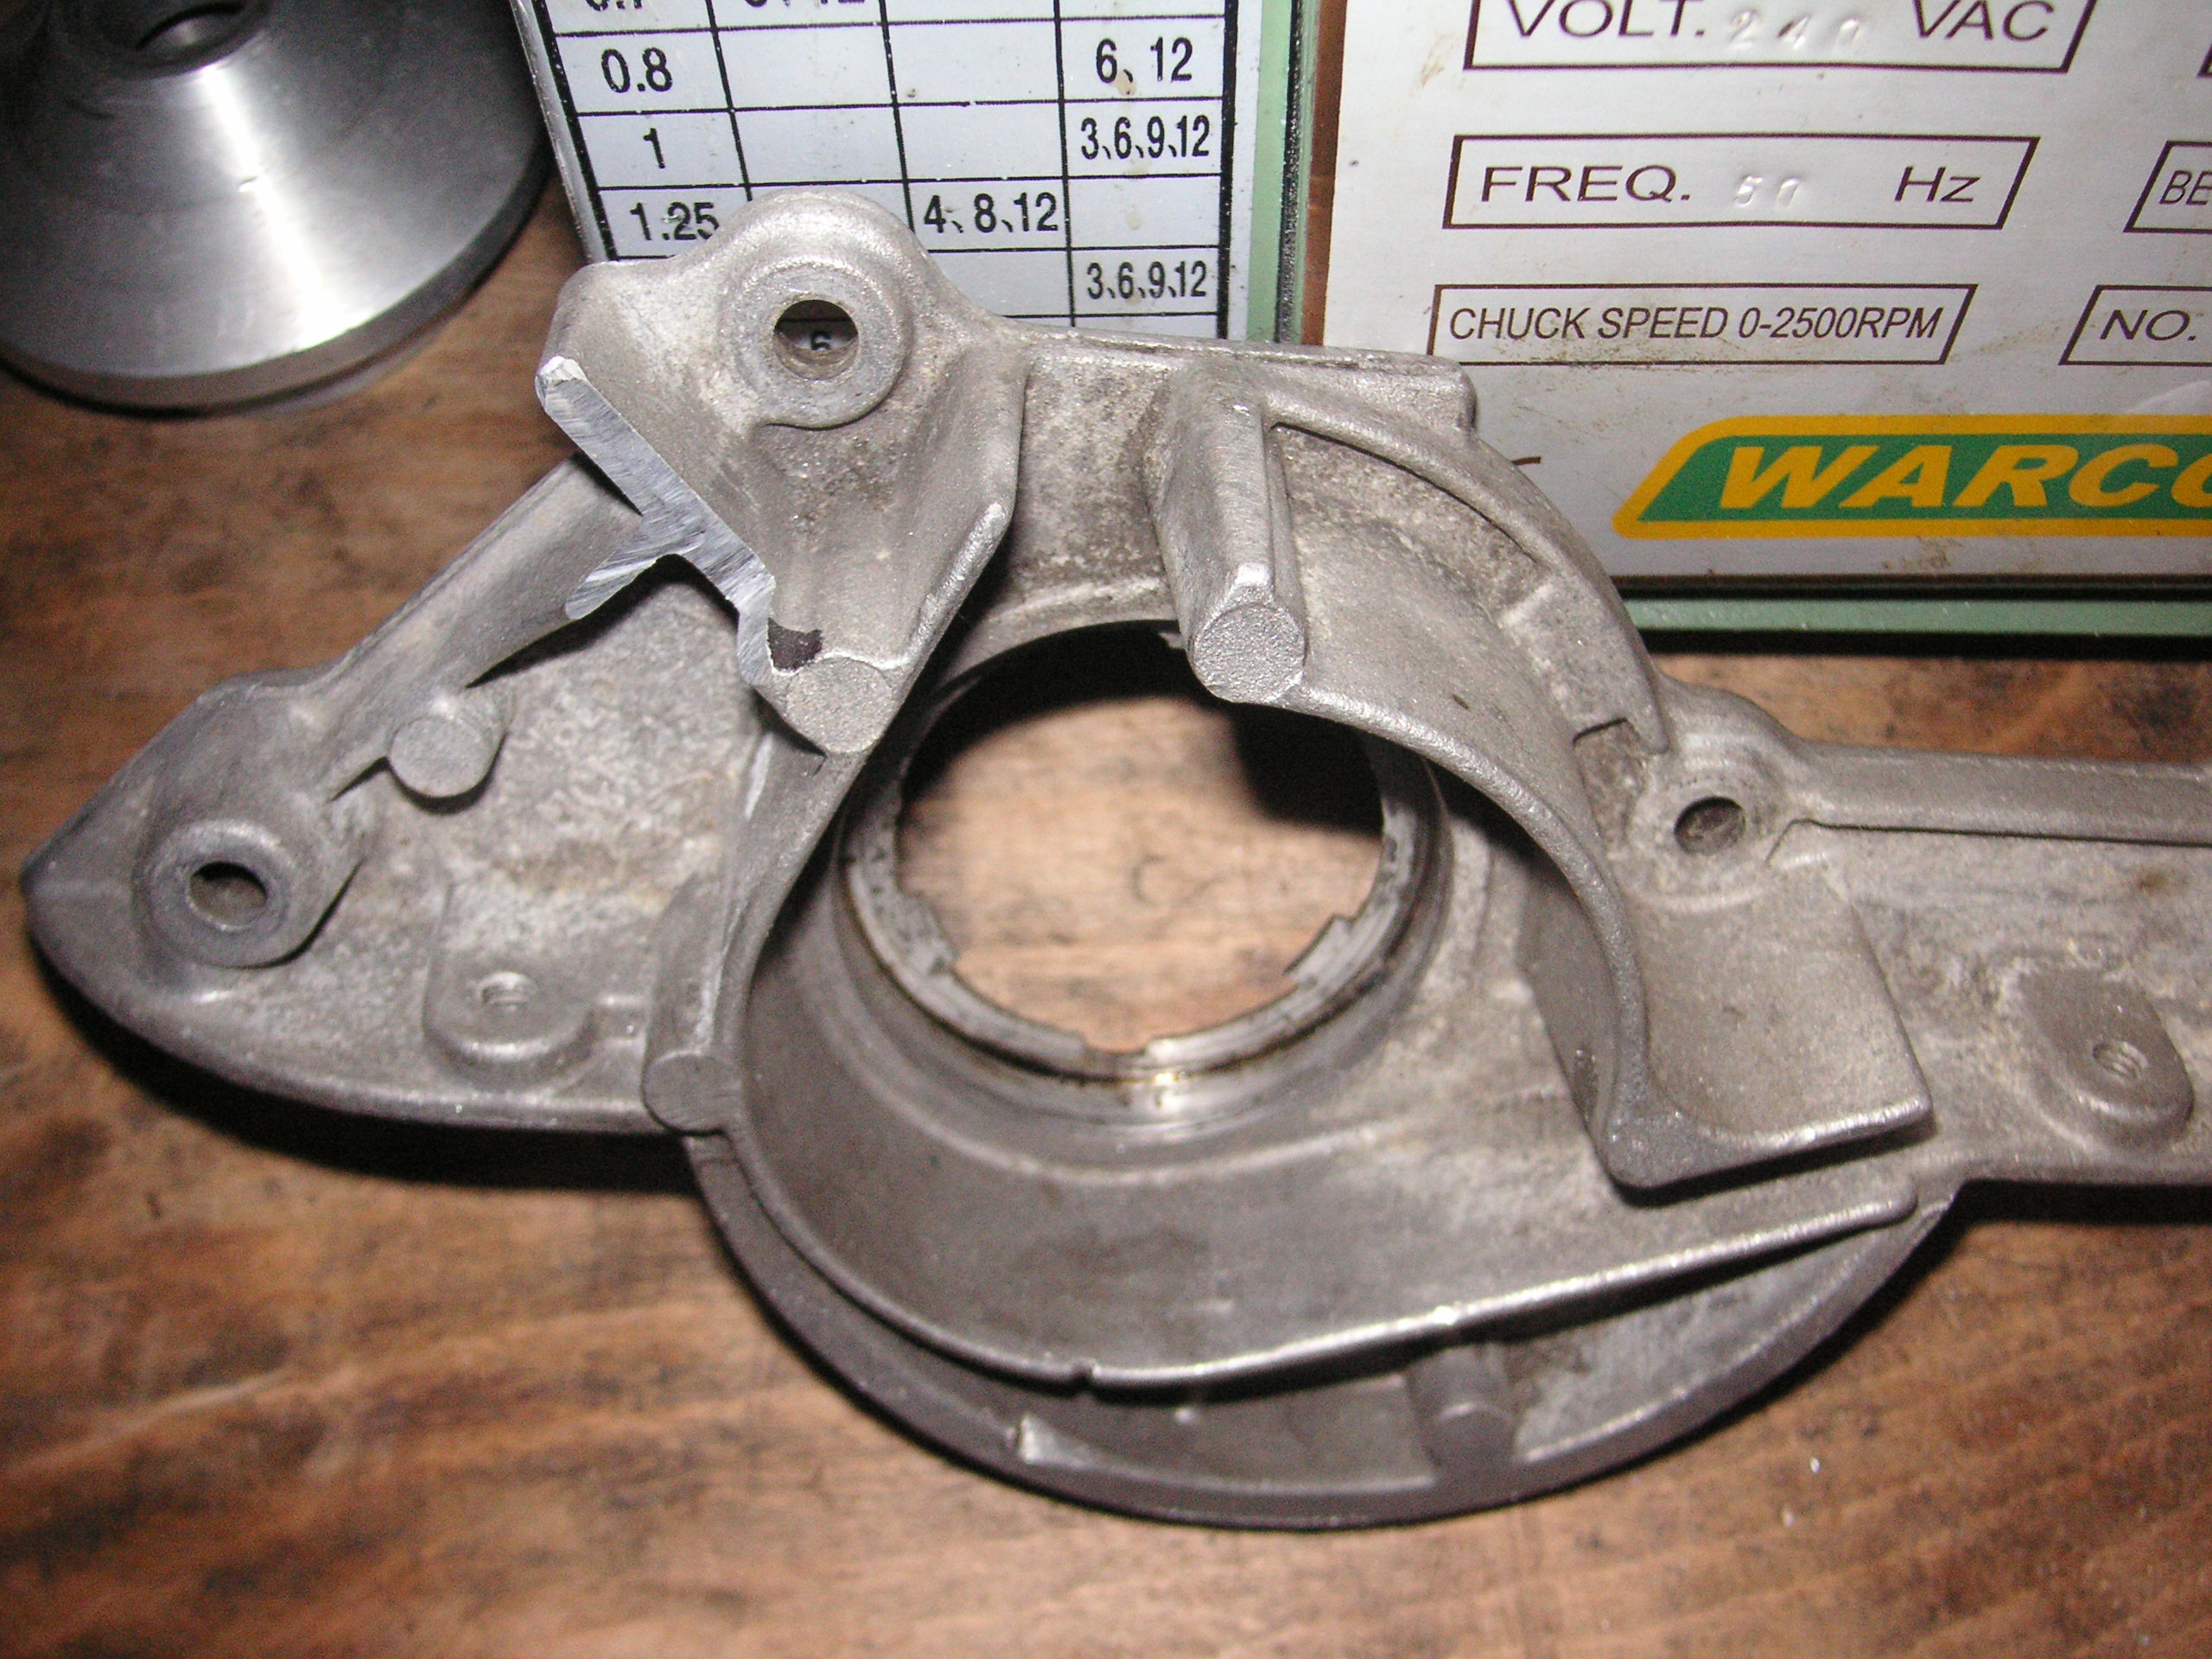
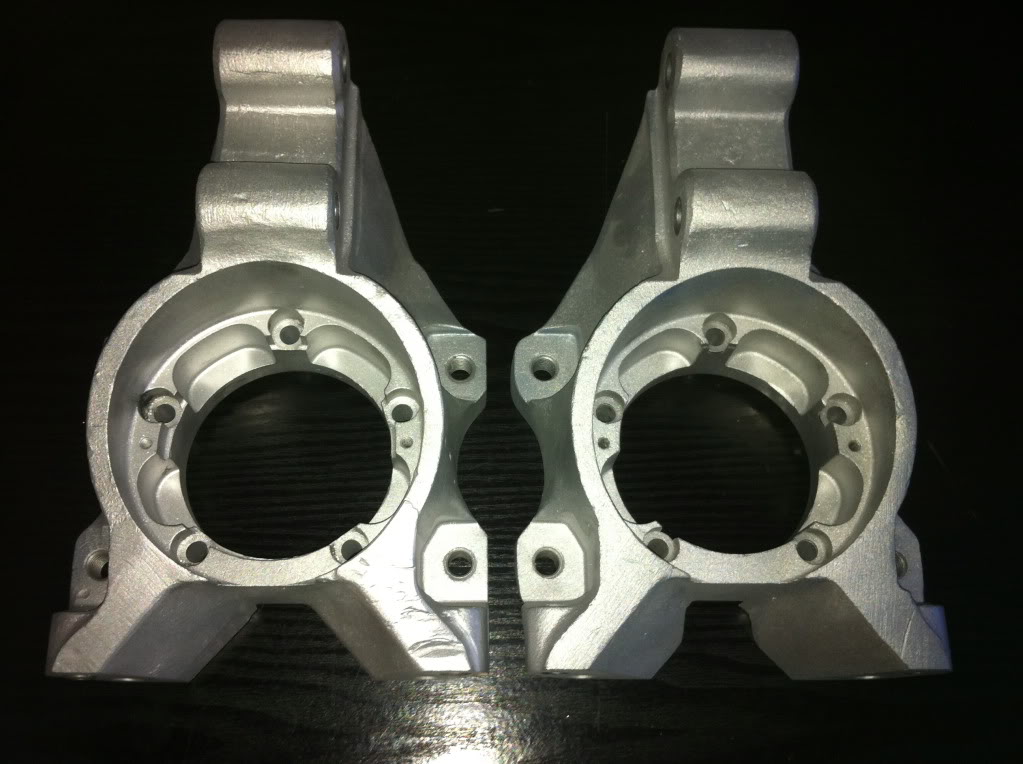
First off i had the uprights blasted as i didn't want them blue
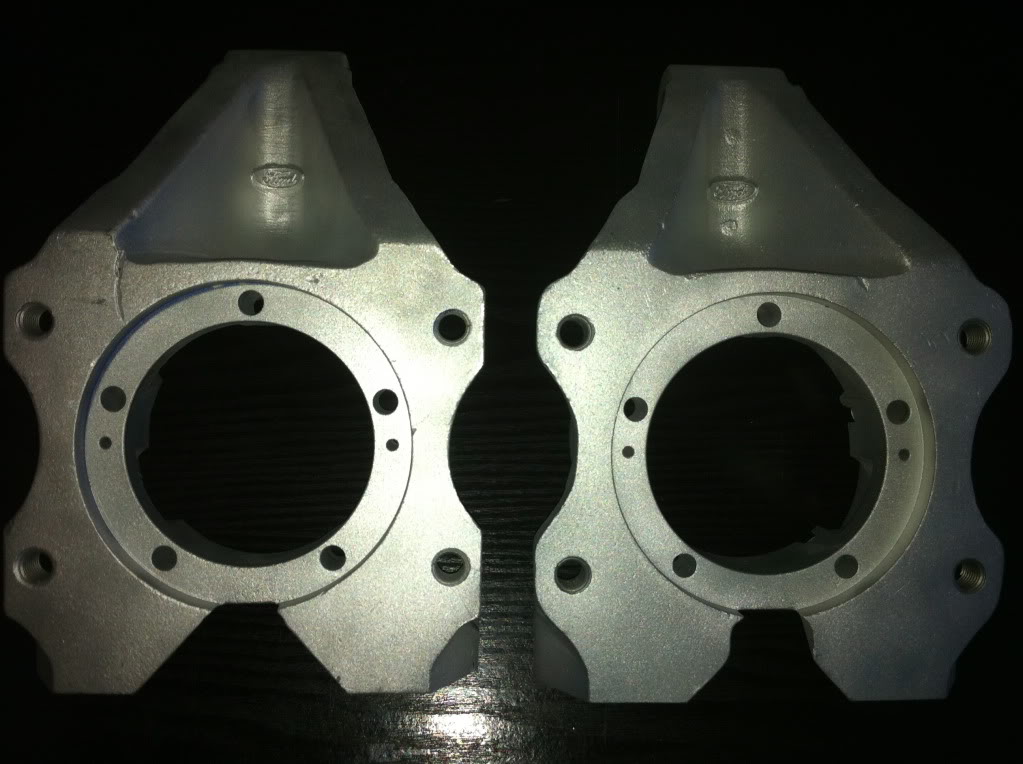
Not sure what to do with these yet.
Then after stripping down the electric power steering pump i had to clean up the motor and fluid res while the other cast piece is away for blasting and alumablast painting
motor housing and fluid res before (cast centre piece is what is away for blast and paint)

Fluid res after
motor housing after
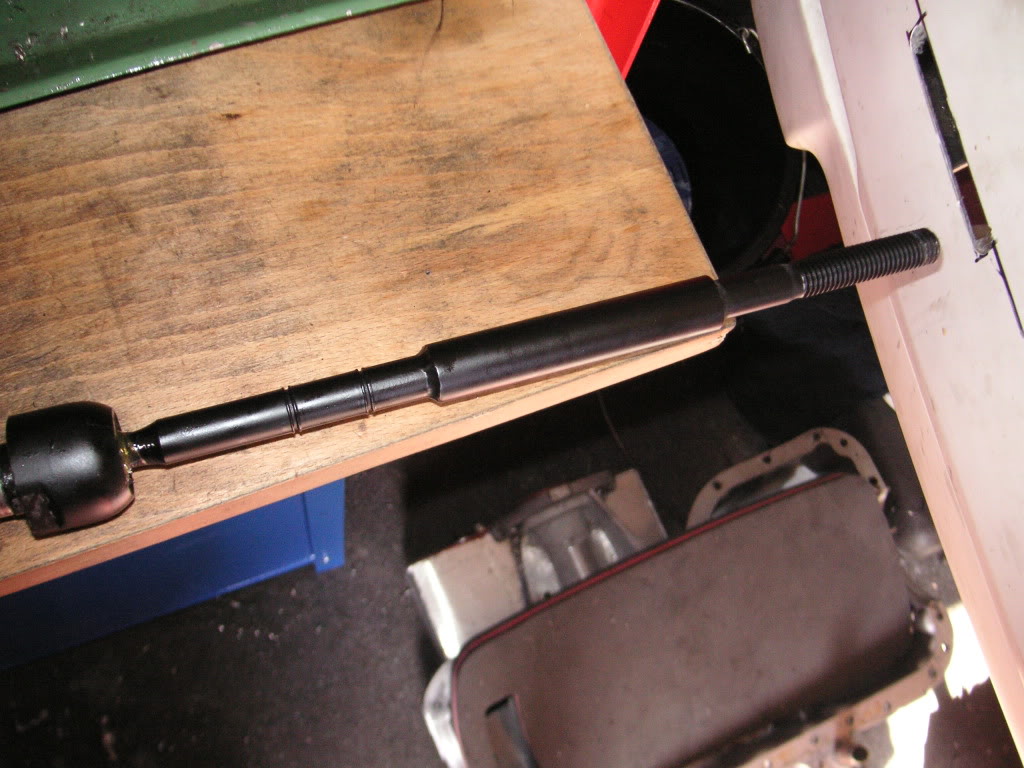
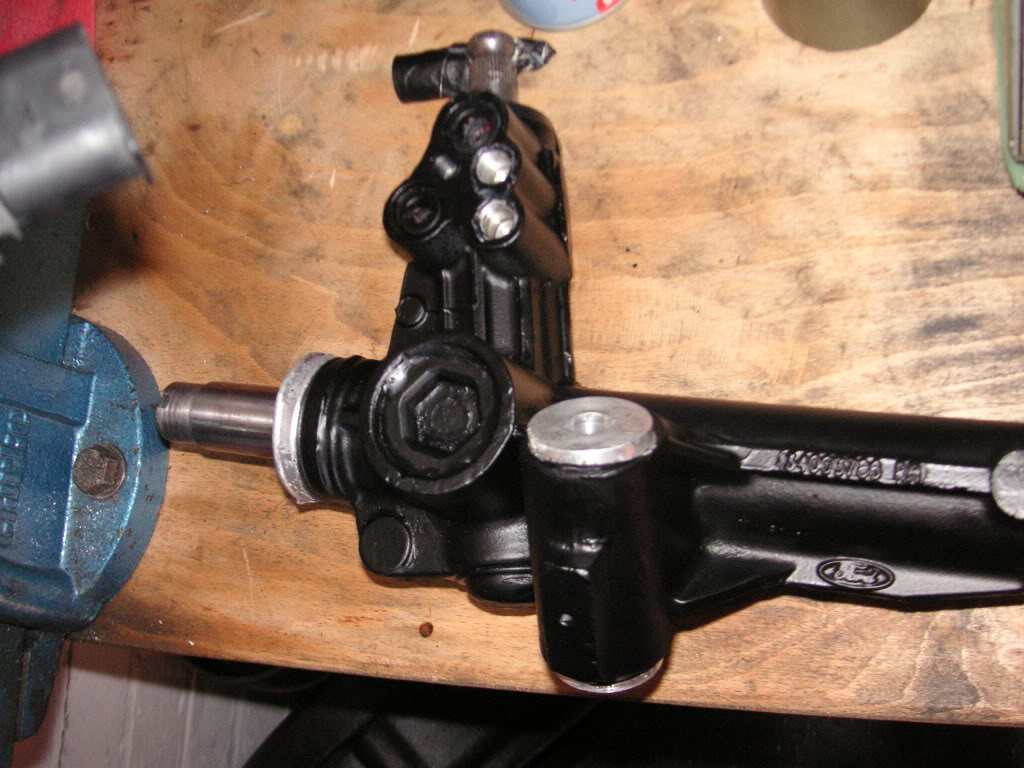
Whilst i had the matt black out i also painted the steering rack and the 2 steering knuckles as they were looking a bit grubby
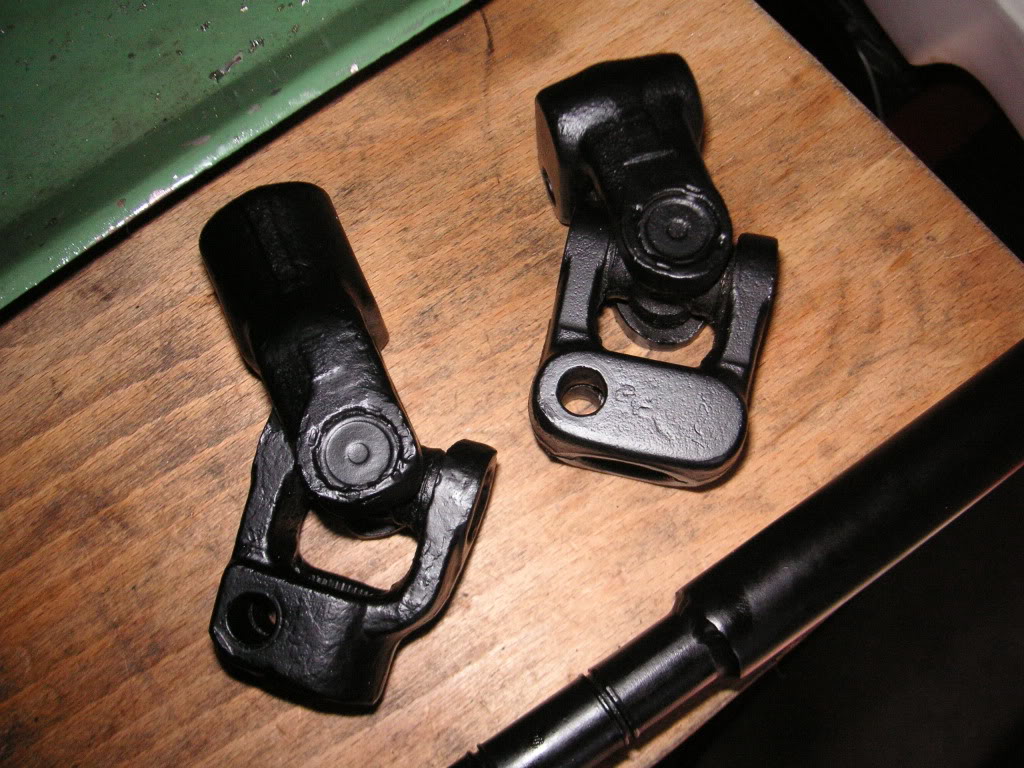
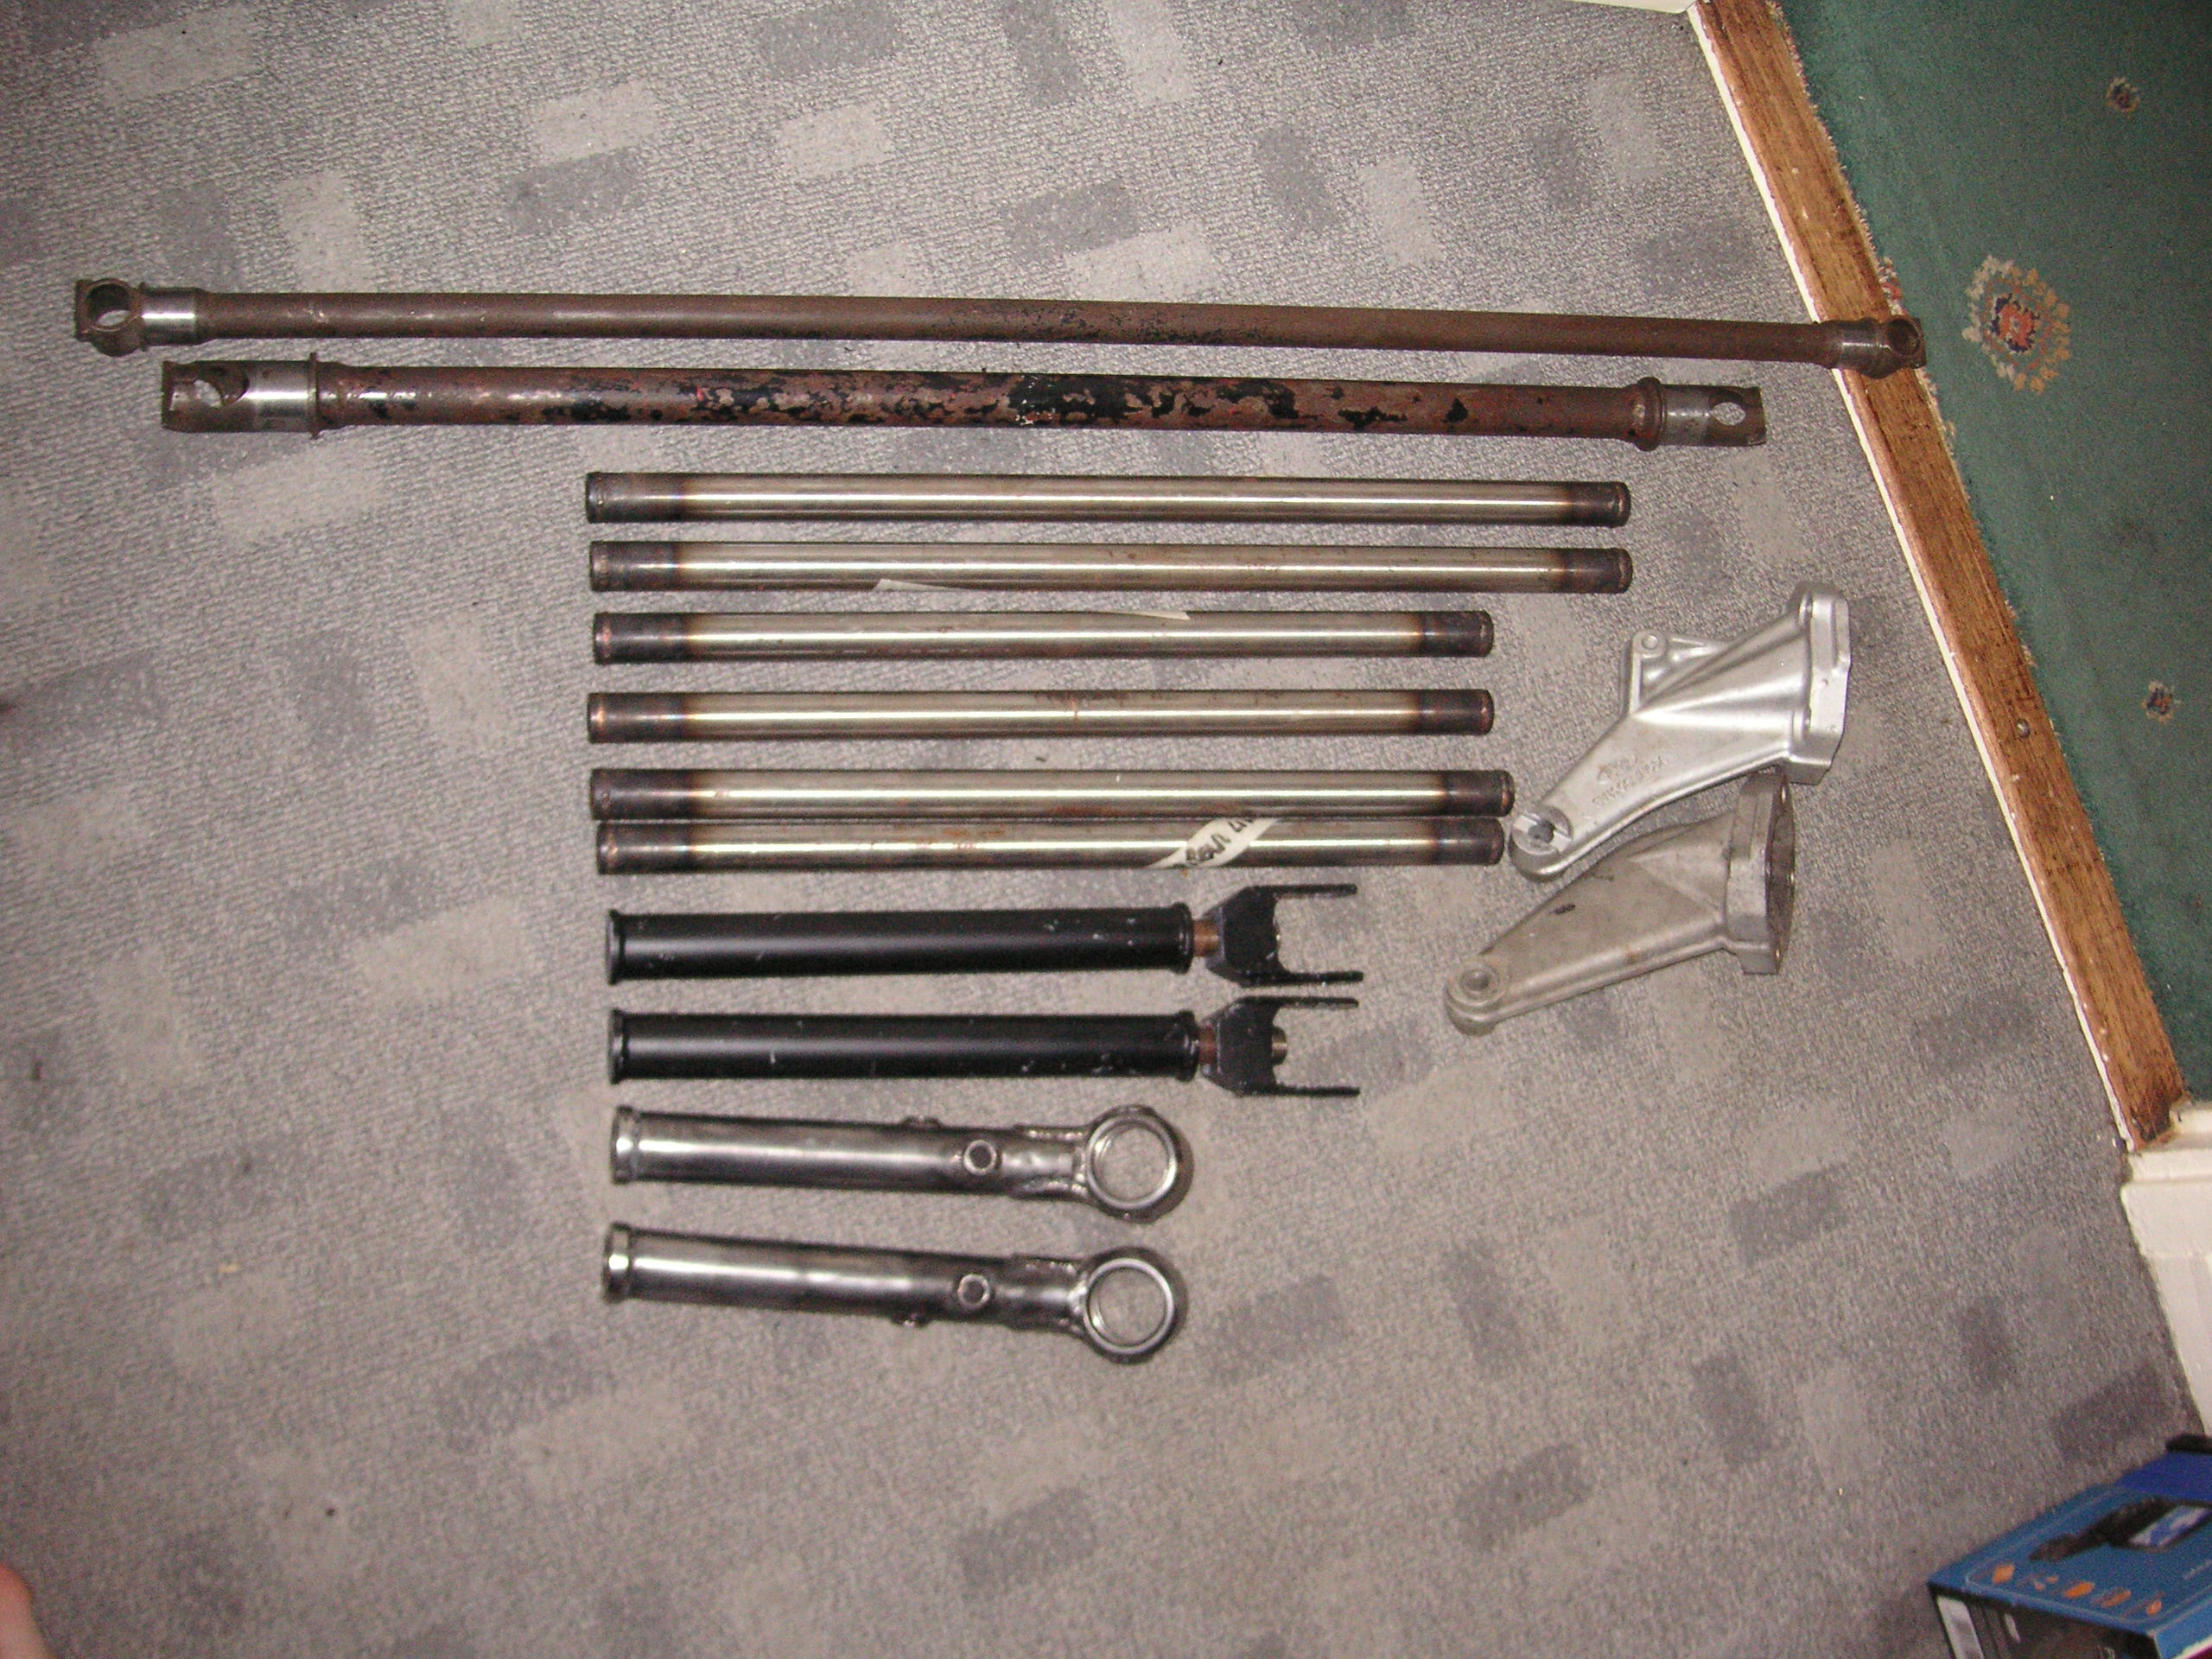
Then as a practice on the mini lathe i decided to make up another set of droplinks for the bladed roll bar st up but out of stainless steel, yes there heavier but was more of a test of the lathe, don't know what i will use yet as i have 2 sets of alloy and one stainlses,
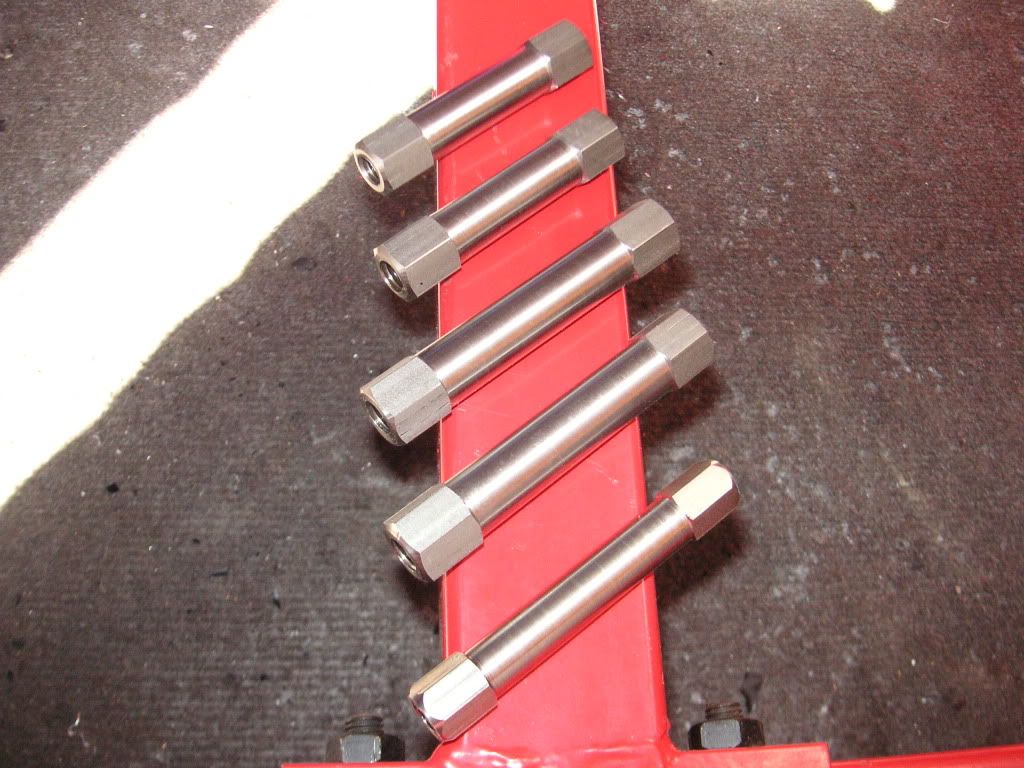
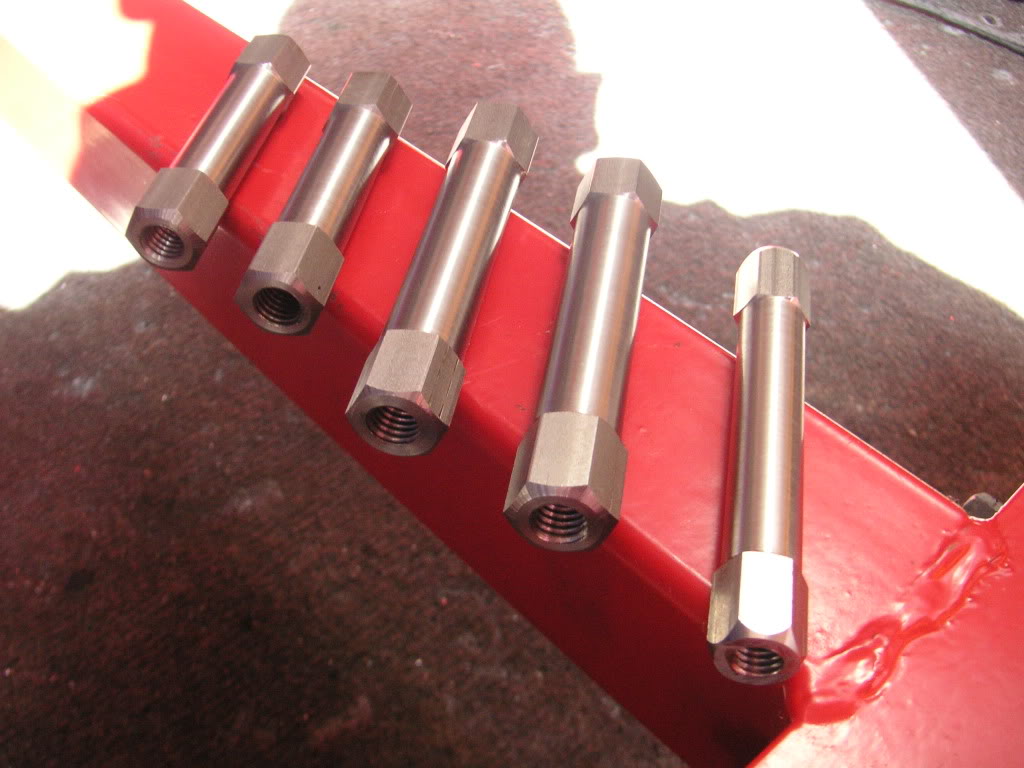
The smaller of the 5 is going to be the rose jointed alternator adjuster, i just have to wait for the m8 rose joints and half nuts
There will be plenty to put back together once parts start coming back from Chris Latham in a few weeks time
so more updates then i should think
Thanks
Marc
I have had a clean up of a few parts,
First off i had the uprights blasted as i didn't want them blue
Not sure what to do with these yet.
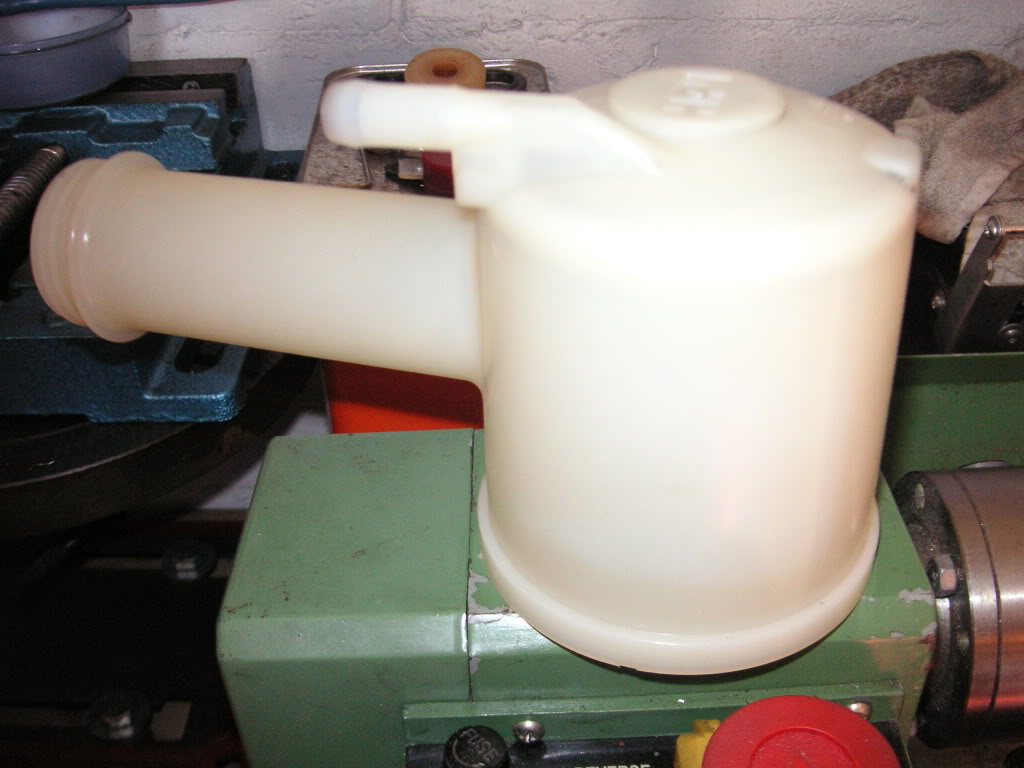
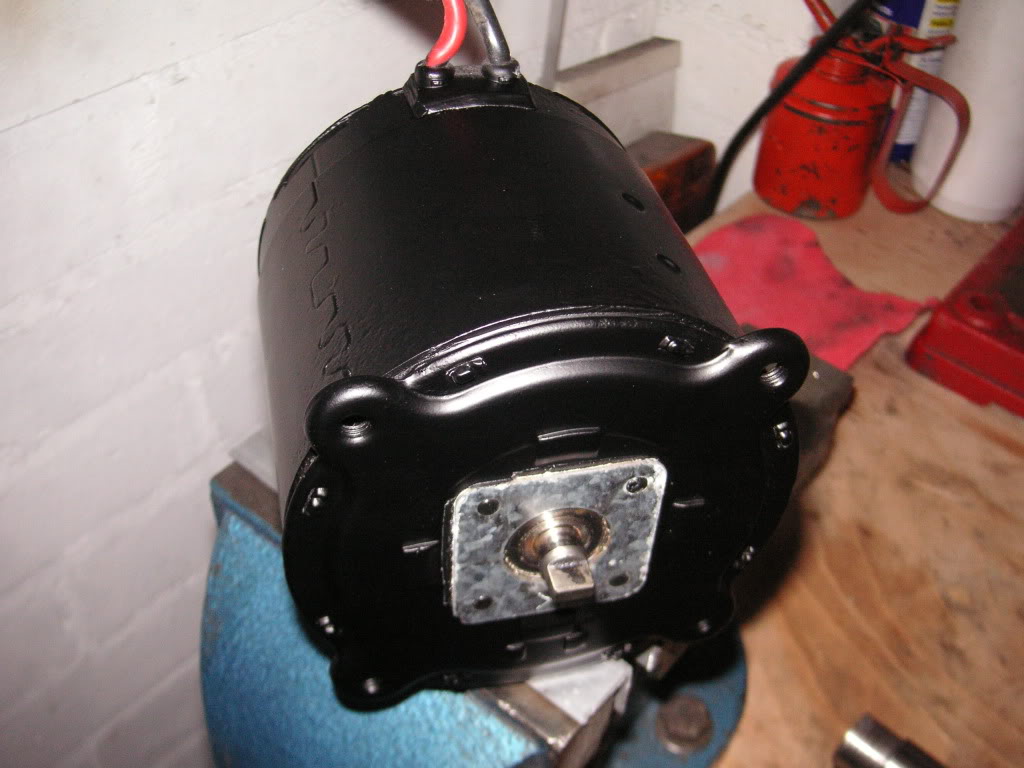
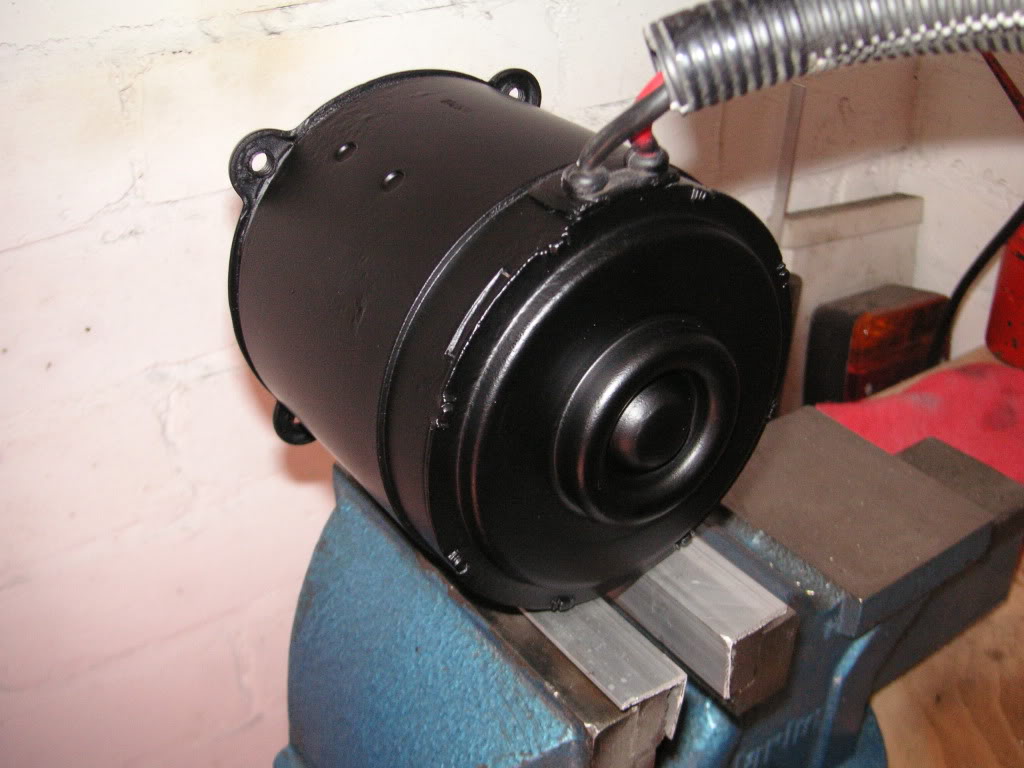
Then after stripping down the electric power steering pump i had to clean up the motor and fluid res while the other cast piece is away for blasting and alumablast painting
motor housing and fluid res before (cast centre piece is what is away for blast and paint)
Fluid res after
motor housing after
Whilst i had the matt black out i also painted the steering rack and the 2 steering knuckles as they were looking a bit grubby
Then as a practice on the mini lathe i decided to make up another set of droplinks for the bladed roll bar st up but out of stainless steel, yes there heavier but was more of a test of the lathe, don't know what i will use yet as i have 2 sets of alloy and one stainlses,
The smaller of the 5 is going to be the rose jointed alternator adjuster, i just have to wait for the m8 rose joints and half nuts
There will be plenty to put back together once parts start coming back from Chris Latham in a few weeks time
so more updates then i should think
Thanks
Marc
Last edited by M K; 09-04-2011 at 02:24 PM.
10-04-2011, 12:28 PM
#1157
Not sure yet mate,
It's 99% ready for paint but I don't see the point painting yet to just
Leave in the garage for another year and risk damaging etc,
Ideally want the engine finished with transmission ready to go in before it gets painted so I'd guess early next year,
Had a really good quote from escos Gaz on the escort cosworth forum for a paint job,
13-04-2011, 04:51 PM
#1158
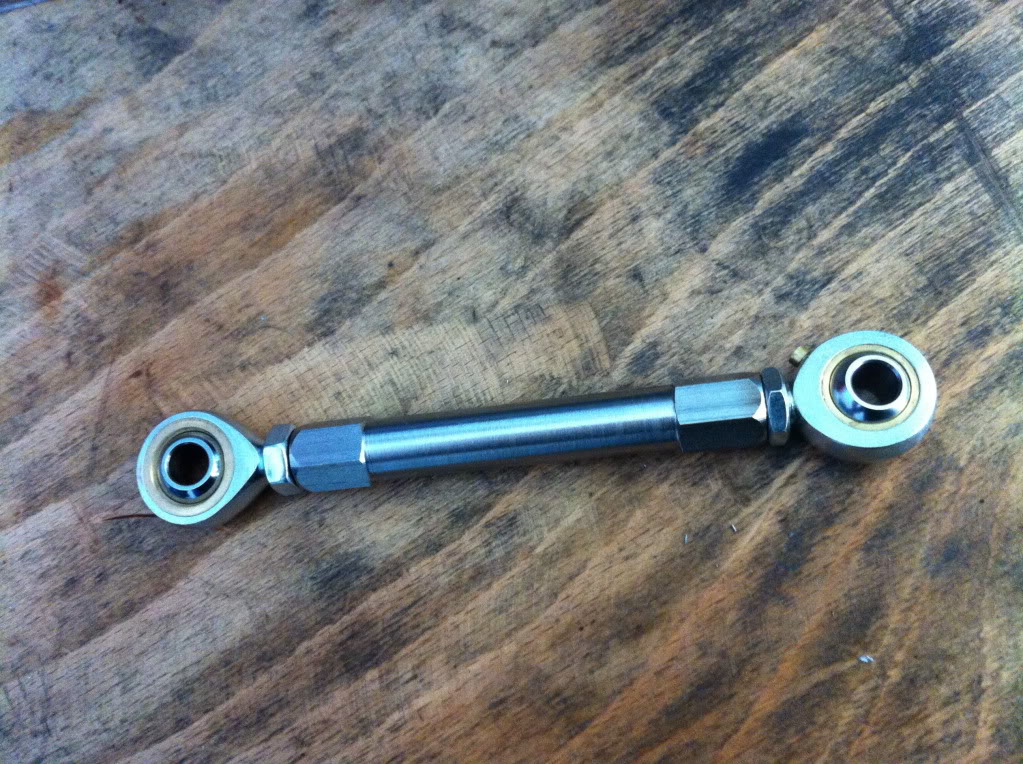
Got the rose joints through for the alternator adjuster, the one with the grease nipple on was sent by mistake and will be replaced by another self lubricating teflon liner high performance like in the other end,
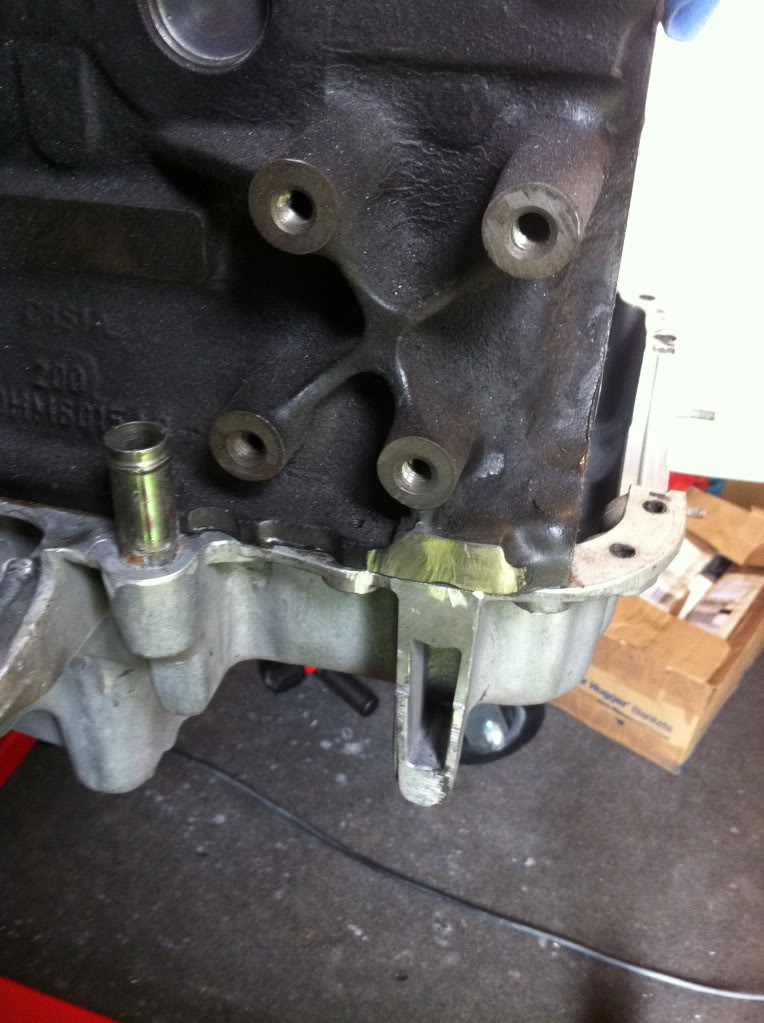
Got the grinder out and removed the lug from the block so the alternator drop bracket can be fitted.
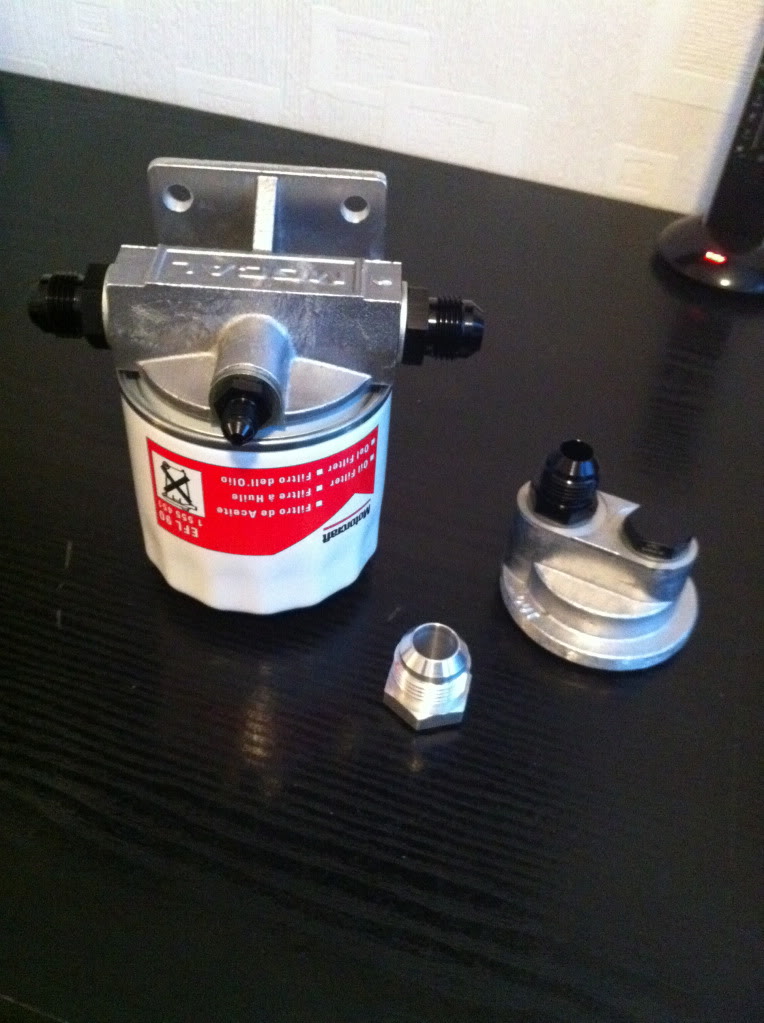
Then got my mocal remote oil filter housing and drilled out the blank so i can fit an M14x1.5 to -4 fitting for the turbo oil feed,
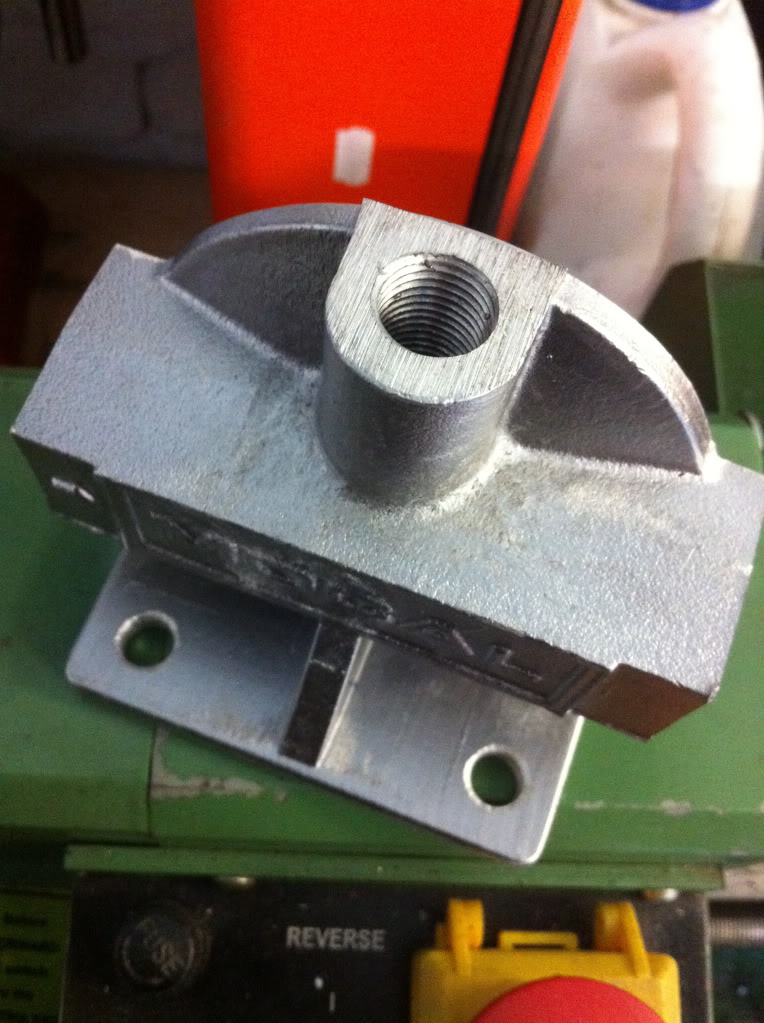

Fitted the the filter and main -10 feed and return fittings pictured along side the oil filter take off adapter, with -10 outlet and inlet blanked off as oil will be returned direct to the block, ala wrc, and also pictured is another -12 weld on fitting which will be welded to the sump for the turbo oil return rather than the metal push fitting (you can see the standard metal push fitting fitted to the sump in the picture above where i cut the lug off the block)
Got the grinder out and removed the lug from the block so the alternator drop bracket can be fitted.
Then got my mocal remote oil filter housing and drilled out the blank so i can fit an M14x1.5 to -4 fitting for the turbo oil feed,
Fitted the the filter and main -10 feed and return fittings pictured along side the oil filter take off adapter, with -10 outlet and inlet blanked off as oil will be returned direct to the block, ala wrc, and also pictured is another -12 weld on fitting which will be welded to the sump for the turbo oil return rather than the metal push fitting (you can see the standard metal push fitting fitted to the sump in the picture above where i cut the lug off the block)
Last edited by M K; 13-04-2011 at 04:56 PM.
18-04-2011, 04:59 PM
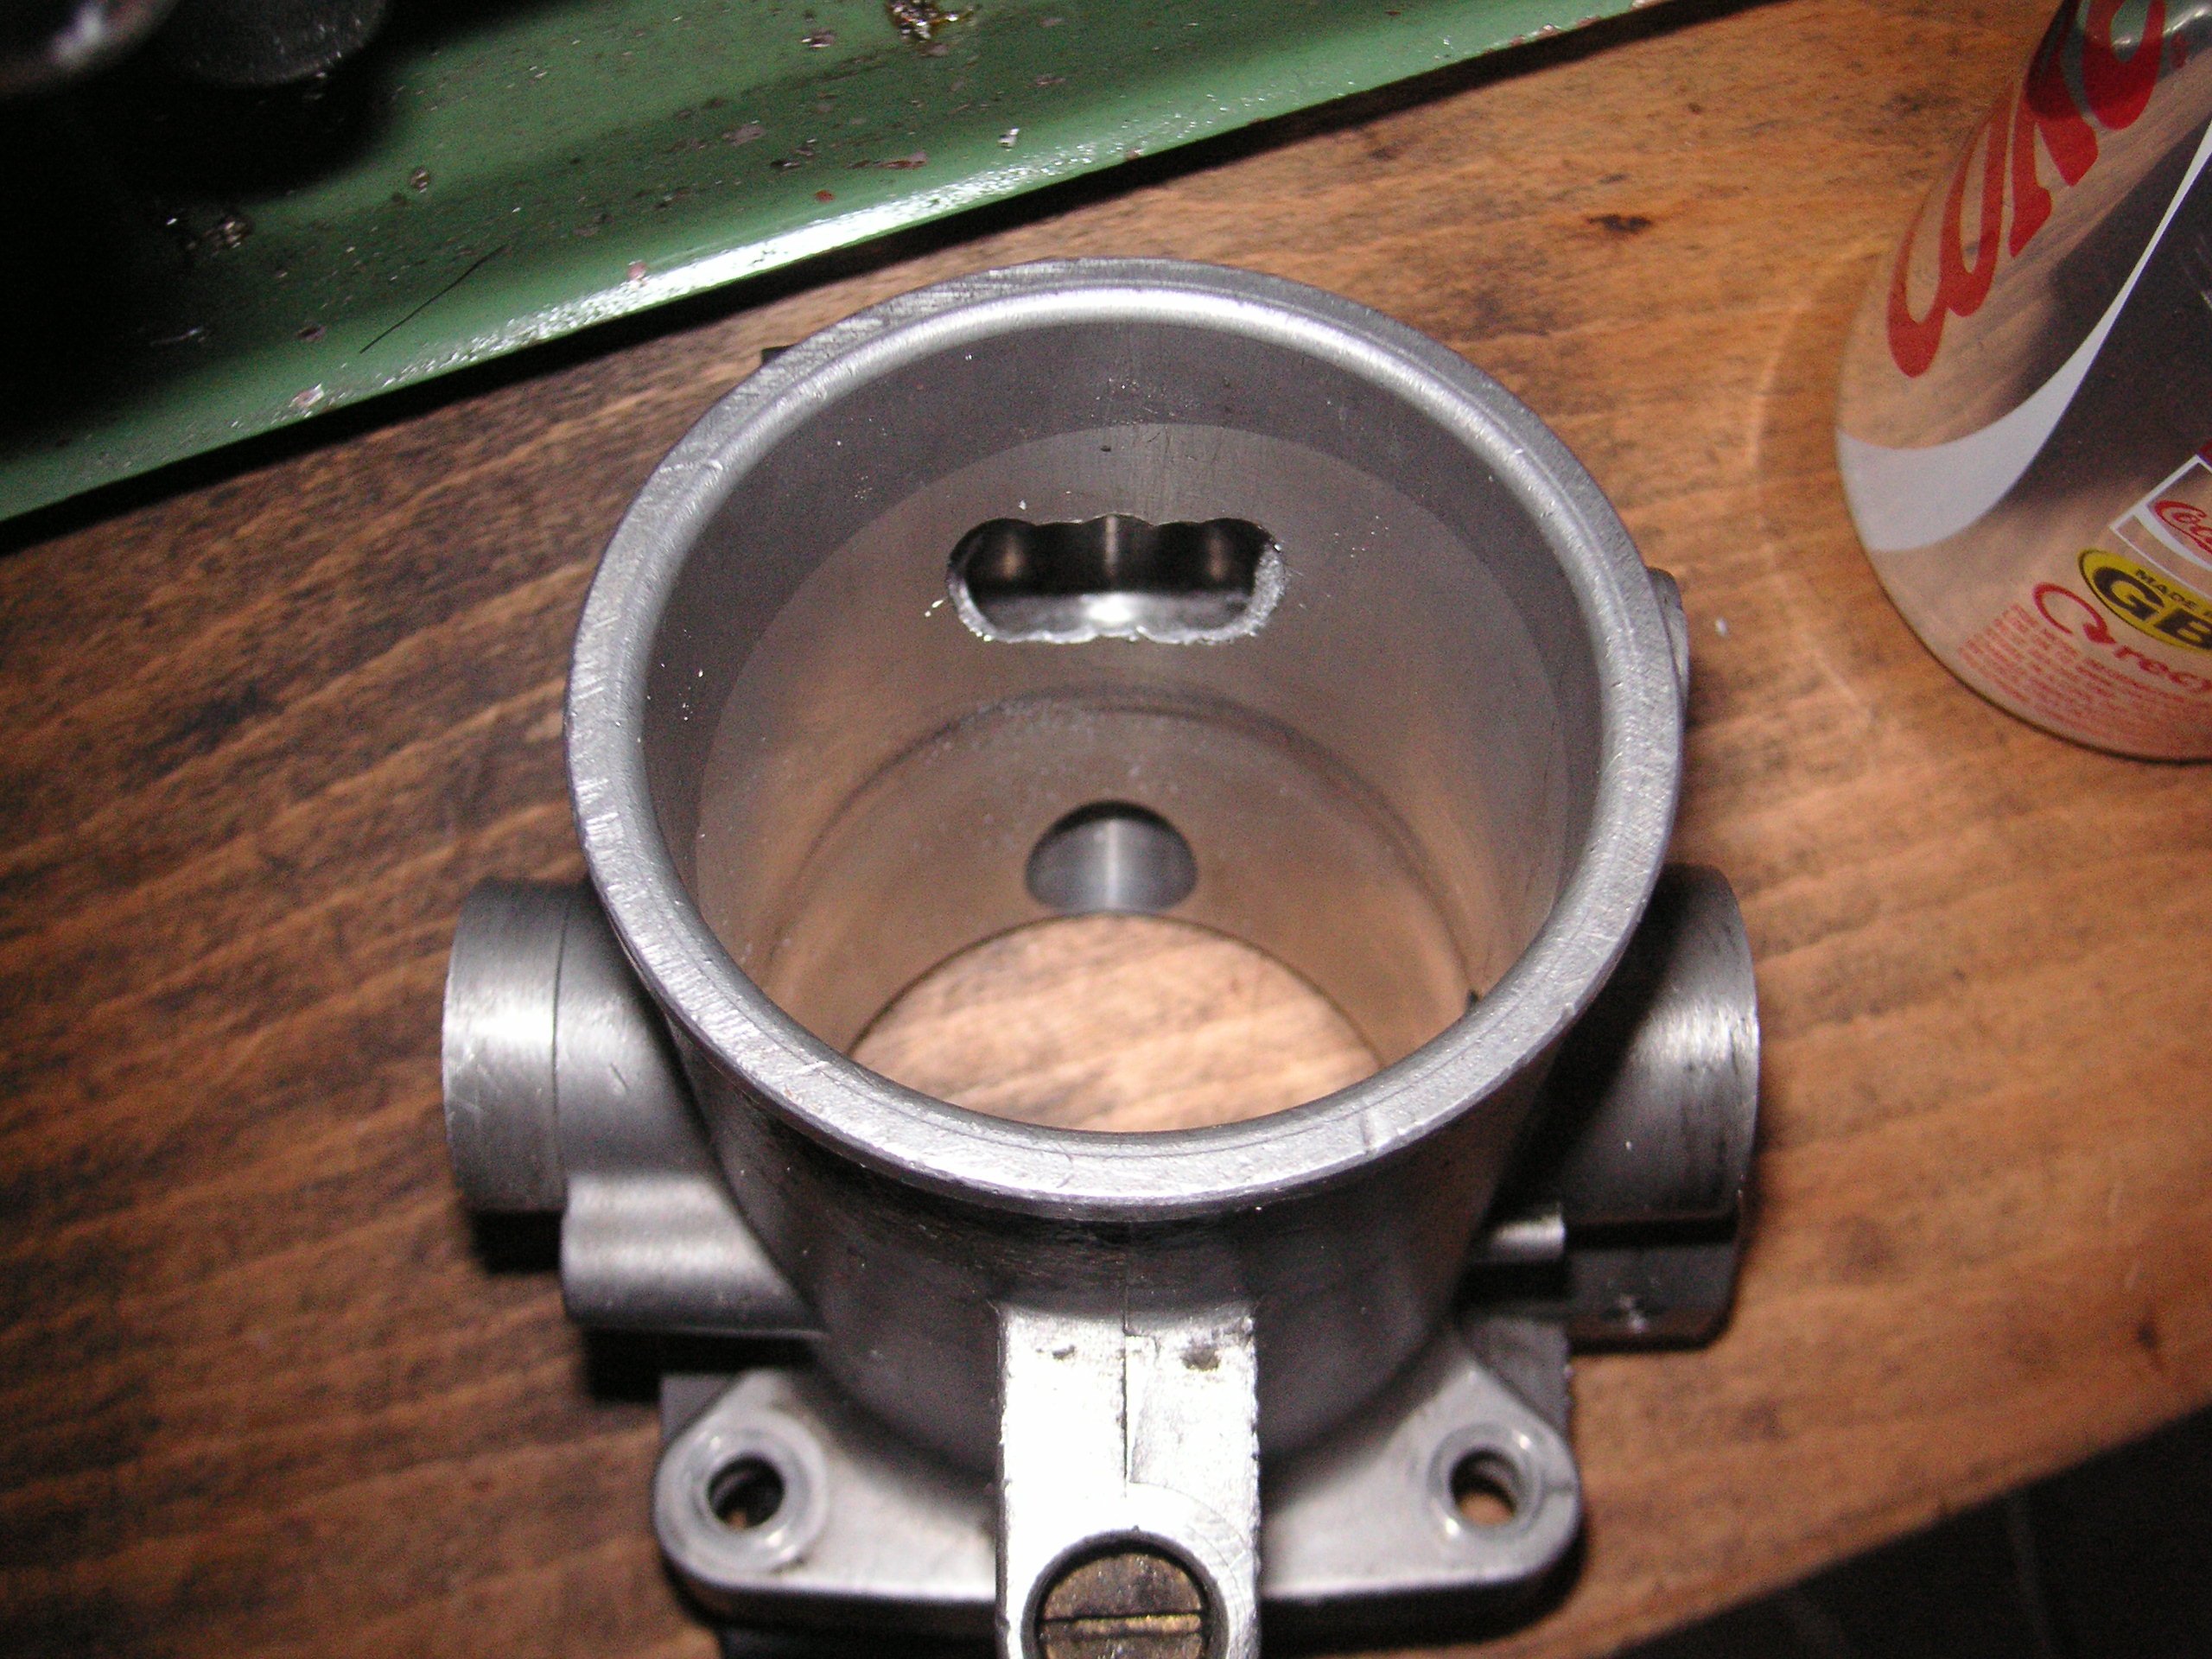
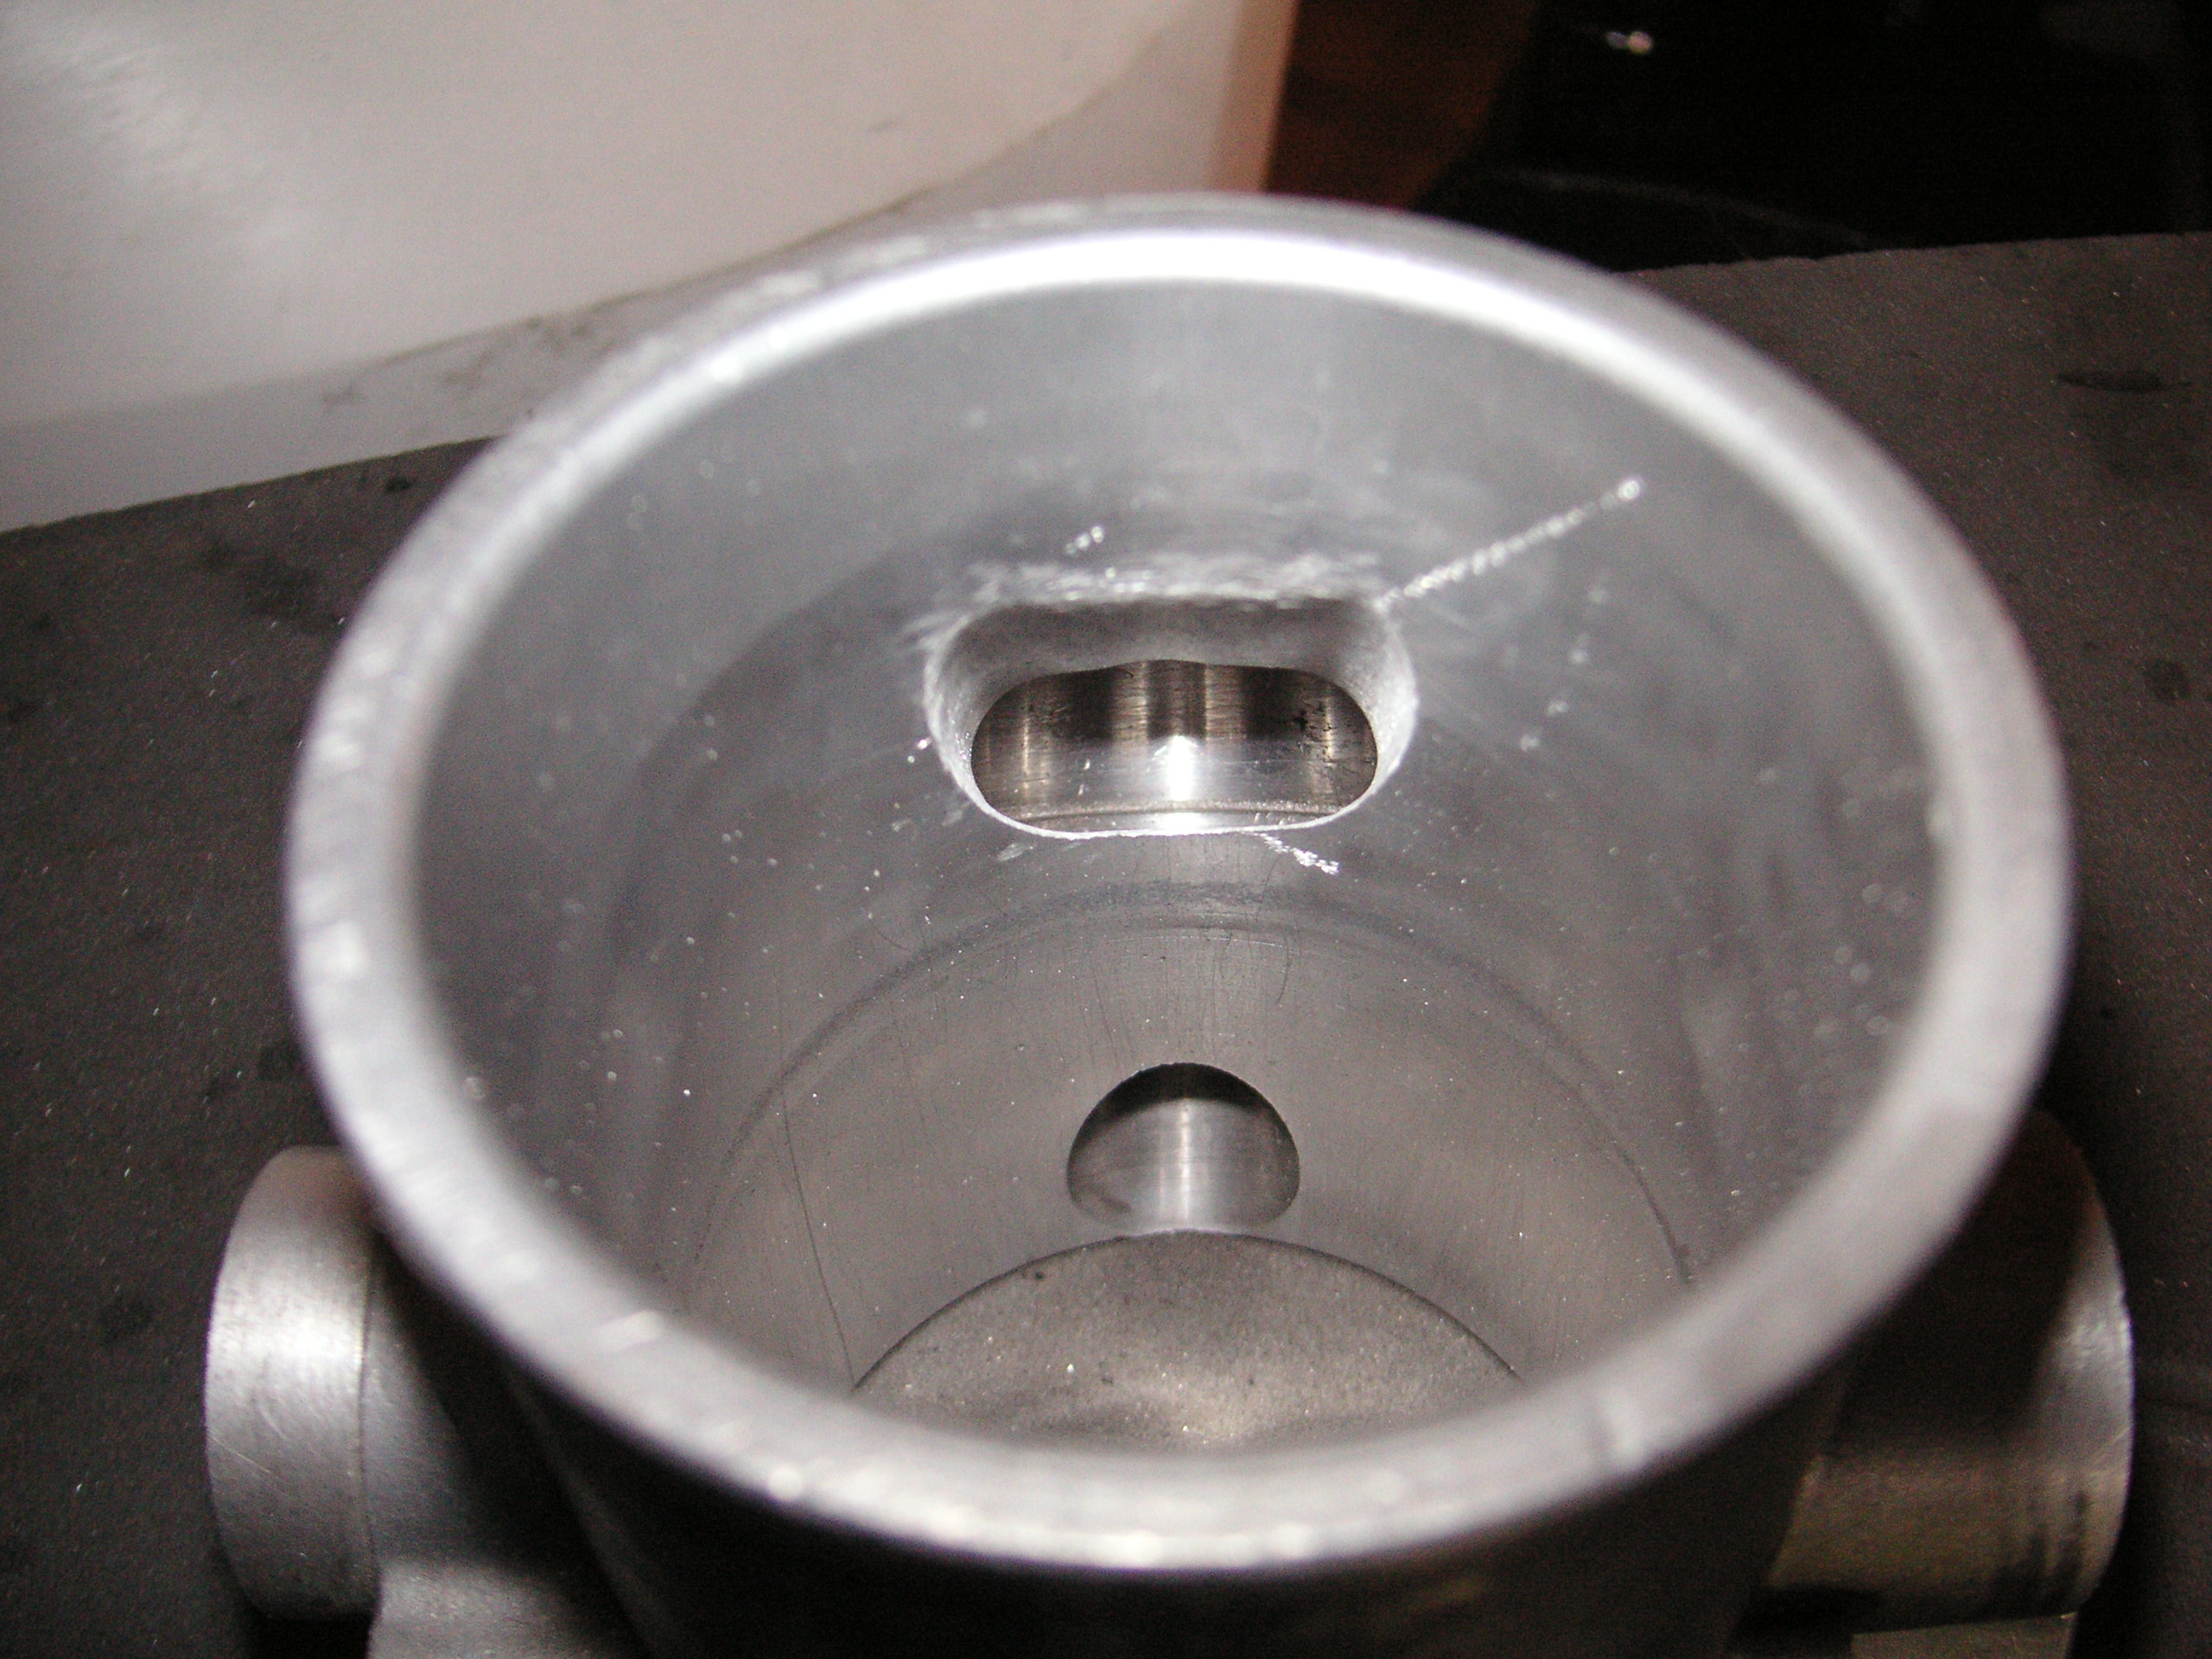
#1160
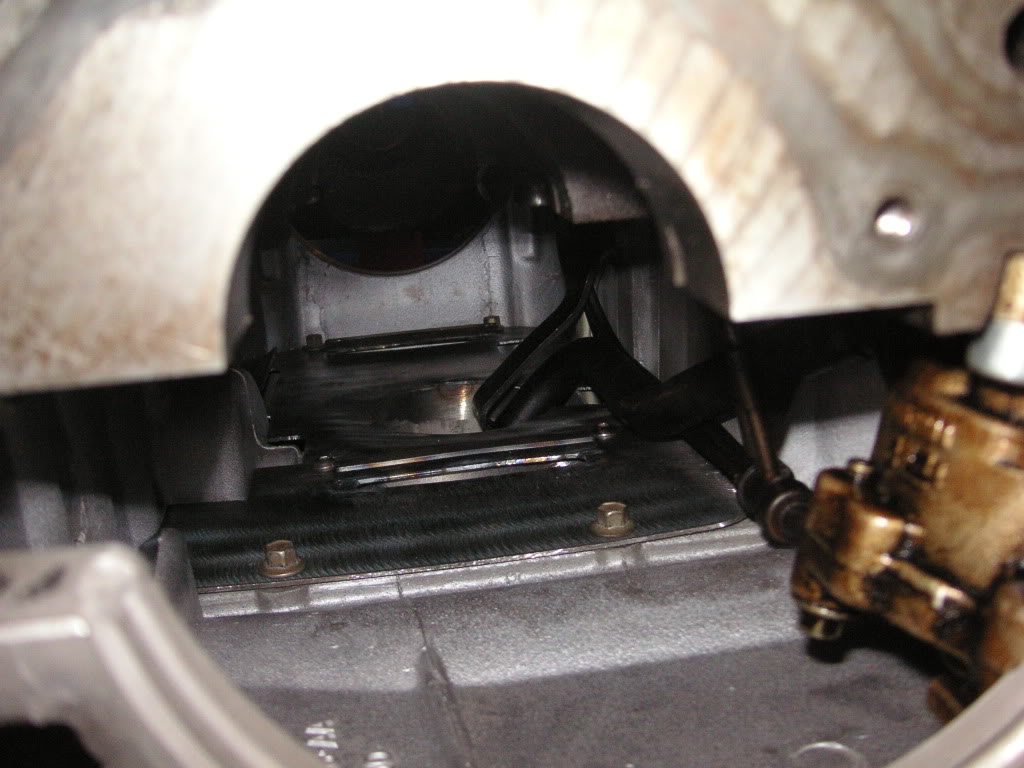
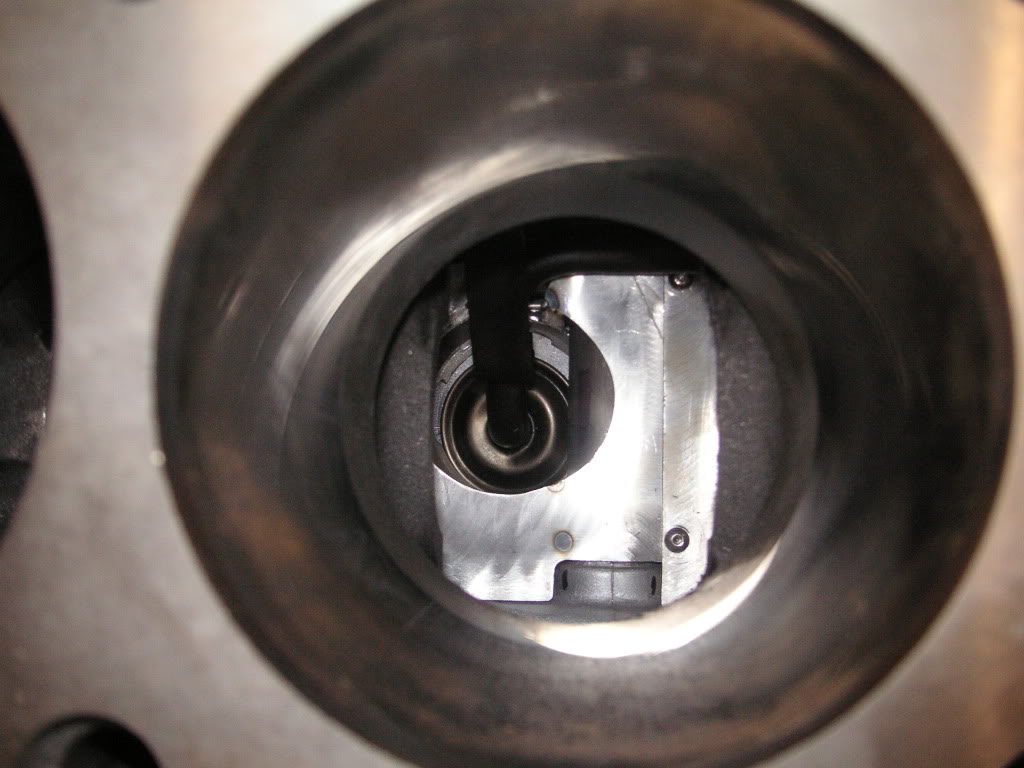
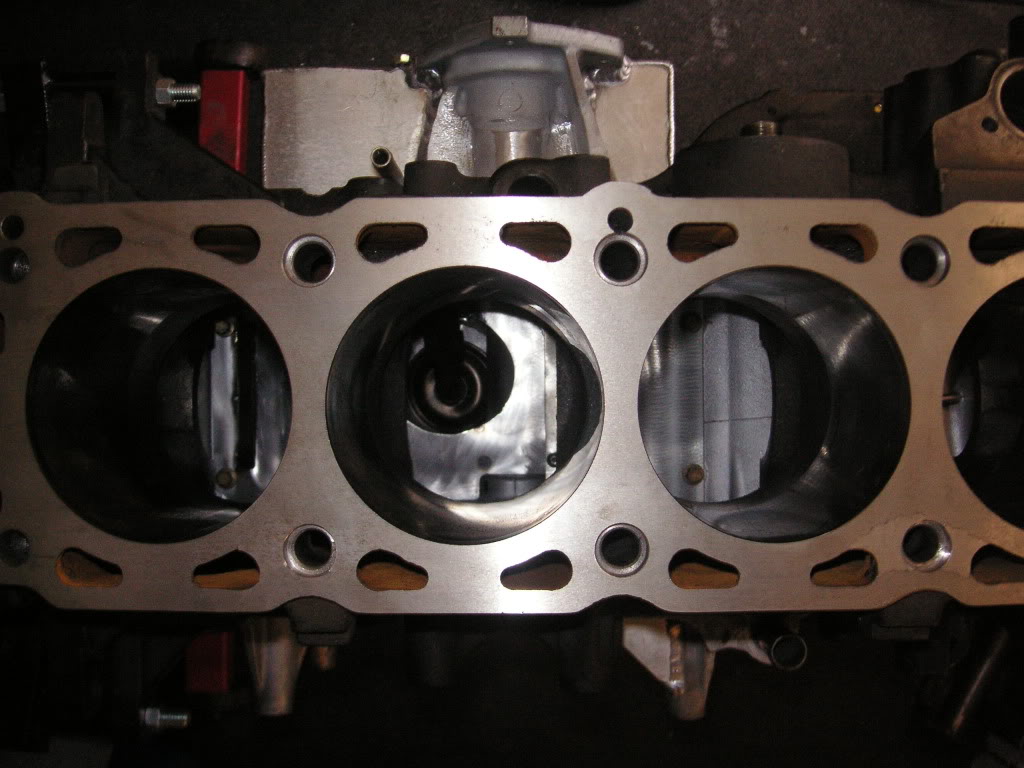
Modified my throttle body for ALS today, did this myself to save a few quid and i am really happy how it turned out, its hard to get the right angle when taking pics though,
Total cost to do this - �6.88
first off i positioned the throttle body in the pillar drill vice so the holes were at 90 degree's to the bed and used a 9.8mm drill bit to check the pillar drill went in and out fine and everything was angled correctly, then i changed the drill bit for a 9mm end mill bit and slid the throttle body so the end mill bit was now positioned between the 2 holes and machined the centre of the 2 holes so it was flat so i had a flat surface to drill into, then drilled through with the 9.8mm drill bit to roughly join the 2 holes.
once roughly joined i upped the speed on the pillar drill and carefully by sliding the vice back and forward milled out a little neater between the 2 holes,
It was then finished off with a dremel and some sandpaper,
its not 100% perfect but the dremel broke so stopped play there, its only for the als, its not exactly head poting so has not got to be a mirror finish so i was chuffed with it,
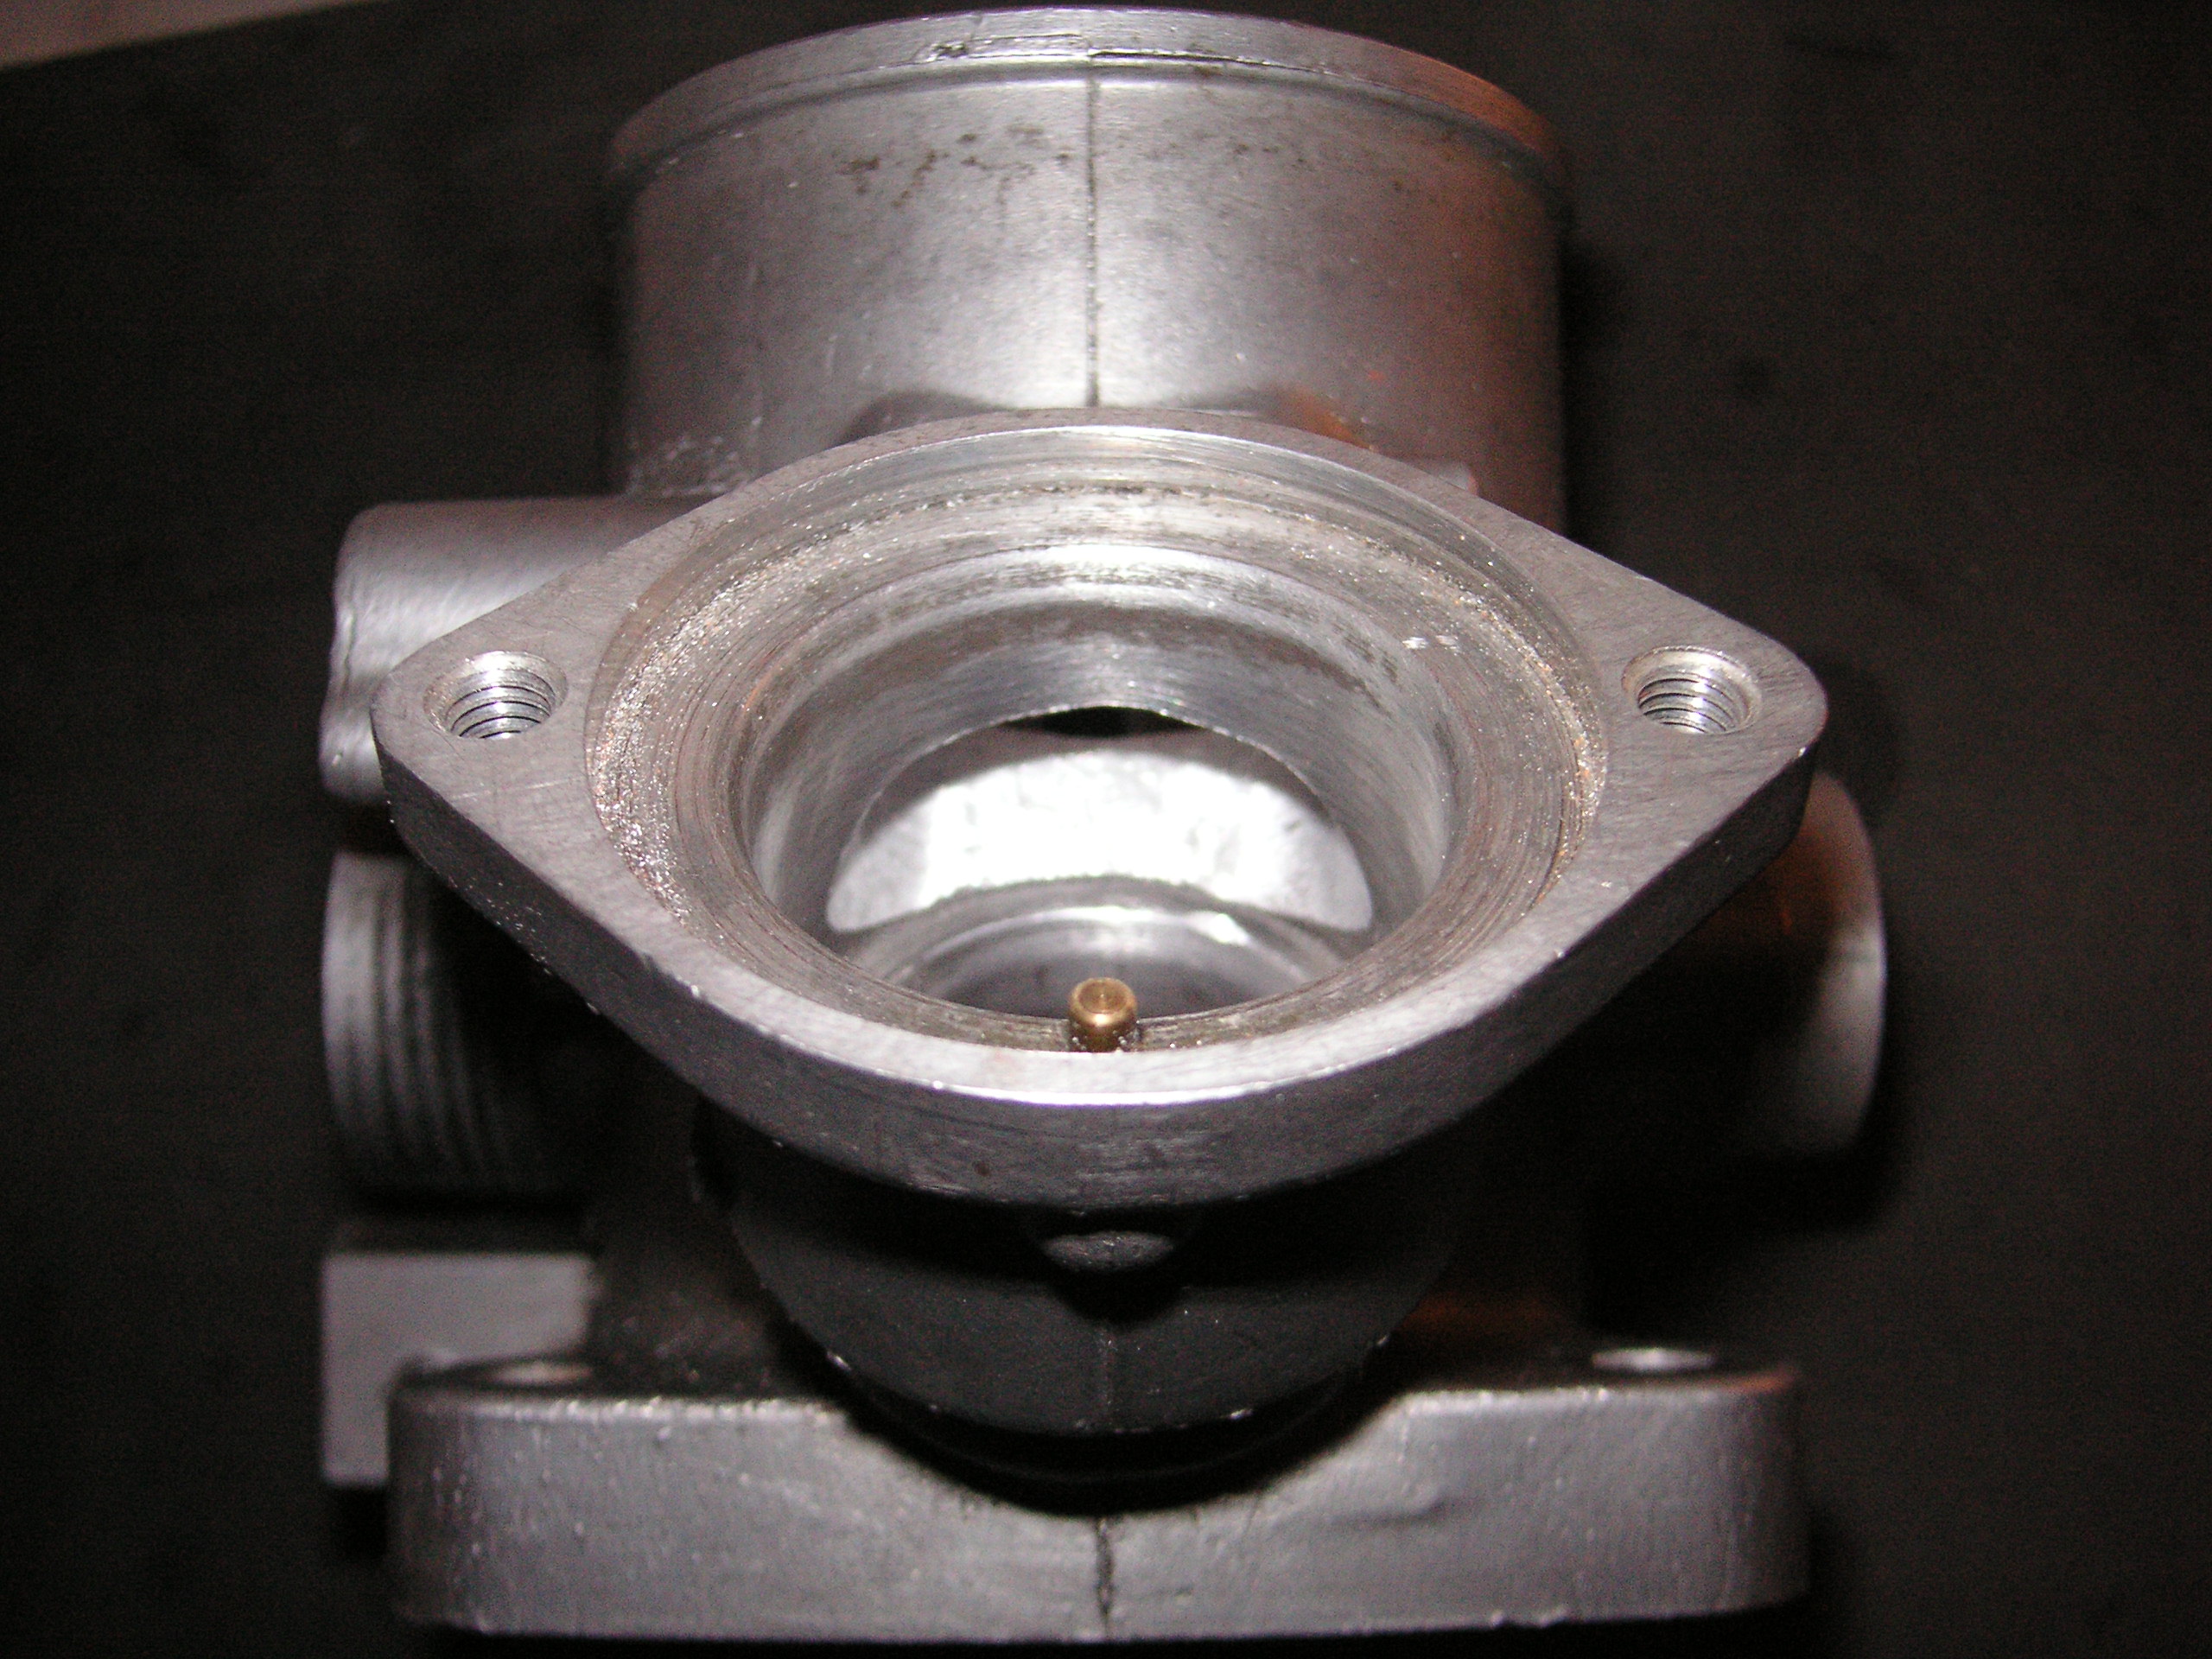
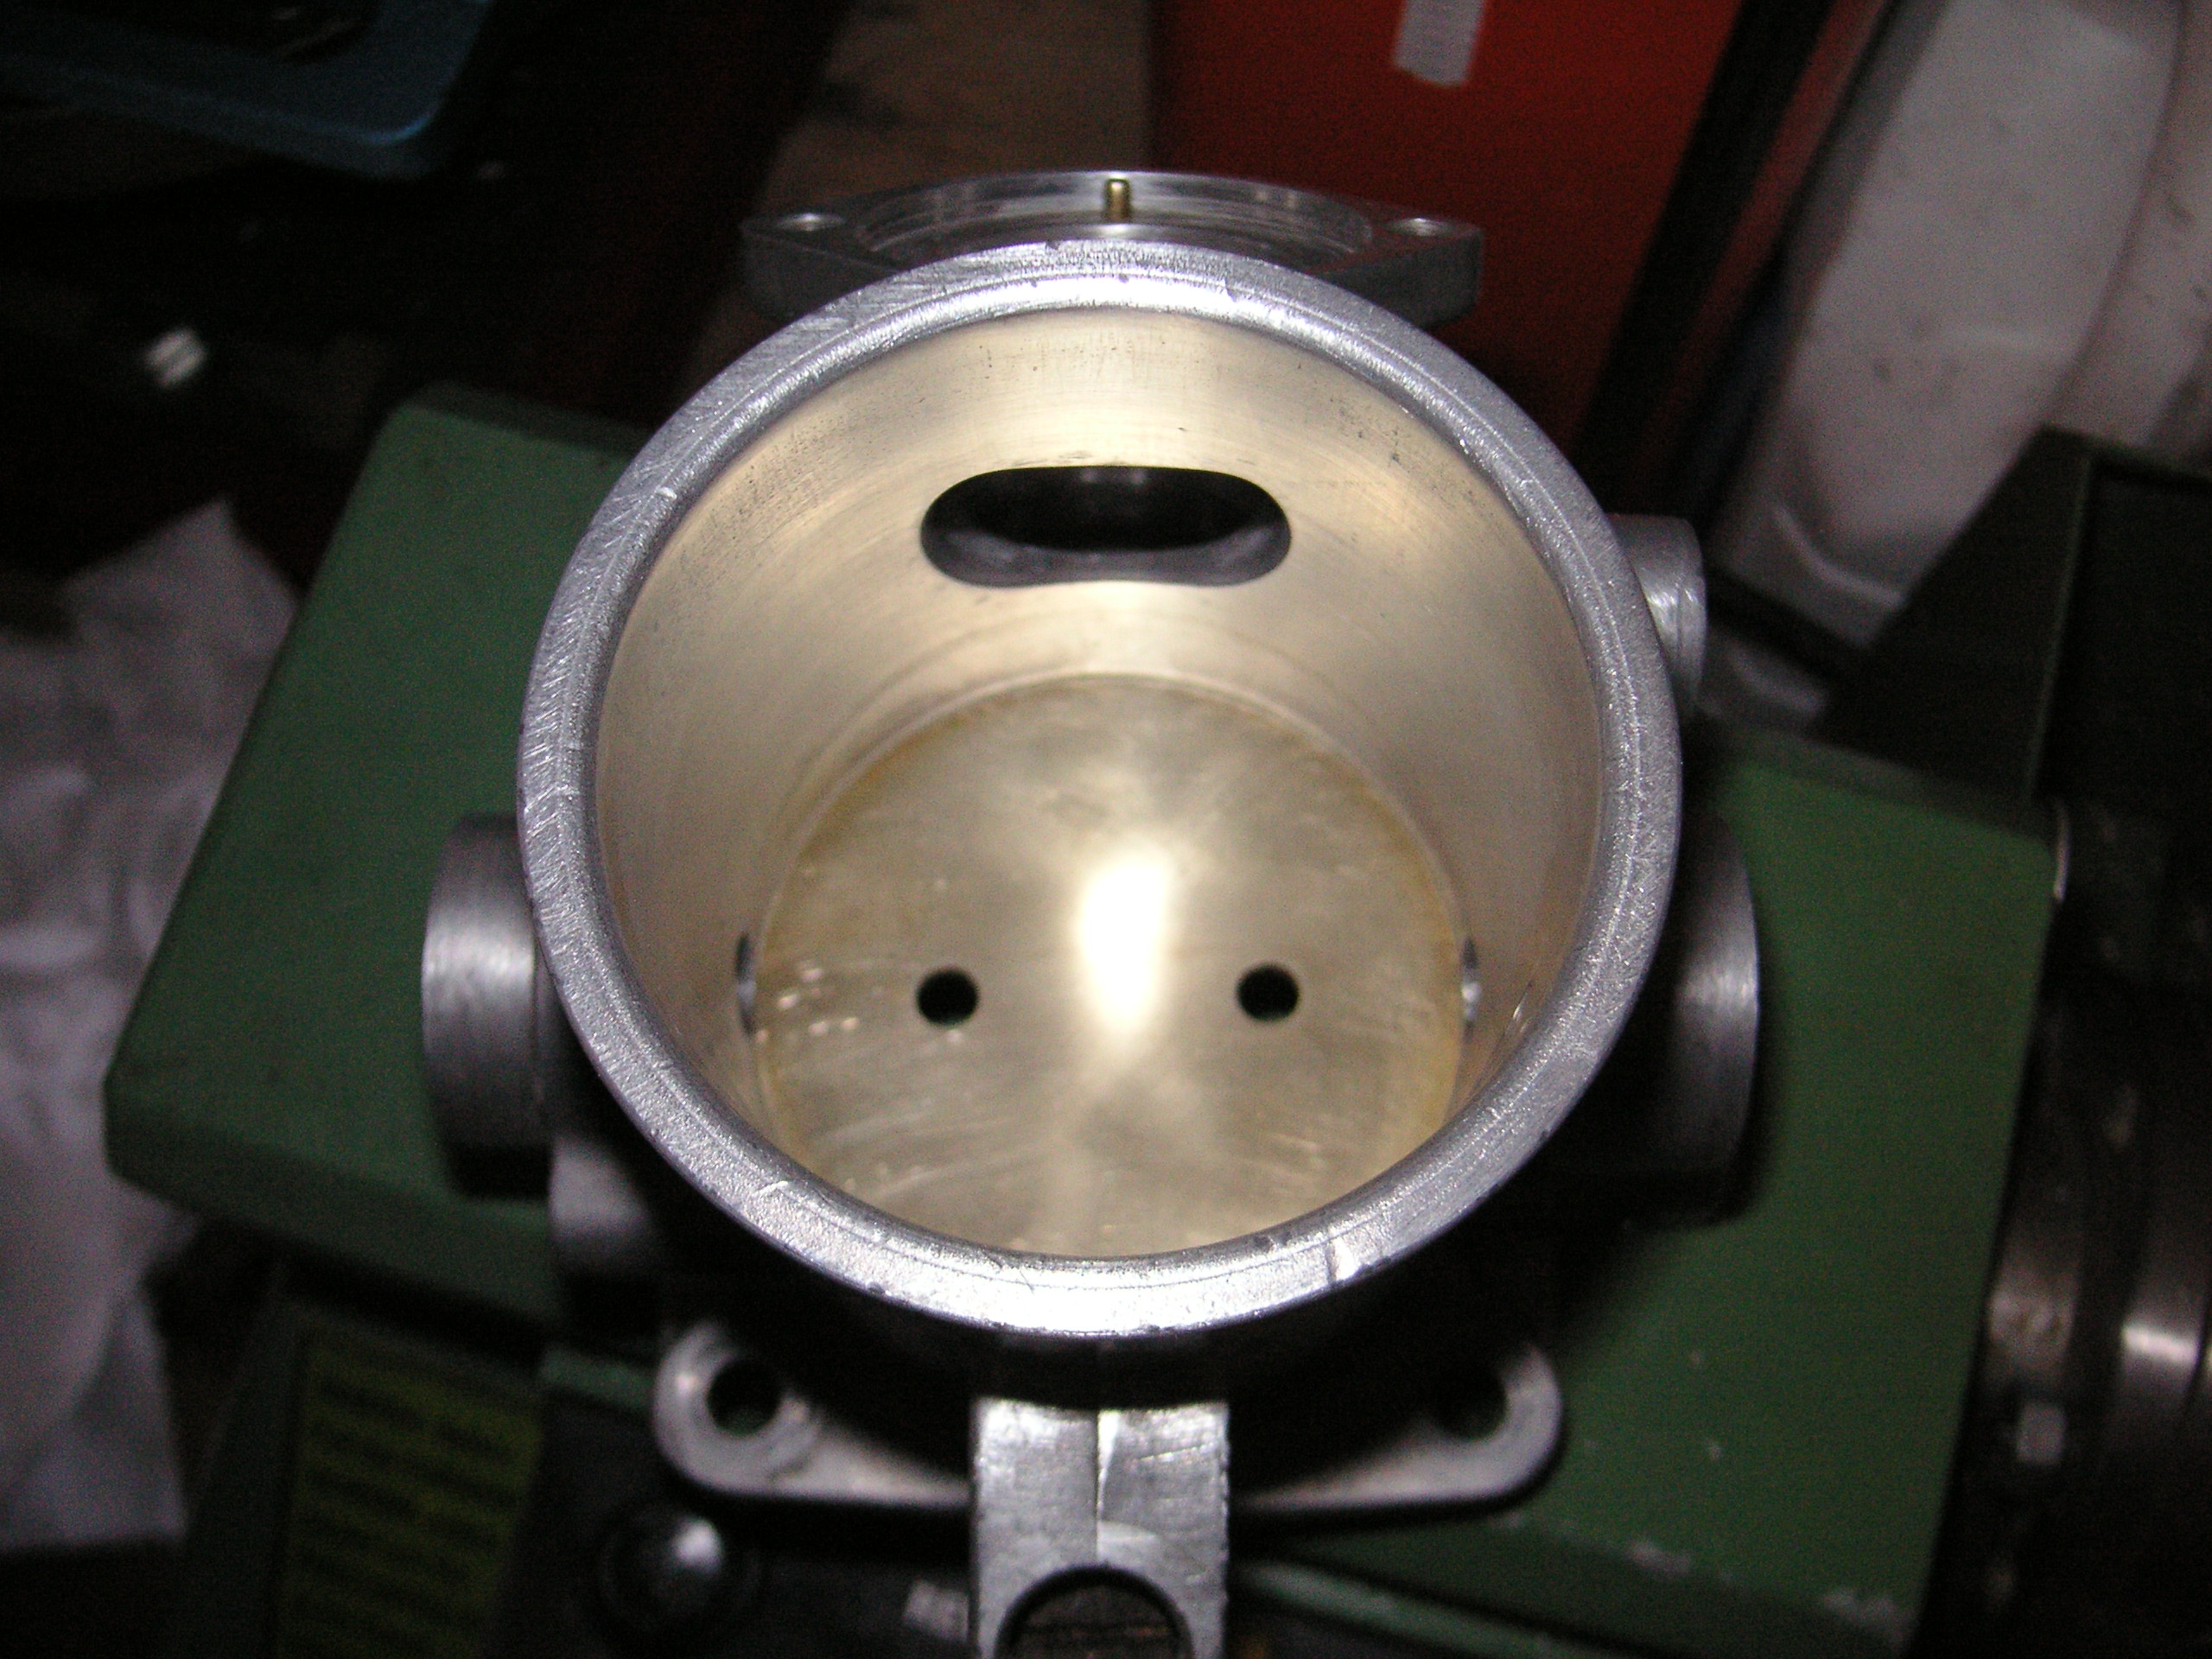
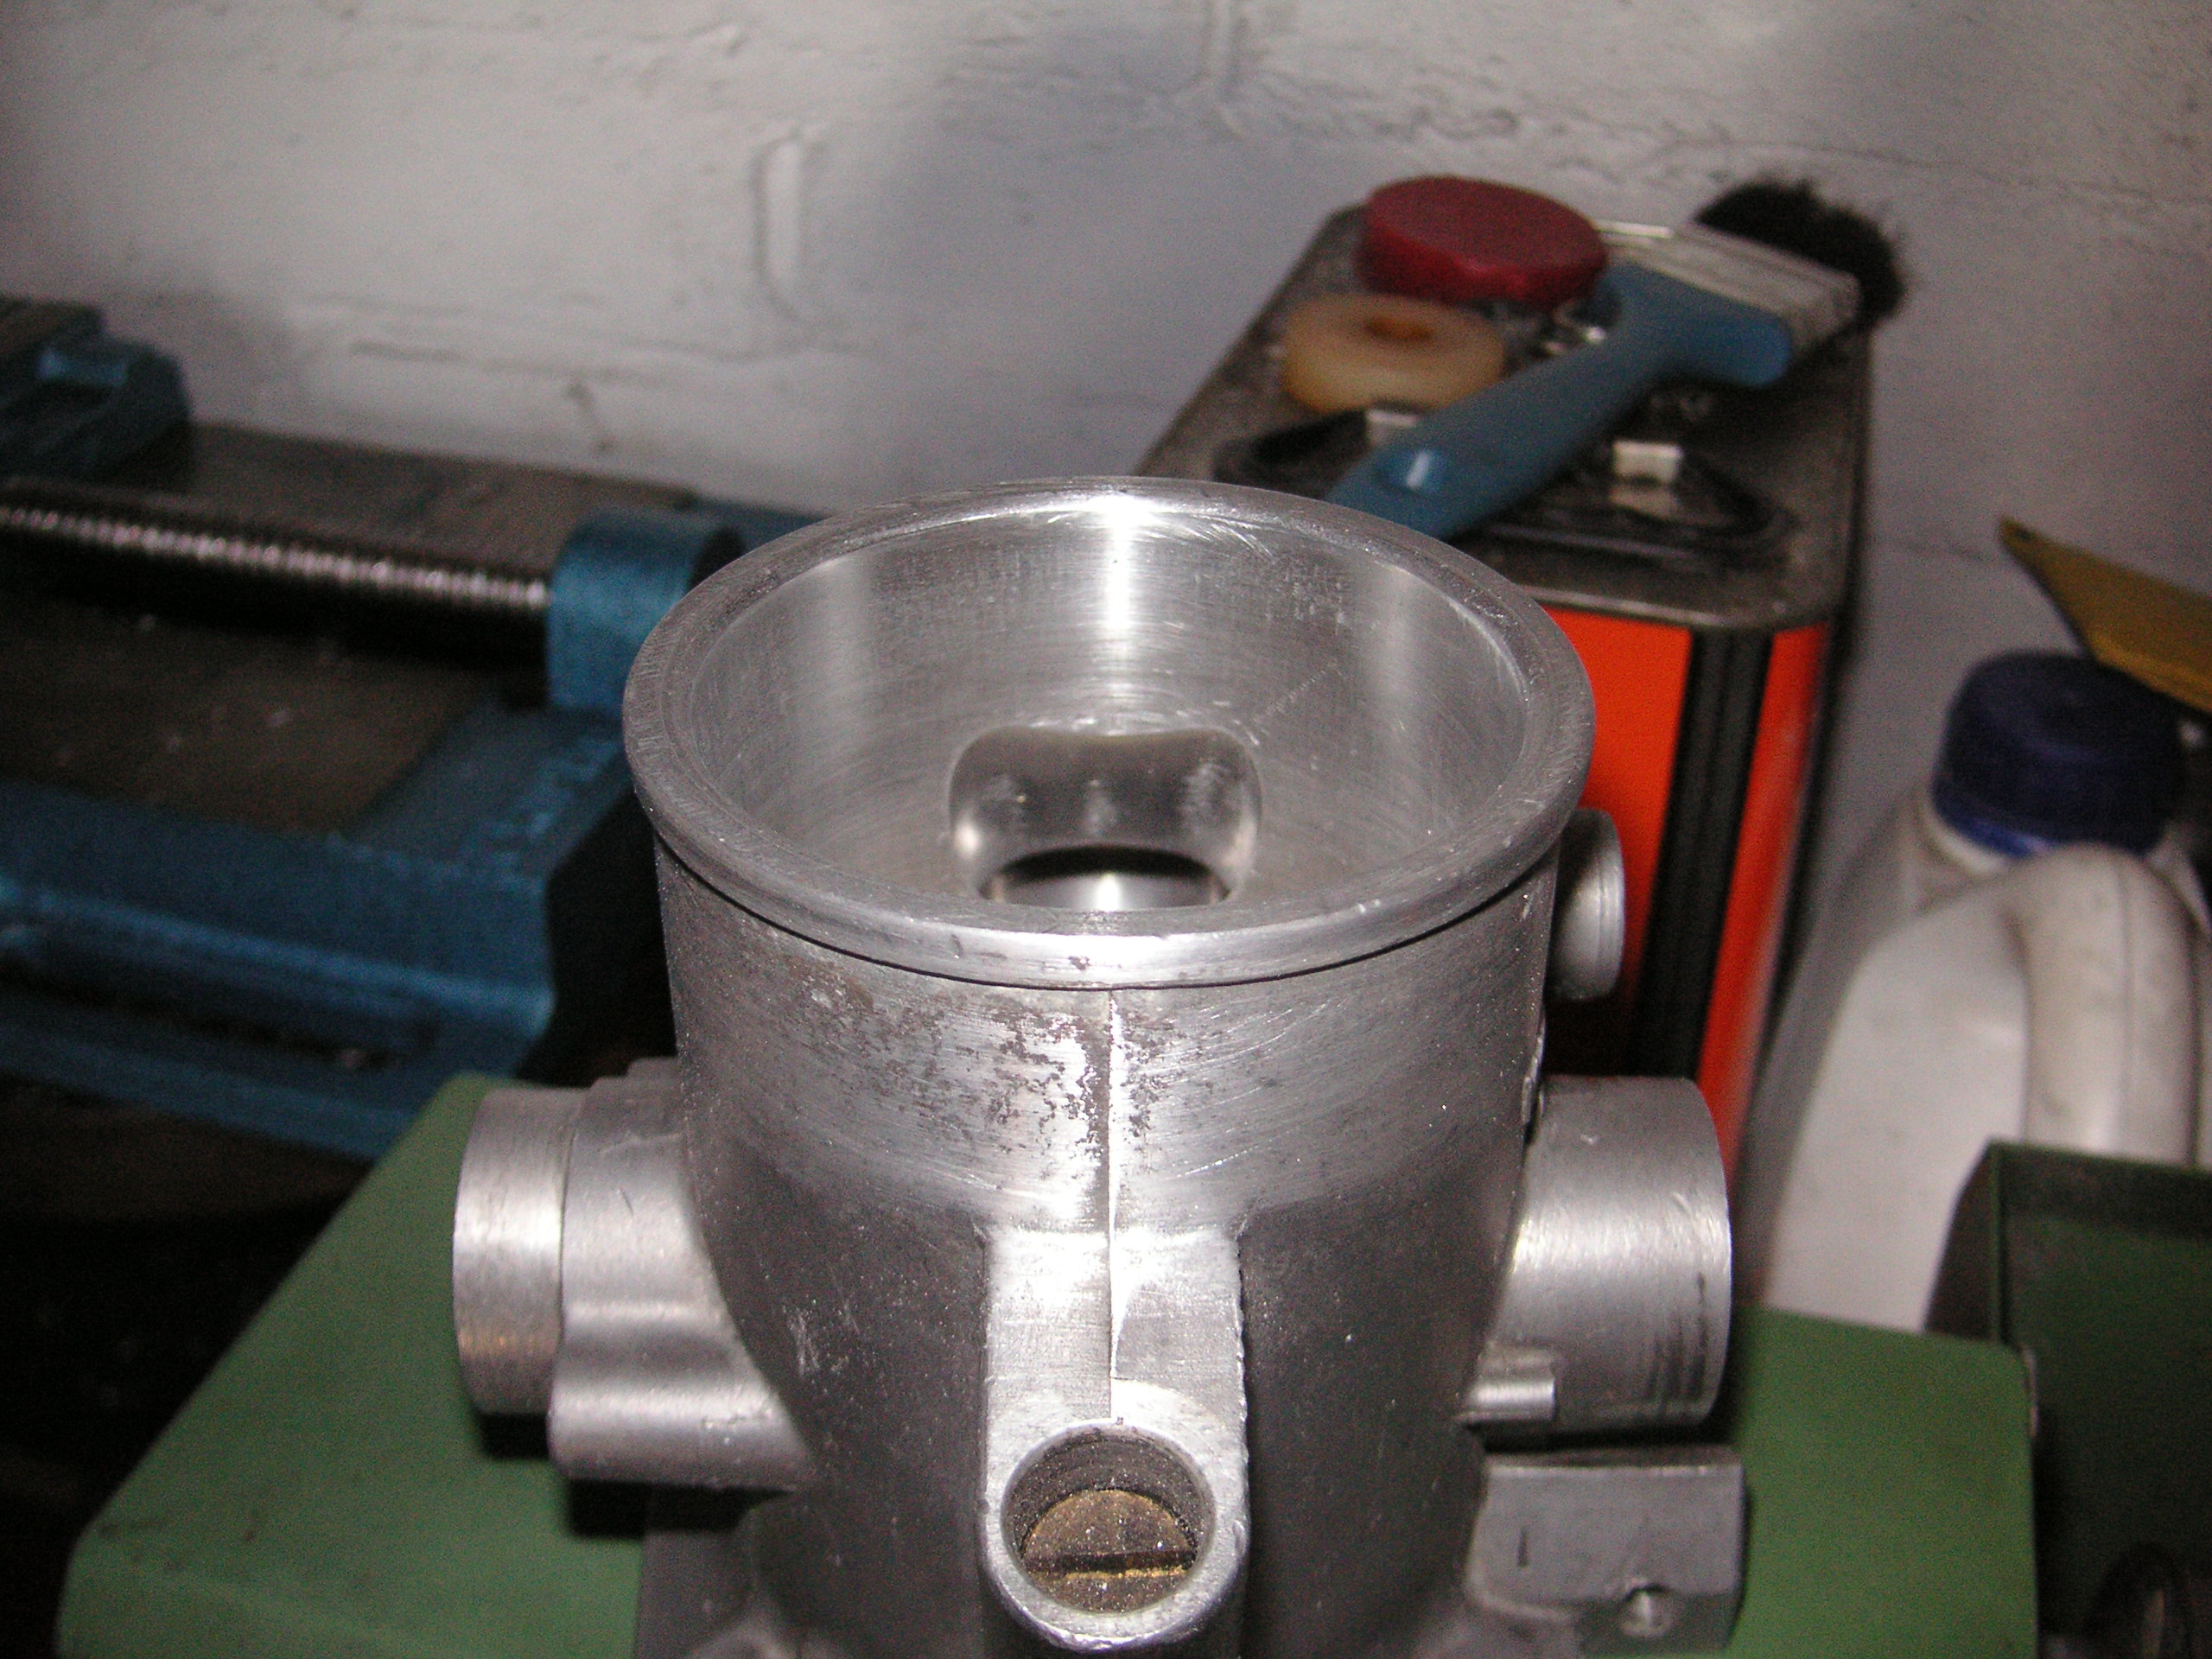
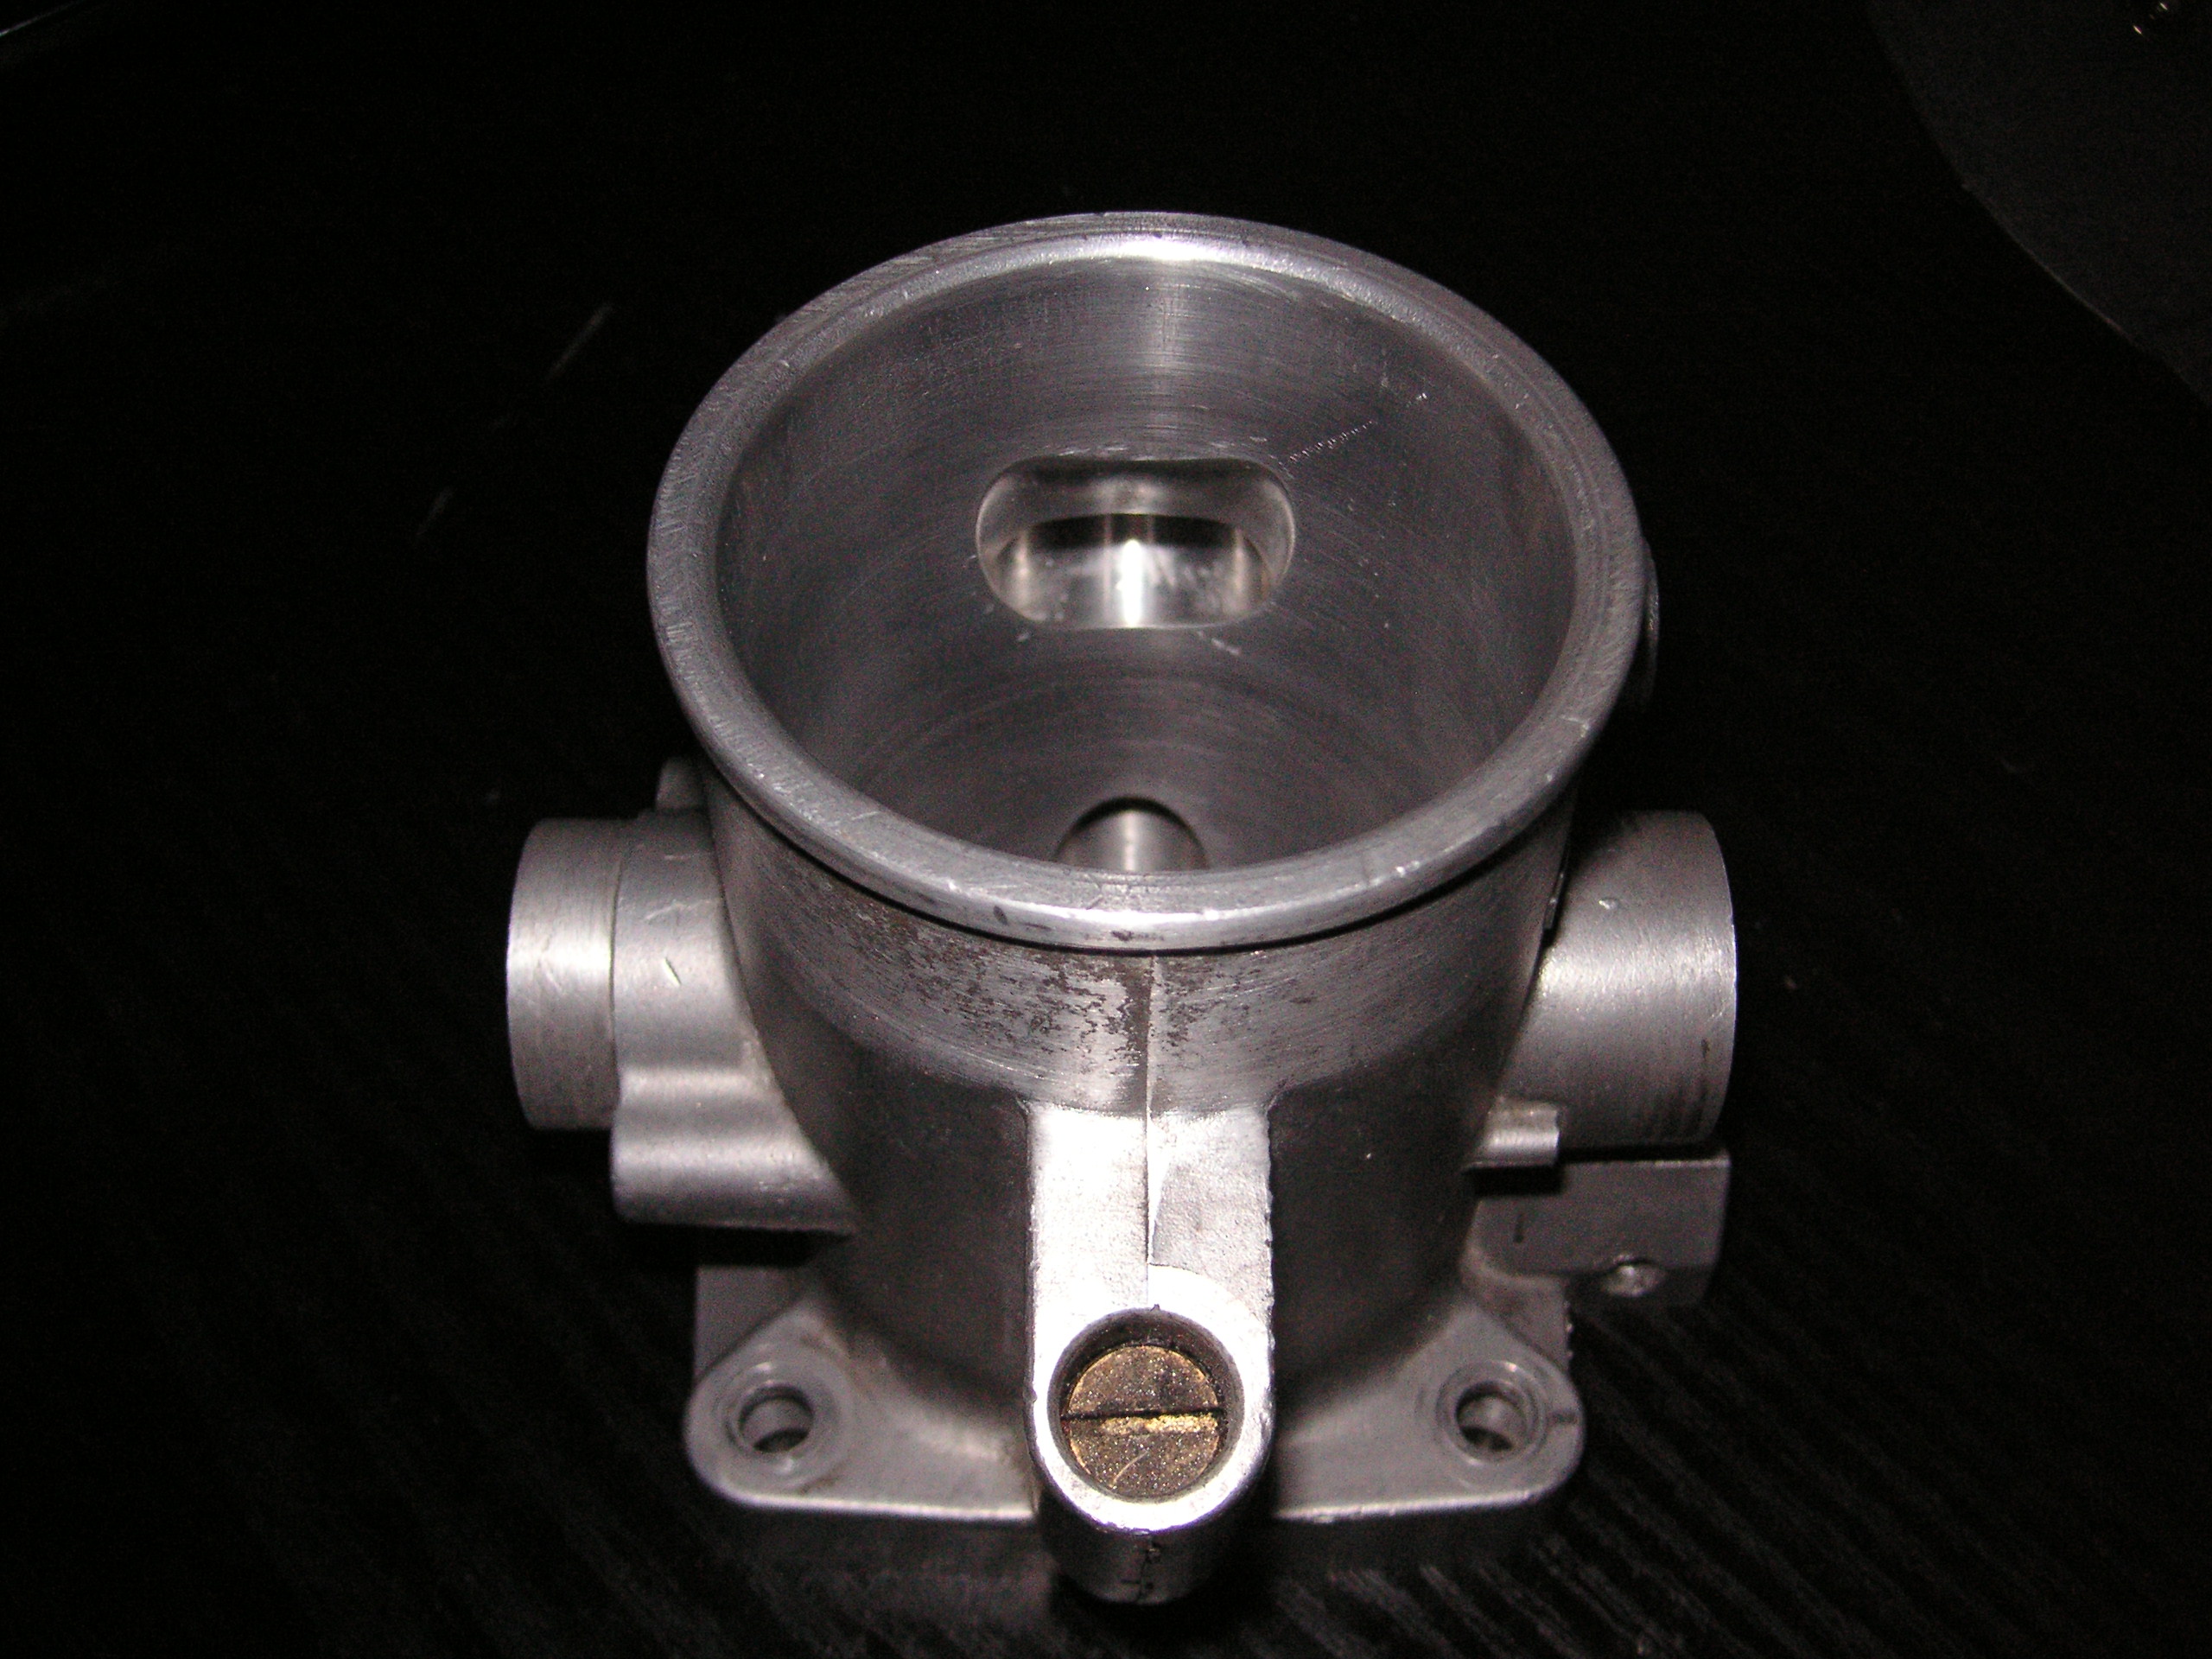
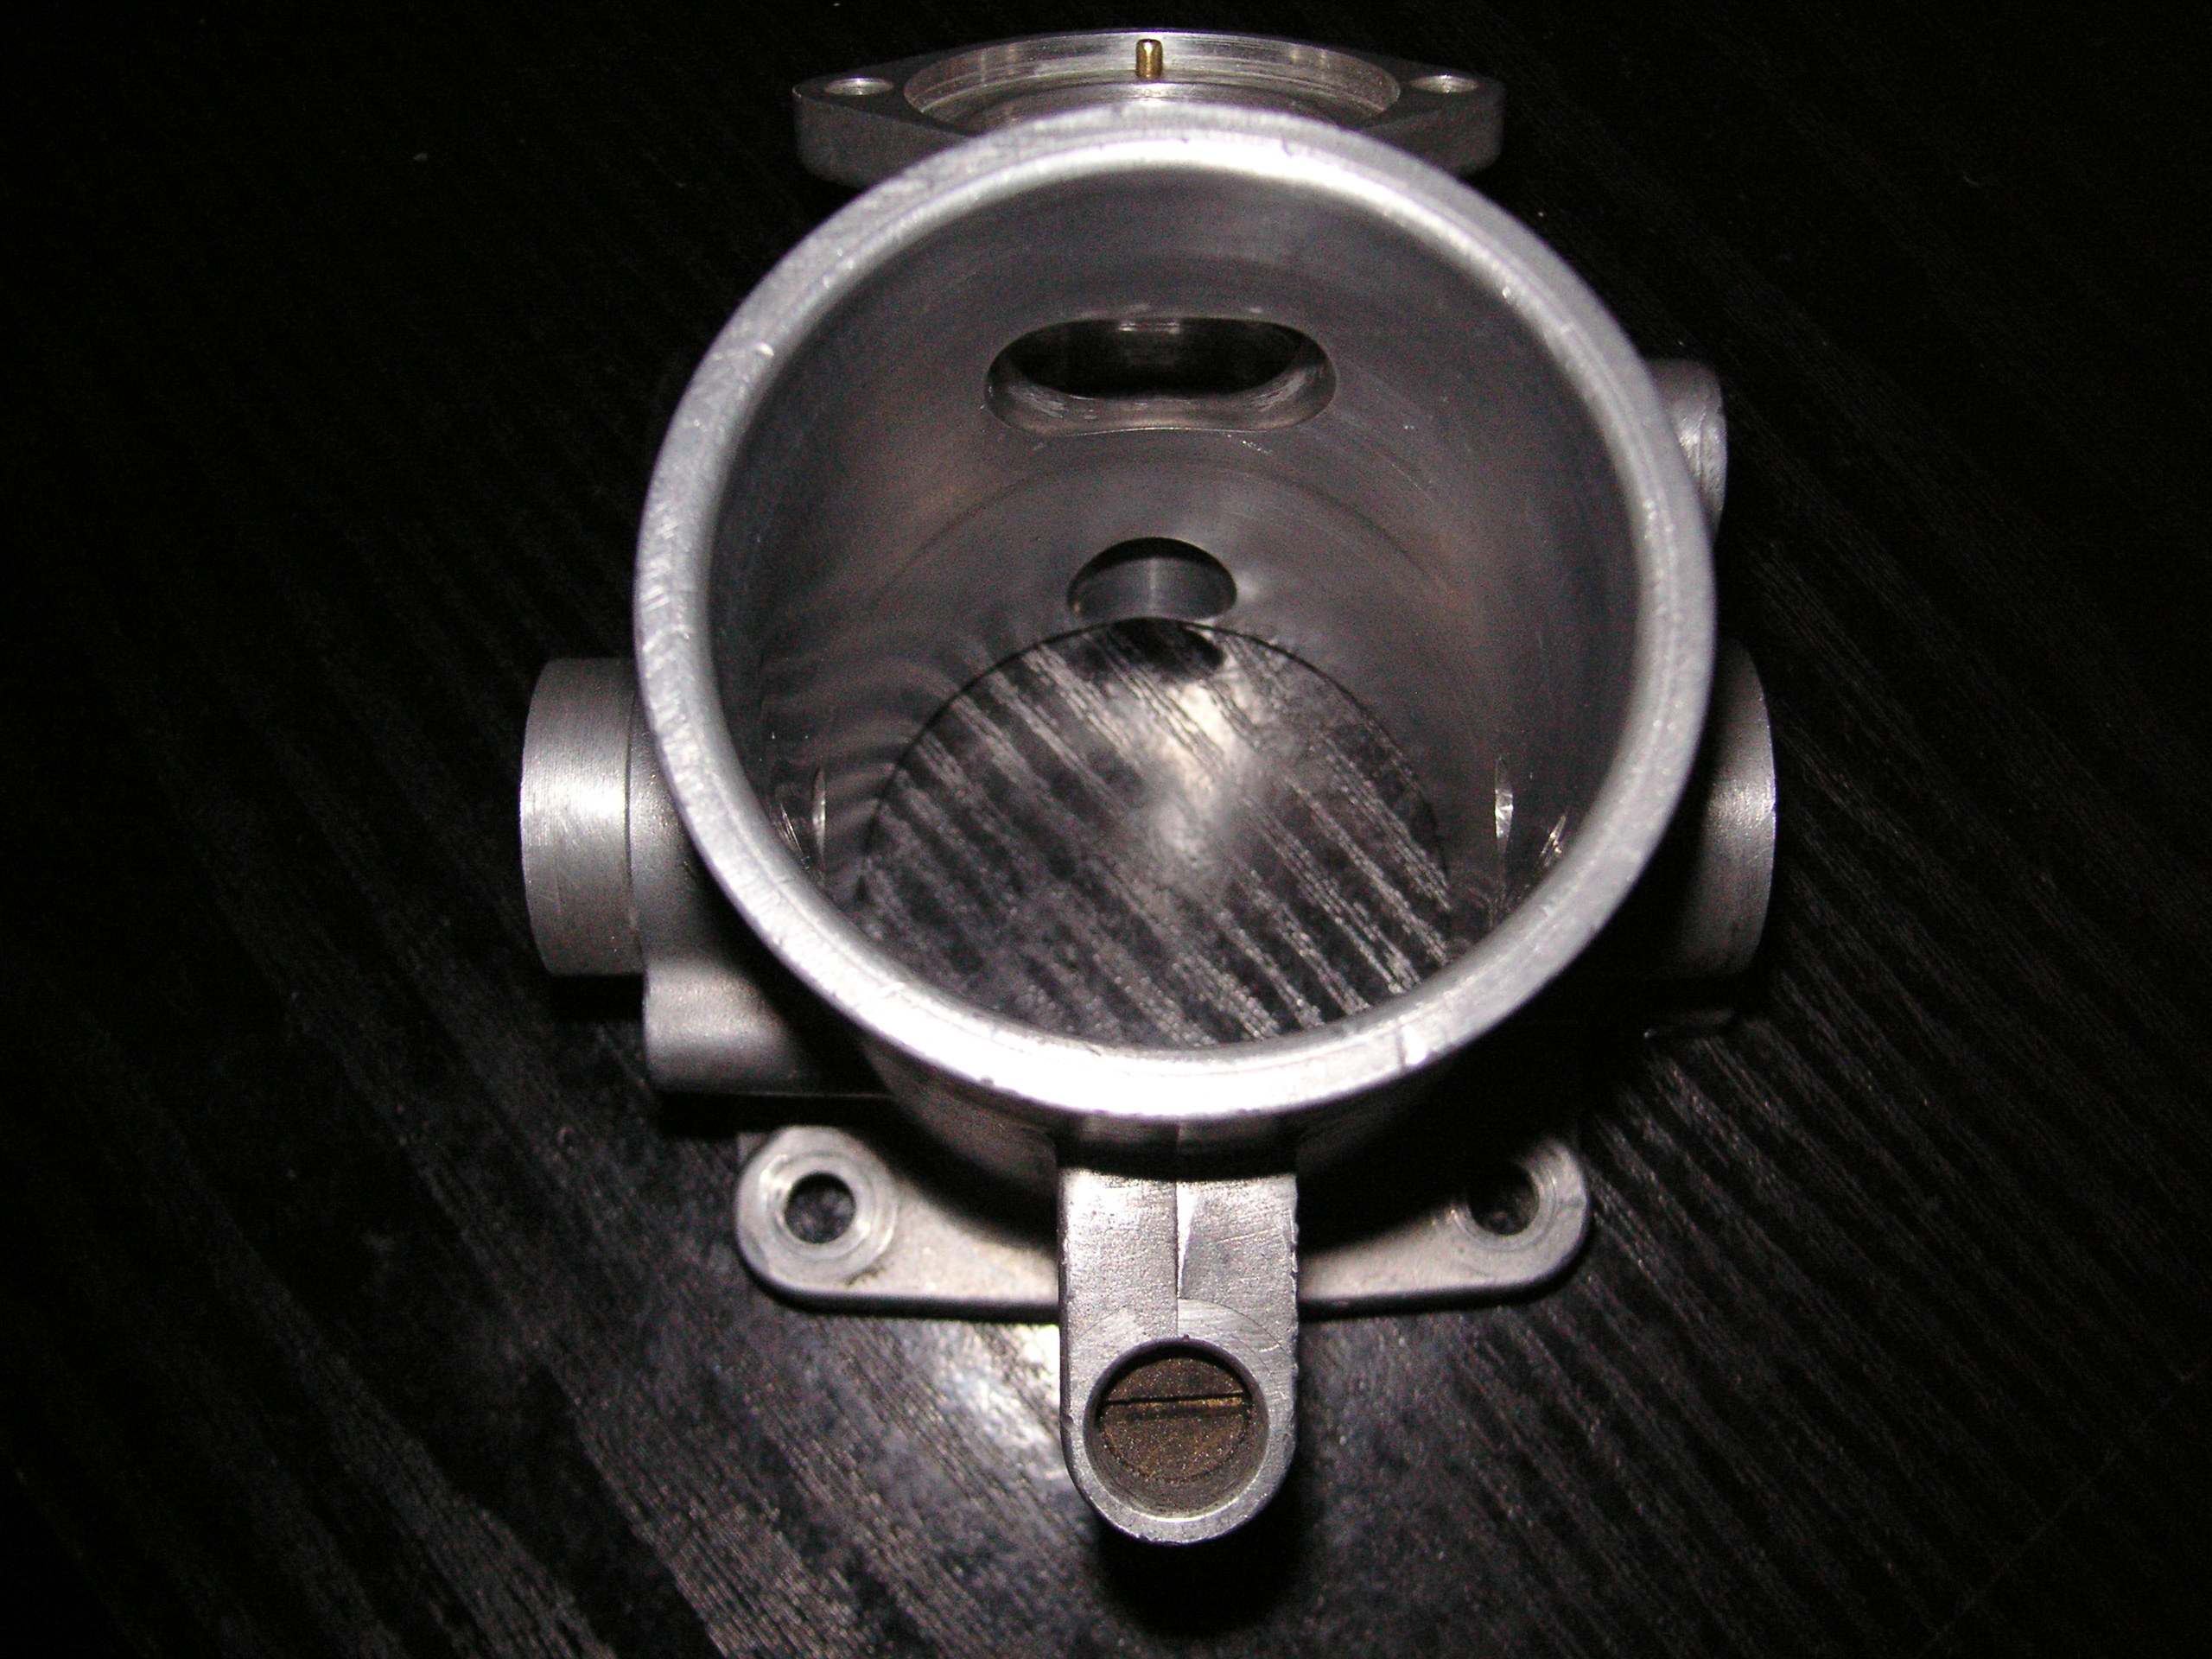