My Series 1 RS Turbo project, from the beginning.
 07-06-2009, 01:16 PM
#1
10K+ Poster!!
Thread Starter
iTrader: (1)

Join Date: May 2003
Location: Lancashire
Posts: 12,748
Likes: 0
Received 0 Likes
on
0 Posts
The old skool members and people from the RSOC board before the great melt down will remember this project. I have recently had need to remove the engine and rebuild it so towards the end of this thread is the more recent and up to date progress with the car.
Starting at the beginning......
Here is what happened to the old scrapper over several years.
I was 19 when I bought it. I ran it for 12 months and covered 30k miles. The came the option to either scrap it or rebuild it.
Before work starts...
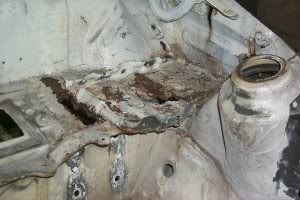
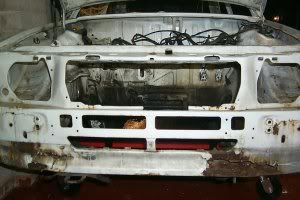
Front of the car. Doesn't look too bad here but there is rot just above the indicators where the wing id rotting from the inside out and the front panel has blisters forming below the paint.

On this picture the rot is more visable where the front panel meets the wings. There is some rot further up too.

This is where the seam on the wing has become rotton and the wing is actually being held on by the body kit.

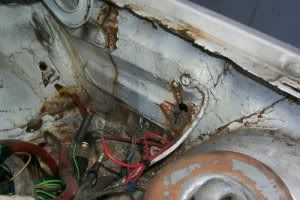
This is where a small wiring fire occoured and set fire to the interior trim. Nearly lost the car that day!!! Thankfully the wiring is now a lot better than it was back then.

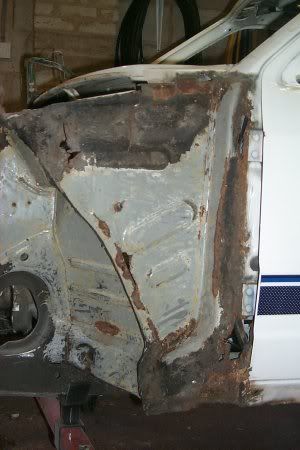
These next 2 pictures show the rotton inner wings. The one next to the batter actually has 2 very large cracks in it. Probably due to the amount of flex in the shell through corrosion.


Stripped almost to a bare shell...
The body kit was hiding a multitude of corrosional sins!!

Here is where the wings were rotting from the inside out!

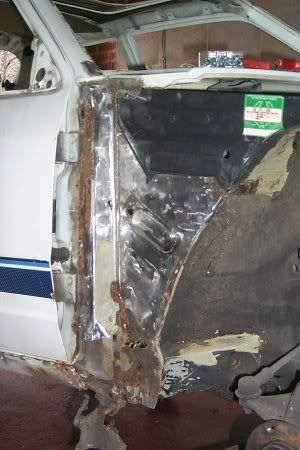
Again, the body kit hiding a rotton outer sill.

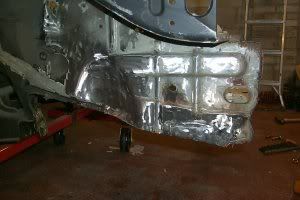
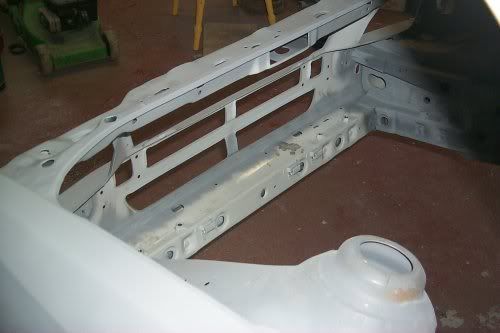
Picture of the other side of the front panel/crossmember.

A very rotton battery tray!!
A very rotton and cracked inner wing. There is a crack near the bonnet hinge and the other is near where the earth wire is screwed to the body.
2 of the bare shell.


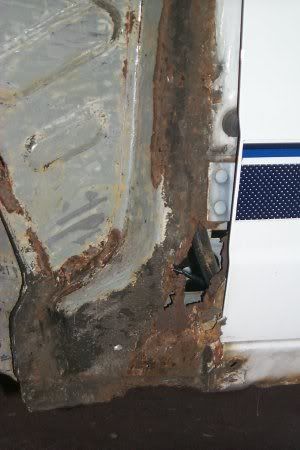
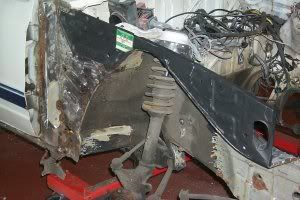
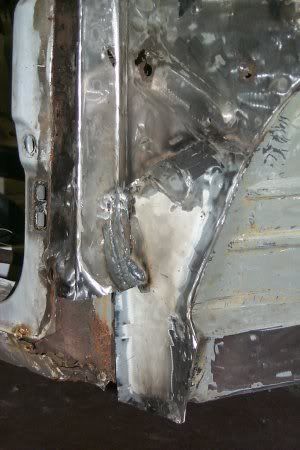
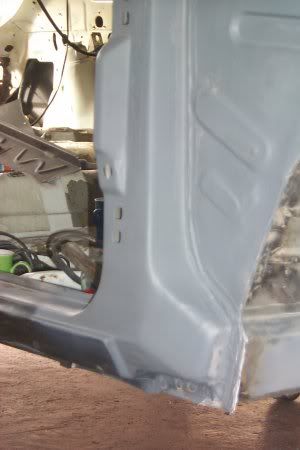
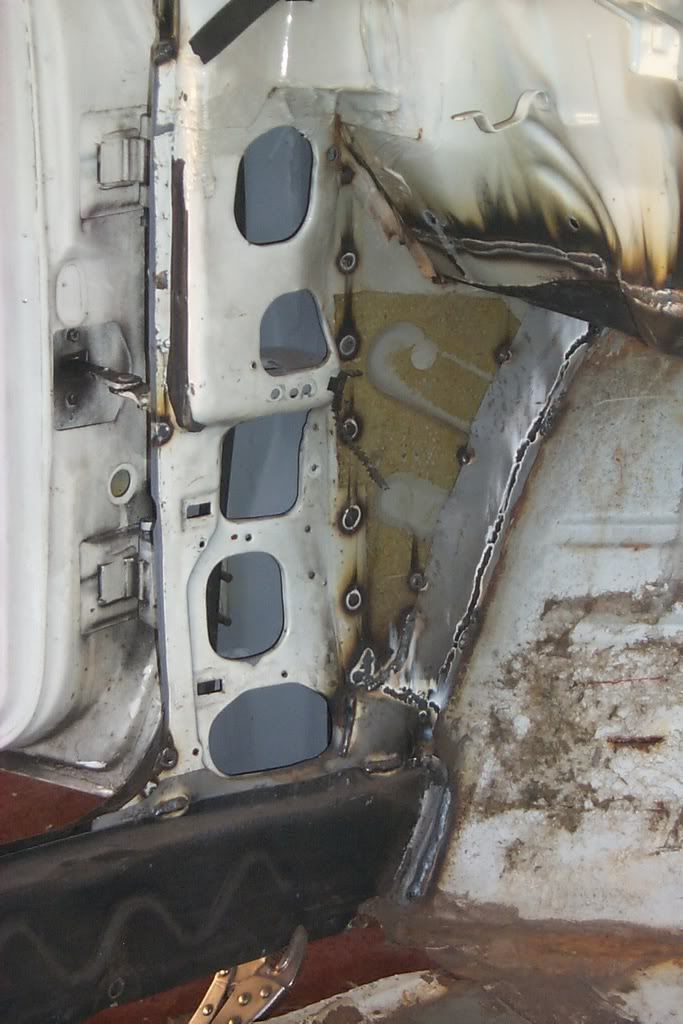
This is the reason why the passenger wing was hardly attached to the car anymore!! A corroded A pillar!! It's suprising the door didn't fall off!! The wing nearly did.
Full front end looking like a battle ship with all the brown streaks.
Front end with the corroded panels removed and work starting on cleaning up the other affected areas.

Front end was first on the list...
It had the following items replaced...
Inner wings,
Outer wings,
Front crossmember,
Front panel,
Scuttle panel,
Bonnet
N/S A pillar.
The chassis legs and other parts were patched and repaired after the rot was cut out and back to good metal.
The inner wings have been cut out and the new inner wings trial fitted.
An area that needed small patching up and cleaning.
Another area that needed cleaning and patching up. There was a hole here for the aerial but I did away with it.
You can just make out a section that has been repaired just the right of the bottom of the new inner wing.
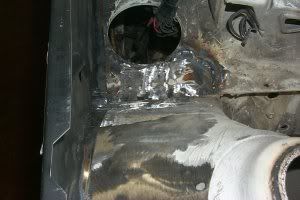
Fuse box mounting. Always a culprit for wet carpets where water has run down trhough the corroded panel. Rot cut out, small section made and welded in (which is the weld marks on the picture above).
The offside A pillar primed after the repairs have been done.

The Battery tray area. Now with new battery tray. The inner sides of the front chassis legs have been cleaned and primed.
Close up of the offside A pillar.
And again.
View to the other side still to be completed.
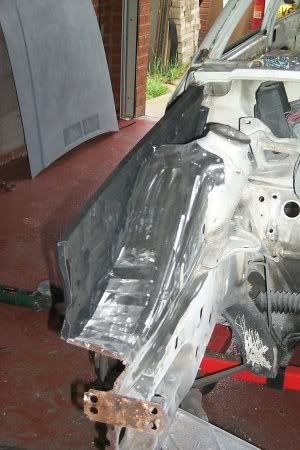
Next the car had new inner and outer sills and various patches of rot cut out and replaced with new metal.
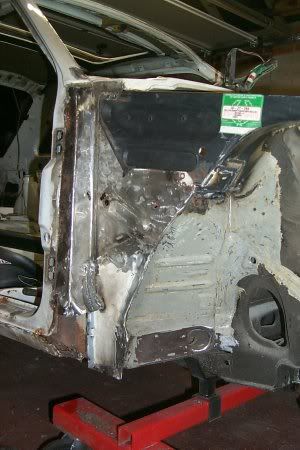
Here is the outer sill after having been fitted. The door is now back on to see if the thing actually still fits and closes without over lapping anything!! The door is mounted on a nice new A pillar.
Before the outer sill was fitted, the inner sill has to be fitted to the floor pans and pillars.
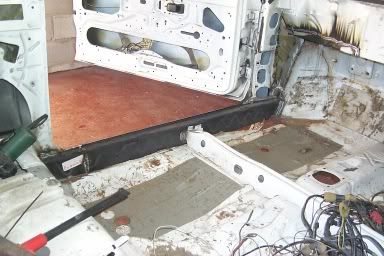
Some of the floor pans were rotton where they meet the sill and had split so new repair sections were made and fitted (after the old rotton bits got cut out of course).
Here is another repaired floor section. Not quite so easy to make out as it's covered in primer.
These had to be done before the front could be finished as the front wings over lap the bottom of the sill
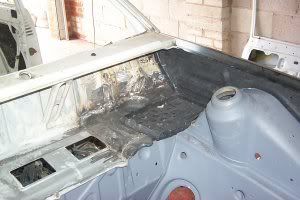
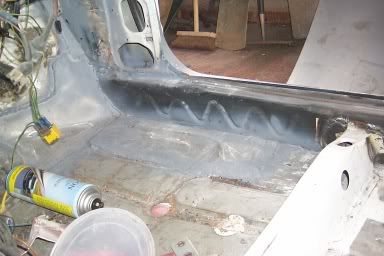
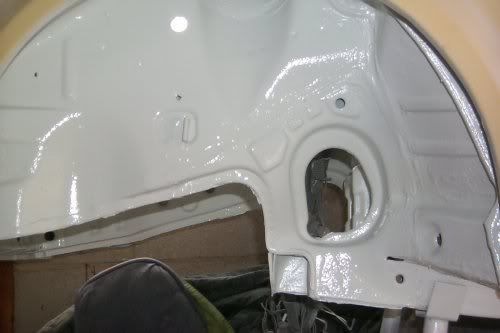
As parts of the metal work were repaired, it had to be protected again to stop it rusting. Everything got cleaned and then coated in primer. Bellow is pictures of the front end nearing the stages of completion. The bulk head still needed work and so did the wings but it's getting there.

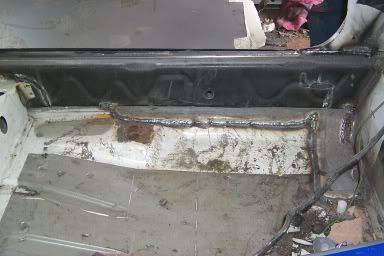
More pictures of the sills and N/S A pillar...
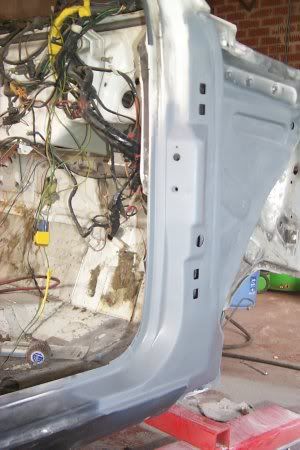
The nearside A pillar had suffered quite badly from rot.
This shows the new pillar being fitted from the inside of the car. There also needs a plate making for the hole in the floor. The wheel arch has already had a repair peice patched into it.
Same area, different angle.

Pictures of the repais in primer..
A pillar completed. The door even shuts correctly too!! Bonus!
Inner/outer sills and floor pan on the near side.

Front panel and crossmeber.
Whole front end and door on the near side.
Update time.
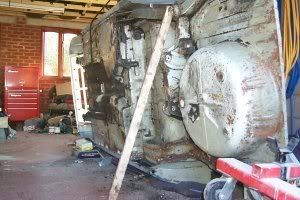
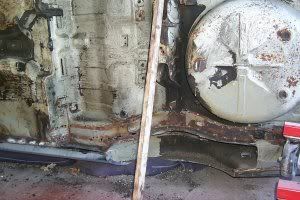
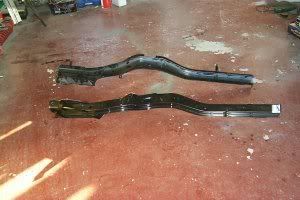
The car's chassis legs were a bit rotten so I decided it was having new ones instead of patches.
The car was rolled onto it's side and the chassis legs were removed and the floor pan cleaned. The new chassis legs were then welded in place following the lines of the originals.
The car also had a new back panel fitted afterwards.

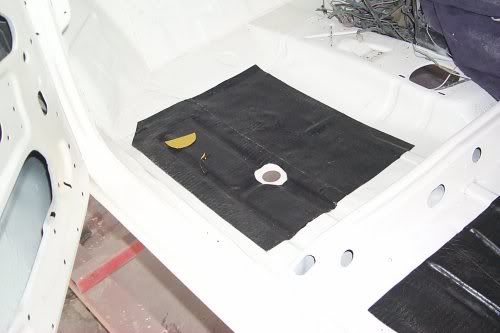
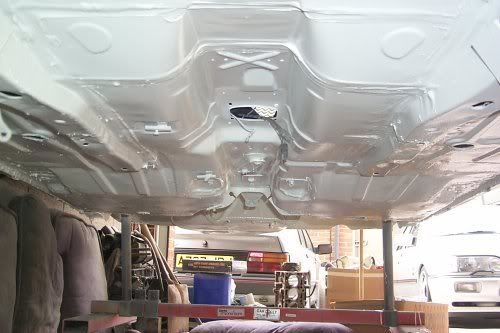
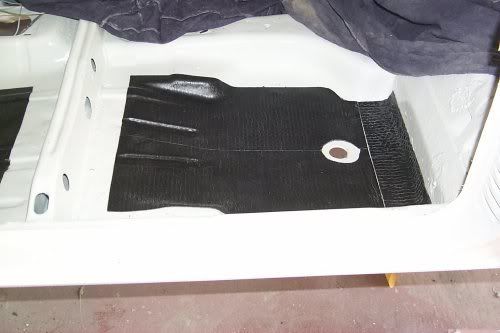
After the car had been cleaned under neath, the shell got sealed and then painted underneath and on the inside. After the paint dried on the inside, new sound deadening mats were stuck onto the floor pans in the original places.
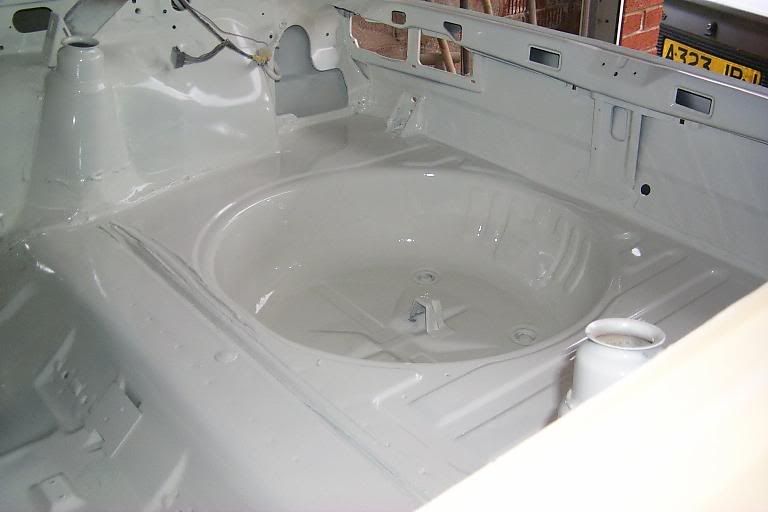
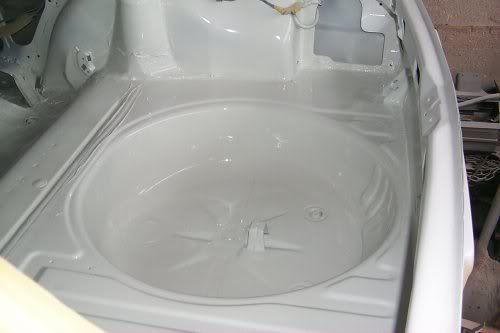
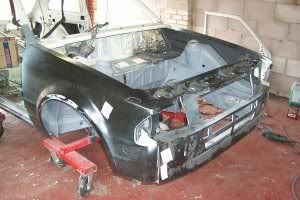
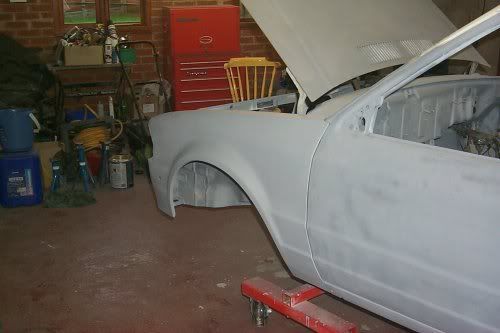
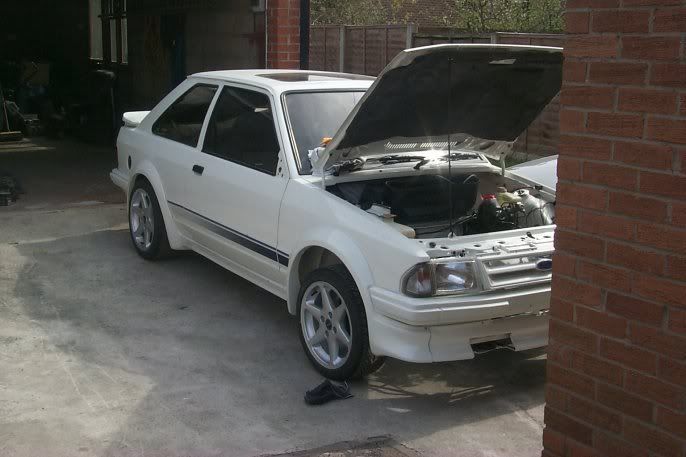
The attention was then turned onto the outside. Firstly the bodykit was temporarily attached to the car and any holes that required drilling were done. The kit was then removed. The car was flatted, primed and the painted.


Shame it's not this clean and shiny any more!!!


Rear suspension on. New powder coated bottom arms. All the old arms cleaned and coated. New Koni shock absorbers with standard height springs.
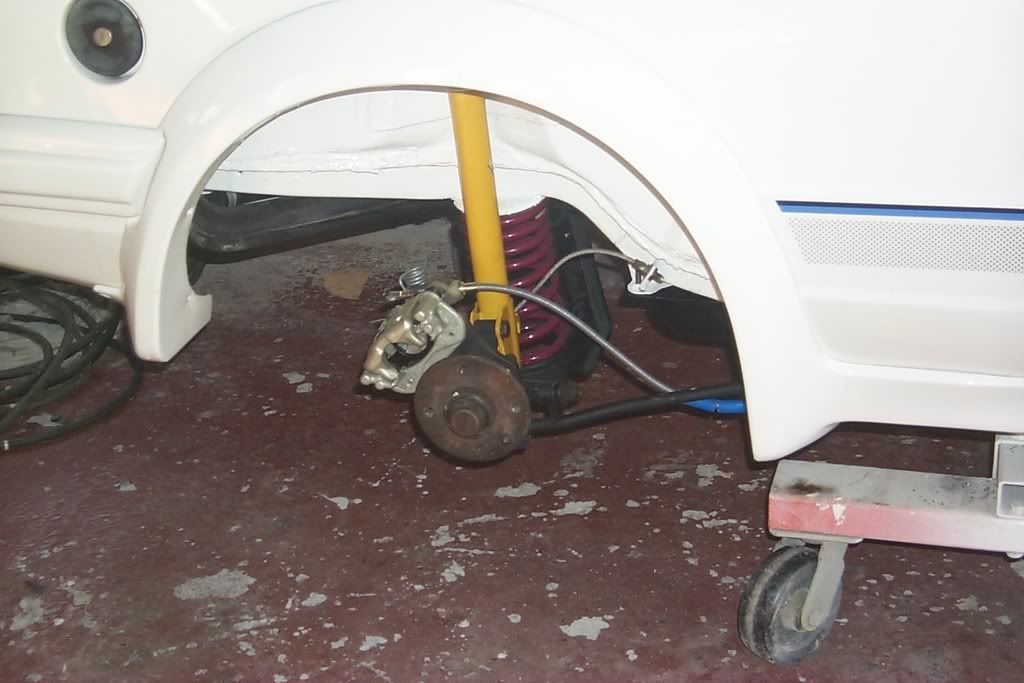
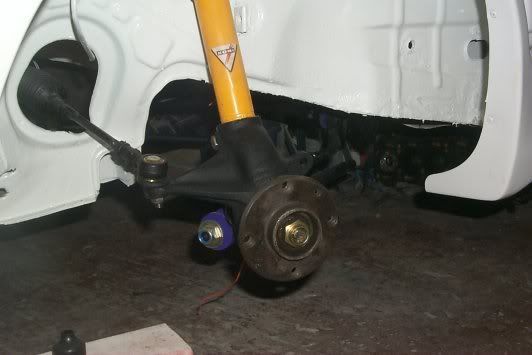
Front suspension going on with new Konis/standard height springs.
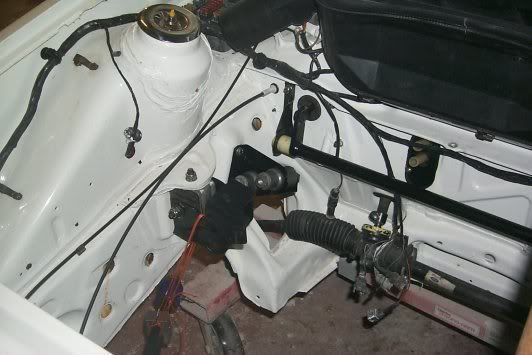
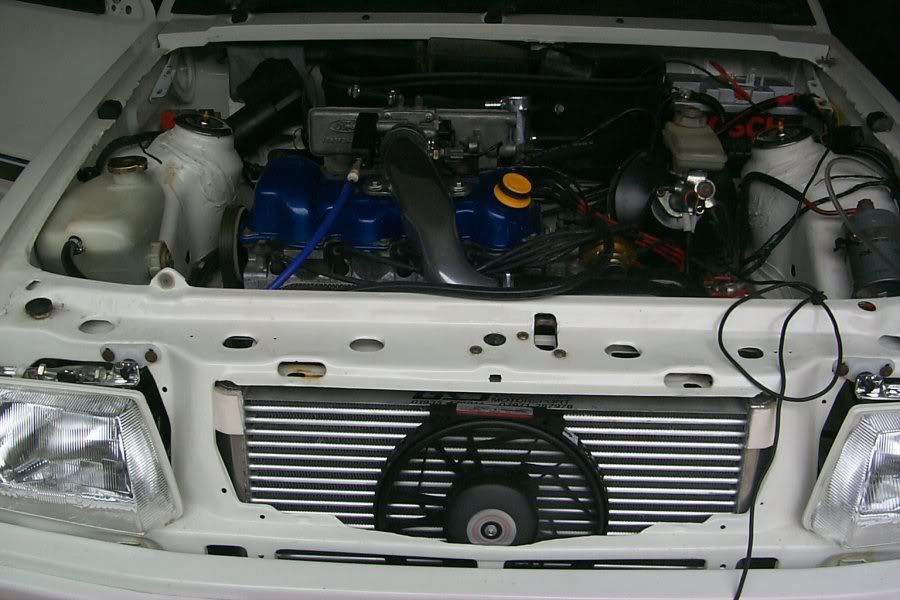
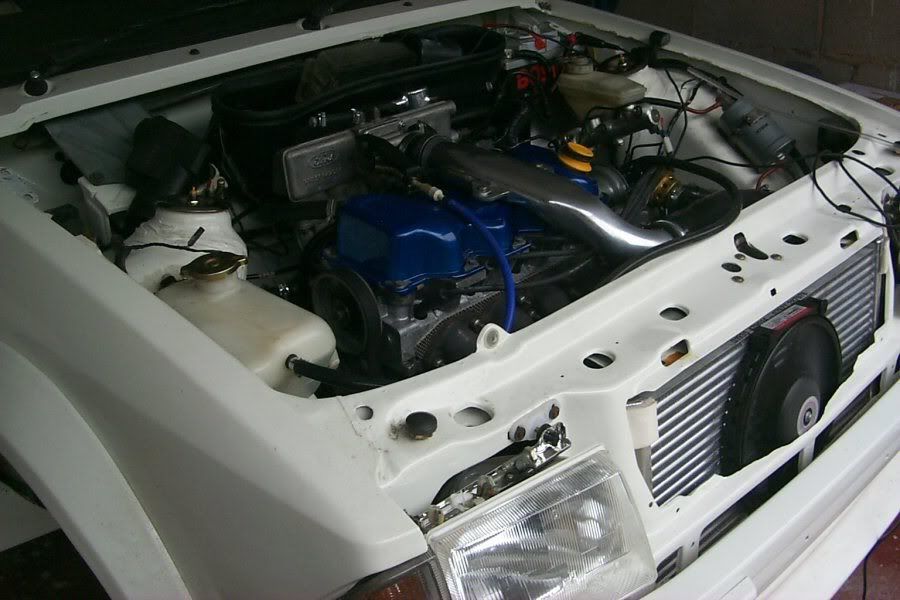
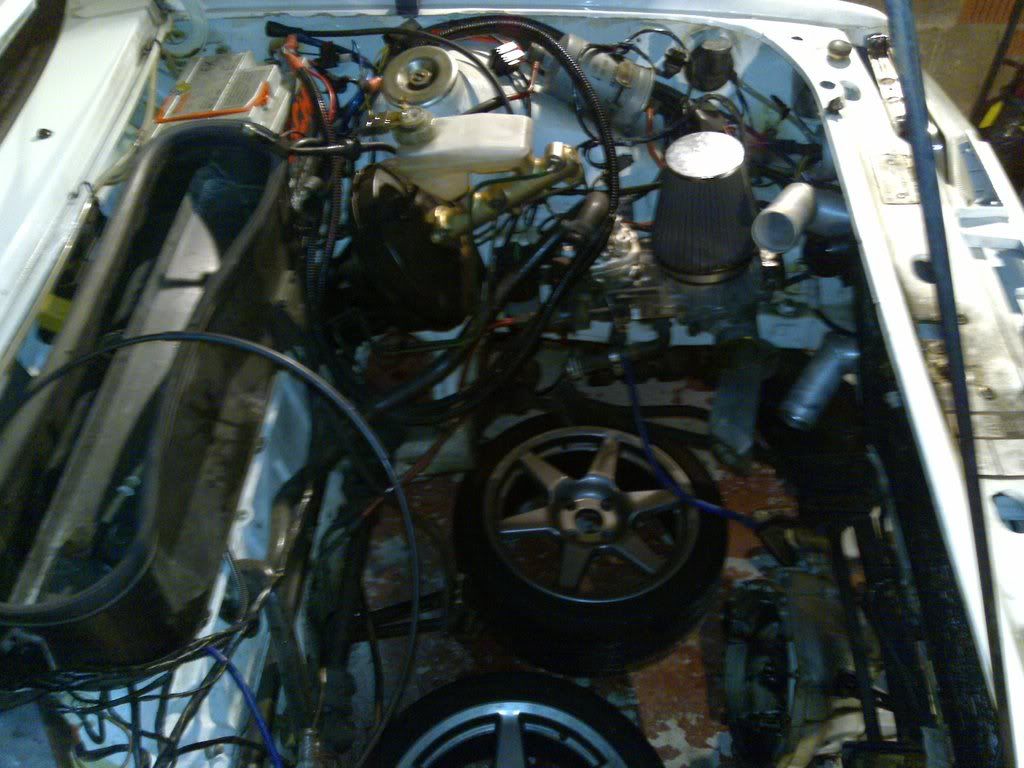
Engine bay going back together.
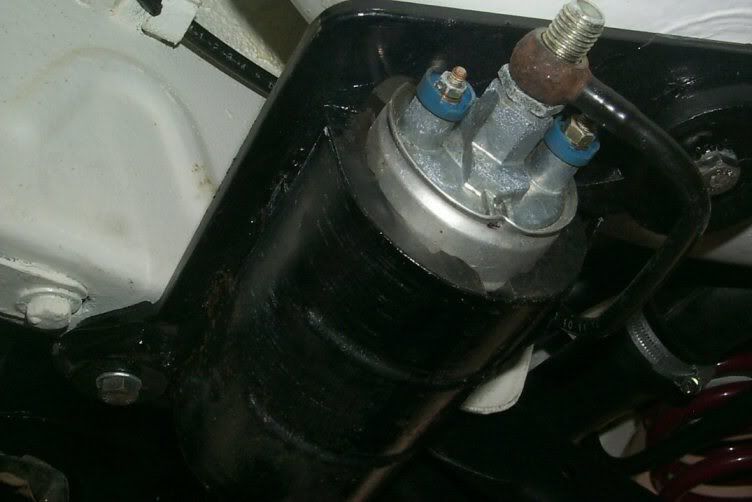
Refurbed fuel pump cradle.
Development of my front brake kit.
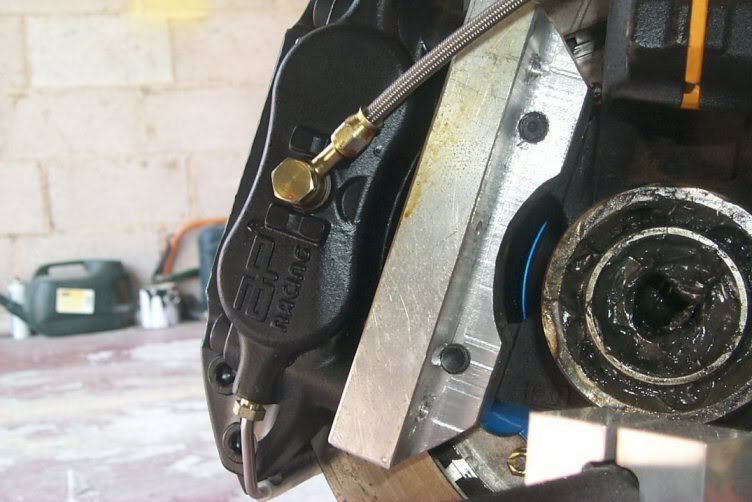
Some more of the brakes. 315mm rotors with AP 4 pots.
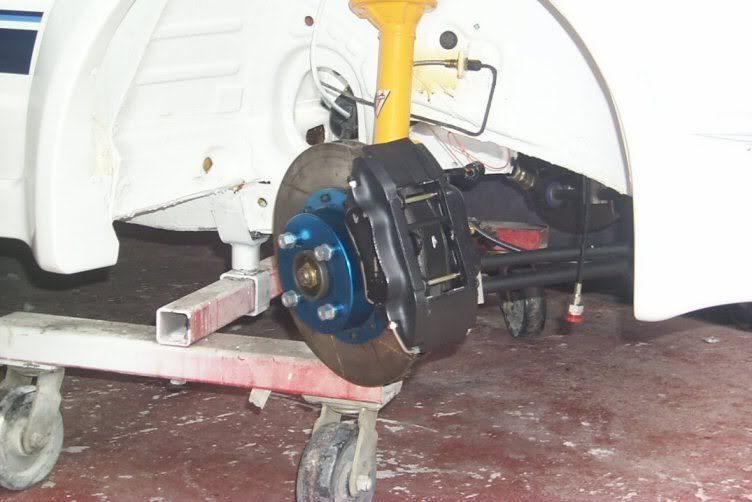
Adjustable track control arms.
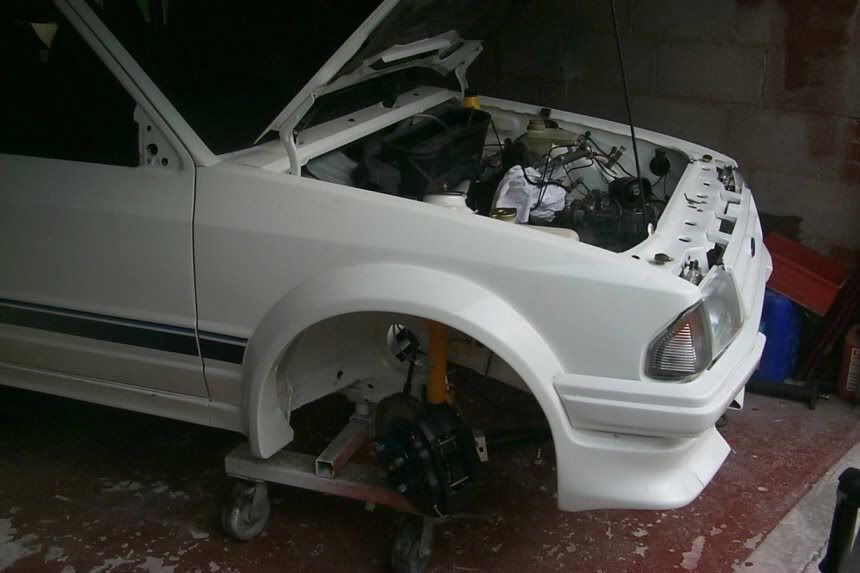
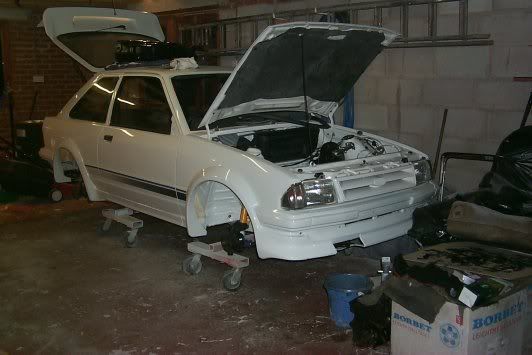
Car itself going baack together. Front end on and most of the ancilliary bits back under the bonnet.
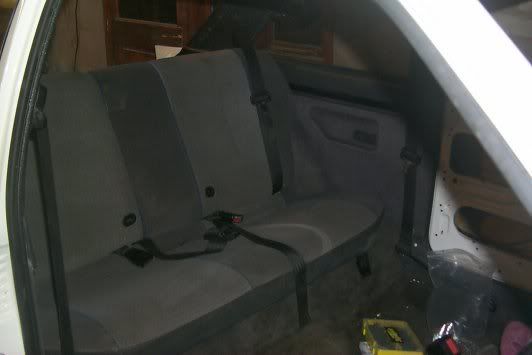
Back seat back in.
Roof lining back in.
Dash back in.
Carpet back in.
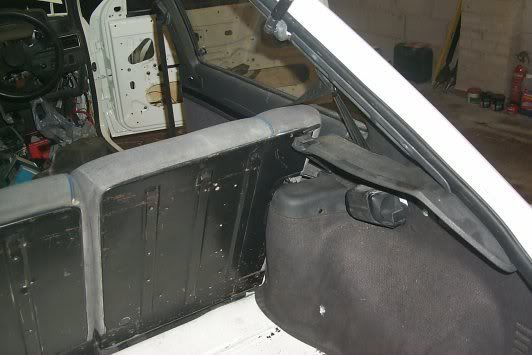
Rear quarter trims back in.
Boot trims back in.
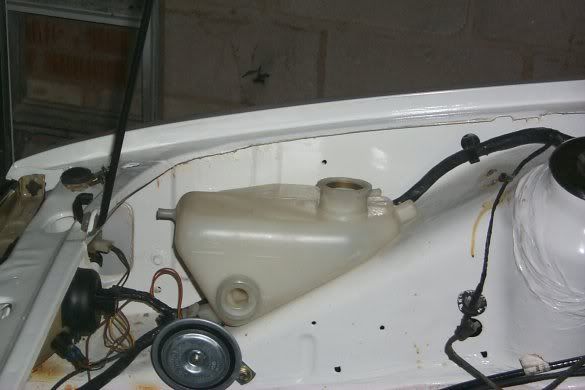
New header tank. This was a very rare find 5 years ago!!
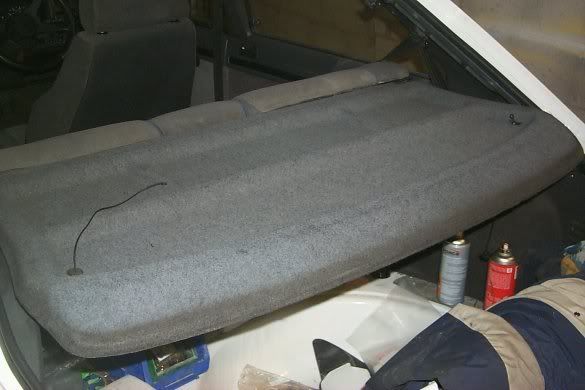
Another rare find. A mint parcel shelf (although not a genuine S1 shelf as it doesn't have speakers in it)
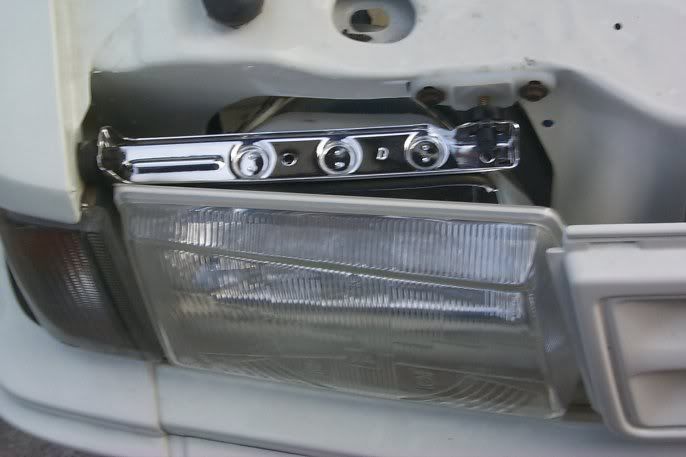
Another new set of head lamps as I broke the bulb holder on the others!
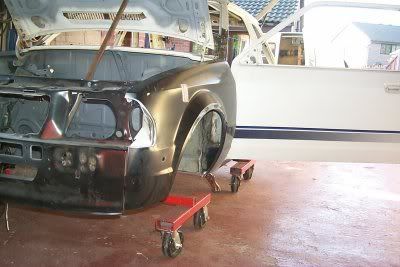
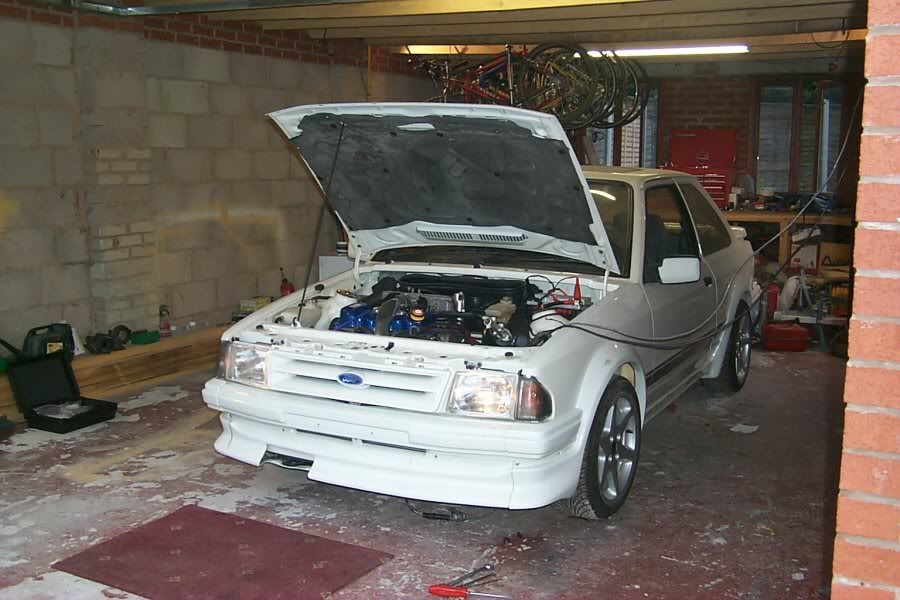
The car now supporting itself for the first time in about 3 years.
In the garage on it's trolleys.

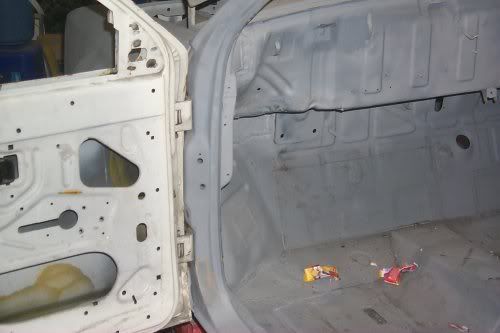
Door panels back on
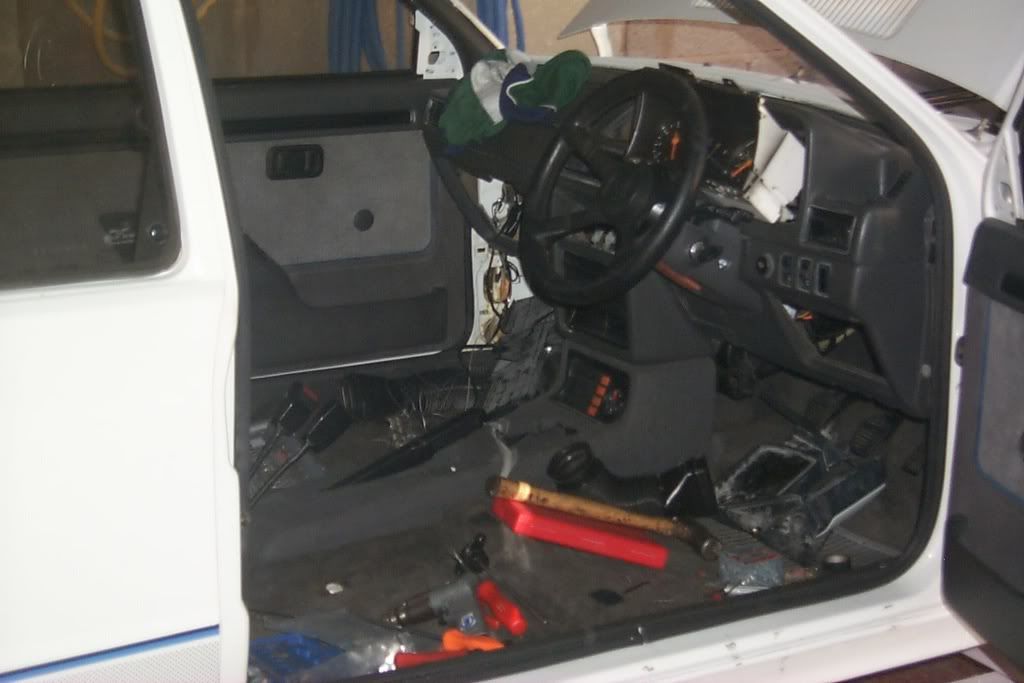
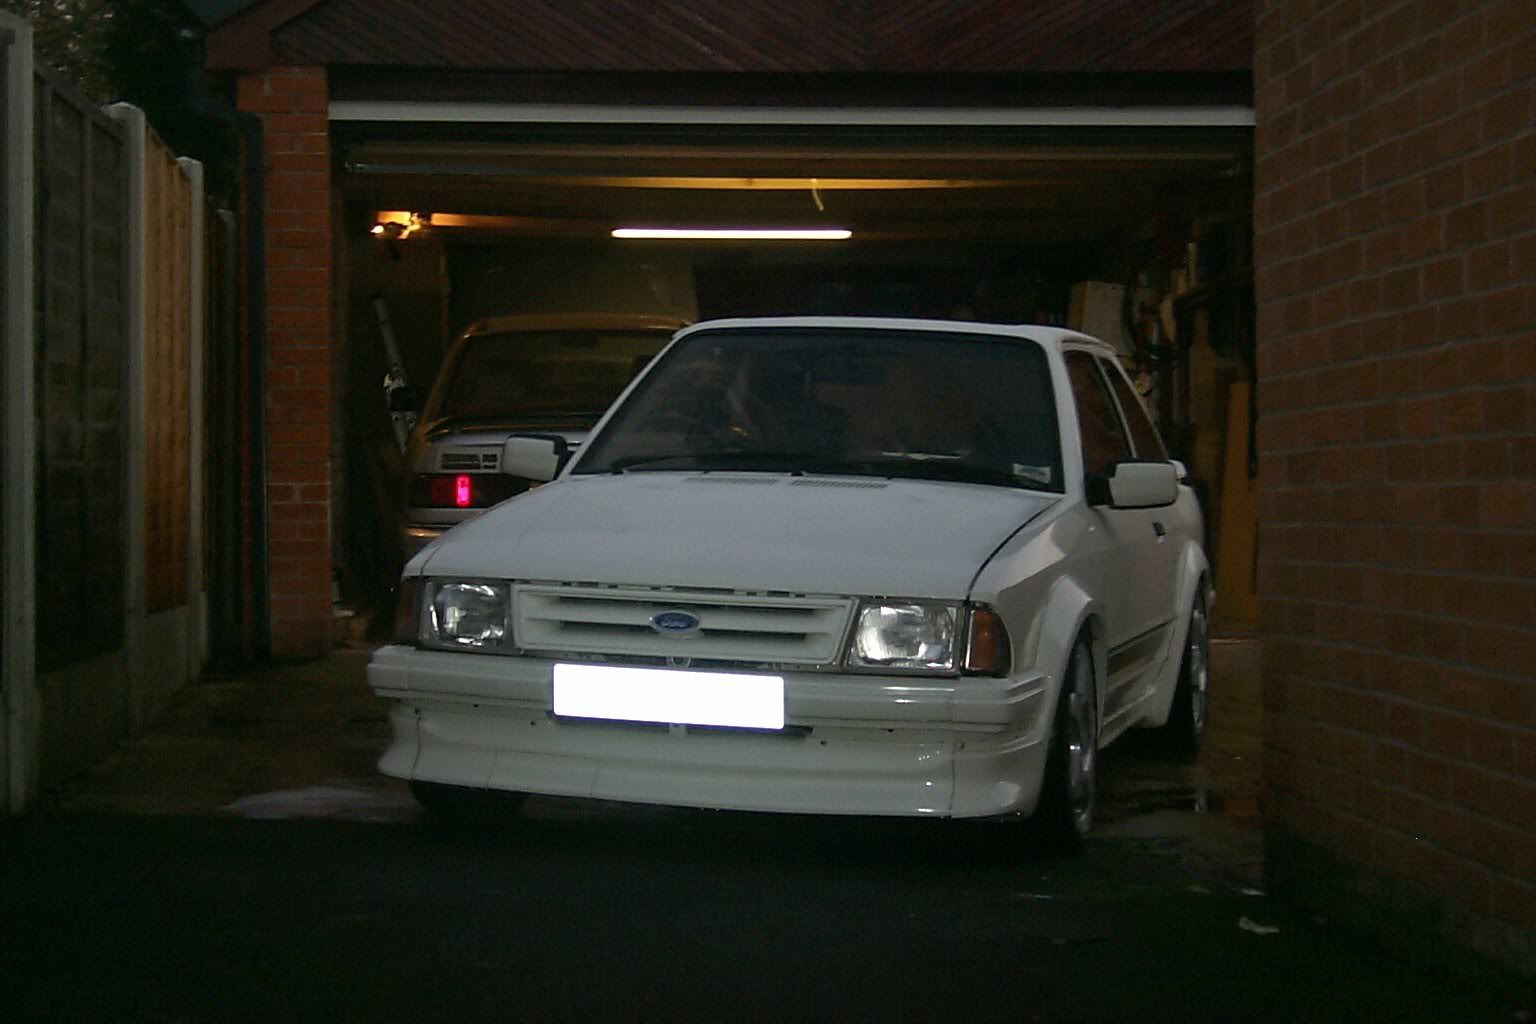
Sat outside waiting for a few minor things, like an engine and gear box!!
New update will consist of a few bits from engine build.
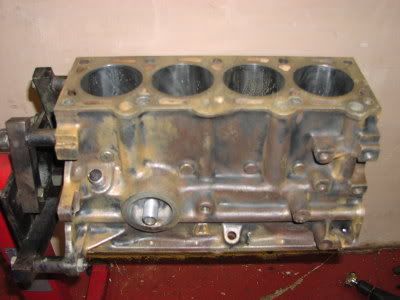
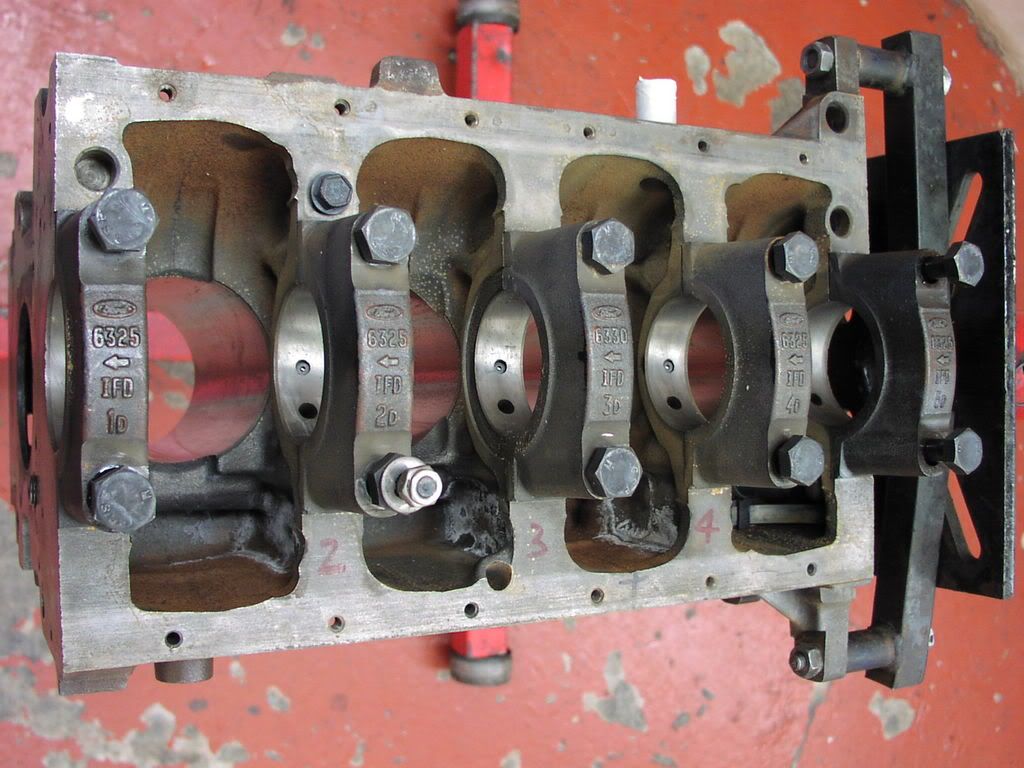
Bare engine block.
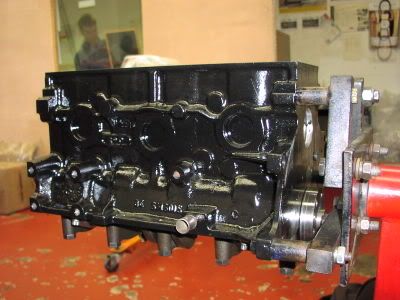
Painted engine block!
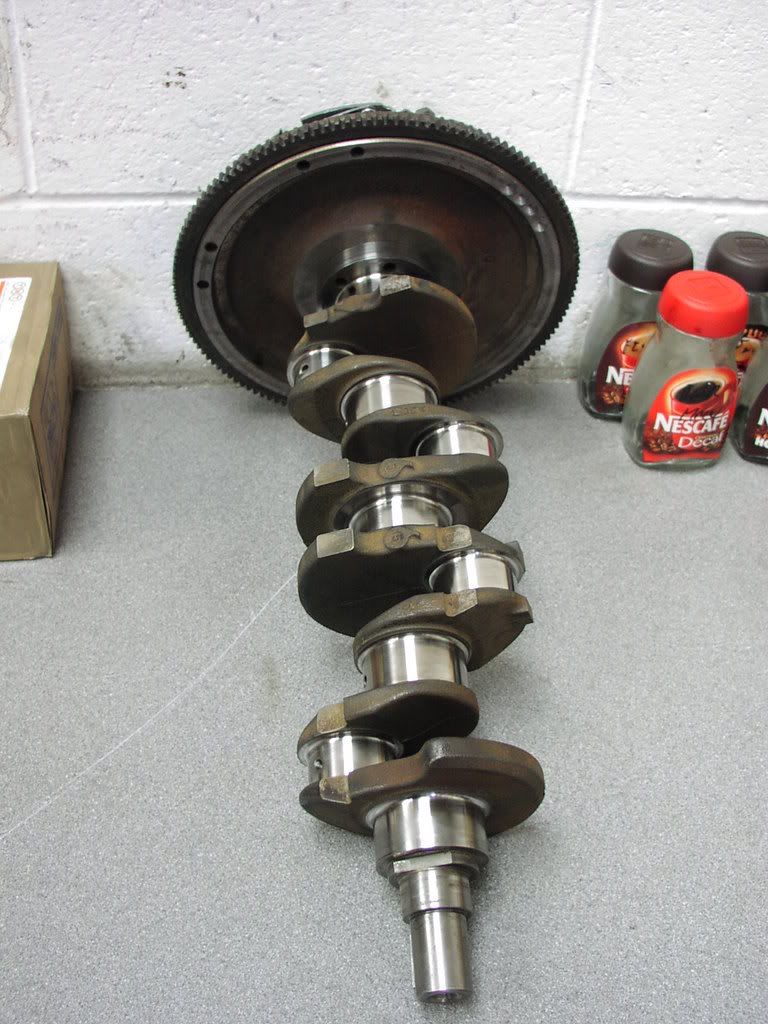
Crank and flywheel.
Small modification to the block!!

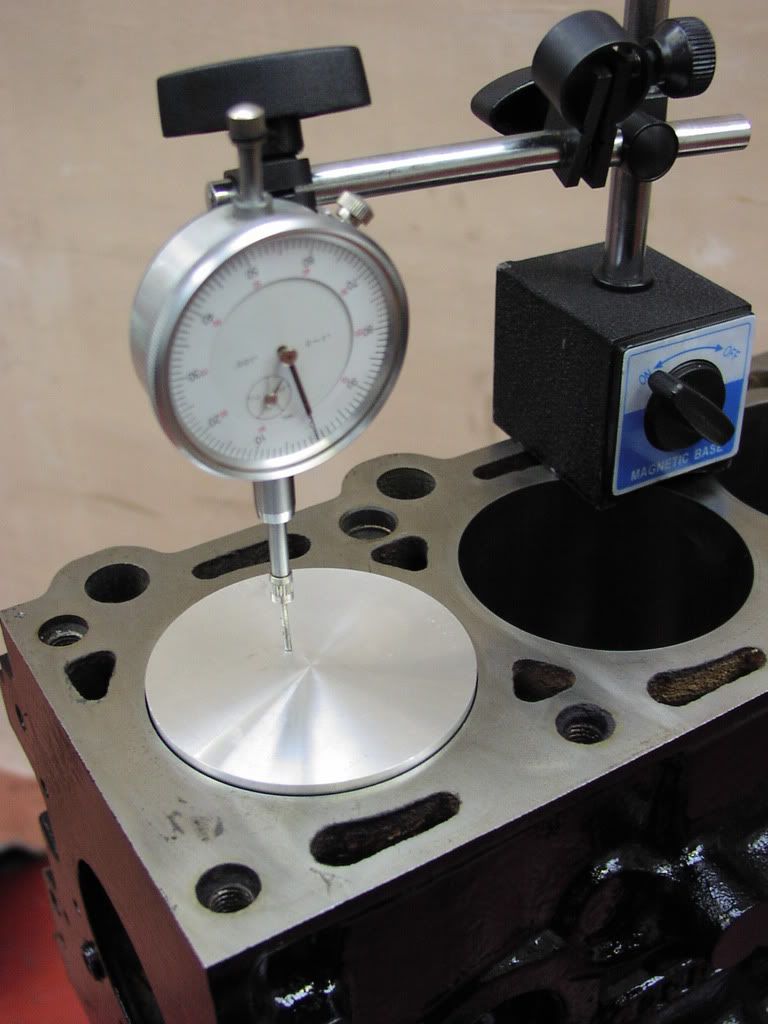
Piston height measurement for compression ratio calculation.
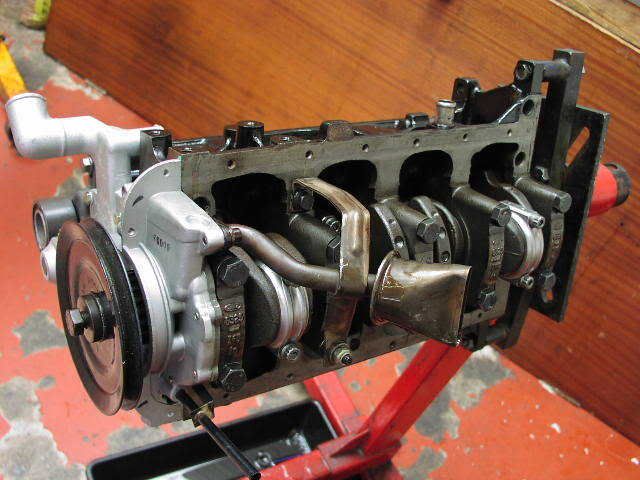
Crank, oil pump, pick up pipe,pistons and rods in.
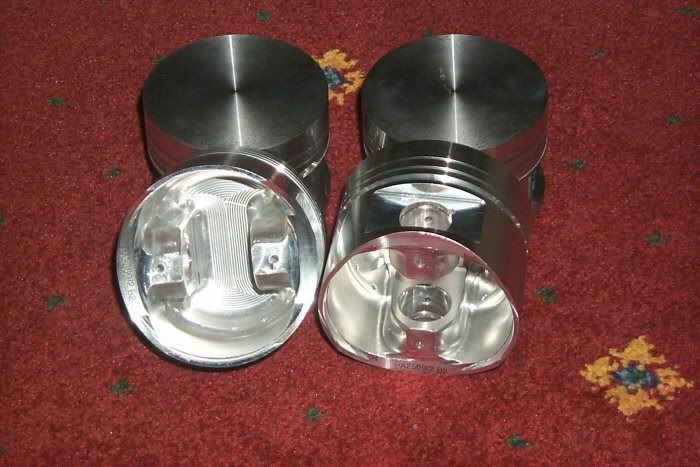
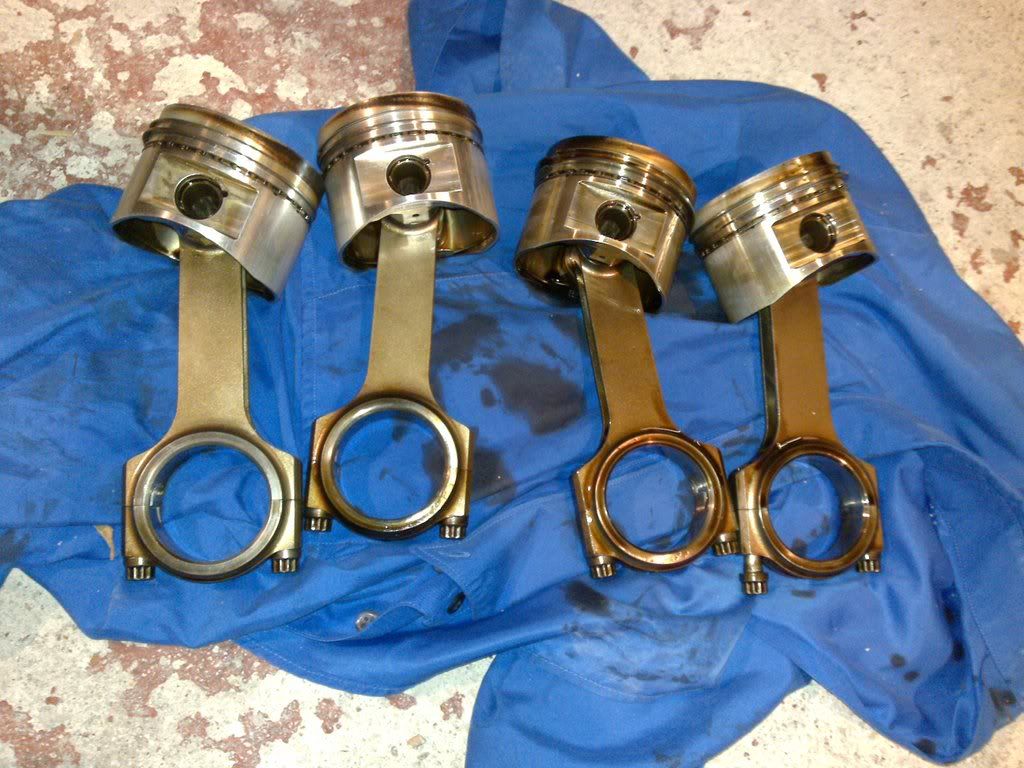
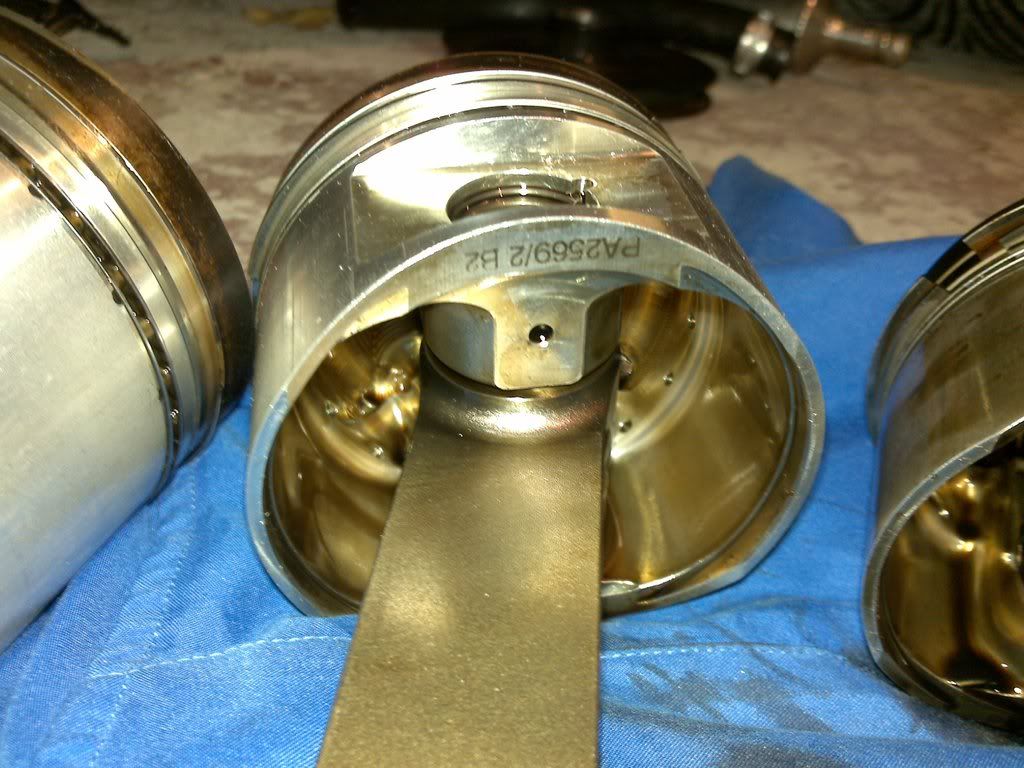
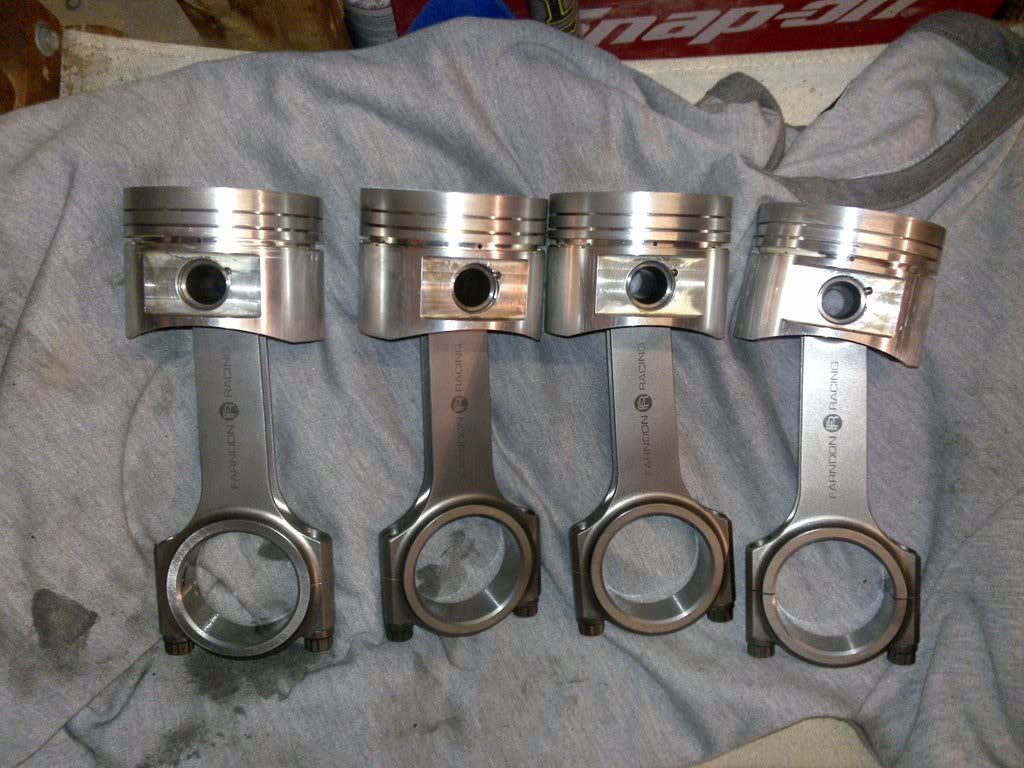
Cosworth forged piston.
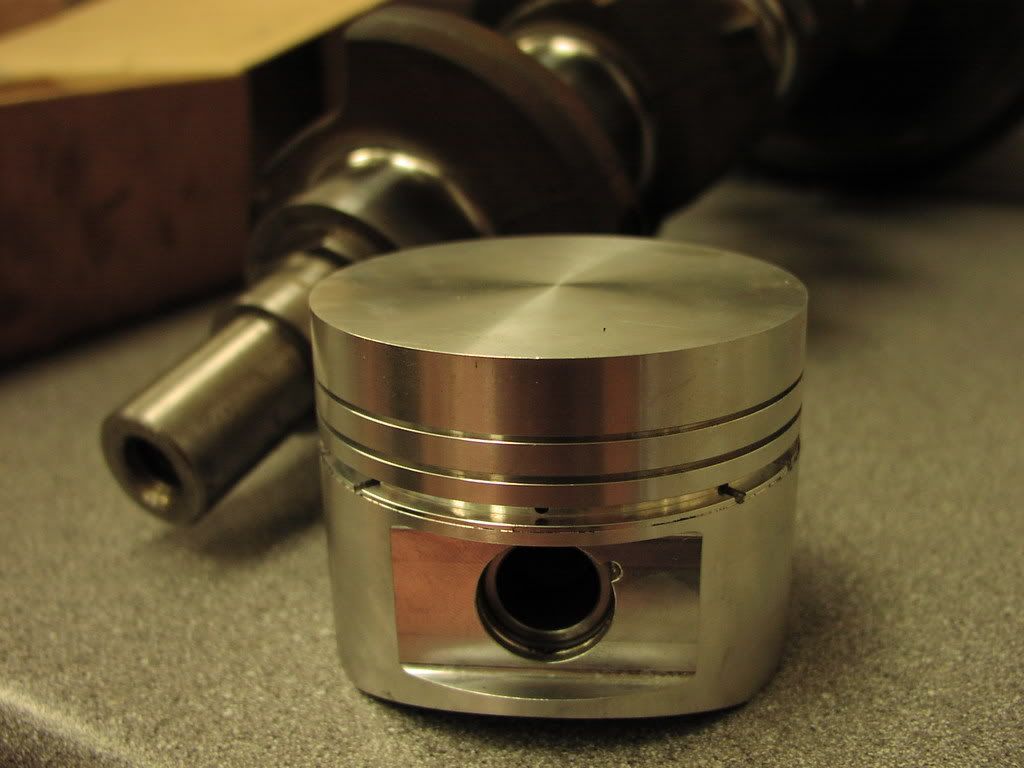
The full set.
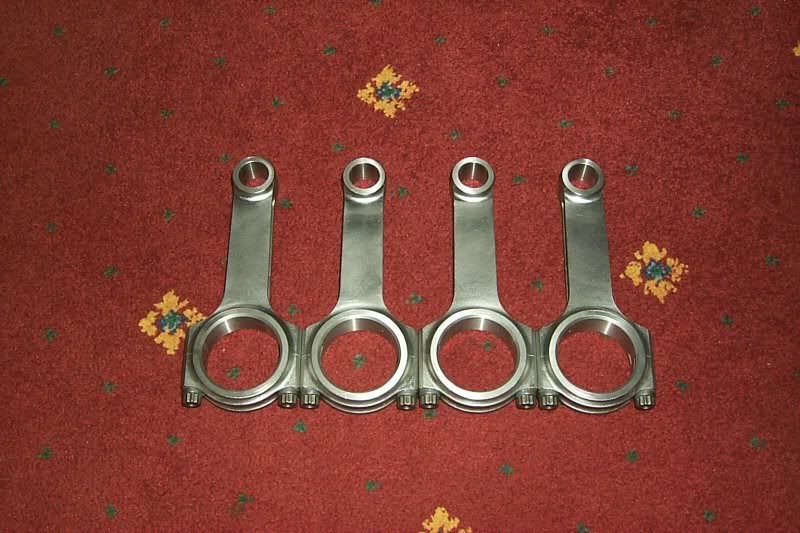
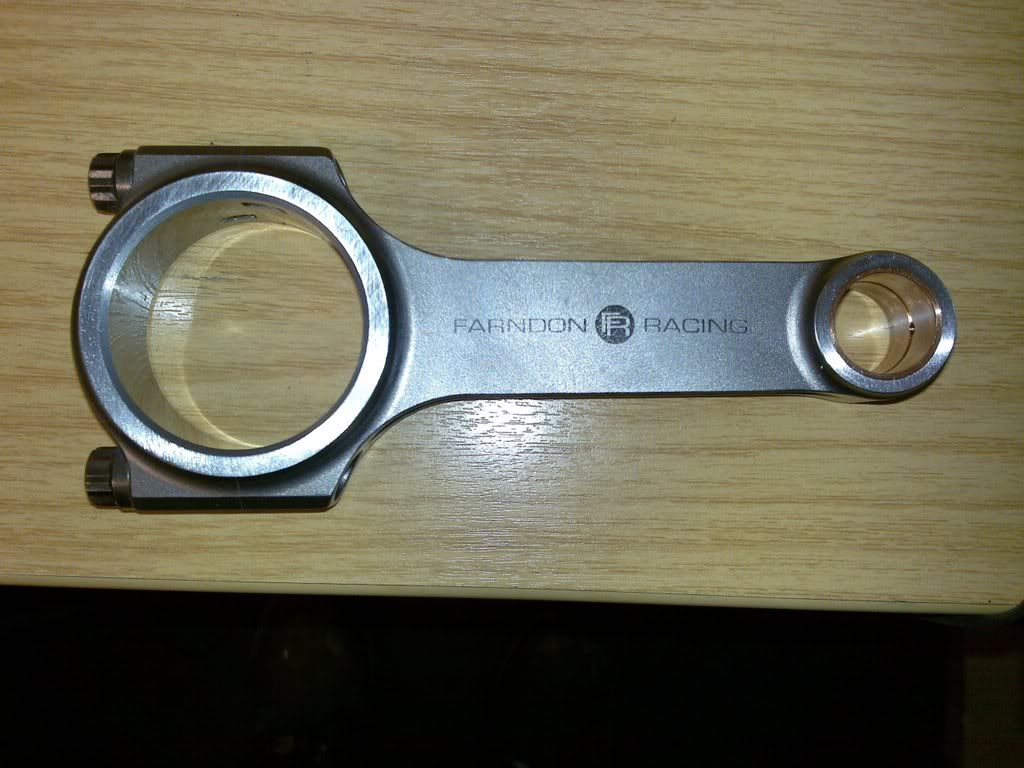
Con rod. These went back for further work to change the spec.
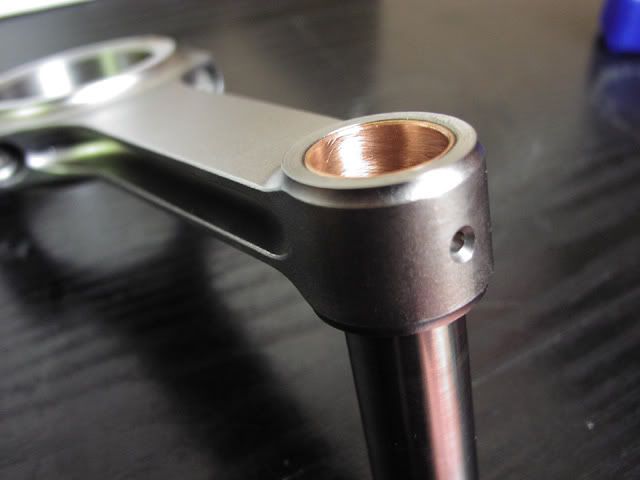
The full set.
Both together.
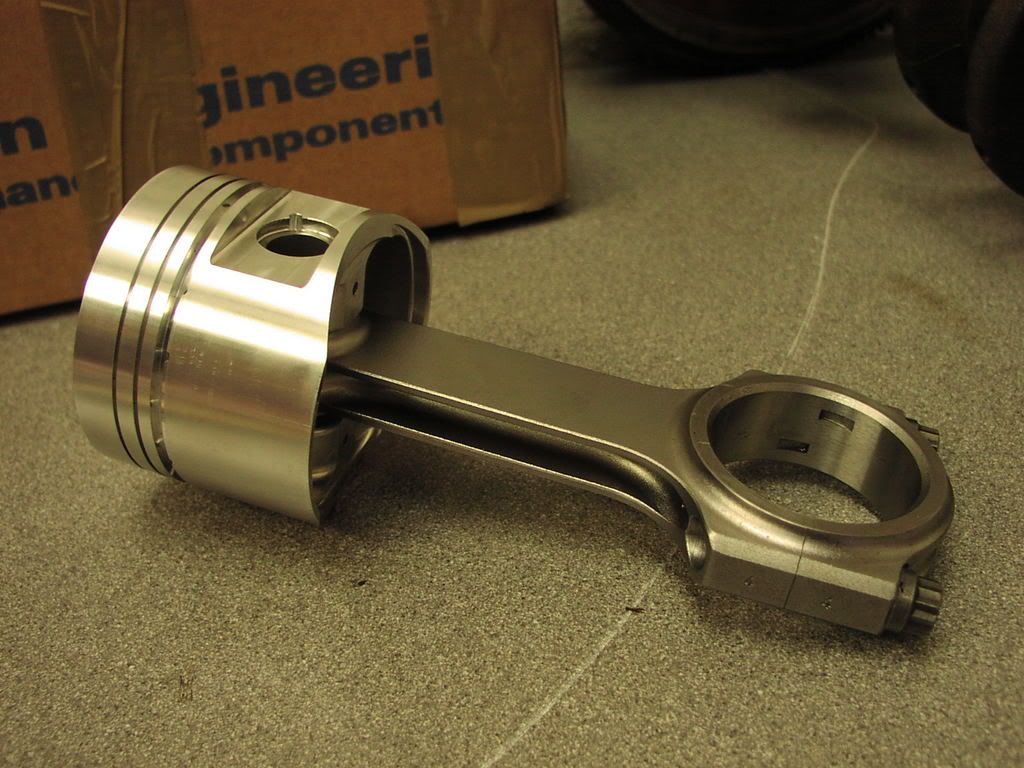
The con rods are so finely machined that when the end caps are on the rods, the split completely disappears and looks like the cap isn't seperate.
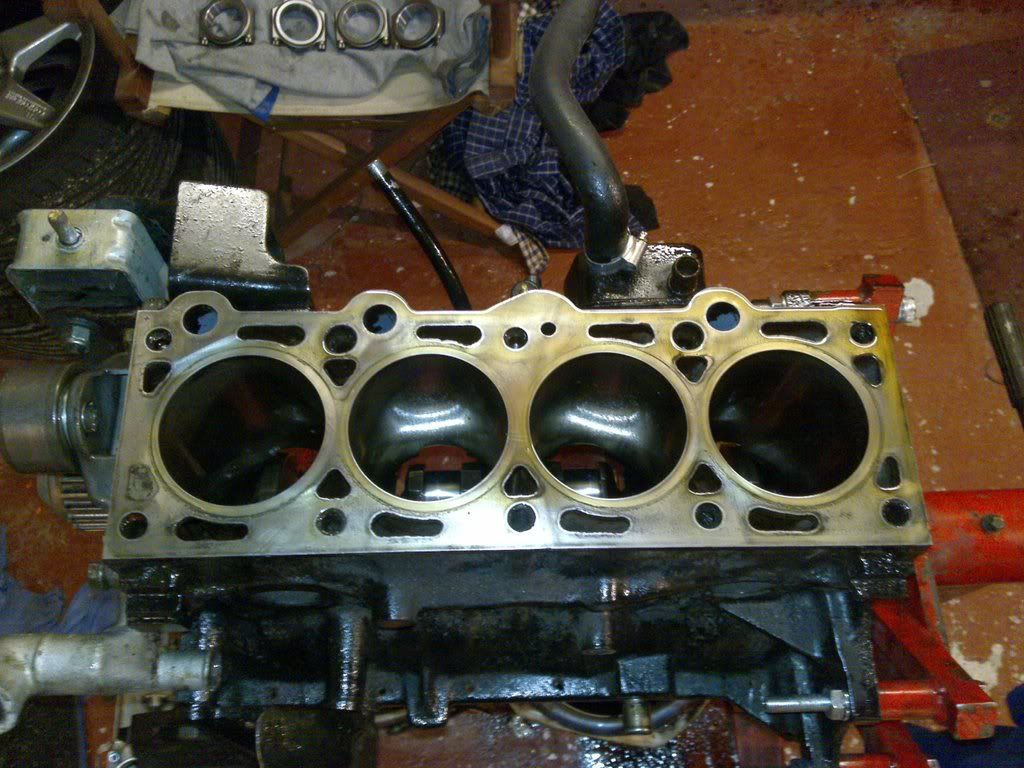
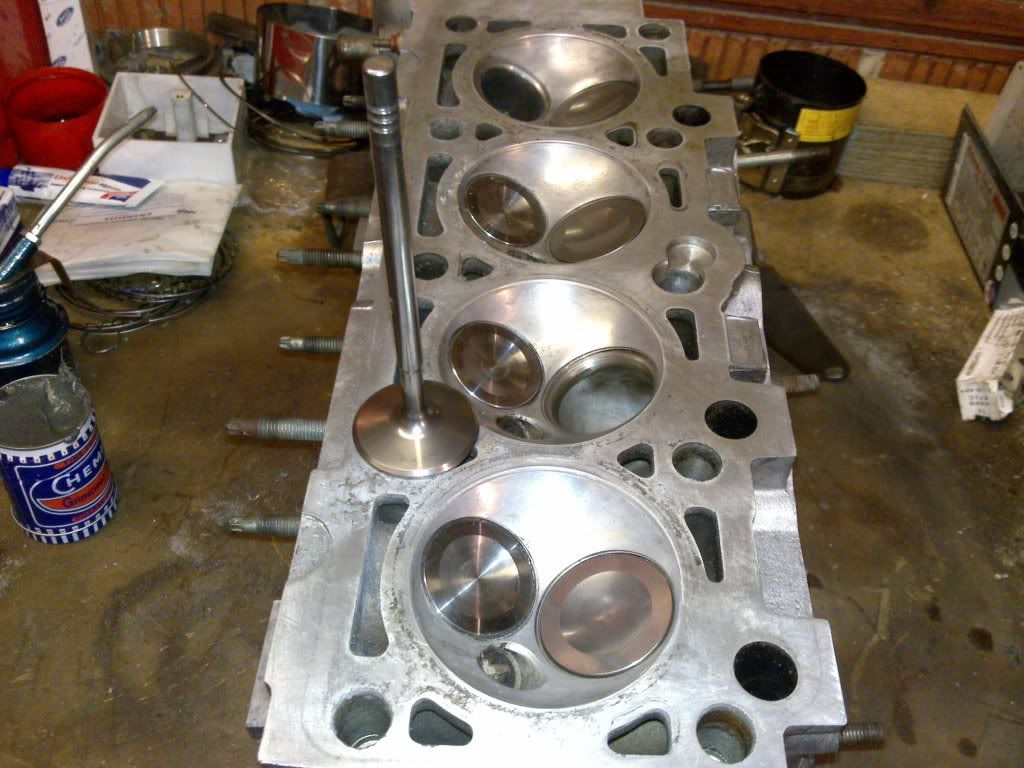
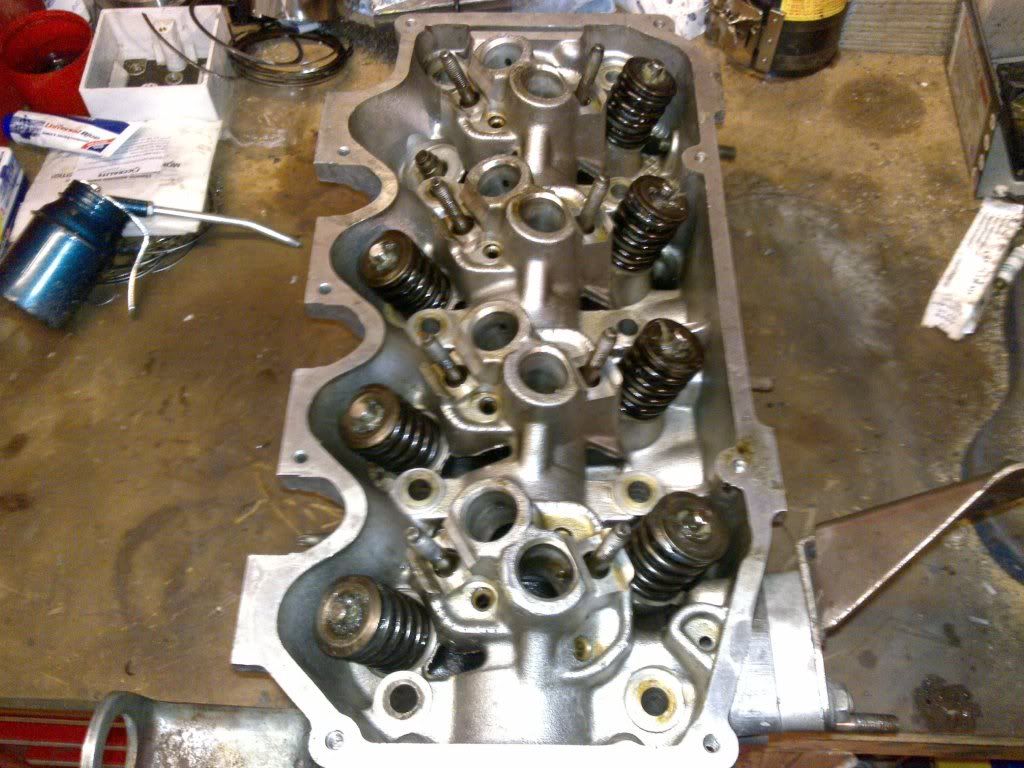
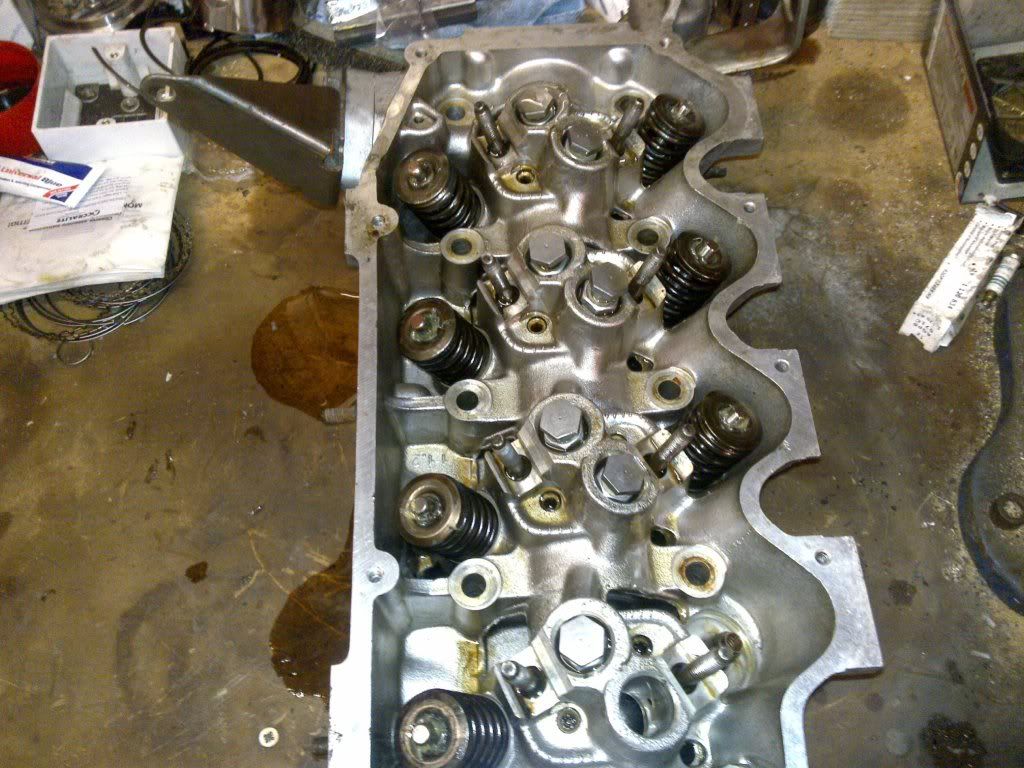
Cylinder head pictures. Big valve big port head.
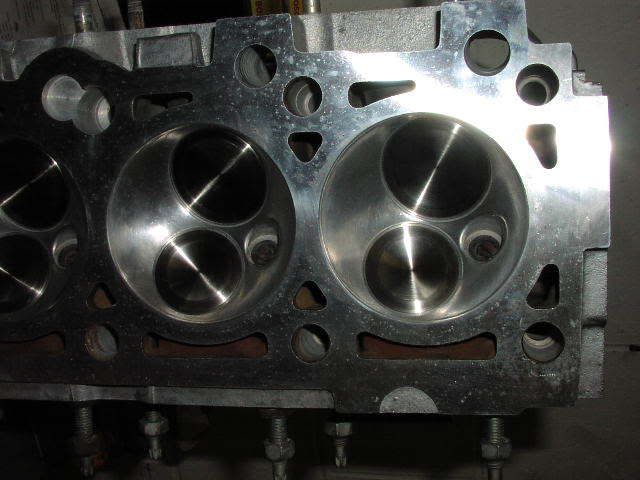
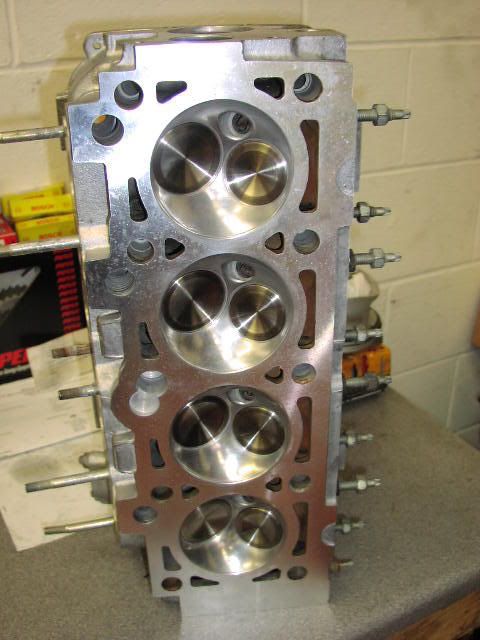
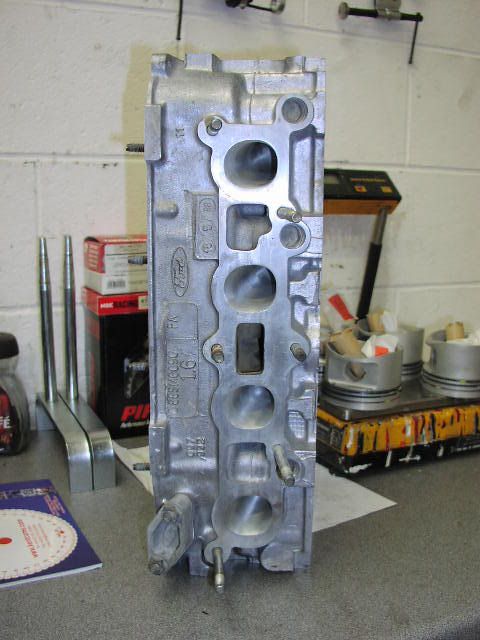
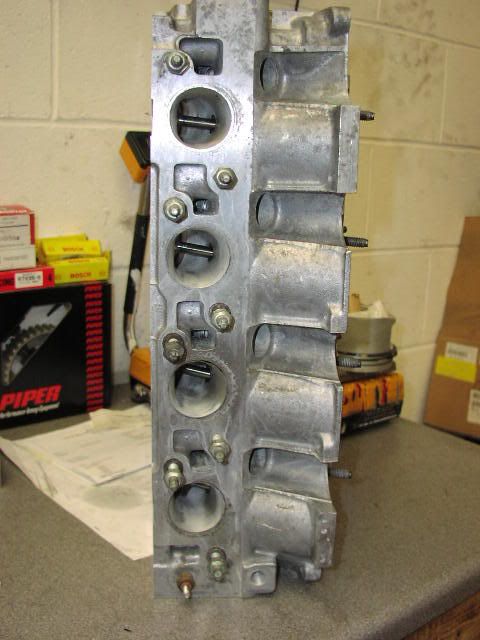
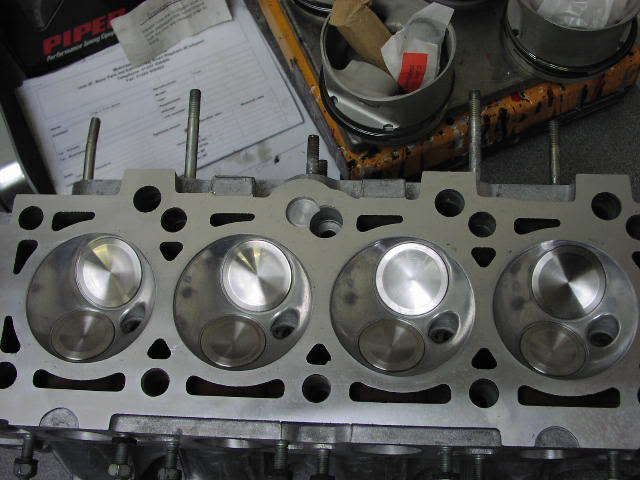
Head on.
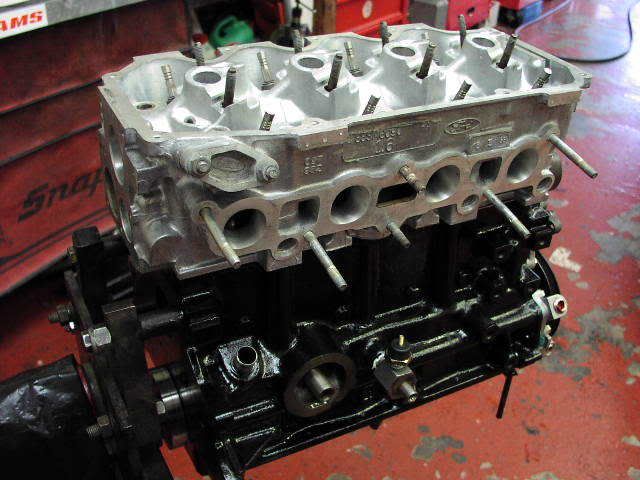
Cam being dialed in.
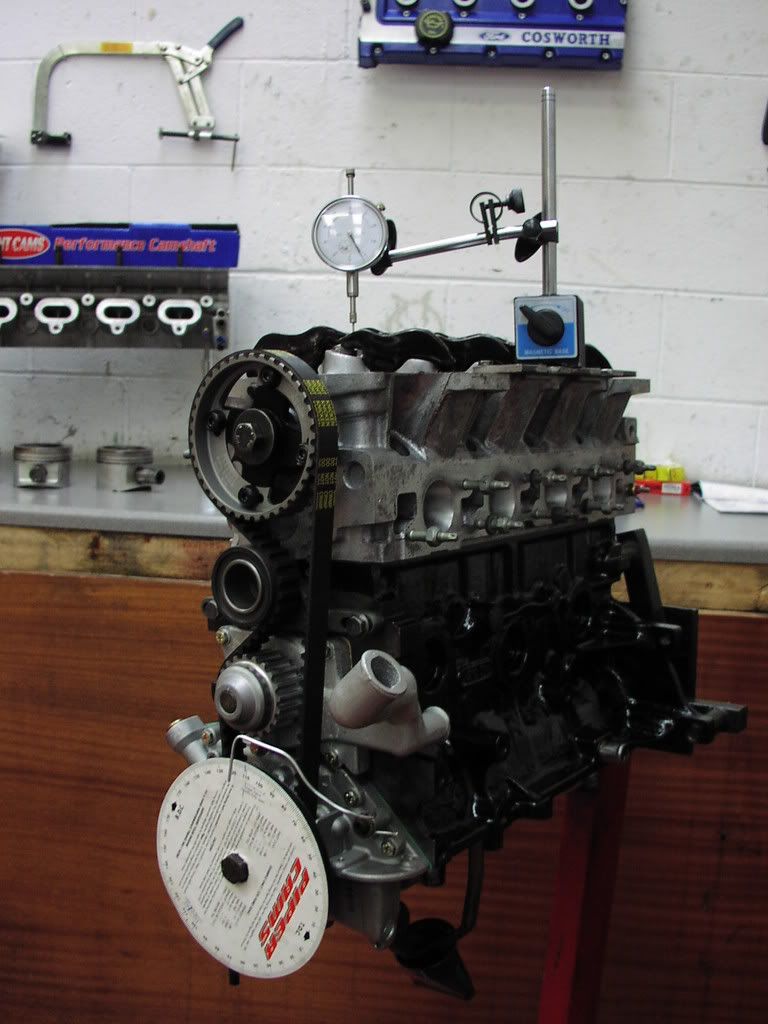
Nearly complete.
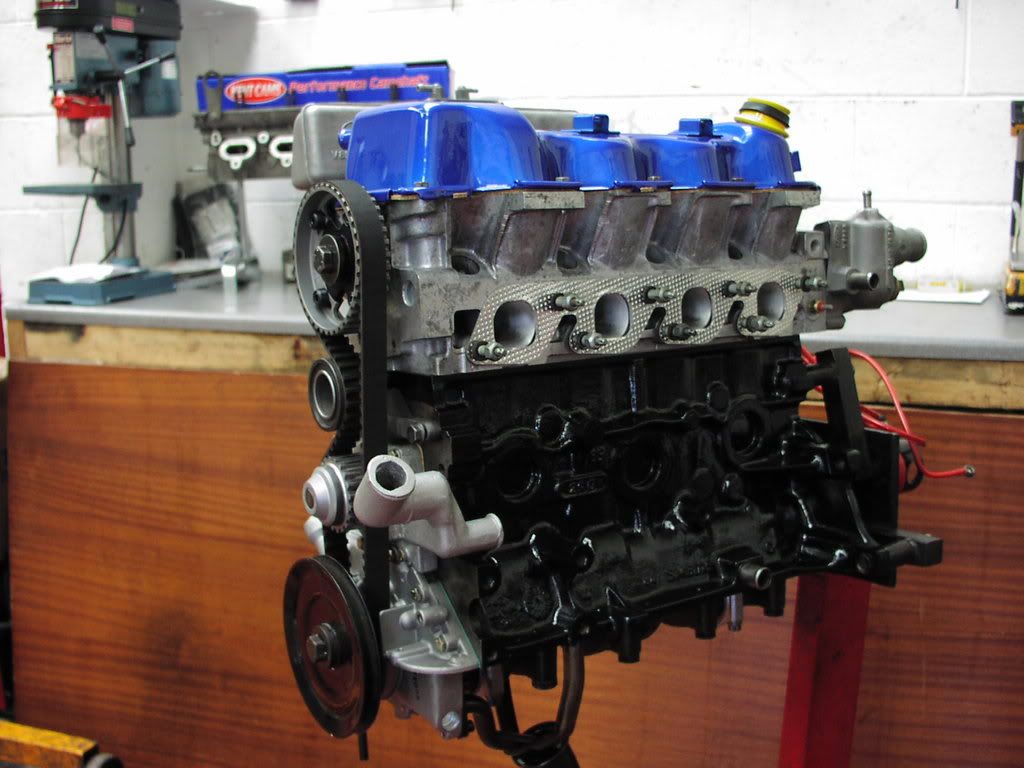
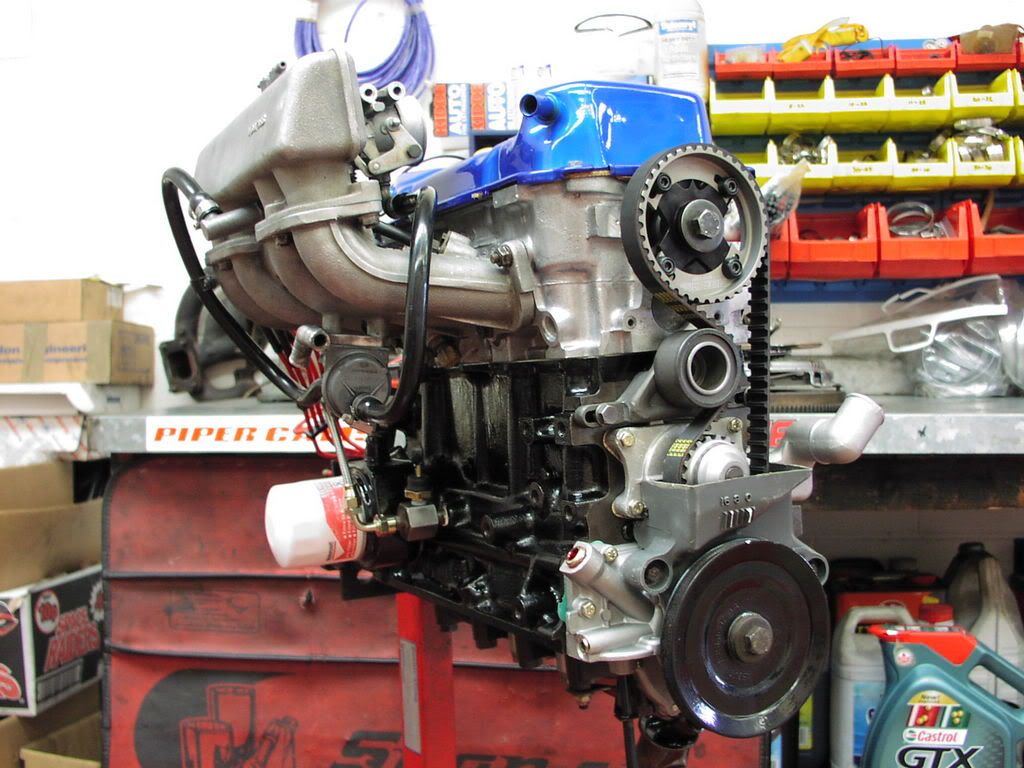
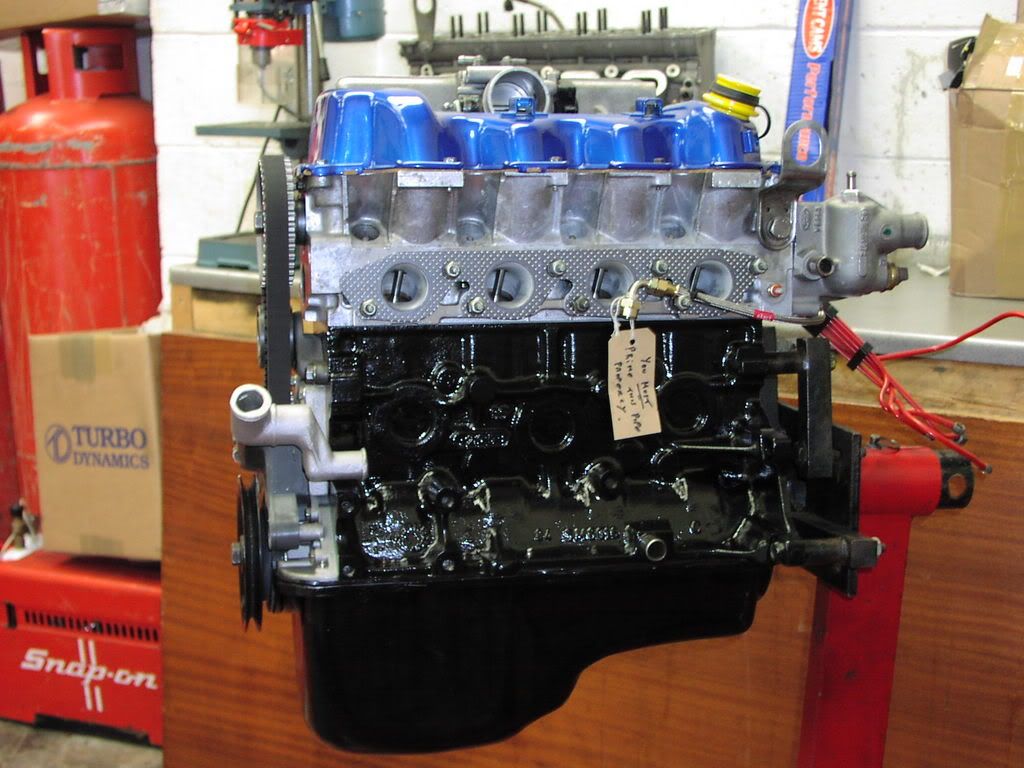
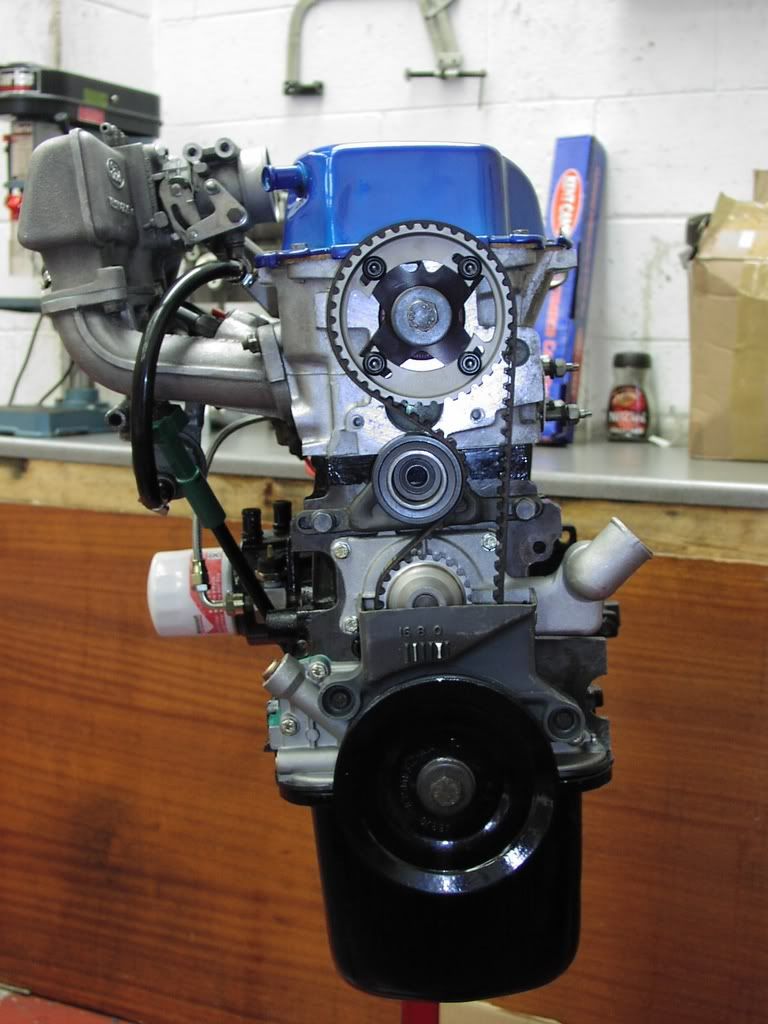
Complete engine vitrually ready for fitting.
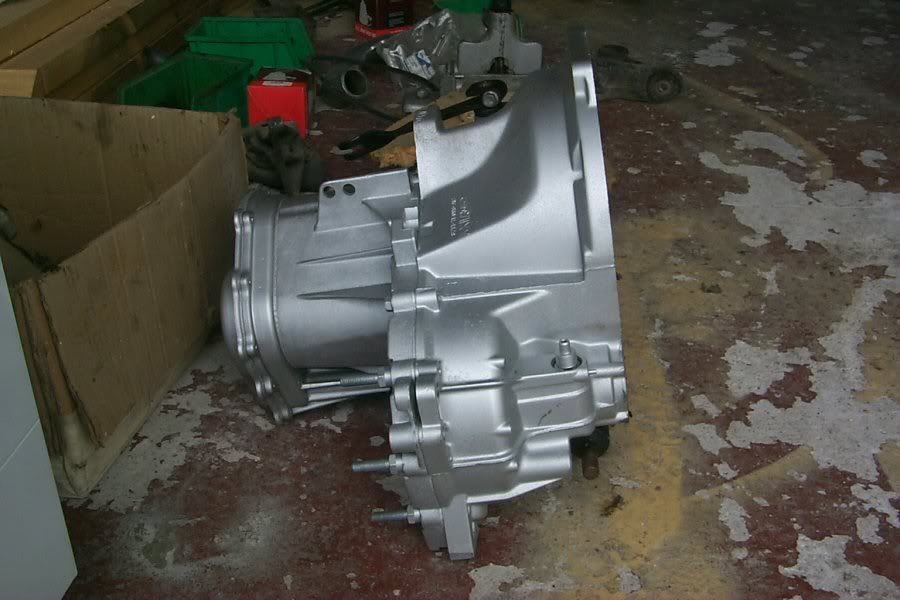
New gearbox.
Assembles by Competition Transmission Services. It's a Stage 2Plus box which means it has the slightly taller S2 ratios, shot peened and polished. New 27.5mm diameter mainshaft with up rated larger bearings and a Quaife ATB diff.
Engine with flywheel and Alcon 6 paddle clutch.
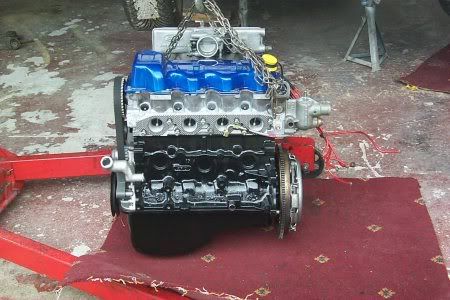
Engine, this is gearbox, gearbox meet engine.
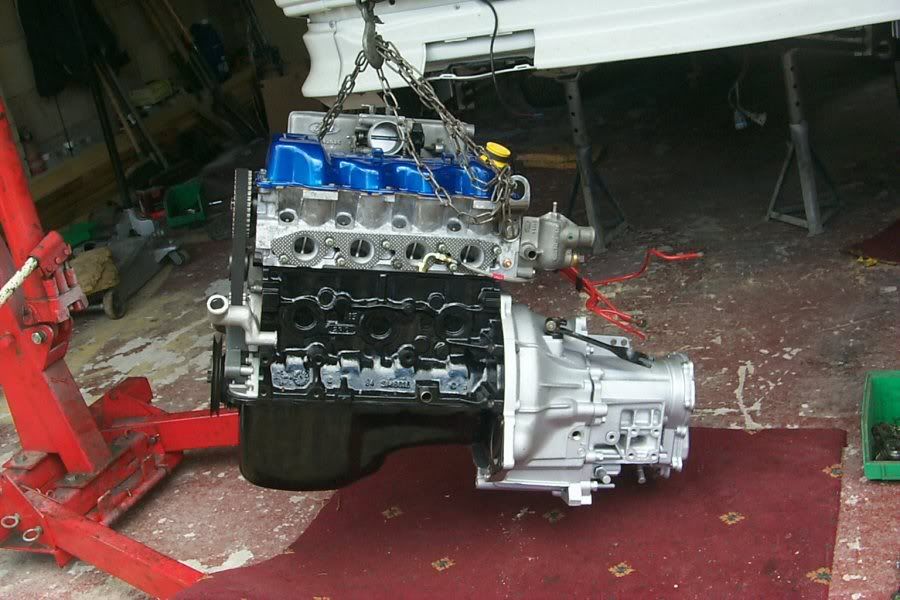
Ready for lifting in.
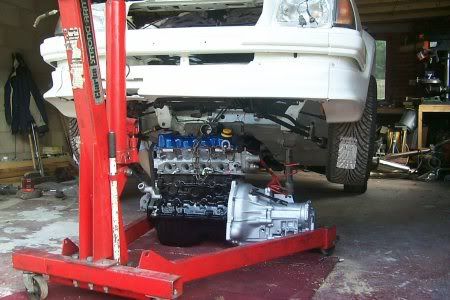
Dangling by a chain.
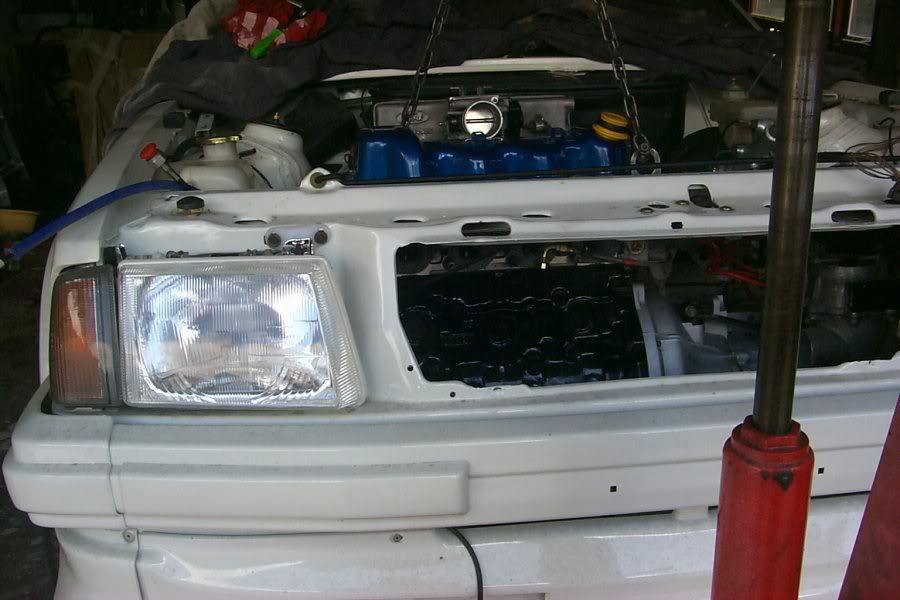
Mounted.
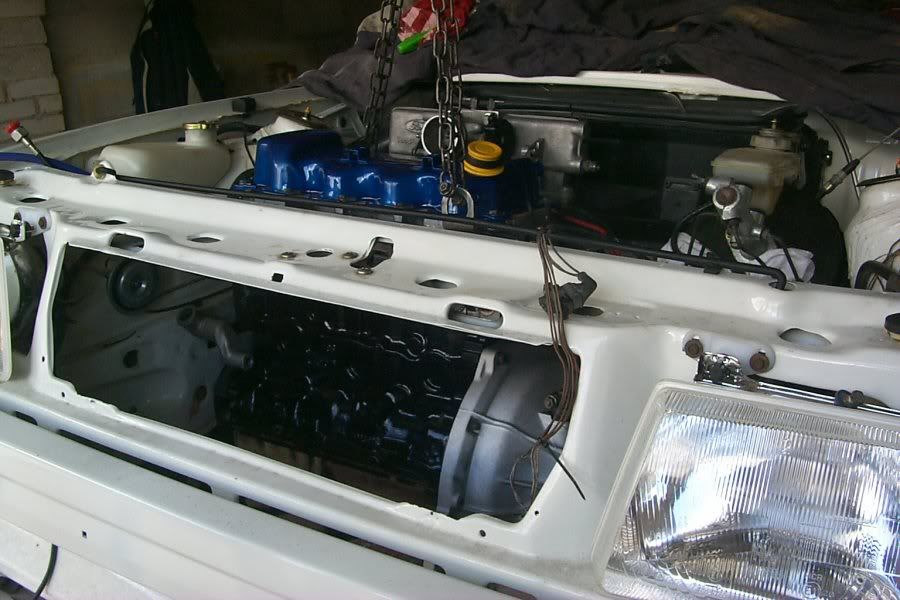
Ready for connecting up.
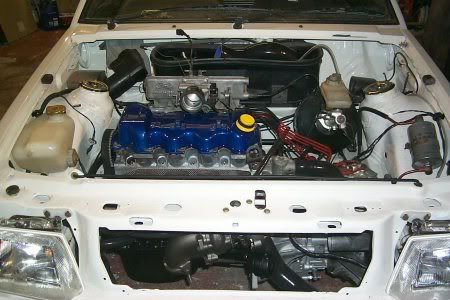
Engine running and cooling fan on.
[img]
http://img.photobucket.com/albums/07...unning_001.jpg[/img]
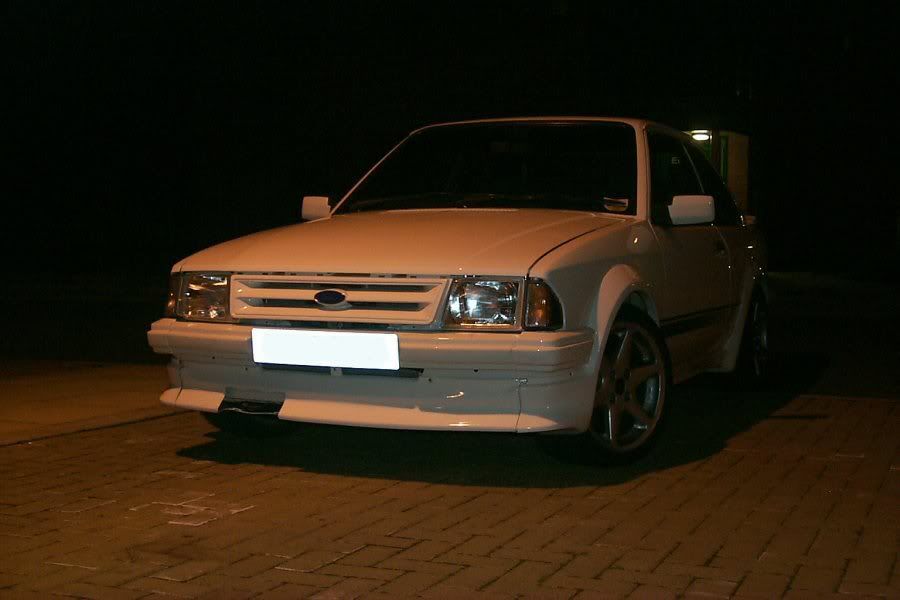
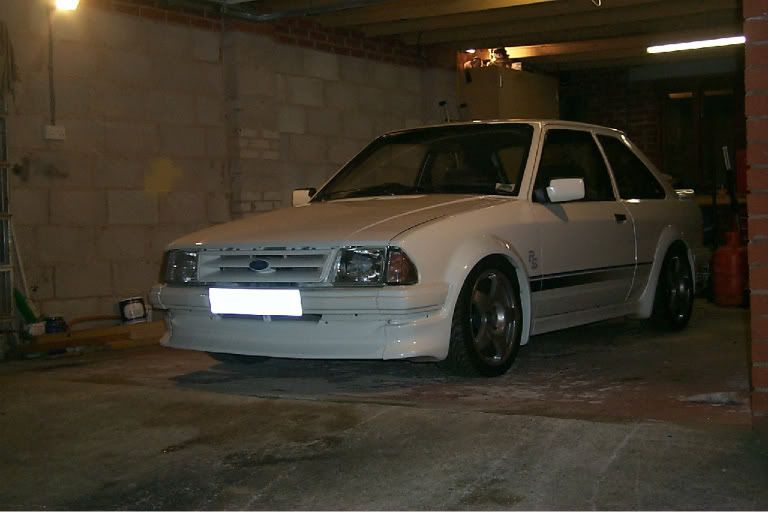
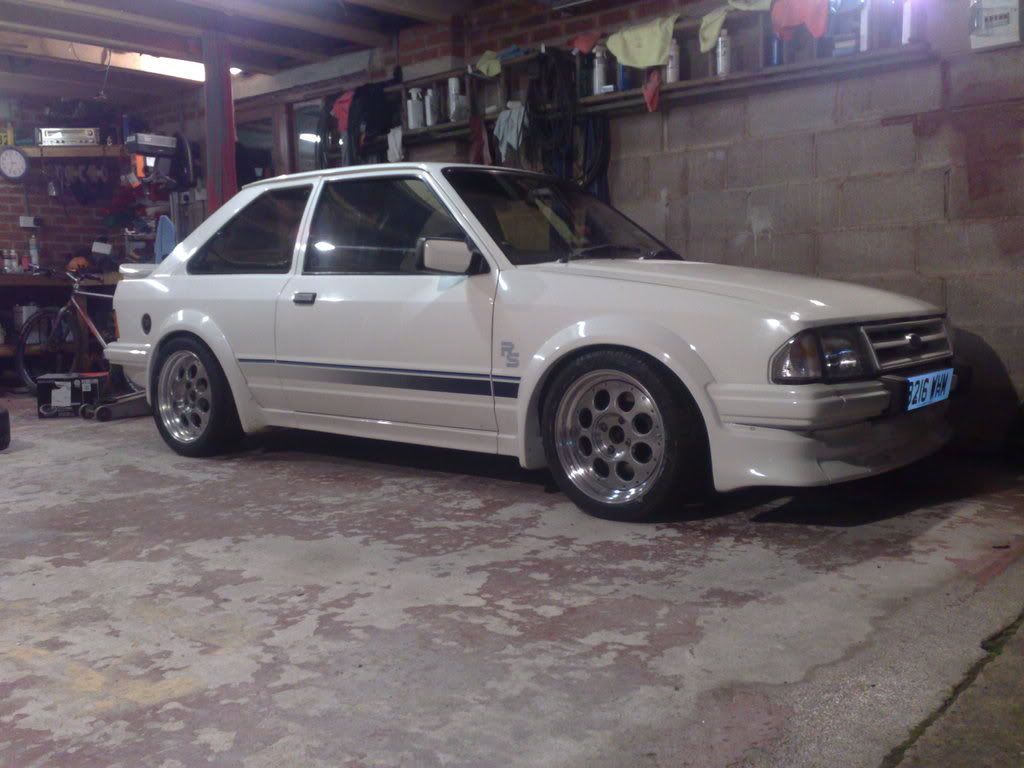
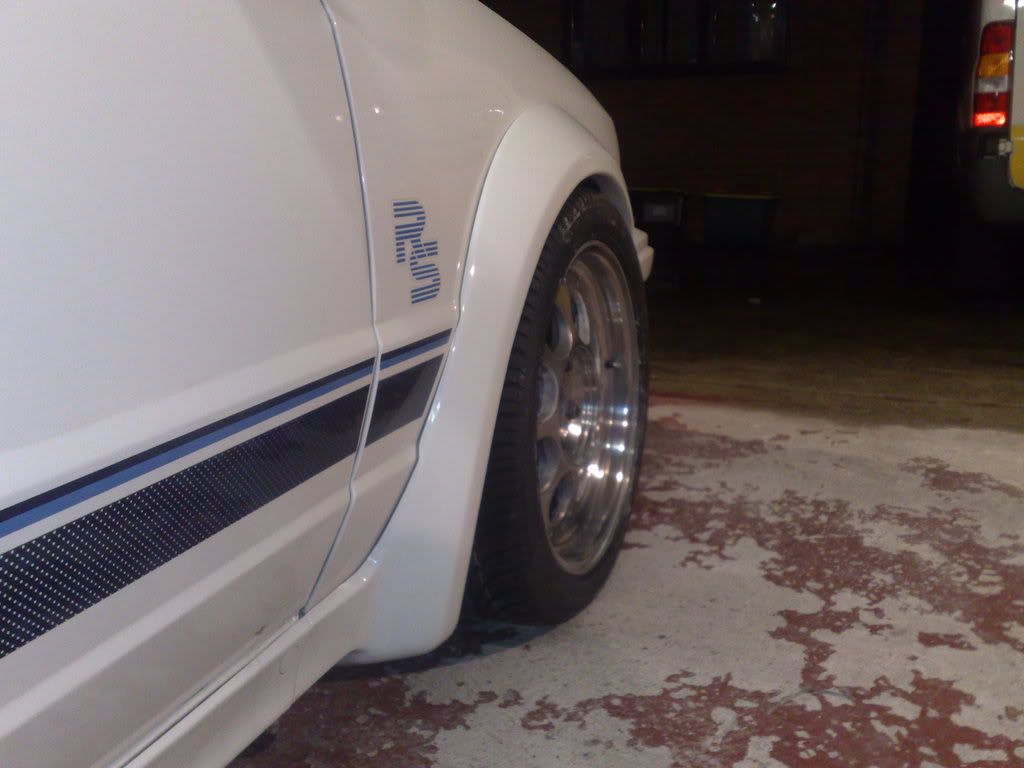
Car out on the road at Preston Docks sat on standard height springs and Borbet C wheels.
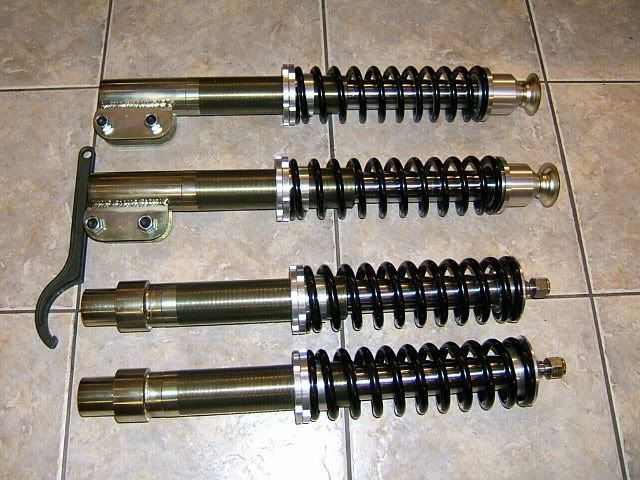
Finally my new suspension arrives which allows me to sort the stance out on the car. This stuff cost a small fortune which I probably should have just saved and spent on a Cossie instead.
Bilstein coilovers specially made to fit standard rear turrets on MK 3 and 4 Escorts.
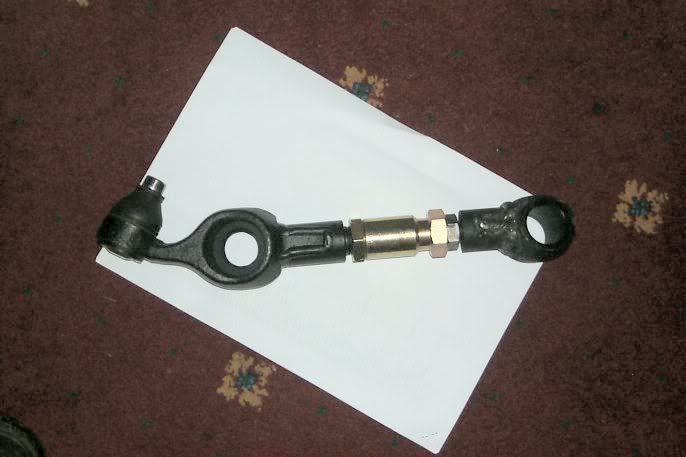
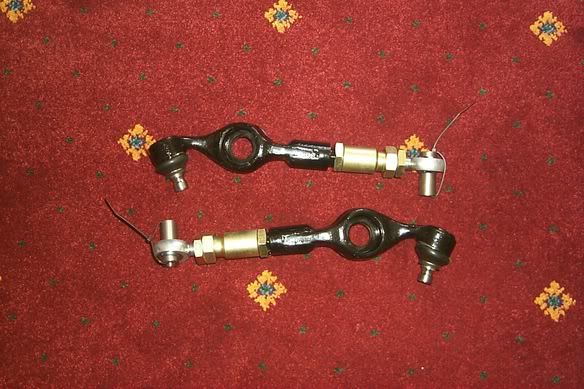
New adjustable TCAs with rose joints.
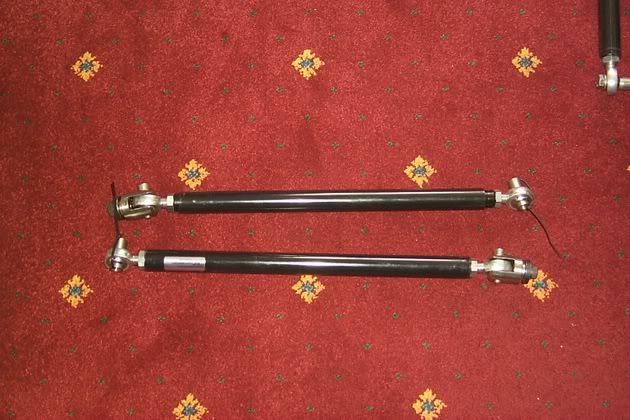
New adjustable rose jointed tie rods for the rear suspension.
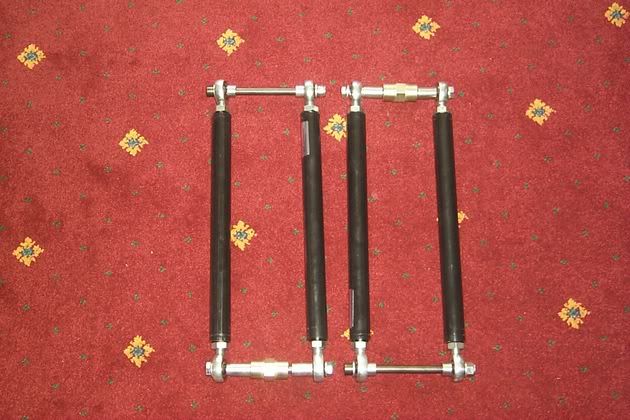
New parrallel arms to replace the rear wish bones.
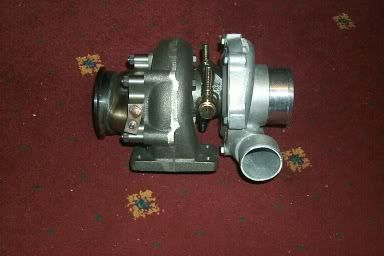
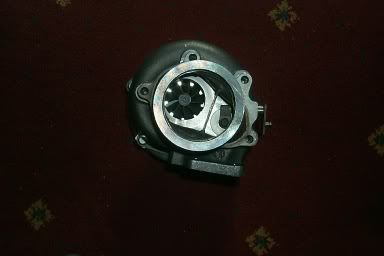
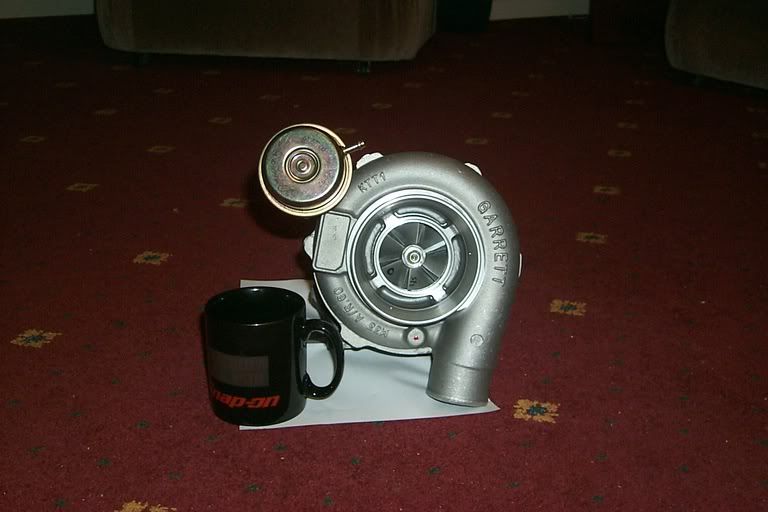
New turbo ready to go on when I get round to it!!

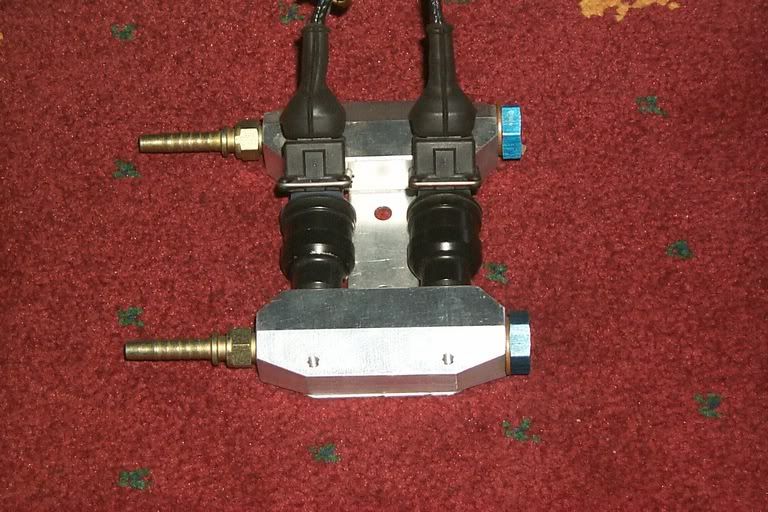
Air to air injectors for boost control.

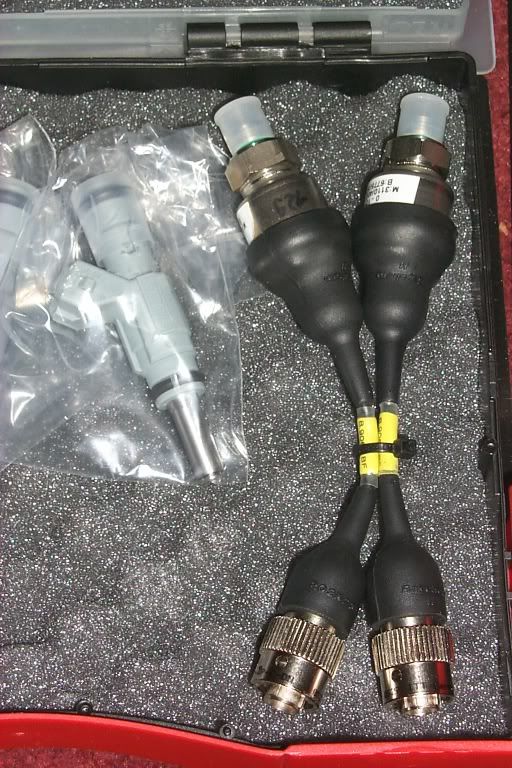
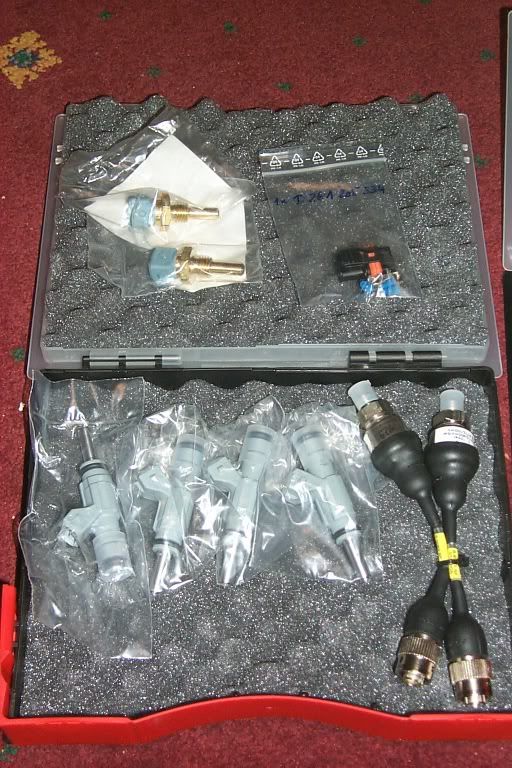
Bosch pressure sensors for oil and fuel pressure.
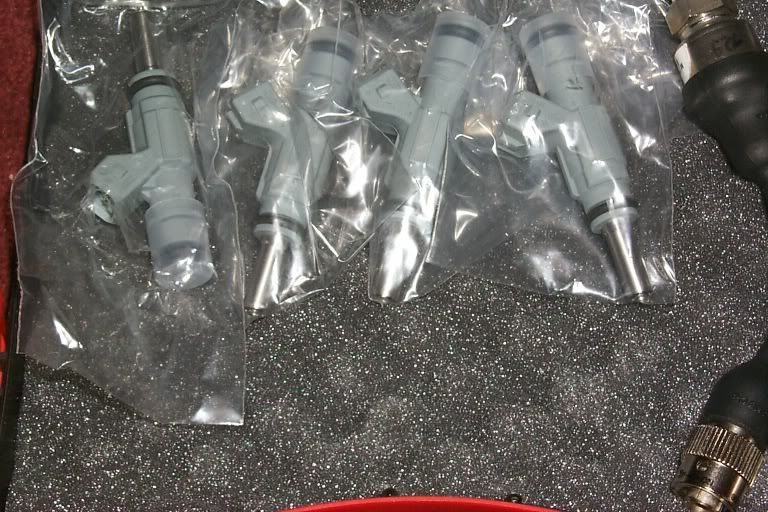
Bosch 500cc injectors.
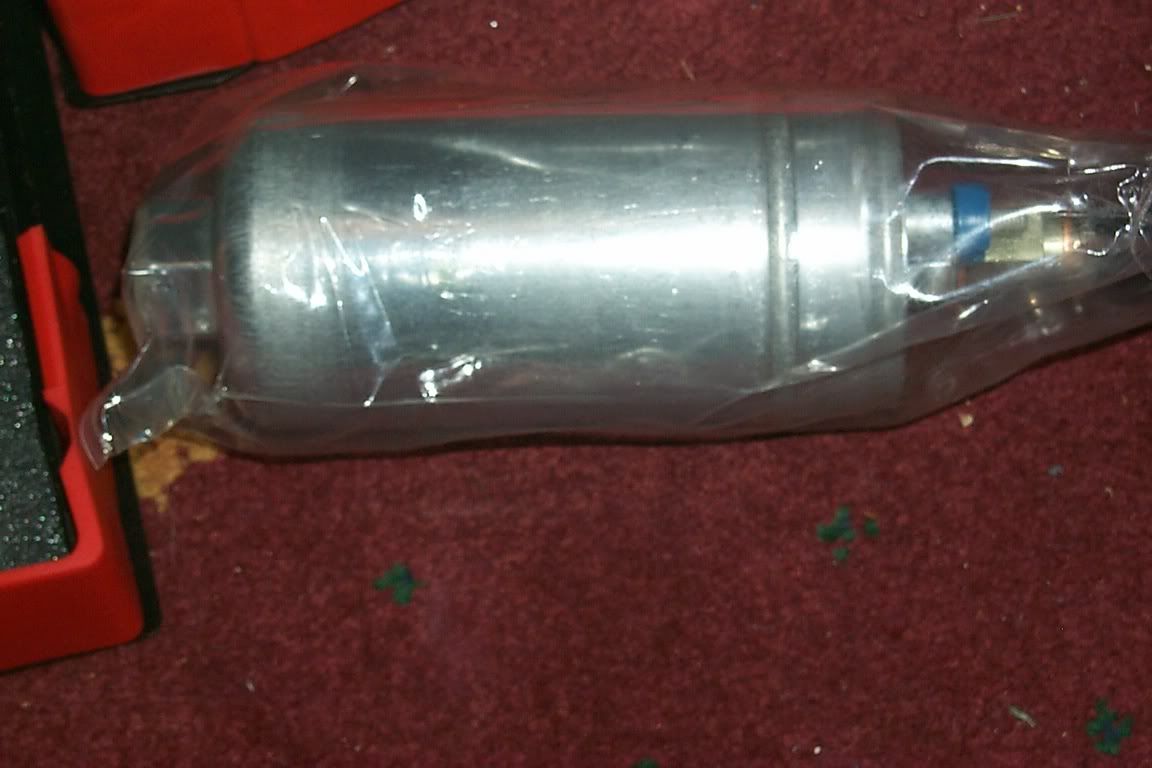
Bosch 8 bar fuel pump.
Bosch throttle position sensor, crank and cam position sensors and a 5 bar MAP sensor.
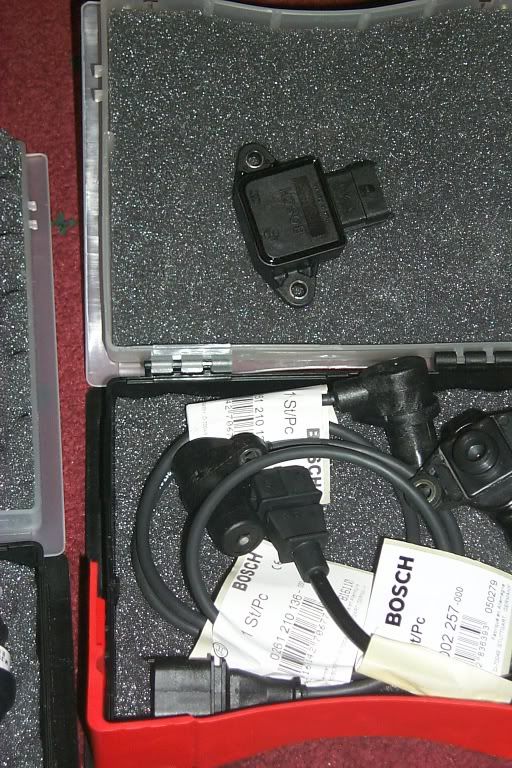
Bosch temp sensors for oil and coolant.
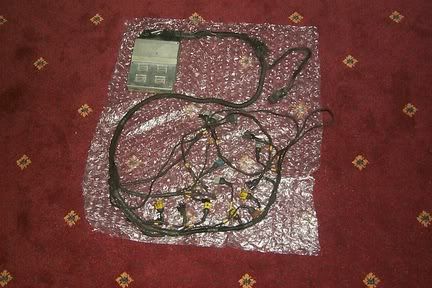
Pectel T6 engine management system. The ECU is �2200 plus VAT without the loom.
Thats about it folks. The management swap is a long standing project that I am struggling with as I am short on time to sort things out and am too tight to spend my money!!
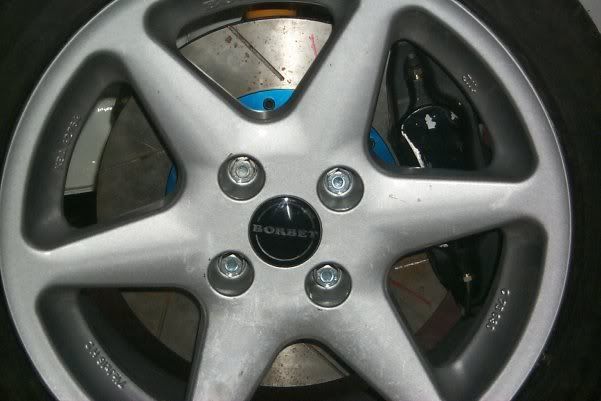
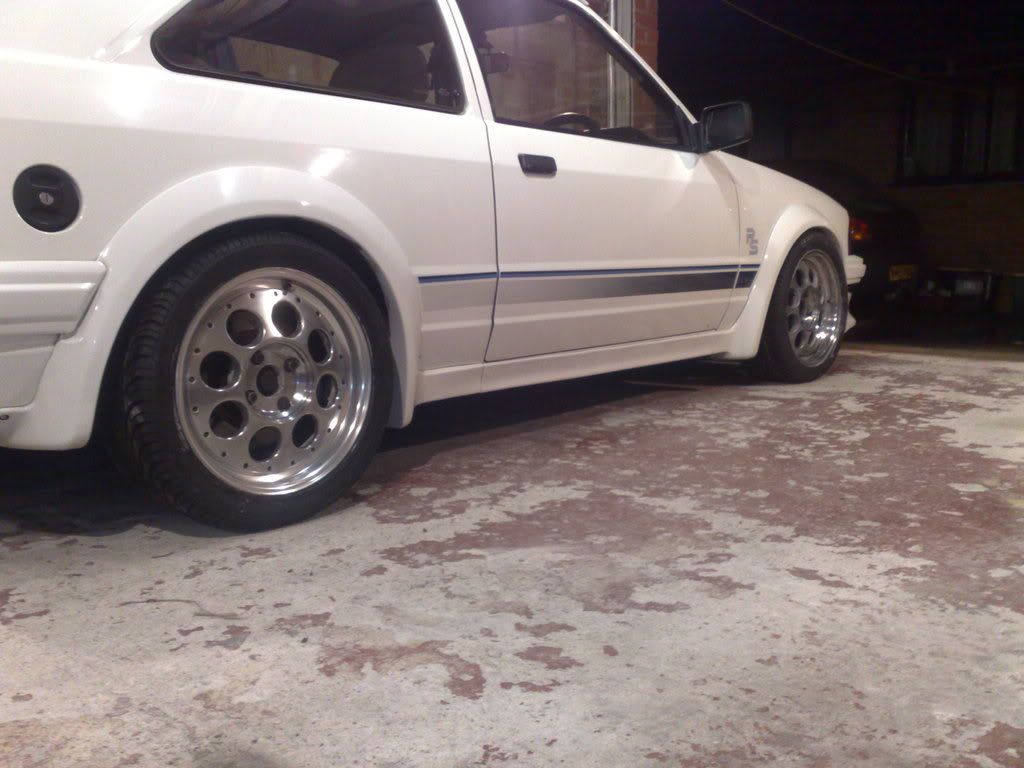
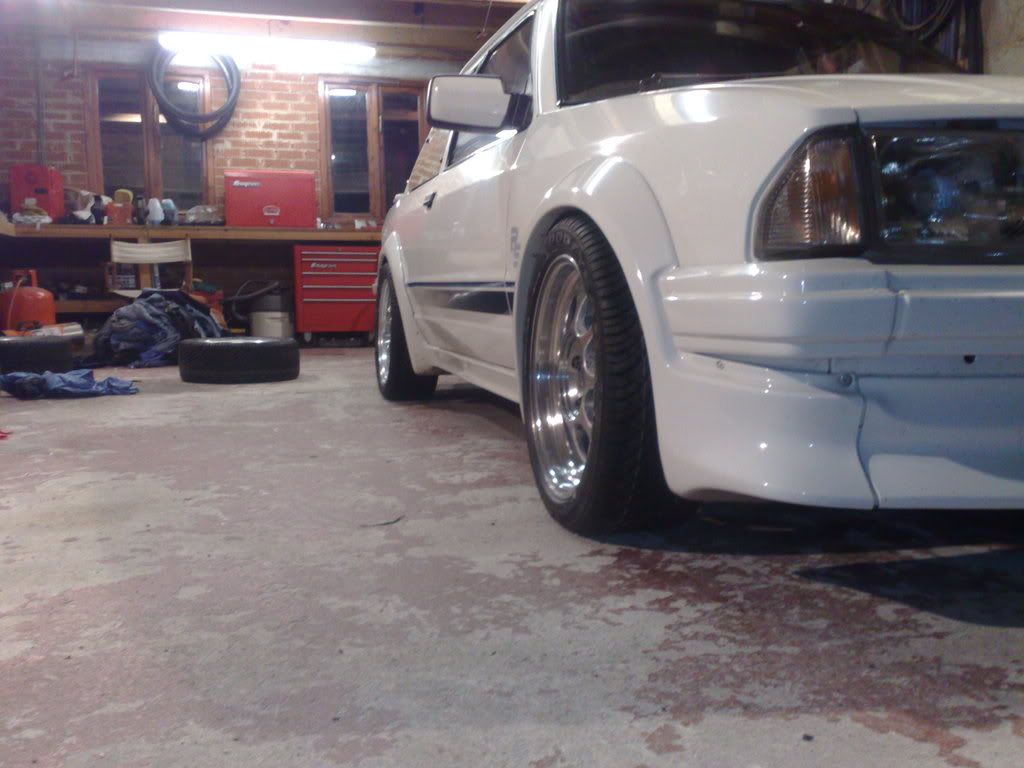
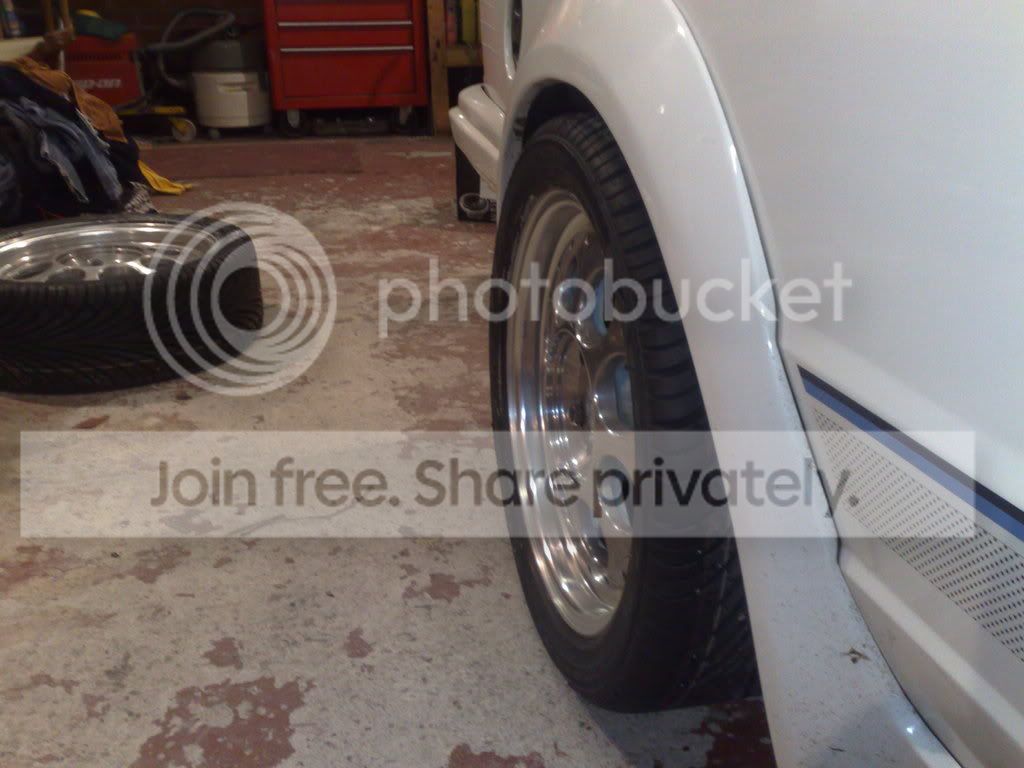
Datapost touring car wheels. Weight absolutely nothing!!! They weighed less with a tyre on than my Compomotive MO's do without a tyre on!!
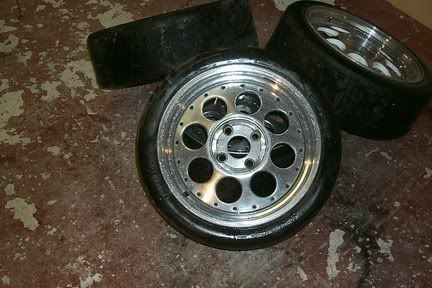
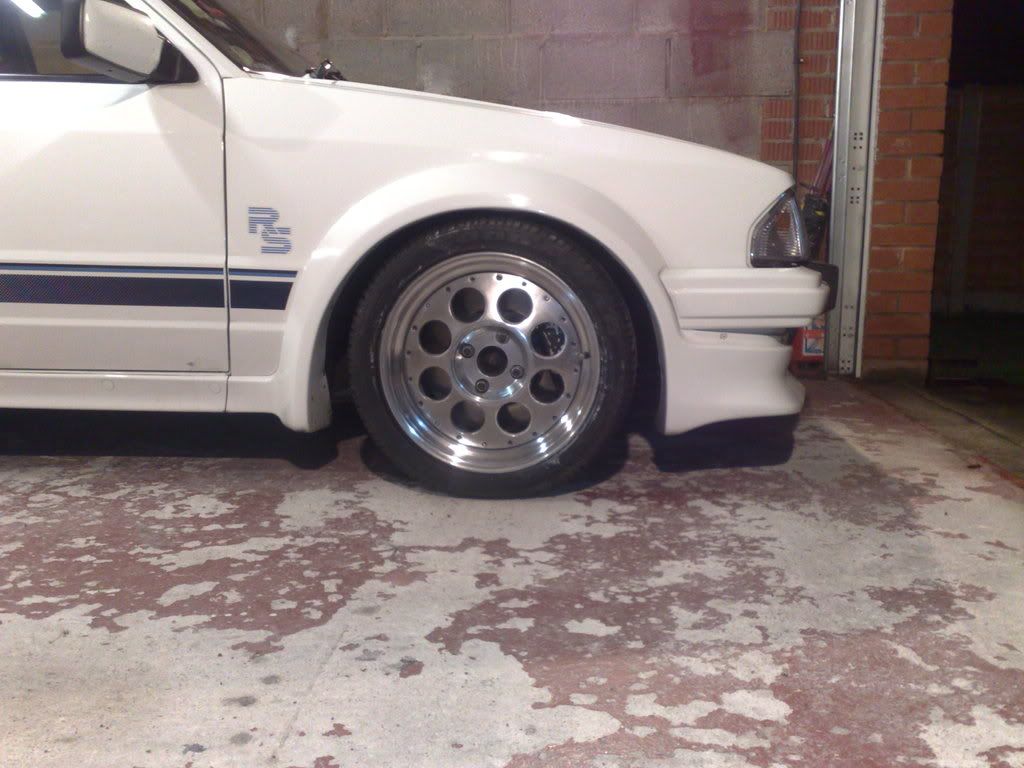
And on Compomotive MO's. These 16" wheels may be changed for the new style 17" wheels soon although I may then put the 16" wheels back on. It all depends on how much it upsets the handling on the 17" wheels.
Starting at the beginning......
Here is what happened to the old scrapper over several years.
I was 19 when I bought it. I ran it for 12 months and covered 30k miles. The came the option to either scrap it or rebuild it.
Before work starts...
Front of the car. Doesn't look too bad here but there is rot just above the indicators where the wing id rotting from the inside out and the front panel has blisters forming below the paint.
On this picture the rot is more visable where the front panel meets the wings. There is some rot further up too.
This is where the seam on the wing has become rotton and the wing is actually being held on by the body kit.
This is where a small wiring fire occoured and set fire to the interior trim. Nearly lost the car that day!!! Thankfully the wiring is now a lot better than it was back then.
These next 2 pictures show the rotton inner wings. The one next to the batter actually has 2 very large cracks in it. Probably due to the amount of flex in the shell through corrosion.
Stripped almost to a bare shell...
The body kit was hiding a multitude of corrosional sins!!
Here is where the wings were rotting from the inside out!
Again, the body kit hiding a rotton outer sill.
Picture of the other side of the front panel/crossmember.
A very rotton battery tray!!
A very rotton and cracked inner wing. There is a crack near the bonnet hinge and the other is near where the earth wire is screwed to the body.
2 of the bare shell.
This is the reason why the passenger wing was hardly attached to the car anymore!! A corroded A pillar!! It's suprising the door didn't fall off!! The wing nearly did.
Full front end looking like a battle ship with all the brown streaks.
Front end with the corroded panels removed and work starting on cleaning up the other affected areas.
Front end was first on the list...
It had the following items replaced...
Inner wings,
Outer wings,
Front crossmember,
Front panel,
Scuttle panel,
Bonnet
N/S A pillar.
The chassis legs and other parts were patched and repaired after the rot was cut out and back to good metal.
The inner wings have been cut out and the new inner wings trial fitted.
An area that needed small patching up and cleaning.
Another area that needed cleaning and patching up. There was a hole here for the aerial but I did away with it.
You can just make out a section that has been repaired just the right of the bottom of the new inner wing.
Fuse box mounting. Always a culprit for wet carpets where water has run down trhough the corroded panel. Rot cut out, small section made and welded in (which is the weld marks on the picture above).
The offside A pillar primed after the repairs have been done.
The Battery tray area. Now with new battery tray. The inner sides of the front chassis legs have been cleaned and primed.
Close up of the offside A pillar.
And again.
View to the other side still to be completed.
Next the car had new inner and outer sills and various patches of rot cut out and replaced with new metal.
Here is the outer sill after having been fitted. The door is now back on to see if the thing actually still fits and closes without over lapping anything!! The door is mounted on a nice new A pillar.
Before the outer sill was fitted, the inner sill has to be fitted to the floor pans and pillars.
Some of the floor pans were rotton where they meet the sill and had split so new repair sections were made and fitted (after the old rotton bits got cut out of course).
Here is another repaired floor section. Not quite so easy to make out as it's covered in primer.
These had to be done before the front could be finished as the front wings over lap the bottom of the sill
As parts of the metal work were repaired, it had to be protected again to stop it rusting. Everything got cleaned and then coated in primer. Bellow is pictures of the front end nearing the stages of completion. The bulk head still needed work and so did the wings but it's getting there.
More pictures of the sills and N/S A pillar...
The nearside A pillar had suffered quite badly from rot.
This shows the new pillar being fitted from the inside of the car. There also needs a plate making for the hole in the floor. The wheel arch has already had a repair peice patched into it.
Same area, different angle.
Pictures of the repais in primer..
A pillar completed. The door even shuts correctly too!! Bonus!
Inner/outer sills and floor pan on the near side.
Front panel and crossmeber.
Whole front end and door on the near side.
Update time.
The car's chassis legs were a bit rotten so I decided it was having new ones instead of patches.
The car was rolled onto it's side and the chassis legs were removed and the floor pan cleaned. The new chassis legs were then welded in place following the lines of the originals.
The car also had a new back panel fitted afterwards.
After the car had been cleaned under neath, the shell got sealed and then painted underneath and on the inside. After the paint dried on the inside, new sound deadening mats were stuck onto the floor pans in the original places.
The attention was then turned onto the outside. Firstly the bodykit was temporarily attached to the car and any holes that required drilling were done. The kit was then removed. The car was flatted, primed and the painted.
Shame it's not this clean and shiny any more!!!
Rear suspension on. New powder coated bottom arms. All the old arms cleaned and coated. New Koni shock absorbers with standard height springs.
Front suspension going on with new Konis/standard height springs.
Engine bay going back together.
Refurbed fuel pump cradle.
Development of my front brake kit.
Some more of the brakes. 315mm rotors with AP 4 pots.
Adjustable track control arms.
Car itself going baack together. Front end on and most of the ancilliary bits back under the bonnet.
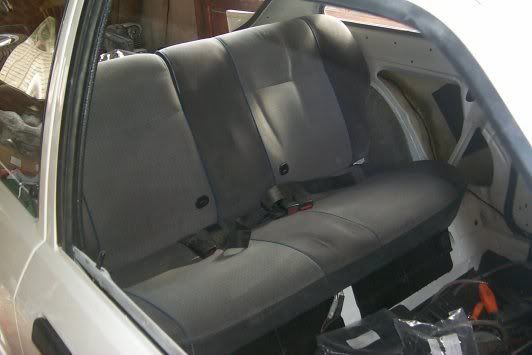
Back seat back in.
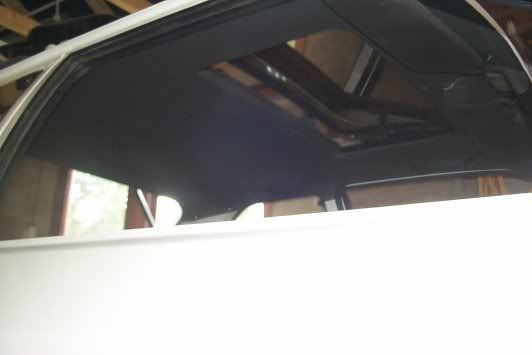
Roof lining back in.
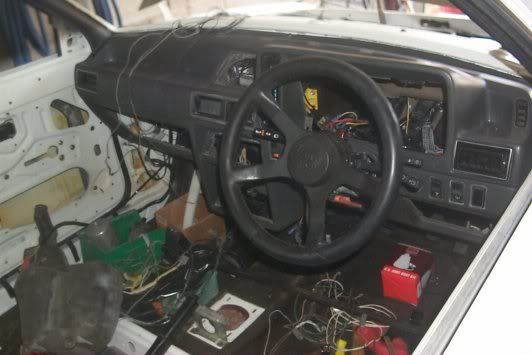
Dash back in.
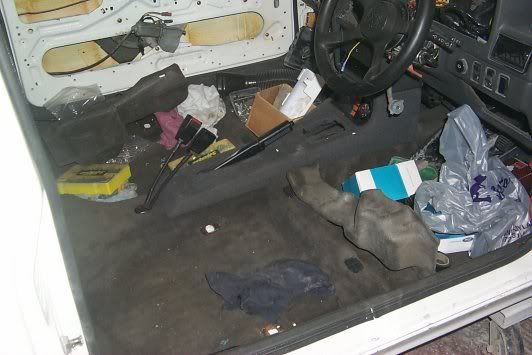
Carpet back in.
Rear quarter trims back in.
Boot trims back in.
New header tank. This was a very rare find 5 years ago!!
Another rare find. A mint parcel shelf (although not a genuine S1 shelf as it doesn't have speakers in it)
Another new set of head lamps as I broke the bulb holder on the others!
The car now supporting itself for the first time in about 3 years.
In the garage on it's trolleys.
Door panels back on
Sat outside waiting for a few minor things, like an engine and gear box!!
New update will consist of a few bits from engine build.
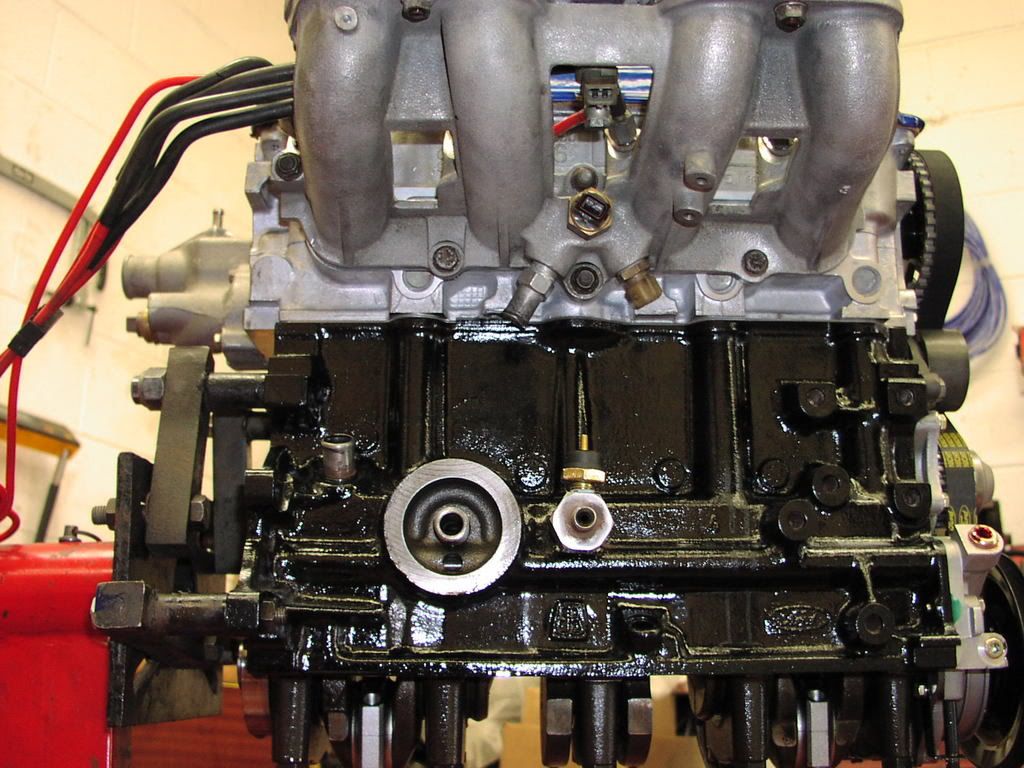
Bare engine block.
Painted engine block!
Crank and flywheel.
Small modification to the block!!
Piston height measurement for compression ratio calculation.
Crank, oil pump, pick up pipe,pistons and rods in.
Cosworth forged piston.
The full set.
Con rod. These went back for further work to change the spec.
The full set.
Both together.
The con rods are so finely machined that when the end caps are on the rods, the split completely disappears and looks like the cap isn't seperate.
Cylinder head pictures. Big valve big port head.
Head on.
Cam being dialed in.
Nearly complete.
Complete engine vitrually ready for fitting.
New gearbox.
Assembles by Competition Transmission Services. It's a Stage 2Plus box which means it has the slightly taller S2 ratios, shot peened and polished. New 27.5mm diameter mainshaft with up rated larger bearings and a Quaife ATB diff.
Engine with flywheel and Alcon 6 paddle clutch.
Engine, this is gearbox, gearbox meet engine.
Ready for lifting in.
Dangling by a chain.
Mounted.
Ready for connecting up.
Engine running and cooling fan on.
[img]
http://img.photobucket.com/albums/07...unning_001.jpg[/img]
Car out on the road at Preston Docks sat on standard height springs and Borbet C wheels.
Finally my new suspension arrives which allows me to sort the stance out on the car. This stuff cost a small fortune which I probably should have just saved and spent on a Cossie instead.
Bilstein coilovers specially made to fit standard rear turrets on MK 3 and 4 Escorts.
New adjustable TCAs with rose joints.
New adjustable rose jointed tie rods for the rear suspension.
New parrallel arms to replace the rear wish bones.
New turbo ready to go on when I get round to it!!
Air to air injectors for boost control.
Bosch pressure sensors for oil and fuel pressure.
Bosch 500cc injectors.
Bosch 8 bar fuel pump.
Bosch throttle position sensor, crank and cam position sensors and a 5 bar MAP sensor.
Bosch temp sensors for oil and coolant.
Pectel T6 engine management system. The ECU is �2200 plus VAT without the loom.
Thats about it folks. The management swap is a long standing project that I am struggling with as I am short on time to sort things out and am too tight to spend my money!!
Datapost touring car wheels. Weight absolutely nothing!!! They weighed less with a tyre on than my Compomotive MO's do without a tyre on!!
And on Compomotive MO's. These 16" wheels may be changed for the new style 17" wheels soon although I may then put the 16" wheels back on. It all depends on how much it upsets the handling on the 17" wheels.
Last edited by DazC; 07-06-2009 at 01:23 PM.


 07-06-2009, 01:25 PM
#3
YES I KNOW I CANT SPELL
Join Date: Mar 2008
Location: chingford e4
Posts: 5,271
Likes: 0
Received 0 Likes
on
0 Posts
the first thing i was going to comment on was that you were keeping it on mfi glag to see you are swaping over to efi 
very very nice car you have there tho spot on
very very nice car you have there tho spot on
 07-06-2009, 01:27 PM
#5
10K+ Poster!!
Thread Starter
iTrader: (1)
Join Date: May 2003
Location: Lancashire
Posts: 12,748
Likes: 0
Received 0 Likes
on
0 Posts
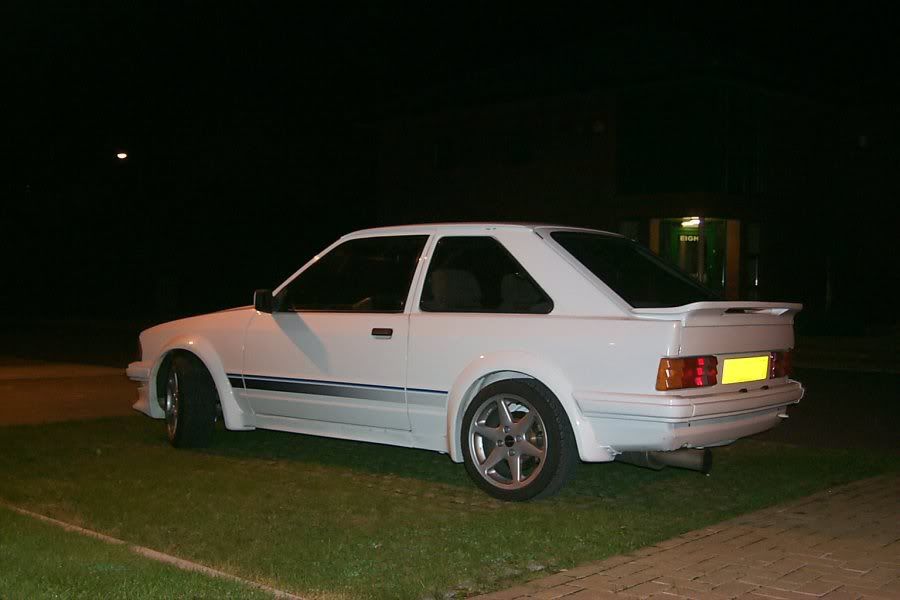
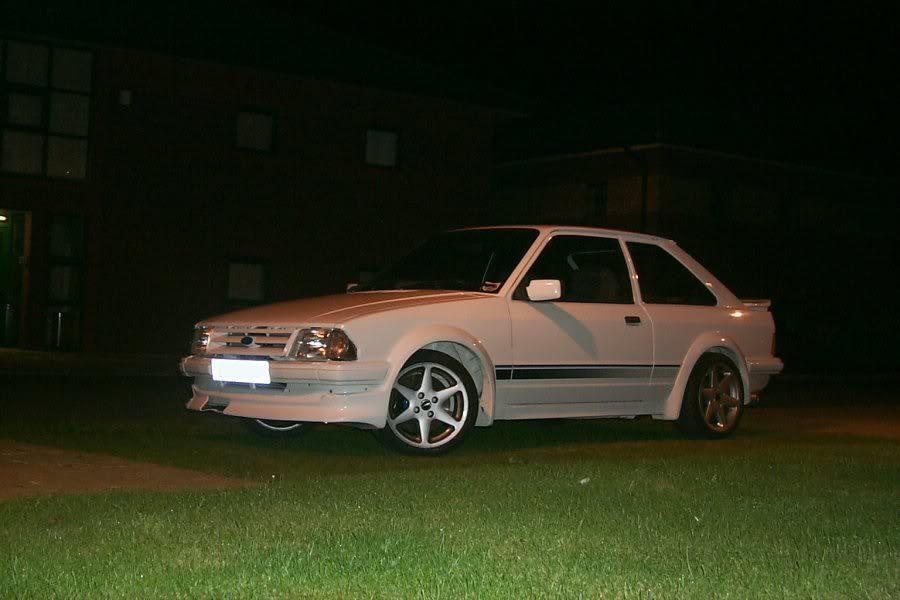
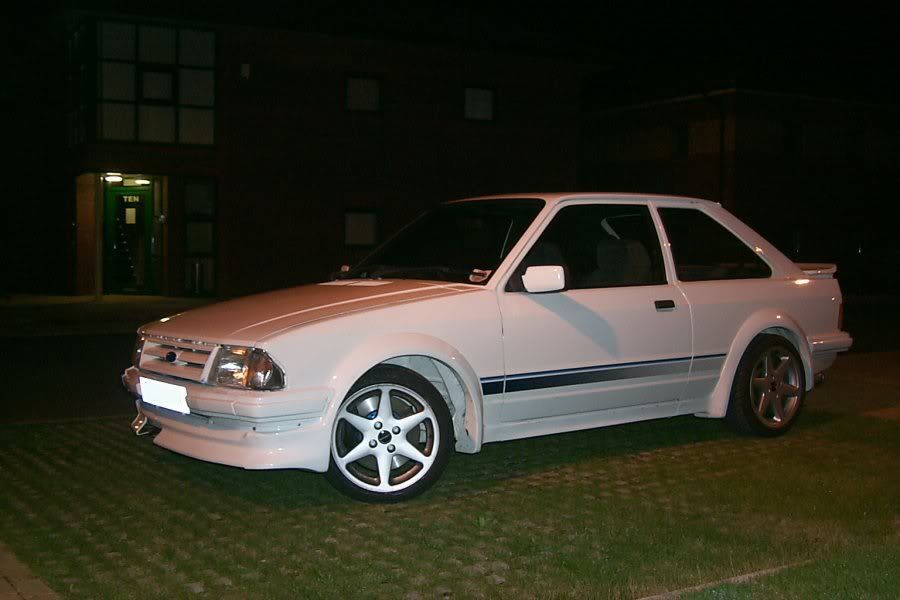
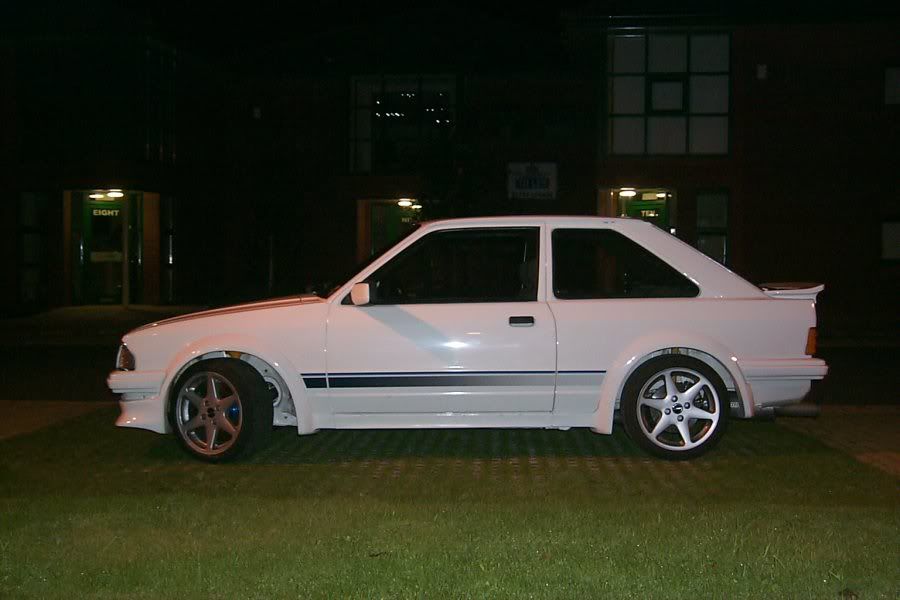
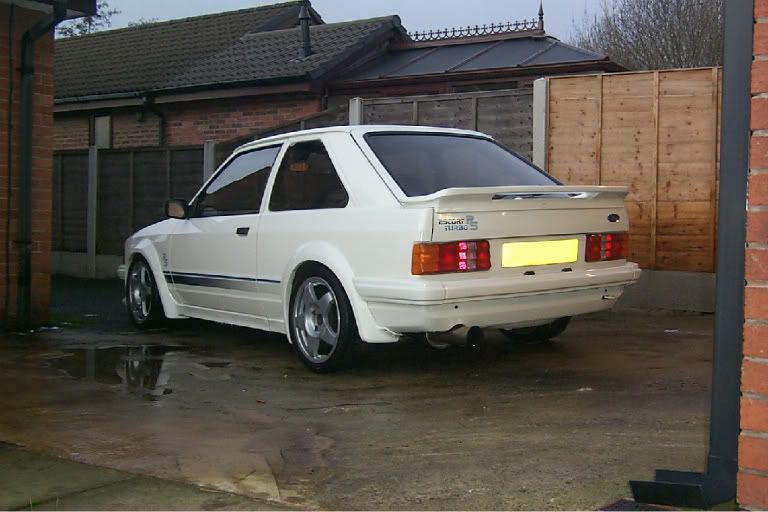
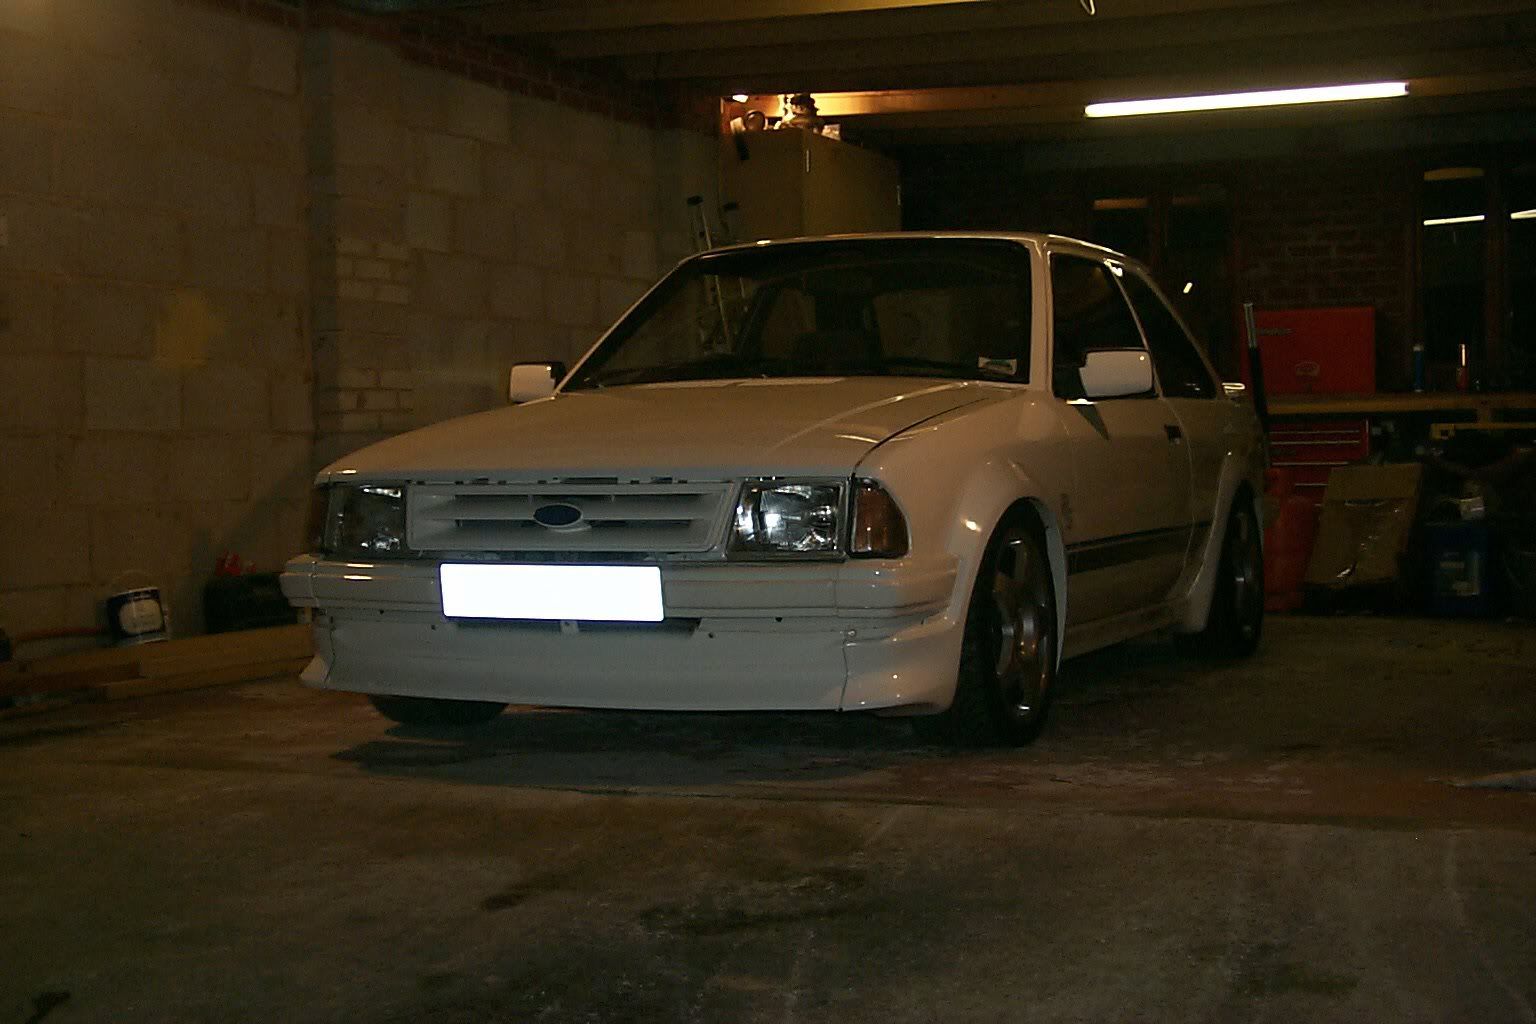
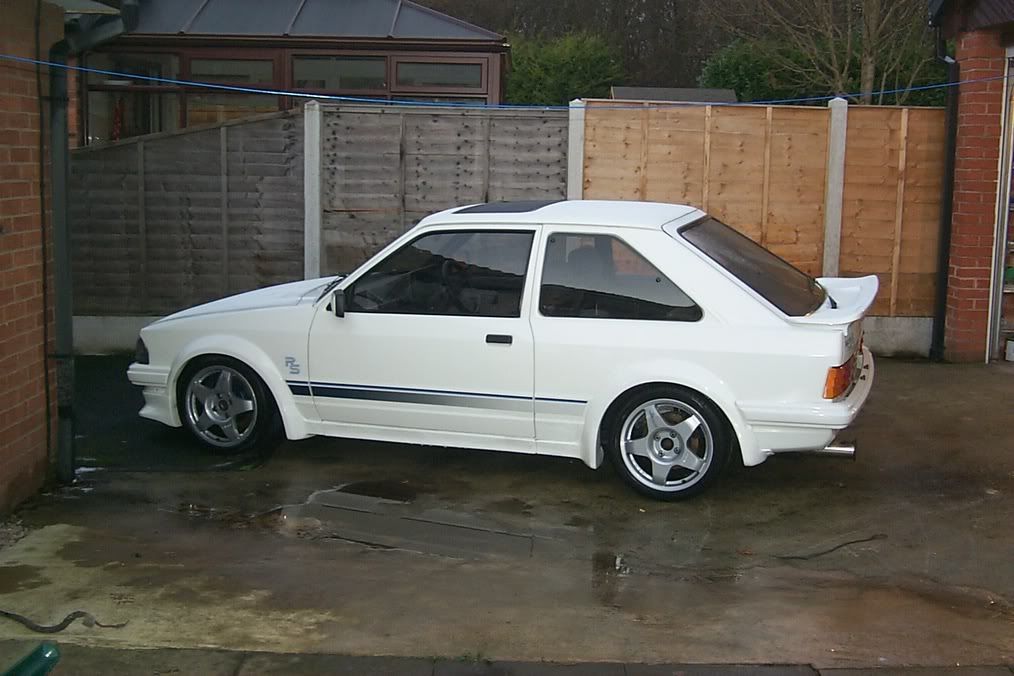
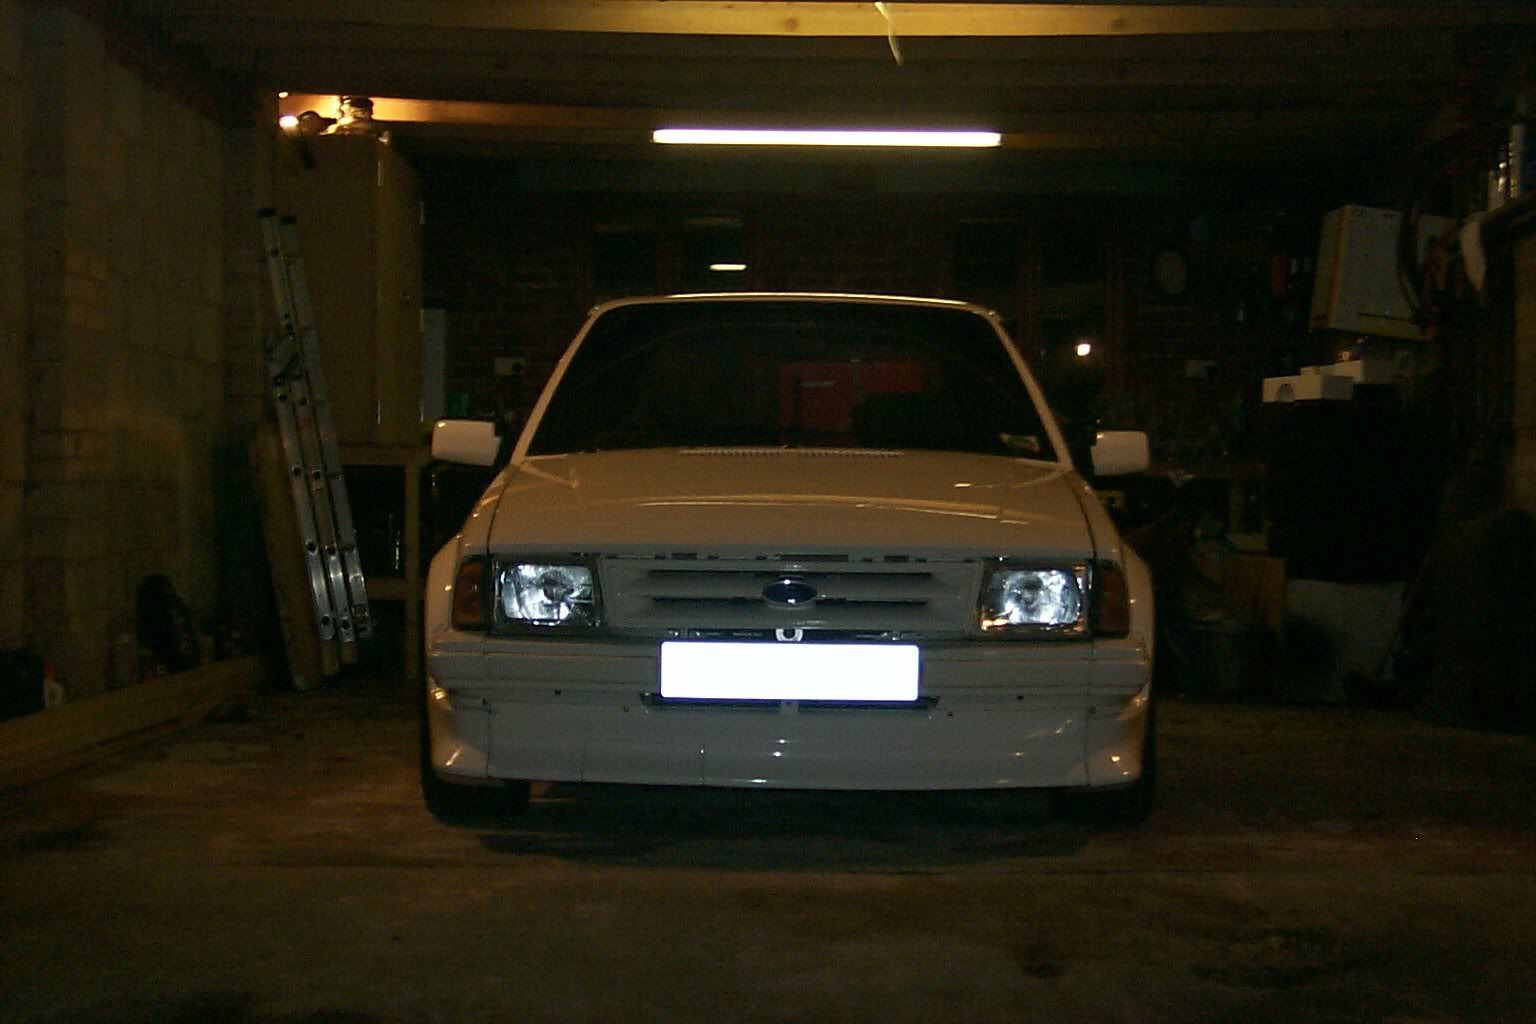
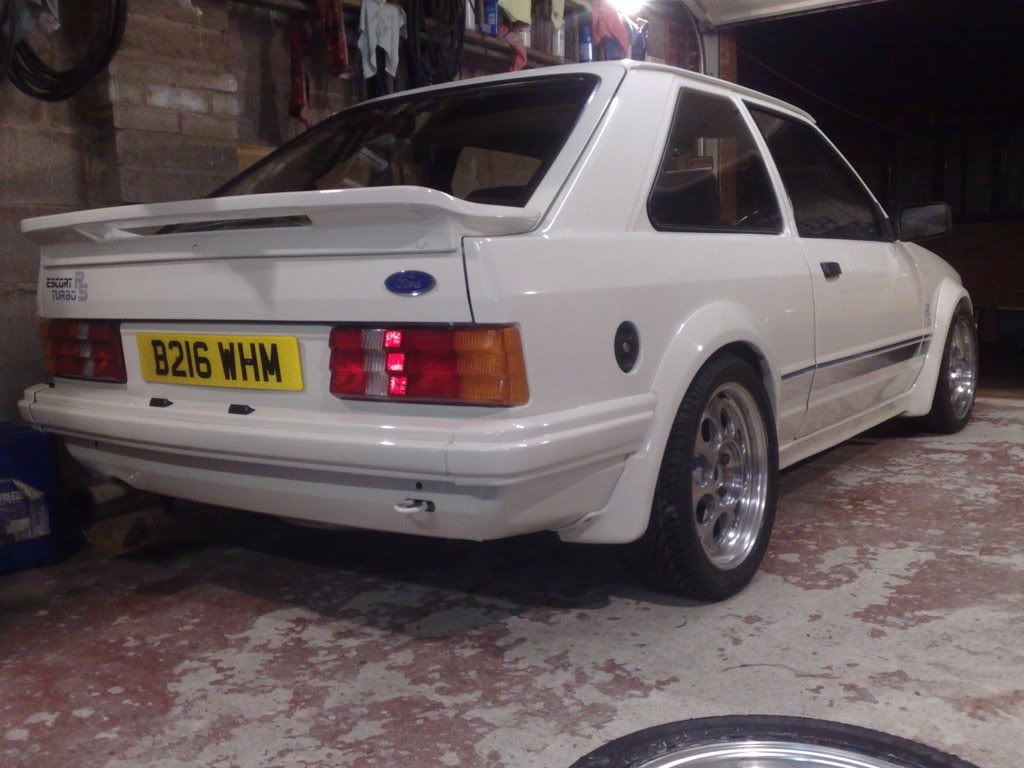
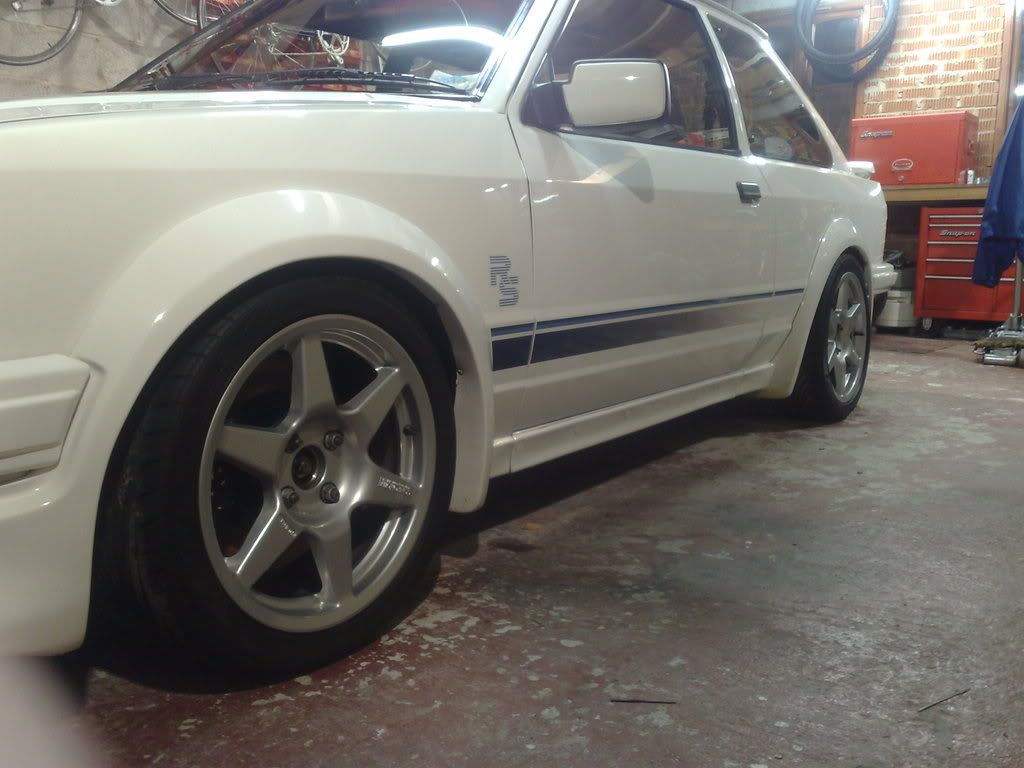
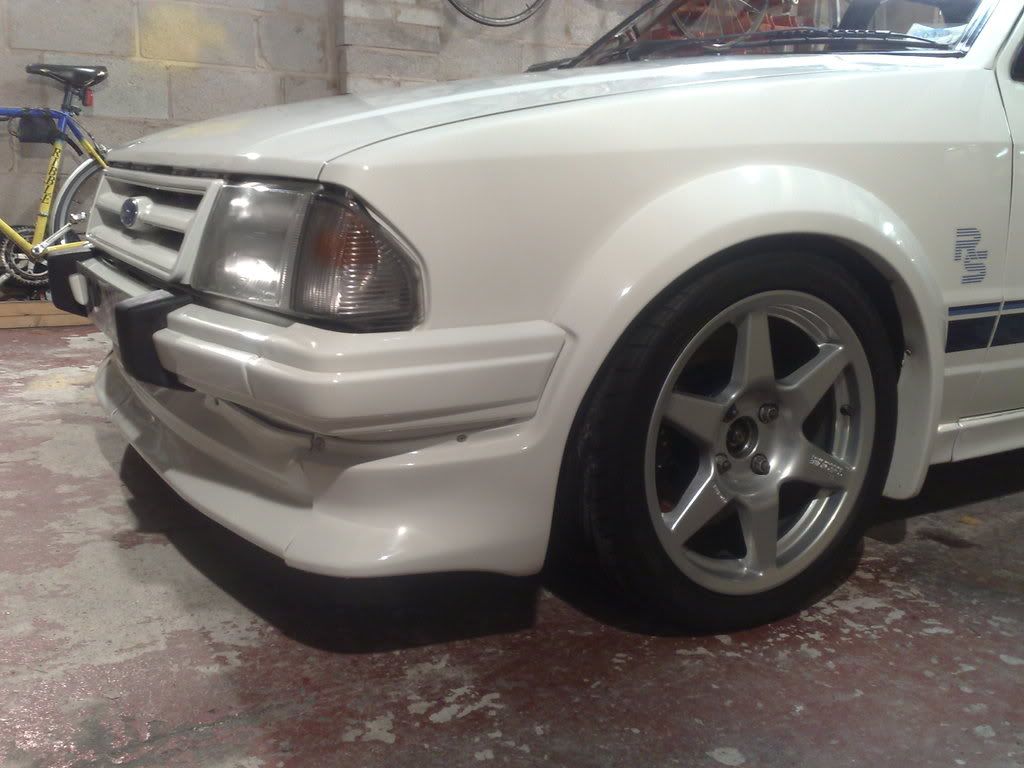
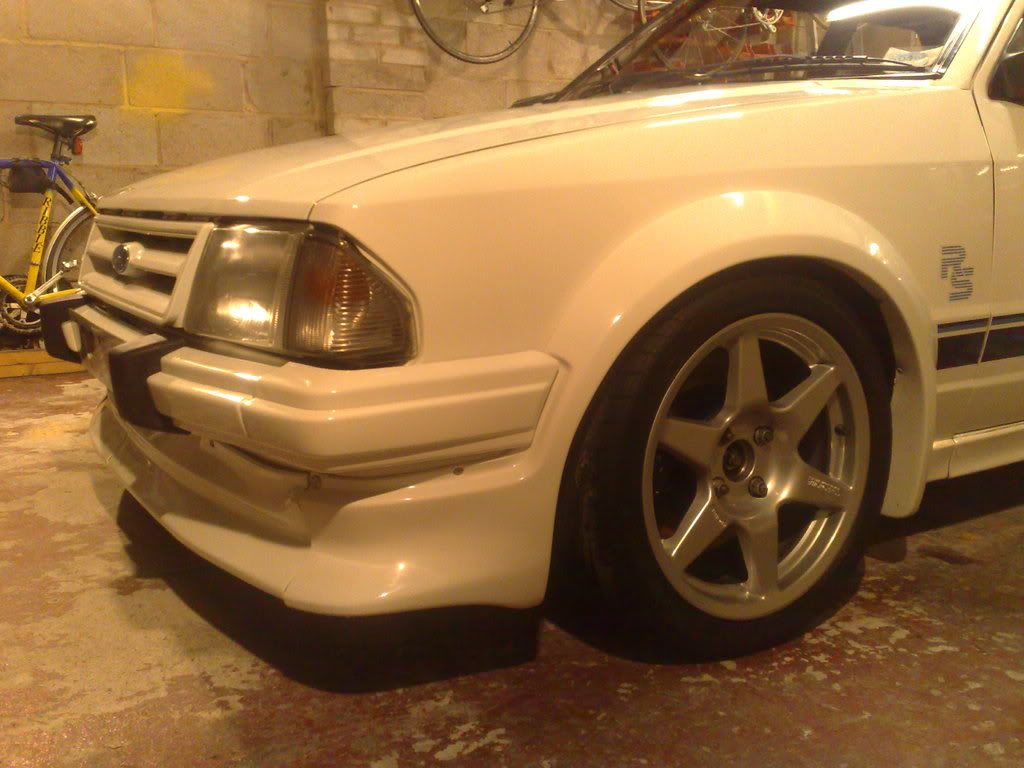
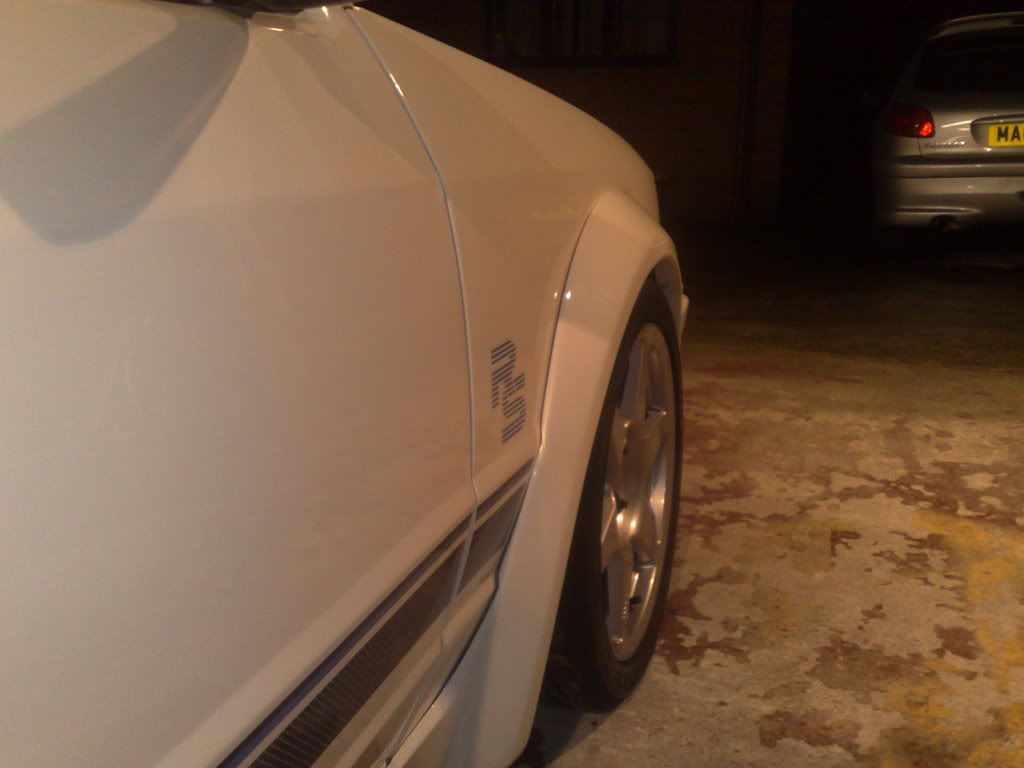
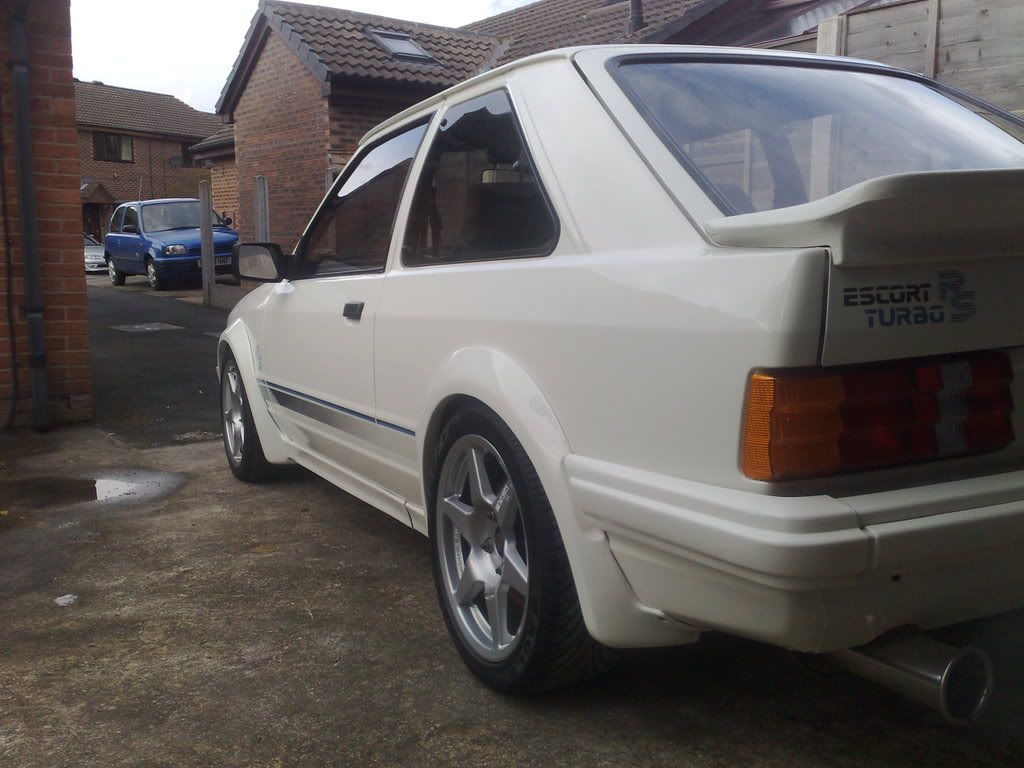
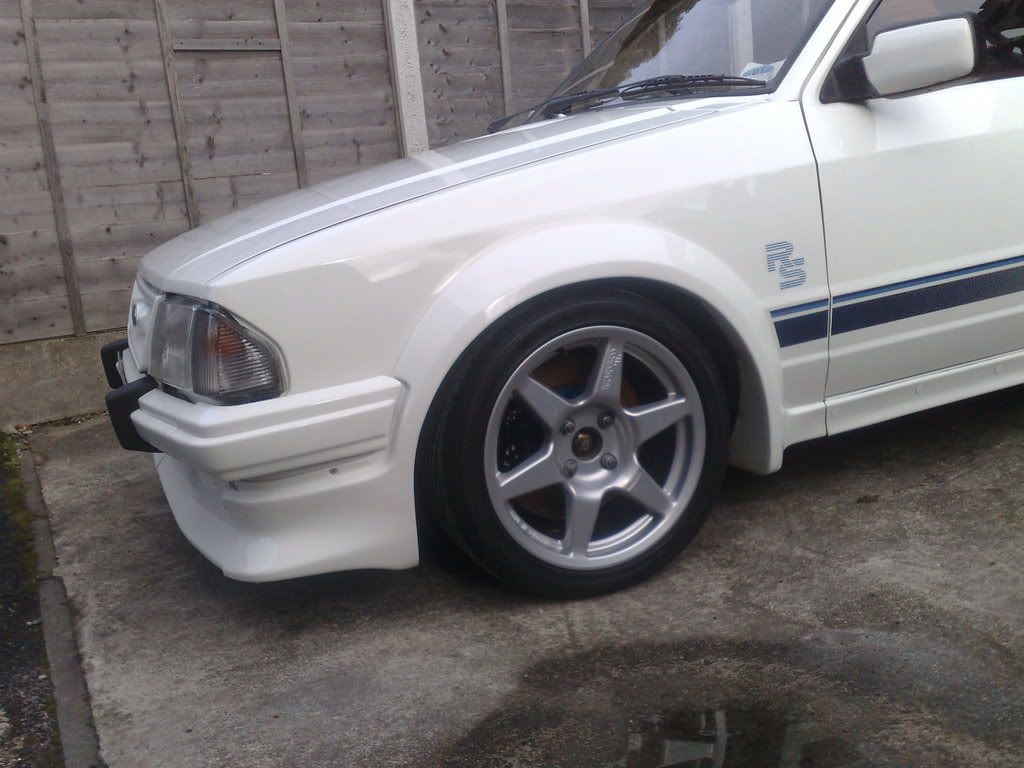
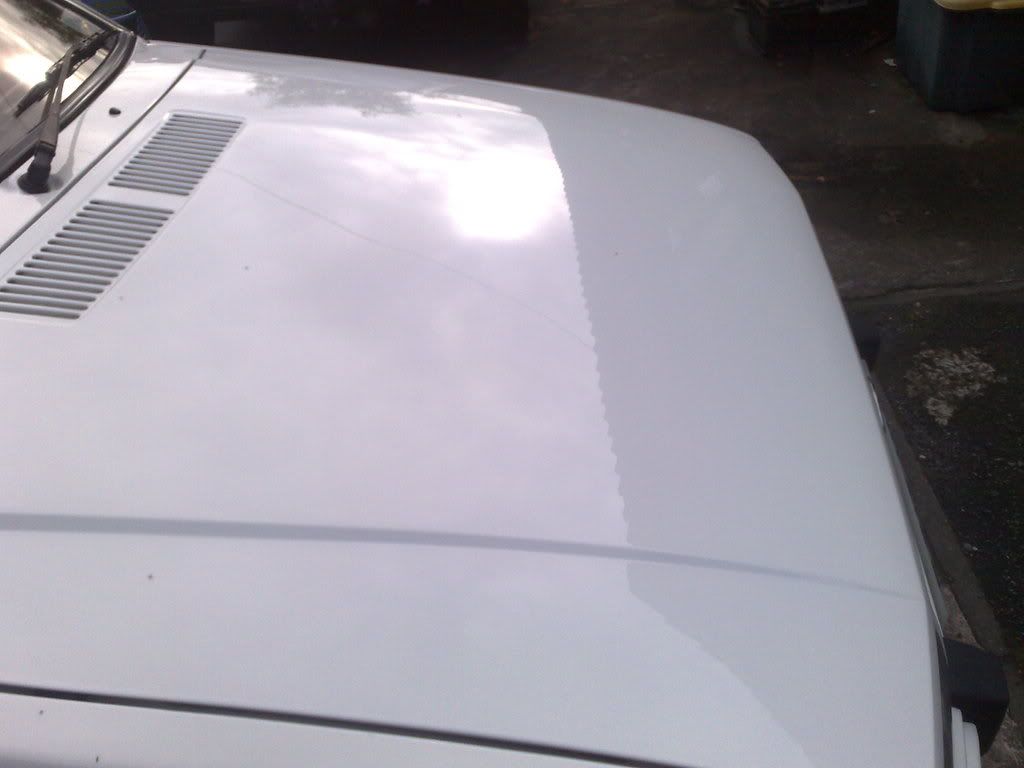
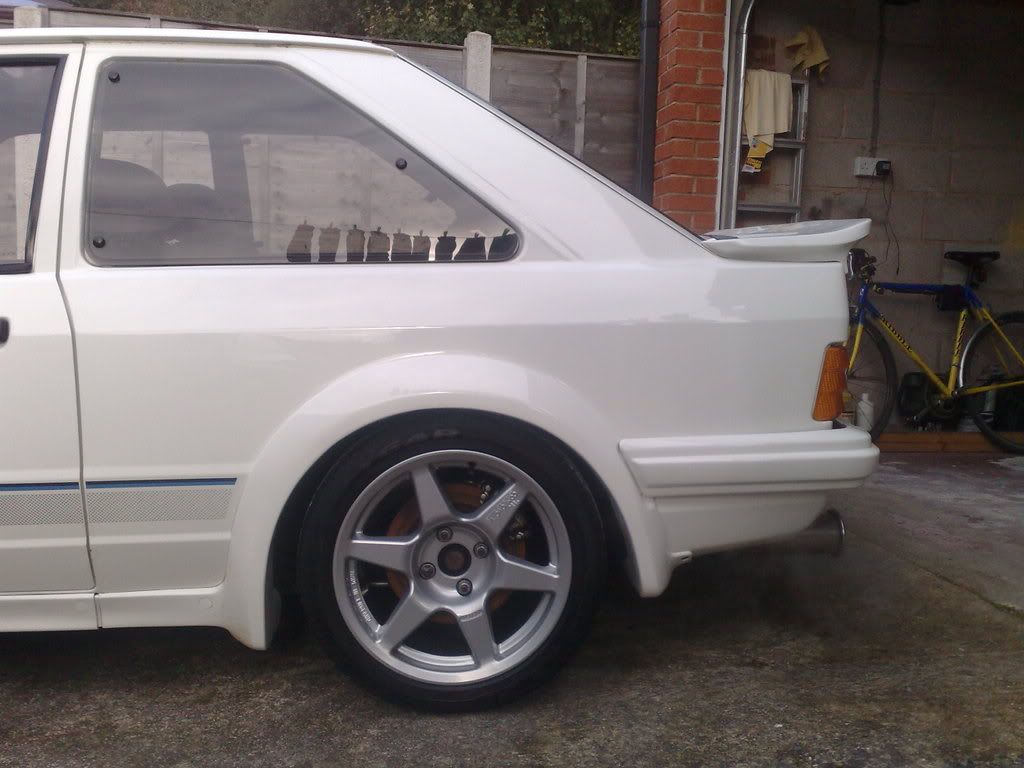
Last year I had the car detailed to bring the paint bck up to a decent shine again. First few pictures are crap due to lighting but the bottom pictures show how good a job Nis at Pride and Performance did on the car.
07-06-2009, 01:32 PM
#6
10K+ Poster!!
Thread Starter
iTrader: (1)
Join Date: May 2003
Location: Lancashire
Posts: 12,748
Likes: 0
Received 0 Likes
on
0 Posts
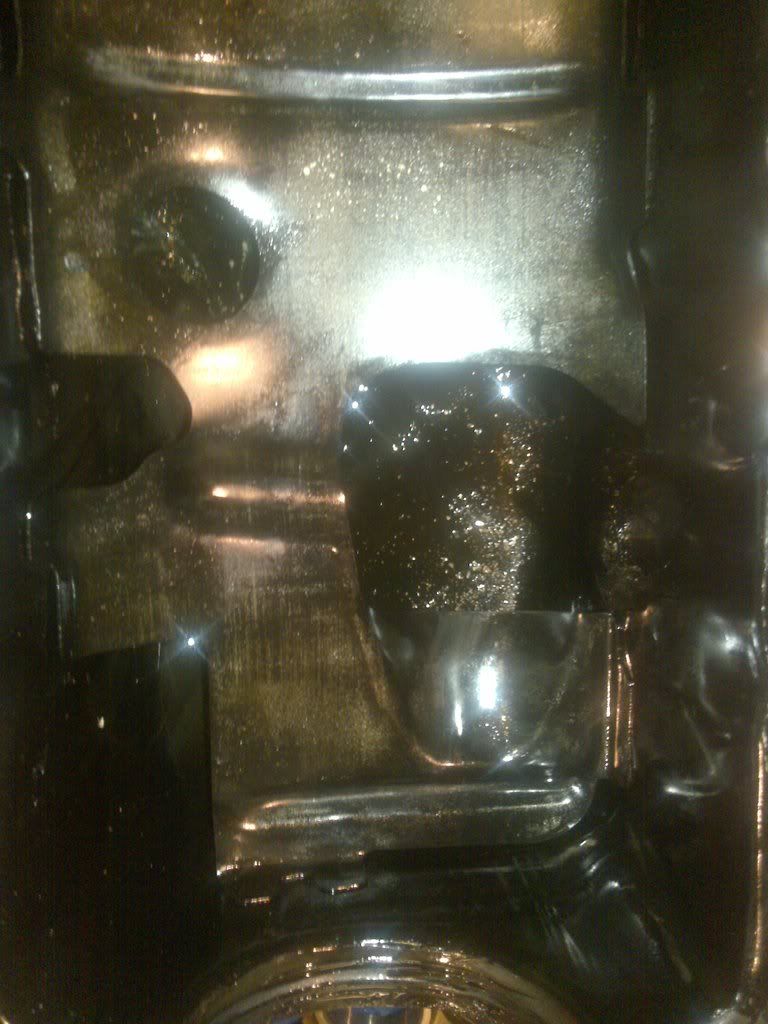
Then I had some issues with oil starvation...
Engine is out, crank is bollocksed, 2 rods fooked (1 may be ok), I've lost a circlip on my Cosworth pistons and my sump has NO baffles at all!!
Engine is out, crank is bollocksed, 2 rods fooked (1 may be ok), I've lost a circlip on my Cosworth pistons and my sump has NO baffles at all!!
07-06-2009, 01:36 PM
#7
10K+ Poster!!
Thread Starter
iTrader: (1)
Join Date: May 2003
Location: Lancashire
Posts: 12,748
Likes: 0
Received 0 Likes
on
0 Posts
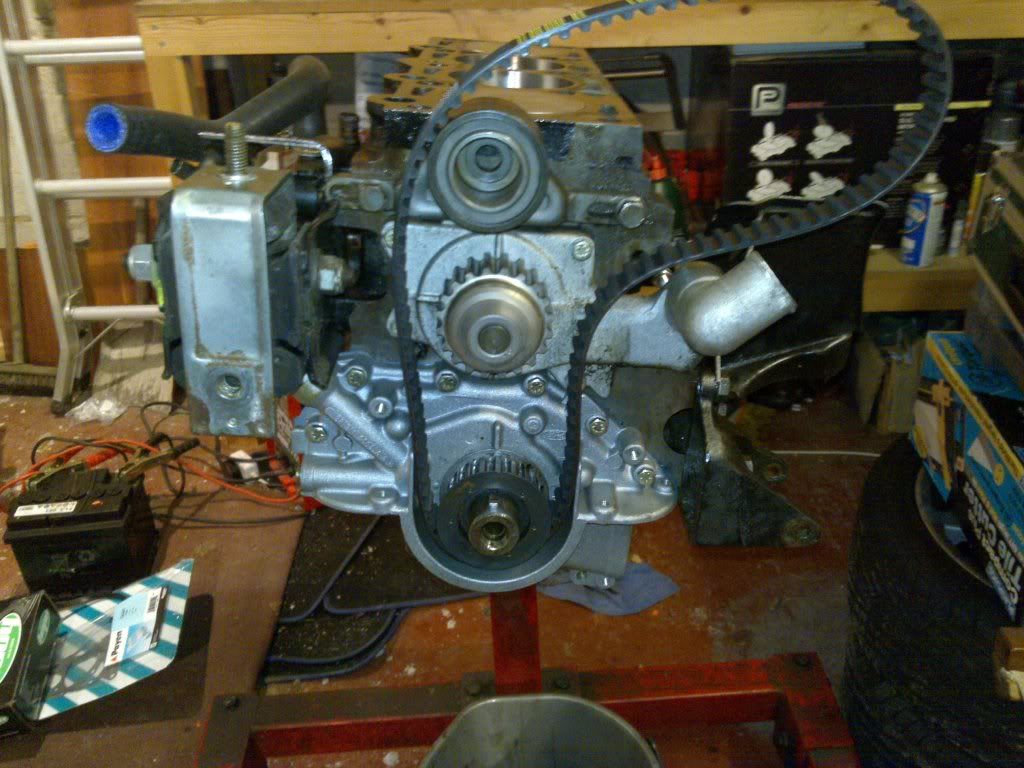
Yesterday I made some progress with the engine. My rods have turned up so I cracked on with getting the bottom end assembled.
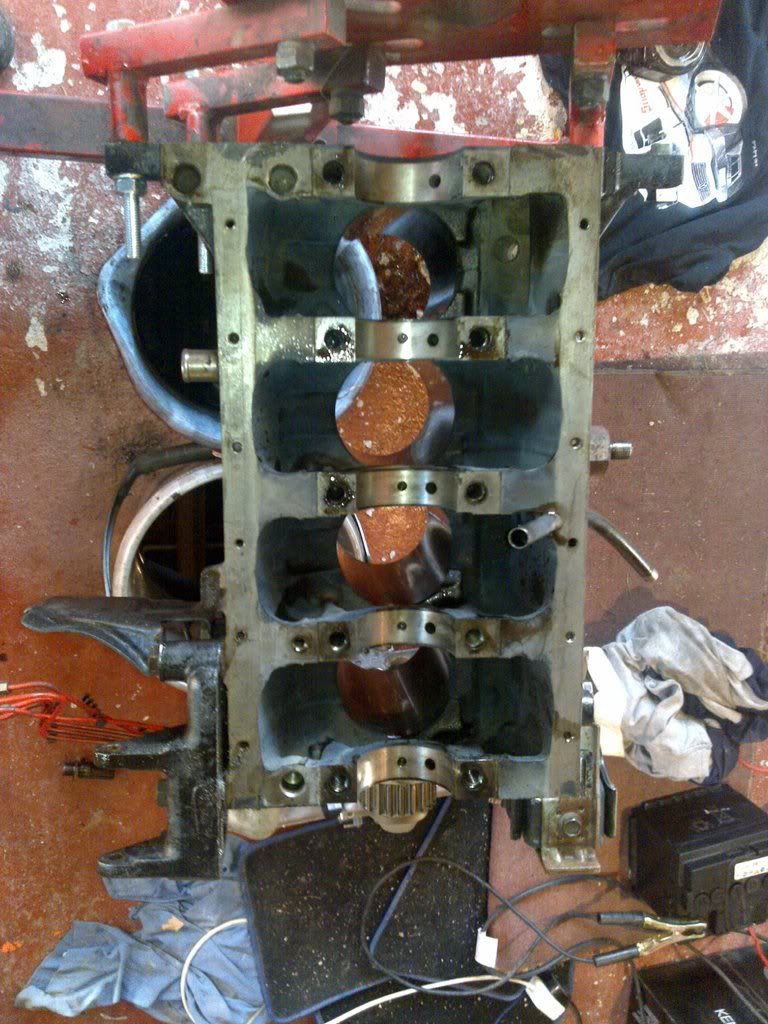
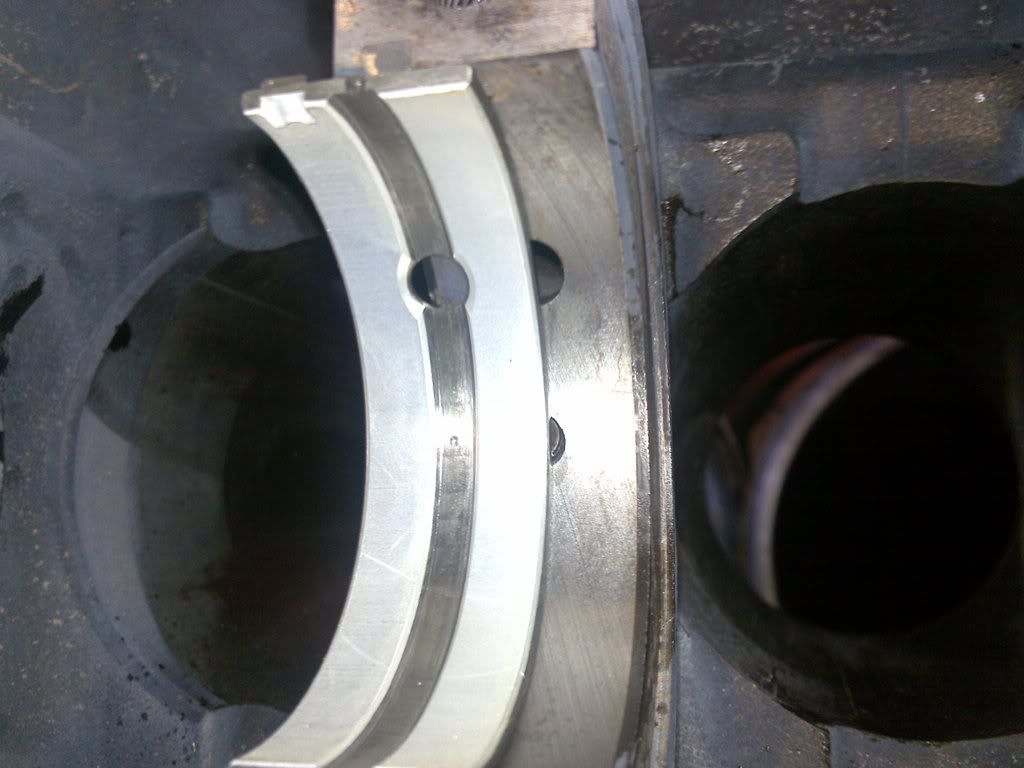
Block cleaned up ready for instalation. All the bit from the old bearings removed.
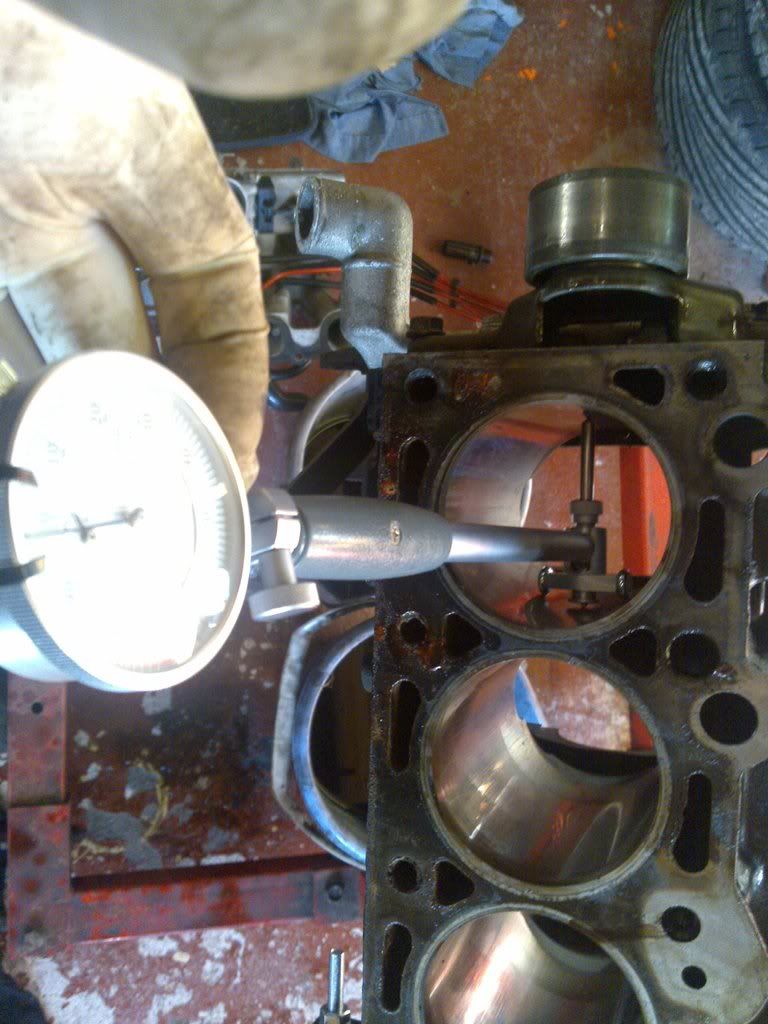
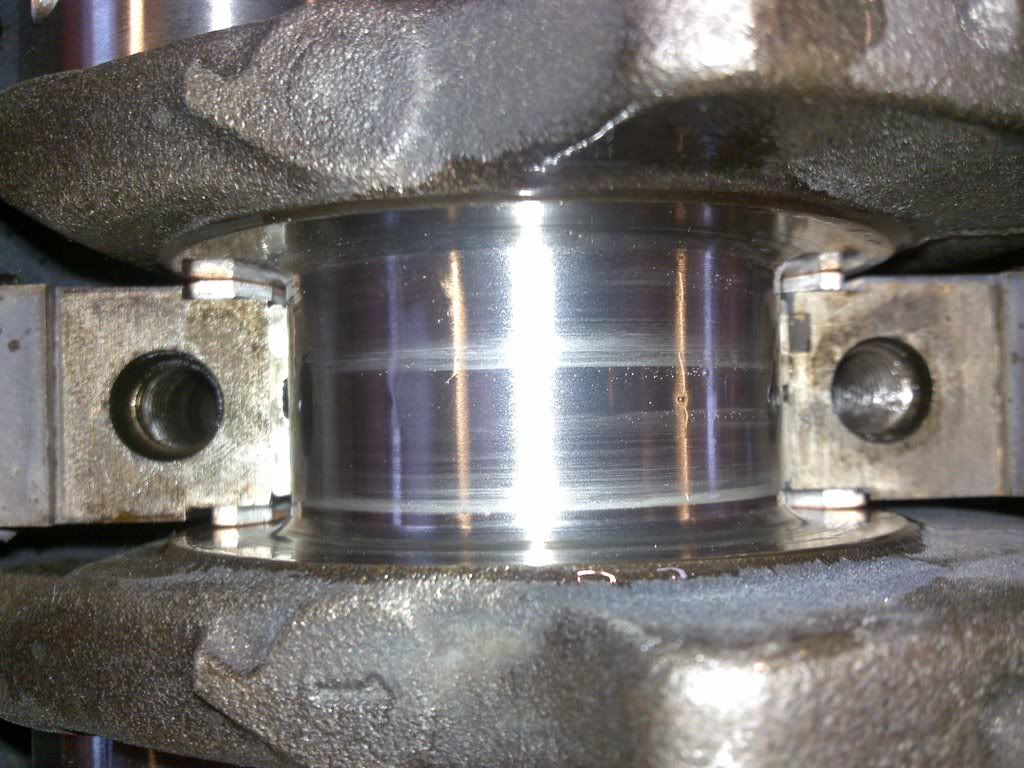
Checking the bores for ovality and tapering.
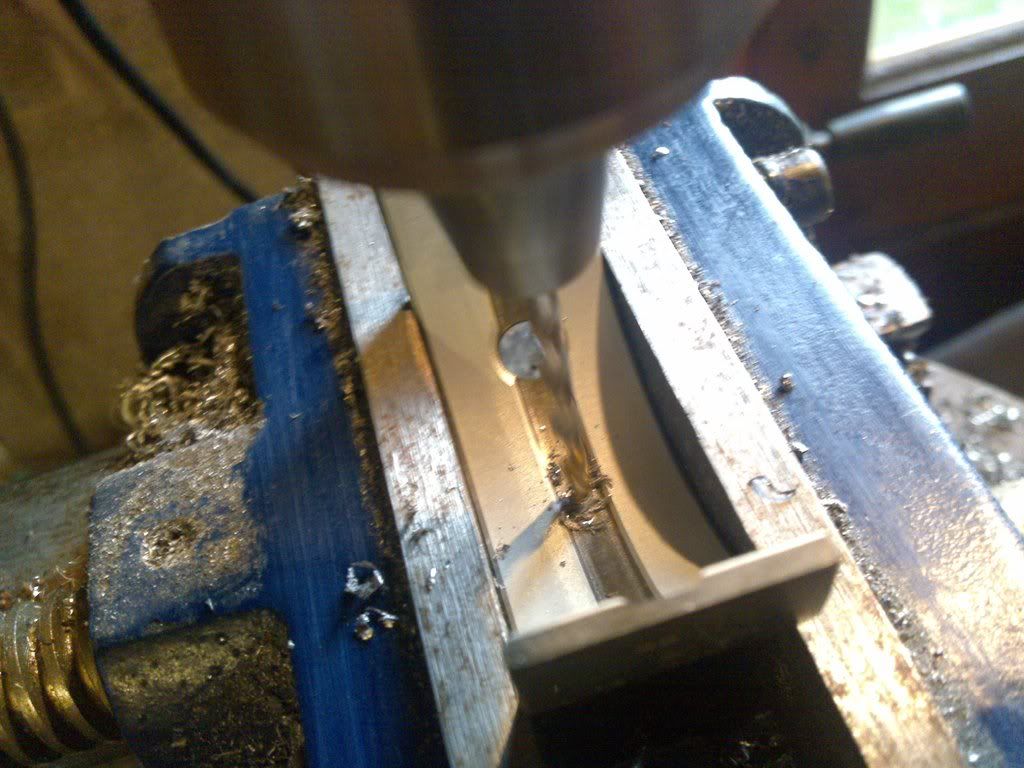
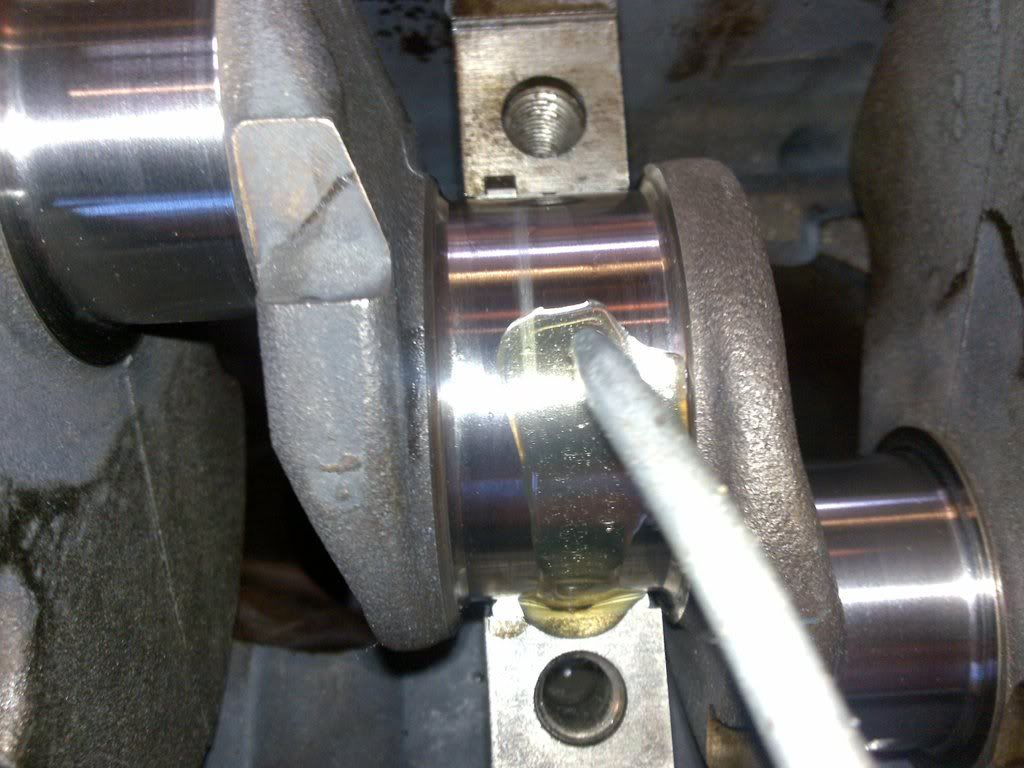
Now I have under piston spray jets which can be sseen as the extra holes on the main bearing journals in this picture.

This means I have to drill my new bearings to allow oil to get to these jets.

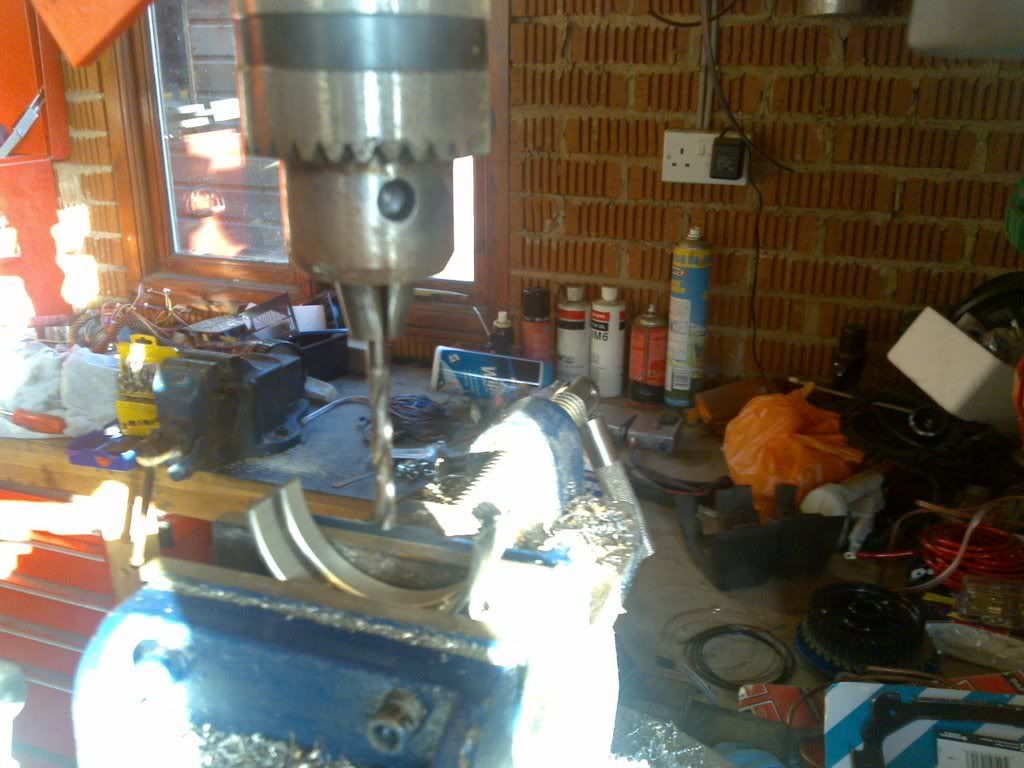
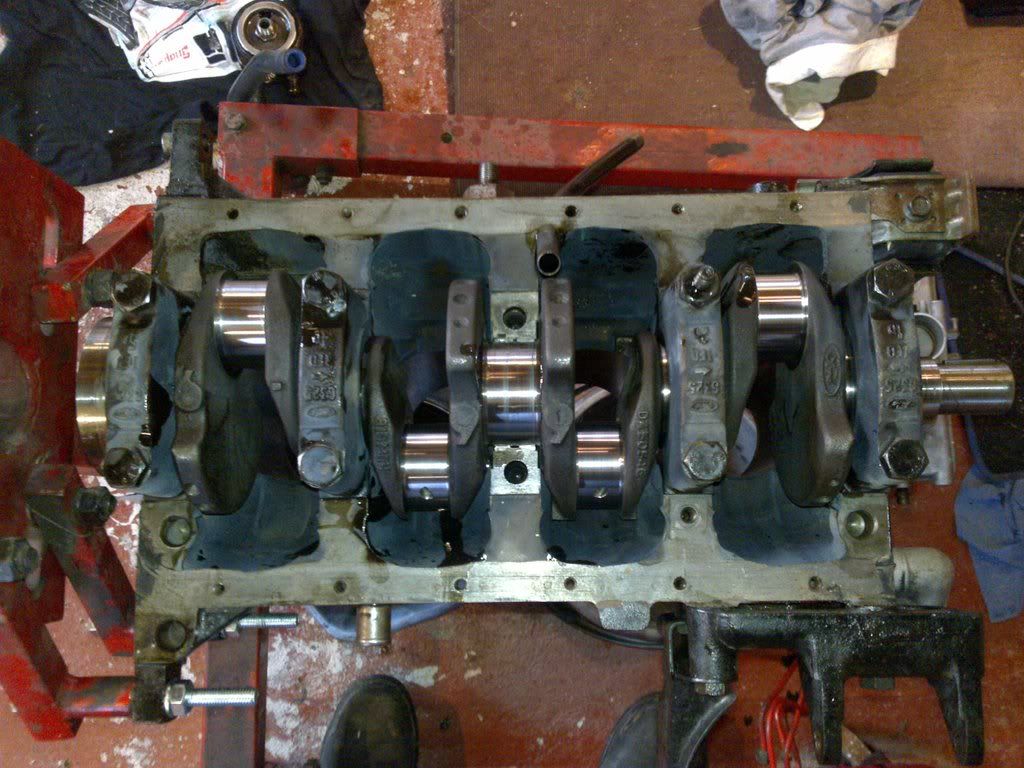
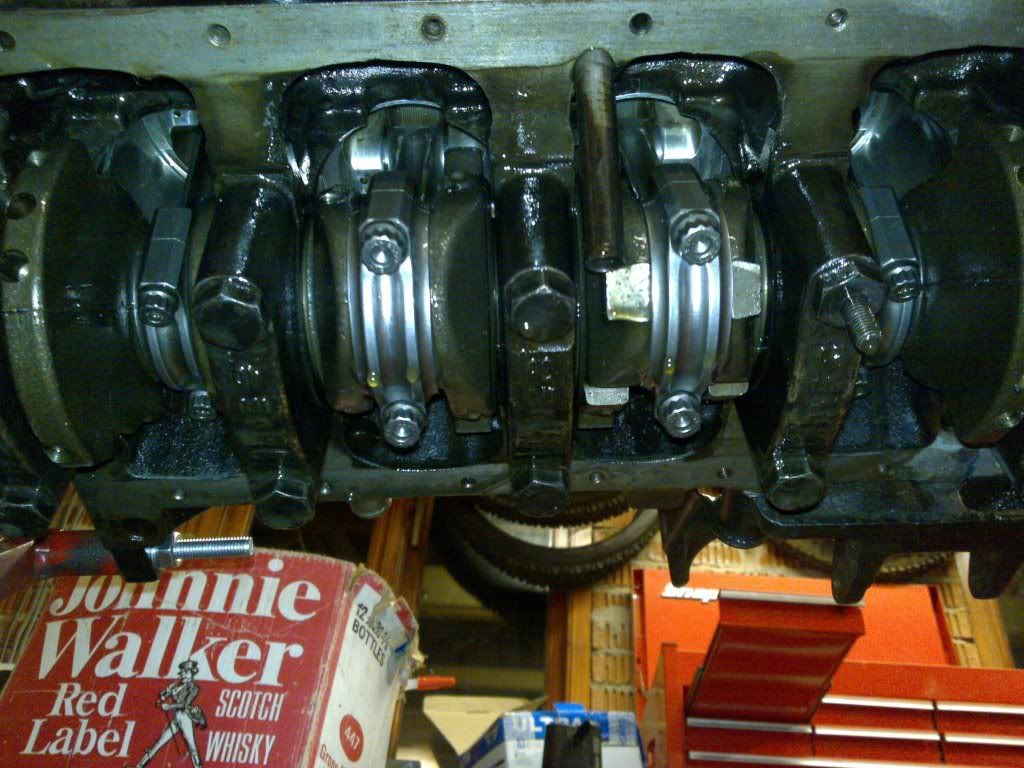
Then the crank can be sat in.
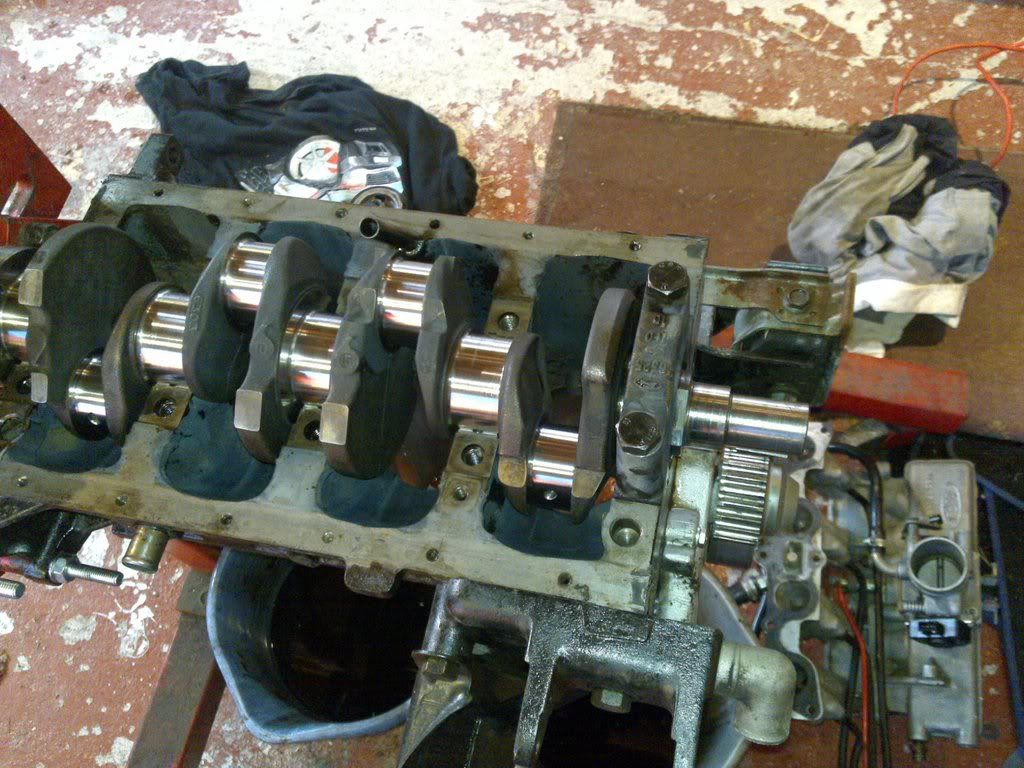
And the bearing caps refitted. These are around twice as substantial as the ones fitted to the Zetec block which are a weak point when going big power. No such issue on the CVH.
Not forgetting plenty of oil.
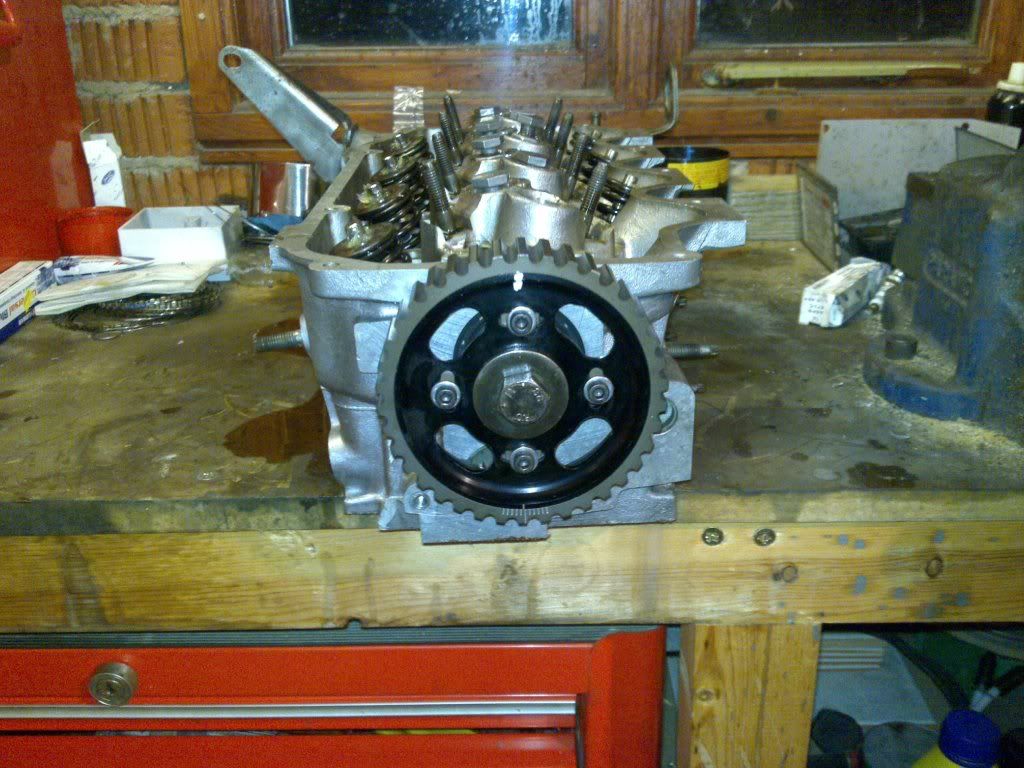
All on apart from number 3
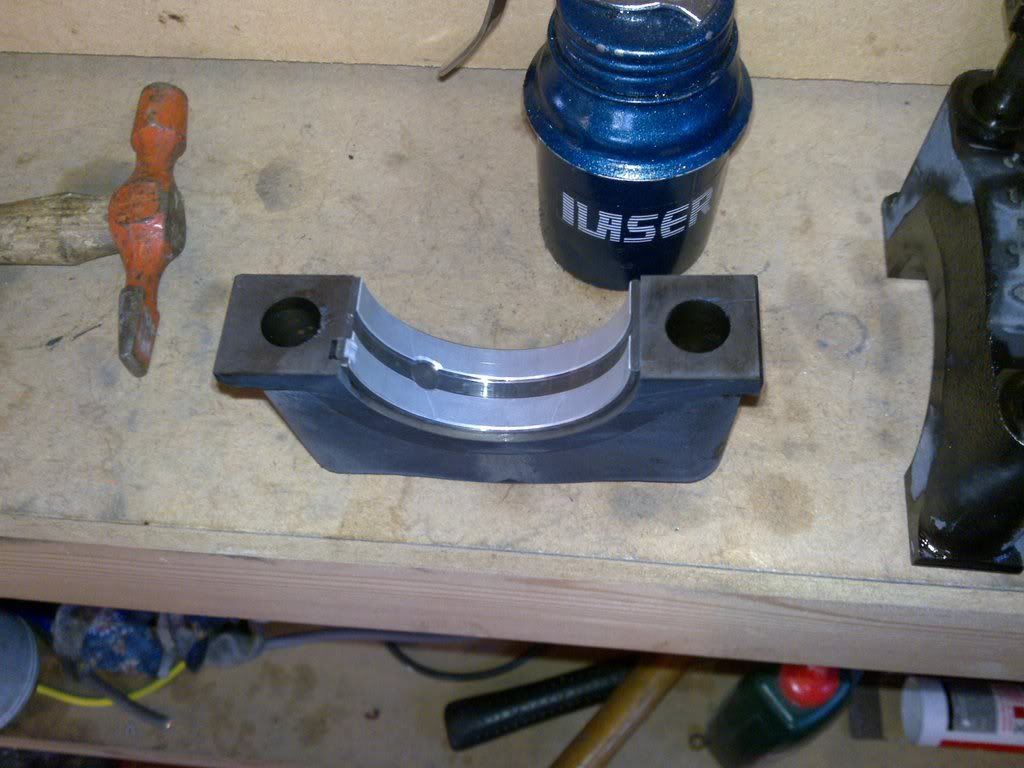
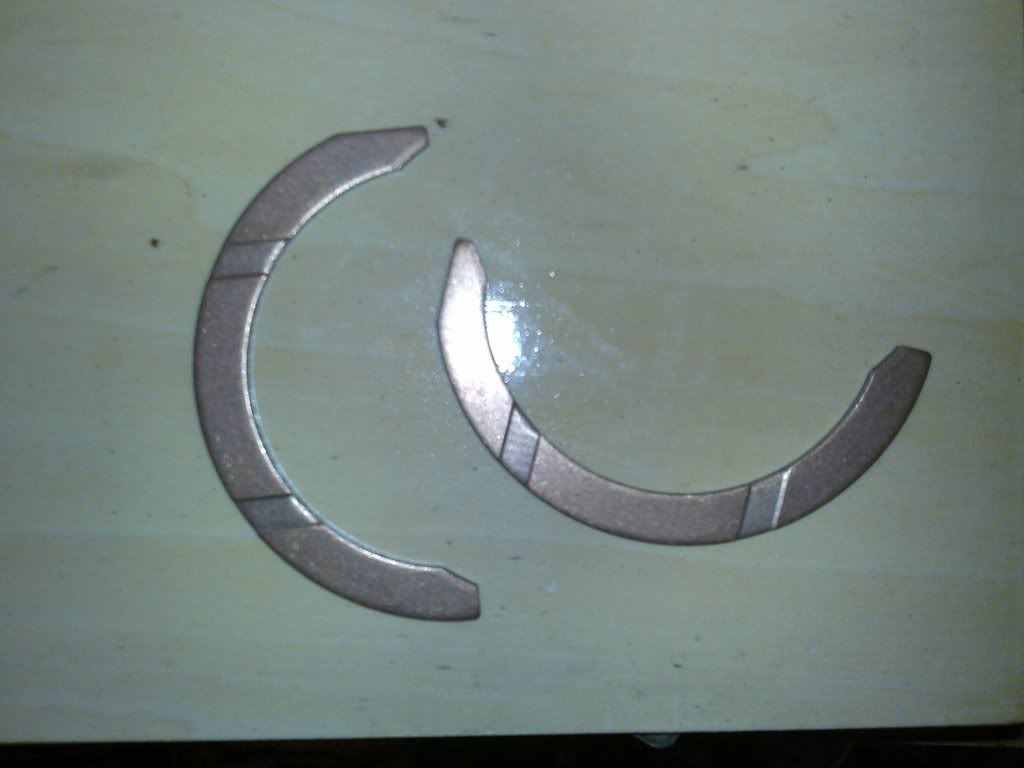
Because the thrust bearings need to be fitted. Early Evo owners will know what these are!!
Installed.
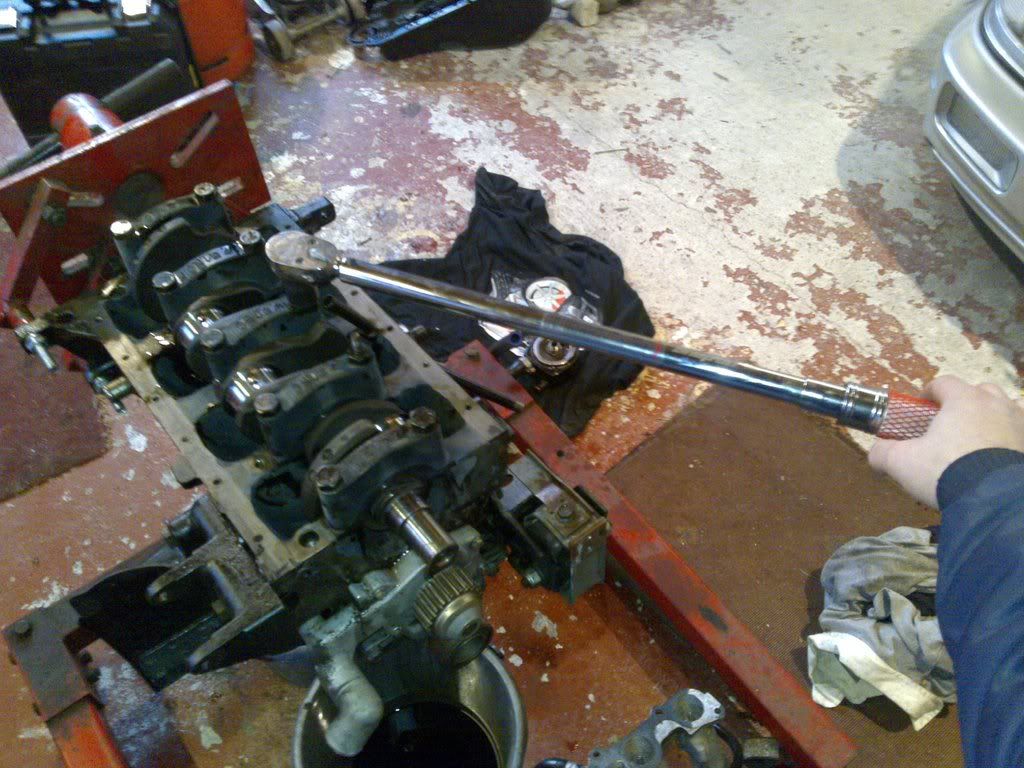
Torqued down, checking the crank still spins after each end cap is tightened.
Pistons cleaned up and inspected.
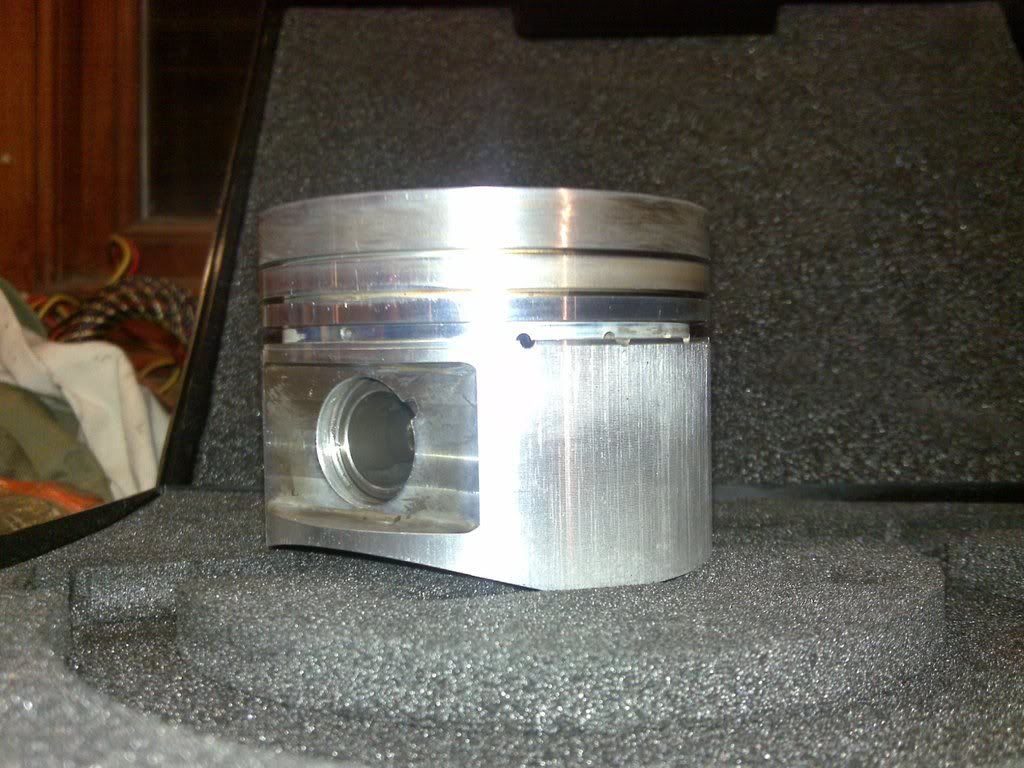
Fitted to the new rods.
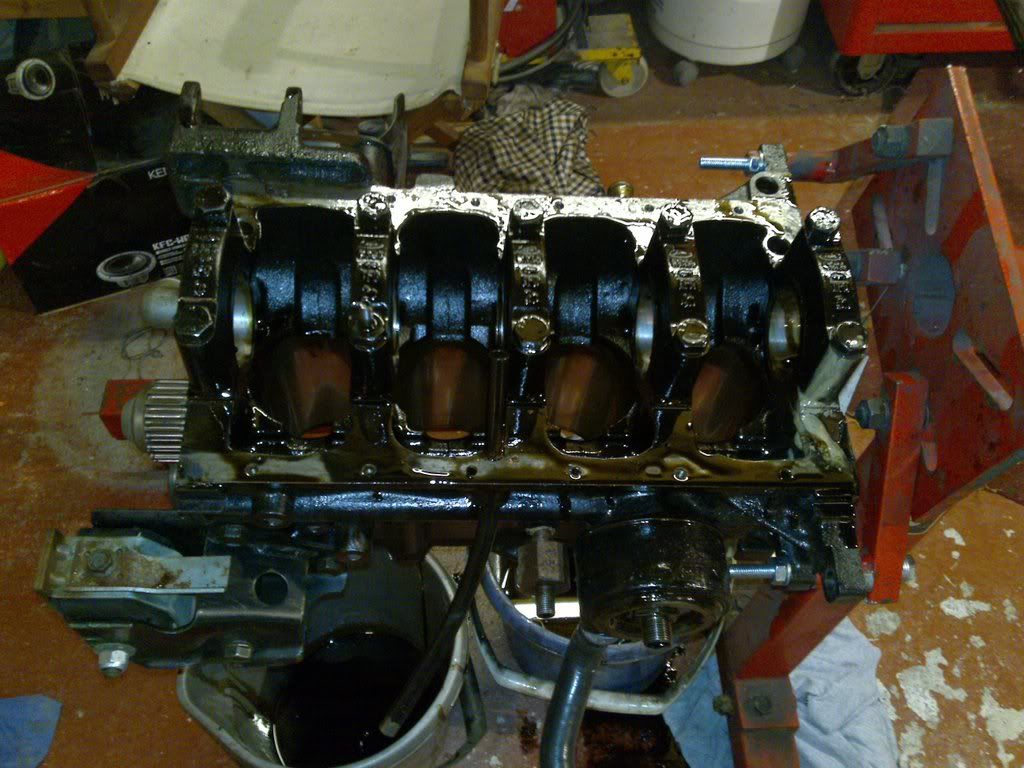
And finally for this weekend, block to head face cleaned up
Block cleaned up ready for instalation. All the bit from the old bearings removed.
Checking the bores for ovality and tapering.
Now I have under piston spray jets which can be sseen as the extra holes on the main bearing journals in this picture.
This means I have to drill my new bearings to allow oil to get to these jets.
Then the crank can be sat in.
And the bearing caps refitted. These are around twice as substantial as the ones fitted to the Zetec block which are a weak point when going big power. No such issue on the CVH.
Not forgetting plenty of oil.
All on apart from number 3
Because the thrust bearings need to be fitted. Early Evo owners will know what these are!!
Installed.
Torqued down, checking the crank still spins after each end cap is tightened.
Pistons cleaned up and inspected.
Fitted to the new rods.
And finally for this weekend, block to head face cleaned up
Last edited by DazC; 07-06-2009 at 01:38 PM.
Trending Topics
07-06-2009, 01:45 PM
#8
10K+ Poster!!
Thread Starter
iTrader: (1)
Join Date: May 2003
Location: Lancashire
Posts: 12,748
Likes: 0
Received 0 Likes
on
0 Posts
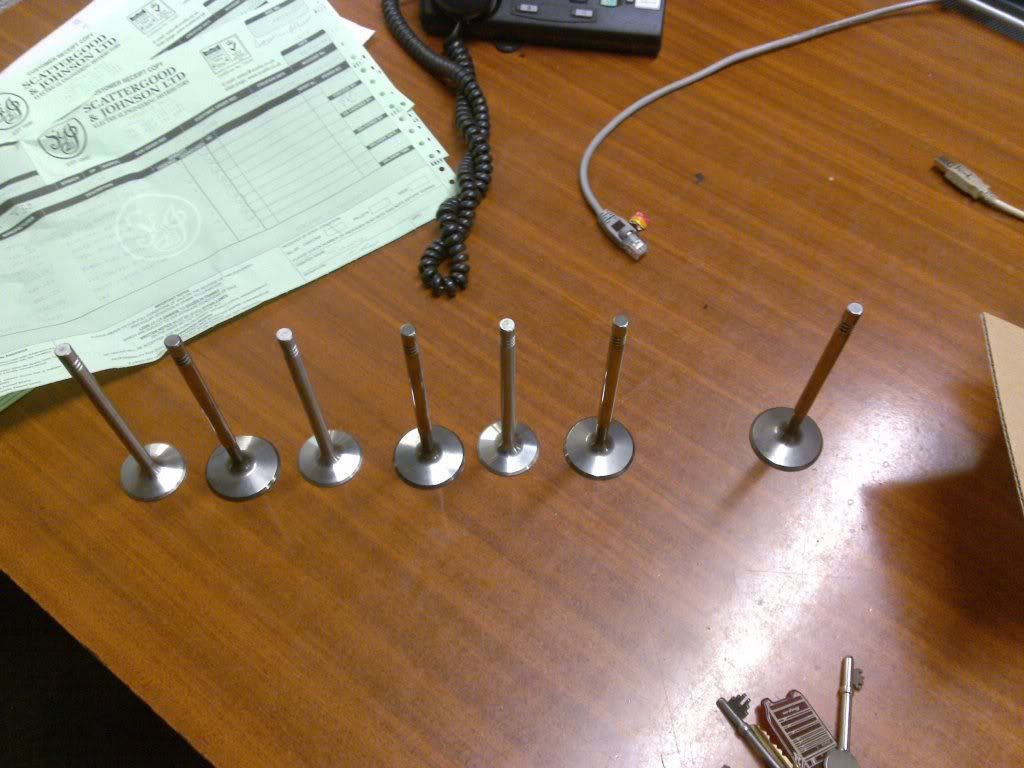
I ordered a full set of replacement big valves and got 7. Thankfully a quick phone call sorted that out
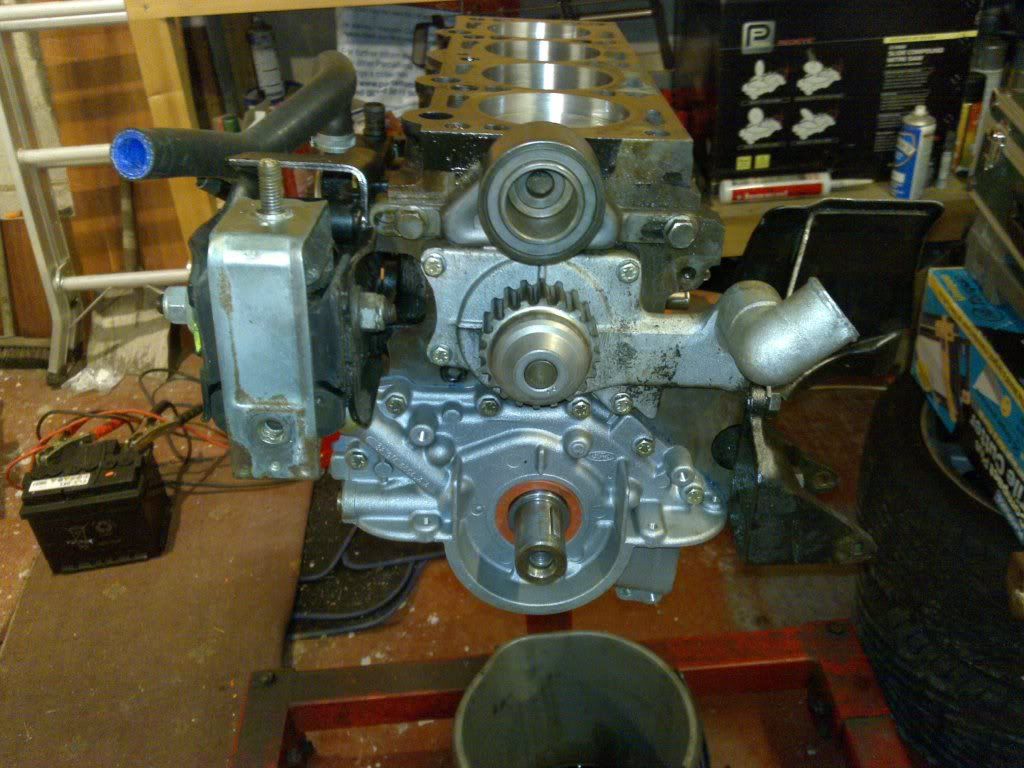
I fitted the pistons in the block.

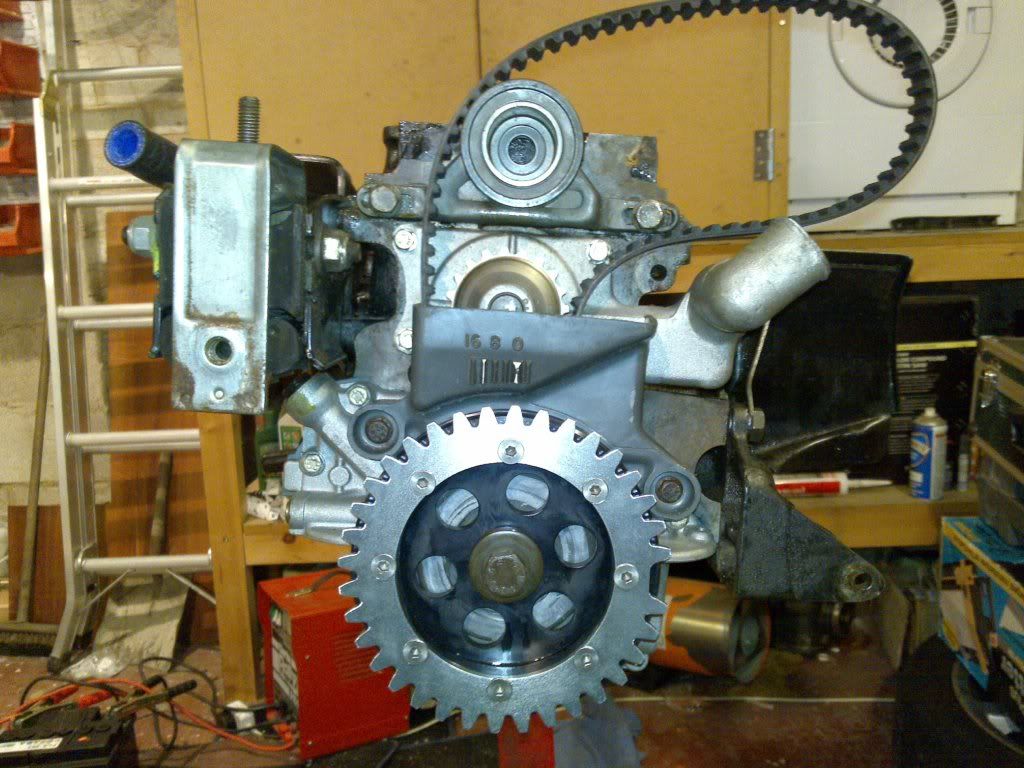
Fancy new pulley. Hopefully help it run on ew management. It weight 700 grams. 90 more than a standard one but a whole 300 less than the other abortion I was going to use!!
I fitted the pistons in the block.
Fancy new pulley. Hopefully help it run on ew management. It weight 700 grams. 90 more than a standard one but a whole 300 less than the other abortion I was going to use!!
Last edited by DazC; 07-06-2009 at 02:01 PM.
07-06-2009, 01:50 PM
#9
10K+ Poster!!
Thread Starter
iTrader: (1)
Join Date: May 2003
Location: Lancashire
Posts: 12,748
Likes: 0
Received 0 Likes
on
0 Posts
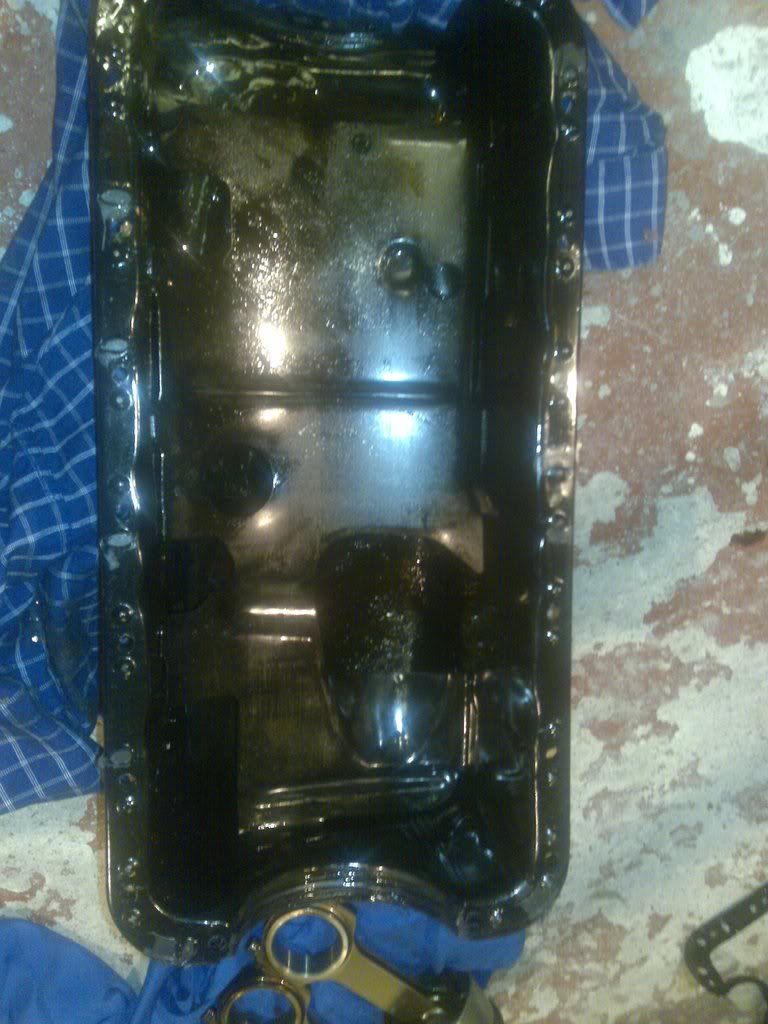
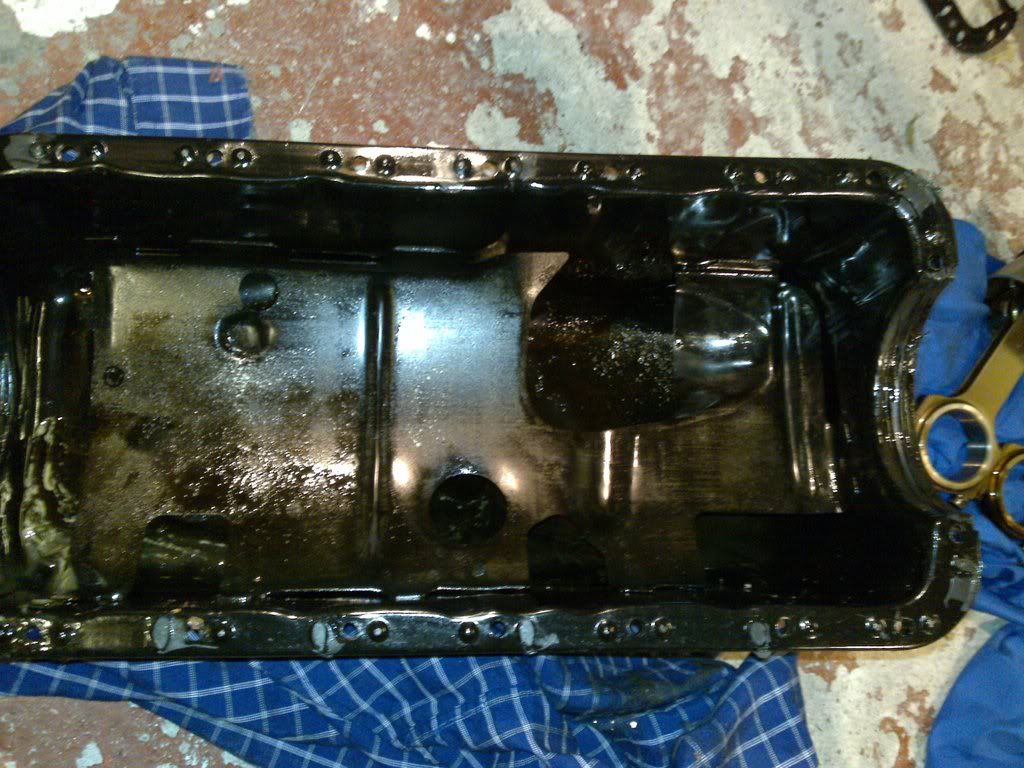
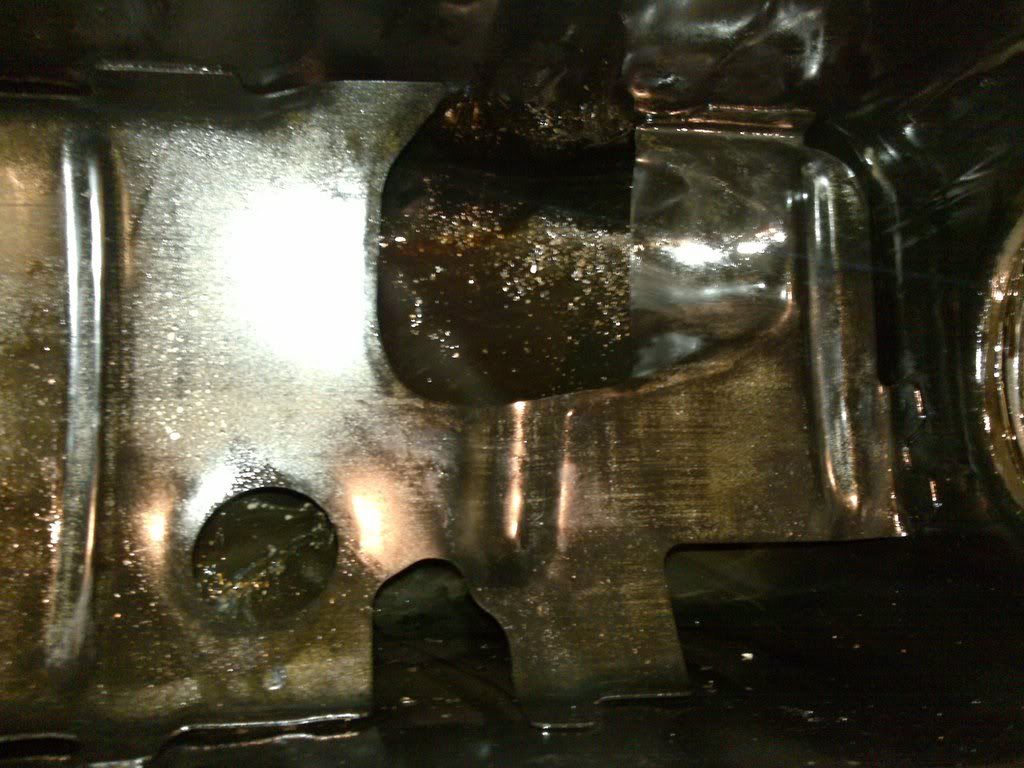
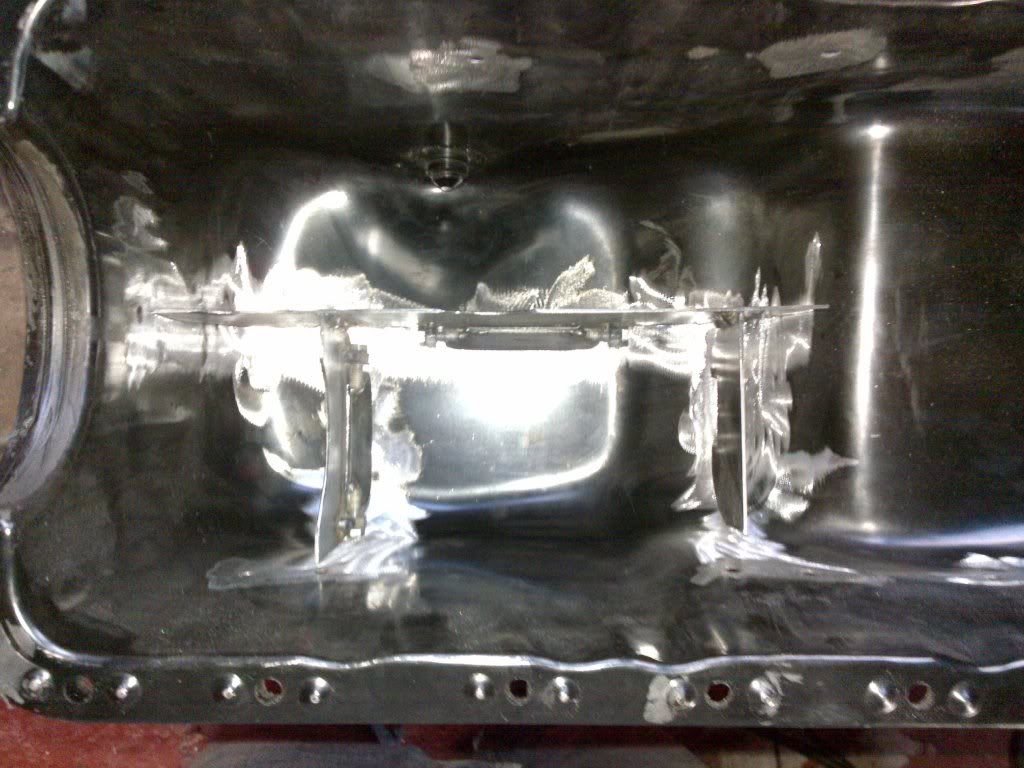
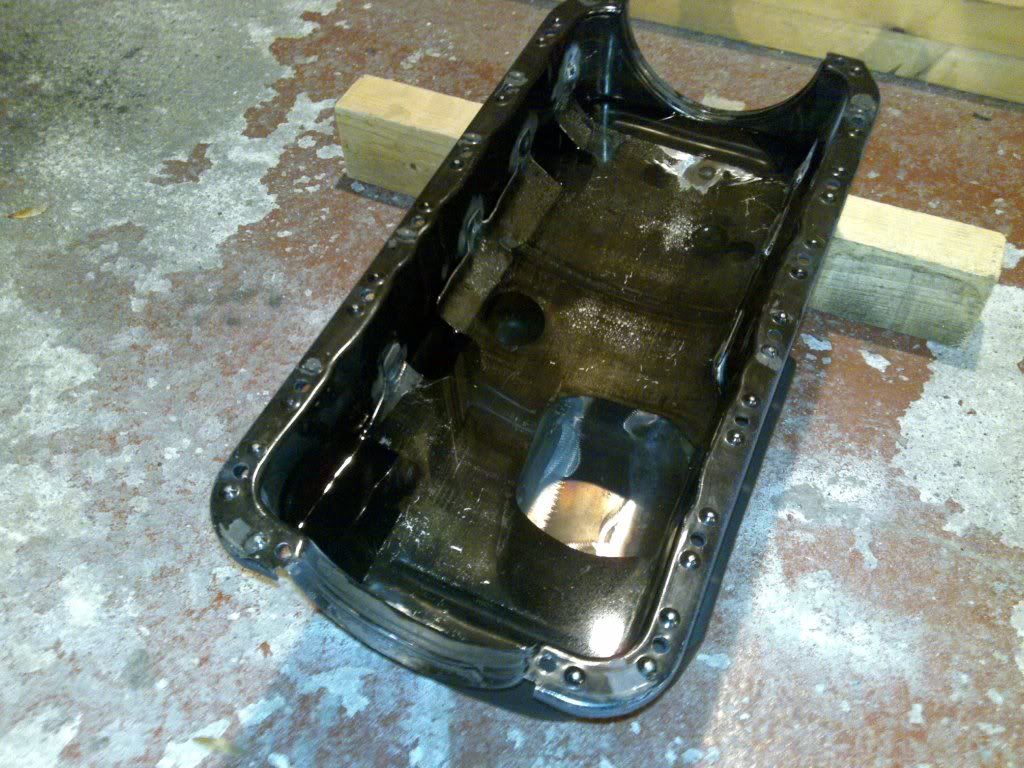
Today has been modify your sump day. I had already cut the plates at work with the plasma cutter and decided I'd use my welder at home because I can stick shit to a blanket with it where as I am not 100% used to the one at work. Plus mine is less abused.
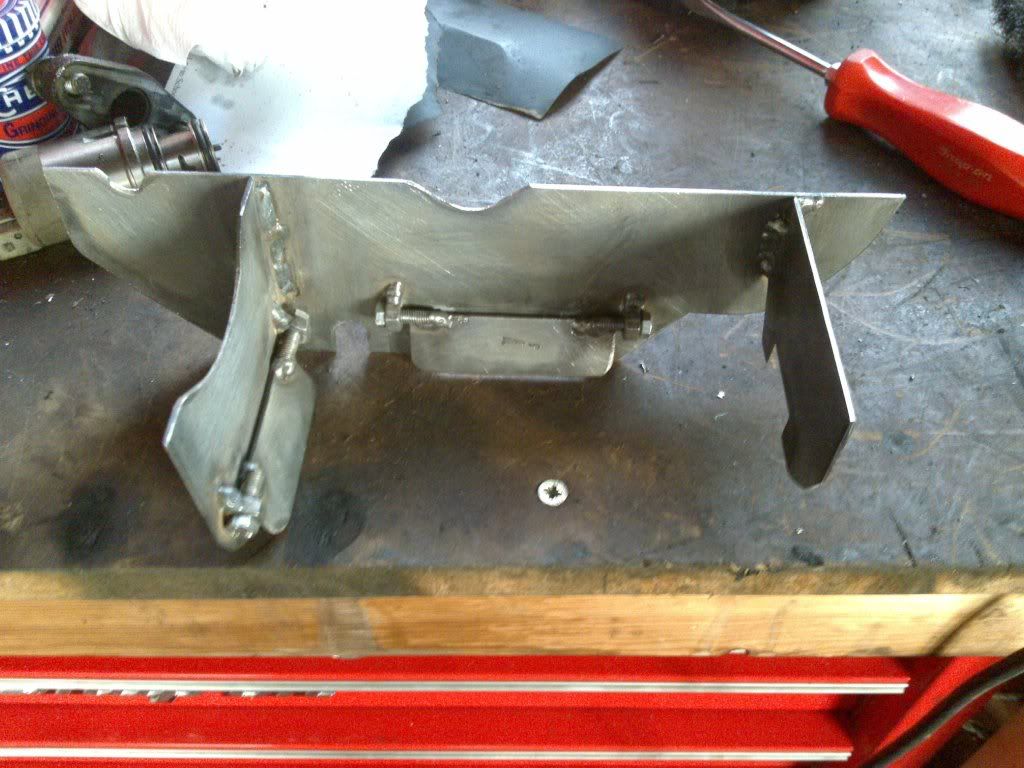
First off is the gated baffles.
Then I glued them into the sump.
Then I decided that my oil molecules needed a bit of a lean too for them to spread out into so here it is. The lean too nailed on the side of my sump.
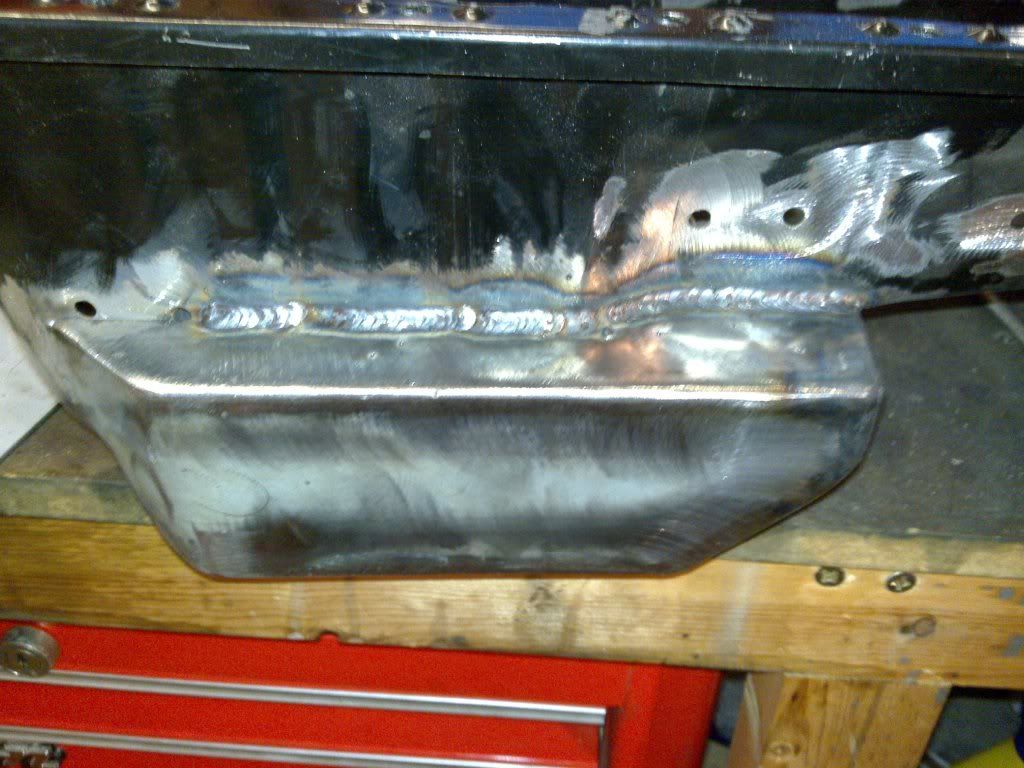
Then after butchering the baffle out, I had to butcher it back in......
Fully welded sump extension
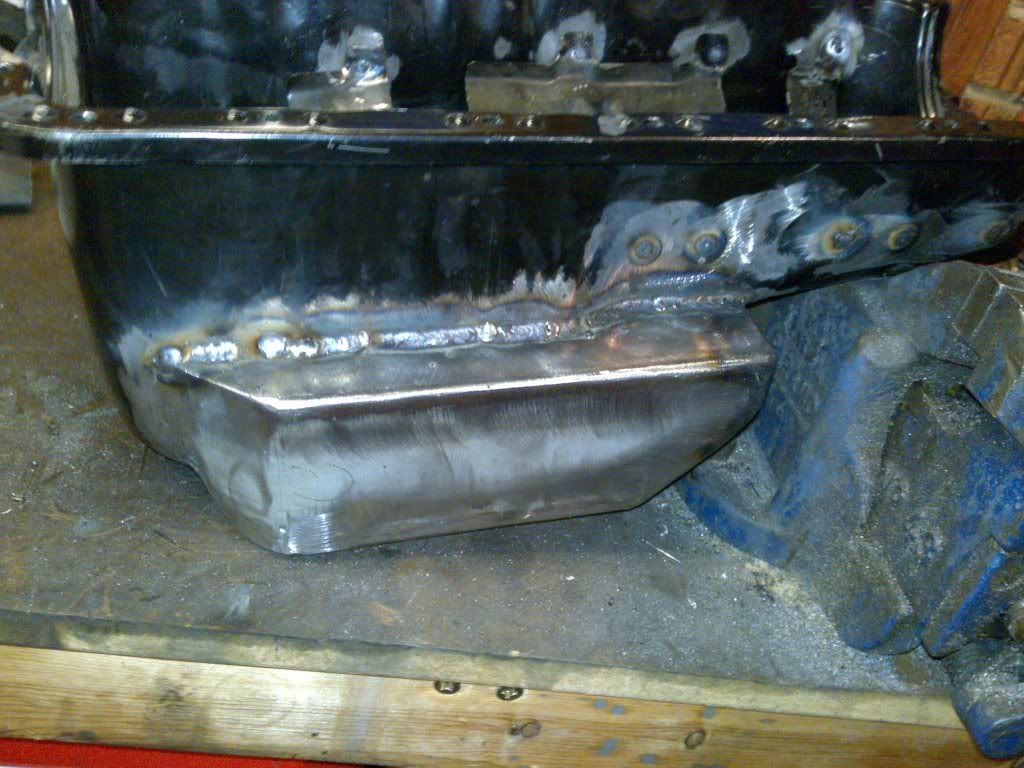
Using the original front as a baffle
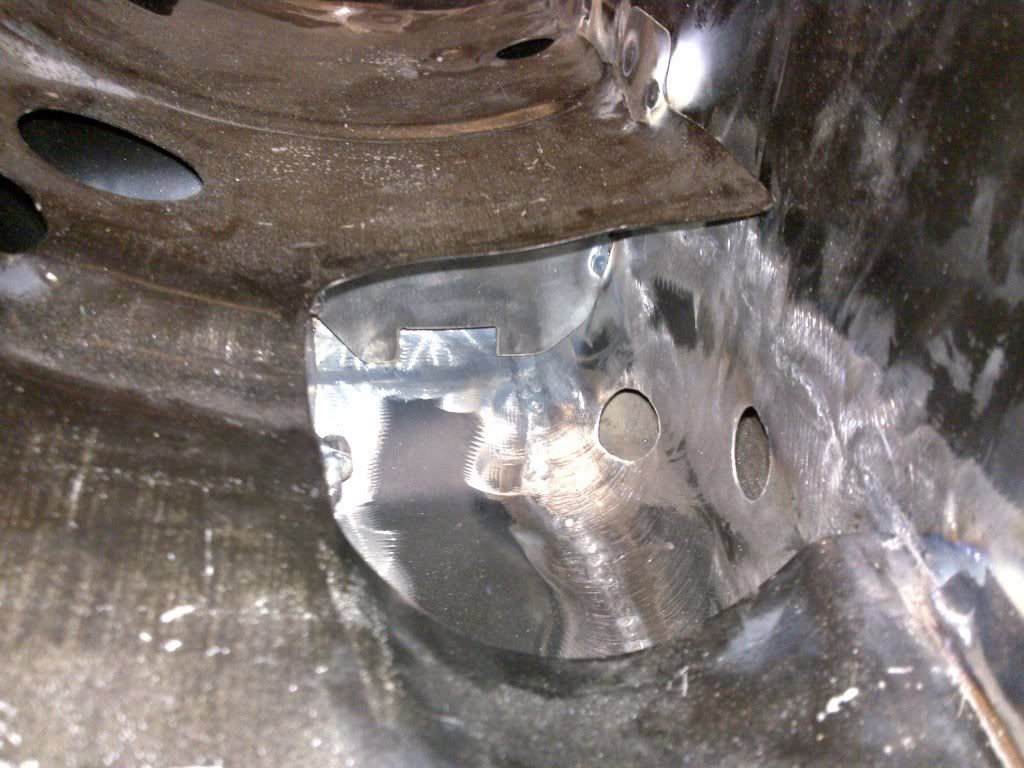
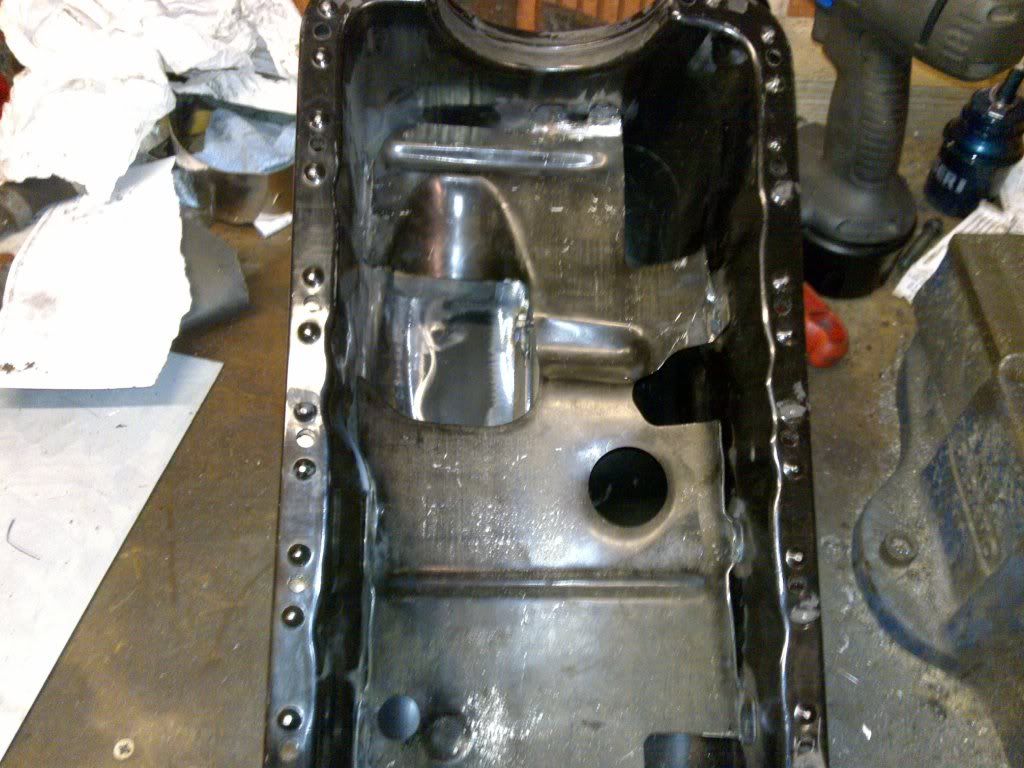
Windage tray back in.
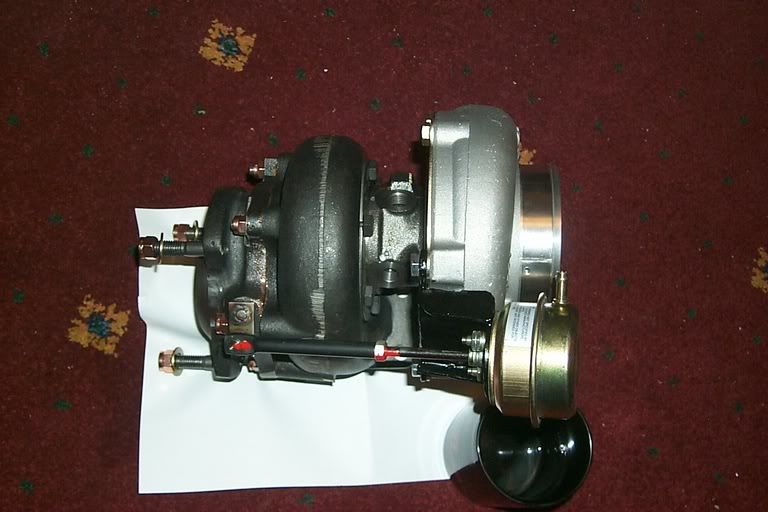
Then I thought I'd fit my turbo but his a small issue. It interferes
with the manifold worse than gary glitter does children!
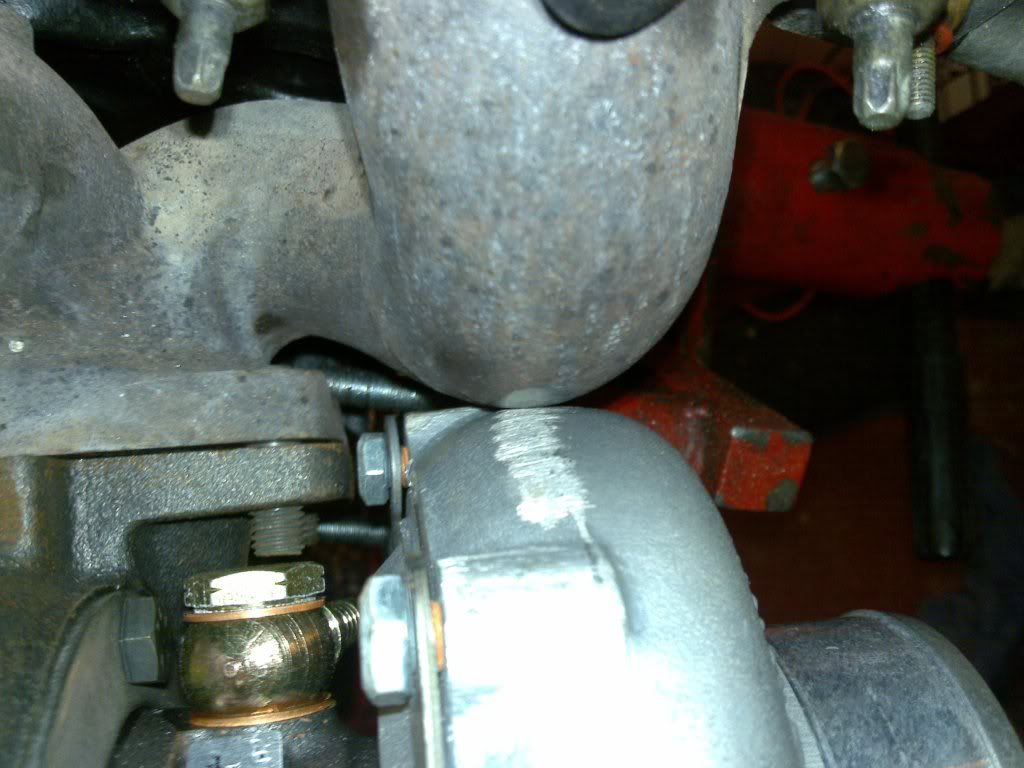
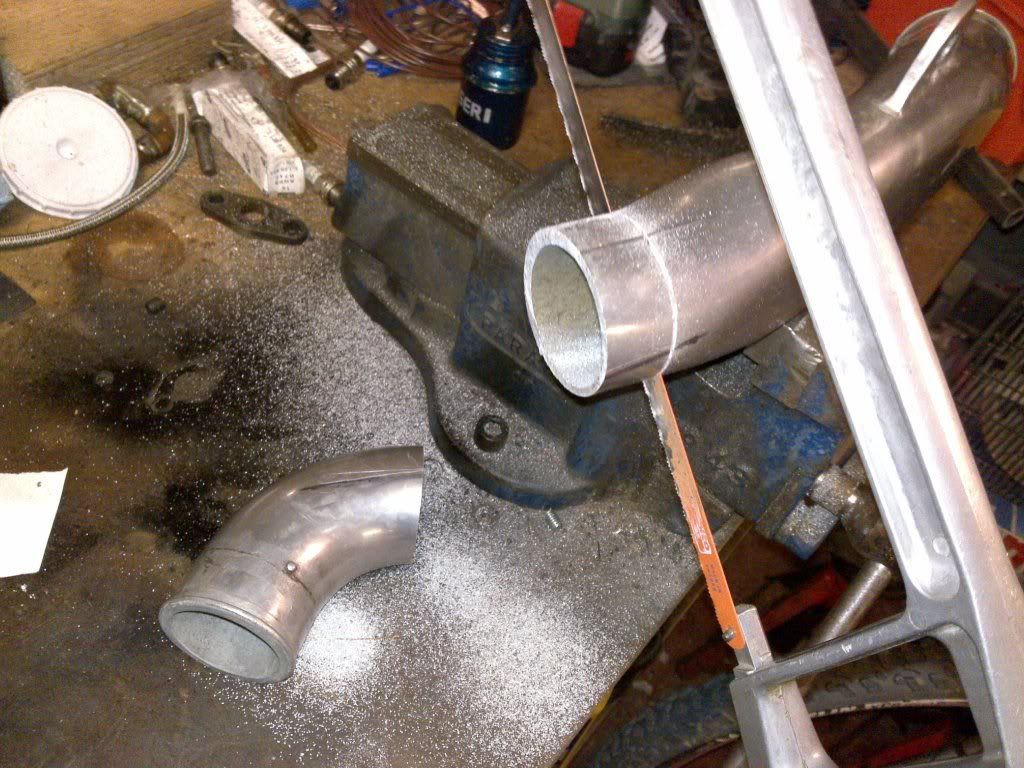
So I decided to run the turbo blowing air the wrong way around the intercooler compared to standard.
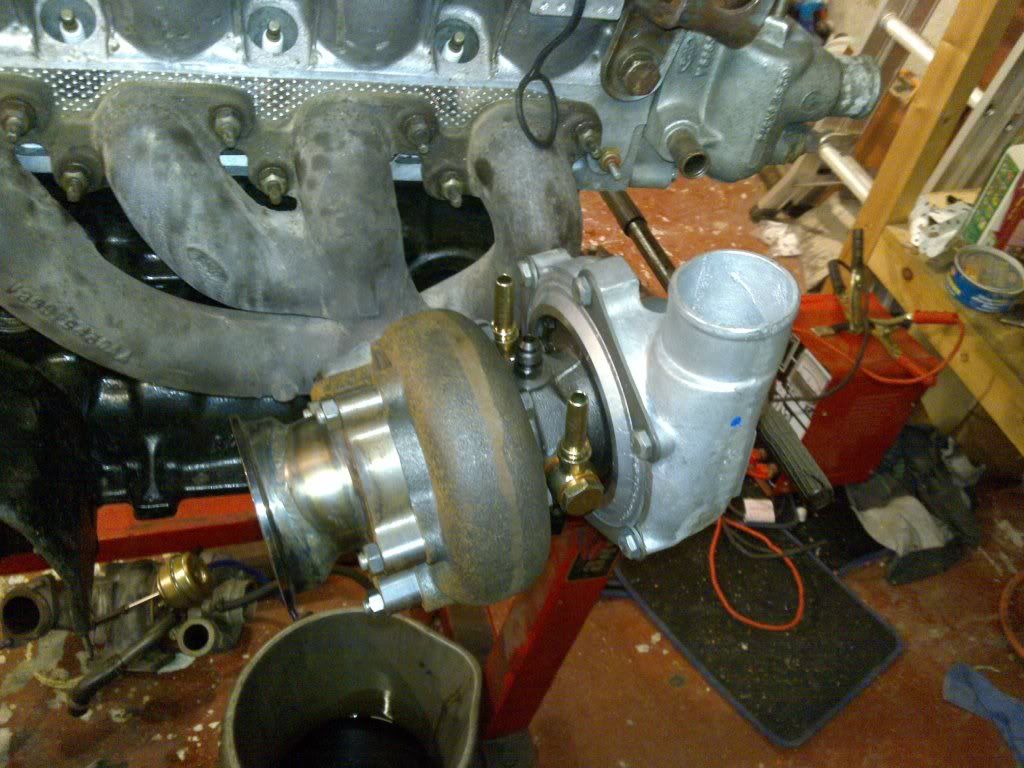
I knocked up an oil feed pipe to keep things lubed up. Mostly my turbo.
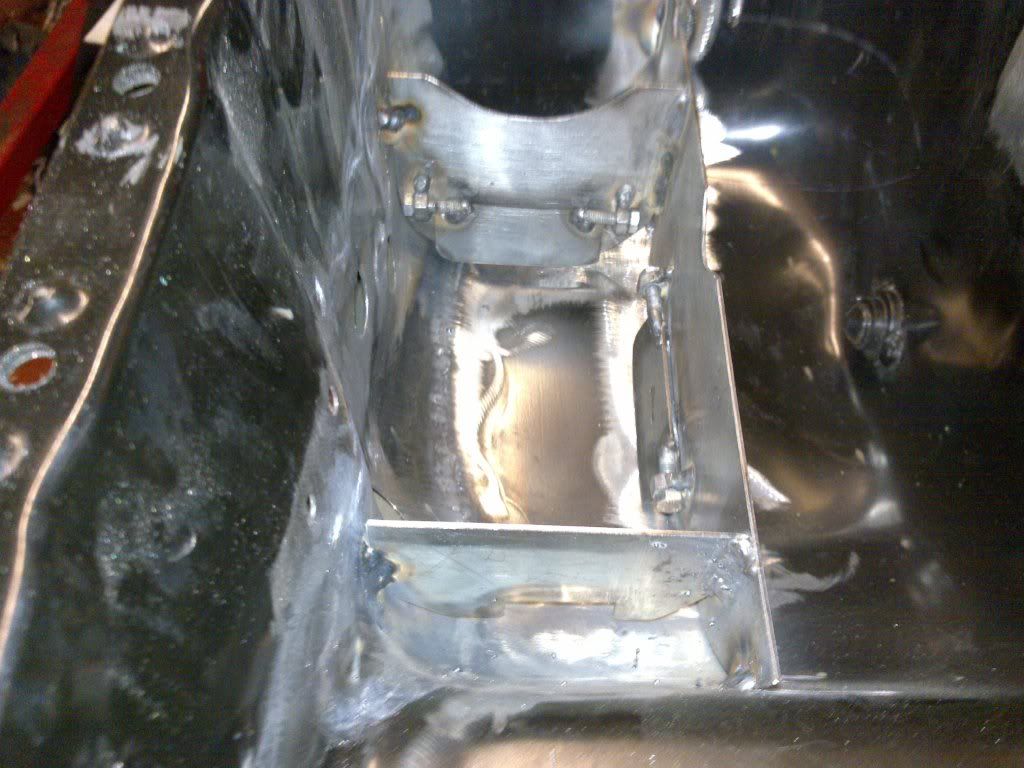
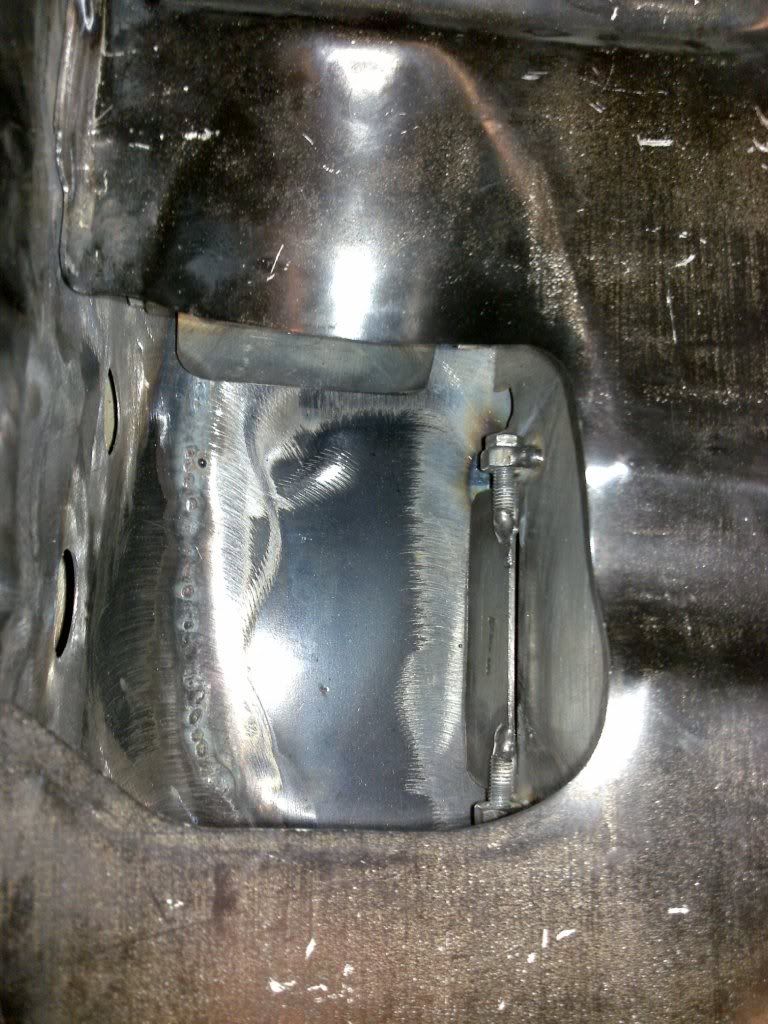
Then I had a go at making my actuator bracket and oil return. Work in progress
And finally a test of my sump to see if it holds water, literally.
First off is the gated baffles.
Then I glued them into the sump.
Then I decided that my oil molecules needed a bit of a lean too for them to spread out into so here it is. The lean too nailed on the side of my sump.
Then after butchering the baffle out, I had to butcher it back in......
Fully welded sump extension
Using the original front as a baffle
Windage tray back in.
Then I thought I'd fit my turbo but his a small issue. It interferes
with the manifold worse than gary glitter does children!
So I decided to run the turbo blowing air the wrong way around the intercooler compared to standard.
I knocked up an oil feed pipe to keep things lubed up. Mostly my turbo.
Then I had a go at making my actuator bracket and oil return. Work in progress
And finally a test of my sump to see if it holds water, literally.
 07-06-2009, 01:52 PM
#11
10K+ Poster!!
Thread Starter
iTrader: (1)
Join Date: May 2003
Location: Lancashire
Posts: 12,748
Likes: 0
Received 0 Likes
on
0 Posts
Latest update. Things are moving slowly but it isn't far off now.
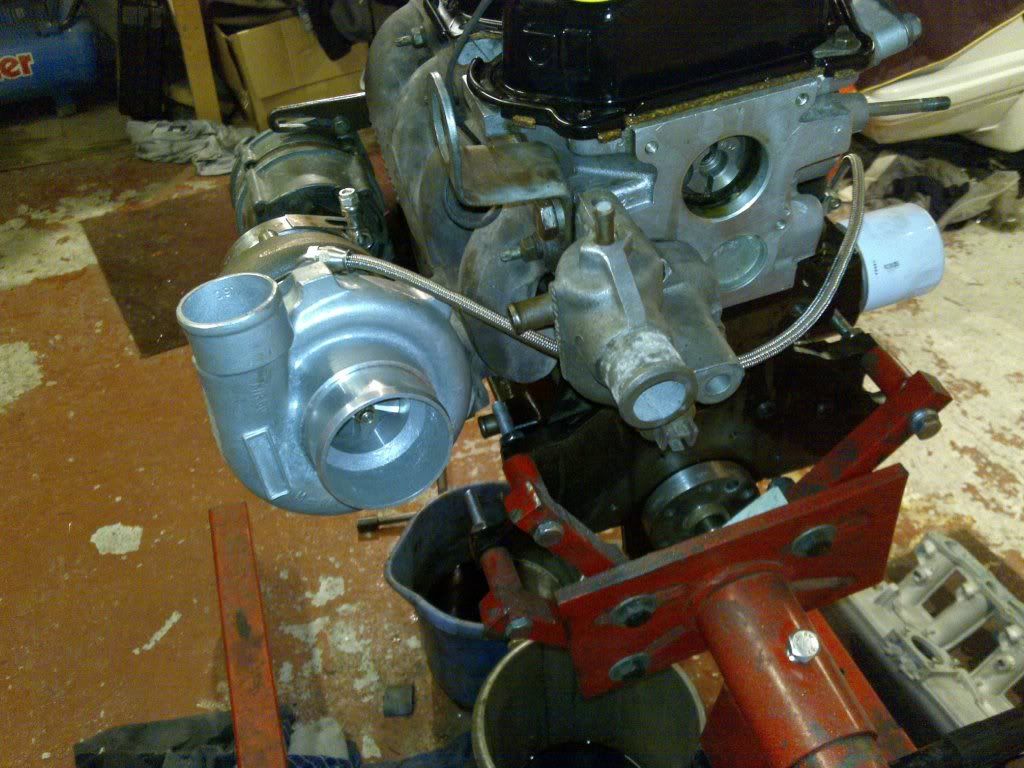
I needed a hole filling in on my breather and a larger diameter pipe fitting welding on to replace another. I've previously had the bracket welded onto to bolt it to the manifold. I still need to modify the bottom return pipe fitting.
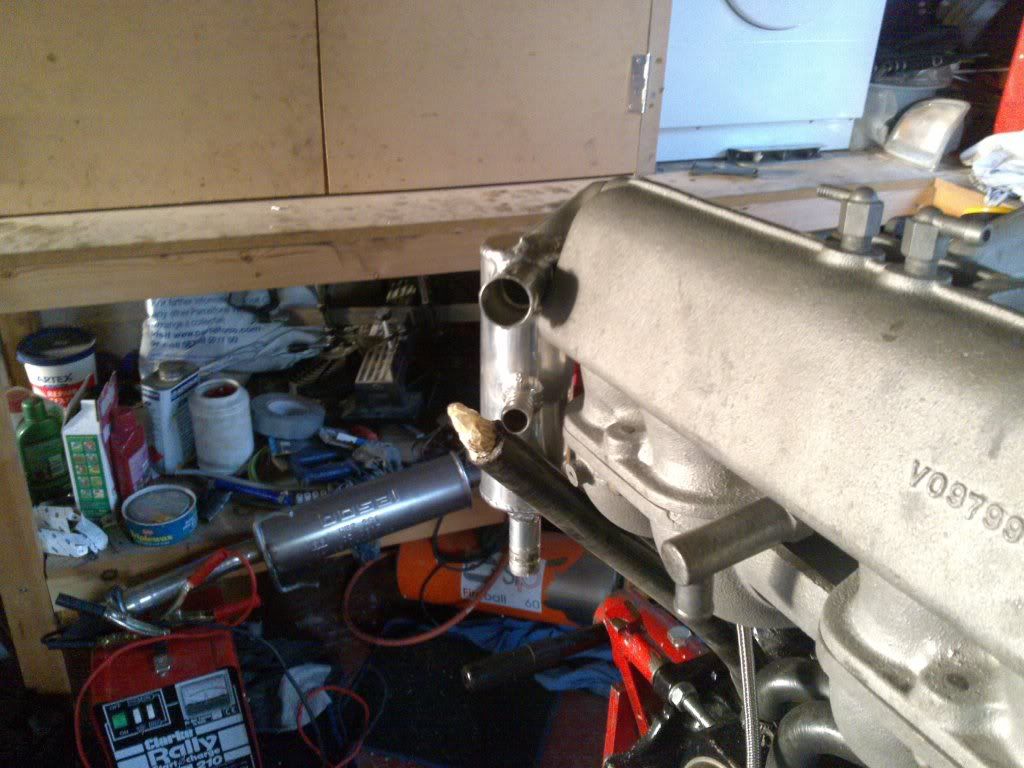
I had a issue with the cross over pipe being too long and blocking the outlet from the turbo, so I cut out 20mm out of it and got it welded back up
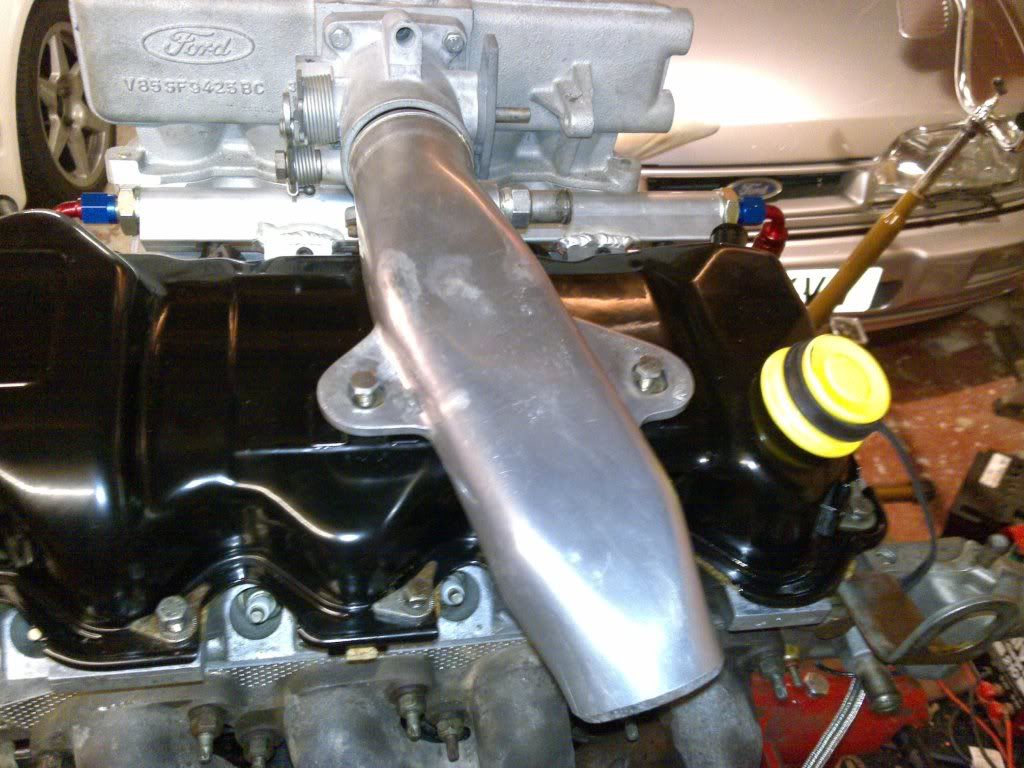

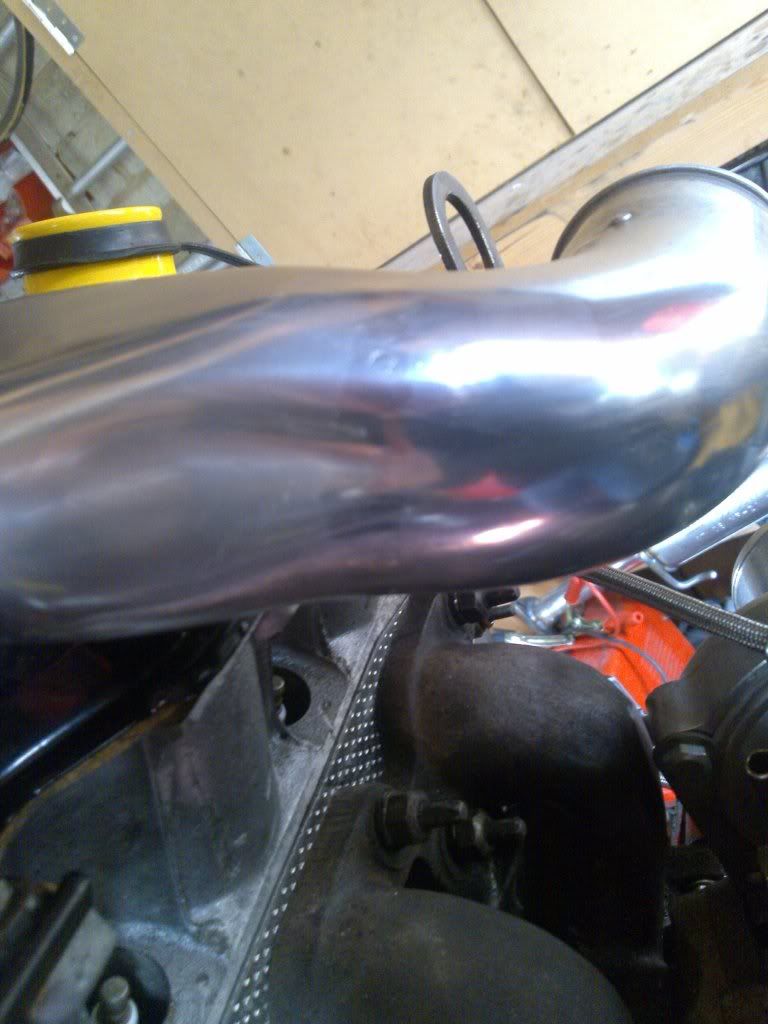
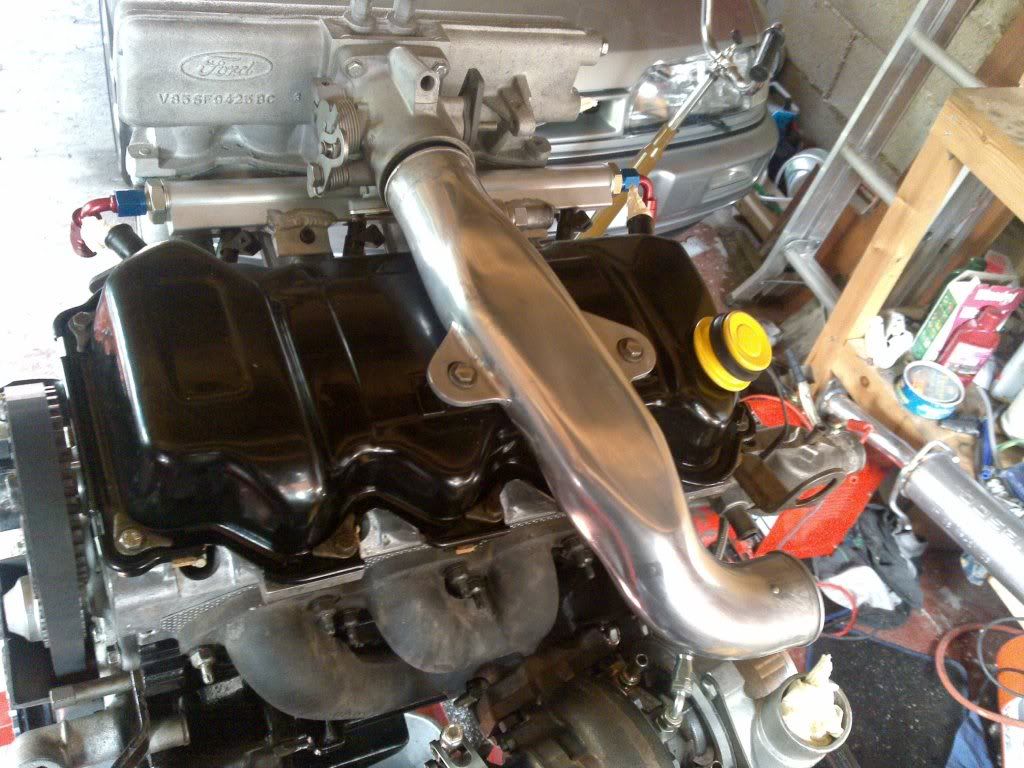
Which now gives me some clearance to get some pipes on!
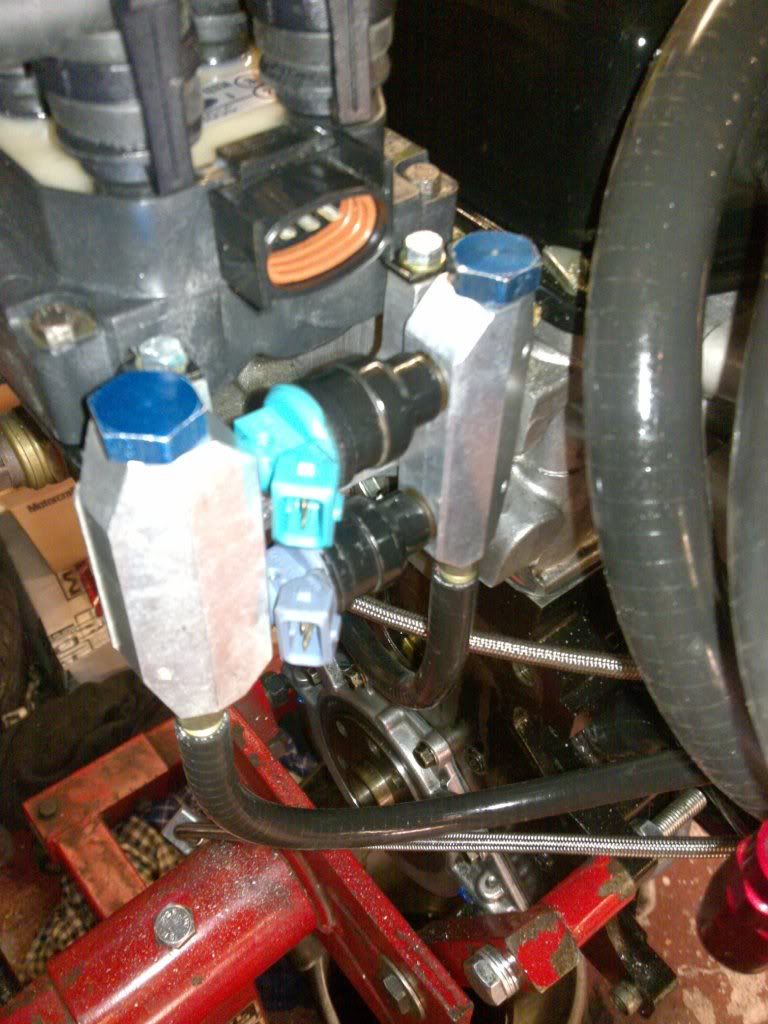
I also got a flange knocked up to fit onto the manifold to provide a connection for a pipe to feed my 5 bar MAP sensor. This needs remote mounting somewhere....

I also set about unpicking the management loom from the car. I have to keep this in working order as it's going in the 16i that AJC has bought back.
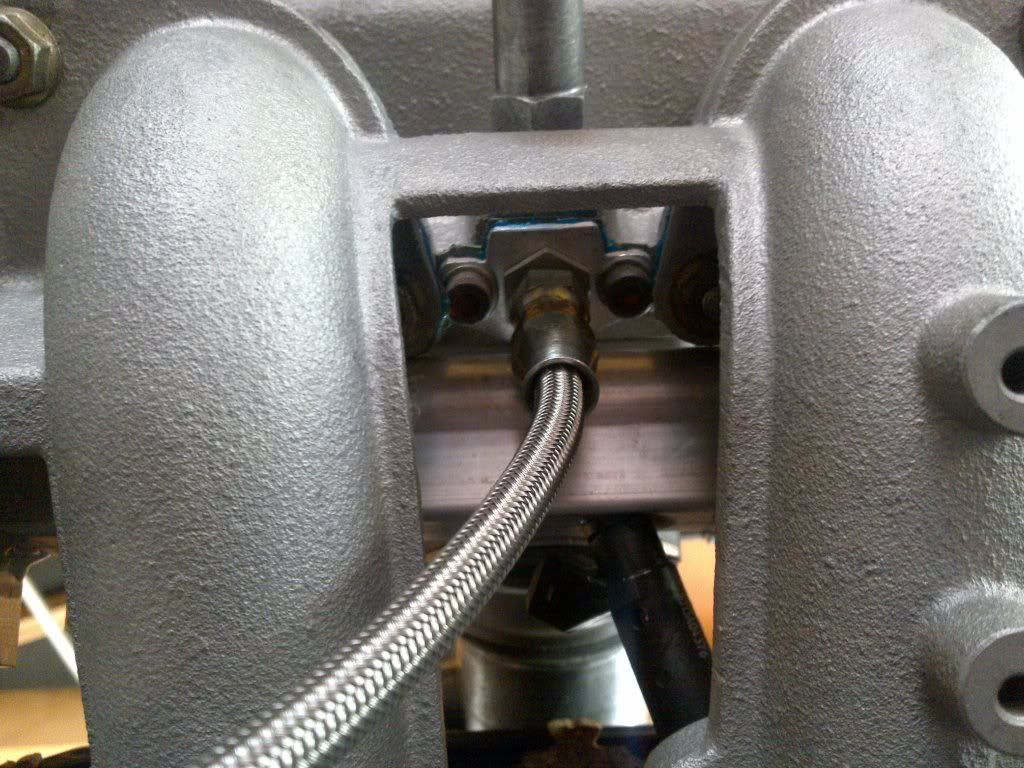
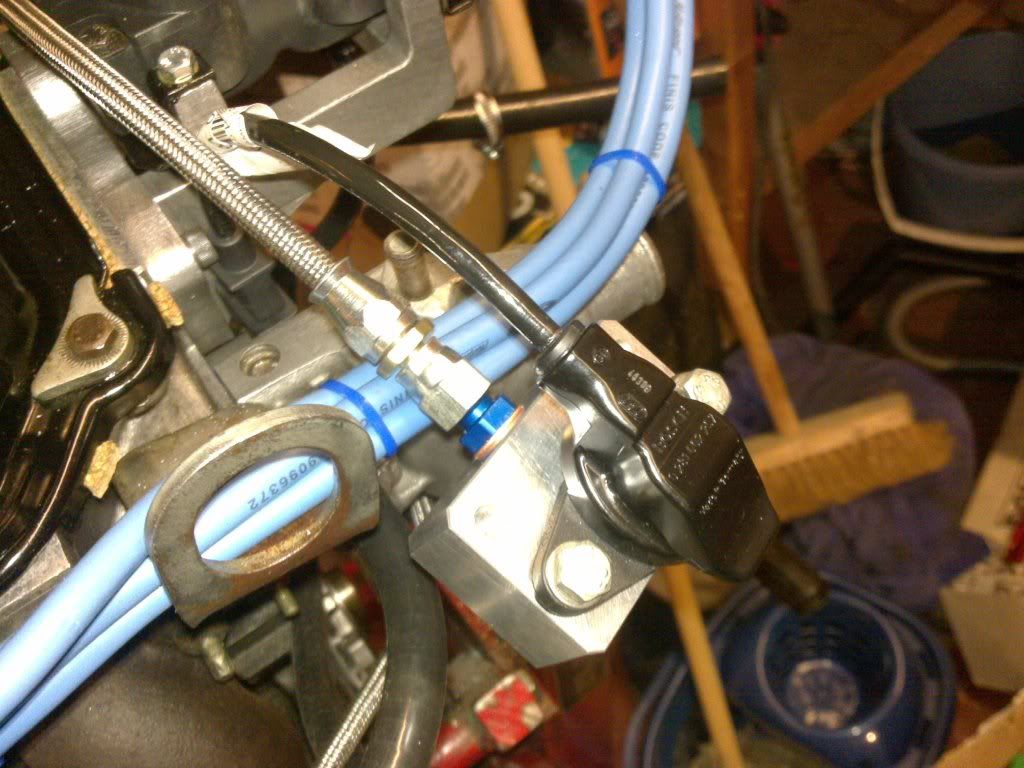
And then a little bit of aeroquip. More of this stuff to come.

I needed a hole filling in on my breather and a larger diameter pipe fitting welding on to replace another. I've previously had the bracket welded onto to bolt it to the manifold. I still need to modify the bottom return pipe fitting.
I had a issue with the cross over pipe being too long and blocking the outlet from the turbo, so I cut out 20mm out of it and got it welded back up
Which now gives me some clearance to get some pipes on!
I also got a flange knocked up to fit onto the manifold to provide a connection for a pipe to feed my 5 bar MAP sensor. This needs remote mounting somewhere....
I also set about unpicking the management loom from the car. I have to keep this in working order as it's going in the 16i that AJC has bought back.
And then a little bit of aeroquip. More of this stuff to come.
07-06-2009, 01:55 PM
#12
10K+ Poster!!
Thread Starter
iTrader: (1)
Join Date: May 2003
Location: Lancashire
Posts: 12,748
Likes: 0
Received 0 Likes
on
0 Posts
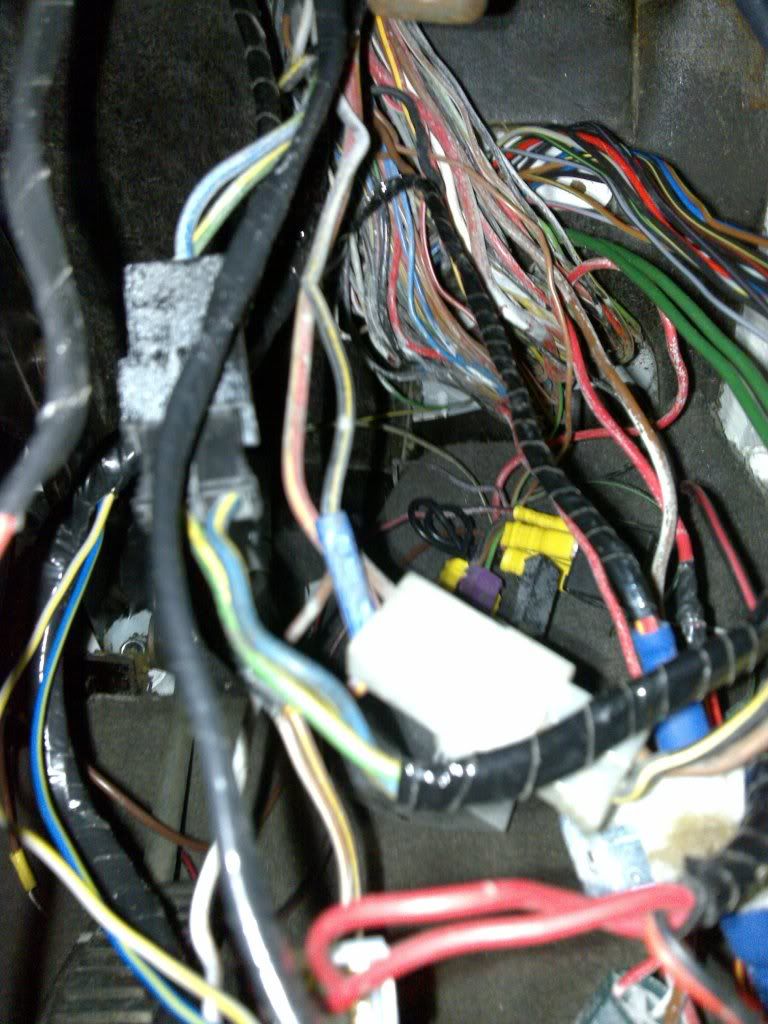
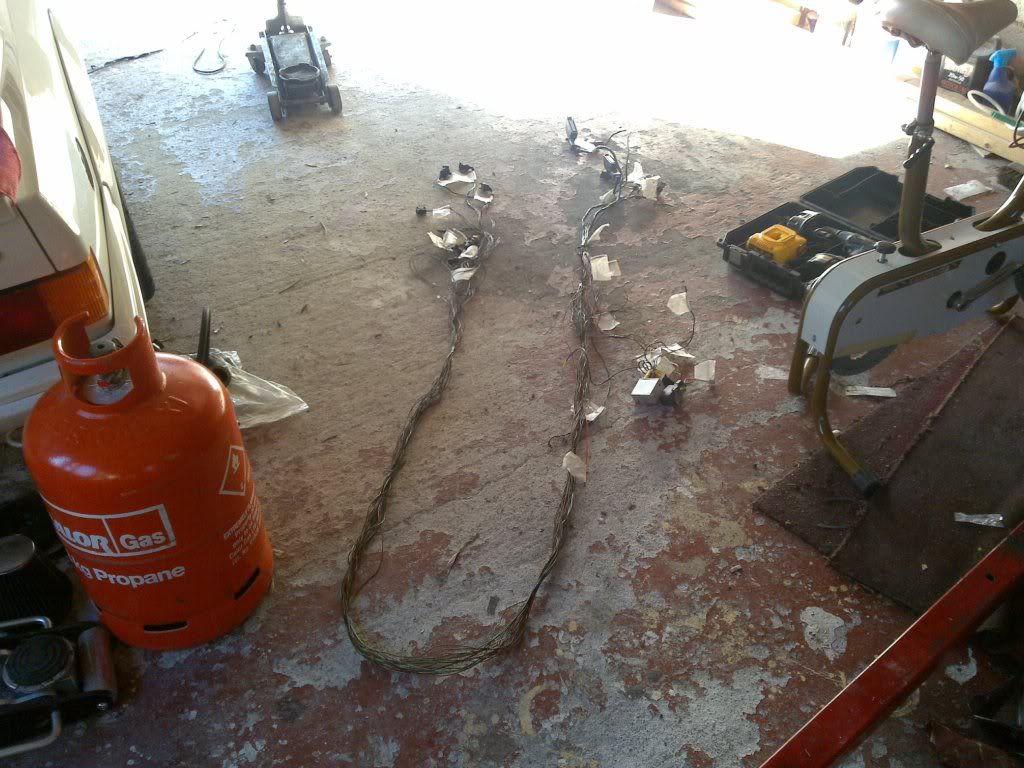
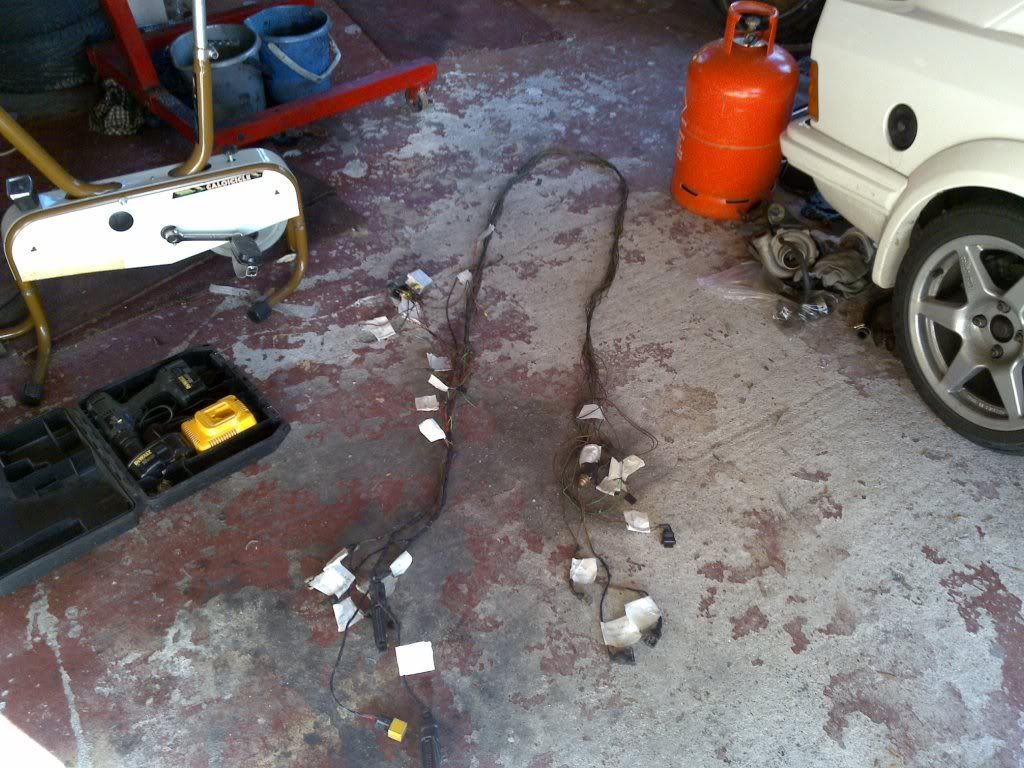
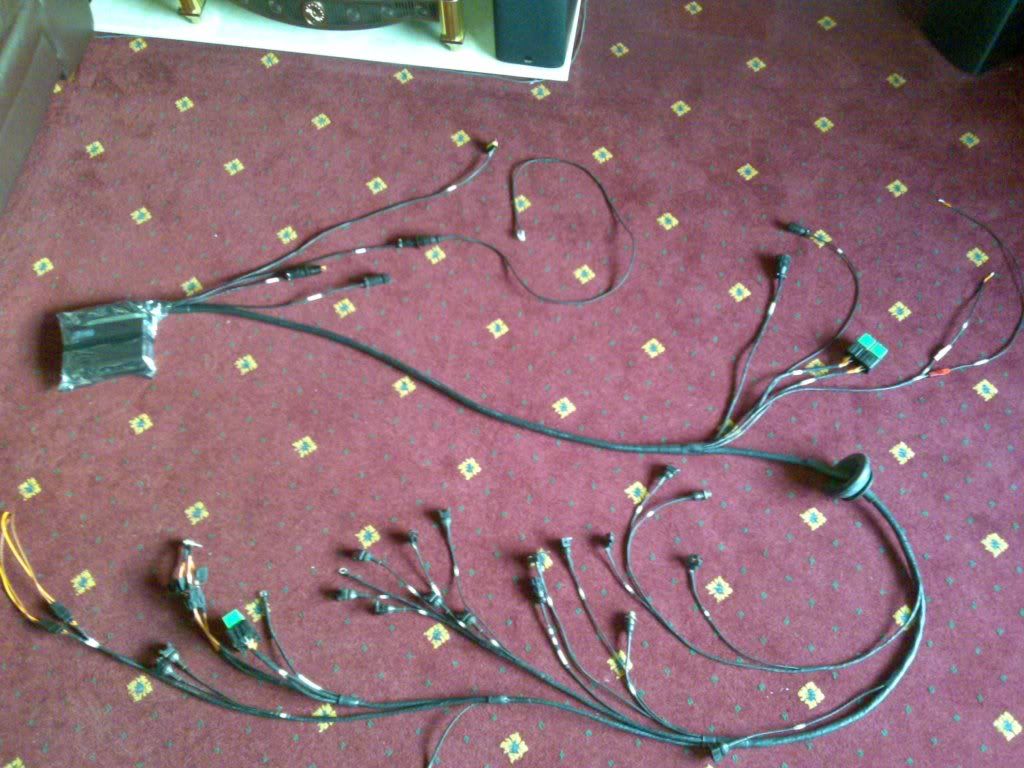
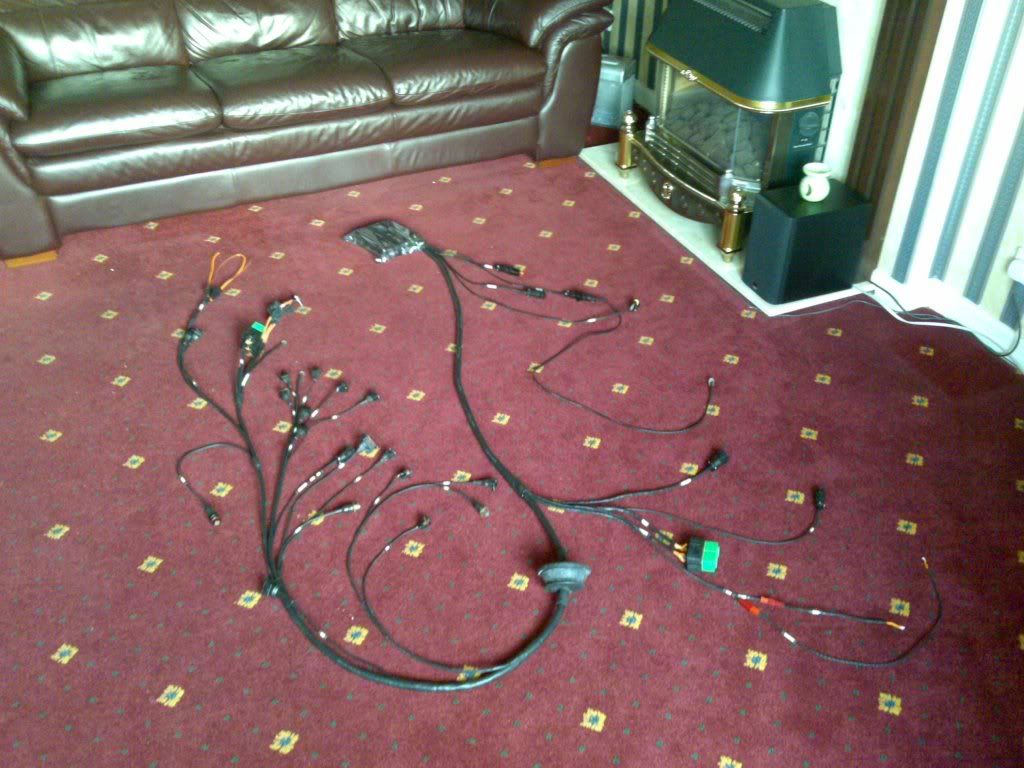
Some more done tonight. Stripping back the loom to unpick the management loom away from the main car loom. Not an easy job as it keeps passing trough other wiring. Got most of it seperated though.
Like I say, I can't just axe through it and bin i all as it's got to go back in another car. Otherwise it would be really easy to remove!!

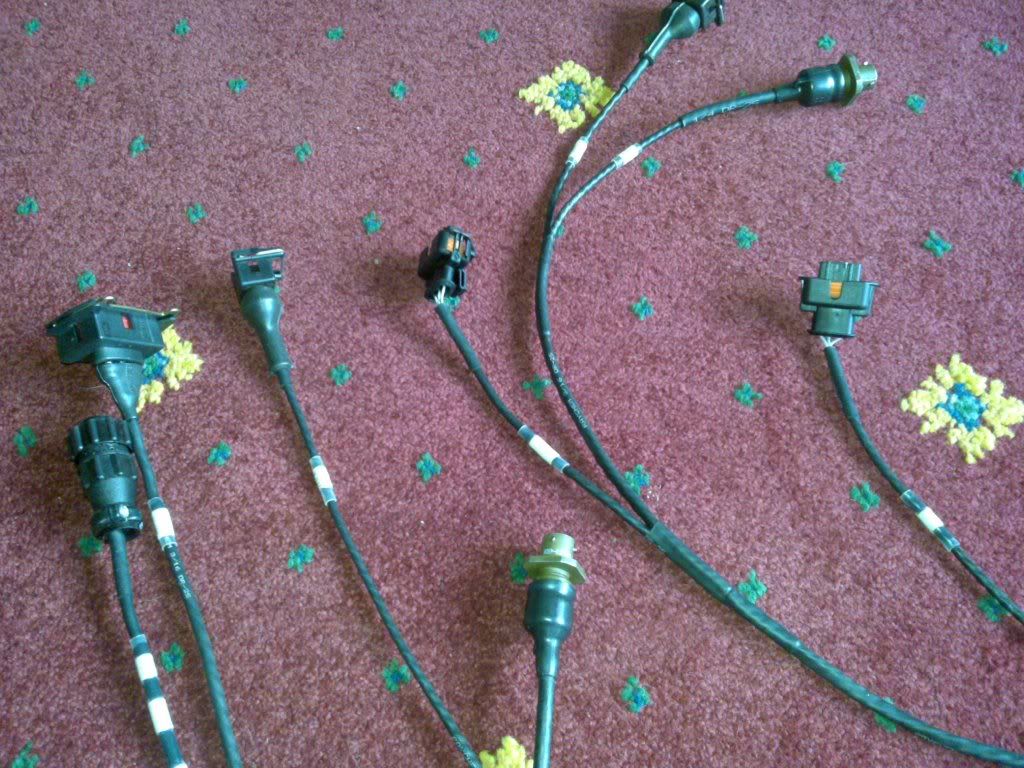
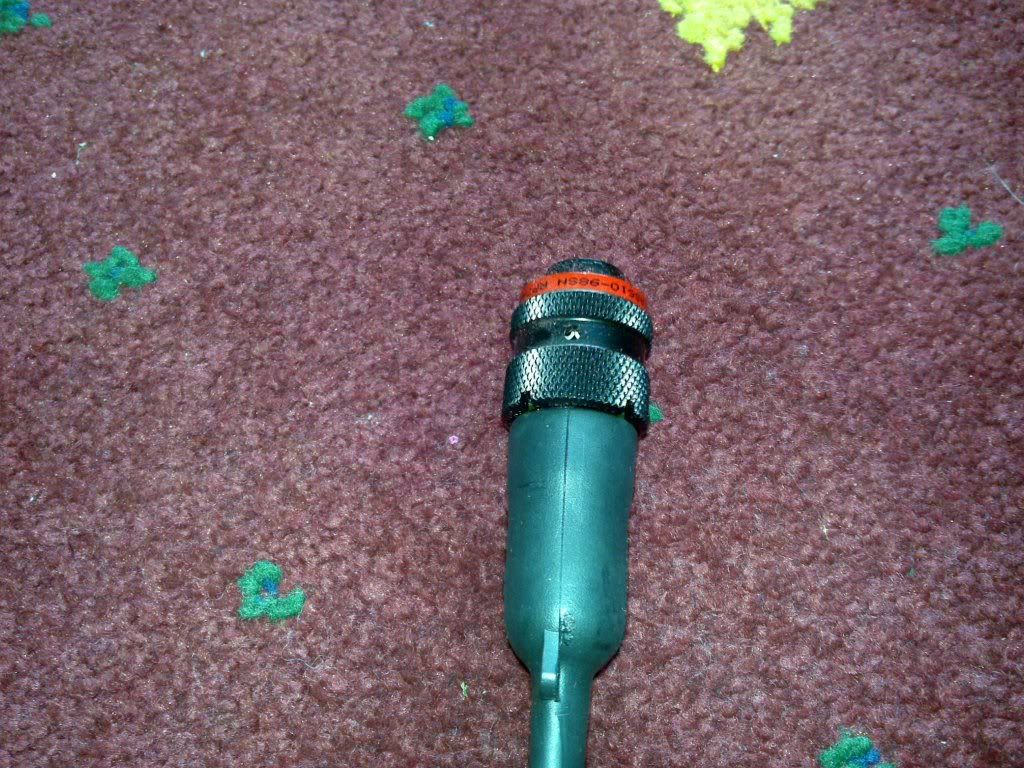
ECU plugs

Fuse box
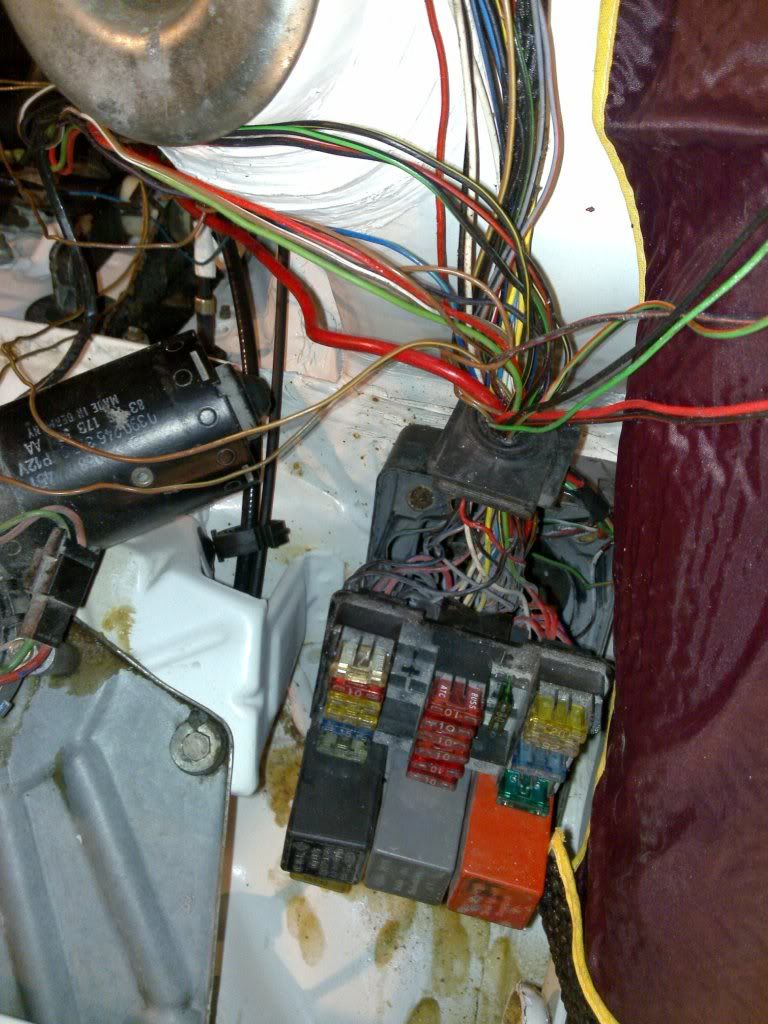
Under the dash. Still got to finish under here.
[img]
http://img.photobucket.com/albums/0703/DazC1/06052009168.jpg[/img]
And one of my modified breather....

It's wierd the way the looms are made. Some of it is as if it's been an after thought, like they've made all the looms and thought "Shit!! We need to run this in!" And then lashed it through all the rest of the wires instead of alongside. The rev counter wire always seems a bit of an after thought as they were run on the outside of the loom!.
Like I say, I can't just axe through it and bin i all as it's got to go back in another car. Otherwise it would be really easy to remove!!
ECU plugs
Fuse box
Under the dash. Still got to finish under here.
[img]
http://img.photobucket.com/albums/0703/DazC1/06052009168.jpg[/img]
And one of my modified breather....
It's wierd the way the looms are made. Some of it is as if it's been an after thought, like they've made all the looms and thought "Shit!! We need to run this in!" And then lashed it through all the rest of the wires instead of alongside. The rev counter wire always seems a bit of an after thought as they were run on the outside of the loom!.
 07-06-2009, 01:57 PM
#14
10K+ Poster!!
Thread Starter
iTrader: (1)
Join Date: May 2003
Location: Lancashire
Posts: 12,748
Likes: 0
Received 0 Likes
on
0 Posts
Some more updates.
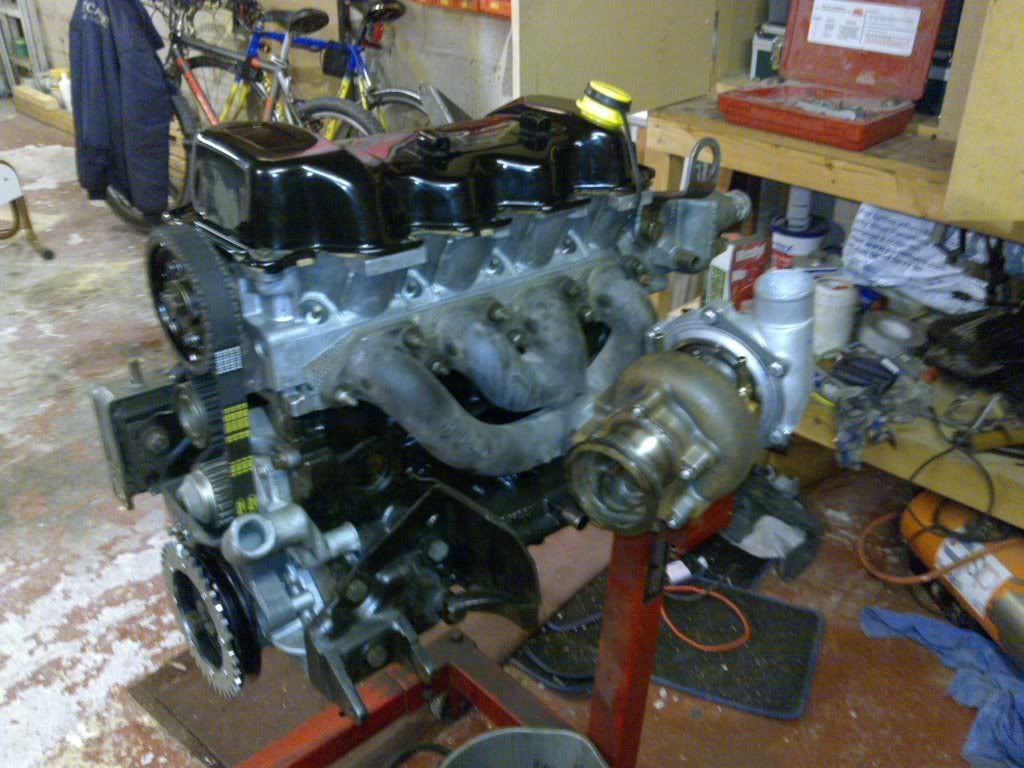
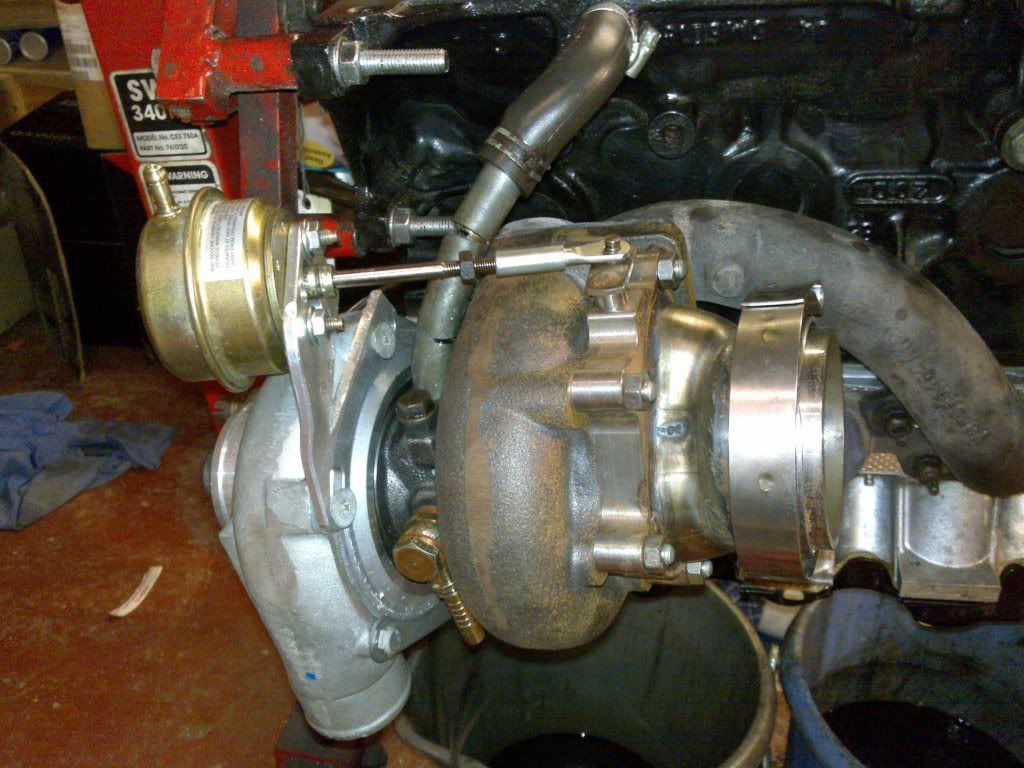
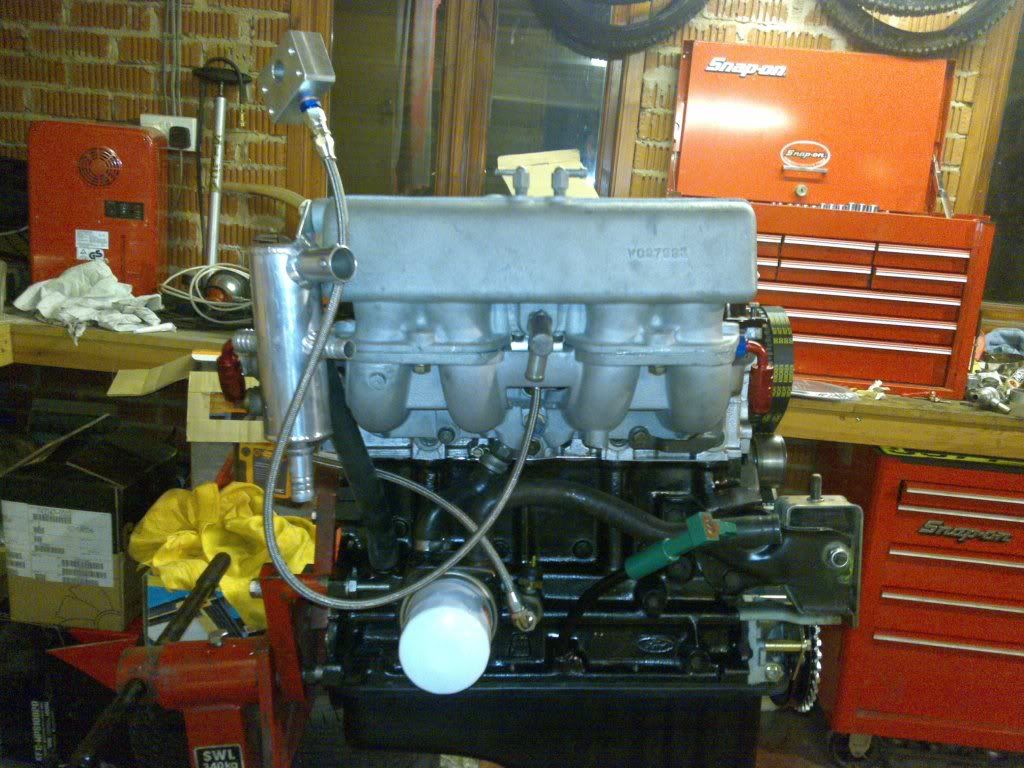
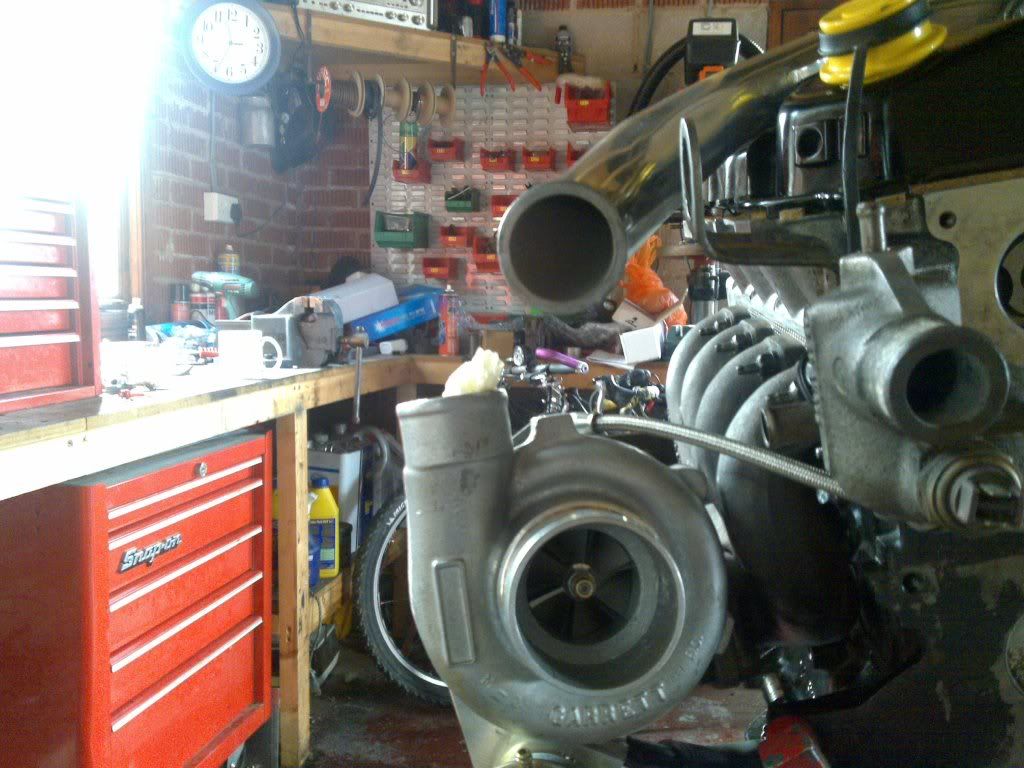
I have got my new coil pack after the 4th attempt! I got hold of an RS1600i coilpack bracket and made some small brackets to allow fitment of the early Ford coil pack as seen fitted to XR2/3i's, Mondeos, Fiesta Turbos etc..

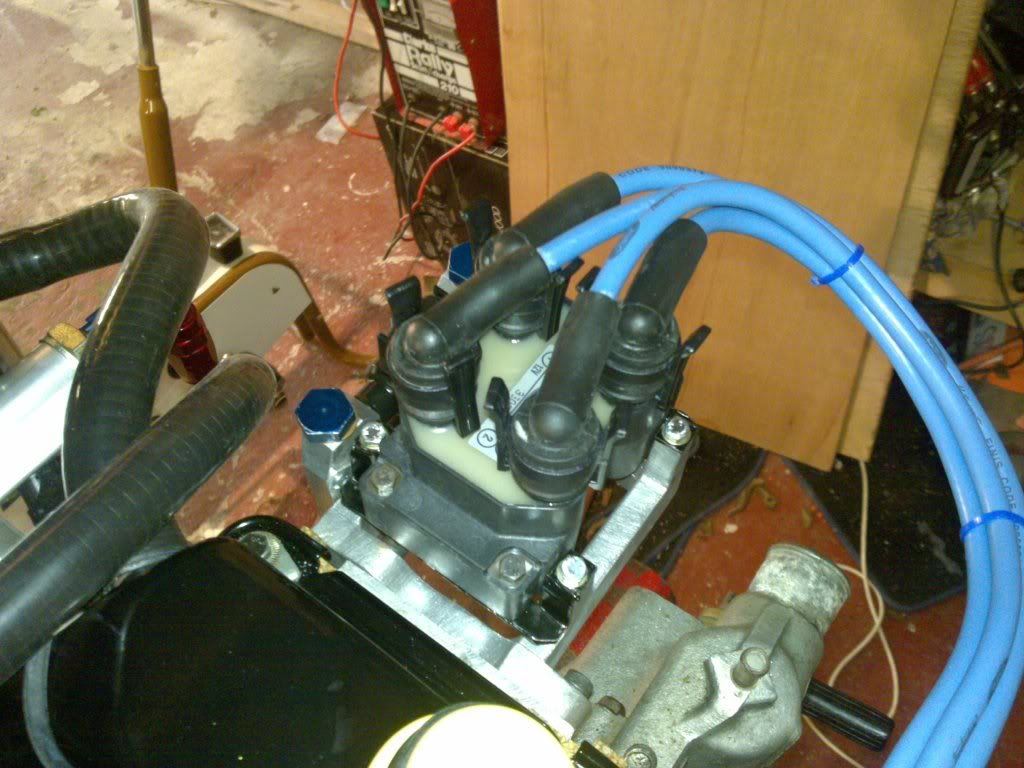
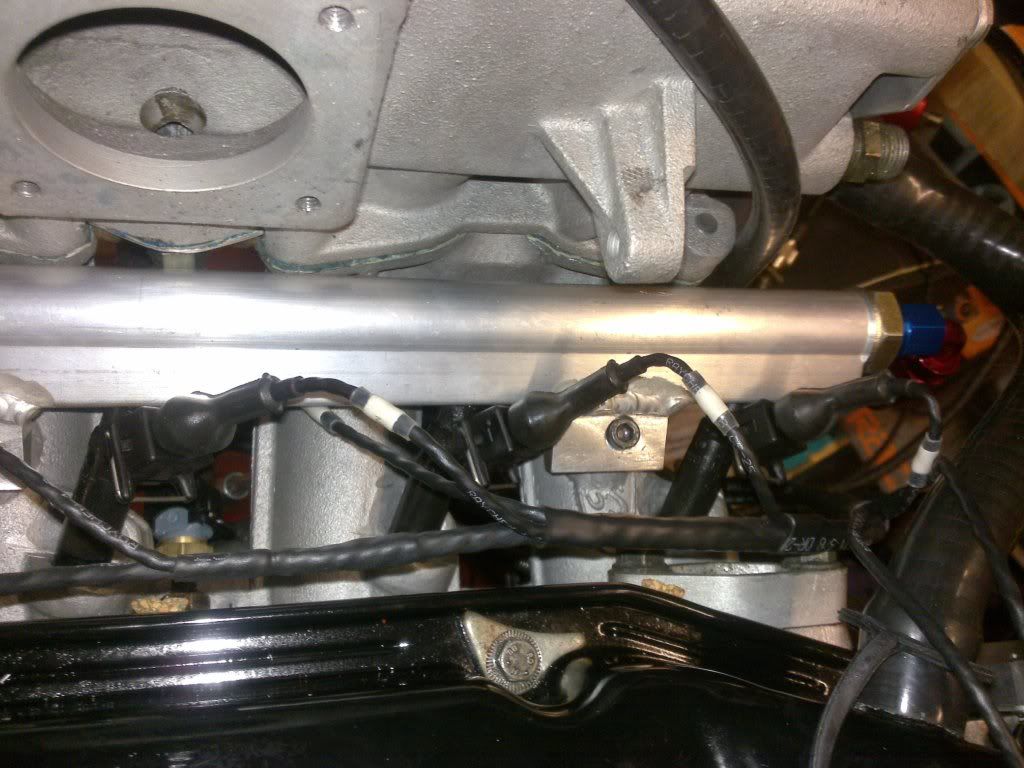
I also drilled and tapped the bracket so I could mount my air to air injectors on there. These are used for accurate control of the boost pressures generated by the turbo.

The air to air injectors are piped up.
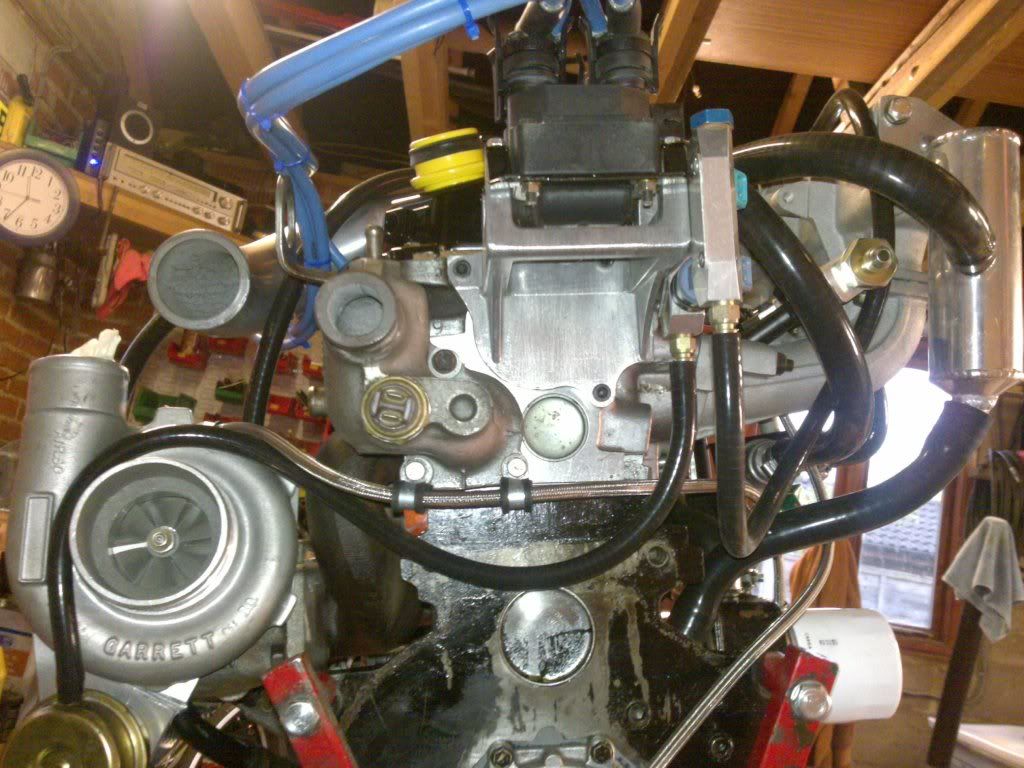
The engine

All I have left to do now is drill and tap the cross over pipe on the rocker cover for a charge air temperature sensor, manufacture some brackets for my engine position sensors, pipe up the cooling for the turbo when I have worked it out (S1 turbos had an oil colled turbo core, where as the new one has a water cooler core) and clip up a few pipes. It's all ready for mapping then installation after that. Hopefully it'll be ready next week end.
I have got my new coil pack after the 4th attempt! I got hold of an RS1600i coilpack bracket and made some small brackets to allow fitment of the early Ford coil pack as seen fitted to XR2/3i's, Mondeos, Fiesta Turbos etc..
I also drilled and tapped the bracket so I could mount my air to air injectors on there. These are used for accurate control of the boost pressures generated by the turbo.
The air to air injectors are piped up.
The engine
All I have left to do now is drill and tap the cross over pipe on the rocker cover for a charge air temperature sensor, manufacture some brackets for my engine position sensors, pipe up the cooling for the turbo when I have worked it out (S1 turbos had an oil colled turbo core, where as the new one has a water cooler core) and clip up a few pipes. It's all ready for mapping then installation after that. Hopefully it'll be ready next week end.
07-06-2009, 01:59 PM
#15
10K+ Poster!!
Thread Starter
iTrader: (1)
Join Date: May 2003
Location: Lancashire
Posts: 12,748
Likes: 0
Received 0 Likes
on
0 Posts
Another update.
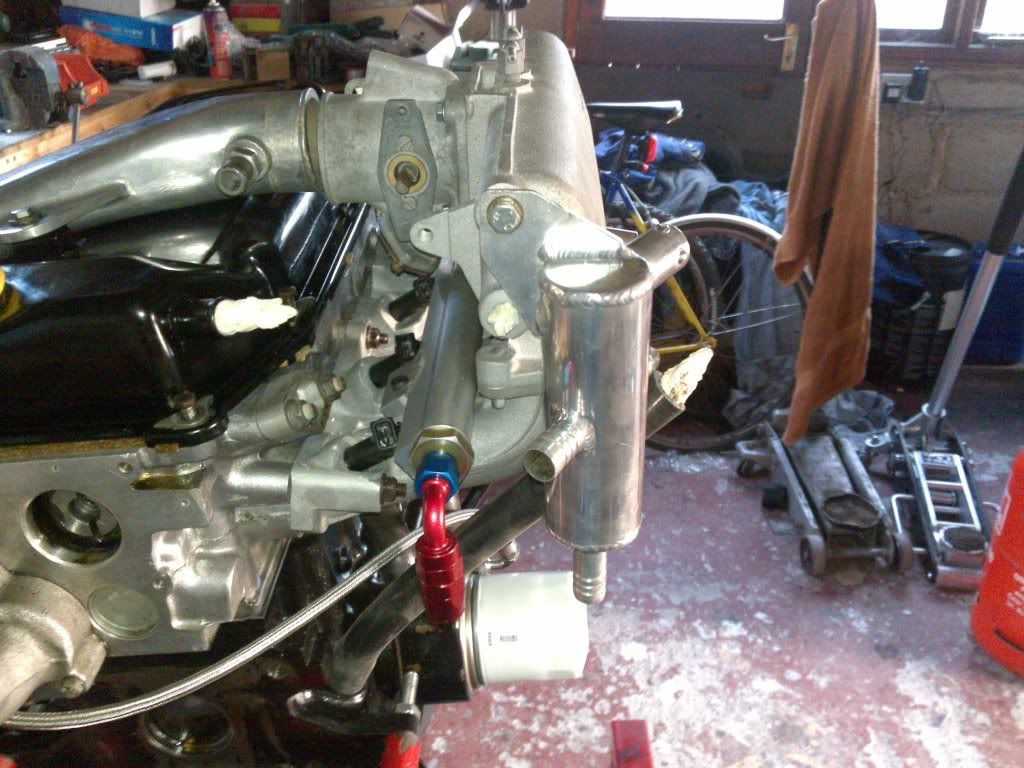
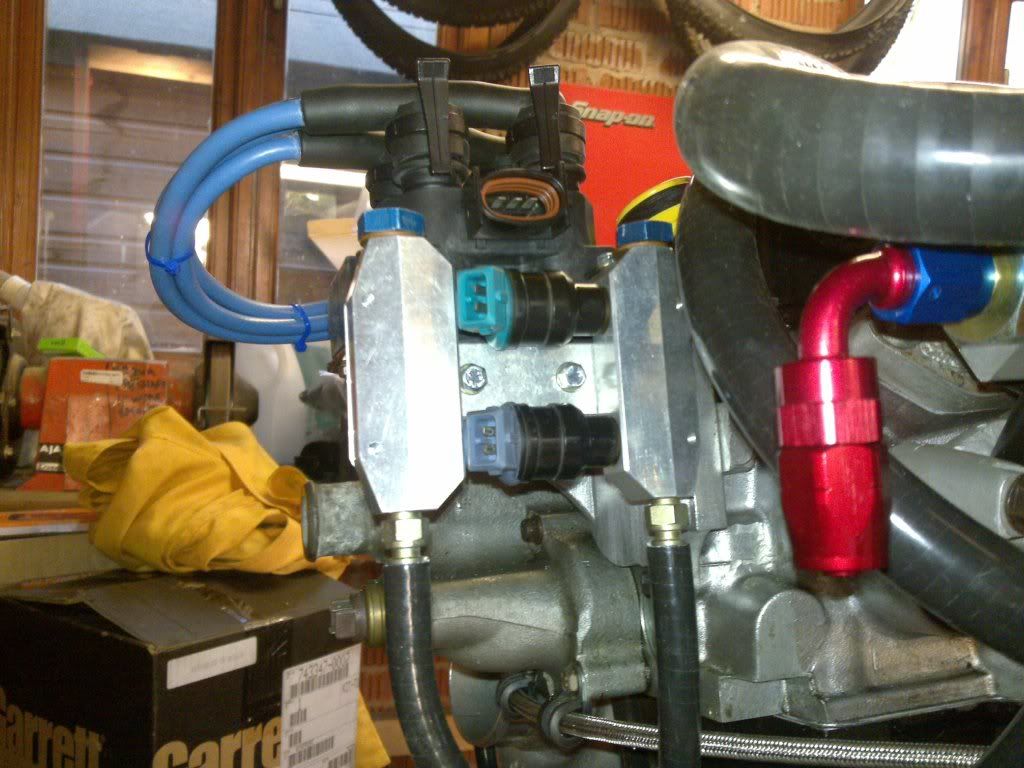
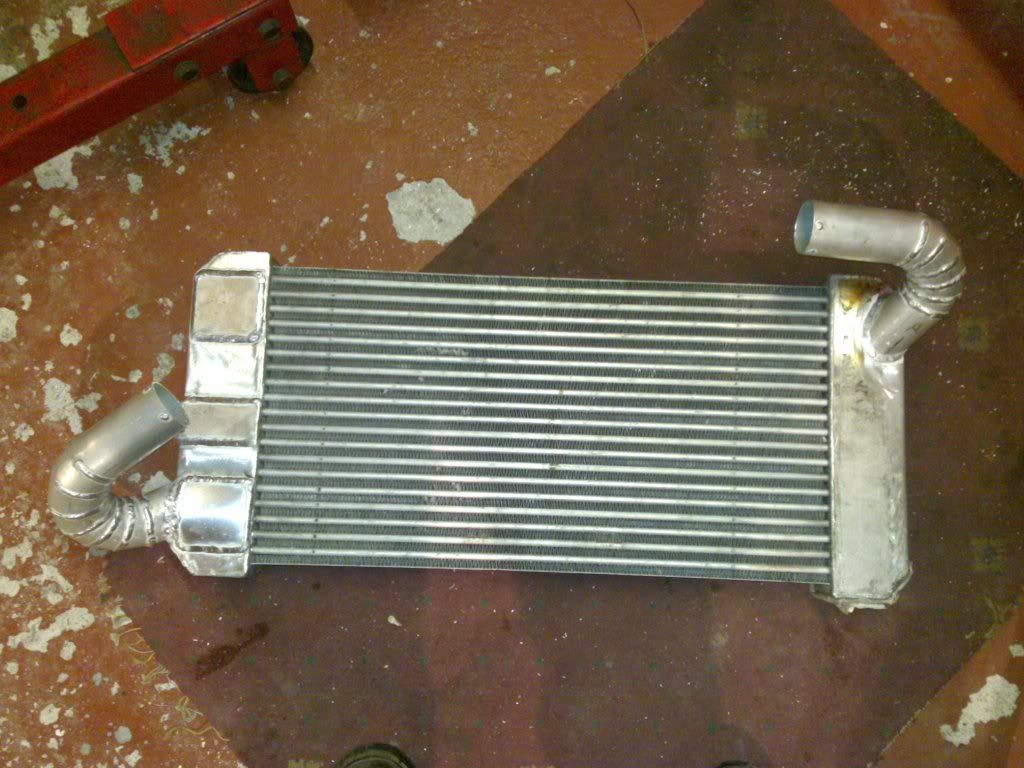
Intercooler has now been welded up and converted to a single pass item
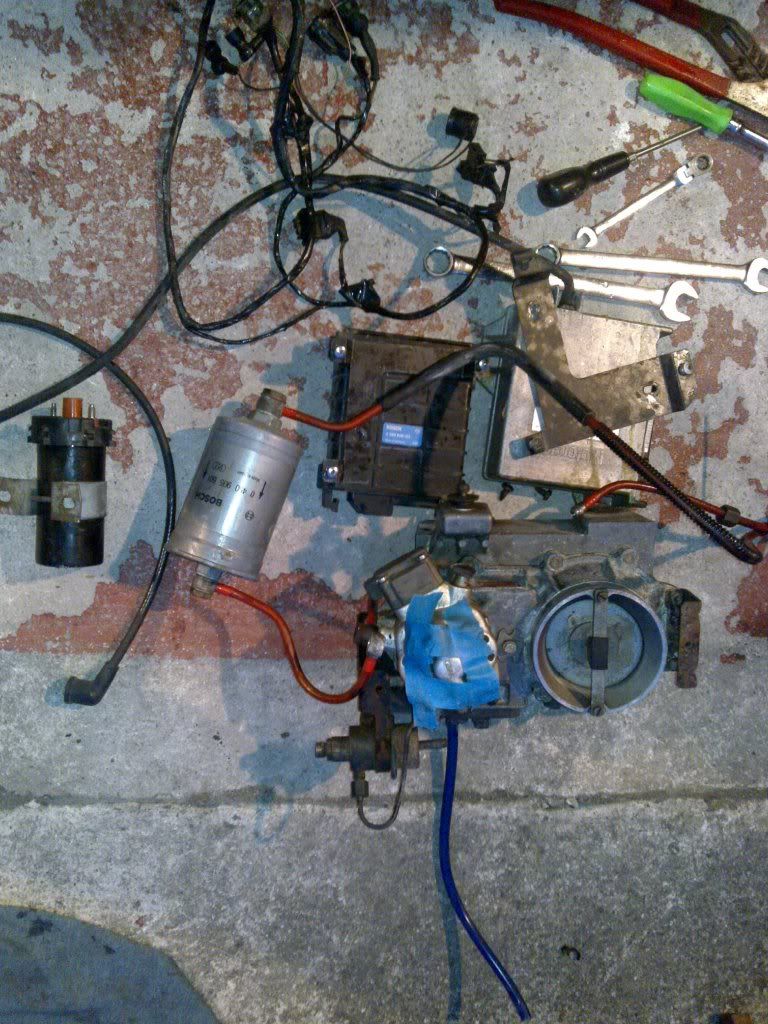
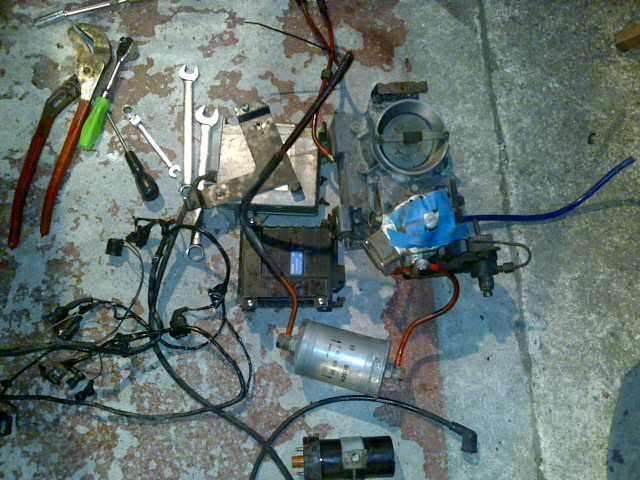
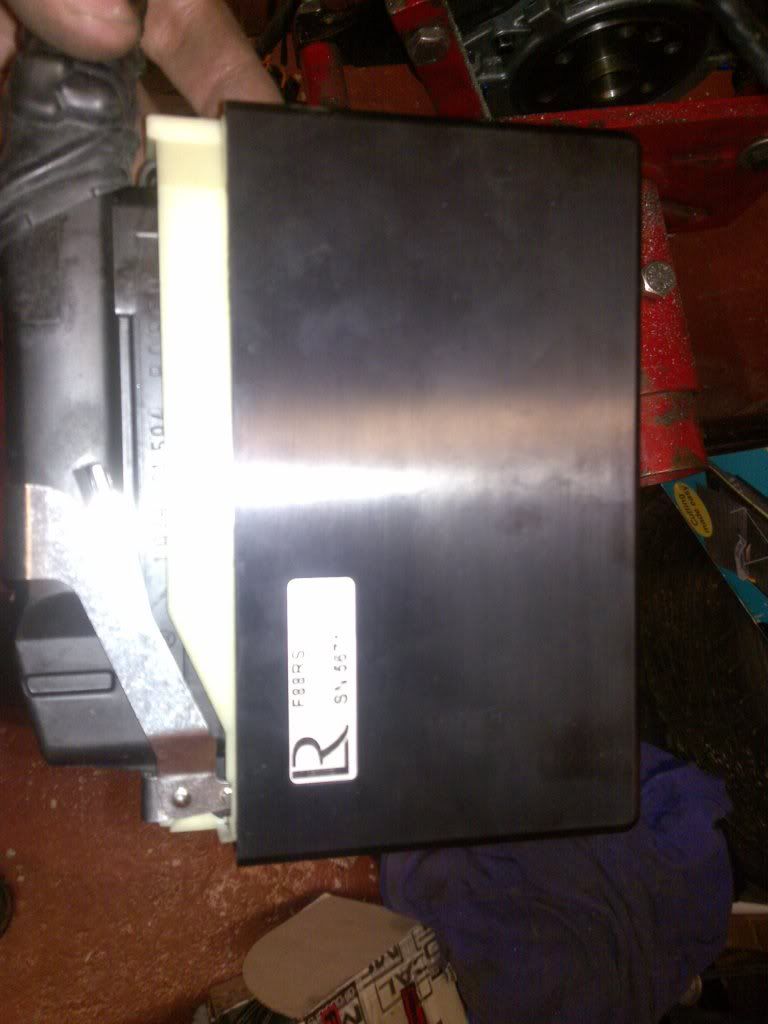
A change of management system saw this little lot turn up.
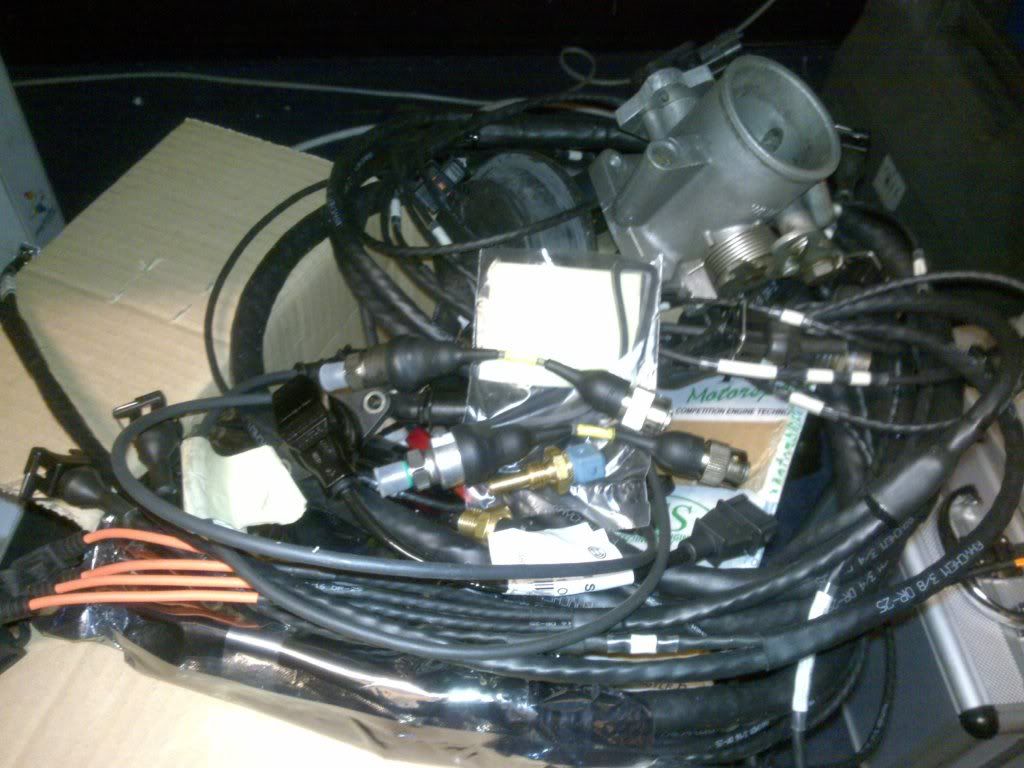
Unravelled it looks like this.

ECU

Several sensors fitted to the engine

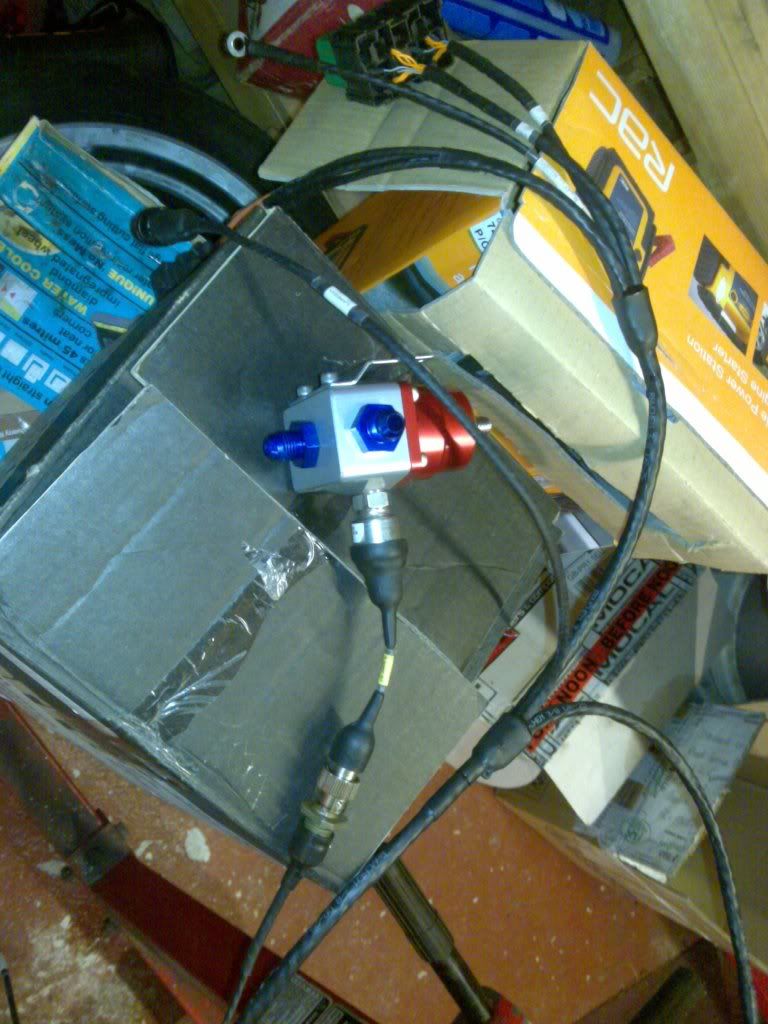
I've yet to mount the positional sensors and I need to modify the throttle body a little bit but we're not so far away!
Intercooler has now been welded up and converted to a single pass item
A change of management system saw this little lot turn up.
Unravelled it looks like this.
ECU
Several sensors fitted to the engine
I've yet to mount the positional sensors and I need to modify the throttle body a little bit but we're not so far away!
07-06-2009, 02:07 PM
#17
10K+ Poster!!
Thread Starter
iTrader: (1)
Join Date: May 2003
Location: Lancashire
Posts: 12,748
Likes: 0
Received 0 Likes
on
0 Posts
I am/will be!
It's an old topic copied and pasted then the more recent updates at the end. I sold the T6 on ages ago.


 07-06-2009, 08:01 PM
#26
10K+ Poster!!
Thread Starter
iTrader: (1)
Join Date: May 2003
Location: Lancashire
Posts: 12,748
Likes: 0
Received 0 Likes
on
0 Posts
Nige, I gave up on that ages ago!!!
Mark, I'm all sorted with the wiring now!! Just need to tidy up and repair the remaining loom in the car.
Mark, I'm all sorted with the wiring now!! Just need to tidy up and repair the remaining loom in the car.


 08-06-2009, 12:02 AM
#31
10K+ Poster!!
Thread Starter
iTrader: (1)
Join Date: May 2003
Location: Lancashire
Posts: 12,748
Likes: 0
Received 0 Likes
on
0 Posts
thanks lads. It's been a long slow project. It did 19k on the old engine before i killed it.
Rad, it's finding time to sort out threads like these. I had one going on the rs board but i've not updated any for the last 3 years or so.
Rad, it's finding time to sort out threads like these. I had one going on the rs board but i've not updated any for the last 3 years or so.
08-06-2009, 07:32 AM
#33
10K+ Poster!!
Thread Starter
iTrader: (1)
Join Date: May 2003
Location: Lancashire
Posts: 12,748
Likes: 0
Received 0 Likes
on
0 Posts
i got then from someone in the rs owners club who found 8 in a barn. 4 wider ones went back to the car and i got the narrower set. Mine are still 7 inch wide though.
Power wise, i'm looking for about 300 ish.
Power wise, i'm looking for about 300 ish.

