Tutorial - How to make a Sig
 14-03-2006, 09:50 PM
#1
Too many posts.. I need a life!!
Thread Starter
iTrader: (2)
Join Date: Aug 2005
Location: Fareham - HANTS
Posts: 735
Likes: 0
Received 0 Likes
on
0 Posts
As lots of people request for sigs to be made, and people want to learn how do do them.
I spoke to Adrian (section Mod) and offered to write a sig tutorial to show people how to make them, and more importantly make them to the proper size which is 550 x 150 at a maximum of 25k.
Before we start. I don�t claim to be an expert and there are methods which people will disagree with, but this a basic intro to making a sig. So no abuse please. If you have any info or tips then please add to the thread.
I will give you a step by step guide to making this sig using Photoshop 7.
Open up Photoshop and select the following windows.
WINDOW
TOOLS,
OPTIONS,
STYLES,
LAYERS,
STATUS BAR
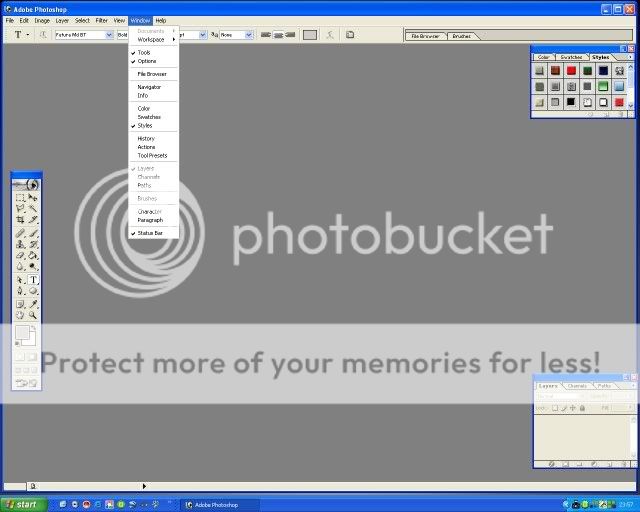
These are all you will need to start off with.
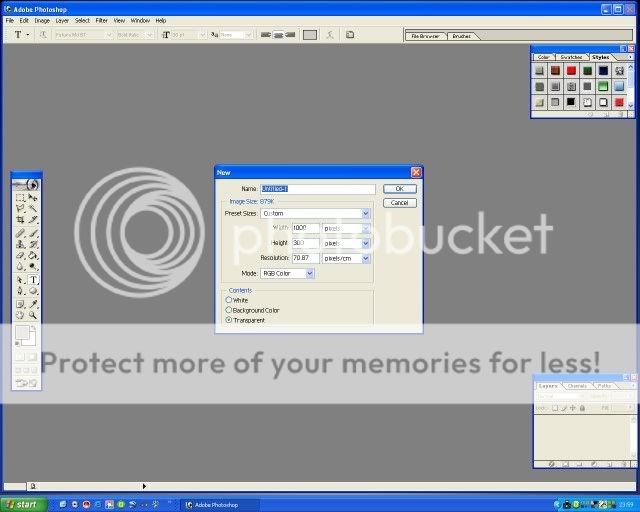
Now we need to create a new blank canvas to make our sig.
FILE
NEW
Select the following sizes, 1000 by 300, with around 70 pixel/cm (yes this is to big but it will all become clear later.
Now open the images you want to use.
FILE
OPEN
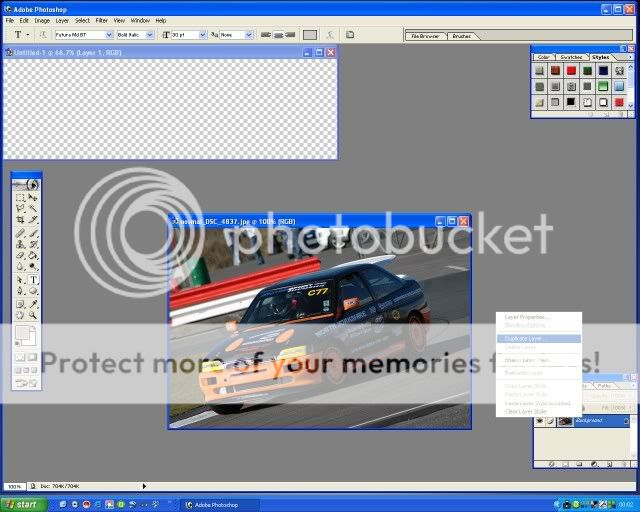
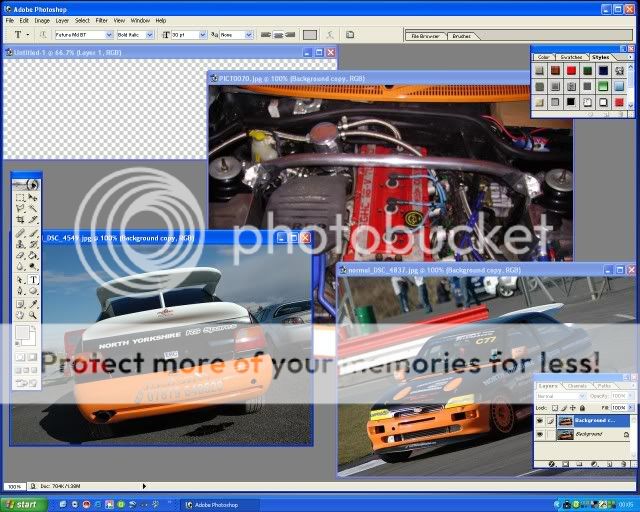
You should have the screen like above, note the layer window at the bottom right. This layer has a padlock symbol beside it. This means we can�t adjust it so we have to make a copy. Right click on the layer and select �Duplicate Layer�. You can give it a name if you want to.
Open the rest of the images you want to use and duplicate them all.
So now I have 3 images I want to use to create the sig, and I have duplicated all of them.
Note � Each image has a separate layer pallet, by clicking on the selected image you will see that the layer window changes to show the layers of that individual image.
Now to start creating the sig.
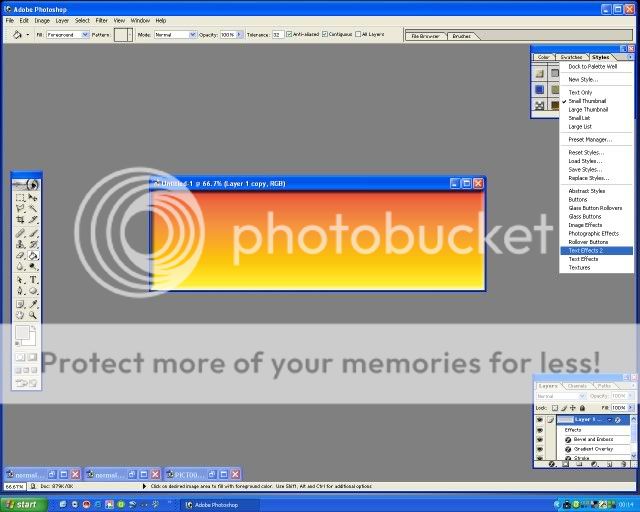
Minimise your images so that you only have the new blank on the screen. Once you have worked out what you want for the background colour select the �Fill Tool�

Using the styles pallet you can find the correct pattern/ colour you want.
I have chosen an orange/yellow background.
Now I want to transfer my engine image onto the new sig.
Bring up your image, make sure you have the duplicate layer highlighted,
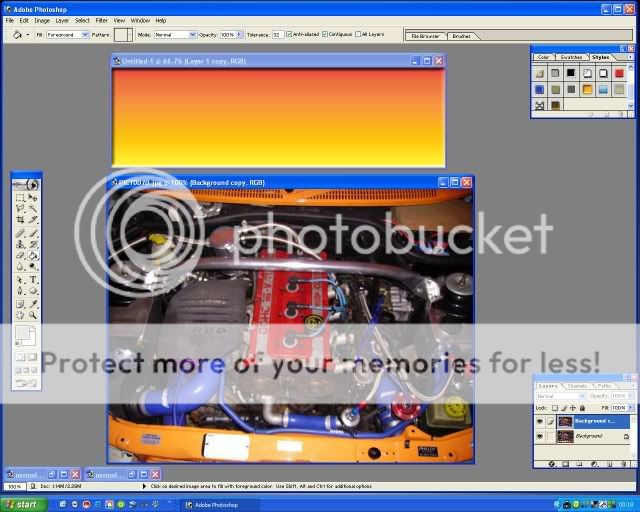
Now left click and hold the layer box in the �Layer Window� and drag the box onto the new sig. The image will now be inside the sig, and note that you have created a new layer automatically in the new sig �Layer Window�.
Basically you are creating a wedding cake effect with it made up of lots of individual layers. We can select each layer and change as we see fit. So if you are not happy with your background colour choice, you can select that layer and change it without having any effect on the other layers. You can also delete a layer at any time by right clicking on the layer box in the �Layer Window� and selecting delete.
You can also select
EDIT
UNDO
Or
EDIT
STEP BACKWORD
at any time if you make a mistake.
Now minimise the original image so all you have is the new sig.
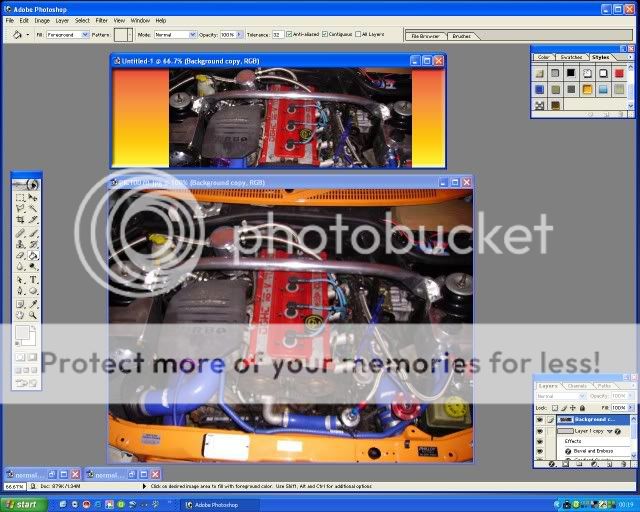
Press Ctrl and T at the same time and you will get a box around the picture like this. Easier to maximise the new sig before you do this.
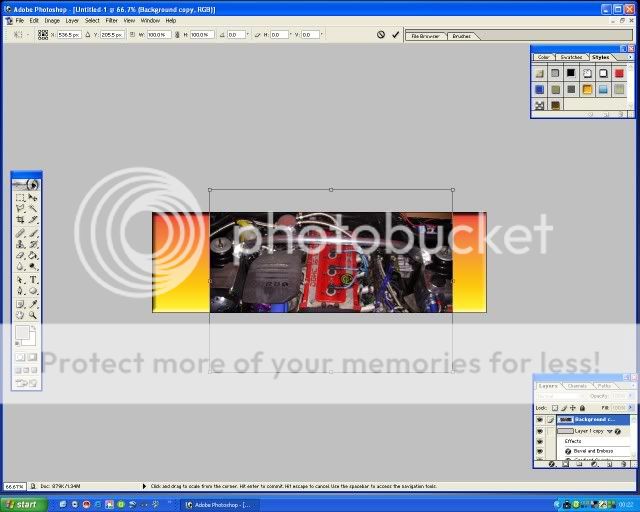
You can now adjust the image size and place it wherever you want on the new sig. Also by holding the CTRL button you can adjust the �skew� of the image.
Below I have stretched the image to fill the box and then reduced the opacity in the �Layer Window� to create this effect.
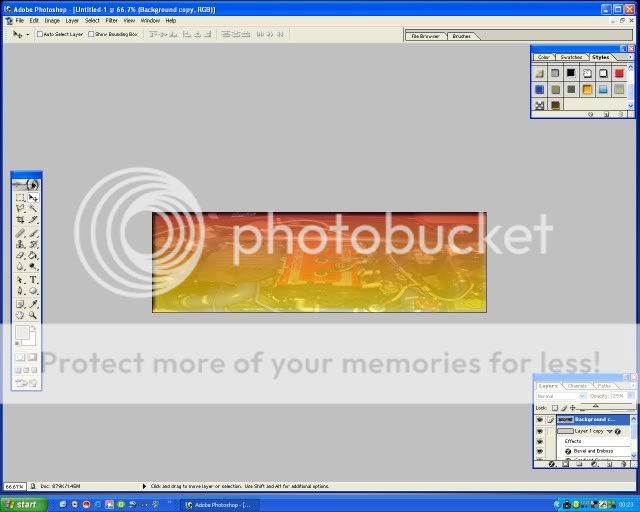
Now minimise the new sig and bring up your next picture to adjust.
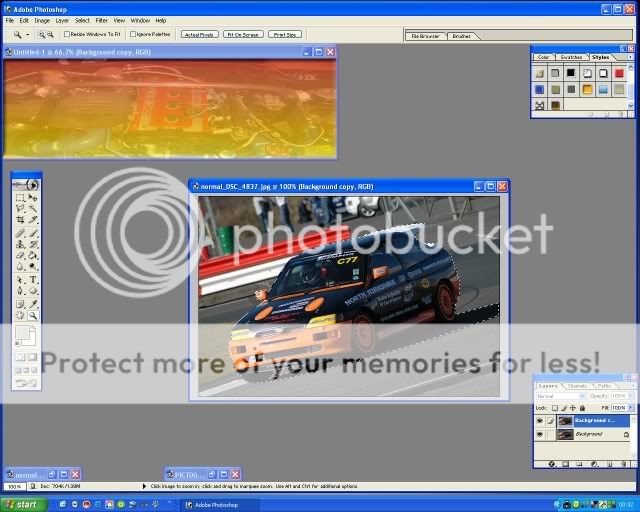
I want to cut this image out before transferring it to the new sig.
Select the �Polygonal Lasso� tool from the �Tool Window�, now carefully go round your image until you join the start and end points up. Dashed line should now flash. If you make a mistake at any time hit the Esc button and start again.
I also want to get rid of a piece of the road from under the car so you hold the Alt button as you trace round this shape.
You should end up with something like this.
Select the �Move� Tool and drag this layer onto the new sig and adjust as before for size and position.
Carry out the same principles for the rest of your pictures.
Now we add some text.
Select the �Text Tool� in the �Tool Window�, position the curser where you want to start the text. Adjust the size, colour and font as you would normally using the top toolbar. Select the �Move Tool� in the �Tool Window� so you can now move the text wherever you want.
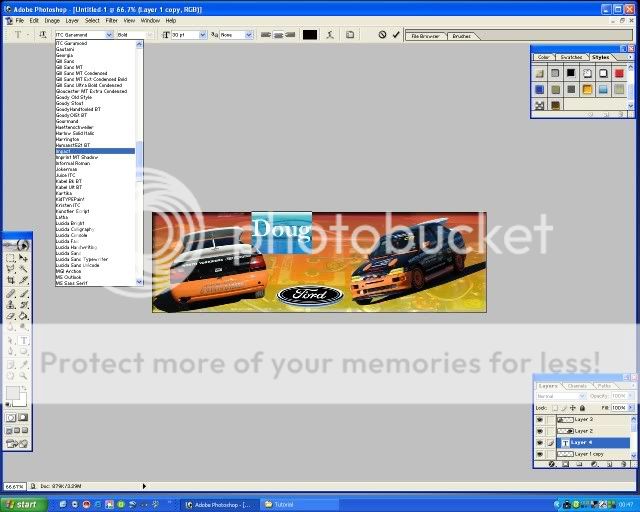
You will have to select the �Text Tool� and highlight the text if you want to change size and font etc.
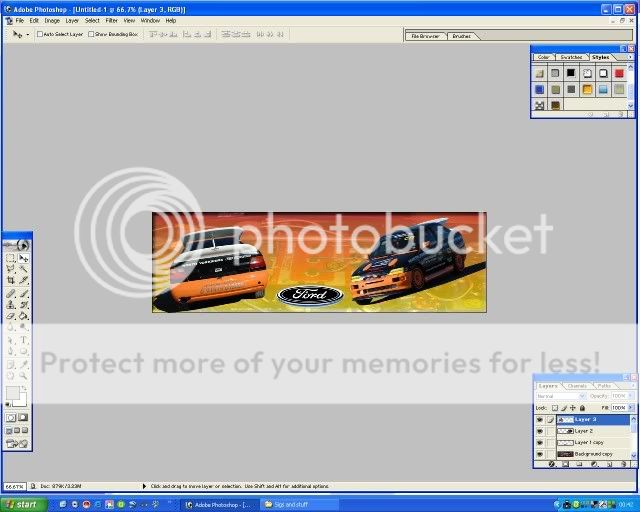
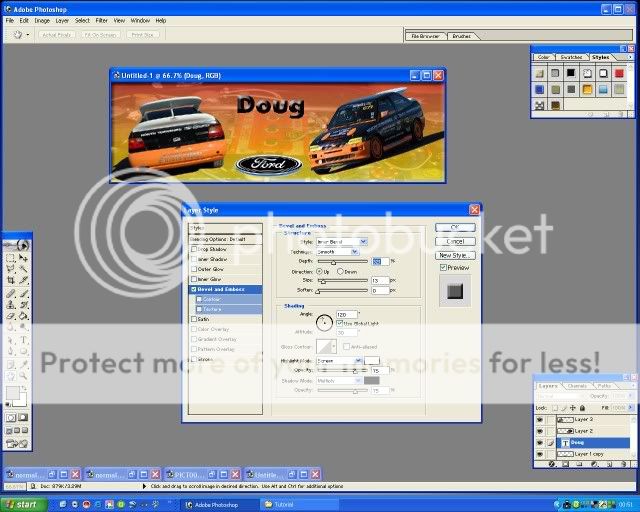
Now for the text effects.
Select-LAYER, LAYER STYLE, then choose an option. I have chosen Bevel and Emboss. Now have a play and adjust as you see fit.
Well done, you have created a sig.
Nearly finished.
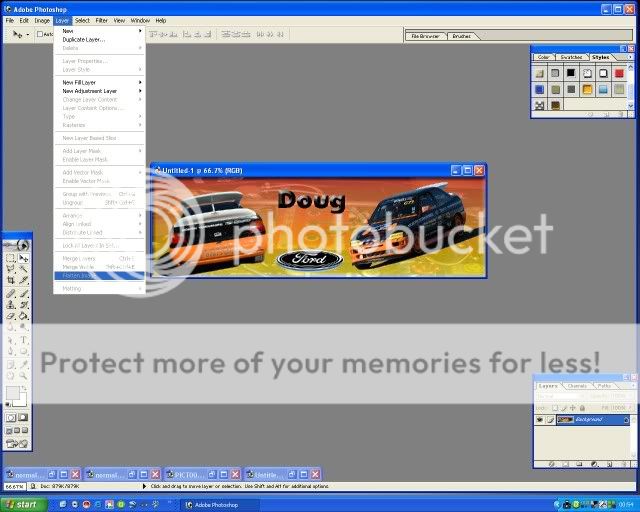
We now have to merge all the layers together to create one picture. At the moment we have lots of different pictures on top of each other.
Select
LAYER
FLATTEN IMAGE
Note that you now only have one layer in your �Layer Window�
Next we have to save the file. Usual steps
FILE
SAVE AS
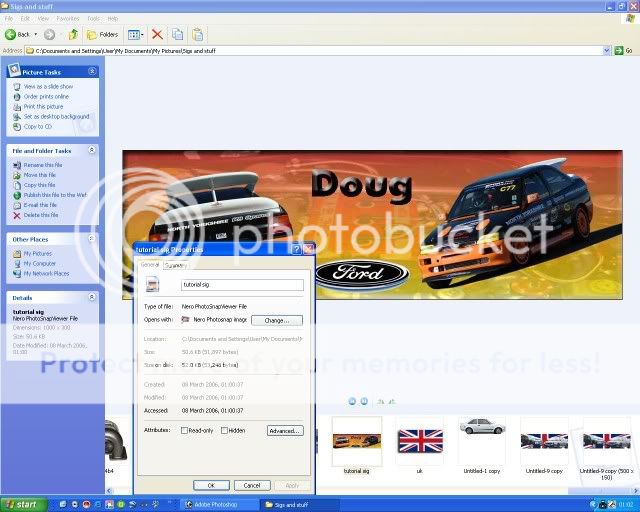
Make sure you save the picture as a JPEG.
You now get this window
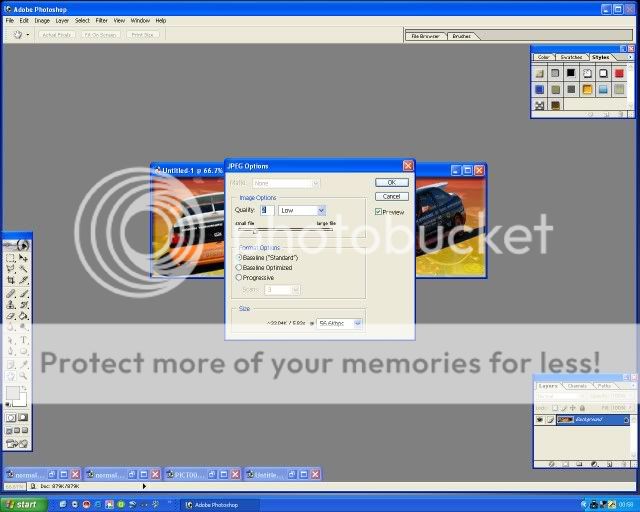
By moving the bar from Low to High you will adjust the size and quality of the file. Select around 35k-40k at 56.6kps in the size window.
Now if we look at the image in My Pictures you can see that the file is too big. 50k to be exact and still 1000 x 300 pixels in size.
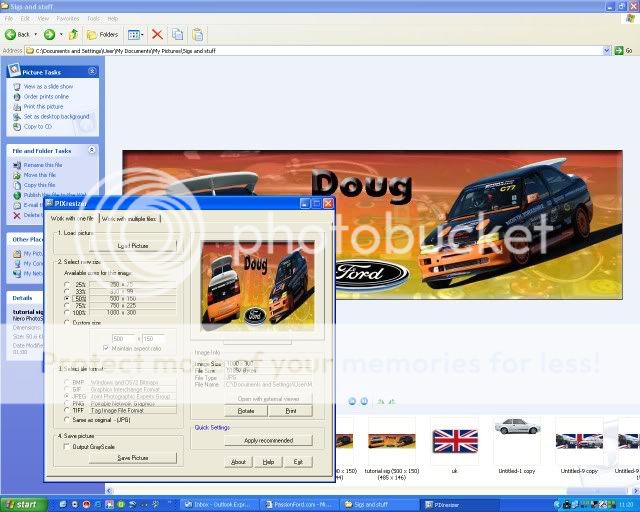
Download the following Pixel Resizer Program �
http://bluefive.pair.com/pixresizer.htm
Open up the Pixresizer program and load your sig. Now select the reduction box to 50% and save the new smaller sig. Sig is now 500 x 150, remember original was 1000 x 300, you have now reduced the size of the file but still kept decent quality. This is the whole point of doing it this way. If you select 500 x 150 originally in Photoshop, when you save and reduce quality, the sig can look very poor. This way you keep more quality.
I had to reduce the file even more using the custom selection. Sig is now 480 x 144 pixels and is 25k in size.
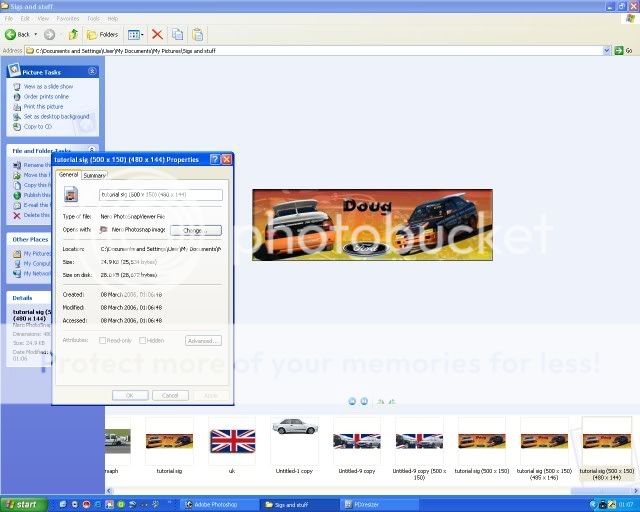
Job done.
There are lots more things that can be done with Photoshop, this is just the tip of the ice-berg, just take your time and have a play.
Like I said at the start, this is a basic sig to show you all where to start and hopefully demonstrate that it is easy stuff. Remember and just adjust each layer at a time and build the sig up to what you want.
If you have any other useful tips then please add to the topic.
Enjoy
Leigh
I spoke to Adrian (section Mod) and offered to write a sig tutorial to show people how to make them, and more importantly make them to the proper size which is 550 x 150 at a maximum of 25k.
Before we start. I don�t claim to be an expert and there are methods which people will disagree with, but this a basic intro to making a sig. So no abuse please. If you have any info or tips then please add to the thread.
I will give you a step by step guide to making this sig using Photoshop 7.
Open up Photoshop and select the following windows.
WINDOW
TOOLS,
OPTIONS,
STYLES,
LAYERS,
STATUS BAR
These are all you will need to start off with.
Now we need to create a new blank canvas to make our sig.
FILE
NEW
Select the following sizes, 1000 by 300, with around 70 pixel/cm (yes this is to big but it will all become clear later.
Now open the images you want to use.
FILE
OPEN
You should have the screen like above, note the layer window at the bottom right. This layer has a padlock symbol beside it. This means we can�t adjust it so we have to make a copy. Right click on the layer and select �Duplicate Layer�. You can give it a name if you want to.
Open the rest of the images you want to use and duplicate them all.
So now I have 3 images I want to use to create the sig, and I have duplicated all of them.
Note � Each image has a separate layer pallet, by clicking on the selected image you will see that the layer window changes to show the layers of that individual image.
Now to start creating the sig.
Minimise your images so that you only have the new blank on the screen. Once you have worked out what you want for the background colour select the �Fill Tool�
Using the styles pallet you can find the correct pattern/ colour you want.
I have chosen an orange/yellow background.
Now I want to transfer my engine image onto the new sig.
Bring up your image, make sure you have the duplicate layer highlighted,
Now left click and hold the layer box in the �Layer Window� and drag the box onto the new sig. The image will now be inside the sig, and note that you have created a new layer automatically in the new sig �Layer Window�.
Basically you are creating a wedding cake effect with it made up of lots of individual layers. We can select each layer and change as we see fit. So if you are not happy with your background colour choice, you can select that layer and change it without having any effect on the other layers. You can also delete a layer at any time by right clicking on the layer box in the �Layer Window� and selecting delete.
You can also select
EDIT
UNDO
Or
EDIT
STEP BACKWORD
at any time if you make a mistake.
Now minimise the original image so all you have is the new sig.
Press Ctrl and T at the same time and you will get a box around the picture like this. Easier to maximise the new sig before you do this.
You can now adjust the image size and place it wherever you want on the new sig. Also by holding the CTRL button you can adjust the �skew� of the image.
Below I have stretched the image to fill the box and then reduced the opacity in the �Layer Window� to create this effect.
Now minimise the new sig and bring up your next picture to adjust.
I want to cut this image out before transferring it to the new sig.
Select the �Polygonal Lasso� tool from the �Tool Window�, now carefully go round your image until you join the start and end points up. Dashed line should now flash. If you make a mistake at any time hit the Esc button and start again.
I also want to get rid of a piece of the road from under the car so you hold the Alt button as you trace round this shape.
You should end up with something like this.
Select the �Move� Tool and drag this layer onto the new sig and adjust as before for size and position.
Carry out the same principles for the rest of your pictures.
Now we add some text.
Select the �Text Tool� in the �Tool Window�, position the curser where you want to start the text. Adjust the size, colour and font as you would normally using the top toolbar. Select the �Move Tool� in the �Tool Window� so you can now move the text wherever you want.
You will have to select the �Text Tool� and highlight the text if you want to change size and font etc.
Now for the text effects.
Select-LAYER, LAYER STYLE, then choose an option. I have chosen Bevel and Emboss. Now have a play and adjust as you see fit.
Well done, you have created a sig.
Nearly finished.
We now have to merge all the layers together to create one picture. At the moment we have lots of different pictures on top of each other.
Select
LAYER
FLATTEN IMAGE
Note that you now only have one layer in your �Layer Window�
Next we have to save the file. Usual steps
FILE
SAVE AS
Make sure you save the picture as a JPEG.
You now get this window
By moving the bar from Low to High you will adjust the size and quality of the file. Select around 35k-40k at 56.6kps in the size window.
Now if we look at the image in My Pictures you can see that the file is too big. 50k to be exact and still 1000 x 300 pixels in size.
Download the following Pixel Resizer Program �
http://bluefive.pair.com/pixresizer.htm
Open up the Pixresizer program and load your sig. Now select the reduction box to 50% and save the new smaller sig. Sig is now 500 x 150, remember original was 1000 x 300, you have now reduced the size of the file but still kept decent quality. This is the whole point of doing it this way. If you select 500 x 150 originally in Photoshop, when you save and reduce quality, the sig can look very poor. This way you keep more quality.
I had to reduce the file even more using the custom selection. Sig is now 480 x 144 pixels and is 25k in size.
Job done.
There are lots more things that can be done with Photoshop, this is just the tip of the ice-berg, just take your time and have a play.
Like I said at the start, this is a basic sig to show you all where to start and hopefully demonstrate that it is easy stuff. Remember and just adjust each layer at a time and build the sig up to what you want.
If you have any other useful tips then please add to the topic.
Enjoy
Leigh


 15-03-2006, 05:50 AM
#5
Virgin

Join Date: Feb 2006
Location: Wakefield. West Yorkshire
Posts: 5
Likes: 0
Received 0 Likes
on
0 Posts
WOW !!
Thank you so much Leigh
Ive had Photo Shop for over a year now but never really knew how to use it The best I could do was my Sig below
Ive just followed your 'How To' & made this...

It's only my first attempt but I'm really pleased with it
Top marks Leigh for an excellent 'How To' I found it really easy to follow 
Thank you so much Leigh
Ive had Photo Shop for over a year now but never really knew how to use it
Ive just followed your 'How To' & made this...
It's only my first attempt but I'm really pleased with it
Top marks Leigh for an excellent 'How To' I found it really easy to follow
15-03-2006, 06:30 AM
#7
Virgin
Join Date: Feb 2006
Location: Wakefield. West Yorkshire
Posts: 5
Likes: 0
Received 0 Likes
on
0 Posts
Originally Posted by foci-gaz
nice bit of work there fella
Bouncing Cougar
thats not bad for a starter keep having a fiddle and you will get better
Bouncing Cougar
thats not bad for a starter keep having a fiddle and you will get better
Ive had another 'fiddle' & made this for my mate.....

I'll be at it all day now
Maz
Trending Topics
15-03-2006, 06:49 AM
#8
Too many posts.. I need a life!!
Thread Starter
iTrader: (2)
Join Date: Aug 2005
Location: Fareham - HANTS
Posts: 735
Likes: 0
Received 0 Likes
on
0 Posts
Originally Posted by Bouncing Cougar
WOW !!
Thank you so much Leigh
Ive had Photo Shop for over a year now but never really knew how to use it The best I could do was my Sig below
Ive just followed your 'How To' & made this...
It's only my first attempt but I'm really pleased with it
Top marks Leigh for an excellent 'How To' I found it really easy to follow
Thank you so much Leigh
Ive had Photo Shop for over a year now but never really knew how to use it
Ive just followed your 'How To' & made this...
It's only my first attempt but I'm really pleased with it
Top marks Leigh for an excellent 'How To' I found it really easy to follow
Leigh


 . here's my first atempt


 18-06-2006, 09:28 AM
#21
Too many posts.. I need a life!!
Thread Starter
iTrader: (2)
Join Date: Aug 2005
Location: Fareham - HANTS
Posts: 735
Likes: 0
Received 0 Likes
on
0 Posts
Originally Posted by ford-driver
Hey, do ya recon it would be very similar steps with adobe photoshop 8 ? Thanks
Leigh
 18-06-2006, 07:35 PM
#23
Too many posts.. I need a life!!
Thread Starter
iTrader: (2)
Join Date: Aug 2005
Location: Fareham - HANTS
Posts: 735
Likes: 0
Received 0 Likes
on
0 Posts
Originally Posted by DaveAVT
Why dont you just use Photoshop to resize?
As I stated at the start of the tutorial, people do sigs in different ways, some use Paint Shop Pro and some use Microsoft Paint. each to ther own and all that. I also mentioned that if anyone had any tips or tricks then to post them up on the tutorial then we can all learn new ways.
Leigh
 24-11-2006, 06:55 PM
#25
PassionFord Post Whore!!
What a fantastic tutorial.
When I get photoshop I`m gonna use this and have a go
When I get photoshop I`m gonna use this and have a go
27-11-2006, 03:53 PM
#27
Too many posts.. I need a life!!
Thread Starter
iTrader: (2)
Join Date: Aug 2005
Location: Fareham - HANTS
Posts: 735
Likes: 0
Received 0 Likes
on
0 Posts
either use the pix resizer program in the first post, or select IMAGE, IMAGE RESIZE in Photoshop.
resize to 550x150 but less than 25k in size when you save it.
Leigh
resize to 550x150 but less than 25k in size when you save it.
Leigh
09-01-2007, 12:06 AM
#29
BANNED
BANNED
iTrader: (2)

Join Date: Jul 2006
Location: West London
Posts: 12,617
Likes: 0
Received 0 Likes
on
0 Posts
thats a great lesson always had photoshop but never tried to make a sig and you made it so easy cheers mate
Last edited by L33 BYT; 23-05-2010 at 07:57 PM.


 10-12-2007, 07:03 PM
#35
Advanced PassionFord User
Join Date: Nov 2006
Location: Swindon,Exeter
Posts: 1,644
Likes: 0
Received 0 Likes
on
0 Posts
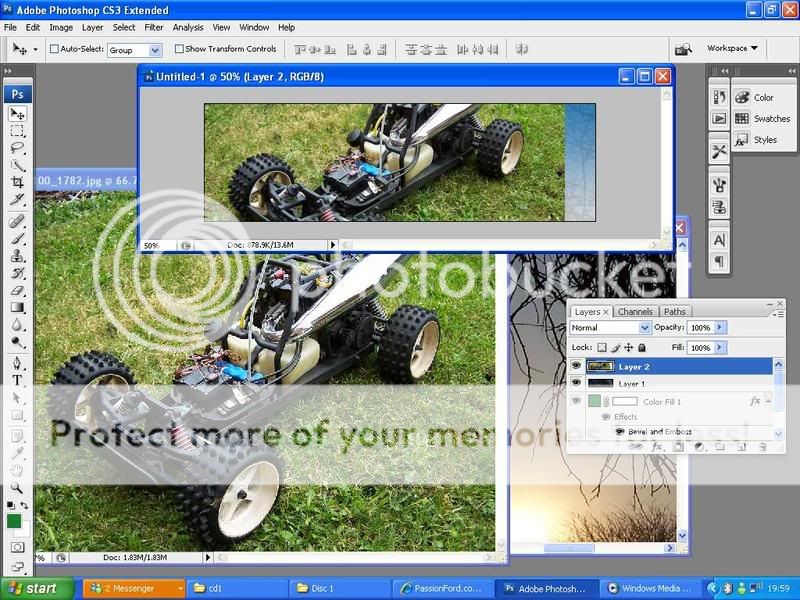
RS-Leigh
im following your instructions and im struggling with the image im dragging in being too big? as you can see its too big and i cant get the full picture within the box can anyone help please?
im following your instructions and im struggling with the image im dragging in being too big? as you can see its too big and i cant get the full picture within the box can anyone help please?
04-03-2008, 03:50 PM
#39
15000
Join Date: Jul 2006
Location: Glasgow,Scotland
Posts: 34
Likes: 0
Received 0 Likes
on
0 Posts
i have 2 problems 1 is it wont let me put in 70 pixels/cm it keep changing to 30
2 is when you drag the duplicate image over to the sig it doesnt go in to it just sits on top help me please it driving me nuts
2 is when you drag the duplicate image over to the sig it doesnt go in to it just sits on top help me please it driving me nuts