Anyone doing or done an underside resto on a S2 ???
 01-01-2009, 10:57 AM
#1
Advanced PassionFord User
Thread Starter
Join Date: Dec 2006
Location: Crewe
Posts: 1,521
Likes: 0
Received 0 Likes
on
0 Posts
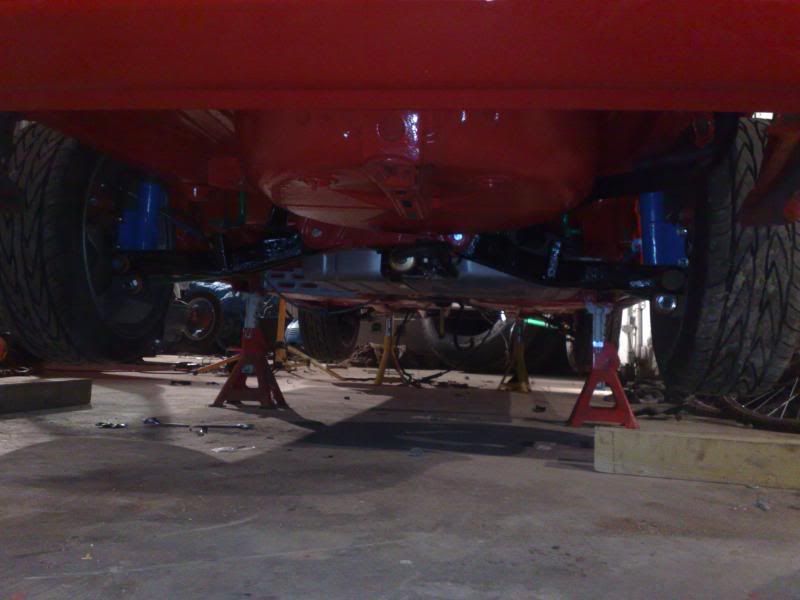
Im in the process of doing mine just wanted peoples opinions on how easy/hard parts are to come by, or what parts people found hard to remove etc. What colours are people doing fuel tanks, tank straps, rear arms etc. Have people put new poly bushes in or new standard bushes ??
Last edited by MattyRST; 01-01-2009 at 10:58 AM.
 01-01-2009, 01:36 PM
#2
I've found that life I needed.. It's HERE!!

Join Date: Apr 2005
Location: Northants
Posts: 1,096
Likes: 0
Received 0 Likes
on
0 Posts
i found most things easy to come by this site and ebay helped
im doing a mk4 cabby in gray and had all the arms and hubs done sliver and black
aint got a fuel tank yet and i fitted poly bushes

ive also binned the tie bars in this pic aswell ive got adjustable ones now

im doing a mk4 cabby in gray and had all the arms and hubs done sliver and black
aint got a fuel tank yet and i fitted poly bushes
ive also binned the tie bars in this pic aswell ive got adjustable ones now
Last edited by anodised; 01-01-2009 at 01:38 PM.
01-01-2009, 03:48 PM
#3
I've found that life I needed.. It's HERE!!

Join Date: Aug 2006
Location: The Netherlands
Posts: 1,063
Likes: 0
Received 0 Likes
on
0 Posts
i did mine car. I painted the underside red and all the parts black, but the fueltank silver and the koni's stayed yellow. I did alot with hamerite and normal spraycans, but if i could do it over i would poudercoat alot parts. I had some things with fuel and laying on the ground andso they damage. not much, but if you look at the costs of all the spraycans it both costs alot
 01-01-2009, 06:07 PM
#5
Advanced PassionFord User
Thread Starter
Join Date: Dec 2006
Location: Crewe
Posts: 1,521
Likes: 0
Received 0 Likes
on
0 Posts
01-01-2009, 06:08 PM
#6
Advanced PassionFord User
Thread Starter
Join Date: Dec 2006
Location: Crewe
Posts: 1,521
Likes: 0
Received 0 Likes
on
0 Posts
i did mine car. I painted the underside red and all the parts black, but the fueltank silver and the koni's stayed yellow. I did alot with hamerite and normal spraycans, but if i could do it over i would poudercoat alot parts. I had some things with fuel and laying on the ground andso they damage. not much, but if you look at the costs of all the spraycans it both costs alot
01-01-2009, 06:11 PM
#7
Advanced PassionFord User
Thread Starter
Join Date: Dec 2006
Location: Crewe
Posts: 1,521
Likes: 0
Received 0 Likes
on
0 Posts
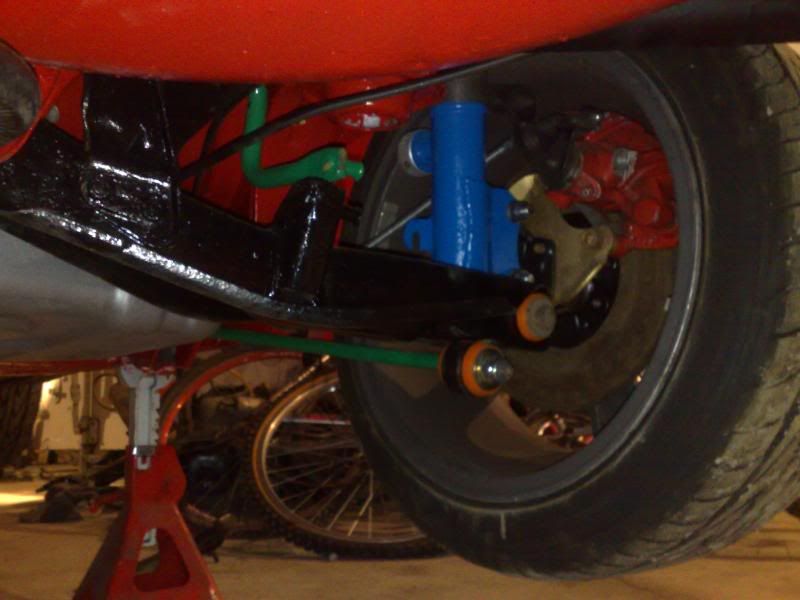
I like the silver rear arms, my rear ARB has been painted black, just deciding on what colour to paint the parts all black or silver and black
Trending Topics


 01-01-2009, 07:38 PM
#9
PassionFord Post Troll

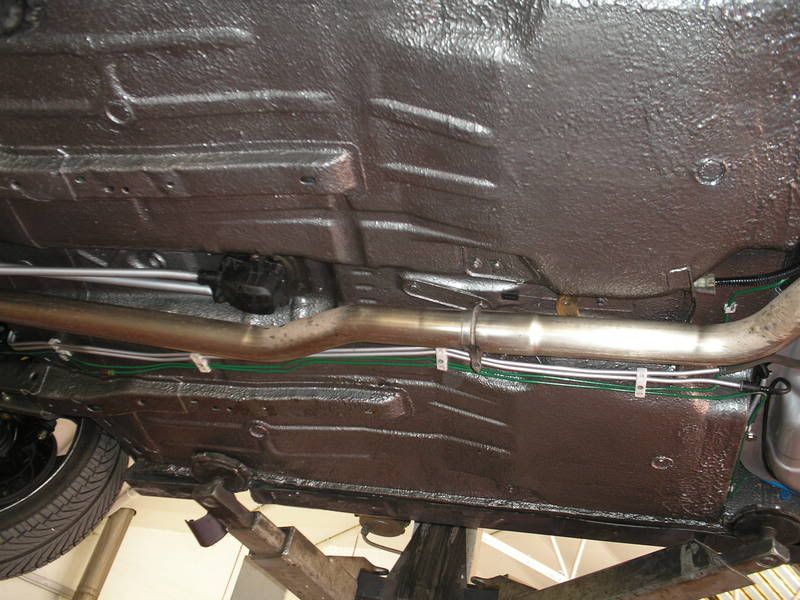
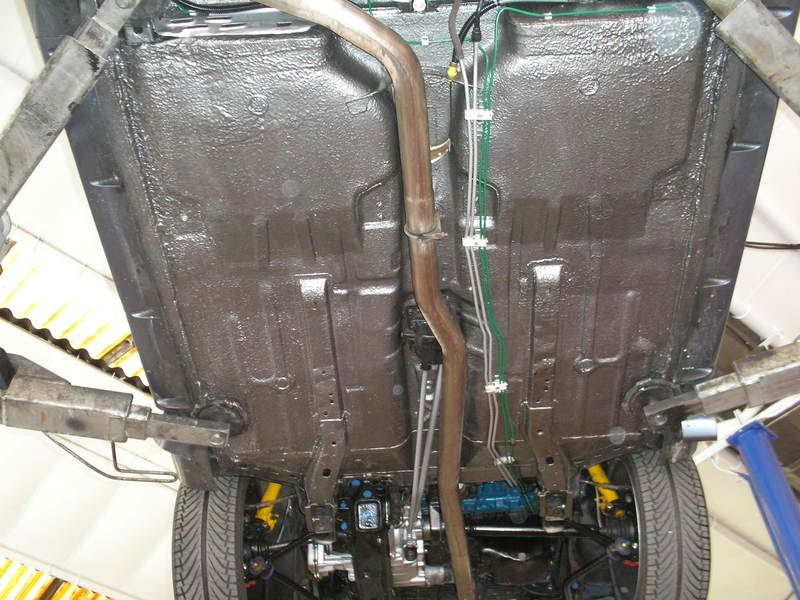
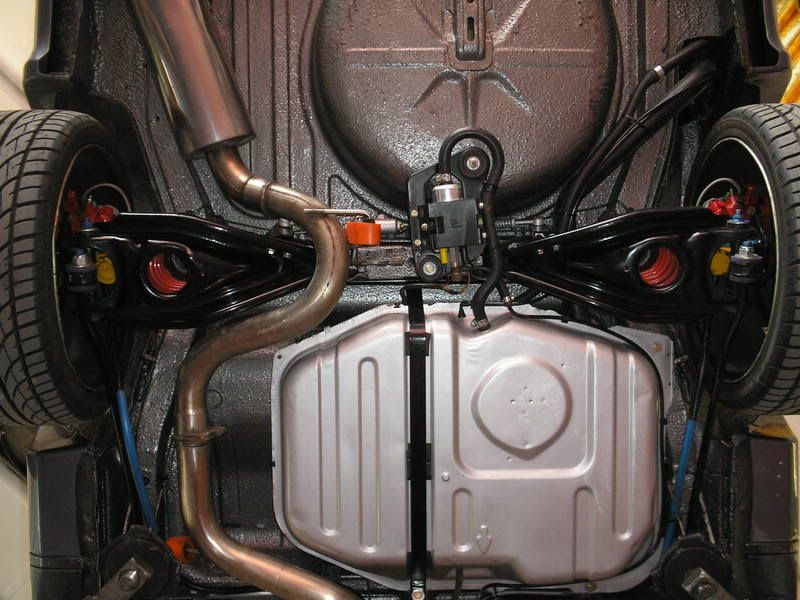
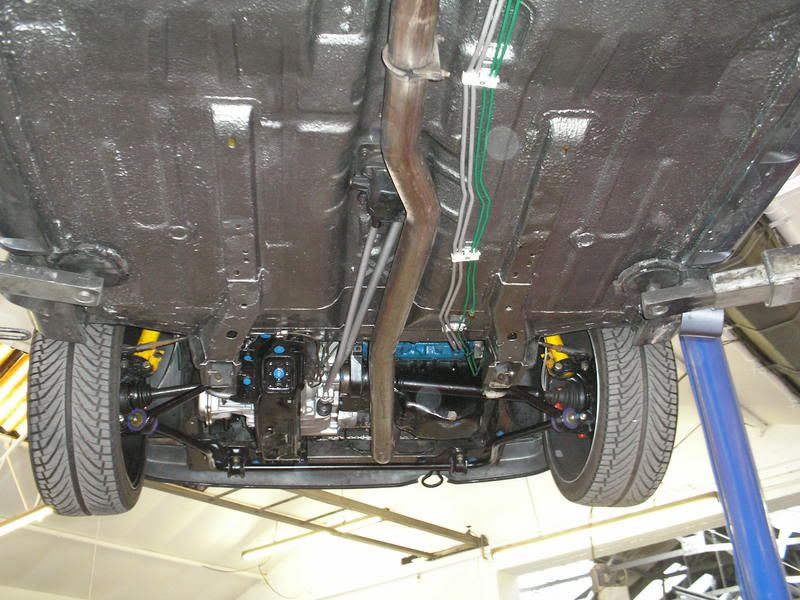
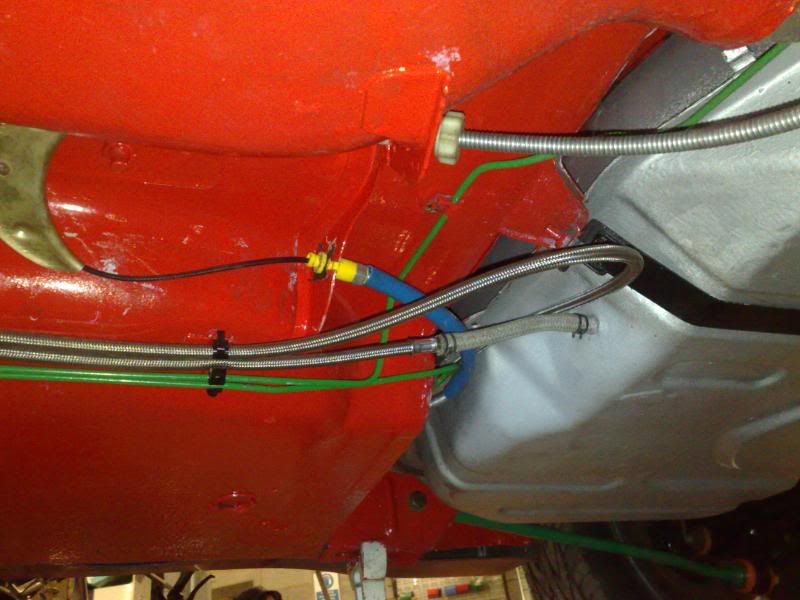
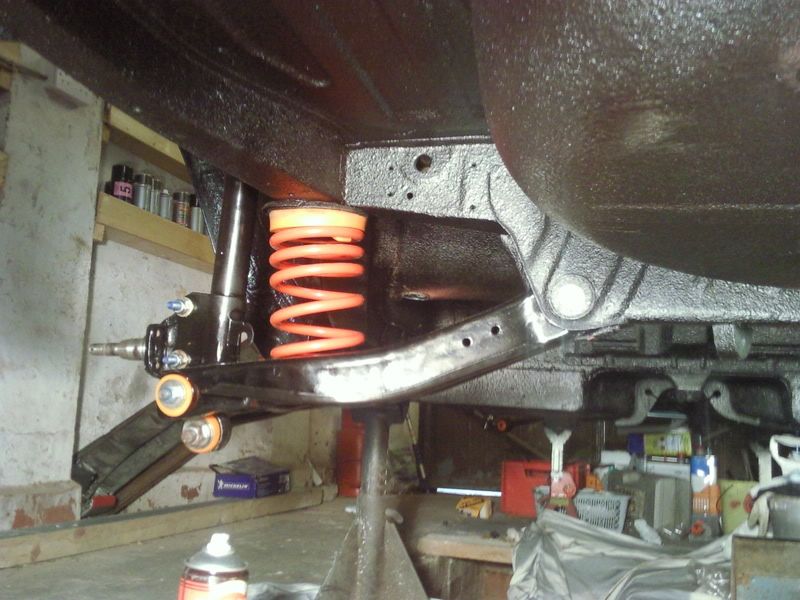
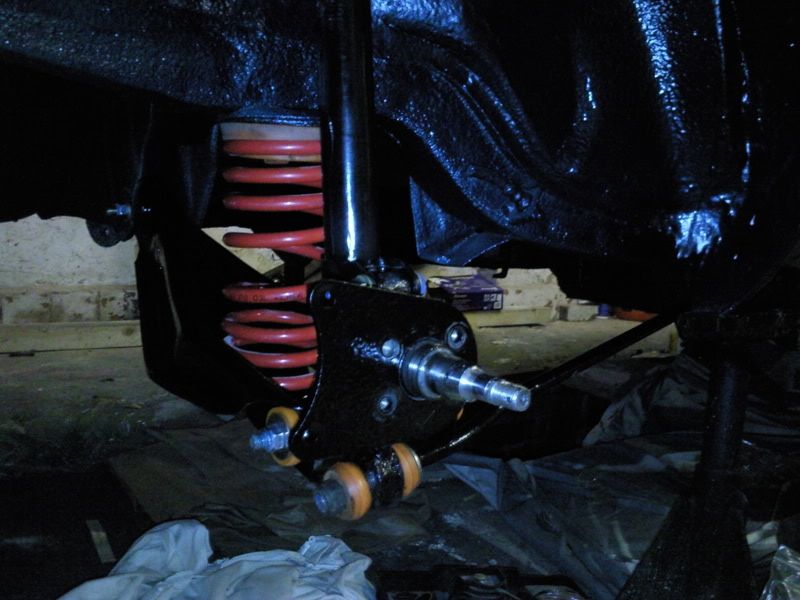
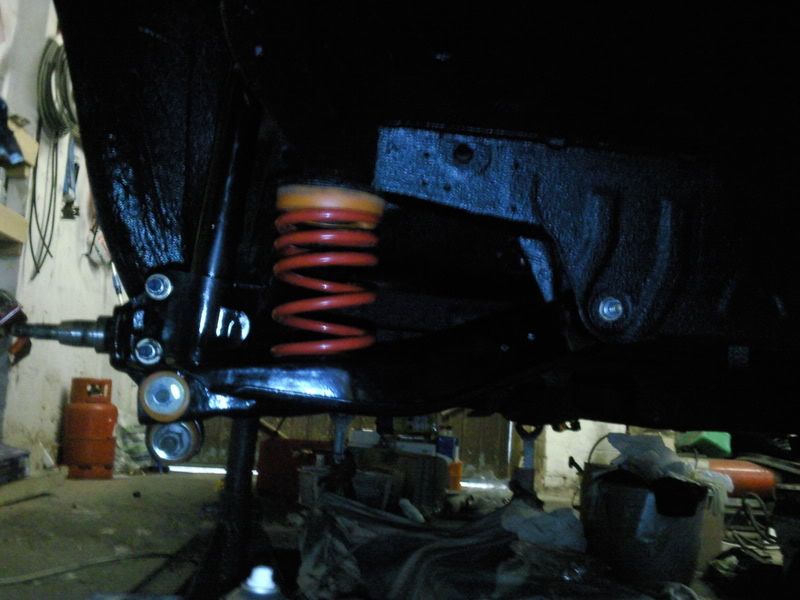
The best thing on my opinion is to keep the colours standard.
Tank-silver
suspension-black
fuel pipes-green e.c.t.
Also polybush every thing.Then you never need worry and it looks good
Here's mine.


Tank-silver
suspension-black
fuel pipes-green e.c.t.
Also polybush every thing.Then you never need worry and it looks good
Here's mine.
Last edited by mercury grey minter; 01-01-2009 at 07:40 PM.
 01-01-2009, 08:25 PM
#11
Wye Valley Hardcore
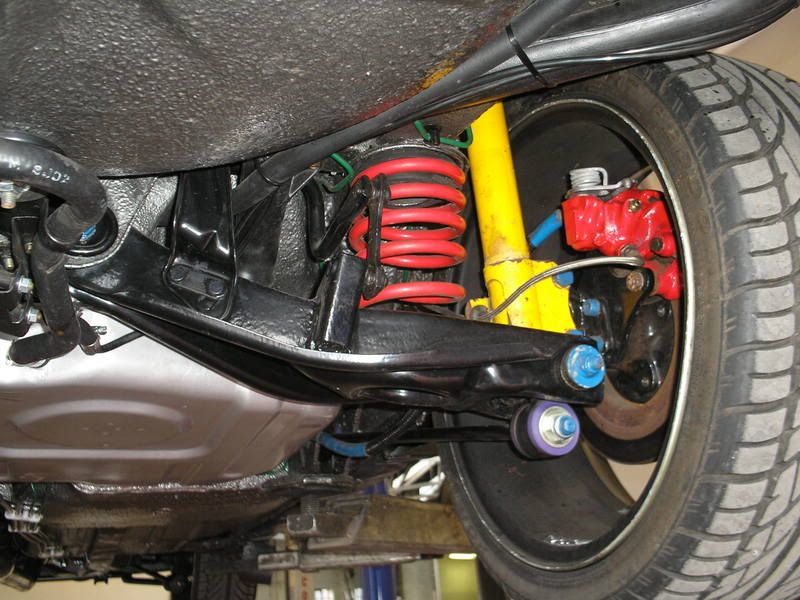
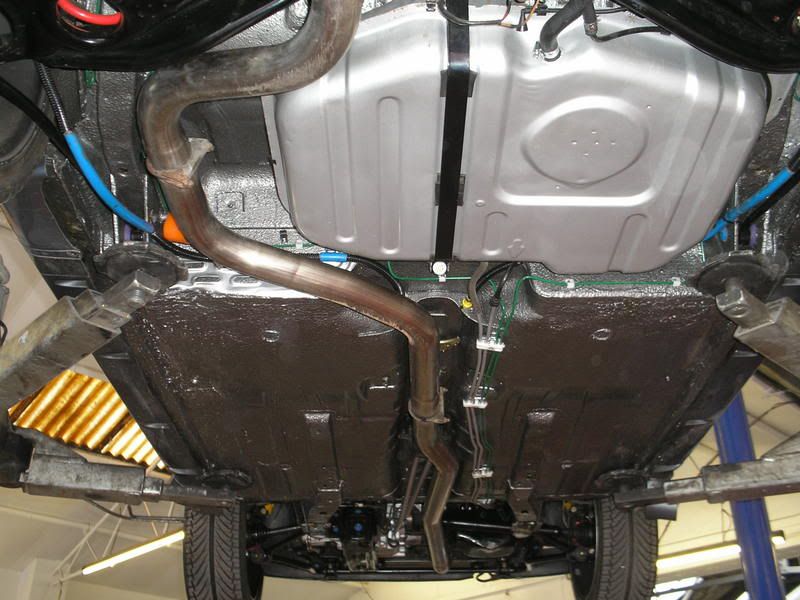
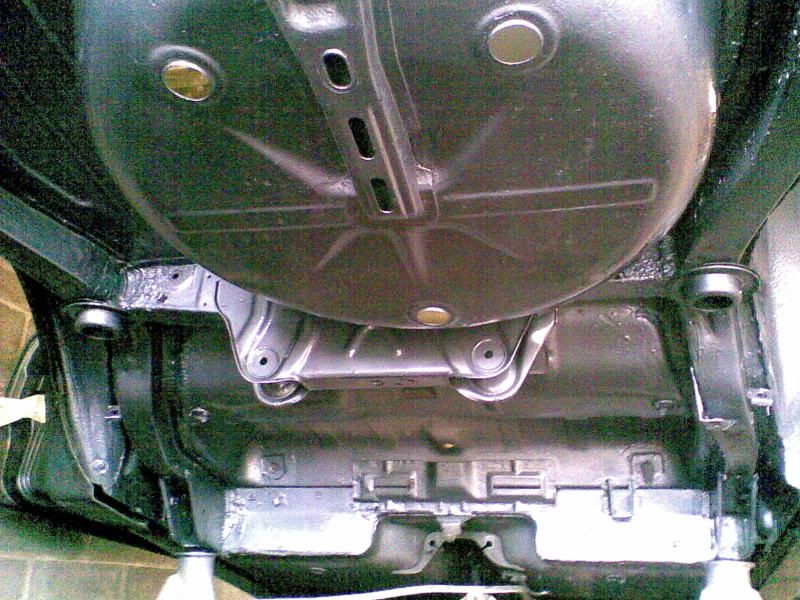
Not as nice/concourse as the others here, just wanted mine to look tidy.
Fuel pump hanger will more than likely be rotton beyond repair, I'd polybush and replace all the bolts.
I kept standard colours but a touch of colour for the tie bars.
Fuel pump hanger will more than likely be rotton beyond repair, I'd polybush and replace all the bolts.
I kept standard colours but a touch of colour for the tie bars.
Last edited by muz; 01-01-2009 at 08:28 PM.
01-01-2009, 08:34 PM
#12
Advanced PassionFord User
iTrader: (1)

Join Date: Jan 2005
Location: Birmingham
Posts: 1,949
Likes: 0
Received 0 Likes
on
0 Posts
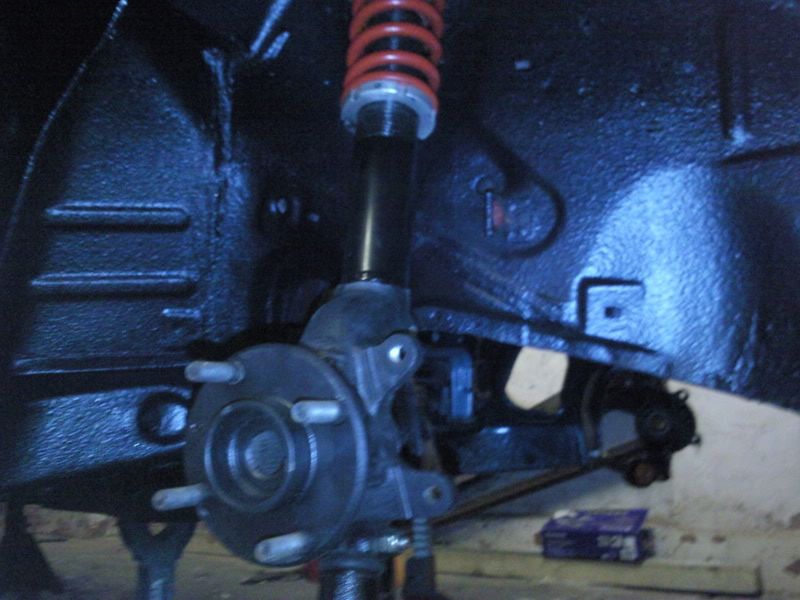
few pics of whats been thrown back on mine already, just black stonechipped underside, then black powdercoated arms/tie bars/hubs etc, and all new genuine ford nuts bolts and washers
 02-01-2009, 09:17 AM
#15
Advanced PassionFord User
Thread Starter
Join Date: Dec 2006
Location: Crewe
Posts: 1,521
Likes: 0
Received 0 Likes
on
0 Posts
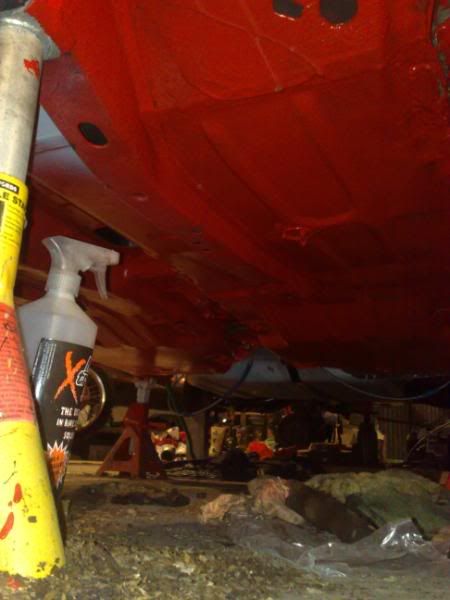
Ive been taking some pics of mine, alot of time and effort has gone into some of the cars shown in this thread and id be a happy man if mine looked half as good as the ones shown.
02-01-2009, 12:14 PM
#16
Advanced PassionFord User

Join Date: Dec 2004
Posts: 1,962
Likes: 0
Received 0 Likes
on
0 Posts
really good thread this with some very solid looking rsts 
i'll be doing mine this year hopefully- i'll be very happy if it looks anywhere near as good as most of these!
i'll be doing mine this year hopefully- i'll be very happy if it looks anywhere near as good as most of these!
02-01-2009, 05:51 PM
#18
I've found that life I needed.. It's HERE!!
Join Date: Aug 2006
Location: The Netherlands
Posts: 1,063
Likes: 0
Received 0 Likes
on
0 Posts
if i understand you correct you mean the fuel pipe from the chassis? if so there is a screw in it
If you mean the fillerneck from the fuel tank it is just pushed in you can pull it out
and i you don't mean both of these i look stupid and i need to work on my english then
If you mean the fillerneck from the fuel tank it is just pushed in you can pull it out
and i you don't mean both of these i look stupid and i need to work on my english then
02-01-2009, 05:59 PM
#19
Advanced PassionFord User
Thread Starter
Join Date: Dec 2006
Location: Crewe
Posts: 1,521
Likes: 0
Received 0 Likes
on
0 Posts
if i understand you correct you mean the fuel pipe from the chassis? if so there is a screw in it
If you mean the fillerneck from the fuel tank it is just pushed in you can pull it out
and i you don't mean both of these i look stupid and i need to work on my english then
If you mean the fillerneck from the fuel tank it is just pushed in you can pull it out
and i you don't mean both of these i look stupid and i need to work on my english then
 02-01-2009, 06:09 PM
#21
Advanced PassionFord User
Thread Starter
Join Date: Dec 2006
Location: Crewe
Posts: 1,521
Likes: 0
Received 0 Likes
on
0 Posts
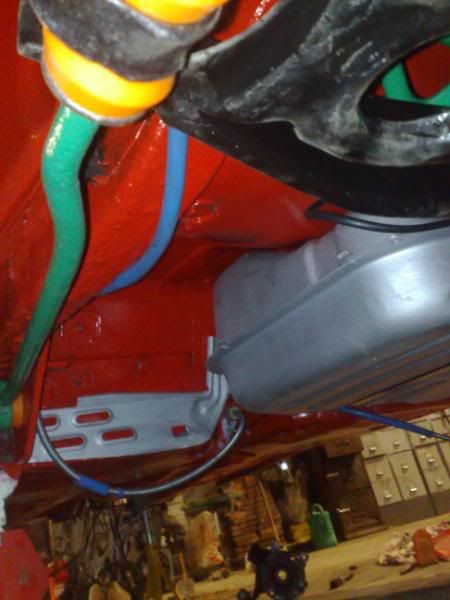
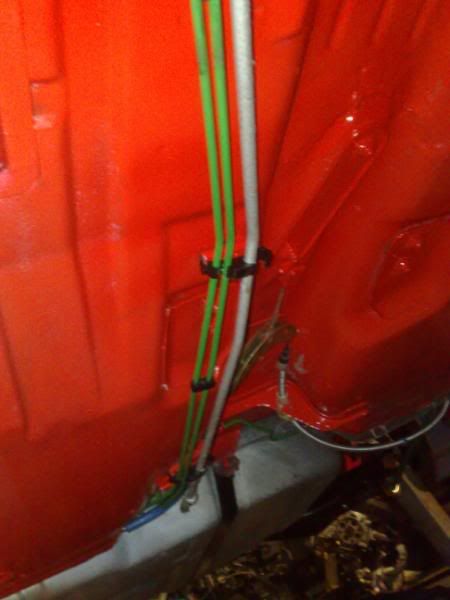
anodised ive undone the screw next to the cap, no rust, around the cap, im hoping its just the sealent cracking around the filler neck (inside the arch where the pipes come down)
02-01-2009, 06:12 PM
#22
I've found that life I needed.. It's HERE!!
Join Date: Apr 2005
Location: Northants
Posts: 1,096
Likes: 0
Received 0 Likes
on
0 Posts
oh right cant think what mine had behind it some rubber type foam stuff i think
but im going to weld a plate over mine and fit the filler in the boot
but im going to weld a plate over mine and fit the filler in the boot
02-01-2009, 06:33 PM
#23
Fleet Manager
02-01-2009, 07:25 PM
#24
Advanced PassionFord User
iTrader: (1)
Join Date: Jan 2005
Location: Birmingham
Posts: 1,949
Likes: 0
Received 0 Likes
on
0 Posts
think i remember from his resto thread that he used the mega expensive 3M bag type stonechip underseal stuff, that comes in the dark grey, very close to mercury grey
its 1 of the nicest underside restos iv seen on a car that wasnt spending its life in a carcoon, subtle and clean as fook
its 1 of the nicest underside restos iv seen on a car that wasnt spending its life in a carcoon, subtle and clean as fook

 02-01-2009, 07:55 PM
#26
PassionFord Post Troll
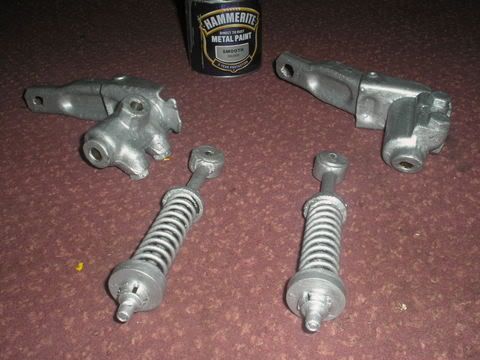
As RSANDY said.(Kind words)I used the 3m bag sealer then painted it with HAMMERTITE HAMMERED GREY.The closest to mercury grey.
Bag sealer = �110
Hammerite = �15.
Poly bushes = �210
Powder coated suspension = �250
All new bolts,nuts and washers = �45
It,s not cheap doing an underbody resto,but do it right and it will last a good 10 years.
Well worth it for the way it looks and peace of mind.
No more crossing your fingers come m.o.t time.
02-01-2009, 07:57 PM
#27
Advanced PassionFord User
Thread Starter
Join Date: Dec 2006
Location: Crewe
Posts: 1,521
Likes: 0
Received 0 Likes
on
0 Posts

 02-01-2009, 09:08 PM
#31
Advanced PassionFord User
iTrader: (1)
Join Date: Jan 2005
Location: Birmingham
Posts: 1,949
Likes: 0
Received 0 Likes
on
0 Posts
applies to prepping anything before paint...
flat using suitable grade wet n dry, wipe with panel degreaser, tackrag, then paint
on a tank though, especially if u say its ready for paint, id ignore the wet n dry n give it a quick rub with red scotch, then degreser and tack rag
flat using suitable grade wet n dry, wipe with panel degreaser, tackrag, then paint
on a tank though, especially if u say its ready for paint, id ignore the wet n dry n give it a quick rub with red scotch, then degreser and tack rag
02-01-2009, 09:36 PM
#32
Advanced PassionFord User
Thread Starter
Join Date: Dec 2006
Location: Crewe
Posts: 1,521
Likes: 0
Received 0 Likes
on
0 Posts
applies to prepping anything before paint...
flat using suitable grade wet n dry, wipe with panel degreaser, tackrag, then paint
on a tank though, especially if u say its ready for paint, id ignore the wet n dry n give it a quick rub with red scotch, then degreser and tack rag
flat using suitable grade wet n dry, wipe with panel degreaser, tackrag, then paint
on a tank though, especially if u say its ready for paint, id ignore the wet n dry n give it a quick rub with red scotch, then degreser and tack rag
02-01-2009, 10:41 PM
#34
Advanced PassionFord User
iTrader: (1)
Join Date: Jan 2005
Location: Birmingham
Posts: 1,949
Likes: 0
Received 0 Likes
on
0 Posts
yeah as above, if its bare metal, grind or red scotch it perfectly clean (depending how much surface rust has managed to form), and then etch primer it, so it has a well bonded primer base
when you said ready for paint, i assumed it was already in primer, my mistake
when you said ready for paint, i assumed it was already in primer, my mistake
03-01-2009, 12:11 AM
#35
I've found that life I needed.. It's HERE!!
Join Date: Aug 2006
Location: The Netherlands
Posts: 1,063
Likes: 0
Received 0 Likes
on
0 Posts
that's also what i did with my petrol tank.
but for the underside i used also a sealend for the places where they also sprayed it as factory, because not the whole underside has been sprayed in the factory. Just the chassisrails and wheelarches and besides the skirts a little bit. That's whats done on my car and all the rest is just painted. Factory was only primer, but i wasn't happy with that so i did everyting with red.
but for the underside i used also a sealend for the places where they also sprayed it as factory, because not the whole underside has been sprayed in the factory. Just the chassisrails and wheelarches and besides the skirts a little bit. That's whats done on my car and all the rest is just painted. Factory was only primer, but i wasn't happy with that so i did everyting with red.
04-01-2009, 12:28 AM
#37
PassionFord Post Troll
04-01-2009, 11:43 AM
#38
Fleet Manager
As RSANDY said.(Kind words)I used the 3m bag sealer then painted it with HAMMERTITE HAMMERED GREY.The closest to mercury grey.
Bag sealer = �110
Hammerite = �15.
Poly bushes = �210
Powder coated suspension = �250
All new bolts,nuts and washers = �45
It,s not cheap doing an underbody resto,but do it right and it will last a good 10 years.
Well worth it for the way it looks and peace of mind.
No more crossing your fingers come m.o.t time.
Bag sealer = �110
Hammerite = �15.
Poly bushes = �210
Powder coated suspension = �250
All new bolts,nuts and washers = �45
It,s not cheap doing an underbody resto,but do it right and it will last a good 10 years.
Well worth it for the way it looks and peace of mind.
No more crossing your fingers come m.o.t time.
cool hammerd grey it is then lol
04-01-2009, 03:22 PM
#39
Advanced PassionFord User
Thread Starter
Join Date: Dec 2006
Location: Crewe
Posts: 1,521
Likes: 0
Received 0 Likes
on
0 Posts
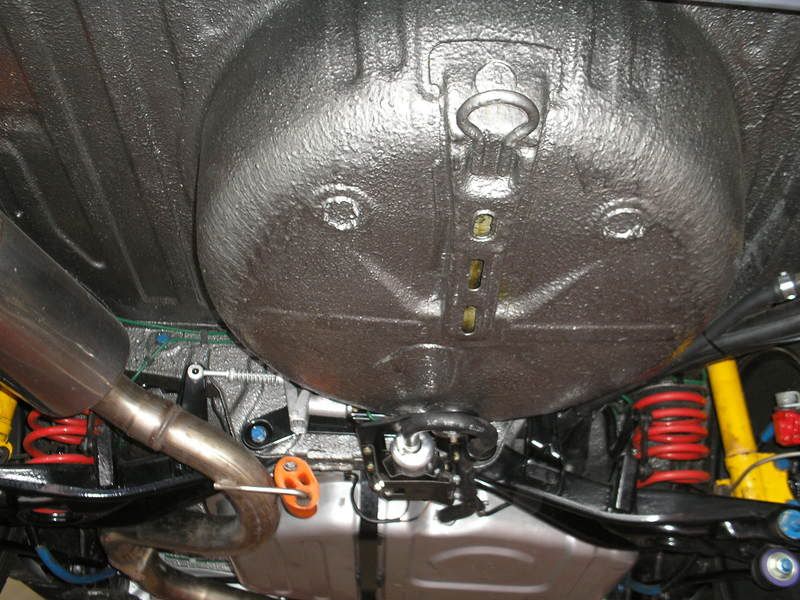
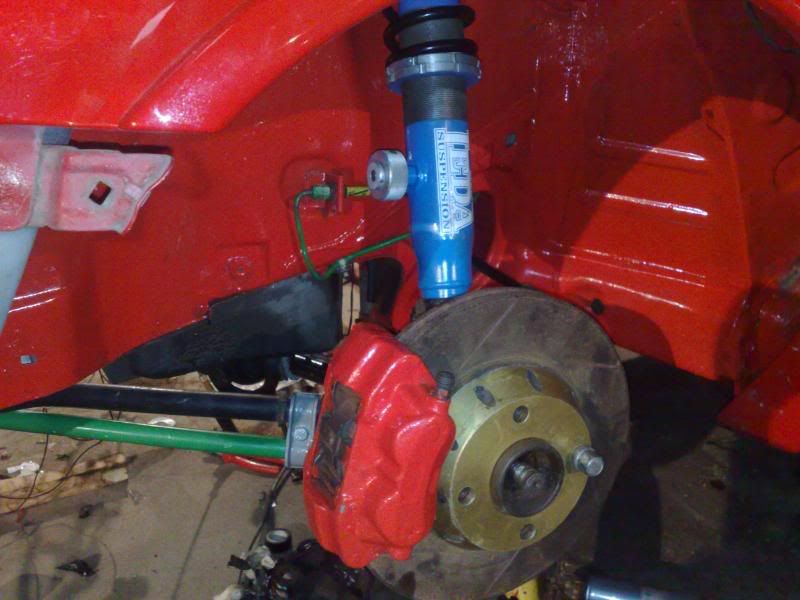
How/what did people use to clean up the brake bias valves (that sit above the fuel pump), and did people powder coat/spray/ paint with a brush ??
04-01-2009, 08:08 PM
#40
PassionFord Post Troll