


Std Fuel Lines vs Braided

Thread Starter
I've found that life I needed.. It's HERE!!
iTrader: (20)
Joined: Dec 2004
Posts: 1,454
Likes: 1
From: West Sussex
 Std Fuel Lines vs Braided
Dad's Cossie is very near completion but we have hit a stumbling block, the fuel lines! The good std replacement lines we were going to use won't fit as they turned out to be 2wd and the front of the pipes are quite different to the originals so cannot route into the engine bay very well.
What he has to decide now is whether to try and get hold of more std lines off a 4x4, which finding some that aren't a million miles away will be difficult, or go braided the whole length. He has already got some braided line and fittings to do the sections on either end of both metal lines but is a little worried about mounting different clips to the underside to secure the -6 braided hose. He likes the idea of braided in general, just not drilling loads of holes in the floor/chassis!
I've done a bit of a search but can't find many pics of how people have done this so was hoping someone could help with some advice and pics maybe...?
What he has to decide now is whether to try and get hold of more std lines off a 4x4, which finding some that aren't a million miles away will be difficult, or go braided the whole length. He has already got some braided line and fittings to do the sections on either end of both metal lines but is a little worried about mounting different clips to the underside to secure the -6 braided hose. He likes the idea of braided in general, just not drilling loads of holes in the floor/chassis!
I've done a bit of a search but can't find many pics of how people have done this so was hoping someone could help with some advice and pics maybe...?

I've found that life I needed.. It's HERE!!
Joined: Jan 2013
Posts: 1,065
Likes: 1
From: scotland
I would use copper or braided just from a it will last longer point of view ,
the braided lines a guy on here has done it (looks cool) but I think his was Teflon instead of rubber hose , but what ever you do make sure its safe for whats going throw it ie oil,fuel , brake fluid
the braided lines a guy on here has done it (looks cool) but I think his was Teflon instead of rubber hose , but what ever you do make sure its safe for whats going throw it ie oil,fuel , brake fluid

Gary Krishna
iTrader: (9)
Joined: Mar 2008
Posts: 4,029
Likes: 67
From: Rickmansworth, Hertfordshire.
You don't have to drill any holes anywhere 
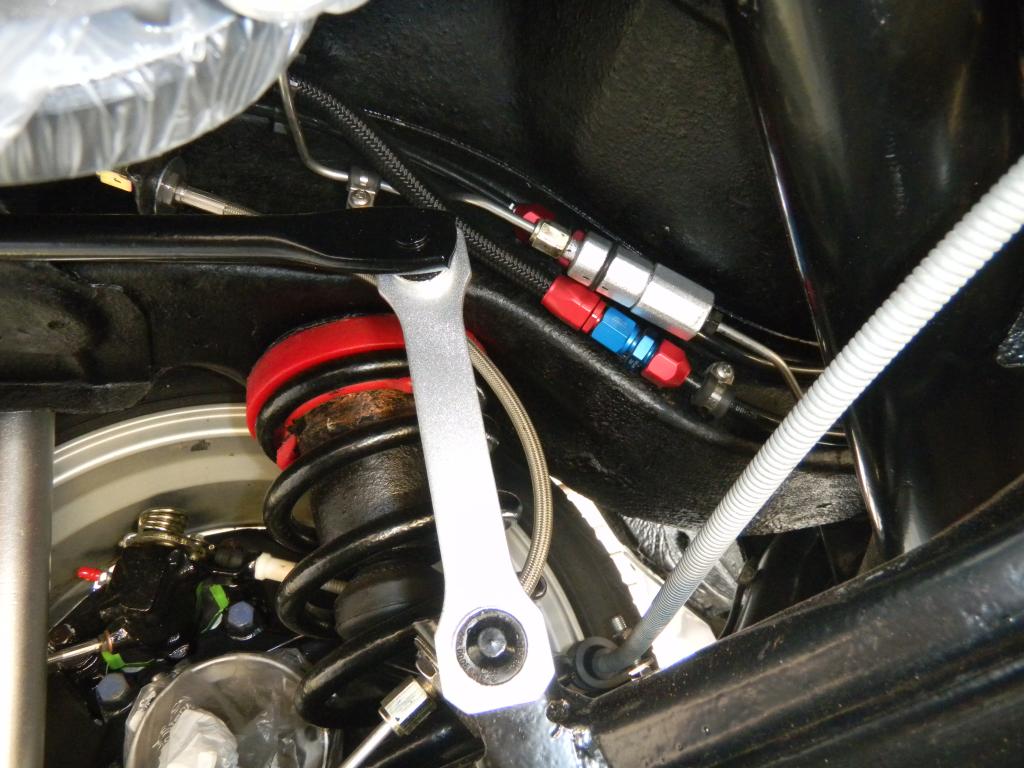
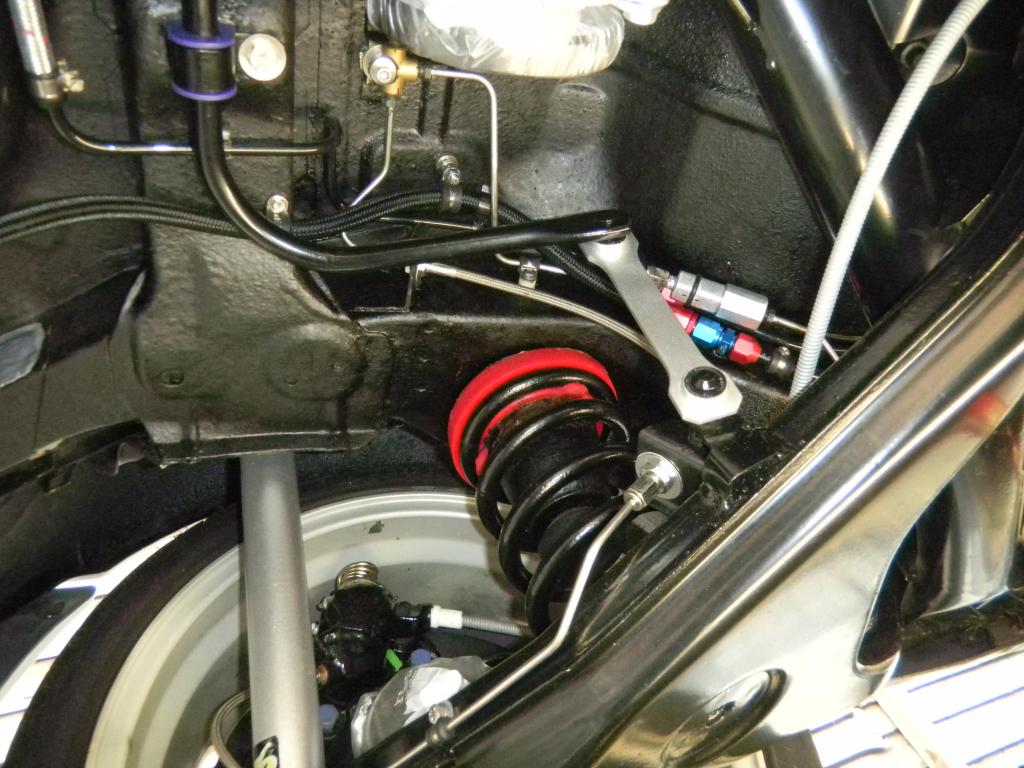
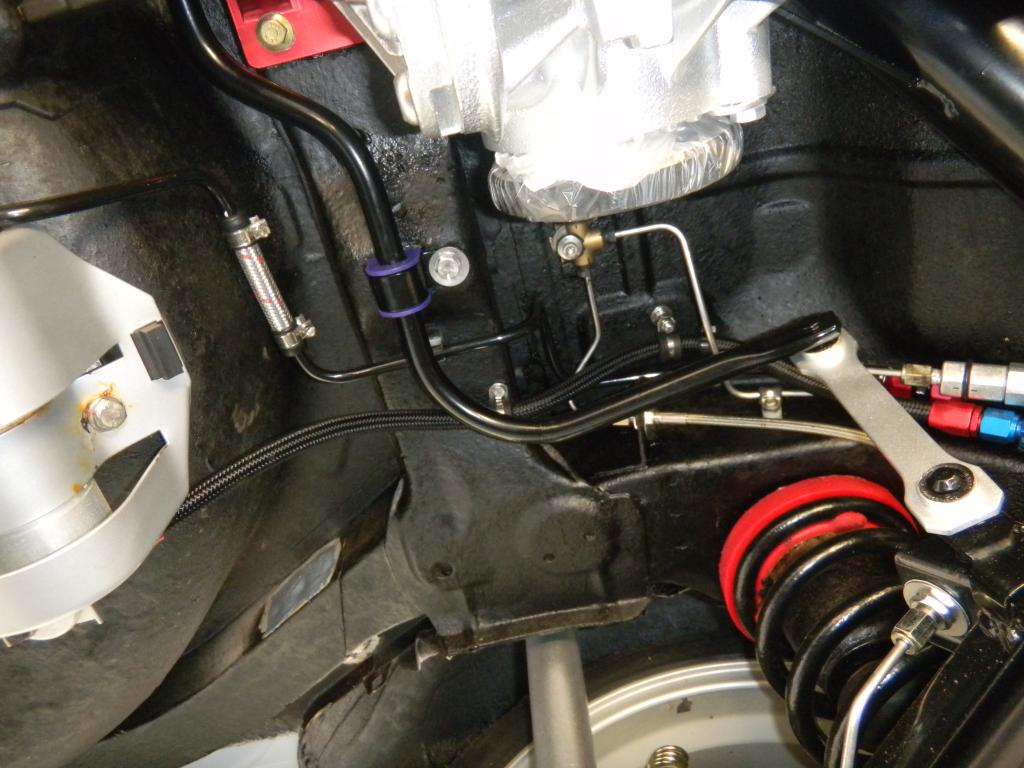
I made some little aluminium plates that fix to the original mounting points using the original self tapping screws. I then used hose separator clamp type thingys, drilled the threads out and nut and bolted it to the little plate, job done!
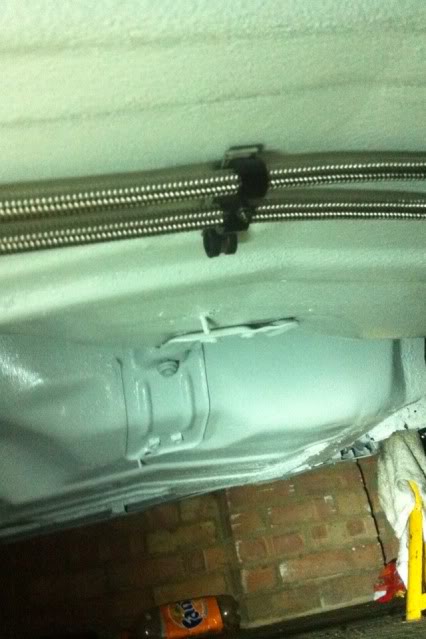
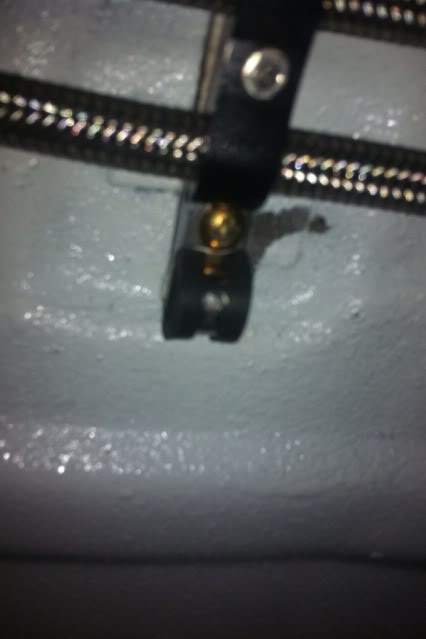
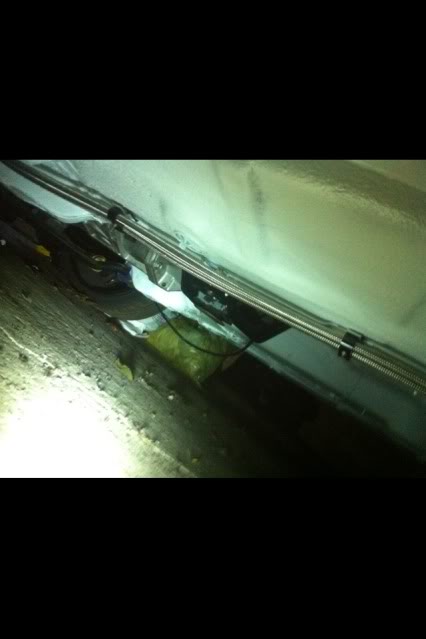
I used a p clip on there as well for the brake line.
I made some little aluminium plates that fix to the original mounting points using the original self tapping screws. I then used hose separator clamp type thingys, drilled the threads out and nut and bolted it to the little plate, job done!
I used a p clip on there as well for the brake line.



Thread Starter
I've found that life I needed.. It's HERE!!
iTrader: (20)
Joined: Dec 2004
Posts: 1,454
Likes: 1
From: West Sussex
You don't have to drill any holes anywhere
I made some little aluminium plates that fix to the original mounting points using the original self tapping screws. I then used hose separator clamp type thingys, drilled the threads out and nut and bolted it to the little plate, job done!
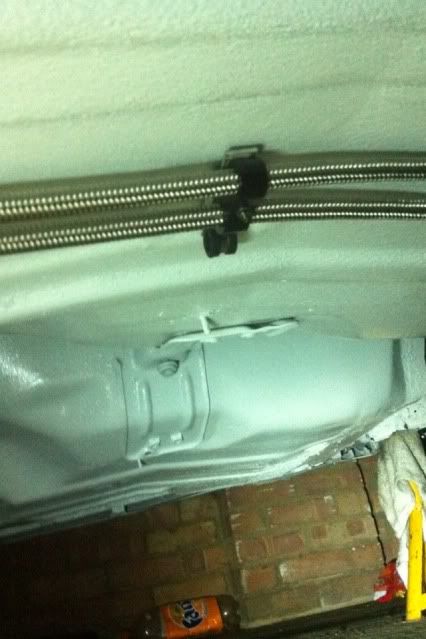
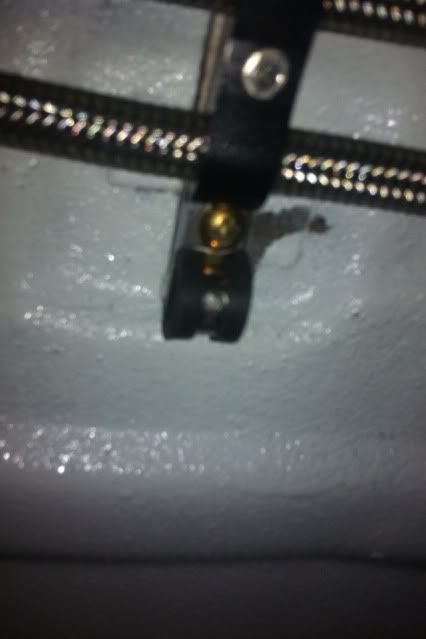
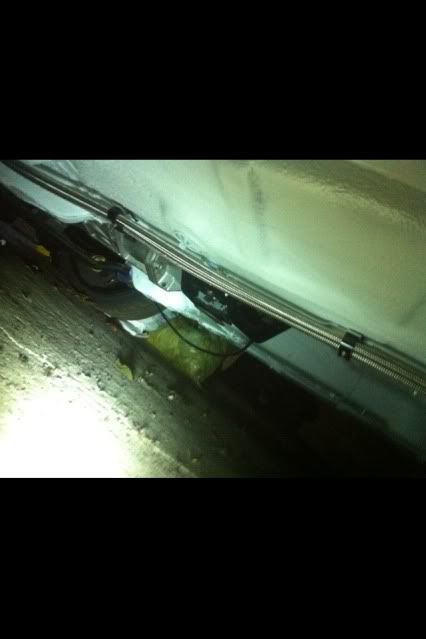
I used a p clip on there as well for the brake line.
I made some little aluminium plates that fix to the original mounting points using the original self tapping screws. I then used hose separator clamp type thingys, drilled the threads out and nut and bolted it to the little plate, job done!
I used a p clip on there as well for the brake line.
But that only works for the front 4 clips underneath, the last one before the lines step up is slotted on a little peg... what did you do there?
Also, how did you go about securing them for the remainder of the length past the beam along the chassis rail?

Gary Krishna
iTrader: (9)
Joined: Mar 2008
Posts: 4,029
Likes: 67
From: Rickmansworth, Hertfordshire.
Thanks, that's a great idea, I like that!
But that only works for the front 4 clips underneath, the last one before the lines step up is slotted on a little peg... what did you do there?
Also, how did you go about securing them for the remainder of the length past the beam along the chassis rail?
But that only works for the front 4 clips underneath, the last one before the lines step up is slotted on a little peg... what did you do there?
Also, how did you go about securing them for the remainder of the length past the beam along the chassis rail?

I made a couple of little brackets for the hose clamps to bolt to, one off where the long sideways bar for the exhaust bolts on to the beam and one that is held on by the N/S/R braided brake hose where it attaches to the floor. I'll get a couple of pics for you once the engine is back out tomorrow.

PassionFord Post Whore!!
iTrader: (1)
Joined: May 2003
Posts: 8,952
Likes: 55
From: stockton on tees
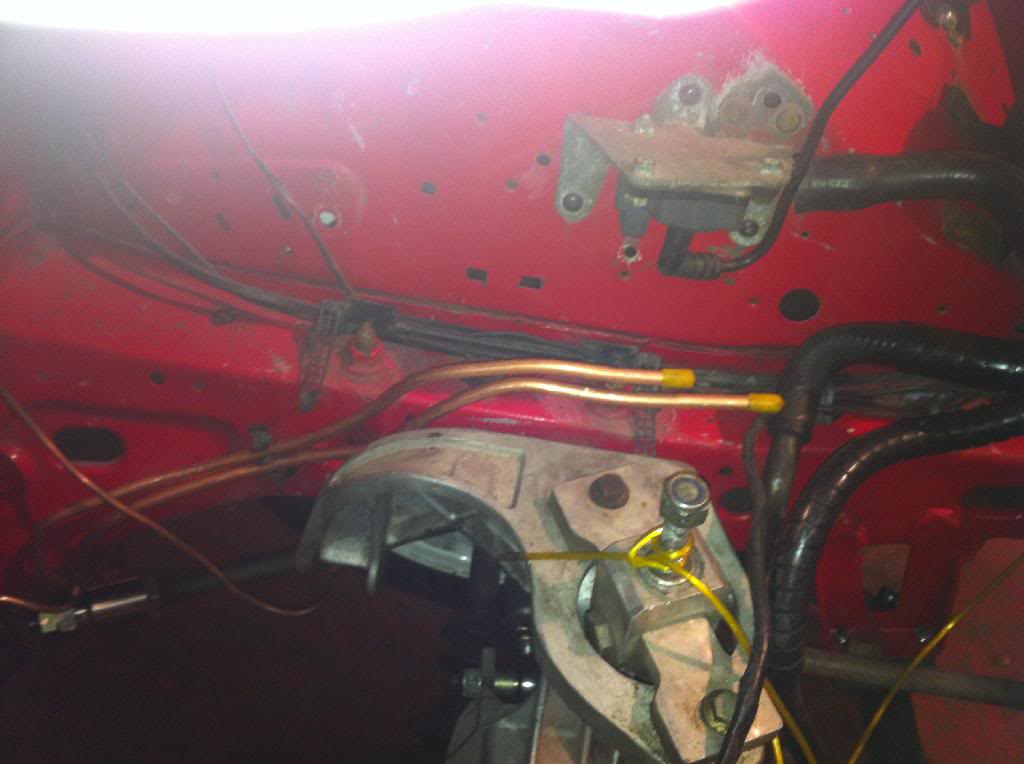
I used 5/16 copper pipe (£25 off ebay) and matched the pipes to the original lines, I haven't used the original connectors as I chopped them off long ago but i'm sure they will fit straight on at each end, I used compression joints to connect them at each end to the flexi pipes
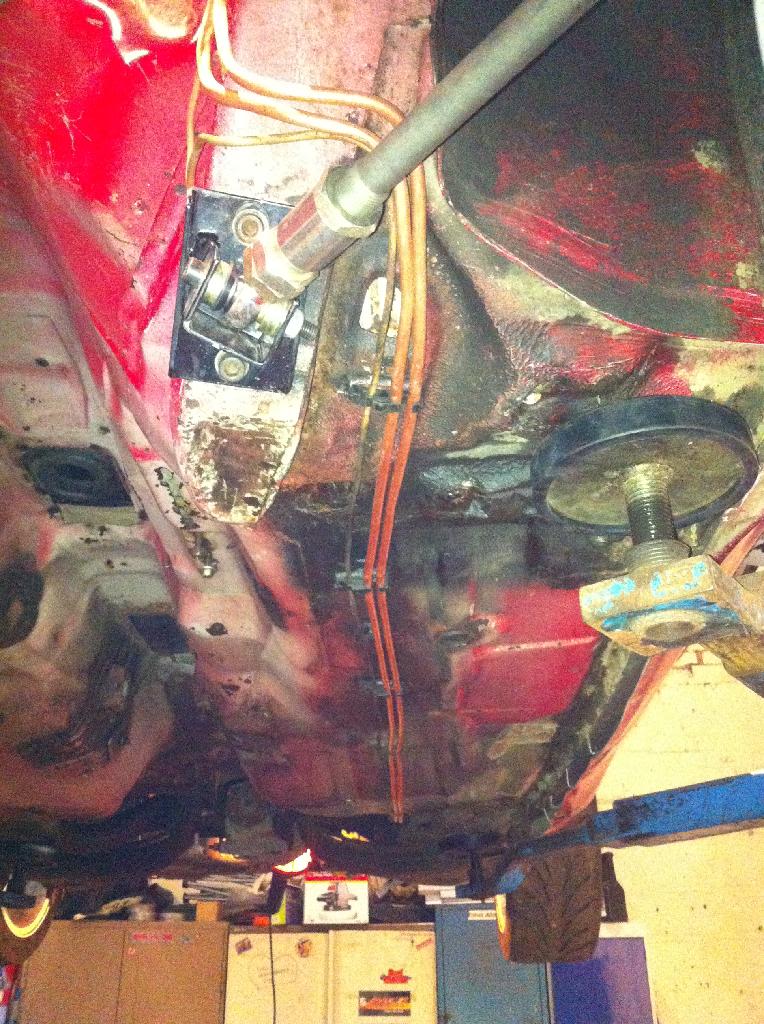
Trending Topics

I've found that life I needed.. It's HERE!!
Joined: Nov 2004
Posts: 1,198
Likes: 44
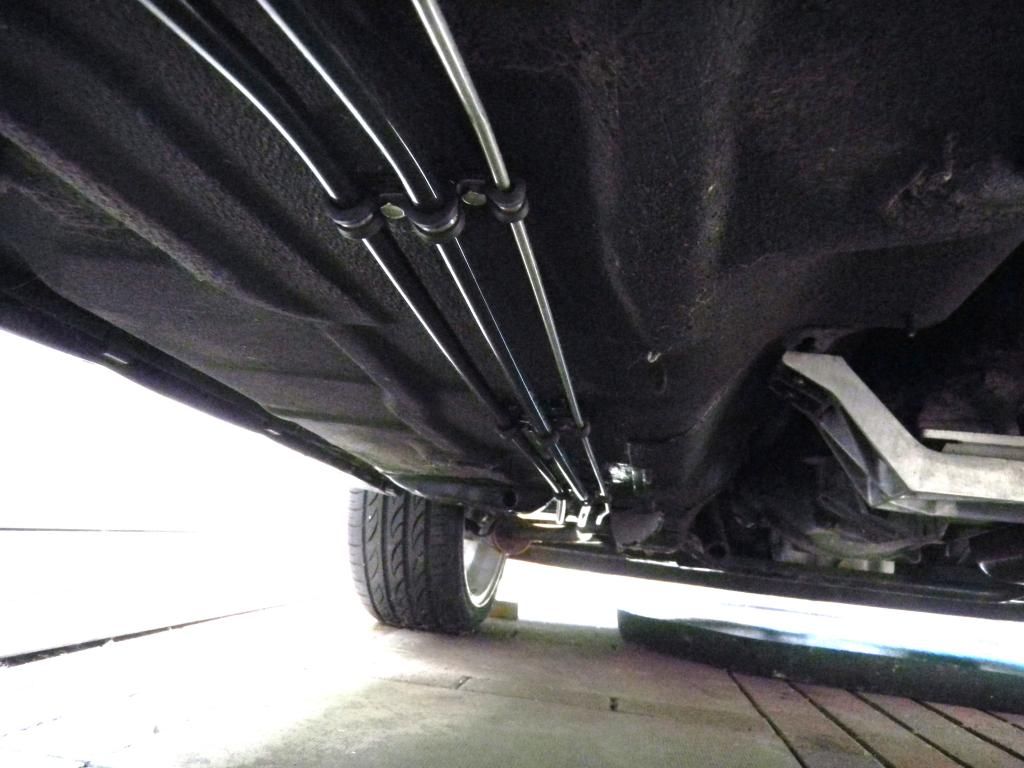
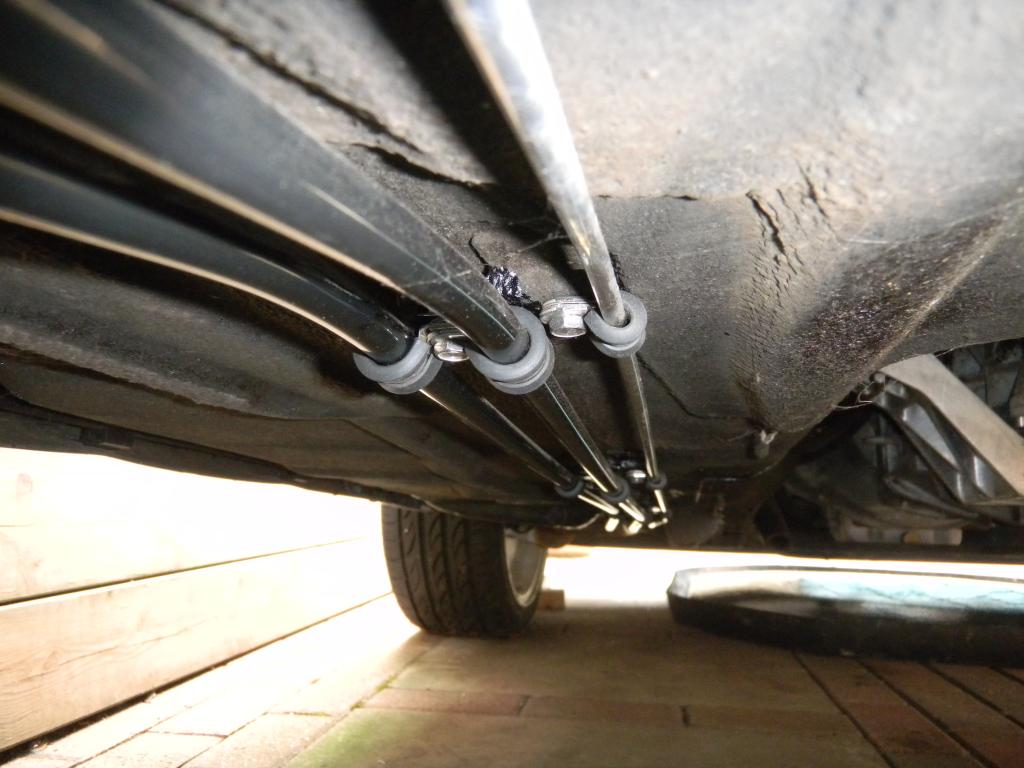
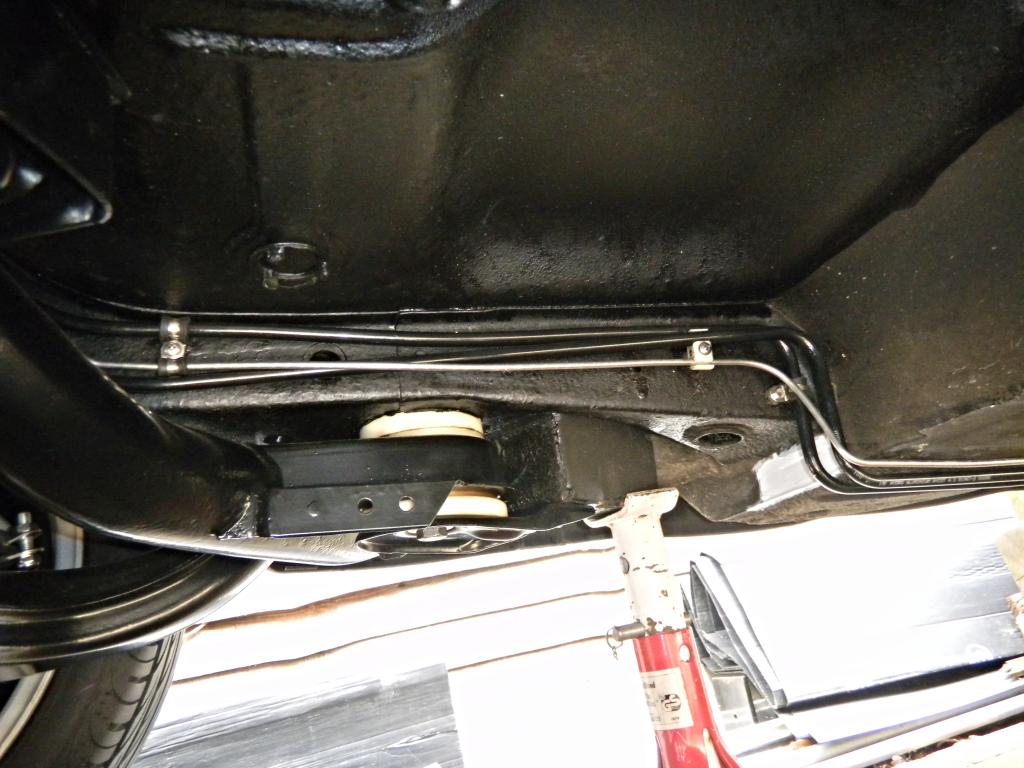
when I done mine I used polymer coated aluminium hardlines which you can bend with a small pipe bender, and just used stainless P clips and drilled and tapped them to the existing piece of metal that the old plastic clips were fixed to.


Thread Starter
I've found that life I needed.. It's HERE!!
iTrader: (20)
Joined: Dec 2004
Posts: 1,454
Likes: 1
From: West Sussex
Thanks for the input guys! 
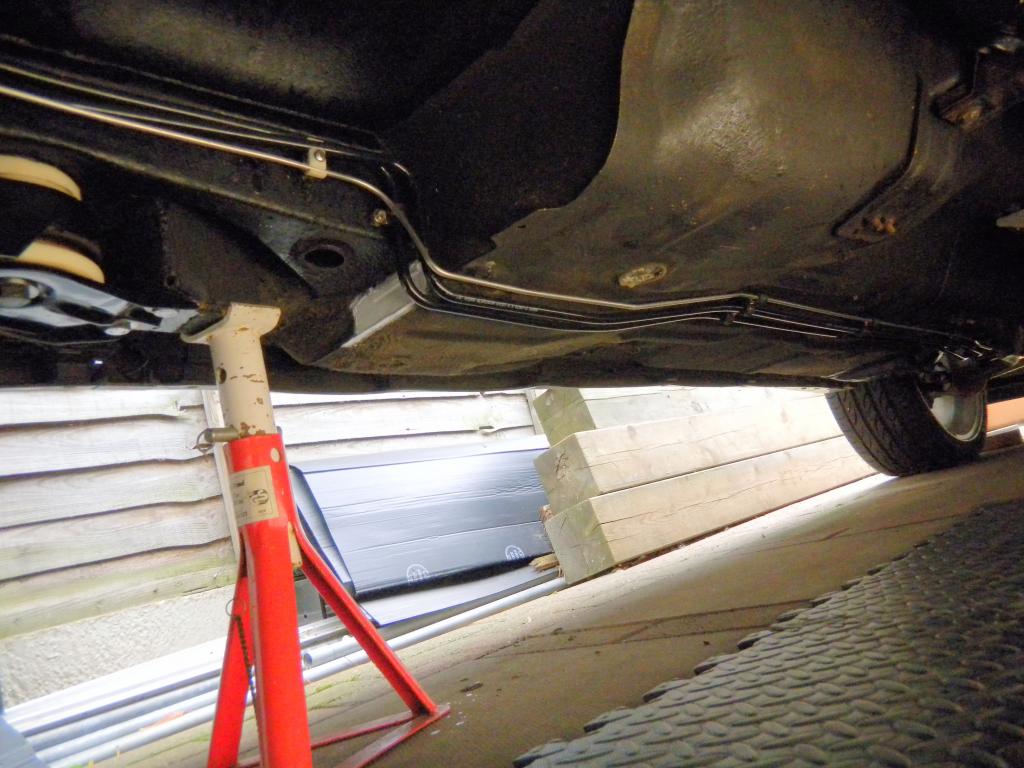
Well with a bit of messing about we've got the std fuel pipes clipped in and sitting more or less where we want them, so hopefully braided ends can go on and we're there...
Well with a bit of messing about we've got the std fuel pipes clipped in and sitting more or less where we want them, so hopefully braided ends can go on and we're there...


Thread
Thread Starter
Forum
Replies
Last Post
JK12
Pictures, video & Photoshop Forum
33
Apr 26, 2021 12:09 PM
Dubs44
Cars & Parts Wanted.
1
Sep 19, 2015 06:31 AM
