Fiesta ST race car project
 27-11-2009, 08:13 PM
#1
Too many posts.. I need a life!!
Thread Starter

Join Date: Feb 2006
Location: Ayr
Posts: 555
Likes: 0
Received 0 Likes
on
0 Posts
This is my new baby now!
I started off racing Fiesta XR2's at Knockhill late in 2007. After a full season in them in 2008, I was offered the chance to test a race spec Fiesta ST in November 2008. Almost on the same day I decided that eventually I would like to trade in my XR2 for a newer ST - the car was that good!
I competed in several events in my XR2 in 2009 to keep my foot in the door, but the car was up for sale and sold in September. Just to make sure I was going down the right path, before commiting to my own build I borrowed an ST and raced it at the October SMRC meeting at Knockhill. Lots of fun, even if I was a little scared of damaging someone elses well prepared car.
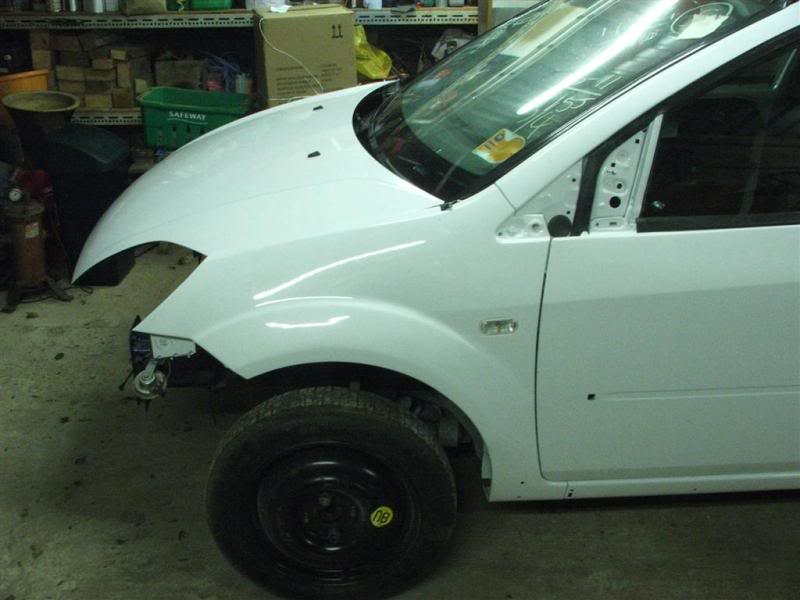
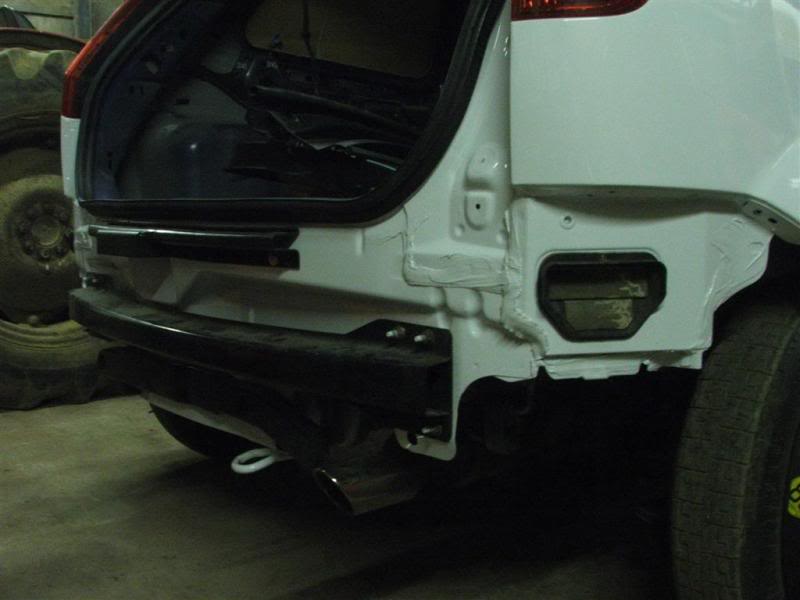
A couple of weeks later I went to view a written off blue 54 reg ST in a barn that was awaiting final repairs and then a coat of paint - it was just needing someone to buy it.. The car didn't have any chassis damage, just cosmetic, so I gave the order to go ahead with my preferred colour choice - Frozen White.
The car was finished up this week and was delivered for me yesterday.
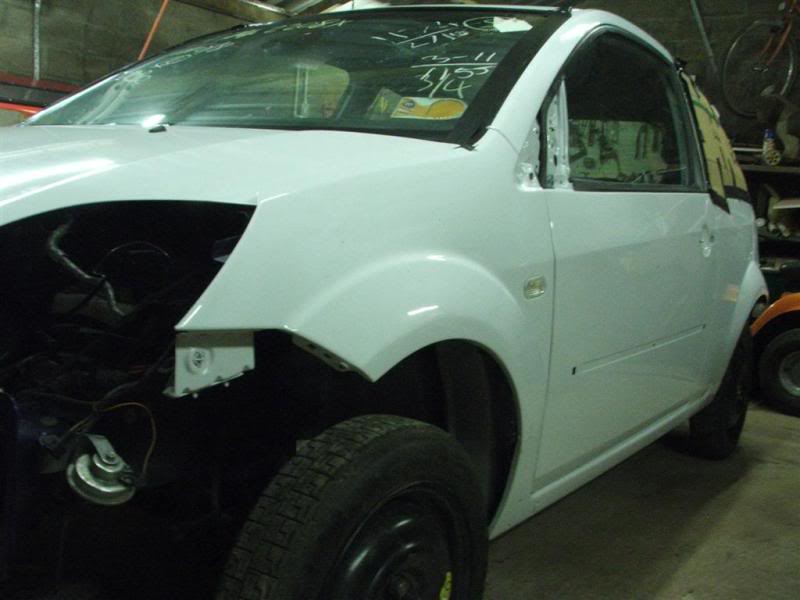
How Project ST looks as it stands tonight:
Exterior
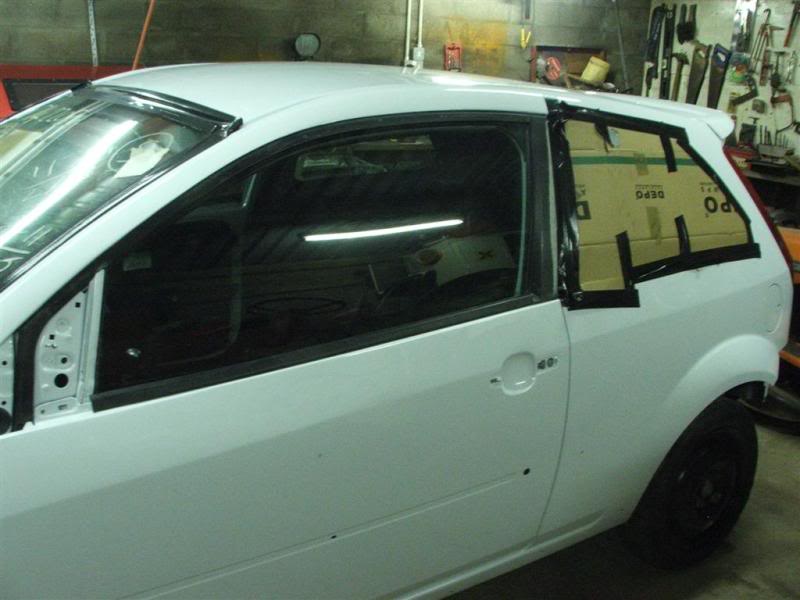

Interior:
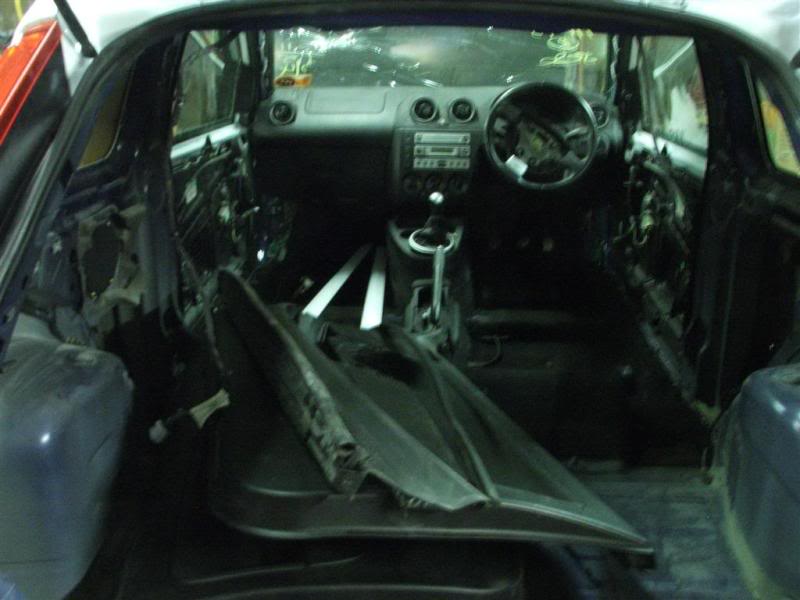
If you're wondering why the windows are only taped in, there's a good reason! They will need to come out again for rollcage, and were simply taped on to keep elements away from inside during transportation.
The engine for it is being stored elsewhere right now, just incase you're wondering if I forgot to ask for a car with one.
The car will be built to BRSCC Ford Fiesta Championship regulations, although my plans are initially to run in the Scottish Motor Racing Club*Fiesta ST Cup, which competes alongside the Mk2 XR2's I used to race.
Some of the specs of the car will be as follows:
-Standard 2.0 Duratec ST engine
-K&N induction kit
-Performance exhaust
-Weld in Rollcage, interior will be painted metallic grey
-AST Suspension (multi adjustable!) - regulation item
-15" ATS DTC Alloy Wheels, Dunlop tyres, slicks & wets - regulation item.
-Regular competition preparation items - for example:*race seat, harnesses, fire extinguisher, electrical cut off
As you will see from the pics, the interior seats are removed, however a lot still needs to be removed to prepare the car for it's rollcage. Carpets, dash, wiring loom are the obvious items.
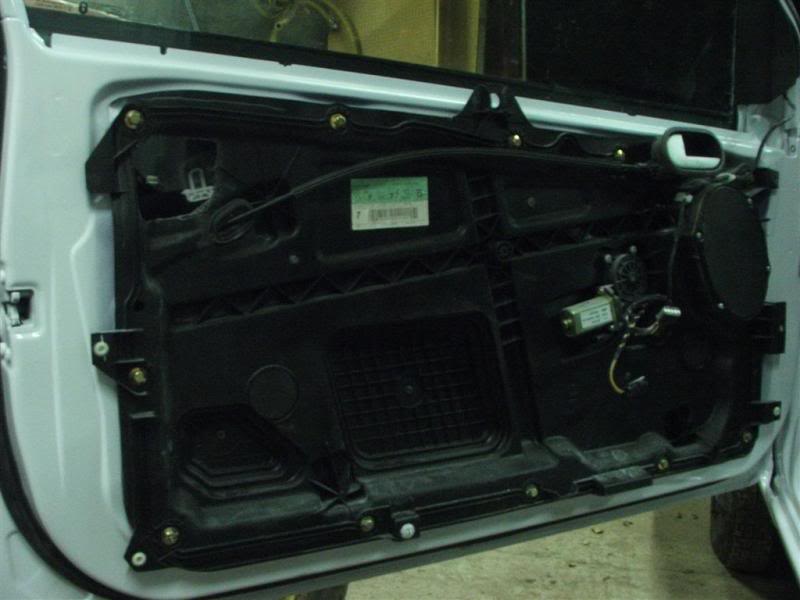
As well as that door side impact bars need to be removed - for weight saving, all redundant metal mounts need to be removed, for example where the rear seat back secures into, and the big job for weight saving is to remove every bit of seam sealer in the car. This stuff is basically everywhere, it's also used as sound deadening on the roof and rear quarters.
I'm not sure how long the above jobs will take me but this project I'll be doing it along the way as I can afford it, so it may take a while longer than I'd hoped for - which was the start of the 2010 season. Unless I can get a sponsor between now and then it seems likely to be end of 2010 or start of 2011.
Hope you all enjoy following my progress.
I started off racing Fiesta XR2's at Knockhill late in 2007. After a full season in them in 2008, I was offered the chance to test a race spec Fiesta ST in November 2008. Almost on the same day I decided that eventually I would like to trade in my XR2 for a newer ST - the car was that good!
I competed in several events in my XR2 in 2009 to keep my foot in the door, but the car was up for sale and sold in September. Just to make sure I was going down the right path, before commiting to my own build I borrowed an ST and raced it at the October SMRC meeting at Knockhill. Lots of fun, even if I was a little scared of damaging someone elses well prepared car.
A couple of weeks later I went to view a written off blue 54 reg ST in a barn that was awaiting final repairs and then a coat of paint - it was just needing someone to buy it.. The car didn't have any chassis damage, just cosmetic, so I gave the order to go ahead with my preferred colour choice - Frozen White.
The car was finished up this week and was delivered for me yesterday.
How Project ST looks as it stands tonight:
Exterior
Interior:
If you're wondering why the windows are only taped in, there's a good reason! They will need to come out again for rollcage, and were simply taped on to keep elements away from inside during transportation.
The engine for it is being stored elsewhere right now, just incase you're wondering if I forgot to ask for a car with one.
The car will be built to BRSCC Ford Fiesta Championship regulations, although my plans are initially to run in the Scottish Motor Racing Club*Fiesta ST Cup, which competes alongside the Mk2 XR2's I used to race.
Some of the specs of the car will be as follows:
-Standard 2.0 Duratec ST engine
-K&N induction kit
-Performance exhaust
-Weld in Rollcage, interior will be painted metallic grey
-AST Suspension (multi adjustable!) - regulation item
-15" ATS DTC Alloy Wheels, Dunlop tyres, slicks & wets - regulation item.
-Regular competition preparation items - for example:*race seat, harnesses, fire extinguisher, electrical cut off
As you will see from the pics, the interior seats are removed, however a lot still needs to be removed to prepare the car for it's rollcage. Carpets, dash, wiring loom are the obvious items.
As well as that door side impact bars need to be removed - for weight saving, all redundant metal mounts need to be removed, for example where the rear seat back secures into, and the big job for weight saving is to remove every bit of seam sealer in the car. This stuff is basically everywhere, it's also used as sound deadening on the roof and rear quarters.
I'm not sure how long the above jobs will take me but this project I'll be doing it along the way as I can afford it, so it may take a while longer than I'd hoped for - which was the start of the 2010 season. Unless I can get a sponsor between now and then it seems likely to be end of 2010 or start of 2011.
Hope you all enjoy following my progress.


 30-11-2009, 08:00 PM
#6
Too many posts.. I need a life!!
Thread Starter
Join Date: Feb 2006
Location: Ayr
Posts: 555
Likes: 0
Received 0 Likes
on
0 Posts
Saturday was my first day setting to work on the car, have spent a couple of hours each day working on the car - it's all I can suffer in the cold!
This actually started off as planning to remove the carpet but that hasn't come out yet.
From what I could see on the interior the gearstick mount was the 'only' thing bolted on top of the carpet.
4 nuts held down the mount:
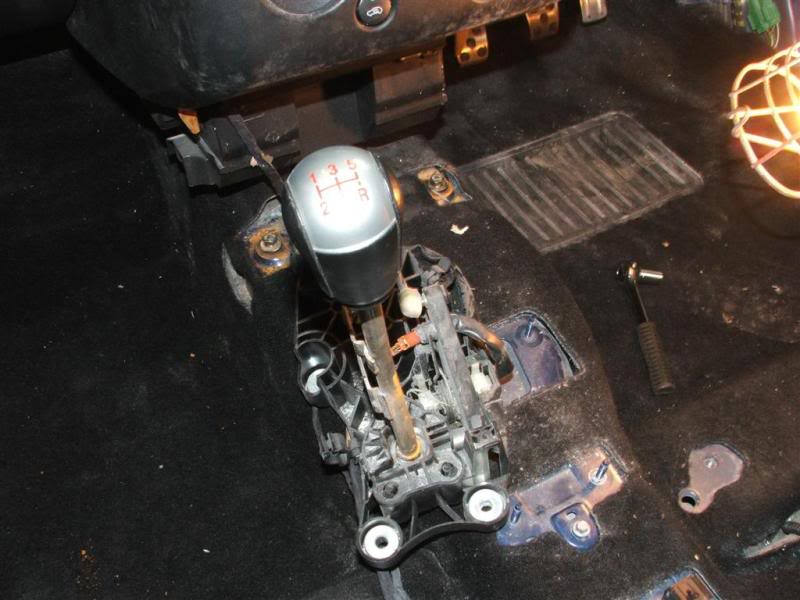
After using my best technical skills of pulling the carpet as hard as I can, it wouldn't budge, I figured the heater unit is either bolted on the carpet or sits on it tightly.
The dash needs to come out for the cage anyway so went to work on that.
First item out is the radio, and this part of dash:
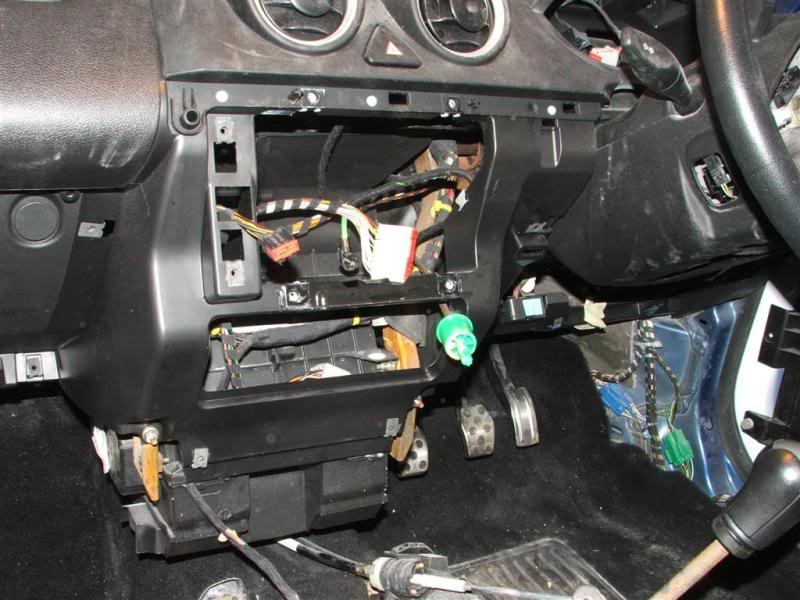
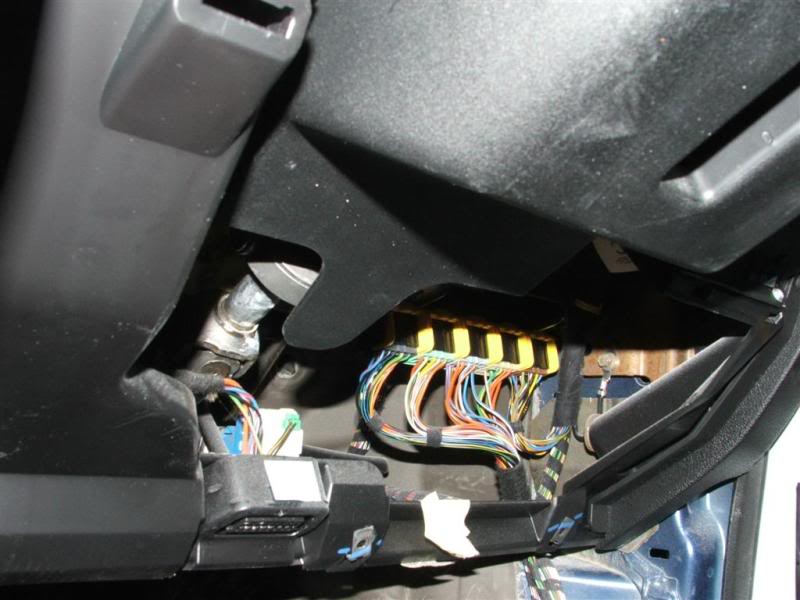
To get to the screws on the drivers side you also need to remove this panel below the steering column:
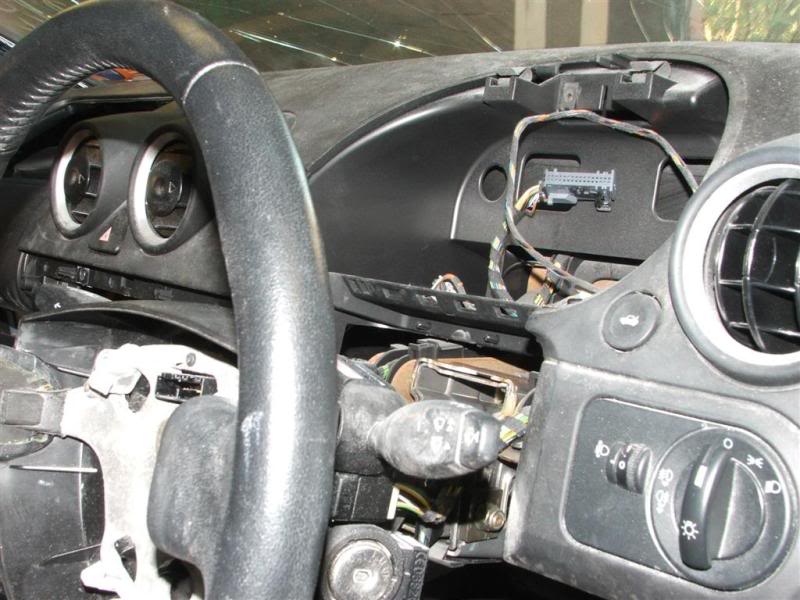
Also took off the steering column shroud and dial cover to see if there are any fixings:
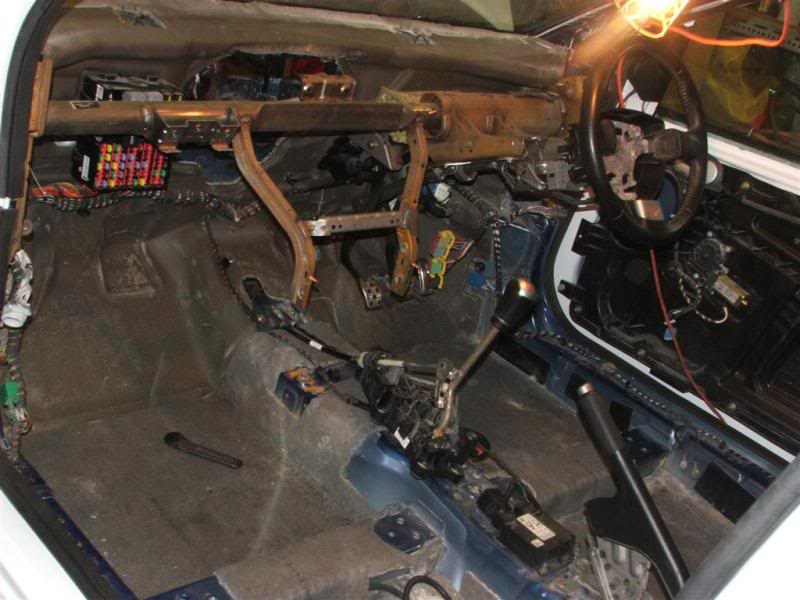
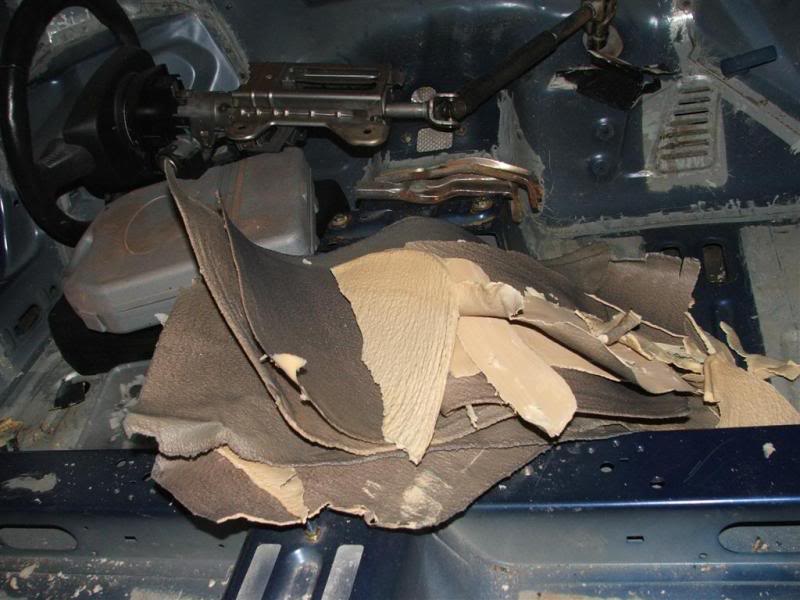
After removing what fixings I could see tried to remove the dash but could tell something was still holding it in. Cup of tea and biscuit later came back out and found some more. Tried again and yet no luck. It felt as if it was still fixed in at the bottom somewhere. Looked where the radio slides into and 2 bolts were all that was holding the dash on. To make it easy I also took the steering wheel off, not sure if it can be done being left on, but since the airbag was off it was a case of removing one nut. Once the dash was off found the OBD port connection was still plugged in, what a ballache that was trying to release it from it's mount.
Dash ready to come out:
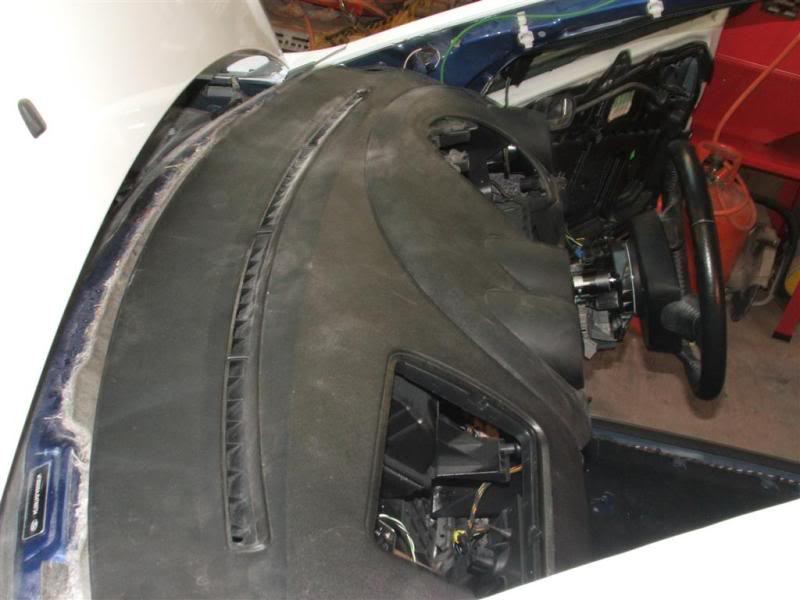
Dash out:

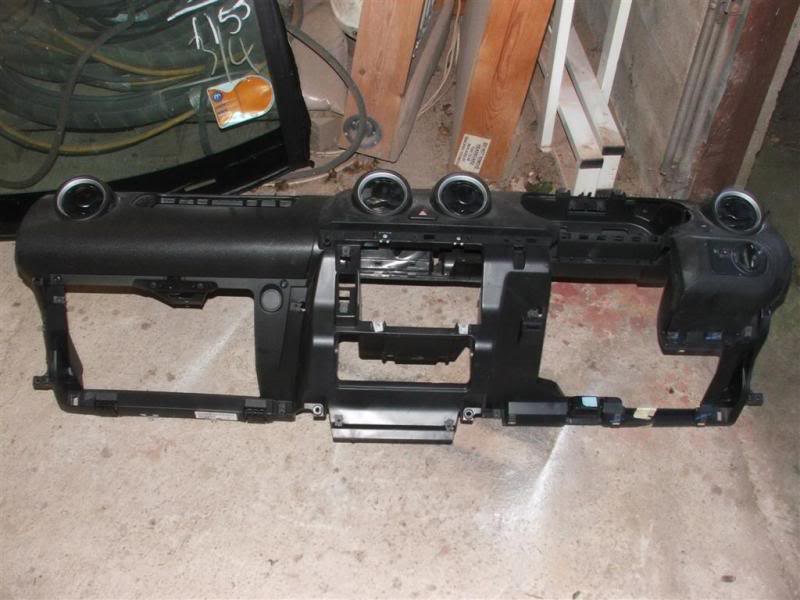
One loose dash:
Next plan is to remove all the stuff that is behind the dash, loom and carpets.
This actually started off as planning to remove the carpet but that hasn't come out yet.
From what I could see on the interior the gearstick mount was the 'only' thing bolted on top of the carpet.
4 nuts held down the mount:
After using my best technical skills of pulling the carpet as hard as I can, it wouldn't budge, I figured the heater unit is either bolted on the carpet or sits on it tightly.
The dash needs to come out for the cage anyway so went to work on that.
First item out is the radio, and this part of dash:
To get to the screws on the drivers side you also need to remove this panel below the steering column:
Also took off the steering column shroud and dial cover to see if there are any fixings:
After removing what fixings I could see tried to remove the dash but could tell something was still holding it in. Cup of tea and biscuit later came back out and found some more. Tried again and yet no luck. It felt as if it was still fixed in at the bottom somewhere. Looked where the radio slides into and 2 bolts were all that was holding the dash on. To make it easy I also took the steering wheel off, not sure if it can be done being left on, but since the airbag was off it was a case of removing one nut. Once the dash was off found the OBD port connection was still plugged in, what a ballache that was trying to release it from it's mount.
Dash ready to come out:
Dash out:
One loose dash:
Next plan is to remove all the stuff that is behind the dash, loom and carpets.
30-11-2009, 08:05 PM
#7
PassionFord Regular
iTrader: (1)

Join Date: May 2006
Location: West yorkshire
Posts: 394
Likes: 0
Received 0 Likes
on
0 Posts
Really interested to see this build, I was building an Escort Xr3i to race in the Xr challenge but was unfortunatley made redundant so had to sell it. Ive got a new job now but have decided to go karting instead for a few seasons untill I can afford to have a go at formula ford.
Trending Topics
01-12-2009, 10:25 PM
#10
PassionFord Post Troll
wish i knew you were taking the dash out! its a twenty min job,, disconect heater pipes, one bolt out the steering , couple dash bar bolts , multi plugs and heater and everything comes out in oner! leave all clocks and heater controls etc in
02-12-2009, 06:56 PM
#11
Too many posts.. I need a life!!
Thread Starter
Join Date: Feb 2006
Location: Ayr
Posts: 555
Likes: 0
Received 0 Likes
on
0 Posts

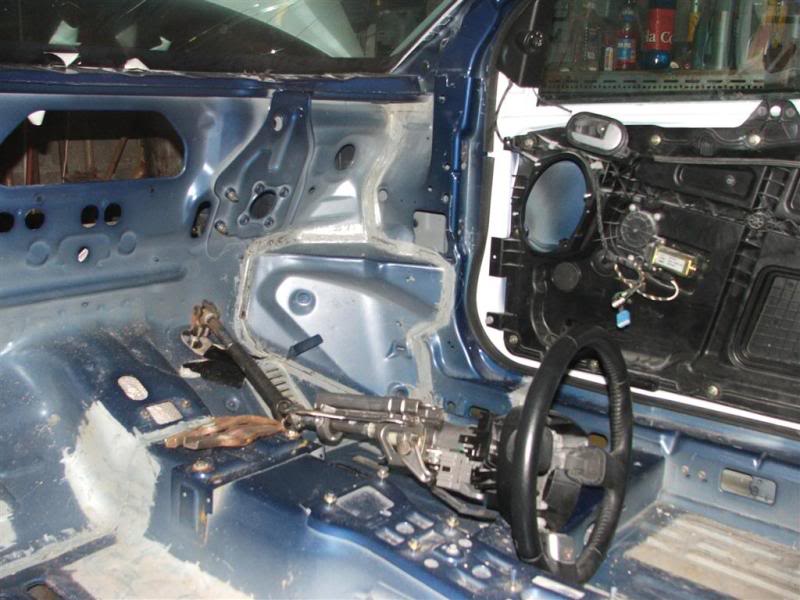
Wish I knew all that, is it the bolts that have the tubular section between them running across between both front door pillars?
ie the ones in this pic ? and the whole dash comes out ? damn

Last edited by BlairM; 02-12-2009 at 06:58 PM.
07-12-2009, 05:26 PM
#14
Too many posts.. I need a life!!
Thread Starter
Join Date: Feb 2006
Location: Ayr
Posts: 555
Likes: 0
Received 0 Likes
on
0 Posts
Some pics of the past weekends progress on the car - have finally got all the dash out, wiring looms, carpets, underlay etc.
Wiring looom itself has filled up half a large cardboard box. I don't want to see it again lol...nightmares!!
Removed this crossmember to let me get easier access to pedals etc to remove. Crossmember will be going back in as the steering column mounts on to it and I still need to be able to move car. Also, when the cage gets welded in, this part is pretty much in their for life anyhow.
Pedals off, loom was secured in behind them.

Loom out, just left with the underlay / insulation.
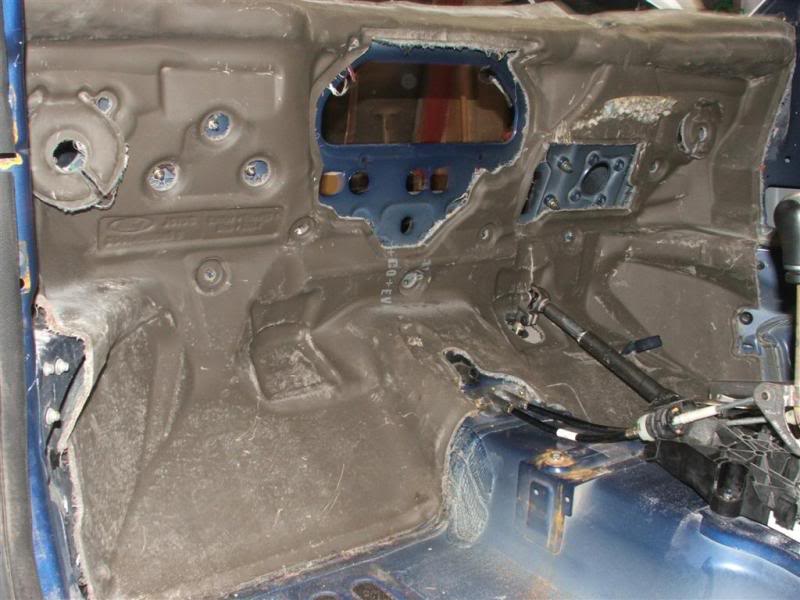
Went and bought a heat gun (an extremely hot hairdryer!), to help remove all the seam sealer. Tried it out today and to be honest, it's not hard, just time consuming.
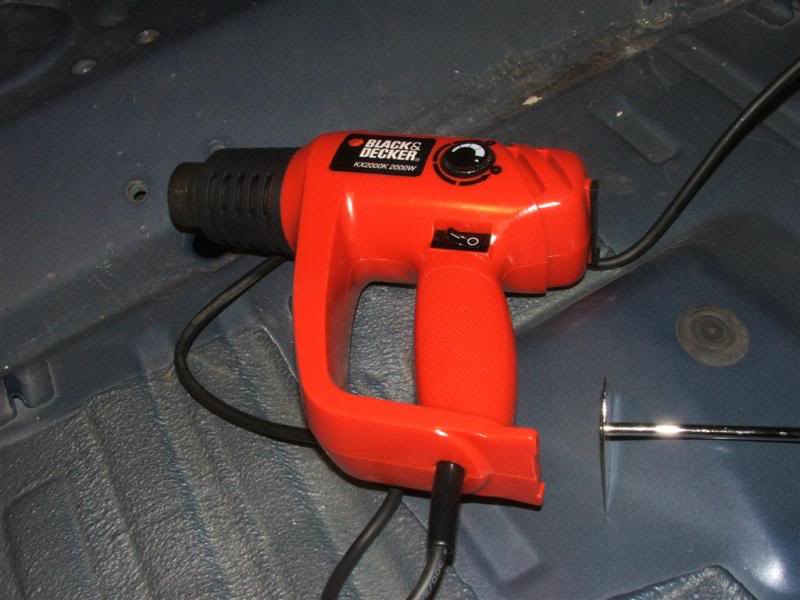
A few bits I tried it out on first.
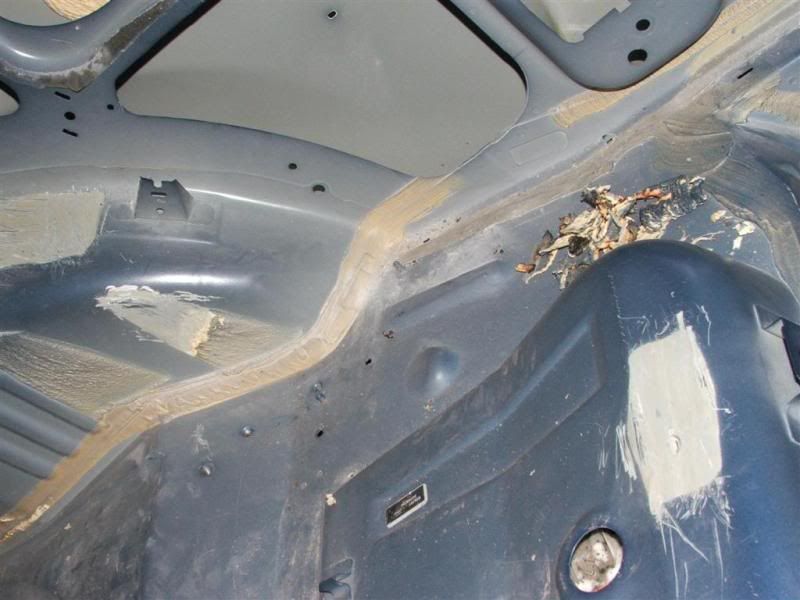
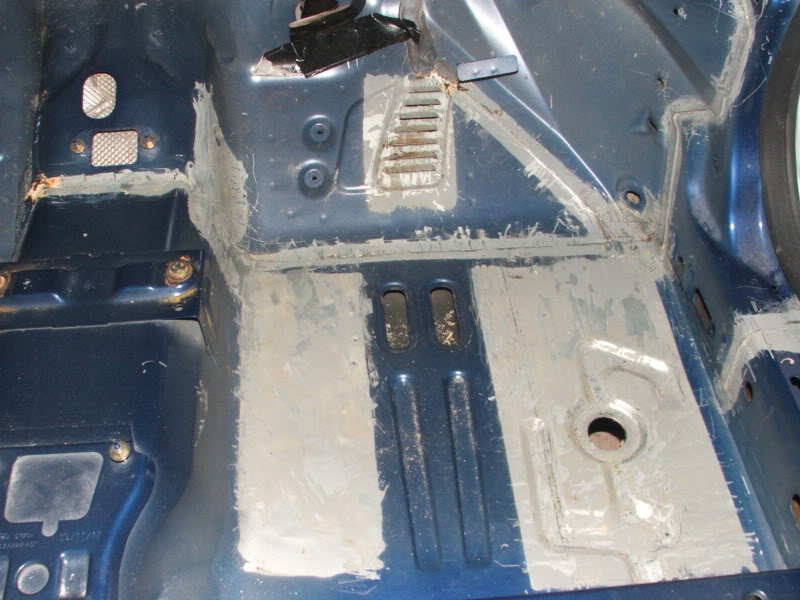
Sealer in passenger footwell:
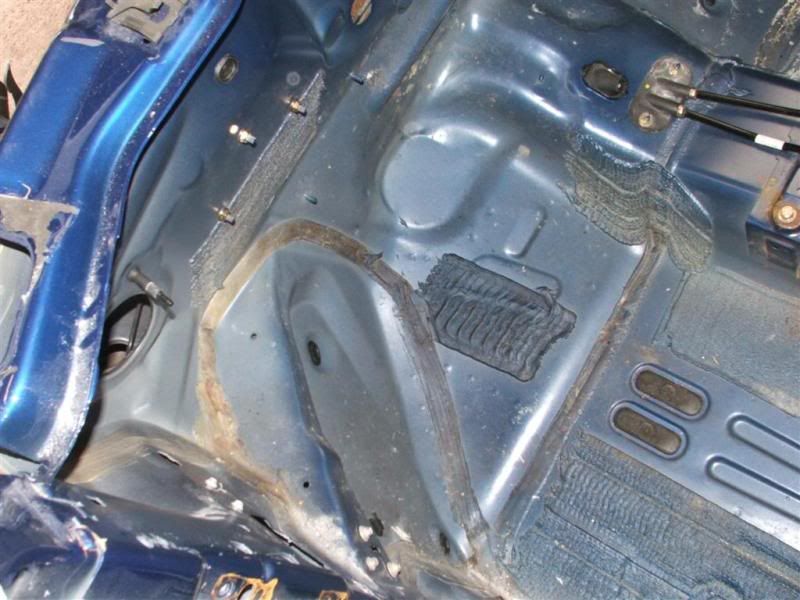
More under where passenger seat would sit:
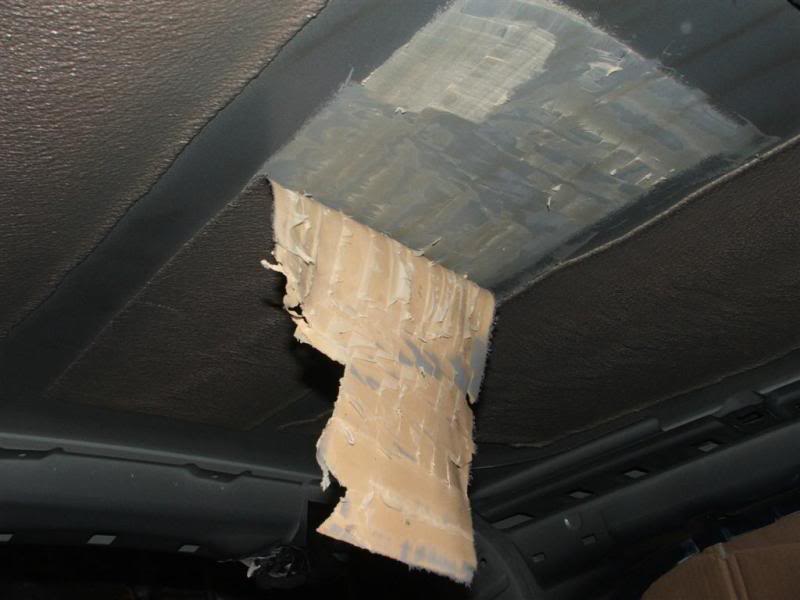
And the part I'm really not fancying doing - the roof:
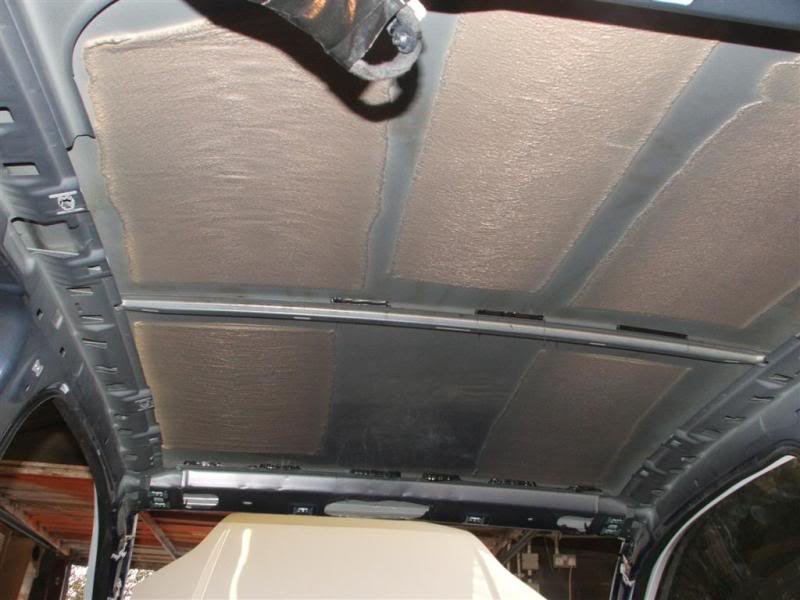
Worried that on the roof it's easy to damage if not careful.
Guessing the seam sealer might take a couple of weekends at my pace to do it, have been told it takes 3 days normally at it constantly to remove.
After that it should be ready for a rollcage but I need a few things to go my way, so fingers, feet and toes crossed for that.
Wiring looom itself has filled up half a large cardboard box. I don't want to see it again lol...nightmares!!
Removed this crossmember to let me get easier access to pedals etc to remove. Crossmember will be going back in as the steering column mounts on to it and I still need to be able to move car. Also, when the cage gets welded in, this part is pretty much in their for life anyhow.
Pedals off, loom was secured in behind them.
Loom out, just left with the underlay / insulation.
Went and bought a heat gun (an extremely hot hairdryer!), to help remove all the seam sealer. Tried it out today and to be honest, it's not hard, just time consuming.
A few bits I tried it out on first.
Sealer in passenger footwell:
More under where passenger seat would sit:
And the part I'm really not fancying doing - the roof:
Worried that on the roof it's easy to damage if not careful.
Guessing the seam sealer might take a couple of weekends at my pace to do it, have been told it takes 3 days normally at it constantly to remove.
After that it should be ready for a rollcage but I need a few things to go my way, so fingers, feet and toes crossed for that.

 14-12-2009, 06:25 PM
#16
Too many posts.. I need a life!!
Thread Starter
Join Date: Feb 2006
Location: Ayr
Posts: 555
Likes: 0
Received 0 Likes
on
0 Posts
Have been working away on remove the sound deadening material. Have tried a few tiny bits of the seam sealer and that looks even trickier to do.
Looks a bit of a mess in these pics but is a work in progress.
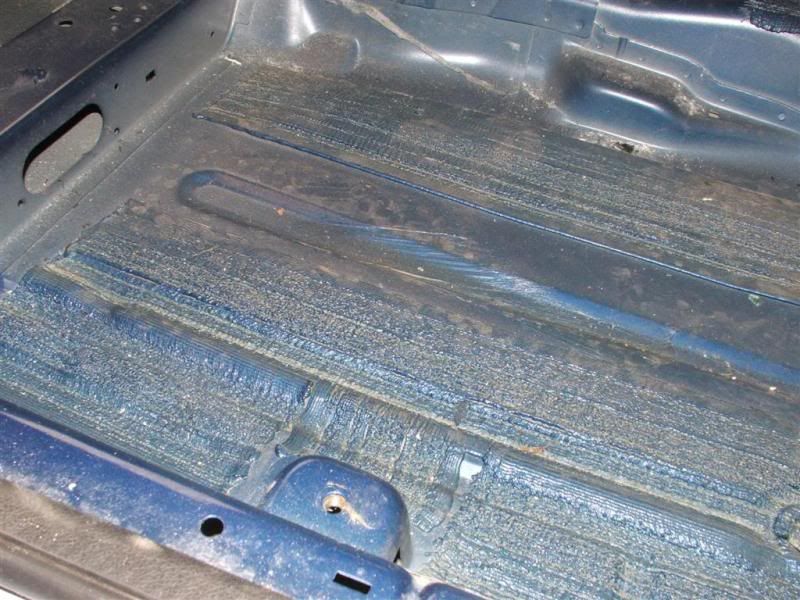
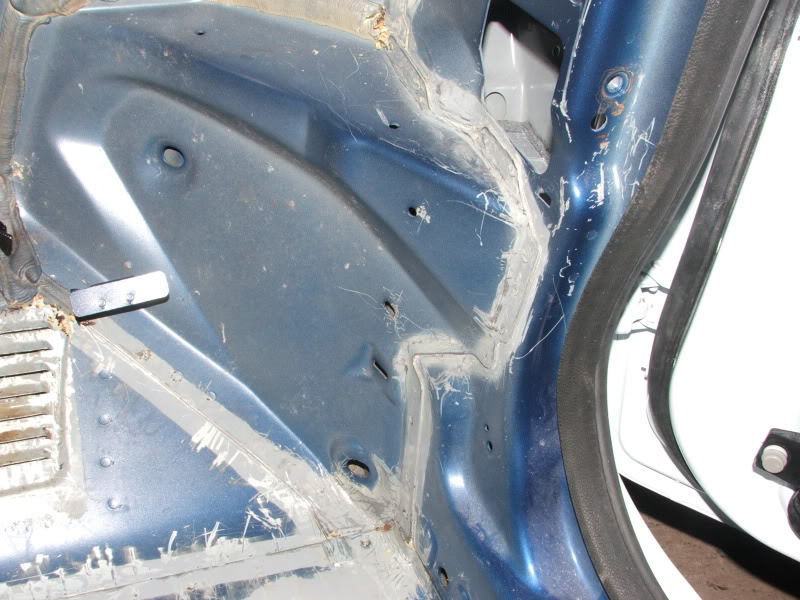
Offside rear wheel arch and boot floor:
Under drivers seat:

The more exciting news today is that I've ordered up my cage. Full weld in, T45 cage from Custom Cages. It's on an estimated 14 working day delivery, and because of Christmas holidays this means about the 15th January. Gives me time to get the car ready for the cage to be fitted.
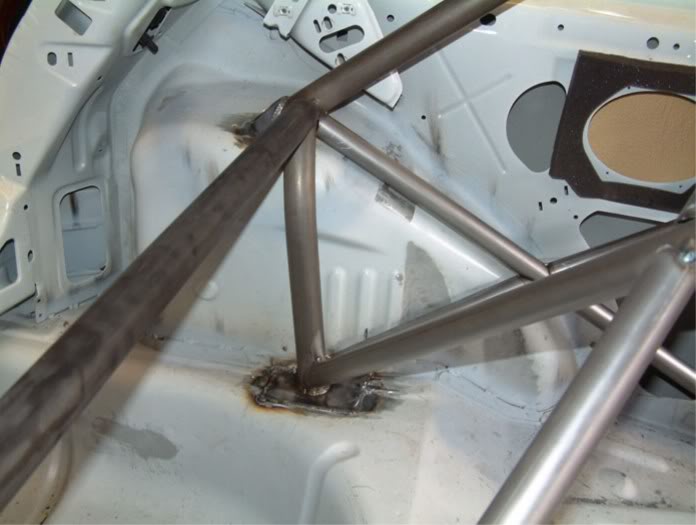
Some pics from their website - diagram is the latest spec the pictures may be out of date they say - I've spotted a few differences!
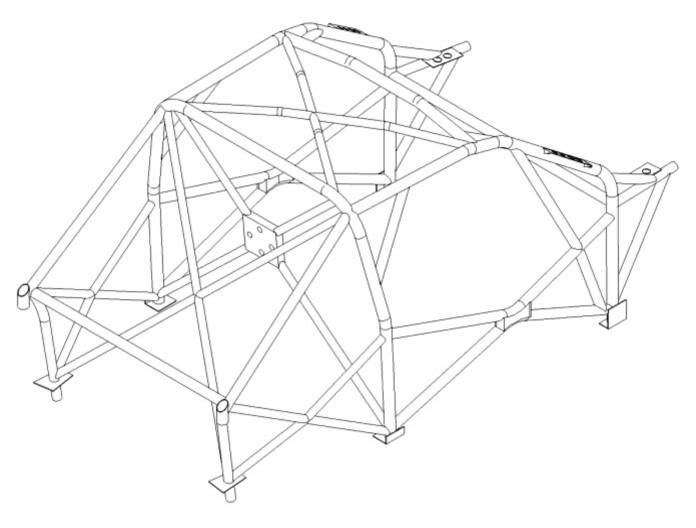
Front view:
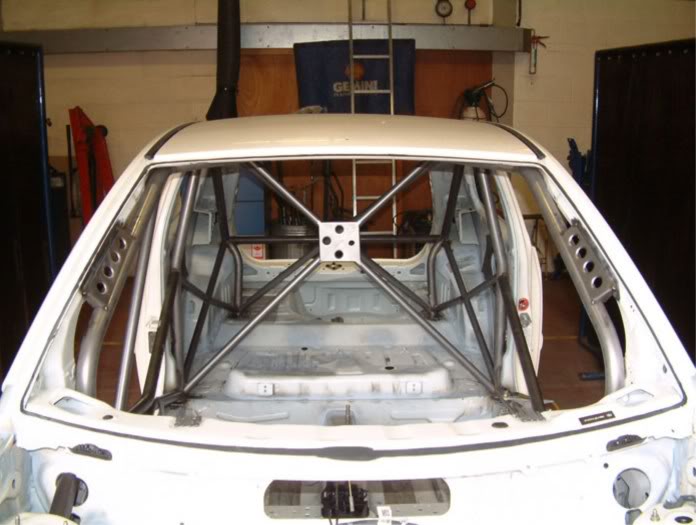
Diagonals behind driver:
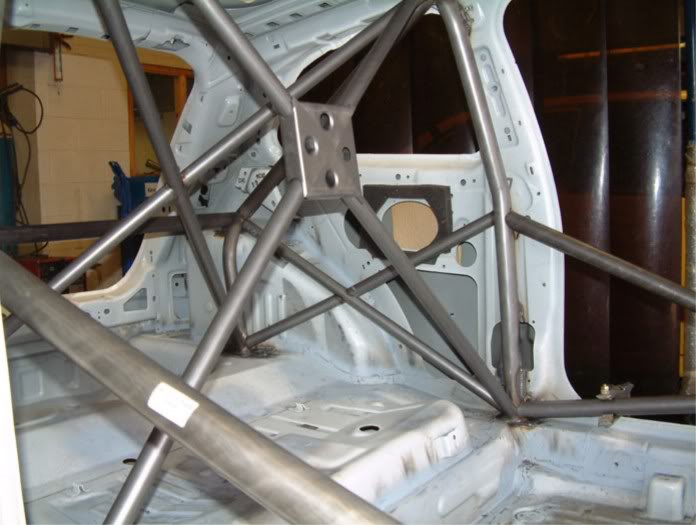
Door bars:
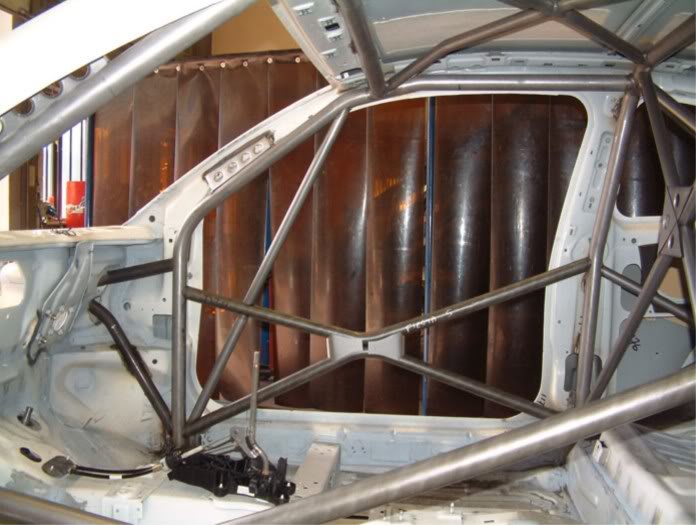
Nearside rear arch detail:
Looks a bit of a mess in these pics but is a work in progress.
Offside rear wheel arch and boot floor:
Under drivers seat:
The more exciting news today is that I've ordered up my cage. Full weld in, T45 cage from Custom Cages. It's on an estimated 14 working day delivery, and because of Christmas holidays this means about the 15th January. Gives me time to get the car ready for the cage to be fitted.
Some pics from their website - diagram is the latest spec the pictures may be out of date they say - I've spotted a few differences!
Front view:
Diagonals behind driver:
Door bars:
Nearside rear arch detail:
14-12-2009, 09:23 PM
#18
9500RPM torqueless wonder

Join Date: May 2004
Location: Paisley, Scotland
Posts: 1,269
Likes: 0
Received 0 Likes
on
0 Posts
I seen on an American site them using buckets of dry ice on the sound deadening then hitting it with a hammer and it shatters and you just shovel the bits out not sure if it works on all types of deadening material, or where to get dry ice from but it could make your work easier if it works
15-12-2009, 12:32 PM
#21
Focus St mk2 310 bhp :D
Join Date: May 2006
Location: Bolton/Kirkham
Posts: 2,438
Likes: 0
Received 0 Likes
on
0 Posts
Good luck with it blair!!
So are all the cars just standard power then?
I've seen some vids of the st cup racing on youtube and it looks frappin awesome!
So are all the cars just standard power then?
I've seen some vids of the st cup racing on youtube and it looks frappin awesome!

 15-12-2009, 01:42 PM
#25
Too many posts.. I need a life!!
Thread Starter
Join Date: Feb 2006
Location: Ayr
Posts: 555
Likes: 0
Received 0 Likes
on
0 Posts
After I've got the bulk off, I'm always left with a residue, which I need to heat up again to get off ? That sound normal?
21-12-2009, 07:26 PM
#26
Too many posts.. I need a life!!
Thread Starter
Join Date: Feb 2006
Location: Ayr
Posts: 555
Likes: 0
Received 0 Likes
on
0 Posts
Doesn't seem like much progress but probably spent 4 or 5 hours on the car at the weekend removing sealer. So much so my shoulder was giving me some hassle, plenty of effort required lol. Also removed the gearstick and linkage and handbrake as they were getting in the way.
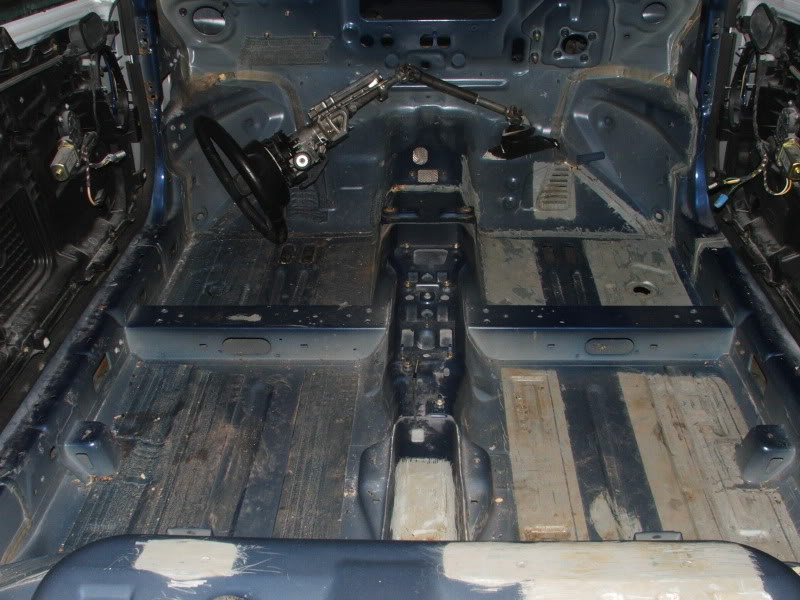
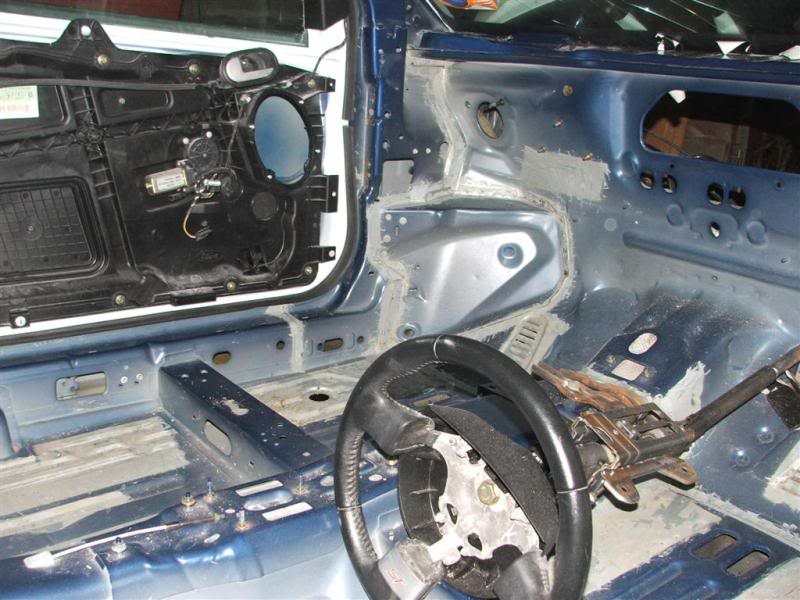
Drivers side floor, I put a bit of metal over the steering column entry point and taped it down, since there is a foam material there which would melt if I got heat gun near it.
At side of footwell, you can see the bracket here that stops the throttle travel.
Overview of car:
All the sound deadening in the passenger front side of the car (plus roof and rear quarter) still needs to be removed, then it's basically onto get all the seam sealer out. That seems especially tricky as it is right in every small gap there is. There are holes in the floor where there was a rubber grommet, prior to painting I'll get a small plate of metal fixed in there to cover it up.
Finish on Wednesday for my Xmas Hols, so got 2 weeks, less festivities to crack on with the car. By the end hope to have it ready for cage, of which I'm hearing some negative stories regarding their delivery times on other cages...
21-12-2009, 09:06 PM
#28
Advanced PassionFord User
iTrader: (2)
Join Date: Jan 2007
Location: fife, scotland
Posts: 1,508
Likes: 0
Received 0 Likes
on
0 Posts
coming along nicely that is! watched this years end of season race on motors tv for the xr's and st's, cracking racing i'll need to fire up more often and watch it!
p.s. cold i hate as well so your not alone with working out in it!
p.s. cold i hate as well so your not alone with working out in it!
21-12-2009, 09:19 PM
#29
Too many posts.. I need a life!!
Thread Starter
Join Date: Feb 2006
Location: Ayr
Posts: 555
Likes: 0
Received 0 Likes
on
0 Posts
Yep, at least the heat gun helps with the cold. Feels like sitting in my road car with the heater on full bung, toasty!  Fire on up to Knockhill buddy, although it is always fookin freezing up there, even in summer!
jammerrs - nah, won't be able to push it any further i think. Throttle is an electronic thing anyway, that brackets probably just to stop you snapping it off with your size 10's
jammerrs - nah, won't be able to push it any further i think. Throttle is an electronic thing anyway, that brackets probably just to stop you snapping it off with your size 10's
01-01-2010, 09:23 PM
#30
Too many posts.. I need a life!!
Thread Starter
Join Date: Feb 2006
Location: Ayr
Posts: 555
Likes: 0
Received 0 Likes
on
0 Posts
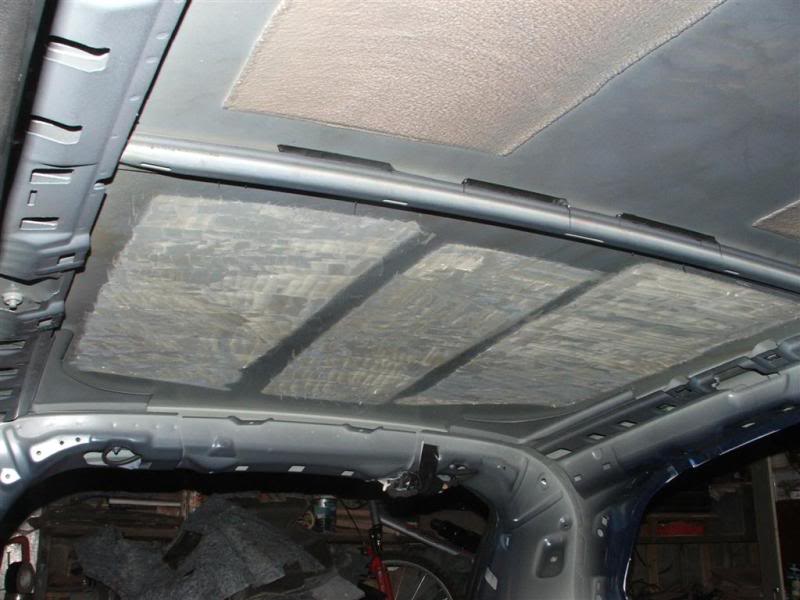
Today I've taken all the sound deadening off the roof, finished the sealer round the boot and wheel arches yesterday. Roof etc wasn't as hard as I thought it would be. Material on it wasn't too thick so didn't take much heat to make it soft enough to scrape off. In saying that my right arm is aching now, not used to this manual work being an office worker..
First one of 5 slabs coming off, when the car goes for it's rollcage will get the orbital sander out and clean all that off prepping it for paint.
Off!
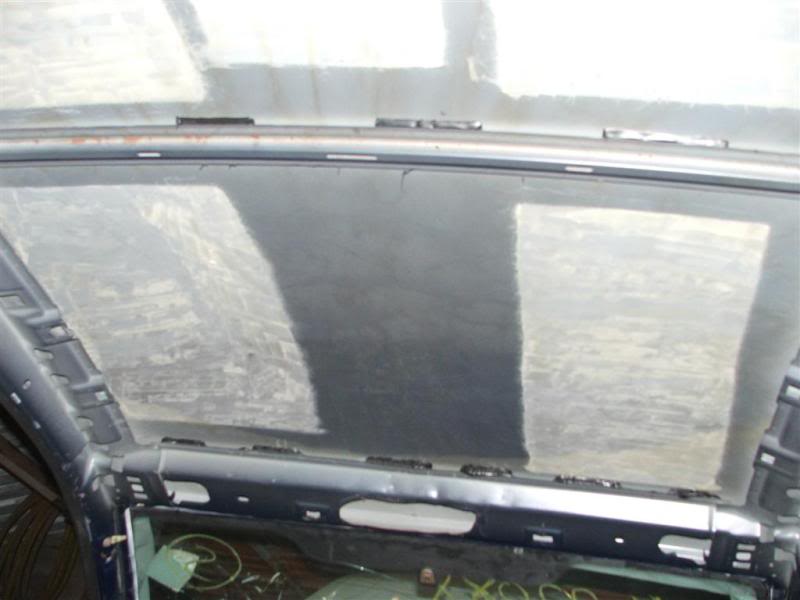
Rear 3 slabs all done
Front two done
What came off
I've had a quick weigh in of all I've removed so far, about 8kg there in sound deadening..
Overview of car as it stands tonight.
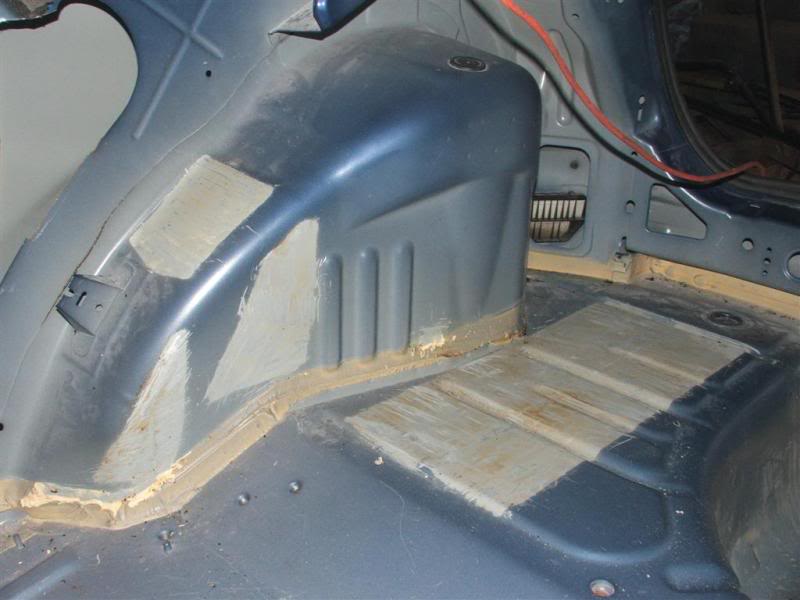
Front drivers corner
Passengers corner
Nearside B Pillar
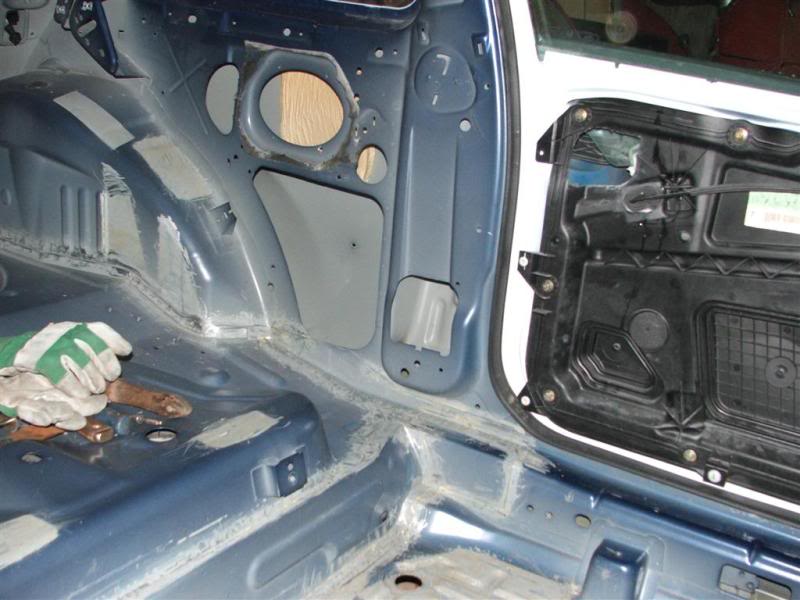
Boot / wheelwell

Offside B Pillar
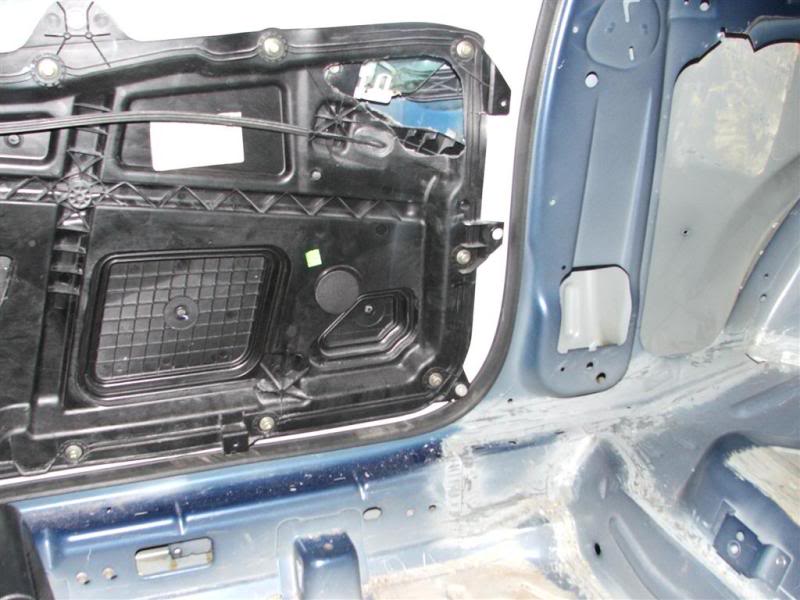
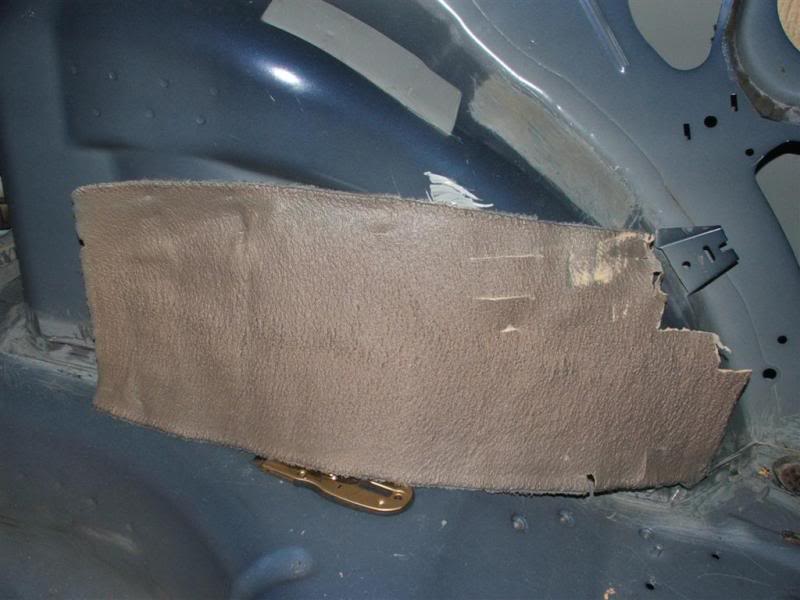
Still got this bit of sound deadening to remove:
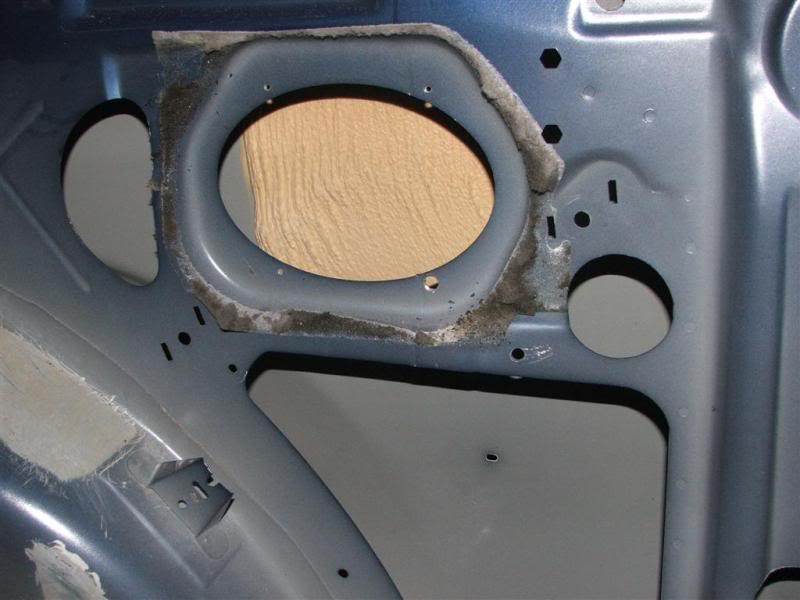
I haven't done that yet as I need to cut away the panel with the speaker in it. This is a job that needs to be done anyway, as it's not needed and will be replaced with a nice shiny fibreglass panel. Offside has been cut away to allow repair of the rear quarter, but this still needs to be tidied up a bit yet.
First one of 5 slabs coming off, when the car goes for it's rollcage will get the orbital sander out and clean all that off prepping it for paint.
Off!
Rear 3 slabs all done
Front two done
What came off
I've had a quick weigh in of all I've removed so far, about 8kg there in sound deadening..
Overview of car as it stands tonight.
Front drivers corner
Passengers corner
Nearside B Pillar
Boot / wheelwell
Offside B Pillar
Still got this bit of sound deadening to remove:
I haven't done that yet as I need to cut away the panel with the speaker in it. This is a job that needs to be done anyway, as it's not needed and will be replaced with a nice shiny fibreglass panel. Offside has been cut away to allow repair of the rear quarter, but this still needs to be tidied up a bit yet.
01-01-2010, 09:34 PM
#31
PassionFord Post Whore!!

Join Date: Nov 2004
Location: Middlesbrough
Posts: 7,295
Likes: 0
Received 0 Likes
on
0 Posts
looking at one of these for me self how much was the cage
i know of a rear end damaged one for 800 and the new shell from ford is a grand
i know of a rear end damaged one for 800 and the new shell from ford is a grand
Last edited by jacko; 01-01-2010 at 09:37 PM.
02-01-2010, 12:06 AM
#33
Too many posts.. I need a life!!
Thread Starter
Join Date: Feb 2006
Location: Ayr
Posts: 555
Likes: 0
Received 0 Likes
on
0 Posts
Was just going to say to jacko that sounds like a good deal, as my car pre repairs and paint cost me �1750, I know I've not got an engine in it but there's one for it lol, just not here right now.  What state does the shell come in jacko, does it come with all the sealer and all the mounts welded on ? Be a bonus if you can get it without.
The cage is basically �1000 inc vat from custom cages plus I'm getting a mate to fit it.
The cage is basically �1000 inc vat from custom cages plus I'm getting a mate to fit it.
02-01-2010, 04:02 PM
#34
PassionFord Post Whore!!
Join Date: Nov 2004
Location: Middlesbrough
Posts: 7,295
Likes: 0
Received 0 Likes
on
0 Posts
its a parts only salvage car but the shell is just a standard road one as in has sealer and all brackets
i recon 3500 would build one with all the bits apart from extras like tuning parts
i recon 3500 would build one with all the bits apart from extras like tuning parts
02-01-2010, 06:20 PM
#35
Too many posts.. I need a life!!
Thread Starter
Join Date: Feb 2006
Location: Ayr
Posts: 555
Likes: 0
Received 0 Likes
on
0 Posts
Just as a track day car ?
Mine has to have certain suspensions, certain wheels, certain tyres so the price for these mount up. Probably half of what I spend will go in the above.
Mine has to have certain suspensions, certain wheels, certain tyres so the price for these mount up. Probably half of what I spend will go in the above.
02-01-2010, 06:31 PM
#37
Too many posts.. I need a life!!
Thread Starter
Join Date: Feb 2006
Location: Ayr
Posts: 555
Likes: 0
Received 0 Likes
on
0 Posts
Got them here http://www.fordracinguk.com/regulations.html
Can put a different exhaust on it, I haven't read the regs to be honest, but from speaking to others they preferred choice seems to be a Milltek from Pumaspeed, can also ditch the standard Flexi pipe for a milltek one which is meant to instantly give you 5 - 10bhp. A few of the other races have K&N kits too.
Can put a different exhaust on it, I haven't read the regs to be honest, but from speaking to others they preferred choice seems to be a Milltek from Pumaspeed, can also ditch the standard Flexi pipe for a milltek one which is meant to instantly give you 5 - 10bhp. A few of the other races have K&N kits too.
 02-01-2010, 09:16 PM
#40
Too many posts.. I need a life!!
Thread Starter
Join Date: Feb 2006
Location: Ayr
Posts: 555
Likes: 0
Received 0 Likes
on
0 Posts
Cheers Brian.
Yeh the spec is very basic so the emphasis is on driver skill, ST is basically Group N spec, so it's as close to showroom as possible.
The AST suspension kit is around �1600 + VAT and the wheels �100 each, tyres �150 each, consider you need slicks and wets so minimum 8 wheels - soon mounts up.
Yeh the spec is very basic so the emphasis is on driver skill, ST is basically Group N spec, so it's as close to showroom as possible.
The AST suspension kit is around �1600 + VAT and the wheels �100 each, tyres �150 each, consider you need slicks and wets so minimum 8 wheels - soon mounts up.