mallard green S2 resto (16x8 comp TH's fitted)
 10-08-2008, 05:16 PM
#1
Advanced PassionFord User
Thread Starter
iTrader: (1)

Join Date: Jan 2005
Location: Birmingham
Posts: 1,949
Likes: 0
Received 0 Likes
on
0 Posts
ok, this could take a while, nearly 3 years worth of pics, so bear with me....
also, please bear in mind that this car is COMPLETELY home built, every bit of stripping, welding, painting, engine rebuild etc, is done at home either by myself or friends enlisted to help. only things like shotblastings or powdercoating or polishing is done elsewhere. proper budget home brew spec
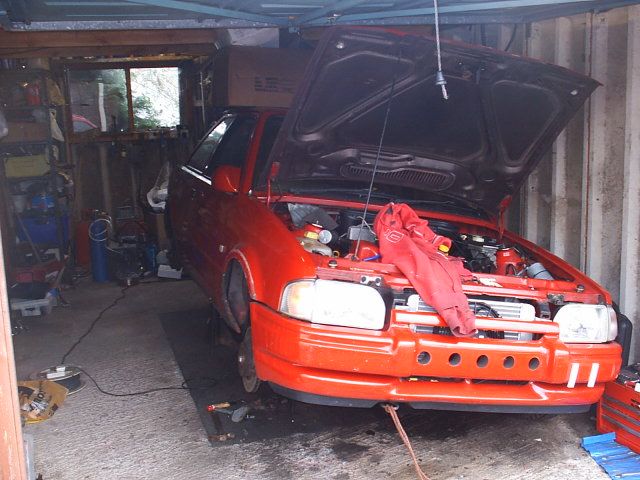
when i turned 17, i inherited the family hand-me-down escort 1.3 popular, completely standard, but then after a while she ended up like this...

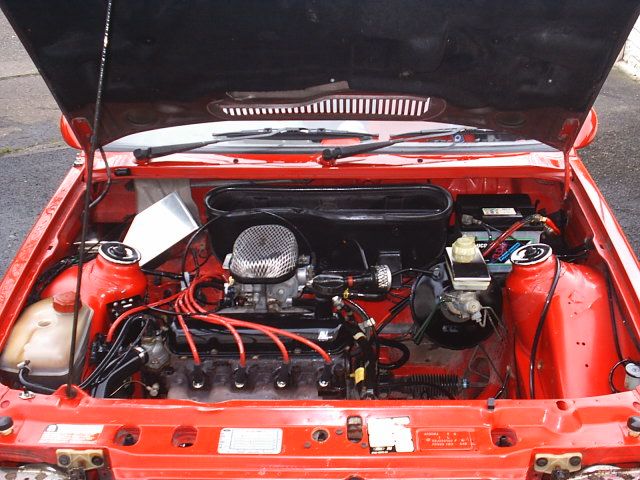
with this still under the bonnet...
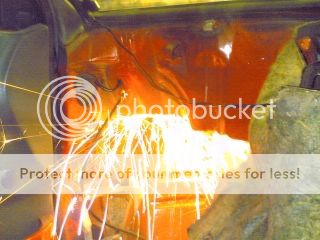
obviously as i got a bit older, the 1.3ohv lump was hardly up to standard, so 1 day this happened....
and resulted in this...
now full RST spec, i did a show season with it...
and it kept me happy. spec engine wise was piper cam, superchip, -31, hybrid t3 etc, and she made 200bhp on jamsports rollers...

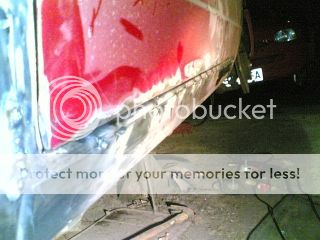
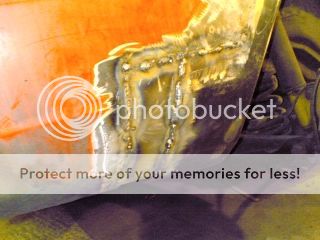
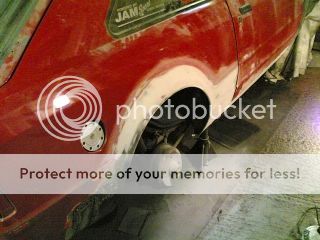
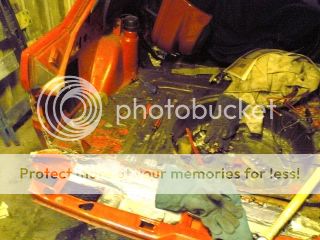
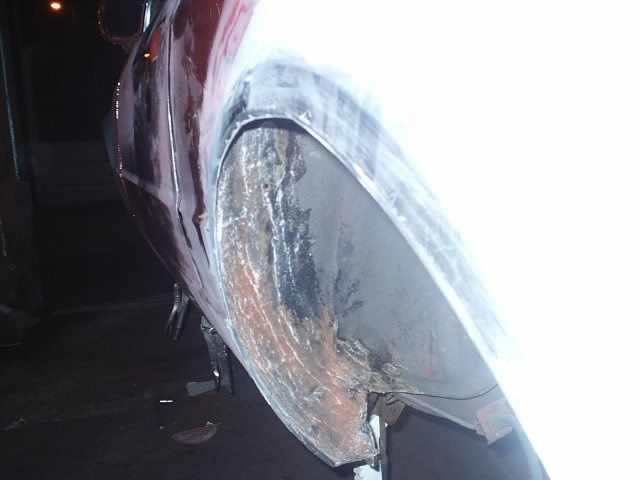
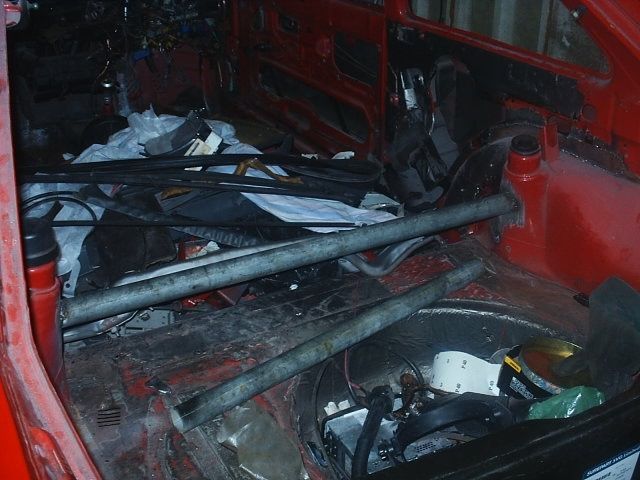
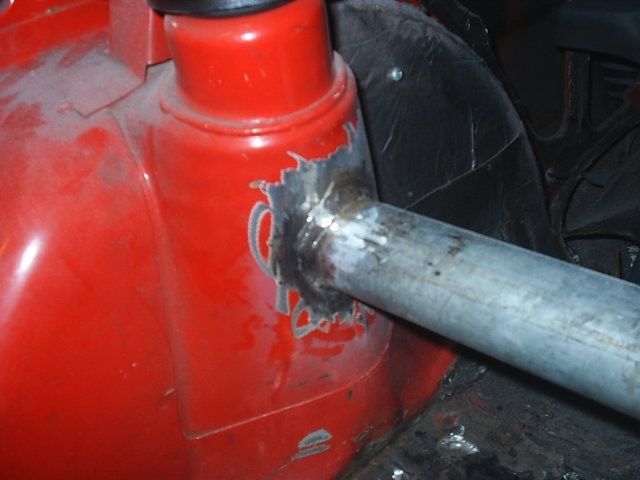
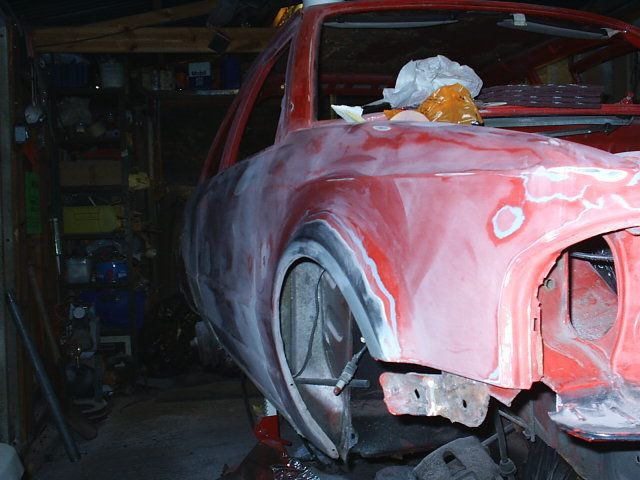
then in october 2005, after numerous moments of bad luck, including a headgasket failure, it finally came to a head when in the space of 2 weeks, a friend drove into the back of me, and then an old man drove into the rear arch whilst it was parked up. at this point, it was taken off the road, in anticipation of being rebuilt. she sat in the garage for a number of months, then 1 day i finally got round to getting her out, assesing the damage, and started stripping her down.
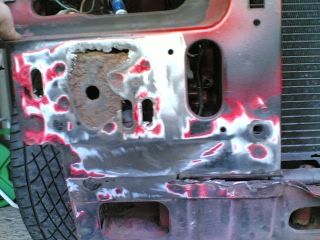
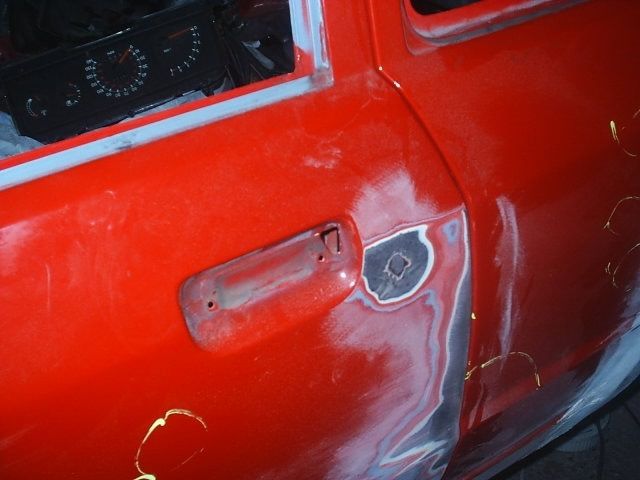
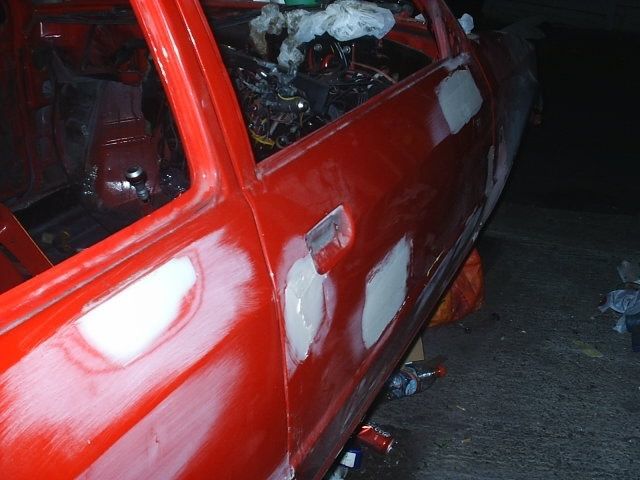
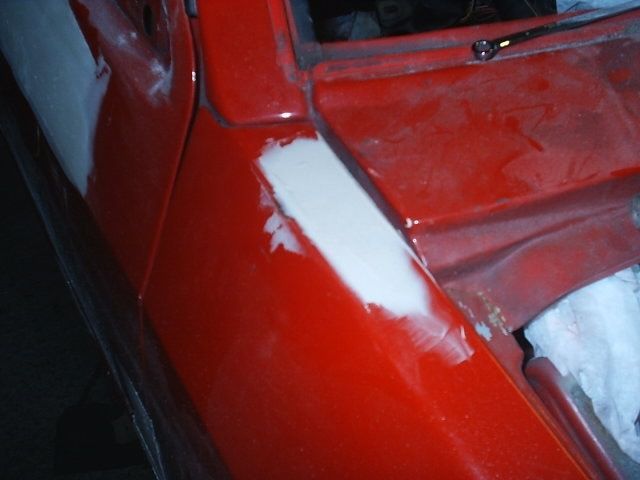
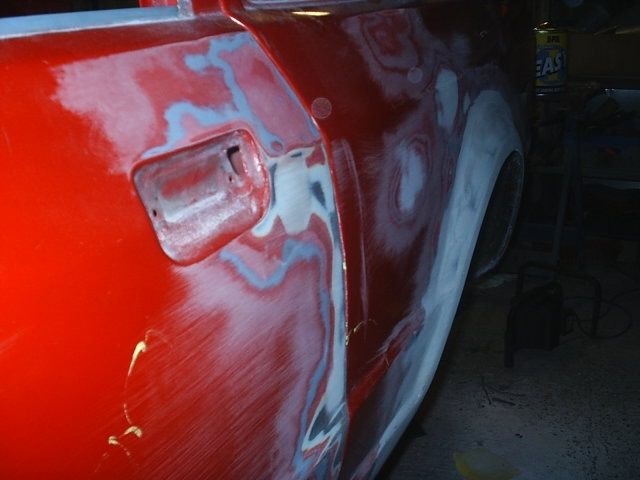
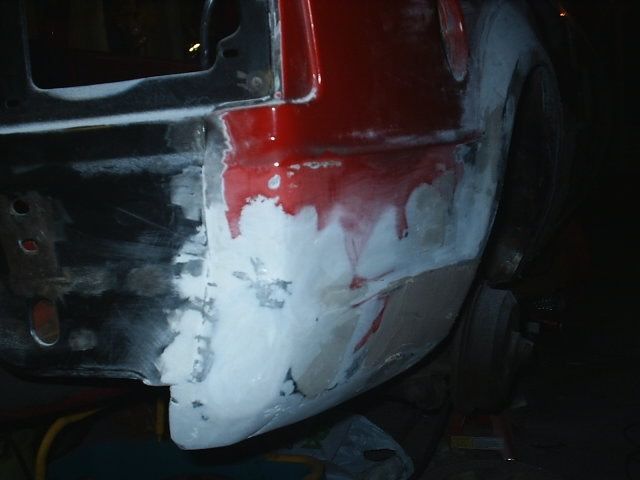
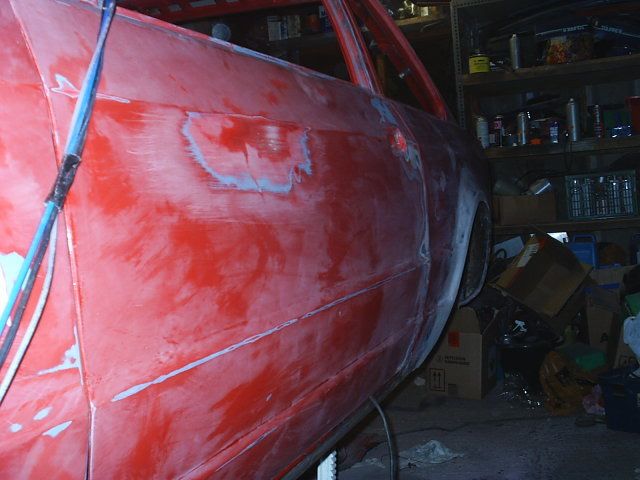
it wasnt pretty....


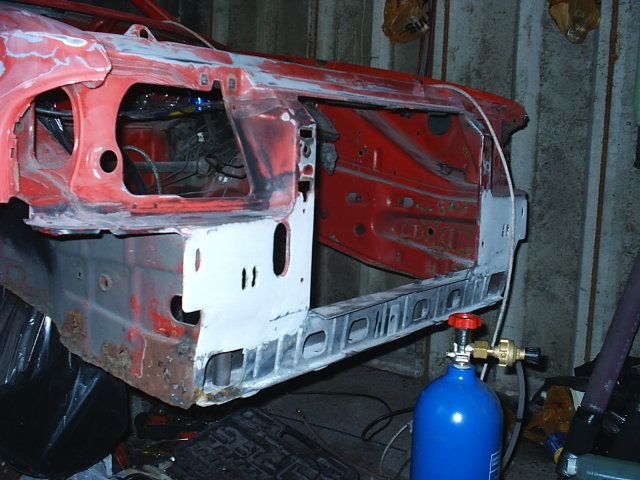
and that was just the outer panels, when i got her in the air and had a closer look, it got even worse...
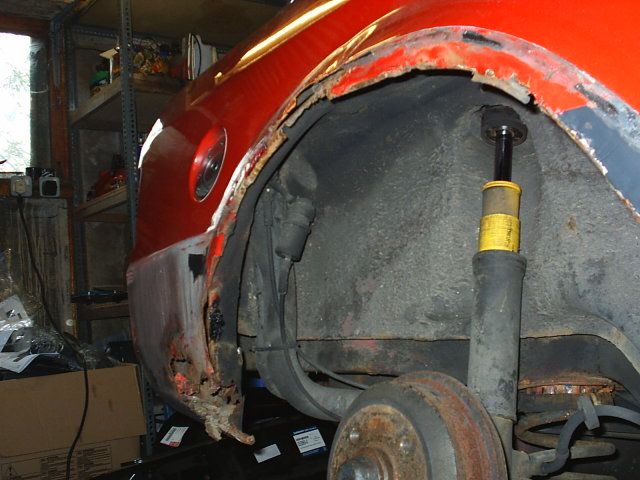
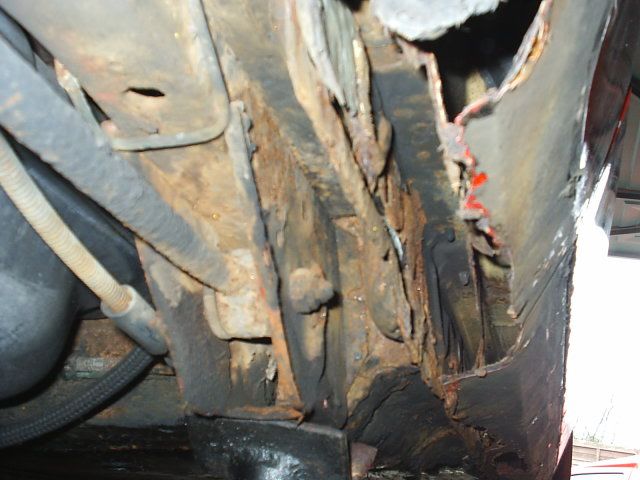


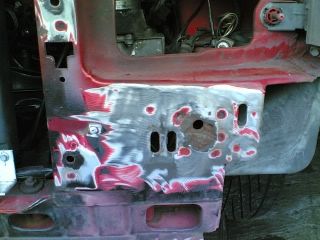
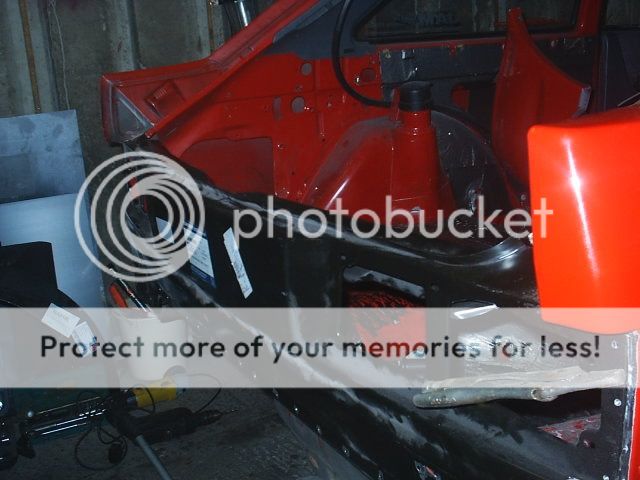
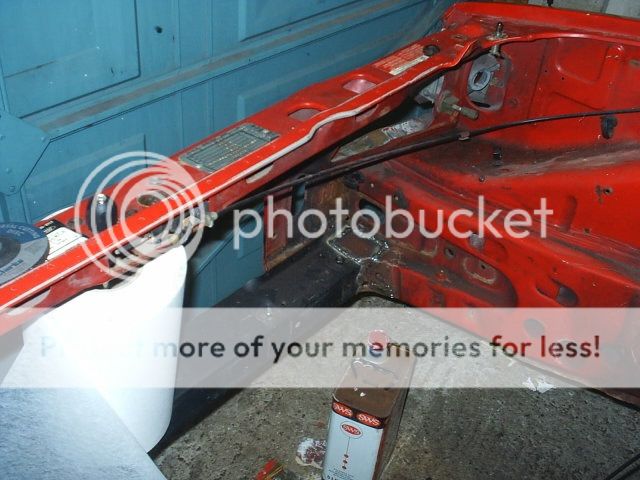
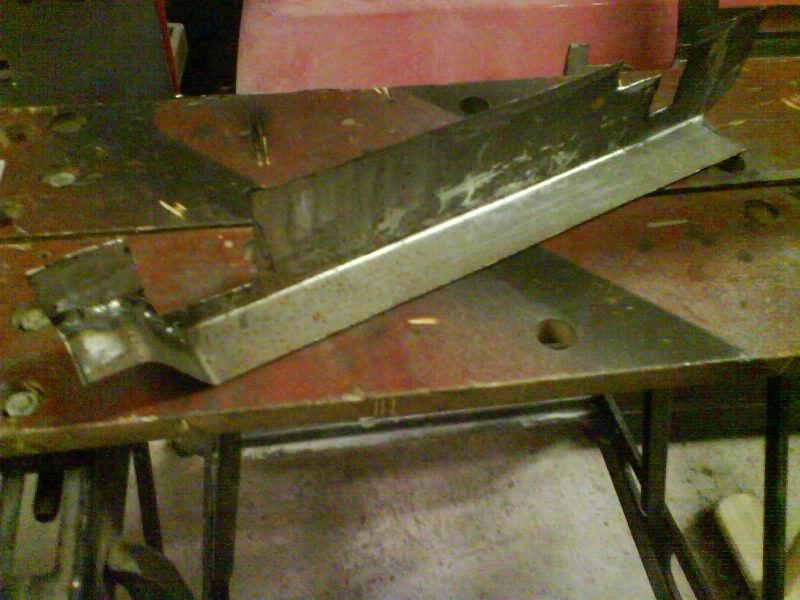
basically needed 2 rear arches, a back panel, a crossmember, front panel repaired, new battery tray, new drivers sill, boot floor repair, plus the inner sills and floorpans needed attention here n there, but at the time i was happy to just patch them up.
some people may ask why i would bother to restore this, seeing as its only a 1.3 popular shell, and a bit of a mess to say the least!
but...
this car had been in the family for near enough 10 years at the time, and before that was owned by a close family friend who worked at a ford dealership, so its history was well documented, and basically all except the 1st year of its life was known to us, and its sentimental value was great, so the rebuild began...
also, please bear in mind that this car is COMPLETELY home built, every bit of stripping, welding, painting, engine rebuild etc, is done at home either by myself or friends enlisted to help. only things like shotblastings or powdercoating or polishing is done elsewhere. proper budget home brew spec
when i turned 17, i inherited the family hand-me-down escort 1.3 popular, completely standard, but then after a while she ended up like this...
with this still under the bonnet...
obviously as i got a bit older, the 1.3ohv lump was hardly up to standard, so 1 day this happened....
and resulted in this...
now full RST spec, i did a show season with it...
and it kept me happy. spec engine wise was piper cam, superchip, -31, hybrid t3 etc, and she made 200bhp on jamsports rollers...
then in october 2005, after numerous moments of bad luck, including a headgasket failure, it finally came to a head when in the space of 2 weeks, a friend drove into the back of me, and then an old man drove into the rear arch whilst it was parked up. at this point, it was taken off the road, in anticipation of being rebuilt. she sat in the garage for a number of months, then 1 day i finally got round to getting her out, assesing the damage, and started stripping her down.
it wasnt pretty....
and that was just the outer panels, when i got her in the air and had a closer look, it got even worse...
basically needed 2 rear arches, a back panel, a crossmember, front panel repaired, new battery tray, new drivers sill, boot floor repair, plus the inner sills and floorpans needed attention here n there, but at the time i was happy to just patch them up.
some people may ask why i would bother to restore this, seeing as its only a 1.3 popular shell, and a bit of a mess to say the least!
but...
this car had been in the family for near enough 10 years at the time, and before that was owned by a close family friend who worked at a ford dealership, so its history was well documented, and basically all except the 1st year of its life was known to us, and its sentimental value was great, so the rebuild began...
Last edited by RSandy; 16-02-2013 at 09:54 PM.
 10-08-2008, 05:34 PM
#2
Advanced PassionFord User
Thread Starter
iTrader: (1)
Join Date: Jan 2005
Location: Birmingham
Posts: 1,949
Likes: 0
Received 0 Likes
on
0 Posts
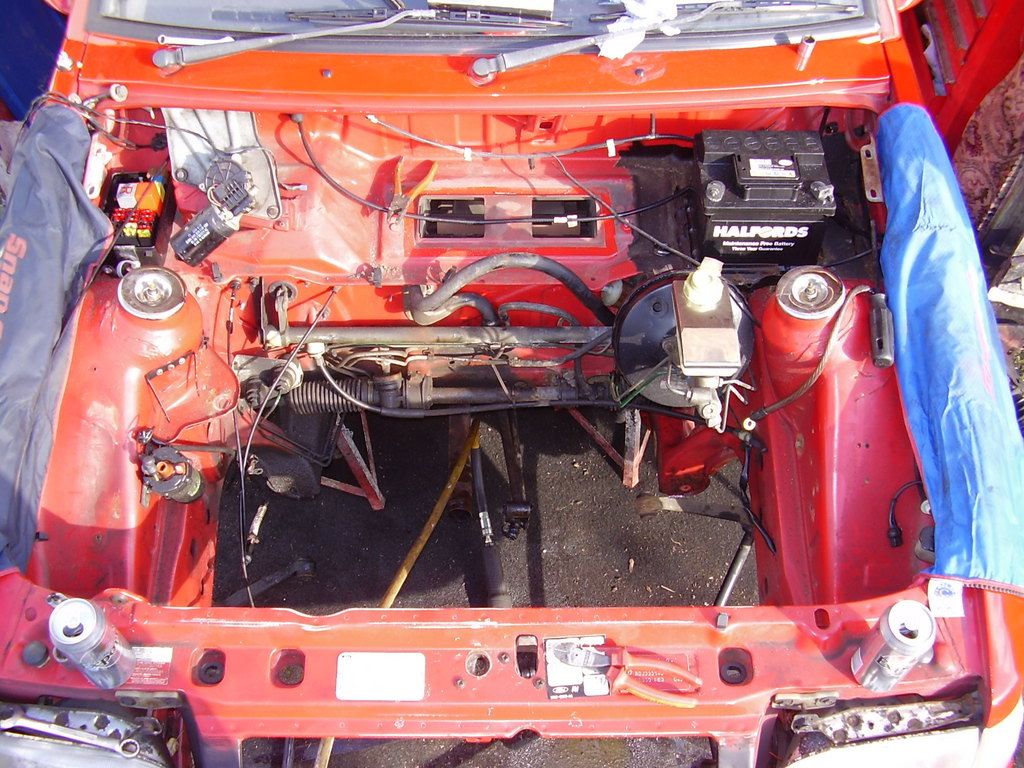
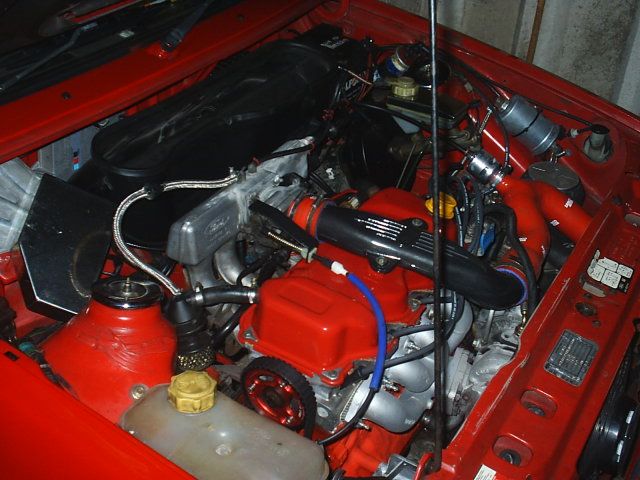
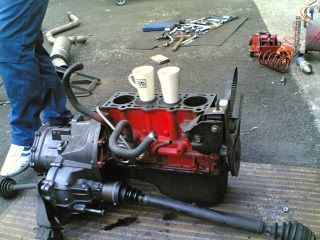
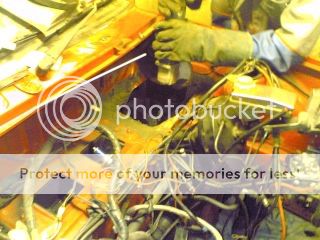
1st up, out came the engine..
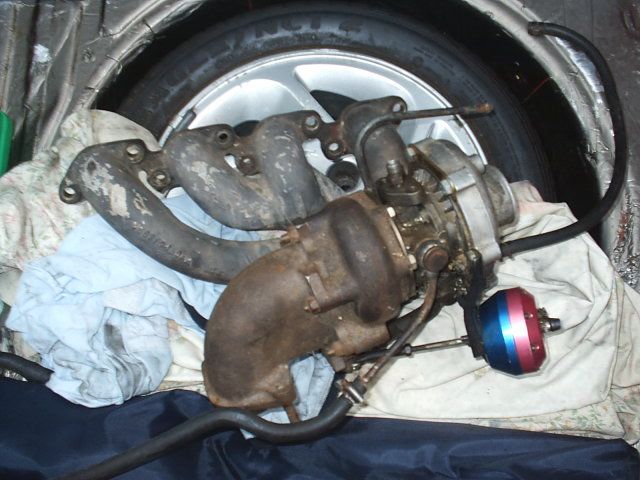
and then i went to PJ motorsport with plenty of cash and bought the new toys..
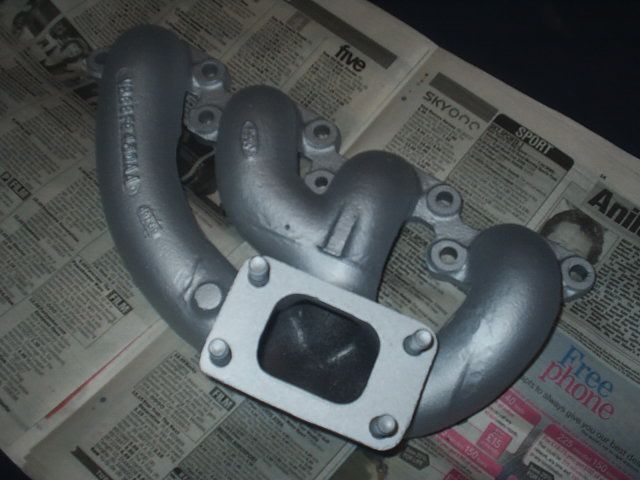
also found a bargain turbo, 2nd hand but only covered 600 miles on my mates car before he decided to break it. turbo is a turbo technics stage 2 hybrid t3
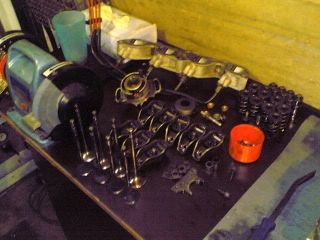
block was stripped down, rebored and honed to suit the new oversized mahle pistons, and then painted gloss black...
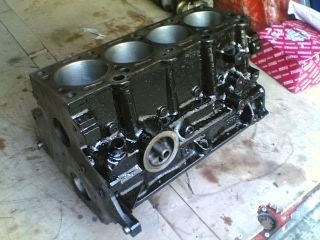
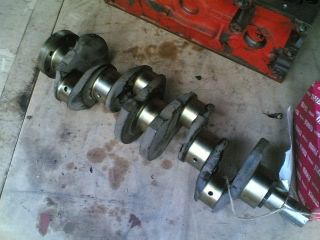
also had the crank reground due to 1 slight score, but better to be safe than sorry, matched to the heavy duty bearing kit i purchased
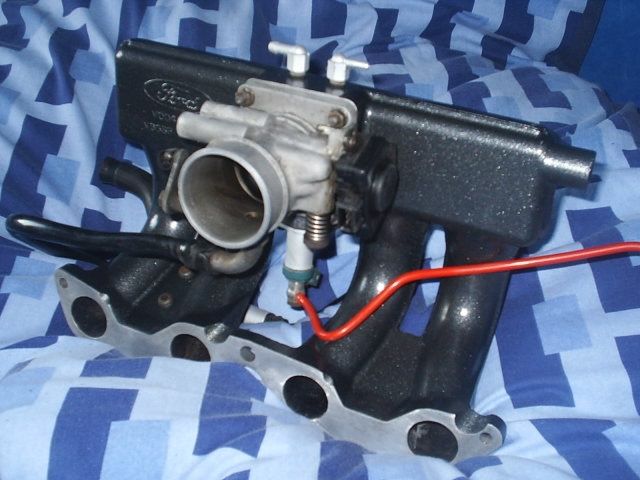
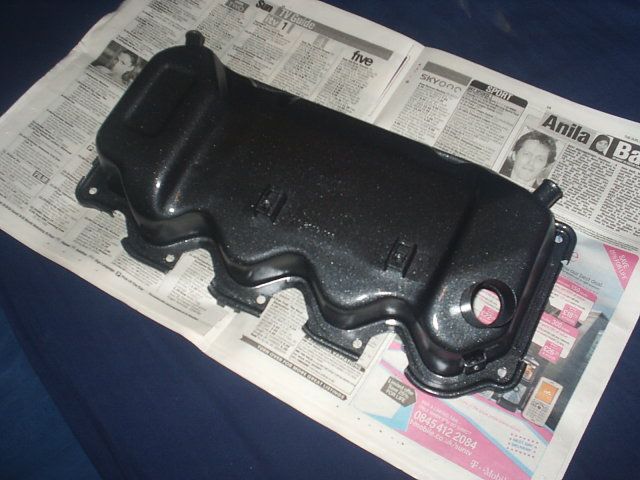
also began refurbing parts to make the bay look classier than before, so went with dark colours this time...
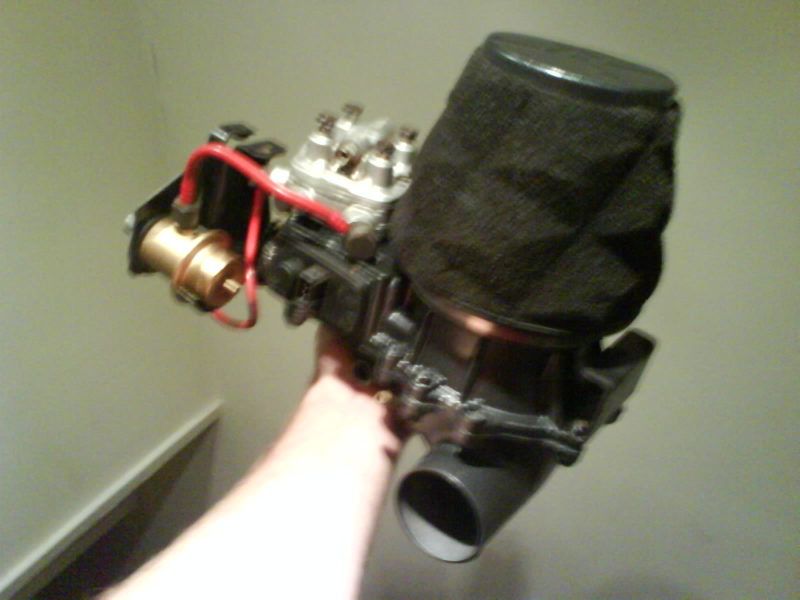
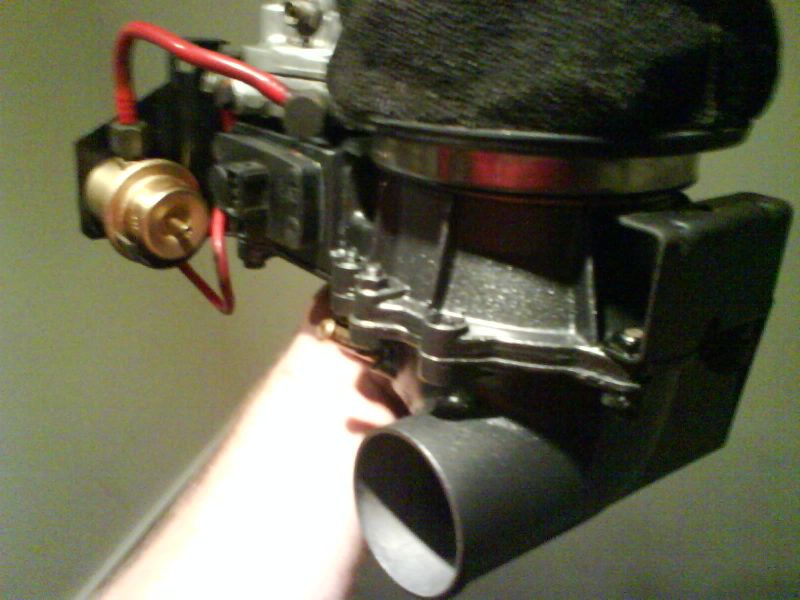
inlet manifold..

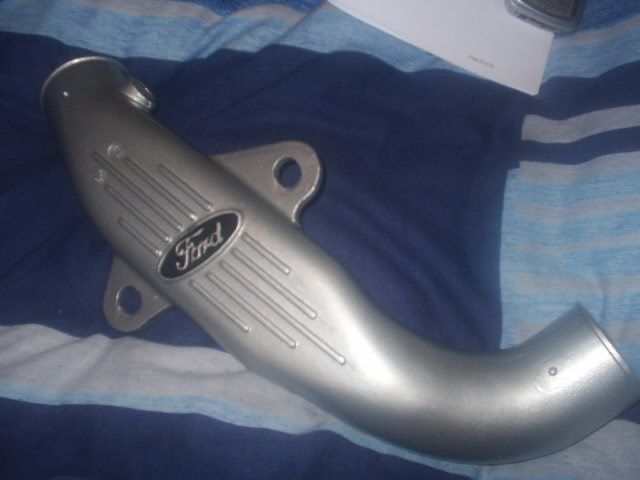
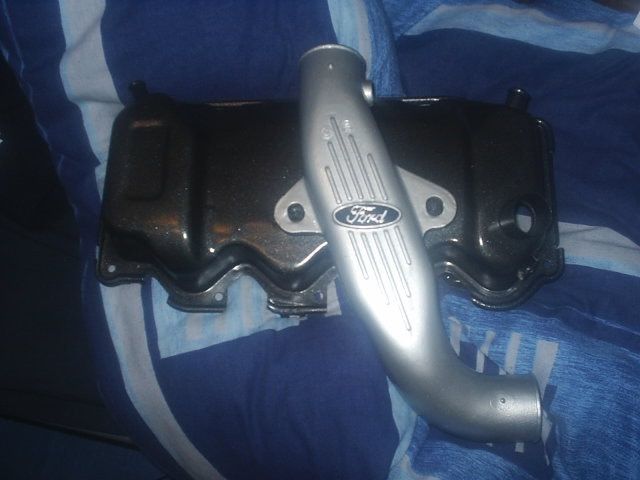
rocker cover and crossover pipe..
and other random engine bits i had blasted and painted..
it was decided that for storage reasons, due to an impending house move, the head would be assembled and packed away, but the block would stay in its component pieces. making it so i didnt get a hernia getting it all into the loft!! lol
head rebuild..
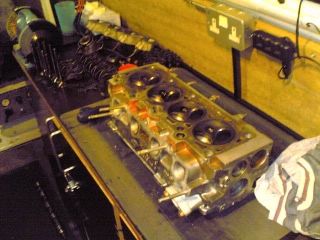
head had a very light skim, as was a very very low mileage item anyways, the ports were left standard, and the main change being the piper 285t/2 cam kit fitted, along with the adjustable vernier
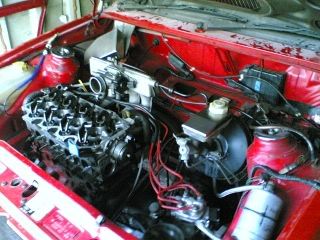
basic spec of the engine is:
standard spec mahle pistons, block rebored to suit
standard rods, shot peened
reground crank, with heavy duty bearing kit
standard head with piper 285t/2 cam kit and vernier
uprated oil pump
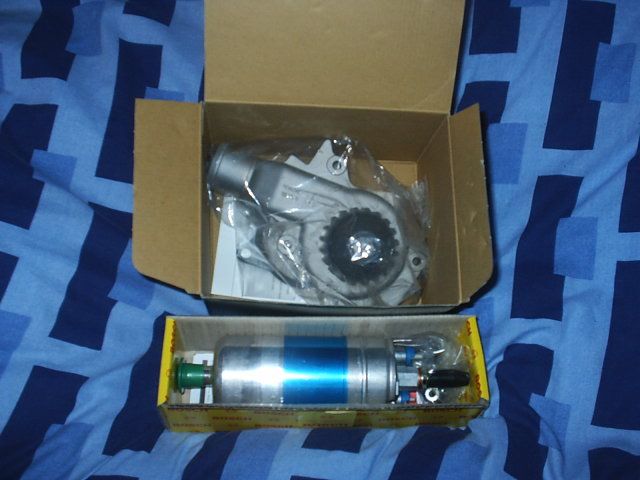
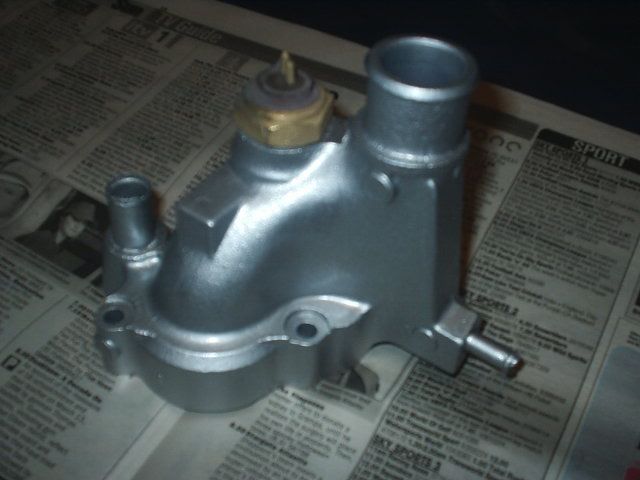
new waterpump
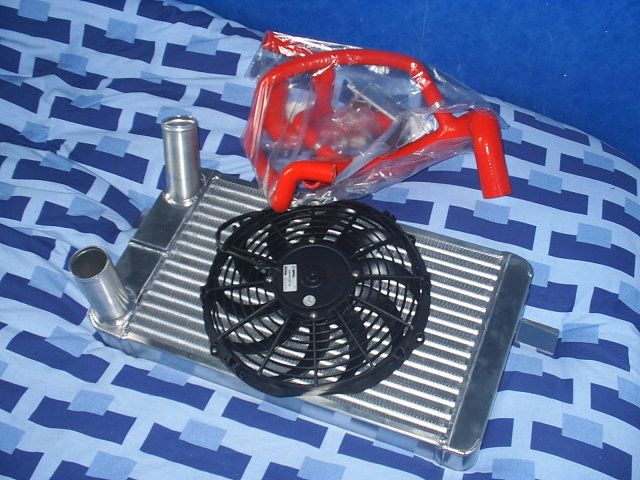
cosworth fuel pump
radtec fmic with twin fans
turbosystems chipped ecu
mongoose 2.5inch exhaust system
turbo technics stage 2 hybrid t3 with -31 actuator
standard airbox
nearly 3 years later this is still in bits, but soon to go together, now the body is near completion (that update will floow on...)
and then i went to PJ motorsport with plenty of cash and bought the new toys..
also found a bargain turbo, 2nd hand but only covered 600 miles on my mates car before he decided to break it. turbo is a turbo technics stage 2 hybrid t3
block was stripped down, rebored and honed to suit the new oversized mahle pistons, and then painted gloss black...
also had the crank reground due to 1 slight score, but better to be safe than sorry, matched to the heavy duty bearing kit i purchased
also began refurbing parts to make the bay look classier than before, so went with dark colours this time...
inlet manifold..
rocker cover and crossover pipe..
and other random engine bits i had blasted and painted..
it was decided that for storage reasons, due to an impending house move, the head would be assembled and packed away, but the block would stay in its component pieces. making it so i didnt get a hernia getting it all into the loft!! lol
head rebuild..
head had a very light skim, as was a very very low mileage item anyways, the ports were left standard, and the main change being the piper 285t/2 cam kit fitted, along with the adjustable vernier
basic spec of the engine is:
standard spec mahle pistons, block rebored to suit
standard rods, shot peened
reground crank, with heavy duty bearing kit
standard head with piper 285t/2 cam kit and vernier
uprated oil pump
new waterpump
cosworth fuel pump
radtec fmic with twin fans
turbosystems chipped ecu
mongoose 2.5inch exhaust system
turbo technics stage 2 hybrid t3 with -31 actuator
standard airbox
nearly 3 years later this is still in bits, but soon to go together, now the body is near completion (that update will floow on...)
10-08-2008, 05:40 PM
#3
Advanced PassionFord User
Thread Starter
iTrader: (1)
Join Date: Jan 2005
Location: Birmingham
Posts: 1,949
Likes: 0
Received 0 Likes
on
0 Posts
wheels...
i decided i was bored of the dare v1 17s, so set my heart on a set of compomotive MO's, in 17s
finally found a bargain set, which were 2nd hand but just been refurbed, so i snapped them up...
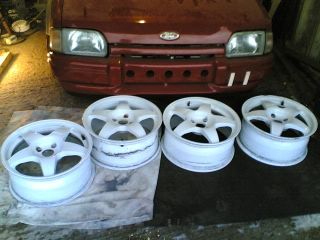
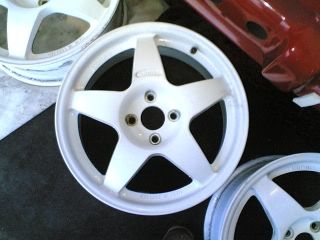
originally the car was going to remain red, but when i decided on the colour change, i figured leaving the wheels white just wudnt work, so i opted to go a bit different, and having taken inspiration by a set i had seen before, i went for this finish...
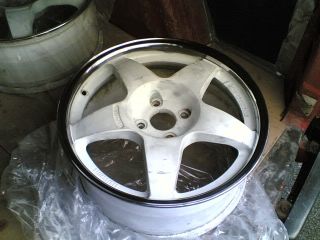
had the lips polished, and then painted the centres graphite grey..
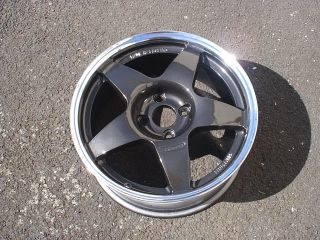
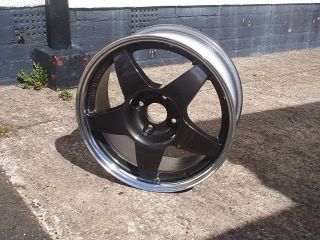
the rims are 17x7.5" et40
i decided i was bored of the dare v1 17s, so set my heart on a set of compomotive MO's, in 17s
finally found a bargain set, which were 2nd hand but just been refurbed, so i snapped them up...
originally the car was going to remain red, but when i decided on the colour change, i figured leaving the wheels white just wudnt work, so i opted to go a bit different, and having taken inspiration by a set i had seen before, i went for this finish...
had the lips polished, and then painted the centres graphite grey..
the rims are 17x7.5" et40


 10-08-2008, 06:19 PM
#7
Advanced PassionFord User
Thread Starter
iTrader: (1)
Join Date: Jan 2005
Location: Birmingham
Posts: 1,949
Likes: 0
Received 0 Likes
on
0 Posts
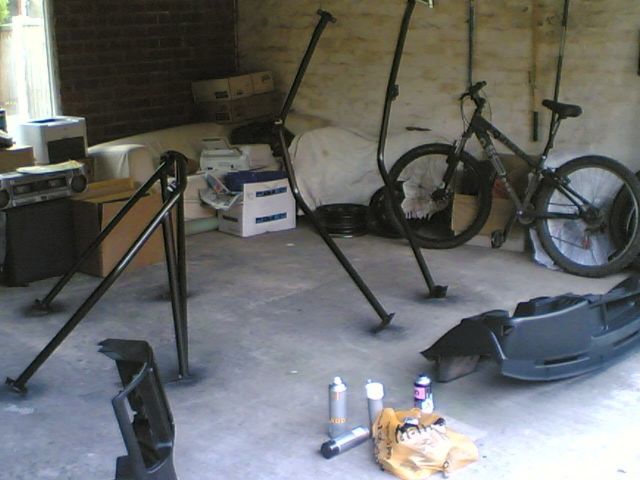
it was at this point of the build i had to move house, and seein as the car still didnt have any wheels, the only option was brute force and ignorance, and drag it onto a trailer, n tow it to the new house behind my daily vectra...
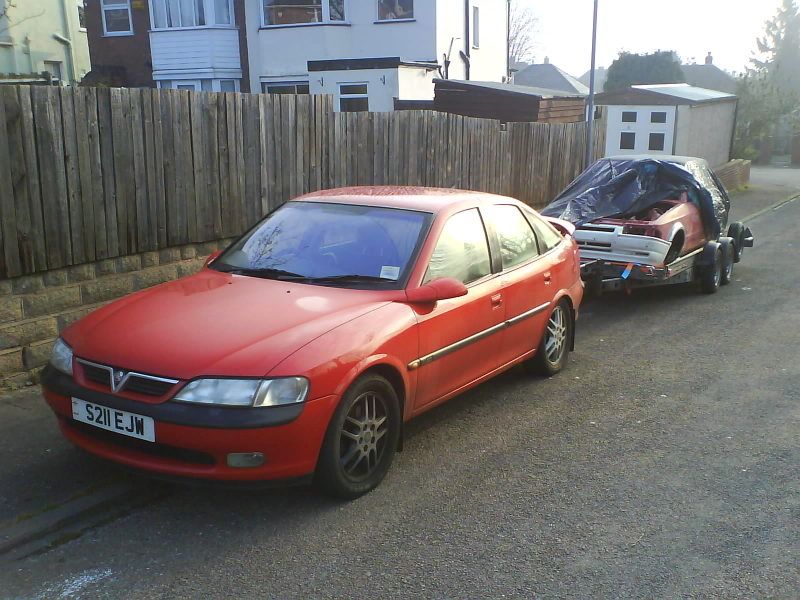
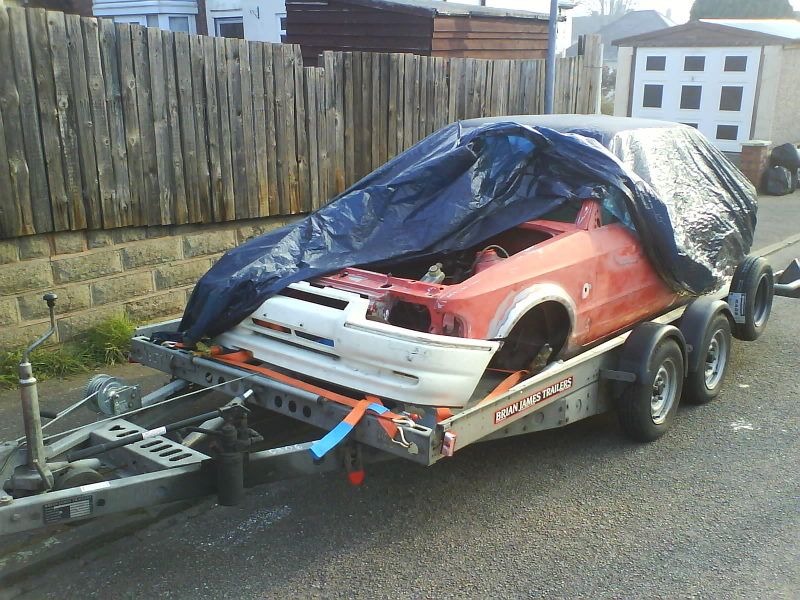
what i would say is, anybody who plans on doing a full car rebuild, dotn plan on moving house any time soon, biggest ballache ever, n took i think 8 of us to carry the damn thing!!!
what i would say is, anybody who plans on doing a full car rebuild, dotn plan on moving house any time soon, biggest ballache ever, n took i think 8 of us to carry the damn thing!!!
Trending Topics
10-08-2008, 06:21 PM
#8
Too many posts.. I need a life!!

Join Date: Jul 2006
Location: Norfolk
Posts: 581
Likes: 0
Received 0 Likes
on
0 Posts
sweet project! Nice to see another car getting the five star treatment. Are you gonna seam weld up the car? Might be worth doing while you have it striped down. Keep up the good work
10-08-2008, 06:27 PM
#9
Advanced PassionFord User
Thread Starter
iTrader: (1)
Join Date: Jan 2005
Location: Birmingham
Posts: 1,949
Likes: 0
Received 0 Likes
on
0 Posts
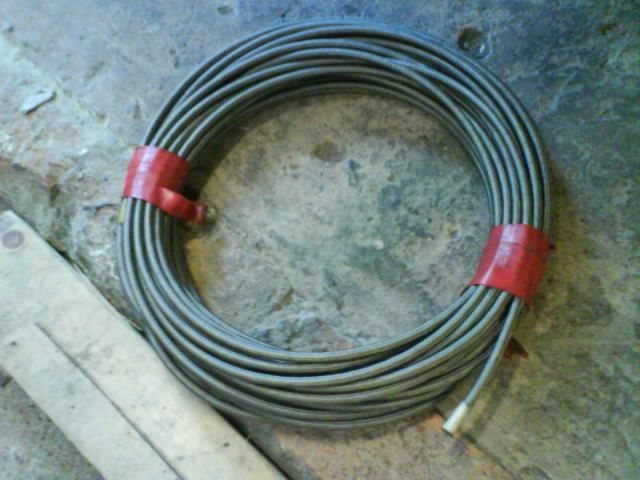
when finally at home in the new house, with bigger garage, i finally got round to removing the wiring loom fully..

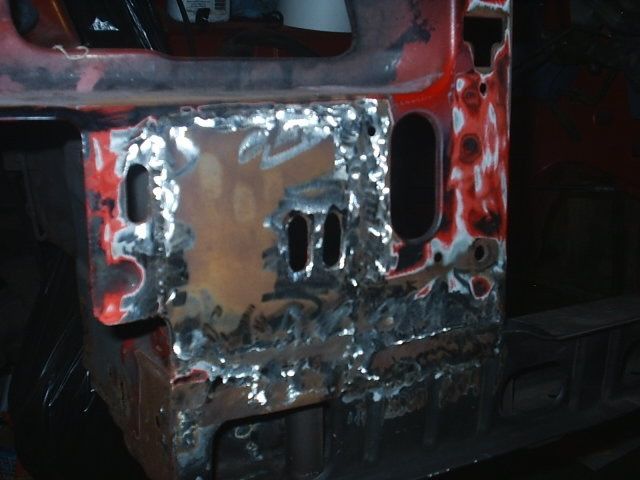
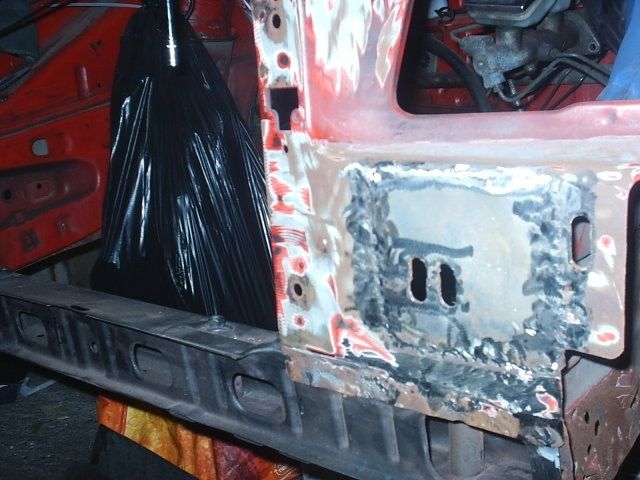
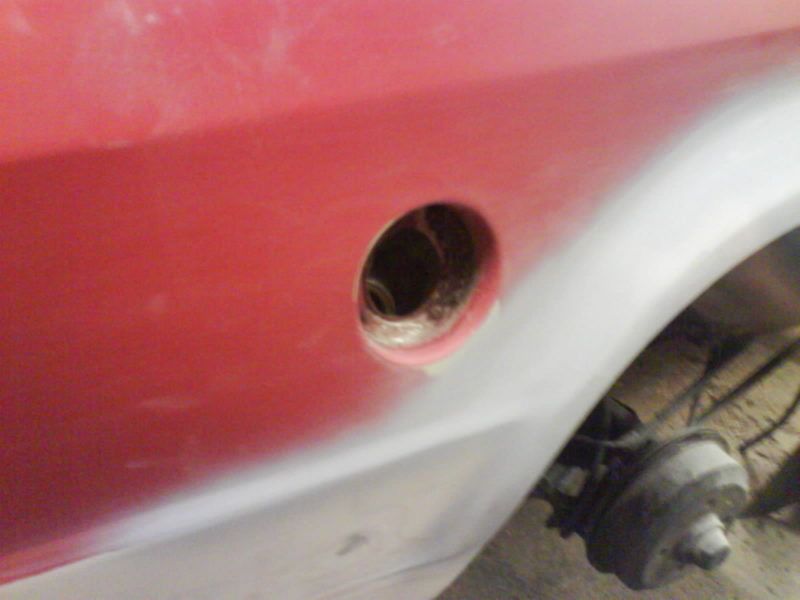
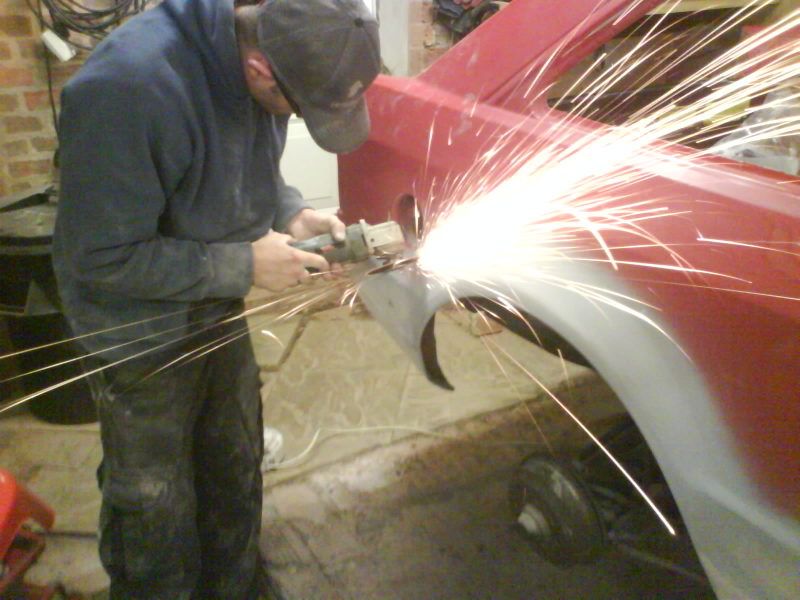
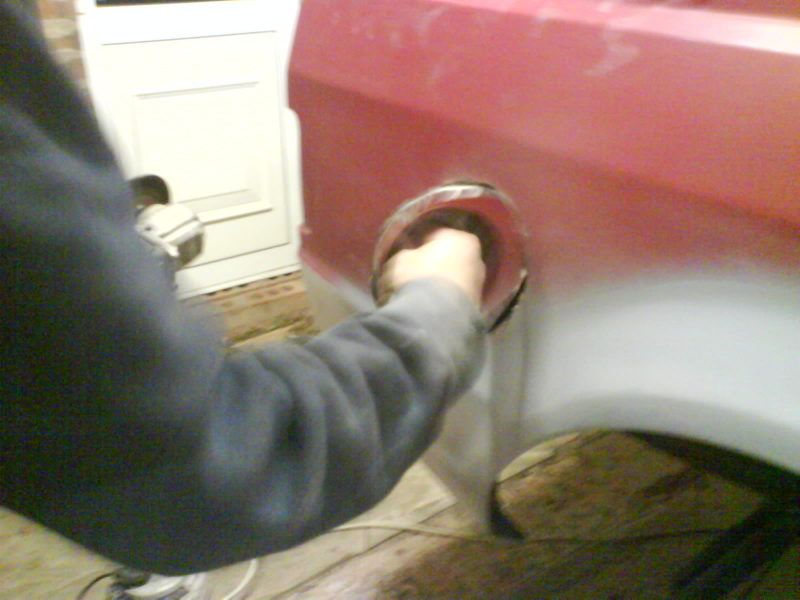
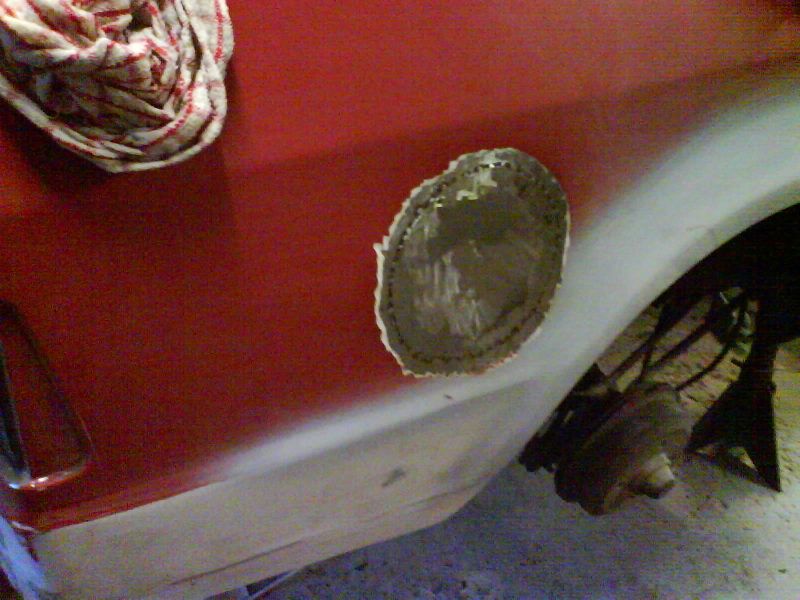
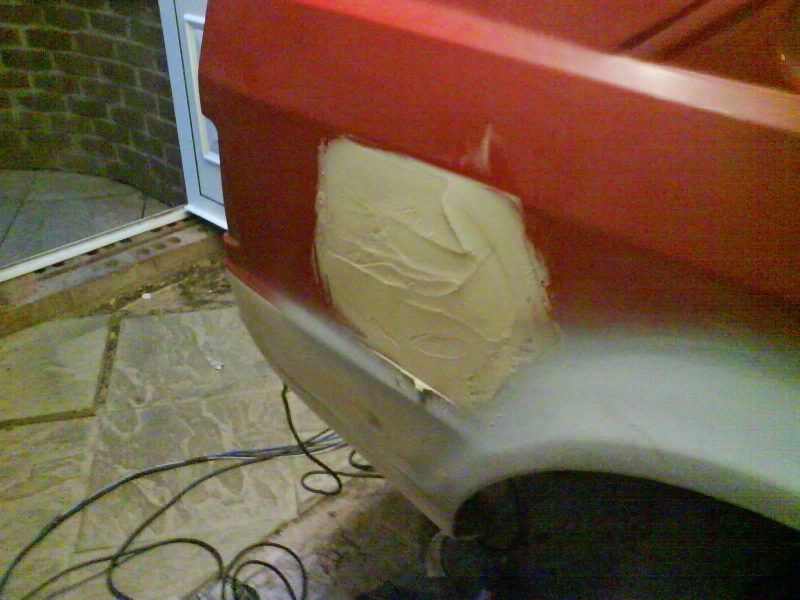
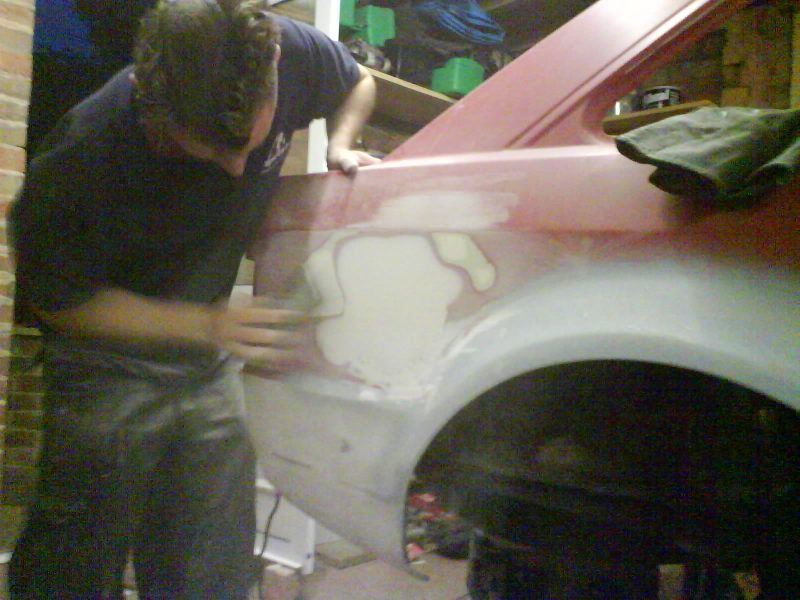
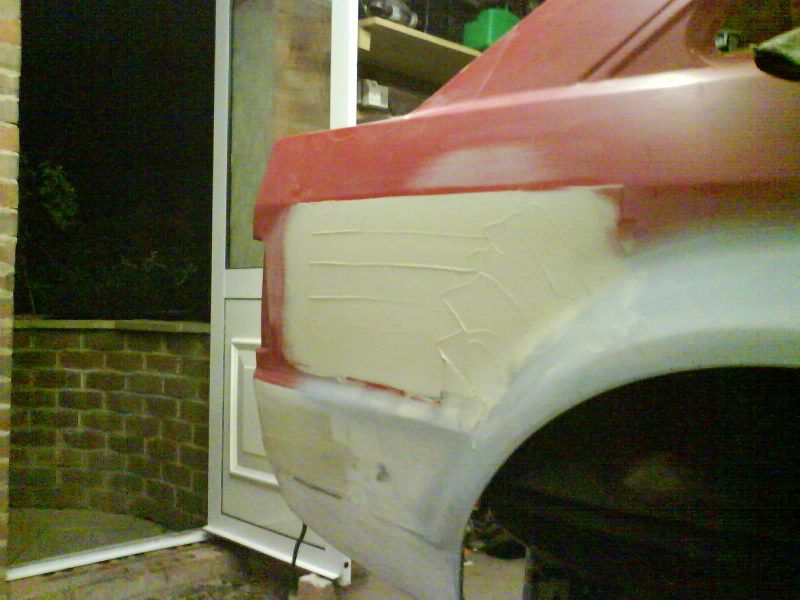
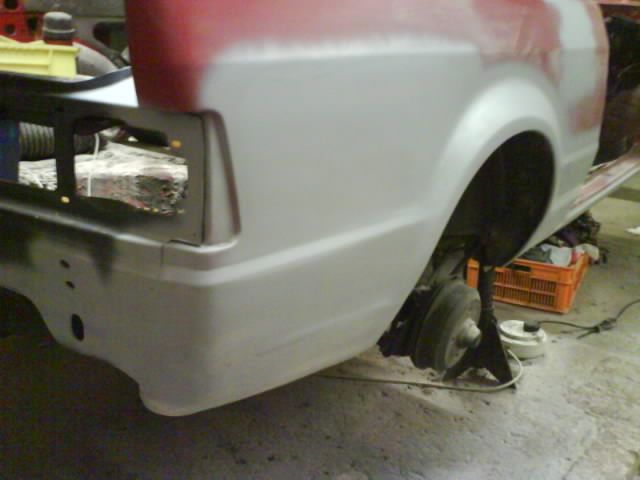
then 1 night, we decided that due to a bit of rust in the filler cap area, we wouldnt try and fix it, we would just cut it out and smooth the rear quarter, n relocate the cap elsewhere, maybe an in-car fuel cell, still undecided lol
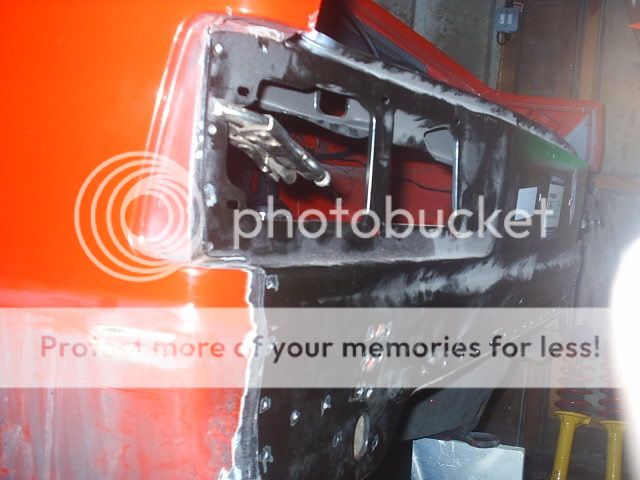
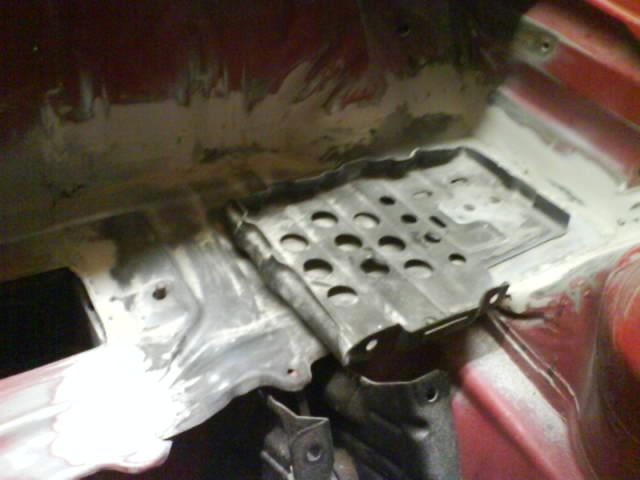
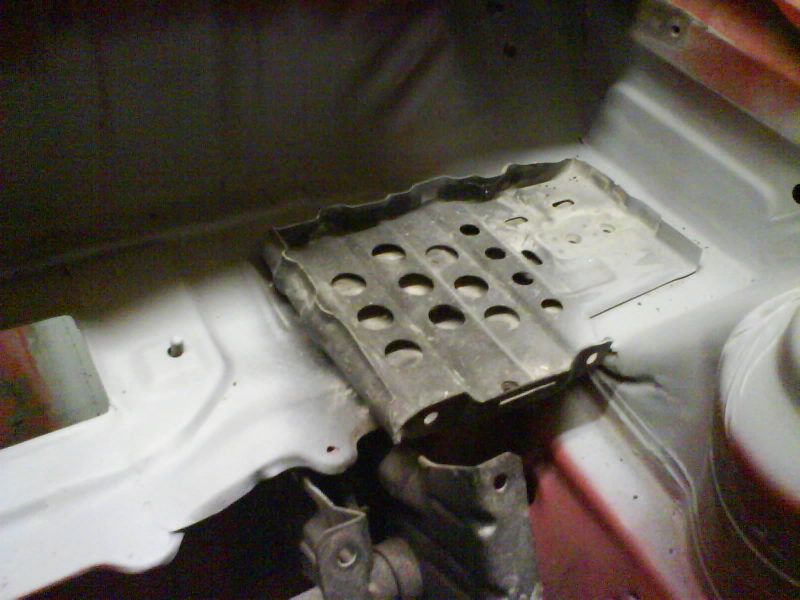
battery tray area smoothed and fillered...
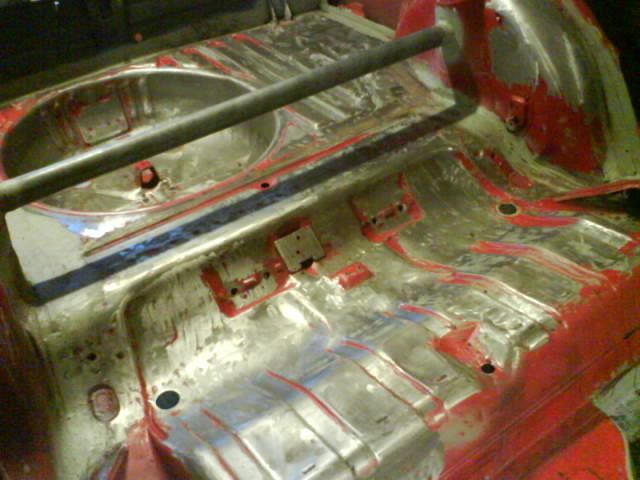
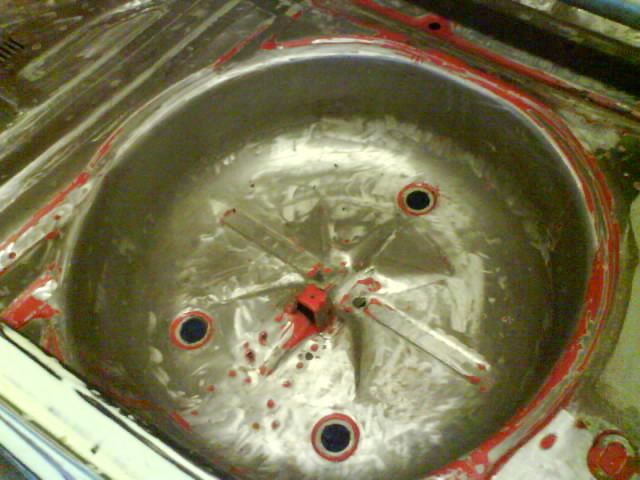
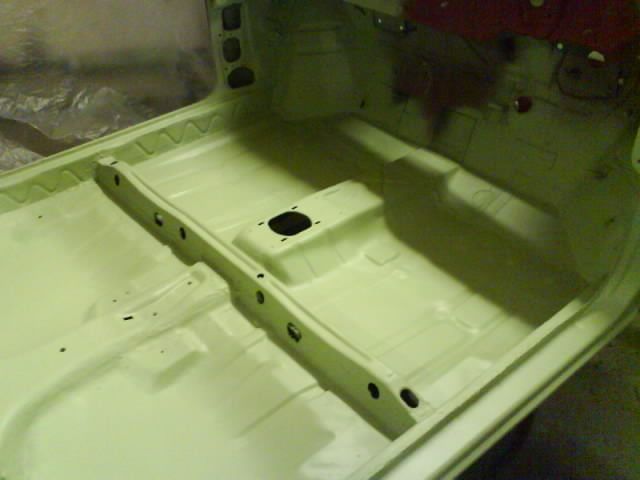
some more floorpan pics...
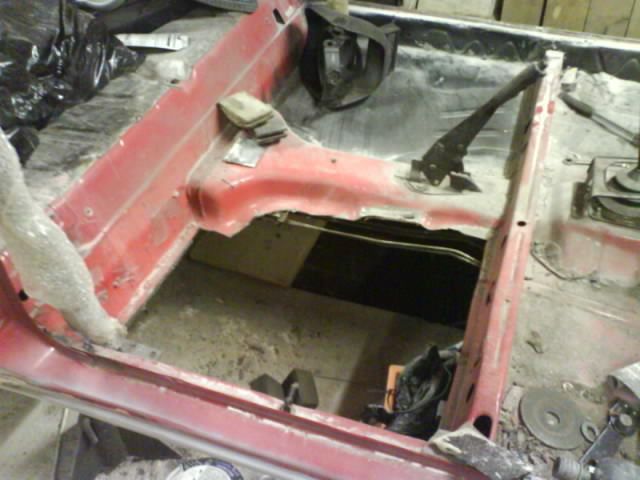
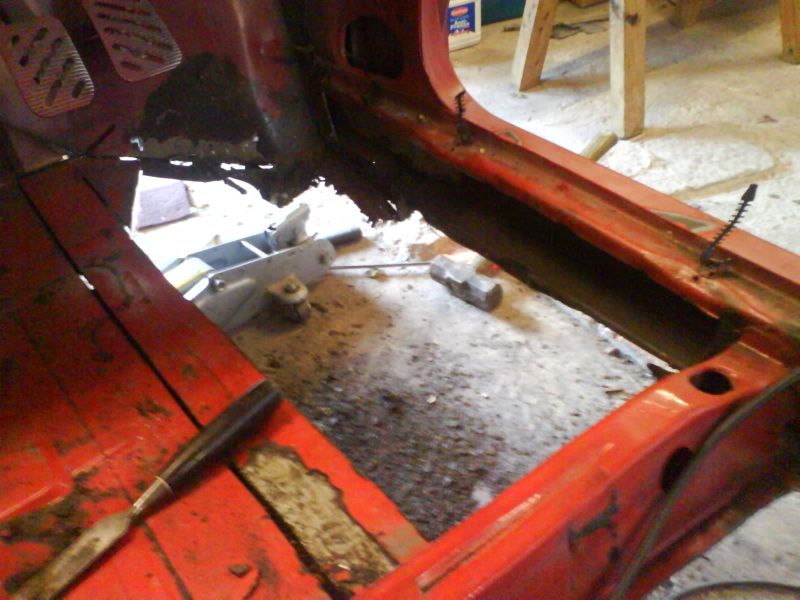
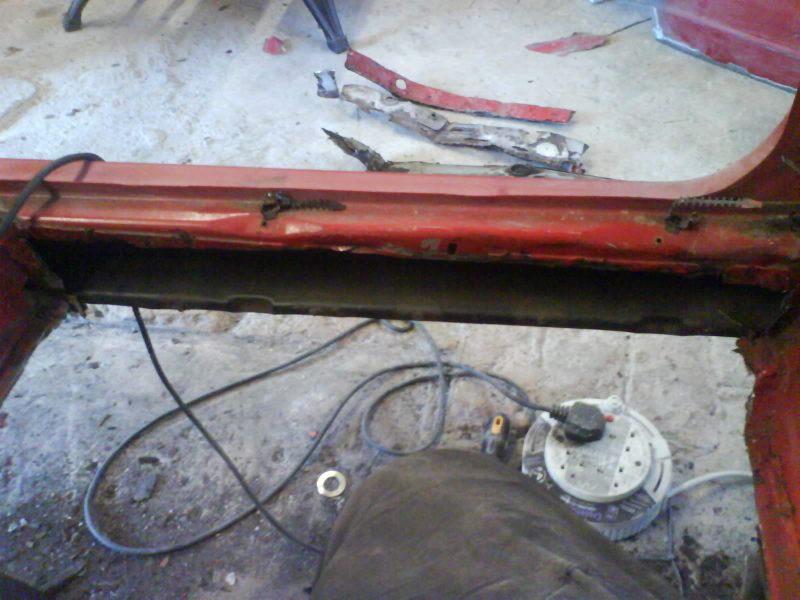
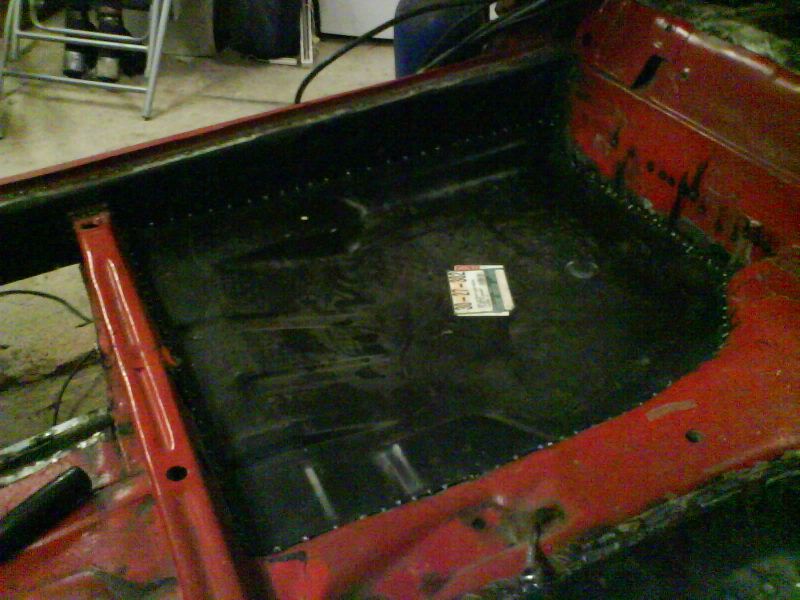
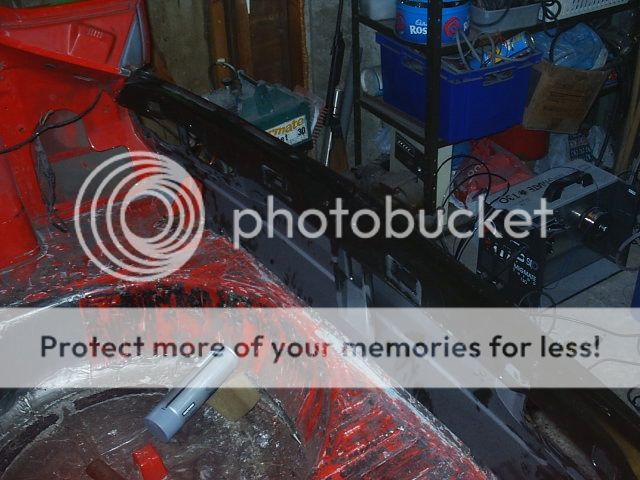
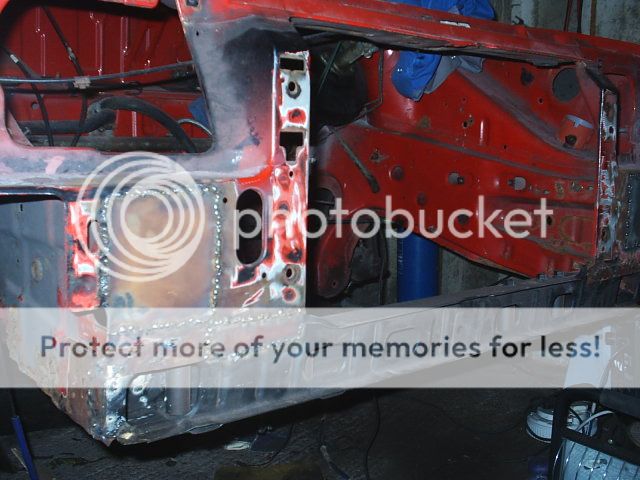
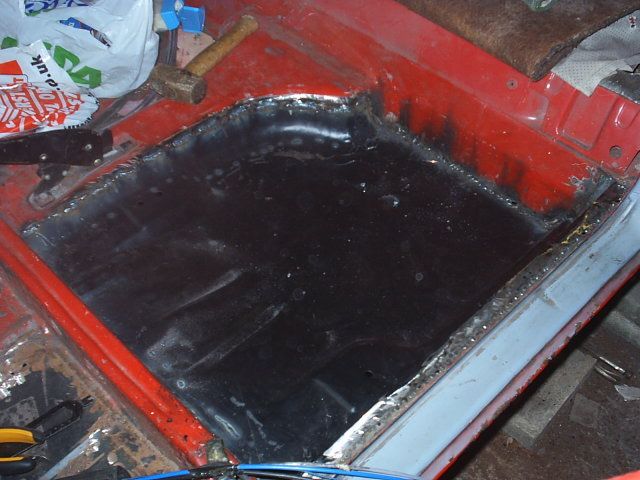
basically, the floorpan thing just grew and grew. what started as simply needing a patch in both front pans, and the seatbelt mounts in both rears, ended up as all 4 floorpans being cut out and replaced, and the inner sills done at the same time. i figured this way it would be stronger for the future, and above all look neater than patchwork
then 1 night, we decided that due to a bit of rust in the filler cap area, we wouldnt try and fix it, we would just cut it out and smooth the rear quarter, n relocate the cap elsewhere, maybe an in-car fuel cell, still undecided lol
battery tray area smoothed and fillered...
some more floorpan pics...
basically, the floorpan thing just grew and grew. what started as simply needing a patch in both front pans, and the seatbelt mounts in both rears, ended up as all 4 floorpans being cut out and replaced, and the inner sills done at the same time. i figured this way it would be stronger for the future, and above all look neater than patchwork
10-08-2008, 06:41 PM
#10
Advanced PassionFord User
Thread Starter
iTrader: (1)
Join Date: Jan 2005
Location: Birmingham
Posts: 1,949
Likes: 0
Received 0 Likes
on
0 Posts
few more...
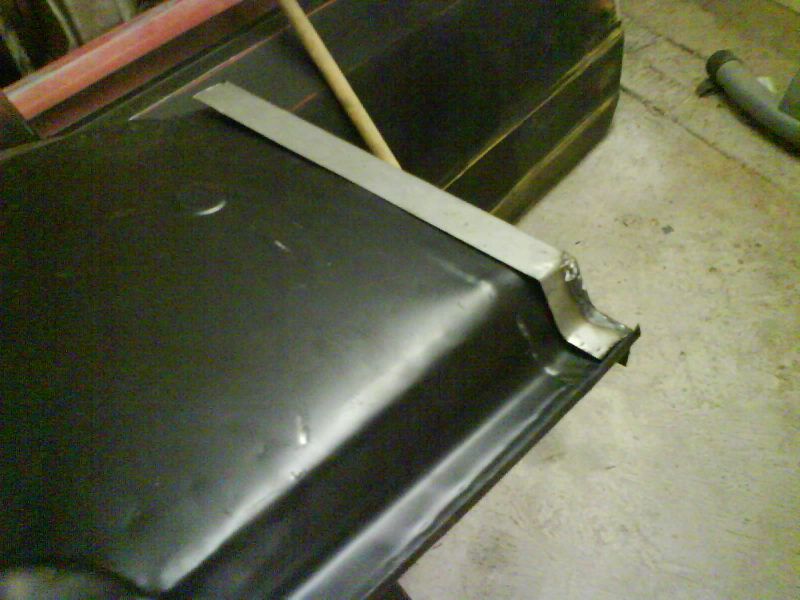
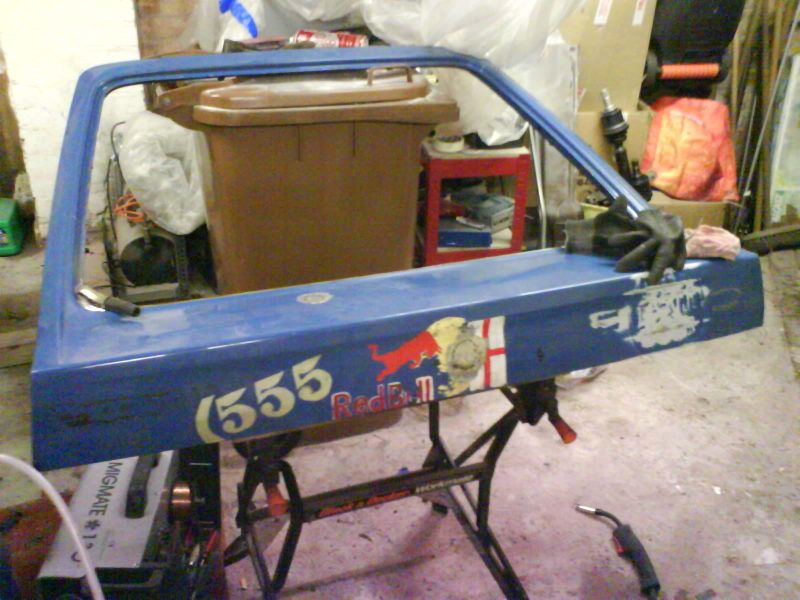
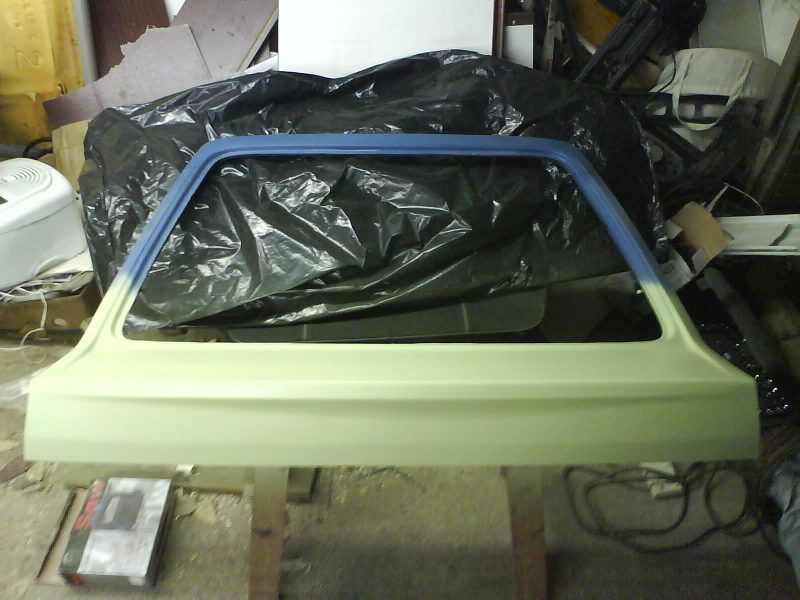
my comedy new base spec tailgate, off some old guys motor, its mint, but yet sported sum interesting senial demensia graphics!! lol
only cost me a tenner, but its solid all over, n has no spoiler holes, which suits me as im going spoilerless
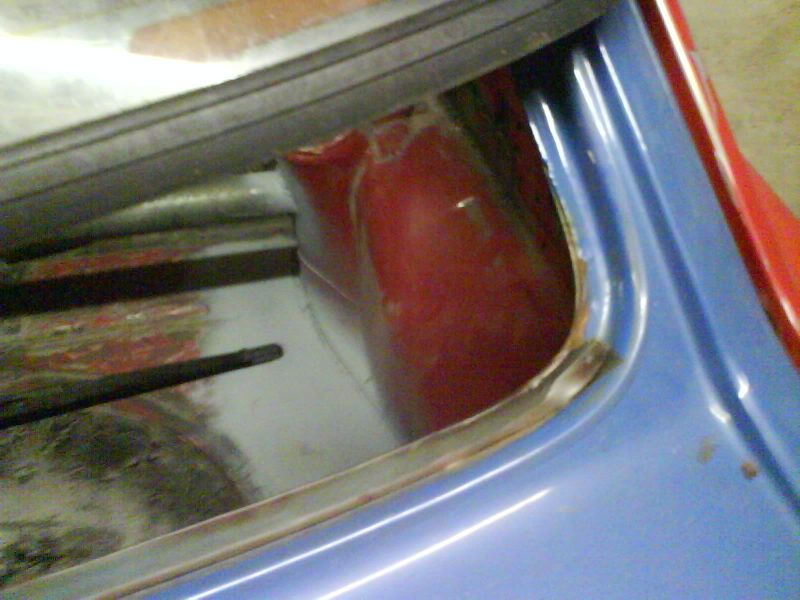
roof needed a bit of attention, due to a few knocks n dents over the years after roofrack use etc. but lucky for me, no rusty sunroof to deal with...

my comedy new base spec tailgate, off some old guys motor, its mint, but yet sported sum interesting senial demensia graphics!! lol
only cost me a tenner, but its solid all over, n has no spoiler holes, which suits me as im going spoilerless
roof needed a bit of attention, due to a few knocks n dents over the years after roofrack use etc. but lucky for me, no rusty sunroof to deal with...
10-08-2008, 06:44 PM
#11
Advanced PassionFord User
Thread Starter
iTrader: (1)
Join Date: Jan 2005
Location: Birmingham
Posts: 1,949
Likes: 0
Received 0 Likes
on
0 Posts
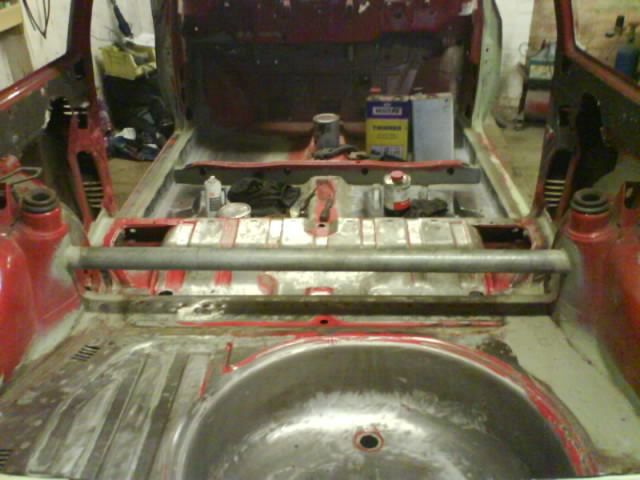
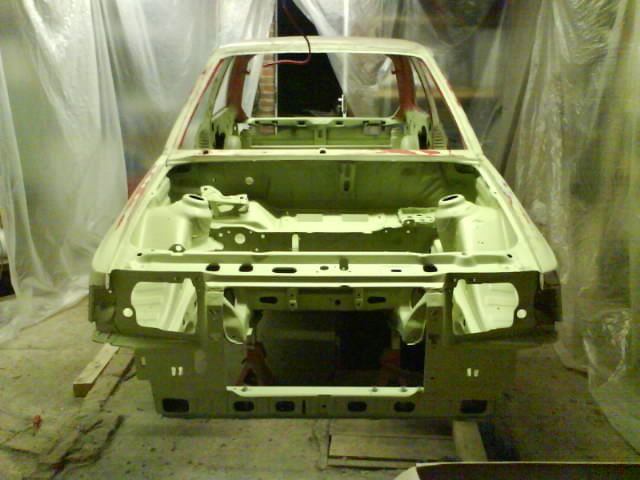
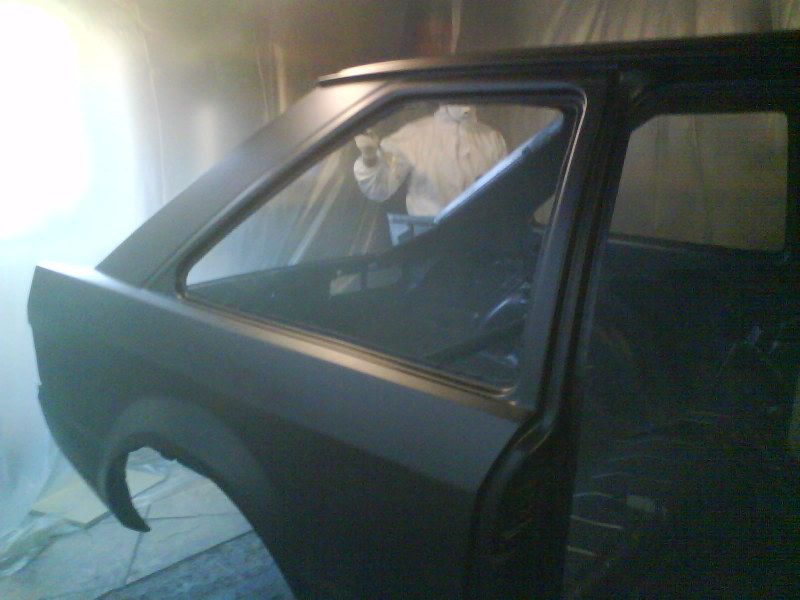
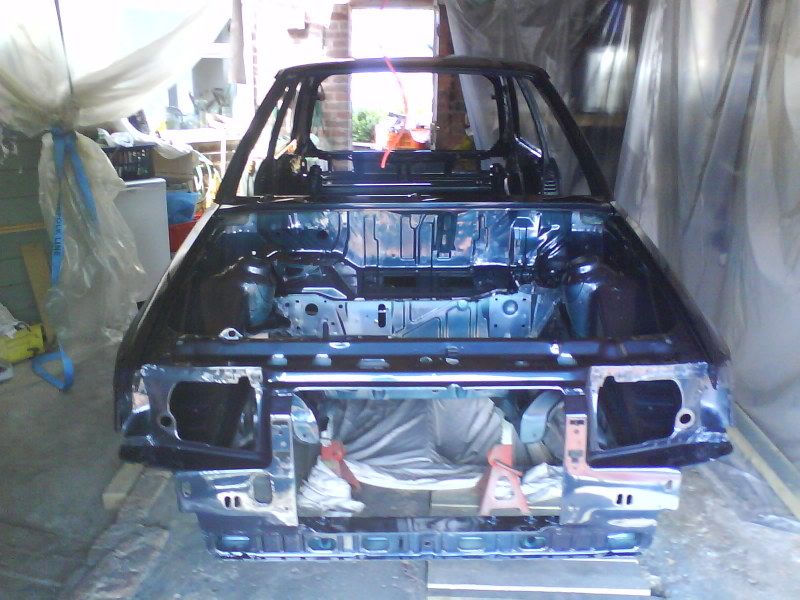
outside in primer finally...


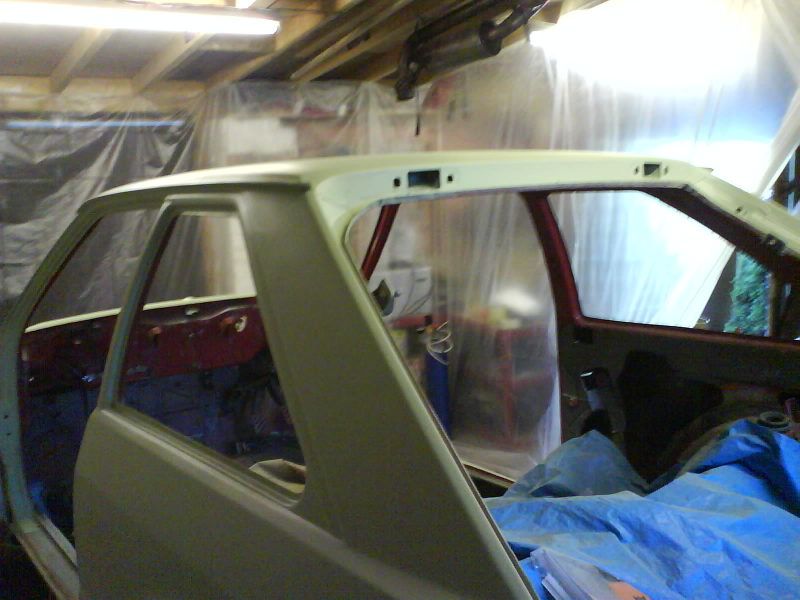
note the quickly converted garage to spray booth, bit of a clean, few plastic sheets, wet floor, bit of heat, jobs a gudden!
note the quickly converted garage to spray booth, bit of a clean, few plastic sheets, wet floor, bit of heat, jobs a gudden!
10-08-2008, 06:46 PM
#12
Advanced PassionFord User
Thread Starter
iTrader: (1)
Join Date: Jan 2005
Location: Birmingham
Posts: 1,949
Likes: 0
Received 0 Likes
on
0 Posts
tailgate smoothing, removing the lock and the wiper...
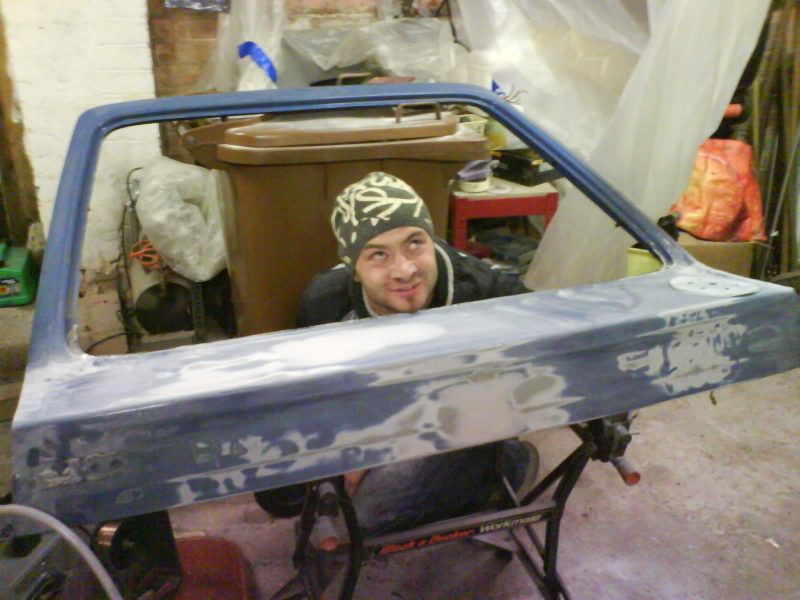
ignore my retarded friend, he may look like a spacca, but his bodywork skills make up for this! lol
ignore my retarded friend, he may look like a spacca, but his bodywork skills make up for this! lol

 10-08-2008, 06:53 PM
#15
Advanced PassionFord User
Thread Starter
iTrader: (1)
Join Date: Jan 2005
Location: Birmingham
Posts: 1,949
Likes: 0
Received 0 Likes
on
0 Posts
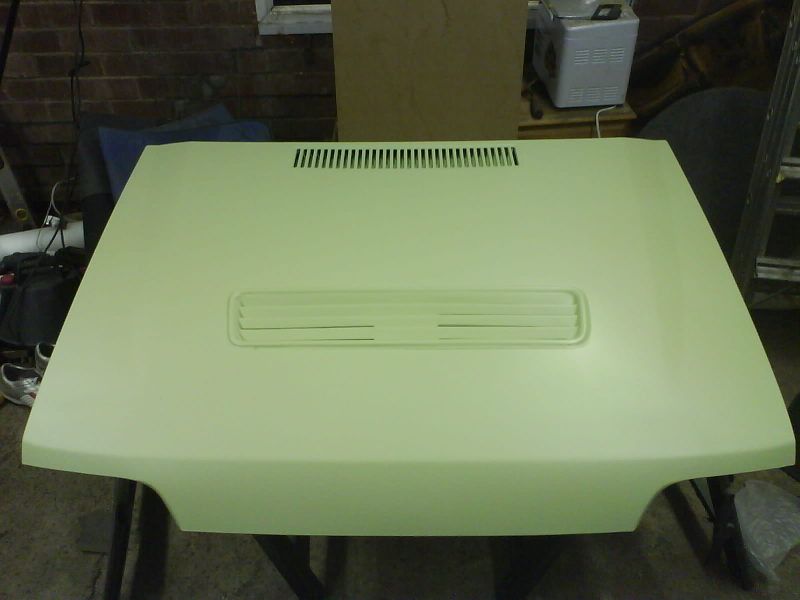
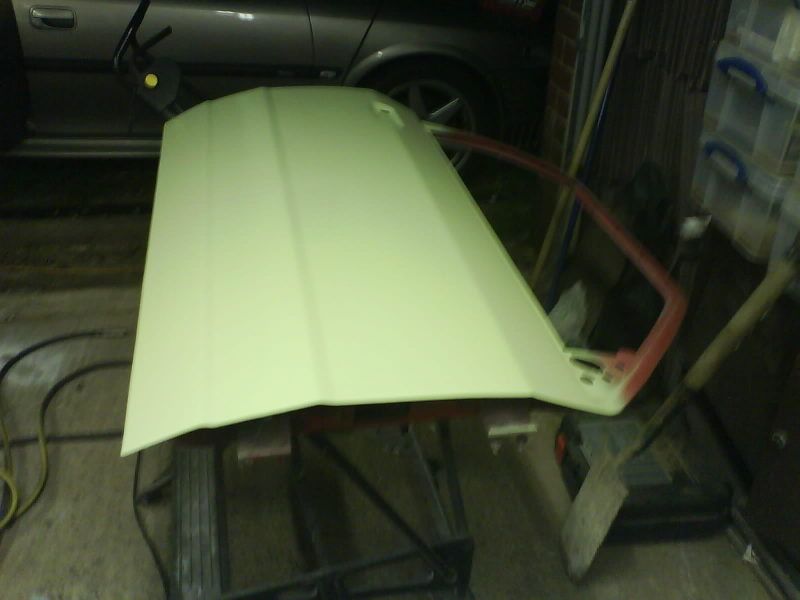
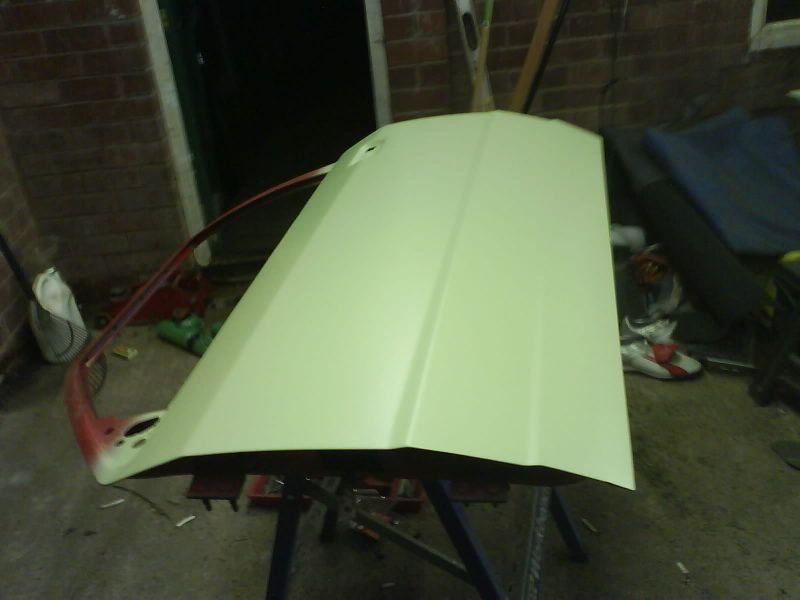
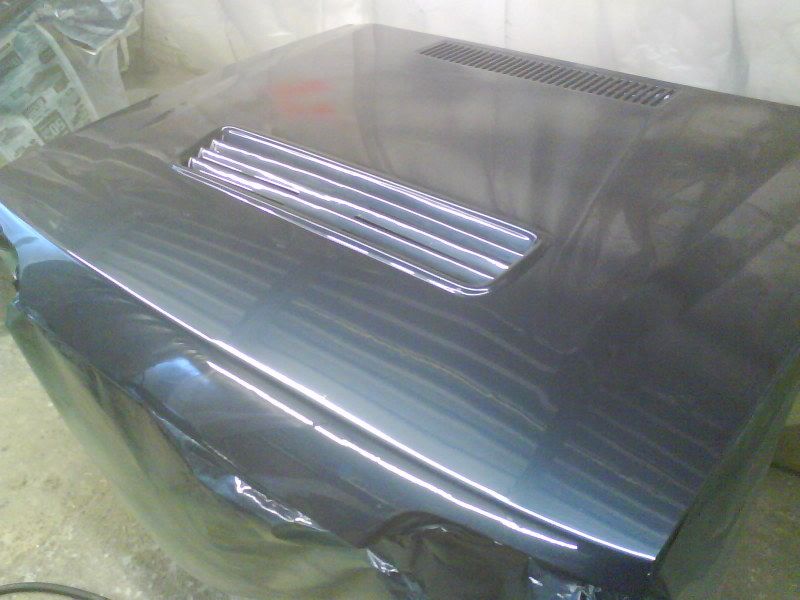
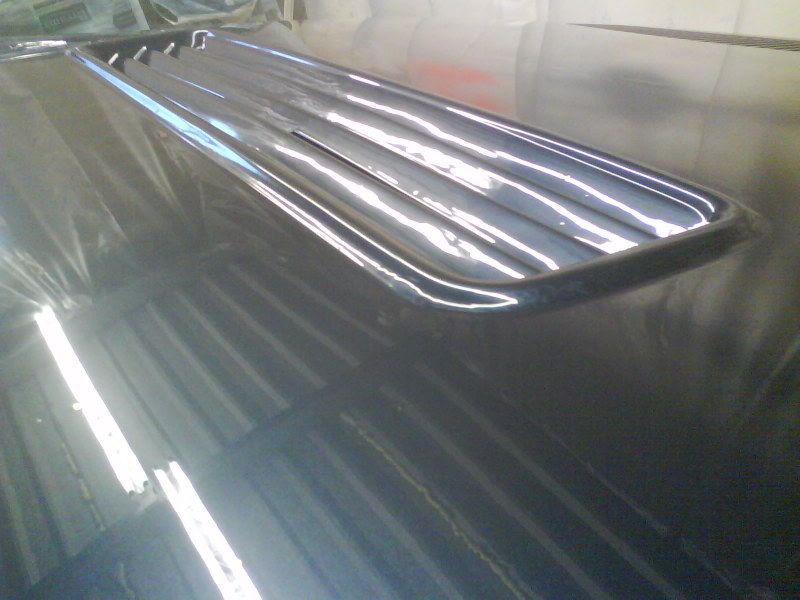
next up, the bit most people will either love or hate, the bonnet
now i didnt want to use the typical rs turbo bonnet, as its just going to look like every other RS, and also i wanted something that actually cooled an important area, not just my dizzy and cambelt!! lol
so, my original red bonnet was dented, a black bonnet i had turned out to have a slight crease in it, so i went back to the old guy who i had the tailgate off...
came back with the matching bonnet lol
and so it all began, 1st with the removal of the badge...
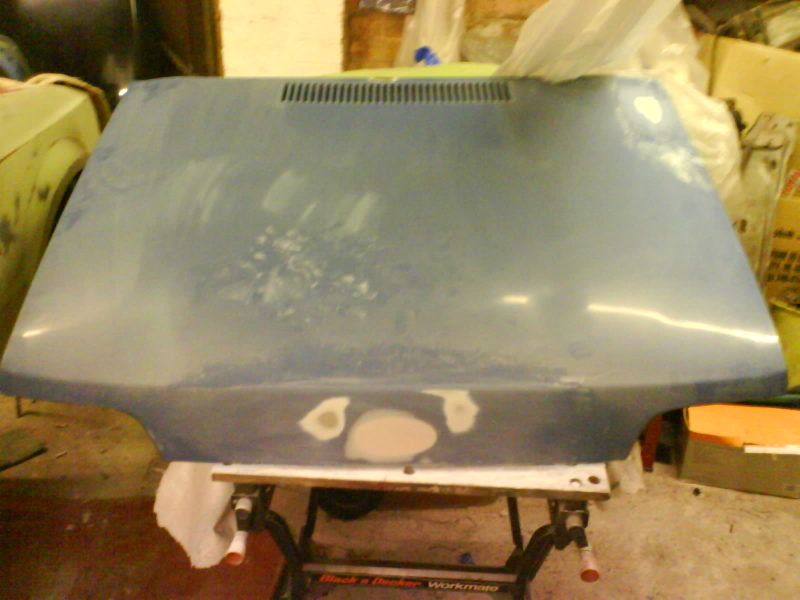
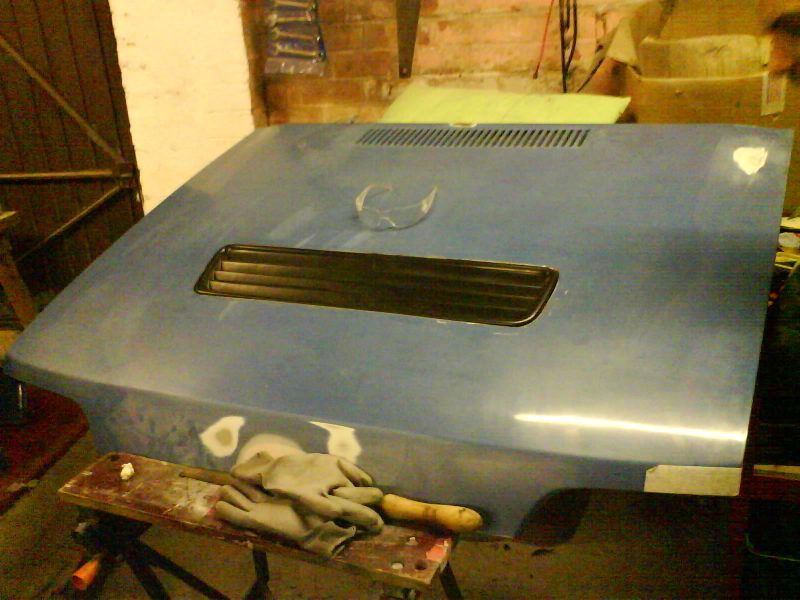
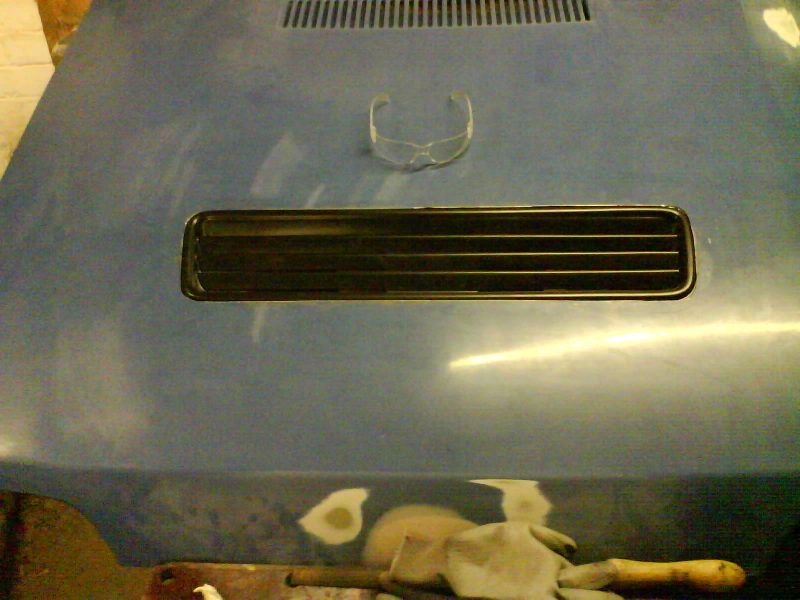
and then with the venting. i chose to go with a lancia integrale style louvre type vent, which eventually turned out to cost me nothing, so heres how it went...
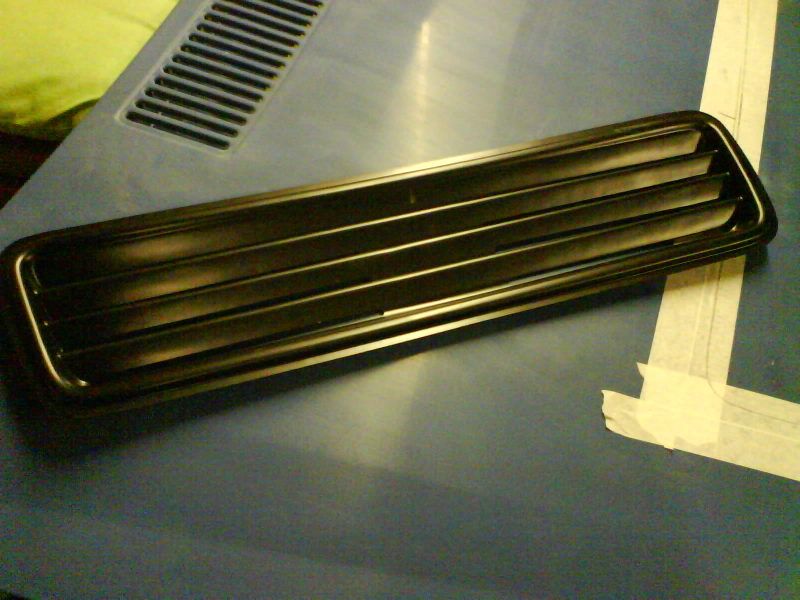
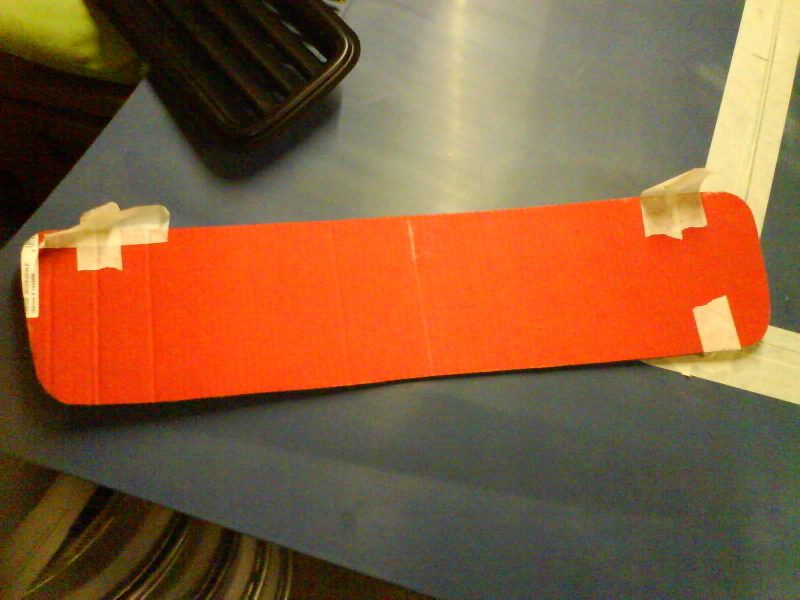
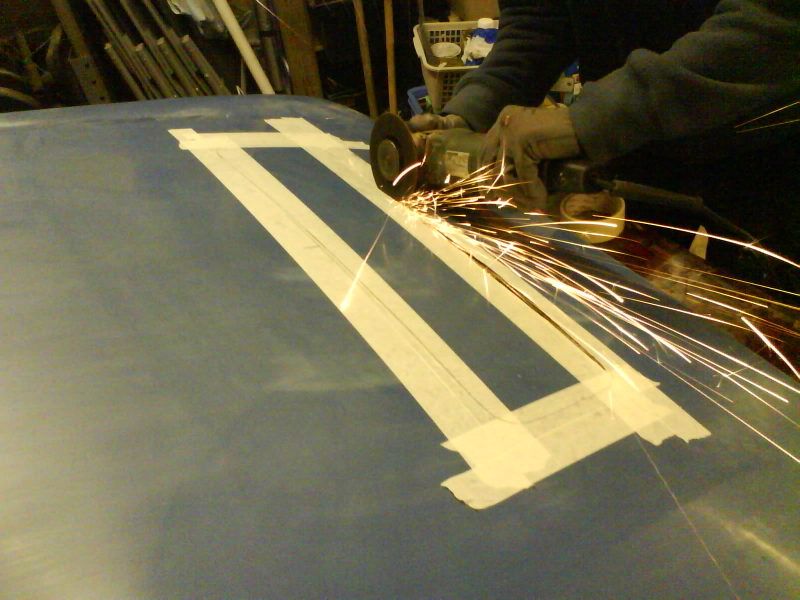
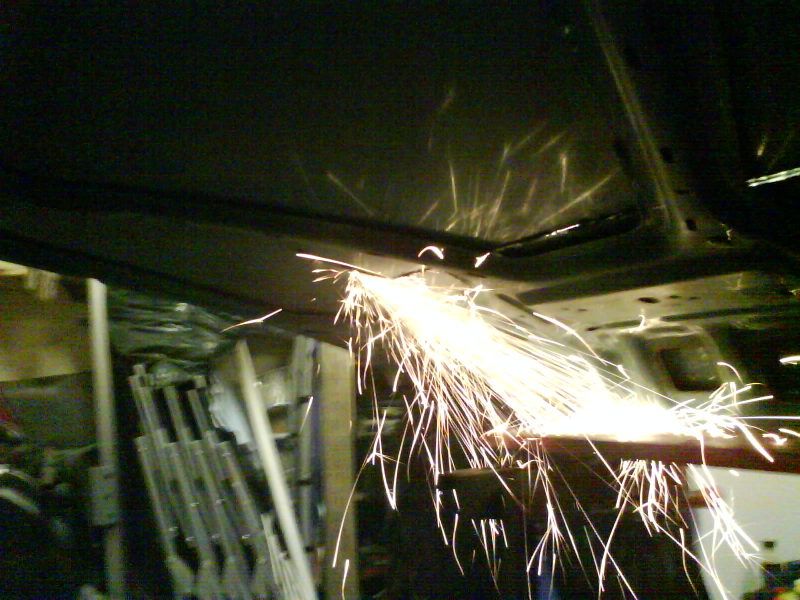
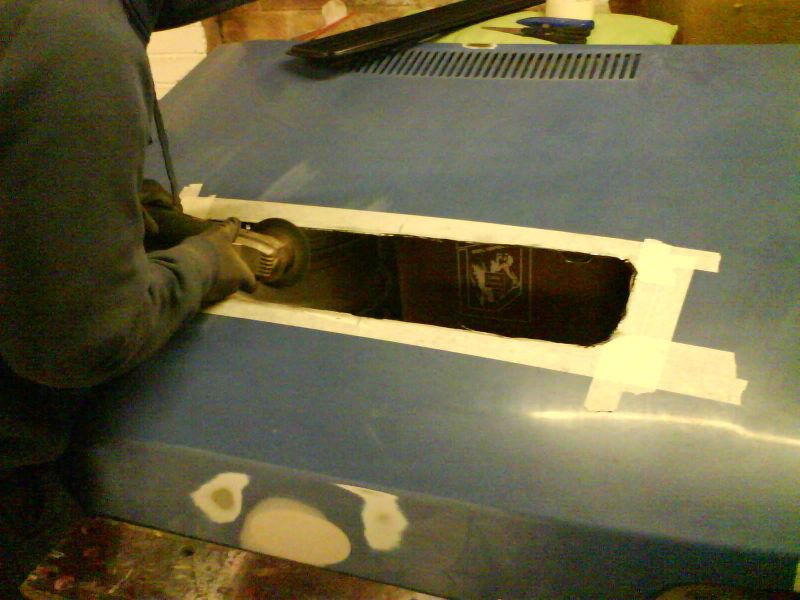
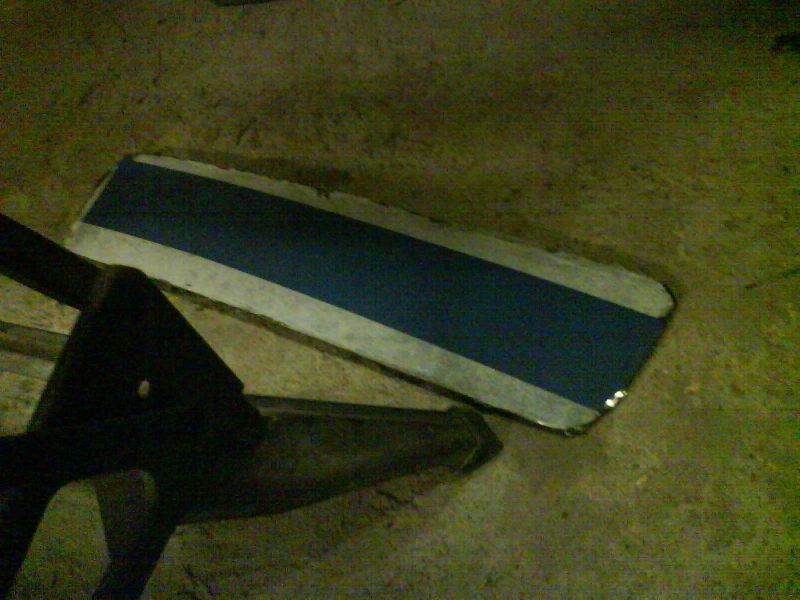
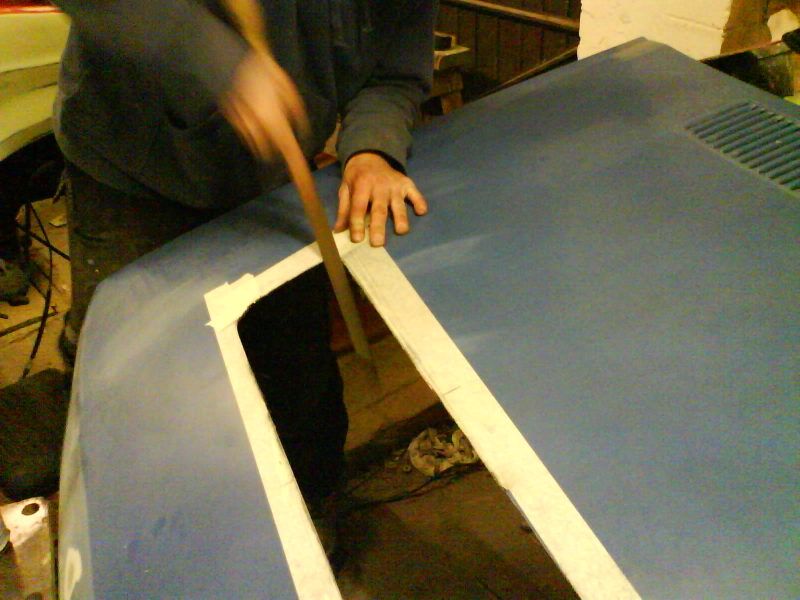
vent was a shitty sitck on variety item, but we decided it had to look OE, so the bonnet was cut, and it was glued from underneath, as seen with it weighed down by starter motors lol
now i didnt want to use the typical rs turbo bonnet, as its just going to look like every other RS, and also i wanted something that actually cooled an important area, not just my dizzy and cambelt!! lol
so, my original red bonnet was dented, a black bonnet i had turned out to have a slight crease in it, so i went back to the old guy who i had the tailgate off...
came back with the matching bonnet lol
and so it all began, 1st with the removal of the badge...
and then with the venting. i chose to go with a lancia integrale style louvre type vent, which eventually turned out to cost me nothing, so heres how it went...
vent was a shitty sitck on variety item, but we decided it had to look OE, so the bonnet was cut, and it was glued from underneath, as seen with it weighed down by starter motors lol
10-08-2008, 06:55 PM
#16
Advanced PassionFord User
Thread Starter
iTrader: (1)
Join Date: Jan 2005
Location: Birmingham
Posts: 1,949
Likes: 0
Received 0 Likes
on
0 Posts
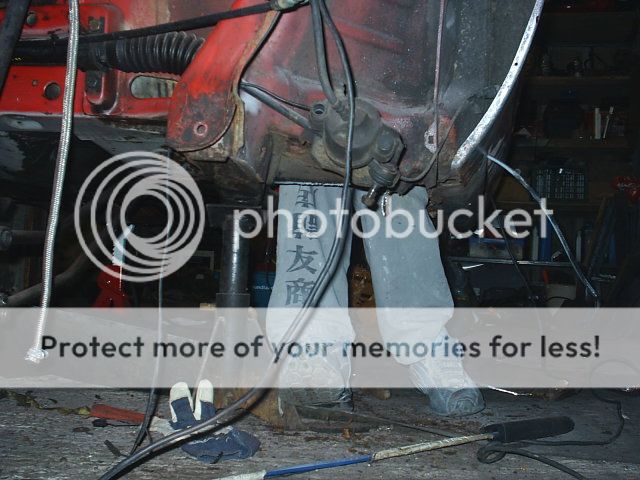
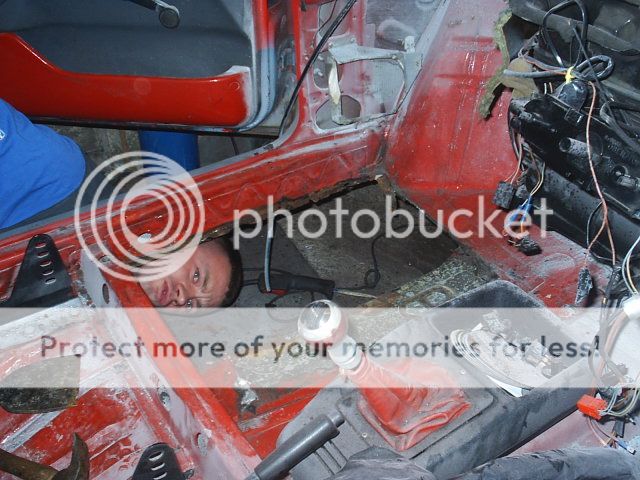
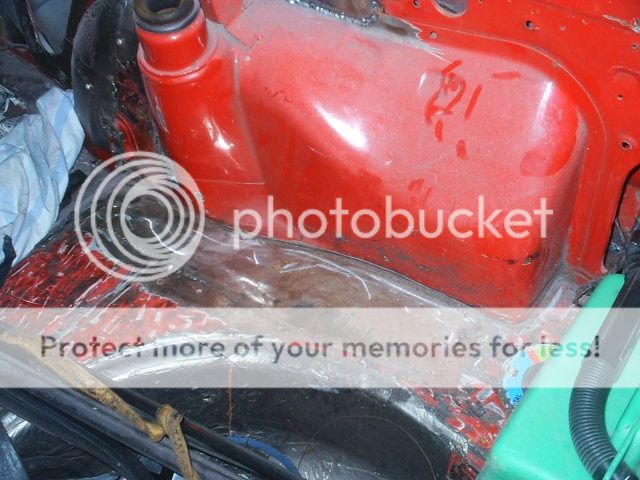
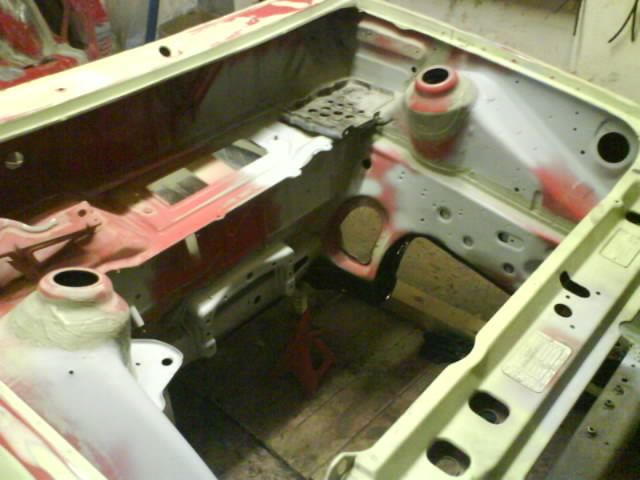
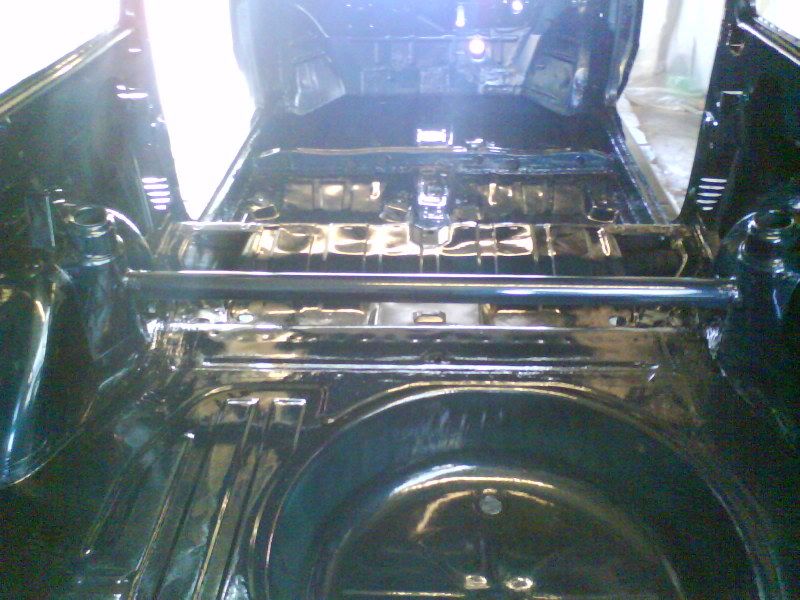
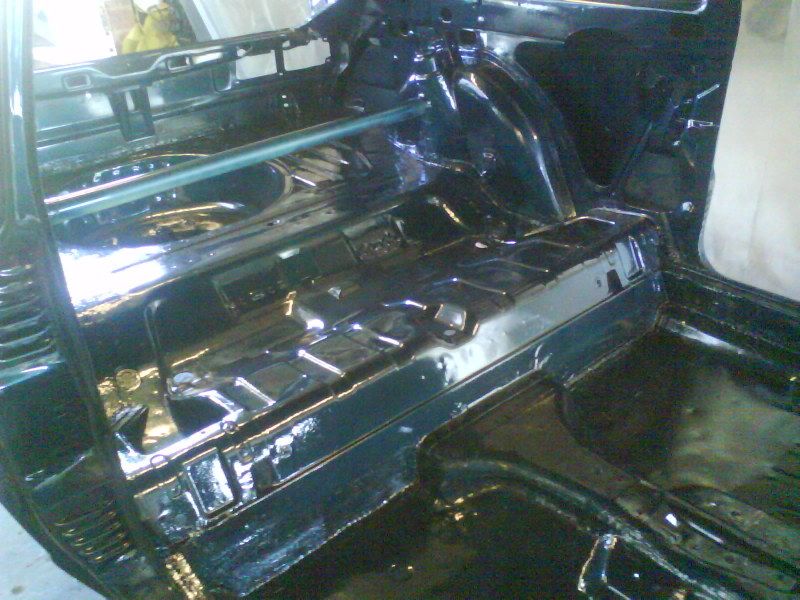
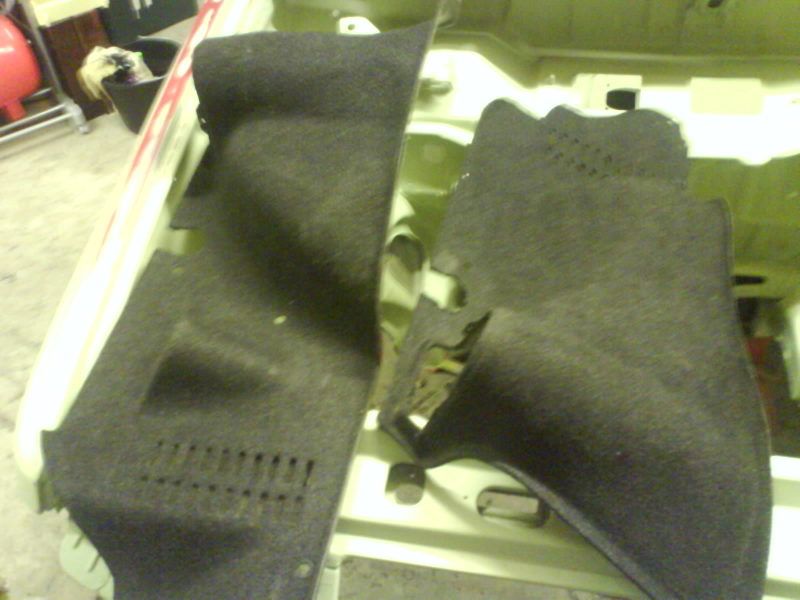
carried out an underbody resto also, but pics are limited due to bad camera and bad lighting when in the pit in the garage, so these are all i have...
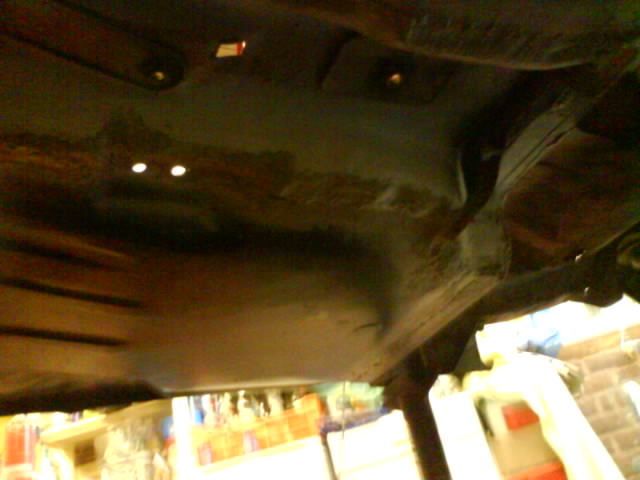
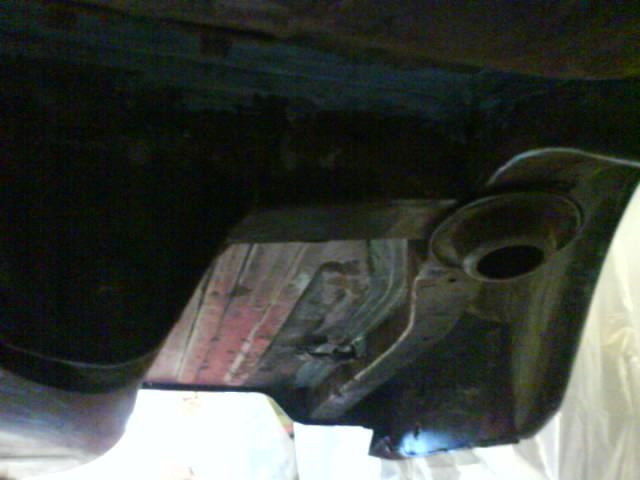
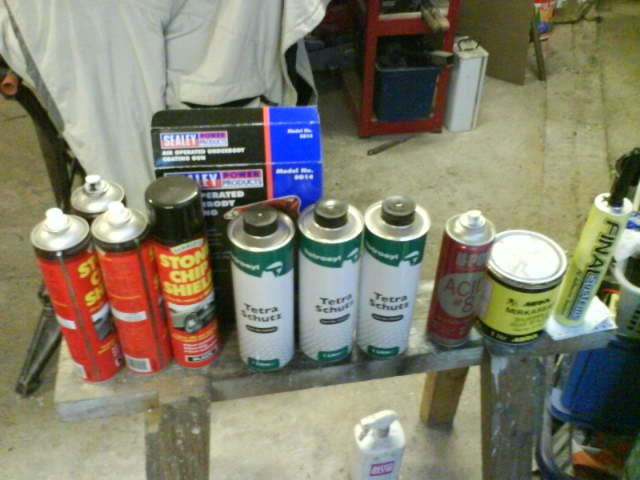
basically removed all the old crud, did the underside in underbody schutz, black, and then did the inner arch areas in stonechip, so that they could be sprayed body colour
basically removed all the old crud, did the underside in underbody schutz, black, and then did the inner arch areas in stonechip, so that they could be sprayed body colour
10-08-2008, 07:01 PM
#18
Advanced PassionFord User
Thread Starter
iTrader: (1)
Join Date: Jan 2005
Location: Birmingham
Posts: 1,949
Likes: 0
Received 0 Likes
on
0 Posts
the reason the inside wasnt coated in primer at same time as outside, is because in my younger years i made up fort he 1.3 power by having a massive install in the back, and this meant lots n lots of sound deadening
turns out this stuff doesnt come out too easy, unless u have dry ice which i cud not get, so i spent the best part of 3 complete days removing it and taking it back to bare metal, ready for primer
heres the pics...

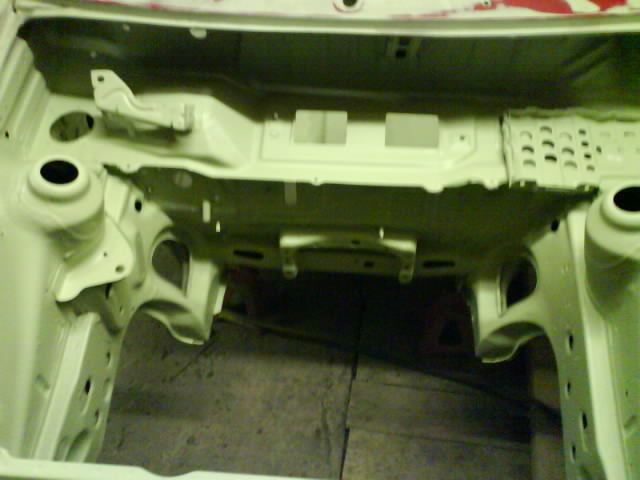
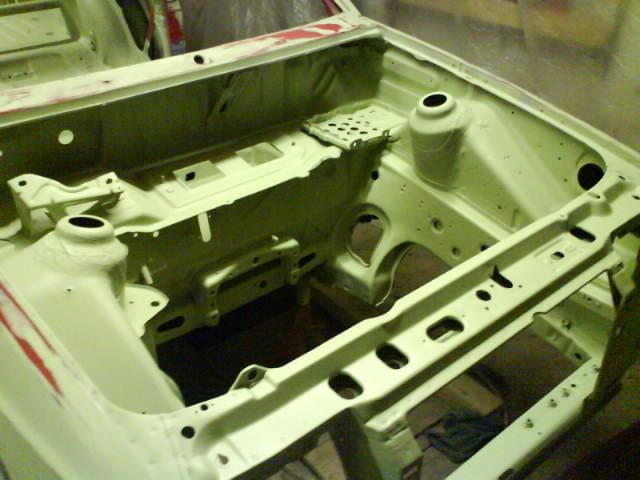
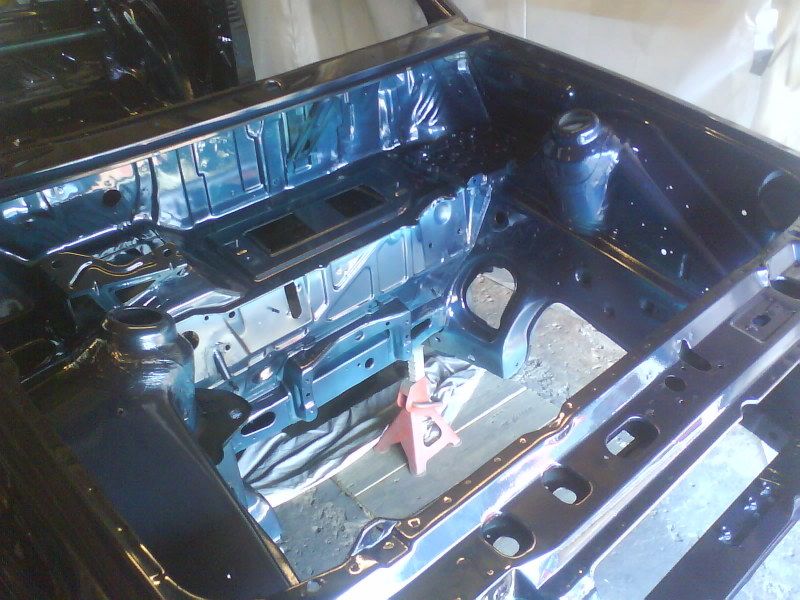
then went on to seam seal the entire car, inside and underside (underside done before the underseal applied), and engine bay

and then came more primer...
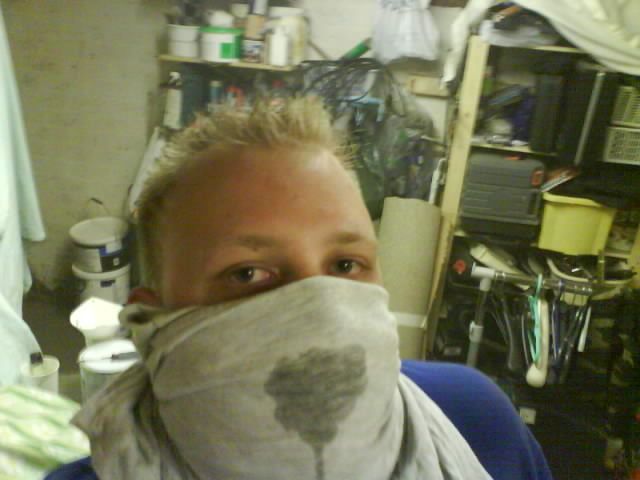
i didnt get a posh mask, so i tied a tshirt round my head, and then drank beer through it...
also got the bonnet, tailgate, and doors in primer, using a mates garage which i have subsequently taken over! lol
turns out this stuff doesnt come out too easy, unless u have dry ice which i cud not get, so i spent the best part of 3 complete days removing it and taking it back to bare metal, ready for primer
heres the pics...
then went on to seam seal the entire car, inside and underside (underside done before the underseal applied), and engine bay
and then came more primer...
i didnt get a posh mask, so i tied a tshirt round my head, and then drank beer through it...
also got the bonnet, tailgate, and doors in primer, using a mates garage which i have subsequently taken over! lol
10-08-2008, 07:08 PM
#19
Advanced PassionFord User
Thread Starter
iTrader: (1)
Join Date: Jan 2005
Location: Birmingham
Posts: 1,949
Likes: 0
Received 0 Likes
on
0 Posts
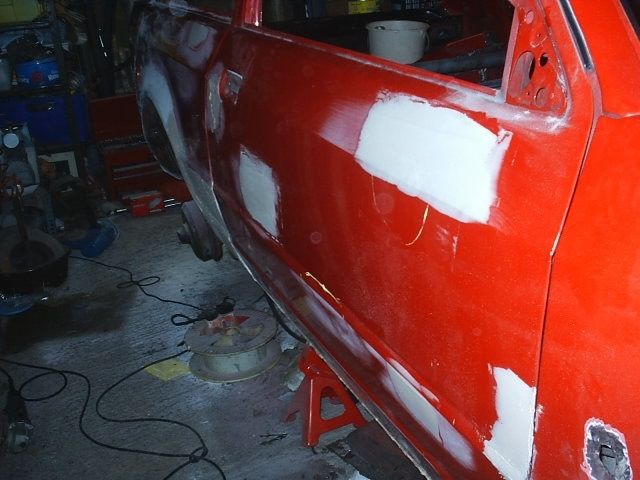
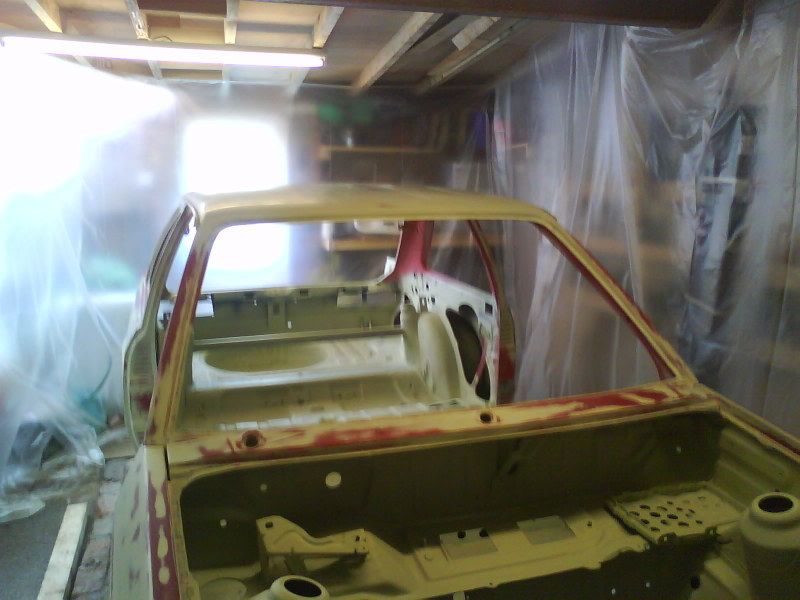
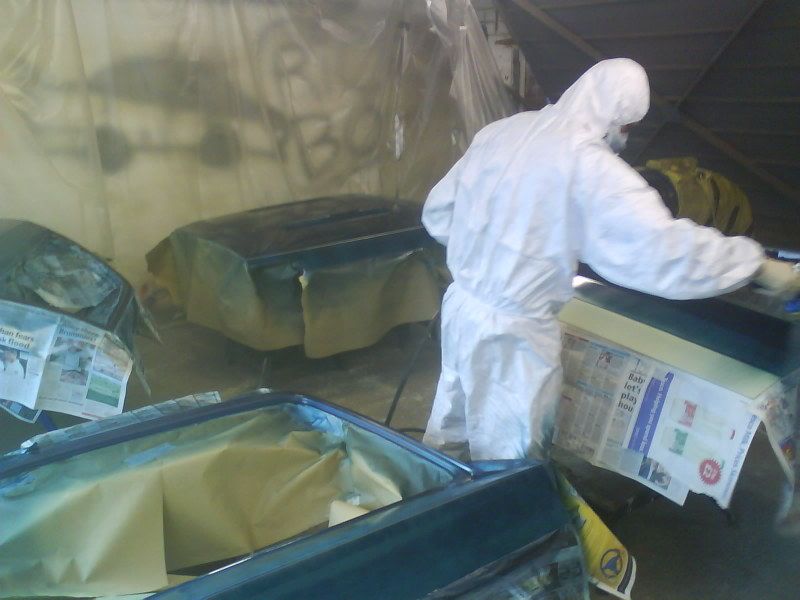
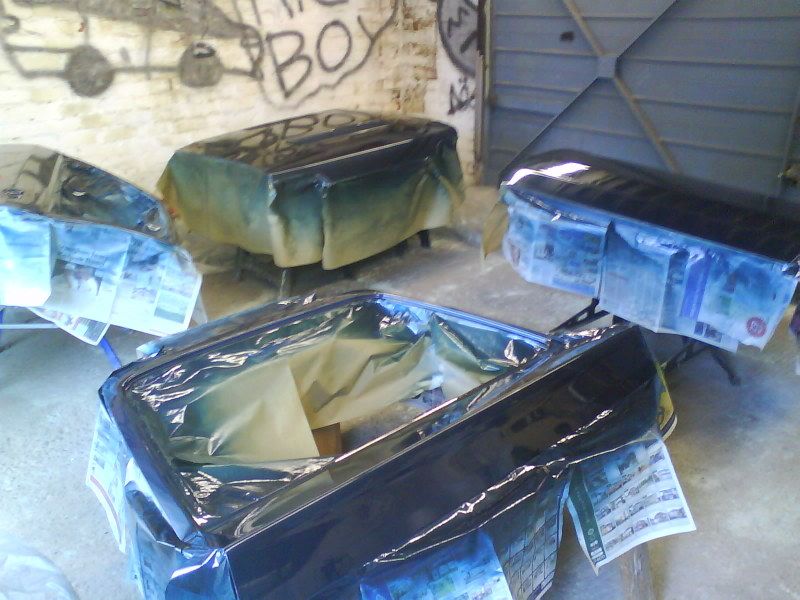
few pics of the final prep work, guide coat flatting, took it all down to 800 grit, pics of doors only, just to show the progress...
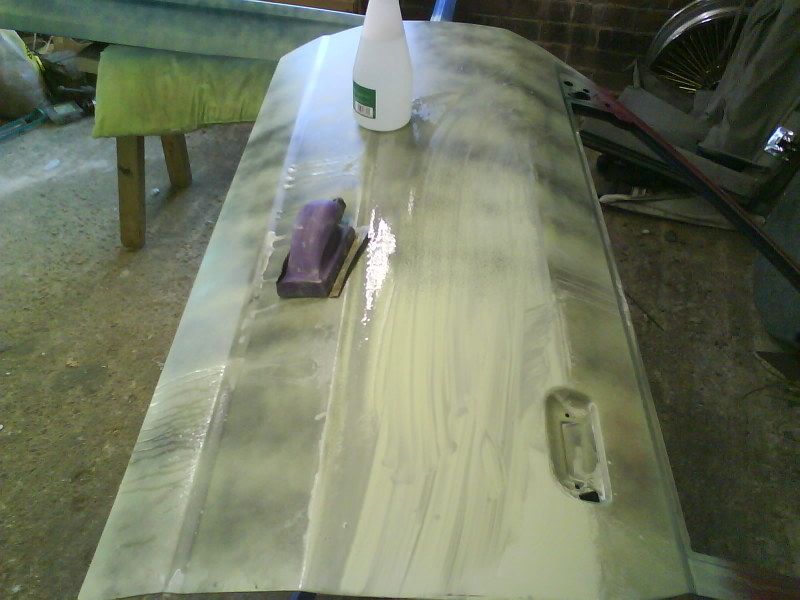
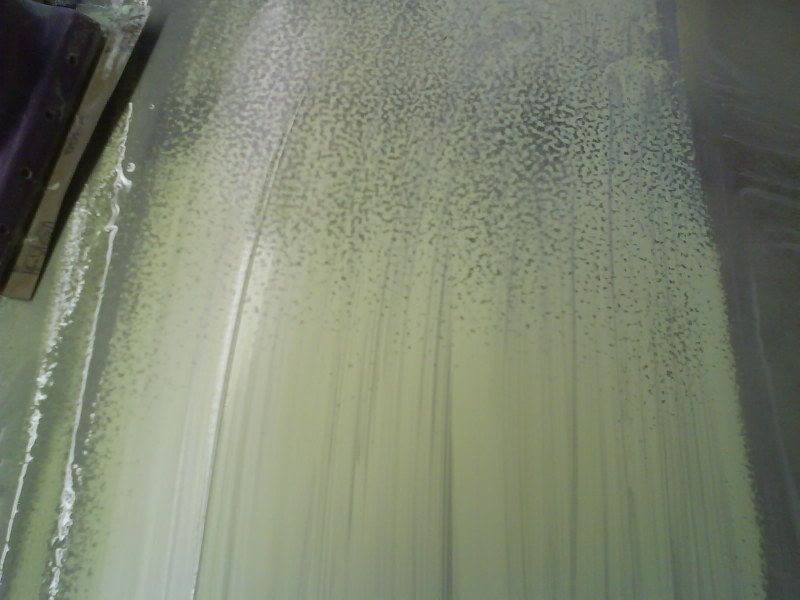
i should add the prep work that went into the shell was unreal, my bodywork guy saw my desire to have the best paintjob we could possibly achieve in a garage, and of course good prep is half the battle!!
then went shopping for the materials for the respray...
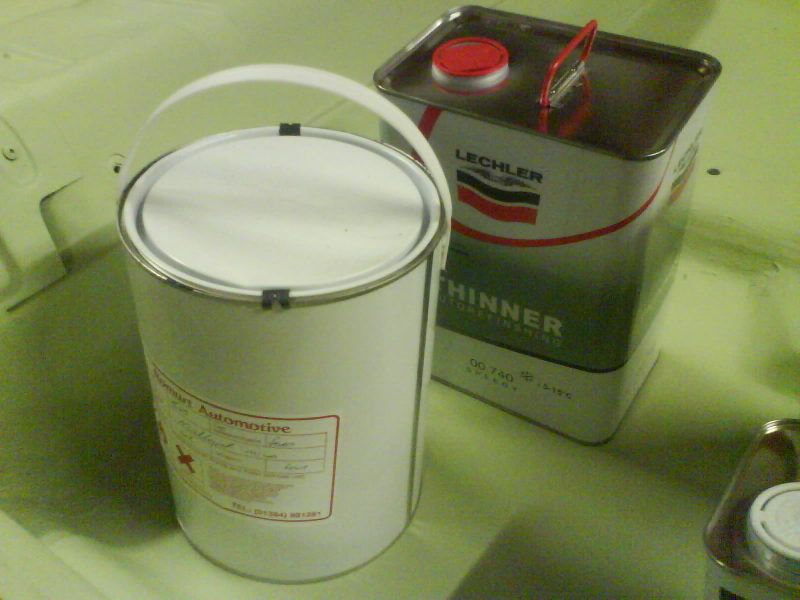
4litres of mallard green mica pearl, and high quality thinners
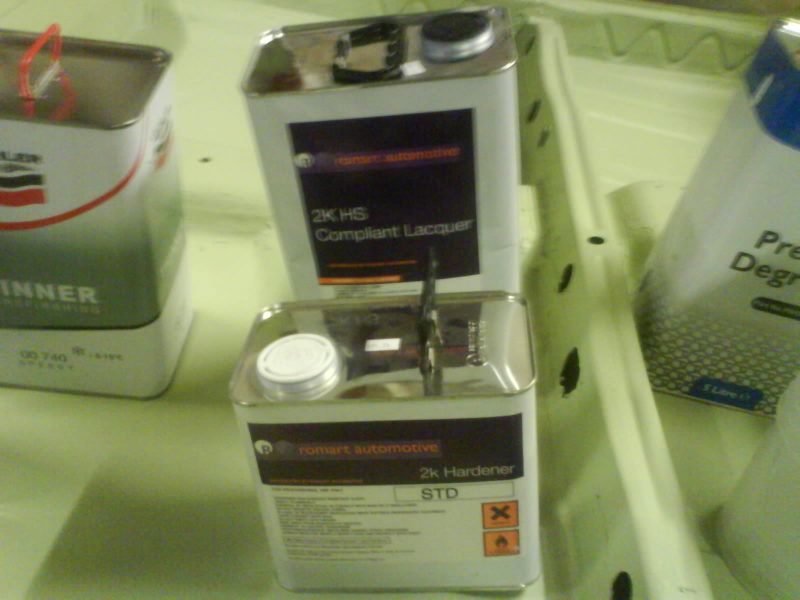
5 litres of laquer, the type my bodywork guy used to using and he swears by it, so good enough for me
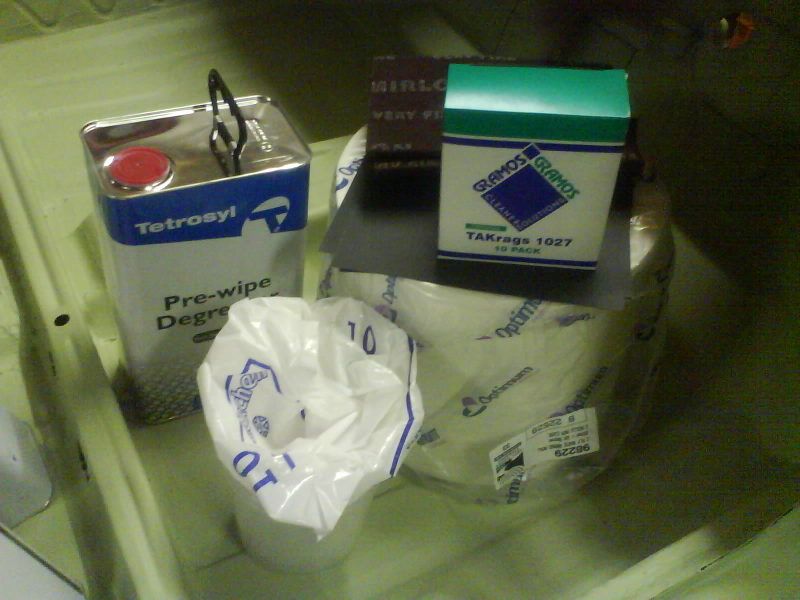
extras such as panel wipe, tac rags, filters etc etc
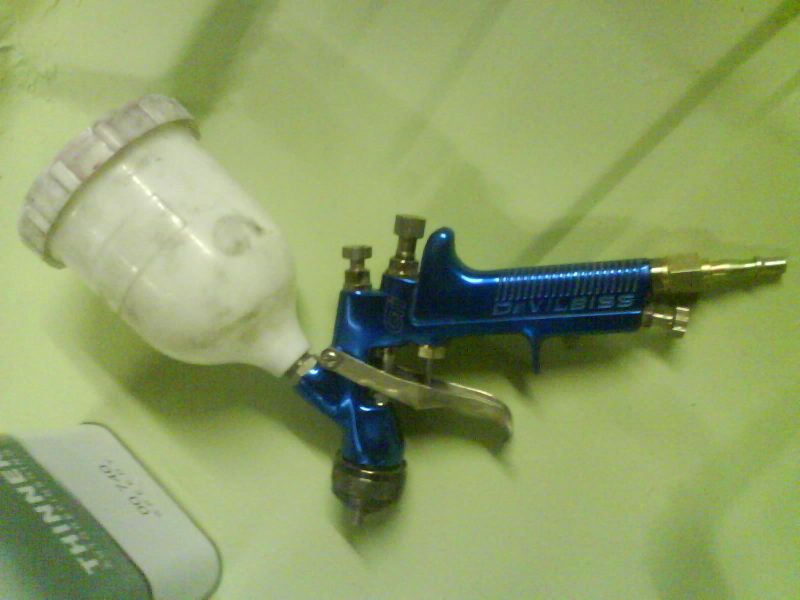
devilbiss gti gravity feed gun, figured a good respray needed a good gun
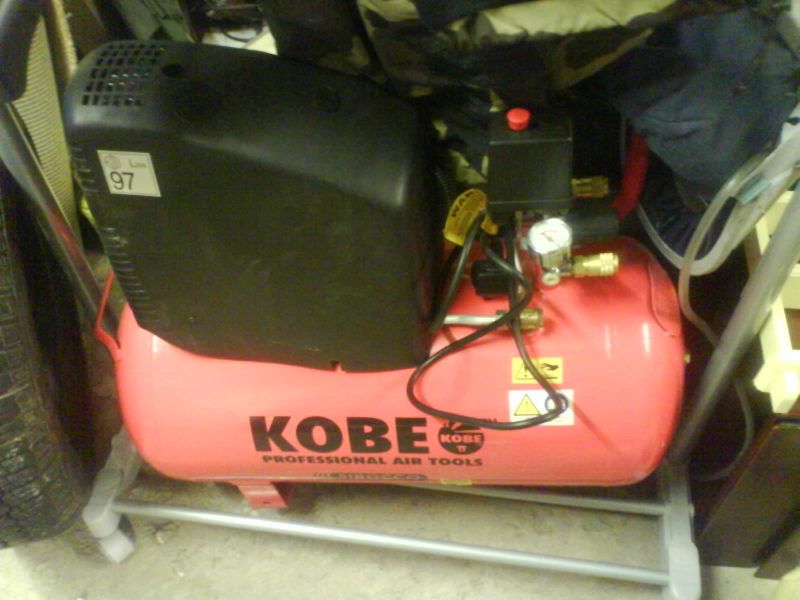
bought a second 50litre compressor, to link to the other identical compressor, which in turn gives out ample power to keep up even with a big gun on full flow
i should add the prep work that went into the shell was unreal, my bodywork guy saw my desire to have the best paintjob we could possibly achieve in a garage, and of course good prep is half the battle!!
then went shopping for the materials for the respray...
4litres of mallard green mica pearl, and high quality thinners
5 litres of laquer, the type my bodywork guy used to using and he swears by it, so good enough for me
extras such as panel wipe, tac rags, filters etc etc
devilbiss gti gravity feed gun, figured a good respray needed a good gun
bought a second 50litre compressor, to link to the other identical compressor, which in turn gives out ample power to keep up even with a big gun on full flow
10-08-2008, 07:14 PM
#20
Advanced PassionFord User
Thread Starter
iTrader: (1)
Join Date: Jan 2005
Location: Birmingham
Posts: 1,949
Likes: 0
Received 0 Likes
on
0 Posts
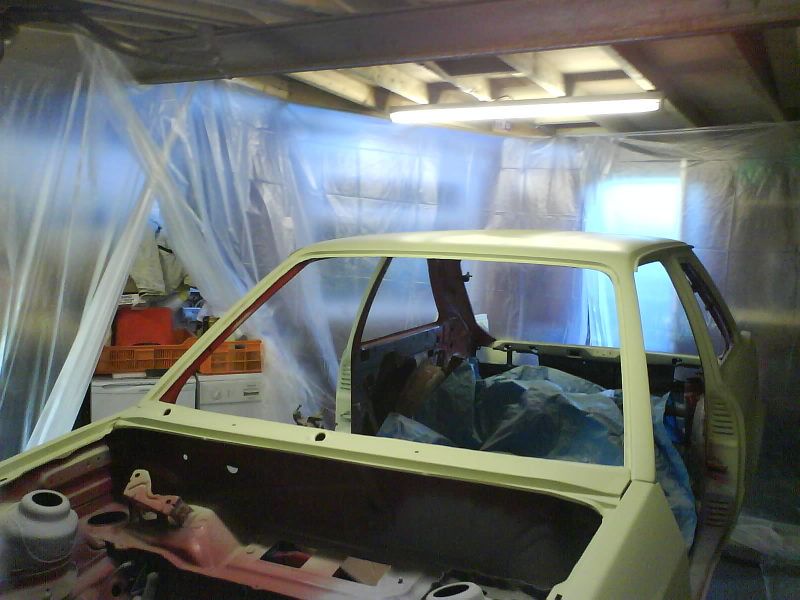
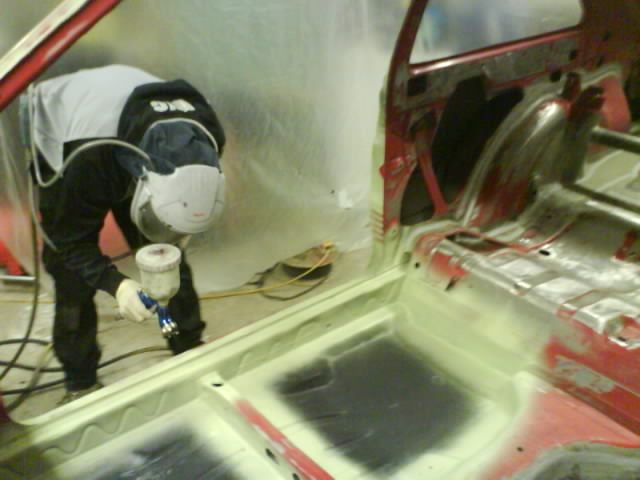
and so came the big day, RESPRAY TIME!!!!
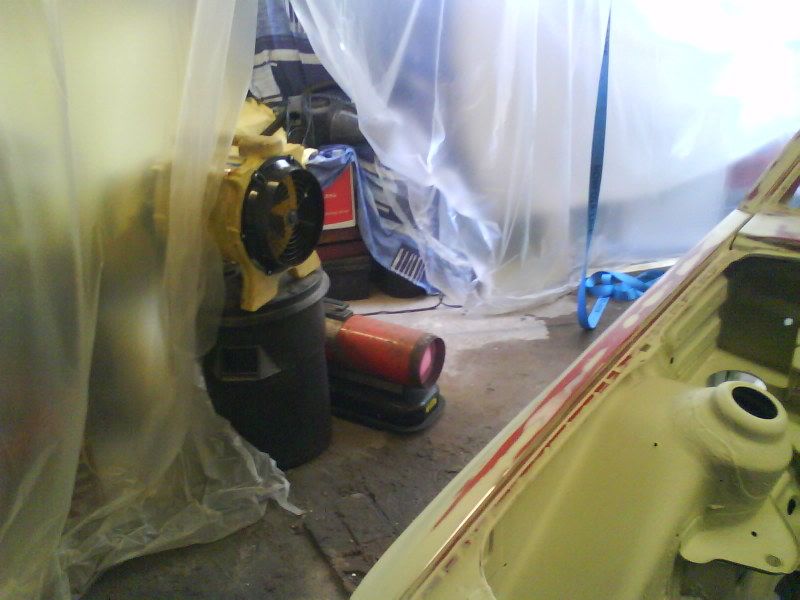
prepped the garage big time, full on clean and vacuum spotless, floor soaked, garage fully sheeted and sealed, had the space heater, and hired an industrial fume extractor to shift the overspray, everything i could do to get this as close to a spray booth/oven as possible really...
and then came the paint...
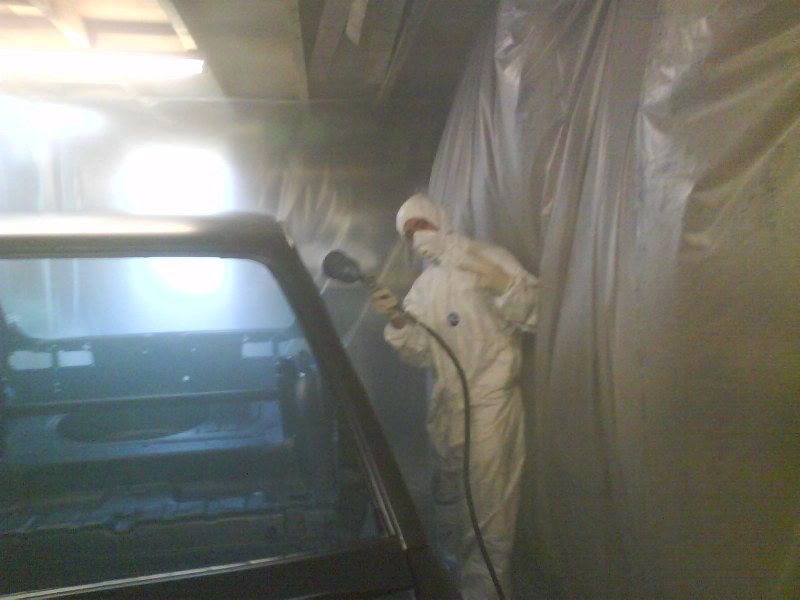

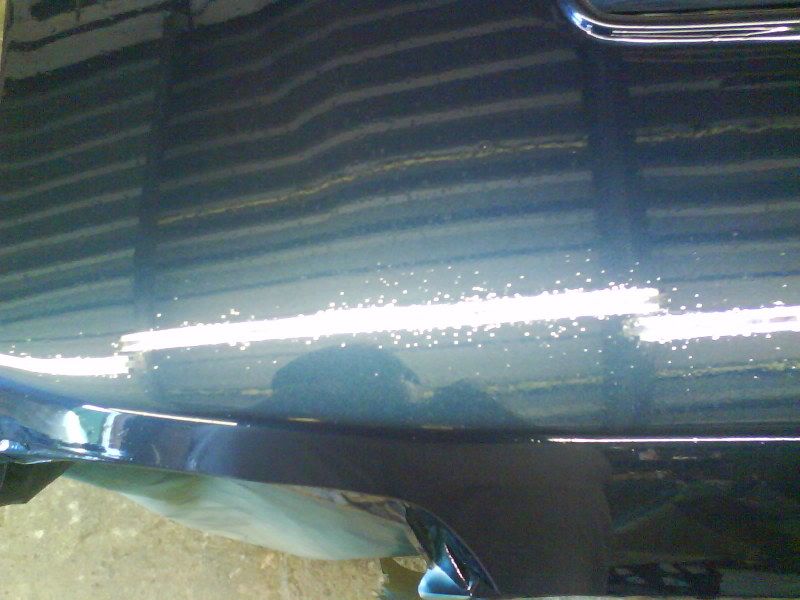
and the results...
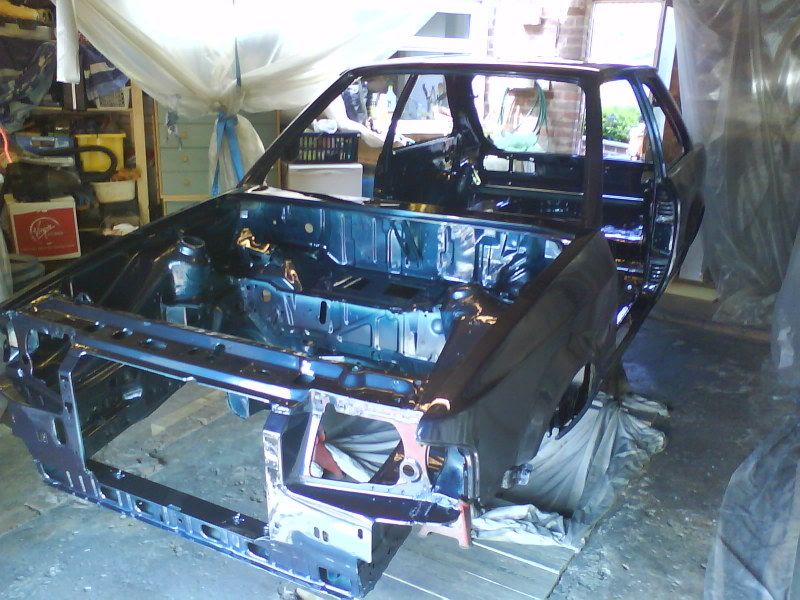
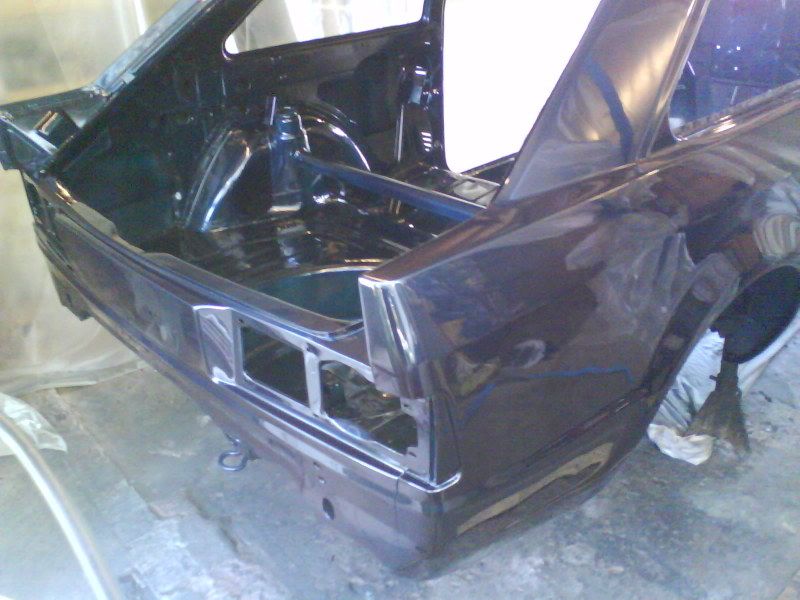
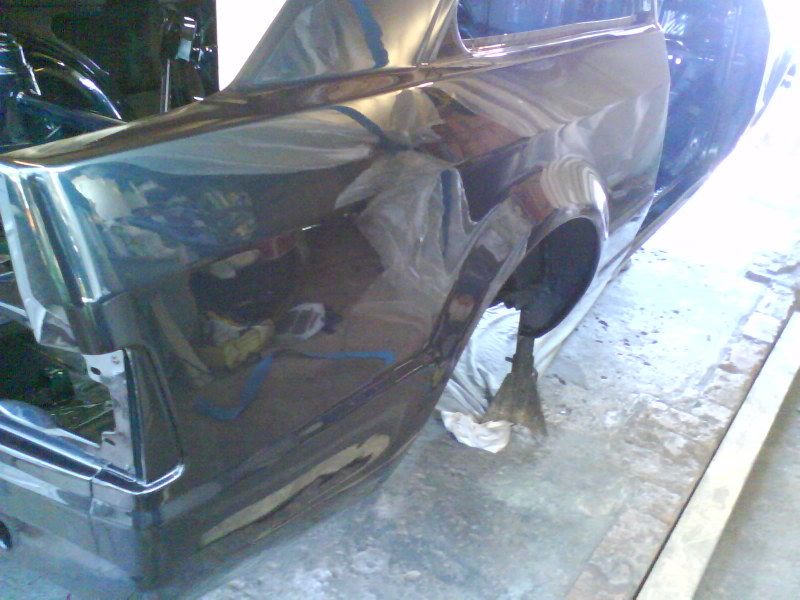
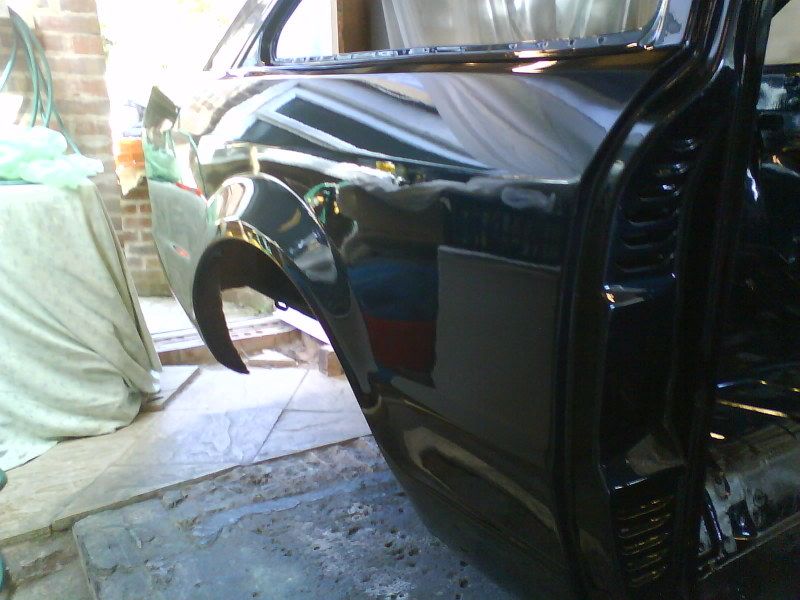
must add, this is the finish straight from the gun, NO CUTTING OR POLISHING
we were in shock as to how glass like it came out, n with absolutely minimal shit in it too, that little extractor did us proud!!!
this was the best day of the entire build, almost emotional, chuffed would be an understatement, especially consdering the budget, and the fact the only time this car left the garage was when i moved house
prepped the garage big time, full on clean and vacuum spotless, floor soaked, garage fully sheeted and sealed, had the space heater, and hired an industrial fume extractor to shift the overspray, everything i could do to get this as close to a spray booth/oven as possible really...
and then came the paint...
and the results...
must add, this is the finish straight from the gun, NO CUTTING OR POLISHING
we were in shock as to how glass like it came out, n with absolutely minimal shit in it too, that little extractor did us proud!!!
this was the best day of the entire build, almost emotional, chuffed would be an understatement, especially consdering the budget, and the fact the only time this car left the garage was when i moved house
10-08-2008, 07:19 PM
#21
Advanced PassionFord User
Thread Starter
iTrader: (1)
Join Date: Jan 2005
Location: Birmingham
Posts: 1,949
Likes: 0
Received 0 Likes
on
0 Posts
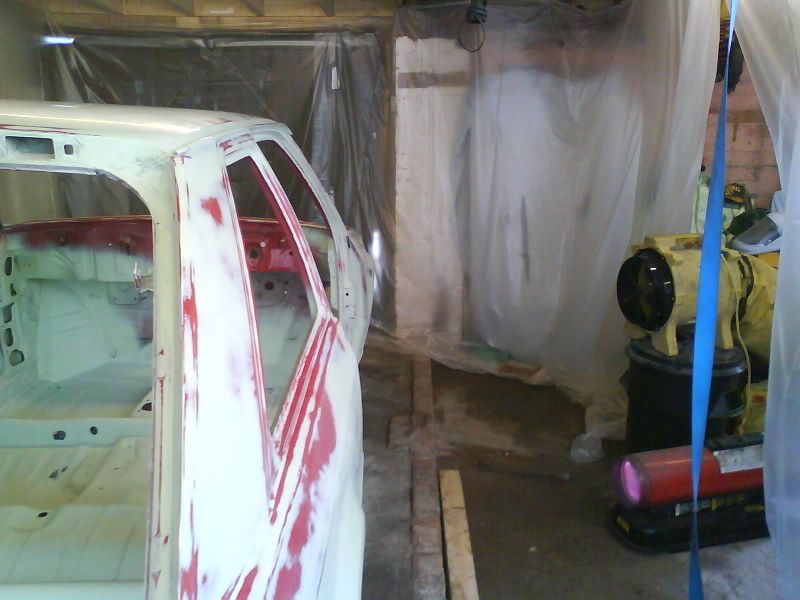
the respray didnt go all plain sailing though, we did suffer a small amount of reaction in the laquer
we are pretty sure the paint supplier must have sumhow got speedy hardener in a standard hardener tin, because the mixture was correct, yet this went off extremely fast, touch dry in half an hour, and solid within 24hours!! couldnt even get a thumb nail print into it the day after!!
heres the blistering caused...
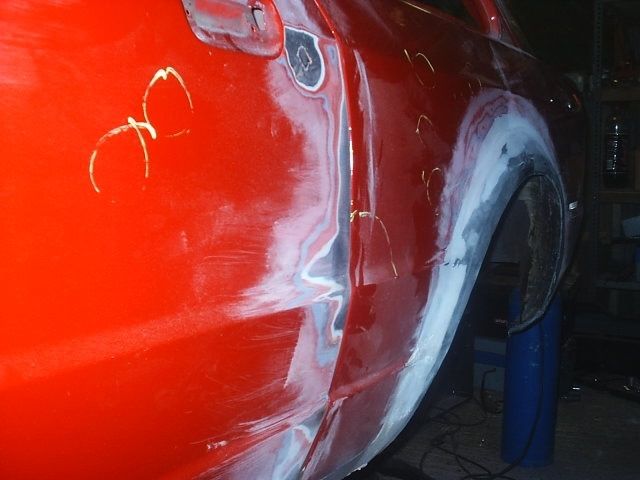
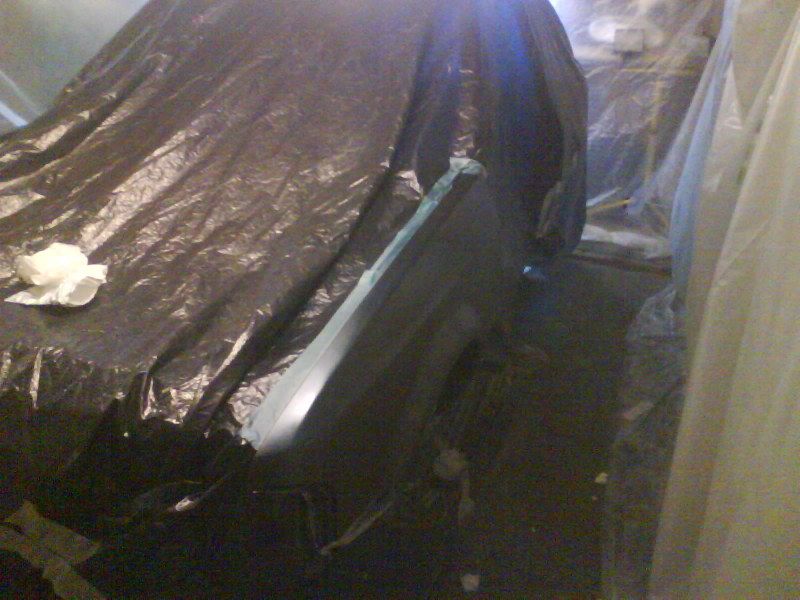
it took out the bonnet, and both front wings of the shell. the front wings have since been prepped and sprayed for a 2nd time...
and here is the paint lab used during spray time lol ....
we are pretty sure the paint supplier must have sumhow got speedy hardener in a standard hardener tin, because the mixture was correct, yet this went off extremely fast, touch dry in half an hour, and solid within 24hours!! couldnt even get a thumb nail print into it the day after!!
heres the blistering caused...
it took out the bonnet, and both front wings of the shell. the front wings have since been prepped and sprayed for a 2nd time...
and here is the paint lab used during spray time lol ....
10-08-2008, 07:37 PM
#23
Advanced PassionFord User
Thread Starter
iTrader: (1)
Join Date: Jan 2005
Location: Birmingham
Posts: 1,949
Likes: 0
Received 0 Likes
on
0 Posts
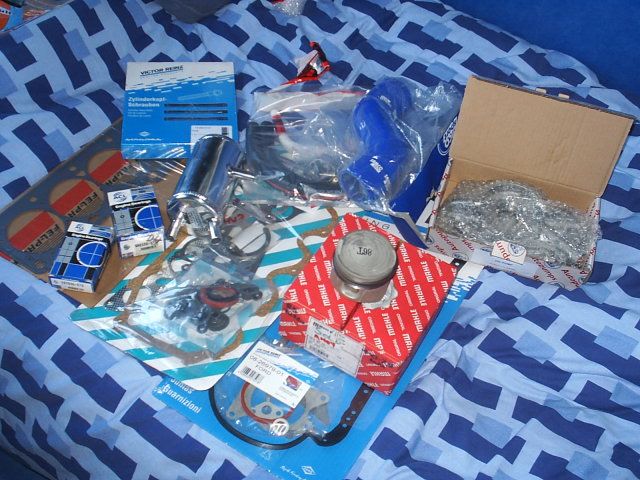
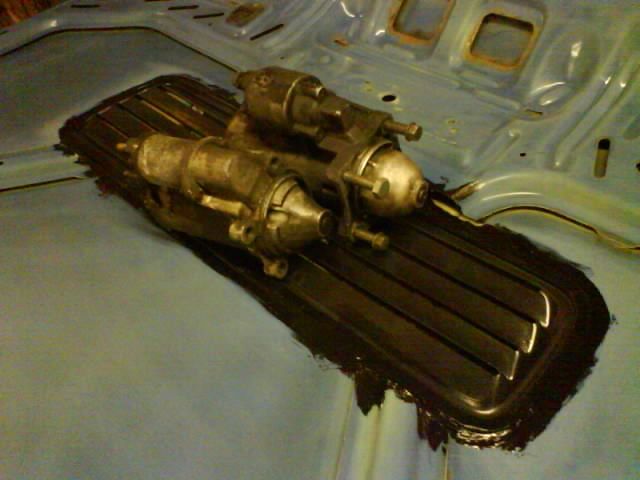
other random bits purcahsed along the way, and cleaned and painted as its gone on...
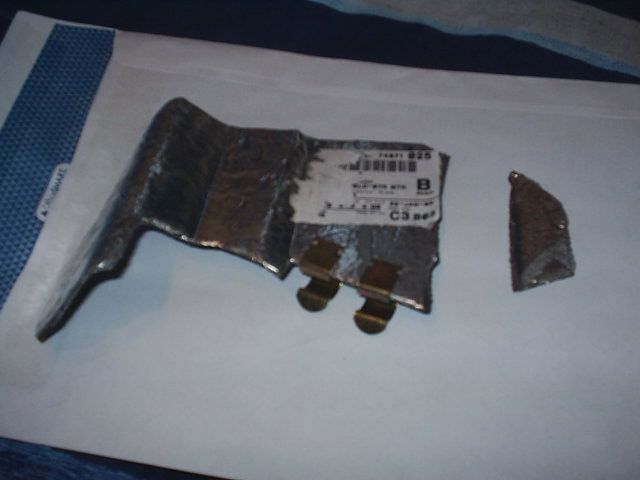
starter heat shield (damaged via post office!!)
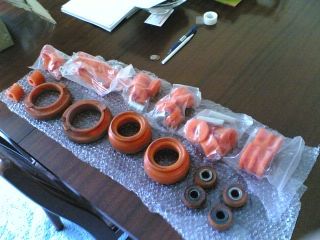
full polybush kit
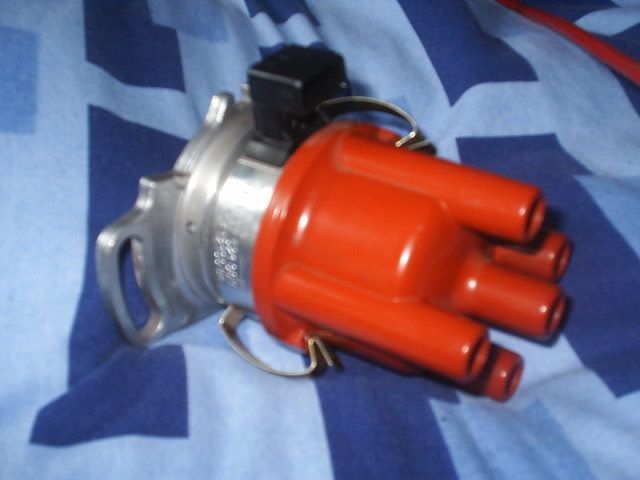
brand new distributor
new front calipers, to be used with hi spec spacers and 2wd cossie discs
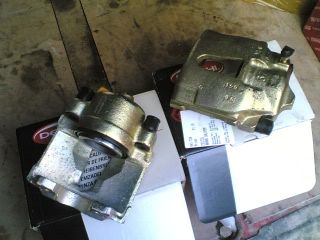
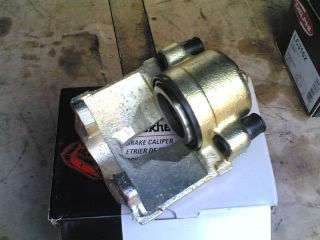
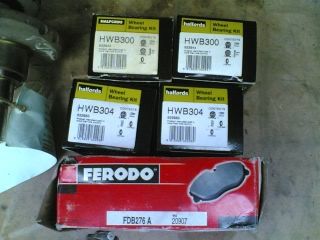
new front pads and 4 new wheel bearings
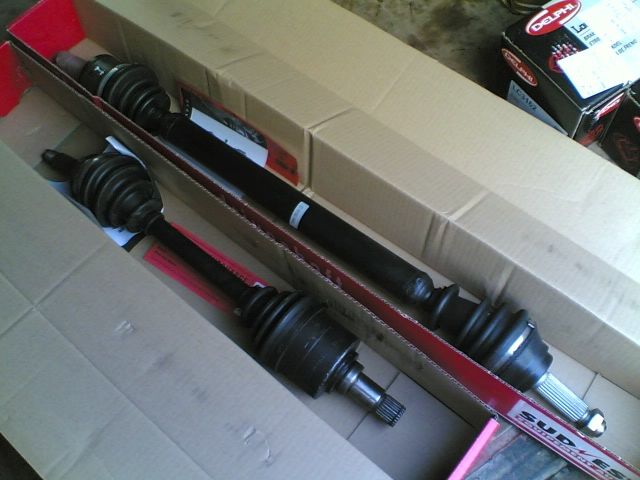
new pair of driveshafts, non RS items so no teeth for abs belts on inner cv's
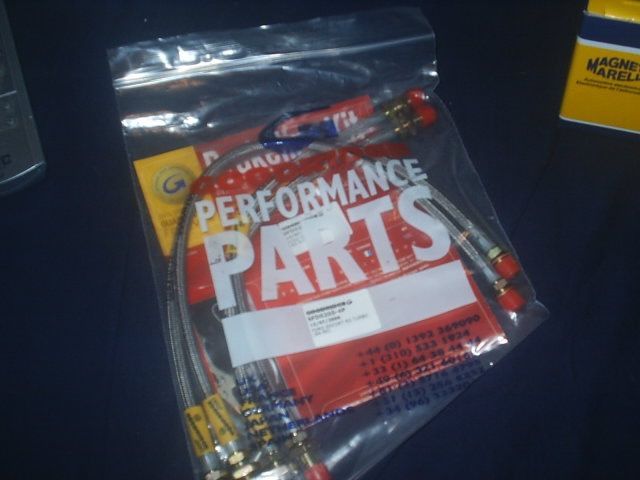
braided brake hoses
new smoked rear lights

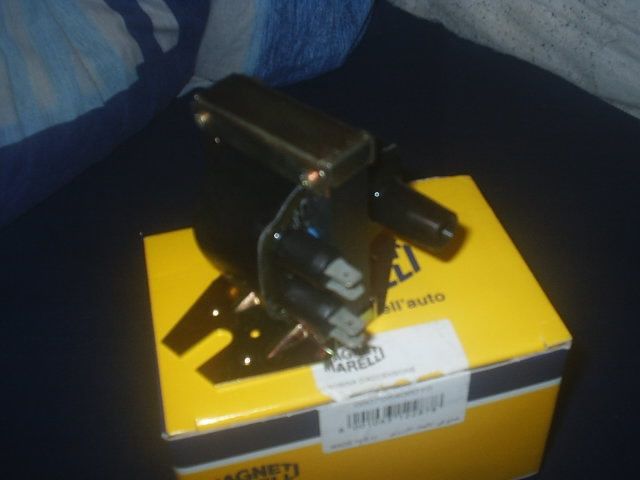
group A coil
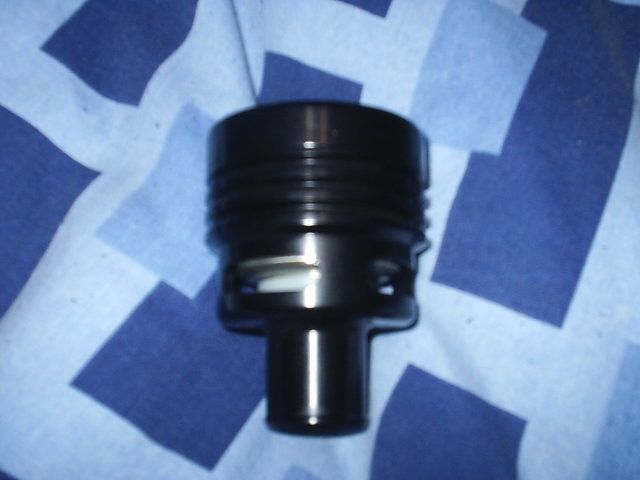
amal valve, cleaned n painted
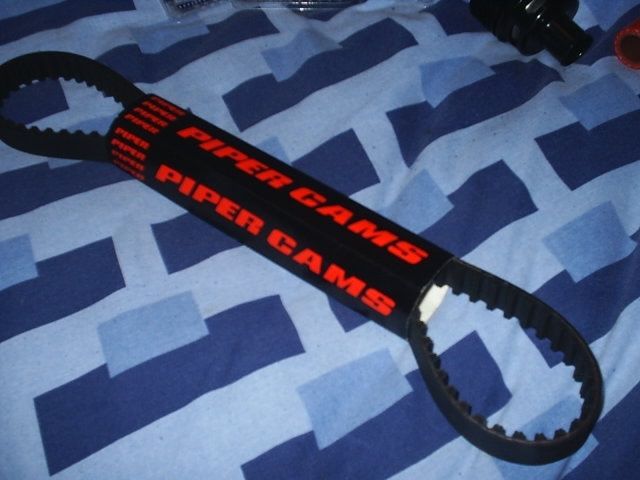
piper cambelt
collins dump valve
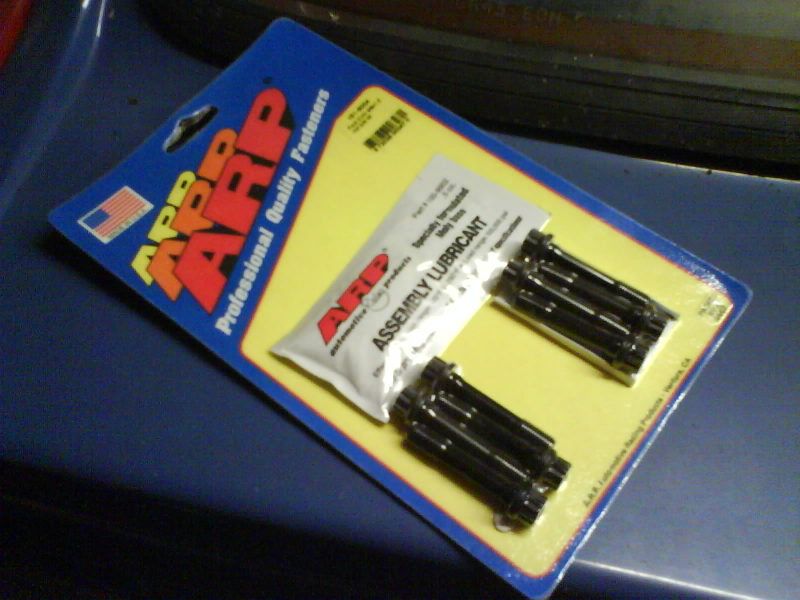
ARP rod bolts
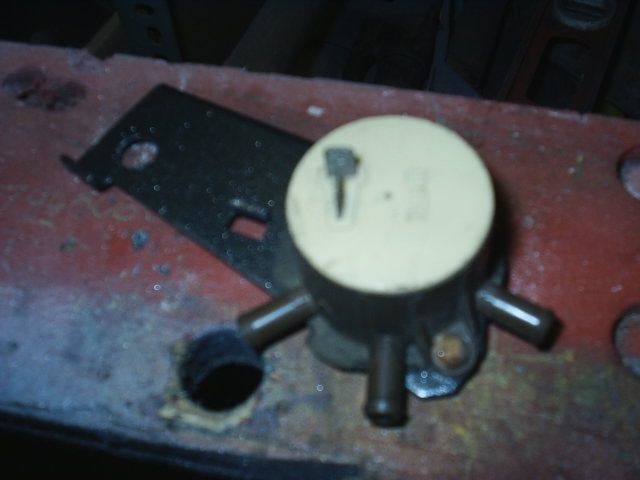
metering unit, cleaned, stripped, and painted
fuel filler cap

loads of goodridge braided brake hose
mint rear quarter cards
standard airbox with front cut off mod
starter heat shield (damaged via post office!!)
full polybush kit
brand new distributor
new front calipers, to be used with hi spec spacers and 2wd cossie discs
new front pads and 4 new wheel bearings
new pair of driveshafts, non RS items so no teeth for abs belts on inner cv's
braided brake hoses
new smoked rear lights
group A coil
amal valve, cleaned n painted
piper cambelt
collins dump valve
ARP rod bolts
metering unit, cleaned, stripped, and painted
fuel filler cap
loads of goodridge braided brake hose
mint rear quarter cards
standard airbox with front cut off mod
10-08-2008, 07:38 PM
#24
Advanced PassionFord User
Thread Starter
iTrader: (1)
Join Date: Jan 2005
Location: Birmingham
Posts: 1,949
Likes: 0
Received 0 Likes
on
0 Posts
im in great barr mate, dont exactly know when it will b out on the road, either late this year or early next year, just to get it shaken down n set up ready for the spring n show season 2009
10-08-2008, 07:41 PM
#25
Advanced PassionFord User
Thread Starter
iTrader: (1)
Join Date: Jan 2005
Location: Birmingham
Posts: 1,949
Likes: 0
Received 0 Likes
on
0 Posts
the floor pans all got a dose of seam welding though for strength, but other than that, just as it was
10-08-2008, 07:44 PM
#26
PassionFord Post Whore!!
Nice job done. Keep up the good work 
10-08-2008, 07:46 PM
#27
Advanced PassionFord User
Thread Starter
iTrader: (1)
Join Date: Jan 2005
Location: Birmingham
Posts: 1,949
Likes: 0
Received 0 Likes
on
0 Posts
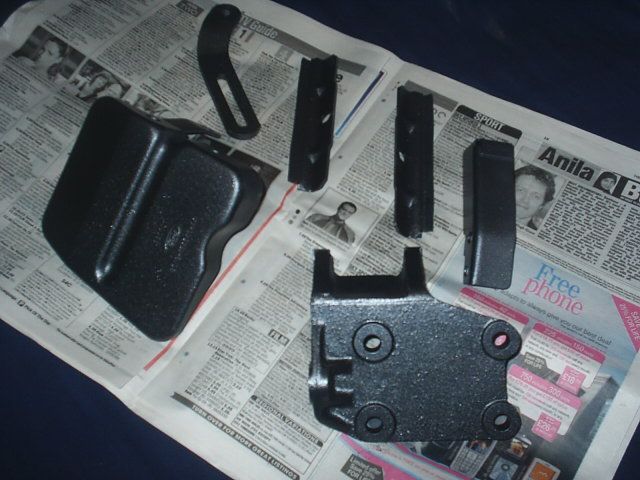
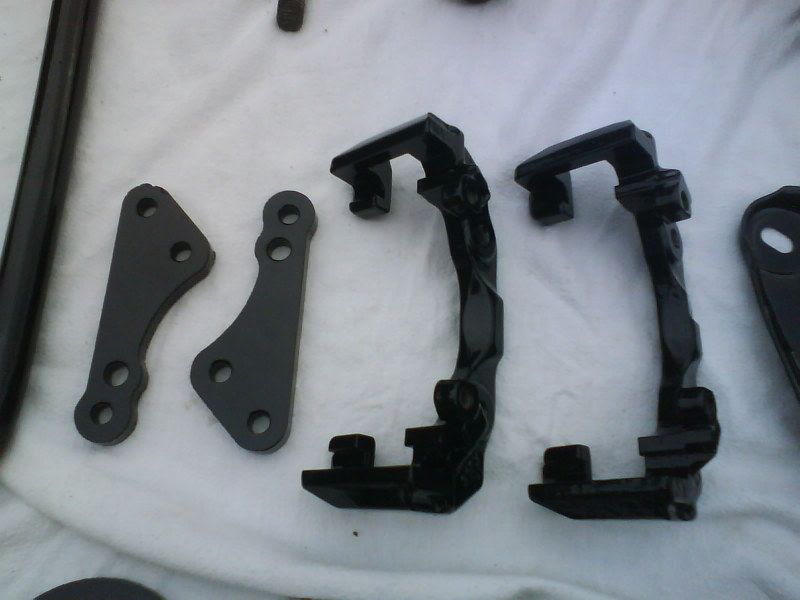
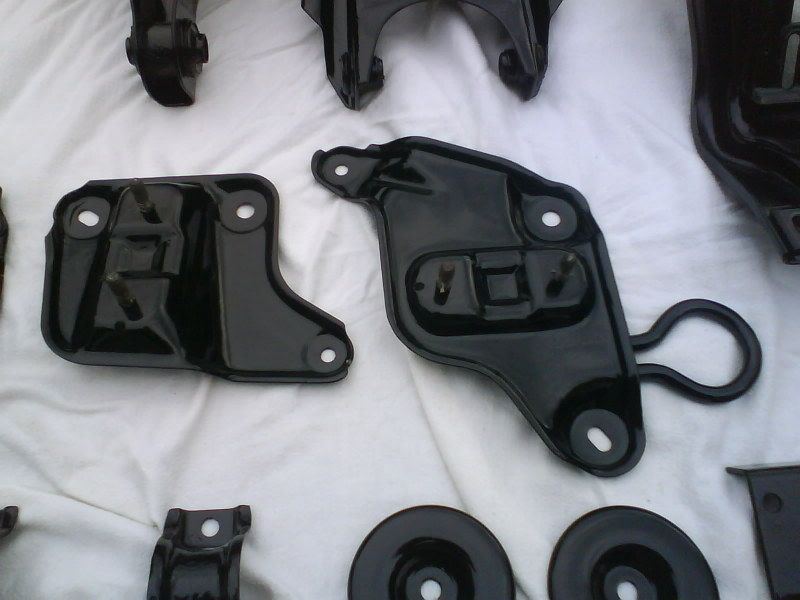
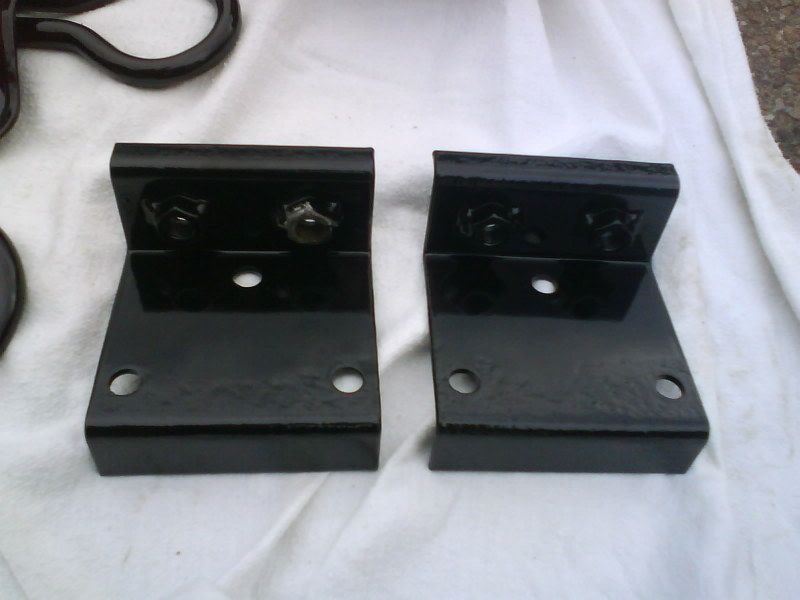
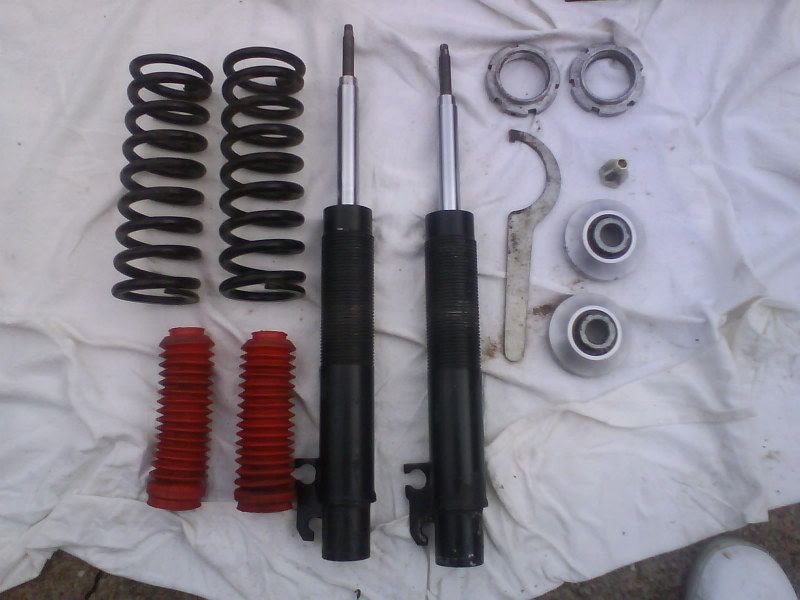
suspension parts etc powdercoated in gloss black...
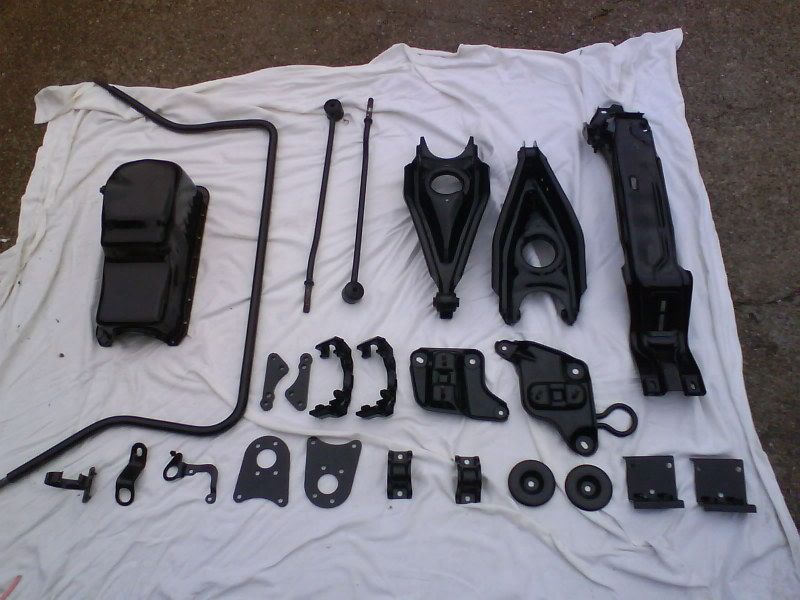
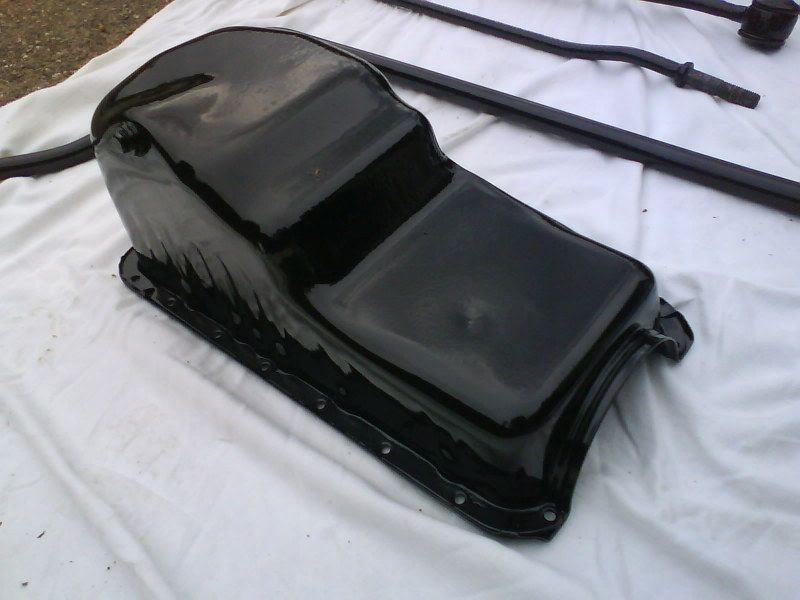
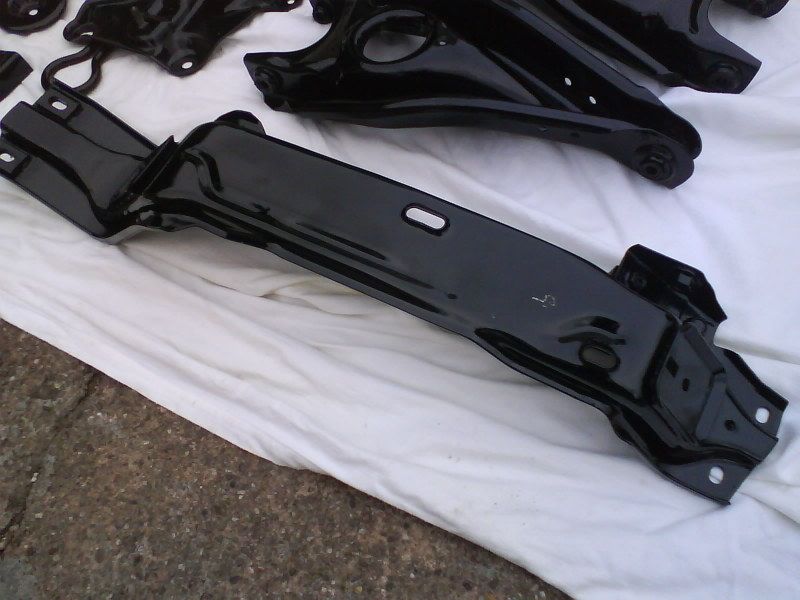
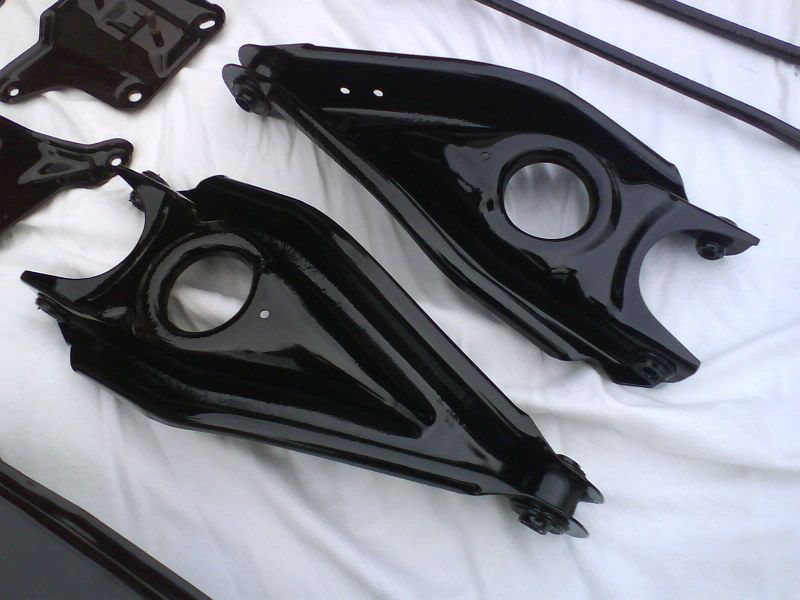
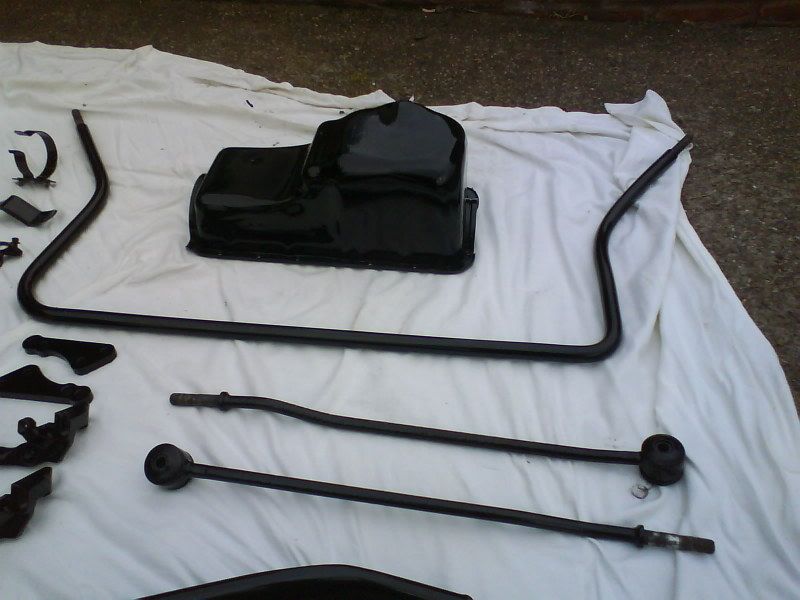
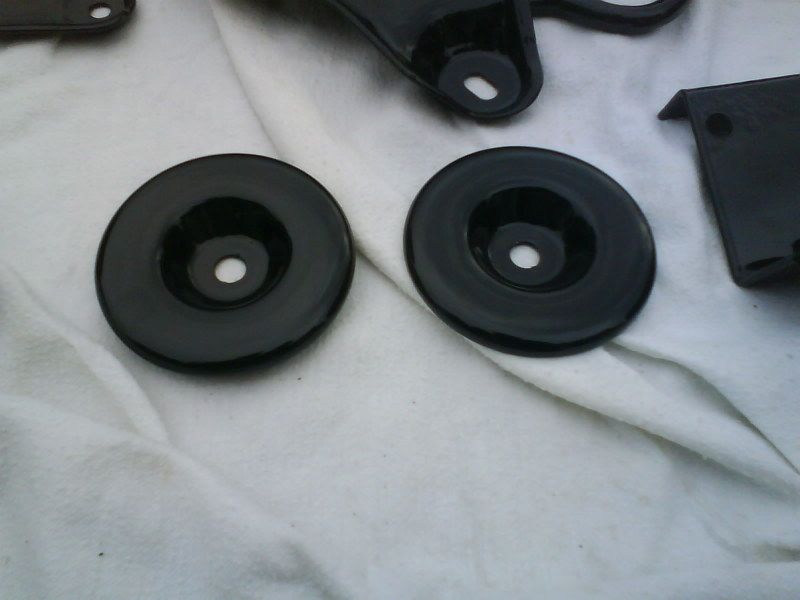

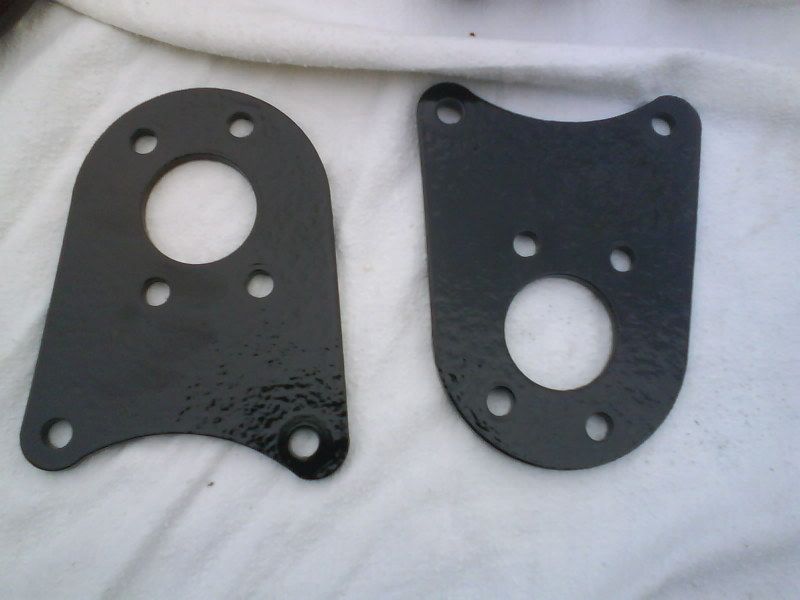

also got hold of a pair of front coilovers for a bargain price, so these are stripped down, ready to be repainted, along with my koni adjutable rear shocks, and the rear lowering springs
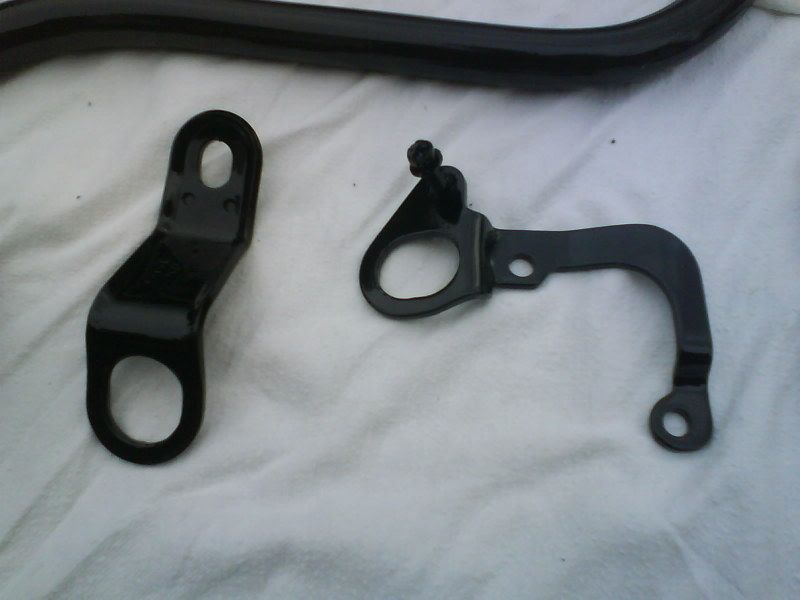
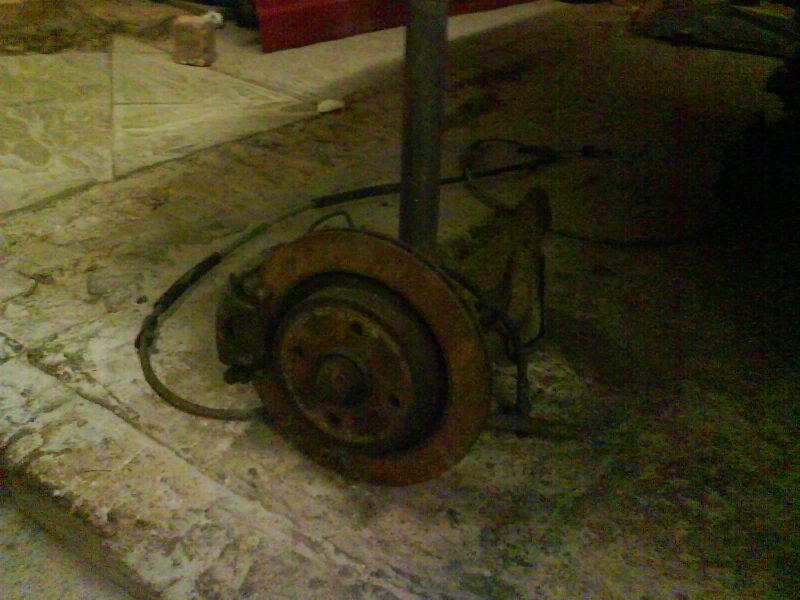
got hold of a rear disc conversion using 4x4 cossie discs and calipers...
and managed to track down a good RSturbo LSD box, which im having rebuilt as a matter of course...
also got hold of a pair of front coilovers for a bargain price, so these are stripped down, ready to be repainted, along with my koni adjutable rear shocks, and the rear lowering springs
got hold of a rear disc conversion using 4x4 cossie discs and calipers...
and managed to track down a good RSturbo LSD box, which im having rebuilt as a matter of course...
Last edited by RSandy; 10-08-2008 at 07:49 PM.

 10-08-2008, 08:07 PM
#31
Advanced PassionFord User
Thread Starter
iTrader: (1)
Join Date: Jan 2005
Location: Birmingham
Posts: 1,949
Likes: 0
Received 0 Likes
on
0 Posts
and finally the interior
it used to look like this..
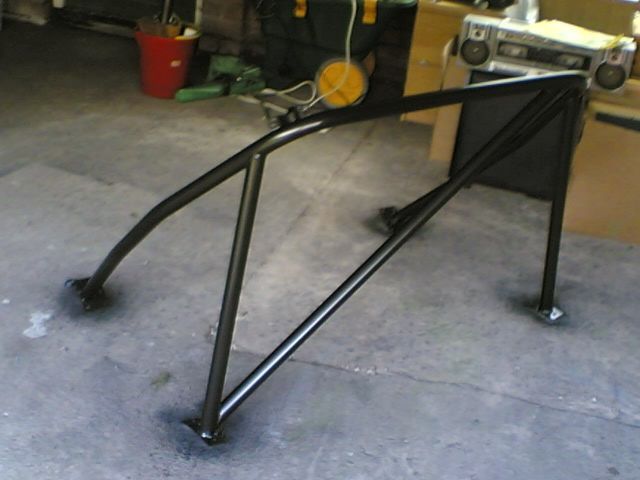
but time took its toll, and my seats became worn n ripped, the finish on the cgae was substandard, and generally the inside needed a makeover
firstly, i stripped the seats down, sourced new covers from sparco direct (at great cost sadly), then went about recovering them. changed to black covers to suit the new colour of the car...
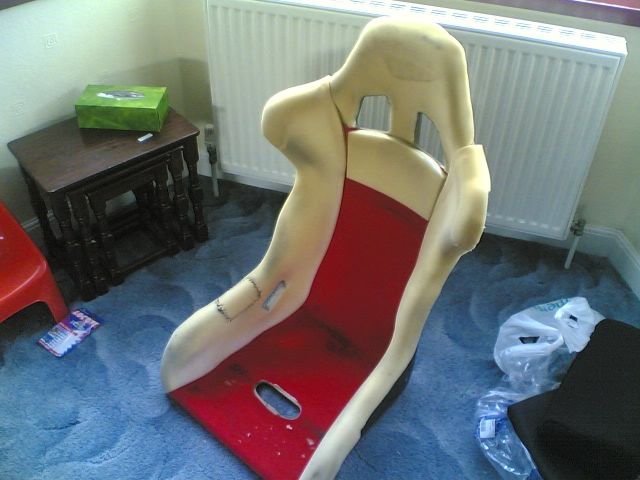
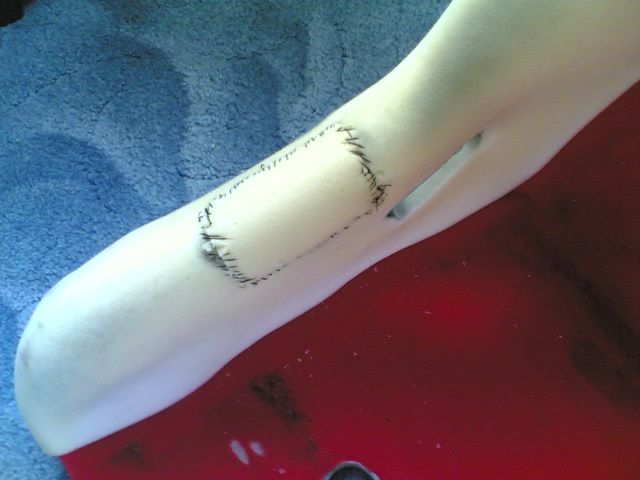

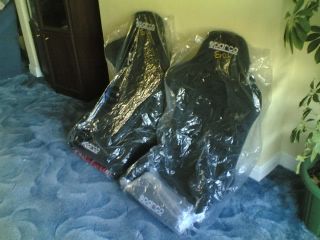
the seats were packed away n stored safely. the seats are sparco evo 2 fibreglass shell jobbies, very comfy, none of this metal frame covered in thin foam bollocks!! lol
gave the cage a prep and paint in graphite grey to match the wheels etc
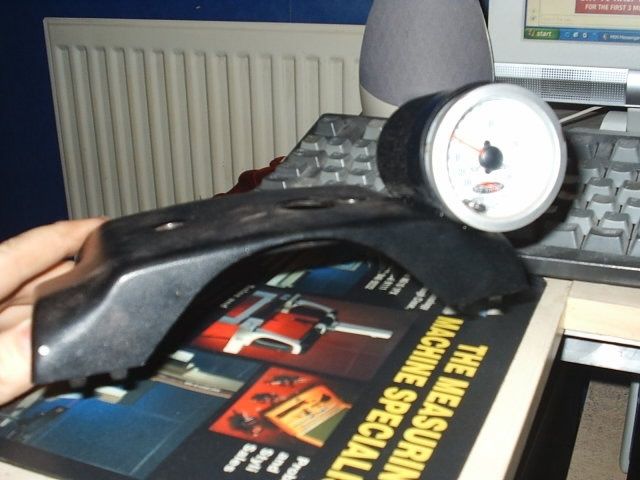
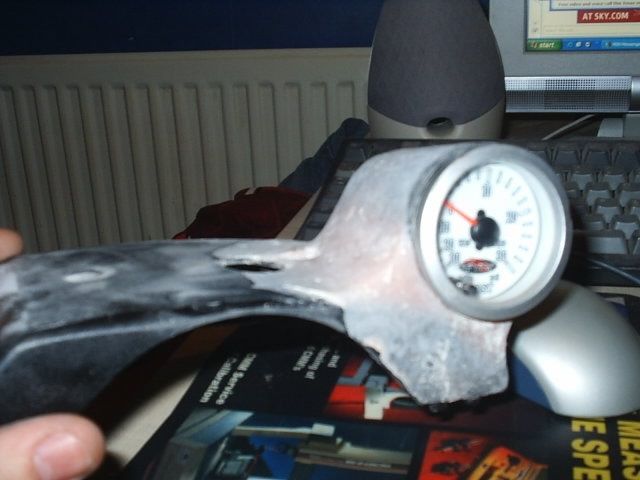
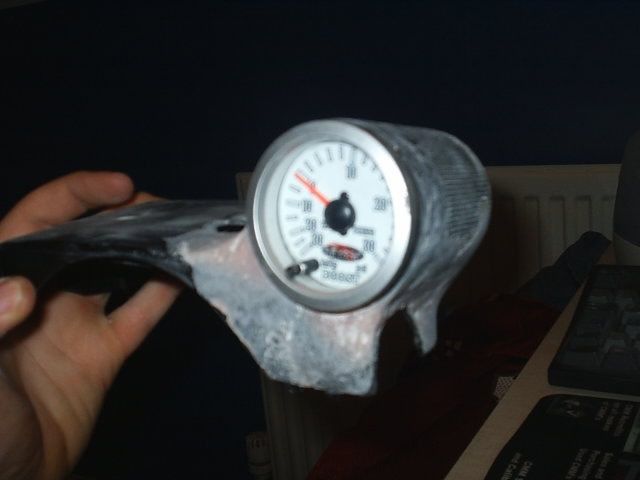
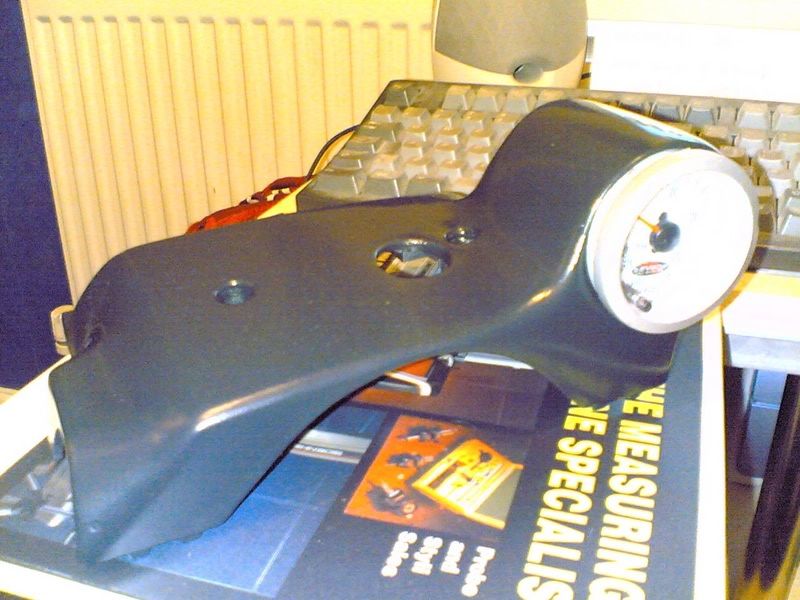
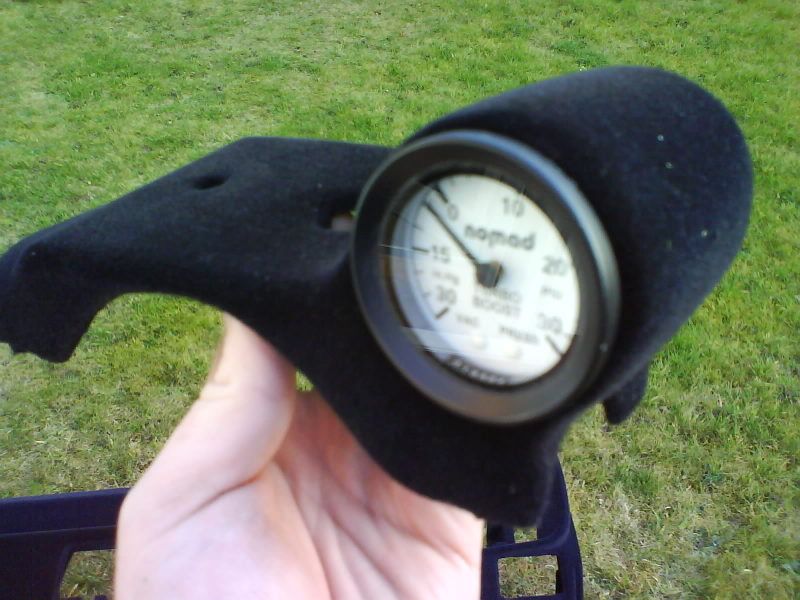
made myself a 'twins' spec gauge holder...

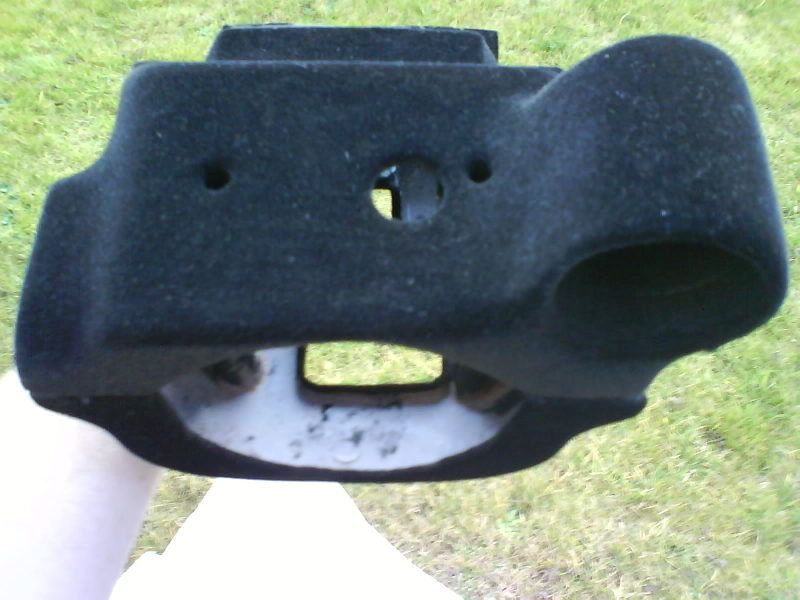
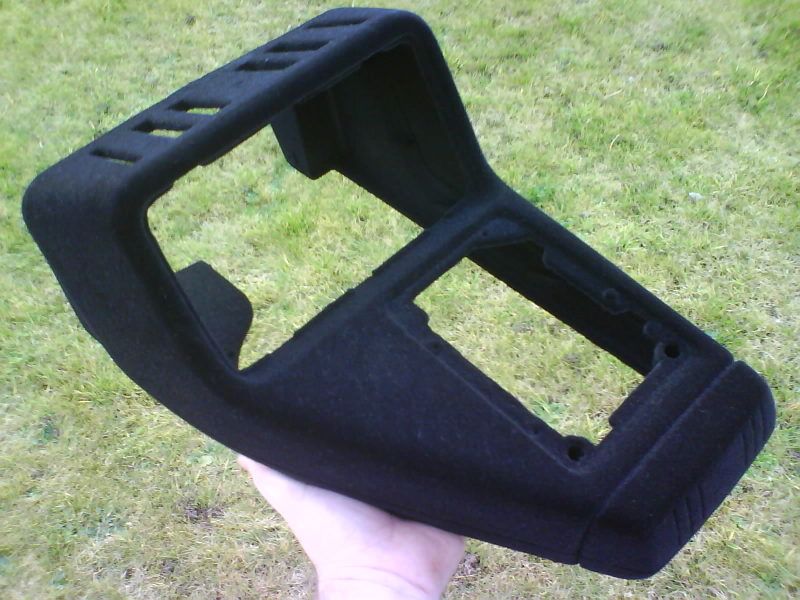
then came the fun part, the dashboard
originally i resprayed it in 2 tone black and dark grey, which looked nice, but soon i grew tired of it...
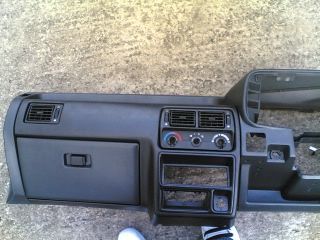
so then i noticed flocking was becoming more easily available, so went down this route. now a lot of people may have already read my horror story of this whole saga, so i wont go into too much detail
heres the pics of the 1st attempt ala suffolk flocking services...
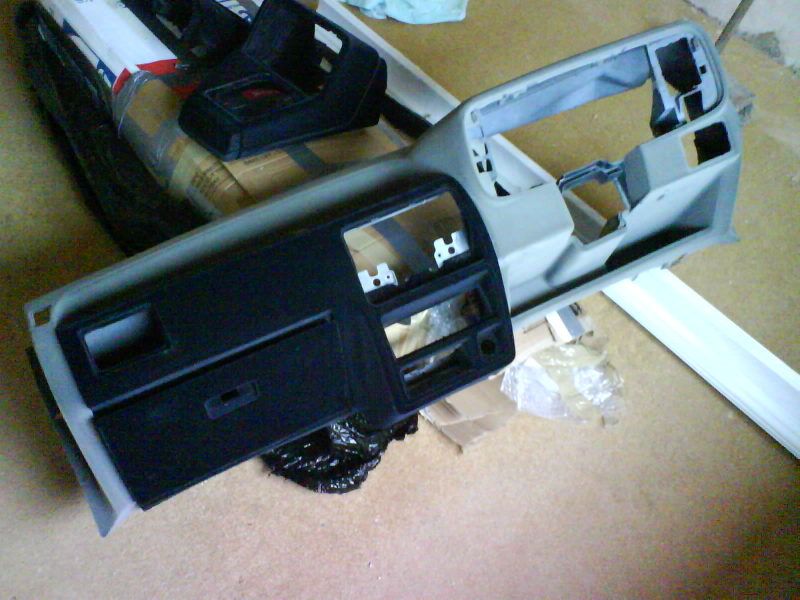
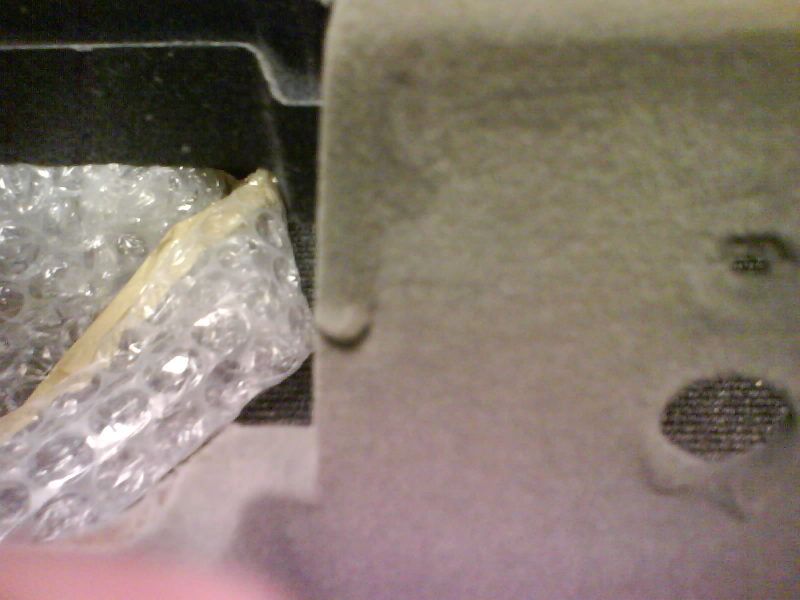

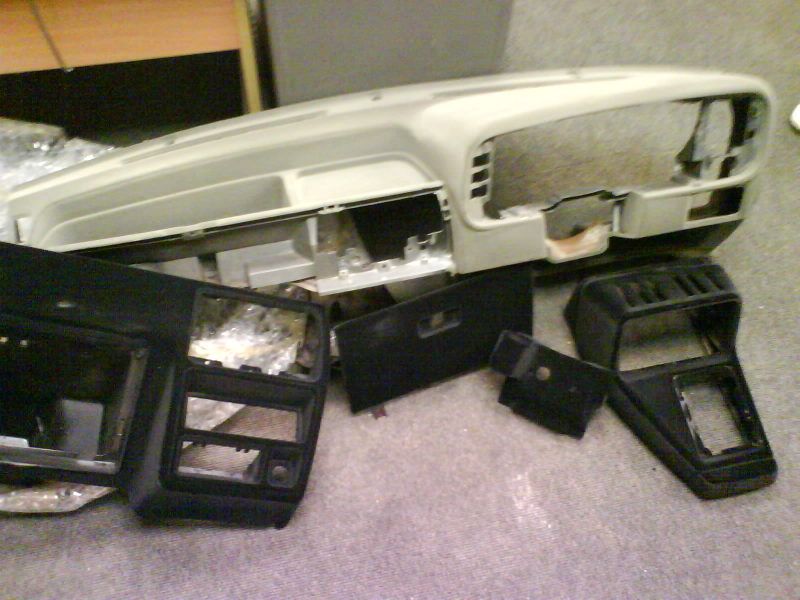
bearing in mind this was supposed to be dark grey and black 2 tone, it wasnt exactly up to scratch, not just in colour but in finish
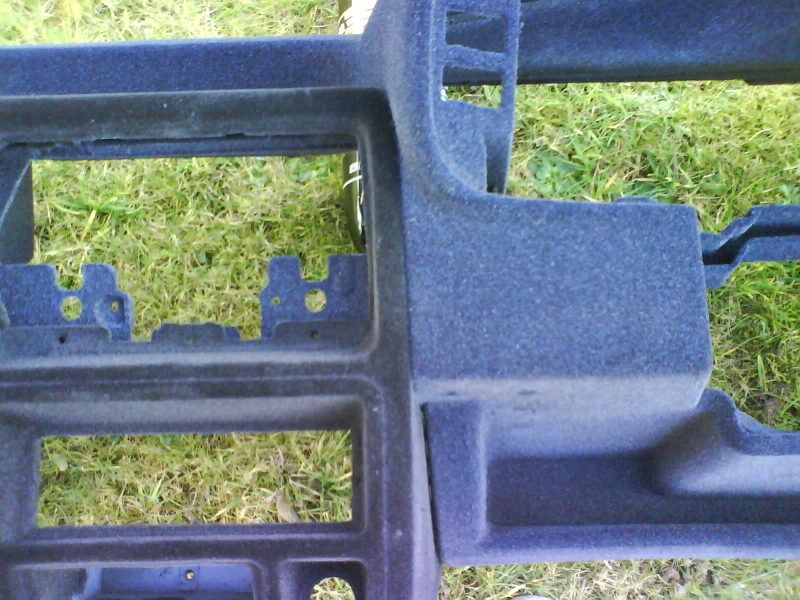
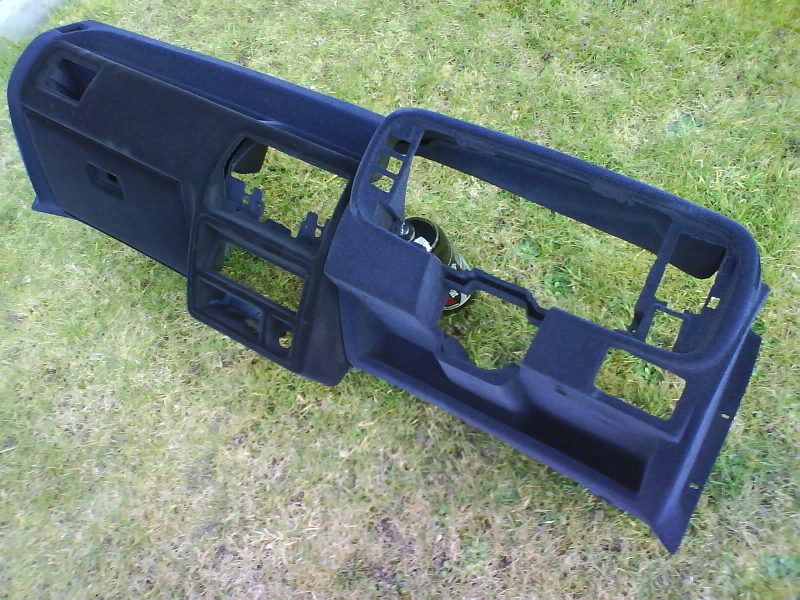
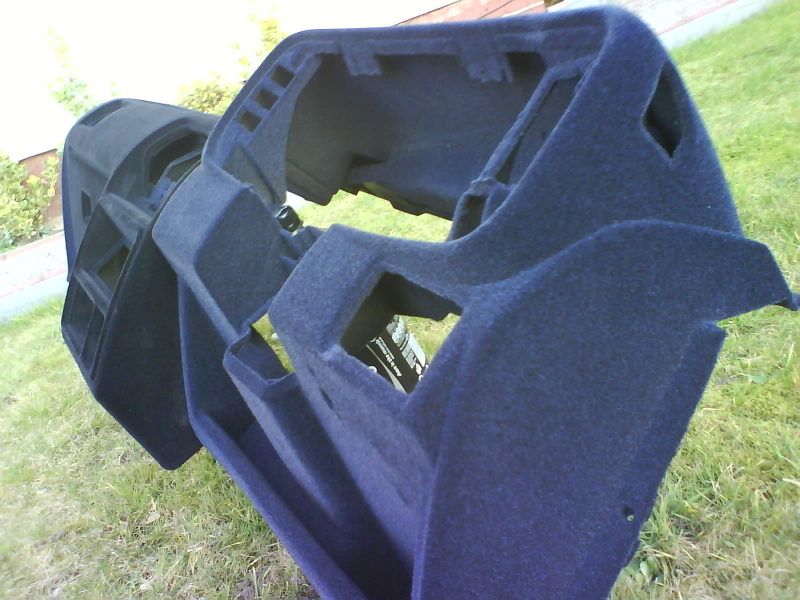
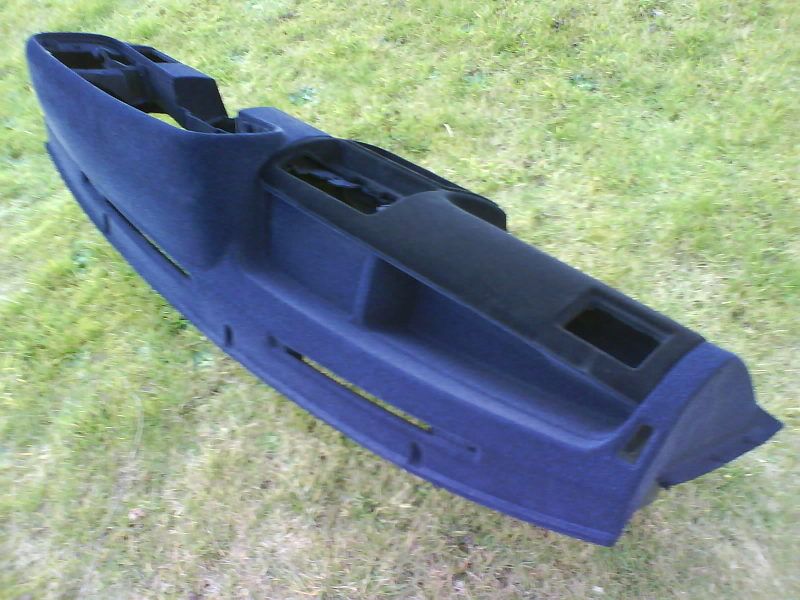
so lots of faffing n plenty of miles driven, the dash ended up in banbury at central blast cleaning, and the results were much more like it. chuffed!!!...
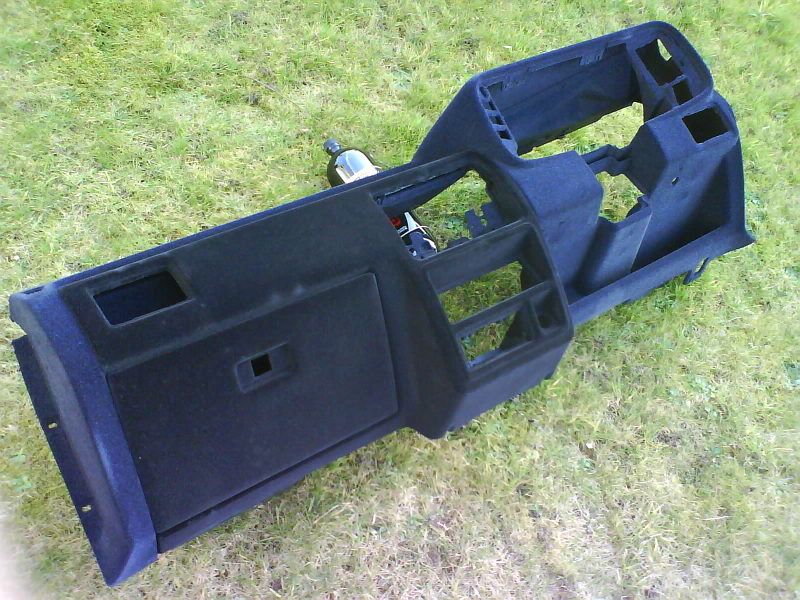
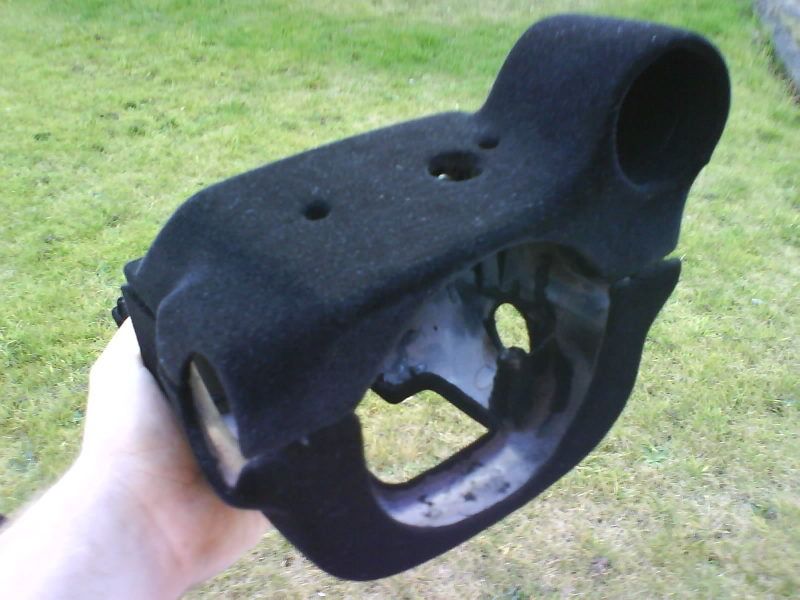
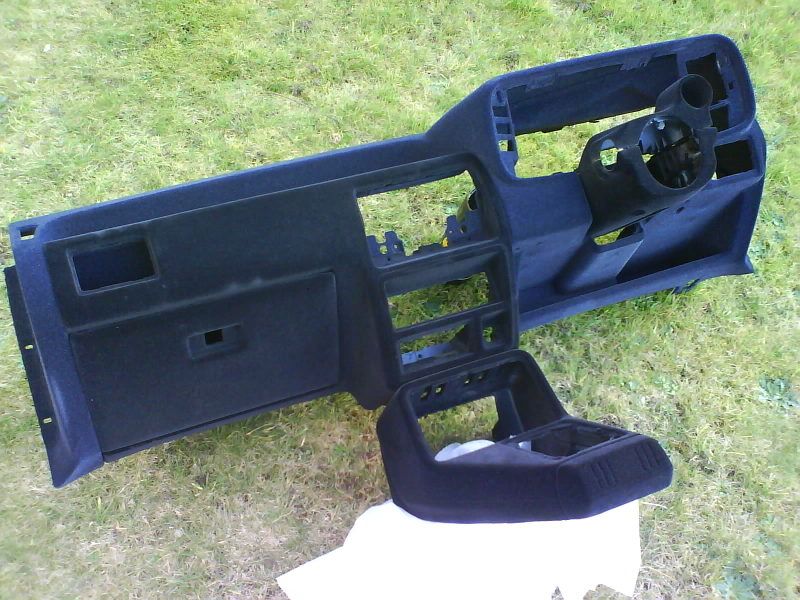
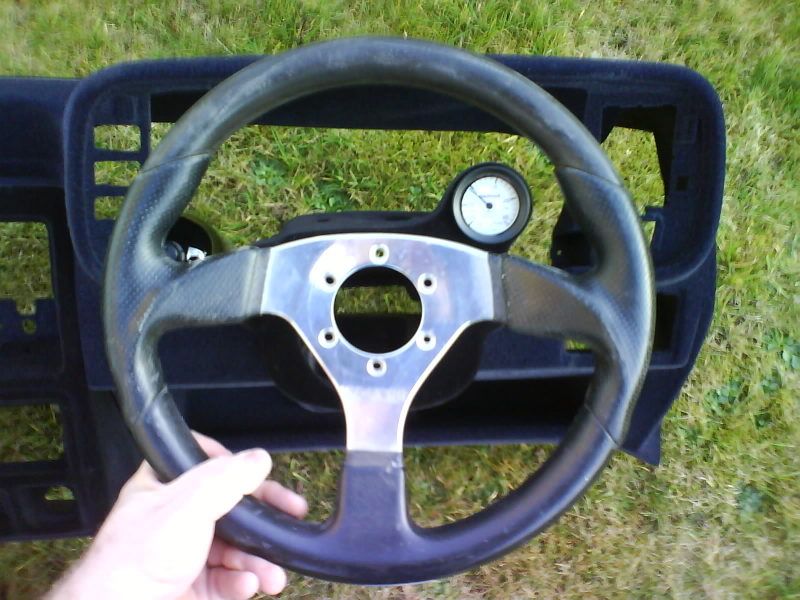
steering wheel shown is just an old 1 for picture purposes, now have a deep dished sparco 350mm 3 spoke rally style wheel in black with black alcantara rim
it used to look like this..
but time took its toll, and my seats became worn n ripped, the finish on the cgae was substandard, and generally the inside needed a makeover
firstly, i stripped the seats down, sourced new covers from sparco direct (at great cost sadly), then went about recovering them. changed to black covers to suit the new colour of the car...
the seats were packed away n stored safely. the seats are sparco evo 2 fibreglass shell jobbies, very comfy, none of this metal frame covered in thin foam bollocks!! lol
gave the cage a prep and paint in graphite grey to match the wheels etc
made myself a 'twins' spec gauge holder...
then came the fun part, the dashboard
originally i resprayed it in 2 tone black and dark grey, which looked nice, but soon i grew tired of it...
so then i noticed flocking was becoming more easily available, so went down this route. now a lot of people may have already read my horror story of this whole saga, so i wont go into too much detail
heres the pics of the 1st attempt ala suffolk flocking services...
bearing in mind this was supposed to be dark grey and black 2 tone, it wasnt exactly up to scratch, not just in colour but in finish
so lots of faffing n plenty of miles driven, the dash ended up in banbury at central blast cleaning, and the results were much more like it. chuffed!!!...
steering wheel shown is just an old 1 for picture purposes, now have a deep dished sparco 350mm 3 spoke rally style wheel in black with black alcantara rim

 10-08-2008, 08:14 PM
#35
Advanced PassionFord User
Thread Starter
iTrader: (1)
Join Date: Jan 2005
Location: Birmingham
Posts: 1,949
Likes: 0
Received 0 Likes
on
0 Posts
cheers mate
must say i had to steal you gauge pod idea, just too good not to recreate
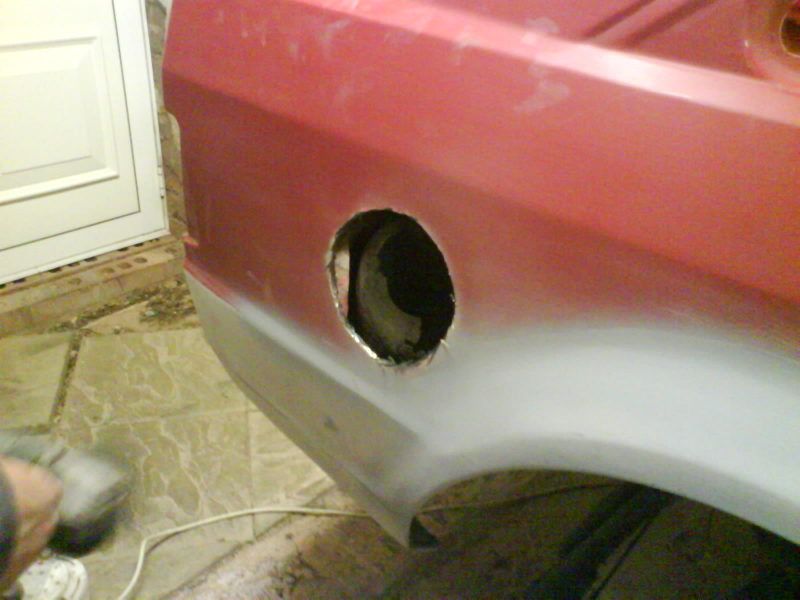
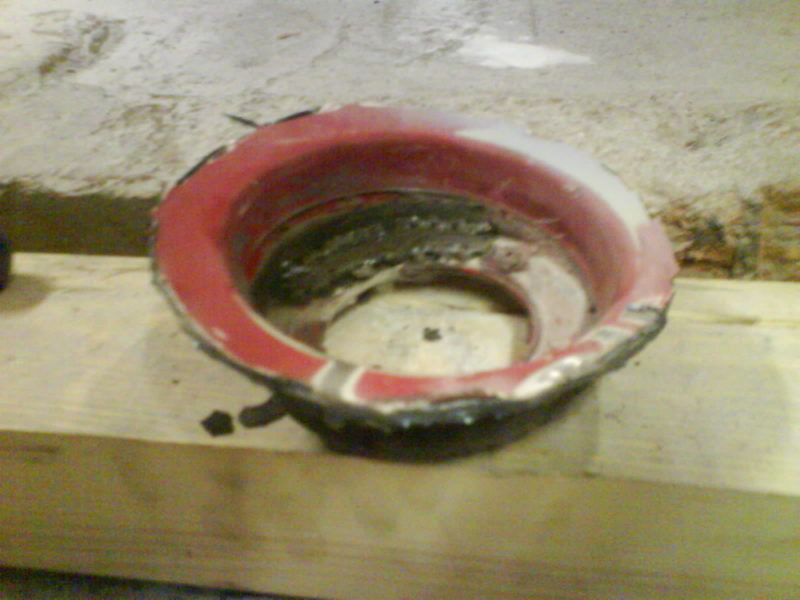
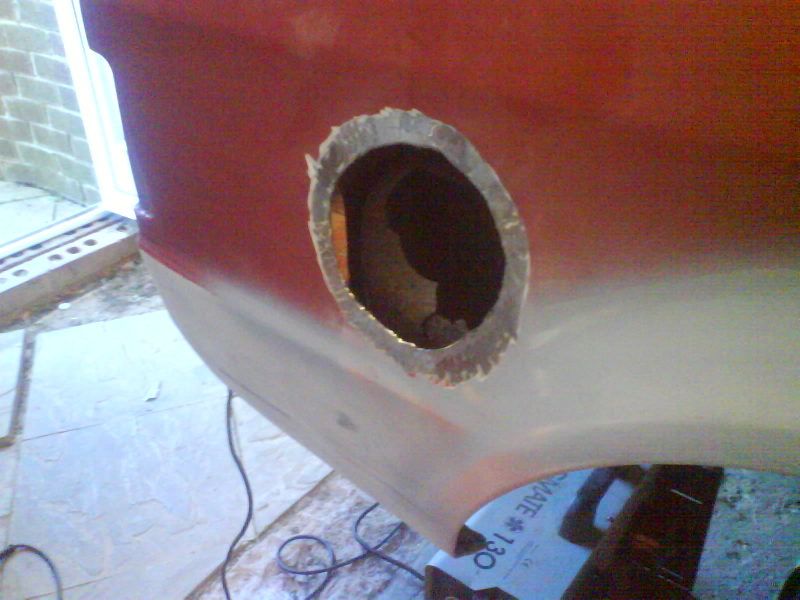
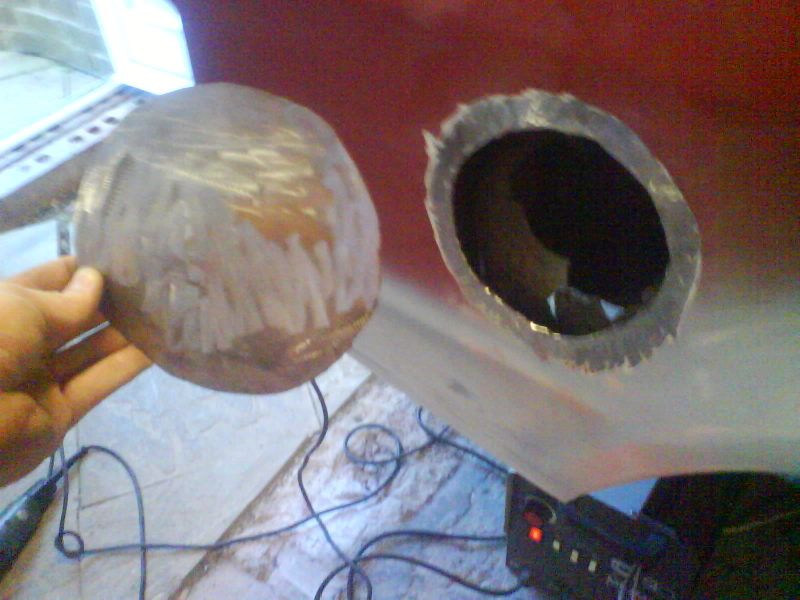
also, start of last year i bought a bmw e36 rear bumper to blend its bottom section onto my rst rear bumper, then low n behold, u go and e46 yours!! lol
it is a great looking splitter mod to do though, and amazing just how close dimensionally a 3 series bmw rear bumper is to an escort rear!!
must say i had to steal you gauge pod idea, just too good not to recreate
also, start of last year i bought a bmw e36 rear bumper to blend its bottom section onto my rst rear bumper, then low n behold, u go and e46 yours!! lol
it is a great looking splitter mod to do though, and amazing just how close dimensionally a 3 series bmw rear bumper is to an escort rear!!
10-08-2008, 08:47 PM
#36
PassionFord Post Troll
 10-08-2008, 08:54 PM
#37
Advanced PassionFord User
Thread Starter
iTrader: (1)
Join Date: Jan 2005
Location: Birmingham
Posts: 1,949
Likes: 0
Received 0 Likes
on
0 Posts
no doubt the finish wud have been slightly better dwn at CBC tho, but hey ho
 10-08-2008, 09:13 PM
#40
BANNED
BANNED
iTrader: (14)

Join Date: Dec 2006
Location: BALLS DEEP
Posts: 6,504
Likes: 0
Received 0 Likes
on
0 Posts
looking really good that mate, you have spent alot of time on that,i scrapped my 3i shell recently that was no where near as bad as that but was to much work for me ,and couldnt afford to get it done ,so i bought a bonus shell for 200 which just really needs a bit of paint, keep up the good work mate