My project Sierra GT 24v Cosworth
 27-03-2008, 03:04 PM
#1
Regular Contributor
Thread Starter

Join Date: May 2007
Location: The Netherlands
Posts: 282
Likes: 0
Received 0 Likes
on
0 Posts
My m8 and me have been working on this for over 2years
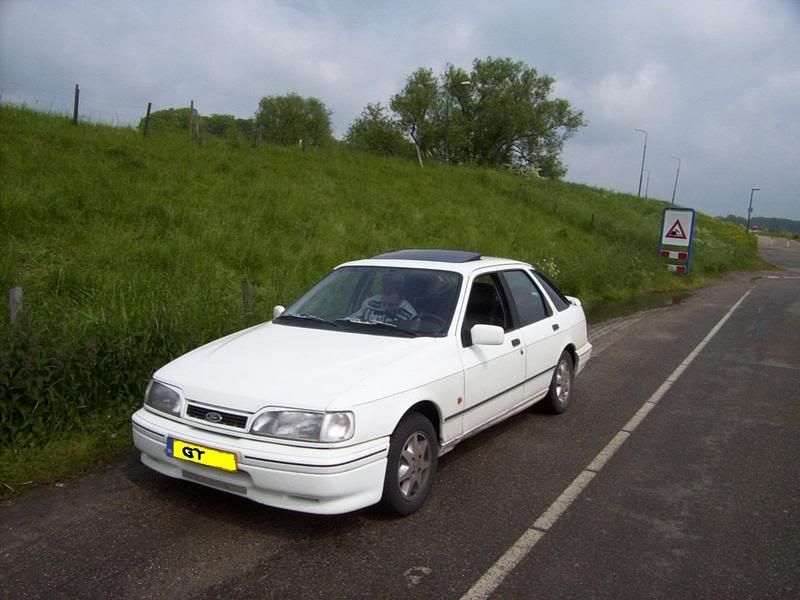
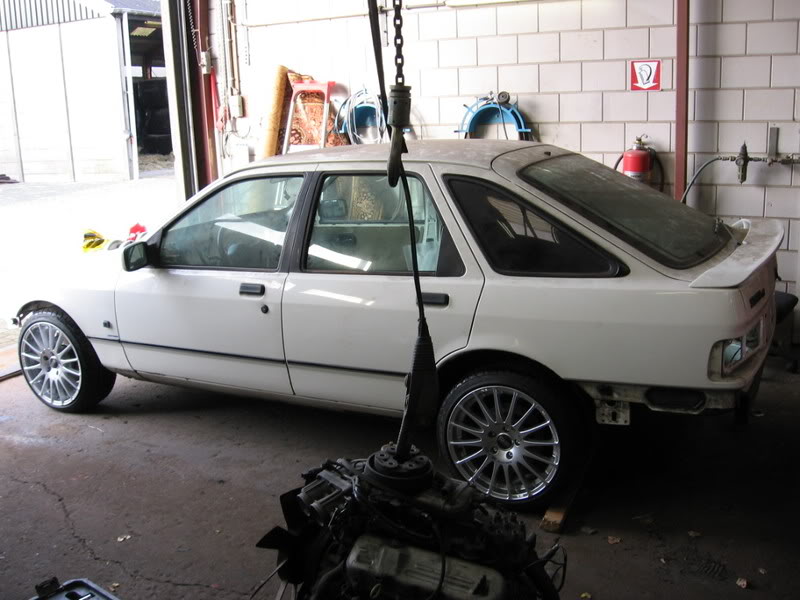
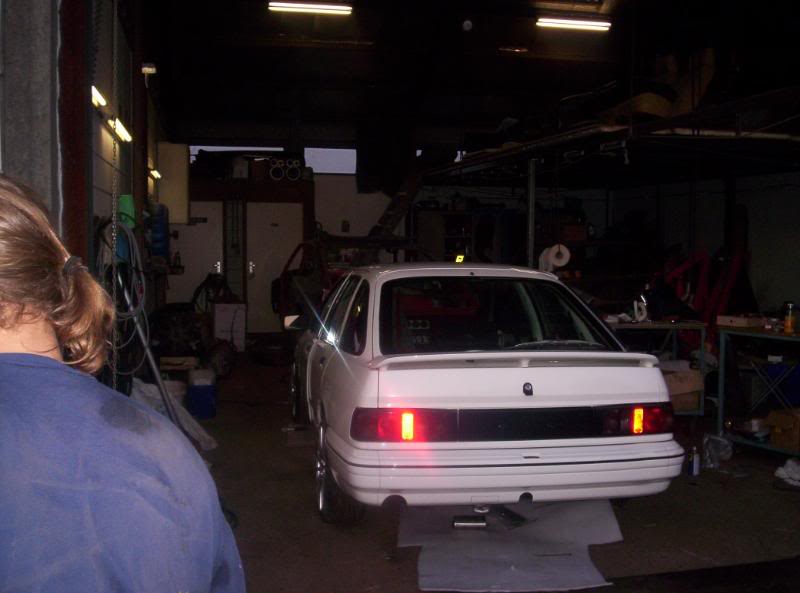
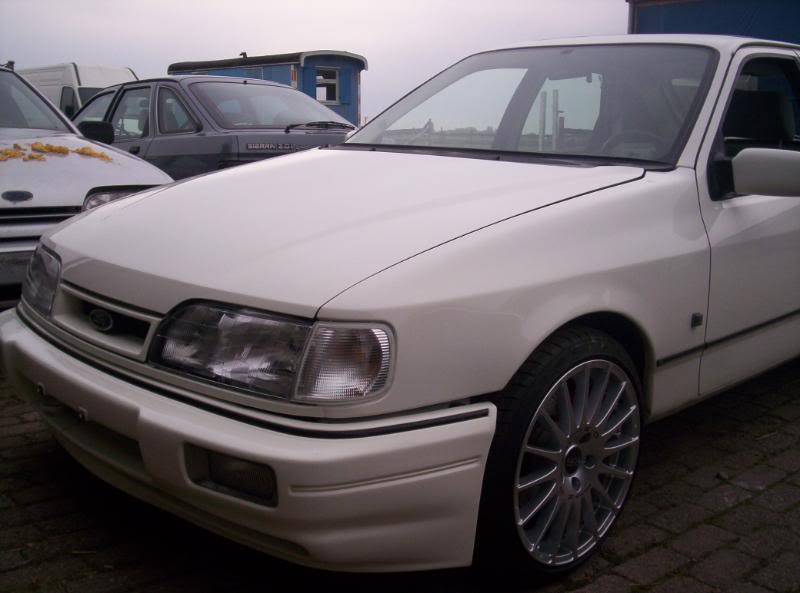
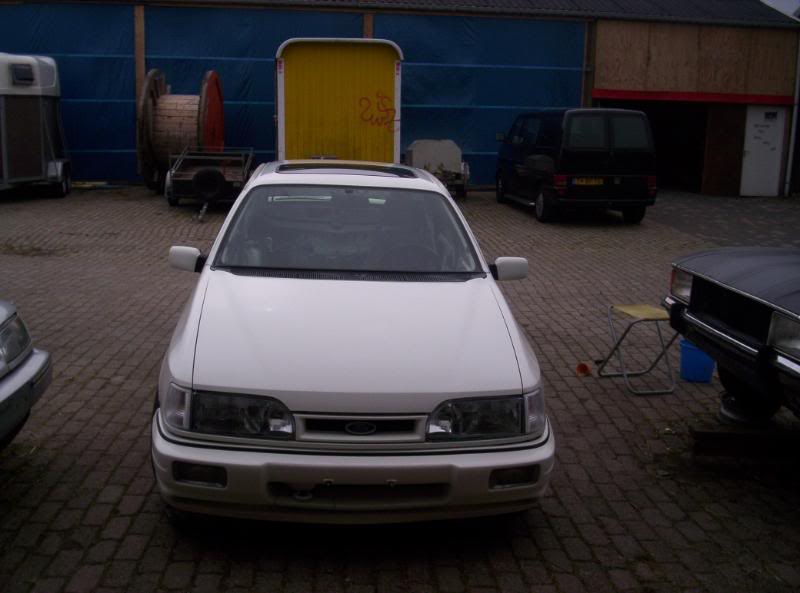
Car as I bought it:
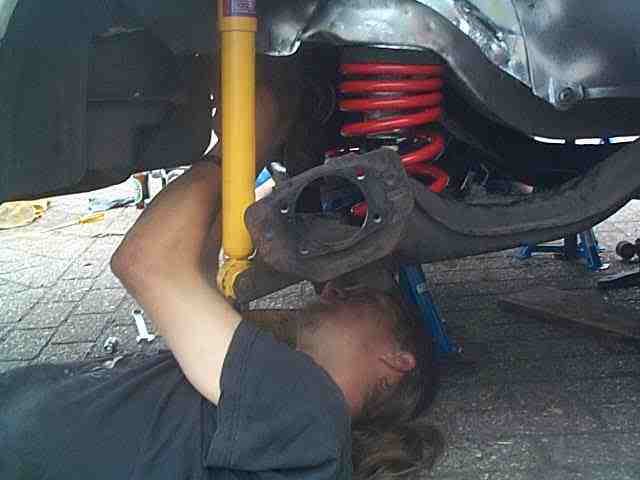
Stage 1, lowering and brakeupgrades:
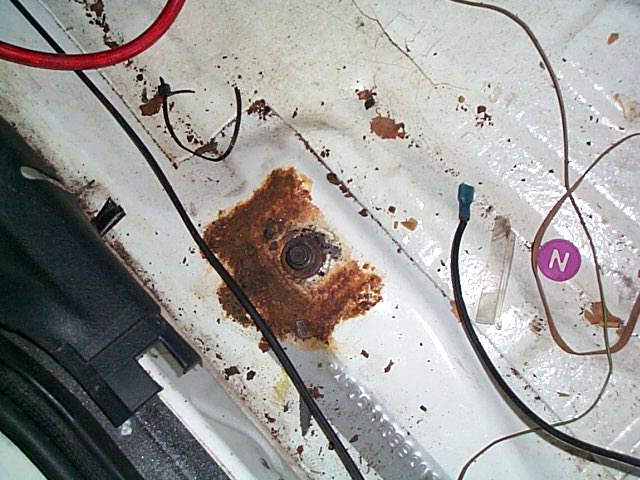
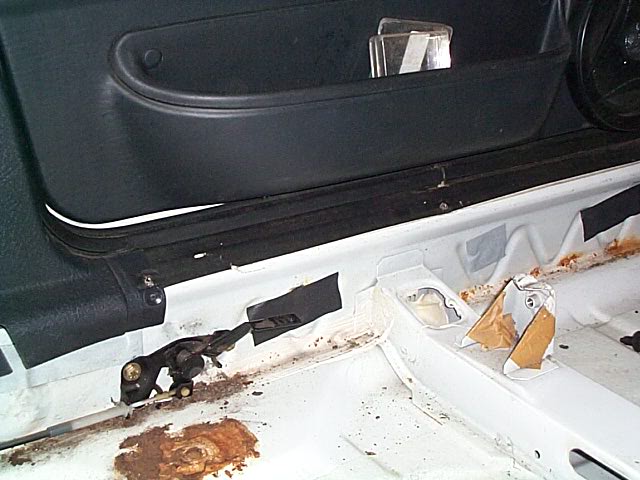
Rust:
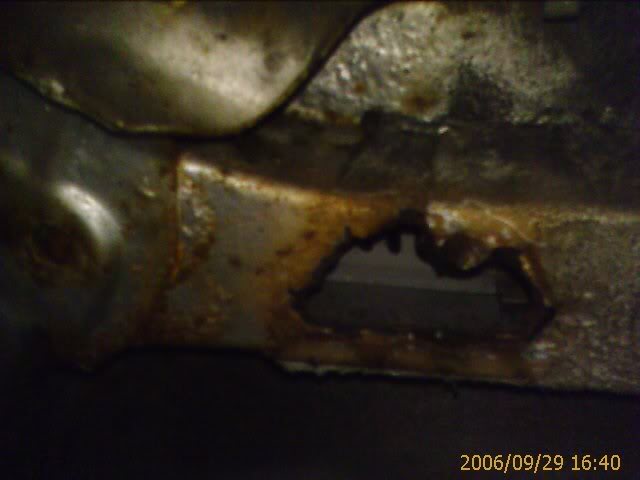
Welkded chassisleg:
New seatmount:

Rebuilding the engine:
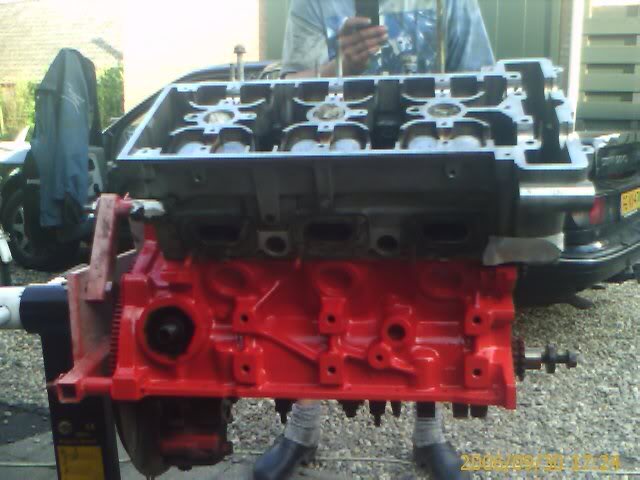
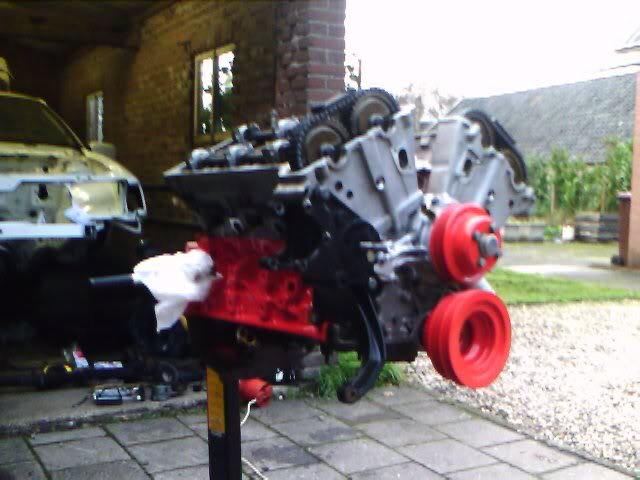
We changed all the timing parts and guides, gasket ands seals.
The heads, crank and pistons stayed in place because they were fine.
Continued on next post (limited amount of piccies)
Car as I bought it:
Stage 1, lowering and brakeupgrades:
Rust:
Welkded chassisleg:
New seatmount:
Rebuilding the engine:
We changed all the timing parts and guides, gasket ands seals.
The heads, crank and pistons stayed in place because they were fine.
Continued on next post (limited amount of piccies)
 27-03-2008, 03:05 PM
#2
Regular Contributor
Thread Starter
Join Date: May 2007
Location: The Netherlands
Posts: 282
Likes: 0
Received 0 Likes
on
0 Posts
Continues:
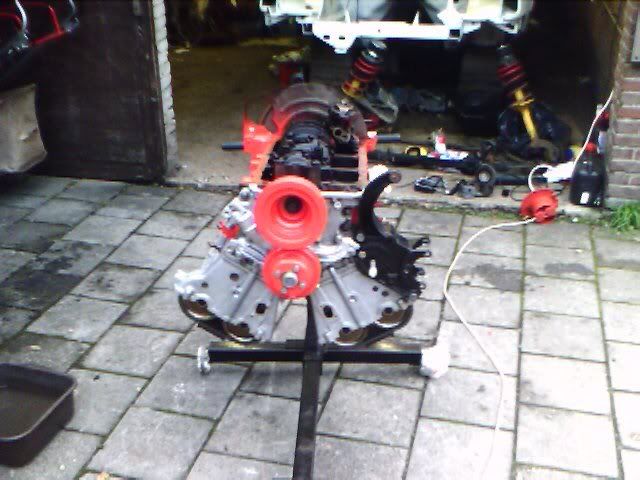
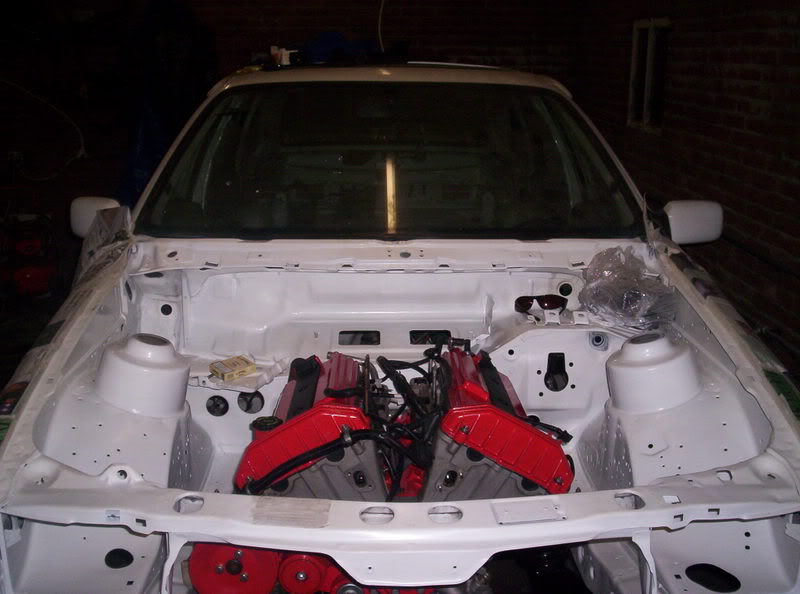
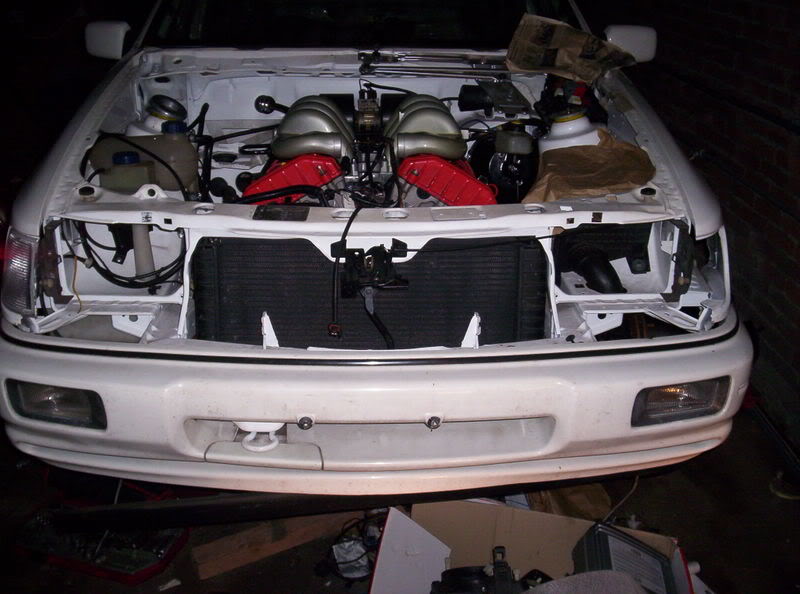
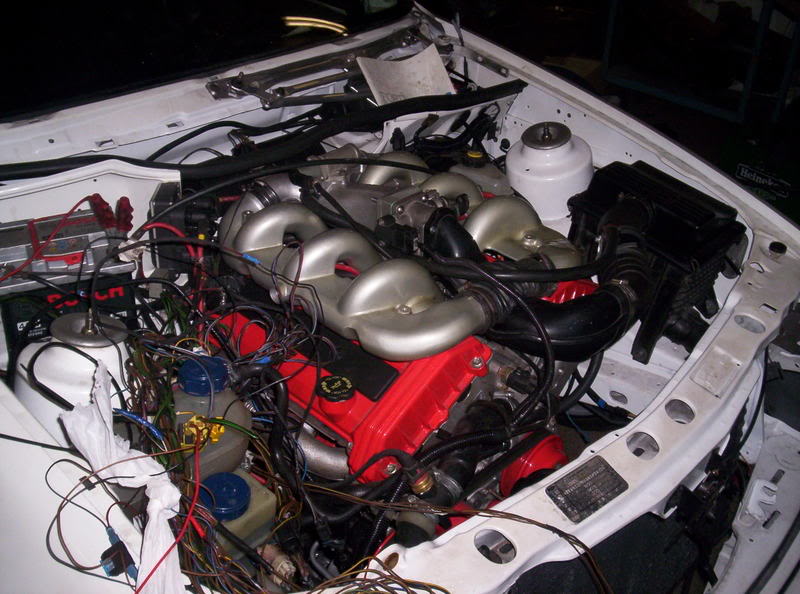
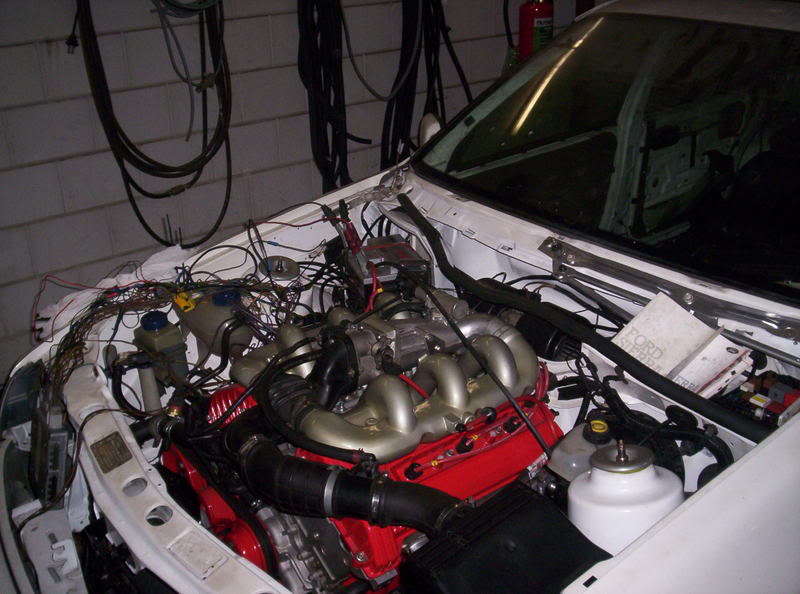
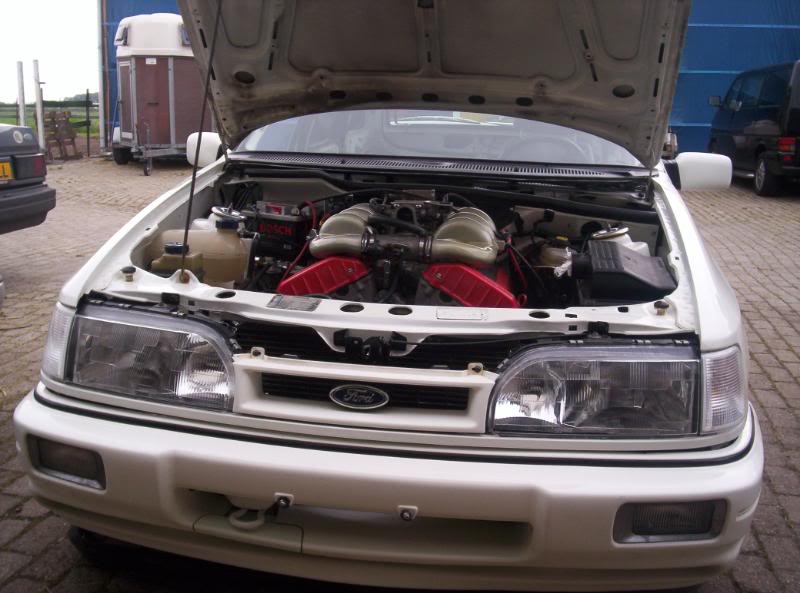
Engine ready to go in:
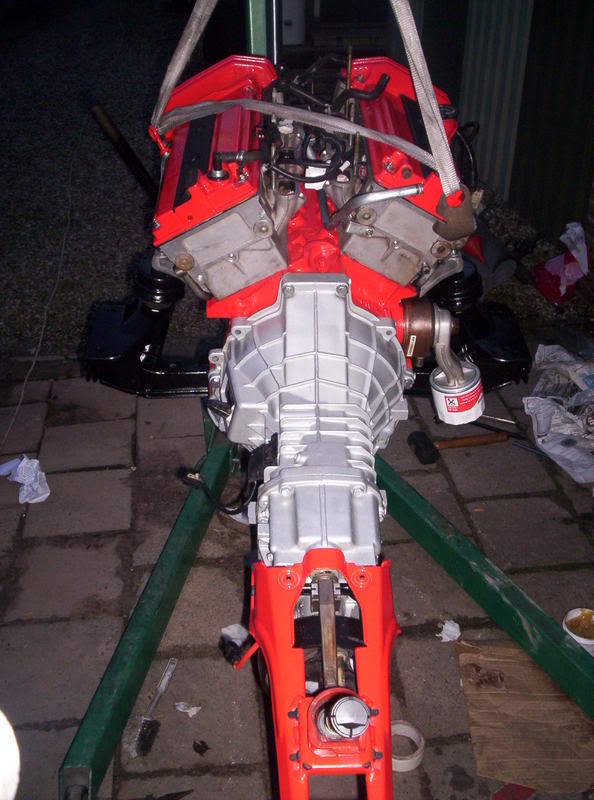
Almost there:
I fitted Calibra V6 injectors with the improved spray pattern, BOB cams, BOB plenum.
The engine will be run on a MegaSquirt management.
I haven't fitted a performance exhausr and a performance airfilter to reduce noise. My car needs to go through a couple of inspections because of the change of amount in cilinders and increased power. So that will be done afterwards.
Now, the plenum. We decided to use the plenum from the new model because the original
one is crap. Too a LOT of work getting it to fit. We started making an adapterplate
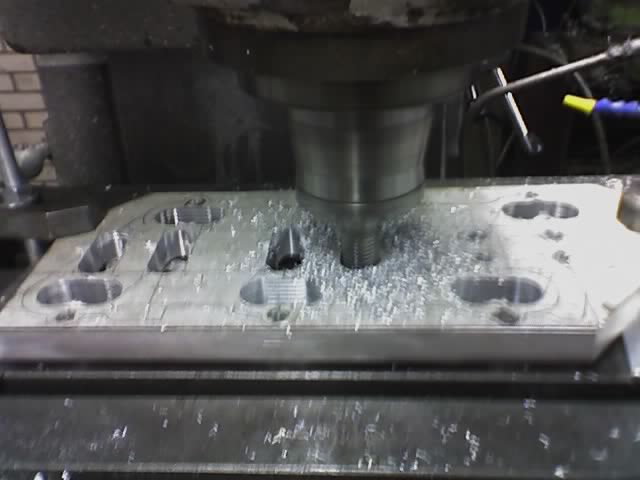
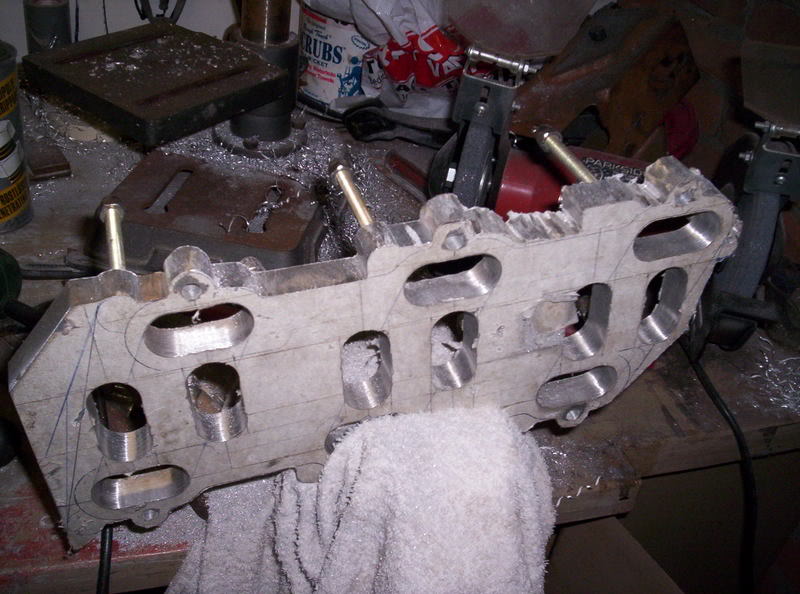
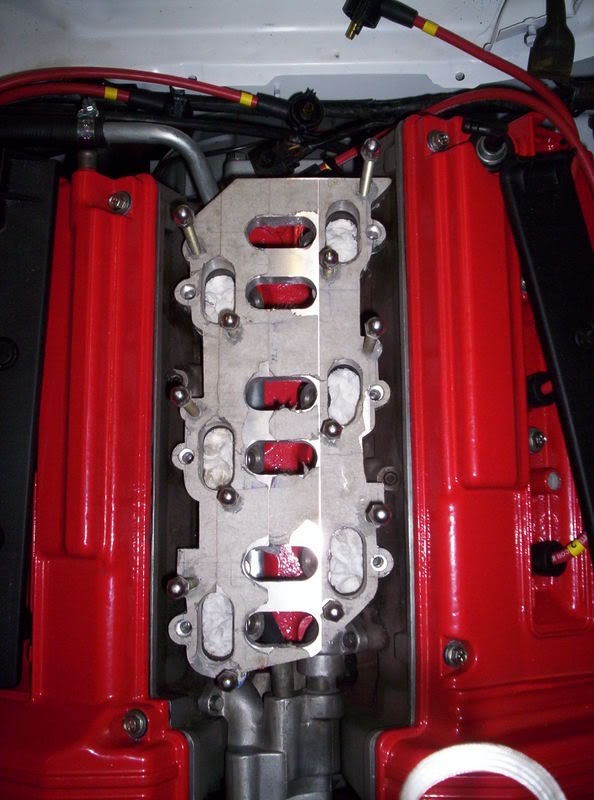
This didn't work, the holes you see are for the injectors
This is how we planned it but it didn't fit with the injector plugs and the fuelrail
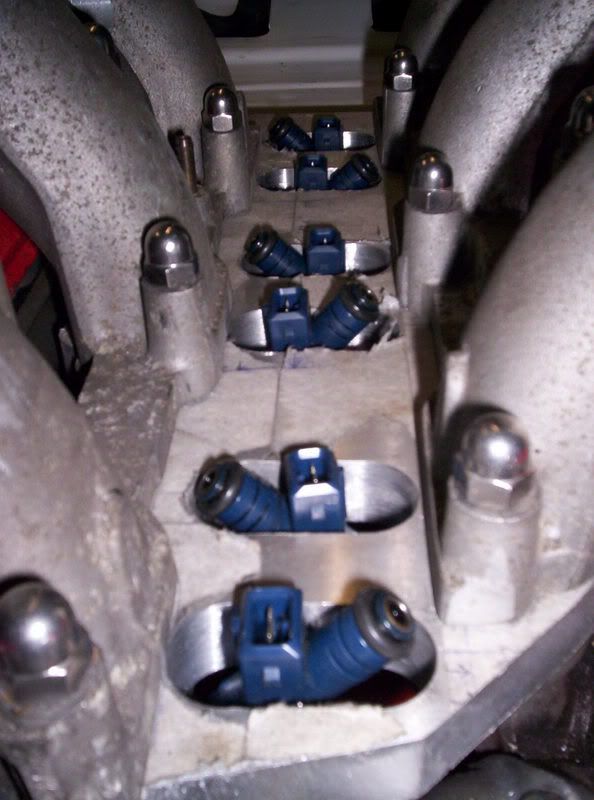
We made the holes for the injector bigger and turned the injectors 90 degrees.

It fits:

Skip to 2008
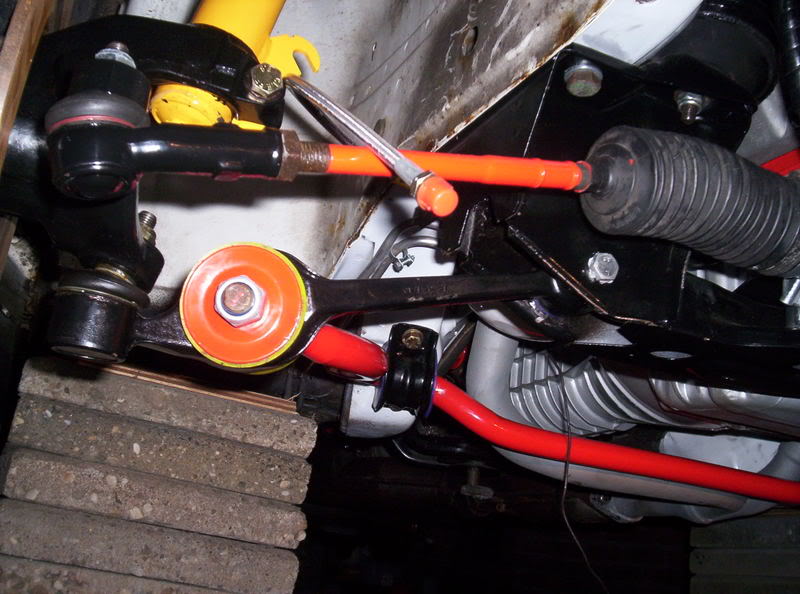
I wanted to go 5stud but not fit Granada/Scorpio knuckles/uprights (whatever you call them) so my m8 machined down the wheelbearingfitting in a couple of new carriers I bought to be able to fit Granada bearings and hubs.
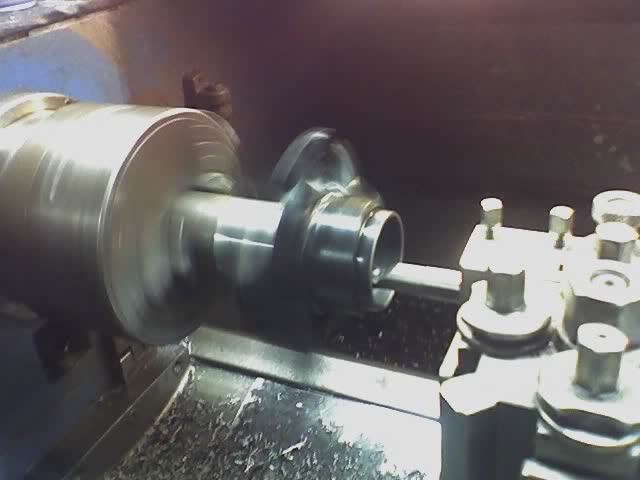
Saves unsprung weight and it's a cool mod. Besides, there is LOT more choice in wheels and offset with 5x112 instead of 4x10⁸
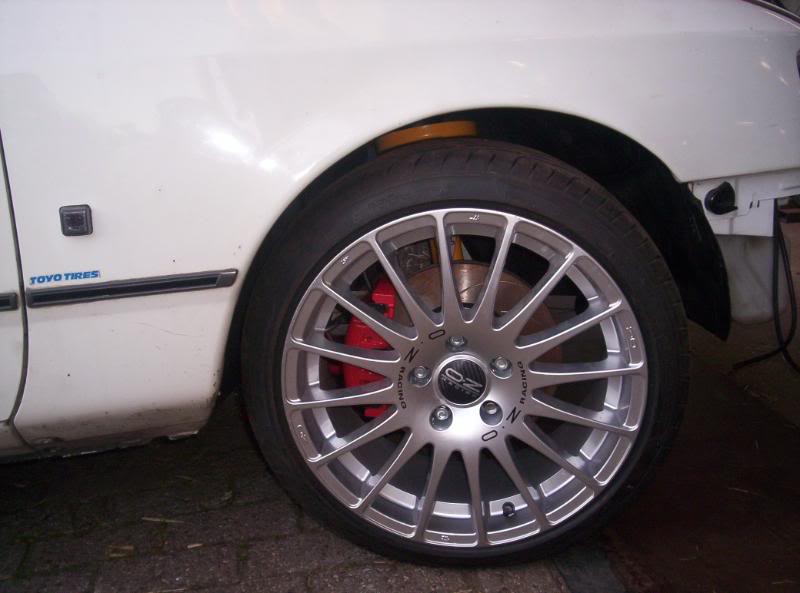
Now I can fit these:
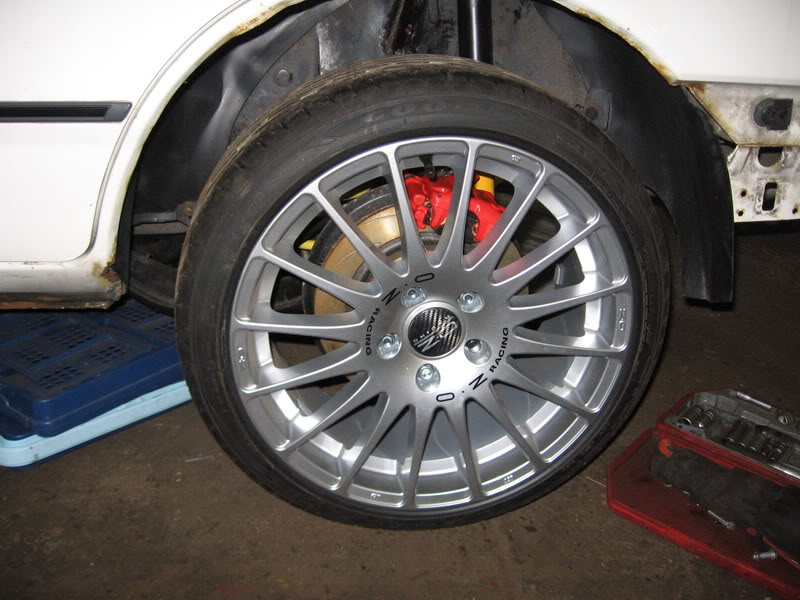
OZ SuperTurismo 8x17". You can't get them in 8 wide for 4x10⁸ PCD. ET value is spot on, 37.
Getting the right ET value was also one reason for this mod.
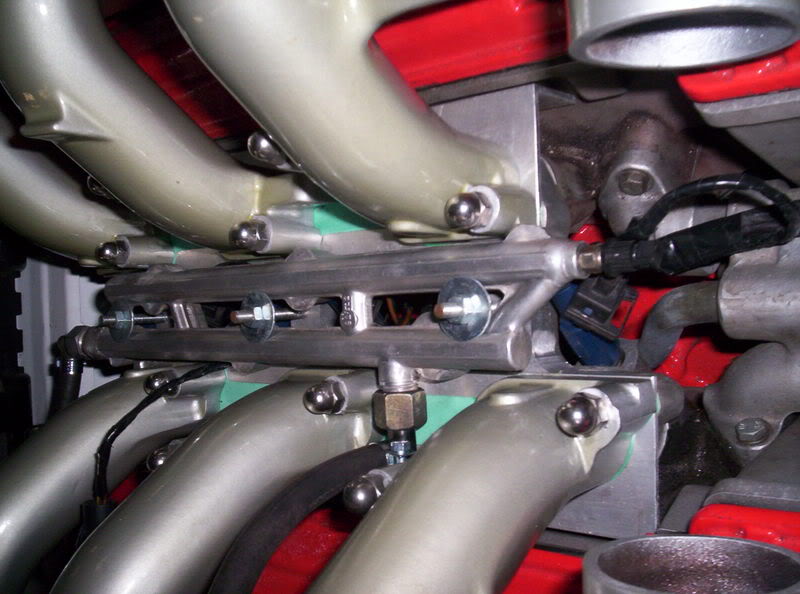
The Fuelrail was heavily modded toi be able to still fit. The original FPR was grinded of, together with one of the fuelhose connections. My m8 welded it shut and fitted a hose connection on the rearside of the rail.
My FSE FPR:
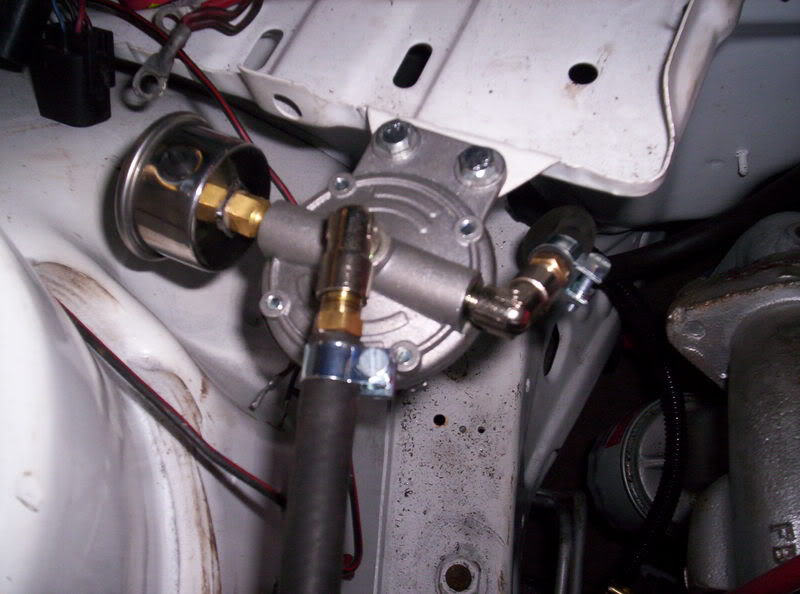
The gauge is still attached. To me it makes sense keeping it in the engine bay as it comes in handy seeing it when adjusting fuelpressure
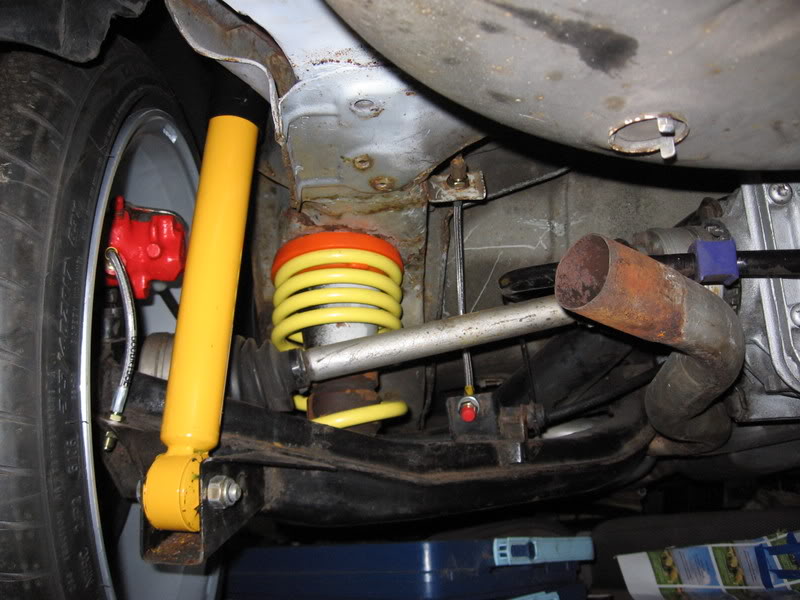
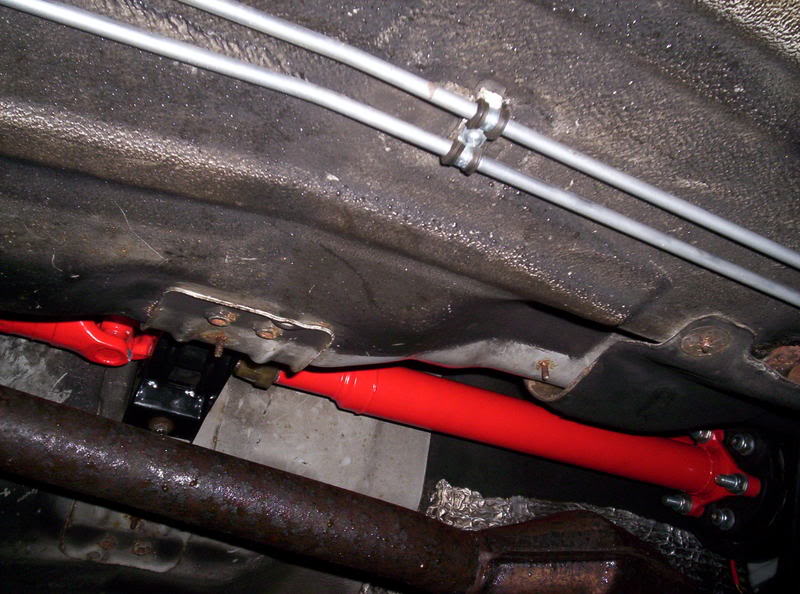
A couple of randow underside shots:
Last weekend we tried firing it up but unfortunately I still have a couple of issues with the loom. We are trying to get it sorted by next weekend.
Untill now I have:
spark
fuelpressure
oilpressure
just no feed to the injectors for some reason.
Currect stance:
I am not happy with the rear. The tank isn't full yet, still ned to fit an interior etc so it might improve a bit but I think I need other springs. It's too high. Front is allright, still some clearance to arch so I can still rip though corners with it. It's being built to be driven hard.
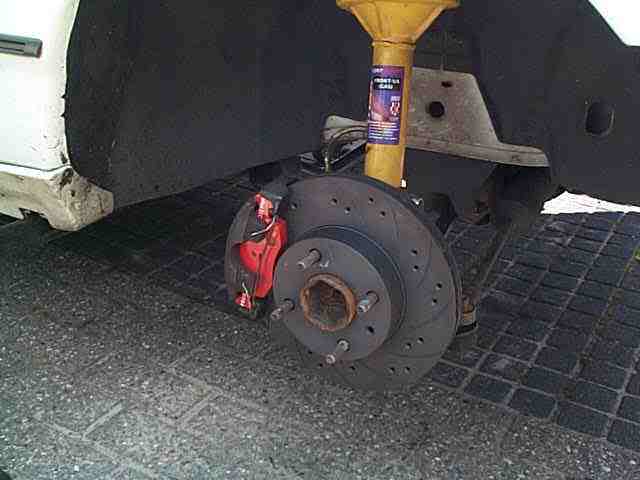
Brakes:
Calipers: Sierra Cosworth all round
Discs: front 278mm National grooved
rear: 273mm National grooved (vented)
Pads: front: Ferodo DS2500
rear: Ferodo DS2500
brakehoses: Goodrich braided hoses
In the future I might upgrade the fronts but I have a feeling that they will do for now.
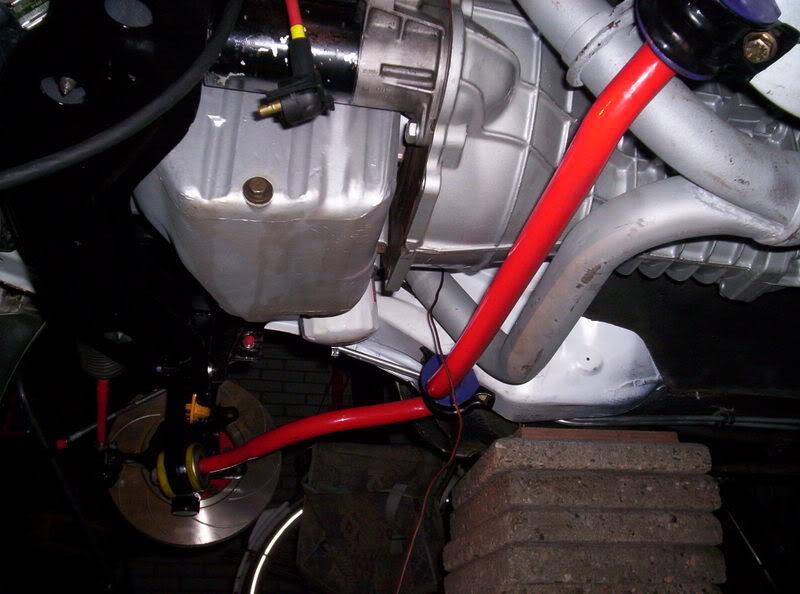
One more piccie of the front:
Engine ready to go in:
Almost there:
I fitted Calibra V6 injectors with the improved spray pattern, BOB cams, BOB plenum.
The engine will be run on a MegaSquirt management.
I haven't fitted a performance exhausr and a performance airfilter to reduce noise. My car needs to go through a couple of inspections because of the change of amount in cilinders and increased power. So that will be done afterwards.
Now, the plenum. We decided to use the plenum from the new model because the original
one is crap. Too a LOT of work getting it to fit. We started making an adapterplate
This didn't work, the holes you see are for the injectors
This is how we planned it but it didn't fit with the injector plugs and the fuelrail
We made the holes for the injector bigger and turned the injectors 90 degrees.
It fits:
Skip to 2008
I wanted to go 5stud but not fit Granada/Scorpio knuckles/uprights (whatever you call them) so my m8 machined down the wheelbearingfitting in a couple of new carriers I bought to be able to fit Granada bearings and hubs.
Saves unsprung weight and it's a cool mod. Besides, there is LOT more choice in wheels and offset with 5x112 instead of 4x10⁸
Now I can fit these:
OZ SuperTurismo 8x17". You can't get them in 8 wide for 4x10⁸ PCD. ET value is spot on, 37.
Getting the right ET value was also one reason for this mod.
The Fuelrail was heavily modded toi be able to still fit. The original FPR was grinded of, together with one of the fuelhose connections. My m8 welded it shut and fitted a hose connection on the rearside of the rail.
My FSE FPR:
The gauge is still attached. To me it makes sense keeping it in the engine bay as it comes in handy seeing it when adjusting fuelpressure
A couple of randow underside shots:
Last weekend we tried firing it up but unfortunately I still have a couple of issues with the loom. We are trying to get it sorted by next weekend.
Untill now I have:
spark
fuelpressure
oilpressure
just no feed to the injectors for some reason.
Currect stance:
I am not happy with the rear. The tank isn't full yet, still ned to fit an interior etc so it might improve a bit but I think I need other springs. It's too high. Front is allright, still some clearance to arch so I can still rip though corners with it. It's being built to be driven hard.
Brakes:
Calipers: Sierra Cosworth all round
Discs: front 278mm National grooved
rear: 273mm National grooved (vented)
Pads: front: Ferodo DS2500
rear: Ferodo DS2500
brakehoses: Goodrich braided hoses
In the future I might upgrade the fronts but I have a feeling that they will do for now.
One more piccie of the front:
Last edited by Remko GT; 27-03-2008 at 03:14 PM.
27-03-2008, 04:56 PM
#3
PassionFord Post Whore!!

very nice mate, should be round the 240 to 260 bhp mark, have soft cut out at 67500 max
they tend to valve bounce at 7000k unless you by fooking pricey valves springs from merlin, but I have heard merlin has sold up
they tend to valve bounce at 7000k unless you by fooking pricey valves springs from merlin, but I have heard merlin has sold up
28-03-2008, 11:26 AM
#4
Regular Contributor
Thread Starter
Join Date: May 2007
Location: The Netherlands
Posts: 282
Likes: 0
Received 0 Likes
on
0 Posts
Thanks for the input! I know the body is a bit tatty but I stuck all my budget in the mechanical part rather than looks. Might get a respray in the future but can't afford it atm. Maybe in a year or so.
Valves bounce @7k? Hmm, best save up for solid lifters and uprated valve springs then.
Rev limiter will be set at 6250 (as standard) for peace of mind.
Valves bounce @7k? Hmm, best save up for solid lifters and uprated valve springs then.
Rev limiter will be set at 6250 (as standard) for peace of mind.

Trending Topics
29-03-2008, 03:44 PM
#8
10K+ Poster!!

I'm liking that a LOT !
I feel the need for something for this years Ring trip and that is exactly what I want ! However I'm slightly concerned I might kill myself lol
I'll drop you a PM regarding the transmission at some point
I feel the need for something for this years Ring trip and that is exactly what I want ! However I'm slightly concerned I might kill myself lol
I'll drop you a PM regarding the transmission at some point
30-03-2008, 11:46 AM
#9
Regular Contributor
Thread Starter
Join Date: May 2007
Location: The Netherlands
Posts: 282
Likes: 0
Received 0 Likes
on
0 Posts
Yesterday friends of mine sorted out the problems in the loom. Our hunch was right, a couple of wires were spliced into a powersplice that reallydidn't belong there. When all seemed fine with the loom, and the loom looked like it was a match to the diagrams, she still wouldn't fire. After some thinking and listening we realised that for some reason the ECU wasn't switching the injectors on. So we decided to take of the ECU and bridge the pin outs in the connector. The injectors came to life immediately. Hmmmmm. Maybe the ECU faulty? Unlikely but possible. I got on the phone and was able to borrow another ECU. When we compared the 2, it was evident it were 2 completely different ECUs.Casing was different so were the partnumbers. I have been sold a wrong ECU with the engine. Ooopssss. When we connected the ECU I had borrowed she fired up at once. Not a splutter, tappety sound or something that. She ran like it was new engine from the 1st moment. Not even the tappets were noisy/rattly. After having stood still for over 3 years. She ran sweet as a nut.
Oilpressure was around 60psi, fuelpressure around 37psi.
I got a little drunk....
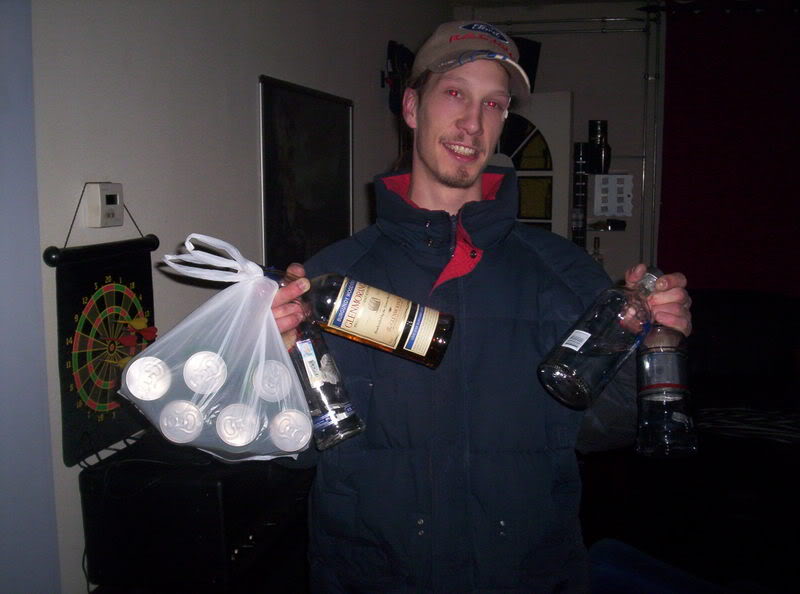
Plans:
The entire exhaust will be replaced with a home made S/S twinexhaust. The spairwheel well will be cut out and the fueltank replaced to the center of the rear of the car (hope that makes sense) and the twin back boxes will be run along both sides of the tank.
As you can see, for now the induction has been improvised out of several parts from both the DOHC and the BOB 24v. Effectively we had to give her a severe case of astma. It was the only way we could get a hose between the airbox and the throttle body. Like the exhaust, that will be replaced after the inspections I mentioned earlier. Unfortunately the laws with engine swaps and powerincreasings is a lot stricter in Holland than in the UK.
I can't go there with a big mother of a cone filter. The induction noise alone would get it failed for the emissionstests.
Oilpressure was around 60psi, fuelpressure around 37psi.
I got a little drunk....
Plans:
The entire exhaust will be replaced with a home made S/S twinexhaust. The spairwheel well will be cut out and the fueltank replaced to the center of the rear of the car (hope that makes sense) and the twin back boxes will be run along both sides of the tank.
As you can see, for now the induction has been improvised out of several parts from both the DOHC and the BOB 24v. Effectively we had to give her a severe case of astma. It was the only way we could get a hose between the airbox and the throttle body. Like the exhaust, that will be replaced after the inspections I mentioned earlier. Unfortunately the laws with engine swaps and powerincreasings is a lot stricter in Holland than in the UK.
I can't go there with a big mother of a cone filter. The induction noise alone would get it failed for the emissionstests.
02-04-2008, 11:04 AM
#11
Regular Contributor
Thread Starter
Join Date: May 2007
Location: The Netherlands
Posts: 282
Likes: 0
Received 0 Likes
on
0 Posts
Thanks for the kind replies. 
I agree, Ford should've made a 24v Sierra. I've heart Ford was planning on it but realised it would be too much competition for the other 200hp Sierra we all know and love. So they didn't.
So now we are making a Sierra XR4 EVO
I agree, Ford should've made a 24v Sierra. I've heart Ford was planning on it but realised it would be too much competition for the other 200hp Sierra we all know and love. So they didn't.
So now we are making a Sierra XR4 EVO
02-04-2008, 04:38 PM
#12
Lucifer II - 666
Wicked project
07-04-2008, 11:25 AM
#13
Regular Contributor
Thread Starter
Join Date: May 2007
Location: The Netherlands
Posts: 282
Likes: 0
Received 0 Likes
on
0 Posts
Last week we entirely cut off the EEC IV ECU connecter of the engineloom. The plan was to connect the MegaSquirt ECU but we ran into trouble. The DB37 ECU connector is missing...
My m8 managed to find another one, that should be in today so hopefully tonight we are starting the soldering, then it should fire up again.
I downloadad all possible wiring looms, MegaSquirt software and any info I could find onto my laptop. I hope the serial cable I got is the correct cable to be able to change a couple of setting in the ECU. A friend, who built my ECU, ran it for a month in his 16v Sierra (not Cosworth) so it's still on 4 cilinders, that obviously needs to be changed to 6 cilinders and the flowrate of the injectors changed to 215cc/min. The ECU has a basemapping but will need a lot of tweeking.
When it fires, it's of with the engine loom, shortening it where necessary, cut out the MAF sensor wiring and taping it back in.
This weekend I made a wiring loom for the electrically adjustable headlights I acquired in Germany, I am in the process of sorting out the wiring for the front foglights and the wiring for a heated front-screen. When that's done the dash goes back in. Well, not really back as I bought a black dash in stead of the darkblue that what was in it originally.
Last edited by Remko GT; 07-04-2008 at 11:26 AM.
14-04-2008, 12:54 PM
#14
Regular Contributor
Thread Starter
Join Date: May 2007
Location: The Netherlands
Posts: 282
Likes: 0
Received 0 Likes
on
0 Posts
Change of plans. I decided it's not worth fitting a twinexhaust. Saves us a lot of headscratching on how to route them, which backboxes to use, calculating diameter, how long they should be etc, etc.
Last weekend I've driven a m8's 24v car and it sounded gorgeous. We will still be making our own exhaust but copying an exhaust is ofcourse a lot easier then completely designing your own. I think I'll use a 3" XR4x4 2.9i Magnex backbox (or something similar), decat it, fit a less restrictive middle box in stead of the twin-middle-boxes that is on it now, that should do I think. However, using a XR4x4 backbox that has been designed for, what?, 150-160hp isn't maybe entirely what I need for the tweeked 24v Cos engine in my car.
Last weekend I've driven a m8's 24v car and it sounded gorgeous. We will still be making our own exhaust but copying an exhaust is ofcourse a lot easier then completely designing your own. I think I'll use a 3" XR4x4 2.9i Magnex backbox (or something similar), decat it, fit a less restrictive middle box in stead of the twin-middle-boxes that is on it now, that should do I think. However, using a XR4x4 backbox that has been designed for, what?, 150-160hp isn't maybe entirely what I need for the tweeked 24v Cos engine in my car.
15-05-2008, 10:41 AM
#15
Regular Contributor
Thread Starter
Join Date: May 2007
Location: The Netherlands
Posts: 282
Likes: 0
Received 0 Likes
on
0 Posts
Another update.
Last weekend we finished the swap from Ford's EEC IV to a MegaSquirt I v3.0 ECU
The loom isn't quite finished but the engine has run on the new ECU. Should be done the next 2 weeks. Had a discussion with my m8 who built the ECU. He said it might be that 15% more torque can be gained from the 2.9 24v. I hope my gearbox can cope with that. Otherwise it means another expensive phonecall with Burton. Well, actually not the phonecall but the parts that will need to be ordered then.
I finished the brakecaliper rebuilding and painting so fitted them to the car. I haven't driven the car yet but the brakepedal feel is already like kicking into a brick wall even though there is still a little bit of air that needs to be bled out. Should be done tonight. The brakesystem has been filled with fancy Castrol SRF brakefluid as recommended by mr. M Rainbird. I bought 3 bottles of 1ltr. each and I now still have 2 full bottles remaining. Plenty to spare then D
D
I was surprised how clear the stuff is (looked like water) although I had no problems restraining myself tasting it though
New Ferodo DS2500 brakepads allround, new National brakediscs allround as well and new GoodRich braided hoses.
MC is from a UK Sierra GLSi, therefore we had to make a couple of custom brakelines to be able to connect the MC to that valve going to the rearbrakes as the connections are entirely different from the original MC. Made our own flaringtool with 2bits of aluminium, a hammer, a counterwieght and a pin with a point grinded to it. It was kinda awkward because the connection for that on the GLSi MC is on the wingside so space was tight and the line to the front wheel runs behind the engine. Next time 1st fit brakes and then the engine.
My m8 made a bracket for the throttlecable. Obviously there isn't a really suitablew cable for the 24v in the Sierra so I used a 12v one. It's a bit short but it will do for now.
The thing we did notice that the the acceleratorpedal travel is a VERY short compared to a boggo Sierra. Tried solving that by playing with the pivotpoint in the accelrator pedal but not enough was gained so left it as it was. Maybe a aftermarket pedalbox in the future but now we will just weld on a higher "bumpstop" to prevent any damage to the throttlebody or the cable bracket.
Nearly there for a testdrive.D Just need to fit some seatbelts, the headlights and the induction part from filter to throttlebody.
Piccies coming next weekend
Last weekend we finished the swap from Ford's EEC IV to a MegaSquirt I v3.0 ECU
The loom isn't quite finished but the engine has run on the new ECU. Should be done the next 2 weeks. Had a discussion with my m8 who built the ECU. He said it might be that 15% more torque can be gained from the 2.9 24v. I hope my gearbox can cope with that. Otherwise it means another expensive phonecall with Burton. Well, actually not the phonecall but the parts that will need to be ordered then.
I finished the brakecaliper rebuilding and painting so fitted them to the car. I haven't driven the car yet but the brakepedal feel is already like kicking into a brick wall even though there is still a little bit of air that needs to be bled out. Should be done tonight. The brakesystem has been filled with fancy Castrol SRF brakefluid as recommended by mr. M Rainbird. I bought 3 bottles of 1ltr. each and I now still have 2 full bottles remaining. Plenty to spare then
I was surprised how clear the stuff is (looked like water) although I had no problems restraining myself tasting it though
New Ferodo DS2500 brakepads allround, new National brakediscs allround as well and new GoodRich braided hoses.
MC is from a UK Sierra GLSi, therefore we had to make a couple of custom brakelines to be able to connect the MC to that valve going to the rearbrakes as the connections are entirely different from the original MC. Made our own flaringtool with 2bits of aluminium, a hammer, a counterwieght and a pin with a point grinded to it. It was kinda awkward because the connection for that on the GLSi MC is on the wingside so space was tight and the line to the front wheel runs behind the engine. Next time 1st fit brakes and then the engine.
My m8 made a bracket for the throttlecable. Obviously there isn't a really suitablew cable for the 24v in the Sierra so I used a 12v one. It's a bit short but it will do for now.
The thing we did notice that the the acceleratorpedal travel is a VERY short compared to a boggo Sierra. Tried solving that by playing with the pivotpoint in the accelrator pedal but not enough was gained so left it as it was. Maybe a aftermarket pedalbox in the future but now we will just weld on a higher "bumpstop" to prevent any damage to the throttlebody or the cable bracket.
Nearly there for a testdrive.
Piccies coming next weekend
10-06-2008, 10:49 AM
#16
Regular Contributor
Thread Starter
Join Date: May 2007
Location: The Netherlands
Posts: 282
Likes: 0
Received 0 Likes
on
0 Posts
Update and new piccie time:
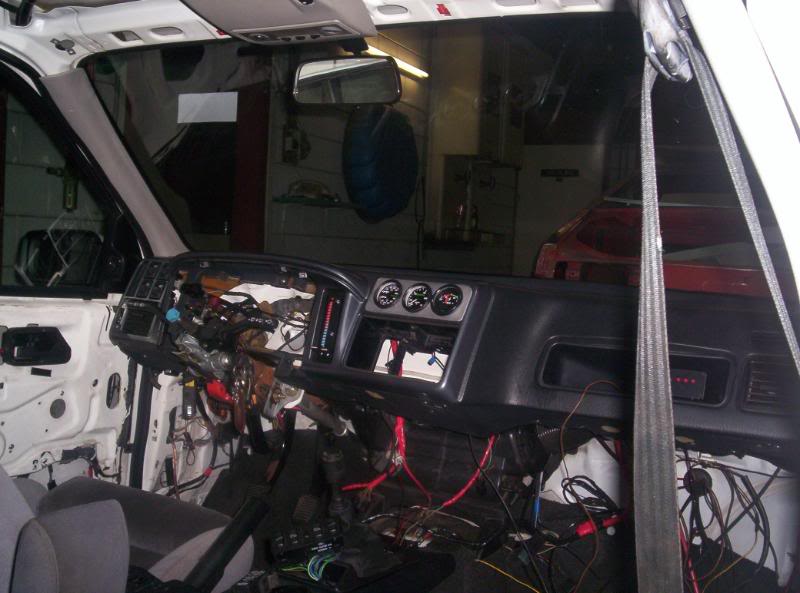
The engine is now running on the MegaSquirt management. Again a lot of wires (MAF for instance) have been removed from the loom. It's been taped up, shortened where necessary, put into the bay and connected to the engine.
I fitted a blach dash and a trio of Racetech gauges into a homemade bracket that's has been glued into the dash:
Put on the rearbumper and taillights:
since it's hardly a Sierra GT anymore I decided to remove all the badges
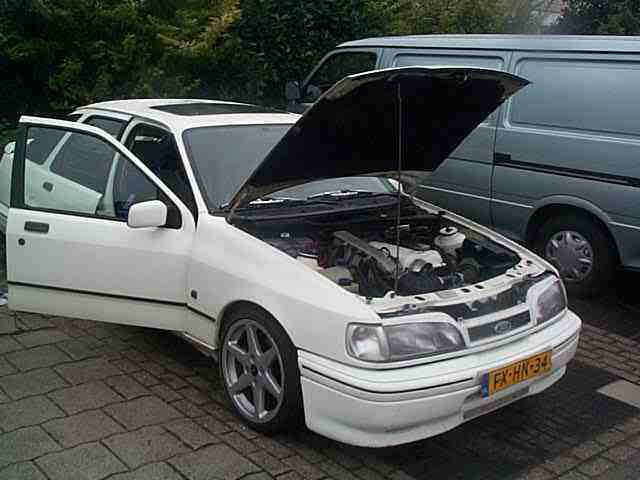
To clear the plenum we had to make and fit bonnetraisers. Initially I disliked the look but it grew on me and think it looks kinda cool. The bonnet has a couple of dents but will be placed with a vented 4x4 bonnet after I get it resprayed together with the grill and a pair of RS option sideskirts that will be going on.
New repeaters and headlight:
How the engine bay is now:
We gave it a thorough cleaning and polishing:
Refurbished front brakes:

and fitted and bled:
I am now in the process of installing the interior I have for it. Last weekend I installed a Sapphy leather rearseat and the leather doorcards. The middlebracket(hinge) for the seat needed to changed from a 5door to a Sapphy rearseat bracket and the outerbracket needed to be changed position (this was just a matter of 2 T50 bolts undoing and bolting up higher on the mountings already in the car. Anyone who has ever replaced or tinkered with a rearseat probably knows what I mean.)
However, to secure the rearseat to the body I still need to do some some serious grinding and welding. I've decided the best way to secure the seat is with the Sapphy seatsecuring. This is very different from a hatchback so rather than bodging something I am going to grind out the entire metal part that sits inbetween the rearturrets in a Sapphy and weld that into the hatchback. A couple of advantages in that:
1. Easy way of securing the rearseat as it will be original
2. Good strong base to make a new parcelshelf. Hatchbakc parcelshelves are crap as they are always sagging.
3. Good separation of boot area from the rest.
4. Stiffer chassis.
2, maybe 3 weeks and the build should be finished and we can start roadmapping it.
The engine is now running on the MegaSquirt management. Again a lot of wires (MAF for instance) have been removed from the loom. It's been taped up, shortened where necessary, put into the bay and connected to the engine.
I fitted a blach dash and a trio of Racetech gauges into a homemade bracket that's has been glued into the dash:
Put on the rearbumper and taillights:
since it's hardly a Sierra GT anymore I decided to remove all the badges
To clear the plenum we had to make and fit bonnetraisers. Initially I disliked the look but it grew on me and think it looks kinda cool. The bonnet has a couple of dents but will be placed with a vented 4x4 bonnet after I get it resprayed together with the grill and a pair of RS option sideskirts that will be going on.
New repeaters and headlight:
How the engine bay is now:
We gave it a thorough cleaning and polishing:
Refurbished front brakes:
and fitted and bled:
I am now in the process of installing the interior I have for it. Last weekend I installed a Sapphy leather rearseat and the leather doorcards. The middlebracket(hinge) for the seat needed to changed from a 5door to a Sapphy rearseat bracket and the outerbracket needed to be changed position (this was just a matter of 2 T50 bolts undoing and bolting up higher on the mountings already in the car. Anyone who has ever replaced or tinkered with a rearseat probably knows what I mean.)
However, to secure the rearseat to the body I still need to do some some serious grinding and welding. I've decided the best way to secure the seat is with the Sapphy seatsecuring. This is very different from a hatchback so rather than bodging something I am going to grind out the entire metal part that sits inbetween the rearturrets in a Sapphy and weld that into the hatchback. A couple of advantages in that:
1. Easy way of securing the rearseat as it will be original
2. Good strong base to make a new parcelshelf. Hatchbakc parcelshelves are crap as they are always sagging.
3. Good separation of boot area from the rest.
4. Stiffer chassis.
2, maybe 3 weeks and the build should be finished and we can start roadmapping it.
Last edited by Remko GT; 10-06-2008 at 10:50 AM.
10-06-2008, 11:48 AM
#18
Virgin
Join Date: Jun 2008
Location: Eindhoven, The Netherlands
Posts: 12
Received 0 Likes
on
0 Posts
Great project! I like the way you went about the engine modification... I'll be using a standard 24v boa in my granada. But then i'm not building a race monster.
13-06-2008, 03:10 PM
#19
Regular Contributor
Thread Starter
Join Date: May 2007
Location: The Netherlands
Posts: 282
Likes: 0
Received 0 Likes
on
0 Posts
Thanks for the reply But it's not a racemonster. It won't be a stripped-out trackslag but a road car with creature comforts. Parts of the interior haven't been fitted yet but will be in the next week (hopefully)
I am still in the process of arranging a tidy headliner and armrests.
But it's not a racemonster. It won't be a stripped-out trackslag but a road car with creature comforts. Parts of the interior haven't been fitted yet but will be in the next week (hopefully) I am still in the process of arranging a tidy headliner and armrests.
02-08-2008, 12:46 AM
#20
Regular Contributor
Thread Starter
Join Date: May 2007
Location: The Netherlands
Posts: 282
Likes: 0
Received 0 Likes
on
0 Posts
The build is mostly done, we got to the point the engine needs to be tuned. We had a lot of problems thursday because the AFR indicated by the WB HEGO was way of from what we observed. Switchpoint was wrong, it was set to a NB HEGO so all the readings were completely useless. Changed switchpoint, a couple of basic engine settings, the exhaust gas settings and got it idling at 900rpm quite good where thursday it was coughing thick black smoke, espcially when the throttle was opened, at that time it was even worse than a Turbodiesel at full chat, meaning it was heavily overfuelling. I guess that's an understatement, it left black patches on the pavement. The CO mi8ght well have in the region of 15 tgo 18%
Turned out I had connected the engine loom to the wrong analogue output, misunderstanding the manual in my ignorance at that time, wired in the wrong analogue output from the LC-1. I initially used the brown wire, which is the output that simulates a NB lambda reading, that was also counteracting to get proper AFR readings, w resopldered the engine loom to the 2nd analogue wire from the LC-1, the yellow wire, the AFR readings made a lot more sense, more or less coresspong to what we were observing, and we've managed to dial out the heavy overfuelling untill 3k rpm. I realised some of the exhaust gas setting we're of too. Can't remember all the details atm because I'm a bit pissed but got we did get it idling on a AFR around a lambda of 2.352 on WB setting so that's around a AFR of 14.7. Also the revvs pick up far better than yesterday, it doesn't completely smother in petrol anymore, good enough to take it out on a real testdrive, put it on autotune and see what would happen. That didn't do any good so we made some more changes and decided to turn off the autotune and taking it 1k to 3k revs ourselves. After that I think water came out of the exhaust idling, meaning we are deffo getting close. Tomorrow I am going to adress the handbrake cable adjustment because it's too tense but apart from some minor "problems" everything is spot on. The handling is perfect, no vibration in the steering wheel whatsoever, brakes work great, I couldn't be happier with today's progress.
Couple of video's:
On this one it misfired or backfired when I was a bit too enthusiastic with the TB and revved it above 4k rpm where we haven't adressed the fuelling yet aso it was way too rich there, scared the shite out of me though when it amde a bang where I hadn't expected it
A short vid of the 1st time we take it onto the open road from enclosed private property:
A 30 sec vid of the dash and interior:

An on-board vid while the car is driven by my m8 Sander, really leaving private property and taking it out on the road for a real spin:

A vid of the exterior, the engine bay and the interior of the car, also showing the leather Saph rearseat install:

And one where we open up the taps and hit the brakes, crank up the volume, and enjoy the noise of the V6D

All and all the last couple of weeks brought a lot of pregress. Even though the mapping is far from finished, the car already felt fast, I am getting more and more sure by the time we've got the mapping dialled in, a proper induction kit fitted and a cutom SS exhaust 250hp NA might be feasible.
Updates next week
Turned out I had connected the engine loom to the wrong analogue output, misunderstanding the manual in my ignorance at that time, wired in the wrong analogue output from the LC-1. I initially used the brown wire, which is the output that simulates a NB lambda reading, that was also counteracting to get proper AFR readings, w resopldered the engine loom to the 2nd analogue wire from the LC-1, the yellow wire, the AFR readings made a lot more sense, more or less coresspong to what we were observing, and we've managed to dial out the heavy overfuelling untill 3k rpm. I realised some of the exhaust gas setting we're of too. Can't remember all the details atm because I'm a bit pissed but got we did get it idling on a AFR around a lambda of 2.352 on WB setting so that's around a AFR of 14.7. Also the revvs pick up far better than yesterday, it doesn't completely smother in petrol anymore, good enough to take it out on a real testdrive, put it on autotune and see what would happen. That didn't do any good so we made some more changes and decided to turn off the autotune and taking it 1k to 3k revs ourselves. After that I think water came out of the exhaust idling, meaning we are deffo getting close. Tomorrow I am going to adress the handbrake cable adjustment because it's too tense but apart from some minor "problems" everything is spot on. The handling is perfect, no vibration in the steering wheel whatsoever, brakes work great, I couldn't be happier with today's progress.
Couple of video's:
On this one it misfired or backfired when I was a bit too enthusiastic with the TB and revved it above 4k rpm where we haven't adressed the fuelling yet aso it was way too rich there, scared the shite out of me though when it amde a bang where I hadn't expected it
A short vid of the 1st time we take it onto the open road from enclosed private property:
A 30 sec vid of the dash and interior:
An on-board vid while the car is driven by my m8 Sander, really leaving private property and taking it out on the road for a real spin:
A vid of the exterior, the engine bay and the interior of the car, also showing the leather Saph rearseat install:
And one where we open up the taps and hit the brakes, crank up the volume, and enjoy the noise of the V6
All and all the last couple of weeks brought a lot of pregress. Even though the mapping is far from finished, the car already felt fast, I am getting more and more sure by the time we've got the mapping dialled in, a proper induction kit fitted and a cutom SS exhaust 250hp NA might be feasible.
Updates next week
14-08-2008, 11:20 AM
#23
Regular Contributor
Thread Starter
Join Date: May 2007
Location: The Netherlands
Posts: 282
Likes: 0
Received 0 Likes
on
0 Posts
It's passed the MOT today! After that my m8 took it for a 20mile drive and everything was spot on. Wheels are being aligned now.
Had some problems with the brakes and the coolant but solved it yesterday. Had serious problems with the brakes sticking. Turned out to be the brakelight switch was keeping the brakes on thus overheating them. That something so small can give such huge problems...
Tonight we're continuing the tuning effort. It's already pretty quick.
Tonight I'm installing my min leather Recaro seats and swap a damaged seatbelt. Temporarily borrowing it from my m8's Sierra
Now all is left is making it prettier.
fit sideskirts
fit 4point Sabelt harnasses
build custom SS exhaust
improve inlet
Next winter a respray?
03-09-2008, 10:24 AM
#25
Virgin

Join Date: Nov 2007
Posts: 6
Likes: 0
Received 0 Likes
on
0 Posts
Nice work Remko, the car looks cool. My friend has just got a full set of Samco silicone hoses on his, Samco told him they were a new kit, really made the engine stand out. They would look great on your car.
04-06-2009, 02:44 PM
#26
Regular Contributor
Thread Starter
Join Date: May 2007
Location: The Netherlands
Posts: 282
Likes: 0
Received 0 Likes
on
0 Posts
Thanks!
Disaster struck though
Had the car running fine, thought it was slightly pinking, so took it to a RollingRoad to get the mapping sorted in a safe environment. Wasn't pinking after all, had a conrod bearing bailing on me. Trapped dirt in the engine came loose with the oilswaps.
Took out my pistons, crank and block. Cil no. 1 showed severe moisture damage as well, beyond repair.
Dynosheet showed promise though. 300Nm @4400rpm, 170bhp @4100rpm, couldn't rev it over 4.5k rpm, map reading was all over the place due to excessive backpressure and the wrong position for the MAP pick up on the plenum. Pistonrings were fucked, can't even describe how bad the oilrings were. Exhaust was way too small, good for torque and emission but not good for performance.
Now I am in the process of stripping a Scorpio Cossie donor car and dropping in a replacement engine while I save up to get an entire new engine built with forged pistons, BOB short block (stronger mainbearings) slight overbore to 3.0liter and girdled bottom end.
Should do 6.8k rpm and make over 250bhp. I considered going turbo but I just know I'd want more power soon. Engine can be build to cope with that but figured the transmission will turn to chocolate over 300bhp so decided againt it and keeping it N/A.
31-08-2009, 01:49 PM
#30
Too many posts.. I need a life!!
Join Date: Aug 2009
Location: dundee
Posts: 674
Likes: 0
Received 0 Likes
on
0 Posts
hi very nice motor. i was considering this conversion to a sierra how did it pan out start to finish, would you do it again and what pitfalls is there. the loom is a minor problem as my grandad is a autosparky also heard there could be a prob with the gearbox. does this engine drop right in with minor problems any hints and tips greatly appreciated
blair
blair
 30-03-2012, 01:26 PM
#32
Virgin

Join Date: Sep 2003
Posts: 6
Likes: 0
Received 0 Likes
on
0 Posts
Well, are you driving your car, or sold it?
Have a question about MS tuning setup.
Actually trying to start BOB engine on megasquirt ECU.
What constants should i use in tuning software?
even or odd firing (even i think)
required fuel - ?
and so on.
Any help apreciated.
Have a question about MS tuning setup.
Actually trying to start BOB engine on megasquirt ECU.
What constants should i use in tuning software?
even or odd firing (even i think)
required fuel - ?
and so on.
Any help apreciated.

Thread
Thread Starter
Forum
Replies
Last Post