
Ford Focus RS Sony Head Unit


Thread Starter
Virgin
Joined: Nov 2013
Posts: 10
Likes: 0
From: Leicestershire
Hi
I am new to this forum so hopefully I have posted in the right place
First of all I have to be honest in that I had a crazy moment the other morning and decided to push my CD, when not needed, into my Sony Head Unit, I had pressed load but when was ready I pushed the cd in rather than letting the head unit take it the natural way. After approx 30 seconds of struggling my head unit took the CD and came up with 'drive fault'
I am thinking of taking the head unit out and perhaps taking it apart to remove the cd?
Would this be a bad thing? Any suggestions and/or help would be appreciated
Webbo
I've found that life I needed.. It's HERE!!


Joined: Oct 2008
Posts: 1,017
Likes: 14
From: Cheshire
You can remove the front from the radio once its out of the dash. There is 4 torxs that are on the edges 2 top and 2 bottom Then flick the front over the clips around the edges and then the front will come away from the radio unit. There is a ribbon with a red connector on the end. You can carefully remove the ribbon from the face to save damaging the ribbon with the weight of the face. Then you should be able to see the CD.
Thread Starter
Virgin
Joined: Nov 2013
Posts: 10
Likes: 0
From: Leicestershire
Cheers mate, I bought a Bojo tool the other day and removed the trim on Wednesday, was abit of a struggle to be honest as I was concered I was going to snap something. I have slightlty distorted one of the clips but nothing that should cause any major problems
Thread Starter
Virgin
Joined: Nov 2013
Posts: 10
Likes: 0
From: Leicestershire
Trending Topics
I've found that life I needed.. It's HERE!!
Joined: Oct 2008
Posts: 1,017
Likes: 14
From: Cheshire
Right, i dug the spare radio out and took some pictures. The CD is held in quite well into the CD drive 
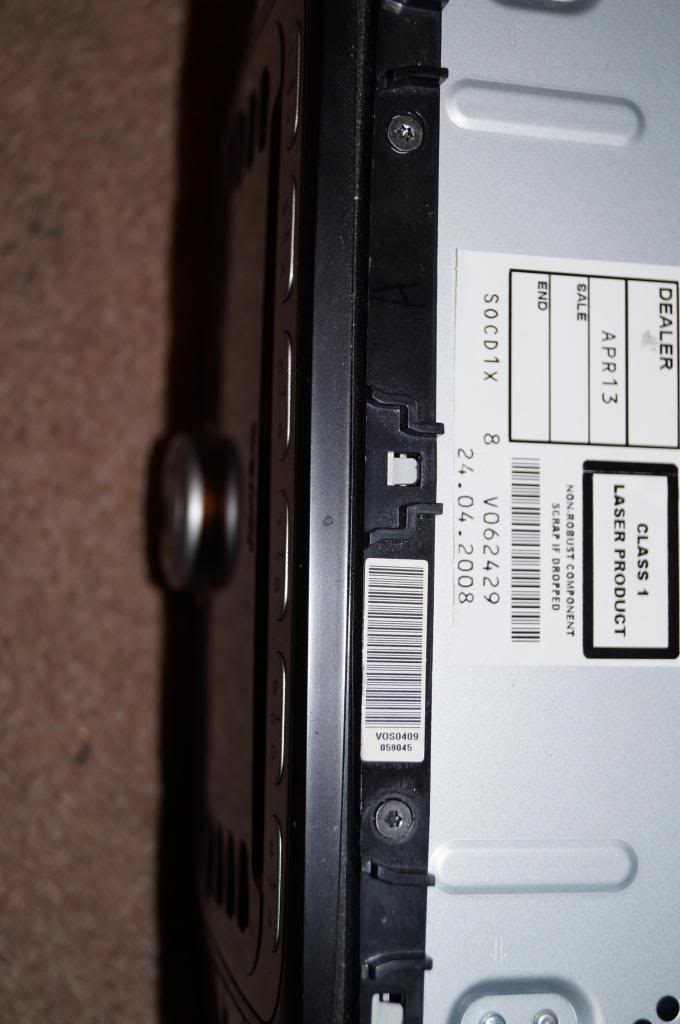
The first picture Shows the location of the face (TOP) torx screws T8
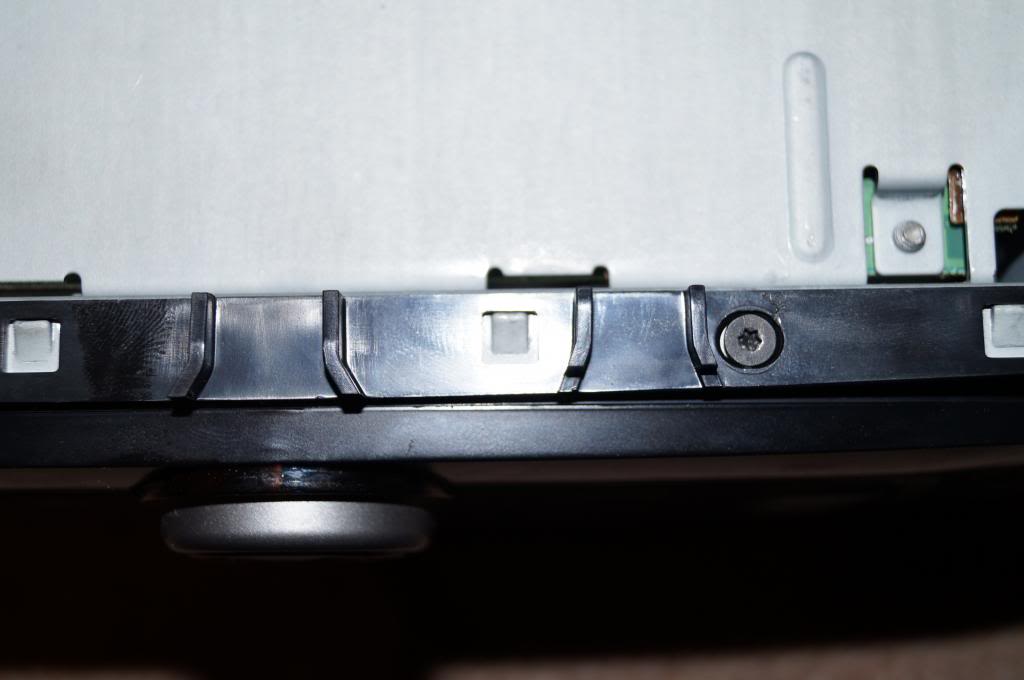
This picture shows the location of the bottom ones. One may be under some tape T8 again.
Once the four T8's are out start at the bottom to unclip it from the mounting frame.
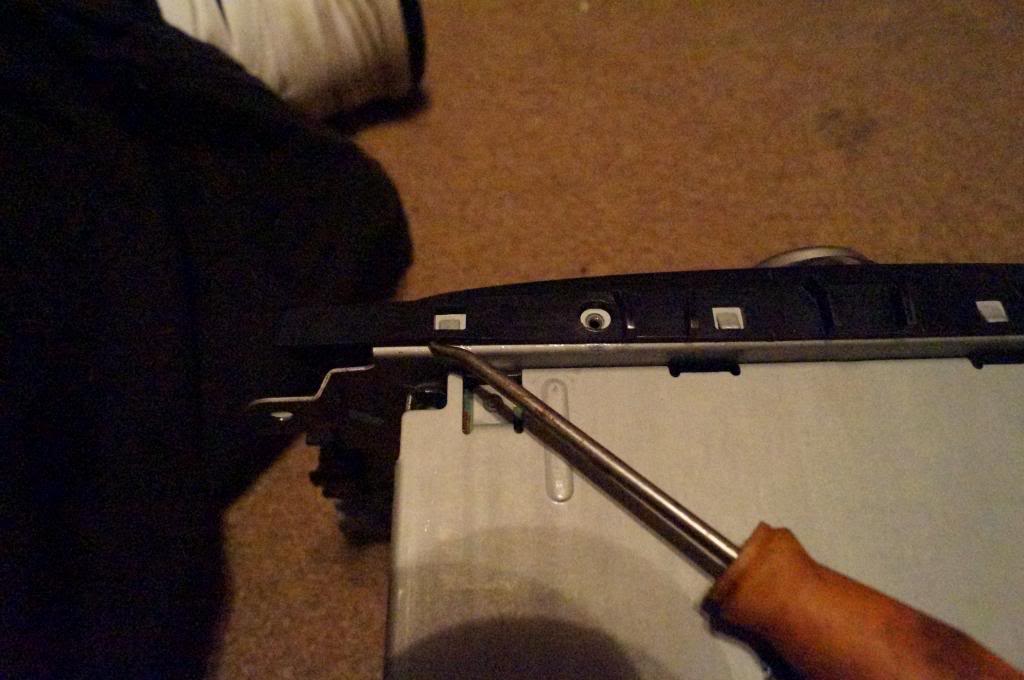
When its half undone it will be like this.
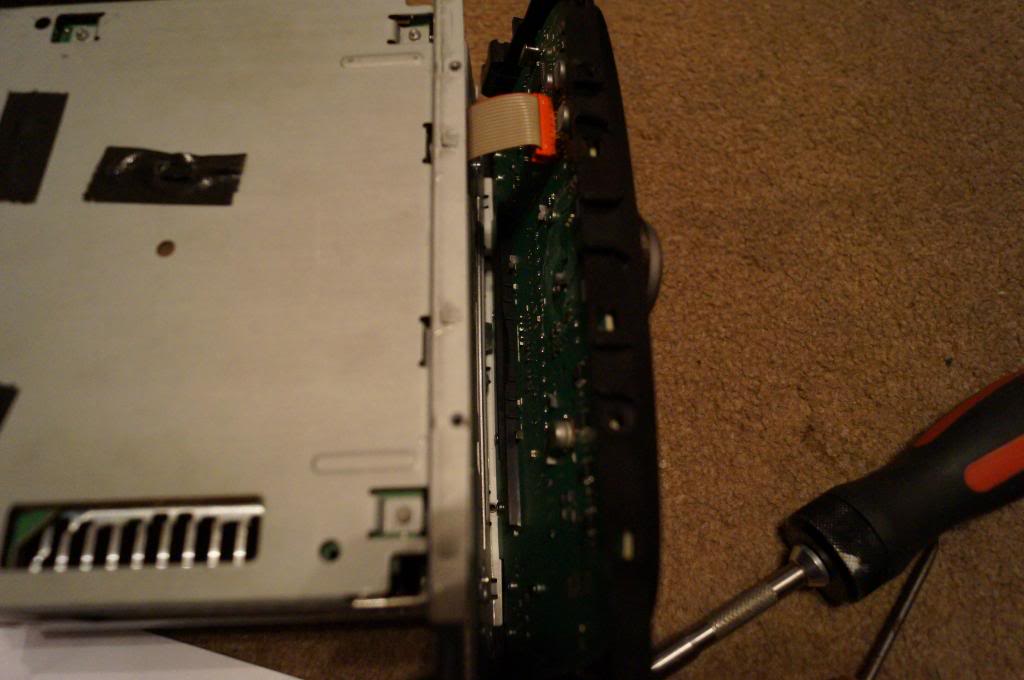
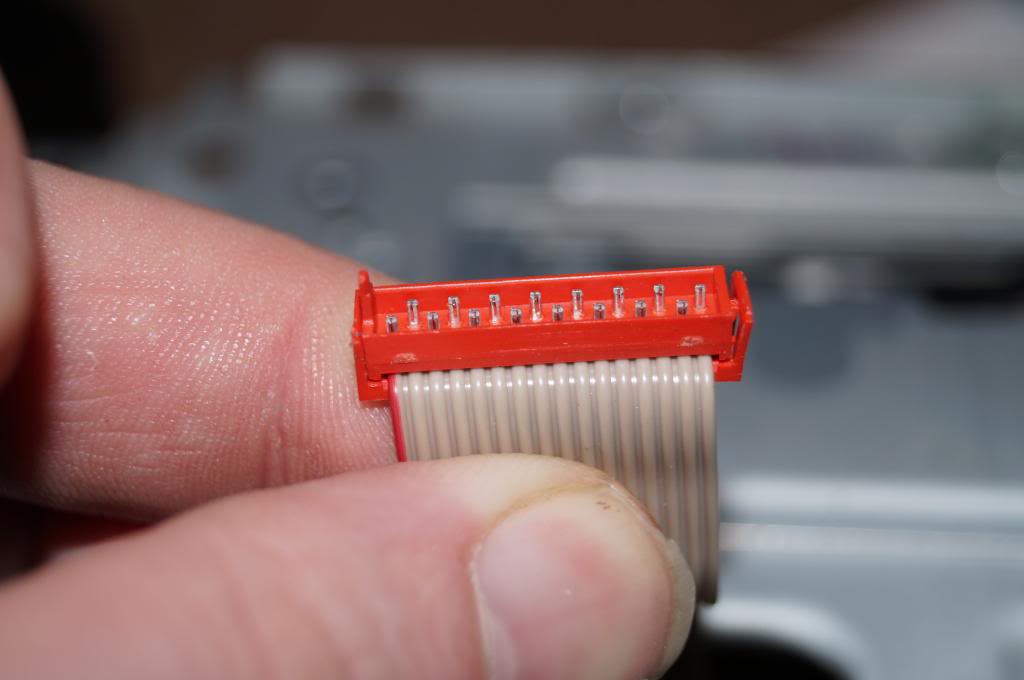
This would be ideal time to unclip the red connector on the back of the face of the radio. As you can see in the picture it has little wings on to keep it in place
Then you can unclip the face off the top clips like a hinge. Then you can see the mounting face that holds the radio into the dash (This can be changed so you can convert a Focus radio like the one here into a Fiesta ST square face radio. I have done this with my old radio so the Fiesta now had DAB).
Now this plate has numbers on it. Number 6 is needs to be removed so you can remove the lid from the radio
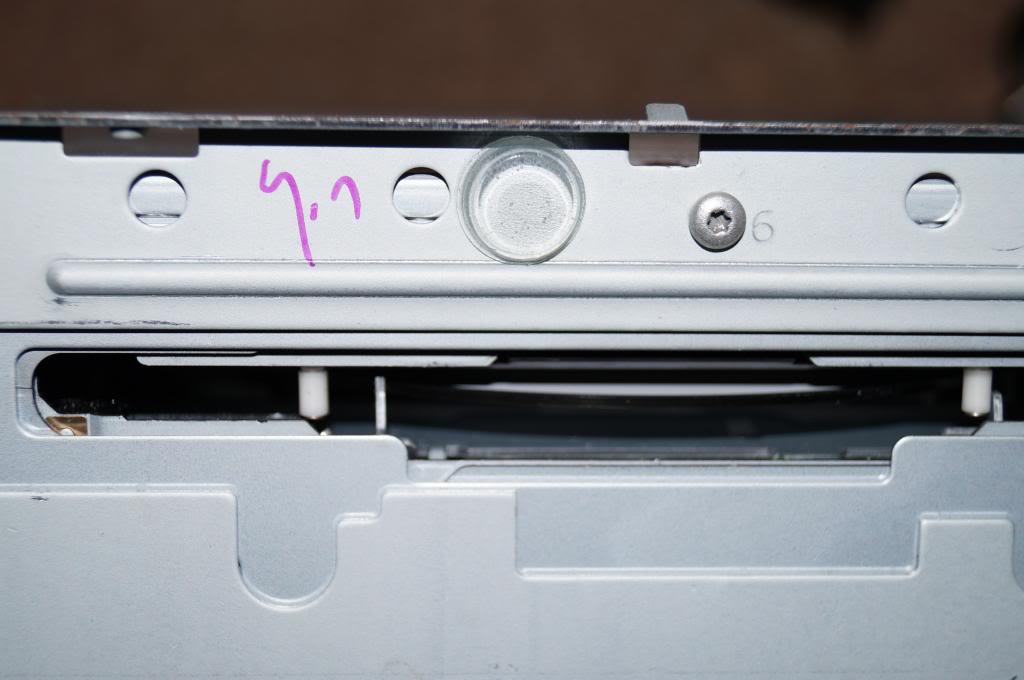
Once that and the lid is removed you can see where the CD drive lives.
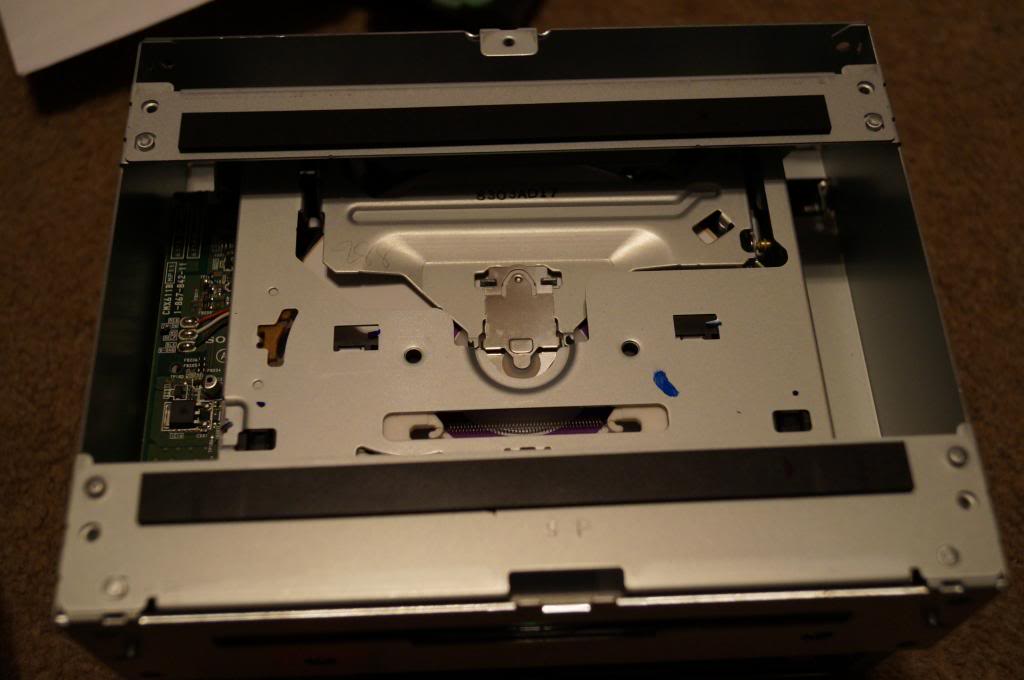
This sits on 4 dowels and lifts up. There is another ribbon on the left side that connects the CD drive to the circuit board below.
Now the problem is the CD in this radio is stuck in the drive as there is two arms that will not move out of the way. You can see them to the left of each of the plastic roller pins.
Ive had a good fiddle with the arms that i can see and they will not lower down
Even when you move the gears on the side of the CD drive.
Now you can have a fiddle with yours and see if you can get it to move or try and find a faulty one with a bad display and swap the CD drives.
The first picture Shows the location of the face (TOP) torx screws T8
This picture shows the location of the bottom ones. One may be under some tape T8 again.
Once the four T8's are out start at the bottom to unclip it from the mounting frame.
When its half undone it will be like this.
This would be ideal time to unclip the red connector on the back of the face of the radio. As you can see in the picture it has little wings on to keep it in place
Then you can unclip the face off the top clips like a hinge. Then you can see the mounting face that holds the radio into the dash (This can be changed so you can convert a Focus radio like the one here into a Fiesta ST square face radio. I have done this with my old radio so the Fiesta now had DAB).
Now this plate has numbers on it. Number 6 is needs to be removed so you can remove the lid from the radio
Once that and the lid is removed you can see where the CD drive lives.
This sits on 4 dowels and lifts up. There is another ribbon on the left side that connects the CD drive to the circuit board below.
Now the problem is the CD in this radio is stuck in the drive as there is two arms that will not move out of the way. You can see them to the left of each of the plastic roller pins.
Ive had a good fiddle with the arms that i can see and they will not lower down
Even when you move the gears on the side of the CD drive.
Now you can have a fiddle with yours and see if you can get it to move or try and find a faulty one with a bad display and swap the CD drives.

Thread
Thread Starter
Forum
Replies
Last Post
salsheikh
Alloy wheels and ICE for sale
0
Jul 30, 2015 08:45 PM