
Opel Manta 400 Cosworth
 28-09-2013, 09:56 PM
#1
Wahay!! I've lost my Virginity!!
Thread Starter

Hi all.
I know this post will piss some people off and I apologize for that.
Mods please move it if it's not seen fit for here.
I will keep my first post concise as I know you are only really bothered about the engine
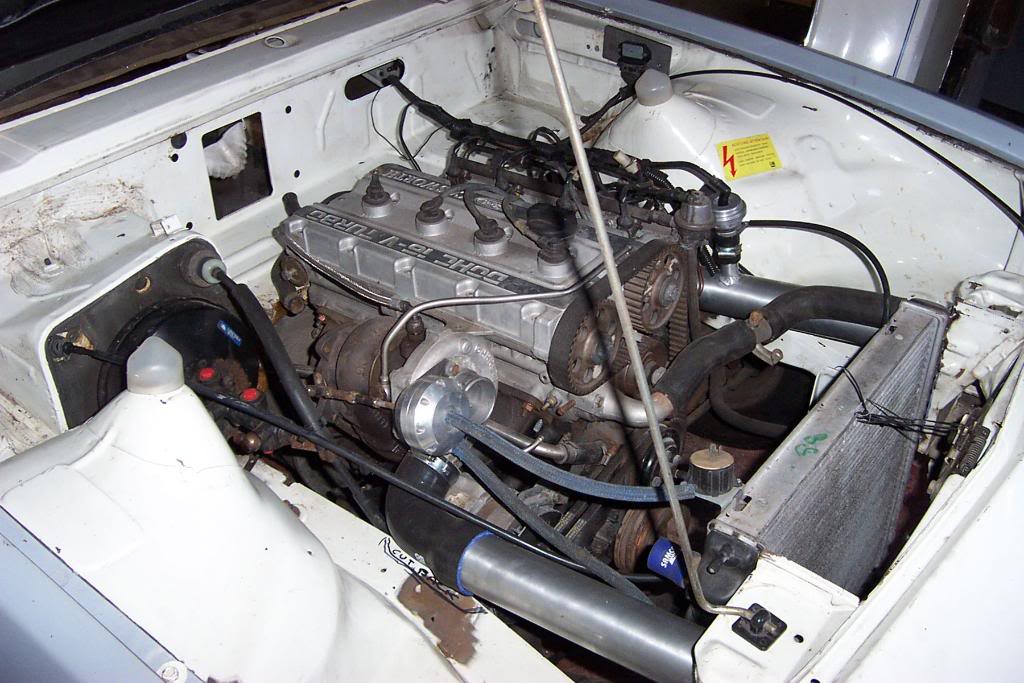
The Manta 400 was fitted with a cosworth head but it was fitted to an boat anchor of a bottom end ( pretty close to a pinto eh!)
Cossie YB and box fitted 10 years ago
Opel Manta coupe, the best shell I have had in 20 years and owned by a lady with only 40 thousand miles on the clock
Back in the day digital cameras didn't exist so I have no pics of it as it was :'(
Hey ho..... cosworth engine added and t5 box
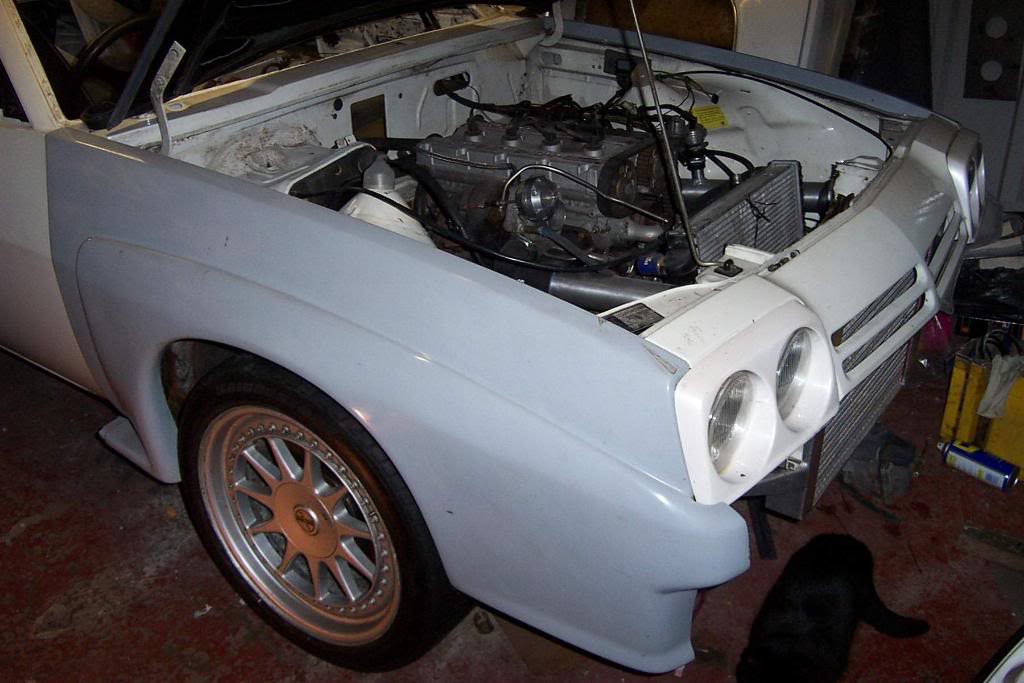
manta i240 bodykit from the best in the country( rallytech)
T5 box a bit long for the manta so I sierra tunnel added although I now may go back to a getrag 265 and manta tunnel :'(
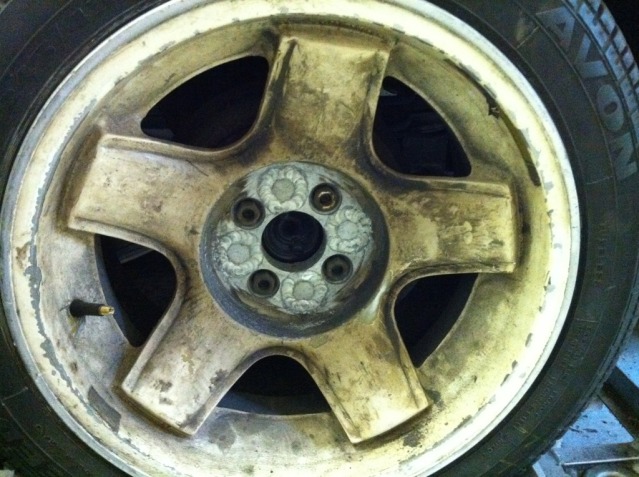
Manta pcd is 4x100 and I wanted 5 x120 so hubs changed to monza with manta bearings custom made at a cost of 200 quid so I could pick and choose bmw rims
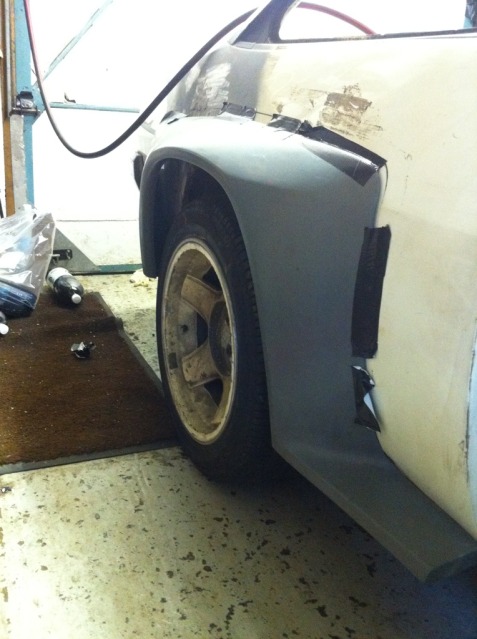
These are harge split rims
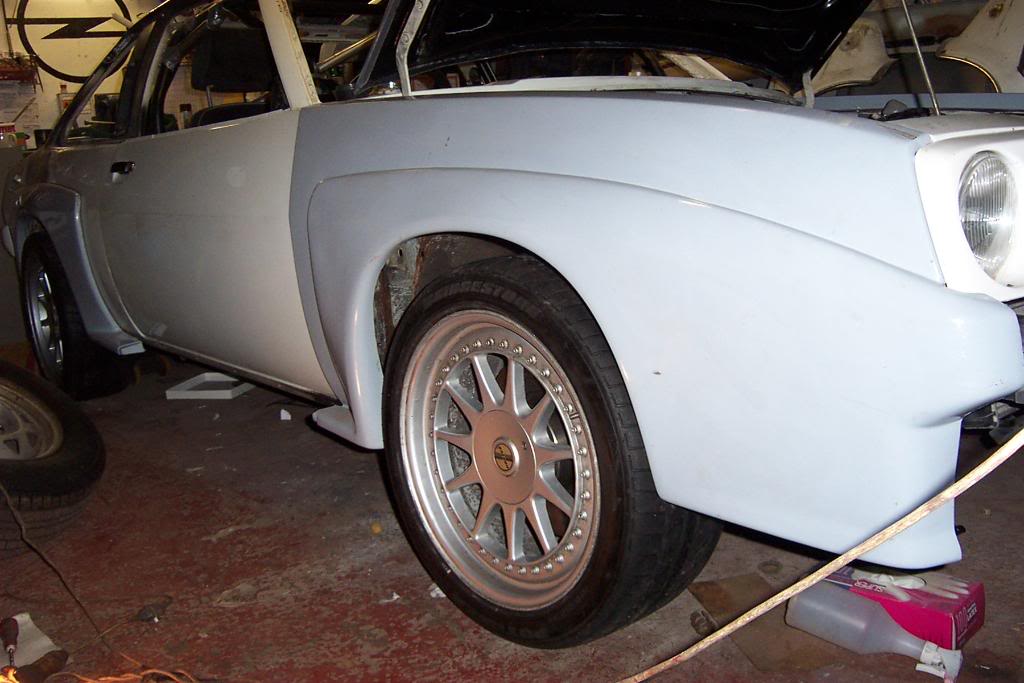
Other rims to consider are these which seem to fill the arch better
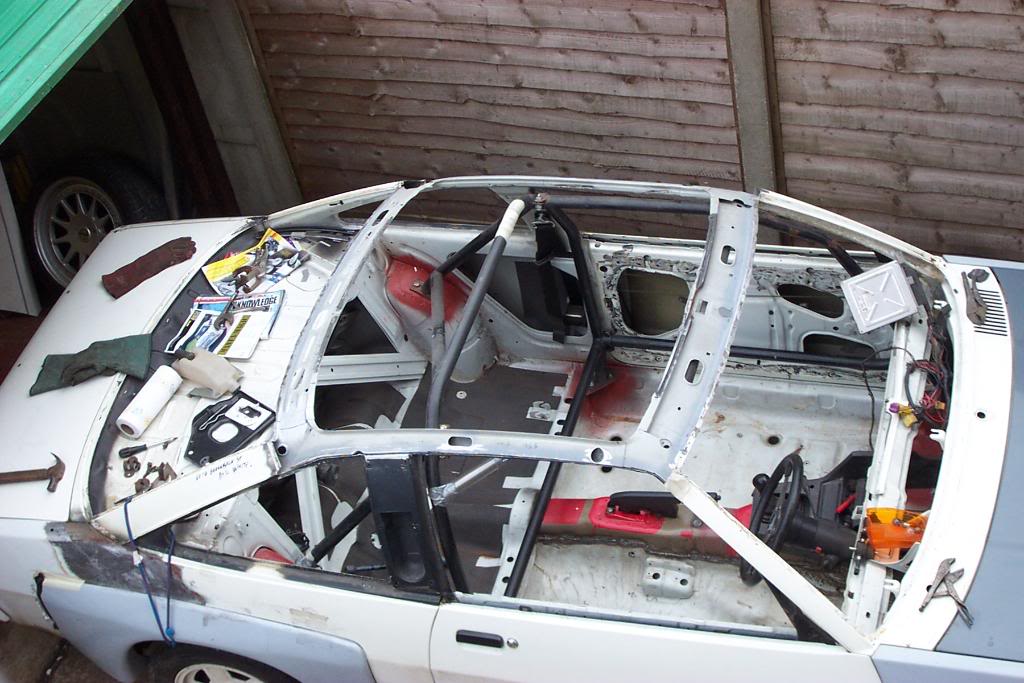
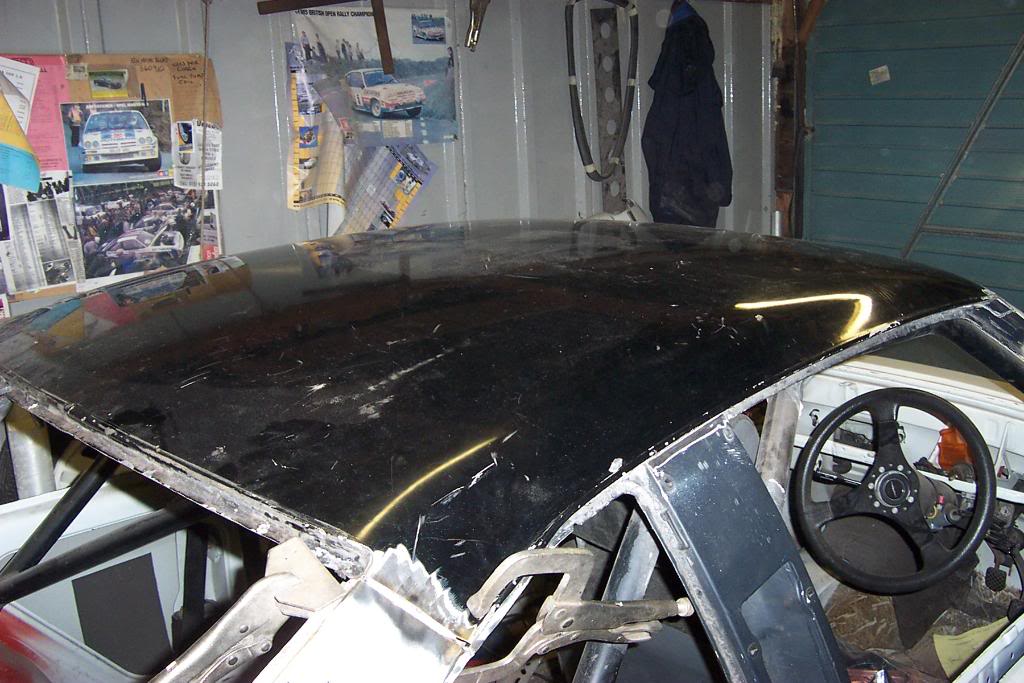
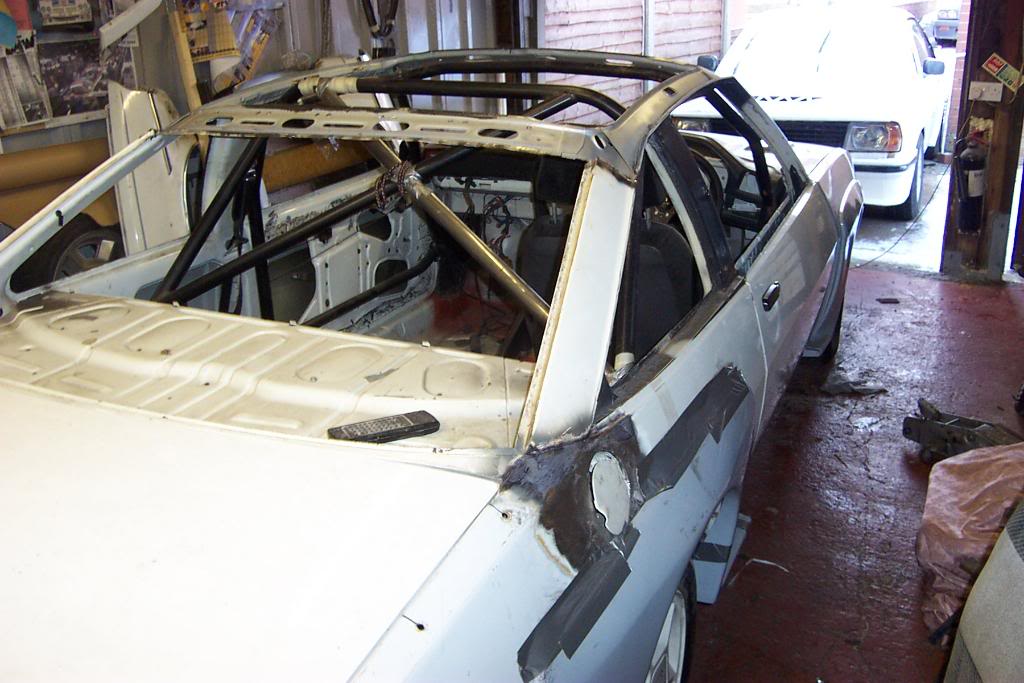
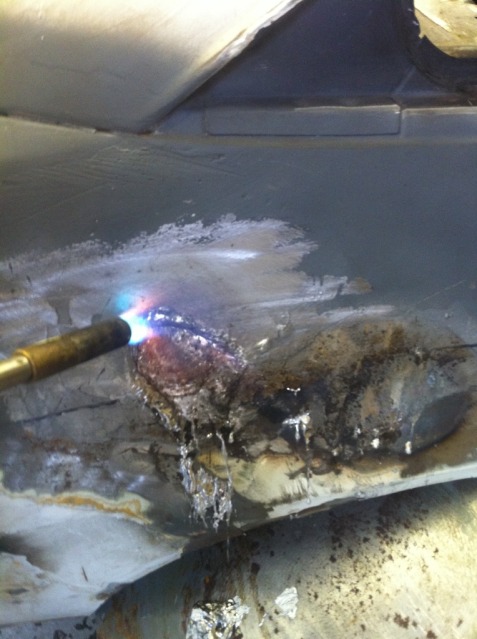
The roof on a manta is rubbish so I cut it off and added a non sunroof one
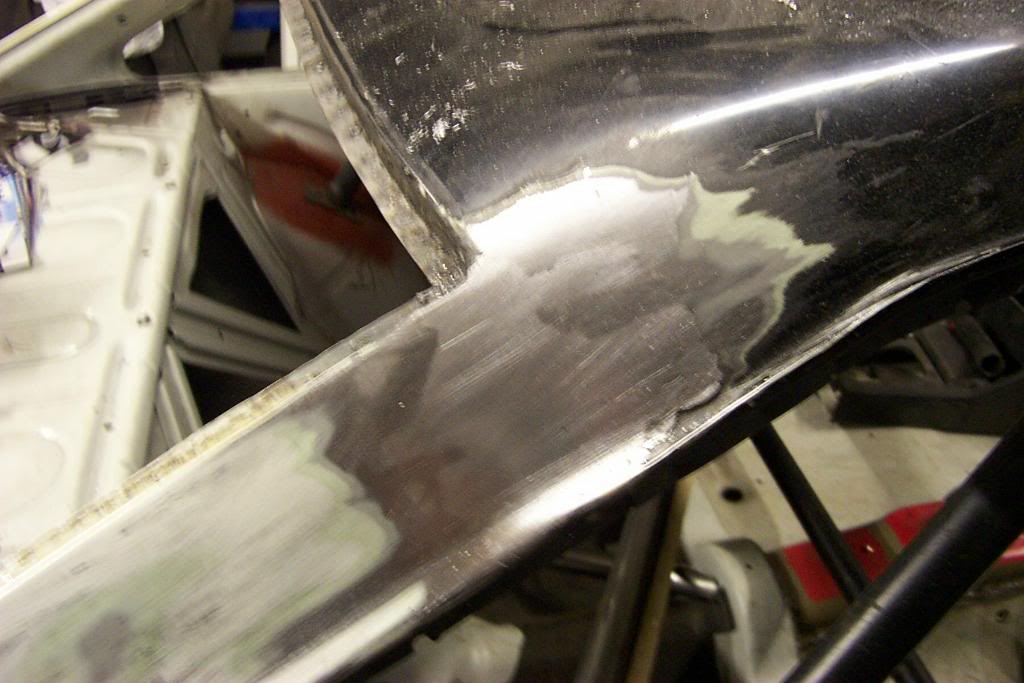
And lead fill
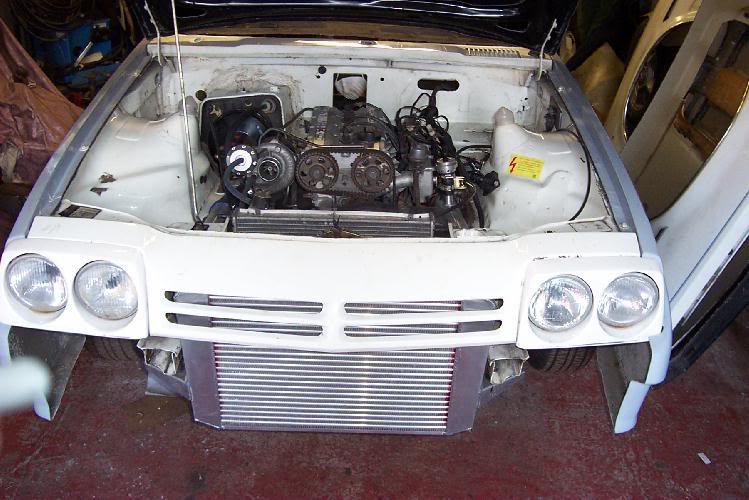
RS500 intercooler tucked into nose
cage added
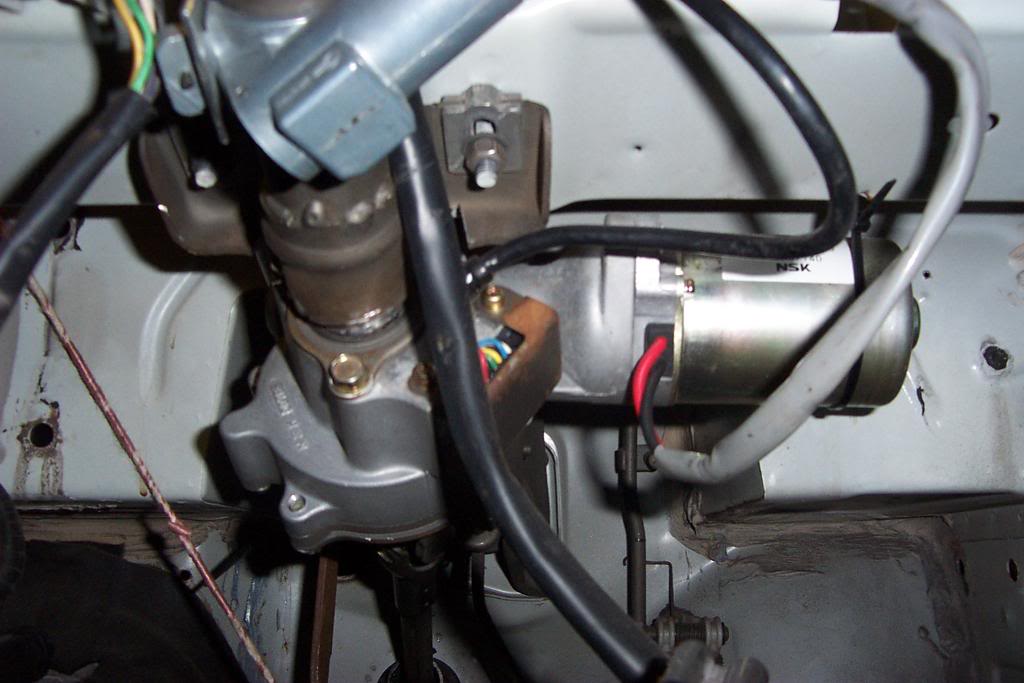
manta steering is always really heavy( honestly it can be a 2 hand job just to turn and that leaves no hands for stirring the box :-X) on a lowered car so I added corsa b column power steering
I know this post will piss some people off and I apologize for that.
Mods please move it if it's not seen fit for here.
I will keep my first post concise as I know you are only really bothered about the engine
The Manta 400 was fitted with a cosworth head but it was fitted to an boat anchor of a bottom end ( pretty close to a pinto eh!)
Cossie YB and box fitted 10 years ago
Opel Manta coupe, the best shell I have had in 20 years and owned by a lady with only 40 thousand miles on the clock
Back in the day digital cameras didn't exist so I have no pics of it as it was :'(
Hey ho..... cosworth engine added and t5 box
manta i240 bodykit from the best in the country( rallytech)
T5 box a bit long for the manta so I sierra tunnel added although I now may go back to a getrag 265 and manta tunnel :'(
Manta pcd is 4x100 and I wanted 5 x120 so hubs changed to monza with manta bearings custom made at a cost of 200 quid so I could pick and choose bmw rims
These are harge split rims
Other rims to consider are these which seem to fill the arch better
The roof on a manta is rubbish so I cut it off and added a non sunroof one
And lead fill
RS500 intercooler tucked into nose
cage added
manta steering is always really heavy( honestly it can be a 2 hand job just to turn and that leaves no hands for stirring the box :-X) on a lowered car so I added corsa b column power steering
 28-09-2013, 09:59 PM
#2
Irregular Poster
Probably the best combination of a classic car for me!!
Prefer Mantas to mk1 and mk2 escorts...and iu love manta 400s. So a manta 400 replica with a YB, is just perfect
Cant wait to see it finished!
Prefer Mantas to mk1 and mk2 escorts...and iu love manta 400s. So a manta 400 replica with a YB, is just perfect
Cant wait to see it finished!
28-09-2013, 10:00 PM
#3
Wahay!! I've lost my Virginity!!
Thread Starter
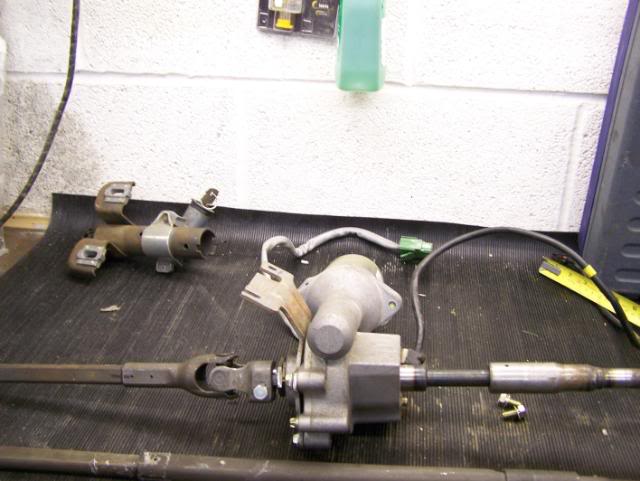
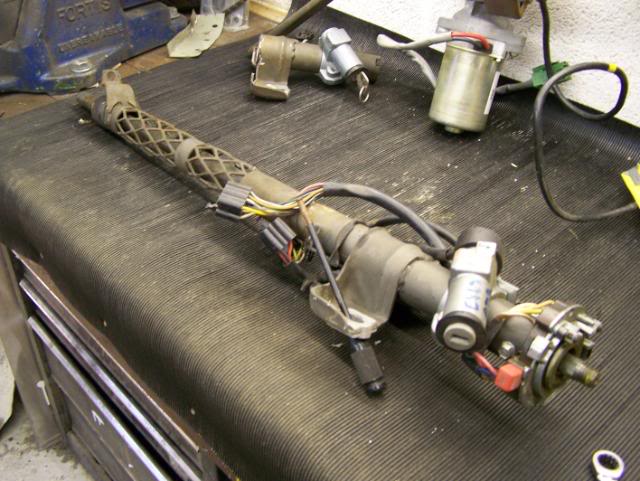
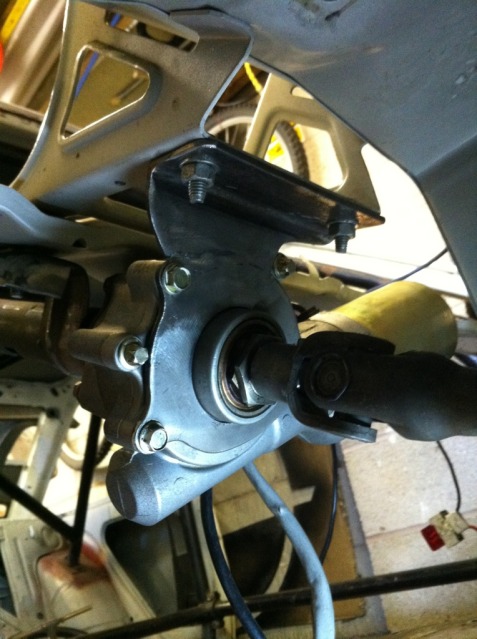
The power steering wasn't that hard to do on the manta and you can adapt it to suit most cars I suppose, this is how I did it on my manta..
Corsa b column
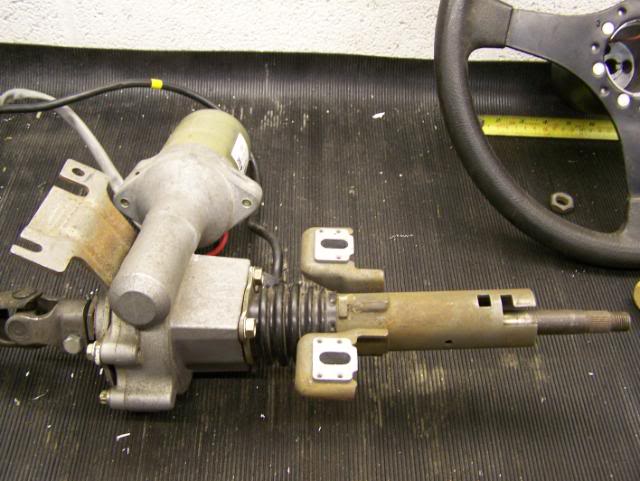
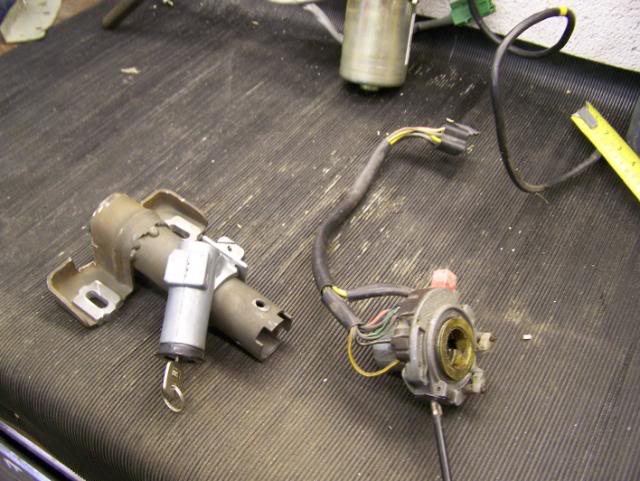
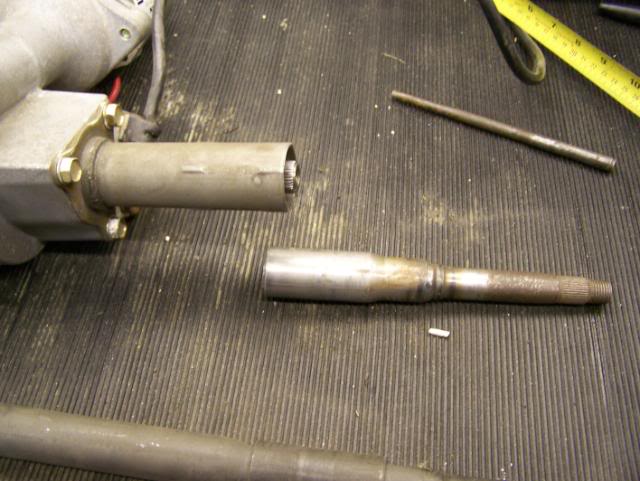
Remove the outer collapsable top part of the corsa bit
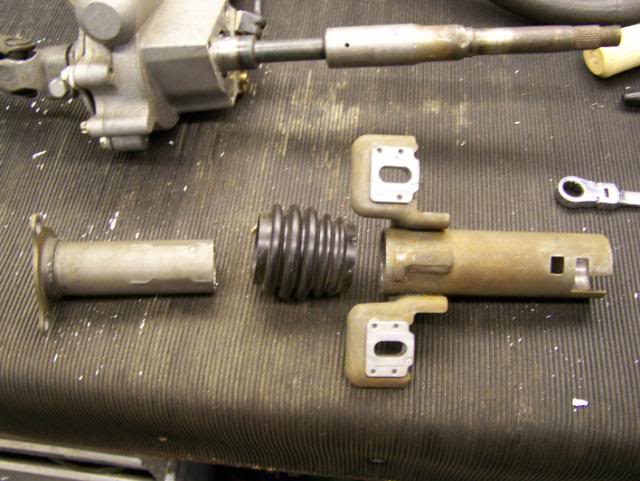
You are left with
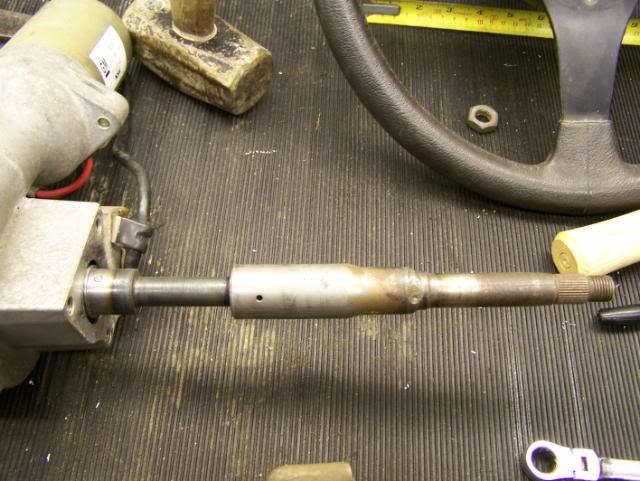
Don't hit the end of the spline as I did or the spline end will come off
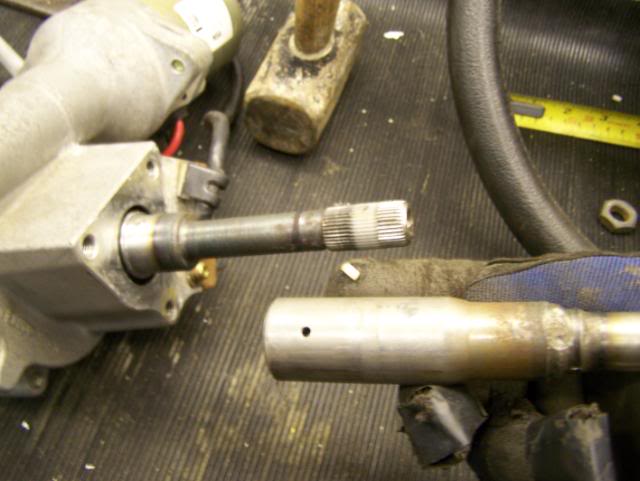
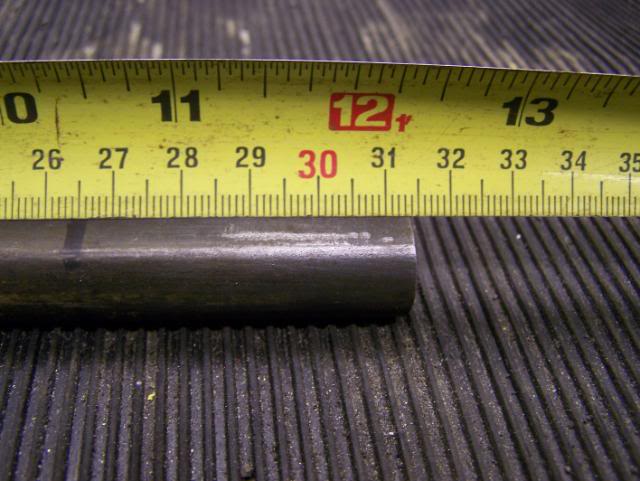
I will be putting a blob of weld on mine to hold the 2 parts together as the top part with the manta bit added will not collapse now anyway, the reference for the amount to stick out is 85mm for the top part
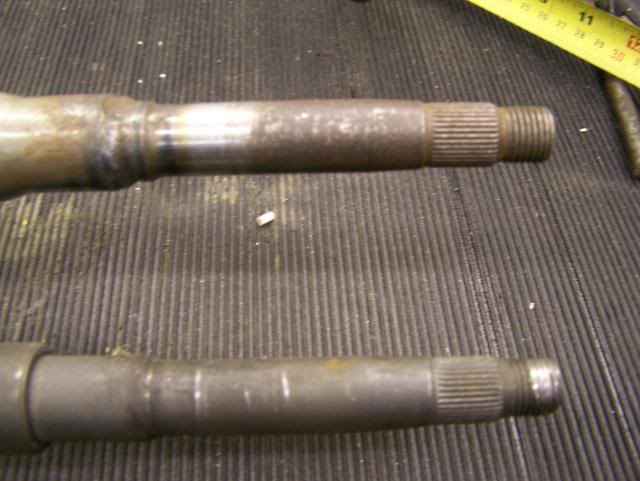
Take your manta column and remove the inside part
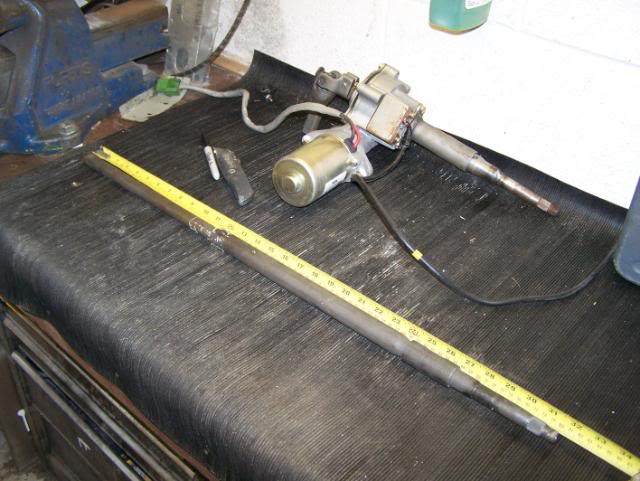
What I was trying to do was keep the columns the same length so the inner part was my reference point
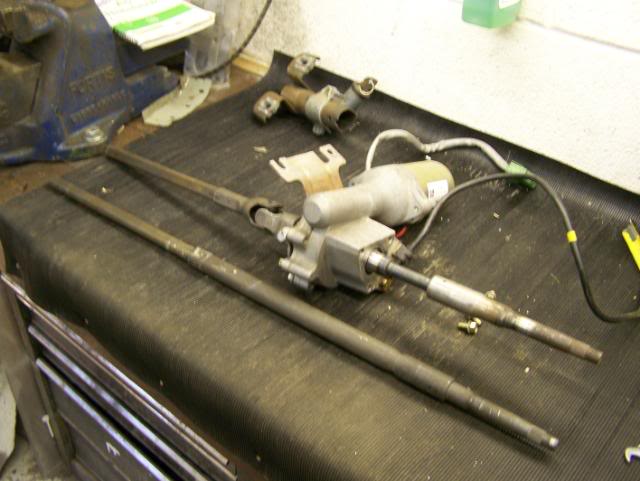
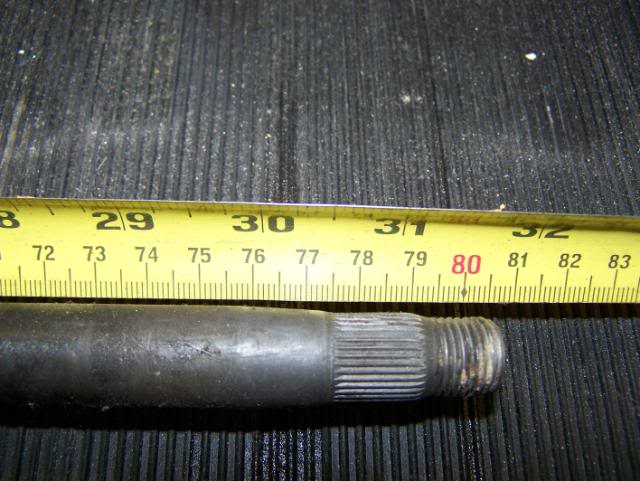
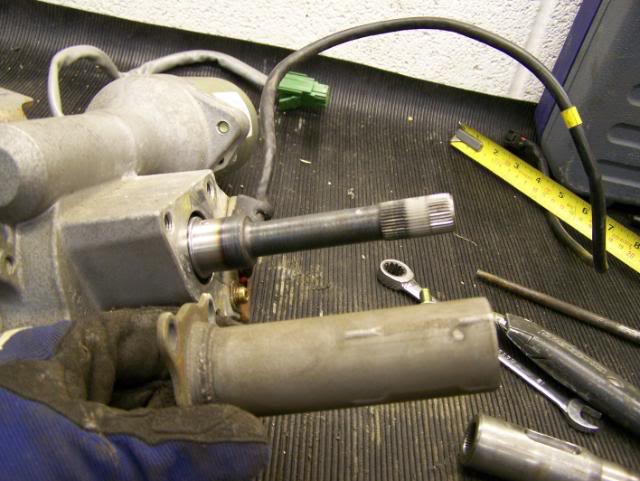
Take the outside of the manta column and chop it into 3 pieces
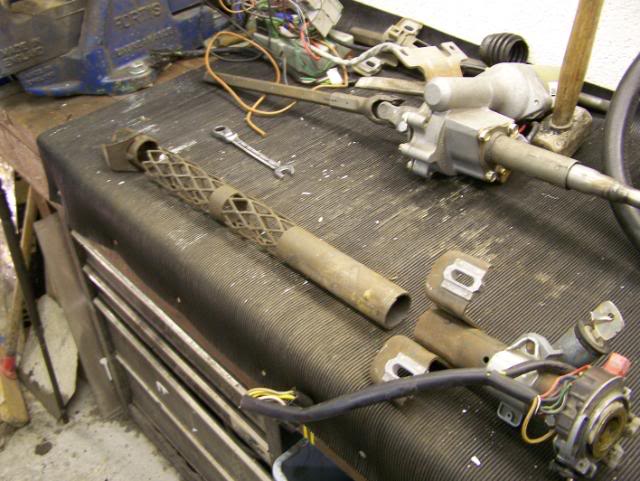
You want the top outer part to be 180mm
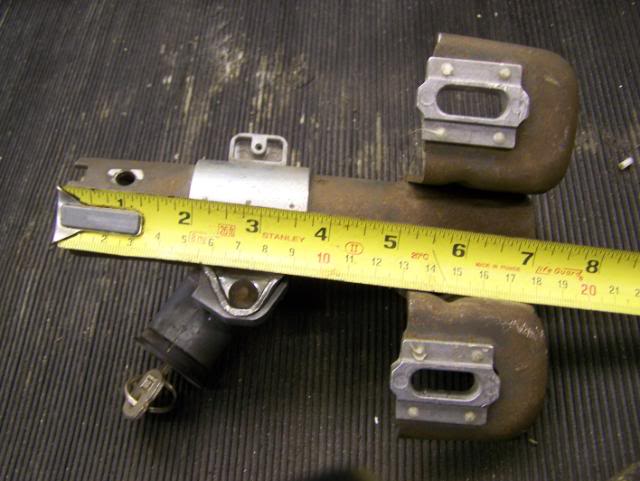
That part slips over the inner of the corsa bit
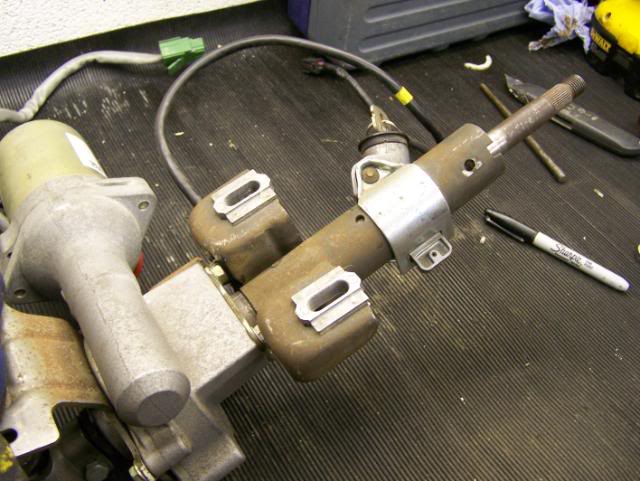
These two parts will be welded together
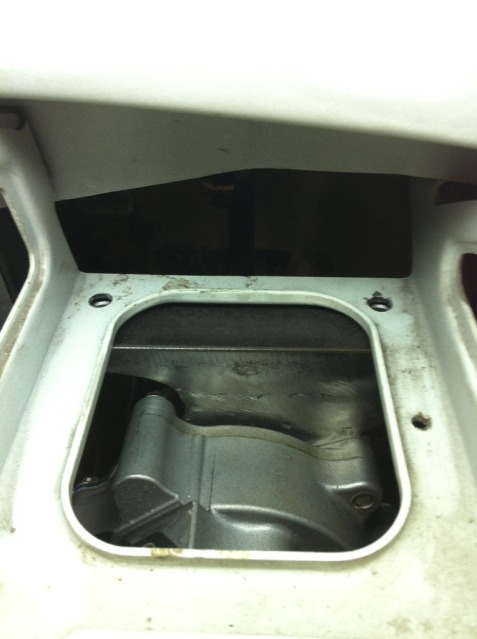
Make room to get at the bolts
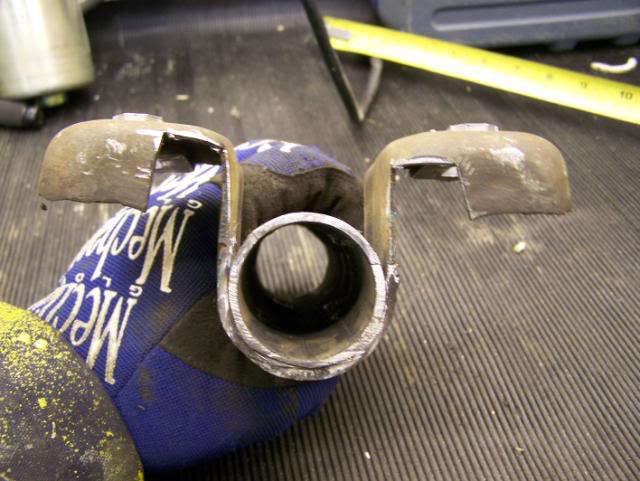
This will now take the manta multi switchgear and wheel in the same place as a standard car
Bottom part of the column
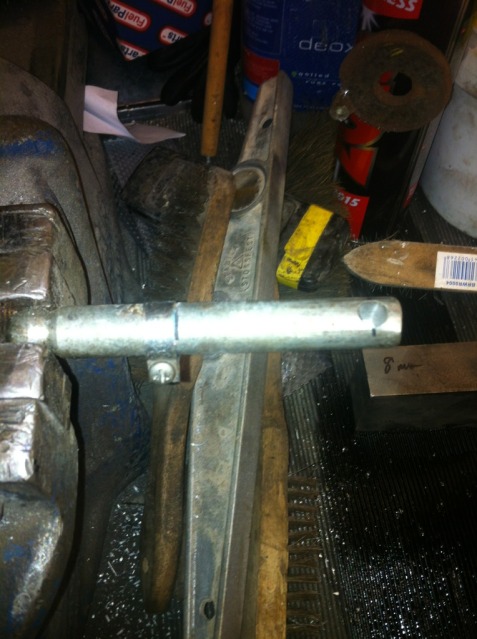
Take the inner shaft from the manta and split it then cut the bottom part down to 315mm
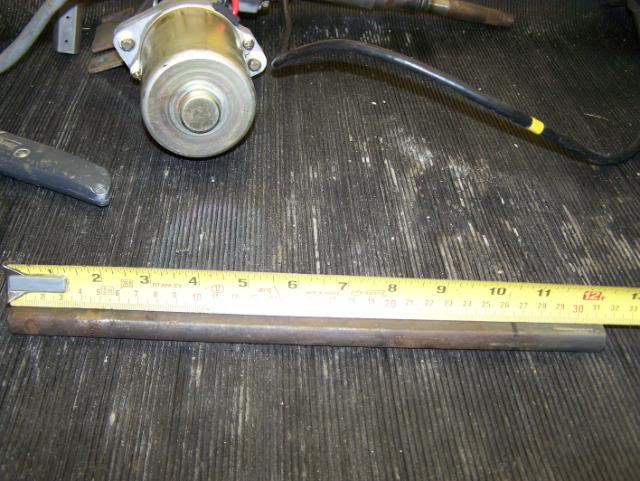
Shove that into the corsa UJ, it's a tight fit but this part if you leave unwelded will collapse in a front ender
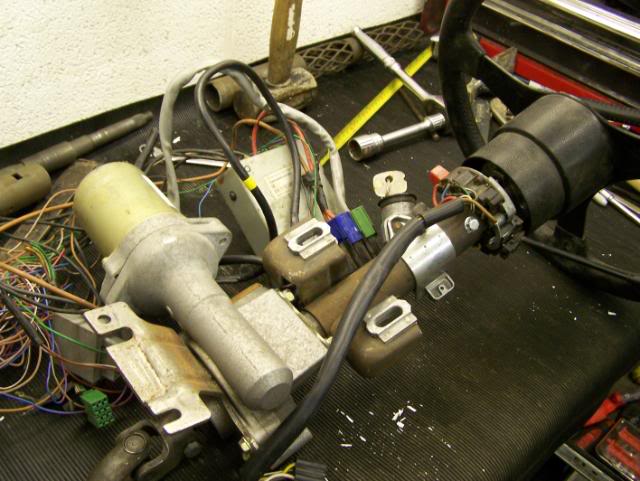
Take the bottom part of the outer of the manta column and bolt it to the floor, mine hasn't got a bearing in as it will be blasted and a new one fitted
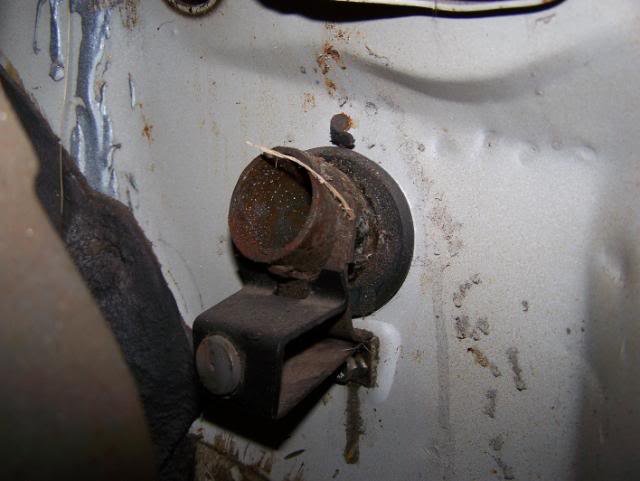
Column will now bolt into place as the original


It fits in the bay as the standard one does

I'll be getting a control unit to replicate the singals for the ecu from ebay, this one is around 40 quid and looks good
http://cgi.ebay.co.uk/Corsa-Rally-Kit-Escort-Electric-Power-Steering-Control_W0QQitemZ320487330523QQcmdZViewItemQQptZUK_CarsParts_Vehicles_CarParts_SM?hash=item4a9e8892db#ht_1145wt_958
I got the column myself so removed lots of wiring and got the fuseholer that was standard in the car

Ramdom reference pics now
Corsa b column
Remove the outer collapsable top part of the corsa bit
You are left with
Don't hit the end of the spline as I did or the spline end will come off
I will be putting a blob of weld on mine to hold the 2 parts together as the top part with the manta bit added will not collapse now anyway, the reference for the amount to stick out is 85mm for the top part
Take your manta column and remove the inside part
What I was trying to do was keep the columns the same length so the inner part was my reference point
Take the outside of the manta column and chop it into 3 pieces
You want the top outer part to be 180mm
That part slips over the inner of the corsa bit
These two parts will be welded together
Make room to get at the bolts
This will now take the manta multi switchgear and wheel in the same place as a standard car
Bottom part of the column
Take the inner shaft from the manta and split it then cut the bottom part down to 315mm
Shove that into the corsa UJ, it's a tight fit but this part if you leave unwelded will collapse in a front ender
Take the bottom part of the outer of the manta column and bolt it to the floor, mine hasn't got a bearing in as it will be blasted and a new one fitted
Column will now bolt into place as the original
It fits in the bay as the standard one does
I'll be getting a control unit to replicate the singals for the ecu from ebay, this one is around 40 quid and looks good
http://cgi.ebay.co.uk/Corsa-Rally-Kit-Escort-Electric-Power-Steering-Control_W0QQitemZ320487330523QQcmdZViewItemQQptZUK_CarsParts_Vehicles_CarParts_SM?hash=item4a9e8892db#ht_1145wt_958
I got the column myself so removed lots of wiring and got the fuseholer that was standard in the car
Ramdom reference pics now
28-09-2013, 10:01 PM
#4
Advanced PassionFord User
At least you did the right thing and put a ford engine in to it lol.It looks well though mate well done.Have to show the Vauxhall boys how its surposed to be done lol
28-09-2013, 10:02 PM
#5
Wahay!! I've lost my Virginity!!
Thread Starter
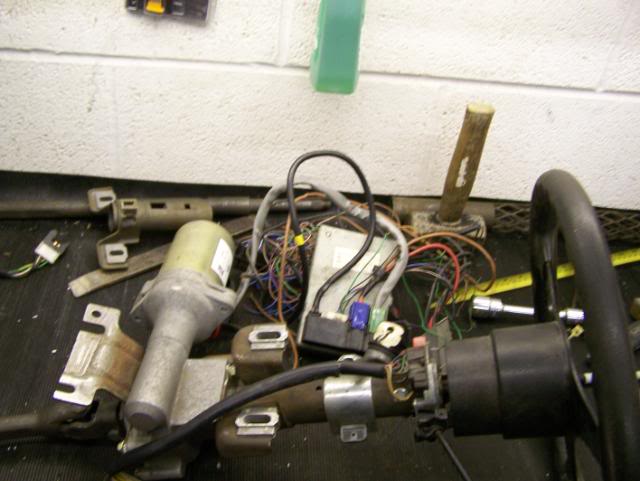
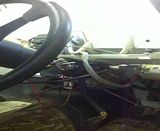
All wired up and tested. Now I can turn the 225/45/17s on the front with one finger if I should choose 

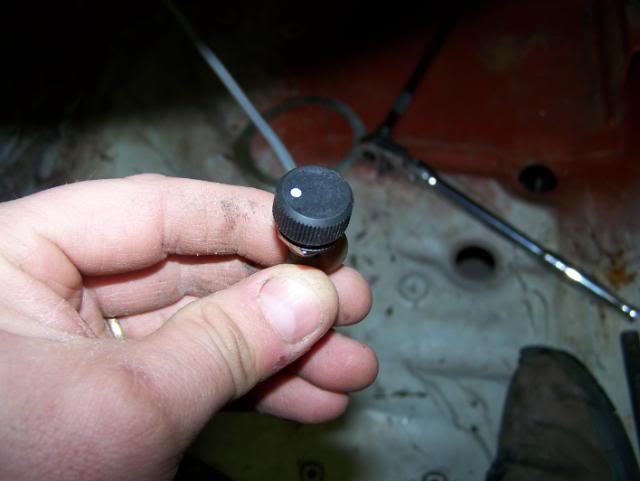
The assistance can be wound up and down and you can really feel the difference, the motor is completely silent apart from a click from inside the original ecu when I turn the power on, the little dial button will fit well with the dash.
The wiring is long at the mo and will be done properly once the overhung bias pedal box goes in, the fag lighter is for size comparison
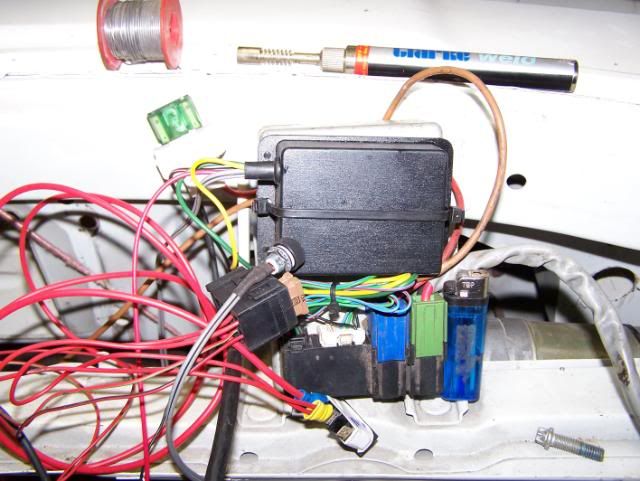
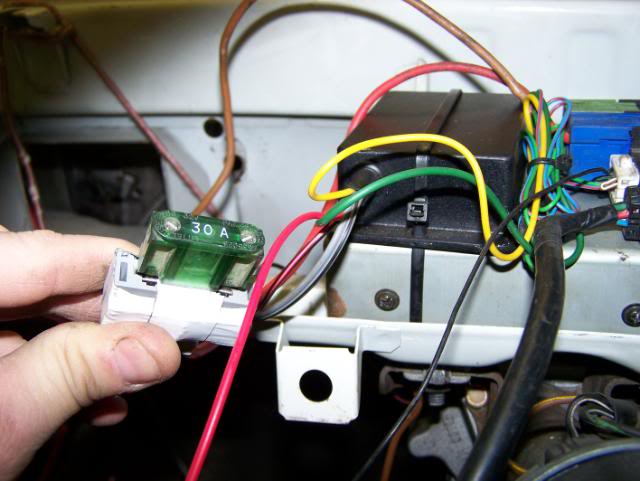
and the ecu and it's piggyback will need hiding and they are a fair size, I added a 7amp fuse to the incoming power for both ecus and a 30 amp ( as that was all I had ) to the main feed for the motor power, both earths are on rings that fit onto the column holding bolts
I added a temporary on/off switch to isolate the power while testing
The whole column is heavier than the manta one but fits in well and I'll just have to add a couple of washers welded with captive nuts to hold the back brace but it probably doesn't need it
Job done :thumbup

The assistance can be wound up and down and you can really feel the difference, the motor is completely silent apart from a click from inside the original ecu when I turn the power on, the little dial button will fit well with the dash.

The wiring is long at the mo and will be done properly once the overhung bias pedal box goes in, the fag lighter is for size comparison

and the ecu and it's piggyback will need hiding and they are a fair size, I added a 7amp fuse to the incoming power for both ecus and a 30 amp ( as that was all I had ) to the main feed for the motor power, both earths are on rings that fit onto the column holding bolts

I added a temporary on/off switch to isolate the power while testing

The whole column is heavier than the manta one but fits in well and I'll just have to add a couple of washers welded with captive nuts to hold the back brace but it probably doesn't need it


Job done :thumbup
28-09-2013, 10:03 PM
#6
Wahay!! I've lost my Virginity!!
Thread Starter
 .
.So.
Iv'e never liked the T5 and sierra tunnel...

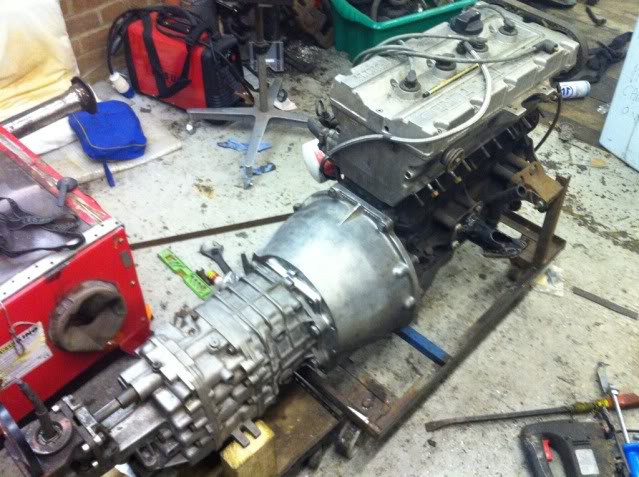
After a little googling I found out the RS500 Touring cars used a Getrag box, the 265
I have a couple lying around so what the hell.
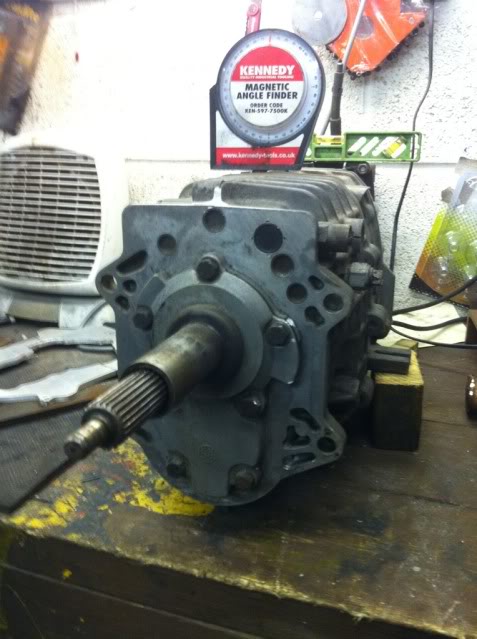
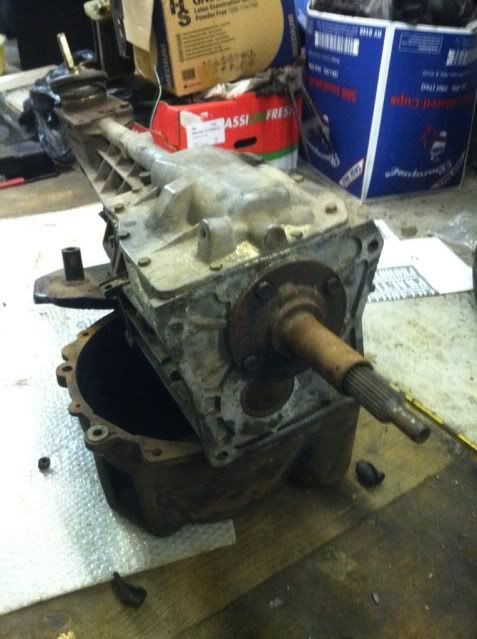
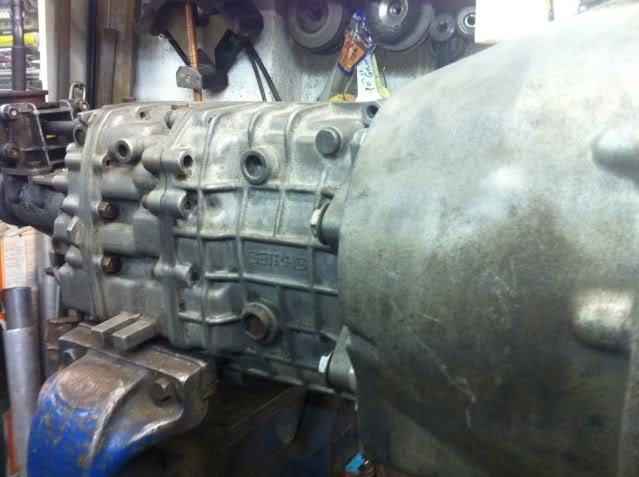
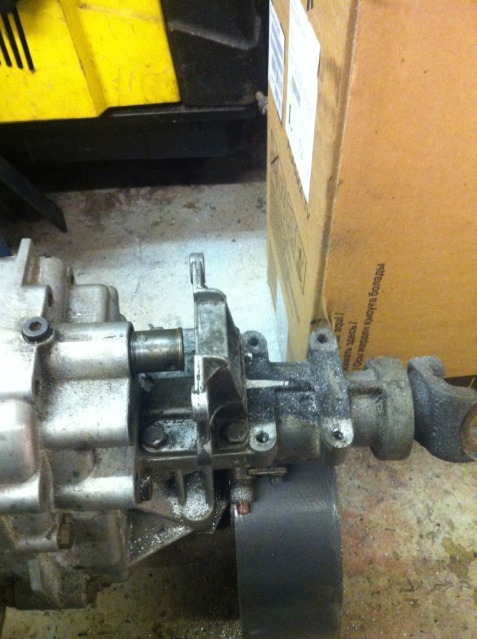
265 monza box, yea
Need to join the two
Ali 4mm plate
Cut big hole in T5 bellhousing
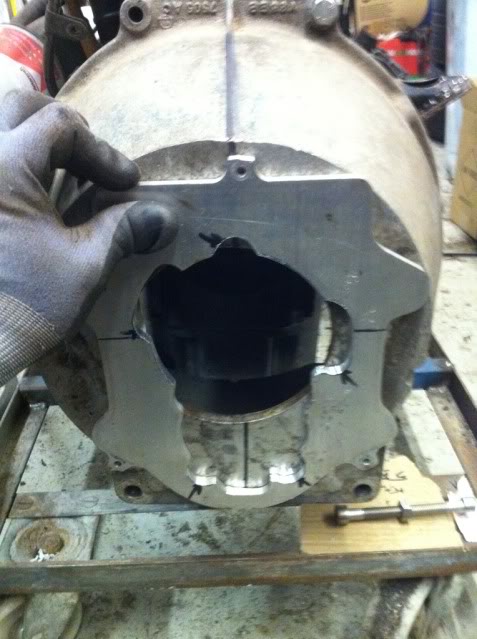
10 hours of measuring and measuring and measuring and swarf everywhere
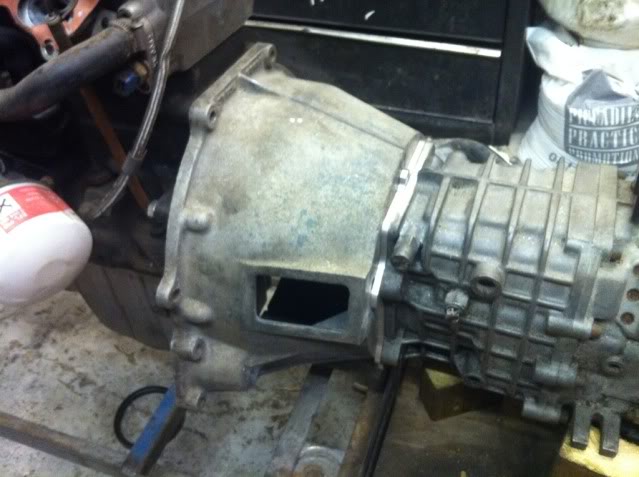
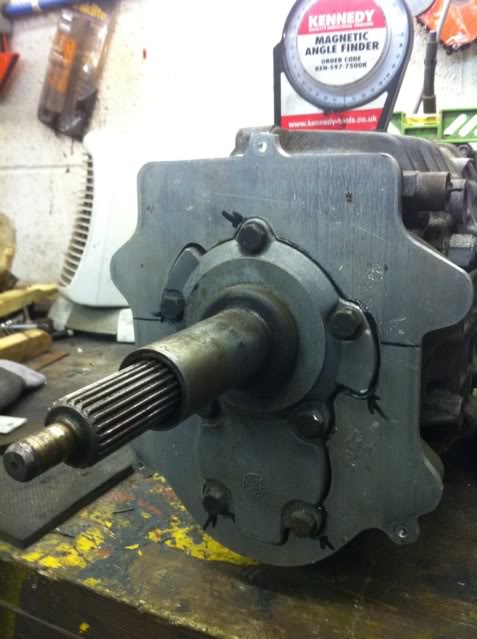
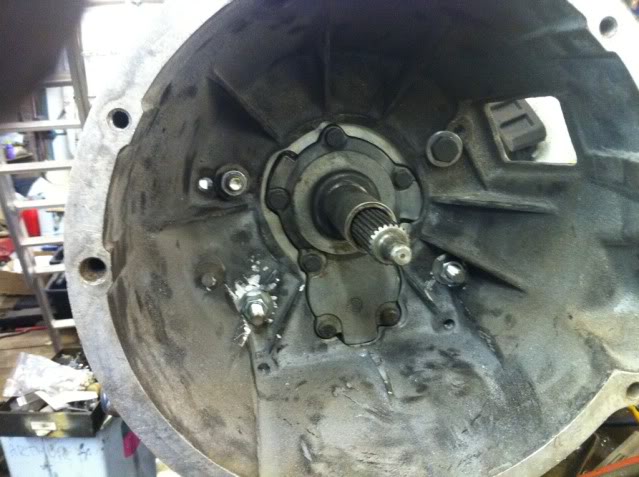
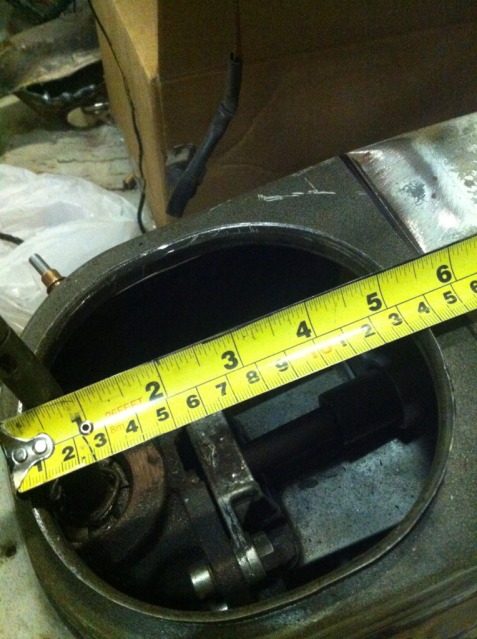
That's just together, not bolted up yet, spigot not done
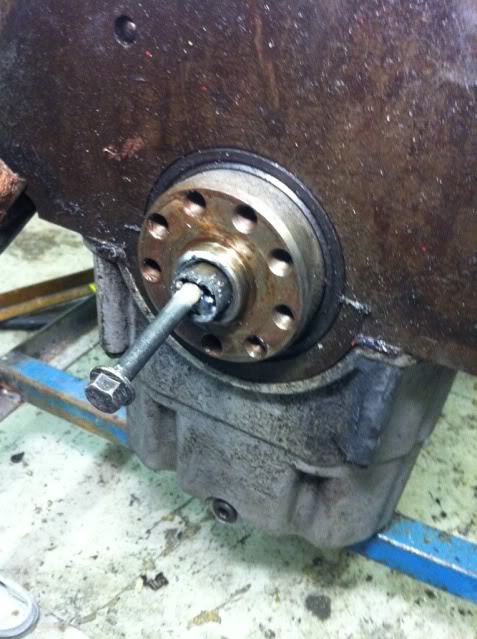
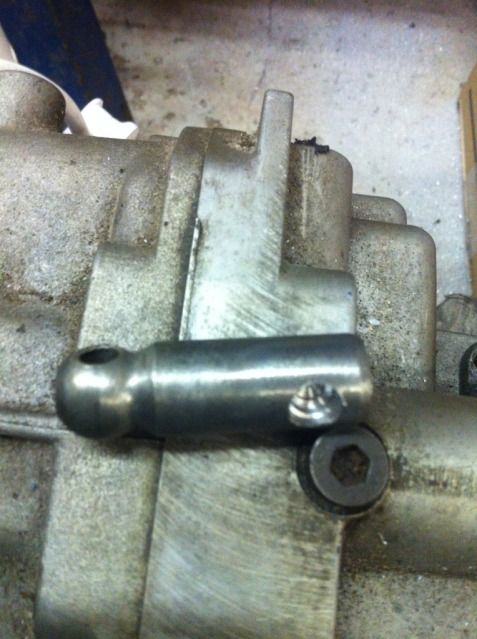
Spigot was a PITA, tried getting it out of the cossie ... Arrrrrghhhhhh, ended up welding a nut to the race and drifted it out
New oilite bearing fitted ( thank's Rutts ) after boiling it in oil
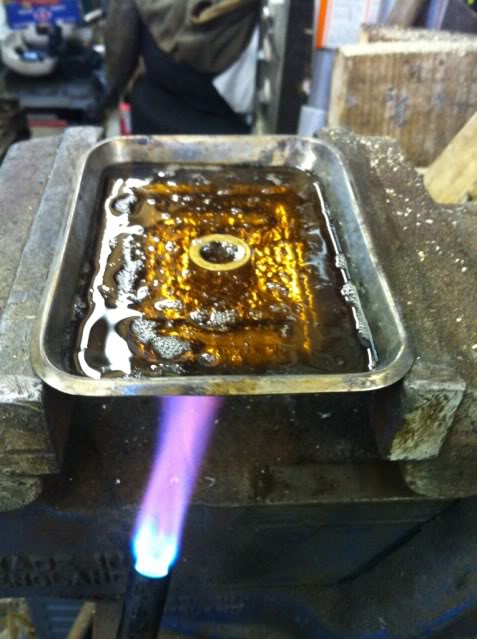
It went a different colour
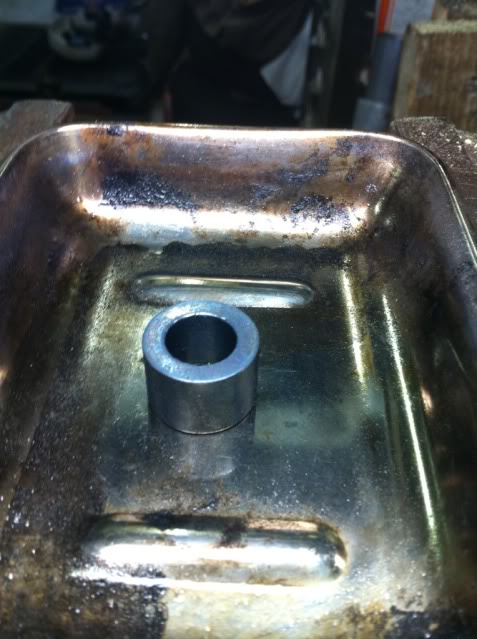
Info, Sierra cosworth spigot bearing outer is 21mm, inner 14mm
Manta outer 21mm, inner 15mm
I needed a 21OD, 12ID
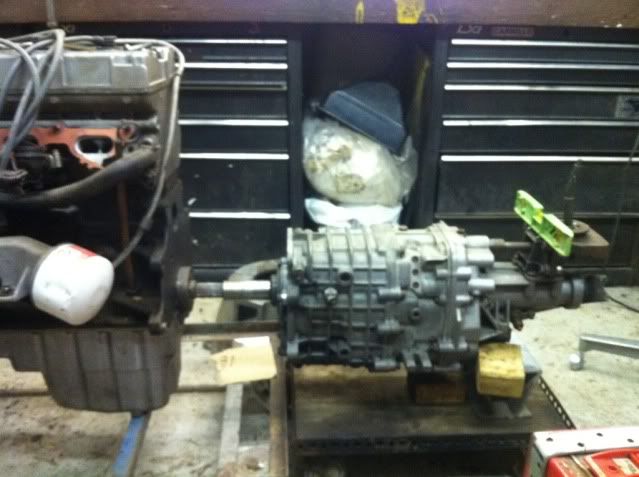
Lots of angle measurements later as I had built a stand for the YB to sit the engine at 4 degree to Exhaust and the box had to be level
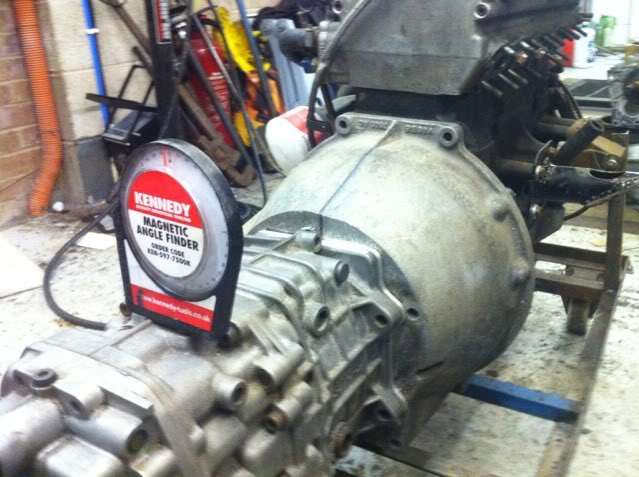
Bolted up
Last edited by mantakev; 29-09-2013 at 12:26 PM.

Trending Topics
28-09-2013, 10:05 PM
#8
Wahay!! I've lost my Virginity!!
Thread Starter
Power steering video test
The motor needs turning 180 degree to put the motor on the other side away from the fusebox, easy to do tomorrow.
Can't embed it so here's a link to click
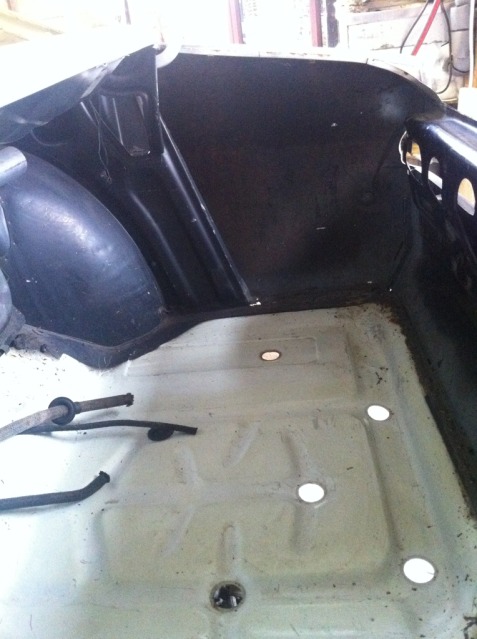
Looking in the boot for the first time in a while and it's still mint B)
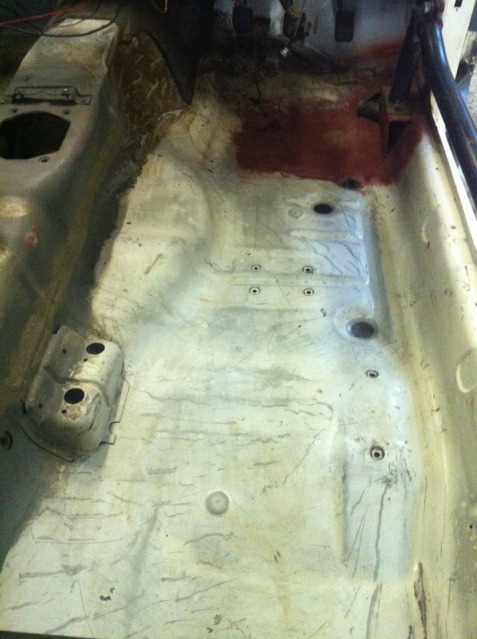
Inside too
Car up onto it's bread tray movers
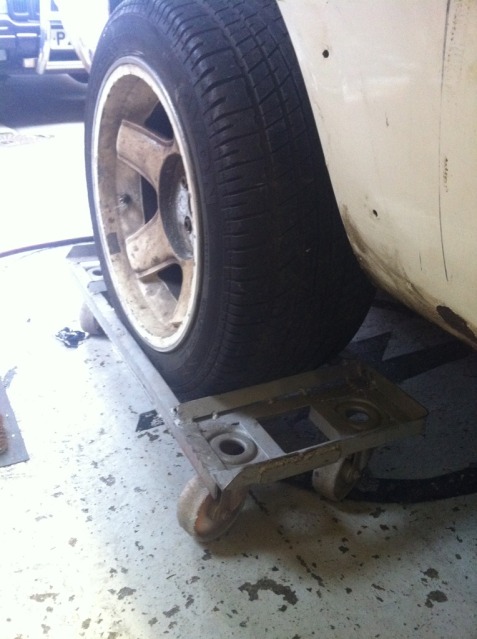
This one has to come off so it's off with its lead
I'm cutting carefully and in sections as I only have one spare rear quarter!

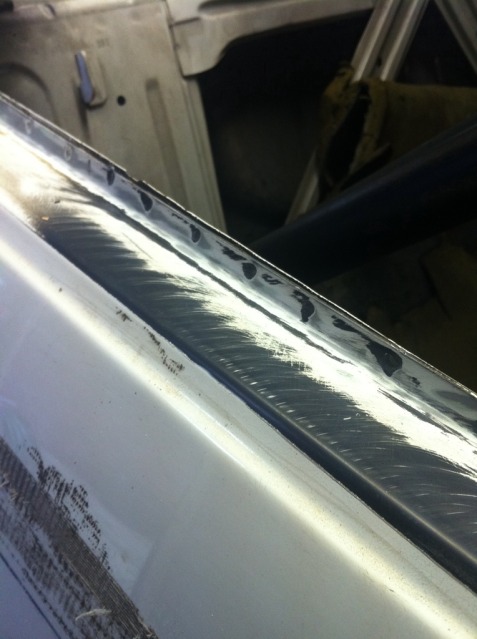
Looking for spot welds on the window surround
Door pillar ones hard to find
Rear panel edge needs tidying up
This is a tricky bit as it has about 3 different places where the rear quarter joins to it
The motor needs turning 180 degree to put the motor on the other side away from the fusebox, easy to do tomorrow.
Can't embed it so here's a link to click
Looking in the boot for the first time in a while and it's still mint B)
Inside too
Car up onto it's bread tray movers
This one has to come off so it's off with its lead
I'm cutting carefully and in sections as I only have one spare rear quarter!
Looking for spot welds on the window surround
Door pillar ones hard to find
Rear panel edge needs tidying up
This is a tricky bit as it has about 3 different places where the rear quarter joins to it
28-09-2013, 10:08 PM
#9
Wahay!! I've lost my Virginity!!
Thread Starter
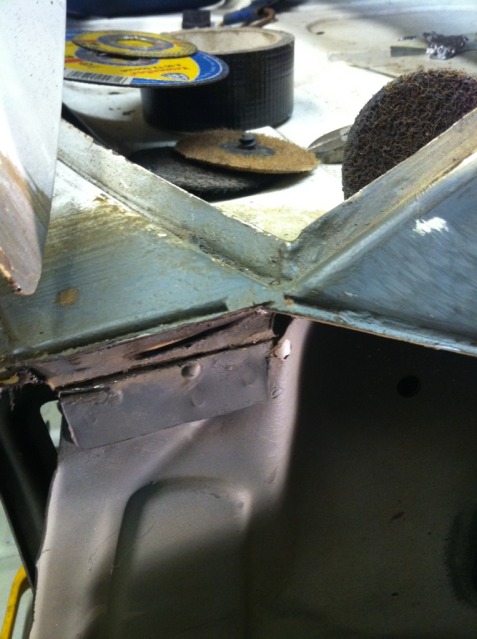
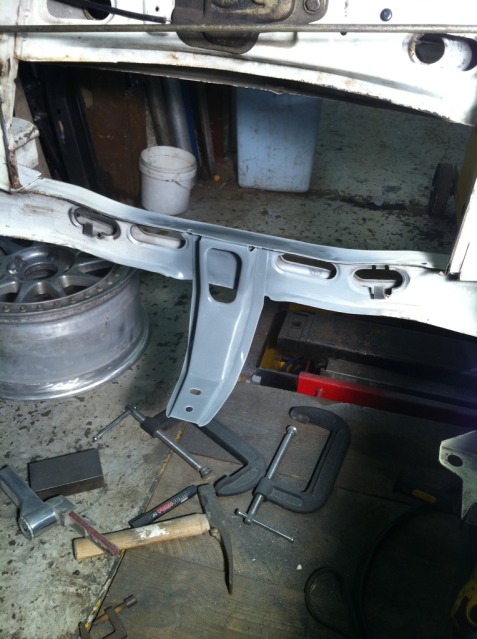
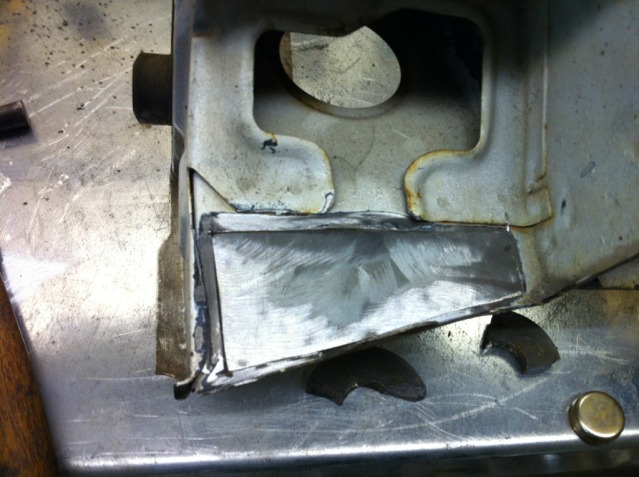
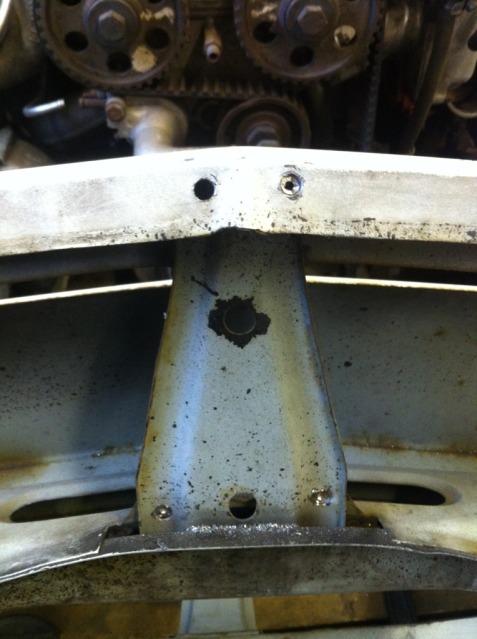
I looked at the rad crossmember on the car and it's in very good condition, so I decided to just change
the drop mount.
This bit needs cutting out in the middle

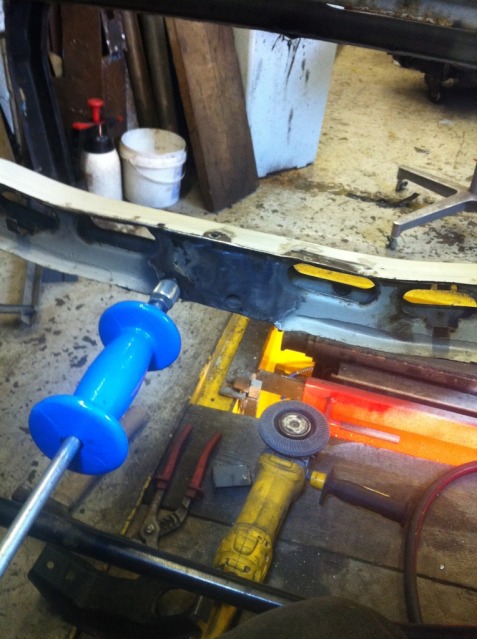
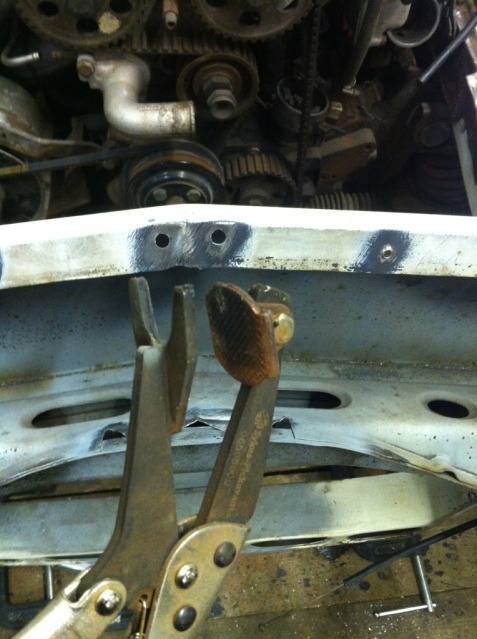
It left some distortion due to the heat put in while welding the modified mount on so the slide hammer was unleashed
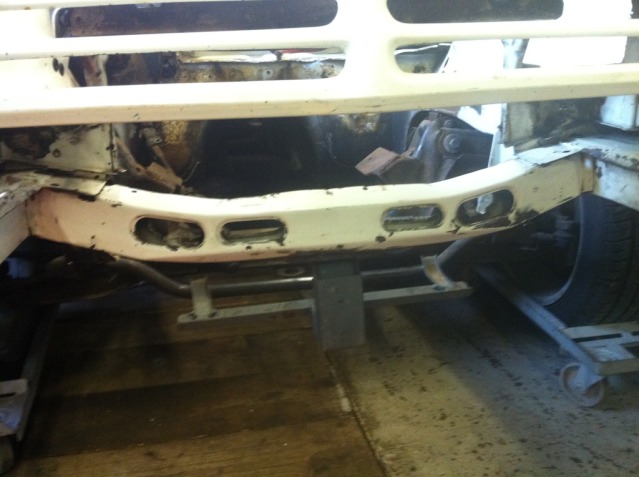
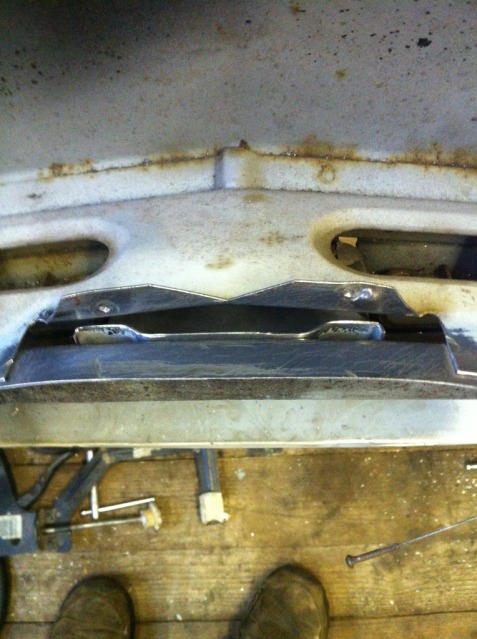
Spot welds drilled out of the new rad crossmember

Then added to the old one
I was feeling a bit flush so treated myself to some Bilt Hamber and some Clecos
200 quid later I wasn't so flush

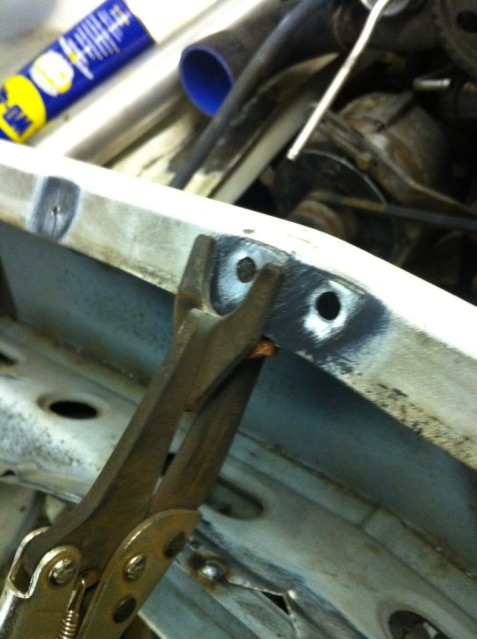
The rad support was stripped of primer and prepared for clamping, treated in SAS weld through primer. Was told by the bloke I personally bought it of " It's the best, everyone rates it"
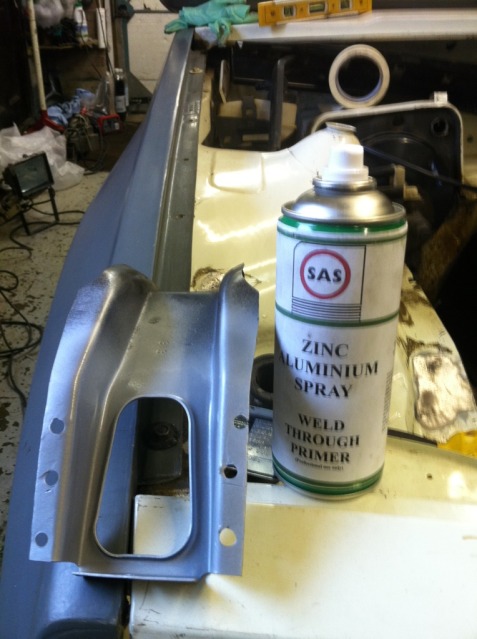
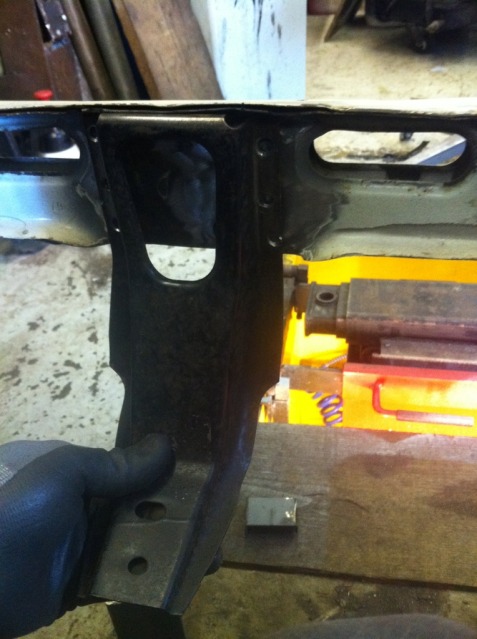
Welded in and dressed off, for the really Manta anal ( who? me?) out there you will see I've changed the rad support by grinding it into a more aesthetically pleasing shape h34r:
h34r:
So the next job will be spot welding on the rear quarter
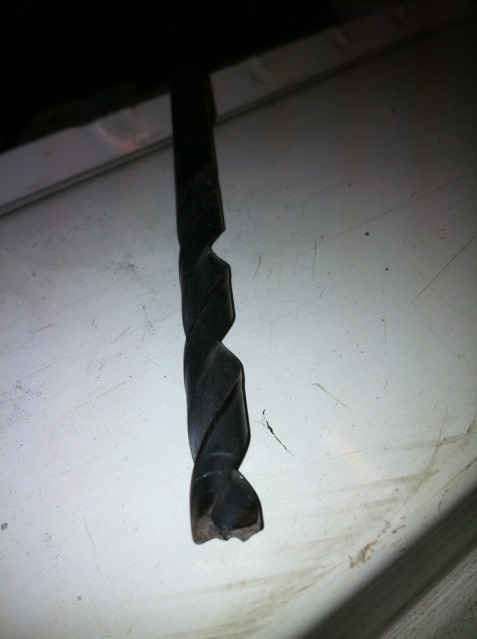
I don't use the spot welder that often so I needed to find the parameters of the weld and test the integrity of them .
I also am using an unknown weld through primer....
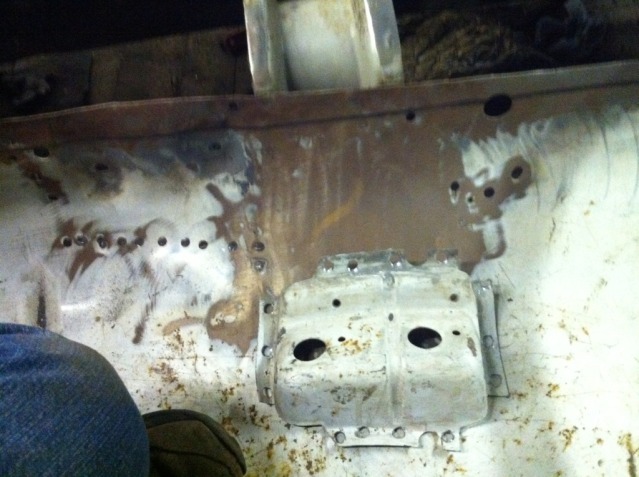
Test 1.... spot welder and a piece of Manta panel
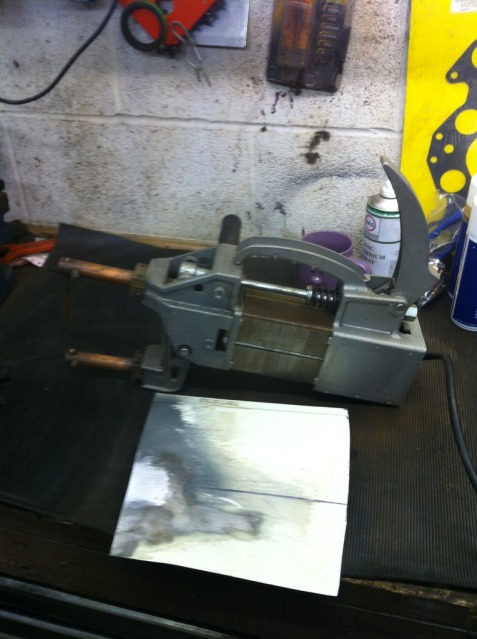
Cut Manta panel and treated with SAS weld through primer
I clamped the SAS primered panels together and put the spot welder on max.
Not a single brrrrrrrssssstttttppppp from the welder! Weird?
Again and again I tried, nothing.
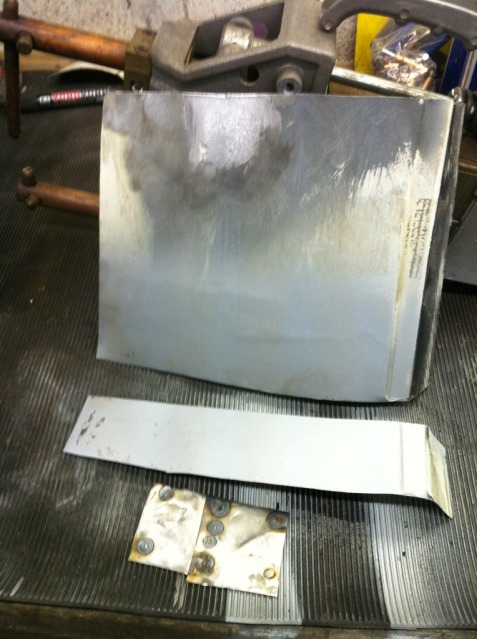
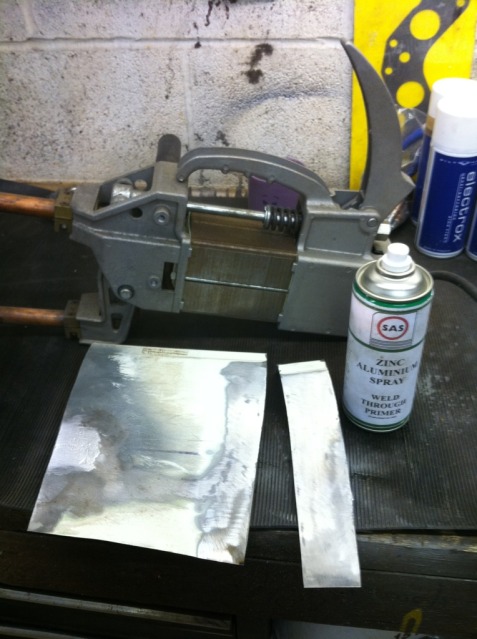
The small test panel in the same picture above was squeezed with the same spot welder on the same power and it stuck hard.
The weld through primer doesn't seem to be a weld through primer..........
So I stripped it off and reprimed with the Bilt Hamber electrox..
Bssssssppppppttttttttttt, it went through the Bilt Hamber stuff
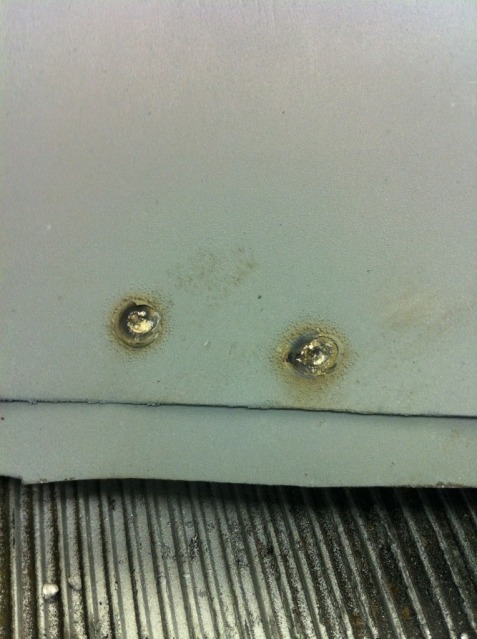
I tested the weld strength and it was stuck so hard I had to crack out the spot weld dril
l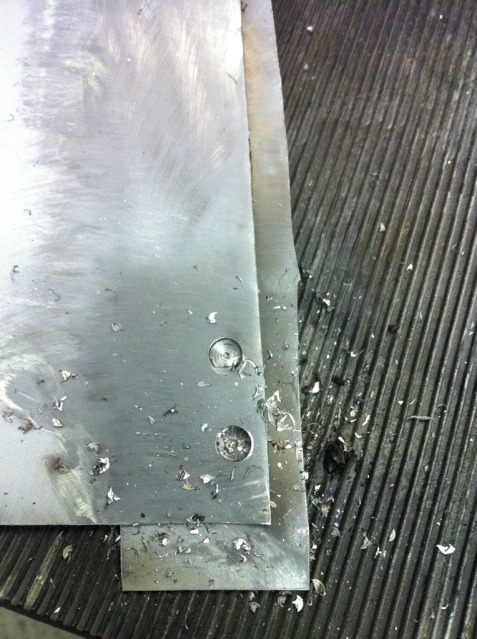
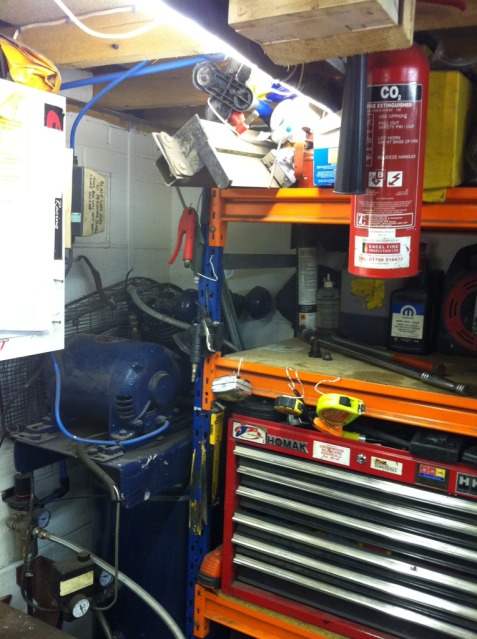
Next thing is to find out why my compressor isn't working and it's in a real tight space!!
the drop mount.
This bit needs cutting out in the middle
It left some distortion due to the heat put in while welding the modified mount on so the slide hammer was unleashed
Spot welds drilled out of the new rad crossmember
Then added to the old one
I was feeling a bit flush so treated myself to some Bilt Hamber and some Clecos
200 quid later I wasn't so flush
The rad support was stripped of primer and prepared for clamping, treated in SAS weld through primer. Was told by the bloke I personally bought it of " It's the best, everyone rates it"
Welded in and dressed off, for the really Manta anal ( who? me?) out there you will see I've changed the rad support by grinding it into a more aesthetically pleasing shape
h34r: So the next job will be spot welding on the rear quarter
I don't use the spot welder that often so I needed to find the parameters of the weld and test the integrity of them .
I also am using an unknown weld through primer....
Test 1.... spot welder and a piece of Manta panel
Cut Manta panel and treated with SAS weld through primer
I clamped the SAS primered panels together and put the spot welder on max.
Not a single brrrrrrrssssstttttppppp from the welder! Weird?
Again and again I tried, nothing.
The small test panel in the same picture above was squeezed with the same spot welder on the same power and it stuck hard.
The weld through primer doesn't seem to be a weld through primer..........
So I stripped it off and reprimed with the Bilt Hamber electrox..
Bssssssppppppttttttttttt, it went through the Bilt Hamber stuff
I tested the weld strength and it was stuck so hard I had to crack out the spot weld dril
l
Next thing is to find out why my compressor isn't working and it's in a real tight space!!
28-09-2013, 10:11 PM
#10
Wahay!! I've lost my Virginity!!
Thread Starter
First I fitted the EPS mounts supplied my manta sport, great fit and highly recommended
Trimmed a spare dash to trial fit

The whole thing fits like it was made for the Manta originally
Next job
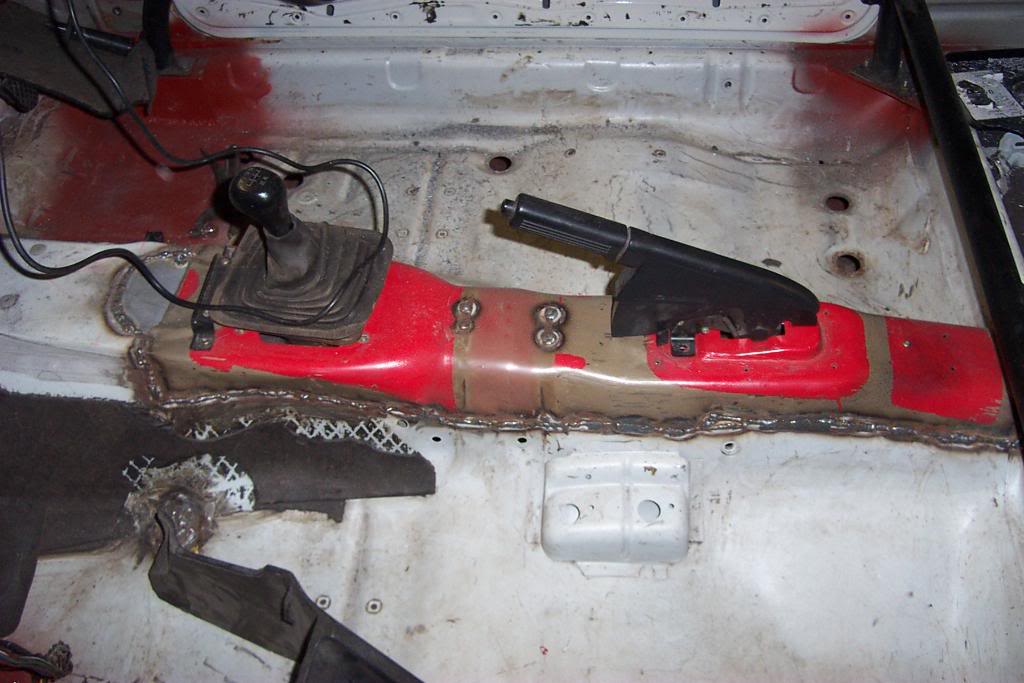
I trimmed the last of the sierra tunnel off and started to strip down the replacement Manta tunnel.
It took hours and hours and hours, hundreds of spot welds to remove <_< hmmmm spot weld drills are rubbish and expensive so I made my own following the tutorial on retro rides from tonybmw ( check out the thread it's fantastic!)
It works better than my Presto ones!
Seat mount removed for access to spot welds holding handbrake mount
Old handbrake remains removed with spot weld drill and chisel and replacement one removed using spot weld drill ( see where this is going!)

Old seat belt mount I'd cut through for the sierra handbrake mech so I removed the old remains using the spot weld drill and removed the replacement from the replacement tunnel using? Yep, the spot weld drill

Pic of replacement inside tunnel
Trail fit of the replacement tunnel, still need a bit of adjustment but getting their.

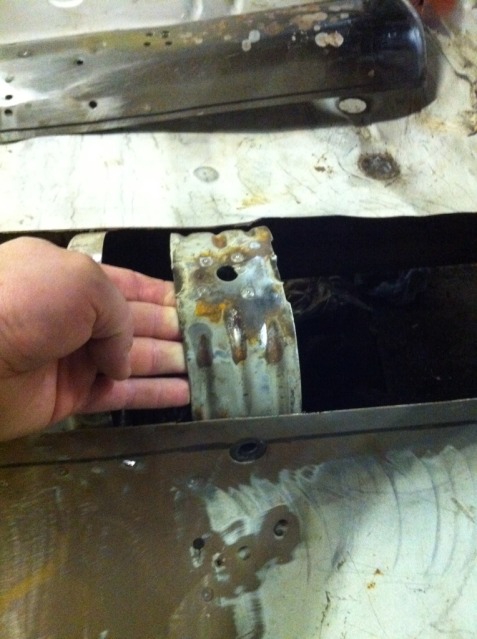
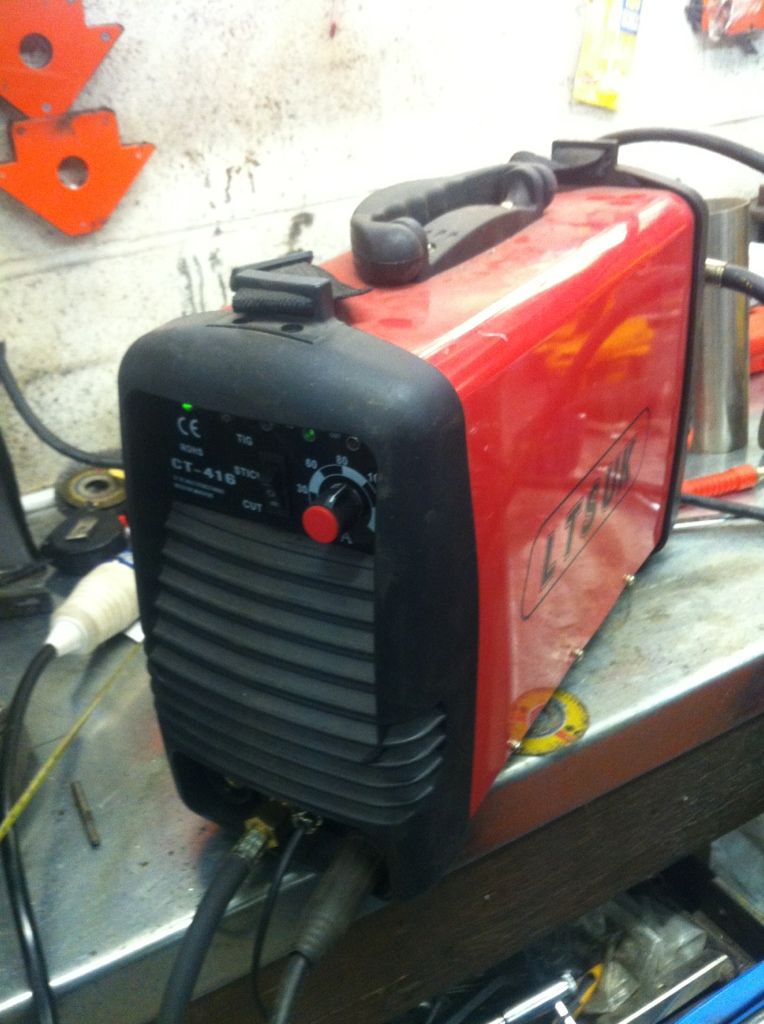
Then I decided the replacement parts need blasting before I put them back on but my blaster is in a right PITA place and need lifting up and down every time I need it, so I decided to play with my new toy..
Plasma cutter
Made some plates for the bottom of the legs
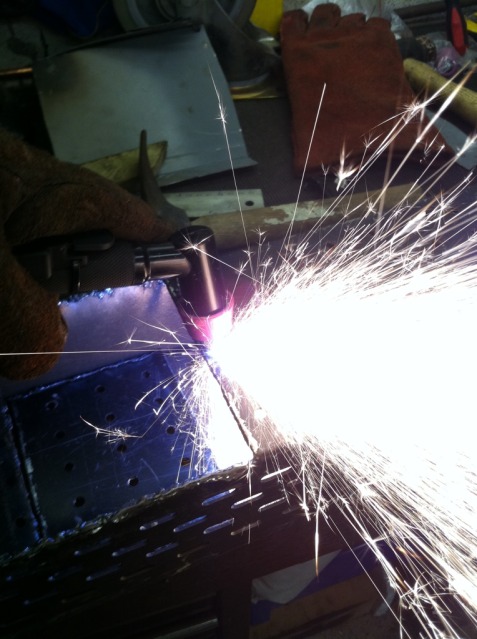
Cut some legs and welded them on but I didn't realise until I'd stared welding that the plates were galvanised steel! What a pain to weld with goggles, and a mask on!

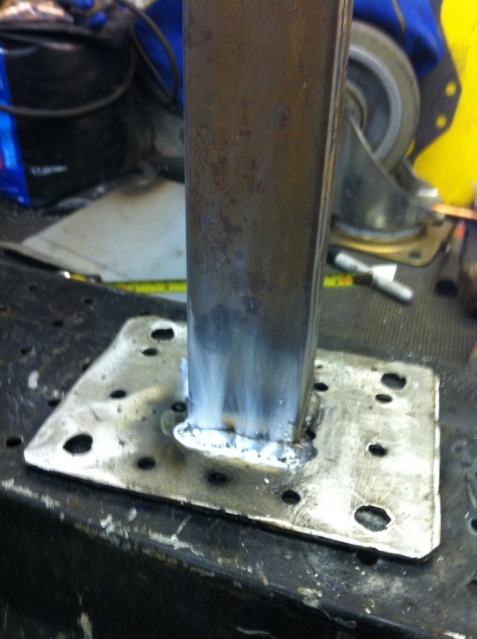
Added some industrial bin castors ( thank you baycrazy for the 99p rollers!!)
Only thing to do now is to add some cross bracing that will give me a shelf but it's so much better now as it's at the correct height and easy to use..
Time to put the glass bead in?
ARRRRGHHHHH where's the bung gone from the bottom!!

Ah well there's always tomorrow")
Trimmed a spare dash to trial fit
The whole thing fits like it was made for the Manta originally
Next job
I trimmed the last of the sierra tunnel off and started to strip down the replacement Manta tunnel.
It took hours and hours and hours, hundreds of spot welds to remove <_< hmmmm spot weld drills are rubbish and expensive so I made my own following the tutorial on retro rides from tonybmw ( check out the thread it's fantastic!)
It works better than my Presto ones!
Seat mount removed for access to spot welds holding handbrake mount
Old handbrake remains removed with spot weld drill and chisel and replacement one removed using spot weld drill ( see where this is going!)
Old seat belt mount I'd cut through for the sierra handbrake mech so I removed the old remains using the spot weld drill and removed the replacement from the replacement tunnel using? Yep, the spot weld drill
Pic of replacement inside tunnel
Trail fit of the replacement tunnel, still need a bit of adjustment but getting their.
Then I decided the replacement parts need blasting before I put them back on but my blaster is in a right PITA place and need lifting up and down every time I need it, so I decided to play with my new toy..
Plasma cutter
Made some plates for the bottom of the legs
Cut some legs and welded them on but I didn't realise until I'd stared welding that the plates were galvanised steel! What a pain to weld with goggles, and a mask on!
Added some industrial bin castors ( thank you baycrazy for the 99p rollers!!)
Only thing to do now is to add some cross bracing that will give me a shelf but it's so much better now as it's at the correct height and easy to use..
Time to put the glass bead in?
ARRRRGHHHHH where's the bung gone from the bottom!!
Ah well there's always tomorrow
Last edited by mantakev; 29-09-2013 at 10:44 AM. Reason: typo
28-09-2013, 10:12 PM
#11
Wahay!! I've lost my Virginity!!
Thread Starter
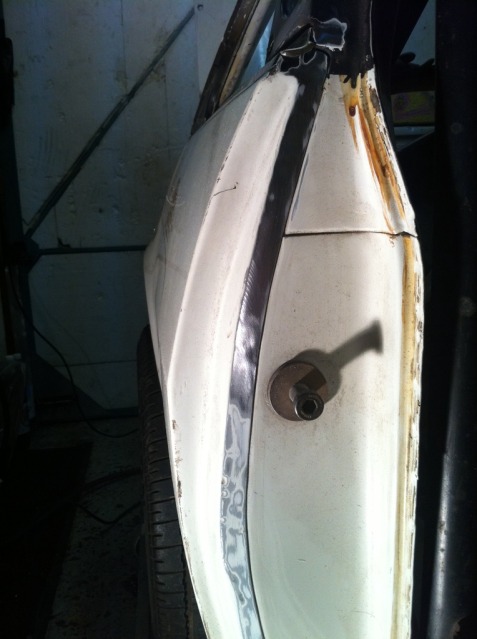
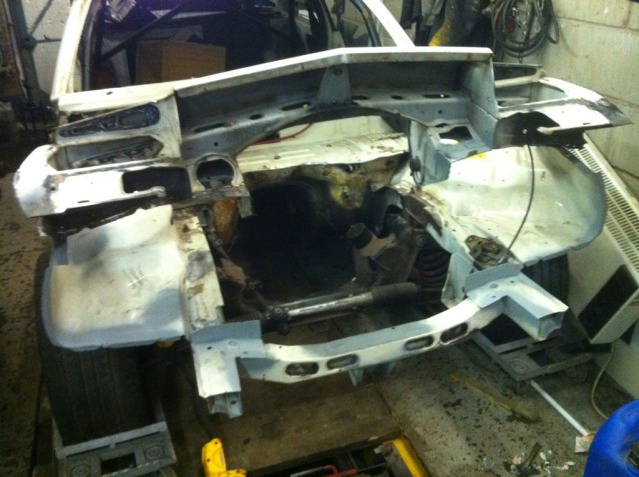
The old front end I had cocked up while fitting the IC so I cut it off and did some small repairs to the new ish front end, new ones are nearly impossible to find and if you do you are looking at the best part of a grand.
.


.
Last edited by mantakev; 01-10-2013 at 05:44 PM. Reason: double post tidy up
28-09-2013, 10:13 PM
#12
Wahay!! I've lost my Virginity!!
Thread Starter
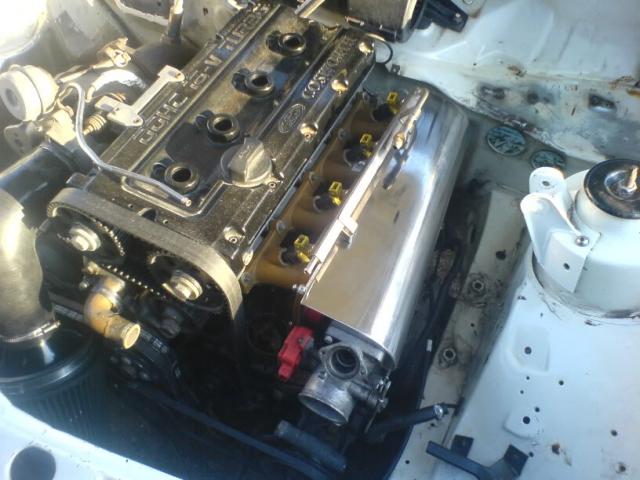
Clearance issues have bugged me so I've ordered a swedish style inlet
Should be here in a couple of weeks
Should be here in a couple of weeks

Last edited by mantakev; 29-09-2013 at 10:45 AM.
28-09-2013, 10:22 PM
#13
Wahay!! I've lost my Virginity!!
Thread Starter
I'm not sure what takes the longest time, welding or fiddly bits?
*
*

803s on the way too, good enough for 330 but I eventually want 450+ BHP
*
Now looking for a L8 ECU and 4x4 TPS
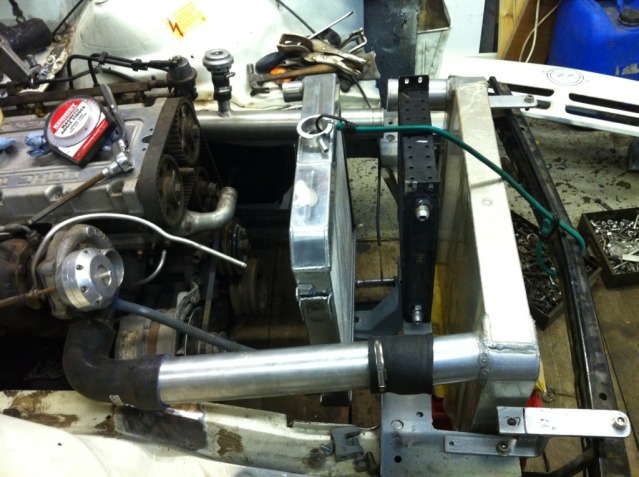
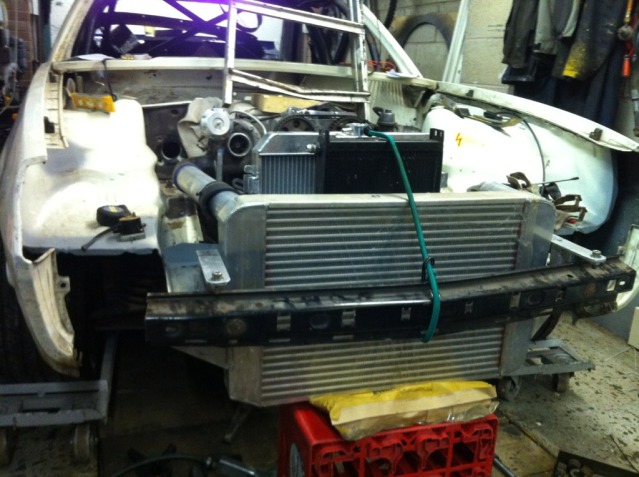
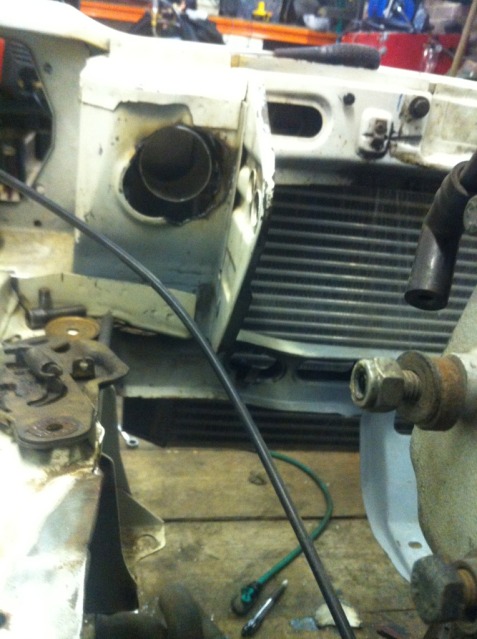
Setting up the RS 500 intercooler into the front nose has been fun and I'm still not 100%. I may have to make lots more cuts into the panels I've just repaired*
*
*
May need to run a pre cooler for the turbo water ar an aftercooler for the turbo water. I need to take advice on this, it's the black rad in the middle. The oil cooler is a modine run off the side of the block so that's covered
*
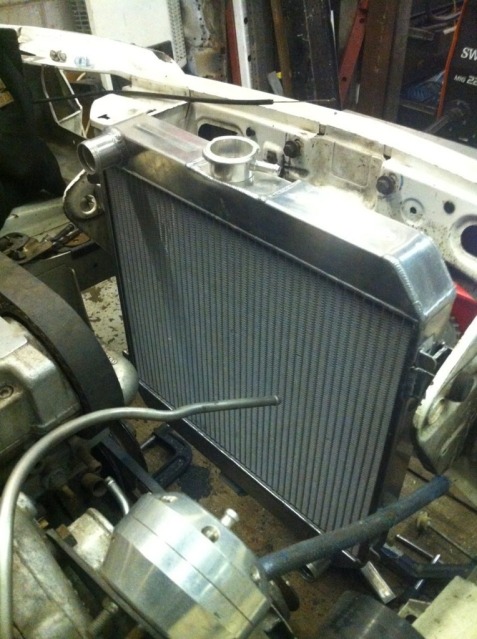
Tried in the matching Radtech radiator
*
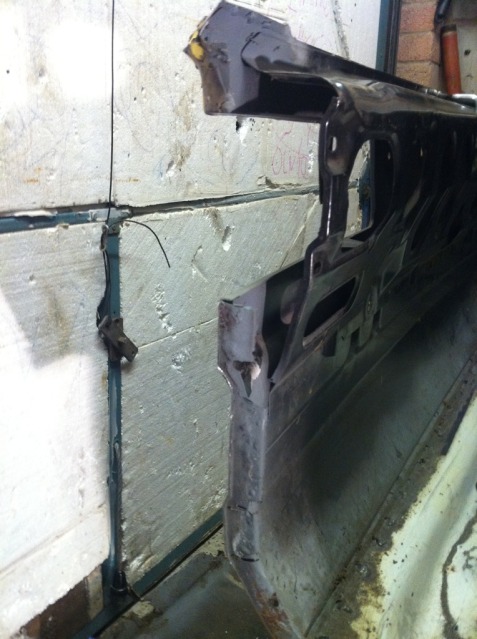
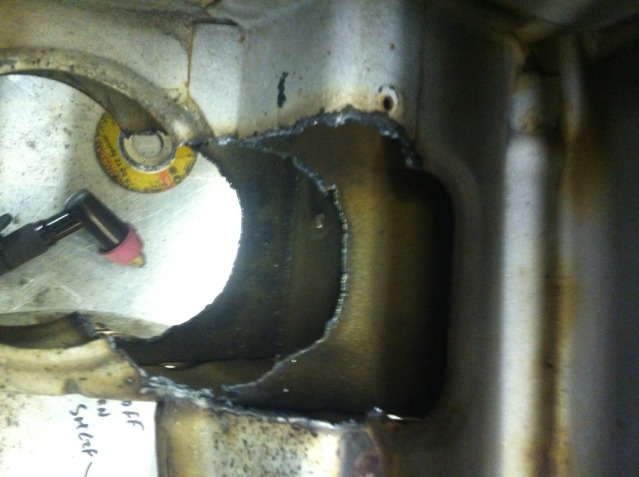
Need to make space for the IC so cut out the nose brace
*
hunt the spot welds again, remove and clean.
*
Spot weld pliers are good for this stuff

*
*

803s on the way too, good enough for 330 but I eventually want 450+ BHP
*

Now looking for a L8 ECU and 4x4 TPS

Setting up the RS 500 intercooler into the front nose has been fun and I'm still not 100%. I may have to make lots more cuts into the panels I've just repaired*
*


*
May need to run a pre cooler for the turbo water ar an aftercooler for the turbo water. I need to take advice on this, it's the black rad in the middle. The oil cooler is a modine run off the side of the block so that's covered
*
Tried in the matching Radtech radiator
*

Need to make space for the IC so cut out the nose brace


*
hunt the spot welds again, remove and clean.
*
Spot weld pliers are good for this stuff


Last edited by mantakev; 29-09-2013 at 10:50 AM. Reason: double post
28-09-2013, 10:25 PM
#14
Wahay!! I've lost my Virginity!!
Thread Starter
My 5 stud 5x120 pcd conversion
so I'm looking at the axle, I looked at cossie and doing a de dion type, nope
I looked at the 1041 volvo they were using in Sweden, too hard to get parts for.
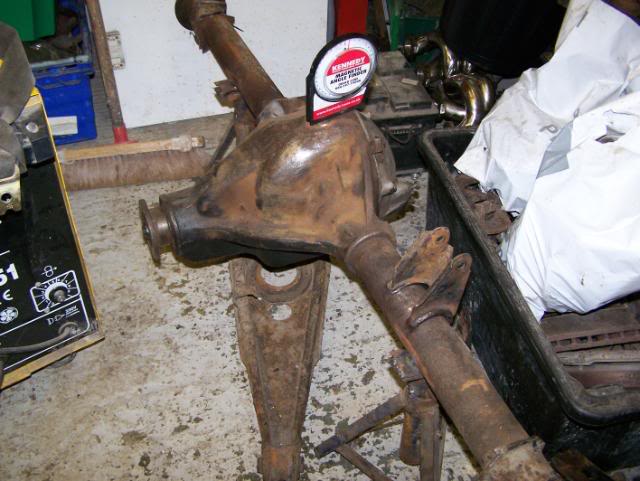
So I settled on the 4ha mega axle as used by aston martin, scimitar and jaguar as it is unbreakable
Pic is a 4ha compared to a 400 axle
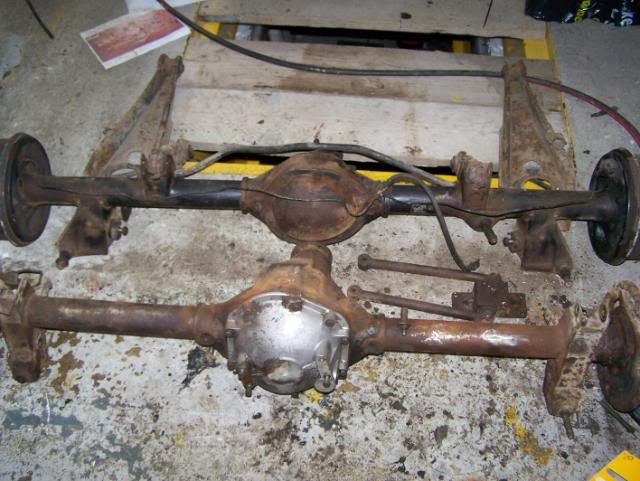
I removed the axle from a scimitar gte and it was a 4 hour fight
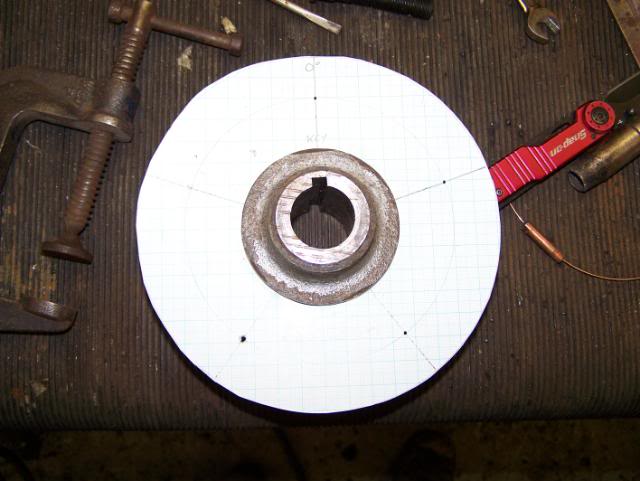
PCD on the hub is 4x10⁸ and I need 5x 120 so I went out and got a set of geometry school stuff, plotted the center of the scimitar and the bmw and transfered it onto graph paper
So after a plug on one hole
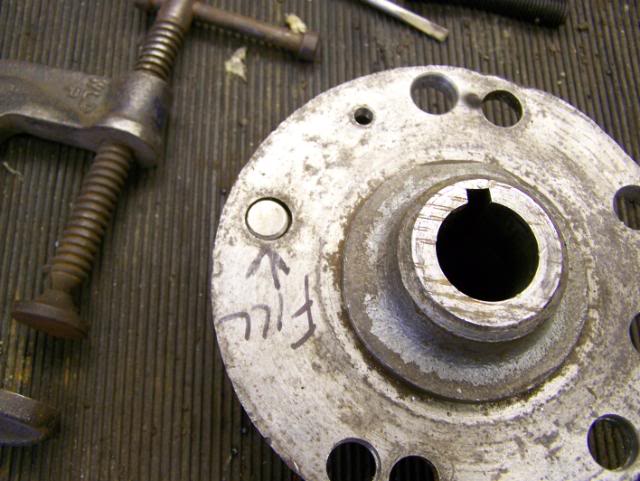
And a weld then grind flat

The 5x120 can be drilled

I had to add a milled surface for the back of the stud parallel to the hub so I got a counter bore drill
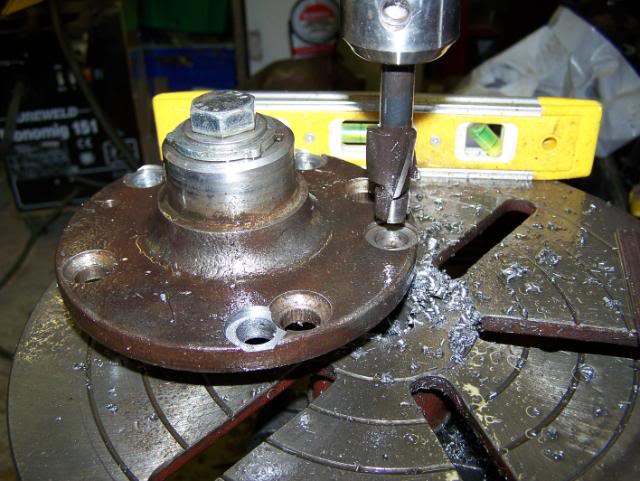
It did this
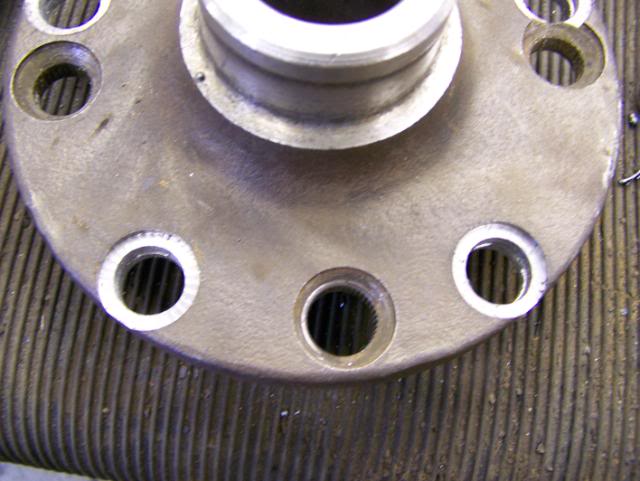
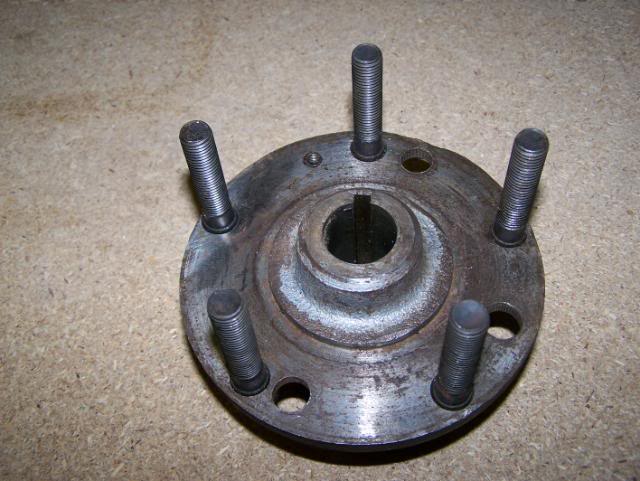
Studs in and ready for the wheels
I am removing the links from the 4ha and replacing them with 400 type ones

Next is to use all the mounts cut off the 400 axle and transfer them onto the 4ha
Sorry if the posts are copied or in a strange order
so I'm looking at the axle, I looked at cossie and doing a de dion type, nope
I looked at the 1041 volvo they were using in Sweden, too hard to get parts for.
So I settled on the 4ha mega axle as used by aston martin, scimitar and jaguar as it is unbreakable
Pic is a 4ha compared to a 400 axle
I removed the axle from a scimitar gte and it was a 4 hour fight
PCD on the hub is 4x10⁸ and I need 5x 120 so I went out and got a set of geometry school stuff, plotted the center of the scimitar and the bmw and transfered it onto graph paper
So after a plug on one hole
And a weld then grind flat
The 5x120 can be drilled
I had to add a milled surface for the back of the stud parallel to the hub so I got a counter bore drill
It did this
Studs in and ready for the wheels
I am removing the links from the 4ha and replacing them with 400 type ones
Next is to use all the mounts cut off the 400 axle and transfer them onto the 4ha
Sorry if the posts are copied or in a strange order
Last edited by mantakev; 29-09-2013 at 10:52 AM.
28-09-2013, 10:28 PM
#15
Wahay!! I've lost my Virginity!!
Thread Starter
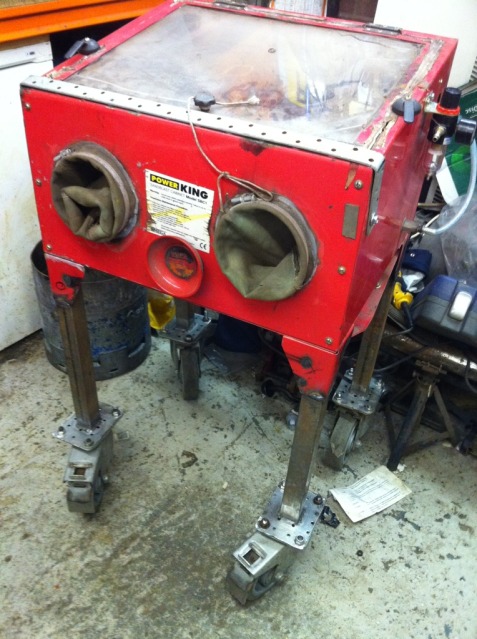
Blaster now on proper legs and base It's the little things that keep moving on

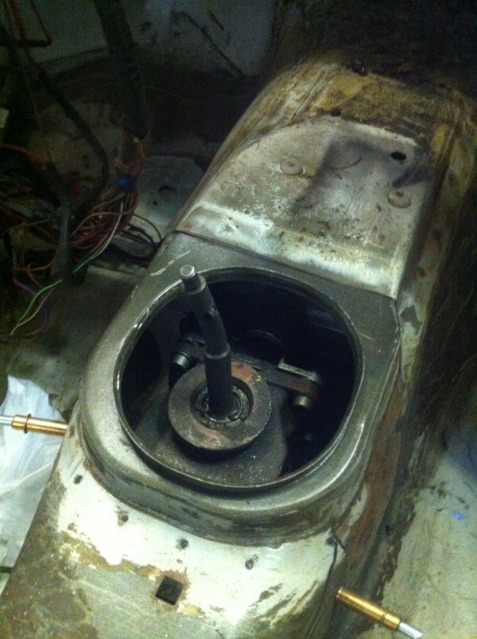
Torque tube off so I can position and grind tunnel top
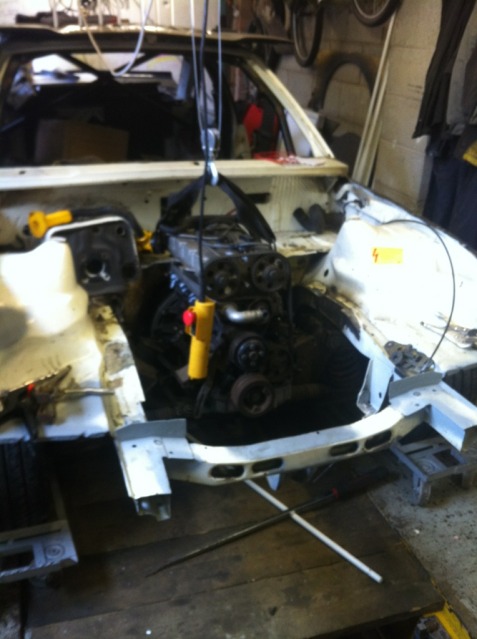
Hoist into position on gantry
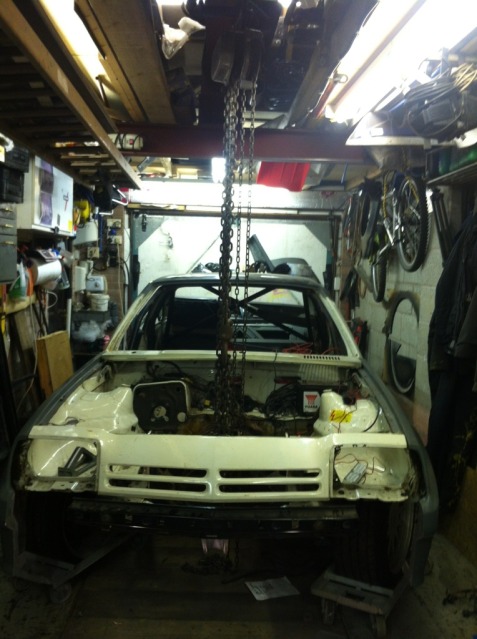
Engine up
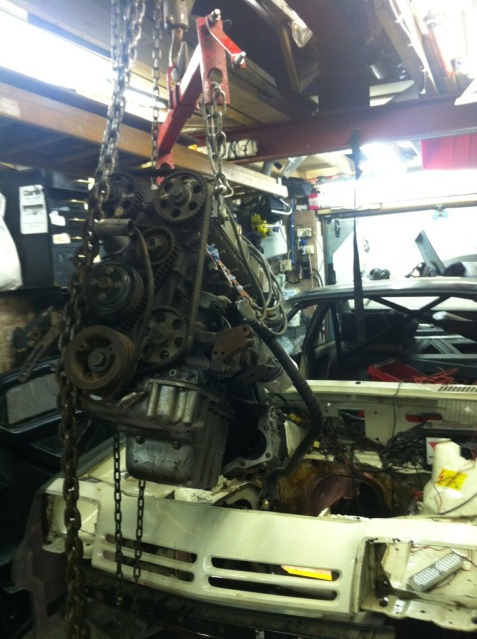
And in
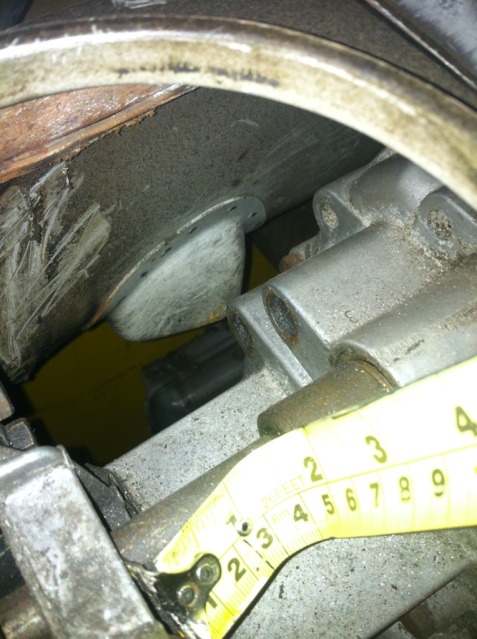
Really tight at the back
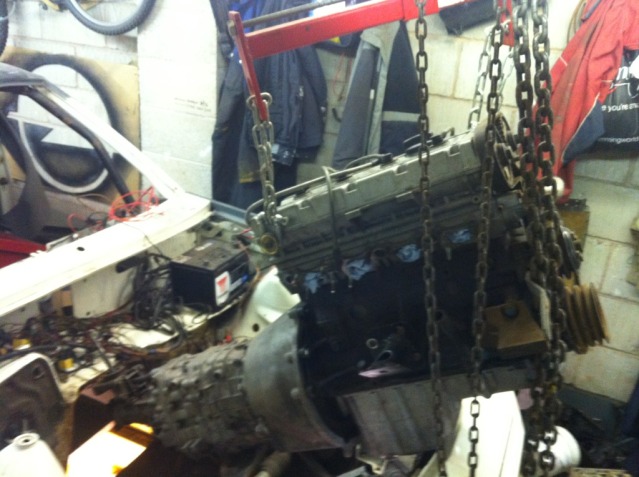
This was to see how the new T5 bellhousing and getrag 265 box fits
Hmmmm this in in neutral

Arrrghhhh... I will now have to do a few things
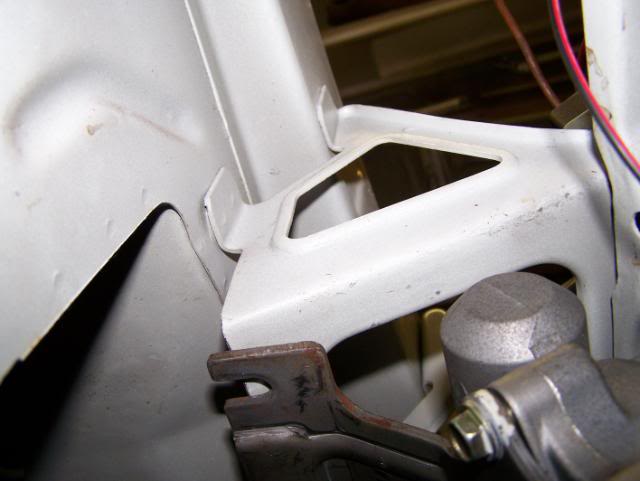
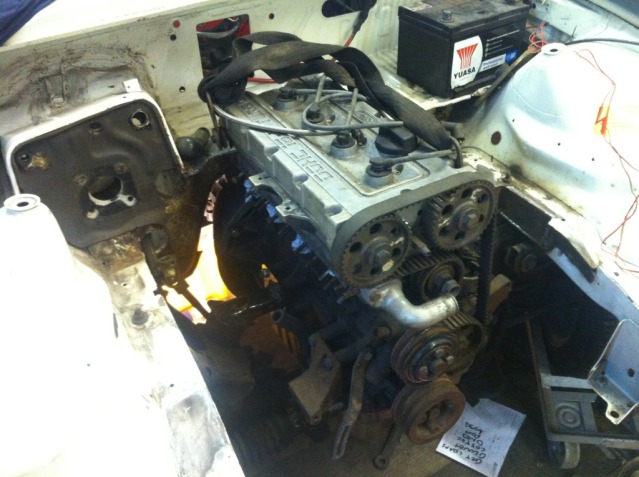
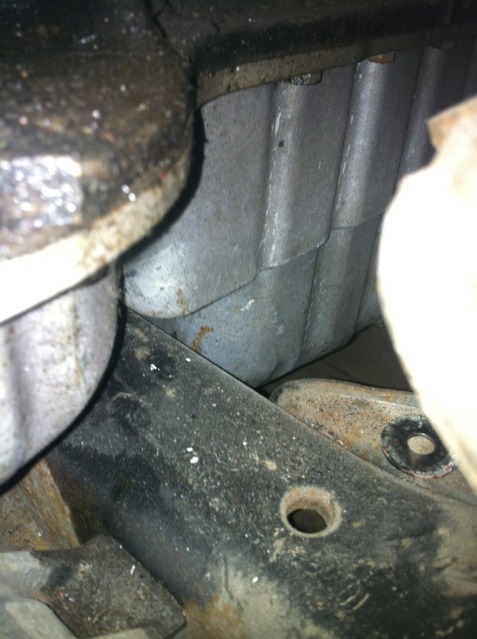
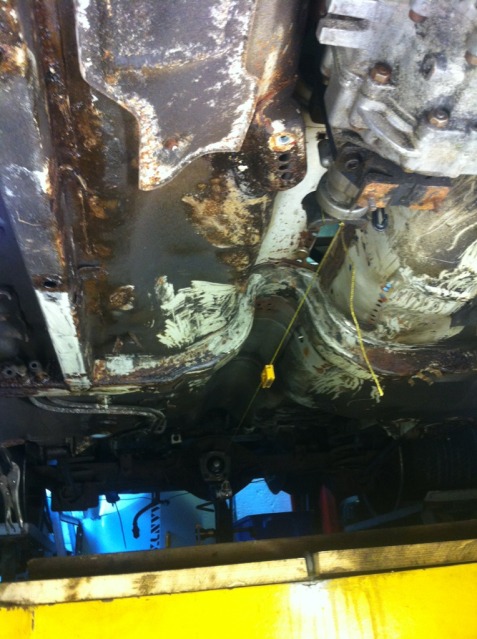
Engine will come forward an inch, that's not bad as I have this much clearance
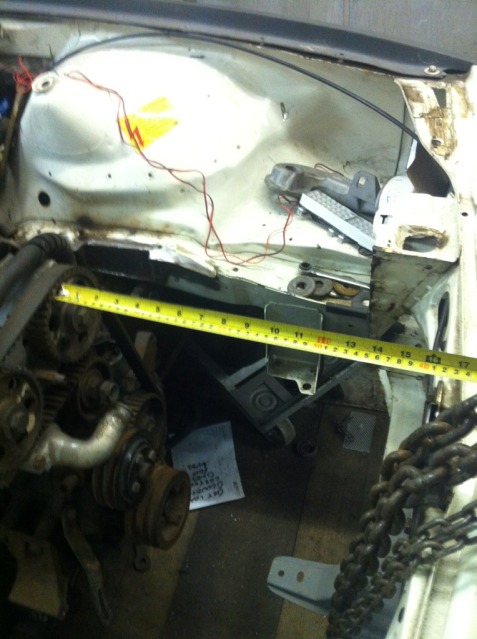
I will move the holes in the mounts forward by an inch or so
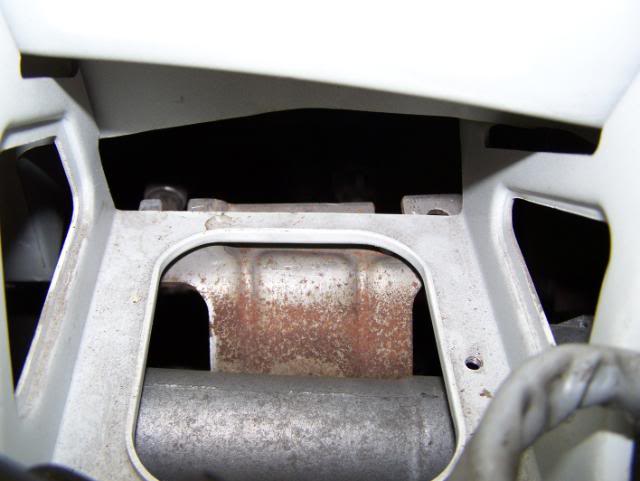
This will lead to some fun with the crossmember It's tight as here
The lever then will come into the centre of the hole by an inch, but I need two or more to centre it
I'll take an inch out of the remote and move it all forward by an inch
I'm going to have to make some adjustments to the gear lever remote
Ah ha, new hoist and no front panel meant it was out in 30 seconds *
Time to attack that bloody gearlever position, measure, beer, measure, beer, measire, berr, mearsed,bear \nd this happened*
*
took off the gearlever remote, unbolted it all, removed the black spacer, positioned it forward, drilled and tapped new holes, cut down selector, modified linkage, bolted it all up
-2.5" wooooooooooooooooooooooooooooooooooooooooooooooooo ooooooooooooooooooo

*
put the engine and box back in to see if the modification to the gearlever remote worked
It fits great, right in the middle
*
*
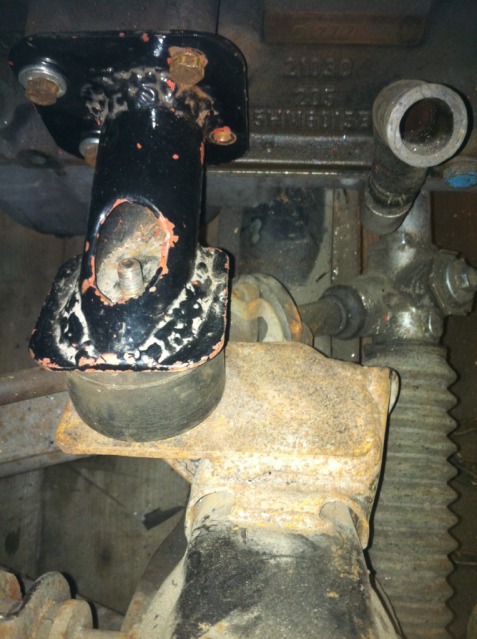
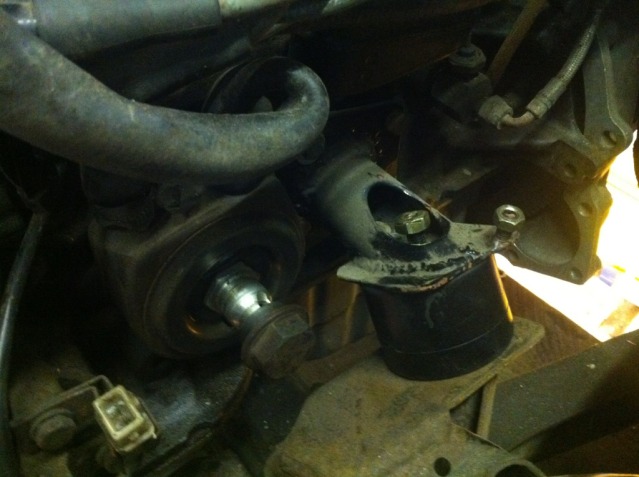
next was to center the box left to right and then make a gearbox mount for it
The original 240 mount wasn't a mile out so I used that and modified it for the 265 picking up on the original holes
*
*
*
I used a rack of eye and string to get it pointing at the diff, the diff is going to be replaced with a 4HA so it's not uber critical its 100%
*
*
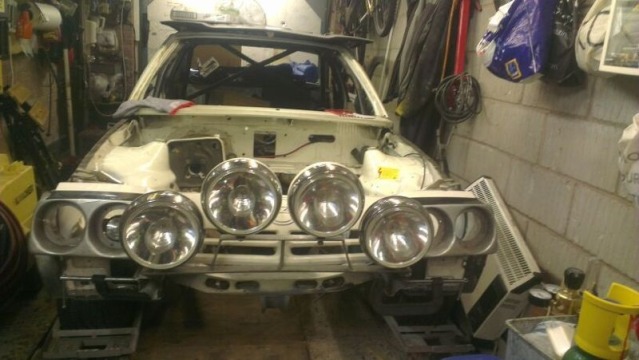
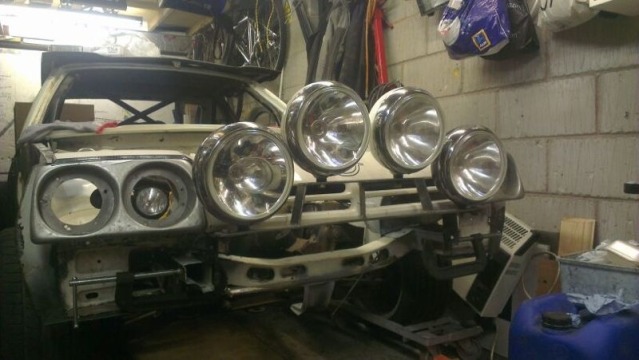
Fed up of being in the pit I then properly fitted the light bar brackets*
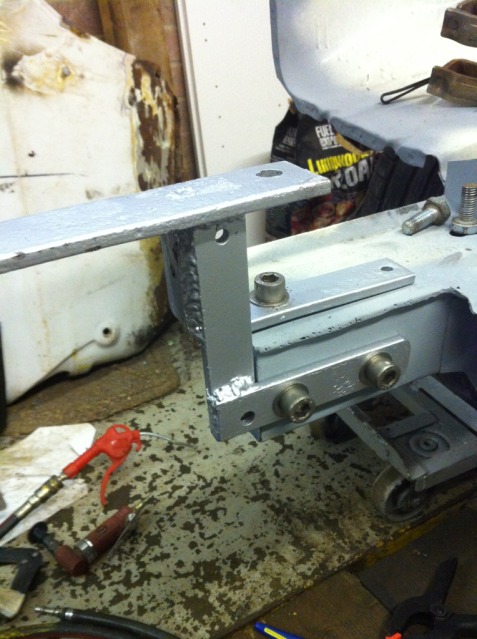
*
Then leveled the light bar to the chassis as the chassis is level
*

Tried on the super oscars
*
.
Torque tube off so I can position and grind tunnel top
Hoist into position on gantry
Engine up
And in
Really tight at the back
This was to see how the new T5 bellhousing and getrag 265 box fits
Hmmmm
Arrrghhhh... I will now have to do a few things
Engine will come forward an inch, that's not bad as I have this much clearance
I will move the holes in the mounts forward by an inch or so
This will lead to some fun with the crossmember
It's tight as hereThe lever then will come into the centre of the hole by an inch, but I need two or more to centre it
I'll take an inch out of the remote and move it all forward by an inch
I'm going to have to make some adjustments to the gear lever remote
Ah ha, new hoist and no front panel meant it was out in 30 seconds *
Time to attack that bloody gearlever position, measure, beer, measure, beer, measire, berr, mearsed,bear \nd this happened*
*
took off the gearlever remote, unbolted it all, removed the black spacer, positioned it forward, drilled and tapped new holes, cut down selector, modified linkage, bolted it all up
-2.5" wooooooooooooooooooooooooooooooooooooooooooooooooo ooooooooooooooooooo


*
put the engine and box back in to see if the modification to the gearlever remote worked
It fits great, right in the middle
*

*
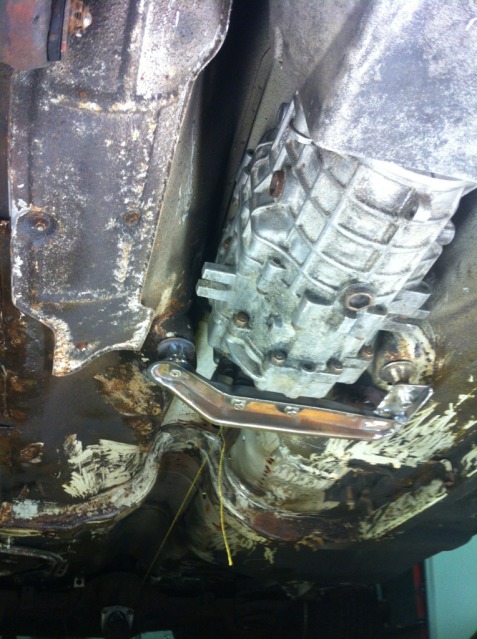
next was to center the box left to right and then make a gearbox mount for it
The original 240 mount wasn't a mile out so I used that and modified it for the 265 picking up on the original holes
*
*

*
I used a rack of eye and string to get it pointing at the diff, the diff is going to be replaced with a 4HA so it's not uber critical its 100%
*

*
Fed up of being in the pit I then properly fitted the light bar brackets*

*
Then leveled the light bar to the chassis as the chassis is level
*

Tried on the super oscars
*


.
Last edited by mantakev; 29-09-2013 at 12:39 PM. Reason: typo
 29-09-2013, 12:26 AM
#20
Too many posts.. I need a life!!
Join Date: Mar 2008
Location: down near combe
Posts: 786
Likes: 0
Received 0 Likes
on
0 Posts
very good posts and interesting, just a couple of things

is there enough strength left in these now the studs have been moved out towards the edge?
and are you able to leave the engine/box where they are and just weld on a L style piece to shift the shifter forward slightly, thats what i'd do and would still shift quite well i'd have thought?
good luck with it all and look forward to the updates
29-09-2013, 10:50 AM
#21
Wahay!! I've lost my Virginity!!

Cool thread, when removing the spigot bearing, did you try filling it with grease and pushing a tight fit rod in it, it mostly slides right out.
29-09-2013, 11:05 AM
#22
Wahay!! I've lost my Virginity!!
Thread Starter
very good posts and interesting, just a couple of things

is there enough strength left in these now the studs have been moved out towards the edge?
and are you able to leave the engine/box where they are and just weld on a L style piece to shift the shifter forward slightly, thats what i'd do and would still shift quite well i'd have thought?
good luck with it all and look forward to the updates
is there enough strength left in these now the studs have been moved out towards the edge?
and are you able to leave the engine/box where they are and just weld on a L style piece to shift the shifter forward slightly, thats what i'd do and would still shift quite well i'd have thought?
good luck with it all and look forward to the updates
Yea I looked at that too and thought it may be a bit close to the edge, I was going to add a ring around the edge to add more metal.
Until ......
My mates at Retro Power put me onto these

Got these from ebay and they are 4HA hubs with a 5x120 PCD
Now i've already got a pair of 4HA 5x120 hubs but i like these too

Problem is the studs are too small, so i smacked ten bells of s##t out of them, no movement
Turns out they are screwed in!

New studs meant i had to open the holes up and machine a flat face for the stud to sit in

New studs ( escort +25mm ones) pulled in

standard hub ( jag) vs bigger stud one
 29-09-2013, 11:07 AM
#23
Wahay!! I've lost my Virginity!!
Thread Starter
All over the garage
I recently saw on another thread a clever bloke who used a bolt anchor and put that in to remove. Worked a treat
29-09-2013, 11:09 AM
#24
Wahay!! I've lost my Virginity!!
Thread Starter
29-09-2013, 11:19 AM
#25
Wahay!! I've lost my Virginity!!
Thread Starter
29-09-2013, 11:22 AM
#26
Wahay!! I've lost my Virginity!!
Thread Starter
 29-09-2013, 11:36 AM
#27
Wahay!! I've lost my Virginity!!
Thread Starter
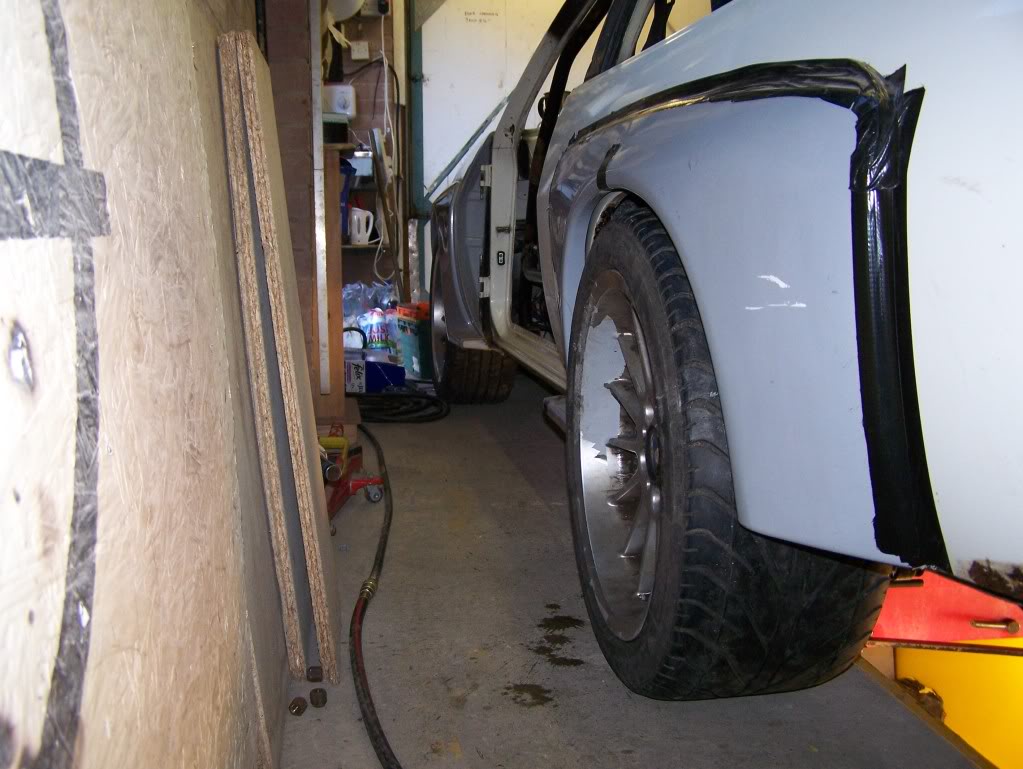
I decided to go bigger on the arches so I sold the i240 kit and bought the best 400 kit available
I wasn't happy with the drivers side rear 1/4 so as I said I removed it
Beer and a Manta in the garage, a match made in heaven

Tried on the new rear quarter

That's a 1000 euro panel and I'm going to cut it up to fit the 400 kit!
THe revs were probably ford pcd but have been changed to 4x100
I've got 4 of those in 16" but I have 3 sets of wheels for the car
The revs pcd needs changing again if it's possible to 5x120 as I'v done the 5 stud conversion

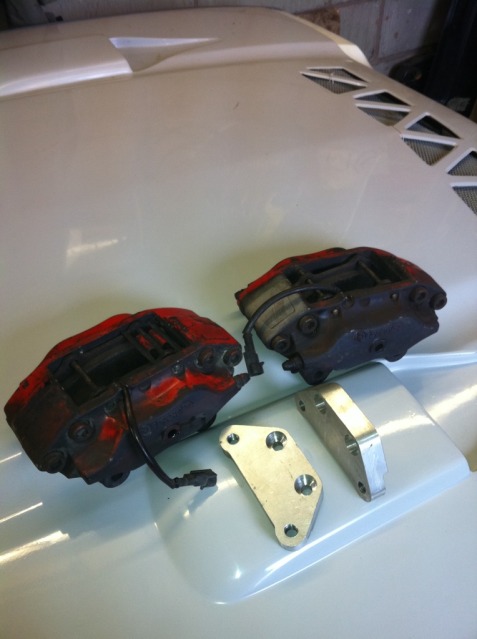
Front brakes are lancia delta integrale evo 4 pots with m3 discs, rear will be cosworth vented calipers and skyline discs
I wasn't happy with the drivers side rear 1/4 so as I said I removed it
Beer and a Manta in the garage, a match made in heaven

Tried on the new rear quarter

That's a 1000 euro panel and I'm going to cut it up to fit the 400 kit!

THe revs were probably ford pcd but have been changed to 4x100
I've got 4 of those in 16" but I have 3 sets of wheels for the car
The revs pcd needs changing again if it's possible to 5x120 as I'v done the 5 stud conversion


Front brakes are lancia delta integrale evo 4 pots with m3 discs, rear will be cosworth vented calipers and skyline discs
 29-09-2013, 11:39 AM
#28
Wahay!! I've lost my Virginity!!
Thread Starter
Lets see if this link works, it shows the difference in non EPS and EPS on my car

Can't seem to embed that vid? can anyone help?
Can't seem to embed that vid? can anyone help?
Last edited by mantakev; 29-09-2013 at 12:08 PM.
 29-09-2013, 11:49 AM
#30
Wahay!! I've lost my Virginity!!
Thread Starter
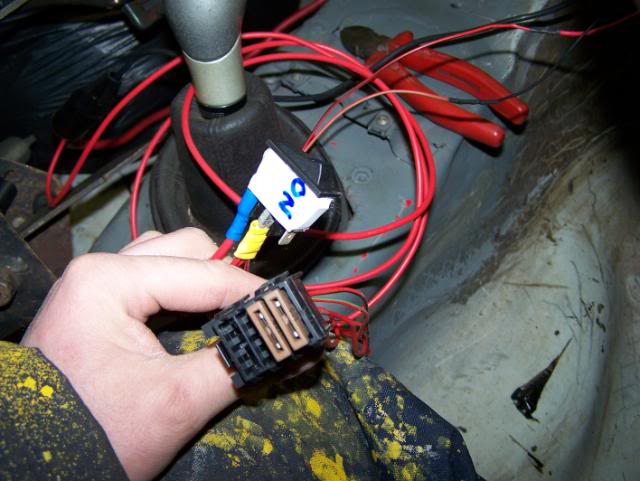
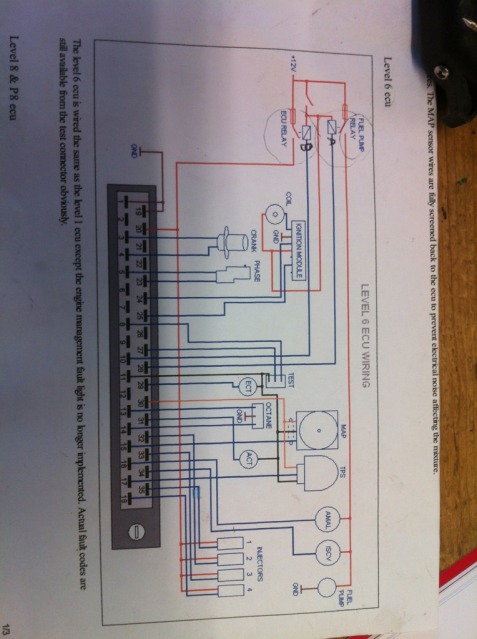
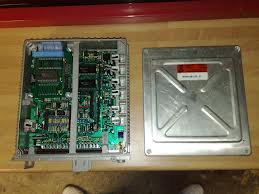
I've worked out the wiring on the cossie engine but there is a relay block on the loom with no relay in it.

The purple one, is connected into the loom and the ground goes back to pin 1 on the ECU. The brown green wire goes from position 85 on the relay to pin 29 on the ECU and that feeds something called the ECT on the diagram.What does it do?

The purple one, is connected into the loom and the ground goes back to pin 1 on the ECU. The brown green wire goes from position 85 on the relay to pin 29 on the ECU and that feeds something called the ECT on the diagram.What does it do?


 29-09-2013, 12:20 PM
#33
Wahay!! I've lost my Virginity!!
Thread Starter
Thank's for the replys. I thought I'd get a new one ripped as I'd put a ford engine in an opel.
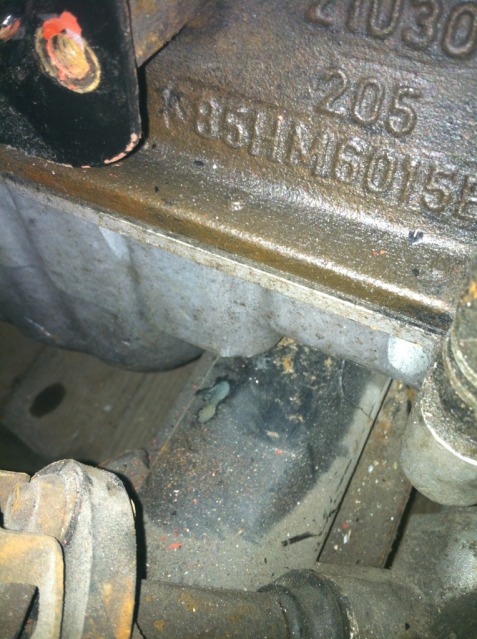
The engine came out of a sapphire that was jumped and had the engine taken out while the body was fixed. The car was said to be too bad to fix so I bought the engine
It's fairly standard apart from a -31, ported head and a group a headgasket and collins stage 1 chip
It won't be staying fairly standard!
Yea the manta manta video is a must have for any manta owners garage, so is manta magic and manta der film
Last edited by mantakev; 29-09-2013 at 12:23 PM.
29-09-2013, 12:37 PM
#34
Wahay!! I've lost my Virginity!!
Thread Starter
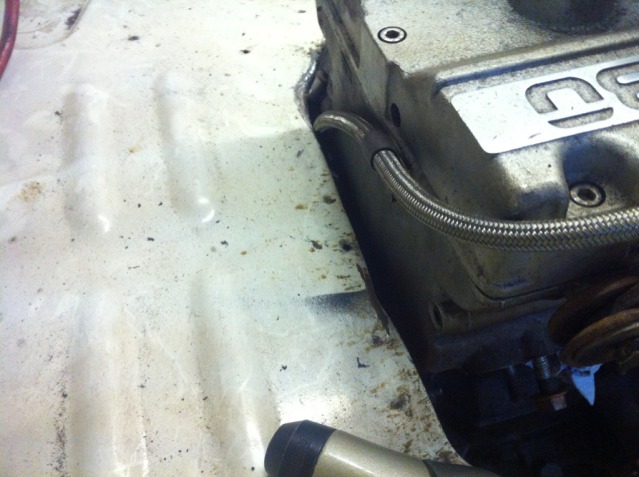
I had to use the 4x4 turbo manifold for clearance
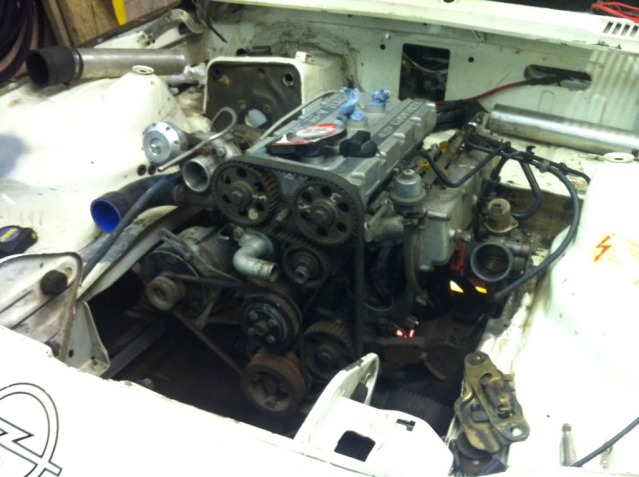
I used the 4x4 oil filter extension too
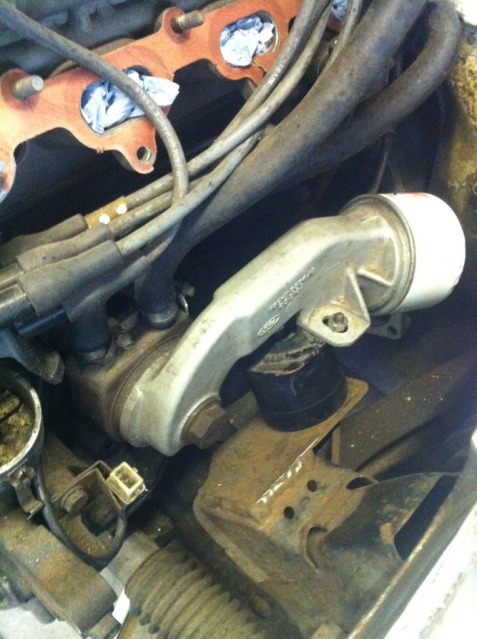
It's probably very close to what people do when putting them into mk1 and mk2 escorts

I used the 4x4 oil filter extension too

It's probably very close to what people do when putting them into mk1 and mk2 escorts
29-09-2013, 06:35 PM
#36
Wahay!! I've lost my Virginity!!
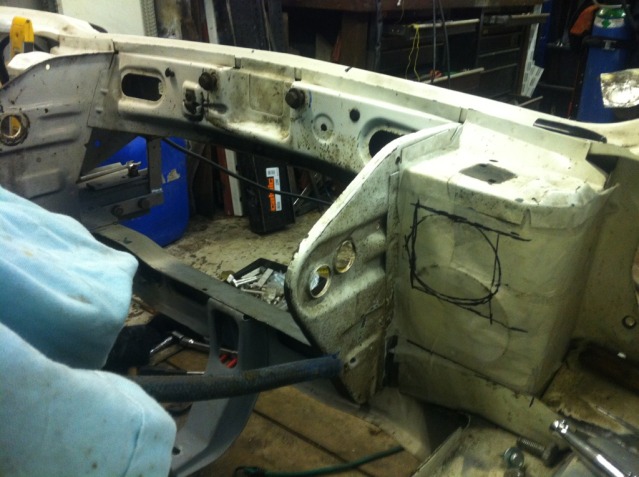
Thread Starter
spent all day measuring and drawing up the position of the IC to come through into the engine bay. There are 3 different skins to cut through so my trusty plasma cutter came out to play
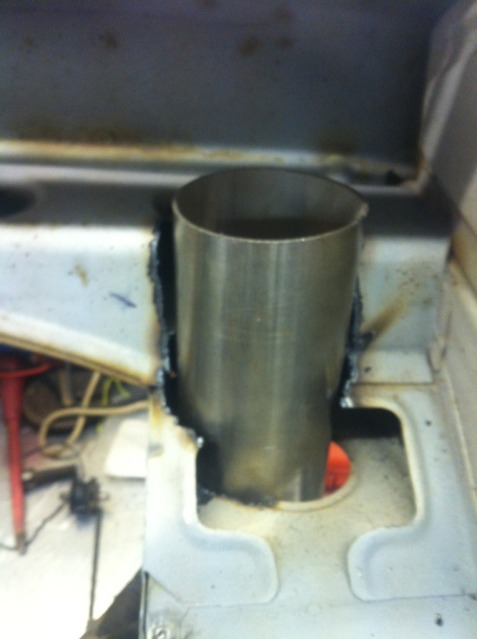
The radtech IC fits like a glove

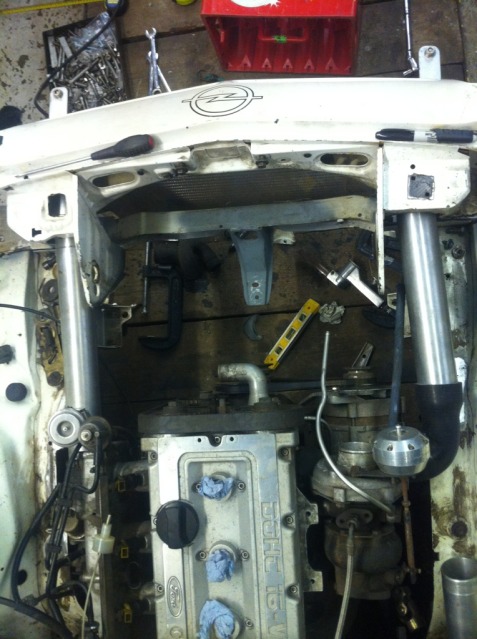


The radtech IC fits like a glove

 29-09-2013, 06:36 PM
#37
Wahay!! I've lost my Virginity!!
Thread Starter
need to tidy up the plasma cuts next and nail the front end on. I've decided I will have to take some of the OCD out of the build or it will never ever get done
Need to speak to some cossie gurus about what to do to get around the 450 horse figure out of the engine. I know greens won't do
Greys, t34 or t38 roller, L8 , 3bar map,and a proper RR session?
Need to speak to some cossie gurus about what to do to get around the 450 horse figure out of the engine. I know greens won't do
Greys, t34 or t38 roller, L8 , 3bar map,and a proper RR session?
Last edited by mantakev; 29-09-2013 at 06:47 PM.
29-09-2013, 06:55 PM
#38
Very cool like it
T38 imo for that power level + a live map. and as your near MSD would be a good choice.
Keep us updated will be a very cool car when finished
bigturbo.co.uk comes in handy eh
Paul
T38 imo for that power level + a live map. and as your near MSD would be a good choice.
Keep us updated will be a very cool car when finished
bigturbo.co.uk comes in handy eh
Paul
Last edited by costina; 29-09-2013 at 06:57 PM.
29-09-2013, 07:32 PM
#40
I've found that life I needed.. It's HERE!!
Great project. Nearly finished!!