My 24v sapphire, re-shell
 22-12-2015, 09:44 AM
#121

During the last year the car (well at least the shell) passed 400.000 km. But all those km through rain, snow and salt did take their toll on the shell. Last year the car again needed welding on the front seat mounts and on the left rear sill. I was getting a bit fed up with the constant welding required each year to pass the MoT. The only sensible decision would be either to get rid in time or to re-shell the car, which had already been playing in my mind for a couple of years. But in the end I decided that I still wanted to keep it, so I went to search for a replacement shell.
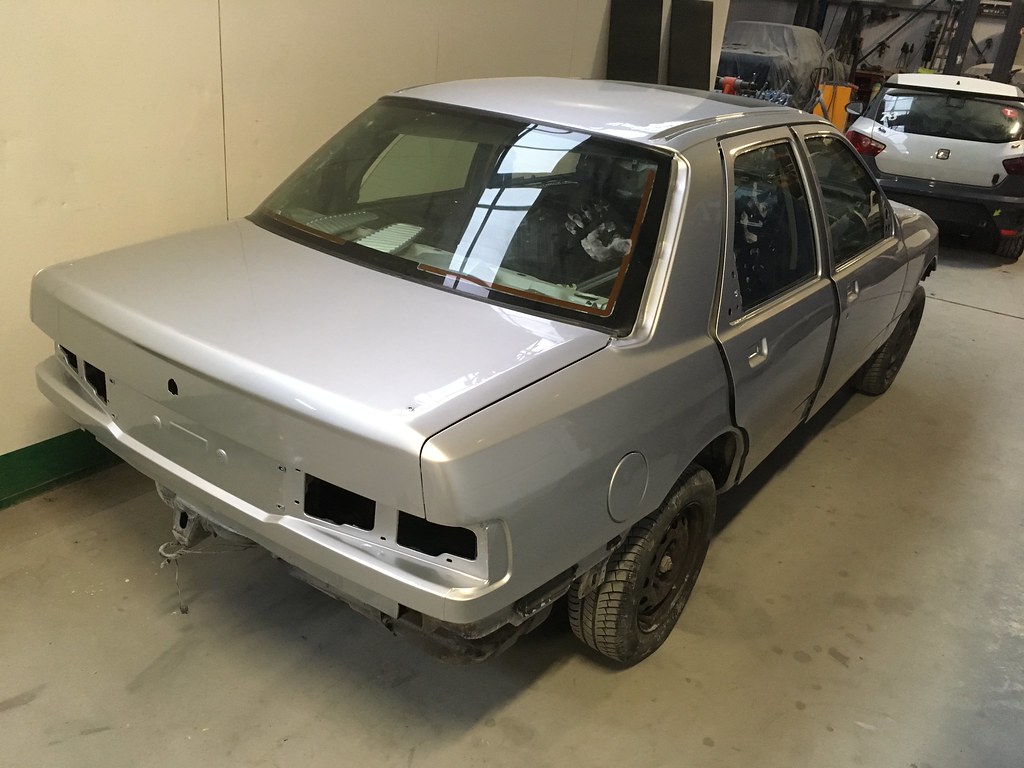
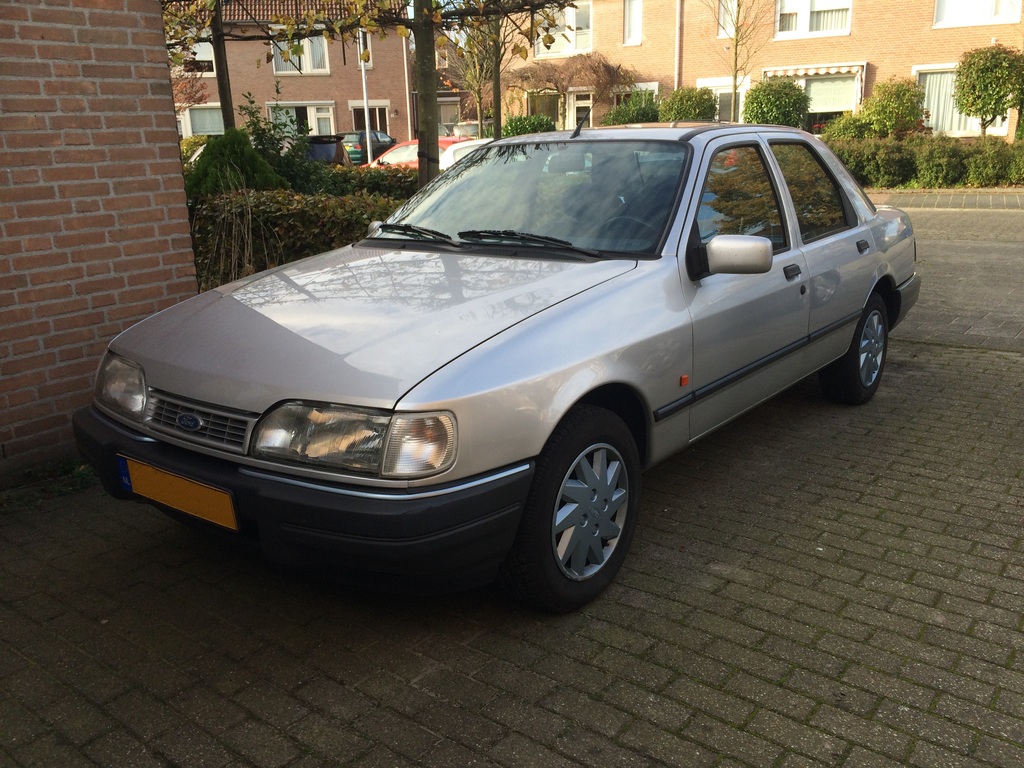
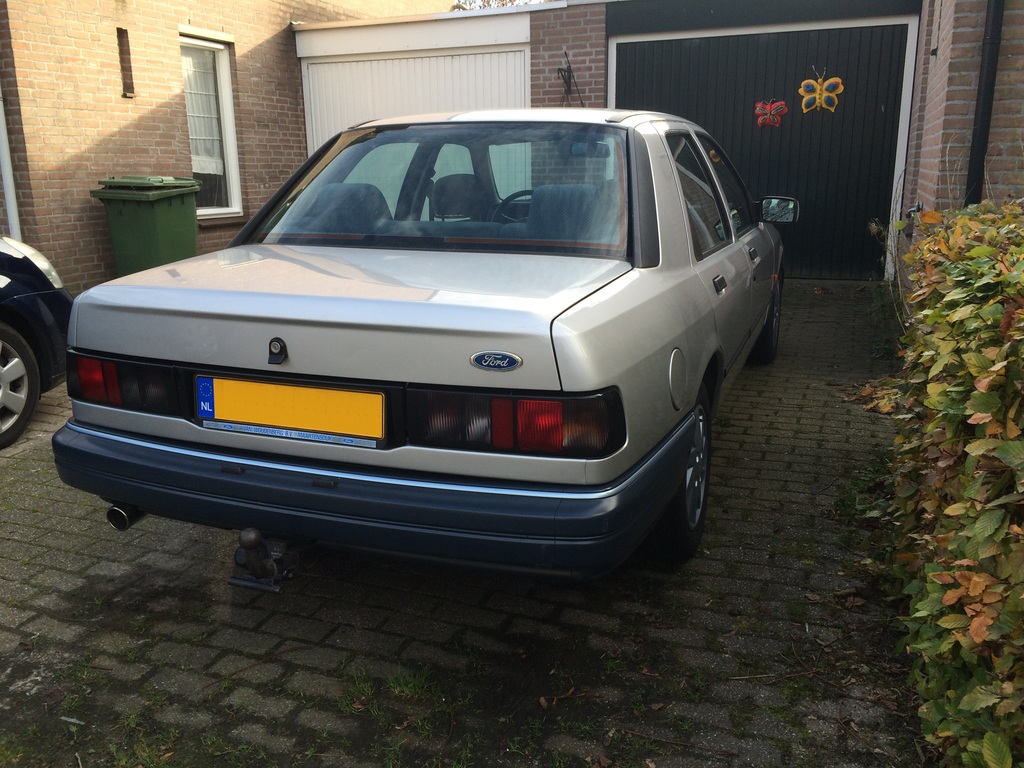
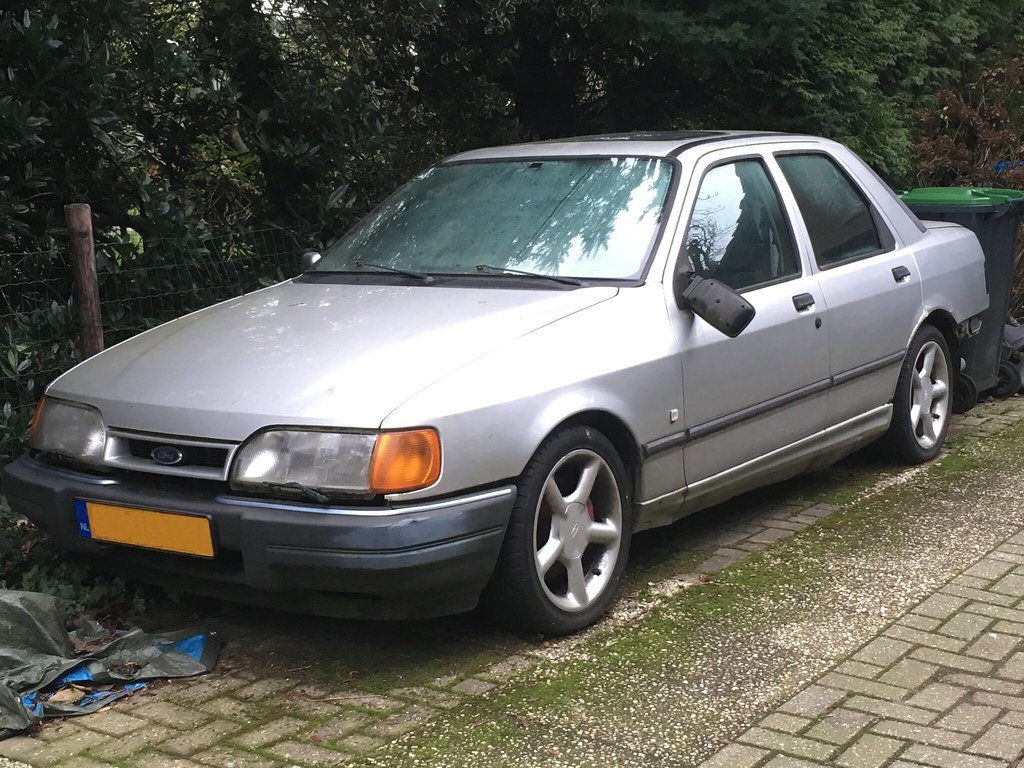
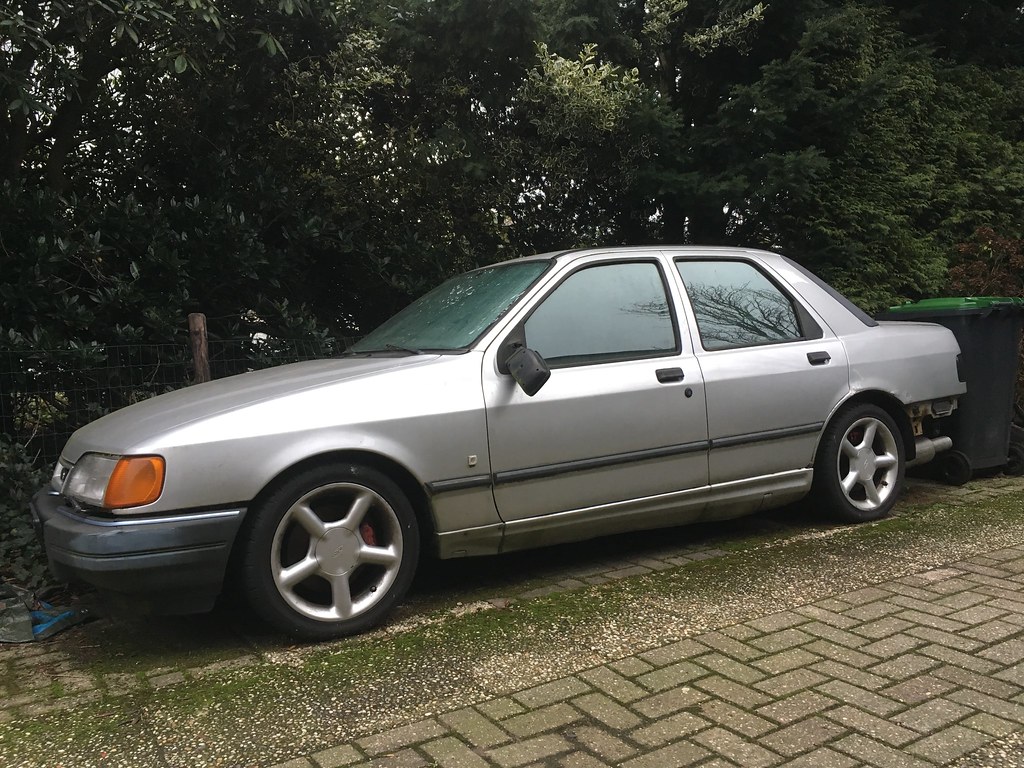
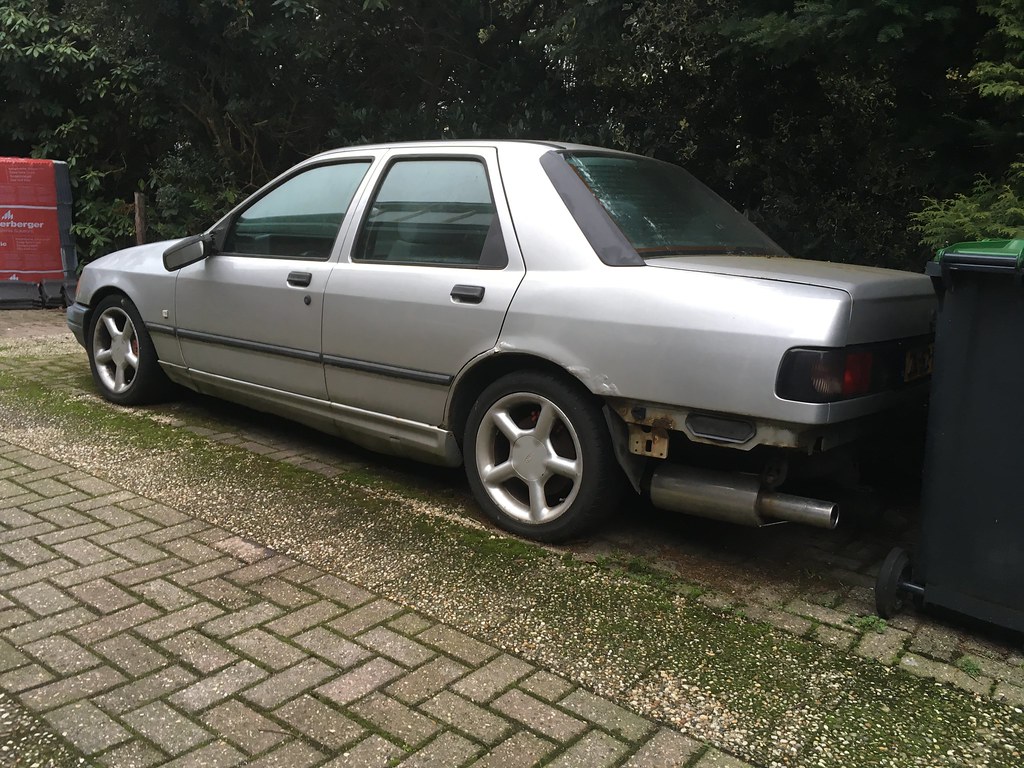
Luckily enough this was found very quickly and funny enough the replacement is almost the same as the 24v was originally. The new one is a 2.0i Azur Sapphire automatic in Moondust Silver with sunroof, put on the road May 6th 1991, while the 24v was a 2.0i CL manual sapphire in Moondust Silver with sunroof, put on the road May 1st 1991. ;D
But the real reason why I bought this is because it was almost completely rust free. The sills, arches, chassis legs have no rust at all, there is only a bit of rust on the chassis leg underneath the master brake cylinder. Which probably leaked at some point, as it clearly has been replaced. The car has done only 130.000 km and was at the first owner until 2012 and in that time always serviced by the Ford dealer, with all stamps in the maintenance book.
Over time the car will be stripped completely to prepare rebuilding it as the 24v. Some pics of the new one.
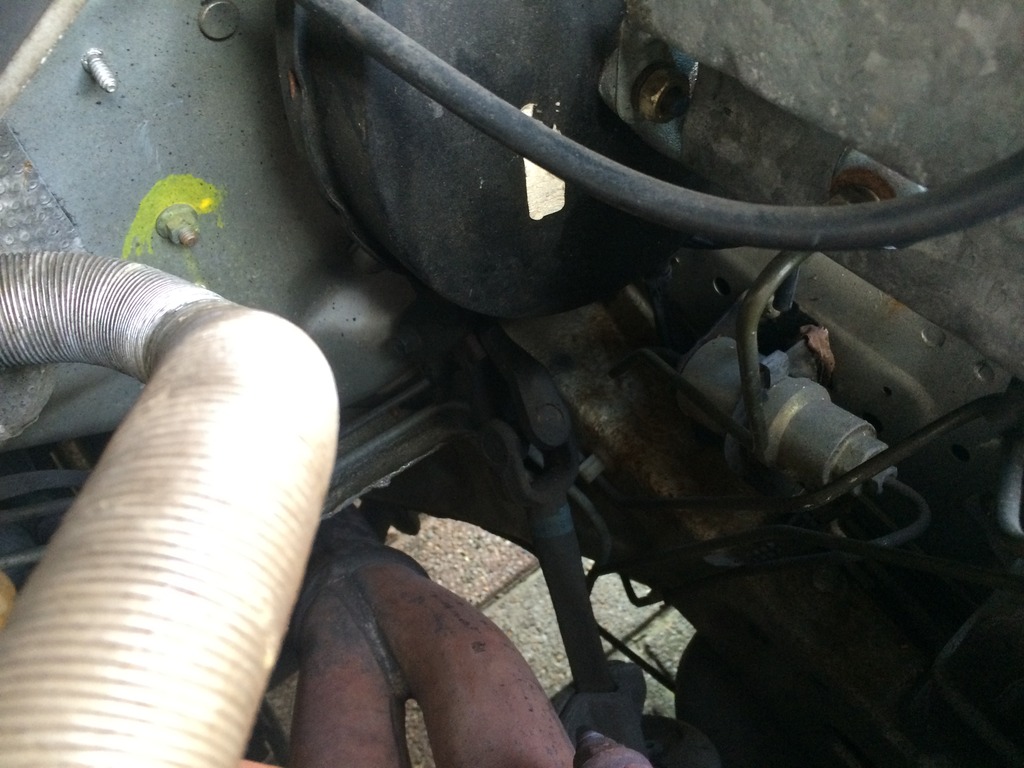
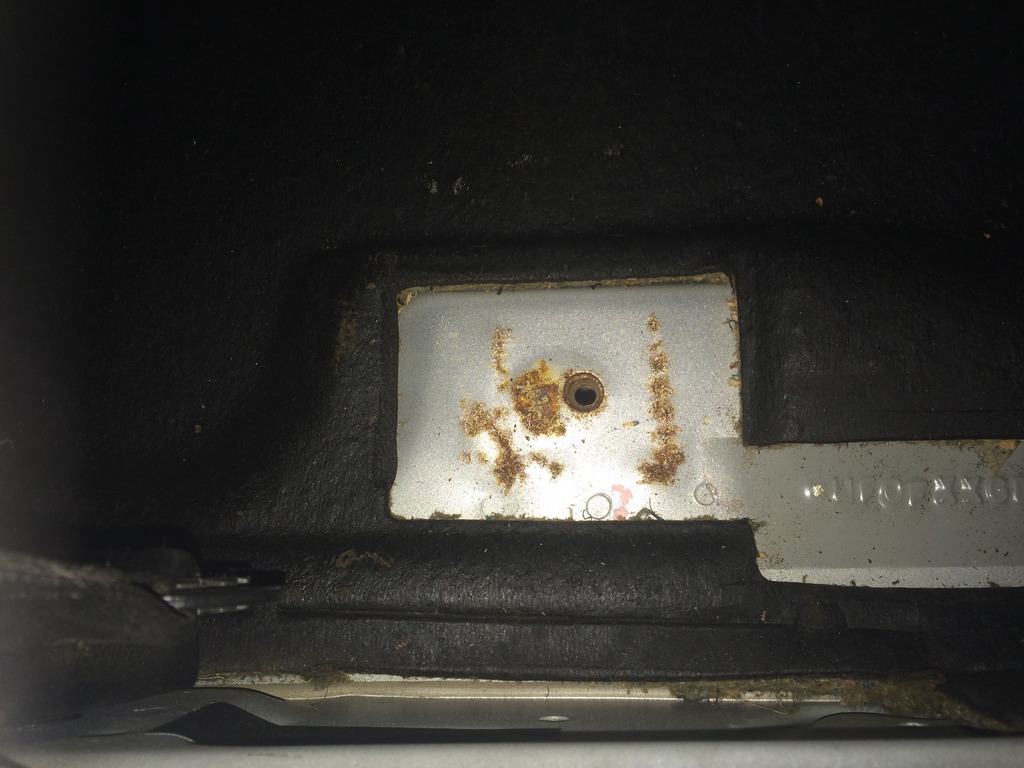
The rust underneath the master cylinder.
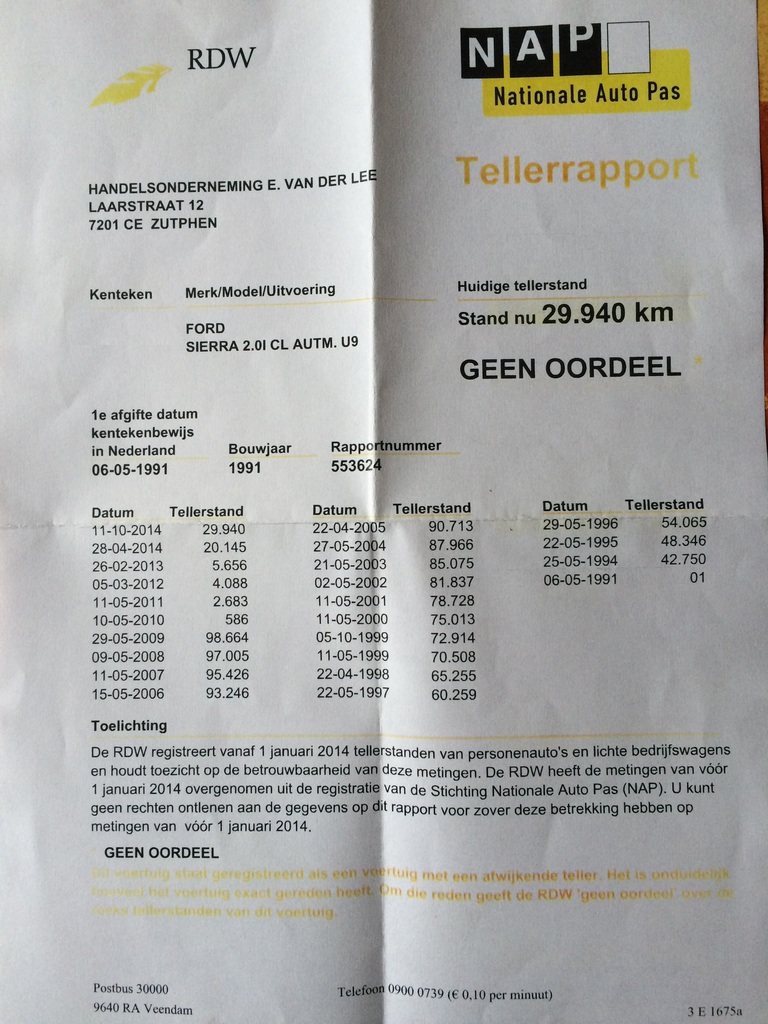
And the officially checked mileage.

 01-01-2016, 06:17 PM
#126
Thanks all!
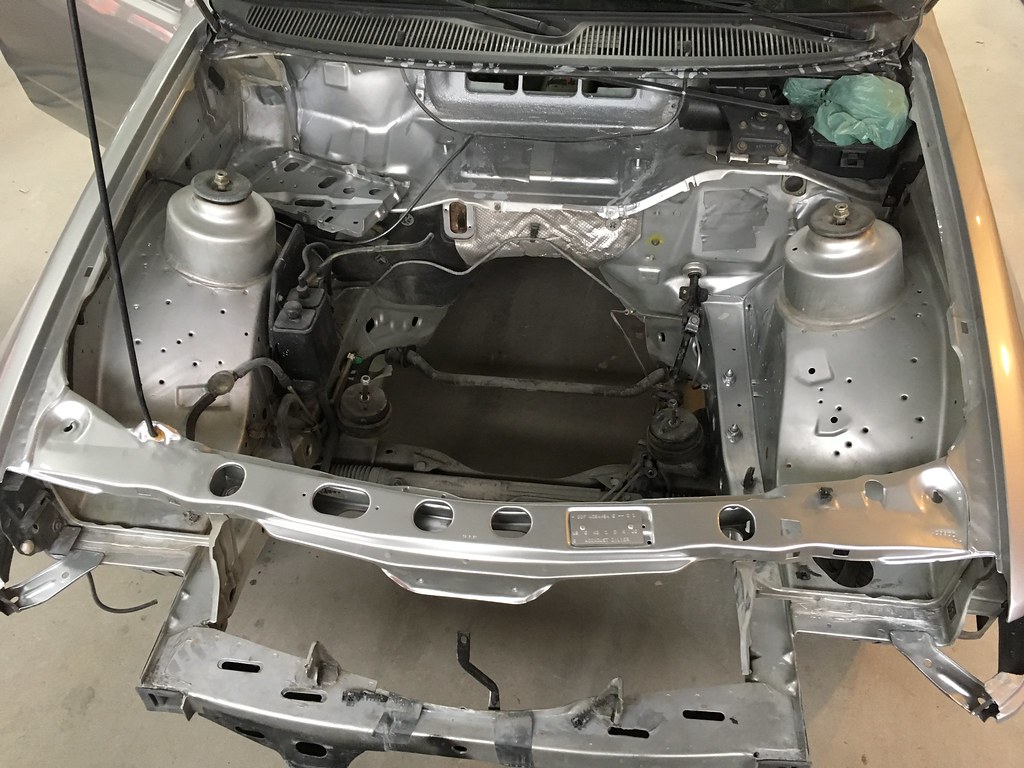
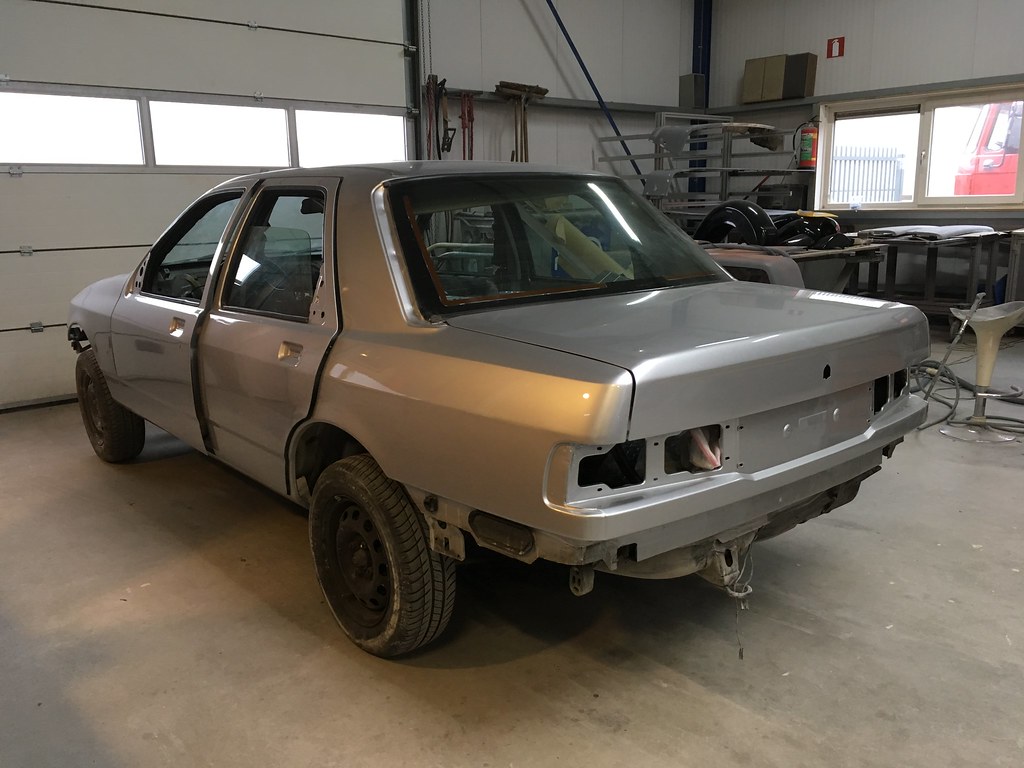
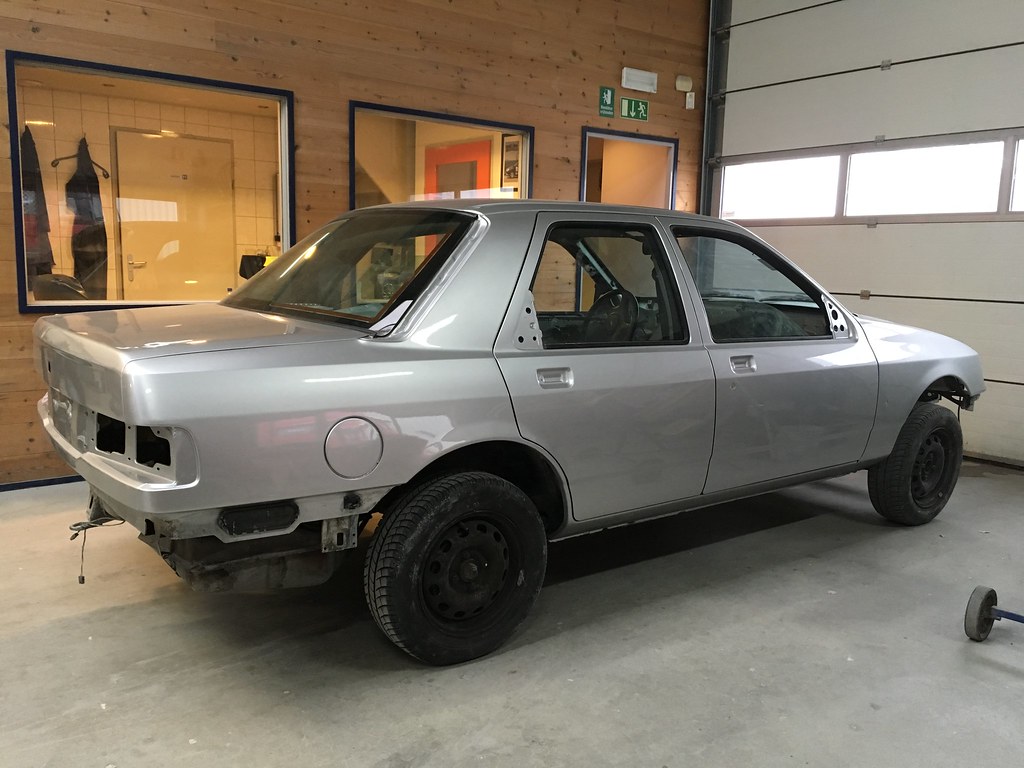
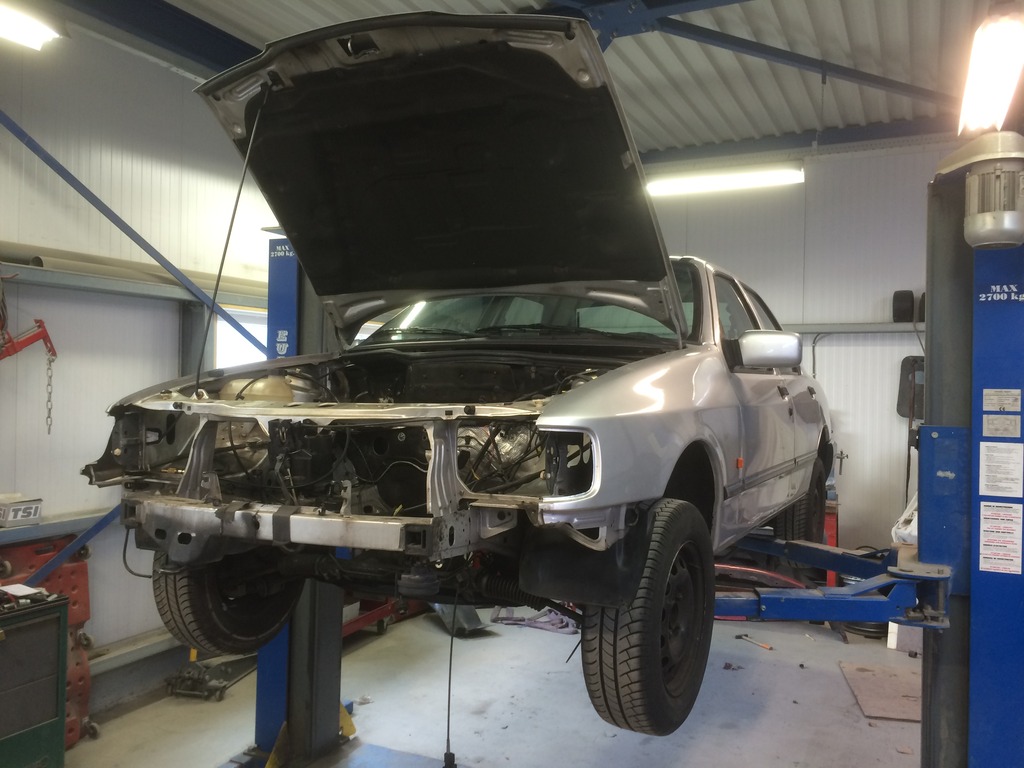
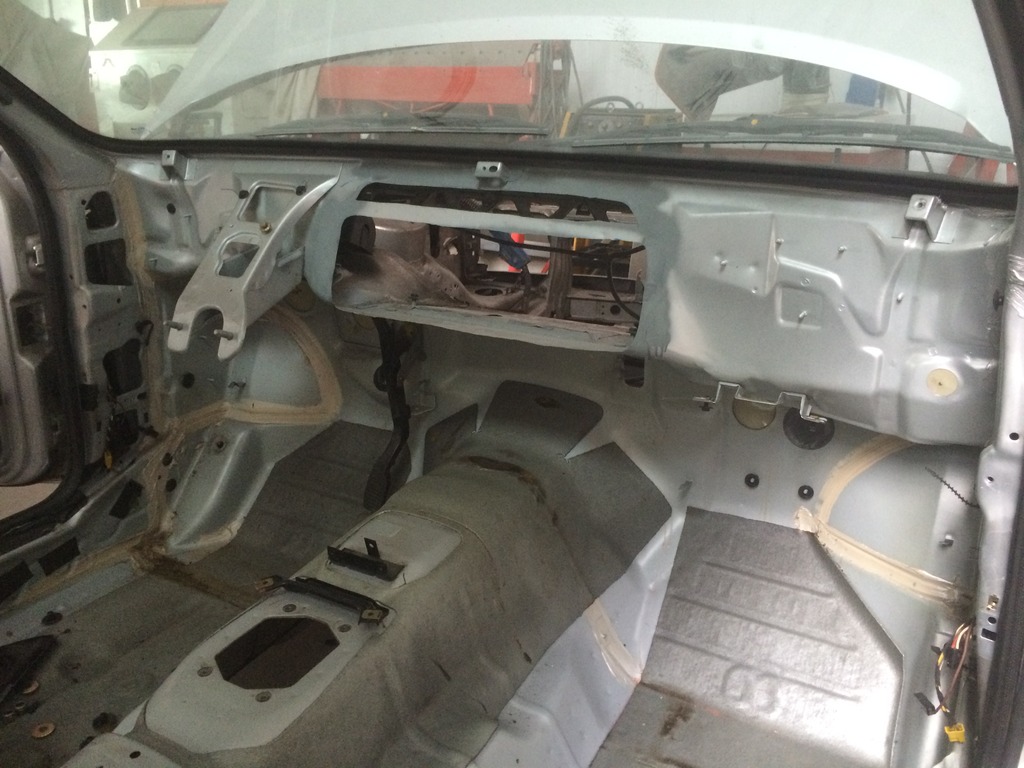
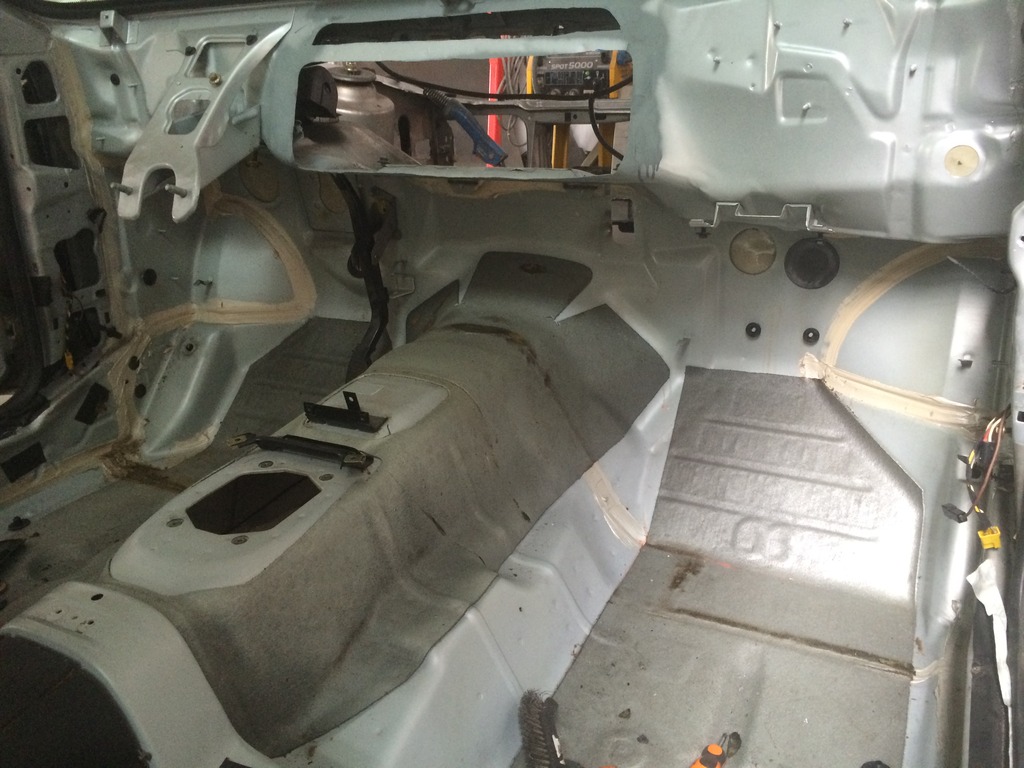
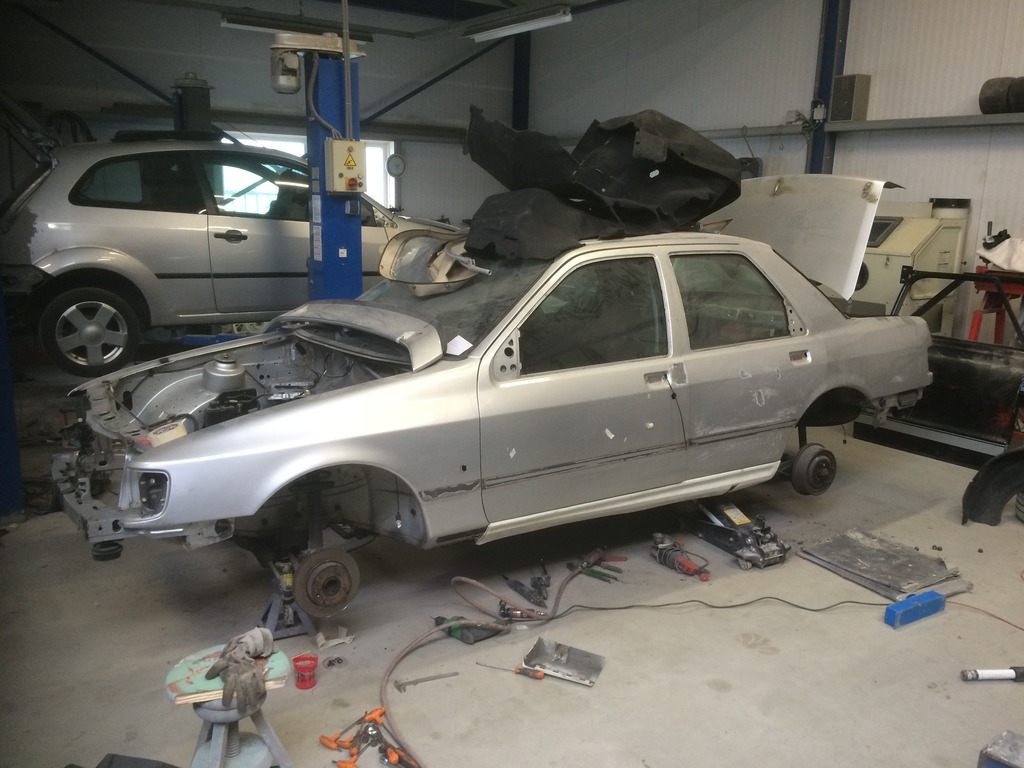
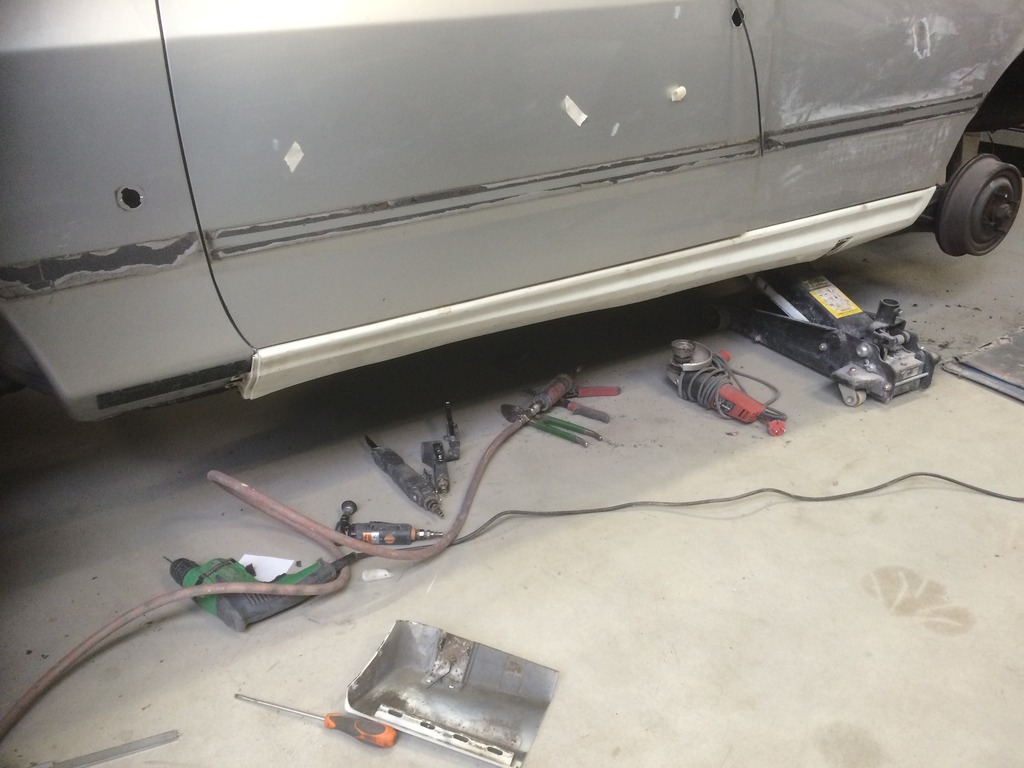
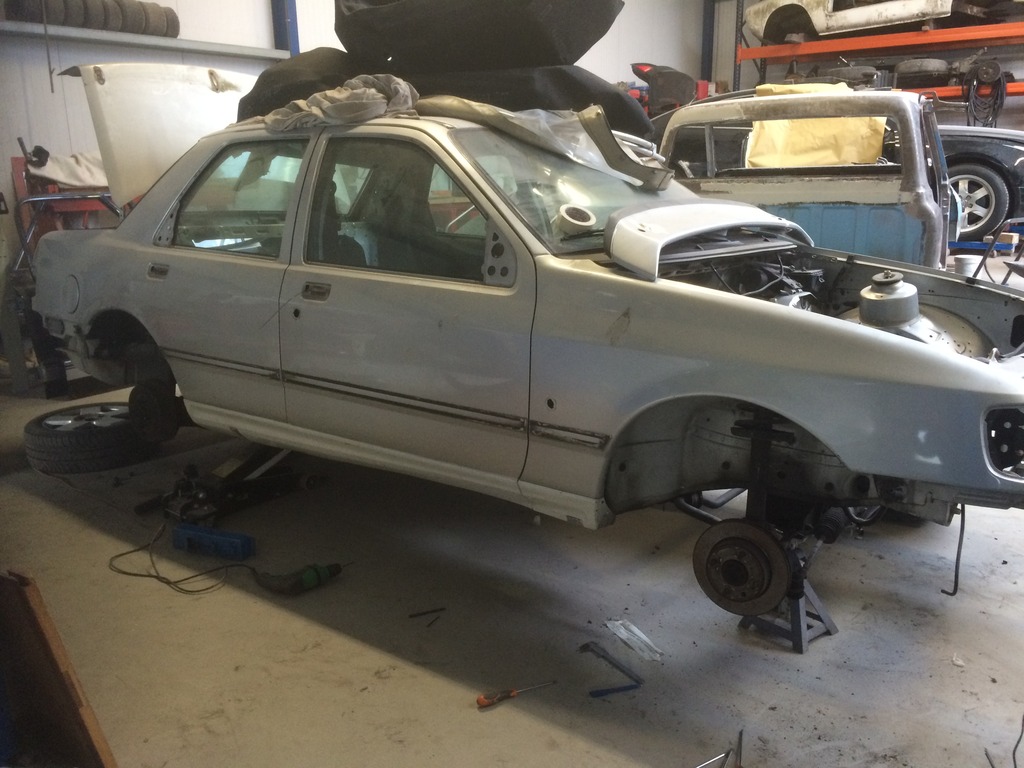
Since I found the replacement already end of 2014, during the last year I started stripping it. I first took the engine and box out, as those were picked up the next day by the new owner.
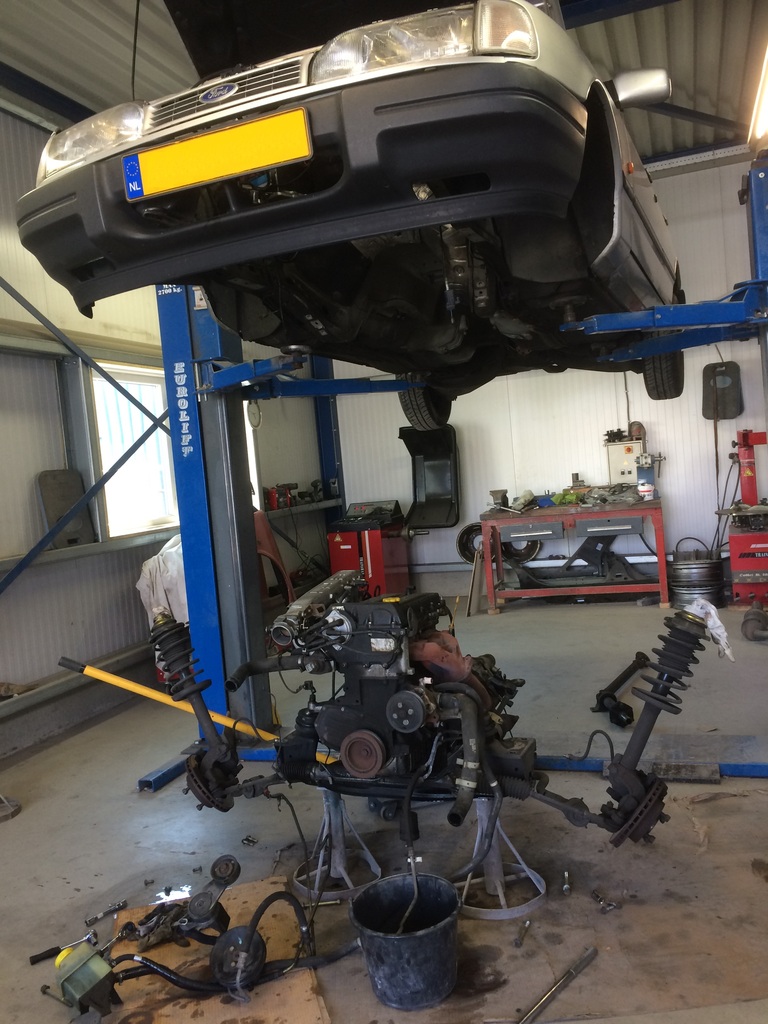
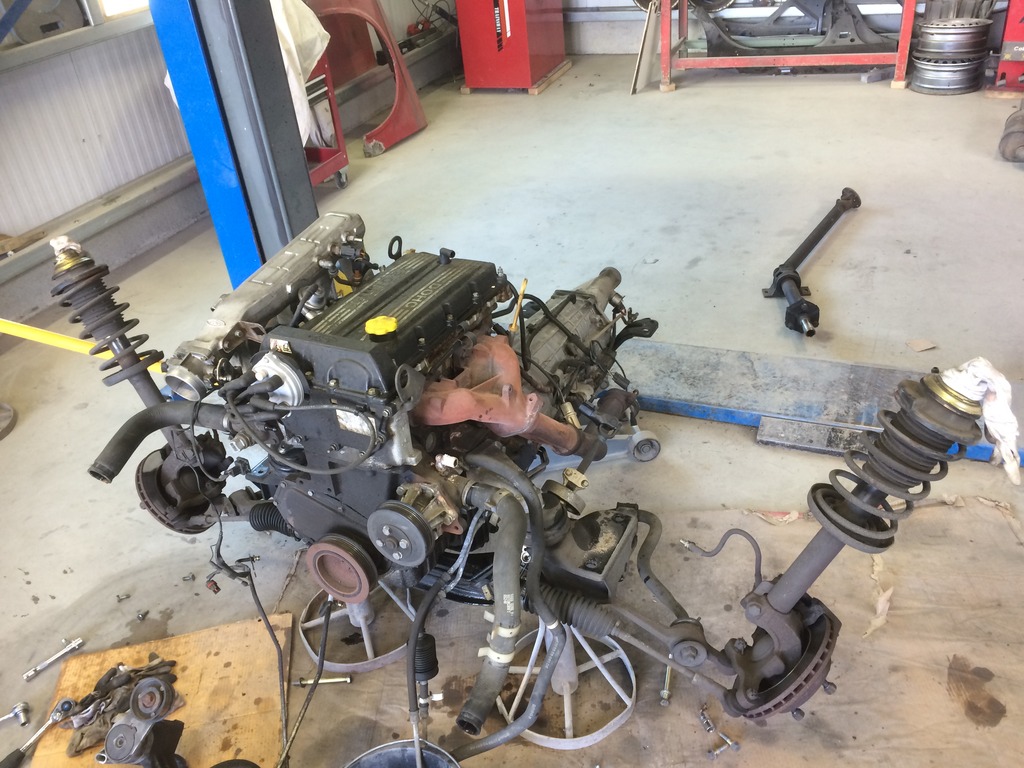

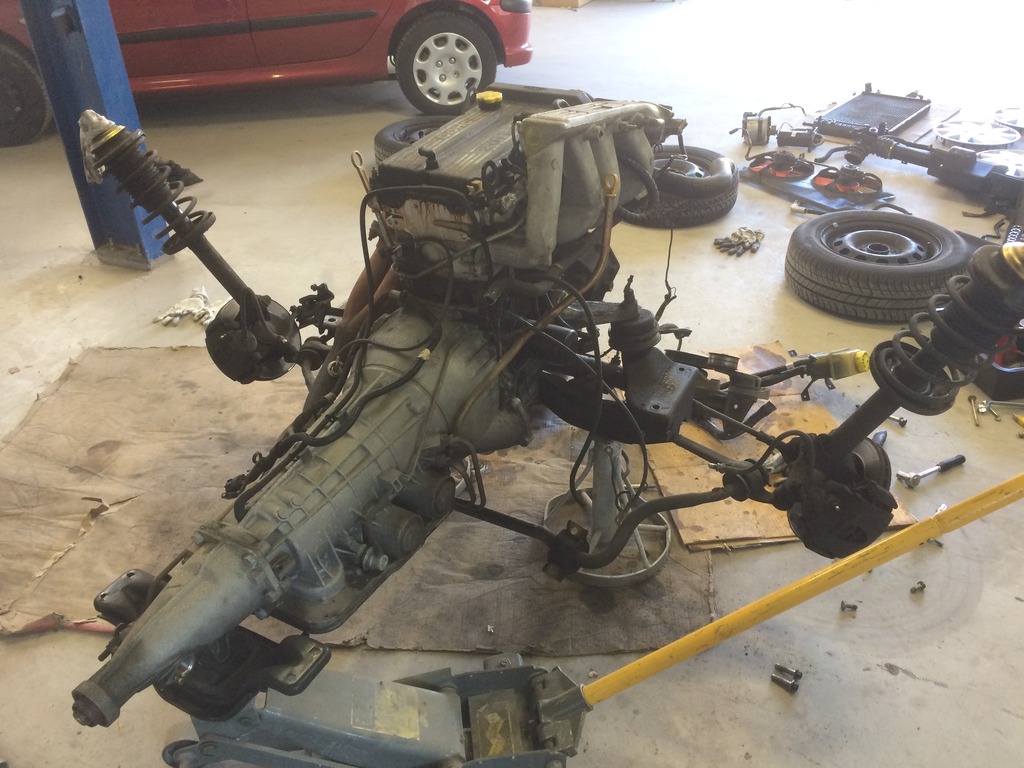
And put the front suspension back on so the car could still be rolled around.
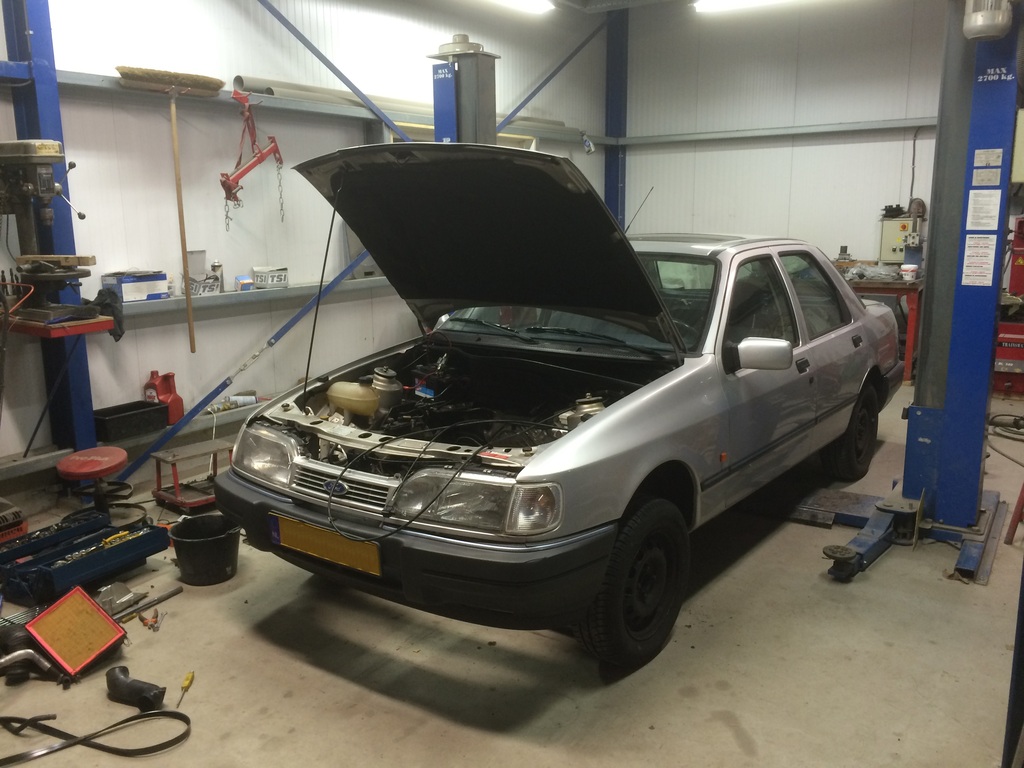
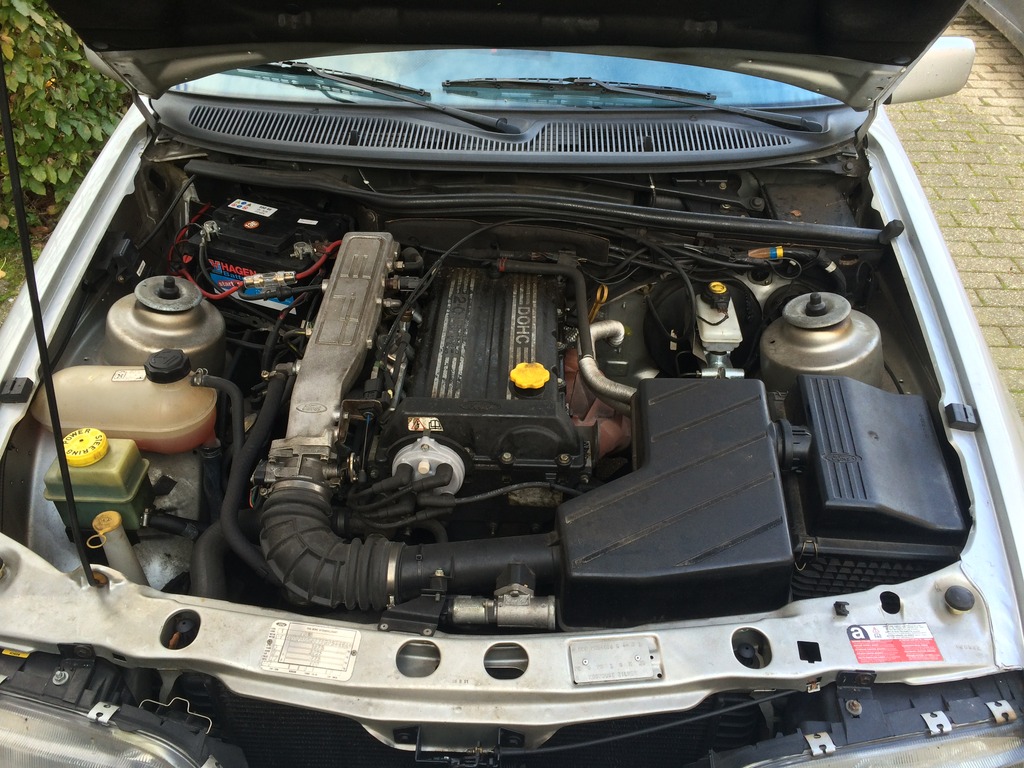
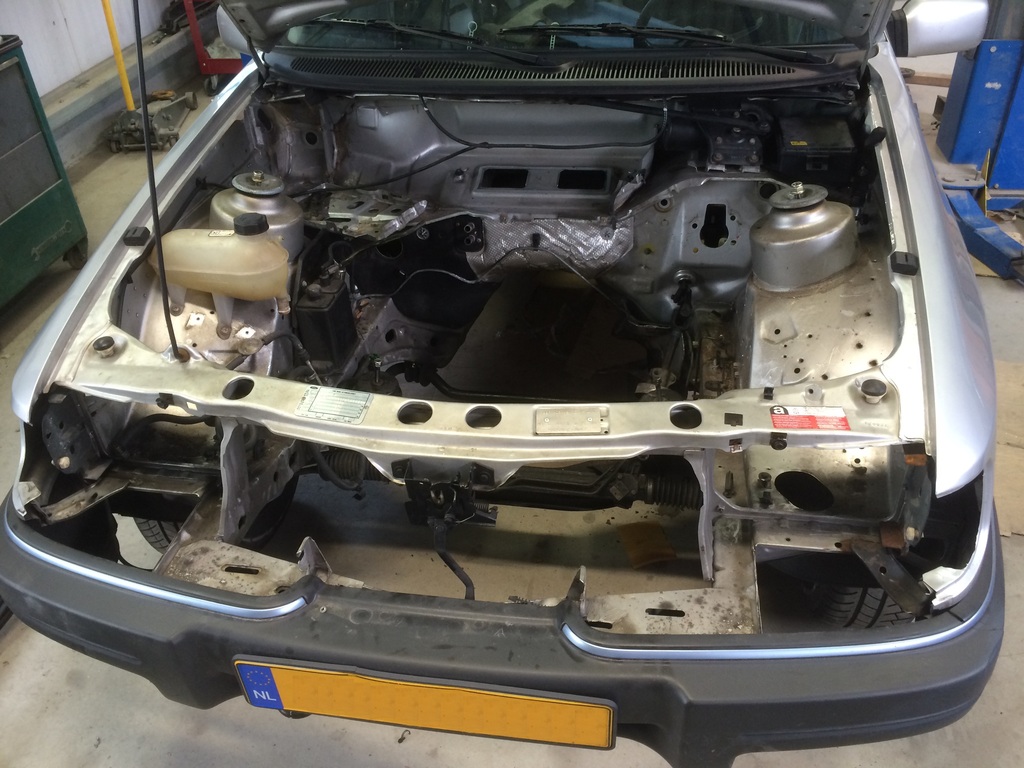
At a later time I removed the head lamps, grill, bumper, washer bottle and air filter box.
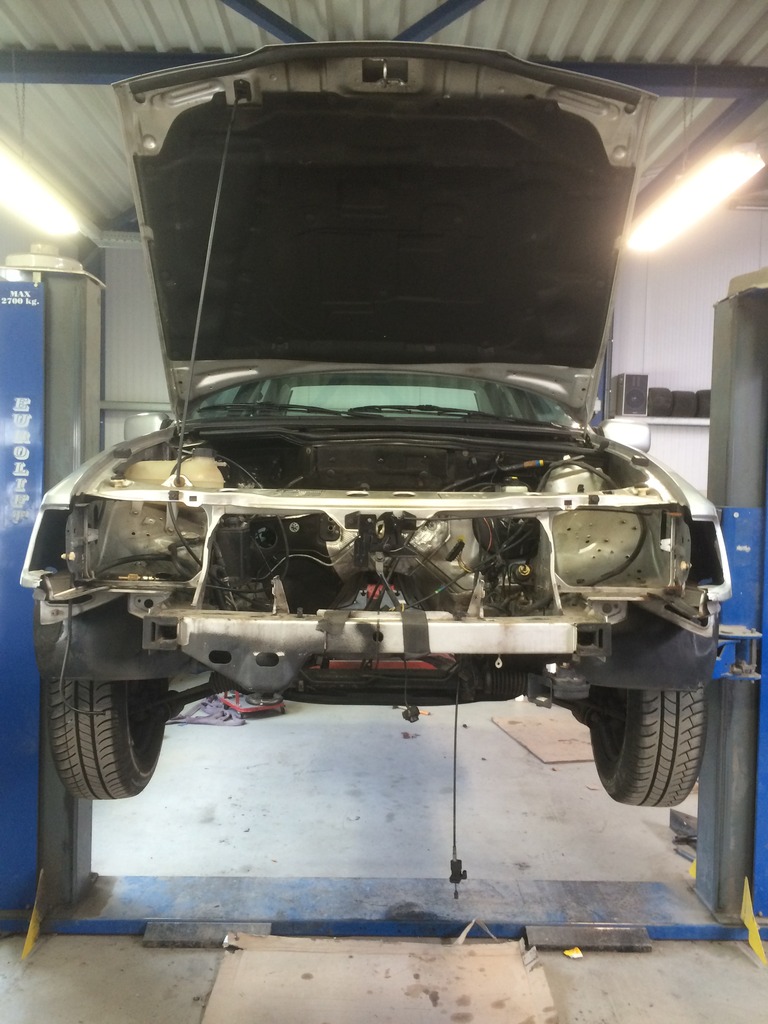
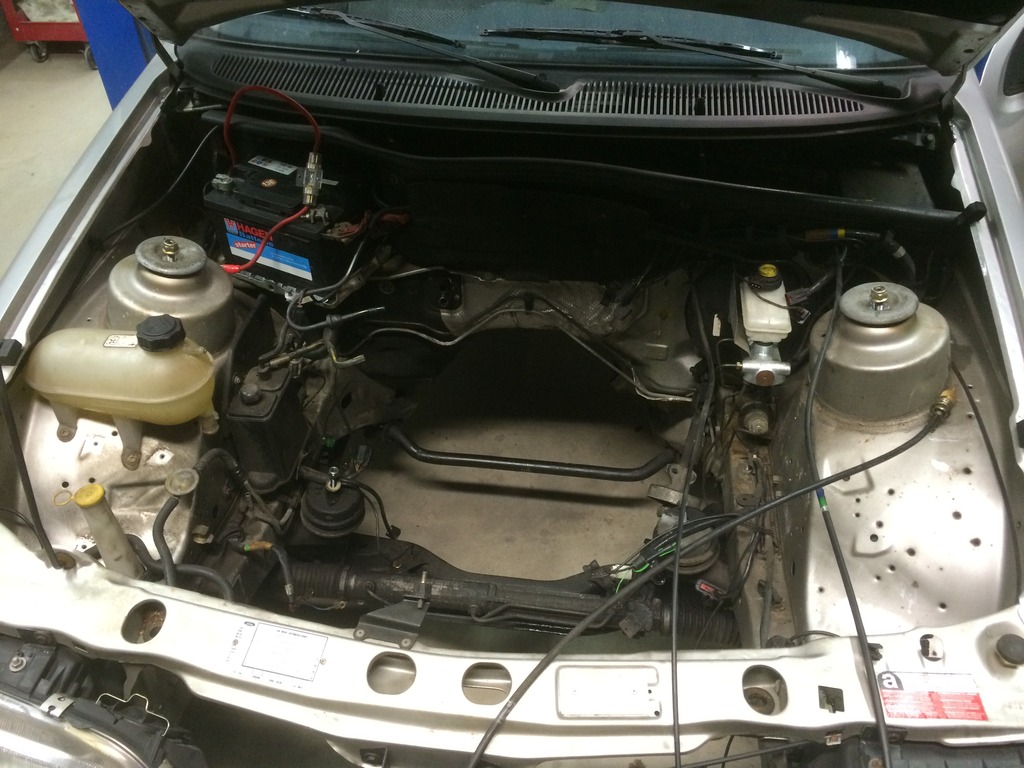
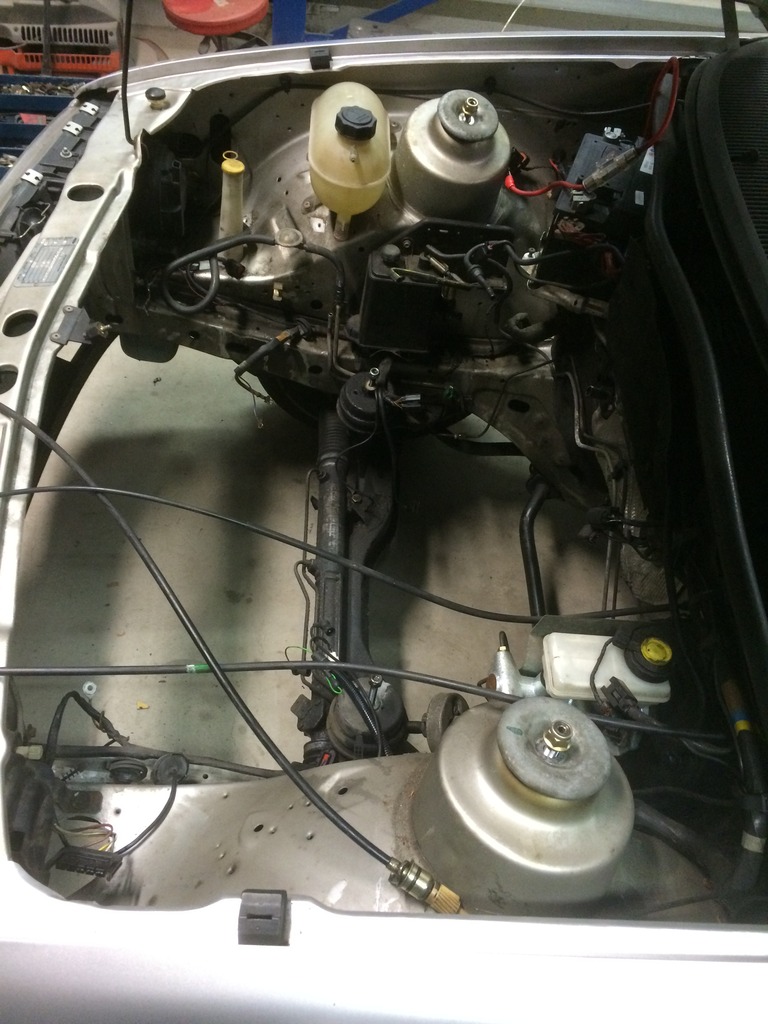
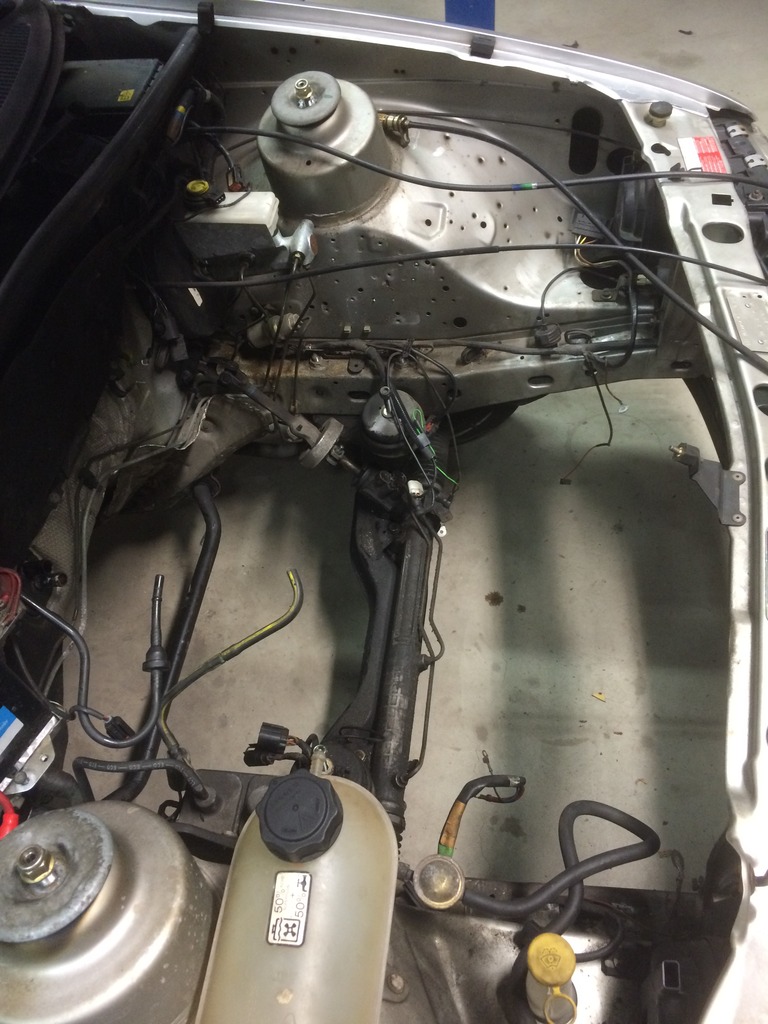
And eventually I also removed the main loom, the engine loom, master brake cylinder and most other parts underneath the bonnet. But as the front bumper was in the way I temporarily put it back on.
Since I found the replacement already end of 2014, during the last year I started stripping it. I first took the engine and box out, as those were picked up the next day by the new owner.


And put the front suspension back on so the car could still be rolled around.


At a later time I removed the head lamps, grill, bumper, washer bottle and air filter box.


And eventually I also removed the main loom, the engine loom, master brake cylinder and most other parts underneath the bonnet. But as the front bumper was in the way I temporarily put it back on.


 15-01-2016, 02:47 PM
#130
Virgin

Join Date: Apr 2007
Posts: 11
Likes: 0
Received 0 Likes
on
0 Posts
Great work on this car -stunning skills!
Thanks also for sharing some excellent data on ECU/Tweecer, Ignition graph and Pocket Dyno performance times -all very useful and interesting.
Was your car running 4x4 or rear wheel drive when you did the 1/4 mile times?
Do you know what the car's 0-100 mph (0-161 km/h) time is?
Thanks also for sharing some excellent data on ECU/Tweecer, Ignition graph and Pocket Dyno performance times -all very useful and interesting.
Was your car running 4x4 or rear wheel drive when you did the 1/4 mile times?
Do you know what the car's 0-100 mph (0-161 km/h) time is?
14-02-2016, 05:51 PM
#132
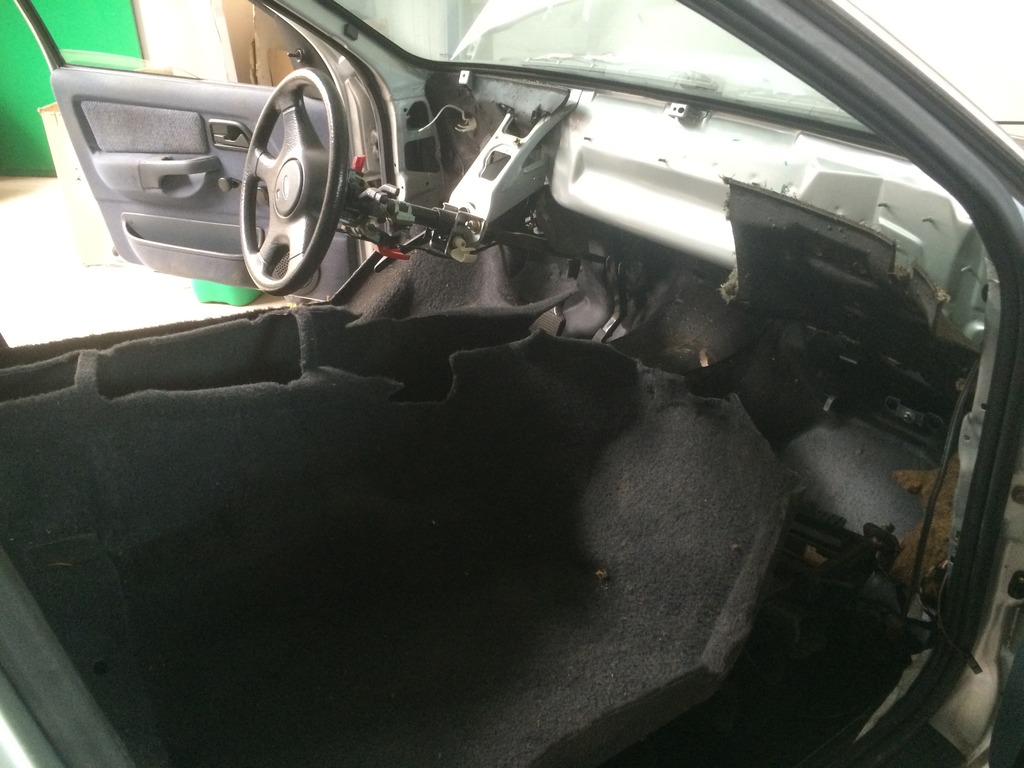
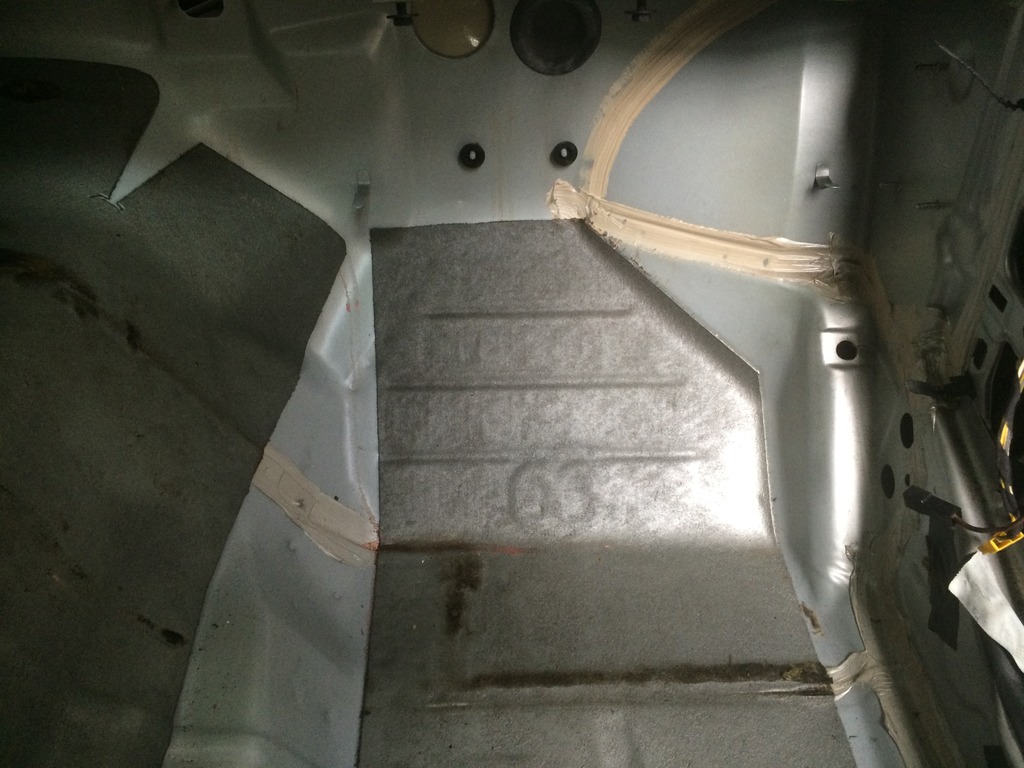
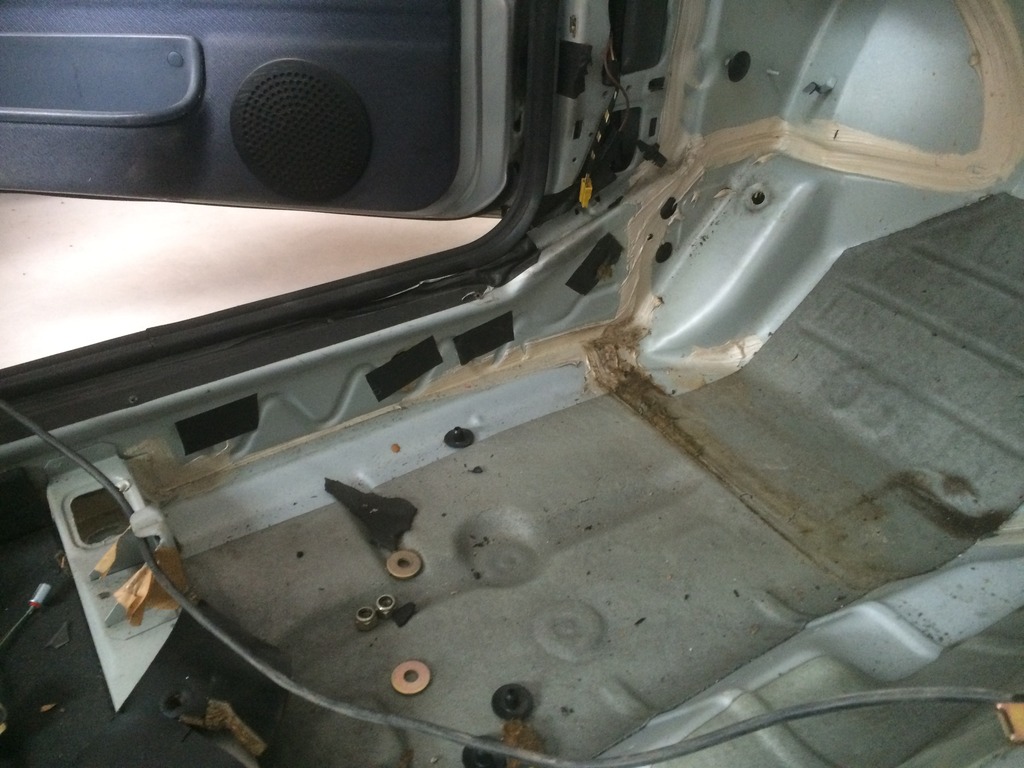
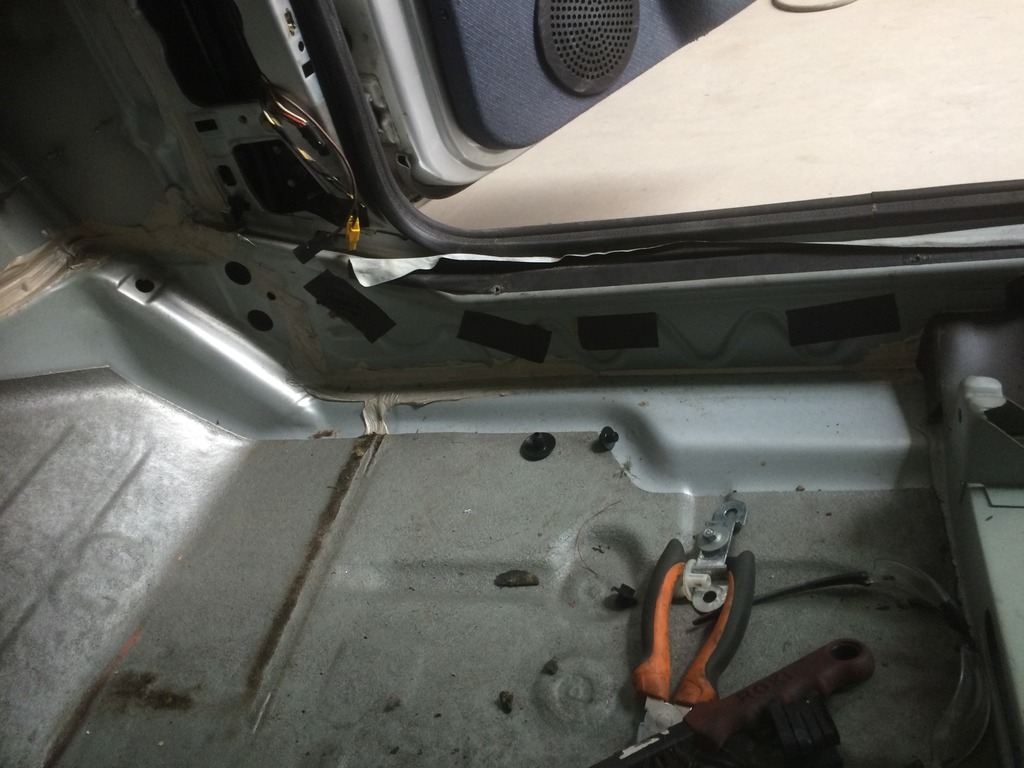
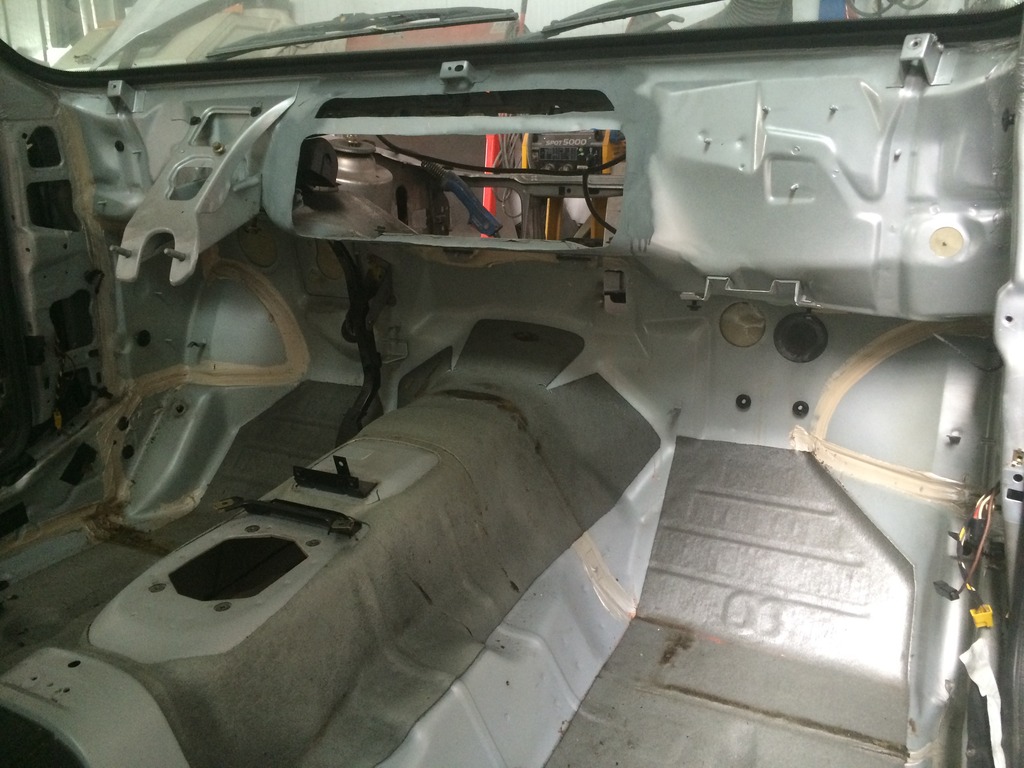
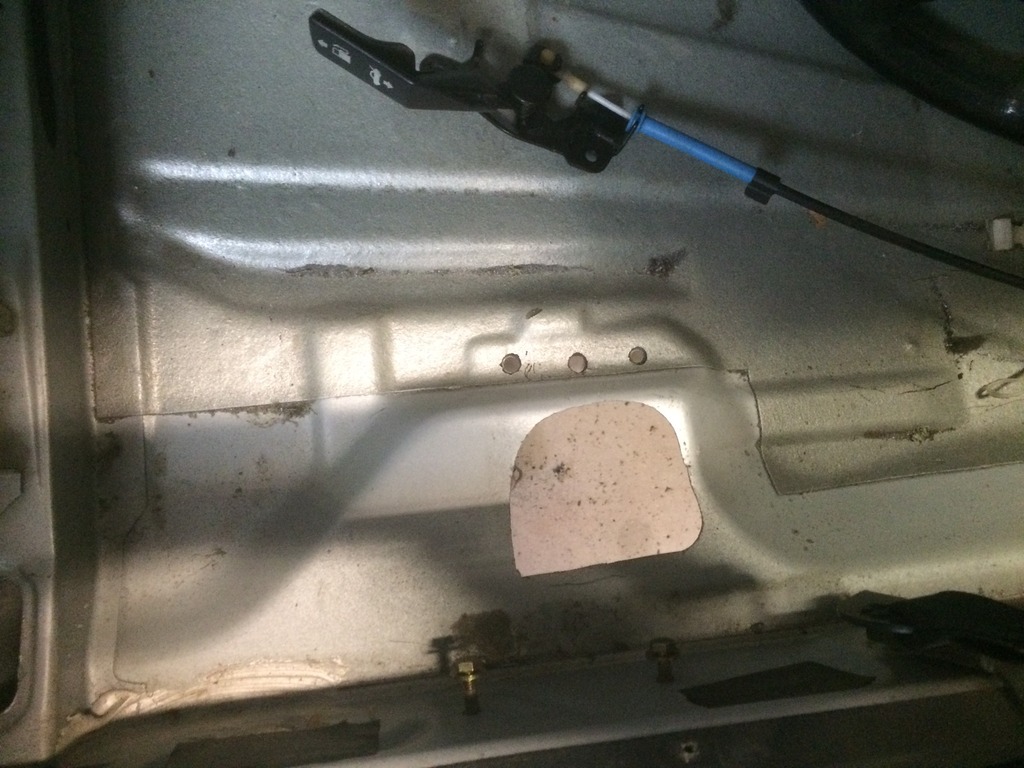
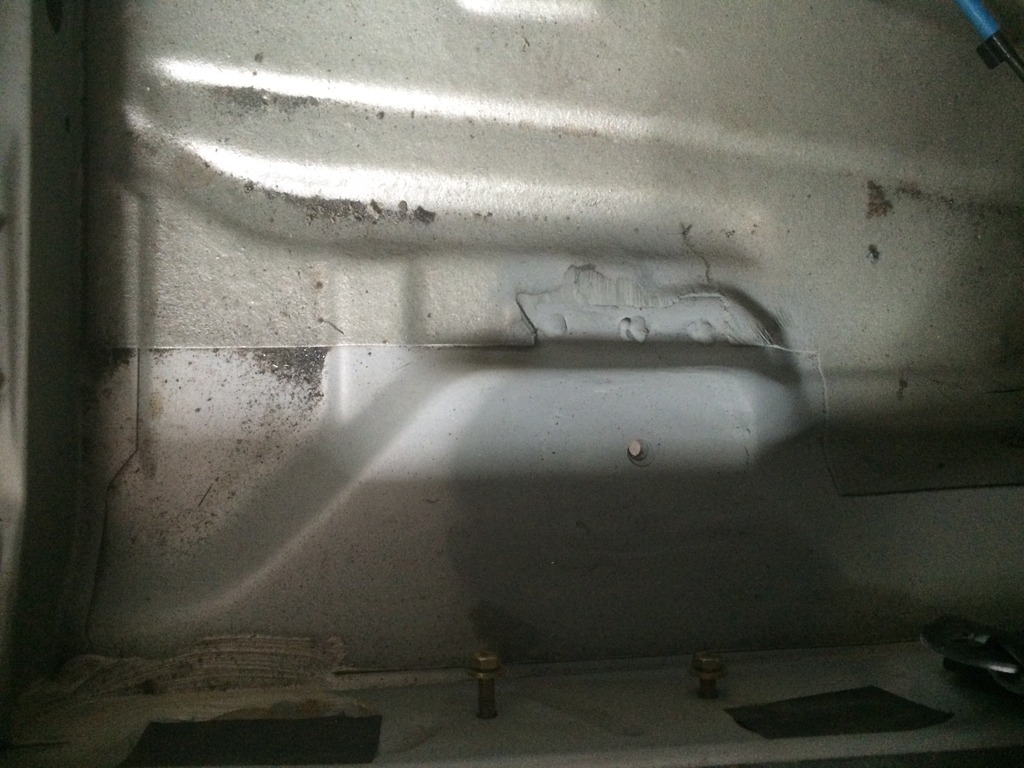
Since the car was completely empty I also took out the carpet. Sadly both front seat mounts again have some rust, that really is the weakest spot on a Sierra.
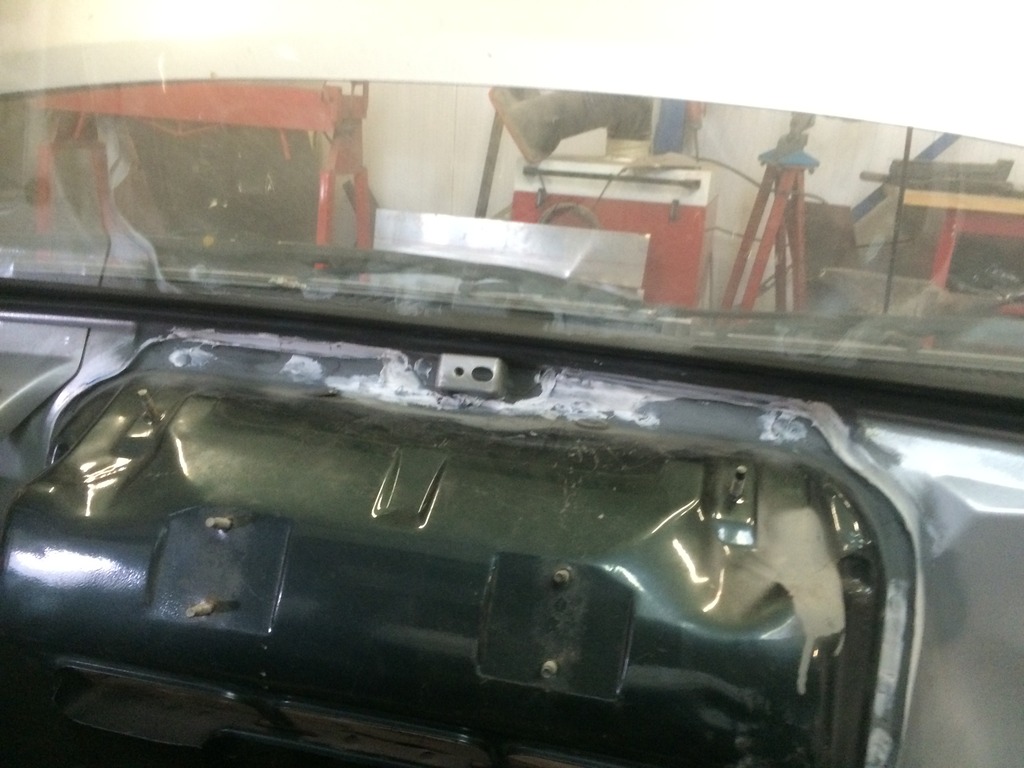
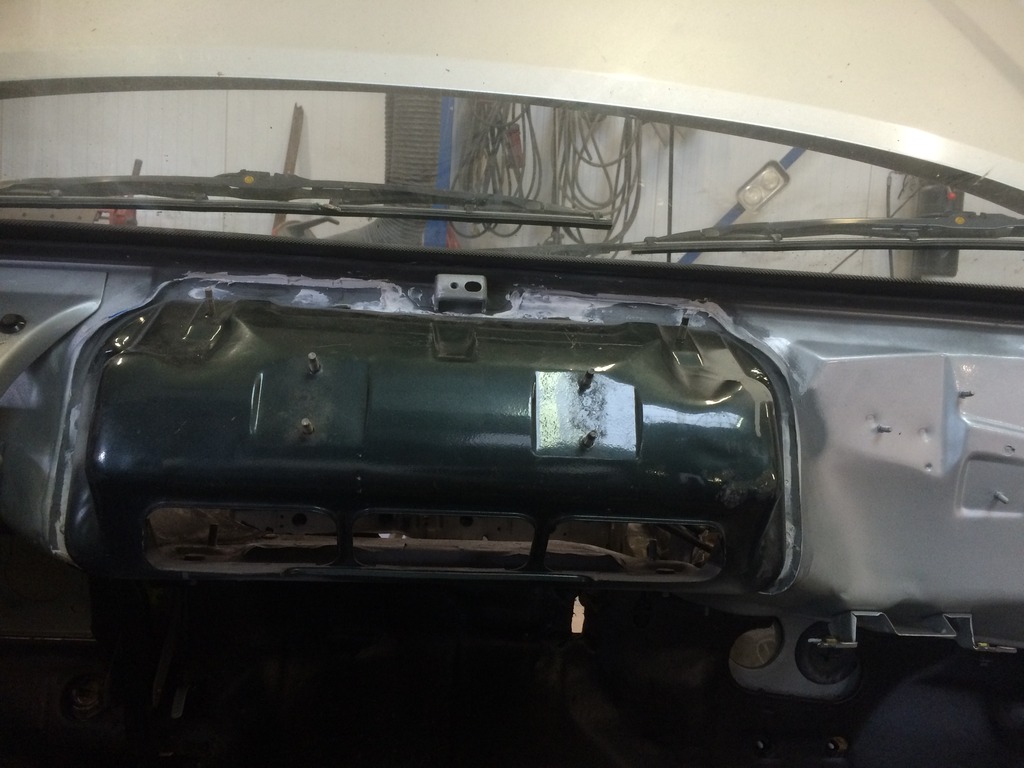
And I also started to modify the bulkhead for the aircon vaporizer.
Removed the sound proofing.
Measuring what needs to be removed.
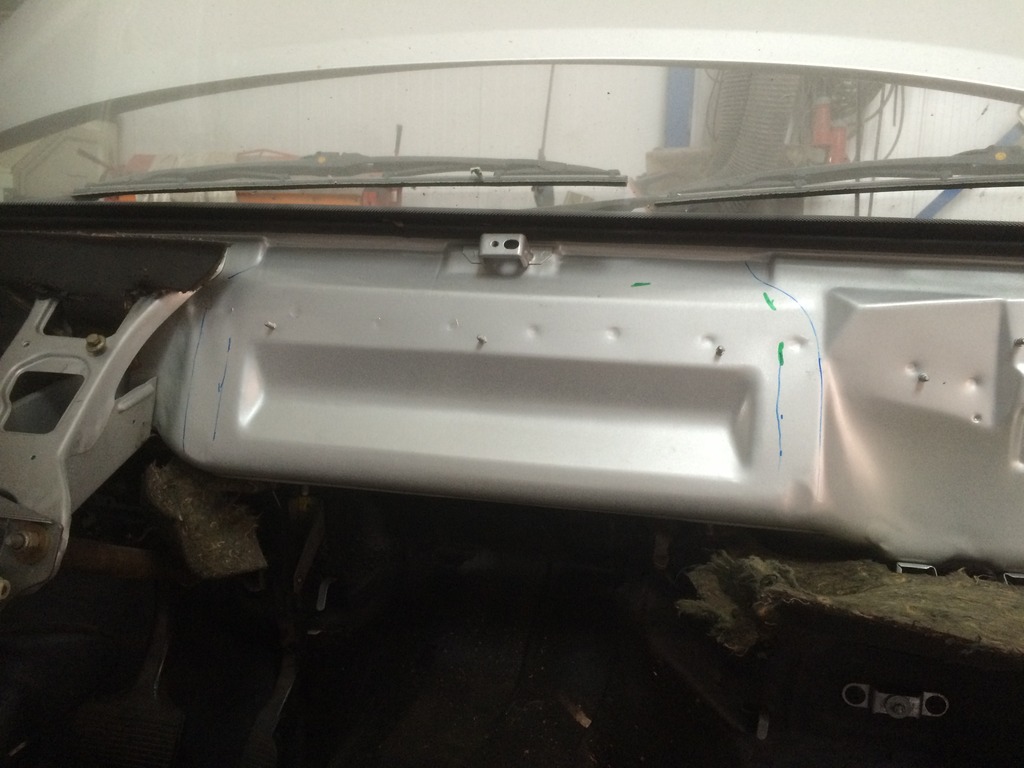
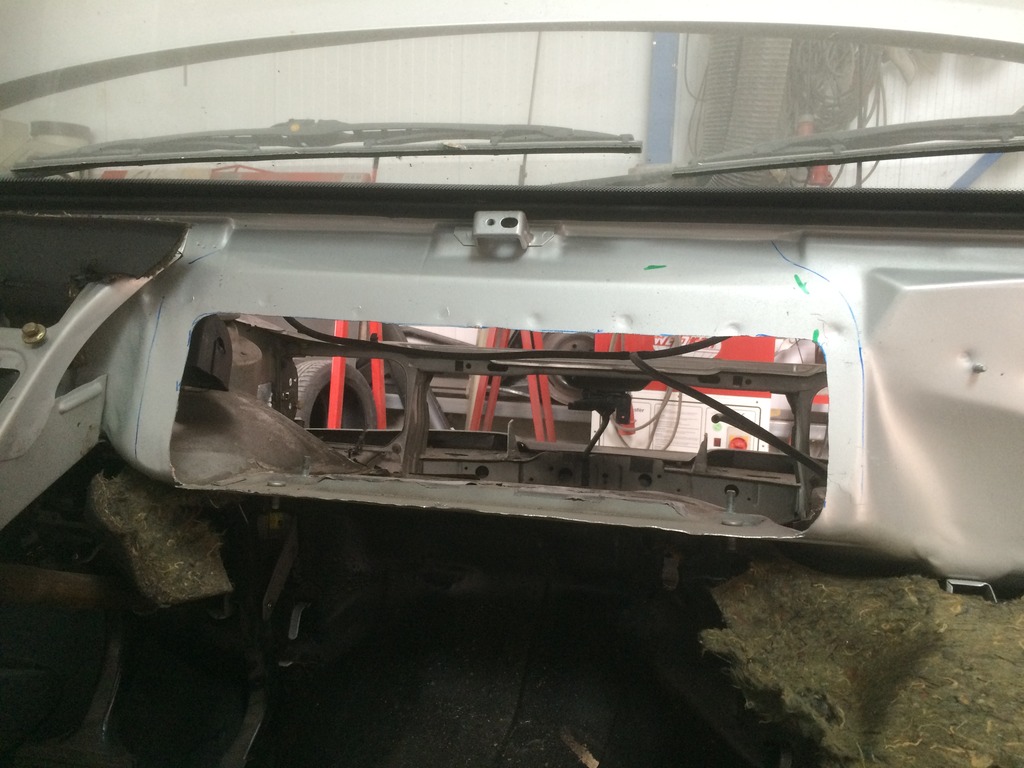
And cutting up the bulk head to make room for the vaporizer.
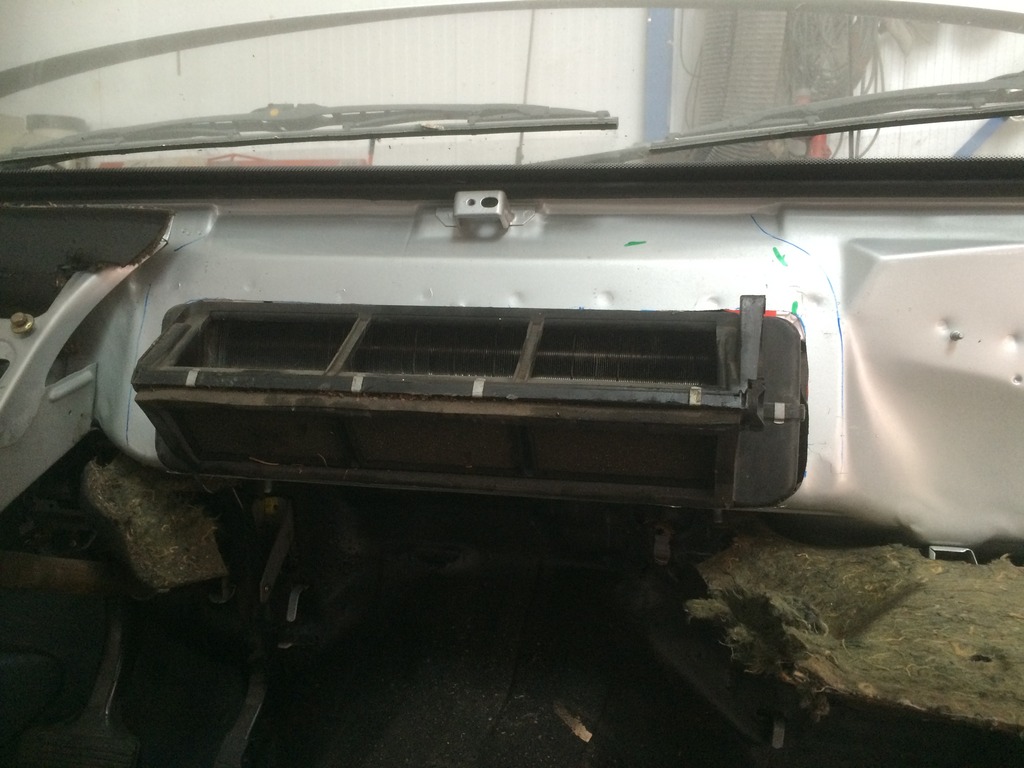
Now the vaporizer fits in.
After that I also made the top hole, which is needed for the fan to draw outside air in.
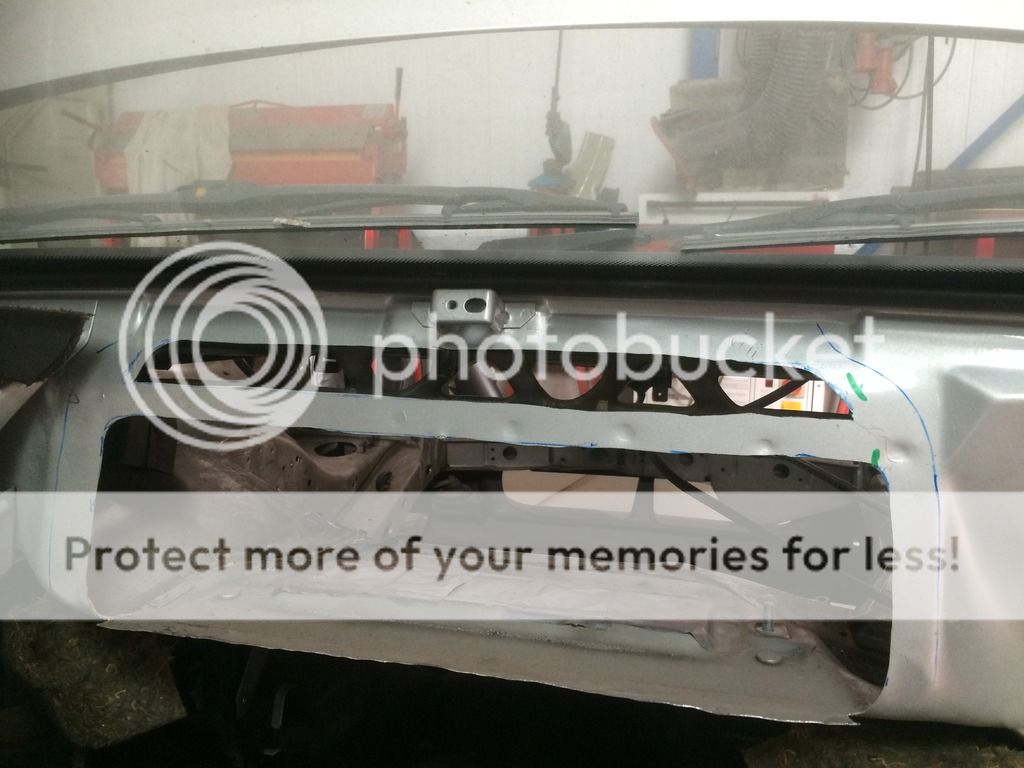
And the holes from the engine compartment.


And I also started to modify the bulkhead for the aircon vaporizer.
Removed the sound proofing.

Measuring what needs to be removed.

And cutting up the bulk head to make room for the vaporizer.

Now the vaporizer fits in.

After that I also made the top hole, which is needed for the fan to draw outside air in.

And the holes from the engine compartment.

 14-02-2016, 06:03 PM
#133
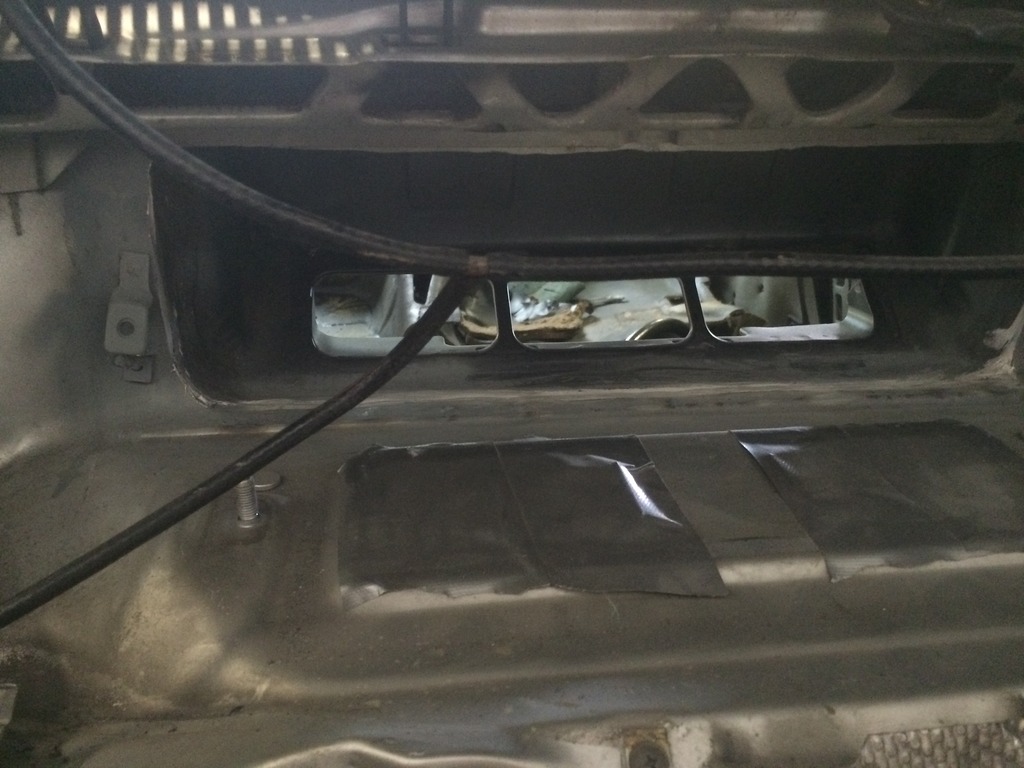
To check if there was no hidden rust underneath the other sound proofing I took everything out. Luckily everything apart from the seat mounts was perfect.
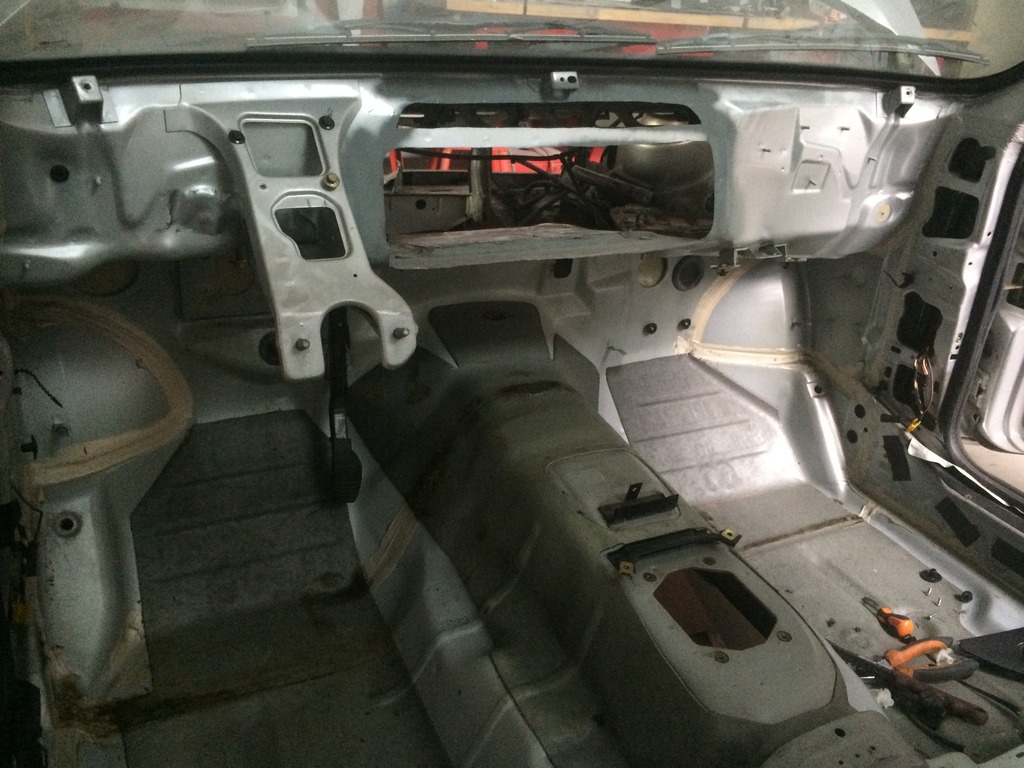
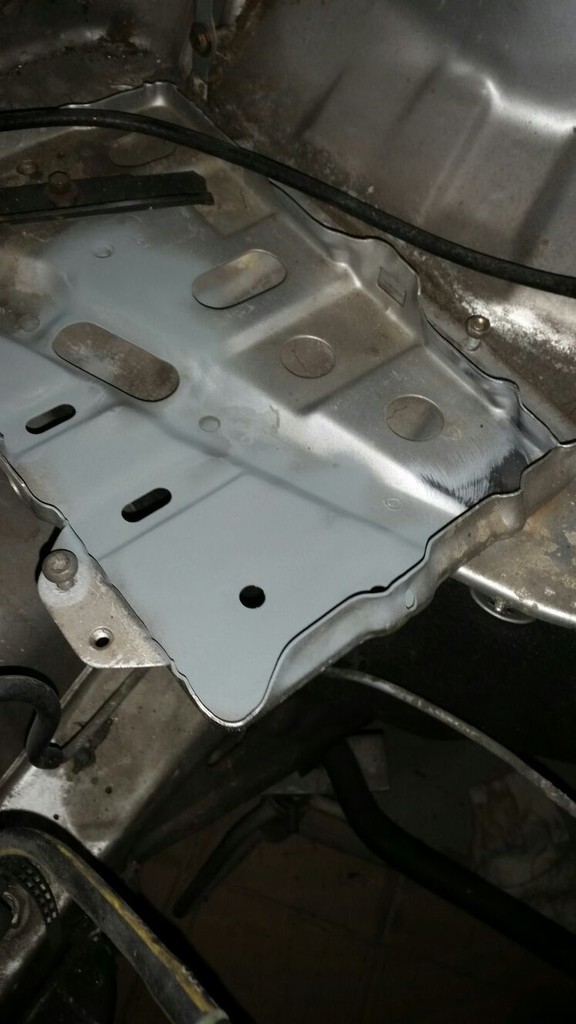
The metal box for the aircon vaporizer is also welded on and sealed.
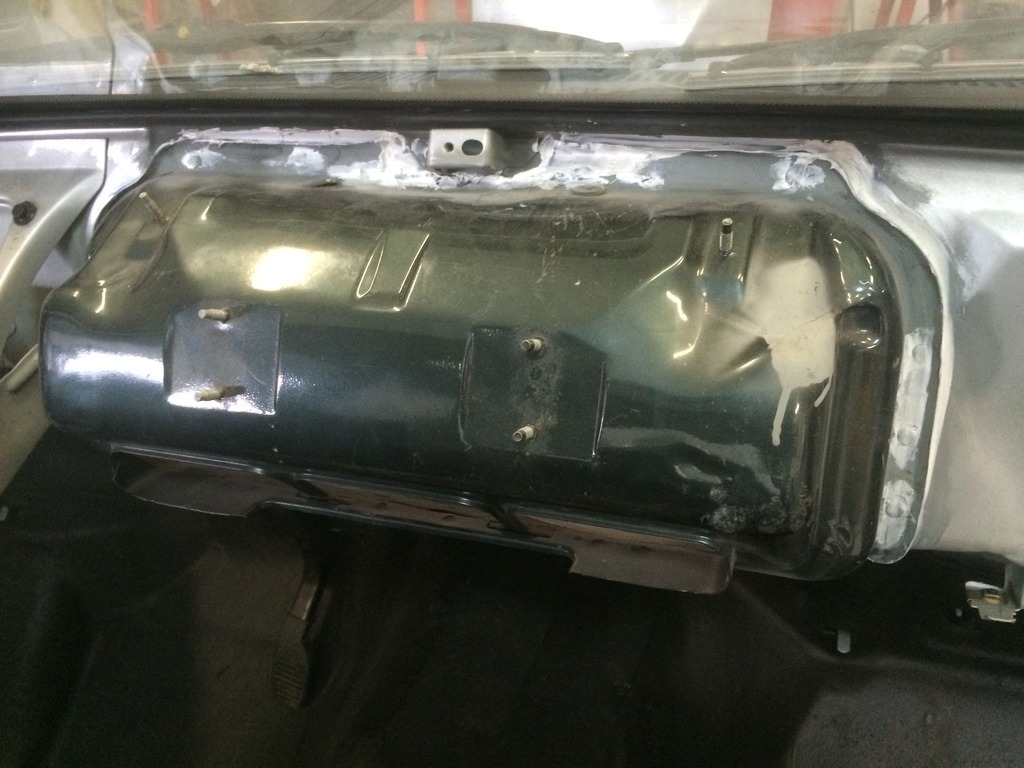
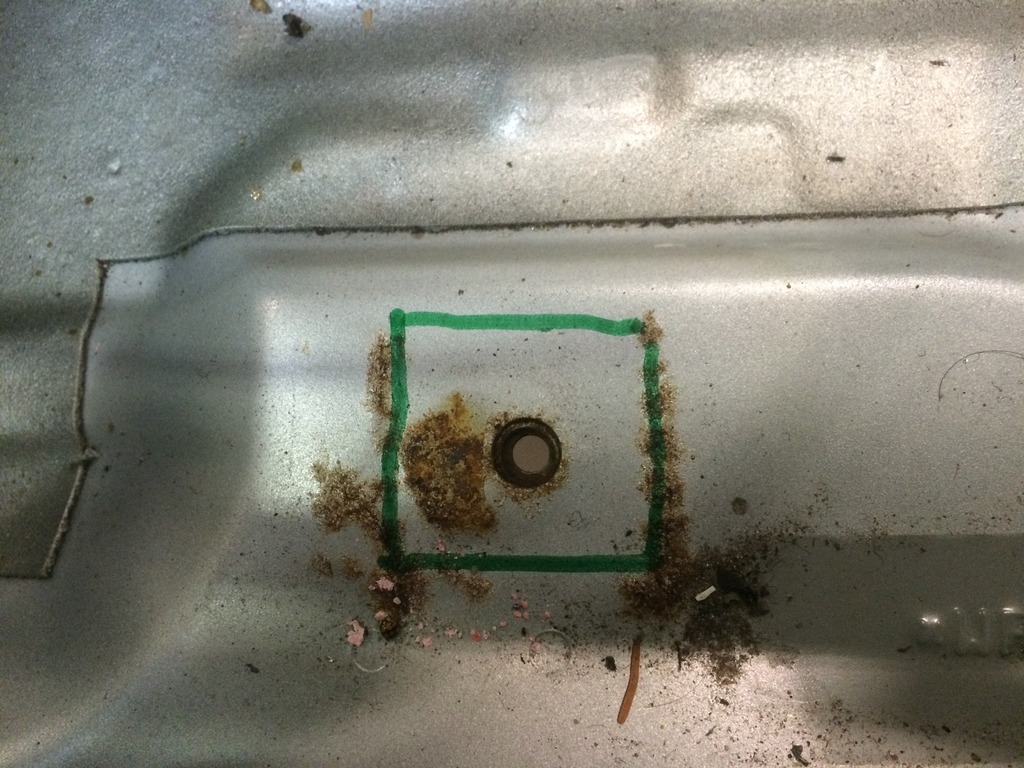
I also took a closer look at the rust spots at front seat mounts. The rust seems to be exactly where the edges of the seat mounts rest on (green line). I first thought the mount would rub on the floor, but the carpet is still in between.
 15-02-2016, 09:33 PM
#137
PassionFord Regular

The following users liked this post:
doga-ot (19-02-2016)
20-02-2016, 06:56 PM
#141
Again something done on the car.
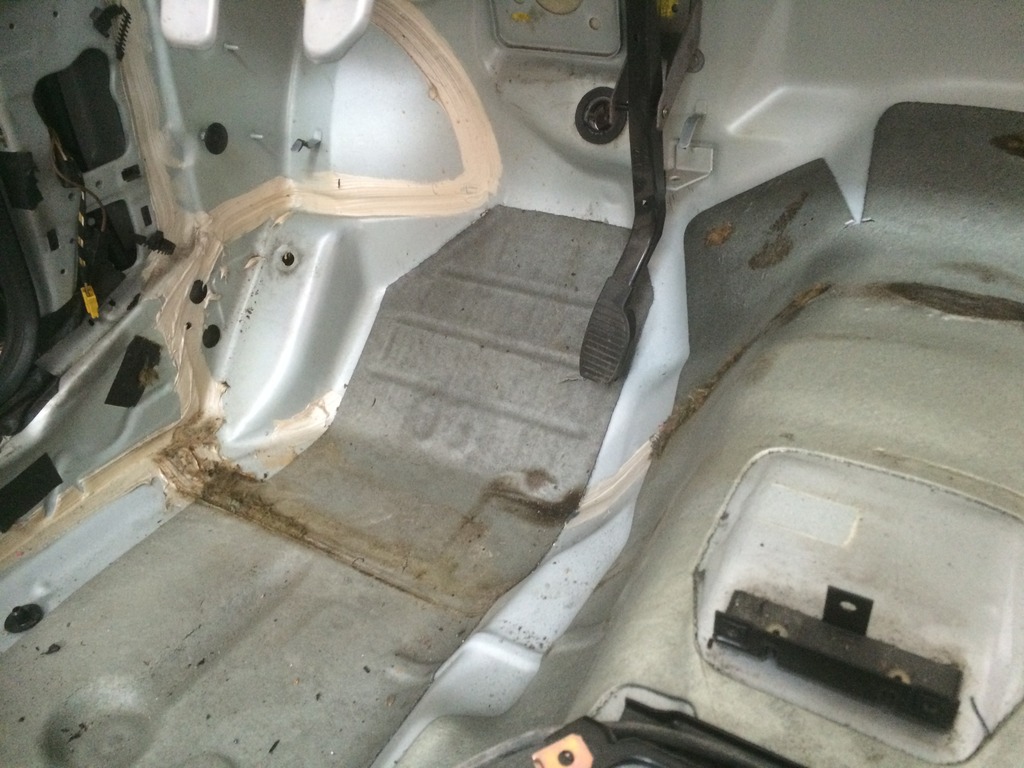
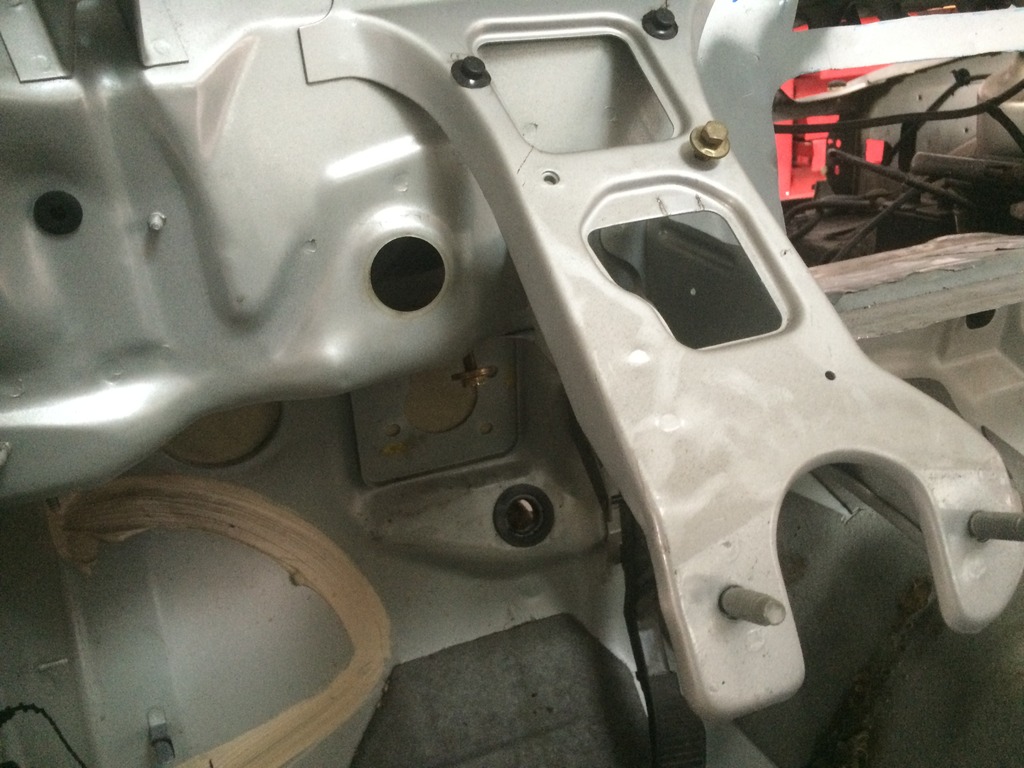
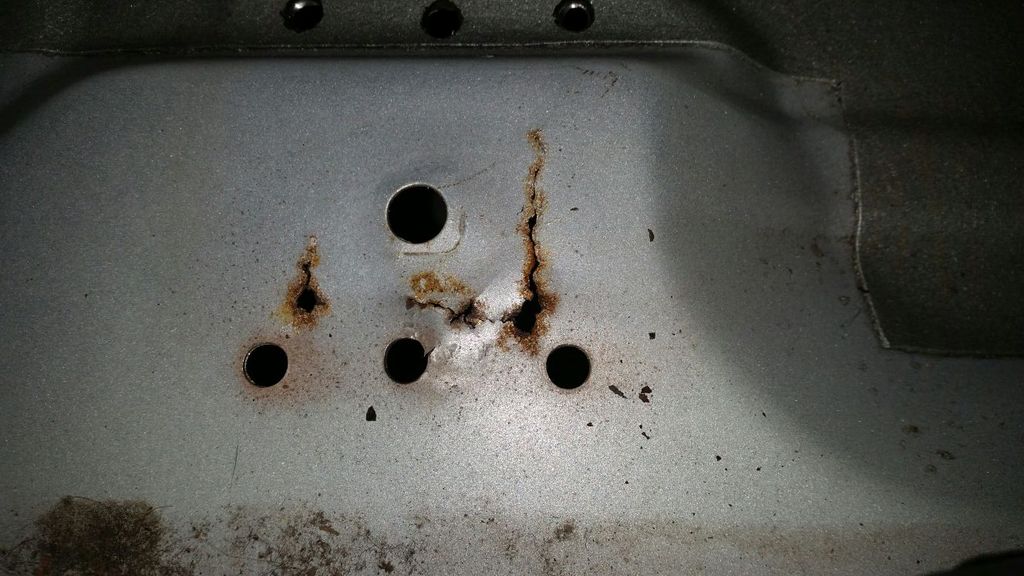
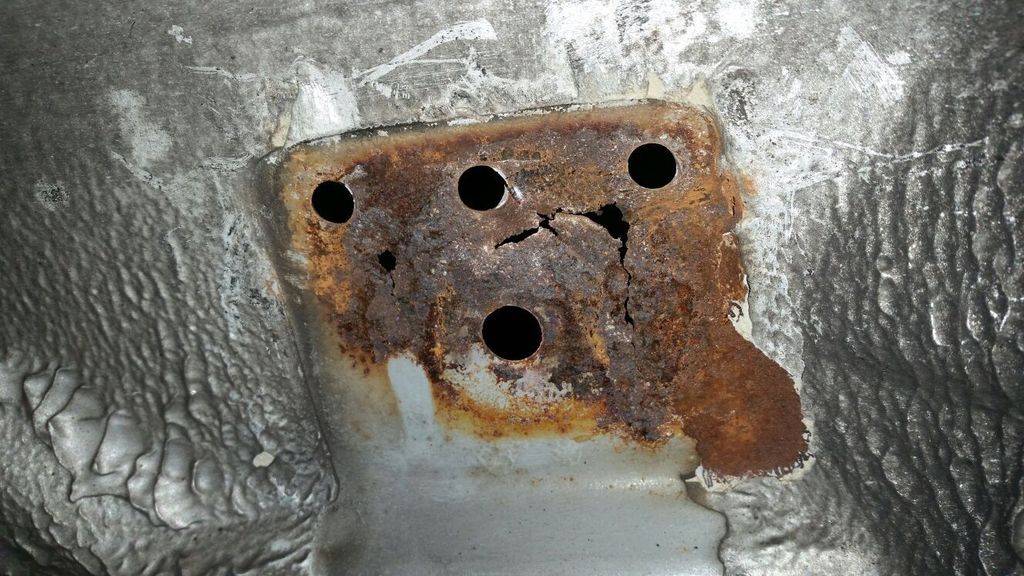
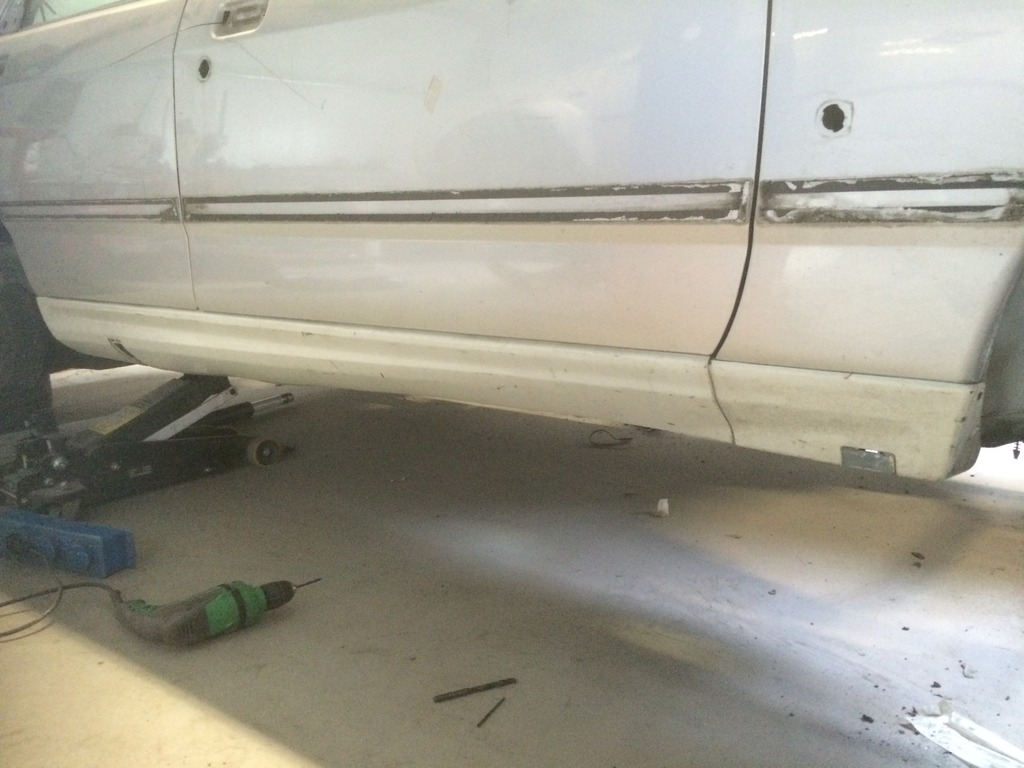
Drilled out the spot welds from the small plate underneath the seat and removed the plate.
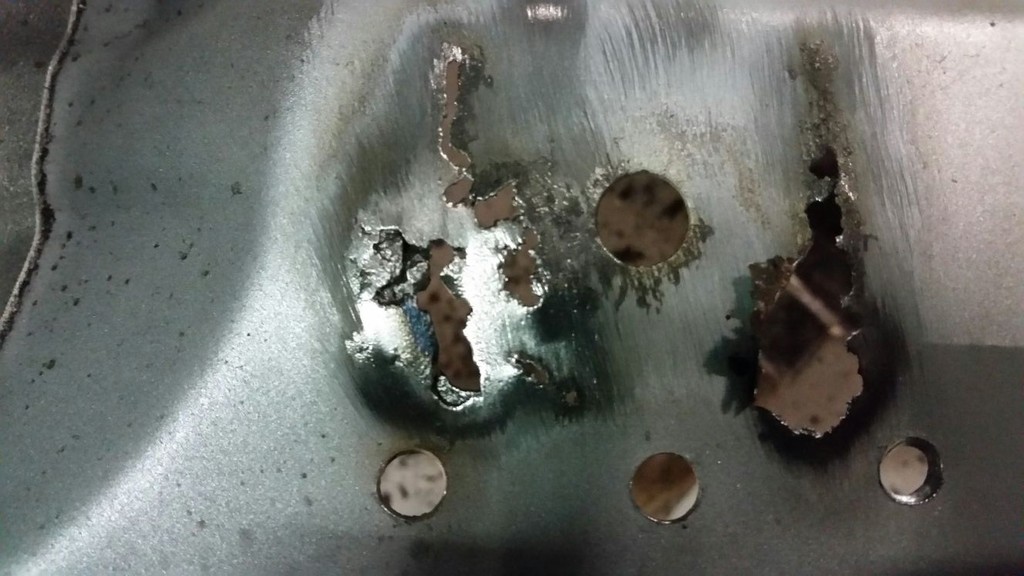
From underneath.
And the top of the plate.
It's clear to see that the rust starts in between the two plates, which is caused by water getting in between the plates, probably water that the thrown up by the front wheels, as the plates are just in line with the front wheels.
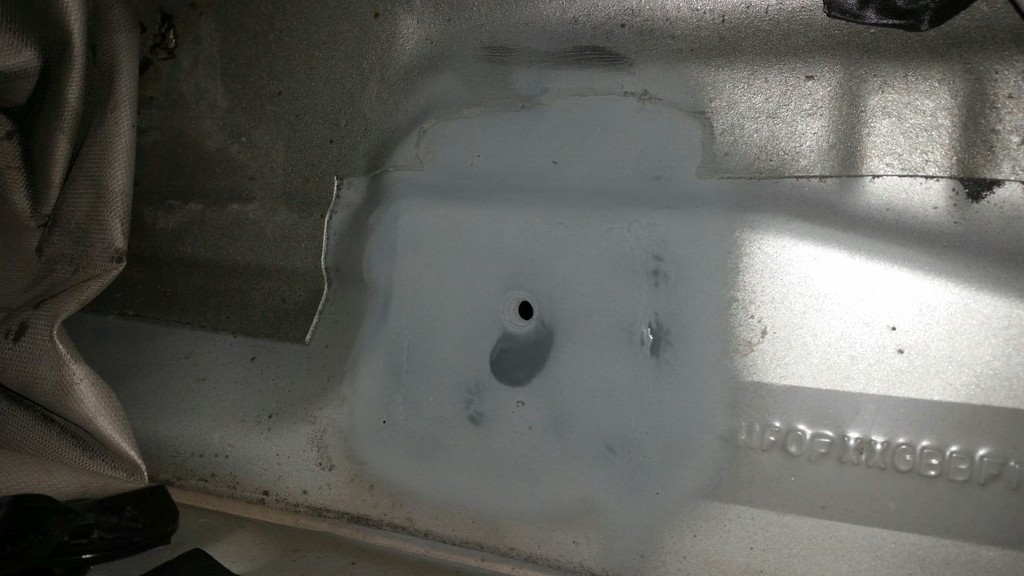
And the other side.
And repaired.

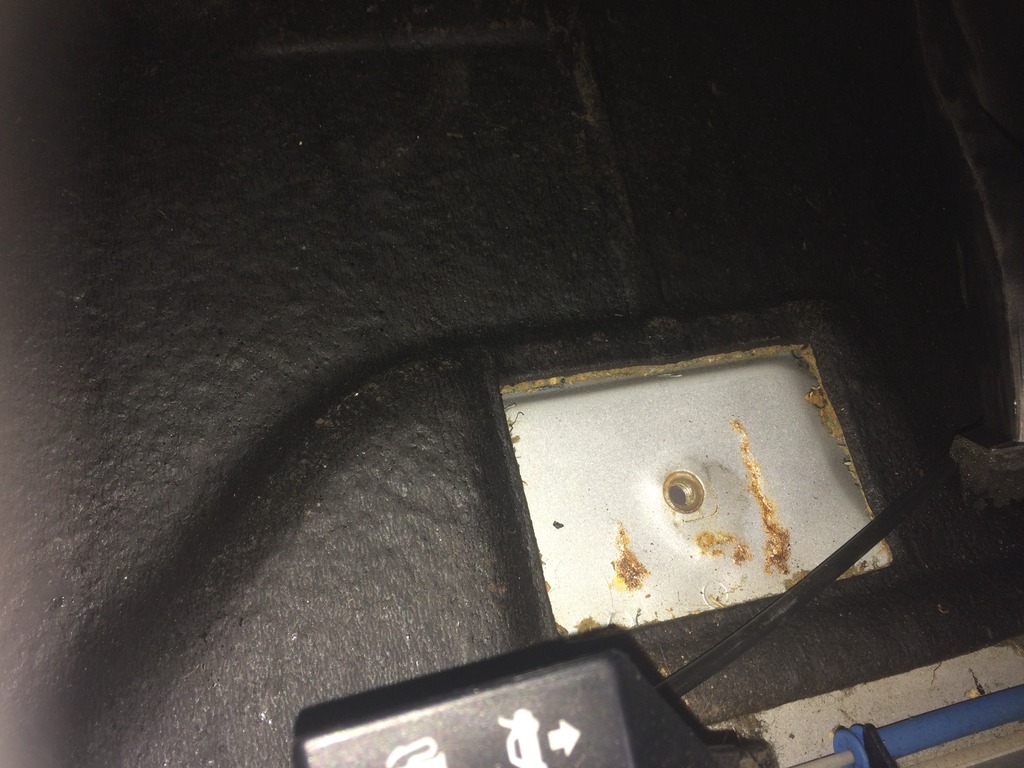
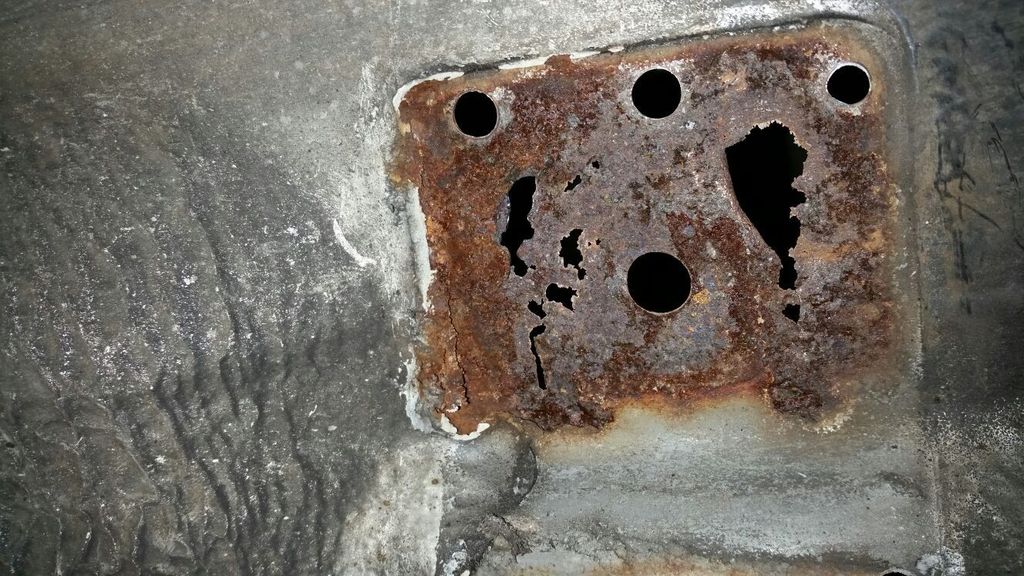
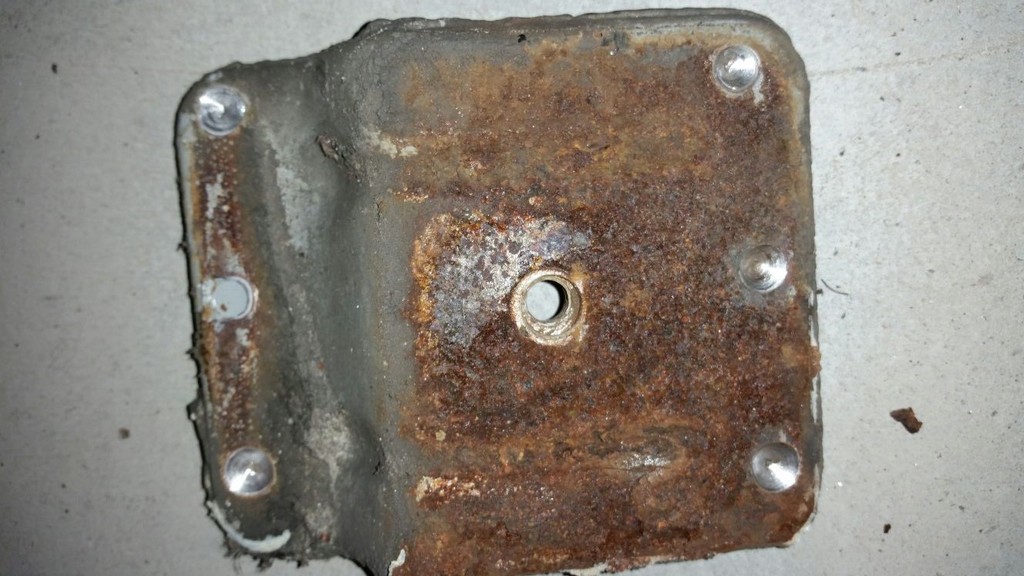
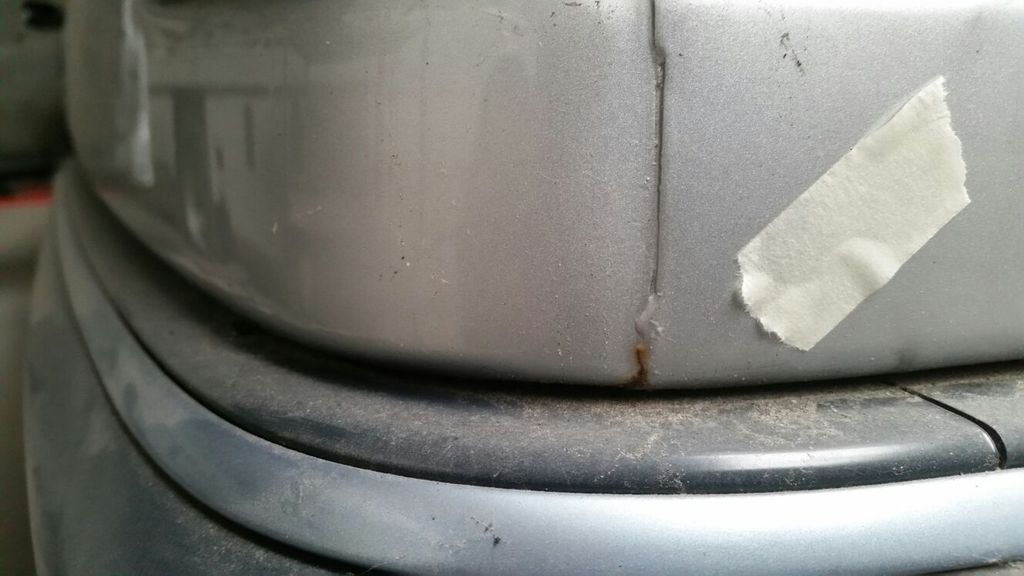
Also a little spot of rust near the rear light has been removed.
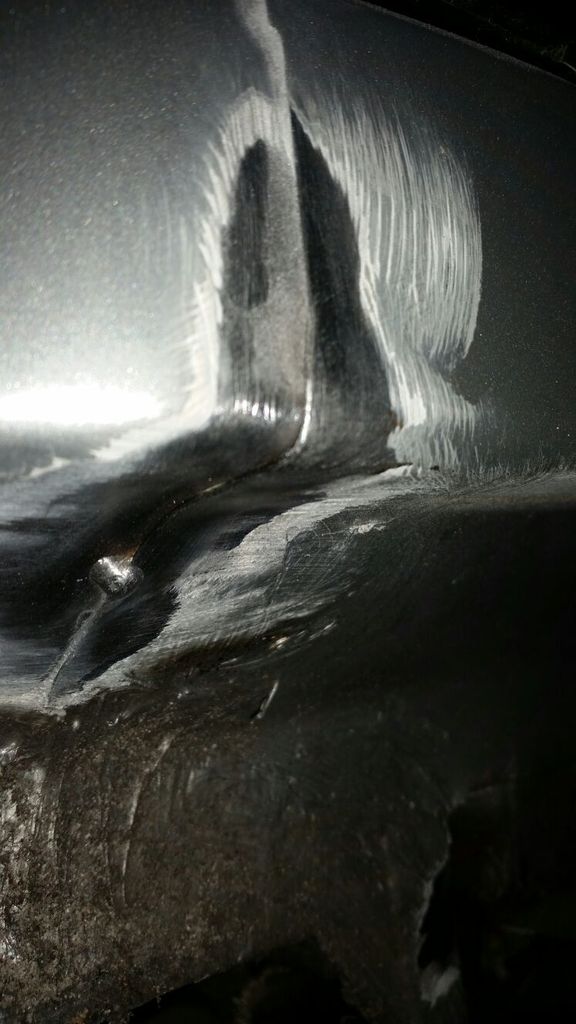
And the rust caused by the leaking master cylinder removed from the chassis leg.
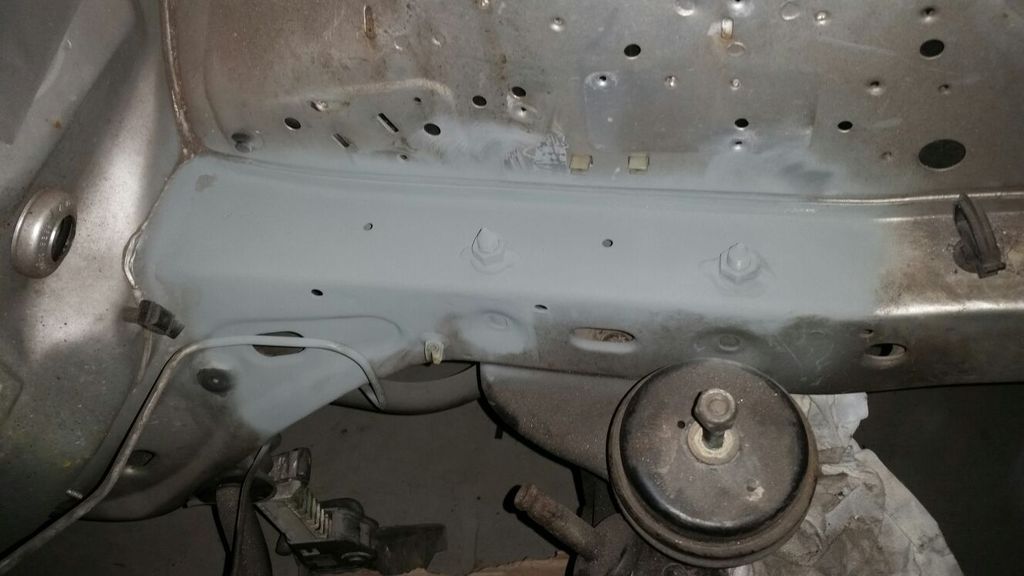
And the same at the battery tray, caused by a leaking battery.
Drilled out the spot welds from the small plate underneath the seat and removed the plate.

From underneath.

And the top of the plate.

It's clear to see that the rust starts in between the two plates, which is caused by water getting in between the plates, probably water that the thrown up by the front wheels, as the plates are just in line with the front wheels.
And the other side.


And repaired.


Also a little spot of rust near the rear light has been removed.


And the rust caused by the leaking master cylinder removed from the chassis leg.

And the same at the battery tray, caused by a leaking battery.


 05-07-2016, 01:52 PM
#147
PassionFord Regular
just seen both of your thread...
your works are great man!
keep us posted...
your works are great man!
keep us posted...
05-07-2016, 04:08 PM
#148
Agreed, fantastic work, just been through from start to finish! Is there no way to seal up the plates under the seat mounts with Araldite or something similar to keep the water out?
04-01-2017, 09:09 AM
#150
Finally something is done again on the sapph. The rotten seat mount on the driver's side is cut out.
And a new plate welded in.
I temporarily fitted the cosworth side skirts to drill all the mounting holes.
The other side.

And a new plate welded in.

I temporarily fitted the cosworth side skirts to drill all the mounting holes.


The other side.


 17-02-2017, 06:23 AM
#154
Unfortunately no progress yet.
The hubs I used previously were standard Sierra hubs (non-Cosworth). They use the tapered pin with nut just like the 3dr. The pinch bolt is only used on Sapph Cosworth hubs and 4x4 hubs (XR and Cosworth).
The hubs I used previously were standard Sierra hubs (non-Cosworth). They use the tapered pin with nut just like the 3dr. The pinch bolt is only used on Sapph Cosworth hubs and 4x4 hubs (XR and Cosworth).
 15-01-2019, 12:24 PM
#156
It's been a long time since this has been updated, but finally it's time to do so.
The Sapph has been on my driveway for just over 3 years. During that time a big tree branch fell on top of it causing the left side mirror to break off.
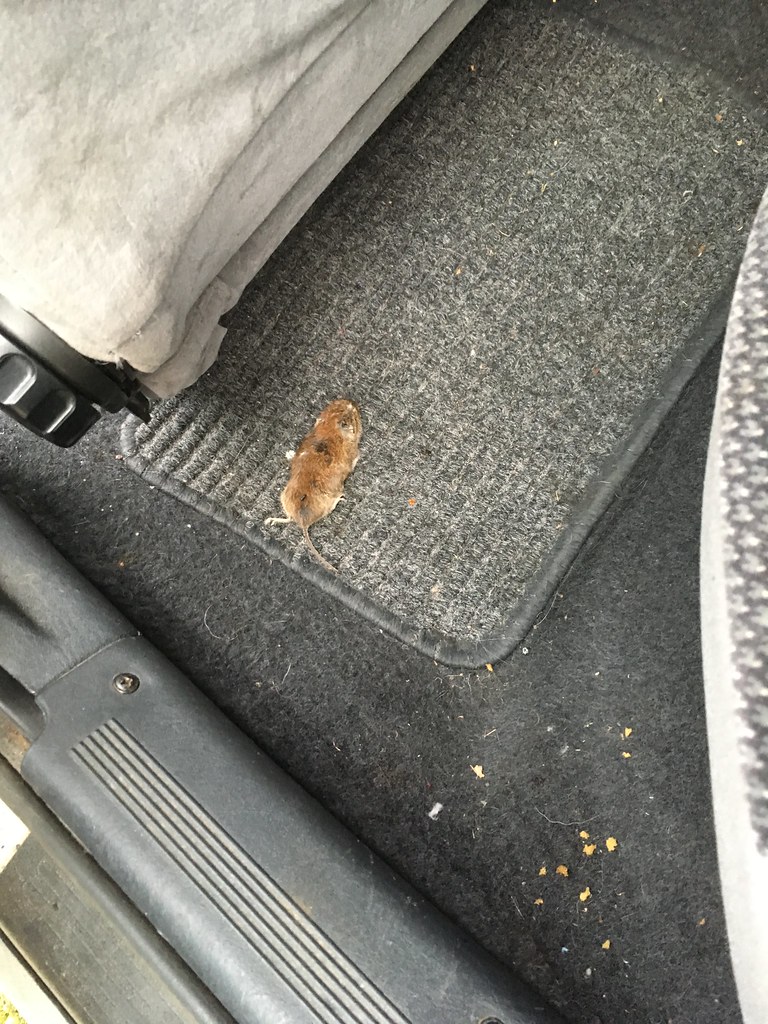
I guess the last 2.5 years the car hadn't been opened anymore. During that time it got a new resident that also died already.
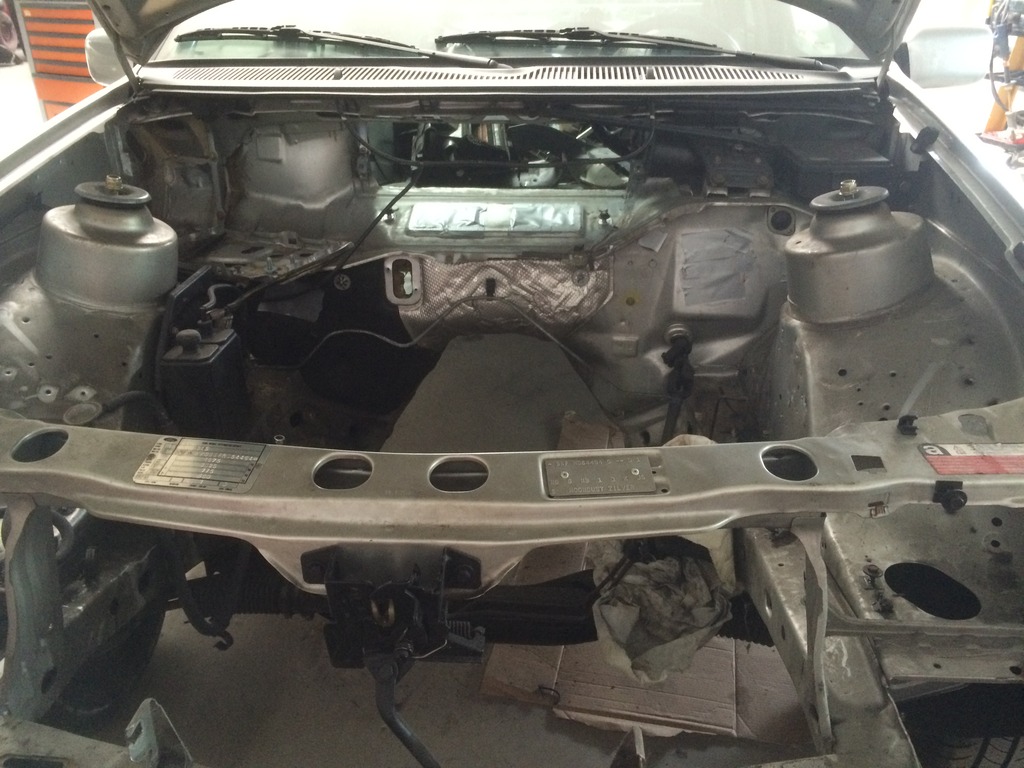
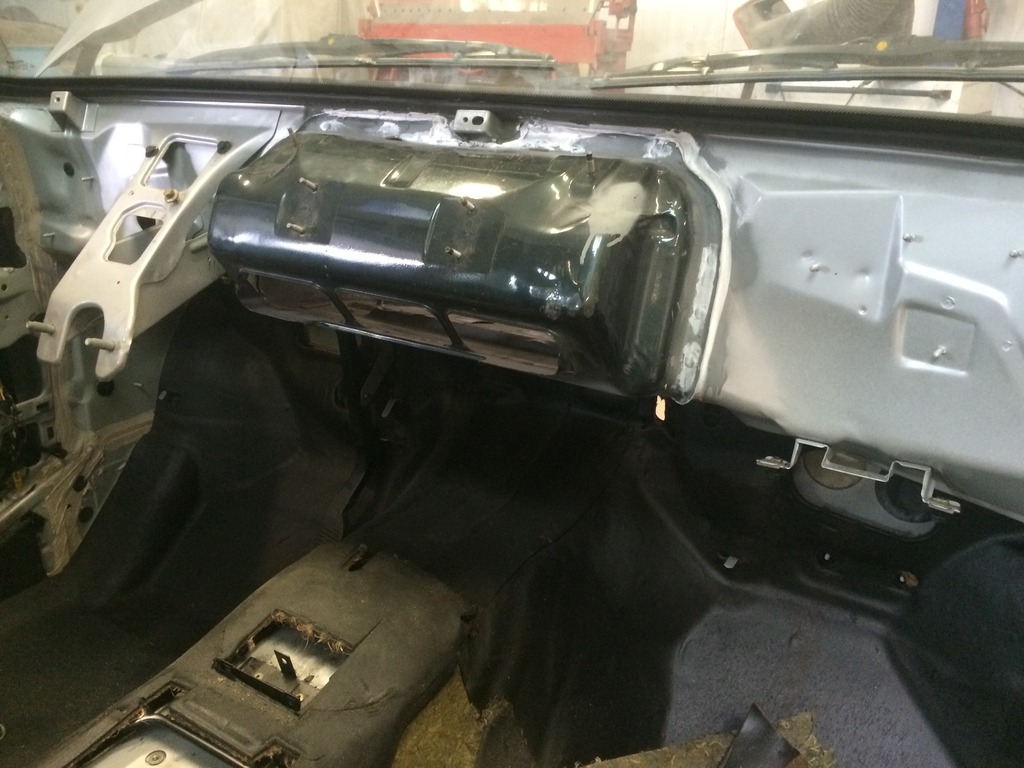
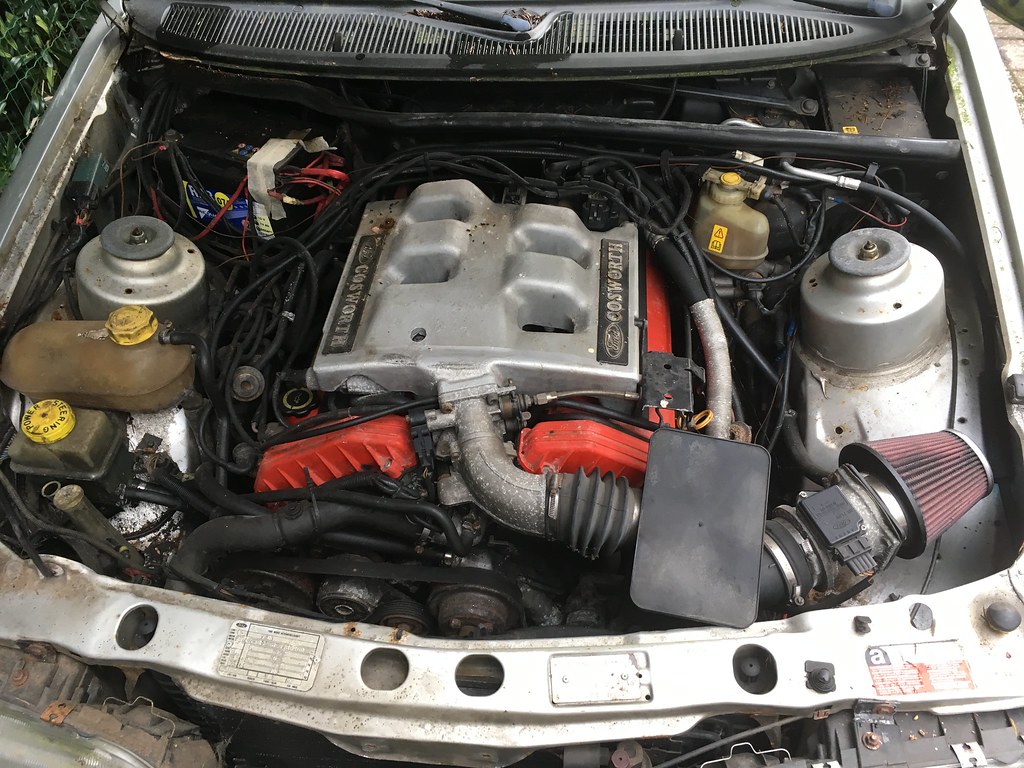
Because it has been standing outside for so long it hasn't gotten any better. The rust has gotten a lot worse and the car was really moist inside as well. I also couldn't open the bonnet with the handle on the steering column, as the locking mechanism was dry and rusty. Luckily the front bumper was only slid in the front chassis rails and I was able to remove the grill with the bonnet closed. After that I removed the bolts holding the bonnet lock in place and then managed to push the lock open with some pliers.

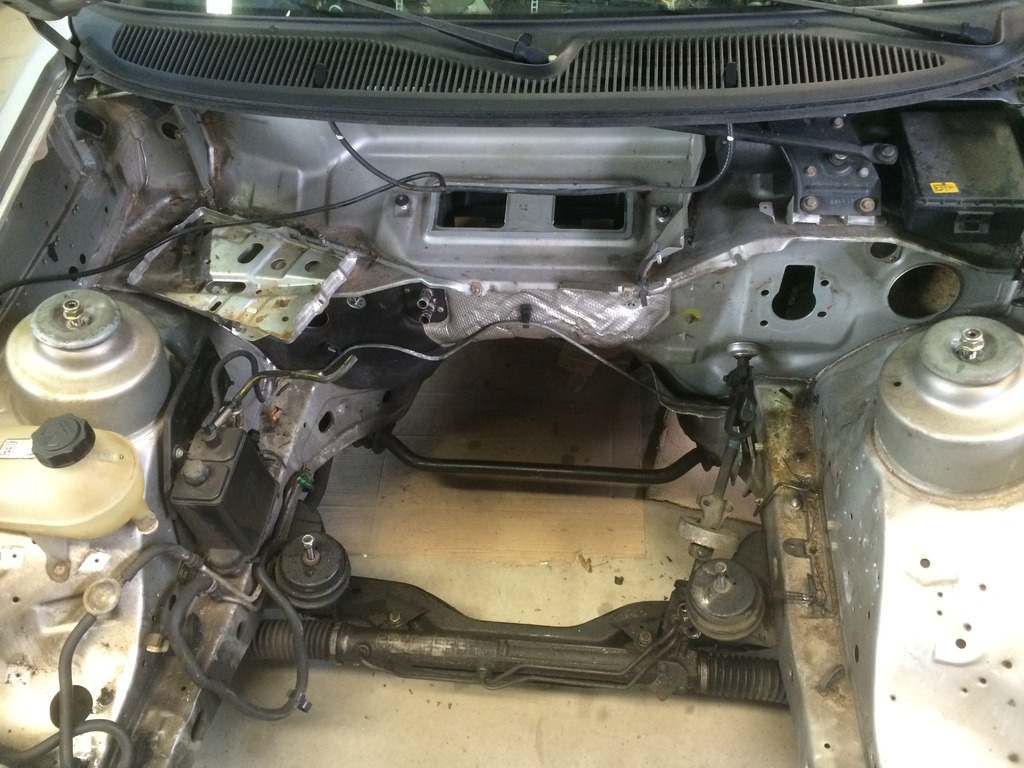
Underneath the bonnet it hasn't gotten any prettier either.
The Sapph has been on my driveway for just over 3 years. During that time a big tree branch fell on top of it causing the left side mirror to break off.
I guess the last 2.5 years the car hadn't been opened anymore. During that time it got a new resident that also died already.
Because it has been standing outside for so long it hasn't gotten any better. The rust has gotten a lot worse and the car was really moist inside as well. I also couldn't open the bonnet with the handle on the steering column, as the locking mechanism was dry and rusty. Luckily the front bumper was only slid in the front chassis rails and I was able to remove the grill with the bonnet closed. After that I removed the bolts holding the bonnet lock in place and then managed to push the lock open with some pliers.
Underneath the bonnet it hasn't gotten any prettier either.
16-01-2019, 01:55 PM
#157
The plan for last weekend was to move the car from the drive way to inside the garage. To start I inflated all tyres. But after standing for 3 years the battery was of course also flat. But I had hope it would started with a fully charged battery. So I fully charged battery from the Cosworth and put that in. When I turned the key all lights on the dash came on as normal, so that was looking good. I then turned the ignition to III to turn the engine over, and then................absolutely nothing. No engine turning over, no click from the starter, no dimming lights on the dash, nothing. I guess the starter is stuck and not even engaging in the flywheel.
After standing outside for 3 years I was also worried the brakes would be stuck. Luckily I could get the jack underneath on the left side, to check if the wheels would turn. That actually wasn't too bad. But unfortunately I couldn't check the right side.
So if it didn't want to drive into the garage I had to push it in. So I first tried to push it forward a bit.... but there was absolutely no movement. Next option was to hook up the towing cable to it and to the BMW and turn the steering wheel a bit to make sure it would go into the right direction.
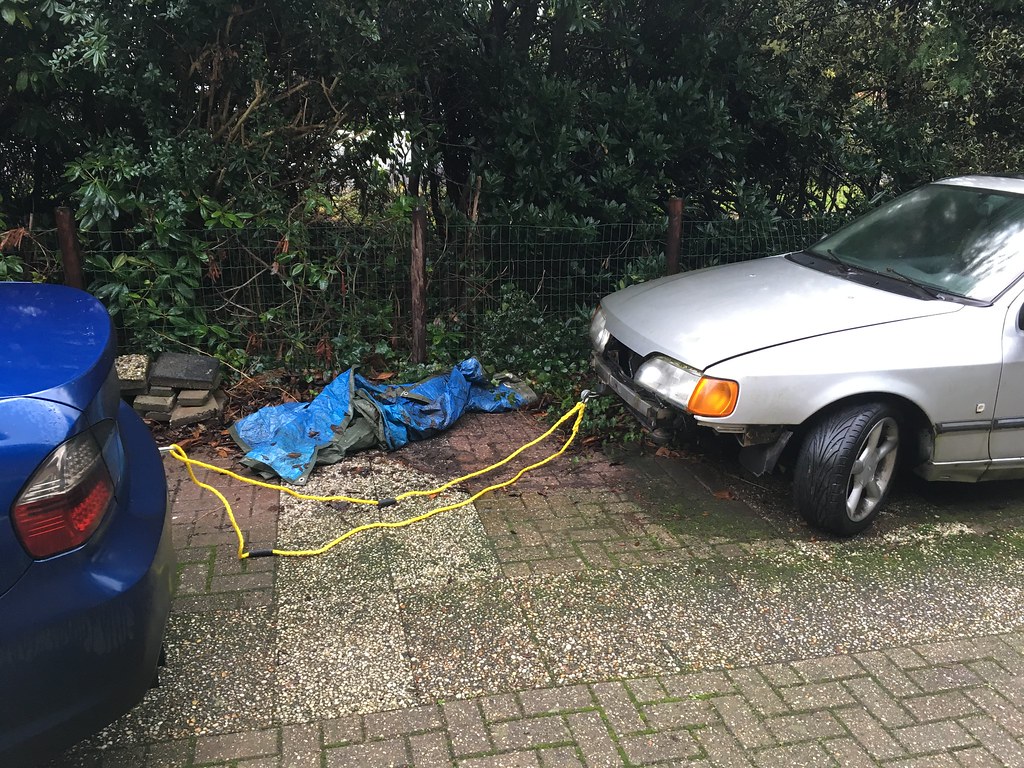
The first part was a bit hard, but after a meter or so it started to roll a bit easier. It finally moved after 3 years.

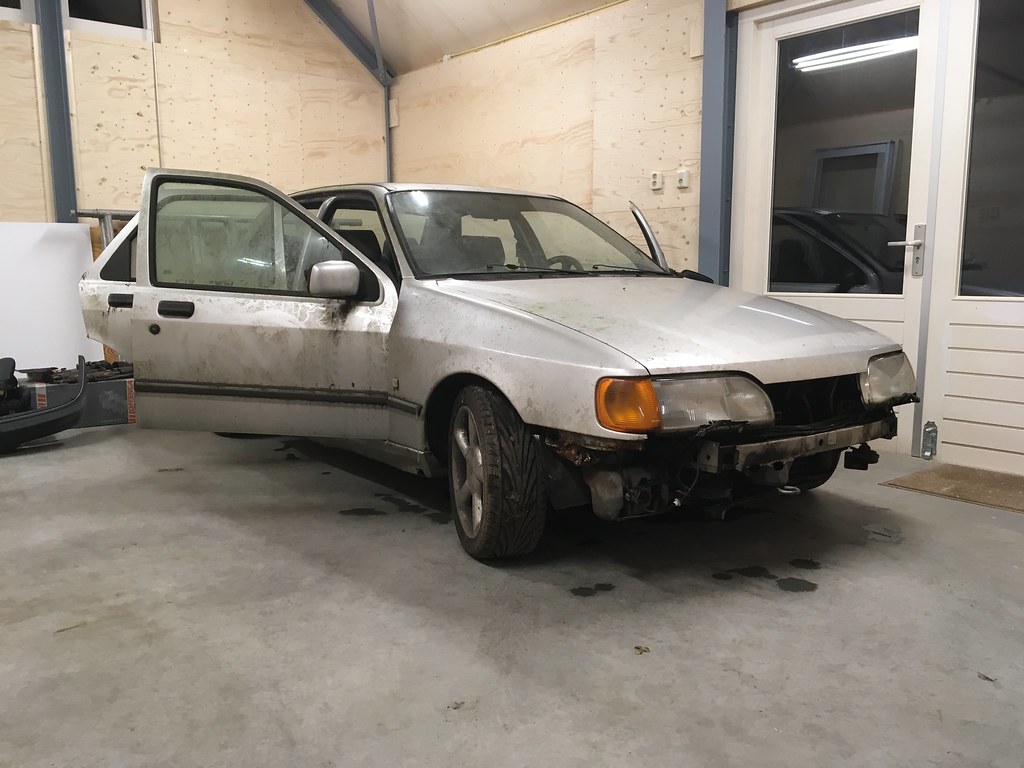
And finally inside the garage.
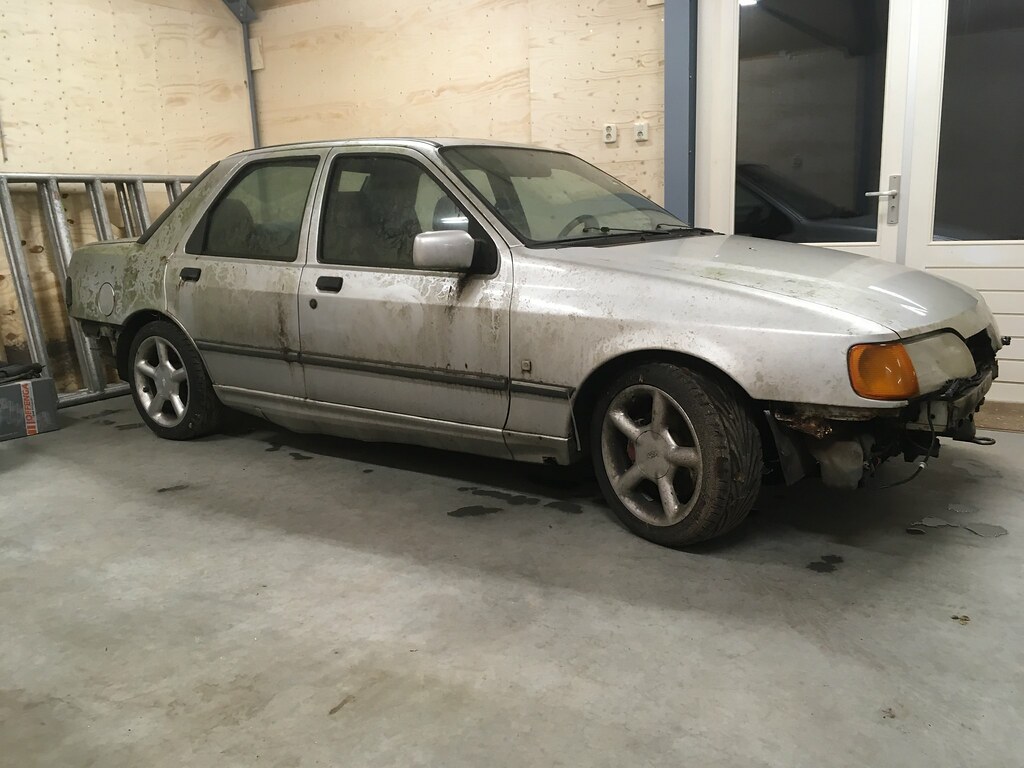
Last year I already had the pressure washer out once because it was starting to look a bit 'green', but I couldn't reach the right side then. But it's going apart anyway, so not really a problem...
But first I opened all doors so it can dry and breathe a bit, which is reeeeaaally needed.
After standing outside for 3 years I was also worried the brakes would be stuck. Luckily I could get the jack underneath on the left side, to check if the wheels would turn. That actually wasn't too bad. But unfortunately I couldn't check the right side.
So if it didn't want to drive into the garage I had to push it in. So I first tried to push it forward a bit.... but there was absolutely no movement. Next option was to hook up the towing cable to it and to the BMW and turn the steering wheel a bit to make sure it would go into the right direction.
The first part was a bit hard, but after a meter or so it started to roll a bit easier. It finally moved after 3 years.
And finally inside the garage.
Last year I already had the pressure washer out once because it was starting to look a bit 'green', but I couldn't reach the right side then. But it's going apart anyway, so not really a problem...
But first I opened all doors so it can dry and breathe a bit, which is reeeeaaally needed.