
V8 Sierra 3dr Track Day Car - Adios!
 30-05-2013 | 04:16 PM
#201

Trying to get the Cortina finished and out the way at the minute - it's proving troublesome!
30-05-2013 | 06:20 PM
#204

Thread Starter
PassionFord Regular
Joined: Jan 2005
Posts: 432
Likes: 8
From: Cheshire
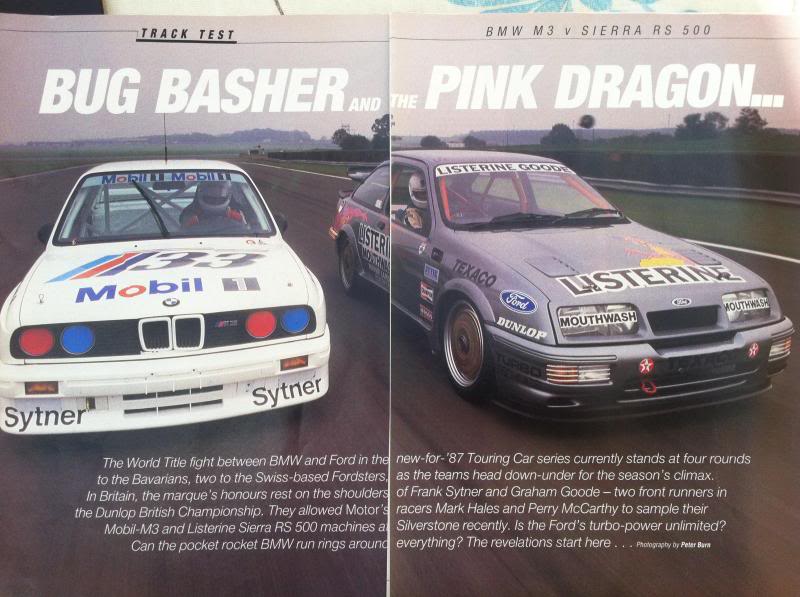
Tonight's reading - a 1987 magazine track test comparison between Graham Goode's Sierra (just before it was written off in an accident) and Frank Sytner's M3...
Iain

Iain
Last edited by IainRS1700T; 01-06-2013 at 10:27 PM.
31-05-2013 | 08:35 PM
#205
Thread Starter
PassionFord Regular
Joined: Jan 2005
Posts: 432
Likes: 8
From: Cheshire
Oh dear..
I see organising my photo bucket albums has had disastrous results for the photos in this thread!
Sorry folks.
There's a job for me when I get a quiet evening.. Didn't think sorting my pics out would be quite so catastrophic!
Iain
I see organising my photo bucket albums has had disastrous results for the photos in this thread!
Sorry folks.
There's a job for me when I get a quiet evening.. Didn't think sorting my pics out would be quite so catastrophic!
Iain
01-06-2013 | 08:31 PM
#207
Thread Starter
PassionFord Regular
Joined: Jan 2005
Posts: 432
Likes: 8
From: Cheshire
Well guys I'm getting there with reinstating the photos back into the thread, with the last two pages done now.
I'll continue reinstating them on the earlier pages as an when the chance arrives. I've still got everything - just organising my photobucket albums has broken the links..
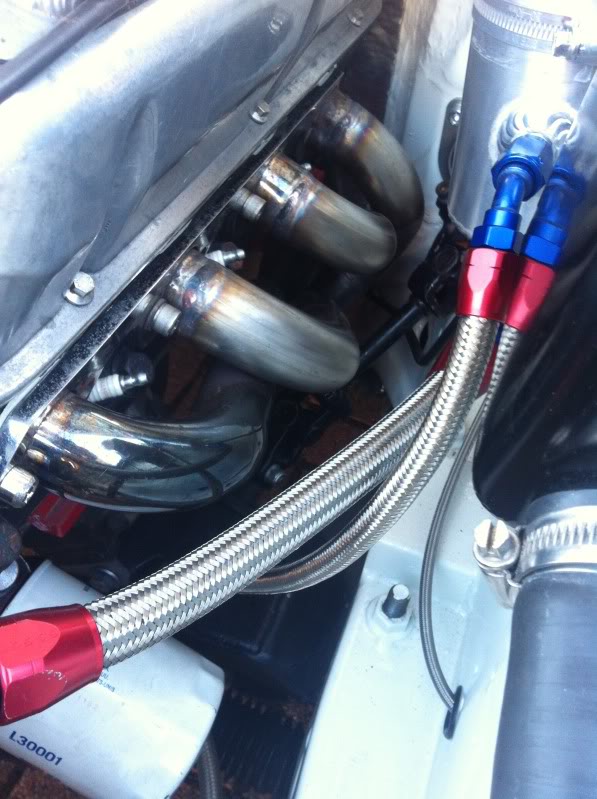
Popped into MDA today to drop off the stuff I've been collecting this week. The main aim was to get the water hoses up and running. I took a chance on some of the thread sizes and fortunately I guessed right..
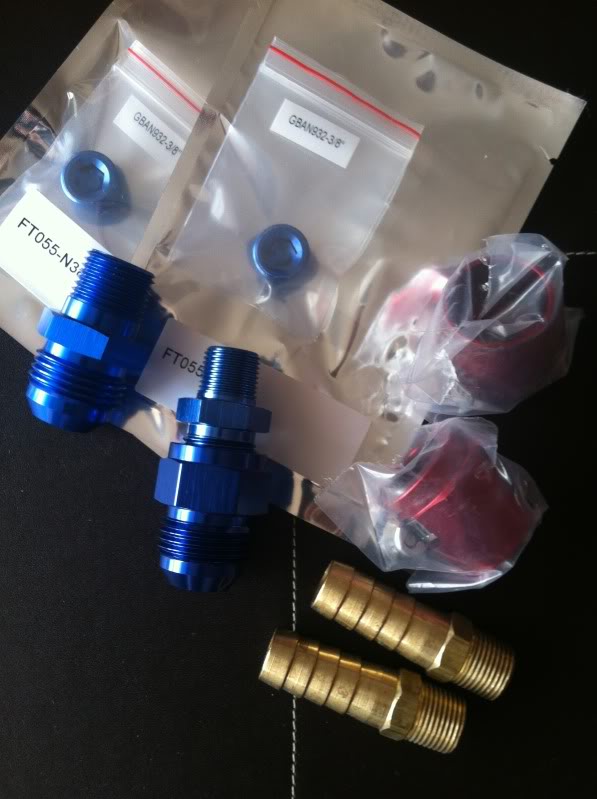
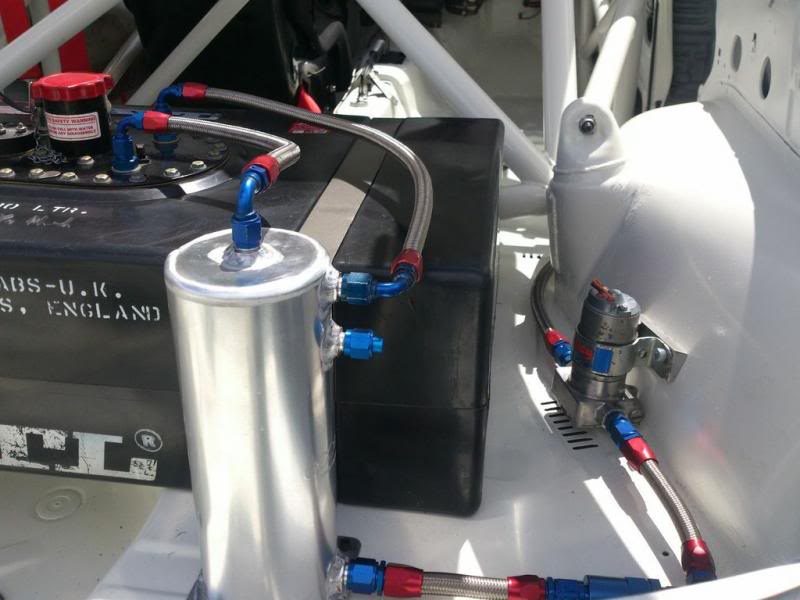
Here's a couple of 3/8 npt blanks for the inlet manifold. I found before having the temp sender in the thermostat housing a much more reliable (accurate) reading. There's a couple of traditional brass water pump fittings (only one needed, and the other a spare) for the theromostat bypass hose). As I had a spare -12 90deg female fitting, plus the need to change one on the catch tank, I decided if I could find the right size adapters I'd use them for the heater hoses.
Fortunately it seemed that I could. Ebay is a good source of odd sized adapters that you don't usually find from the likes of Goodridge etc. I found a 3/8' npt to -10 adaptor then a -12 coupling which I'll use with the straight female -12 off the water pump; and a straight 1/2" npt to -12 which I'll use in the inlet manifold with the -12 90deg. Along with a couple of -12 hose finishers that's my heater matrix hoses sorted. No sooner had I dropped them off Mat had fitted everything and swapped the catch tank straight outlet for a 45deg to get a better run with the hose behind the fan motor instead of in front and under the cage. And he sent me the pic to prove it..
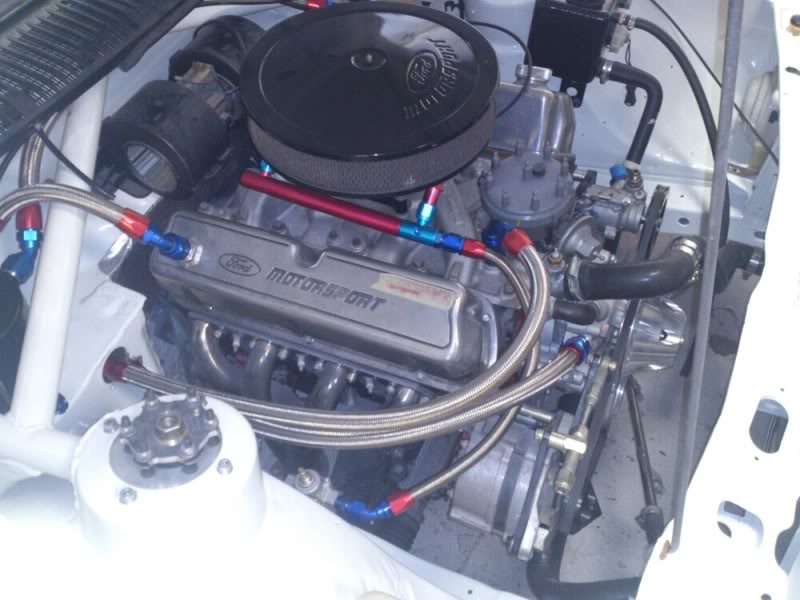
So that's now fuel lines done, brake lines done, oil breather done, oil cooler done, coolant hoses and heater hoses done. The clutch line is on tomorrow's job sheet..
I'd also popped into see Dave Baines at Autoquip UK for a couple of fittings, and picked up a rotary brake bias adjuster and some captive nut plate thingys for my harness eye bolts.
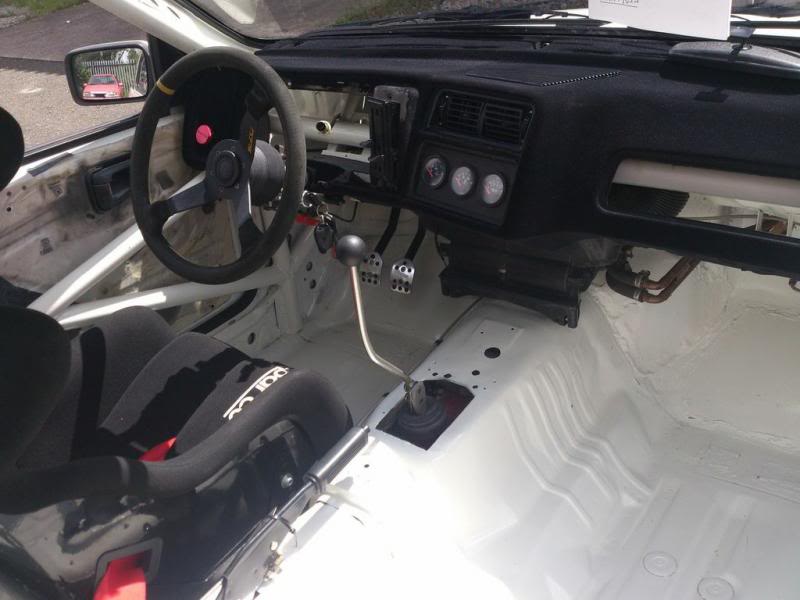
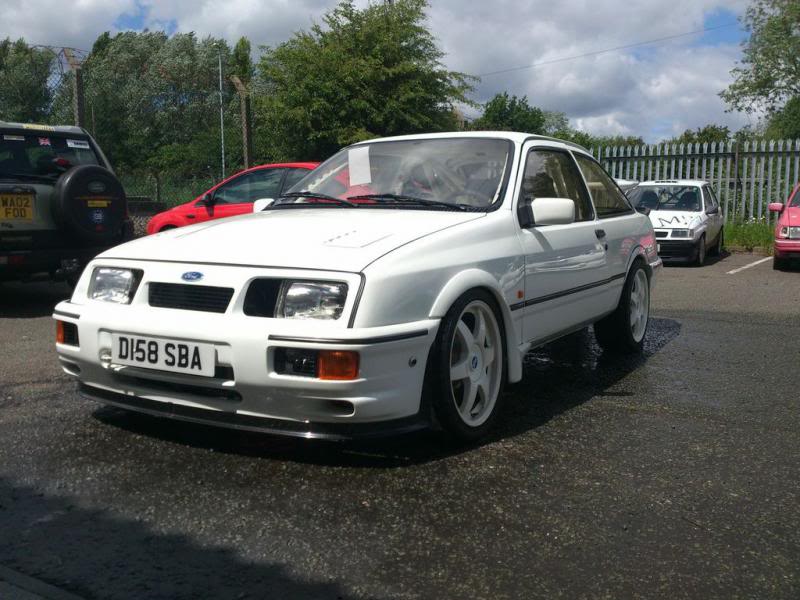
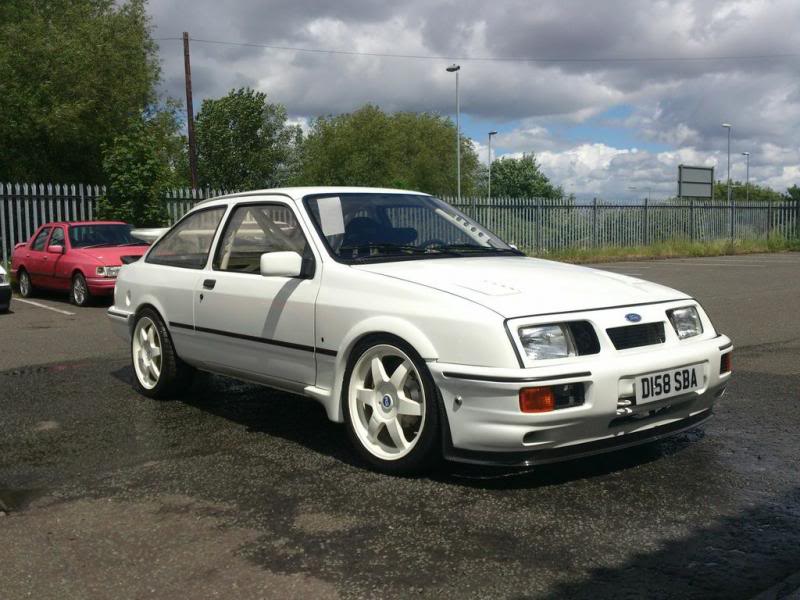
When I'd popped in the car was out sunning itself. It's quite rare to for me to see it properly out, so I couldn't resist snapping a few pics.. S'cuse the job sheet on the window, and the open bonnet!
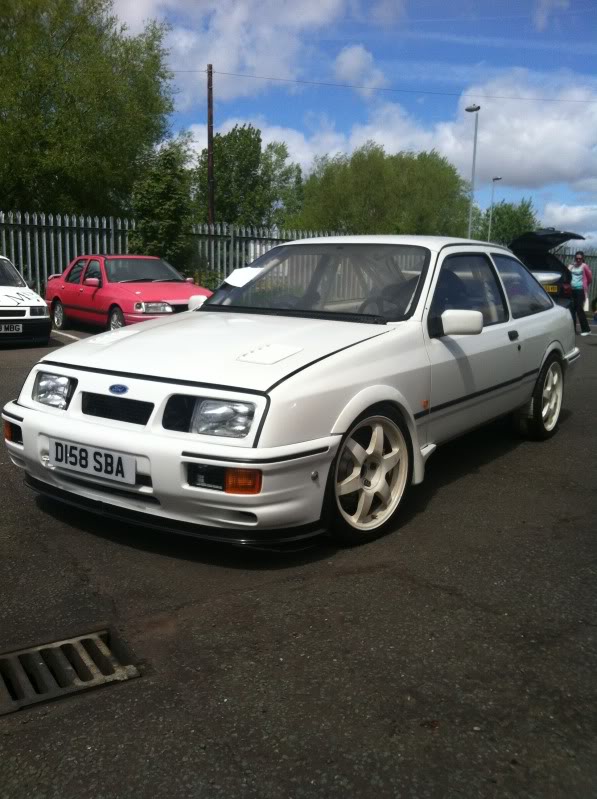
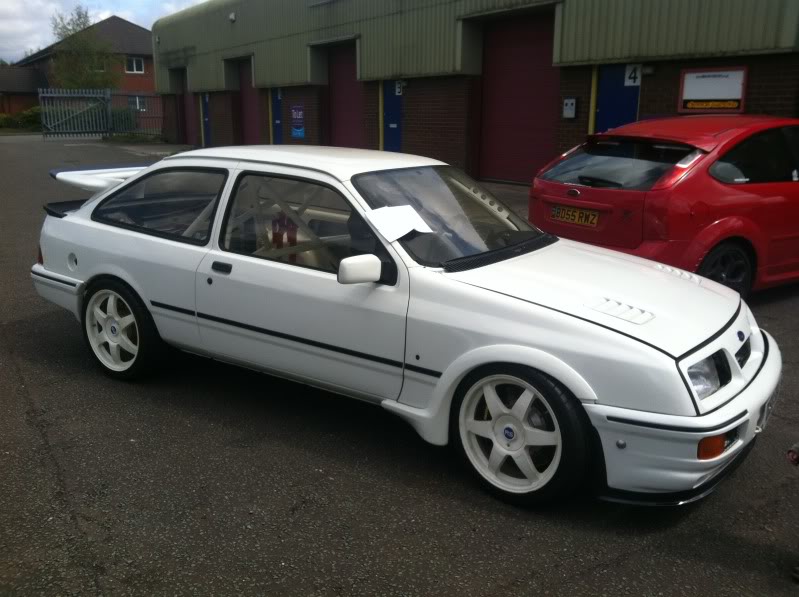
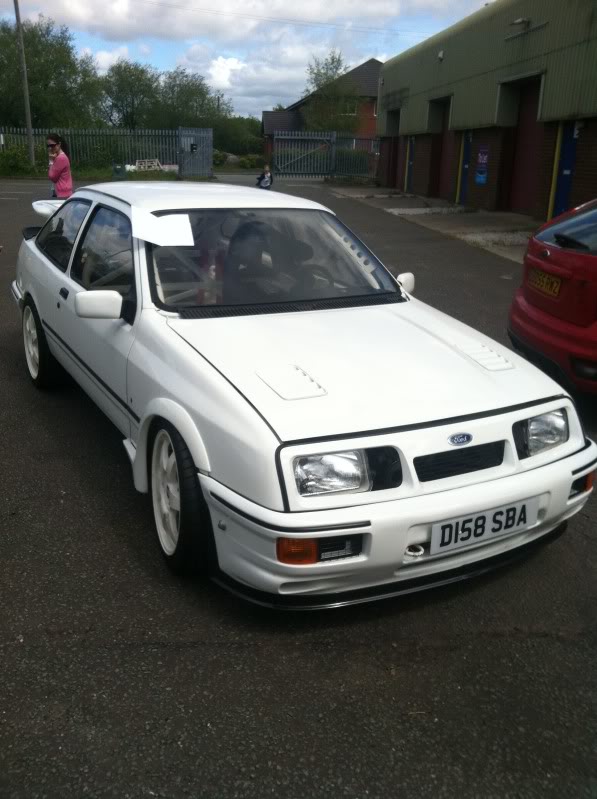
I was chuffed to see it looking this good - it was a nice motivator! As you can see still a bit of bodywork to go, but fairly small beer considering. A bit of arch rolling is needed on the rear for clearance before the arches go on; and once they're on the sills can follow.
PAS lines is one of last jobs for Mat. We've got some -6 rack fittings, -6 and -10 pump rtn/outlets, and a fluid reservoir that matches. Just got to make it work together now...
I need to source some gearbox oil, but I've sorted some engine oil already. I've got a busy week at work lined up next week, but hopefully I can make some progress on the dash by next week. Had a bit of inspiration on the clocks this week so I'll update when I've got something to show for it..
Cheers for now,
Iain
I'll continue reinstating them on the earlier pages as an when the chance arrives. I've still got everything - just organising my photobucket albums has broken the links..
Popped into MDA today to drop off the stuff I've been collecting this week. The main aim was to get the water hoses up and running. I took a chance on some of the thread sizes and fortunately I guessed right..

Here's a couple of 3/8 npt blanks for the inlet manifold. I found before having the temp sender in the thermostat housing a much more reliable (accurate) reading. There's a couple of traditional brass water pump fittings (only one needed, and the other a spare) for the theromostat bypass hose). As I had a spare -12 90deg female fitting, plus the need to change one on the catch tank, I decided if I could find the right size adapters I'd use them for the heater hoses.
Fortunately it seemed that I could. Ebay is a good source of odd sized adapters that you don't usually find from the likes of Goodridge etc. I found a 3/8' npt to -10 adaptor then a -12 coupling which I'll use with the straight female -12 off the water pump; and a straight 1/2" npt to -12 which I'll use in the inlet manifold with the -12 90deg. Along with a couple of -12 hose finishers that's my heater matrix hoses sorted. No sooner had I dropped them off Mat had fitted everything and swapped the catch tank straight outlet for a 45deg to get a better run with the hose behind the fan motor instead of in front and under the cage. And he sent me the pic to prove it..

So that's now fuel lines done, brake lines done, oil breather done, oil cooler done, coolant hoses and heater hoses done. The clutch line is on tomorrow's job sheet..
I'd also popped into see Dave Baines at Autoquip UK for a couple of fittings, and picked up a rotary brake bias adjuster and some captive nut plate thingys for my harness eye bolts.
When I'd popped in the car was out sunning itself. It's quite rare to for me to see it properly out, so I couldn't resist snapping a few pics.. S'cuse the job sheet on the window, and the open bonnet!


I was chuffed to see it looking this good - it was a nice motivator! As you can see still a bit of bodywork to go, but fairly small beer considering. A bit of arch rolling is needed on the rear for clearance before the arches go on; and once they're on the sills can follow.
PAS lines is one of last jobs for Mat. We've got some -6 rack fittings, -6 and -10 pump rtn/outlets, and a fluid reservoir that matches. Just got to make it work together now...
I need to source some gearbox oil, but I've sorted some engine oil already. I've got a busy week at work lined up next week, but hopefully I can make some progress on the dash by next week. Had a bit of inspiration on the clocks this week so I'll update when I've got something to show for it..
Cheers for now,
Iain
01-06-2013 | 09:12 PM
#210
Thread Starter
PassionFord Regular
Joined: Jan 2005
Posts: 432
Likes: 8
From: Cheshire
I'll start off with the same system I think and see how I'm doing for noise levels (with track days in mind), but I quite fancy side exits on both sides. I'll need to judge how much silencing I can do away with and get inside a reasonable noise limit.
Iain
01-06-2013 | 09:52 PM
#211

Too many posts.. I need a life!!
Joined: Dec 2009
Posts: 767
Likes: 4
From: UK
Yes mate, a 351w. The last one sounded good - even better when you take off half the exhaust though!
I'll start off with the same system I think and see how I'm doing for noise levels (with track days in mind), but I quite fancy side exits on both sides. I'll need to judge how much silencing I can do away with and get inside a reasonable noise limit.

Iain
I'll start off with the same system I think and see how I'm doing for noise levels (with track days in mind), but I quite fancy side exits on both sides. I'll need to judge how much silencing I can do away with and get inside a reasonable noise limit.
Iain
Keep up the good work and keep posting!
 01-06-2013 | 10:24 PM
#213
Thread Starter
PassionFord Regular
Joined: Jan 2005
Posts: 432
Likes: 8
From: Cheshire
Yes still got the hanging ones like the Brooklyn car. Will prob go for those over the vitaloni ones just for visibility's sake on track days, as I think I'll feel a little vulnerable being LHD. Time will tell. Not sure whether to paint them either!
Still not convinced on the rubbing strips though!
Cheers
Iain
01-06-2013 | 10:47 PM
#215

Advanced PassionFord User
Joined: May 2004
Posts: 1,648
Likes: 18
From: Teesside
LHD is good fun on track. You get to use more track, as most corners are right handers. LHD gives a better view of the track and you can get to the edge of the tarmac.
Its funny for a passenger. Sat in the normal driving side without controls. Mine was fun.
Its funny for a passenger. Sat in the normal driving side without controls. Mine was fun.
02-06-2013 | 06:21 AM
#216
Thread Starter
PassionFord Regular
Joined: Jan 2005
Posts: 432
Likes: 8
From: Cheshire
Hi Rob,
It's something I've thought about alot! I've been in quite a few LHD as a road passenger, & I've driven LHD quite alot on the continent, plus I was an Integrale owner for a few years. The one thing I've never done though is LHD on track...
I imagine that going clockwise round most circuits will see me on the outside of most turns, so finding my apexes will be interesting. Perhaps on the exits I'll get some pay back! Either way big L plates will be the order of the day
Cheers
Iain
12-06-2013 | 07:51 PM
#217
Thread Starter
PassionFord Regular
Joined: Jan 2005
Posts: 432
Likes: 8
From: Cheshire
Update time.. Getting close now
Clutch is done - might need a longer actuator rod tho to produce enough movement in the clutch fork.
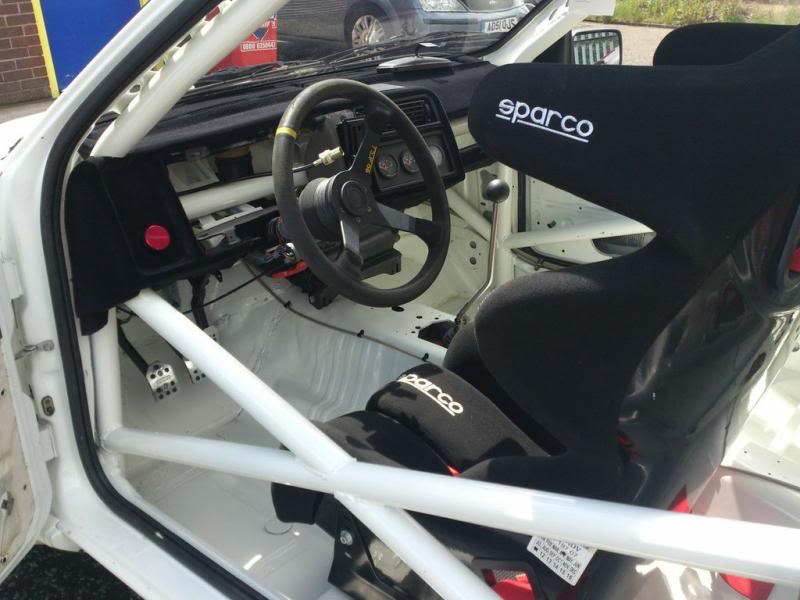
Seat now fully bolted in and harness fitted.
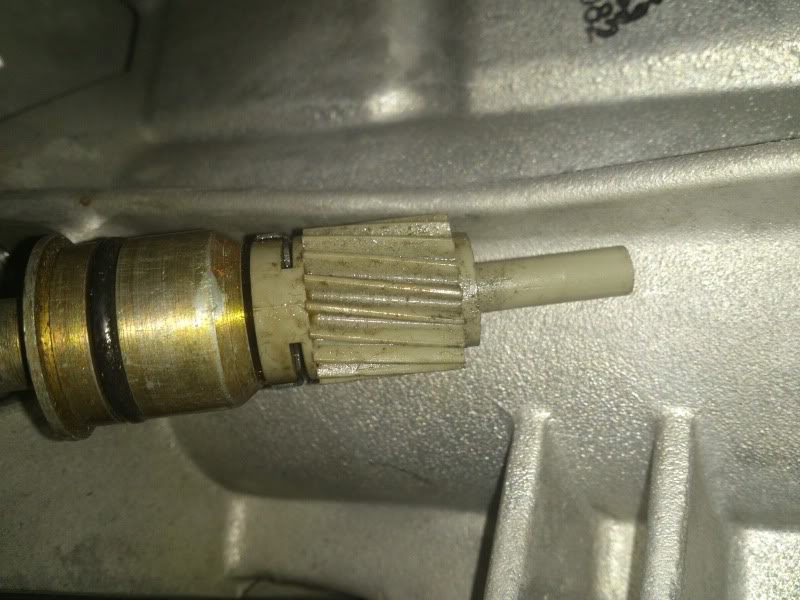
We're fitting the 18T speedo drive I had - I have ordered a 20T to get more accuracy - but we'll fit this for the time being.
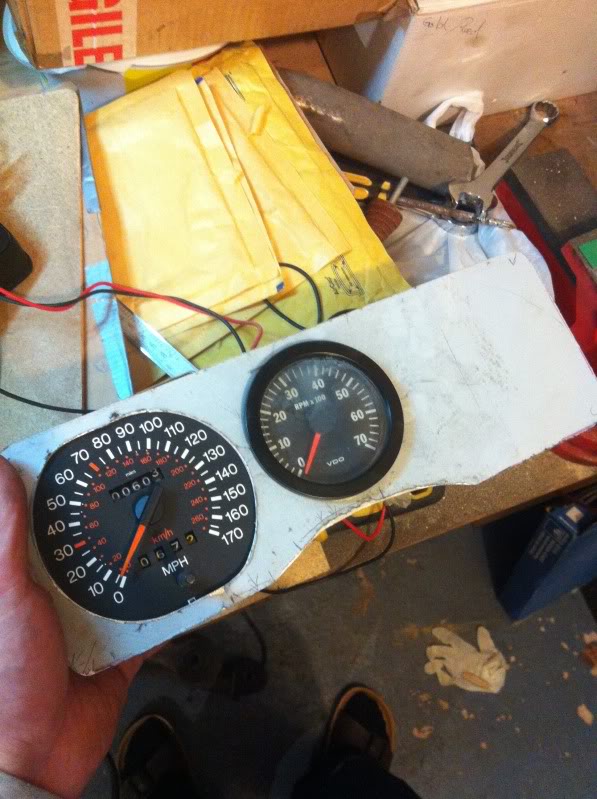
I'm slowly getting there with the instrument cluster. Some more hole drilling to go..
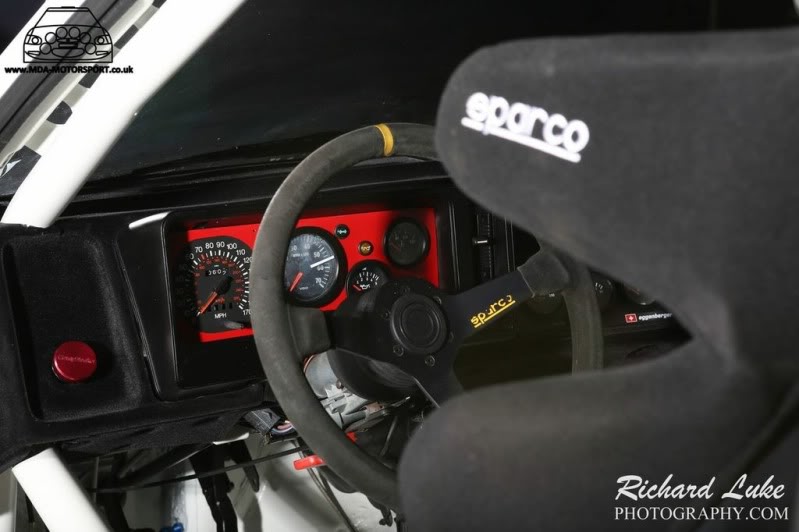
I'm aiming for an Eggenberger inspired look;
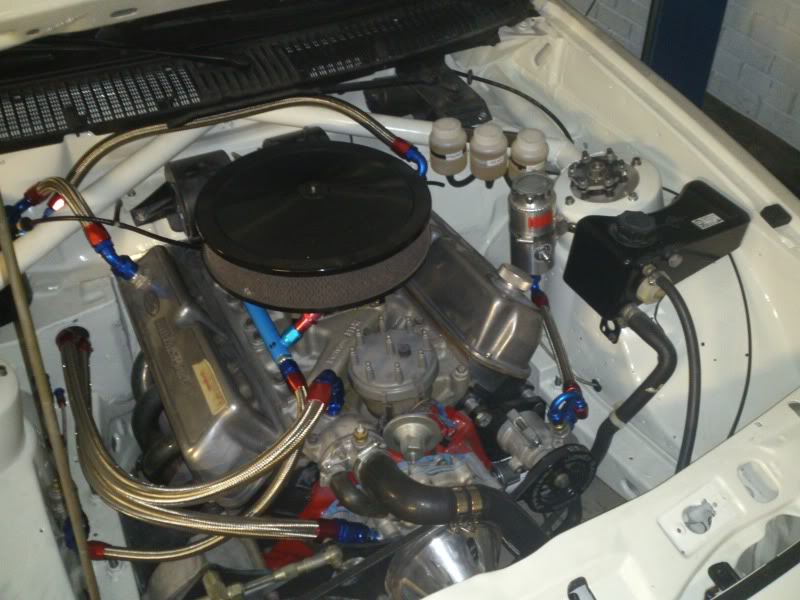
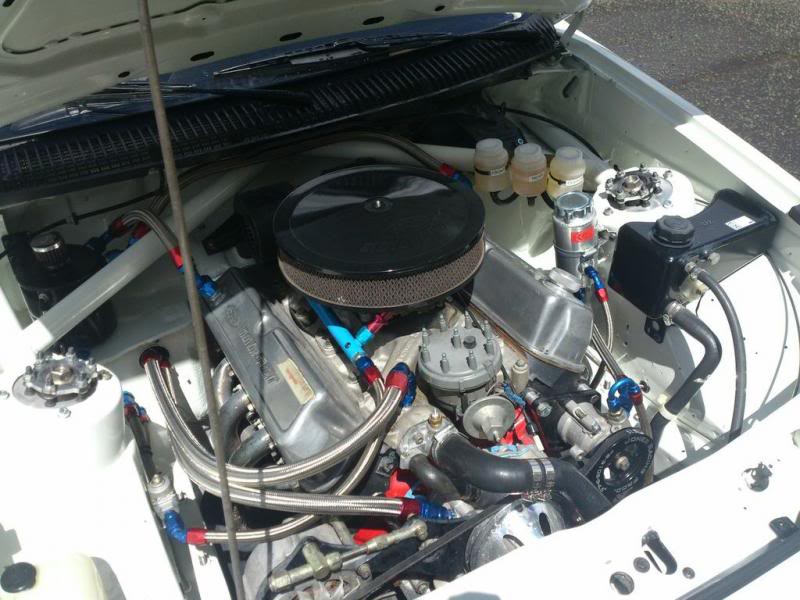
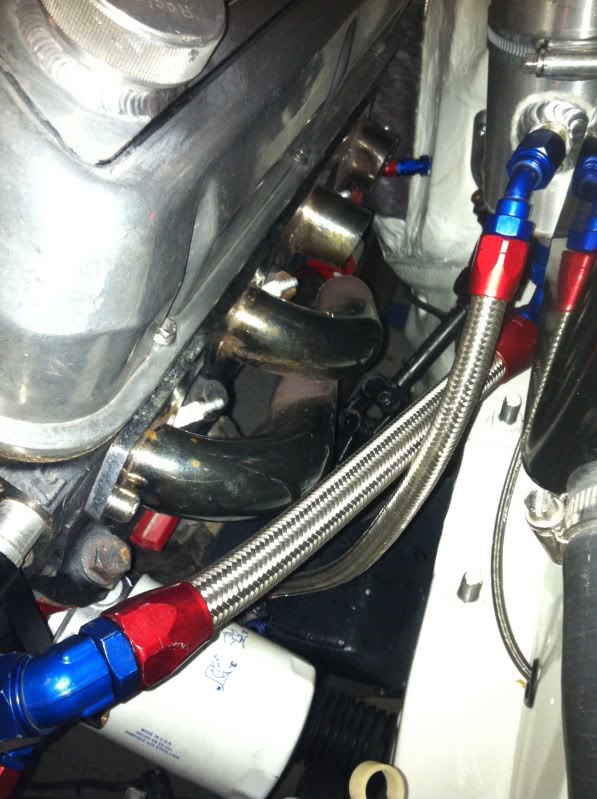
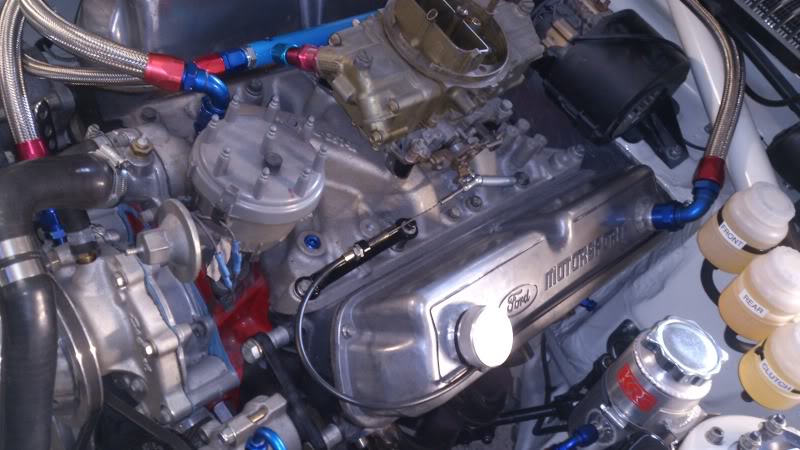
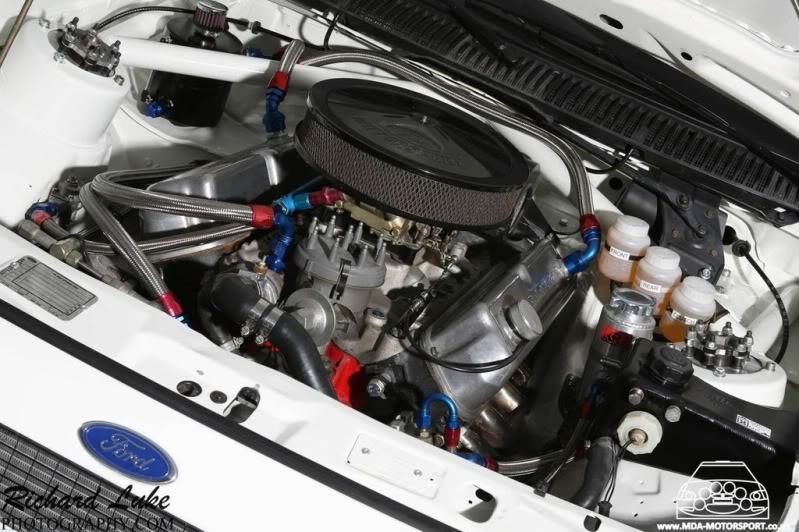
Mat's done a great job sorting out hoses. The engine bay is currently looking like this:
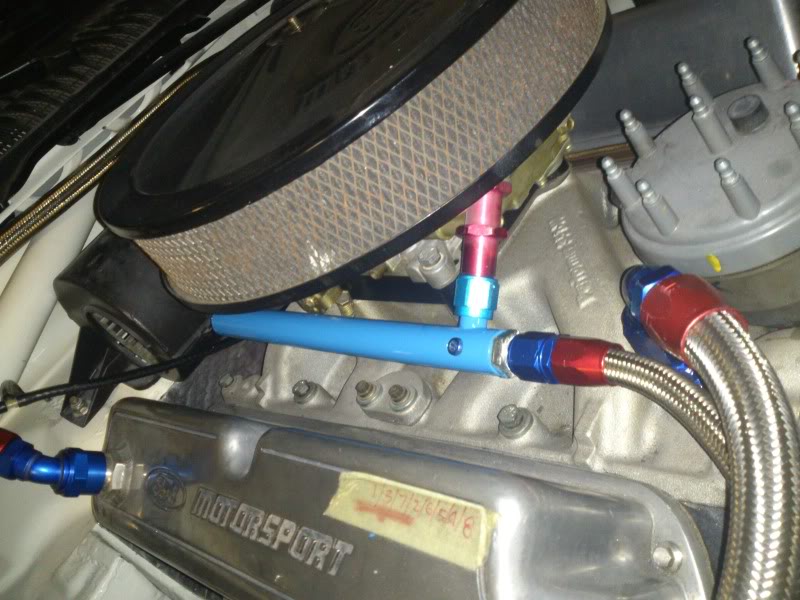
And then just finished off the low pressure side of the PAS using the US sourced KRC reservoir. This uses -6 & -10
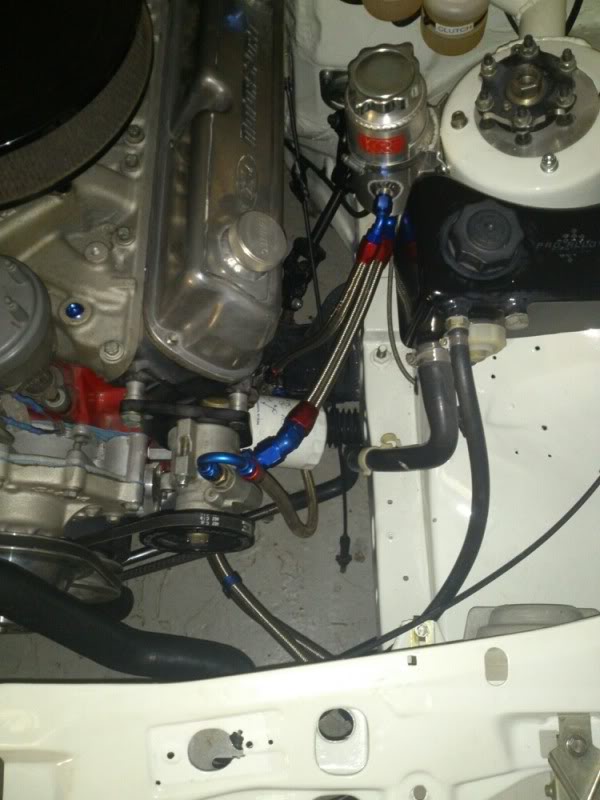
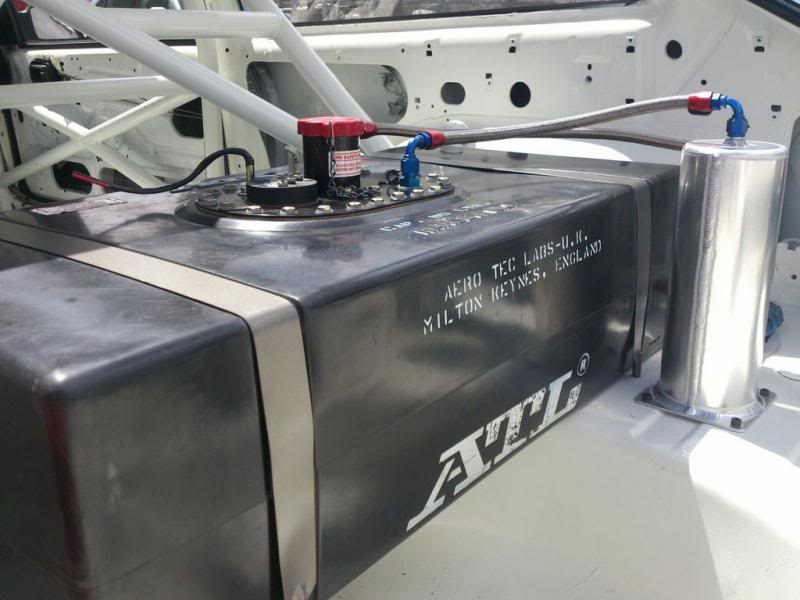
Oh, and the fuel log has been welded up. Then the join was machined smooth and had a lick of paint to finish it off. It looks great and will be alot safer than the push together fitting and an o-ring seal that's standard.
I've won some new plug leads off the bay this week. I also scored a set of headers. We've got clearance issues with the steering column, so as they were cheap as chips it's worth offering them up to see if they fit.
I've got gearbox fluid on it's way this week too, so it feels like we're getting close to finishing.
Main jobs left will be rolling the rear arches to gain tyre clearance, doing the Gp A sleeve/stud mod on the rears that Mat's done on the front, and sorting out pas high pressure hoses.
Then it'll be over to me for the electrics - things could easily grind to a halt at that point but I want to be finished in time for Ford Fair.. There, I've said it now...
Cheers
Iain
Clutch is done - might need a longer actuator rod tho to produce enough movement in the clutch fork.
Seat now fully bolted in and harness fitted.
We're fitting the 18T speedo drive I had - I have ordered a 20T to get more accuracy - but we'll fit this for the time being.
I'm slowly getting there with the instrument cluster. Some more hole drilling to go..
I'm aiming for an Eggenberger inspired look;
Mat's done a great job sorting out hoses. The engine bay is currently looking like this:
And then just finished off the low pressure side of the PAS using the US sourced KRC reservoir. This uses -6 & -10
Oh, and the fuel log has been welded up. Then the join was machined smooth and had a lick of paint to finish it off. It looks great and will be alot safer than the push together fitting and an o-ring seal that's standard.
I've won some new plug leads off the bay this week. I also scored a set of headers. We've got clearance issues with the steering column, so as they were cheap as chips it's worth offering them up to see if they fit.
I've got gearbox fluid on it's way this week too, so it feels like we're getting close to finishing.
Main jobs left will be rolling the rear arches to gain tyre clearance, doing the Gp A sleeve/stud mod on the rears that Mat's done on the front, and sorting out pas high pressure hoses.
Then it'll be over to me for the electrics - things could easily grind to a halt at that point but I want to be finished in time for Ford Fair.. There, I've said it now...
Cheers
Iain
Last edited by IainRS1700T; 12-06-2013 at 07:54 PM.
19-06-2013 | 09:00 AM
#218
Thread Starter
PassionFord Regular
Joined: Jan 2005
Posts: 432
Likes: 8
From: Cheshire
A bit more progress this past week.
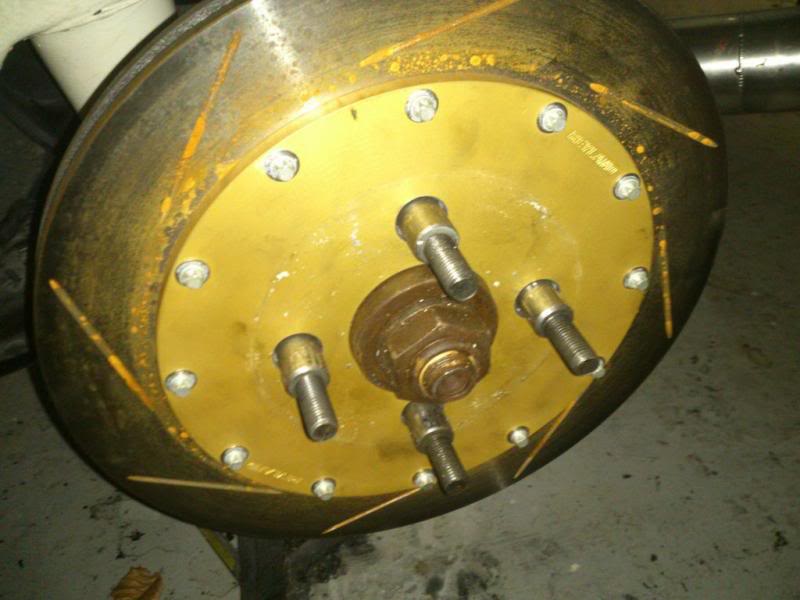
Mat machined up on the lathe some sleeves for the studs for the rear wheels. I'm using extended 63mm studs which are M12, but Mat's sleeves bring me up to M14 dimensions;
My rotary bias adjuster now fitted where the side vent used to be and Mat made me a gear lever! I used to have an Integrale many moons ago, and just before I sold it I bought a Final Edition gear knob for it. I never fitted it, but kept in my man drawers at home along with spare batteries and house keys from 20yrs ago, so now seemed like a good time to put it to use;
The poor car hasn't seen much daylight since starting its transformation so it also got a thorough wash and brush up in the sunshine
It's getting there! We're waiting on an arch roller before fitting the rear arches and side skirts, and for the rad to come back from a little repair. Rather than go back to radtec it's going to Pete at Spec R who's service was top notch when I got the catch tank made.
When the rads back in, every single fluid related job will be completed.
I'm off to the garage to finish my dash! Here's a few more pics for good measure
Cheers
Iain


 19-06-2013 | 05:26 PM
#222
Thread Starter
PassionFord Regular
Joined: Jan 2005
Posts: 432
Likes: 8
From: Cheshire
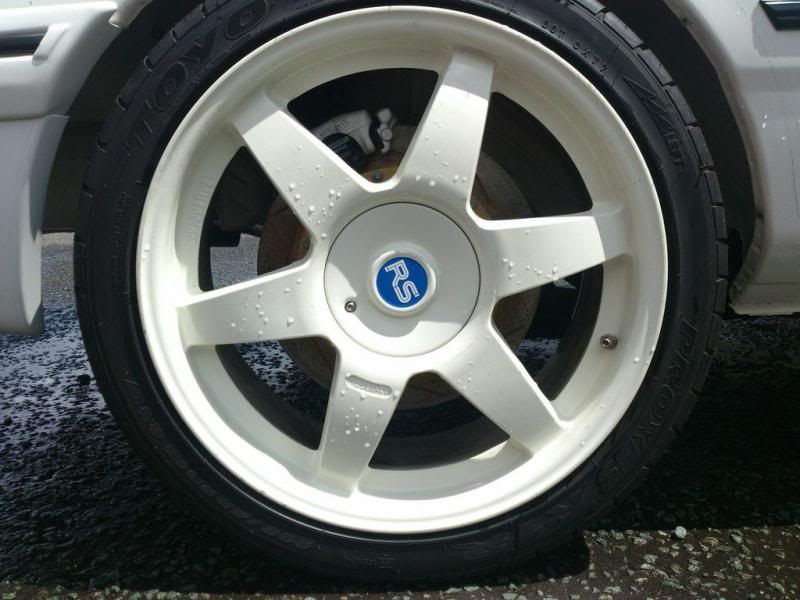
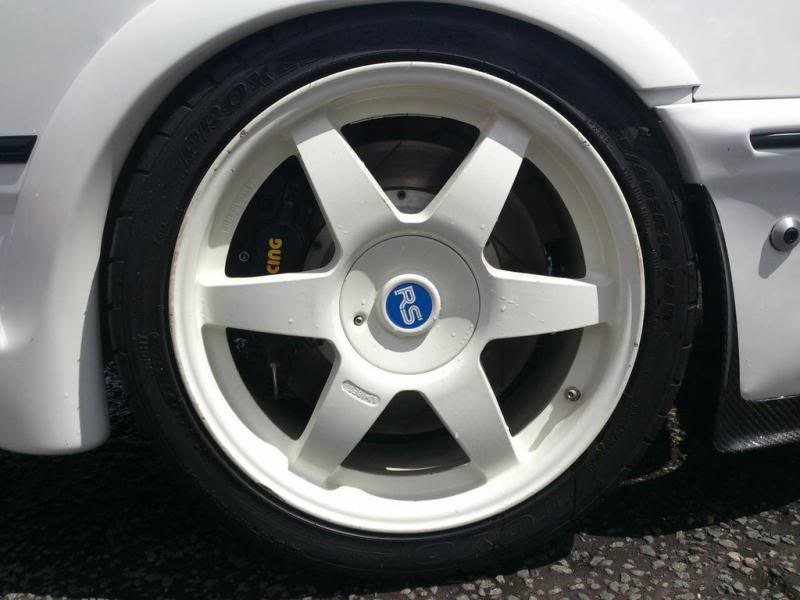
Yes mate, 225/40 18's. These are Toyo R1R's.
I think I would have preferred 17's but a good deal came up on the brakes & at 356mm that dictated whl size. I think there might be a chance still of 17's (clearance-wise) but that will have to wait until I can get the chance to try some.
If I could get to 245 or similar on the back that would be ideal.
I'll save all that for a bit of trial & error in the future!
I'm making some progress on the instrument cluster at the moment. I hope to post some pics in a bit.
Thanks for your kind words gents
Iain
19-06-2013 | 06:09 PM
#224
Thread Starter
PassionFord Regular
Joined: Jan 2005
Posts: 432
Likes: 8
From: Cheshire
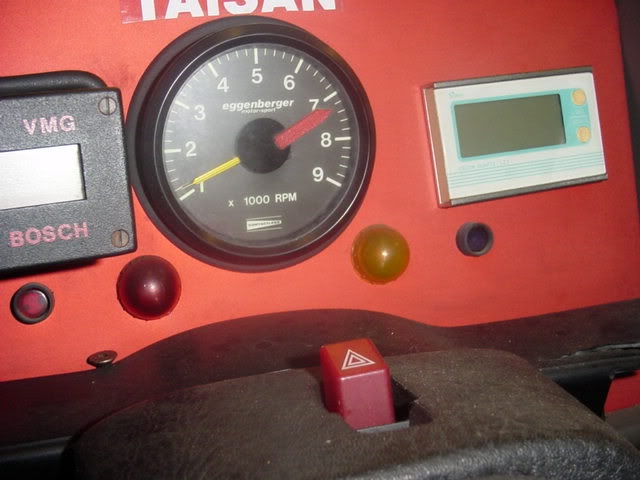
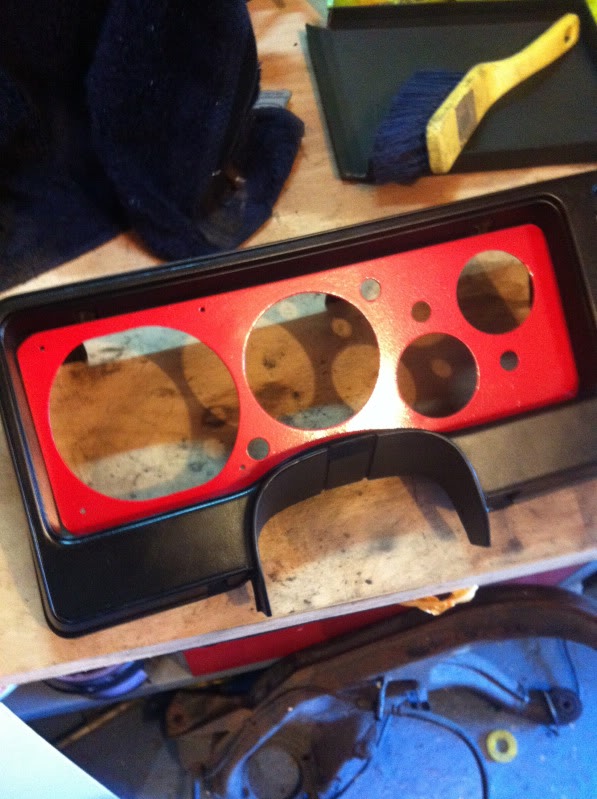
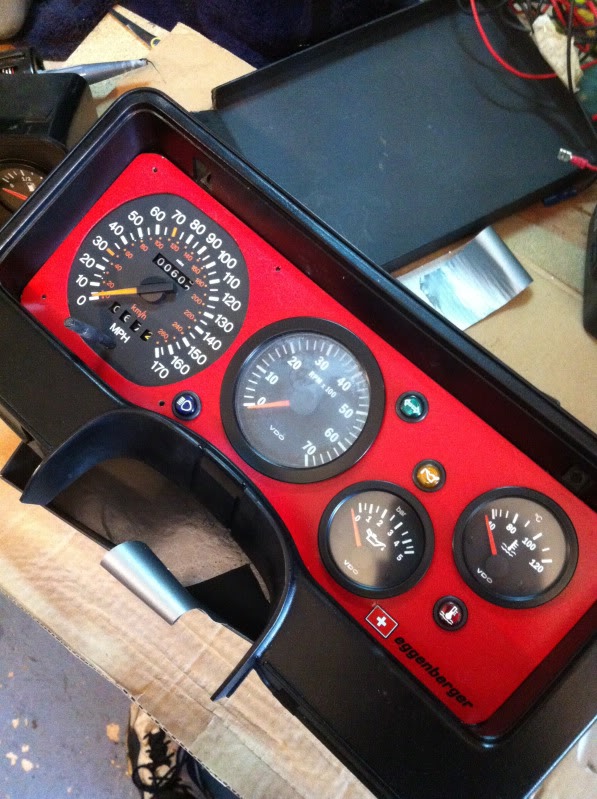
Here we go.. The instrument cluster turned out well I reckon. Well, I'm pleased with it anyway!
First up, trial fit the speedo on the reverse of the panel:
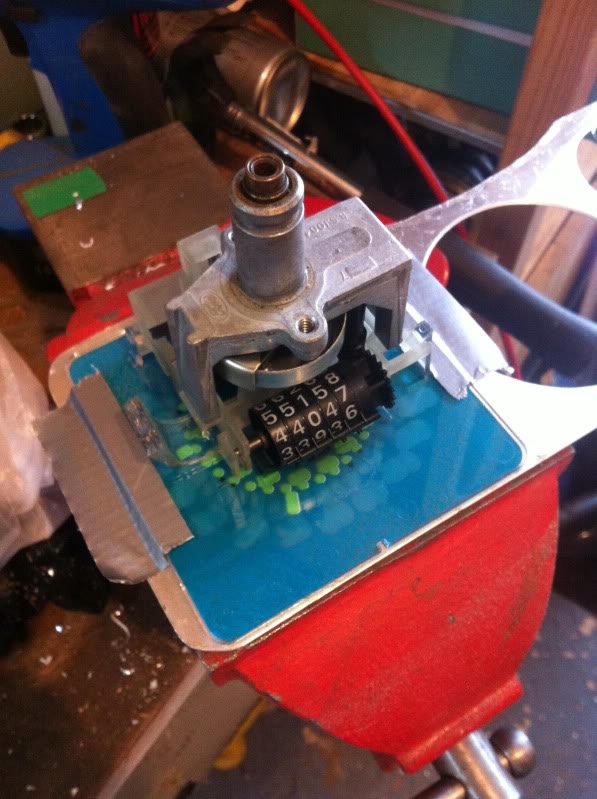
That looked ok, so I decided the drill thru the corners of the speedo face to help fix it. Here's a little trial fit (I used some spare smaller gauges here - when the time comes I think I'll put oil pressure and coolant temp here, with a warning light for each.)
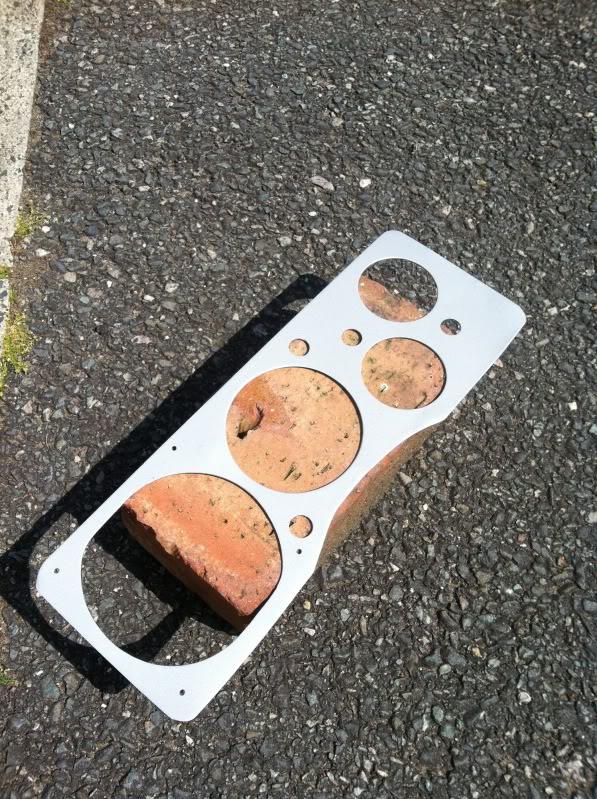
Time for some primer;
Then some paint. Remember I'm going for the Eggenberger look here! Not to everyone's taste I'm sure, but I've learned so much from the original touring cars in this build I like the idea of giving each car a little 'nod in the way I've built mine.
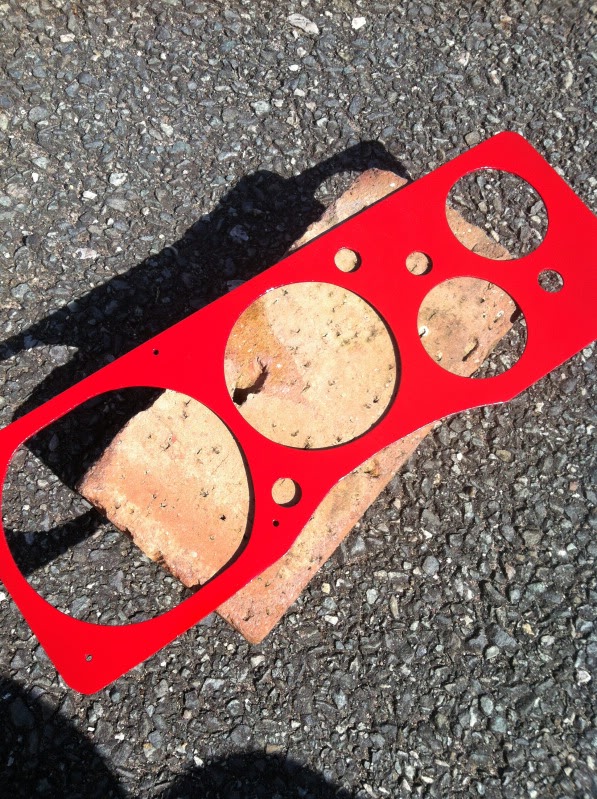
I was after a slightly tangerine red, and hopefully I've managed that. Inevitably I could wait to fit it, so with the paint barely dry, in it went...
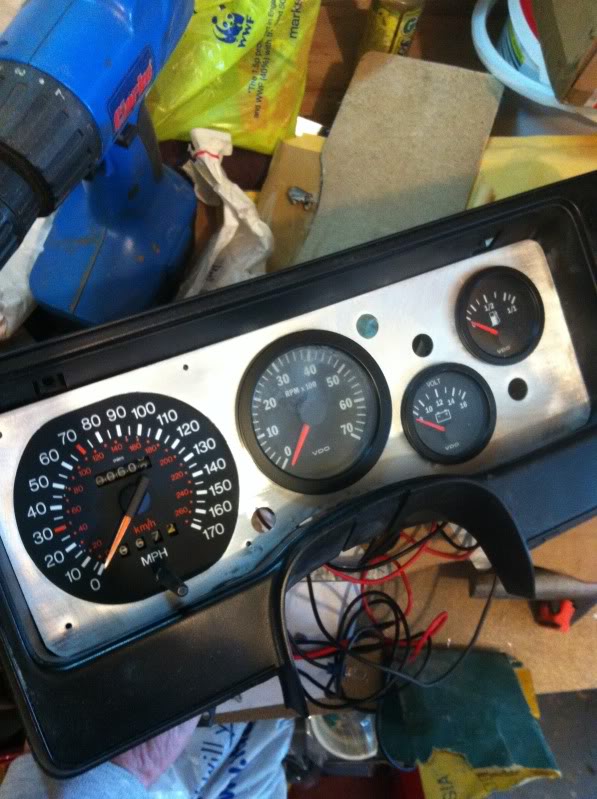
Then came the gauges & my cheeky Eggenberger salute;
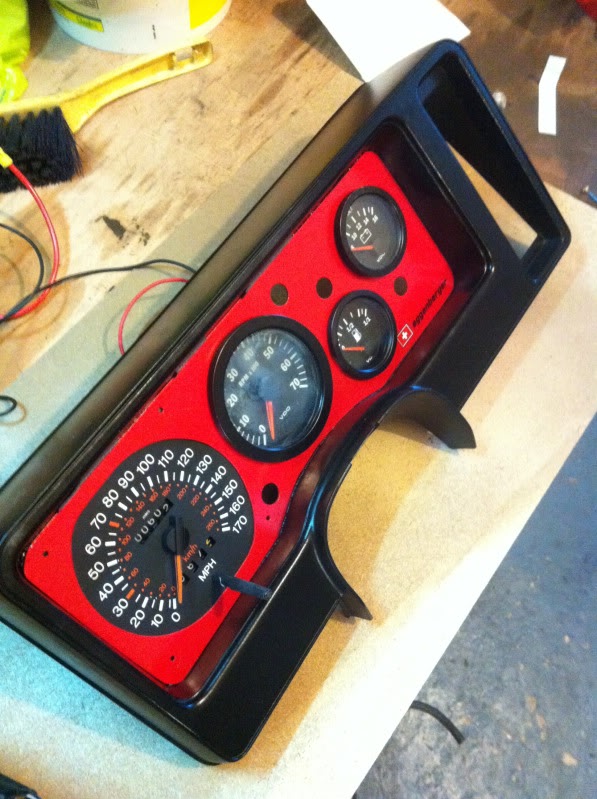
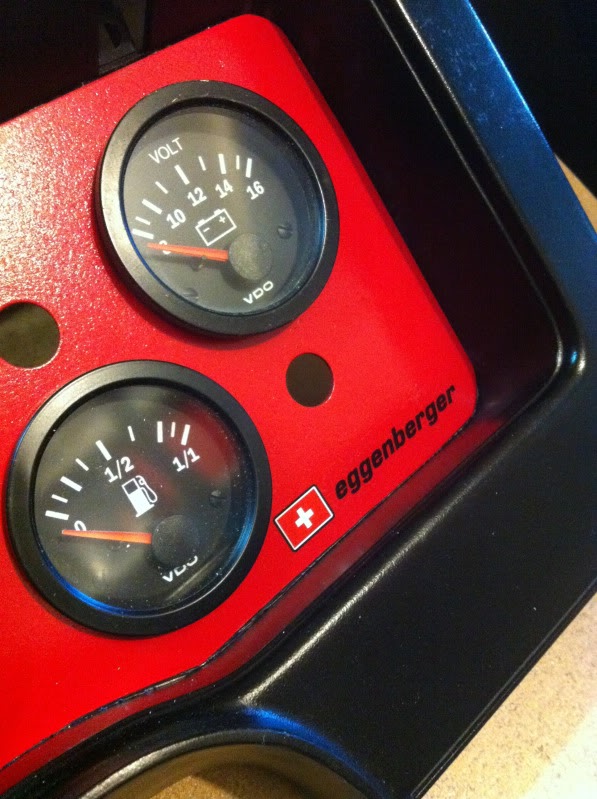
The speedo aperture has a flat top & bottom as the original was of course square, so getting that right was difficult with curved sides. I think I got close..
All I need now is to fit the correct 52mm gauges and the warning lamps then it can all slot home in the dash
Cheers
Iain
First up, trial fit the speedo on the reverse of the panel:
That looked ok, so I decided the drill thru the corners of the speedo face to help fix it. Here's a little trial fit (I used some spare smaller gauges here - when the time comes I think I'll put oil pressure and coolant temp here, with a warning light for each.)
Time for some primer;
Then some paint. Remember I'm going for the Eggenberger look here! Not to everyone's taste I'm sure, but I've learned so much from the original touring cars in this build I like the idea of giving each car a little 'nod in the way I've built mine.
I was after a slightly tangerine red, and hopefully I've managed that. Inevitably I could wait to fit it, so with the paint barely dry, in it went...
Then came the gauges & my cheeky Eggenberger salute;
The speedo aperture has a flat top & bottom as the original was of course square, so getting that right was difficult with curved sides. I think I got close..
All I need now is to fit the correct 52mm gauges and the warning lamps then it can all slot home in the dash
Cheers
Iain
 19-06-2013 | 11:25 PM
#227
PassionFord Post Whore!!
iTrader: (11)
Joined: May 2004
Posts: 5,640
Likes: 33
From: Solihull near Birmingham
Yes mate, 225/40 18's. These are Toyo R1R's.
I think I would have preferred 17's but a good deal came up on the brakes & at 356mm that dictated whl size. I think there might be a chance still of 17's (clearance-wise) but that will have to wait until I can get the chance to try some.
If I could get to 245 or similar on the back that would be ideal.
I'll save all that for a bit of trial & error in the future!
I'm making some progress on the instrument cluster at the moment. I hope to post some pics in a bit.
Thanks for your kind words gents
Iain
I think I would have preferred 17's but a good deal came up on the brakes & at 356mm that dictated whl size. I think there might be a chance still of 17's (clearance-wise) but that will have to wait until I can get the chance to try some.
If I could get to 245 or similar on the back that would be ideal.
I'll save all that for a bit of trial & error in the future!
I'm making some progress on the instrument cluster at the moment. I hope to post some pics in a bit.
Thanks for your kind words gents
Iain
Rich
22-06-2013 | 03:39 PM
#229
Thread Starter
PassionFord Regular
Joined: Jan 2005
Posts: 432
Likes: 8
From: Cheshire
Paid a quick visit to the MDA workshop this morning to drop off the extended studs for the rear whls
The car looked awesome!
It was great to see it so close to completion and nice & clean
All the little snagging jobs are being ticked off and that list is getting smaller.
The clutch is now 100% and today I sat in the car and could change gear for the first time. The ergonomics of position, steering & gear change seem really good. The pedals feel good too, but I guess only time will tell when it's properly up and running.
My instrument cluster panel fitted so that's a bonus, and I came away with the right gauges to fit into it. I need to source some warning lights now.
Mat sliced the troublesome drivers side manifold to allow final fitment of the steering column. I'll leave the rest to JP's to sort out.
Mat also discovered the downpipe section fouls on the gearbox too, so some work to do there as well.
Rear arch rolling is underway. The throttle cable is ordered and should be ready next week.
Mat's aiming to have these jobs tidied up in the next week and then we'll look to the week after for the exhaust.
We're getting there!
Cheers
Iain
25-06-2013 | 08:07 AM
#230
Thread Starter
PassionFord Regular
Joined: Jan 2005
Posts: 432
Likes: 8
From: Cheshire
Rear arches rolled and body kit (r. arches & side skirts) fitted!
I'm chuffed to bits with how it's looking Thanks to Mat for sending me the pics.
I've ordered my dash warning lights and a few other bits & pieces to complete my instrument panel. They should be arriving today so I can finish that off tmw.
I'm waiting on a quote from JP on the exhaust mods, and the rad from Spec R, then it's wiring time. Think I might unravel the loom this week and get my head around this wiring malarky...
Cheers
Iain
I'm chuffed to bits with how it's looking
I've ordered my dash warning lights and a few other bits & pieces to complete my instrument panel. They should be arriving today so I can finish that off tmw.
I'm waiting on a quote from JP on the exhaust mods, and the rad from Spec R, then it's wiring time. Think I might unravel the loom this week and get my head around this wiring malarky...
Cheers
Iain
25-06-2013 | 05:52 PM
#232
Thread Starter
PassionFord Regular
Joined: Jan 2005
Posts: 432
Likes: 8
From: Cheshire
I've got next years cam in the garage ready for the winter overhaul, and will be looking for some nice alloy heads to match, which will save me 25kg up front and give me well over 40bhp in return
Getting this up and running was always about chassis and (hopefully) reliability and future-proofing improvements in power and driver ability (!)
Time will tell...
Cheers
Iain
26-06-2013 | 10:06 PM
#233
Thread Starter
PassionFord Regular
Joined: Jan 2005
Posts: 432
Likes: 8
From: Cheshire
Another little update;
Custom throttle cable is sorted and fitted:
I've finished off the instrument cluster today, and got the right gauges in; (Sorry some the pics are a little fuzzy)
And then sorted the smaller gauge panel;

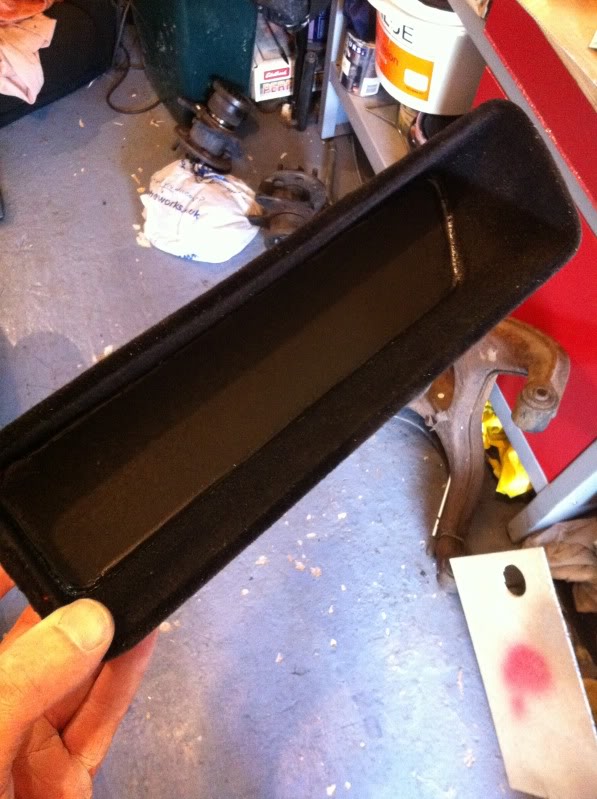
I don't have an ECU cover for the dash, so originally in its rd car guise I had the recess/pocket thingy flocked in contrasting black and it looked pretty good. Now the roll cage dash bar is so close behind the dash it won't fit. Today I sliced the back off the recess then bonded in a panel to reduce its depth. It seemed to come out ok, and if I can persuade Adrian at MDA to flock the inside of it again, it should do the job. Can't see much use for it, but it'll fill a hole nicely!
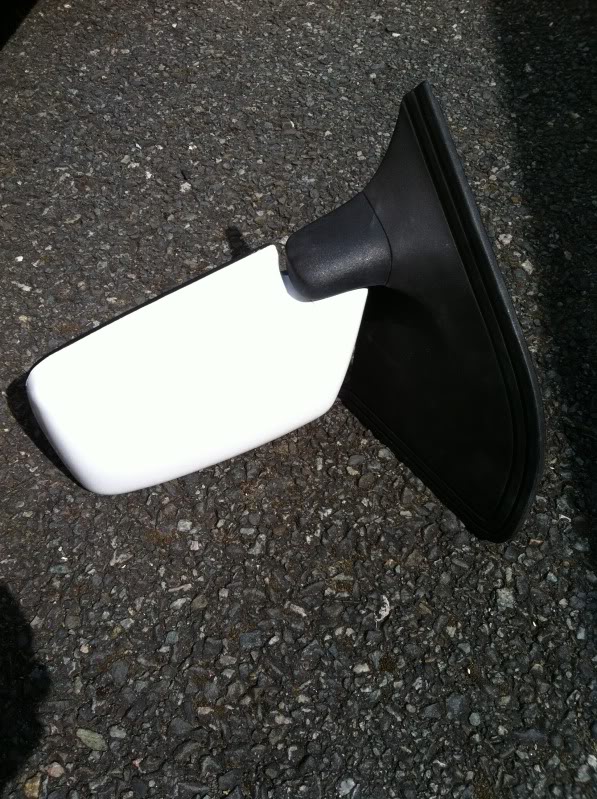
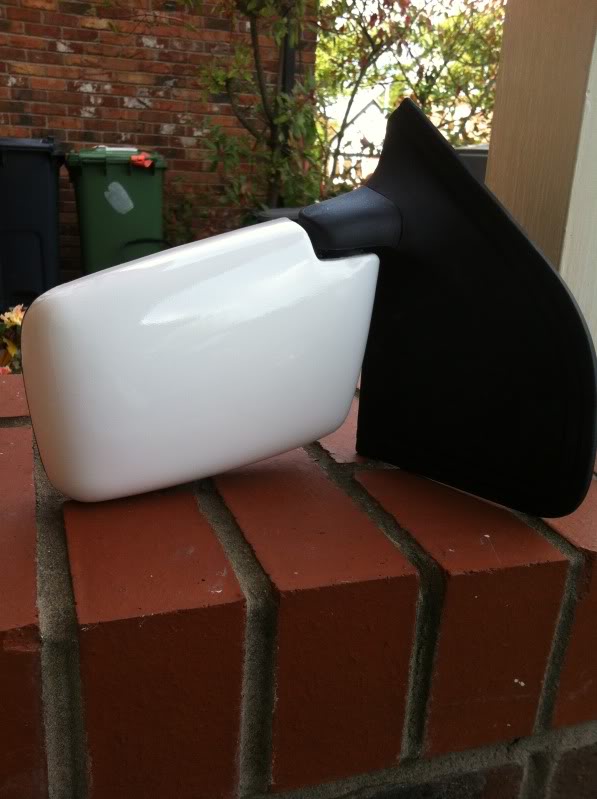
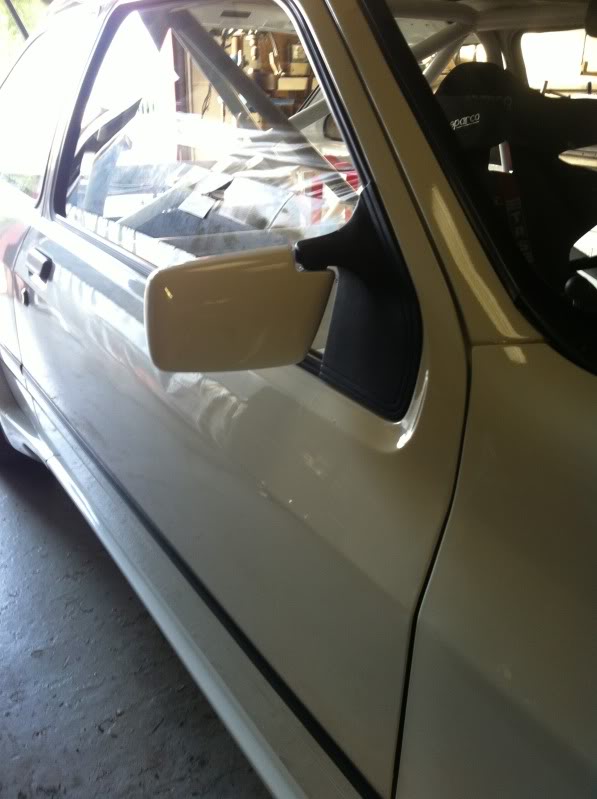
I'm also swapping the mirrors for the type that Brooklyn Motorsport used to use in the BTCC. It's a bog std type that seemed to be fairly rare over here in GB. I gave them a lick of paint today and they came out well;
So, with being on a roll today I had a good look at the wiring loom. I got everything labelled up on the new one. I found a circuit or two I didn't need and missing one or two I did (rear no plate light, & elec window switches.) but nothing that can't be sorted.
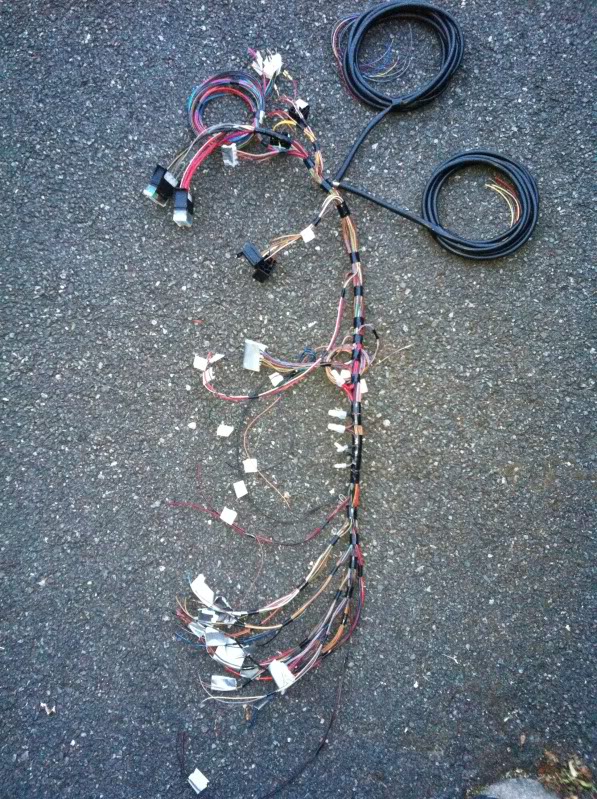
I then cut out alot of the old switches from the original loom.
Folks, I need your help here. For those of you that have been down this path, where do you get new connectors from - the actual crimped on bit - not the plastic plug??
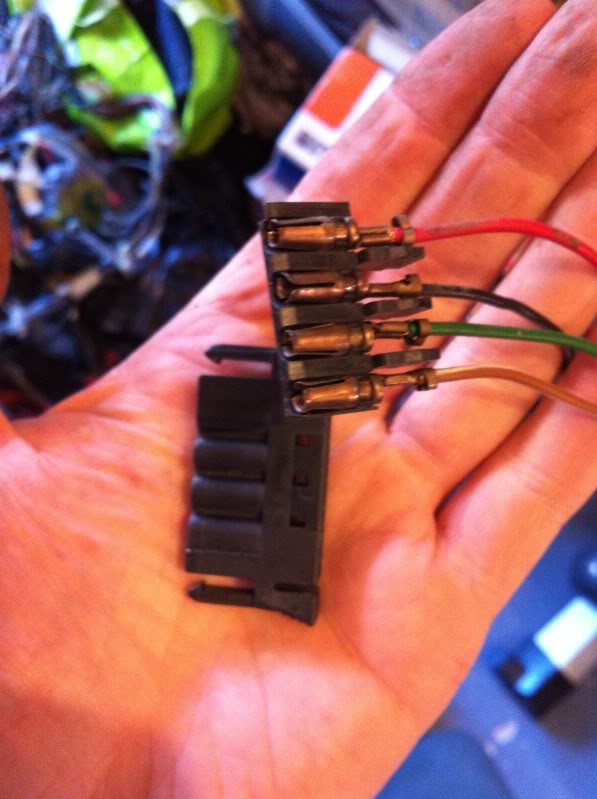
Any help would be welcome!
Cheers
Iain
Custom throttle cable is sorted and fitted:
I've finished off the instrument cluster today, and got the right gauges in; (Sorry some the pics are a little fuzzy)
And then sorted the smaller gauge panel;
I don't have an ECU cover for the dash, so originally in its rd car guise I had the recess/pocket thingy flocked in contrasting black and it looked pretty good. Now the roll cage dash bar is so close behind the dash it won't fit. Today I sliced the back off the recess then bonded in a panel to reduce its depth. It seemed to come out ok, and if I can persuade Adrian at MDA to flock the inside of it again, it should do the job. Can't see much use for it, but it'll fill a hole nicely!
I'm also swapping the mirrors for the type that Brooklyn Motorsport used to use in the BTCC. It's a bog std type that seemed to be fairly rare over here in GB. I gave them a lick of paint today and they came out well;
So, with being on a roll today I had a good look at the wiring loom. I got everything labelled up on the new one. I found a circuit or two I didn't need and missing one or two I did (rear no plate light, & elec window switches.) but nothing that can't be sorted.
I then cut out alot of the old switches from the original loom.
Folks, I need your help here. For those of you that have been down this path, where do you get new connectors from - the actual crimped on bit - not the plastic plug??
Any help would be welcome!
Cheers
Iain
06-09-2013 | 10:02 PM
#234
Thread Starter
PassionFord Regular
Joined: Jan 2005
Posts: 432
Likes: 8
From: Cheshire
Long overdue update time!
Getting close.. (I think I say that every time..)
Well the car is back home now, and I'm just a few hours work on it away from being able to turn the key; although when I can find those few hours remains to be seen!
To carry on from where I left off, back at MDA Mat had sourced and fitted custom power steering hoses. Then after a fair wait which saw Ford Fair (my original deadline) come and go I managed to get the car to Russ Fellows down the road in Chester to sort the exhaust manifold on the drivers side, and tweak the down pipes around the Tremec TKO box.
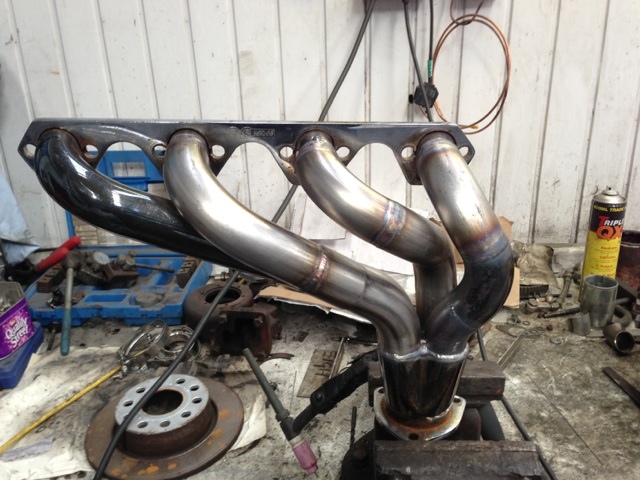
Russ re-built the manifold to avoid the steering column, working off the original flanges and re-using the original collector and basically re-doing everything in between. After a couple of days (and nights) Russ produced the goods and did a cracking job at a fair price.
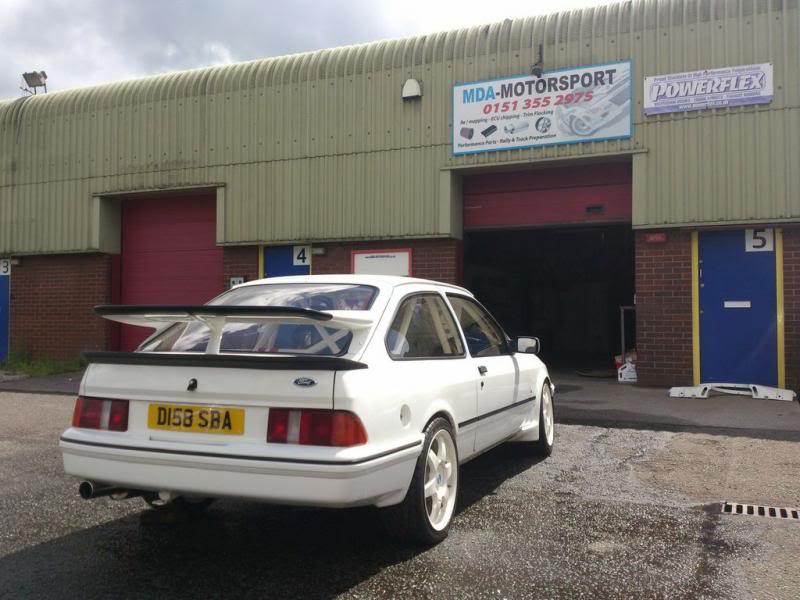
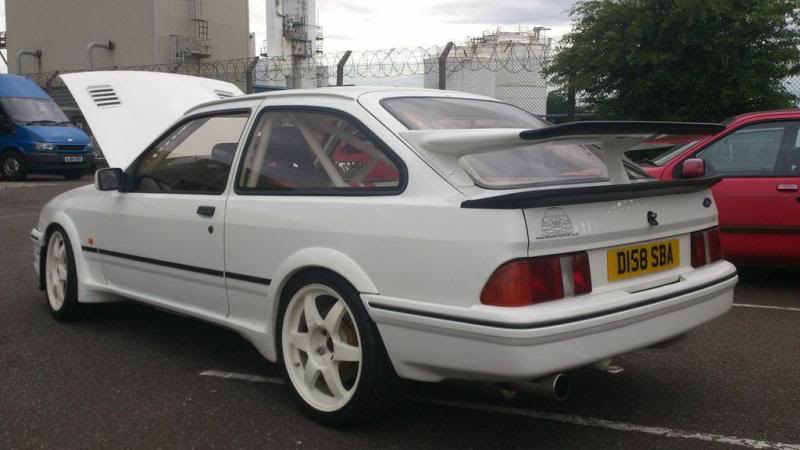
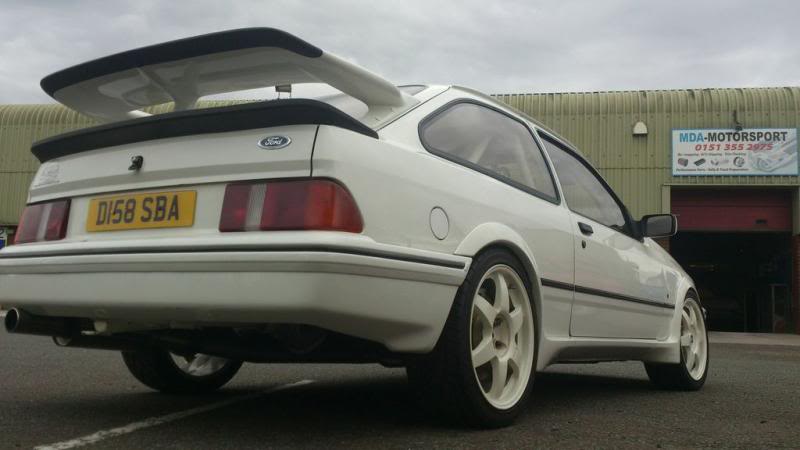
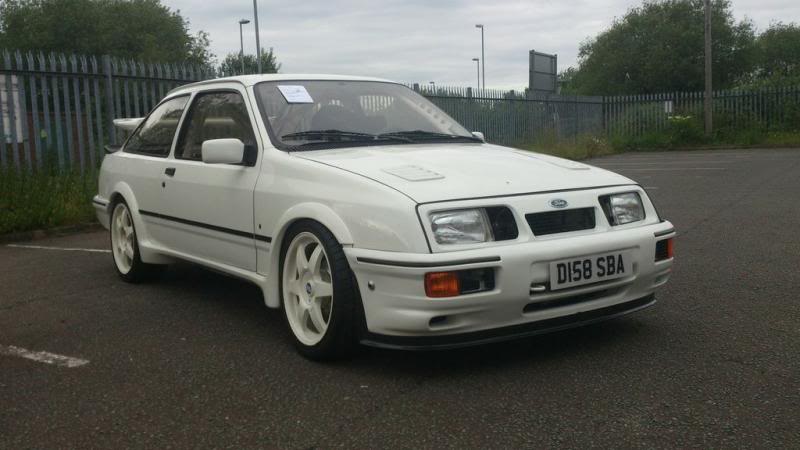
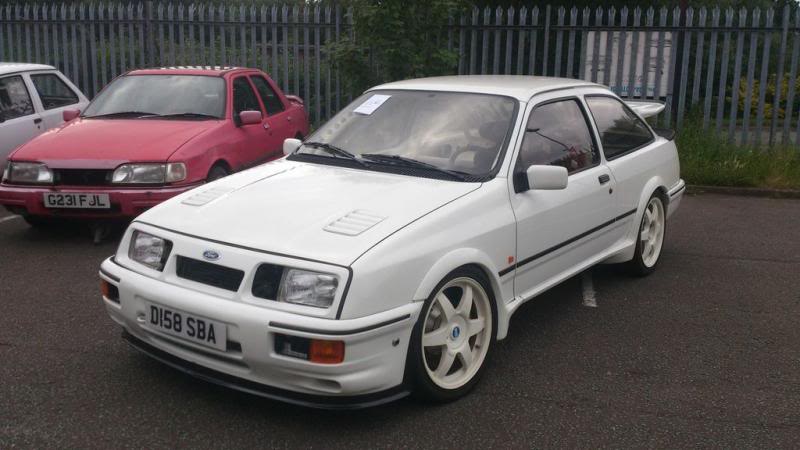
One of Mat's friends Rich is a keen photographer and so as a bit of a send off arranged a mini photo shoot of the car before it came back to me. So not quite everything completed on the car, but mission accomplished by Mat and Adrian at MDA before it came back to me to finish things off.
Before Rich turned up I had time to fit my 'new' mirrors, inspired by the Brooklyn Motorsport gp A touring car that also used them instead of the more common Vitaloni's. They look great and I'm well chuffed with them, although they're not as light as they look, so style points only I'm afraid!
Rich really came up with the goods for an amateur photog; This is what I was getting with my camera phone;
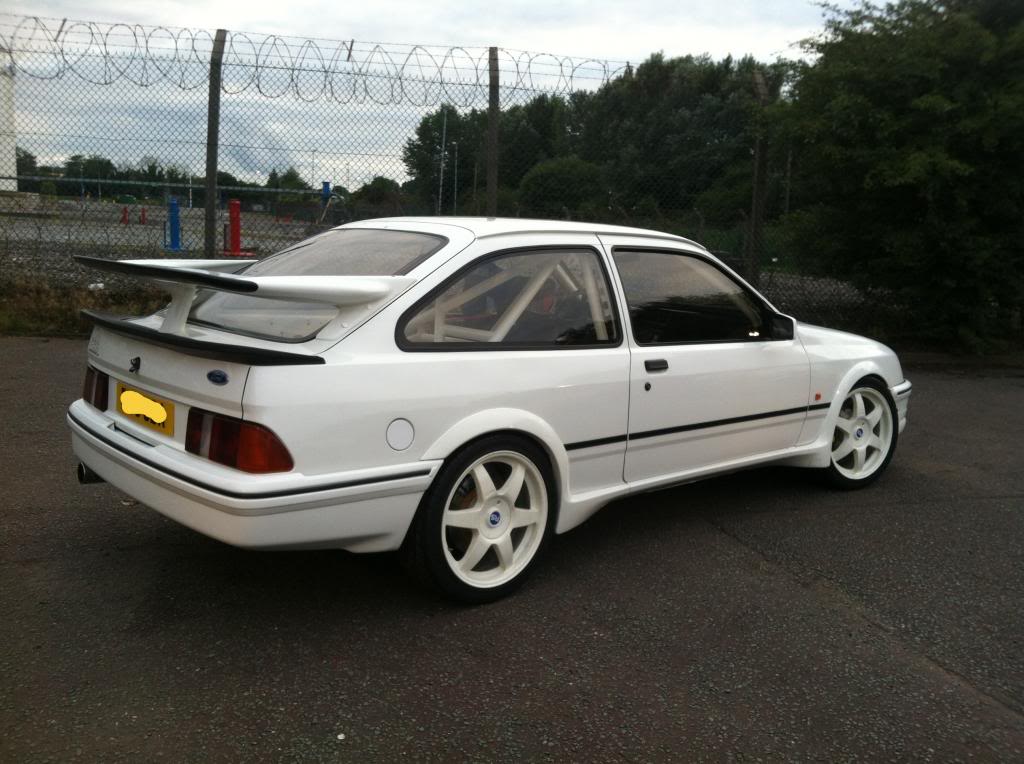
And this is what Rich got! (forgive my crude no. plate edit)

Bit of a difference..


Came out well didn't they? I was well chuffed with those. Many thanks for Rich and Mat for taking the trouble.
So a few days later it's back home!
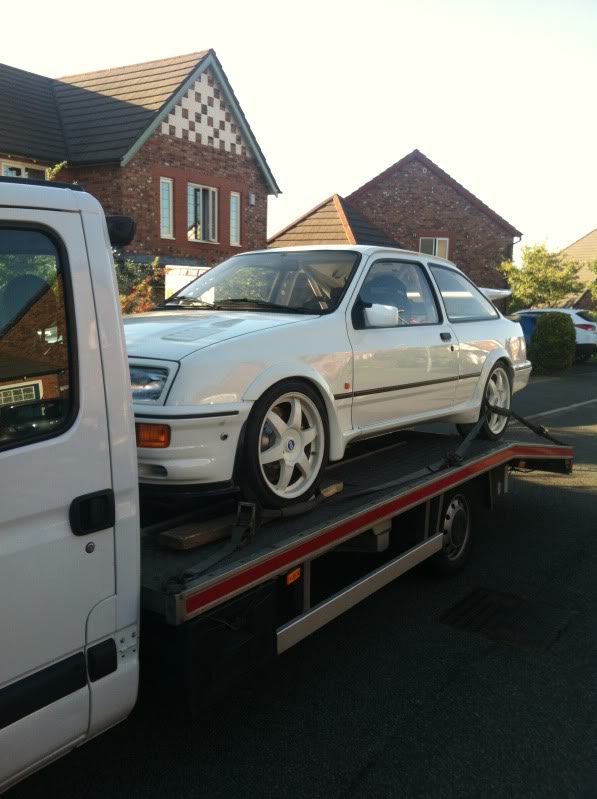
Phil at A2B near Chester doing the honours at very short notice & comes highly recommended.
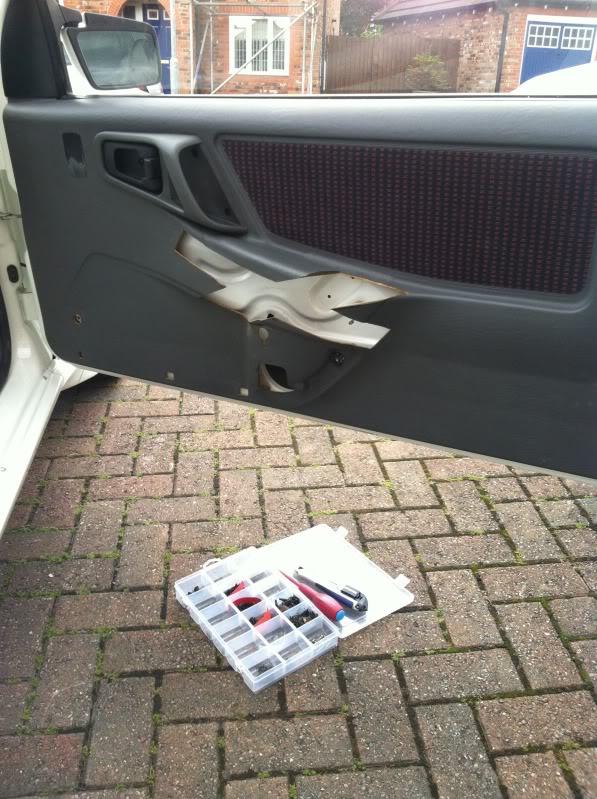
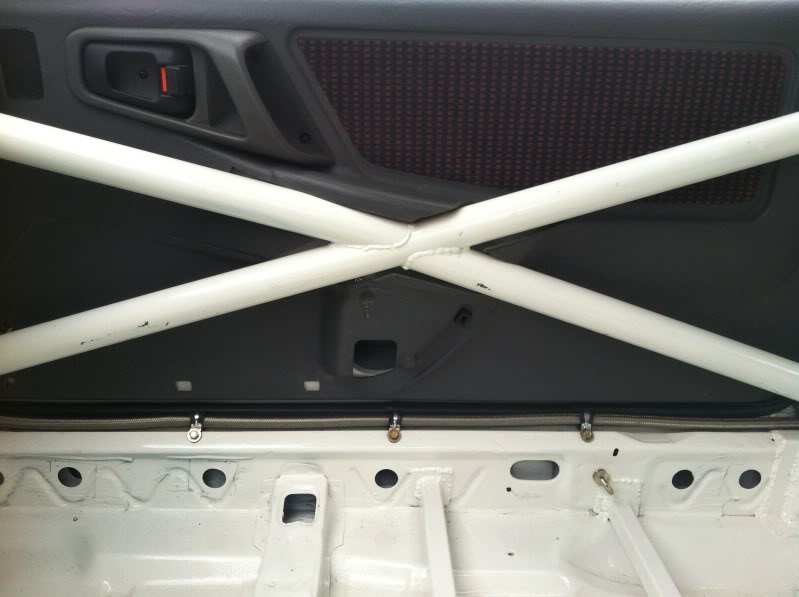
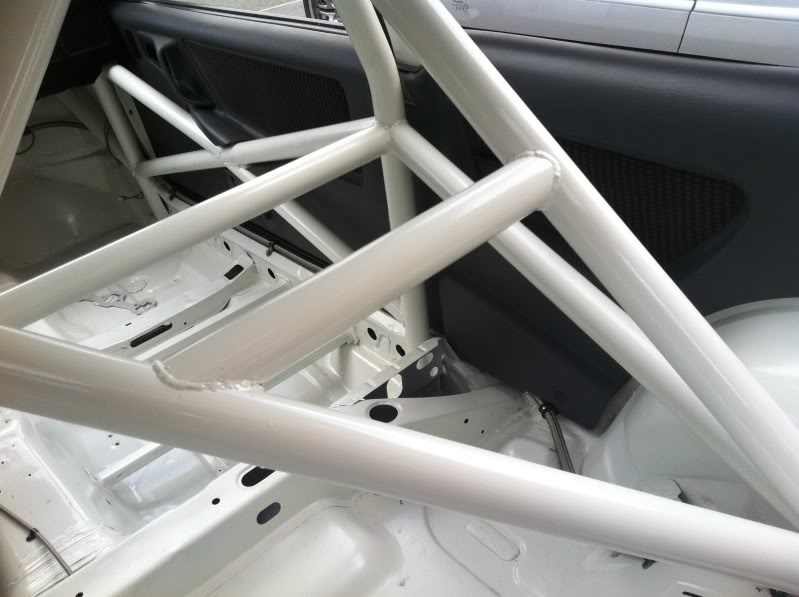
So, I spent a bit of time thinking about where to start first, and as I was soon bored of looking at bare door panels, I decided to take a saw and a knife to my door cards. I was keen to emulate the gp A touring cars by retaining the original door cards and rear 1/4 panels which mean't a bit of surgery to fit around the cage bars.
I did the rear 1/4 panels too, with some surgery required around the original aperture for the seat belts which coincides with the cage hoop by the door frame.
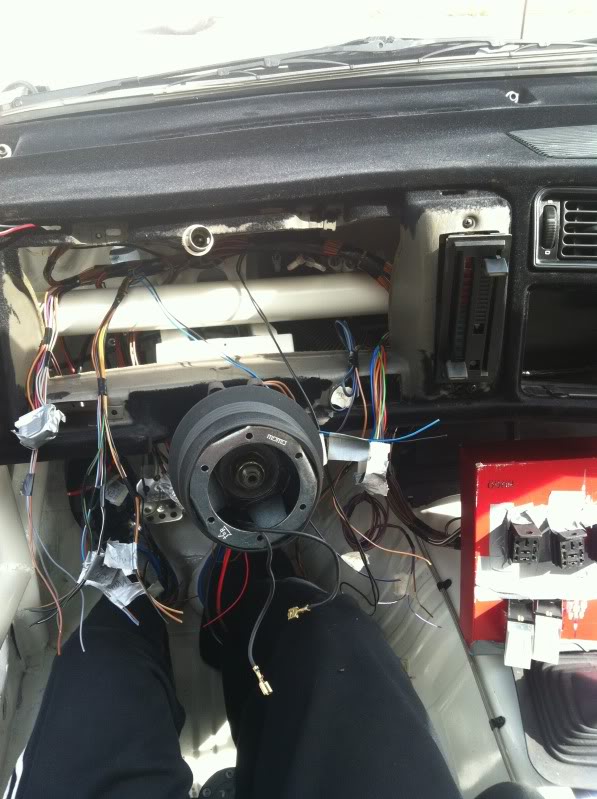
After that the wiring was looming large on the horizon, and it was the last large job to complete. After doing as much prep as possible the time came to actually fit it in the car and start figuring out where to route everything and how to mount the fuses and relays etc.
I used a card box to act as a centre console and continued labelling and routing everything as I went.
After getting everything basically in position I began making a basic console from some alloy sheet. I don't think the likes of Spec R need worry about my prowess with a bench vice and a hammer just yet...
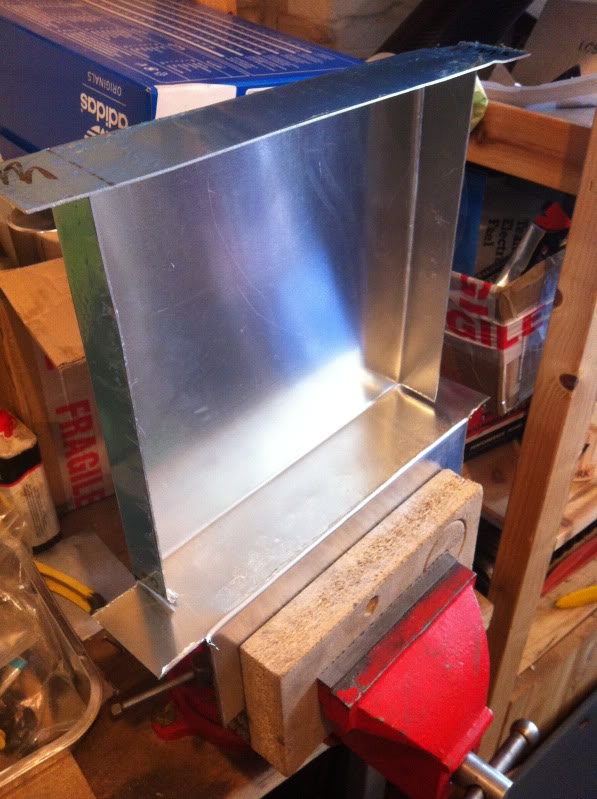
With a basic console rigged up and with the help of my mate Dave who is a trained HGV electrician we've slowly been working our way through all the connections, and routing. With nothing quite the same to replicate we've been slowly feeling our way through it and trying to think of everything possible before making that final cut..
I made sure I had plenty of terminals, heat shrink, braiding etc etc you name it I thought I had it, but it still didn't stop me running out of certain sizes of things and having to re-order more. Fortunately the weather was kind to us over several days of working on it on the driveway and we've made decent progress.

I've tried to future proof things as much as possible just by going that extra yard; for example the regs for cars in sprints and hill climbs need to have a yellow battery earth cable, so I made sure I got some yellow heat shrink in to cover the cable properly. Likewise with heat sleeving stuff in the engine bay and doing my best to do a neat job, but it's not a full on motorsport spec loom. Just nice and tidy and new. I've got to the point where I'm a few joins and terminals away from finishing. Once I've turned the key and hopefully not blown anything up I can do some more tidying and clipping everything away.
I'll keep you posted - in the meantime you hear a loud boom over the weekend it's not a fighter jet going supersonic, it's me blowing up half of cheshire when I turn the key..!
Oh, just sorted a set of flat face 5 spoke MO's in gp A fitment from Paul Linfoot which are 17's so without even turning a wheel in anger my 18" 6 spoke MO's are going to be moved on. The main motivation for this is having the flexibility to achieve the right set up on the track (geometry etc), rather than using a geometry governed by clearance for the 18's, which are really more at home on something like an Es Cos.
Cheers all,
Iain
PS Good luck to Mat who's running his maxi Escort for the first time in anger at the Prom rally tmw in W Kirkby!
Getting close.. (I think I say that every time..)
Well the car is back home now, and I'm just a few hours work on it away from being able to turn the key; although when I can find those few hours remains to be seen!
To carry on from where I left off, back at MDA Mat had sourced and fitted custom power steering hoses. Then after a fair wait which saw Ford Fair (my original deadline) come and go I managed to get the car to Russ Fellows down the road in Chester to sort the exhaust manifold on the drivers side, and tweak the down pipes around the Tremec TKO box.

Russ re-built the manifold to avoid the steering column, working off the original flanges and re-using the original collector and basically re-doing everything in between. After a couple of days (and nights) Russ produced the goods and did a cracking job at a fair price.

One of Mat's friends Rich is a keen photographer and so as a bit of a send off arranged a mini photo shoot of the car before it came back to me. So not quite everything completed on the car, but mission accomplished by Mat and Adrian at MDA before it came back to me to finish things off.
Before Rich turned up I had time to fit my 'new' mirrors, inspired by the Brooklyn Motorsport gp A touring car that also used them instead of the more common Vitaloni's. They look great and I'm well chuffed with them, although they're not as light as they look, so style points only I'm afraid!

Rich really came up with the goods for an amateur photog; This is what I was getting with my camera phone;

And this is what Rich got! (forgive my crude no. plate edit)

Bit of a difference..


Came out well didn't they? I was well chuffed with those. Many thanks for Rich and Mat for taking the trouble.
So a few days later it's back home!

Phil at A2B near Chester doing the honours at very short notice & comes highly recommended.
So, I spent a bit of time thinking about where to start first, and as I was soon bored of looking at bare door panels, I decided to take a saw and a knife to my door cards. I was keen to emulate the gp A touring cars by retaining the original door cards and rear 1/4 panels which mean't a bit of surgery to fit around the cage bars.


I did the rear 1/4 panels too, with some surgery required around the original aperture for the seat belts which coincides with the cage hoop by the door frame.

After that the wiring was looming large on the horizon, and it was the last large job to complete. After doing as much prep as possible the time came to actually fit it in the car and start figuring out where to route everything and how to mount the fuses and relays etc.
I used a card box to act as a centre console and continued labelling and routing everything as I went.

After getting everything basically in position I began making a basic console from some alloy sheet. I don't think the likes of Spec R need worry about my prowess with a bench vice and a hammer just yet...

With a basic console rigged up and with the help of my mate Dave who is a trained HGV electrician we've slowly been working our way through all the connections, and routing. With nothing quite the same to replicate we've been slowly feeling our way through it and trying to think of everything possible before making that final cut..
I made sure I had plenty of terminals, heat shrink, braiding etc etc you name it I thought I had it, but it still didn't stop me running out of certain sizes of things and having to re-order more. Fortunately the weather was kind to us over several days of working on it on the driveway and we've made decent progress.

I've tried to future proof things as much as possible just by going that extra yard; for example the regs for cars in sprints and hill climbs need to have a yellow battery earth cable, so I made sure I got some yellow heat shrink in to cover the cable properly. Likewise with heat sleeving stuff in the engine bay and doing my best to do a neat job, but it's not a full on motorsport spec loom. Just nice and tidy and new. I've got to the point where I'm a few joins and terminals away from finishing. Once I've turned the key and hopefully not blown anything up I can do some more tidying and clipping everything away.
I'll keep you posted - in the meantime you hear a loud boom over the weekend it's not a fighter jet going supersonic, it's me blowing up half of cheshire when I turn the key..!
Oh, just sorted a set of flat face 5 spoke MO's in gp A fitment from Paul Linfoot which are 17's so without even turning a wheel in anger my 18" 6 spoke MO's are going to be moved on. The main motivation for this is having the flexibility to achieve the right set up on the track (geometry etc), rather than using a geometry governed by clearance for the 18's, which are really more at home on something like an Es Cos.
Cheers all,
Iain
PS Good luck to Mat who's running his maxi Escort for the first time in anger at the Prom rally tmw in W Kirkby!
Last edited by IainRS1700T; 06-09-2013 at 10:11 PM.
07-09-2013 | 12:18 AM
#235

Regular Contributor
Joined: Jan 2011
Posts: 225
Likes: 1
From: west yorkshire
Evening Ian, looking stunning, have a bit more faith in your ability's lol,this isn't some condom car down the retail park,you are doing a proper job, looking forward to seeing and hearing it on full chat when you get it on track,take care speak soon Paul
07-09-2013 | 01:50 PM
#237
Thread Starter
PassionFord Regular
Joined: Jan 2005
Posts: 432
Likes: 8
From: Cheshire
Cheers Fellas
Mind you I've just read thru this page again and I seem to be saying 'nearly there' and 'getting close' quite a few times!
I'm moving house in about three weeks - only down the road - it would be nice to drive it straight into its nice new double garage! Any track days in Sept are on the back burner for the time being until we've moved - but I'll need to make it a long drive to its MOT to get some miles in
Iain
07-09-2013 | 08:20 PM
#239
Thread Starter
PassionFord Regular
Joined: Jan 2005
Posts: 432
Likes: 8
From: Cheshire
Cheers Steve
I am, but even more so if it will start, go, and stop alright!
Got a feeling it will stop alright, but I need to get it going first then I'll begin to relax a bit more. A lot of unknowns at the moment so I'm not counting my chickens just yet!
Cheers
Iain
I am, but even more so if it will start, go, and stop alright!
Got a feeling it will stop alright, but I need to get it going first then I'll begin to relax a bit more. A lot of unknowns at the moment so I'm not counting my chickens just yet!
Cheers
Iain