RS Turbo S2 - Engine bay and underside resto
 30-05-2011, 10:52 PM
#81
Regular Contributor

nice thread fella,can sympathise with all hard work on the underside not easy and takes ages. Must of cost you a fortune in clips from ford,worth it for the finish it gives. When you putting all that effort into it not worth cutting corners,nice to see you not rushing it. As for showing it carnt see why you wont win something, least you going to get is allot of people coming up to you and telling you wot a nice car you have and how great it is you done it all yourself. Keep going fella inspiring me to get mine to same standard
 02-06-2011, 09:37 AM
#82
Will it ever end !!!!!!!
Thread Starter

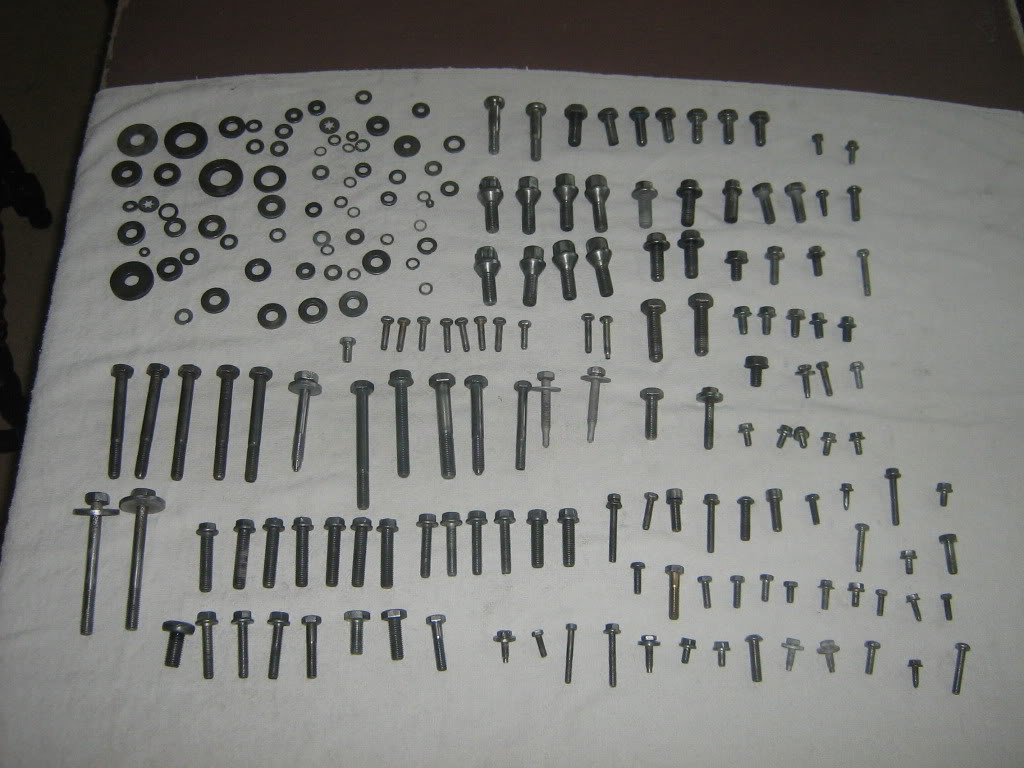
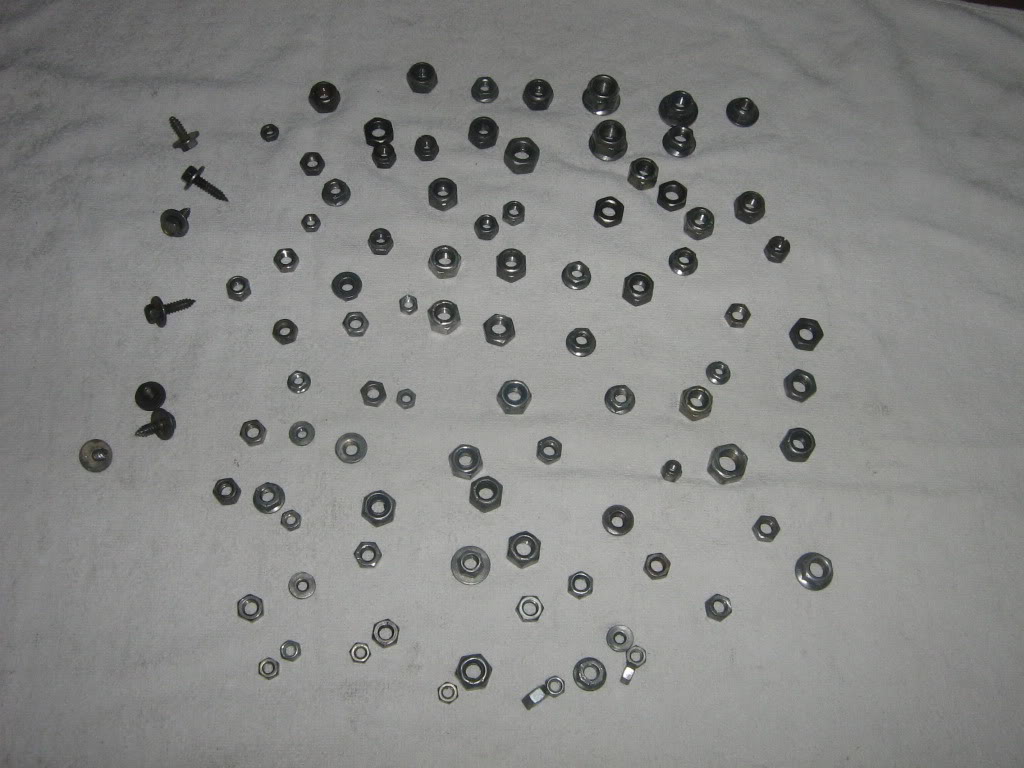
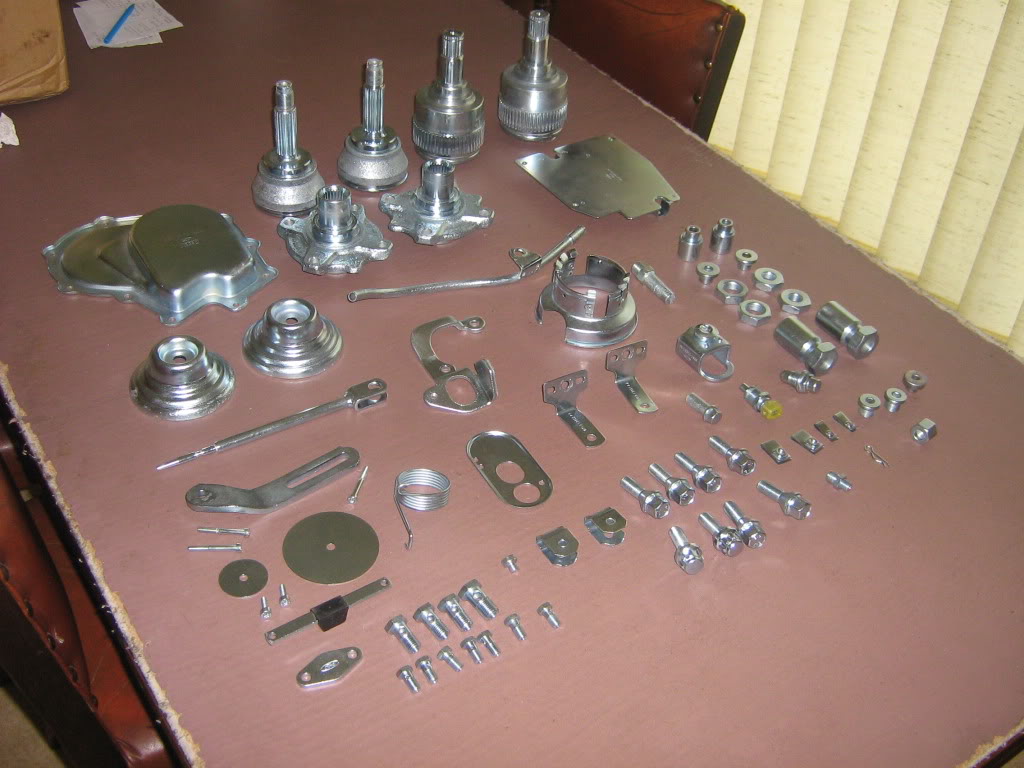
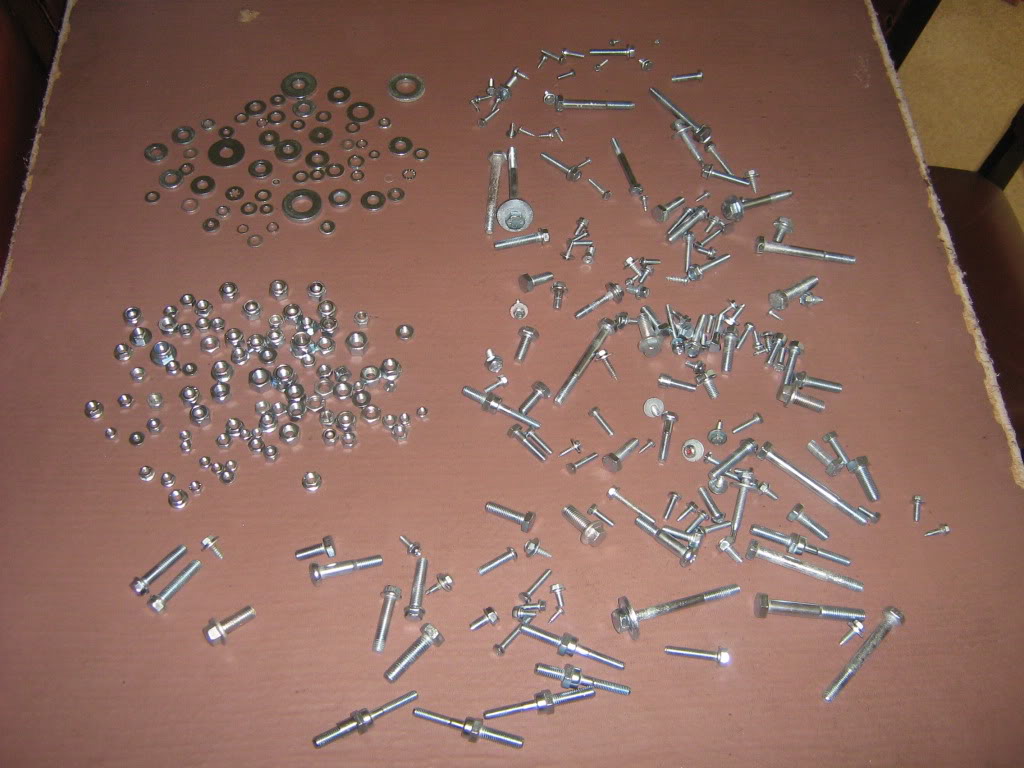
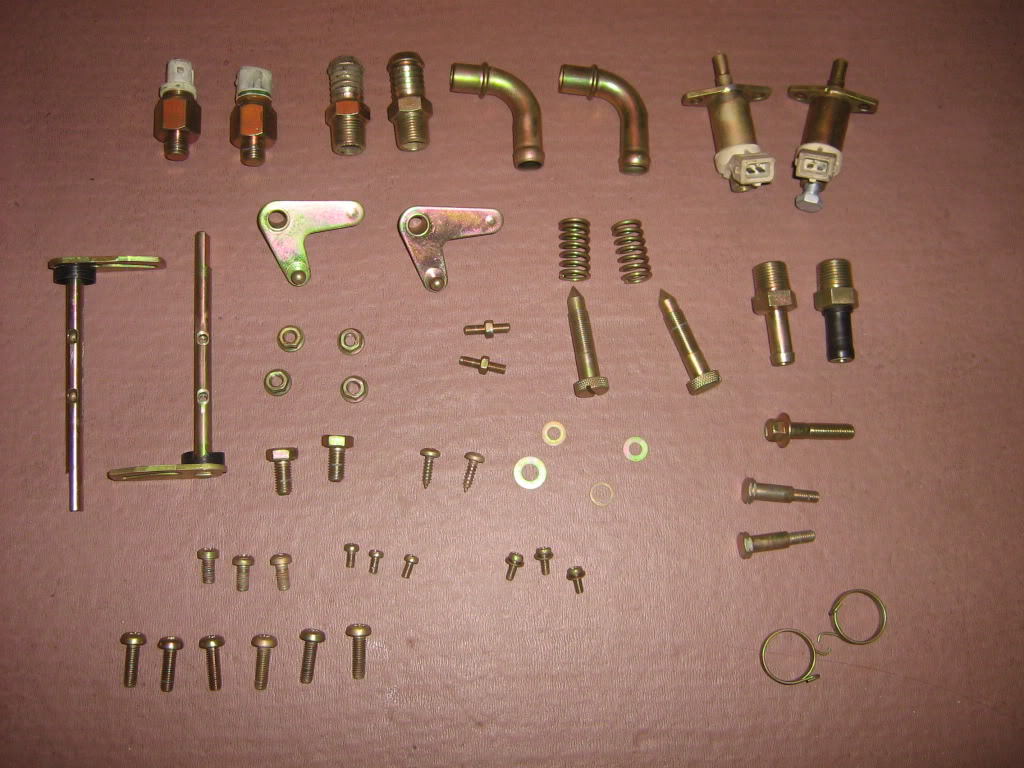
Update time - now for the last two days I have spent about 6 hours standing and polishing all 397 nuts, bolts, washers, screws, sensors etc etc in prep for zinc plating - i know it sounds like a lot of effort but will reflect in a better finish once the zinc is done.
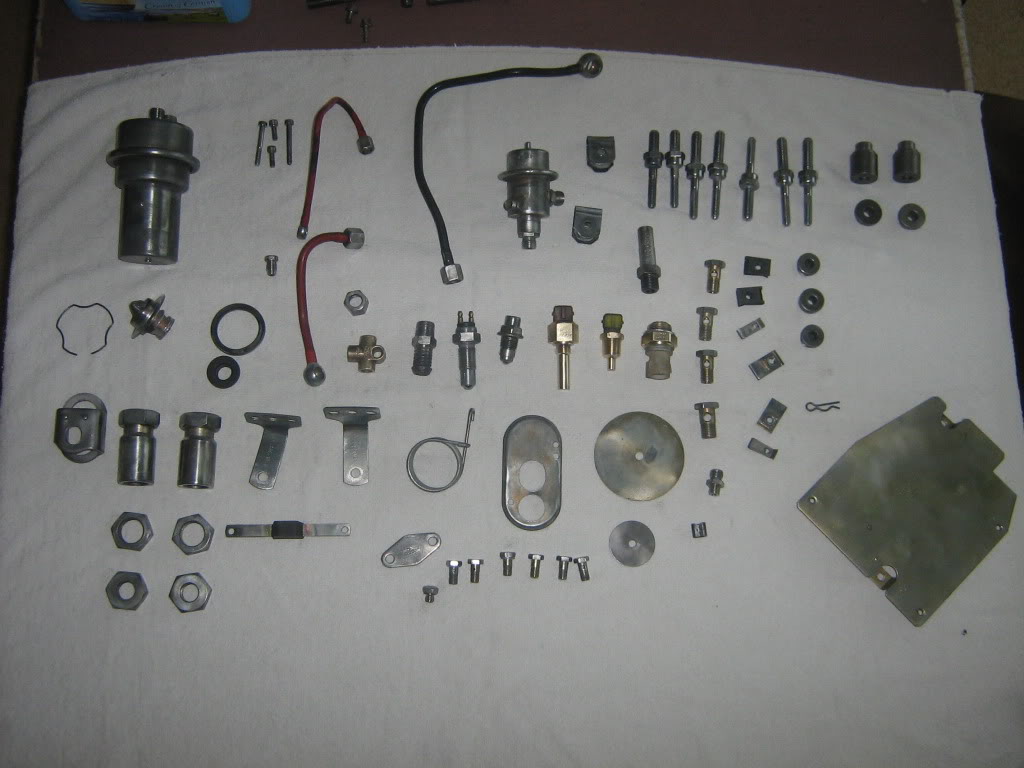
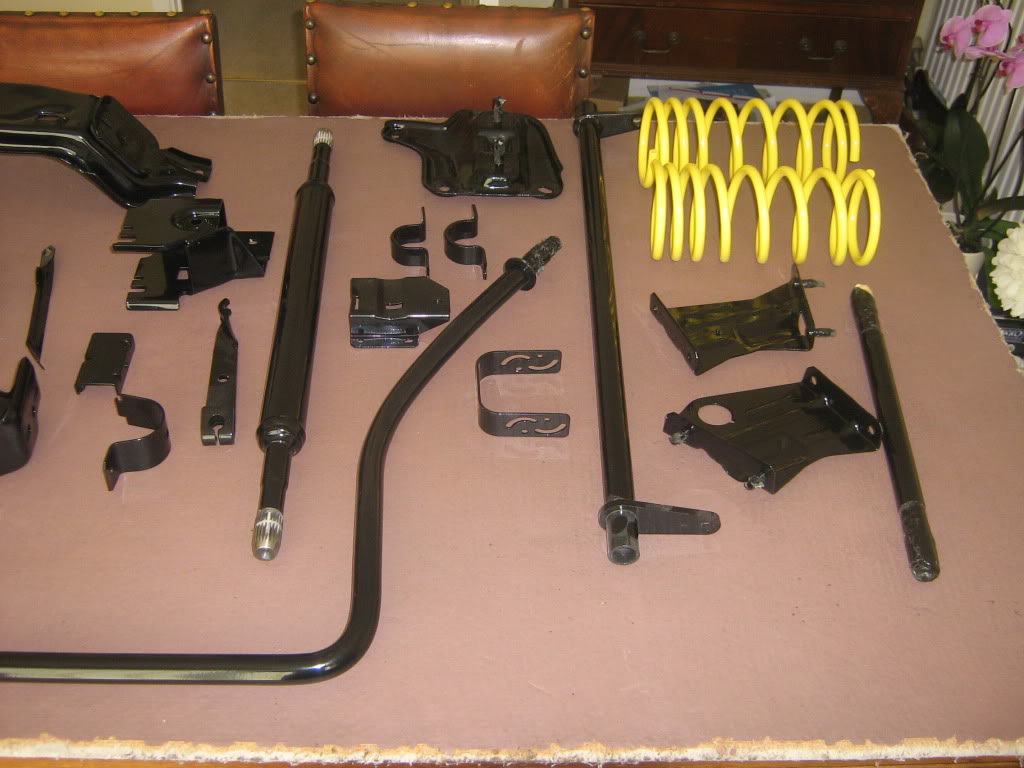
Also made use of my friends wire wheel and blasting machine to prep up some more items - shocks will be painted and everything else done in zinc - well apart from the manifold
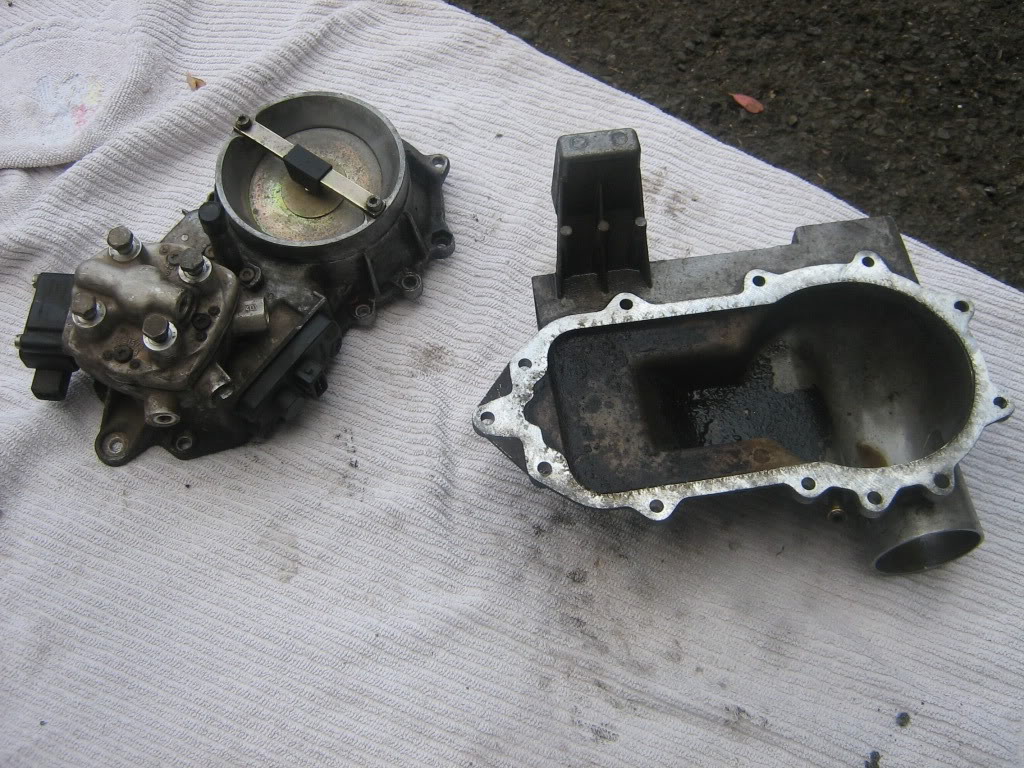
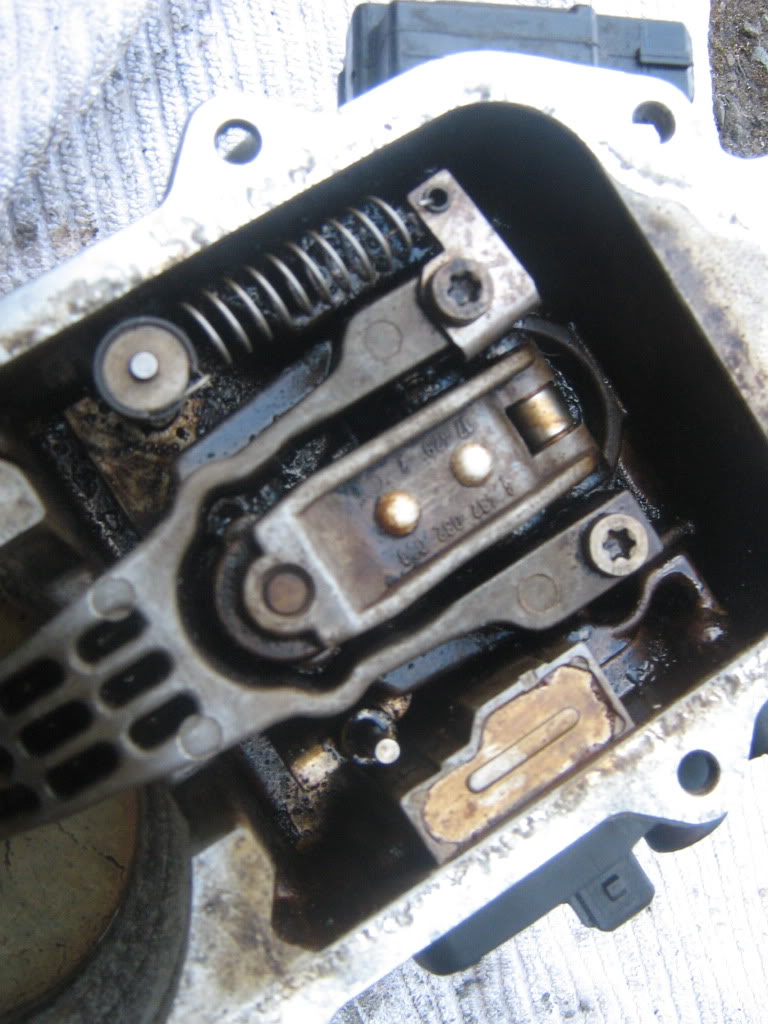
Also stripped the metering unit down ready for a clean up - i have a new gasket for this so when back together will be minty but not even started on that yet.
, just stripped to check condition.
Gearbox taken off and again will be painted etc - new gaskets

Also just been to pick up the powdercoating 28 items in total just off the engine bay !!!
All in all looking pretty good.
Need to get the engine bay in paint now over the next couple of weeks so that the reassembly can finally get underway - not looking forward to that !!
Also made use of my friends wire wheel and blasting machine to prep up some more items - shocks will be painted and everything else done in zinc - well apart from the manifold
Also stripped the metering unit down ready for a clean up - i have a new gasket for this so when back together will be minty but not even started on that yet.
, just stripped to check condition.
Gearbox taken off and again will be painted etc - new gaskets
Also just been to pick up the powdercoating 28 items in total just off the engine bay !!!
All in all looking pretty good.
Need to get the engine bay in paint now over the next couple of weeks so that the reassembly can finally get underway - not looking forward to that !!
Last edited by s2turbsZVH; 14-06-2011 at 09:35 PM.
 06-06-2011, 10:54 AM
#84
Will it ever end !!!!!!!
Thread Starter
Should be - in the end !
Took all the 397 nuts and bolts and screws and other items including hubs, drivehsaft ends, manifold, gearbox plate etc etc for new zinc today and got a quote of just �70 to do the lot - definately chuffed with that. Will be ready in less than a week - prefect - maybe then i will be able to start assembly!
Took all the 397 nuts and bolts and screws and other items including hubs, drivehsaft ends, manifold, gearbox plate etc etc for new zinc today and got a quote of just �70 to do the lot - definately chuffed with that. Will be ready in less than a week - prefect - maybe then i will be able to start assembly!
 06-06-2011, 02:21 PM
#87
Will it ever end !!!!!!!
Thread Starter
I will try and do some more close up pictures of the powdercoating a bit later on as the overall picture doesnt show the quality (well given how bad they were before they were done anyway).
The items were blasted, primed and then powdercoated and althought cost me �190 to get done I am more than happy as i gave them 26 items in total so cost less than �7.50 per item which seems pretty fair given the size of some of the bits.
The items were blasted, primed and then powdercoated and althought cost me �190 to get done I am more than happy as i gave them 26 items in total so cost less than �7.50 per item which seems pretty fair given the size of some of the bits.

 09-06-2011, 04:26 PM
#89
Will it ever end !!!!!!!
Thread Starter
Just got all the zinc stuff back - i have gone for silver on the front the same as the back as opposed to the normal yellow/gold and given car will not be concourse it will just be a litlle different to the rest.
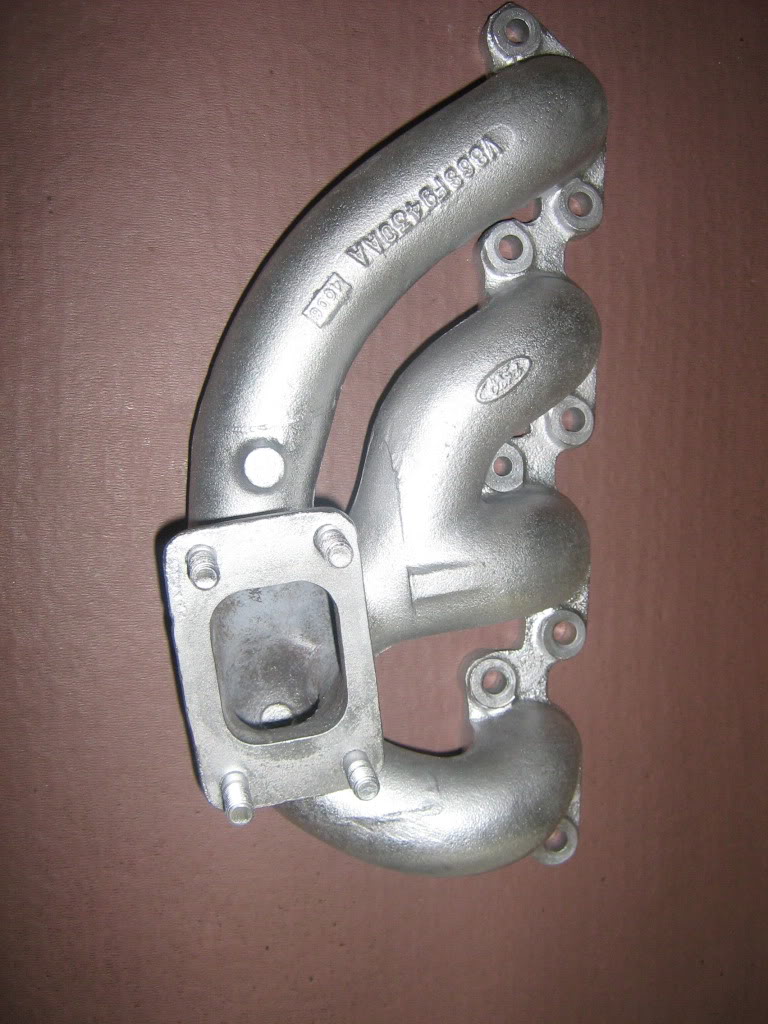
Even did the manifold to see how that holds up - cant be any worse than the usual rusty brown look !!!
Even did the manifold to see how that holds up - cant be any worse than the usual rusty brown look !!!
Last edited by s2turbsZVH; 15-06-2011 at 07:13 AM.
09-06-2011, 06:22 PM
#90
10K+ Poster!!

Coming on really nicely with you, should be a real minter when its done.
 14-06-2011, 09:22 PM
#92
Will it ever end !!!!!!!
Thread Starter
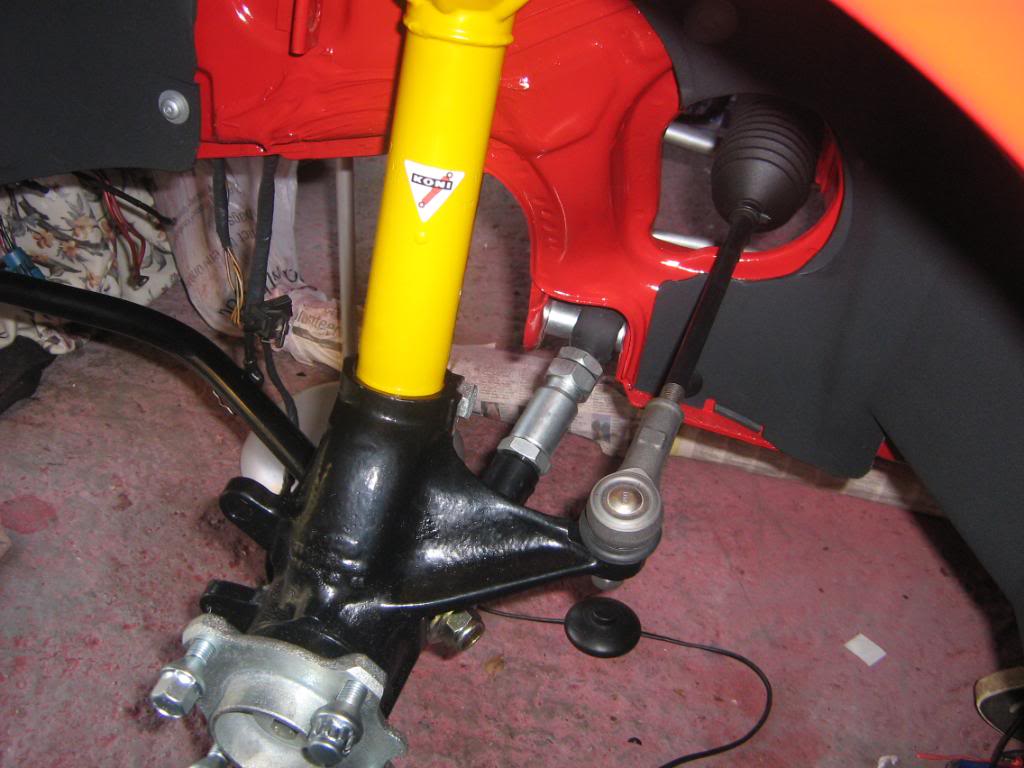
Started to put a few items back together now.
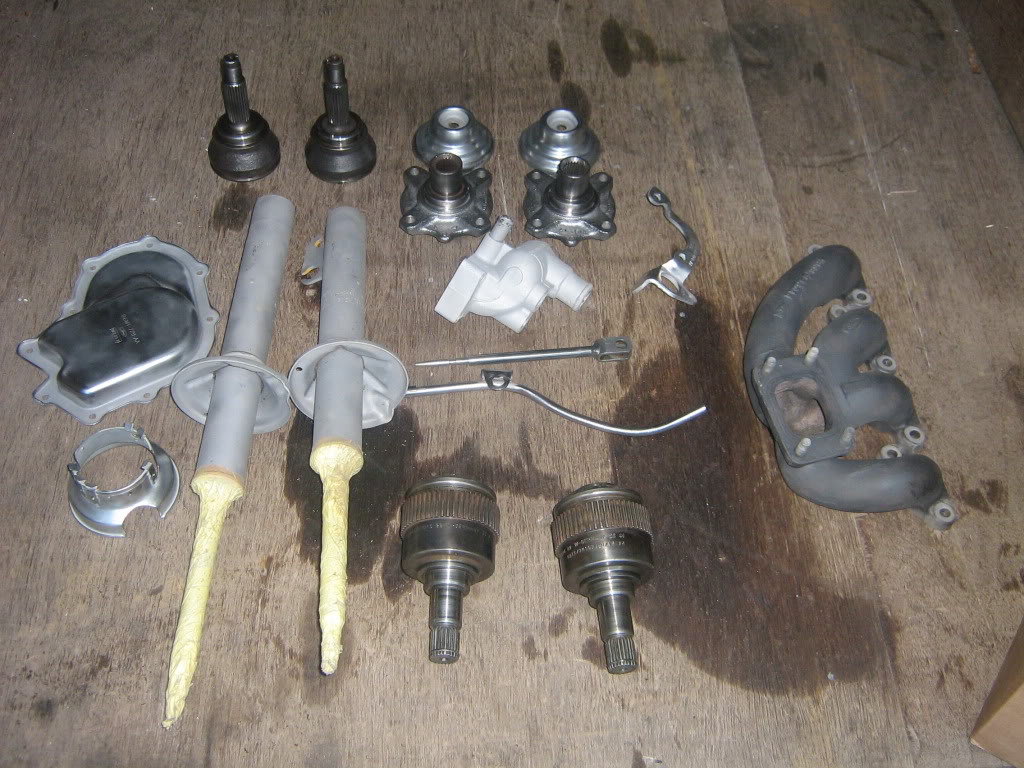
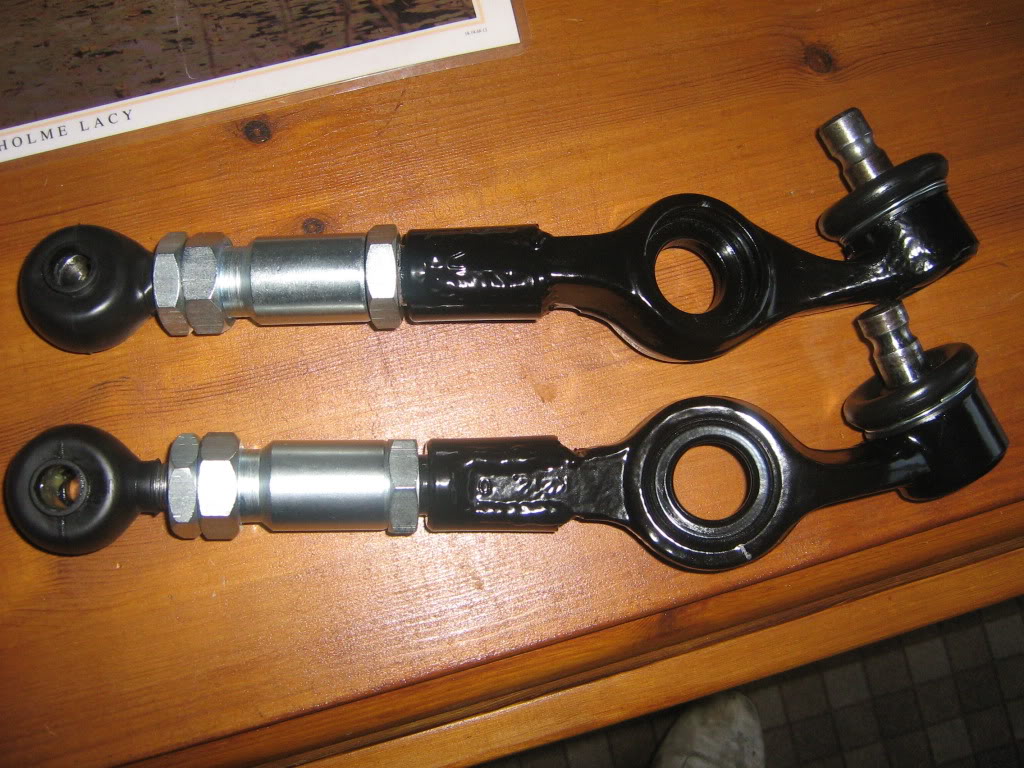
Starting with the Adjustable TCA - they have been re powdercoated, the nuts etc all re done in silver zinc, new rose joint dust covers and new ball joint rubbers - now looking nice and mint and definately better than when they were new !
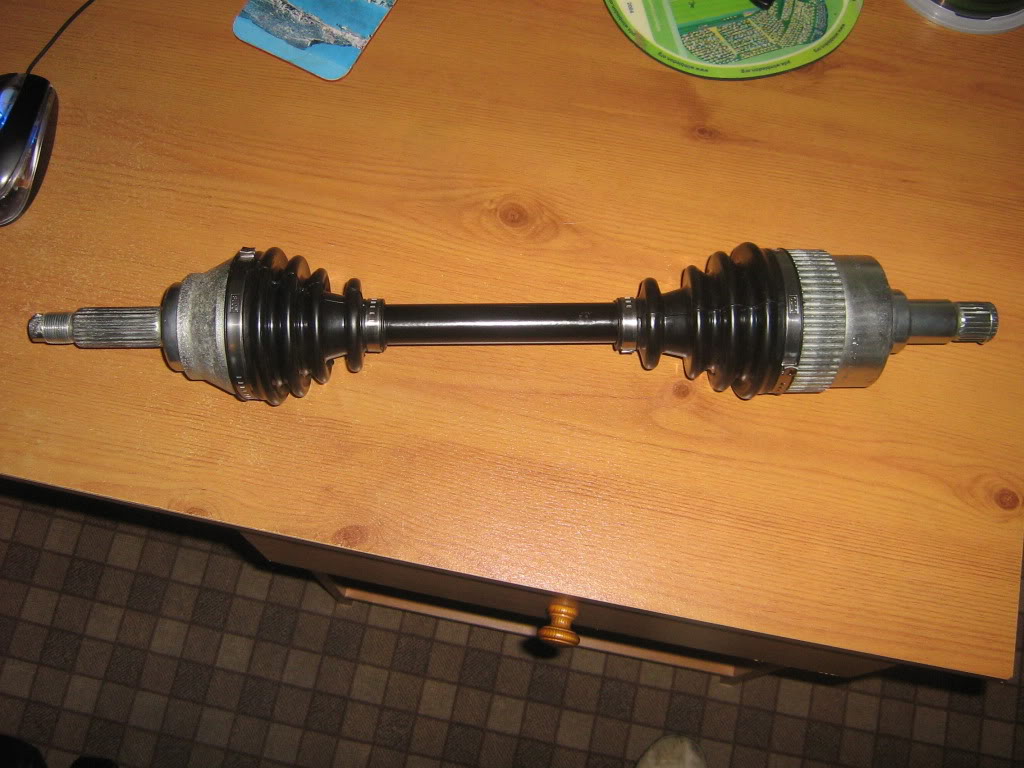
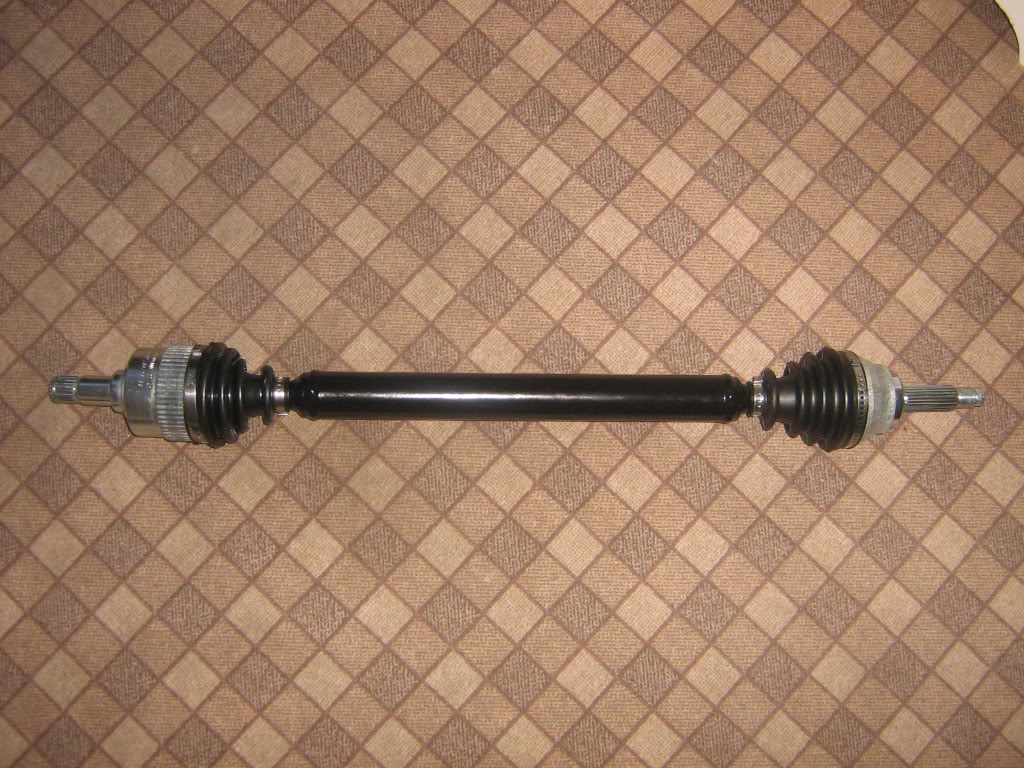
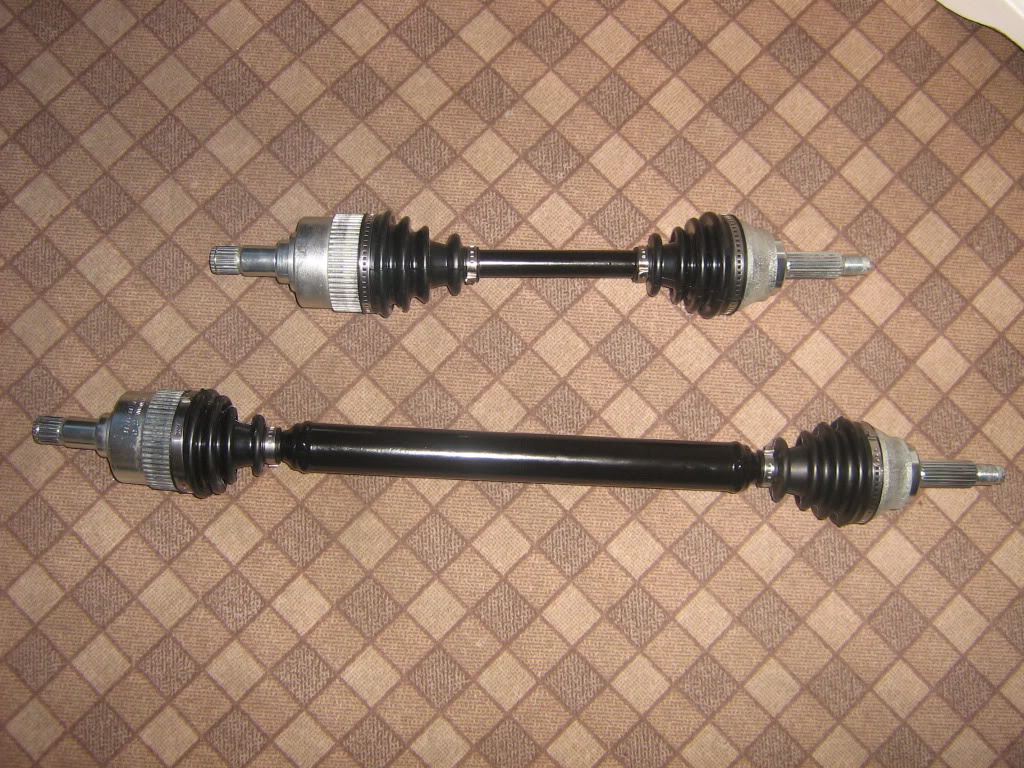
Also the driveshaft reassembled - all shaft end redone with silver zinc, the shafts now powdercoated and new CV gaiters, new clips and new grease - now as good as new again.
More to follow soon.
Starting with the Adjustable TCA - they have been re powdercoated, the nuts etc all re done in silver zinc, new rose joint dust covers and new ball joint rubbers - now looking nice and mint and definately better than when they were new !
Also the driveshaft reassembled - all shaft end redone with silver zinc, the shafts now powdercoated and new CV gaiters, new clips and new grease - now as good as new again.
More to follow soon.
Last edited by s2turbsZVH; 14-06-2011 at 09:32 PM.
20-06-2011, 08:50 PM
#93
Will it ever end !!!!!!!
Thread Starter
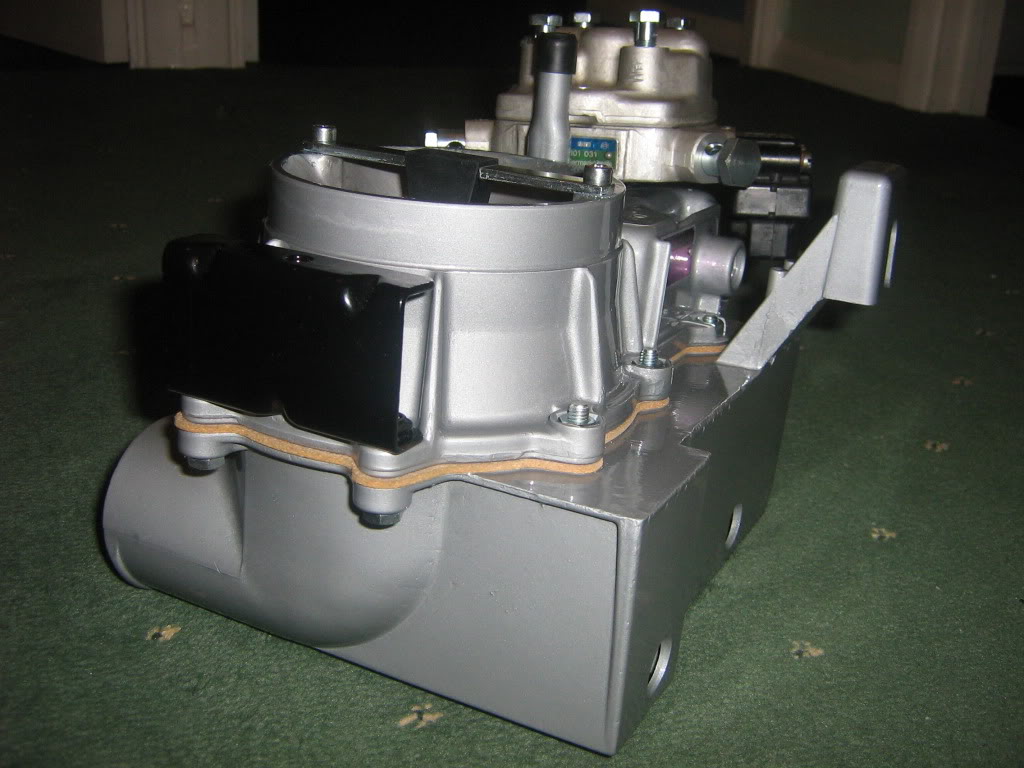
More parts that i have refurbed and all painted in 2pack lacquer to make them fuel and oil resistant 
The metering unit
Before

After


Thermostat housing

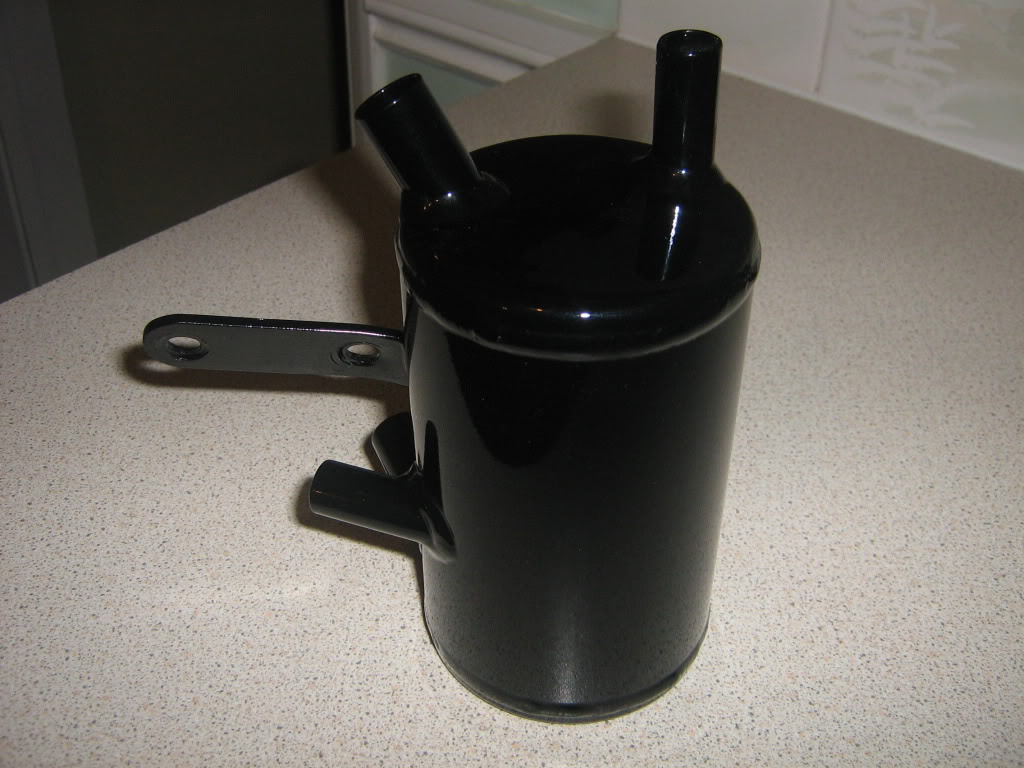
Fuel Accumulator
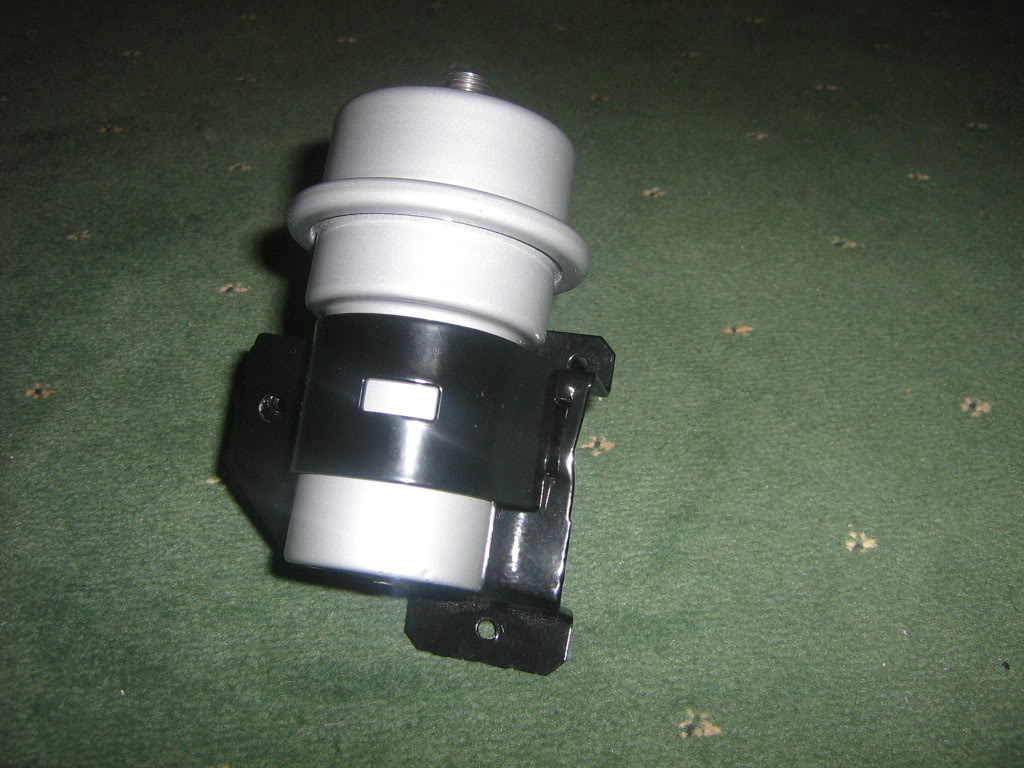
More to follow soon
The metering unit
Before
After
Thermostat housing
Fuel Accumulator
More to follow soon
03-07-2011, 02:17 PM
#94
Will it ever end !!!!!!!
Thread Starter
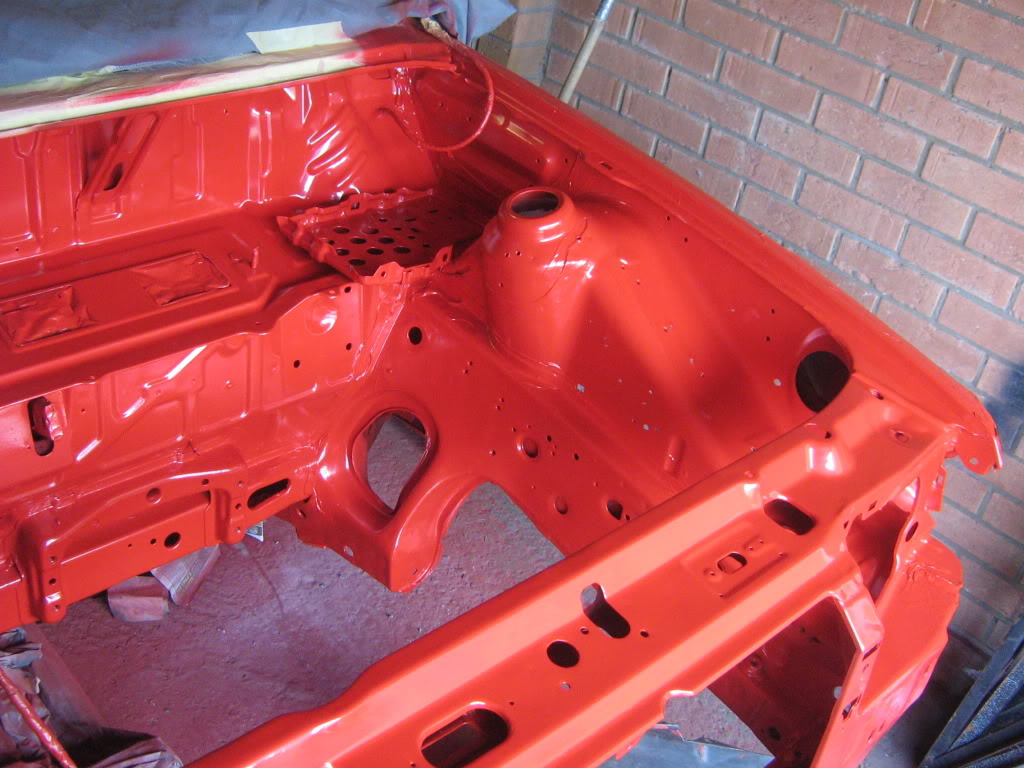
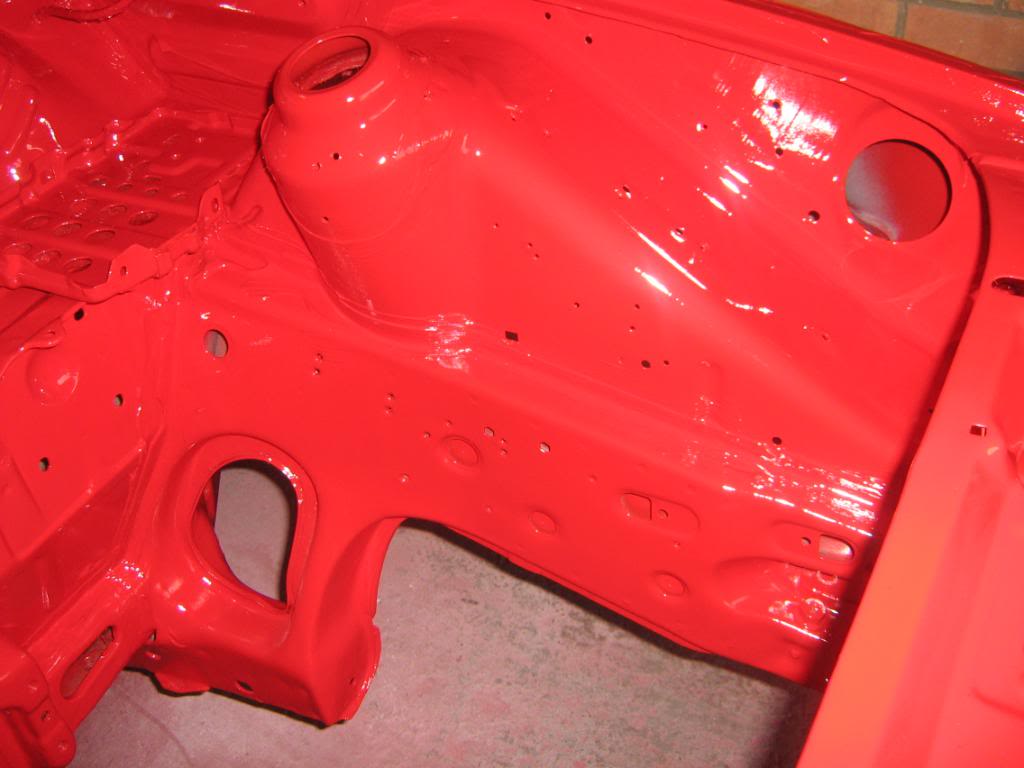
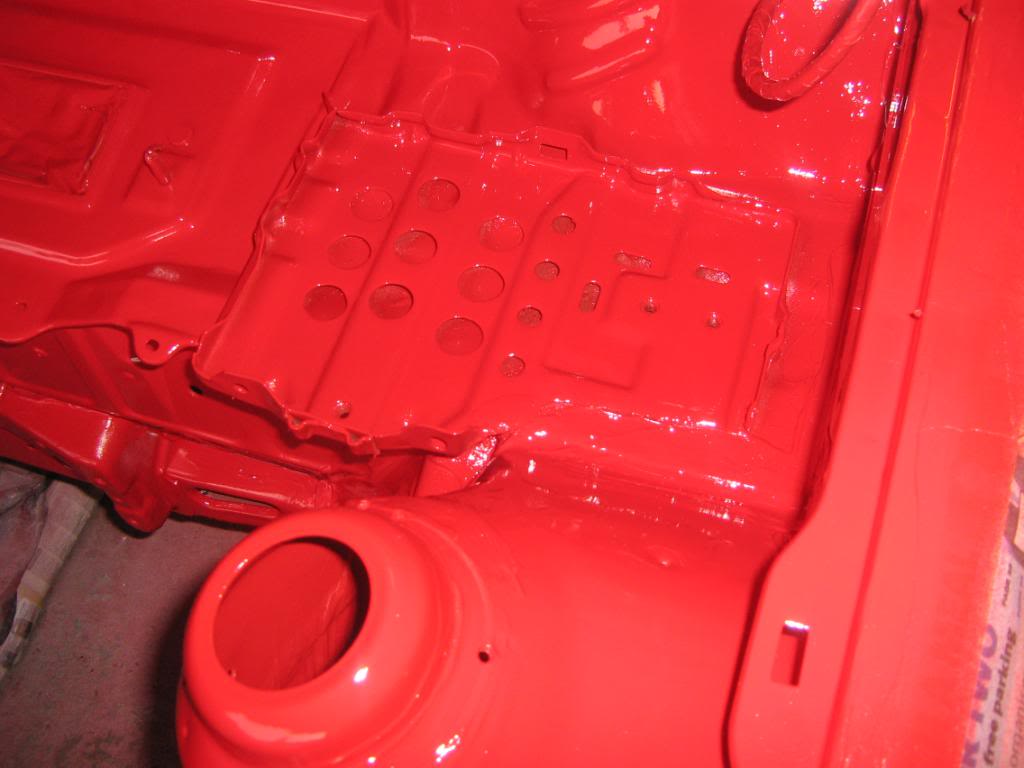
Engine bay now prepared and painted - two coats of overpaintable stone chip and then red oxide primer.
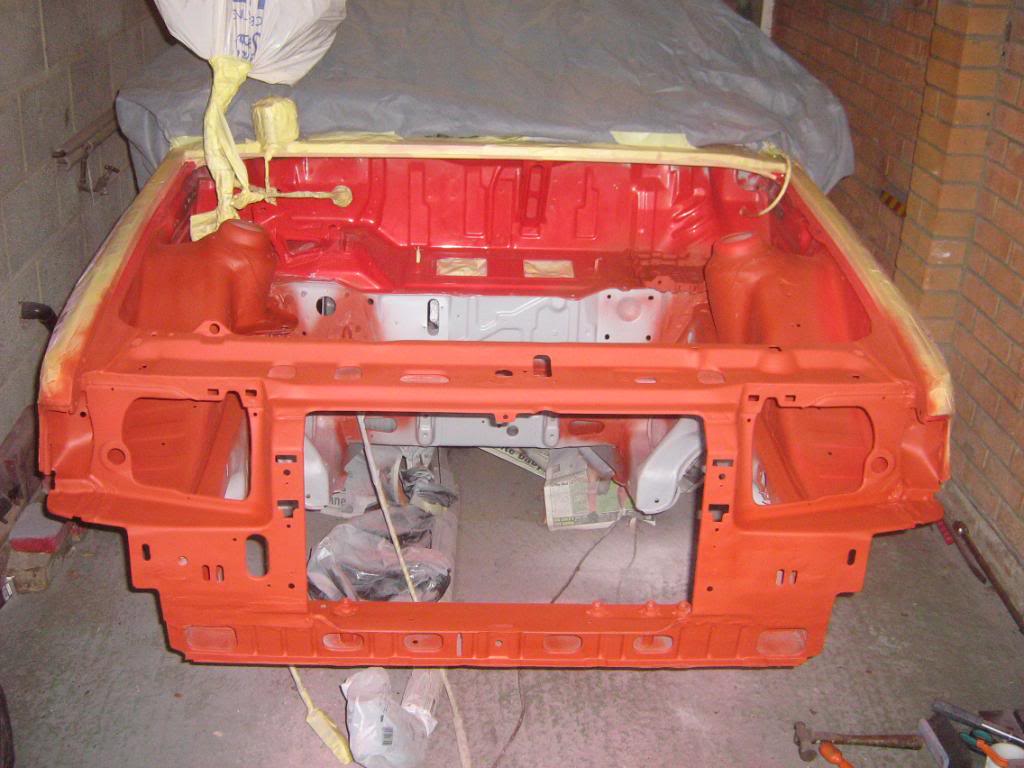
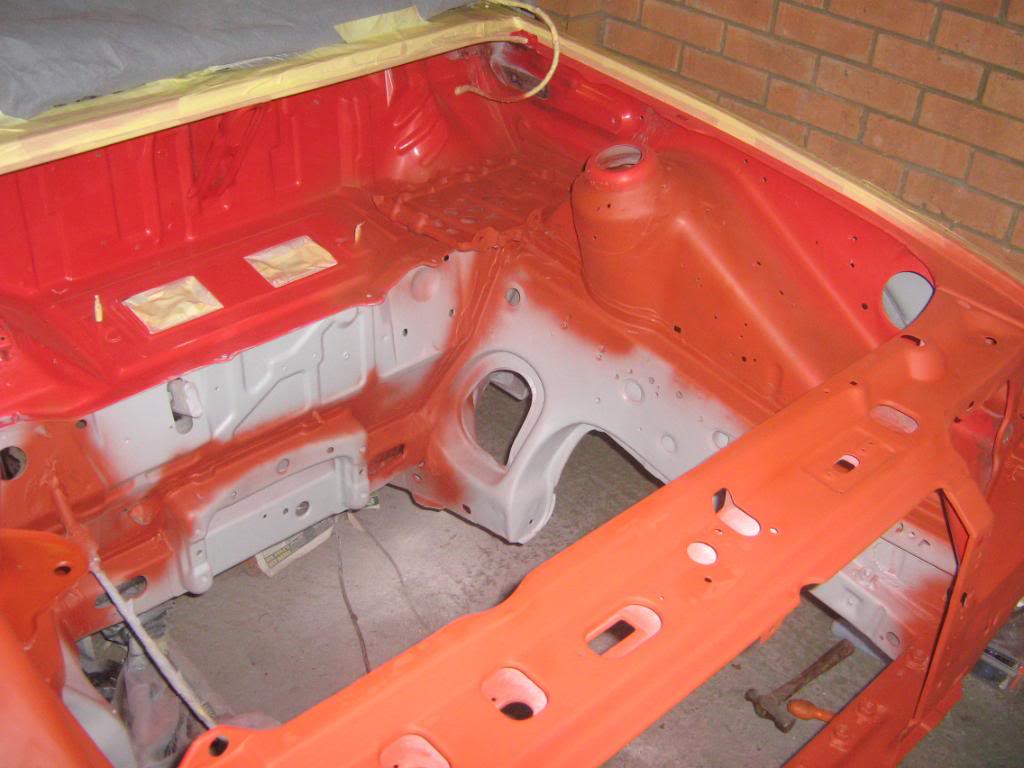
Now followed by the red - celly to be followed with two pack lacquer later to make it ping !!
Now followed by the red - celly to be followed with two pack lacquer later to make it ping !!
Last edited by s2turbsZVH; 03-07-2011 at 03:00 PM.
03-07-2011, 08:36 PM
#96
Will it ever end !!!!!!!
Thread Starter
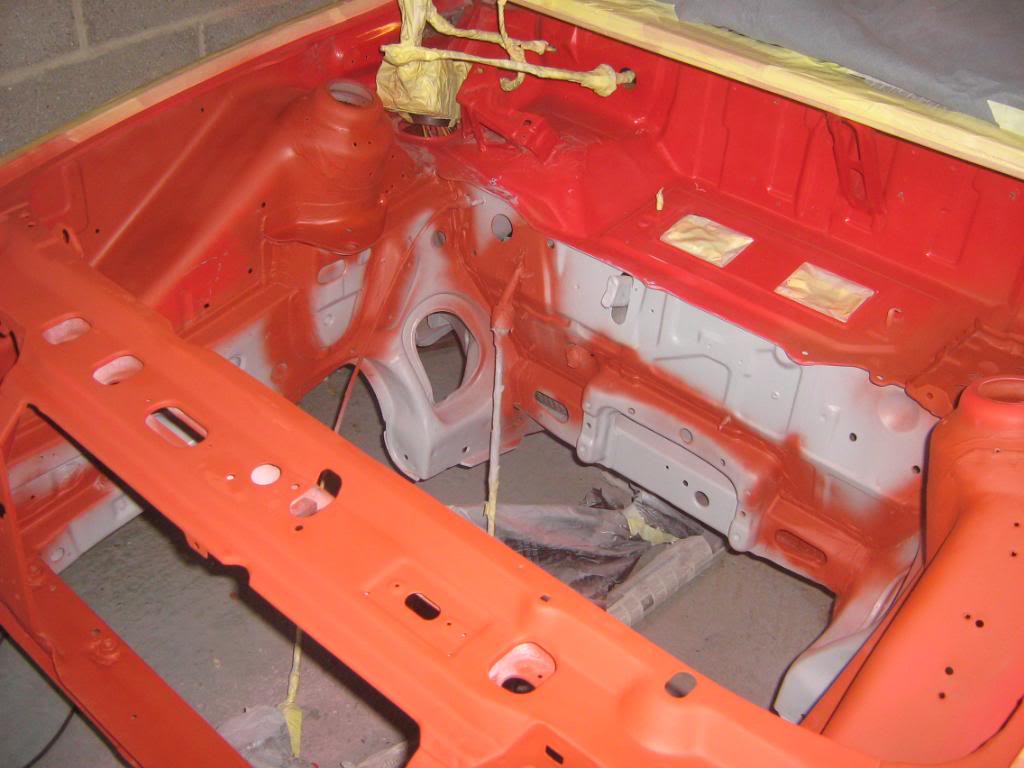
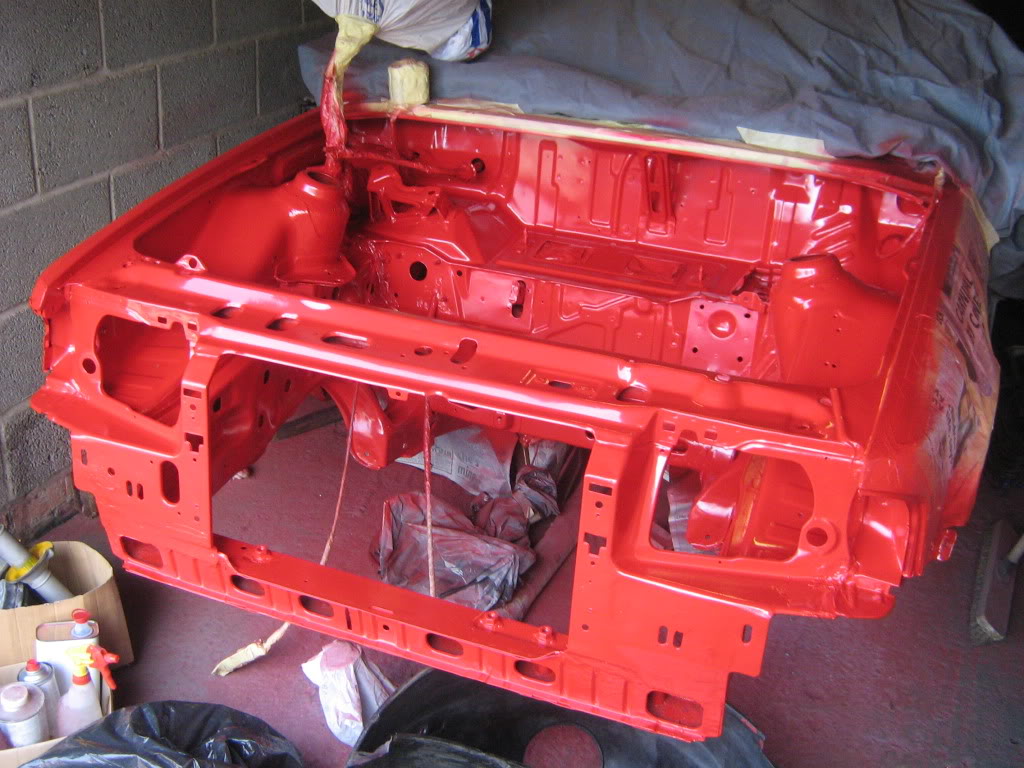
Now completed the two pack lacquer - certainly makes it ping !!
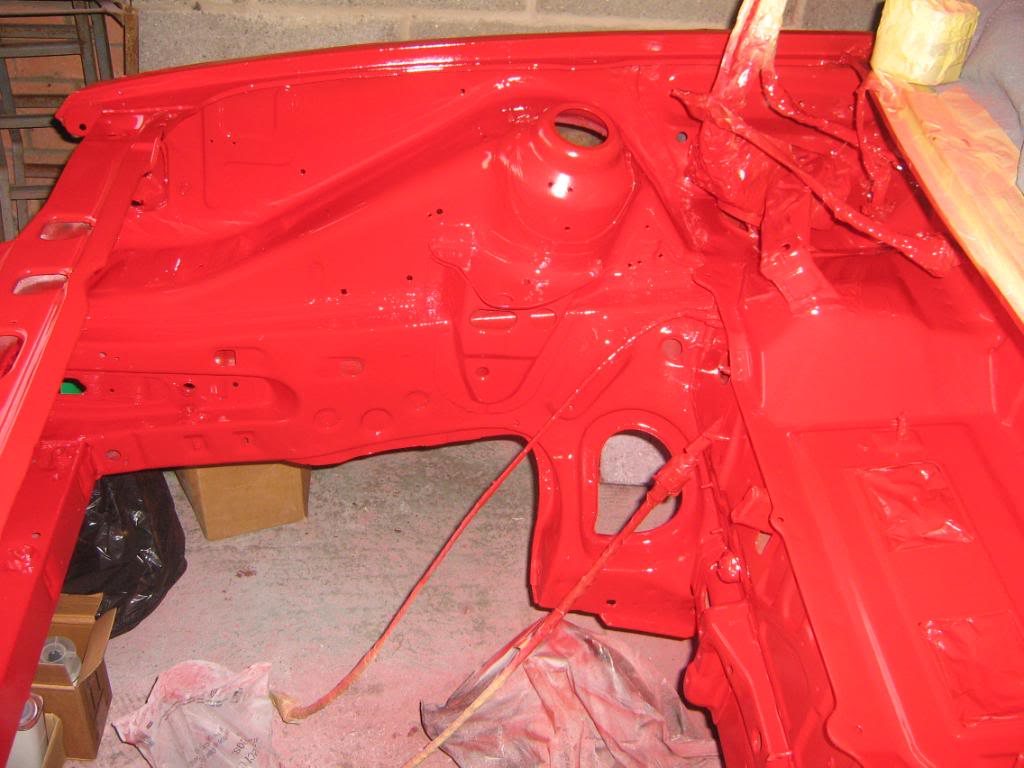
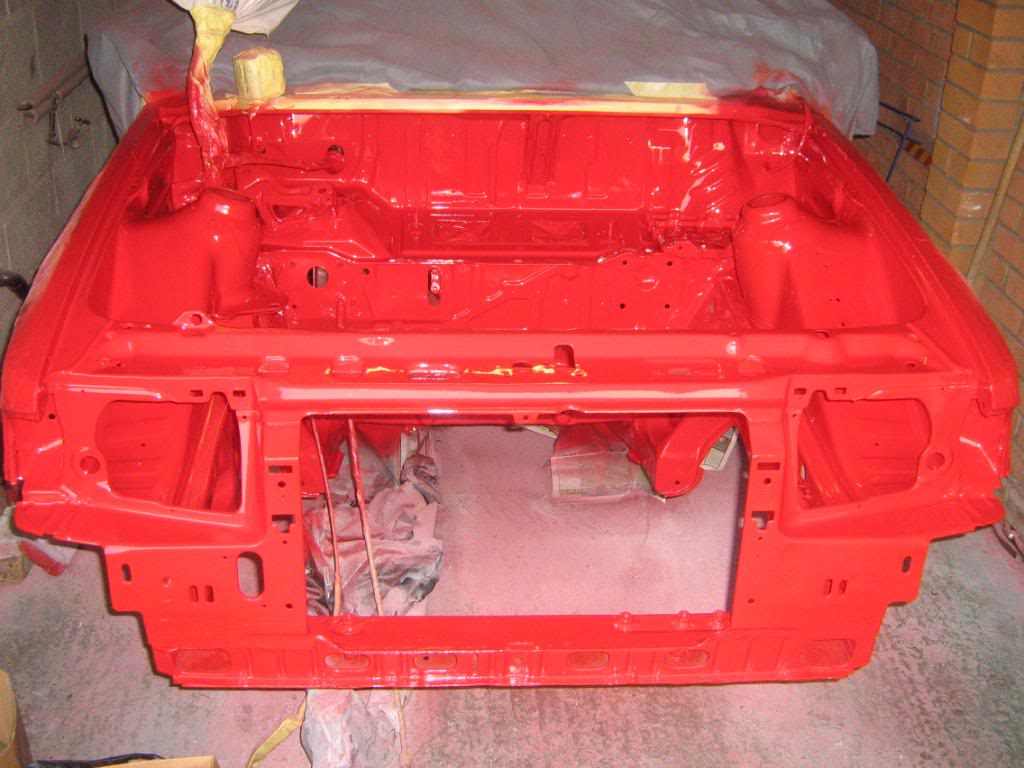
Just need to leave it a number of days to harden and then reassembly begins !
Just need to leave it a number of days to harden and then reassembly begins !
07-07-2011, 09:17 PM
#97
Will it ever end !!!!!!!
Thread Starter
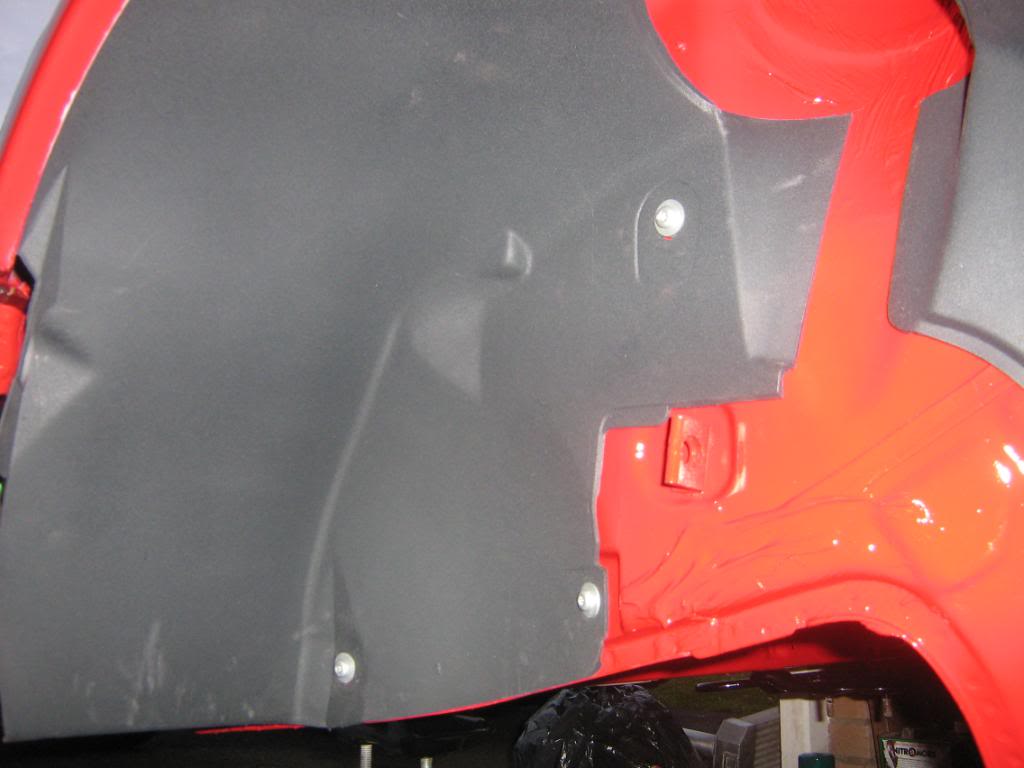
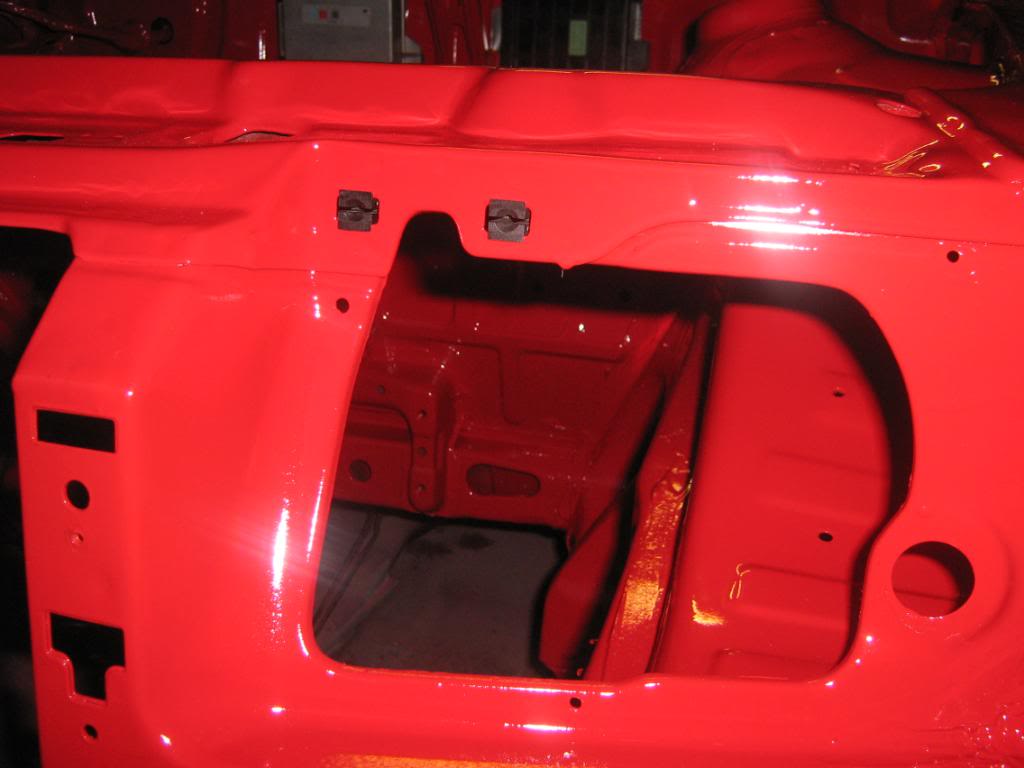
Car now painted so the rebuild starts
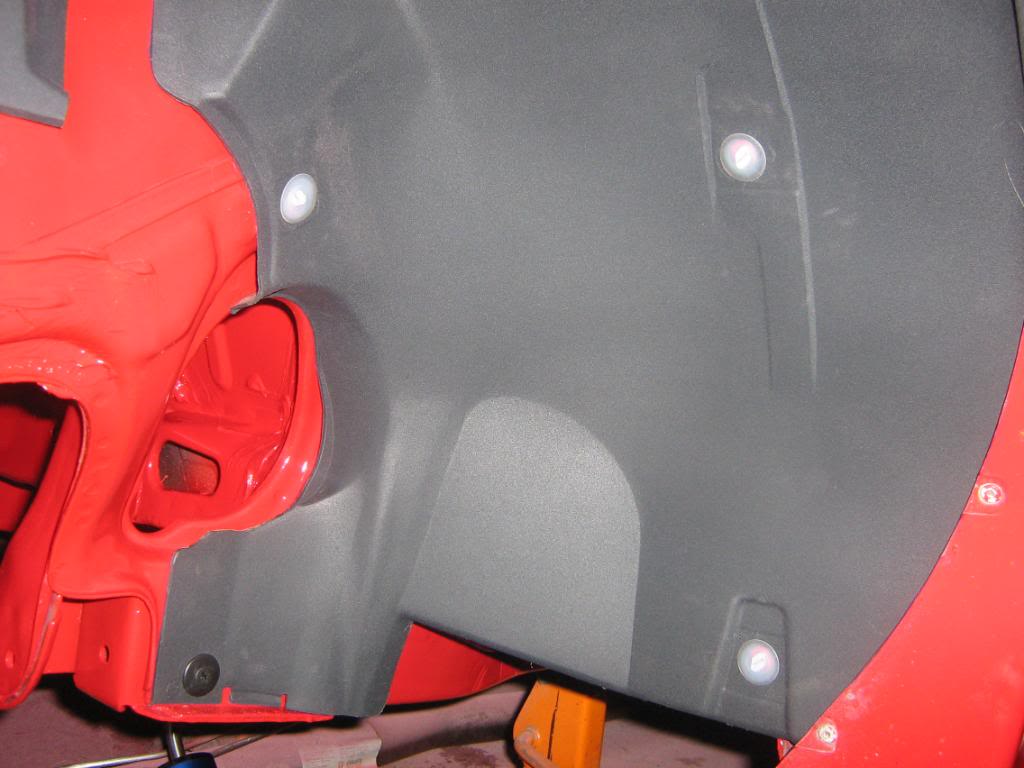
First off the old splash guards were cleaned and then painted with a plastic paintand a special paint used to give it a rough finish and then fitted to the car with new clips and screws etc etc

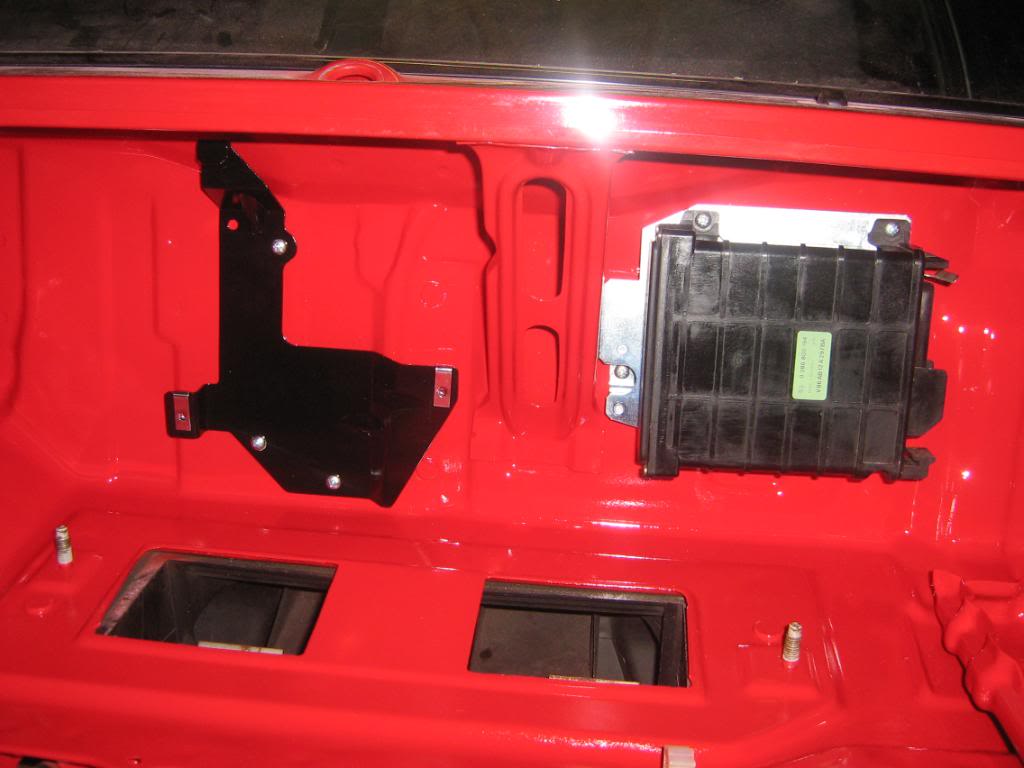
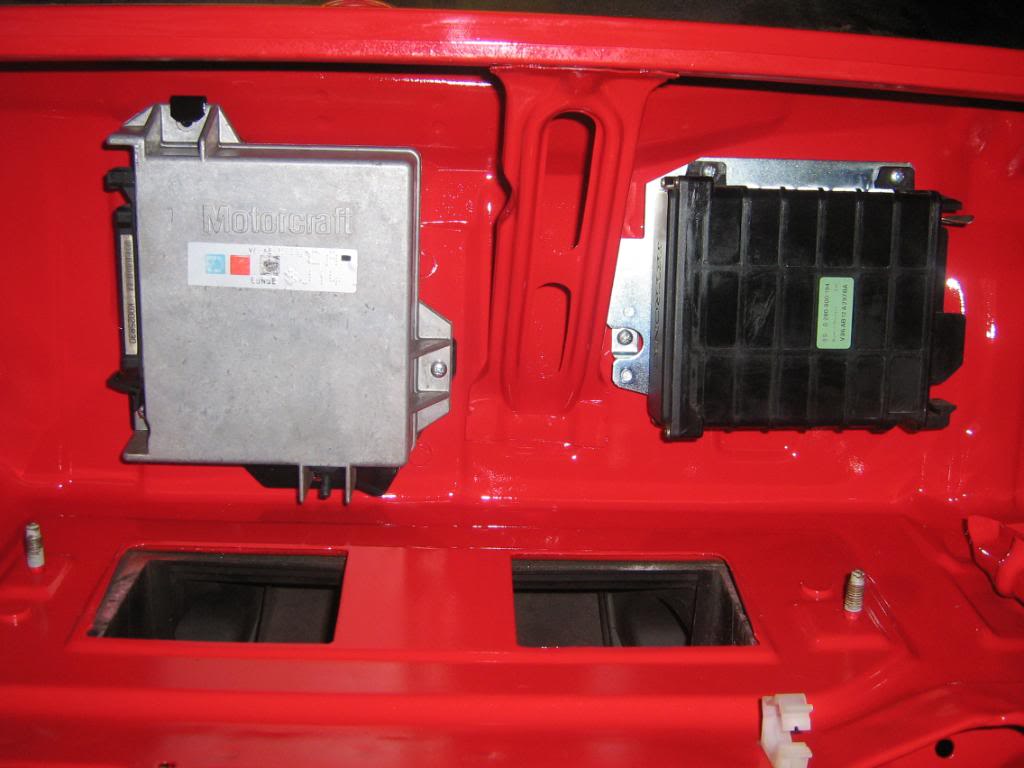
Then fitted the ecu and the fuel ecu plates and ecu's themselves
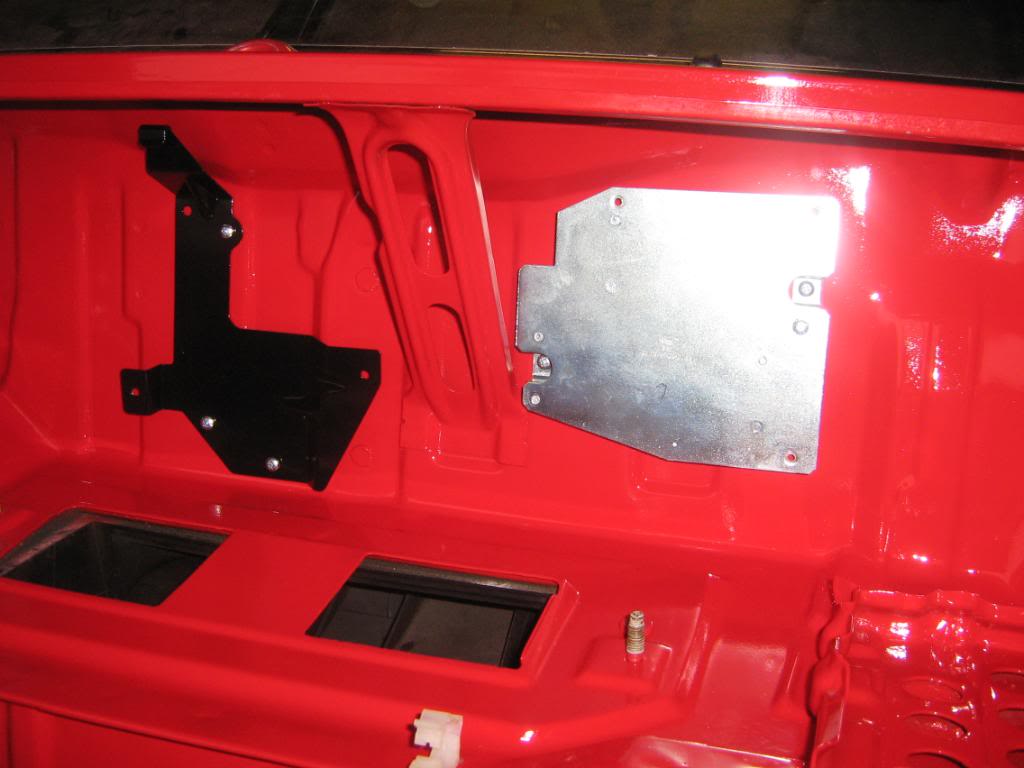
The ARB mounting plates which have been powdercoated
Then new headlight mounting clips
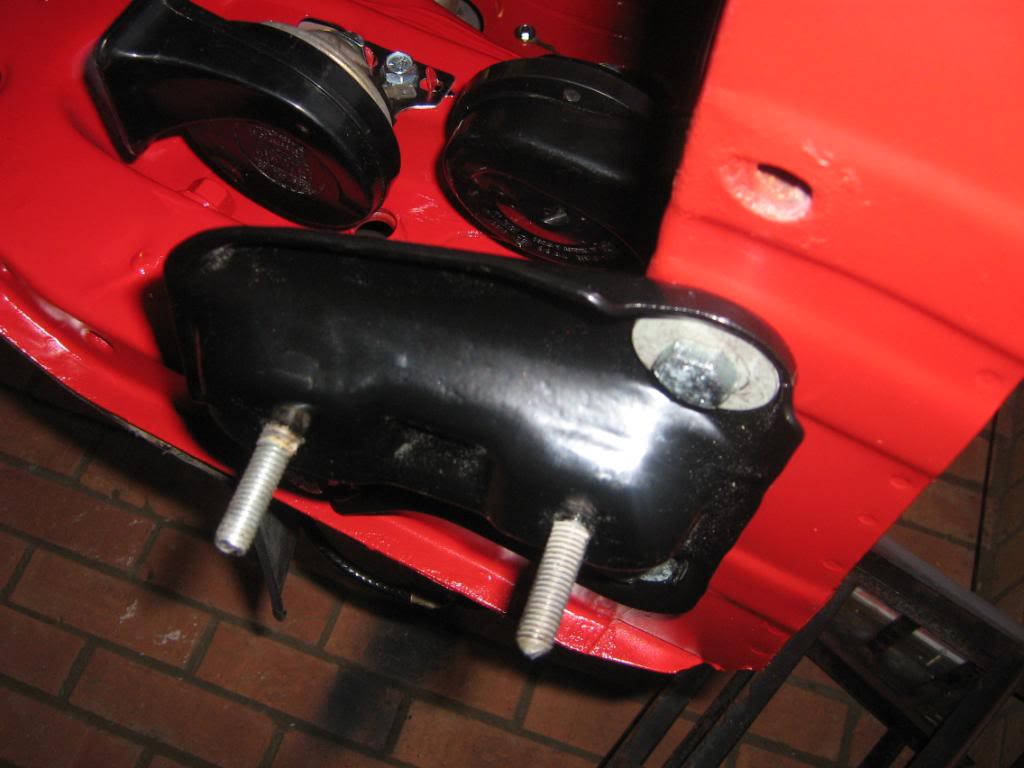
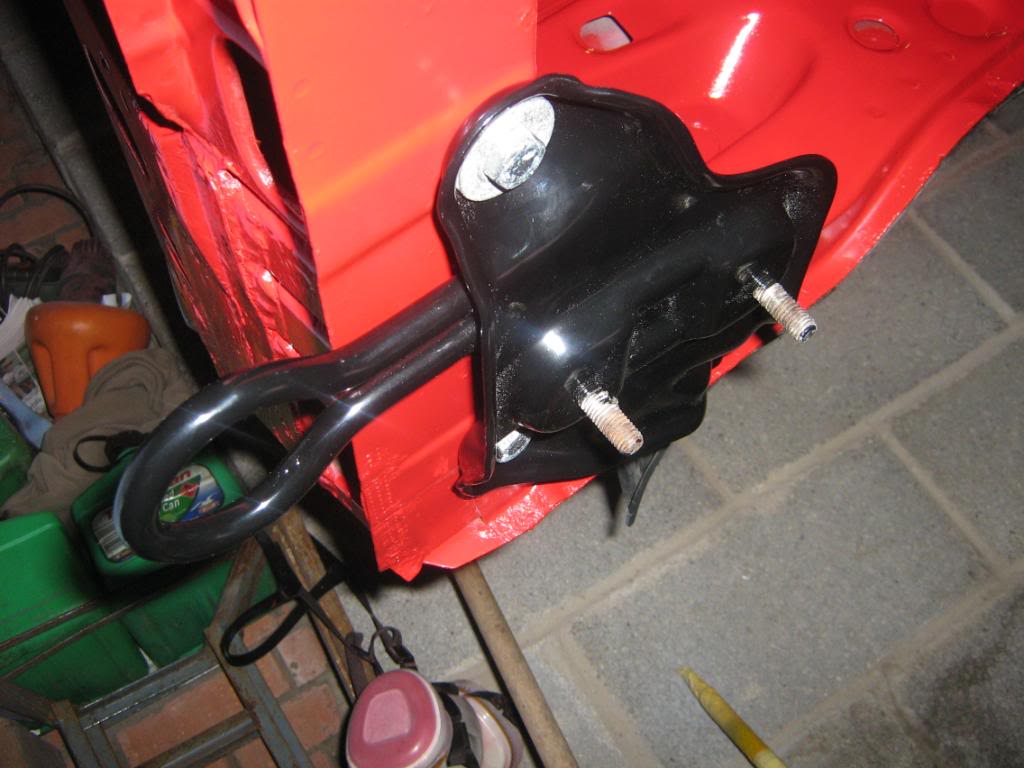
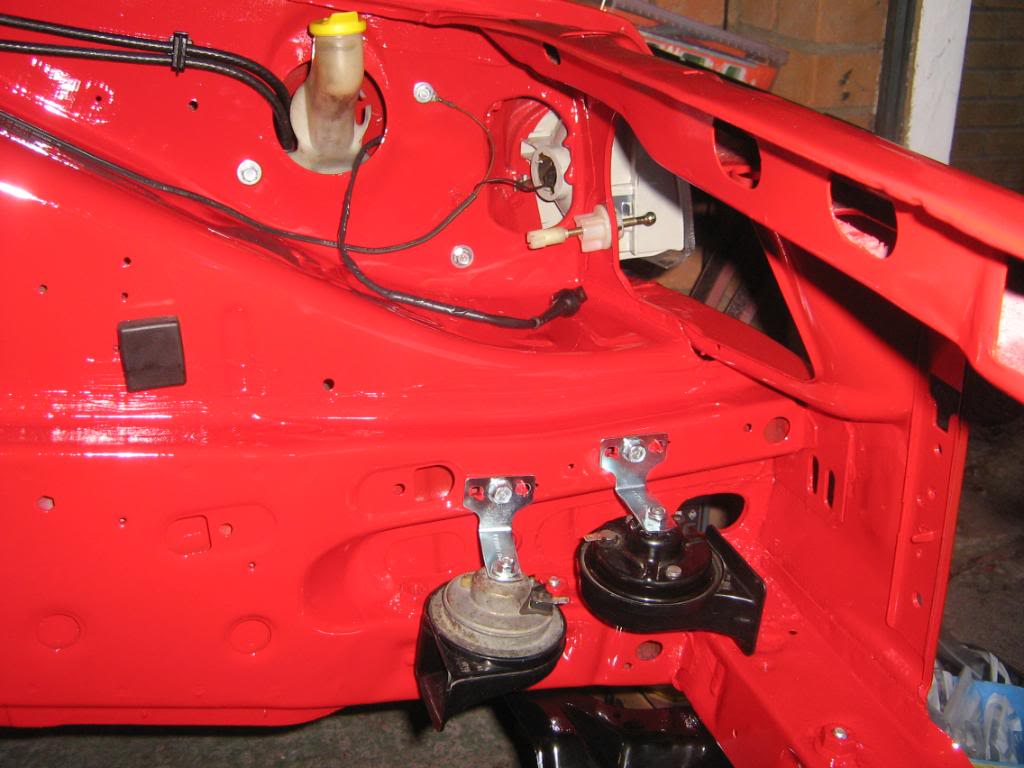
Then horns, washer bottle and wiring for the indicators and the indicators themselves
and finally the cover which was rezinced in the engine bay
Thats it for now but more to come soon !!!!!!
First off the old splash guards were cleaned and then painted with a plastic paintand a special paint used to give it a rough finish and then fitted to the car with new clips and screws etc etc
Then fitted the ecu and the fuel ecu plates and ecu's themselves
The ARB mounting plates which have been powdercoated
Then new headlight mounting clips
Then horns, washer bottle and wiring for the indicators and the indicators themselves
and finally the cover which was rezinced in the engine bay
Thats it for now but more to come soon !!!!!!
 10-07-2011, 04:55 PM
#100
Will it ever end !!!!!!!
Thread Starter
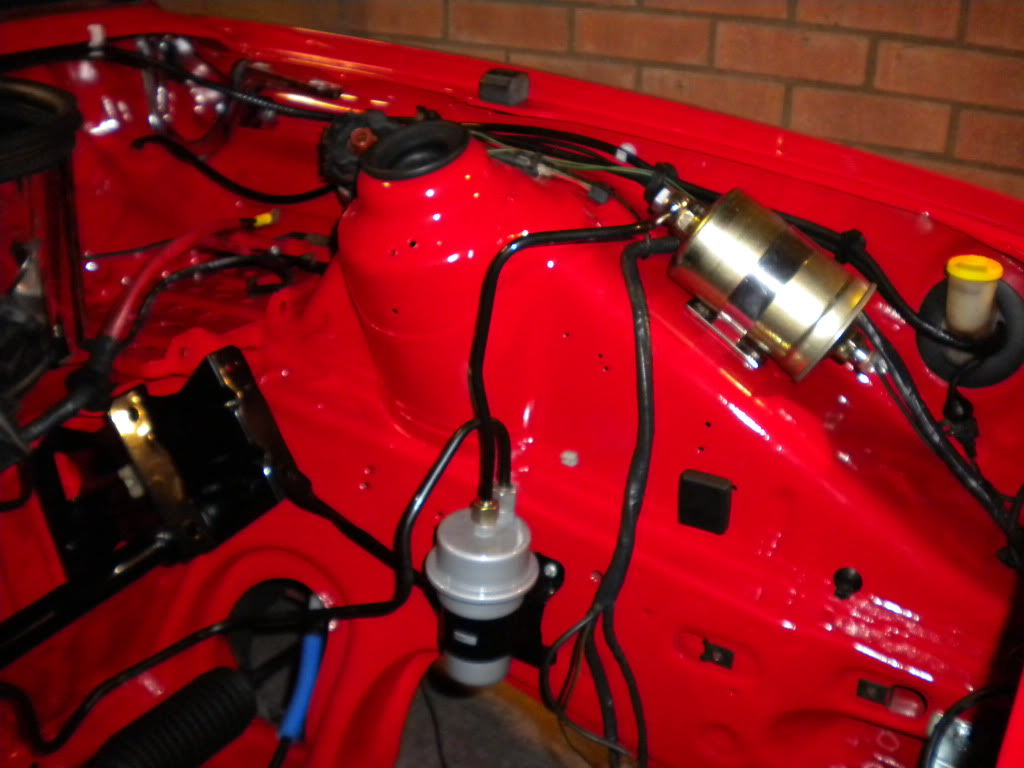
Another update - fitted the fuel accumulator
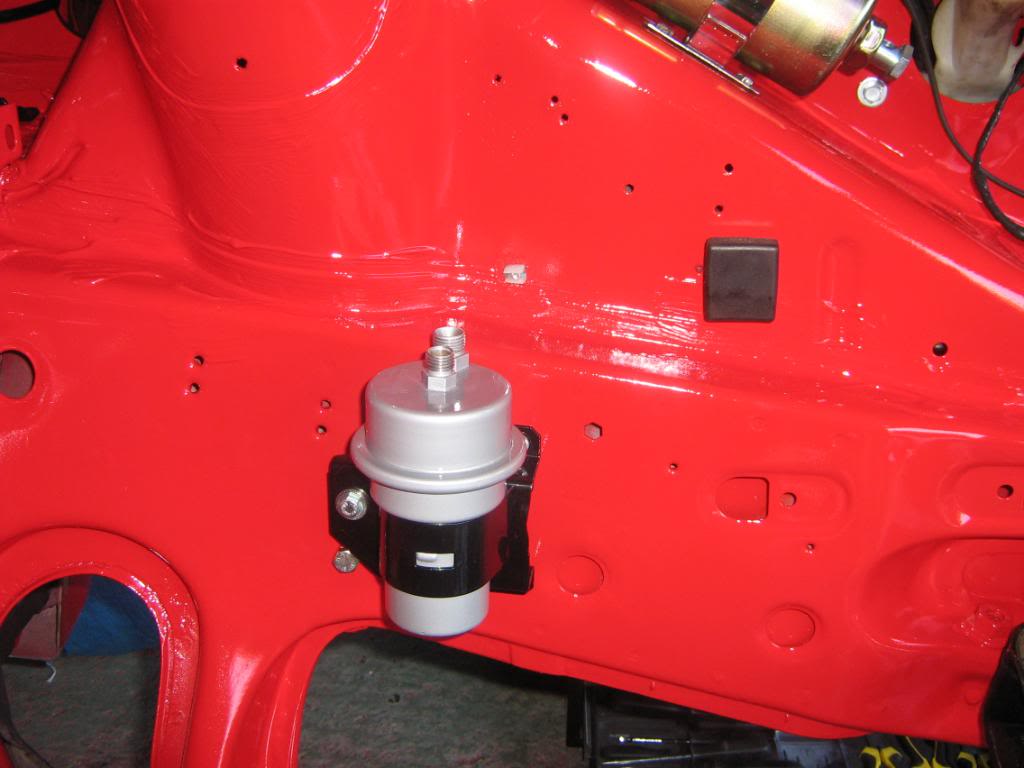
Fuel filter

Front indicators
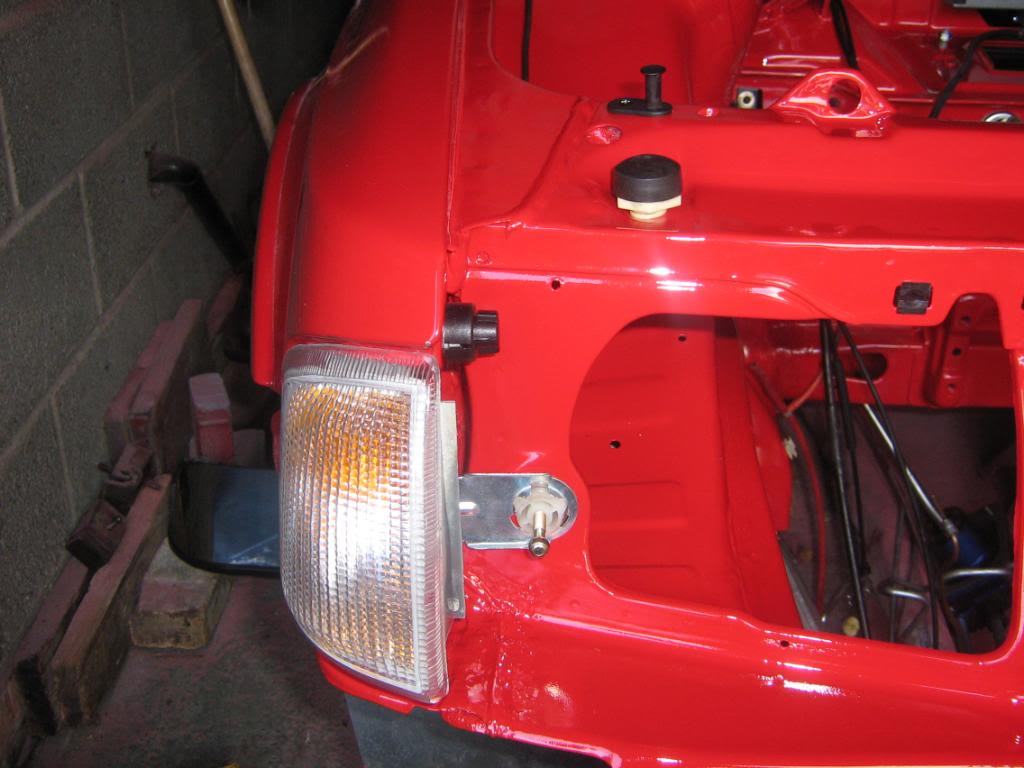
Wiper motors and arms and all connected
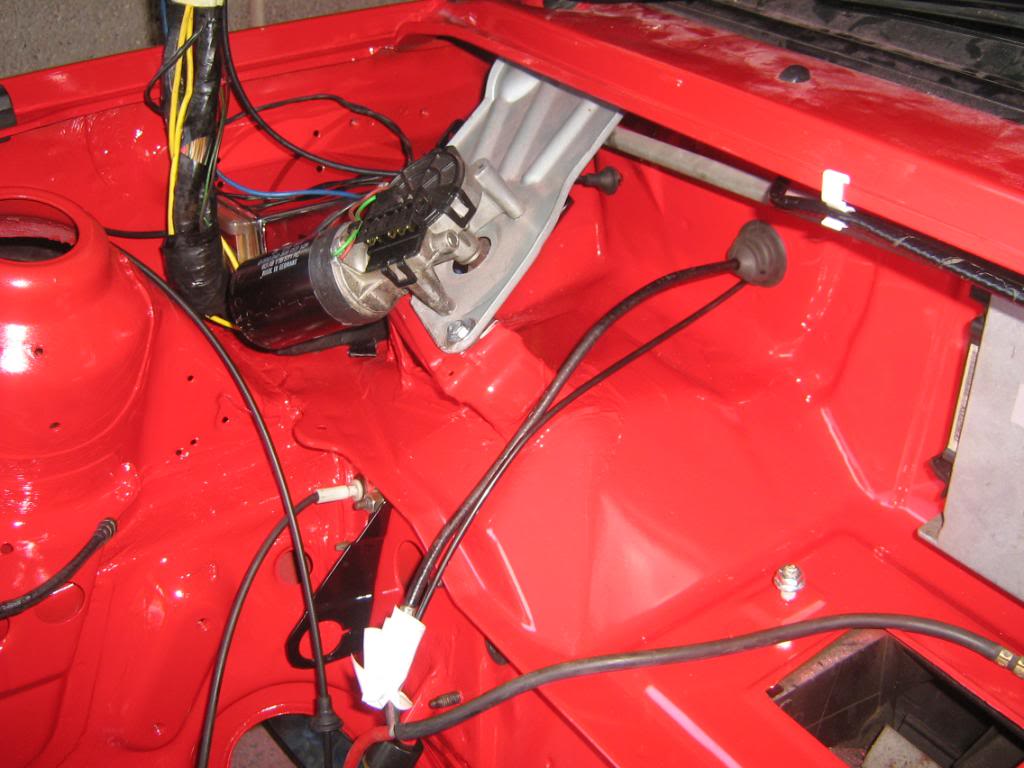
and finally and overall of where its at (you can see the coil fitted as well)
Just need to sort the loom out now, been putting that off but to be honest shouldnt be too bad
Fuel filter
Front indicators
Wiper motors and arms and all connected
and finally and overall of where its at (you can see the coil fitted as well)
Just need to sort the loom out now, been putting that off but to be honest shouldnt be too bad
 10-07-2011, 10:51 PM
#102
Will it ever end !!!!!!!
Thread Starter
11-07-2011, 07:13 AM
#103
Will it ever end !!!!!!!
Thread Starter
28-11-2011, 08:57 PM
#104
Will it ever end !!!!!!!
Thread Starter
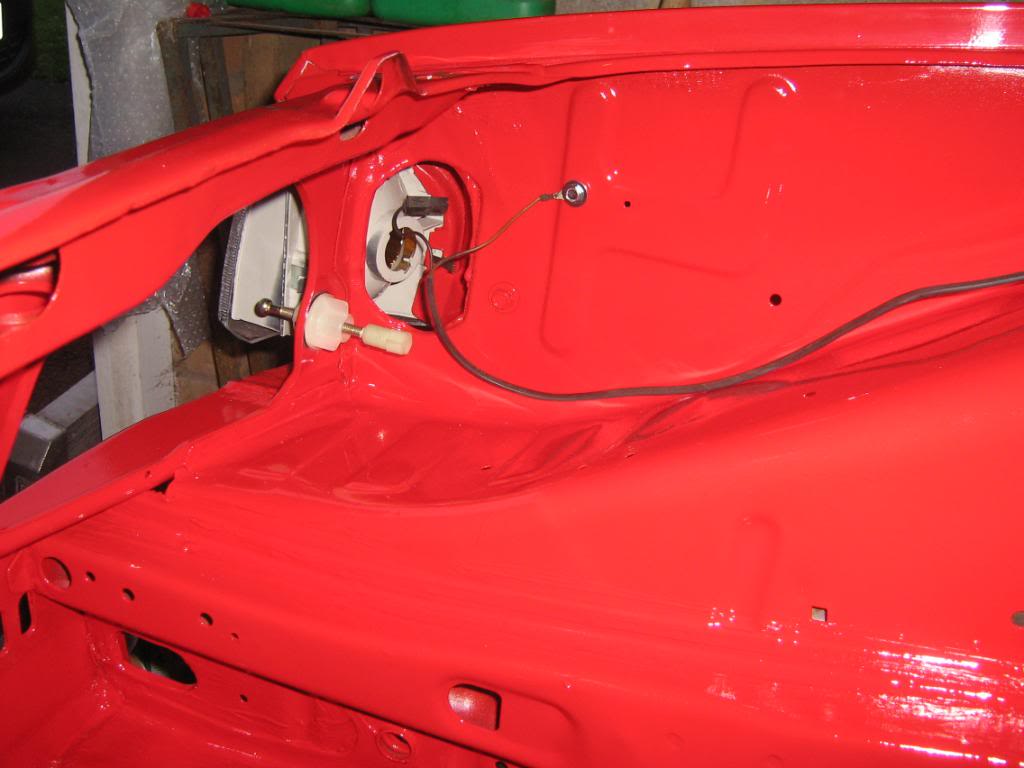
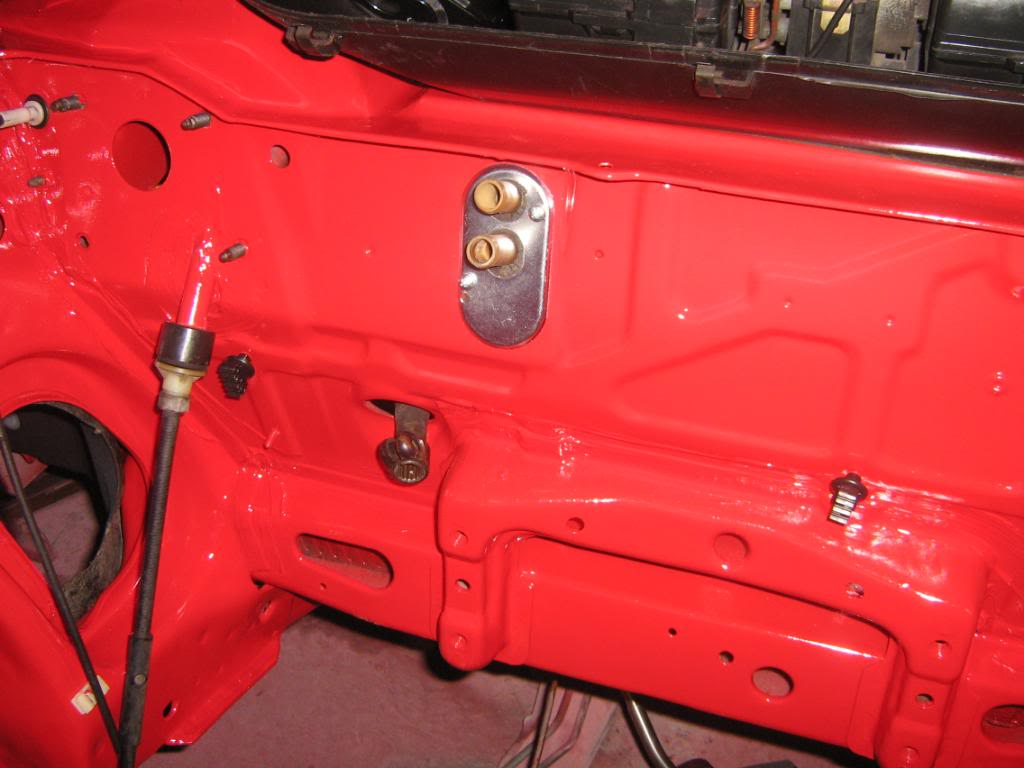
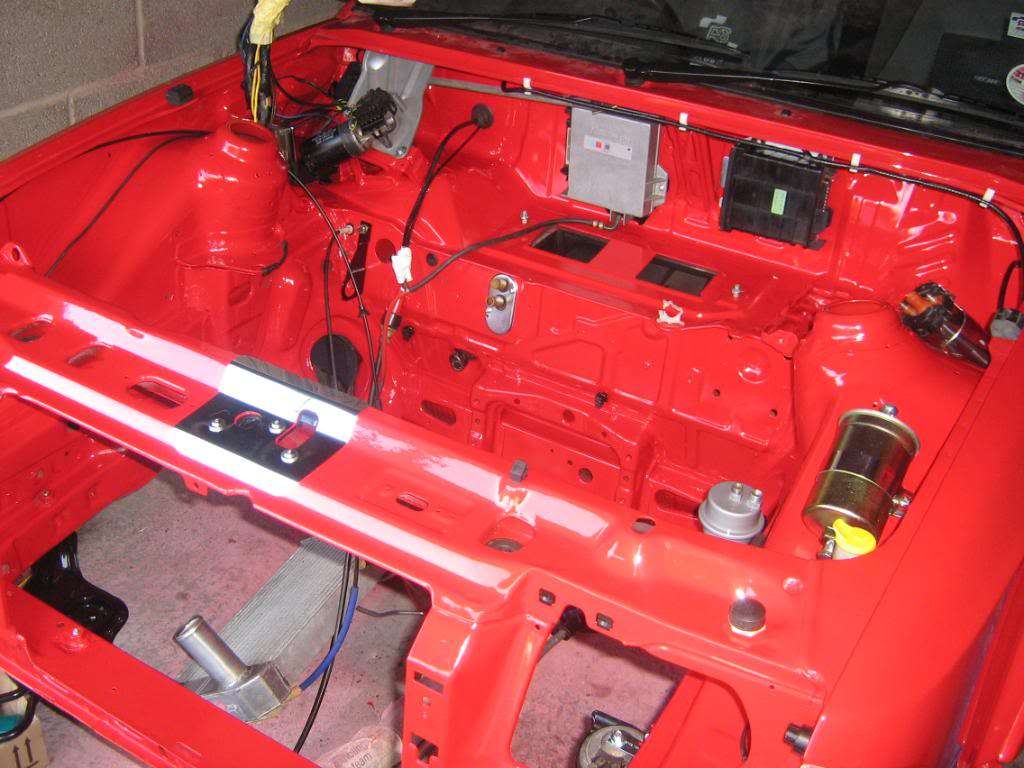
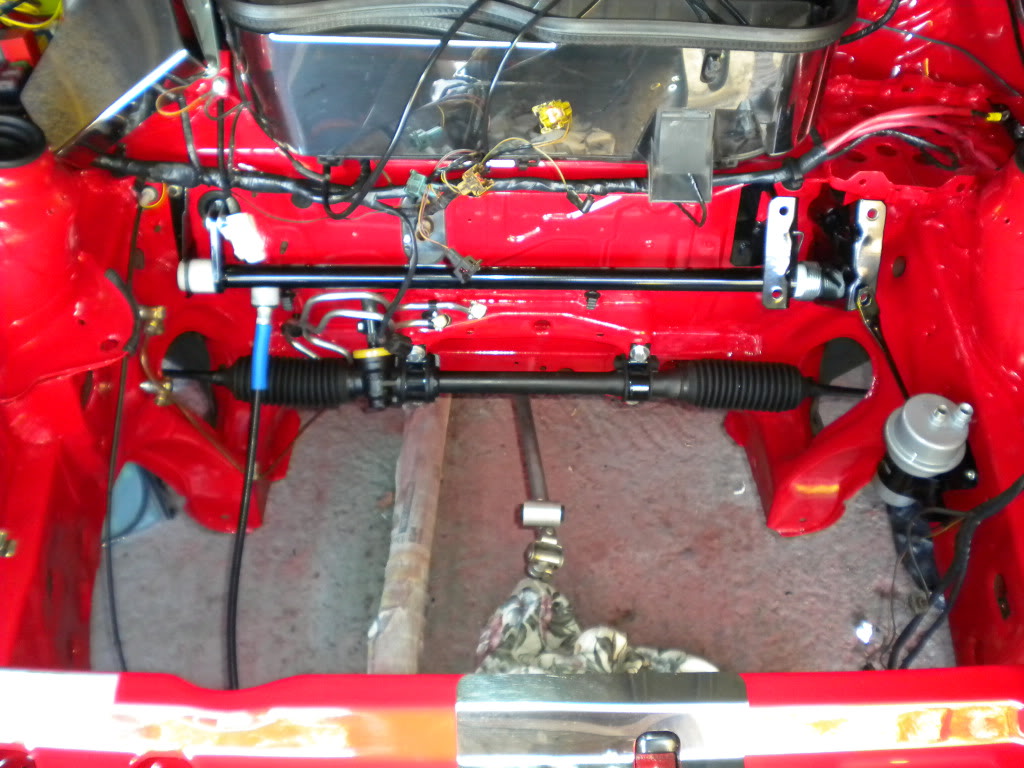
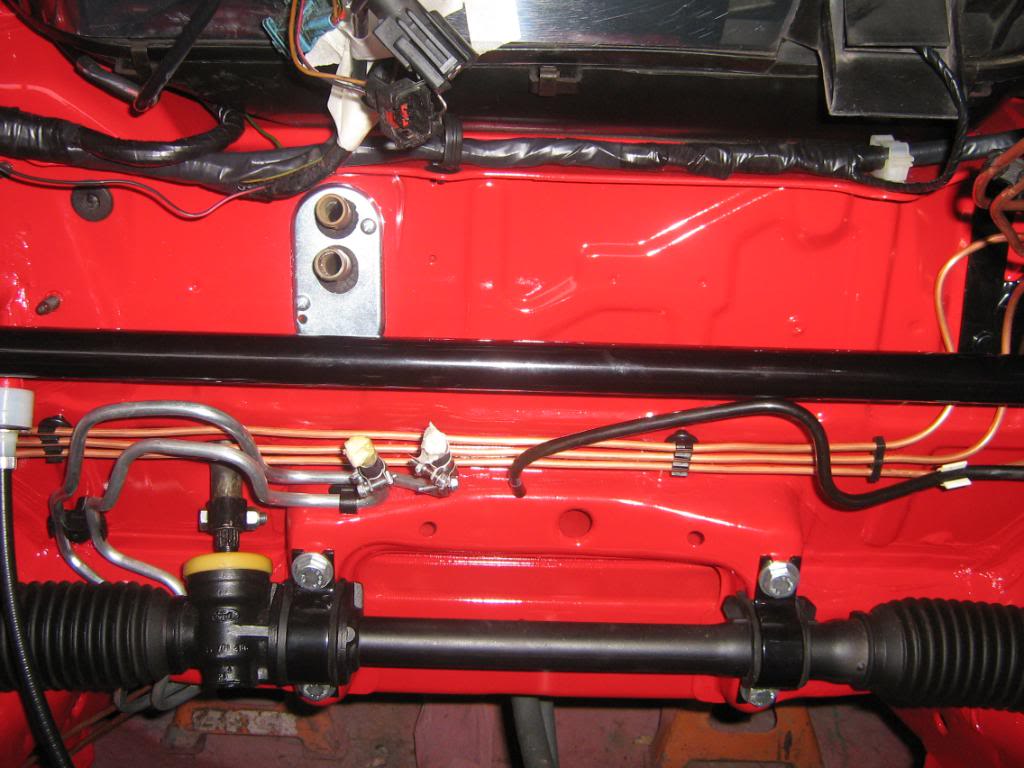
Bit of an update - been slow going recently but fitted few more items and coming along a bit more now - hopefully will make some serious headway between now and the new year and get it close to completion by then
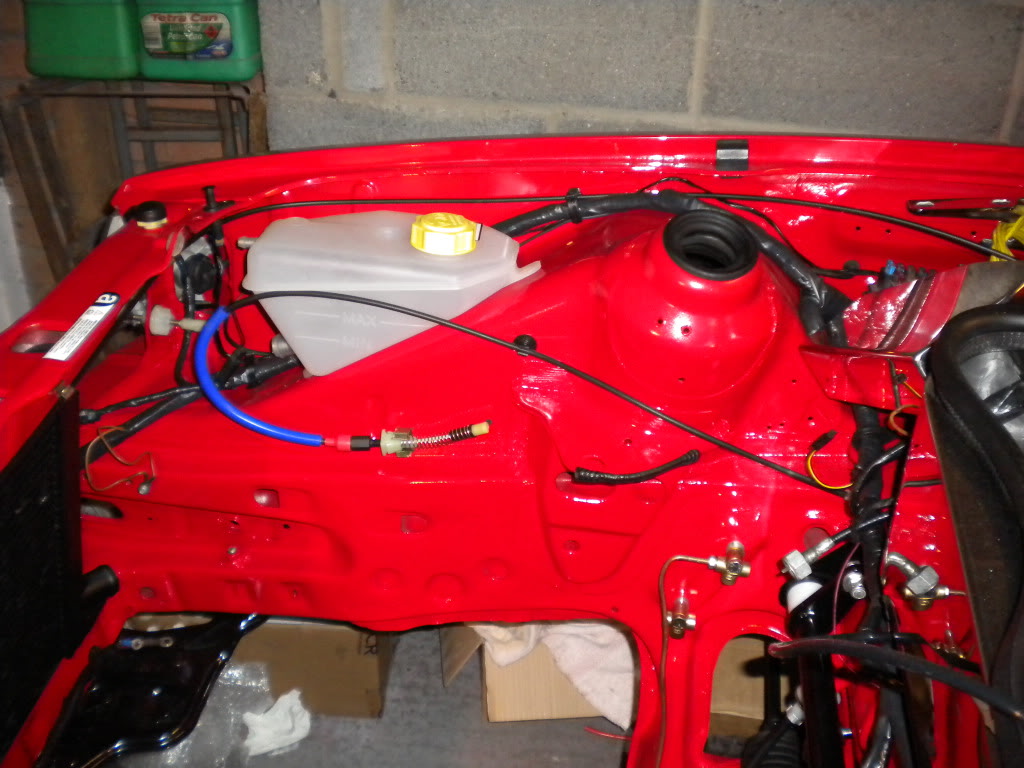
Fitted the fuel accumulator to the fuel filter and also managed to get a rare rubber seal that goes round the opening where the washer bottle exits the wing
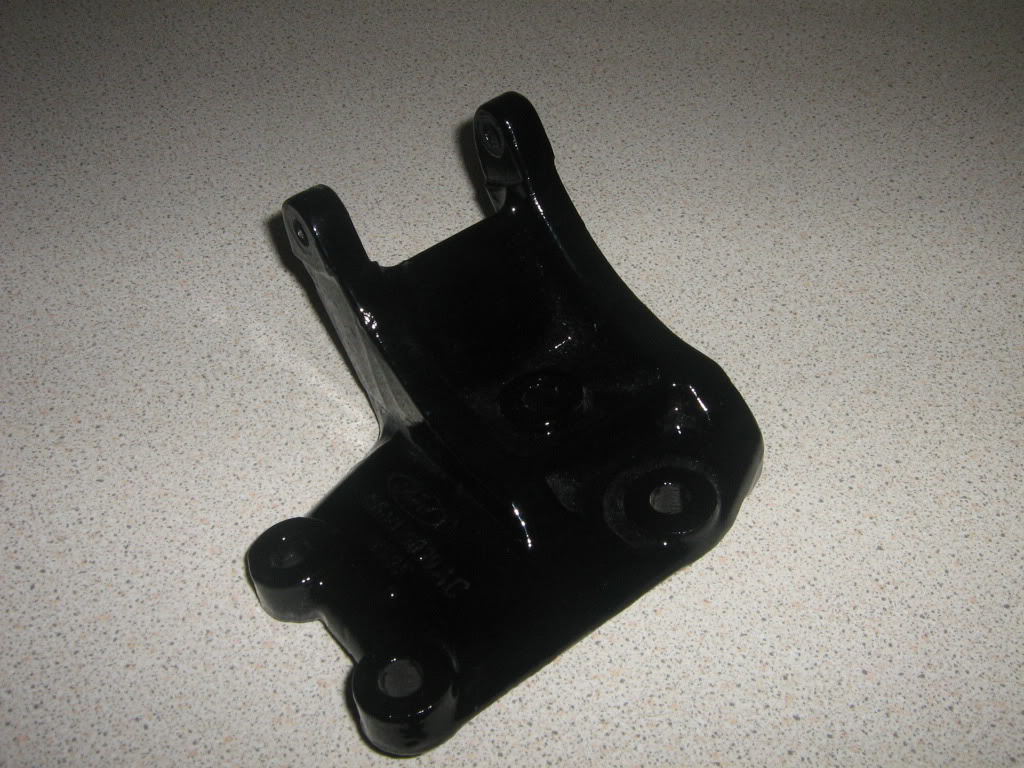
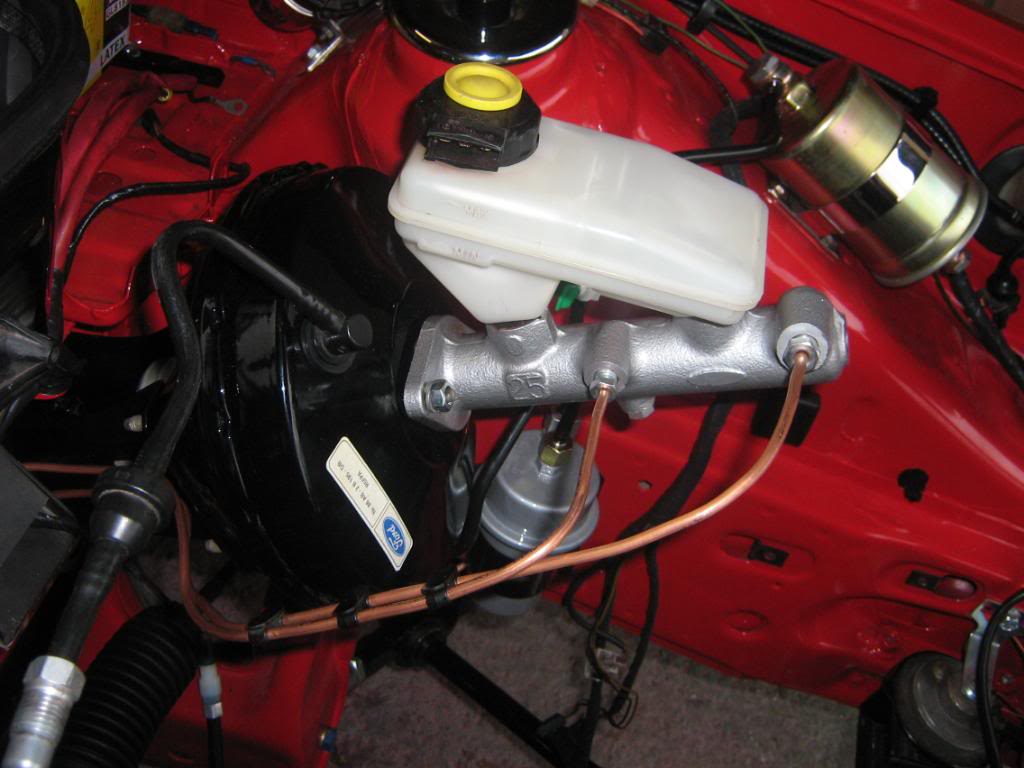
Also fitted a new accelarator cable and lined up the minty new header tank as well
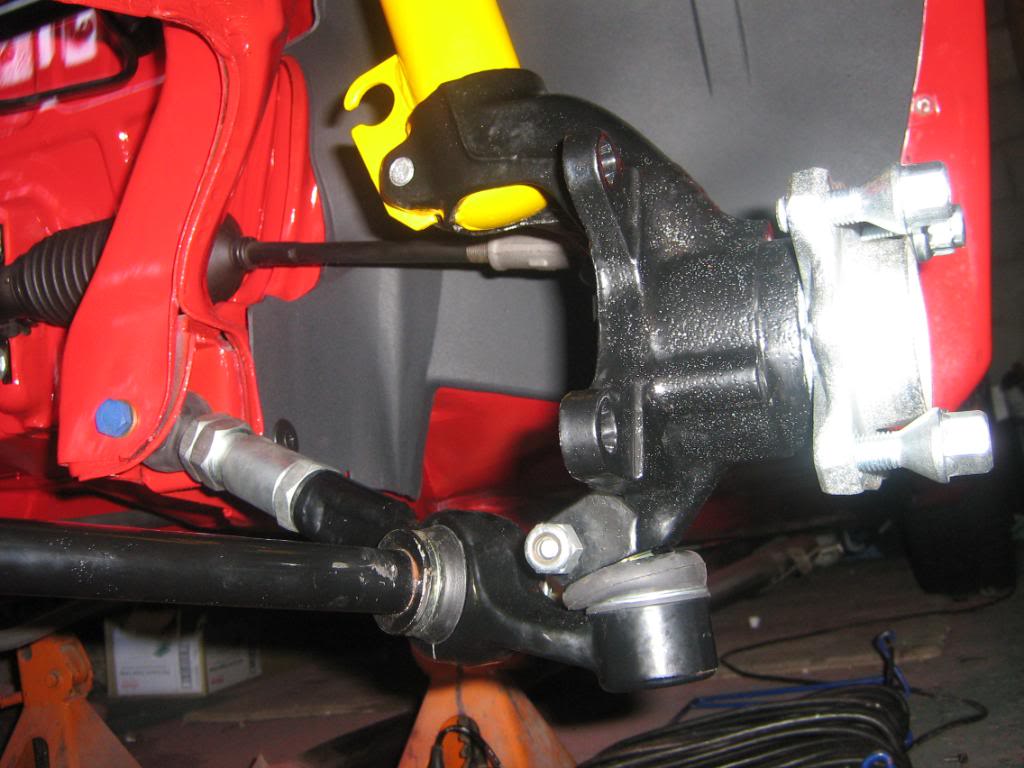
And as you can see a few more items fitted including the brake torsion bar, new steering rack and new clutch cable
Fitted the fuel accumulator to the fuel filter and also managed to get a rare rubber seal that goes round the opening where the washer bottle exits the wing
Also fitted a new accelarator cable and lined up the minty new header tank as well
And as you can see a few more items fitted including the brake torsion bar, new steering rack and new clutch cable
30-12-2011, 07:10 PM
#105
Will it ever end !!!!!!!
Thread Starter
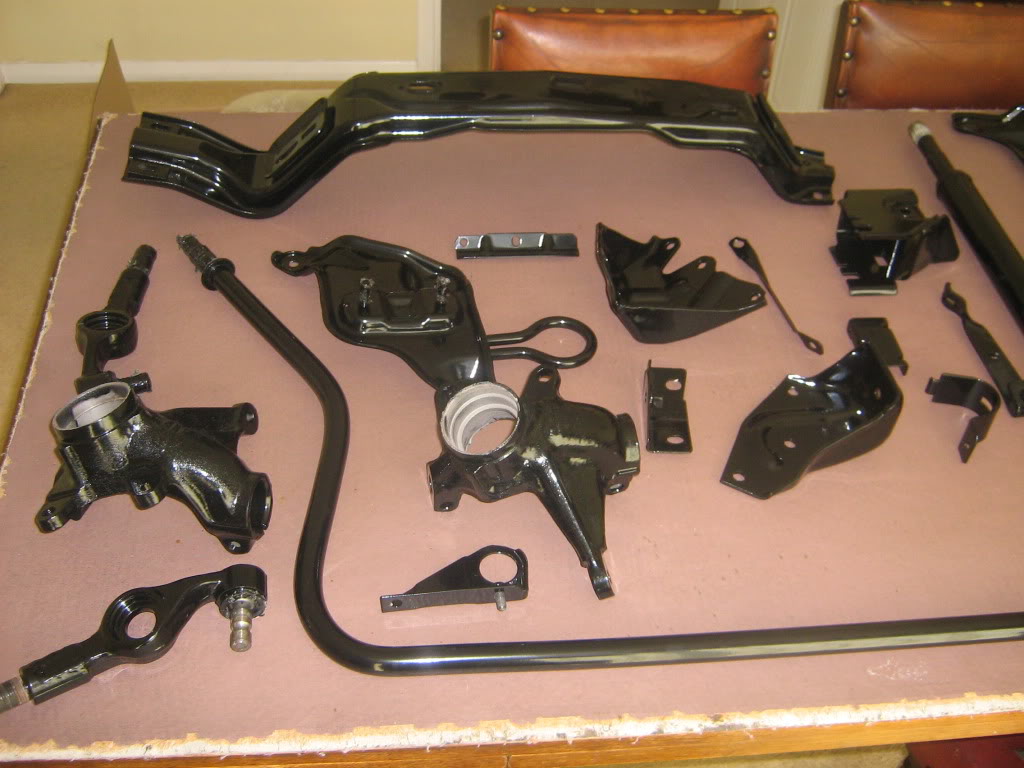
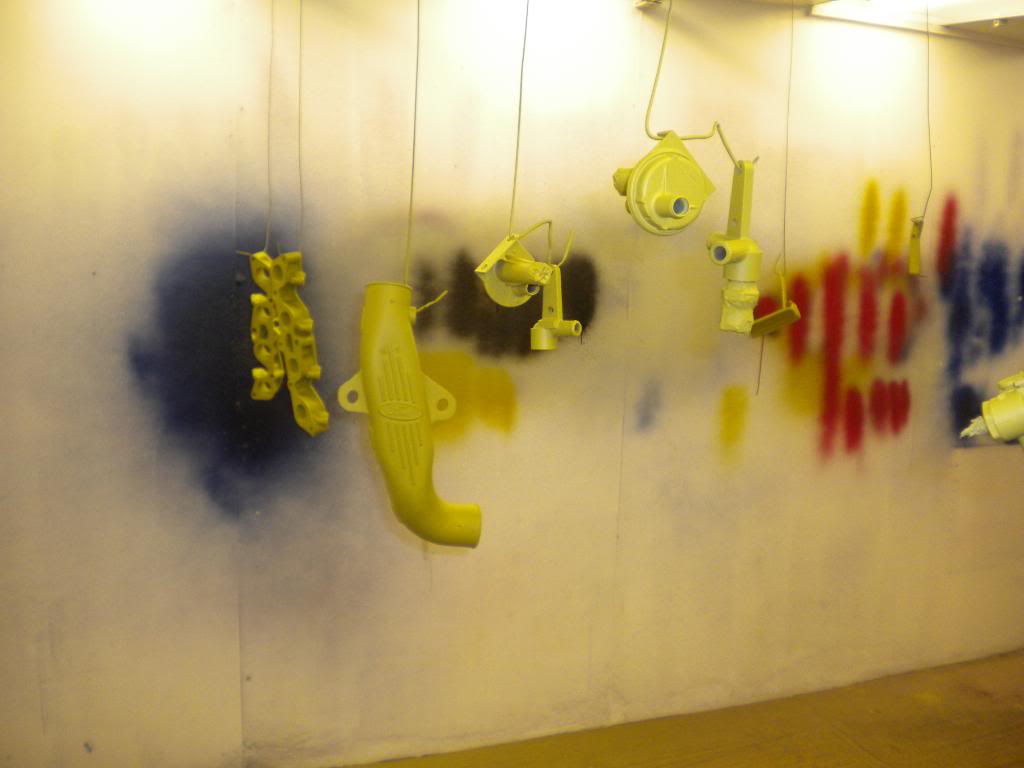
Update time - had access to a paint booth over crimbo and this is what i have managed to get done
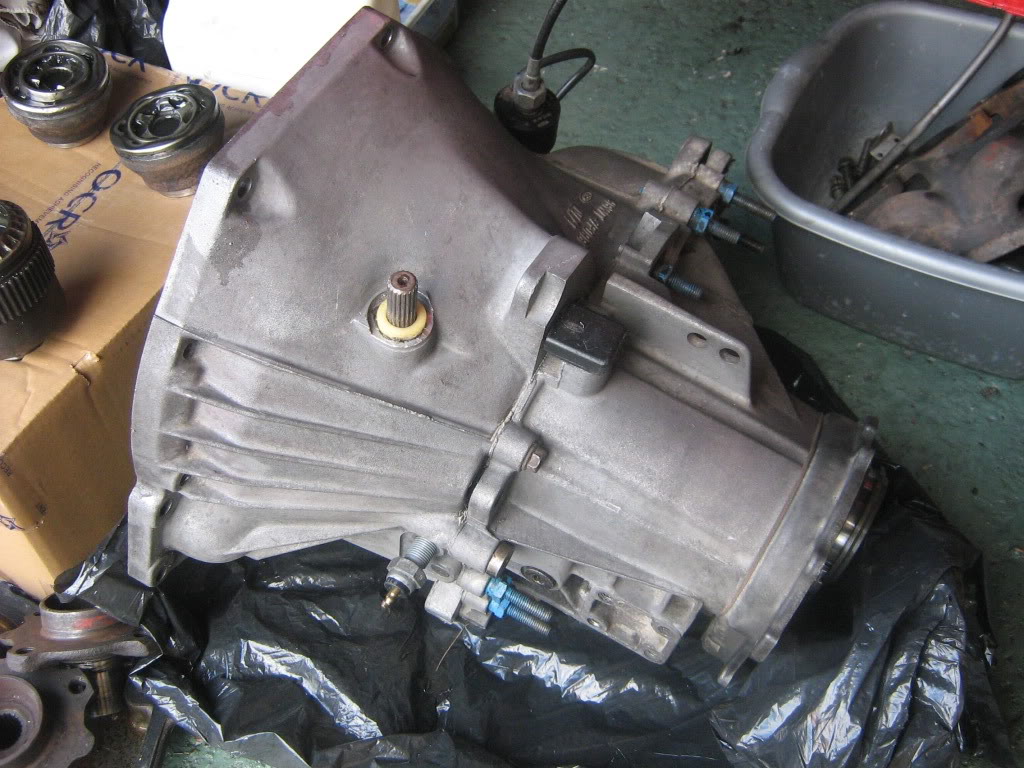
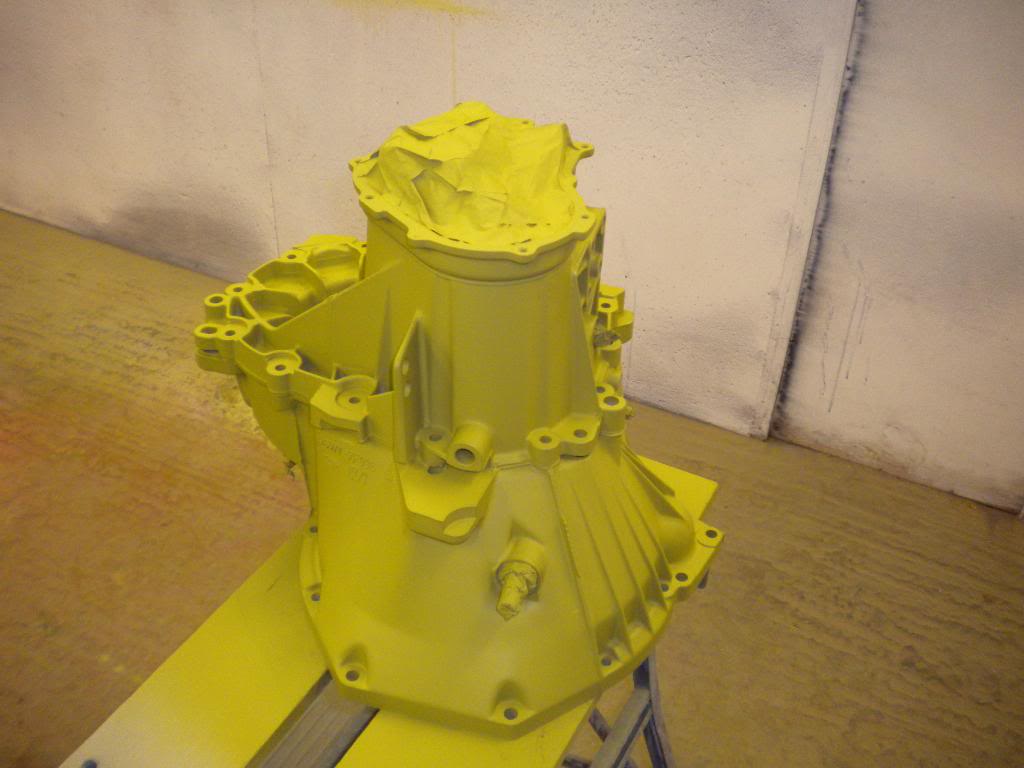
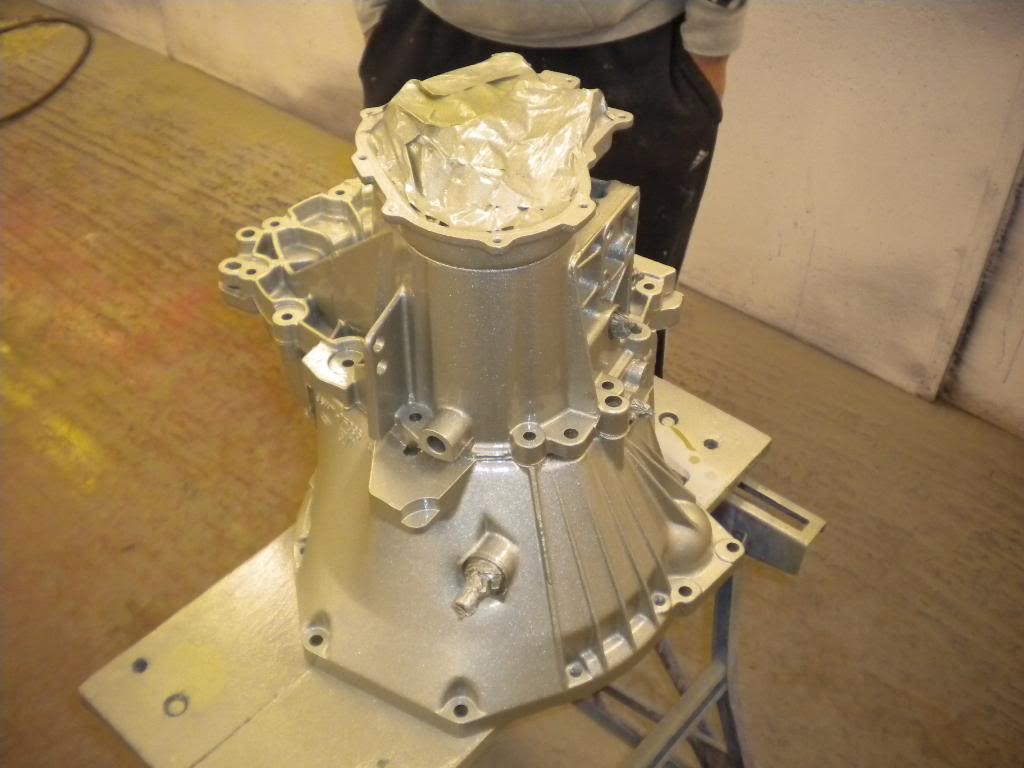
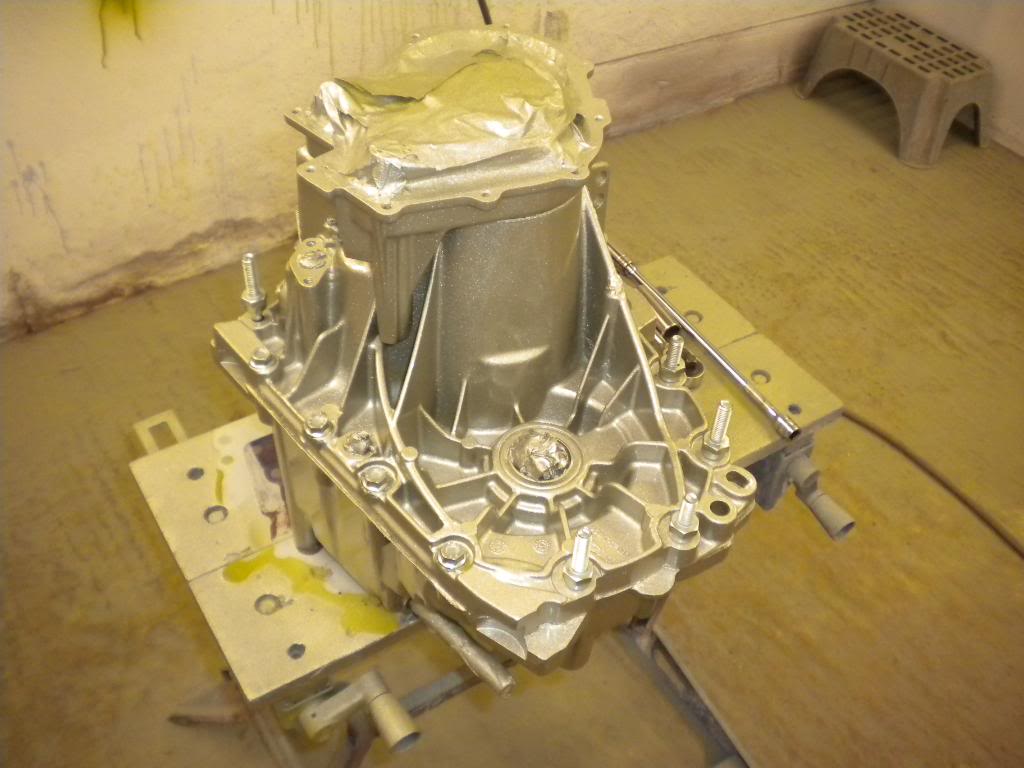
Gearbox - primed and then topcoat with Alumablast - decided to 2k lacquer most of the items as this will give some protection from oil,fuel etc as all the items are in the engine bay
From this
to this
With nice re zinced bolts etc
Various other items primed
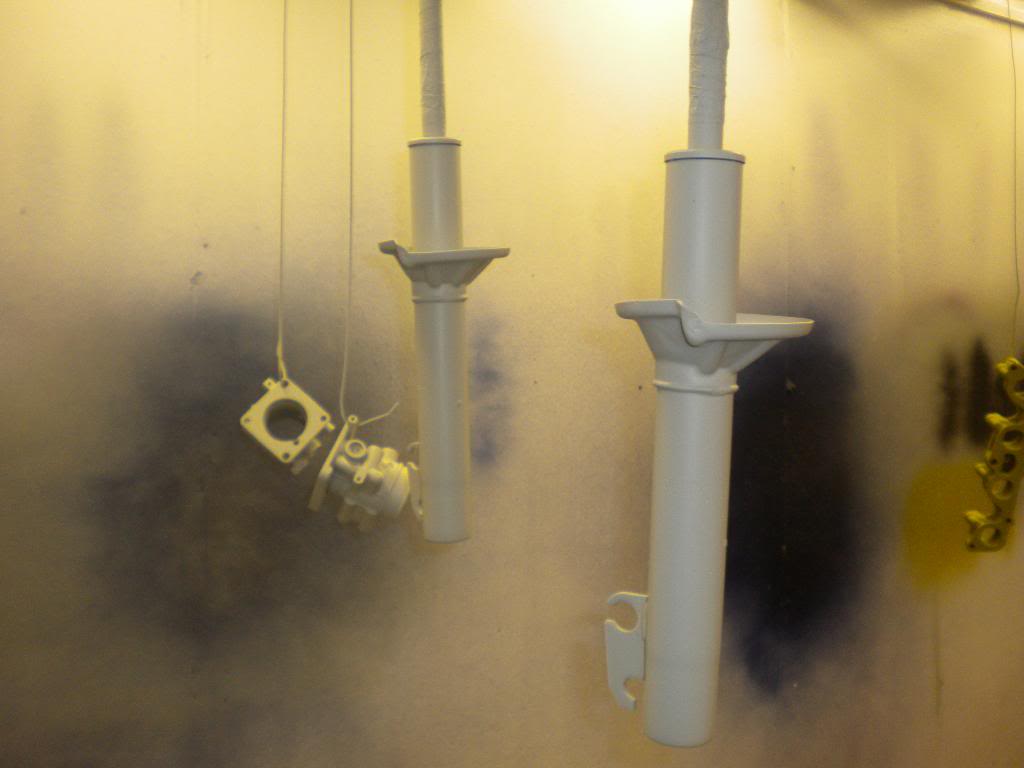
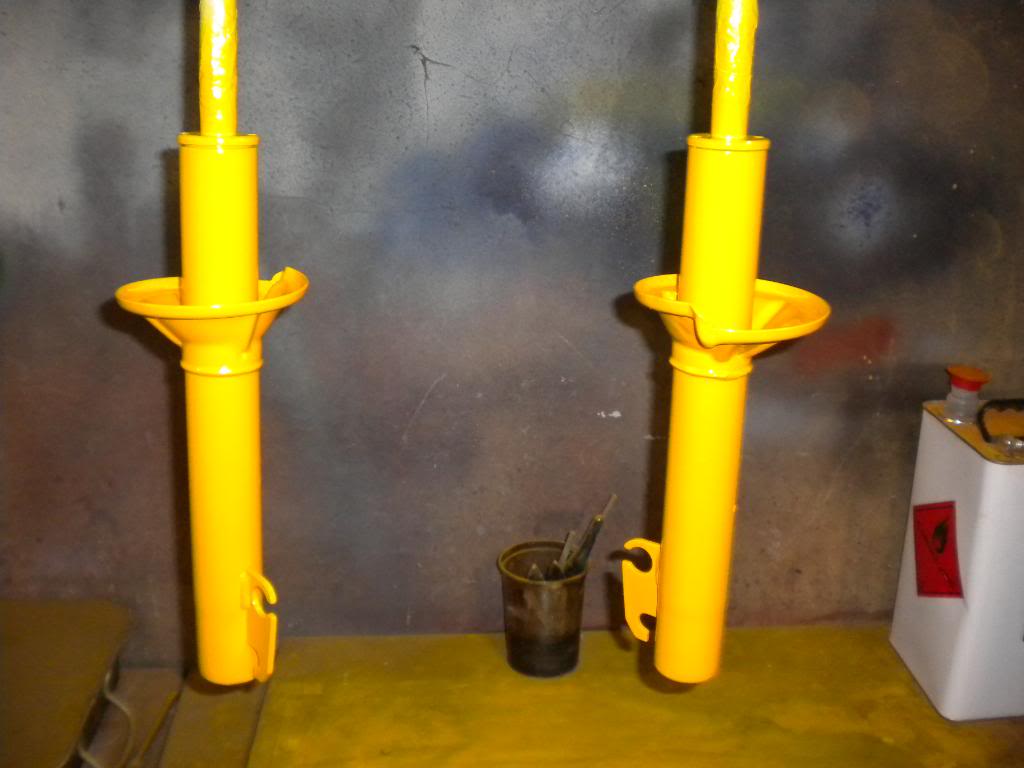
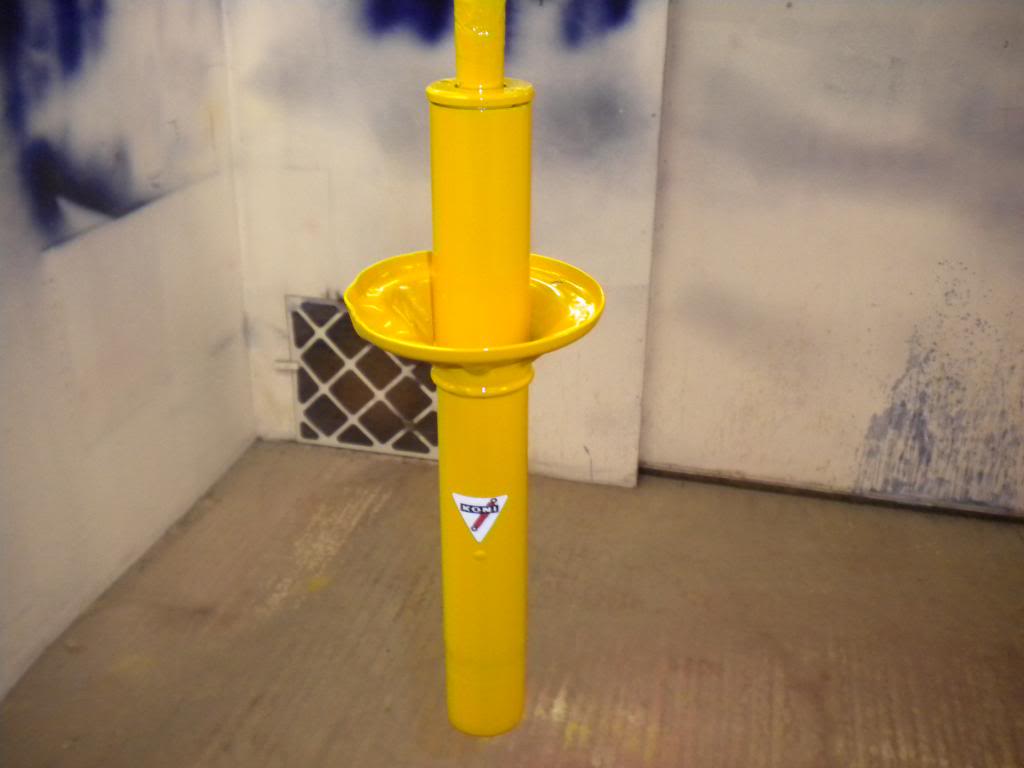
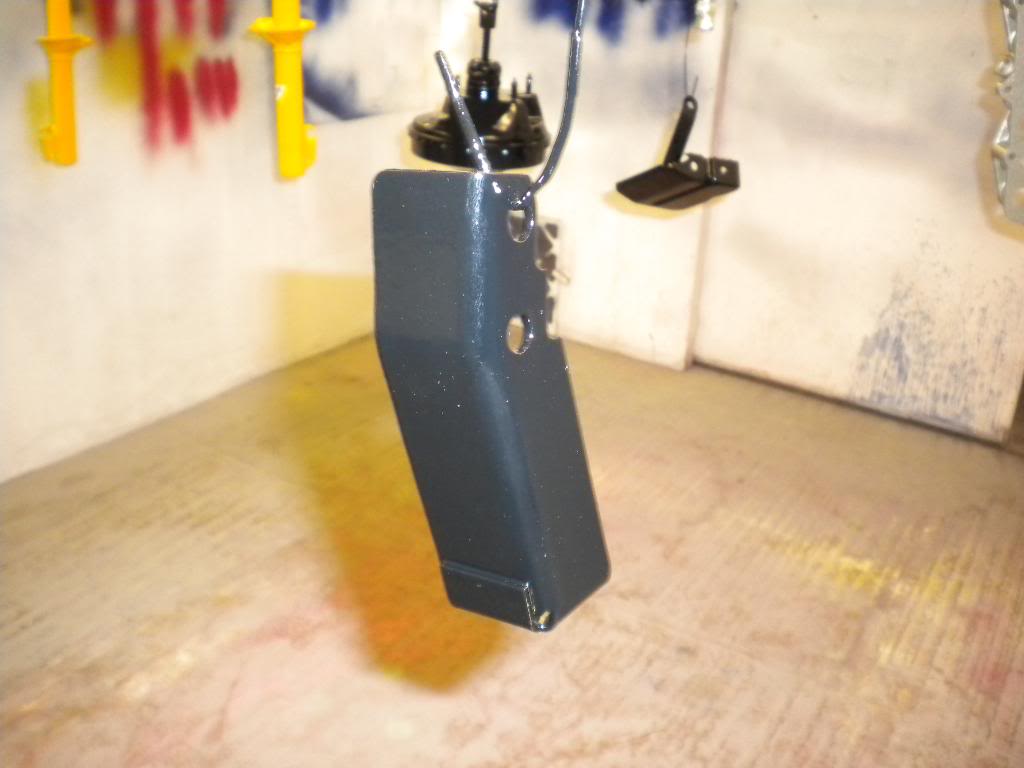
Shock repainted from this

To end up like this
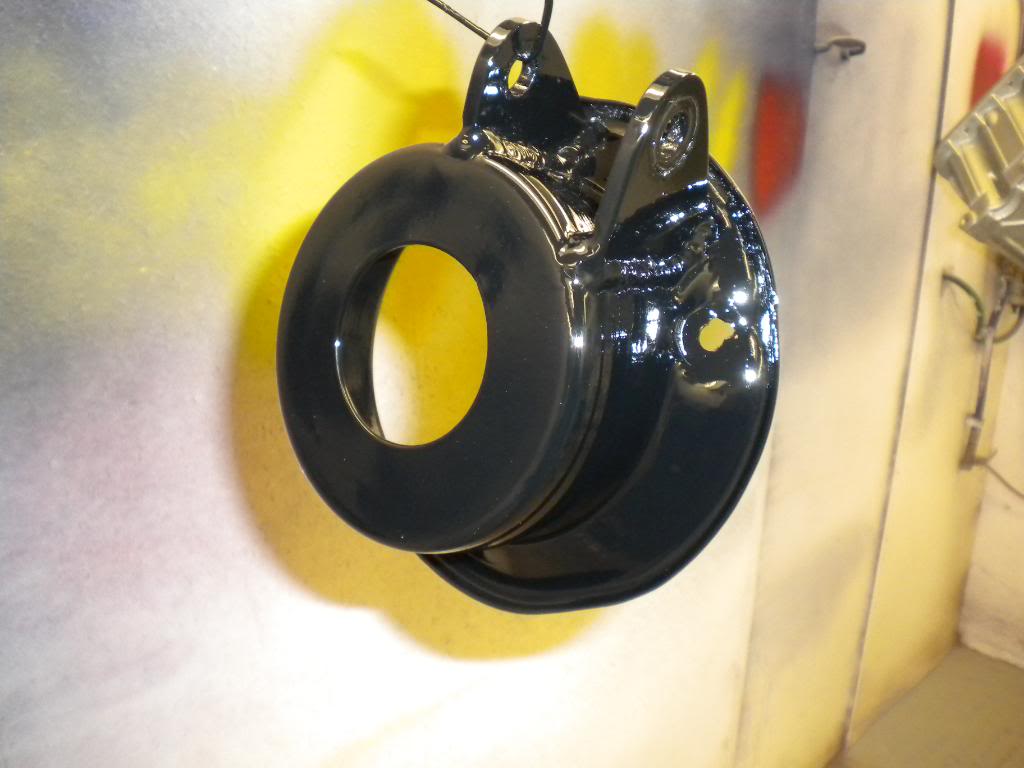
Then the crossover
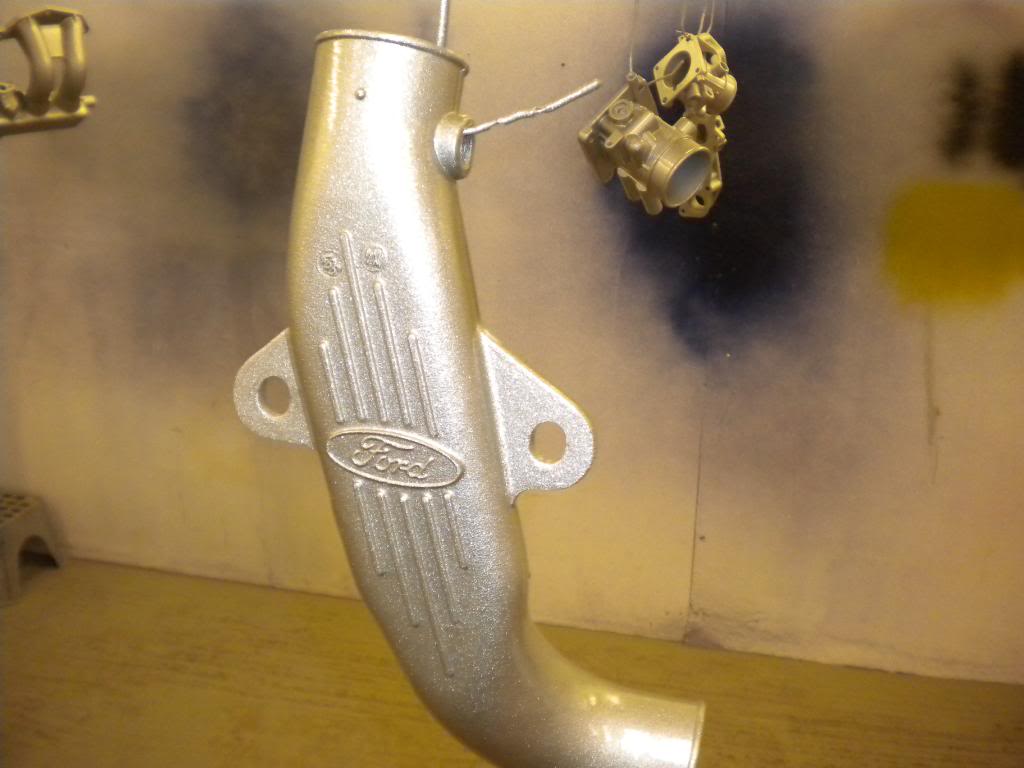
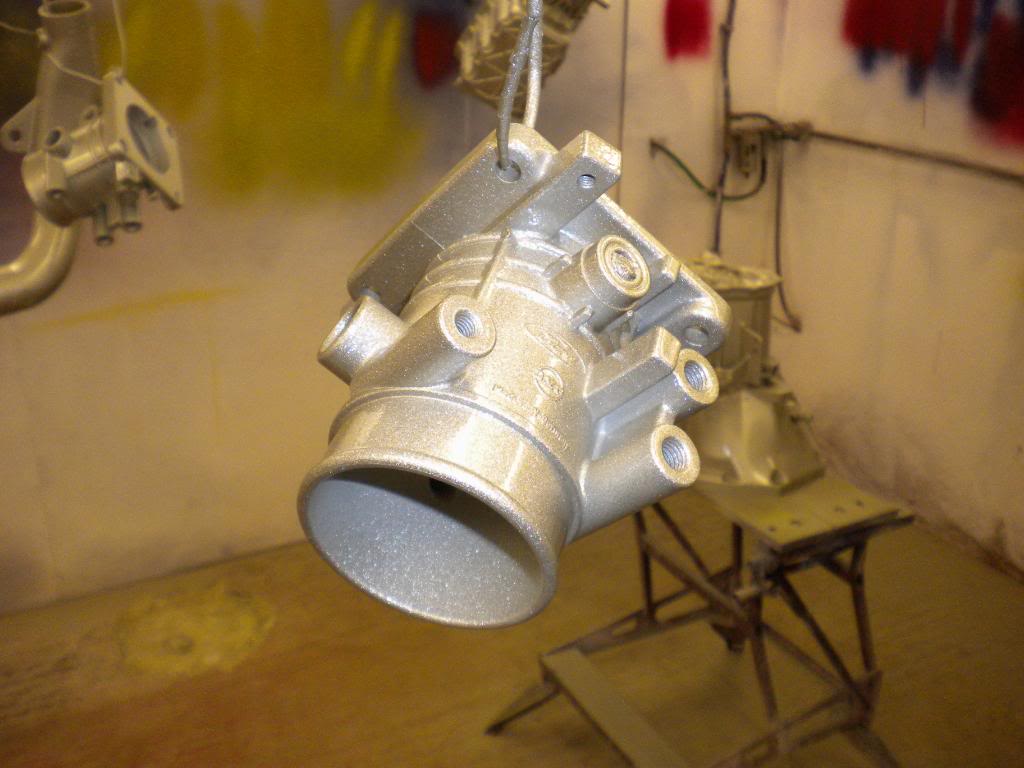
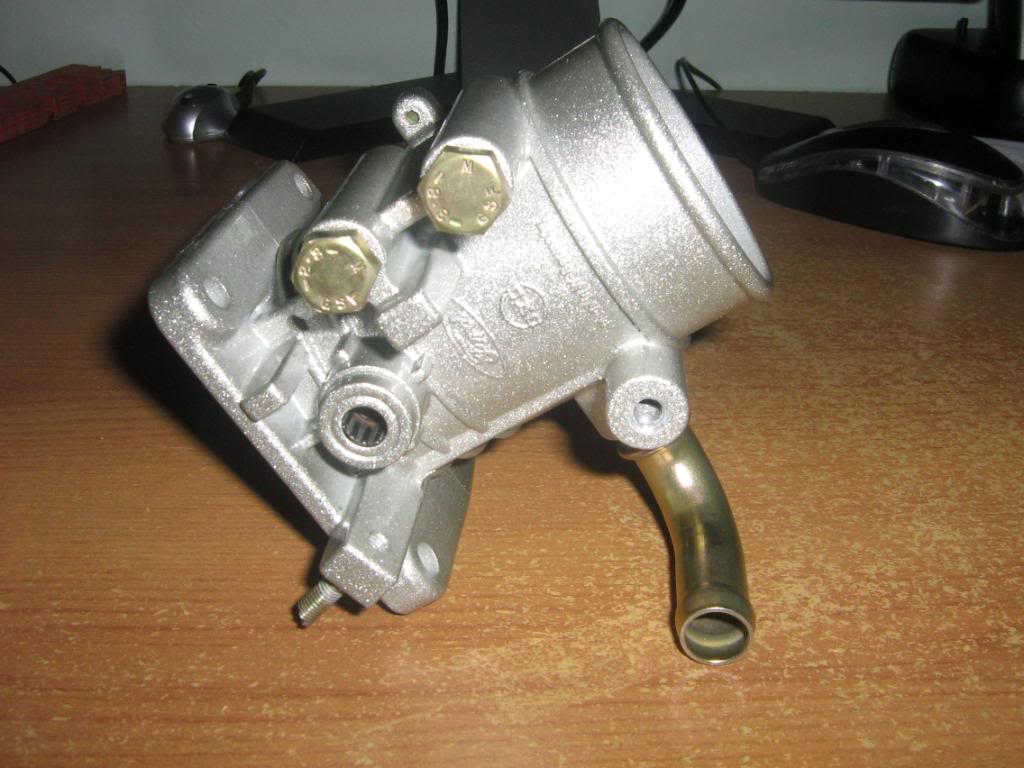
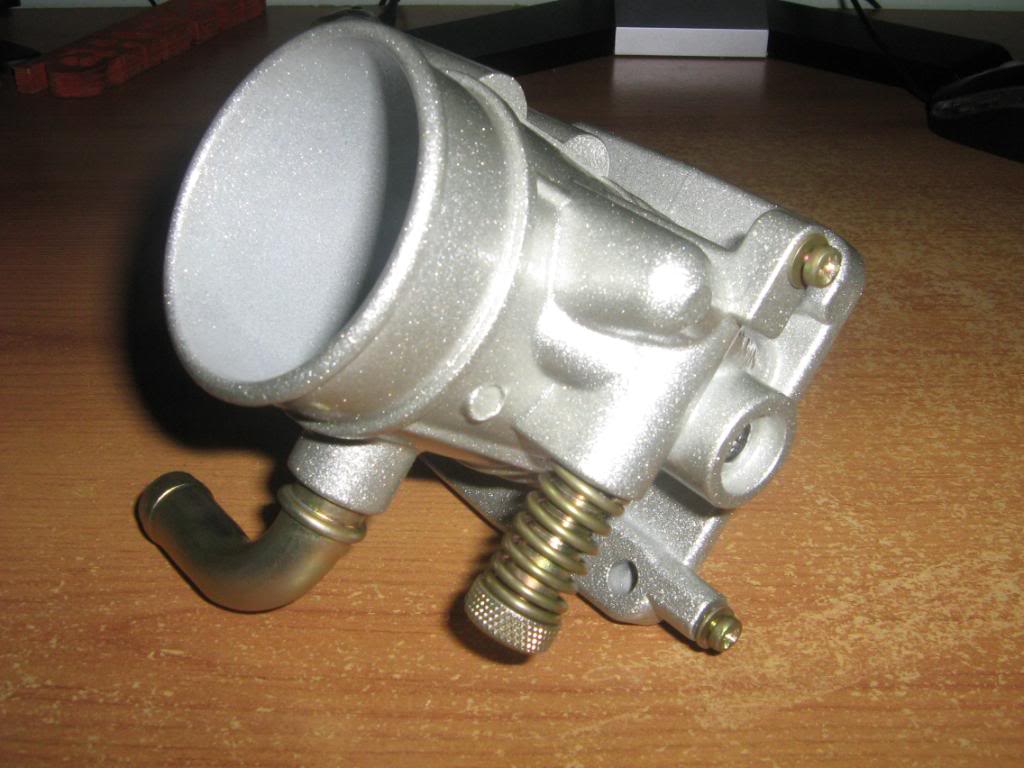
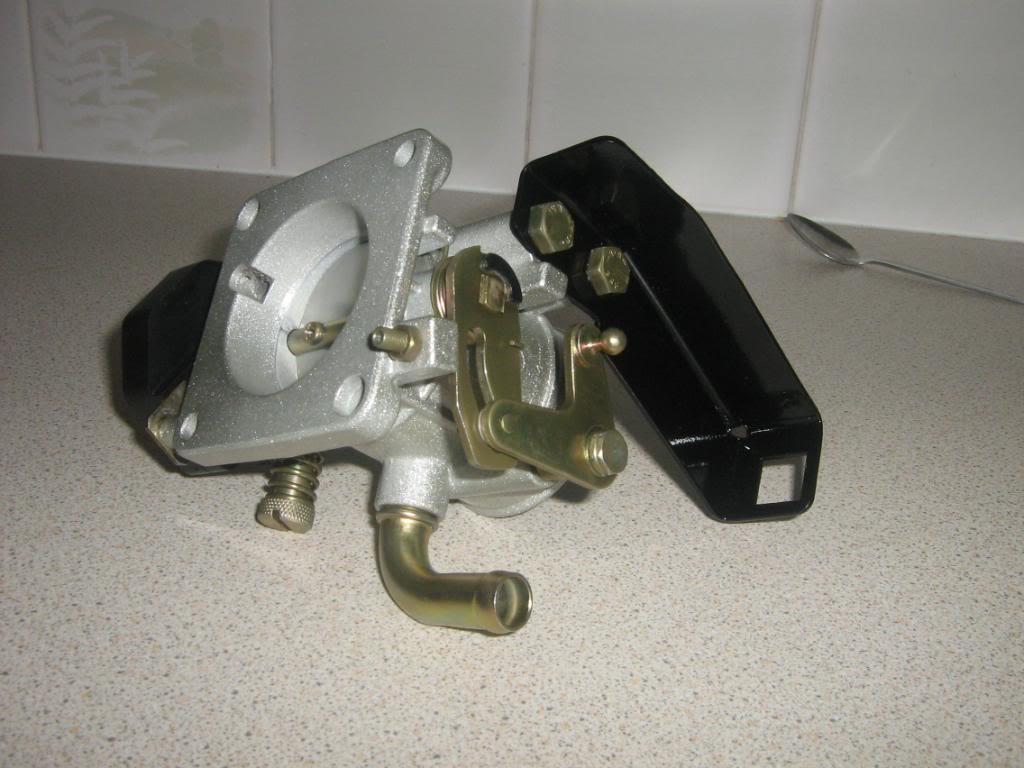
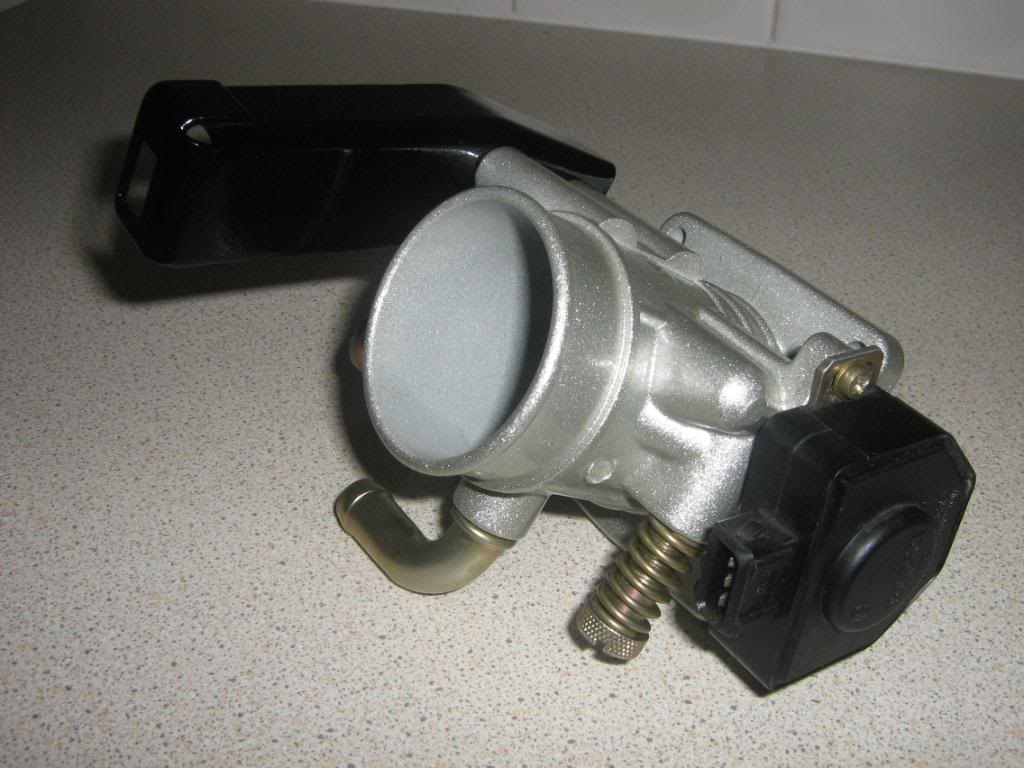
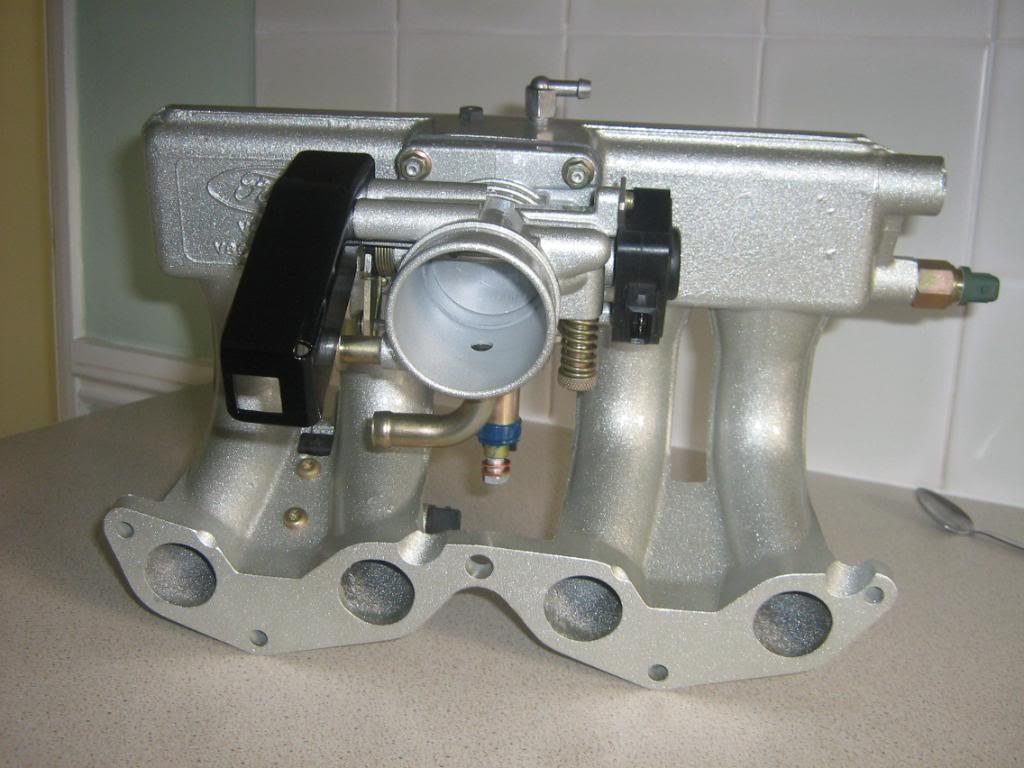
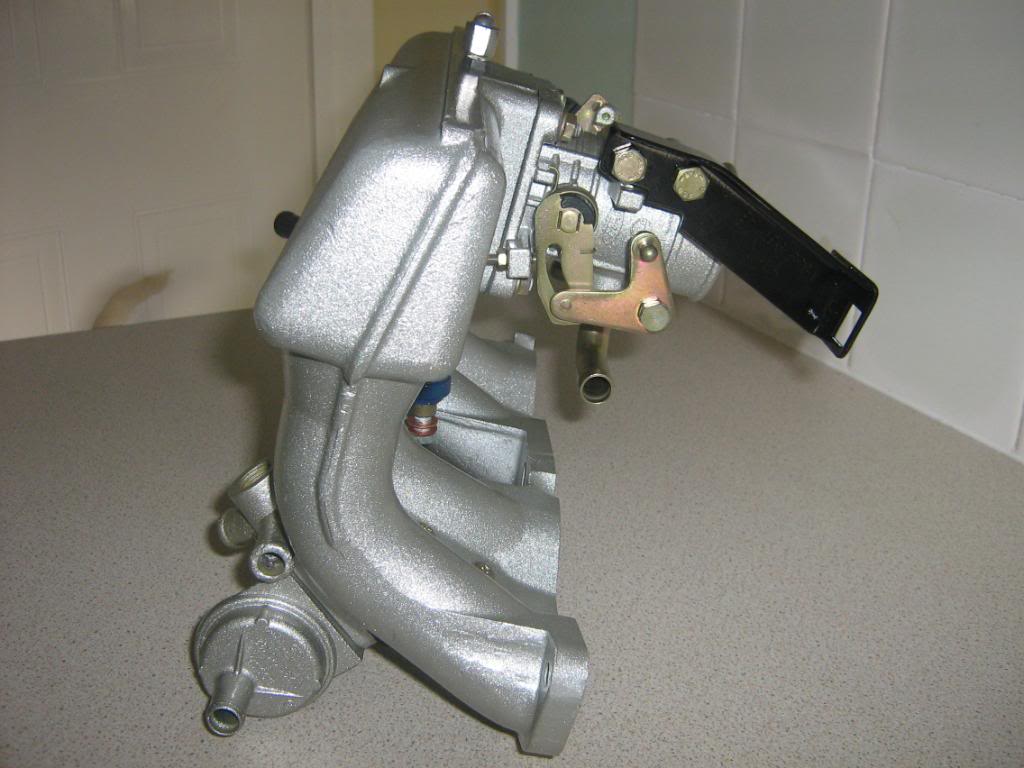
The throttle housing and manifold
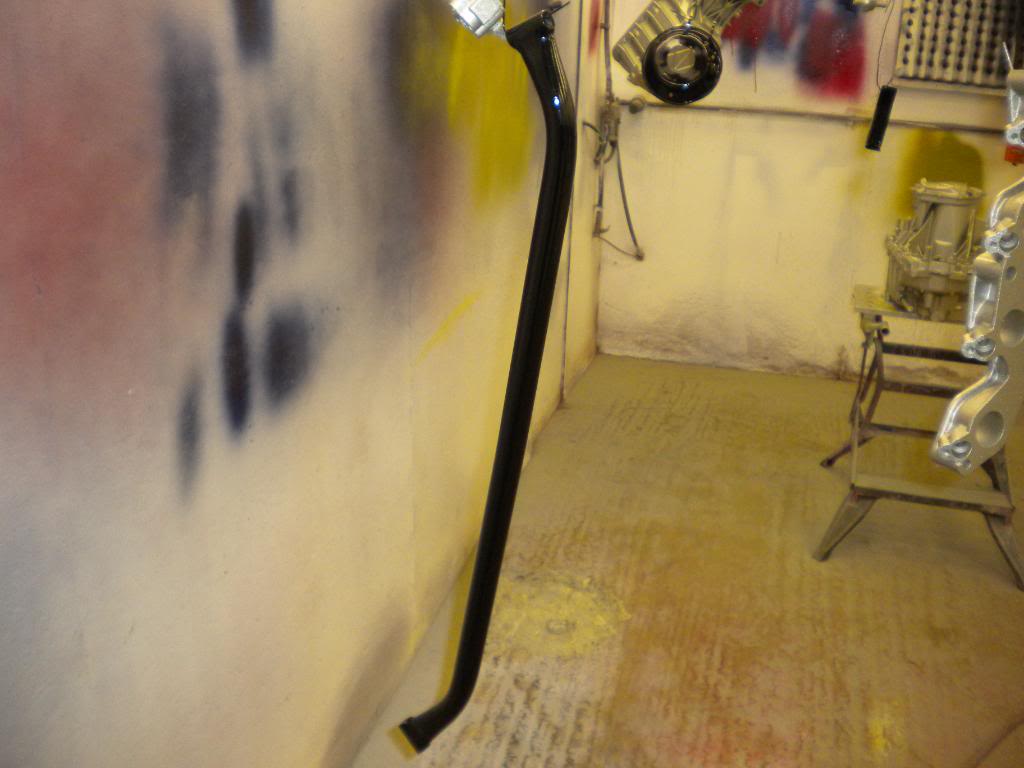
and finally the front strut brace
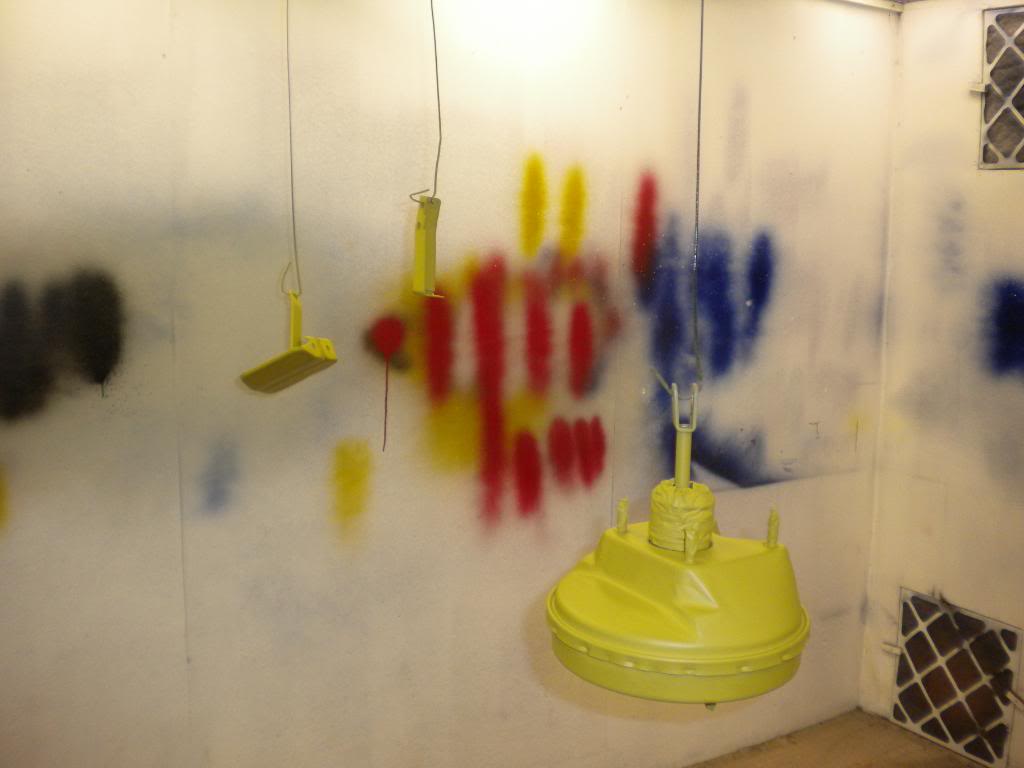
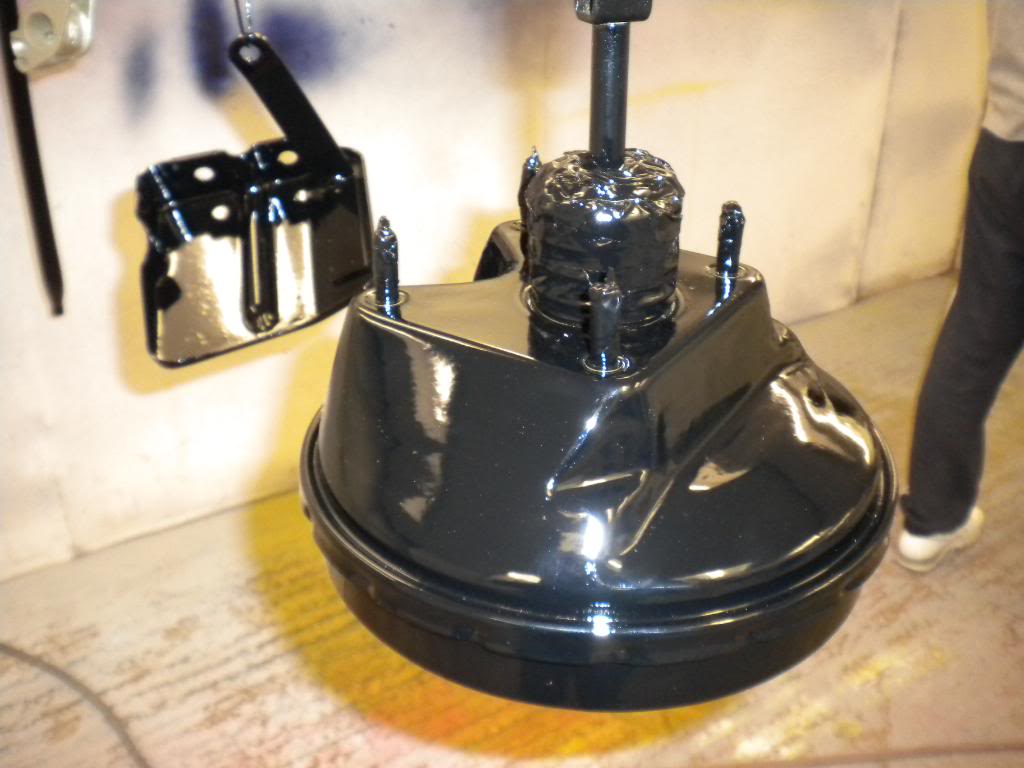
and brake servo
and accelarator mouting bracket
Gearbox - primed and then topcoat with Alumablast - decided to 2k lacquer most of the items as this will give some protection from oil,fuel etc as all the items are in the engine bay
From this
to this
With nice re zinced bolts etc
Various other items primed
Shock repainted from this
To end up like this
Then the crossover
The throttle housing and manifold
and finally the front strut brace
and brake servo
and accelarator mouting bracket

 30-12-2011, 08:34 PM
#108
Will it ever end !!!!!!!
Thread Starter
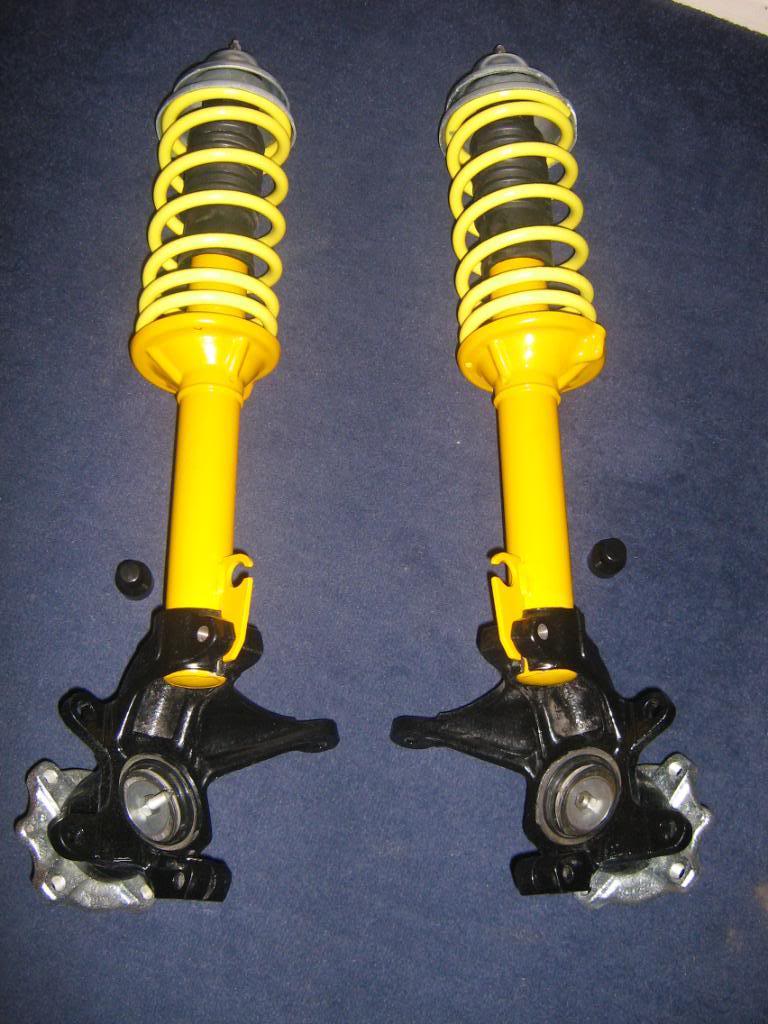
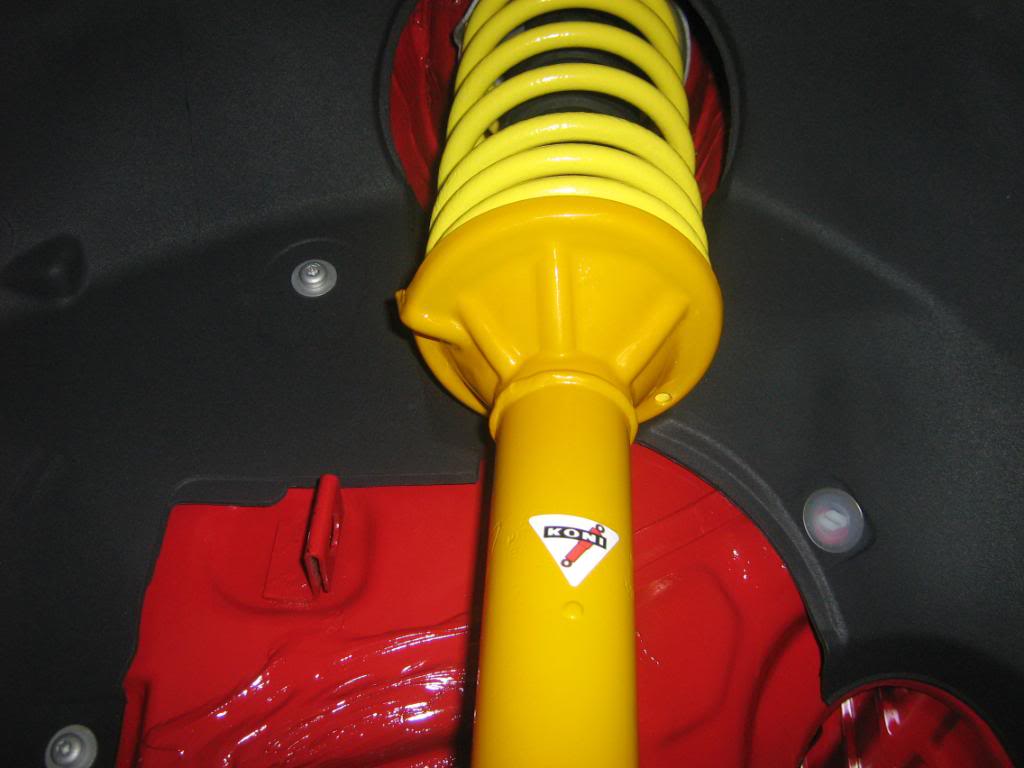
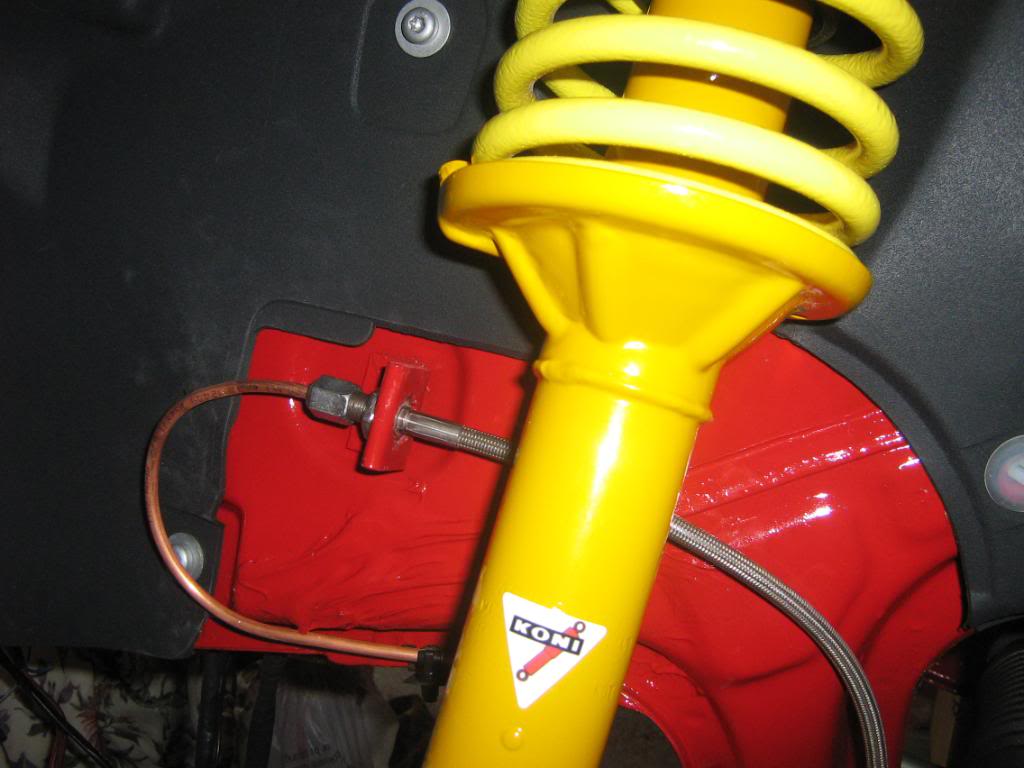
Just put together the shocks - as you can see all parts either new or refurbished so looking good now.
So to go from this to this after a bit of paint a few new parts and some re zincing i am really happy
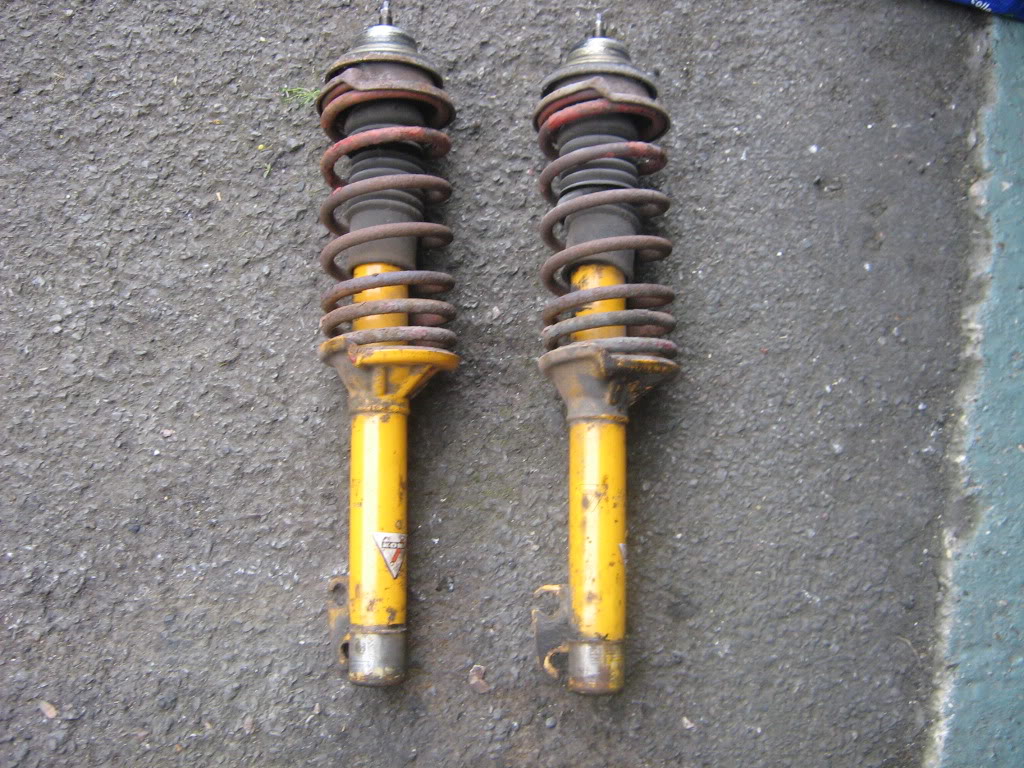
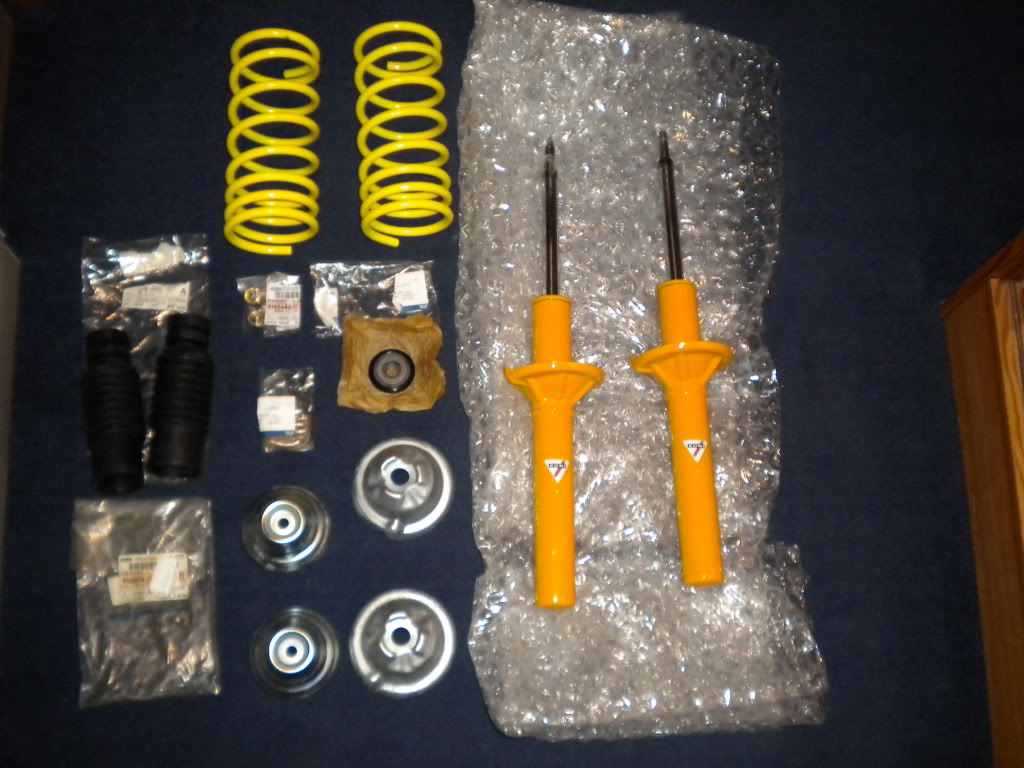
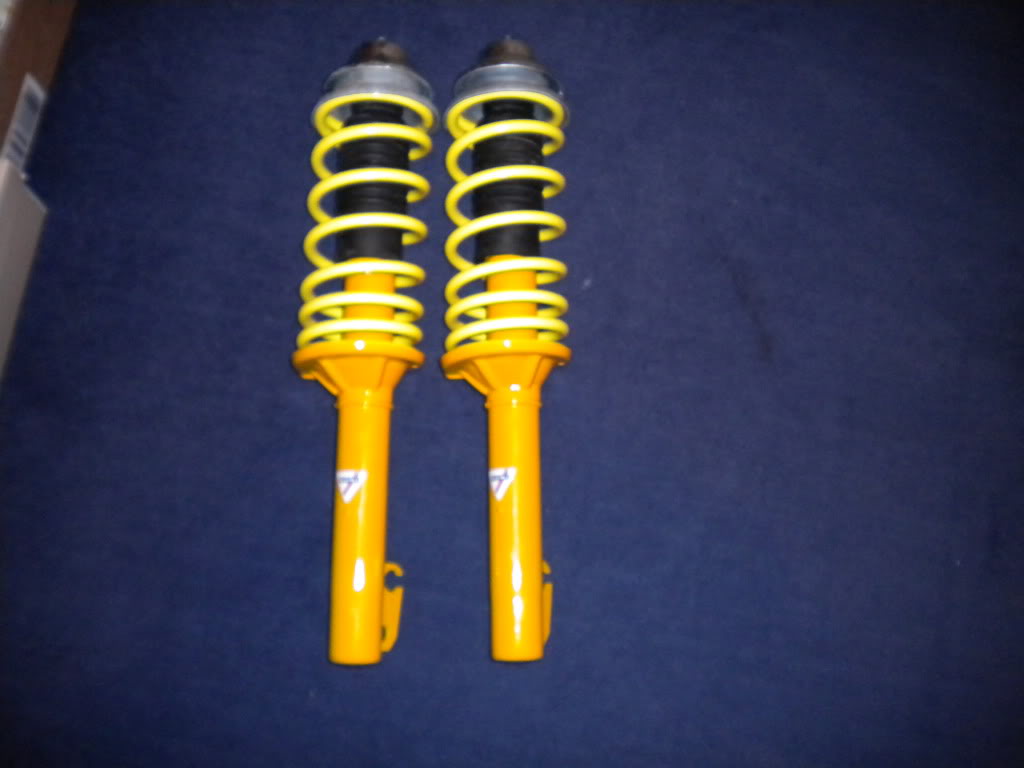
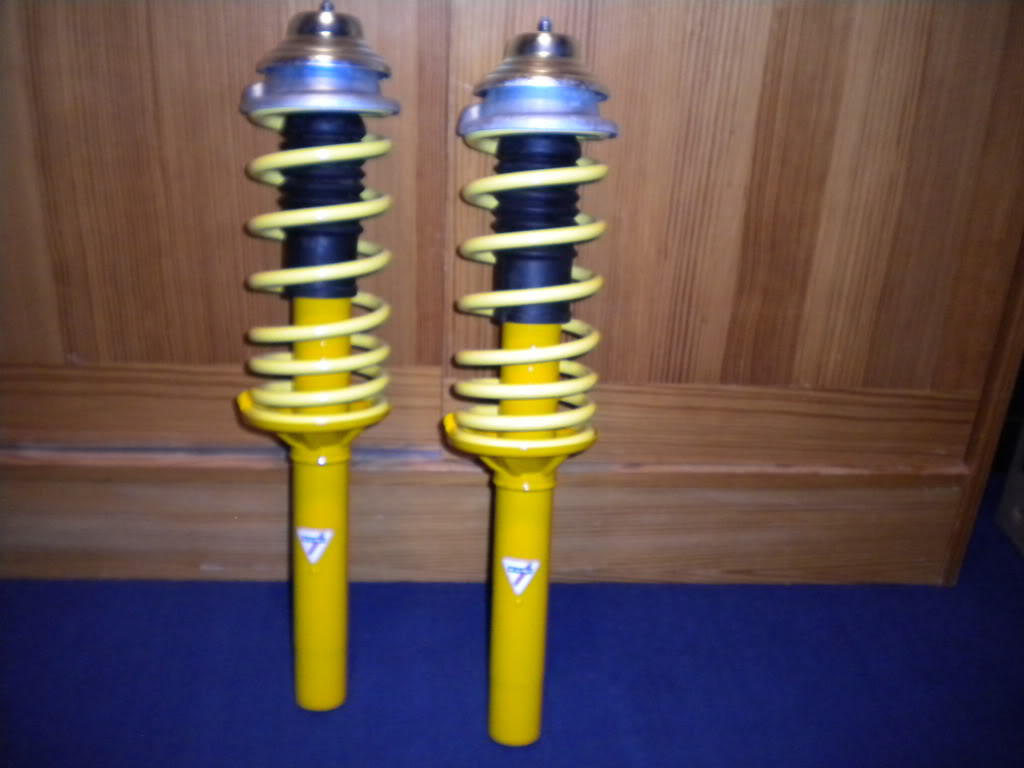
So to go from this to this after a bit of paint a few new parts and some re zincing i am really happy
30-12-2011, 08:46 PM
#109

I just looked through the whole thread and think you have done an amazing job the car looks really well now the only thing im not to keen on is the chrome plate on the slam panel round the bonnet latch but thats just my opinion.
Keep up the good work pal and will keep an eye out for you at some shows in the new year.
Cheers Bram
Keep up the good work pal and will keep an eye out for you at some shows in the new year.
Cheers Bram
30-12-2011, 09:02 PM
#110

Got the connector of a guy on ebay - provided the braided fuel line with the connector already fitted and this just slots over the metal fuel line - perfect fit - �30 + about �4 post for the hose with the connectors (includes the banjo fitting for the fuel pump also well so its basically a plug and play jobbie).
Just a quick question I dont suppose you remember the guy from ebays name do you?
30-12-2011, 09:02 PM
#111
Will it ever end !!!!!!!
Thread Starter
I just looked through the whole thread and think you have done an amazing job the car looks really well now the only thing im not to keen on is the chrome plate on the slam panel round the bonnet latch but thats just my opinion.
Keep up the good work pal and will keep an eye out for you at some shows in the new year.
Cheers Bram
Keep up the good work pal and will keep an eye out for you at some shows in the new year.
Cheers Bram
30-12-2011, 09:06 PM
#112
Will it ever end !!!!!!!
Thread Starter
http://www.ebay.co.uk/itm/Escort-S2-...item20b336eade
09-04-2012, 07:55 PM
#113
Will it ever end !!!!!!!
Thread Starter
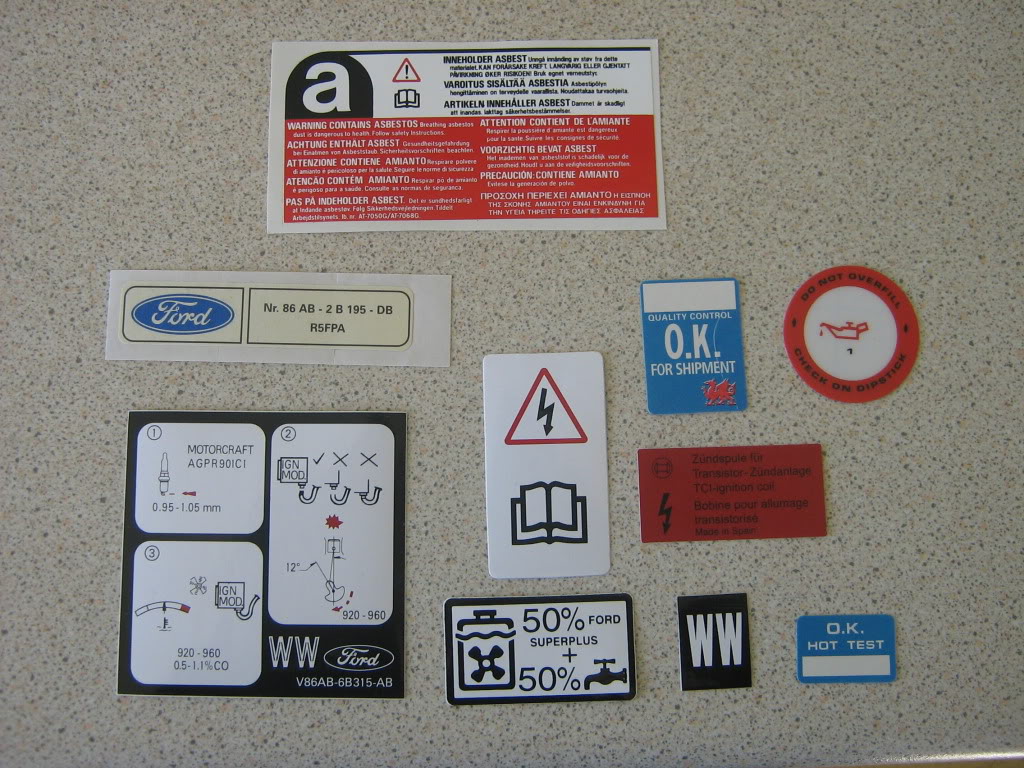
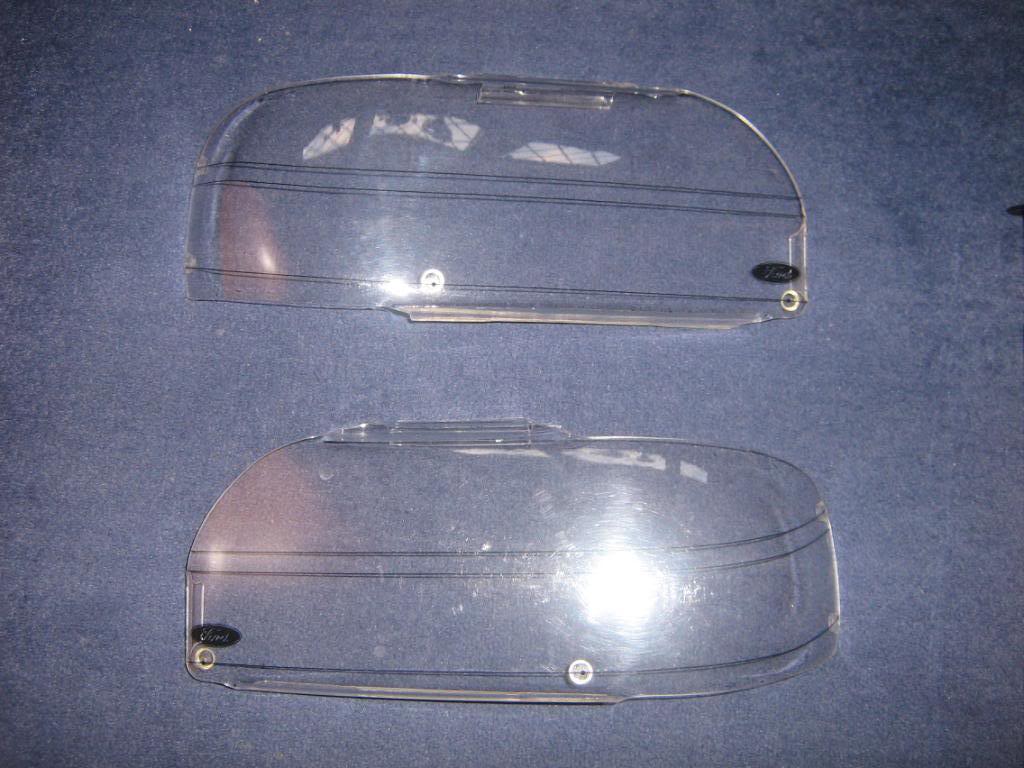
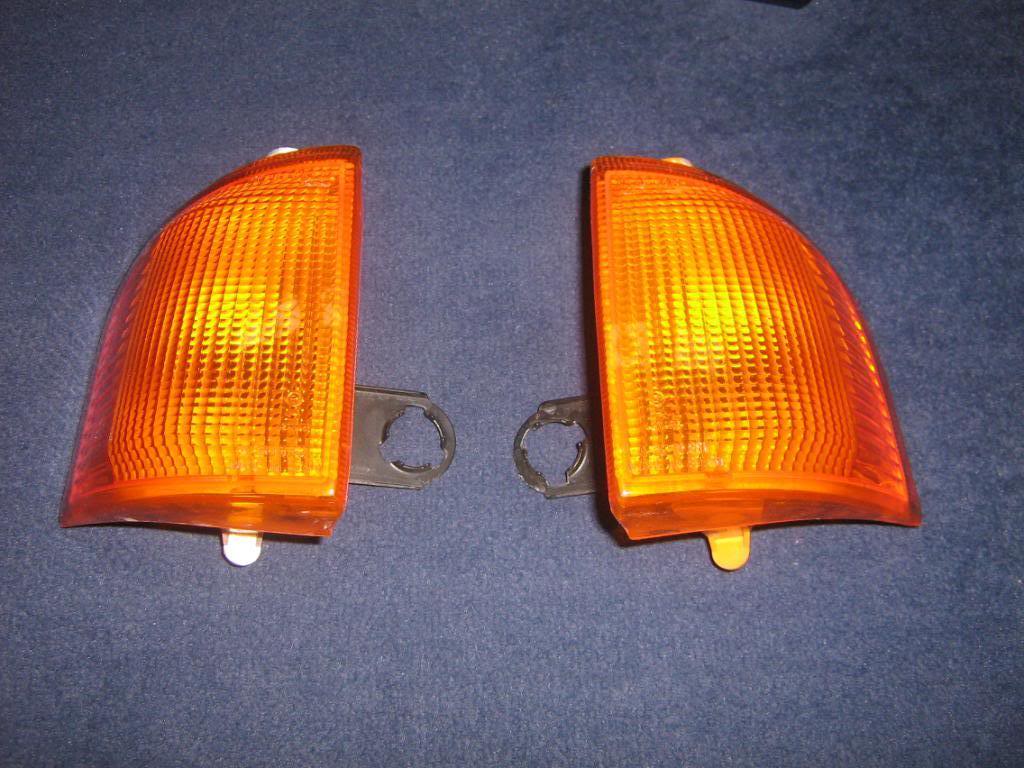
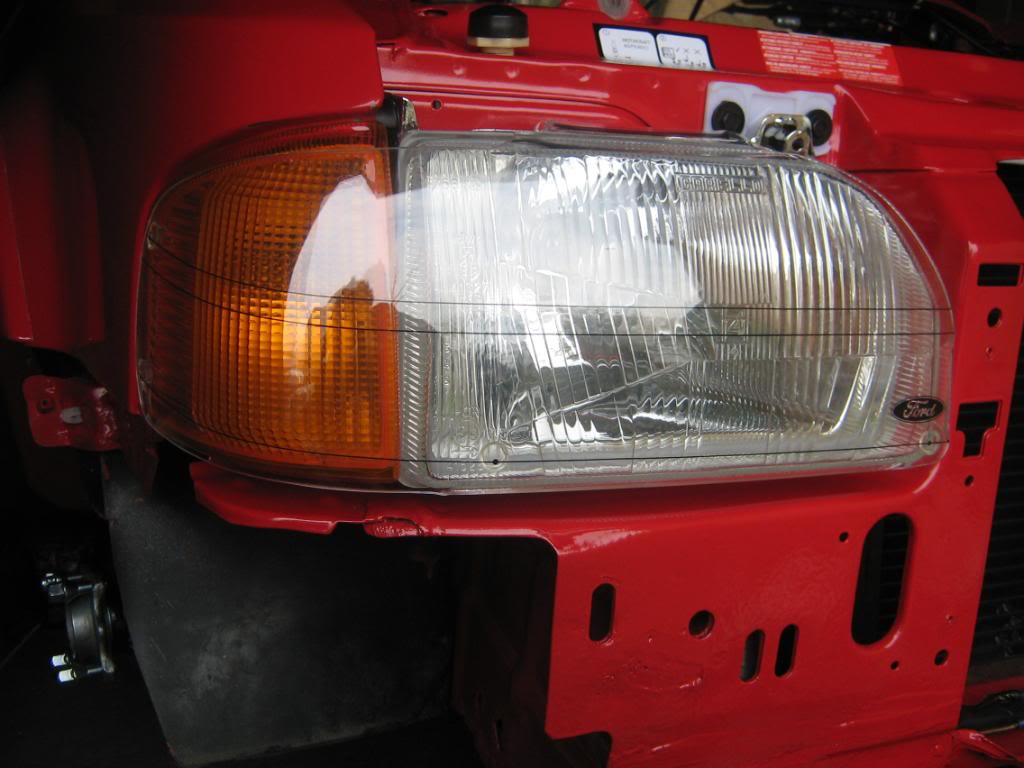
Bit of an update - completed quite a few things recently but probably best to just let the pics do the talking

Got some new rears, some stickers, light protectors and ambers as well
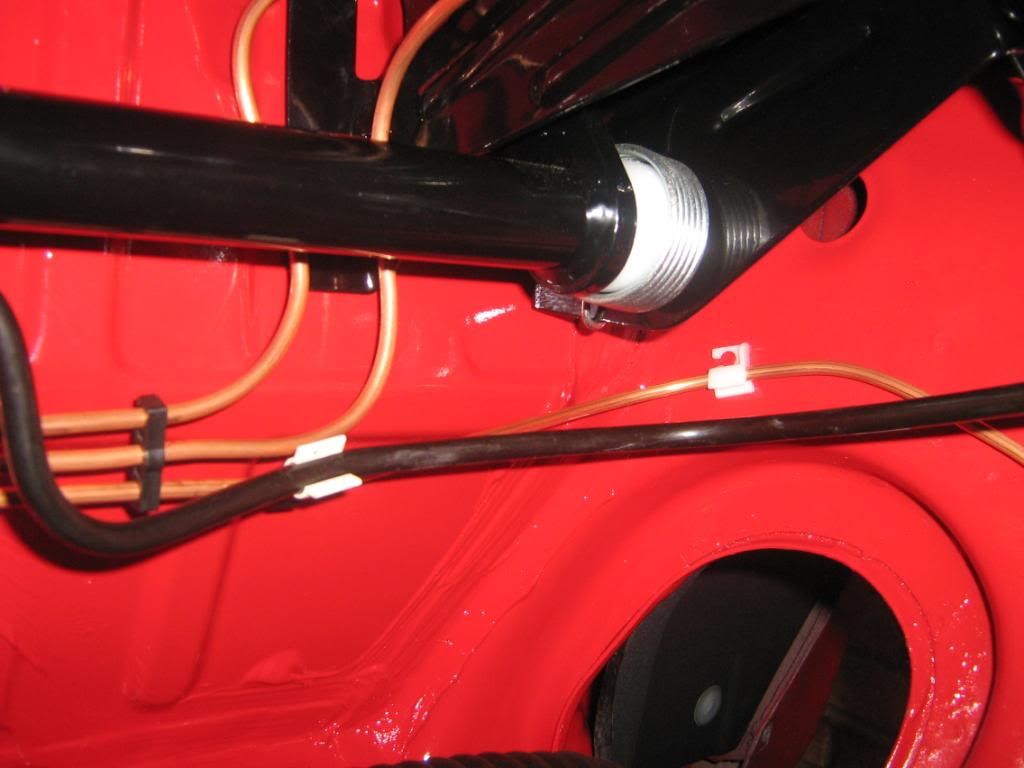
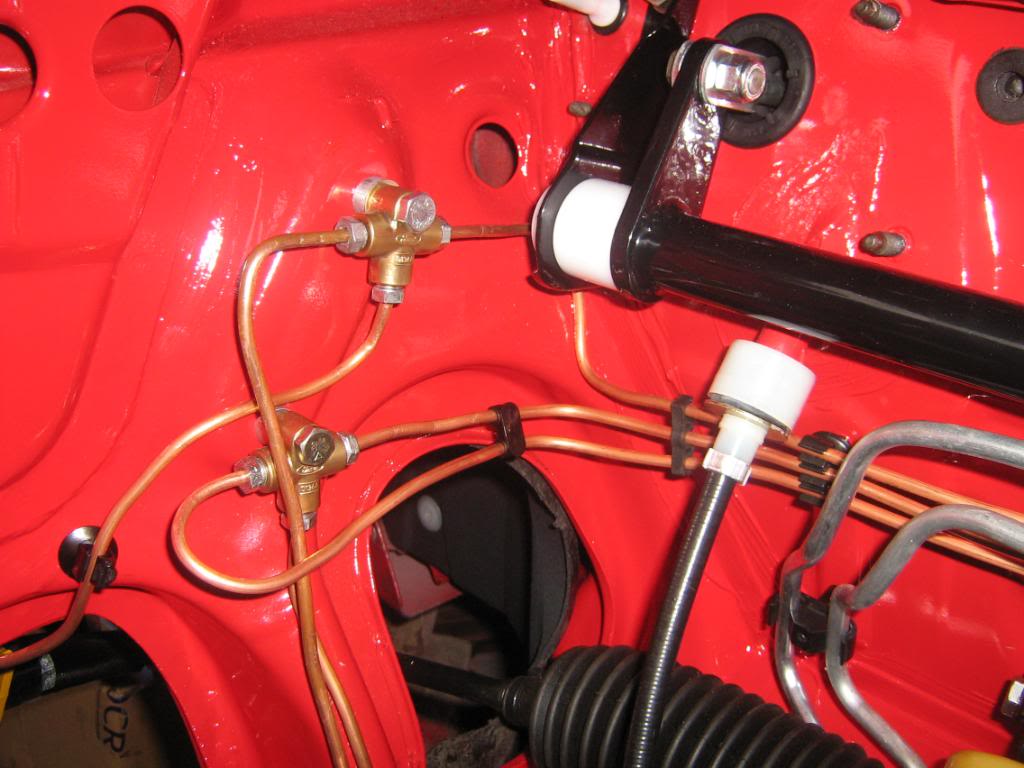
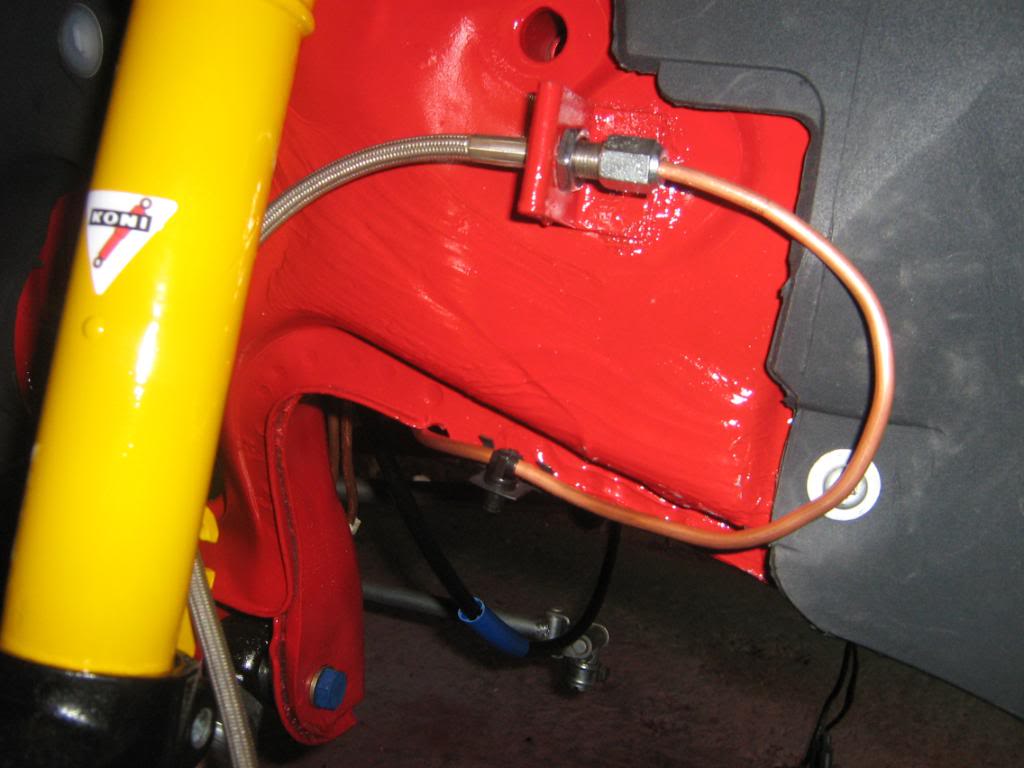
Also sorted new brake lines all round as well now that ABS is all removed
Got some new rears, some stickers, light protectors and ambers as well
Also sorted new brake lines all round as well now that ABS is all removed
Last edited by s2turbsZVH; 09-04-2012 at 08:10 PM.
19-04-2012, 10:08 AM
#115
Will it ever end !!!!!!!
Thread Starter
27-04-2012, 10:08 AM
#117
Will it ever end !!!!!!!
Thread Starter
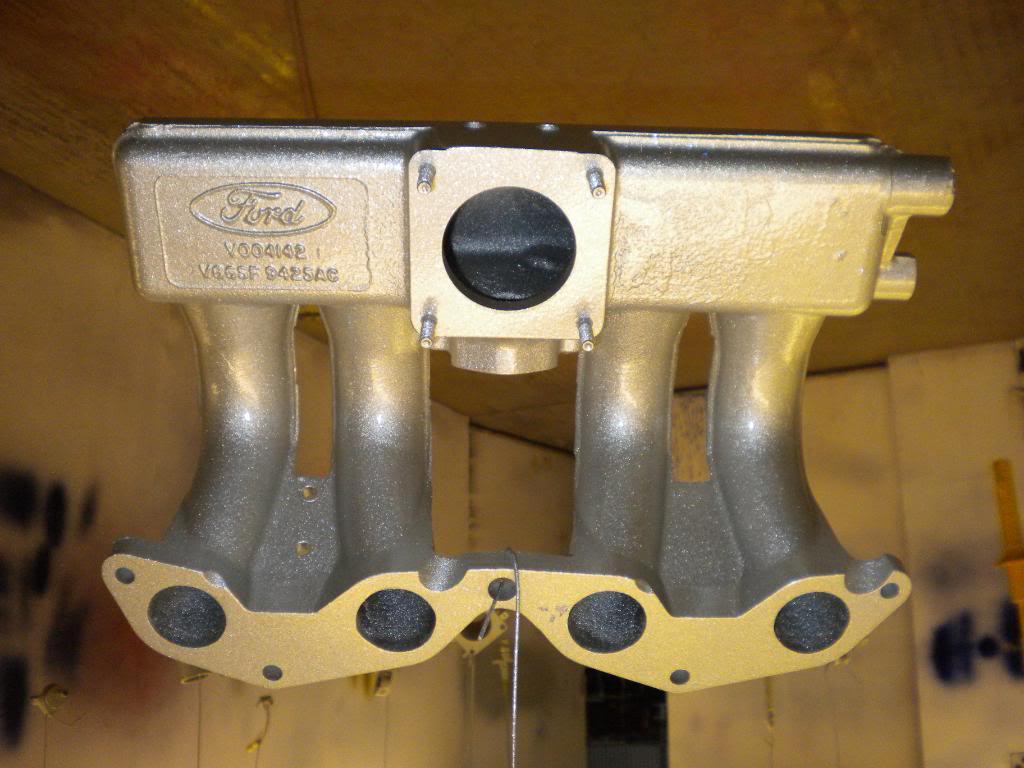
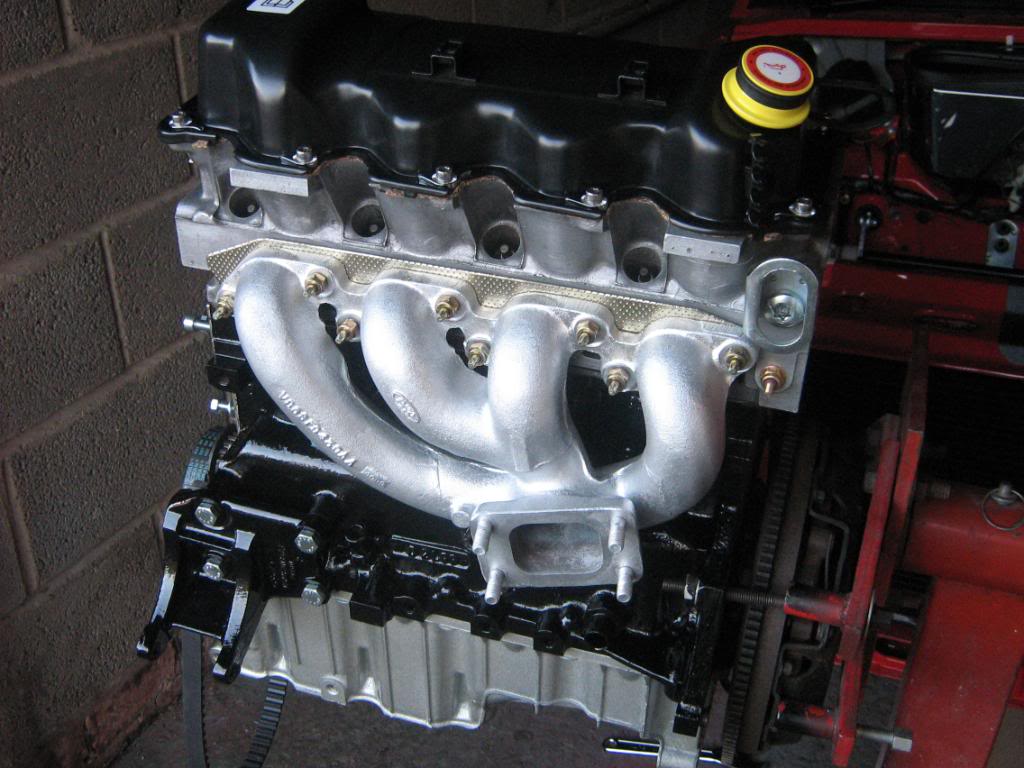
Engine update - been tidying up the engine recently and this is where its at :-
New gaskets, manifold studs, new temp sensor, repainted block, sump painted in alumblast and 2k laquered and manifold re zinced.
Also new stickers and oil filler cap to reflect standard as close as possible but witha bit of a twist - painted rocker cover, painted sump etc.
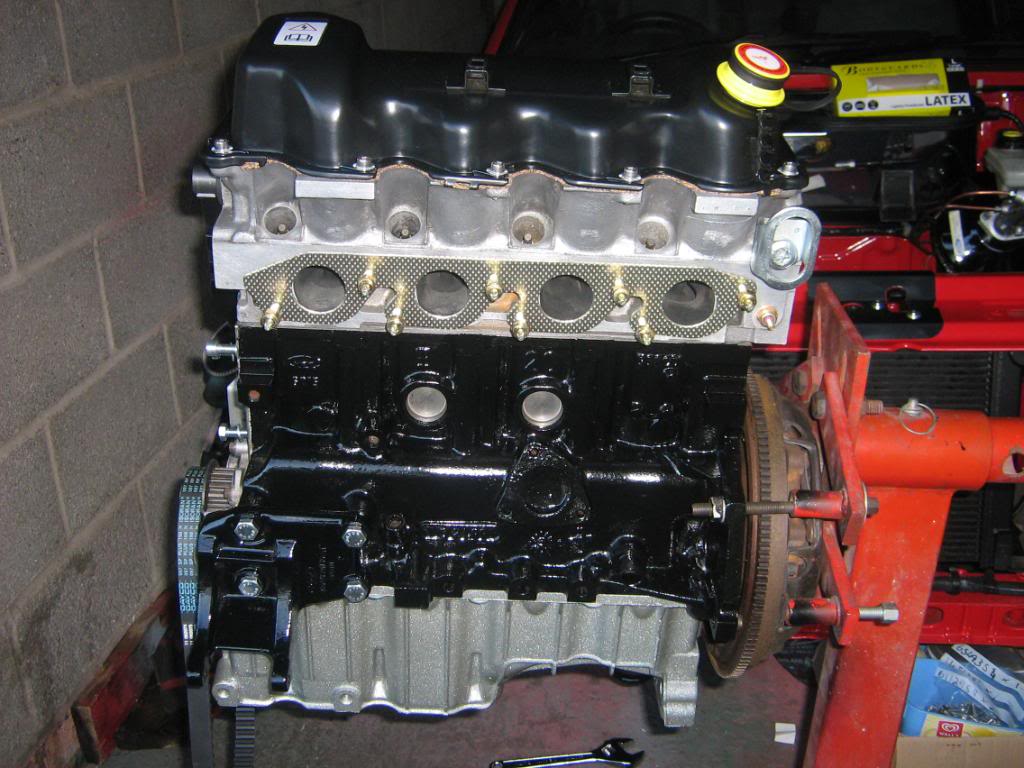
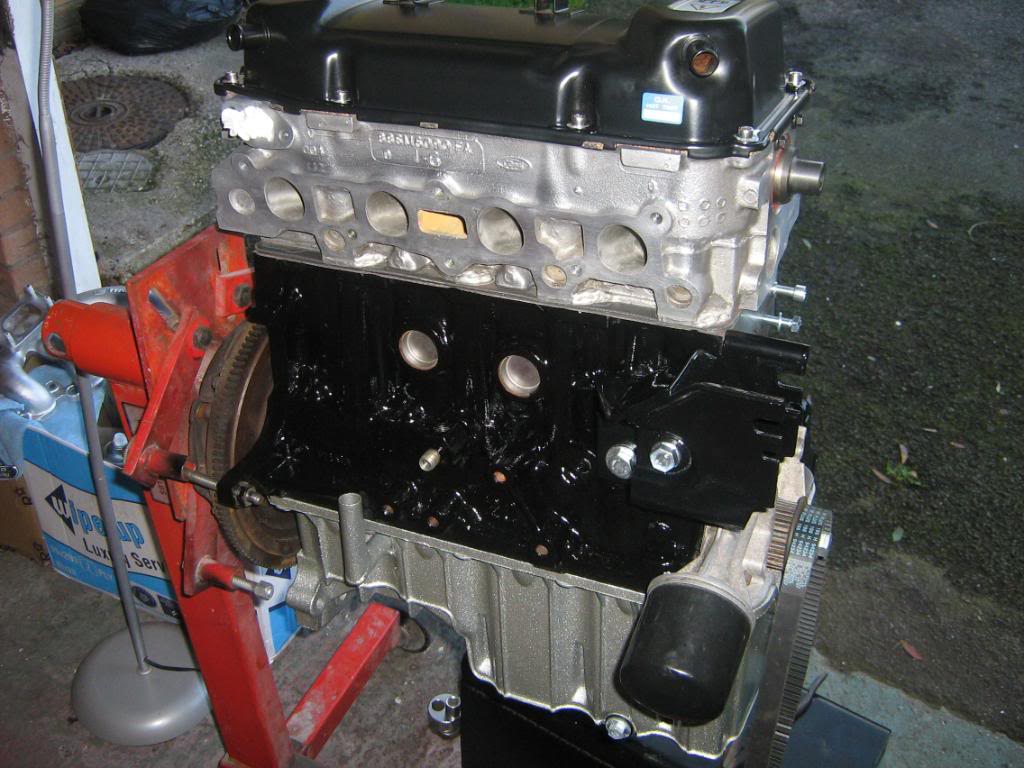
Again more to follow over the weekend
New gaskets, manifold studs, new temp sensor, repainted block, sump painted in alumblast and 2k laquered and manifold re zinced.
Also new stickers and oil filler cap to reflect standard as close as possible but witha bit of a twist - painted rocker cover, painted sump etc.
Again more to follow over the weekend
27-04-2012, 05:48 PM
#120
Will it ever end !!!!!!!
Thread Starter
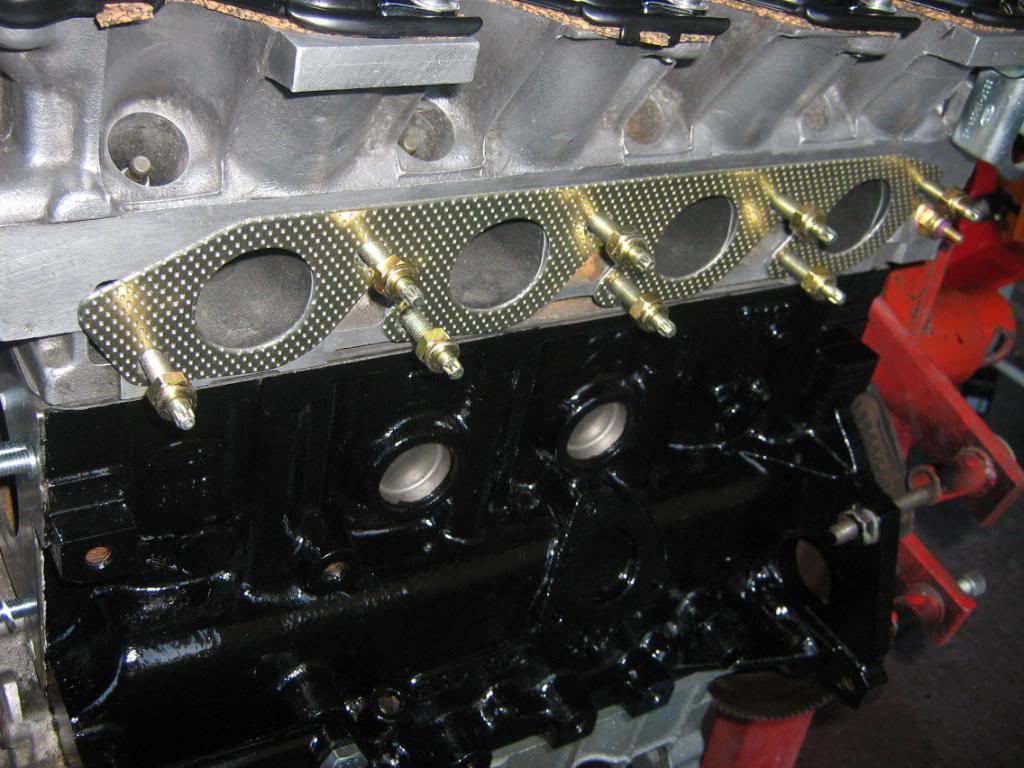
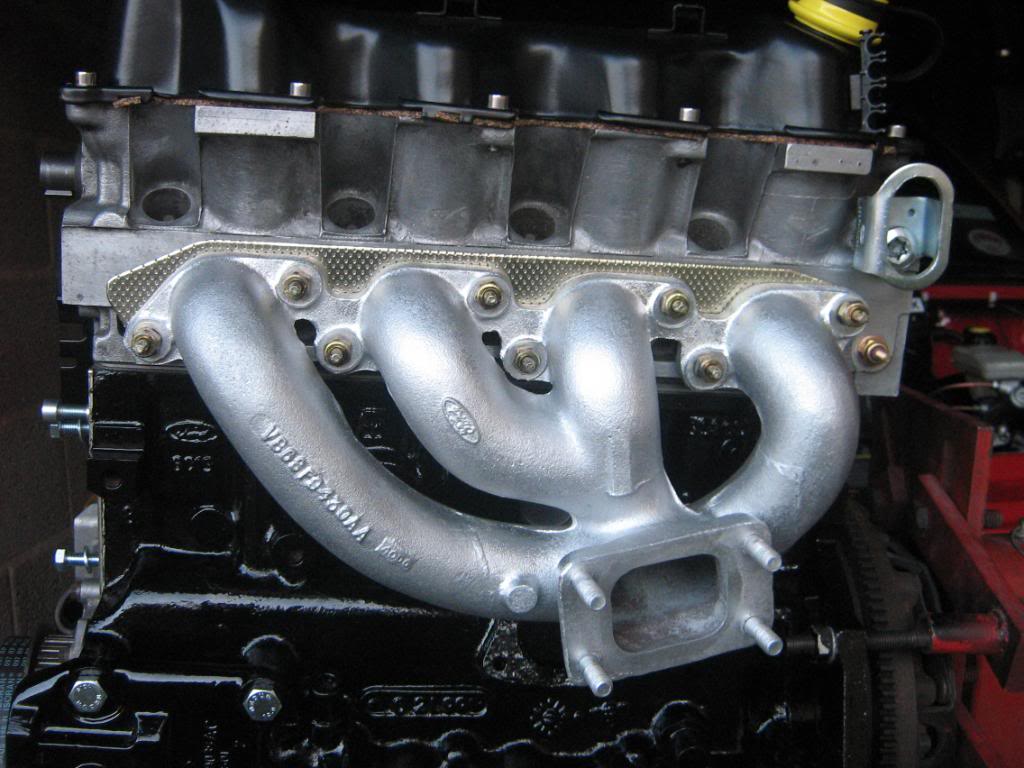
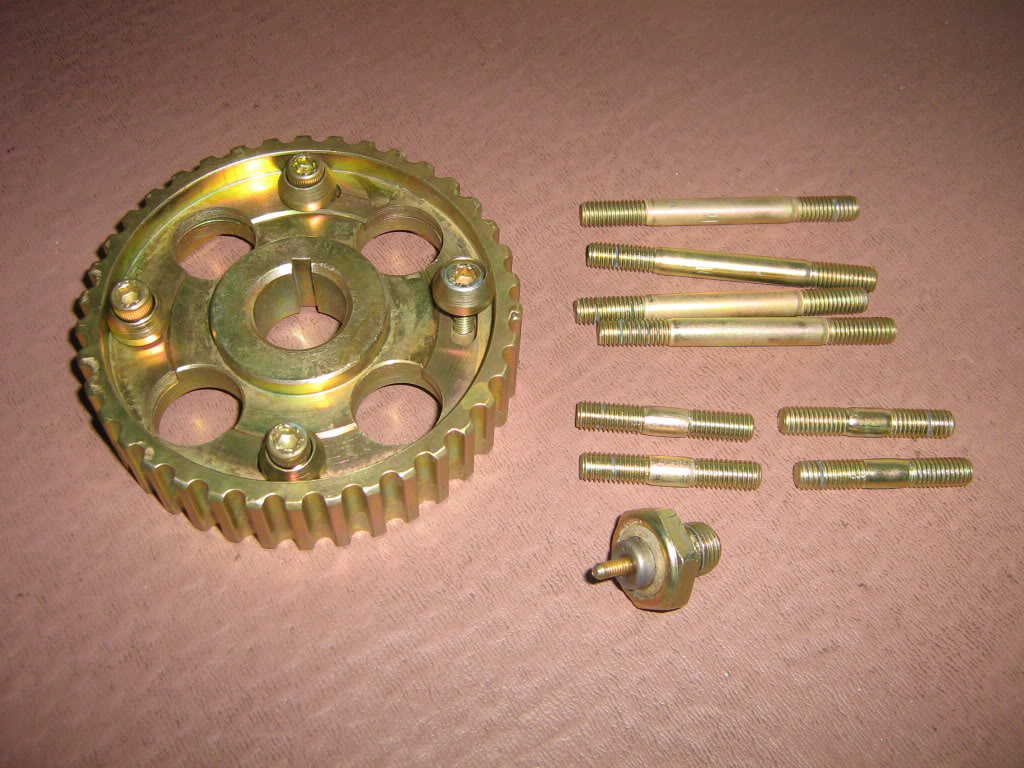
Some items back from zinc plating today so engine build can finally get finished
Adjustable vernier, inlet manifold and other studs and oil sensor
Adjustable vernier, inlet manifold and other studs and oil sensor