
Puma 'Black' Project


Thread Starter
Wahay!! I've lost my Virginity!!
Joined: Aug 2008
Posts: 58
Likes: 0
From: West Yorkshire
I haven't posted this on here before, but have had it on ProjectPuma, PumaPeople and ZSOC, the following is a summary of my progress since Oct'08, hope it kind of makes sense!
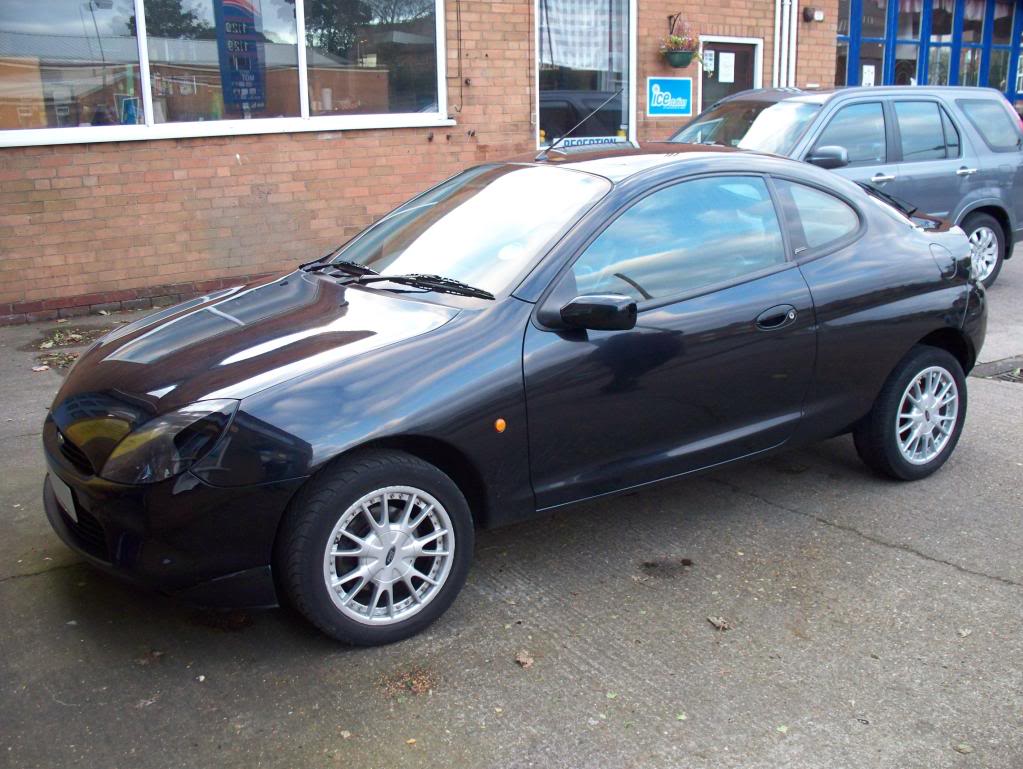
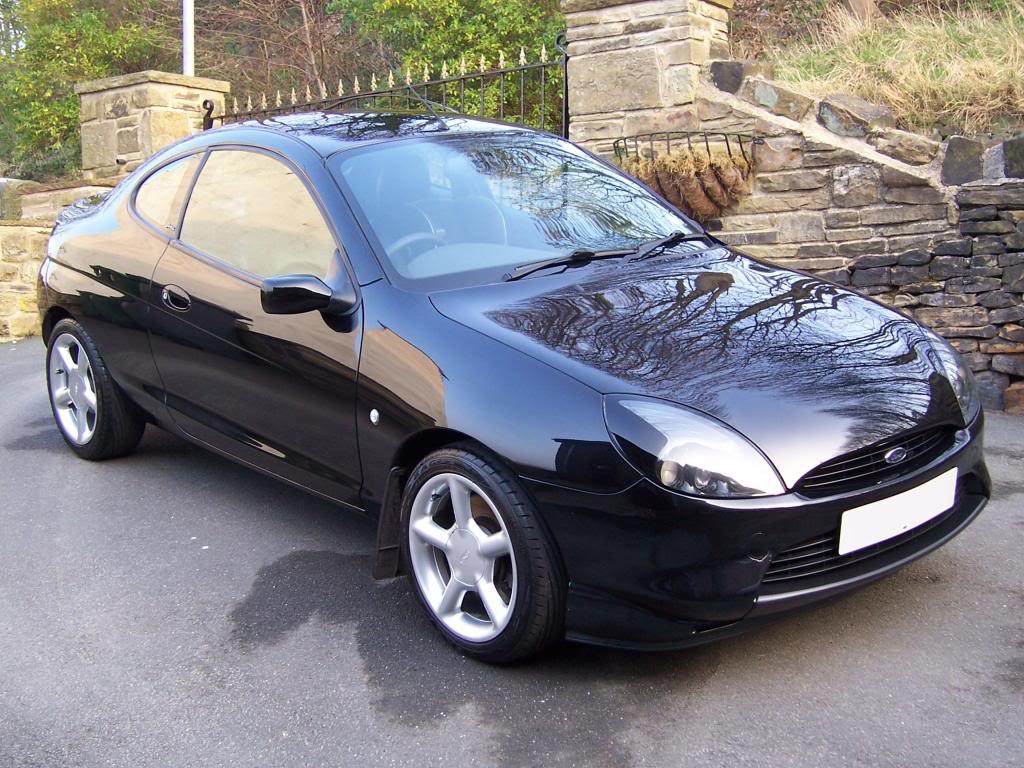
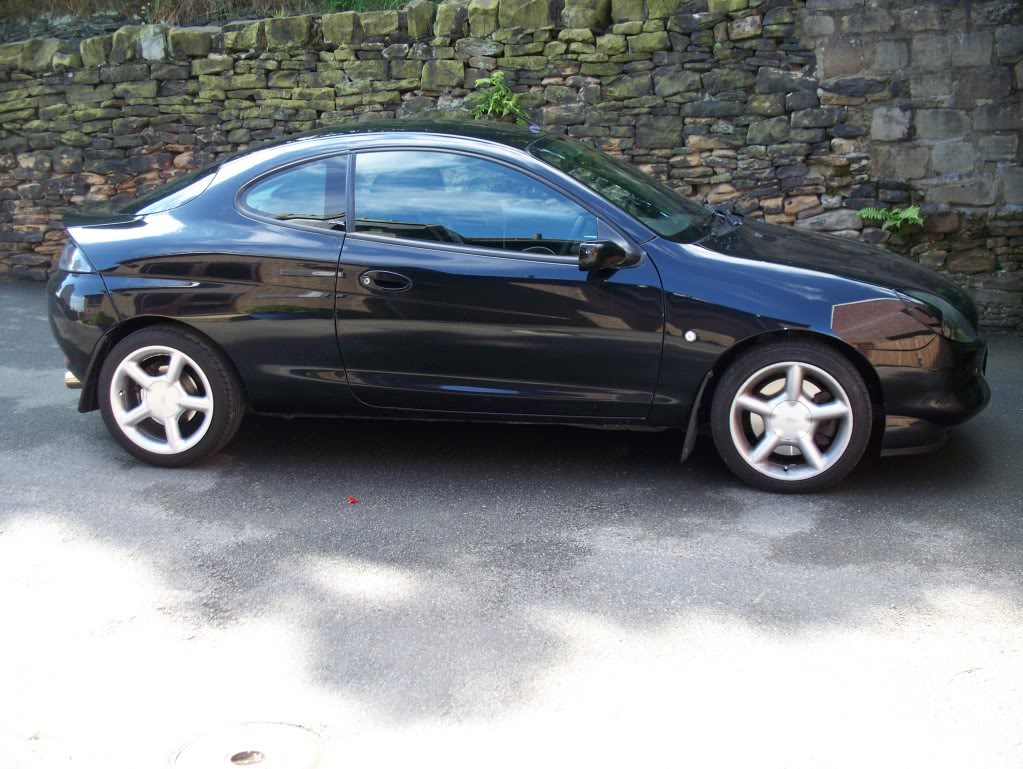
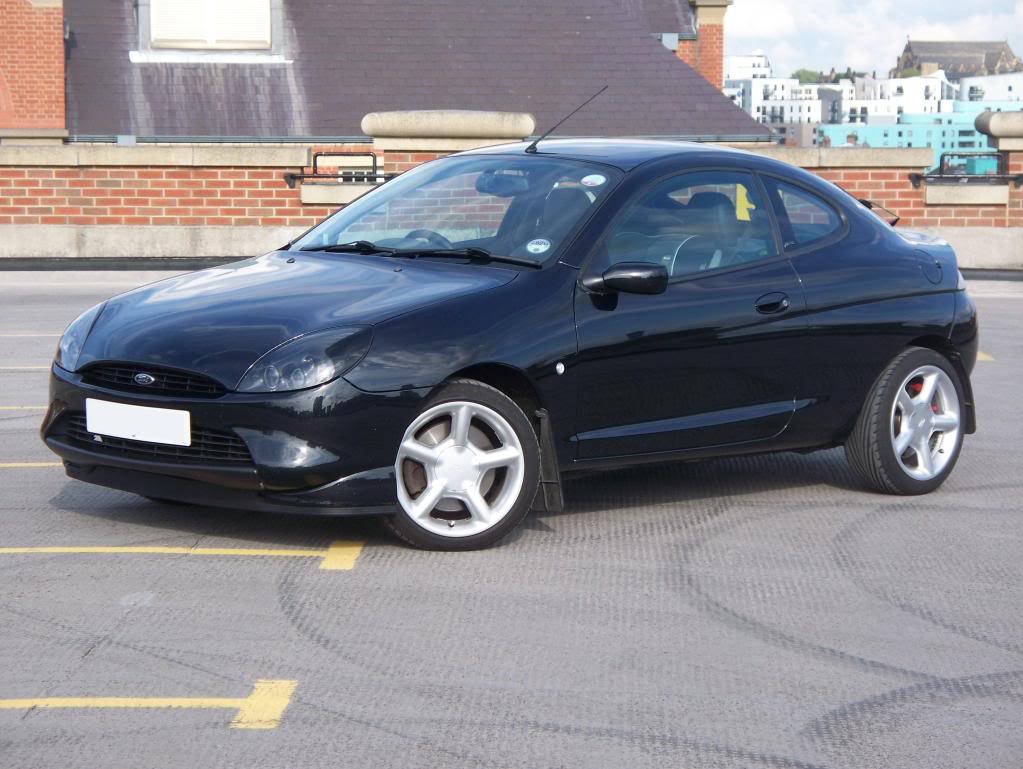
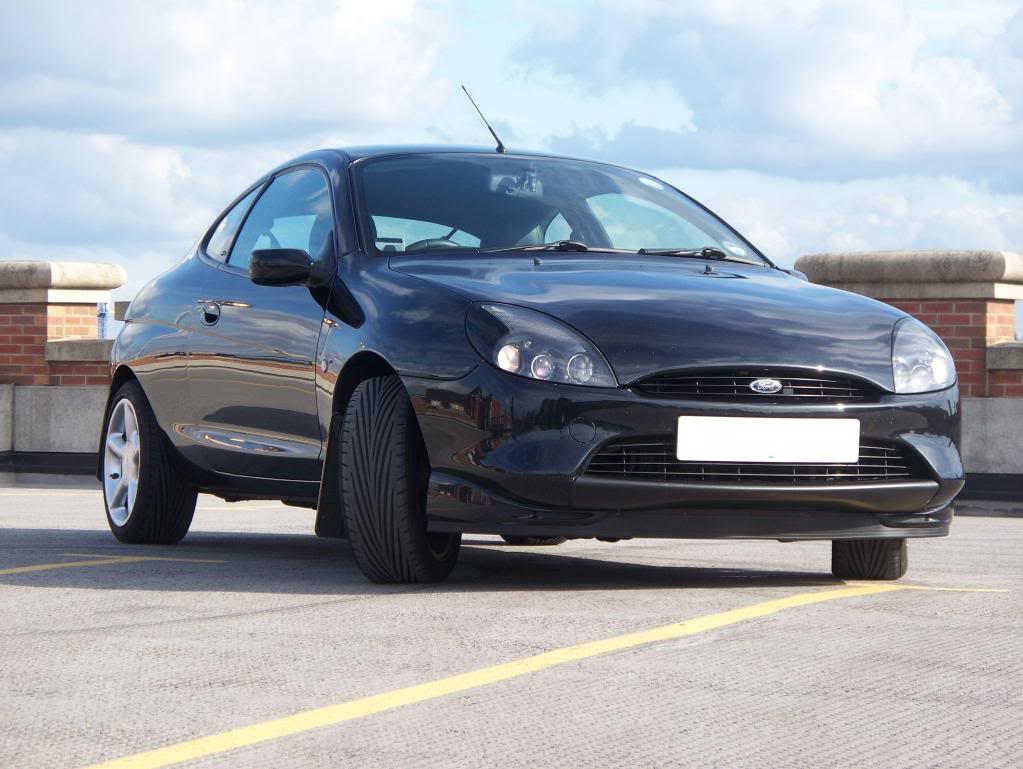
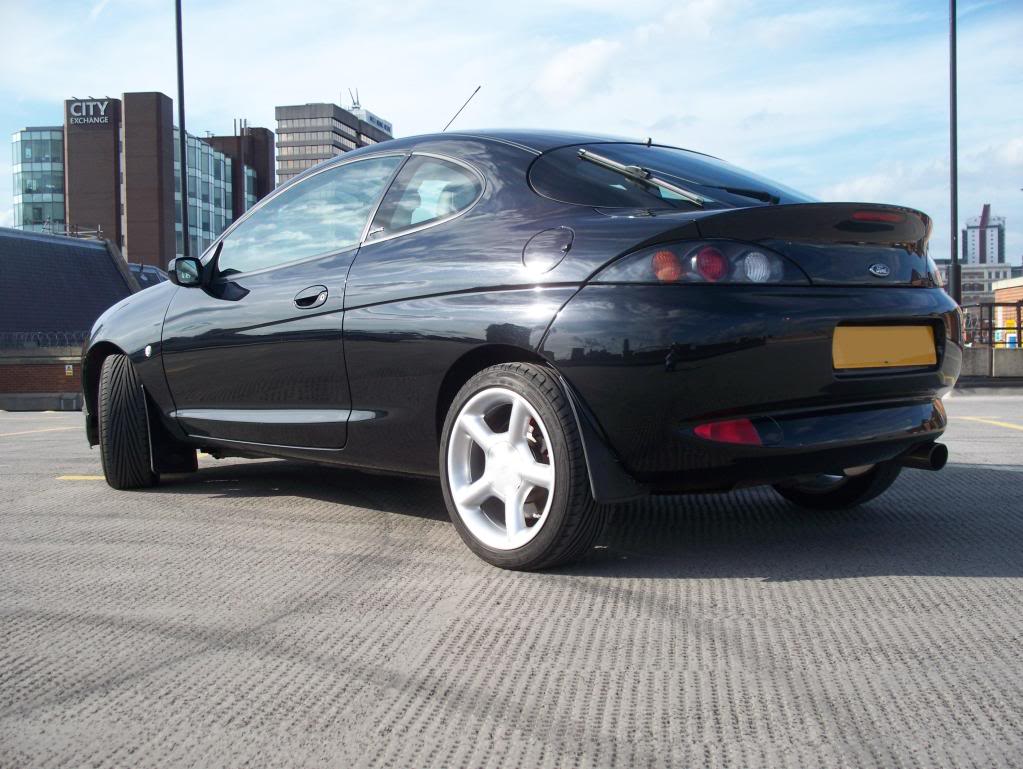
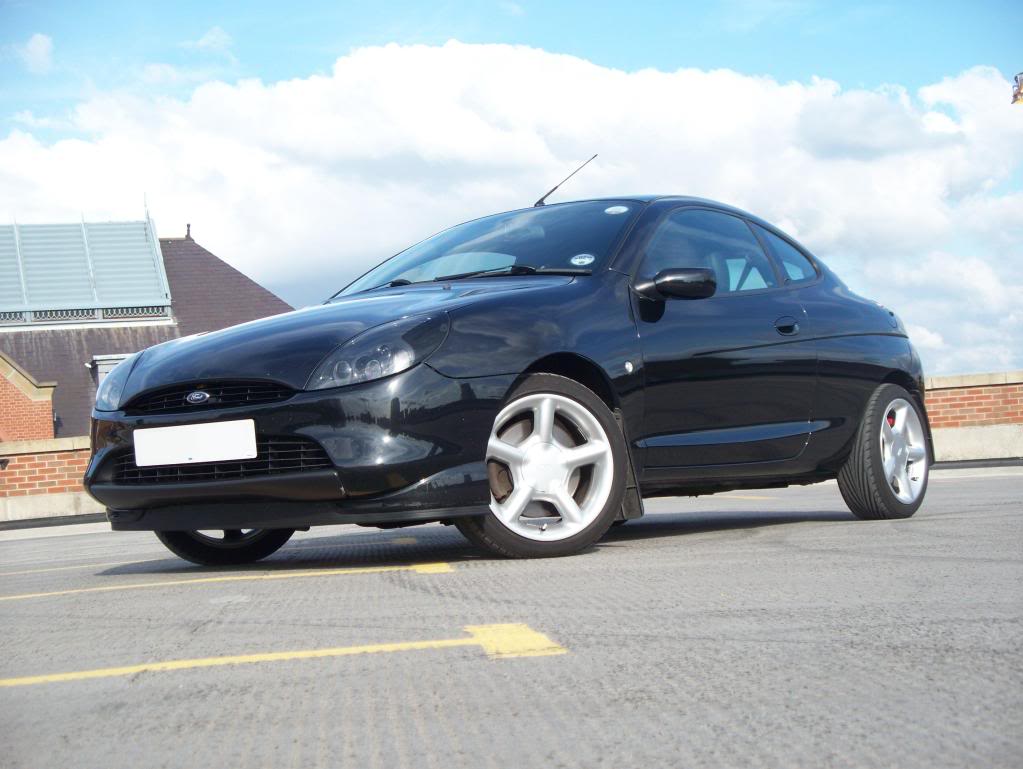
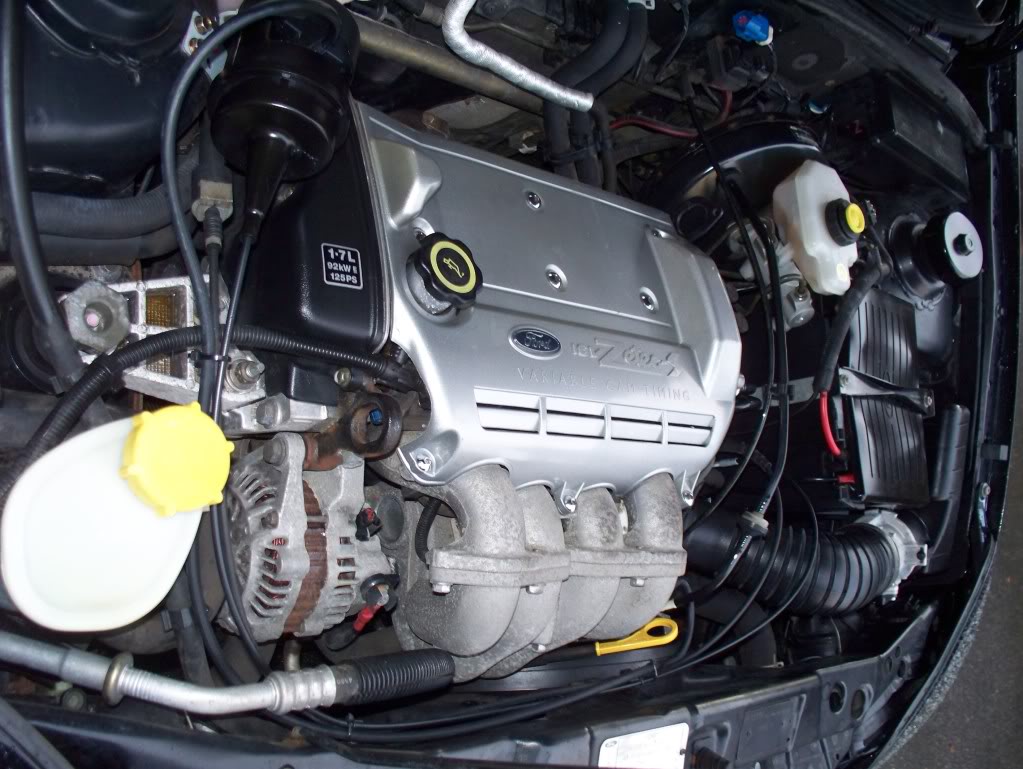
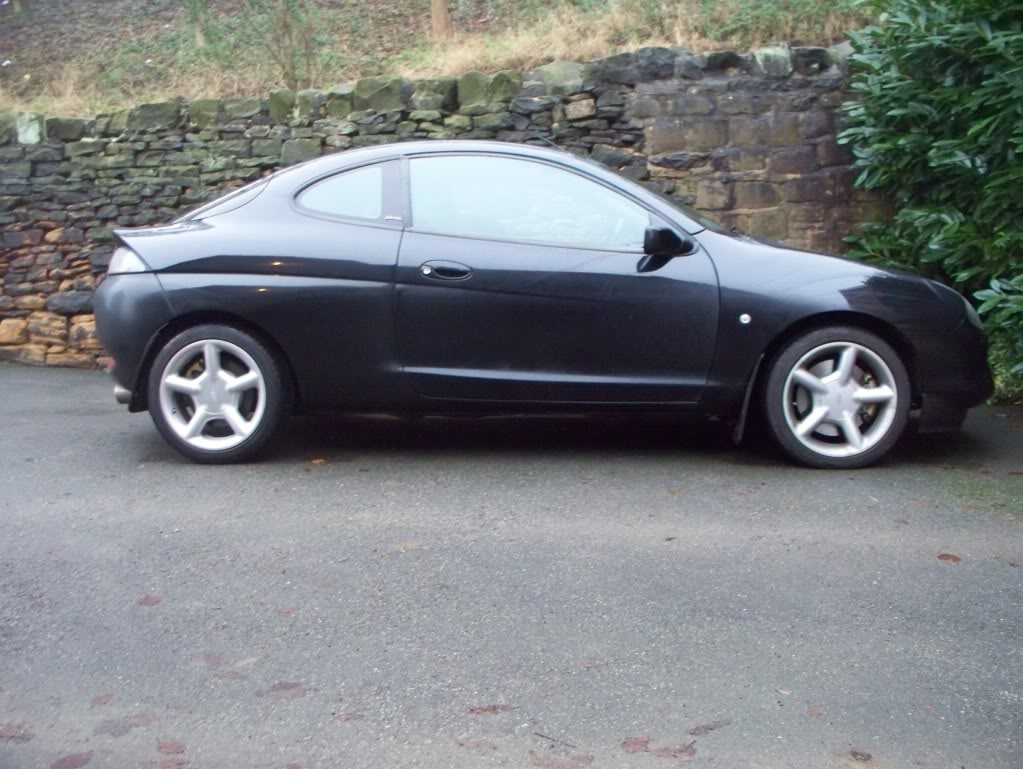
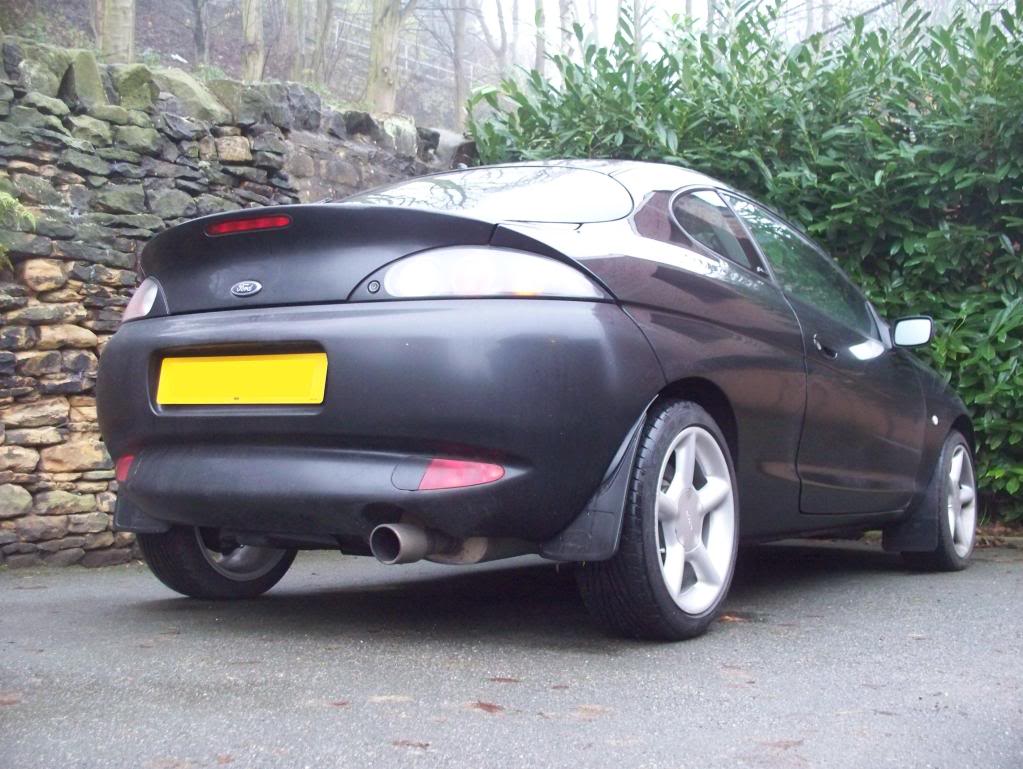
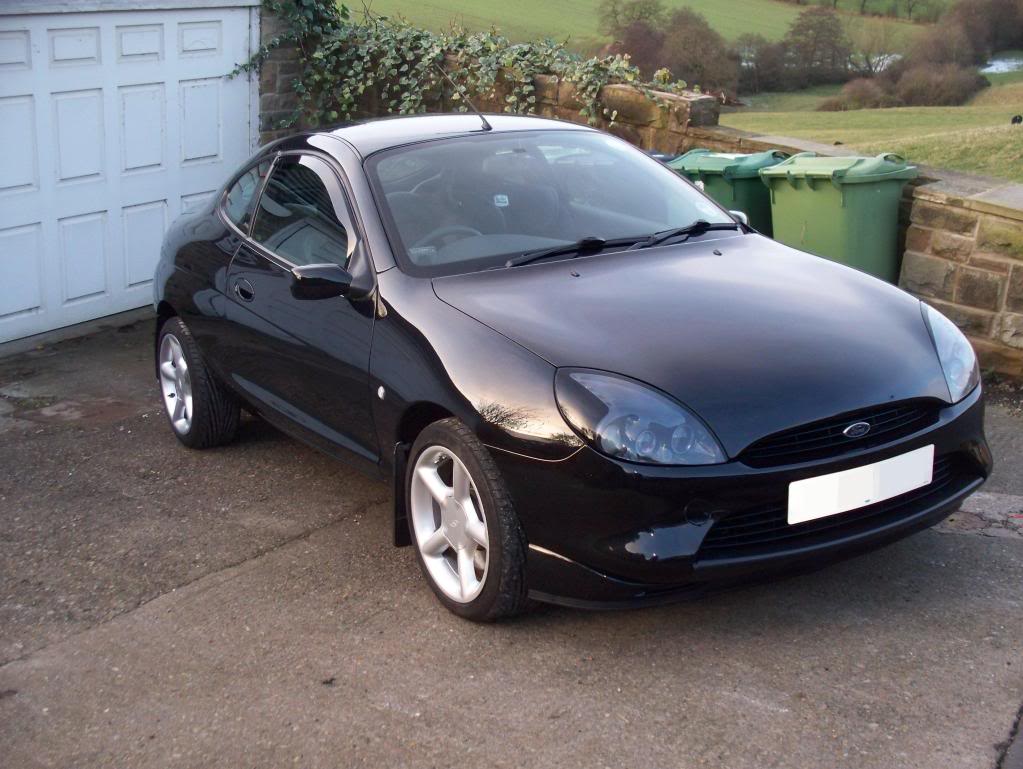
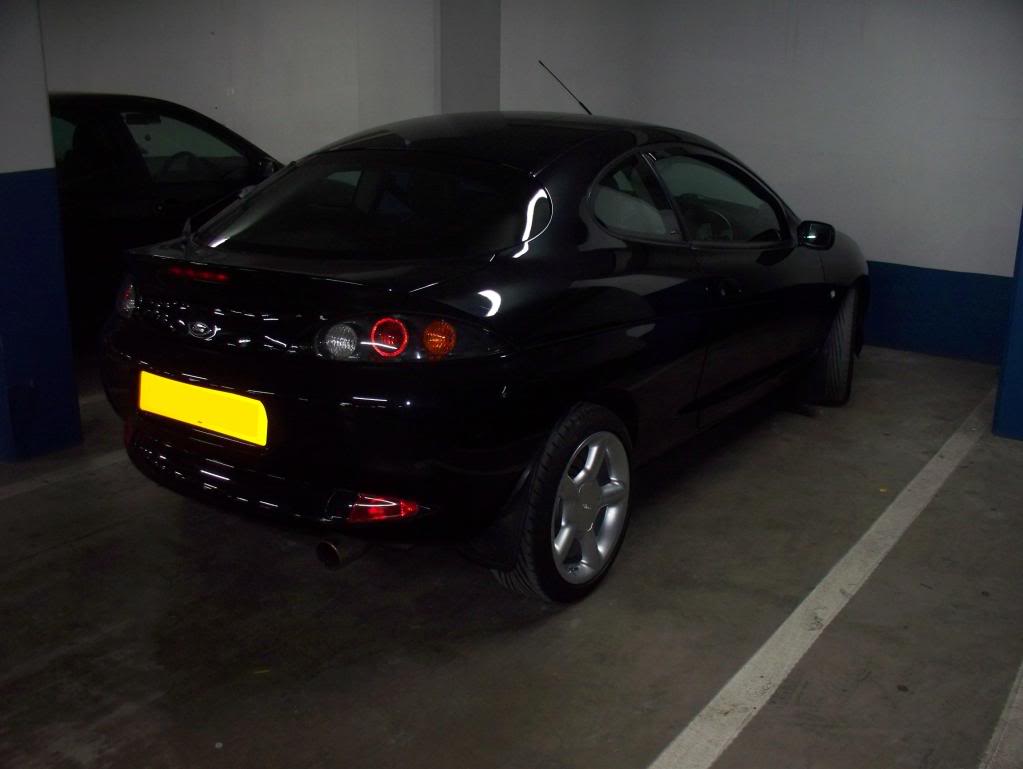
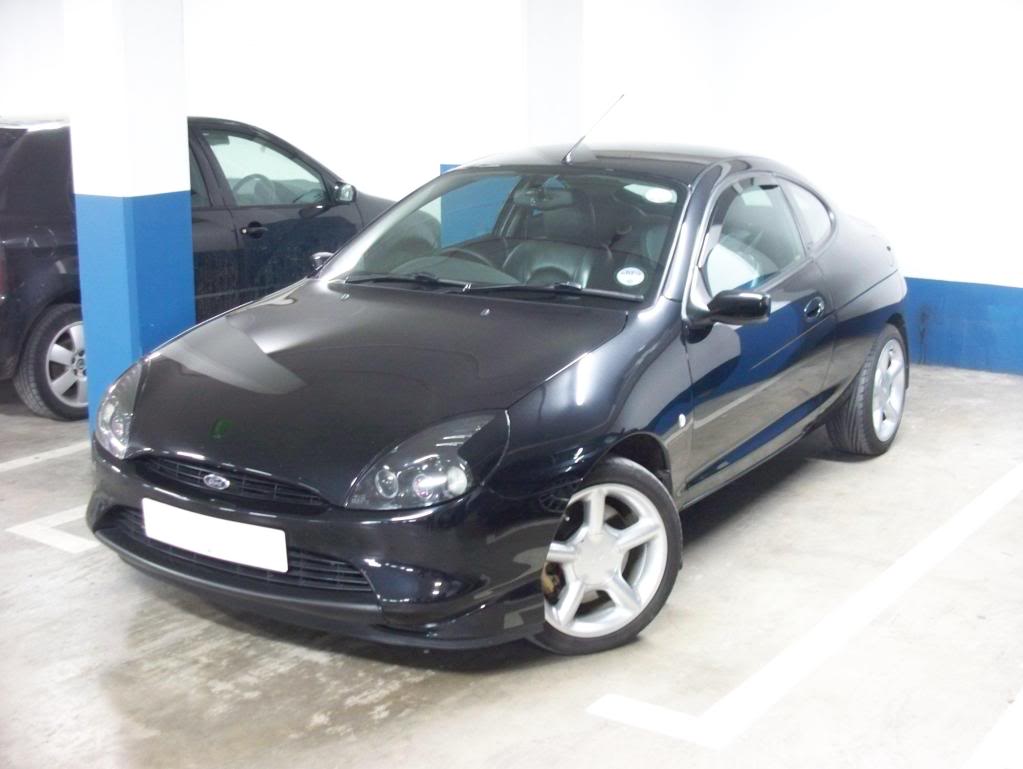
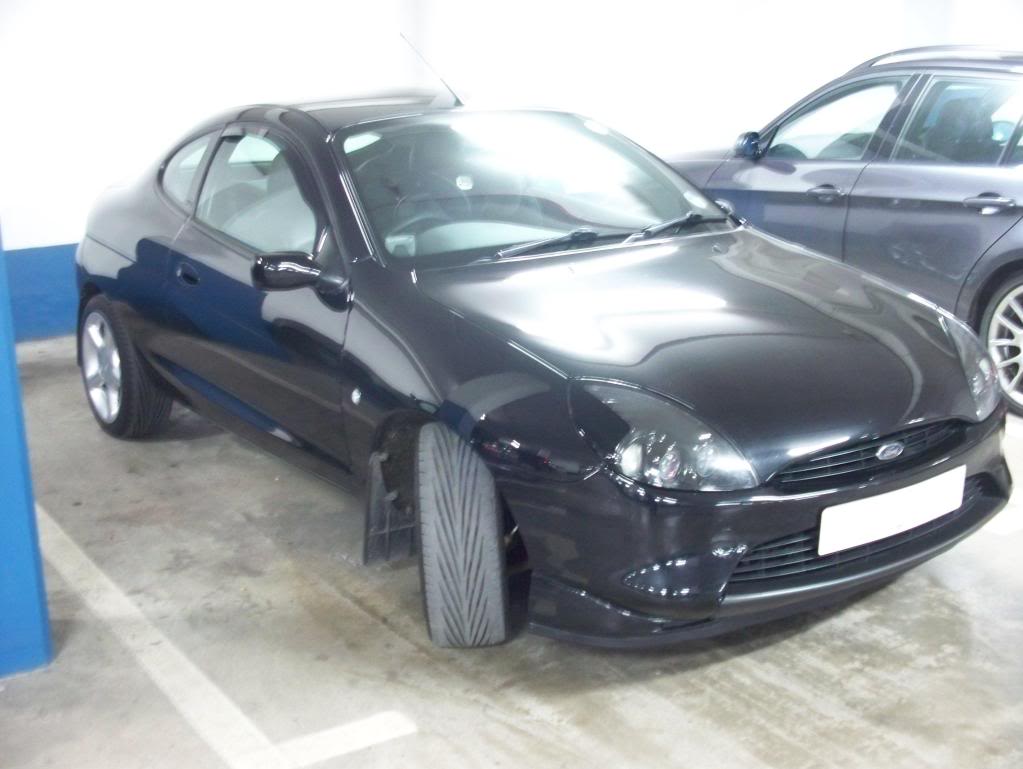
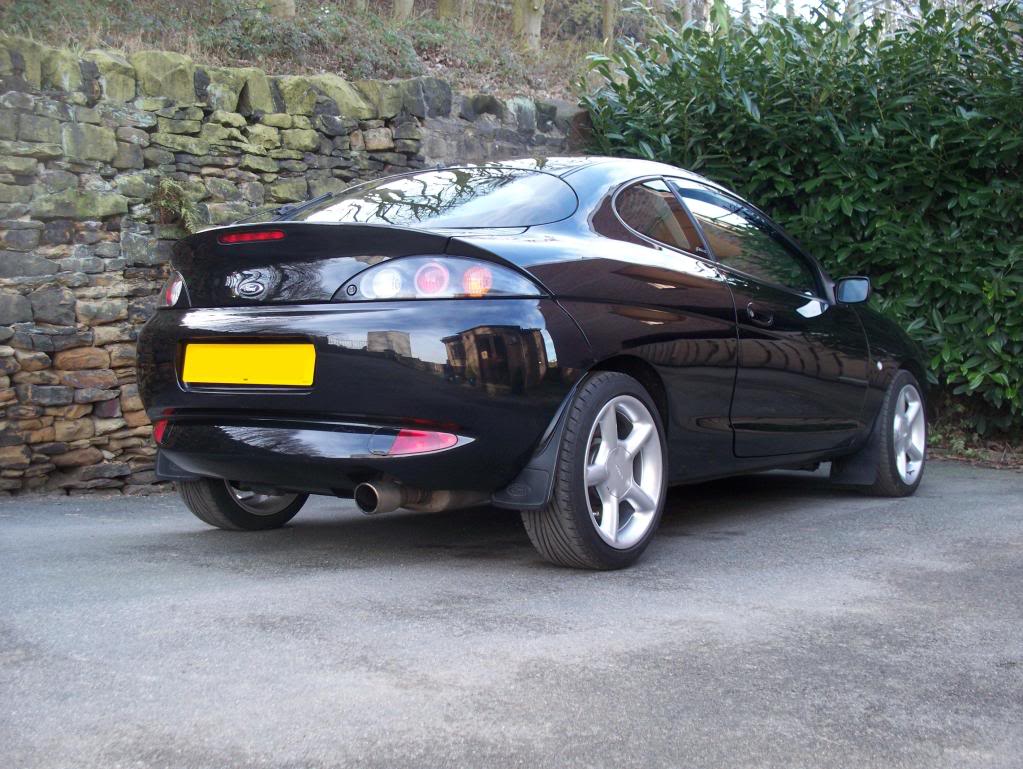
2001 Puma 1.7 'Black'
Vehicle specification
Maintenance Items / Standard Parts Replaced - new unless otherwise stated
Cam belt
Full service, plugs, pollen, air, etc.
Heater control valve
Steering column stalk assembly
O/S A pillar trim
Various screw covers
All four dampers
All four top mounts
Drivers window rubber
Lambda sensor (NTK)
Air flow meter (MAF)
Denso Iridium ITV16 spark plugs
Front wheel bearings
Puma alloy gear knob (Summer use)
Replacement remote key (with Ford badge intact) - used
Glovebox lid - used
O/S engine mount
N/S engine mount
Torque restrictor
Rear beam bushes
Coil pack (used, nearly new)
O/S/F ABS sensor
Drop links & ABS mounts
Anti-roll bar bushes
Early Puma black parcel shelf
Replacement luggage compartment shelf suspension pin
Fiesta Ghia drivers side sunvisor
Fiesta Ghia LHD drivers side sunvisor
Red exhaust hanger - removed
Modifications to date:
Scan Gauge
Ford Focus Mk1 1.6 / 1.8 clutch
Milltek EVO exhaust system, with sport cat and manifold
Lambda sensor extension harness
Second lambda blanking plug
Ford Racing Puma PCM (ECU)
Ford Racing Puma lower arm rear bushes
Ford Racing Puma style airbox modification, with additional front cold air feed, resonator removed
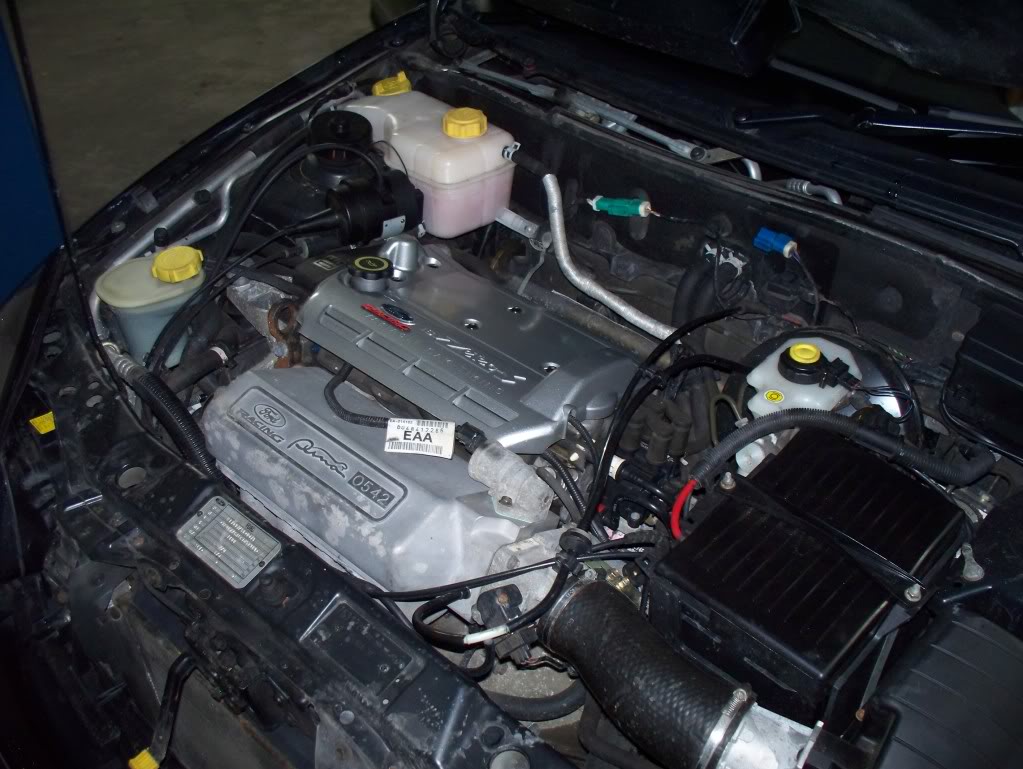
Ford Racing Puma inlet manifold, No. 542, with new inlet manifold, TB and ICV gaskets
Ford Racing Puma specification camshafts
Audiovox CCS-100 cruise control
Kenwood stereo, with iPod interface & steering wheel remote
Pioneer Custom Fit TS-H687 6x8 3-way rear speakers
Pioneer TS-C1320 front component speakers
Origin B2 GPS speed camera detector, painted Halfords Platinum Silver, with Target laser diffuser
Nokia CK-7W hands free kit
Brodit phone cradle
Dashmount phone bracket
Modified Autoleads phone mute loom
AutoLeads DIN stereo adaptor, painted Halford Platinum Silver
Clear side repeat indicators
Jaguar X- / S-Type remote key
Ford Focus II remote key
Transit / Transit Connect remote key fob
Ford PATS torch key
Ford Fiesta black leather steering wheel and airbag
Ford Fiesta black leather gear knob (winter use)
Ford Mondeo MkIII interior mirror lamps
Ford Mondeo MkIII auto-dim rear view mirror
Ford Mondeo MkIII dual tone horn
Ford Focus Mk1 rear interior lamp
Ford Fiesta glovebox lamp
Ford Fiesta Ghia X temperature clock
Second luggage compartment lamp
Front footwell lamps
Ford carpet floor mats
Ford rubber floor mats
Ford 1980's spec universal front mudflaps
Ford 1980's spec custom fit Sierra rear mudflaps
Eibach lowering springs
Ford Ka 12.5mm rear axle spacers
Ford Focus ST170 front brake calipers
Ford Focus ST170 300mm front brake discs
Ford Focus ST170 rear disc brakes, with Ford Racing Puma hubs
Ford Escort estate rear ABS loom
Ford Fiesta Zetec-S front anti-roll bar
Ford Accessories 7J x 16 ET35 "Cosworth Style" alloy wheels x 5
GoodYear Eagle GSD3 195/45R16 tyres
Ford Accessories brushed aluminium effect hand brake handle
Nuerburgring decal
Valeo Xtrm wiper blades
Ford Mondeo MkIII / Jaguar X-Type front brake calipers - removed
Milltek / OE / Piper FRP exhaust system, sport cat and manifold - removed
Powerflex rear beam bushes - removed
Eibach 15mm hubcentric front wheel spacers - removed
Ford StreetKa 20.5mm rear axle spacers - removed
Ford Racing Puma 253mm rear disc brakes - removed
Ford Mondeo Zetec 6.5J x 16 ET40 "Cosworth Style" alloy wheels x 5 - removed
To fit;
FRP tailpipe trim
Anti-corrosion treatment to front wheelhouses & inaccessible underbody areas covered by heatshield & fuel tank
New tail lamps
Waeco MagicTouch MT2000 touch indicator module
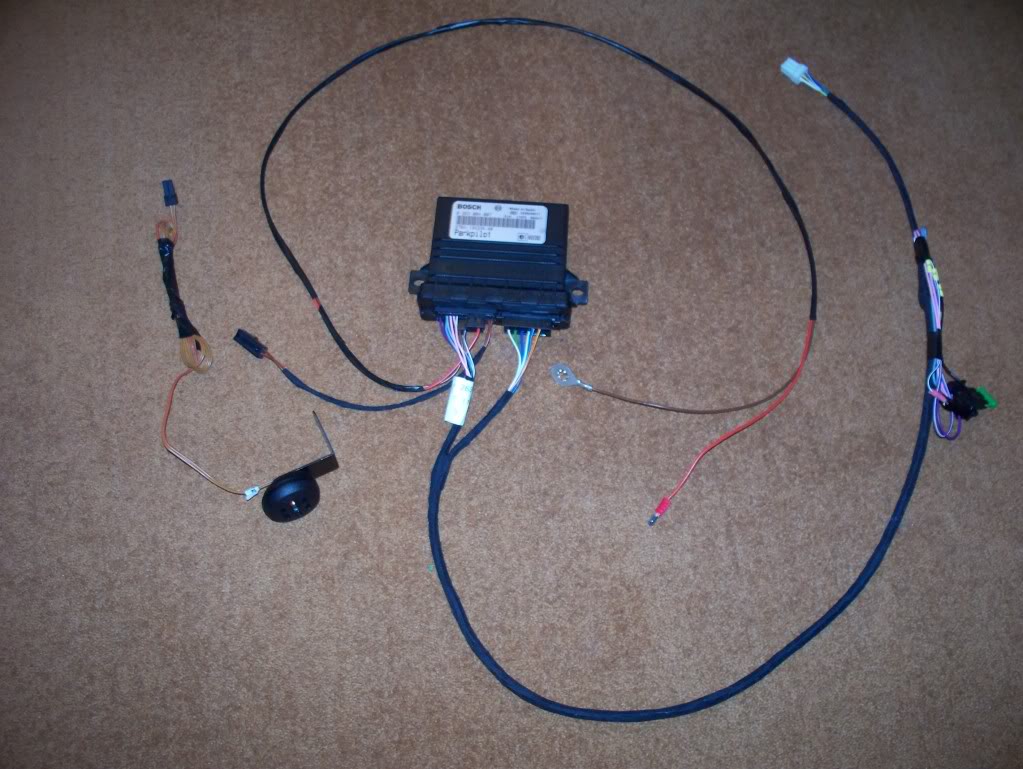
Bosch ParkPilot parking sensor
O/S/R wheel arch repair panel
New FRP limited slip differential
New FRP gearbox
Early Puma master cylinder, servo and pipes to ABS pump
To purchase;
-
Considering;
Retrimmed Fiesta Ghia leather steering wheel (all leather,not just the side bits)
Replacement headling, A- and B- pillar trims, to be reupholstered in dark grey alcantara
Front bumper with smoothed no. plate recess
Fiesta ST clutch, 1.7 slave, etc.
Lightened flywheel
The story so far...
I sold my 54 plate IS300 in June, and smoked around in a borrowed '97 Ka2 for a while. Really loved that little car, after the safety net of the Lexus (211HP and RWD with an LSD, but you can't turn the bloody stability contol off, so no tail out antics) something truly chuckable was wonderful. I fancied something similar [to the Ka], but with a touch more luxury, a bit more go, and ABS. I considered the following;
LuxuryKa - rejected it on the grounds of performance, and that if I fitted 16" wheels, which I wanted to accommodate 300mm brakes, then unless I got Ford Racing arches, it would look silly and I would need rack limiters, plus Ford Racing arches are really expensive.
SportKa - rejected it on the grounds of fuel economy and an appalling turning circle, plus they still seemed too expensive for what you got.
Puma - I'd had one previously, when they were new, but sold it as I was only a poor student and couldn't afford the HP. Should be more economical and quicker than the SportKa, and have a better turning circle.
ST170 - rejected on the grounds that any with Custom and Luxury packs were too damn expensive!
ST220 - rejected on the grounds that it was bigger than I needed. I had a 2001 2.5 Zetec-S from 2004 - 2006 and loved it, but I wanted something more economical after my Lexus (26MPG when going v. steady), and didn't need a Mondeo size car.
So the search was on.
I acquired this car in October 2008, at which time it had done 66,000 miles. I had seen it on eBay, the description was poor, and the seller's answers weren't great, but I had been without a car of my own since July and the cash was burning a hole in my pocket. Headed down to Leicestershire to collect to and discovered that it didn't have a passenger airbag, despite the sellers assurance that it did (seems quite a common mistake on Puma / Fiesta / Ka), and on a short test drive that the clutch was shagged. Biggest surprise was just how much less space there was inside compared to the Ka I had been running. At least the boot is a reasonable size.
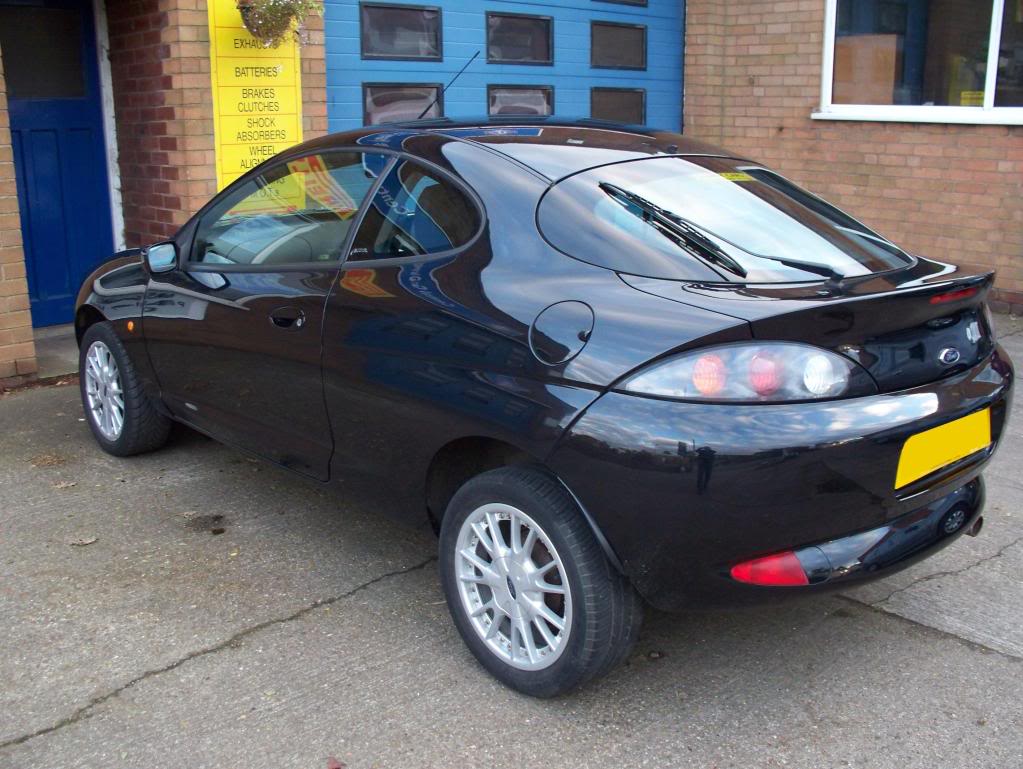
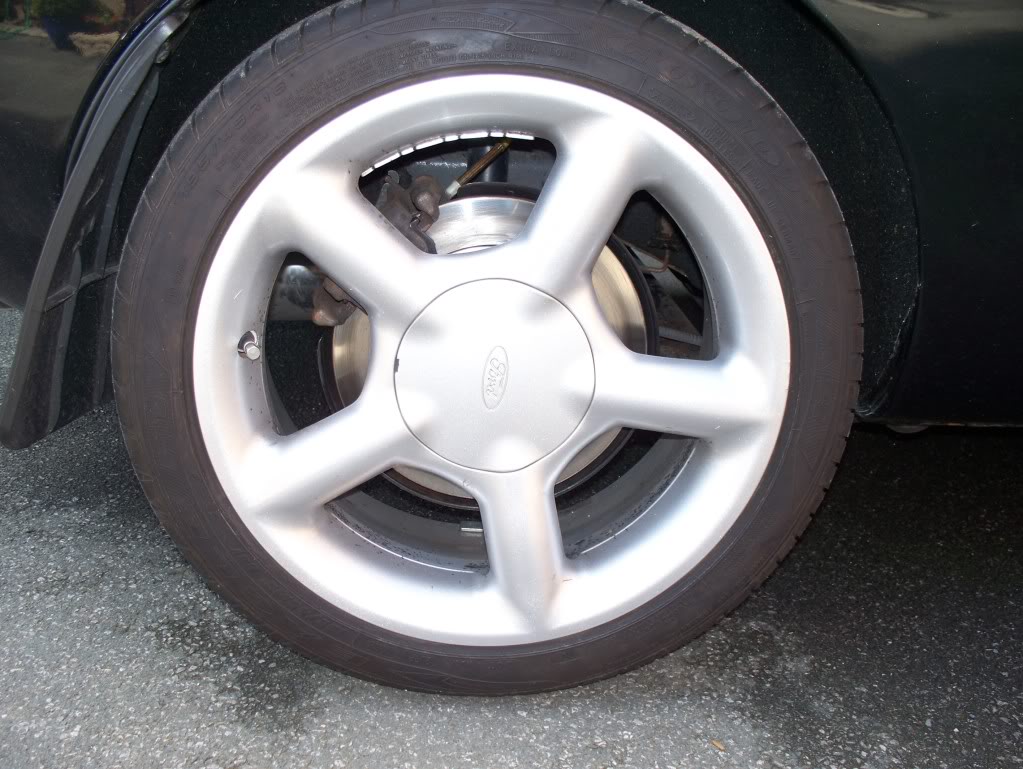
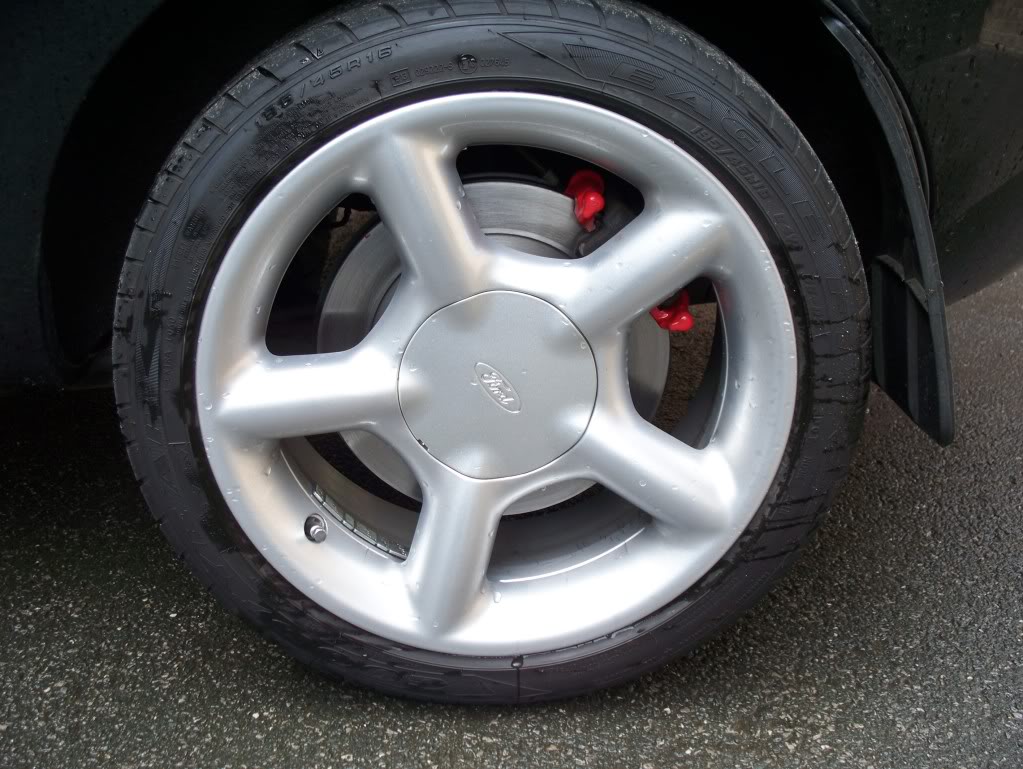
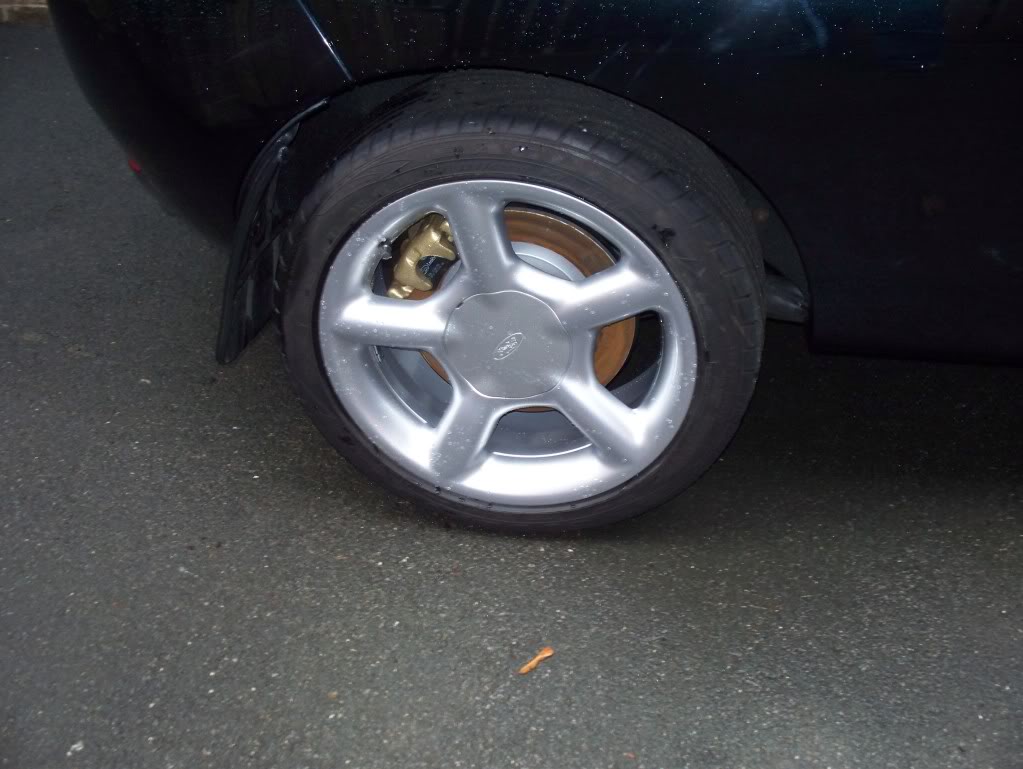
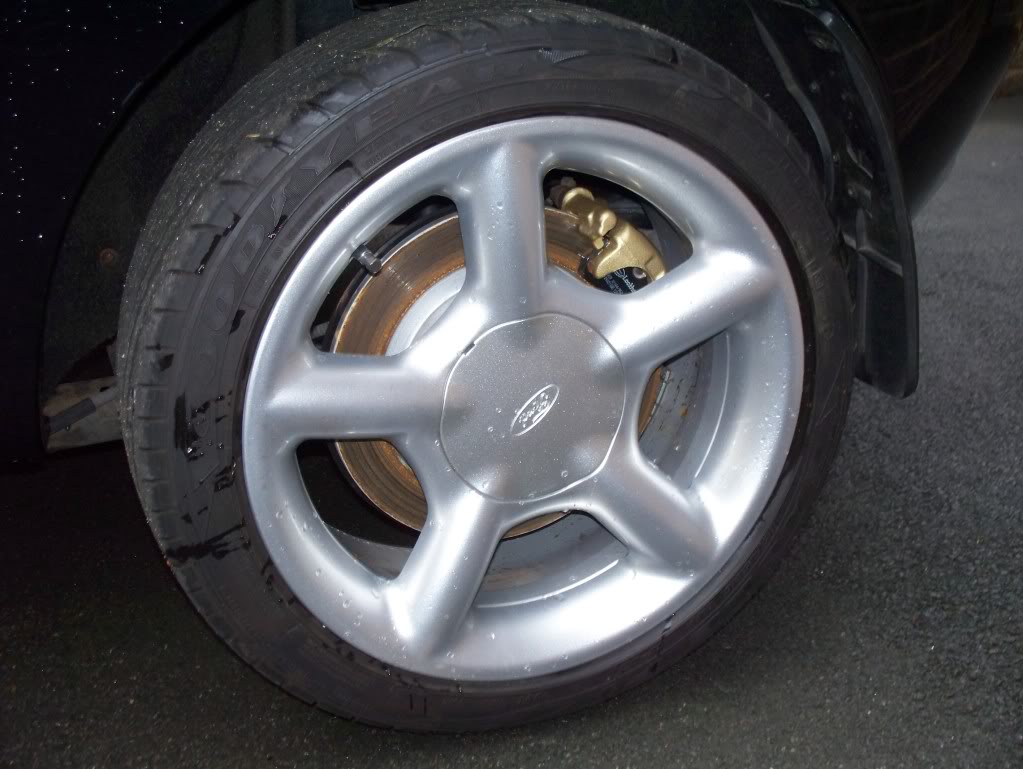
I agreed a small discount with the seller and drove the car very carefully to a relative's garage as it was two years overdue for a cambelt. On the plus side, it had 10 months MoT and a Kenwood CD changer. I hadn't really researched the 'Black' special edition, and had expected it to have the same wheels as the Thunder / Fiesta Zetec-S, instead of the F1 style wheels that can't be refurbished due to the plastic fake studs. I had been told that the tyres were all good, and two had been recently replaced, however this was putting a rather positive spin on things. I drove away already knowing that I had spent too much money. I was most petrified however about possibly Nikasil problems, which would make the whole thing something of a liability.
Got it onto the motorway and the car was SHAKING! I had noticed the n/s/f wheel was a bit scuffed, but hadn't anticipated anything like this. My daughter was in the passenger seat and I was quite worried for her safety. Anyhow, things improved a bit after a few miles, but at least one of the wheels was clearly out of balance.
After a circa 80 mile drive, I dropped it off at the garage, with some Mobil 1 0w40 and instructions to do a full service, cambelt, aux. drive belt, clutch (Focus 1.8), balance the wheels and change the heater control valve.
There are mixed opinions on changing the HCV, however I had been running a borrowed Ka since selling my IS300 in July, and the day before going on hols the HCV had failed, emptying all of the engine's coolant onto the ground. Stopped the Ka as soon as I realised, and touch wood, there were no lasting problems, but I somehow doubted the Puma's Sigma engine would be as hardy as the HCS engine in the Ka). I also ordered a few parts including a replacement o/s A pillar trim, to replace the original that was hanging off.
While the car was away I put together a phone mute loom that would also connect my Kenwood stereo to the car's standard wiring loom and power my Origin B2.
I collected it about two weeks later, checked the CD changer worked, then whipped it out along with the original 6000CD in favour of my Kenwood stereo. I also discovered the paint had surface contamination all over it, so gave it a good going over with a clay bar, followed by a polishing with 3M Hand Glaze followed by Auto Glym Super Resin Polish. Despite this same treatment having nicely removed some scratches from our CR-V only a month of so earlier, the results weren't as great as I had hoped. I also noticed a small amount of rust starting on the n/s/r wheel arch, and that the car was missing its front spoiler / air dam.
Around this time I also fitted some clear side repeat indicators, the originals were a real pain to remove, and I had to use a cordless drill and two screwdrivers! I was surprised to find that the repeaters had different connections on each side, but it seems this is pretty common.
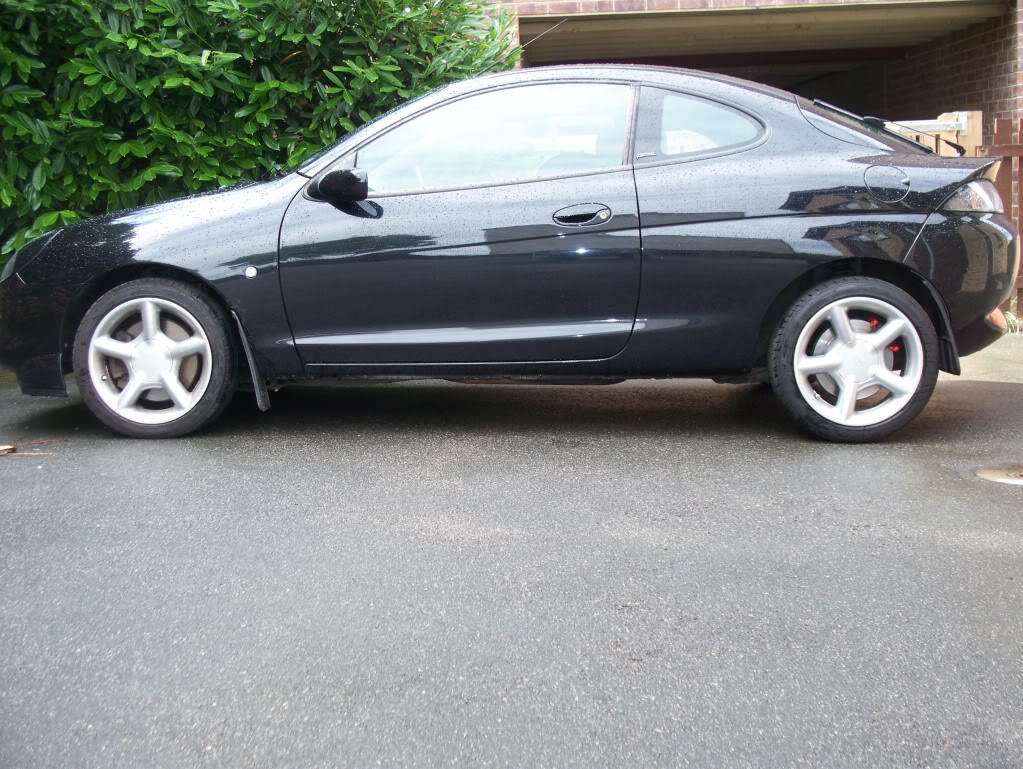
I soon decided that these F1 style wheels weren't for me. Apart from anything else they were going to be awkward to clean. Bought a single brand new machined finish 16" Scorpio 12 spoke alloy on eBay, decided that I didn’t like it, so I bought a single brand new 15" Escort GTi "Cossie Style" 5 spoke, with a view to acquiring another three, and also bought some Mondeo V6 front callipers. I had been undecided since buying the car as to what I wanted to do about the brakes. I had a brand new Puma in 1998 and the brakes were the biggest disappointment. Having previously had a Mk3 Mondeo, and having frequented fordmondeo.org, I was quite keen on the possibility of fitting Mk3 Mondeo / Jaguar X-Type calipers, along with ST170 300mm front discs. This realistically meant going for 16" wheels, and being a big fan of Cossie style wheels on the Puma, that was what I decided to get. Found some fairly tatty 6�Jx16 ET40 wheels on eBay, made some enquiries about refurbishing and got them bought, dropped them off for refurbishing and had them fitted to the car 48hrs later with some brand new 195/45R16 Good Year Eagle F1 GSD3 tyres. Cost me a fortune, but it sticks like you wouldn't believe, wet or dry.
Soon after this I had the opportunity to drive the car on some great driving roads, and quickly decided that getting something sorted with the brakes was quite urgent. The 258mm brakes weren't bad as such, but quickly began to fade in fast road use. I sold the Mondeo V6 callipers on pumapeople.com and sourced some Mk3 Mondeo calipers from eBay for around �60 the pair, delivered. Once the guys at the garage had had chance to give them a look over, I procured some new Mintex ST170 discs from a local motor factor, which were fitted along with new genuine Ford pads, Goodridge braided hoses and new fluid.
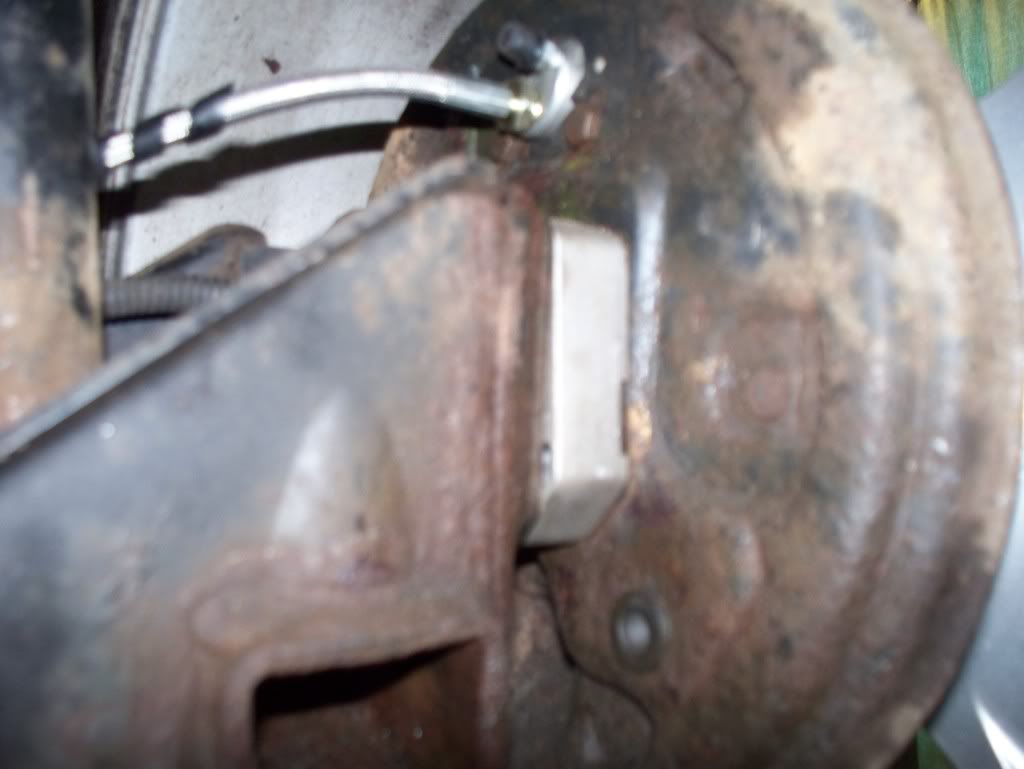
20.5mm rear axle spacer, Goodridge braided brake line
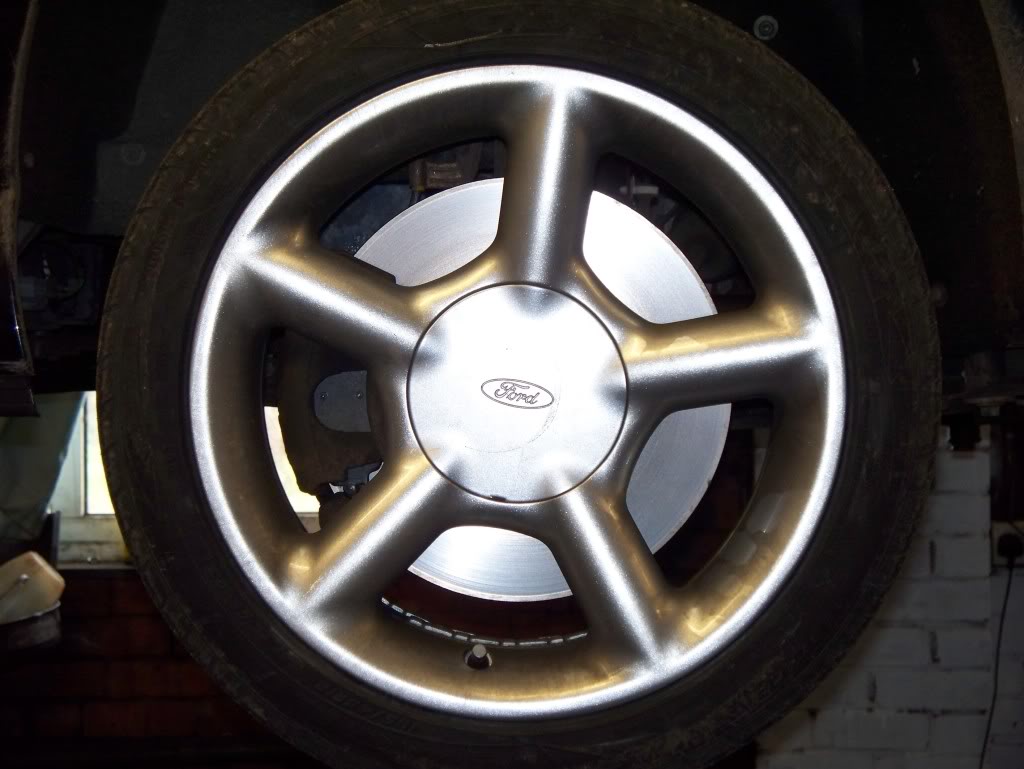
300mm ST170 front disc, with Mk3 Mondeo / Jaguar X-type brake caliper, behind 6�Jx16 ET40 "Cosworth Design" alloy wheel
I had noticed a knocking noise from the n/s rear which I was unsuccessful in curing, so I ordered some new Powerflex polyurethane bushes for the rear beam, I had these fitted while the car was in for the brakes, and the garage also decided that I could do with new front lower arm rear bushes, so I ordered FRP spec items from Pumaspeed and got them fitted at the same time. Being as I was leaving it there for a few days, I had the fuel filter changed due to slight pulsing when cruising, the air con serviced, and an OMP lower strut brace fitted. Most of it was straightforward, but fitting the strut brace was very awkward, possibly due to poor quality manufacture, I would later have an engine mount replaced in the hope it would stop the occasional contact between gearbox and brace, but to no avail, though the much later fitment of a new gearbox mount did seem to solve things.
When I collected the car I gave the MAF a clean and took advantage of the ramp to fit a replacement front air dam.
Near side Powerflex rear beam bush
When I got home, I swapped the air box lid for another item with the resonator removed - value for money, this was a great improvement, in terms of noise at least.
It was around this time that I noticed that the "touch wipe" function wasn't working, so had to get a brand new set of stalks, which I procured from eBay for around �35. On the plus side the new stalks are something that you touch a lot, and the do help to make the car feel more like new.
I obtained a Fiesta Ghia X clock, with temperature display, and a temperature sensor from an old Scorpio. A quick browse at Maplin found a suitable plug to connect the temperature probe to the back of the clock, so after a quick test, and a modification to the back of the clock, I set about fitting it. All went well until I broke one of the headlamps removing it. I hadn't turned the switch and forced it - d'oh!
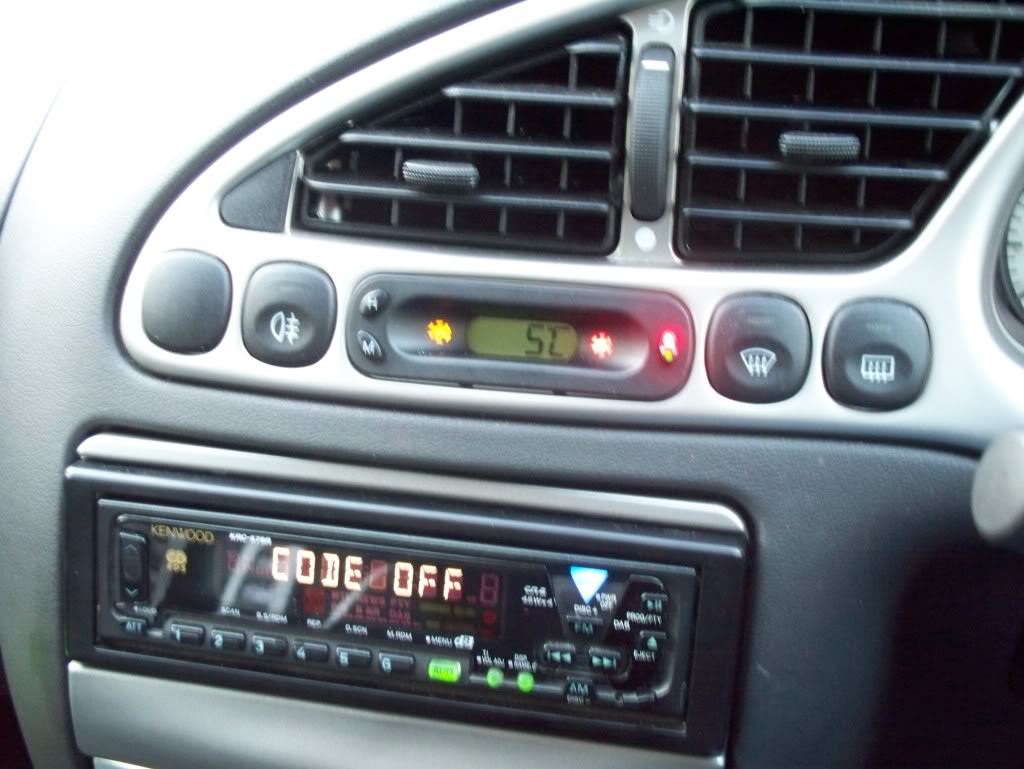
Clock, with temperature display
I think around the same time I bought a new glovebox light assembly along with a second boot lamp and fitted those.
In my Mondeo, I modified the interior lamp with a couple of diodes so the map lights come on with the main light, so I got hold of a spare Puma lamp and did the same mod.
For some time, I had been planning on fitting Mondeo Mk3 sun visor mirror lamps to our CR-V. Given that this is also lacking in the Puma, and Puma headlings are both cheaper and easier to replace the CR-V ones, I had a crack at fitting a passenger side mirror lamp, with good results. The important lesson here was that there is only adequate depth in certain places, so this will dictate the location of the lamp. Later, when fitting a roof mounted DVD to the Honda I discovered that there isn't the depth in that car, so rather than fitting the light to the Puma being the "dry run", it was actually final version. Incidentally these same lamps are fitted as rear map reading lamps in the Range Rover Sport, which sounds a bit classier than saying they are from a Mondeo!
Mk3 Mondeo / Range Rover Sport interior lamp
While obtaining the mirror lamps from the scrap yard, I also got hold of a steering column audio control and wiring, which I may use if I decide to change the Kenwood to an Alpine IDA-X305, but most impressively I came across a rather sorry looking Mondeo Ghia with an auto-dim rear view mirror. I had planned on fitting this to the Honda, which uses the same wedge type mounting, but we had a Harmon Kardon Drive / Play in that car, with the screen mounted above the rear view mirror, and the auto mirror wouldn't fit with the Drive / Play screen. Instead I decided to fit it to the Puma. I had to buy a new wedge from a local Ford dealer, and adhesive from Halfords, but mounting it was very easy. I stripped down the loom and made a new one, which I fitted at the same time as the mirror lamps and an electromagnetic parking sensor. While I really have just tapped into existing wiring at the front of the car, I couldn't be bothered finding the right wire, and instead took the feed from the boot instead.
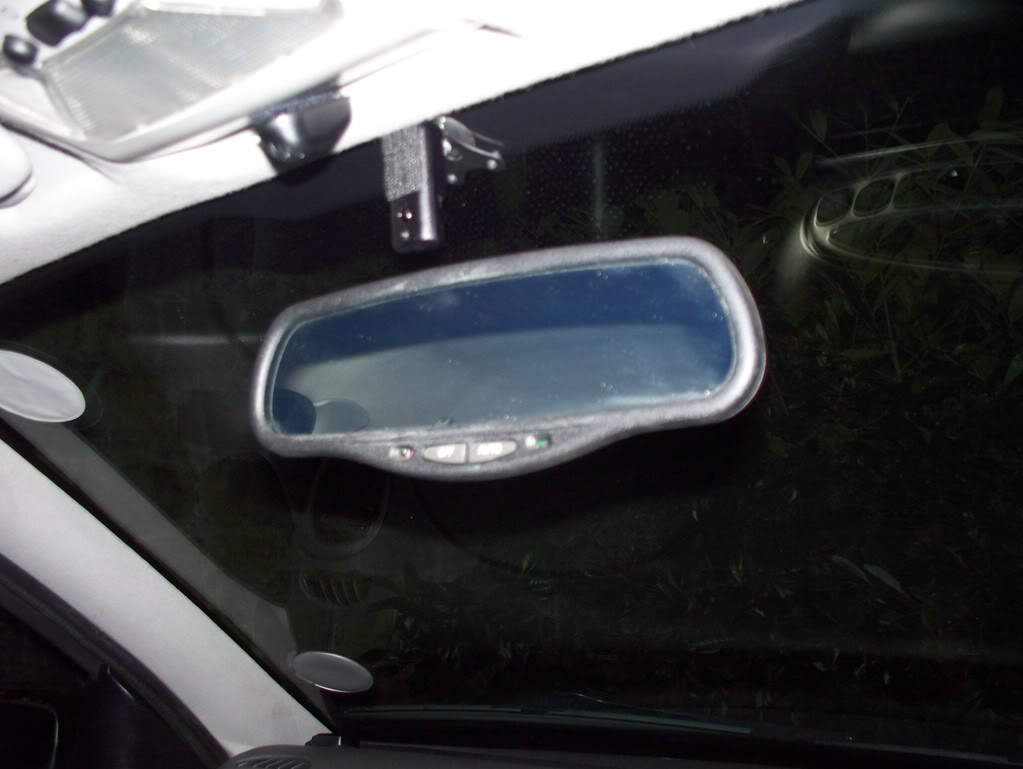
Auto-dim rear view mirror
I'd had a slight knocking noise from the n/s/r since I got the car, which hadn't been cured by the Powerflex bushes, in fact they just made the car a bit harsh. I wanted to sharpen the handling a bit, and considered going for one of the lower priced coilover setups, but I was concerned about it being too harsh, and also that if you adjusted the ride height, you would throw out the alignment. I do around 12-15,000 miles per year, so didn't want things to be too hard, I also didn't want to spoil the original balance. With this in mind, I replaced the dampers and top mounts with original equipment and the springs with Eibach items, which were cheaper than four original Ford items. This firmed things up nicely, and also cured the knocking noise. What impressed me most though was that they really improved the stance, the 30mm drop being more noticeable than I had expected.
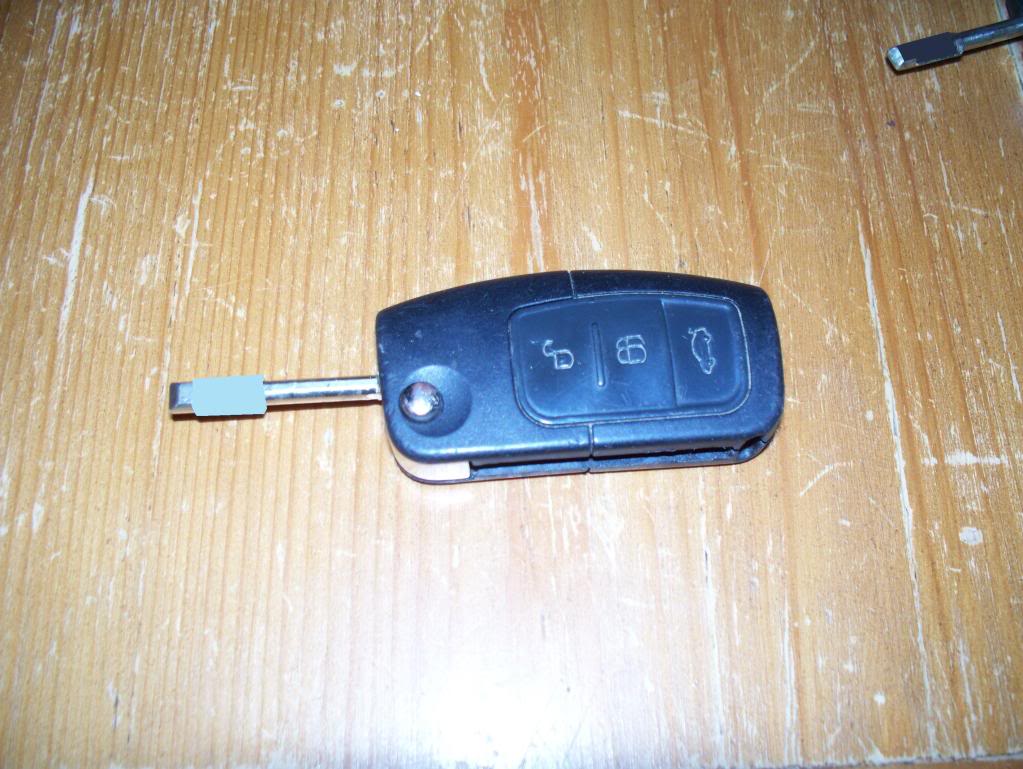
The remote key I received with the car was a bit worn, and I had a Jaguar remote key left over from my Mondeo, so using a red PATS chip from a redundant key, and the blade from my remote, I set about adapting the Jaguar key to work with the Puma. Around the same time I also got a much smarter Ford remote from eBay and two new 'Horseshoe' sections cut from my local Ford dealer.
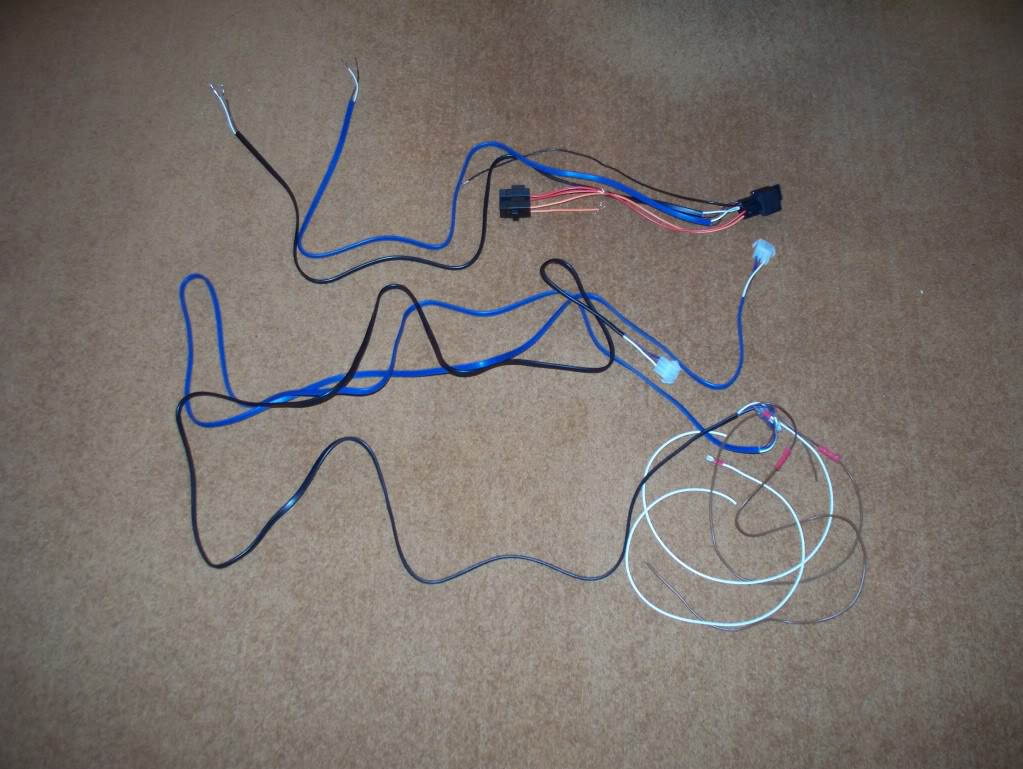
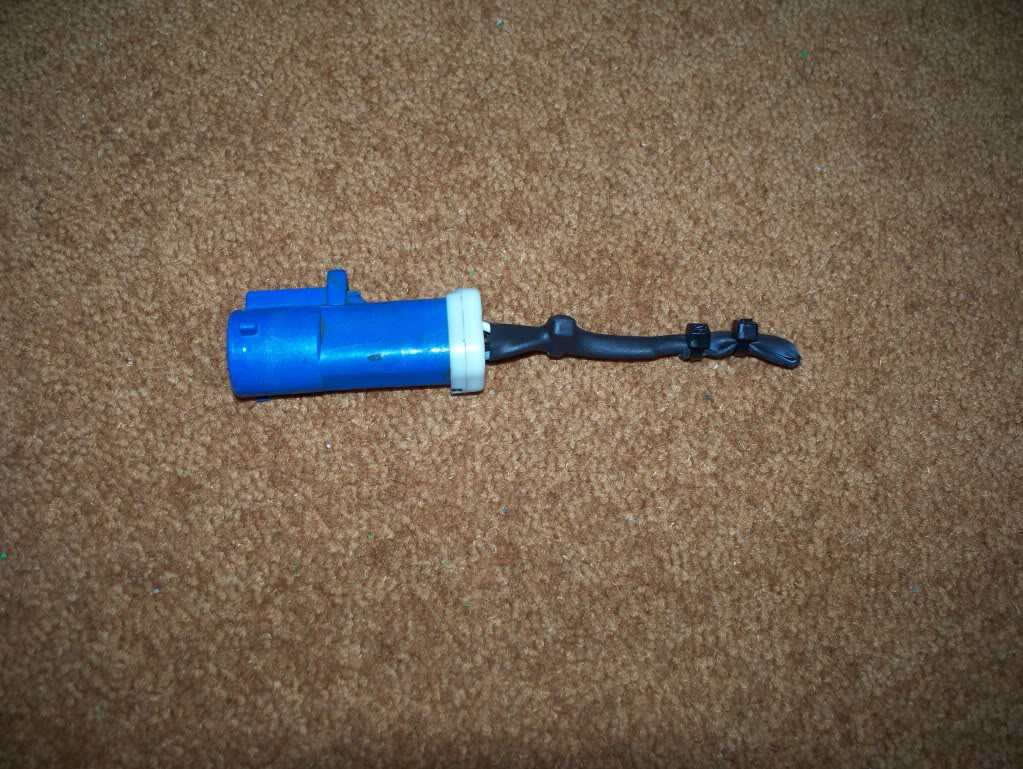
While hunting for a replacement headlamp, I came across a Piper back box and Milltek manifold, then shortly after acquired an FRP mid section with sport cat. Having established that the FRP lambda extension loom wouldn't fit my car (it is only suited to earlier cars with black lambda plugs), I visited a few scrap yards and got hold of the necessary plugs and sockets to put together my own lambda extension harness (green plugs) and MIL eliminator harness (blue plugs).
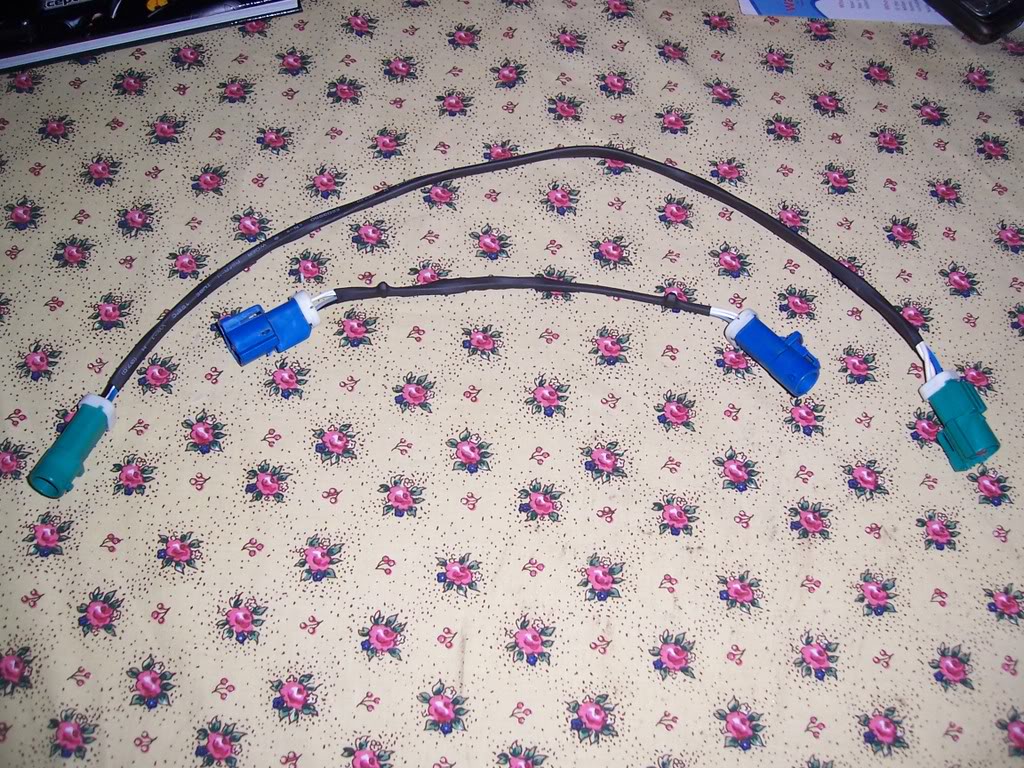
Lambda extension harness and (unsuccessful) MIL eliminator
I left the car at the garage while I went on holiday, and phoned up regularly to check on progress. When I heard that not only was it running, but that the Check Engine light was staying off, I was delighted! Similarly when I spoke to the technician, my friend Paul, and he told me that it makes a brilliant noise, and that my lambda extension was just the right length, I was quite pleased, and anxious to get back and have a go. I was however a touch concerned when I was told that it was "a bit loud", but was still keen to get back and give the job a good course of looking at.
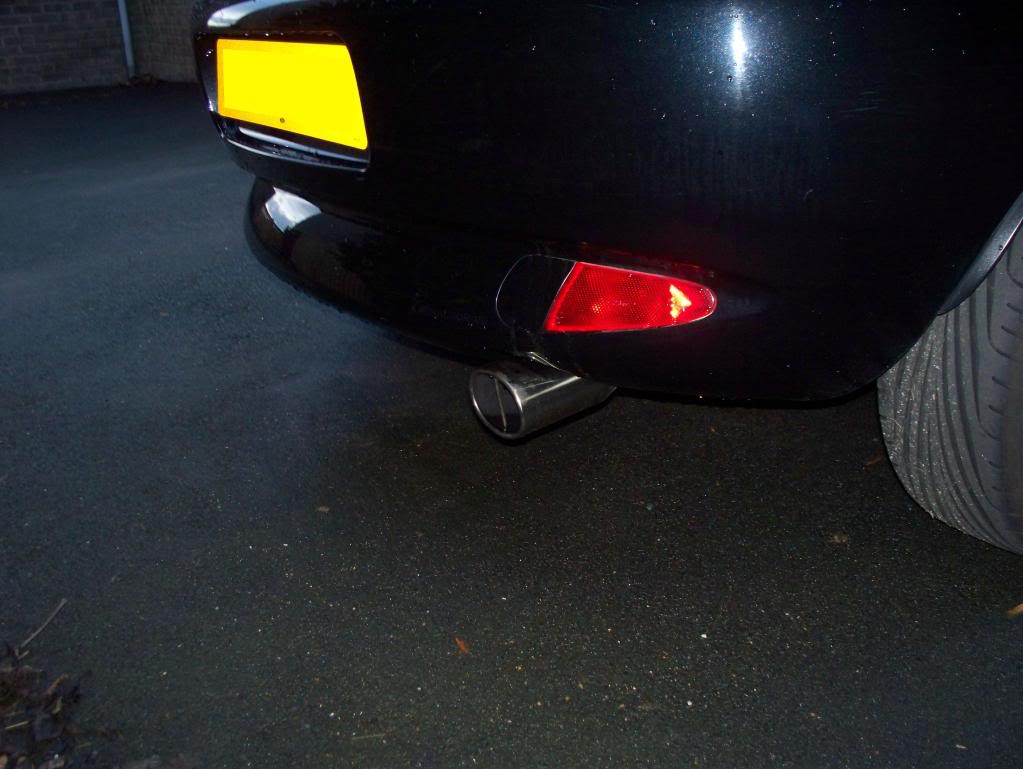
Piper "FRP" rear box
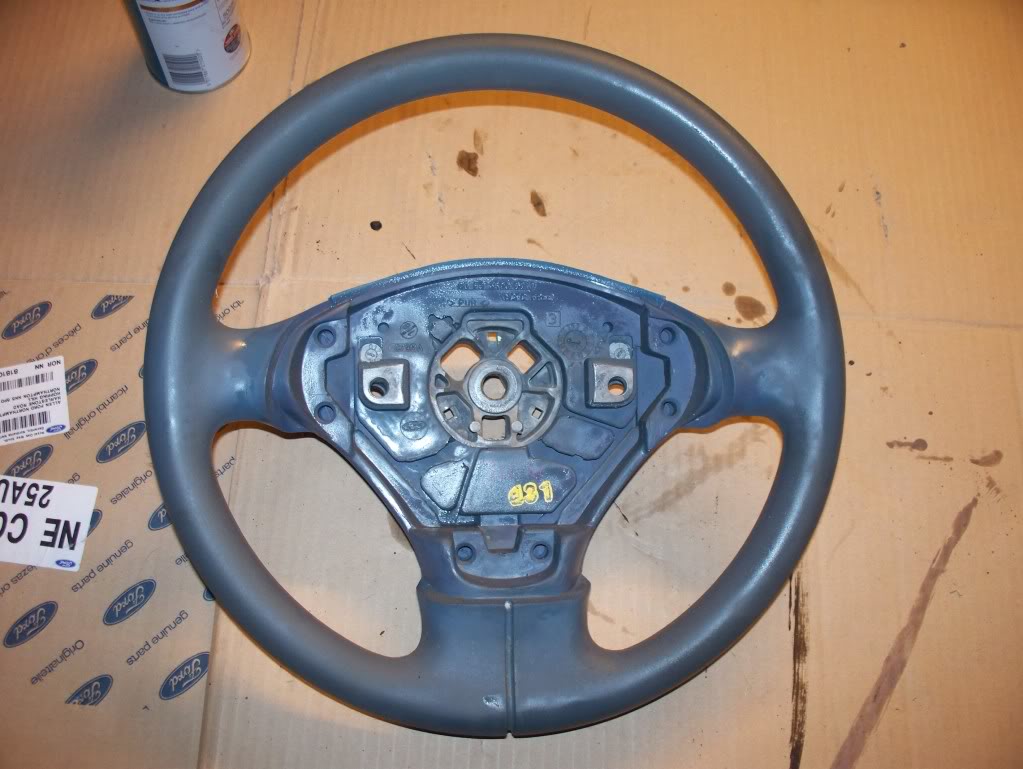
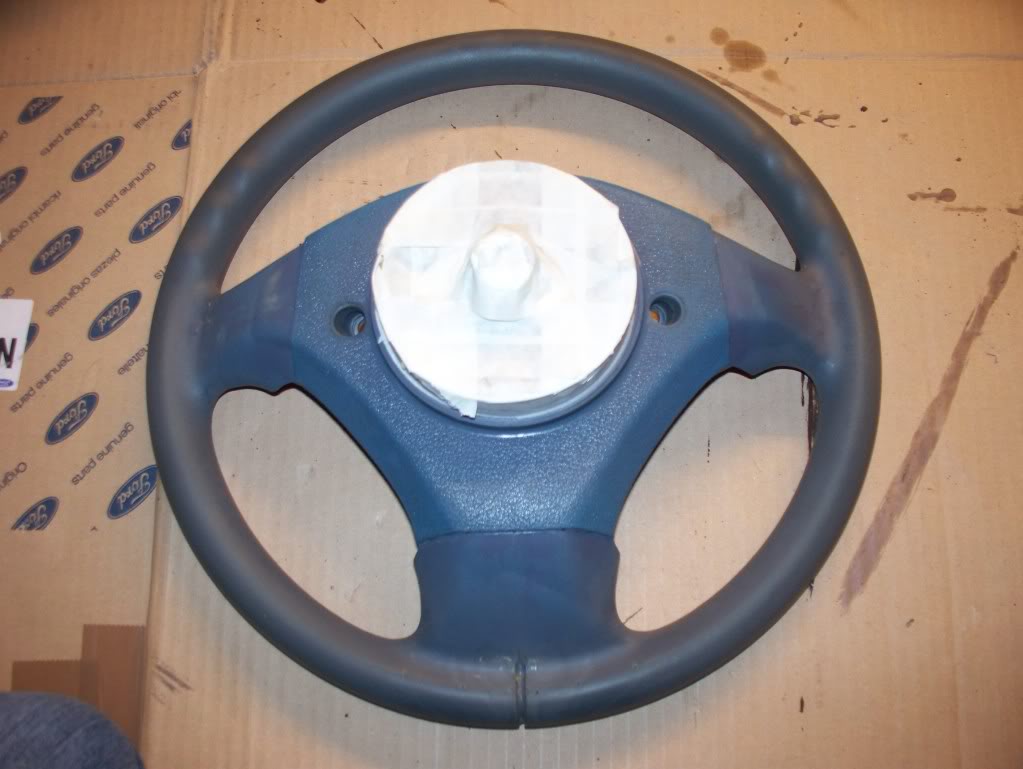
When I got my car it had suffered from the dreaded melting steering wheel, an issue believed to be a consequence of getting hand cream onto the leather sections of the wheel, from where it reacts with the adhesive and goes all nasty. I had been keeping my eye on eBay for a new steering wheel and while on my hols I was delighted to get a brand new black leather steering wheel for a 1995 - 2002 Fiesta. This was waiting for me when I got back, along with a pair of early Ford 'large oval' mudflaps.
While on hols I also got an Audiovox CC-100 cruise control kit from amazon.com, and some Valeo Ultimate wiper blades, these are the same as the Valeo XTRM ones we get here, but in the US are only US$20 for two.
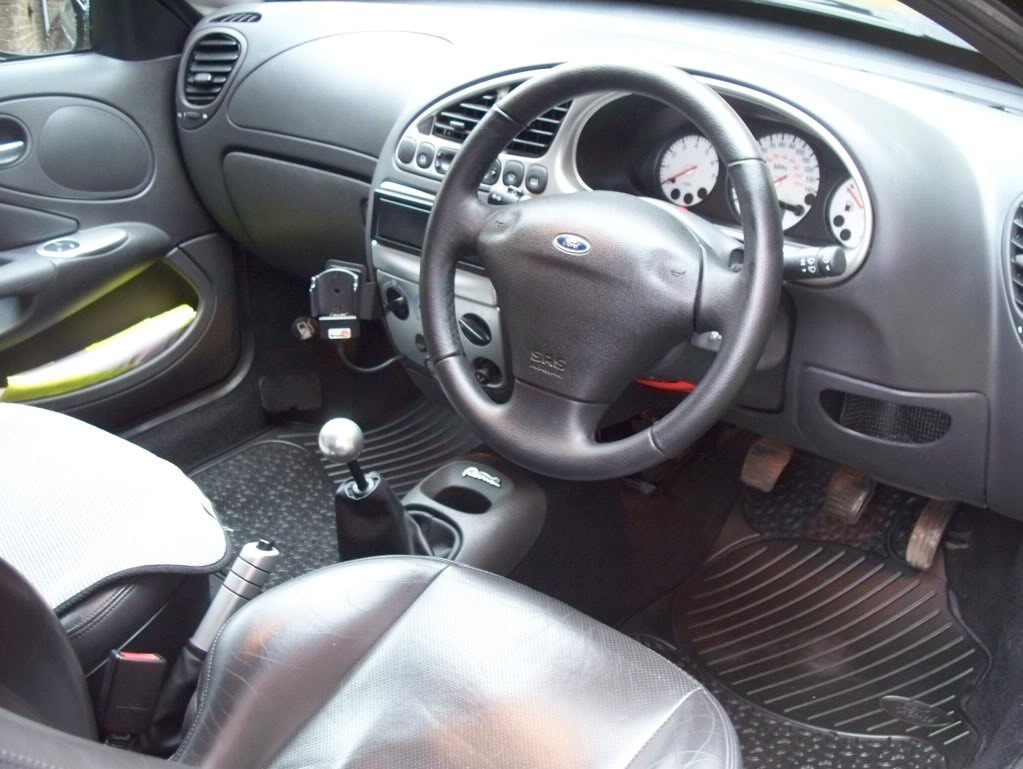
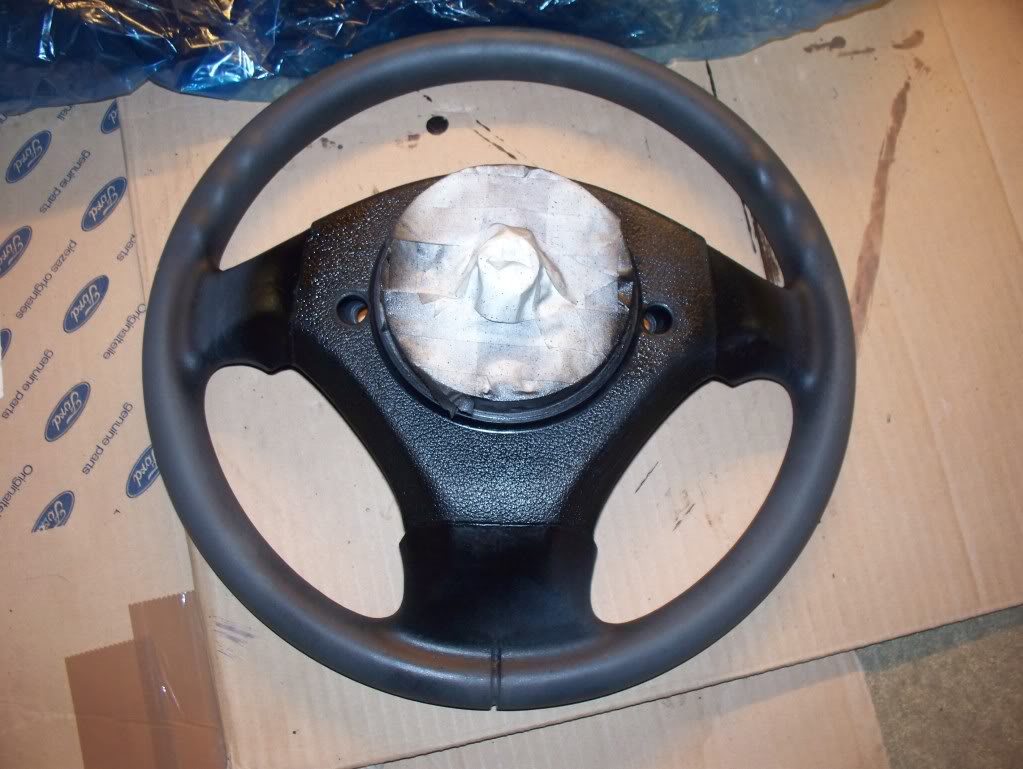
Upon my return I set about fitting first the steering wheel, initially with the original midnight black (grey) airbag, then later I got a black airbag from a late model Fiesta with the enamelled Ford badge. Over the next few weeks I also fitted the cruise control and the mudflaps, along with some Sierra rear mudflaps that I managed to get to fit to the back of the car.
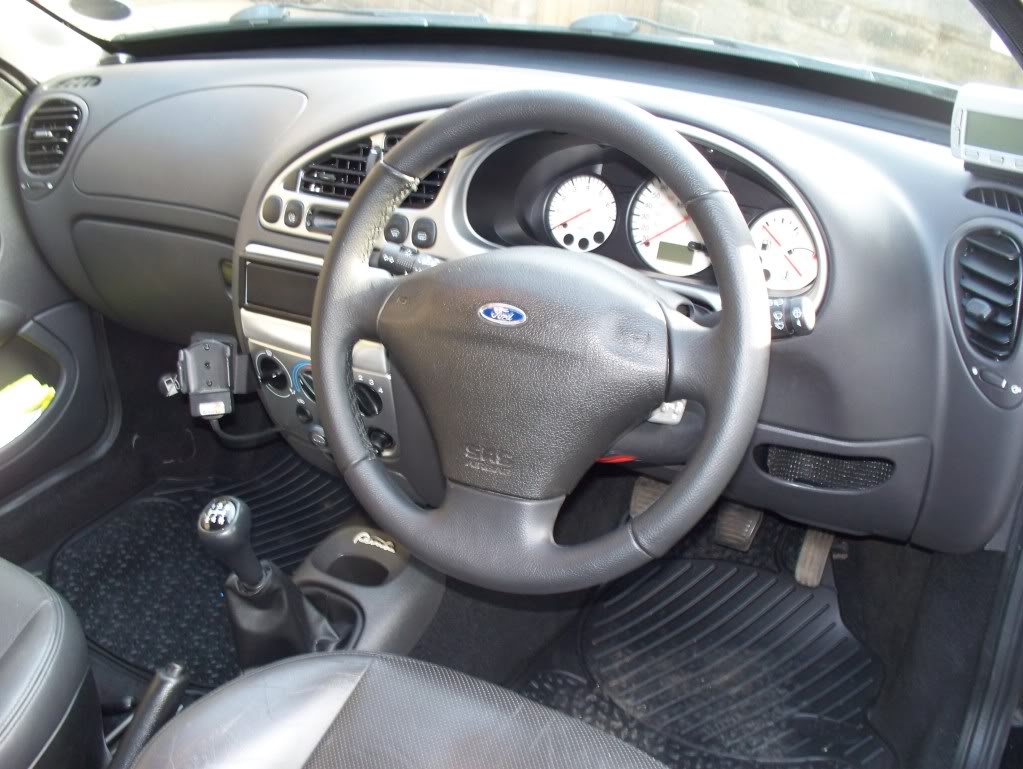
Fiesta black leather steering wheel, with matching airbag
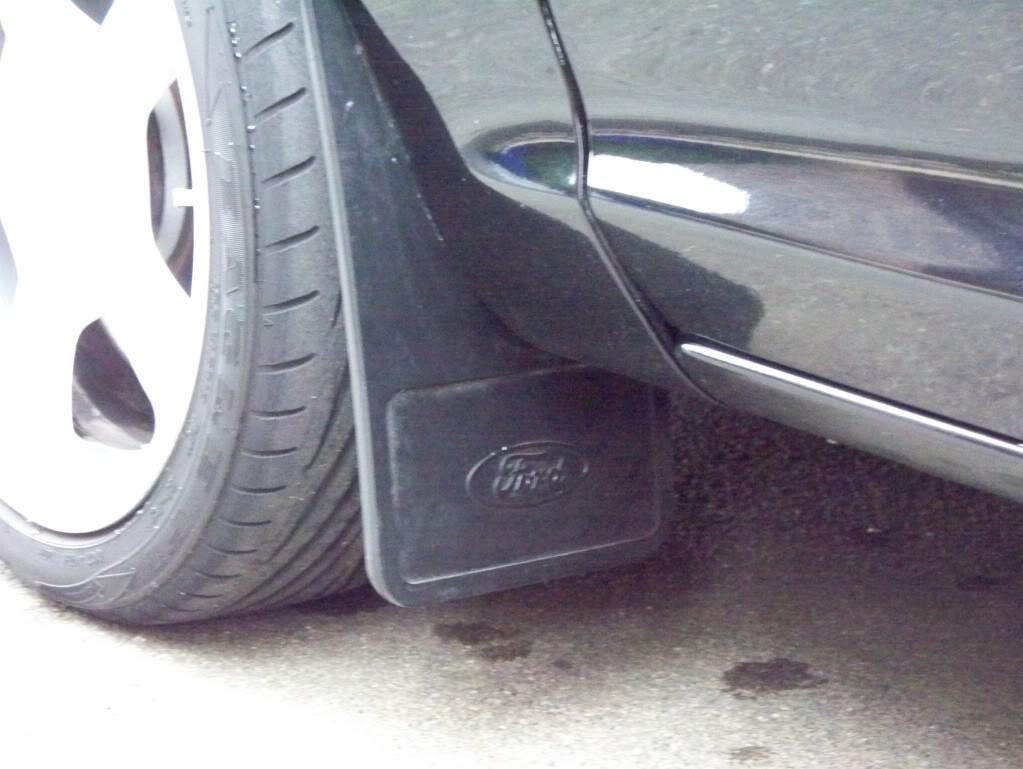
Front mudflap
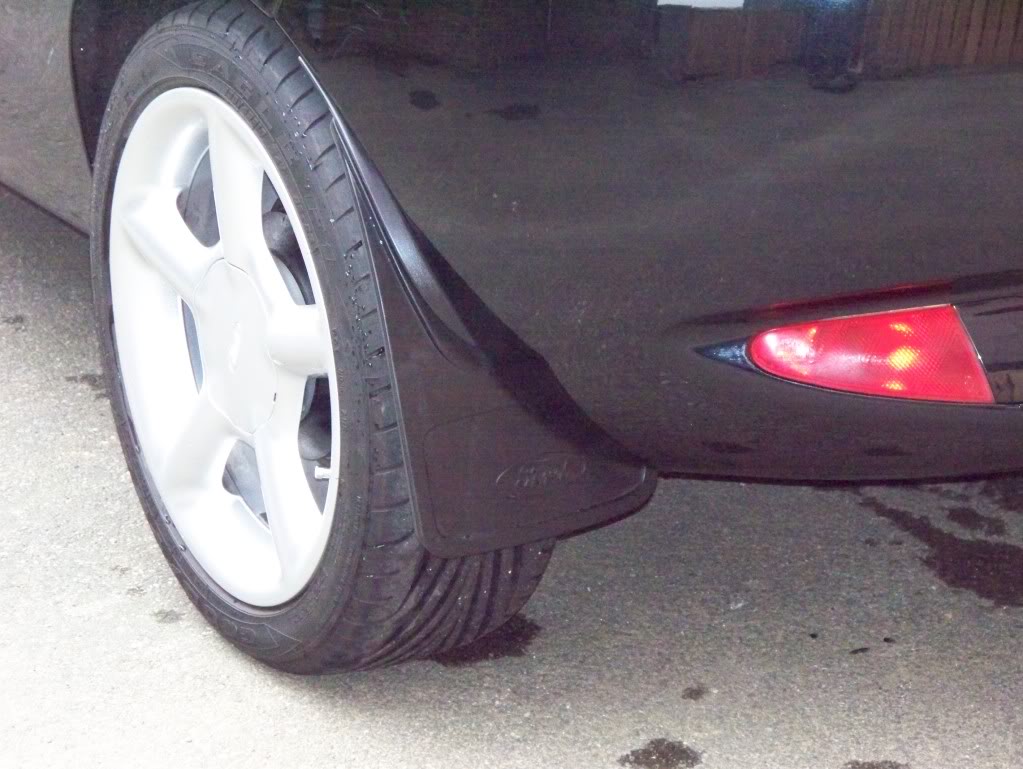
Sierra rear mudflap
I ran the car like this for a while, with few minor changes. As the exhaust had been bought in bits from different sources, we had to guess what was needed to fit it. The fire ring was no problem as it was a standard Bosal part, but we made the mistake of not using sprung screws for the manifold – mid section joint. Additionally, my MIL eliminator was a bit dodgy, so my check engine lamp kept illuminating, and a minor collision with a very small rock meant the removal of my lower strut brace. A trip to PumaSpeed sorted all of these issues as the lower strut (which had been damaged by some road debris) was removed and a TAPE ECU with the FRP map was installed, this ignores the second lambda, and makes the exhaust pop deliciously on the overrun!
While the car was grippy, I hadn't been especially happy with the handling since fitting the ET40 6.5J wheels, it just didn't feel "right", so I had some Eibach 15mm hubcentric spacers fitted at the front, these nicely broadened the front track to match the rear, though to fit the extended studs it was necessary to replace the front wheel bearings, which made things more expensive than I would have liked.
Front track, ET40 wheels, with 15mm spacer
My rear drums were looking a bit sorry for themselves, but a coat of black hammerite soon tidied them up.
Standard rear drums, with a coat of black Hammerite
Unfortunately I still wasn't entirely happy with the feel of the front of the car, so bought some 7Jx16 ET35 Cosworth Design wheels. Got these on with the original tyres (without spacers), and I was delighted, it felt like a Puma again! Trying them with the spacers, giving the equivalent of ET20 was AWFUL, felt like the steering wheel wasn’t connected to the wheels!
I am a big fan of fuel computers, they really help me to improve my fuel economy. I decided the most suitable device to get was a Scangauge II, which I procured via eBay. It's a brilliant tool and with some minor modifications it fitted discretely into the ashtray.
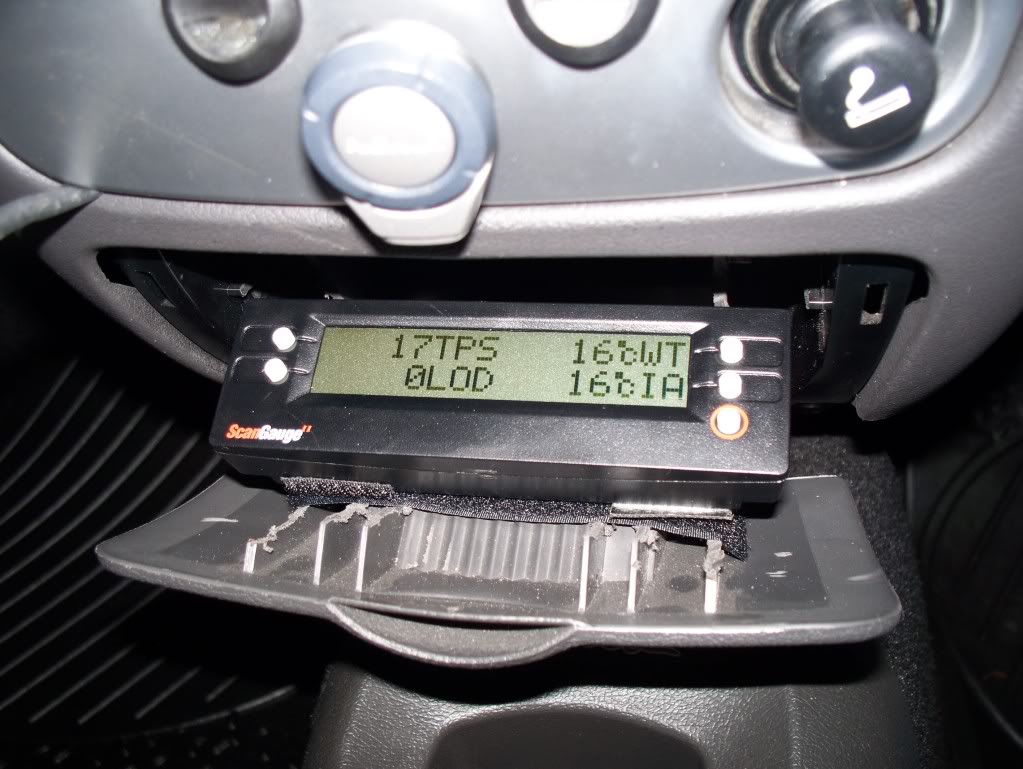
ScanGauge II
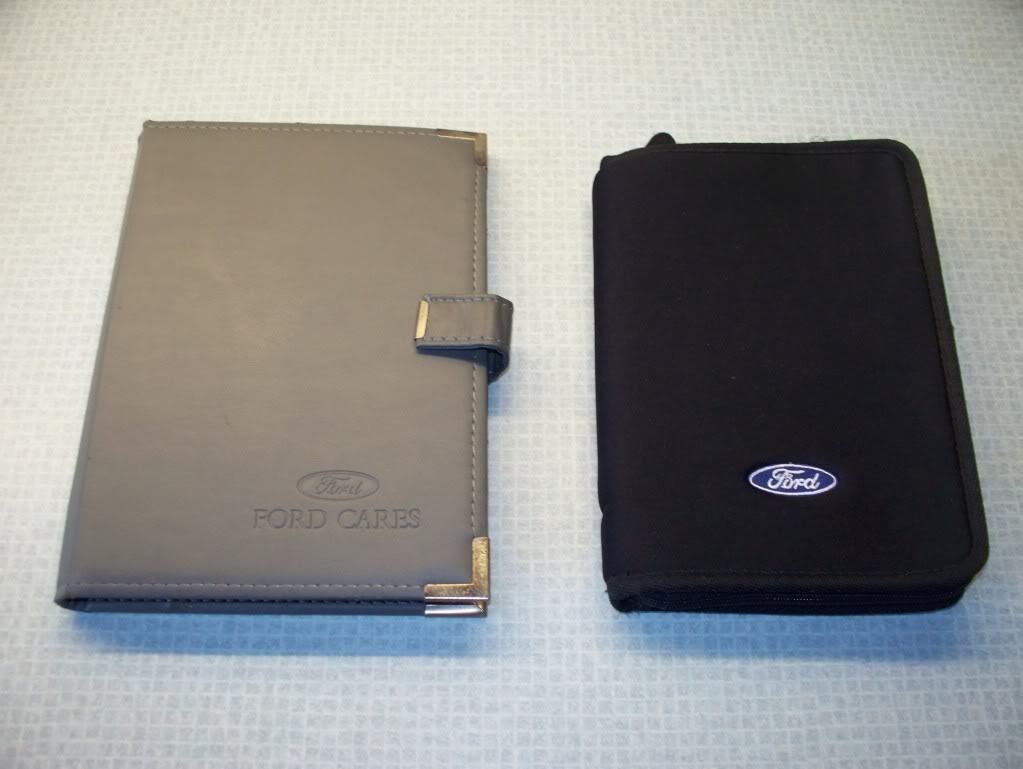
During a root through some of my old junk in the garage I came across a leather effect book pack, gave it a clean and it looks a lot better than the original one.
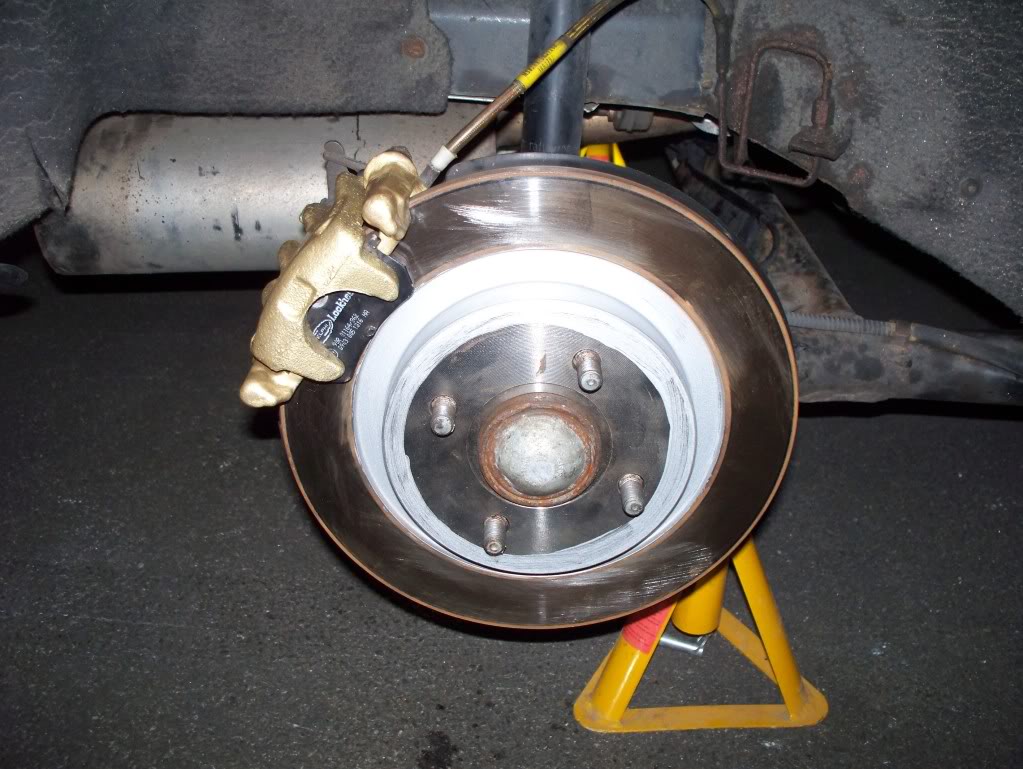
Next mod was to fit some FRP rear discs. I bought a used set and fitted them with new Delphi discs and pads, and a new ATE rear ABS loom. Pretty easy to fit, but the new Fiesta ST shields needed modifying to accept the Puma's ABS sensor, and disconnecting the brake lines was awkward. Other than that it was plug and play. My top tip though is to clean out the ABS sensor holes with a dremmel before fitting, makes the sensor much easier to slide into place.
FRP rear disc brake, behind 16" "Cosworth Design" alloy wheel
Once fitted, the extra track from the FRP / Focus hubs, plus the 7J ET35 wheels meant that the track was perhaps a touch wide, and would foul the liners under compression, so I replaced the 20.5mm spacers with the 12.5mm to bring it in a touch. At the same time, I fitted ST170 rear brake carriers to my FRP setup, along with new 270mm ST170 discs and new ST170 brake shields.
Rear wheel position with discs, 20.5mm axle spacers and ET35 wheels
ST170 rear discs, carrier painted, need to do the caliper
Side view showing 300mm front discs and 280mm rear discs
As seems to be common with FRP manifold cars, the lambda sensor soon died, so I replaced it with a new NTK item, which is the same make as OE, and the car seemed much better, much less reluctant to go. This had been an intermittent symptom for some time though, so I don't think I can completely blame the FRP system.
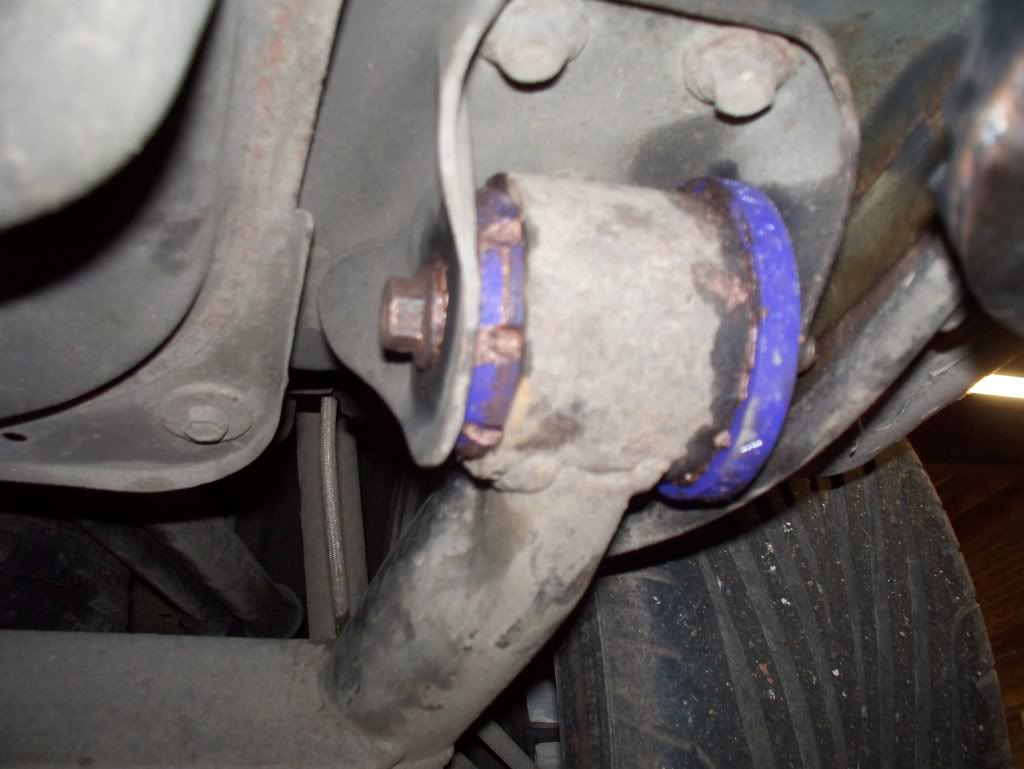
I also noticed an increasing amount of creaking from the sprung joint, suggesting excessive engine movement due to a failing torque restrictor, so got a new one ordered.
While the Mk3 Mondeo / ST170 brakes are very resistant to fade, I wasn’t especially impressed with the feed of them, there seemed to be a lot of dead travel before anything happened, so I bought some ST170 front callipers, which I had refurbished and fitted with some Mintex 1144 pads, along with new discs.
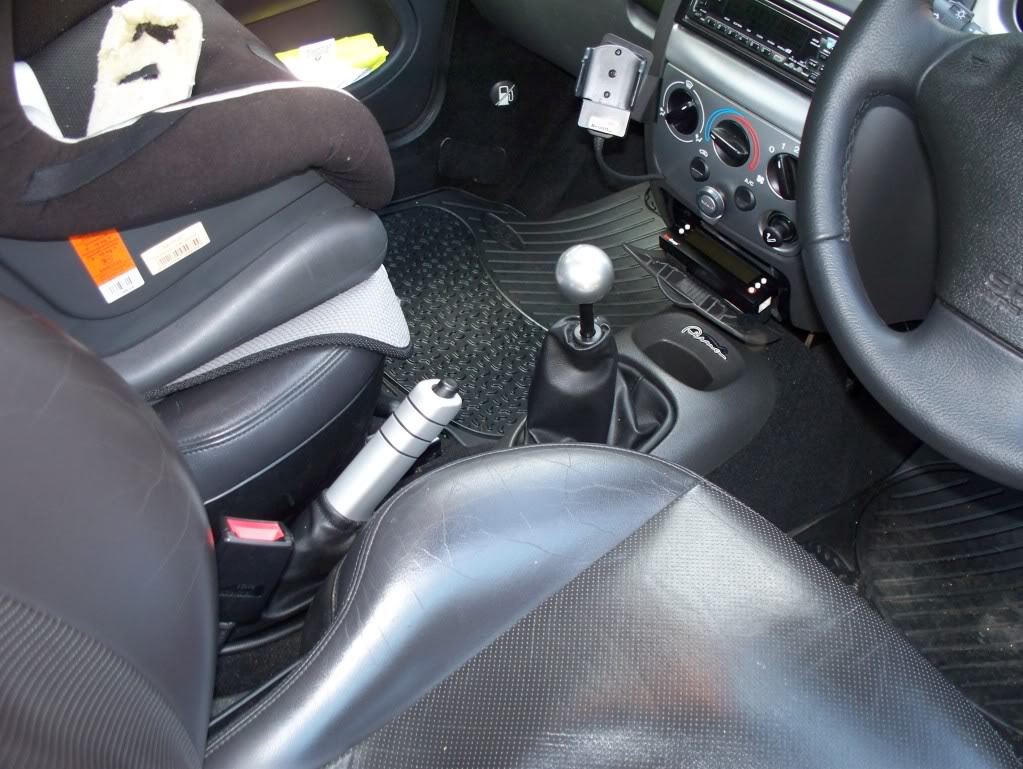
Came across a genuine Ford brushed aluminium effect handbrake handle on zsoc, so got that scooped up and fitted;
There was a slight defect in the paint from the repair that had been done in late '08, the guy who did the work was great, sorted it out, and also tidied up a small scab that had formed on the drivers door sill.
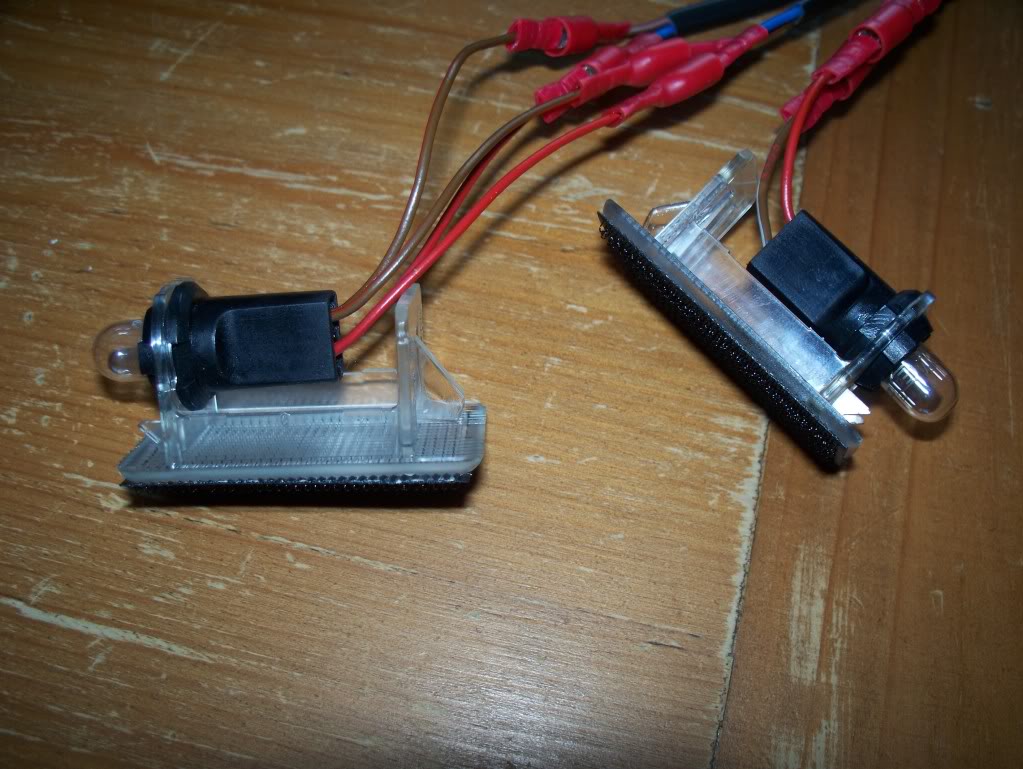
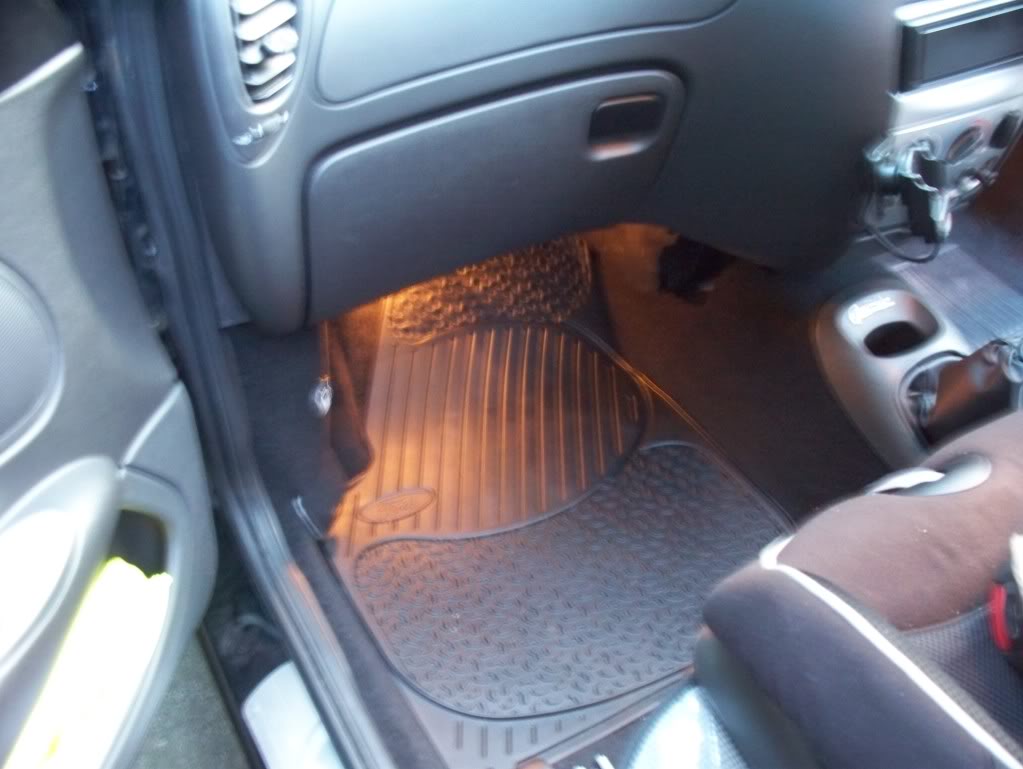
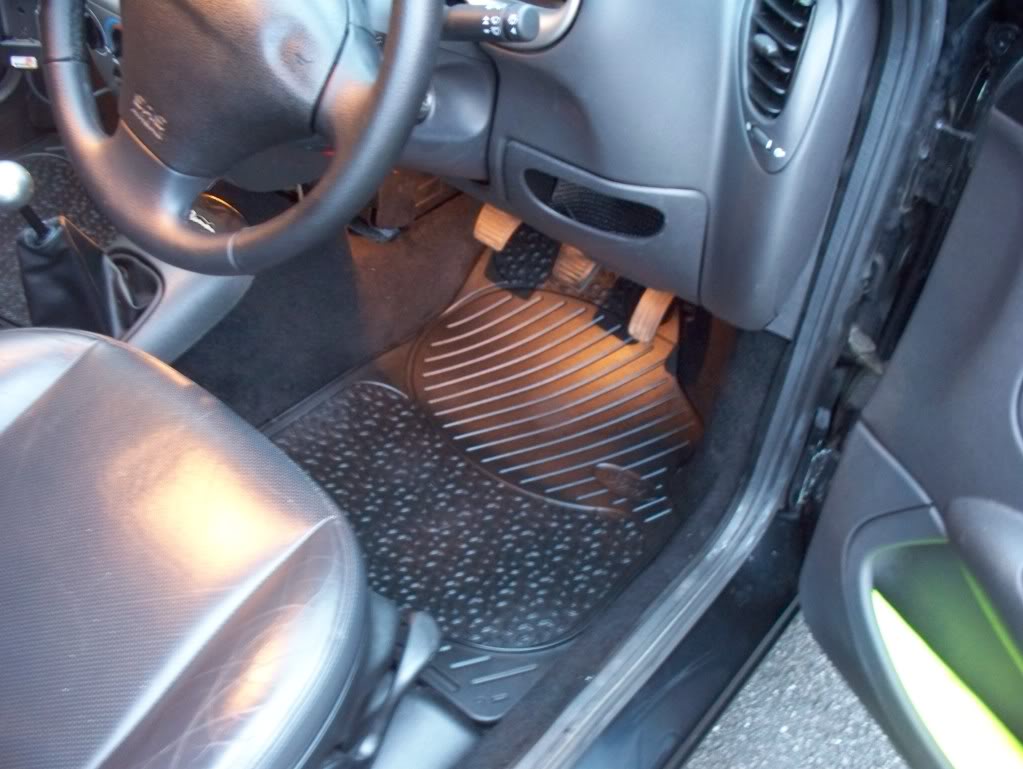
Following a bit of pondering as to how to fit them, I fitted some front footwell lamps, using standard Ford parts, and some velcro, a little unorthodox perhaps, but fingers crossed it works!
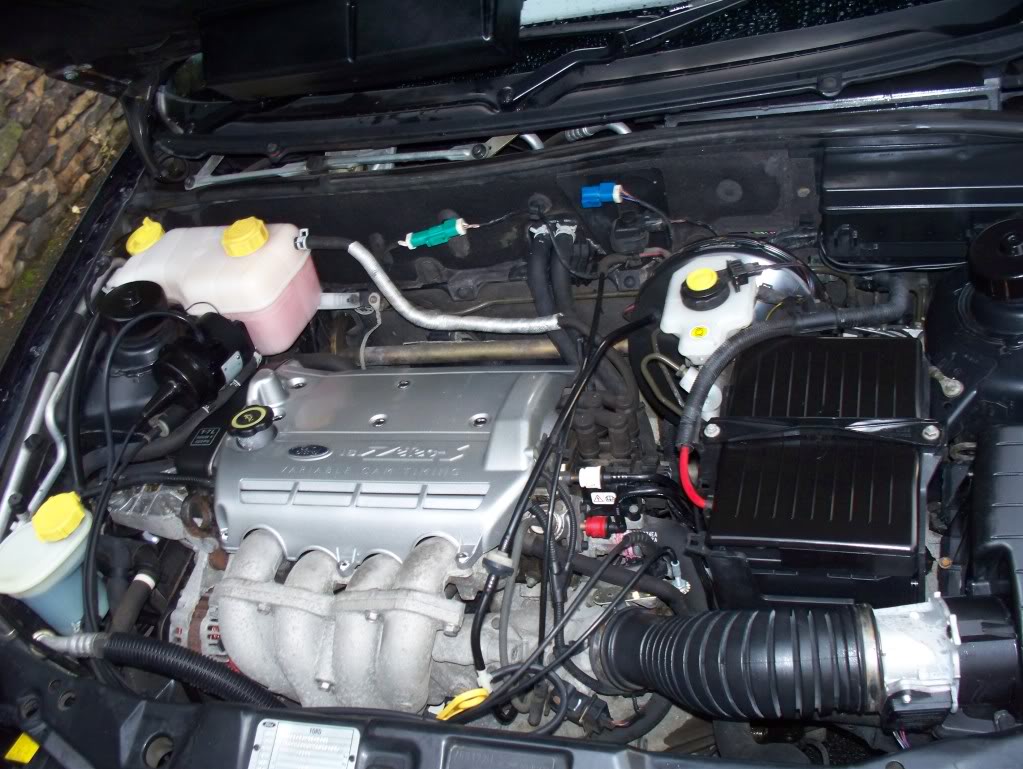
Fitted an FRP style air box, which was a bloody awful job, and gave the engine bay a good clean. Anyone doing similar should check the bottom of the battery box, as mine was full of water.
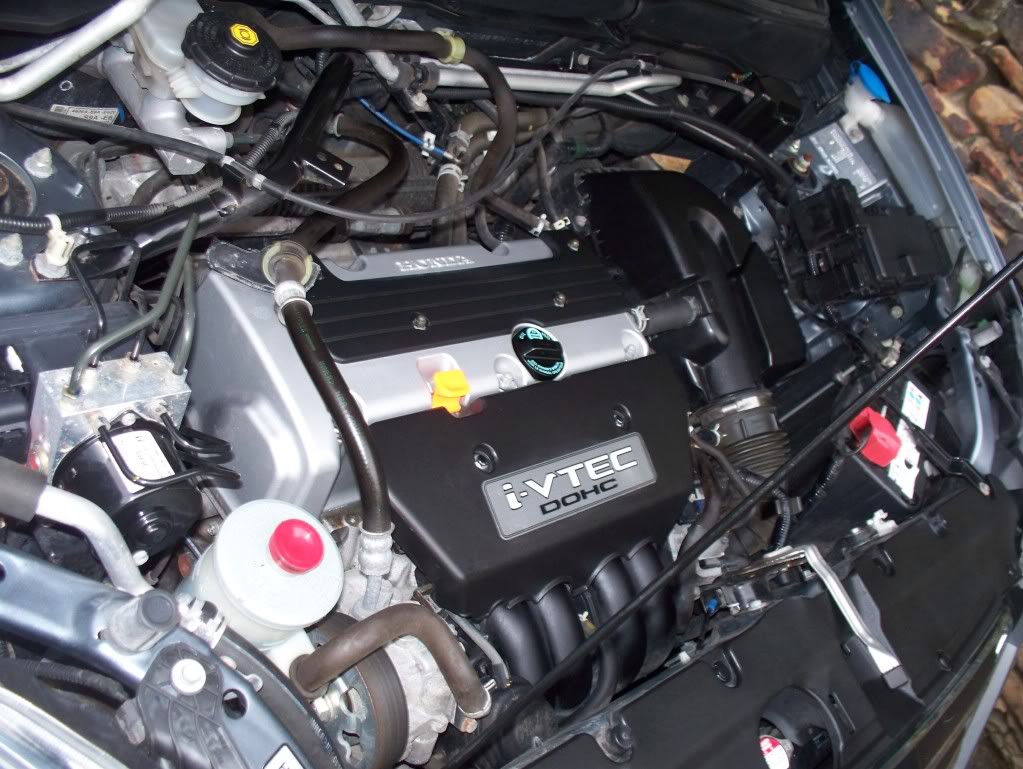
and one of Rhonda the Honda;
AutoGlym Engine & Machine Cleaner is pretty impressive stuff!
I was toying with the idea of fitting a Milltek Evo exhaust that I had acquired. I was reluctant as there won't be any power increase, I like the Piper FRP tailpipe, and the Evo's flexi means that it doesn't use the front mount, but given that the flexi will hopefully compensate for future wear in the torque restrictor I decided to give it a go.
At the same time I fitted a new left hand engine mount, torque restrictor, rear beam bushes, and replaced the exhaust manifold gasket. I replaced the engine / gearbox mount as I quite missed the benefit of the lower strut brace, and hoped that a new mount would lift the engine enough for it not to foul – I later found that it worked, up until I pulled off a curb and bent the (second) brace slightly, cue more knocking over bumps, speed humps, etc.
Things were going well, battery out, got the old engine mount off and fitted the new one, old torque link out and new one in, got most of the FRP exhaust system off, only shearing one bolt in the process, new Milltek rear box on, stripped down the rear beam, got the top mounting nuts / bolt off the manifold, and then had to ask for help from one of the technicians.
New OE rear beam bushes in, rebuilt the beam, had to space out my o/s/r ABS sensor to stop it fouling the tone wheel, but it was still close enough to get a reading.
Dean (technician) took over on the manifold while I got the relevant torque settings and torqued up the various parts I had removed and refitted/replaced. Everything was going fine up until I misread the torque setting for the studs which connect the engine support to the n/s engine mount and sheared the stud. Bugger. So the Milltek EVO, sport cat, etc. was all in, but I had to wait for a replacement engine support before I could drive it, and as the battery box has to be removed to access the mount, I couldn’t heard it running with the new Milltek EVO exhaust. At this point I was hoping it would be quieter than the Piper FRP, though I still think the Piper FRP back box is GORGEOUS.
Once I got the car back, with the new rear beam bushes it was so much nicer to drive, especially on roads where the top layer of tarmac is worn.
Next the car spent a week of so with it's bottom in the air, while I was off work and using the Honda instead. I took the opportunity to paint up the rear calipers in gold, and also to apply a coat of silver hammerite to the discs (current rear, and new fronts, waiting for ST170 calipers); the rear discs in particular very quickly looked shabby due to very light (but very orange) surface corrosion; hopefully this will keep them looking smarter for a bit longer
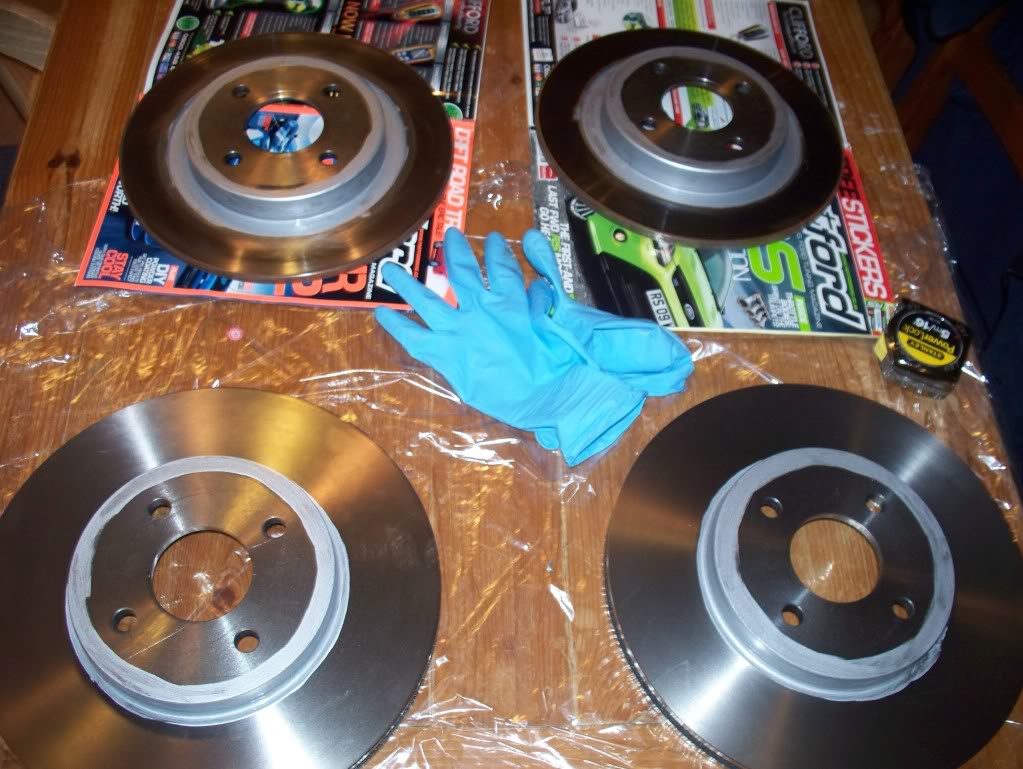
Current rear, and new front brake discs, with light coat of silver hammerite to non-contact areas
Off-side rear brake disc & caliper
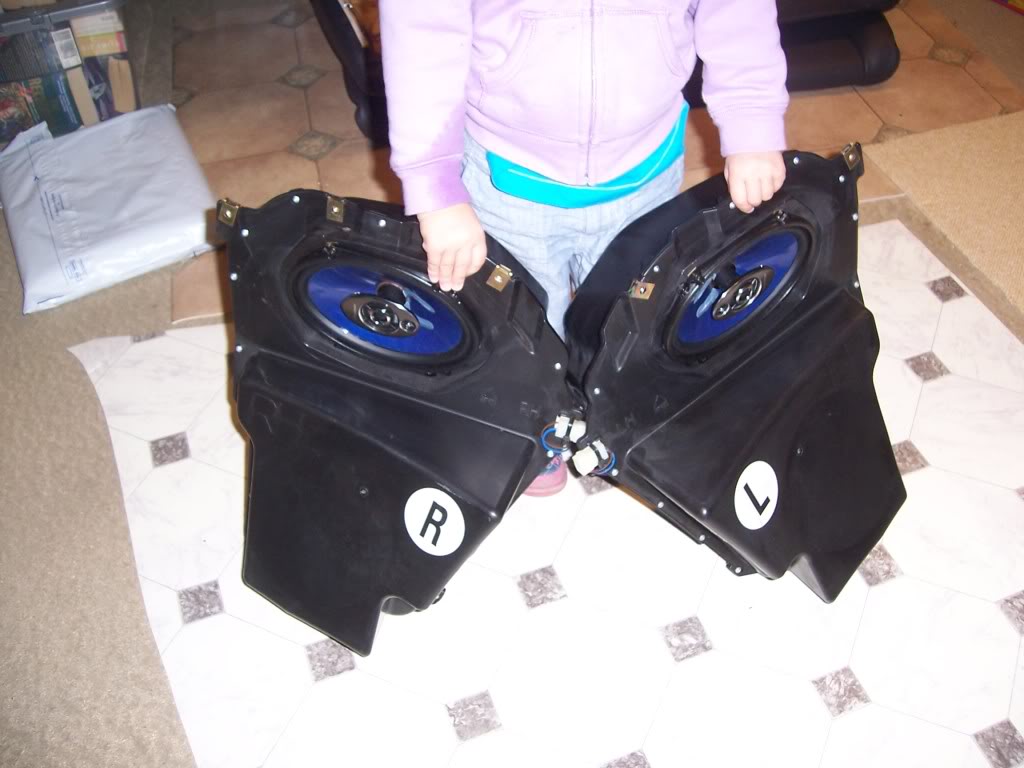
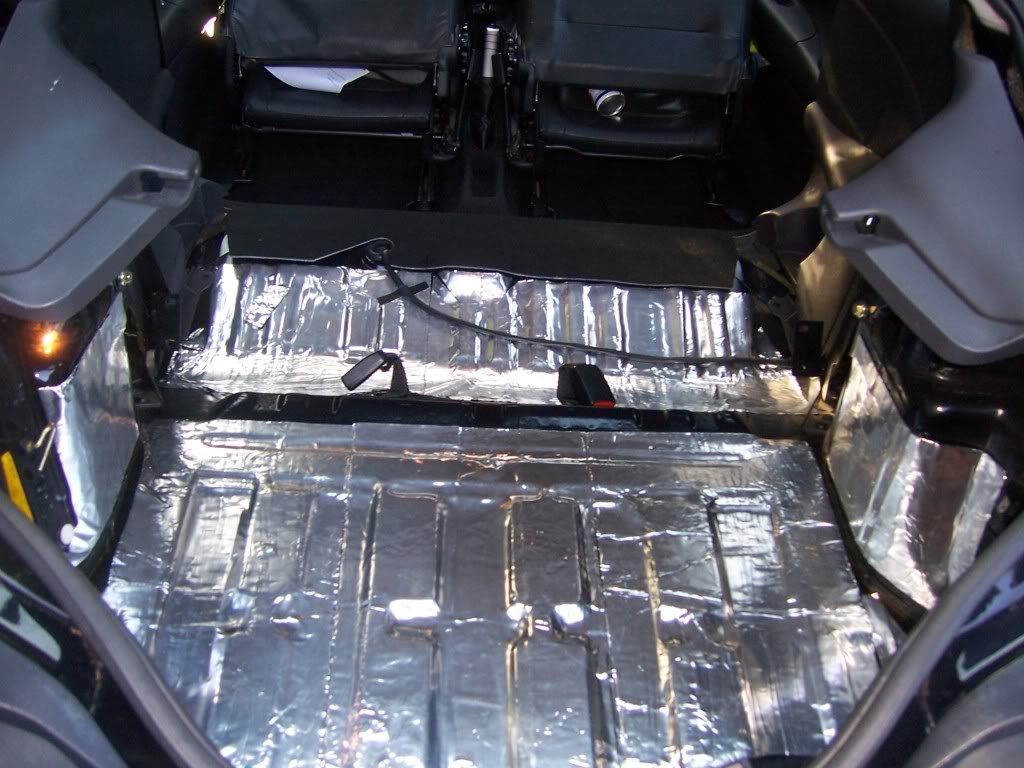
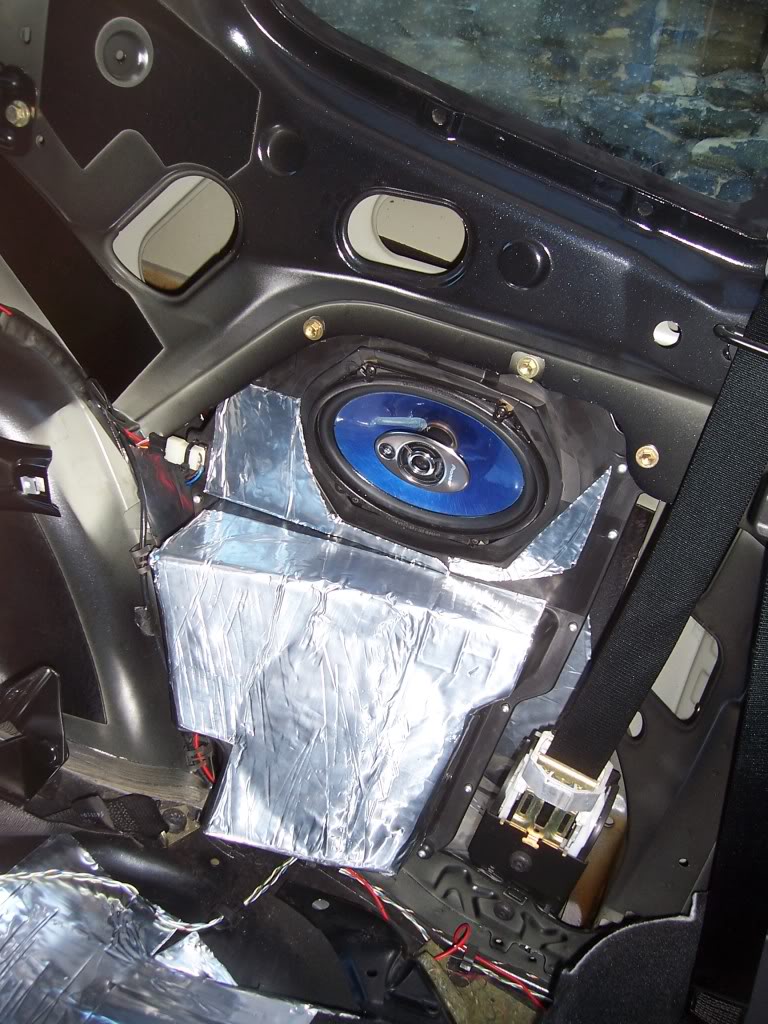
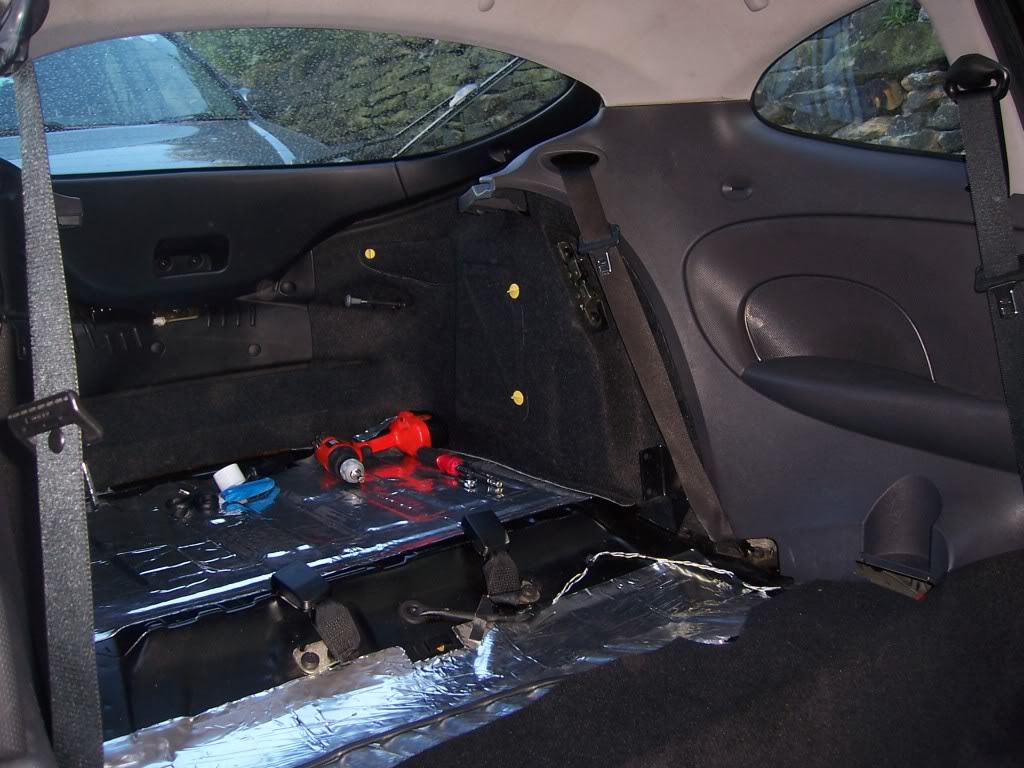
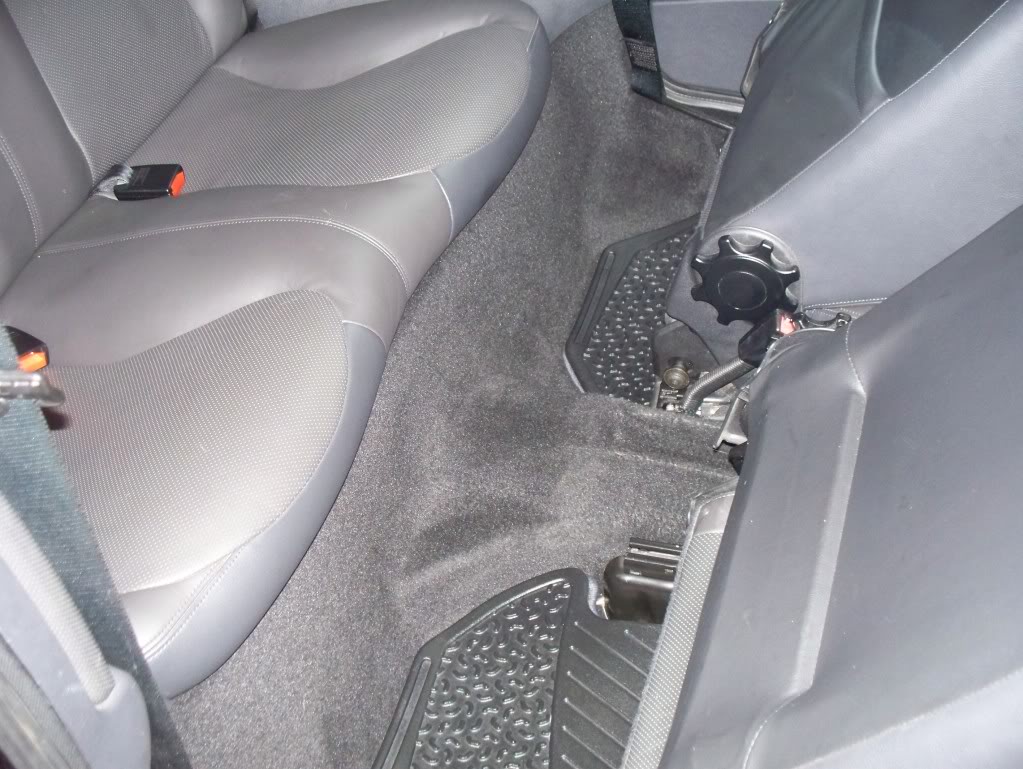
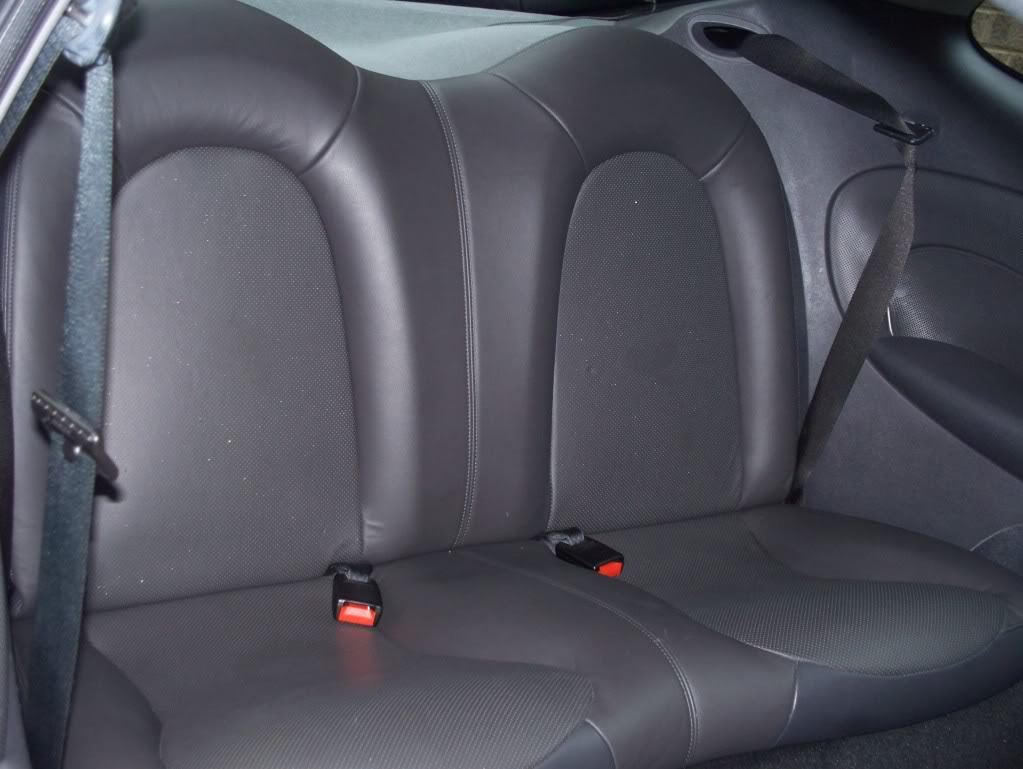
I stripped out most of the rear trim, in preparation for some rust proofing and sound deadening, which I performed once the car came back. I was amazed at how easy it is to remove the rear seats, and the quarter panels weren't too tricky either, however I have bought a bundle of new trim clips, and both rear quarters are currently laying in the back of the car, restrained by the seatbelts.
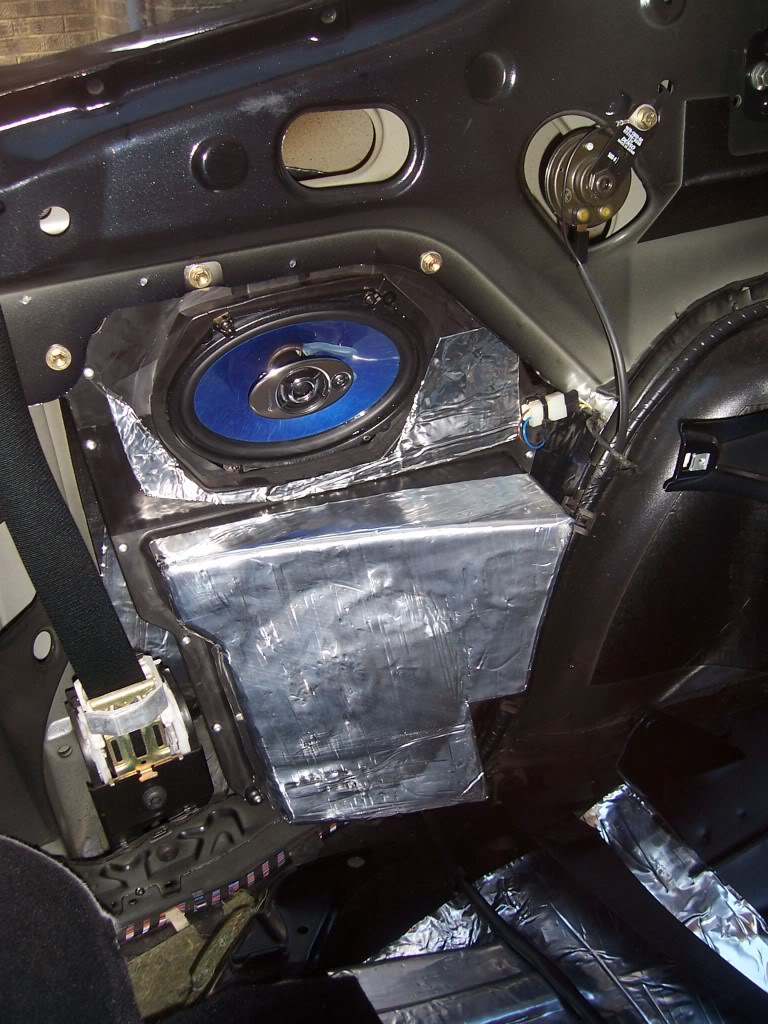
Having stripped out the rear quarters, I removed the speaker boxes to fit some Pioneer TS-H687 6x8 custom fit speakers. The fit could not have been easier or better, but I hadn't realised that while the plug onto the speaker box is a standard Ford speaker plug, the one from the inside of the box to the speaker is not;
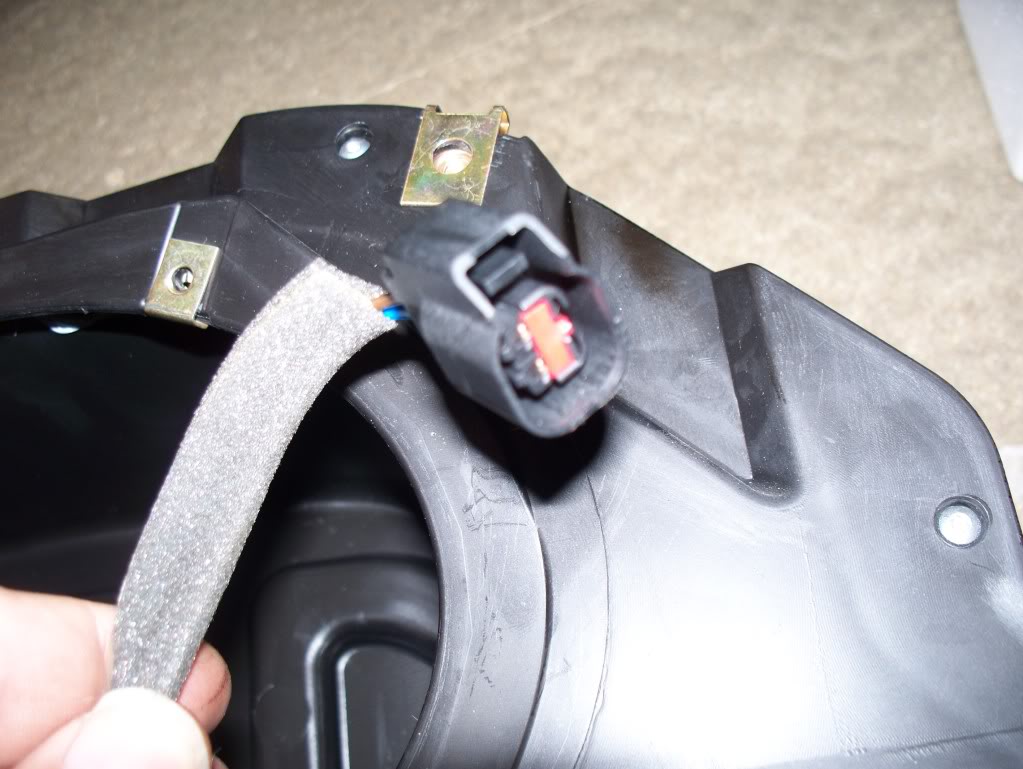
Standard Ford speaker connection from rear box to speaker
This unfortunately meant cutting the wiring and fitting new connectors, not really a problem, just that I don't like cutting original wiring.
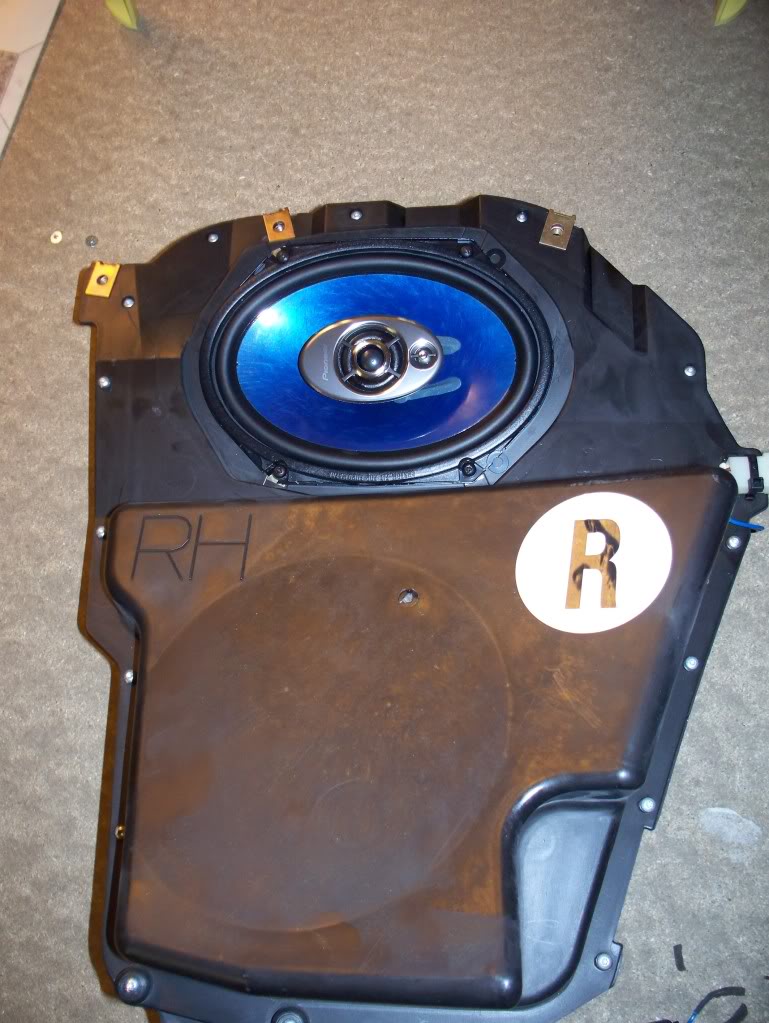
Pioneer TS-H687 6x8 Custom Fit rear speaker
The new speakers look quite nice, the pods need a wipe down and a layer of Second Skin Damplifier, then they will be ready to go back in when I get the car back.
Also made up a new key, which is really nice to use, but not quite as slick as the Jag key;
Ford Focus II key, modified with Tibbe blade and "RED" PATS transponder
The car then went for some minor remedial works to sort a couple of rust spots, on a rear arch, and again on the drivers door tread area.
Couple more pics before it went in for paint;
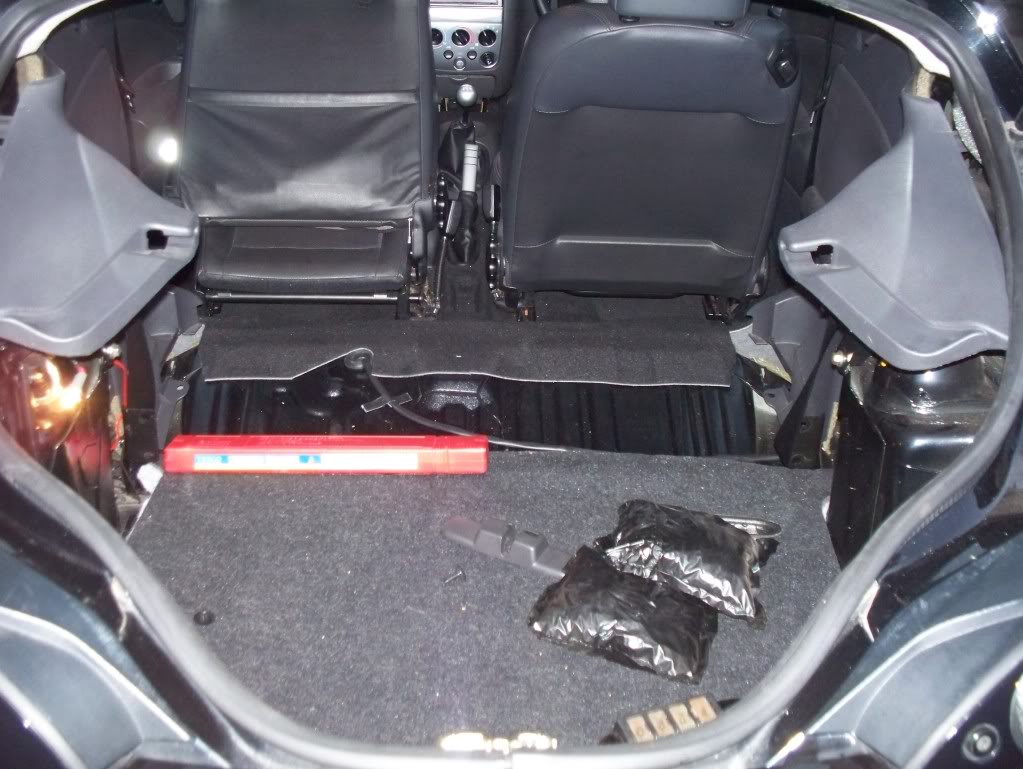
Rear interior stripped, the side panels are just sitting roughly in place to avoid them damaging each other, I was amazed at how easy it was to take it all out.
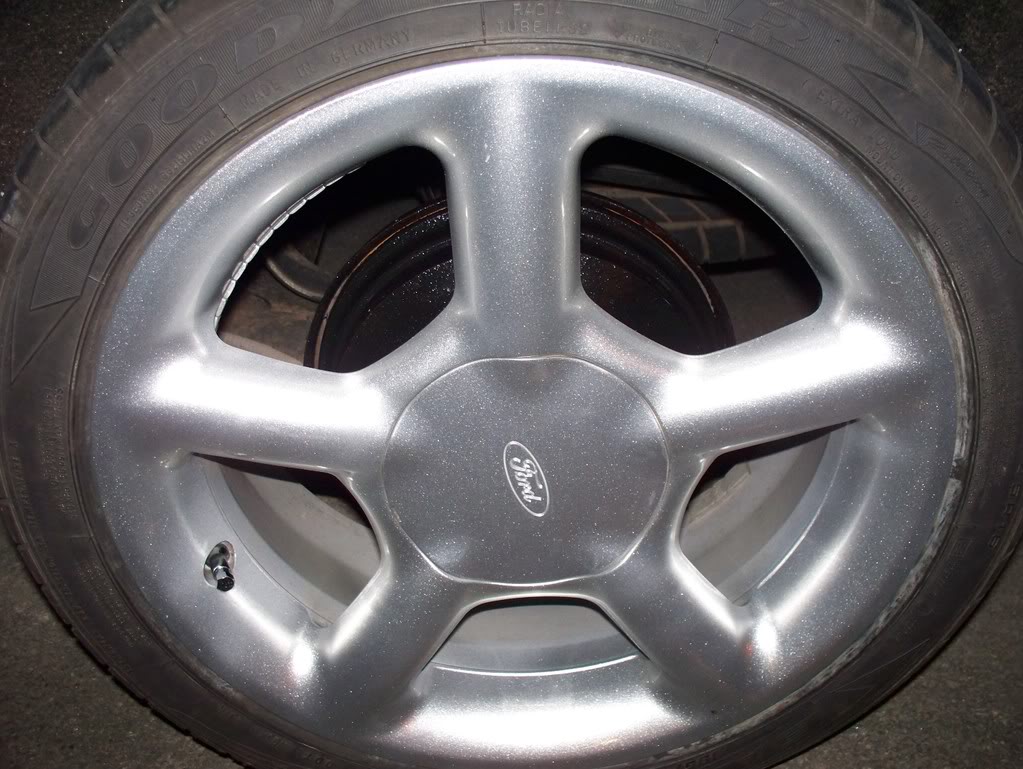
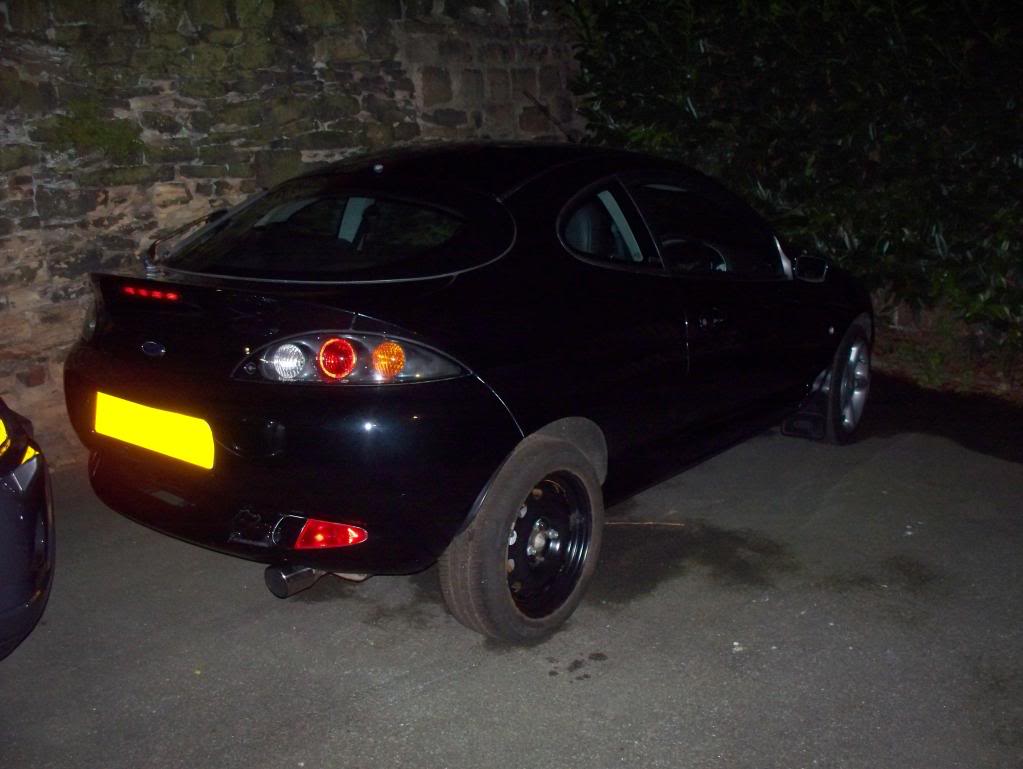
Standard 15" spare just about clears the 270mm rear brakes, quite like the sleeper look of the plain black steelie, shame they wouldn't fit over the front though.
Finally cleaned and ready for the bodyshop. I was going to remove the rear quarter window, but I really can't be bothered with the hassle, so will just get it painted up to the bodyline.
When I got the car back, it looked like the bodyshop had done a nice job. Also had a few dents smart repaired at the same time, and as far as I can tell, the results are excellent.
Before reassembling the interior, etc. I applied some Dymax S-50 to the inside of the sills, rear arches, and around the boot. Having applied the Dymax S-50 quite generously, I was surprised at how it had crept through some of the seams, notably in the sills, puddling on the drive. Still, should be better now!
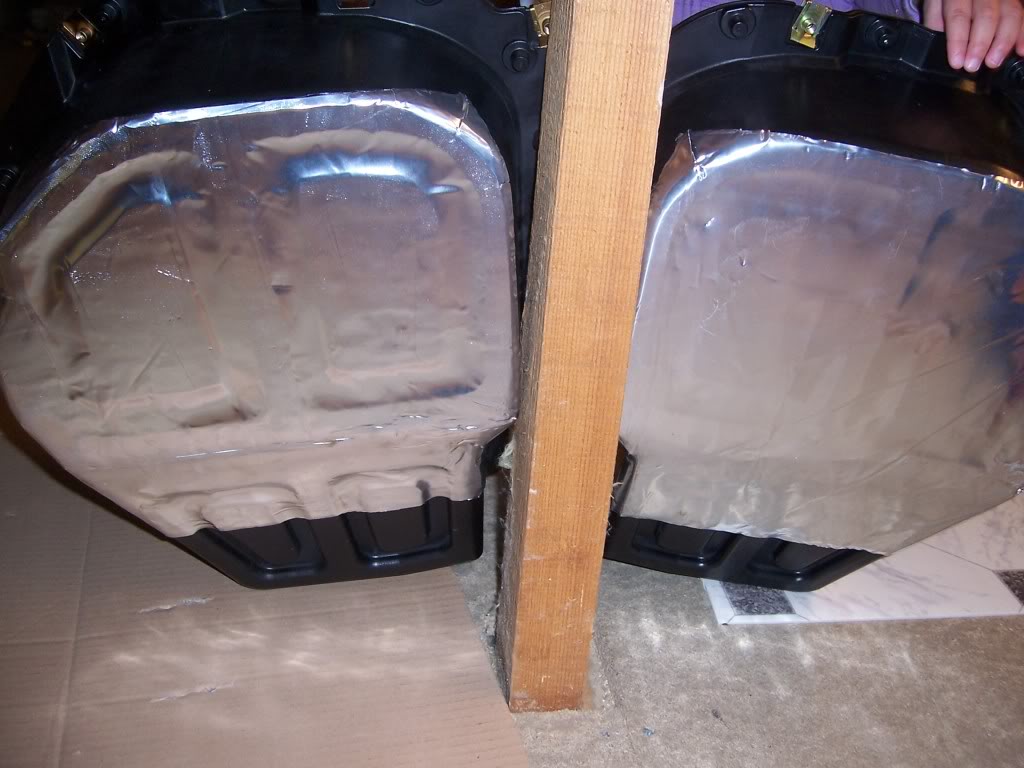
While I had the rear interior stripped, I decided to upgrade the speakers.
Gave the speaker pods a wipe down, with the help of my small assistant;
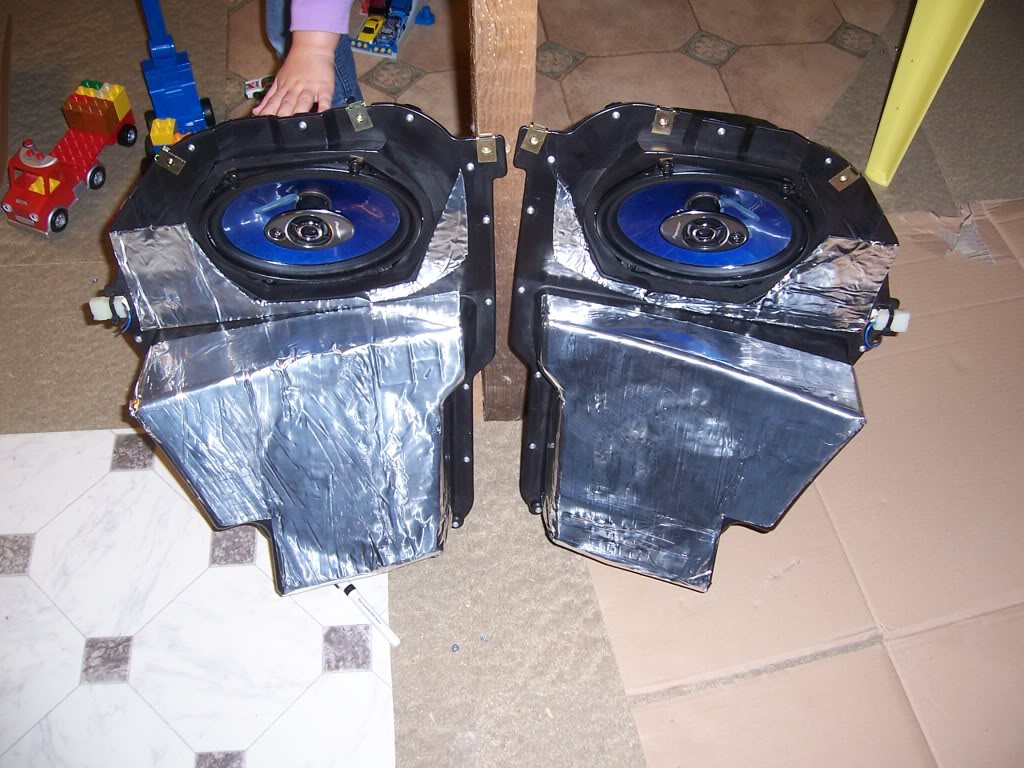
Then applied some Damplifier Second Skin to each pod;
Rear interior trim stripped for application of rust proofing and sound deadening;
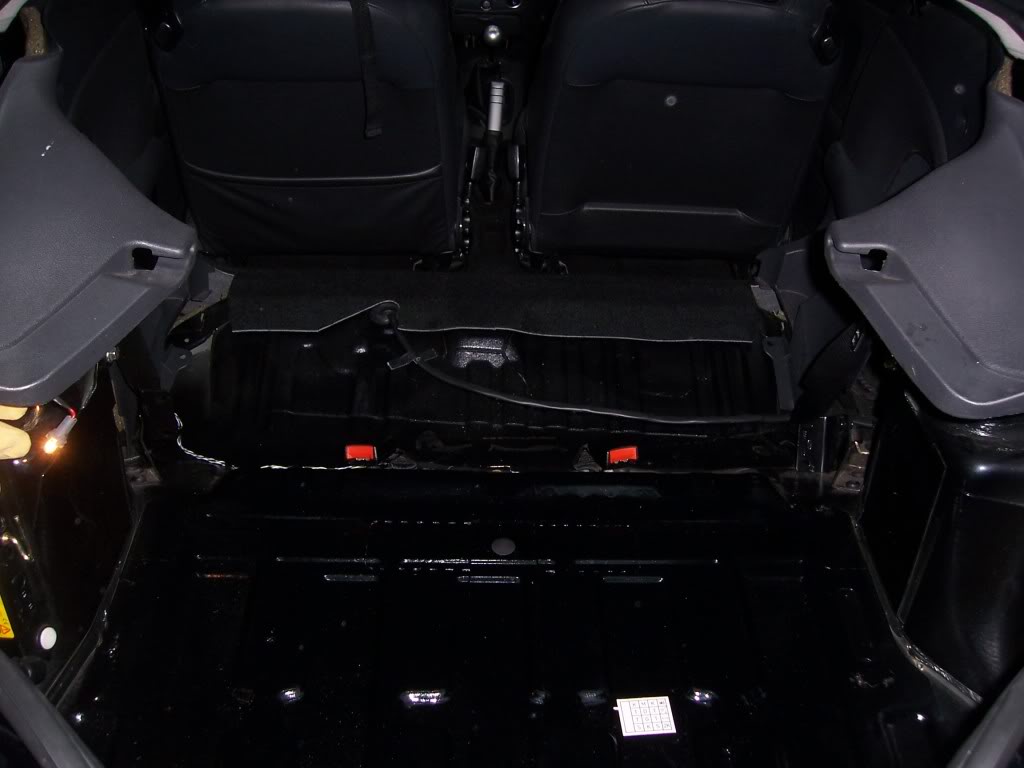
Damplifier Second Skin to the floor and under seat area;
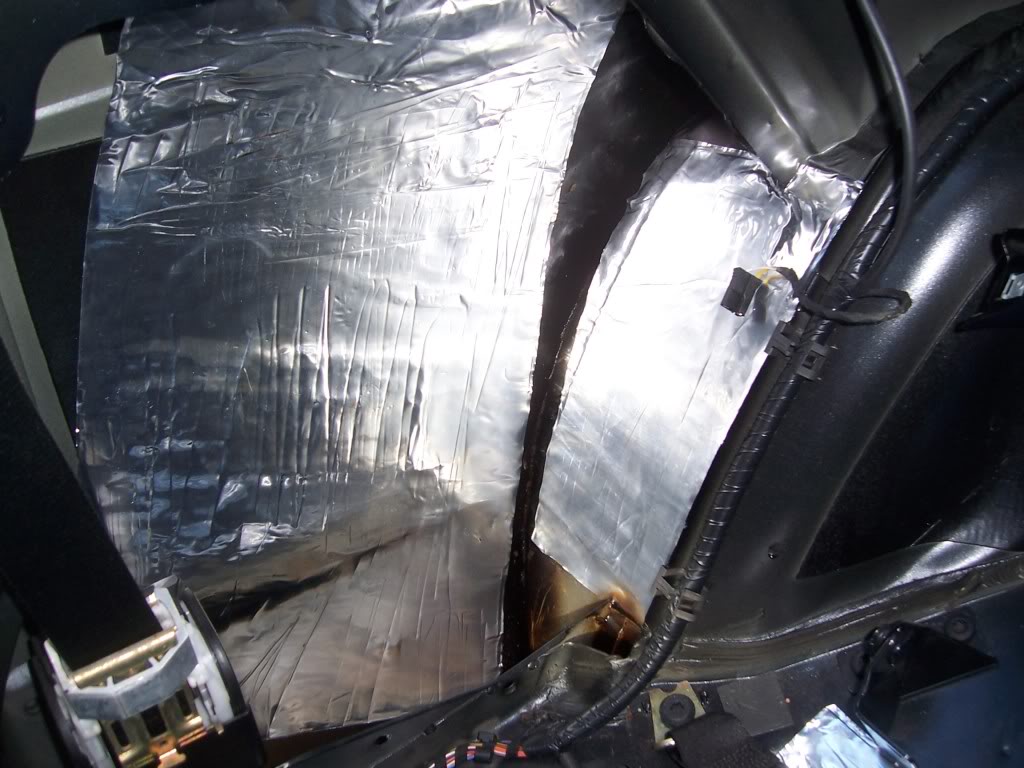
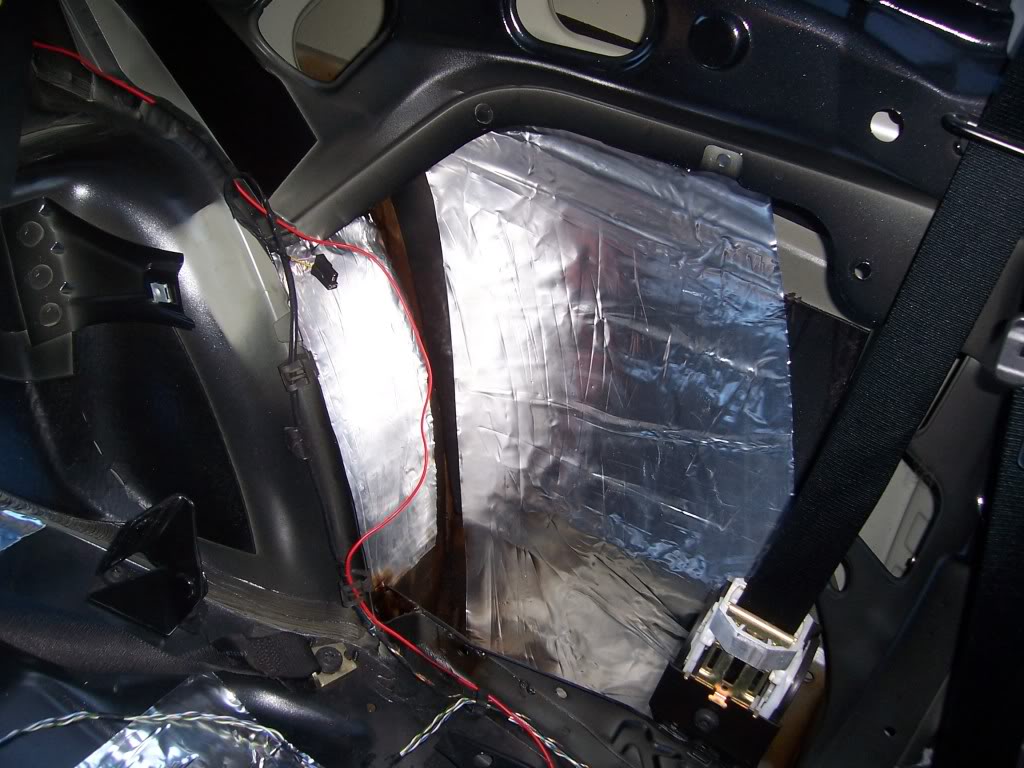
And to the rear quarters;
Speaker Pods in;
Replaced the drivers side door rubber as the original one had split, not really worthy of a photo though.
Quarters and luggage compartment trims refitted;
I also got the rear seats refitted, shelf in, etc. this afternoon, and got the inside of the windows cleaned.
Swapped back the alloy for the steelie, touched up a scuff on the o/s/r calliper, refitted the mudflaps, and refitted my Kenwood audio remote, which seems to fall off whenever the car goes to a garage.
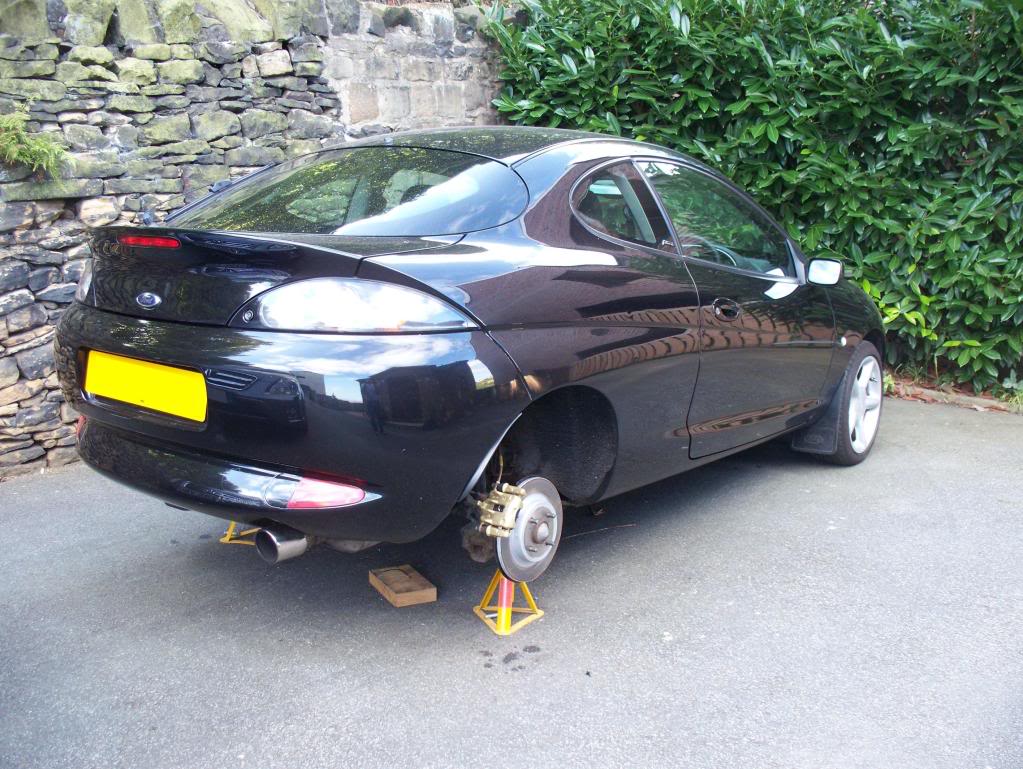
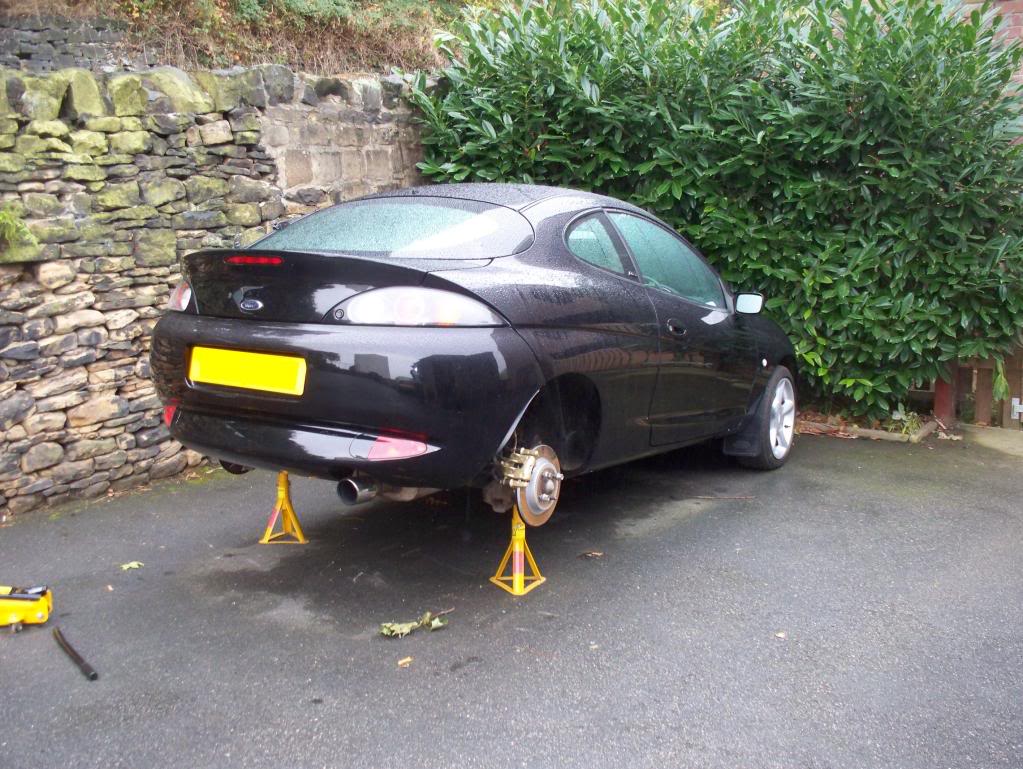
Next opportunity I got, I lifted the back end up again to take bits off, before laying on some wet tarmac in the rain.
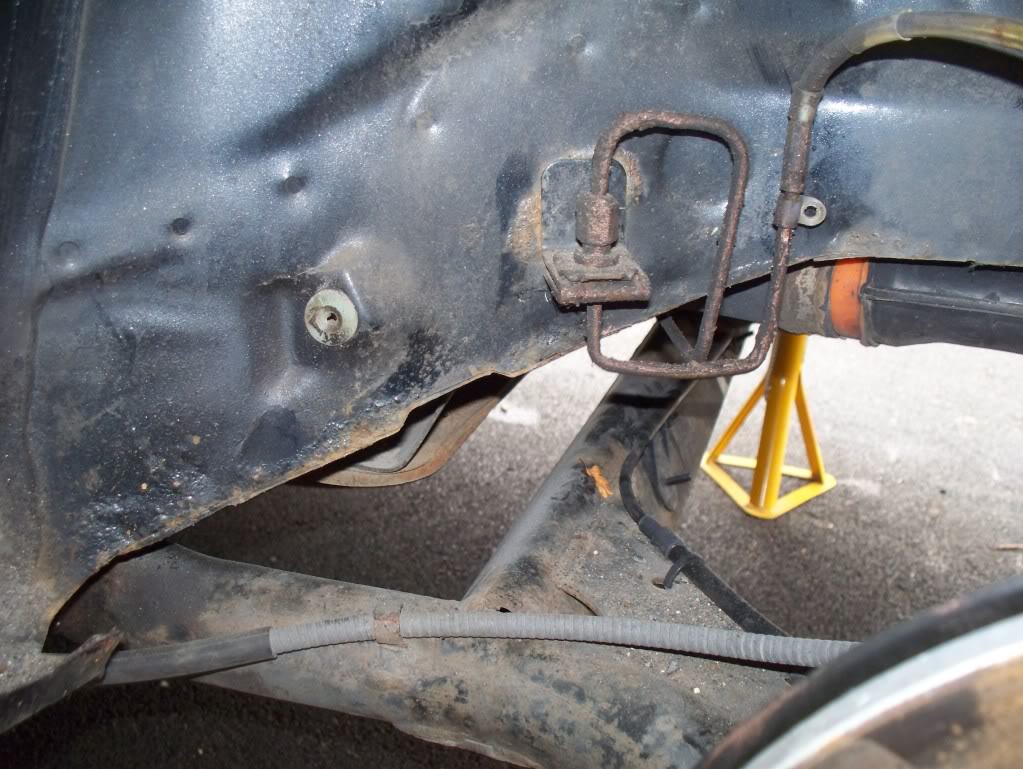
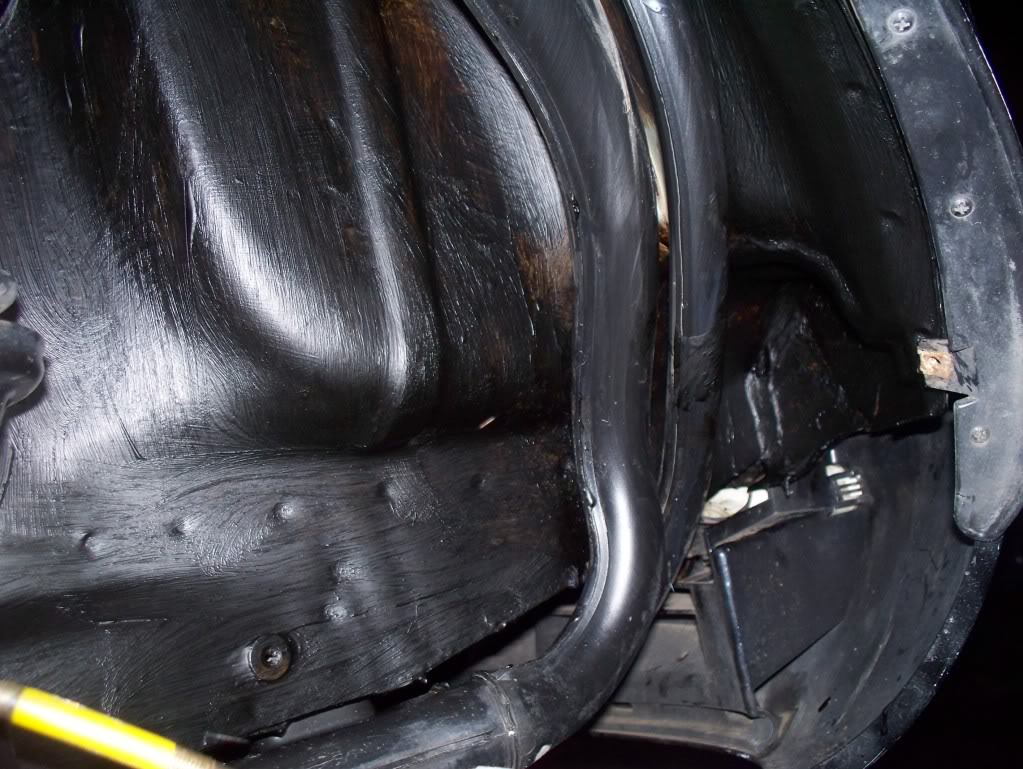
Jacked it up as high as the trolley jack would allow, popped in some stands, whipped off the back wheels, removed the spare and carrier, then set to removing both of the rear wheel arch liners;
This meant I could get a good look at the hidden rust;
Drivers side
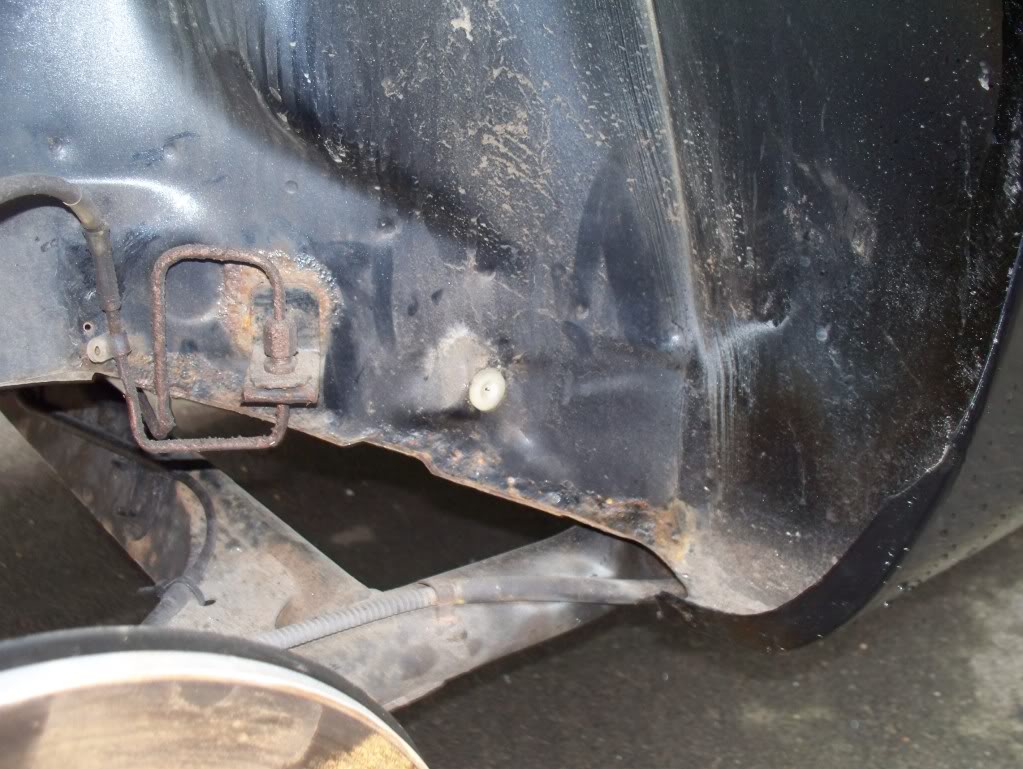
and the arch that has just been repaired;

Passengers side
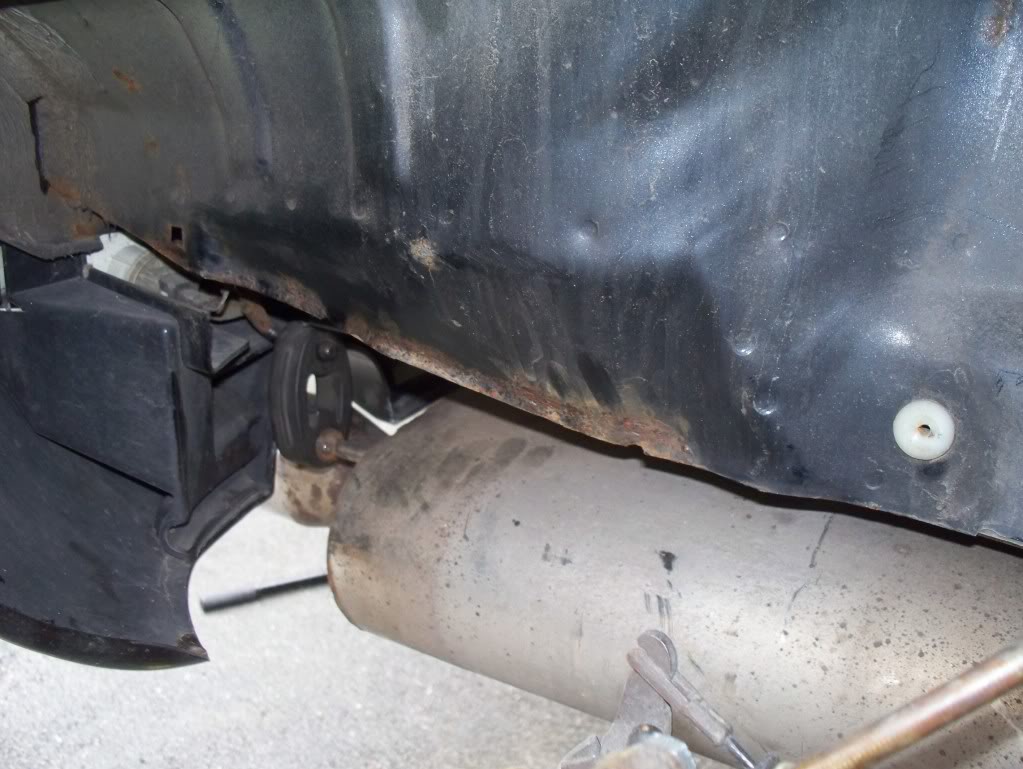
Both sides were suffering along the bottom of the inside edge, I couldn't get the access to this that I wanted on the drivers side because of the rear box and heat shield. I will attend to this area when I can get the car to the garage, at which point I will do the rest of the underside.
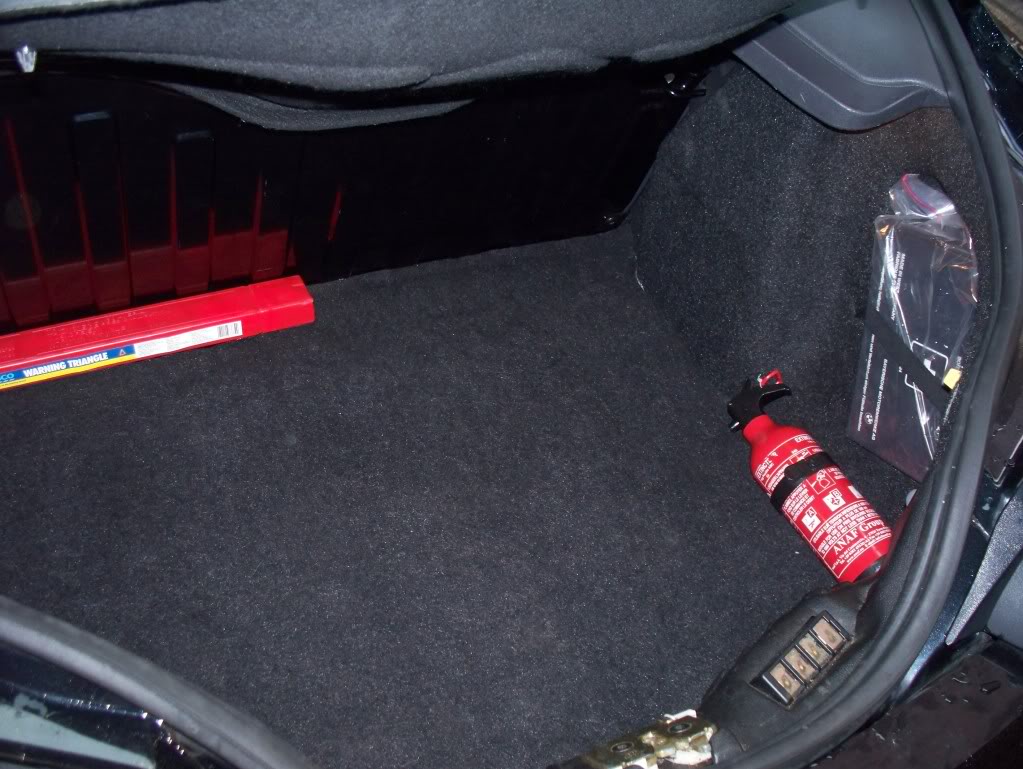
Boot floor
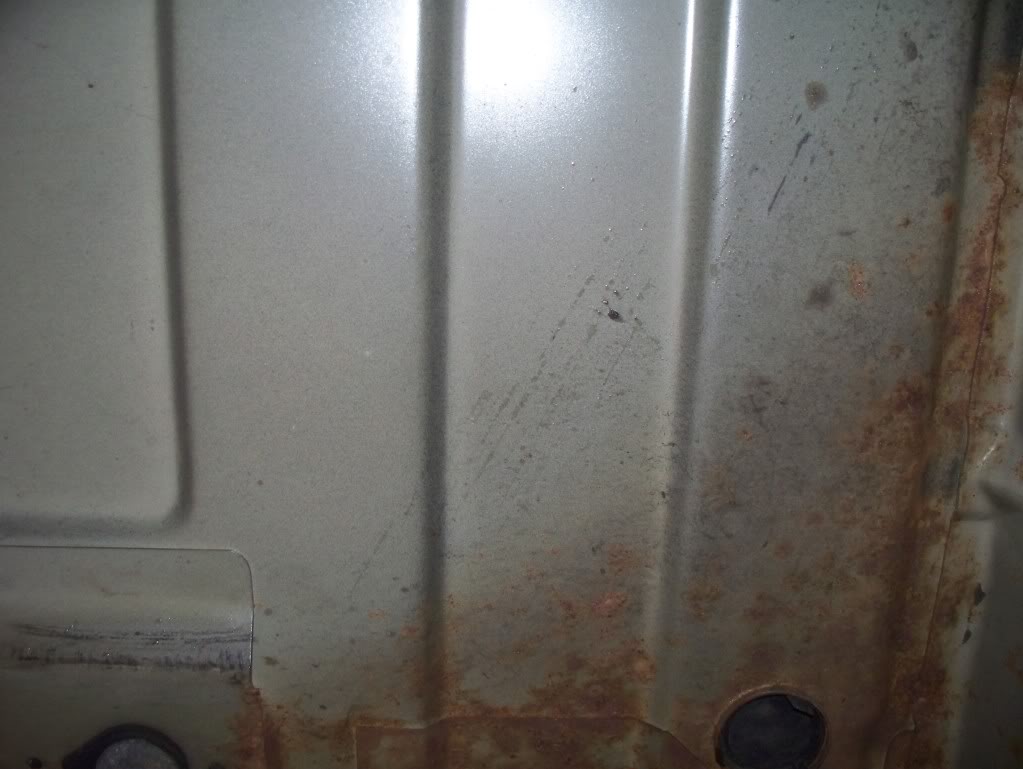
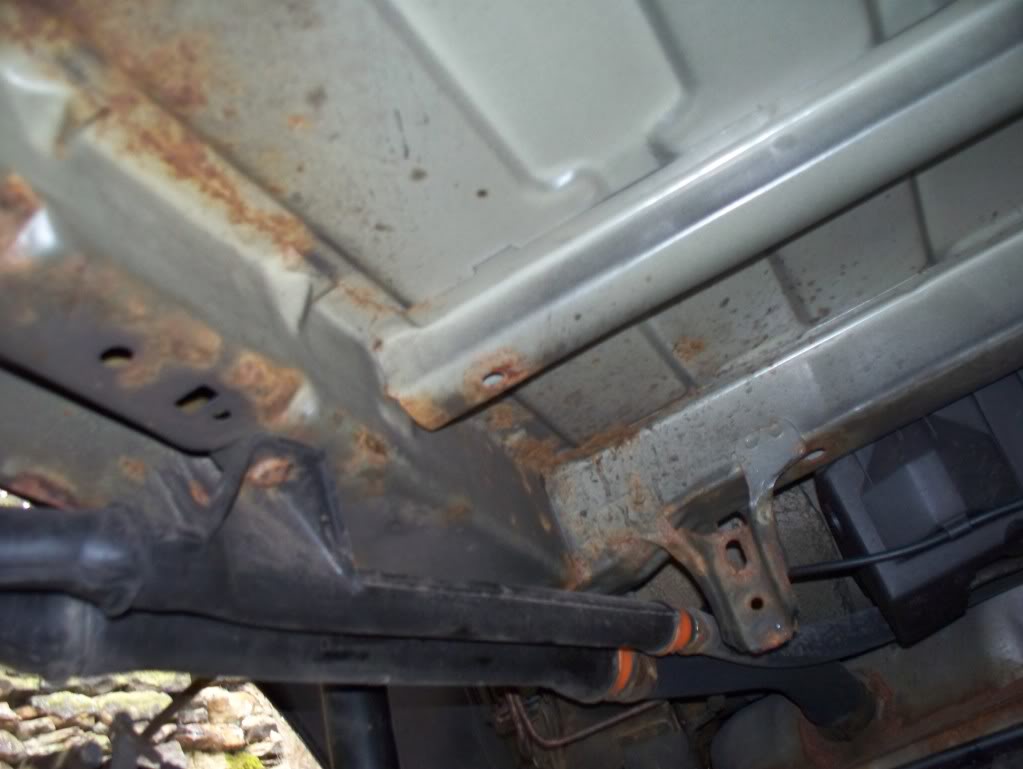
Wasn't so bad, but was a bit tatty on the chassis rail, I think the other side won't be quite as bad, I expect it will have had some protection due to the exhaust and heat shield. Could be wrong though.
Spare wheel carrier was also very tatty.
So, using a drill with a wire brush attachment, I cleaned up the rusty bits, then washed / degreased with Auto Glym Engine & Machine Cleaner, before rinsing and drying with paper towel. While that was drying a bit more, I washed off the wheel arch liners, using the same stuff. What really surprised me was how quickly they dried - granted, it was quite breezy, but within 2 hrs they were pretty much dry.
Next step was to treat the arches and boot floor with some Hydrate 80, this stuff is pretty thin, my daughter thought the car needed some milk!
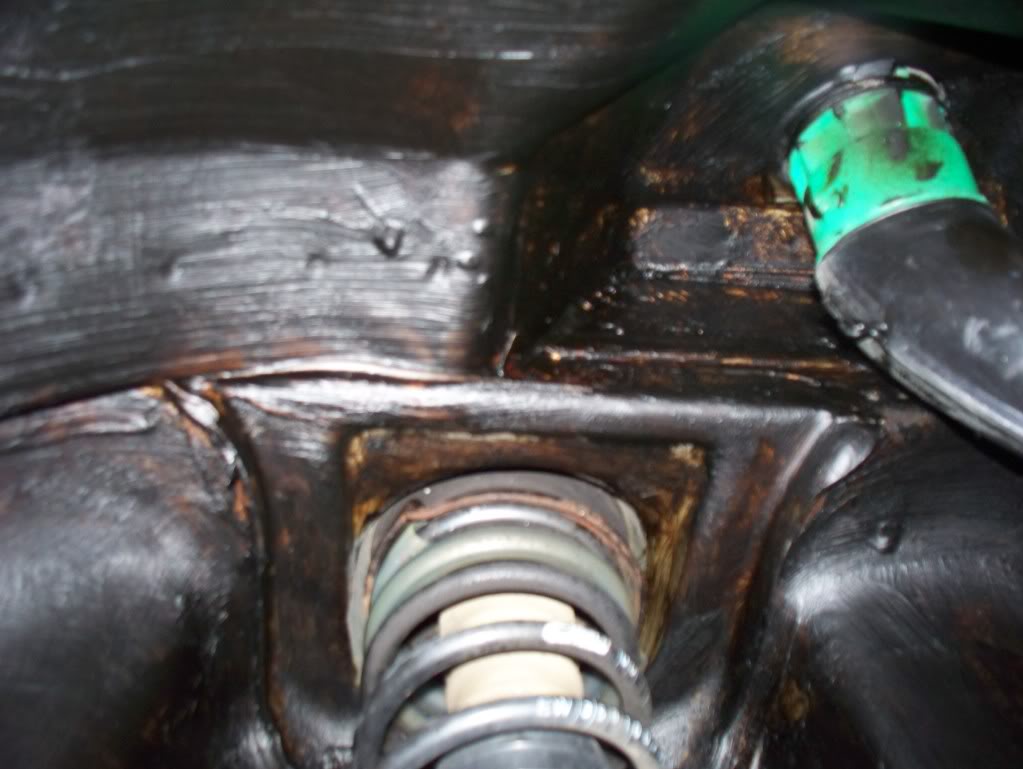
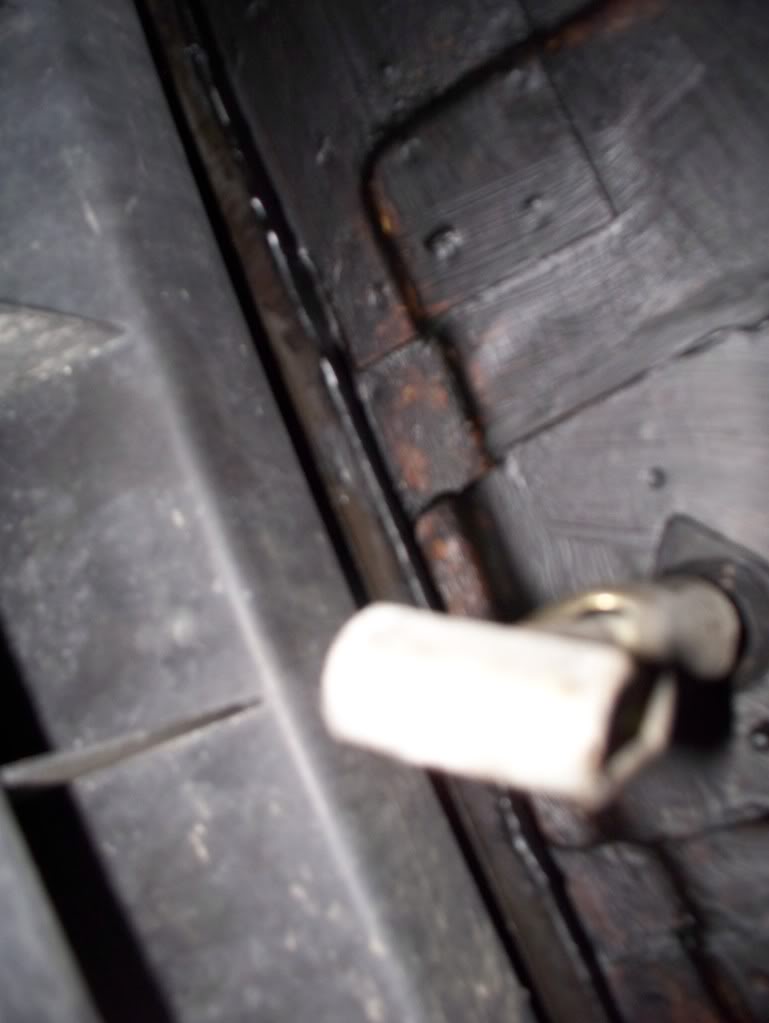
The fuel filler pipe makes things a touch awkward on the near side, but I am pretty sure I got reasonable coverage. Also tried to get up to the filler neck as much as possible.
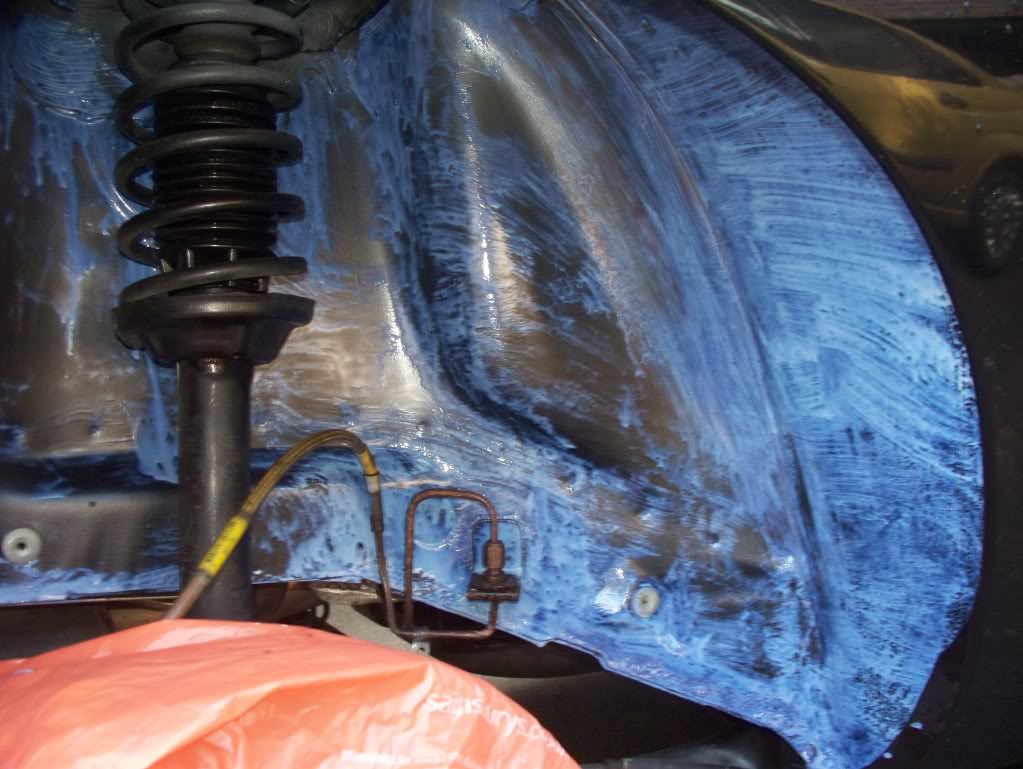
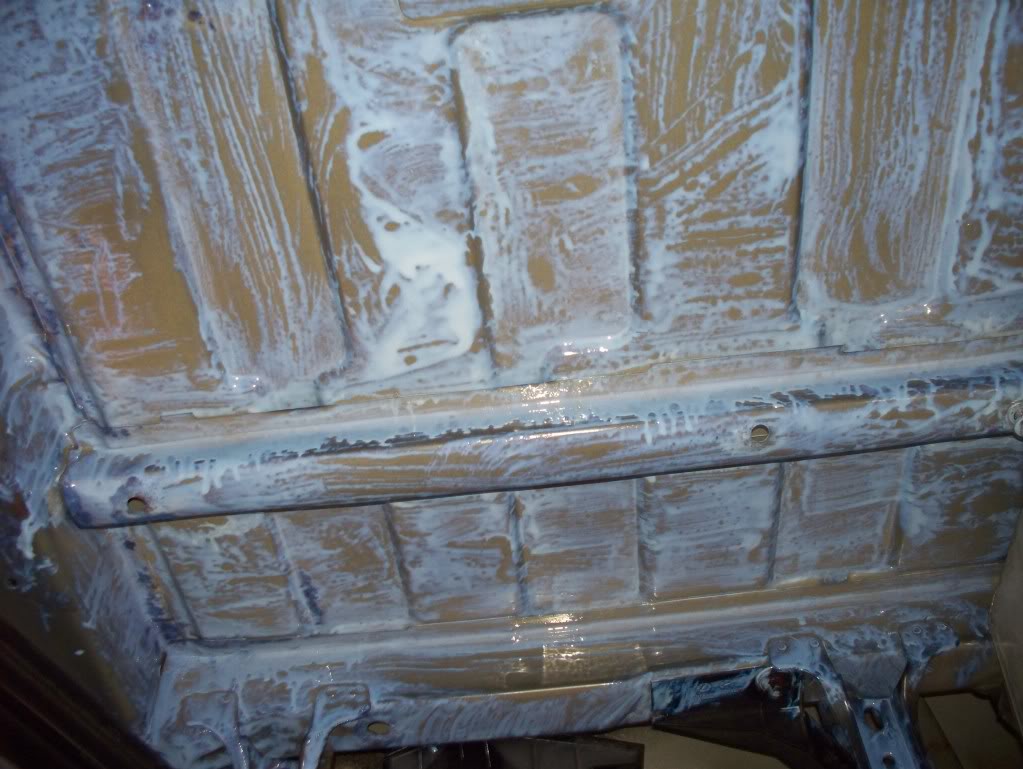
When applying it was a very light blue colour, which was initially concerning, but it soon dried to a translucent grey colour.
I applied two coats of the Hydrate 80, left it for a while, sprayed some Dynax S-80 in the cavities that were accessible, then had a crack at the spare wheel carrier. No pics of this yet, but I gave it a quick buzz over with the drill & wire brush, and have since given both sides a single coat of Hydrate. I'd had the arches waxoyled shortly after I got the car, so about a year ago, the Hydrate wasn't too keen on going over the Waxoyl, but I couldn't be bothered trying to remove it, and think it should be fine.
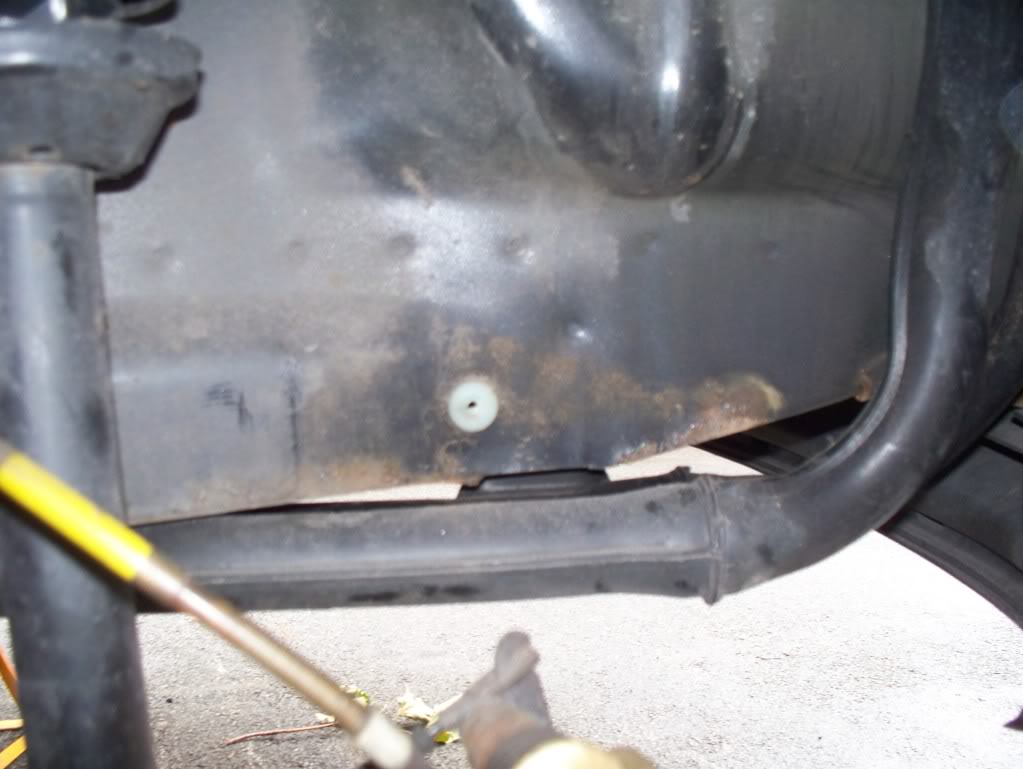
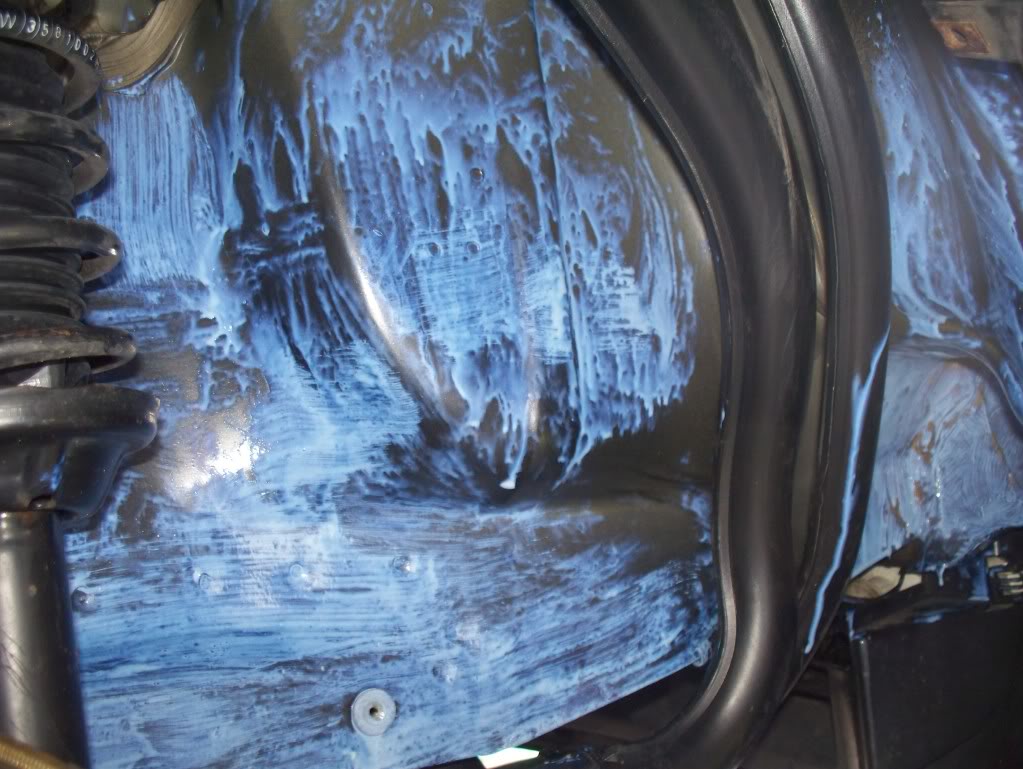
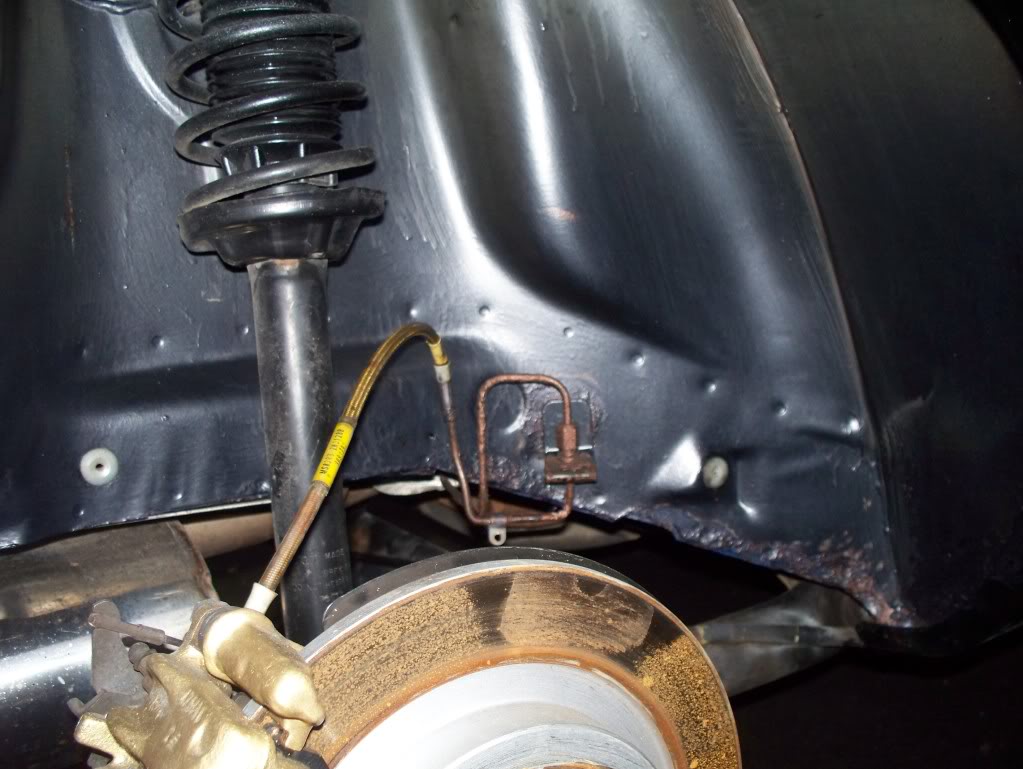
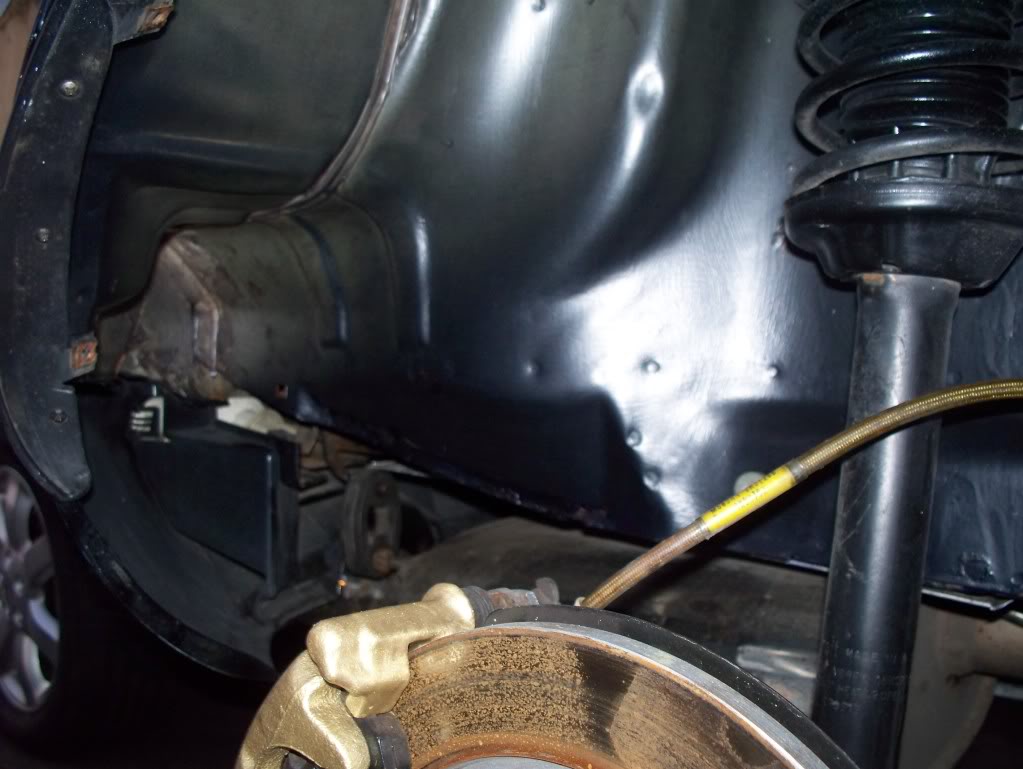
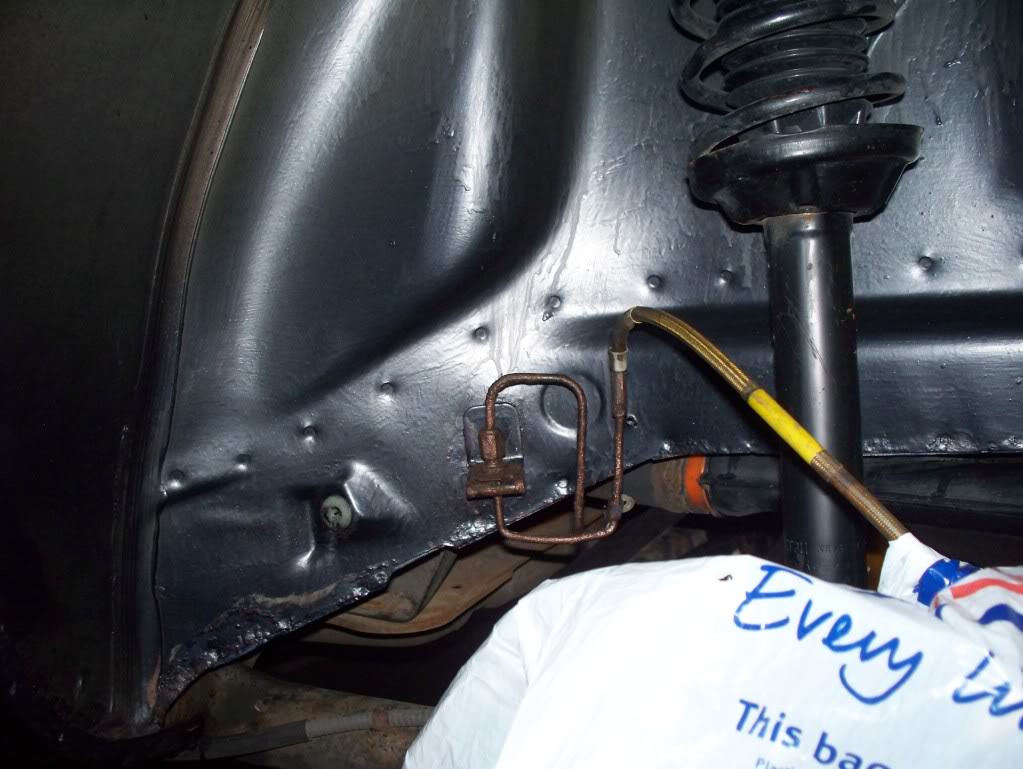
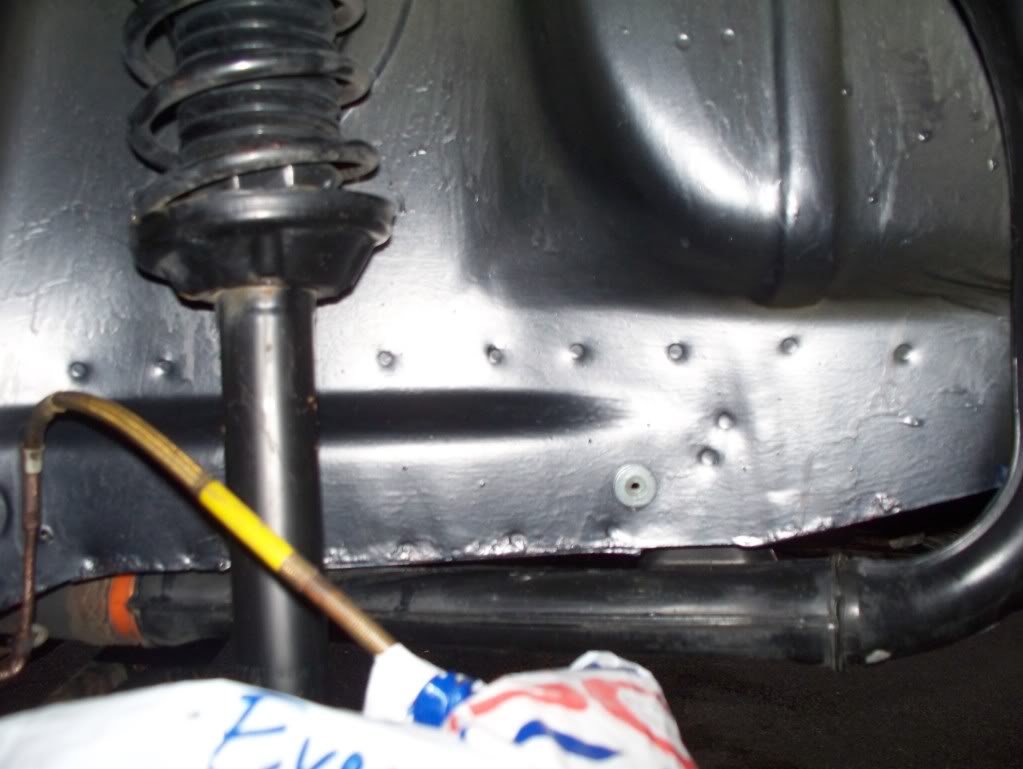
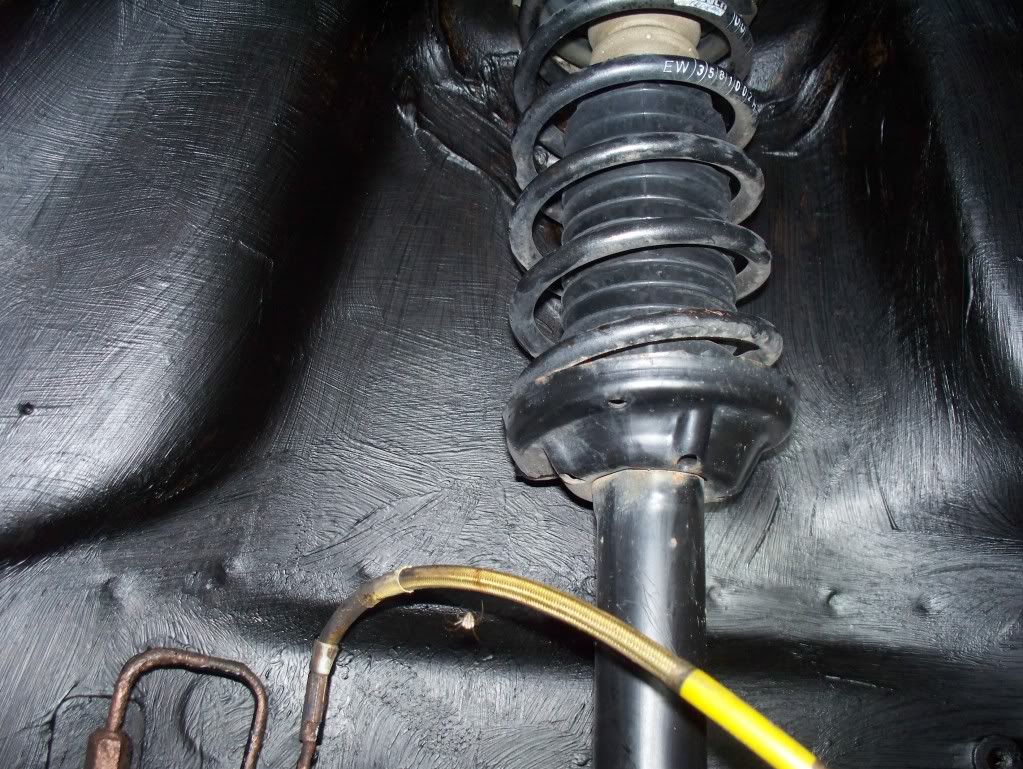
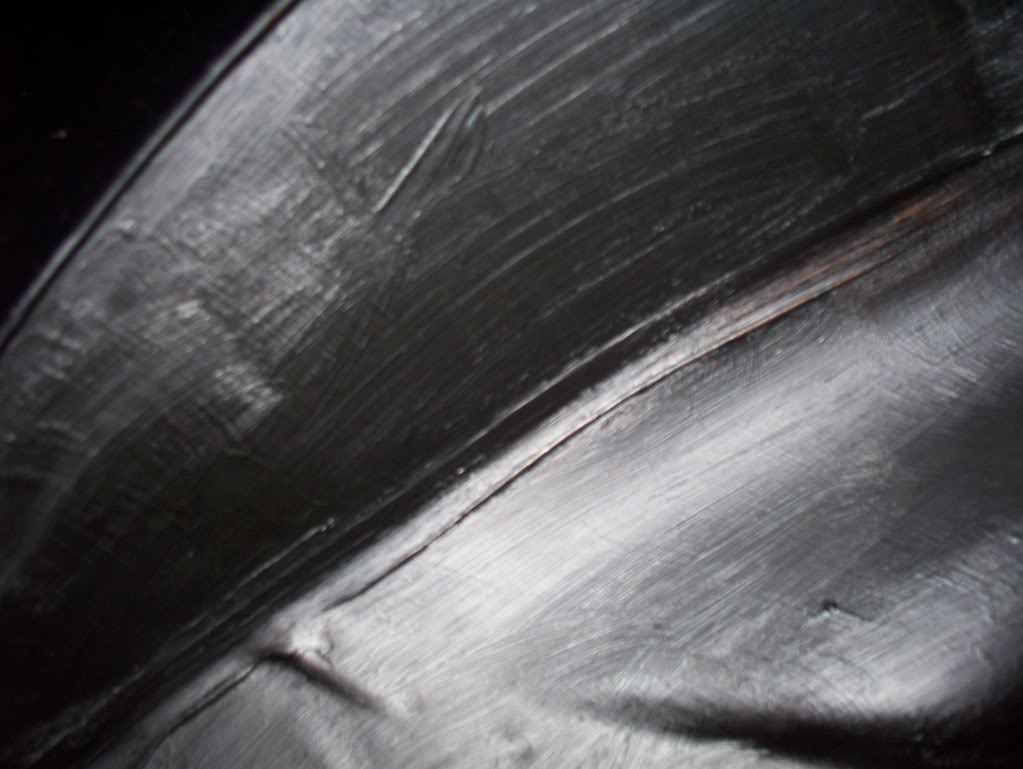
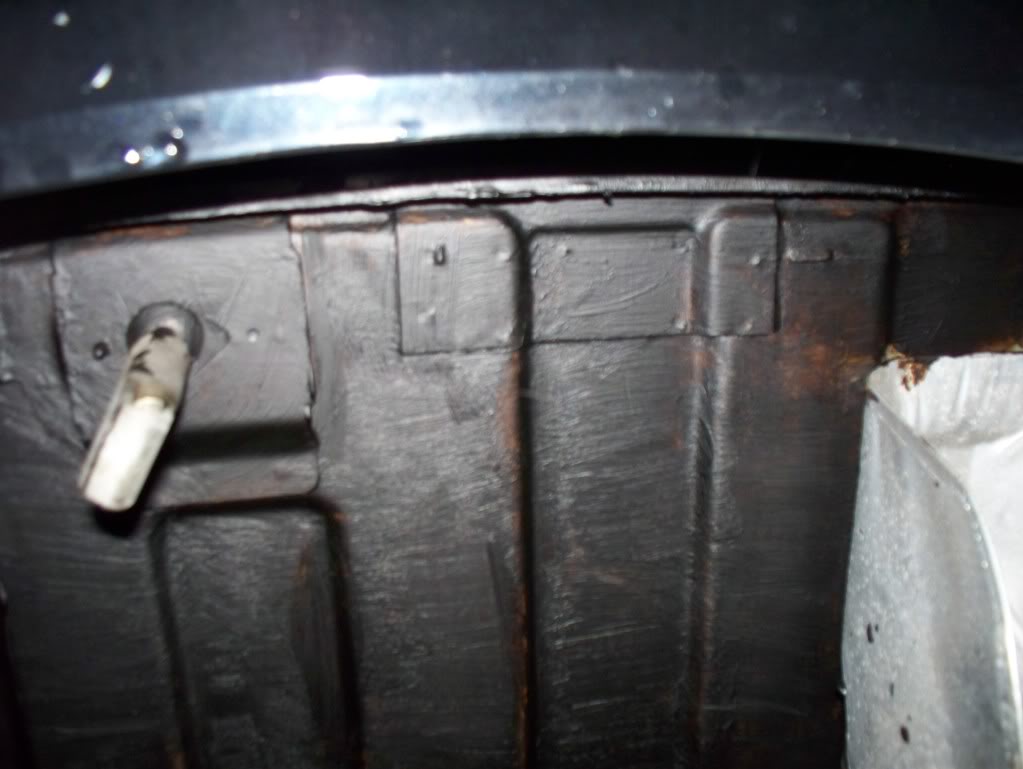
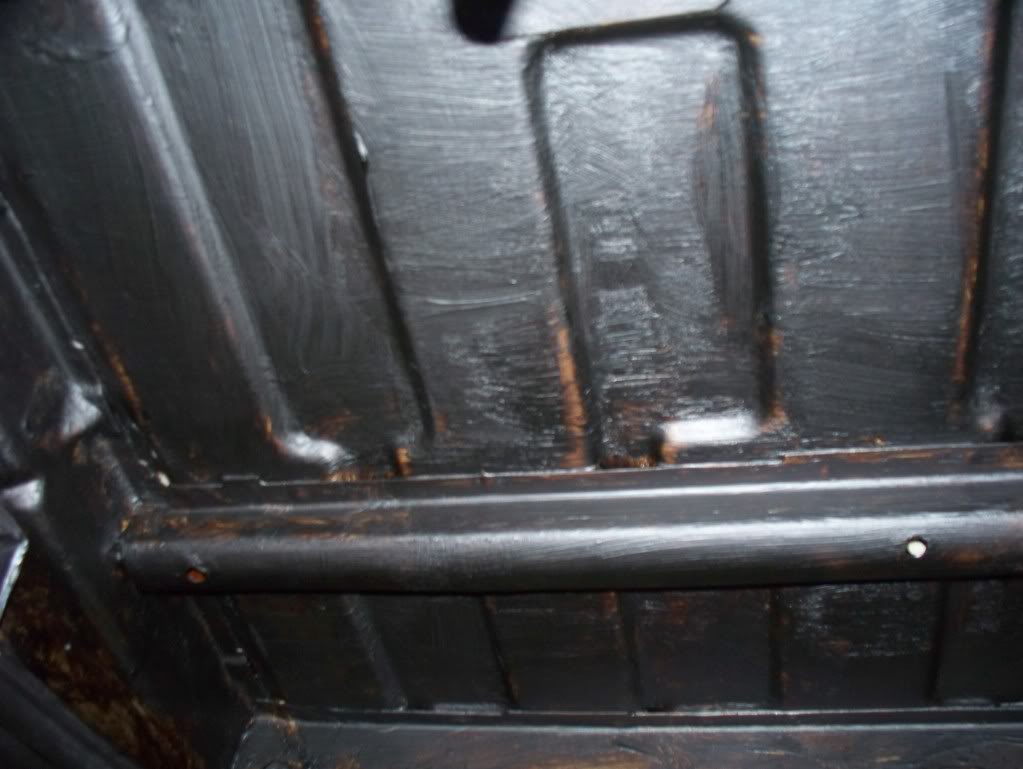
Once the Hydrate 80 had dried, I gave the car a couple of coats of Dynax UB, left it for 24hrs to cure, before refitting the wheel arch liners, got the drivers one in before it occurred to me that I should take some pics, so below are pics of the passenger side rear arch and the boot floor;
Passenger side rear wheel house
Underside of the boot floor

Spare wheel carrier also got several coats of Dynax UB before refitting.
Next job was to fit a nearly new coil pack that I bought from a chap on ZSOC. There wasn't anything wrong with my old one, but these things are known to cause probs, and mine was 77k miles / 8yrs old.
Couple of pics of my painted rear calipers, seems like ages ago that I did this;
Granted, they would look better had I actually driven it to remove the surface corrosion on the contact parts.
Also, some pics of the inside, looking quite presentable;
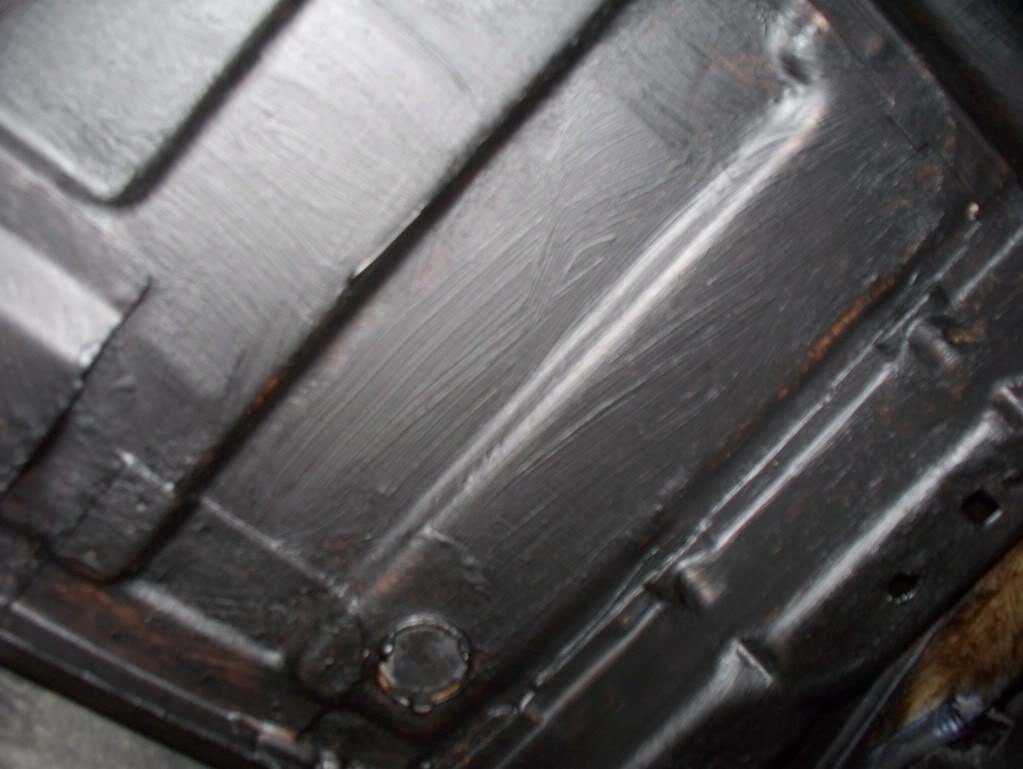
Next I treated the underside from the front doors back, in as far as the inner chassis rails, same treatment as the rear, brush off rust, two coats of Hydrate 80, two coats of Dynax UB.
The underside was pretty good, aside from some corrosion on the seam, towards the rear, on both sides, and a small amount on the O/S/F where the seam had become damaged from jacking. Tried straightening this up, but that seemed impossible, but I have still treated and protected these areas.
My plan is to get that done, and also hopefully treat under the front arches, then the "driveway" element of the treatment will be complete.
Next phase will be to get the car to the garage, remove the exhaust, heat shield and fuel tank, and treat the exposed parts. On the plus side, most of those areas should be in pretty good shape, having hopefully been protected from the elements.
I also need to paint the outer face of the bottom seams, I had hoped to get this done at the weekend, but the weather wasn't playing ball.
Around this time (late 2009), I purchased FRP inlet no. 542, many thanks to Poder!
Also received a brand new o/s/r lamp, to go with the new n/s/r that I still have to fit.
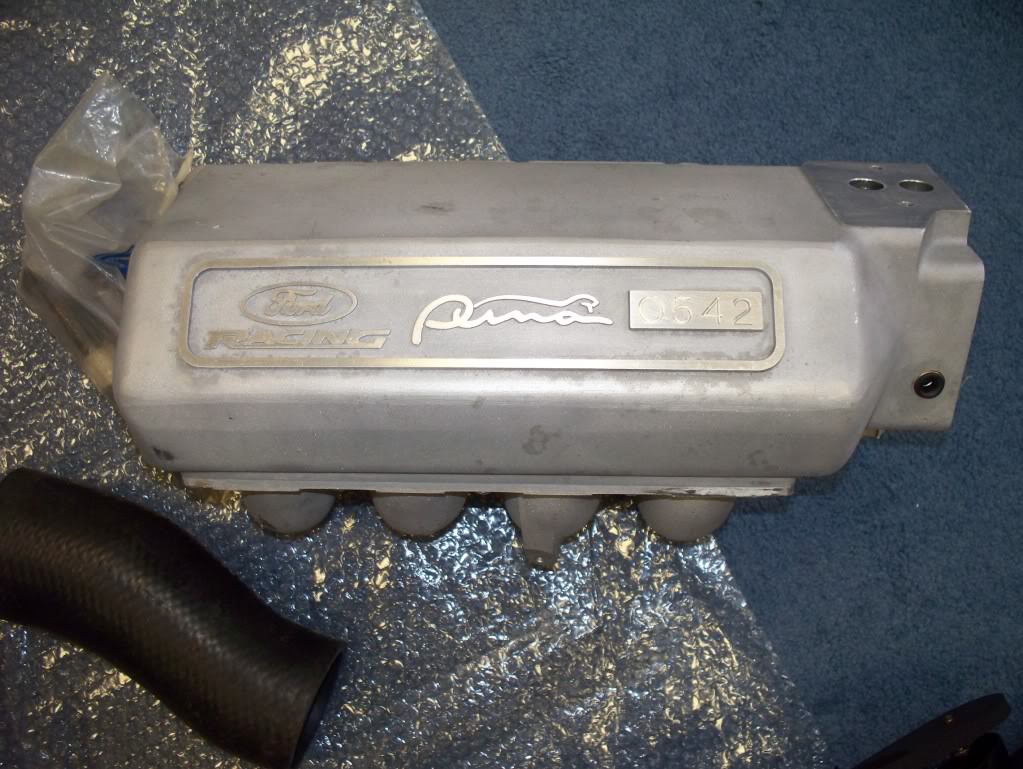
Very excited, I identified the FRP inlet as being a must-have accessory even before I bought my car!
I then started collecting together the various bolts, gaskets, etc. that I would need to fit the FRP inlet.
My next purchase as a Ka boot net, fits nicely on the hooks for the Puma rear seat;

Works well, good for keeping smaller things in place in the boot.
Next, a few pics of stuff waiting to be fitted
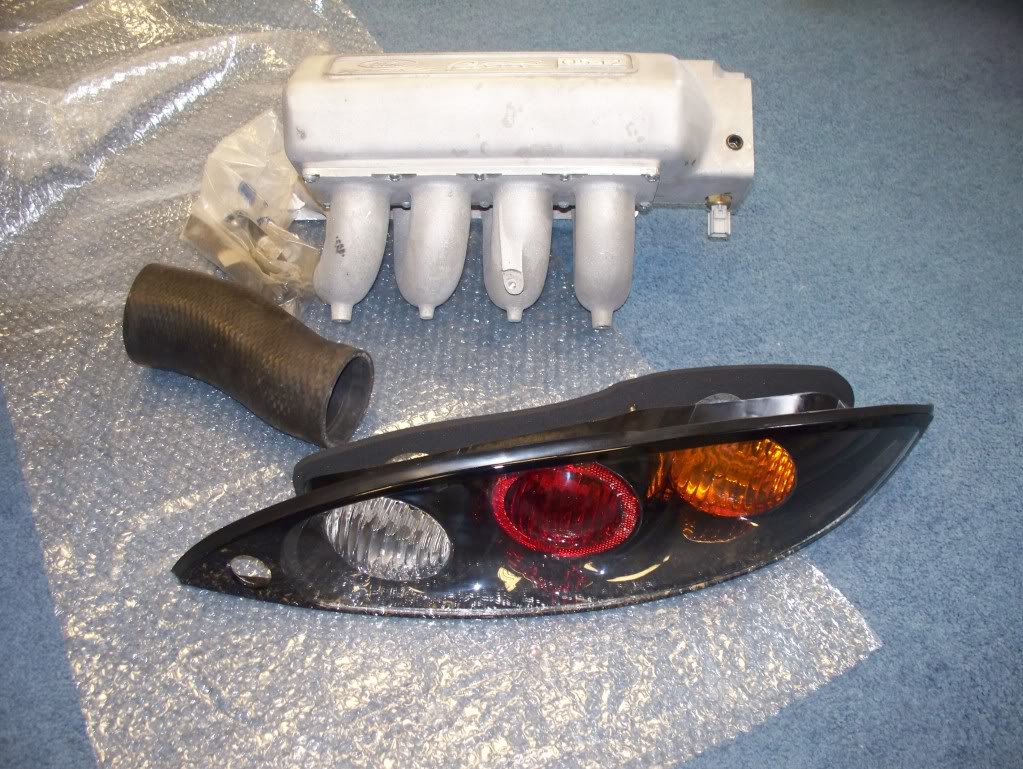
First off a shot of most of the important bits;
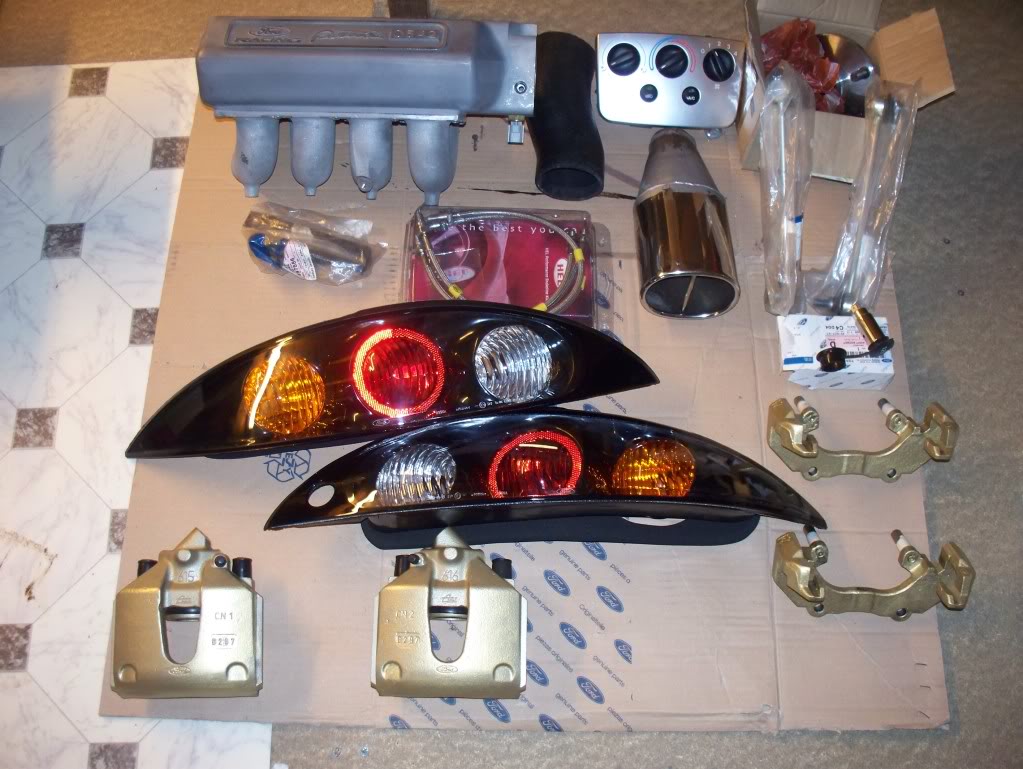
Pair of brand new tail lamps, FRP tail pipe, think everything else is details below.
Front brake / suspension project;
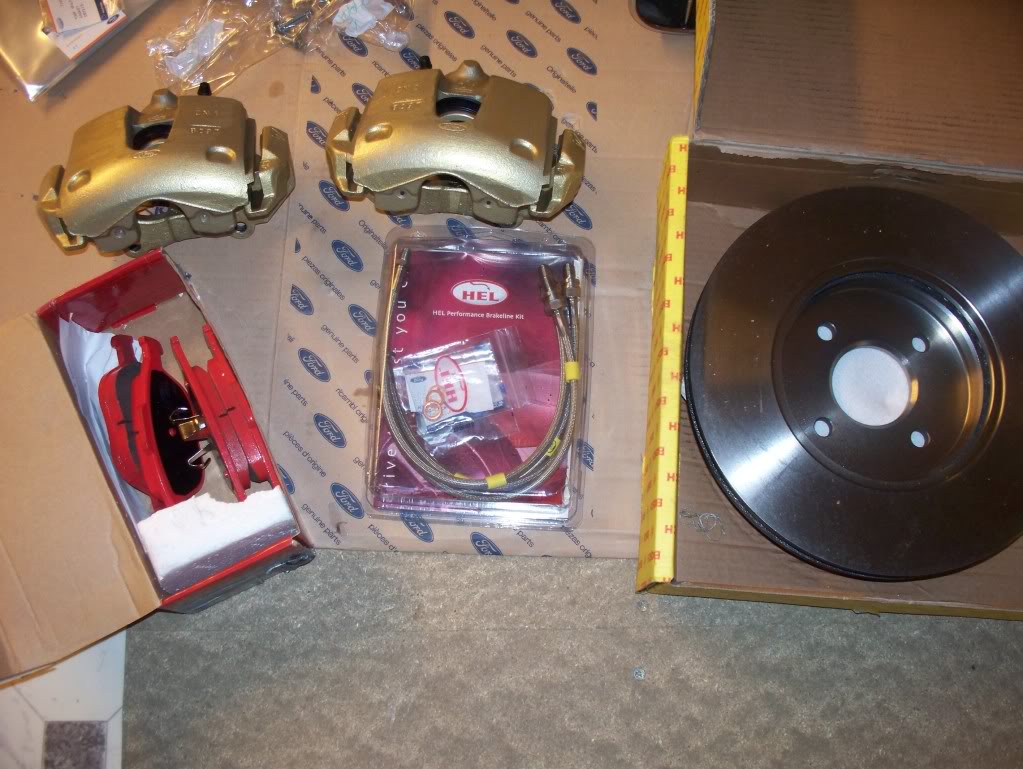
Remanufactured ST170 front calipers, HEL braided lines, new clips, new Bosch front discs, new Apex brake pads, though hopefully the new (hopefully correctly shaped) 1144's will have arrived by the time I am ready to fit them.
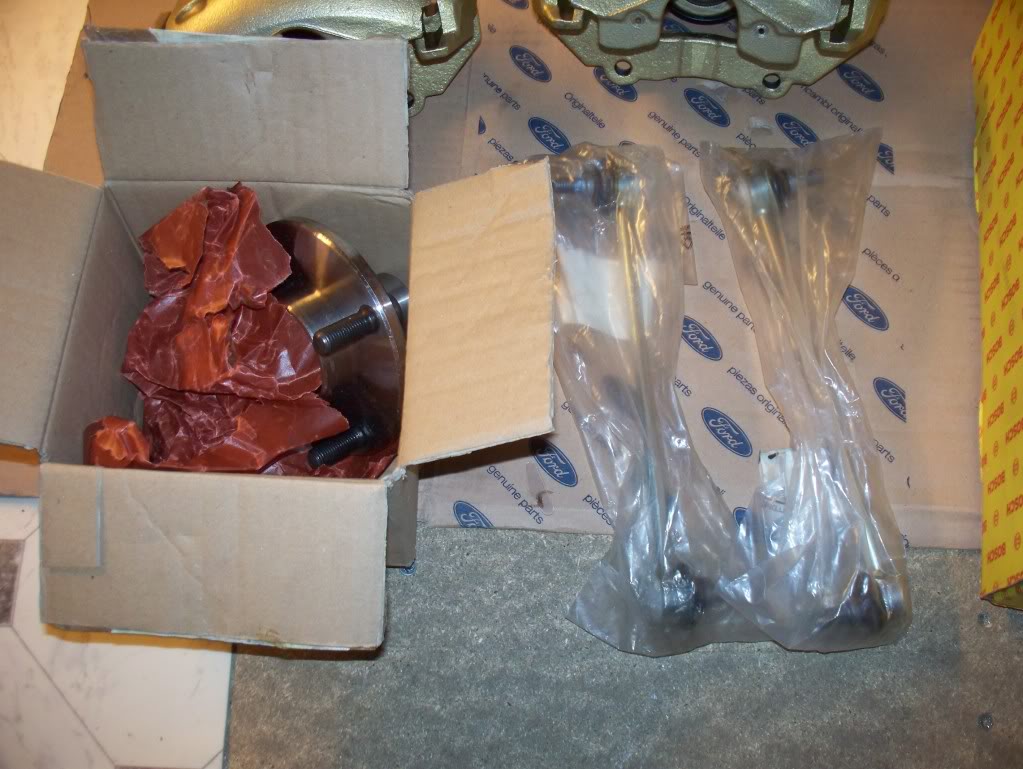
New wheel hub, pair of new drop links. I also have new clips for the ABS sensors.
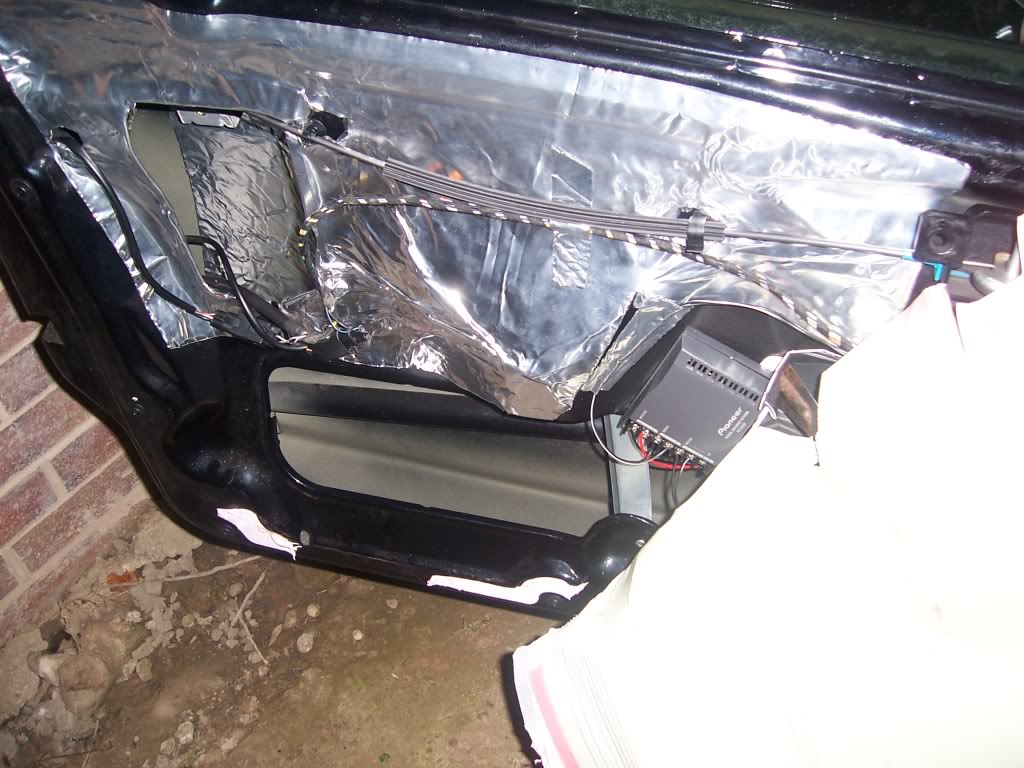
Front door audio project
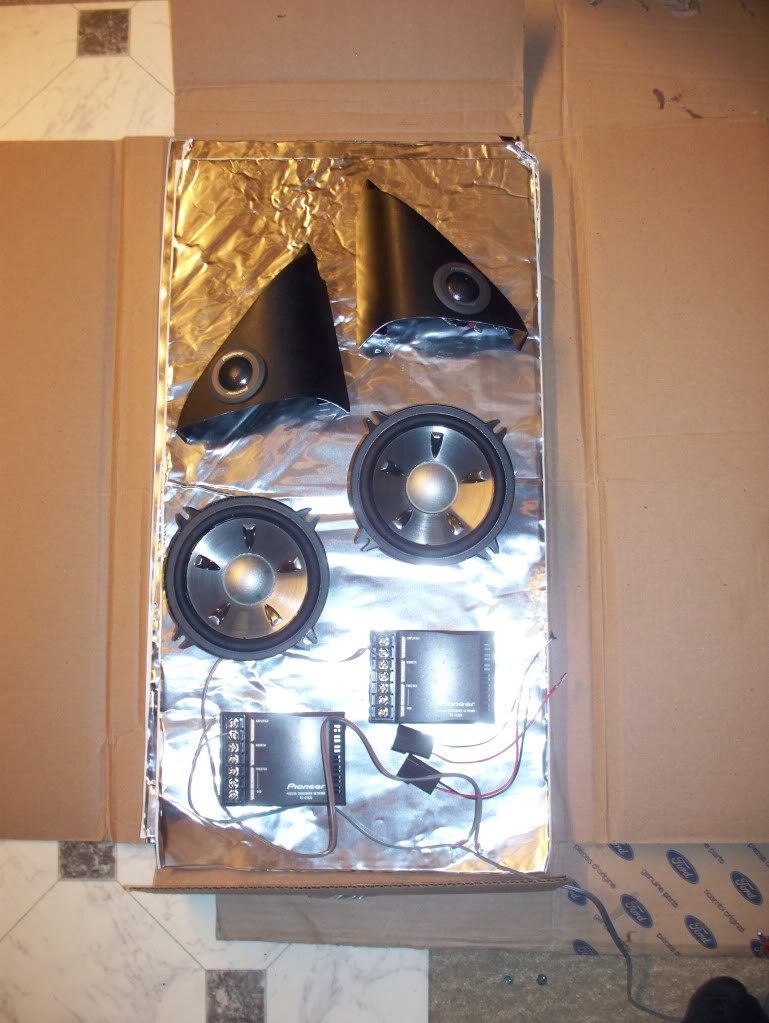
Pioneer components, sound deadening, and will also be rustproofing at the same time
FRP Inlet Project
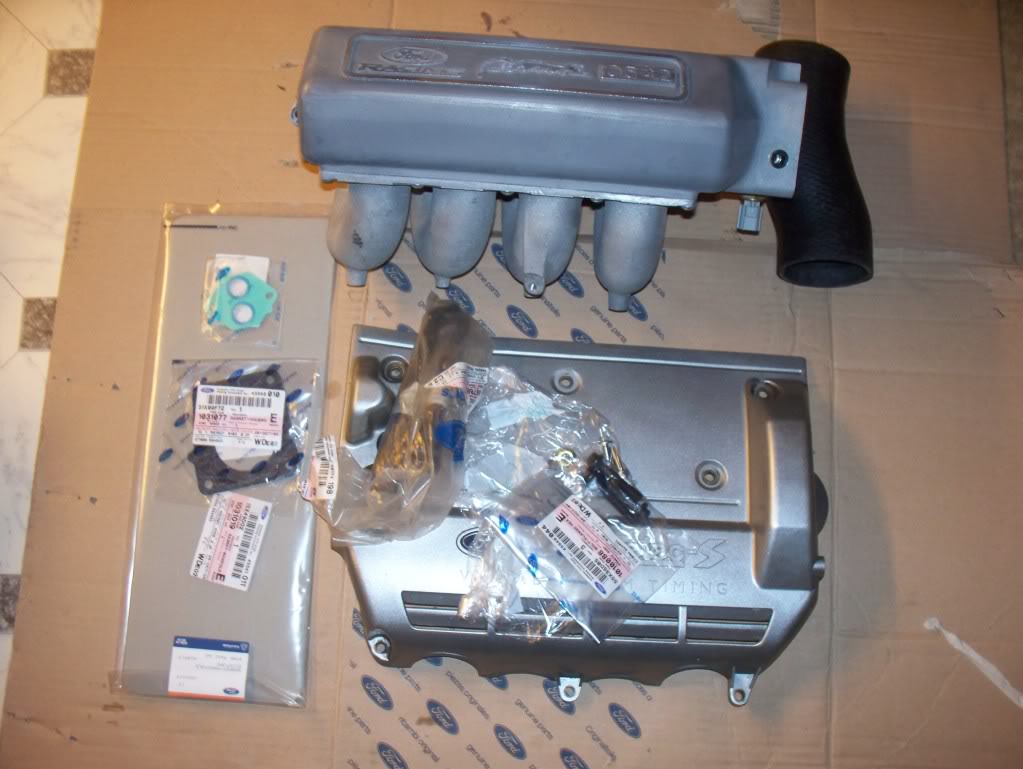
Inlet 542, new inlet, ICV and TB gaskets, nuts and bolts, and a spare engine cover to chop down (thanks to Karl.V, awsomely quick!).
Heater Control Panel Project
Not got a pic of this, but replacement heater control panel without cigar lighter socket, accessory socket for glove compartment, new pop-port cable for Nokia CK-7W, new cable to try out laser diffuser.
So, having collecting together the various bits I needed for the FRP inlet, I set about fitting it.
One of the downsides of trying to do this outside, on a cold, windy day, was that I seem to have managed to loose one of the inlet manifold bolts, along with the bolt for the dipstick. Not huge prob as I can take the opportunity to get the more appropriate hardware for securing the mounting brackets, both to the manifold and to the engine block.
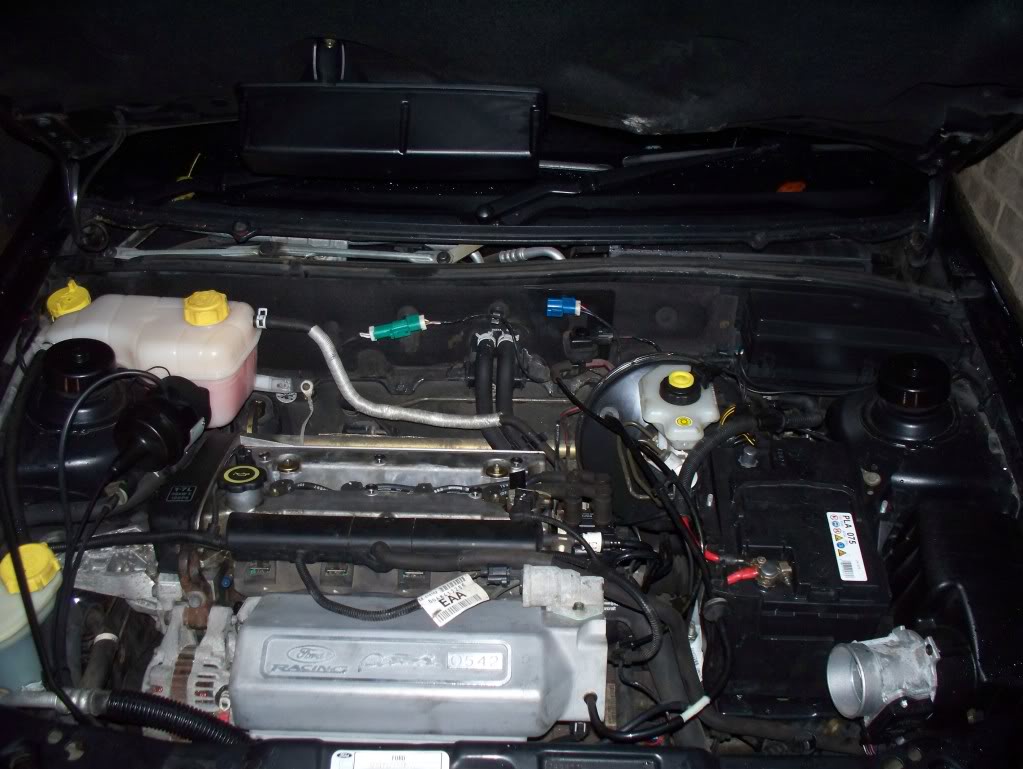
Pic was taken before I refitted the TB
To fit the FRP supports you do need a few nuts and bolts. I used two of the same bolts as the dipstick (1663888) to mount the supports to the bottom of the inlet, albeit with a washer on each, and two M8x13mm bolts (1012255) to mount the brackets to the block, using the alternator side, and middle mounting points. The outer mounting point at the TB end is not used.
What was very odd, is that the bolts fixing the inlet to the head, were different on my car to what is shown on Ford's parts software. The bolts on my car were M8x30mm, with a domed head, but according to Ford, these should be an M8x45mm, with a long unthreaded section, which seemed odd. This wouldn't have been a problem, had I not managed to loose one of the three original bolts. What followed was something akin to panic. Fortunately with a bit of help from BurfyBoy, I came across a 1372612, which was very similar to the bolts on my car. Except it wouldn't fit in the recess for the bottom mounting, but a quick swap with another and the job was done.
If anyone needs any info on fitting one of these, I have posted a “how to” on Pumapeople.com
By a cruel twist of fate, my wife actually drove it with the new inlet before me!
I didn’t have a pukka FRP engine cover, so set about butchering a spare one. The blades I had for the jigsaw didn't want to know, and the damned Dremmel slipped several times, so it wasn't great, but was ok until I could find something better.
Once I got to drive the car with the inlet, I can't honestly say that I noticed much difference at low revs, but it is noticeable further up the rev range, and has to be the ultimate in underbonnet bling for a Puma!
One noticeable benefit of the inlet is that the inlet temp seems lower than before. I typically compare the inlet temp (from scangauge) with my exterior temp sensor. Not especially accurate, but so long as both are consistent it should give a good indication. It also seemed less vulnerable to low speed heat soak. Typically at motorway speeds there would be a difference of about 6-8 C, but in town, this difference could be much higher. Today the difference never got above 3C, despite different driving environments.
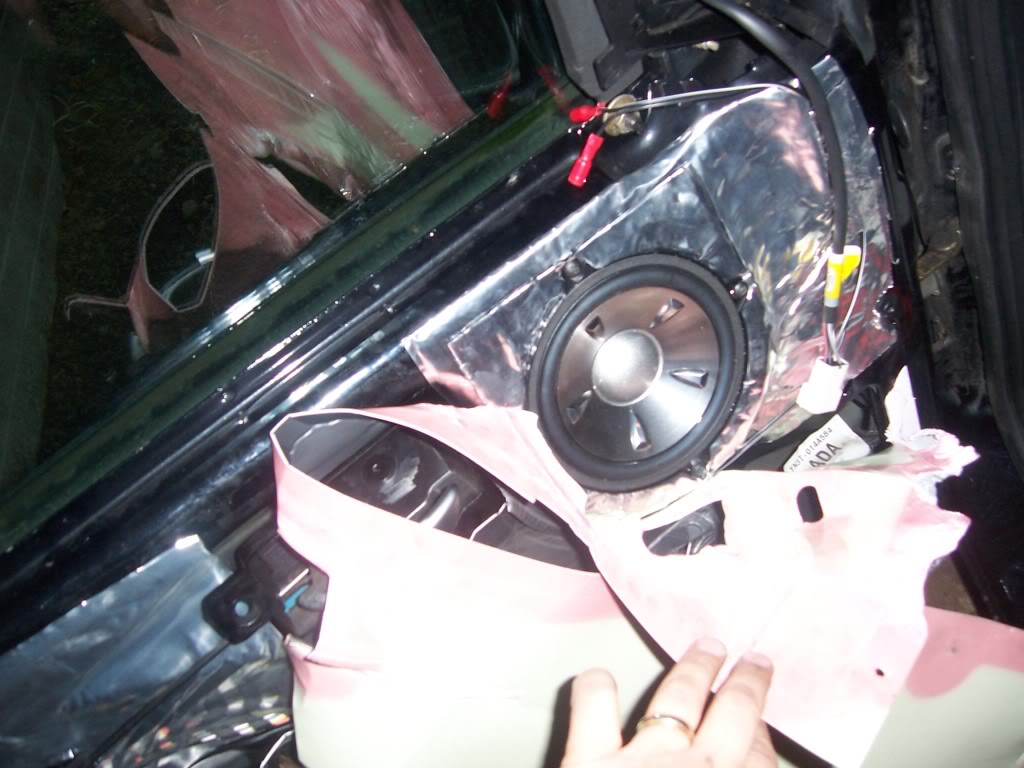
Next job was to strip down both front doors, applied some Second Skin sound deadening to the upper section and a sheet to the inside of the door skin. Also fitted some Pioneer component speakers, with the tweeter mounted in the inner mirror trim.
While I had the doors stripped, I sprayed some Bilt Hamber Dynax S80 into the lower parts of the doors, so that is another area I can tick off the list.
Still have a few more bits to treat, but it can wait until I have more time, and hopefully a spare car to use while I take this one to bits.
The same weekend I fitted some Halford's Extreme Brilliance bulbs to my dip beam, which do seem noticeably better.

Bit miffed as I managed to loose a screw cover, but managed to get a replacement within a couple of days.
My ABS light came on, I worked out that the o/s/f sensor was faulty using a multimeter, then next day bizarrely the light went off on Tues, but was back on the following day, so I got a new genuine ATE sensor from a local motor factor for �38.99. Tried to remove the old one thet night, and managed to snap off the sensor, so the car went to the garage.
When I got it back, it had refurbished ST170 front calipers, along with new Bosch discs and Mintex 1144 pads, new drop links, ABS sensor cable mounts, Fiesta Zetec-S front ARB, with new bushes and a new ATE o/s/f ABS sensor.
The ST170 brakes seemed a bit better than the Mk3 Mondeo ones, but then I was never that impressed with them, could just be the new pads though.
After a couple of days with the new brakes, I noticed an annoying clunking noise under braking from the o/s/f, which we later deduced was a poorly fitting 1144 outer pad. The movement of the pad also seemed to cause it to chuck out a LOT of dust compared to the other side. I fitted some new Apex pads instead, that I had laying around, and they fit much better, the clunking noise is gone, and the amount of dust is now pretty much even.
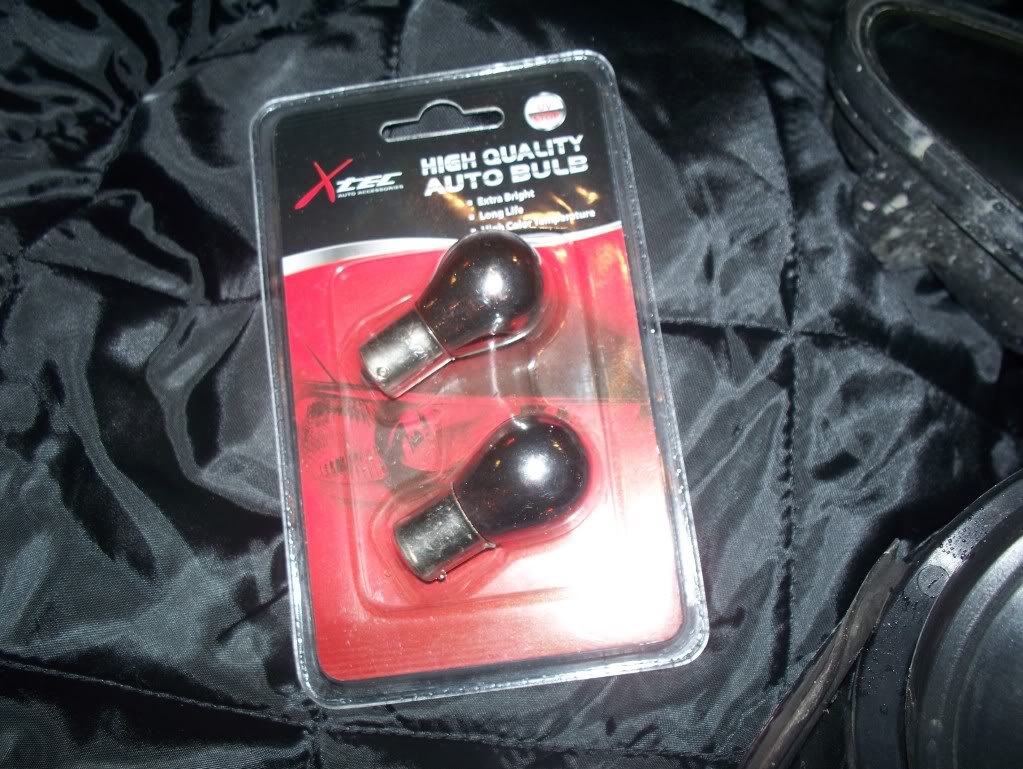
Also just received some silver indicator bulbs for the front and side repeaters on both the Puma and Rhonda the Honda, hoping to get those fitted over the next few days.
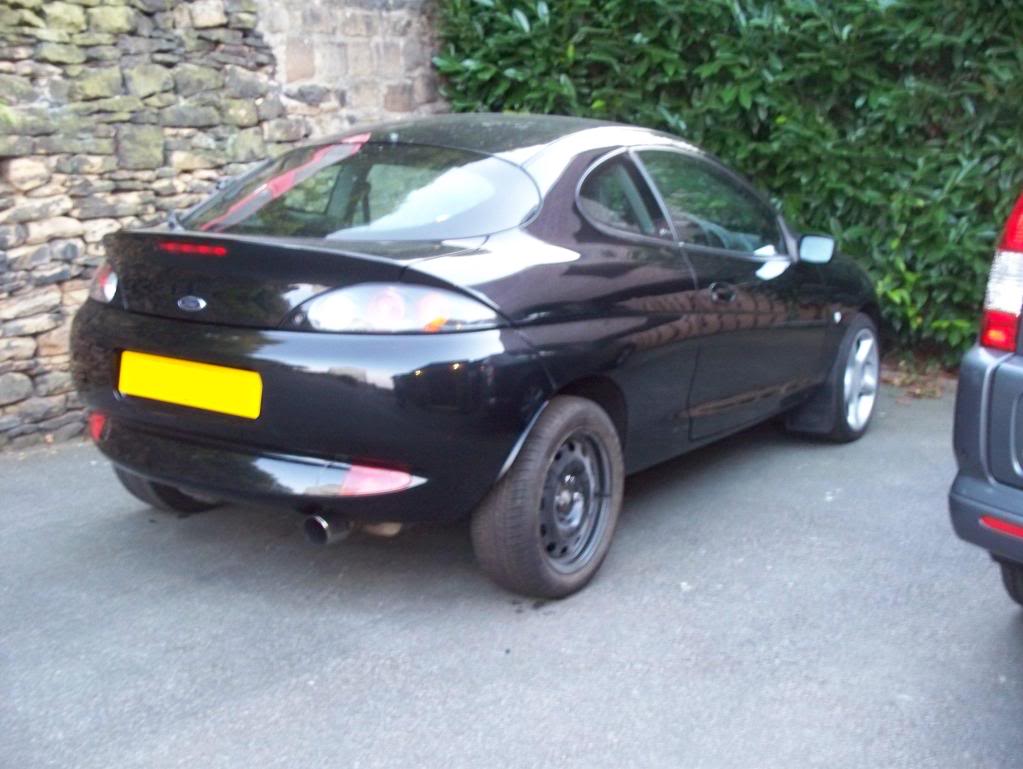
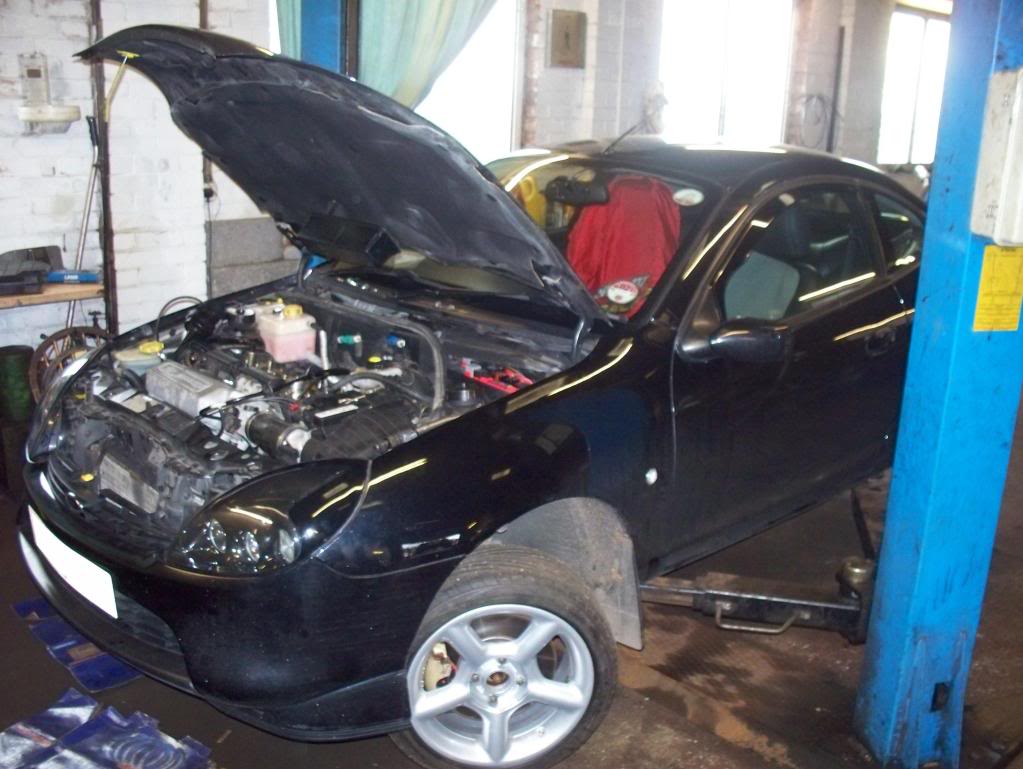
Couple of pics of the car looking a bit grubby. These pics were taken on Tuesday afternoon, you wouldn't think that at 8pm Sunday it looked great, but I guess that is the problem with this time of year;
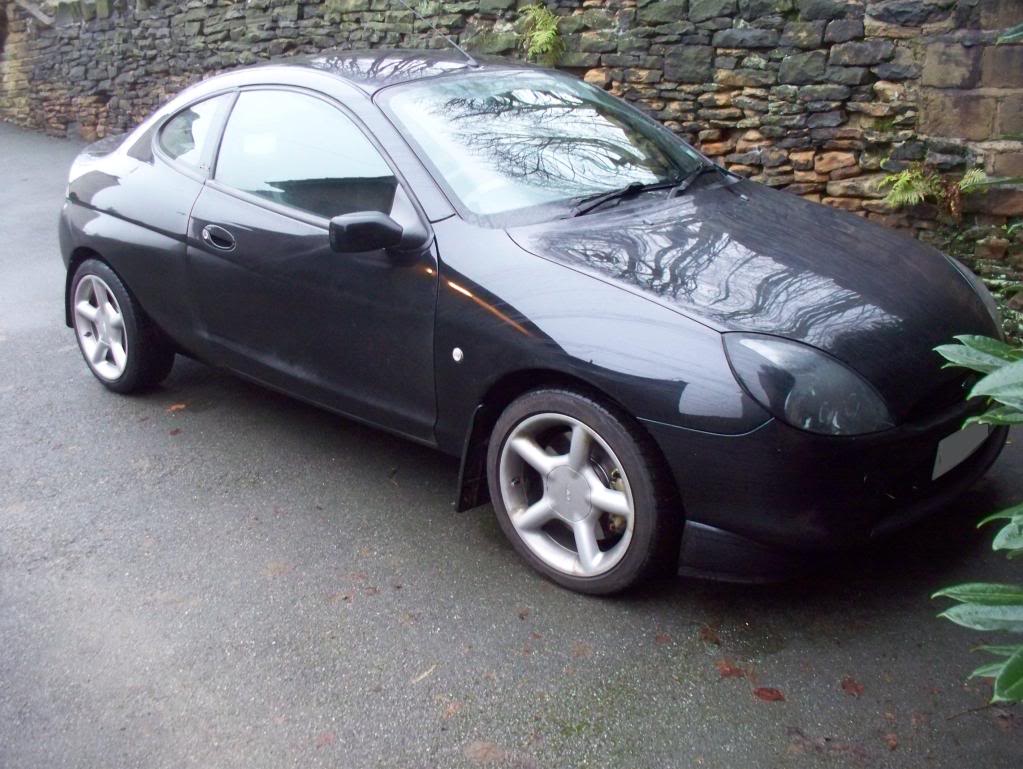
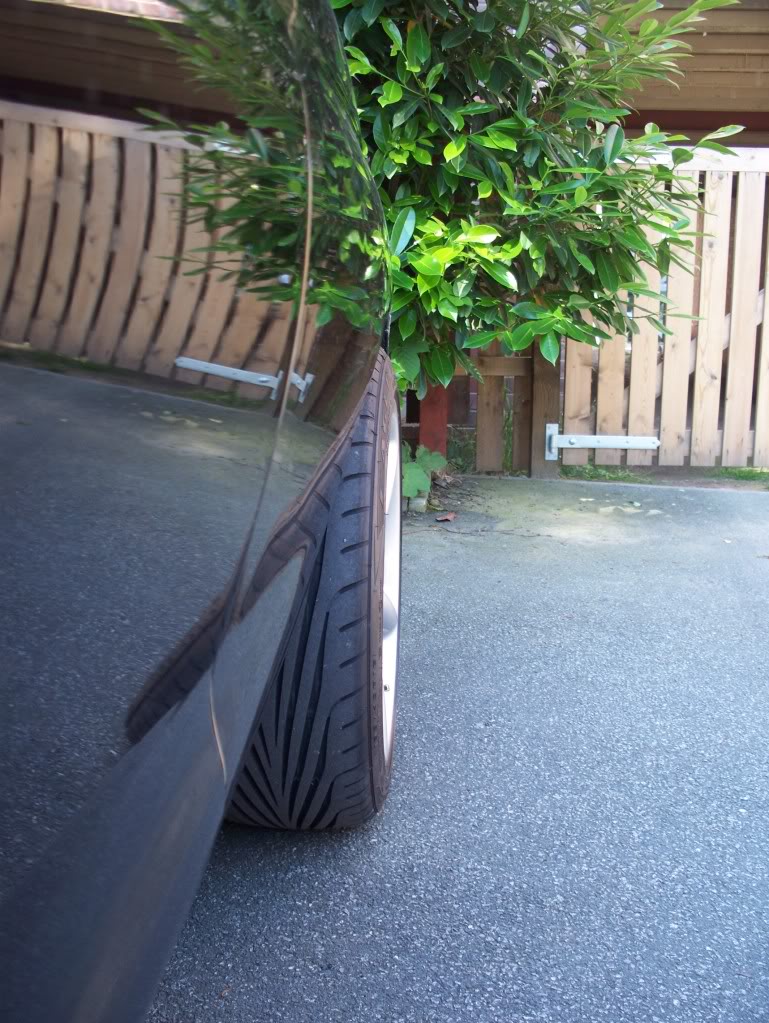
Quite like the last pic, would obviously be nicer if the car was clean!
Given the fairly grim weather, I should also mention just how good the GSD3's are. At no point did I feel anything less than 100% confident in the level of grip and feedback that they provided, regardless of the weather conditions. They are bloody awful in snow though.
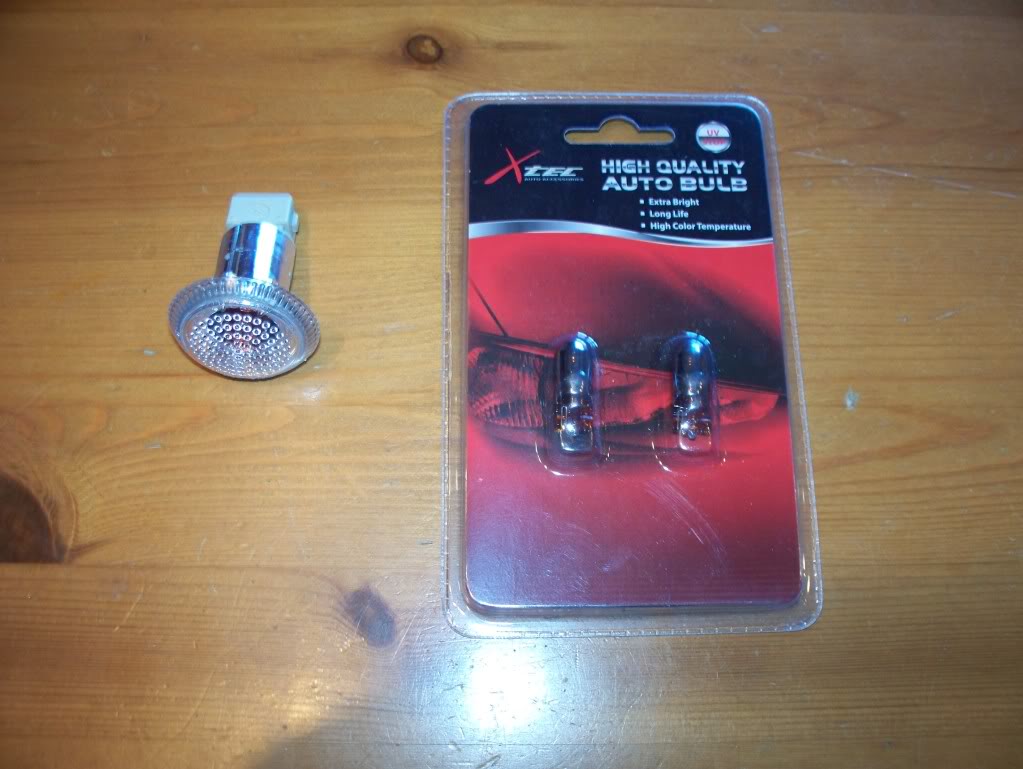
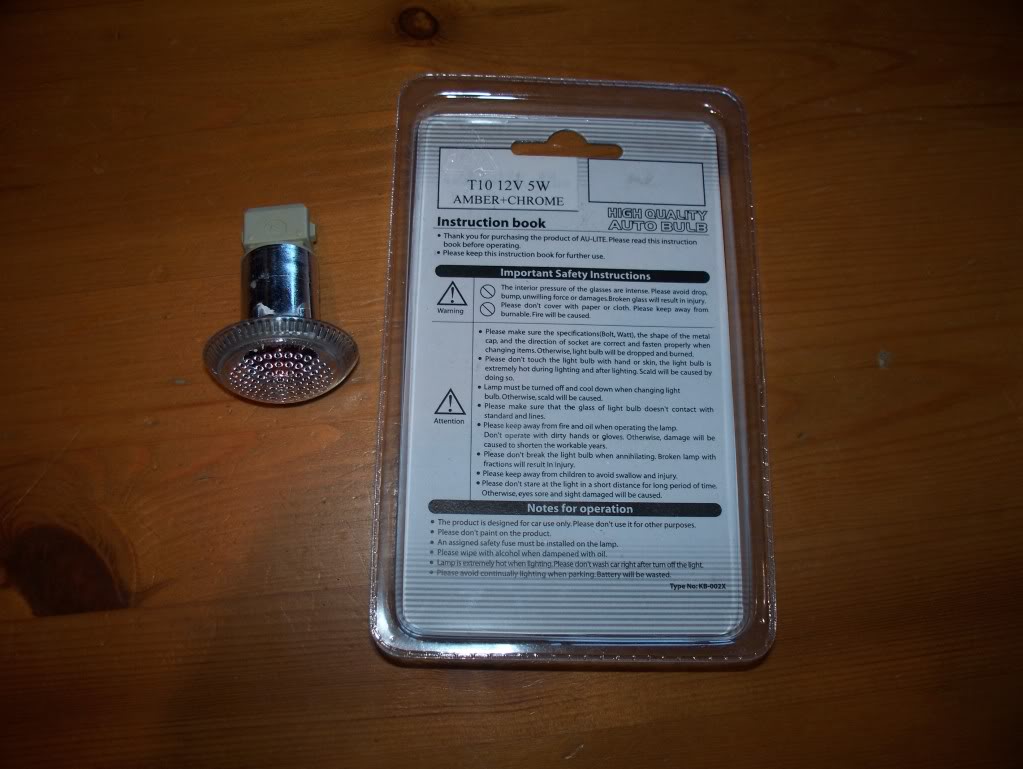
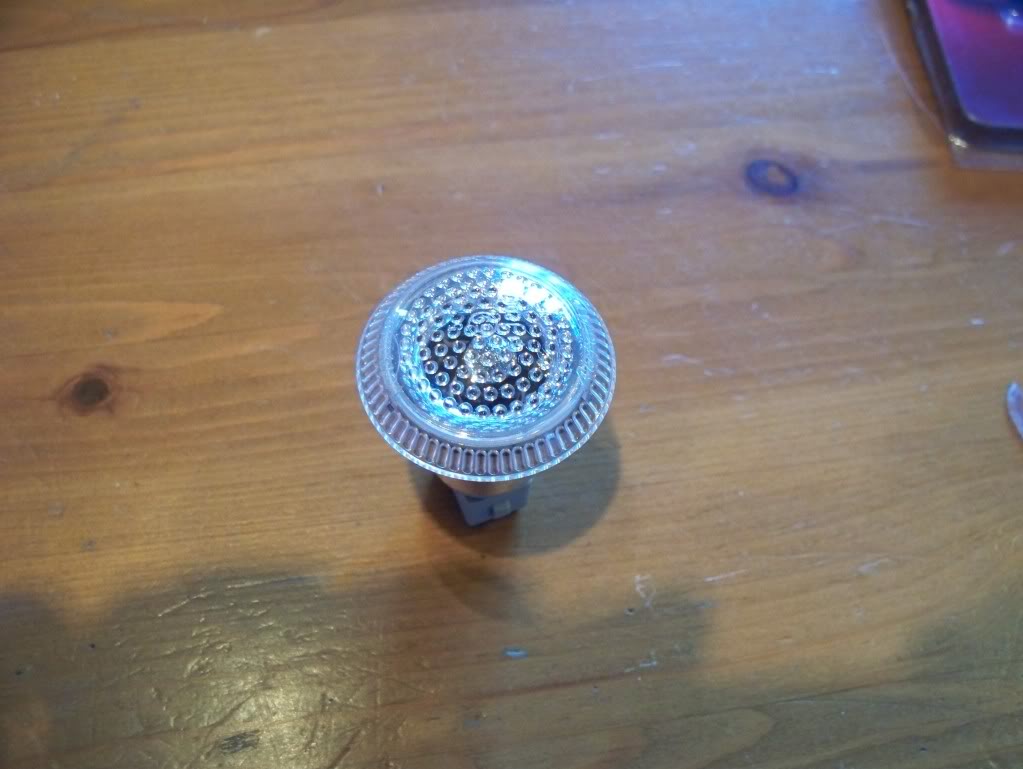
Received some new indicator bulbs, a set for the Puma and a set for our grey CR-V. Want to get them both wash and get some daytime pics of both with the current amber indicators before I change them over. One set is "diadem" type, the other the cheaper "Amber+Chrome"
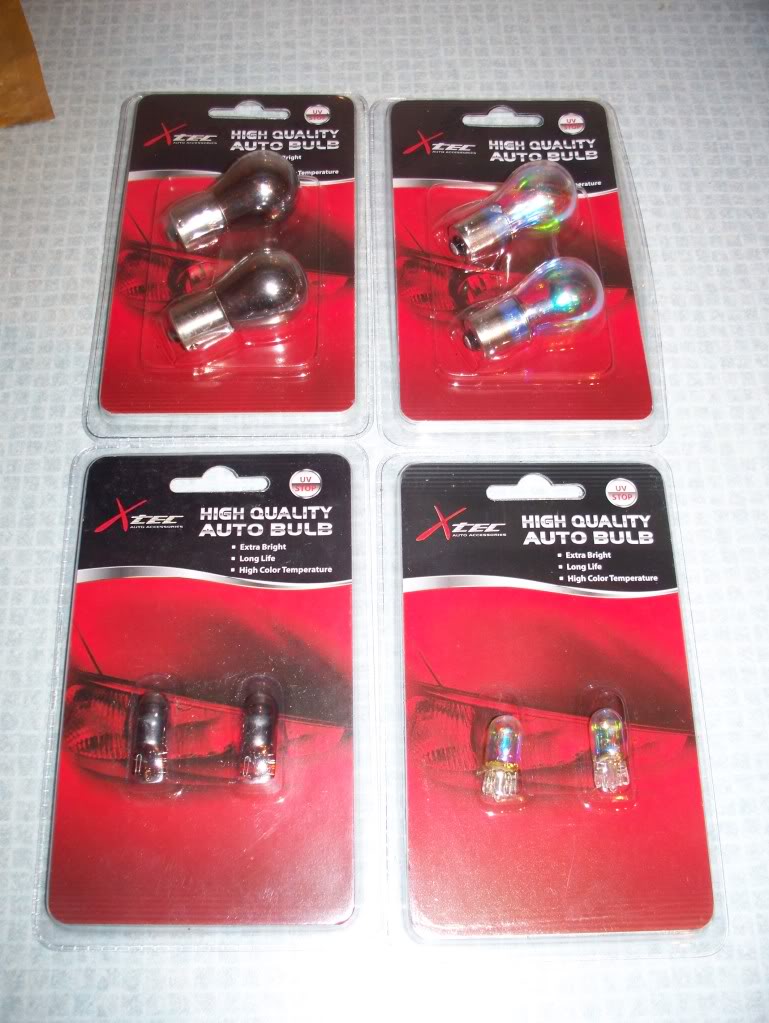
Thanks for Rick (YOG) for the link. If only I knew why I ordered an extra lot of "Amber+Chrome" 501's. I think I had in mind that they would do for the side lights, which are currently looking a bit too blue, but given that these are orange, I was clearly being a bit dim.
When the car was on the ramp to diagnose the brake problem we noticed inner edge wear on the front tyres, so I ordered a pair of new GSD3s and need to get the alignment checked again. Shame as there is still 4mm in the middle, but there is enough meat left on them for me to stick them on some of my spare wheels and keep them for track days.
I have also ordered a pair of new GSD3's for the front, but probably won't fit those for a little while yet, until the weather improves and chances of kerbing are reduced.
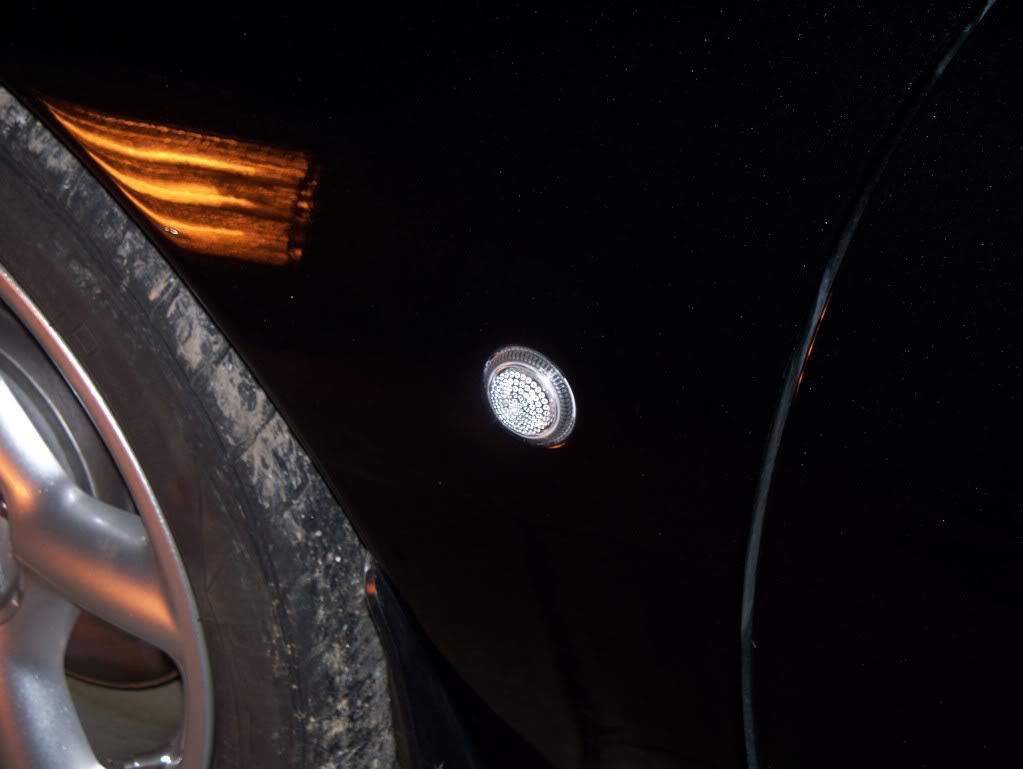
Taking my first trip into the office for about a week, so I collected some wind deflectors from PnthrBlkZS, got those fitted this evening and removed my headlamps and brought them inside to fit amber / chrome indicator; also gave them a good wash after taking the pics - outer lenses were clean, but the rears were rather grubby, probably due to road muck making it's way into the engine bay.
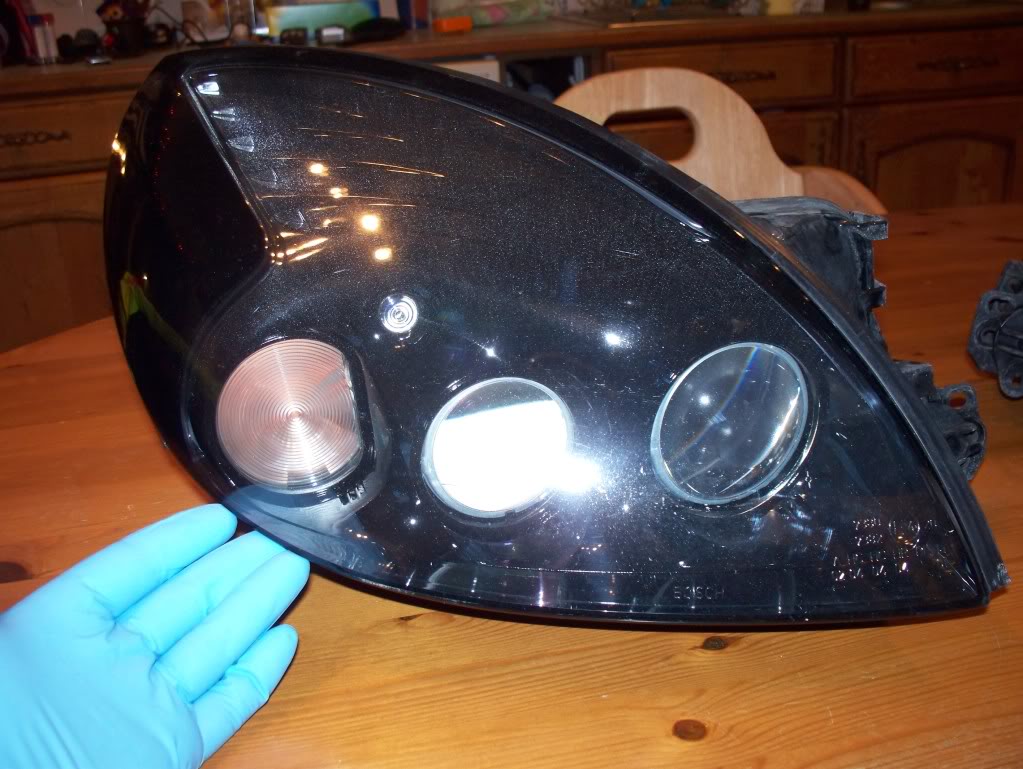
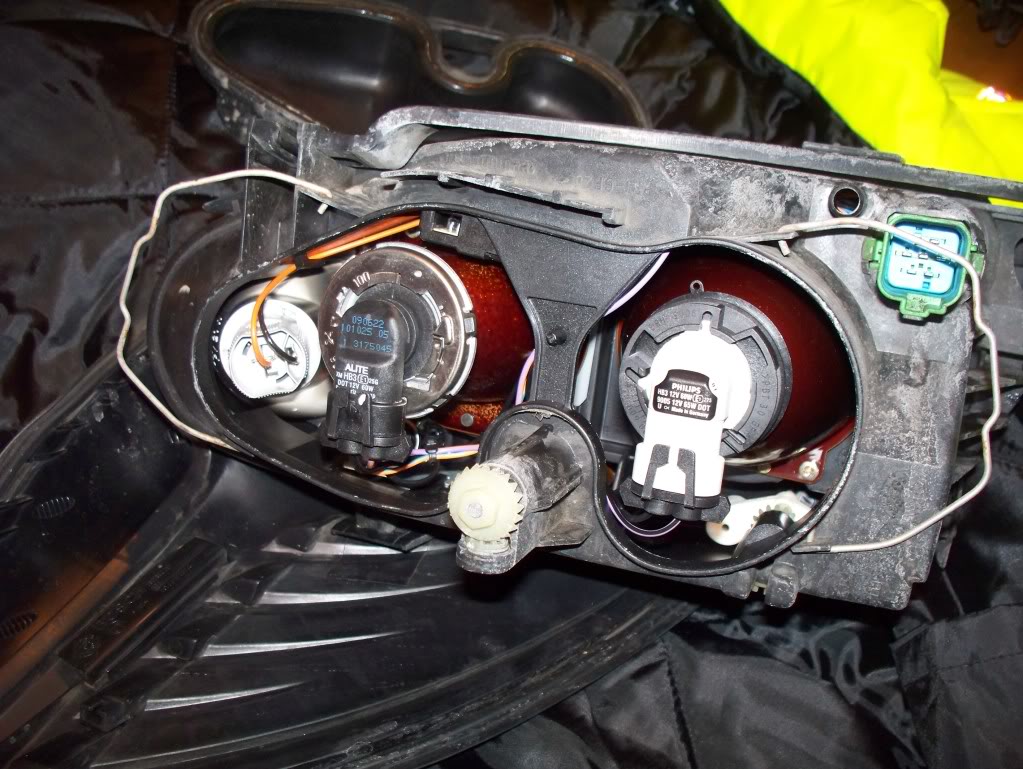

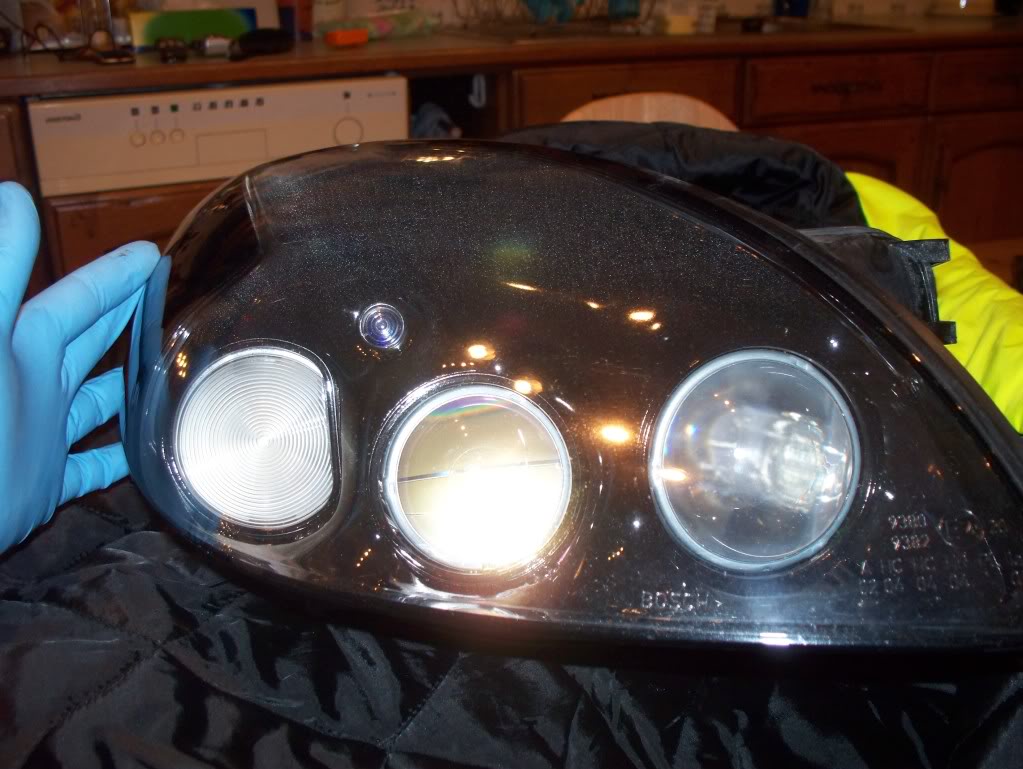
Refitted the headlamps, everything works, and they definitely look better than previously.
While the front was jacked up to change the brake pads, I removed the front mudflaps and wheelhouse liners, to provide access to remove the side repeaters and changed those bulbs too. I had hoped to get some Dynax in there, but it is just too cold!
What I did do though, was to give the whole car a good polish, firstly with AG Super Resin Polish, then with SG Ultra Deep Shine. Also gave the glass a coat of RainX.
Based upon my impressions so far, the wind deflectors are a sound way to avoid the window rubber problem.
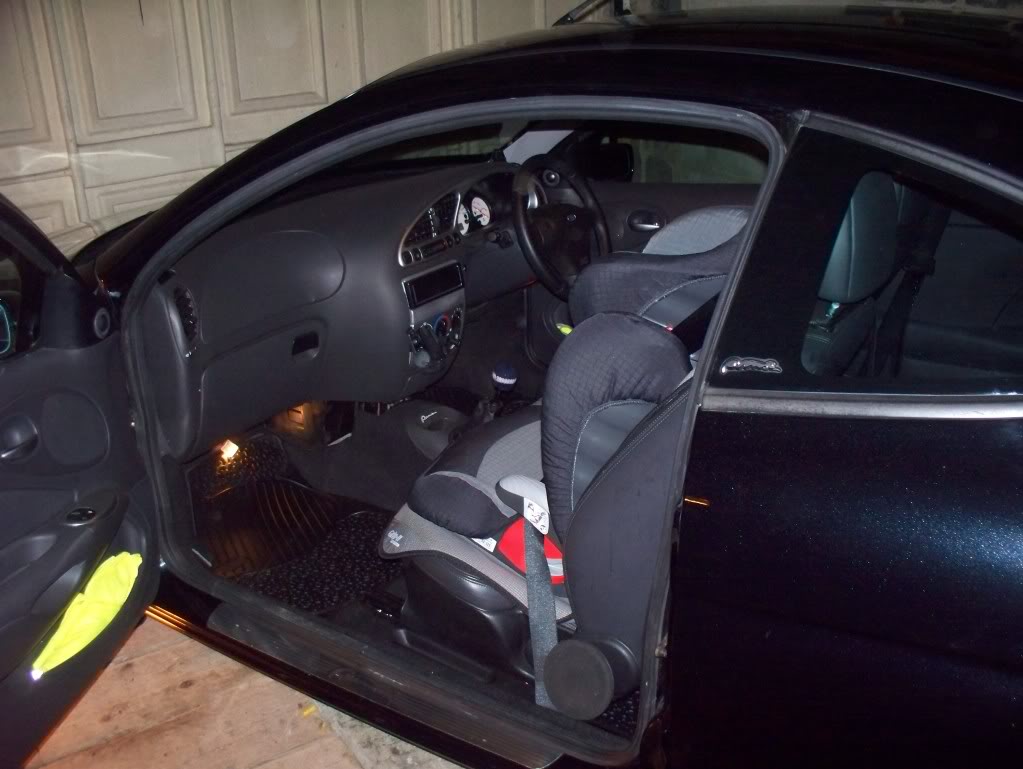
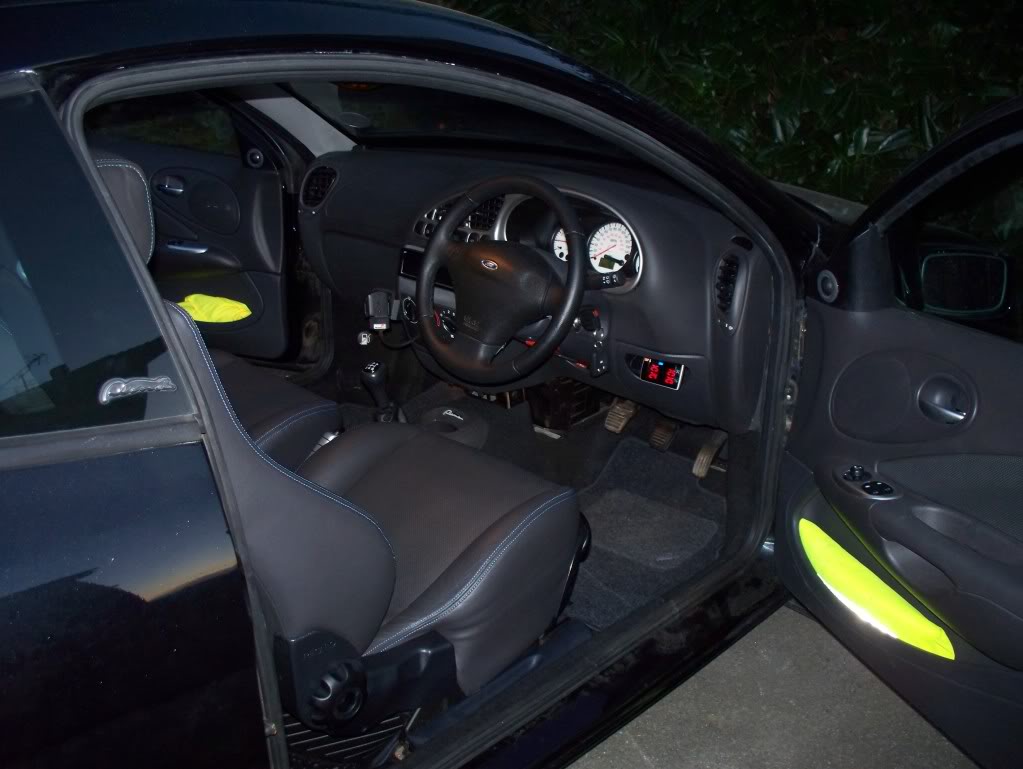
One of my clean looking interior, excuse the dangling footwell lamp, I need to replace the velcro on the lens;
And a few of my freshly polished paintwork;
Pics in the car park are a bit rubbish, just couldn't get the settings quite right
Fitted a new gear lever gaitor, and tried to fit an ST170 leather handbrake gaitor, but they are a difference shape. While I was doing this I made the mistake of leaving my interior light on, so when I went to the car the next day the battery was dead.
Picked up a �38 charger from Halfords, hooked it up and the lights (on the charger) were flashing, which I didn't necessarily think was good, but I left it connected for a couple of hours and bingo, started right up! Left the car running for a while after that and it has been fine since.
One problem with the battery cover that I am using is that it is a bit awkward to get to the battery terminals as to remove the cover you also need to remove the retaining strap.
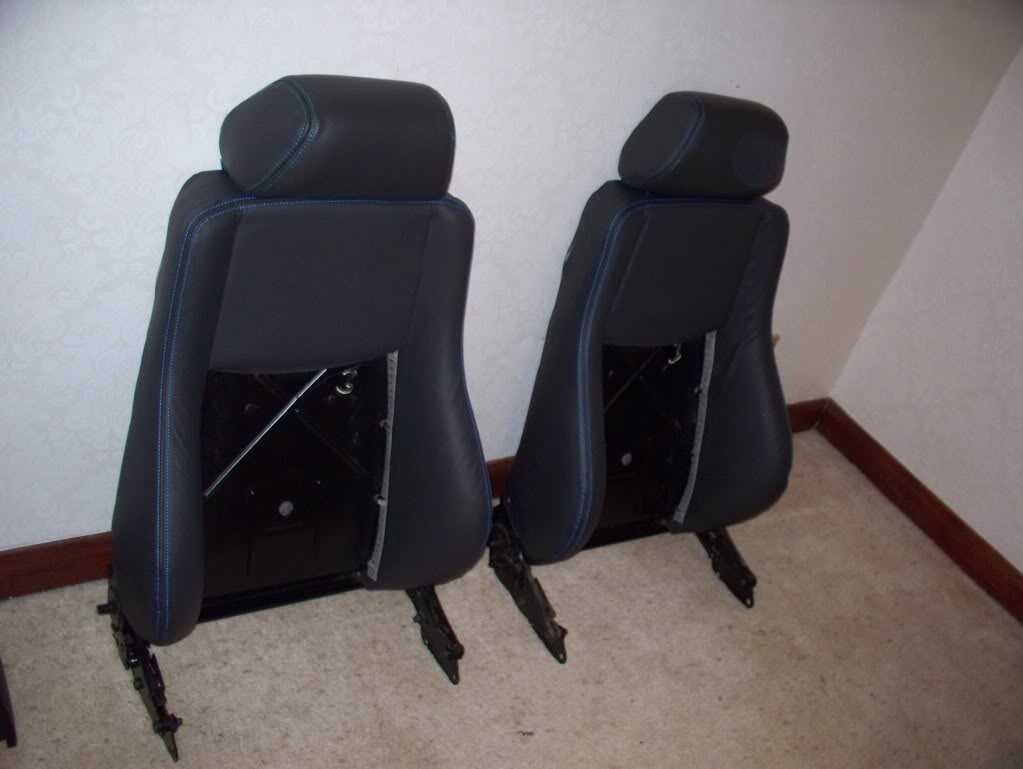
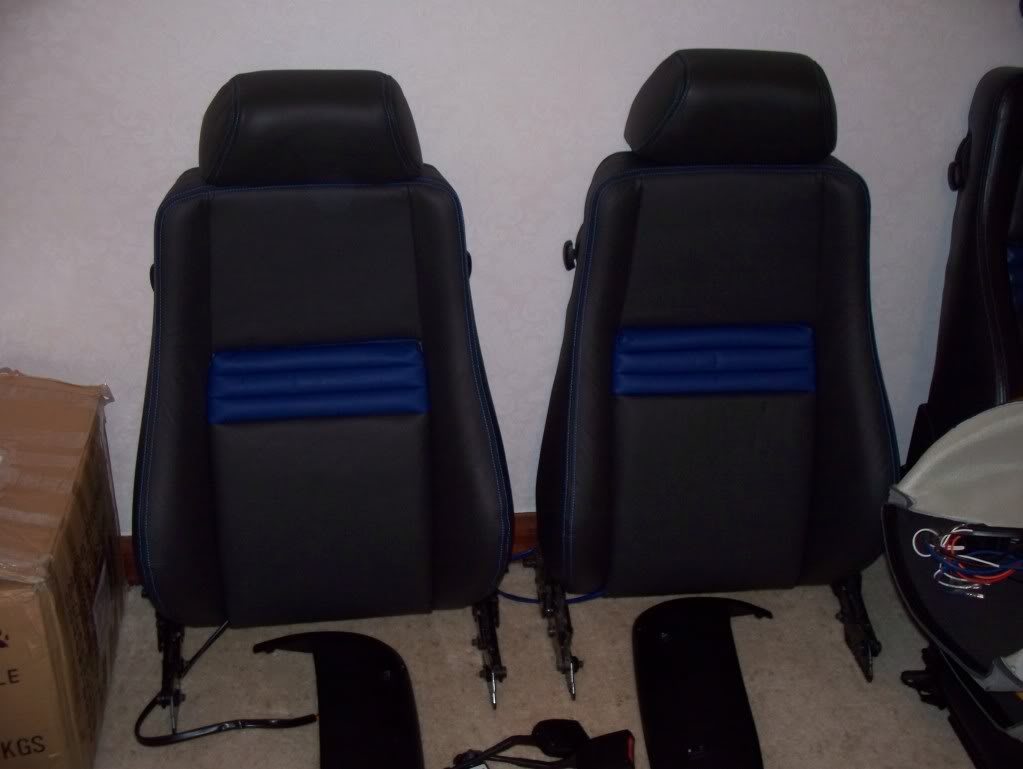
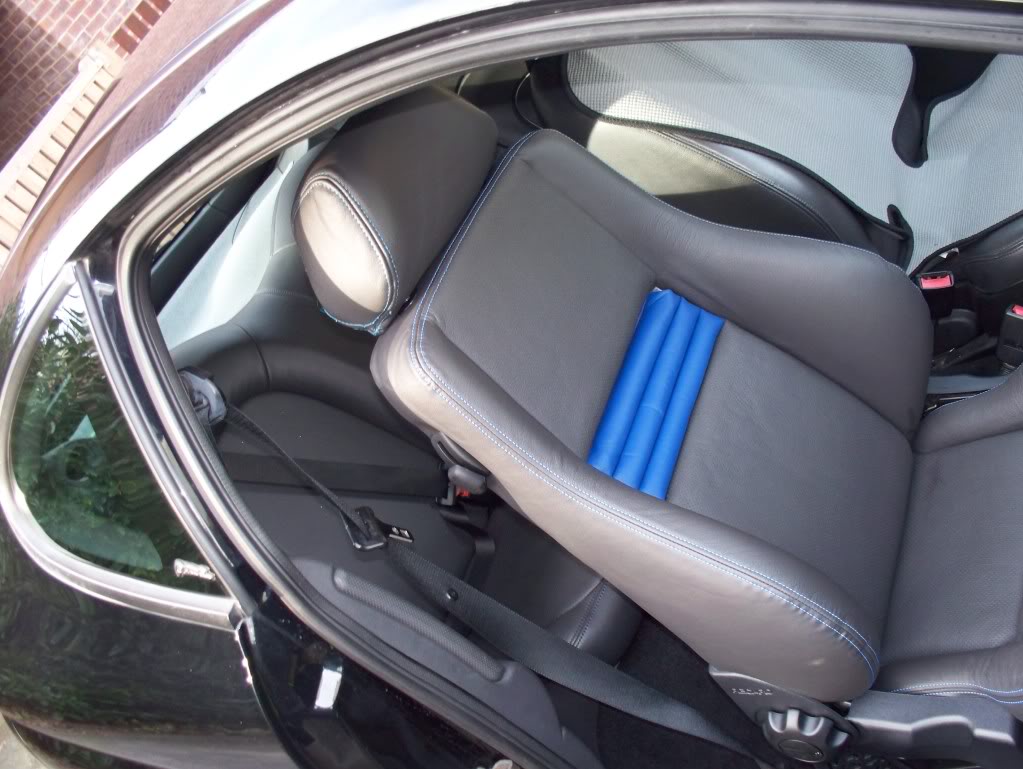
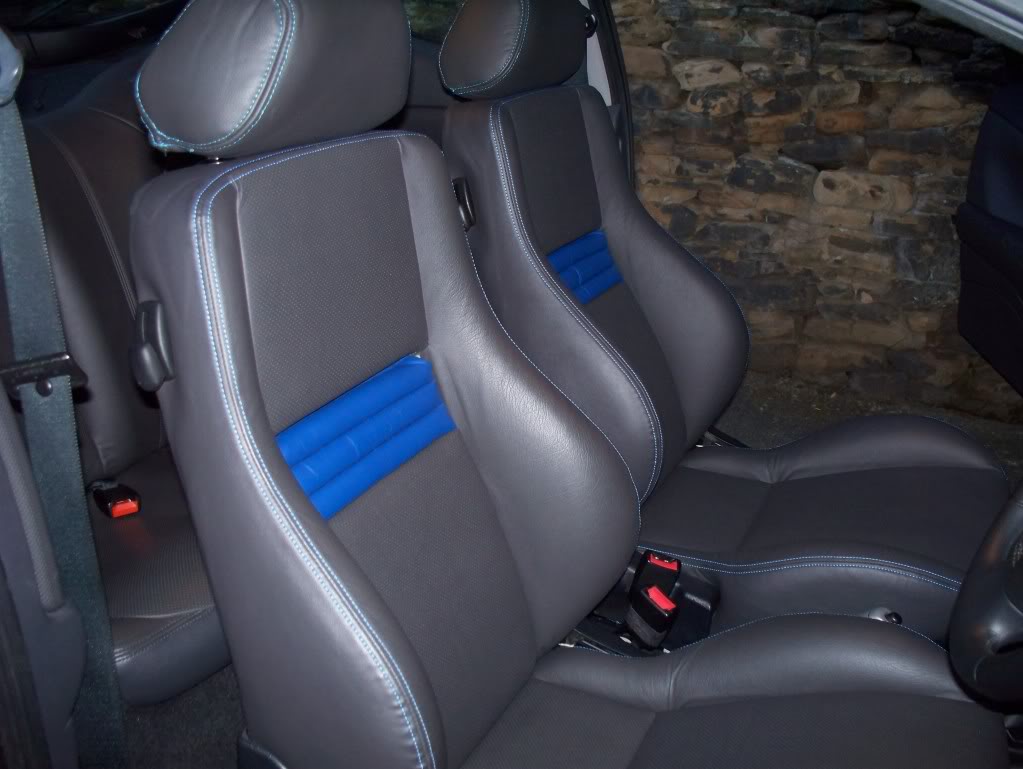
I bought a pair of RS2000 Recaro’s, which I stripped down to retrim with some brand new Puma Futura Midnight Black seat covers, and a Waeco heated seat kit.
Also bought some reprofiled cams to FRP spec, and an FRP cam locking tool.
Got a new key;
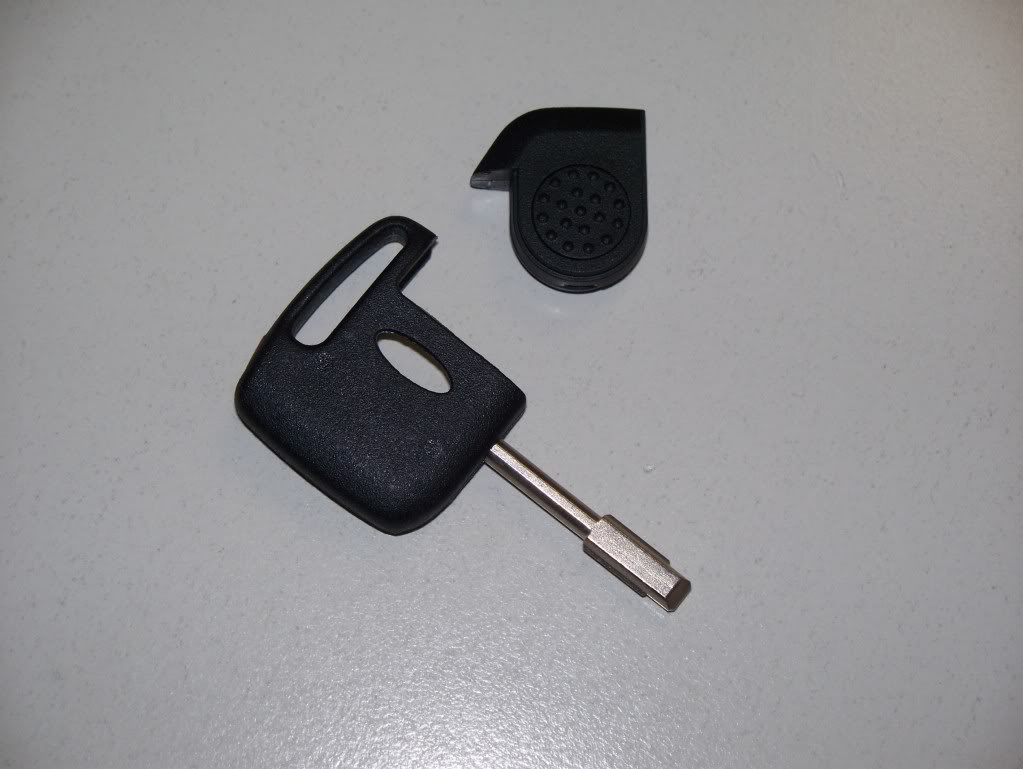
Just needed to get it cut. I will use this with my Transit Connect remote. Have been using it with the original spare key, but I think this one will be nicer.
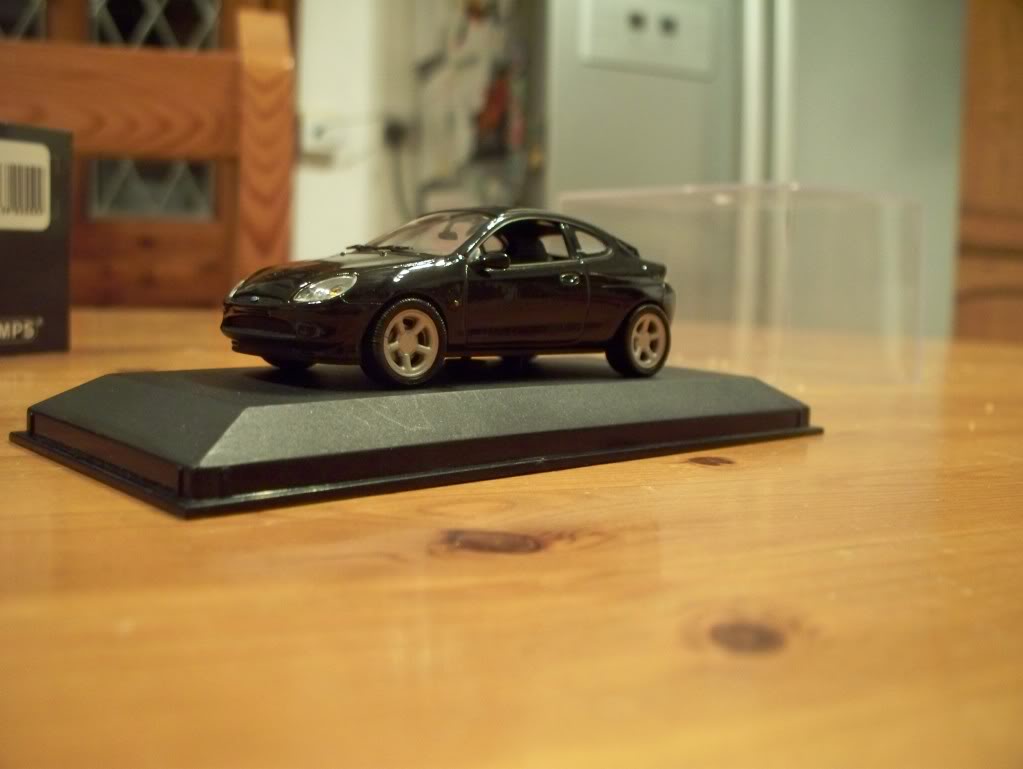
Also got this;
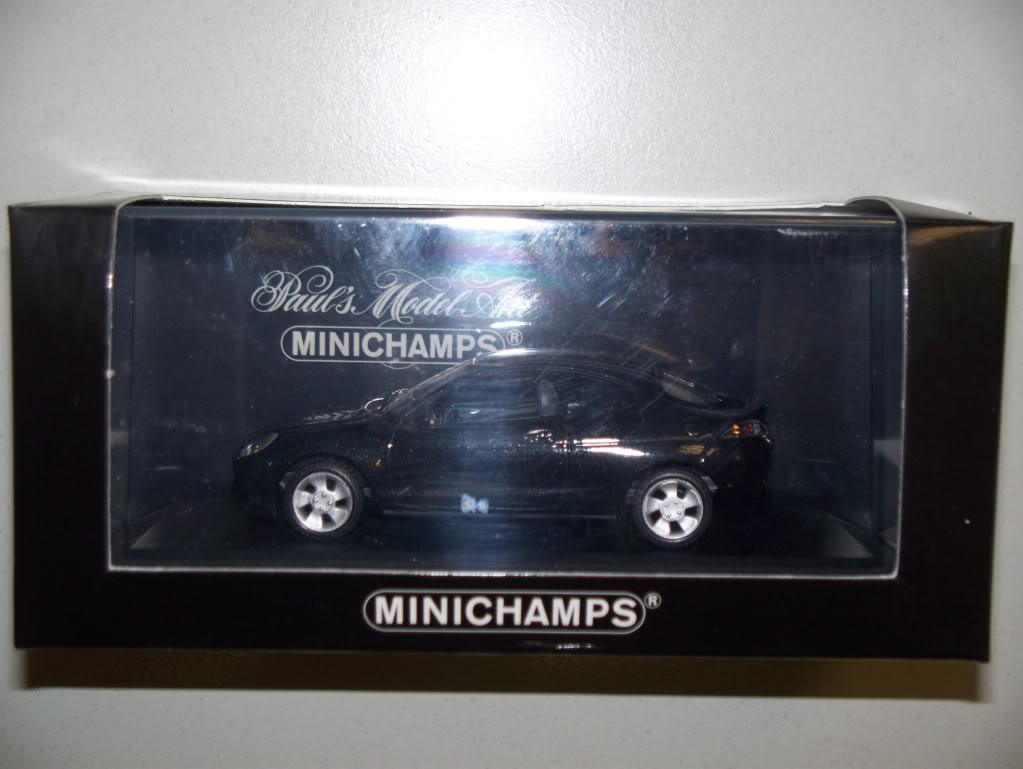
Quite chuffed, now I need to get a 1/43 EsCos to nick the wheels off!
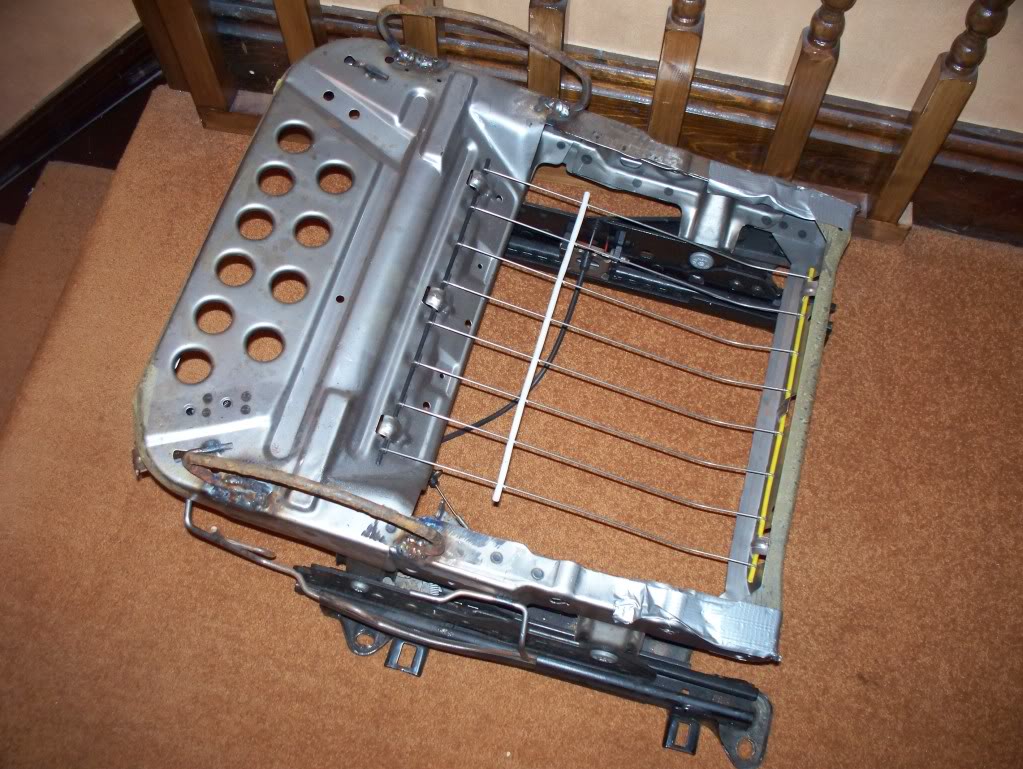
Ok, so the latest thing has been rebuilding the Midnight Black Futura Recaro's, the big delay has been waiting for the thigh reinforcements to be chopped off and welded onto some replacement bases. These Recaro seats use a standard base but with thigh supports welded on, the original bases were LHD and the runners had been cut up, so I am getting the supports changed over to some replacement seat bases. Then I can fit the foam and cover to the new modified base, fit the backrests and bingo, seats will be complete. All that I will need to do then is to sort the wiring in the car for the seat heaters and drivers seat power height adjust.
Progress with the seats...
Backrests, largely complete, just need the centre pads and tilt levers fitting
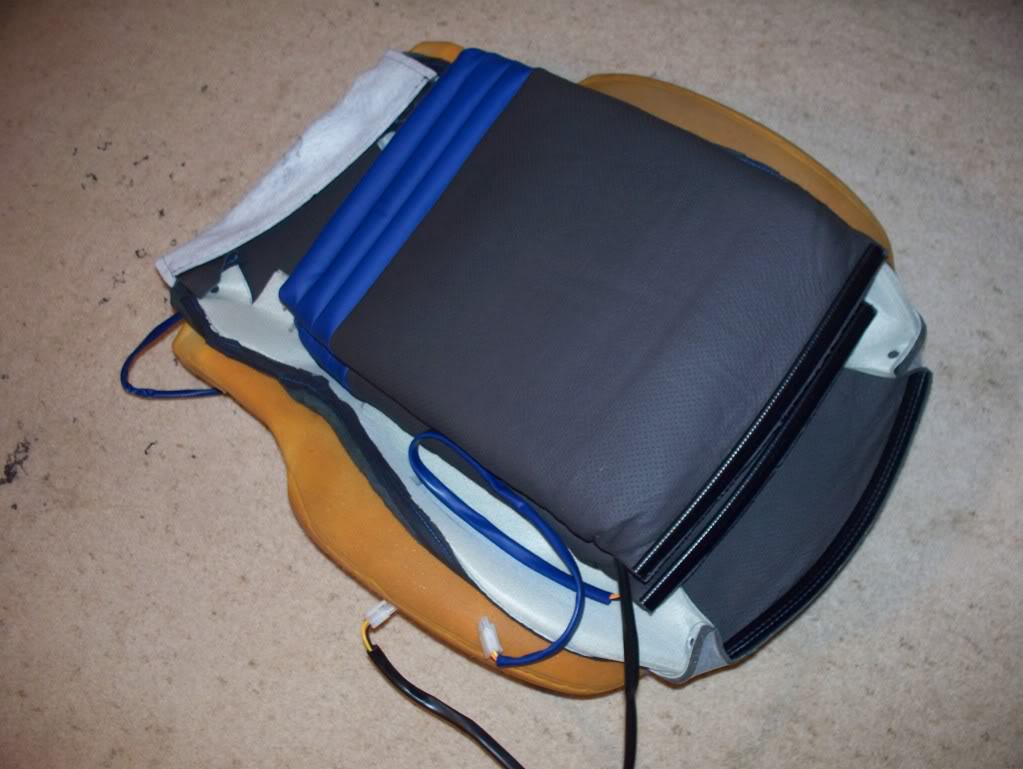
Centre pads, with heating element installed
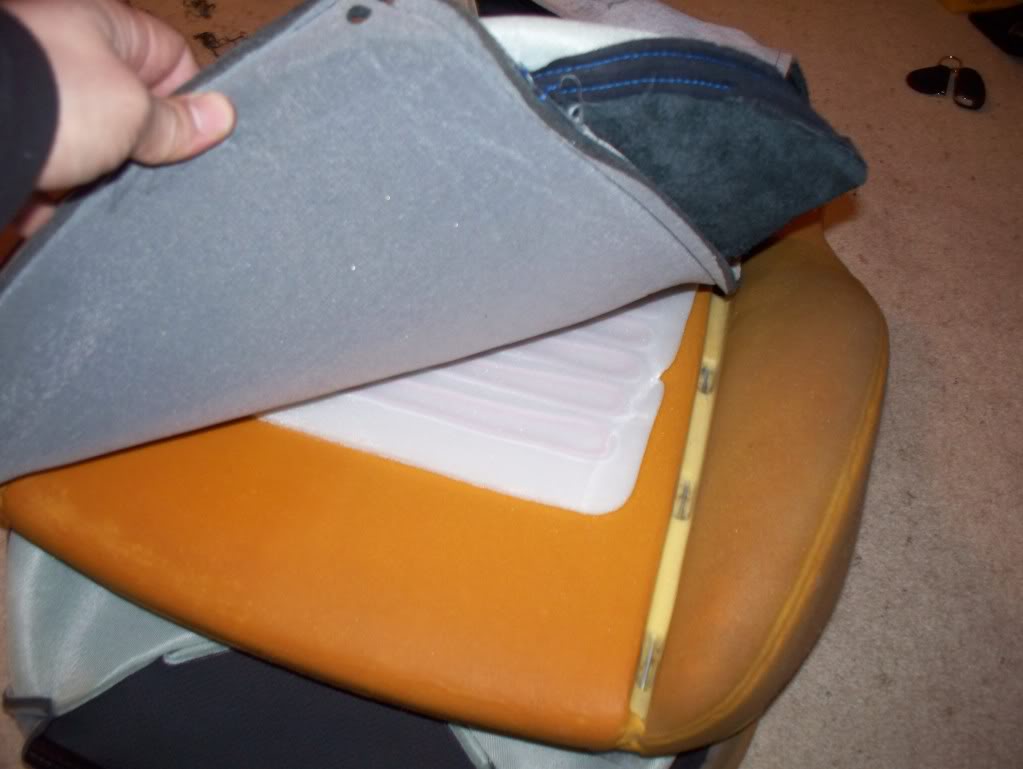
Front of seat base centre pad
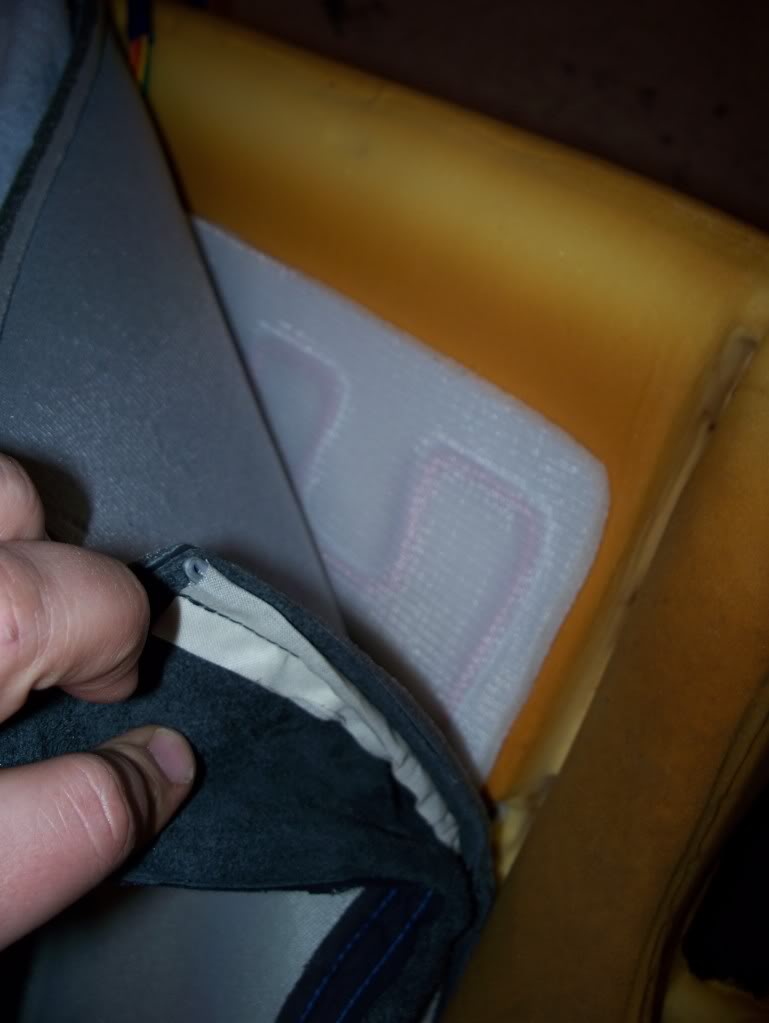
Rear of seat base centre pad
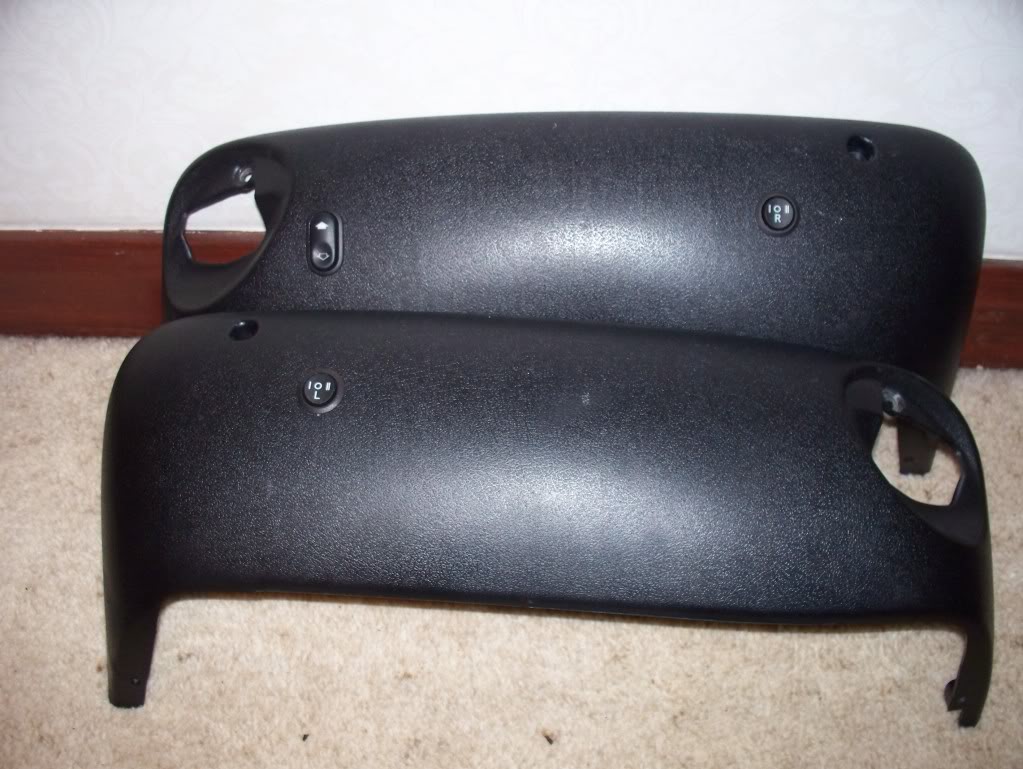
Front trims ready for refitting, with heated seat switches
I have also replaced all of the plastic trim parts, which also took a little while.
Recaro backrests fully assembled, complete with heater pads, all ready to be bolted onto the bases;
Once I had one of the bases back, I set about rebuilding the seat. All was going well, except that there are some spacers on the sides of the standard seat base, which aren't there on the Recaro base, so those needed to be removed, which would have been easier if I hadn’t already fitted the cover!
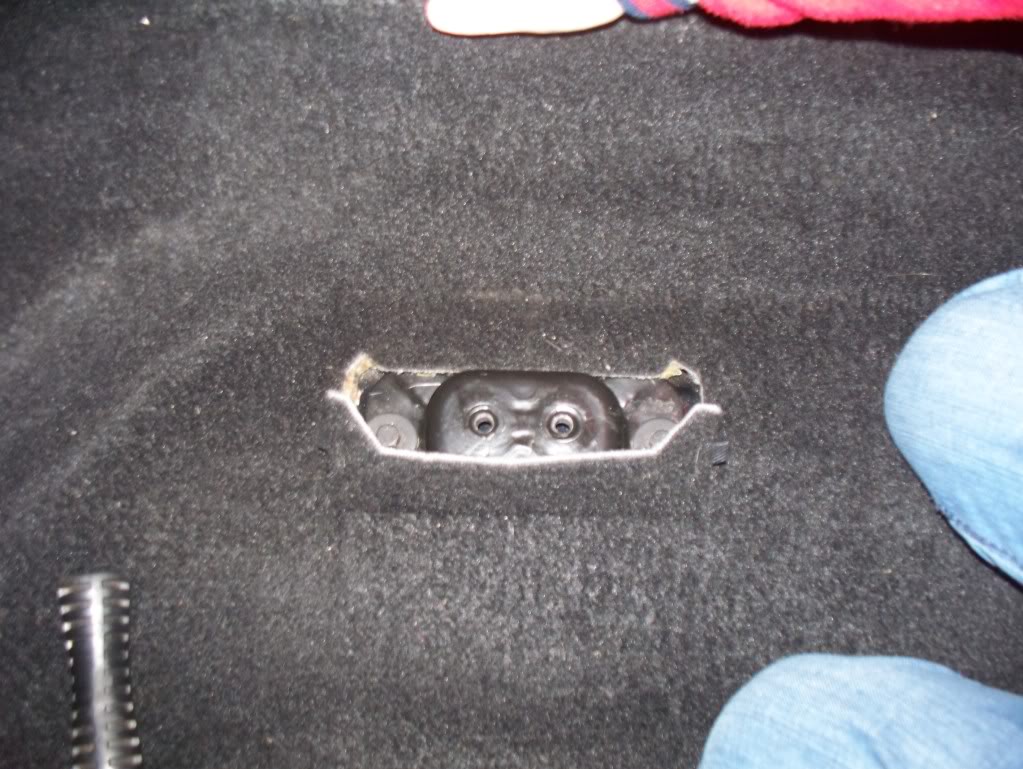
Anyhow, got the seat all built up, and removed the original drivers seat, first job was to fit the "top hat riser" kindly donated by Megaboost, this bolts into the original fittings, and raises the mounting mount for the rear inner bolts;
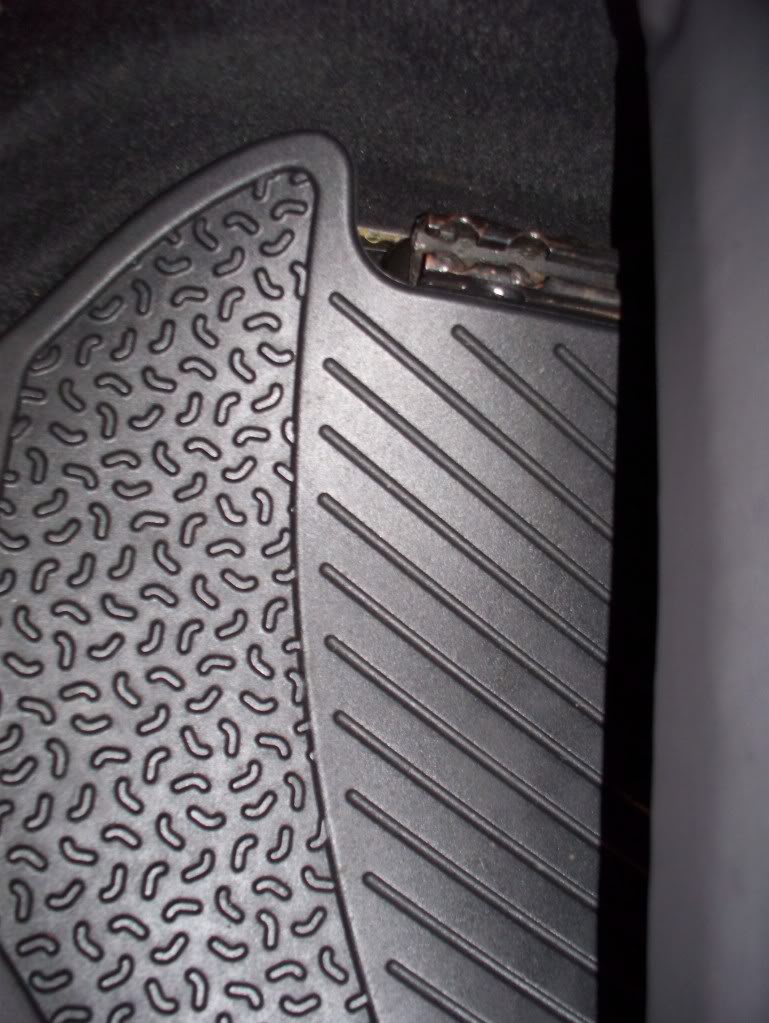
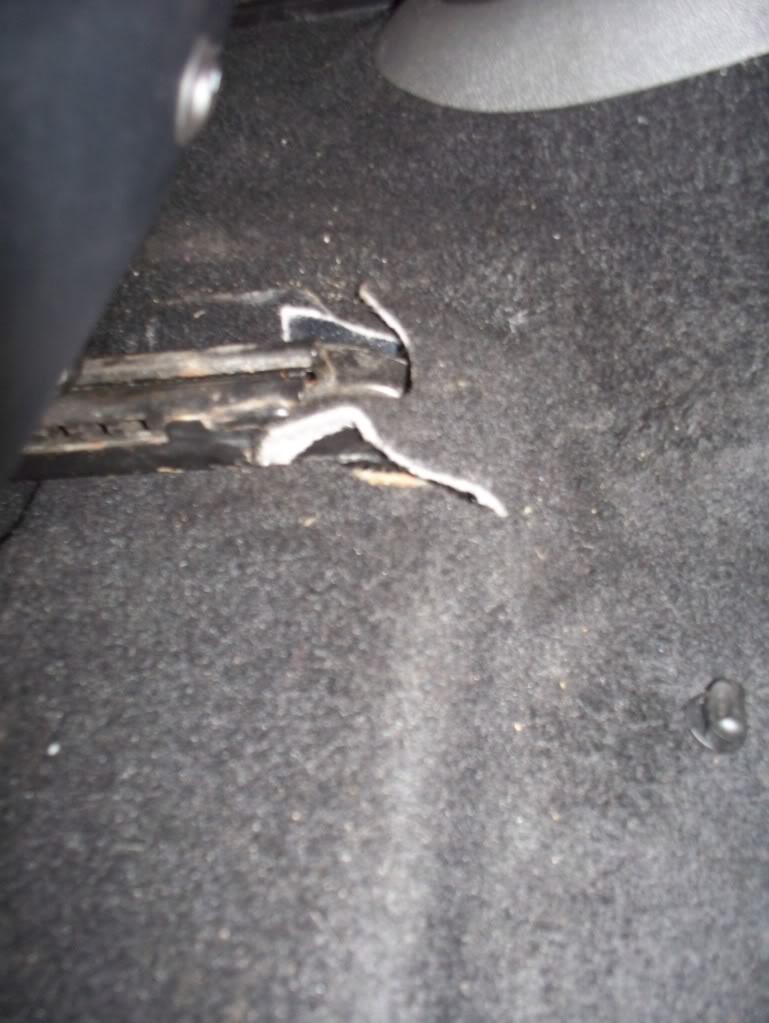
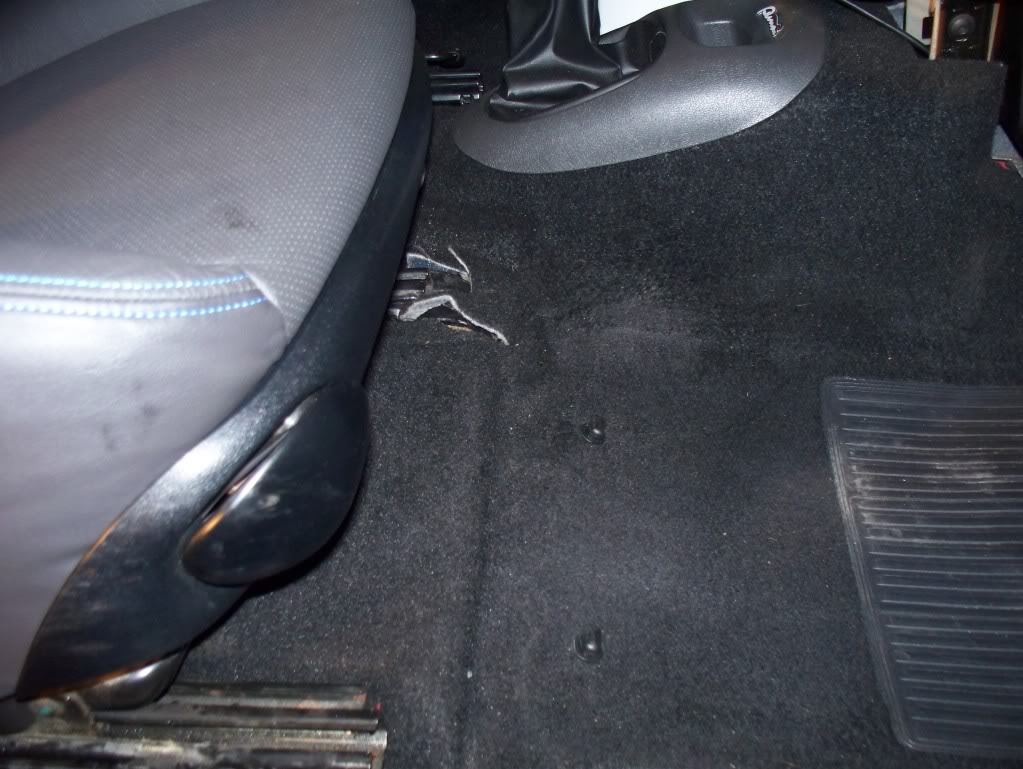
Next step was to swap the pre-tensioner over from my standard seat, doing this without knackering the trim on the original seat was a bit tricky, but we got there, with that fitted, we could install the seat. Everything went well, except that the holes in the carpet aren't quite right. As I will probably refit the standard seats before selling the car, I didn't want to get the stanley knife out, but this isn't a huge issue as the differences aren't hugely obvious;
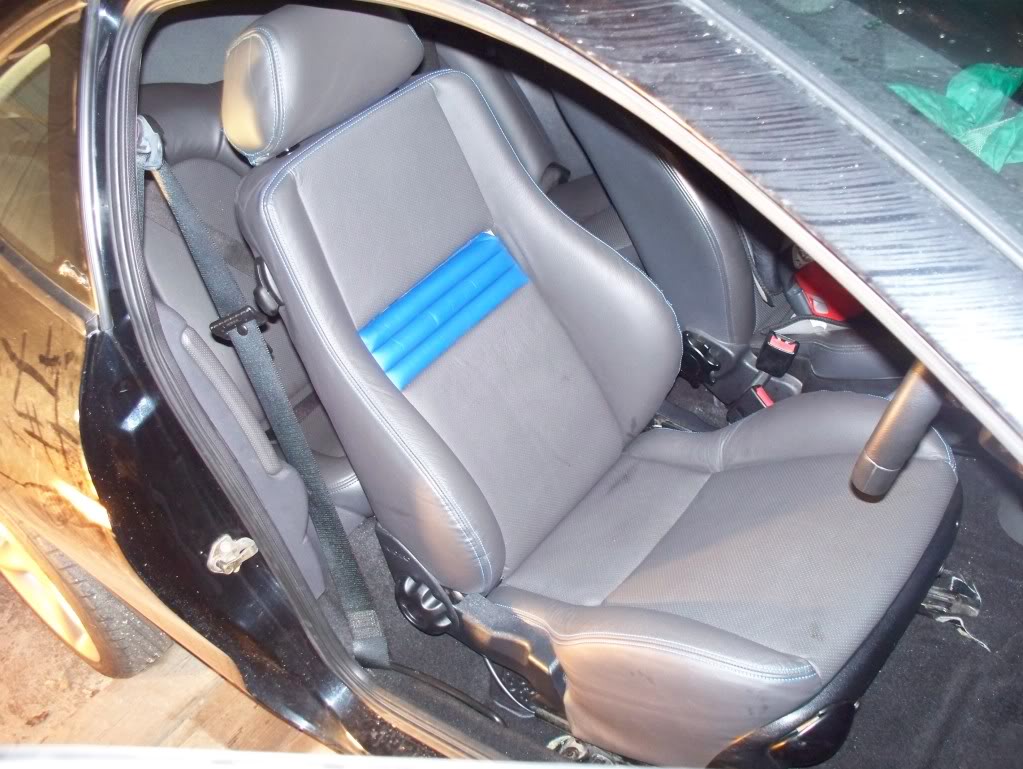
And the end result;
At this stage I still hadn’t done anything about connecting up the seat heater or the power height adjust just yet, I was just desperate to have one of my new seats in place!
New wheels - albeit for the 1/43, not the real one;

When I went on holiday to the US, I acquired a couple of these - Orange TPMS, this not only shows tyre pressure, but also temperature;
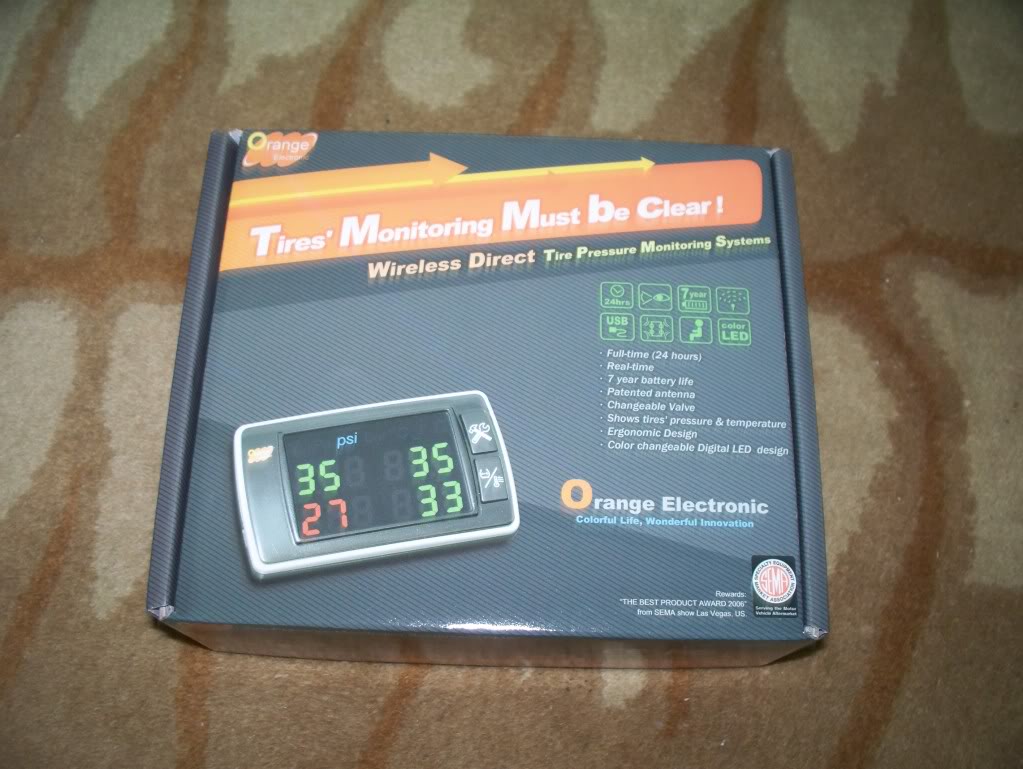
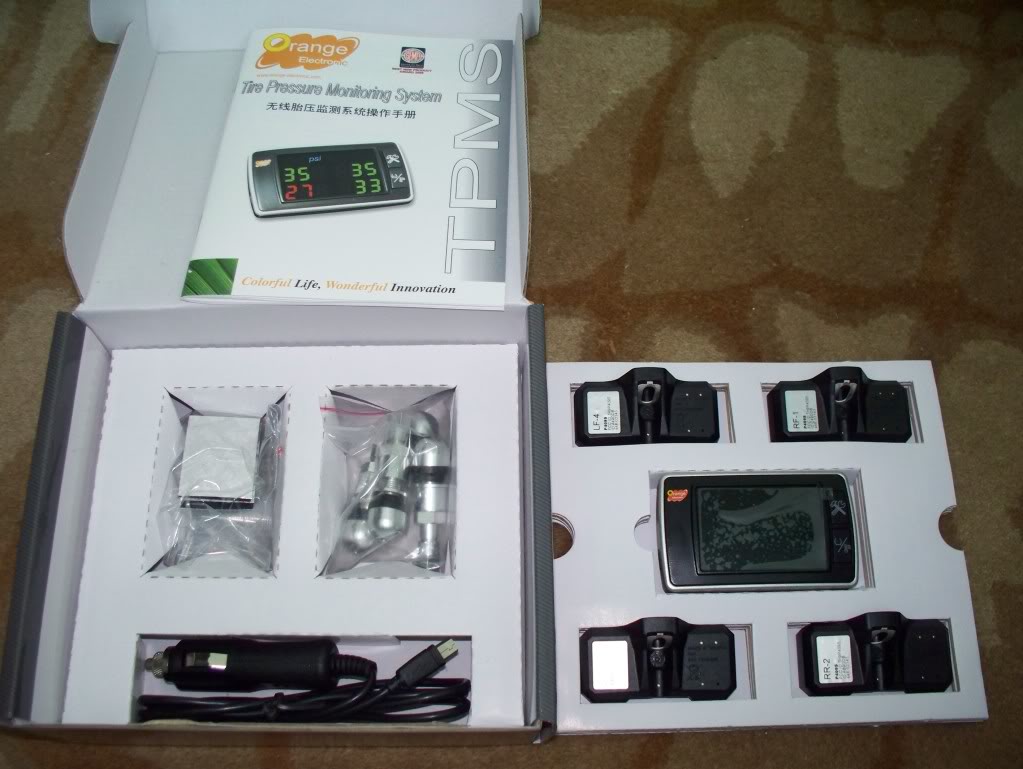
While it looks like some dodgy Chinese rubbish, these guys actually make a lot of the OEM stuff, so it should be pretty good. Just needed to work out where to put the display.
I have also bought a Waeco MT-2000 (touch indicator unit), again one for each car.
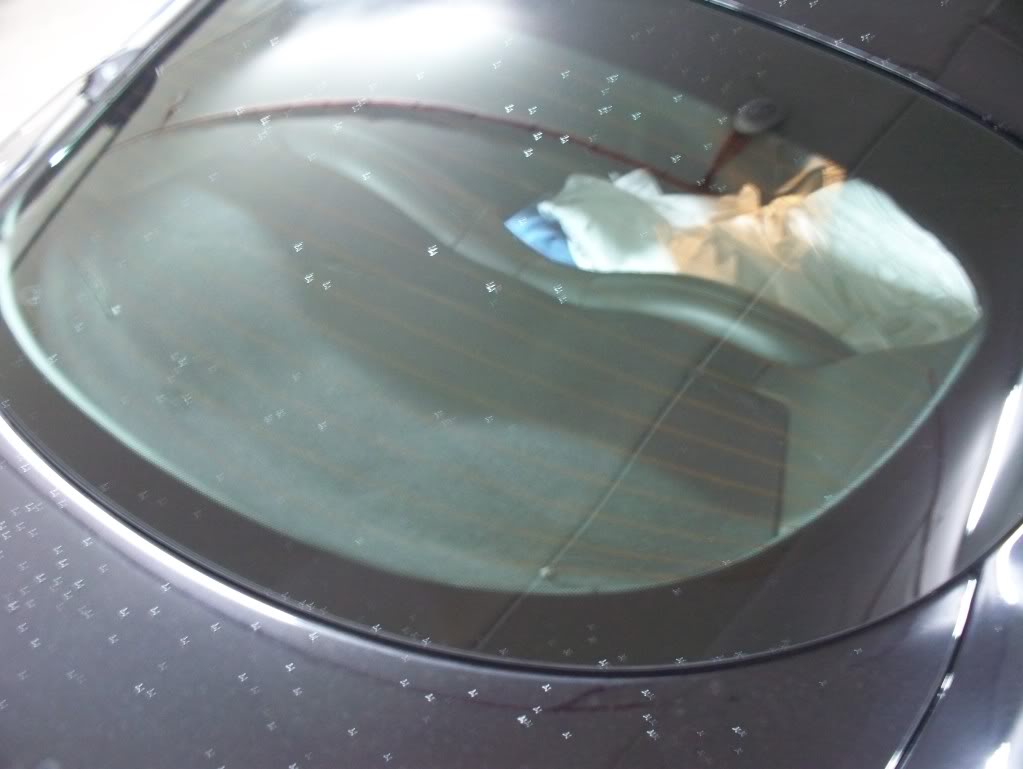
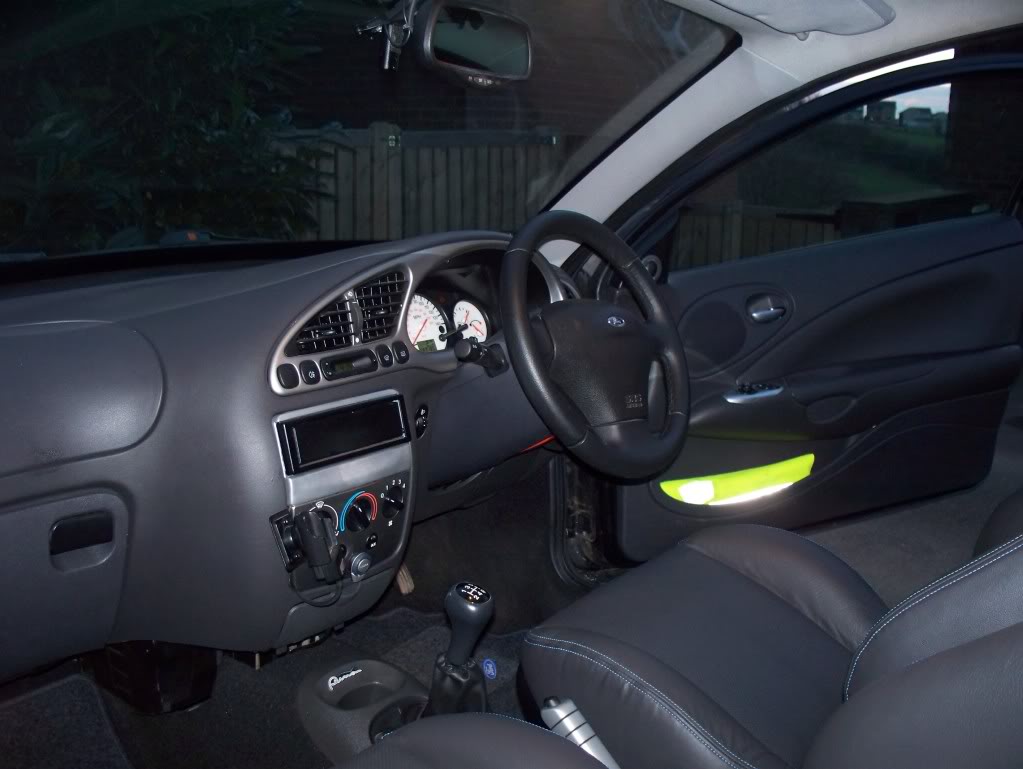
A couple of pics of the car from Feb ‘10, awful shot of the inside, would be better if I took the door off, but that would be a bit extreme! You can see however that the colour match to the remaining original interior looks good;
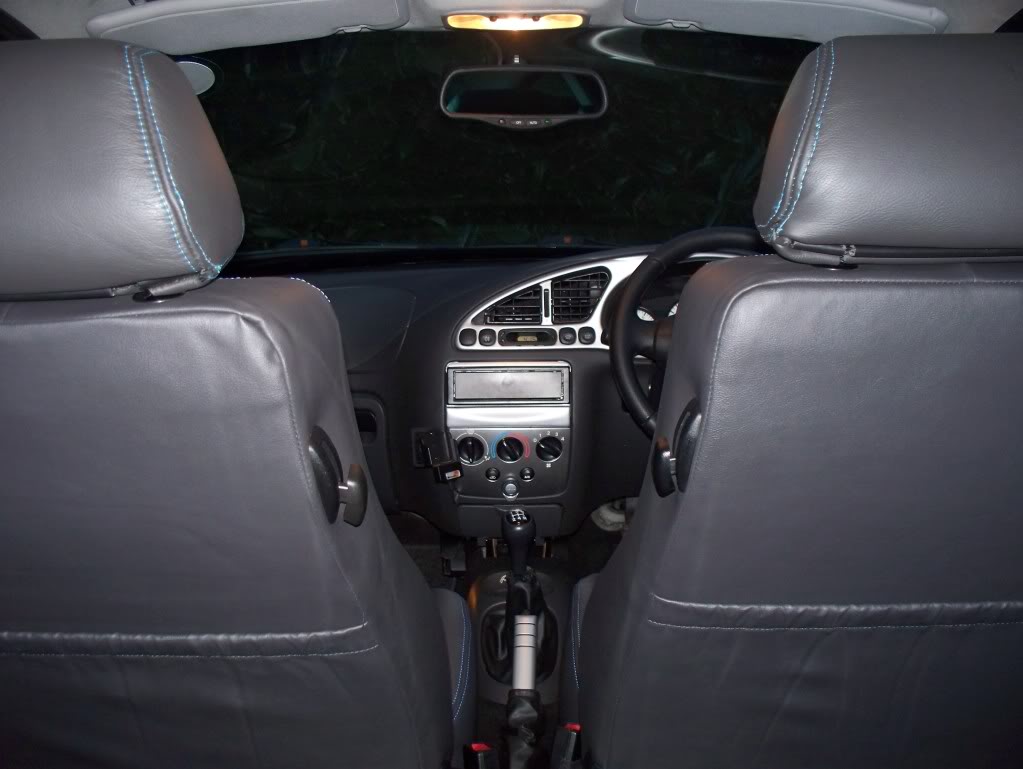
The rear shelf on later cars is quite a light grey colour, so I bought a black one, it is a couple of shades darker than I would have liked, but I think it looks better than the grey;
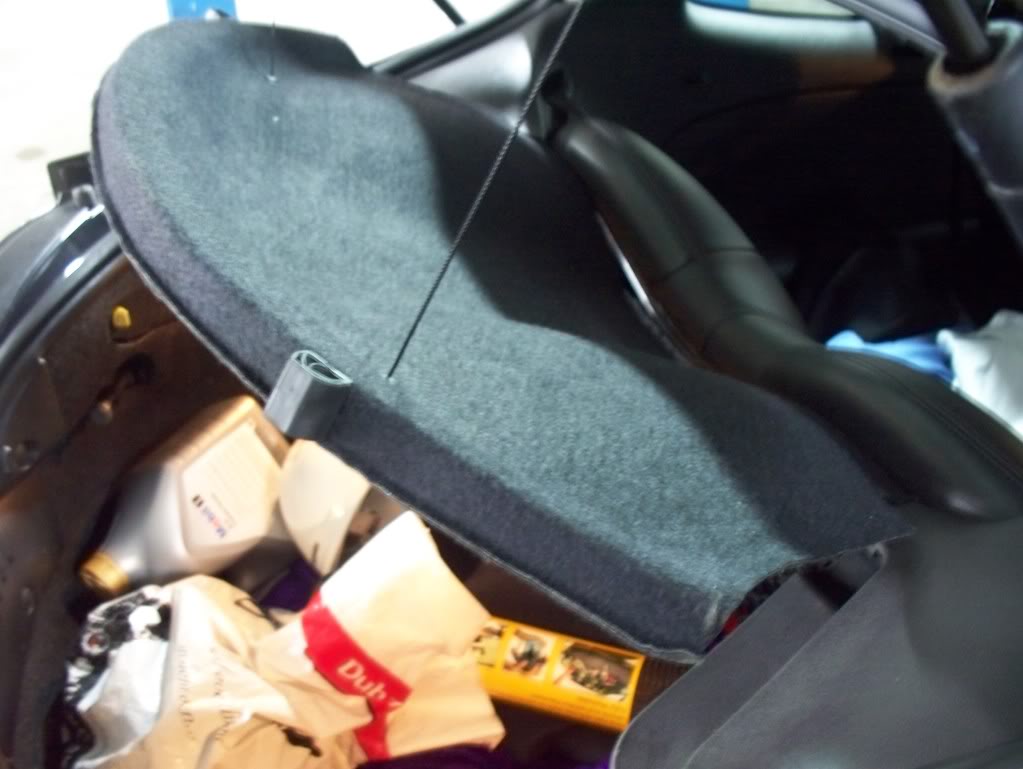
Excuse the crap in the boot and on the back seat, but you get the idea.
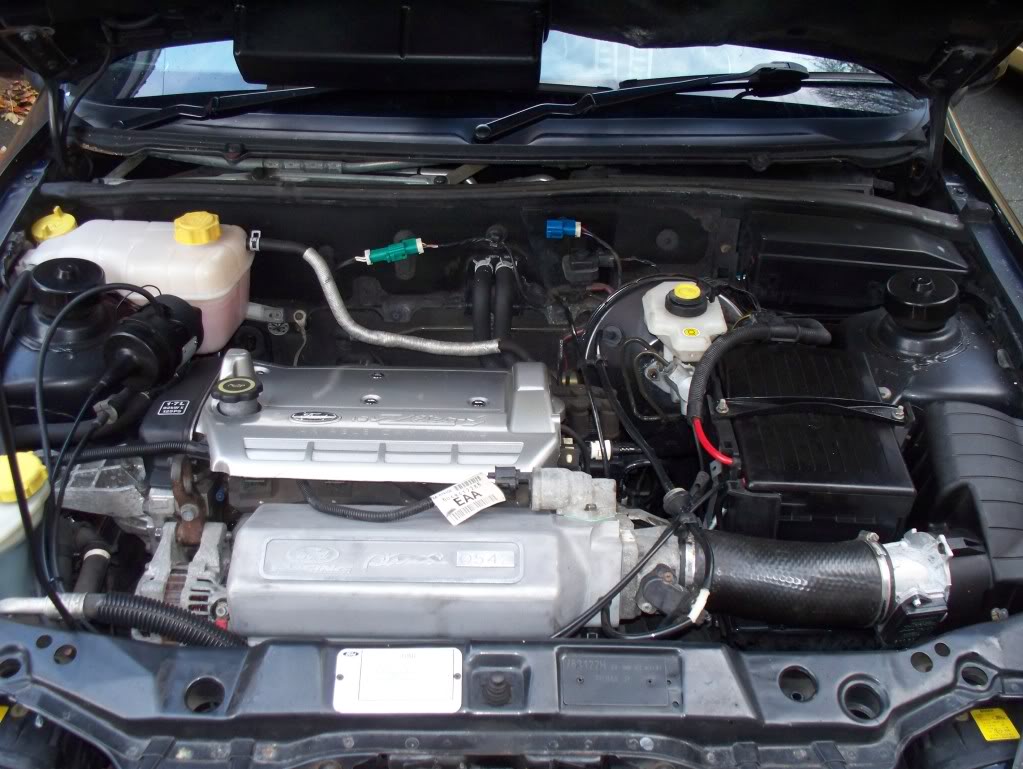
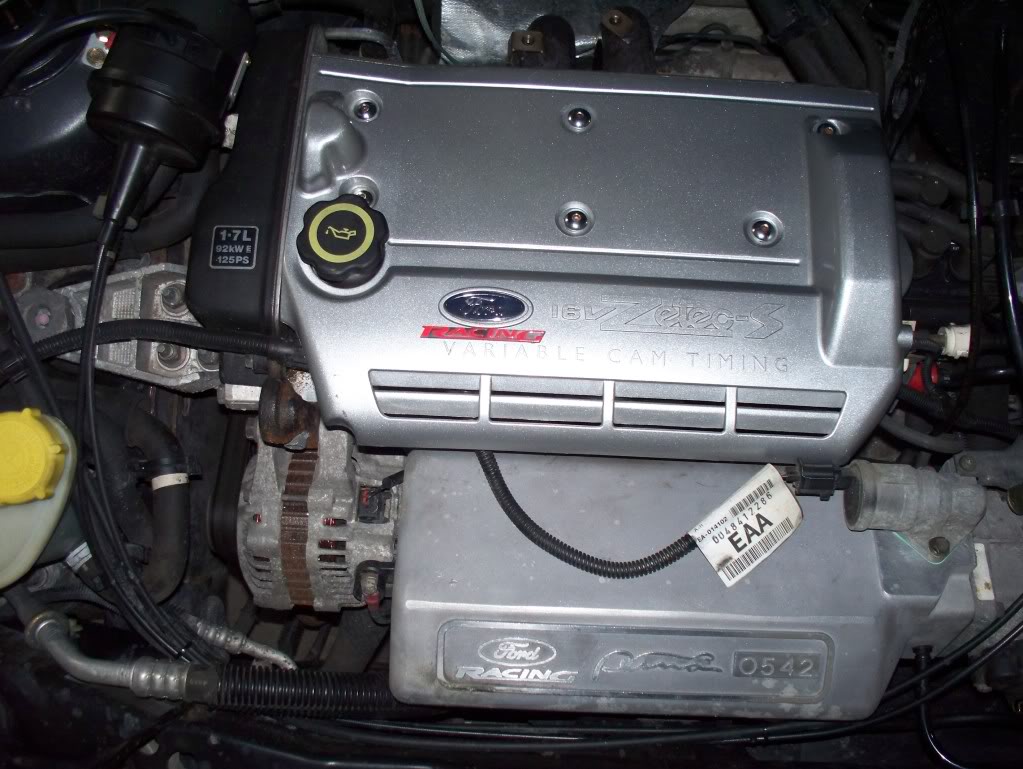
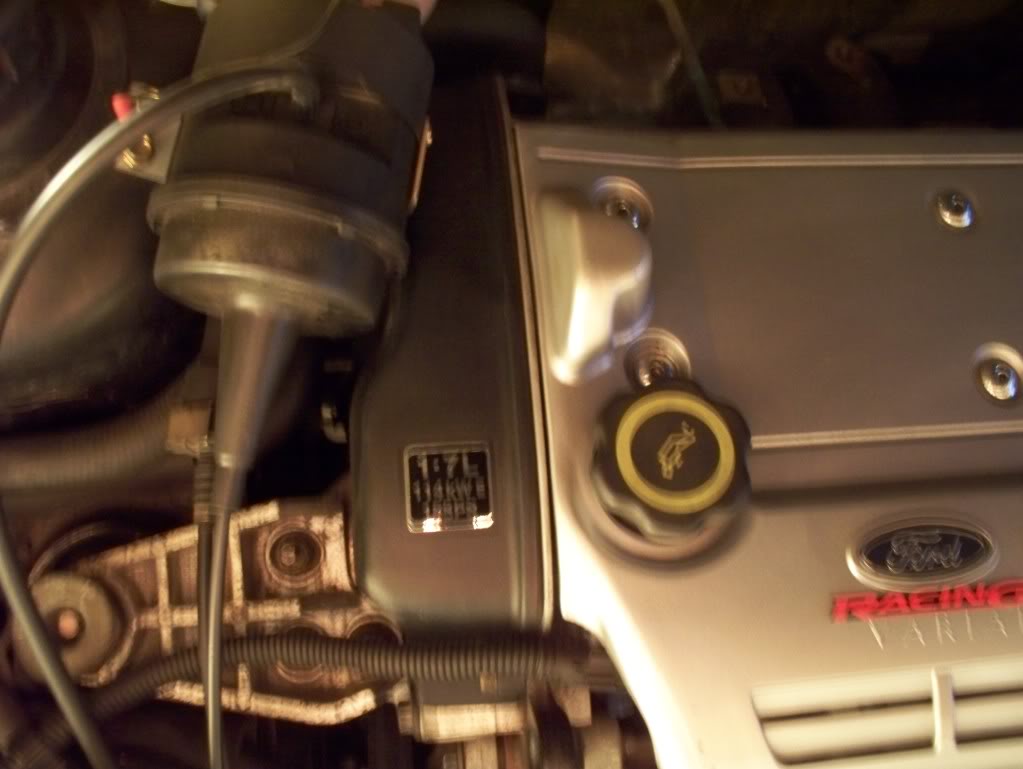
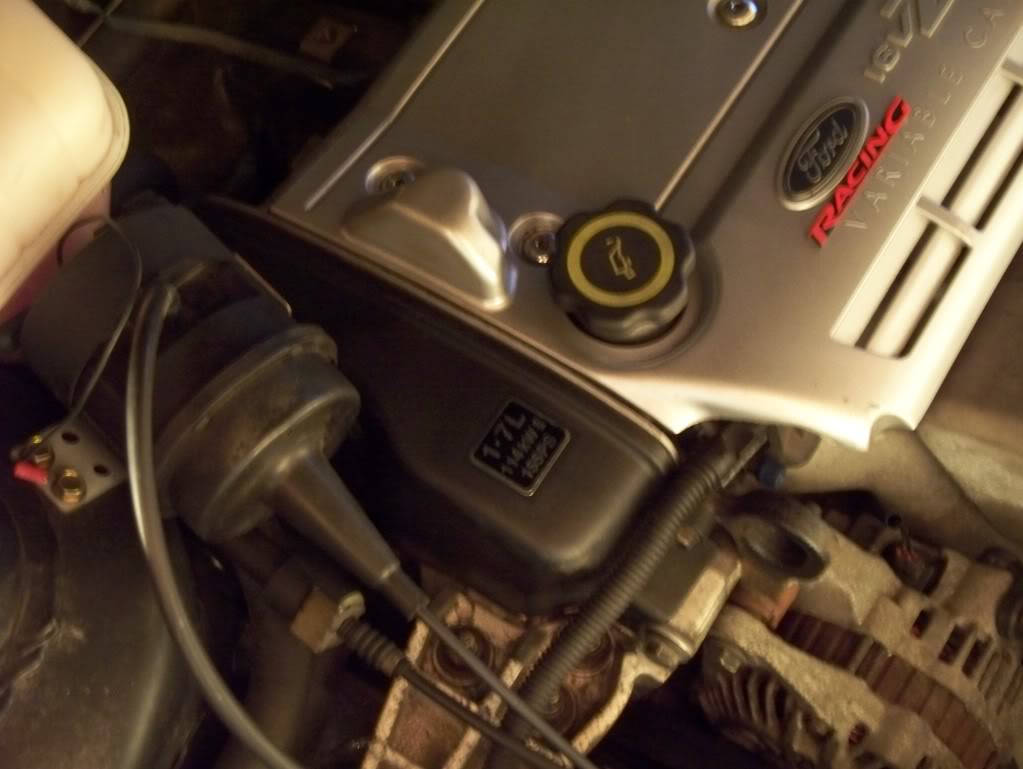
Also received an FRP engine cover, which is much neater than the one I had, stuck a Ford Racing badge on, looks better than I expected;
Bought a spare rear bumper, I have a Bosch Park Pilot reversing sensor system to fit, and will probably get the new bumper painted at the same time as I get the o/s/r arch repaired. I spent a
few hours on the car marking and drilling the spare rear bumper to accept the parking sensors, stripped out the luggage compartment trims, test fitted the new rear bumper to check that the parking sensors were in a useful position, washed the car with the new bumper, removed, washed the rear panel, then refitted the original bumper and washed that. I then removed the sensors from the spare bumper; the sensors are currently silver, I need to rub them down and painted in Panther Black.
I haven't bothered refitting the rear mudflaps as they are a bit of a faff, and they would only need to come off again when it goes for paint; the rear track looks really wide without them!
Dropped the car off at the garage, along with the FRP cams, TPMS, spare wheel and FRP tail pipe. On order, or awaiting fitment were a pair of new GSD3's, cambelt, rocker cover gasket, oil filter and 8 litres of Mobil1 0w40. The new tyres were fitted to the front wheels, at the same time as replacing the n/s/f with the extra wheel as the n/s/f has a small scrape. Also I asked them to investigate the still unsatisfactory feel from the brakes.
While the car was at the garage, I decided to sort out the wiring for the heated seats, and made a start, but soon decided that it was just too long and I didn't have the right connectors to shorten it as I would like;
The blue and black wires at the bottom don't need to go anywhere, they would usually connect the seat to the car, but as I have fitted the switches on the seat, rather than on the dash, I need to shorten these quite a lot.
I also tidied up the wiring for the ParkPilot, on my car it is all going in the one corner, so the wiring was a bit long;
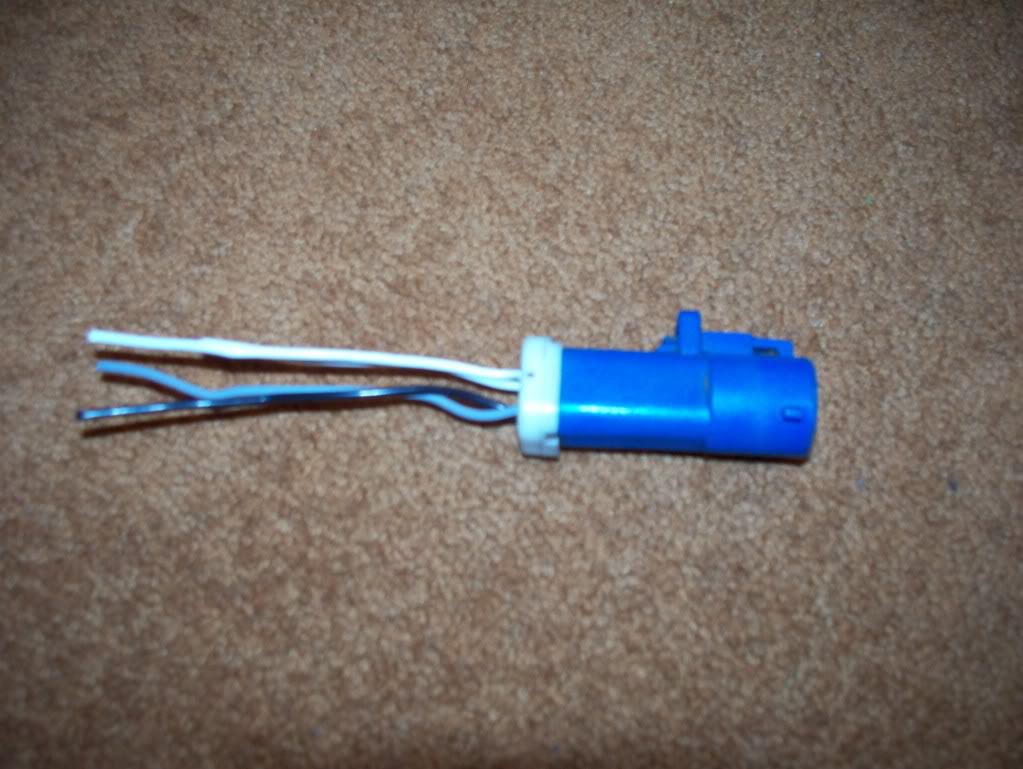
Finally, having disconnected my second lambda some time ago, when changing to the TAPE ECU, I have finally decided to knock together a dummy plug to protect the socket. This is one end of my failed MIL eliminator loom, I just need to alter the length of the wires and cover in heat shrink.
Few pics;
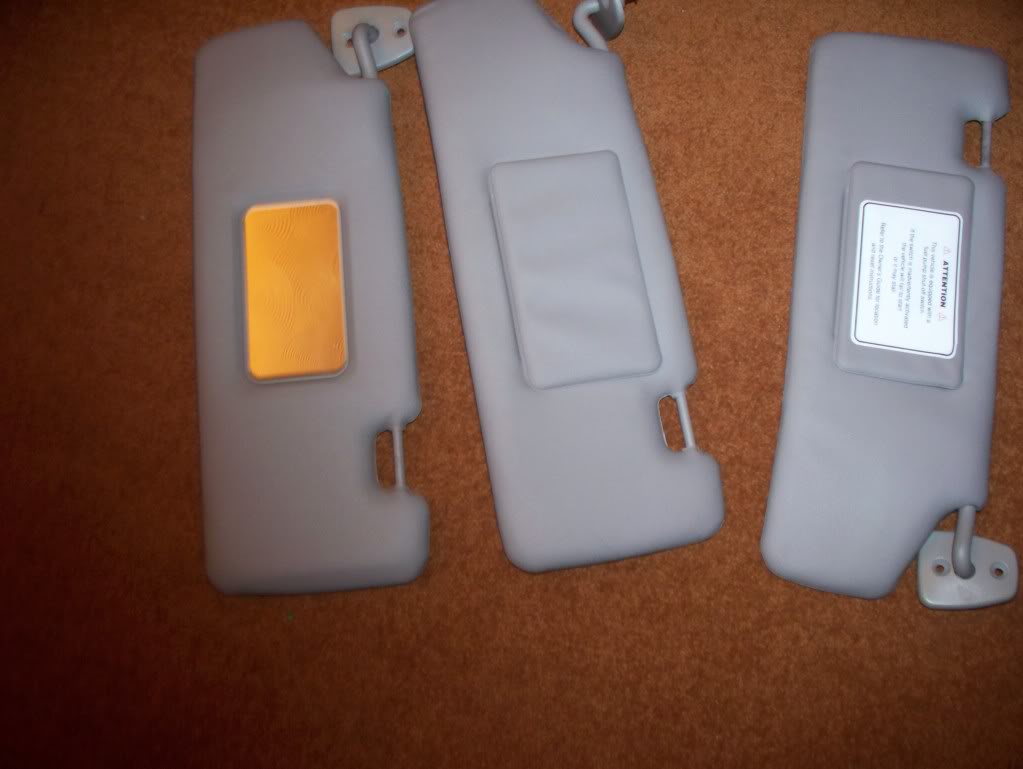
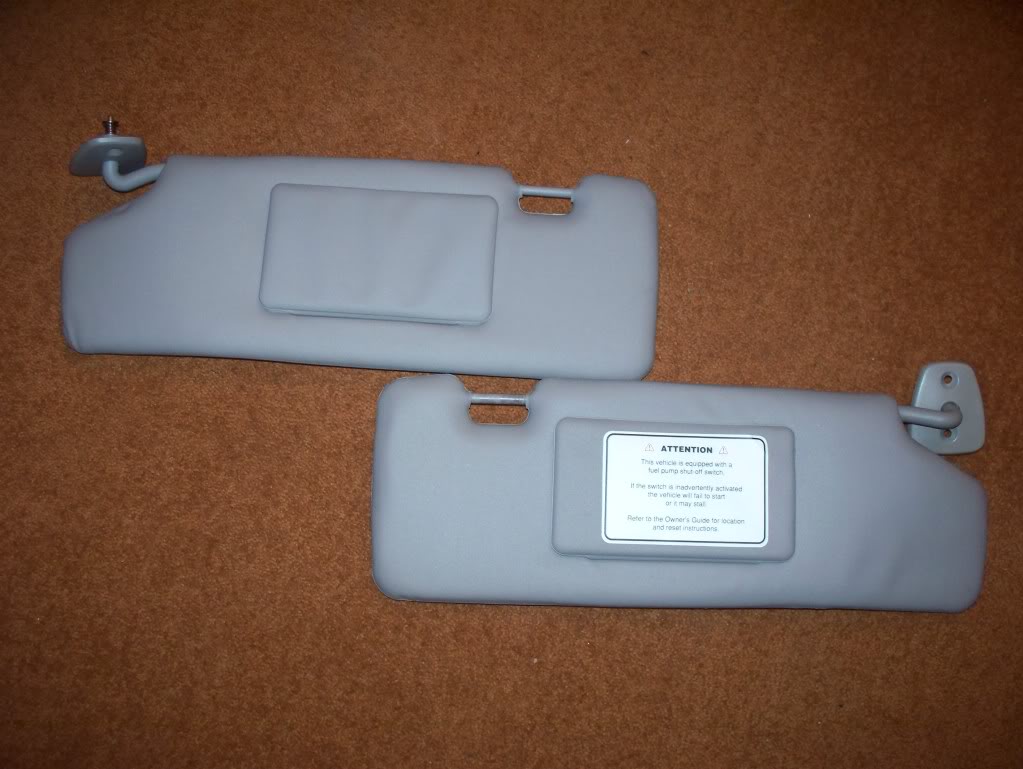
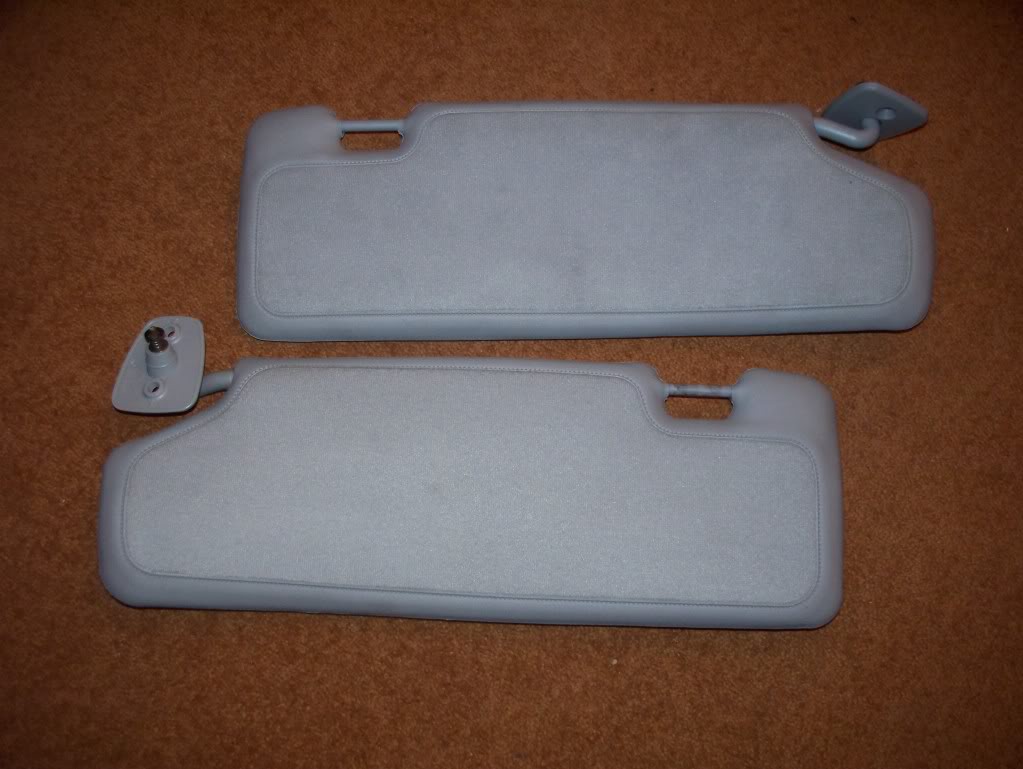
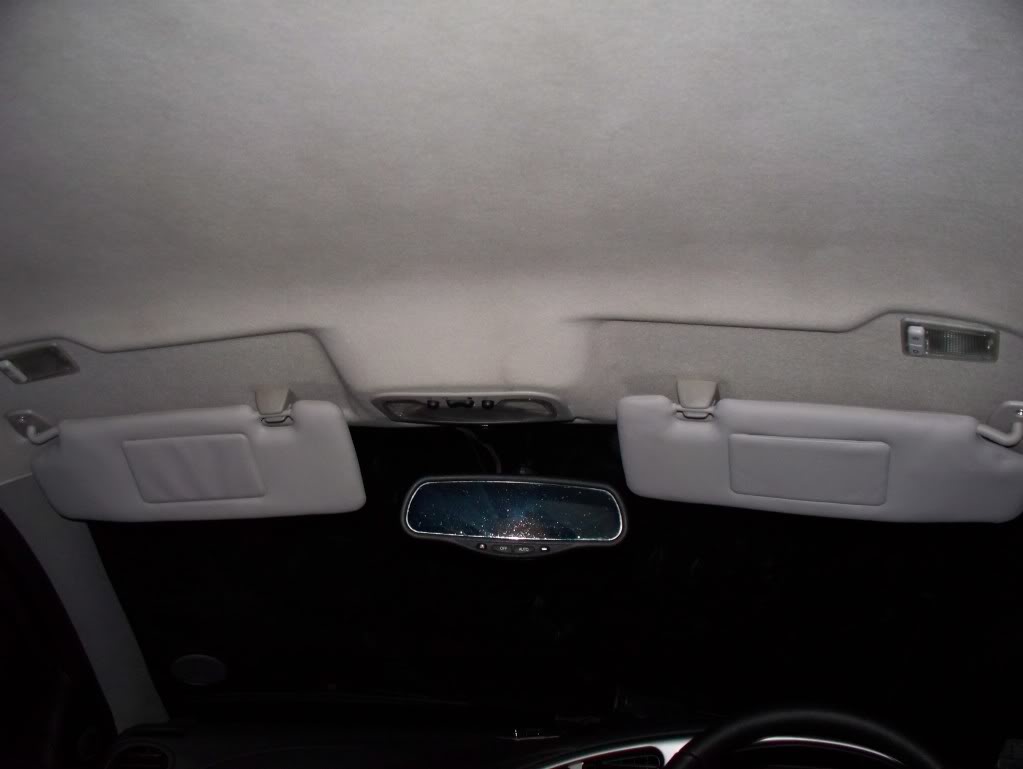
Above are some visors I just bought, turns out the new one I got is actually a drivers side mirror from a LHD car, but I plan to use the ones below, so both side have a cover over the mirror
I also managed to finish my lambda terminator thing;
I also got the passenger side Recaro base back, so I could make a start building that back up.
Backrest is built up, but I may need to strip it down a bit to alter the route of the heated seat wiring and ensure that the boltsers are fitted properly.
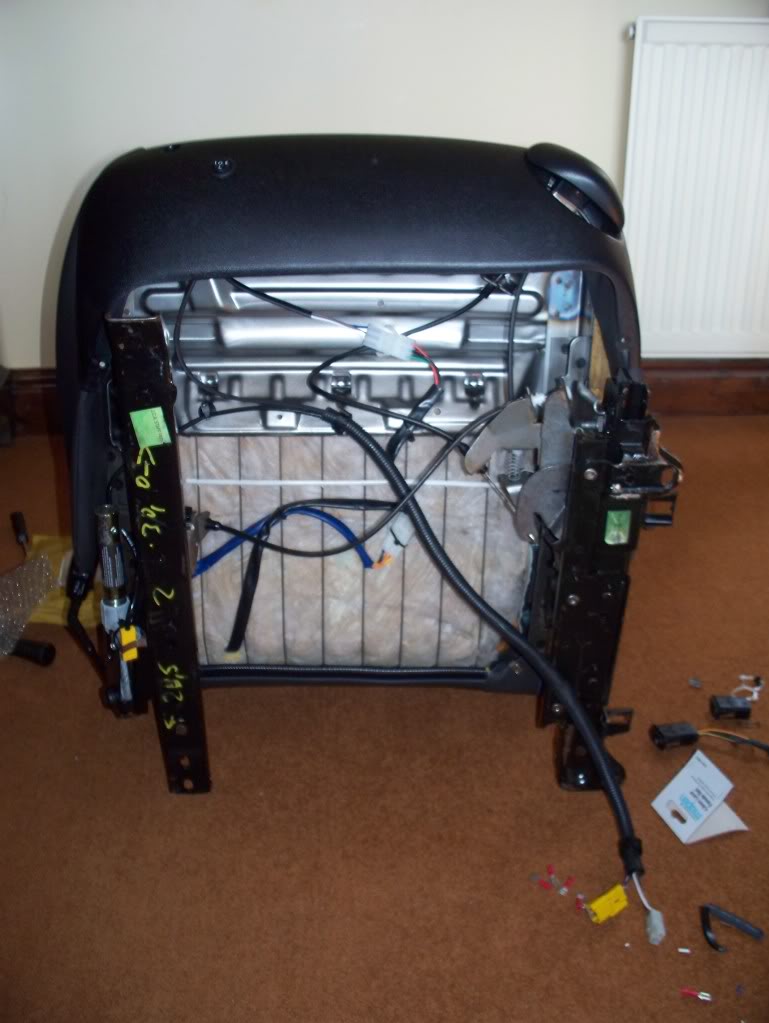
Car as it stood in the garage just before Easter 2010.
Rebuilt passenger seat, wiring looks quite neat.
When I got the car back, I was really impressed with the difference made by the FRP cams, the car pulls like a train, 4th is now just a wonderful gear. Had to drive on some brilliant roads the day I collected it and I so love this car!
I noticed that my high level brake light had stopped working, popped into Halfords, got four Bosch 501's, removed by boot lining to replace the bulbs, broke the shelf string hanger on one side in the process, changed the bulbs and it still didn't work - at this point I started checking the wiring and found that the wire connecting to the bottom of the o/s boot strut had snapped. Replaced that and then took the front seats and sun visors out. Unfortunately I managed to shear one of the seat bolts in the process.
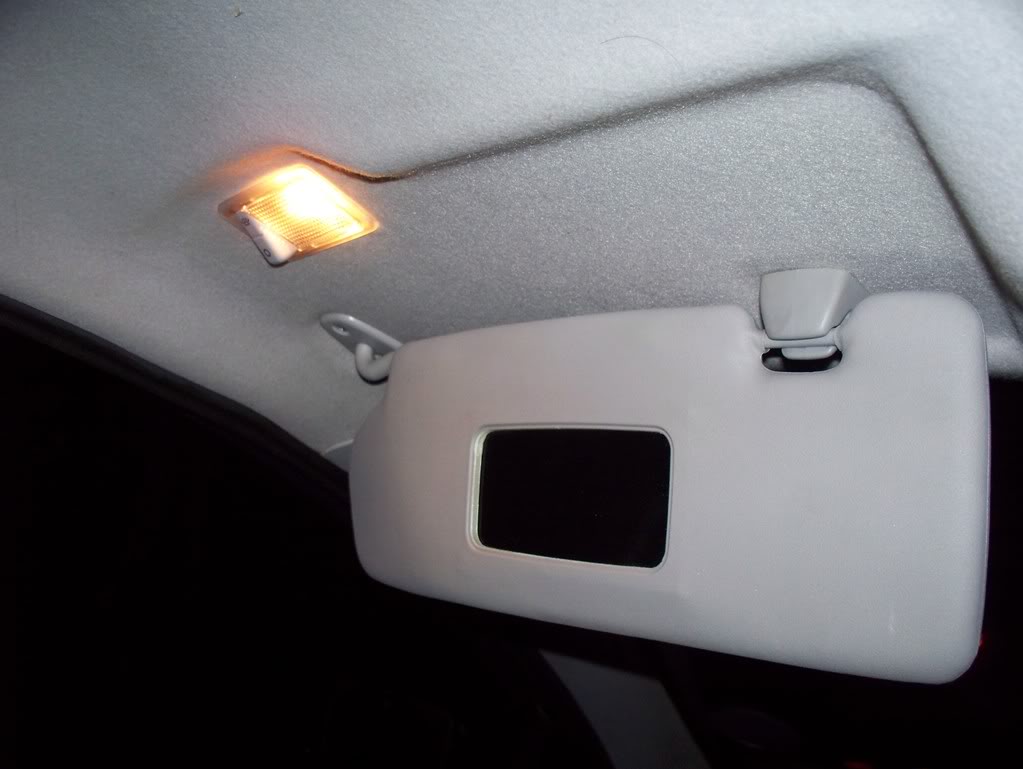
Having ordered a replacement hanger stud thing for the rear shelf, I then spent hours drilling out the remainder of the broken bolt, fitted the new wiring loom for the heated seats and driver’s seat power height, though I haven't hooked it up to the fuse box yet. I also folded over the carpet flaps for the original seats - they get in the way with the earlier and Recaro seats. Fitted the passenger side top hat riser, fitted a rear interior lamp, a second mirror lamp and the new sunvisors.
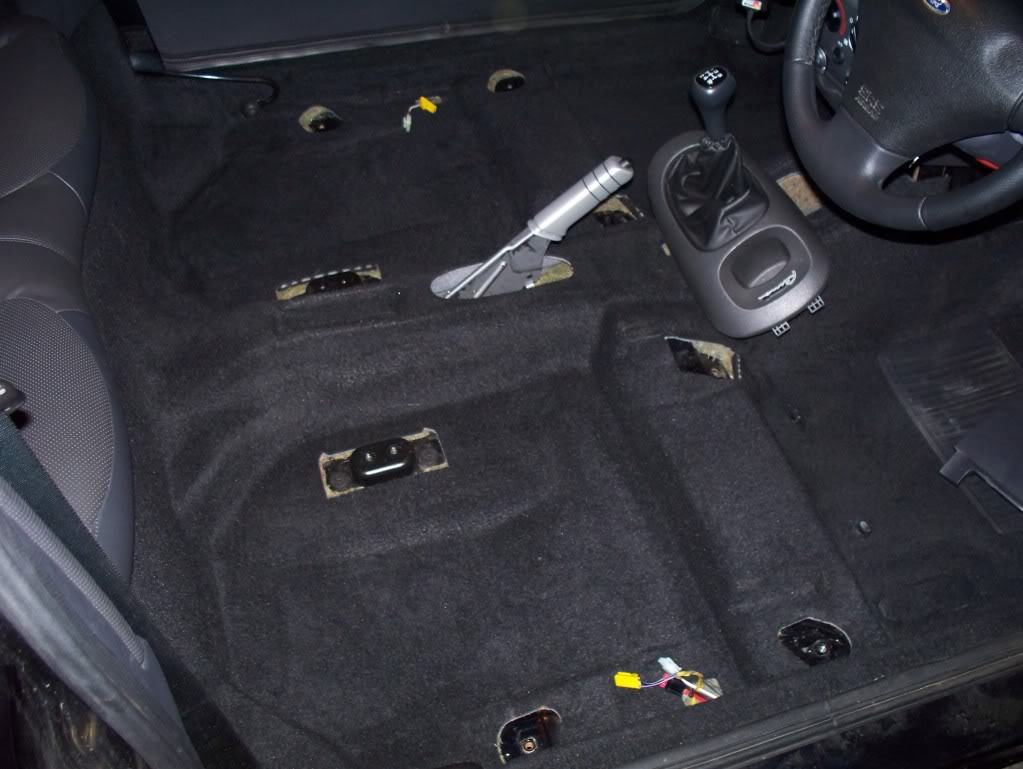
Clean carpet, no seats, two top hat risers, and the wiring in for the seats, etc.
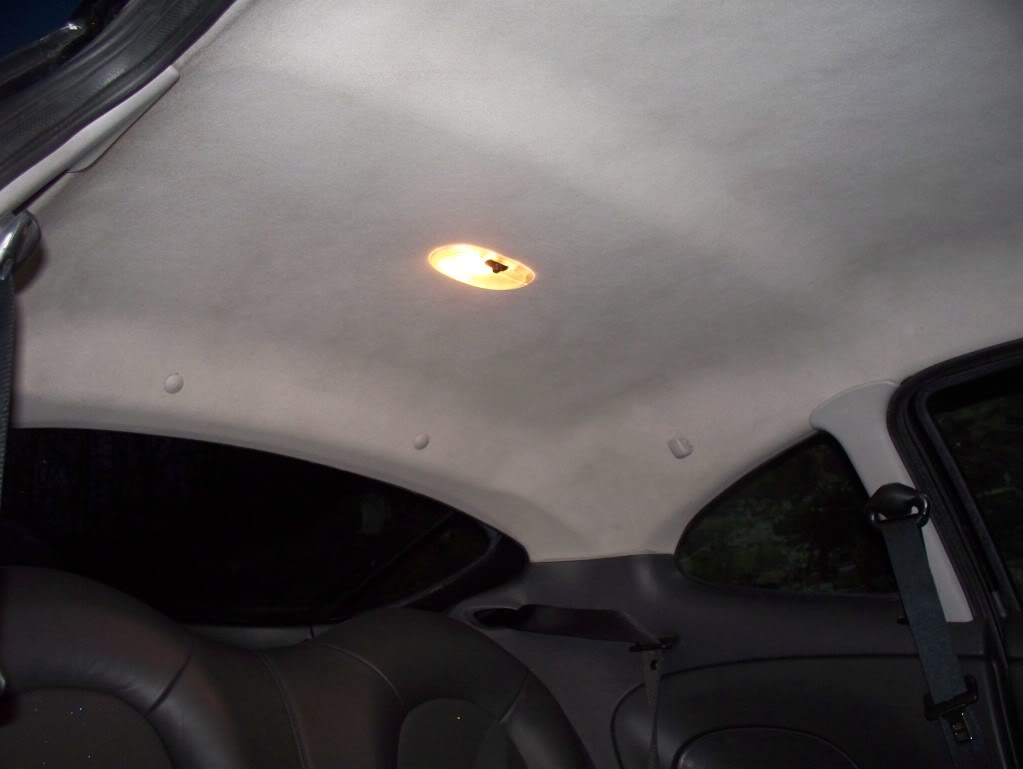
Rear interior lamp
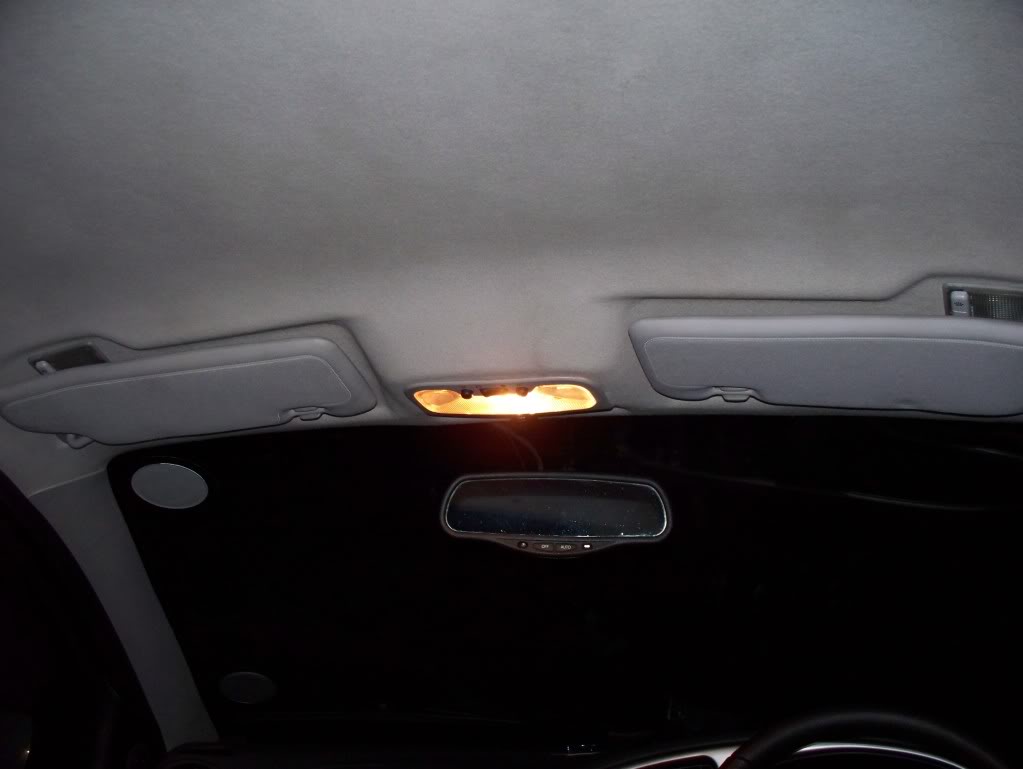
New sunvisors, Ghia spec, with LHD LH visor
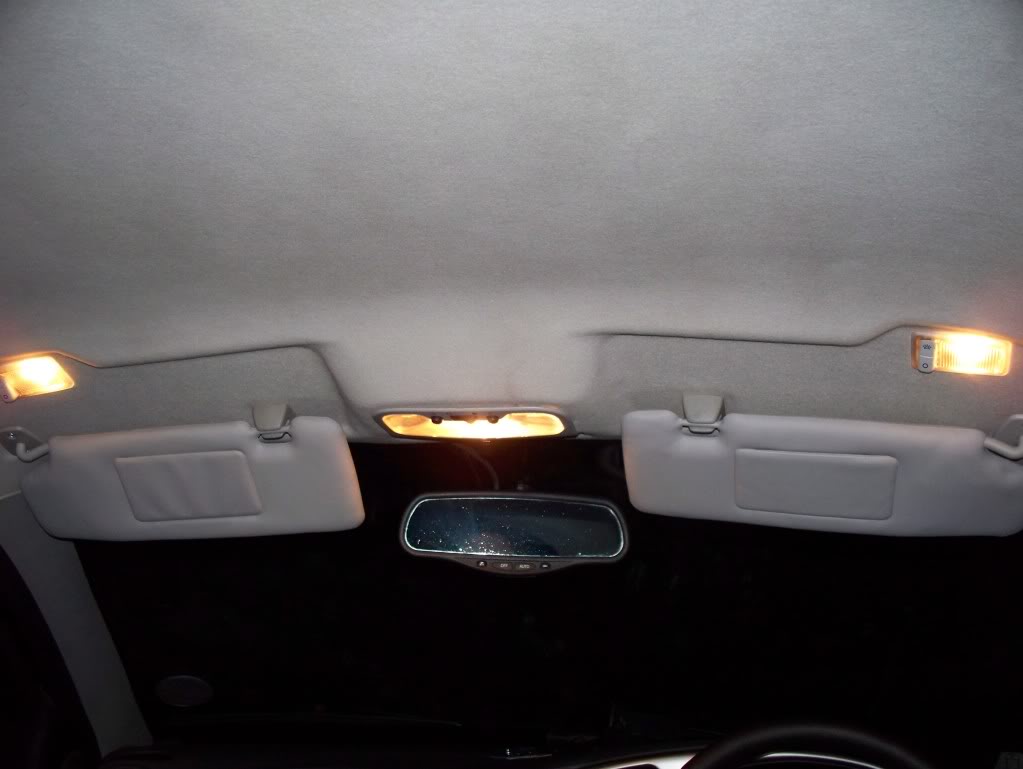
All lit up
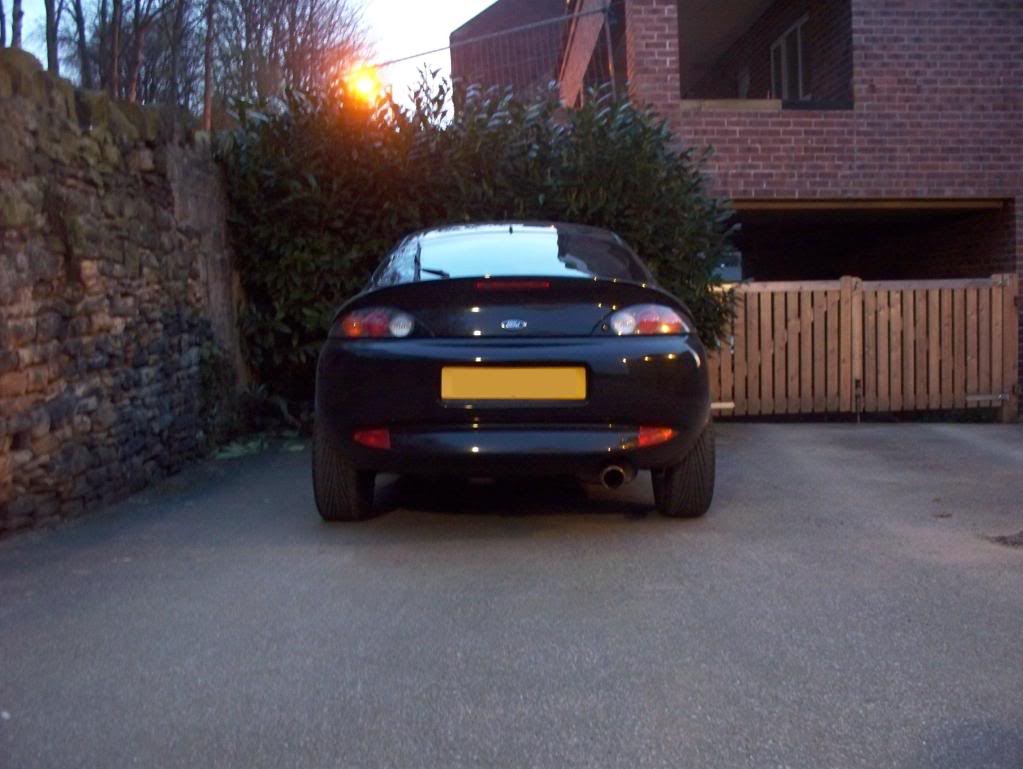
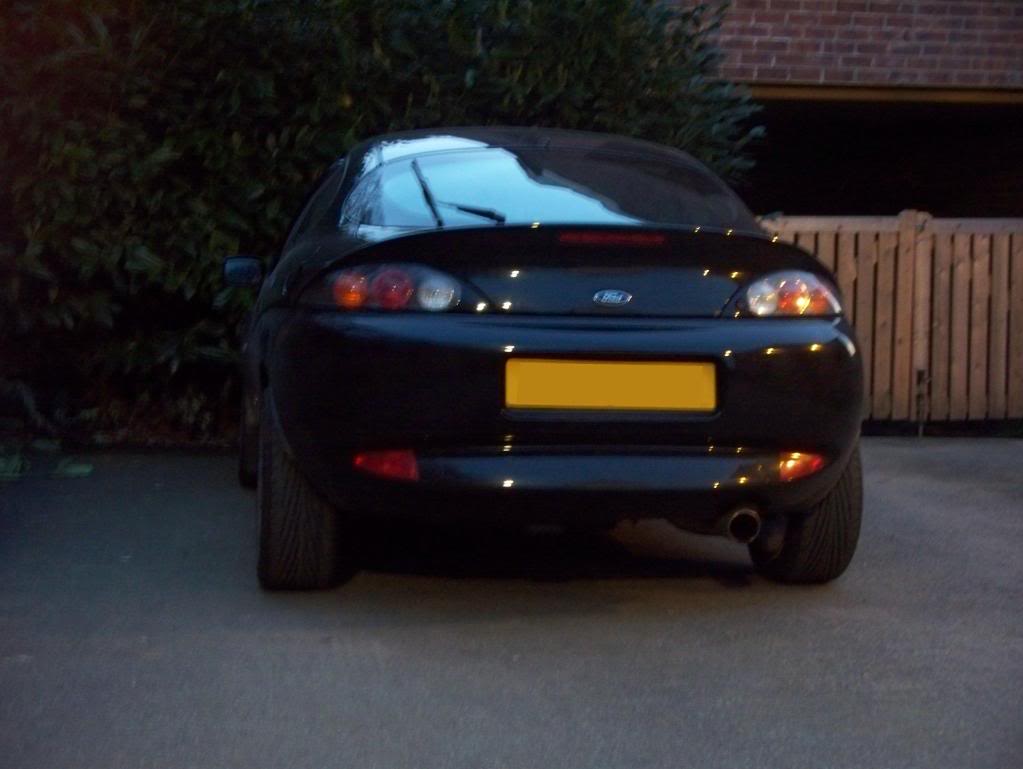
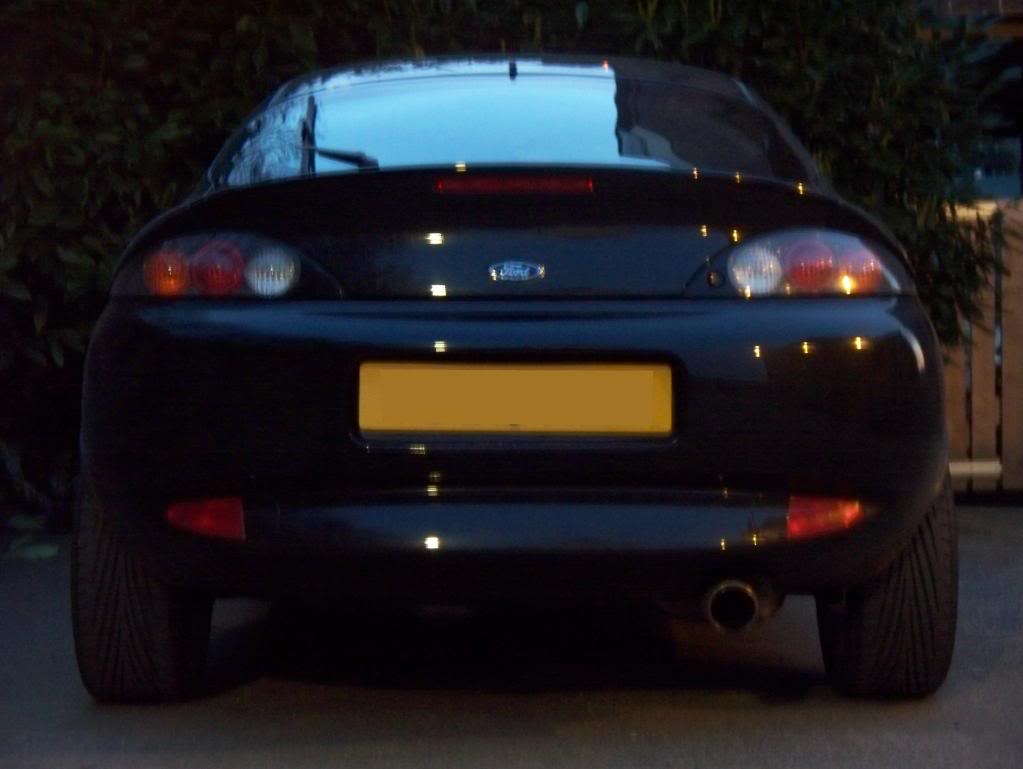
And a couple of shots of the rear, without the mudflaps my rear track looks massive! Excuse the quality, it was dark before I got chance.
As an aside, while driving the car very hard, the brakes worked really well, no concerns over balance, the only time I had any issue was braking very late into corners, where I felt that I wouldn't have had to brake much harder to loose the rear end. I think this was more to do with driving too fast and braking too late than brake balance. Also although this was in the dry, the ABS didn't kick in at all, which was good!
The TPMS display was interesting, when cold the tyres were actually a touch low on pressure, at 27PSI, but I didn't have the time to do anything about it. Before long they were upto 29PSI, so it wasn't really a problem. In hard cross country driving the tyre temps got upto around 38-39C, with the rears a touch cooler, at this temperature the pressures got upto 30PSI. Back on the motorway, cruise set at a gentle 67ish (just over 70 on the speedo) and the temps dropped down to around 30-32C. Quite like the info, just not sure what to do with it!
Finally I got both seats are in!
Also wired in the TPMS, need to put some air in the tyres though, they are a touch low now it has cooled down
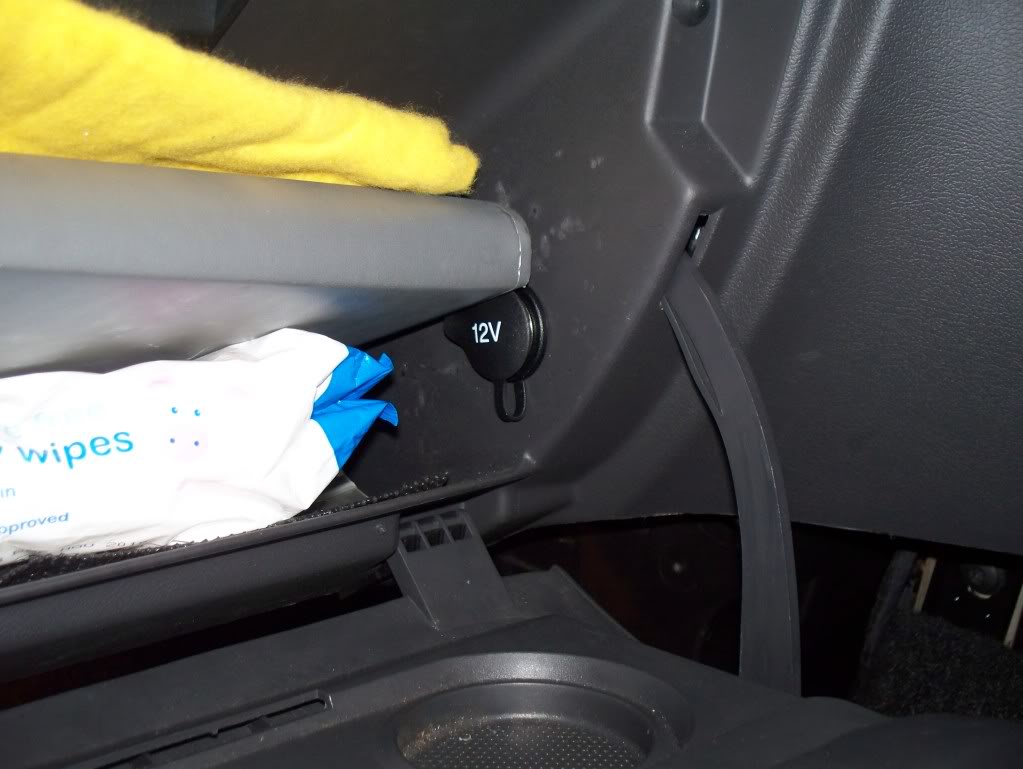
Changed the heater control panel for an early version
And added an aux power socket to the glove compartment
Only disappointment with the seats was that some of the trims for the seat runners, etc. don't seem to fit, but I will probably review things later. Still need to hook up the wiring for the seats, but that should be reasonably straightforward.
Replaced the hanger for the rear shelf, which broke when I was replacing the bulbs in the high level brake light, which didn't need replacing.
I have bought a new FRP gearbox and a brand new LSD to go in it, which is quite exciting. I have also bought a new lower strut brace to replace the one on the car which knocks over bumps.
Massive thumbs up to Scott (Burgerboy) for my FRP engine sticker from Puma-Schmiede, pics don't really do it justice;

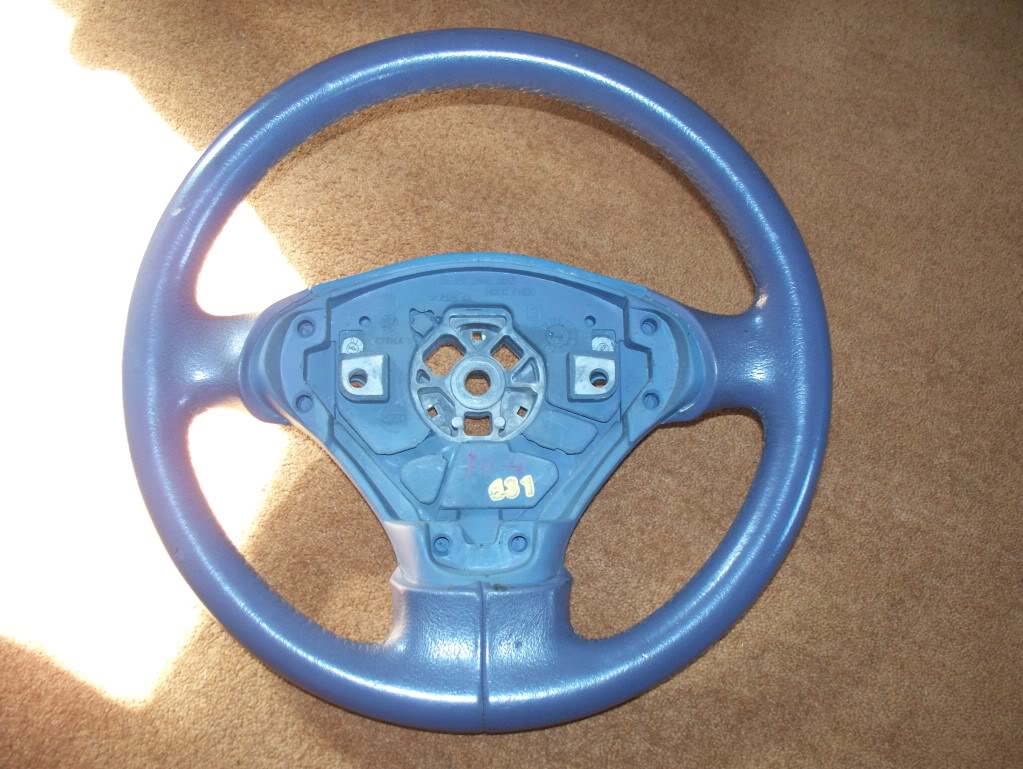
Also some plans are afoot for a new steering wheel, which was going to be based on an early Fiesta Mk4 wheel, but the paint doesn’t like the flexible rubber.
I am also planning on switching out my cat, to see if that solves my clearance problem with a relative's driveway.
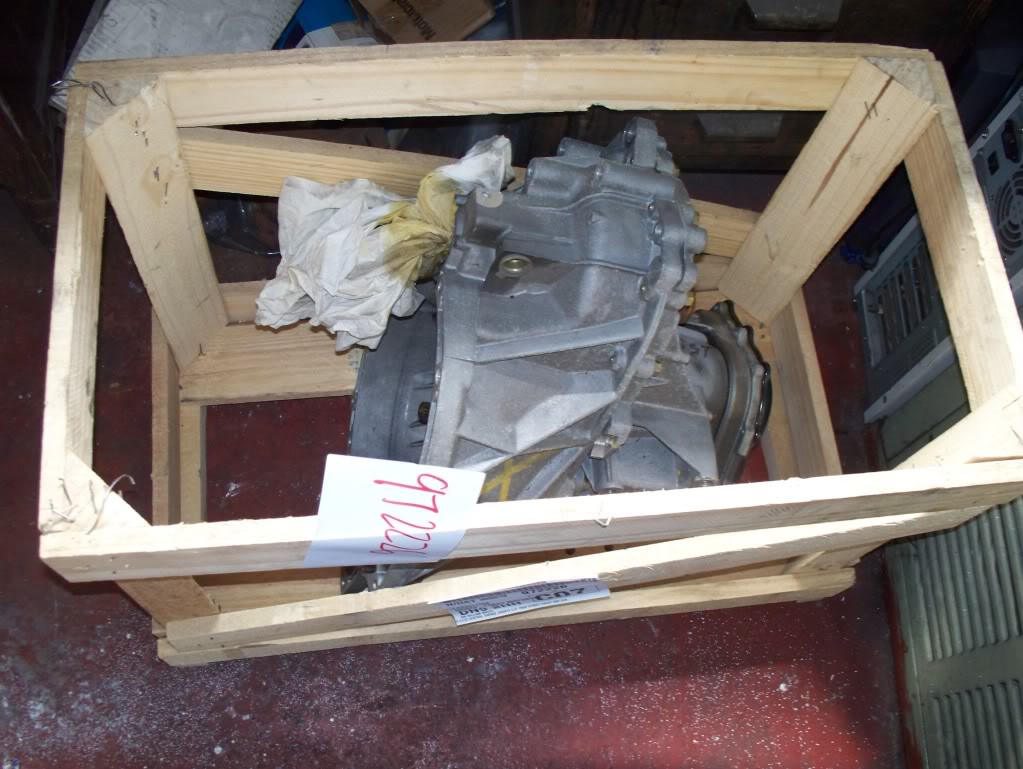
New FRP gearbox
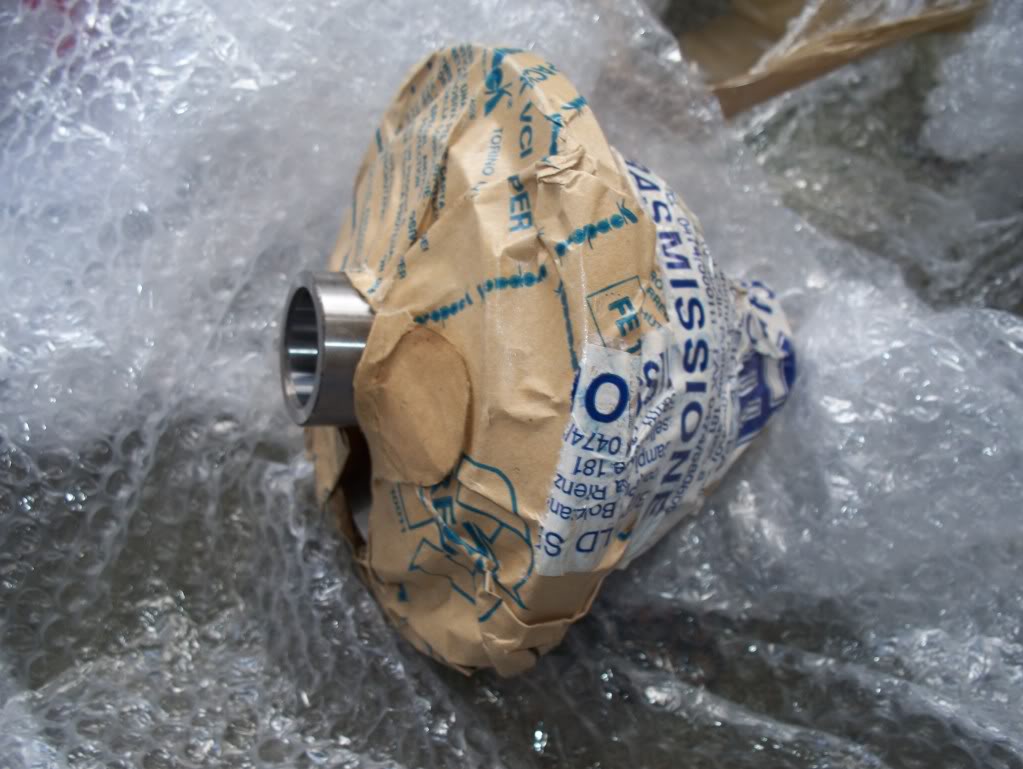
New FRP Limited Slip Differential
While at the garage inspecting my new purchases, I dropped off three of my spare wheels - I am going to have my old front tyres fitted to the two straightest wheels.
I also bought some new plugs
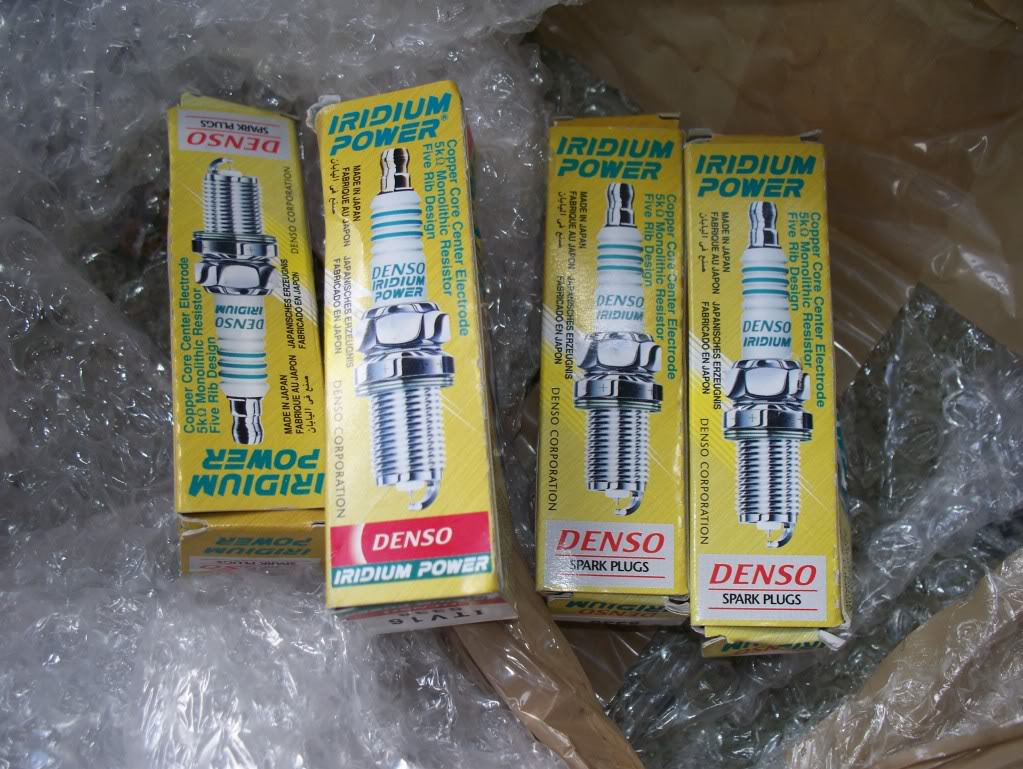
Denso ITV16's
While I was putting the plugs in;
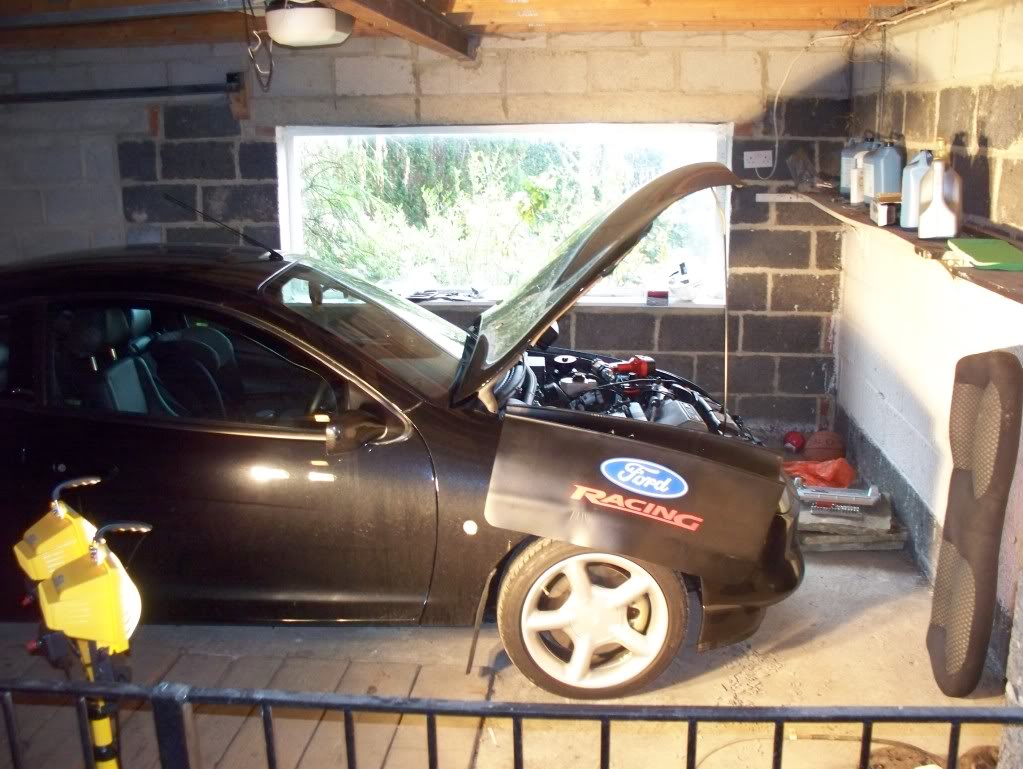

First time I have bothered to use that wing cover with this car, handy for putting stuff on if nothing else!
Next time the car goes into the garage, I will be getting the master cylinder and servo changed. Fitting the bigger brakes with the later servo and MC leads to quite a lot of dead pedal travel. Tony @ PumaSpeed suggested to me some time ago that the earlier setup would solve the problem, and I got the bits but never did anything about it, preferring to try changing fluid, pads, etc. with limited improvement. One of the guys on zsoc has now tried it, with great results, though he did ditch his ABS at the same time, but I am optimistic that this will improve pedal feel. With this in mind, the car will be going back to the garage at some point to get the early Puma master cylinder & servo fitted. I think we are going to have to change one of the pipes to the ABS pump, but hopefully that will be it.
Ok, well that was a long first installment, hopefully it doesn’t read too badly!
Comments and criticisms always welcome!
2001 Puma 1.7 'Black'
Vehicle specification
Maintenance Items / Standard Parts Replaced - new unless otherwise stated
Cam belt
Full service, plugs, pollen, air, etc.
Heater control valve
Steering column stalk assembly
O/S A pillar trim
Various screw covers
All four dampers
All four top mounts
Drivers window rubber
Lambda sensor (NTK)
Air flow meter (MAF)
Denso Iridium ITV16 spark plugs
Front wheel bearings
Puma alloy gear knob (Summer use)
Replacement remote key (with Ford badge intact) - used
Glovebox lid - used
O/S engine mount
N/S engine mount
Torque restrictor
Rear beam bushes
Coil pack (used, nearly new)
O/S/F ABS sensor
Drop links & ABS mounts
Anti-roll bar bushes
Early Puma black parcel shelf
Replacement luggage compartment shelf suspension pin
Fiesta Ghia drivers side sunvisor
Fiesta Ghia LHD drivers side sunvisor
Red exhaust hanger - removed
Modifications to date:
Scan Gauge
Ford Focus Mk1 1.6 / 1.8 clutch
Milltek EVO exhaust system, with sport cat and manifold
Lambda sensor extension harness
Second lambda blanking plug
Ford Racing Puma PCM (ECU)
Ford Racing Puma lower arm rear bushes
Ford Racing Puma style airbox modification, with additional front cold air feed, resonator removed
Ford Racing Puma inlet manifold, No. 542, with new inlet manifold, TB and ICV gaskets
Ford Racing Puma specification camshafts
Audiovox CCS-100 cruise control
Kenwood stereo, with iPod interface & steering wheel remote
Pioneer Custom Fit TS-H687 6x8 3-way rear speakers
Pioneer TS-C1320 front component speakers
Origin B2 GPS speed camera detector, painted Halfords Platinum Silver, with Target laser diffuser
Nokia CK-7W hands free kit
Brodit phone cradle
Dashmount phone bracket
Modified Autoleads phone mute loom
AutoLeads DIN stereo adaptor, painted Halford Platinum Silver
Clear side repeat indicators
Jaguar X- / S-Type remote key
Ford Focus II remote key
Transit / Transit Connect remote key fob
Ford PATS torch key
Ford Fiesta black leather steering wheel and airbag
Ford Fiesta black leather gear knob (winter use)
Ford Mondeo MkIII interior mirror lamps
Ford Mondeo MkIII auto-dim rear view mirror
Ford Mondeo MkIII dual tone horn
Ford Focus Mk1 rear interior lamp
Ford Fiesta glovebox lamp
Ford Fiesta Ghia X temperature clock
Second luggage compartment lamp
Front footwell lamps
Ford carpet floor mats
Ford rubber floor mats
Ford 1980's spec universal front mudflaps
Ford 1980's spec custom fit Sierra rear mudflaps
Eibach lowering springs
Ford Ka 12.5mm rear axle spacers
Ford Focus ST170 front brake calipers
Ford Focus ST170 300mm front brake discs
Ford Focus ST170 rear disc brakes, with Ford Racing Puma hubs
Ford Escort estate rear ABS loom
Ford Fiesta Zetec-S front anti-roll bar
Ford Accessories 7J x 16 ET35 "Cosworth Style" alloy wheels x 5
GoodYear Eagle GSD3 195/45R16 tyres
Ford Accessories brushed aluminium effect hand brake handle
Nuerburgring decal
Valeo Xtrm wiper blades
Ford Mondeo MkIII / Jaguar X-Type front brake calipers - removed
Milltek / OE / Piper FRP exhaust system, sport cat and manifold - removed
Powerflex rear beam bushes - removed
Eibach 15mm hubcentric front wheel spacers - removed
Ford StreetKa 20.5mm rear axle spacers - removed
Ford Racing Puma 253mm rear disc brakes - removed
Ford Mondeo Zetec 6.5J x 16 ET40 "Cosworth Style" alloy wheels x 5 - removed
To fit;
FRP tailpipe trim
Anti-corrosion treatment to front wheelhouses & inaccessible underbody areas covered by heatshield & fuel tank
New tail lamps
Waeco MagicTouch MT2000 touch indicator module
Bosch ParkPilot parking sensor
O/S/R wheel arch repair panel
New FRP limited slip differential
New FRP gearbox
Early Puma master cylinder, servo and pipes to ABS pump
To purchase;
-
Considering;
Retrimmed Fiesta Ghia leather steering wheel (all leather,not just the side bits)
Replacement headling, A- and B- pillar trims, to be reupholstered in dark grey alcantara
Front bumper with smoothed no. plate recess
Fiesta ST clutch, 1.7 slave, etc.
Lightened flywheel
The story so far...
I sold my 54 plate IS300 in June, and smoked around in a borrowed '97 Ka2 for a while. Really loved that little car, after the safety net of the Lexus (211HP and RWD with an LSD, but you can't turn the bloody stability contol off, so no tail out antics) something truly chuckable was wonderful. I fancied something similar [to the Ka], but with a touch more luxury, a bit more go, and ABS. I considered the following;
LuxuryKa - rejected it on the grounds of performance, and that if I fitted 16" wheels, which I wanted to accommodate 300mm brakes, then unless I got Ford Racing arches, it would look silly and I would need rack limiters, plus Ford Racing arches are really expensive.
SportKa - rejected it on the grounds of fuel economy and an appalling turning circle, plus they still seemed too expensive for what you got.
Puma - I'd had one previously, when they were new, but sold it as I was only a poor student and couldn't afford the HP. Should be more economical and quicker than the SportKa, and have a better turning circle.
ST170 - rejected on the grounds that any with Custom and Luxury packs were too damn expensive!
ST220 - rejected on the grounds that it was bigger than I needed. I had a 2001 2.5 Zetec-S from 2004 - 2006 and loved it, but I wanted something more economical after my Lexus (26MPG when going v. steady), and didn't need a Mondeo size car.
So the search was on.
I acquired this car in October 2008, at which time it had done 66,000 miles. I had seen it on eBay, the description was poor, and the seller's answers weren't great, but I had been without a car of my own since July and the cash was burning a hole in my pocket. Headed down to Leicestershire to collect to and discovered that it didn't have a passenger airbag, despite the sellers assurance that it did (seems quite a common mistake on Puma / Fiesta / Ka), and on a short test drive that the clutch was shagged. Biggest surprise was just how much less space there was inside compared to the Ka I had been running. At least the boot is a reasonable size.
I agreed a small discount with the seller and drove the car very carefully to a relative's garage as it was two years overdue for a cambelt. On the plus side, it had 10 months MoT and a Kenwood CD changer. I hadn't really researched the 'Black' special edition, and had expected it to have the same wheels as the Thunder / Fiesta Zetec-S, instead of the F1 style wheels that can't be refurbished due to the plastic fake studs. I had been told that the tyres were all good, and two had been recently replaced, however this was putting a rather positive spin on things. I drove away already knowing that I had spent too much money. I was most petrified however about possibly Nikasil problems, which would make the whole thing something of a liability.
Got it onto the motorway and the car was SHAKING! I had noticed the n/s/f wheel was a bit scuffed, but hadn't anticipated anything like this. My daughter was in the passenger seat and I was quite worried for her safety. Anyhow, things improved a bit after a few miles, but at least one of the wheels was clearly out of balance.
After a circa 80 mile drive, I dropped it off at the garage, with some Mobil 1 0w40 and instructions to do a full service, cambelt, aux. drive belt, clutch (Focus 1.8), balance the wheels and change the heater control valve.
There are mixed opinions on changing the HCV, however I had been running a borrowed Ka since selling my IS300 in July, and the day before going on hols the HCV had failed, emptying all of the engine's coolant onto the ground. Stopped the Ka as soon as I realised, and touch wood, there were no lasting problems, but I somehow doubted the Puma's Sigma engine would be as hardy as the HCS engine in the Ka). I also ordered a few parts including a replacement o/s A pillar trim, to replace the original that was hanging off.
While the car was away I put together a phone mute loom that would also connect my Kenwood stereo to the car's standard wiring loom and power my Origin B2.
I collected it about two weeks later, checked the CD changer worked, then whipped it out along with the original 6000CD in favour of my Kenwood stereo. I also discovered the paint had surface contamination all over it, so gave it a good going over with a clay bar, followed by a polishing with 3M Hand Glaze followed by Auto Glym Super Resin Polish. Despite this same treatment having nicely removed some scratches from our CR-V only a month of so earlier, the results weren't as great as I had hoped. I also noticed a small amount of rust starting on the n/s/r wheel arch, and that the car was missing its front spoiler / air dam.
Around this time I also fitted some clear side repeat indicators, the originals were a real pain to remove, and I had to use a cordless drill and two screwdrivers! I was surprised to find that the repeaters had different connections on each side, but it seems this is pretty common.
I soon decided that these F1 style wheels weren't for me. Apart from anything else they were going to be awkward to clean. Bought a single brand new machined finish 16" Scorpio 12 spoke alloy on eBay, decided that I didn’t like it, so I bought a single brand new 15" Escort GTi "Cossie Style" 5 spoke, with a view to acquiring another three, and also bought some Mondeo V6 front callipers. I had been undecided since buying the car as to what I wanted to do about the brakes. I had a brand new Puma in 1998 and the brakes were the biggest disappointment. Having previously had a Mk3 Mondeo, and having frequented fordmondeo.org, I was quite keen on the possibility of fitting Mk3 Mondeo / Jaguar X-Type calipers, along with ST170 300mm front discs. This realistically meant going for 16" wheels, and being a big fan of Cossie style wheels on the Puma, that was what I decided to get. Found some fairly tatty 6�Jx16 ET40 wheels on eBay, made some enquiries about refurbishing and got them bought, dropped them off for refurbishing and had them fitted to the car 48hrs later with some brand new 195/45R16 Good Year Eagle F1 GSD3 tyres. Cost me a fortune, but it sticks like you wouldn't believe, wet or dry.
Soon after this I had the opportunity to drive the car on some great driving roads, and quickly decided that getting something sorted with the brakes was quite urgent. The 258mm brakes weren't bad as such, but quickly began to fade in fast road use. I sold the Mondeo V6 callipers on pumapeople.com and sourced some Mk3 Mondeo calipers from eBay for around �60 the pair, delivered. Once the guys at the garage had had chance to give them a look over, I procured some new Mintex ST170 discs from a local motor factor, which were fitted along with new genuine Ford pads, Goodridge braided hoses and new fluid.
20.5mm rear axle spacer, Goodridge braided brake line
300mm ST170 front disc, with Mk3 Mondeo / Jaguar X-type brake caliper, behind 6�Jx16 ET40 "Cosworth Design" alloy wheel
I had noticed a knocking noise from the n/s rear which I was unsuccessful in curing, so I ordered some new Powerflex polyurethane bushes for the rear beam, I had these fitted while the car was in for the brakes, and the garage also decided that I could do with new front lower arm rear bushes, so I ordered FRP spec items from Pumaspeed and got them fitted at the same time. Being as I was leaving it there for a few days, I had the fuel filter changed due to slight pulsing when cruising, the air con serviced, and an OMP lower strut brace fitted. Most of it was straightforward, but fitting the strut brace was very awkward, possibly due to poor quality manufacture, I would later have an engine mount replaced in the hope it would stop the occasional contact between gearbox and brace, but to no avail, though the much later fitment of a new gearbox mount did seem to solve things.
When I collected the car I gave the MAF a clean and took advantage of the ramp to fit a replacement front air dam.
Near side Powerflex rear beam bush
When I got home, I swapped the air box lid for another item with the resonator removed - value for money, this was a great improvement, in terms of noise at least.
It was around this time that I noticed that the "touch wipe" function wasn't working, so had to get a brand new set of stalks, which I procured from eBay for around �35. On the plus side the new stalks are something that you touch a lot, and the do help to make the car feel more like new.
I obtained a Fiesta Ghia X clock, with temperature display, and a temperature sensor from an old Scorpio. A quick browse at Maplin found a suitable plug to connect the temperature probe to the back of the clock, so after a quick test, and a modification to the back of the clock, I set about fitting it. All went well until I broke one of the headlamps removing it. I hadn't turned the switch and forced it - d'oh!
Clock, with temperature display
I think around the same time I bought a new glovebox light assembly along with a second boot lamp and fitted those.
In my Mondeo, I modified the interior lamp with a couple of diodes so the map lights come on with the main light, so I got hold of a spare Puma lamp and did the same mod.
For some time, I had been planning on fitting Mondeo Mk3 sun visor mirror lamps to our CR-V. Given that this is also lacking in the Puma, and Puma headlings are both cheaper and easier to replace the CR-V ones, I had a crack at fitting a passenger side mirror lamp, with good results. The important lesson here was that there is only adequate depth in certain places, so this will dictate the location of the lamp. Later, when fitting a roof mounted DVD to the Honda I discovered that there isn't the depth in that car, so rather than fitting the light to the Puma being the "dry run", it was actually final version. Incidentally these same lamps are fitted as rear map reading lamps in the Range Rover Sport, which sounds a bit classier than saying they are from a Mondeo!
Mk3 Mondeo / Range Rover Sport interior lamp
While obtaining the mirror lamps from the scrap yard, I also got hold of a steering column audio control and wiring, which I may use if I decide to change the Kenwood to an Alpine IDA-X305, but most impressively I came across a rather sorry looking Mondeo Ghia with an auto-dim rear view mirror. I had planned on fitting this to the Honda, which uses the same wedge type mounting, but we had a Harmon Kardon Drive / Play in that car, with the screen mounted above the rear view mirror, and the auto mirror wouldn't fit with the Drive / Play screen. Instead I decided to fit it to the Puma. I had to buy a new wedge from a local Ford dealer, and adhesive from Halfords, but mounting it was very easy. I stripped down the loom and made a new one, which I fitted at the same time as the mirror lamps and an electromagnetic parking sensor. While I really have just tapped into existing wiring at the front of the car, I couldn't be bothered finding the right wire, and instead took the feed from the boot instead.
Auto-dim rear view mirror
I'd had a slight knocking noise from the n/s/r since I got the car, which hadn't been cured by the Powerflex bushes, in fact they just made the car a bit harsh. I wanted to sharpen the handling a bit, and considered going for one of the lower priced coilover setups, but I was concerned about it being too harsh, and also that if you adjusted the ride height, you would throw out the alignment. I do around 12-15,000 miles per year, so didn't want things to be too hard, I also didn't want to spoil the original balance. With this in mind, I replaced the dampers and top mounts with original equipment and the springs with Eibach items, which were cheaper than four original Ford items. This firmed things up nicely, and also cured the knocking noise. What impressed me most though was that they really improved the stance, the 30mm drop being more noticeable than I had expected.
The remote key I received with the car was a bit worn, and I had a Jaguar remote key left over from my Mondeo, so using a red PATS chip from a redundant key, and the blade from my remote, I set about adapting the Jaguar key to work with the Puma. Around the same time I also got a much smarter Ford remote from eBay and two new 'Horseshoe' sections cut from my local Ford dealer.
While hunting for a replacement headlamp, I came across a Piper back box and Milltek manifold, then shortly after acquired an FRP mid section with sport cat. Having established that the FRP lambda extension loom wouldn't fit my car (it is only suited to earlier cars with black lambda plugs), I visited a few scrap yards and got hold of the necessary plugs and sockets to put together my own lambda extension harness (green plugs) and MIL eliminator harness (blue plugs).
Lambda extension harness and (unsuccessful) MIL eliminator
I left the car at the garage while I went on holiday, and phoned up regularly to check on progress. When I heard that not only was it running, but that the Check Engine light was staying off, I was delighted! Similarly when I spoke to the technician, my friend Paul, and he told me that it makes a brilliant noise, and that my lambda extension was just the right length, I was quite pleased, and anxious to get back and have a go. I was however a touch concerned when I was told that it was "a bit loud", but was still keen to get back and give the job a good course of looking at.
Piper "FRP" rear box
When I got my car it had suffered from the dreaded melting steering wheel, an issue believed to be a consequence of getting hand cream onto the leather sections of the wheel, from where it reacts with the adhesive and goes all nasty. I had been keeping my eye on eBay for a new steering wheel and while on my hols I was delighted to get a brand new black leather steering wheel for a 1995 - 2002 Fiesta. This was waiting for me when I got back, along with a pair of early Ford 'large oval' mudflaps.
While on hols I also got an Audiovox CC-100 cruise control kit from amazon.com, and some Valeo Ultimate wiper blades, these are the same as the Valeo XTRM ones we get here, but in the US are only US$20 for two.
Upon my return I set about fitting first the steering wheel, initially with the original midnight black (grey) airbag, then later I got a black airbag from a late model Fiesta with the enamelled Ford badge. Over the next few weeks I also fitted the cruise control and the mudflaps, along with some Sierra rear mudflaps that I managed to get to fit to the back of the car.
Fiesta black leather steering wheel, with matching airbag
Front mudflap
Sierra rear mudflap
I ran the car like this for a while, with few minor changes. As the exhaust had been bought in bits from different sources, we had to guess what was needed to fit it. The fire ring was no problem as it was a standard Bosal part, but we made the mistake of not using sprung screws for the manifold – mid section joint. Additionally, my MIL eliminator was a bit dodgy, so my check engine lamp kept illuminating, and a minor collision with a very small rock meant the removal of my lower strut brace. A trip to PumaSpeed sorted all of these issues as the lower strut (which had been damaged by some road debris) was removed and a TAPE ECU with the FRP map was installed, this ignores the second lambda, and makes the exhaust pop deliciously on the overrun!
While the car was grippy, I hadn't been especially happy with the handling since fitting the ET40 6.5J wheels, it just didn't feel "right", so I had some Eibach 15mm hubcentric spacers fitted at the front, these nicely broadened the front track to match the rear, though to fit the extended studs it was necessary to replace the front wheel bearings, which made things more expensive than I would have liked.
Front track, ET40 wheels, with 15mm spacer
My rear drums were looking a bit sorry for themselves, but a coat of black hammerite soon tidied them up.
Standard rear drums, with a coat of black Hammerite
Unfortunately I still wasn't entirely happy with the feel of the front of the car, so bought some 7Jx16 ET35 Cosworth Design wheels. Got these on with the original tyres (without spacers), and I was delighted, it felt like a Puma again! Trying them with the spacers, giving the equivalent of ET20 was AWFUL, felt like the steering wheel wasn’t connected to the wheels!
I am a big fan of fuel computers, they really help me to improve my fuel economy. I decided the most suitable device to get was a Scangauge II, which I procured via eBay. It's a brilliant tool and with some minor modifications it fitted discretely into the ashtray.
ScanGauge II
During a root through some of my old junk in the garage I came across a leather effect book pack, gave it a clean and it looks a lot better than the original one.
Next mod was to fit some FRP rear discs. I bought a used set and fitted them with new Delphi discs and pads, and a new ATE rear ABS loom. Pretty easy to fit, but the new Fiesta ST shields needed modifying to accept the Puma's ABS sensor, and disconnecting the brake lines was awkward. Other than that it was plug and play. My top tip though is to clean out the ABS sensor holes with a dremmel before fitting, makes the sensor much easier to slide into place.
FRP rear disc brake, behind 16" "Cosworth Design" alloy wheel
Once fitted, the extra track from the FRP / Focus hubs, plus the 7J ET35 wheels meant that the track was perhaps a touch wide, and would foul the liners under compression, so I replaced the 20.5mm spacers with the 12.5mm to bring it in a touch. At the same time, I fitted ST170 rear brake carriers to my FRP setup, along with new 270mm ST170 discs and new ST170 brake shields.
Rear wheel position with discs, 20.5mm axle spacers and ET35 wheels
ST170 rear discs, carrier painted, need to do the caliper
Side view showing 300mm front discs and 280mm rear discs
As seems to be common with FRP manifold cars, the lambda sensor soon died, so I replaced it with a new NTK item, which is the same make as OE, and the car seemed much better, much less reluctant to go. This had been an intermittent symptom for some time though, so I don't think I can completely blame the FRP system.
I also noticed an increasing amount of creaking from the sprung joint, suggesting excessive engine movement due to a failing torque restrictor, so got a new one ordered.
While the Mk3 Mondeo / ST170 brakes are very resistant to fade, I wasn’t especially impressed with the feed of them, there seemed to be a lot of dead travel before anything happened, so I bought some ST170 front callipers, which I had refurbished and fitted with some Mintex 1144 pads, along with new discs.
Came across a genuine Ford brushed aluminium effect handbrake handle on zsoc, so got that scooped up and fitted;
There was a slight defect in the paint from the repair that had been done in late '08, the guy who did the work was great, sorted it out, and also tidied up a small scab that had formed on the drivers door sill.
Following a bit of pondering as to how to fit them, I fitted some front footwell lamps, using standard Ford parts, and some velcro, a little unorthodox perhaps, but fingers crossed it works!
Fitted an FRP style air box, which was a bloody awful job, and gave the engine bay a good clean. Anyone doing similar should check the bottom of the battery box, as mine was full of water.
and one of Rhonda the Honda;
AutoGlym Engine & Machine Cleaner is pretty impressive stuff!
I was toying with the idea of fitting a Milltek Evo exhaust that I had acquired. I was reluctant as there won't be any power increase, I like the Piper FRP tailpipe, and the Evo's flexi means that it doesn't use the front mount, but given that the flexi will hopefully compensate for future wear in the torque restrictor I decided to give it a go.
At the same time I fitted a new left hand engine mount, torque restrictor, rear beam bushes, and replaced the exhaust manifold gasket. I replaced the engine / gearbox mount as I quite missed the benefit of the lower strut brace, and hoped that a new mount would lift the engine enough for it not to foul – I later found that it worked, up until I pulled off a curb and bent the (second) brace slightly, cue more knocking over bumps, speed humps, etc.
Things were going well, battery out, got the old engine mount off and fitted the new one, old torque link out and new one in, got most of the FRP exhaust system off, only shearing one bolt in the process, new Milltek rear box on, stripped down the rear beam, got the top mounting nuts / bolt off the manifold, and then had to ask for help from one of the technicians.
New OE rear beam bushes in, rebuilt the beam, had to space out my o/s/r ABS sensor to stop it fouling the tone wheel, but it was still close enough to get a reading.
Dean (technician) took over on the manifold while I got the relevant torque settings and torqued up the various parts I had removed and refitted/replaced. Everything was going fine up until I misread the torque setting for the studs which connect the engine support to the n/s engine mount and sheared the stud. Bugger. So the Milltek EVO, sport cat, etc. was all in, but I had to wait for a replacement engine support before I could drive it, and as the battery box has to be removed to access the mount, I couldn’t heard it running with the new Milltek EVO exhaust. At this point I was hoping it would be quieter than the Piper FRP, though I still think the Piper FRP back box is GORGEOUS.
Once I got the car back, with the new rear beam bushes it was so much nicer to drive, especially on roads where the top layer of tarmac is worn.
Next the car spent a week of so with it's bottom in the air, while I was off work and using the Honda instead. I took the opportunity to paint up the rear calipers in gold, and also to apply a coat of silver hammerite to the discs (current rear, and new fronts, waiting for ST170 calipers); the rear discs in particular very quickly looked shabby due to very light (but very orange) surface corrosion; hopefully this will keep them looking smarter for a bit longer
Current rear, and new front brake discs, with light coat of silver hammerite to non-contact areas
Off-side rear brake disc & caliper
I stripped out most of the rear trim, in preparation for some rust proofing and sound deadening, which I performed once the car came back. I was amazed at how easy it is to remove the rear seats, and the quarter panels weren't too tricky either, however I have bought a bundle of new trim clips, and both rear quarters are currently laying in the back of the car, restrained by the seatbelts.
Having stripped out the rear quarters, I removed the speaker boxes to fit some Pioneer TS-H687 6x8 custom fit speakers. The fit could not have been easier or better, but I hadn't realised that while the plug onto the speaker box is a standard Ford speaker plug, the one from the inside of the box to the speaker is not;
Standard Ford speaker connection from rear box to speaker
This unfortunately meant cutting the wiring and fitting new connectors, not really a problem, just that I don't like cutting original wiring.
Pioneer TS-H687 6x8 Custom Fit rear speaker
The new speakers look quite nice, the pods need a wipe down and a layer of Second Skin Damplifier, then they will be ready to go back in when I get the car back.
Also made up a new key, which is really nice to use, but not quite as slick as the Jag key;
Ford Focus II key, modified with Tibbe blade and "RED" PATS transponder
The car then went for some minor remedial works to sort a couple of rust spots, on a rear arch, and again on the drivers door tread area.
Couple more pics before it went in for paint;
Rear interior stripped, the side panels are just sitting roughly in place to avoid them damaging each other, I was amazed at how easy it was to take it all out.
Standard 15" spare just about clears the 270mm rear brakes, quite like the sleeper look of the plain black steelie, shame they wouldn't fit over the front though.
Finally cleaned and ready for the bodyshop. I was going to remove the rear quarter window, but I really can't be bothered with the hassle, so will just get it painted up to the bodyline.
When I got the car back, it looked like the bodyshop had done a nice job. Also had a few dents smart repaired at the same time, and as far as I can tell, the results are excellent.
Before reassembling the interior, etc. I applied some Dymax S-50 to the inside of the sills, rear arches, and around the boot. Having applied the Dymax S-50 quite generously, I was surprised at how it had crept through some of the seams, notably in the sills, puddling on the drive. Still, should be better now!
While I had the rear interior stripped, I decided to upgrade the speakers.
Gave the speaker pods a wipe down, with the help of my small assistant;
Then applied some Damplifier Second Skin to each pod;
Rear interior trim stripped for application of rust proofing and sound deadening;
Damplifier Second Skin to the floor and under seat area;
And to the rear quarters;
Speaker Pods in;
Replaced the drivers side door rubber as the original one had split, not really worthy of a photo though.
Quarters and luggage compartment trims refitted;
I also got the rear seats refitted, shelf in, etc. this afternoon, and got the inside of the windows cleaned.
Swapped back the alloy for the steelie, touched up a scuff on the o/s/r calliper, refitted the mudflaps, and refitted my Kenwood audio remote, which seems to fall off whenever the car goes to a garage.
Next opportunity I got, I lifted the back end up again to take bits off, before laying on some wet tarmac in the rain.
Jacked it up as high as the trolley jack would allow, popped in some stands, whipped off the back wheels, removed the spare and carrier, then set to removing both of the rear wheel arch liners;
This meant I could get a good look at the hidden rust;
Drivers side
and the arch that has just been repaired;
Passengers side
Both sides were suffering along the bottom of the inside edge, I couldn't get the access to this that I wanted on the drivers side because of the rear box and heat shield. I will attend to this area when I can get the car to the garage, at which point I will do the rest of the underside.
Boot floor
Wasn't so bad, but was a bit tatty on the chassis rail, I think the other side won't be quite as bad, I expect it will have had some protection due to the exhaust and heat shield. Could be wrong though.
Spare wheel carrier was also very tatty.
So, using a drill with a wire brush attachment, I cleaned up the rusty bits, then washed / degreased with Auto Glym Engine & Machine Cleaner, before rinsing and drying with paper towel. While that was drying a bit more, I washed off the wheel arch liners, using the same stuff. What really surprised me was how quickly they dried - granted, it was quite breezy, but within 2 hrs they were pretty much dry.
Next step was to treat the arches and boot floor with some Hydrate 80, this stuff is pretty thin, my daughter thought the car needed some milk!
The fuel filler pipe makes things a touch awkward on the near side, but I am pretty sure I got reasonable coverage. Also tried to get up to the filler neck as much as possible.
When applying it was a very light blue colour, which was initially concerning, but it soon dried to a translucent grey colour.
I applied two coats of the Hydrate 80, left it for a while, sprayed some Dynax S-80 in the cavities that were accessible, then had a crack at the spare wheel carrier. No pics of this yet, but I gave it a quick buzz over with the drill & wire brush, and have since given both sides a single coat of Hydrate. I'd had the arches waxoyled shortly after I got the car, so about a year ago, the Hydrate wasn't too keen on going over the Waxoyl, but I couldn't be bothered trying to remove it, and think it should be fine.
Once the Hydrate 80 had dried, I gave the car a couple of coats of Dynax UB, left it for 24hrs to cure, before refitting the wheel arch liners, got the drivers one in before it occurred to me that I should take some pics, so below are pics of the passenger side rear arch and the boot floor;
Passenger side rear wheel house
Underside of the boot floor
Spare wheel carrier also got several coats of Dynax UB before refitting.
Next job was to fit a nearly new coil pack that I bought from a chap on ZSOC. There wasn't anything wrong with my old one, but these things are known to cause probs, and mine was 77k miles / 8yrs old.
Couple of pics of my painted rear calipers, seems like ages ago that I did this;
Granted, they would look better had I actually driven it to remove the surface corrosion on the contact parts.
Also, some pics of the inside, looking quite presentable;
Next I treated the underside from the front doors back, in as far as the inner chassis rails, same treatment as the rear, brush off rust, two coats of Hydrate 80, two coats of Dynax UB.
The underside was pretty good, aside from some corrosion on the seam, towards the rear, on both sides, and a small amount on the O/S/F where the seam had become damaged from jacking. Tried straightening this up, but that seemed impossible, but I have still treated and protected these areas.
My plan is to get that done, and also hopefully treat under the front arches, then the "driveway" element of the treatment will be complete.
Next phase will be to get the car to the garage, remove the exhaust, heat shield and fuel tank, and treat the exposed parts. On the plus side, most of those areas should be in pretty good shape, having hopefully been protected from the elements.
I also need to paint the outer face of the bottom seams, I had hoped to get this done at the weekend, but the weather wasn't playing ball.
Around this time (late 2009), I purchased FRP inlet no. 542, many thanks to Poder!
Also received a brand new o/s/r lamp, to go with the new n/s/r that I still have to fit.
Very excited, I identified the FRP inlet as being a must-have accessory even before I bought my car!
I then started collecting together the various bolts, gaskets, etc. that I would need to fit the FRP inlet.
My next purchase as a Ka boot net, fits nicely on the hooks for the Puma rear seat;
Works well, good for keeping smaller things in place in the boot.
Next, a few pics of stuff waiting to be fitted
First off a shot of most of the important bits;
Pair of brand new tail lamps, FRP tail pipe, think everything else is details below.
Front brake / suspension project;
Remanufactured ST170 front calipers, HEL braided lines, new clips, new Bosch front discs, new Apex brake pads, though hopefully the new (hopefully correctly shaped) 1144's will have arrived by the time I am ready to fit them.
New wheel hub, pair of new drop links. I also have new clips for the ABS sensors.
Front door audio project
Pioneer components, sound deadening, and will also be rustproofing at the same time
FRP Inlet Project
Inlet 542, new inlet, ICV and TB gaskets, nuts and bolts, and a spare engine cover to chop down (thanks to Karl.V, awsomely quick!).
Heater Control Panel Project
Not got a pic of this, but replacement heater control panel without cigar lighter socket, accessory socket for glove compartment, new pop-port cable for Nokia CK-7W, new cable to try out laser diffuser.
So, having collecting together the various bits I needed for the FRP inlet, I set about fitting it.
One of the downsides of trying to do this outside, on a cold, windy day, was that I seem to have managed to loose one of the inlet manifold bolts, along with the bolt for the dipstick. Not huge prob as I can take the opportunity to get the more appropriate hardware for securing the mounting brackets, both to the manifold and to the engine block.
Pic was taken before I refitted the TB
To fit the FRP supports you do need a few nuts and bolts. I used two of the same bolts as the dipstick (1663888) to mount the supports to the bottom of the inlet, albeit with a washer on each, and two M8x13mm bolts (1012255) to mount the brackets to the block, using the alternator side, and middle mounting points. The outer mounting point at the TB end is not used.
What was very odd, is that the bolts fixing the inlet to the head, were different on my car to what is shown on Ford's parts software. The bolts on my car were M8x30mm, with a domed head, but according to Ford, these should be an M8x45mm, with a long unthreaded section, which seemed odd. This wouldn't have been a problem, had I not managed to loose one of the three original bolts. What followed was something akin to panic. Fortunately with a bit of help from BurfyBoy, I came across a 1372612, which was very similar to the bolts on my car. Except it wouldn't fit in the recess for the bottom mounting, but a quick swap with another and the job was done.
If anyone needs any info on fitting one of these, I have posted a “how to” on Pumapeople.com
By a cruel twist of fate, my wife actually drove it with the new inlet before me!
I didn’t have a pukka FRP engine cover, so set about butchering a spare one. The blades I had for the jigsaw didn't want to know, and the damned Dremmel slipped several times, so it wasn't great, but was ok until I could find something better.
Once I got to drive the car with the inlet, I can't honestly say that I noticed much difference at low revs, but it is noticeable further up the rev range, and has to be the ultimate in underbonnet bling for a Puma!
One noticeable benefit of the inlet is that the inlet temp seems lower than before. I typically compare the inlet temp (from scangauge) with my exterior temp sensor. Not especially accurate, but so long as both are consistent it should give a good indication. It also seemed less vulnerable to low speed heat soak. Typically at motorway speeds there would be a difference of about 6-8 C, but in town, this difference could be much higher. Today the difference never got above 3C, despite different driving environments.
Next job was to strip down both front doors, applied some Second Skin sound deadening to the upper section and a sheet to the inside of the door skin. Also fitted some Pioneer component speakers, with the tweeter mounted in the inner mirror trim.
While I had the doors stripped, I sprayed some Bilt Hamber Dynax S80 into the lower parts of the doors, so that is another area I can tick off the list.
Still have a few more bits to treat, but it can wait until I have more time, and hopefully a spare car to use while I take this one to bits.
The same weekend I fitted some Halford's Extreme Brilliance bulbs to my dip beam, which do seem noticeably better.
Bit miffed as I managed to loose a screw cover, but managed to get a replacement within a couple of days.
My ABS light came on, I worked out that the o/s/f sensor was faulty using a multimeter, then next day bizarrely the light went off on Tues, but was back on the following day, so I got a new genuine ATE sensor from a local motor factor for �38.99. Tried to remove the old one thet night, and managed to snap off the sensor, so the car went to the garage.
When I got it back, it had refurbished ST170 front calipers, along with new Bosch discs and Mintex 1144 pads, new drop links, ABS sensor cable mounts, Fiesta Zetec-S front ARB, with new bushes and a new ATE o/s/f ABS sensor.
The ST170 brakes seemed a bit better than the Mk3 Mondeo ones, but then I was never that impressed with them, could just be the new pads though.
After a couple of days with the new brakes, I noticed an annoying clunking noise under braking from the o/s/f, which we later deduced was a poorly fitting 1144 outer pad. The movement of the pad also seemed to cause it to chuck out a LOT of dust compared to the other side. I fitted some new Apex pads instead, that I had laying around, and they fit much better, the clunking noise is gone, and the amount of dust is now pretty much even.
Also just received some silver indicator bulbs for the front and side repeaters on both the Puma and Rhonda the Honda, hoping to get those fitted over the next few days.
Couple of pics of the car looking a bit grubby. These pics were taken on Tuesday afternoon, you wouldn't think that at 8pm Sunday it looked great, but I guess that is the problem with this time of year;
Quite like the last pic, would obviously be nicer if the car was clean!
Given the fairly grim weather, I should also mention just how good the GSD3's are. At no point did I feel anything less than 100% confident in the level of grip and feedback that they provided, regardless of the weather conditions. They are bloody awful in snow though.
Received some new indicator bulbs, a set for the Puma and a set for our grey CR-V. Want to get them both wash and get some daytime pics of both with the current amber indicators before I change them over. One set is "diadem" type, the other the cheaper "Amber+Chrome"
Thanks for Rick (YOG) for the link. If only I knew why I ordered an extra lot of "Amber+Chrome" 501's. I think I had in mind that they would do for the side lights, which are currently looking a bit too blue, but given that these are orange, I was clearly being a bit dim.
When the car was on the ramp to diagnose the brake problem we noticed inner edge wear on the front tyres, so I ordered a pair of new GSD3s and need to get the alignment checked again. Shame as there is still 4mm in the middle, but there is enough meat left on them for me to stick them on some of my spare wheels and keep them for track days.
I have also ordered a pair of new GSD3's for the front, but probably won't fit those for a little while yet, until the weather improves and chances of kerbing are reduced.
Taking my first trip into the office for about a week, so I collected some wind deflectors from PnthrBlkZS, got those fitted this evening and removed my headlamps and brought them inside to fit amber / chrome indicator; also gave them a good wash after taking the pics - outer lenses were clean, but the rears were rather grubby, probably due to road muck making it's way into the engine bay.
Refitted the headlamps, everything works, and they definitely look better than previously.
While the front was jacked up to change the brake pads, I removed the front mudflaps and wheelhouse liners, to provide access to remove the side repeaters and changed those bulbs too. I had hoped to get some Dynax in there, but it is just too cold!
What I did do though, was to give the whole car a good polish, firstly with AG Super Resin Polish, then with SG Ultra Deep Shine. Also gave the glass a coat of RainX.
Based upon my impressions so far, the wind deflectors are a sound way to avoid the window rubber problem.
One of my clean looking interior, excuse the dangling footwell lamp, I need to replace the velcro on the lens;
And a few of my freshly polished paintwork;
Pics in the car park are a bit rubbish, just couldn't get the settings quite right
Fitted a new gear lever gaitor, and tried to fit an ST170 leather handbrake gaitor, but they are a difference shape. While I was doing this I made the mistake of leaving my interior light on, so when I went to the car the next day the battery was dead.
Picked up a �38 charger from Halfords, hooked it up and the lights (on the charger) were flashing, which I didn't necessarily think was good, but I left it connected for a couple of hours and bingo, started right up! Left the car running for a while after that and it has been fine since.
One problem with the battery cover that I am using is that it is a bit awkward to get to the battery terminals as to remove the cover you also need to remove the retaining strap.
I bought a pair of RS2000 Recaro’s, which I stripped down to retrim with some brand new Puma Futura Midnight Black seat covers, and a Waeco heated seat kit.
Also bought some reprofiled cams to FRP spec, and an FRP cam locking tool.
Got a new key;
Just needed to get it cut. I will use this with my Transit Connect remote. Have been using it with the original spare key, but I think this one will be nicer.
Also got this;
Quite chuffed, now I need to get a 1/43 EsCos to nick the wheels off!
Ok, so the latest thing has been rebuilding the Midnight Black Futura Recaro's, the big delay has been waiting for the thigh reinforcements to be chopped off and welded onto some replacement bases. These Recaro seats use a standard base but with thigh supports welded on, the original bases were LHD and the runners had been cut up, so I am getting the supports changed over to some replacement seat bases. Then I can fit the foam and cover to the new modified base, fit the backrests and bingo, seats will be complete. All that I will need to do then is to sort the wiring in the car for the seat heaters and drivers seat power height adjust.
Progress with the seats...
Backrests, largely complete, just need the centre pads and tilt levers fitting
Centre pads, with heating element installed
Front of seat base centre pad
Rear of seat base centre pad
Front trims ready for refitting, with heated seat switches
I have also replaced all of the plastic trim parts, which also took a little while.
Recaro backrests fully assembled, complete with heater pads, all ready to be bolted onto the bases;
Once I had one of the bases back, I set about rebuilding the seat. All was going well, except that there are some spacers on the sides of the standard seat base, which aren't there on the Recaro base, so those needed to be removed, which would have been easier if I hadn’t already fitted the cover!
Anyhow, got the seat all built up, and removed the original drivers seat, first job was to fit the "top hat riser" kindly donated by Megaboost, this bolts into the original fittings, and raises the mounting mount for the rear inner bolts;
Next step was to swap the pre-tensioner over from my standard seat, doing this without knackering the trim on the original seat was a bit tricky, but we got there, with that fitted, we could install the seat. Everything went well, except that the holes in the carpet aren't quite right. As I will probably refit the standard seats before selling the car, I didn't want to get the stanley knife out, but this isn't a huge issue as the differences aren't hugely obvious;
And the end result;
At this stage I still hadn’t done anything about connecting up the seat heater or the power height adjust just yet, I was just desperate to have one of my new seats in place!
New wheels - albeit for the 1/43, not the real one;
When I went on holiday to the US, I acquired a couple of these - Orange TPMS, this not only shows tyre pressure, but also temperature;
While it looks like some dodgy Chinese rubbish, these guys actually make a lot of the OEM stuff, so it should be pretty good. Just needed to work out where to put the display.
I have also bought a Waeco MT-2000 (touch indicator unit), again one for each car.
A couple of pics of the car from Feb ‘10, awful shot of the inside, would be better if I took the door off, but that would be a bit extreme! You can see however that the colour match to the remaining original interior looks good;
The rear shelf on later cars is quite a light grey colour, so I bought a black one, it is a couple of shades darker than I would have liked, but I think it looks better than the grey;
Excuse the crap in the boot and on the back seat, but you get the idea.
Also received an FRP engine cover, which is much neater than the one I had, stuck a Ford Racing badge on, looks better than I expected;
Bought a spare rear bumper, I have a Bosch Park Pilot reversing sensor system to fit, and will probably get the new bumper painted at the same time as I get the o/s/r arch repaired. I spent a
few hours on the car marking and drilling the spare rear bumper to accept the parking sensors, stripped out the luggage compartment trims, test fitted the new rear bumper to check that the parking sensors were in a useful position, washed the car with the new bumper, removed, washed the rear panel, then refitted the original bumper and washed that. I then removed the sensors from the spare bumper; the sensors are currently silver, I need to rub them down and painted in Panther Black.
I haven't bothered refitting the rear mudflaps as they are a bit of a faff, and they would only need to come off again when it goes for paint; the rear track looks really wide without them!
Dropped the car off at the garage, along with the FRP cams, TPMS, spare wheel and FRP tail pipe. On order, or awaiting fitment were a pair of new GSD3's, cambelt, rocker cover gasket, oil filter and 8 litres of Mobil1 0w40. The new tyres were fitted to the front wheels, at the same time as replacing the n/s/f with the extra wheel as the n/s/f has a small scrape. Also I asked them to investigate the still unsatisfactory feel from the brakes.
While the car was at the garage, I decided to sort out the wiring for the heated seats, and made a start, but soon decided that it was just too long and I didn't have the right connectors to shorten it as I would like;
The blue and black wires at the bottom don't need to go anywhere, they would usually connect the seat to the car, but as I have fitted the switches on the seat, rather than on the dash, I need to shorten these quite a lot.
I also tidied up the wiring for the ParkPilot, on my car it is all going in the one corner, so the wiring was a bit long;
Finally, having disconnected my second lambda some time ago, when changing to the TAPE ECU, I have finally decided to knock together a dummy plug to protect the socket. This is one end of my failed MIL eliminator loom, I just need to alter the length of the wires and cover in heat shrink.
Few pics;
Above are some visors I just bought, turns out the new one I got is actually a drivers side mirror from a LHD car, but I plan to use the ones below, so both side have a cover over the mirror
I also managed to finish my lambda terminator thing;
I also got the passenger side Recaro base back, so I could make a start building that back up.
Backrest is built up, but I may need to strip it down a bit to alter the route of the heated seat wiring and ensure that the boltsers are fitted properly.
Car as it stood in the garage just before Easter 2010.
Rebuilt passenger seat, wiring looks quite neat.
When I got the car back, I was really impressed with the difference made by the FRP cams, the car pulls like a train, 4th is now just a wonderful gear. Had to drive on some brilliant roads the day I collected it and I so love this car!
I noticed that my high level brake light had stopped working, popped into Halfords, got four Bosch 501's, removed by boot lining to replace the bulbs, broke the shelf string hanger on one side in the process, changed the bulbs and it still didn't work - at this point I started checking the wiring and found that the wire connecting to the bottom of the o/s boot strut had snapped. Replaced that and then took the front seats and sun visors out. Unfortunately I managed to shear one of the seat bolts in the process.
Having ordered a replacement hanger stud thing for the rear shelf, I then spent hours drilling out the remainder of the broken bolt, fitted the new wiring loom for the heated seats and driver’s seat power height, though I haven't hooked it up to the fuse box yet. I also folded over the carpet flaps for the original seats - they get in the way with the earlier and Recaro seats. Fitted the passenger side top hat riser, fitted a rear interior lamp, a second mirror lamp and the new sunvisors.
Clean carpet, no seats, two top hat risers, and the wiring in for the seats, etc.
Rear interior lamp
New sunvisors, Ghia spec, with LHD LH visor
All lit up
And a couple of shots of the rear, without the mudflaps my rear track looks massive! Excuse the quality, it was dark before I got chance.
As an aside, while driving the car very hard, the brakes worked really well, no concerns over balance, the only time I had any issue was braking very late into corners, where I felt that I wouldn't have had to brake much harder to loose the rear end. I think this was more to do with driving too fast and braking too late than brake balance. Also although this was in the dry, the ABS didn't kick in at all, which was good!
The TPMS display was interesting, when cold the tyres were actually a touch low on pressure, at 27PSI, but I didn't have the time to do anything about it. Before long they were upto 29PSI, so it wasn't really a problem. In hard cross country driving the tyre temps got upto around 38-39C, with the rears a touch cooler, at this temperature the pressures got upto 30PSI. Back on the motorway, cruise set at a gentle 67ish (just over 70 on the speedo) and the temps dropped down to around 30-32C. Quite like the info, just not sure what to do with it!
Finally I got both seats are in!
Also wired in the TPMS, need to put some air in the tyres though, they are a touch low now it has cooled down
Changed the heater control panel for an early version
And added an aux power socket to the glove compartment
Only disappointment with the seats was that some of the trims for the seat runners, etc. don't seem to fit, but I will probably review things later. Still need to hook up the wiring for the seats, but that should be reasonably straightforward.
Replaced the hanger for the rear shelf, which broke when I was replacing the bulbs in the high level brake light, which didn't need replacing.
I have bought a new FRP gearbox and a brand new LSD to go in it, which is quite exciting. I have also bought a new lower strut brace to replace the one on the car which knocks over bumps.
Massive thumbs up to Scott (Burgerboy) for my FRP engine sticker from Puma-Schmiede, pics don't really do it justice;
Also some plans are afoot for a new steering wheel, which was going to be based on an early Fiesta Mk4 wheel, but the paint doesn’t like the flexible rubber.
I am also planning on switching out my cat, to see if that solves my clearance problem with a relative's driveway.
New FRP gearbox
New FRP Limited Slip Differential
While at the garage inspecting my new purchases, I dropped off three of my spare wheels - I am going to have my old front tyres fitted to the two straightest wheels.
I also bought some new plugs
Denso ITV16's
While I was putting the plugs in;
First time I have bothered to use that wing cover with this car, handy for putting stuff on if nothing else!
Next time the car goes into the garage, I will be getting the master cylinder and servo changed. Fitting the bigger brakes with the later servo and MC leads to quite a lot of dead pedal travel. Tony @ PumaSpeed suggested to me some time ago that the earlier setup would solve the problem, and I got the bits but never did anything about it, preferring to try changing fluid, pads, etc. with limited improvement. One of the guys on zsoc has now tried it, with great results, though he did ditch his ABS at the same time, but I am optimistic that this will improve pedal feel. With this in mind, the car will be going back to the garage at some point to get the early Puma master cylinder & servo fitted. I think we are going to have to change one of the pipes to the ABS pump, but hopefully that will be it.
Ok, well that was a long first installment, hopefully it doesn’t read too badly!
Comments and criticisms always welcome!
Last edited by FlashBastd; May 5, 2010 at 06:43 PM.


PassionFord Regular
Joined: Jun 2014
Posts: 421
Likes: 39
From: St Albans
Just found this project story and it's great reading. Clearly very much a labour of love (and cash) but giving me some excellent ideas for my Escort. The sound deadening for example. I can see it was posted up in 2010 - would love to hear what's happened since.
I like the fact that all the mods retain the essence of the original car and have not tried to change it into something it's not.
I like the fact that all the mods retain the essence of the original car and have not tried to change it into something it's not.

Thread
Thread Starter
Forum
Replies
Last Post
SMILER258
Restorations, Rebuilds & Projects.
36
Sep 28, 2015 09:04 AM