My 3 door Sierra project ...
 18-03-2009, 11:32 AM
#1
PassionFord Regular
Thread Starter

In response to those who asked for this thread.
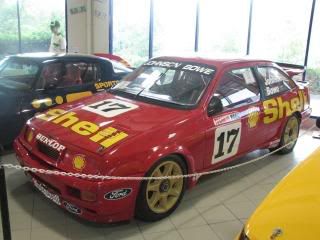
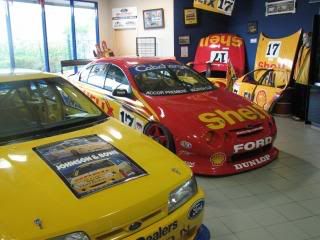
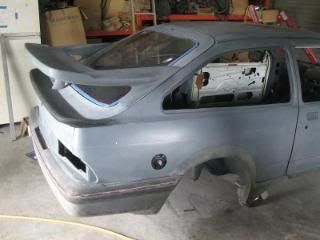
This car started as a sierra I bought about 13 years ago, I drove it for a few years then stored it as I went overseas for three years.
Upon returning it took two years to get the car back home as we never had room.
That was about two years ago. So these first pics are pics of bits of interest over that time.
Last edited by oohogwash1; 18-03-2009 at 09:27 PM.

 18-03-2009, 11:42 AM
#3
PassionFord Regular
Thread Starter
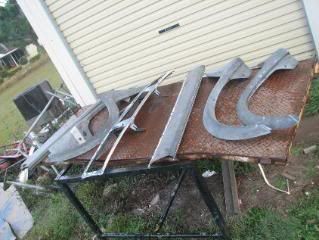
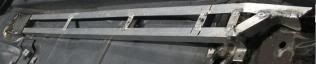
My attempt at a group A rear beam
This also shows the output from my home made powder coating system....
I have some more mods for this before I am done... another plate goes on inside links.
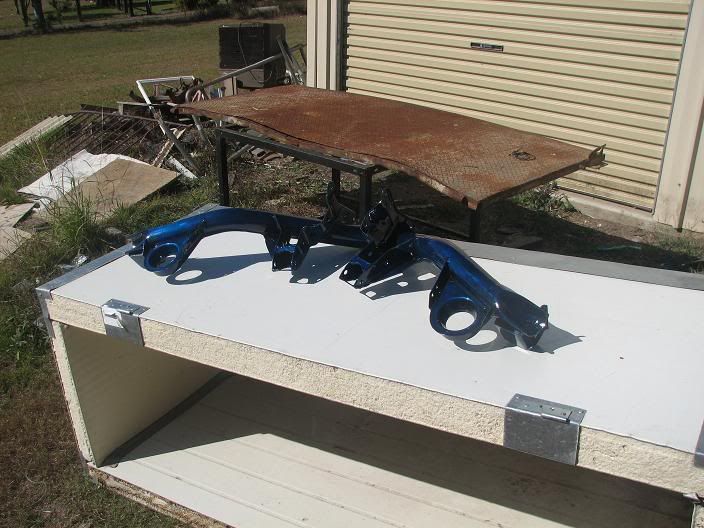
This also shows the output from my home made powder coating system....
I have some more mods for this before I am done... another plate goes on inside links.
Last edited by oohogwash1; 18-03-2009 at 11:43 AM.
18-03-2009, 11:44 AM
#4
PassionFord Regular
Thread Starter
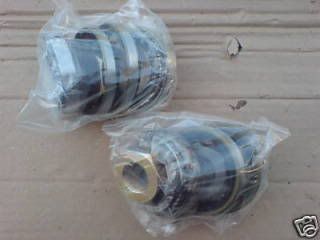
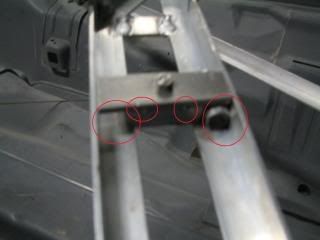
I worked out the difference between winder and electric windows
They both fit on the same set of door panels. The red circles show one set the other holers are the winder ones.
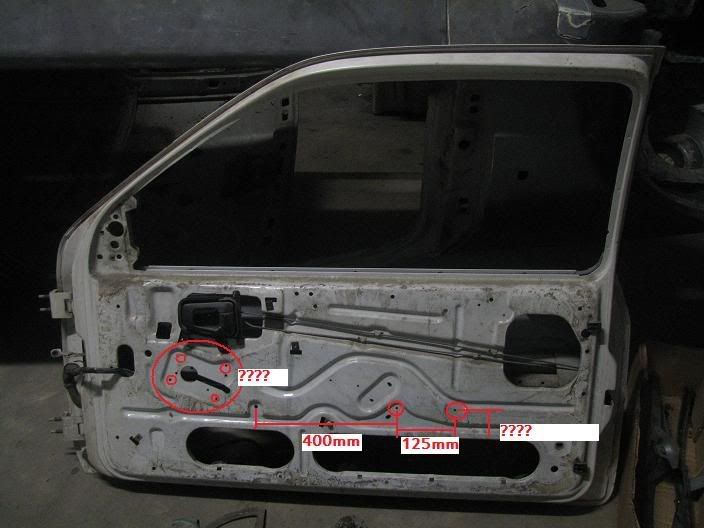
They both fit on the same set of door panels. The red circles show one set the other holers are the winder ones.
Last edited by oohogwash1; 18-03-2009 at 11:46 AM.
18-03-2009, 11:48 AM
#5
PassionFord Regular
Thread Starter
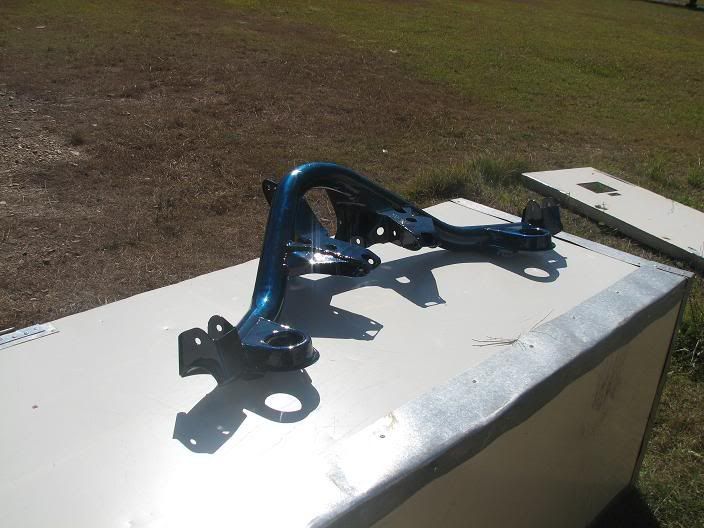
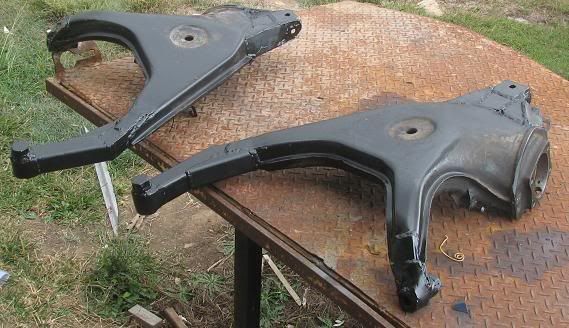
my attempt at adjustable trailing arms and strengthened shock mounts for my GAZ gold coil overs...
The black paint is just to buy some time till I get around to powder coating them... not sure what color to do, translucent blue like the beam, transluscent red, platinum....
The black paint is just to buy some time till I get around to powder coating them... not sure what color to do, translucent blue like the beam, transluscent red, platinum....
18-03-2009, 11:50 AM
#6
PassionFord Regular
Thread Starter
If you have broswed this far you can see that I am one of those guys that is very keen, not enough money to design by cheque book much a I would love to but enjoying the challenge of making stuff....
A picture of the view out the back of our place . Behine the hill and under the balloons is the gold coast Australia
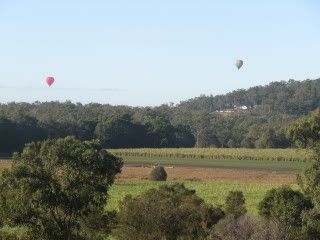
A picture of the view out the back of our place
Last edited by oohogwash1; 18-03-2009 at 11:53 AM.
Trending Topics
18-03-2009, 12:05 PM
#8
PassionFord Regular
Thread Starter
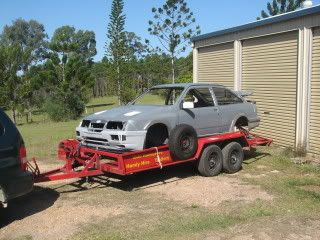
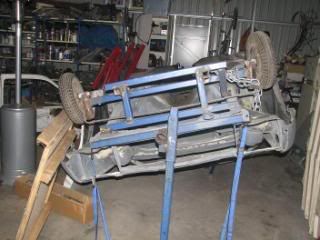
When I take my car for a spin, I do it by rotating it on my rotisserie
I can tell you this was the best idea ever as I can rotate with one hand... however the down side is that I work on crap that no sane person would ever work on without the rotisserie
The second photo shows the mini wheels that I have on the car so I can take it for a push outside into the sun.

I can tell you this was the best idea ever as I can rotate with one hand... however the down side is that I work on crap that no sane person would ever work on without the rotisserie
The second photo shows the mini wheels that I have on the car so I can take it for a push outside into the sun.
Last edited by oohogwash1; 18-03-2009 at 12:20 PM.
18-03-2009, 12:10 PM
#9
PassionFord Regular
Thread Starter
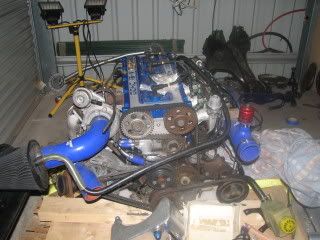
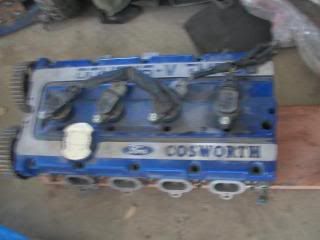
The 200 block was wire rung, previous owner said by Harvey Gibb...
I talked to Harvey on next steps... and after lots of research am going to resleeve the block and remove the wire ringing and run WRC head gasket... Thanks Mike Rainbird for advise on head gaskets that work.
I talked to Harvey on next steps... and after lots of research am going to resleeve the block and remove the wire ringing and run WRC head gasket... Thanks Mike Rainbird for advise on head gaskets that work.
18-03-2009, 12:23 PM
#10
PassionFord Regular
Thread Starter
Setting up geometry was easy with the car inverted... I just mount the rear beam and level the car (upside down) then measure angles against the vertical. Gaz supplied me with shock lengths and DJR folks gave me ride heights... The rest is simple math. This pic shows one trailing arm done and a stocky

18-03-2009, 12:28 PM
#11
PassionFord Regular
Thread Starter
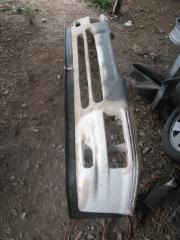
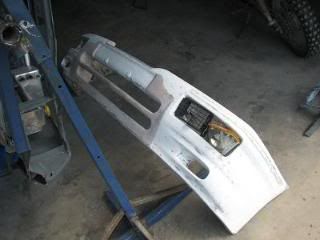
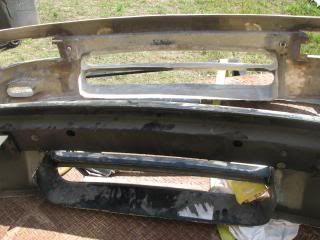
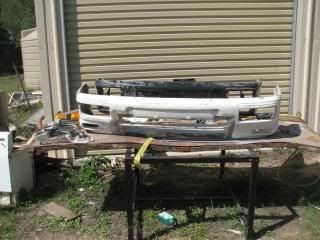
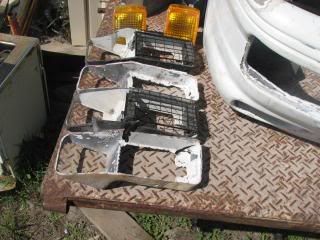
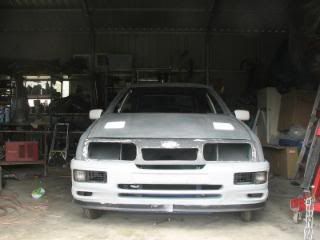
My RS500 bumper, part done. I was going to get my genuine cosworth bumper modified, the repairer said your mad...you cannot buy these in Aus... So I went back and grabbed an old fibreglass 3Door one I was going to throw out and cut up a broken Cosworth bumper I had and made an RS500 bumper. I mapped it exactly against the DJR bumper.... It is exact to the millimeter and has the depth and intracy of the genuine bumper on mounts and the grille / blinker inserts
Part way through, the splitter is seperate, it bolts on with stainless allen heads with aluminium strip bonded into Fibreglass of bumper.
The bumper has had further work since these pics were taken, you get the idea

Part way through, the splitter is seperate, it bolts on with stainless allen heads with aluminium strip bonded into Fibreglass of bumper.
The bumper has had further work since these pics were taken, you get the idea
Last edited by oohogwash1; 18-03-2009 at 12:47 PM.
18-03-2009, 12:50 PM
#12
PassionFord Regular
Thread Starter
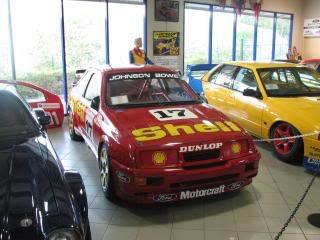
I get inspiration and reference points from Dick Johnson Racing who happen to be two exits down from me and the other V8 supercar teams who are always happy to advise on how to make stuff. Thank you to those DJR guys who are helping me along the way.
 18-03-2009, 12:55 PM
#15
PassionFord Regular
Thread Starter
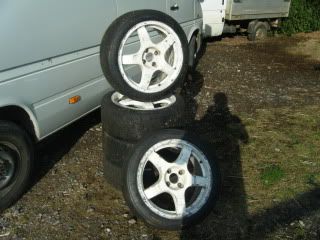
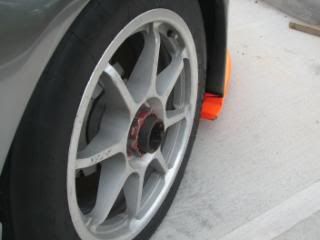
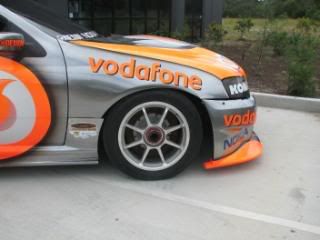
I reckon these wheels would look good but I cannot find them in Sierra pattern... was looking at centre lock hubs... but thats another story
Last edited by oohogwash1; 18-03-2009 at 12:57 PM.


 19-03-2009, 11:17 AM
#22

Sorry, lost all signal yesterday as I was driving out into the countryside.As mentioned, you're in safe hands with Mike Rainbird as one of your parts suppliers.
That bumper looks like a fair old project, and I love the rotisserie idea, which I'm going to use on my next project.
Si
19-03-2009, 11:24 AM
#23
PassionFord Regular
Thread Starter
Thanks for the kind comments you guys, I am honoured to be posting in amoungst the quality guys up here. I feel a bit out of my league.
I enjoyed the conversation to Si, your comments are what urged me to get these pics up for friends to see. Lincoln has been a great help too which I must acknowledge Although his taking my desires up a level has its challenges Also, I would have not chance without the help of those on this site, thanks everyone on here that has helped so far.
The rotisserie was one of my great success stories, the design is such that I can adjust it to exactly the angle I wanted with exactly what I needed, I found i can weld remove stuff easily. You rotate around with one hand ... the roof clears the floor by 50ml,nice and close.
I enjoyed the conversation to Si, your comments are what urged me to get these pics up for friends to see. Lincoln has been a great help too which I must acknowledge Although his taking my desires up a level has its challenges
The rotisserie was one of my great success stories, the design is such that I can adjust it to exactly the angle I wanted with exactly what I needed, I found i can weld remove stuff easily. You rotate around with one hand ... the roof clears the floor by 50ml,nice and close.
Last edited by oohogwash1; 19-03-2009 at 11:31 AM.


 20-03-2009, 01:22 PM
#26
PassionFord Regular
Thread Starter
I think I am building a bigger project than I would have prior to ganging up with you my friend
Oh and since you asked. I should remind you of what my wife said, what was it.... your project seems to have gotten more expensive since you hooked up with that lincoln guy... Yeah I know you are laughing now.... I am glad that I have some one to blame for that now..... darth oxer...
Oh and since you asked. I should remind you of what my wife said, what was it.... your project seems to have gotten more expensive since you hooked up with that lincoln guy... Yeah I know you are laughing now.... I am glad that I have some one to blame for that now..... darth oxer...
Last edited by oohogwash1; 20-03-2009 at 03:06 PM.
20-03-2009, 01:26 PM
#27
PassionFord Regular
Thread Starter
Anyhow here is some pics of my arch trimming
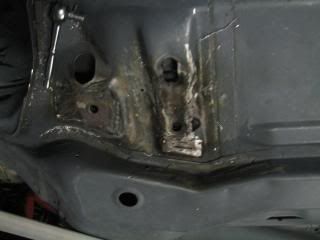
Rear - cut off the seam and tig welded, then covered with seam sealer
Front - cut in 100ml sections across lip and folded inner lip out and tig welded slither around then sealed with seam sealer
Rear - cut off the seam and tig welded, then covered with seam sealer
Front - cut in 100ml sections across lip and folded inner lip out and tig welded slither around then sealed with seam sealer
Last edited by oohogwash1; 20-03-2009 at 01:28 PM.
20-03-2009, 02:44 PM
#28
PassionFord Regular
Thread Starter
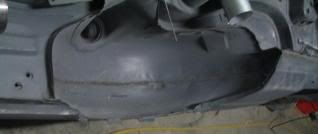
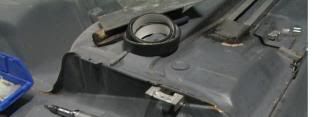
Stage 1 of the over engineered fuel routing...
Pics did not come out too well but you get the idea. The fuel is run in dash 8 aluminium lines that run down the edges of the rack, my brakes and water injection run in the centre two positions. See red circles.
The mount points come apart and screw in with the stainless allen head bolt in middle.
The rack runs inside the car so it avoids any chance of being squashed by kerbs etc... (or my mum driving over junk thats another story). The inside portion of the rack will be covered by another moulded piece as its illegal to run fule through passenger area here.
See where it comes out, this will have an alumimium surround around it to make it seal properly.
Last edited by oohogwash1; 20-03-2009 at 02:49 PM.
20-03-2009, 02:53 PM
#29
PassionFord Regular
Thread Starter
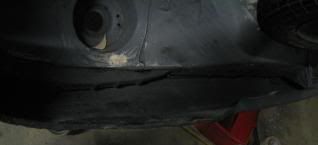
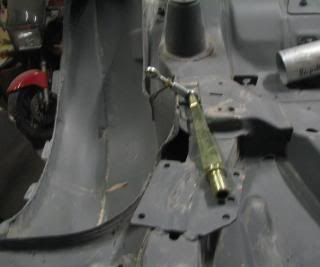
I remember when I had to jack the car with that stupid standard jack how cumbersome it was, I want to use something better, so I have made a flat surface on my jacking point so I can use my own custom jacks for the car and now be worried about having it come out....
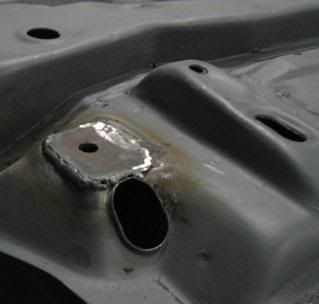
This one also shows that I modified the section just behind the jacking point just in case I need extra room on my rack... which I really did not need to do.
This one also shows that I modified the section just behind the jacking point just in case I need extra room on my rack... which I really did not need to do.
20-03-2009, 02:56 PM
#31
PassionFord Regular
Thread Starter
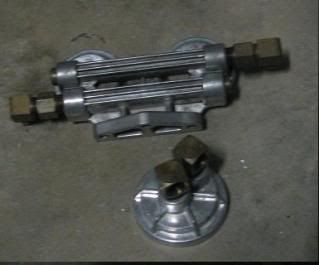
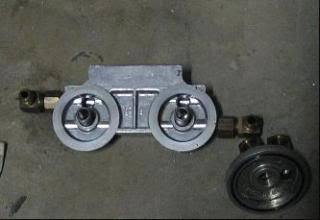
I am currently buying up all oil filter relocation devices around the world, here is the first of a few ... why do I do this... buy multiples and have to sell of the bits.... In this case I just wanted the dual filter bit to play with.
20-03-2009, 03:02 PM
#32
PassionFord Regular
Thread Starter
Thanks mate I'm posting up lots of bits... not sure if they are of any interest...
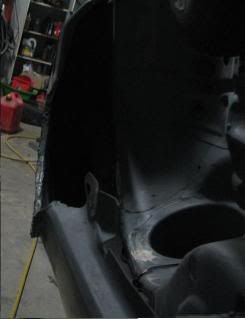
This one is the adjustable rear anti roll bar setup, in this case I am mimicking the DJR setup... in which case I will have a roll bar mounted on a tower that bolts onto the plate I have mounted on the subframe... The removable bit is due to road legality issues (see below)
This will have the blade connected to it and at one end of the blade it connects to the roll bar and the other end to the mount of the coil over... via the doggy bone.
An adjuster from the ARB will be routed into the cabin. Unfortunately for me the mounts for this interfere with rear exit exhaust.. on track day I will drive with side exit exhaust. Still working on legality of being able to run side exit on road, its close but not really legal here.
Note the advantage of a rotisserie, the underbody of your car is now your work bench...
Last edited by oohogwash1; 20-03-2009 at 03:14 PM.
25-07-2009, 02:17 AM
#35
PassionFord Regular
Thread Starter
OK some updates
here is my coil on plug setup, sorry for blurry pic, old age creeping up
These are of a Toyota Yaris, there are a few ND ones with this part number around nowadays...
here is my coil on plug setup, sorry for blurry pic, old age creeping up
These are of a Toyota Yaris, there are a few ND ones with this part number around nowadays...
The following users liked this post:
Vincereese (26-10-2015)
25-07-2009, 02:22 AM
#36
PassionFord Regular
Thread Starter
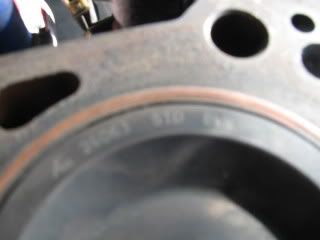
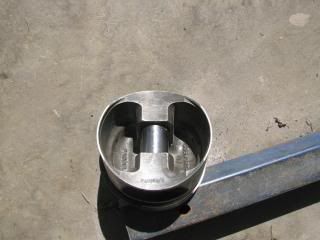
My pistons finally, Cosworth originals with the valve cutouts in em these are magnificent to see up front, Sent one to Lincoln to measure for his project...
The top ring is thinner than std cossie, Cossier-Mahle etc rings.
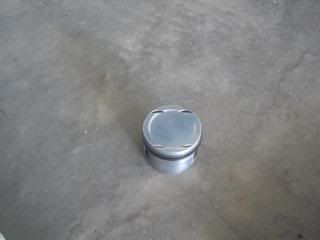
Note that these pistons are a little heavier than my others, there is more meat under piston crown and more around gudgeon pin
The top ring is thinner than std cossie, Cossier-Mahle etc rings.
Note that these pistons are a little heavier than my others, there is more meat under piston crown and more around gudgeon pin