
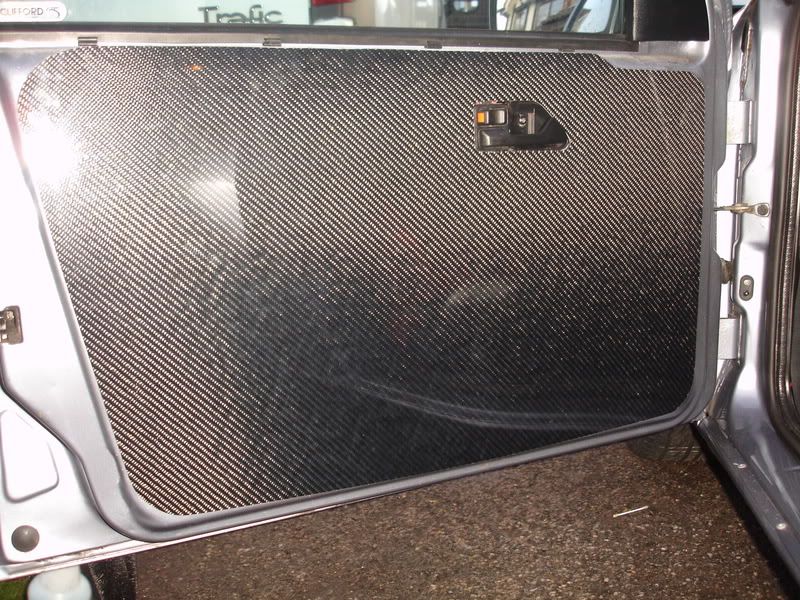
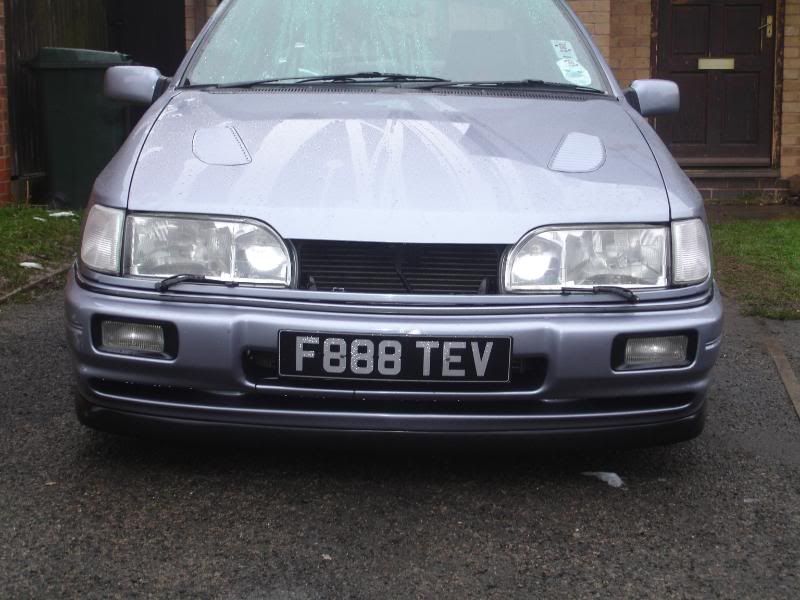
F888TEV Underside and bay paint/resto (New carbon fiber door card inserts)

 11-02-2009, 08:46 PM
#44
Right this is going to b a really small update, as i got the square route of fook all done, 
mainly because of the weather being so shit, but also down to certain number of passionford members coming over and drinkin All my tea and coffee (while lookin round my car at what bits they will have when i get bored and end up breakin the car)
Any way back to the car.............................
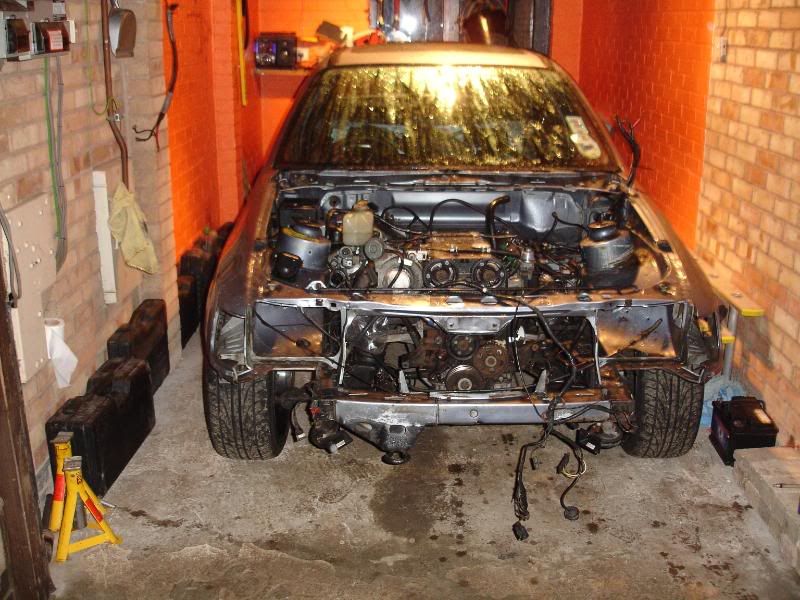
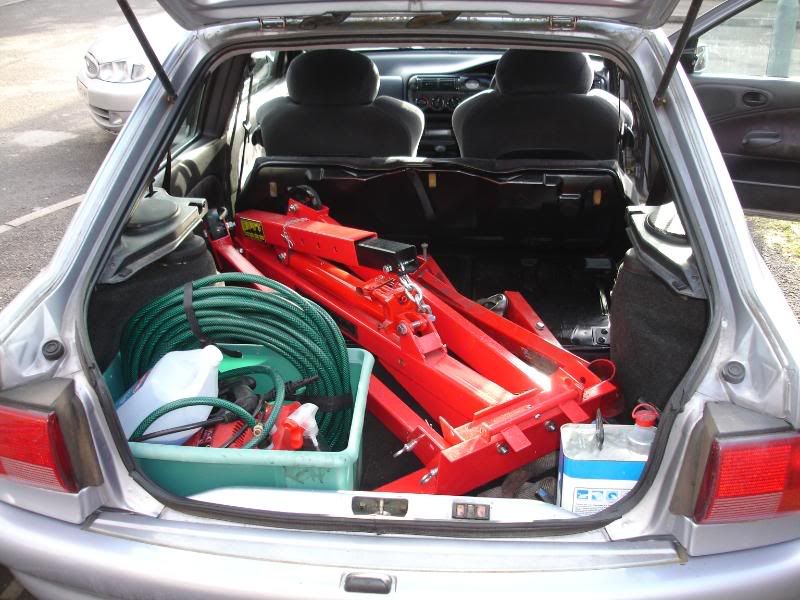
To day was supposed to b the day i made sure the engine was ready to come out but after pussing the car out of the garage i decided first of it needed a good hoover inside

Quick session with my trust old garage hoover and the inside of the car looked like this
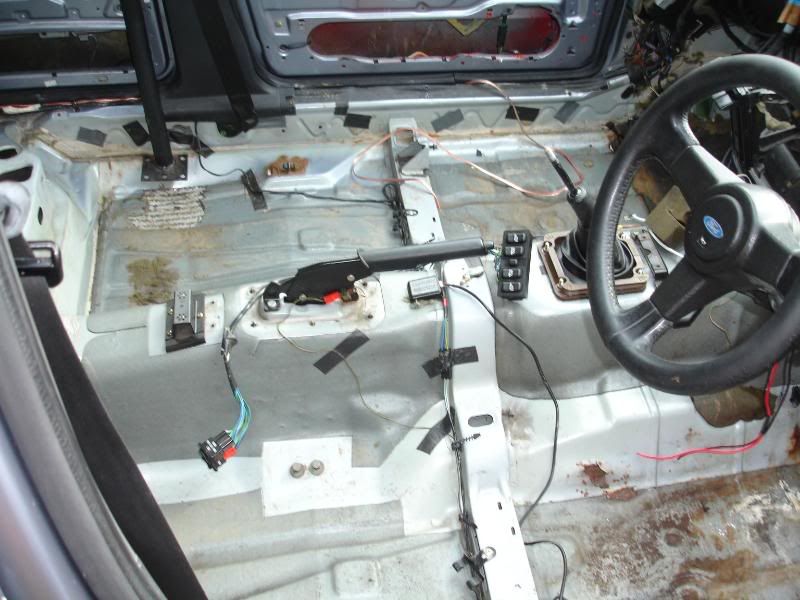
(no different really lol)
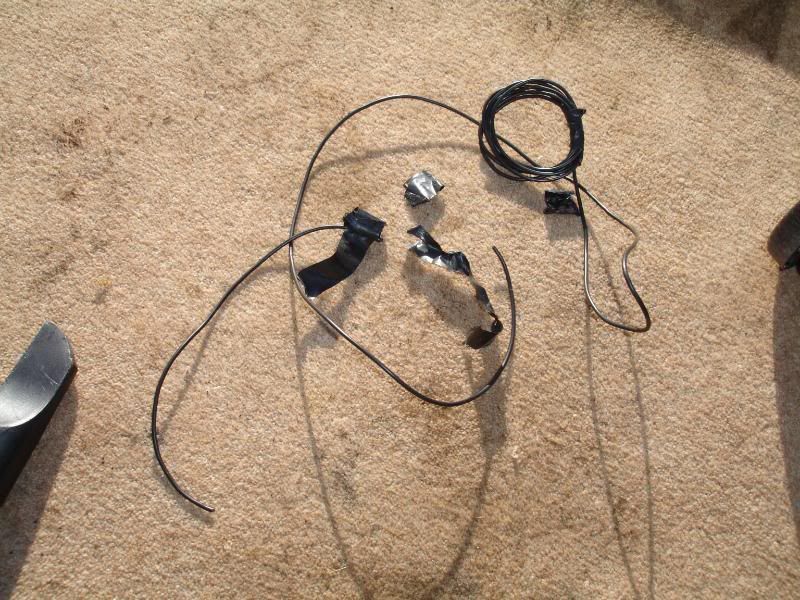
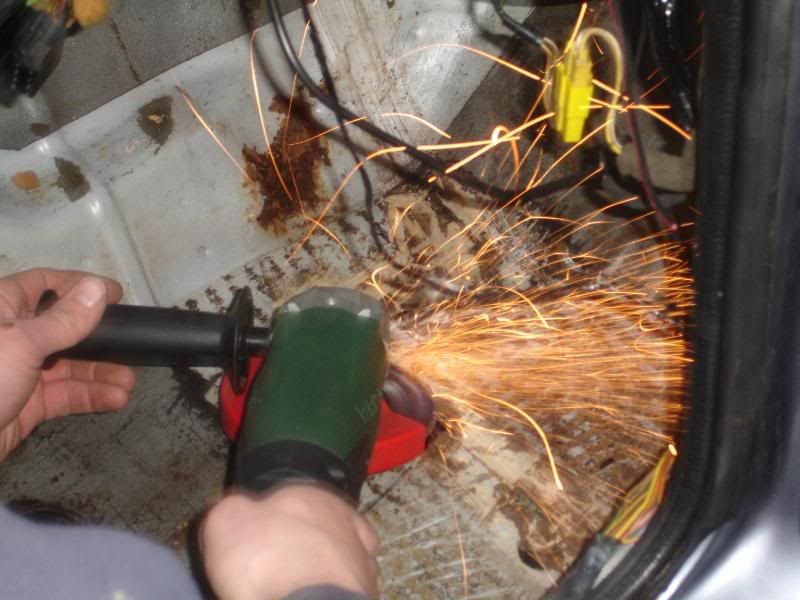
i also managed to remove some excess wiring that seamed to b in the car for no reason other than to P**s me off
(watch out rod with this kinda weight savin i will have a 200mph saff)
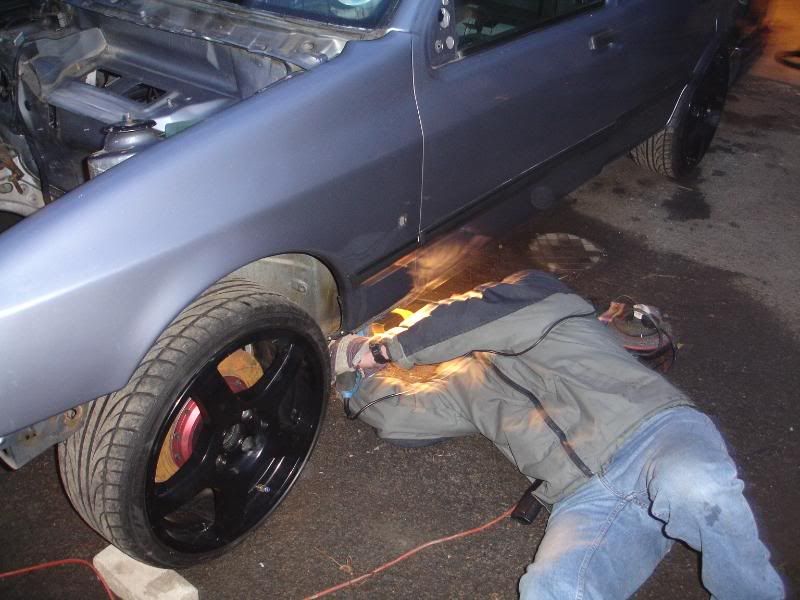
Then on to the bay,
First off i thought remove the coil pack and leads (should have been a simple job but...)
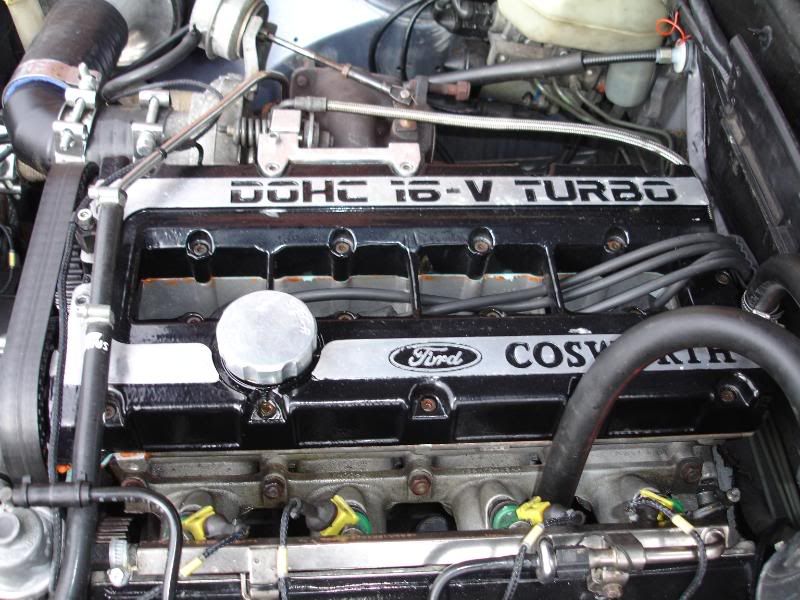
i like a muppet had Threaded the leads through the came cover and bolted the coil pack to the back of the bulk head, (dam Flush cam cover)
So i did what i always do n gave up, thats now tomorrows job,
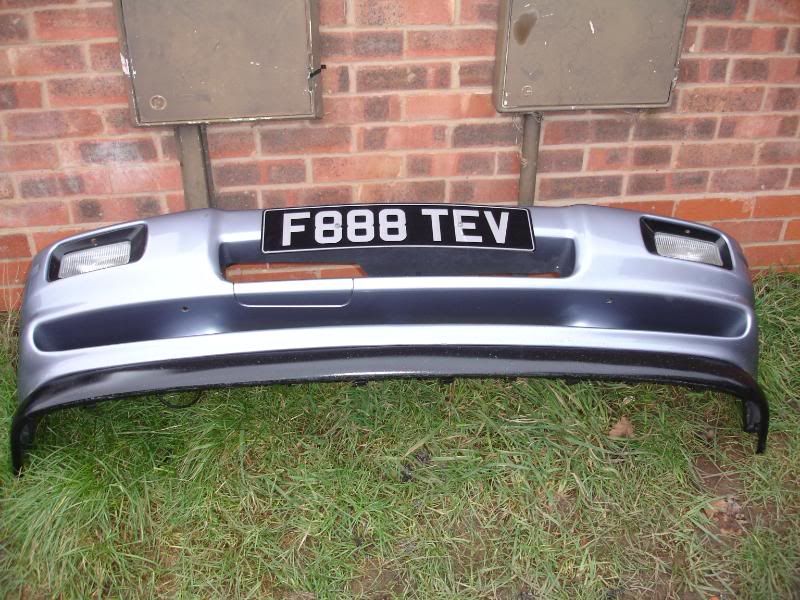
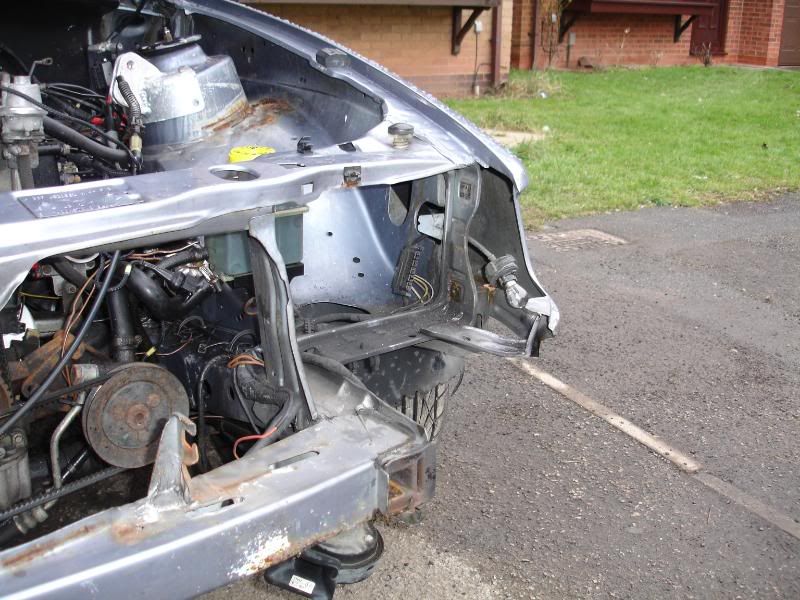
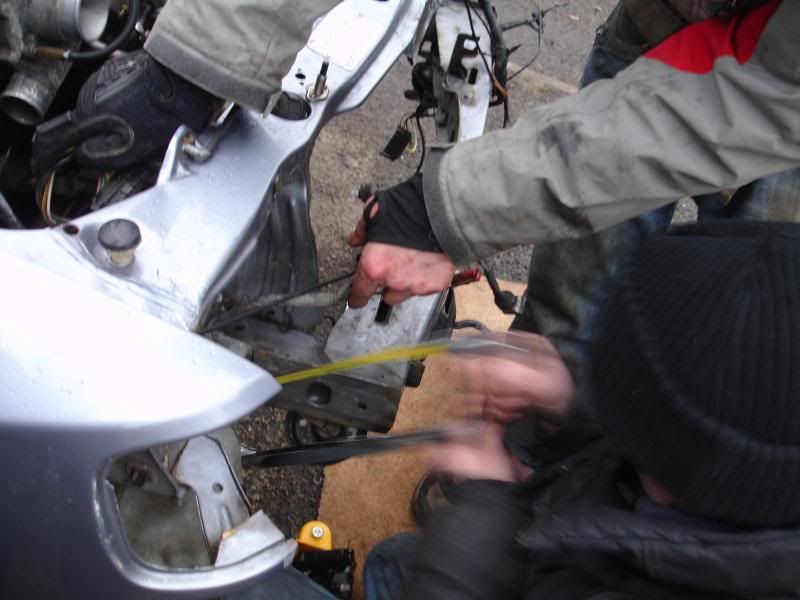
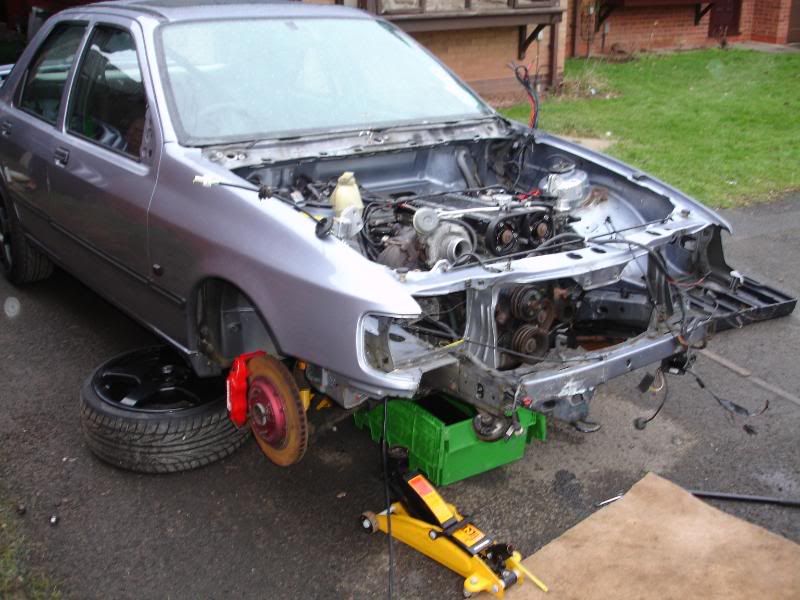
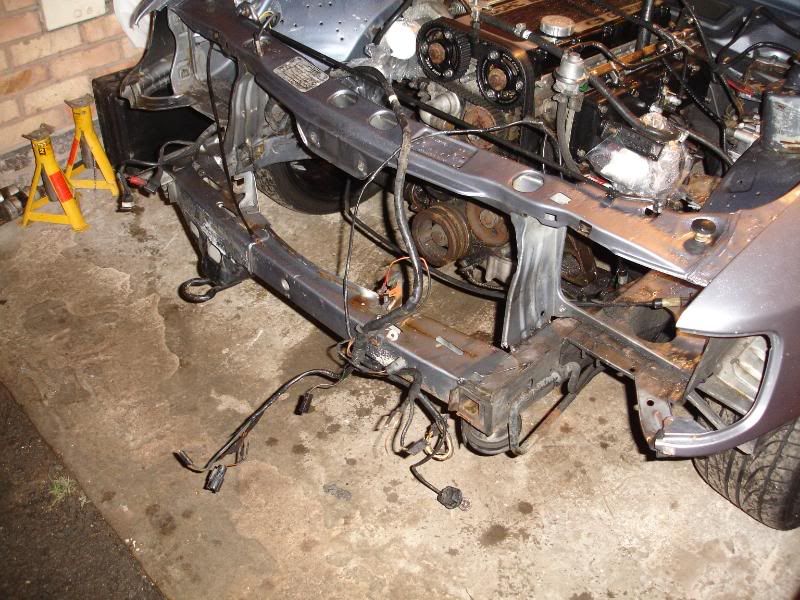
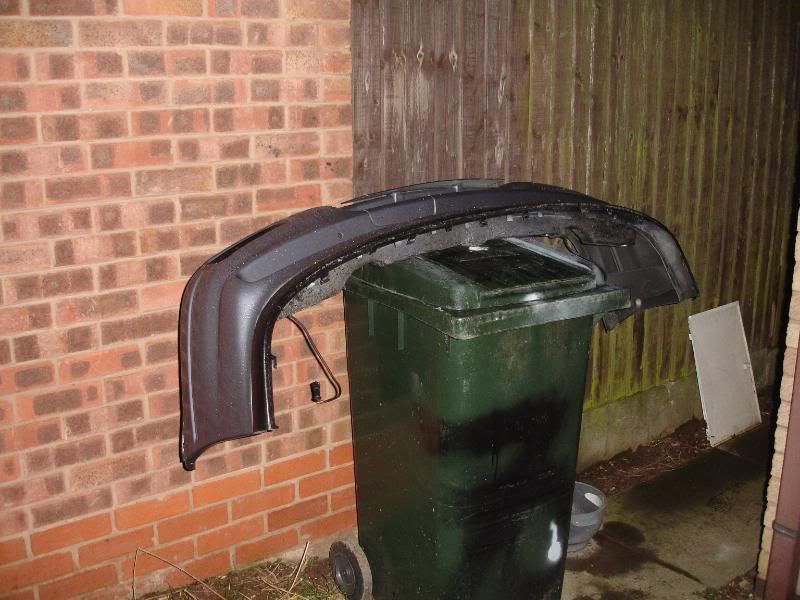
After a quick brew it was time for the bumper to come off,
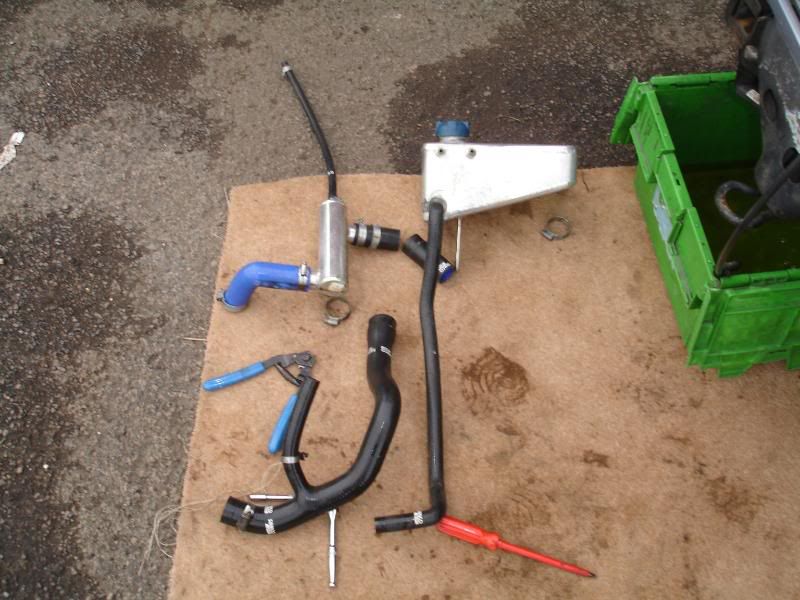
After this all the boost hoses
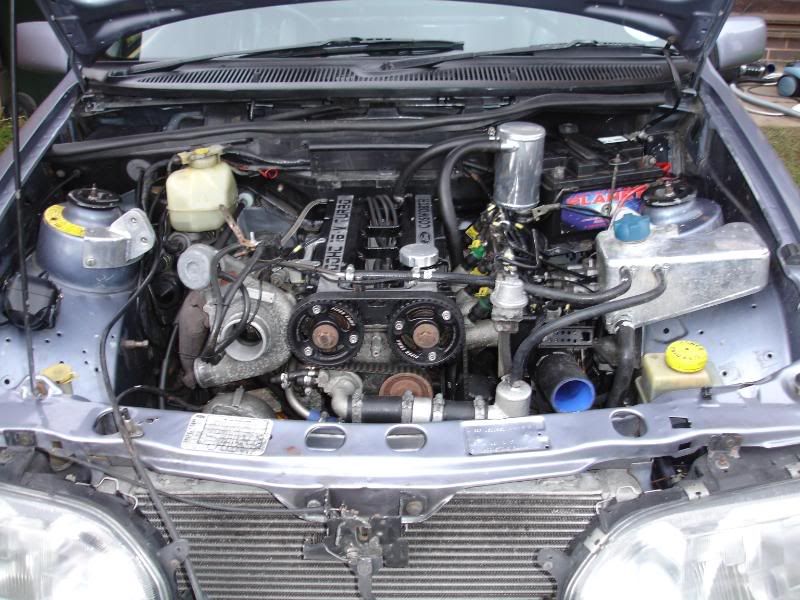
Followed by Draining the rad
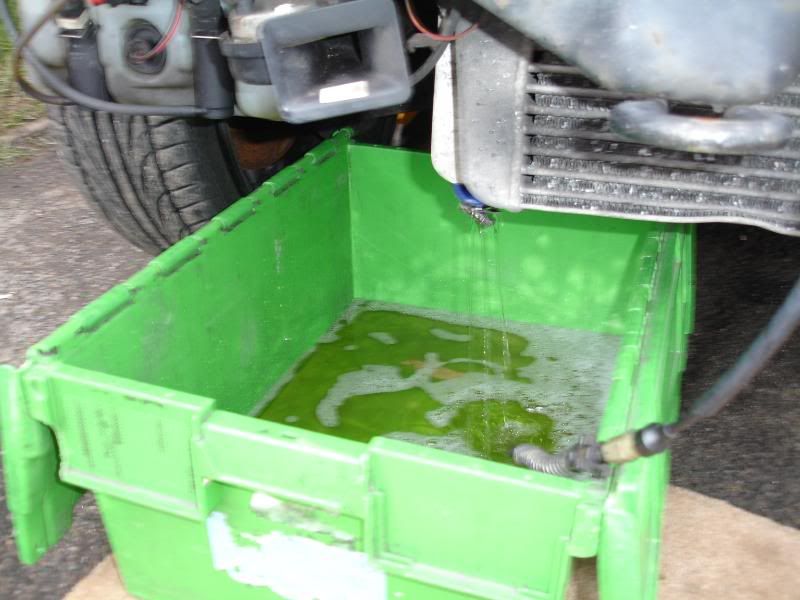
As always i ended up with a wet arm
A qucik removal of the water hoses

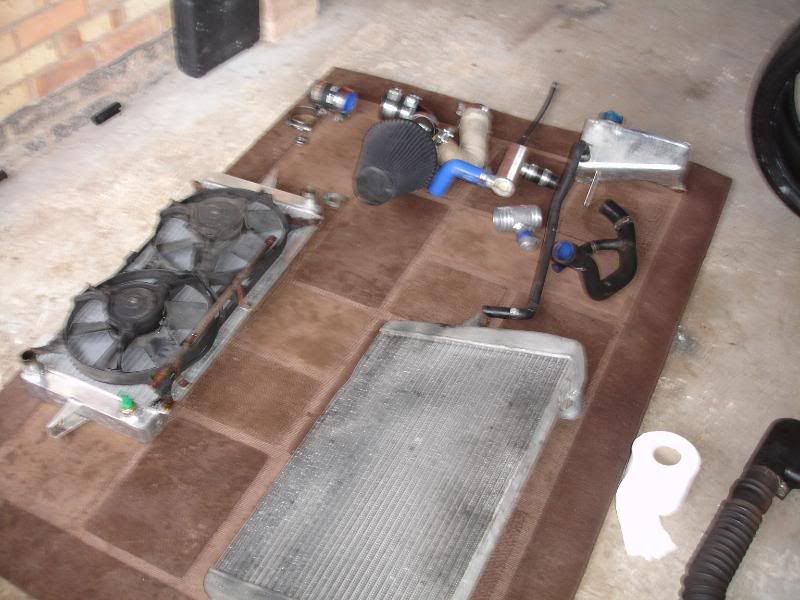
and the rad and cooler came cout really easy, Although it looks like my cooler has had quite a hard life
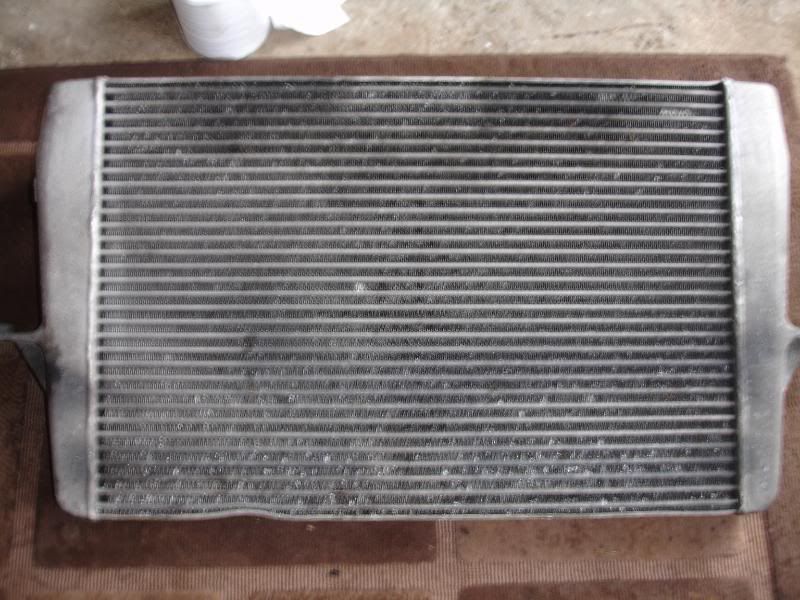
I was also told when i bought the car it was A ORIGINAL RS 500 cooler But it turns out this aint the case
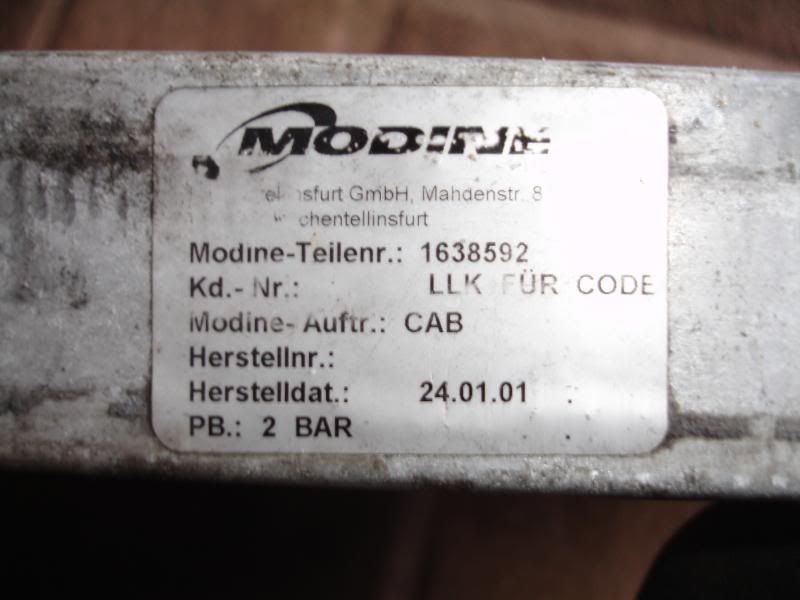
Unless ford made rs500 in 2001
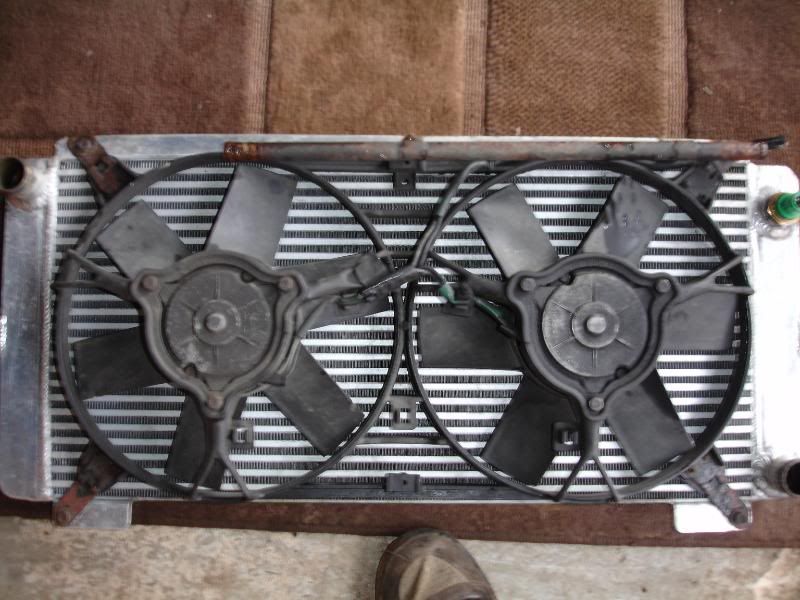
Rad and fans in perfect workin order
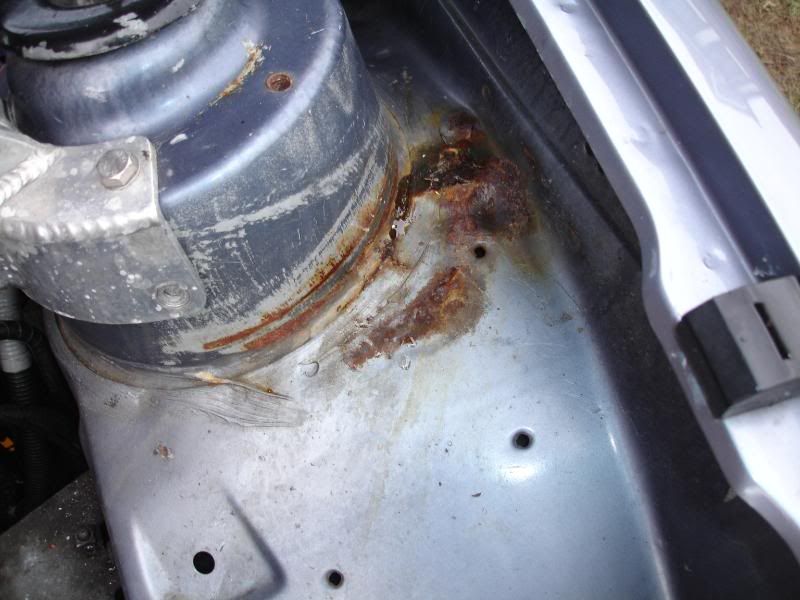
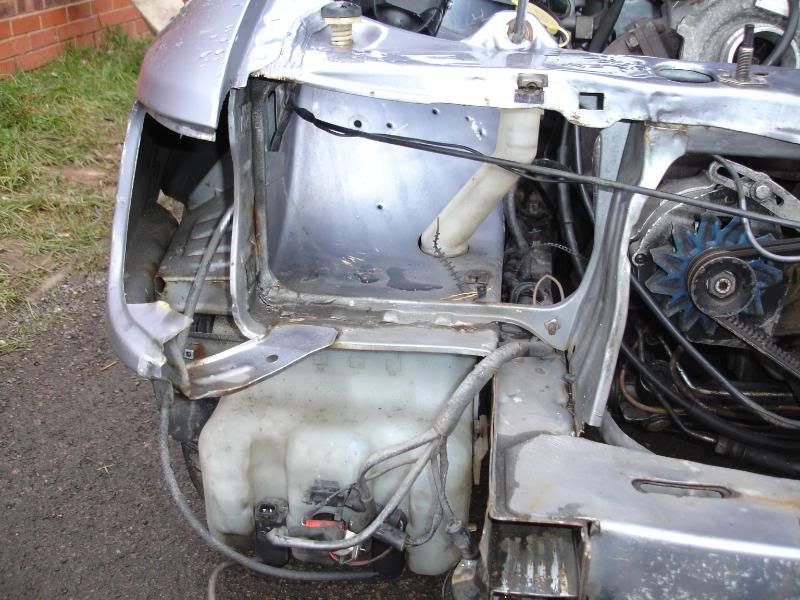
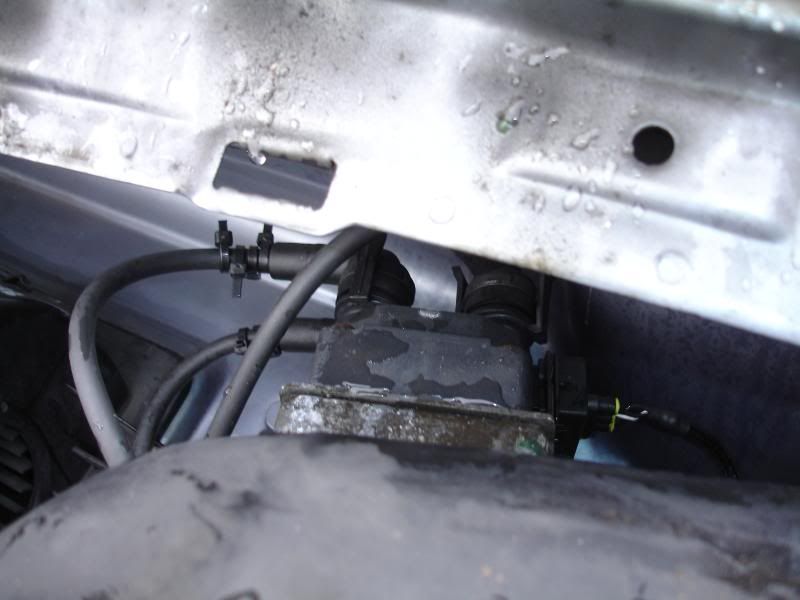
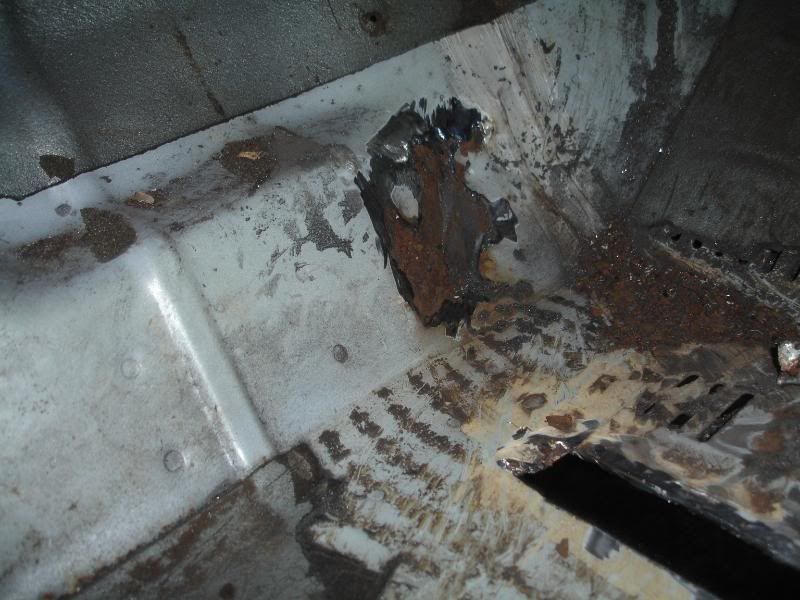
Then on to the rest of the water hoses includin the headder tank and swirl pot
A word of warning to people with ally headder tanks, take a look underneath from time to time, mine was covering a nasty little rust patch
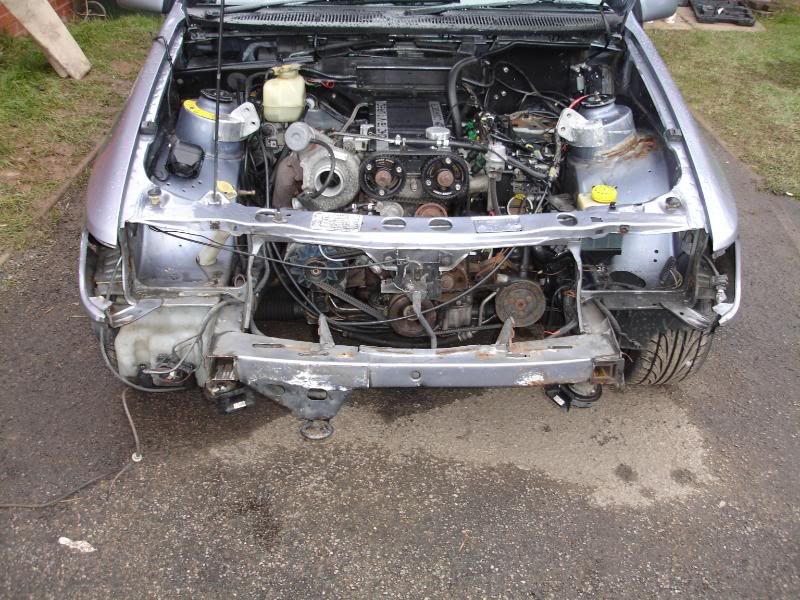
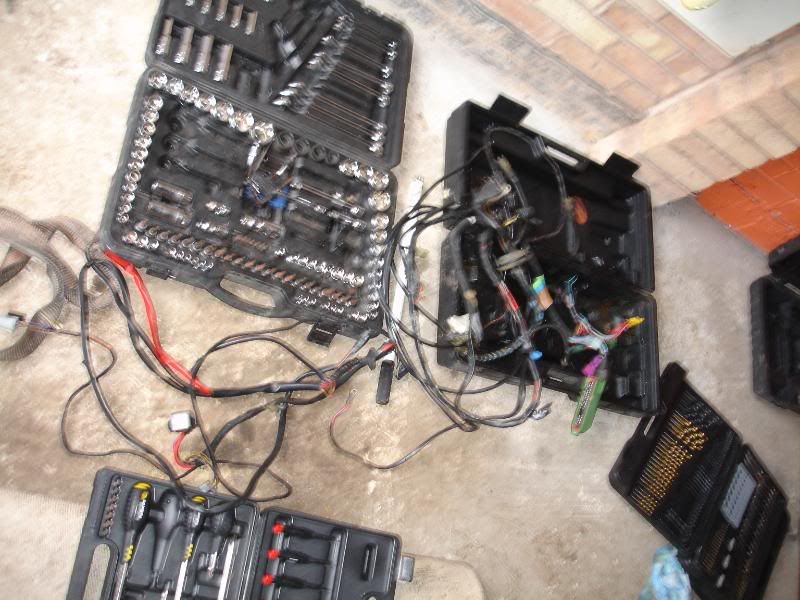
lookin at this lot kinda made me wonder just how much money i have spent on my saph over the years, as when you think bout it there must b about �600 worth of bit and bob from the front end alone
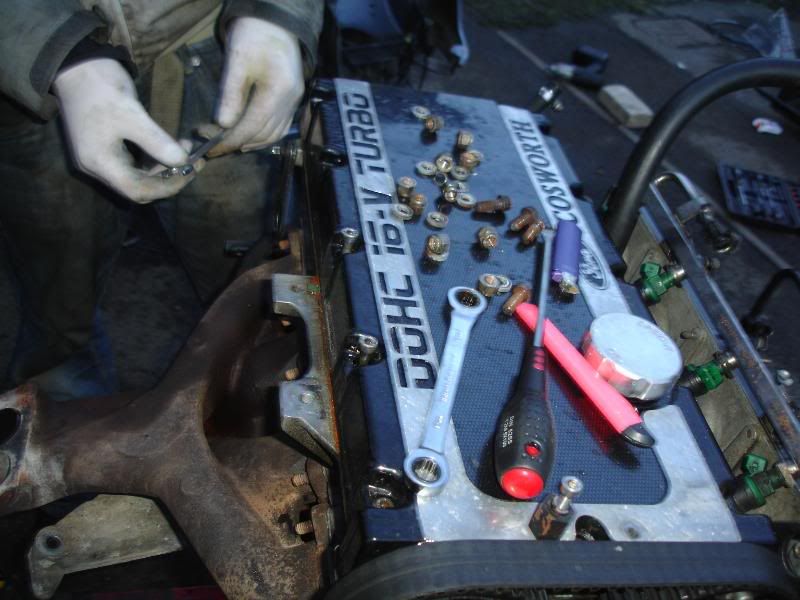
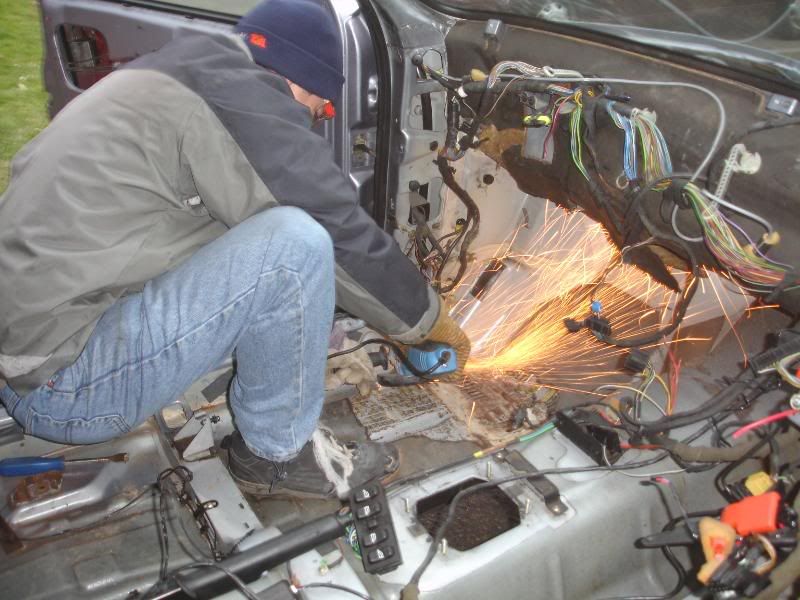
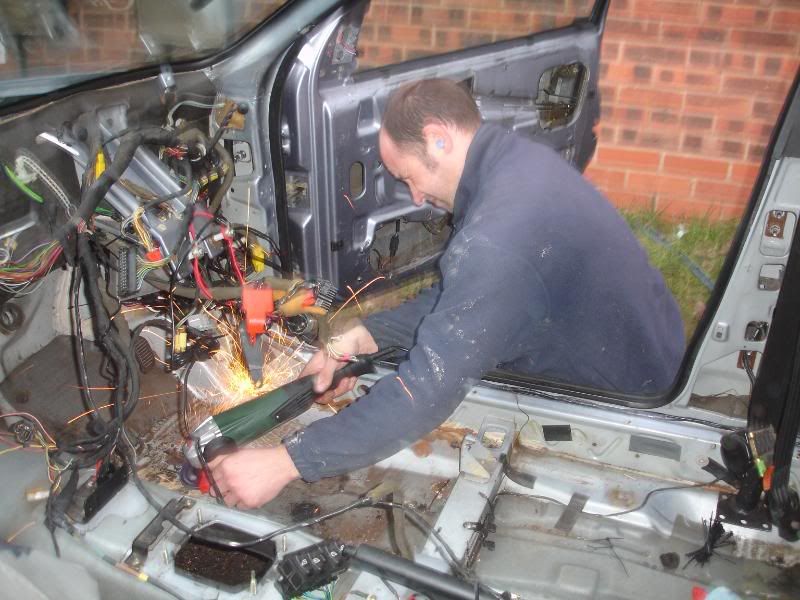
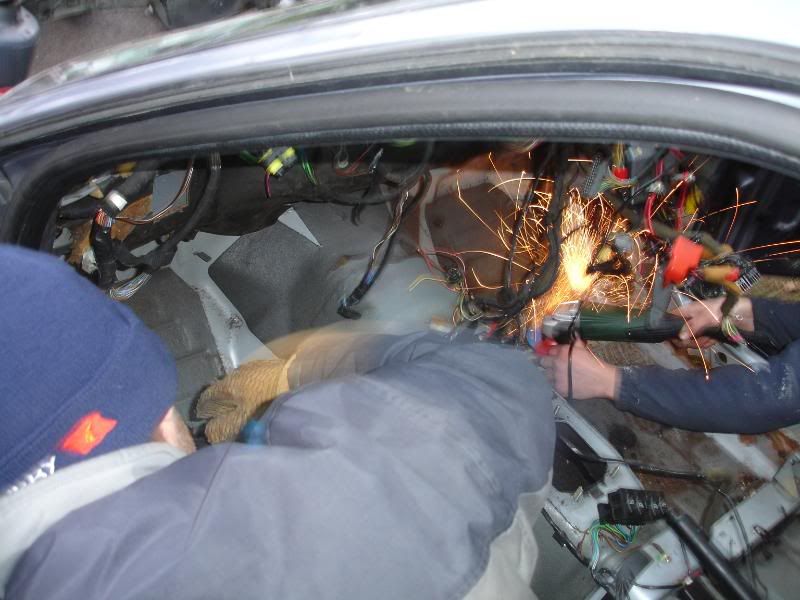
Anyway next up was the Engine loom, in my wisdom when i got my shiny new engine loom from Ryan i used plastic P clips to hold it to the inlet instead of the usual cable ties, what a pain in the ass to remove, took me fookin ages
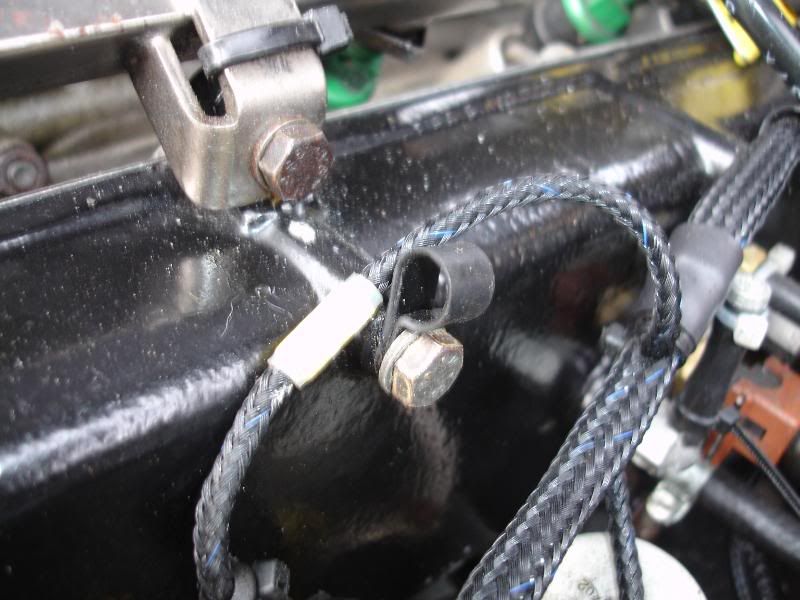
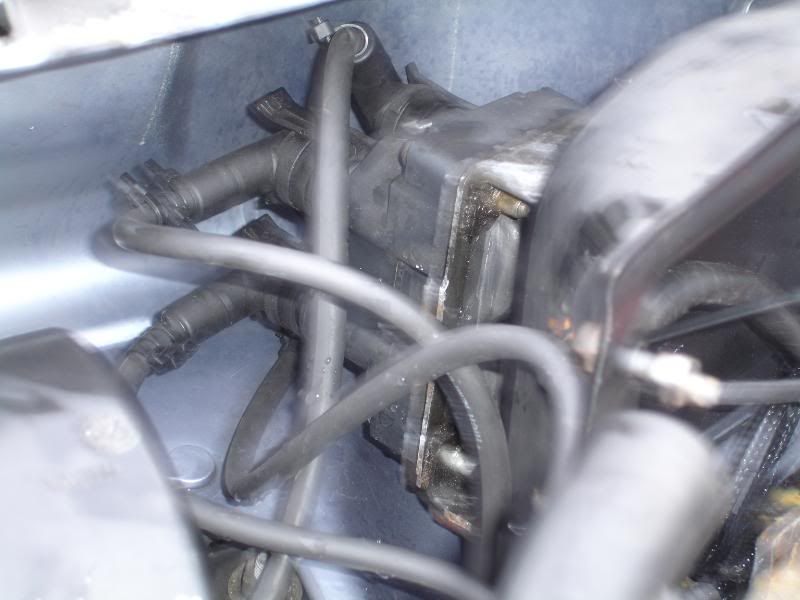
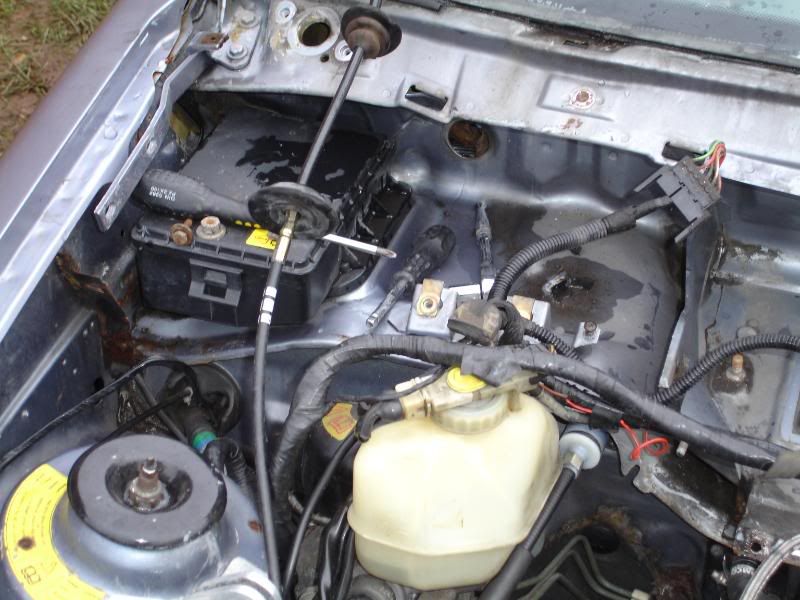
I moved on to the twin ignition amp's
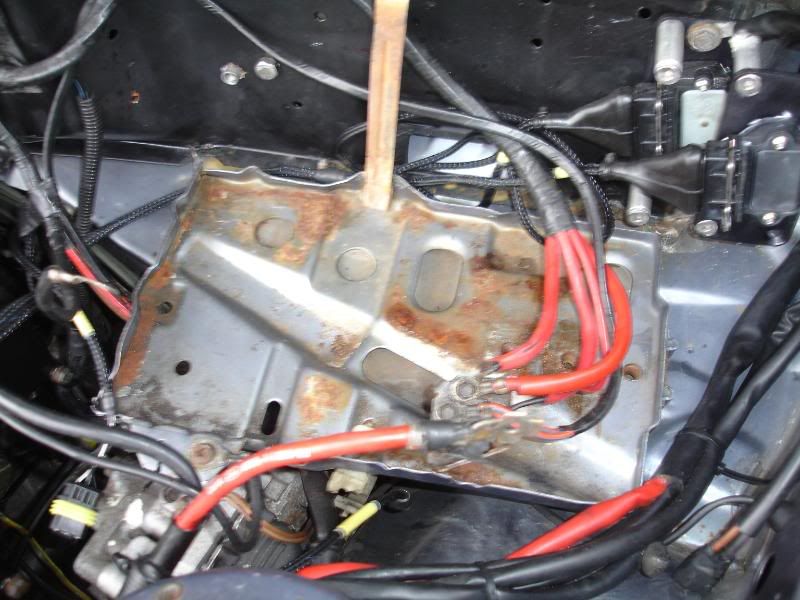
(From this pick you can also see that my bat Trays in really good condition, only a small area of surface rust)
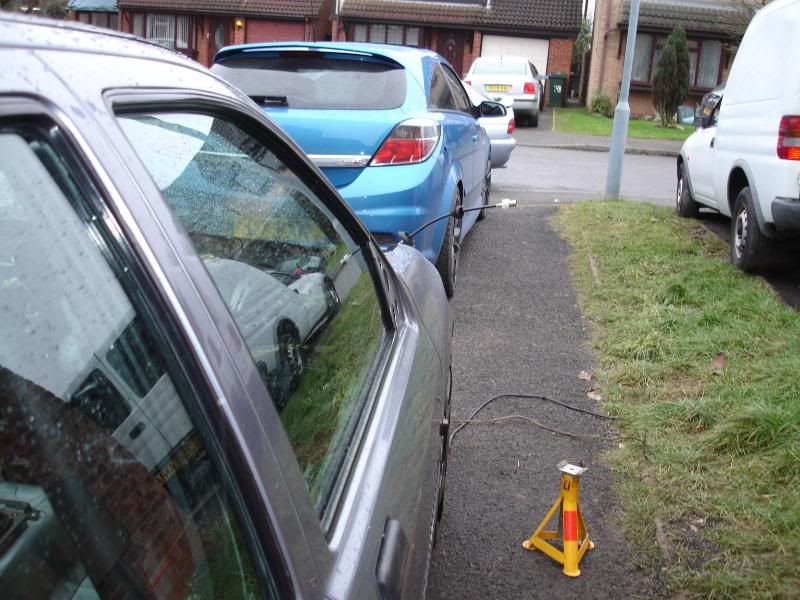
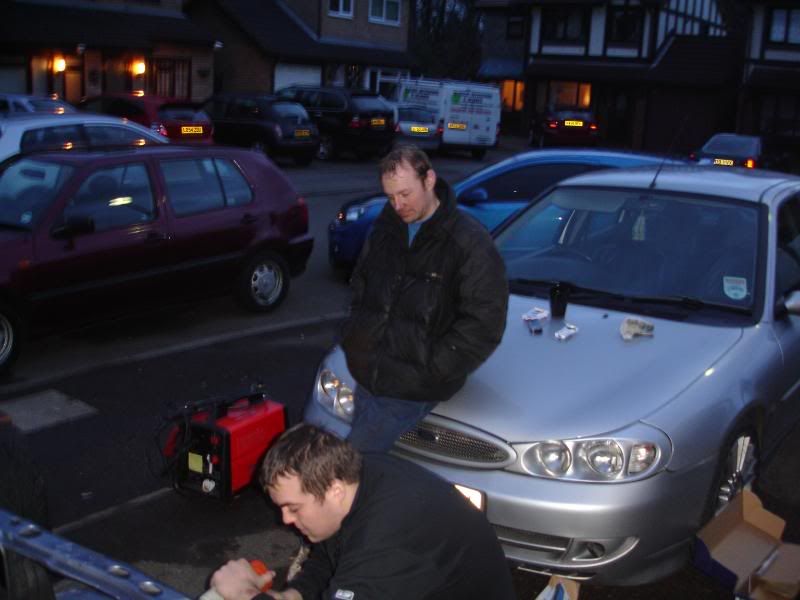
Just as i was about to remove the bonnet it started rainin hard, so as Steve H had turned up to drop me some new wheels of for my escort i stuck the kettle on and called it a day,
Tomorrow had better b a productive day as im running out of time
Cheers jay
mainly because of the weather being so shit, but also down to certain number of passionford members coming over and drinkin All my tea and coffee (while lookin round my car at what bits they will have when i get bored and end up breakin the car)
Any way back to the car.............................
To day was supposed to b the day i made sure the engine was ready to come out but after pussing the car out of the garage i decided first of it needed a good hoover inside
Quick session with my trust old garage hoover and the inside of the car looked like this
(no different really lol)
i also managed to remove some excess wiring that seamed to b in the car for no reason other than to P**s me off
(watch out rod with this kinda weight savin i will have a 200mph saff
)Then on to the bay,
First off i thought remove the coil pack and leads (should have been a simple job but...)
i like a muppet had Threaded the leads through the came cover and bolted the coil pack to the back of the bulk head, (dam Flush cam cover)
So i did what i always do n gave up, thats now tomorrows job,
After a quick brew it was time for the bumper to come off,
After this all the boost hoses
Followed by Draining the rad
As always i ended up with a wet arm
A qucik removal of the water hoses
and the rad and cooler came cout really easy, Although it looks like my cooler has had quite a hard life
I was also told when i bought the car it was A ORIGINAL RS 500 cooler But it turns out this aint the case
Unless ford made rs500 in 2001
Rad and fans in perfect workin order
Then on to the rest of the water hoses includin the headder tank and swirl pot
A word of warning to people with ally headder tanks, take a look underneath from time to time, mine was covering a nasty little rust patch
lookin at this lot kinda made me wonder just how much money i have spent on my saph over the years, as when you think bout it there must b about �600 worth of bit and bob from the front end alone
Anyway next up was the Engine loom, in my wisdom when i got my shiny new engine loom from Ryan i used plastic P clips to hold it to the inlet instead of the usual cable ties, what a pain in the ass to remove, took me fookin ages
I moved on to the twin ignition amp's
(From this pick you can also see that my bat Trays in really good condition, only a small area of surface rust)
Just as i was about to remove the bonnet it started rainin hard, so as Steve H had turned up to drop me some new wheels of for my escort i stuck the kettle on and called it a day,
Tomorrow had better b a productive day as im running out of time
Cheers jay


 12-02-2009, 09:04 PM
#53
Right today has been a dam productive day, im really pleased with how the cars shapin up, ive given myself a dead line to have the car ready for axel stand by the weekend as i go back to work monday
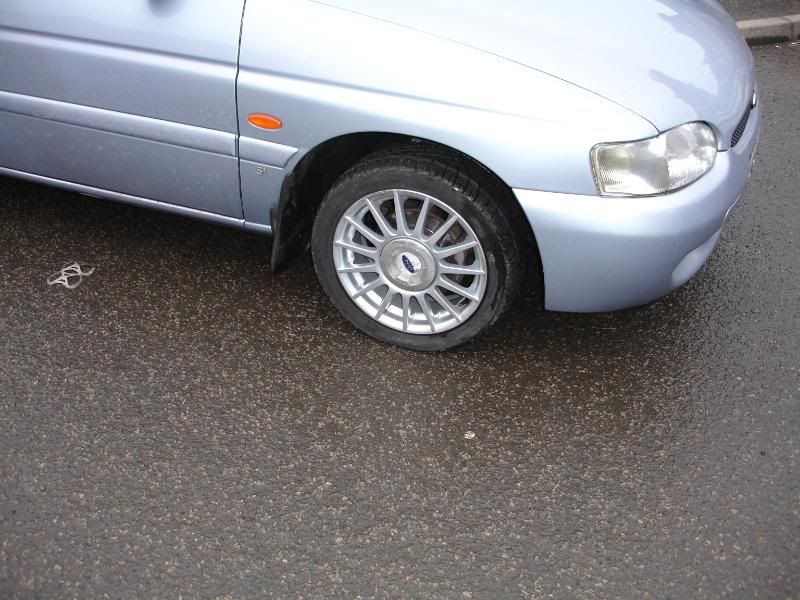
Anyway first job for today was to actually chane the wheels over on my daily drive, as some of you may have seen it had quite possibly the worst wheel ive ever seen, so thanx to a Delivery from steve H the scort went from this

To this
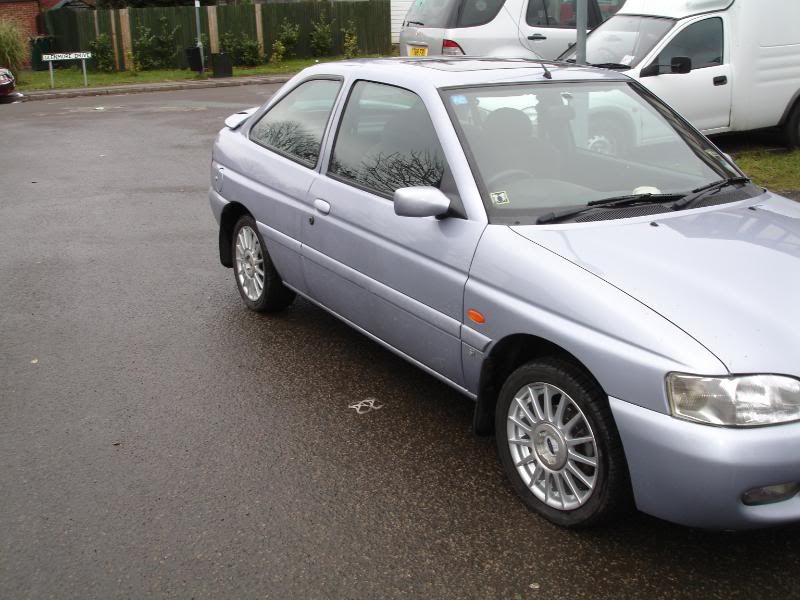
A million times better
After the usual brew i had a quick trial fit of something that arrive the other day
Then moved on to the task ahead,
All the trim bit and head light removed, and luckly as expected no rust, to b honist i would have been suprised if i had found any
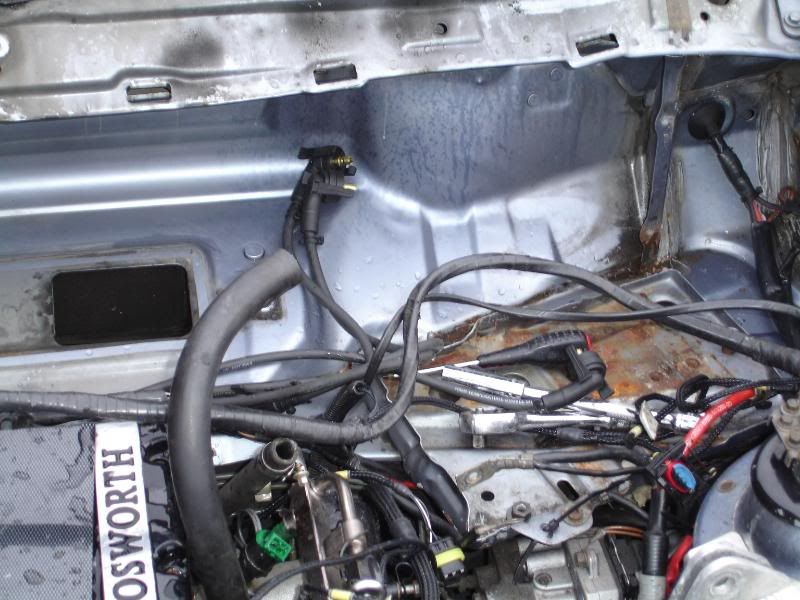
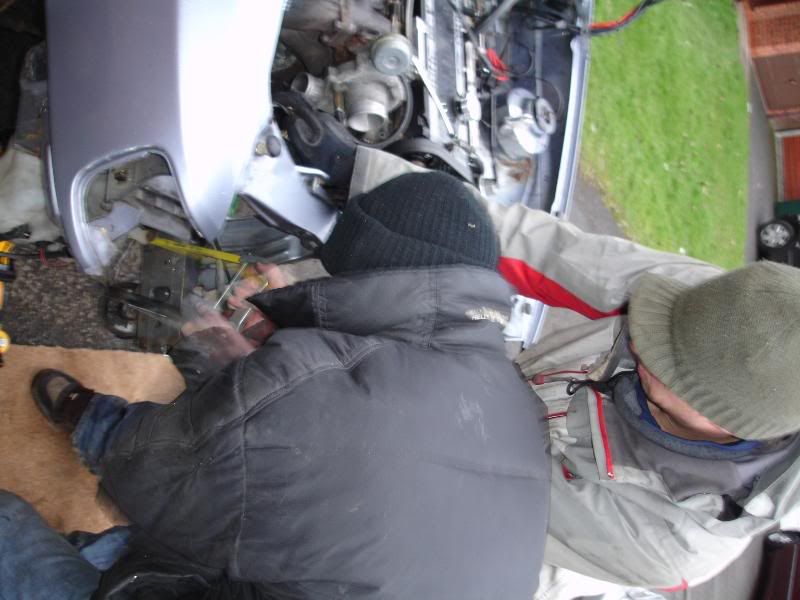
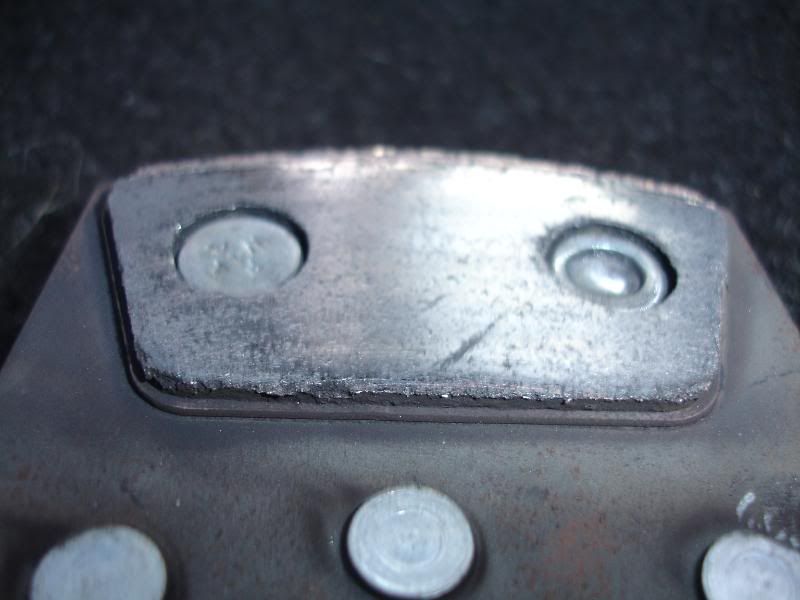
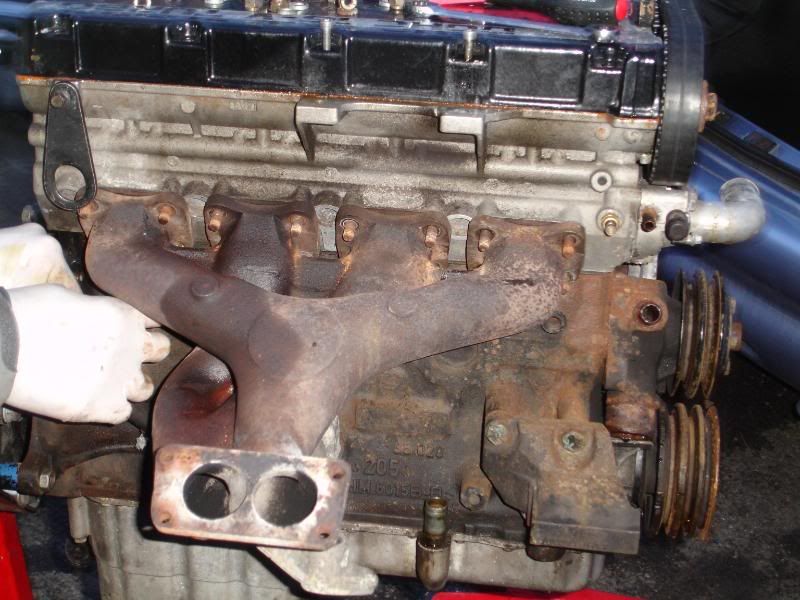
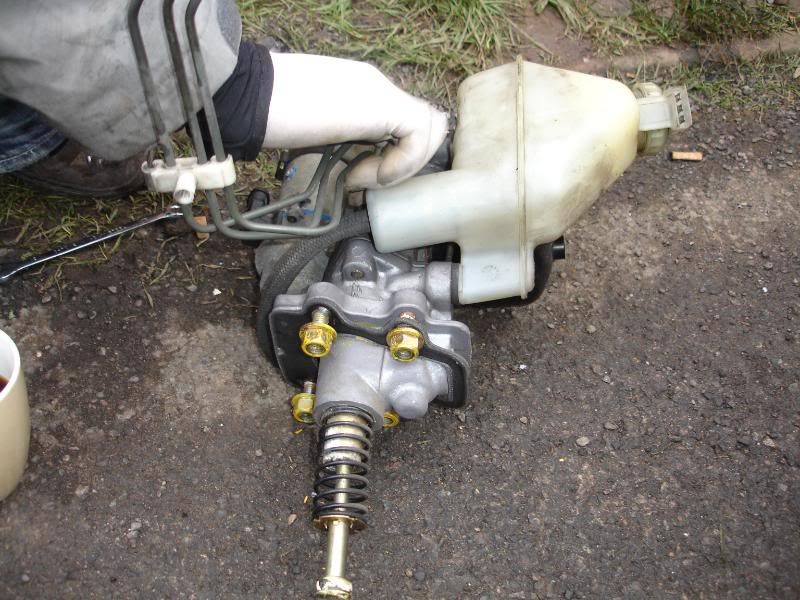
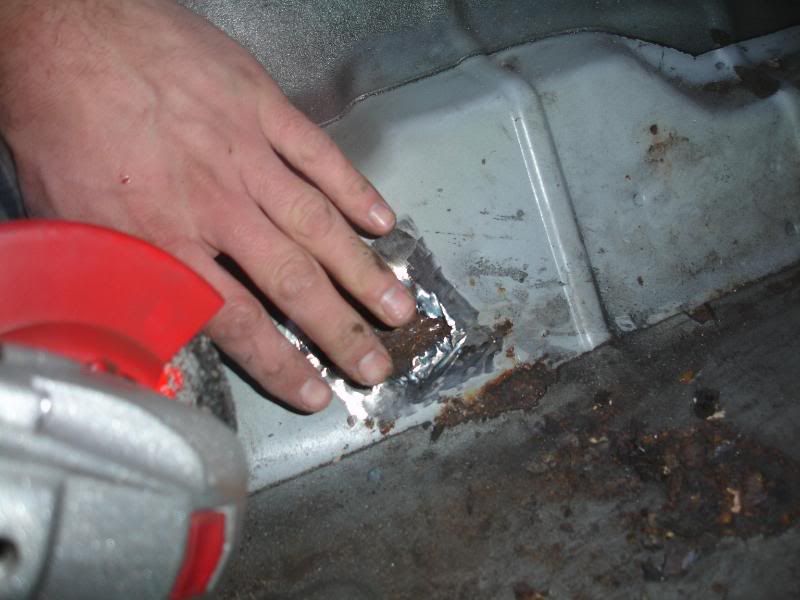
next up was the coil pack that i had left the other day, as you can see from the pic's its a great place to hide the coil pac until you have to do any kinda work
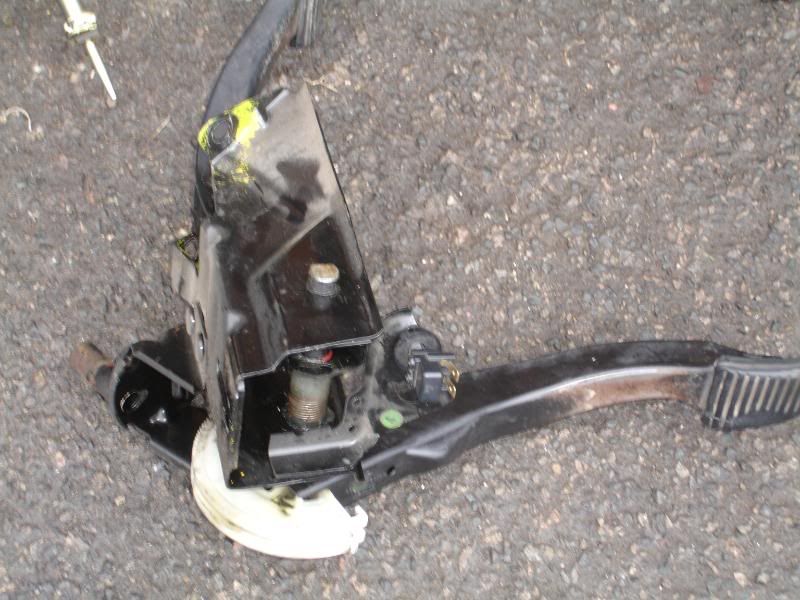
With the rear bulk head an coil pack removed it was time to go to work on the heater motor, another simple job but took ages
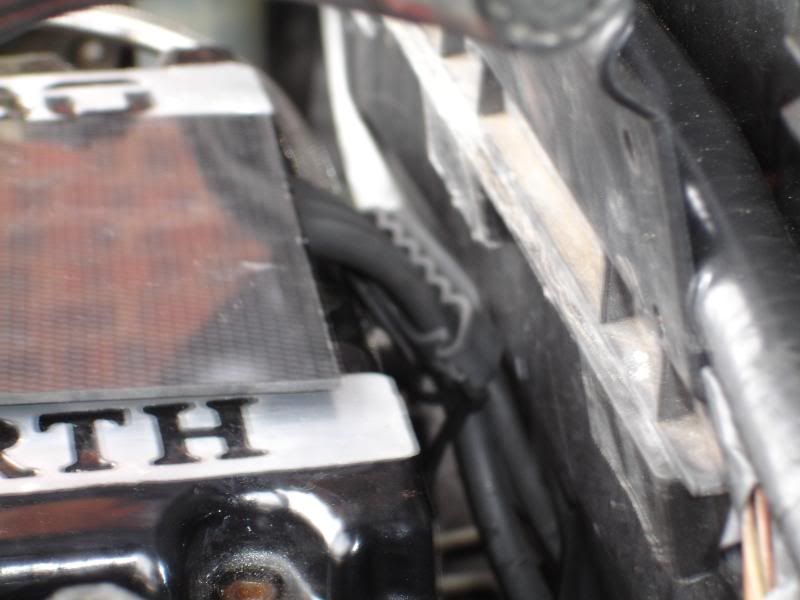
at this point it was another time for a brew, and i realised that not only imo does my cam cover look good but it serves a purpus
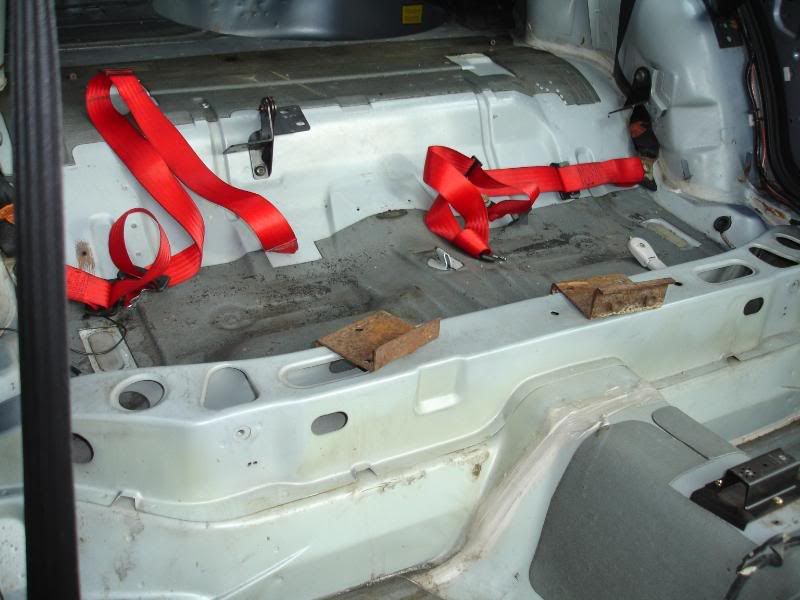
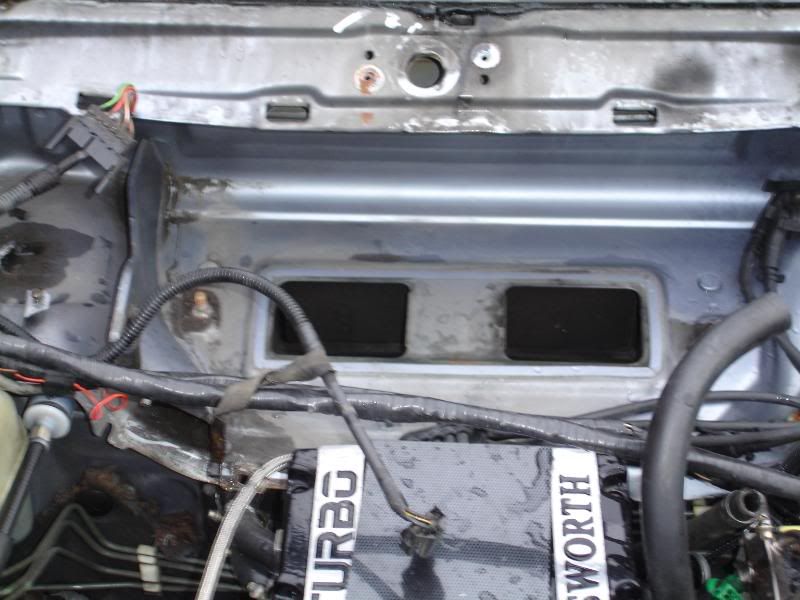
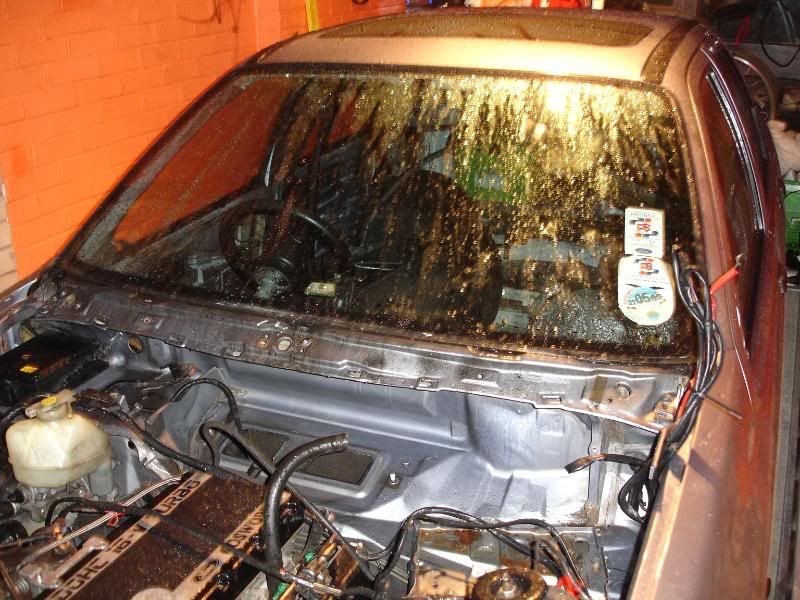
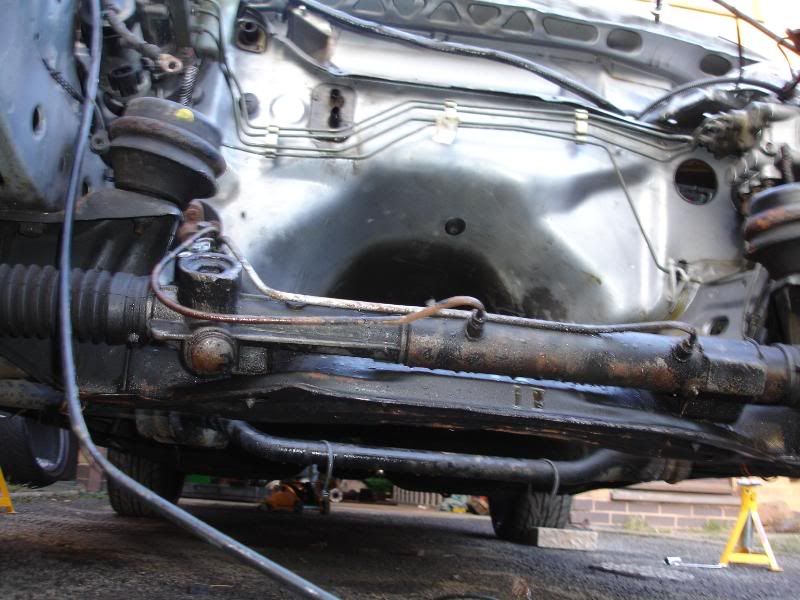
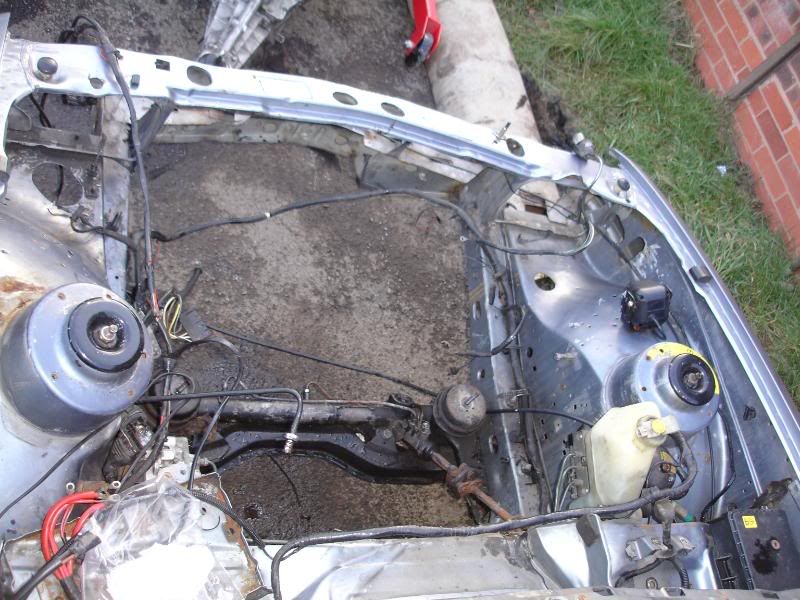
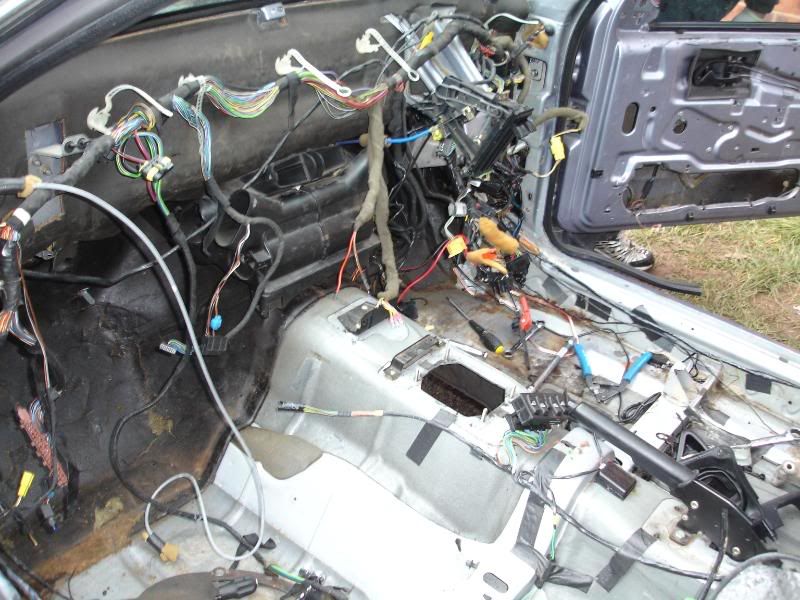
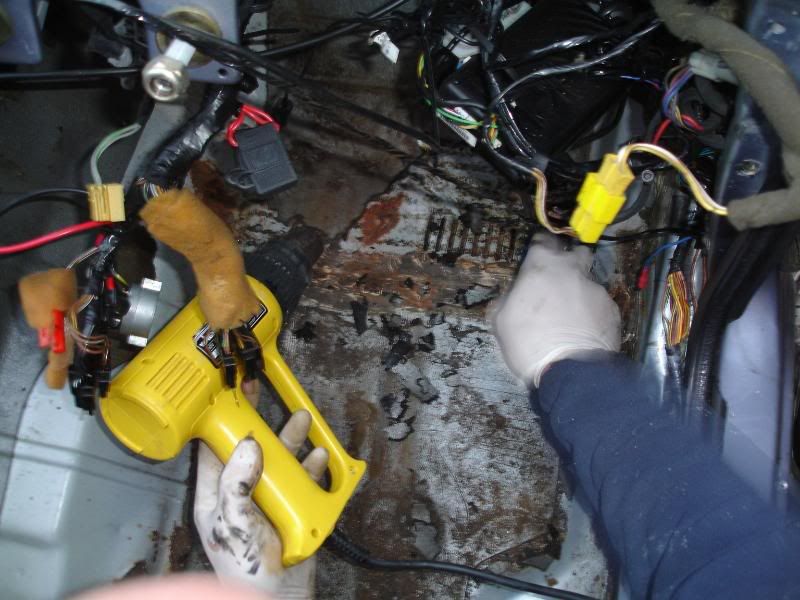
a couple of shots of behind the bulk head with everyting removed including wiper motor scuttle panel etc,
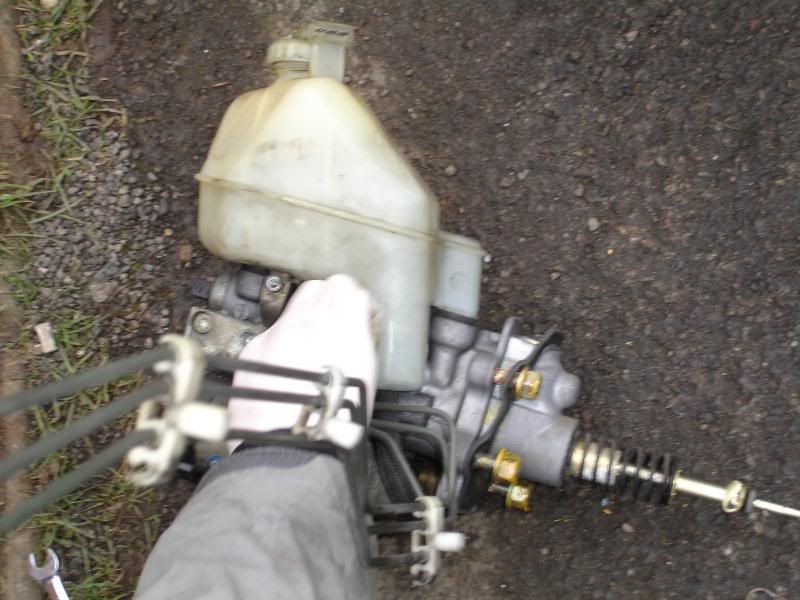
with my engine loom removed and all the electrics to the point they can b pushed back in to the engine bay, it was time to do the simple task of Draining oil,power-steerin fluid and gearbox oil, (simple and dirty)
With most of the engine bay now buttoned up it was time to do the Pain in the ass jobs
First off removing the wingmirros
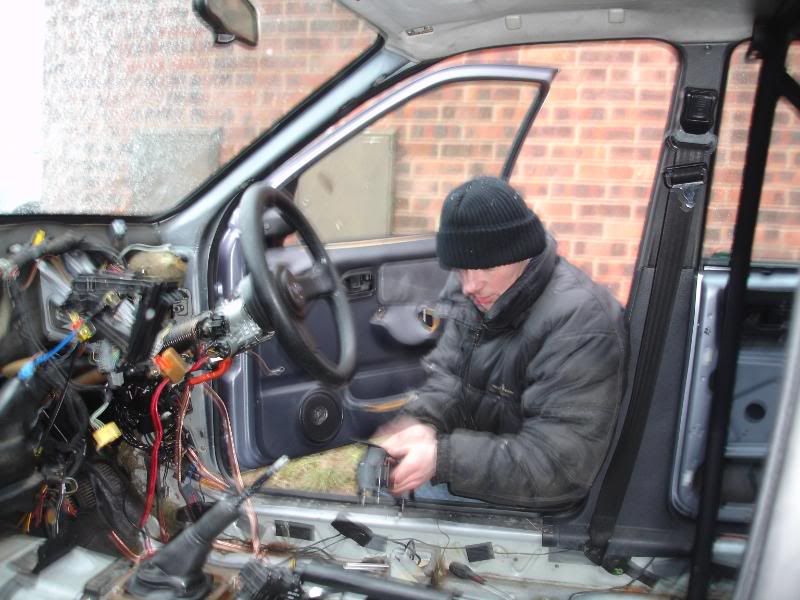
I really The car with out them,
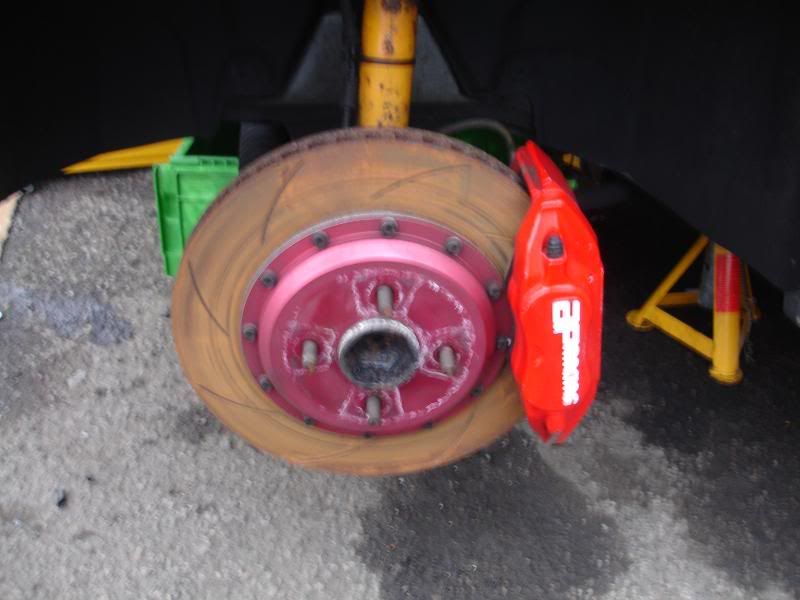
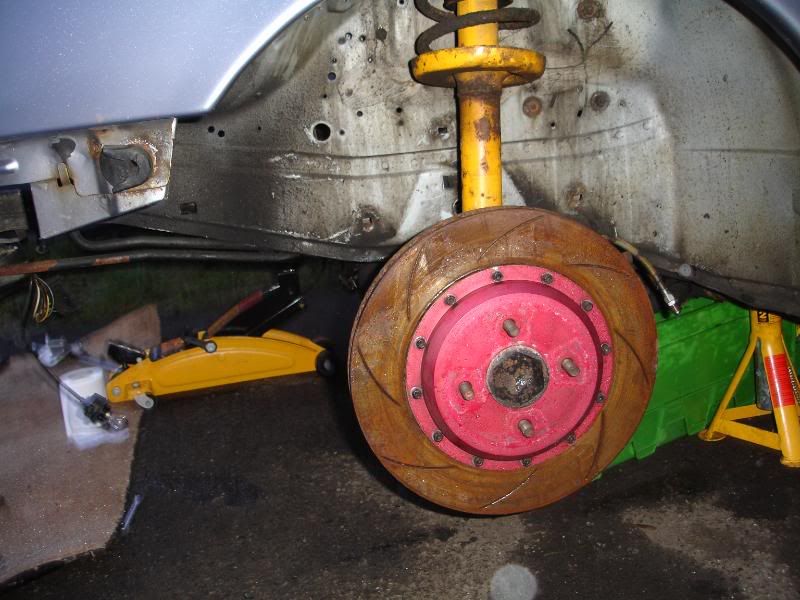
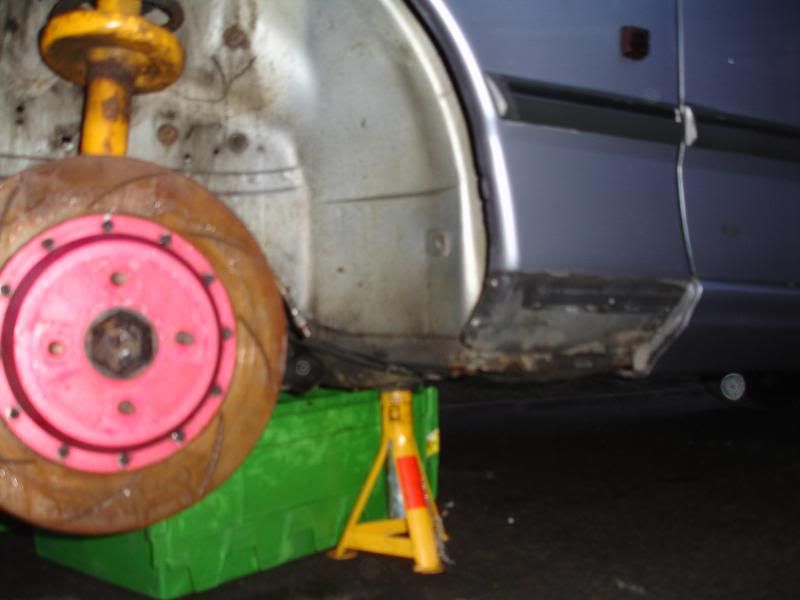
Then off to the front brakes
Again should have been a simple job, but i hadnt taken the wheels off since i had to tyres changed b4 i went to the ring, Dam pikey tyre place didnt use a torque wrench
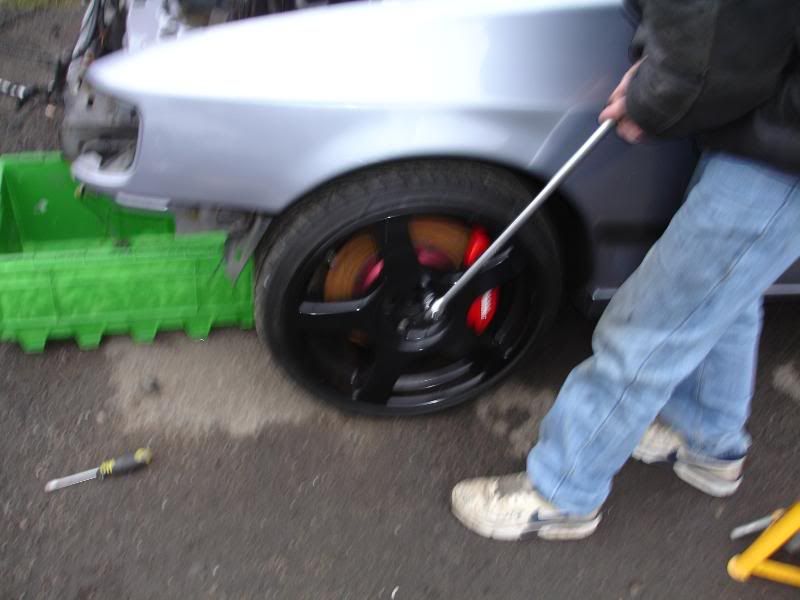
So i now need a complet new set of wheel nuts
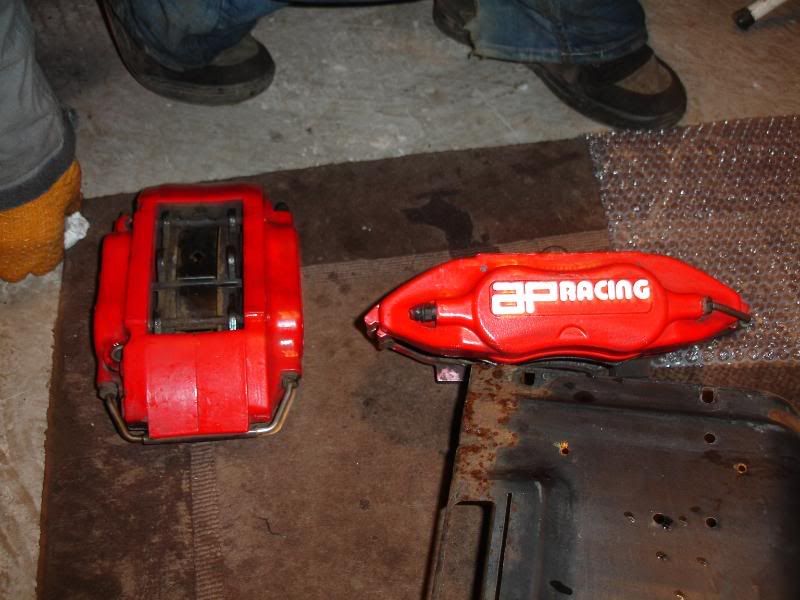
Finally after getting the wheel off it was a simlpe job of removing the front calipers
Next off was the washer bottle,
oh well it was the only way to get it out, dam captive nuts
Then it was the arch gard things
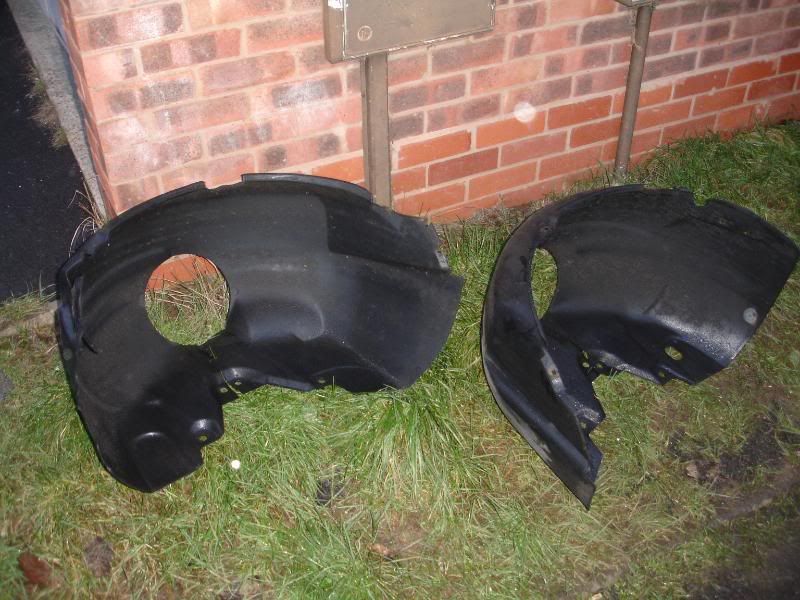
To my suprise they both came out whole (cheers rich you r getting the hang of it now)
inner arches r clean to,
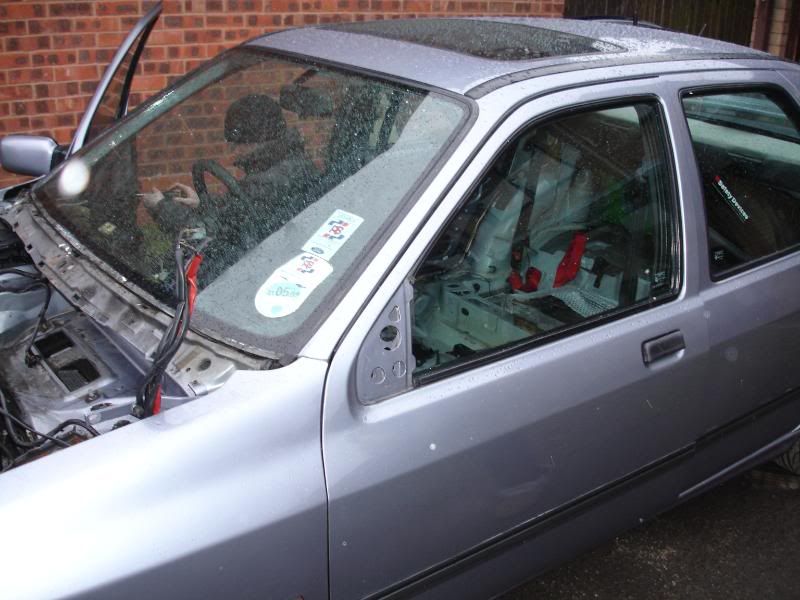
so at 4pm today the car looked like this
as tev was jacked up and wheels off i thought it would b a good idea to drill the rivets out of the side skirts
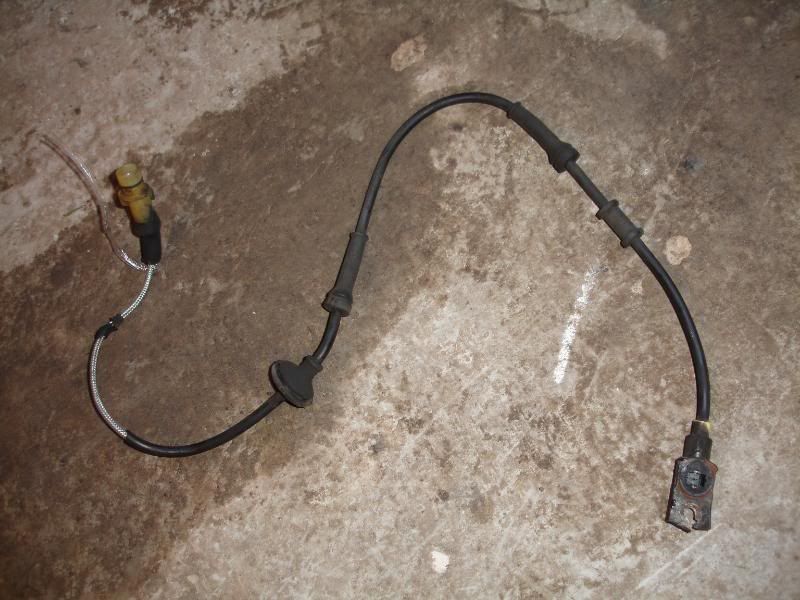
And remove the abs sensors, when the dash was removed i wonderd why the abs light feed had been cut,
looks like this may b my answer
Oh well more money i need to spend,
Due to the light Failin it was time to put the car back in the garage until tomorrow when the engine comes out,
The bin always comes in handy
And belive it or not i even cleaned up
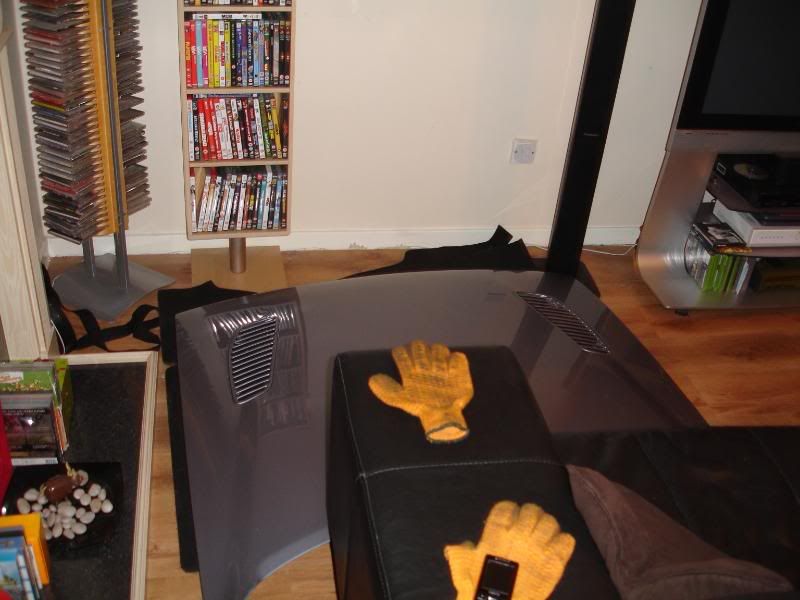
Roll on tomorrow, when the engine comes out, i still hot a clue where its going to go, im running out of room big style, i currently have a bonnet propped up in my living room.
Cheers jay
Anyway first job for today was to actually chane the wheels over on my daily drive, as some of you may have seen it had quite possibly the worst wheel ive ever seen, so thanx to a Delivery from steve H the scort went from this
To this
A million times better
After the usual brew i had a quick trial fit of something that arrive the other day
Then moved on to the task ahead,
All the trim bit and head light removed, and luckly as expected no rust, to b honist i would have been suprised if i had found any
next up was the coil pack that i had left the other day, as you can see from the pic's its a great place to hide the coil pac until you have to do any kinda work
With the rear bulk head an coil pack removed it was time to go to work on the heater motor, another simple job but took ages
at this point it was another time for a brew, and i realised that not only imo does my cam cover look good but it serves a purpus
a couple of shots of behind the bulk head with everyting removed including wiper motor scuttle panel etc,
with my engine loom removed and all the electrics to the point they can b pushed back in to the engine bay, it was time to do the simple task of Draining oil,power-steerin fluid and gearbox oil, (simple and dirty)
With most of the engine bay now buttoned up it was time to do the Pain in the ass jobs
First off removing the wingmirros
I really The car with out them,
Then off to the front brakes
Again should have been a simple job, but i hadnt taken the wheels off since i had to tyres changed b4 i went to the ring, Dam pikey tyre place didnt use a torque wrench
So i now need a complet new set of wheel nuts
Finally after getting the wheel off it was a simlpe job of removing the front calipers
Next off was the washer bottle,
oh well it was the only way to get it out, dam captive nuts
Then it was the arch gard things
To my suprise they both came out whole (cheers rich you r getting the hang of it now)
inner arches r clean to,
so at 4pm today the car looked like this
as tev was jacked up and wheels off i thought it would b a good idea to drill the rivets out of the side skirts
And remove the abs sensors, when the dash was removed i wonderd why the abs light feed had been cut,
looks like this may b my answer
Oh well more money i need to spend,
Due to the light Failin it was time to put the car back in the garage until tomorrow when the engine comes out,
The bin always comes in handy
And belive it or not i even cleaned up
Roll on tomorrow, when the engine comes out, i still hot a clue where its going to go, im running out of room big style, i currently have a bonnet propped up in my living room.
Cheers jay
12-02-2009, 09:11 PM
#55
BANNED
BANNED

Join Date: Aug 2004
Location: The beach
Posts: 5,249
Likes: 0
Received 0 Likes
on
0 Posts
Nice progress Jay 
yes mate but I will have been to bank and paid for new motor before I come over so its aldi all the way
will be there at some point dude.
Originally Posted by Tev
if the new owners pickin your car up you will b loaded, sure you can splash out on some more exppensive coffee lol
Feel free to drop over when ever your free fella
Feel free to drop over when ever your free fella
will be there at some point dude.
Last edited by SteveH; 12-02-2009 at 09:12 PM.
 13-02-2009, 05:03 PM
#67
BANNED
BANNED
Join Date: Aug 2004
Location: The beach
Posts: 5,249
Likes: 0
Received 0 Likes
on
0 Posts
Sorry about today dude, guy took his time getting to me after you rang
Car is now gone though, deposit paid on that one I told you about
I'm free over the weekend to come and drink hot bevs though
Car is now gone though, deposit paid on that one I told you about
I'm free over the weekend to come and drink hot bevs though
 13-02-2009, 11:58 PM
#70
BANNED
BANNED
Join Date: Aug 2004
Location: The beach
Posts: 5,249
Likes: 0
Received 0 Likes
on
0 Posts
Free all day sunday (subject to me getting up)......... jaffa cakes anyone?

 16-02-2009, 08:37 PM
#76
Just for you fella,
Right sorry the updates late,
Friday was on of those days that we actually did very little but the car looked so much different when done,
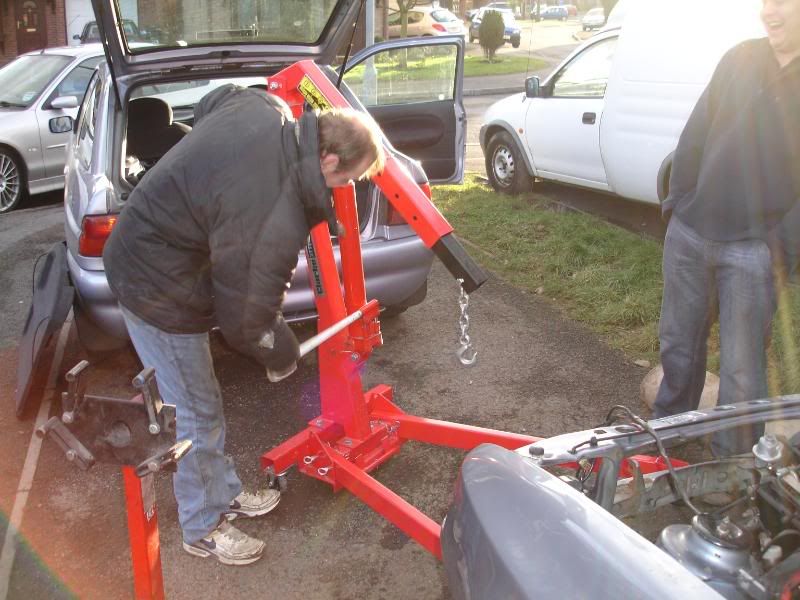
First off i made a quick trip to richs house in the trusty work horse that is the scort
Needed the engine crane,
After we finally made a start,
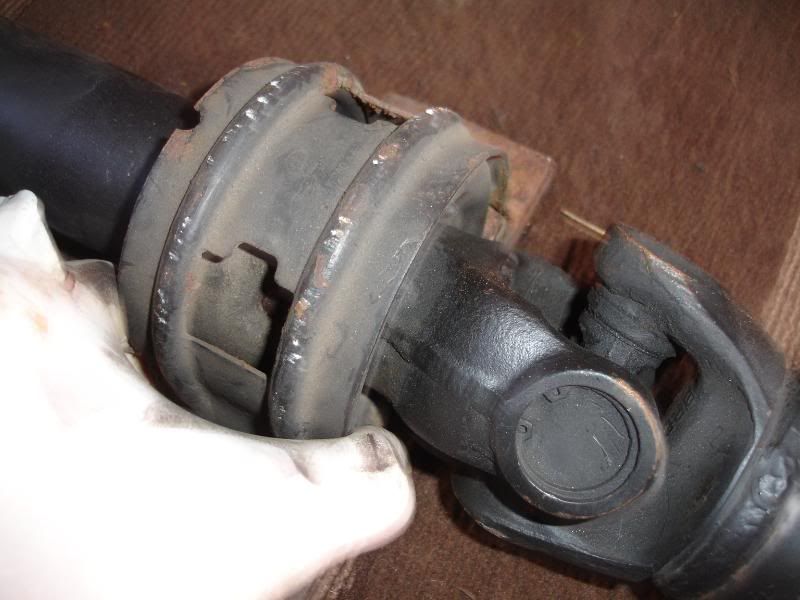
First out was the prop
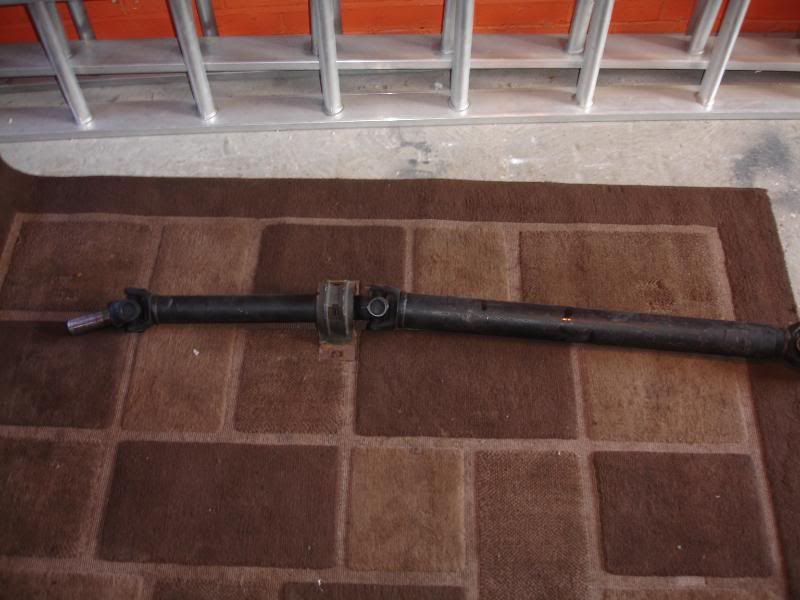
it looks in good condition but it turns out the bearin is shot to shit, u can kinda see how much play there is from this photo
quick cuppa then down to the important bit,
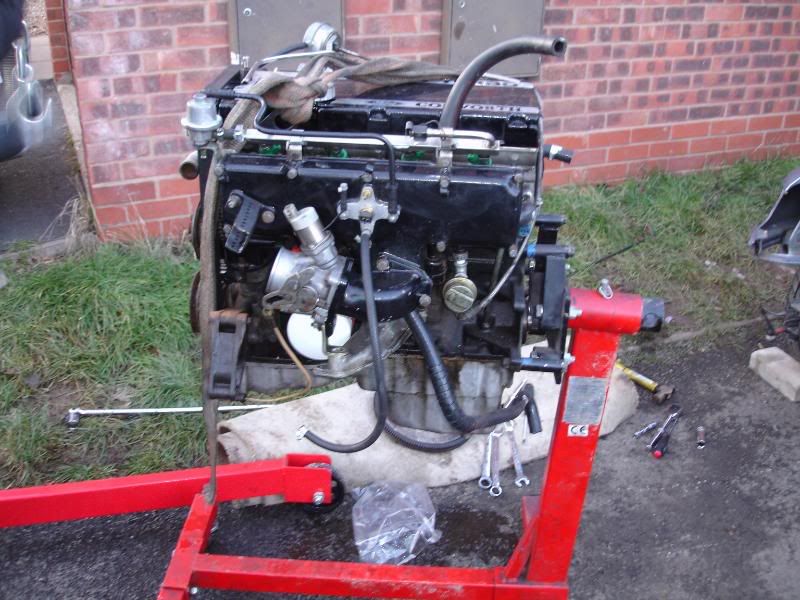
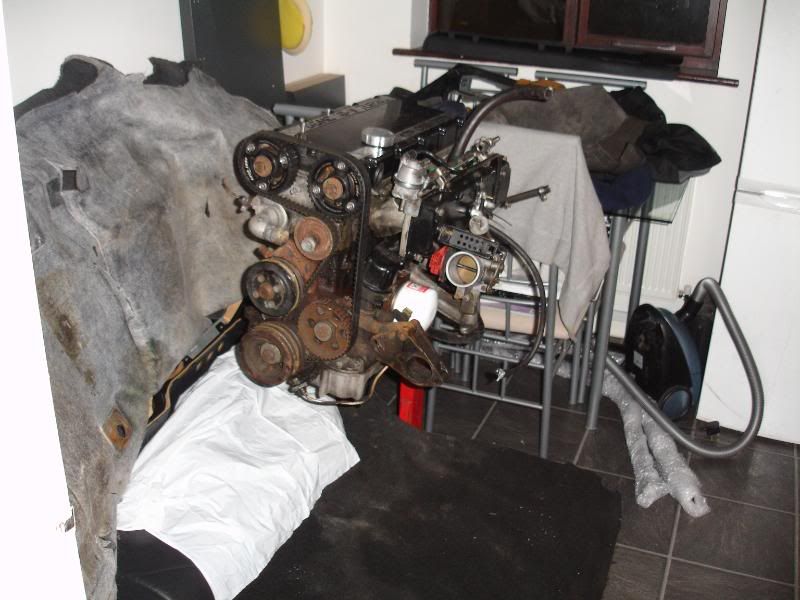
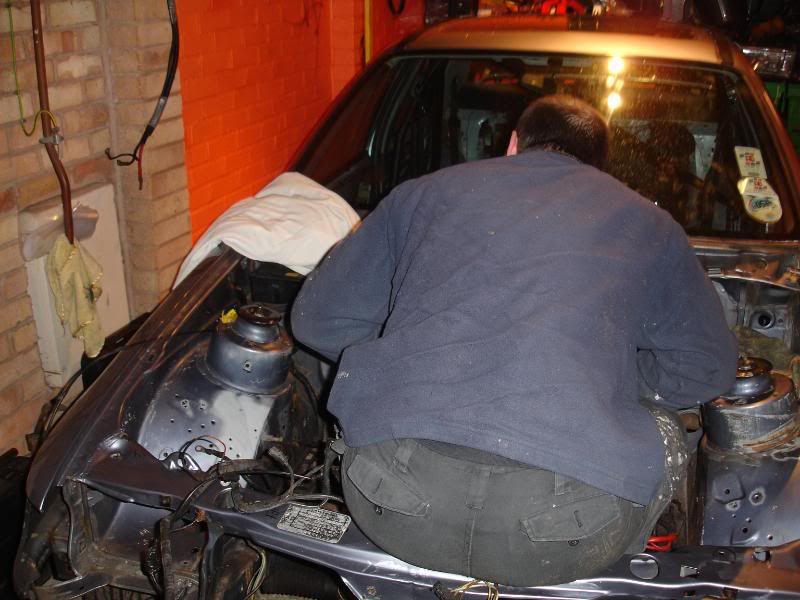
Engine out
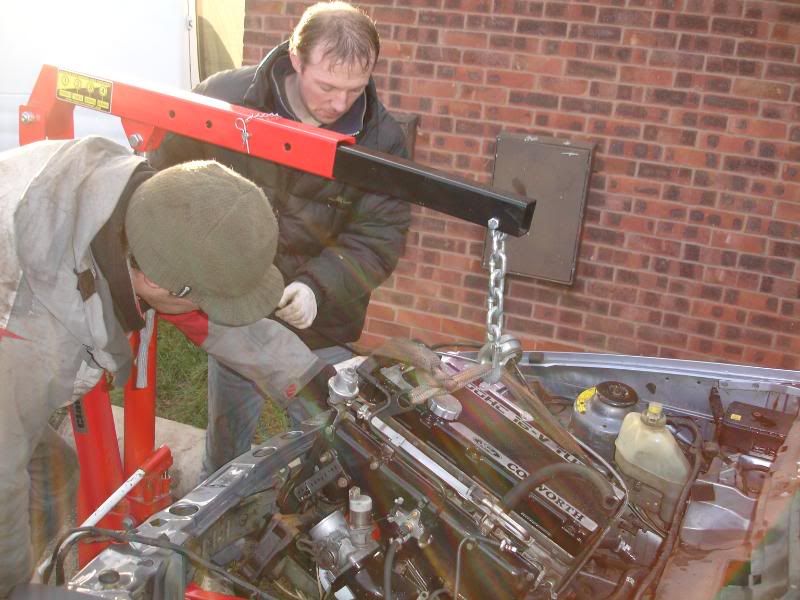

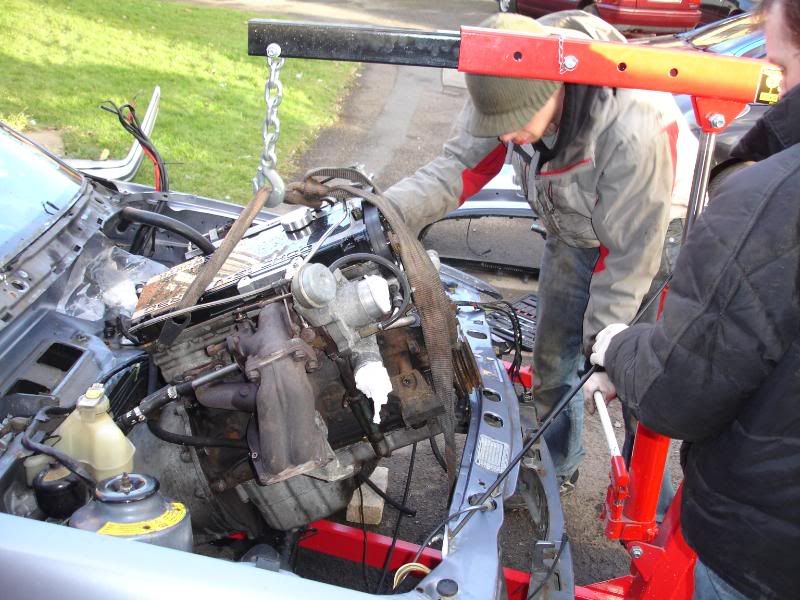
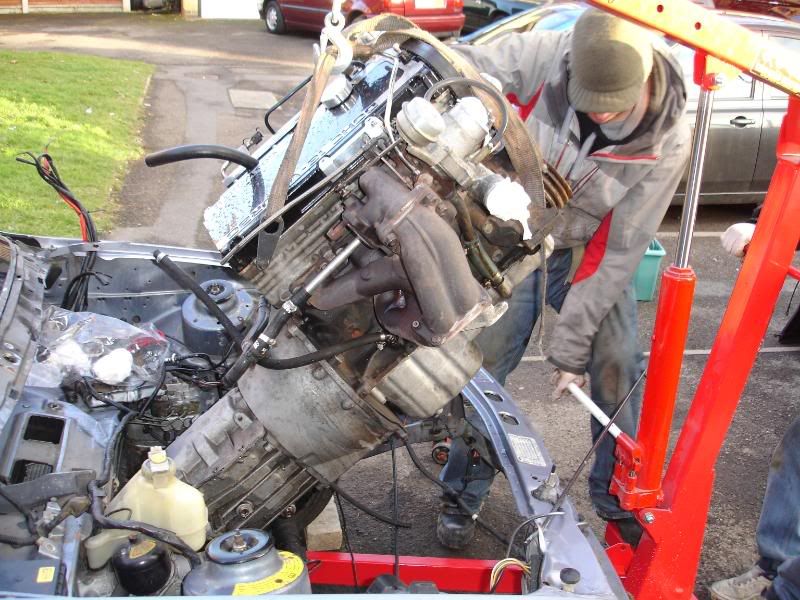
A quick wiggle in the right direction

and it was all over
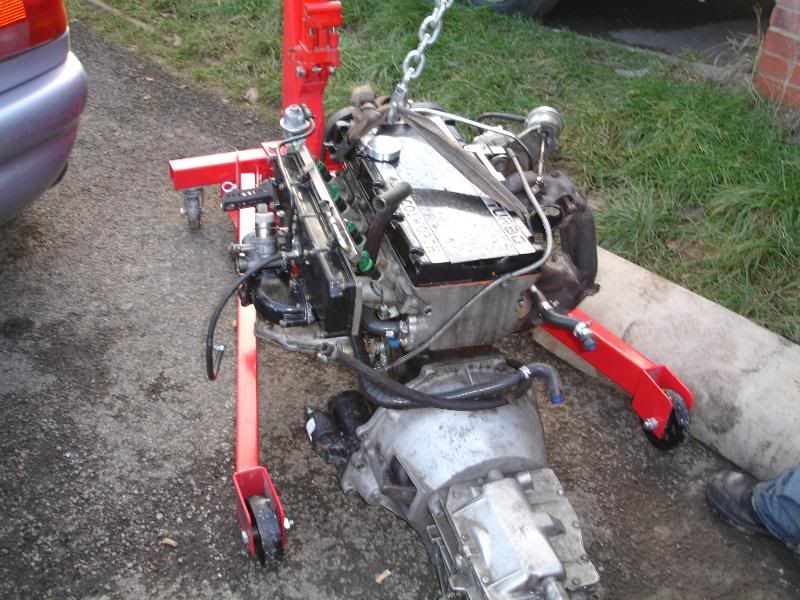
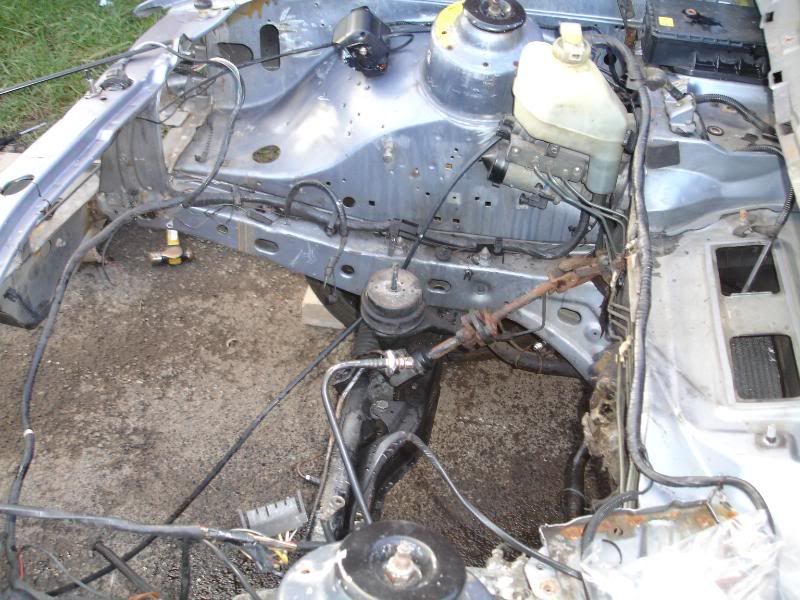
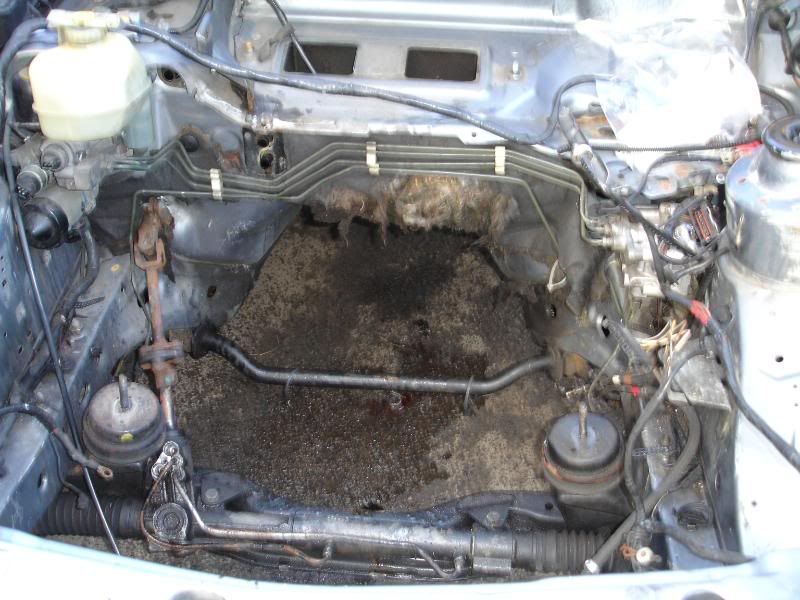
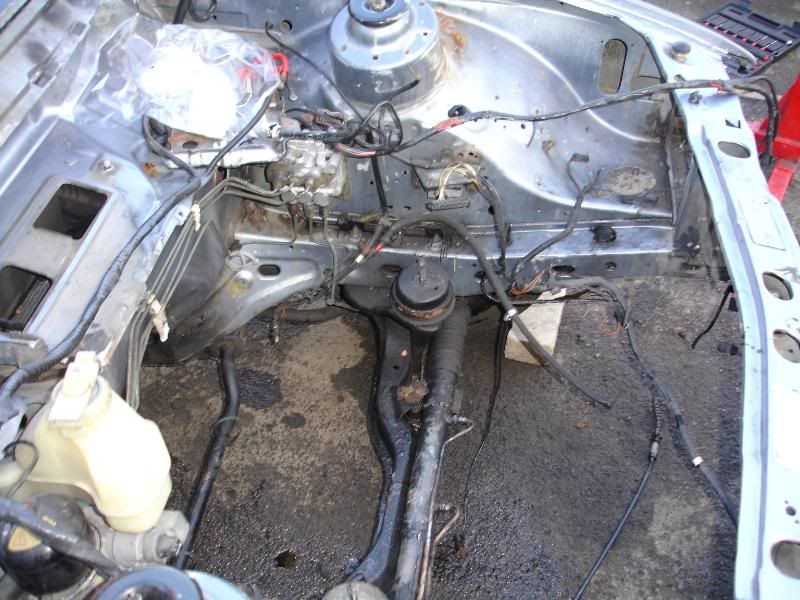
as to be expected the bay was really clean
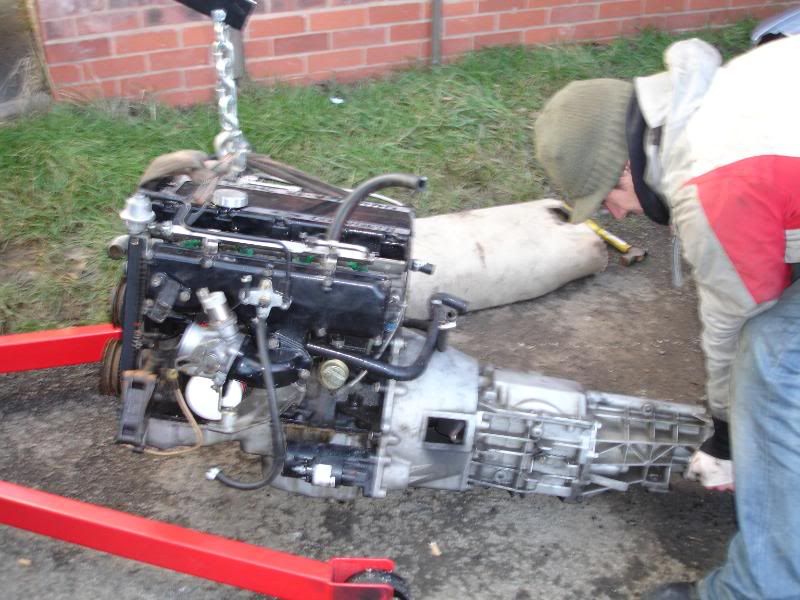
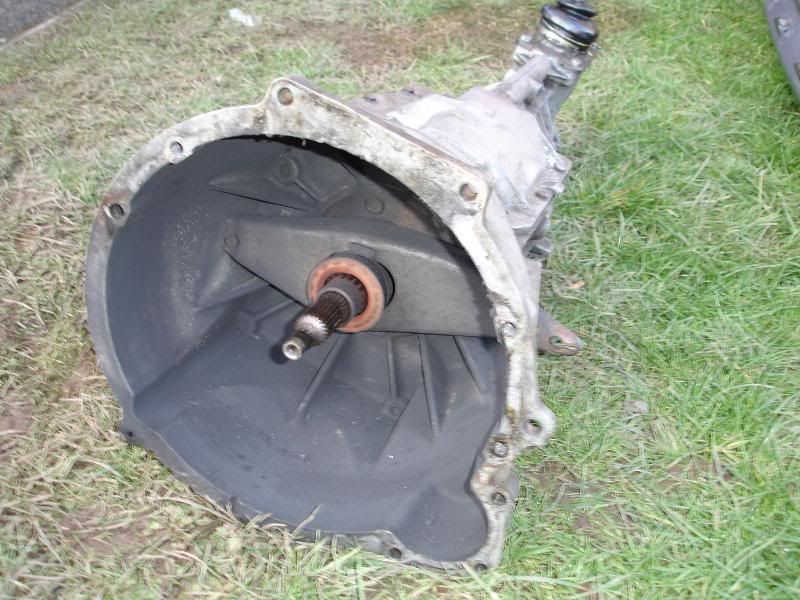
Next thing on the list was to split the box from the engine as i wanted to get the engine on the stand

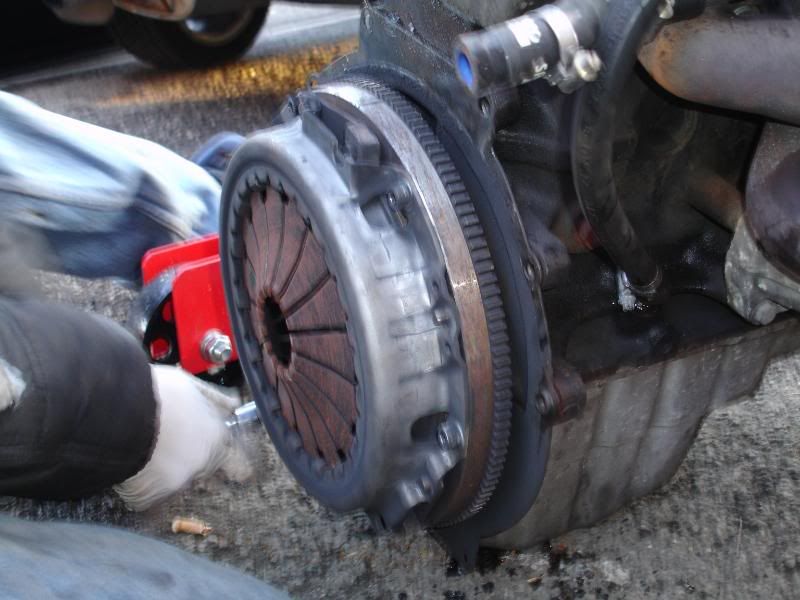
With the box off it was time to remove the clutch cover and clutch,
i was hoping to find a clutch and cover in good condition as i only changed it 6000 miles ago
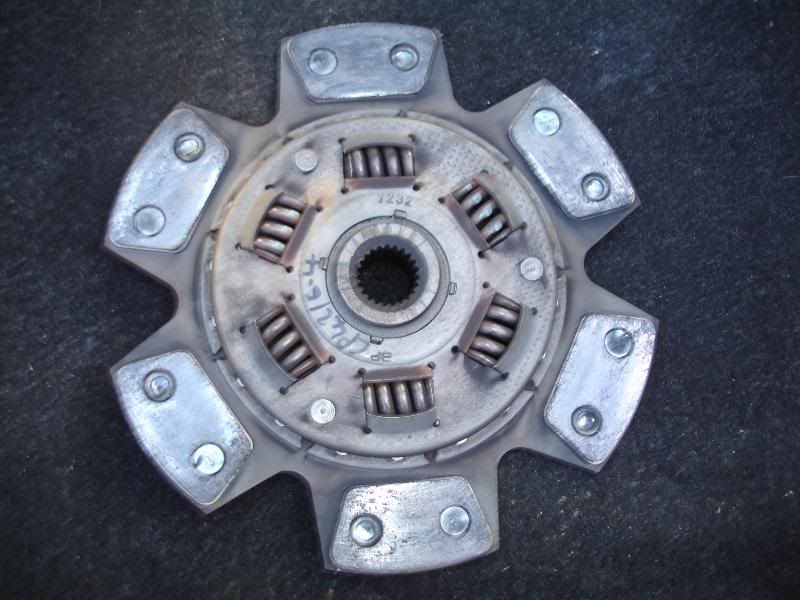
as you can see its nearly at the rivets so this is for you AP
And the clutch cover and Fly r just as bad if not worsre

I suppose that i can lay the blame all on ap as im sure the trip to the ring i went on in october didnt help
Anyway less of me moaning and more bout the build
so next up it was engine stand time,
Before

After
Time to remove a couple of odds and sods out of the bay
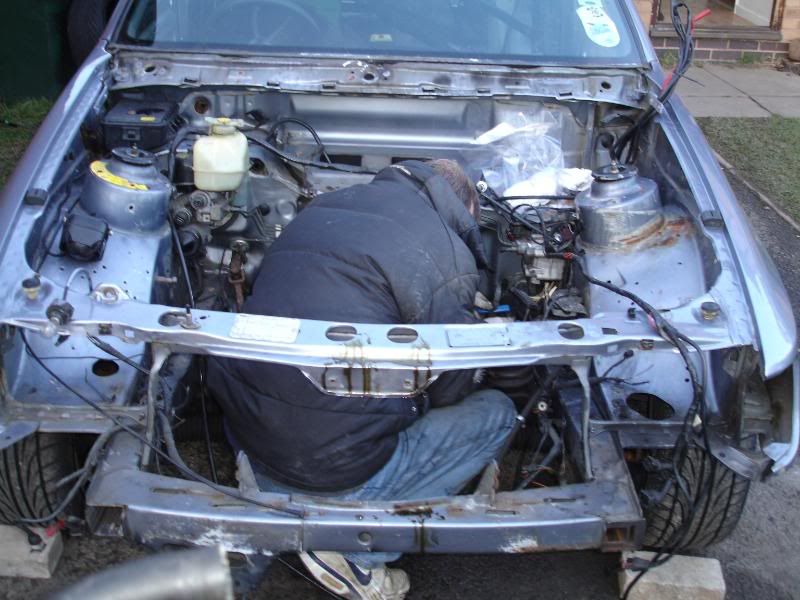
including me
While i had the engine at a height that was easy to work on i thought it would b a good idea to give it the once over, and take the turbo and zorst manifold off as it turned out the gaskets was fooked
how fookin difficult to take the manifold off, i really do need a trained ferrit
buy the time we had finished it was getting dark, so time to pack away,
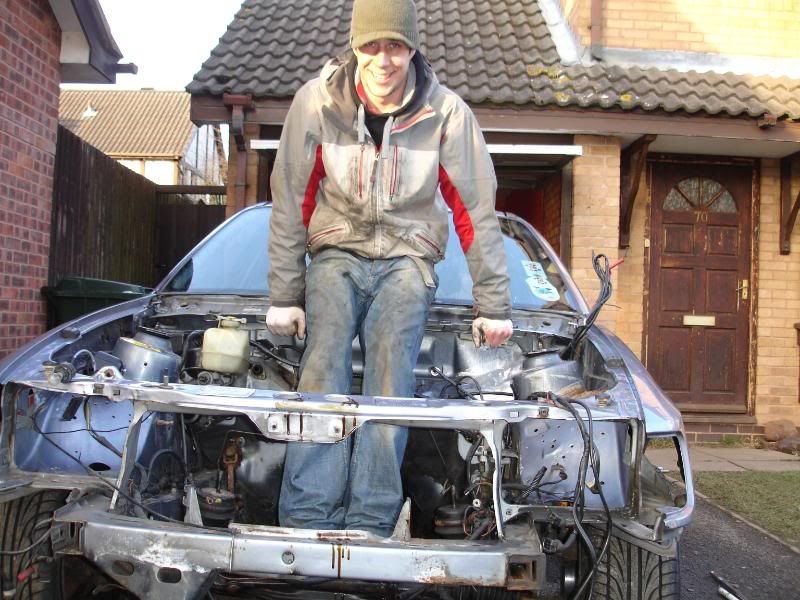
so The bonnet ended up in my living room
and my engine, well thats in the kitchin
Well thats friday wrapped up,
so in 5 days the cars gone from this

To this

Right sorry the updates late,
Friday was on of those days that we actually did very little but the car looked so much different when done,
First off i made a quick trip to richs house in the trusty work horse that is the scort
Needed the engine crane,
After we finally made a start,
First out was the prop
it looks in good condition but it turns out the bearin is shot to shit, u can kinda see how much play there is from this photo
quick cuppa then down to the important bit,
Engine out
A quick wiggle in the right direction
and it was all over
as to be expected the bay was really clean
Next thing on the list was to split the box from the engine as i wanted to get the engine on the stand
With the box off it was time to remove the clutch cover and clutch,
i was hoping to find a clutch and cover in good condition as i only changed it 6000 miles ago
as you can see its nearly at the rivets so this is for you AP
And the clutch cover and Fly r just as bad if not worsre
I suppose that i can lay the blame all on ap as im sure the trip to the ring i went on in october didnt help
Anyway less of me moaning and more bout the build
so next up it was engine stand time,
Before
After
Time to remove a couple of odds and sods out of the bay
including me
While i had the engine at a height that was easy to work on i thought it would b a good idea to give it the once over, and take the turbo and zorst manifold off as it turned out the gaskets was fooked
how fookin difficult to take the manifold off, i really do need a trained ferrit
buy the time we had finished it was getting dark, so time to pack away,
so The bonnet ended up in my living room
and my engine, well thats in the kitchin
Well thats friday wrapped up,
so in 5 days the cars gone from this
To this
16-02-2009, 09:38 PM
#77
Well is actually kinda day 7 as i did nothing sat, anyway sunday started with a few quick phone calls to all the people that had promissed to give a hand if i needed, (they all just fanced takin the angle grinder to my pride and joy (Mr c)
The last couple of bits had to come out of the engine bay

We decided to take some more of the loom out (abs and electric heated screen loom)
My garage now looks like a branch of currys
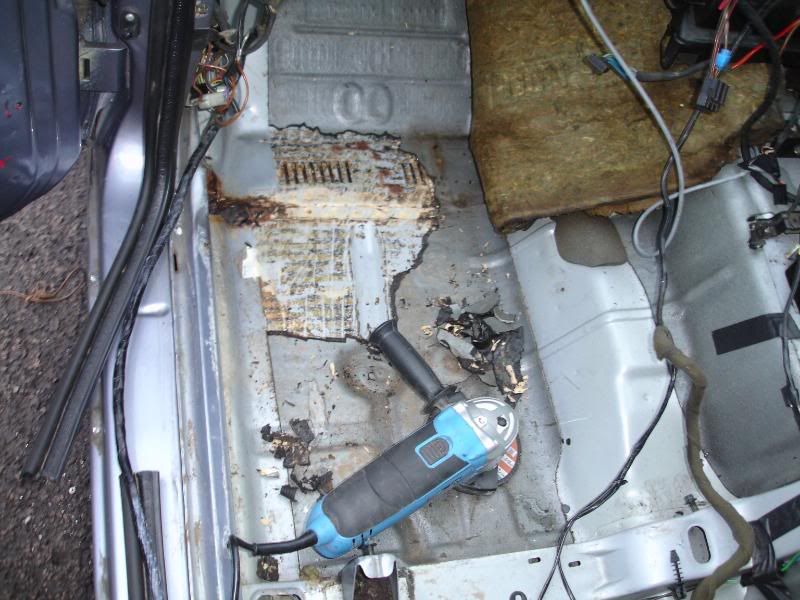
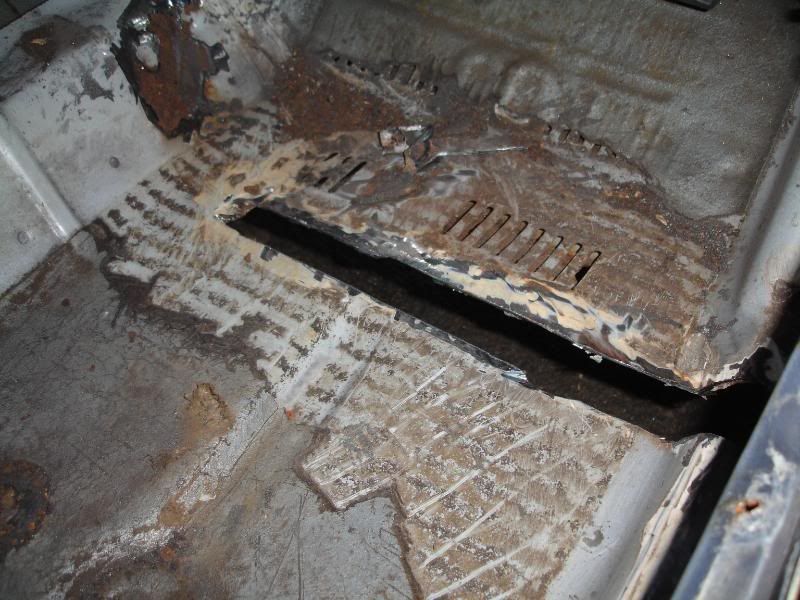
Anyway after a little tidy up it was time to start tidying up the floor pan for weldind well thats what i tought,
a quick sessin with the heat gun to remove the shit tar sound deadening
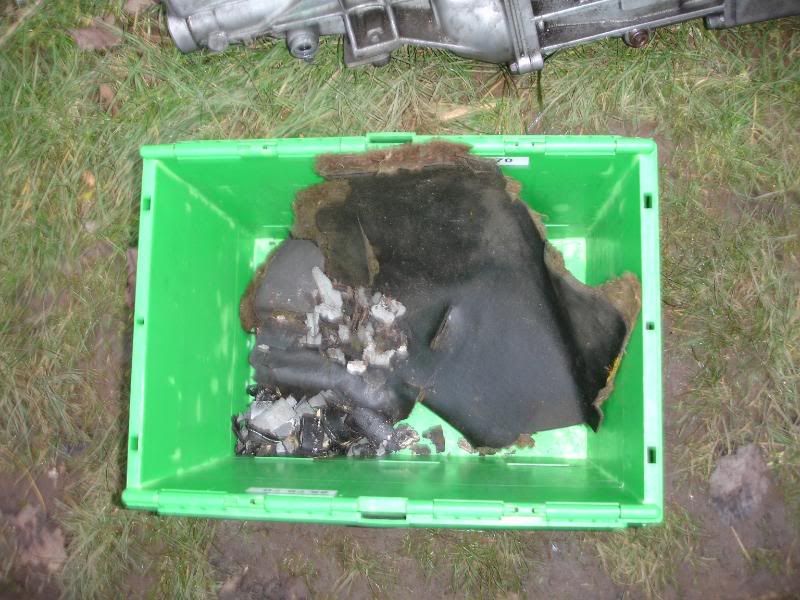
Revield even more rust:w all:
The hole in the passenger floor was even worse than first thought
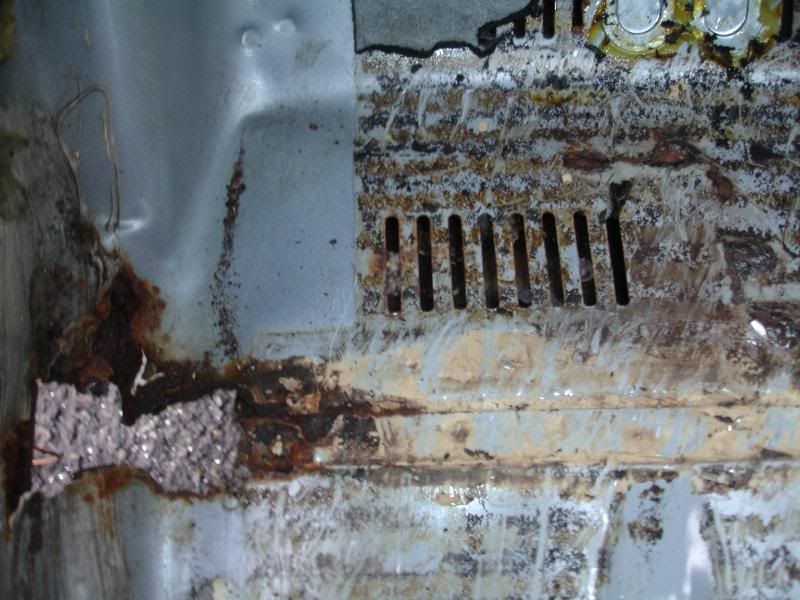
(i always wonderd why the carpet felt damp)
But it turns out the drivers side was a hell of a lot wores
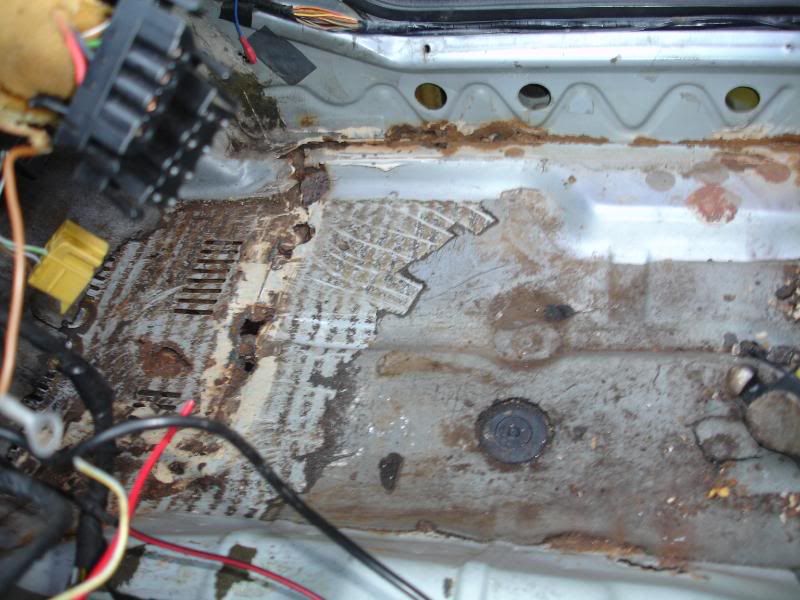
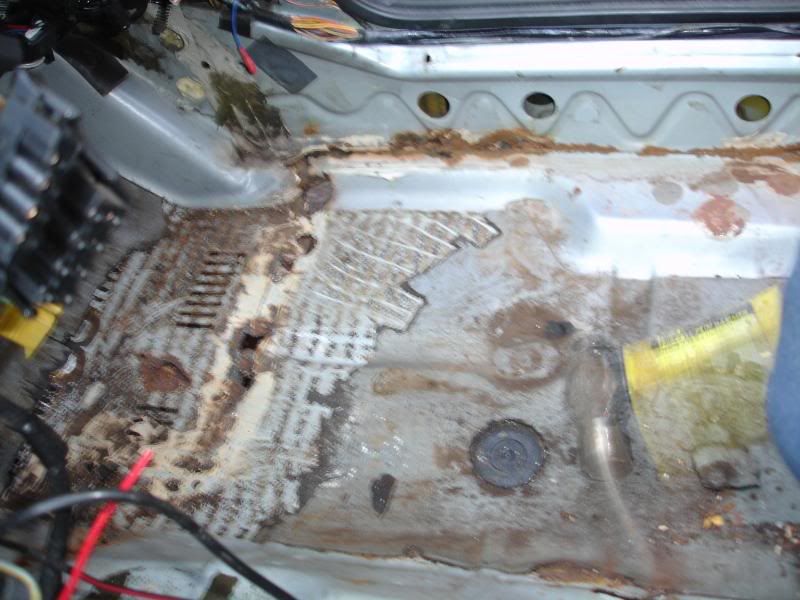
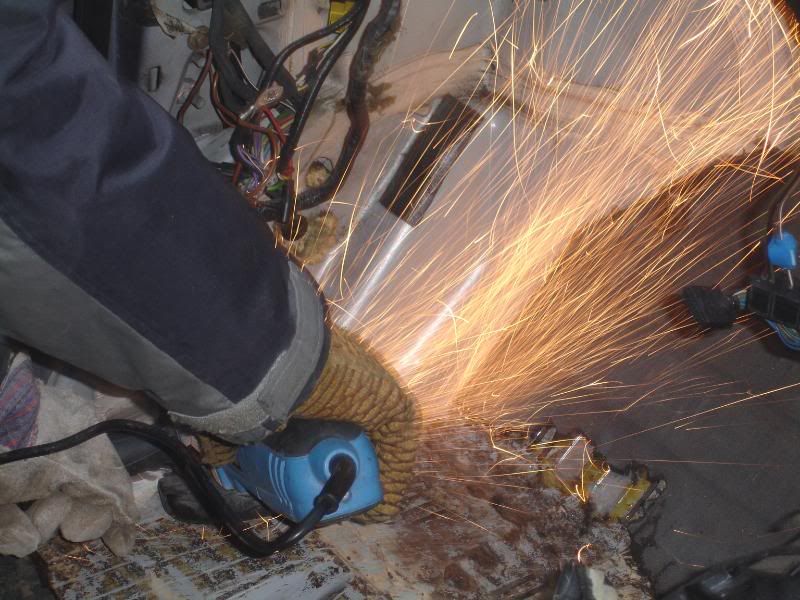
By the looks of it some1a jcaked off the floor, causin the floor skins to split and rust
So the only option was to take drastic action, (time for my m8s to have there fun
(Mr C)
All under the watch full eye of rich
To be left with a cosworth that resembles fred flinstones car
Oh well its all going to b worth it in the long run,
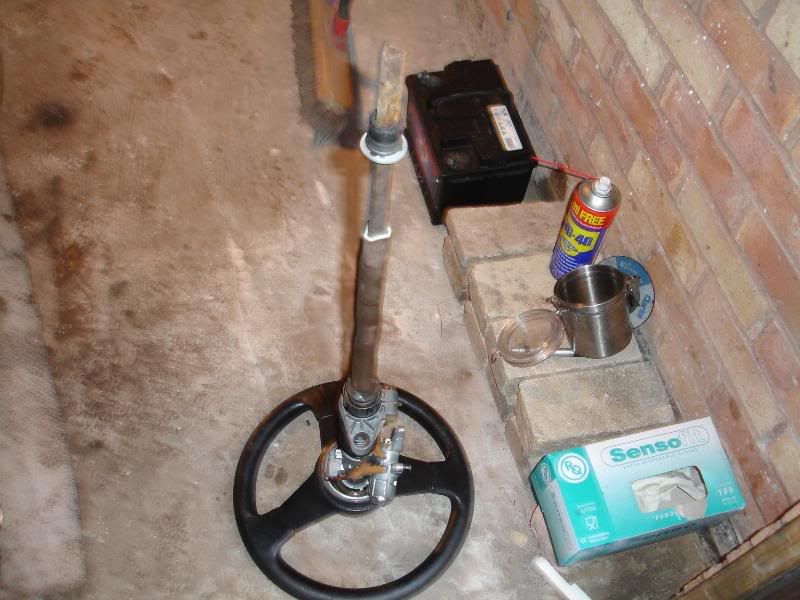
quick shot of my new 909 motor sport rack and steering wheel
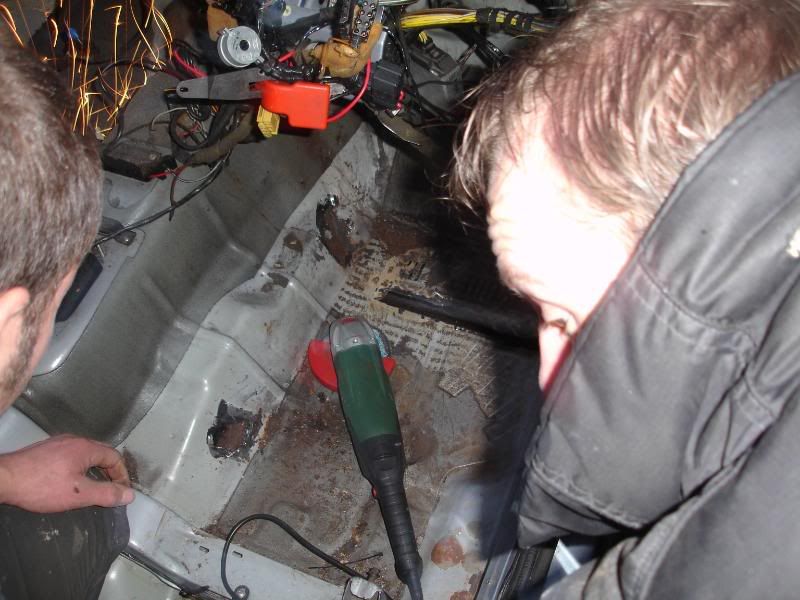
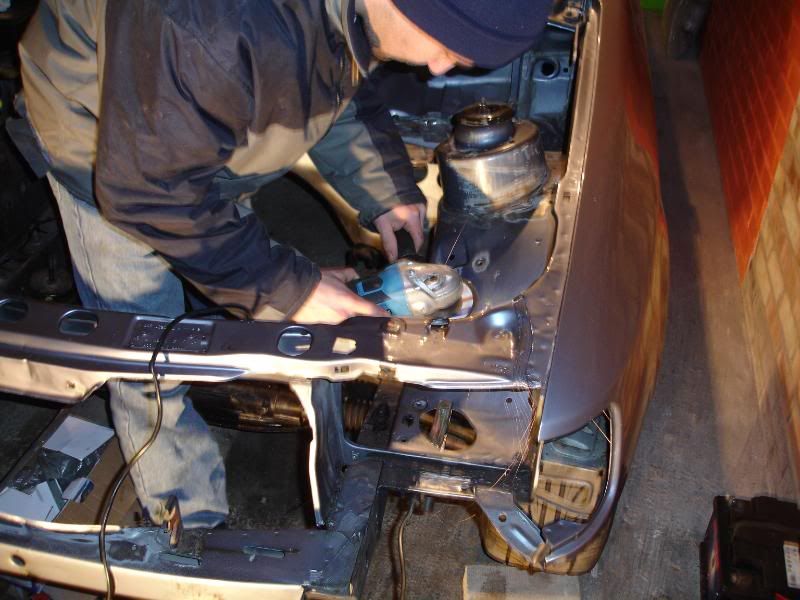
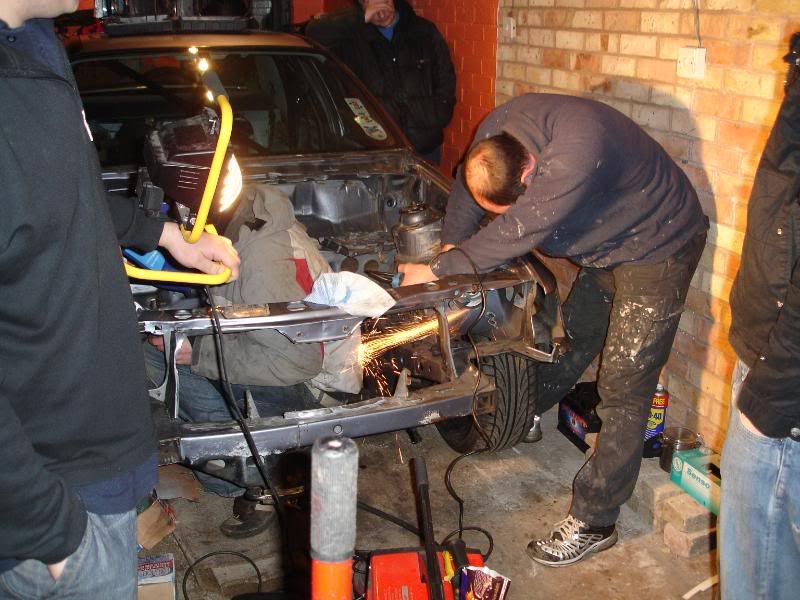
As ever we was beaten by light but it didnt stop us wielding all the little holes in the inner wings of the engine bay, ive seen this done on a few cars n thought it looks fookin amazin, little did i kow it was going to b such a pain in the ass,
so it really was all hands to the pump,
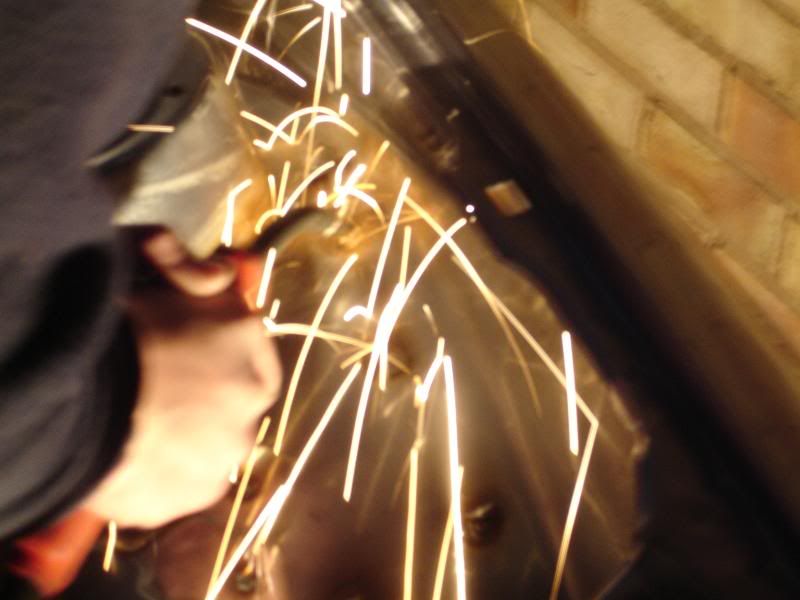
First off was take a drill to the holes takin all the paint off to get a good wield,
Then a shit load more grindin

(we do pay attention to health and safety lol)
Then the wielding
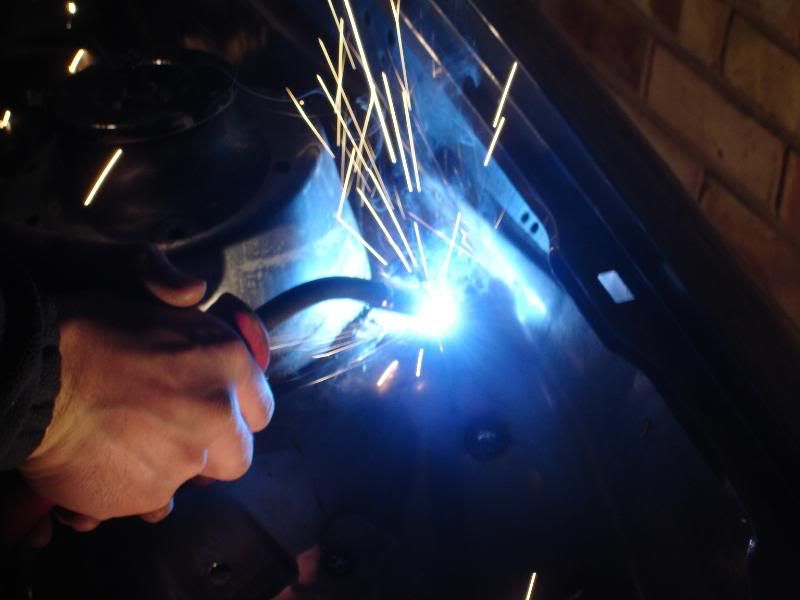
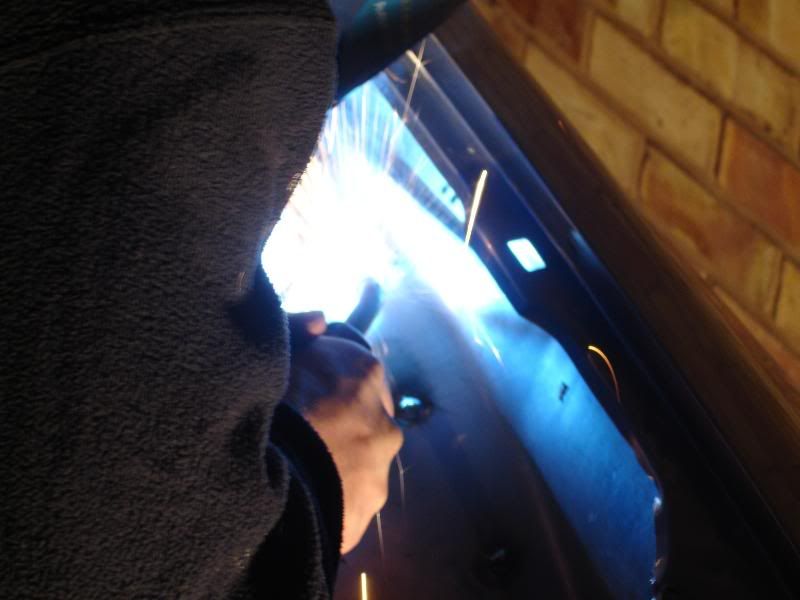
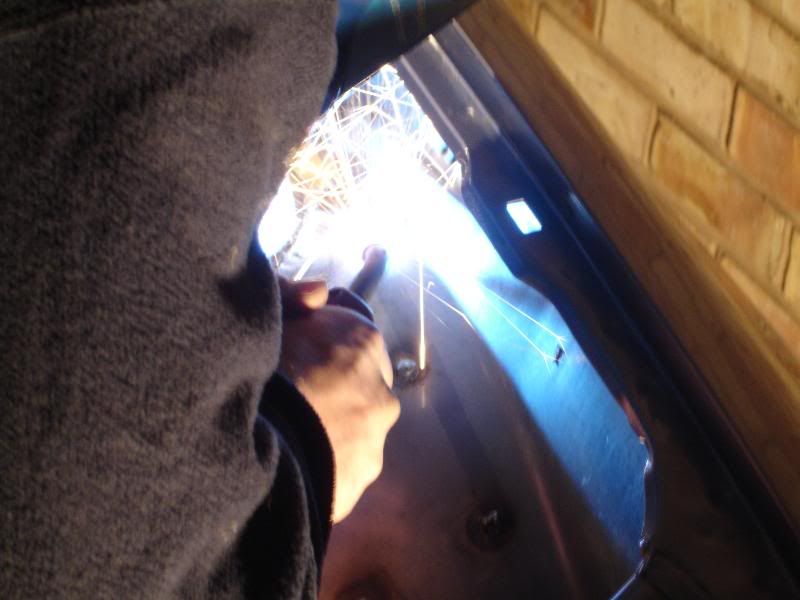
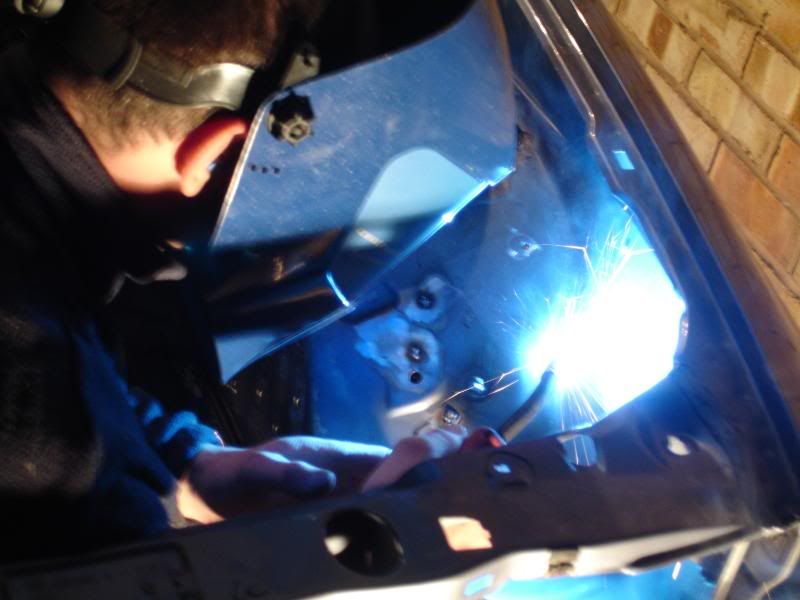
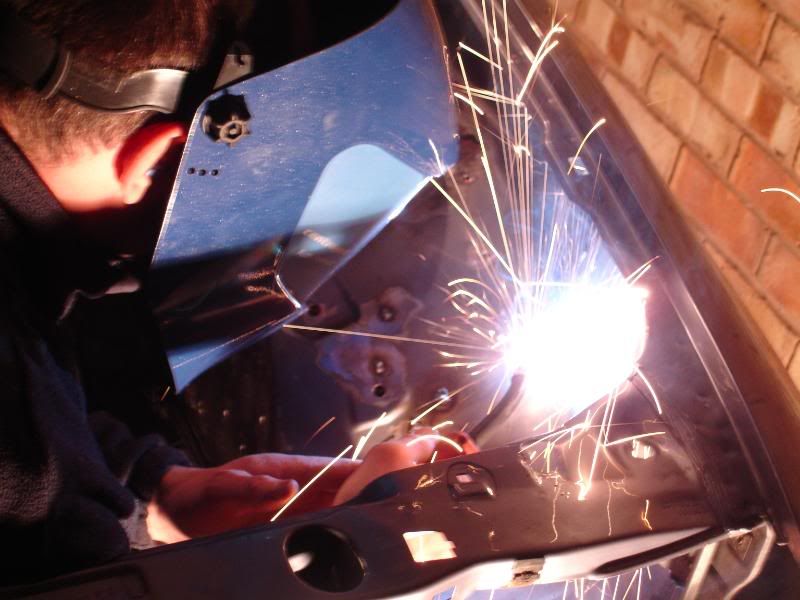
This is what the inner wings looked like half way through
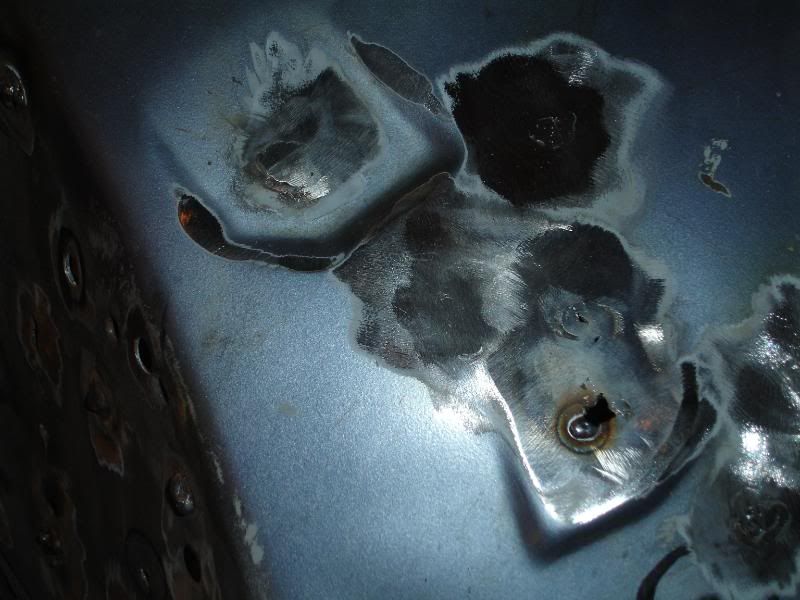
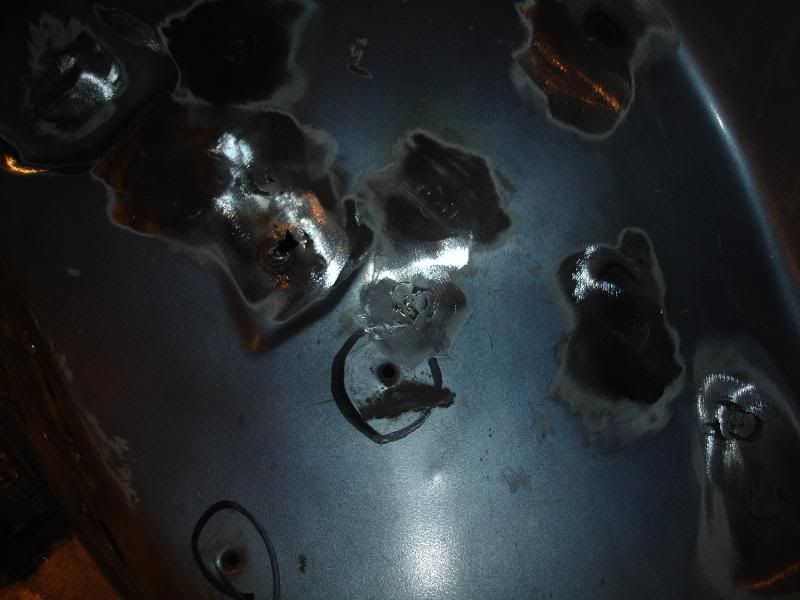
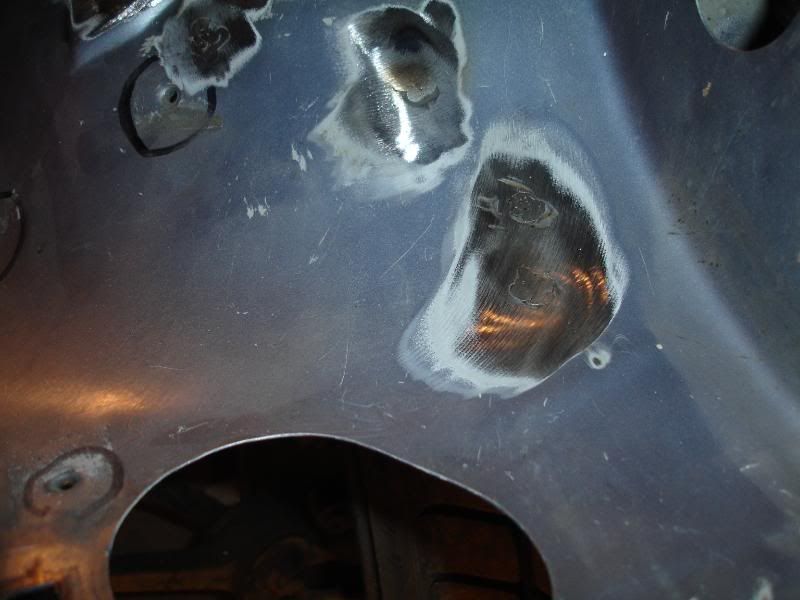
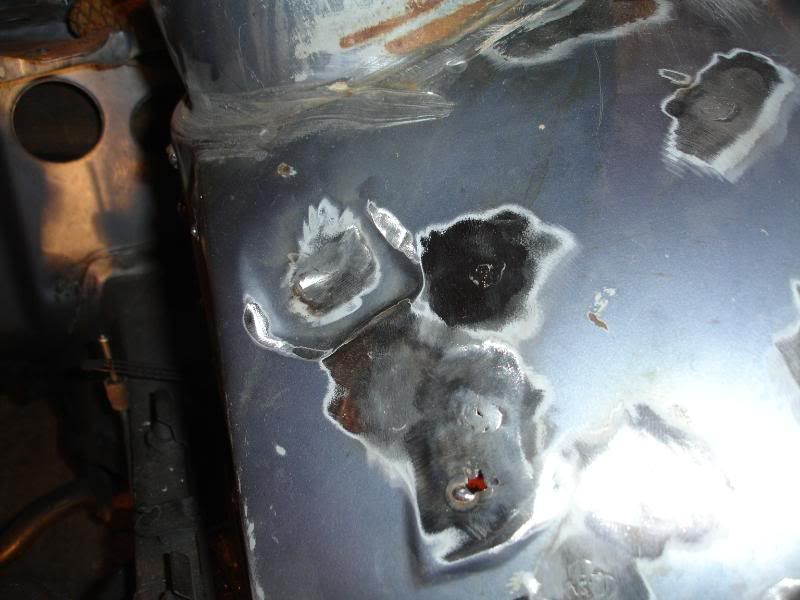
A spot more wielding and a shit load more grinding but like a muppet i completly forgot to take any more pics
all i will say is the results good, but theirs still more holes to wield then a quick skim over with filler should see the engine bay finished
Its a hell of a lot of work for something only a few people will see,
but its something ive wanted to do since ive had the car, im also toying with stitch and seam wielding the bay Whats peoples opinions on this???
Anyway thats your lot for now, a big thanx to.................
Rich (xr4x4)
Mark(Mr C)
Adi
Simon
And Steve H for turning up 5 hours late with a half eaten packet of biscuits
And ofcourse Sue my grilfriend for putting up with us all and cookin dinner
Cheers jay
(Mr c)The last couple of bits had to come out of the engine bay
We decided to take some more of the loom out
(abs and electric heated screen loom)My garage now looks like a branch of currys
Anyway after a little tidy up it was time to start tidying up the floor pan for weldind well thats what i tought,
a quick sessin with the heat gun to remove the shit tar sound deadening
Revield even more rust
:w all:The hole in the passenger floor was even worse than first thought
(i always wonderd why the carpet felt damp)
But it turns out the drivers side was a hell of a lot wores
By the looks of it some1a jcaked off the floor, causin the floor skins to split and rust
So the only option was to take drastic action, (time for my m8s to have there fun
(Mr C)
All under the watch full eye of rich
To be left with a cosworth that resembles fred flinstones car
Oh well its all going to b worth it in the long run,
quick shot of my new 909 motor sport rack and steering wheel
As ever we was beaten by light but it didnt stop us wielding all the little holes in the inner wings of the engine bay, ive seen this done on a few cars n thought it looks fookin amazin, little did i kow it was going to b such a pain in the ass,
so it really was all hands to the pump,
First off was take a drill to the holes takin all the paint off to get a good wield,
Then a shit load more grindin
(we do pay attention to health and safety lol)
Then the wielding
This is what the inner wings looked like half way through
A spot more wielding and a shit load more grinding but like a muppet i completly forgot to take any more pics
all i will say is the results good, but theirs still more holes to wield then a quick skim over with filler should see the engine bay finished
Its a hell of a lot of work for something only a few people will see,
but its something ive wanted to do since ive had the car, im also toying with stitch and seam wielding the bay Whats peoples opinions on this???
Anyway thats your lot for now, a big thanx to.................
Rich (xr4x4)
Mark(Mr C)
Adi
Simon
And Steve H for turning up 5 hours late with a half eaten packet of biscuits
And ofcourse Sue my grilfriend for putting up with us all and cookin dinner
Cheers jay

