
Mk2 Fiesta trackcar,12/10/10 update,ST170 6 speed mounts

 22-02-2009 | 07:36 PM
#42
Thread Starter
Advanced PassionFord User
iTrader: (1)
Joined: May 2003
Posts: 1,702
Likes: 13
From: South Wales
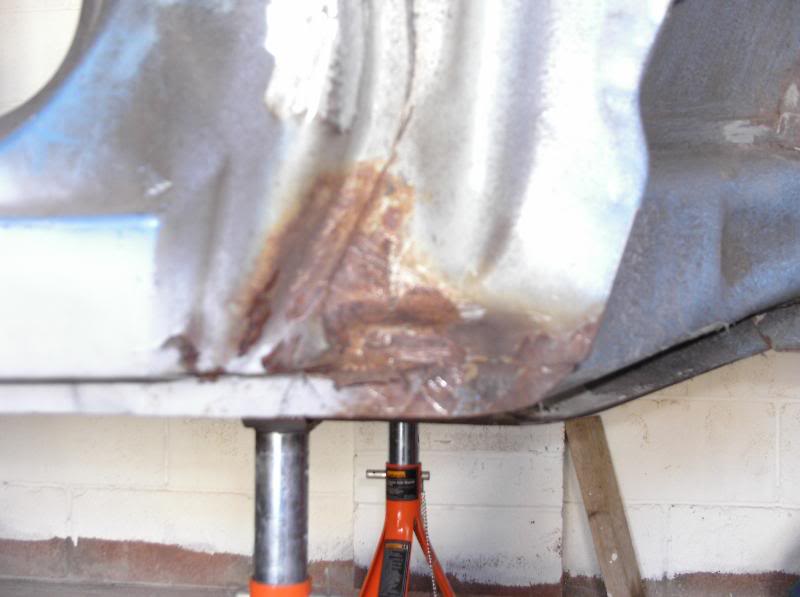
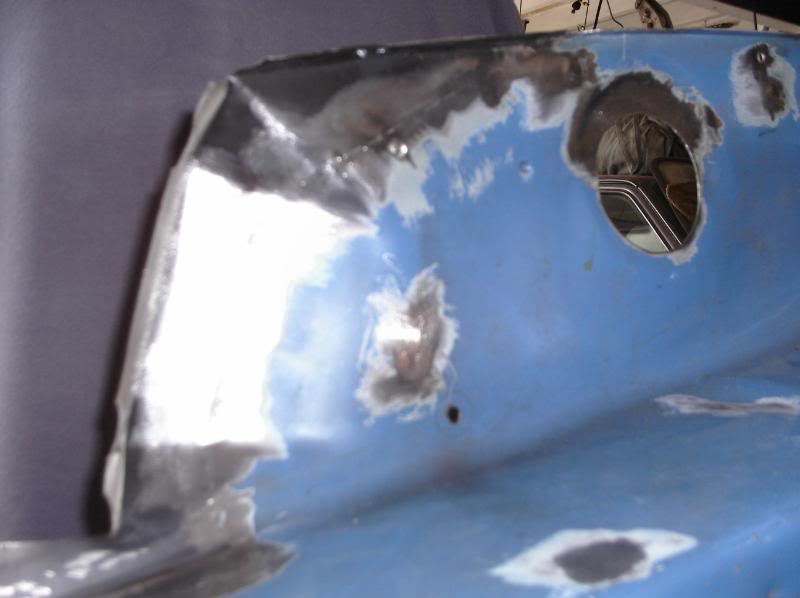
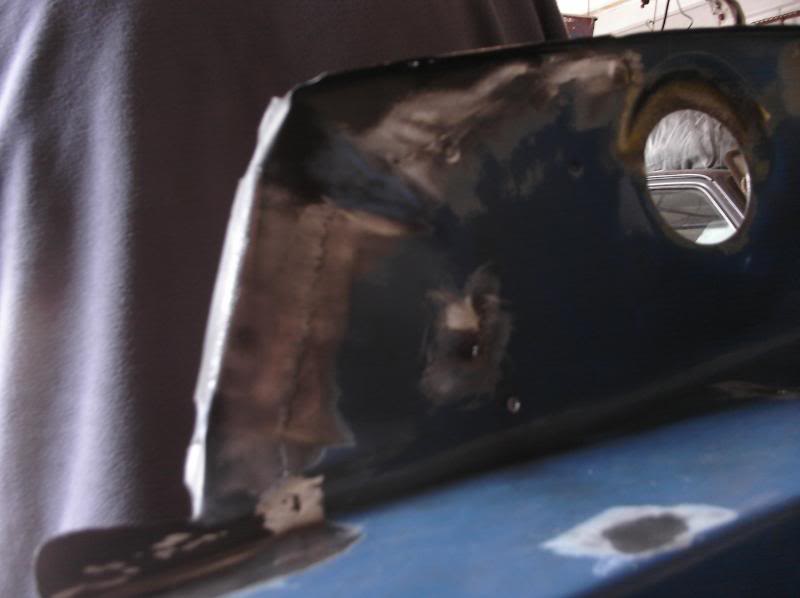
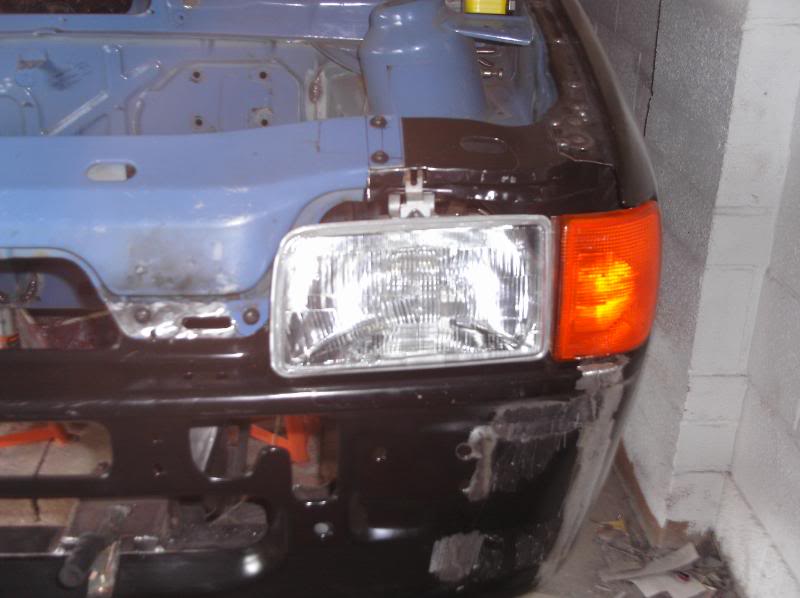
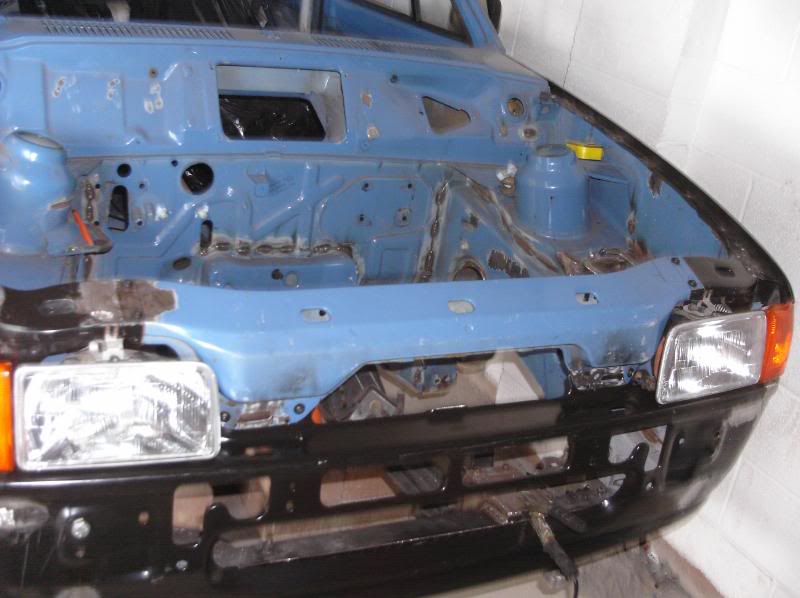
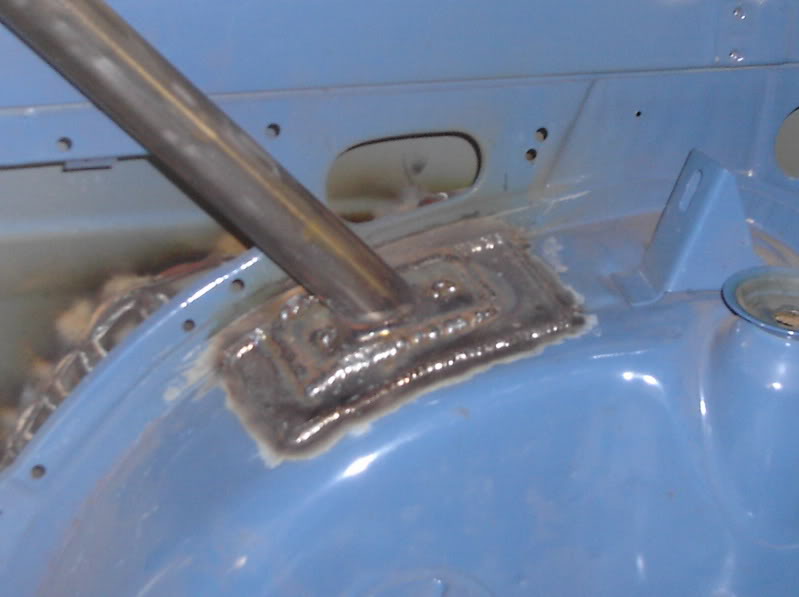
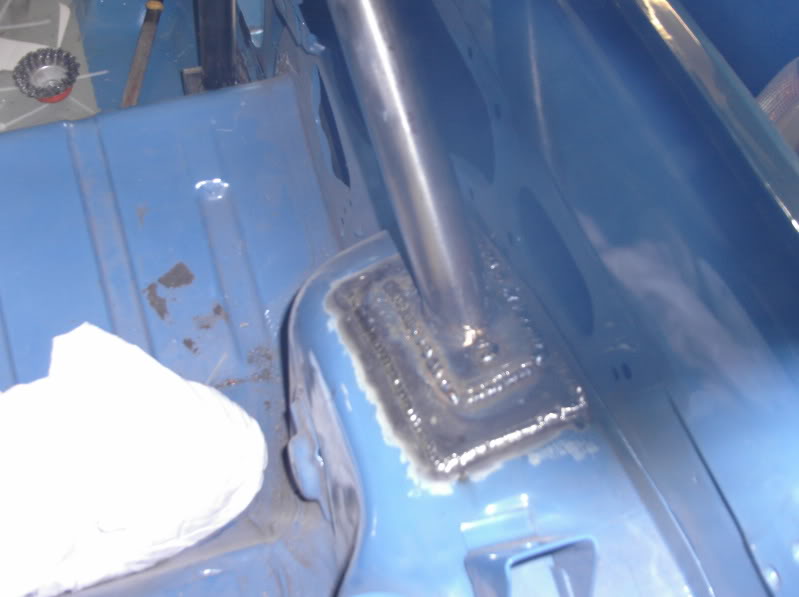
Had a bit of a head scratcher this week, there were a few bits that needed a good grinder wire brushing but due the there position (rear bottom corner of the inner wing and the upper front corner of the inner wing just behind the indicator rear) getting the grinder in there was impossible, so front end off, wings and front panel :-(:-(:-( not happy.
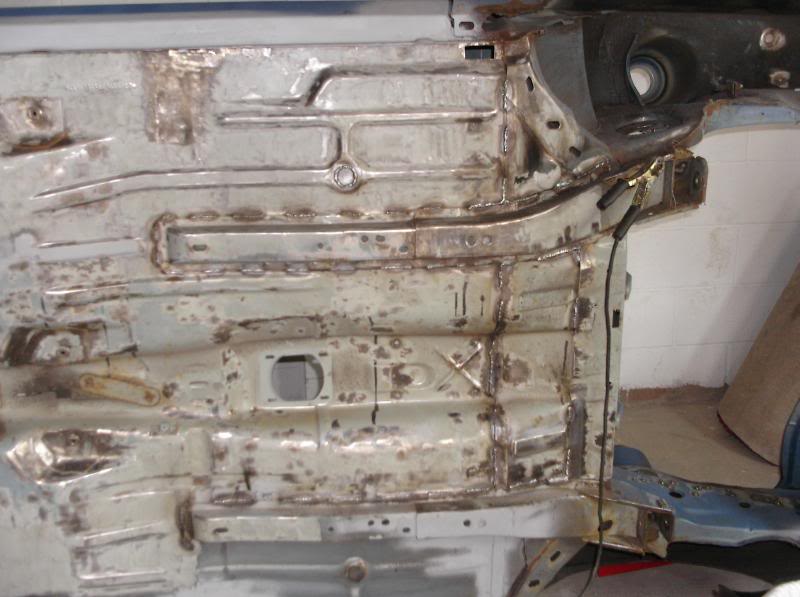
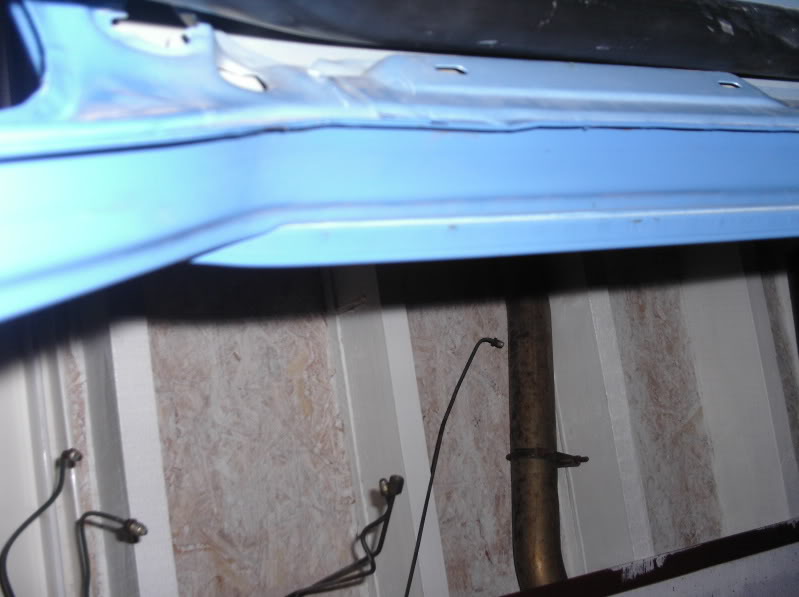
Before i tackled that the chassis rails got seamed and the 4 drain plugs in the floor got welded up and 1 small hole sorted out

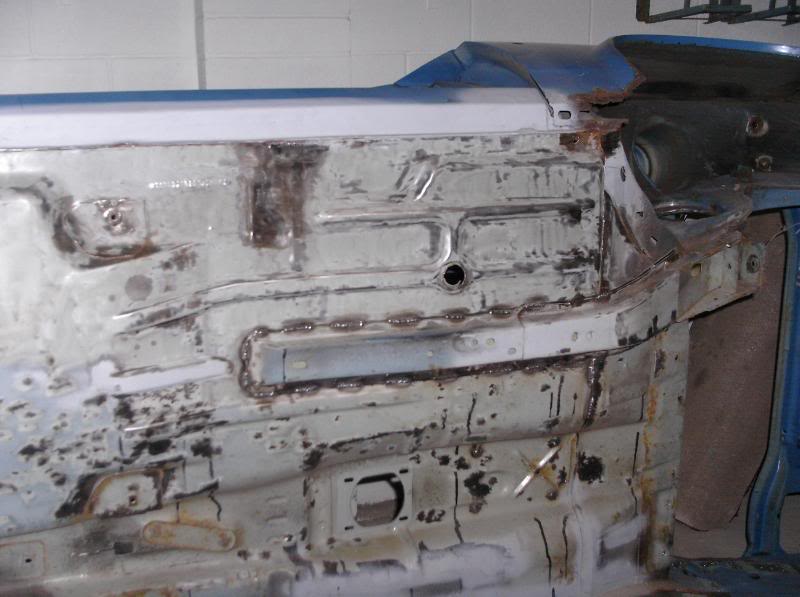

drivers side


passenger


and the inner floor now looks like this

All in all a productive weekend, i've got the wings and front panel but need to get 2 inner wings so that i can cut off 2 small sections for the front on both side to make them perfect.
more to come no dought
Before i tackled that the chassis rails got seamed and the 4 drain plugs in the floor got welded up and 1 small hole sorted out
drivers side
passenger
and the inner floor now looks like this
All in all a productive weekend, i've got the wings and front panel but need to get 2 inner wings so that i can cut off 2 small sections for the front on both side to make them perfect.
more to come no dought
13-04-2009 | 10:44 AM
#44
Thread Starter
Advanced PassionFord User
iTrader: (1)
Joined: May 2003
Posts: 1,702
Likes: 13
From: South Wales
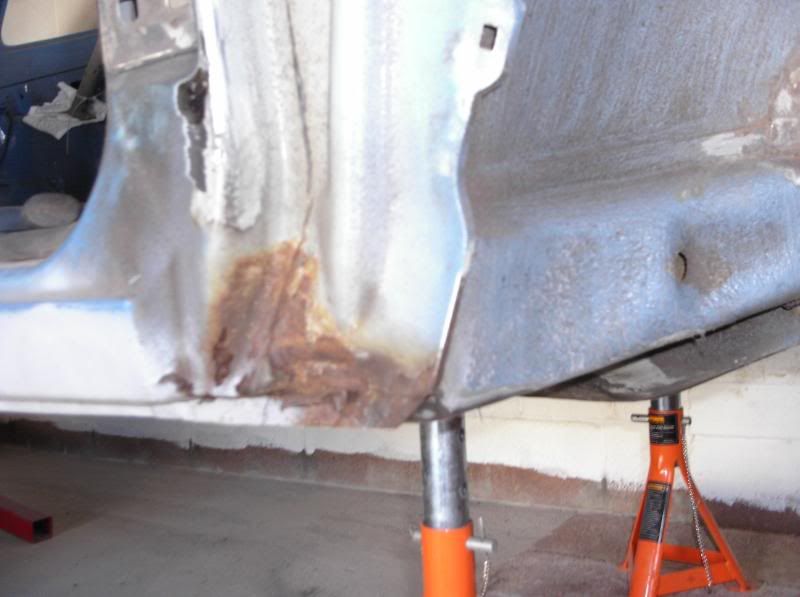
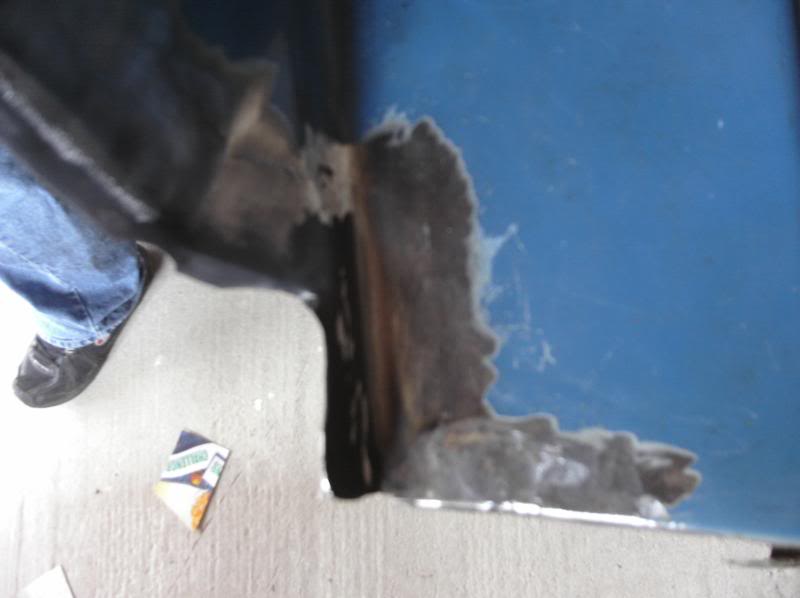
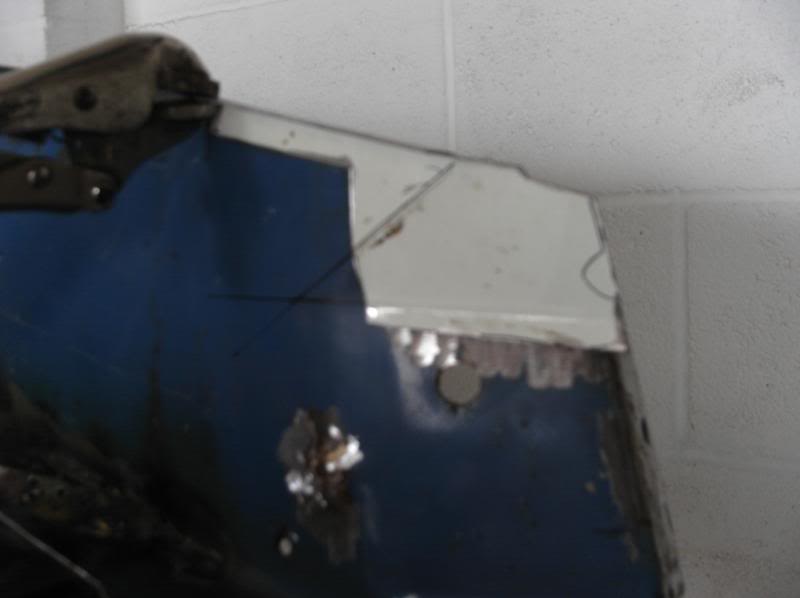
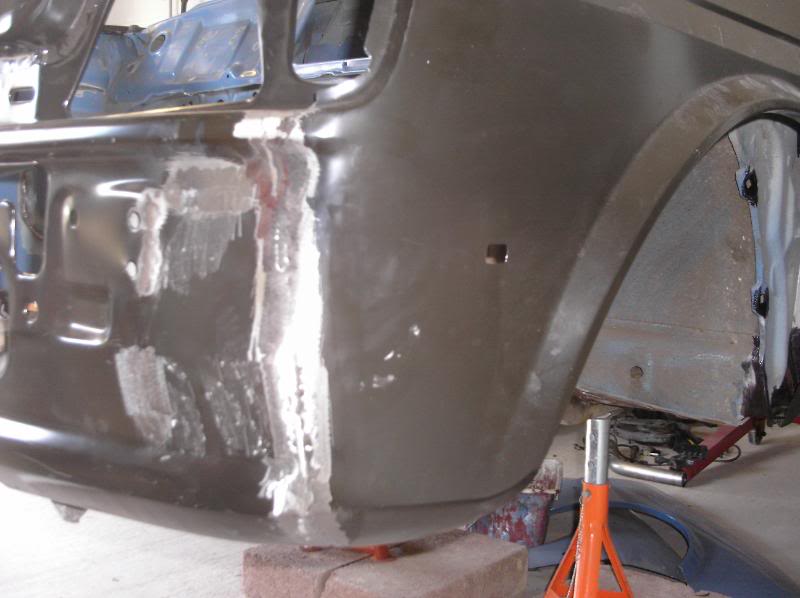
bit of an update, after the inner wings turned up and having a good look at the originals i decided to just cut out and replace a small section of the drivers inner wing and make up a small plate to sort out the passenger side as it seemed stupid to waste the whole passenger repair panel for what was needed.
Drivers side, if you look at the 1st pic you'll see a small tab thats been welded to the inner wing, there a 3 of these welded on and are for fixing the wiring for the headlight etc to as it'll be run between the inner and outter wing to keep the bay tidy.

Passenger side

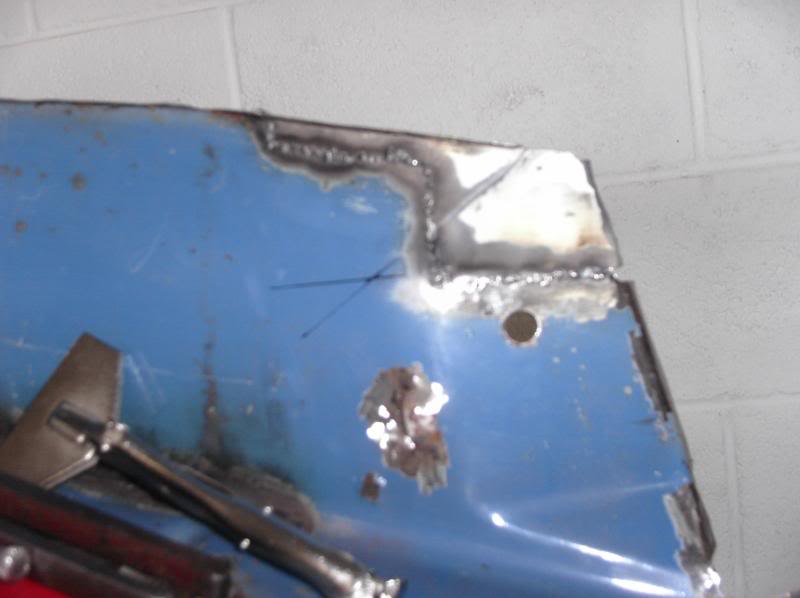
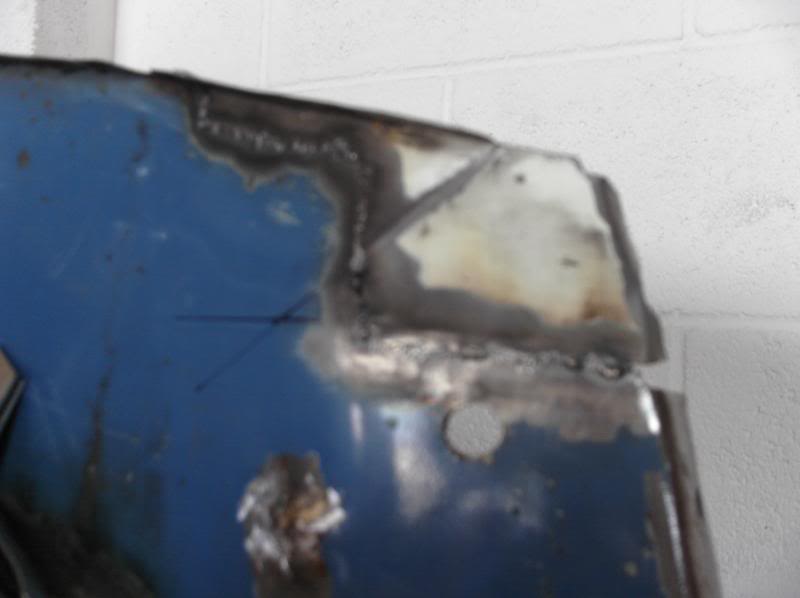


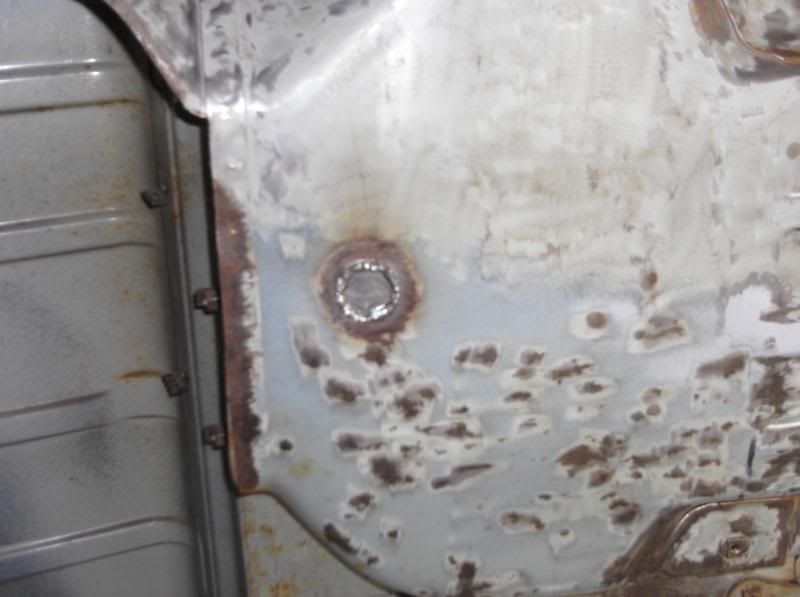
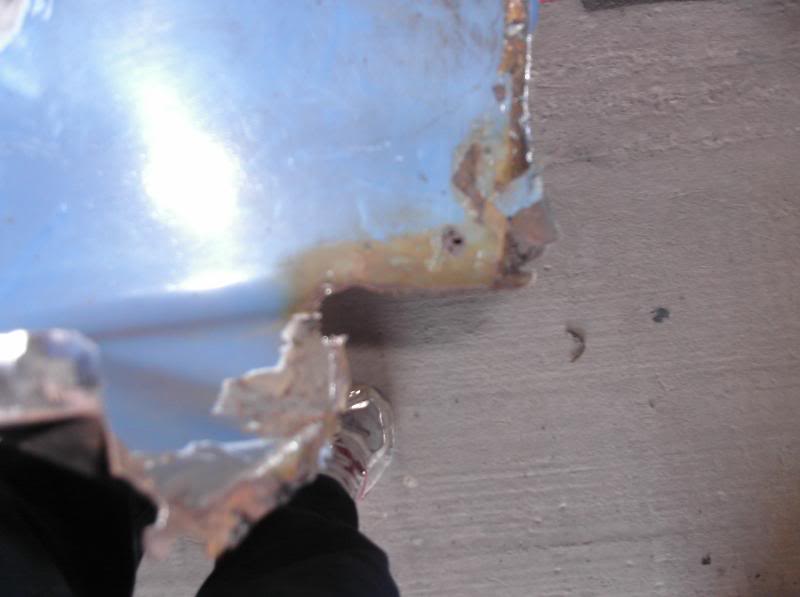
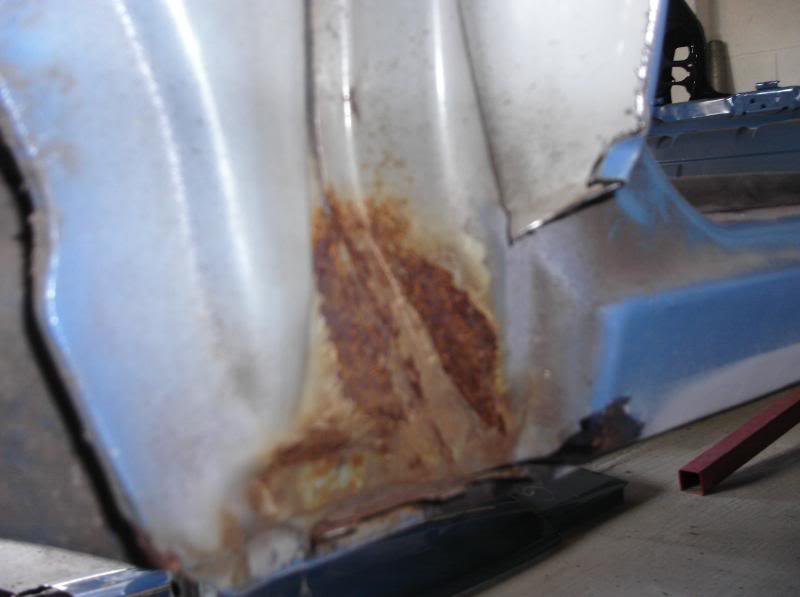
Whilst the wing was off i found a little NASTY bit on the inner wing, it started of as surface rust but was quite thick so after a good grinding session it looked like this
Nothing to dramatic and i'm glad i sorted it before the wing went on.
After that lot i had to do a clutch and Duel mass flywheel on my missus Mondeo TDCi, what a stupid f uck ing idea they are, cars only 42k, it started getting noisey on start up only just before Xmas but i did'nt know what it was. Anyway �375 later :x :x :x (not happy that money was for my firbeglass boot,bonnet and rally arches)and a few hours in the garage and that was sorted.
Back to the Fezzy,
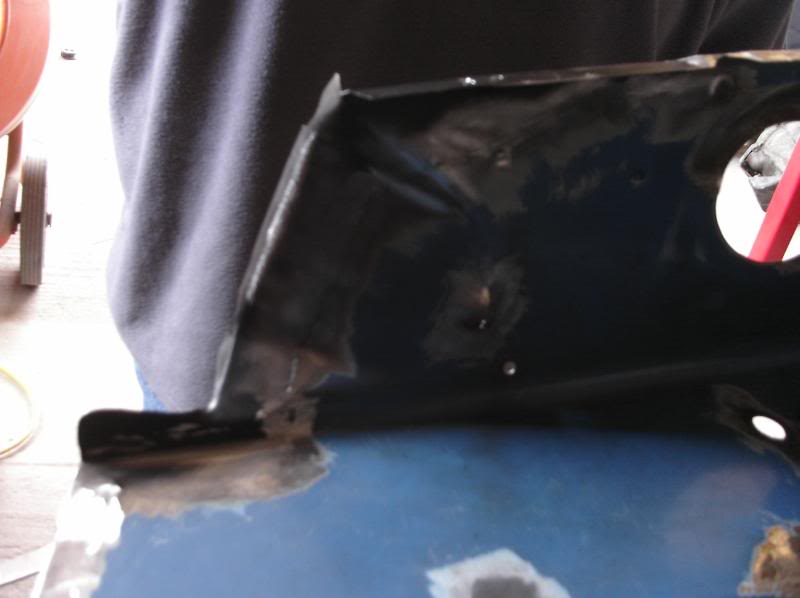
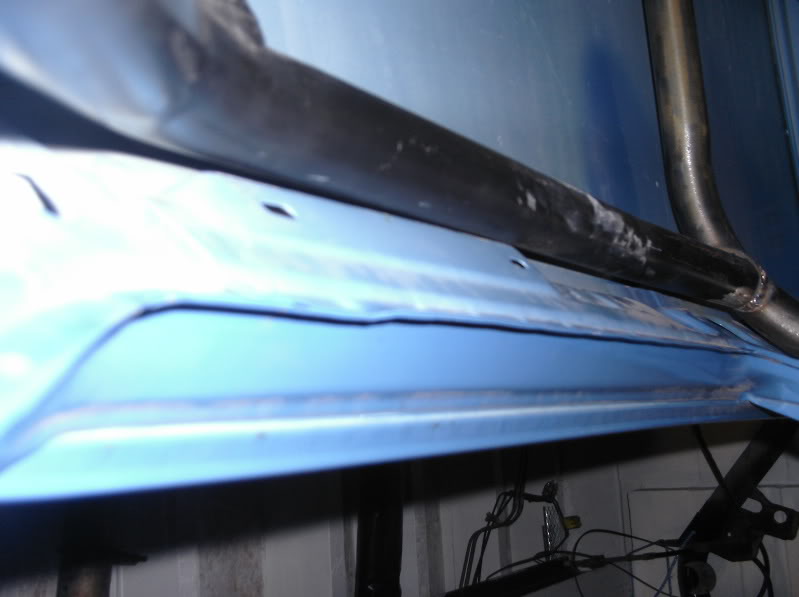
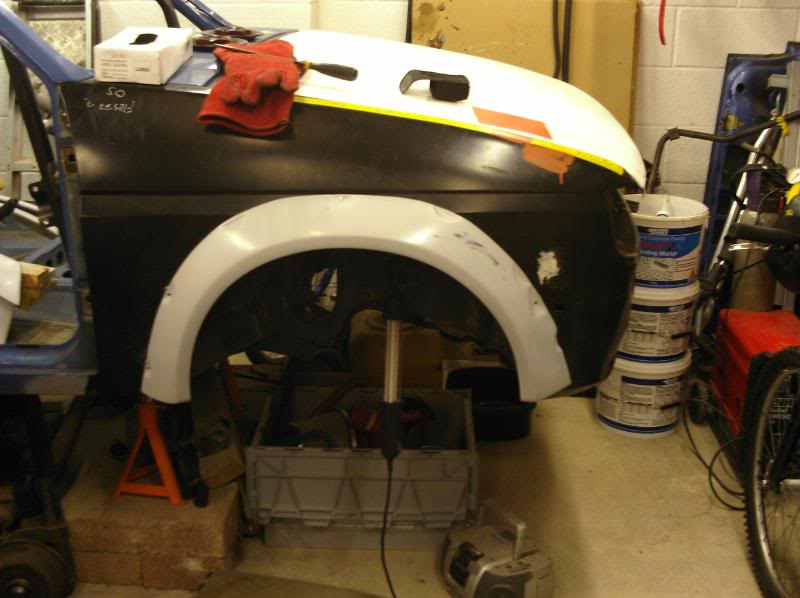
The front end now has 2 new wings and a front panel, now i know there copy wings BUT, what a pain in the arse, i must have put them on and off and trimed and cut them 50 times each, but there are now on and fitted perfect.
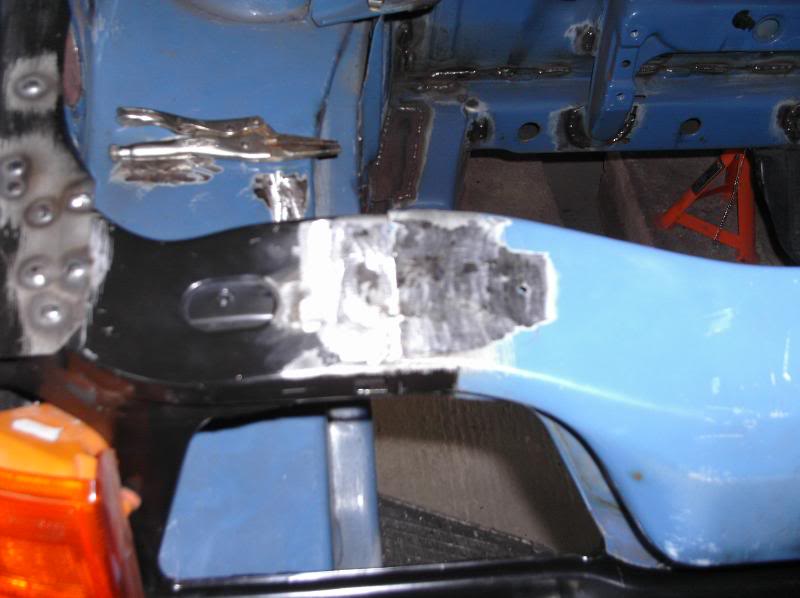
The drivers side was the worst as it stuck out 5mm further than the door at the join, this was sorted but putting a cut on the return part (the metal from the A pillar to wing face)
pic below
this made it fit 99% perfect, the 2mm cut ended up 6-7mm at the A pillar which i then welded up.
The front end all on, and the wing to front panel line seemed up (as it should be IMO) as it looks a lot better and smoother.


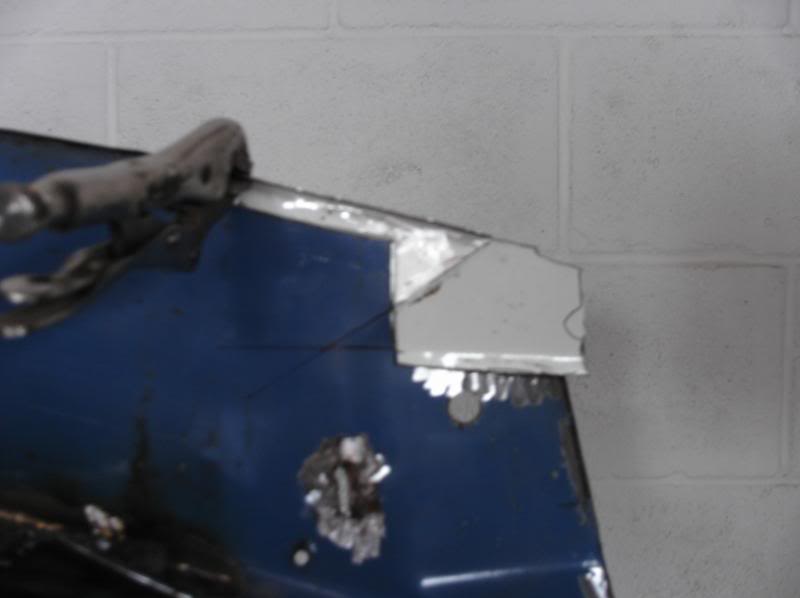
With that all done the bonnet fitted nice etc, but after taking the bonnet off and on just 3 times the nuts in the panel went tits up as there shit :shock: :shock: Never mind as i wanted a removable front panel anyway, plus the front on the bonnet was about 2mm to low, I've seen a few people make there own panel but after having bonnet pins on the front of my other XR2 (which done my head in) i decided to use the centre section of the original front panel, i'll let the pics explain.
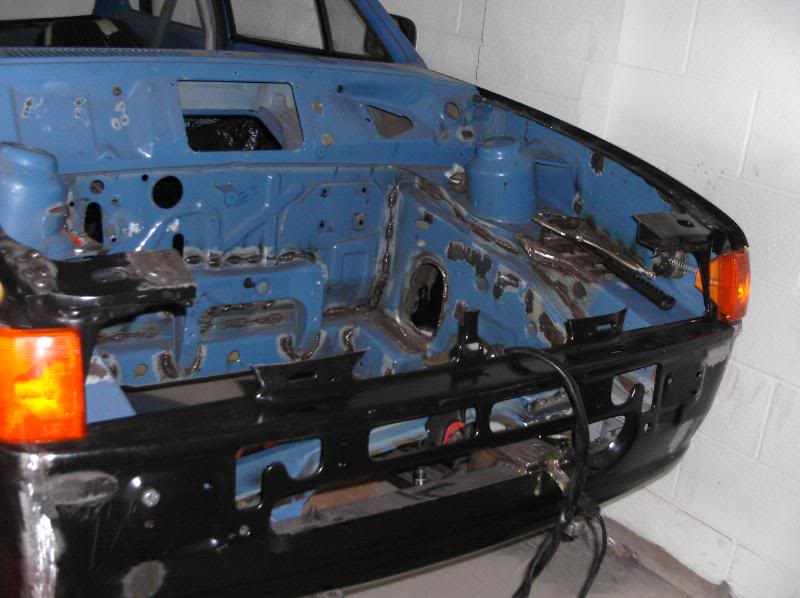


The panel has 8 fixing bolts than attach to nuts that are welded to the inner side of the panel. 2 on the top each side above each headlight, and 2 above the grill fixing slots. Take 2 mins to remove and fits very nicely. And as a bonus the bonnet bolts on a sits level with the front corners of the wings.
Thats it for now as i need to spend some money of stuff to progress. but the cage is next (i think) which i'm picking up at FITP next month.
Drivers side, if you look at the 1st pic you'll see a small tab thats been welded to the inner wing, there a 3 of these welded on and are for fixing the wiring for the headlight etc to as it'll be run between the inner and outter wing to keep the bay tidy.
Passenger side
Whilst the wing was off i found a little NASTY bit on the inner wing, it started of as surface rust but was quite thick so after a good grinding session it looked like this
Nothing to dramatic and i'm glad i sorted it before the wing went on.
After that lot i had to do a clutch and Duel mass flywheel on my missus Mondeo TDCi, what a stupid f uck ing idea they are, cars only 42k, it started getting noisey on start up only just before Xmas but i did'nt know what it was. Anyway �375 later :x :x :x (not happy that money was for my firbeglass boot,bonnet and rally arches)and a few hours in the garage and that was sorted.
Back to the Fezzy,
The front end now has 2 new wings and a front panel, now i know there copy wings BUT, what a pain in the arse, i must have put them on and off and trimed and cut them 50 times each, but there are now on and fitted perfect.
The drivers side was the worst as it stuck out 5mm further than the door at the join, this was sorted but putting a cut on the return part (the metal from the A pillar to wing face)
pic below
this made it fit 99% perfect, the 2mm cut ended up 6-7mm at the A pillar which i then welded up.
The front end all on, and the wing to front panel line seemed up (as it should be IMO) as it looks a lot better and smoother.
With that all done the bonnet fitted nice etc, but after taking the bonnet off and on just 3 times the nuts in the panel went tits up as there shit :shock: :shock: Never mind as i wanted a removable front panel anyway, plus the front on the bonnet was about 2mm to low, I've seen a few people make there own panel but after having bonnet pins on the front of my other XR2 (which done my head in) i decided to use the centre section of the original front panel, i'll let the pics explain.
The panel has 8 fixing bolts than attach to nuts that are welded to the inner side of the panel. 2 on the top each side above each headlight, and 2 above the grill fixing slots. Take 2 mins to remove and fits very nicely. And as a bonus the bonnet bolts on a sits level with the front corners of the wings.
Thats it for now as i need to spend some money of stuff to progress. but the cage is next (i think) which i'm picking up at FITP next month.


 03-05-2009 | 10:46 AM
#49
Thread Starter
Advanced PassionFord User
iTrader: (1)
Joined: May 2003
Posts: 1,702
Likes: 13
From: South Wales
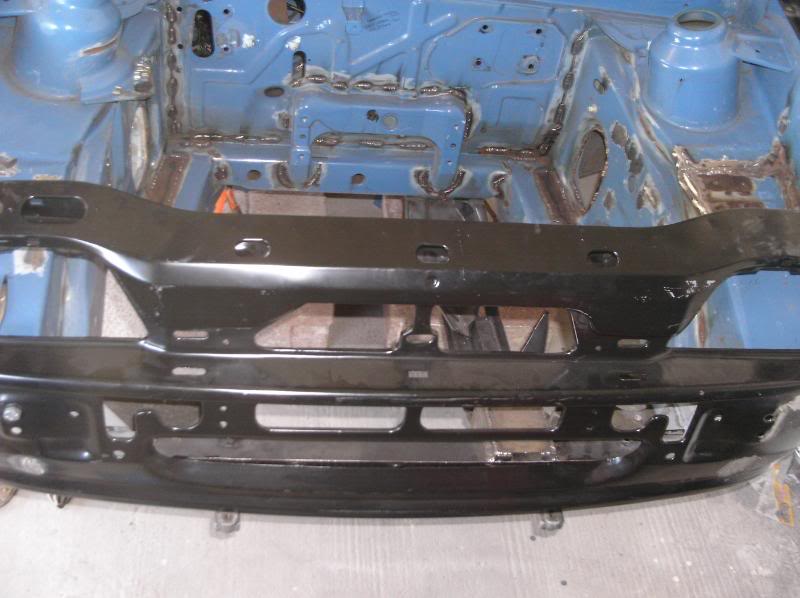
Just thought i'd post up a few pics i just took off the camera, The front end sort of built up with the removable panel fitted properly.

This panel is going to make working on the car so much easier.
Been doing a bit so will get some more pics up over the next few days
This panel is going to make working on the car so much easier.
Been doing a bit so will get some more pics up over the next few days
 19-05-2009 | 09:43 PM
#51
Thread Starter
Advanced PassionFord User
iTrader: (1)
Joined: May 2003
Posts: 1,702
Likes: 13
From: South Wales
Well i've been putting some time and effort in the last few weeks so thought i'd get a few pics and update on here.
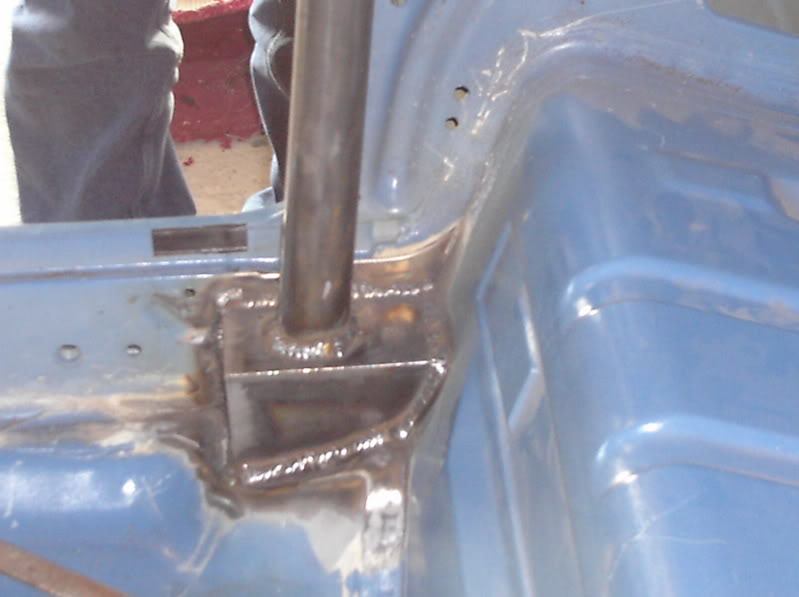
1st off i had to sort out the front gear box craddle mount, due to the removal of the Fiesta crossmember in favour of the Mk3 Escort 1 so i can fit the RS1600i front anti roll bar set up the original positon has gone, i've sort out a new pick up point and moified the craddle to suit.
I also mock fitted an empty gearbox and bare block to check everything fitted ok which can be seen in the pics


It's not 100% finsihed yet as it needs a bit of tidying up etc but you get the idea.
Trail fitted the front hubs etc, with only 1 small issue, I have to remove the end parts of steering rack and replace them with Escort ones as there about 20mm longer, apart from that it's looking good so far.


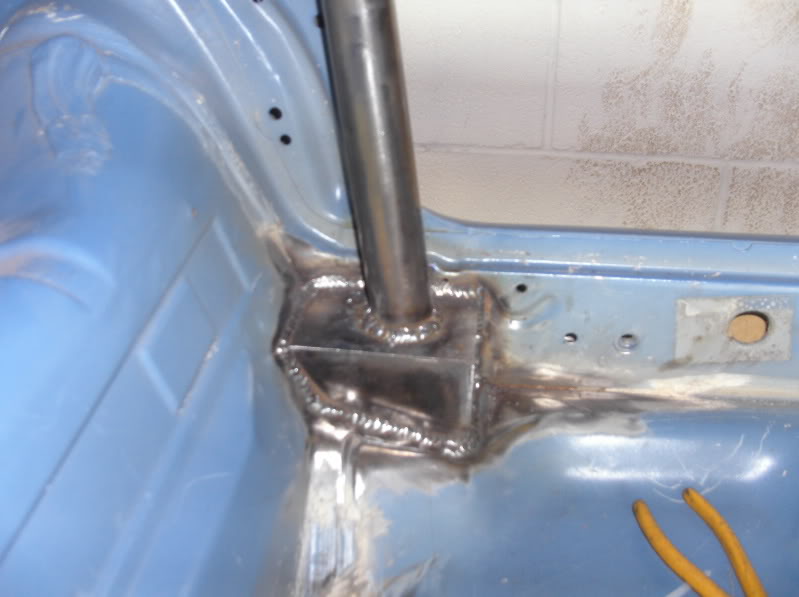
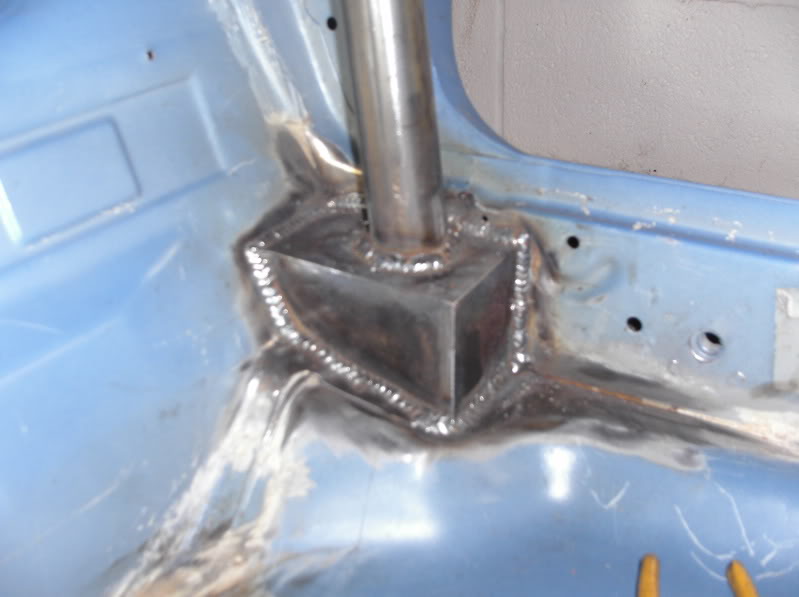
After that i started on the cage I had a rear bolt in cage that has been sat in my parents garage for about 4 years, So i bought a bolt in front section (different make) that i'm going to cut up a bit and modify to suit what i need. The cage will be full welded in and will pick up about 12 points of the car. Got the rear section finshed today so here are some pics.


Hope you like the progrees
More will be done tomorrow if it's raining, other wise i'll be on wall building duties
:P
1st off i had to sort out the front gear box craddle mount, due to the removal of the Fiesta crossmember in favour of the Mk3 Escort 1 so i can fit the RS1600i front anti roll bar set up the original positon has gone, i've sort out a new pick up point and moified the craddle to suit.
I also mock fitted an empty gearbox and bare block to check everything fitted ok which can be seen in the pics
It's not 100% finsihed yet as it needs a bit of tidying up etc but you get the idea.
Trail fitted the front hubs etc, with only 1 small issue, I have to remove the end parts of steering rack and replace them with Escort ones as there about 20mm longer, apart from that it's looking good so far.
After that i started on the cage
Hope you like the progrees
More will be done tomorrow if it's raining, other wise i'll be on wall building duties
:P
Last edited by GINGExR2 T; 22-03-2010 at 02:03 PM.
21-05-2009 | 10:02 PM
#58
Thread Starter
Advanced PassionFord User
iTrader: (1)
Joined: May 2003
Posts: 1,702
Likes: 13
From: South Wales
Bit of an update,
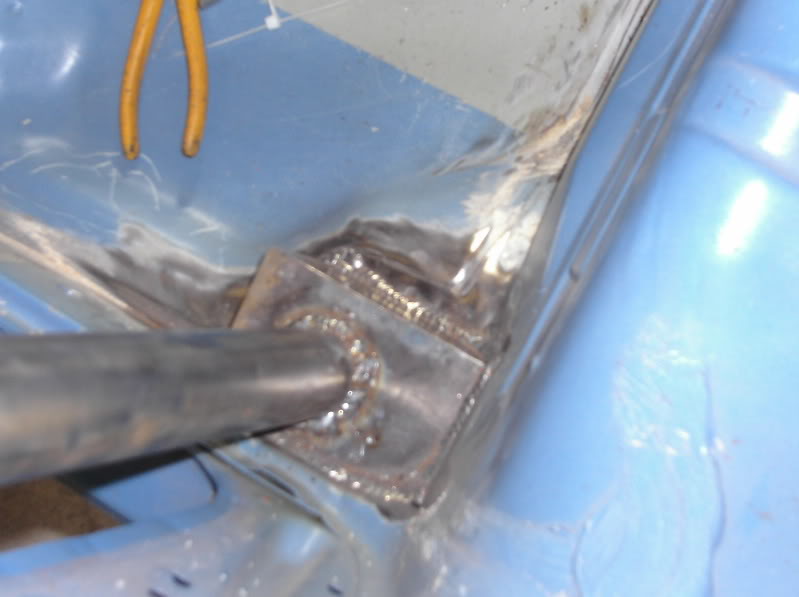
Well today i cracked on with the front half of the cage, what with the front also originally being a bolt in item and wanting it all welded in i had to do a bit of modifying.
1st off the front mounting feet and the bolting together clamps that wolud have bolted it to the rear section where cut off. Then new box sections where fabricated and welded in.
Then the leg that go to the floor where cut down so that the bar over the door sat as high as possible (reason, head room as i keep banging my crash helmet on the cage in my other car).


Cage to roof
The front roof bar was tacked in then the front cage removed so that i could weld all the way around it.


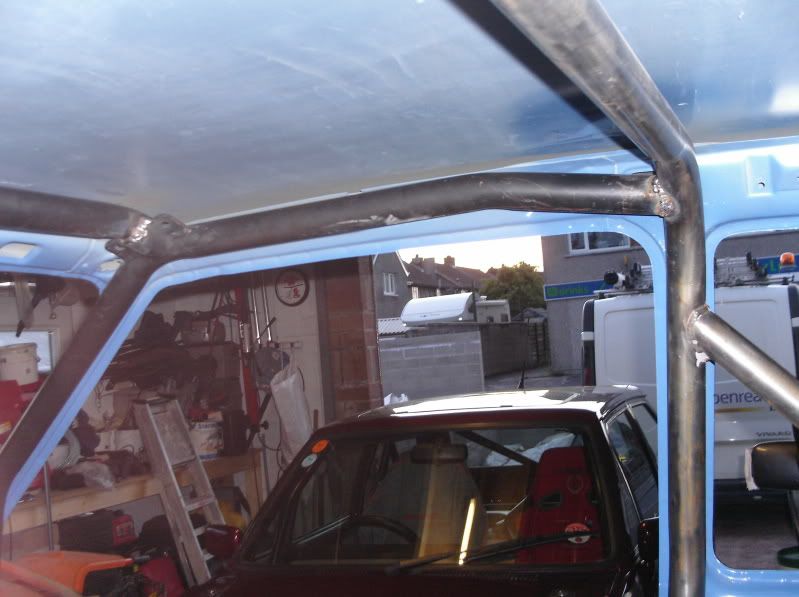
Then welded in at the rear

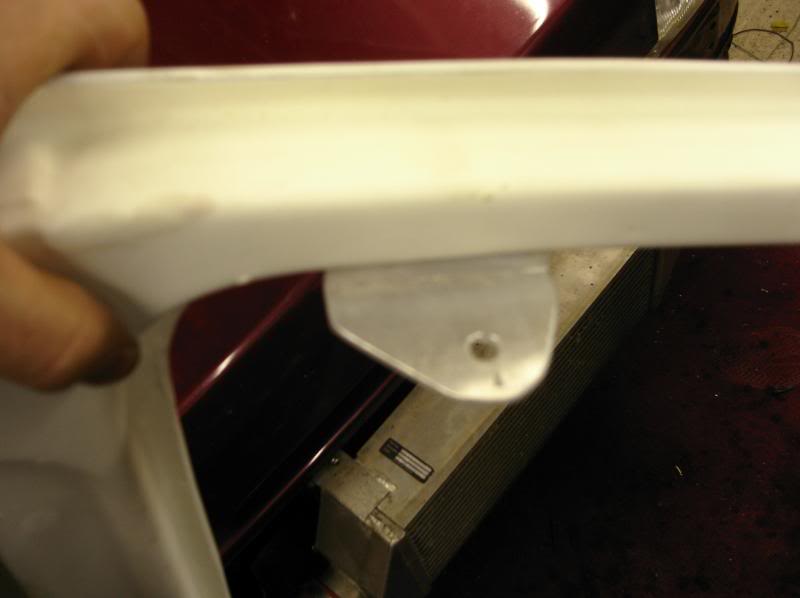
Then there was the front turret pickup point. Now i can't realy finsh this part off as yet as i need to replace the top mount ready for the adjustable items. I made a start anyway my drilling some holes in the drivers side.

The bay side looks nice and neat, the inner side due to the angles a bit iffy at the moment, but nothing to dramatic.
Next thing is get some CDS tubing, and sort the top mounts out.
Thanks for looking, Ginger
Well today i cracked on with the front half of the cage, what with the front also originally being a bolt in item and wanting it all welded in i had to do a bit of modifying.
1st off the front mounting feet and the bolting together clamps that wolud have bolted it to the rear section where cut off. Then new box sections where fabricated and welded in.
Then the leg that go to the floor where cut down so that the bar over the door sat as high as possible (reason, head room as i keep banging my crash helmet on the cage in my other car).
Cage to roof
The front roof bar was tacked in then the front cage removed so that i could weld all the way around it.
Then welded in at the rear
Then there was the front turret pickup point. Now i can't realy finsh this part off as yet as i need to replace the top mount ready for the adjustable items. I made a start anyway my drilling some holes in the drivers side.
The bay side looks nice and neat, the inner side due to the angles a bit iffy at the moment, but nothing to dramatic.
Next thing is get some CDS tubing, and sort the top mounts out.
Thanks for looking, Ginger
Last edited by GINGExR2 T; 21-05-2009 at 10:19 PM.
27-09-2009 | 10:31 PM
#59
Thread Starter
Advanced PassionFord User
iTrader: (1)
Joined: May 2003
Posts: 1,702
Likes: 13
From: South Wales
Well i havn't had much time over the last 3-4 months due to work being hectic and trying to get my front, side and back gardens sorted out.
Anyway i have managed to put a few hours in this weekend and got a bit done.
1st off the fuel filler cap which was simple enough.
I managed to pick up a brand new RS option front valence for cheapness just to try and mould a copy out of it out of fibreglass.
Reason for this is simple, i'm fitting the MCR style rallyarches and think the front needs some to blend in a bit, Plus the RS1600i front antiroll bar fixing points need covering so there not so visible.
Well this was my 1st ever attempt at making something out of firbreglass, so to be on the safe side i covered the valance in masking tape so as not to ruin it.
It came out pretty well for a 1st effort.


The only problem was trying to get the tape off the inside

After ages it got better
Now i new this would be a 1st effort so i decided to try again, but this time i'm leave the tape out. I tried some of the top/flow coat straight onto the back of the valance. Then added a few layers of fibreglass matting and resin. After leaving it for a few hours i pulled it off and the top/flow coat came off clean
So i gave it 2 coats over as few hours ready for tomorrow.
Tomorrow i'm going to add a coat of resin so as to get the shape perfect.
To be continued
Anyway i have managed to put a few hours in this weekend and got a bit done.
1st off the fuel filler cap which was simple enough.
I managed to pick up a brand new RS option front valence for cheapness just to try and mould a copy out of it out of fibreglass.
Reason for this is simple, i'm fitting the MCR style rallyarches and think the front needs some to blend in a bit, Plus the RS1600i front antiroll bar fixing points need covering so there not so visible.
Well this was my 1st ever attempt at making something out of firbreglass, so to be on the safe side i covered the valance in masking tape so as not to ruin it.
It came out pretty well for a 1st effort.
The only problem was trying to get the tape off the inside
After ages it got better
Now i new this would be a 1st effort so i decided to try again, but this time i'm leave the tape out. I tried some of the top/flow coat straight onto the back of the valance. Then added a few layers of fibreglass matting and resin. After leaving it for a few hours i pulled it off and the top/flow coat came off clean
So i gave it 2 coats over as few hours ready for tomorrow.
Tomorrow i'm going to add a coat of resin so as to get the shape perfect.
To be continued
 12-10-2009 | 09:46 PM
#63
Thread Starter
Advanced PassionFord User
iTrader: (1)
Joined: May 2003
Posts: 1,702
Likes: 13
From: South Wales
Bit of an up date, been busy at this weekend.
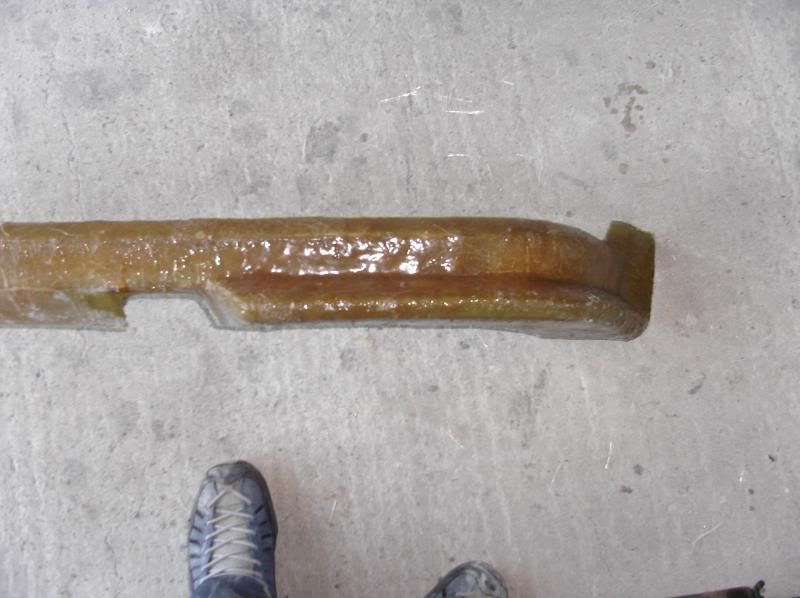
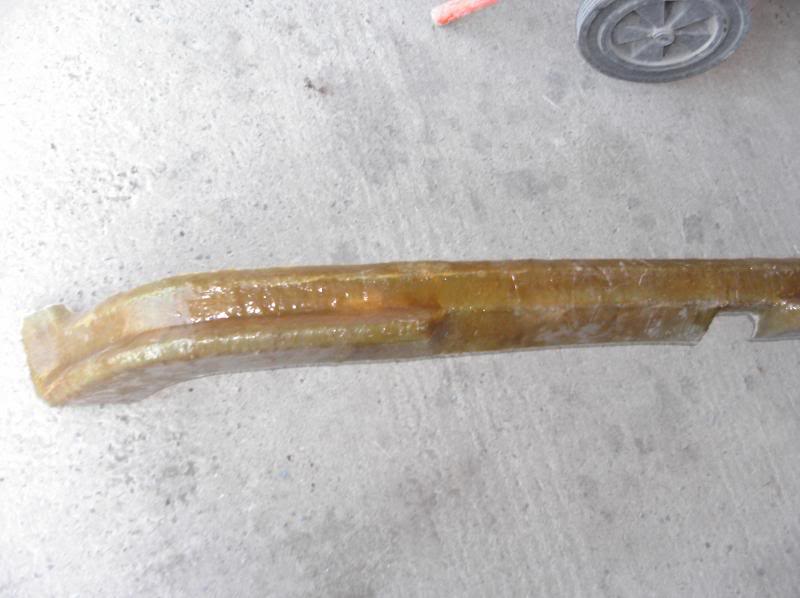
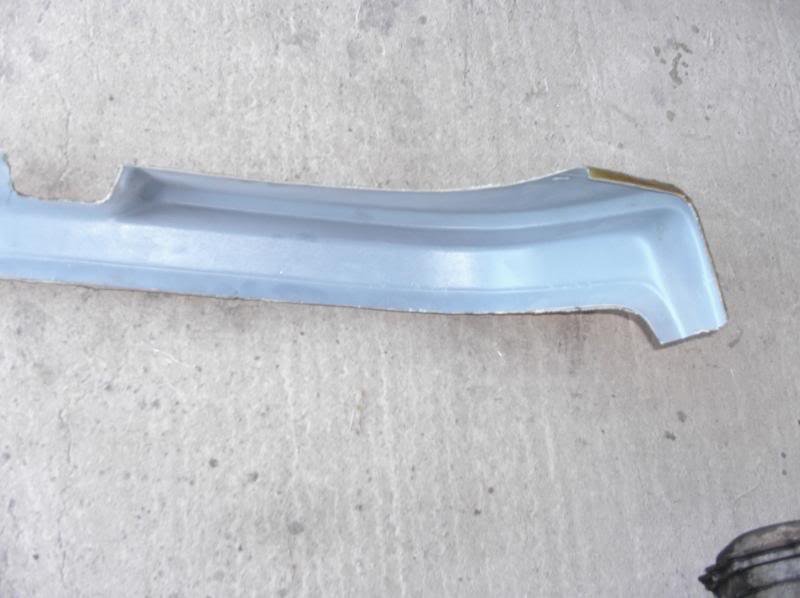
Well after making the 1st mould for my front valance i decided to try again but this time without tape on the valance. The 2nd mould is now finished, took a lot of sweat and swearing to get it off the valance but it did come off. Came out perfect aswell apart from 1 crack that happened when removing it.
I now have to make 1 to modify

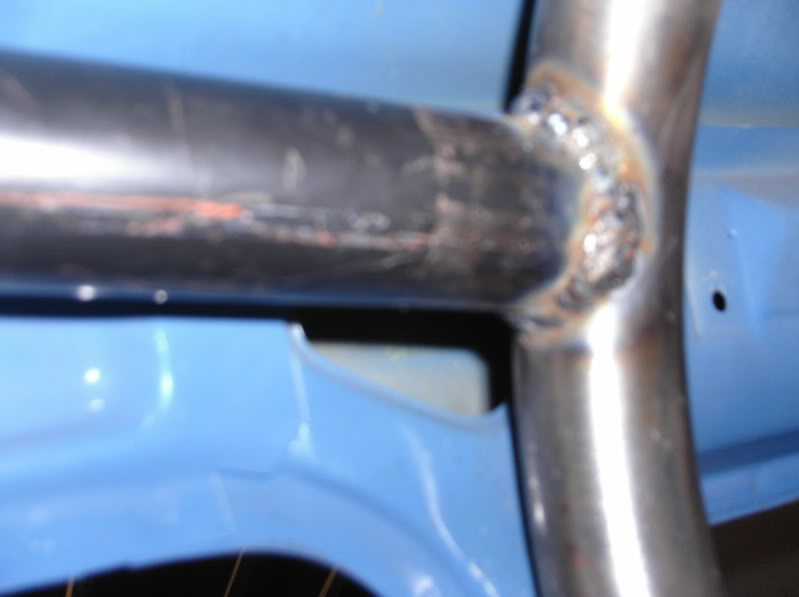
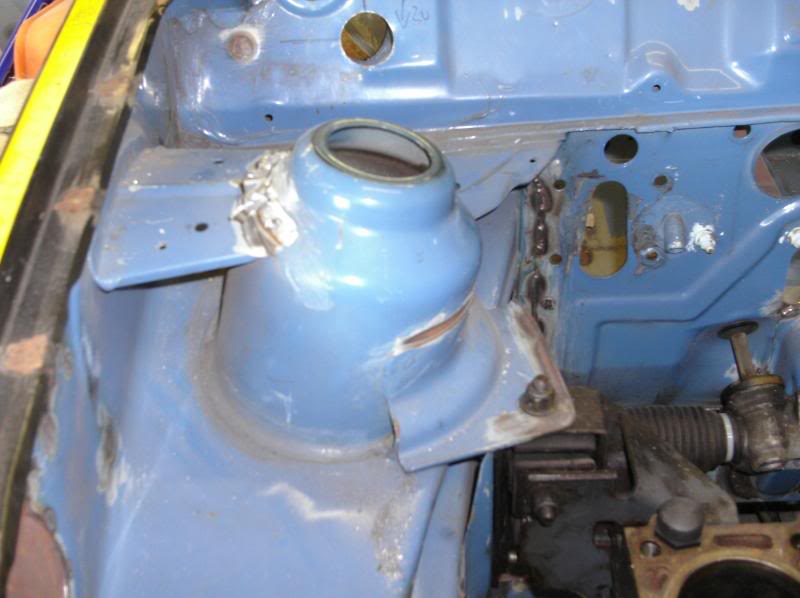
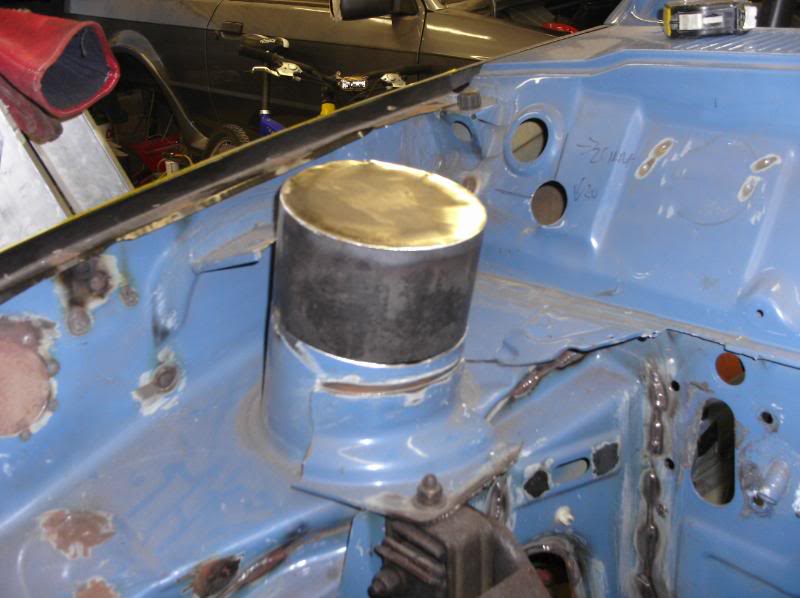
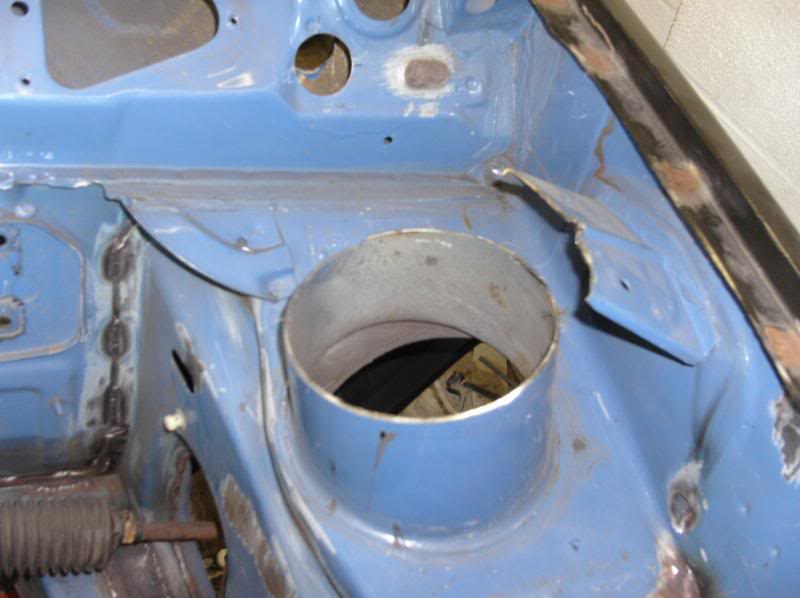
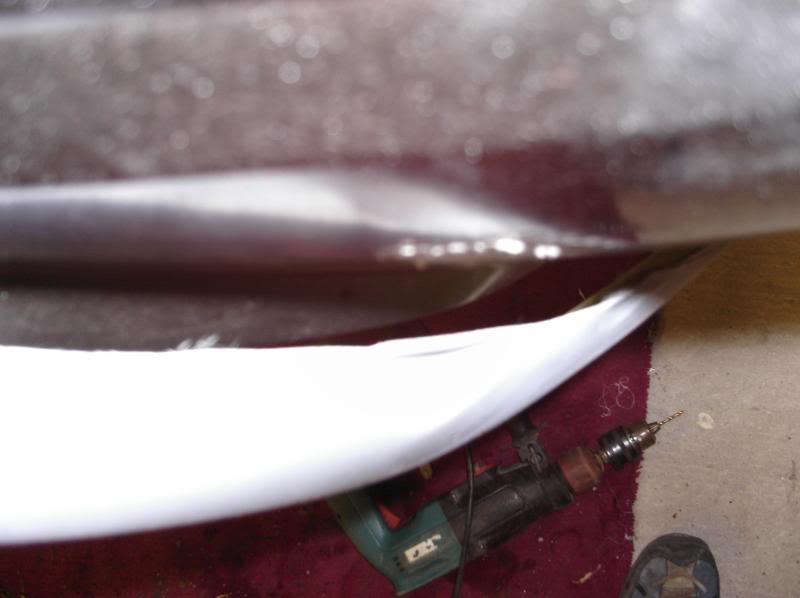
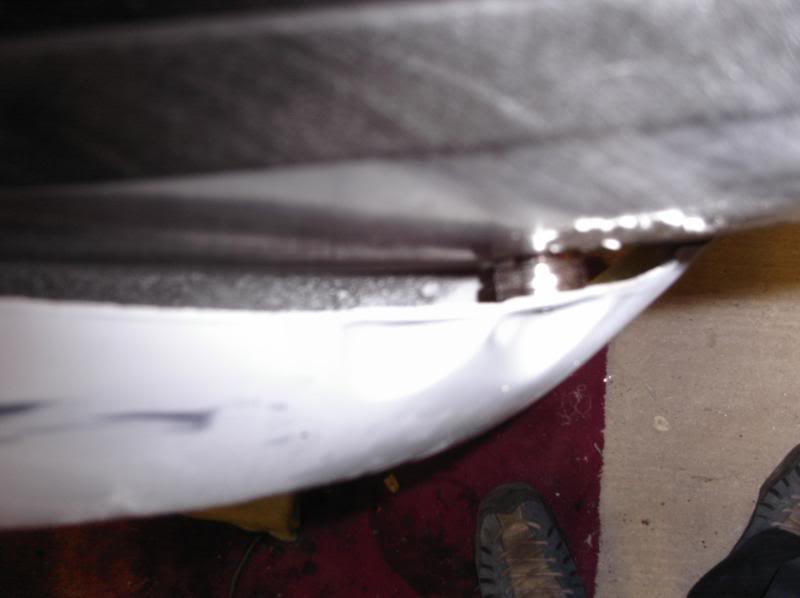
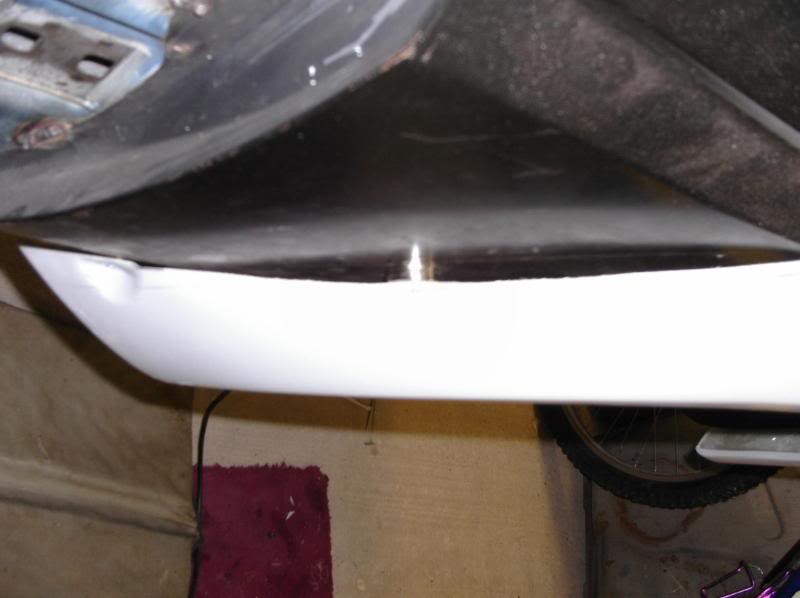
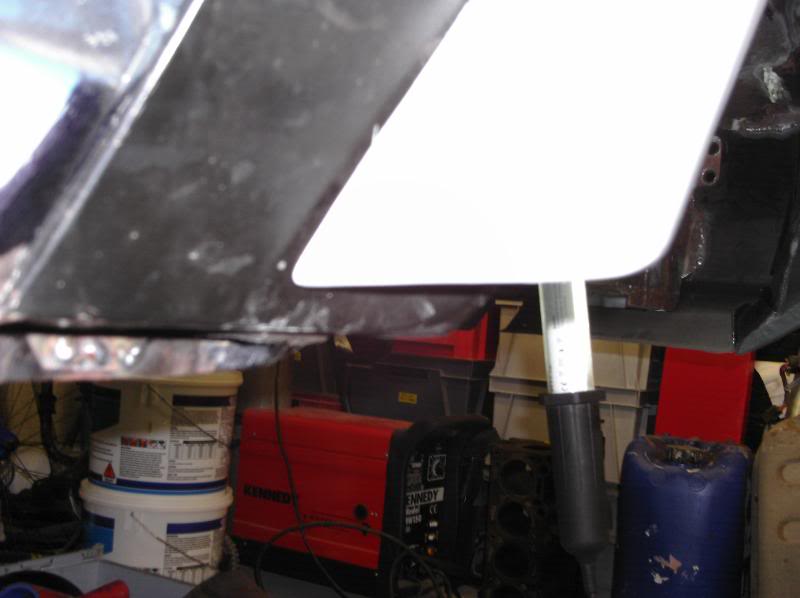
I managed to collect my strut towers for the front struts last week so made a start on fitting them yesterday, Now due to the fact that the cars has been converted to run RS1600 stuff and after measuring the hight of an Escort strut at 165mm from the top of the engine mount to the top of the strut, the Fiesta measures at 140mm. So i cut off 60mm off the original top mount and added the new strut but 30mm taller.
drivers side
before


during


test fit, before the new strut was cut down

cut down test fit


welded on
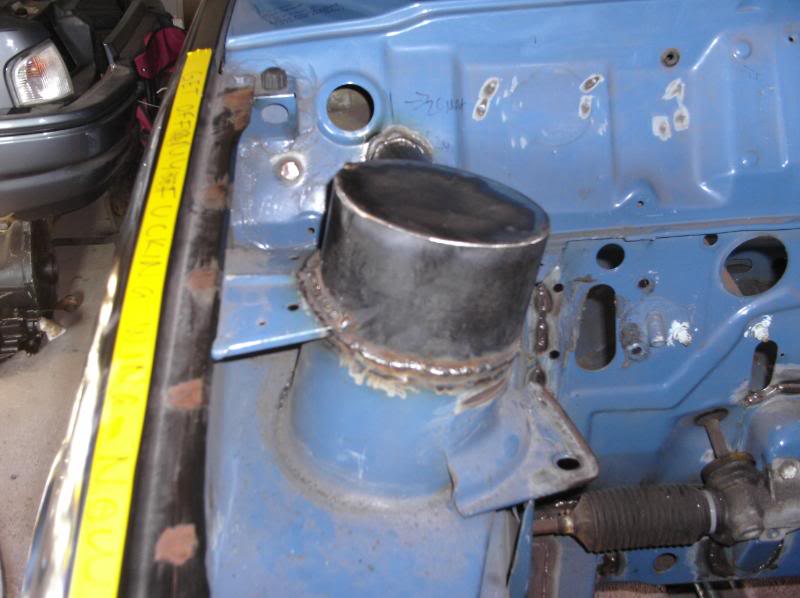
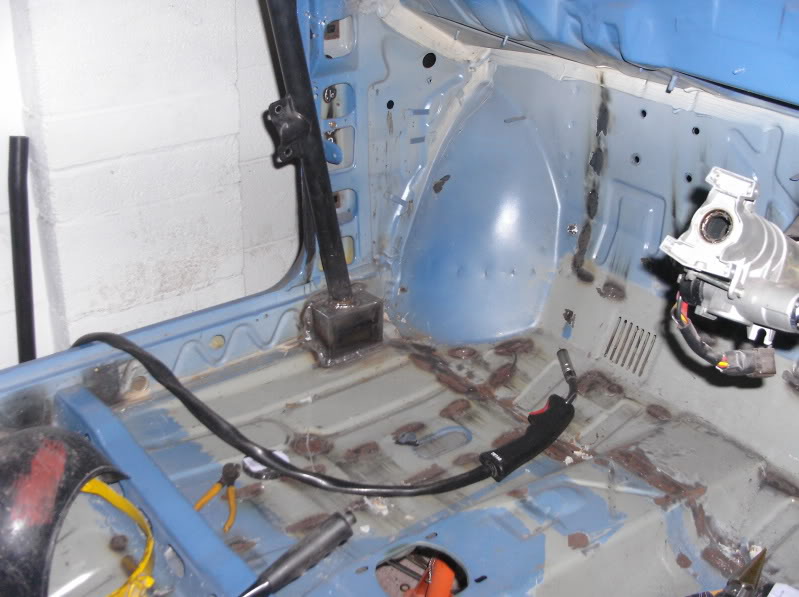
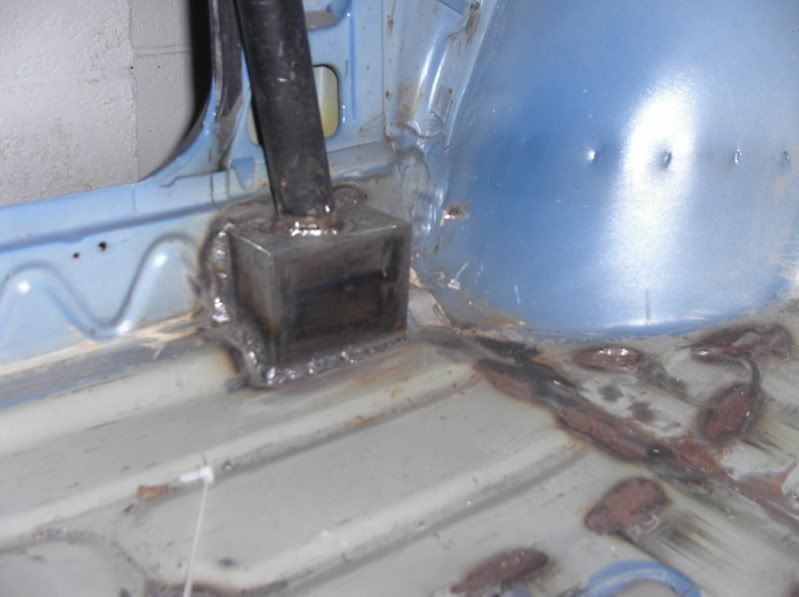
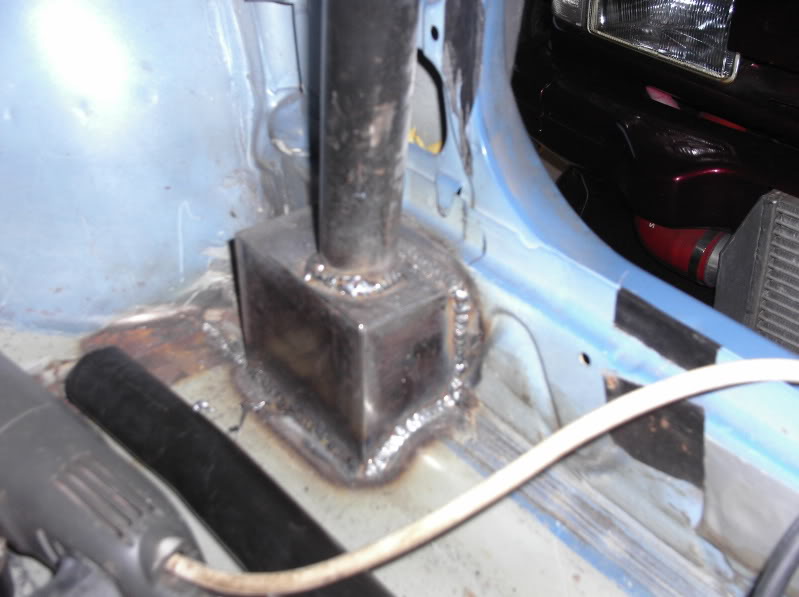
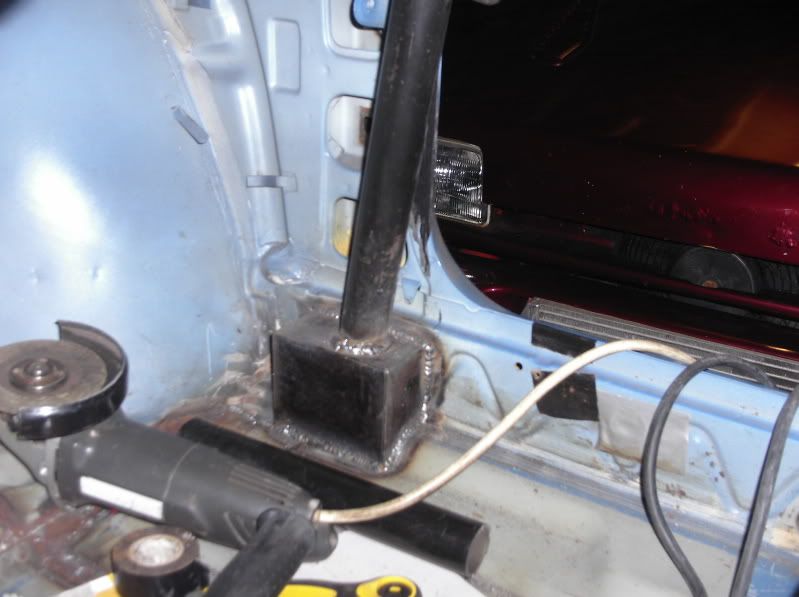
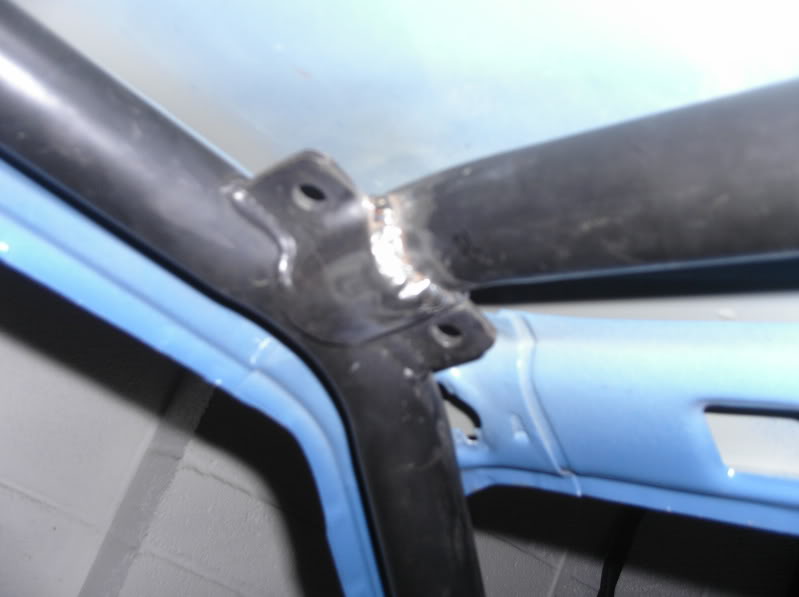
cage pick up at strut top


cage pick up to main cage

passenger

Will crack on with the passenger side tomorrow.
Well after making the 1st mould for my front valance i decided to try again but this time without tape on the valance. The 2nd mould is now finished, took a lot of sweat and swearing to get it off the valance but it did come off. Came out perfect aswell apart from 1 crack that happened when removing it.
I now have to make 1 to modify
I managed to collect my strut towers for the front struts last week so made a start on fitting them yesterday, Now due to the fact that the cars has been converted to run RS1600 stuff and after measuring the hight of an Escort strut at 165mm from the top of the engine mount to the top of the strut, the Fiesta measures at 140mm. So i cut off 60mm off the original top mount and added the new strut but 30mm taller.
drivers side
before
during
test fit, before the new strut was cut down
cut down test fit
welded on
cage pick up at strut top
cage pick up to main cage
passenger
Will crack on with the passenger side tomorrow.
 24-01-2010 | 08:10 PM
#68
Thread Starter
Advanced PassionFord User
iTrader: (1)
Joined: May 2003
Posts: 1,702
Likes: 13
From: South Wales
Finally a proper update
Well my Kustom Karl rear arms arrived last week and the bonnet and boot turn up a few days ago. Still waiting on the arches as after checking the delivery labels there where only 2 items.

For info i have weighed the bonnet and boot and there 10.5kg's together, the boot is 4.2kg and the bonnet 6.3kg.
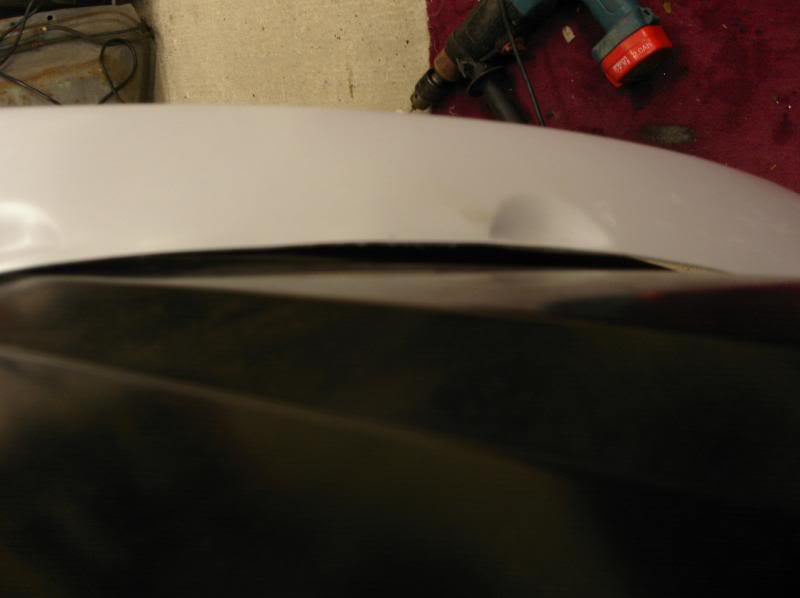
The bonnet will need some work, mainly due to the fact that who ever did the original mould used a shit bonnet, the passenger side front edge above the head light closest to the indy looks like it was bent back a bit so will need a skim of filler to get it right, plus there are 2 parts that look like filler marks.
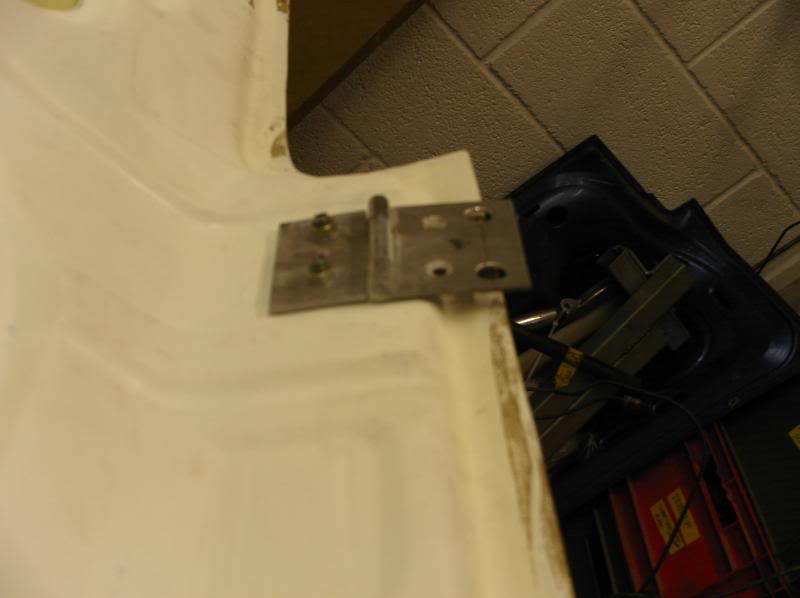
The bonnet hinges are completely useless as you'll see in the pics as there completely wrong!!!


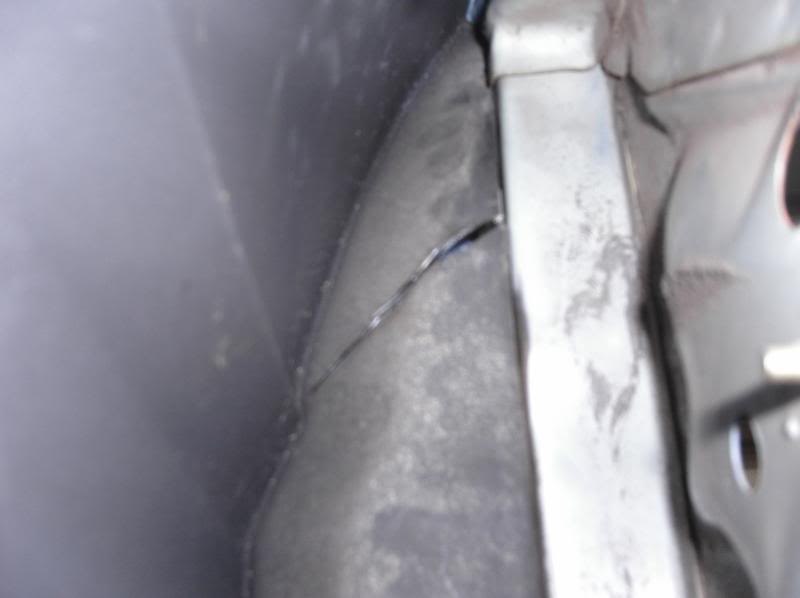
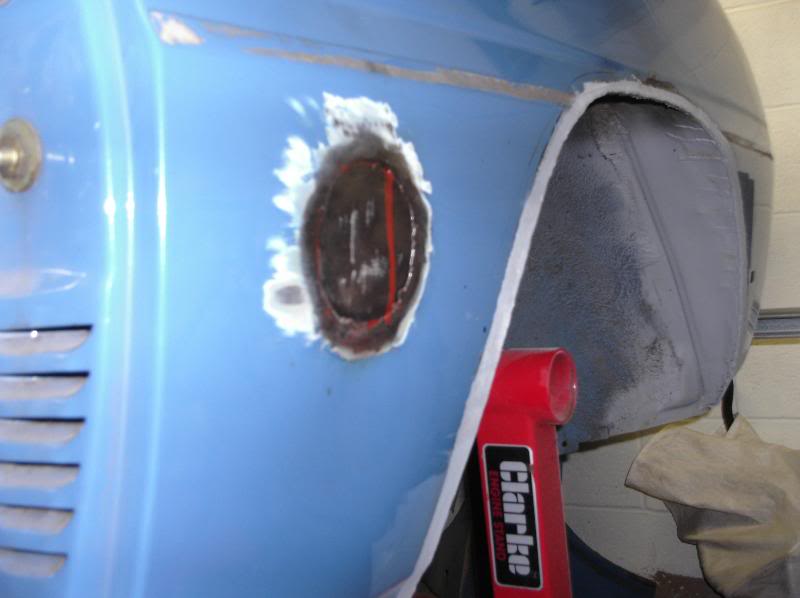
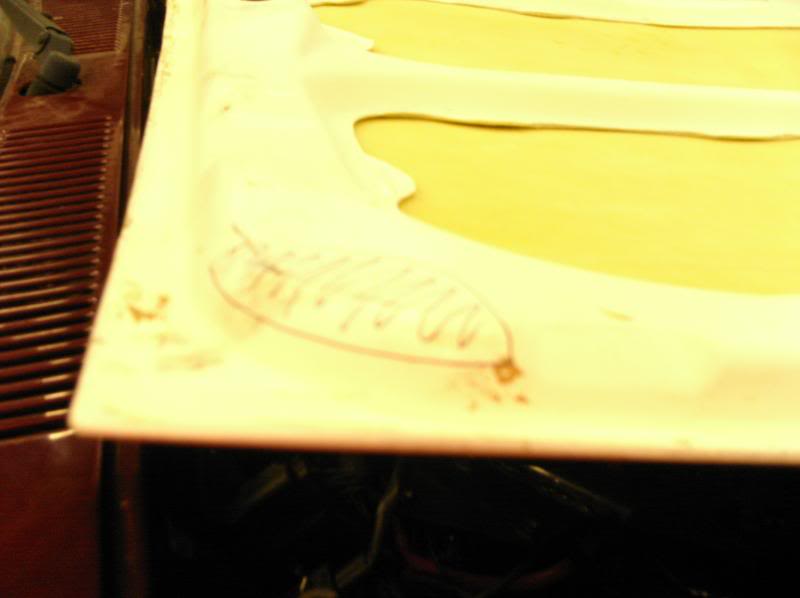
Also in the pics below you'll see the rear corner of the inner skin, it should be recest for the rubber corner stays. i've mark the area black.
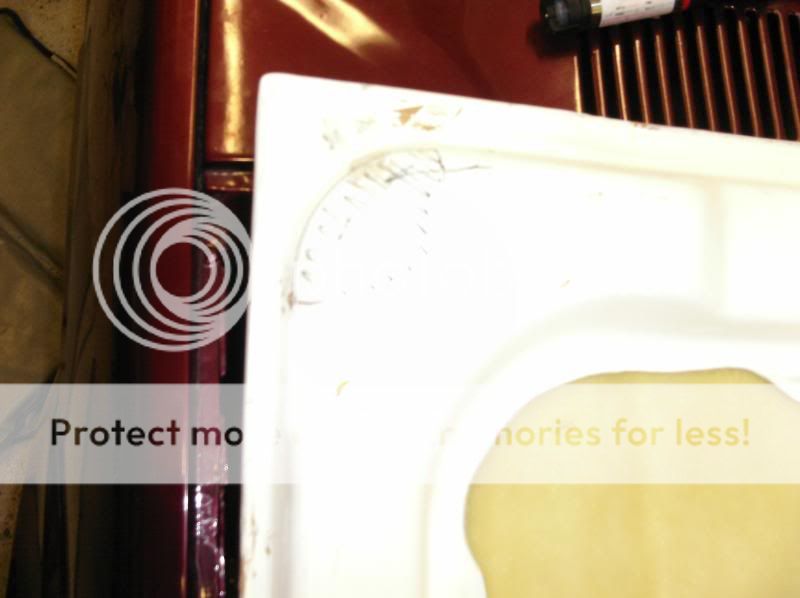


The boot is really good and has hinges but will still need to cut a set off an original boot for the half that actually bolts to the car. it has the strut pickups aswell. The only stupid part of it is the fact when the original mould was taken they left the Fiesta sticker on so it looks like there a sticker on it which you might be able to make out in the pics below, it'll just need sanding out.


the lacth area will need cutting out
boot hinge

And the stupid sticker part

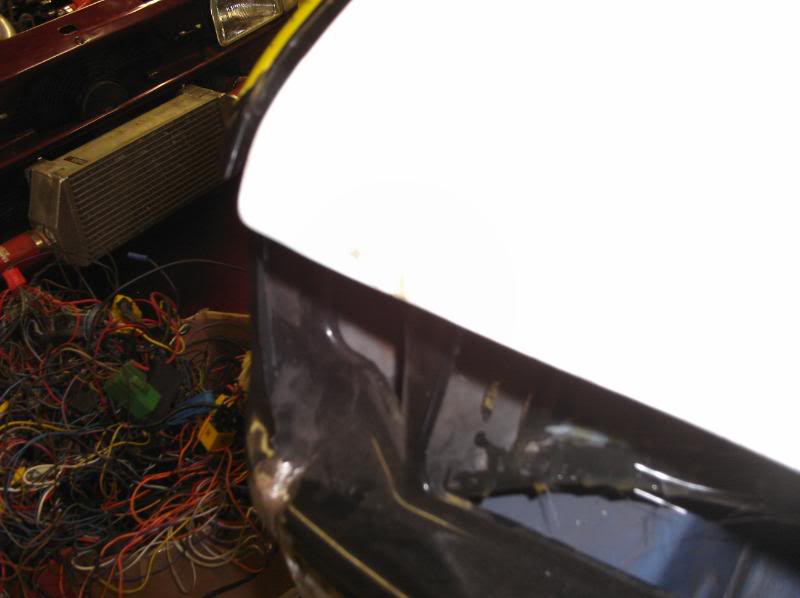
After a quick test fit of the bonnet i found that the inner skin just touches my raised top mounts so just a little bit of fibreglass needs removing. Apart from that it's all good.
Well my Kustom Karl rear arms arrived last week and the bonnet and boot turn up a few days ago. Still waiting on the arches as after checking the delivery labels there where only 2 items.
For info i have weighed the bonnet and boot and there 10.5kg's together, the boot is 4.2kg and the bonnet 6.3kg.
The bonnet will need some work, mainly due to the fact that who ever did the original mould used a shit bonnet, the passenger side front edge above the head light closest to the indy looks like it was bent back a bit so will need a skim of filler to get it right, plus there are 2 parts that look like filler marks.
The bonnet hinges are completely useless as you'll see in the pics as there completely wrong!!!
Also in the pics below you'll see the rear corner of the inner skin, it should be recest for the rubber corner stays. i've mark the area black.
The boot is really good and has hinges but will still need to cut a set off an original boot for the half that actually bolts to the car. it has the strut pickups aswell. The only stupid part of it is the fact when the original mould was taken they left the Fiesta sticker on
the lacth area will need cutting out
boot hinge
And the stupid sticker part
After a quick test fit of the bonnet i found that the inner skin just touches my raised top mounts so just a little bit of fibreglass needs removing. Apart from that it's all good.
Last edited by GINGExR2 T; 30-01-2010 at 10:19 AM.
06-02-2010 | 08:01 PM
#70
Thread Starter
Advanced PassionFord User
iTrader: (1)
Joined: May 2003
Posts: 1,702
Likes: 13
From: South Wales
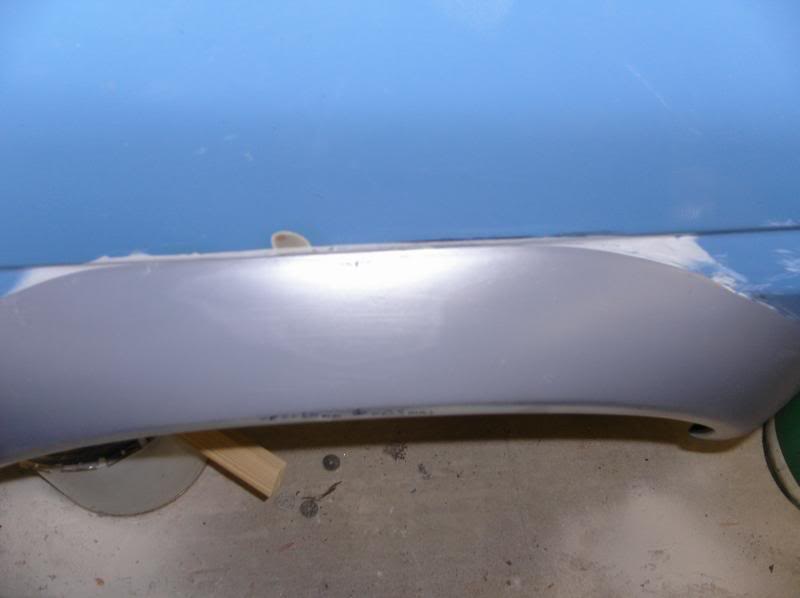
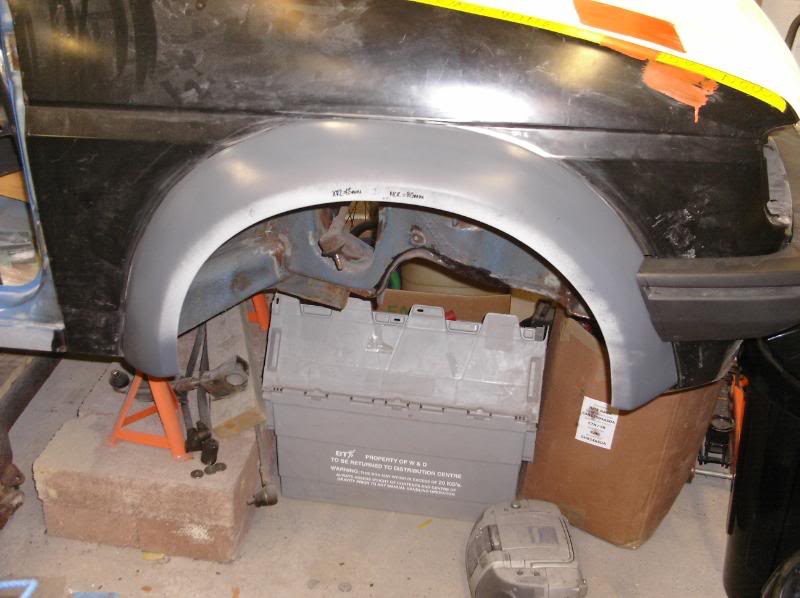
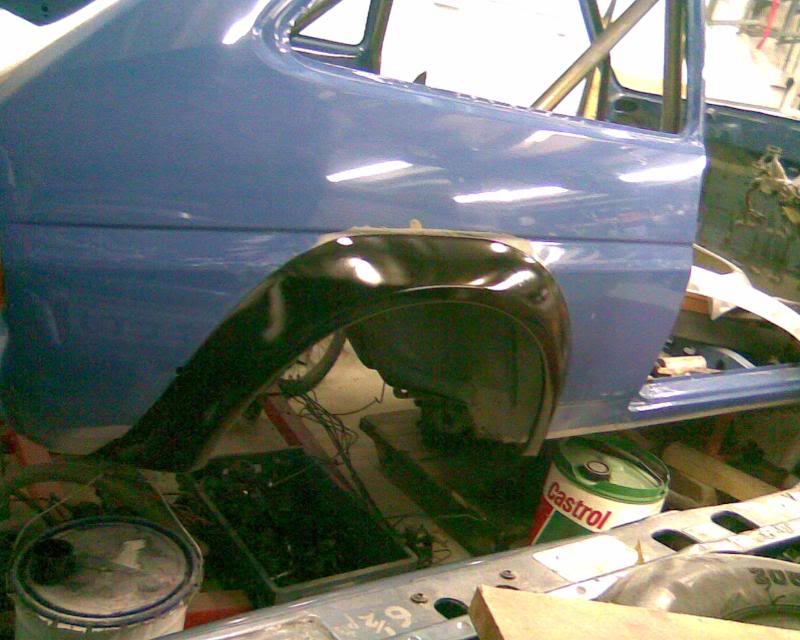
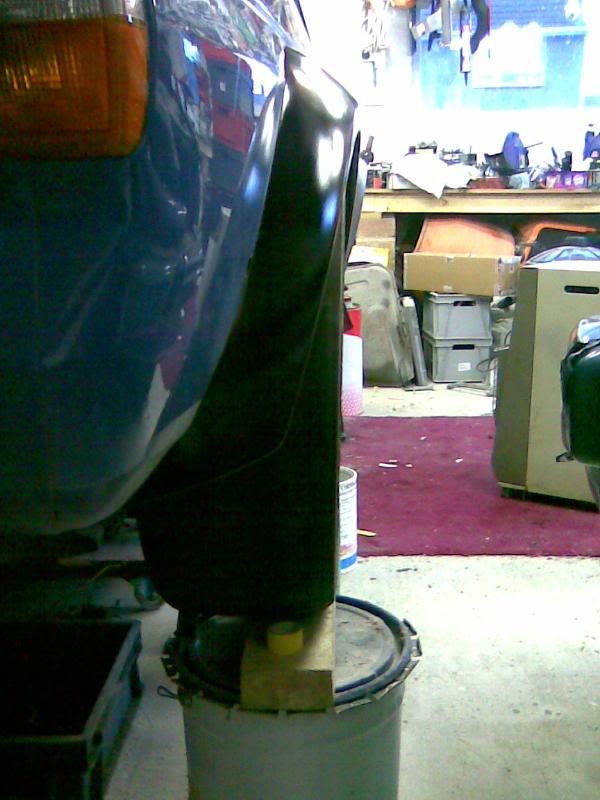
Started on trial fitting the Rally arches this afternoon. Now i know there fibreglass and for a Mk1 BUT, what shit fit, the rears are not to bad seen as though the rear quarters are the same but there still gonna need some extra firbe glass to fit perfect. I want the arches removable and no blended or perminently stuck on.
1st trial fit


After fitting washers to support the gaps

Also the bottom of the arch will need extending about 20mm

The drivers front on

The rears
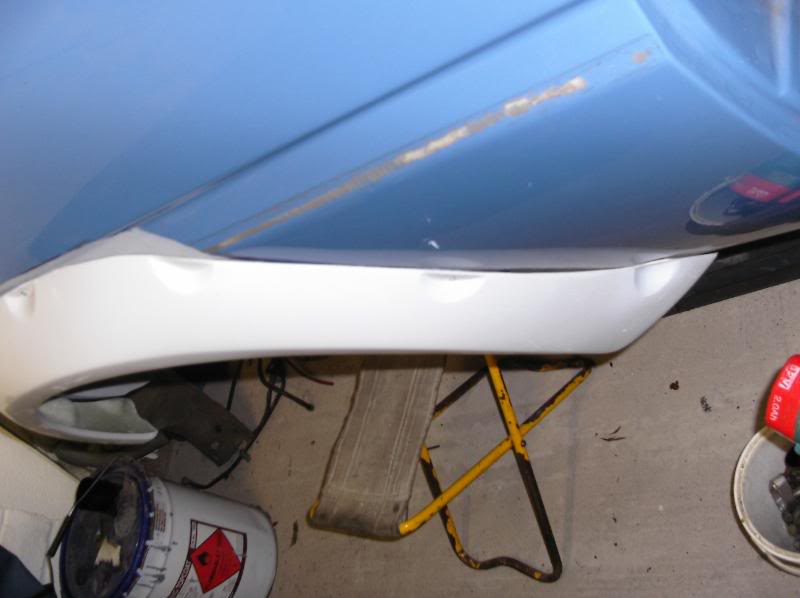
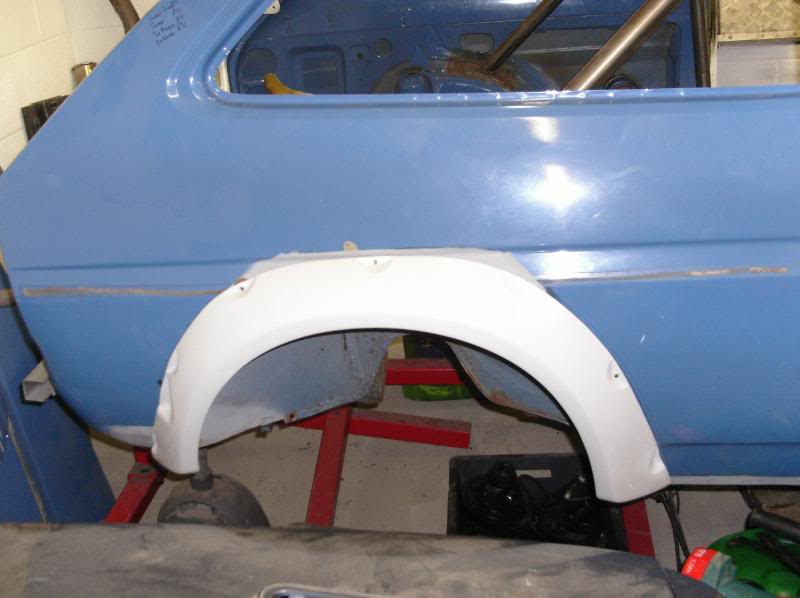
The rears caused me 1 issue, I actually used a set off my mate to measure and cut the metal out, now these ones are a little bit smaller so i'll have to revice the metal work so all the uper fixings are accessable from underneath not inside.
Tomorrow i'm gonna buy some fibreglass and start filling in the (big) gaps so they fit perfect.
more soon

1st trial fit
After fitting washers to support the gaps
Also the bottom of the arch will need extending about 20mm
The drivers front on
The rears
The rears caused me 1 issue, I actually used a set off my mate to measure and cut the metal out, now these ones are a little bit smaller so i'll have to revice the metal work so all the uper fixings are accessable from underneath not inside.
Tomorrow i'm gonna buy some fibreglass and start filling in the (big) gaps so they fit perfect.
more soon
07-03-2010 | 10:28 PM
#71
Thread Starter
Advanced PassionFord User
iTrader: (1)
Joined: May 2003
Posts: 1,702
Likes: 13
From: South Wales
Time for an update,
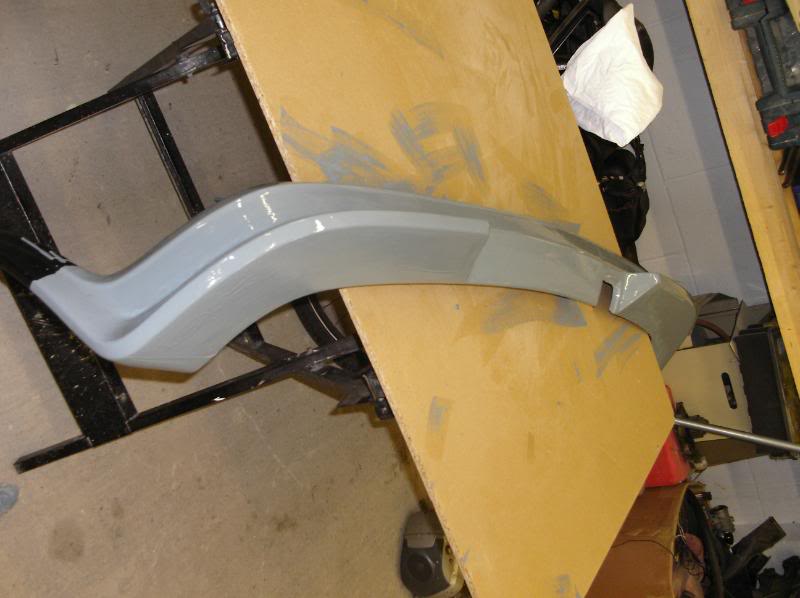
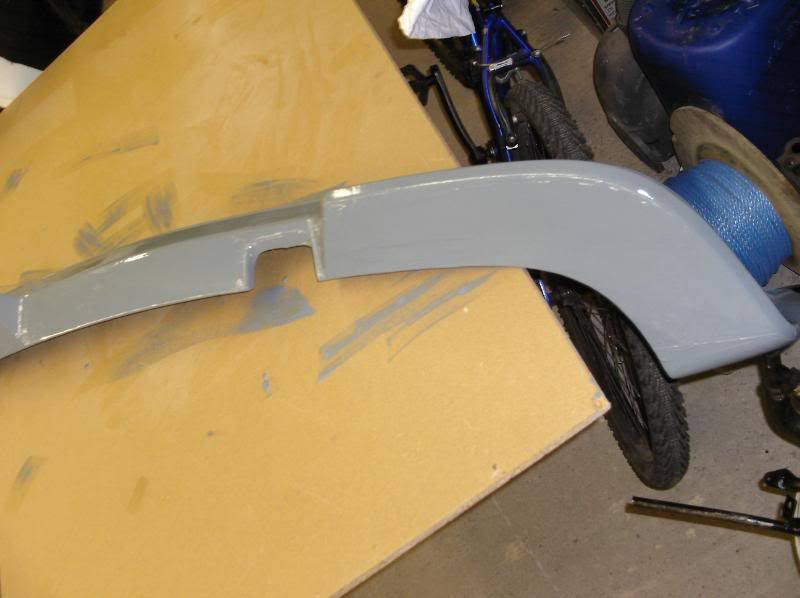
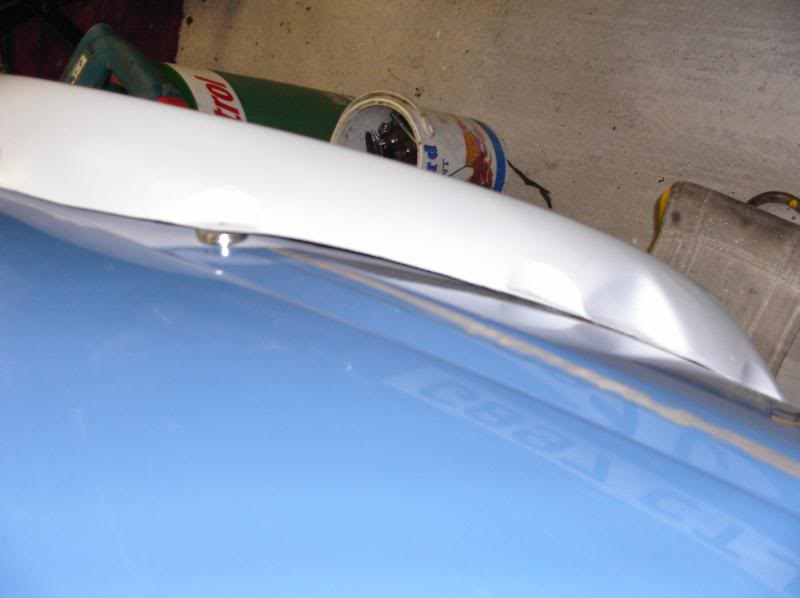
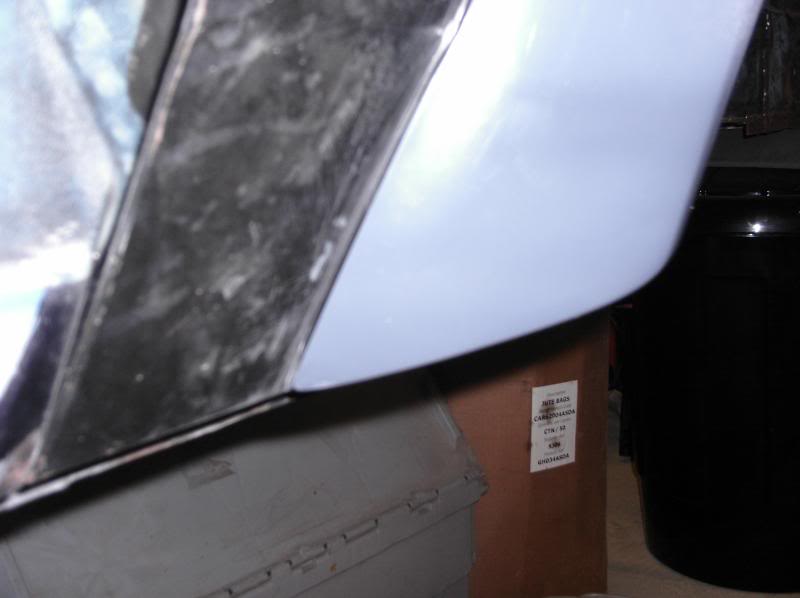
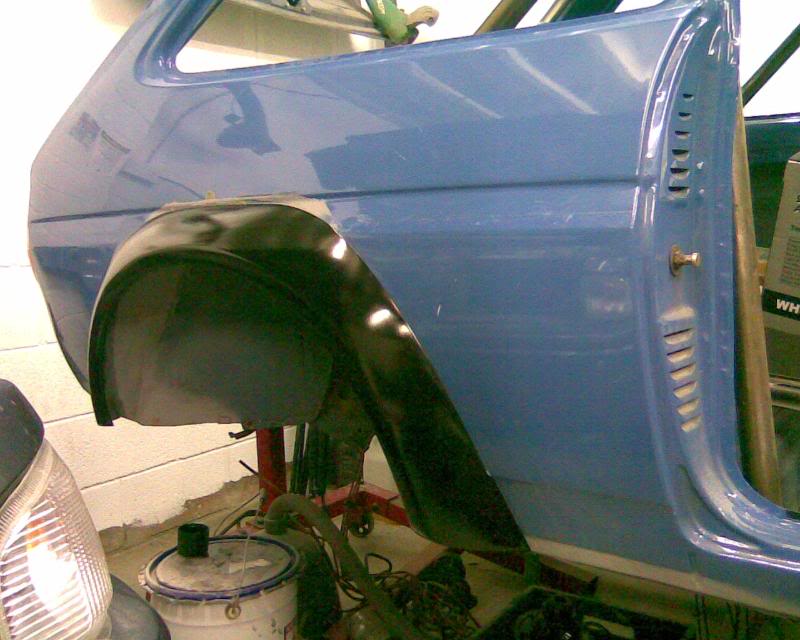
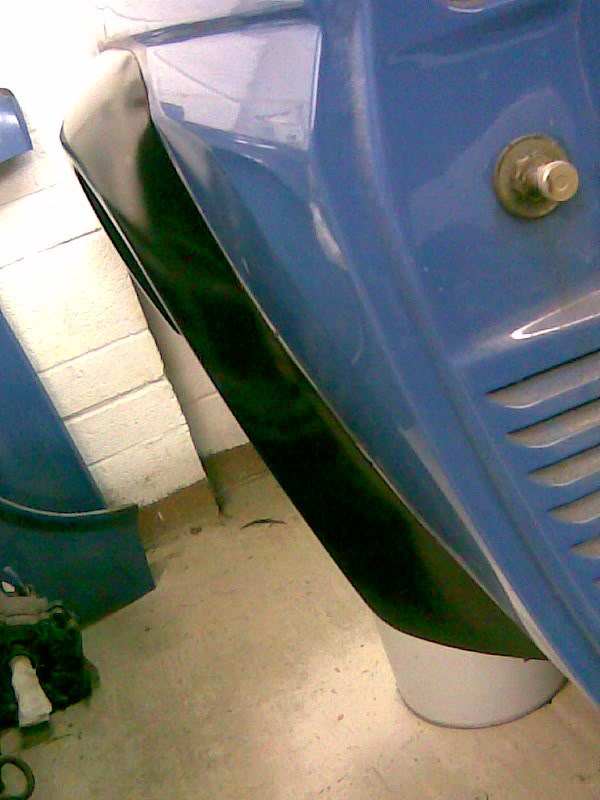
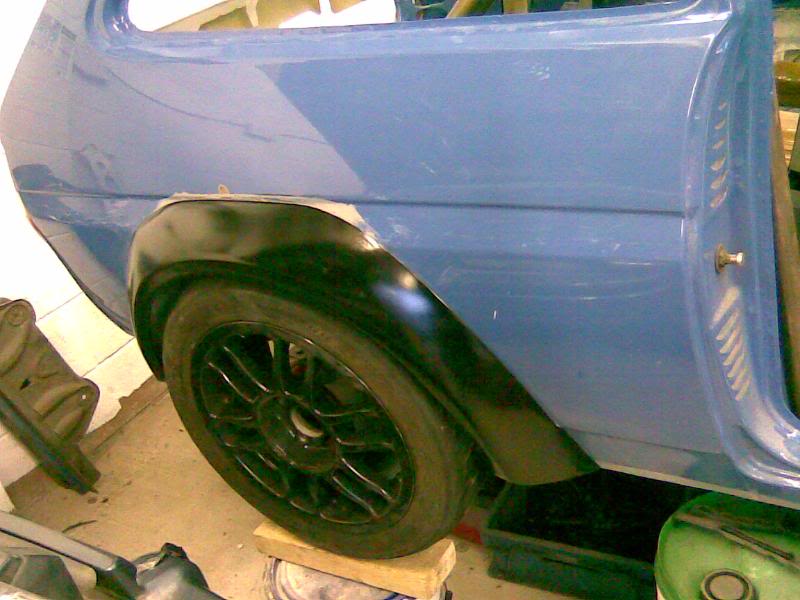
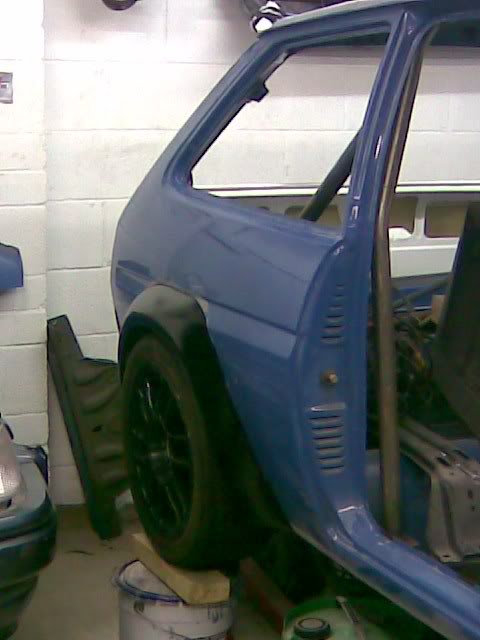
Well after trial fitting the MCR arches i started on making them fit as perfect as possible. With the help of some fibreglass filler and a lot of time and effort they fit the perfect and are a better fit than a standard XR2 arch ever was, they touch the quarter and wing all the way around with out bolts and also fit flush at the bottom of the quarter and wing. So here are the pics.
Rear
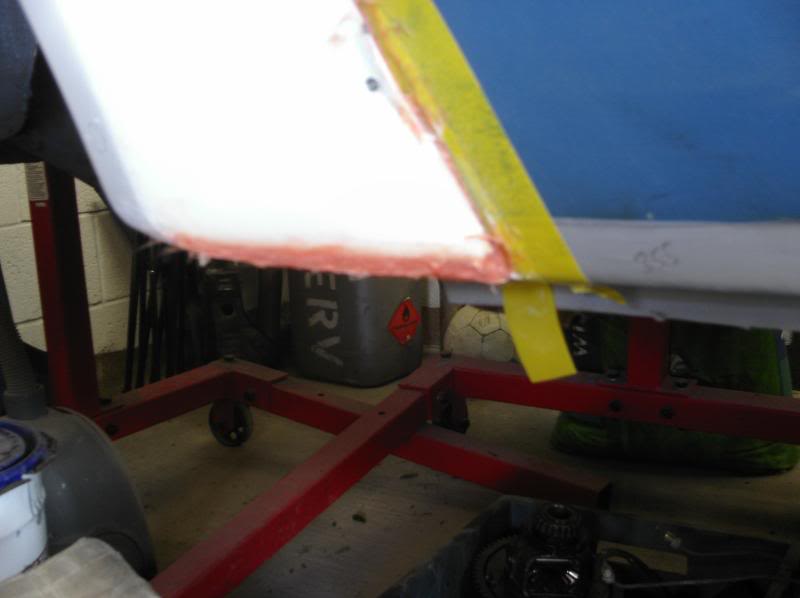
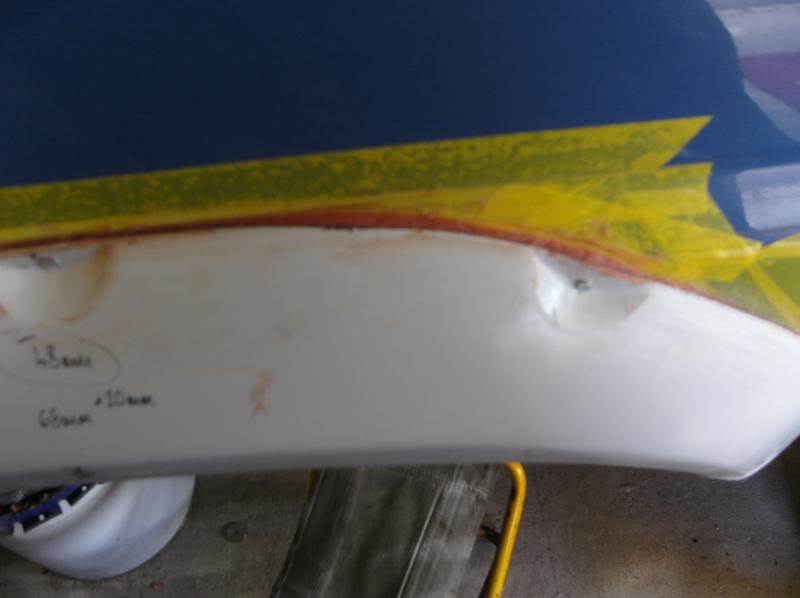

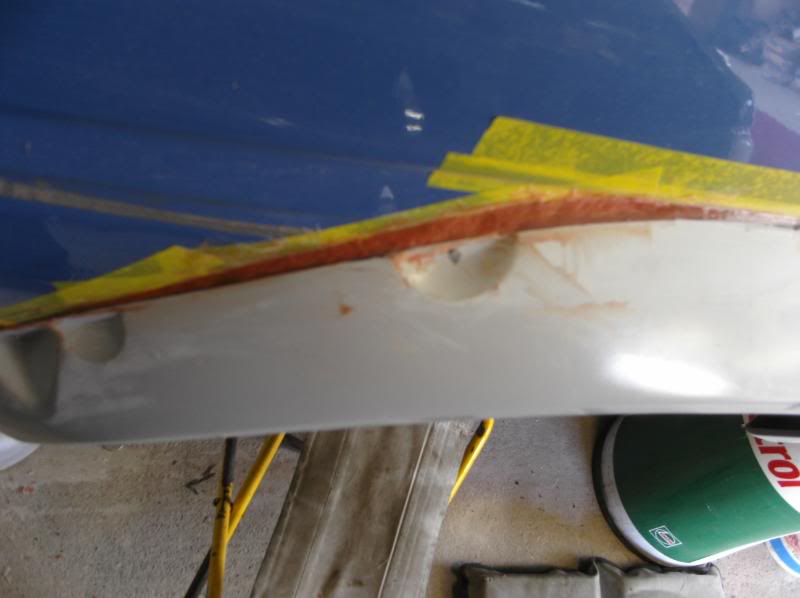
The fronts where done in the same way but the gap was a bit bigger, i did have loads of pics of the front but have managed to loose them when my PC went tit's up last week and hadn't copied them to my back up drive.
Below are the pics of 2 more or less finshed, Now compair with the before there a million times better, plus there now just placed on 8) 8) 8) 8)
Finished items,
Rears


Fronts
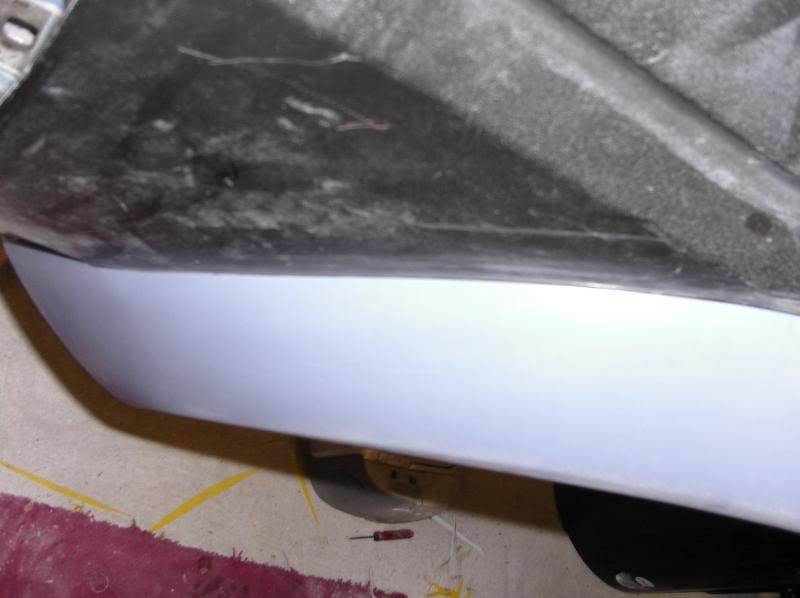


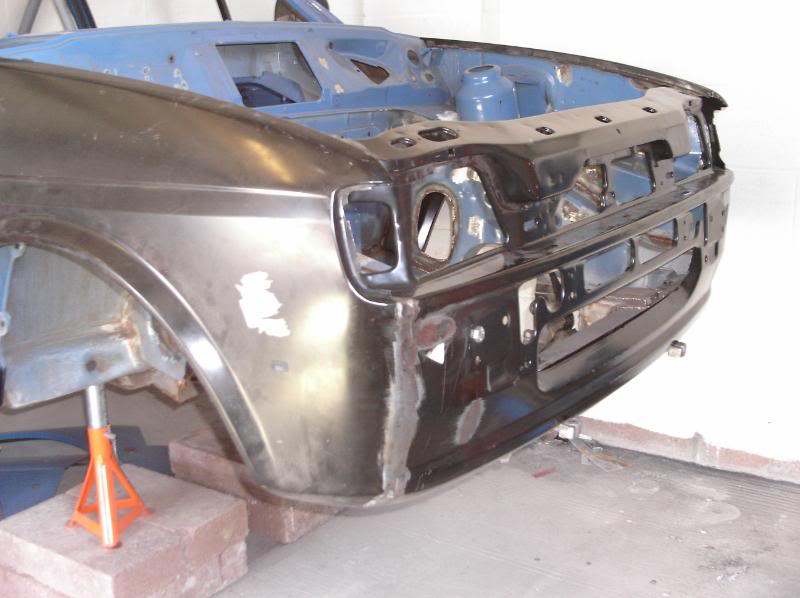
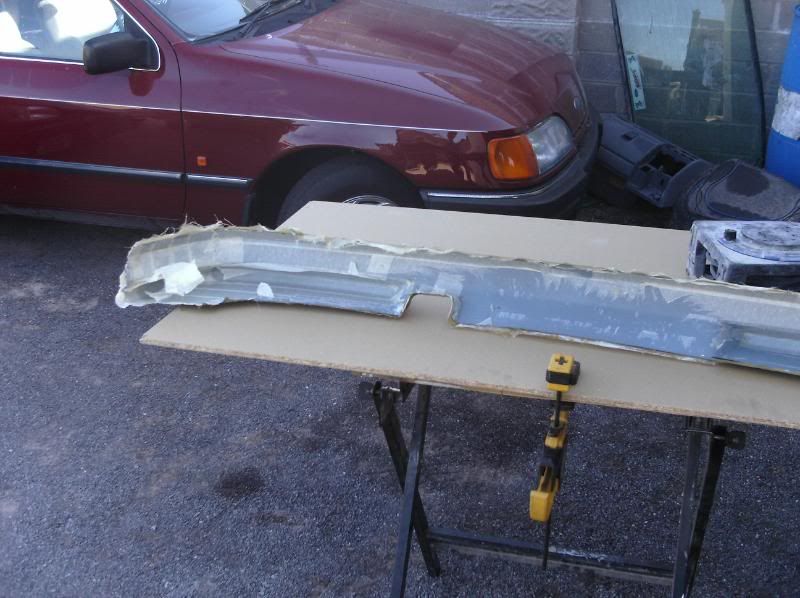
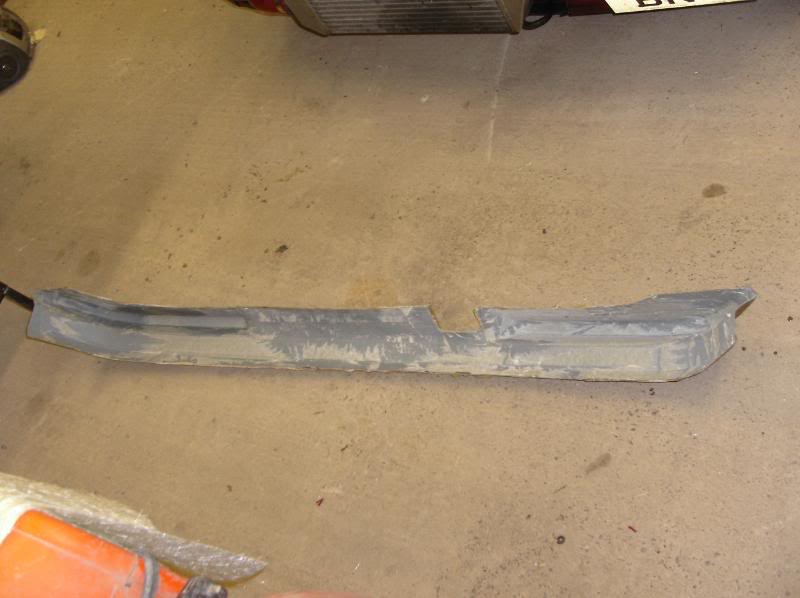
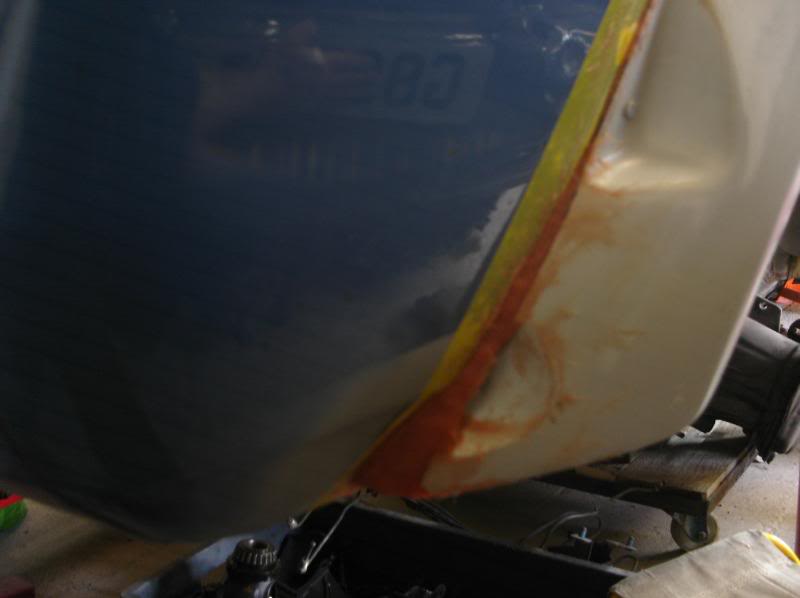
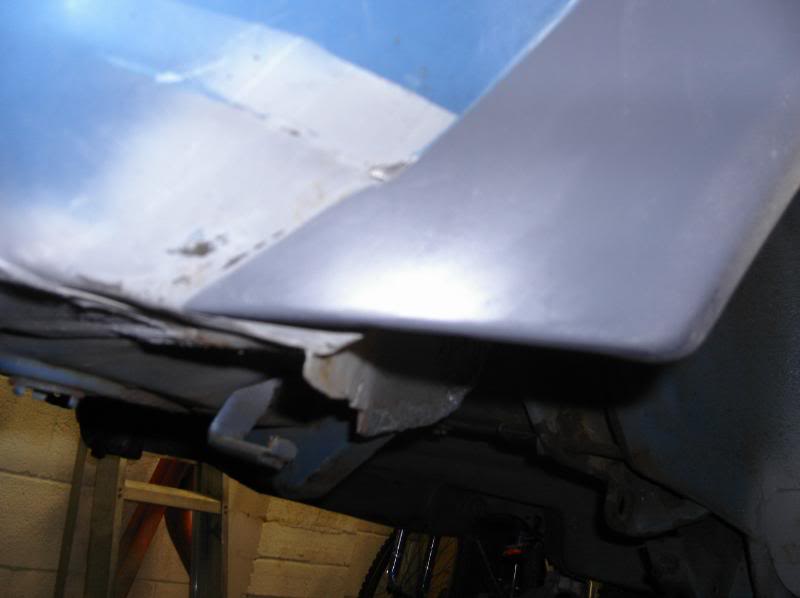
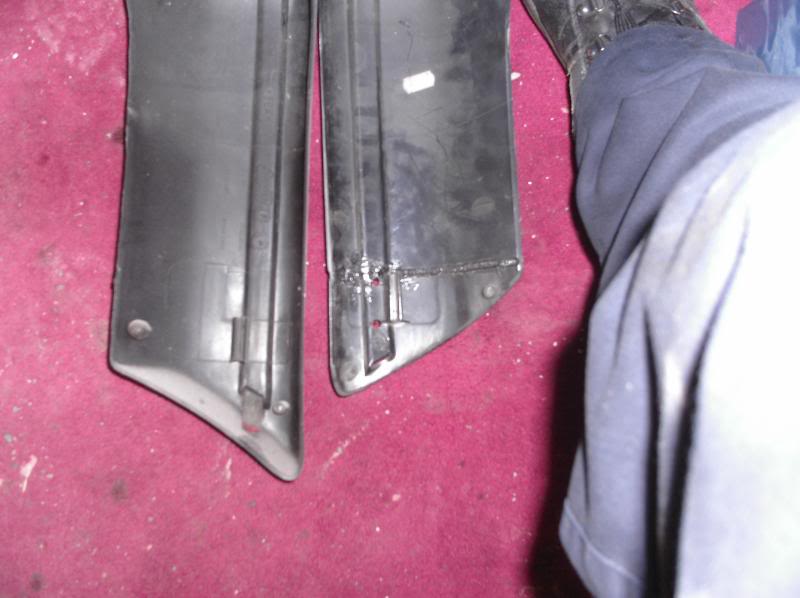
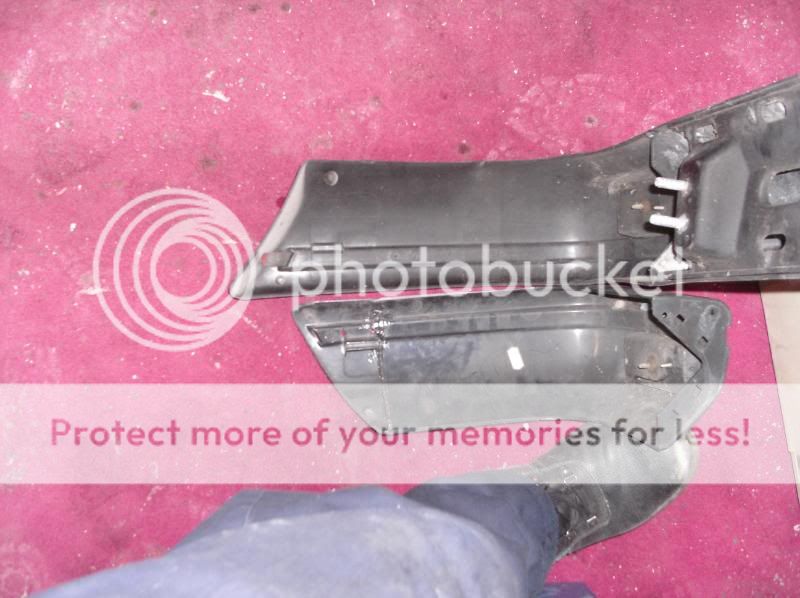
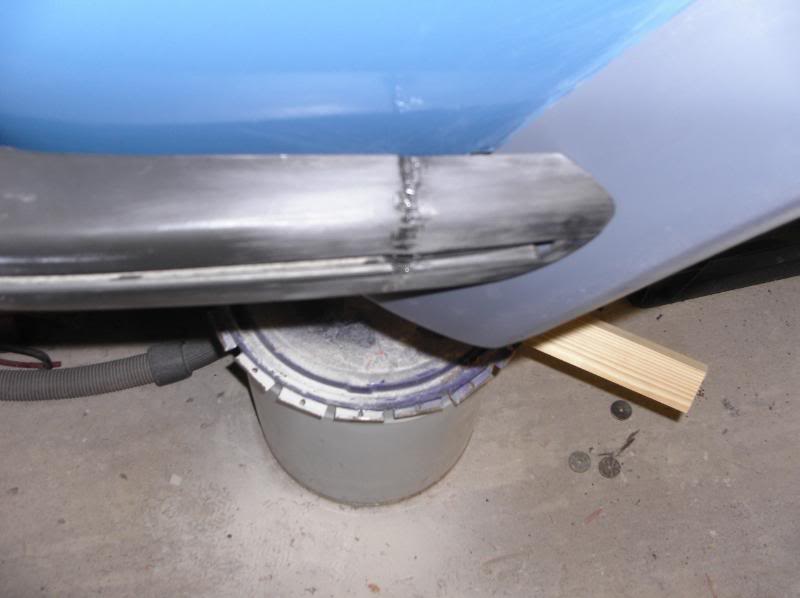
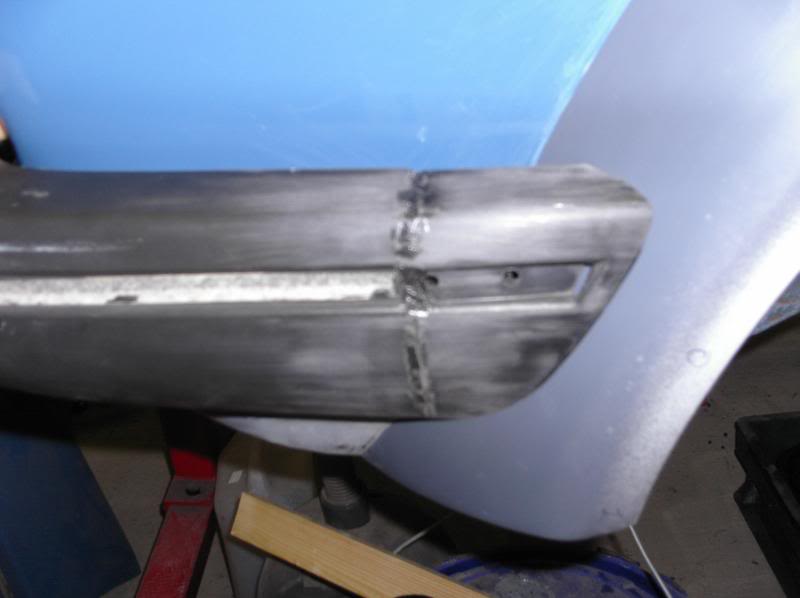
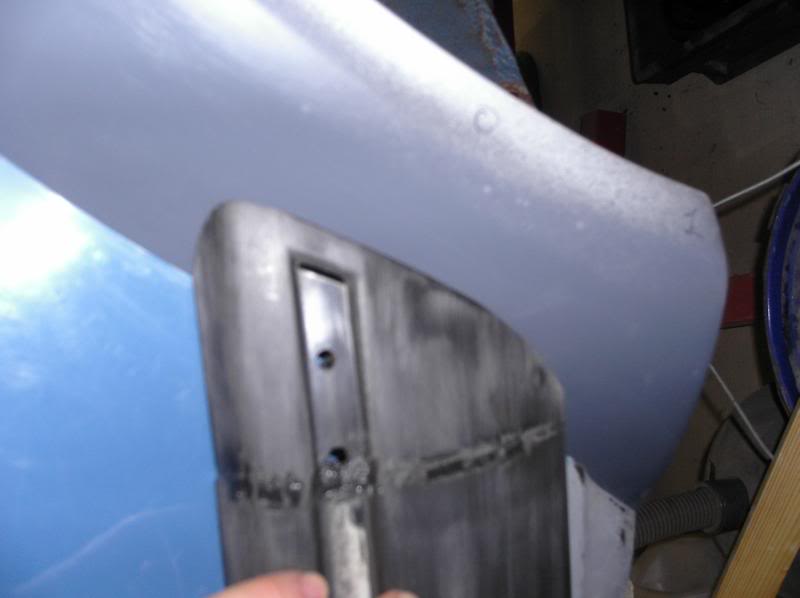
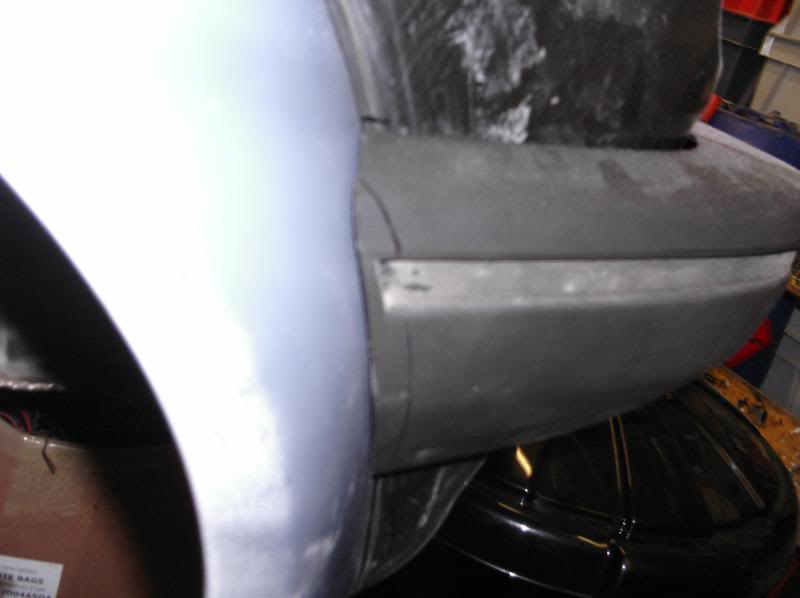
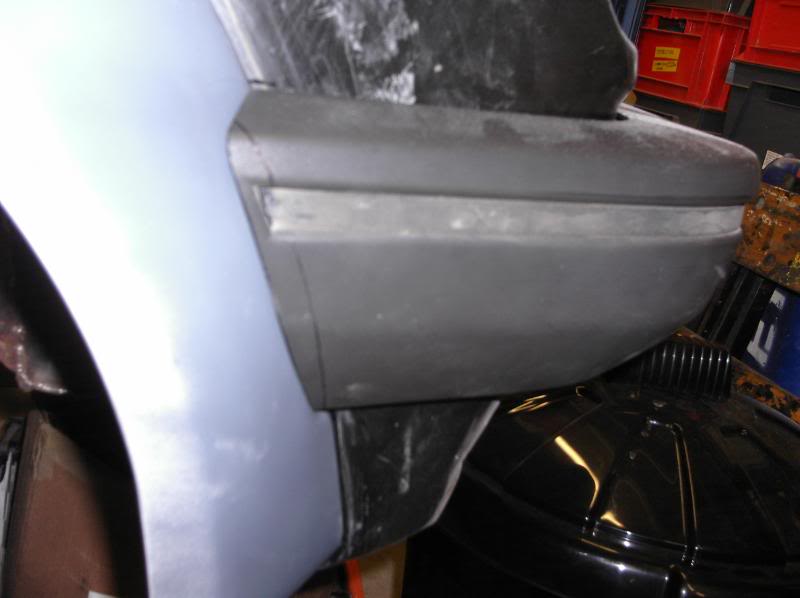
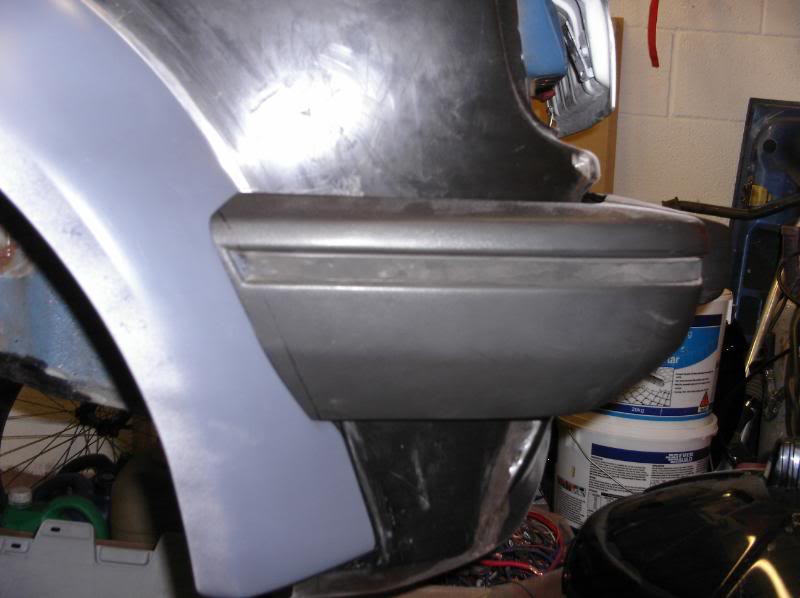
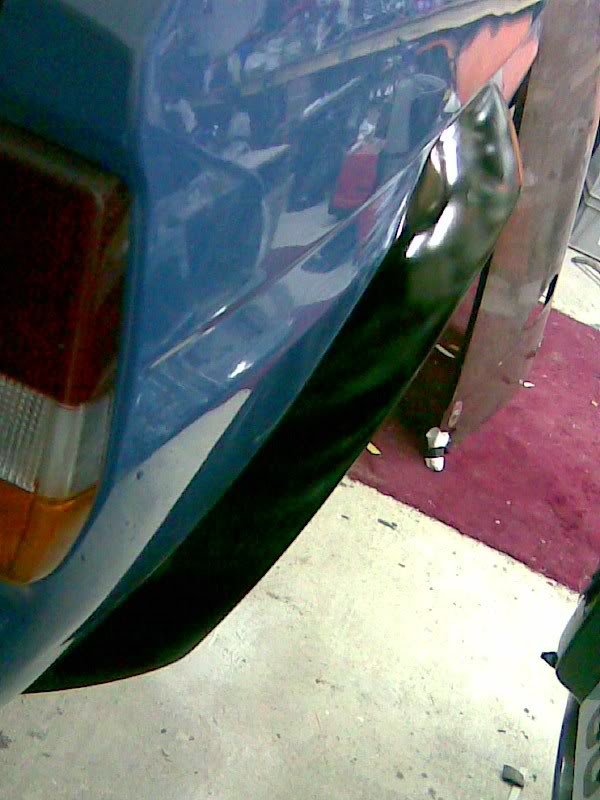
Now onto modding the bumper corners to fit around the arch's
Rear first, These were a bit harder than the front due to me wanting to retain the part were the bumper stripe holds into the end, you see this in the first pics
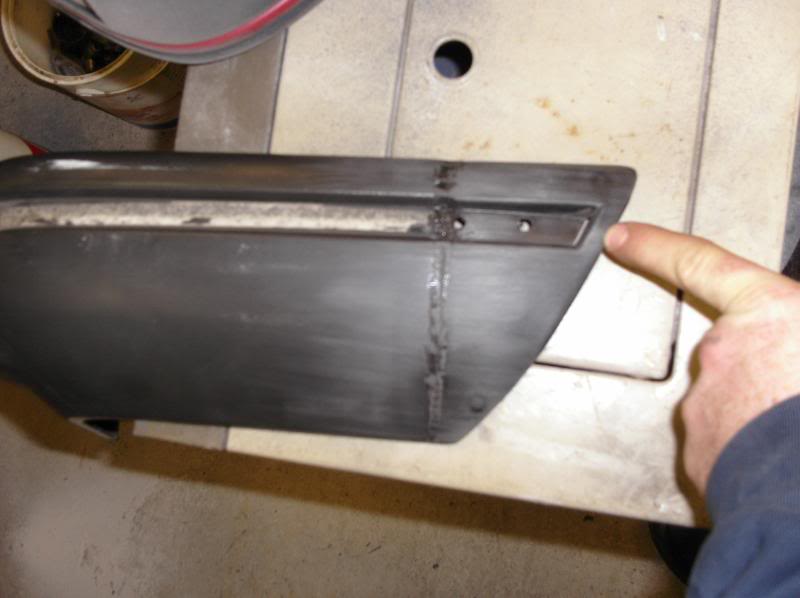
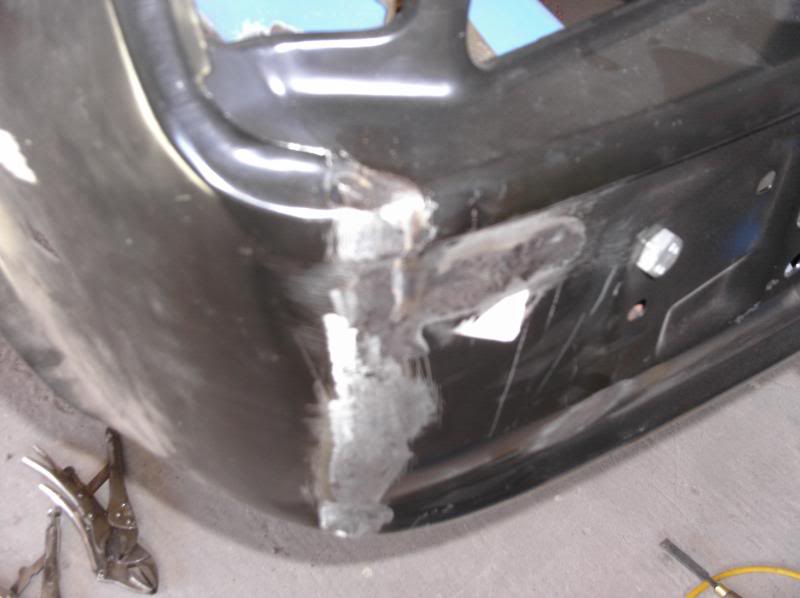
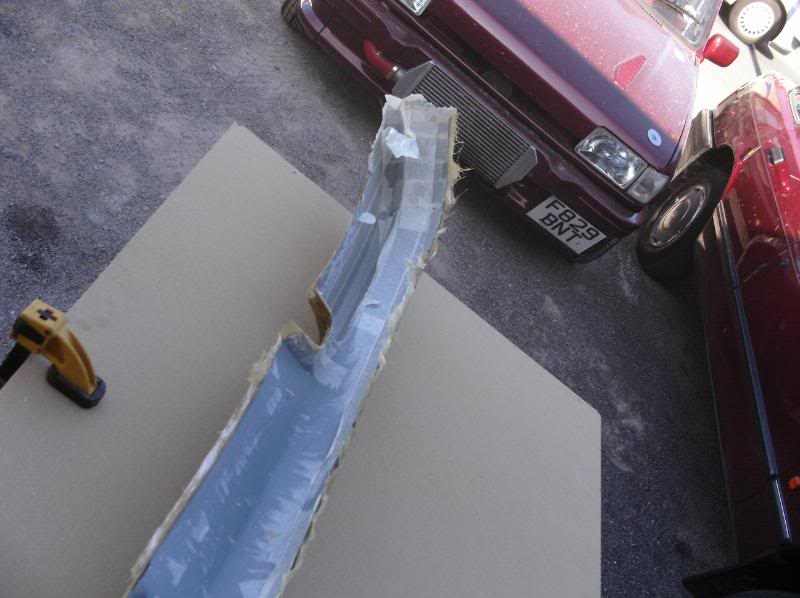
I had to cut a section out ( about 25mm) as the bumper needed to be shorter to retain the fixing point
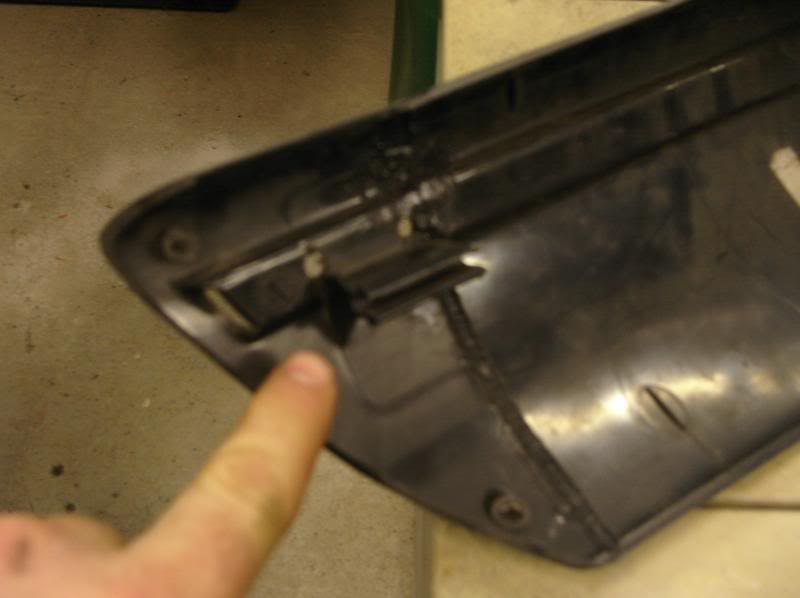

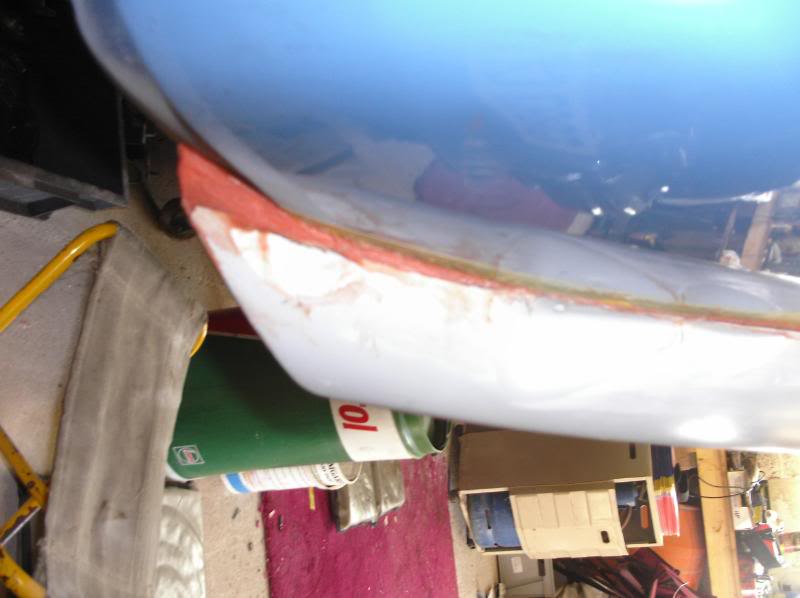
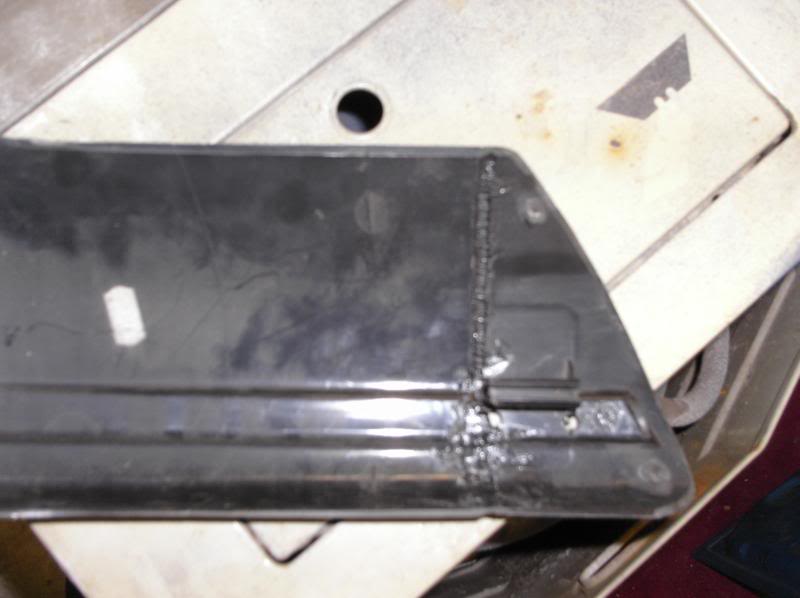
The bumper was then welded back together with a soldering iron, quite easy really and it's the first time i've attempted it.
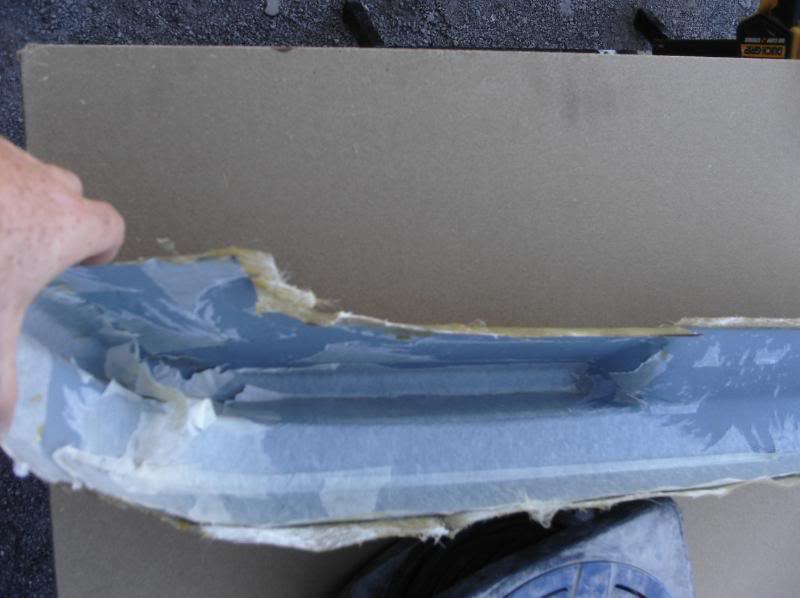
Compaired to original
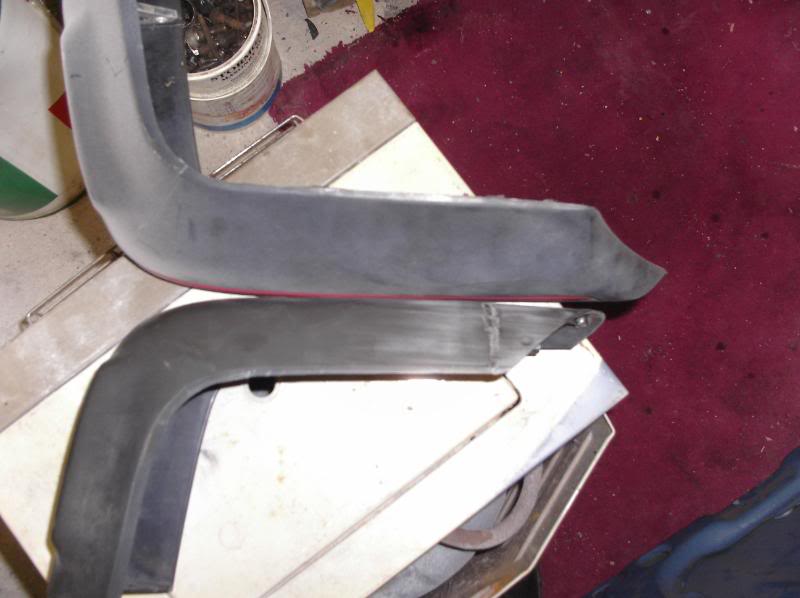

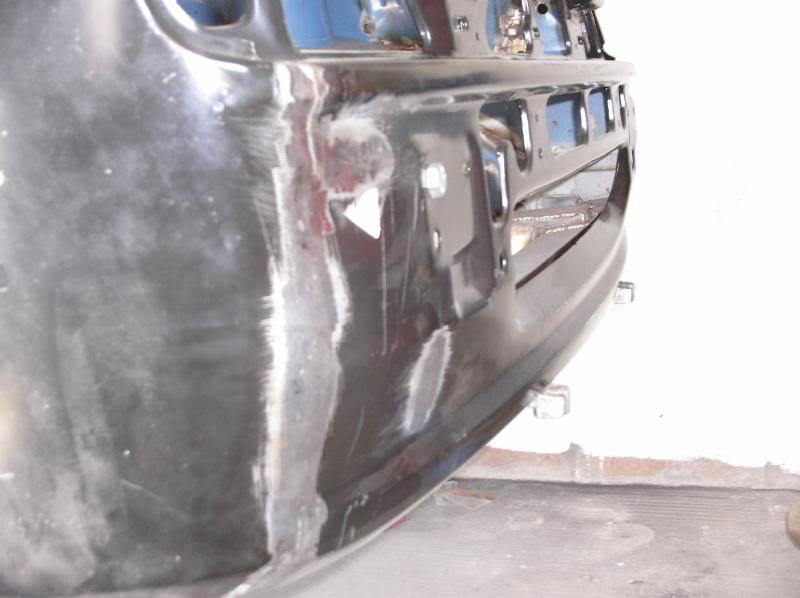
Welded
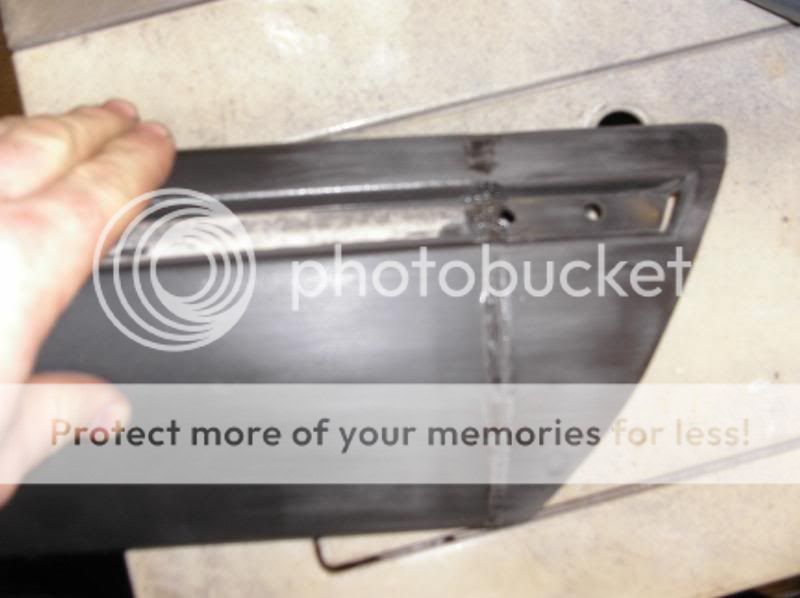
held in place

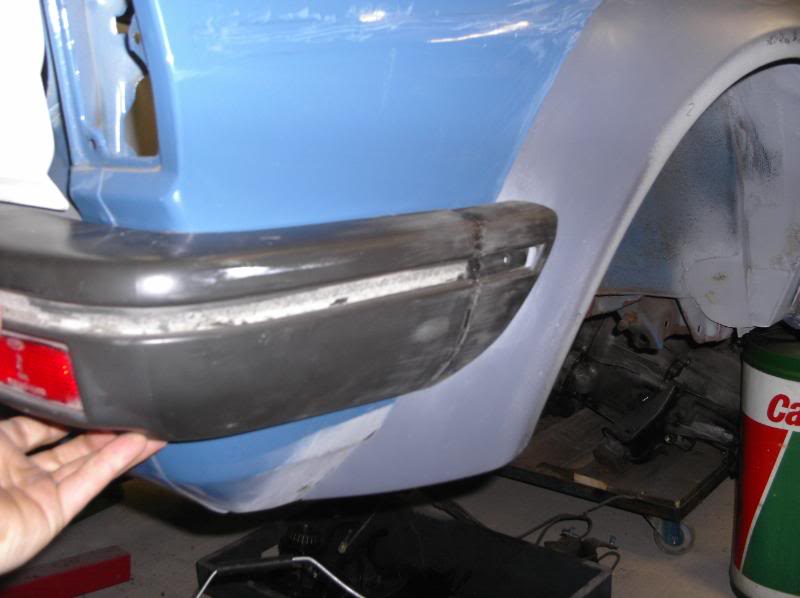
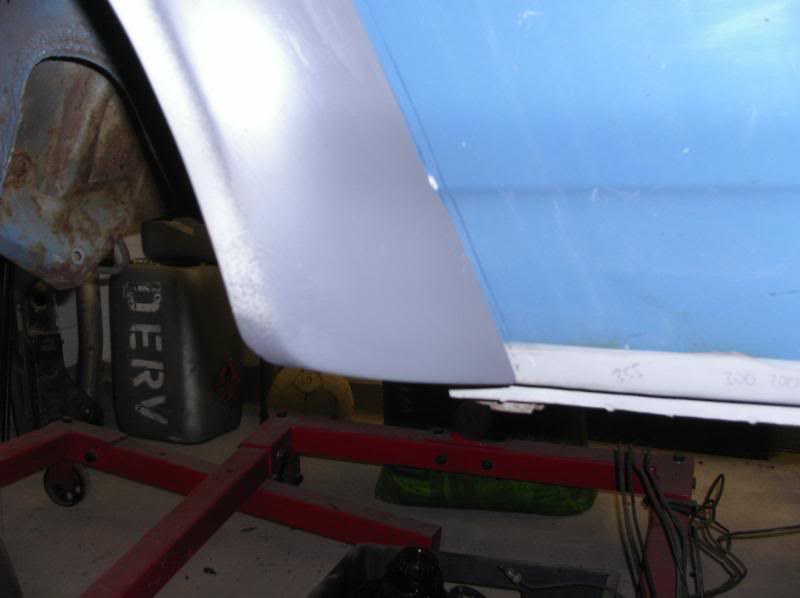
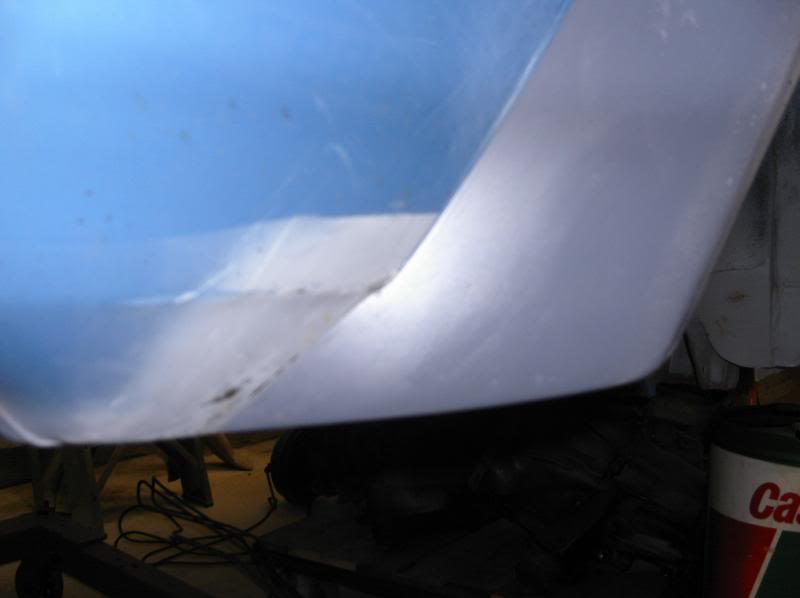
Fronts where easier than the rears as with a small trim they fit fine

Started on getting the fibreglass bonnet to fit tidy, but thats a work in progress at the moment.
Well after trial fitting the MCR arches i started on making them fit as perfect as possible. With the help of some fibreglass filler and a lot of time and effort they fit the perfect and are a better fit than a standard XR2 arch ever was, they touch the quarter and wing all the way around with out bolts and also fit flush at the bottom of the quarter and wing. So here are the pics.
Rear
The fronts where done in the same way but the gap was a bit bigger, i did have loads of pics of the front but have managed to loose them when my PC went tit's up last week and hadn't copied them to my back up drive.
Below are the pics of 2 more or less finshed, Now compair with the before there a million times better, plus there now just placed on 8) 8) 8) 8)
Finished items,
Rears
Fronts
Now onto modding the bumper corners to fit around the arch's
Rear first, These were a bit harder than the front due to me wanting to retain the part were the bumper stripe holds into the end, you see this in the first pics
I had to cut a section out ( about 25mm) as the bumper needed to be shorter to retain the fixing point
The bumper was then welded back together with a soldering iron, quite easy really and it's the first time i've attempted it.
Compaired to original
Welded
held in place
Fronts where easier than the rears as with a small trim they fit fine
Started on getting the fibreglass bonnet to fit tidy, but thats a work in progress at the moment.
Last edited by GINGExR2 T; 07-03-2010 at 10:39 PM.
15-03-2010 | 11:29 PM
#75
Thread Starter
Advanced PassionFord User
iTrader: (1)
Joined: May 2003
Posts: 1,702
Likes: 13
From: South Wales
Well i was a bit bored so i thought i'd give one of the arches a a quick paint to see what i'll look like if i leave the car it's original colour. I've looked at loads of different colour and can't really decide, but the arch's, bumpers, handle's, mirrors etc will all be black so i may just keep it the standard colour which will save me a lot of hastle and money with painting it, Plus i actually do like the blue
Anyway opinions on colour are welcome


I've also done a load of other work on getting the fibreglass bonnet and boot to fit and look tidy as they were a bit shit, boot took best part of 5 hours and the sheel needed new mounting holes as the hinges where in the wrong place :-(:-(
More soon.
Anyway opinions on colour are welcome
I've also done a load of other work on getting the fibreglass bonnet and boot to fit and look tidy as they were a bit shit, boot took best part of 5 hours
More soon.
21-03-2010 | 09:43 PM
#76
Thread Starter
Advanced PassionFord User
iTrader: (1)
Joined: May 2003
Posts: 1,702
Likes: 13
From: South Wales
Well i was bored in the garage a few days ago so thought i'd place a wheel under the rally arches to see how they looked. So after measuring the ride hight of my XR2 and also putting the wheels 20mm futher out at the fronts and rear, due to the front suspension width and having a wider rear axle they look like this


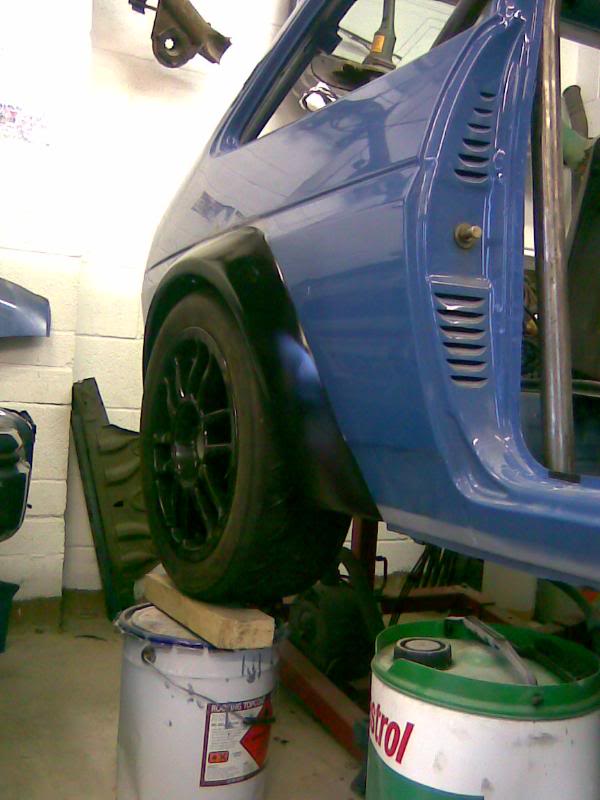

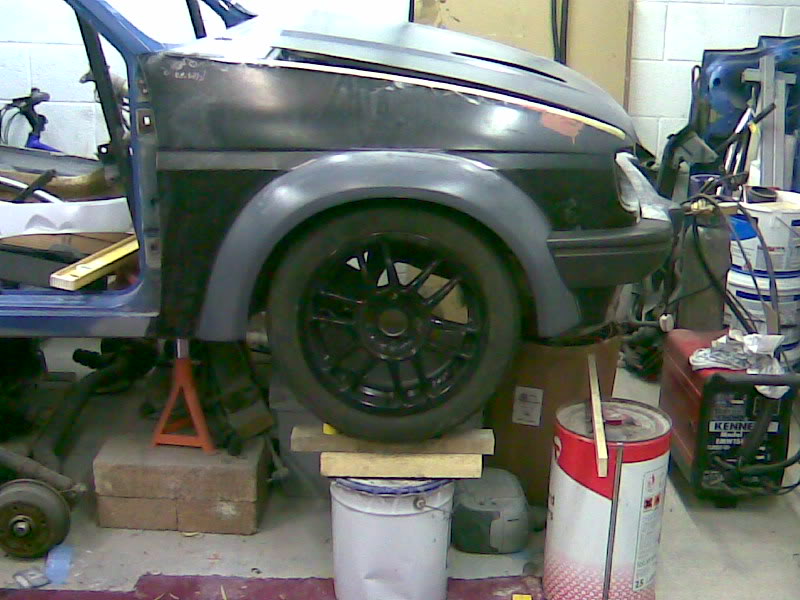

Think it looks wicked
Think it looks wicked
