1.8 Vauxhall Powered Mini Track Car Build- Engine in 24-10


 28-09-2008, 10:16 PM
#42
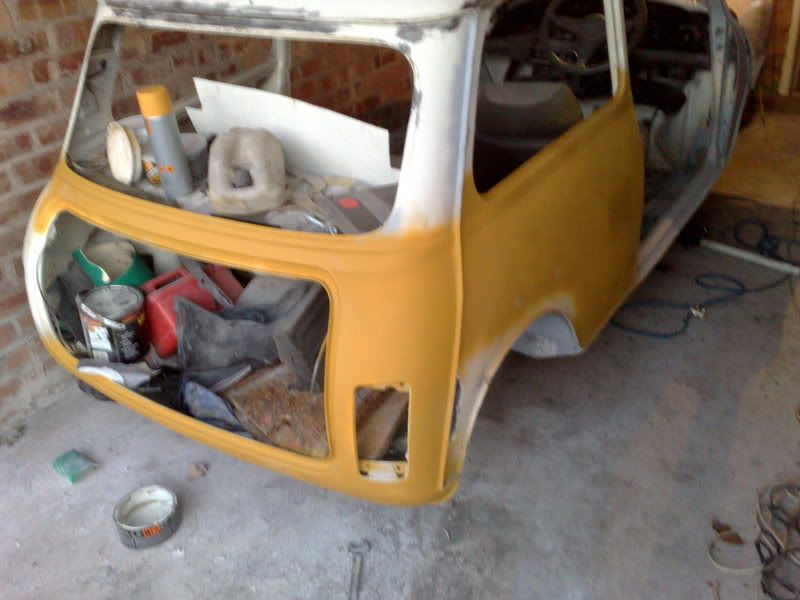
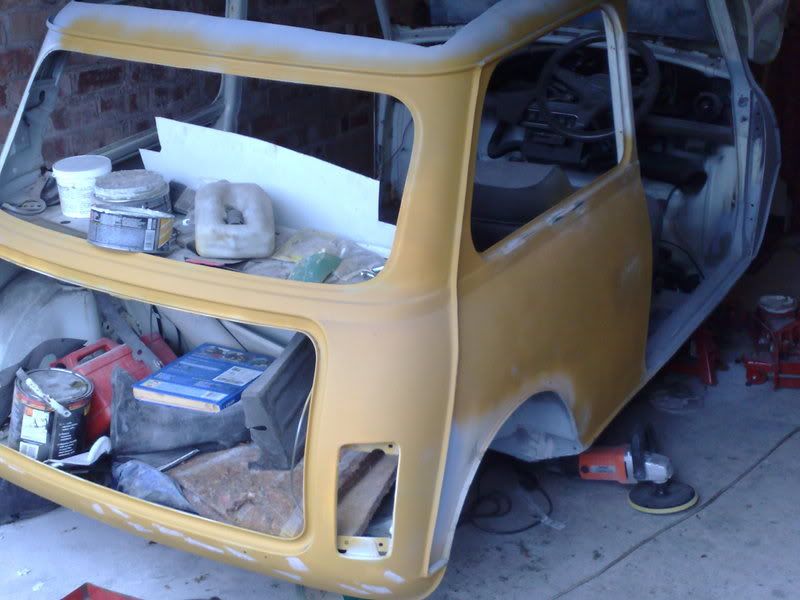
Did a little bit more on thursday as i had a day off work,
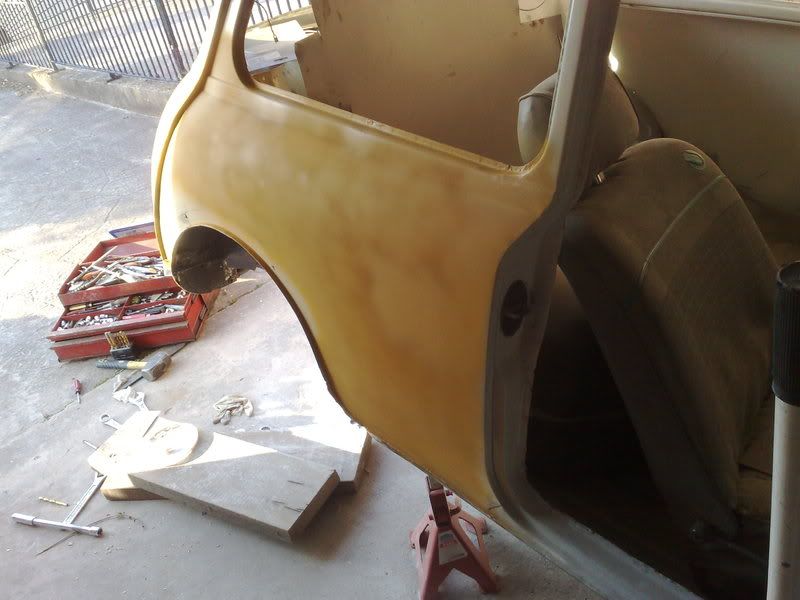
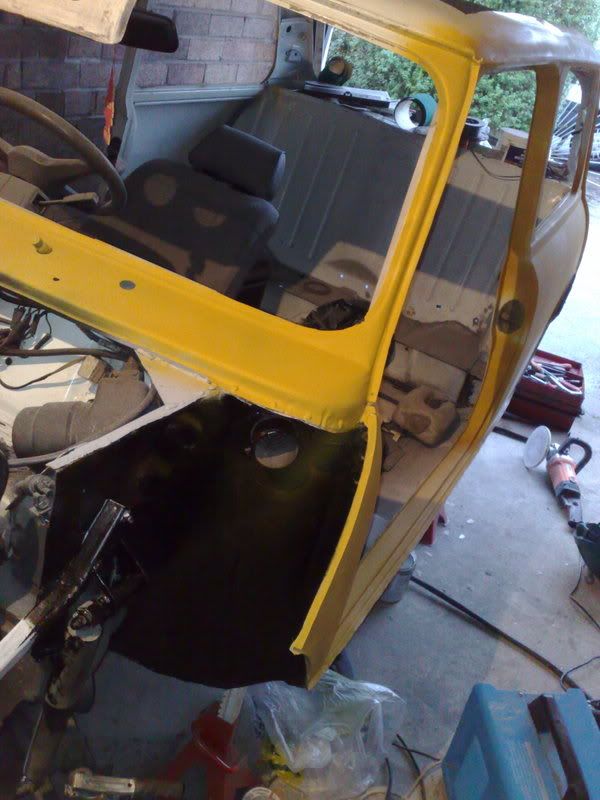
got the A panel tidied up
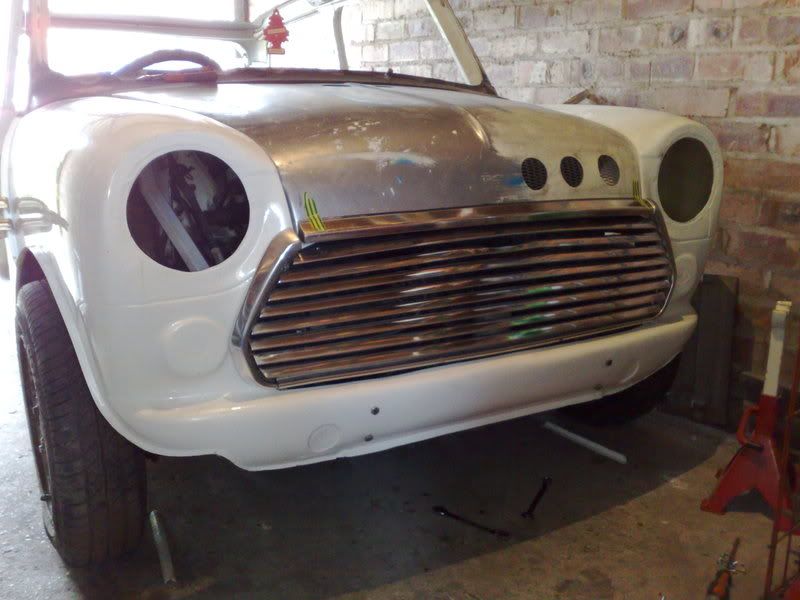
Fitted the grill and got the front end nearly right, not 100% happy with it as it doesn't drop into place easily enough so still more fiddling yet.
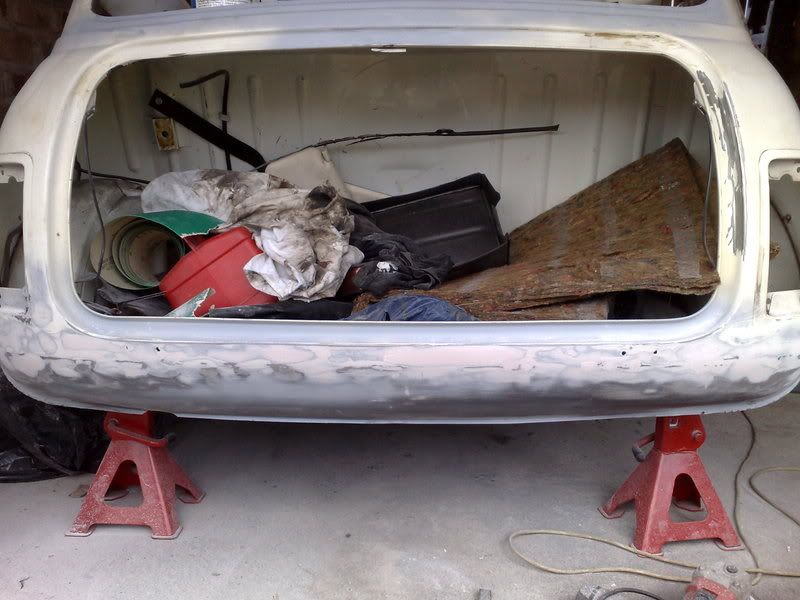
Still going at the rear valance, nearly there now.
got the A panel tidied up
Fitted the grill and got the front end nearly right, not 100% happy with it as it doesn't drop into place easily enough so still more fiddling yet.
Still going at the rear valance, nearly there now.
28-09-2008, 10:17 PM
#43
Got a bit more done this weekend,
Got some plastic headlamp bowls from car transplants on thursday, and will be going back tomorrow to get some black dash rails.
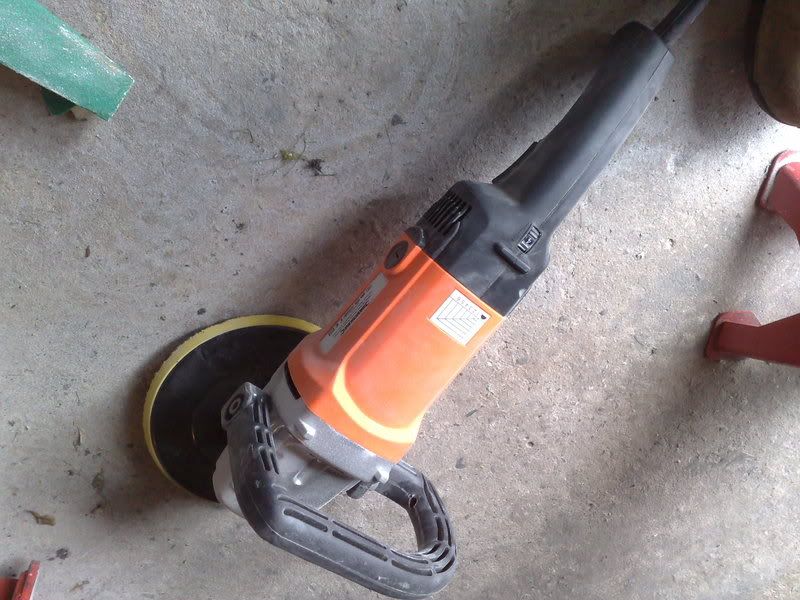
picked up my new rotary polisher and sander on friday night, should make things a little easier, just got to practice with it now, will do that on the 205 as the paintwork is already screwed!!
I've finally managed to get my flip front to a stage where i am 100% happy with it just need to attatch some aluminium triangles in the rear corners not so it can be pinned down with the back of the bonnet.
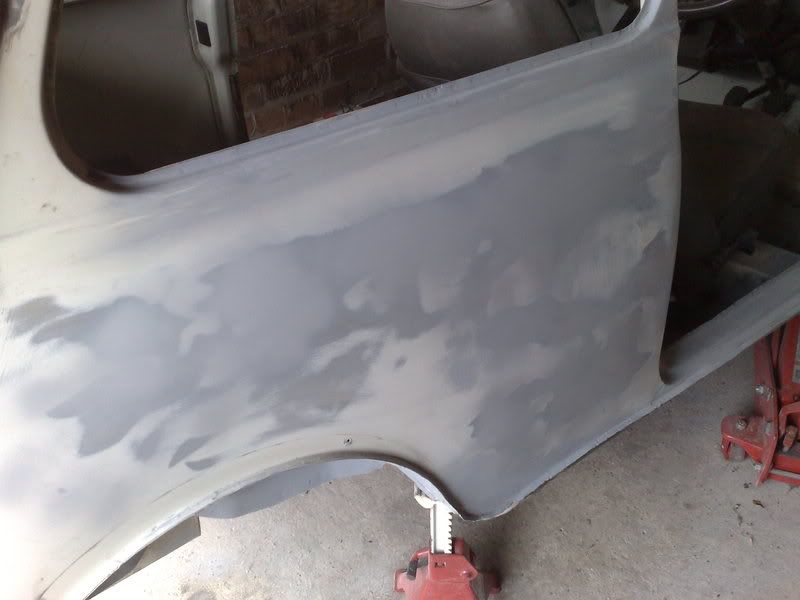
played with the sander on the rear quater panel, makes a nice job, you've just got to go easy with it, its amazing how a panel can look straight but these show up the tiniest of dents
now 95% happy with the rear valence join, just one little bit on the passenger side corner needs a bit more sanding.
Also got the rear quater and valence into high build filler primer.

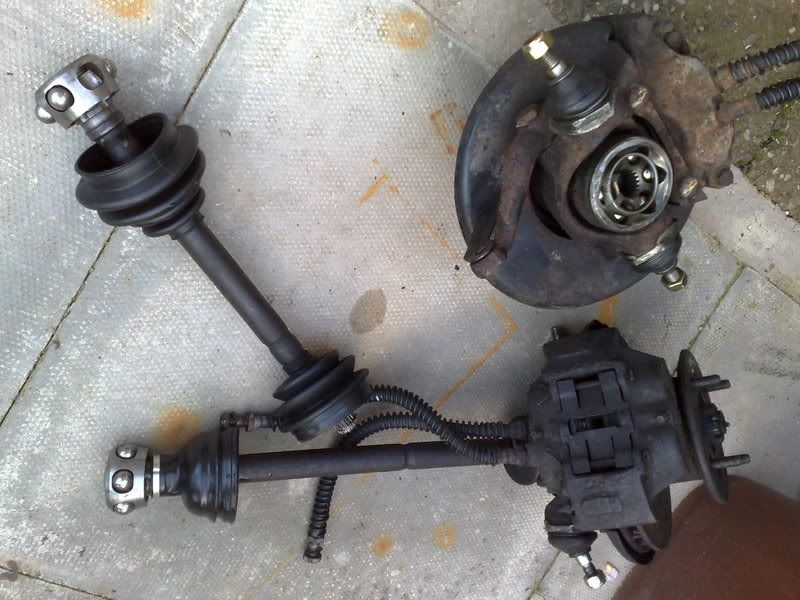
Also jot the front hubs and brakes off and done a part ex deal today with jminimadman for his metro 4pots [ ]
]
gave them a wipe with the magic cloth to get rid of the old cv grease etc, they will be fully painted up, new seals pads, discs and braided lines.
Got some plastic headlamp bowls from car transplants on thursday, and will be going back tomorrow to get some black dash rails.
picked up my new rotary polisher and sander on friday night, should make things a little easier, just got to practice with it now, will do that on the 205 as the paintwork is already screwed!!
I've finally managed to get my flip front to a stage where i am 100% happy with it just need to attatch some aluminium triangles in the rear corners not so it can be pinned down with the back of the bonnet.
played with the sander on the rear quater panel, makes a nice job, you've just got to go easy with it, its amazing how a panel can look straight but these show up the tiniest of dents
now 95% happy with the rear valence join, just one little bit on the passenger side corner needs a bit more sanding.
Also got the rear quater and valence into high build filler primer.
Also jot the front hubs and brakes off and done a part ex deal today with jminimadman for his metro 4pots [
gave them a wipe with the magic cloth to get rid of the old cv grease etc, they will be fully painted up, new seals pads, discs and braided lines.
28-09-2008, 10:49 PM
#45
Too many posts.. I need a life!!
iTrader: (1)
Join Date: Aug 2006
Location: Newcastle upon tyne
Posts: 553
Likes: 0
Received 0 Likes
on
0 Posts
sweet deffo moving on a lot... are you thinking of deseaming the whole car... I had one like that once it just looked soo much better!
 01-10-2008, 07:25 PM
#50
looking good fella,i once started to to deseam my mini got as far as the a panel then my brother rang to say his mgb gt needed a sill rebuild for its mot-that spelt the end of the deseem which was gonna include a roof chop as i never got chance to get back to it,never know one day as i still have it in my lock-up 
 05-10-2008, 01:59 PM
#54
Yesterdays Update.
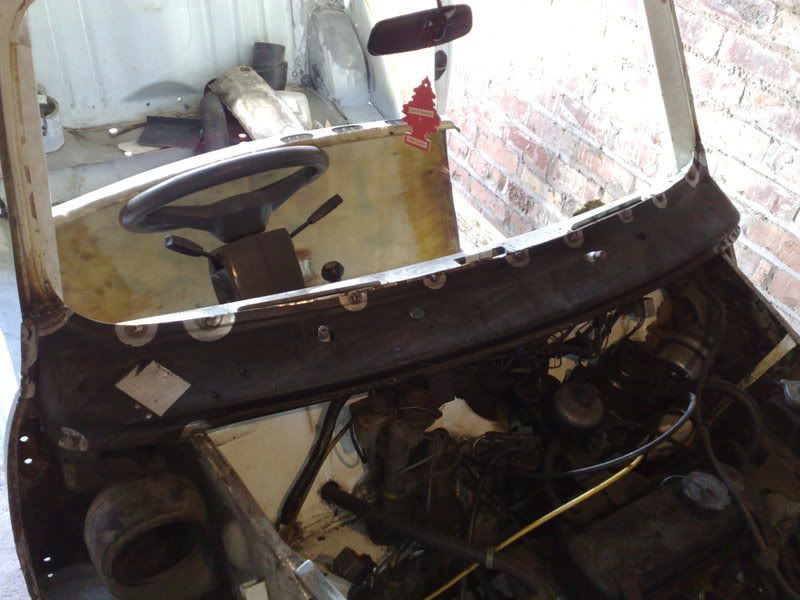
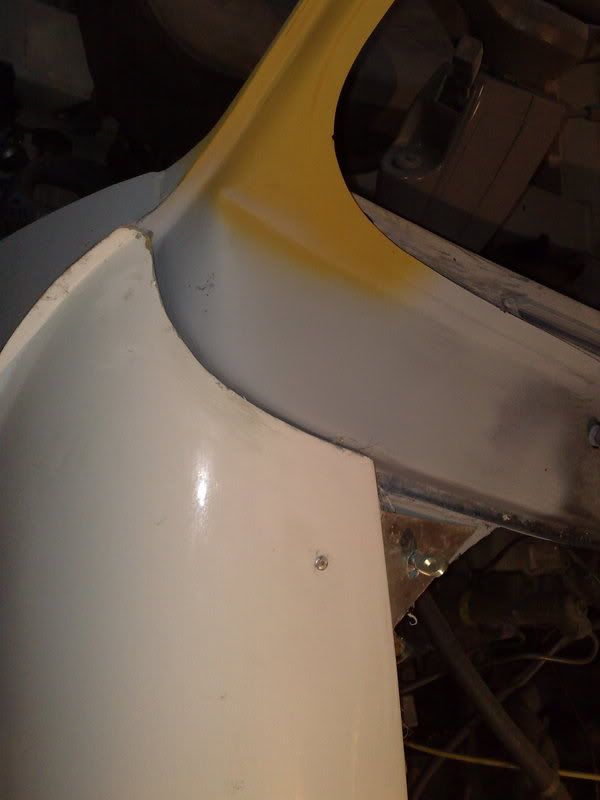
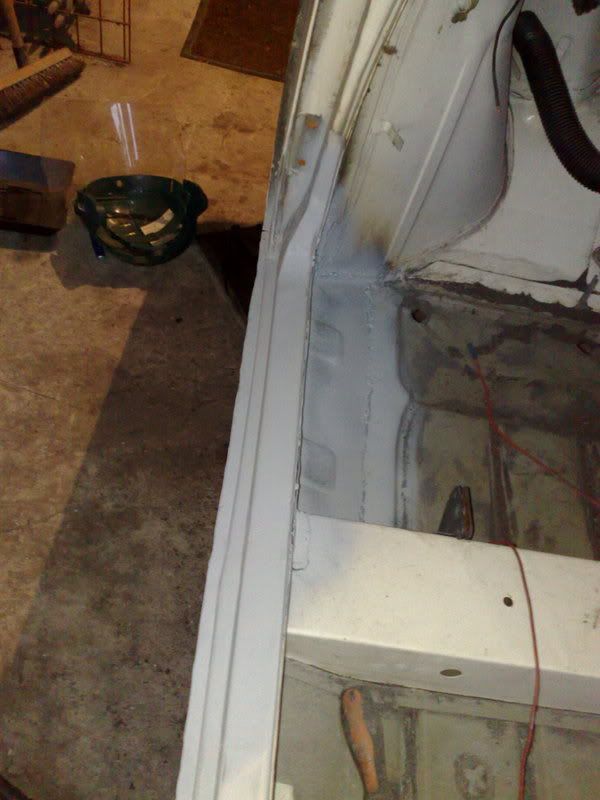
Started off sorting out any little bits of pitting around the roof gutter and C pillar seam, gave it a few coats of etch primer then a few of filler primer
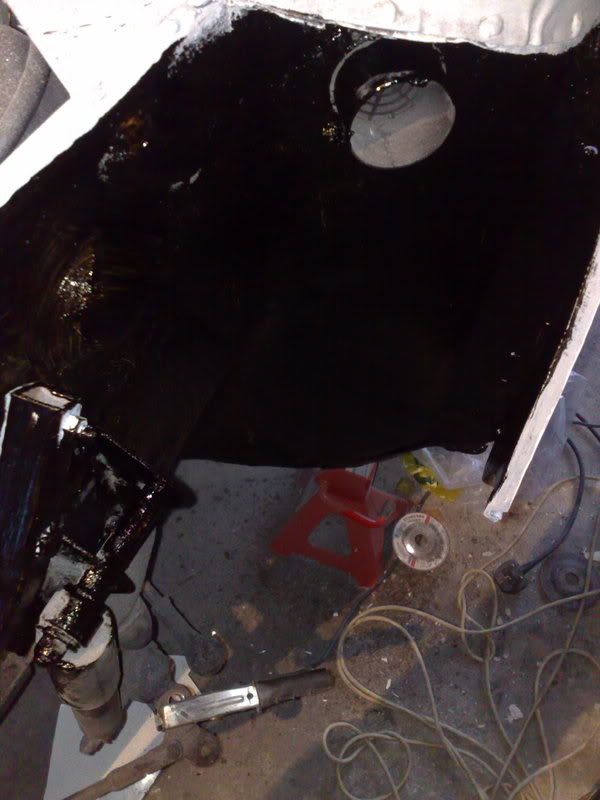
the filer primering last week had shown up a few areas i wasn't 100% happy with, the corner just below the rear window, and a few scratches that were too deep in the rear valance join vso gave these a quick light skim of filler
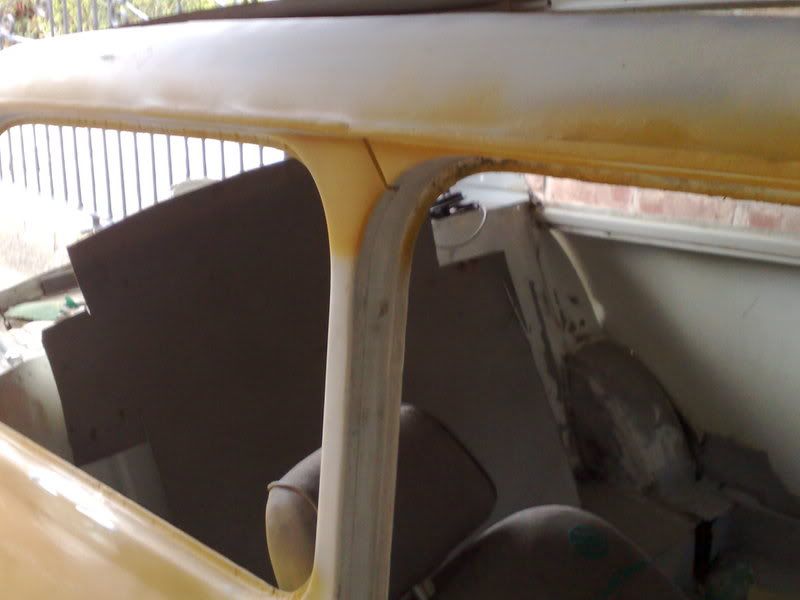
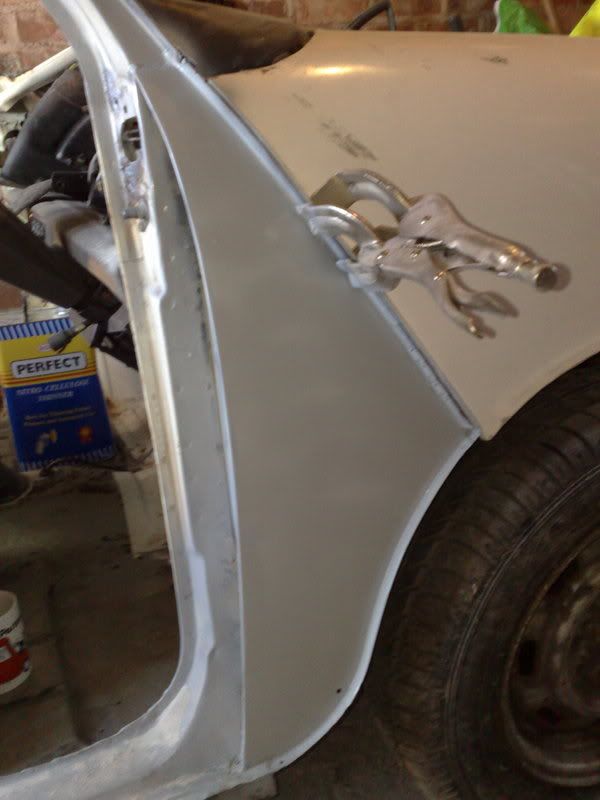
cleaned up the weld and outside of the seam where i have attatched some brakets for the front end, these will be held with dzus fastners like this

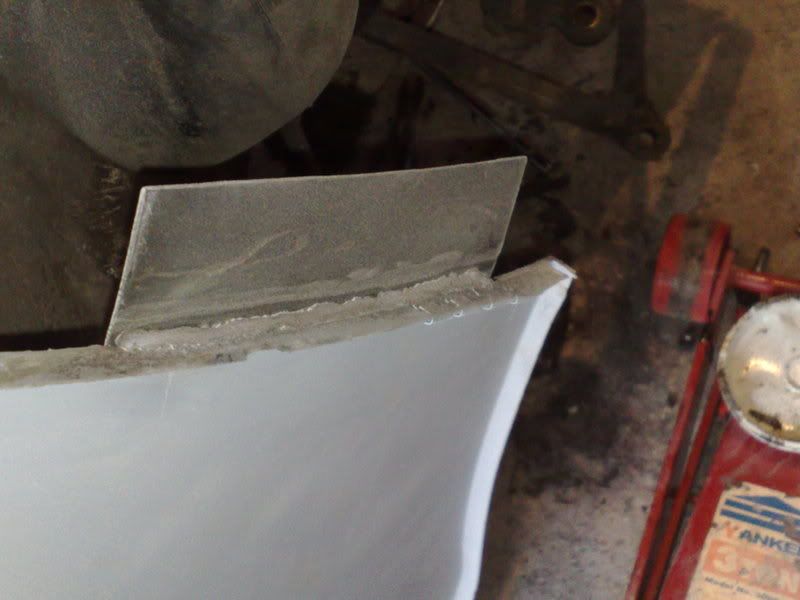
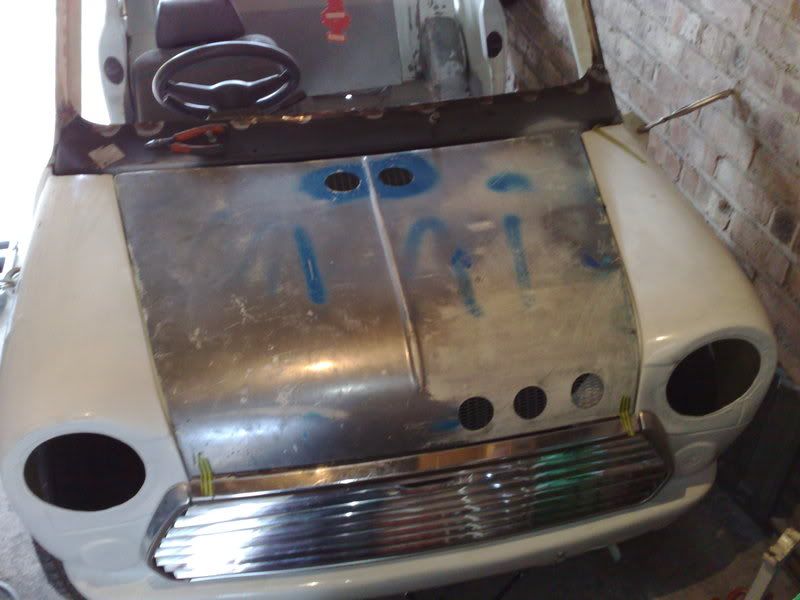
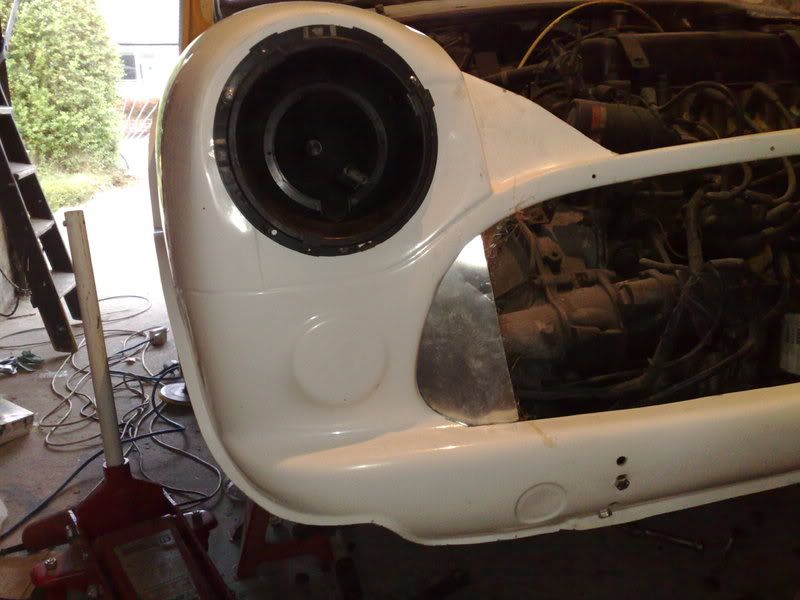
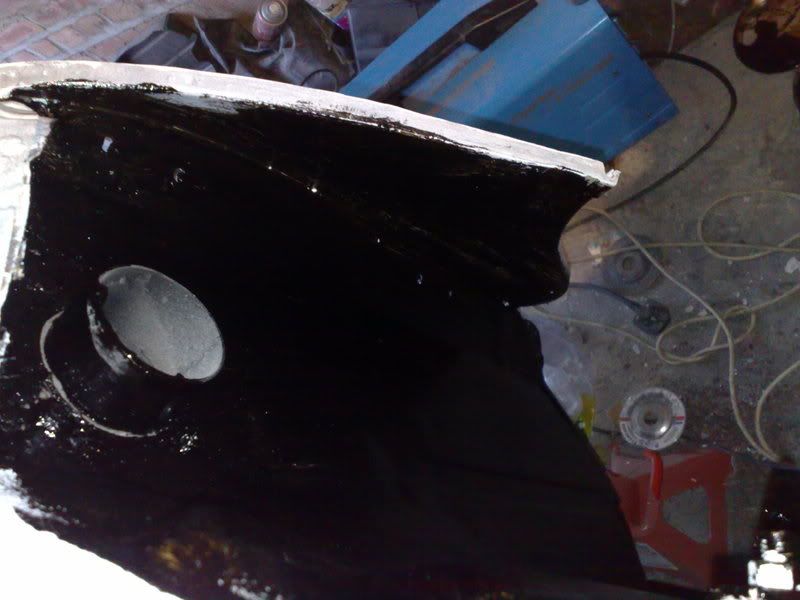
then cut some alluminium and fibreglassed it into the front end to give the grill something to attatch to at the bottom, the fibreglassing looks a mess at the mo so will need tidying up and prob another layer or 2, also fitted my scrapyard find platic headlamp bowls as mine were the older steel type and were too thin to salvage
also fibreglasset some aluminium triangles under the front corners so the bonnet pins at the top of the bonnet will also hold the front end down.
quite pleased with the front end now, just needs more strength which i'm hoping the properly attatched grille will add.
the rivet is there just to hold the plates in place while fibreglassing
more next week.
Started off sorting out any little bits of pitting around the roof gutter and C pillar seam, gave it a few coats of etch primer then a few of filler primer
the filer primering last week had shown up a few areas i wasn't 100% happy with, the corner just below the rear window, and a few scratches that were too deep in the rear valance join vso gave these a quick light skim of filler
cleaned up the weld and outside of the seam where i have attatched some brakets for the front end, these will be held with dzus fastners like this
then cut some alluminium and fibreglassed it into the front end to give the grill something to attatch to at the bottom, the fibreglassing looks a mess at the mo so will need tidying up and prob another layer or 2, also fitted my scrapyard find platic headlamp bowls as mine were the older steel type and were too thin to salvage
also fibreglasset some aluminium triangles under the front corners so the bonnet pins at the top of the bonnet will also hold the front end down.
quite pleased with the front end now, just needs more strength which i'm hoping the properly attatched grille will add.
the rivet is there just to hold the plates in place while fibreglassing
more next week.
Last edited by fraser9764; 05-10-2008 at 02:03 PM.
11-10-2008, 11:23 PM
#55
Bit more done this afternoon,
Been putting off this job for a while now, dont know why coz it was a piece of cake
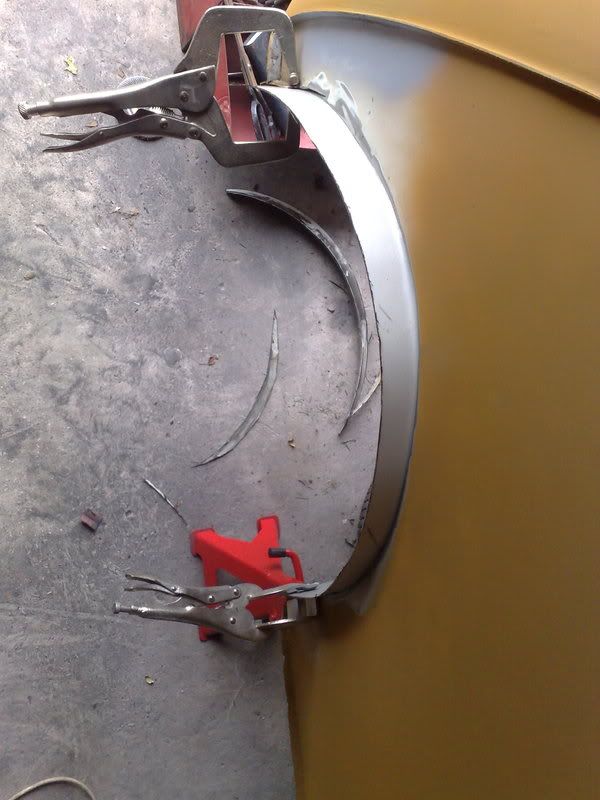
Seeing as im going to be running 7 or 8x13's , miglia arches and as low as i can get it, i needed to tub the rear arches
started by roughly cutting out the offending metal,
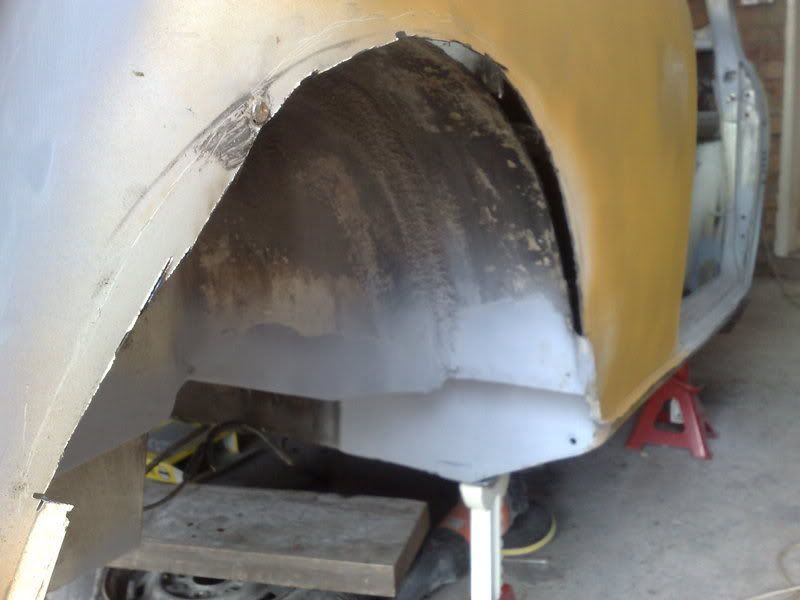
then i cut a bit more out so the outside lined up with the inside and tidied it up a bit
then cut some metal (the old roof skin ) and bent and clamped it in place
then welded it up, tacked it on, then tacked in between, then inbetween them etc... which meant the panel didn't warp at all like it would with the heat from seam welding, then gave it a few coats of etch primer
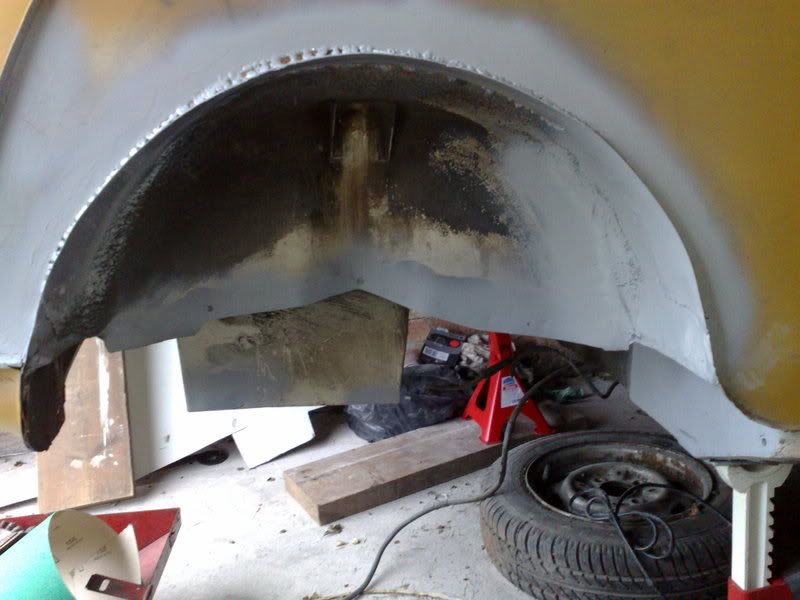
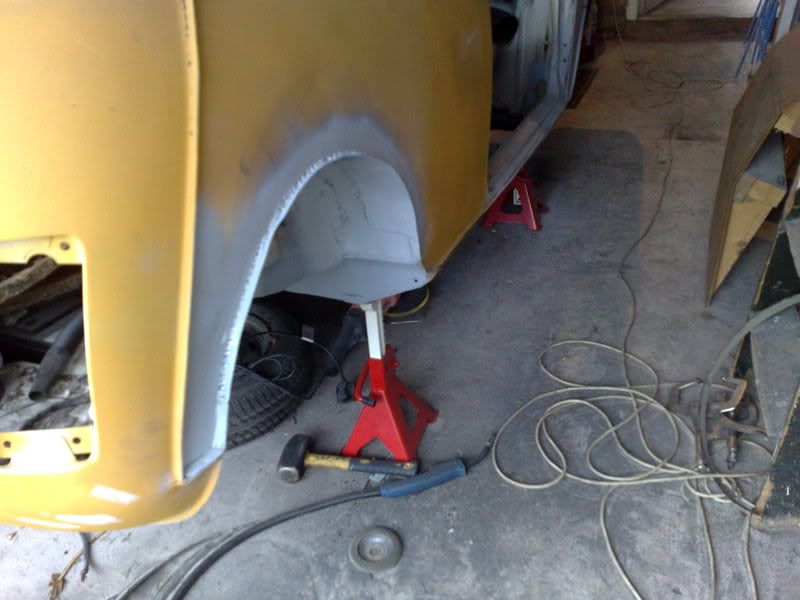
then cleaned up all the welds, ran a bead of seam sealer around the lip with my finger to seal any gaps and tidy it up, and gave it a coat of filler primer
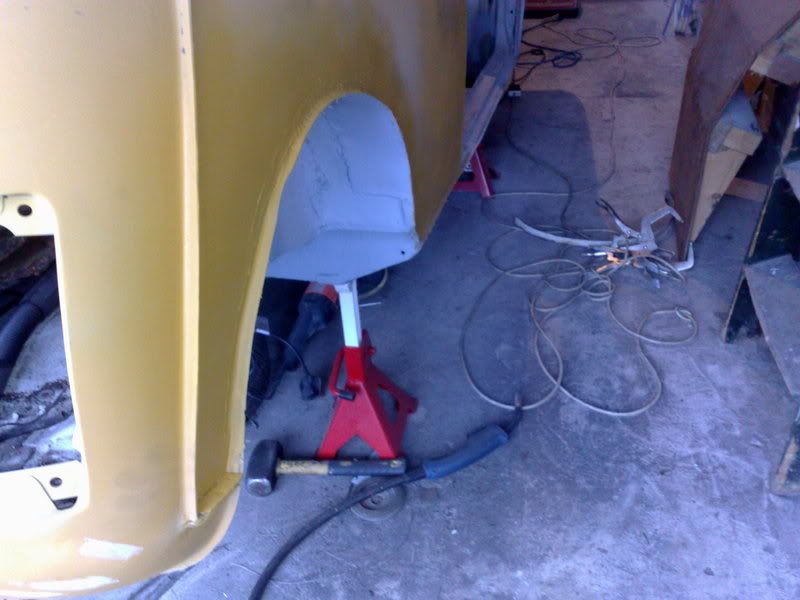
and job jobbed! Which means that the back, drivers side underneath and most of the front, are done apart from flatting back
More tomorrow, going to try and have a re-shuffle in the garage and try and do some work on the other side as it needs half an inner sill, repair to the rear window apeture and door step and a bit of smoothing out.
Been putting off this job for a while now, dont know why coz it was a piece of cake
Seeing as im going to be running 7 or 8x13's , miglia arches and as low as i can get it, i needed to tub the rear arches
started by roughly cutting out the offending metal,
then i cut a bit more out so the outside lined up with the inside and tidied it up a bit
then cut some metal (the old roof skin ) and bent and clamped it in place
then welded it up, tacked it on, then tacked in between, then inbetween them etc... which meant the panel didn't warp at all like it would with the heat from seam welding, then gave it a few coats of etch primer
then cleaned up all the welds, ran a bead of seam sealer around the lip with my finger to seal any gaps and tidy it up, and gave it a coat of filler primer
and job jobbed! Which means that the back, drivers side underneath and most of the front, are done apart from flatting back
More tomorrow, going to try and have a re-shuffle in the garage and try and do some work on the other side as it needs half an inner sill, repair to the rear window apeture and door step and a bit of smoothing out.
 12-10-2008, 10:53 PM
#57
Yeah, the amount of hours i've spent on the damn thing, would have cost a mint

todays update:
not much of an update really, been a bit lazy
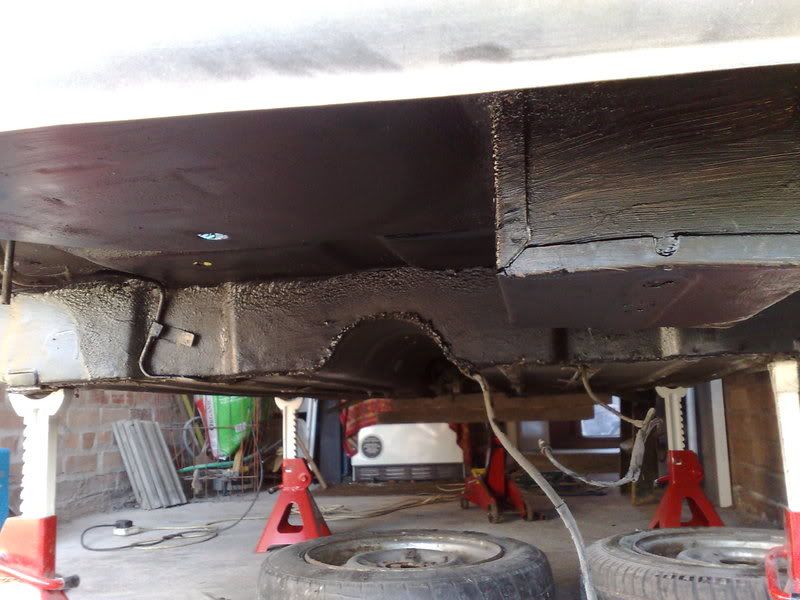
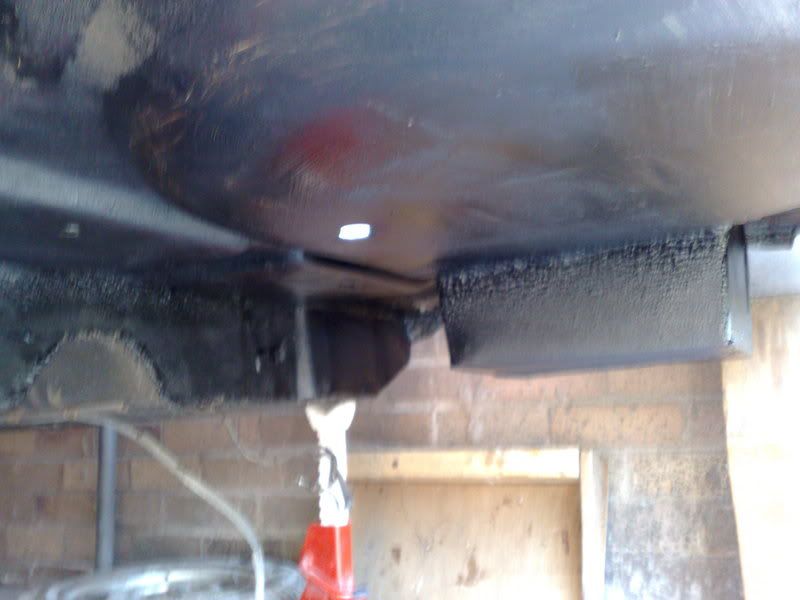
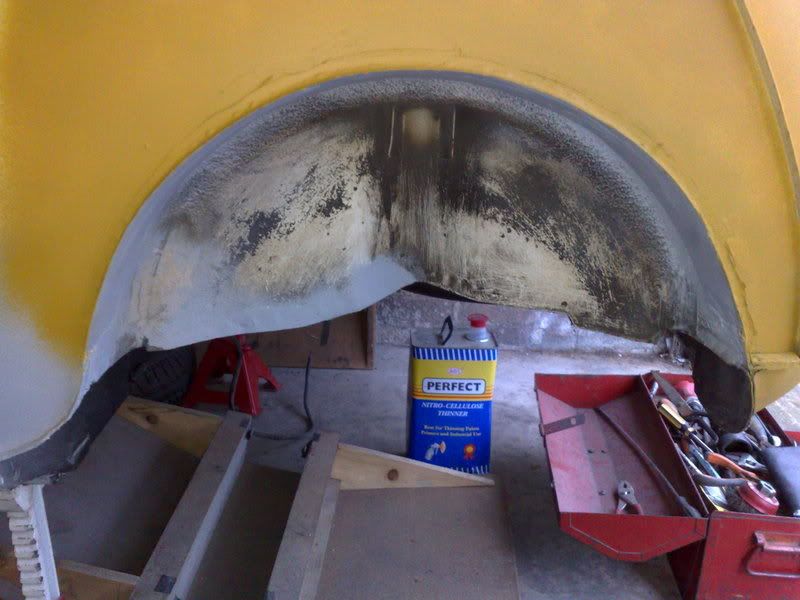
got all the new inner arch seam sealed, then undersealed the arch, boot floor, inside of the rear valance and heel board ready for the rear subframe to go back on.
then manhandled the car over to the other side of the garage (which means the gardner can't get his lawnmower through so i've got to cut the grass now
 )
)Not to self: never try and a car with no wheels sideways on your own with only a crappy 1.5 tonne jack with no lift at all, 4 axle stands and 2 blocks of wood, its chuffin hard work!

then spend the rest of the day inspecting that side, going to need a door step (tried to repair but the metals so thin the welder blows it to pieces), inner sill from front to the seat mount box section and a small repair round the rear window.
I have smoothed in a small dent and the repair to the bottom corner but forgot to take pictures, that new sander makes it soooo easy
Going to order the panels tomorrow week and get them stuck on next weekend
Also ordering new shocks, all the adjustable braketry, hi-los, new discs, pads, wheelbearings, and braided front brake lines on friday as its payday
 19-10-2008, 10:08 PM
#58
This weekends updates:
change of plan with the suspension bits this month, I've been buying goodies, all second hand but they are all either new, or used on a car that was built from new, did about 7 laps of oulton park then got broken for bits and i've been speeking to a mate of my dads about rollcages, so the mini is going in to a place in shropshire as soon as i've got the pennies for a full weld in cage, with X diagonals in the back, harness bar, bar below the dash, welded door bars, and plates with holes stamped out between the A and B pillars
anyway, Pics:
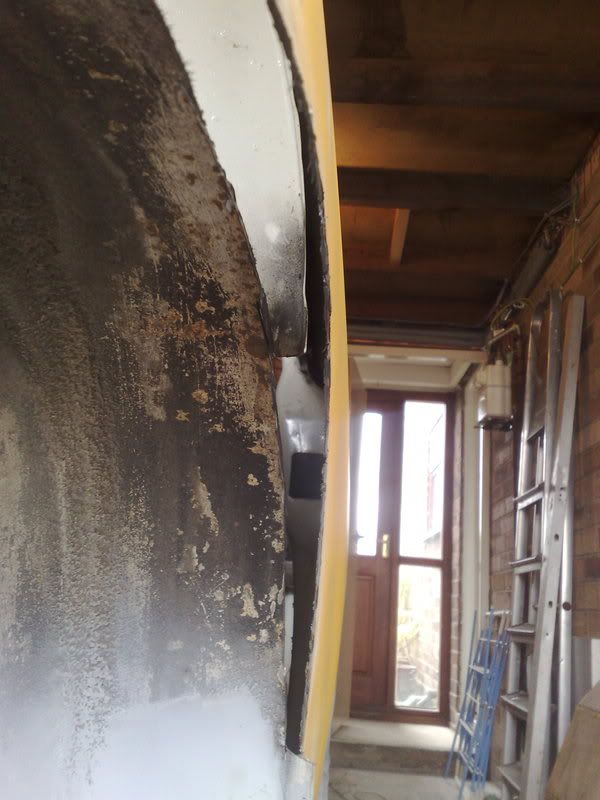
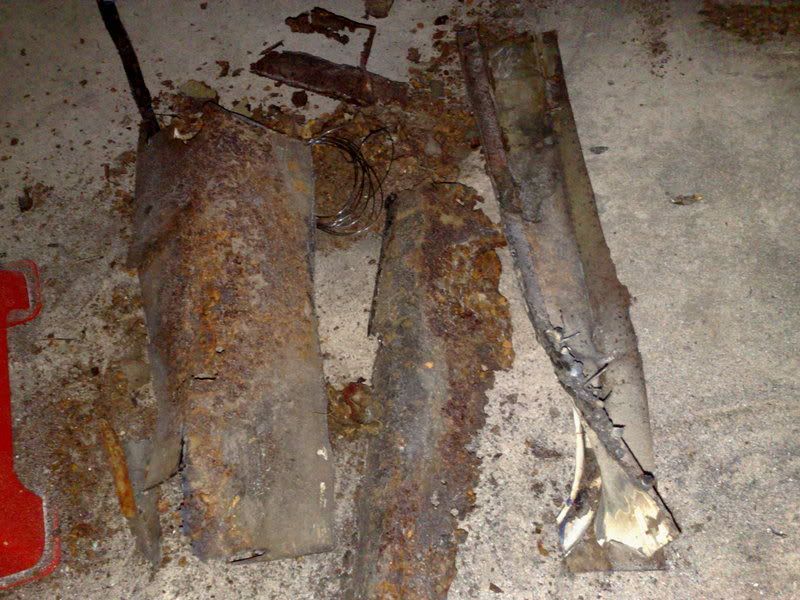
Chopped out the last of the rust from the passenger side front corner,
I didn't bother doing the rear half as it was spot on so just cut the repair panels in half.
By the way, if anyone is going to fit a door step repair panel, Dont buy it from M&M's, im sure it was for a different car!! i had to basically flatten it and remake the damn thing!
New panels welded and started to be smoothed in
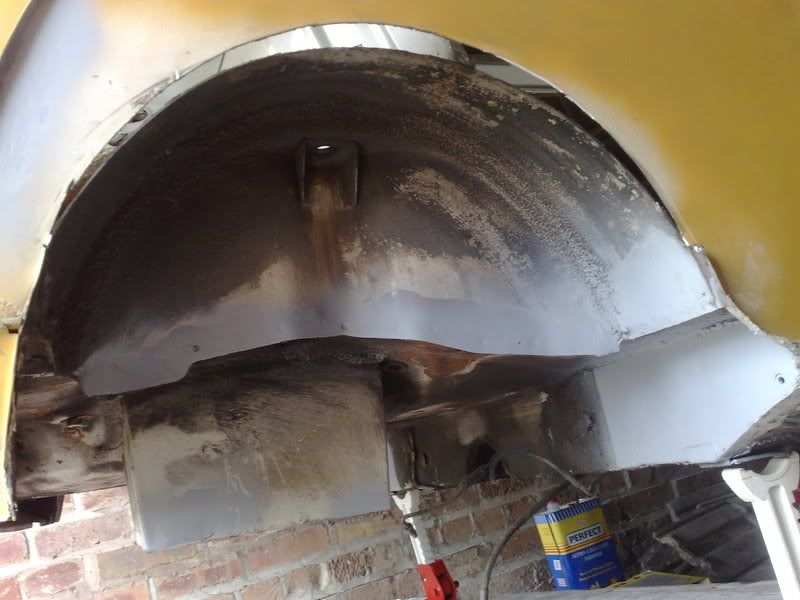
Also tubbed the other rear arch, didn't take long at all to do tis side as i knew what i was doing.
Just needs undersealing in the arch now.
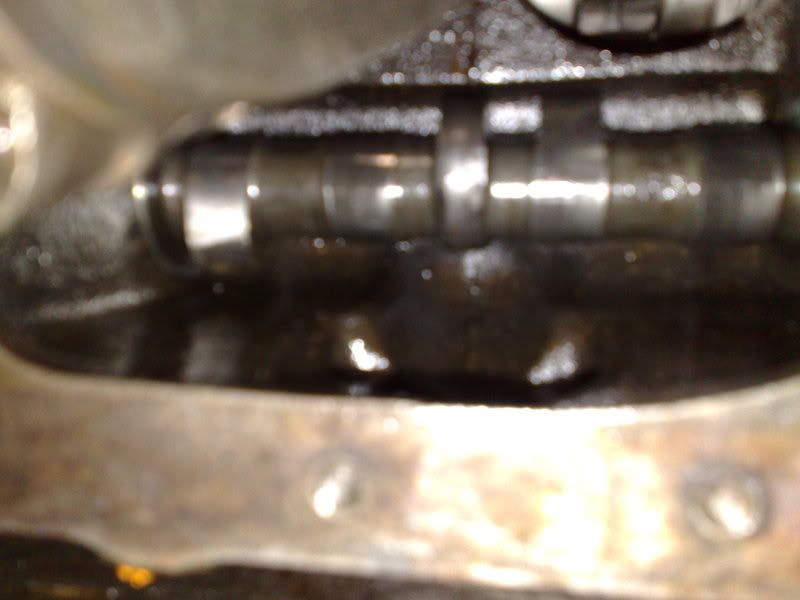
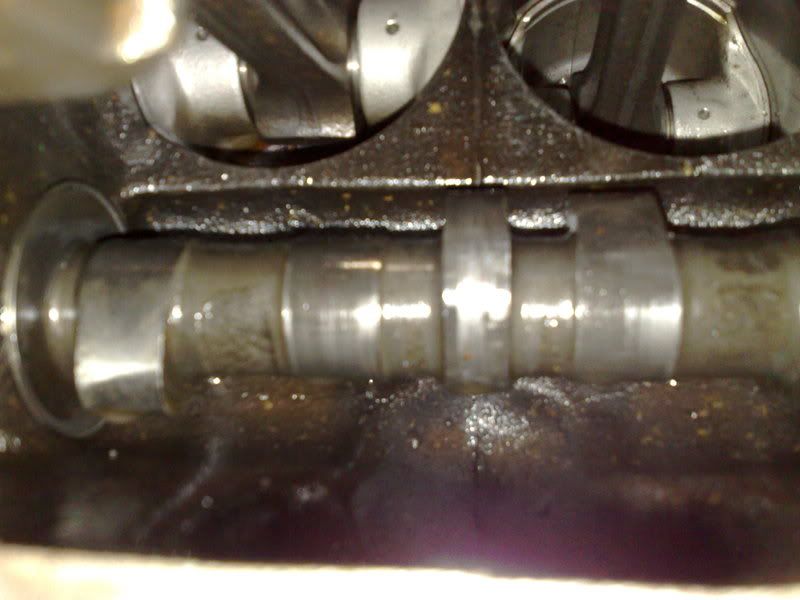
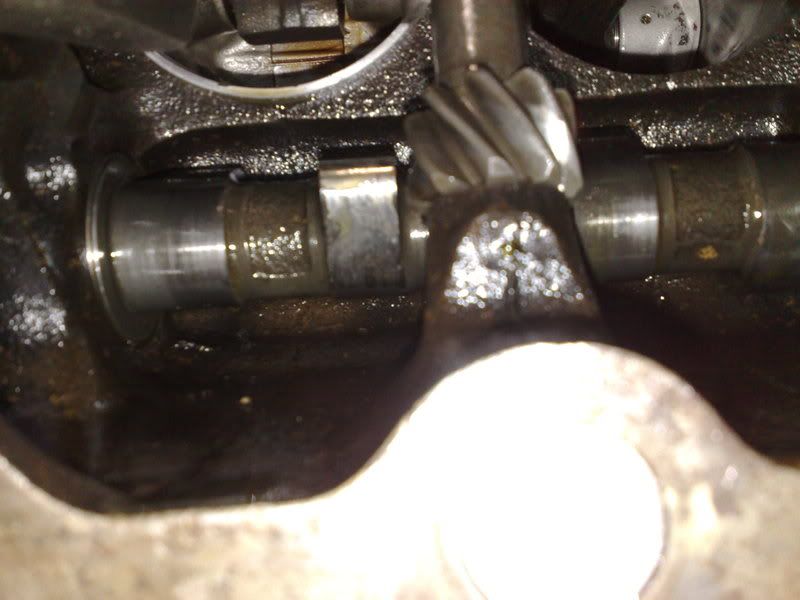
Been doing a bit with the engine this week, made a flywheel puller in work and got all the clutch out which meant i could get the block lifted off the gearbox and onto the bench
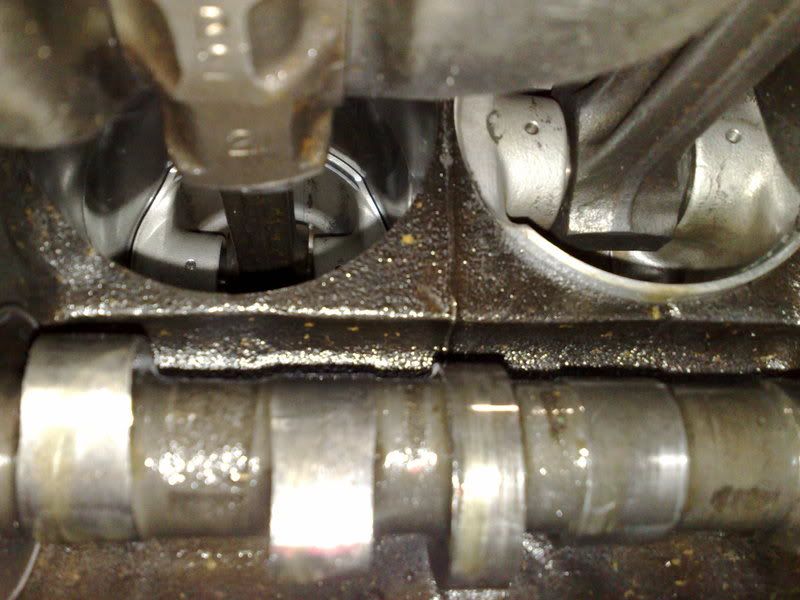
Better news than with the head thank god! apart from the water pump everything looks good, even the cam!!
My rather inventive way of getting the oil out of an engine thats on the floor without a crane!
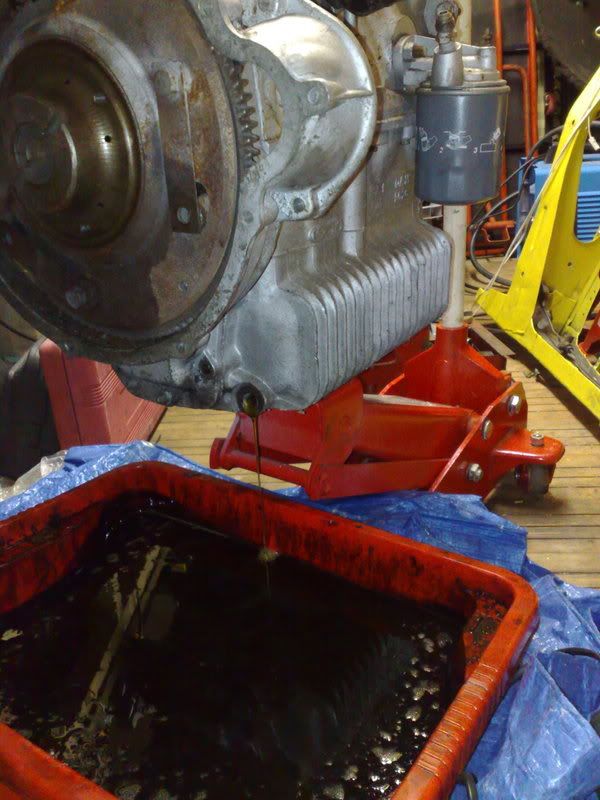
on the bench
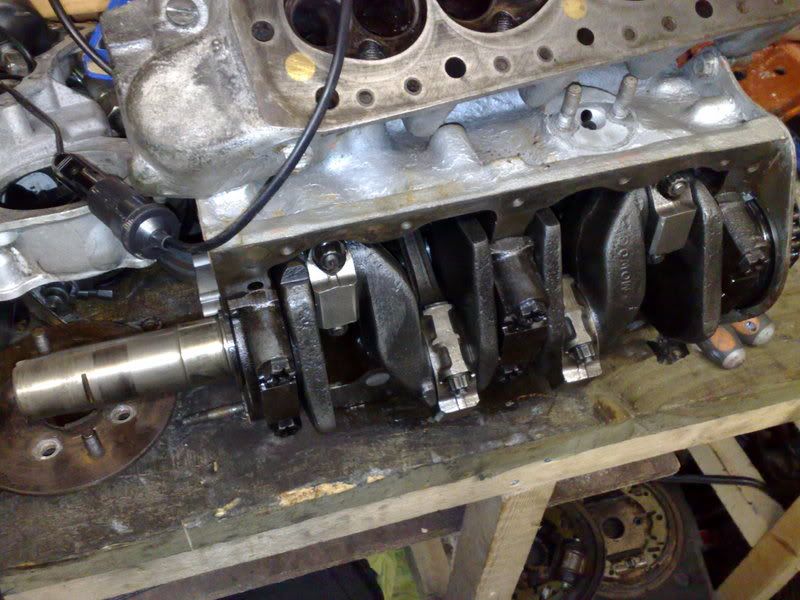
sneeky peaks up into the bottom of the block
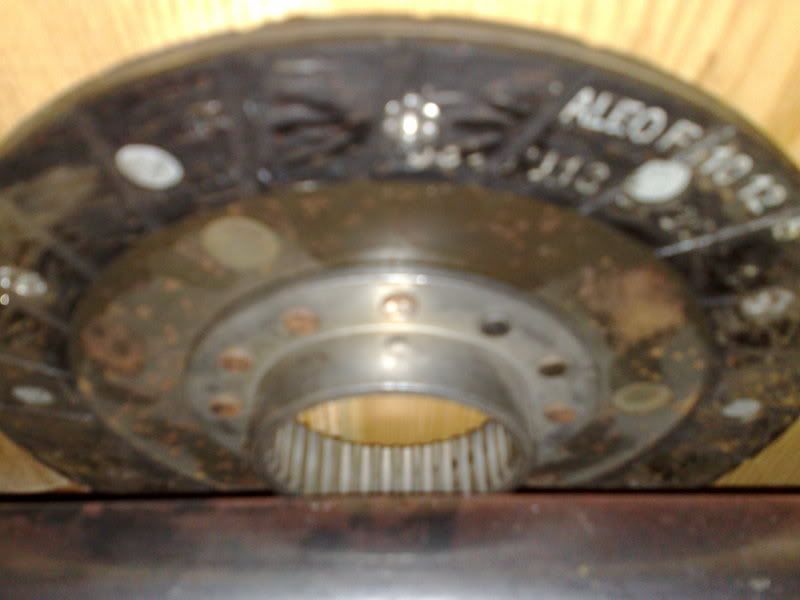
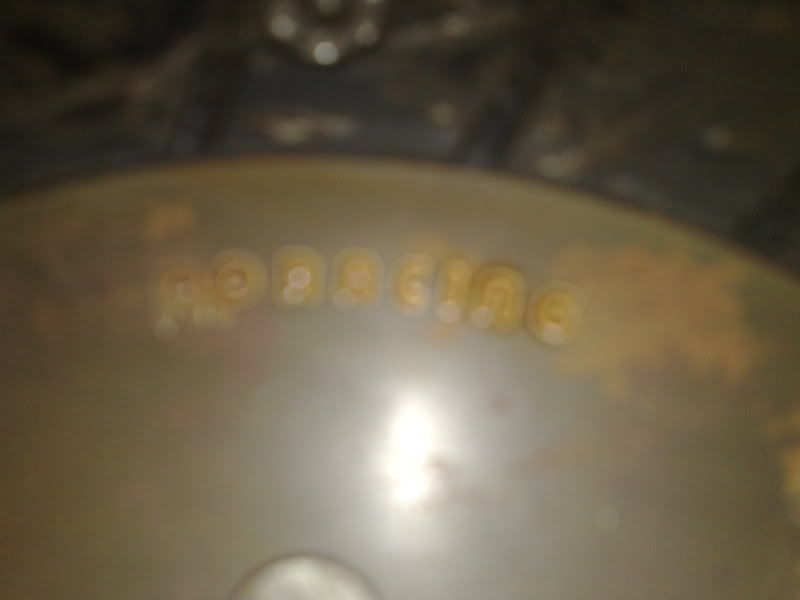
brand new clutch, was told when i bought it it was a metro turbo plate, it says Valeo on the fricton paterial but ap racing in the centre?
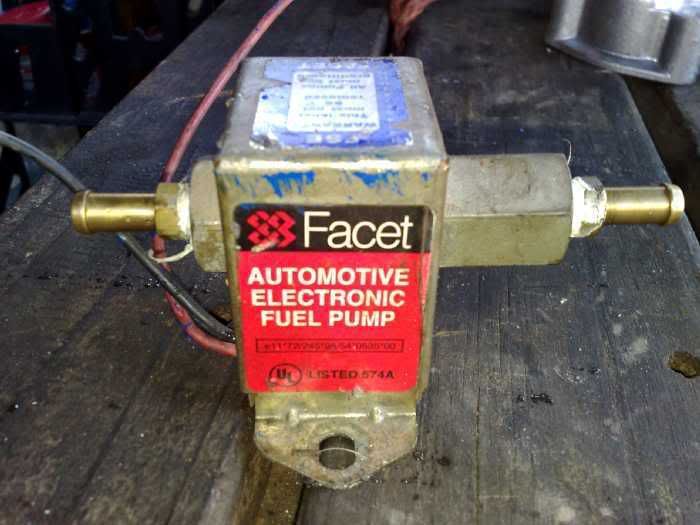
and the goodies off ben
maniflow LCB

Facet fuel pump
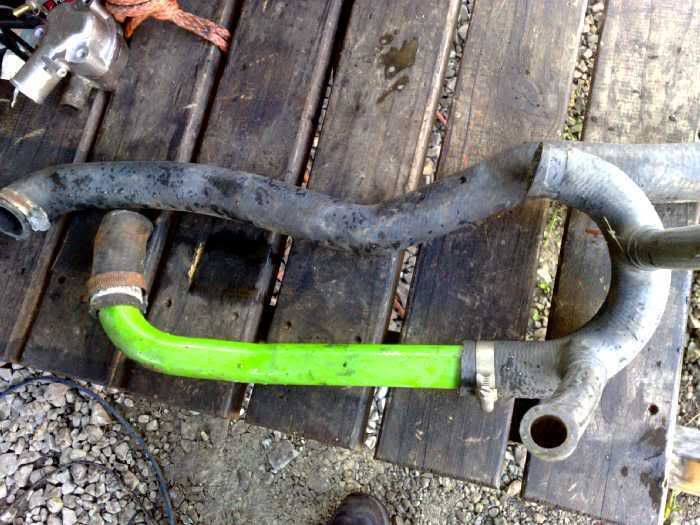
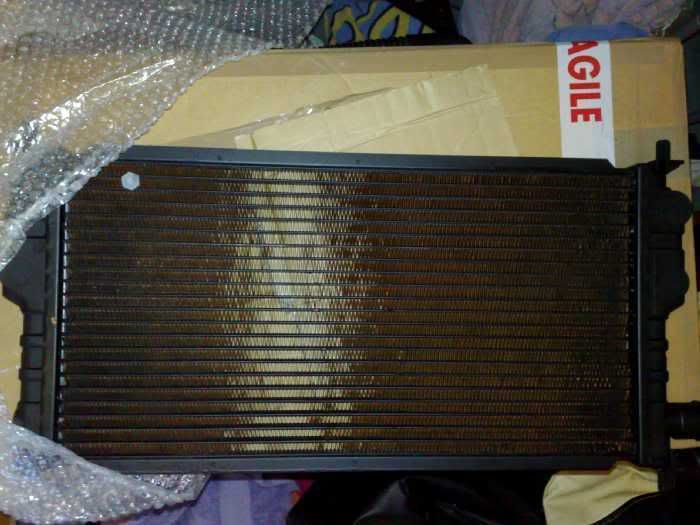
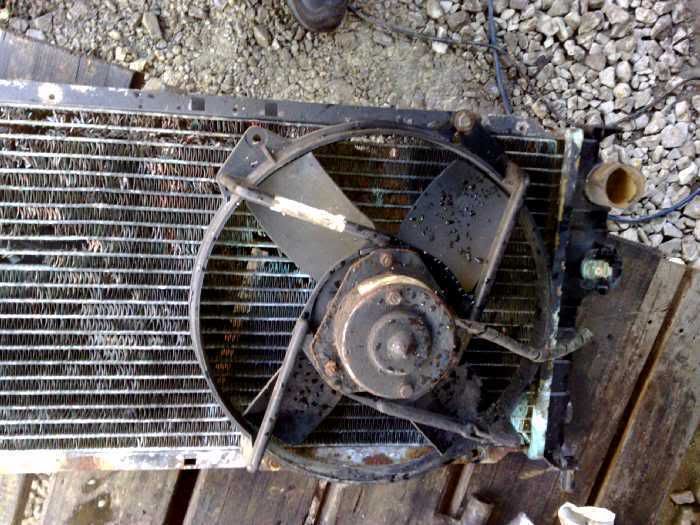
Metro front mounted rad setup
KAD rear antiroll bar
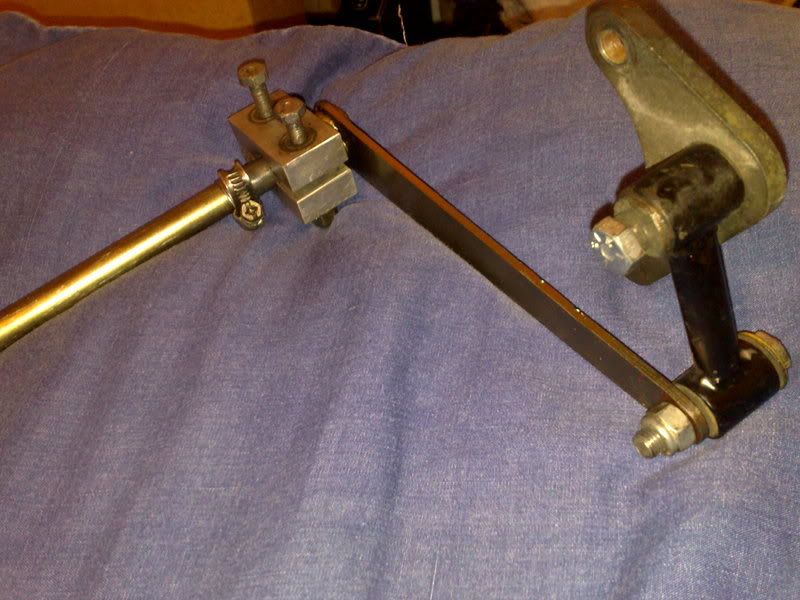
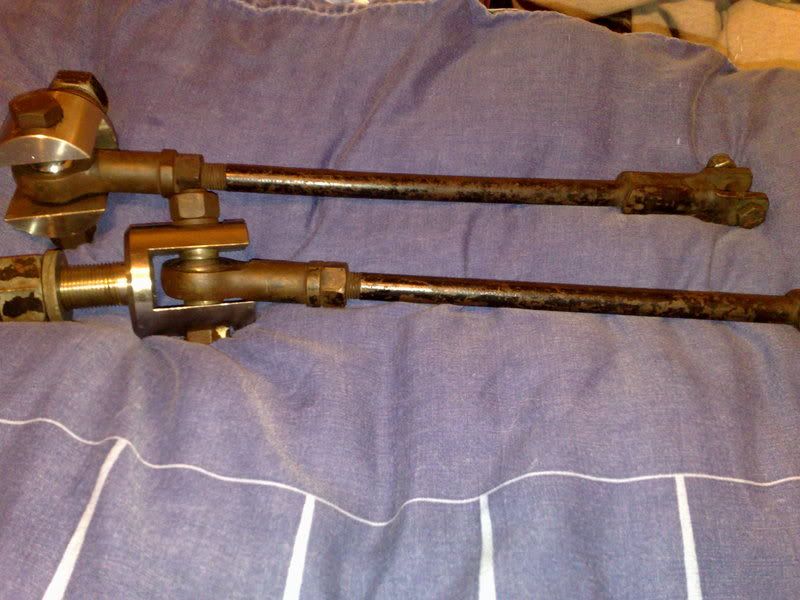
KAD adjustable, heavy duty rose, jointed tie bars
Thats all for now folks, more next week!
change of plan with the suspension bits this month, I've been buying goodies, all second hand but they are all either new, or used on a car that was built from new, did about 7 laps of oulton park then got broken for bits and i've been speeking to a mate of my dads about rollcages, so the mini is going in to a place in shropshire as soon as i've got the pennies for a full weld in cage, with X diagonals in the back, harness bar, bar below the dash, welded door bars, and plates with holes stamped out between the A and B pillars
anyway, Pics:
Chopped out the last of the rust from the passenger side front corner,
I didn't bother doing the rear half as it was spot on so just cut the repair panels in half.
By the way, if anyone is going to fit a door step repair panel, Dont buy it from M&M's, im sure it was for a different car!! i had to basically flatten it and remake the damn thing!
New panels welded and started to be smoothed in
Also tubbed the other rear arch, didn't take long at all to do tis side as i knew what i was doing.
Just needs undersealing in the arch now.
Been doing a bit with the engine this week, made a flywheel puller in work and got all the clutch out which meant i could get the block lifted off the gearbox and onto the bench
Better news than with the head thank god! apart from the water pump everything looks good, even the cam!!
My rather inventive way of getting the oil out of an engine thats on the floor without a crane!
on the bench
sneeky peaks up into the bottom of the block
brand new clutch, was told when i bought it it was a metro turbo plate, it says Valeo on the fricton paterial but ap racing in the centre?
and the goodies off ben
maniflow LCB
Facet fuel pump
Metro front mounted rad setup
KAD rear antiroll bar
KAD adjustable, heavy duty rose, jointed tie bars
Thats all for now folks, more next week!
20-10-2008, 02:54 PM
#59
Chief Iron Oxide Farmer.
Join Date: Apr 2008
Location: Portland
Posts: 1,319
Likes: 0
Received 0 Likes
on
0 Posts
Shit the bed thats had a lot of work!
Its normally the austin ones that last the best too!
Might have been easier to shop around for a better shell to start with.
Still, better the devil you know!
Its normally the austin ones that last the best too!
Might have been easier to shop around for a better shell to start with.
Still, better the devil you know!
20-10-2008, 03:37 PM
#60
I didn't realise quite how much work was needed though when i bought it, thought it was going to be a new front end, and a few small repairs, although it was meant to be a cheap track toy, now i'm buying KAD stuff! (the rear Arb And tie rods are about �340 all together! not much for cossies, but expensive for mini's!)
25-10-2008, 10:12 PM
#61
Two updates for today!
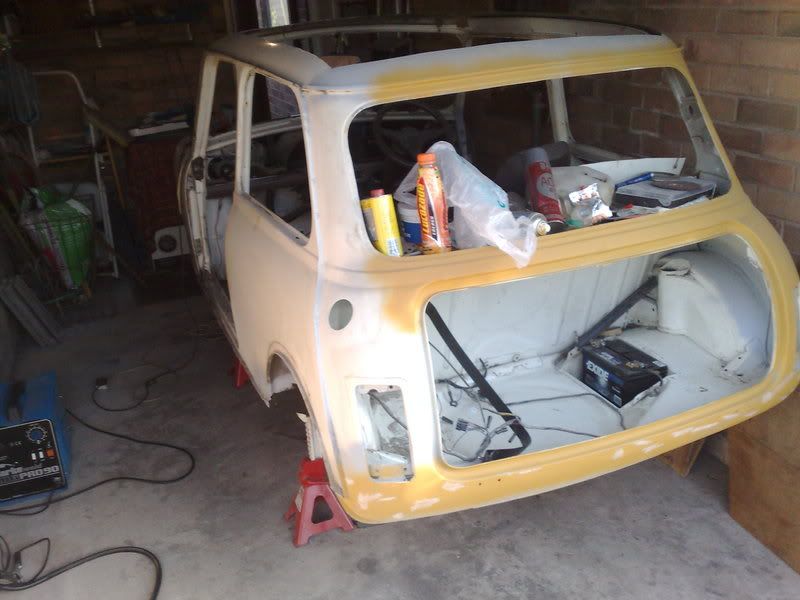
Bodywork first, the shel is now 99% finished, just got to sort one little scab on the roof gutter right above the rear view mirror, but i can't reach it while its on axle stands lol.
Just had sort 3 10p sized holes today, one of which i didn't know about and was hidden in the front arch, Sorted now though
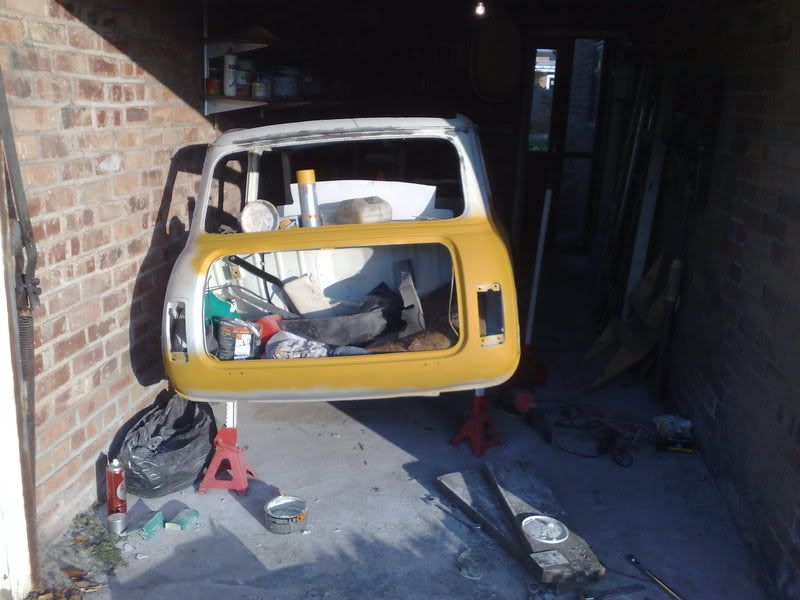
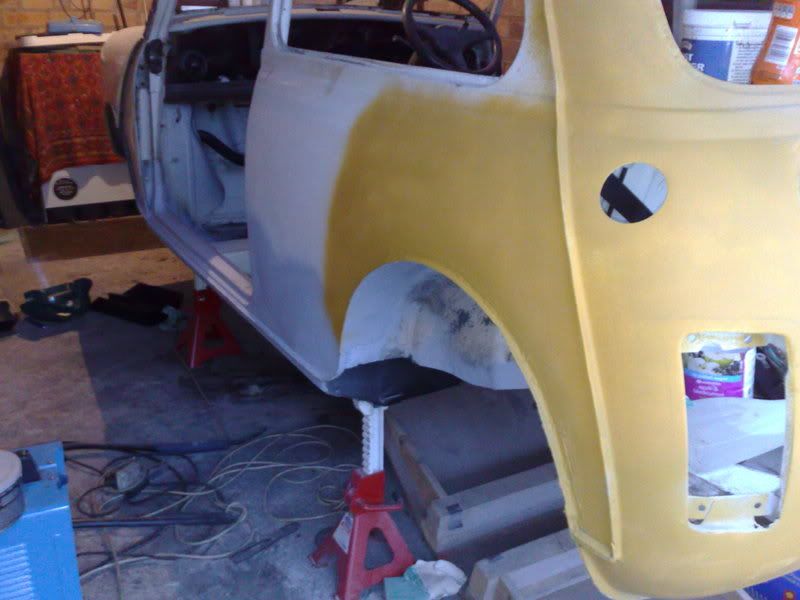
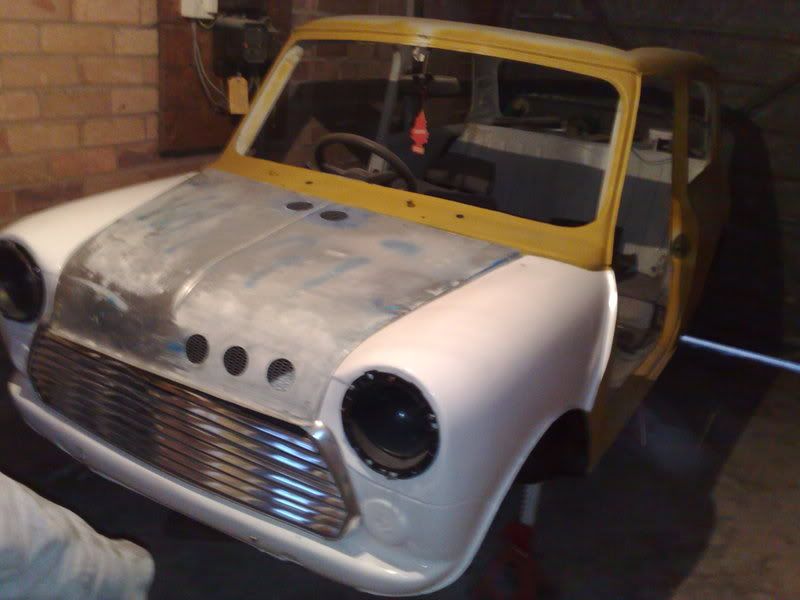
Looks soooo much better being nearly all one colour
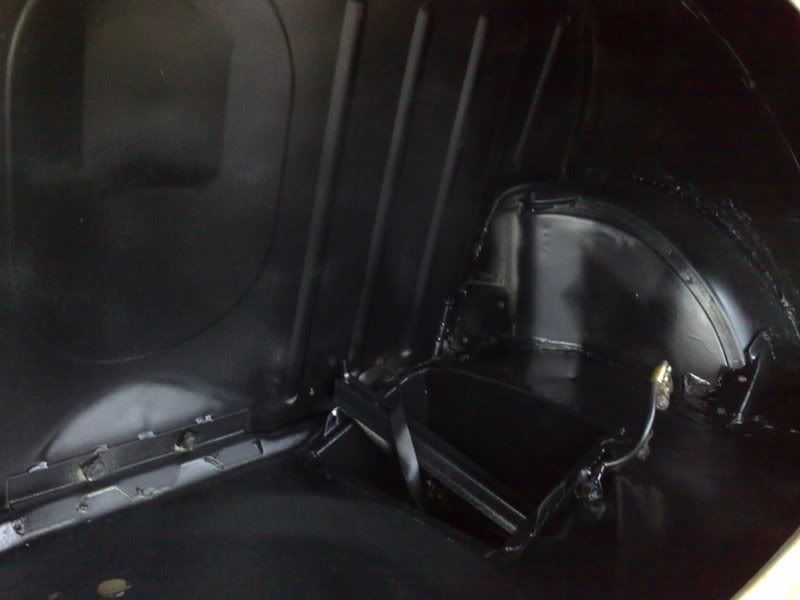
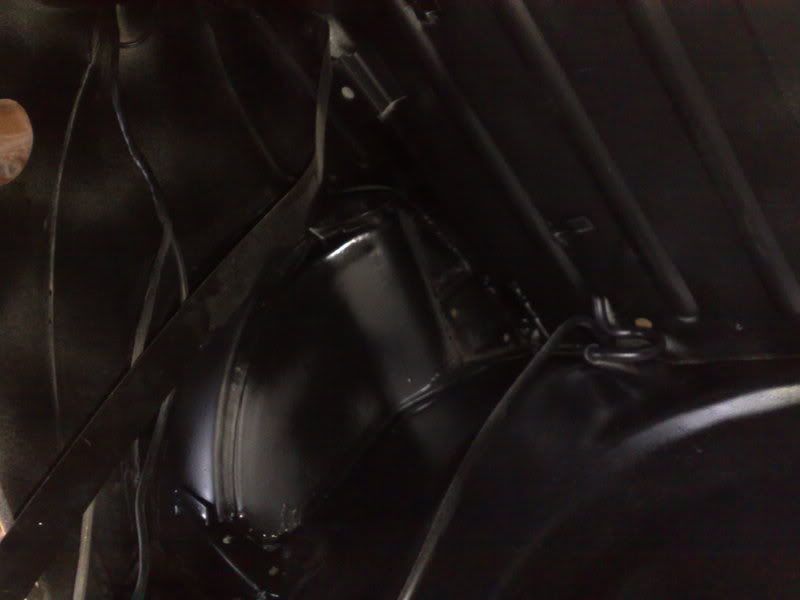
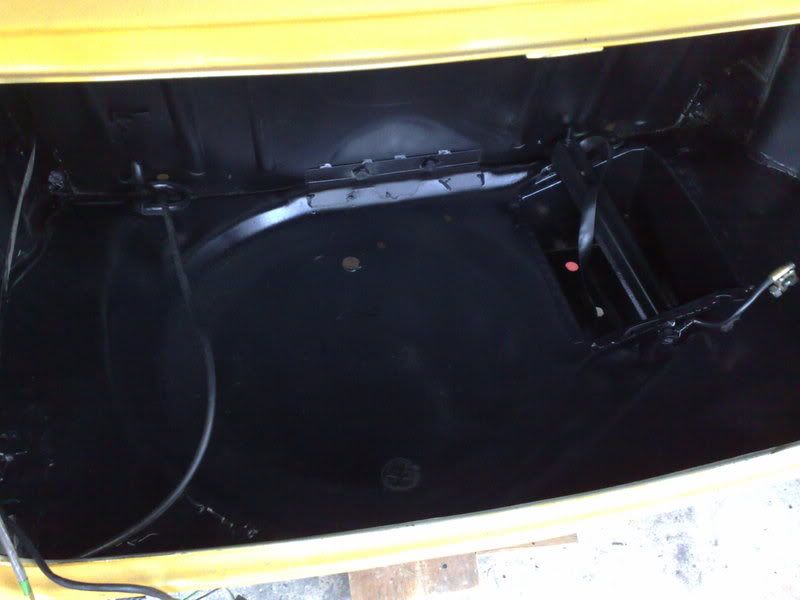
Also painted 2 more arches, one left to do, and the boot floor, arches and under the boot floor are done in hammerite with added waxoyl, the inside of the boot is done in hammerite spray on stonechip as its overpaintable
I know the passenger side is a bit patchy but i was running out and its covered by the tank anyways.
I did think about painting the arches body colour but its been built to use so this is more practical!
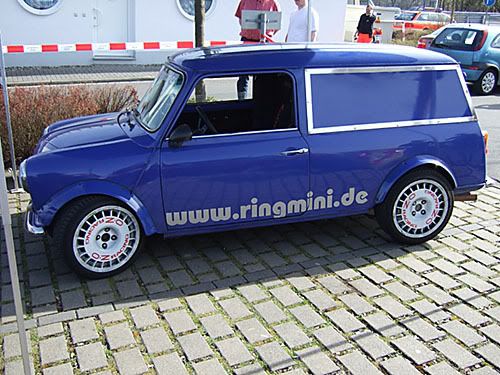
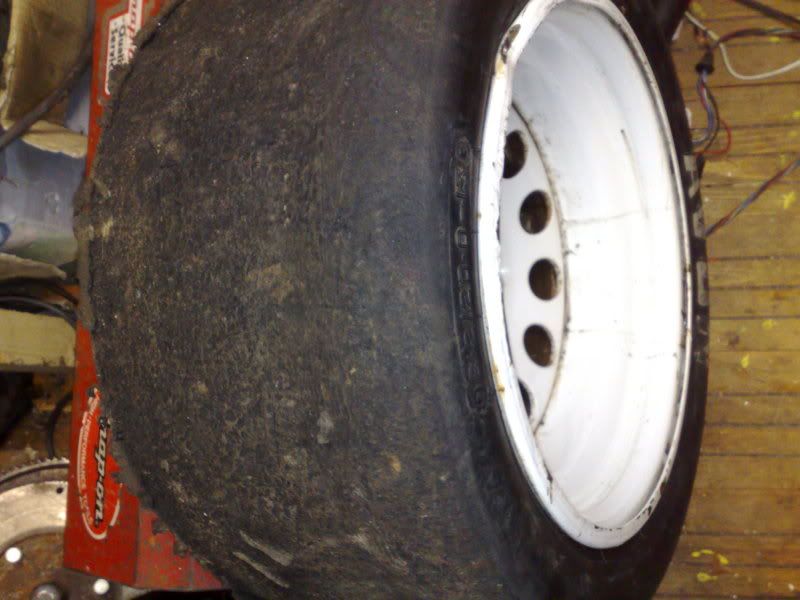
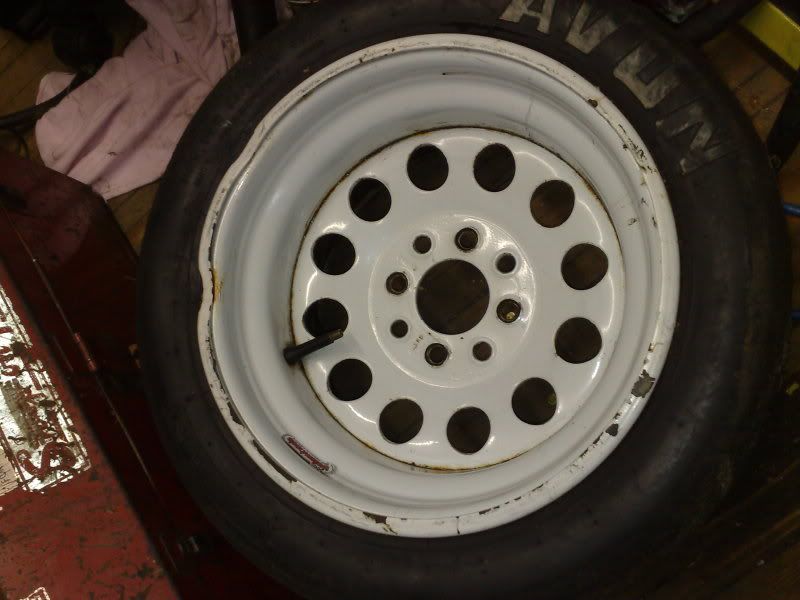
Second update: Wheels! hadn't really thought about them yet but i've ended up with bens old Wellers (You'll have me bankrupt before long!!!) and hopefully the other set of older style wellers for sale at them mo if i can find the pennies this week.
Bens, which are 13x8's shod with Avon slicks, will be track wheels,
Look pretty much the same as these but not quite as deep dish, although not that far off!!
Now for the good bit! as they are track wheels, white is too boring, they will be painted (or powdercoated) this colour:

The other wheels (13x7's) will hopefully be road wheels on Yoko A048's and plain old boring black or white.
unless anyone knows where i can getr hold of these wheels in 7x13's with an ofset that will fill miglia arches?
Thats all for now folks.
Bodywork first, the shel is now 99% finished, just got to sort one little scab on the roof gutter right above the rear view mirror, but i can't reach it while its on axle stands lol.
Just had sort 3 10p sized holes today, one of which i didn't know about and was hidden in the front arch, Sorted now though
Looks soooo much better being nearly all one colour
Also painted 2 more arches, one left to do, and the boot floor, arches and under the boot floor are done in hammerite with added waxoyl, the inside of the boot is done in hammerite spray on stonechip as its overpaintable
I know the passenger side is a bit patchy but i was running out and its covered by the tank anyways.
I did think about painting the arches body colour but its been built to use so this is more practical!
Second update: Wheels! hadn't really thought about them yet but i've ended up with bens old Wellers (You'll have me bankrupt before long!!!) and hopefully the other set of older style wellers for sale at them mo if i can find the pennies this week.
Bens, which are 13x8's shod with Avon slicks, will be track wheels,
Look pretty much the same as these but not quite as deep dish, although not that far off!!
Now for the good bit! as they are track wheels, white is too boring, they will be painted (or powdercoated) this colour:
The other wheels (13x7's) will hopefully be road wheels on Yoko A048's and plain old boring black or white.
unless anyone knows where i can getr hold of these wheels in 7x13's with an ofset that will fill miglia arches?
Thats all for now folks.
26-10-2008, 05:36 PM
#64
you can get compomotive th's but they are only available in 13x5.5s
http://www.smartwheels.biz/compomotive-th-rally.php
them ones are OZ racing and i cant find them anywhere
http://www.smartwheels.biz/compomotive-th-rally.php
them ones are OZ racing and i cant find them anywhere
26-10-2008, 05:54 PM
#65
do you already have some arches as i have some virtually new (never fitted) tiny chip in gel coat, cant remember which ones they are but they are about 4'' wide a side, maybe a little less lol
26-10-2008, 06:40 PM
#66
PM us a pic if you want matey, i haven't got any yet, going to put carbon fibre miglia arches on but i wouldn't mind a set of fibreglass ones just to put on and run for a bit just to be sure them huge wheels arent going to rip them off lol.


 19-11-2008, 09:42 PM
#75
Regular Contributor
iTrader: (2)
Join Date: Jul 2008
Location: West Midlands
Posts: 249
Likes: 0
Received 0 Likes
on
0 Posts
hi i own custom minis please take a look at our website if there is anything you need let me know and we will do you a deal. customminis.co.uk. we do other things that aren,t on the website like fibreglass/carbon doors,dashboards,miglia arches etc, cheeRS adam. keep up the good work.07990543183 and ask for les
Last edited by RSGUESTY; 19-11-2008 at 09:53 PM.
21-11-2008, 06:30 PM
#76
hi i own custom minis please take a look at our website if there is anything you need let me know and we will do you a deal. customminis.co.uk. we do other things that aren,t on the website like fibreglass/carbon doors,dashboards,miglia arches etc, cheeRS adam. keep up the good work.07990543183 and ask for les
Can't wait to see it complete!!
You'll have to bring it to a meet or something..
You'll have to bring it to a meet or something..
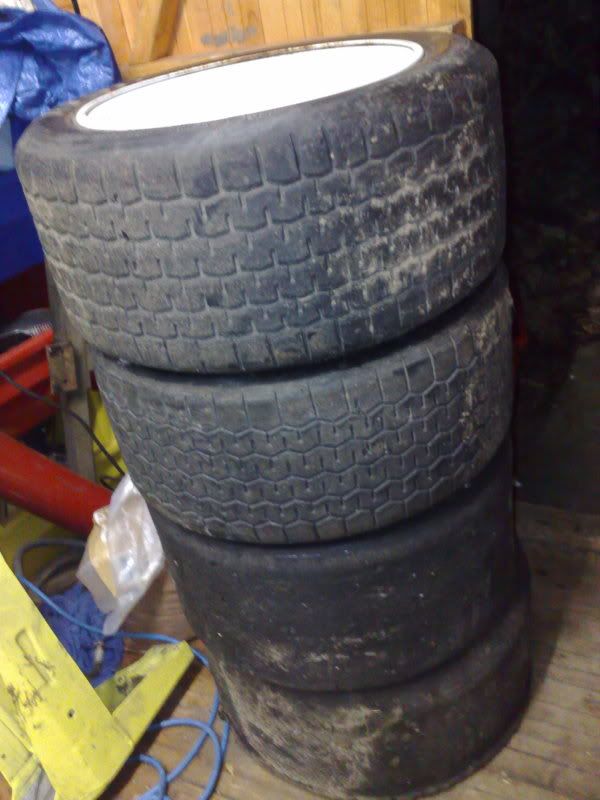
just realised i never posted pics of my wheels
there is a bit of a ding in one of them bit it should pul out, its only in the lip and its never affected balencing them so should be ok.
need 4 new tyres too, think im yust going to use yoko a048's for the time being
Engine coming out tomorrow, should be fun!
22-11-2008, 02:28 PM
#77
Regular Contributor
iTrader: (2)
Join Date: Jul 2008
Location: West Midlands
Posts: 249
Likes: 0
Received 0 Likes
on
0 Posts
ok mate sound. yes we do all those if you come to bingley hall show january you can have a look at our products as we will have a stand there. cheeRS adam.
25-11-2008, 09:57 PM
#78
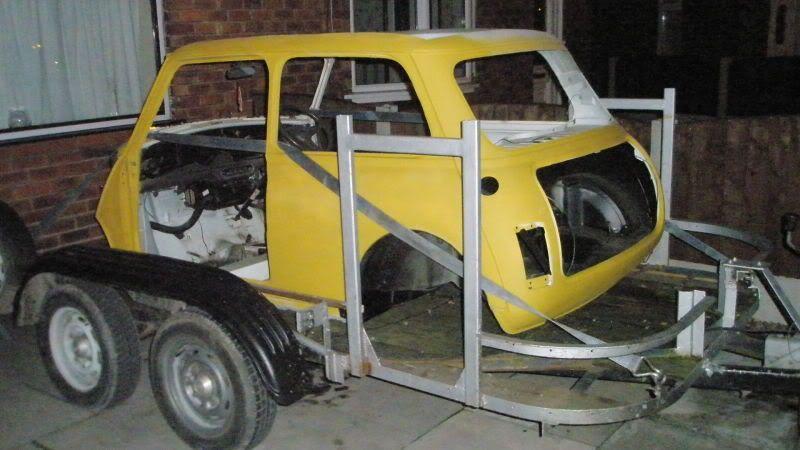
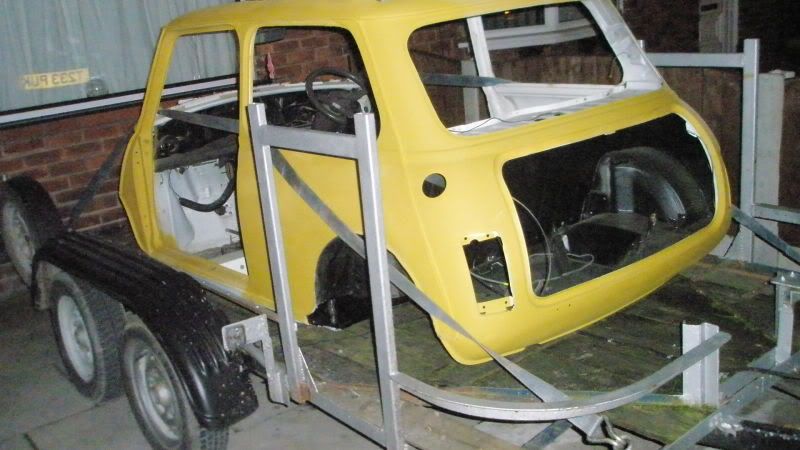
Well its home! 
Not for long though, won't be coming off the trailer, off to SW engineering (i think ) on friday for a full 10 point rollcage
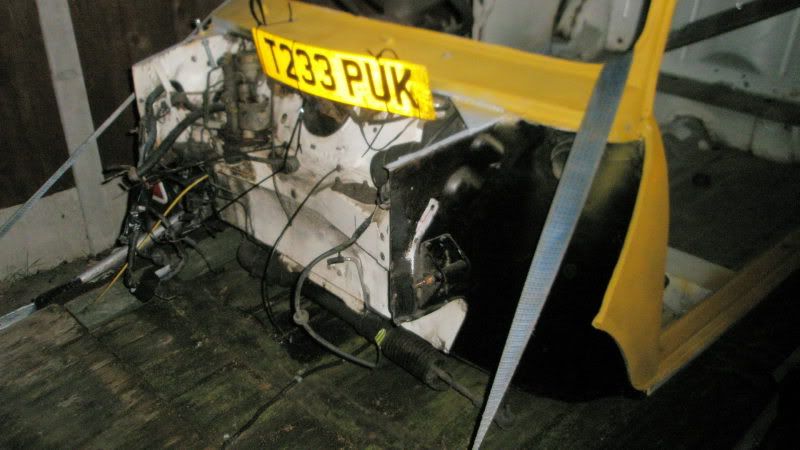
i took the engine out on saturday, only took an hour and a half and 3 cups of tea
got my bro and 2 mates to help lift it onto the trailer tonight, but to be honest, 2 people could do it its so light!
i will try and get steve (the fabricator) to email me pictures as he does the cage so i can update this thread
Not for long though, won't be coming off the trailer, off to SW engineering (i think
) on friday for a full 10 point rollcage i took the engine out on saturday, only took an hour and a half and 3 cups of tea
got my bro and 2 mates to help lift it onto the trailer tonight, but to be honest, 2 people could do it its so light!
i will try and get steve (the fabricator) to email me pictures as he does the cage so i can update this thread
26-11-2008, 03:40 PM
#80
Bad news, The bloke that was supposed tobe doing the rollcage, a supposed mate of my dads, has done a runner, leaving a couple of landrovers in bits in his unit, and several ��� of unpaid bills.
Which leaves me with a shell sat on the driveway, and no rollcage
Which leaves me with a shell sat on the driveway, and no rollcage