
Renault 21 Cosworth RWD - Updated 1st June 2008 - 6 selectable gears!!


 I guessed right first time, I'm not saying shit until Lee comes on though


 22-04-2008, 08:41 PM
#92
PassionFord Post Whore!!
Thread Starter
iTrader: (1)

Join Date: May 2004
Location: Liverpool :o)
Posts: 4,715
Likes: 0
Received 0 Likes
on
0 Posts
Marty.....you have earned yourself a 1989 XJ40 Gearknob.....how dya feel!!! 
Basically I'll be running the same setup as Euan (Rapidcossie).
It made soooo much sense for the following reasons...
1.) The box cost me �250 - inc prop end & gear linkage (hard to find a good T5 for this money), slave cylinder, Jag bellhousing & clutch fork.
2.) Bellhousing cosworth conversion cost me �150
3.) Gearlever protudes out the rear rather than the top - much easier to extend backwards as it where which in my setup is perfect
4.) Its a stronger box - hopefully fit & forget
5.) Its only done 49000miles
6.) Oh & 5th gear is longer - not that I'm planning on doing any high speed runs but it looks good on paper! LOL!
Some more pics...

 Oh and who does the adaptor plates
22-04-2008, 09:19 PM
Oh and who does the adaptor plates
22-04-2008, 09:19 PM
#96
PassionFord Post Whore!!
Thread Starter
iTrader: (1)
Join Date: May 2004
Location: Liverpool :o)
Posts: 4,715
Likes: 0
Received 0 Likes
on
0 Posts
Not sure how light it is - I can weigh it if you like mate before I fit it.
I'll pass his details on once I've got mine & test fitted it!!
Euan....twinnies!!!
I'll pass his details on once I've got mine & test fitted it!!
Euan....twinnies!!!
25-04-2008, 12:37 AM
#101
Advanced PassionFord User
iTrader: (6)
Join Date: Jun 2003
Location: Cork ,Ireland.
Posts: 2,183
Likes: 0
Received 0 Likes
on
0 Posts
lee ,
thats one hell of a project,just to keep you busy while the engine is outa da clio..lol
did you get it home that day from donno ok.
rob v
thats one hell of a project,just to keep you busy while the engine is outa da clio..lol
did you get it home that day from donno ok.
rob v
25-04-2008, 07:03 AM
#103
PassionFord Post Whore!!
Thread Starter
iTrader: (1)
Join Date: May 2004
Location: Liverpool :o)
Posts: 4,715
Likes: 0
Received 0 Likes
on
0 Posts
Rob.....thats the one mate....cant be sitting round at weekends doing nothing now can I!!! Yeh got back fine with the Clio, it wasnt too bad - managed a steady 70mph or so just took my time getting upto that speed! Turned out the friction material had departed company from the rest of the clutch plate on one side - never mind eh!!! LOL! Should be back on the road in a few weeks when I get my box back from having its Gripper fitted.
Chip - cheers mate - gotta keep at it - slowly but surely collecting bits - just diff & 4x4 manifold left to purchase.
Chip - cheers mate - gotta keep at it - slowly but surely collecting bits - just diff & 4x4 manifold left to purchase.
06-05-2008, 08:53 AM
#104
PassionFord Post Whore!!
Thread Starter
iTrader: (1)
Join Date: May 2004
Location: Liverpool :o)
Posts: 4,715
Likes: 0
Received 0 Likes
on
0 Posts
Update time guys....
Finally managed to remove my subframe - bloody battle that was - had to cut the heads off the bolts heat up the old bushes to melt them away from the bolts - took 2 hours to get the fooker off!! But now its off I can properly weld in the new supports & strengthen it all up properly.
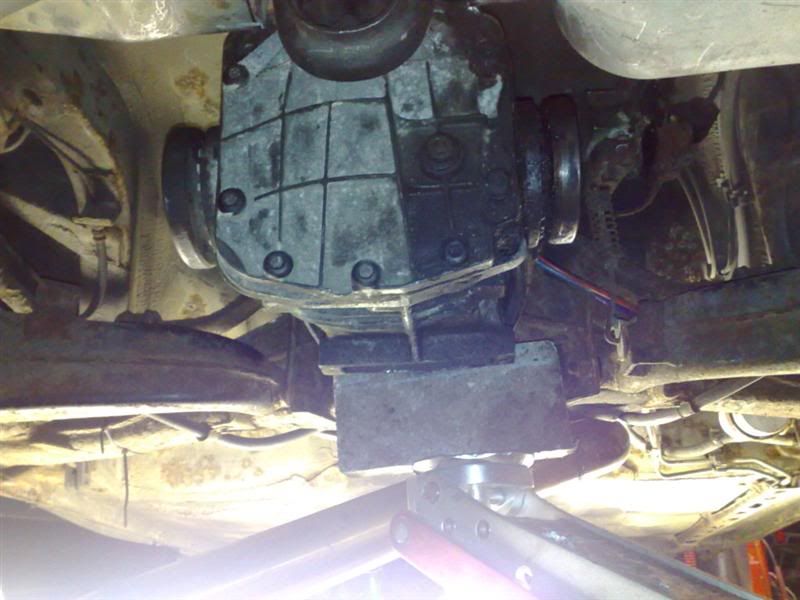
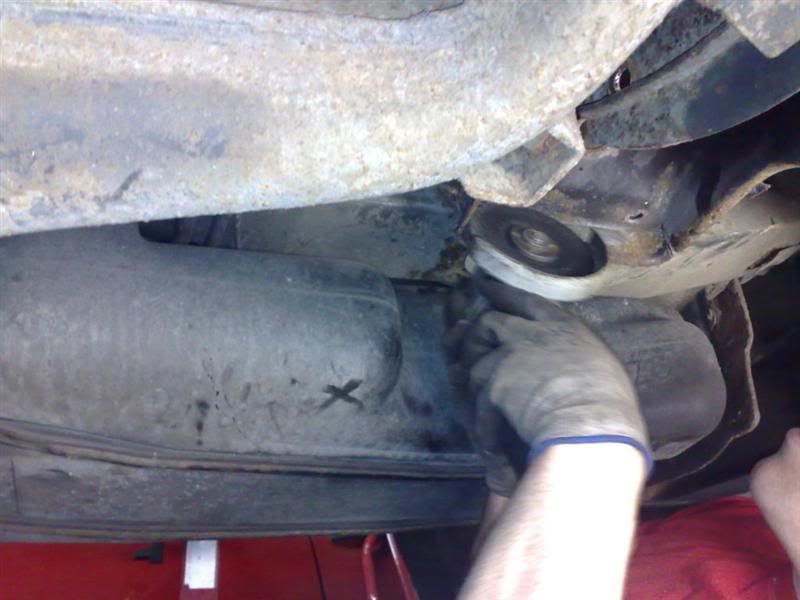
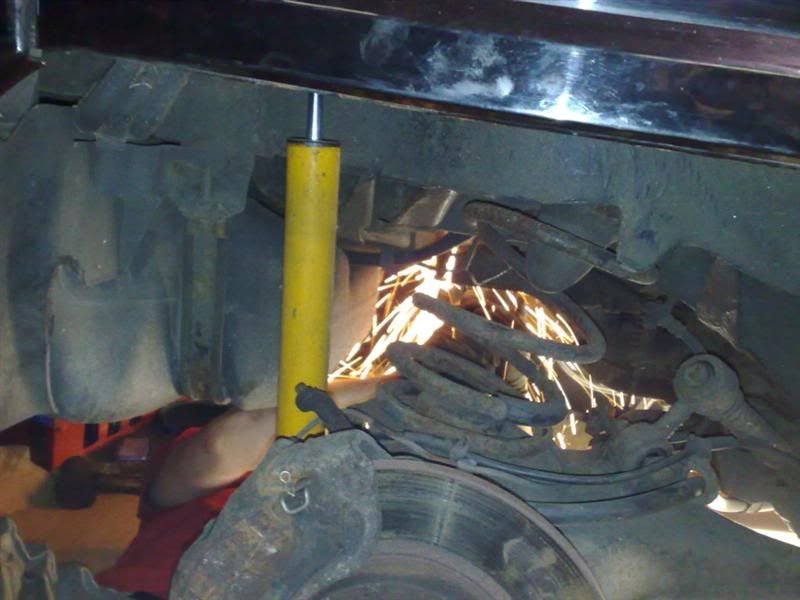
Big part of the update is the cosworth diff is more or less mounted in place - just got to buy a couple of new bolts. Wasnt too bad to fit just a bit awkward with being under the car grinding.....right next to the petrol tank!!!
I'm glad I decided to go with the cosworth diff as I worked out the ratio of the standard Quadra diff - roughly 1 : 1.5 !!! So would of accelerated like a robin reliant but I'd of probably been in contention for the land speed record! LOL!
I still need to seam seal & spray up the newly exposed bits of metal I've had to cut away to get it to fit to protect them. Not quite 100% fitted yet as I need to buy some new M12 bolts & spacers - also I need to drop some sort of bracketry down for the middle bottom mount hole but shouldnt be difficult to do. Also I want to get a steel plate made to strengthen where the rear mount bolts through into the spare wheel well in the boot just to be on the safe side. Also I'm welding large washers where the bolts go through for extra support.
Pics arent the best - bit difficult to try and photograph it perfectly to show everything...
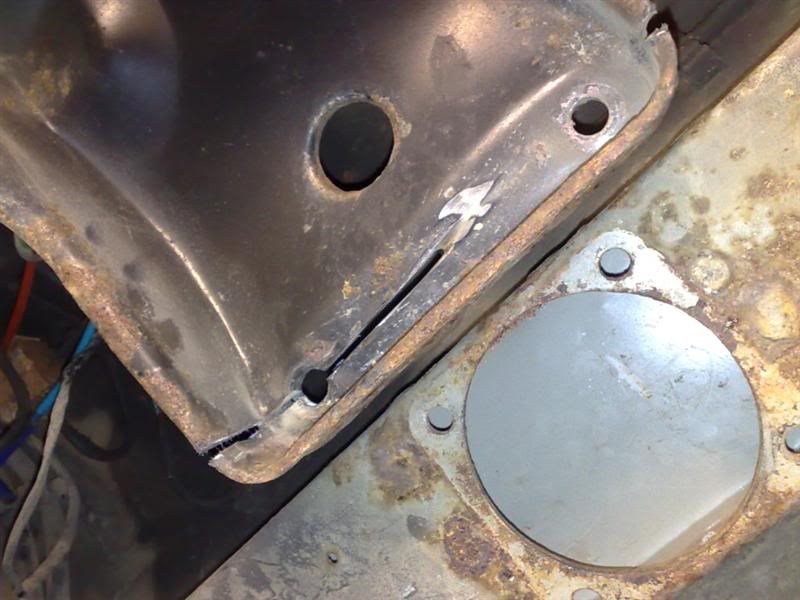
Original mounting holes etc...
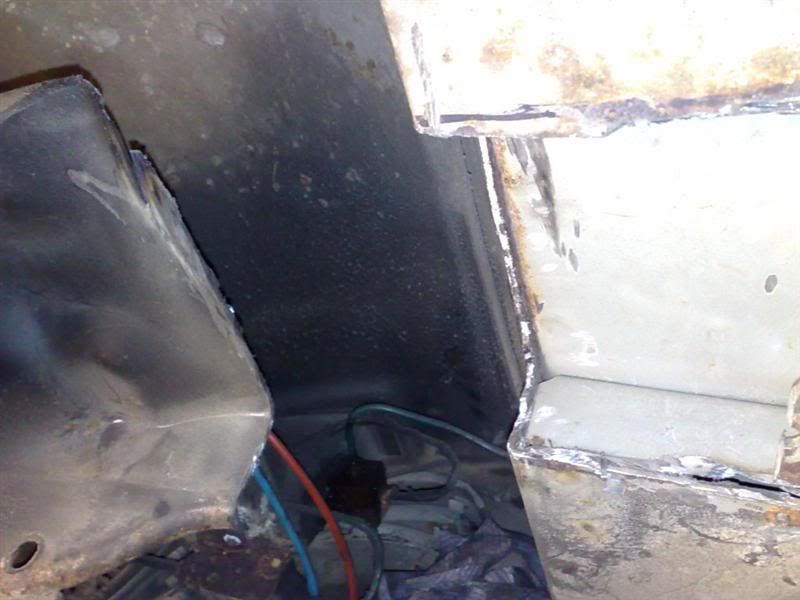
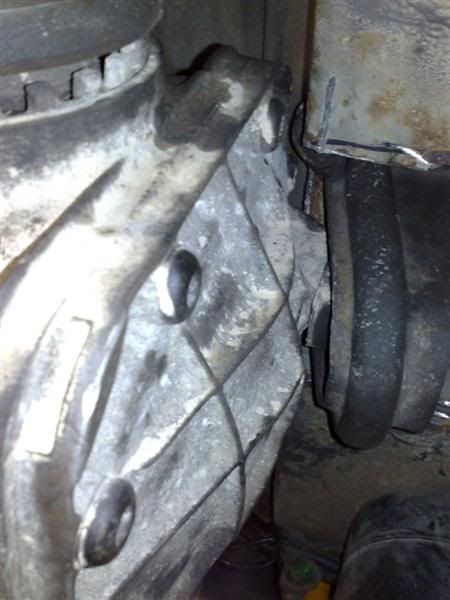
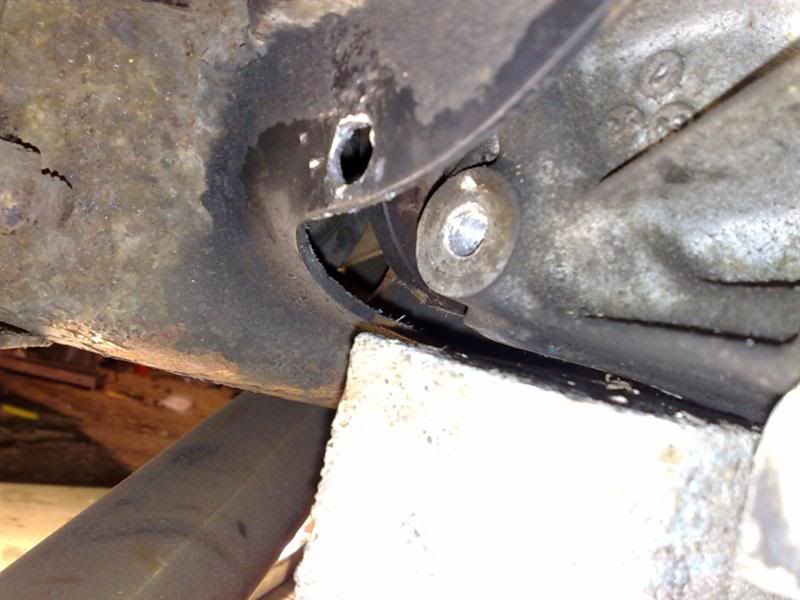
Area cut out for the rear cossie mount
Old diff carrier cut & modded
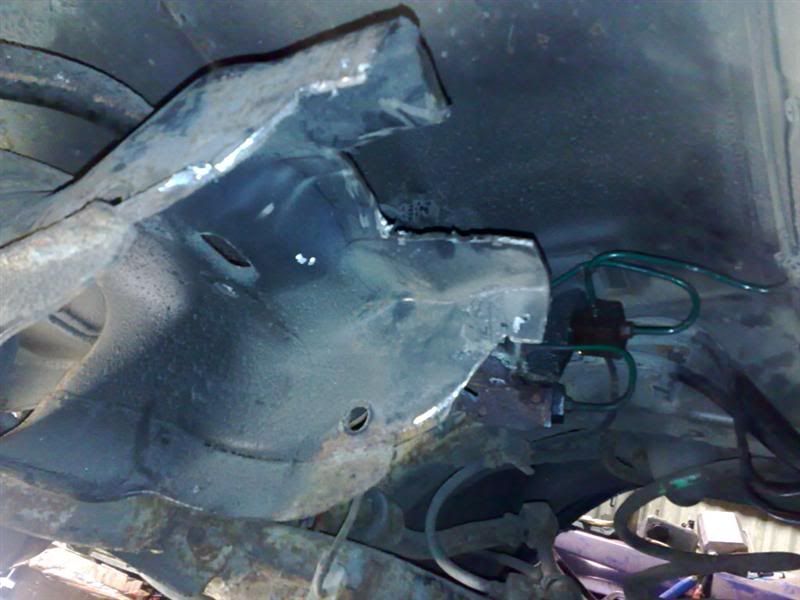
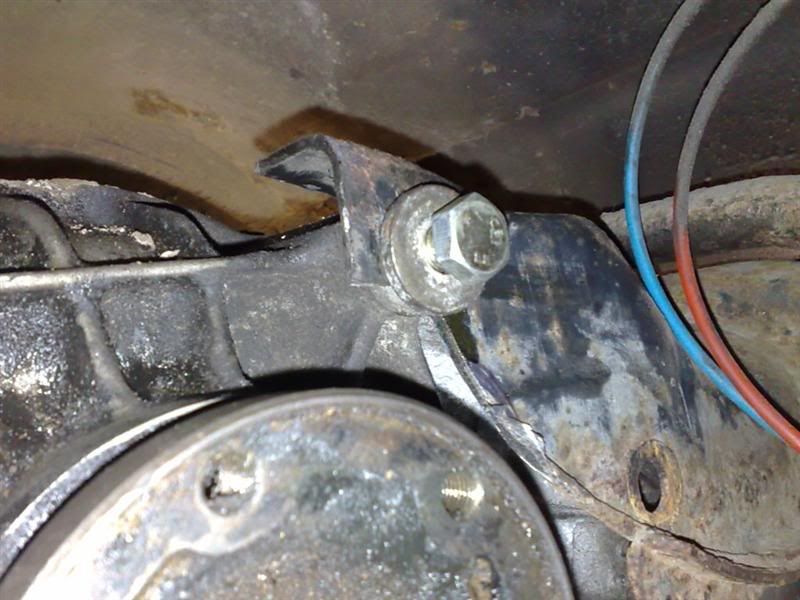
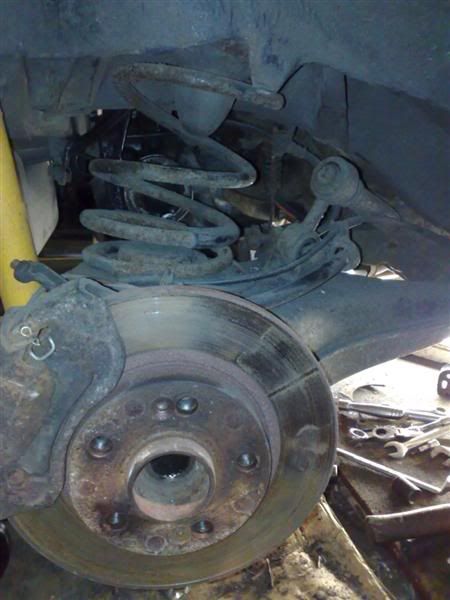
Diff in place..
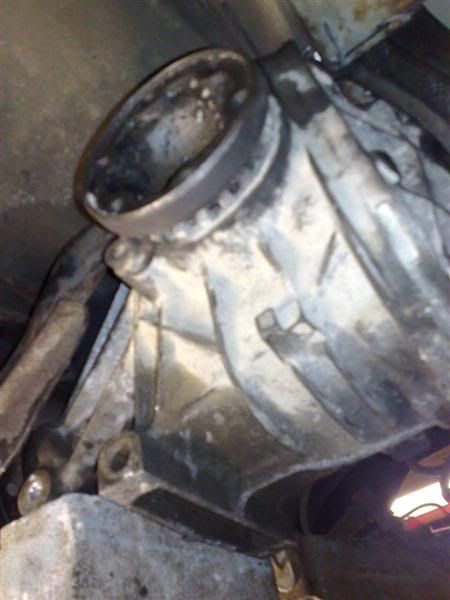
New mounting holes
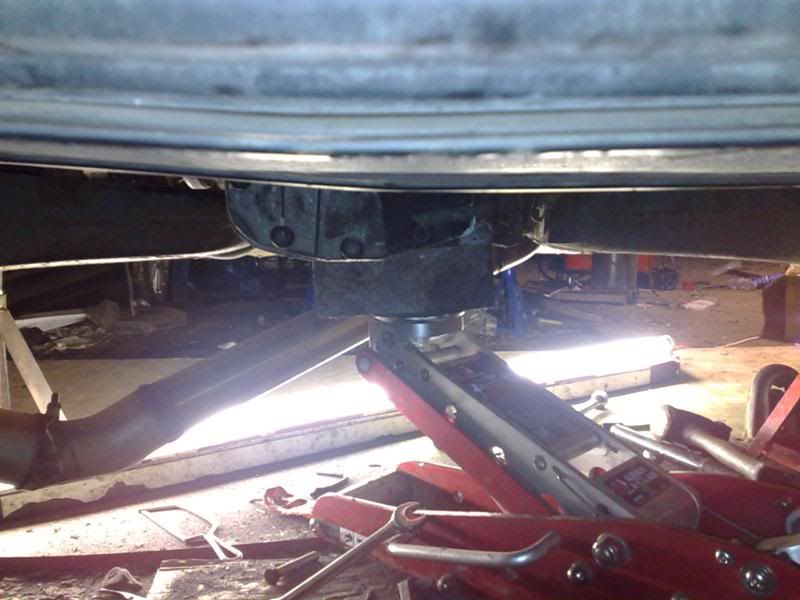
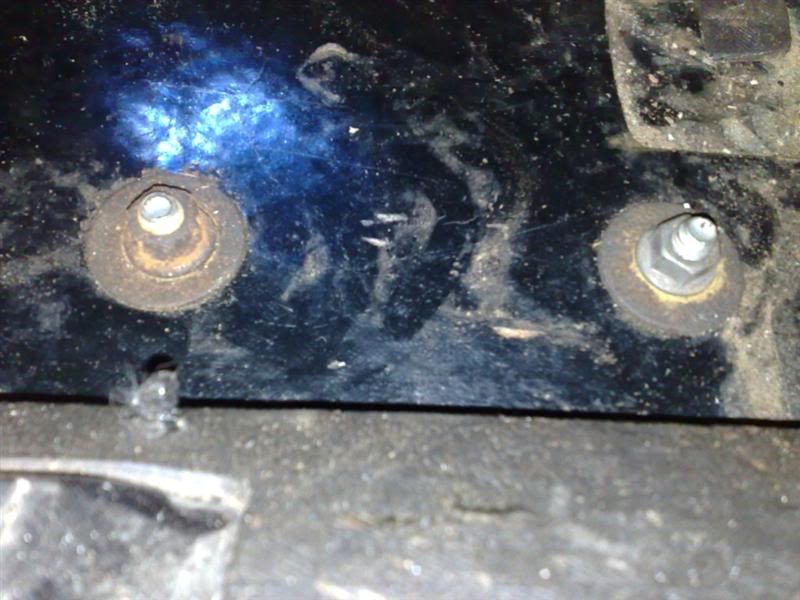
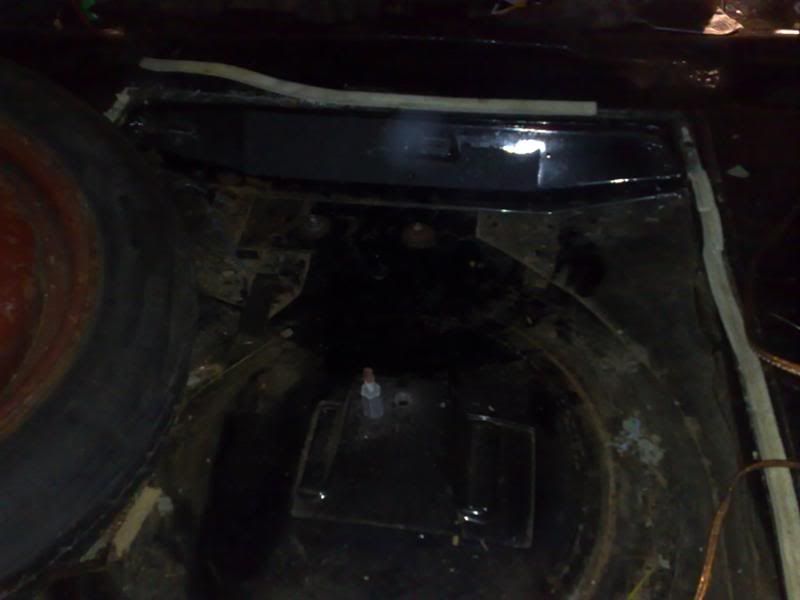
Bolts into boot floor....going to weld/bolt in a strengthing plate here.
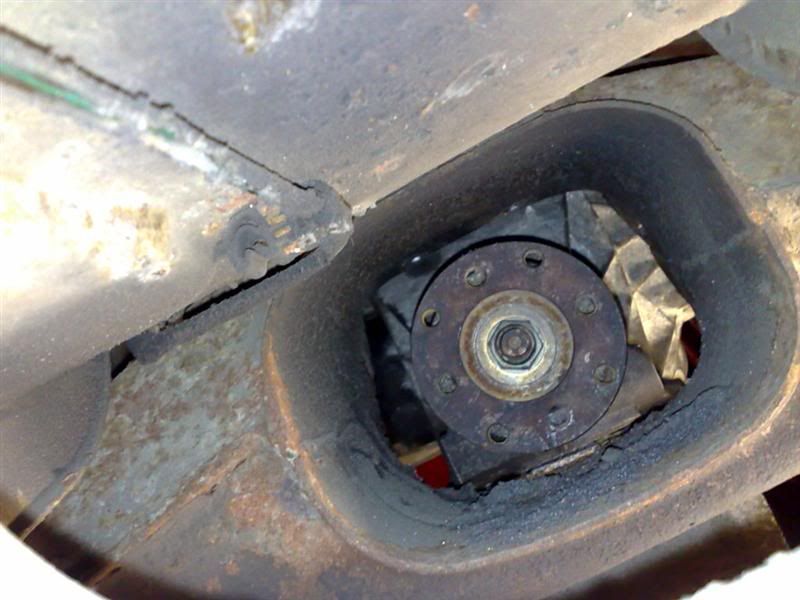
Looking through the rear beam - lined up perfectly
Lined up looking through the wheel well..
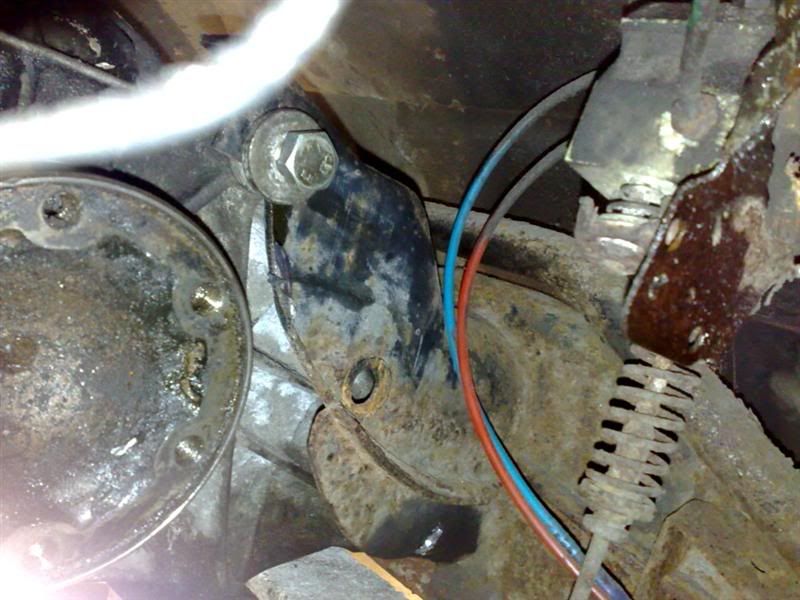
Watch that petrol tank....
Also whilst I was under there i noticed a fractured rear brake line as a couple of drops of brake fluid ended up in my eye which was nice!!! LOL Good job I found it though!!!
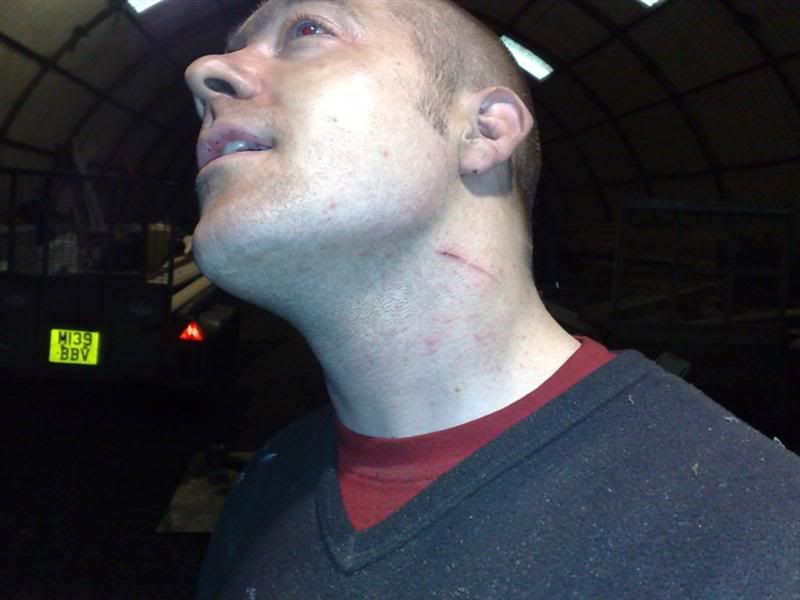
And the car bit back & went for my jugular after I chopped a section of the old carrier away - I went to dodge the piece of sharp metal - twatted my head on the rear beam & it got me anyway! LOL! Also note the grinding spark burns!
Anyway - I've been buying other bits & pieces too which include a 4wd exhaust manifold, AP Paddle clutch, cossie propshaft, fuel rail to name a few.
I'm on the lookout for some cossie rear driveshafts too that I can use to get modified.
Hopefully my next session on the car will see the diff mountings finished & if my bellhousing arrives hopefully the gearbox mountings & gearstick will be fabbed & functional.
Thanks for looking!!
Finally managed to remove my subframe - bloody battle that was - had to cut the heads off the bolts heat up the old bushes to melt them away from the bolts - took 2 hours to get the fooker off!! But now its off I can properly weld in the new supports & strengthen it all up properly.
Big part of the update is the cosworth diff is more or less mounted in place - just got to buy a couple of new bolts. Wasnt too bad to fit just a bit awkward with being under the car grinding.....right next to the petrol tank!!!
I'm glad I decided to go with the cosworth diff as I worked out the ratio of the standard Quadra diff - roughly 1 : 1.5 !!! So would of accelerated like a robin reliant but I'd of probably been in contention for the land speed record! LOL!
I still need to seam seal & spray up the newly exposed bits of metal I've had to cut away to get it to fit to protect them. Not quite 100% fitted yet as I need to buy some new M12 bolts & spacers - also I need to drop some sort of bracketry down for the middle bottom mount hole but shouldnt be difficult to do. Also I want to get a steel plate made to strengthen where the rear mount bolts through into the spare wheel well in the boot just to be on the safe side. Also I'm welding large washers where the bolts go through for extra support.
Pics arent the best - bit difficult to try and photograph it perfectly to show everything...
Original mounting holes etc...
Area cut out for the rear cossie mount
Old diff carrier cut & modded
Diff in place..
New mounting holes
Bolts into boot floor....going to weld/bolt in a strengthing plate here.
Looking through the rear beam - lined up perfectly
Lined up looking through the wheel well..
Watch that petrol tank....
Also whilst I was under there i noticed a fractured rear brake line as a couple of drops of brake fluid ended up in my eye which was nice!!! LOL Good job I found it though!!!
And the car bit back & went for my jugular after I chopped a section of the old carrier away - I went to dodge the piece of sharp metal - twatted my head on the rear beam & it got me anyway! LOL! Also note the grinding spark burns!
Anyway - I've been buying other bits & pieces too which include a 4wd exhaust manifold, AP Paddle clutch, cossie propshaft, fuel rail to name a few.
I'm on the lookout for some cossie rear driveshafts too that I can use to get modified.
Hopefully my next session on the car will see the diff mountings finished & if my bellhousing arrives hopefully the gearbox mountings & gearstick will be fabbed & functional.
Thanks for looking!!

 06-05-2008, 09:51 PM
#110
PassionFord Post Whore!!
Thread Starter
iTrader: (1)
Join Date: May 2004
Location: Liverpool :o)
Posts: 4,715
Likes: 0
Received 0 Likes
on
0 Posts
Hi mate....
Naah its 2wd shafts I need mate - although having said that its really only the flanges I need as they will need to be custom length. Are the flanges the same as 2wd? Any pics?
Naah its 2wd shafts I need mate - although having said that its really only the flanges I need as they will need to be custom length. Are the flanges the same as 2wd? Any pics?
06-05-2008, 09:59 PM
#111
differant pcd on the flanges, i may have a set of flanges if you like ? would have to confirm though tomorrow, but they could be 4wd flanges, are they no where near on length ? the 4wd items are differant sizes, maybe you coule fit the 4wd flanges and utilise maybe just one of the shafts or even use plunge spacers if the distance is not too far out, may save you a few quid ? just a thought.
06-05-2008, 10:30 PM
#112
PassionFord Post Whore!!
Thread Starter
iTrader: (1)
Join Date: May 2004
Location: Liverpool :o)
Posts: 4,715
Likes: 0
Received 0 Likes
on
0 Posts
To be completely honest I was that knackered last nite after getting as far as I did with it I didnt even try to offer up the Renault driveshafts. I know the PCD is very close as I did check this - the difference is size is probably 3mm at most inbetween the holes - the flange size is the same also so it could just be a case of redrilling/enlongating the original holes although theres not locating ring if you know what I mean. I dont think length will be that far out - perhaps shorter on both of them slightly.
What are plunge spacers?
What are plunge spacers?
31-05-2008, 08:27 PM
#114
PassionFord Post Whore!!
Thread Starter
iTrader: (1)
Join Date: May 2004
Location: Liverpool :o)
Posts: 4,715
Likes: 0
Received 0 Likes
on
0 Posts
Right......update time...
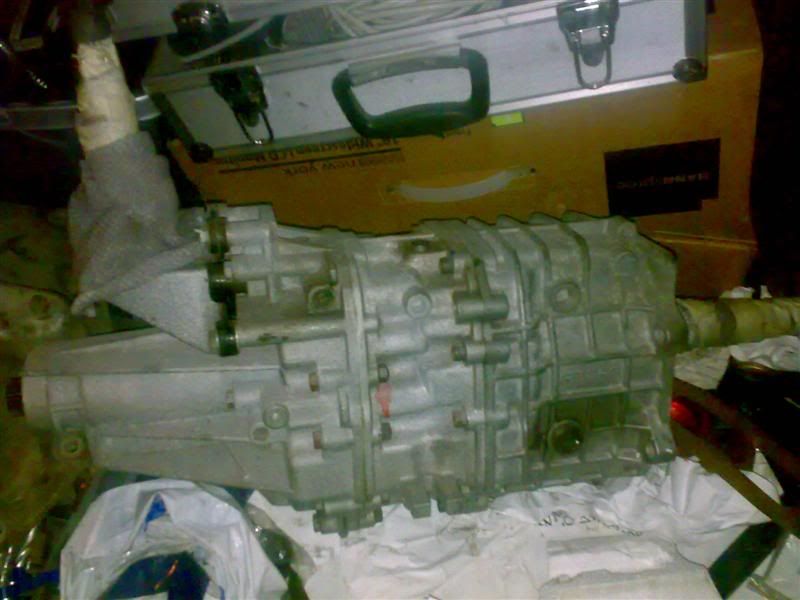
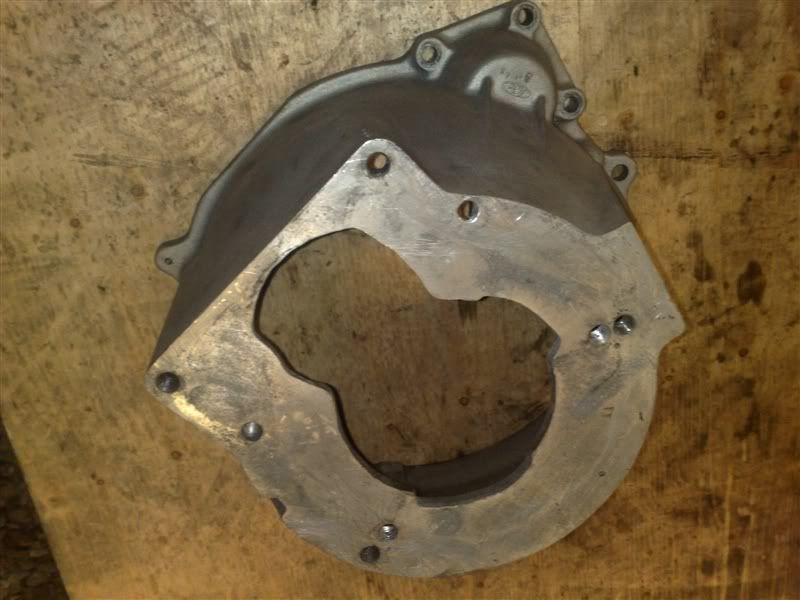
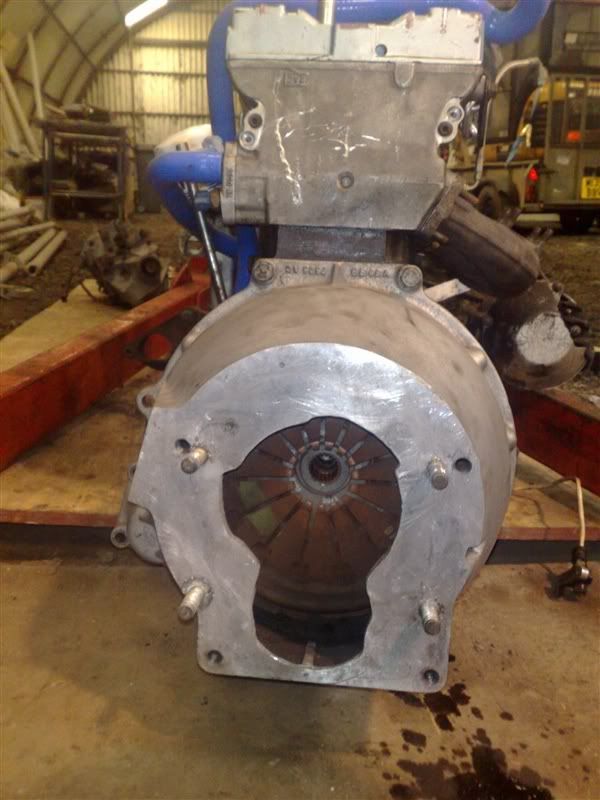
The part I have been waiting for that has been holding up progress finally arrived today....my modded bellhousing to mate up the Getrag gearbox and the Cosworth block...
Very impressed as to how its done - very neat & looks completely OEM I have to admit.
So I've got the gearbox fitted up & the gearlever in place - tomorrows jobs I hope to complete are getting the gearlever working after fabbing up a gearbox mount.
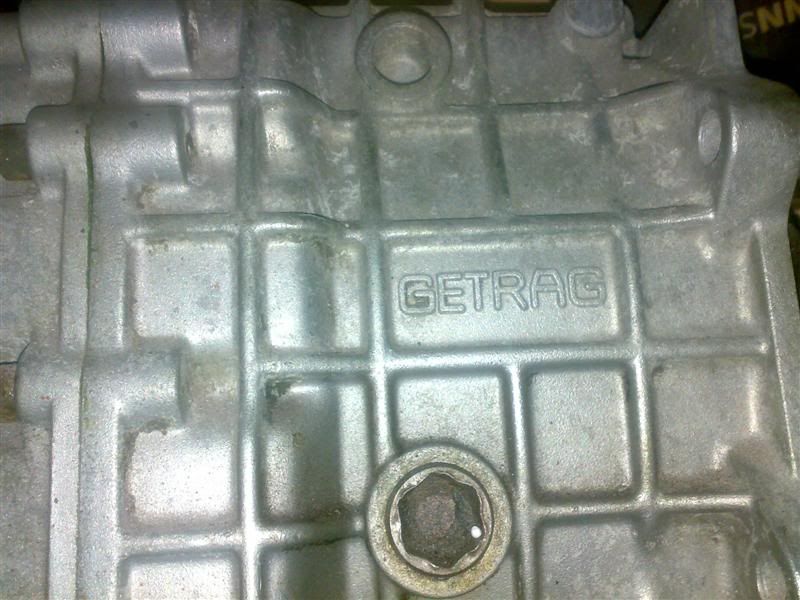
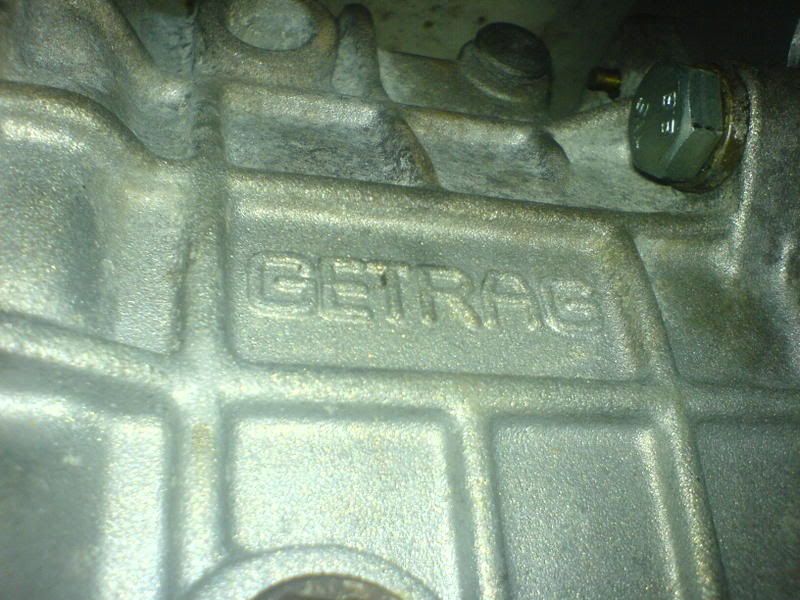
I've also purchased another Getrag gearbox.....why....well because it was cheap of course!!! So I've got a spare now incase I need it or might flog it on - unsure yet!!
So onto the pics - let them explain what I've done....
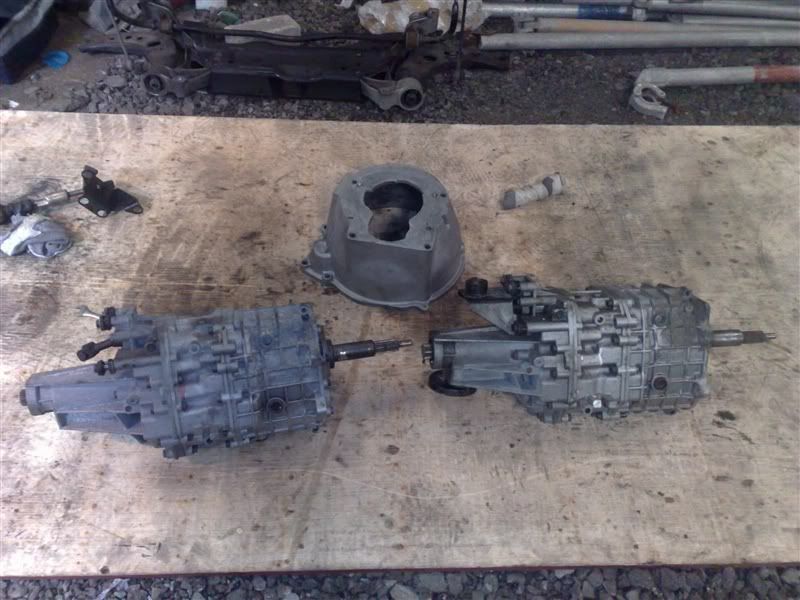
2 Getrag gearboxes with the modded bellhousing
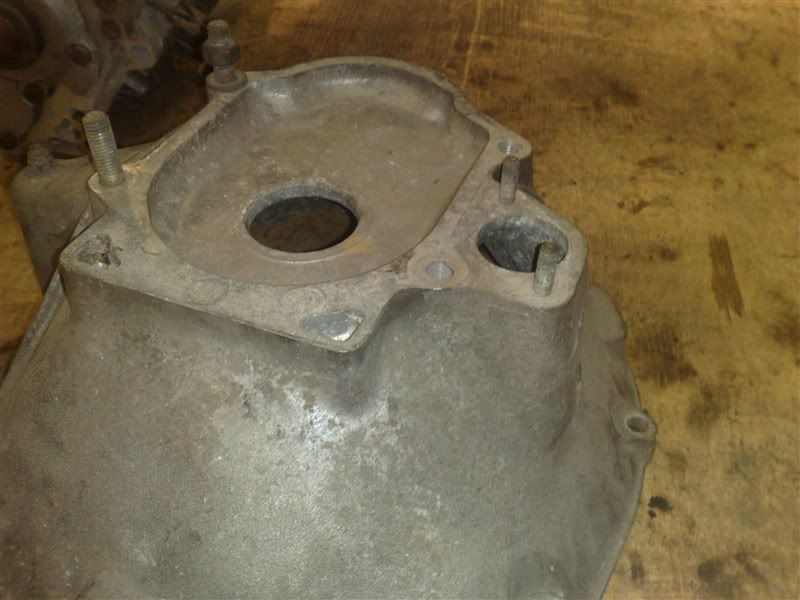
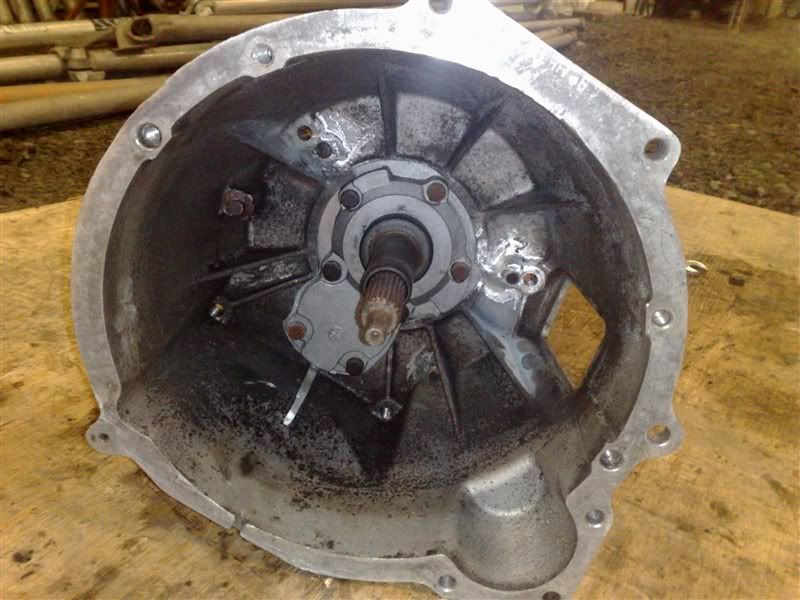
Modded bellhousing...

First job was to remove the studs out of the old Jag bellhousing so I could use em in the new bellhousing....
So out of here....
...into here with a bit of Loctite for good measure...
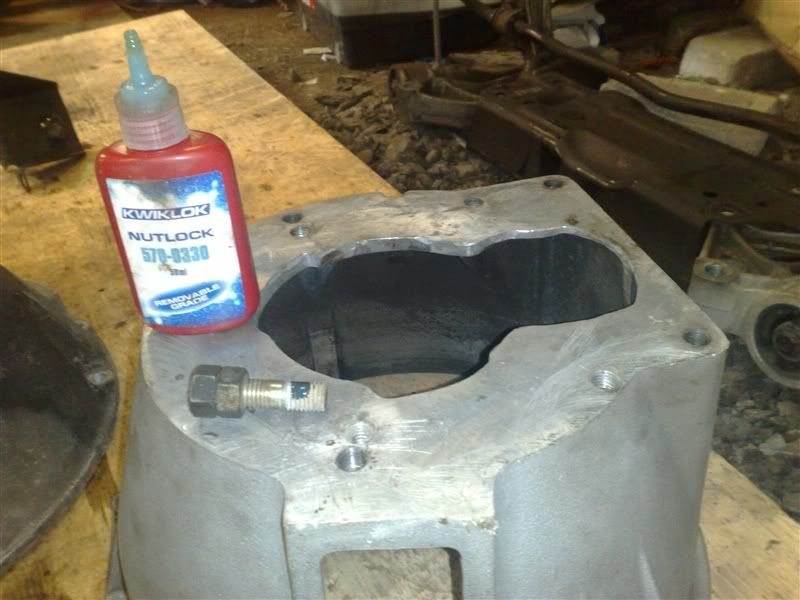
....et voila...
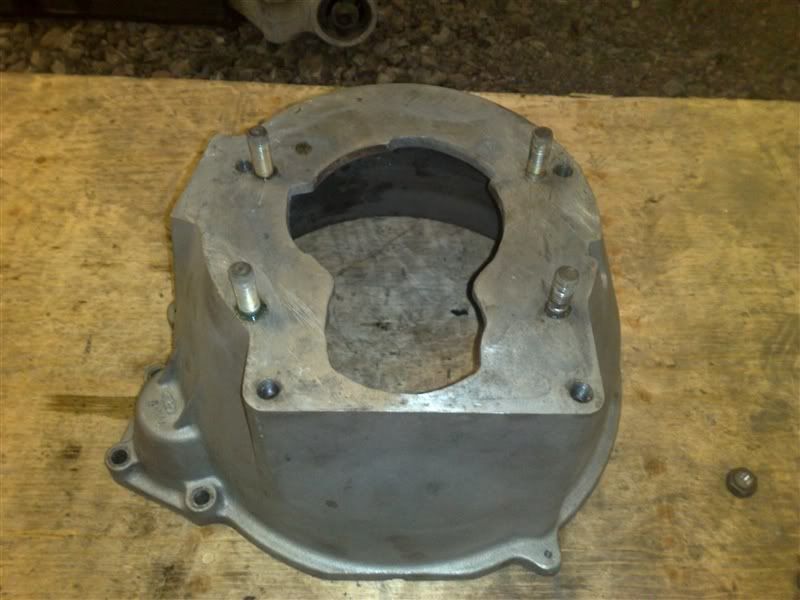
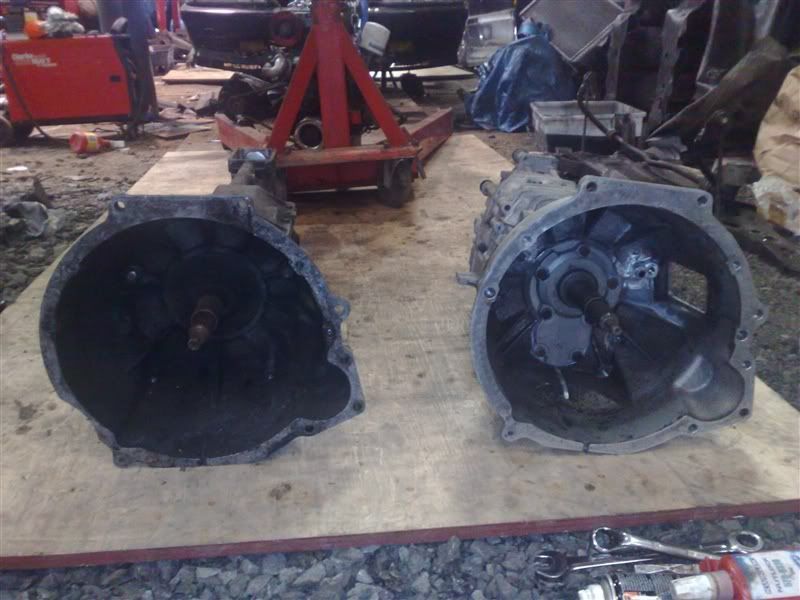
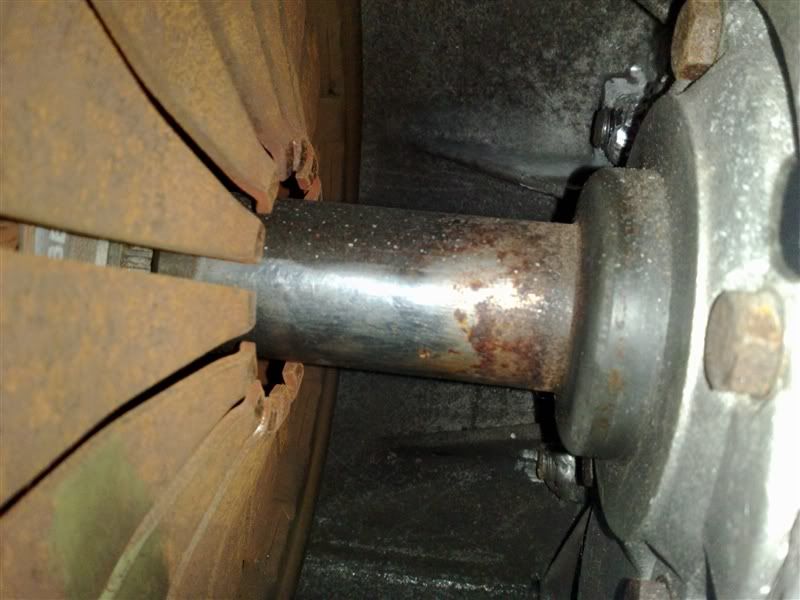
Test fitted box to bellhousing....
Nicely central..
Had to then remove the engine & box out the car as it had the standard T5 fitted -
...so with that out I could then...
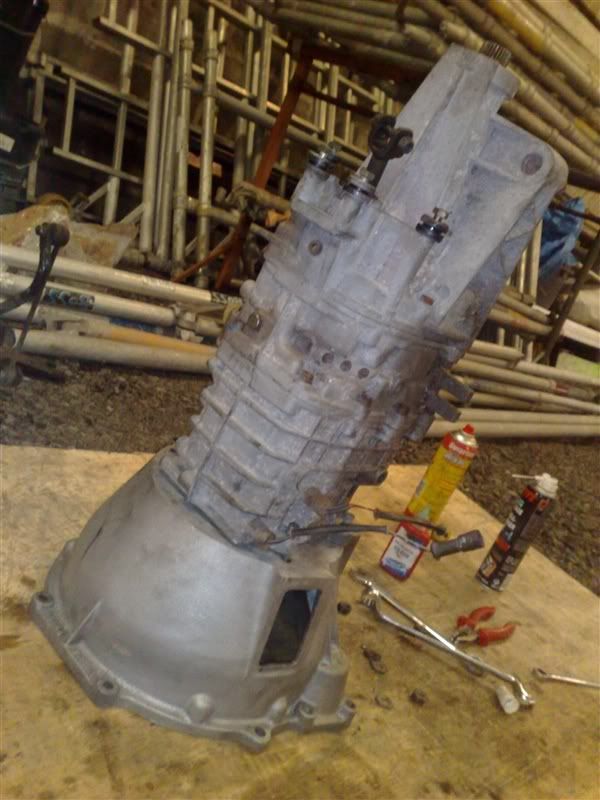
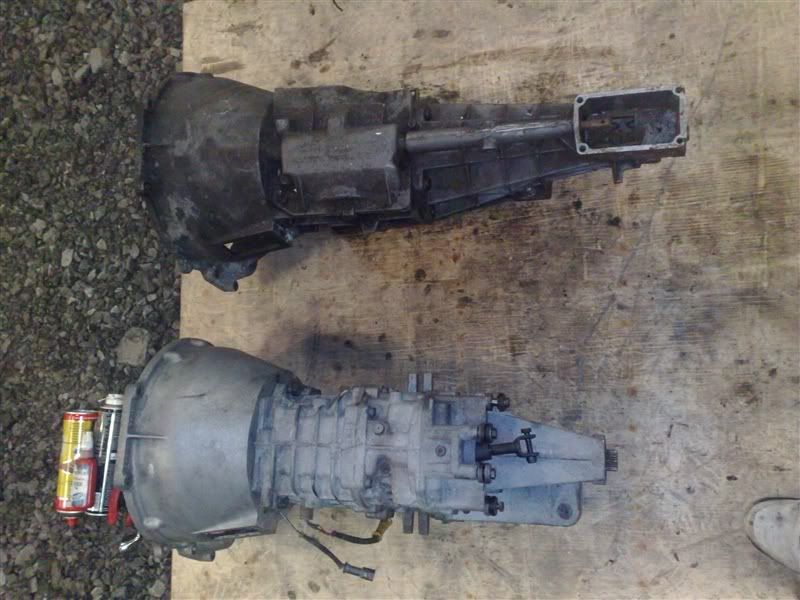
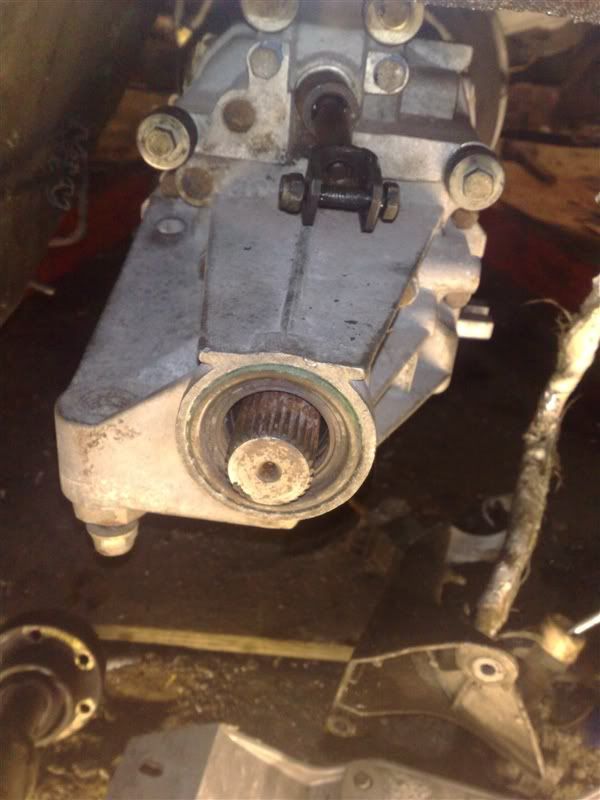
...take pics to compare the boxes for anyone else thinking of using a Jag box for anything in the future - look how much shorter the jag box is...
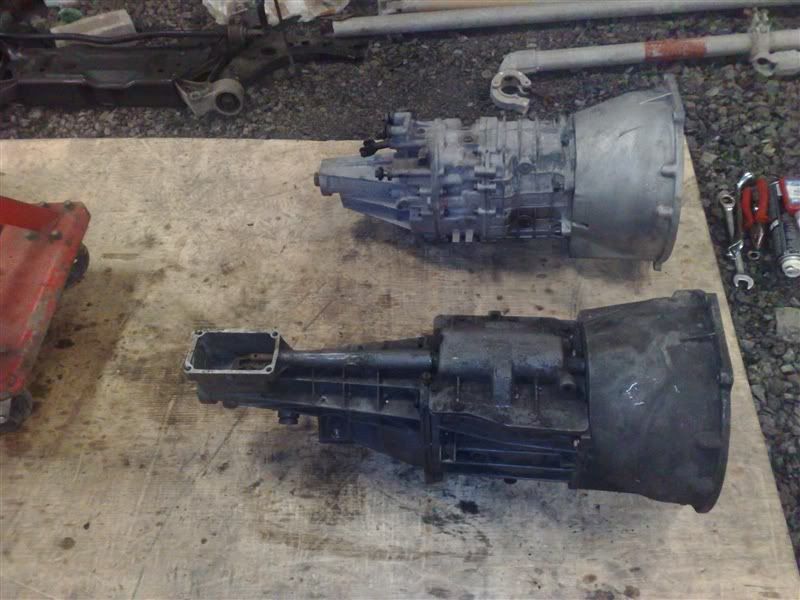
....and skinnier - handy for more room for BIG exhausts perhaps...
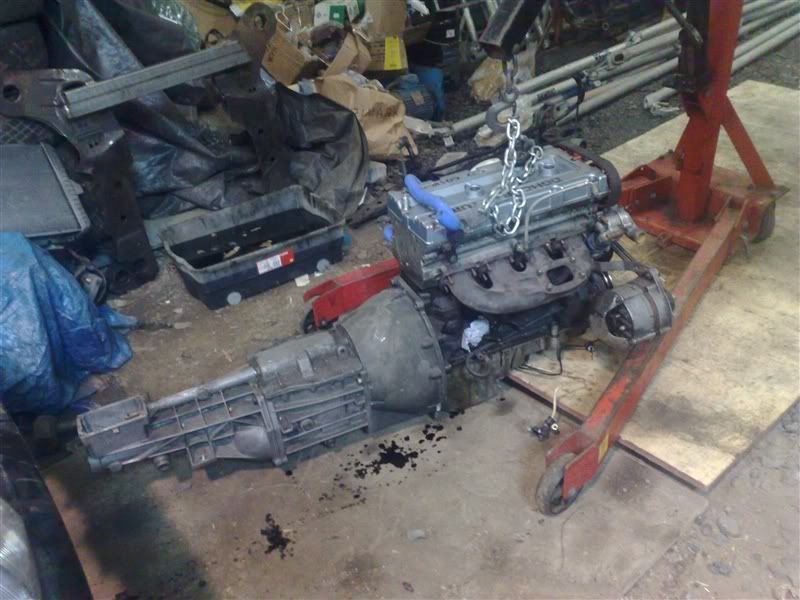
...and then I could attach the box to engine...PERFECT!!
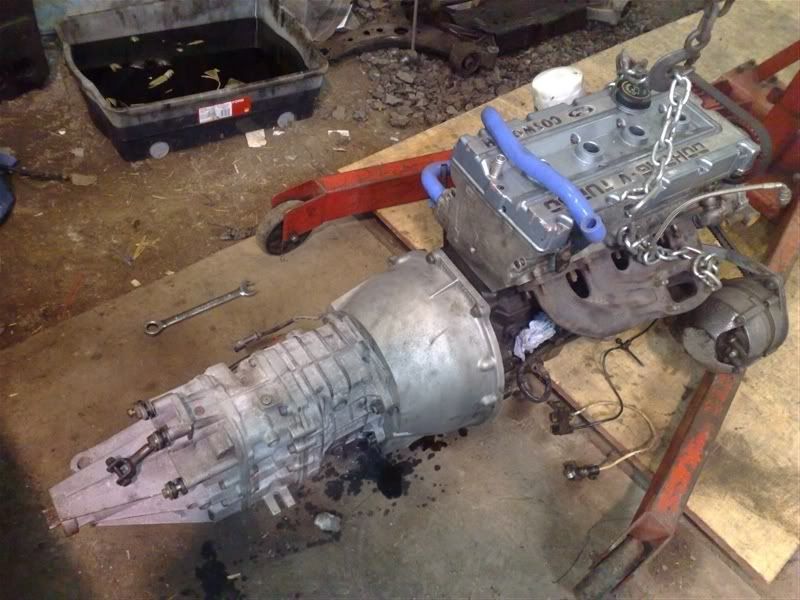
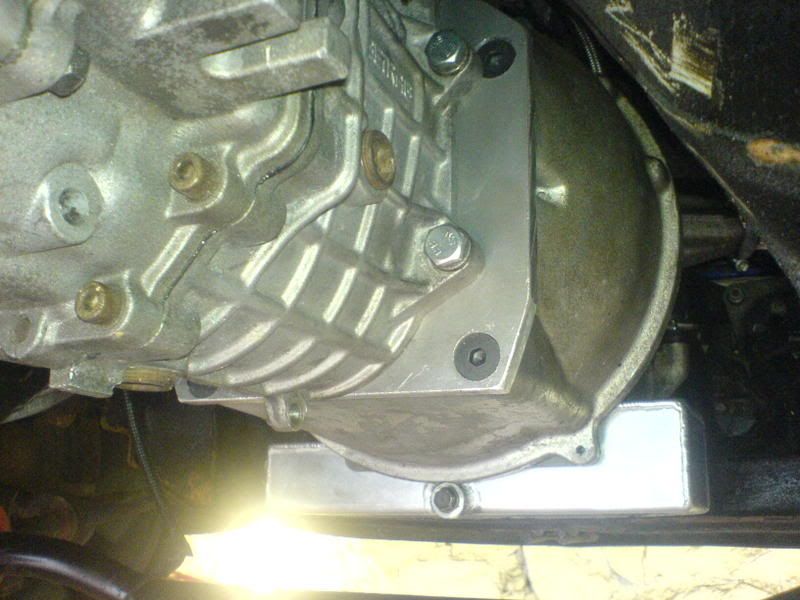
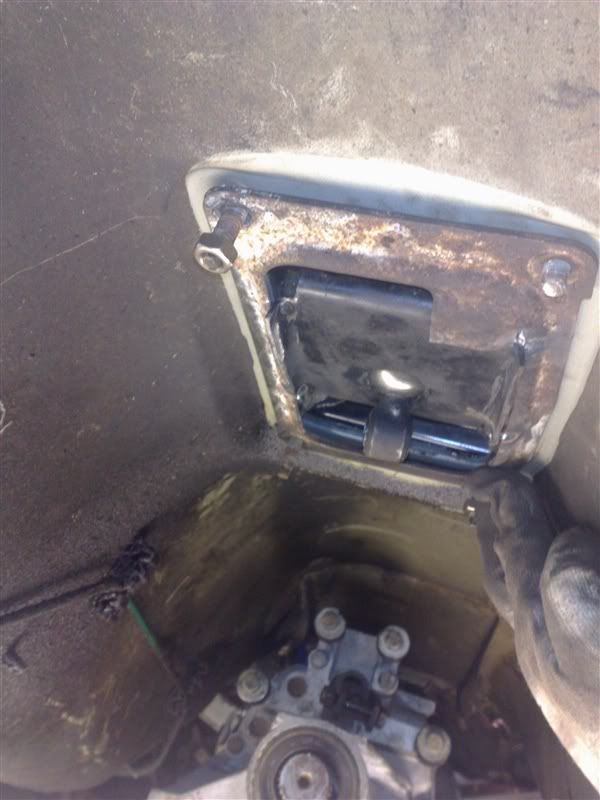
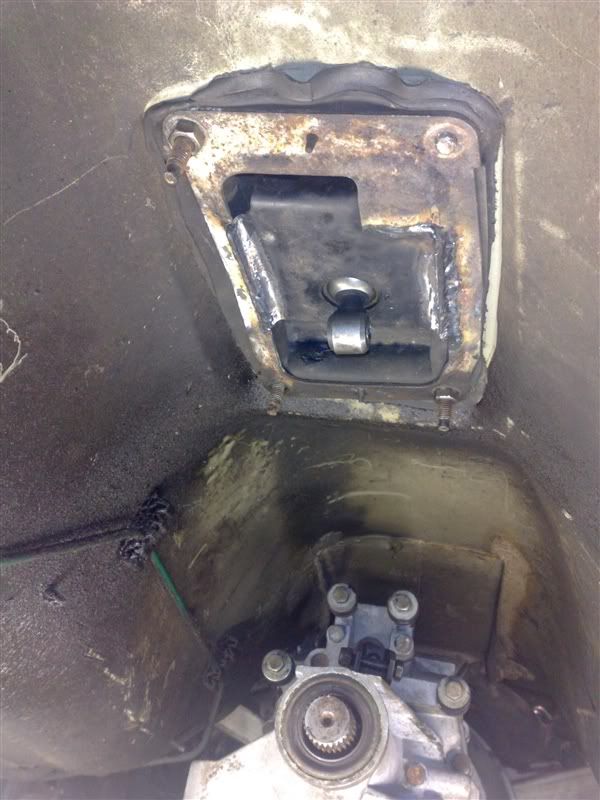
So then in she went....and this is how it now looks underneath...
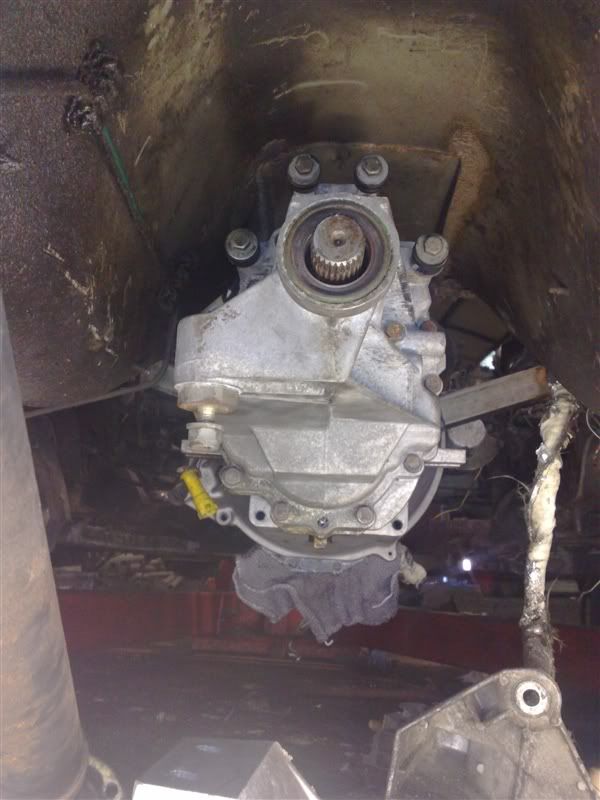
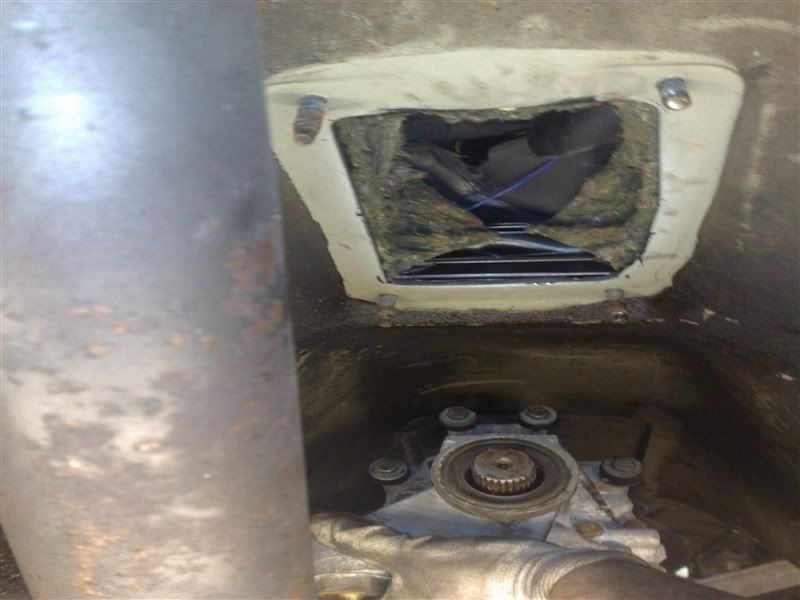
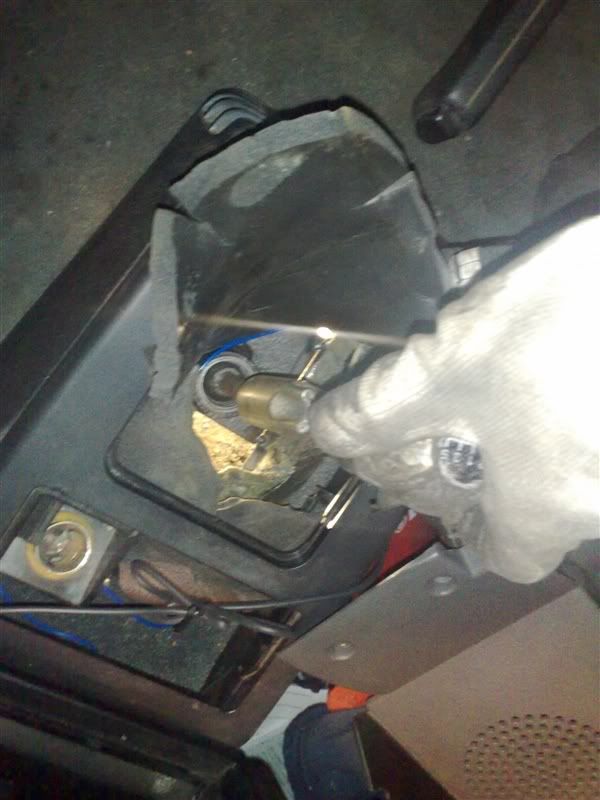
Looking through the hole in the car...
So then with that in place....I decided to turn my attention to getting a gearlever in place...
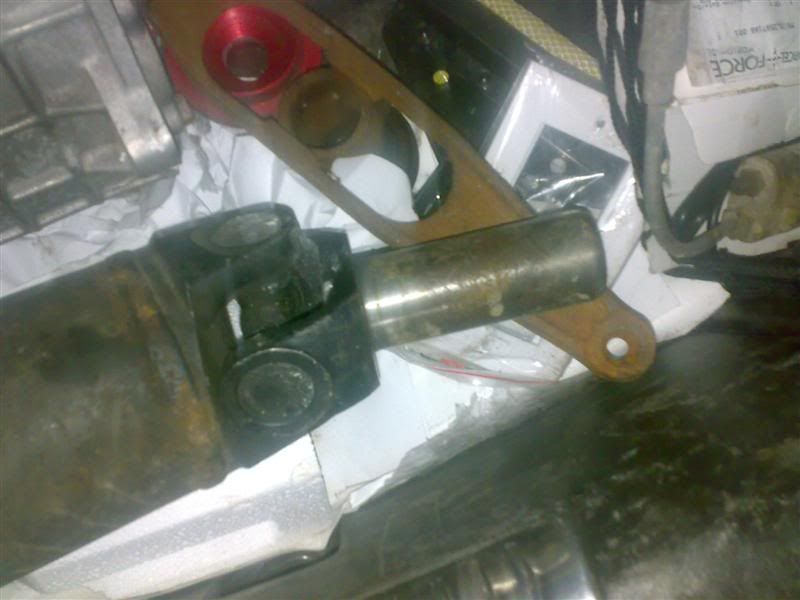
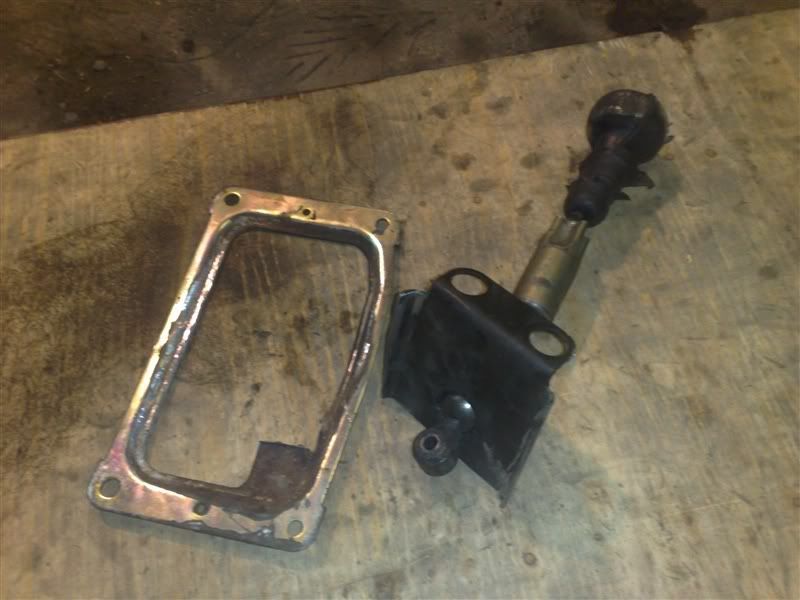
Standard 21T gearlever mechanism...
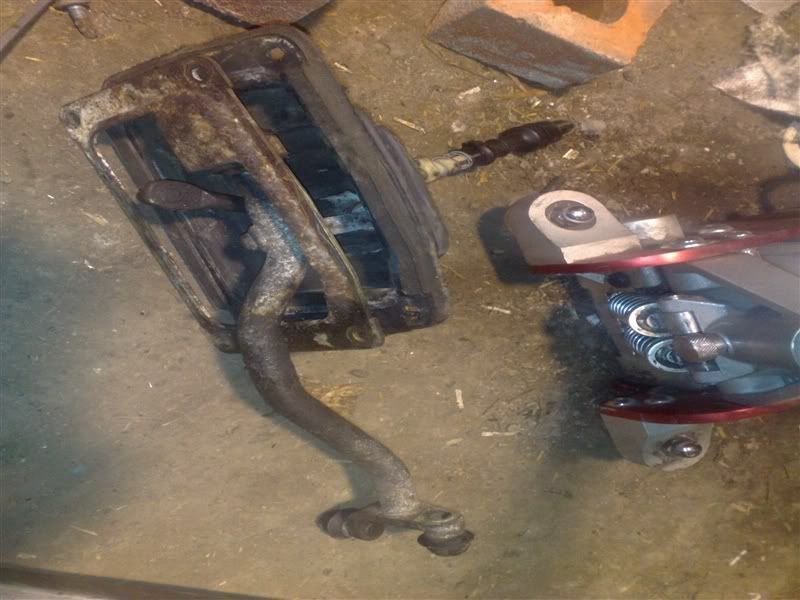
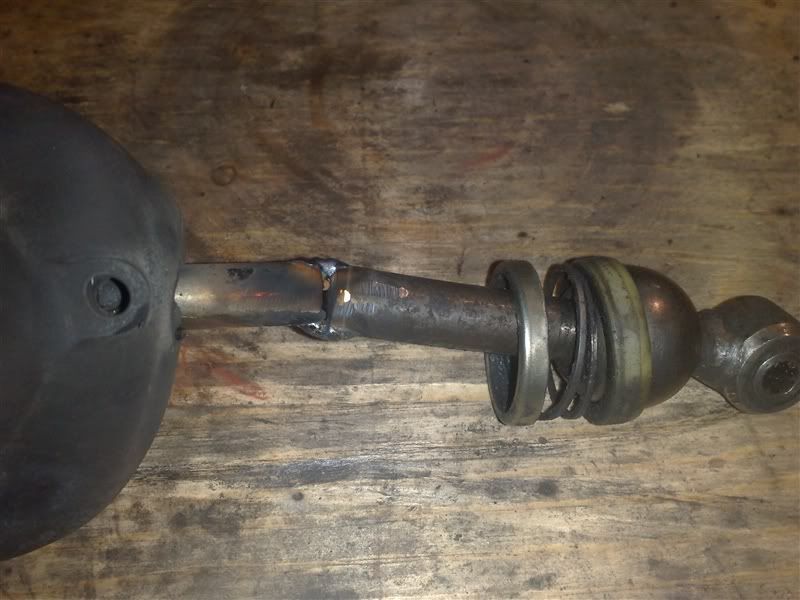
...after a bit of grinder action with a grinded Jag lever...
...getting the centre of the hole#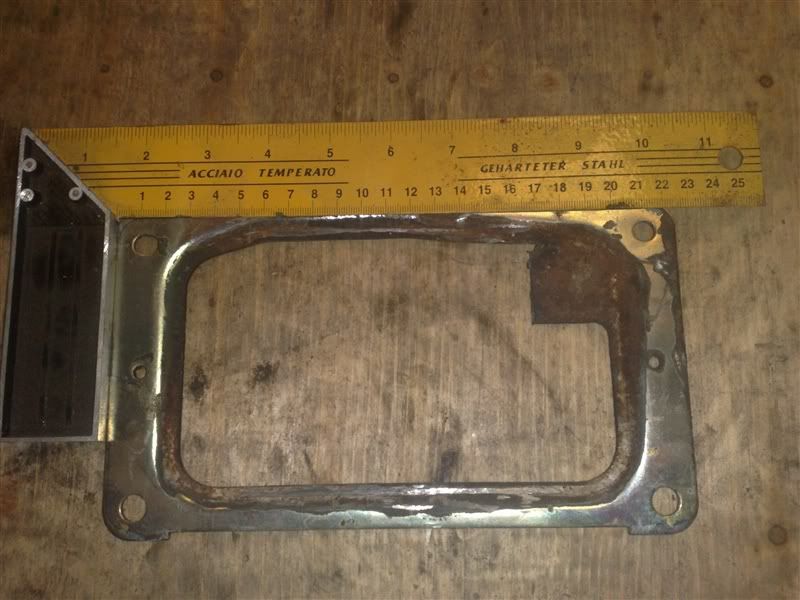
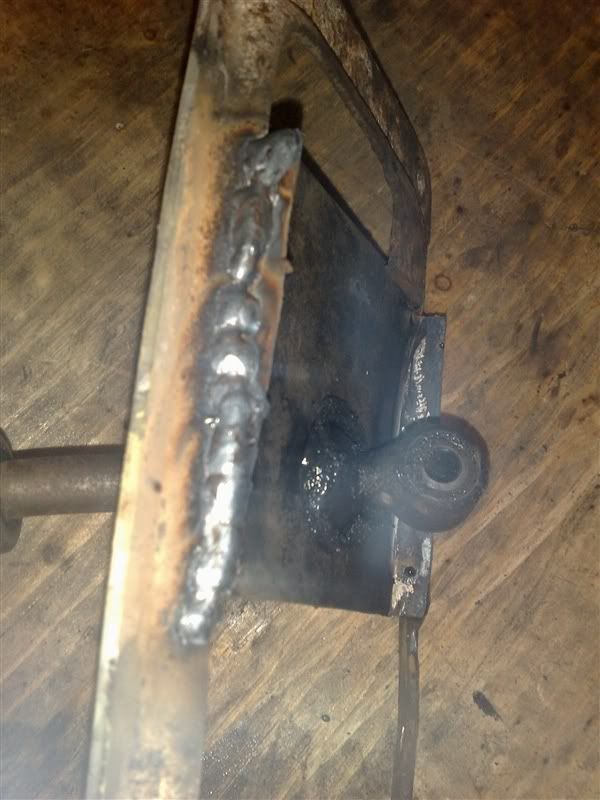
....tacked in place
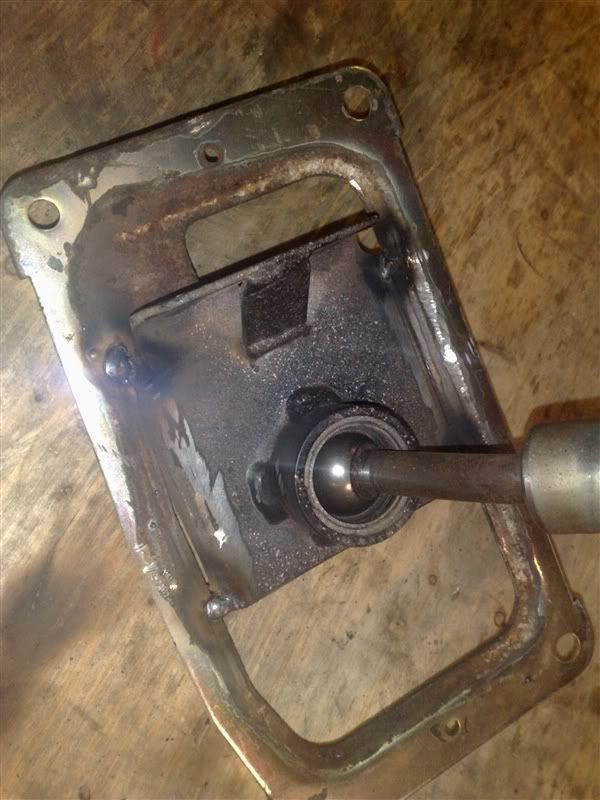
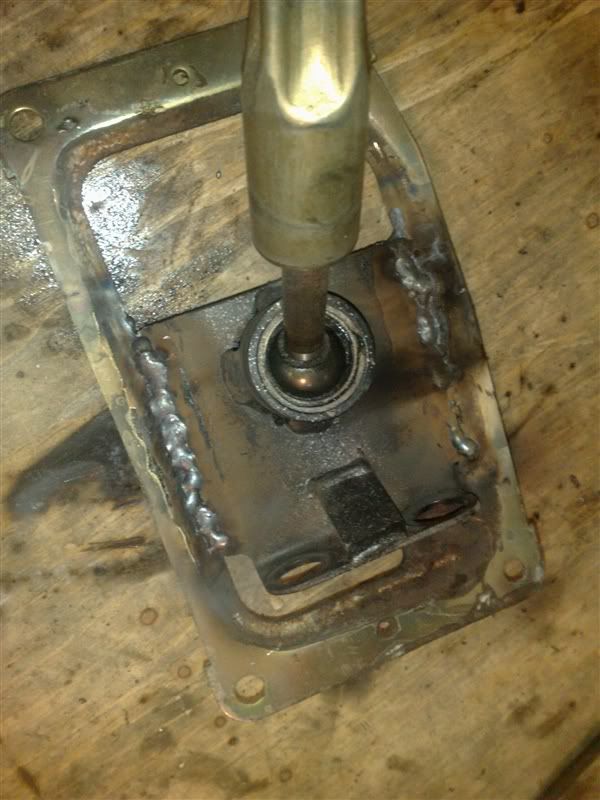
Quick check of fitment...
Securely & strongly welded - rather than pretty & neat lol...
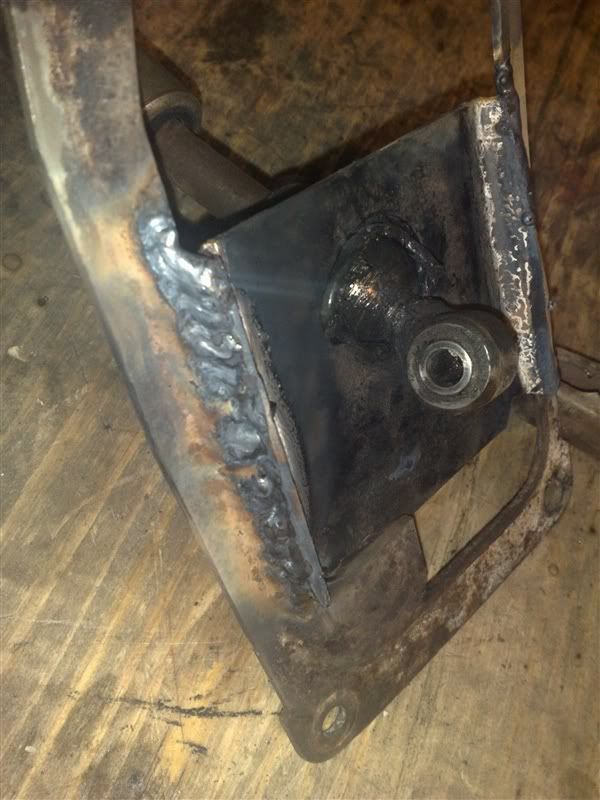
Now when you weld things.....they get VERY hot obviously which I completely forgot about - so I successfully managed to melt the plastic bearing in the ball joint.....I knew I'd bought another box for a reason - so swapped these over...no pics of this as I forgot..
Next - cut & shut the gearstick as I really didnt want an old Jag gearknob in my lush Renault (ahem).....plus I wanted to keep the standard one so you couldnt really tell if you looked inside!!
..just tacked for the time being until I've got the whole mechanism working perfectly - as I wasnt sure of the exact angle for neutral..
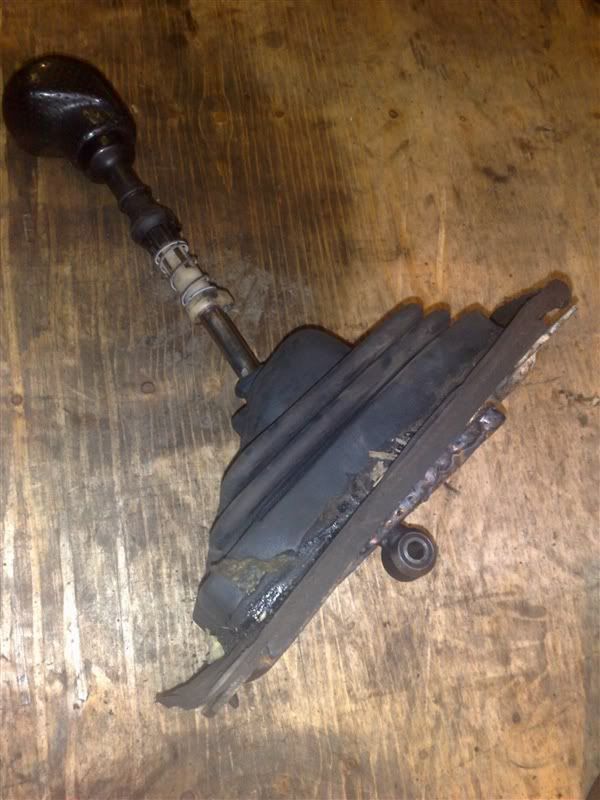
...you'd never know!!
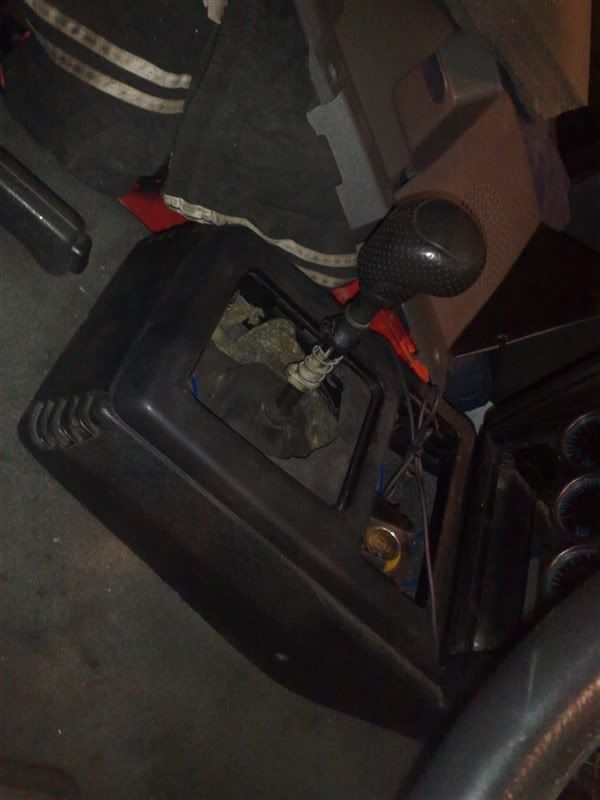
..all bolted in place ready for me to fab up & attach a connecting rod!!
Hopefully more tomorrow - thanks for looking!!!
The part I have been waiting for that has been holding up progress finally arrived today....my modded bellhousing to mate up the Getrag gearbox and the Cosworth block...
Very impressed as to how its done - very neat & looks completely OEM I have to admit.
So I've got the gearbox fitted up & the gearlever in place - tomorrows jobs I hope to complete are getting the gearlever working after fabbing up a gearbox mount.
I've also purchased another Getrag gearbox.....why....well because it was cheap of course!!!
So I've got a spare now incase I need it or might flog it on - unsure yet!!So onto the pics - let them explain what I've done....
2 Getrag gearboxes with the modded bellhousing
Modded bellhousing...
First job was to remove the studs out of the old Jag bellhousing so I could use em in the new bellhousing....
So out of here....
...into here with a bit of Loctite for good measure...
....et voila...
Test fitted box to bellhousing....
Nicely central..
Had to then remove the engine & box out the car as it had the standard T5 fitted -
...so with that out I could then...
...take pics to compare the boxes for anyone else thinking of using a Jag box for anything in the future - look how much shorter the jag box is...
....and skinnier - handy for more room for BIG exhausts perhaps...
...and then I could attach the box to engine...PERFECT!!
So then in she went....and this is how it now looks underneath...
Looking through the hole in the car...
So then with that in place....I decided to turn my attention to getting a gearlever in place...
Standard 21T gearlever mechanism...
...after a bit of grinder action with a grinded Jag lever...
...getting the centre of the hole#
....tacked in place
Quick check of fitment...
Securely & strongly welded - rather than pretty & neat lol...
Now when you weld things.....they get VERY hot obviously which I completely forgot about - so I successfully managed to melt the plastic bearing in the ball joint.....I knew I'd bought another box for a reason - so swapped these over...no pics of this as I forgot..
Next - cut & shut the gearstick as I really didnt want an old Jag gearknob in my lush Renault (ahem).....plus I wanted to keep the standard one so you couldnt really tell if you looked inside!!
..just tacked for the time being until I've got the whole mechanism working perfectly - as I wasnt sure of the exact angle for neutral..
...you'd never know!!
..all bolted in place ready for me to fab up & attach a connecting rod!!
Hopefully more tomorrow - thanks for looking!!!

