Ford Cortina MkV Crusader (Was YB) RB20 Restoration (UPDATE 17/03/13)
 28-04-2009, 06:38 PM
#81
Too many posts.. I need a life!!
Thread Starter
Join Date: Sep 2003
Location: Beds/Herts
Posts: 688
Likes: 0
Received 0 Likes
on
0 Posts
Cheers Paul,
Won't be using a Swedish plenum, i've looked into most of these and they have a fatal flaw from what i've seen of them. I don't think i'll worry about moving the engine to the N/S. Did you try putting a 2wd manifold on yours then?
When am I gonna see some pics of your project then? You've not got any on here or BSC.
Last edited by BlackSaff; 28-04-2009 at 06:39 PM.
 28-04-2009, 09:17 PM
#82
Cheers Paul,
Won't be using a Swedish plenum, i've looked into most of these and they have a fatal flaw from what i've seen of them. I don't think i'll worry about moving the engine to the N/S. Did you try putting a 2wd manifold on yours then?
When am I gonna see some pics of your project then? You've not got any on here or BSC.
Won't be using a Swedish plenum, i've looked into most of these and they have a fatal flaw from what i've seen of them. I don't think i'll worry about moving the engine to the N/S. Did you try putting a 2wd manifold on yours then?
When am I gonna see some pics of your project then? You've not got any on here or BSC.

Here is some old pics
Just a bare shell atm and bits everyware
Paul
29-04-2009, 12:38 PM
#84
Thanks
I was running cossie 283mm discs with mondeo calipers Front
then it was 324mm focus RS discs and calipers(which i sold to a m8 for his capri) and 18" focus rims!!
now i using 324mm focus discs and pug 306 coupe brembos again with focus rims
rears was 273 cos discs and calipers and both were on my own designed custom brackets
But i wil say that the first set of brake were very good indeed and would lock at 3 figures

Paul

 23-05-2009, 01:44 PM
#89
Too many posts.. I need a life!!
Thread Starter
Join Date: Sep 2003
Location: Beds/Herts
Posts: 688
Likes: 0
Received 0 Likes
on
0 Posts
Right then, let's have an update.
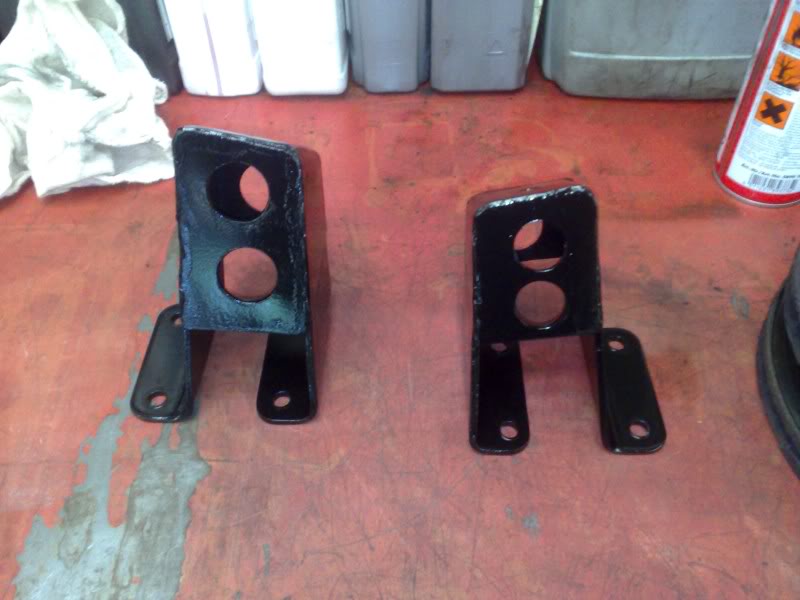
Well if you remember the engine mounts I was making templates to strengthen, i've finally got round to cutting them out of 3mm steel and welding them to the mounts. So here they are all finished and painted ready to do their job.
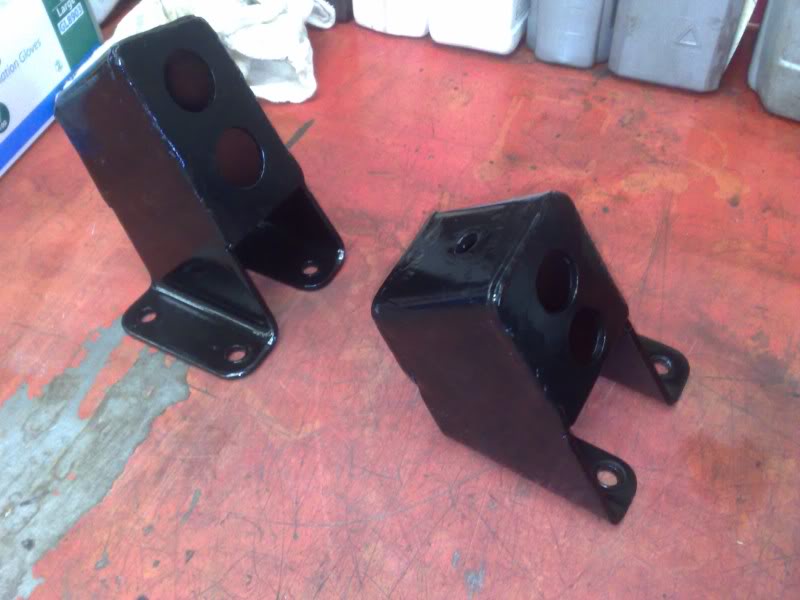
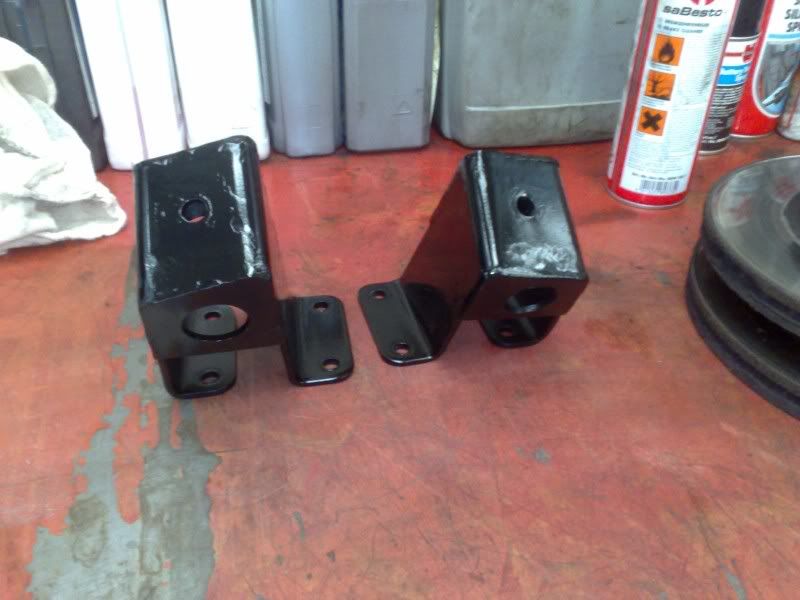
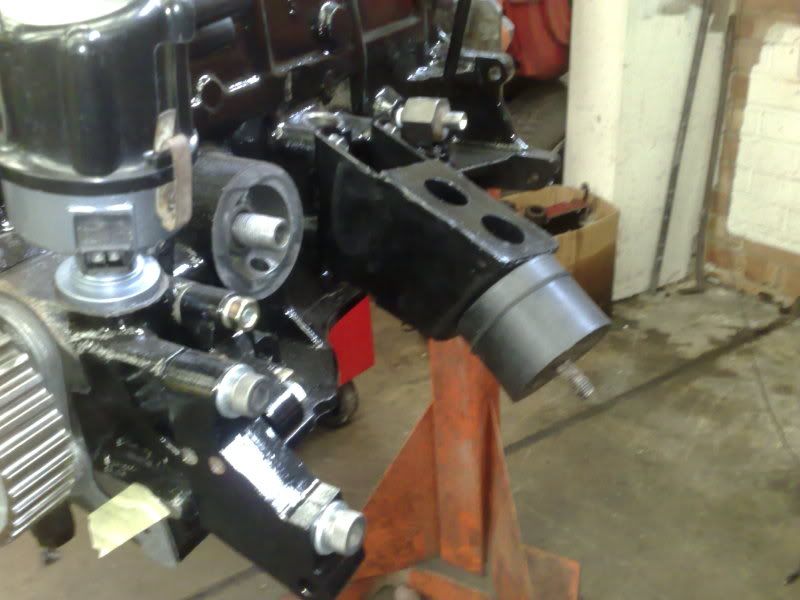
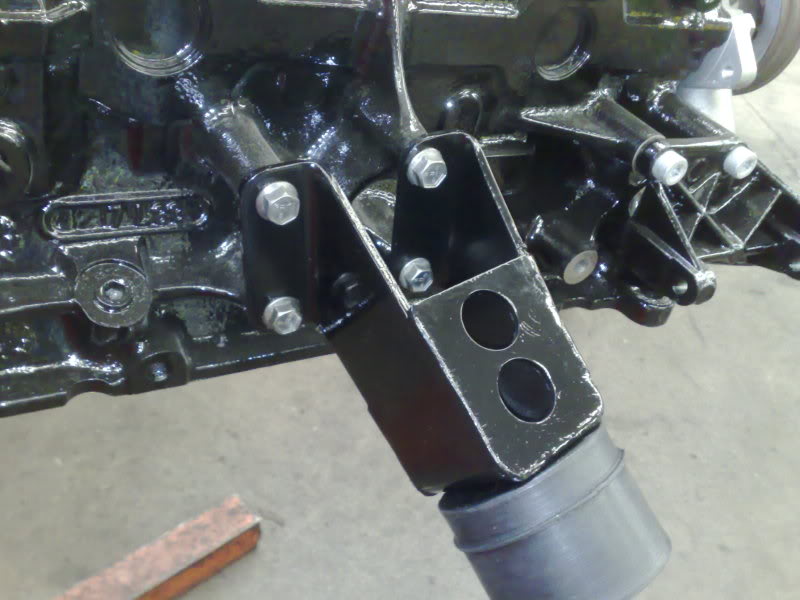
Here they are fitted to the block along with heavy duty 55mm rubber mounts.
Still in the design frame of mind i've been trying to work out what front braking and suspension setup i'm going to use. First of all let's start with the brakes. I don't want to have bigger wheels than 15" on the car therefore this limits to a degree which brakes I can use (nothing bigger than 300mm), I've decided to use standard Ford Sierra Cosworth 2wd front 4 pot calipers. Here they are compared to the standard Cortina caliper.
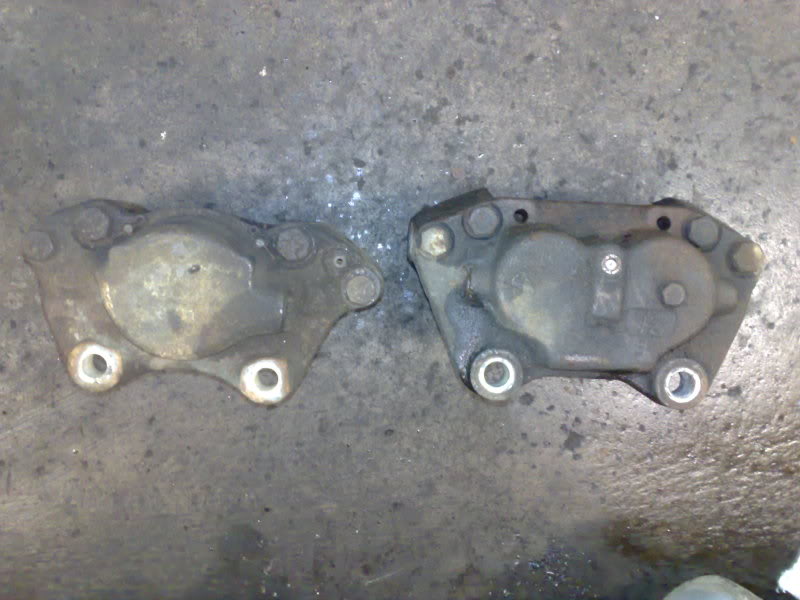
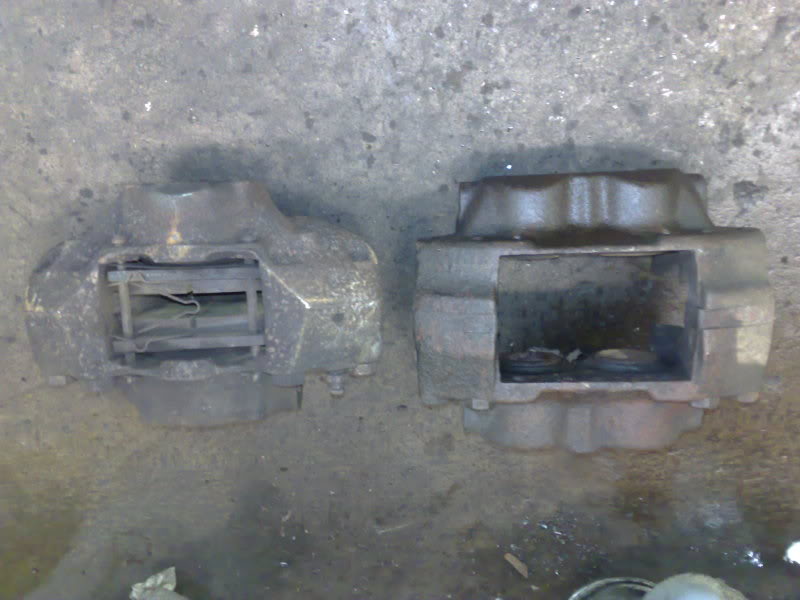
You can see the increase in stopping power i'm going to have up front. Here is the Cortina front stub axle.
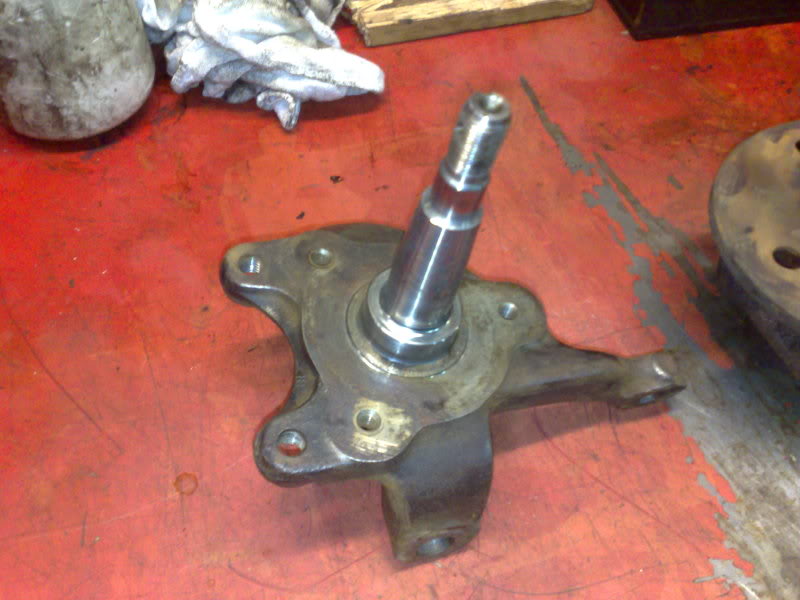
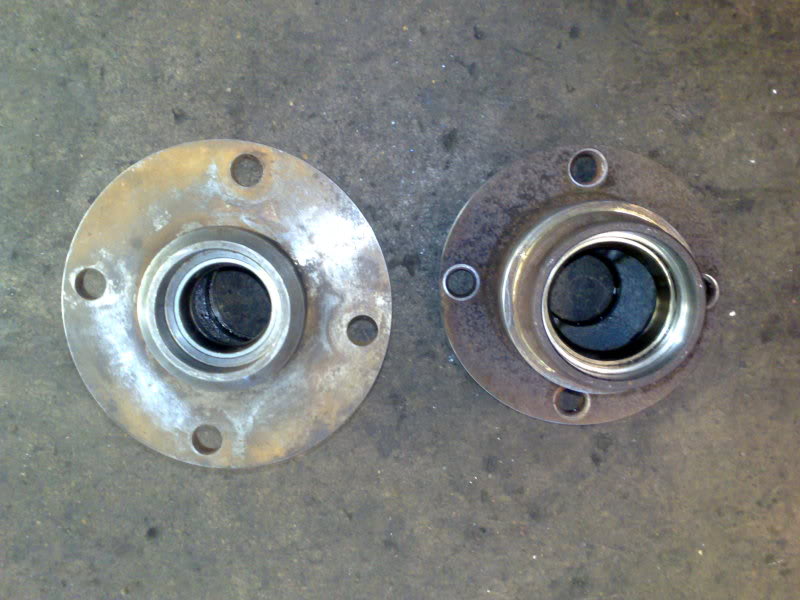
Here is the stub axle along with the Cortina hub aswell.

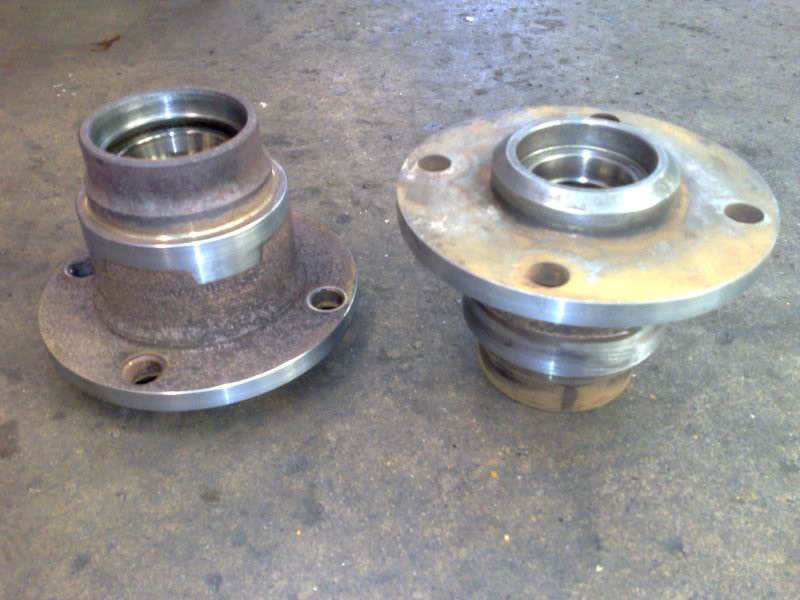
Here we have the first problem. As you can see on the back of the hub in the picture below there are 4 locating lugs around the outside of the rear of the hub. (Hub on the right in the picture). The original Cortina disc is supposed to bolt up to the REVERSE of the hub. My larger discs are now going to be mounted in FRONT of the hub. This means I will need longer wheel studs which isn't an issue. I had a problem with regards to the new discs won't fit over the old hubs as they're too wide in diameter.
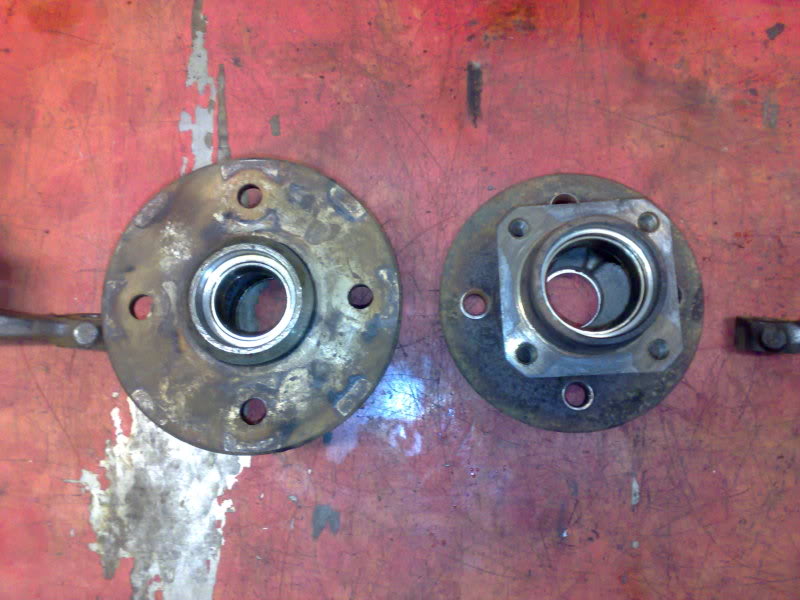
After an hour in the engineering shop, problem solved. I've had the lugs removed from the back of the hubs as I don't need them and also the diameter of the face has been turned down by 20mm on the overall diameter.
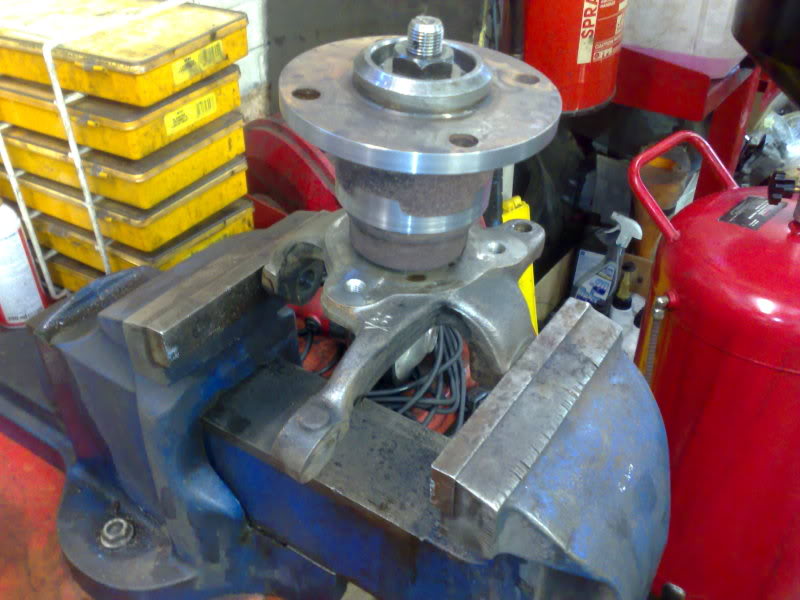
Then a quick dry test fit back onto the stub axle and next thing will be working out which discs to use to best suit the caliper.
Well if you remember the engine mounts I was making templates to strengthen, i've finally got round to cutting them out of 3mm steel and welding them to the mounts. So here they are all finished and painted ready to do their job.
Here they are fitted to the block along with heavy duty 55mm rubber mounts.
Still in the design frame of mind i've been trying to work out what front braking and suspension setup i'm going to use. First of all let's start with the brakes. I don't want to have bigger wheels than 15" on the car therefore this limits to a degree which brakes I can use (nothing bigger than 300mm), I've decided to use standard Ford Sierra Cosworth 2wd front 4 pot calipers. Here they are compared to the standard Cortina caliper.
You can see the increase in stopping power i'm going to have up front. Here is the Cortina front stub axle.
Here is the stub axle along with the Cortina hub aswell.
Here we have the first problem. As you can see on the back of the hub in the picture below there are 4 locating lugs around the outside of the rear of the hub. (Hub on the right in the picture). The original Cortina disc is supposed to bolt up to the REVERSE of the hub. My larger discs are now going to be mounted in FRONT of the hub. This means I will need longer wheel studs which isn't an issue. I had a problem with regards to the new discs won't fit over the old hubs as they're too wide in diameter.
After an hour in the engineering shop, problem solved. I've had the lugs removed from the back of the hubs as I don't need them and also the diameter of the face has been turned down by 20mm on the overall diameter.
Then a quick dry test fit back onto the stub axle and next thing will be working out which discs to use to best suit the caliper.
Last edited by BlackSaff; 10-10-2009 at 01:53 PM.
 12-06-2009, 06:12 PM
#95
Too many posts.. I need a life!!
Thread Starter
Join Date: Sep 2003
Location: Beds/Herts
Posts: 688
Likes: 0
Received 0 Likes
on
0 Posts
Ok, it's update time again.
I brought the car into the shop today and decided to strip her down some more. Got lots done on it.
Removed;
-Front and rear screens.
-Steering column.
-Wiper motor and linkage.
-Rear Qtr outer panels.
-Bonnet cable and housing.
-Brake pipes.
-Fuel lines.
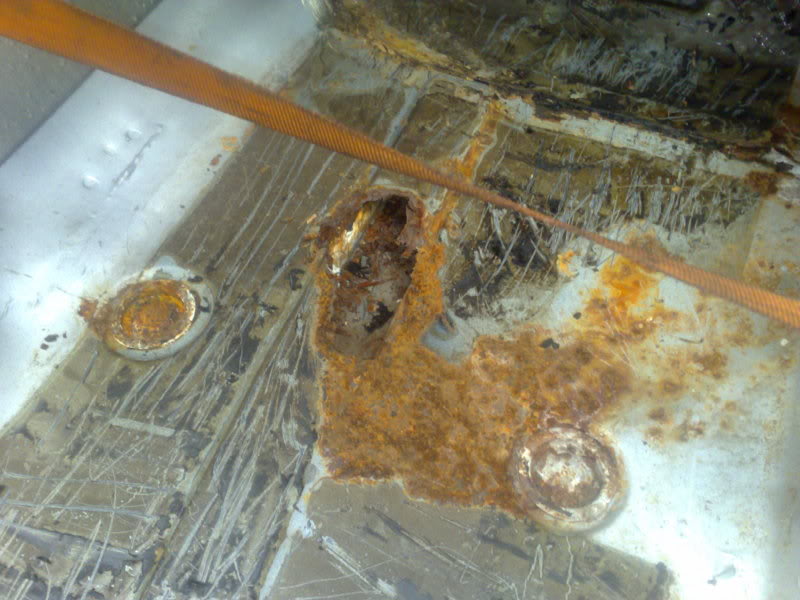
I then started removing some of the wiring loom metal tabs in the engine bay, the brackets for the washer bottle and header tank and then cut the battery tray out as i'm going to put this in the car. After cutting them out and grinding the welds off I cleaned them up and primered them to keep them from rusting. I want to try and keep the engine bay looking as smooth as possible to keep it nice and neat. I didn't get the whole battery tray cut out as the angle grinder decided to break. I turned my attention to the inside of the car and started removing the sound deadening in the footwells. Horrible messy sticky stuff this, wasn't happy to find a big rotten hole on the drivers floor.
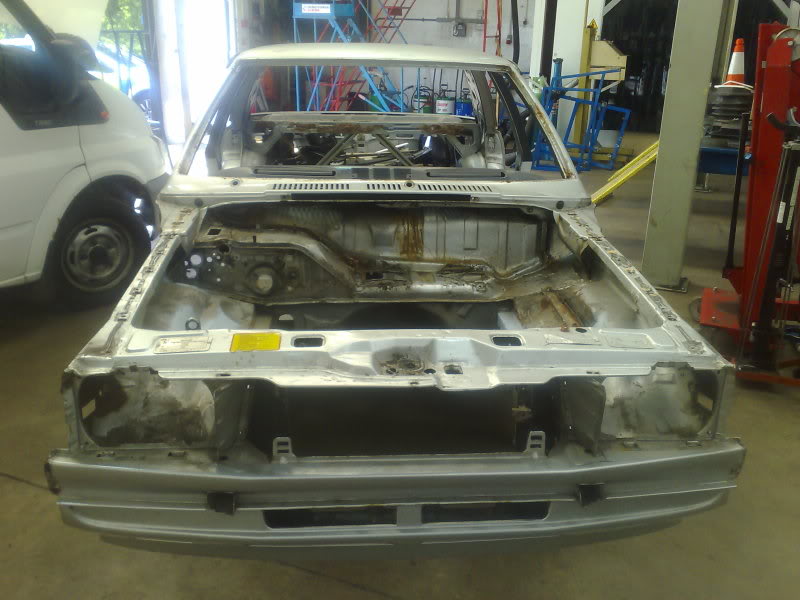
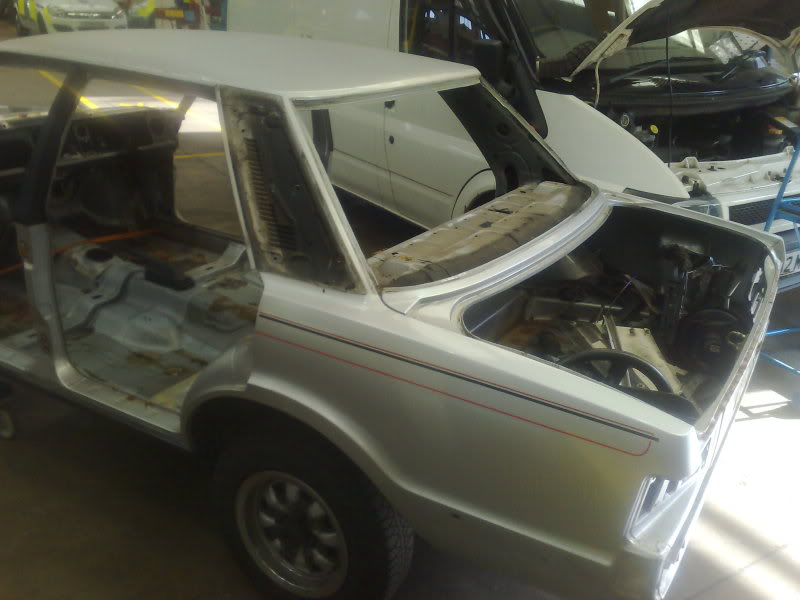
Front end minus everything now including the screen
Rear screen out and also the rear quarter trim panels
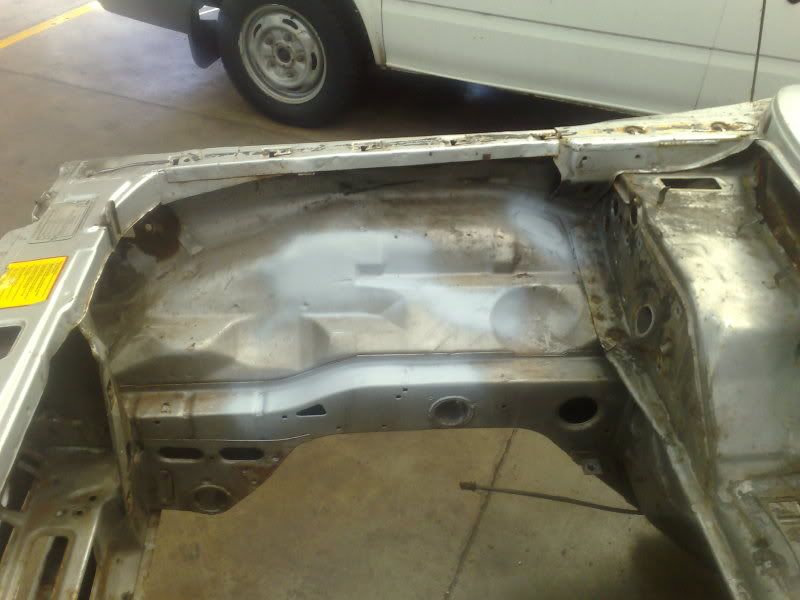
O/S engine bay with brackets and wiring tabs cut out
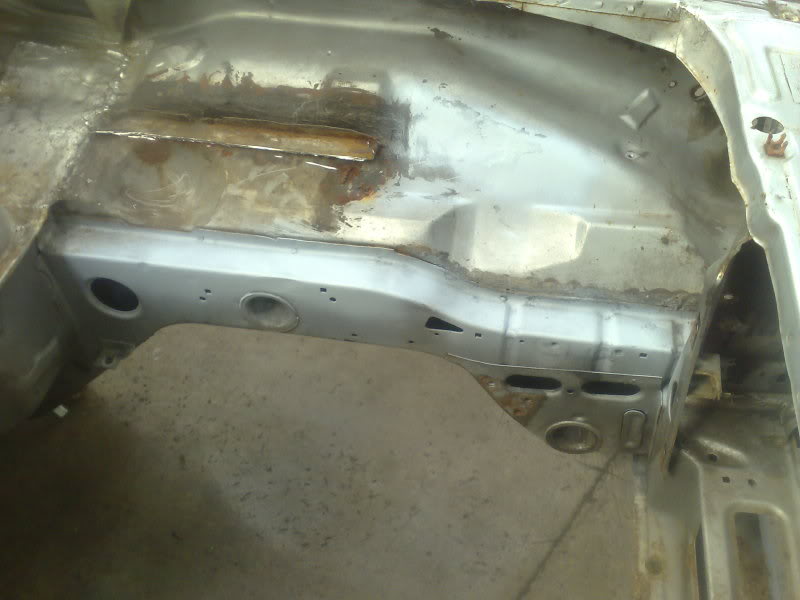
N/S engine bay with the majority of the battery tray removed and the washer bottle bracket.
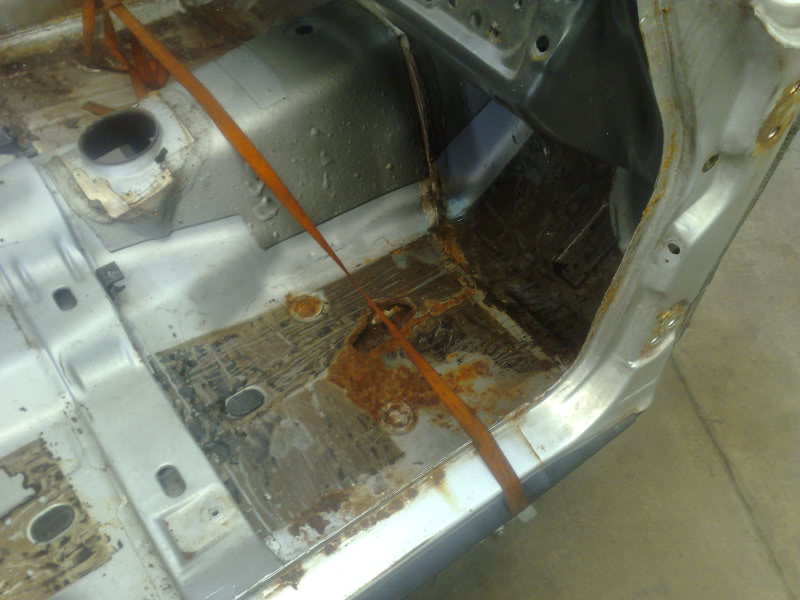
Driver footwell with sound deadening removed only to find a big hole.
A couple more updates coming up very soon, one for engine and one for braking.
I brought the car into the shop today and decided to strip her down some more. Got lots done on it.
Removed;
-Front and rear screens.
-Steering column.
-Wiper motor and linkage.
-Rear Qtr outer panels.
-Bonnet cable and housing.
-Brake pipes.
-Fuel lines.
I then started removing some of the wiring loom metal tabs in the engine bay, the brackets for the washer bottle and header tank and then cut the battery tray out as i'm going to put this in the car. After cutting them out and grinding the welds off I cleaned them up and primered them to keep them from rusting. I want to try and keep the engine bay looking as smooth as possible to keep it nice and neat. I didn't get the whole battery tray cut out as the angle grinder decided to break. I turned my attention to the inside of the car and started removing the sound deadening in the footwells. Horrible messy sticky stuff this, wasn't happy to find a big rotten hole on the drivers floor.
Front end minus everything now including the screen
Rear screen out and also the rear quarter trim panels
O/S engine bay with brackets and wiring tabs cut out
N/S engine bay with the majority of the battery tray removed and the washer bottle bracket.
Driver footwell with sound deadening removed only to find a big hole.
A couple more updates coming up very soon, one for engine and one for braking.
Last edited by BlackSaff; 10-10-2009 at 01:55 PM.
29-06-2009, 10:35 PM
#97
Too many posts.. I need a life!!
Thread Starter
Join Date: Sep 2003
Location: Beds/Herts
Posts: 688
Likes: 0
Received 0 Likes
on
0 Posts
Little update time,
Collected my Cosworth engine parts from NMS at the weekend and started putting them together slowly.
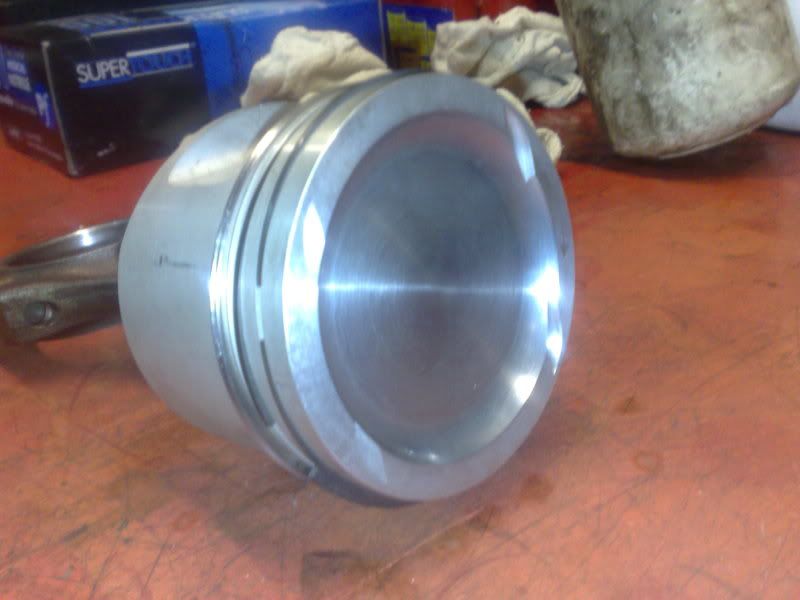
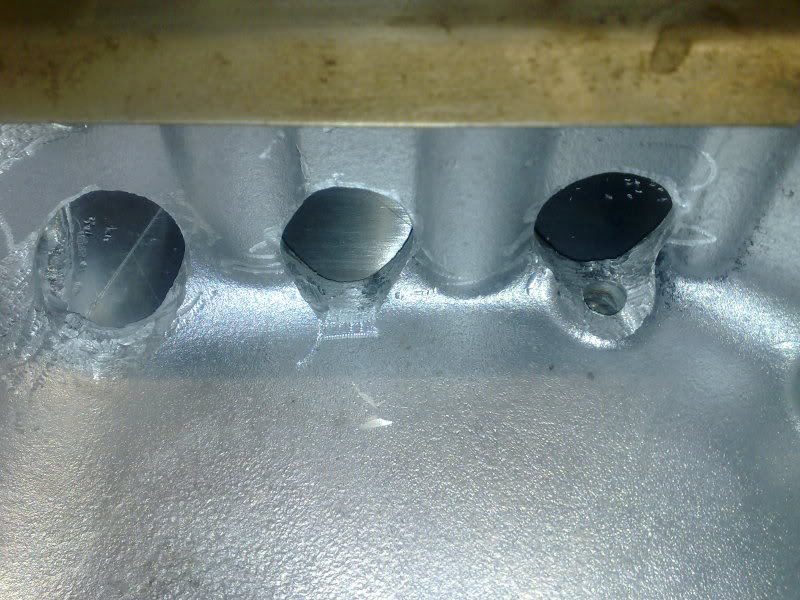
These are standard Mahle Coworth 0.5 oversize pistons much like the ones I bought.

I sent mine to NMS and this is how they've come back, they've been machined out to reduce the compression ratio to 7.5:1 and had valve cuts put in.
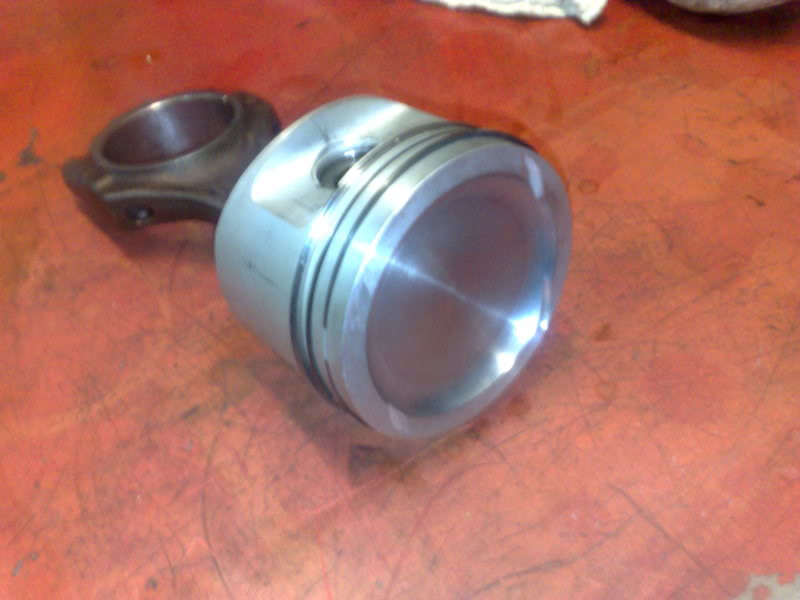
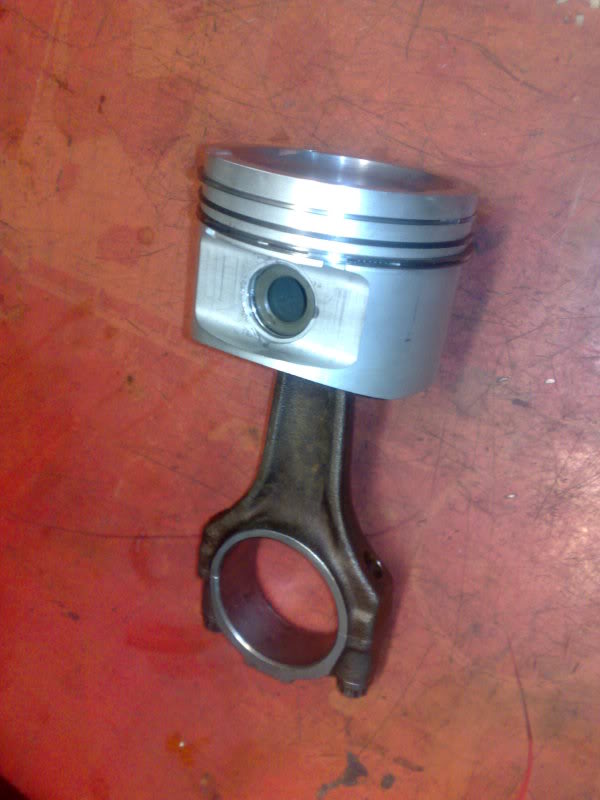
I put the pistons onto the rods which have been balanced and have had new little end bearings fitted, I fitted the pistons onto the rods like so.
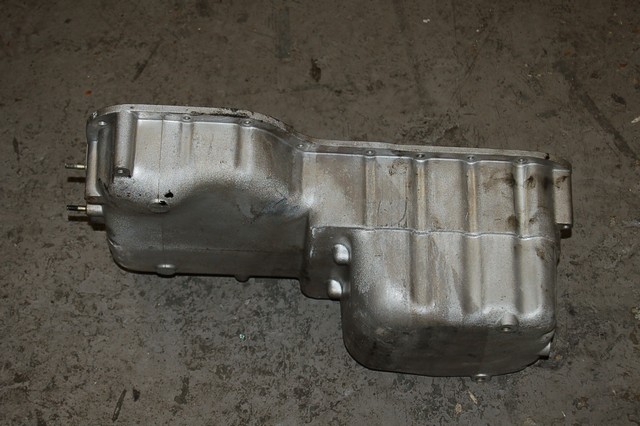
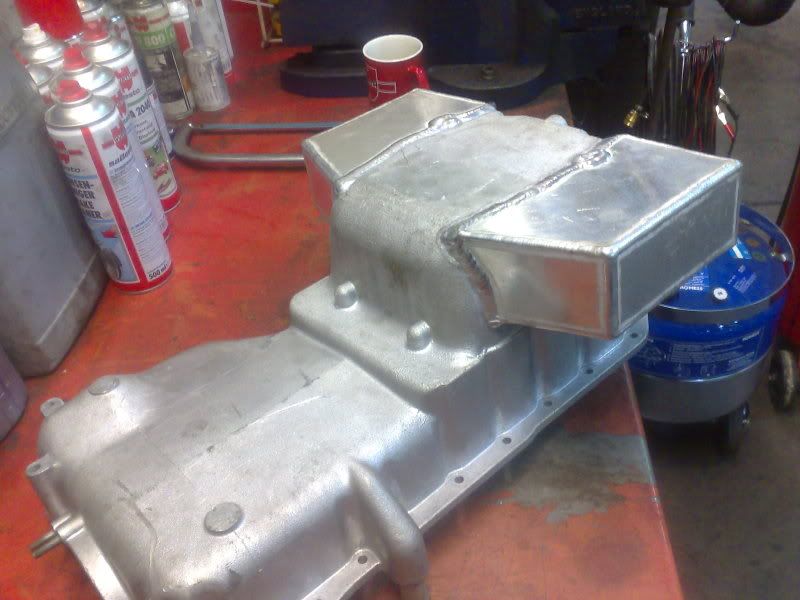
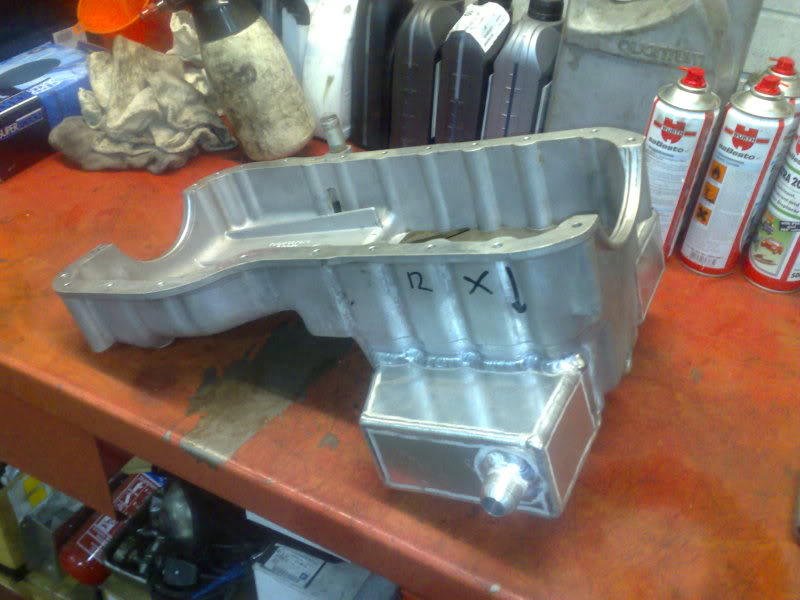
Then comes my new sump, as the car is going to be used on track I've gone for a big wing sump. It should hold approx 6 litres of oil now (2 litres more than before)and should hopefully prevent oil starvation by collecting in the outer wings and not being able to splash to one side on heavy cornering. The take off is a -12 for the oil breather return. I'll get a lick of paint on it soon.
Standard sump.
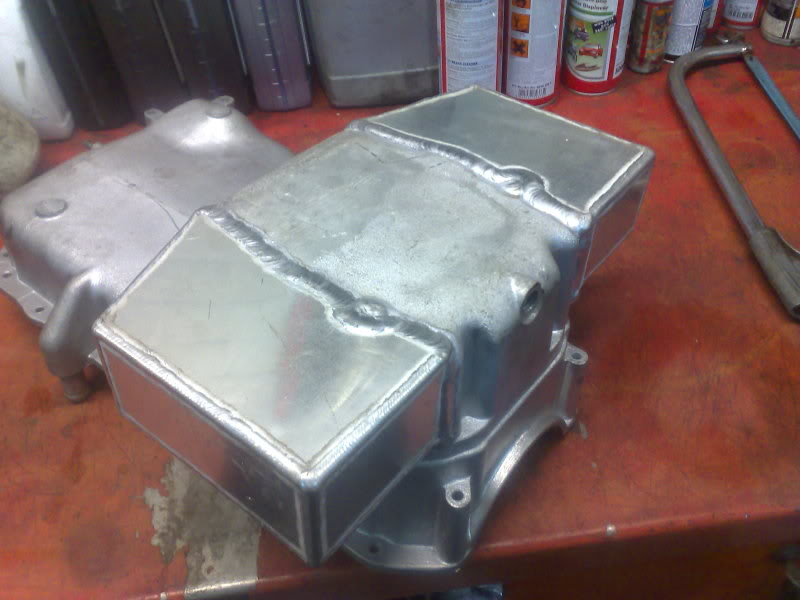
My Big wing sump.
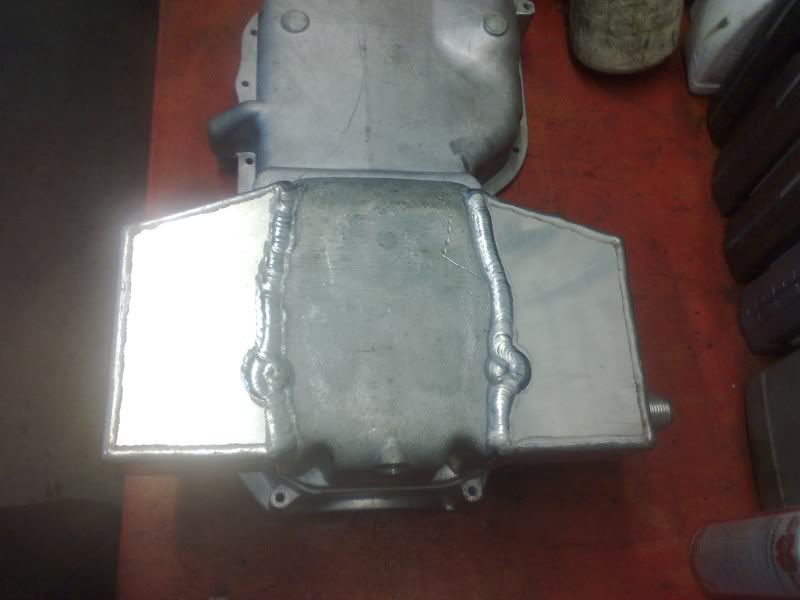
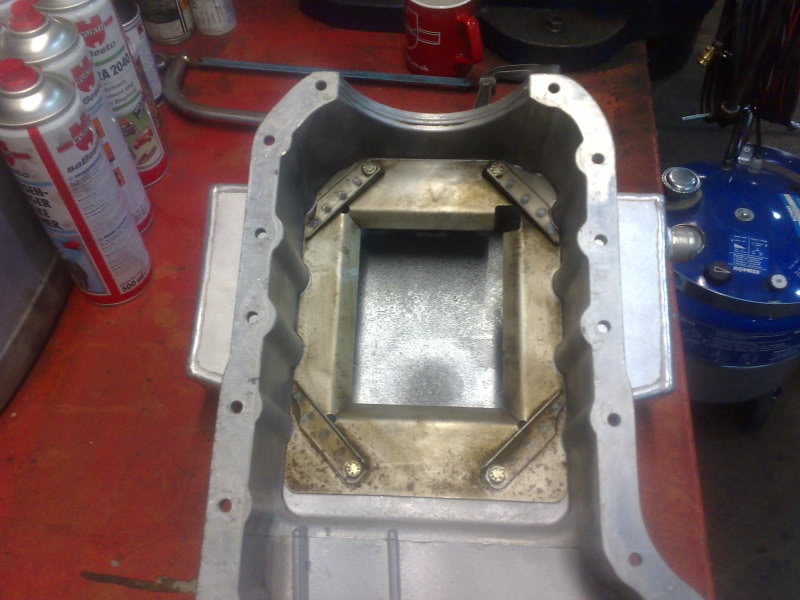
The baffle holes in the sump that lead to the wings.
Only a little update but just to show it's all still moving forward slowly.
Collected my Cosworth engine parts from NMS at the weekend and started putting them together slowly.
These are standard Mahle Coworth 0.5 oversize pistons much like the ones I bought.
I sent mine to NMS and this is how they've come back, they've been machined out to reduce the compression ratio to 7.5:1 and had valve cuts put in.
I put the pistons onto the rods which have been balanced and have had new little end bearings fitted, I fitted the pistons onto the rods like so.
Then comes my new sump, as the car is going to be used on track I've gone for a big wing sump. It should hold approx 6 litres of oil now (2 litres more than before)and should hopefully prevent oil starvation by collecting in the outer wings and not being able to splash to one side on heavy cornering. The take off is a -12 for the oil breather return. I'll get a lick of paint on it soon.
Standard sump.
My Big wing sump.
The baffle holes in the sump that lead to the wings.
Only a little update but just to show it's all still moving forward slowly.
Last edited by BlackSaff; 10-10-2009 at 01:57 PM.
 08-07-2009, 04:35 PM
#104
Too many posts.. I need a life!!
Thread Starter
Join Date: Sep 2003
Location: Beds/Herts
Posts: 688
Likes: 0
Received 0 Likes
on
0 Posts
New update time.
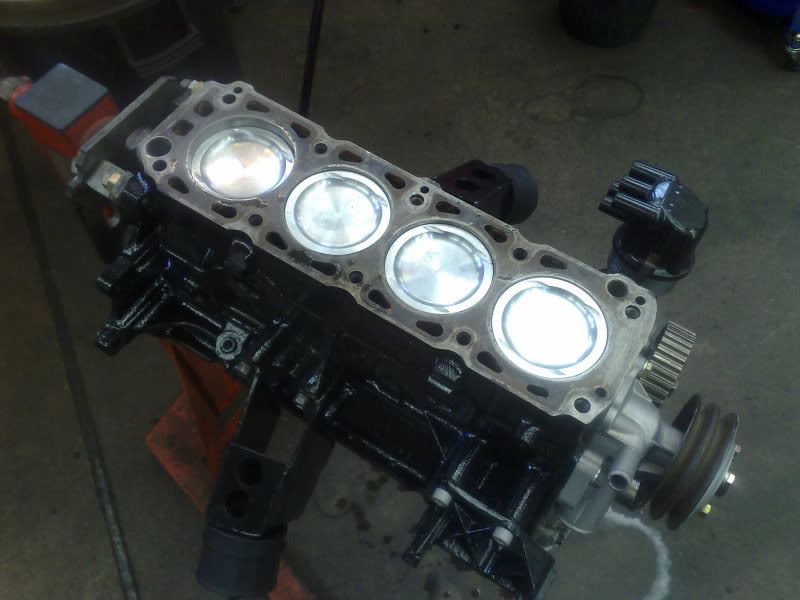
Today I had a spare hour so I decided to fit the Pistons and rods into the block. Thoroughly cleaned my work bay and got started. First job I made sure to clean the block thoroughly as it'd been sat a little while. Once clean, I found the piston ring compressing tool and cleaned and lubricated the inside of it. Then lubricated the bores of the block to fit the pistons and rods in making sure that my rings stayed the 120degrees apart they should be.
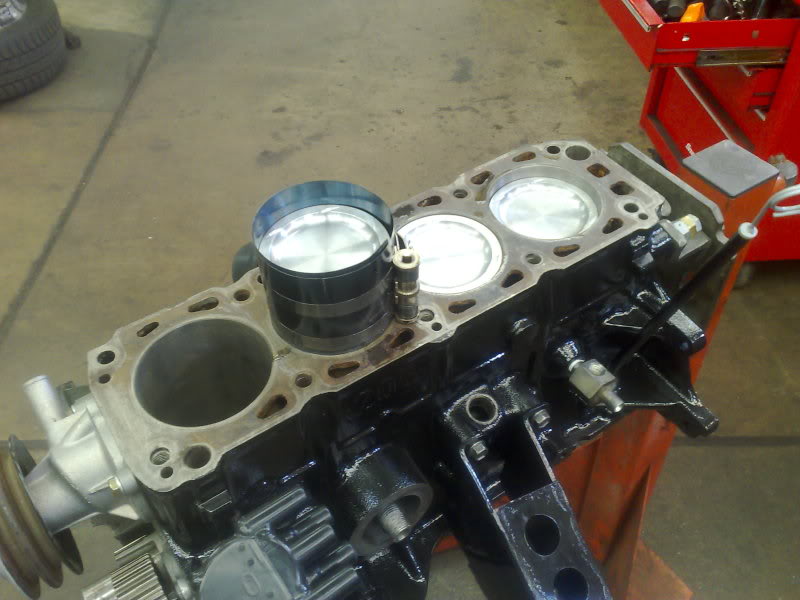
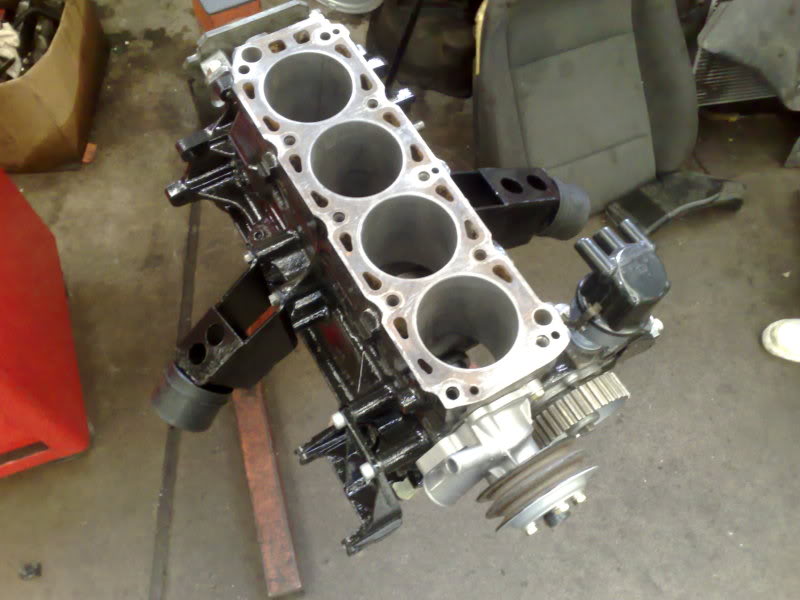
So after taking my time got them all nicely slid into the block.
So then it was time to connect them all up to the crankshaft. For this bit i'm going to need these. Vandervell .25 Big end bearings and a set of ARP rod bolts.
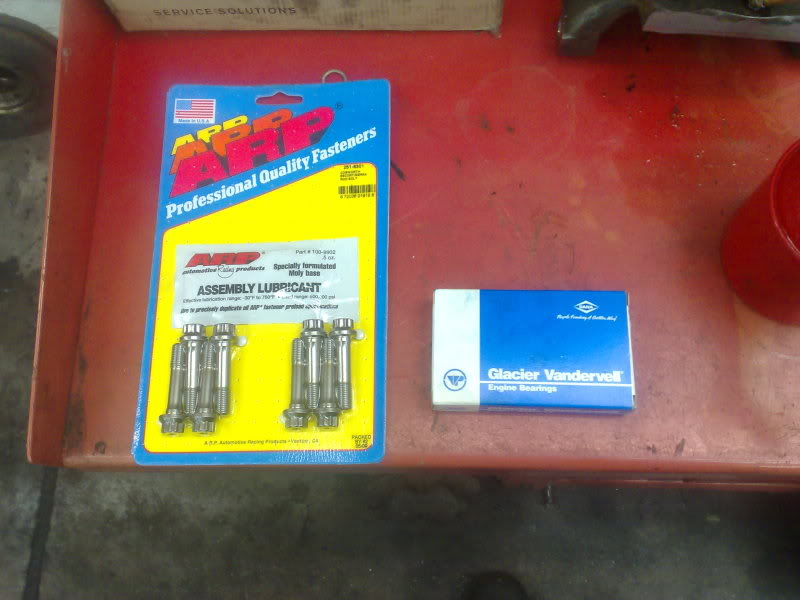
I turned the engine over and started cleaning the rod and crankshaft journals. I then fitted the bearings into the rods and caps, lubricated the shells and the journals and fitted them all in one by one. Torqued up my rod bolts and hey presto.
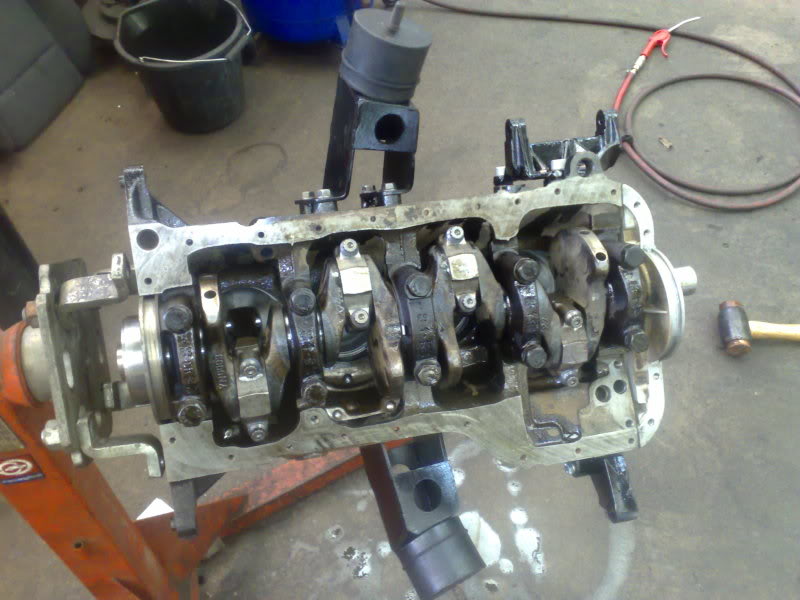
Flipped the block back over and here you have them all fitted into the bores. Span the crank over once and all is well.
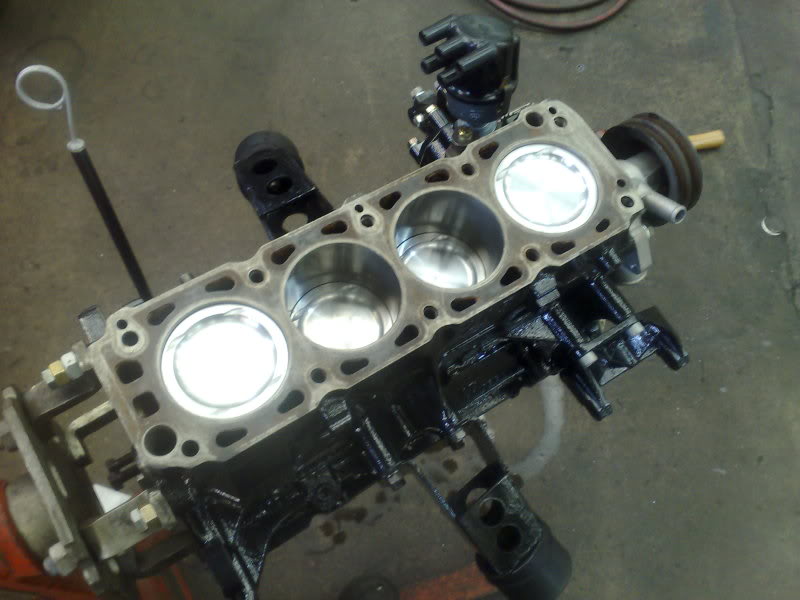
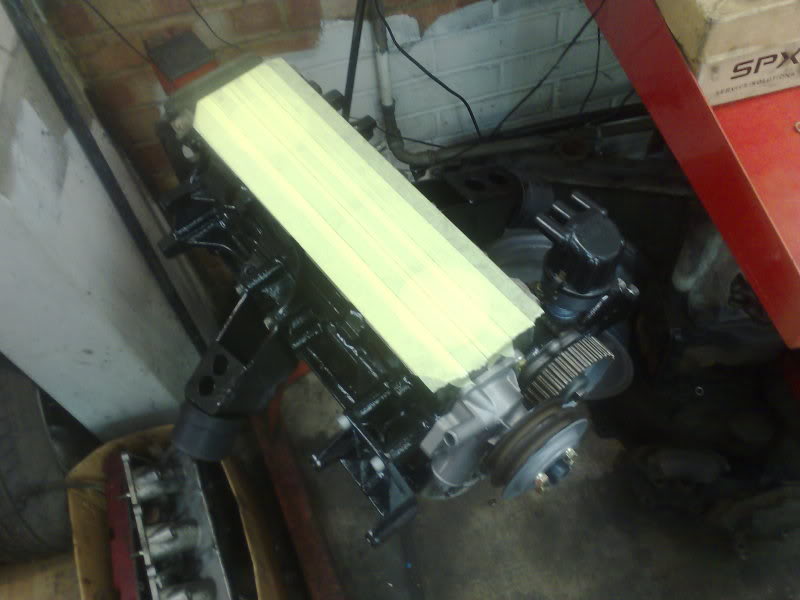
That's enough for today, so I mask up the block face to try and protect it and put it back in the corner.
Thanks for looking
Today I had a spare hour so I decided to fit the Pistons and rods into the block. Thoroughly cleaned my work bay and got started. First job I made sure to clean the block thoroughly as it'd been sat a little while. Once clean, I found the piston ring compressing tool and cleaned and lubricated the inside of it. Then lubricated the bores of the block to fit the pistons and rods in making sure that my rings stayed the 120degrees apart they should be.
So after taking my time got them all nicely slid into the block.
So then it was time to connect them all up to the crankshaft. For this bit i'm going to need these. Vandervell .25 Big end bearings and a set of ARP rod bolts.
I turned the engine over and started cleaning the rod and crankshaft journals. I then fitted the bearings into the rods and caps, lubricated the shells and the journals and fitted them all in one by one. Torqued up my rod bolts and hey presto.
Flipped the block back over and here you have them all fitted into the bores. Span the crank over once and all is well.
That's enough for today, so I mask up the block face to try and protect it and put it back in the corner.
Thanks for looking
Last edited by BlackSaff; 10-10-2009 at 01:58 PM.
 27-07-2009, 08:38 AM
#109
I'm Finding My Feet Here Now
Join Date: Jul 2009
Location: portsmouth
Posts: 124
Likes: 0
Received 0 Likes
on
0 Posts
what a great project
i have to say it though im shocked you`ve ripped apart that motor
should be in some old guys garage waiting to go to a museam.
i grew up beeing taken to school discos in these!
Tony
p/s can i ask why the winged sump in my head the only thing i can see an advantage is greater oilcapacity would help with keeping the oil temp lower but surely oil coolers cover that
excuase my ignorence
Last edited by Tondeur; 27-07-2009 at 08:40 AM.
04-09-2009, 06:22 AM
#112
Too many posts.. I need a life!!
Thread Starter
Join Date: Sep 2003
Location: Beds/Herts
Posts: 688
Likes: 0
Received 0 Likes
on
0 Posts
No updates yet.
Work is still being carried out on it but it's boring bits like removing sound deadening etc. Also went over to the dark side and bought myself a Skyline R32. Going to get into a spot of drifting for fun.
Work is still being carried out on it but it's boring bits like removing sound deadening etc. Also went over to the dark side and bought myself a Skyline R32. Going to get into a spot of drifting for fun.


 again, we need a update