
YB engine rebuild diary w/Pics
 22-06-2011 | 09:04 PM
#41
do you plan on replacing the valve stem oil seals mate ?
if so , strip the valves out,and save a mountain of time by just getting the head acid dipped ,
local wheel refurbishment place near me has a acid bath , dipped my head and inlet for 30 min , then sat it in there powdercoat oven to dry for 15 min ,
came out like new , and got rid of every mm of burnt on oil , carbon ect that i couldnt of shifted
beef
p.s scotty , if you get stuck mate drop me a shout !!
beef
23-06-2011 | 04:49 PM
#42
Thread Starter
PassionFord Regular
Joined: Aug 2010
Posts: 441
Likes: 0
From: cambridgeshire
cheers for the info dude, its something i may have considered but since im off work ive had a go at it myself to keep me busy
something i will definitely consider next time
something i will definitely consider next time
23-06-2011 | 05:04 PM
#43
Too many posts.. I need a life!!
Joined: Dec 2009
Posts: 810
Likes: 0
From: England
i used 3 of these to give the inside a clean on mine, didnt take too long using these, but cleaning the outside took a good bit longer, was cheap and easy
http://cgi.ebay.co.uk/ws/eBayISAPI.d...m=140534364877
http://cgi.ebay.co.uk/ws/eBayISAPI.d...m=140534364877
23-06-2011 | 05:11 PM
#44
Thread Starter
PassionFord Regular
Joined: Aug 2010
Posts: 441
Likes: 0
From: cambridgeshire
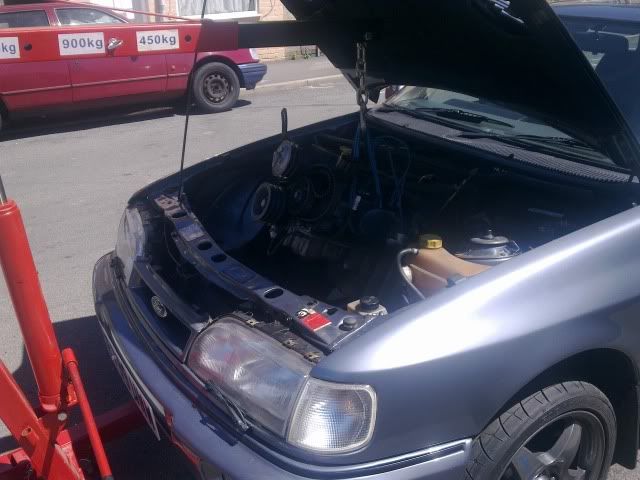
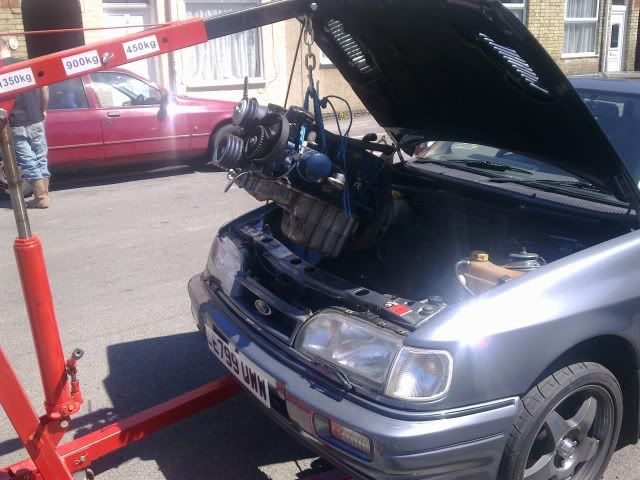
Prepped the bottom end thismorning before the rain struck, its now ready to just lift out tomorrow when my mate brings his engine hoist round ... done it a million times before on the astra without one but i REALLY dont wanna damage this car.
Discovered some light damage to the piston crowns where the valves have been touching, im informd this is quite common and happens when they are over revved
Im bit confused though as the valves seem fine, none appear bent (maybe this happened on a previous head?)
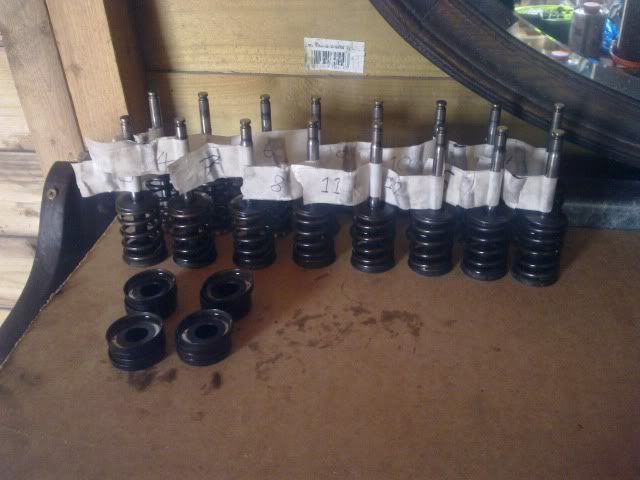
Finally got all 16 valves out, i followed some previous advice on here and whacked the Valve/Spring with a socket extension bar and hammer to loosen the colletts, some were more stubborn than others
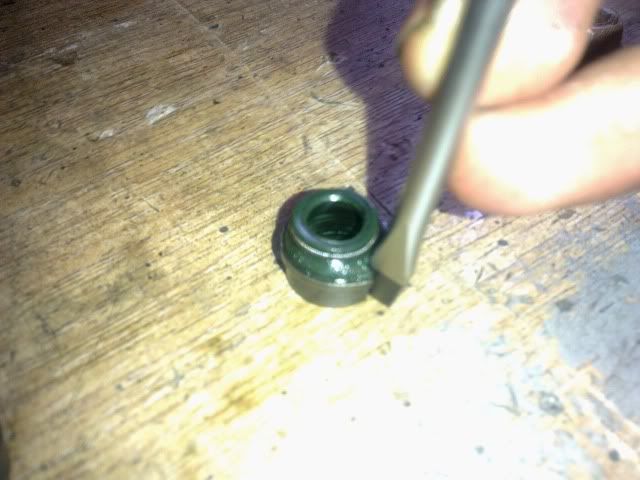
Personally i remove the valve guide seals with a small flat screwdriver and hammer breaking one side thus releasing its grip on the valve guide where it can then be pulled off with pin nose pliers, i'd only advise this if your confident as you dont want to cause any damage to the valve guides
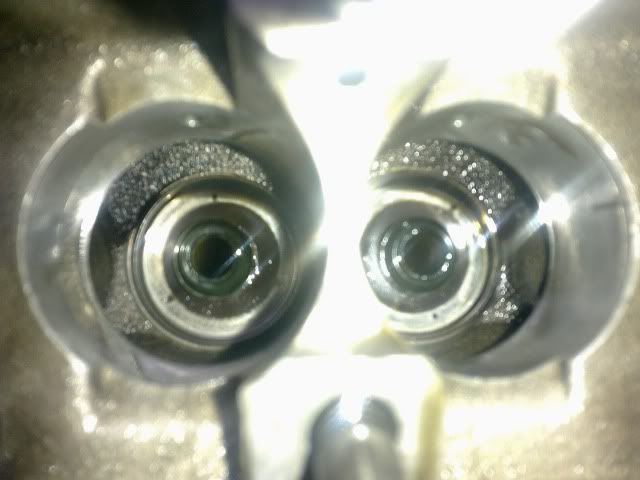
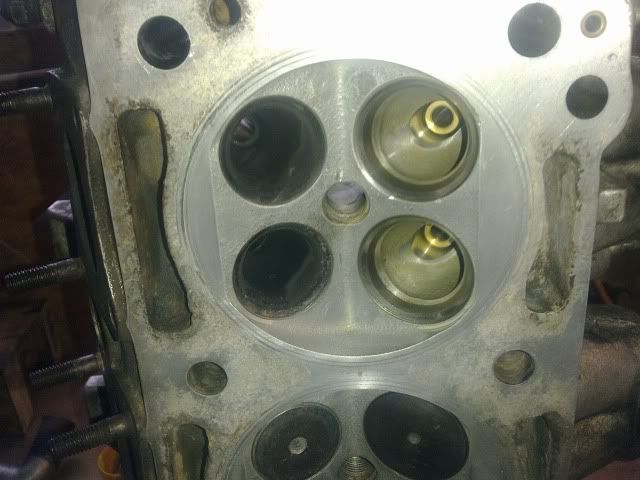
the valve guides look as if they have been replaced with bronze ones, i dont know if these are original on cossies but there certainly not on any of the other engines ive looked at.
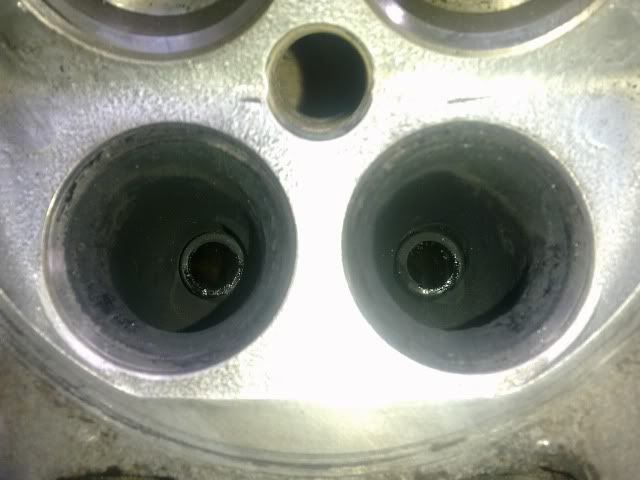
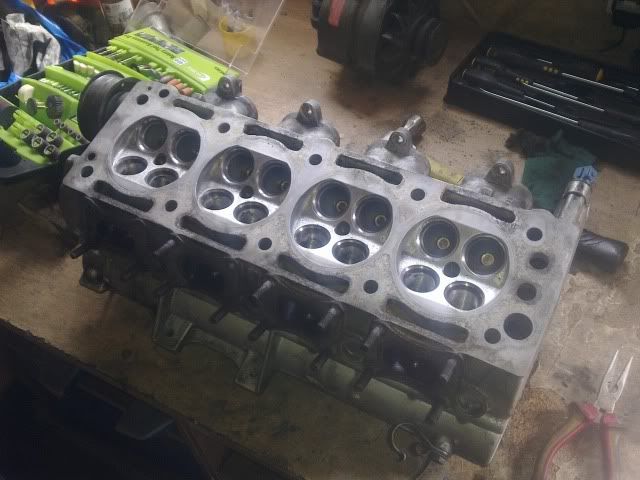
I have dremeled out the exhaust side just to clear the carbon and finished cleaning with thinners, i have in no way changed the size or shape of the ports (whats the point when they can acheive well over the 300BHP im looking for)
All valves etc... have been labelled and left to soak overnight
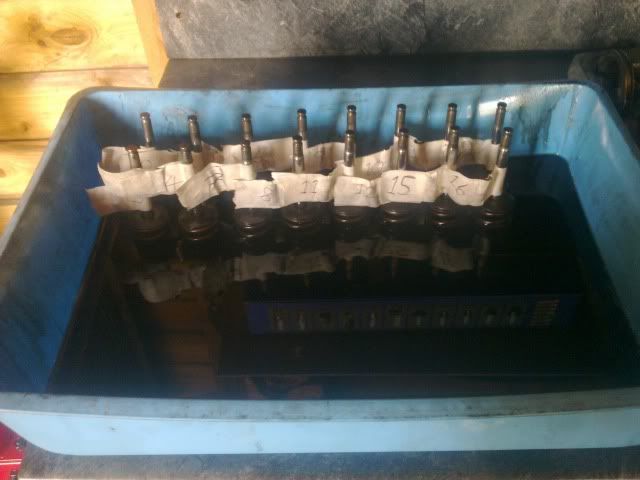
... yes, that's a cat litter tray! lol
Discovered some light damage to the piston crowns where the valves have been touching, im informd this is quite common and happens when they are over revved
Im bit confused though as the valves seem fine, none appear bent (maybe this happened on a previous head?)
Finally got all 16 valves out, i followed some previous advice on here and whacked the Valve/Spring with a socket extension bar and hammer to loosen the colletts, some were more stubborn than others
Personally i remove the valve guide seals with a small flat screwdriver and hammer breaking one side thus releasing its grip on the valve guide where it can then be pulled off with pin nose pliers, i'd only advise this if your confident as you dont want to cause any damage to the valve guides
the valve guides look as if they have been replaced with bronze ones, i dont know if these are original on cossies but there certainly not on any of the other engines ive looked at.
I have dremeled out the exhaust side just to clear the carbon and finished cleaning with thinners, i have in no way changed the size or shape of the ports (whats the point when they can acheive well over the 300BHP im looking for)
All valves etc... have been labelled and left to soak overnight
... yes, that's a cat litter tray! lol
23-06-2011 | 05:16 PM
#45

20K+ Super Poster.
Joined: Jul 2006
Posts: 24,596
Likes: 3
From: uk
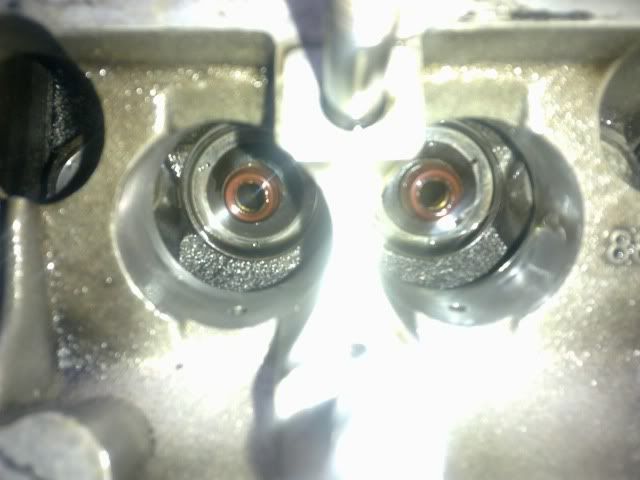
I see you have the same Halfords Pro screwdriver set as me, they're good aren't they!!
There's loads of different stem seals used by the time the heads been overhauled, mine are actually off a completely different make of car!!
tabetha
There's loads of different stem seals used by the time the heads been overhauled, mine are actually off a completely different make of car!!
tabetha
23-06-2011 | 06:41 PM
#46
Thread Starter
PassionFord Regular
Joined: Aug 2010
Posts: 441
Likes: 0
From: cambridgeshire
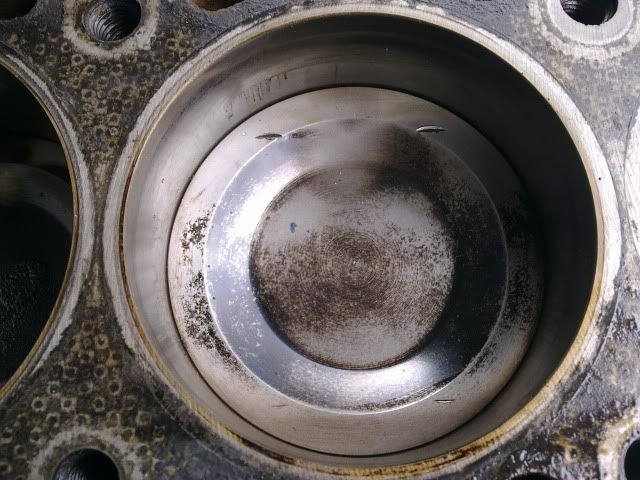
got 1 main worry really which is:
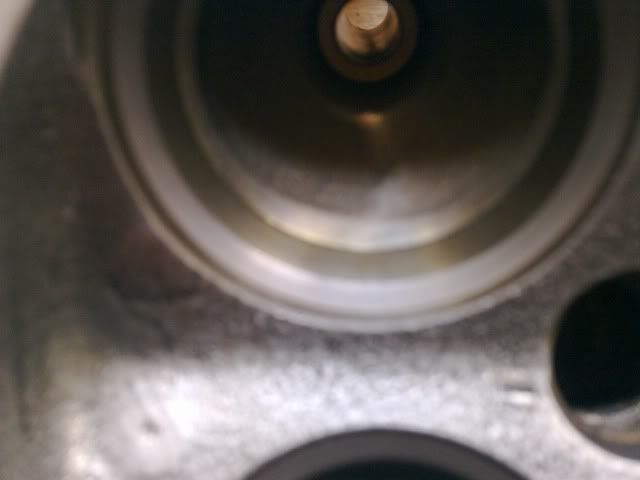
pitting in the cylinder head over one of the firing rings, dont really want to skim it as it looks close to the end of its life. it ran fine before with no problems so do i take the risk?
the det marks dont cover the entire firing ring but it will deffo be a weak point
23-06-2011 | 08:08 PM
#48
Thread Starter
PassionFord Regular
Joined: Aug 2010
Posts: 441
Likes: 0
From: cambridgeshire
i was kinda hoping you would say that, my older brother said the same thing, just a bit worrying that at some point they have been touching (another sign of a seriously over skimmed head im guessing)
23-06-2011 | 10:53 PM
#53
PassionFord Post Whore!!
Joined: Nov 2006
Posts: 7,445
Likes: 3
From: Sunderland
If you plan on taking the bottom end apart too then valve cutouts are a good idea... you'll want bigger power sooner or later 
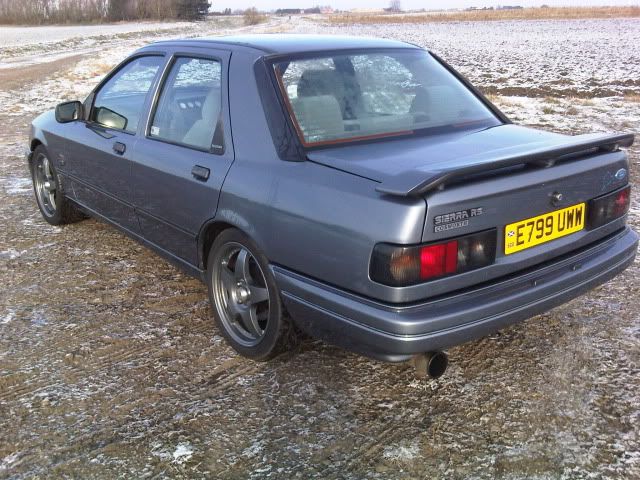
Any more pics of the car? nice to see another Mercury Grey one getting some love, Im currently doing work to mine too
Any more pics of the car? nice to see another Mercury Grey one getting some love, Im currently doing work to mine too

 24-06-2011 | 01:24 PM
#56
20K+ Super Poster.
Joined: Jul 2006
Posts: 24,596
Likes: 3
From: uk
[QUOTE=5tox;5515758]how much roughly would i be looking at to get the valve cutouts on the pistons?
Depends where you go, I was quoted by a local place �9 per cut, ie �9 X 16 = �144 + 20% VAT = �172.80p.
I got mine done for �45, all in by going to another place, I'm happy to get yours done for you, as not sure if they'll deal with posting items back etc if sent.
tabetha
Depends where you go, I was quoted by a local place �9 per cut, ie �9 X 16 = �144 + 20% VAT = �172.80p.
I got mine done for �45, all in by going to another place, I'm happy to get yours done for you, as not sure if they'll deal with posting items back etc if sent.
tabetha
26-06-2011 | 06:16 PM
#58
Thread Starter
PassionFord Regular
Joined: Aug 2010
Posts: 441
Likes: 0
From: cambridgeshire
Got the bottom end out thismorning
and got a few valves ground in thiseveing, hopefully get these finishd tomorrow and get the block apart for inspection and measurements to see exactly what ive got
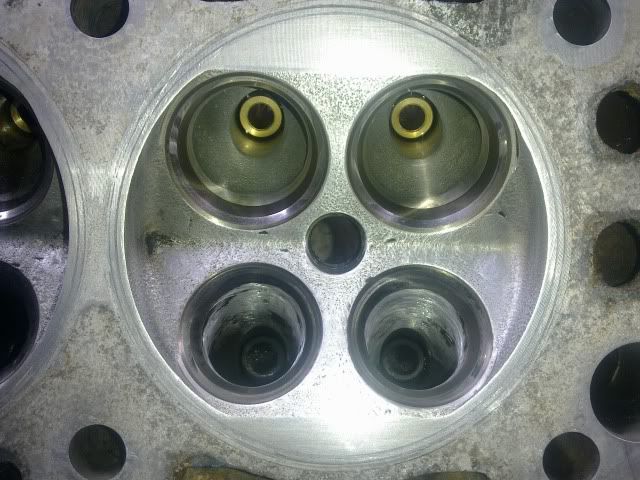
the valve seats were a mirror finish but after grinding them in with fine paste they have lost their shine and have a dull matt finish, is this correct?
heres the comparison

Diddnt get a huge amount done today but instead enjoyed a fantastic afternoon picnic with the kids in the park... i think it recoded something like 27 degrees
and got a few valves ground in thiseveing, hopefully get these finishd tomorrow and get the block apart for inspection and measurements to see exactly what ive got
the valve seats were a mirror finish but after grinding them in with fine paste they have lost their shine and have a dull matt finish, is this correct?
heres the comparison
Diddnt get a huge amount done today but instead enjoyed a fantastic afternoon picnic with the kids in the park... i think it recoded something like 27 degrees
26-06-2011 | 06:45 PM
#59
20K+ Super Poster.
Joined: Jul 2006
Posts: 24,596
Likes: 3
From: uk
Going dull grey is normal.
If the valve seats have been cut on a serdi machine cutter, don't touch them, you will make them worse, a SERDI really is that good.
It's supposed to be even hotter monday, at 30C, in the south east at least.
tabetha
If the valve seats have been cut on a serdi machine cutter, don't touch them, you will make them worse, a SERDI really is that good.
It's supposed to be even hotter monday, at 30C, in the south east at least.
tabetha
26-06-2011 | 06:52 PM
#60
Thread Starter
PassionFord Regular
Joined: Aug 2010
Posts: 441
Likes: 0
From: cambridgeshire
what do you reckon to those det marks, are they going to cause me a probem... funny thing is that the car ran spot on with them before,
Somebody took a look yesterday and said it should be fine, hes built loads of them and knows his stuff but i thought the firing rings had to be perfect
Somebody took a look yesterday and said it should be fine, hes built loads of them and knows his stuff but i thought the firing rings had to be perfect
26-06-2011 | 10:17 PM
#64
Thread Starter
PassionFord Regular
Joined: Aug 2010
Posts: 441
Likes: 0
From: cambridgeshire
started off pulling apart vauxhalls C20XE's very cheap to buy and no big deal if you mess it up, i am by no means a mechanic though (often asking advice and help on here) just enjoy pulling things apart to see how they work really
I guess the big test is to see if it runs when i stick it all back together
I guess the big test is to see if it runs when i stick it all back together

 27-06-2011 | 07:14 PM
#68
Thread Starter
PassionFord Regular
Joined: Aug 2010
Posts: 441
Likes: 0
From: cambridgeshire
Matt Lewis reckons a standard victor reinz one will do for the 330bhp im after
...it come as part of a complete set i got off him a few months ago, i know its said daily on here but he is a genuine top bloke who i would recommend to anybody
...it come as part of a complete set i got off him a few months ago, i know its said daily on here but he is a genuine top bloke who i would recommend to anybody
27-06-2011 | 07:46 PM
#69
Thread Starter
PassionFord Regular
Joined: Aug 2010
Posts: 441
Likes: 0
From: cambridgeshire
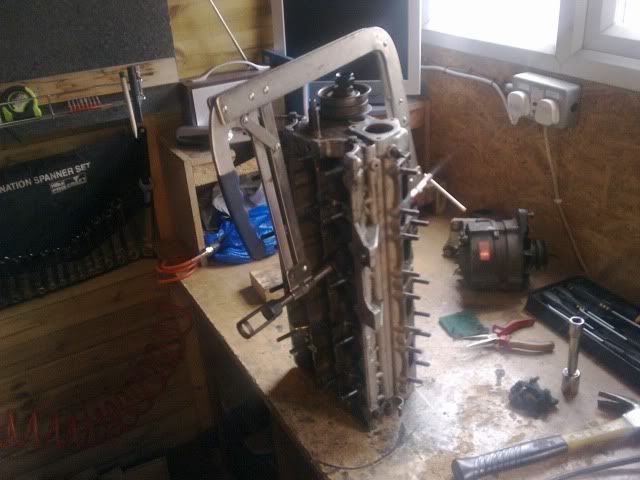
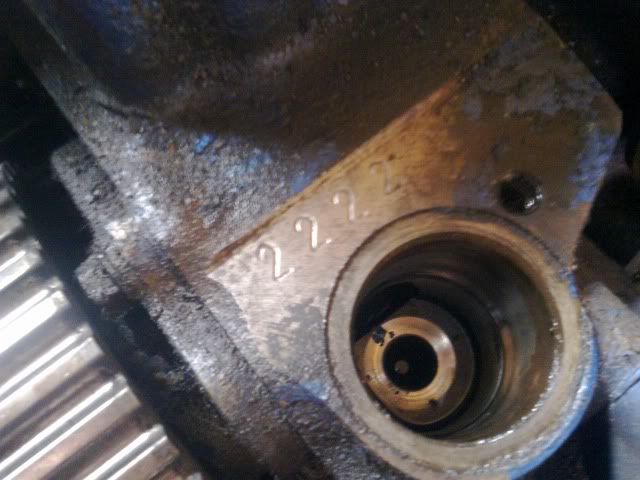
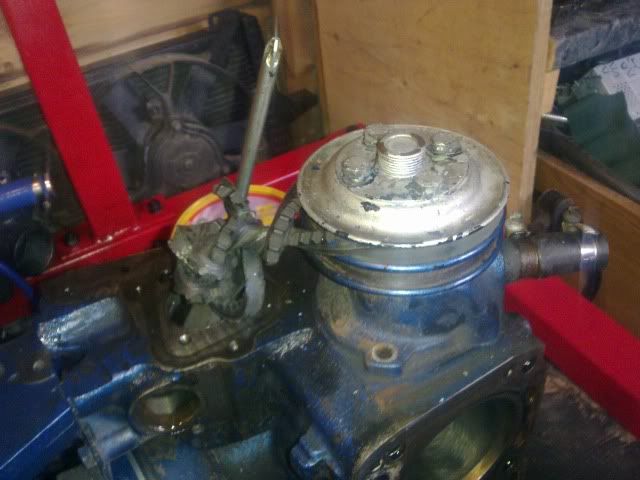
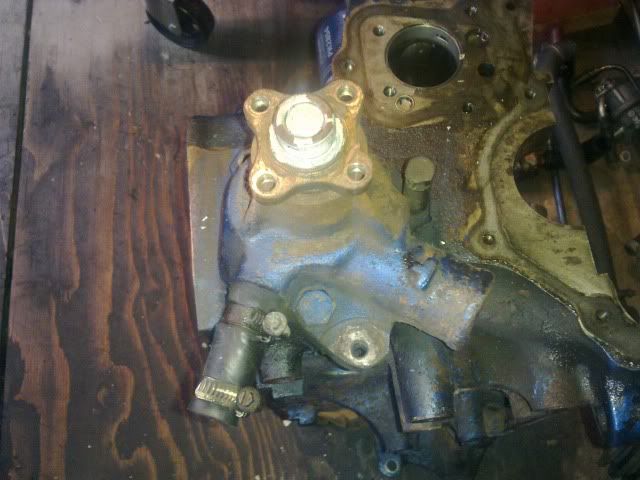
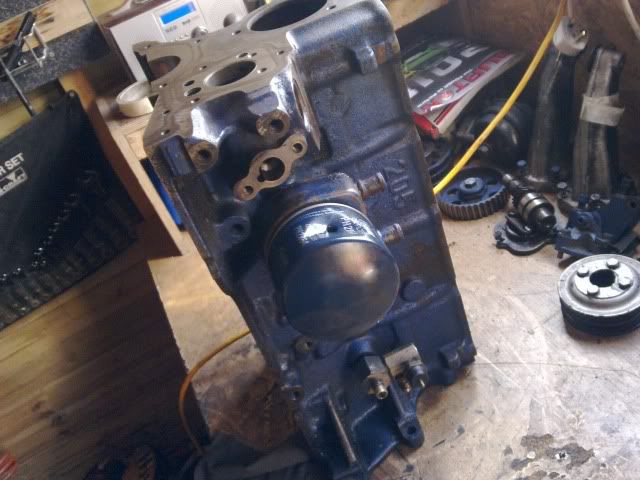
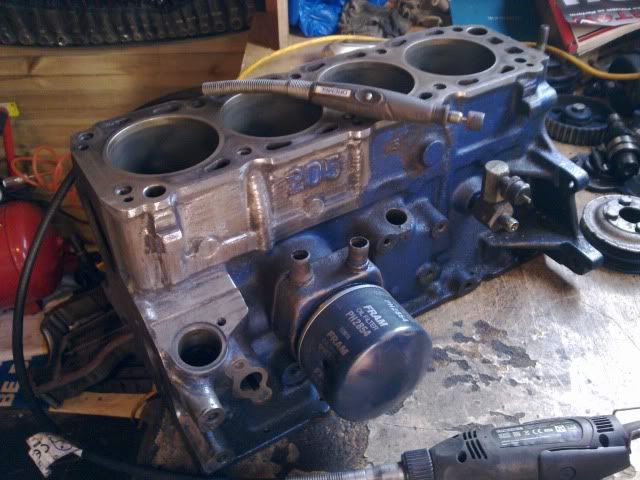
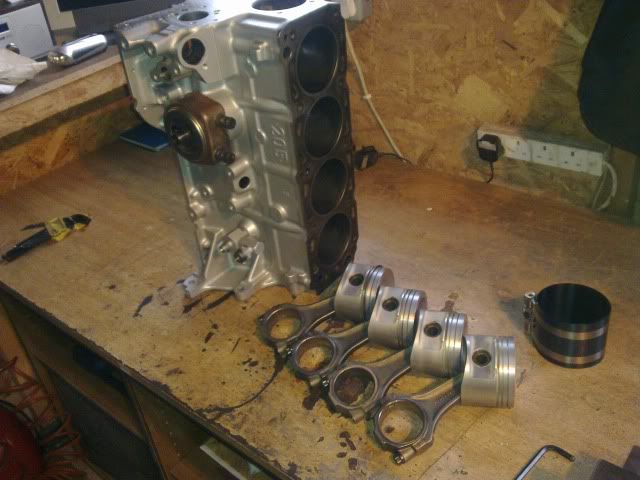
Got the block completely stripped down thisafternoon, found a few stamps which tell me its a good genuine cossie block, Next to the distributor i have '2222' and next to the water pump i have 'YBB11485'
heres how it went...
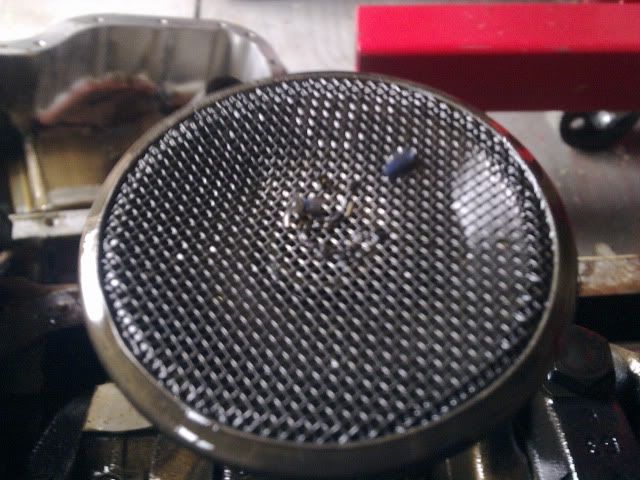
... to begin with i found quite a bit of what looked like threadlock stuck to the oil pickup pipe
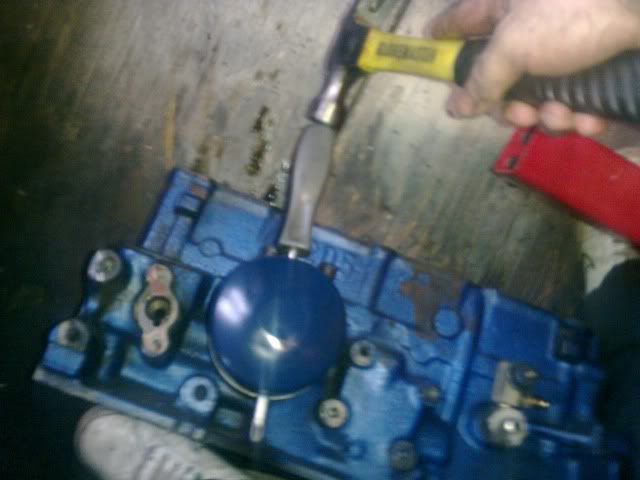
You wont find this method in the haynes manual but the wood keeps the crank still and undamaged while getting off the flywheel and crank pulley

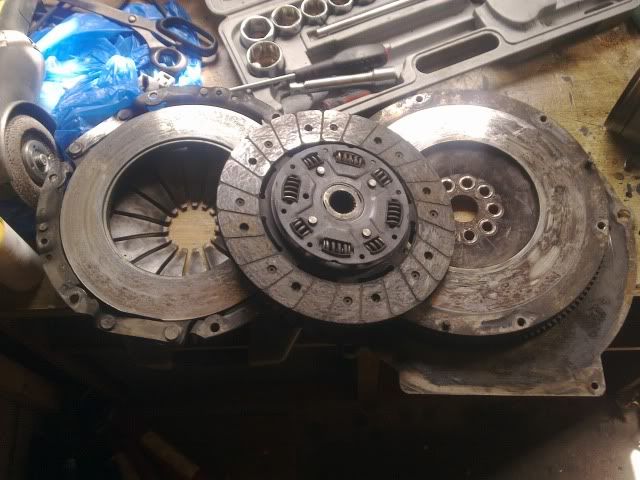
The clutch friction plate is in very good condition with loads of meat left on it
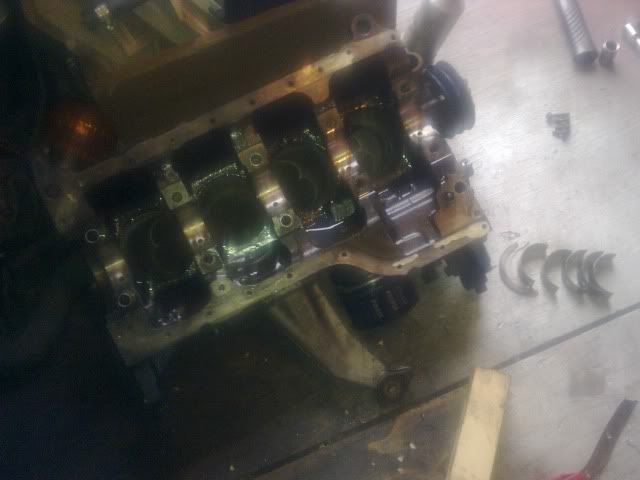
Pistons out
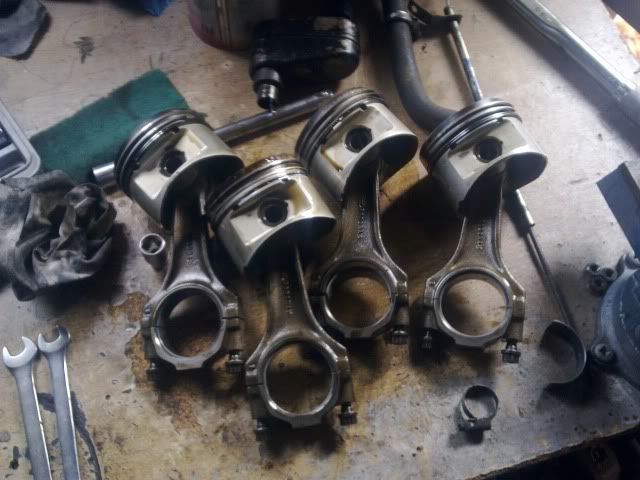
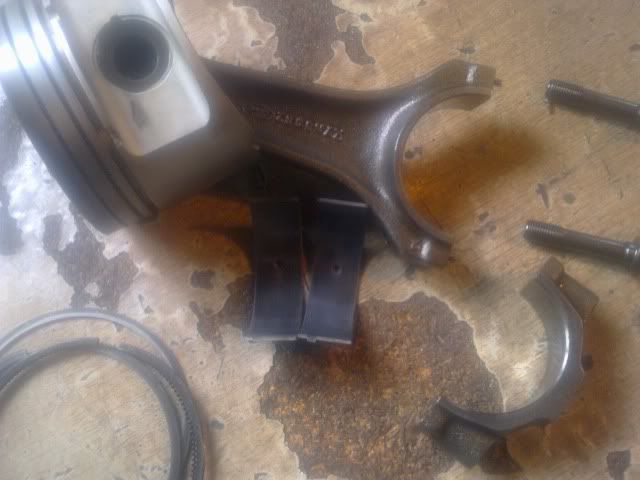
Main and big end bearings removed to reveal 'STD' no that doesnt mean a trip to the clinic but Standard Size
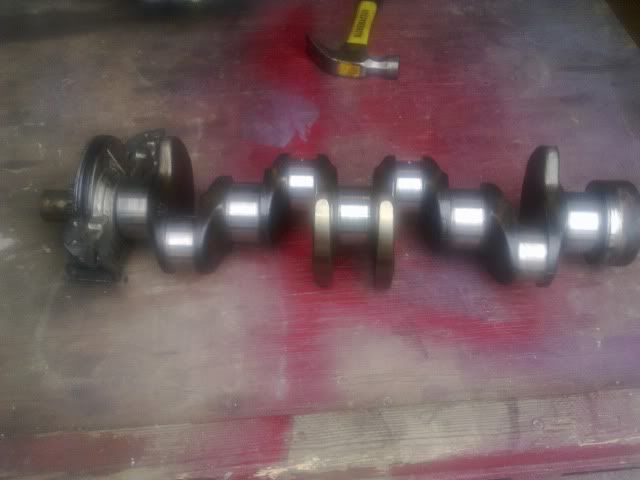
Crank has some very slight scoring only felt if your very careful with your finger nail but the bearings were very patchy dark grey with scoring on main and big ends, definitely wanted replacing
... Another non-conventional method of removing the water pump, twisted an old belt with a screwdriver, holding the pully still so i could get a wrench on the 4 bolts
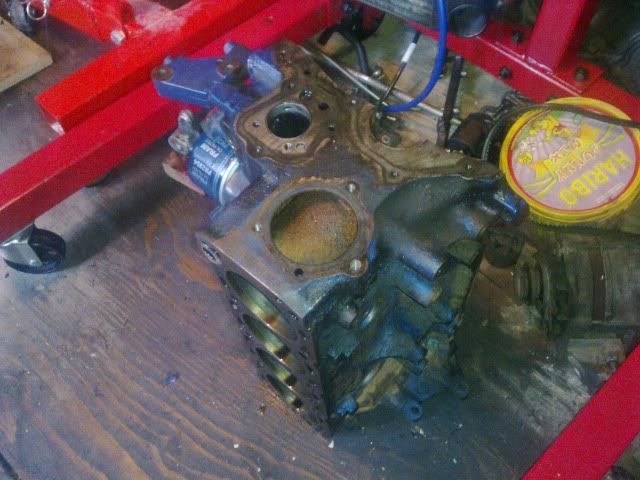
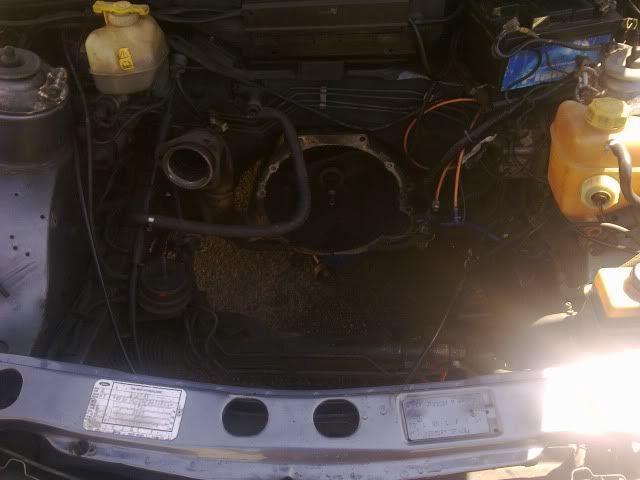
Removed all the other odd bits and a now with a bare block ready for rubbing back and spraying tomorrow
... ive always removed oil filters this way because im to tight to go and buy the correct tool
Pics arent great but just wanted the thing apart, will make more of an effort when sticking it back together.
So i have to get me some standard bearings (Graham Goode does genuine mahle ones very cheap, about �80 for both main and big end which as far as i know cant be beaten price wise)
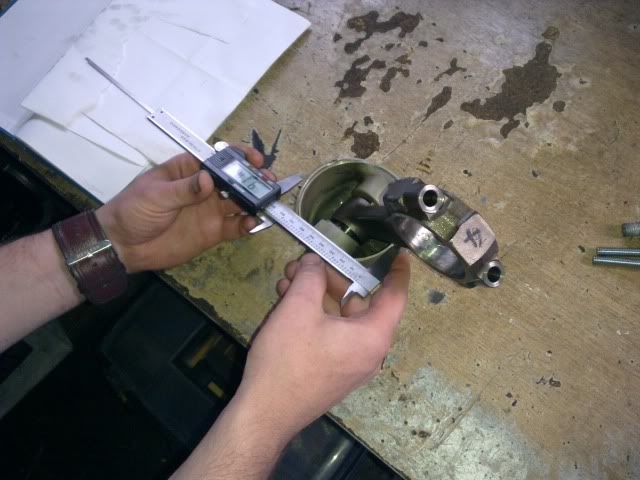
Now i have measured the pistons in acordance with the guide in the Burton power magazine and mine are as follows
1- 91.17mm
2- 91.15mm
3- 91.16mm
4- 91.13mm
I measured from underneath the piston (skirt) from side to side along the longest part of the skirt (not the sides where the gudgeon pin slides in)
heres how it went...
... to begin with i found quite a bit of what looked like threadlock stuck to the oil pickup pipe
You wont find this method in the haynes manual but the wood keeps the crank still and undamaged while getting off the flywheel and crank pulley
The clutch friction plate is in very good condition with loads of meat left on it
Pistons out
Main and big end bearings removed to reveal 'STD' no that doesnt mean a trip to the clinic but Standard Size
Crank has some very slight scoring only felt if your very careful with your finger nail but the bearings were very patchy dark grey with scoring on main and big ends, definitely wanted replacing
... Another non-conventional method of removing the water pump, twisted an old belt with a screwdriver, holding the pully still so i could get a wrench on the 4 bolts
Removed all the other odd bits and a now with a bare block ready for rubbing back and spraying tomorrow
... ive always removed oil filters this way because im to tight to go and buy the correct tool
Pics arent great but just wanted the thing apart, will make more of an effort when sticking it back together.
So i have to get me some standard bearings (Graham Goode does genuine mahle ones very cheap, about �80 for both main and big end which as far as i know cant be beaten price wise)
Now i have measured the pistons in acordance with the guide in the Burton power magazine and mine are as follows
1- 91.17mm
2- 91.15mm
3- 91.16mm
4- 91.13mm
I measured from underneath the piston (skirt) from side to side along the longest part of the skirt (not the sides where the gudgeon pin slides in)
27-06-2011 | 07:55 PM
#70
Thread Starter
PassionFord Regular
Joined: Aug 2010
Posts: 441
Likes: 0
From: cambridgeshire
is this going to require Standard size rings?
my bores are each 90.90 which would have been 90.86 (i believe) standard size before honing (that makes sense so far)
but my pistons are measuring 91.13 so surely they wouldnt fit in the bore?
Burton mag says:
-Remember the bore size will be fractionally bigger due to the piston clearance. This can be anything from around 0.02-0.1mm depending on the type of piston
Am i having a senior moment here?
Last edited by 5tox; 27-06-2011 at 08:28 PM.
27-06-2011 | 09:28 PM
#71
20K+ Super Poster.
Joined: Jul 2006
Posts: 24,596
Likes: 3
From: uk
Where did you measure the bores ? at the top or midway down like they should be measured to asses wear ?
The issue is not wear so much in itself, the bores do not in any engine wear evenly, the worst wear occurs on the thrust face halfway down the bore, they need scoping, this is device that measures at different depths down the bores.
With your measurements though there's obviously a mistake been made somewhere, as it's so stripped I would just get the machine shop you want to use to check the bores, with the correct gauge much more accurate, it's going to need a reface of the block anyway, and if over about 80,000 miles I would personally get it rebored 1st oversize, rather than just re ringing, but your machinist will have a much better idea when scoped.
The shells look fine, what you'd expect, the crank may well be needing a polish if you can feel ridges.
DON'T paint the block yet, wait till it's back from checking/and or boring, because you will then need to remove the oil gallery plugs behind the auxillary shaft cover and the ball bearing in the rear of the block, so the gallery can be cleaned out, just tap it afterwards with 1/4NPT and plug it up again by screwing a NPT bolt in, you can get the blanks for the front of the block to just pop in with some sealant.
If you have trouble getting the blanks for the front give me a shout.
To prep and clean the block after facing/boring will take around 6-8 hours, with many cuts from the sharp edges and scouring pads washing up liquid, compressed air etc, but well worth doing right.
I have seen people not doing this on 2 occasions, both engines lasted less than 2000 miles and were shit in that time.
tabetha
27-06-2011 | 09:51 PM
#73
Thread Starter
PassionFord Regular
Joined: Aug 2010
Posts: 441
Likes: 0
From: cambridgeshire
measured from the top, i may have a look for a local machineshop and see what they say... harvey gibbs is just up the road but a very busy guy
to be honest money is running a little thin too
to be honest money is running a little thin too
28-06-2011 | 02:48 PM
#77
Thread Starter
PassionFord Regular
Joined: Aug 2010
Posts: 441
Likes: 0
From: cambridgeshire
Anyway good news,ive sat the block on my workbench and properly measured the cylinder bores (i wasnt holding the gauge firmly enough which was enough to give a false reading)
With both edges right up against the furthest sides of each bore im geting a constant reading of 91.30 (0.5mm oversize)
standard size is 90.86, 0.5mm oversize gives a bore size of 91.32
my pistons are giving a constant reading of 91.25 which tell me they are also 0.5mm oversize (taking general wear and ring gap into consideration)
I then discovered something dremeled into the bottom of each rod, an arrow and the number 5 on each
(this is the information which would have been on the top of each piston 0.5 and an arrow)
29-06-2011 | 05:23 PM
#78
Thread Starter
PassionFord Regular
Joined: Aug 2010
Posts: 441
Likes: 0
From: cambridgeshire
Got cleaned up and painted today, the old paint was all flaking away and combined with all the sludge and oil just looked generally crap
... you really need alot of time and patience at this stage, it has literally taken me all day
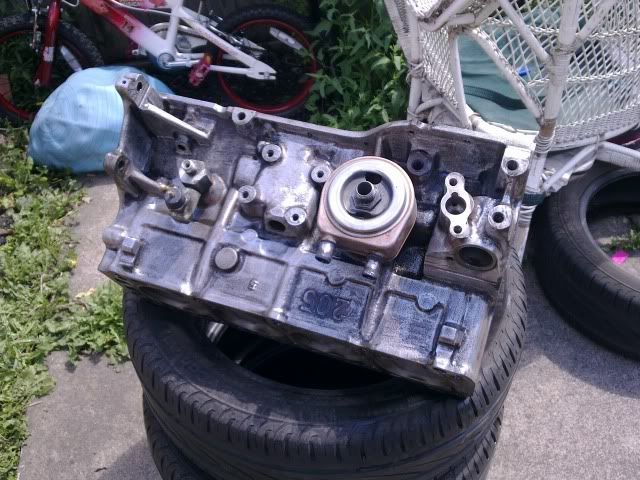
started with this
Dremel was helpful in some places, combined with lots of wirewool sandpaper and thinners i started geting it back to bare
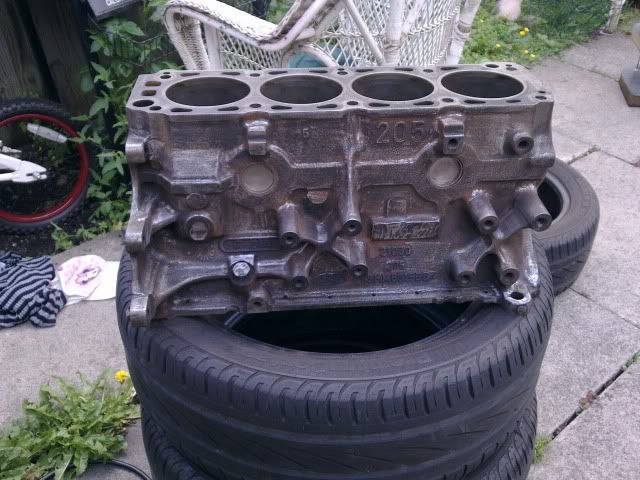
Thorougly cleaned out with engine degreaser, soapy water and alot of compressed air then masked up and painted with 2 coats of hammerite
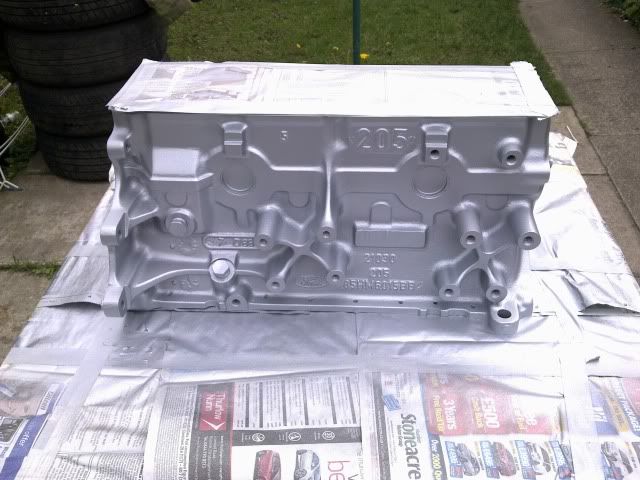
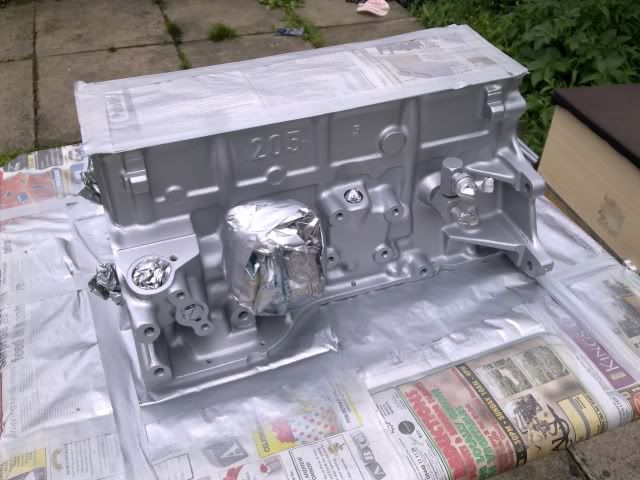
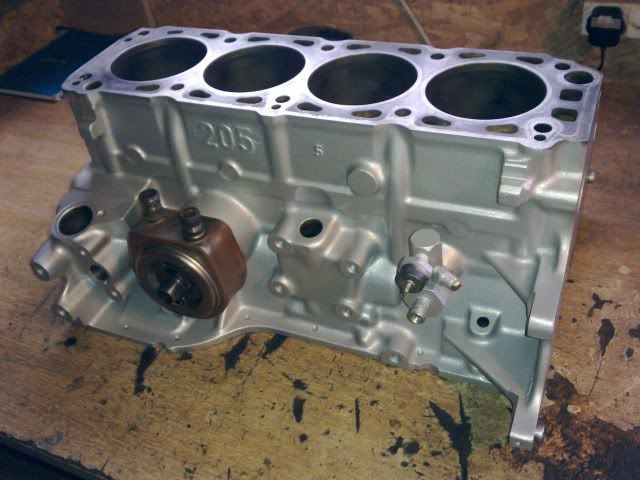
So now i have a nice clean block to work with, im glad that bit is out of the way.
Just waiting on rings and bearing to arrive so i can start to re-assemble
... you really need alot of time and patience at this stage, it has literally taken me all day
started with this
Dremel was helpful in some places, combined with lots of wirewool sandpaper and thinners i started geting it back to bare
Thorougly cleaned out with engine degreaser, soapy water and alot of compressed air then masked up and painted with 2 coats of hammerite
So now i have a nice clean block to work with, im glad that bit is out of the way.
Just waiting on rings and bearing to arrive so i can start to re-assemble
29-06-2011 | 06:11 PM
#80

BANNED
Joined: Jan 2005
Posts: 9,757
Likes: 1
From: North Wales....Congleton now though!
I'd take the modine off and clean that properly, looking at the bits you've picked up in the sump. If you're going to do it, do it right 
Are you getting the block honed or bored? Just thinking since you've just painted it. Looks good so far
Are you getting the block honed or bored? Just thinking since you've just painted it. Looks good so far