
My RS2000 Rally Car (Well, one of them)

Thread Starter
PassionFord Post Whore!!
iTrader: (1)
Joined: Jan 2006
Posts: 5,412
Likes: 186
From: Norfolk Drives: Couple of Fords
A couple of people have been bugging me to put pictures of my rally cars on the forum, and I have never got round to it. However, today I have finally decided to put one of them on here.
It's quite a basic little car, bought to get me out on the stages cheaply. I have quite a bit to do with RS2000 rally cars, so it was an obvious choice. This thread is cannibalised from one on another forum, but I will do my best to make it make sense. Sadly work and other commitments have meant that what should have turned into a quick freshen up has turned into a long rebuild, as I don't get much time to work on it. Hopefully it should be out and about during this year though.
My other RS2000 is an ex-works F2 Kit Car, but that is literally a shell and will take a lot of time/money to rebuild. I may do a thread on it eventually though.
Anyway, on with the show...
Last edited by massivewangers; Jan 11, 2016 at 01:24 PM.
Thread Starter
PassionFord Post Whore!!
iTrader: (1)
Joined: Jan 2006
Posts: 5,412
Likes: 186
From: Norfolk Drives: Couple of Fords
I bought the car from a member of www.RS2000-16v.com.
I actually got it in December 2012, but work and other things have meant I haven't really touched it much so far. The basic spec when I bought the car was as follows...
Body:
Seam welded MK5 RS2000 body shell with Safety Devices bolt-in roll cage
Safety Devices rear strut brace
Custom (I think) front strut brace
MK6 rear end conversion
MK6 skirts
MK6 front end conversion
Group A headlamps
Kit Car splitter (from a Mondeo)
Kit Car bonnet vent
Unknown roof vent
Kit Car spoiler (currently removed)
Widened wheel arches
Perspex windows
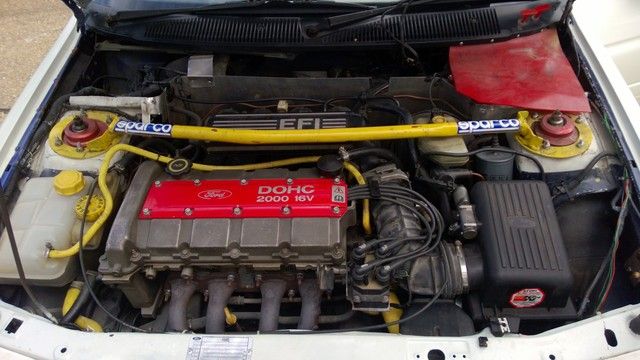
Engine:
De-APS manifold
K&N filter
Superchip
Ashley Group N exhaust and decat
Transmission:
Standard but with Quaife ATB diff
Dave Mac driveshafts (+45mm each side)
Brakes:
Standard with hydraulic handbrake
Braided lines and internal brake pipes
Suspension:
Bilstein Group N dampers
Group A front and rear top mounts
Modified lower arms for wider track, with spherical bearings
Lengthened tie rods
Poly bushes
Then there's all the usual safety gubbins of course, but I won't bore you with that. My reason for buying the car was to get some competitive miles under my belt in a car that's reliable and not too expensive to run.
Plans for this originally included moving up to 17" wheels to facilitate larger front brakes, giving the interior a bit of a make over, a repaint, flocked dash and a couple of other little bits; moving the battery out of the engine bay, repositioning the hydraulic handbrake, adding a couple of extra gauges etc etc.
Some running issues highlighted a few problems with the wiring, and this is where things started to get out of hand to be honest...
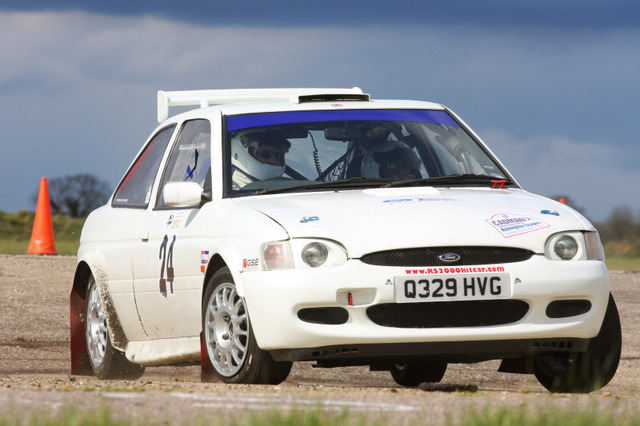
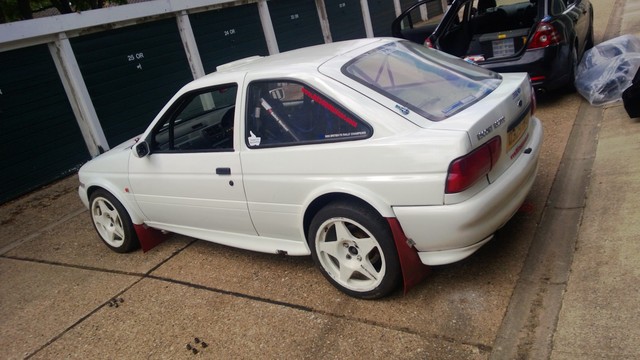
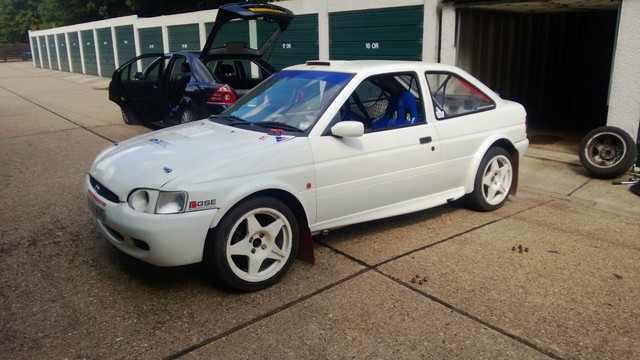
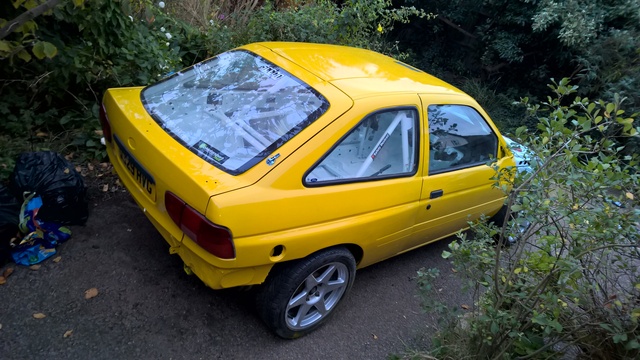
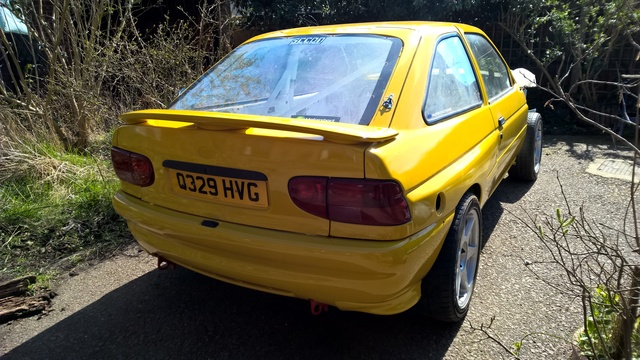
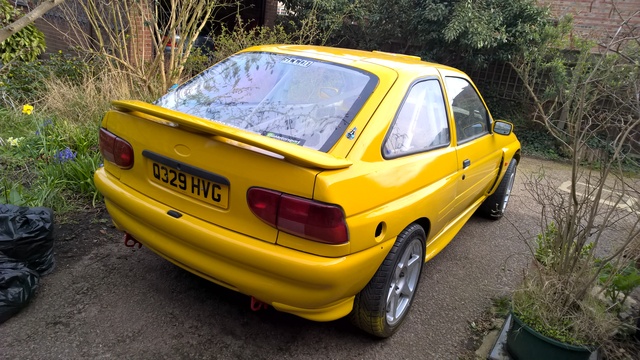
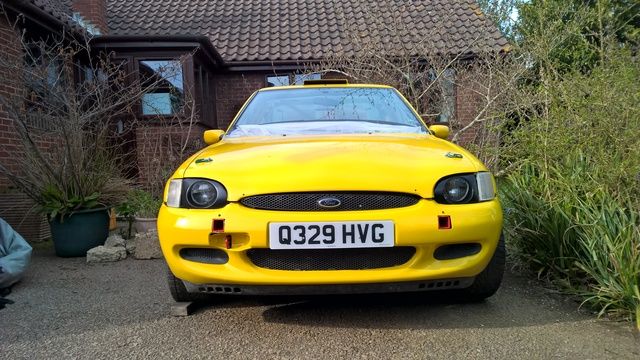
Picture of it on a rally before I got it:
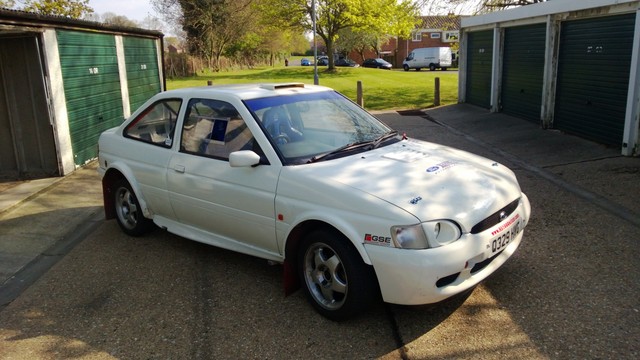
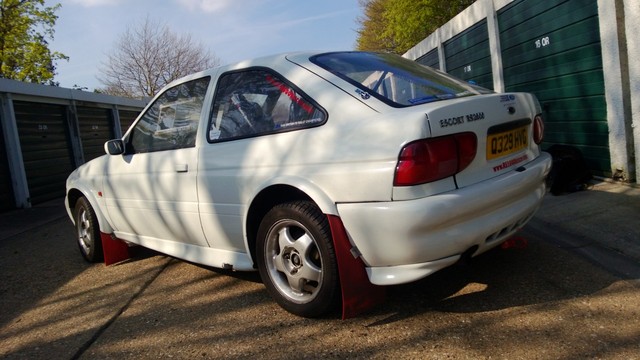
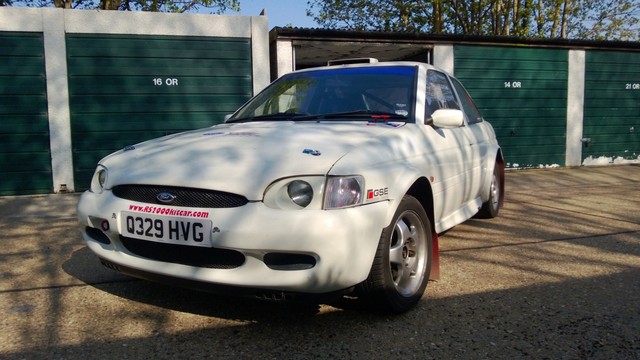
And pictures of when I got it:
I actually got it in December 2012, but work and other things have meant I haven't really touched it much so far. The basic spec when I bought the car was as follows...
Body:
Seam welded MK5 RS2000 body shell with Safety Devices bolt-in roll cage
Safety Devices rear strut brace
Custom (I think) front strut brace
MK6 rear end conversion
MK6 skirts
MK6 front end conversion
Group A headlamps
Kit Car splitter (from a Mondeo)
Kit Car bonnet vent
Unknown roof vent
Kit Car spoiler (currently removed)
Widened wheel arches
Perspex windows
Engine:
De-APS manifold
K&N filter
Superchip
Ashley Group N exhaust and decat
Transmission:
Standard but with Quaife ATB diff
Dave Mac driveshafts (+45mm each side)
Brakes:
Standard with hydraulic handbrake
Braided lines and internal brake pipes
Suspension:
Bilstein Group N dampers
Group A front and rear top mounts
Modified lower arms for wider track, with spherical bearings
Lengthened tie rods
Poly bushes
Then there's all the usual safety gubbins of course, but I won't bore you with that. My reason for buying the car was to get some competitive miles under my belt in a car that's reliable and not too expensive to run.
Plans for this originally included moving up to 17" wheels to facilitate larger front brakes, giving the interior a bit of a make over, a repaint, flocked dash and a couple of other little bits; moving the battery out of the engine bay, repositioning the hydraulic handbrake, adding a couple of extra gauges etc etc.
Some running issues highlighted a few problems with the wiring, and this is where things started to get out of hand to be honest...
Picture of it on a rally before I got it:

And pictures of when I got it:


Thread Starter
PassionFord Post Whore!!
iTrader: (1)
Joined: Jan 2006
Posts: 5,412
Likes: 186
From: Norfolk Drives: Couple of Fords
In between my two jobs I wasn't finding much spare time for this lately. It had a few weird electrical issues, with the lights doing strange things, which turned out to be the chassis earth under the air box. The fuel pump was also making some strange noises, kind of clicking and not sounding like it was running smoothly. I did wonder if it was on it's way out, but some messing made me wonder if it was another earth issue. I turned the ignition on with the fan on and it was clicking. However, a little later, I had the fan off and turned the ignition on and it didn't click, but did sound a bit up and down.
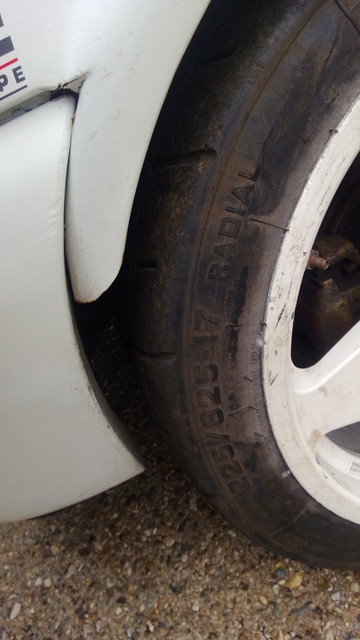
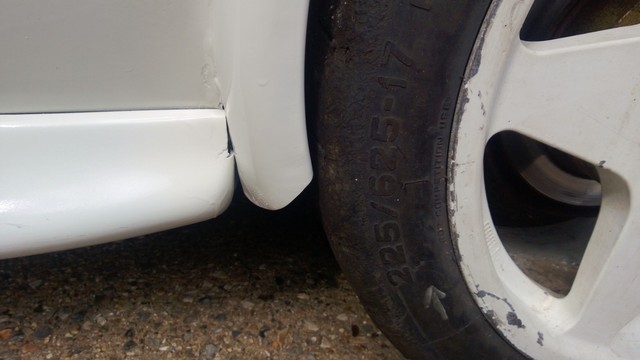
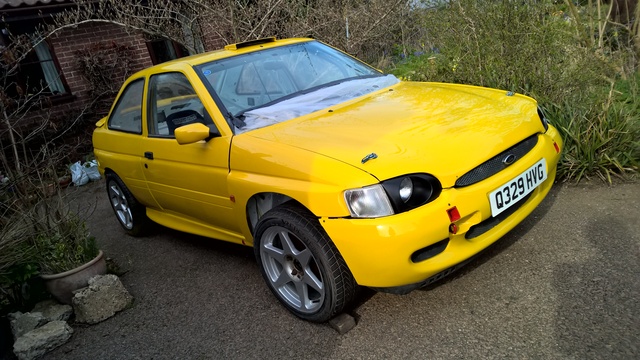
On another note, I put a couple of 17" wheels on with slicks to have a look at arch clearance. I knew the front would be bad, as the lower arms have been extended, pushing the front wheels forward in the arch. I'd hoped the pikey arch extensions on the rear would have given me plenty of clearance, but they appear to have been positioned even more strangely than I thought. There's lots of clearance for travel, but they're not exactly centred on the axle line!
Anyway, through shear luck, the modified lower arms mean that the wheel base is pretty much identical to an Escort Cosworth, so I hoped I would able to get away with some GRP Escort Cosworth front wings to solve the issues on the front, and then possibly fit some Cosworth rear quarters at some stage too, as that should fix the rears. On a positive note, the 17s looked an awful lot better than the standard MK6 wheels! There's a degree or two of camber on the front too, the big wheels really seem to accentuate it!
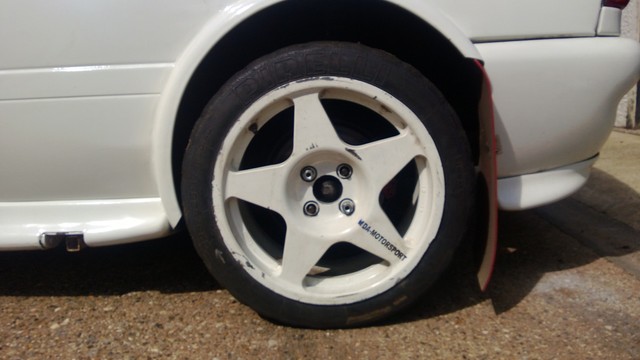
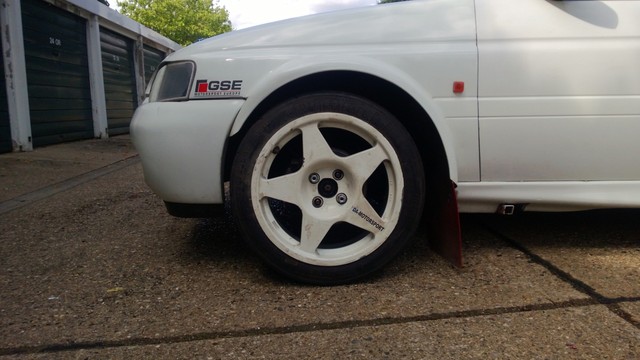


Thread Starter
PassionFord Post Whore!!
iTrader: (1)
Joined: Jan 2006
Posts: 5,412
Likes: 186
From: Norfolk Drives: Couple of Fords
After a very busy period meaning I didn't do much with the car, last summer saw some progress. The intention is to have the car out next season, so I need to get cracking.
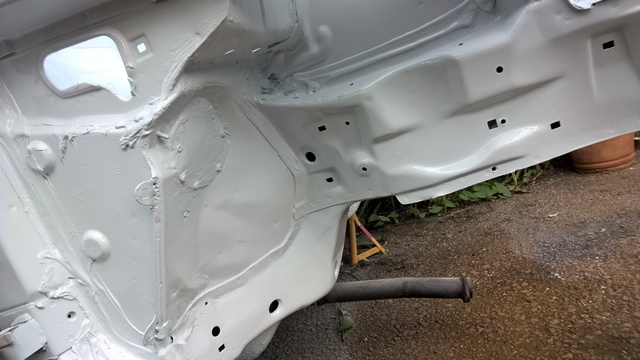
So, the original plan was to keep things very simple and just make a few small tweaks, but it did get a little out of hand, as these things often do. Generally the shell is in pretty good condition from a corrosion perspective but I did find a few areas that needed to be addressed. Most concerning of these was where the nearside front roll cage mounting met the chassis. Sadly, when the cage was fitted, the builder never sealed the welds, so the floor pan and chassis had rusted quite a bit. It was well hidden under the paint, but it was soon fixed up.
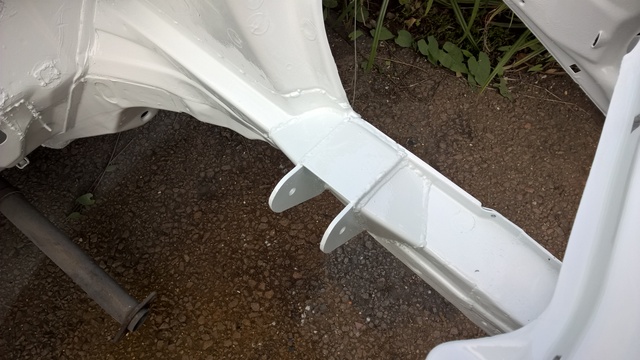
One area that I always wanted to change was the jacking points. The key thing with a car like this is ease of maintenance, and you don't want to have to waste precious moments in service jacking the car up and putting it on axle stands. So, I have fitted sill stand points, as well as the front and rear jacking points, as seen on the F2 cars. A couple of pictures during the fabrication phase:
The sill tubes and front jacking points need to be trimmed to suit the skirts/bumper, but you get the idea. The other corroded area was the front bulkhead, so I had to get busy cutting that up...
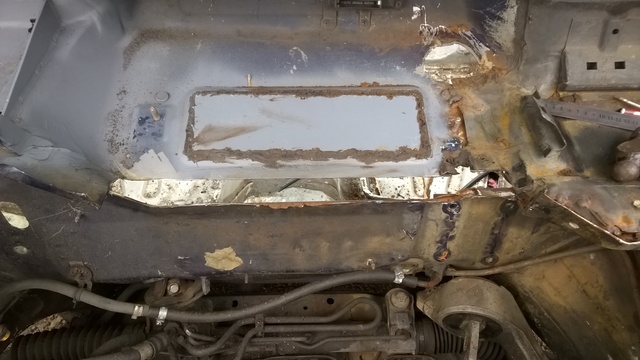
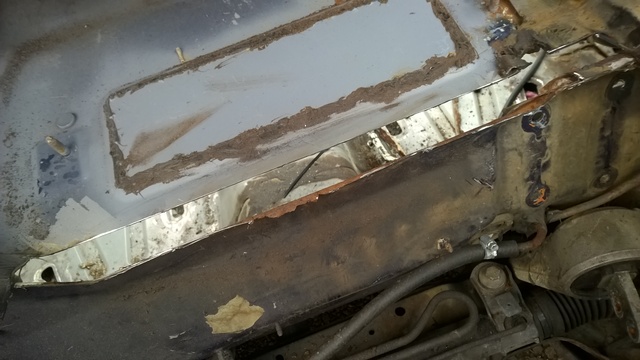
Note that the heater motor hole has also been plated. The heater system is being simplified dramatically, with a new (tiny) heater matrix and fan to save some weight.
So, the original plan was to keep things very simple and just make a few small tweaks, but it did get a little out of hand, as these things often do. Generally the shell is in pretty good condition from a corrosion perspective but I did find a few areas that needed to be addressed. Most concerning of these was where the nearside front roll cage mounting met the chassis. Sadly, when the cage was fitted, the builder never sealed the welds, so the floor pan and chassis had rusted quite a bit. It was well hidden under the paint, but it was soon fixed up.
One area that I always wanted to change was the jacking points. The key thing with a car like this is ease of maintenance, and you don't want to have to waste precious moments in service jacking the car up and putting it on axle stands. So, I have fitted sill stand points, as well as the front and rear jacking points, as seen on the F2 cars. A couple of pictures during the fabrication phase:


The sill tubes and front jacking points need to be trimmed to suit the skirts/bumper, but you get the idea. The other corroded area was the front bulkhead, so I had to get busy cutting that up...


Note that the heater motor hole has also been plated. The heater system is being simplified dramatically, with a new (tiny) heater matrix and fan to save some weight.
Thread Starter
PassionFord Post Whore!!
iTrader: (1)
Joined: Jan 2006
Posts: 5,412
Likes: 186
From: Norfolk Drives: Couple of Fords
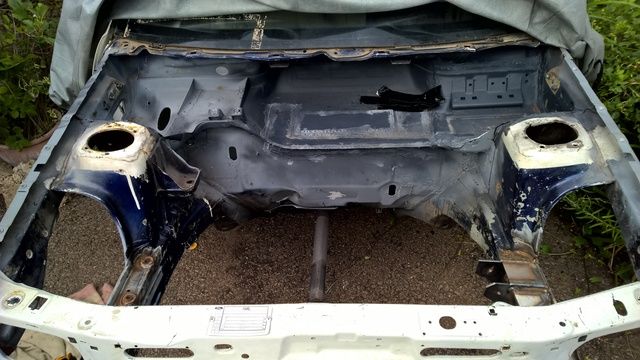
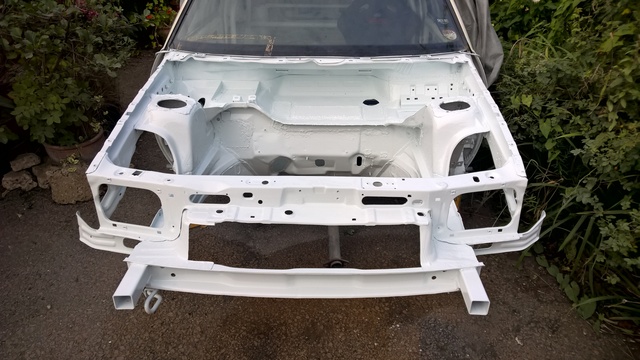
Rust repairs done, but the engine bay still looks a bit minging here. You should be able to make out the bulkhead reinforcement for the Group A pedal box too:
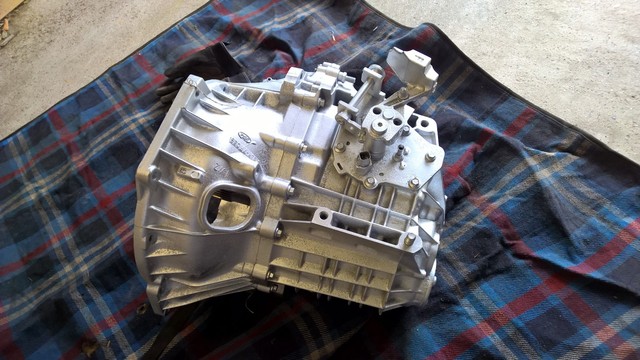
I have never been particularly impressed with the standard gear shift in the RS2000. The linkage always goes sloppy, the boxes themselves only get less common, and the mounts are also a bit cack. The ratios are also pretty hopeless for rallying, meaning you never really get beyond third gear. So, the solution? Ditch it! Instead, I am using another MTX75 gearbox, but from a Focus. Now, a couple of people told me that this wasn't actually possible, and that it would foul the chassis rail unless I used the Escort bellhousing. There was only way to find out, so I bought a Focus box, bolted to the RS engine and tried to put the whole lot in. The standard engine mount was ditched in favour of a Group A version that mounts to the chassis rail so, with this fitted, I could test the engine with the Focus box. Did it hit the chassis rail? Did it hell. It fits perfectly, so I don't know why people had told me it wouldn't fit. Of course, the Focus box uses totally different mounts, so the chassis rail required a fabricated clevis, which you can see in the picture below. I need to finish welding up the gearbox side of the mount, and fabricate the lower mount too. Some might question the value of this conversion, but the boxes are ten-a-penny, I can keep my Quaife diff, and also the shift is much nicer in my view. I can also move the gear lever around and get it a bit higher and closer to the steering wheel. But, the big advantage really is that the Focus is popular in the US, meaning there are lots of parts available. A company over there can provide a revised third, fourth and fifth gear that shortens the gear ratios substantially and should make the car go a bit better. It's only around �650, much better than the �1600 that Quaife charge for their synchro gear kit.
The picture should give you a clue that, with this all done, I could get busy with the spray gun and make things look a bit better under the bonnet:

I have never been particularly impressed with the standard gear shift in the RS2000. The linkage always goes sloppy, the boxes themselves only get less common, and the mounts are also a bit cack. The ratios are also pretty hopeless for rallying, meaning you never really get beyond third gear. So, the solution? Ditch it! Instead, I am using another MTX75 gearbox, but from a Focus. Now, a couple of people told me that this wasn't actually possible, and that it would foul the chassis rail unless I used the Escort bellhousing. There was only way to find out, so I bought a Focus box, bolted to the RS engine and tried to put the whole lot in. The standard engine mount was ditched in favour of a Group A version that mounts to the chassis rail so, with this fitted, I could test the engine with the Focus box. Did it hit the chassis rail? Did it hell. It fits perfectly, so I don't know why people had told me it wouldn't fit. Of course, the Focus box uses totally different mounts, so the chassis rail required a fabricated clevis, which you can see in the picture below. I need to finish welding up the gearbox side of the mount, and fabricate the lower mount too. Some might question the value of this conversion, but the boxes are ten-a-penny, I can keep my Quaife diff, and also the shift is much nicer in my view. I can also move the gear lever around and get it a bit higher and closer to the steering wheel. But, the big advantage really is that the Focus is popular in the US, meaning there are lots of parts available. A company over there can provide a revised third, fourth and fifth gear that shortens the gear ratios substantially and should make the car go a bit better. It's only around �650, much better than the �1600 that Quaife charge for their synchro gear kit.

The picture should give you a clue that, with this all done, I could get busy with the spray gun and make things look a bit better under the bonnet:


Thread Starter
PassionFord Post Whore!!
iTrader: (1)
Joined: Jan 2006
Posts: 5,412
Likes: 186
From: Norfolk Drives: Couple of Fords
With all that done, and the rest of the front suspension cleaned up and refitted, it was on with the body work. I was never too keen on the trailer wheel arches and, thanks to the lack of tyre clearance that they offered and the fact most other stuff had come apart, I decided to replace them. The front was easy - I just cut the wings off and bought some GRP Escort Cosworth ones (thanks to XSport Racing for doing me a great deal). The rear was a little more complex, as the rear quarters had been butchered quite badly. Originally I thought I would fit some steel repair panels, but further investigation revealed that this would turn into quite an involved job and, given what the car is going to be used for, it just wasn't worth spending days rebuilding the arches back to standard.
So, the only real option was GRP panels. For rallying, you are supposed to keep steel rear wings for safety, so I cut the trailer arches off and then rebuilt the inner and outer arches so that they were strong, but looked a bit untidy. I then bought some GRP Cosworth rear arches and fitted them over the existing metal work. I didn't want to get into loads of pretty body work stuff, as the car is built to use, but the panels were riveted and bonded in place (using countersunk rivets), and then smoothed using the bare minimum amount of filler.
Anyway, a few pictures showing the process:


Trending Topics
Thread Starter
PassionFord Post Whore!!
iTrader: (1)
Joined: Jan 2006
Posts: 5,412
Likes: 186
From: Norfolk Drives: Couple of Fords
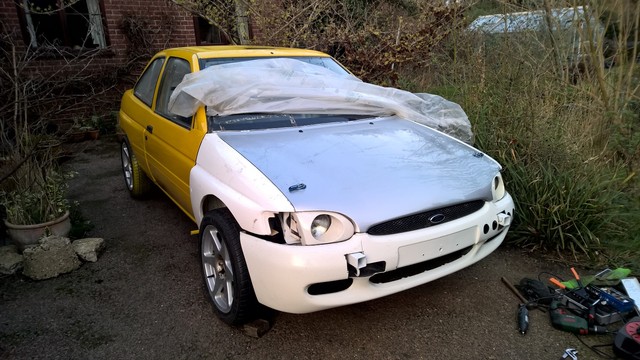
With the rear arches done, most of the body work was good enough for the task, so just required a quick rub down ready for paint. When the previous owner had the car he had it painted white, but I fancied something a bit different. Given that the car is going to get scratched, scuffed, knocked and abused, there was no point at all in having it painted properly, as it would soon get ruined, so I fired up the compressor and got busy with the painting. It is far from perfect, it will never win any awards, but it's come out pretty well to be honest, and the majority of the car is now resplendent in Ford Signal Yellow:
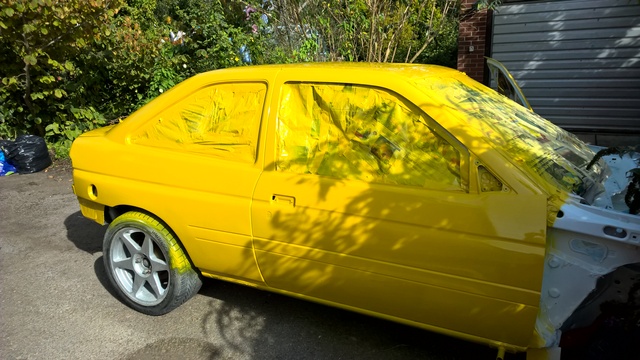
Then the reassembly could begin, refitting windows, lights etc...
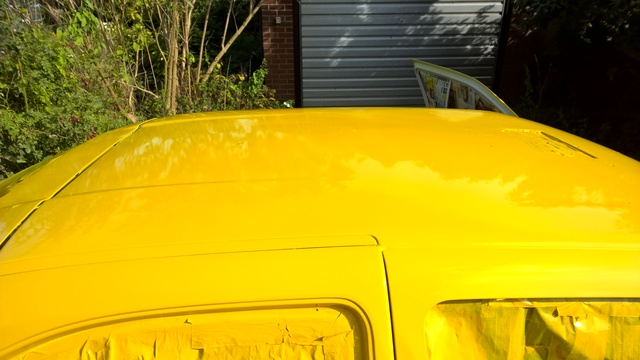
Next step for the outside is to finish off the front wings, and paint the bonnet/bumpers/skirts:

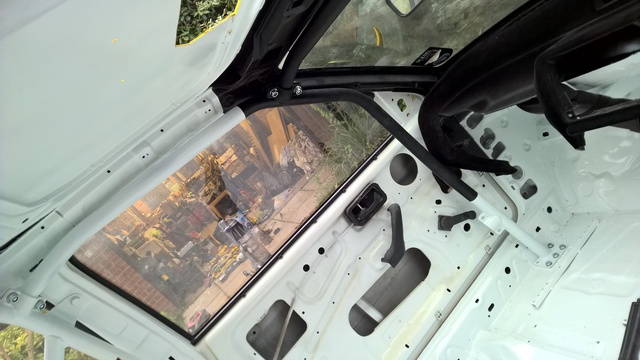
The inside and roll cage has been painted Frozen white (as with the engine bay), and is now starting to come back together. The A-pillars and front part of the cage are satin black to help avoid glare, and the dash is now flocked (after being chopped up severely!)
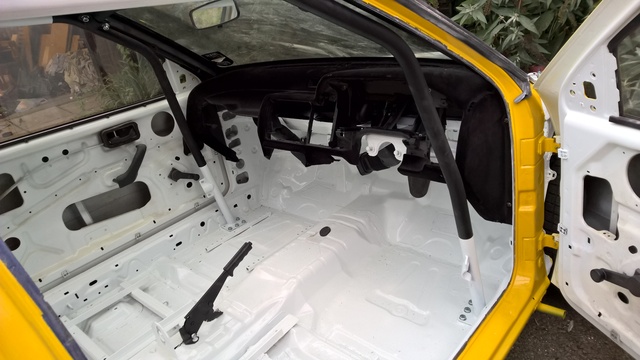


Then the reassembly could begin, refitting windows, lights etc...


Next step for the outside is to finish off the front wings, and paint the bonnet/bumpers/skirts:

The inside and roll cage has been painted Frozen white (as with the engine bay), and is now starting to come back together. The A-pillars and front part of the cage are satin black to help avoid glare, and the dash is now flocked (after being chopped up severely!)


Thread Starter
PassionFord Post Whore!!
iTrader: (1)
Joined: Jan 2006
Posts: 5,412
Likes: 186
From: Norfolk Drives: Couple of Fords
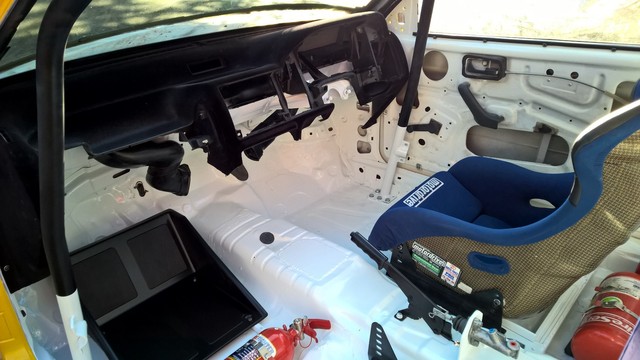
Unfortunately, working away during the week doesn't help progress. I did start to look at fitting the new heater, but realised I didn't have any ally sheet to make the bracket, so I got as far as a cardboard template and then had to stop. I've ordered some now so will get on with that ASAP.
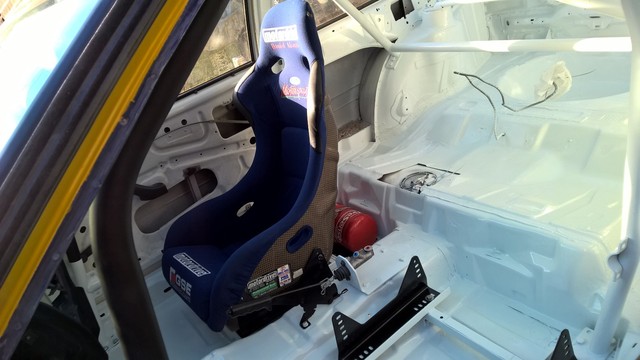
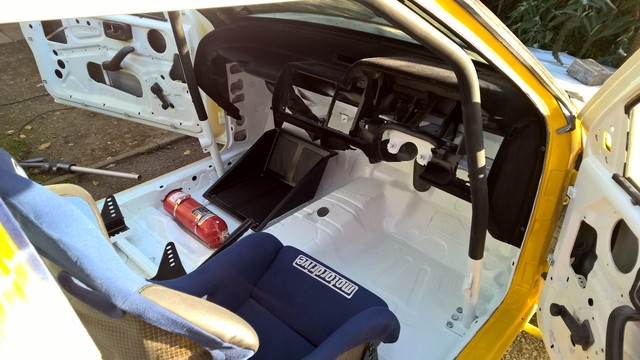
All I did otherwise was put a few bits in to try and get an idea of where things sit and where I have space to route fuel lines and fit some other parts. I've put a driver's seat in in the position it used to be, but it seems very far forward, so I'm going to have to move it back. Nice seat though, an ex-works Motordrive from Daniel Alonso's F2 Escort. Shame I can't use it! Makes it all look a bit more like a car I suppose though!
Few pictures:
A couple of little jobs not pictured. I fitted the front bulkhead fittings for the fuel lines, and also finished tacking together the upper gearbox mount. Just need to throw that at my friend so he can TIG weld it up properly.
I really need to order the gear kit so I can get the engine and box in, and also find a bonnet!
All I did otherwise was put a few bits in to try and get an idea of where things sit and where I have space to route fuel lines and fit some other parts. I've put a driver's seat in in the position it used to be, but it seems very far forward, so I'm going to have to move it back. Nice seat though, an ex-works Motordrive from Daniel Alonso's F2 Escort. Shame I can't use it! Makes it all look a bit more like a car I suppose though!
Few pictures:


A couple of little jobs not pictured. I fitted the front bulkhead fittings for the fuel lines, and also finished tacking together the upper gearbox mount. Just need to throw that at my friend so he can TIG weld it up properly.
I really need to order the gear kit so I can get the engine and box in, and also find a bonnet!
Thread Starter
PassionFord Post Whore!!
iTrader: (1)
Joined: Jan 2006
Posts: 5,412
Likes: 186
From: Norfolk Drives: Couple of Fords
Weekends seem to have been spent trawling dealers trying to decide on a new daily, but managed to get a few hours on it just before Christmas.
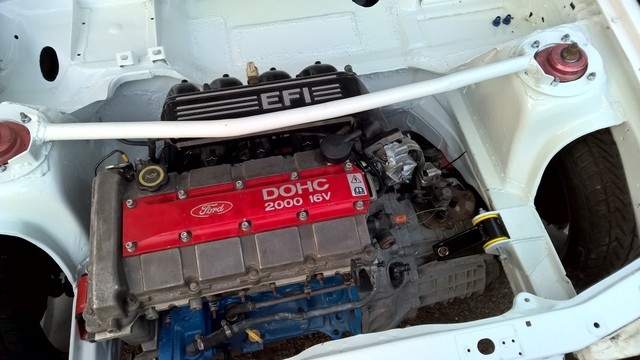
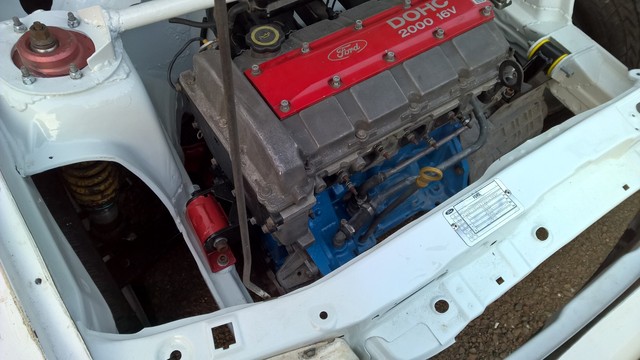
I've fitted the engine back into the car, albeit with a boggo Focus TDI gearbox currently. I still need to make the lower mount, but you get the idea. The box will come out as I need to build the proper one which, for now will be based around a MK1 Focus RS unit, with the Quaife diff, a diesel bell housing to match up to the RS2000 engine, and a Hewland 5.0:1 final drive, which will shorten the gearing quite a lot.
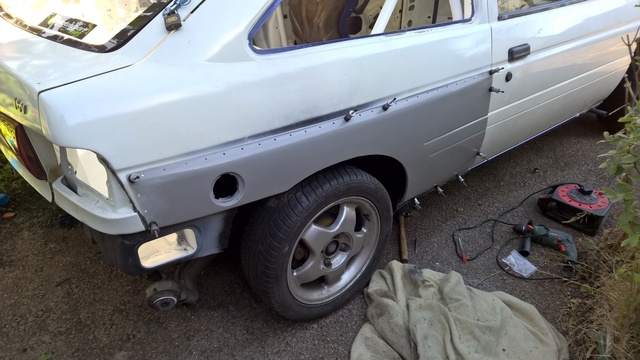
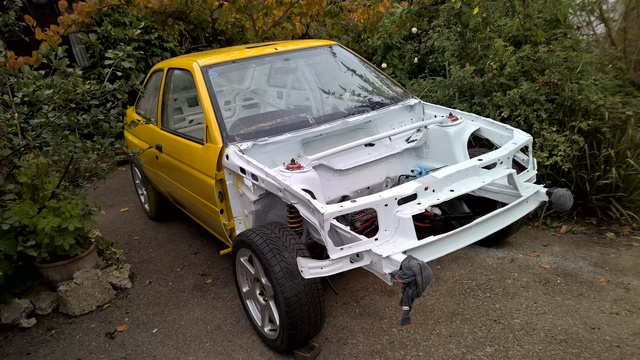
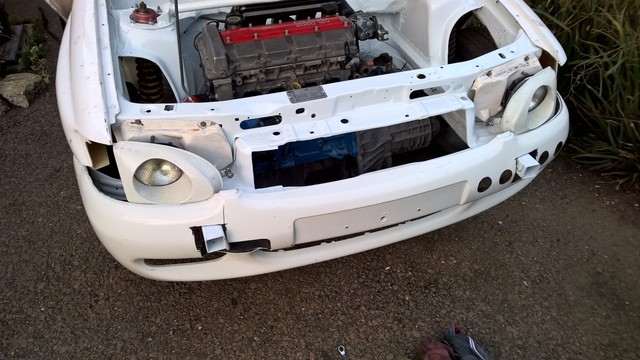
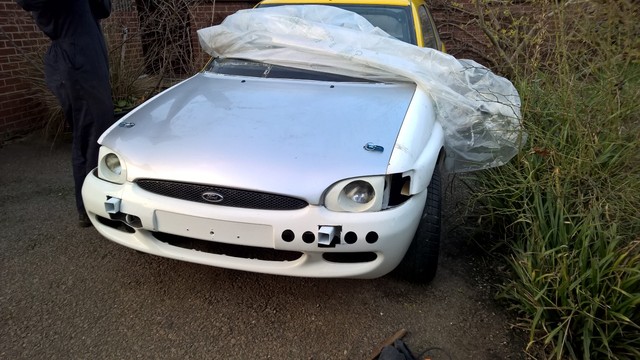
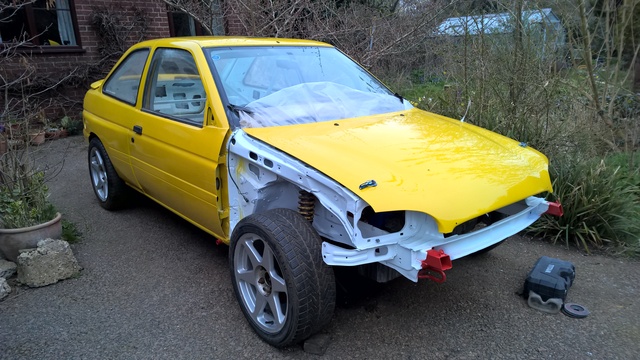
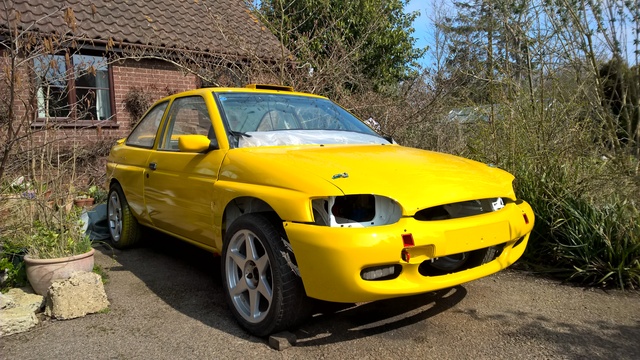
In addition, I have also started to think about fitting up the front end panels, so I bolted on the bonnet, wings and headlights. I then cut up a scrap bumper to allow the jacking points to go through, so I can try and line everything up. As you can see, the wings seem to sit a touch high in relation to the headlights, so some fettling is going to be needed. The bumper will be used to work out where the holes need to go for the jacking points properly, and I will then cut a decent bumper. The ends will also need to be trimmed down to match the Cosworth front wings.
I did start to fit the bonnet pins, but it got dark, so I went inside and had a beer lol.
More to come over the holidays hopefully, then I can get the front fitted and painted.
I've fitted the engine back into the car, albeit with a boggo Focus TDI gearbox currently. I still need to make the lower mount, but you get the idea. The box will come out as I need to build the proper one which, for now will be based around a MK1 Focus RS unit, with the Quaife diff, a diesel bell housing to match up to the RS2000 engine, and a Hewland 5.0:1 final drive, which will shorten the gearing quite a lot.


In addition, I have also started to think about fitting up the front end panels, so I bolted on the bonnet, wings and headlights. I then cut up a scrap bumper to allow the jacking points to go through, so I can try and line everything up. As you can see, the wings seem to sit a touch high in relation to the headlights, so some fettling is going to be needed. The bumper will be used to work out where the holes need to go for the jacking points properly, and I will then cut a decent bumper. The ends will also need to be trimmed down to match the Cosworth front wings.


I did start to fit the bonnet pins, but it got dark, so I went inside and had a beer lol.
More to come over the holidays hopefully, then I can get the front fitted and painted.
Thread Starter
PassionFord Post Whore!!
iTrader: (1)
Joined: Jan 2006
Posts: 5,412
Likes: 186
From: Norfolk Drives: Couple of Fords
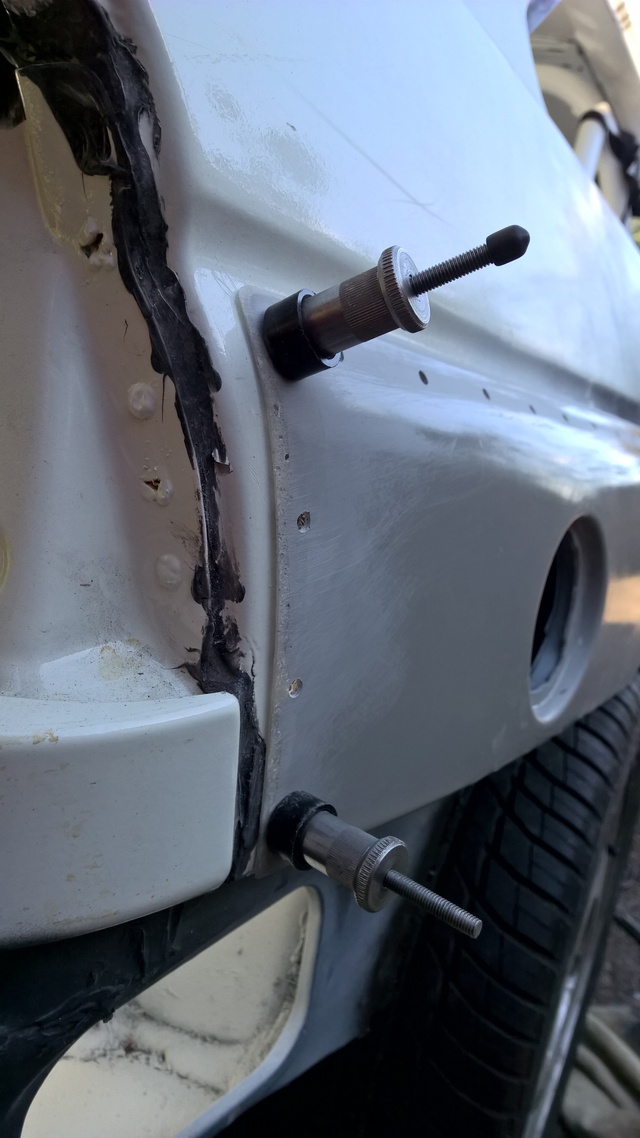
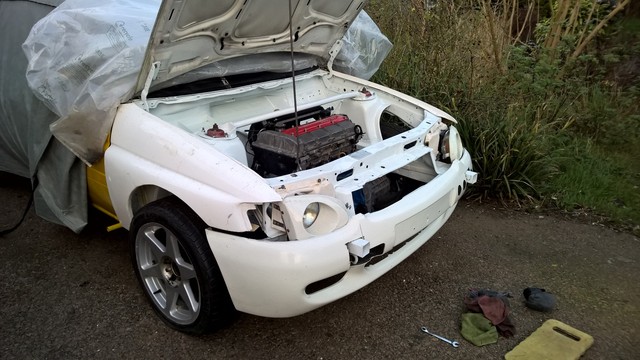
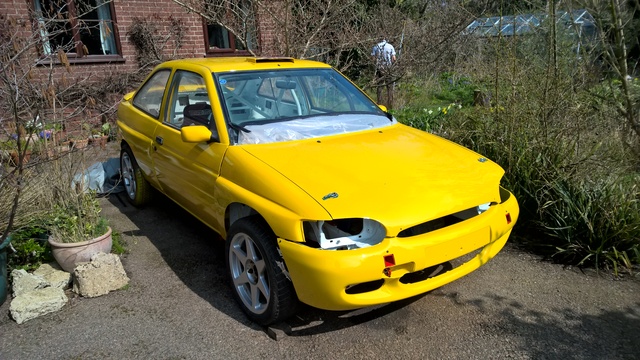
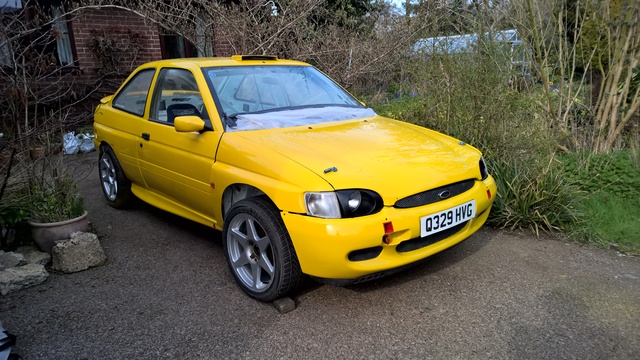
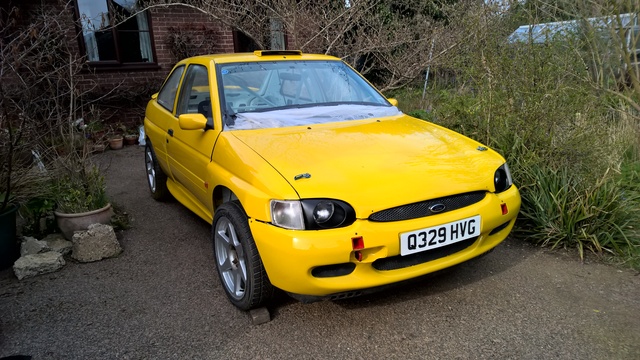
And the most recent update from this weekend - fitted the bonnet catches and fiddled with the position of the bumper/headlight casings to get things lined up a bit better. Need to move the lamps slightly so they sit centrally, and also tweak the gaps on the wing/bonnet shut line. Also need to fit the proper front bumper!
Currently looking for a Focus RS gearbox so I can get that sorted, then shafts etc can go back in and the front suspension all finished off.


Currently looking for a Focus RS gearbox so I can get that sorted, then shafts etc can go back in and the front suspension all finished off.


Thread Starter
PassionFord Post Whore!!
iTrader: (1)
Joined: Jan 2006
Posts: 5,412
Likes: 186
From: Norfolk Drives: Couple of Fords
Still working away on this...
Got two weeks off over Easter and want to get the rest of the body work sorted out, so I've been trying to get on with some of the fiddly associated jobs. All of this stuff seems to take forever and requires endless little brackets making up, but that's life. First off I made some ally brackets to support the base of the wings to the sill and also the front behind the bumper. No pictures of that, but the wings are no longer floppy.
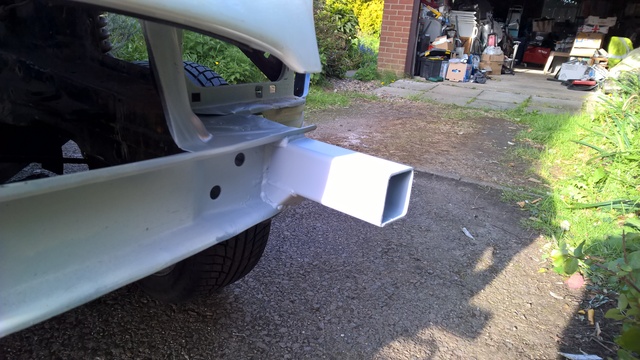
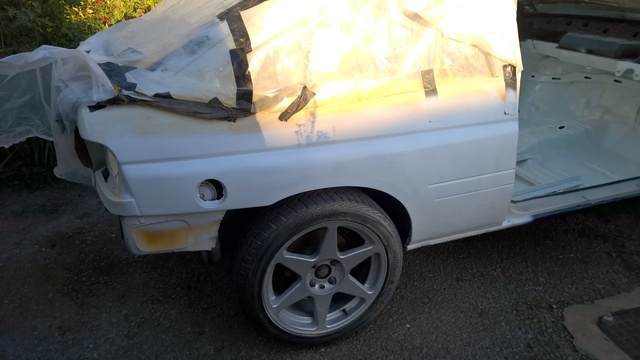
Next up I fitted the proper front bumper. This had to have the front jacking point holes made in it and I had to make up some brackets to fix it to the wings. I also trimmed the ends down a bit so it matches the Cosworth arch profile a bit better. Thanks to the mismatch of MK5 and MK6, Cosworth and RS2000, not to mention the use of GRP parts, the panel gaps were never going to be perfect, so this has all been done just to keep it simple and fuss-free. The chances of damaging these parts are incredibly high, so I just don't see the sense in spending ages on getting perfect gaps. It just needs to be easy to remove and light. Function over form and all that. The only thing left to do here really is to remove the foam from the front bumper, tidy up some of the brackets and add some little tabs so the bumper just screws on above the jacking points.
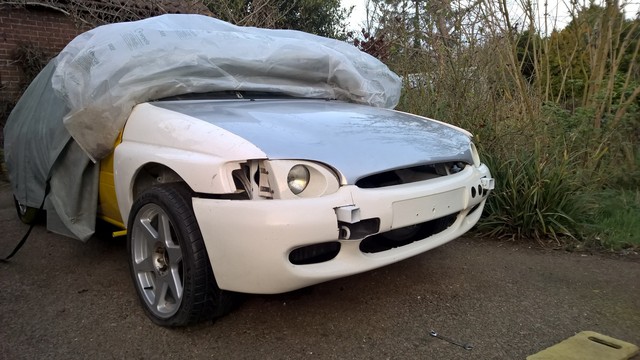
Anyway, it's made the front end look a bit more like a car:

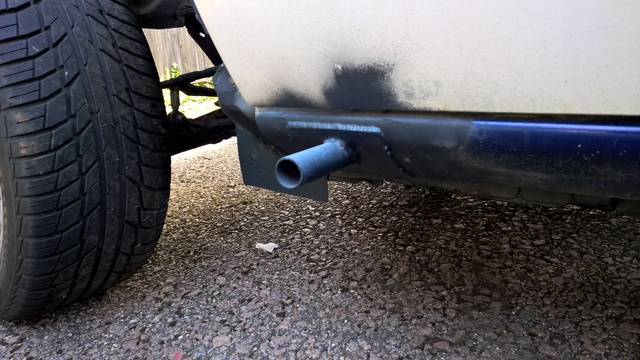
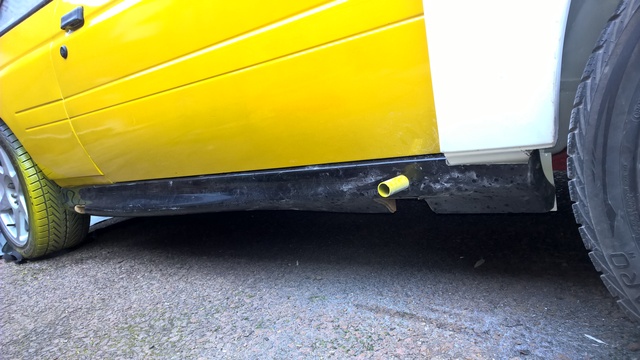
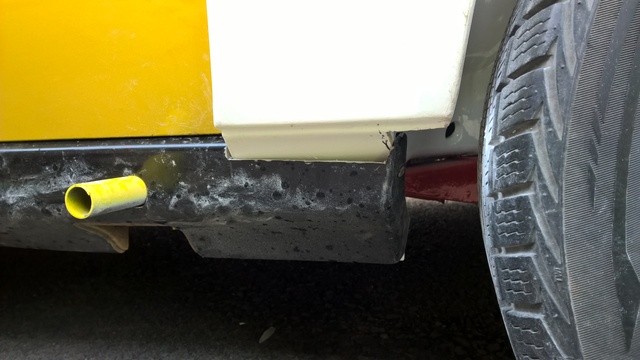
Next on the body work hit list was the side skirts. These were fairly simple, just needed a hole putting in them for the sill stand tubes and a bit of trimming to suit the wide front wings. I have since trimmed the sill stand tubes down, as they are still very long in this picture!
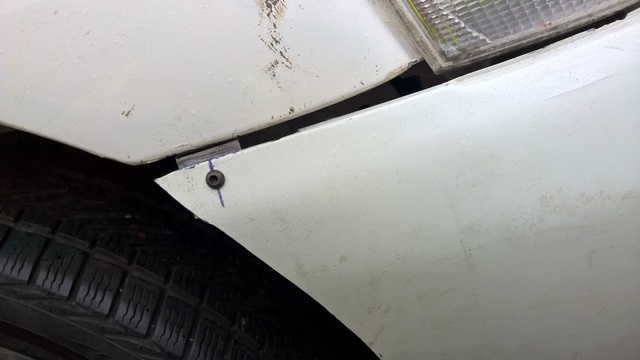
You can see at the front where I've been trimming to suit the wings. For some reason I don't have a picture of it finished. You can also see the difference in wheel arch profile from a Cosworth to a normal Escort, with the Cosworth having a longer wheelbase. I will be trimming the arch profile to match the side skirts. This will also gain me some wheel arch clearance which is no bad thing.
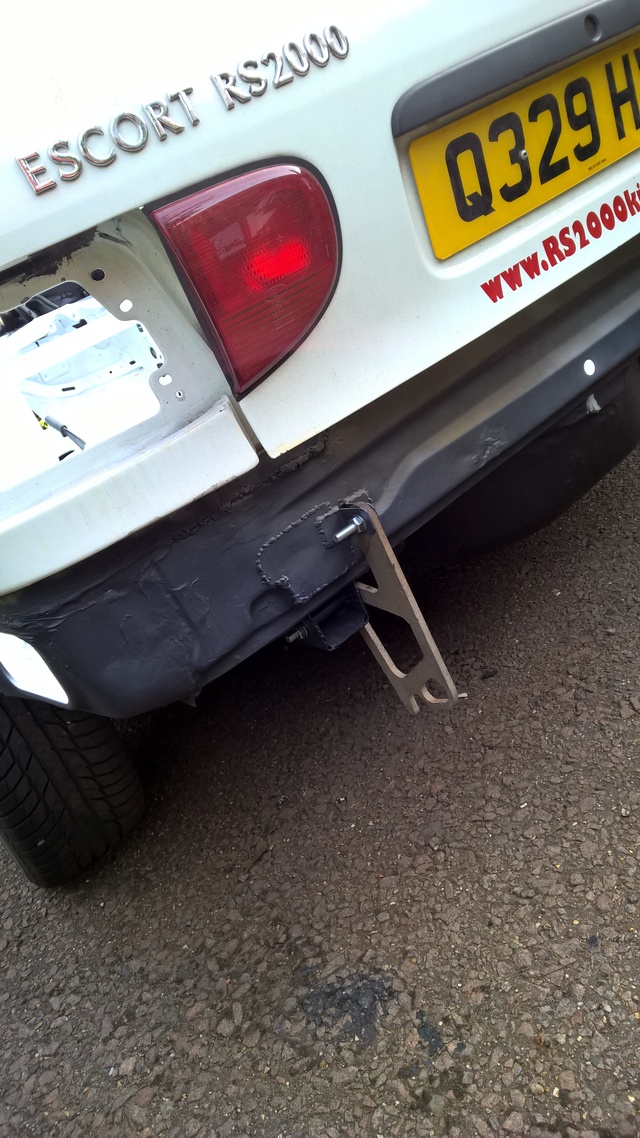
The final job was to fit the rear bumper, which took much longer than I thought it would! The rear jacking points mean that the standard bolt positions had to go anyway and I wanted to save some weight, so I spent what felt like an eternity removing foam to be left with this:
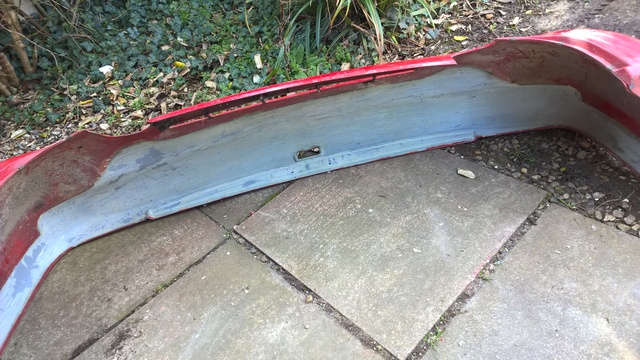
Half a bloody black sack full that was...
Anyway, bumper on, secured on a bracket at the top, an M6 on each side and an extra little support bracket to the spare wheel well. It is amazingly flimsy so I suspect I will get through a few of these! Just needs a spot of trimming to match the rear arch profile. Oh, and painting of course...
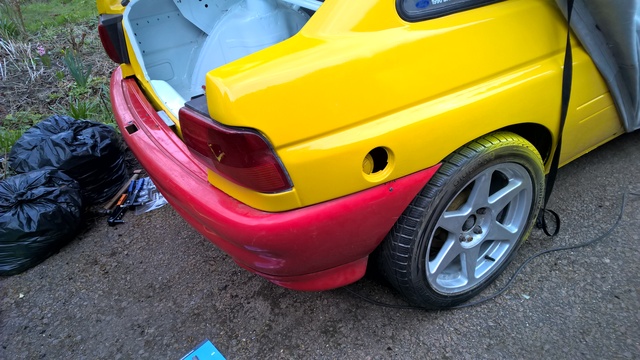
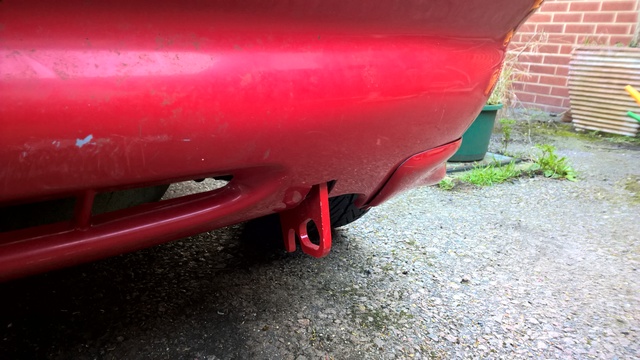
Rear jacking points/towing hooks are on and bumper required some trimming to accommodate:
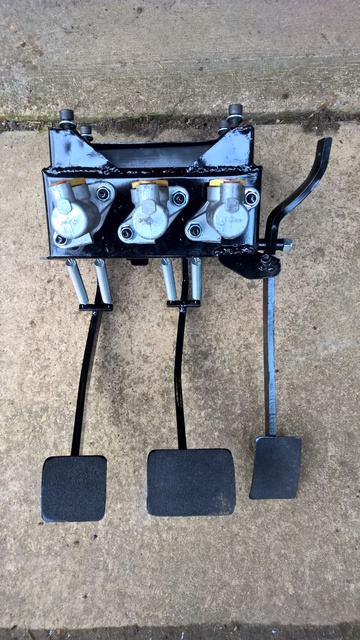
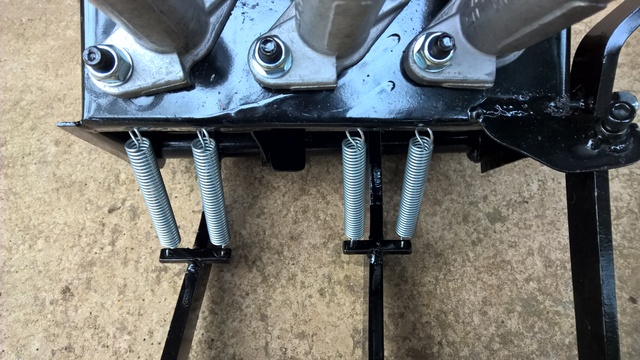
Going back a while, Mat Lewis at MDA Motorsport made me a replica Group A pedal box. Mat originally made it with a single return spring for each pedal. The works ones used two springs and, when I put the cylinders in, it did feel like one spring might not be enough, so I modified it to use two. It probably would have been fine to be honest, but I didn't want to have to take it out again, and I can't leave anything on this car alone lol. Anyway, assembled with rebuilt cylinders (again courtesy of MDA) and ready to fit:
So, as of Friday I am off work for two weeks, so the wings will get some final fettling and then I need to get busy prepping and painting. It will never be a concourse car, it's all very rough and ready, but it's built for a purpose. There's lots of nice shiny examples on here, so I will leave that stuff to the rest of you lol.
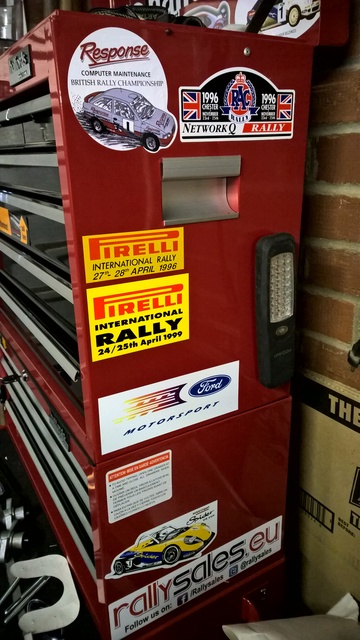
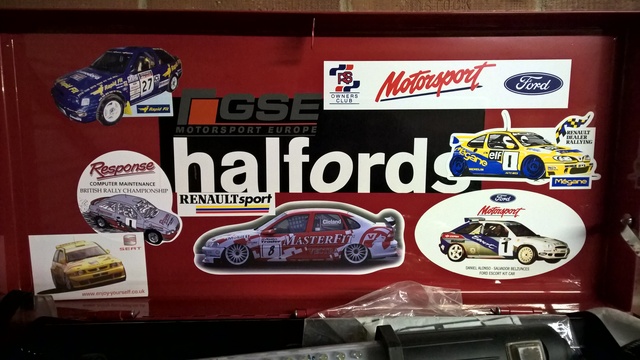
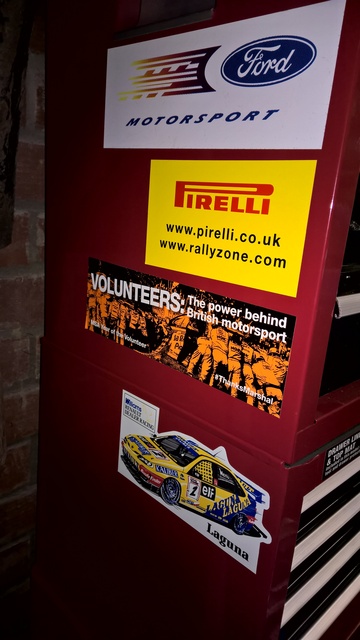
Oh, one last thing, I fitted some retro rally stickers to my tool box lol.
Until the next time...
Got two weeks off over Easter and want to get the rest of the body work sorted out, so I've been trying to get on with some of the fiddly associated jobs. All of this stuff seems to take forever and requires endless little brackets making up, but that's life. First off I made some ally brackets to support the base of the wings to the sill and also the front behind the bumper. No pictures of that, but the wings are no longer floppy.
Next up I fitted the proper front bumper. This had to have the front jacking point holes made in it and I had to make up some brackets to fix it to the wings. I also trimmed the ends down a bit so it matches the Cosworth arch profile a bit better. Thanks to the mismatch of MK5 and MK6, Cosworth and RS2000, not to mention the use of GRP parts, the panel gaps were never going to be perfect, so this has all been done just to keep it simple and fuss-free. The chances of damaging these parts are incredibly high, so I just don't see the sense in spending ages on getting perfect gaps. It just needs to be easy to remove and light. Function over form and all that. The only thing left to do here really is to remove the foam from the front bumper, tidy up some of the brackets and add some little tabs so the bumper just screws on above the jacking points.
Anyway, it's made the front end look a bit more like a car:


Next on the body work hit list was the side skirts. These were fairly simple, just needed a hole putting in them for the sill stand tubes and a bit of trimming to suit the wide front wings. I have since trimmed the sill stand tubes down, as they are still very long in this picture!

You can see at the front where I've been trimming to suit the wings. For some reason I don't have a picture of it finished. You can also see the difference in wheel arch profile from a Cosworth to a normal Escort, with the Cosworth having a longer wheelbase. I will be trimming the arch profile to match the side skirts. This will also gain me some wheel arch clearance which is no bad thing.

The final job was to fit the rear bumper, which took much longer than I thought it would! The rear jacking points mean that the standard bolt positions had to go anyway and I wanted to save some weight, so I spent what felt like an eternity removing foam to be left with this:

Half a bloody black sack full that was...
Anyway, bumper on, secured on a bracket at the top, an M6 on each side and an extra little support bracket to the spare wheel well. It is amazingly flimsy so I suspect I will get through a few of these! Just needs a spot of trimming to match the rear arch profile. Oh, and painting of course...


Rear jacking points/towing hooks are on and bumper required some trimming to accommodate:

Going back a while, Mat Lewis at MDA Motorsport made me a replica Group A pedal box. Mat originally made it with a single return spring for each pedal. The works ones used two springs and, when I put the cylinders in, it did feel like one spring might not be enough, so I modified it to use two. It probably would have been fine to be honest, but I didn't want to have to take it out again, and I can't leave anything on this car alone lol. Anyway, assembled with rebuilt cylinders (again courtesy of MDA) and ready to fit:


So, as of Friday I am off work for two weeks, so the wings will get some final fettling and then I need to get busy prepping and painting. It will never be a concourse car, it's all very rough and ready, but it's built for a purpose. There's lots of nice shiny examples on here, so I will leave that stuff to the rest of you lol.
Oh, one last thing, I fitted some retro rally stickers to my tool box lol.


Until the next time...
Thread Starter
PassionFord Post Whore!!
iTrader: (1)
Joined: Jan 2006
Posts: 5,412
Likes: 186
From: Norfolk Drives: Couple of Fords
Thanks mate.
Problem with rallying is if you go 4WD, you're often thrown into the mix with WRCs and the like. On smaller events the 4WD cars often all run in one class. You'd need a lot of power and then the transmission probably wouldn't be up to the abuse you'd give it.
Problem with rallying is if you go 4WD, you're often thrown into the mix with WRCs and the like. On smaller events the 4WD cars often all run in one class. You'd need a lot of power and then the transmission probably wouldn't be up to the abuse you'd give it.
Thread Starter
PassionFord Post Whore!!
iTrader: (1)
Joined: Jan 2006
Posts: 5,412
Likes: 186
From: Norfolk Drives: Couple of Fords
It's update time again. I had two weeks off over Easter so I tried to spend as much time on the car as possible. The aim was to finish off the painting. The shell was actually painted last September but winter meant that I couldn't really finish things off and I had to do a lot of fettling to get everything to fit.
Anyway, on with the show. As I say, the target was to finish off the painting. This entailed quite a lot of work to be honest; just menial, laborious stuff like sanding, so it was a bit dull. As with the rest of the paint work, this is very much being done for a purpose. The finish is far from perfect, but it's good enough for the job and, once there's a few stickers on it, you won't really notice the imperfections anyway.
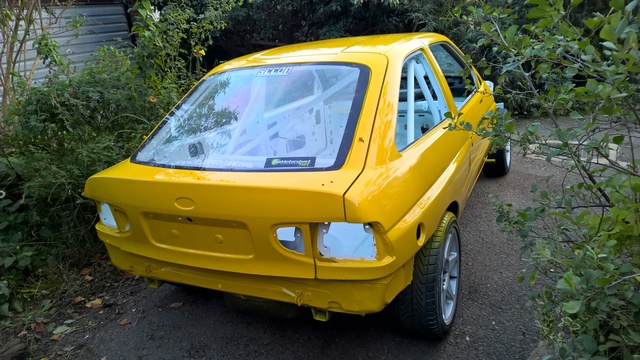
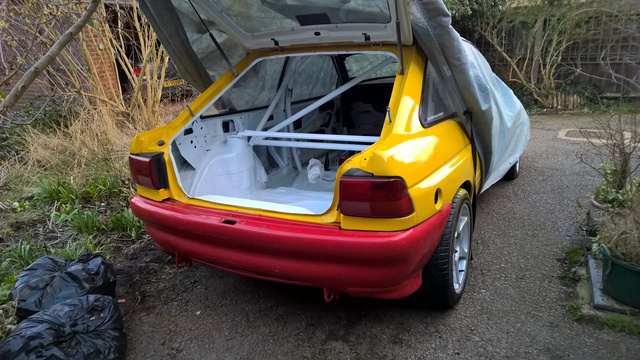
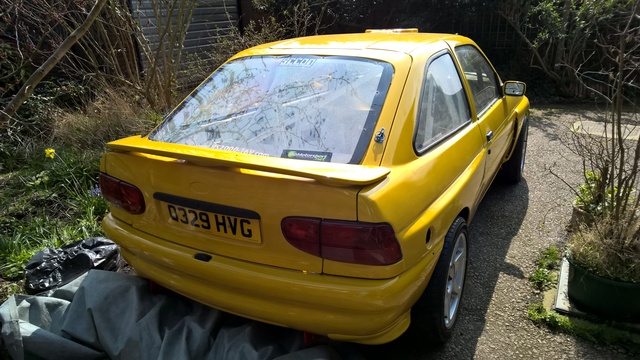
Started with some quite easy stuff, painting the rear spoiler and rear bumper. With these finished and fitted, the rear end was looking better already. Much better than the yellow/red "Noddy" look in pictures above anyway:
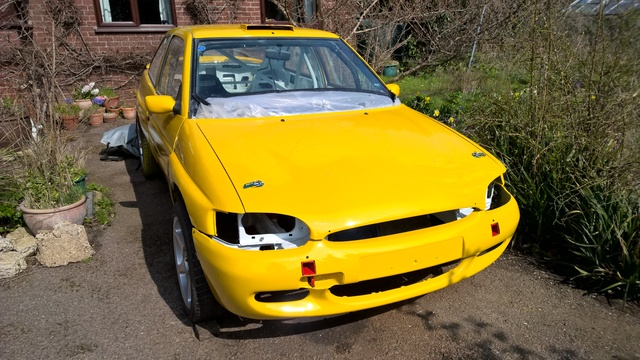
I stripped down the front end and spent a lot of time working on the front wings, firstly to get them to clear the doors when they opened, and also modifying the wheel arch profile to suit my car's odd wheel base length. Cutting the arches wasn't all that fun, but they came out ok. I also painted the bonnet. This hasn't come out all that well to be honest. There was a slight reaction in the paint, so it looks like it has little pin-*****s all over the place. Very odd but, again, with some stickers on it, who cares. Anyway, refitted with catches and washer jets back in:
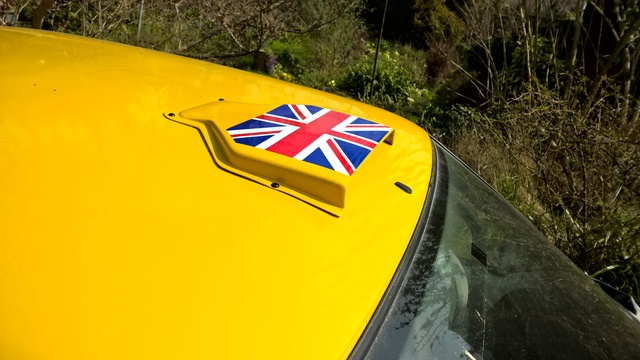
You can also see that I painted the jacking points red, just because really. The roof vent was also painted and fitted with the obligatory sticker. I don't really like the position of this to be honest, but I didn't want to mess about drilling new holes for it and filling the old ones. You can also just about see one of my favourite features - a genuine Ford aerial blanking cap!
Then we'll just skip to the end shall we?! Wings were finally finished after making side repeater holes, reprofiling arches and doing various other things. Front bumper was painted (and then promptly fell off the stands so had to be painted again) and then the whole lot put on, along with the door mirrors. The panels aren't sitting quite right currently, I need to move the bonnet back a touch so it lines up with the bumper better and I'm waiting for the ally bolts for everything to turn up, but you get the idea. You can also see the vents in the back of the wings too:
The side skirts have been painted but aren't refitted yet. That's a job for the weekend. The headlights are also still missing thanks to the drama with the front bumper. When it all fell over, one of the stands smacked into a headlight casing that was drying near it, promptly taking a couple of big chunks out of the gel coat - bummer. This is going to need a little filler to repair it and I ran out of time to do that. Oh, and I need to fit all the bits of trim to the front bumper too, as it's just the bare shell currently.
Next on the list is to have the gearbox rebuilt with some new gears and my Quaife diff, then the exhaust and engine ancillaries can all go back on, which should help to bring the front end down a little bit. Quite a lot of weight has been lost from the front of the car, so some suspension adjustment will be essential, and I may end up changing the front springs, depending on how it all works out.
Until next time.
Anyway, on with the show. As I say, the target was to finish off the painting. This entailed quite a lot of work to be honest; just menial, laborious stuff like sanding, so it was a bit dull. As with the rest of the paint work, this is very much being done for a purpose. The finish is far from perfect, but it's good enough for the job and, once there's a few stickers on it, you won't really notice the imperfections anyway.
Started with some quite easy stuff, painting the rear spoiler and rear bumper. With these finished and fitted, the rear end was looking better already. Much better than the yellow/red "Noddy" look in pictures above anyway:

I stripped down the front end and spent a lot of time working on the front wings, firstly to get them to clear the doors when they opened, and also modifying the wheel arch profile to suit my car's odd wheel base length. Cutting the arches wasn't all that fun, but they came out ok. I also painted the bonnet. This hasn't come out all that well to be honest. There was a slight reaction in the paint, so it looks like it has little pin-*****s all over the place. Very odd but, again, with some stickers on it, who cares. Anyway, refitted with catches and washer jets back in:

You can also see that I painted the jacking points red, just because really. The roof vent was also painted and fitted with the obligatory sticker. I don't really like the position of this to be honest, but I didn't want to mess about drilling new holes for it and filling the old ones. You can also just about see one of my favourite features - a genuine Ford aerial blanking cap!

Then we'll just skip to the end shall we?! Wings were finally finished after making side repeater holes, reprofiling arches and doing various other things. Front bumper was painted (and then promptly fell off the stands so had to be painted again) and then the whole lot put on, along with the door mirrors. The panels aren't sitting quite right currently, I need to move the bonnet back a touch so it lines up with the bumper better and I'm waiting for the ally bolts for everything to turn up, but you get the idea. You can also see the vents in the back of the wings too:


The side skirts have been painted but aren't refitted yet. That's a job for the weekend. The headlights are also still missing thanks to the drama with the front bumper. When it all fell over, one of the stands smacked into a headlight casing that was drying near it, promptly taking a couple of big chunks out of the gel coat - bummer. This is going to need a little filler to repair it and I ran out of time to do that. Oh, and I need to fit all the bits of trim to the front bumper too, as it's just the bare shell currently.
Next on the list is to have the gearbox rebuilt with some new gears and my Quaife diff, then the exhaust and engine ancillaries can all go back on, which should help to bring the front end down a little bit. Quite a lot of weight has been lost from the front of the car, so some suspension adjustment will be essential, and I may end up changing the front springs, depending on how it all works out.
Until next time.
Thread Starter
PassionFord Post Whore!!
iTrader: (1)
Joined: Jan 2006
Posts: 5,412
Likes: 186
From: Norfolk Drives: Couple of Fords
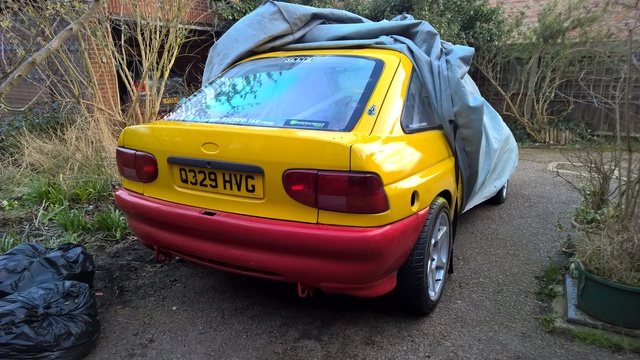
Another minor update. Didn't have a mad weekend on it this weekend but repaired the LH headlamp casing and painted that, then fitted the lights, bumper parts and sideskirts. Pictures below:
That's the bodywork pretty much finished now. I need to add a couple more rivets to the RH side skirt as my rivet gun gave up the ghost halfway through but that's about it until the vinyl goes on. Pretty pleased with the look. Glad I did the headlights in black as I think it breaks up the yellow a bit and adds a bit more aggression to the front end.
I'm in the process of buying an MFactory gear kit so will be finishing off the gearbox mounts this weekend and then the box will come out to have the gear kit and Quaife diff fitted. Once that is done, all of the engine accessories can go back on and things should start to come together apace.
Until next time...
Thread Starter
PassionFord Post Whore!!
iTrader: (1)
Joined: Jan 2006
Posts: 5,412
Likes: 186
From: Norfolk Drives: Couple of Fords
Just local SVs for the moment to get into the groove, though I will probably do a track day or two first, just to make sure nothing falls off.
There are a few events I'd like to tick off the list but we'll see how it goes. Would like a crack at Epynt some time and I'll try and do the prom stages at some point, but dreams of the IoM might have to wait a while yet
There are a few events I'd like to tick off the list but we'll see how it goes. Would like a crack at Epynt some time and I'll try and do the prom stages at some point, but dreams of the IoM might have to wait a while yet

10K+ Poster!!
Joined: May 2010
Posts: 12,785
Likes: 347
From: West Wales
Just local SVs for the moment to get into the groove, though I will probably do a track day or two first, just to make sure nothing falls off.
There are a few events I'd like to tick off the list but we'll see how it goes. Would like a crack at Epynt some time and I'll try and do the prom stages at some point, but dreams of the IoM might have to wait a while yet
There are a few events I'd like to tick off the list but we'll see how it goes. Would like a crack at Epynt some time and I'll try and do the prom stages at some point, but dreams of the IoM might have to wait a while yet
Thread Starter
PassionFord Post Whore!!
iTrader: (1)
Joined: Jan 2006
Posts: 5,412
Likes: 186
From: Norfolk Drives: Couple of Fords
Thanks chaps.
It won't be a bad hack. Order the MFactory gear kit so that should help the pace.
It could just do with another 100bhp really.
It won't be a bad hack. Order the MFactory gear kit so that should help the pace.
It could just do with another 100bhp really.


Thread Starter
PassionFord Post Whore!!
iTrader: (1)
Joined: Jan 2006
Posts: 5,412
Likes: 186
From: Norfolk Drives: Couple of Fords
Yes indeed they are. Destined for another project eventually!
This is just one of them  Yes, spoke to Mark the other week and he mentioned that you're in Chelmsford. I work in Springfield now. Mark said about meeting up at some point.
Thanks bud. Not very with this one. The suspension is mostly standard bar slightly wider track, will have an MFactory gear kit, maybe cams and throttle bodies eventually.
I do have a proper GSE Escort tucked away that's being rebuilt very slowly.
Thanks bud. Not very with this one. The suspension is mostly standard bar slightly wider track, will have an MFactory gear kit, maybe cams and throttle bodies eventually.
I do have a proper GSE Escort tucked away that's being rebuilt very slowly.
Thread Starter
PassionFord Post Whore!!
iTrader: (1)
Joined: Jan 2006
Posts: 5,412
Likes: 186
From: Norfolk Drives: Couple of Fords
Just a small update:
I've made up the lower gearbox mount but not taken any pictures. I've also dropped the gearbox off at a local place to have the diff and final drive from the old box fitted into it, along with these:
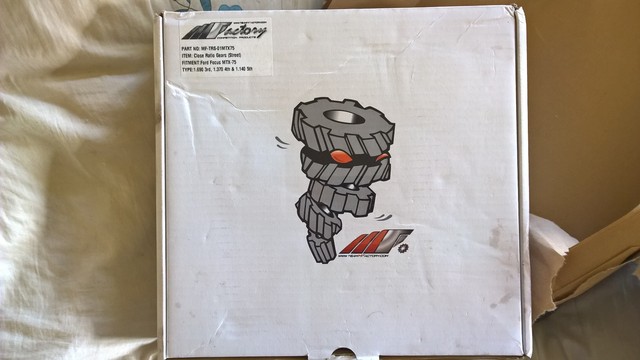
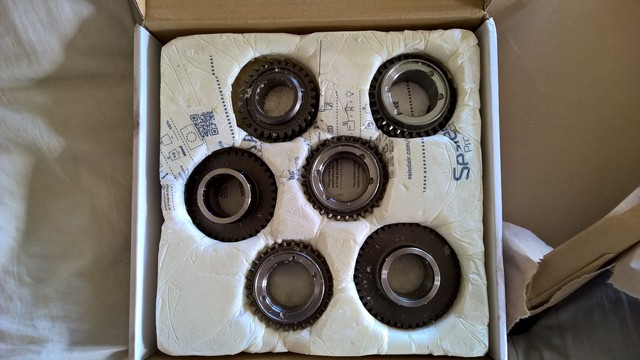
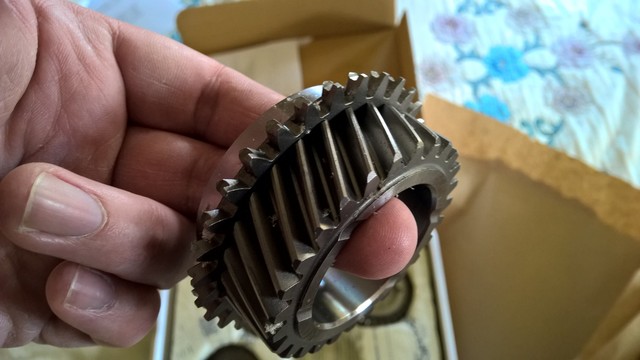
MFactory 3rd, 4th and 5th gear which should drop the top speed down to 110-115mph depending on the tyre size. Doesn't sound a lot but more than enough for most rallies and should help the car along a bit. You rarely used to get out of third or fourth so this should help make the post of the few ponies it's got.
I've also bought the warning lights for the dash, some materials to make the interior rear quarter trim panels and dash board inserts and arranged to have a new loom made, so things are getting there.
Once the gearbox is back, that will be fitted so then the shafts can go in, along with the alternator, exhaust rad etc etc.
More to come soon.
I've made up the lower gearbox mount but not taken any pictures. I've also dropped the gearbox off at a local place to have the diff and final drive from the old box fitted into it, along with these:


MFactory 3rd, 4th and 5th gear which should drop the top speed down to 110-115mph depending on the tyre size. Doesn't sound a lot but more than enough for most rallies and should help the car along a bit. You rarely used to get out of third or fourth so this should help make the post of the few ponies it's got.
I've also bought the warning lights for the dash, some materials to make the interior rear quarter trim panels and dash board inserts and arranged to have a new loom made, so things are getting there.
Once the gearbox is back, that will be fitted so then the shafts can go in, along with the alternator, exhaust rad etc etc.
More to come soon.
Last edited by massivewangers; May 3, 2016 at 04:56 PM.
Thread Starter
PassionFord Post Whore!!
iTrader: (1)
Joined: Jan 2006
Posts: 5,412
Likes: 186
From: Norfolk Drives: Couple of Fords
Another small update. Picked the gearbox up having been rebuilt. Sadly they couldn't make the 3.8 RS final drive work but luckily they had a 3.56 out of another Focus box so only slightly longer. Means top speed will be around 118mph instead of 110 so still more than adequate for my needs. They even painted it silver. All of it. Even the selector mechanism and plugs for some reason. Very strange. Anyway, will be fitted once I buy and fit a new clutch release bearing so hopefully at the weekend.
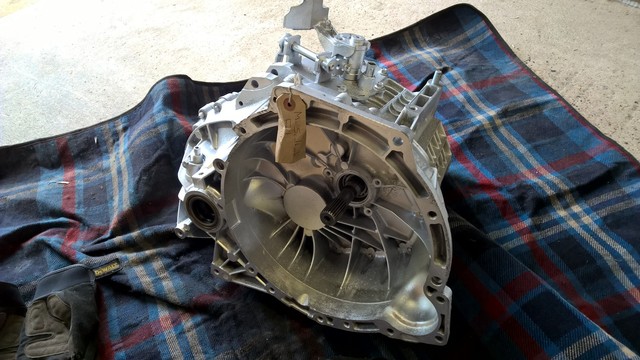
And no, you can't have the tartan blanket.
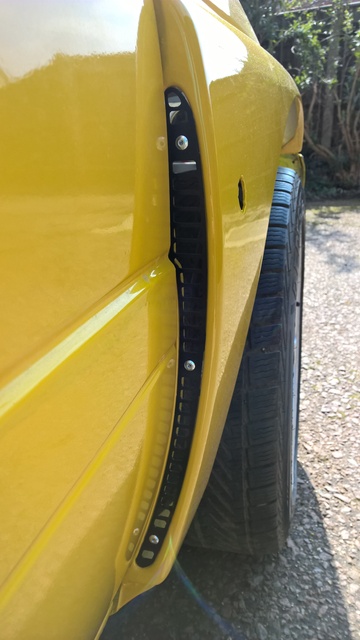
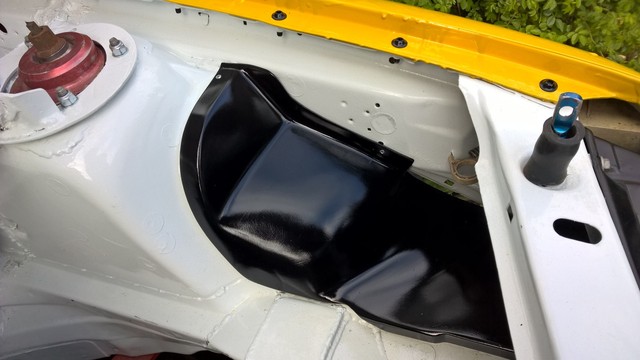
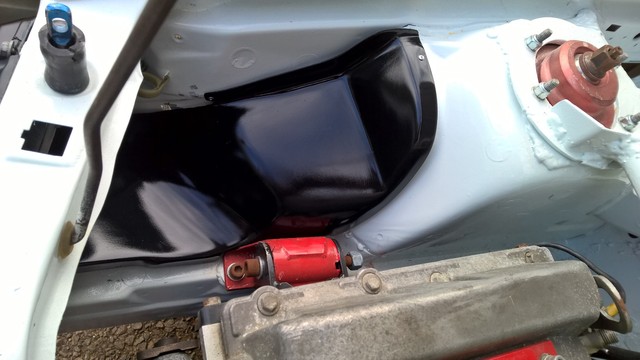
Elsewhere, I didn't get much done as did some other stuff this weekend. I did fit the inner front arch guards though. These have been a total pain in the behind. Had previously been painted but every time I tried to repaint them, the primer reacted, so I had to sand them right back to the gel coat which was a bit of a twat. Should have sanded them more so they were smooth, but a bit of a pointless exercise really. Anyway, they're black and fitted, so it's on to the next job.
As I say, hopefully the box will go in at the weekend, then I can start messing around with drive shafts.
Until next time.


And no, you can't have the tartan blanket.
Elsewhere, I didn't get much done as did some other stuff this weekend. I did fit the inner front arch guards though. These have been a total pain in the behind. Had previously been painted but every time I tried to repaint them, the primer reacted, so I had to sand them right back to the gel coat which was a bit of a twat. Should have sanded them more so they were smooth, but a bit of a pointless exercise really. Anyway, they're black and fitted, so it's on to the next job.


As I say, hopefully the box will go in at the weekend, then I can start messing around with drive shafts.
Until next time.
Thread Starter
PassionFord Post Whore!!
iTrader: (1)
Joined: Jan 2006
Posts: 5,412
Likes: 186
From: Norfolk Drives: Couple of Fords
Yeah just whenever it's done to be honest. Would be nice to do something this year but it very much depends on work and the like so just plodding along with it really 