
My Transit Connect


Thread Starter
Enthusiast
Joined: Dec 2004
Posts: 138
Likes: 0
From: Colchester, Essex
Im copying this from another thread as im looking for some conversion advice and thought id let you see all thats been done so far. It actually got this 1st June 2012 so all thats happened in the last year.......
As my Mk6 Transit has broke yet again, i picked up another addition, and im sure will become another ongoing project!


The interior was disgusting so i spent an hour cleaning it up, but itll need more yet:

i collected some of my facelift parts:

Bought some wheels, an ST steering wheel, all the towing eye caps and parking sensor collars, a set of parking sensors, a new side door as mine is damaged, and an electric window/mirror kit including the door cards, switches, looms and mirrors themselves!
I also bought a new weather strip as mine started peeling, and was a bugger to get the sticky stuff off so it was a clean surface to stick on the new one.
Then treated it to a wash. Was going to polish it too but i think ill get it mopped first! Heres the pics:
Current door:

New Door:

Getting the crap off:

And new one in place:

Parking sensor kit and the collars/towing eye covers:

And all clean

Also another one parked next to me at work today. A SWB low roof with some 18s on:

picked up my electric kit.

So, armed with the toffee wheel.....
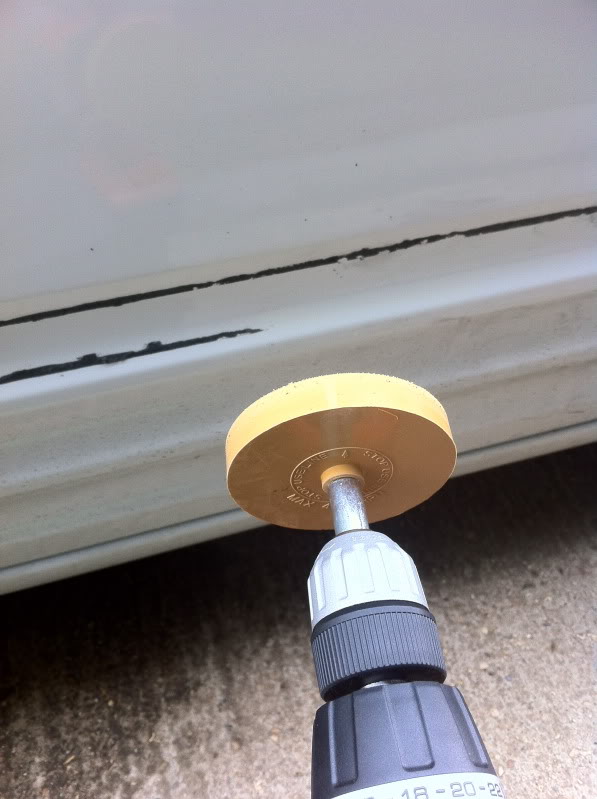
I got cracking getting the side trim residue off:

And done

And working out arch placement for when the new wheels go on:

Also received my Vauxhall Irmscher gear knob thats off for painting to match a few details ill be doing in the future:

And its wearing its temporary Vauxhall Alloys:

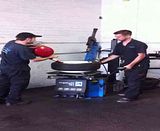
Today then my 11 days off began so i started on the connect. Went to the painters and all my stuff was mid prep:


And he was also working on his race car:

And today the first two banded steels arrived. these are the 2" front ones, but needed to try them on the back to see how much more i can get away with on the rear:


So that shows a 2" band fits straight on the rear. So now to use a primitive gauge to check distance. This is what i wanted, 4":


But far too much so i think im going to go with this which is 3":

I should still be able to open the side door without cutting it, but will still need an extended arch So to continue stripping the van down:

Then turned it round and tried this wheel on where itll end up:


And carried on stripping:


i used the heatgun to split my headlights:

Sanded down the insides:


Whilst my van was in having the damaged sill repaired:


I think my vans had a good whack to the passenger side in the past as there was a lot of filler in the old door. More to prove this shortly in this update.
Washed the rear down:

And fitted up the new bumper with the reversing sensors. The top trim is a crap fit so i think ill have to get an OE one:

Fed the wires through for the sensors and also found the rear 12v plug, and speaker connections:

Also shaved all the old sealant off the headlight lenses (god it was boring!!!):

Got a hand to fit the new side door:


But it didnt line up with the bottom of the passenger door. Top gaps, rear gap and meeting the sill was fine though. Appears the passenger doors been bent in the same way the side door was. So had to make the sliding door fit tighter by cutting and welding the lower runner bracket. Now the door shuts and lines up, but now wont lock when closed. When its on the latch it locks, but obviously opens again as its not shut properly. I checked the connections with a power probe with the door open and theyre all ok, So it seems it now shuts too tight for the contacts so ill look into that tomorrow. Having the hump i moved onto stripping the van of the seats and the bulkhead:

moved on to stripping the doors:


And began fitting up the electric window mechanisms, looms and mirrors. Put the three fuses in (one for the mirrors, one for the windows, and one for the heating) and it all worked! Im lucky enough to be plug and play

Only issue was the Mondeo handles were completely different

My new plates turned up. I didnt think 3/4 size would be that noticeable but clearly they are lol Show use it is then!

Bit of research on the handles said you have to cut the pin. So one on the left cut, one on the right not.....

Pin cut from the mondeo and the connect handles and both the same bar colour:

Mondeo handles in the mondeo case, and then one in the connect case:

Cut the speaker connectors off and rewired:

And Infinity speakers fitted with the handles:

Fitted the 12v supply in the back and added the fuse and now all working:

Stripped my old manual mirrors down so i can have the cases painted/wrapped:

Got all the door cards back on:

Then i stripped out the arch liner to run the amp power cable properly:

And installed the grommet:

Then ran it through the centre instead of down the sides:

Then pushed it outside and t-cut the back up as it looked a bit tired. Not polished it yet but it looks better already:

Popped to the scrappy to weigh in some bits and came back to a sleepy Dean lol:

Once he woke up we got cracking stripping the rear end down:

And the beams off ready for welding

Road trip tomorrow to Devon to collect an RS Turbo
Done the headlight buckets in black:

New rear beam:

Had to cut this much off the shock bolt (to make the total length to 3" so it cleared the U bolts:

And on:

Oh bugger the Jack wont come out lol

With a lift from the arch and an assistant it came out:


Out side to turn it around (notice newer bumper rested in place for now)

Back in stripping the front down:

And out side! Just got to fit the rear hangers, then straighten the rear beam up so its straight and even:


So first things first was to get the headlights resealed:


Then reverse onto some blocks as it was too low for the jack:

Fit the adjustable hangers:

And end up on hole 3:

Top one is the second hole, bottom pic the third. So still have 1 for slammage and 4 for load lugging:

Sat down for a cuppa and noticed the mopping marks:

So fitted the front end on and took it outside for a wash and a polish. It looks OK but the colour match is well off and pattern parts fit ish lol:


And lastly my sticker. Not put one of these on anything since i ran my conversions business lol:

My rear wheels arrived today


The fronts are awaiting paint:

Tried the rears on:


Then tried one on the other side to check the SLD clearance:


The door will go this far without touching the wheel:


But fully open will touch, so ill need to notch the SLD a touch:


When lowering my van for some reason i binned the bearings which left the springs like this:

So replaced topmounts and added the bearings back in lol
Also fitted my 'parts catalogue find' �20 shortened rear shocks. Ive not tested them with a loaded van but theyre spot on unloaded! Sorry for the poor pics


And my wheels are back from the painters:


Just need to get tyres and new wheelnuts!
Started on carpeting the van:

Got dark so i improvised:

And one side done. Bit of creasing round the tunnel but i can live with that:

I did the drivers side with next to no creases but forgot to take a pic lol
I also cut this much off the gear stick for a much shorter throw:

Took the wheels to SuperTyres in Maldon, and i cant rate them enough:

And rushed back to get them on!


And got the gear knob and put a seat back in now its carpeted. Just got to collect some Recaros!

Heres my rather short gear stick. Its like flicking a rocker switch now lol

And started making a better bulkhead...

Todays job was to remove the panelling:

And get it all carpeted:


Then used masking tape to mark where my sub boxes will finish:

And mount the amps:


Aldo fitted my tailored mats. Black with Orange trim:

And fitted my new petrol anodised wheel nuts:


For the third time a ford wheel nut stripped its thread!

Decided the letterbox in my bulkhead was a bit dull so decided on an oval with the same proportions of a ford badge, just larger:
So first you measure out youre dimensions, nock in 3 nails, one at either end and one on the top edge, tie some string round the 3 then remove the top one and draw keeping the string taught:


Then cover:

Fit Speakers:

Then fit Subs. I will cover the boxes too at some point:

Going to order some perspex for the oval too.
stripped the intake pipe off to fit the egr blank:


You can just see it fitted:

Then had a worrying time. The heaviest thing thats been on the ramp so far as it was fully loaded with wheels/doors/other parts:

Went all the way up and was fine whilst we fitted the towbar, so have some confidence in it now lol
Tiger sealed the bung back in the side door and masked to hold it:

And cleaned it up ready to be on show at players tomorrow

And decorated the bonnet:

Then rescued the Vito. Unreliable Germans!

Did nothing bar show it off today at Players 2012, although it made me realise how poor the van is. Ive got a lot to do!:


Well ive bought the engine donor. Just got to collect it
So todays lot of supplies:

And a slightly better picture of my bargain mystery rear shocks fitted:

Yep, the drive shaft was definitely fooked:

And after finally getting the joint out the box and getting covered in grease, i got the new one in:

Started on the arch extensions. 3 Weeks from the US but at least theyre here now:


Masked up ready to cut:

And done:


So now i need to decide about colour. Do i paint the arches white, and leave the extensions black or get new black arches for the front?
I dont think the extensions will paint well due to being semi flexible rubber.
I also might be able to get away with some spacers on the back too
we went off to Fleet in Hampshire to collect another shed:

Then saw this on the way home! No wheel arches, no plate, nor did the car fit! Each wheel was perched on the edge!

So got it in the workshop:

And got it stripped down:


Had a little mishap with the connect:

But soon rectified:

And the mirrors have come back painted, ready to be wrapped:

Got my locksmith to make me a brand new flip key

I stripped the interior out:


And started fitting the flocked bits in:


Then my 10 and 11J wheels turned up:


Then stripped the axle off:

And had it narrowed by 4 inches so i can slam it on the current wheels:

Decided it wasnt low enough so dropped it down some more:


So now have some low milage -60mm from springs for sale if anyone wants some
Then my new wider steelies turned up from the painters:

So took them to the fitters to have the tyres fitted:


And brought them home to fit them


So thats 10" wide on the front with 205s and 11" on the rear with 215s. With the narrowed rear beam i no longer need the arch extensions so had some new arches painted for the rear

My old steelies are for sale if anyones interested. Theyre 9" and 10" with 195s on.....
And that brings us up to today!
As my Mk6 Transit has broke yet again, i picked up another addition, and im sure will become another ongoing project!
The interior was disgusting so i spent an hour cleaning it up, but itll need more yet:
i collected some of my facelift parts:
Bought some wheels, an ST steering wheel, all the towing eye caps and parking sensor collars, a set of parking sensors, a new side door as mine is damaged, and an electric window/mirror kit including the door cards, switches, looms and mirrors themselves!
I also bought a new weather strip as mine started peeling, and was a bugger to get the sticky stuff off so it was a clean surface to stick on the new one.
Then treated it to a wash. Was going to polish it too but i think ill get it mopped first! Heres the pics:
Current door:
New Door:
Getting the crap off:
And new one in place:
Parking sensor kit and the collars/towing eye covers:
And all clean
Also another one parked next to me at work today. A SWB low roof with some 18s on:
picked up my electric kit.
So, armed with the toffee wheel.....
I got cracking getting the side trim residue off:
And done
And working out arch placement for when the new wheels go on:
Also received my Vauxhall Irmscher gear knob thats off for painting to match a few details ill be doing in the future:
And its wearing its temporary Vauxhall Alloys:
Today then my 11 days off began so i started on the connect. Went to the painters and all my stuff was mid prep:
And he was also working on his race car:
And today the first two banded steels arrived. these are the 2" front ones, but needed to try them on the back to see how much more i can get away with on the rear:
So that shows a 2" band fits straight on the rear. So now to use a primitive gauge to check distance. This is what i wanted, 4":
But far too much so i think im going to go with this which is 3":
I should still be able to open the side door without cutting it, but will still need an extended arch So to continue stripping the van down:
Then turned it round and tried this wheel on where itll end up:
And carried on stripping:
i used the heatgun to split my headlights:
Sanded down the insides:
Whilst my van was in having the damaged sill repaired:
I think my vans had a good whack to the passenger side in the past as there was a lot of filler in the old door. More to prove this shortly in this update.
Washed the rear down:
And fitted up the new bumper with the reversing sensors. The top trim is a crap fit so i think ill have to get an OE one:
Fed the wires through for the sensors and also found the rear 12v plug, and speaker connections:
Also shaved all the old sealant off the headlight lenses (god it was boring!!!):
Got a hand to fit the new side door:
But it didnt line up with the bottom of the passenger door. Top gaps, rear gap and meeting the sill was fine though. Appears the passenger doors been bent in the same way the side door was. So had to make the sliding door fit tighter by cutting and welding the lower runner bracket. Now the door shuts and lines up, but now wont lock when closed. When its on the latch it locks, but obviously opens again as its not shut properly. I checked the connections with a power probe with the door open and theyre all ok, So it seems it now shuts too tight for the contacts so ill look into that tomorrow. Having the hump i moved onto stripping the van of the seats and the bulkhead:
moved on to stripping the doors:
And began fitting up the electric window mechanisms, looms and mirrors. Put the three fuses in (one for the mirrors, one for the windows, and one for the heating) and it all worked! Im lucky enough to be plug and play
Only issue was the Mondeo handles were completely different
My new plates turned up. I didnt think 3/4 size would be that noticeable but clearly they are lol Show use it is then!
Bit of research on the handles said you have to cut the pin. So one on the left cut, one on the right not.....
Pin cut from the mondeo and the connect handles and both the same bar colour:
Mondeo handles in the mondeo case, and then one in the connect case:
Cut the speaker connectors off and rewired:
And Infinity speakers fitted with the handles:
Fitted the 12v supply in the back and added the fuse and now all working:
Stripped my old manual mirrors down so i can have the cases painted/wrapped:
Got all the door cards back on:
Then i stripped out the arch liner to run the amp power cable properly:
And installed the grommet:
Then ran it through the centre instead of down the sides:
Then pushed it outside and t-cut the back up as it looked a bit tired. Not polished it yet but it looks better already:
Popped to the scrappy to weigh in some bits and came back to a sleepy Dean lol:
Once he woke up we got cracking stripping the rear end down:
And the beams off ready for welding
Road trip tomorrow to Devon to collect an RS Turbo
Done the headlight buckets in black:
New rear beam:
Had to cut this much off the shock bolt (to make the total length to 3" so it cleared the U bolts:
And on:
Oh bugger the Jack wont come out lol
With a lift from the arch and an assistant it came out:
Out side to turn it around (notice newer bumper rested in place for now)
Back in stripping the front down:
And out side! Just got to fit the rear hangers, then straighten the rear beam up so its straight and even:
So first things first was to get the headlights resealed:
Then reverse onto some blocks as it was too low for the jack:
Fit the adjustable hangers:
And end up on hole 3:
Top one is the second hole, bottom pic the third. So still have 1 for slammage and 4 for load lugging:
Sat down for a cuppa and noticed the mopping marks:
So fitted the front end on and took it outside for a wash and a polish. It looks OK but the colour match is well off and pattern parts fit ish lol:
And lastly my sticker. Not put one of these on anything since i ran my conversions business lol:
My rear wheels arrived today
The fronts are awaiting paint:
Tried the rears on:
Then tried one on the other side to check the SLD clearance:
The door will go this far without touching the wheel:
But fully open will touch, so ill need to notch the SLD a touch:
When lowering my van for some reason i binned the bearings
So replaced topmounts and added the bearings back in lol
Also fitted my 'parts catalogue find' �20 shortened rear shocks. Ive not tested them with a loaded van but theyre spot on unloaded! Sorry for the poor pics
And my wheels are back from the painters:
Just need to get tyres and new wheelnuts!
Started on carpeting the van:
Got dark so i improvised:
And one side done. Bit of creasing round the tunnel but i can live with that:
I did the drivers side with next to no creases but forgot to take a pic lol
I also cut this much off the gear stick for a much shorter throw:
Took the wheels to SuperTyres in Maldon, and i cant rate them enough:
And rushed back to get them on!
And got the gear knob and put a seat back in now its carpeted. Just got to collect some Recaros!
Heres my rather short gear stick. Its like flicking a rocker switch now lol
And started making a better bulkhead...
Todays job was to remove the panelling:
And get it all carpeted:
Then used masking tape to mark where my sub boxes will finish:
And mount the amps:
Aldo fitted my tailored mats. Black with Orange trim:
And fitted my new petrol anodised wheel nuts:
For the third time a ford wheel nut stripped its thread!
Decided the letterbox in my bulkhead was a bit dull so decided on an oval with the same proportions of a ford badge, just larger:
So first you measure out youre dimensions, nock in 3 nails, one at either end and one on the top edge, tie some string round the 3 then remove the top one and draw keeping the string taught:
Then cover:
Fit Speakers:
Then fit Subs. I will cover the boxes too at some point:
Going to order some perspex for the oval too.
stripped the intake pipe off to fit the egr blank:
You can just see it fitted:
Then had a worrying time. The heaviest thing thats been on the ramp so far as it was fully loaded with wheels/doors/other parts:
Went all the way up and was fine whilst we fitted the towbar, so have some confidence in it now lol
Tiger sealed the bung back in the side door and masked to hold it:
And cleaned it up ready to be on show at players tomorrow
And decorated the bonnet:
Then rescued the Vito. Unreliable Germans!
Did nothing bar show it off today at Players 2012, although it made me realise how poor the van is. Ive got a lot to do!:
Well ive bought the engine donor. Just got to collect it
So todays lot of supplies:
And a slightly better picture of my bargain mystery rear shocks fitted:
Yep, the drive shaft was definitely fooked:
And after finally getting the joint out the box and getting covered in grease, i got the new one in:
Started on the arch extensions. 3 Weeks from the US but at least theyre here now:
Masked up ready to cut:
And done:
So now i need to decide about colour. Do i paint the arches white, and leave the extensions black or get new black arches for the front?
I dont think the extensions will paint well due to being semi flexible rubber.
I also might be able to get away with some spacers on the back too
we went off to Fleet in Hampshire to collect another shed:
Then saw this on the way home! No wheel arches, no plate, nor did the car fit! Each wheel was perched on the edge!
So got it in the workshop:
And got it stripped down:
Had a little mishap with the connect:
But soon rectified:
And the mirrors have come back painted, ready to be wrapped:
Got my locksmith to make me a brand new flip key
I stripped the interior out:


And started fitting the flocked bits in:


Then my 10 and 11J wheels turned up:


Then stripped the axle off:

And had it narrowed by 4 inches so i can slam it on the current wheels:

Decided it wasnt low enough so dropped it down some more:


So now have some low milage -60mm from springs for sale if anyone wants some
Then my new wider steelies turned up from the painters:

So took them to the fitters to have the tyres fitted:


And brought them home to fit them


So thats 10" wide on the front with 205s and 11" on the rear with 215s. With the narrowed rear beam i no longer need the arch extensions so had some new arches painted for the rear

My old steelies are for sale if anyones interested. Theyre 9" and 10" with 195s on.....
And that brings us up to today!
Last edited by Drizz; Jun 5, 2013 at 08:40 PM.


Thread Starter
Enthusiast
Joined: Dec 2004
Posts: 138
Likes: 0
From: Colchester, Essex
Mental good or mental bad?
I'm glad some like it. I wasn't sure if it would be welcome on here as its not even slightly quick.... Yet
White arches will be on tomorrow. It's on show at Goodwood Saturday so got a couple of busy days to get it as up to scratch as I can...
I'm glad some like it. I wasn't sure if it would be welcome on here as its not even slightly quick.... Yet
White arches will be on tomorrow. It's on show at Goodwood Saturday so got a couple of busy days to get it as up to scratch as I can...
Trending Topics

Thread Starter
Enthusiast
Joined: Dec 2004
Posts: 138
Likes: 0
From: Colchester, Essex
Got this switch out of a connect in a scrappy today, and its a Ford switch too. Never knew they came with NOS as standard lol

Then fitted the colour coded arches:


And a pic of the current state of the interior:


Then fitted the colour coded arches:


And a pic of the current state of the interior:


Thread Starter
Enthusiast
Joined: Dec 2004
Posts: 138
Likes: 0
From: Colchester, Essex
Cheers guys!
Next on the to-do list are have the door cards and seats trimmed, then convert it to either a more powerful TDCi or a zetec turbo. Im favouring the latter at the mo due to the milage ill need to be doing in it, but as shown above i have a silver top ready to convert....
Next on the to-do list are have the door cards and seats trimmed, then convert it to either a more powerful TDCi or a zetec turbo. Im favouring the latter at the mo due to the milage ill need to be doing in it, but as shown above i have a silver top ready to convert....
Last edited by Drizz; Jun 7, 2013 at 05:01 AM.


Thread Starter
Enthusiast
Joined: Dec 2004
Posts: 138
Likes: 0
From: Colchester, Essex
No mate the wheels went to another connect owner, and i refitted the springs to raise it back up a bit as the milage im doing is horrific now. But this one will probably be going back to standard eventually and the add on bits going on a SWB one that ill buy.
I want to not rush the engine conversion, so taking this off the road isnt really an option, so i plan to get another, do the engine conversion, swap all the good bits over, and sell this as a standard one....
I want to not rush the engine conversion, so taking this off the road isnt really an option, so i plan to get another, do the engine conversion, swap all the good bits over, and sell this as a standard one....

Thread
Thread Starter
Forum
Replies
Last Post
mark94
Ford Mondeo Including ST
5
Oct 10, 2023 06:52 PM
Mark RS
Ford RS Cosworth Parts for Sale
7
Oct 12, 2015 06:01 AM