
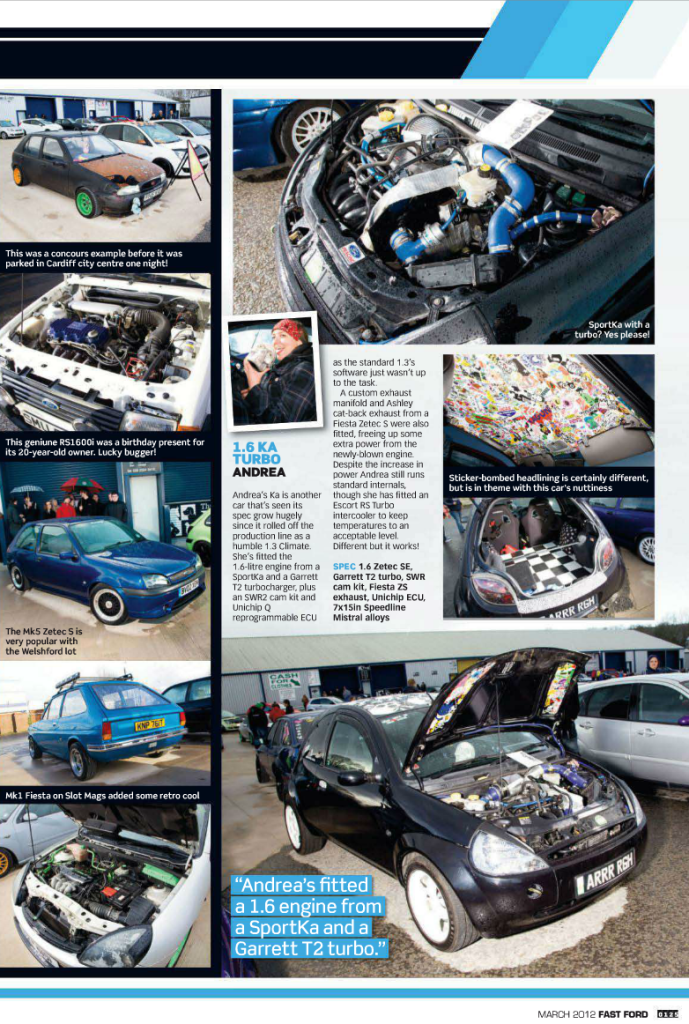
Ford Ka Turbo Project


Thread Starter
ɔɐᴘʈᴀᴉи ᴀᵴʙο
Joined: Aug 2011
Posts: 48
Likes: 1
From: Neath, South Wales
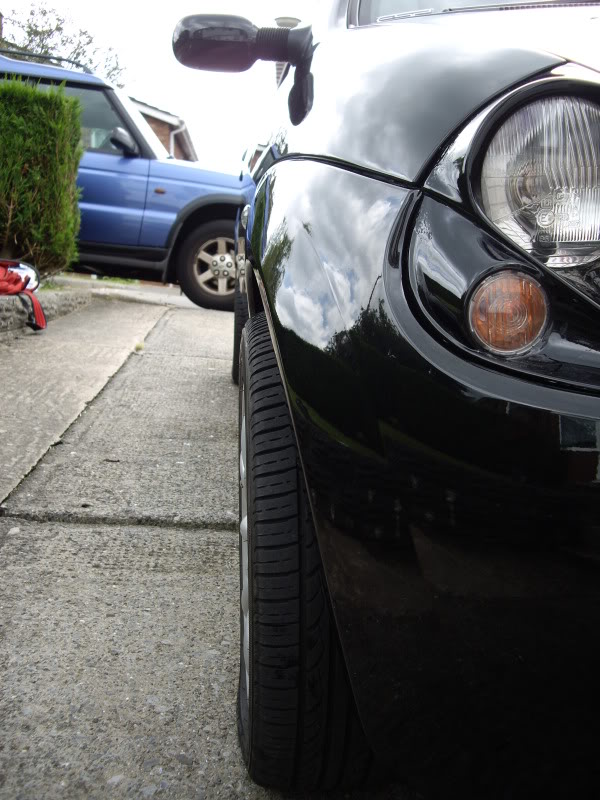
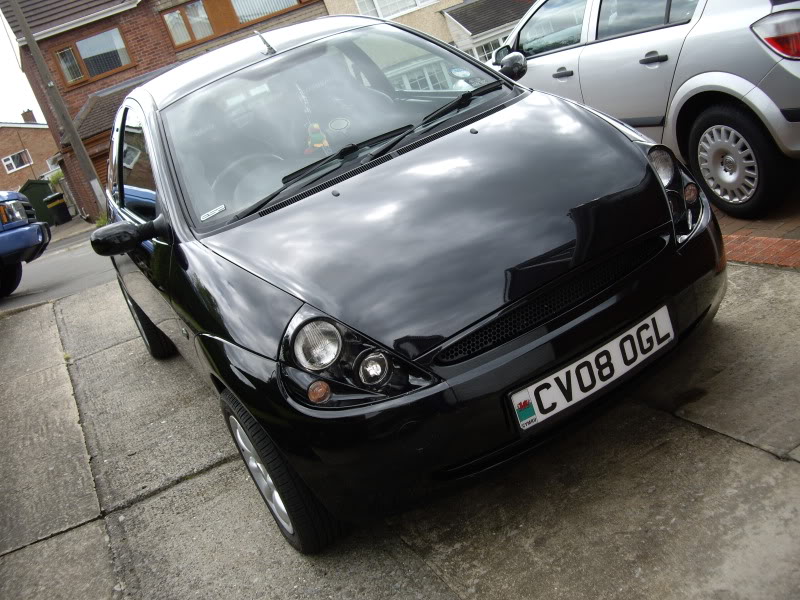
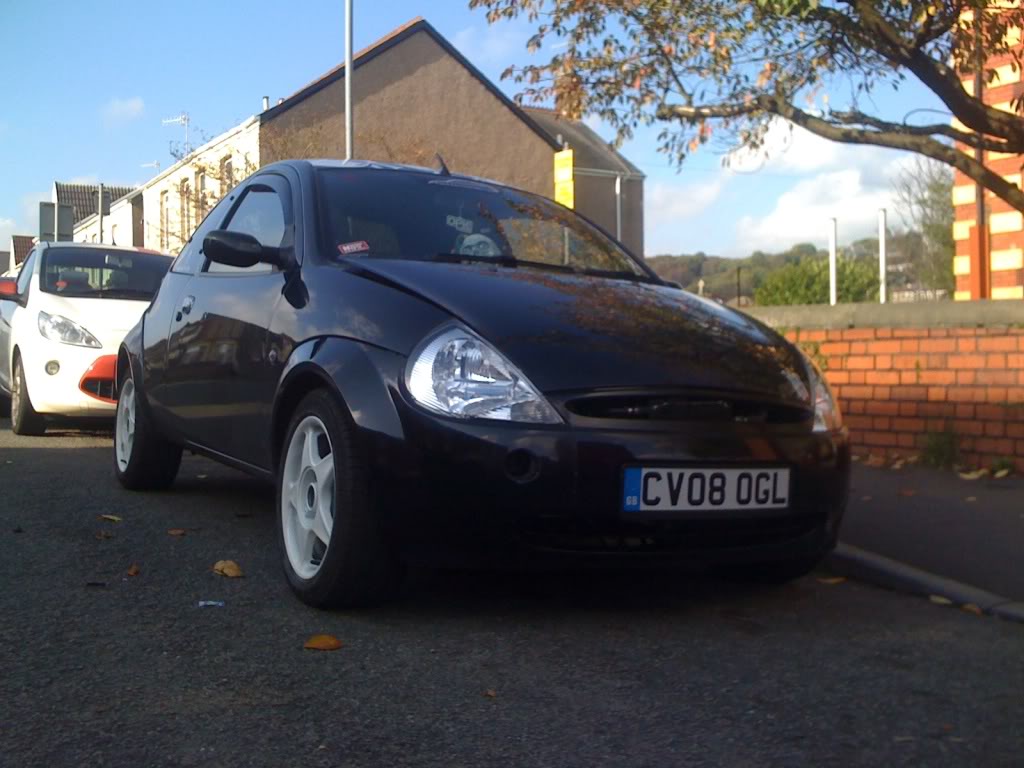
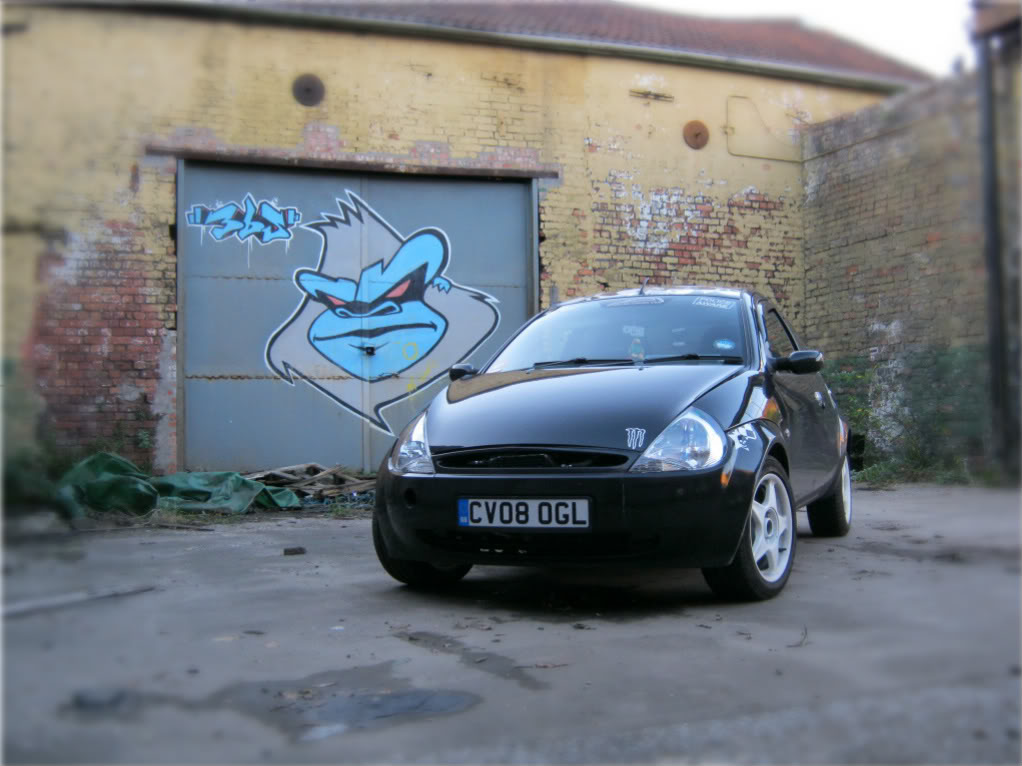
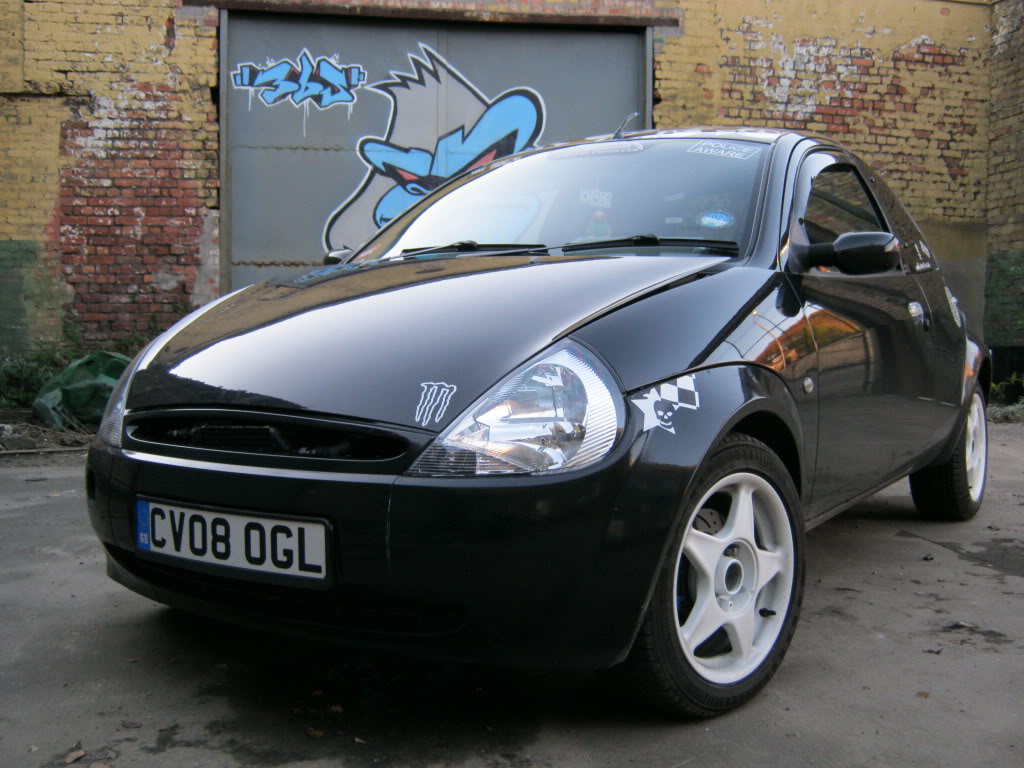
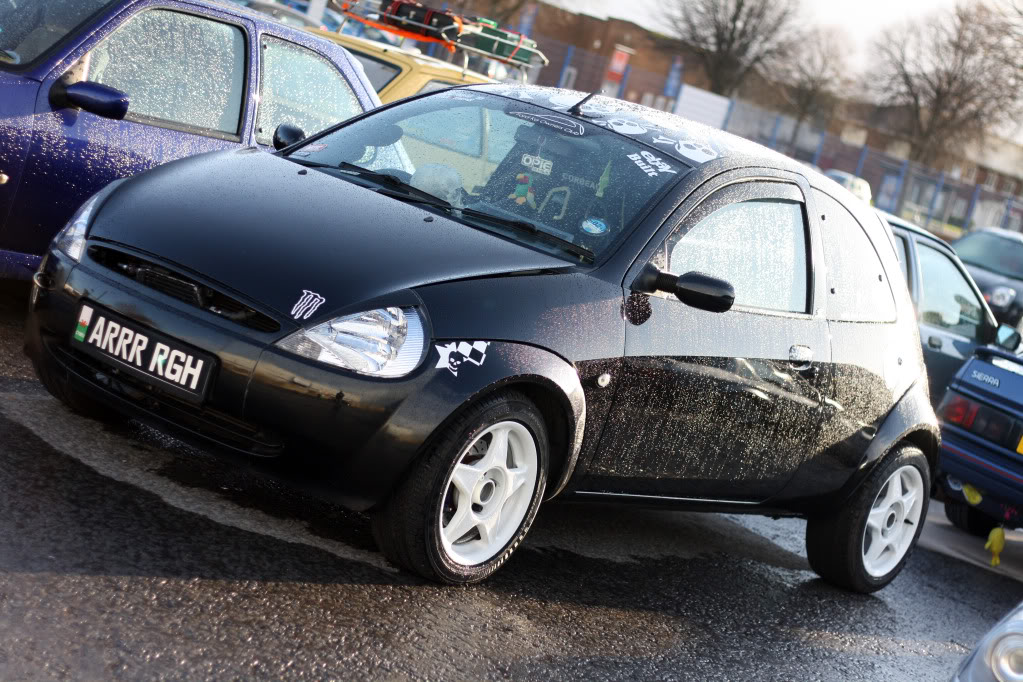
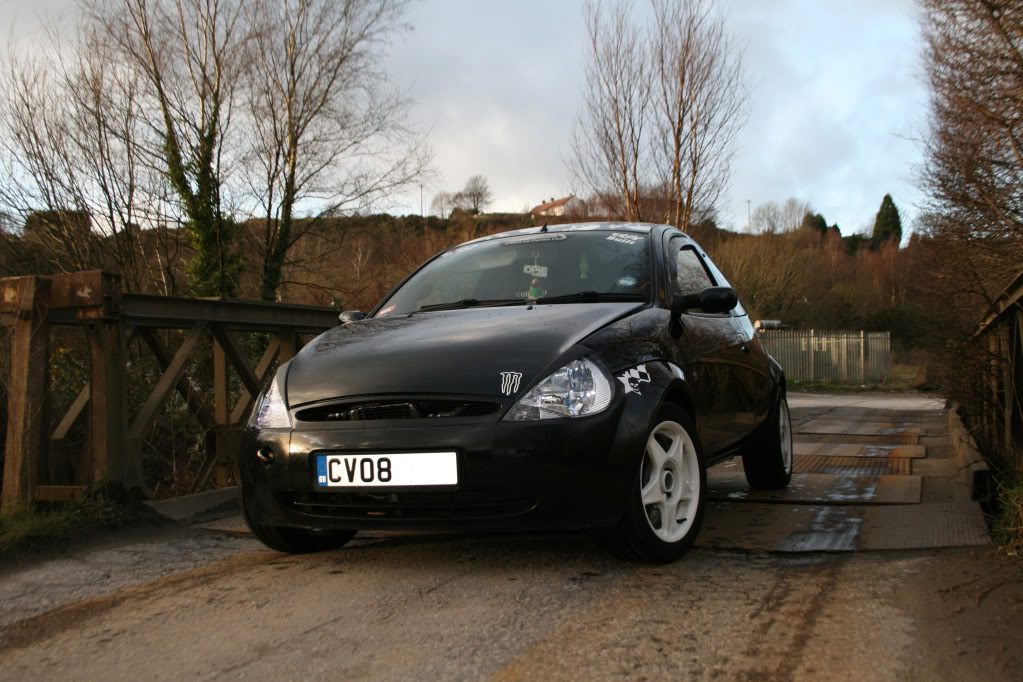
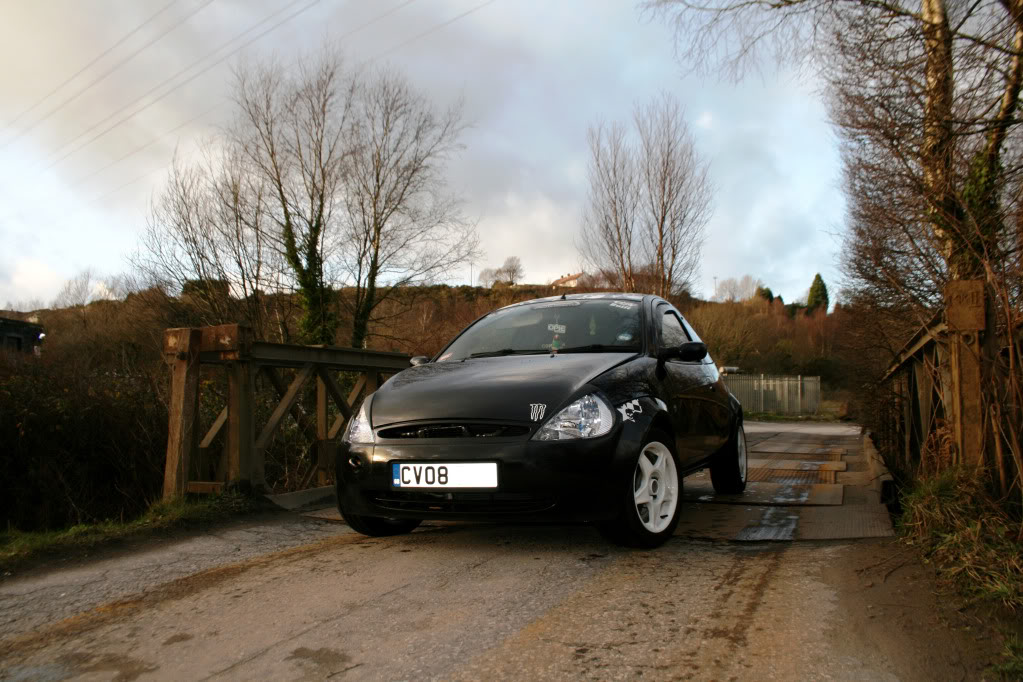
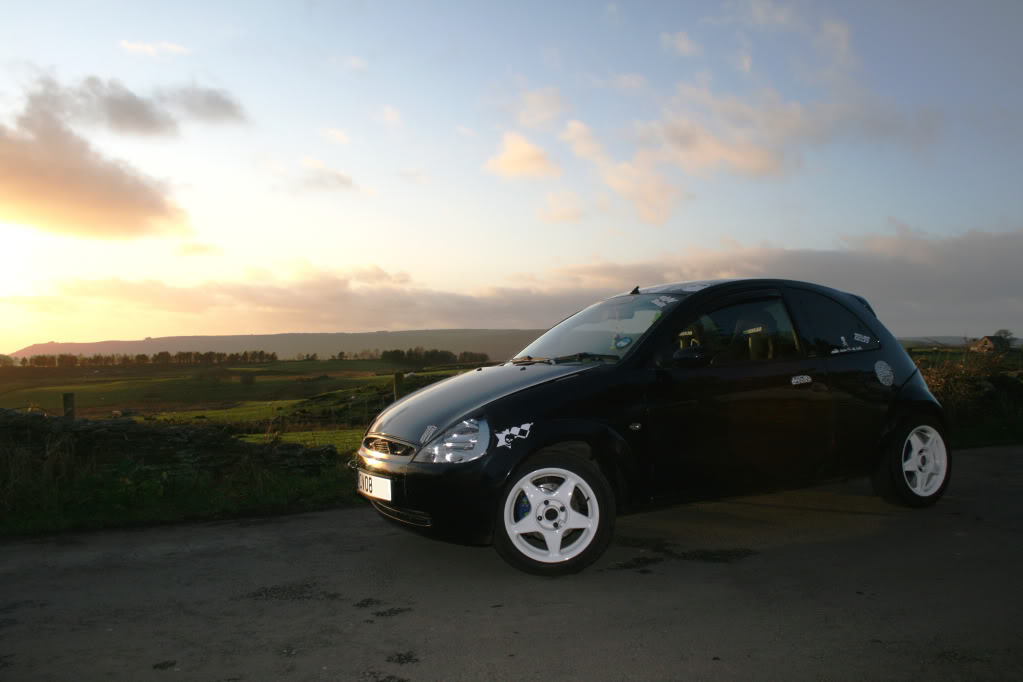
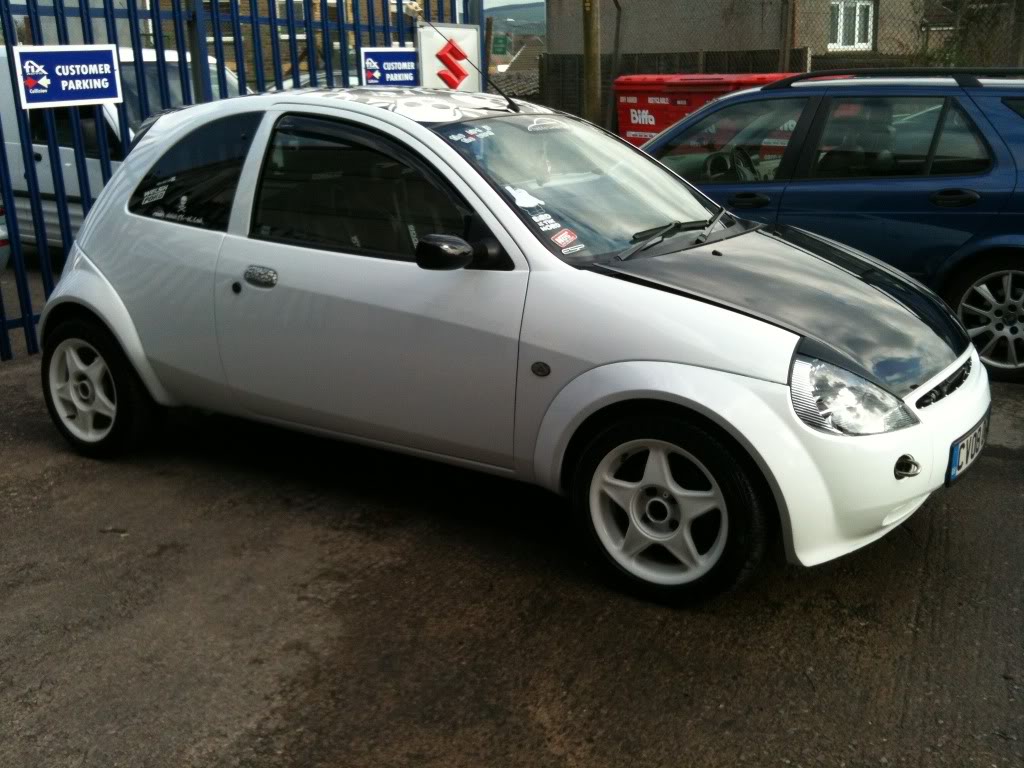
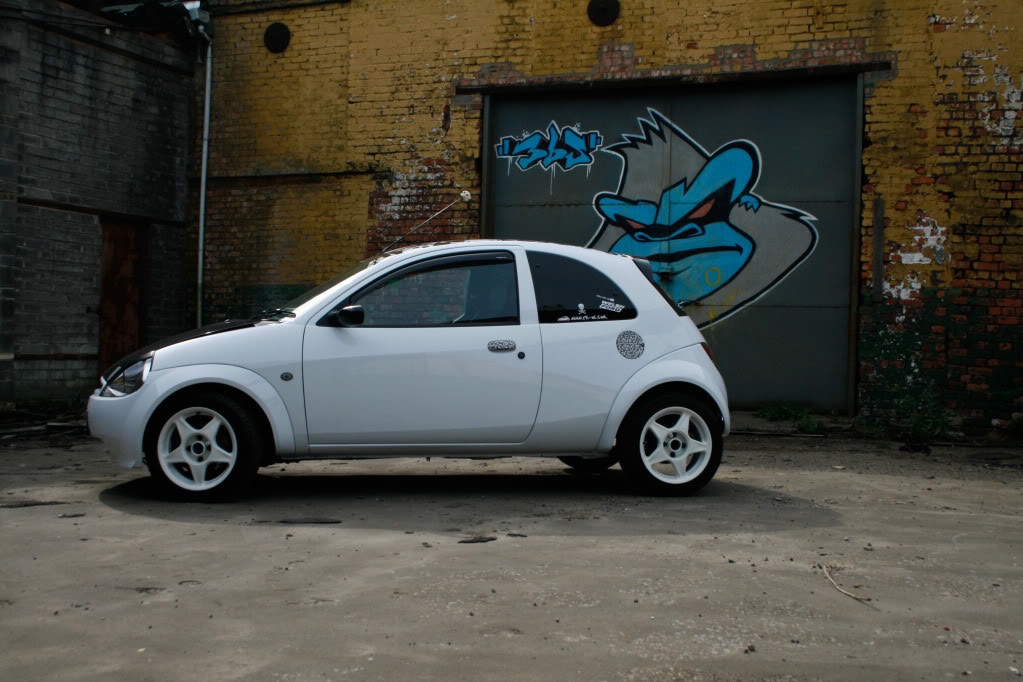
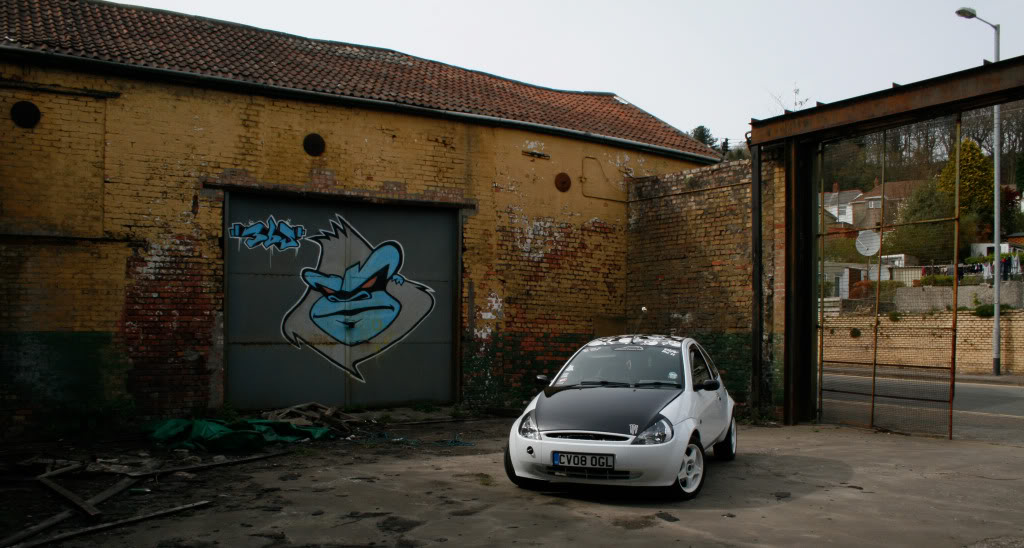
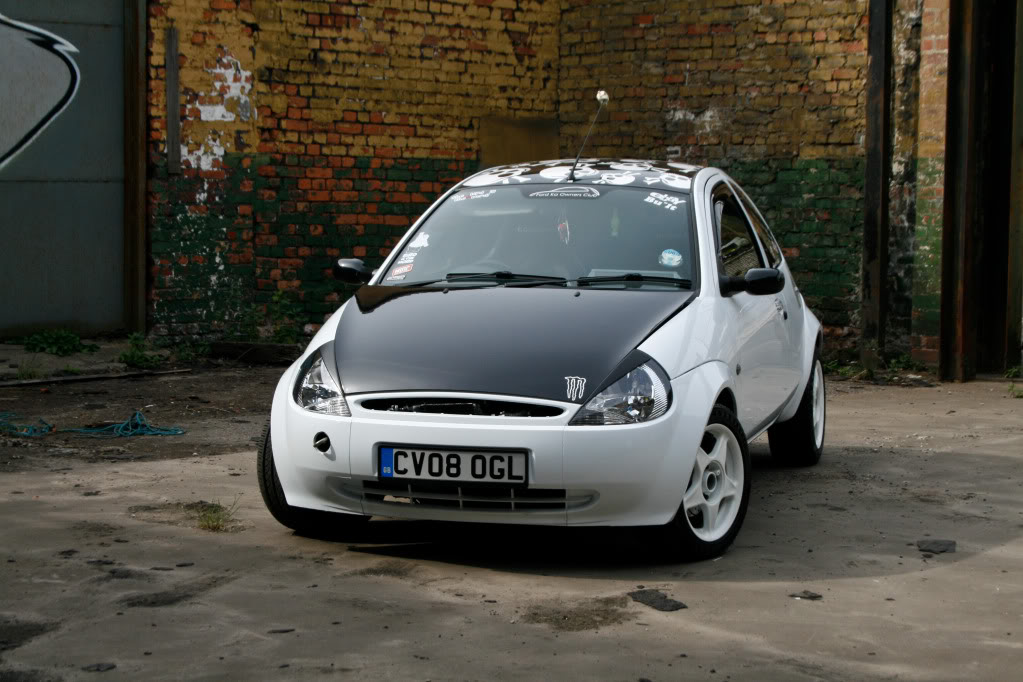
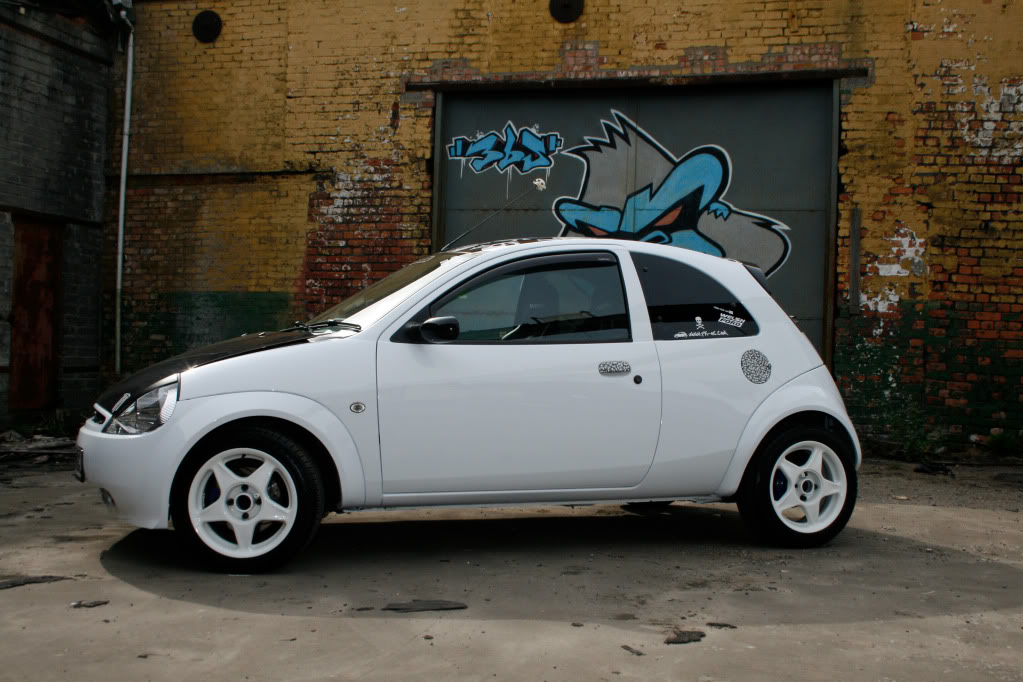
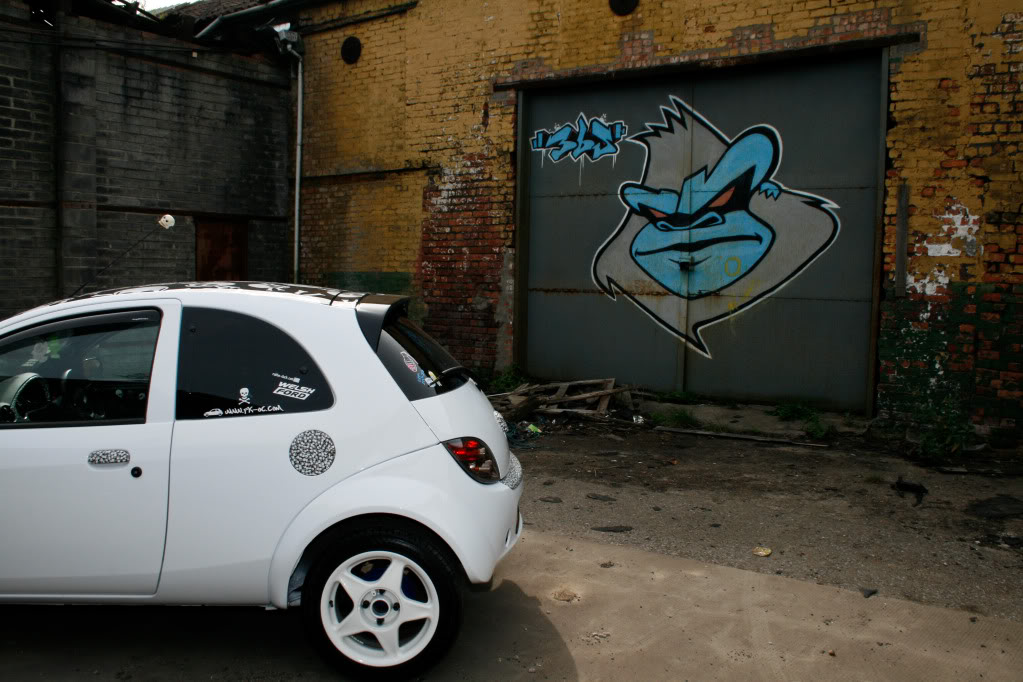
I bought my Ford Ka brand new back in March 2008 and it started out life as a Zetec Climate (1.3) with 69bhp. [I have thousands of pictures of the car from standard up until now, but I won�t bore you with all of them, I�ll just add a few in now and again]
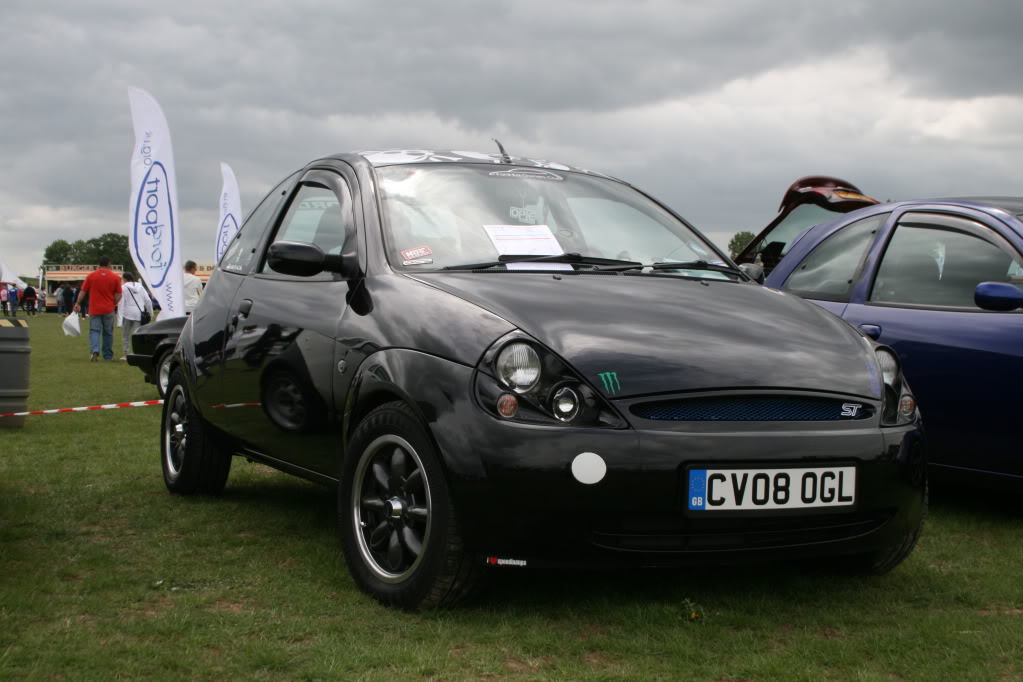
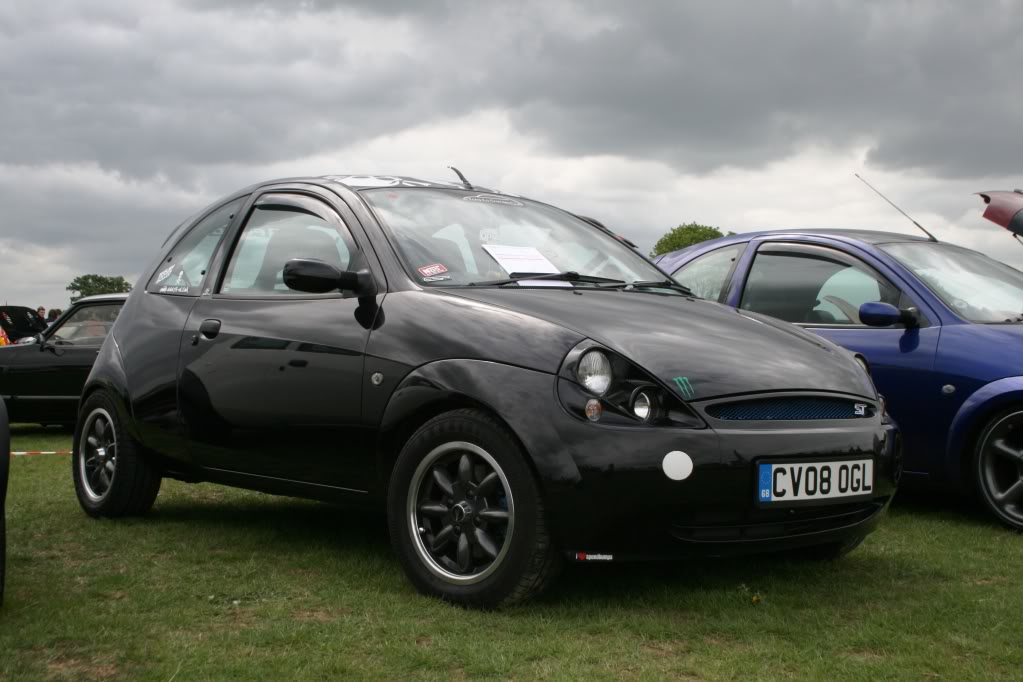
I'd only had the Ka a few days and I changed the peashooter exhaust for a Sportex catback one, fitted the Kenwood headunit from my old car, fitted a Lockwood grille and smoked side repeaters.
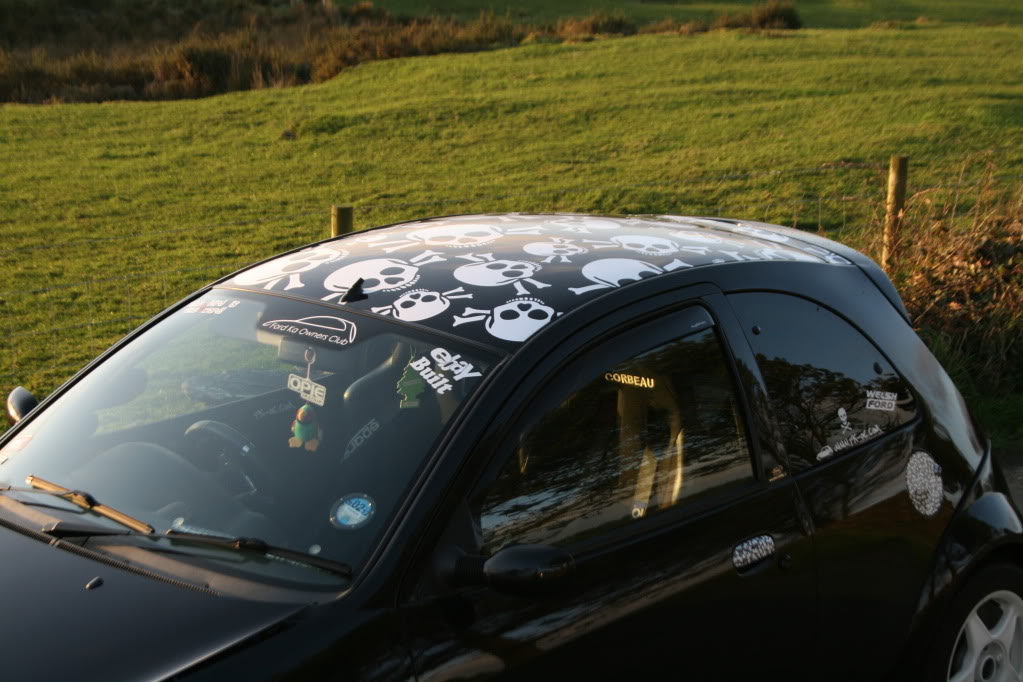
Over the next few weeks I fitted some Swoosh multicolour gauges in a pillar pod (Voltmeter and water temperature):

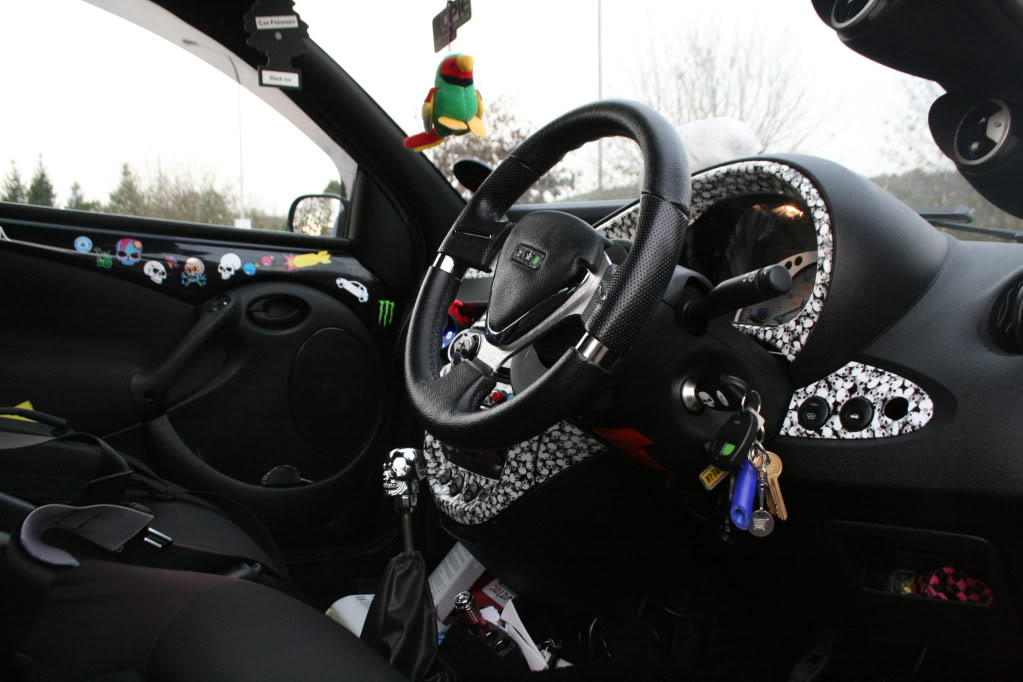
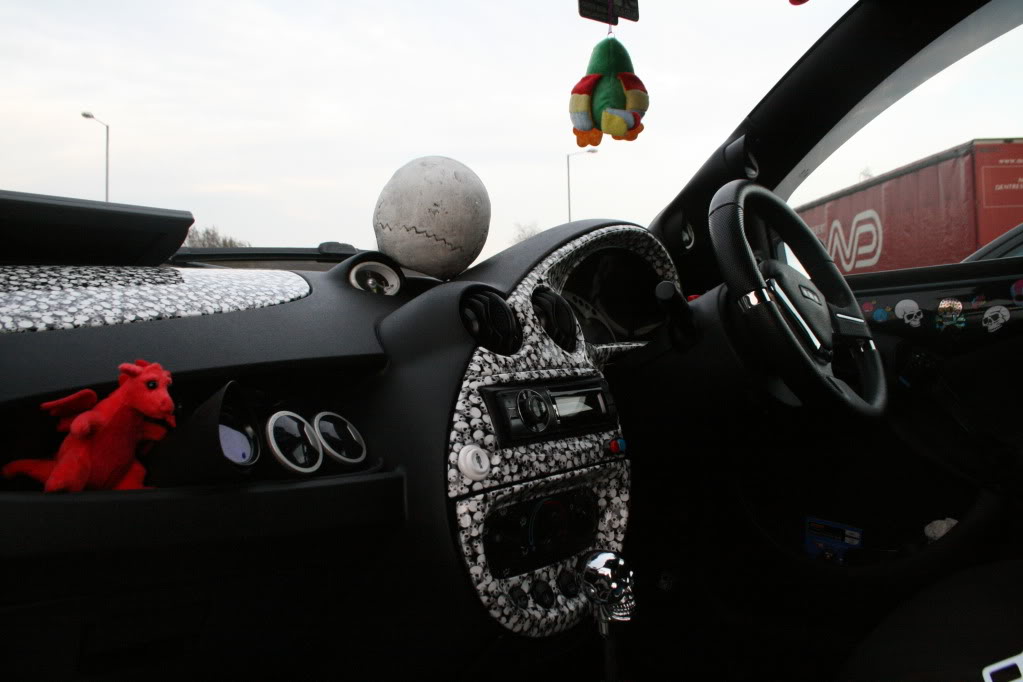
I sprayed my dash surrounds matt white and slightly modified the dials:
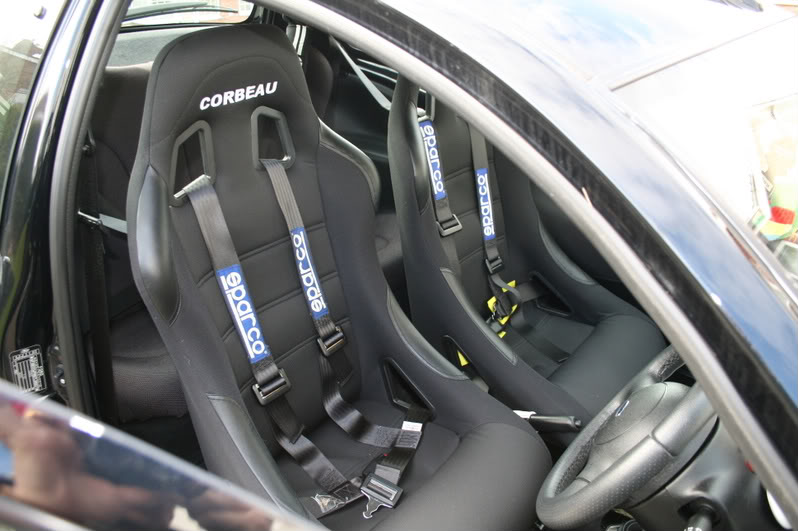
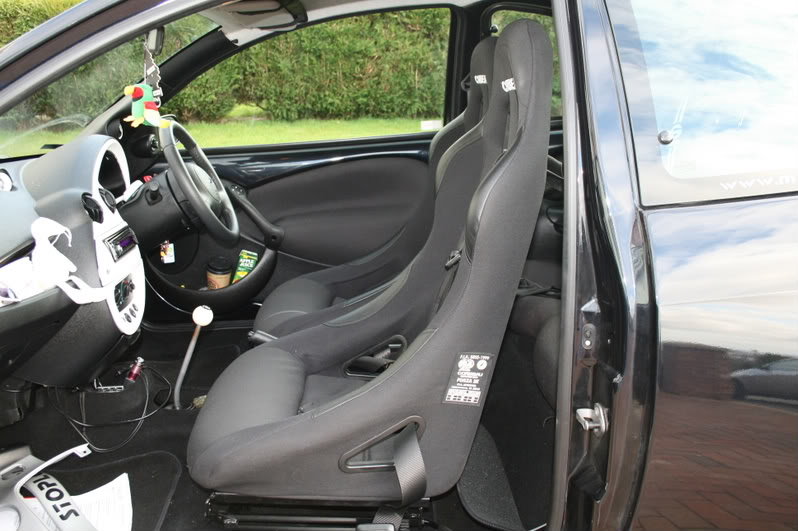
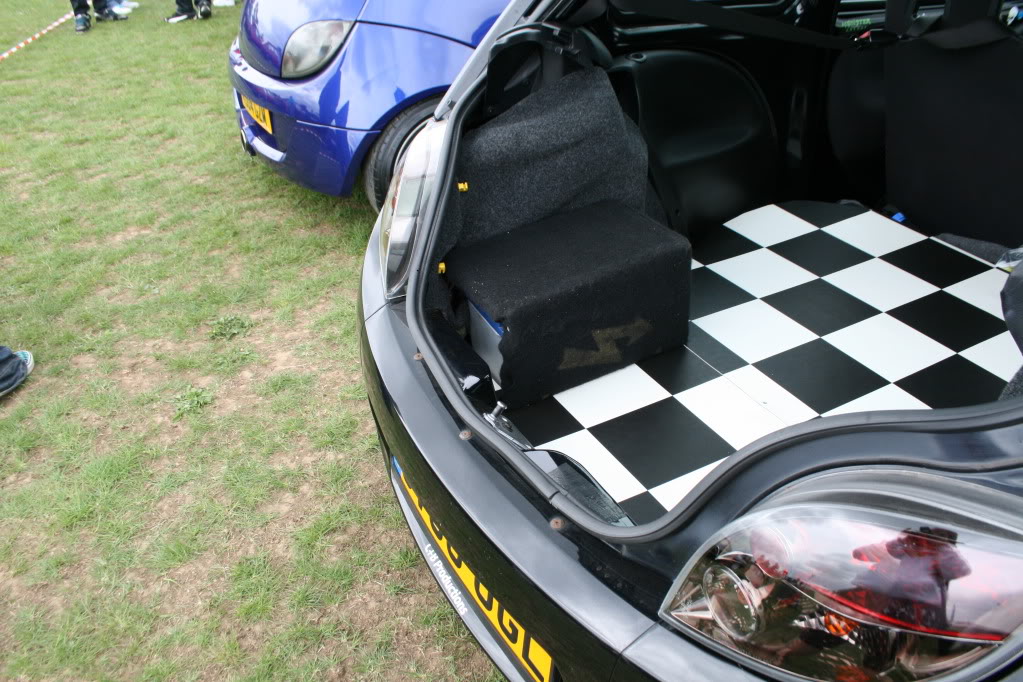
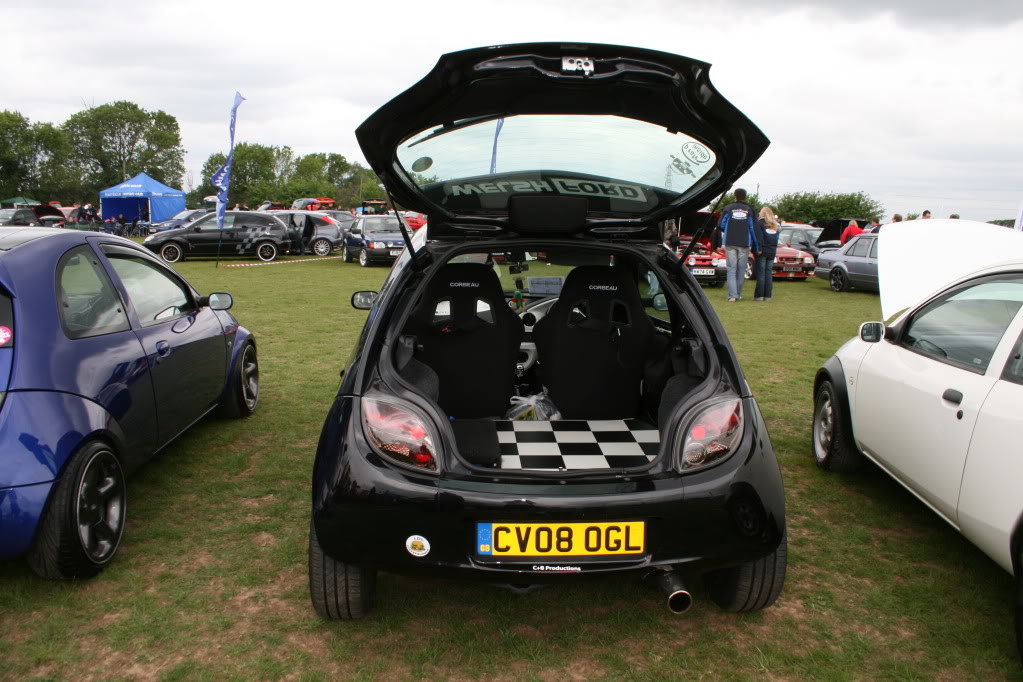
Around this time I also fitted Morettes to the front of the car and clear rear lights on the back. I managed to get hold of a set of Corbeau Forza 2K seats which were brand new, but an excellent price. They started yellow but I had them retrimmed in black and fitted Sparco Torino harnesses. The seats were on sliding and tilting subframes so that passengers could still get in and out of the back:
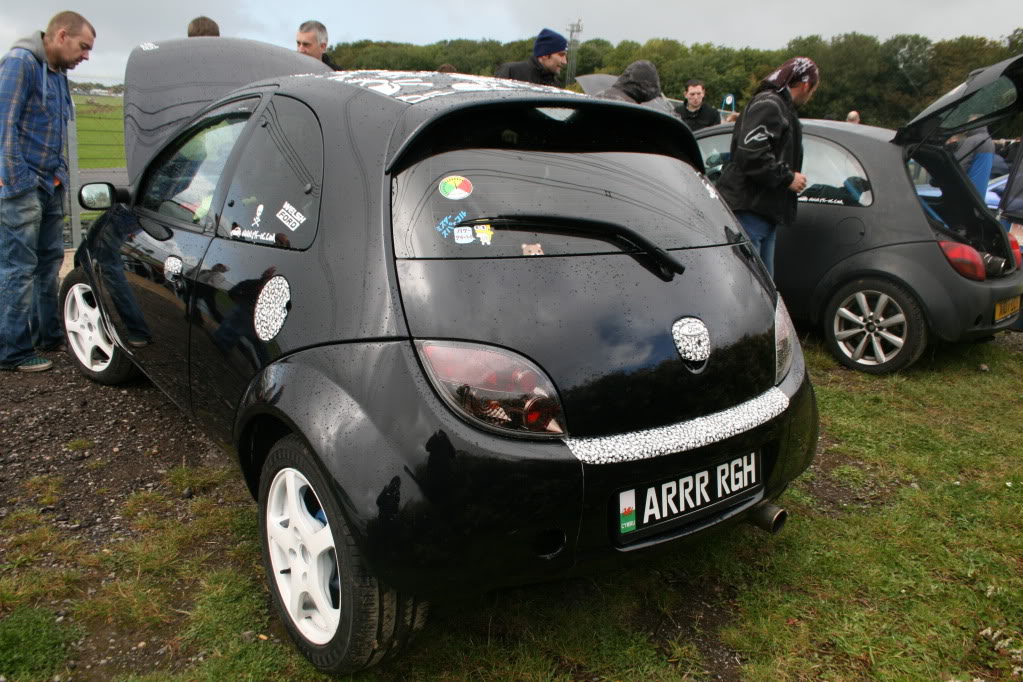
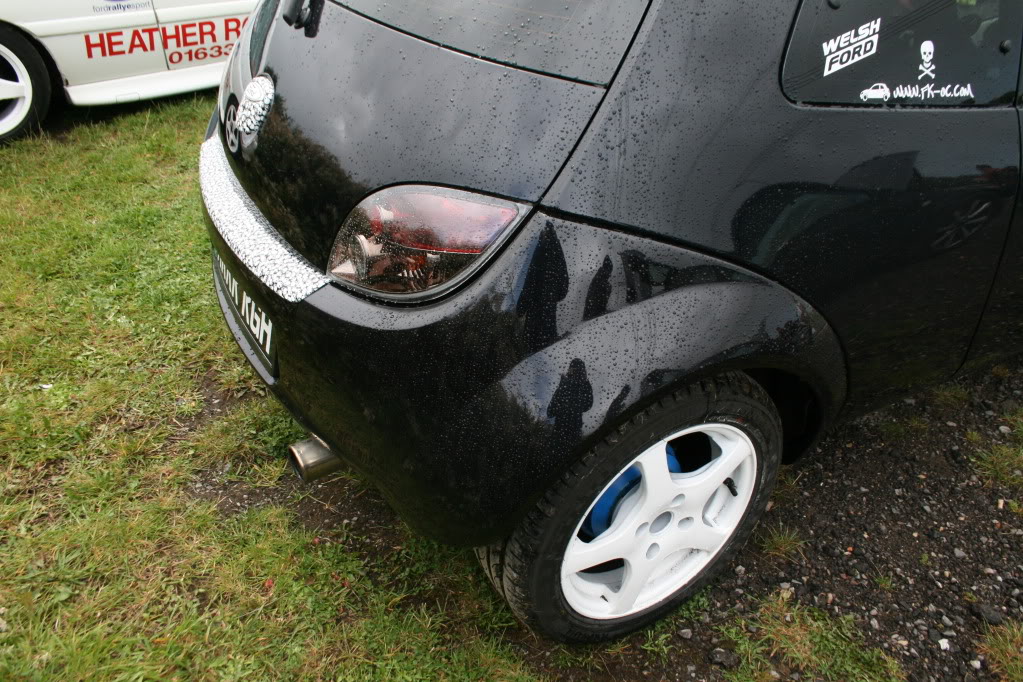
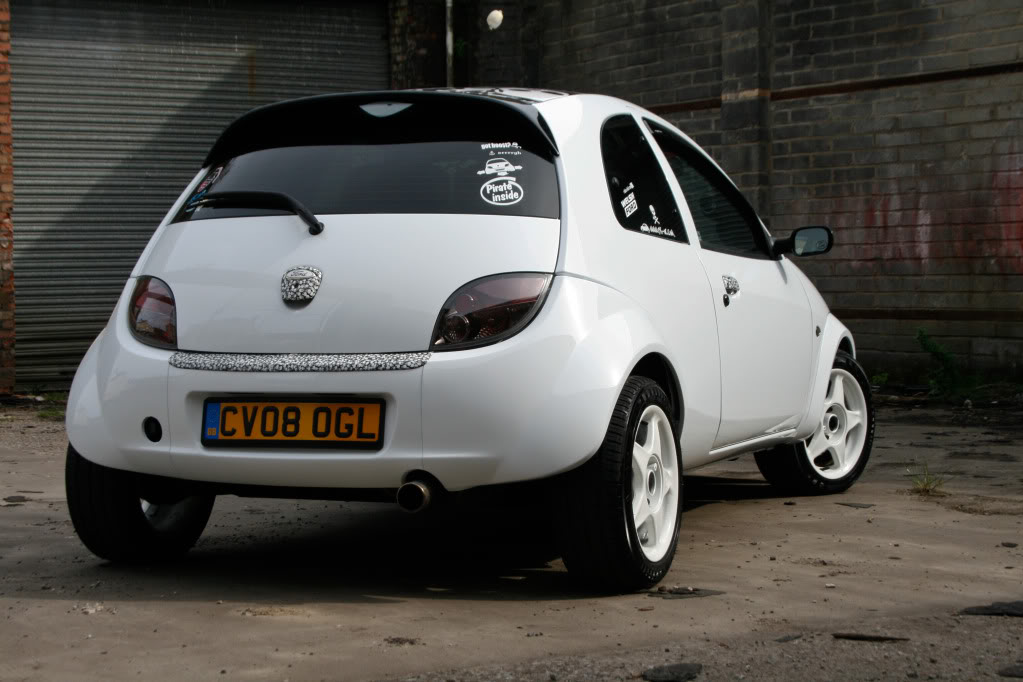
Next I tinted my rear lights but left the indicators clear, fitted a 98 Ka aerial base and modified a Richbrook aerial, got a Bosch S4 battery (as the original was a bit poo), cleaned up and painted the rear drums and debadged the boot and colour coded the boot handle, adding a custom badge:

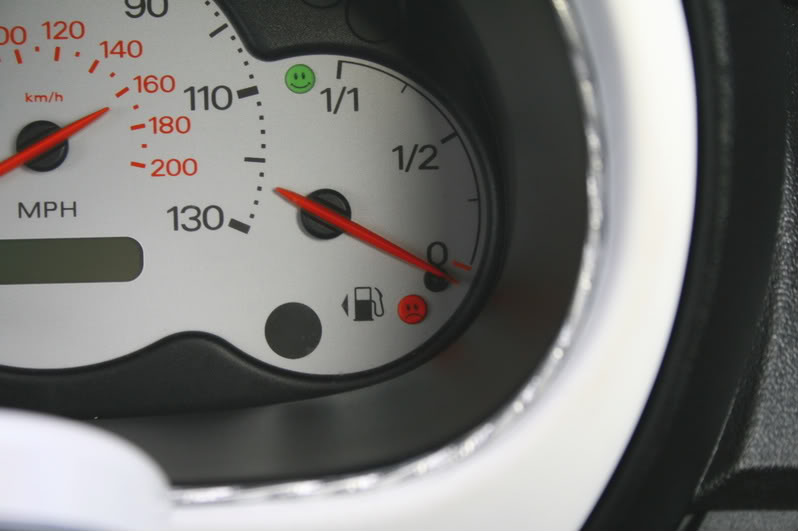
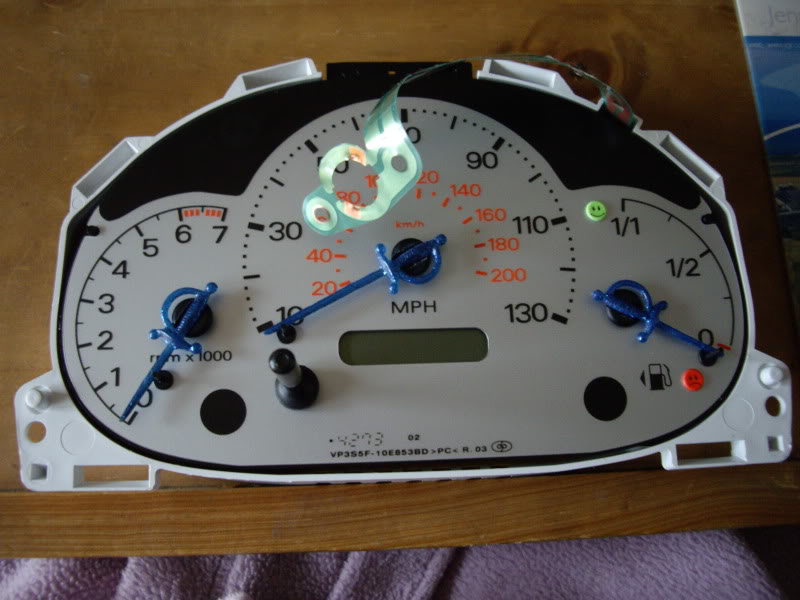
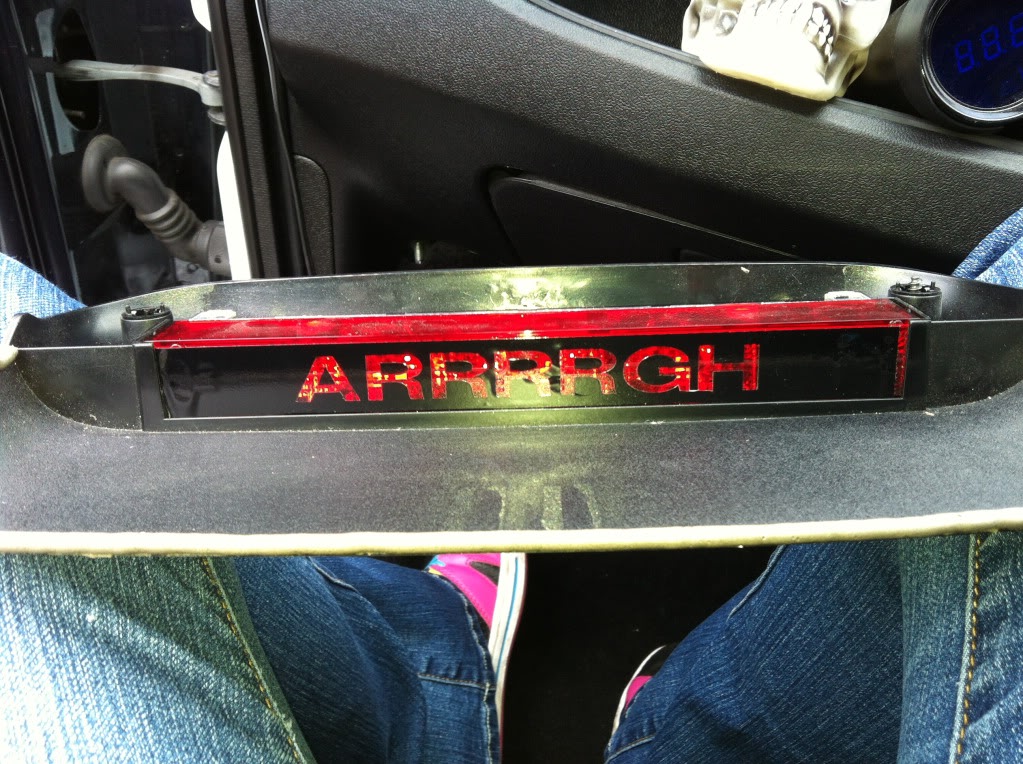
I managed to snap the fuel needle on my gauges (don't ask), so I took them apart and made them look piratey:
For a while I ran the Ka with 32mm wheel spacers on each corner:
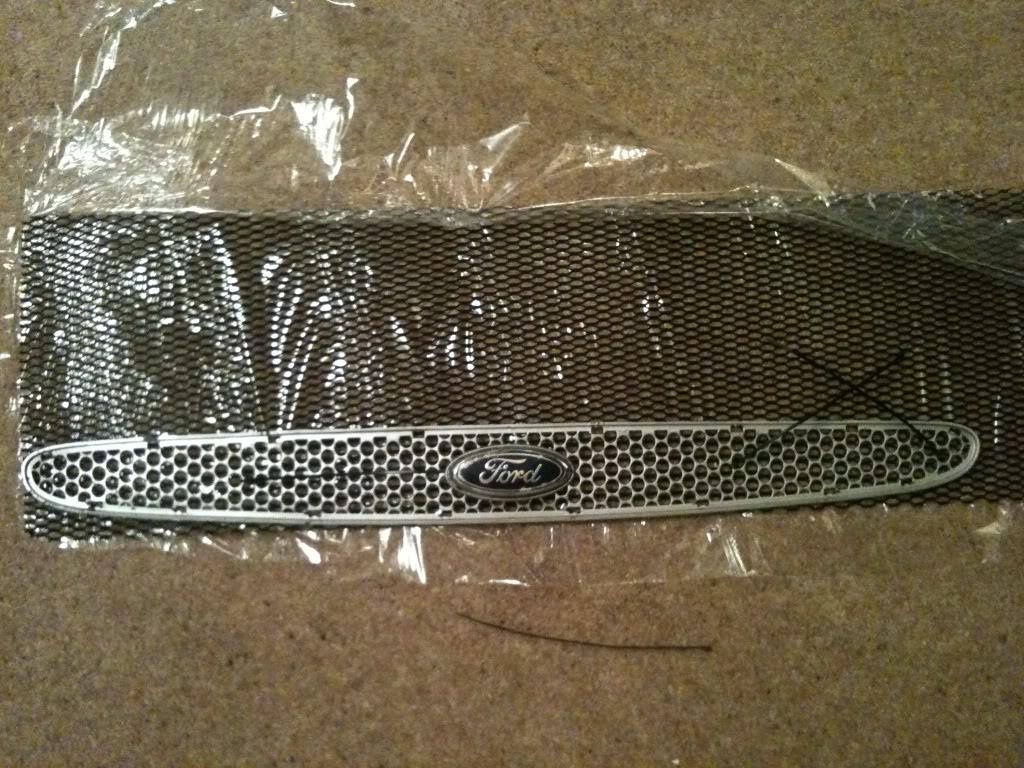
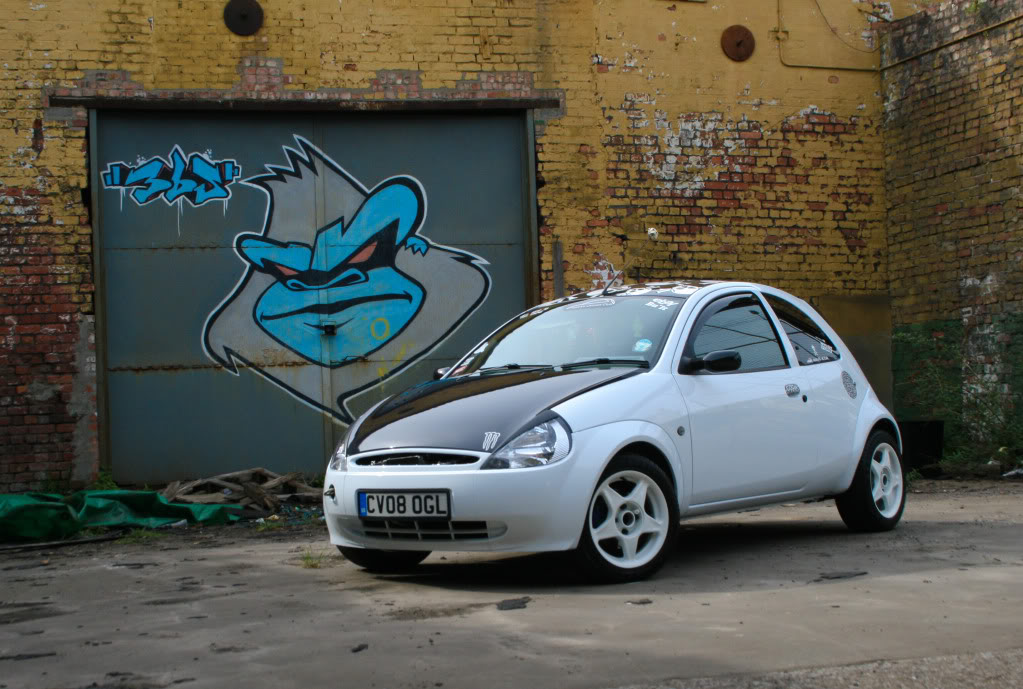
Changed some other bits later - cut a big sheet of blue powder coated mesh for a new grille, added a sub and amp and fitted Puma calipers, disks and pads
I'd only had the Ka a few days and I changed the peashooter exhaust for a Sportex catback one, fitted the Kenwood headunit from my old car, fitted a Lockwood grille and smoked side repeaters.
Over the next few weeks I fitted some Swoosh multicolour gauges in a pillar pod (Voltmeter and water temperature):
I sprayed my dash surrounds matt white and slightly modified the dials:
Around this time I also fitted Morettes to the front of the car and clear rear lights on the back. I managed to get hold of a set of Corbeau Forza 2K seats which were brand new, but an excellent price. They started yellow but I had them retrimmed in black and fitted Sparco Torino harnesses. The seats were on sliding and tilting subframes so that passengers could still get in and out of the back:
Next I tinted my rear lights but left the indicators clear, fitted a 98 Ka aerial base and modified a Richbrook aerial, got a Bosch S4 battery (as the original was a bit poo), cleaned up and painted the rear drums and debadged the boot and colour coded the boot handle, adding a custom badge:
I managed to snap the fuel needle on my gauges (don't ask), so I took them apart and made them look piratey:
For a while I ran the Ka with 32mm wheel spacers on each corner:
Changed some other bits later - cut a big sheet of blue powder coated mesh for a new grille, added a sub and amp and fitted Puma calipers, disks and pads
Thread Starter
ɔɐᴘʈᴀᴉи ᴀᵴʙο
Joined: Aug 2011
Posts: 48
Likes: 1
From: Neath, South Wales
Out with the old:
Bye bye 1.3!
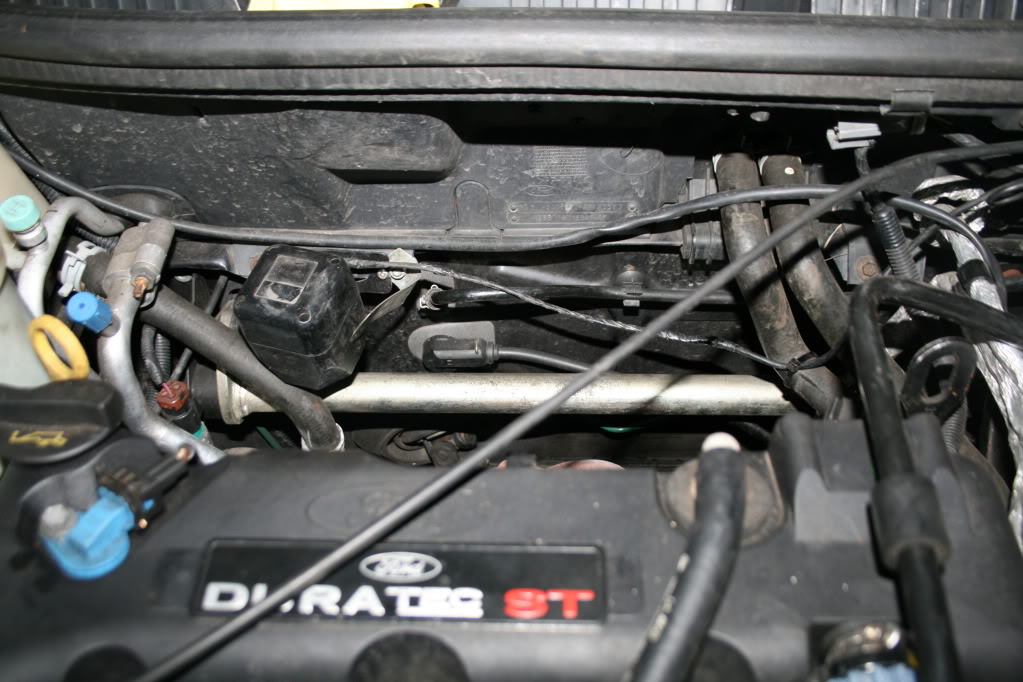
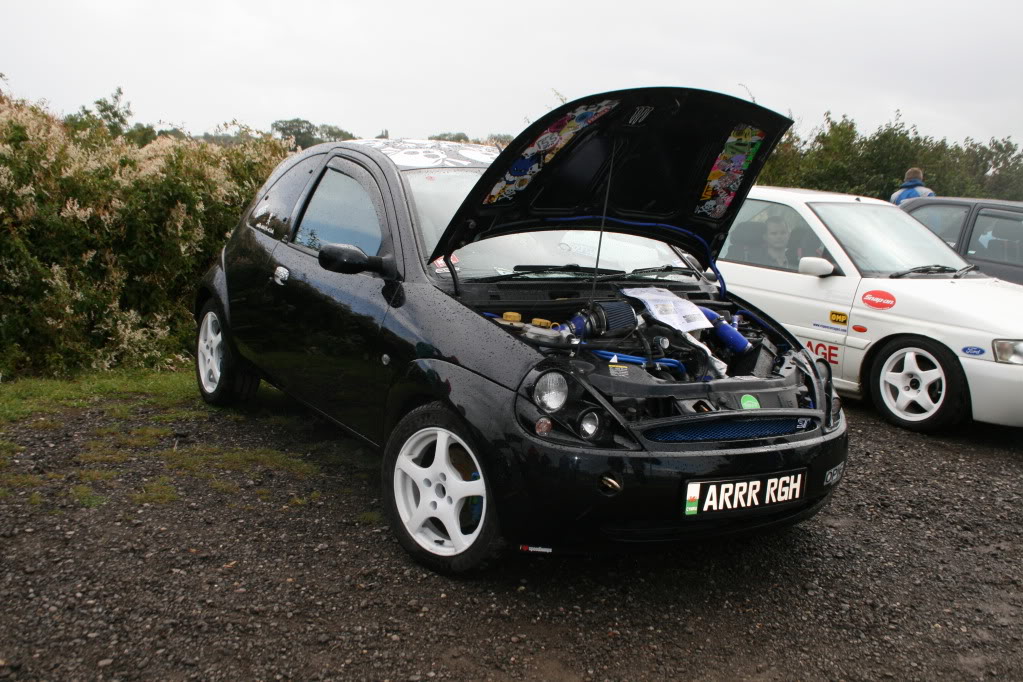
Hello 1.6 SportKa engine:

Apart from the throttle body and inlet manifold being bigger, everything else is the same. The engines are identical in looks and size, so it was a straight swap and all the mounts etc. were the same I ran the car for a few weeks with the 1.3 ECU.
The fitted the SWR2 cam and Unichip Q+:
I didn't go for the full ST120 kit with manifold as I didn't want to mess about with having to get a sports cat fitted. So because my Unichip was set up for the cam and manifold, I needed my map changed. Had it done on the rollers at Got Boost Tuning, just mapping the ignition for the time being rather than messing with the fueling. That actually worked out well because it still uses the same amount of fuel as the 1.3, just uses it more efficiently
Was running 112bhp at this point
Bye bye 1.3!
Hello 1.6 SportKa engine:
Apart from the throttle body and inlet manifold being bigger, everything else is the same. The engines are identical in looks and size, so it was a straight swap and all the mounts etc. were the same
The fitted the SWR2 cam and Unichip Q+:
I didn't go for the full ST120 kit with manifold as I didn't want to mess about with having to get a sports cat fitted. So because my Unichip was set up for the cam and manifold, I needed my map changed. Had it done on the rollers at Got Boost Tuning, just mapping the ignition for the time being rather than messing with the fueling. That actually worked out well because it still uses the same amount of fuel as the 1.3, just uses it more efficiently
Was running 112bhp at this point
Thread Starter
ɔɐᴘʈᴀᴉи ᴀᵴʙο
Joined: Aug 2011
Posts: 48
Likes: 1
From: Neath, South Wales
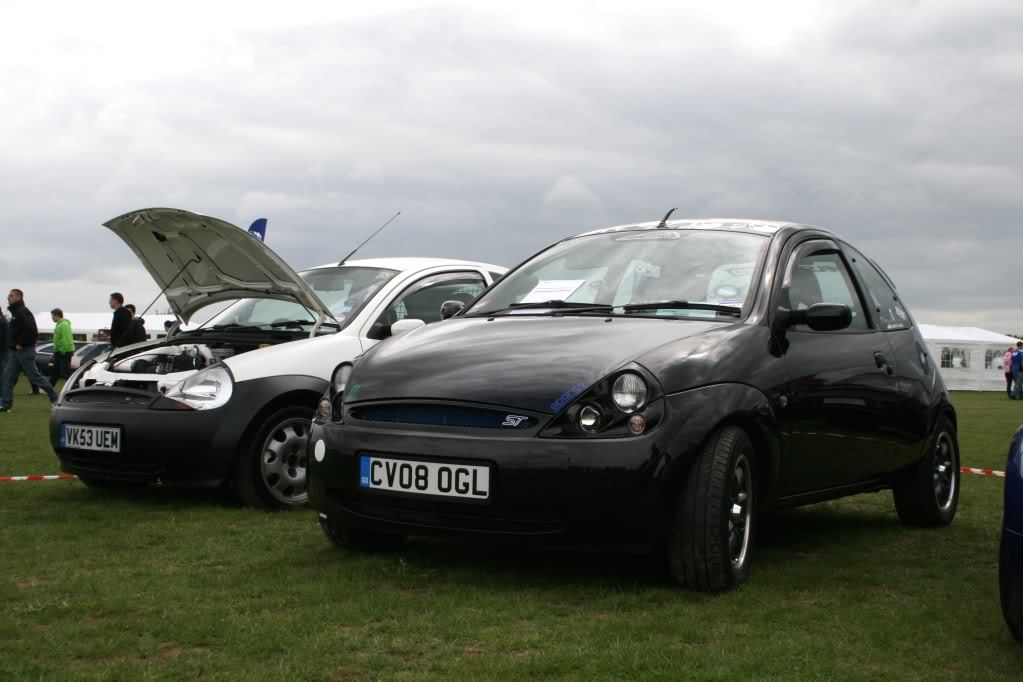
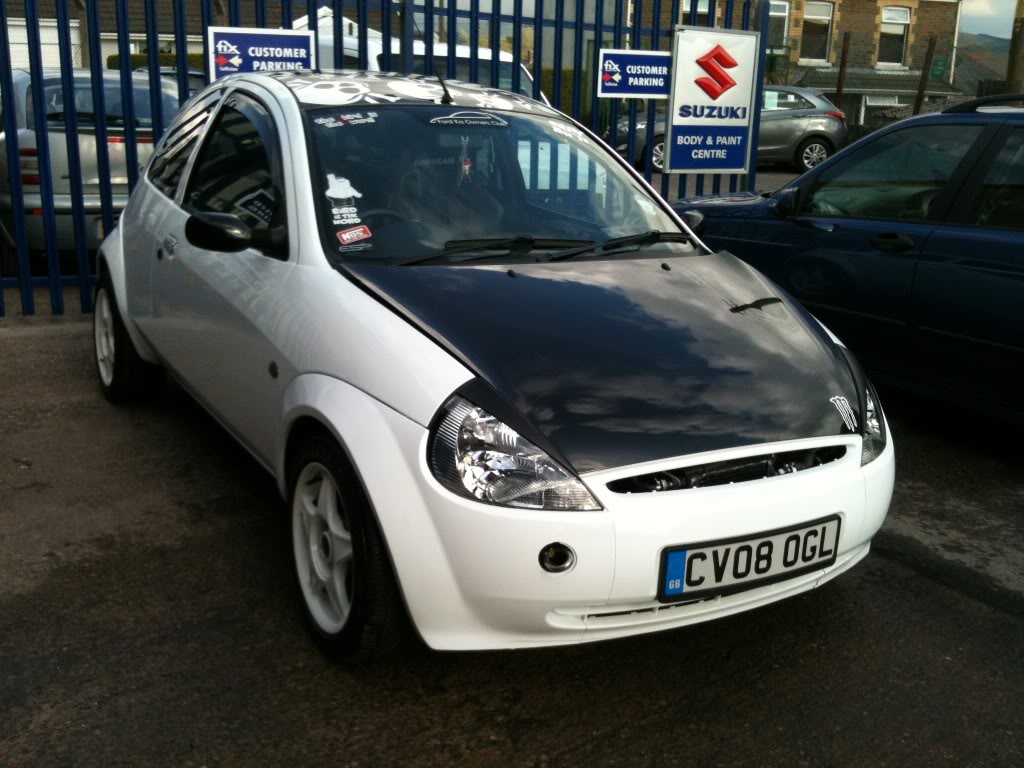
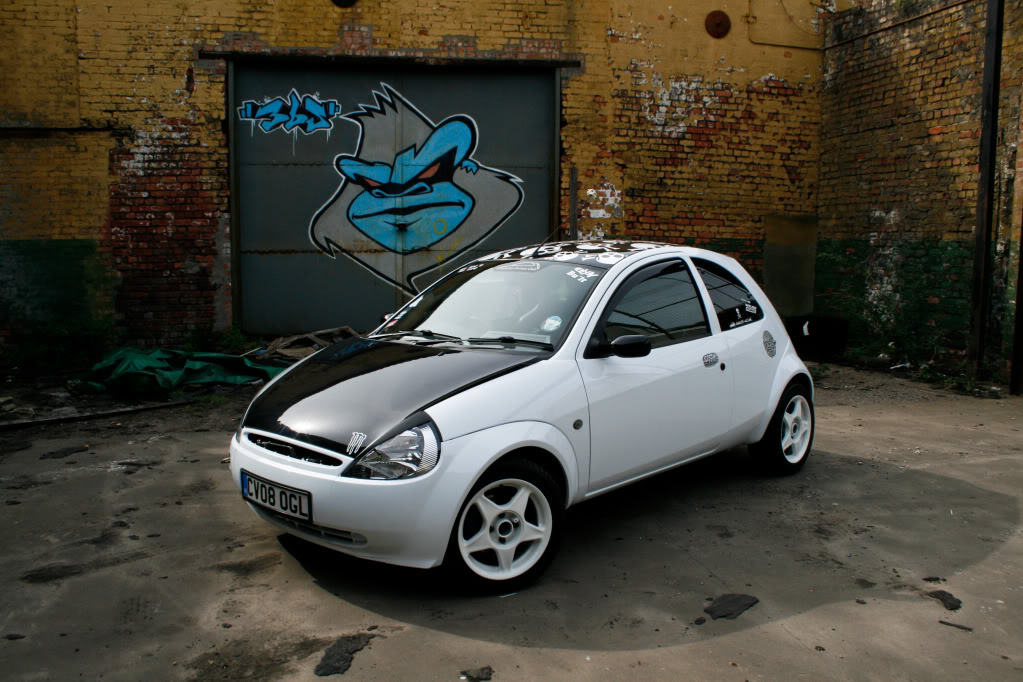
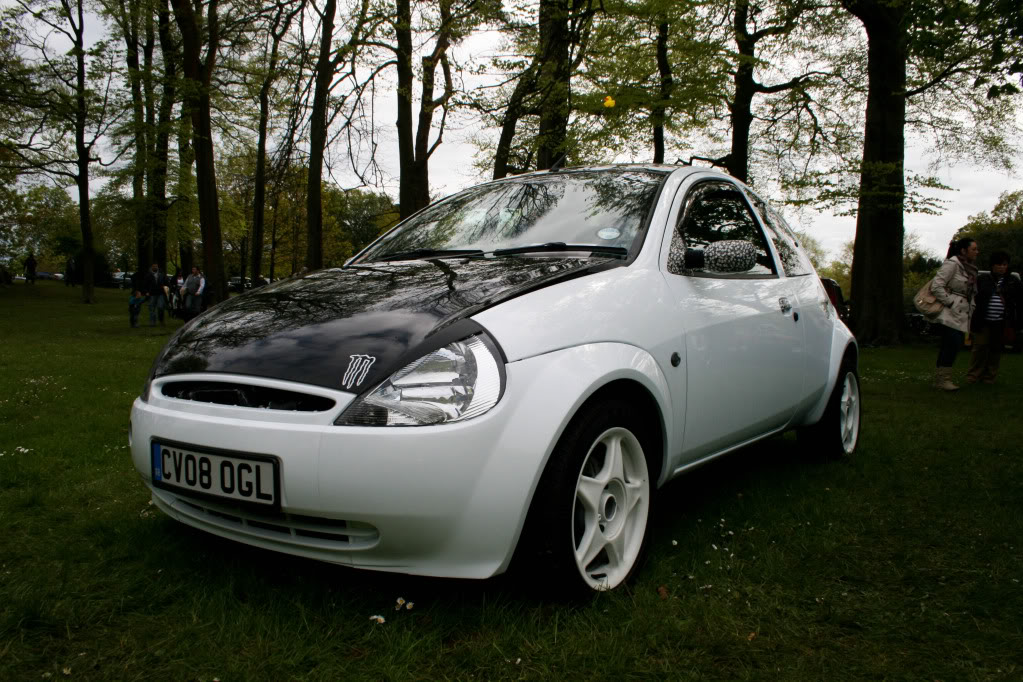
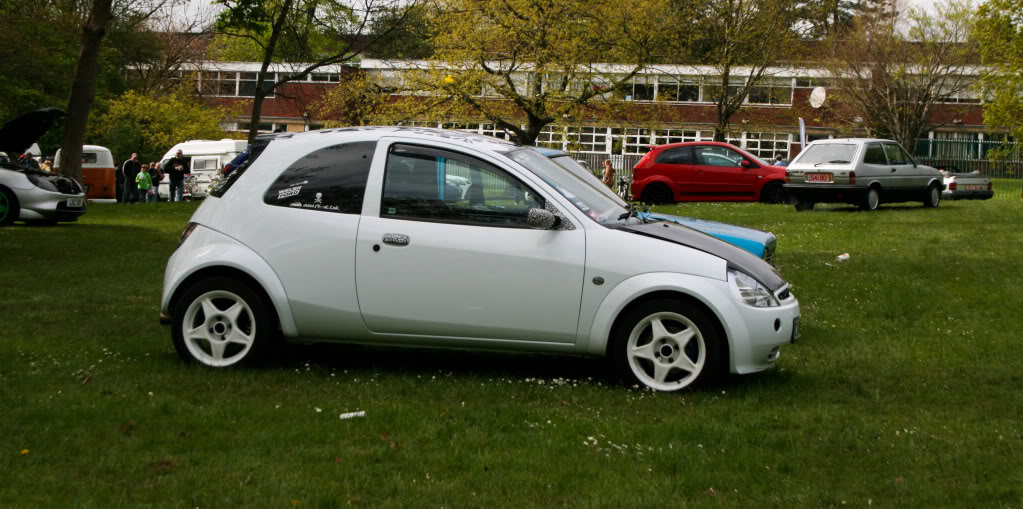
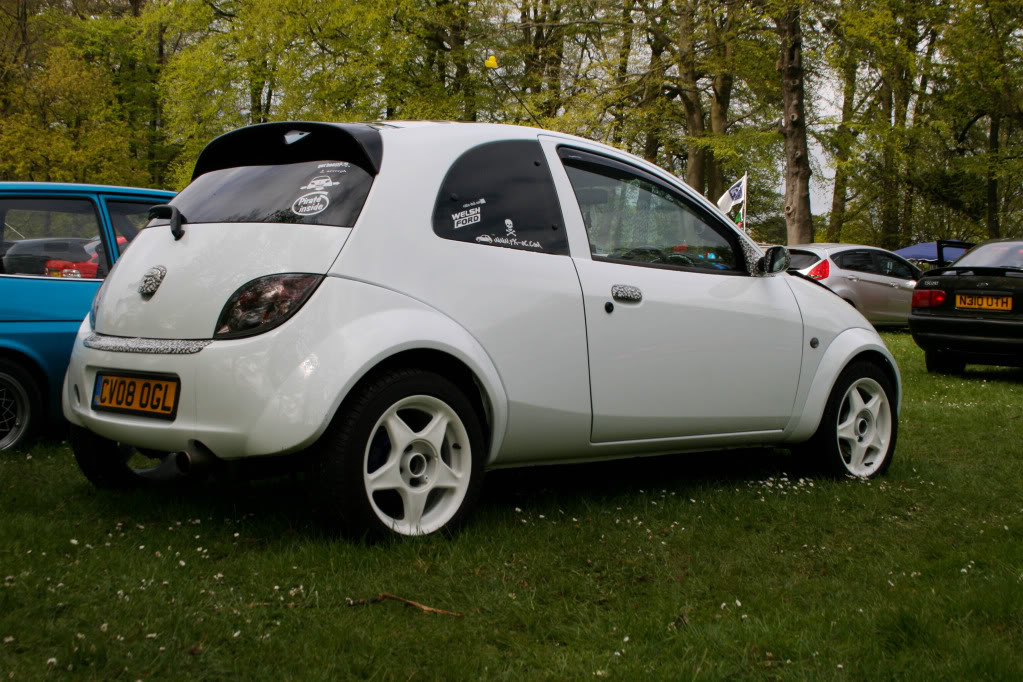
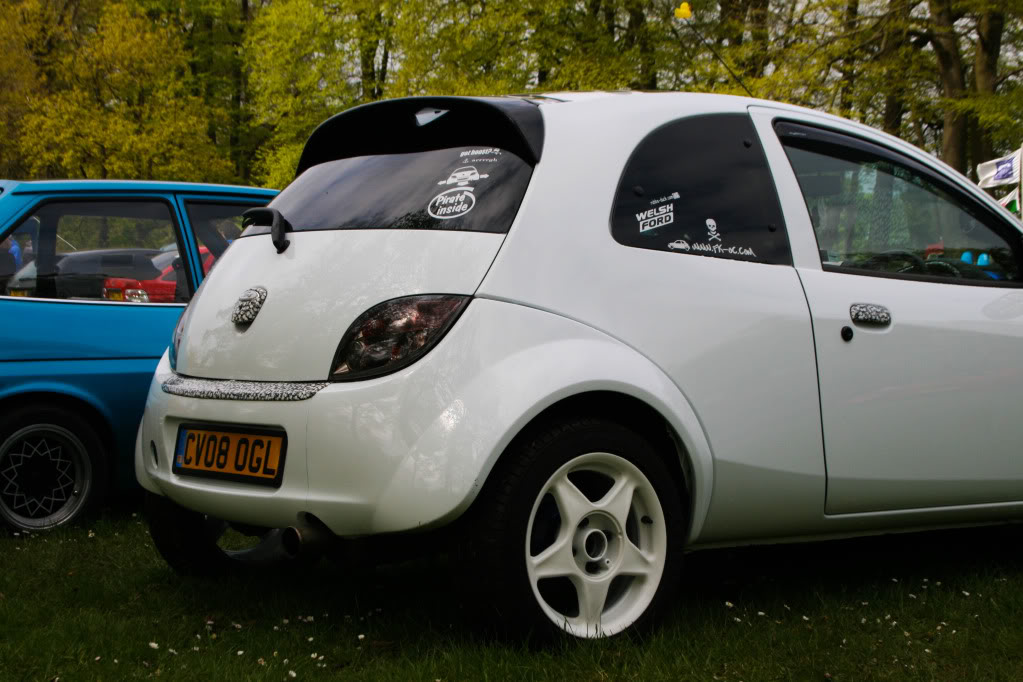
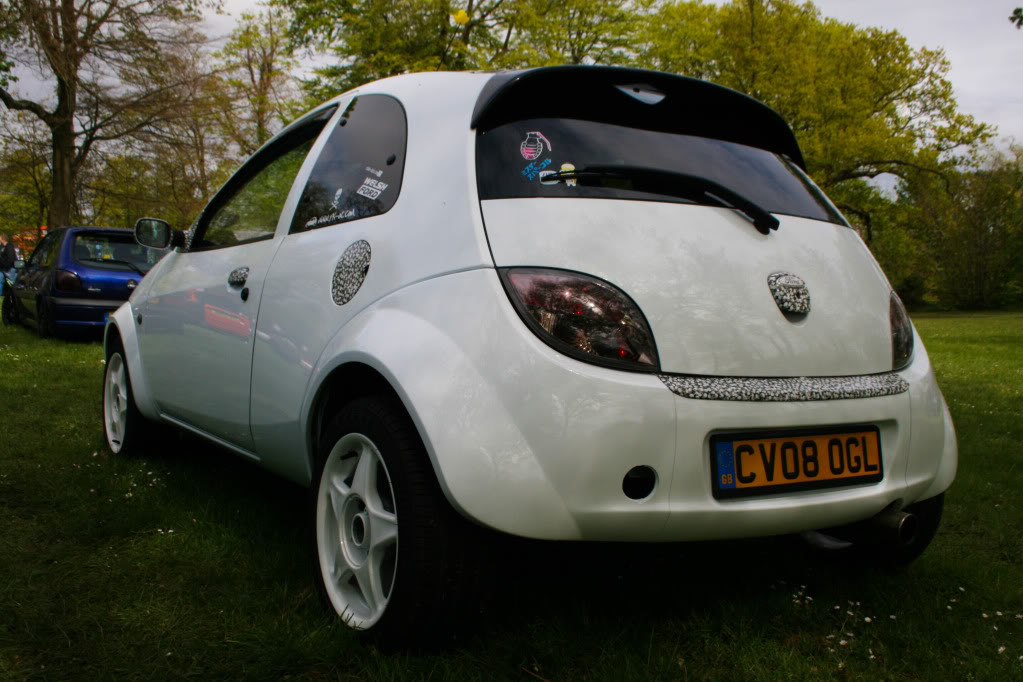
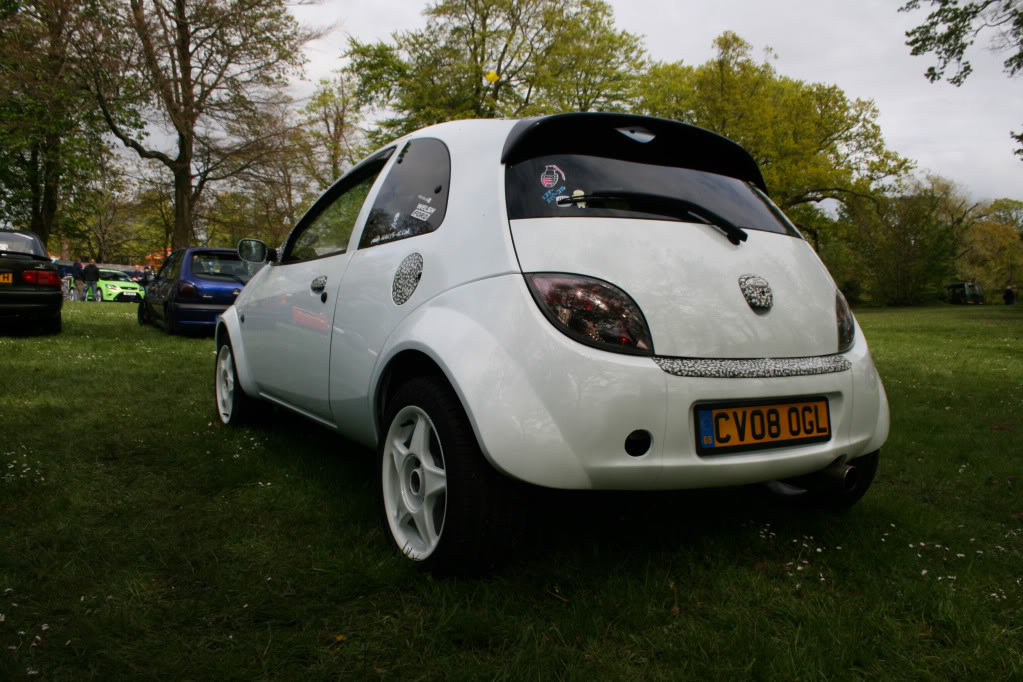
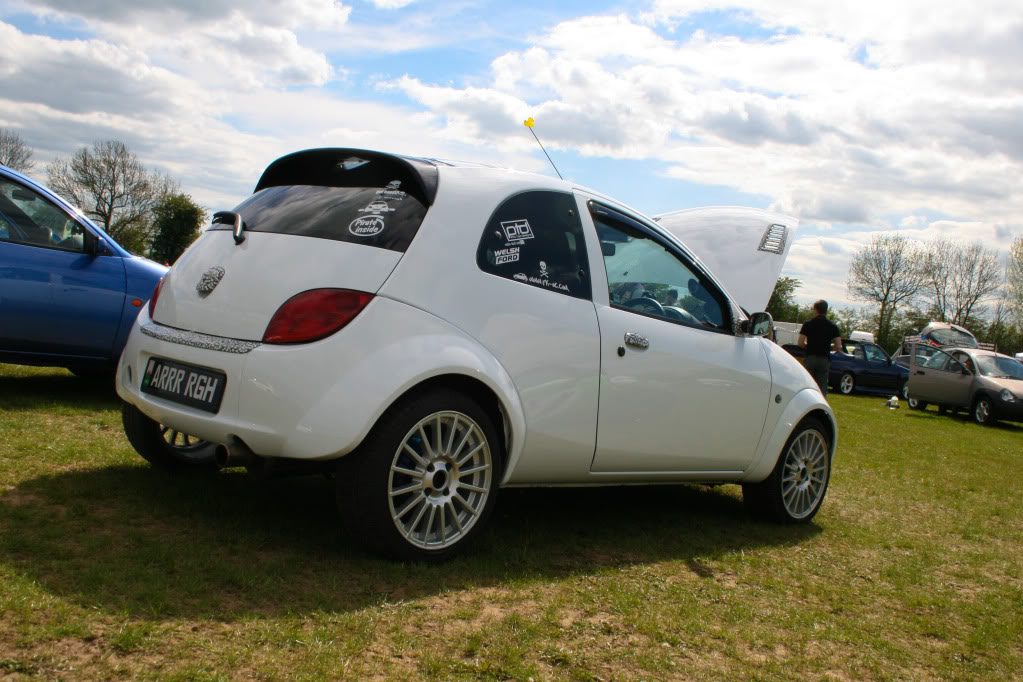
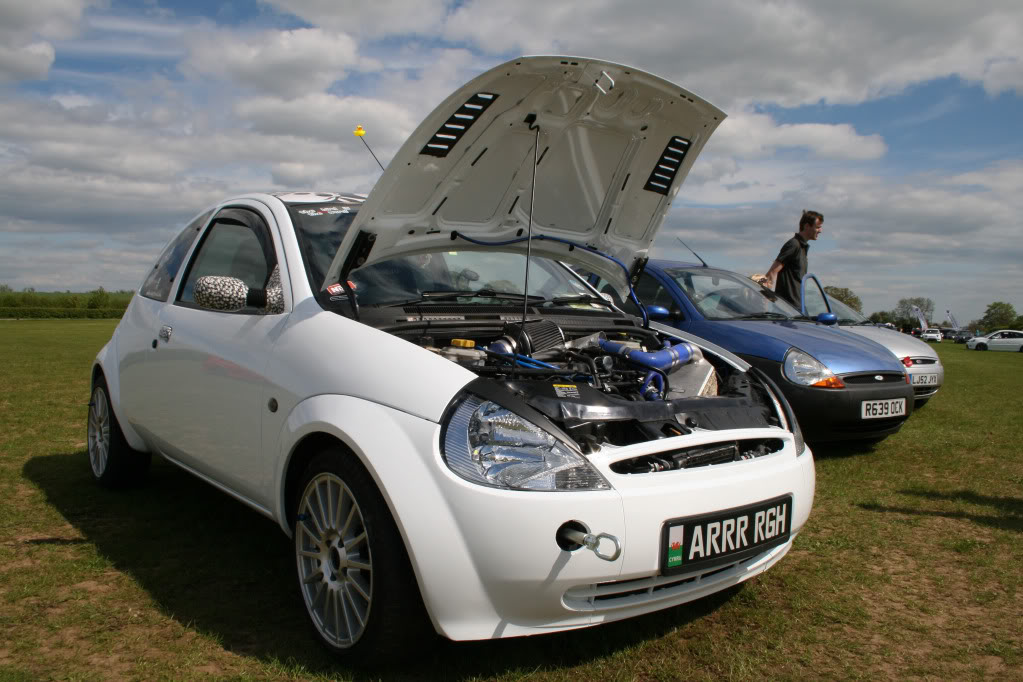
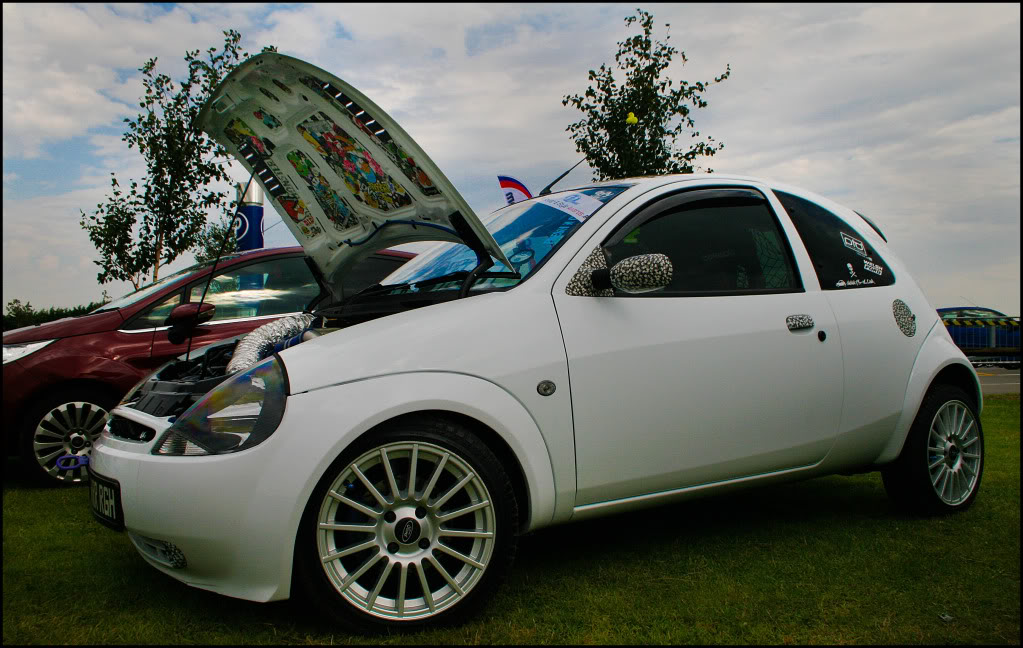
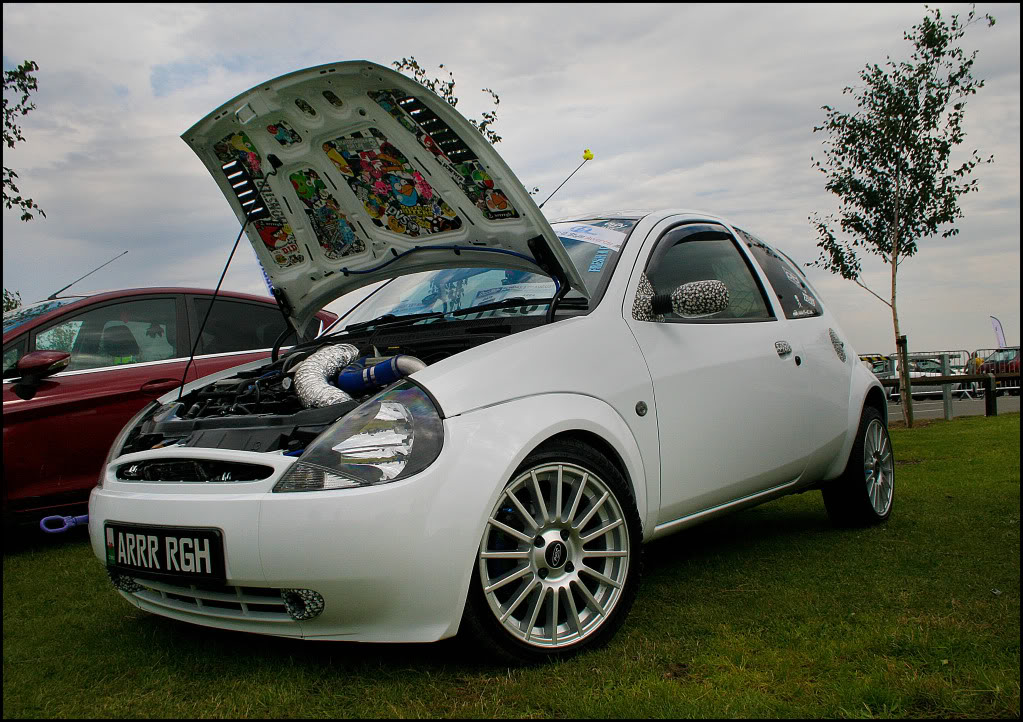
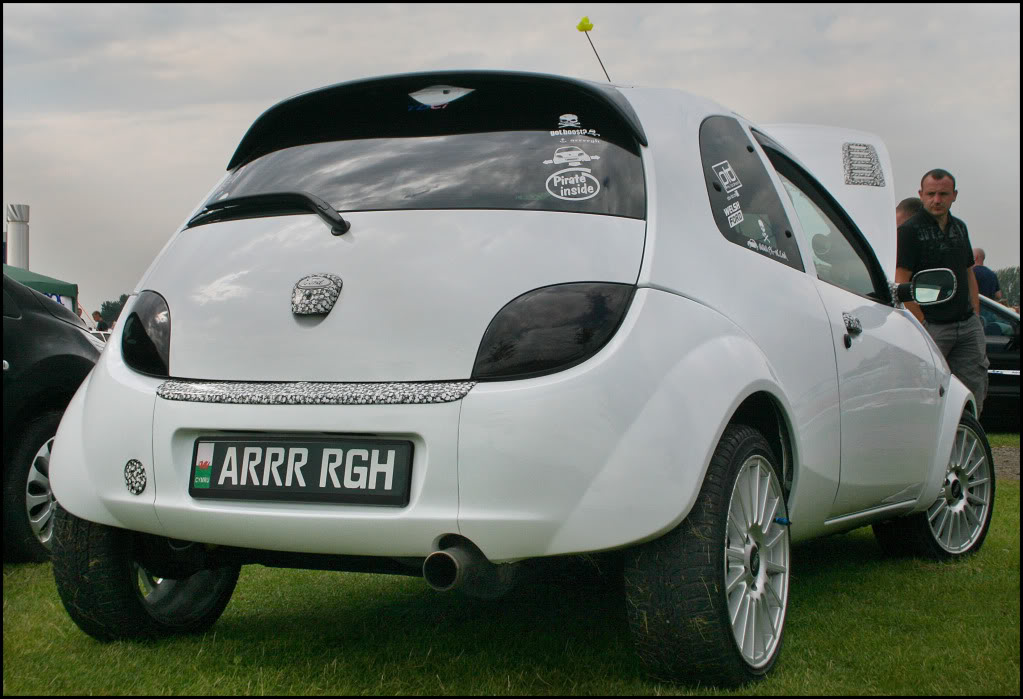
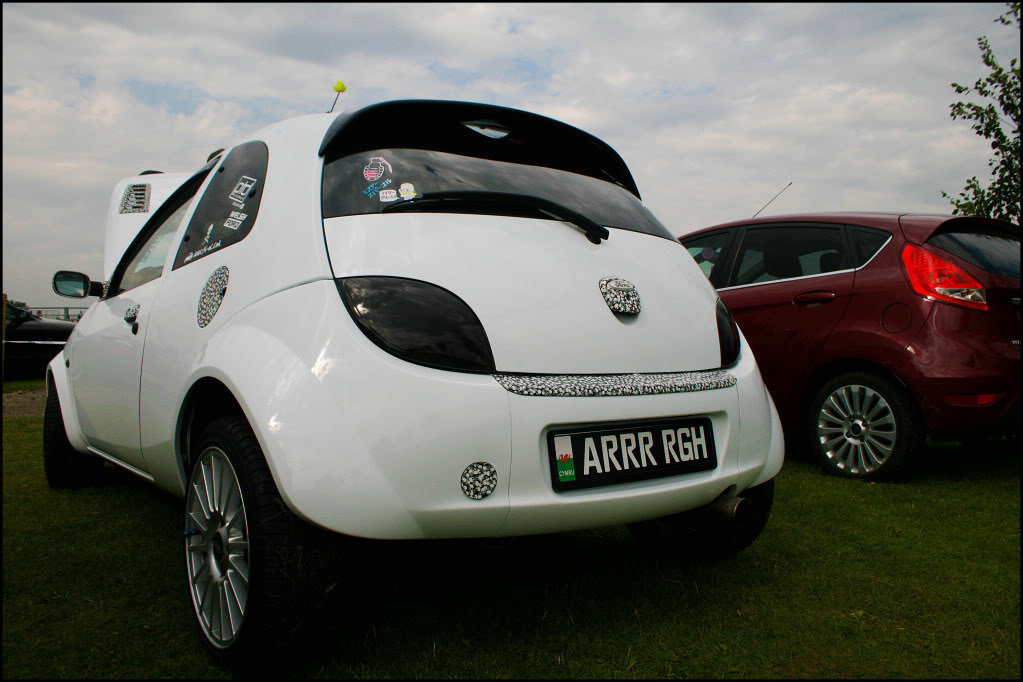
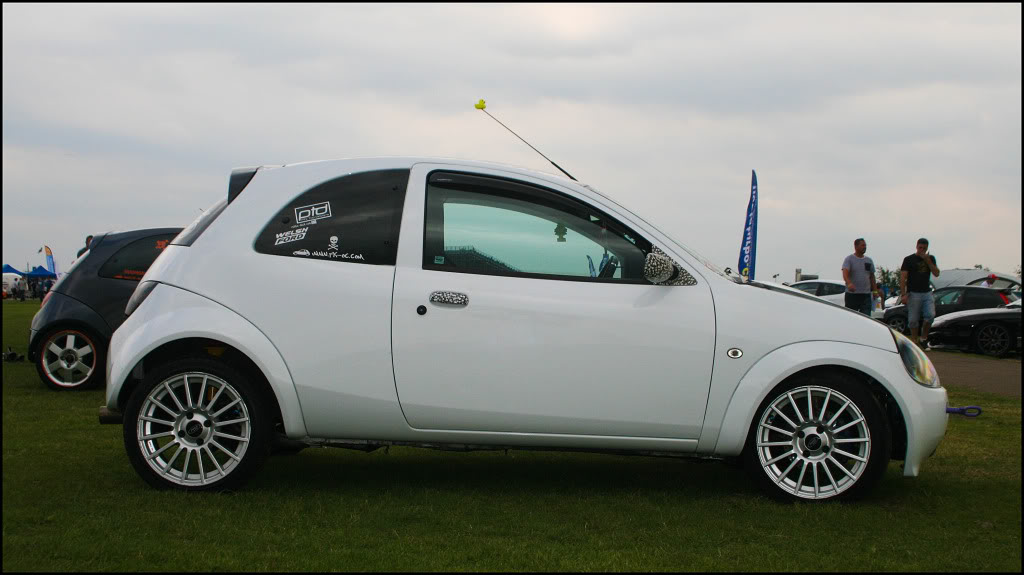
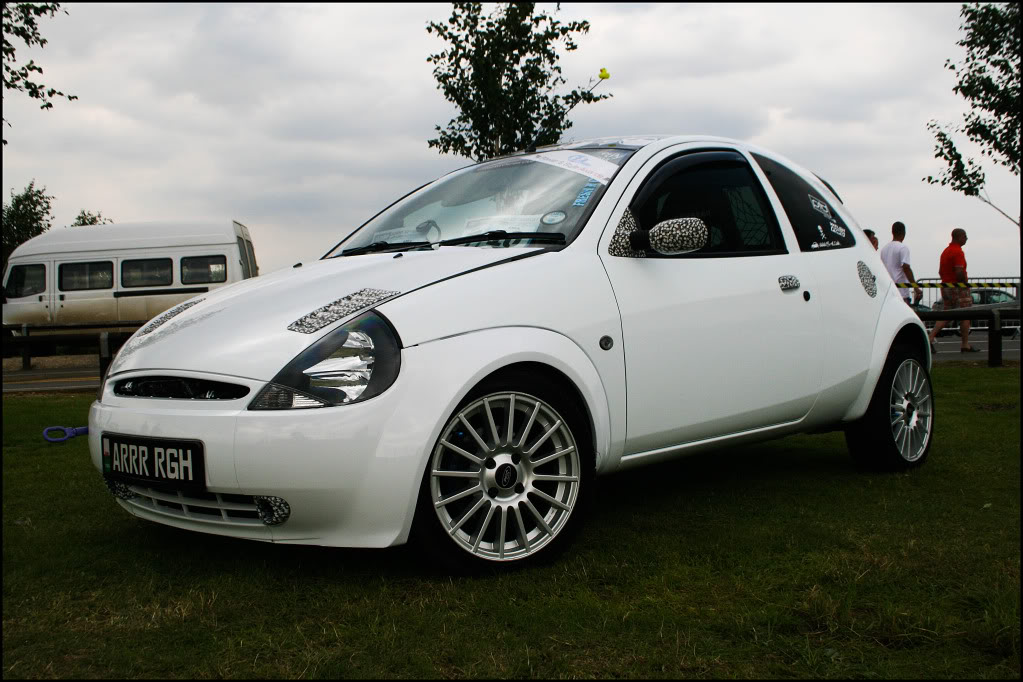
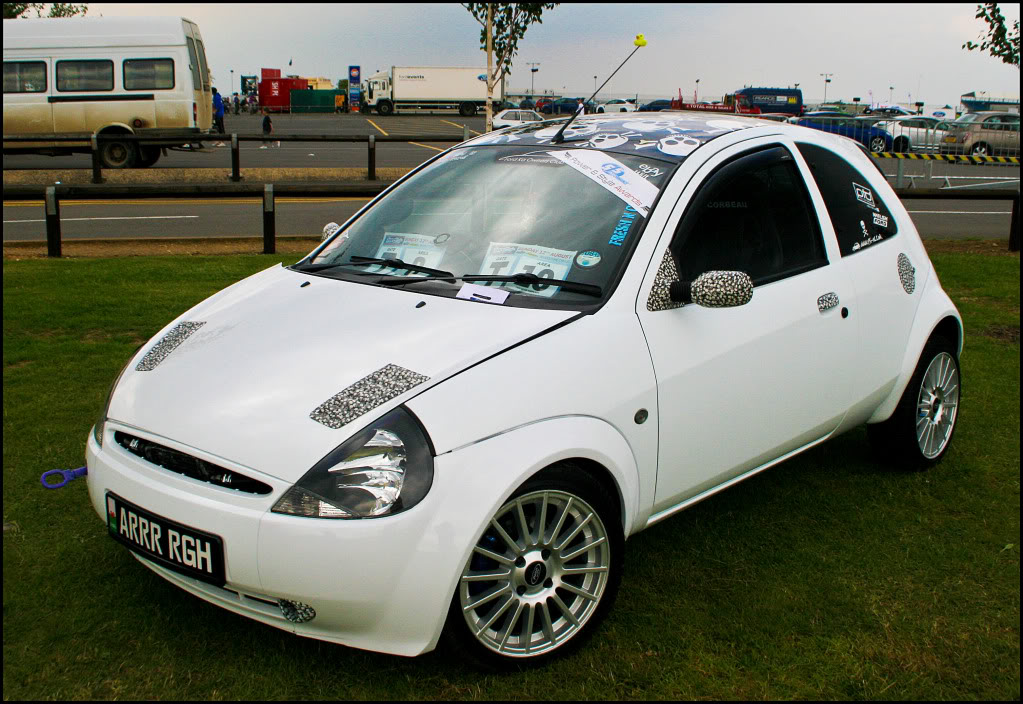
Here�s how the car was looking at Fiesta in the Park 2011:
The Ka has been stripped out for the last couple of years and using it as a daily drive, I was getting fed up of stuff rolling from the boot down to where the rear bench used to be. So my boyfriend helped me to build a van floor (based on the one from a Ka van) and we covered it in vinyl flooring.
At this point I also got a relocation kit to move the battery to the boot, fitted some Alpine component speaker doorcards, wired in the tweeters I have in the headlining, replaced my old sub and amp with a slimline Kicker Comp VT8 sub and an Alpine amp. Big improvement on the stock speakers
Thread Starter
ɔɐᴘʈᴀᴉи ᴀᵴʙο
Joined: Aug 2011
Posts: 48
Likes: 1
From: Neath, South Wales
I got the windows tinted the day after Fiesta in the Park (something I�d always wanted to do):

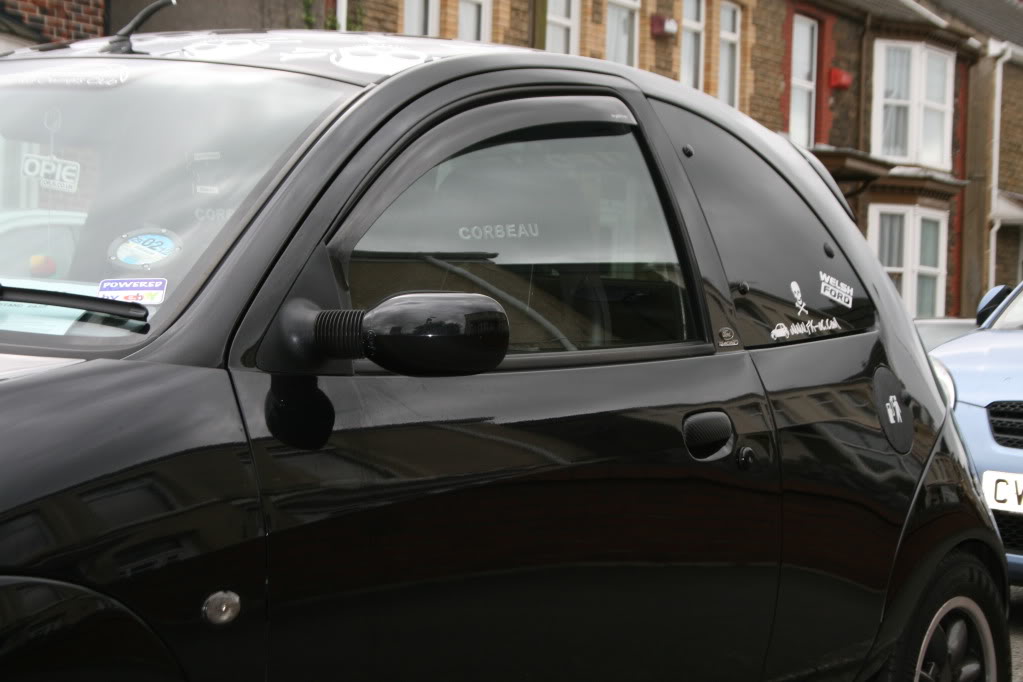
I also carbon fibre wrapped my fuel flap for something to do, looked a lot better when it wasn�t wet!

I also carbon fibre wrapped my fuel flap for something to do, looked a lot better when it wasn�t wet!
Thread Starter
ɔɐᴘʈᴀᴉи ᴀᵴʙο
Joined: Aug 2011
Posts: 48
Likes: 1
From: Neath, South Wales
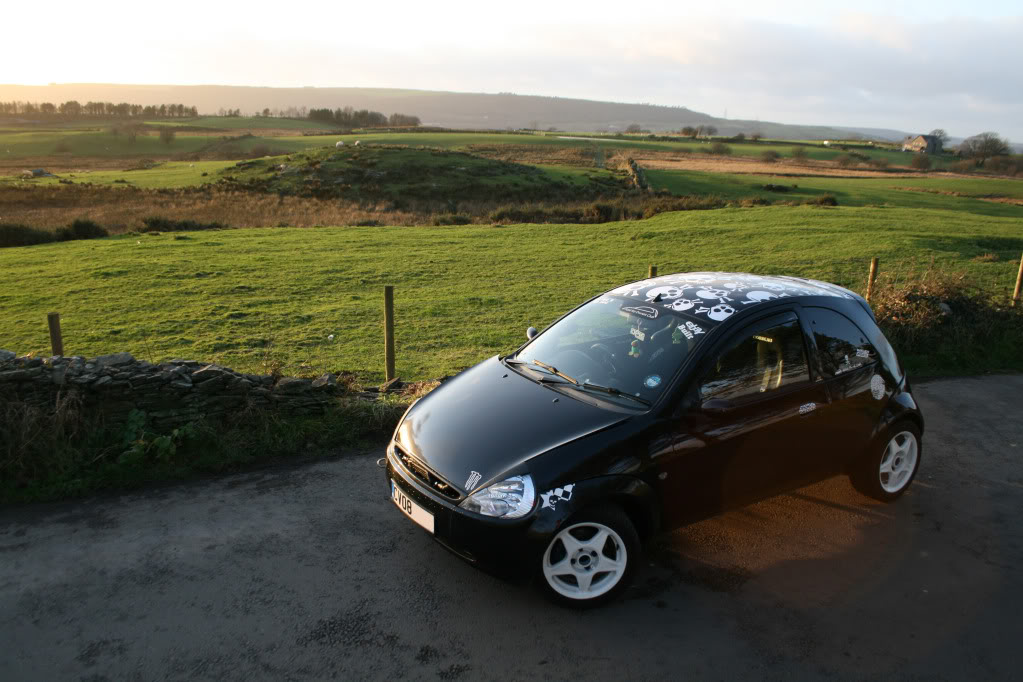
I�d bought a set of wheels in December 2010, just because I wanted some 15's for use on 0-60 strips or in case I wanted to have a go at drag racing. When I knew I was definitely going to the Classic Ford Show which had a 'Run What You Brung' it was time to put tyres on my wheels. So I got some Yokohama A Drives in 195/50/15. At this point I also fitted an anthracite MK4/5 Fiesta rear strut brace to the Ka.
Here are some pictures from the Classic Ford Show (the first 2 are official ones taken by photographers at the strip):
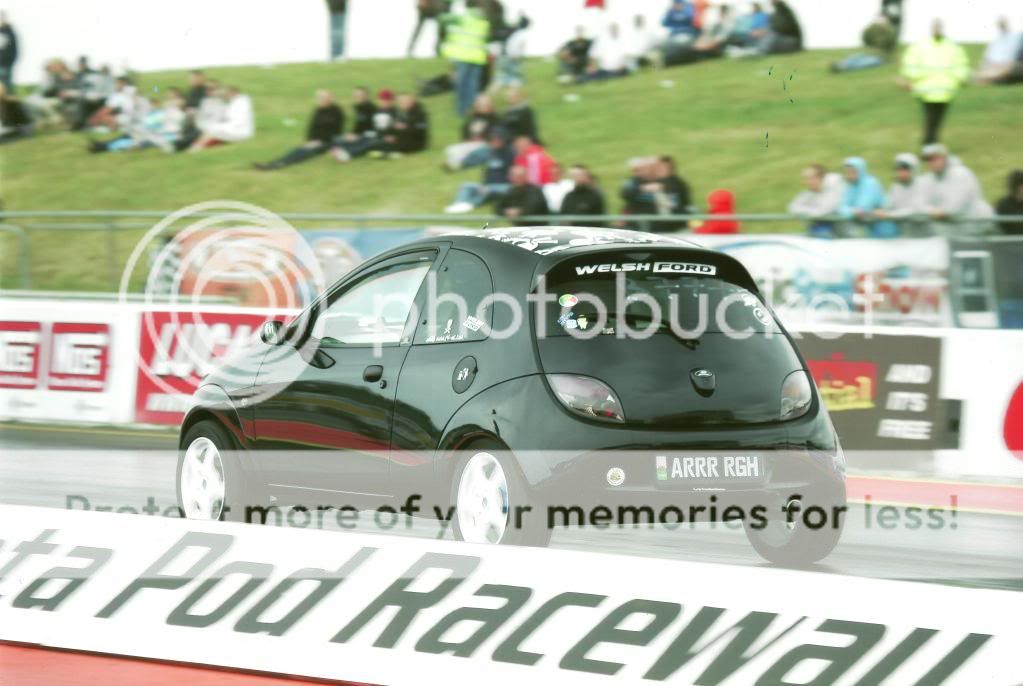

And my boyfriend took some others from up in the stand:

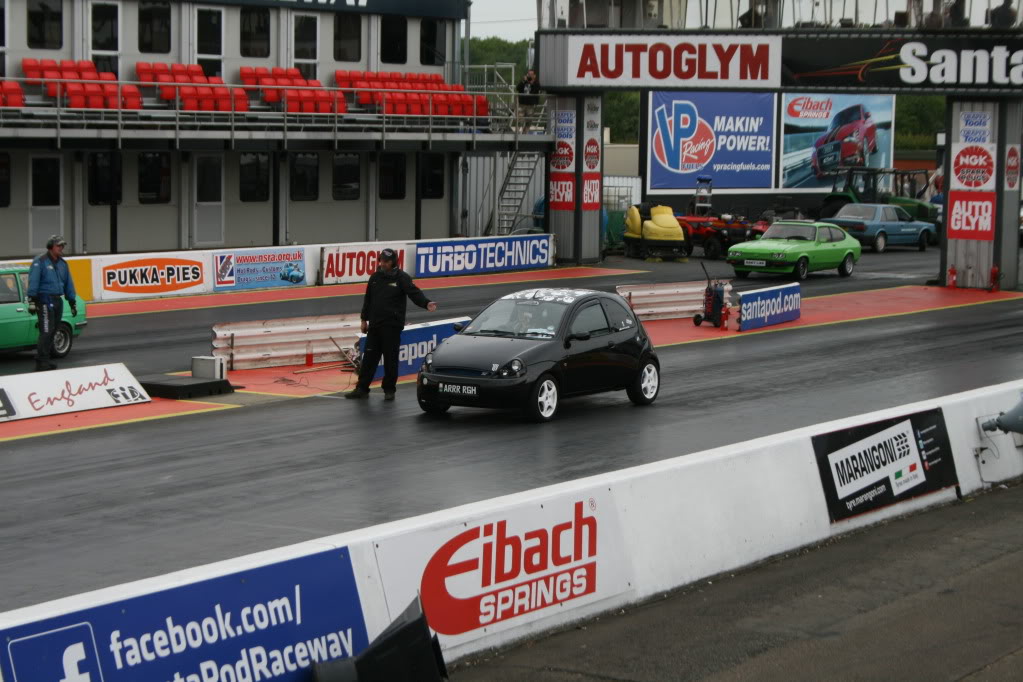
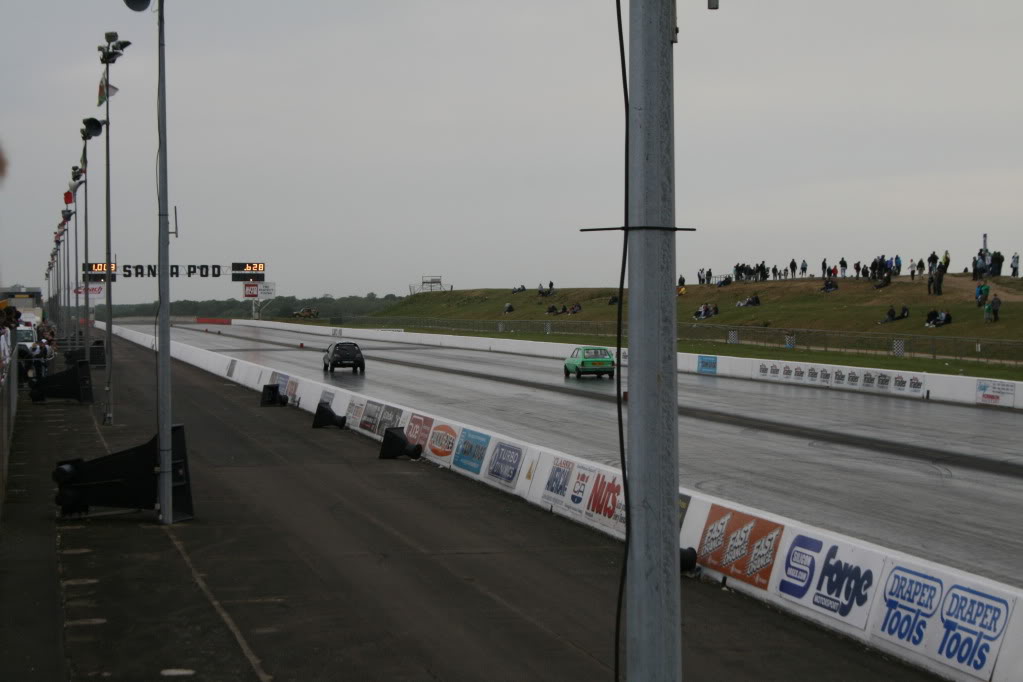
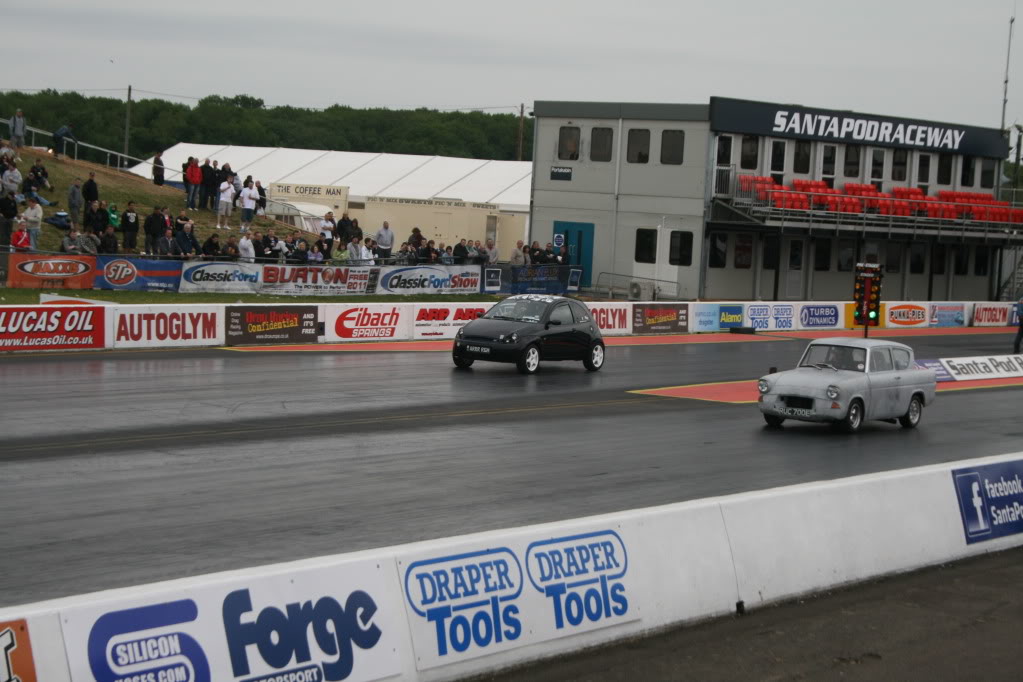
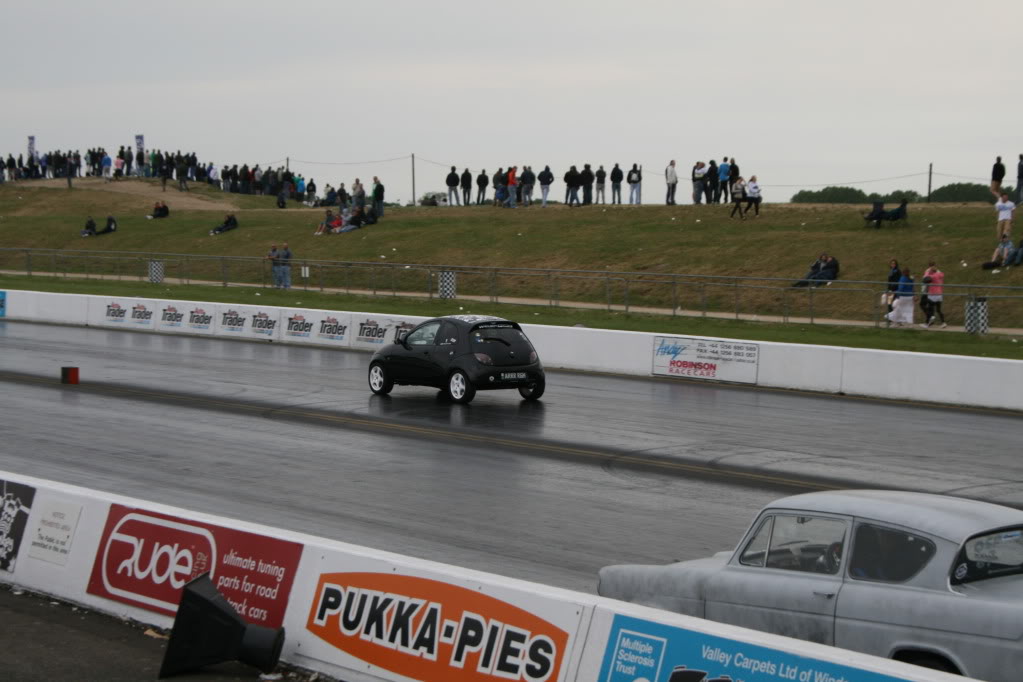
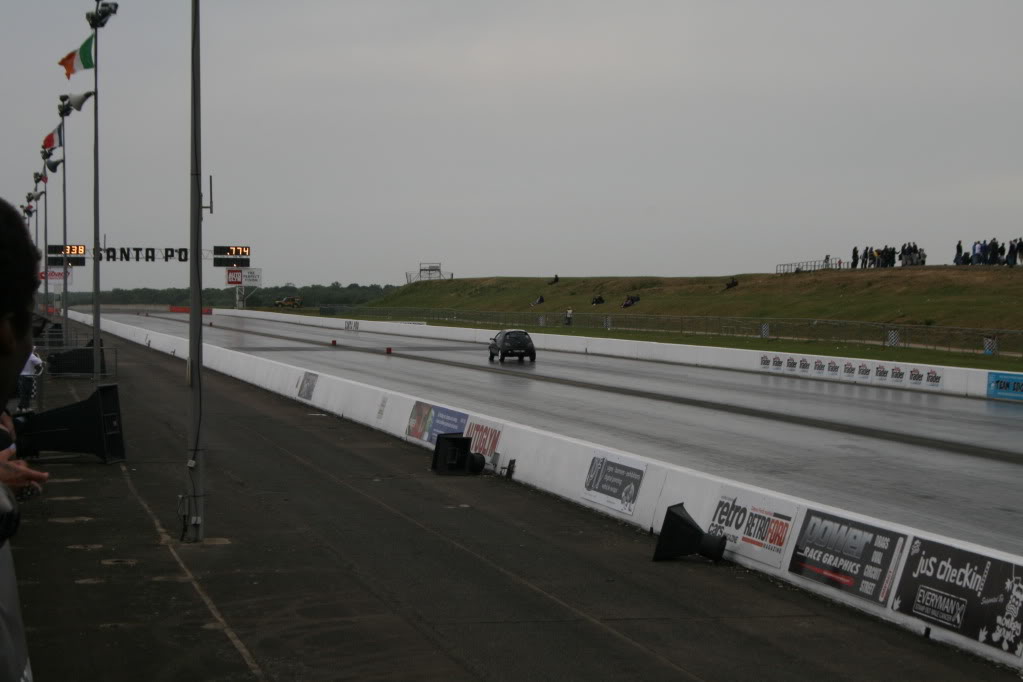
16.7 secs for the 1/4 mile was my best time. Was quite pleased with that as I'd never done this sort of thing before
Here are some pictures from the Classic Ford Show (the first 2 are official ones taken by photographers at the strip):
And my boyfriend took some others from up in the stand:
16.7 secs for the 1/4 mile was my best time. Was quite pleased with that as I'd never done this sort of thing before
Thread Starter
ɔɐᴘʈᴀᴉи ᴀᵴʙο
Joined: Aug 2011
Posts: 48
Likes: 1
From: Neath, South Wales
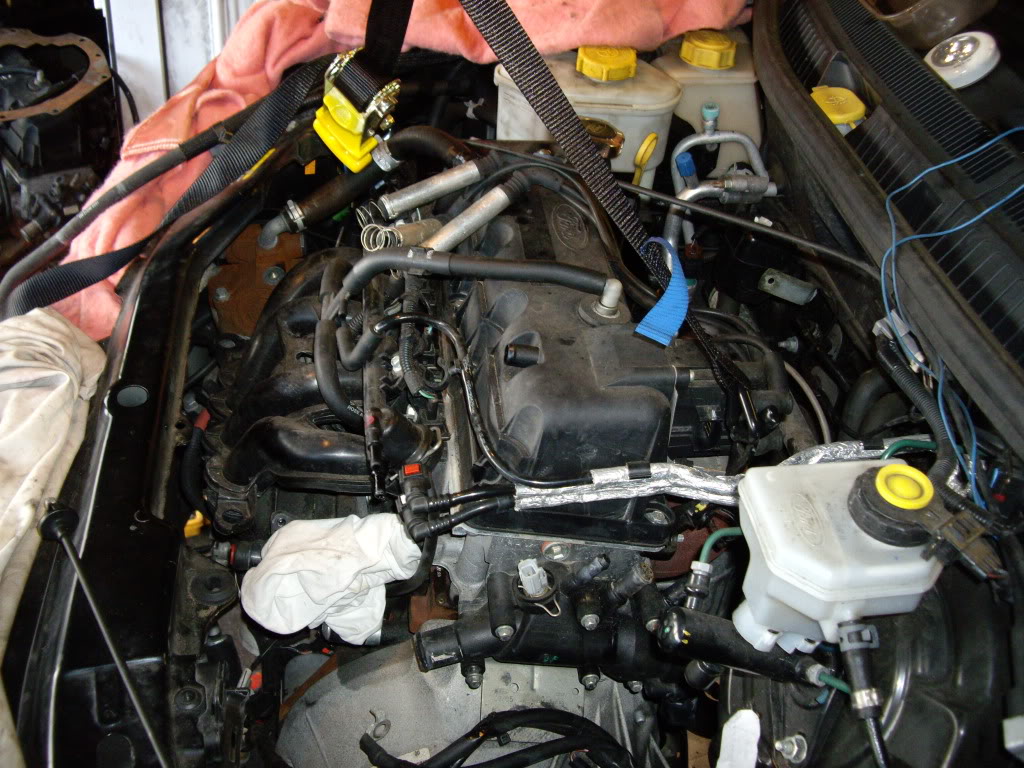
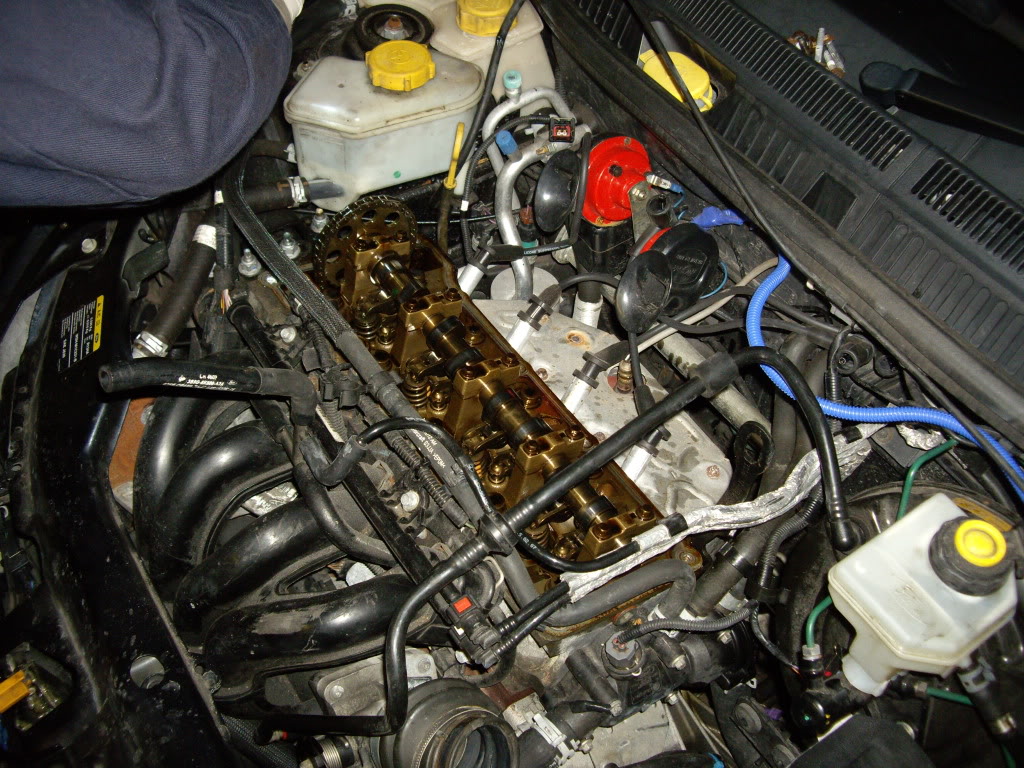
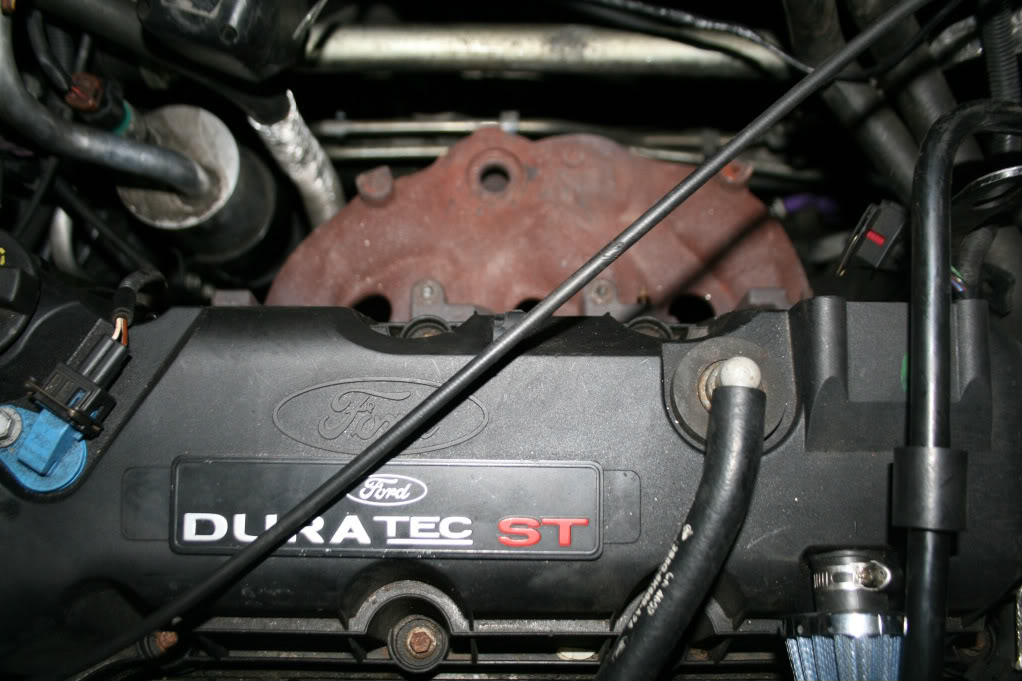
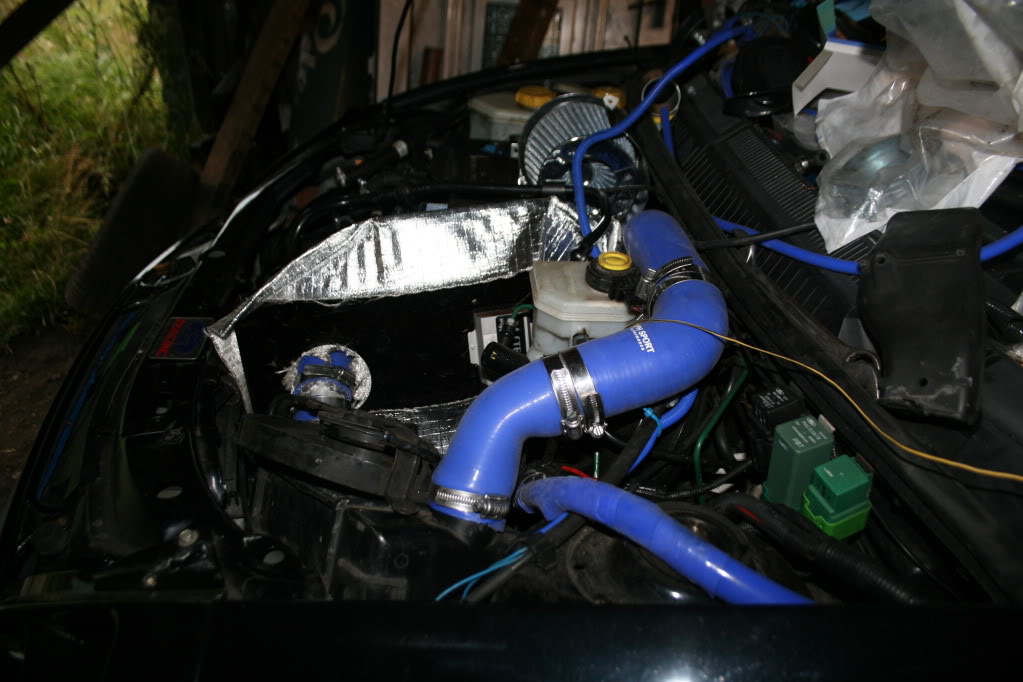
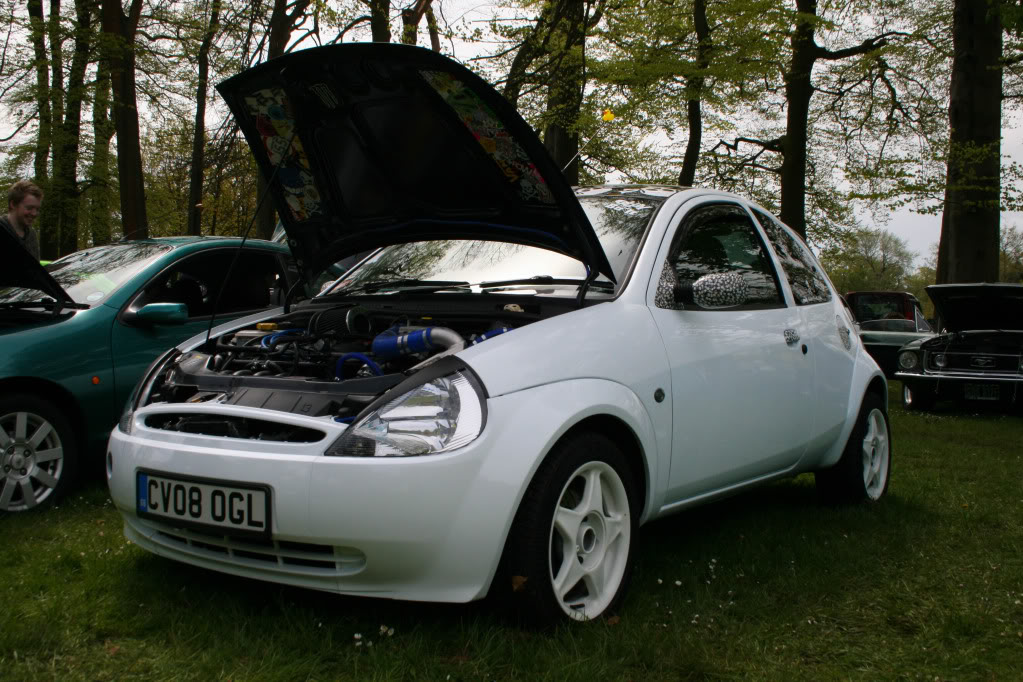
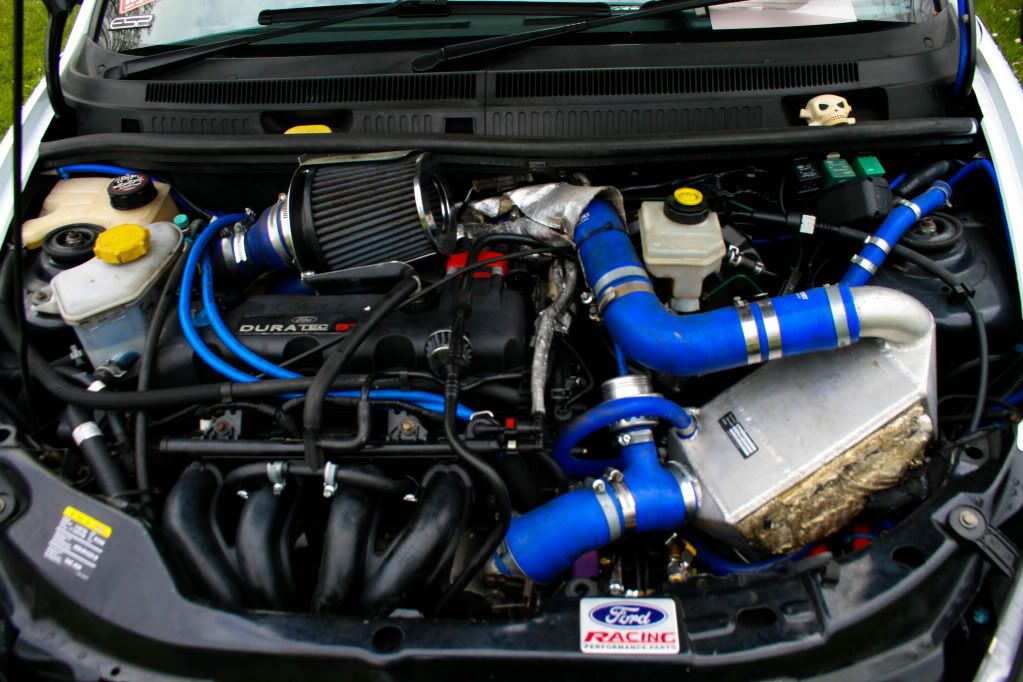
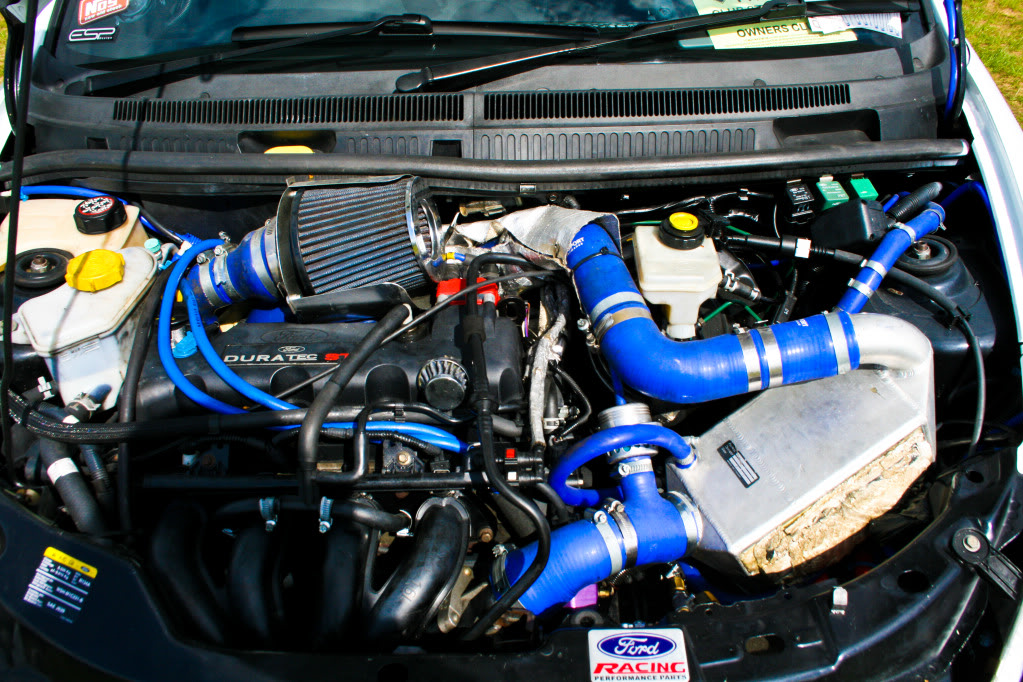
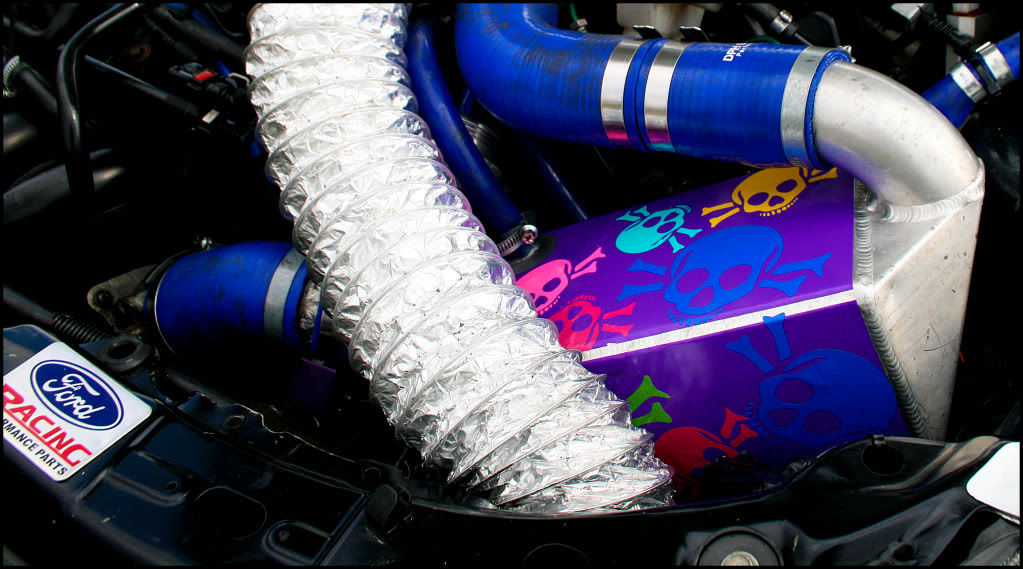
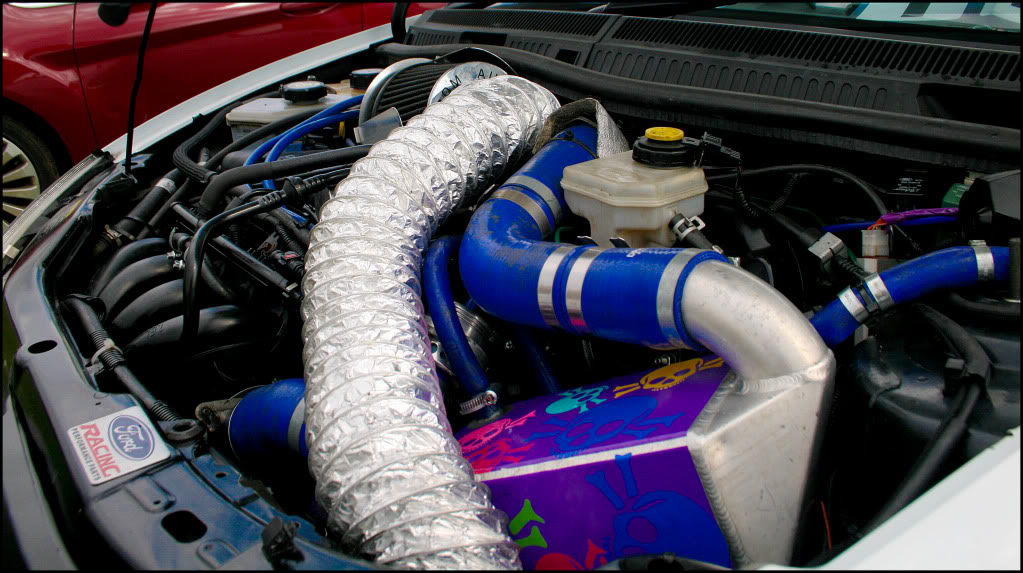
We took the car off the road straight after the Classic Ford Show and set about fitting some new parts in the engine bay ...
Engine as it was:
Out with the old:
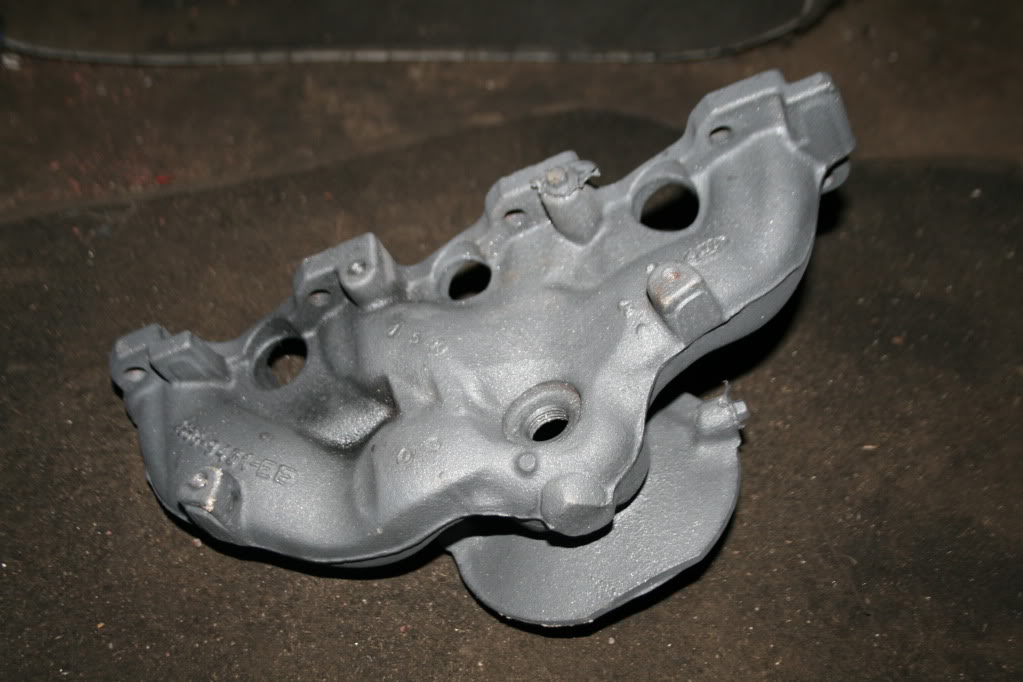
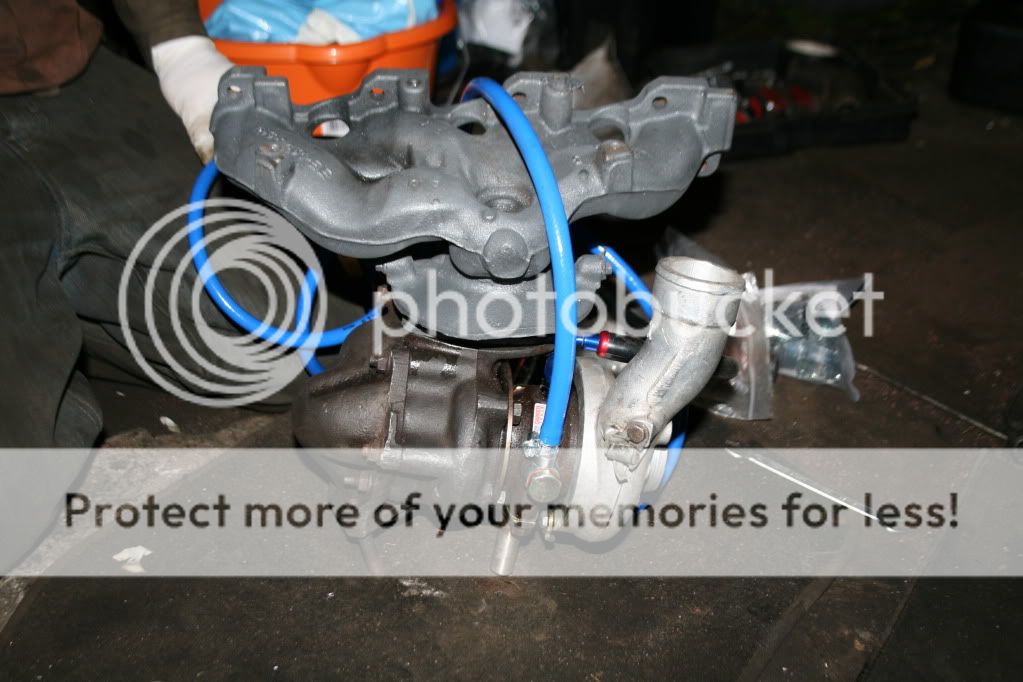
In with the new custom manifold:
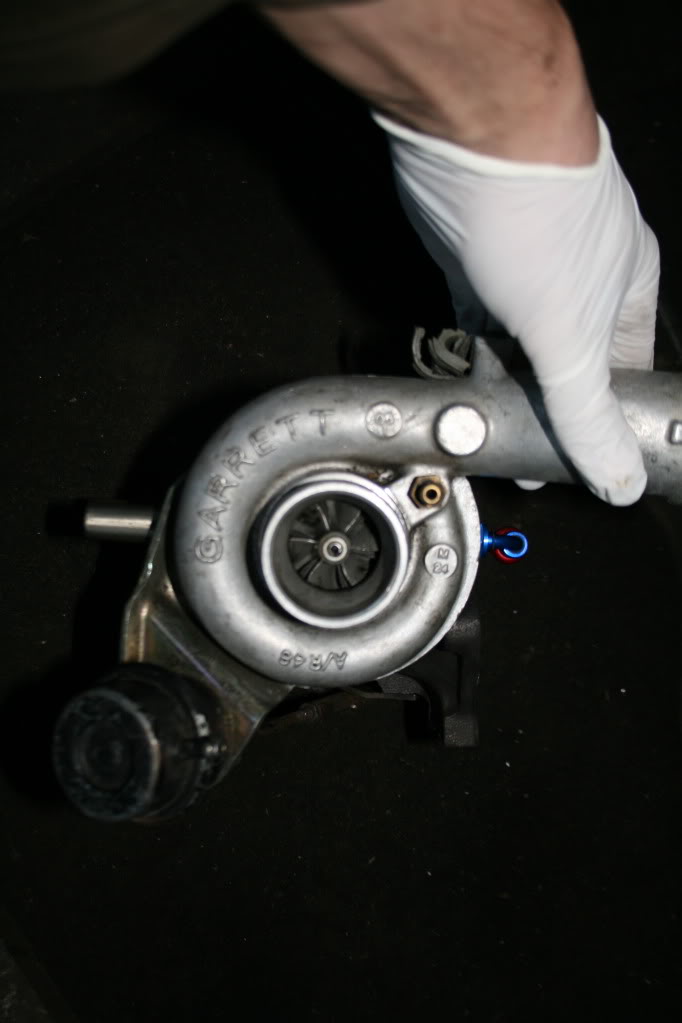
T2 Turbo from a Fiesta RS Turbo
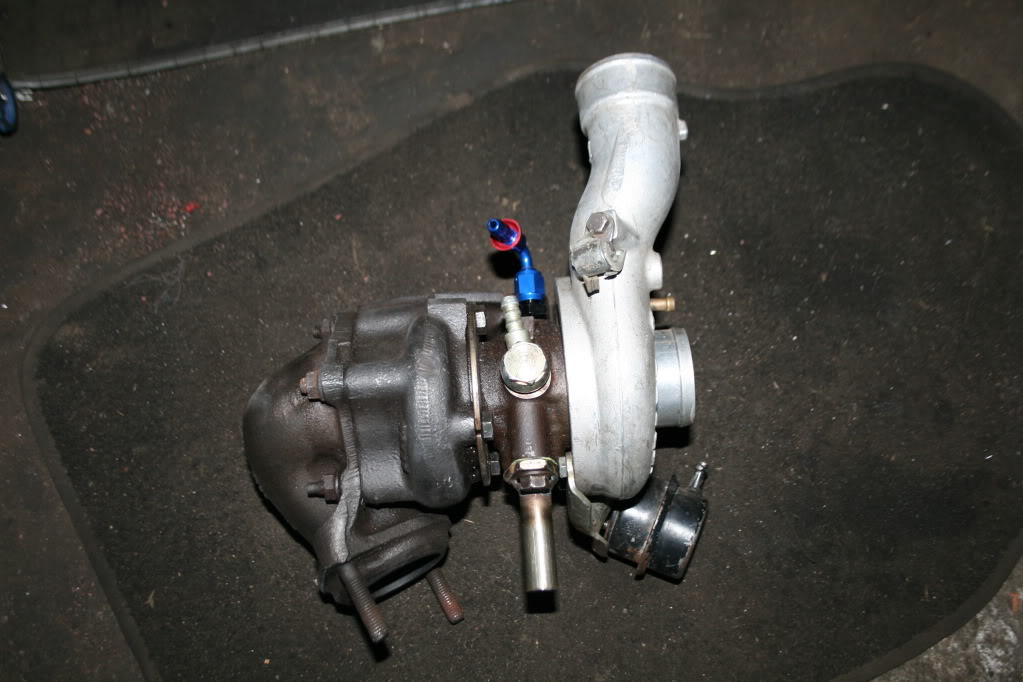
Bolted onto my new manifold with the water hoses etc.
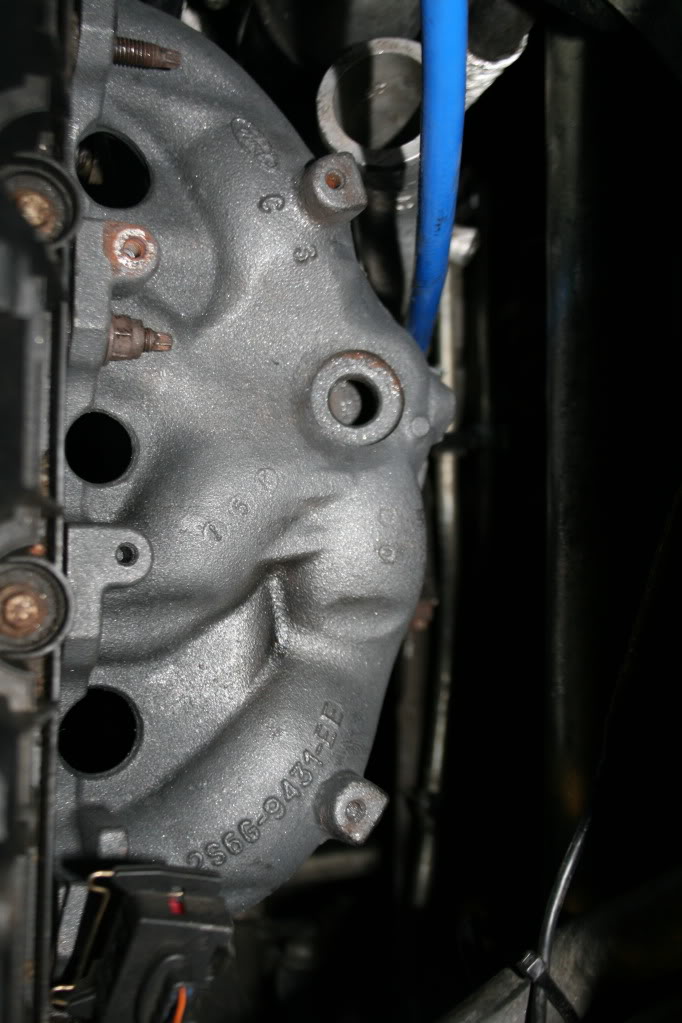
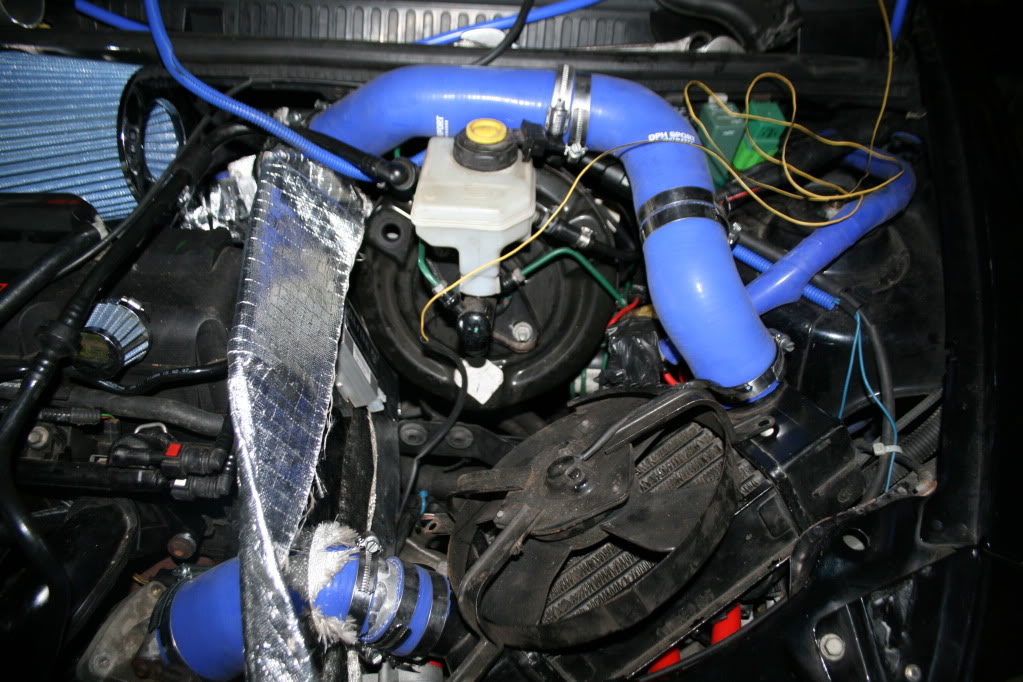
A view down the back of the engine:
Oil lines running to a small oil cooler behind the front bumper grille:
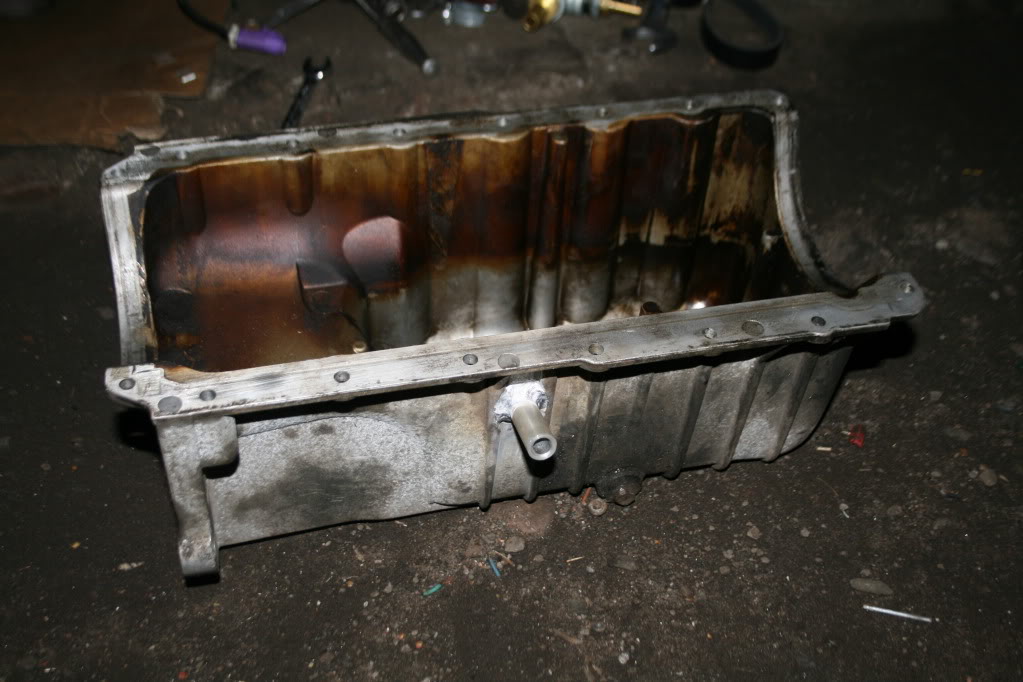
Oil return welded to the sump
My first turbo turned out to be knackered and blew oil past the seals and through the exhaust Managed to source another and get it delivered on the Thursday before Ford Fair. Got it all fitted and running on the Friday night, but then my alternator went and that was that. Put an end to me taking the car to the show which I was quite upset about. Other things hadn't gone to plan too, so maybe it was for the best.
Oil pressure sender, hooked up to a gauge in the car:

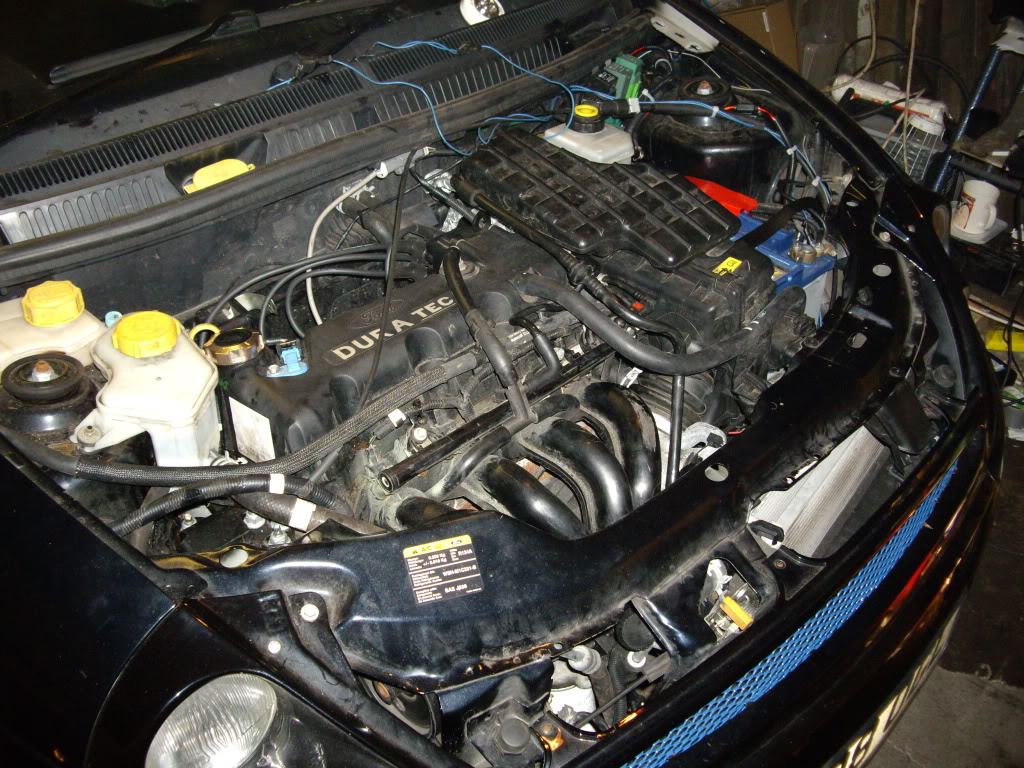
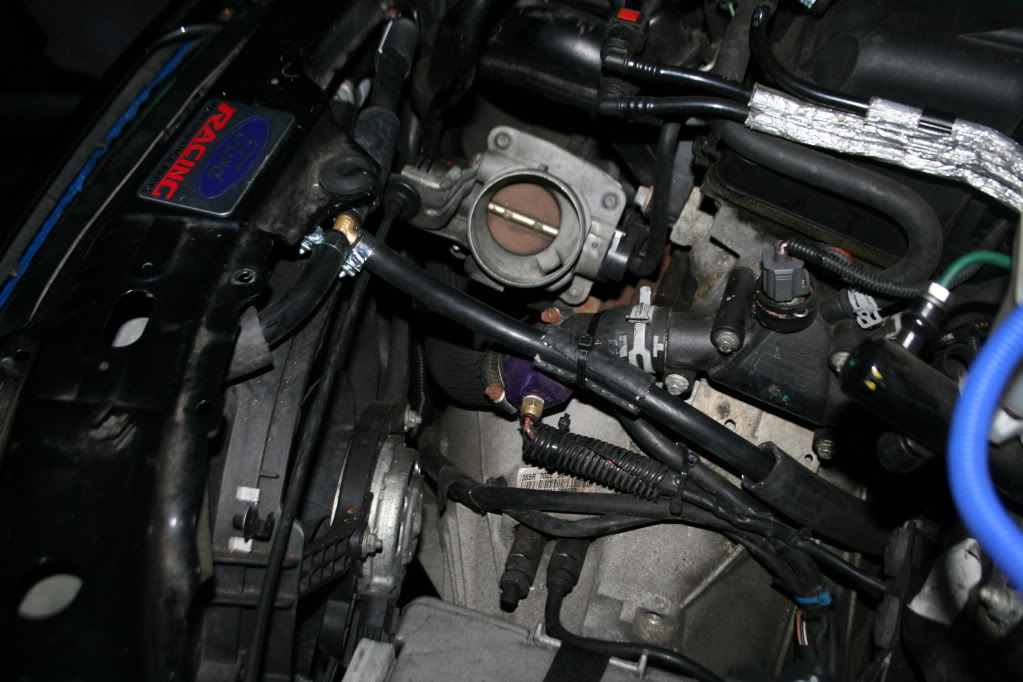
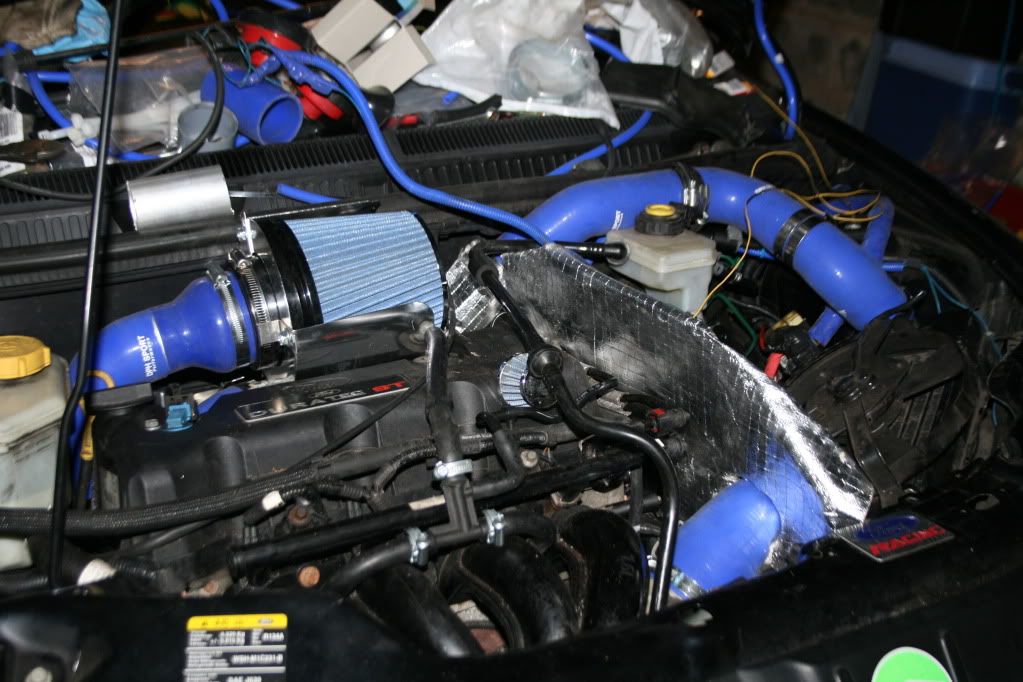
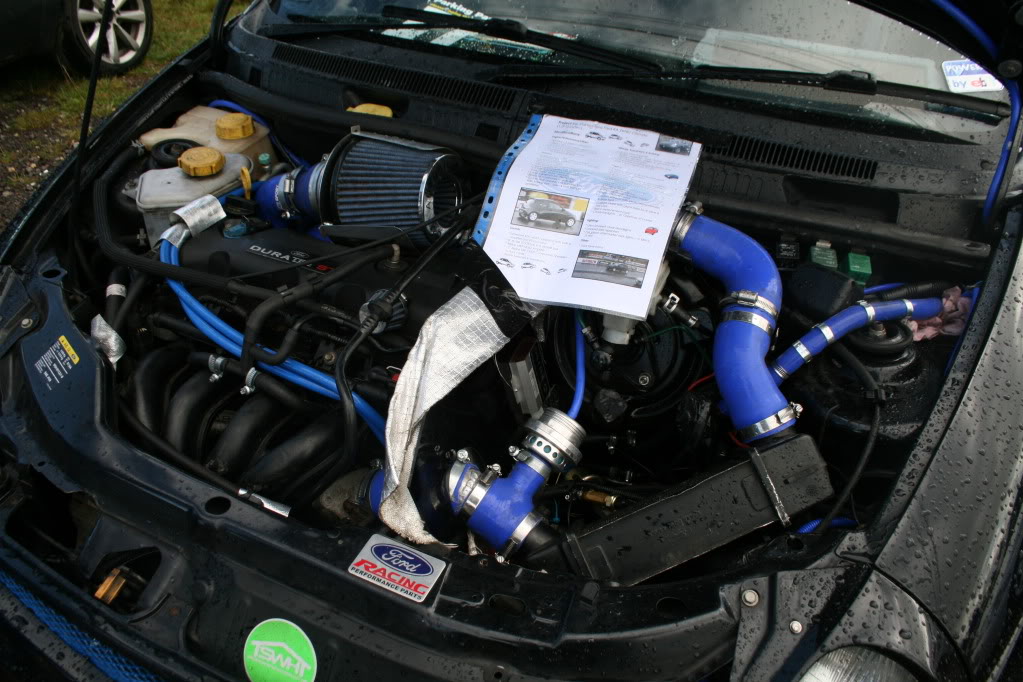
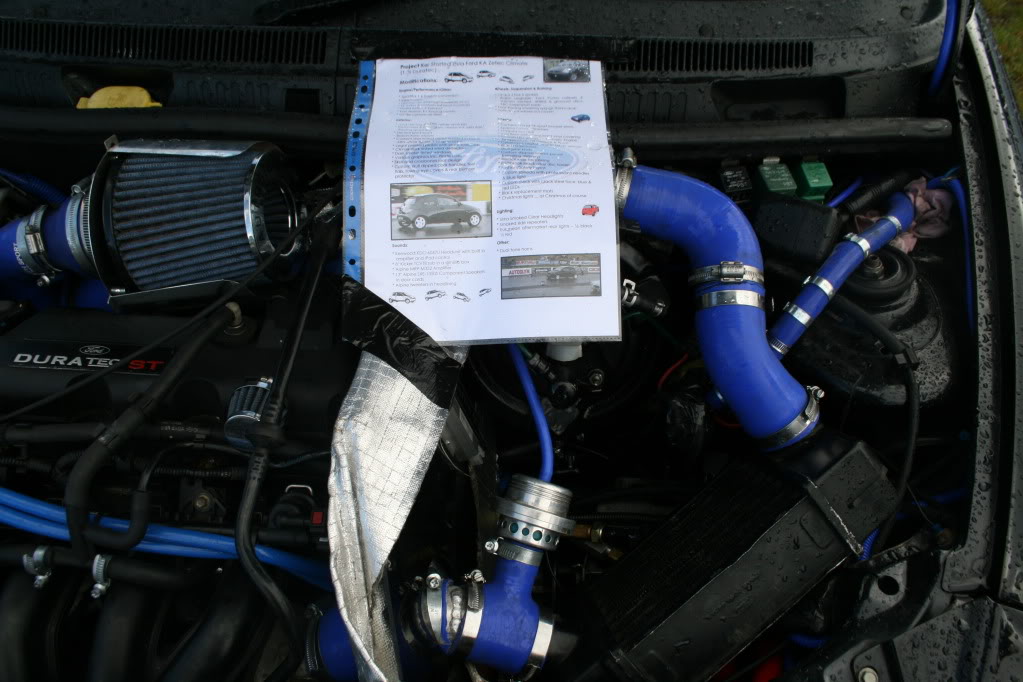
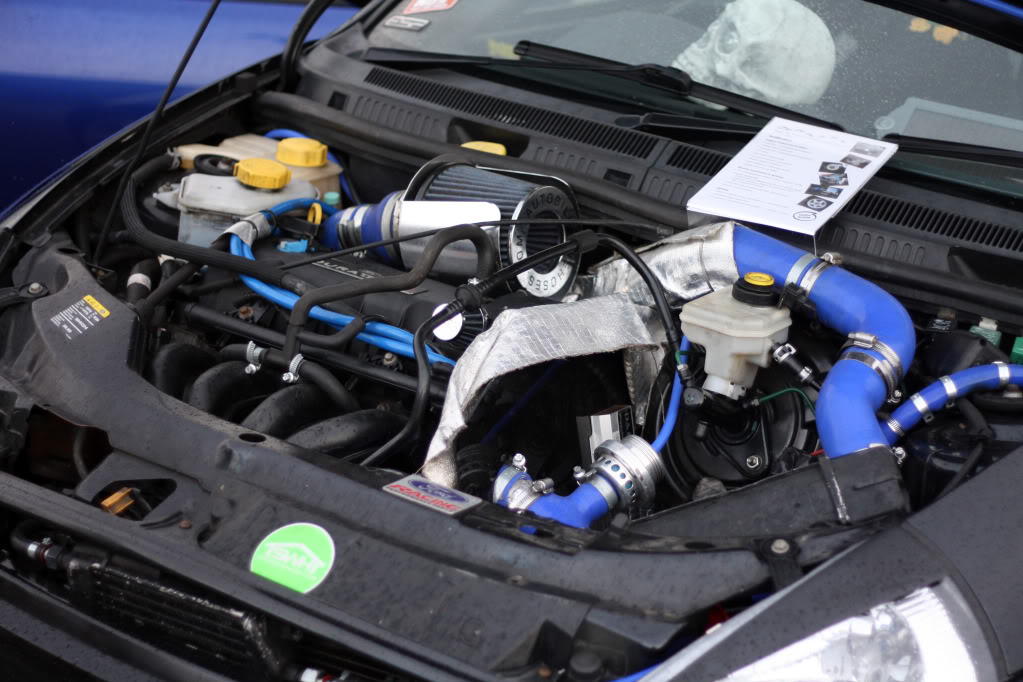
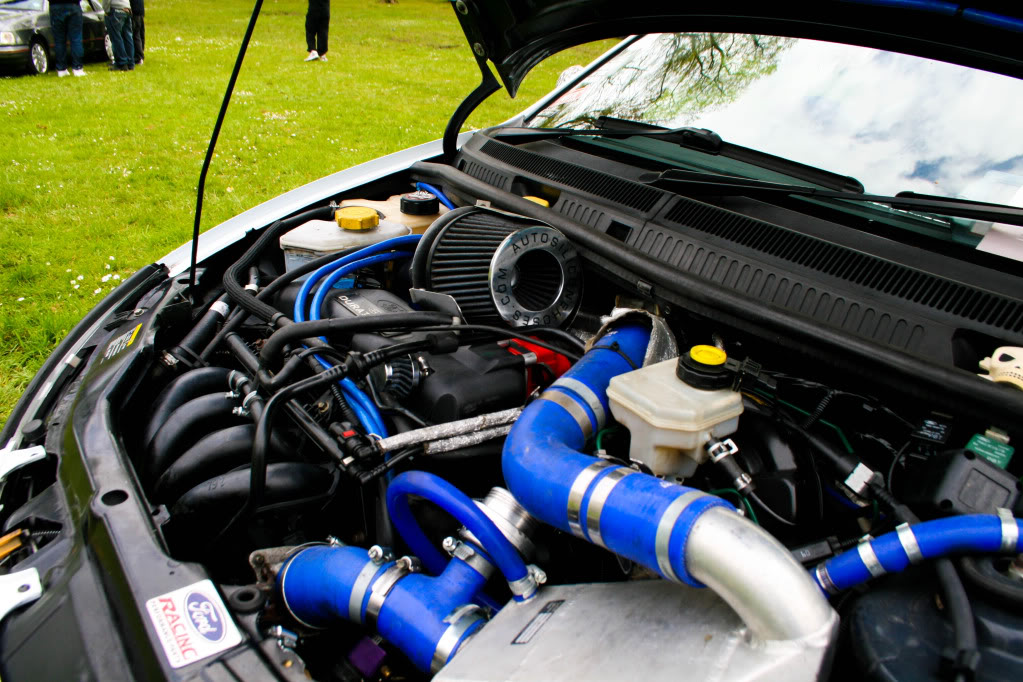
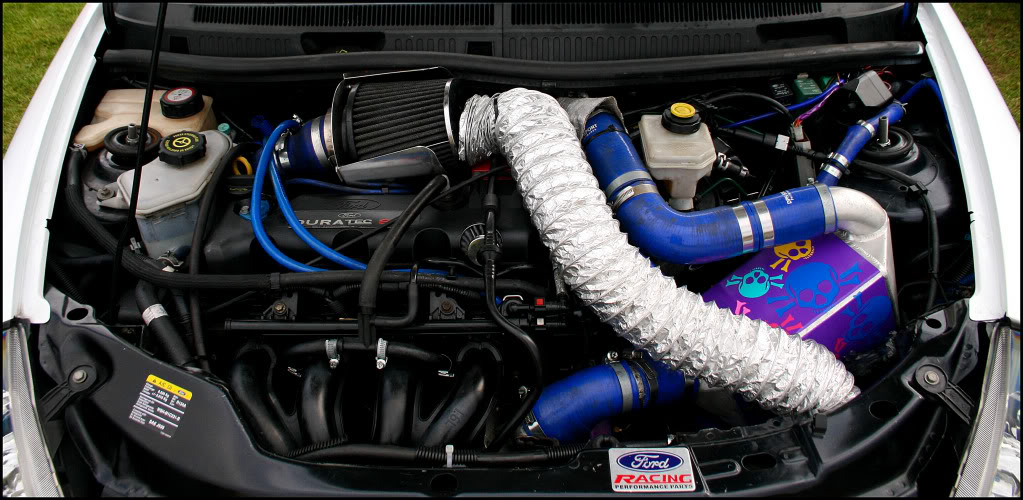
A view of the bay with the air filter, intercooler, hoses, heatsheild etc. fitted:
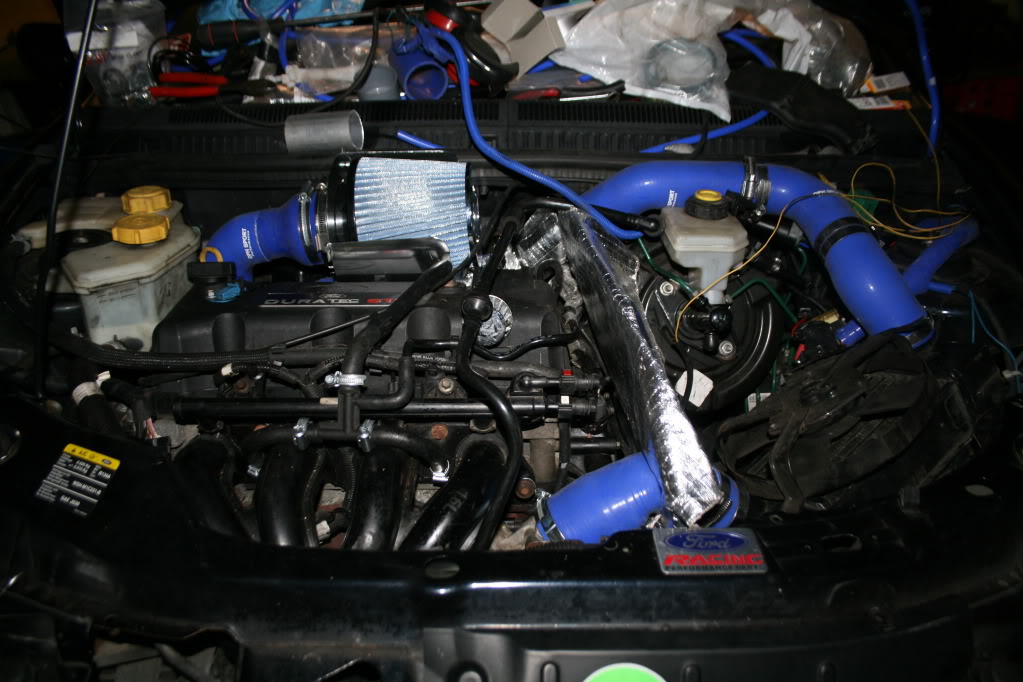
Fan on the intercooler:
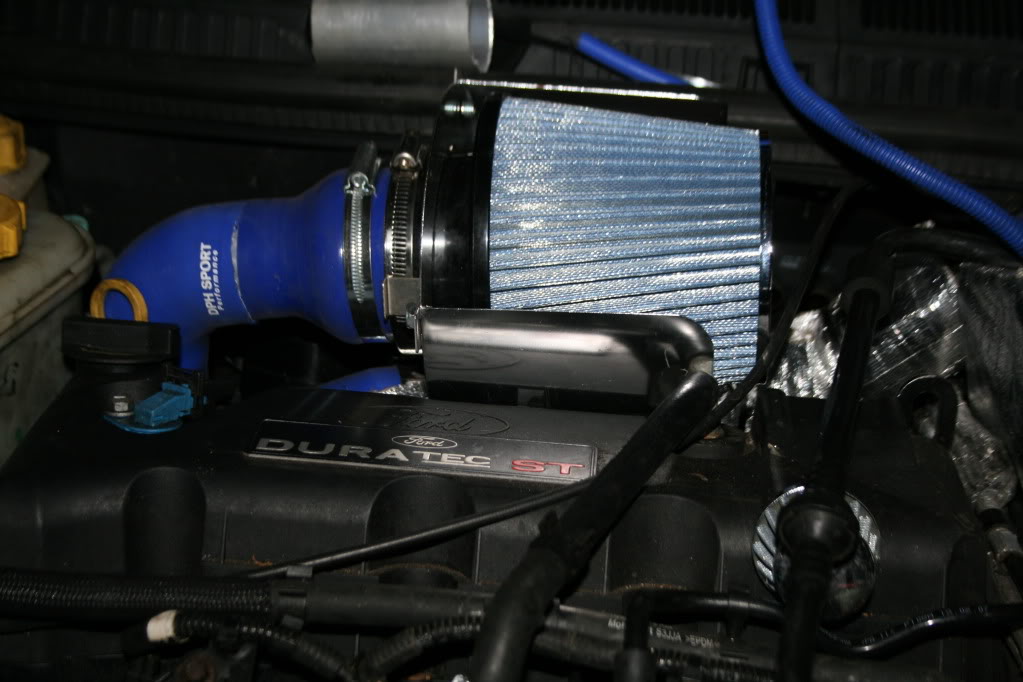
Big ass dual cone air filter with heatshield:
A couple of other photos of the bay:
Gauges inside the car. Left - Outside air temp, Middle - Boost Gauge, Right - Oil Pressure:
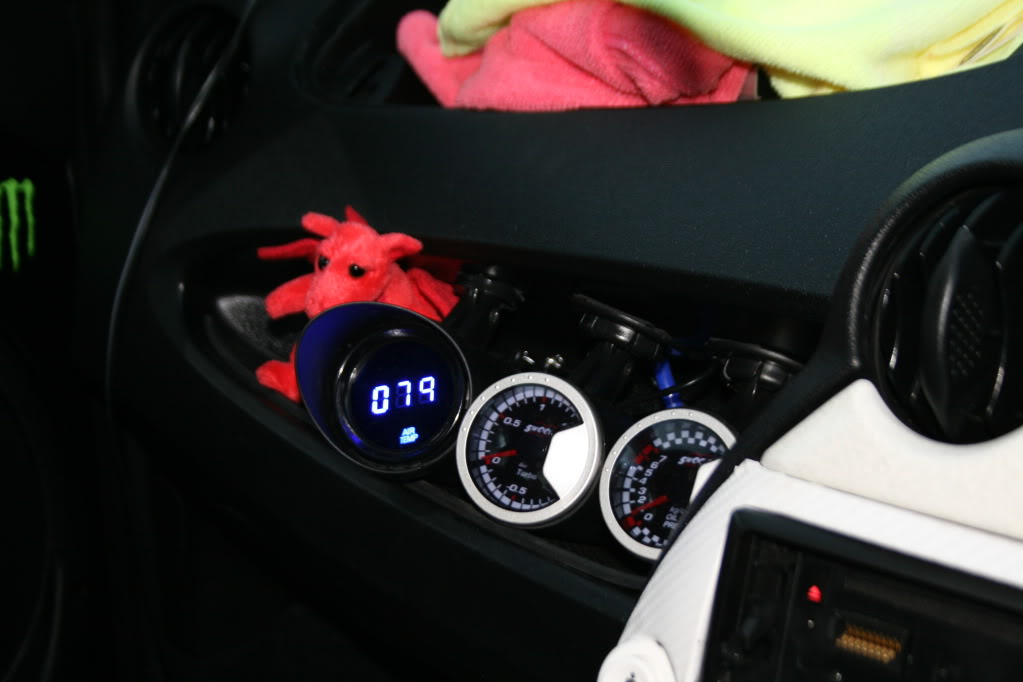
I have also added on the Unichip Boost Module and hope to get the car mapped in a few weeks time. Hopefully it should be running around 160-170bhp
New brakes added - Panther vented, drilled and grooved discs and EBC Greenstuff pads. Stops well
Engine as it was:
Out with the old:
In with the new custom manifold:
T2 Turbo from a Fiesta RS Turbo
Bolted onto my new manifold with the water hoses etc.
A view down the back of the engine:
Oil lines running to a small oil cooler behind the front bumper grille:
Oil return welded to the sump
My first turbo turned out to be knackered and blew oil past the seals and through the exhaust
Oil pressure sender, hooked up to a gauge in the car:
A view of the bay with the air filter, intercooler, hoses, heatsheild etc. fitted:
Fan on the intercooler:
Big ass dual cone air filter with heatshield:
A couple of other photos of the bay:
Gauges inside the car. Left - Outside air temp, Middle - Boost Gauge, Right - Oil Pressure:
I have also added on the Unichip Boost Module and hope to get the car mapped in a few weeks time. Hopefully it should be running around 160-170bhp
New brakes added - Panther vented, drilled and grooved discs and EBC Greenstuff pads. Stops well
Thread Starter
ɔɐᴘʈᴀᴉи ᴀᵴʙο
Joined: Aug 2011
Posts: 48
Likes: 1
From: Neath, South Wales
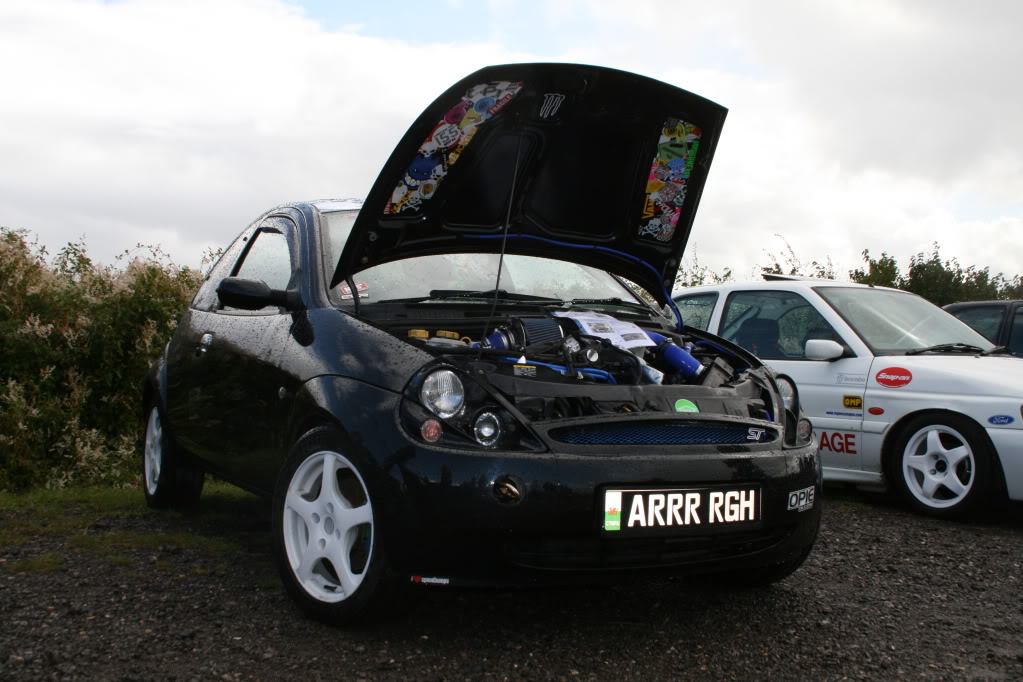
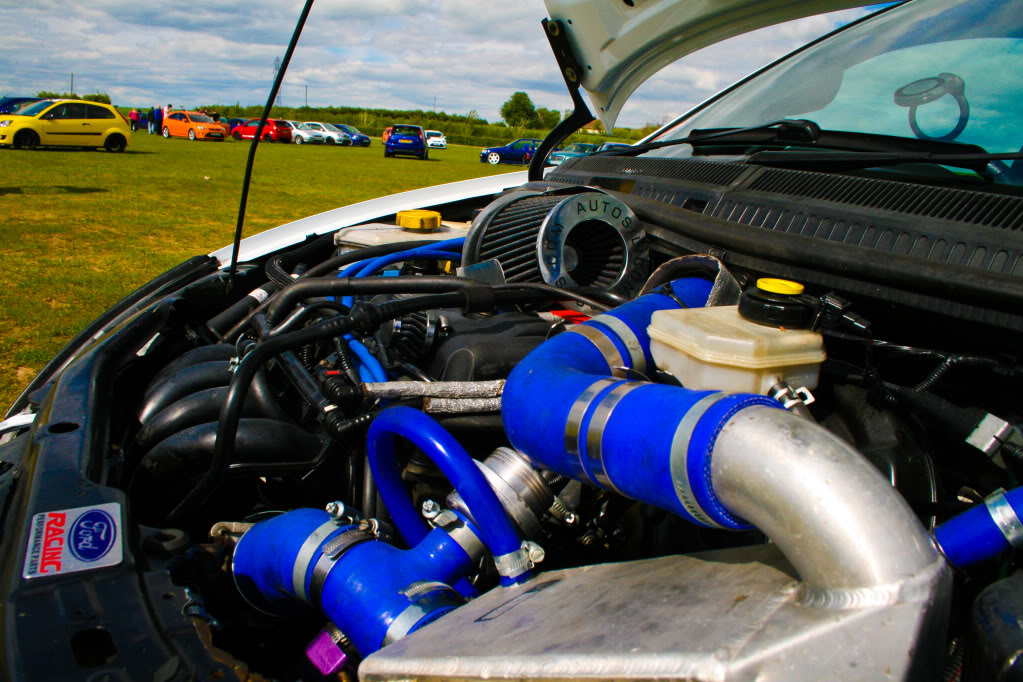
Once the car was back on the road I attended Rally Day at Castle Combe where I unveiled the turbo conversion and the rest of my mods ...
Dump valve fitted:
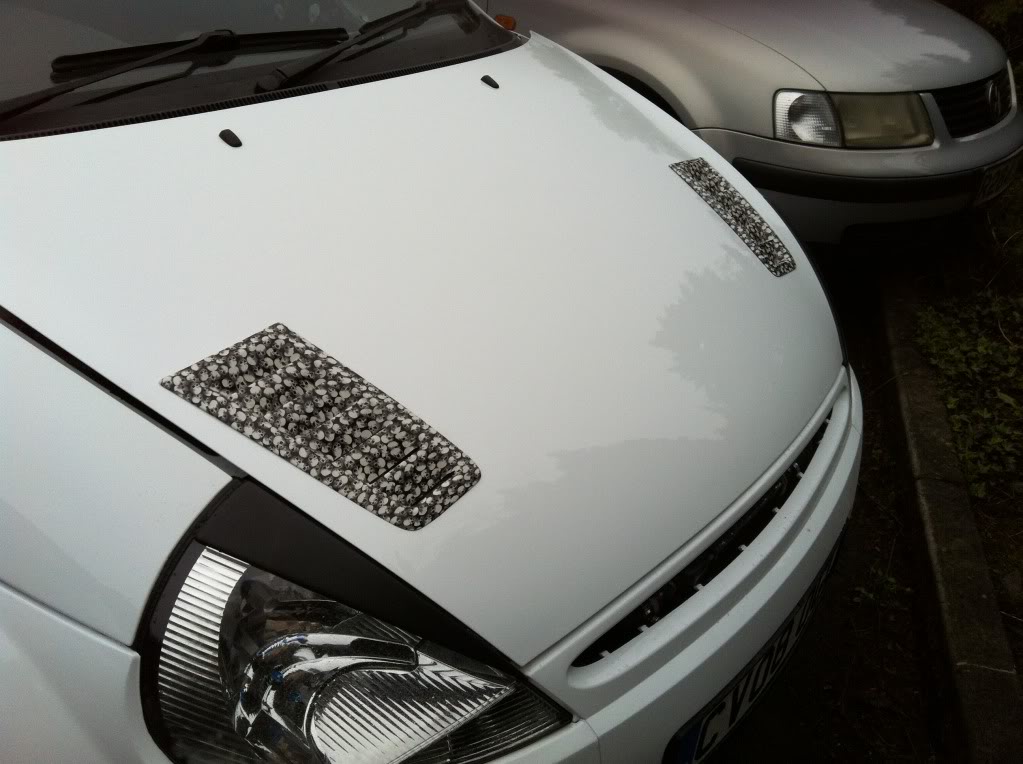
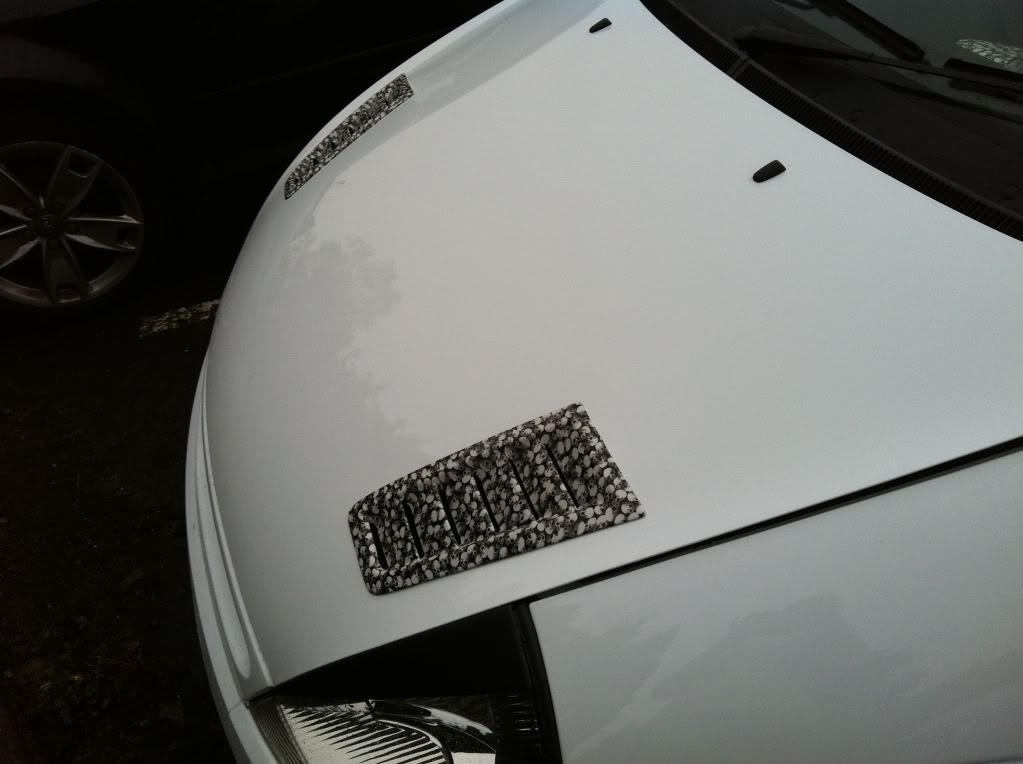
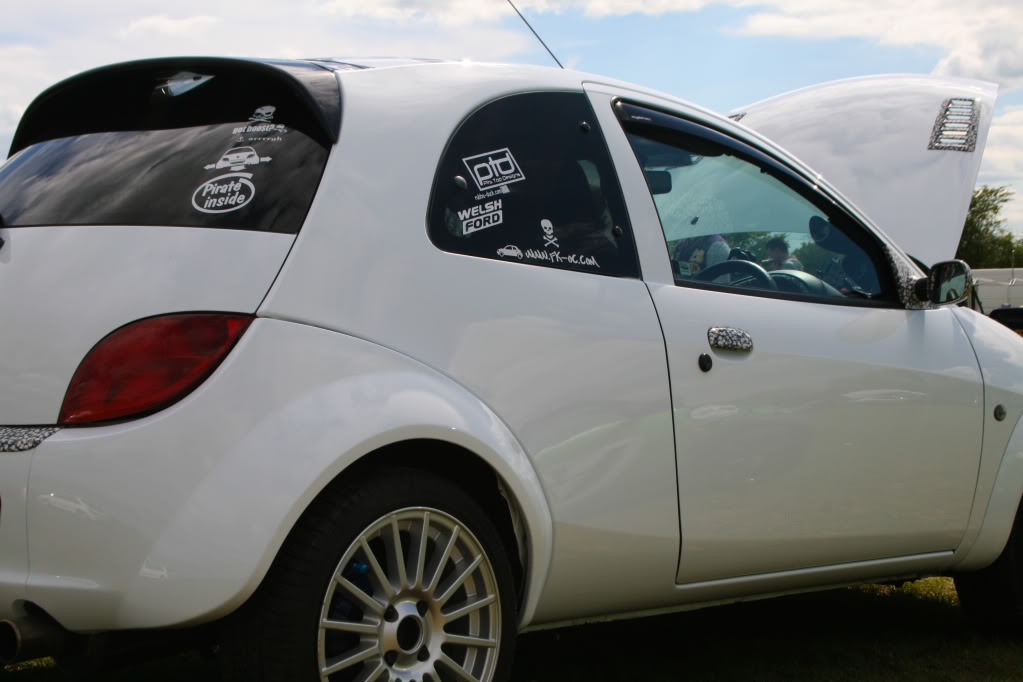
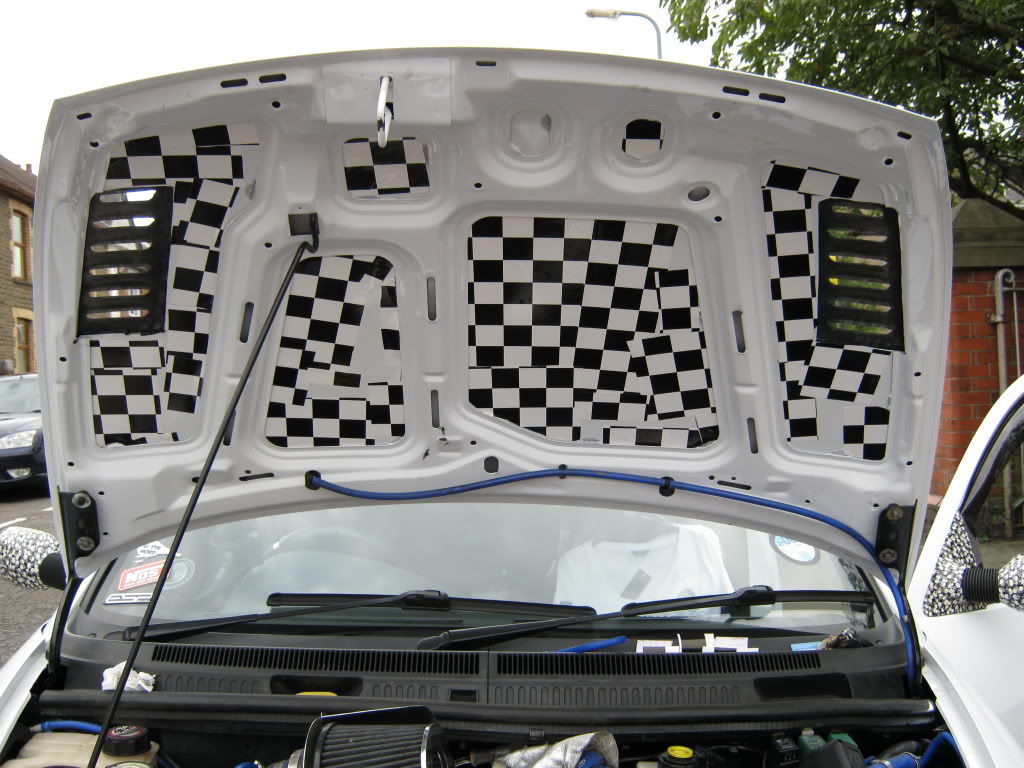
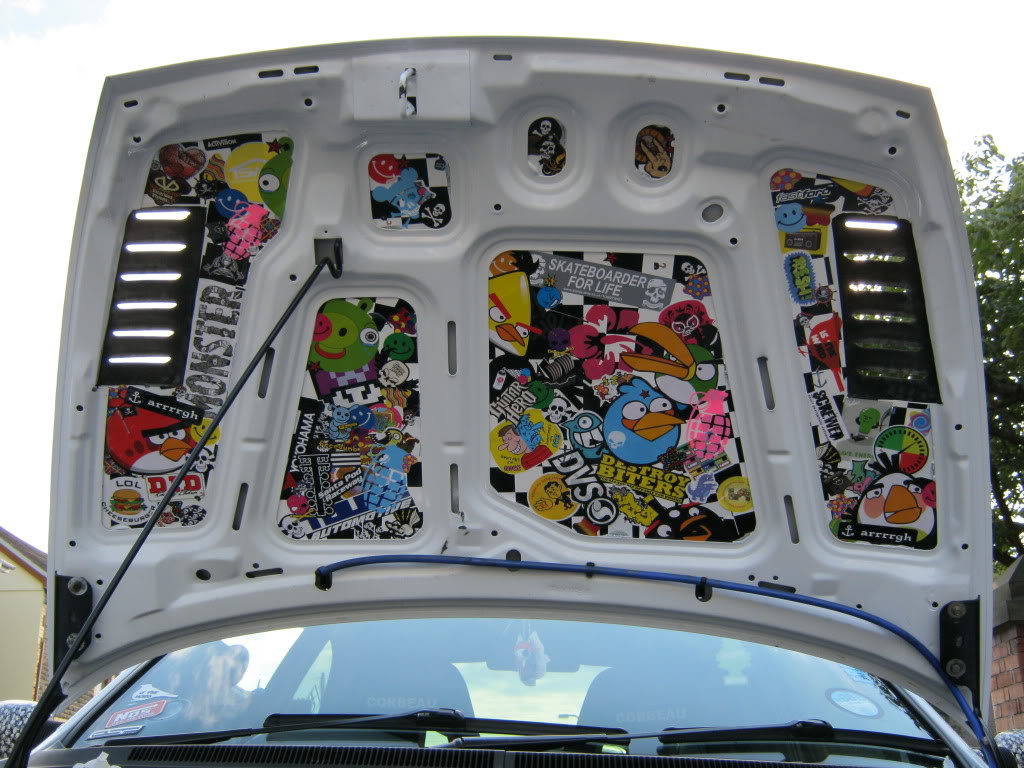
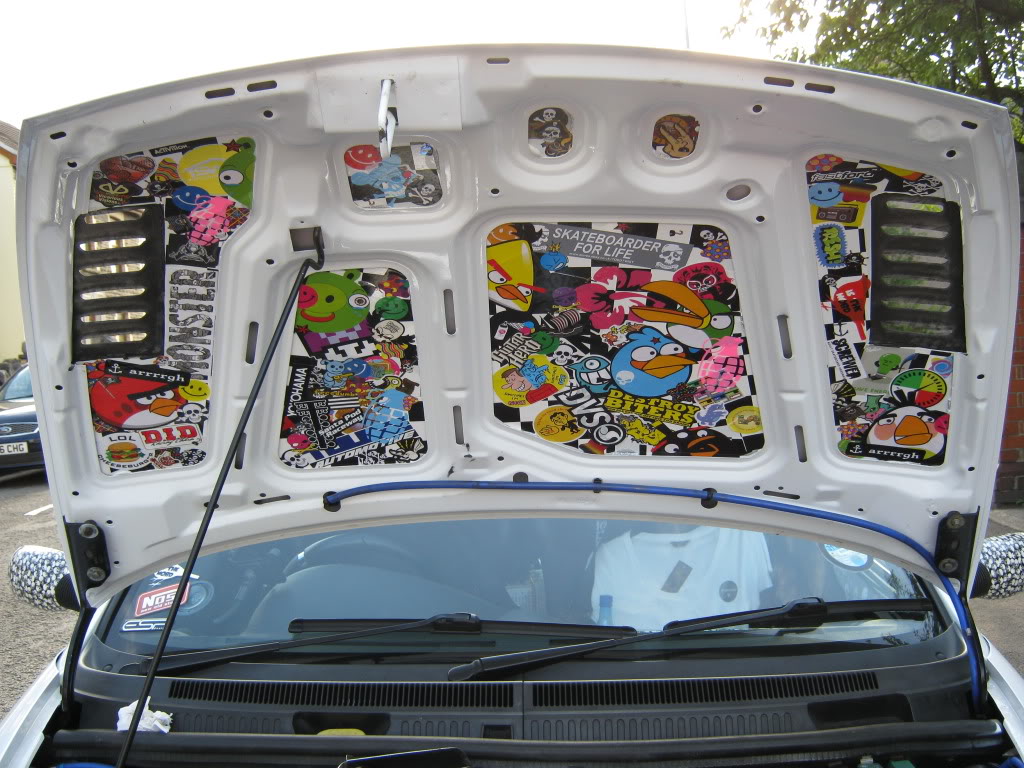
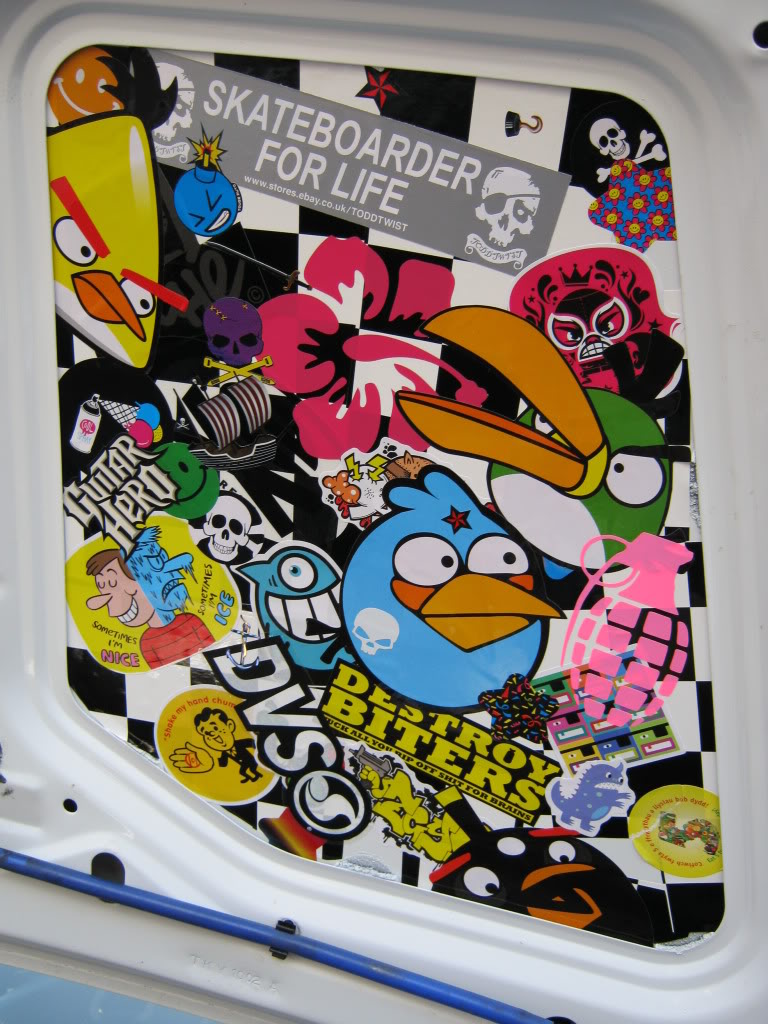
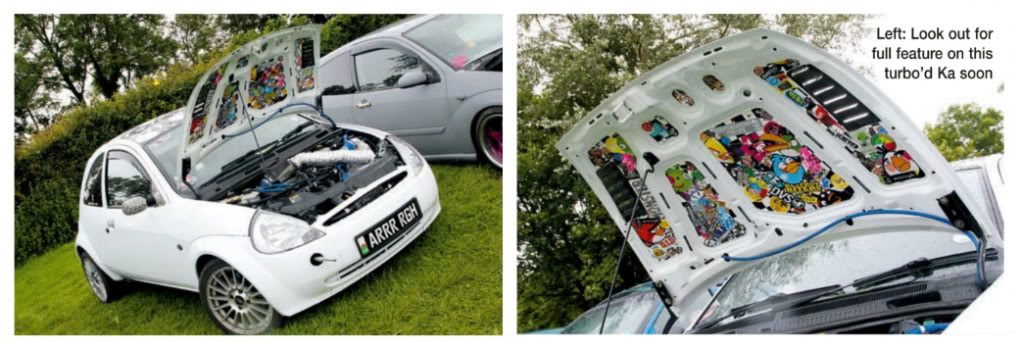
Sticker bombed panels on inside of bonnet (loads of kids at the show spotted a yellow Angry Birds sticker) Lol
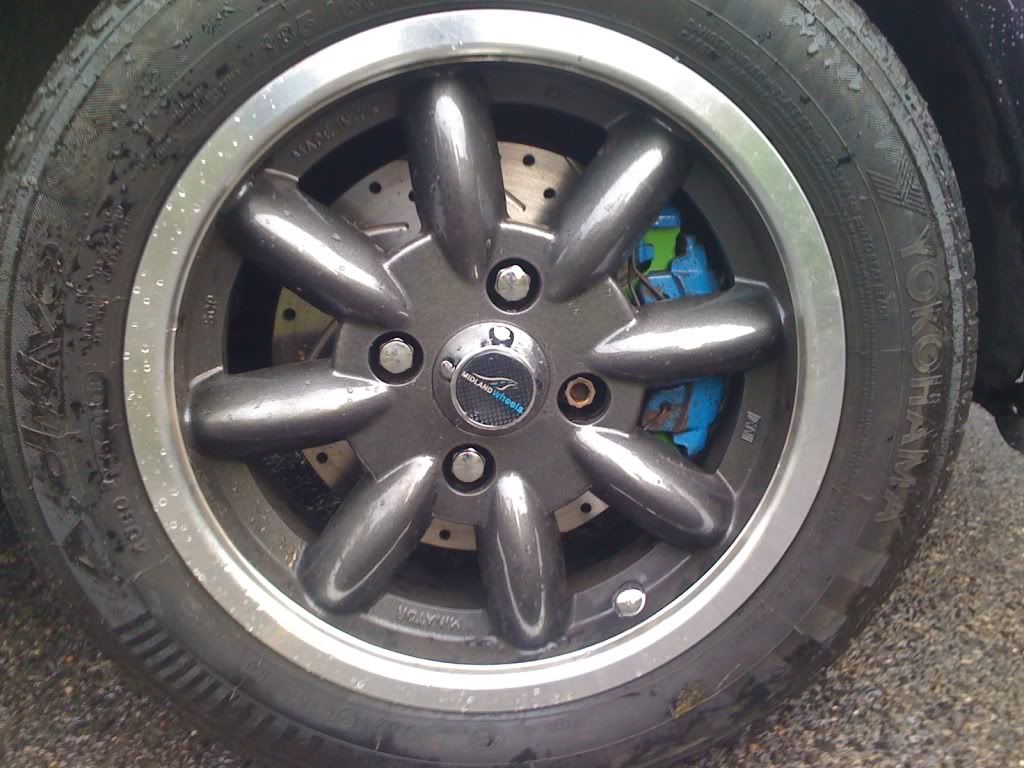
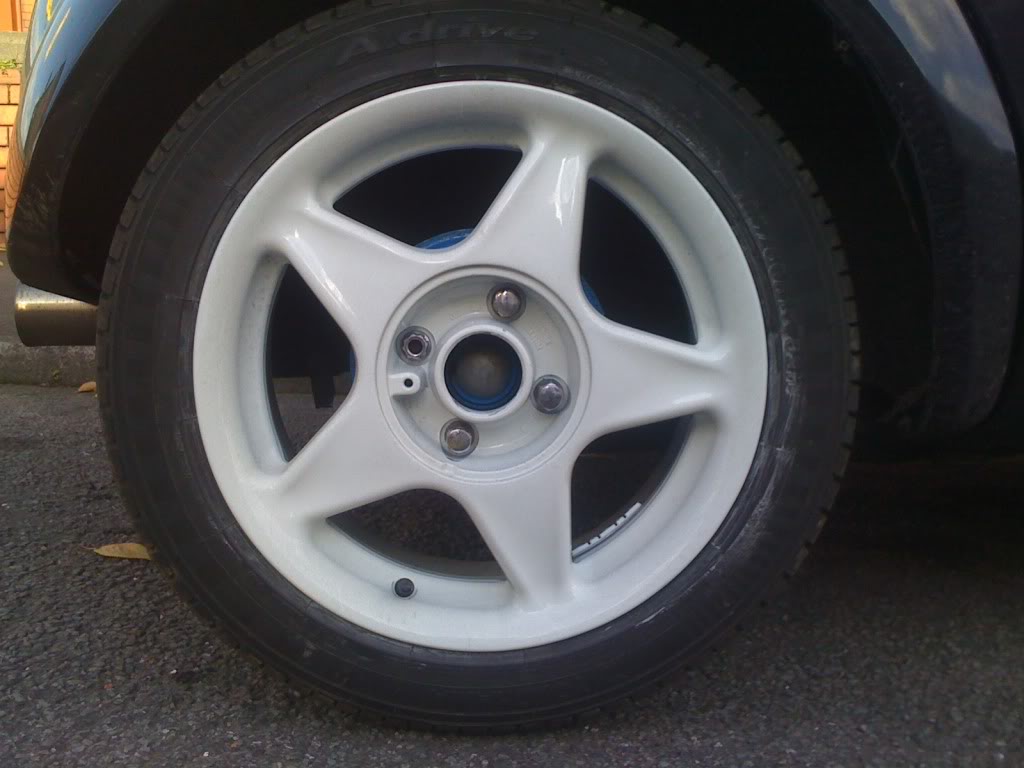
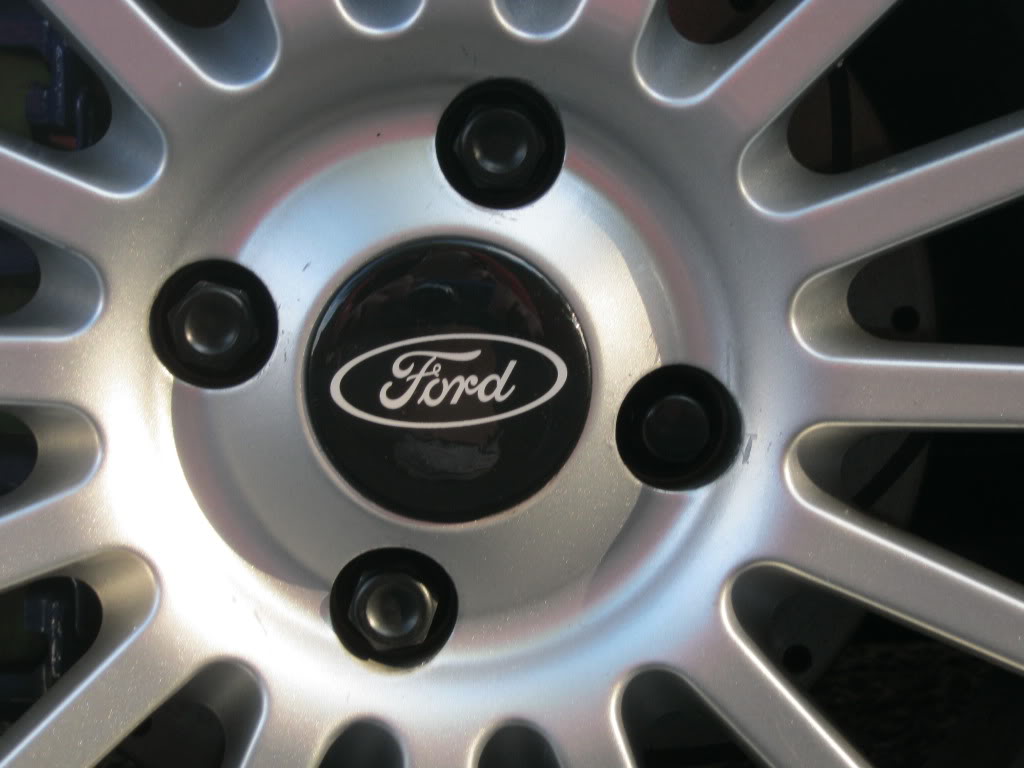
The wheels have had fresh paint, Diamond White on the fronts with a Panther Black inner lip:
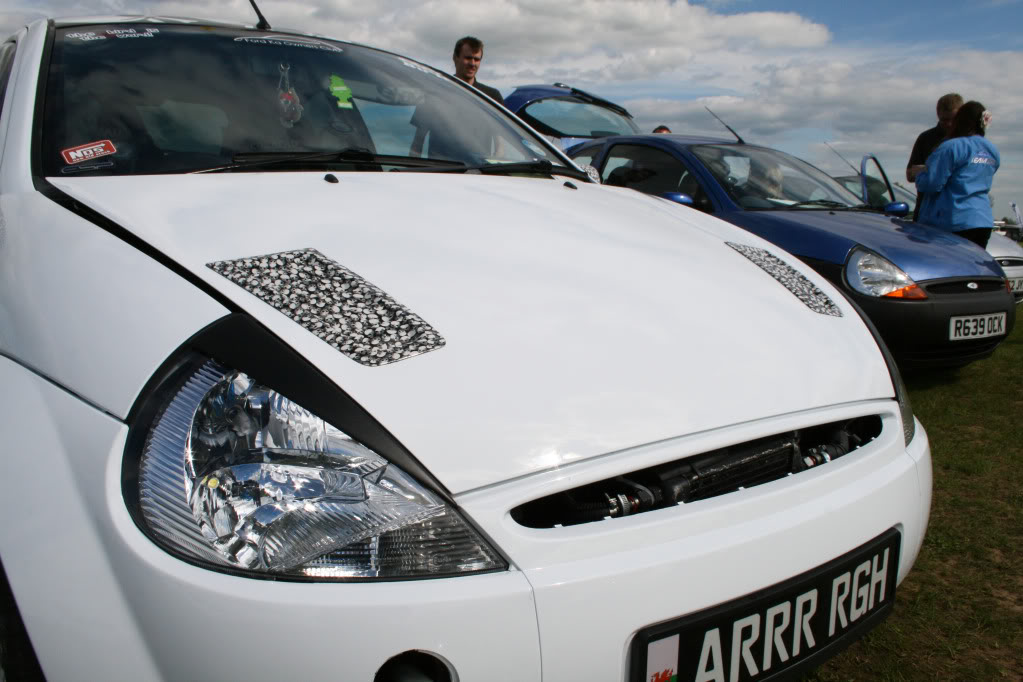
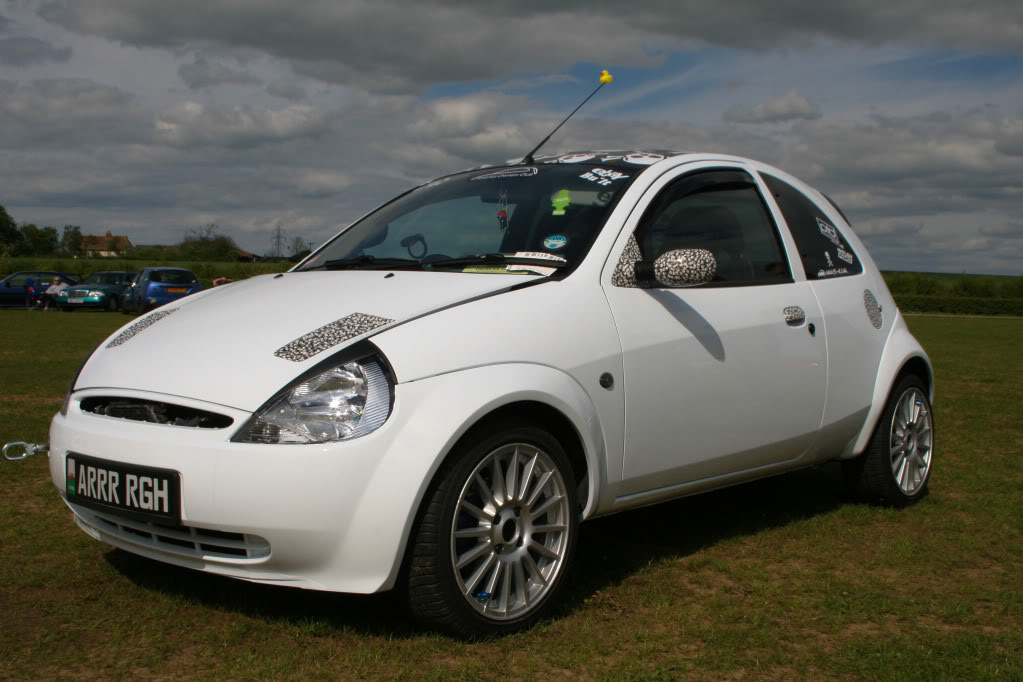
Decided to get something really different done, so I had lots of bits chemically dipped to create a custom look. Boot handle & rear bumper protector with new DMB gel overlay:
Fuel flap chemically dipped:
Ford Racing Arches! Well, only the rear one. Front was still at the painters at this point:
Close up of the boot handle:
The fuel flap:
I'd also had all my interior bits done in this design too, but due to a problem with the last batch of materials they had to be done again from scratch.
Then came a few more changes ...
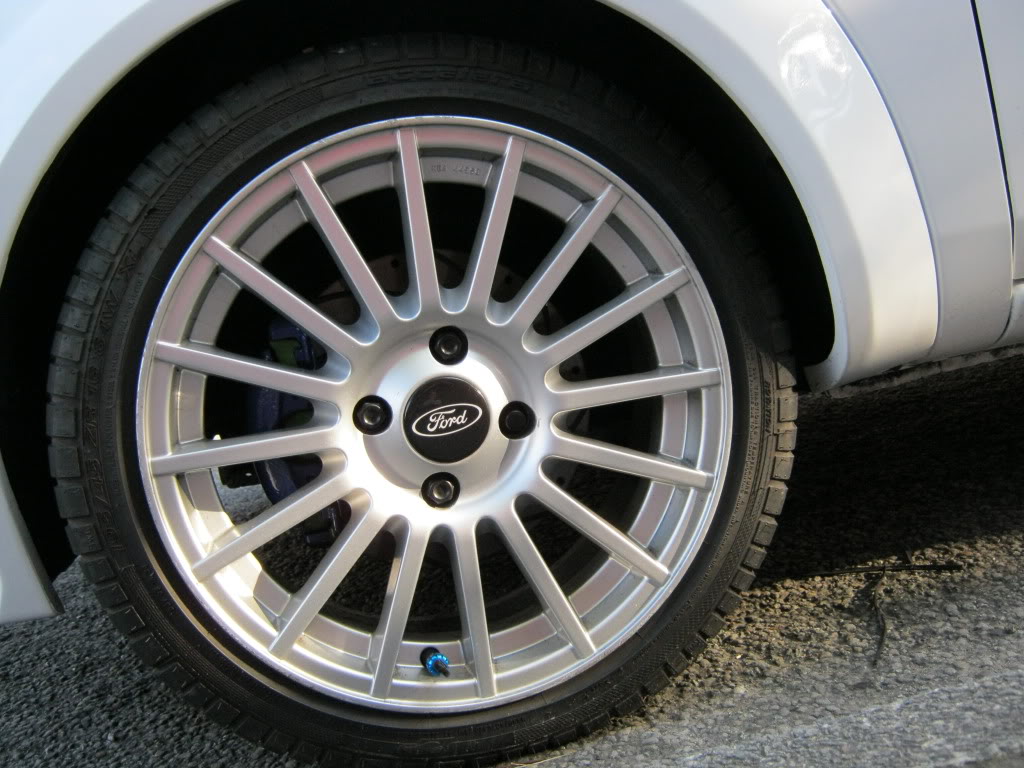
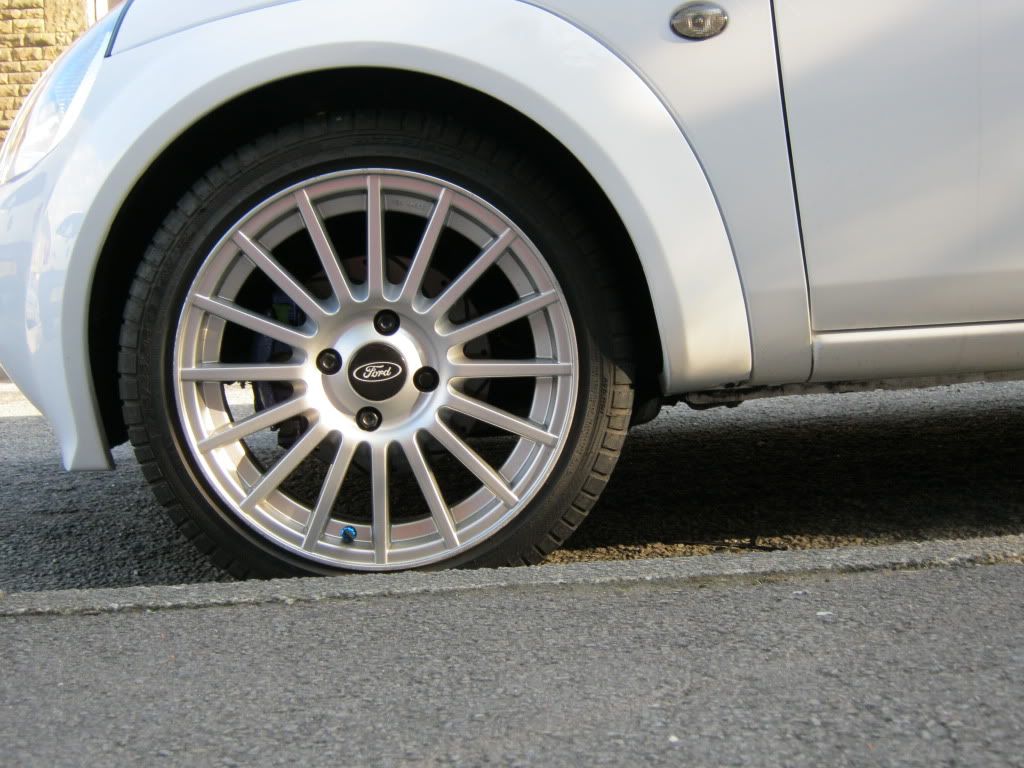
Saw these newly refurbed Speedline Mistrals on eBay, was impressed with the super shiny finish and just had to have them:
Got the front Racing Arches on and decided to change my lights:
Just need to sort some spacers now:
Unfortunately, the paint on the bumpers is shit and I feel it really lets the car down. It�s going in to my local bodyshop soon to be sorted.
Dump valve fitted:
Sticker bombed panels on inside of bonnet (loads of kids at the show spotted a yellow Angry Birds sticker) Lol
The wheels have had fresh paint, Diamond White on the fronts with a Panther Black inner lip:
Decided to get something really different done, so I had lots of bits chemically dipped to create a custom look. Boot handle & rear bumper protector with new DMB gel overlay:
Fuel flap chemically dipped:
Ford Racing Arches! Well, only the rear one. Front was still at the painters at this point:
Close up of the boot handle:
The fuel flap:
I'd also had all my interior bits done in this design too, but due to a problem with the last batch of materials they had to be done again from scratch.
Then came a few more changes ...
Saw these newly refurbed Speedline Mistrals on eBay, was impressed with the super shiny finish and just had to have them:
Got the front Racing Arches on and decided to change my lights:
Just need to sort some spacers now:
Unfortunately, the paint on the bumpers is shit and I feel it really lets the car down. It�s going in to my local bodyshop soon to be sorted.
Trending Topics
Thread Starter
ɔɐᴘʈᴀᴉи ᴀᵴʙο
Joined: Aug 2011
Posts: 48
Likes: 1
From: Neath, South Wales
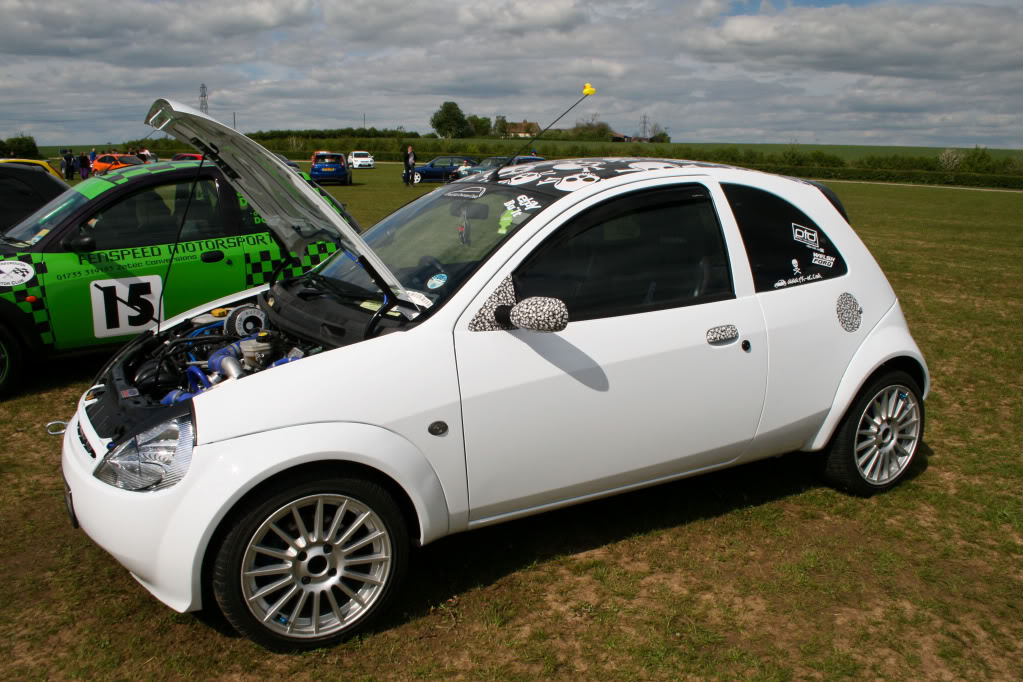
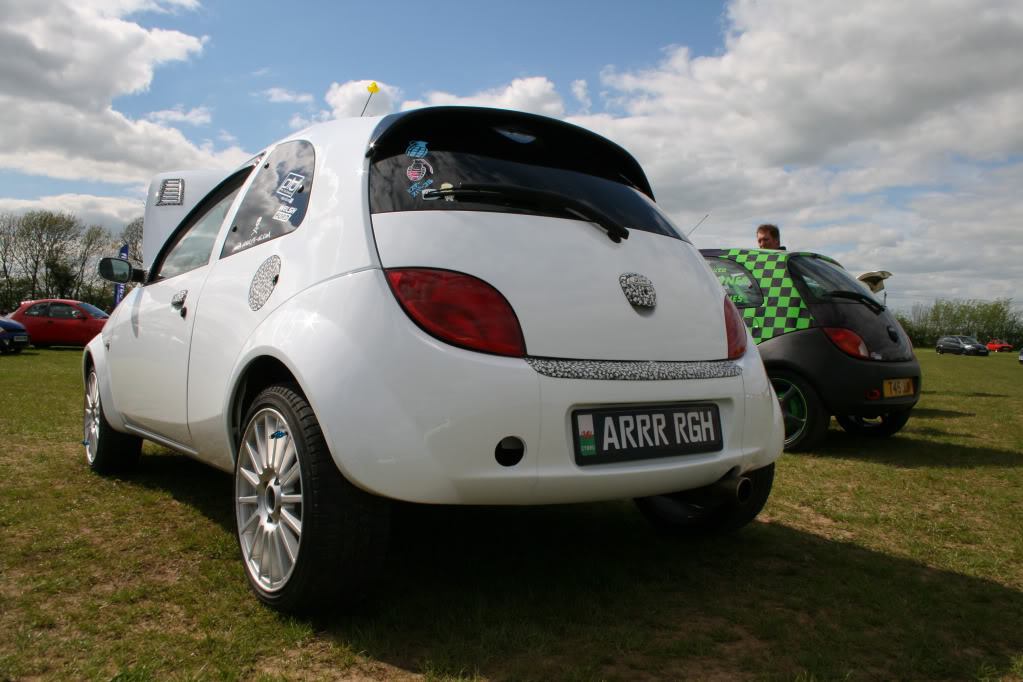
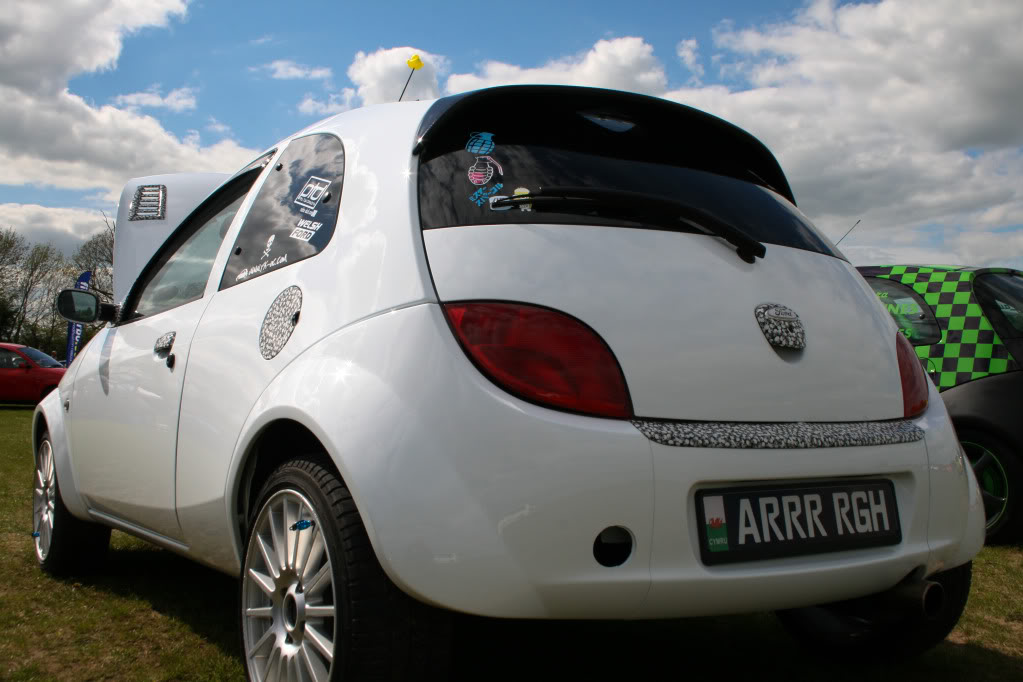
Me and the boyfriend made our way to Cardiff for a �show� but it turned out to be a chivvy cruise, so on the way back we stopped at the Services for a Costa-fortune Coffee and a slice of cake and I took a few snaps as I had done a few more bits and pieces ...
Custom dipped airbag cover fitted:

Interior surrounds fitted:
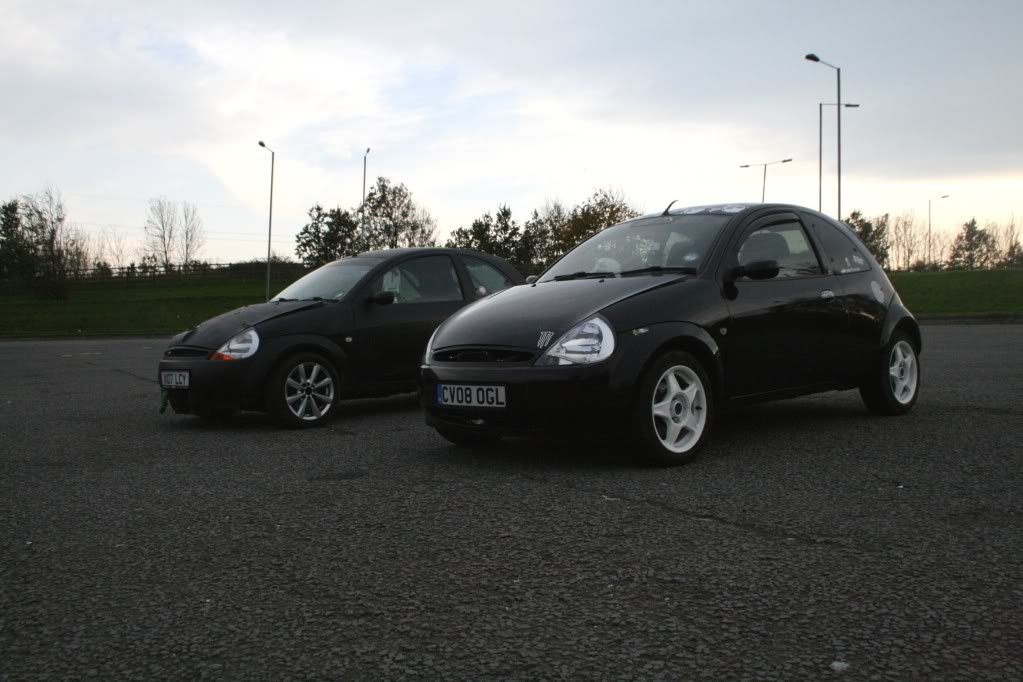
Parked up with my boyfriend's Ka:
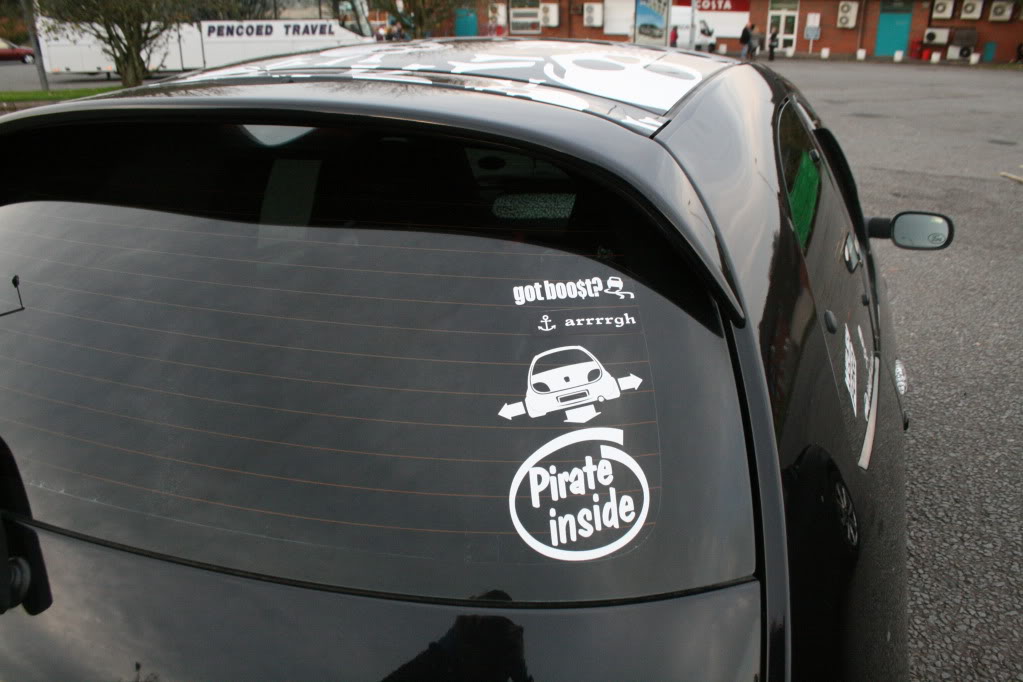
Some new-ish stickers:

Completely dismantled the heater panel, removed bulbs and soldered in some SMD strips to make the lights blue instead of the crappy standard Ford green:
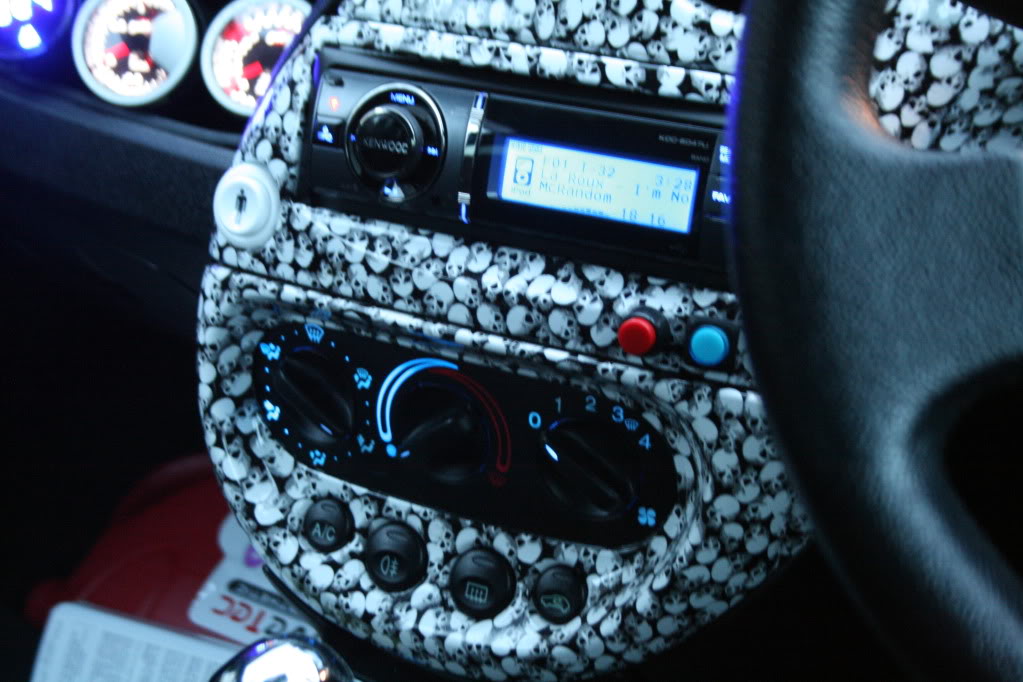
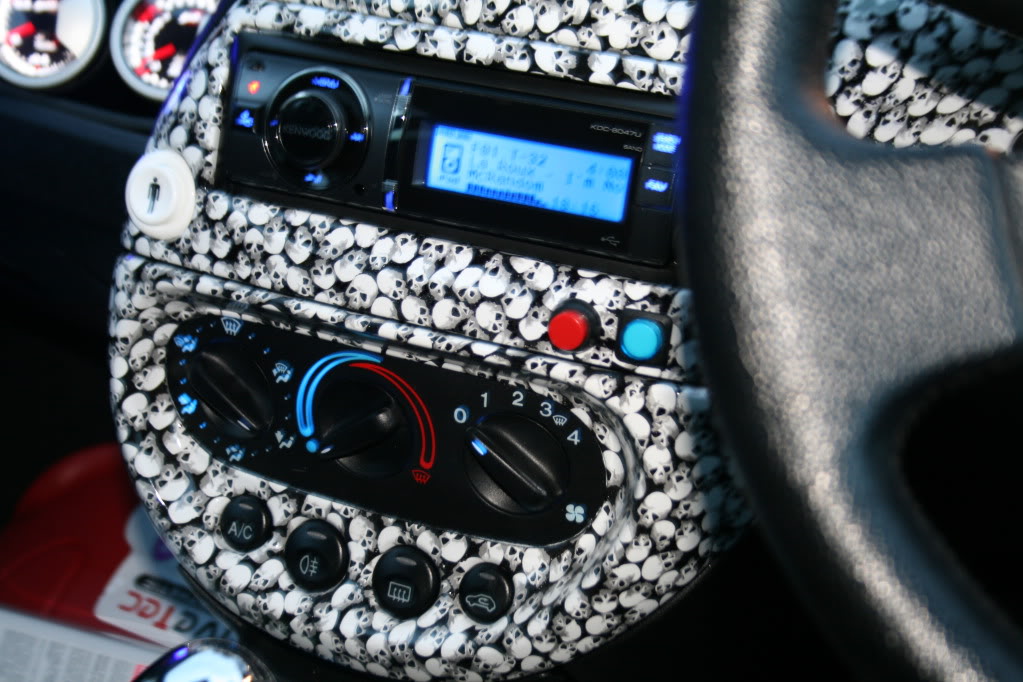
Custom dipped airbag cover fitted:
Interior surrounds fitted:
Parked up with my boyfriend's Ka:
Some new-ish stickers:
Completely dismantled the heater panel, removed bulbs and soldered in some SMD strips to make the lights blue instead of the crappy standard Ford green:
Thread Starter
ɔɐᴘʈᴀᴉи ᴀᵴʙο
Joined: Aug 2011
Posts: 48
Likes: 1
From: Neath, South Wales
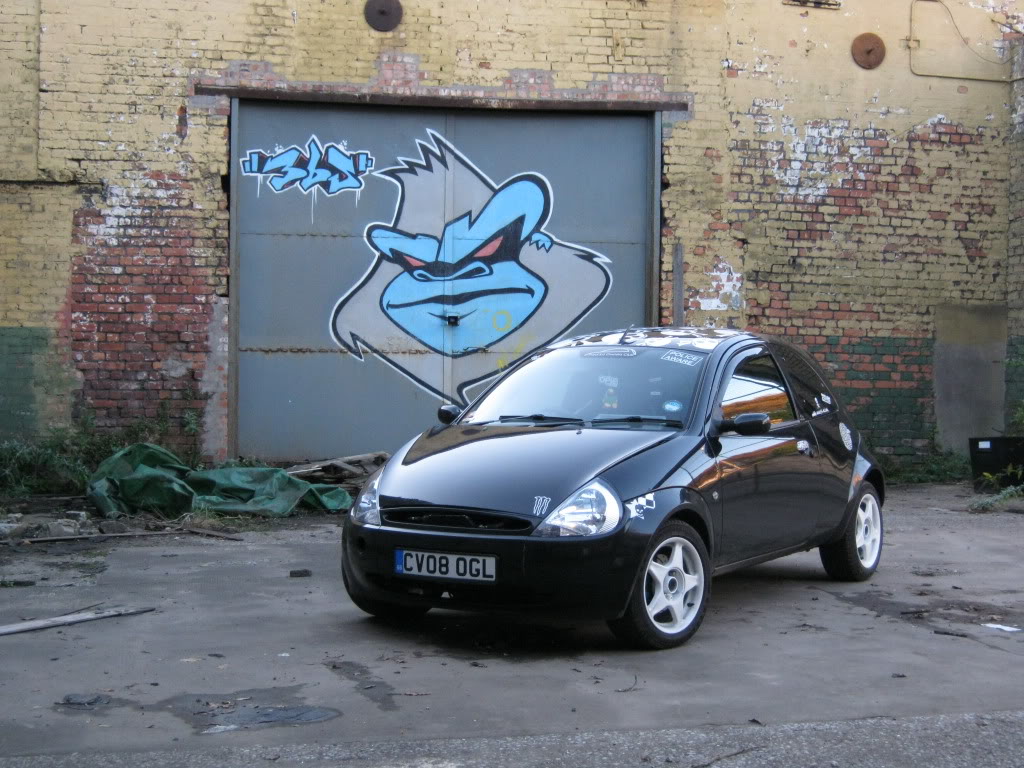
Visited a favourite photo spot to get some new pictures:
And I put together a video slideshow showing it form standard to now:
[youtube]http://www.youtube.com/watch?v=JMemNj6njEc[/youtube]
And I put together a video slideshow showing it form standard to now:
[youtube]http://www.youtube.com/watch?v=JMemNj6njEc[/youtube]
Thread Starter
ɔɐᴘʈᴀᴉи ᴀᵴʙο
Joined: Aug 2011
Posts: 48
Likes: 1
From: Neath, South Wales
I wanted to change the brake calipers and rear drums to a different shade, so did them in Marine Blue:

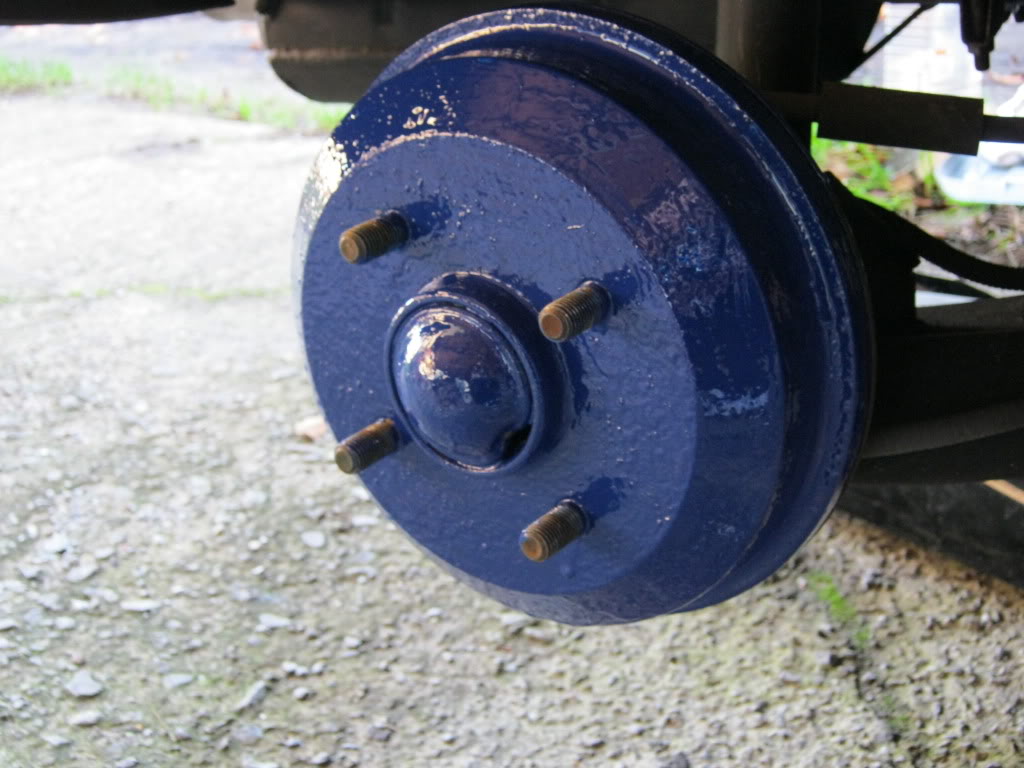
I know ... painted drums but I prefer the colour to that of orange rust and it matches my callipers.
I attended a meet with Welsh Ford where Fast Ford were in attendance to do a feature on the club. My mate Jon kindly sent me these awesome photos he took of my car at the photoshoot:
Then, a few days later I took it for a few pics locally:
That's pretty much it for now! Lots more bits & pieces going on and a huge amount of work before Fiesta in the Park, will update once it all gets done
I know ... painted drums
I attended a meet with Welsh Ford where Fast Ford were in attendance to do a feature on the club. My mate Jon kindly sent me these awesome photos he took of my car at the photoshoot:
Then, a few days later I took it for a few pics locally:
That's pretty much it for now! Lots more bits & pieces going on and a huge amount of work before Fiesta in the Park, will update once it all gets done
Thread Starter
ɔɐᴘʈᴀᴉи ᴀᵴʙο
Joined: Aug 2011
Posts: 48
Likes: 1
From: Neath, South Wales
Been hanging on for warm and dry enough weather to change my aerial as the base completely snapped in half a few weeks ago. Oddly enough, driving around with no aerial and half a base I was still able to get decent enough signal on my headunit, so the headunit's built in small range aerial must be pretty good quality. Lol
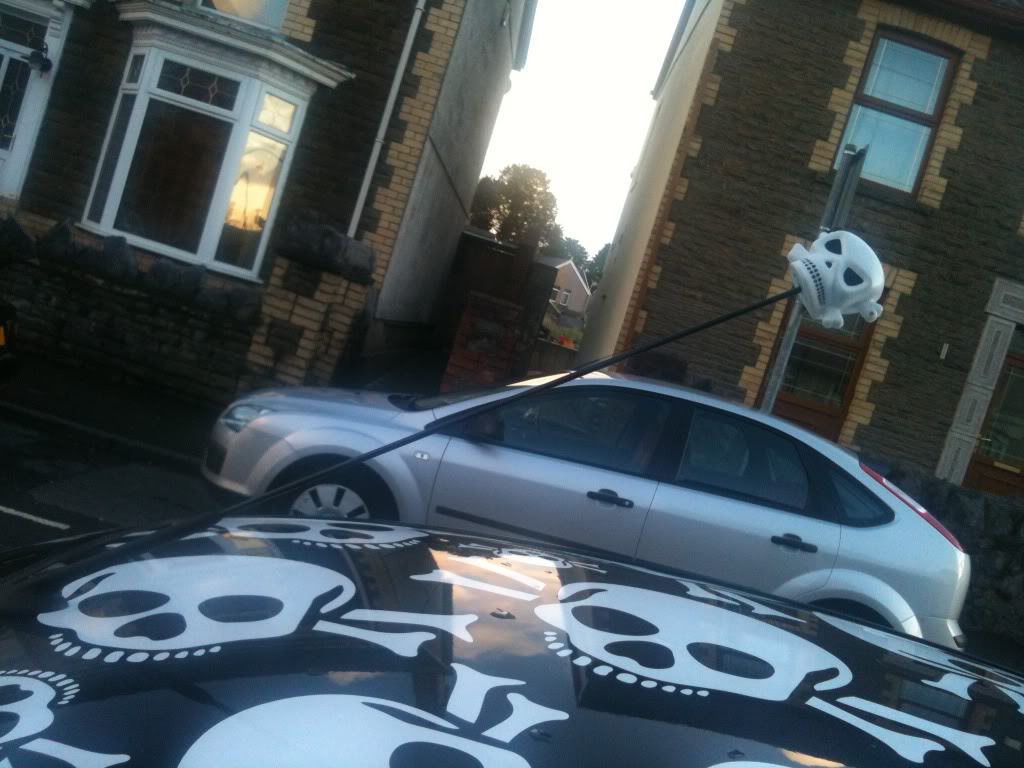
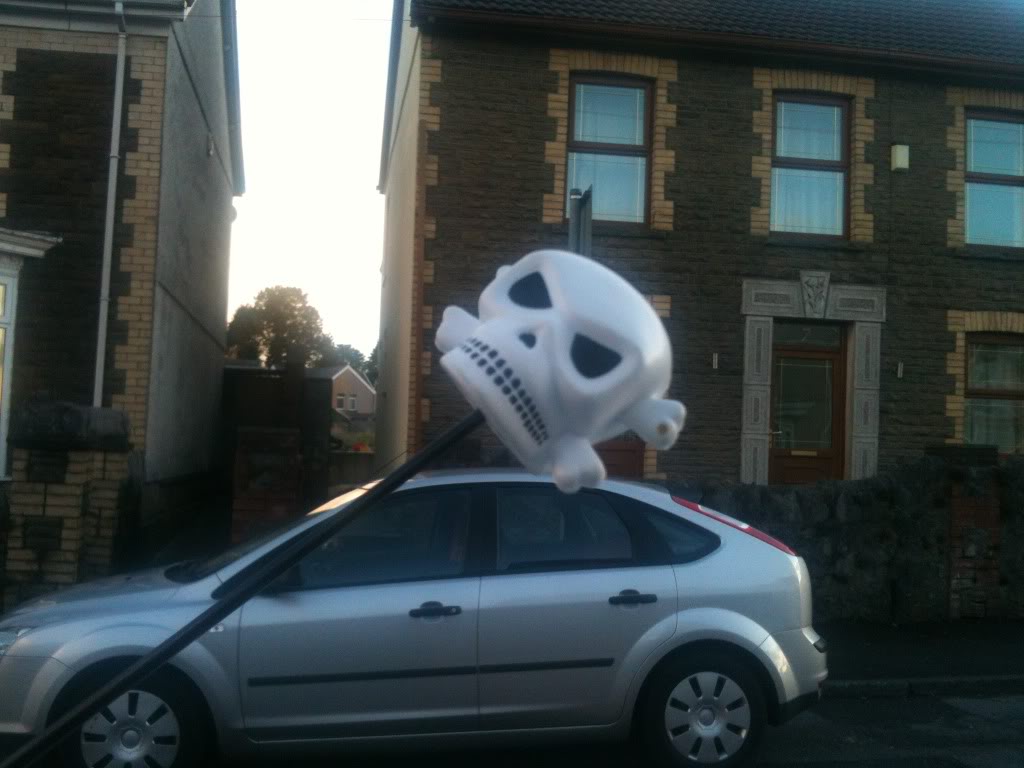
Last Saturday morning we had torretial rain and weather reports said it would clear up by 2pm and for once it actually did. So with the sun shining I went outside, unbolted the old aerial base, gave the surrounding area a bit of a clean and fitted my new aerial with mascot:

Then I went to B&Q for some heavy duty wire cutters ... couldn't find any so ended up getting a JCB metal cutter tool.
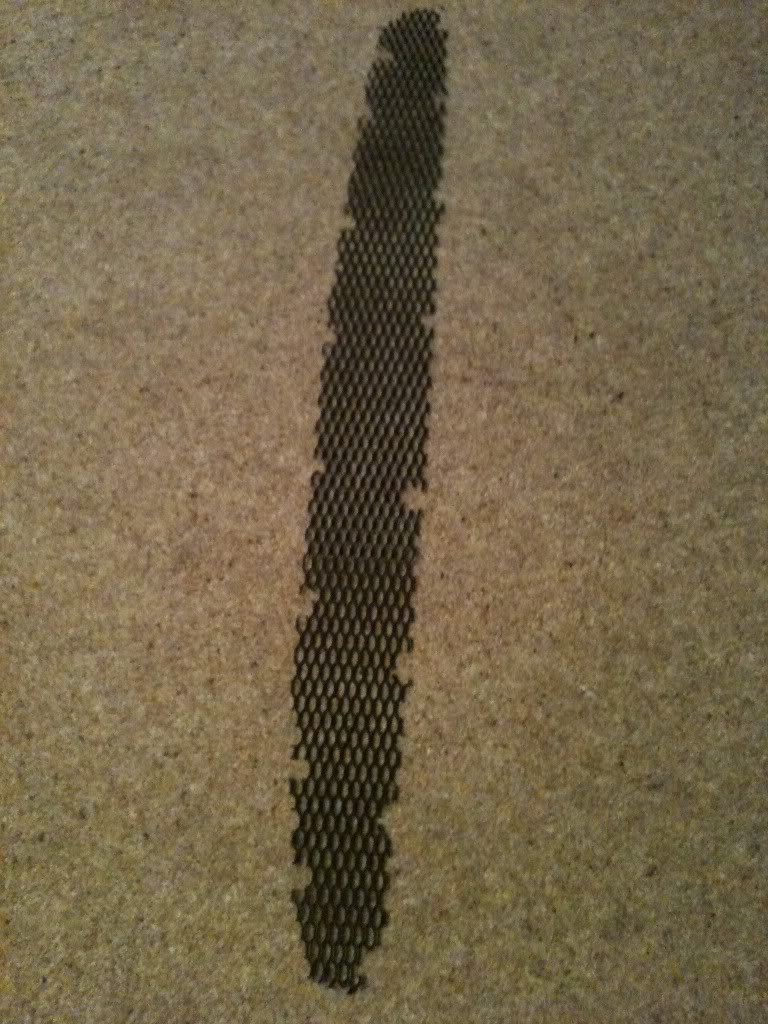
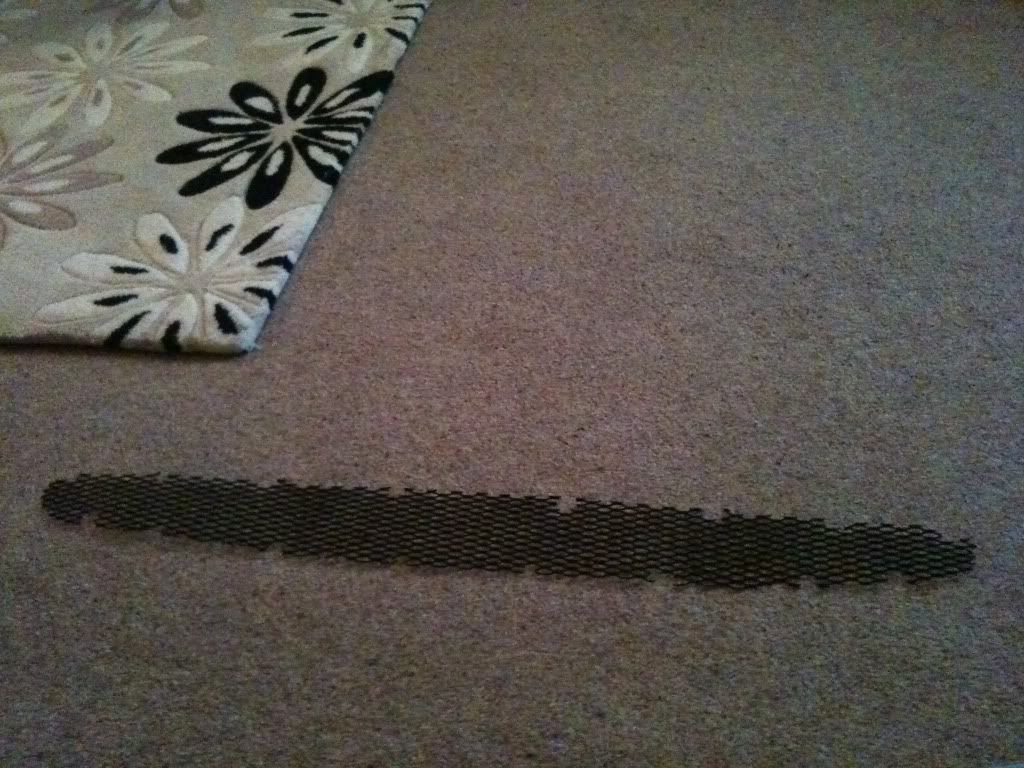
Cable tied an old grille to my powdercoated mesh to stop it moving:
Then cut around it and cut some notches into it to fit over the bumper clips:
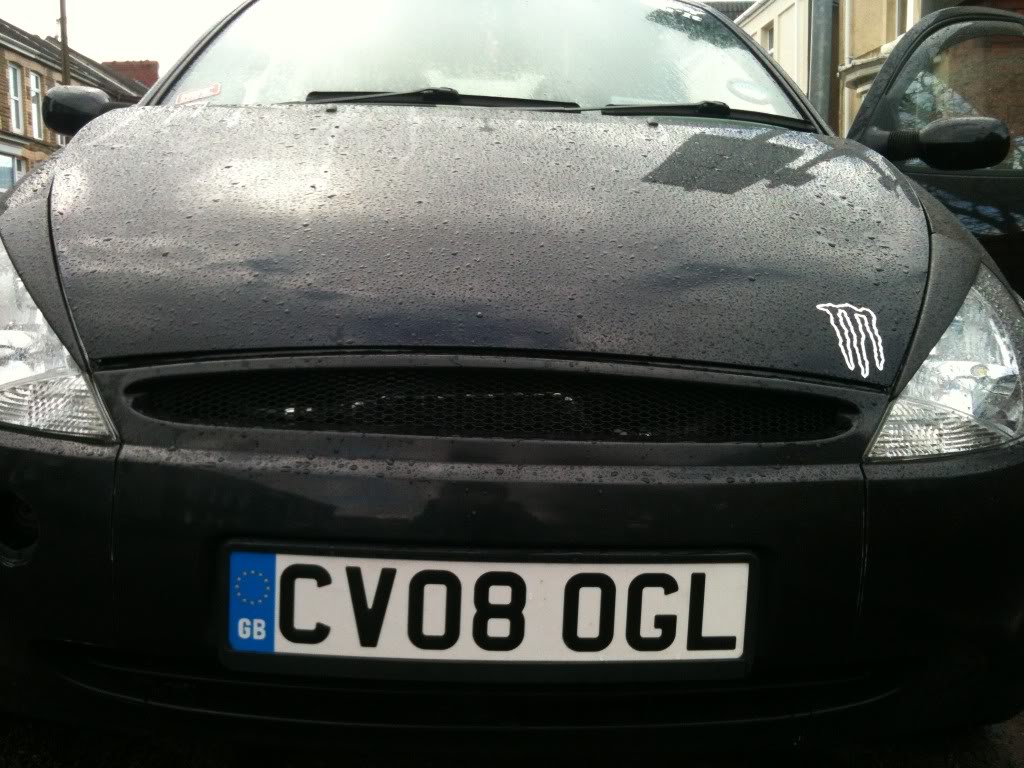
Here's how it looks fitted:
Trying to decide whether to take out the parcel shelf supports in the boot, don't use a shelf anymore what with the van floor fitted so may as well I suppose! Makes it easier to get things in and out anyways
Last Saturday morning we had torretial rain and weather reports said it would clear up by 2pm and for once it actually did. So with the sun shining I went outside, unbolted the old aerial base, gave the surrounding area a bit of a clean and fitted my new aerial with mascot:
Then I went to B&Q for some heavy duty wire cutters ... couldn't find any so ended up getting a JCB metal cutter tool.
Cable tied an old grille to my powdercoated mesh to stop it moving:
Then cut around it and cut some notches into it to fit over the bumper clips:
Here's how it looks fitted:
Trying to decide whether to take out the parcel shelf supports in the boot, don't use a shelf anymore what with the van floor fitted so may as well I suppose! Makes it easier to get things in and out anyways
Thread Starter
ɔɐᴘʈᴀᴉи ᴀᵴʙο
Joined: Aug 2011
Posts: 48
Likes: 1
From: Neath, South Wales
Its not finished yet as we've been doing this and he needs to do a load of work on the V6 one, but hopefully it'll be getting worked on again soon


Thread Starter
ɔɐᴘʈᴀᴉи ᴀᵴʙο
Joined: Aug 2011
Posts: 48
Likes: 1
From: Neath, South Wales
Thanks all for the comments
Ah yeah the mini feature. I was at a meet and Fast Ford were there doing a feature on the club.
Here's my section:
Couple of mistakes in it but nevermind! The stickerbombed headlining isn't mine either, that's in a Fiesta  My headlining is black!
Its not mapped for the turbo yet, but will be done in a few weeks time
How do you mean OTT?
Here's my section:
Couple of mistakes in it
Its not mapped for the turbo yet, but will be done in a few weeks time
How do you mean OTT?
Thread Starter
ɔɐᴘʈᴀᴉи ᴀᵴʙο
Joined: Aug 2011
Posts: 48
Likes: 1
From: Neath, South Wales
Realised I hadn't updated this for ages, so thought I'd better sort it
April/May 2012:
The paint on my racing arches was peeling and needed to be sorted, there were a few dings in the doors and a tiny bit of rust just starting around the fuel flap, so I decided to take the car to our local bodyshop to get them done.
As I was having some custom work done to the bonnet too, I decided to get the whole exterior of the car painted too. They have done a really good job and took the windows out, painted the door shuts, bonnet shuts, boot shuts etc.
This is the day I picked it up (4 weeks ago), the bonnet wasn't actually finished then:
A few minor mods fitted ...
Brake light cover:
Tax disc holder:
Took it to one of my favourite local spots for some pictures (looks like the whole place has been fenced off now and the plot of land is for sale, hope it doesn't get demolished)
Unfortunately, the alternator went. So after only 3 days of driving the car around after having it back from paint, it ended up sat in our garage having a replacement alternator fitted.
At the same time I also had to have a new sump fitted as my previous one had started leaking
May 2012:
Some photo's from Singleton Park Classic Car Show, Swansea, 7th May 2012:
New charge cooler system which was fitted just before the car went in for paint:
The charge cooler system is a Pace one which came from a Renault 5 GT Turbo
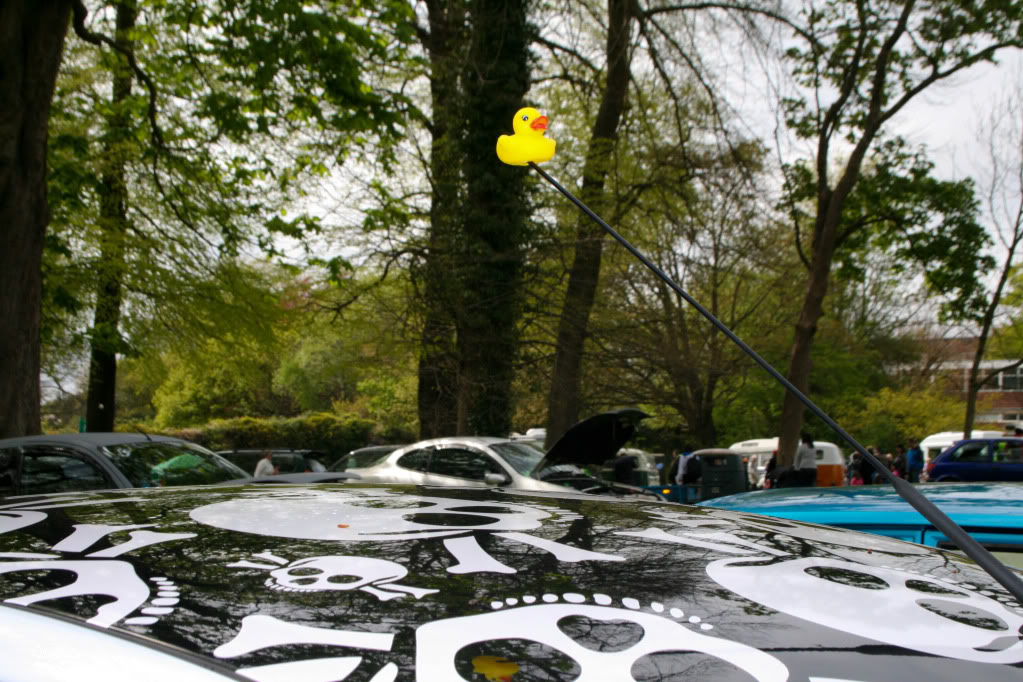
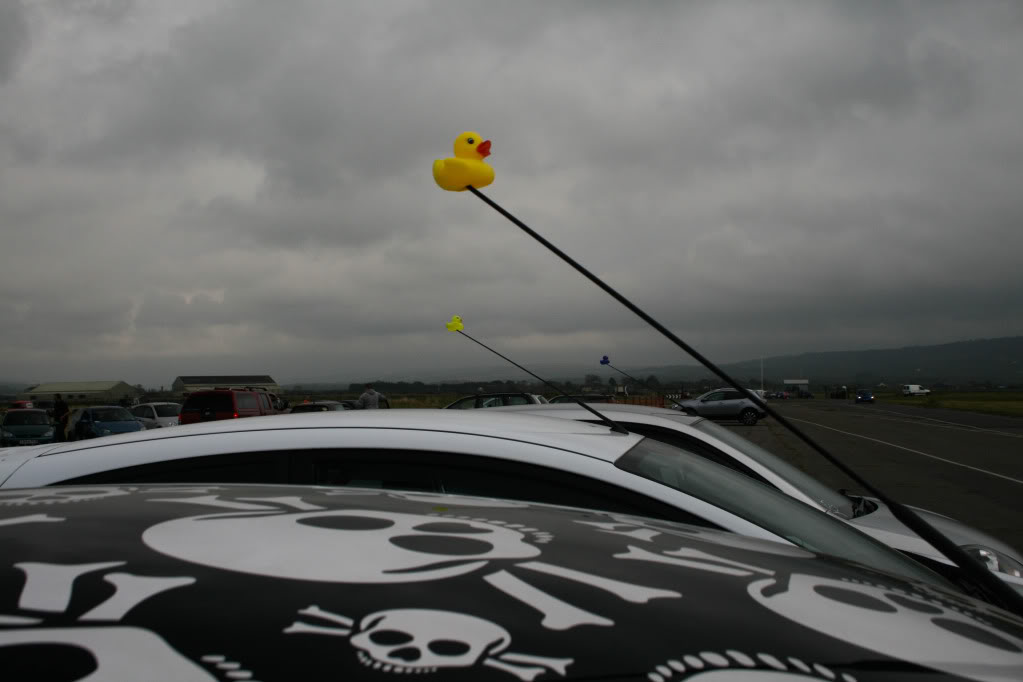
Rubber duck from my friend Jim to represent his car club:
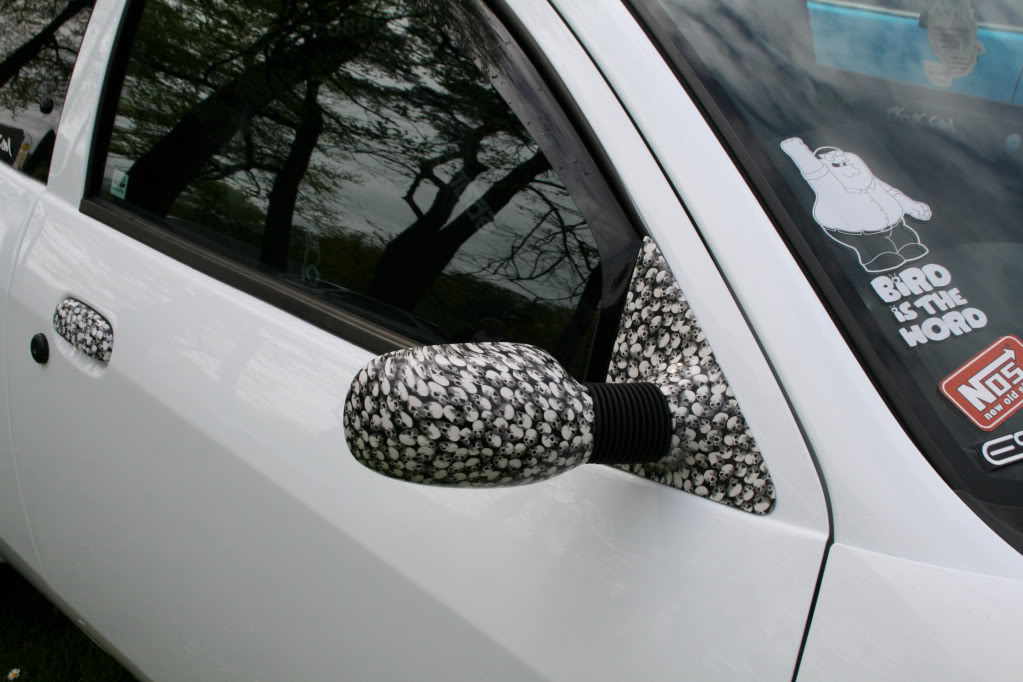
New custom dipped wing mirrors and base plates fitted the day before the show:
A few days after Singleton the car went back to the garage for them to finish off the new bonnet and get it fitted. Here's two snaps I took when I got the car back:
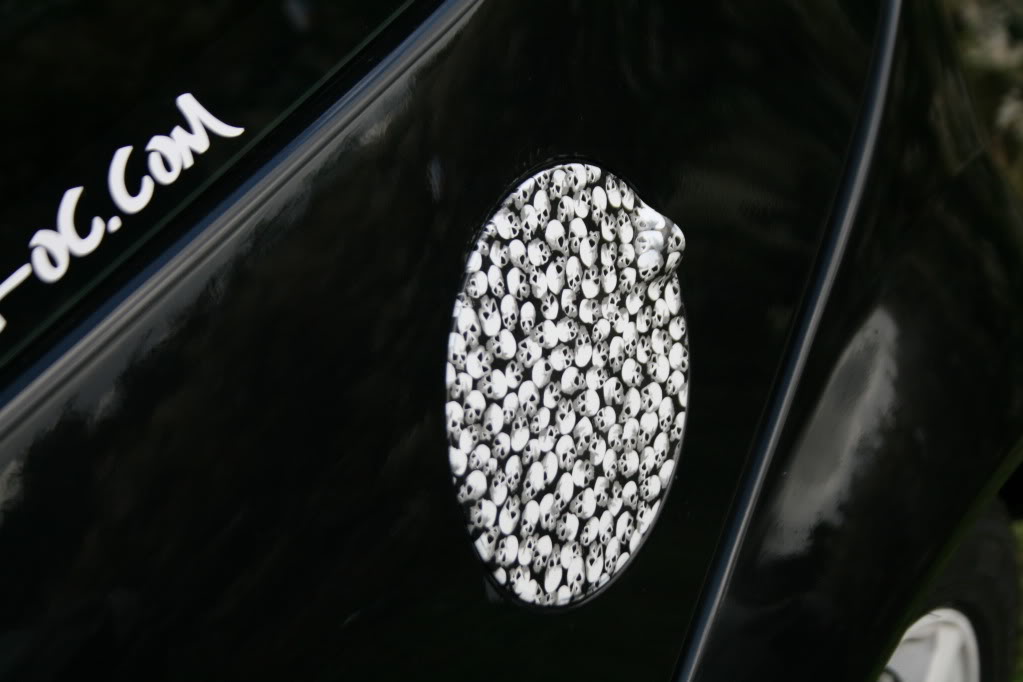
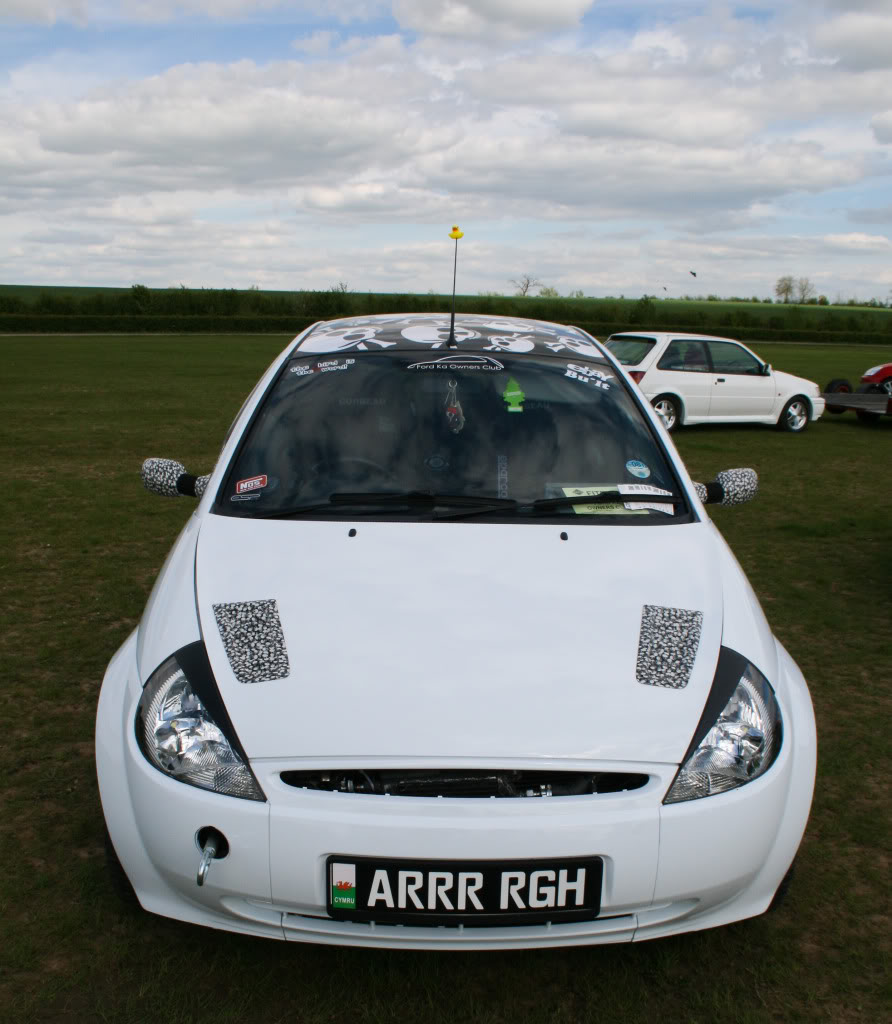
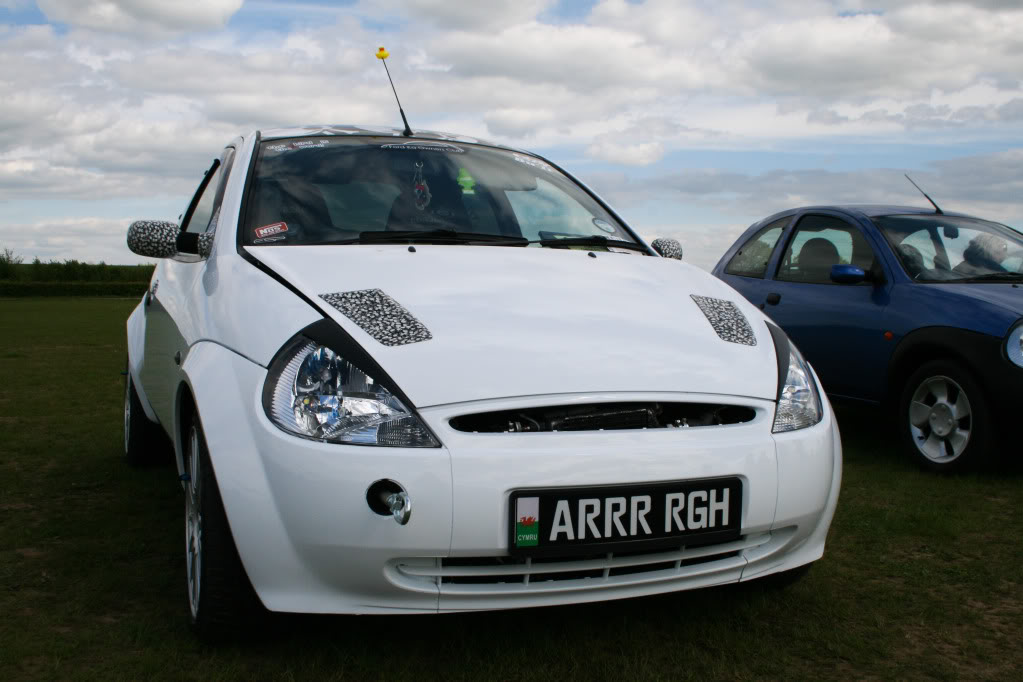
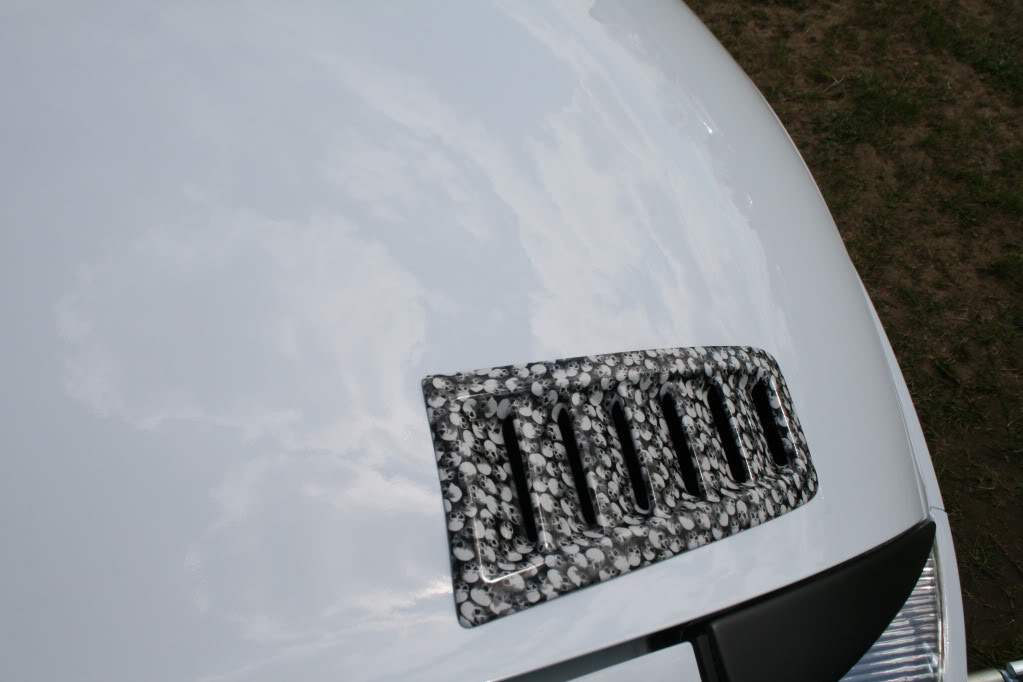
Fitted to the bonnet are Focus RS vents which I've had custom dipped in the skulls pattern to match everything else on the Ka. Very happy with them
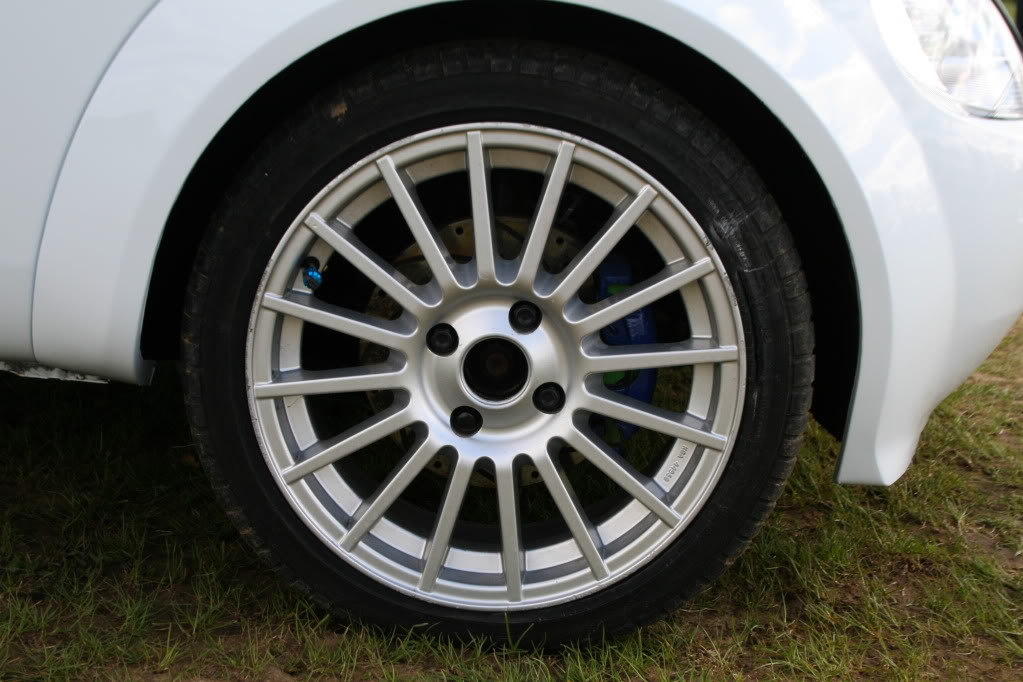
The day before Singleton Show I'd found some wheels locally on Gum Tree, so we went to pick them up. I wasn't feeling the white wheels anymore as the car was now a lot brighter than them. Decided to get a temporary set of alloys whilst I got mine painted, so picked up a set of 16" multispokes and as it happens I really like them on the car!
Here's some photo's from FITP and some pics of the new modifications also fitted:
All red rear lights:

The wheels - 16x7:
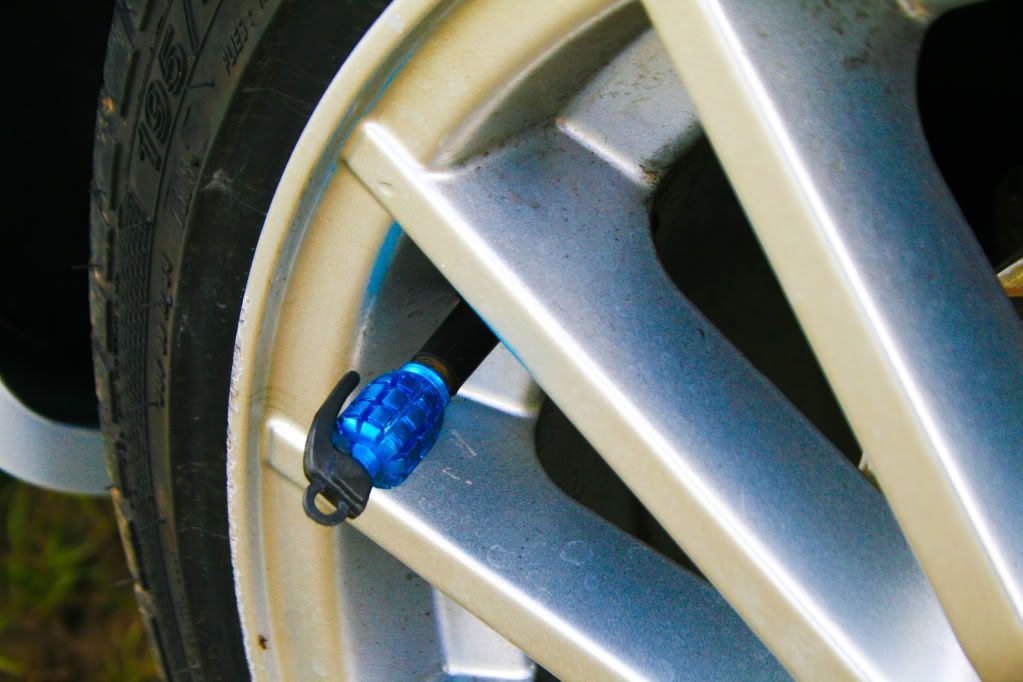
Grenade centre caps that Paul bought me:
Still a few bits left to tidy up and sort and fingers crossed I can get it mapped soon and running on boost. Can't wait
April/May 2012:
The paint on my racing arches was peeling and needed to be sorted, there were a few dings in the doors and a tiny bit of rust just starting around the fuel flap, so I decided to take the car to our local bodyshop to get them done.
As I was having some custom work done to the bonnet too, I decided to get the whole exterior of the car painted too. They have done a really good job and took the windows out, painted the door shuts, bonnet shuts, boot shuts etc.
This is the day I picked it up (4 weeks ago), the bonnet wasn't actually finished then:
A few minor mods fitted ...
Brake light cover:
Tax disc holder:
Took it to one of my favourite local spots for some pictures (looks like the whole place has been fenced off now and the plot of land is for sale, hope it doesn't get demolished)
Unfortunately, the alternator went. So after only 3 days of driving the car around after having it back from paint, it ended up sat in our garage having a replacement alternator fitted.
At the same time I also had to have a new sump fitted as my previous one had started leaking
May 2012:
Some photo's from Singleton Park Classic Car Show, Swansea, 7th May 2012:
New charge cooler system which was fitted just before the car went in for paint:
The charge cooler system is a Pace one which came from a Renault 5 GT Turbo
Rubber duck from my friend Jim to represent his car club:
New custom dipped wing mirrors and base plates fitted the day before the show:
A few days after Singleton the car went back to the garage for them to finish off the new bonnet and get it fitted. Here's two snaps I took when I got the car back:
Fitted to the bonnet are Focus RS vents which I've had custom dipped in the skulls pattern to match everything else on the Ka. Very happy with them
The day before Singleton Show I'd found some wheels locally on Gum Tree, so we went to pick them up. I wasn't feeling the white wheels anymore as the car was now a lot brighter than them. Decided to get a temporary set of alloys whilst I got mine painted, so picked up a set of 16" multispokes and as it happens I really like them on the car!
Here's some photo's from FITP and some pics of the new modifications also fitted:
All red rear lights:
The wheels - 16x7:
Grenade centre caps that Paul bought me:
Still a few bits left to tidy up and sort and fingers crossed I can get it mapped soon and running on boost. Can't wait
Thread Starter
ɔɐᴘʈᴀᴉи ᴀᵴʙο
Joined: Aug 2011
Posts: 48
Likes: 1
From: Neath, South Wales
June 2012:
What I've been up to today ...
I decided I missed the underbelly of my old bonnet, so I thought I'd do something with the new one.
Laying some foundations:
I binned the centre caps that came with my wheels as they were really naff. I ordered some plain replacements and fitted my DMB badges to them:
June 2012:
Some updates but nothing major really ... yet
So just before Classic Ford Show I only had constant heat coming into the Ka. Now whilst this is OK in cool weather it was getting quite annoying.
So we changed the heater control valve for a new one as mine was stuck but after a few minutes of cool air it went back hot. We bled the system but still nothing. Then I thought it might be worth trying the heater control panel.
Before I got a chance I was driving and turned the heat dial and the whole thing came off in my hand. Then I remembered I'd only temporarily put it back together as I wanted to do more work on it.
So out came the headunit, out came the panel and I took it apart to reassemble properly. I realised I'd lost some screws from the back of the panel and remembered that they were the same size (but slightly shorter) than the screws inside my wing mirrors. So quickly grabbed a spare from a box, headed to a local DIY place and they searched for some screws and gave them to me for free Result!
So then I got Paul to resolder a few connections inside the panel, then glued and reassembled the whole thing.
Fitted it the morning we were leaving for Classic Ford and voila - full aircon working! And thank feck for that too as it was the hottest weekend of the year and we couldn't have made it there without it!
Interestingly, we ran the aircon full blast all the way there and all the way back and still got 40mpg
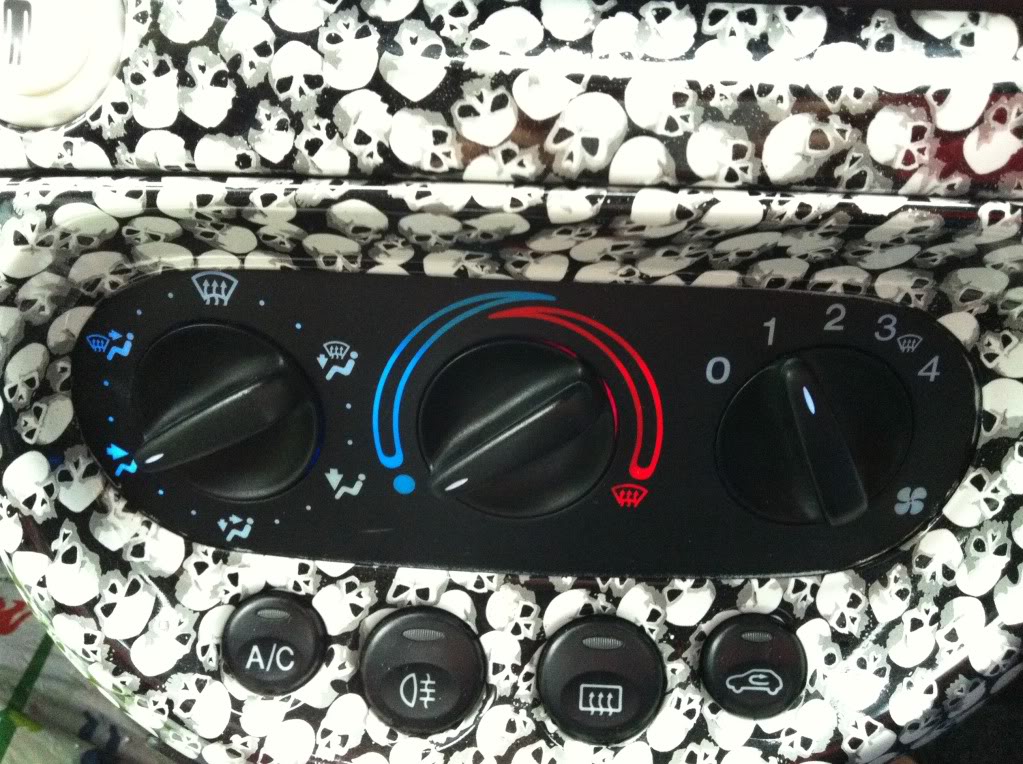
Some snaps from my phone showing how it illuminates.
Hot:
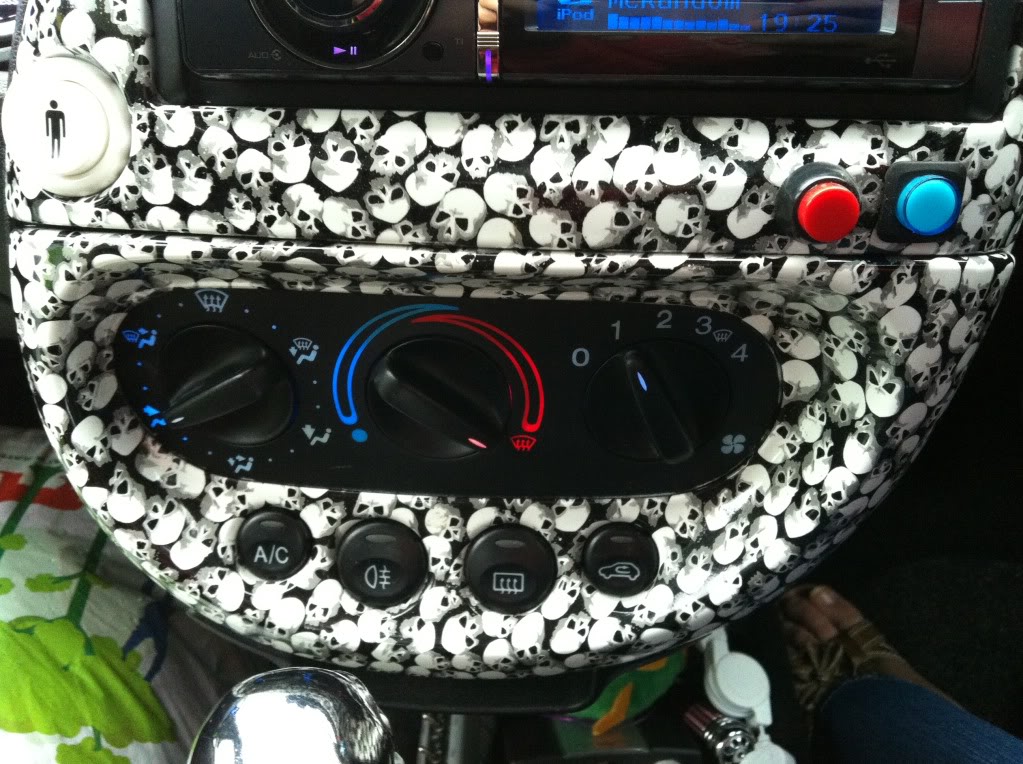
In between (I like how the little marker turns a pinky purple):
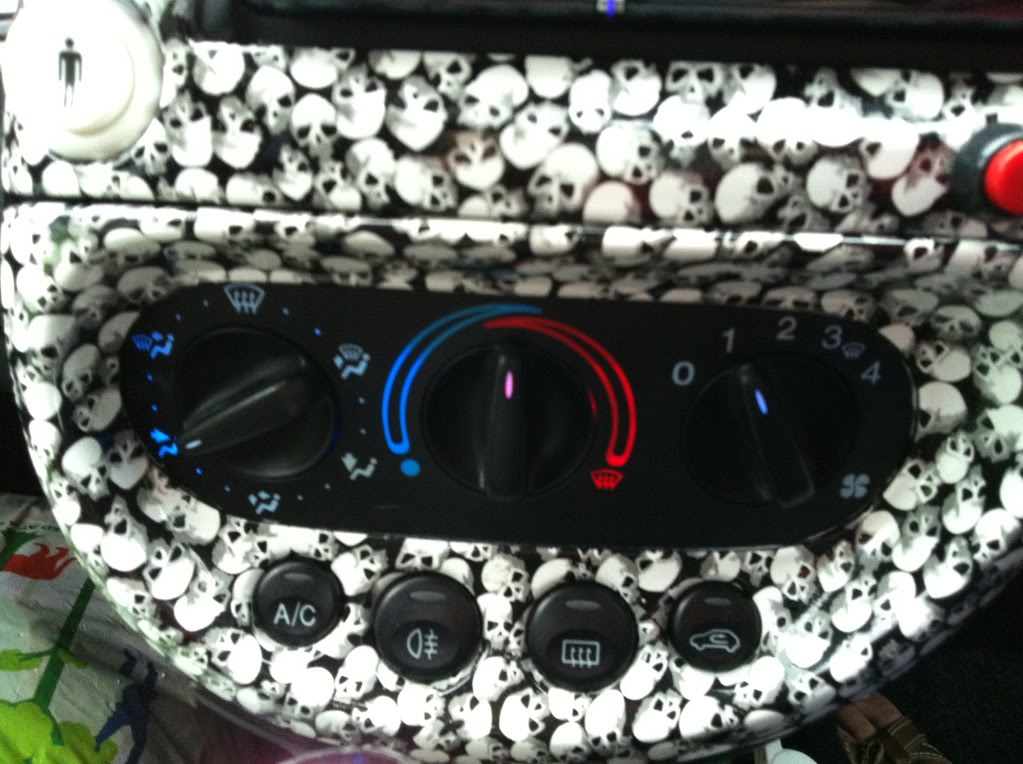
Cold:
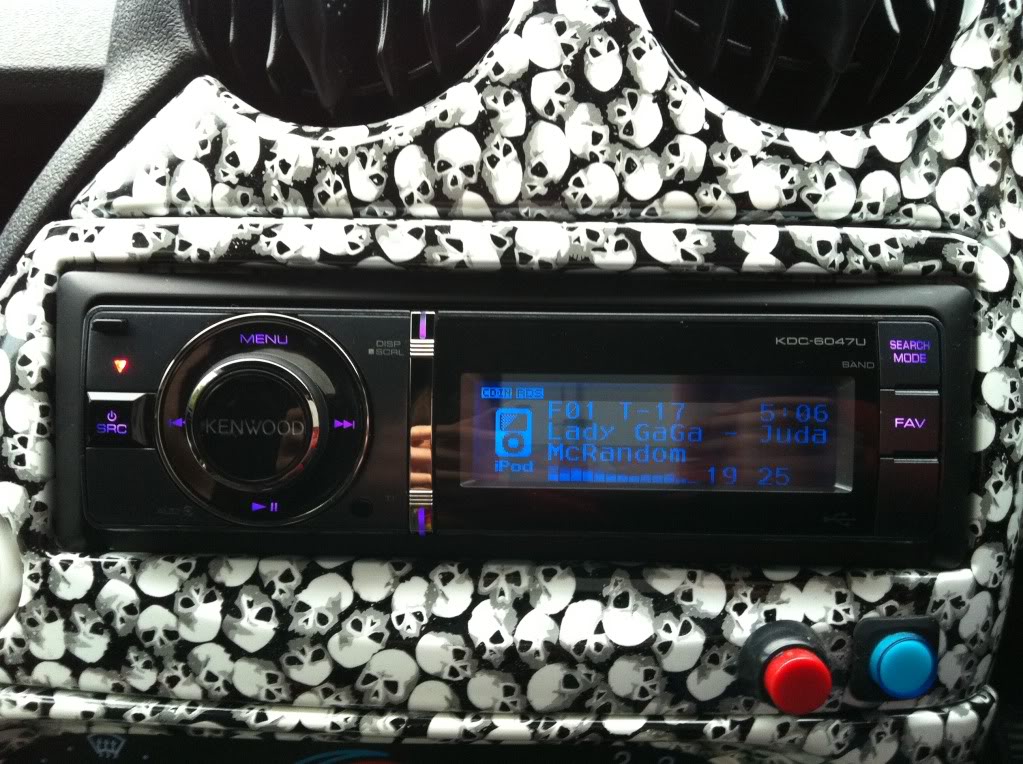
Stereo playing a bit of Gaga and set to illuminate in blue and purple:
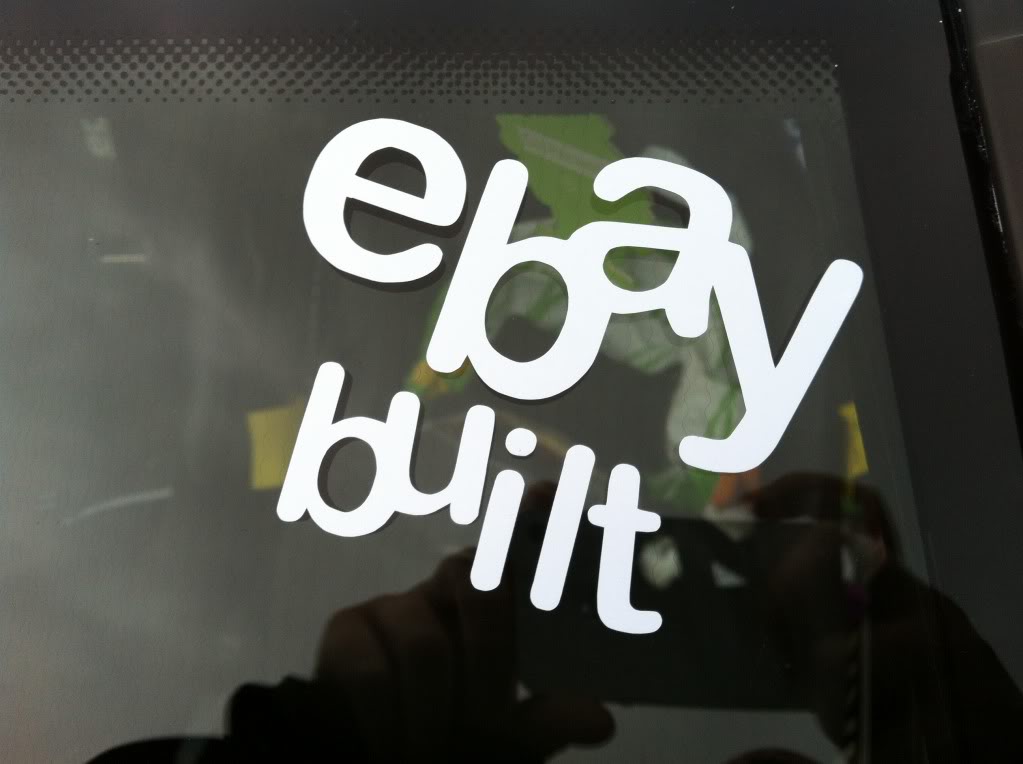
Replacement "eBay Built" sticker as the "i" was missing from my old one
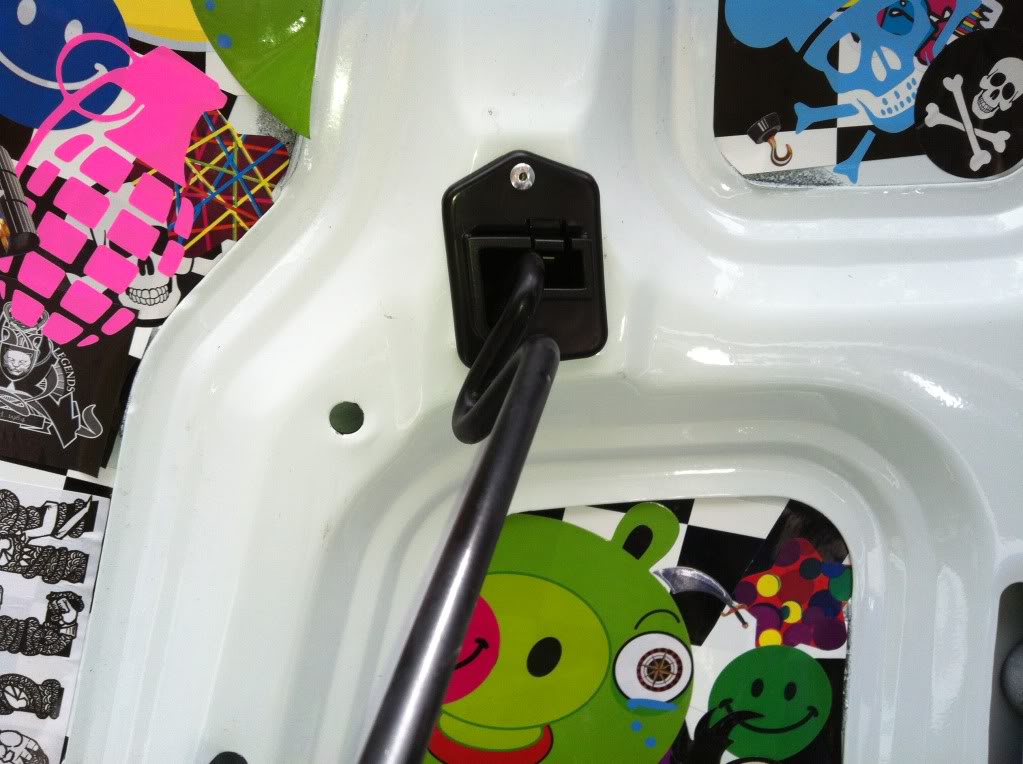
Some of you may recall me saying at Classic Ford that I didn't have an area for my bonnet stay to clip into on this new bonnet, just a square hole. So I looked at a few of the Endura Ka's and they had a yellow plastic clip. However, the bonnet stays are different so we thought I'd have to change that too.
When we got home Paul ordered one from Ford, was pleased to see it was black when it turned up as I've just changed all the bottle caps in the bay to black ones off of a Mondeo
Good news was that we fitted the clip (rivetted in) and the bonnet stay fits no problem
I fitted my Momo steering wheel and in doing so I blew the most awkward fuse known to man (sorry Paul). It's right on top of the fuse box and even when lowering it down you can't see it properly. Eventually we found it and the horn and hazards worked once again!
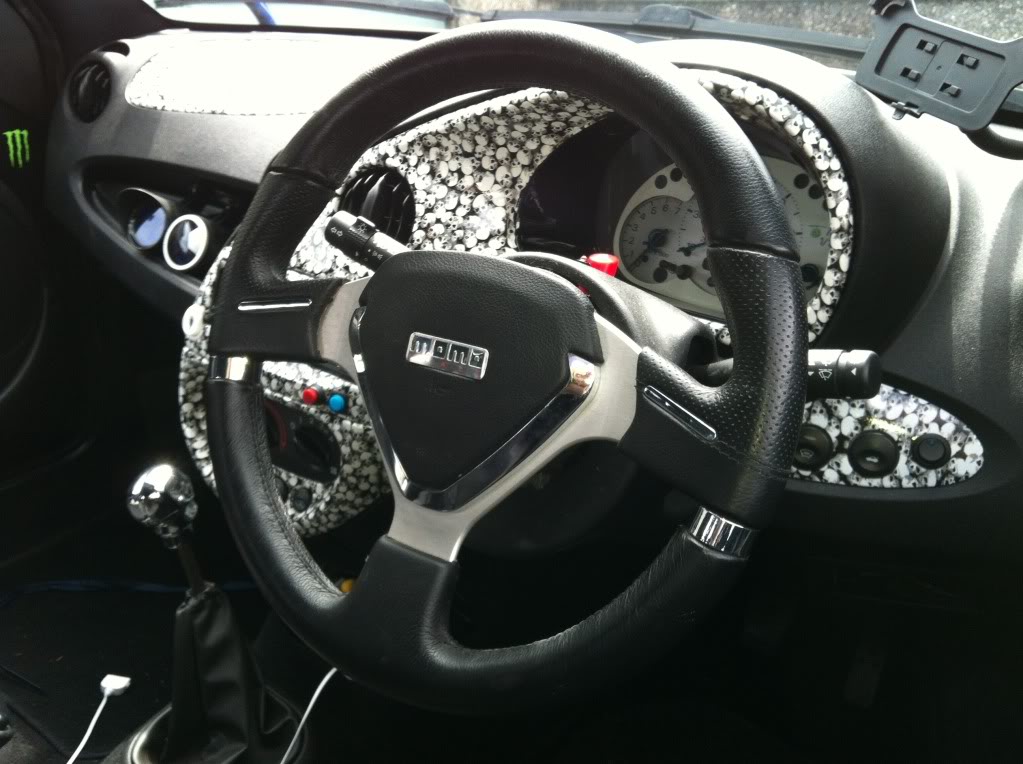
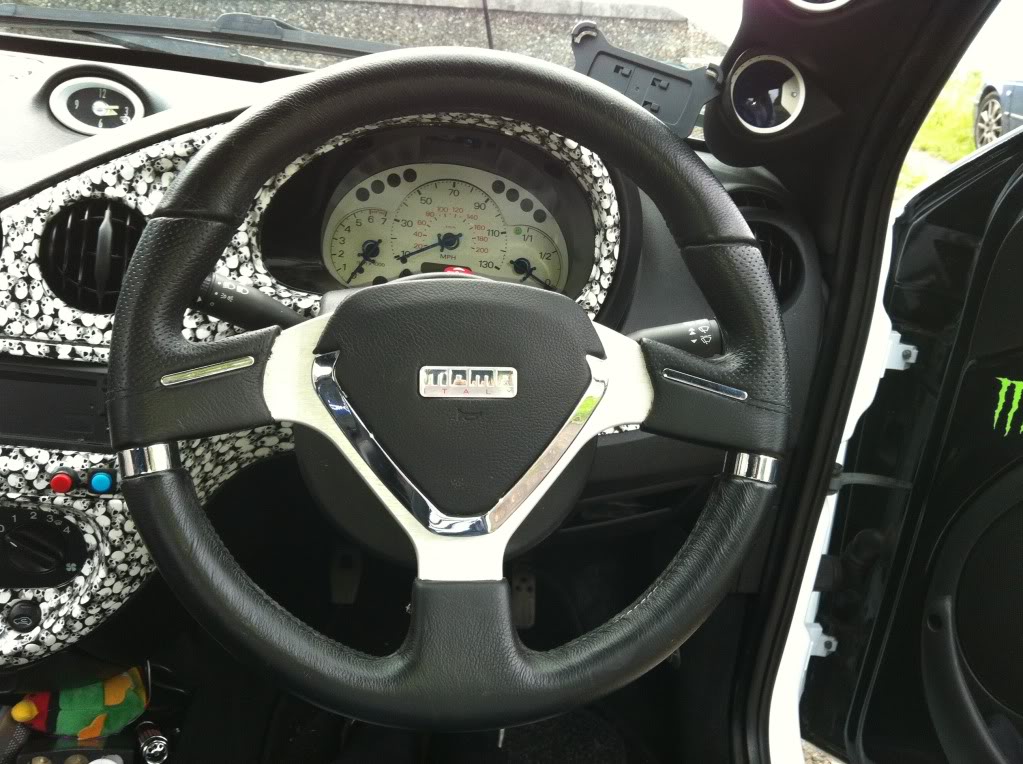
Wheel needs a clean, as does the interior!
Fitted some new sill covers. Didn't really like the silver ones that came with the car (as they always discolour and go milky under the lacquer), so when the Ka was in for paint I told them to bin the plates and I'd sort something after).
So I got these sill covers which are made of a thick vinyl and are a bit similar to skateboard grip tape. They are genuine Ford items and I got them from a Ford Dealership on eBay. They have some glitter in them which you can't see in the pics. Lol
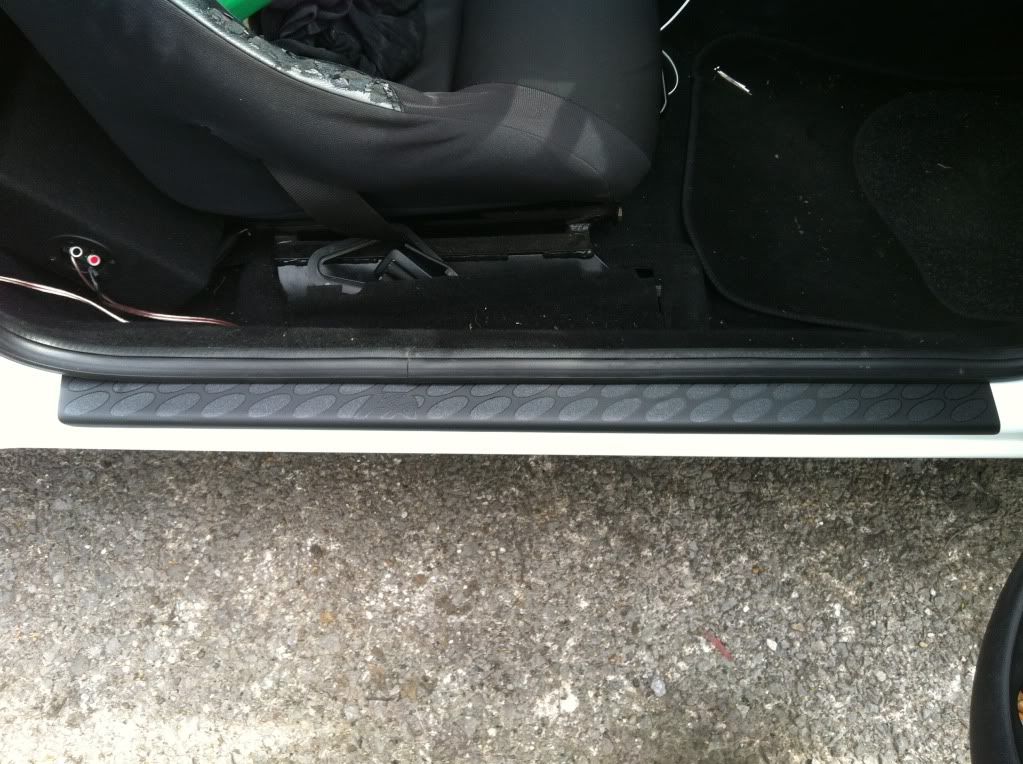
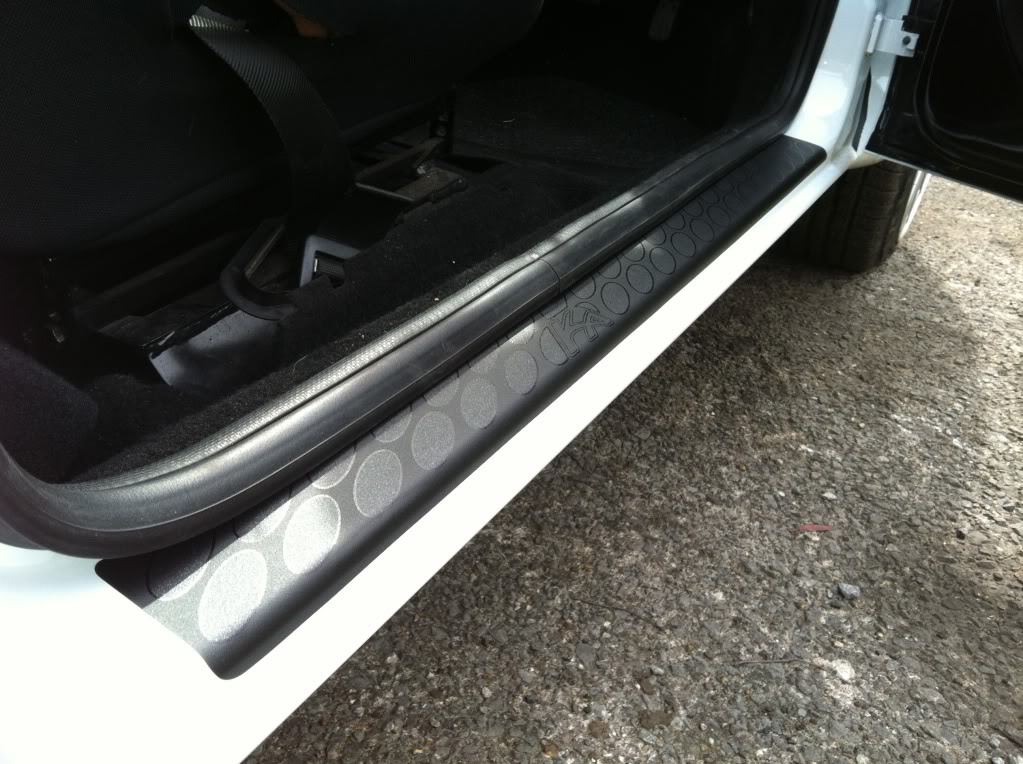
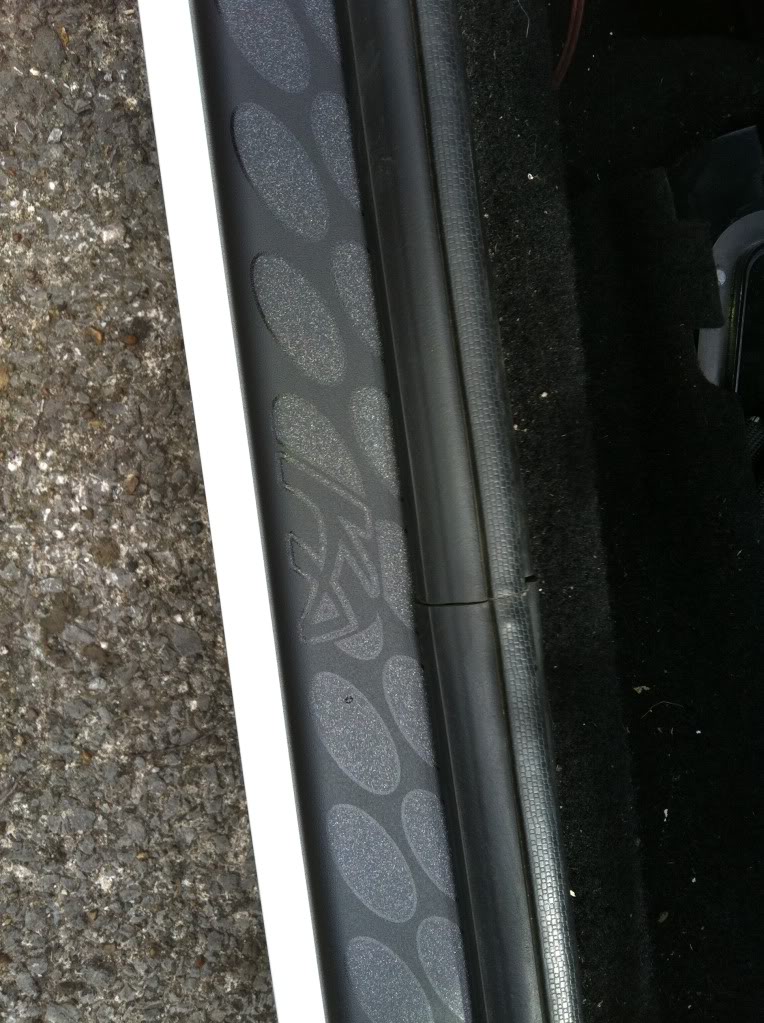
Black suits the Ka better anyways
August 2012:
Small video of it in Bryn Glas tunnels. Running low boost til next week, so just a quick demo of how it sounded on the weekend:
I love the sound even at just 3psi, so can't wait til it runs the full 8psi
Getting it fully set up next week so I'll find out the power figure and get a few more videos.
Got some new pictures and a few more mods, so I'll get those off my camera over the weekend
What I've been up to today ...
I decided I missed the underbelly of my old bonnet, so I thought I'd do something with the new one.
Laying some foundations:
I binned the centre caps that came with my wheels as they were really naff. I ordered some plain replacements and fitted my DMB badges to them:
June 2012:
Some updates but nothing major really ... yet
So just before Classic Ford Show I only had constant heat coming into the Ka. Now whilst this is OK in cool weather it was getting quite annoying.
So we changed the heater control valve for a new one as mine was stuck but after a few minutes of cool air it went back hot. We bled the system but still nothing. Then I thought it might be worth trying the heater control panel.
Before I got a chance I was driving and turned the heat dial and the whole thing came off in my hand. Then I remembered I'd only temporarily put it back together as I wanted to do more work on it.
So out came the headunit, out came the panel and I took it apart to reassemble properly. I realised I'd lost some screws from the back of the panel and remembered that they were the same size (but slightly shorter) than the screws inside my wing mirrors. So quickly grabbed a spare from a box, headed to a local DIY place and they searched for some screws and gave them to me for free
So then I got Paul to resolder a few connections inside the panel, then glued and reassembled the whole thing.
Fitted it the morning we were leaving for Classic Ford and voila - full aircon working! And thank feck for that too as it was the hottest weekend of the year and we couldn't have made it there without it!
Interestingly, we ran the aircon full blast all the way there and all the way back and still got 40mpg
Some snaps from my phone showing how it illuminates.
Hot:
In between (I like how the little marker turns a pinky purple):
Cold:
Stereo playing a bit of Gaga and set to illuminate in blue and purple:
Replacement "eBay Built" sticker as the "i" was missing from my old one
Some of you may recall me saying at Classic Ford that I didn't have an area for my bonnet stay to clip into on this new bonnet, just a square hole. So I looked at a few of the Endura Ka's and they had a yellow plastic clip. However, the bonnet stays are different so we thought I'd have to change that too.
When we got home Paul ordered one from Ford, was pleased to see it was black when it turned up as I've just changed all the bottle caps in the bay to black ones off of a Mondeo
Good news was that we fitted the clip (rivetted in) and the bonnet stay fits no problem
I fitted my Momo steering wheel and in doing so I blew the most awkward fuse known to man (sorry Paul
Wheel needs a clean, as does the interior!
Fitted some new sill covers. Didn't really like the silver ones that came with the car (as they always discolour and go milky under the lacquer), so when the Ka was in for paint I told them to bin the plates and I'd sort something after).
So I got these sill covers which are made of a thick vinyl and are a bit similar to skateboard grip tape. They are genuine Ford items and I got them from a Ford Dealership on eBay. They have some glitter in them which you can't see in the pics. Lol
Black suits the Ka better anyways
August 2012:
Small video of it in Bryn Glas tunnels. Running low boost til next week, so just a quick demo of how it sounded on the weekend:
[youtube]ABh4gmoEvvA[/youtube]
I love the sound even at just 3psi, so can't wait til it runs the full 8psi
Getting it fully set up next week so I'll find out the power figure and get a few more videos.
Got some new pictures and a few more mods, so I'll get those off my camera over the weekend
Thread Starter
ɔɐᴘʈᴀᴉи ᴀᵴʙο
Joined: Aug 2011
Posts: 48
Likes: 1
From: Neath, South Wales
17 August 2012:
Some new photo's of the Ka from Ford Fair 2012 ...
Painted my towing eye purple, forgot a close up picture showing the sparkles in it Doh!
Swapped my lights over to my black clears, fitted my fog surrounds and now sitting lower (60mm front, 40mm rear) on a FK Sport spring and damper kit:
Tinted my European rear lights, they look really dark in the pictures but the bulbs can be seen very clearly when on:
Cleaned and wrapped my chargecooler:
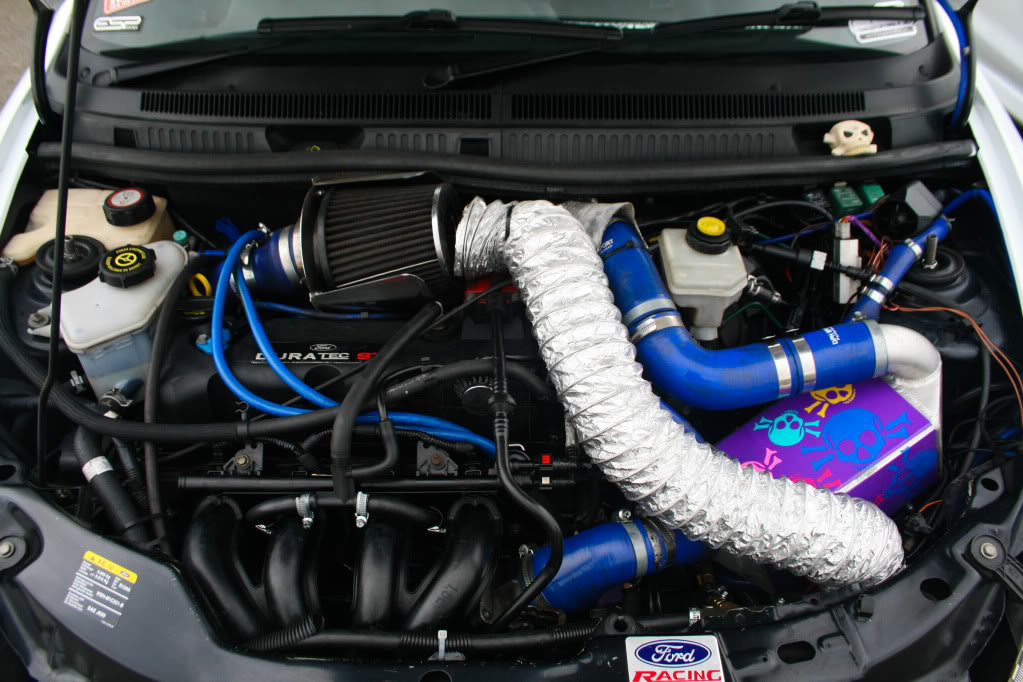
Engine bay and hoses could do with a good clean:
Cold air feed running to air filter:
Can just about make out my new cargo net behind the seats in this one:
I also have some new purple roll bar padding added to my rear strut brace
23 August:
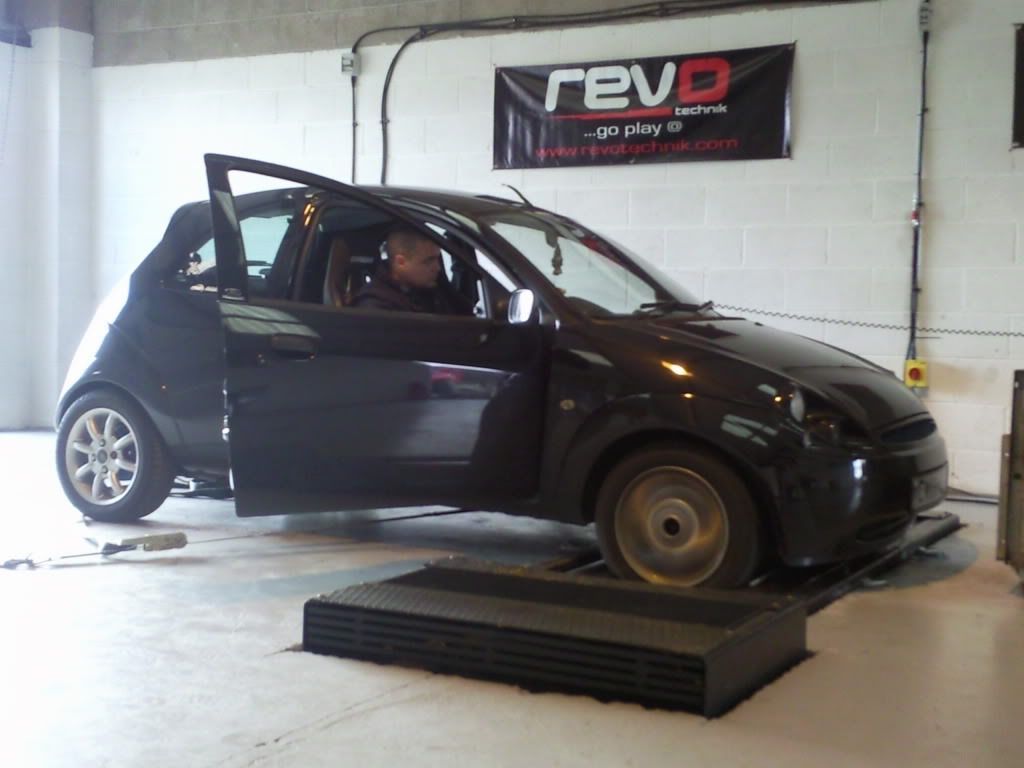
Just had word that the Ka made 150bhp at 8psi, not too bad considering I have no cooling system due to the chargecooler pump knackering a few days before mapping.
Also couldn't run 10psi as the boost controller didn't work, so once I get that and the cooling sorted I can take it back for some more tweaks. The guy who mapped it said that once the cooling is sorted I can get more power He also said it drives really nicely and feels like you're driving a Ka with a 3.0 in it. Lol
Can't wait to go collect it now and looking forward to driving it. At least now it's safe for me to drive and although not as much power as we'd originally planned, it'll do for now
28th August:
Picked the Ka up on Sunday from mapping.
I took a 5 1/2 hour (and quite eventful) train journey on Sunday to collect the Ka. There are so many strange people on trains on a Sunday
Had an awesome drive home in it and its loads of fun
I saw a few people I recognised on the Severn Bridge on their way back from the Sweetshop Automotive event at Krispy Kreme in Bristol. Lol
Severn Bridge Grand Prix:
[youtube]VVrET_Y-q8k[/youtube]
And here�s another video I made of a few clips merged together:
[youtube]RgsCrCWZFQE[/youtube]
Some new photo's of the Ka from Ford Fair 2012 ...
Painted my towing eye purple, forgot a close up picture showing the sparkles in it
Swapped my lights over to my black clears, fitted my fog surrounds and now sitting lower (60mm front, 40mm rear) on a FK Sport spring and damper kit:
Tinted my European rear lights, they look really dark in the pictures but the bulbs can be seen very clearly when on:
Cleaned and wrapped my chargecooler:
Engine bay and hoses could do with a good clean:
Cold air feed running to air filter:
Can just about make out my new cargo net behind the seats in this one:
I also have some new purple roll bar padding added to my rear strut brace
23 August:
Just had word that the Ka made 150bhp at 8psi, not too bad considering I have no cooling system due to the chargecooler pump knackering a few days before mapping.
Also couldn't run 10psi as the boost controller didn't work, so once I get that and the cooling sorted I can take it back for some more tweaks. The guy who mapped it said that once the cooling is sorted I can get more power
Can't wait to go collect it now and looking forward to driving it. At least now it's safe for me to drive and although not as much power as we'd originally planned, it'll do for now
28th August:
Picked the Ka up on Sunday from mapping.
I took a 5 1/2 hour (and quite eventful) train journey on Sunday to collect the Ka. There are so many strange people on trains on a Sunday
Had an awesome drive home in it and its loads of fun
I saw a few people I recognised on the Severn Bridge on their way back from the Sweetshop Automotive event at Krispy Kreme in Bristol. Lol
Severn Bridge Grand Prix:
[youtube]VVrET_Y-q8k[/youtube]
And here�s another video I made of a few clips merged together:
[youtube]RgsCrCWZFQE[/youtube]
Thread Starter
ɔɐᴘʈᴀᴉи ᴀᵴʙο
Joined: Aug 2011
Posts: 48
Likes: 1
From: Neath, South Wales
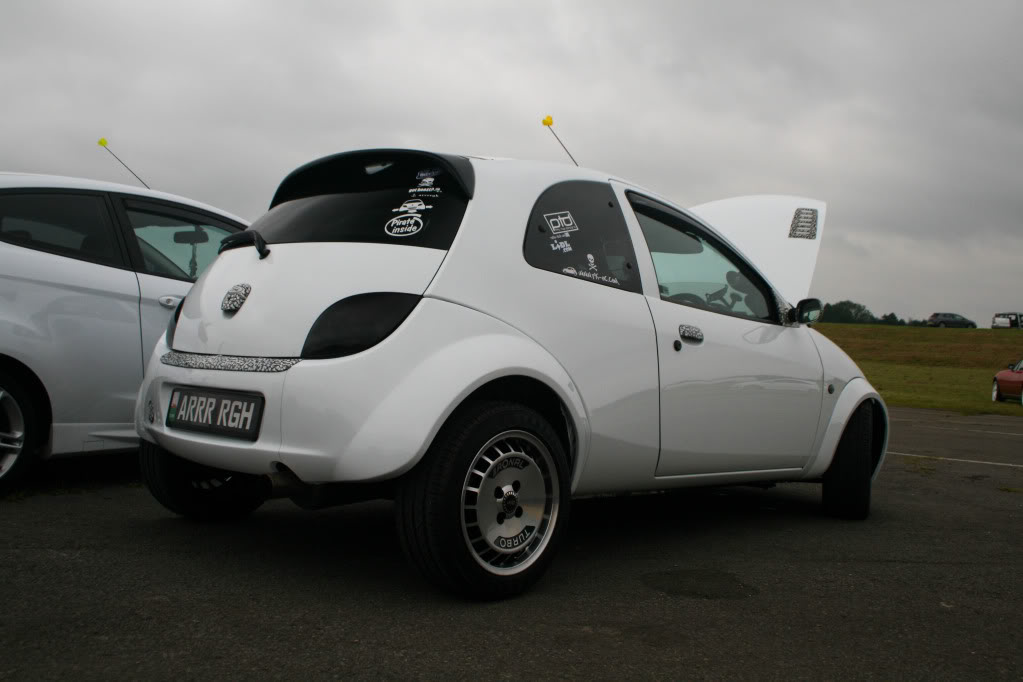
13th October:
Thought I'd do a bit of an update, not much new really except the wheels.
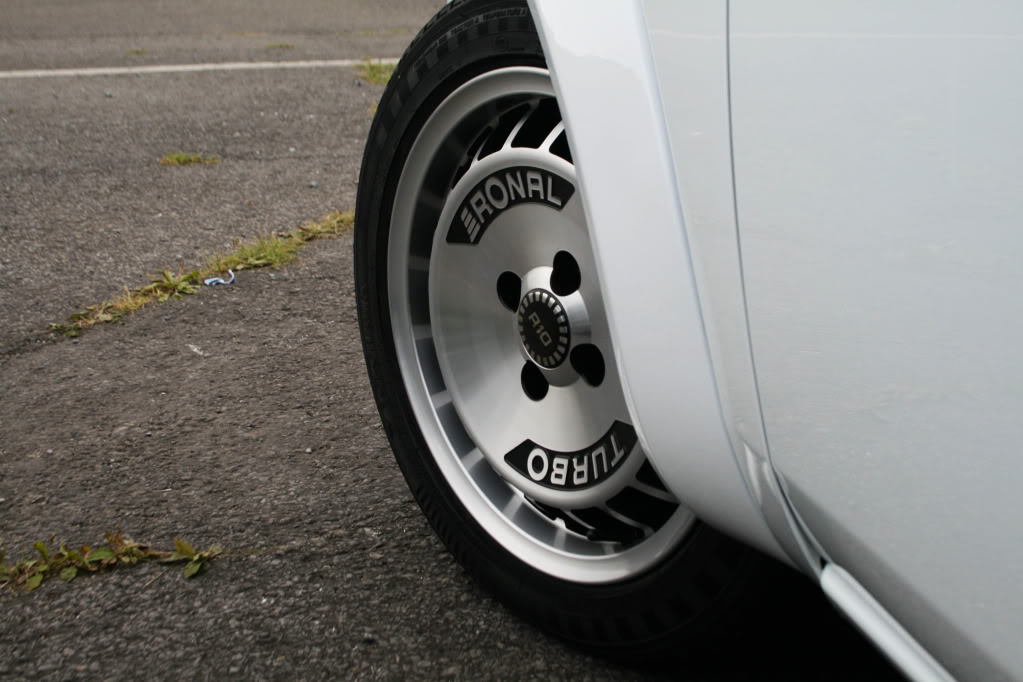
Box fresh:
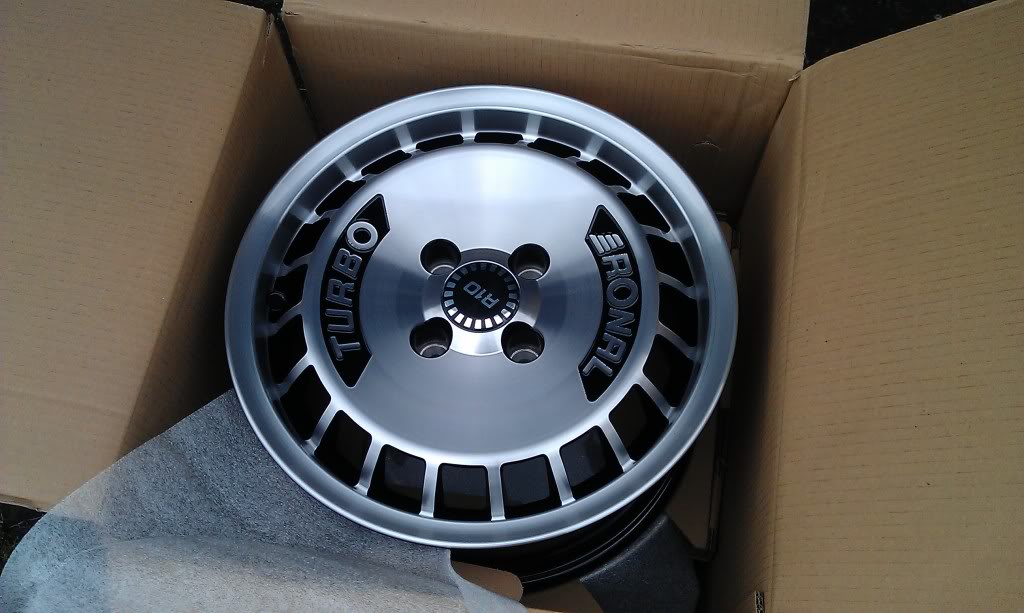
Ronal Turbo's
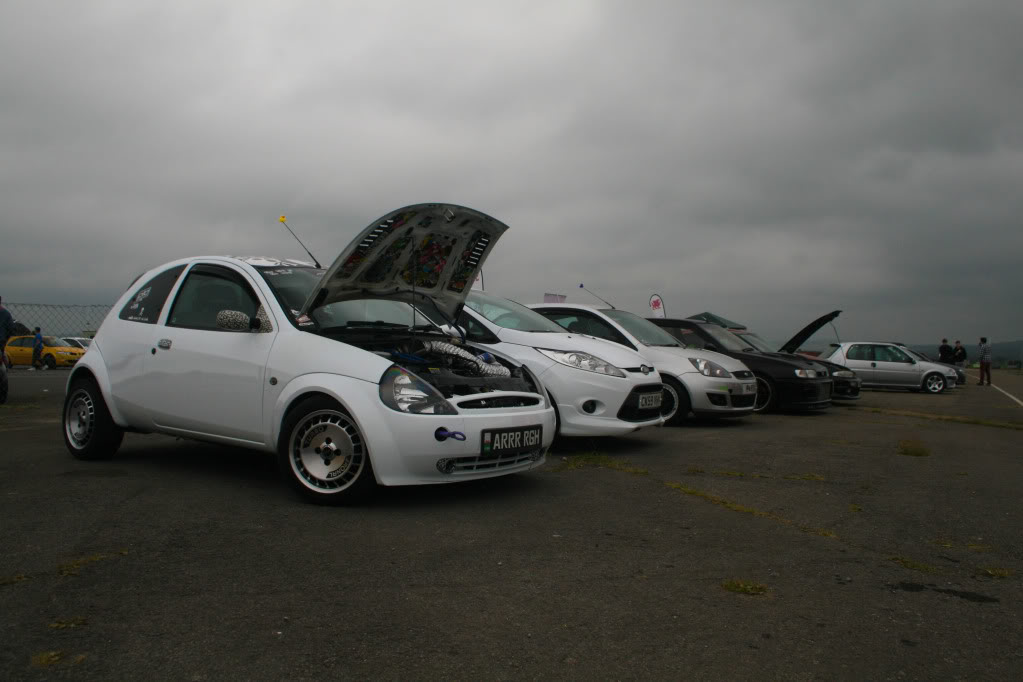
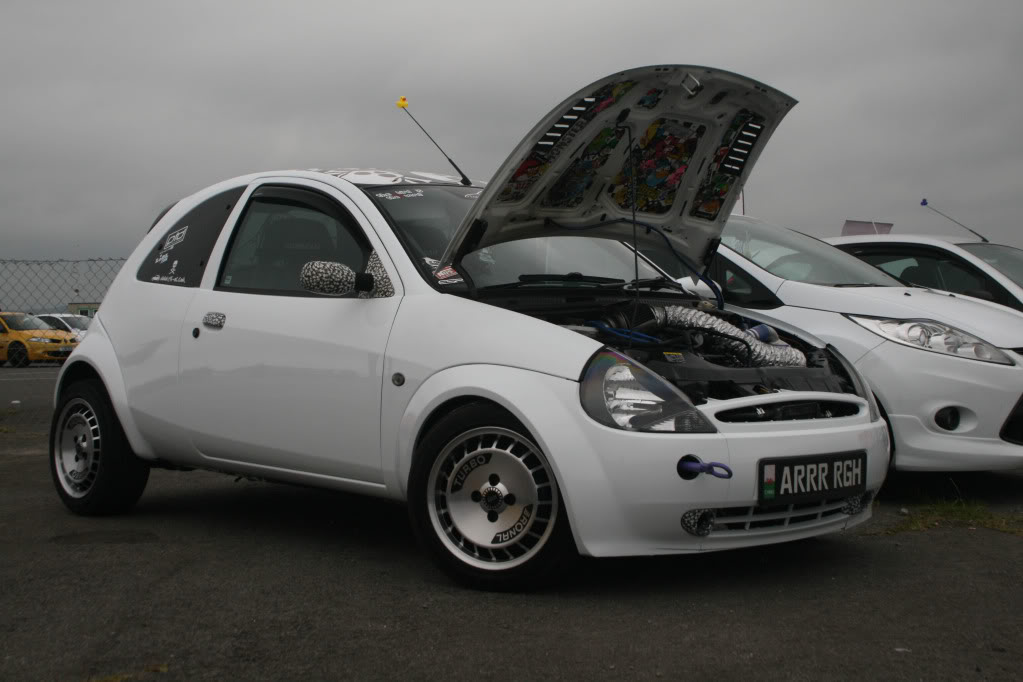
And some recent pics of the Ka at the GTec Show in Pembrey on 09.09.12
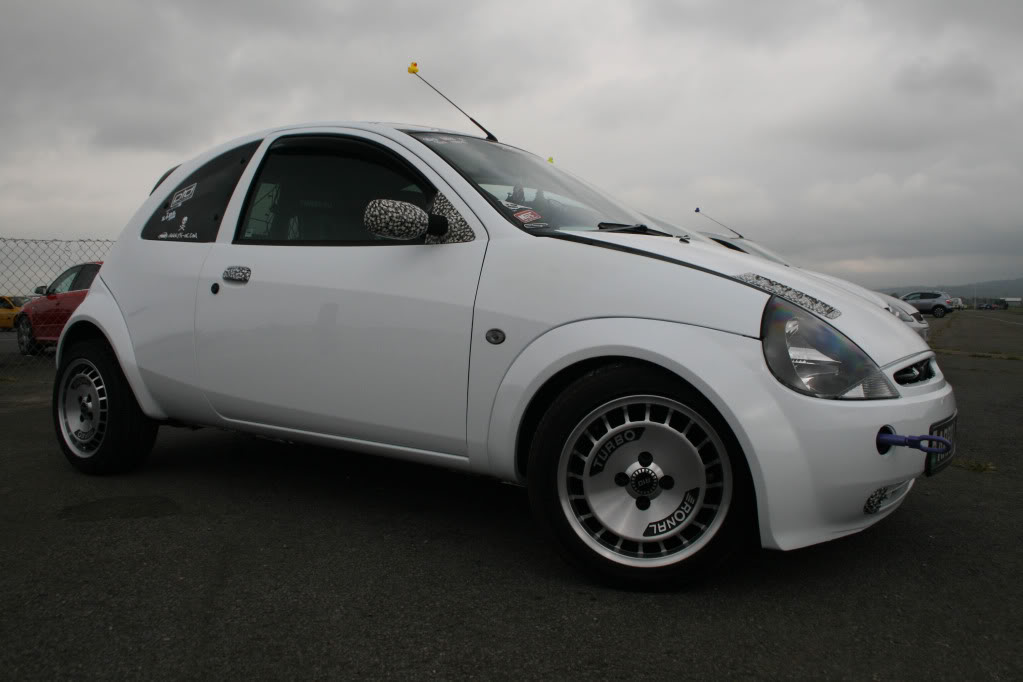
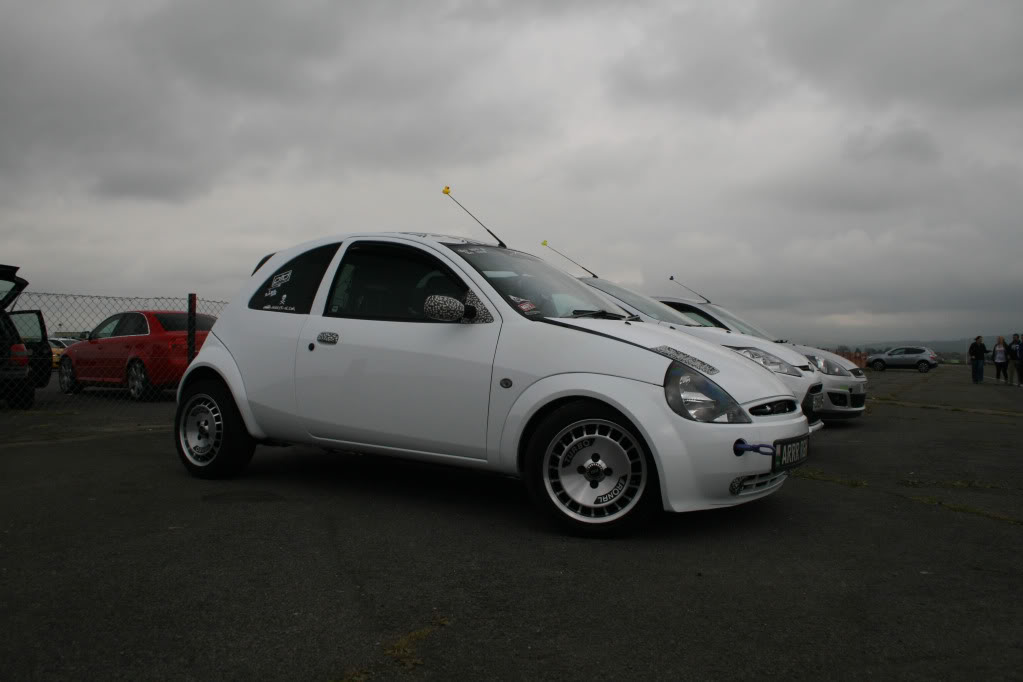
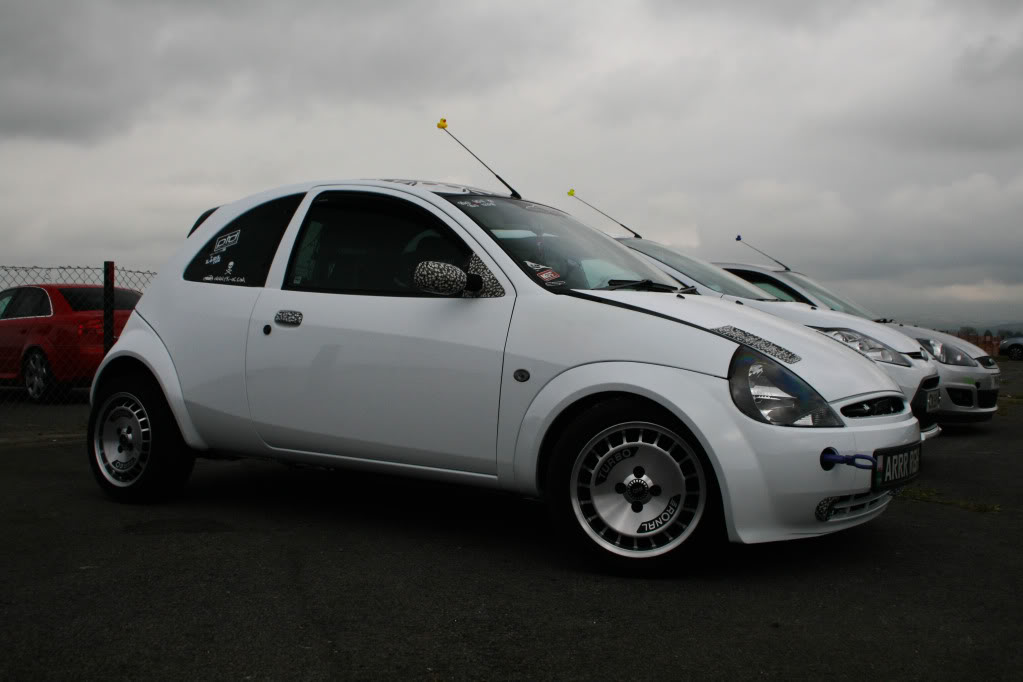
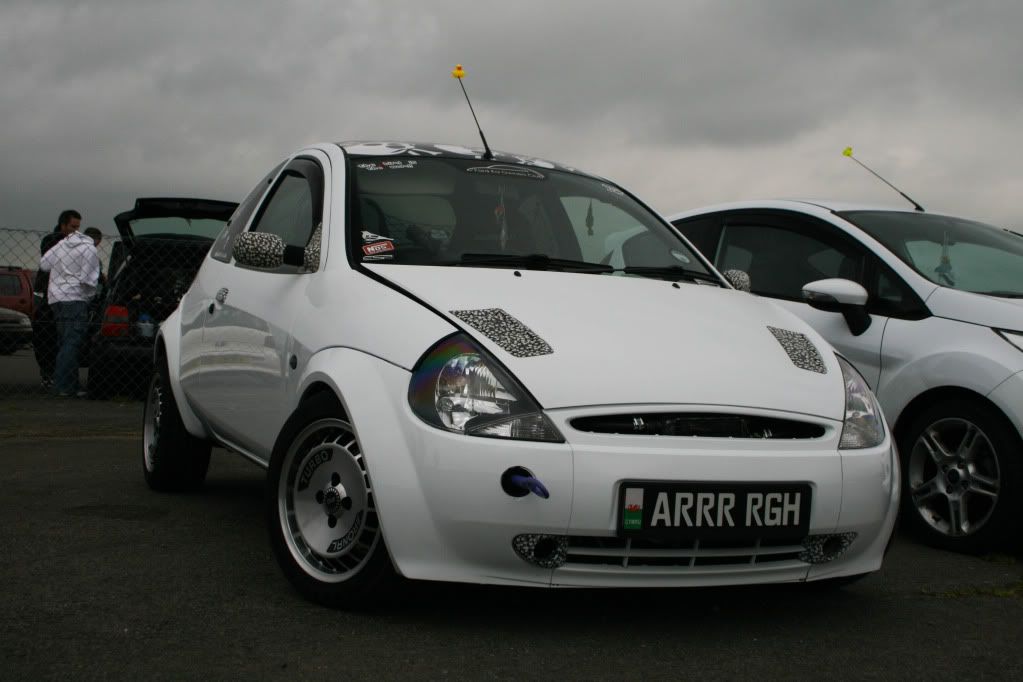
Got a few new stickers too, so I'll have to get some pics of those once the Ka is clean
Thought I'd do a bit of an update, not much new really except the wheels.
Box fresh:
Ronal Turbo's
And some recent pics of the Ka at the GTec Show in Pembrey on 09.09.12
Got a few new stickers too, so I'll have to get some pics of those once the Ka is clean
Thread Starter
ɔɐᴘʈᴀᴉи ᴀᵴʙο
Joined: Aug 2011
Posts: 48
Likes: 1
From: Neath, South Wales
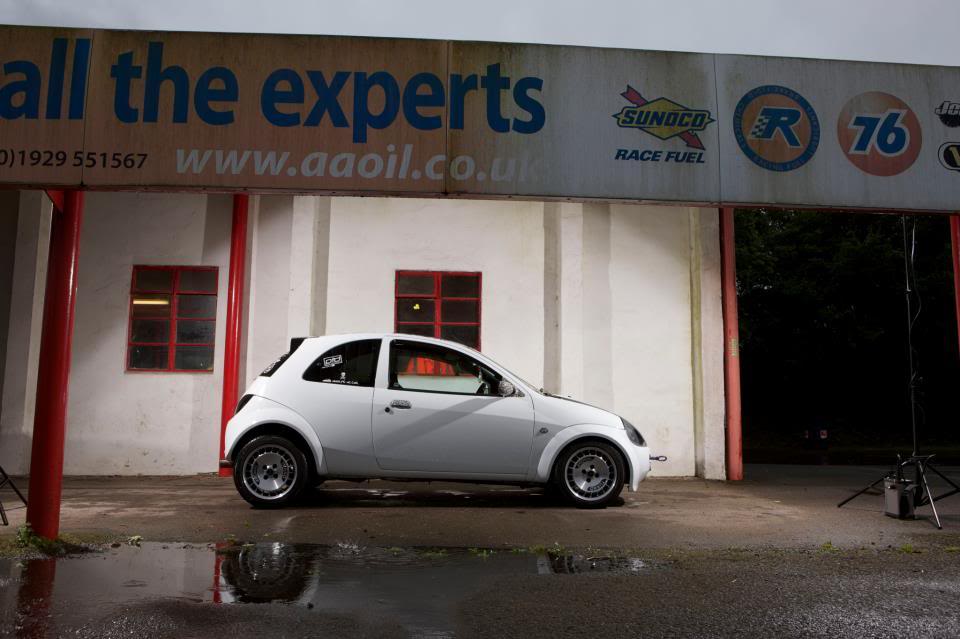
As some of you may have noticed in October 2012's issue of Performance Ford there were a couple pictures of my car from the Bristol & Swindon RSOC Day at Castle Combe Circuit:
The caption and the note about what's coming in the next issues almost gave the game away!
Then this picture got sneakily added to Performance Ford's Facebook page a few weeks ago:
And this is the December issue of Performance Ford
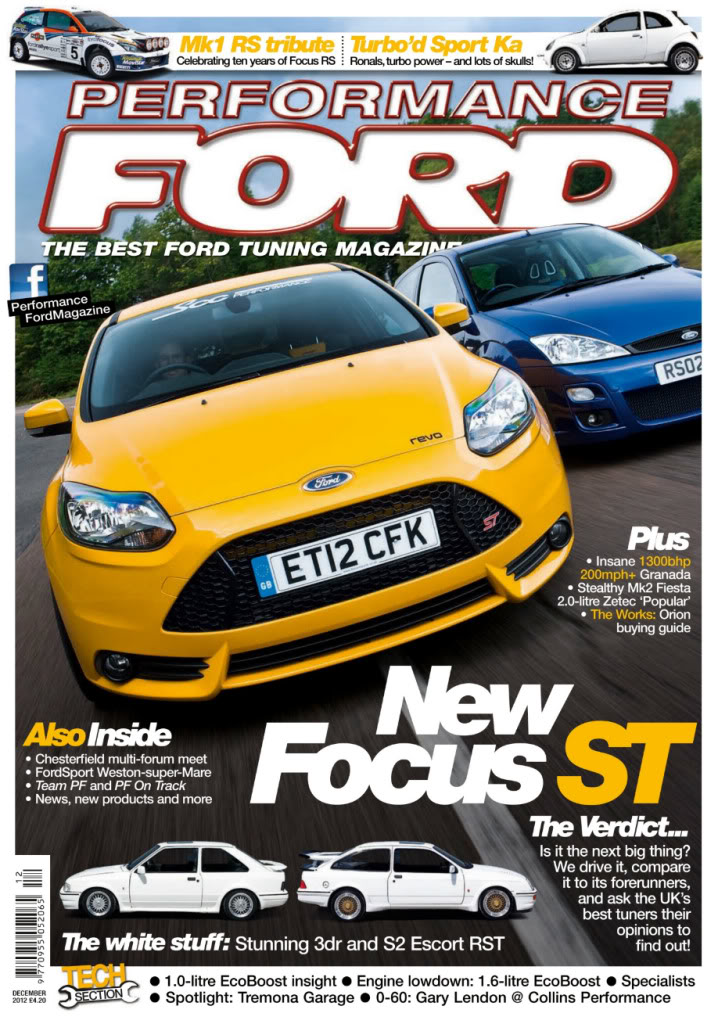
Close up of cover:

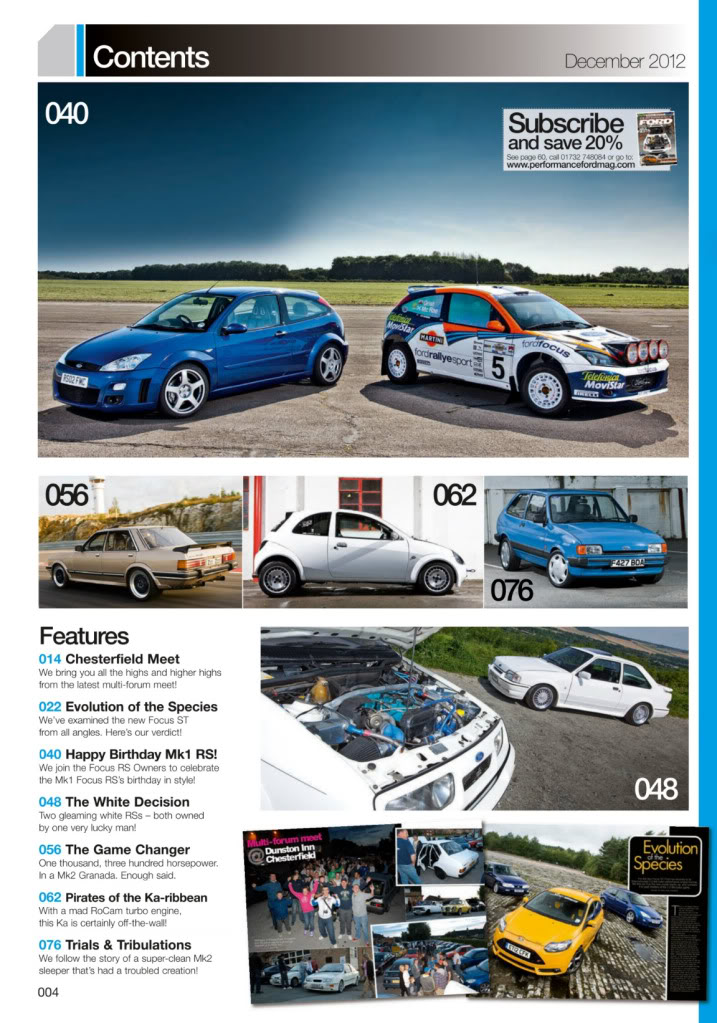
Contents page:
Poster page:
And there's a further 4 pages and write up in the magazine which is out now
The caption and the note about what's coming in the next issues almost gave the game away!
Then this picture got sneakily added to Performance Ford's Facebook page a few weeks ago:
And this is the December issue of Performance Ford
Close up of cover:
Contents page:
Poster page:
And there's a further 4 pages and write up in the magazine which is out now

Thread
Thread Starter
Forum
Replies
Last Post
track.focus'd
Restorations, Rebuilds & Projects.
26
Aug 12, 2015 05:53 PM