RS Turbo S2 - Engine bay and underside resto


Thread Starter
Will it ever end !!!!!!!
Joined: Jun 2007
Posts: 464
Likes: 1
From: Colchester, Essex
 RS Turbo S2 - Engine bay and underside resto
Where do I start - well purchased this 90spec 89 plater in November 2006 and used it here and there until Feb 2008 - then the turbo went bang so in the garage it went - three months later got it up and running and all was good until November 2008 - at that point i lost my job so in the garage it stayed
Anyway sorted new job and in April/May this year got it running and then decided time for a tidy up - plan is to tidy up the rear end up to the engine bay and then in Nov/Dec move onto the engine bay and clean that up as well - so anyway here goes
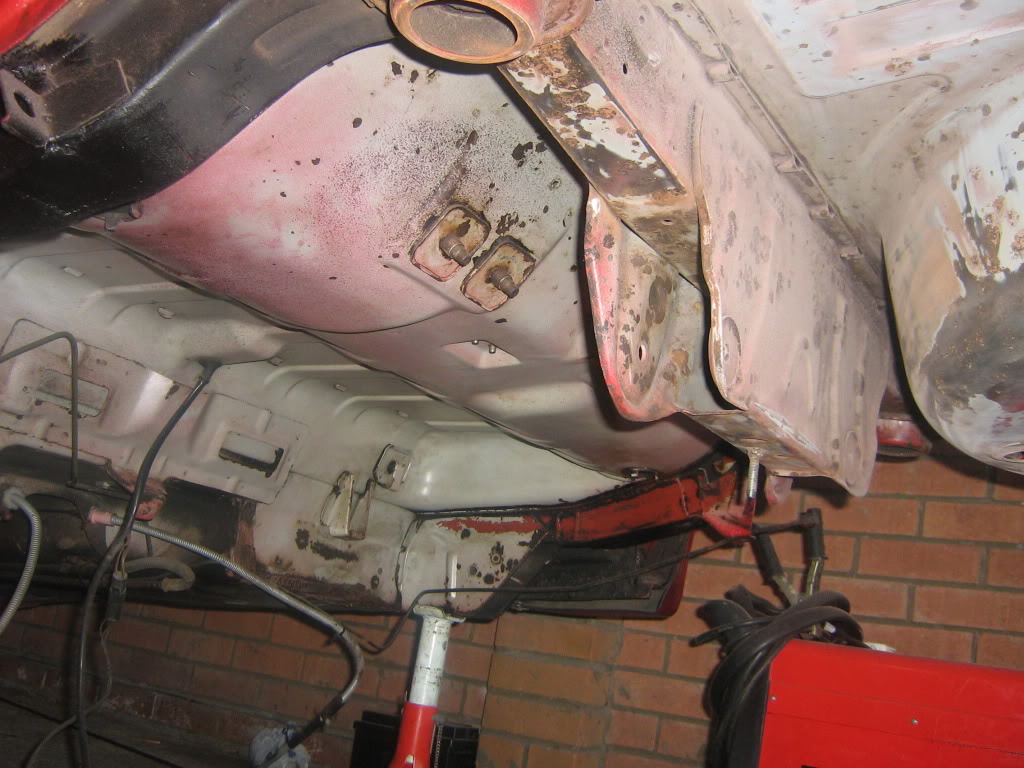
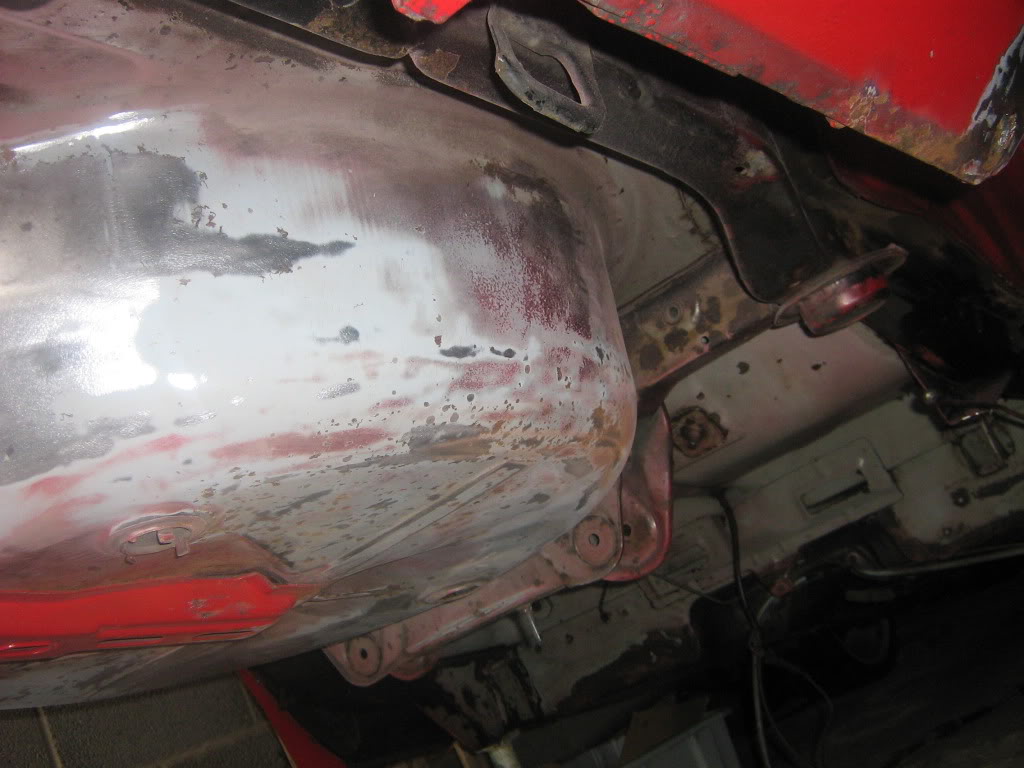
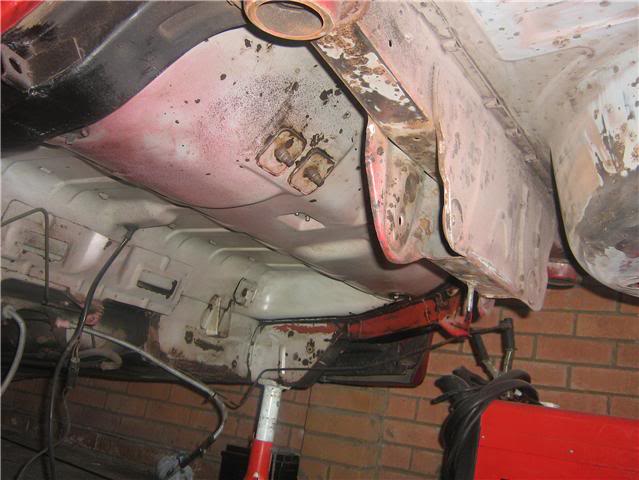
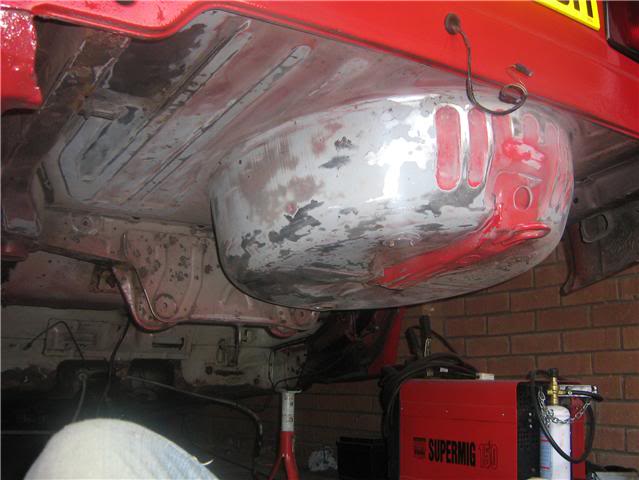
Now from May 2010 - a few pictures of what I had to deal with underneath
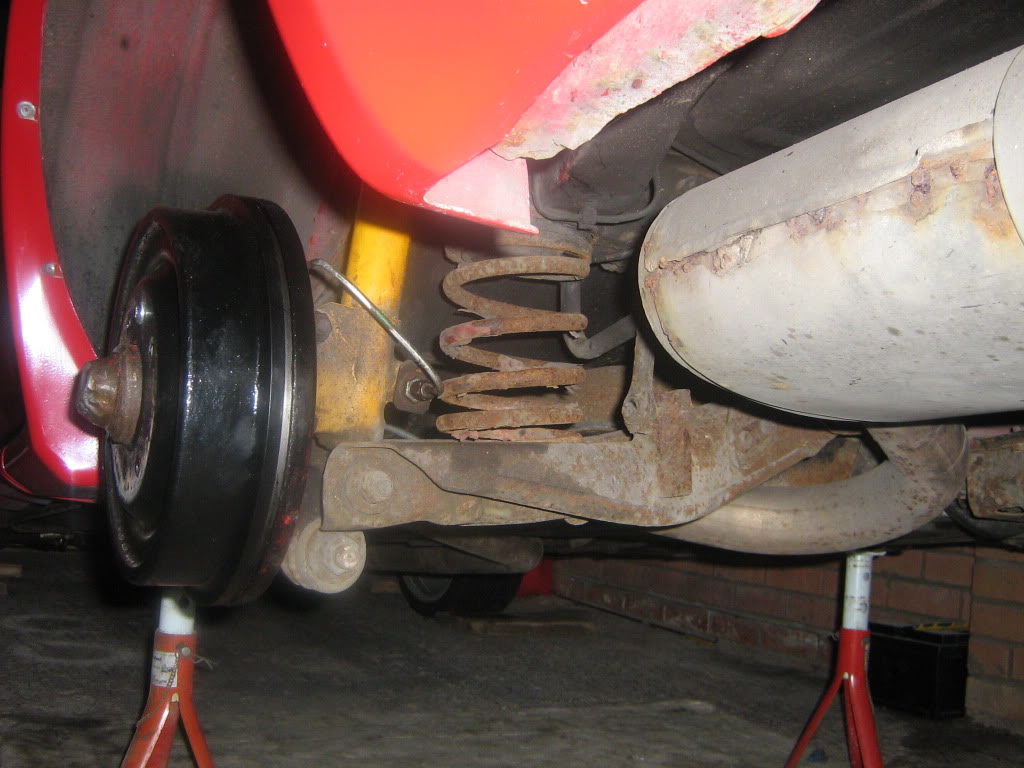
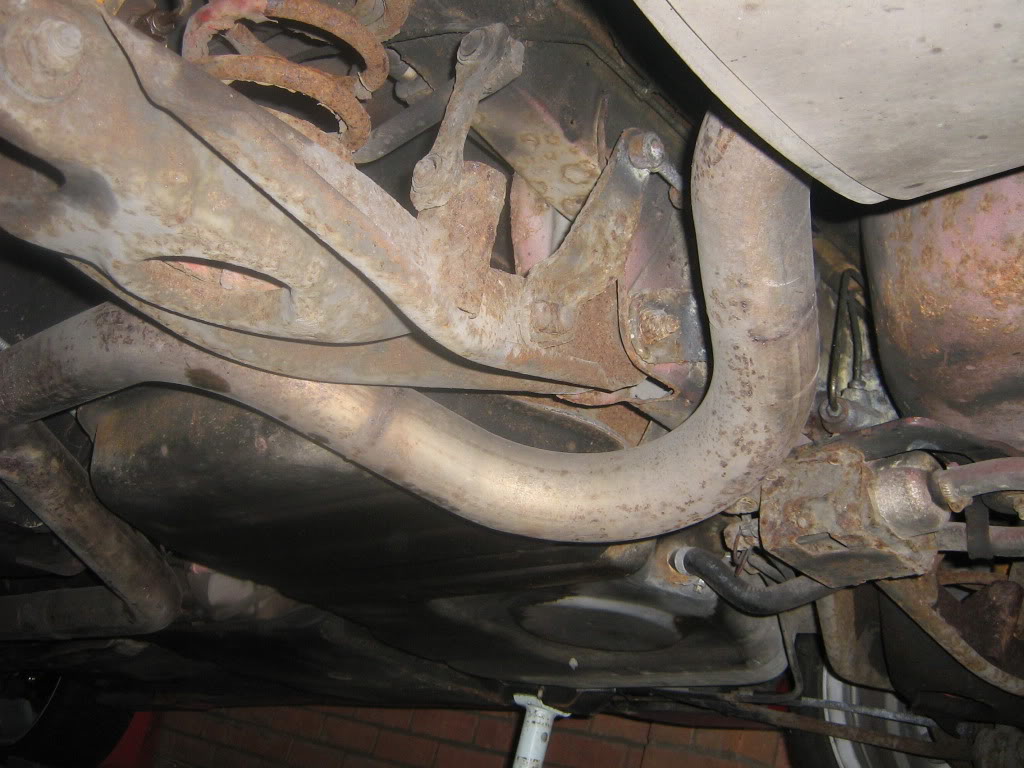
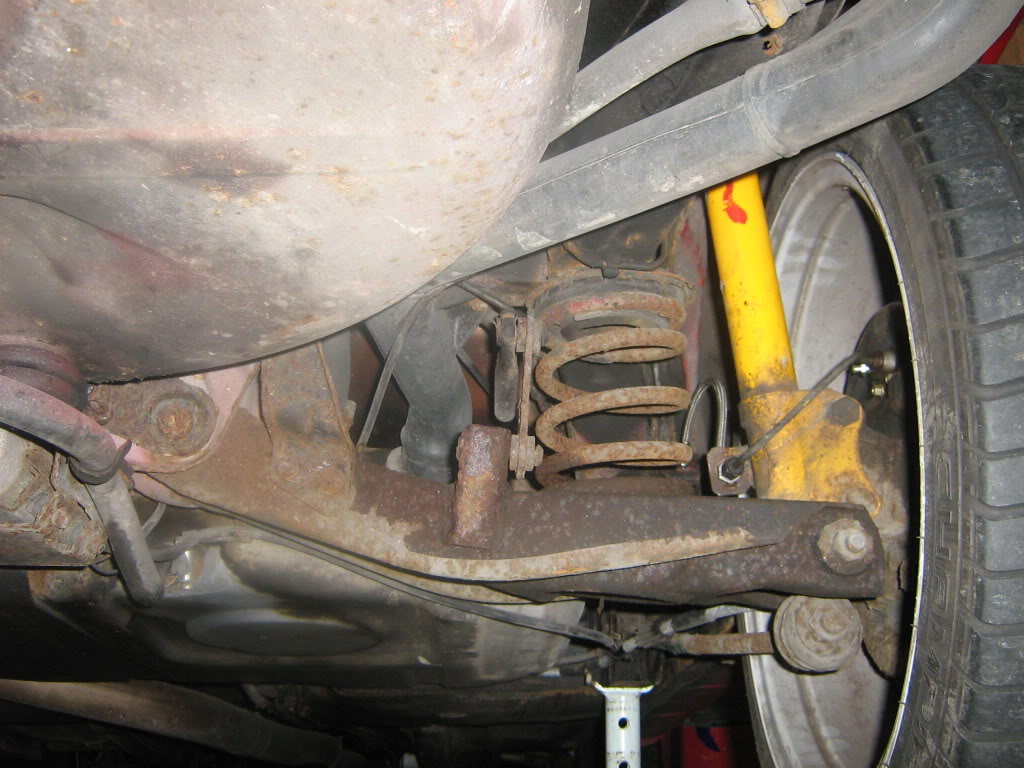
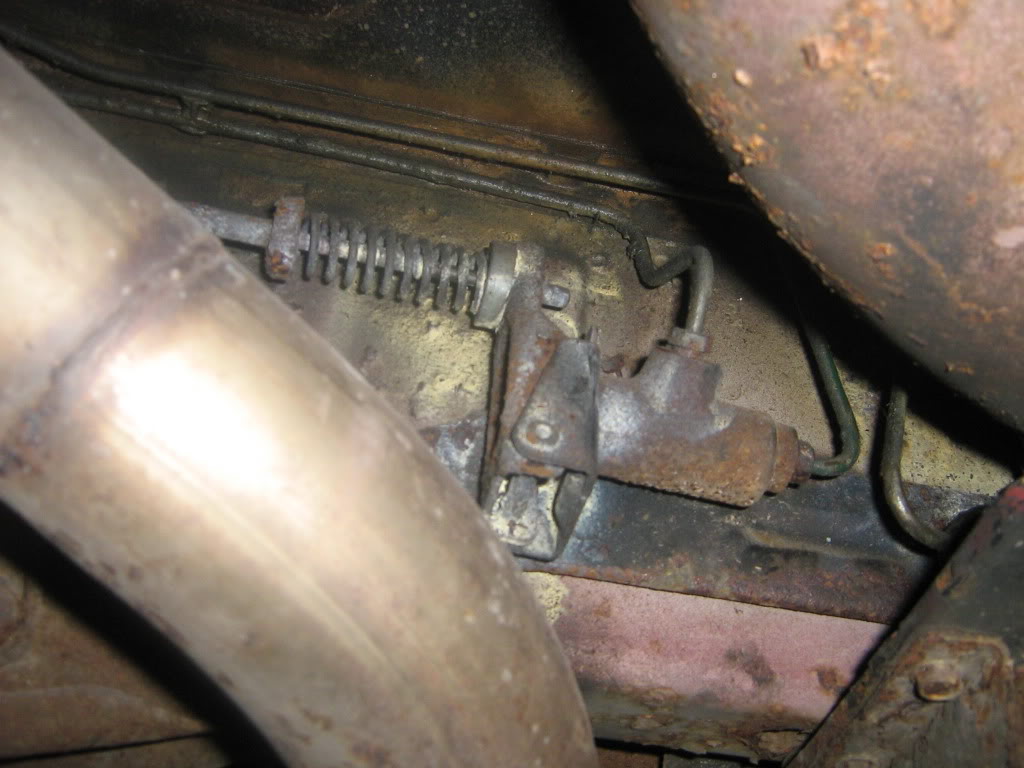
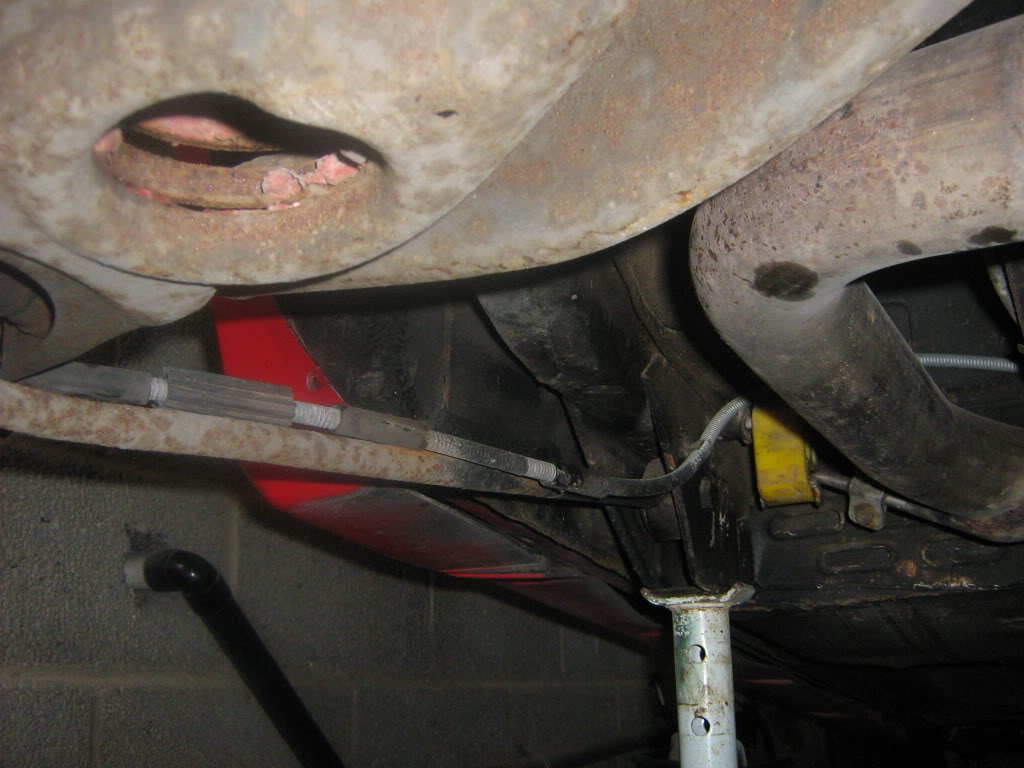
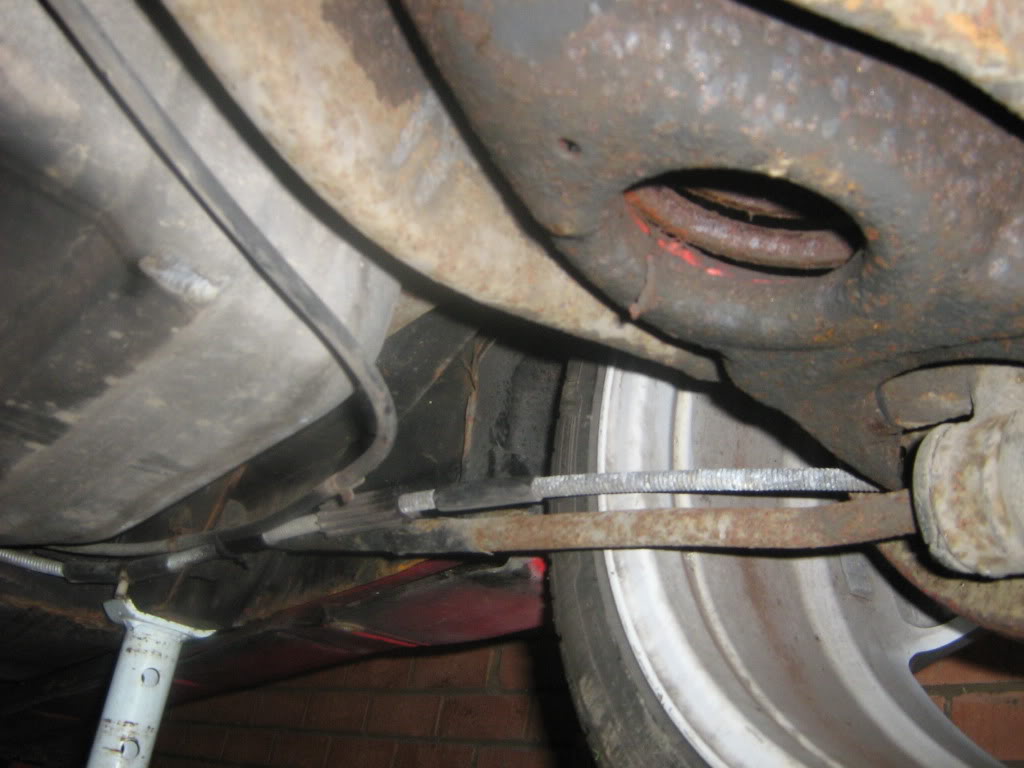
So stripped it down and cleaned off all the underseal................
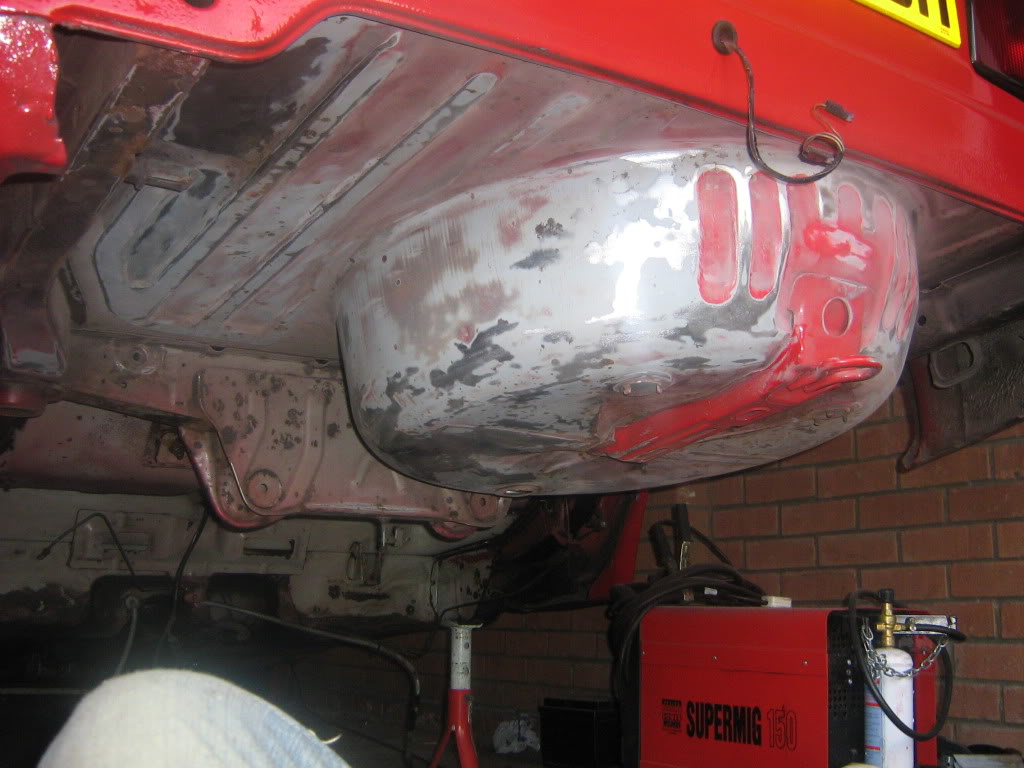
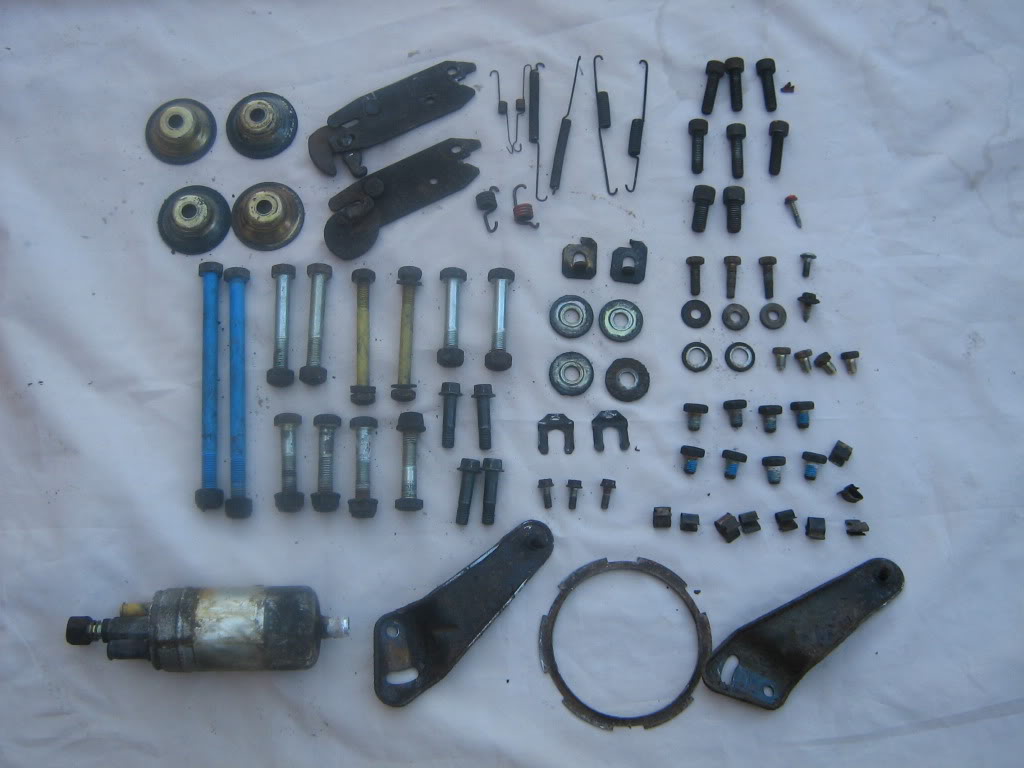
All nuts/bolts/washers etc etc that were removed to be re zinced - in silver
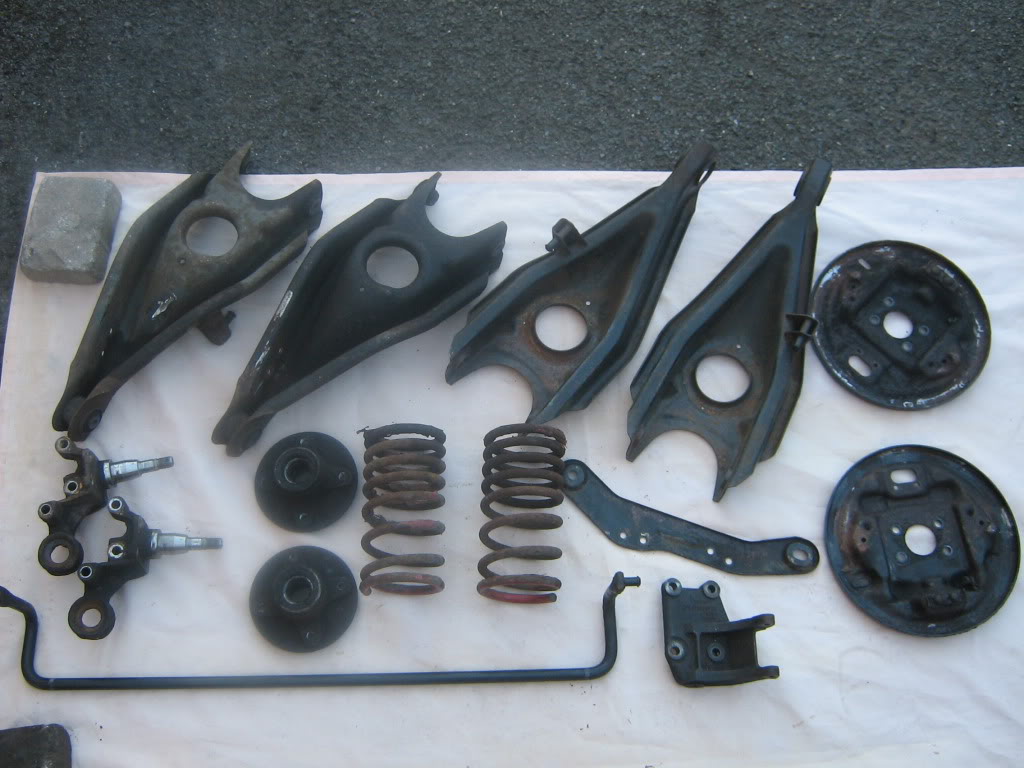
and all the suspension/wishbones/anti roll bar etc for powdercoating (all looking pretty rough!!)
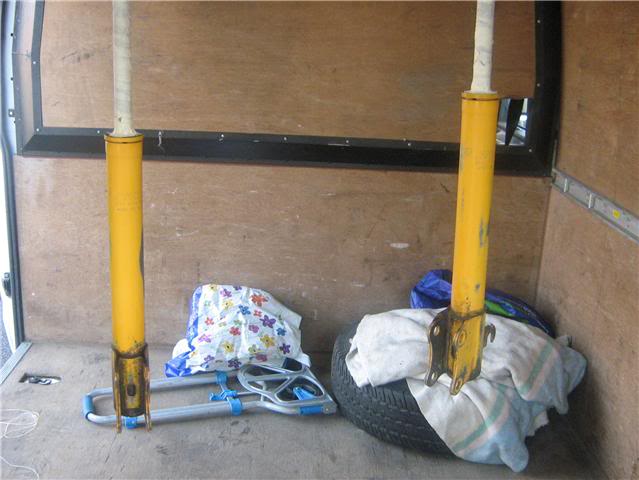
then the shocks (koni adjustables) ready for a lick of paint
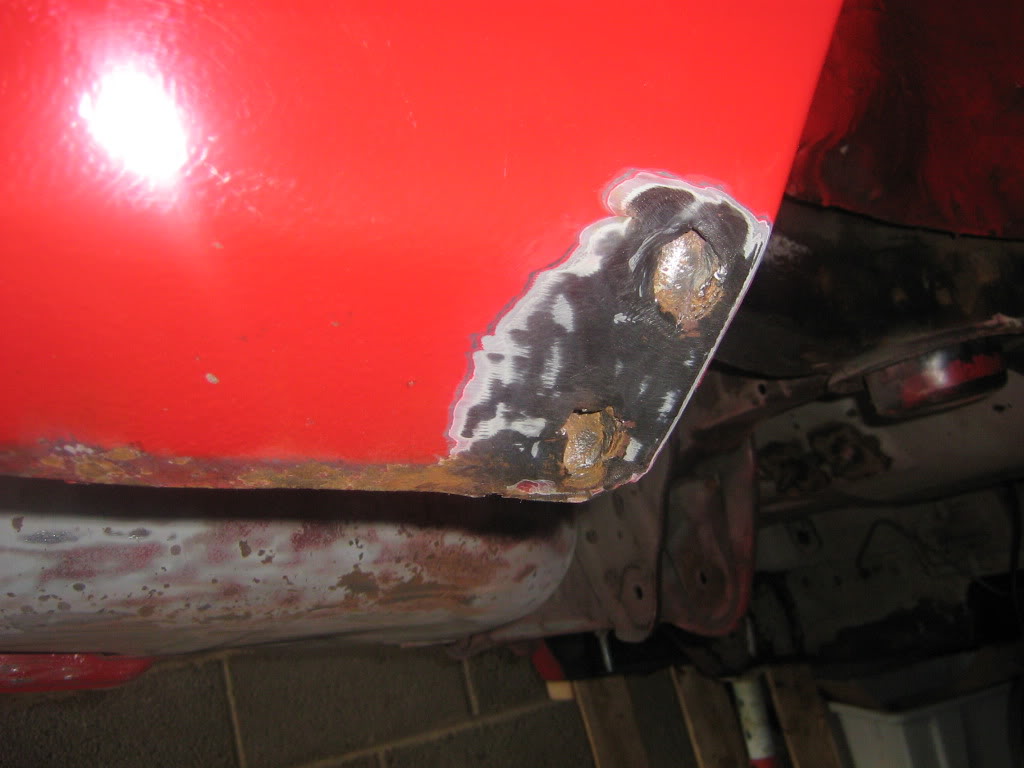
then moved on to the rear on each side behind the bumper - couple of bits to tidy up here - allso shows a spot on the chassis rail that needed welding so plat welded in and eventually tidied up ready for paint
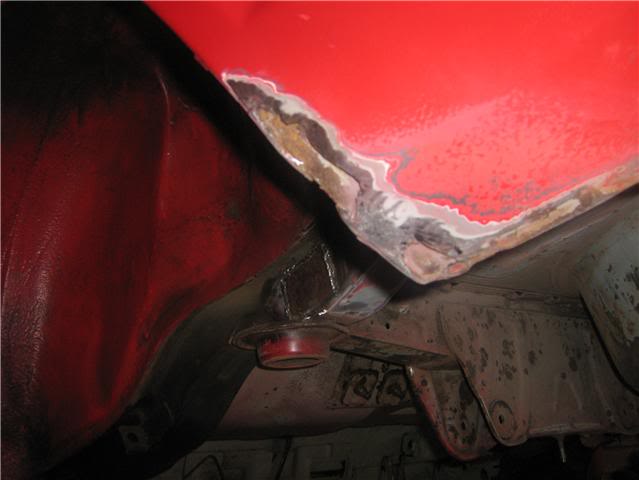
Then decided and priming the bottom and going over this with an overpaintable stone chip protection - no intention of using for anything than fair weather driving so for me this is enough
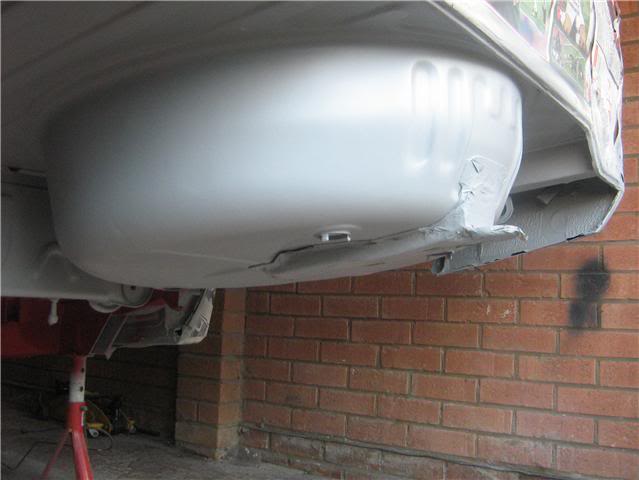
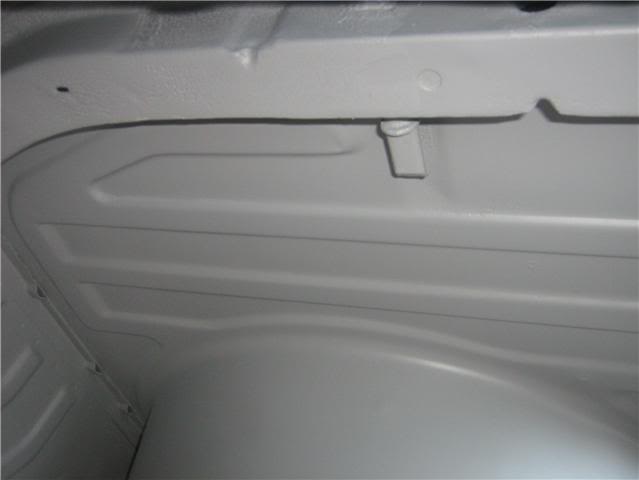
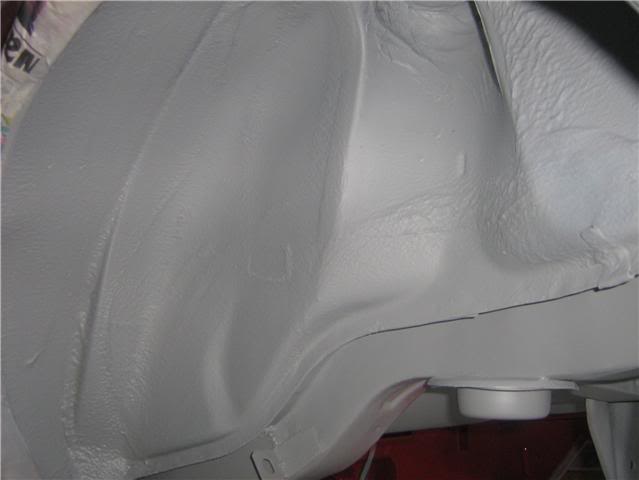
and then began to put some colour onto it
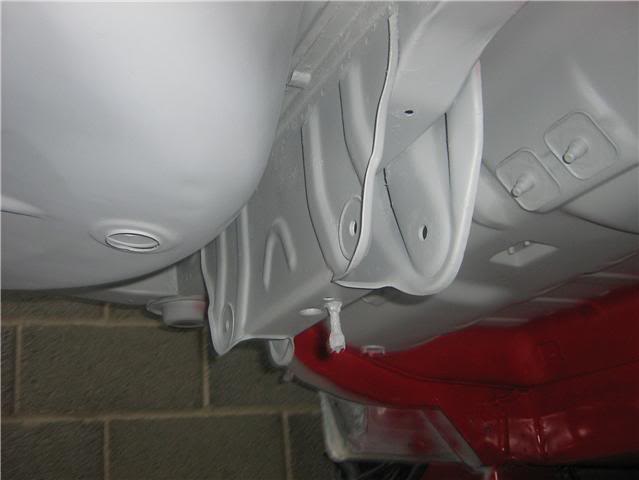
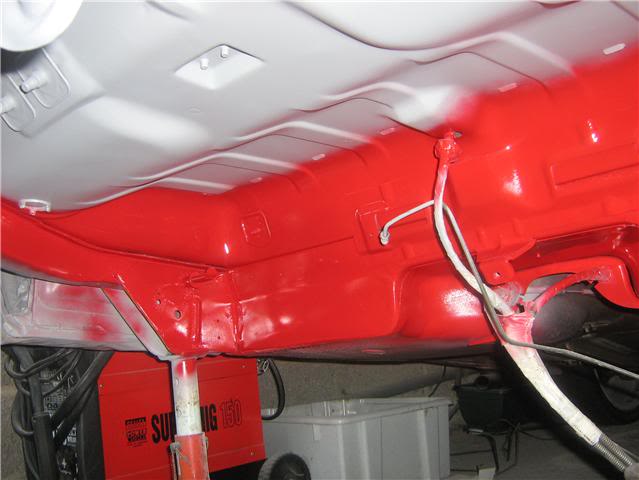
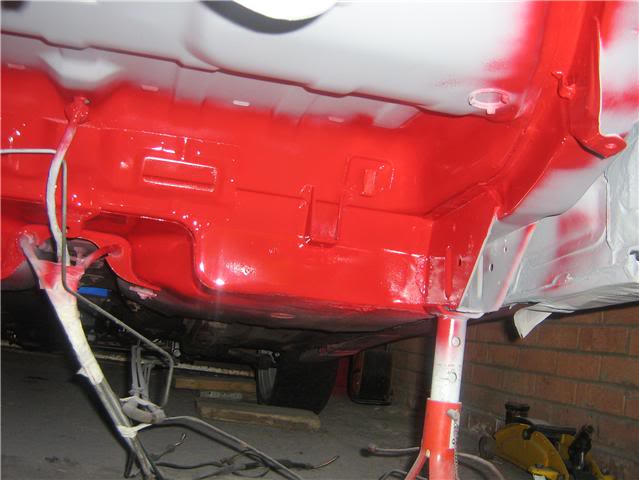
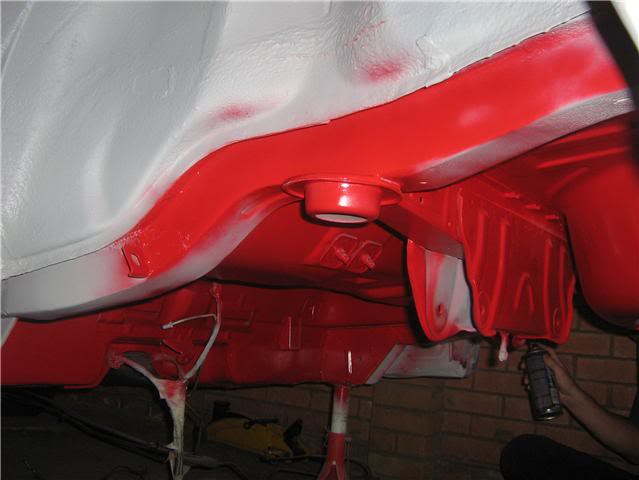
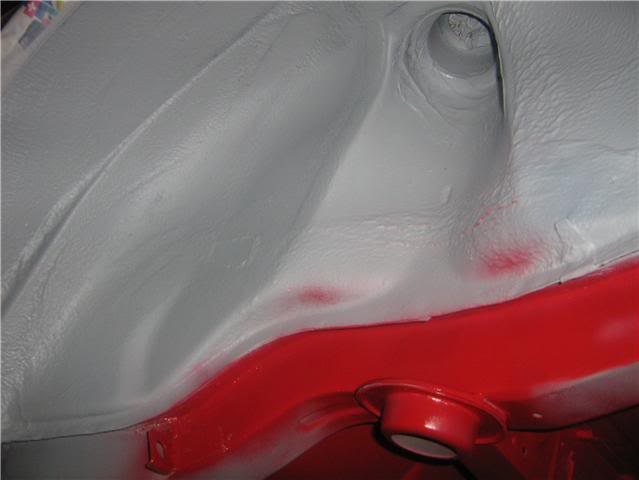
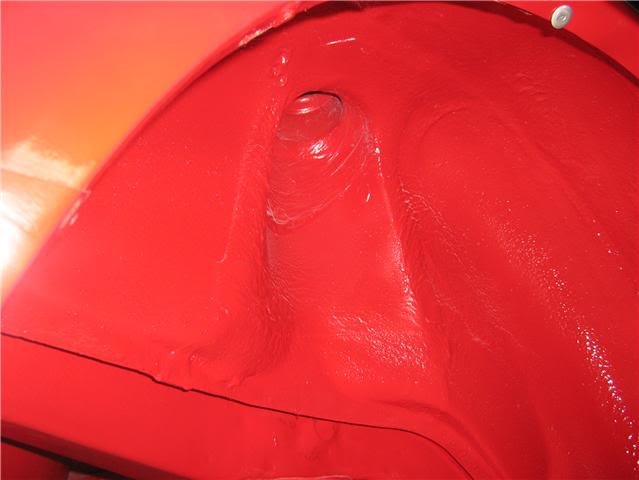
all in all not too bad and I am more than happy with the result
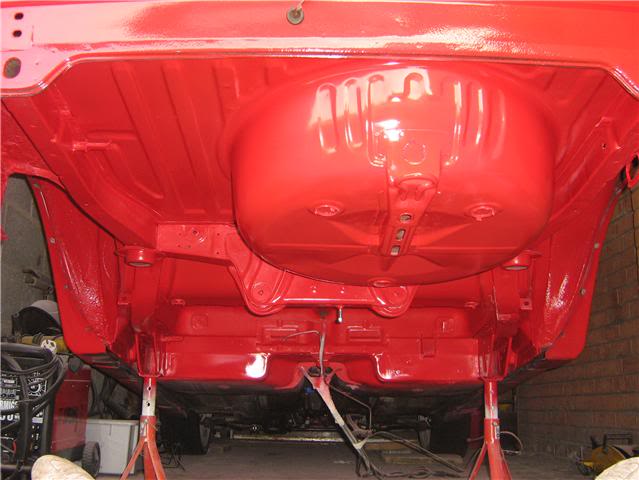
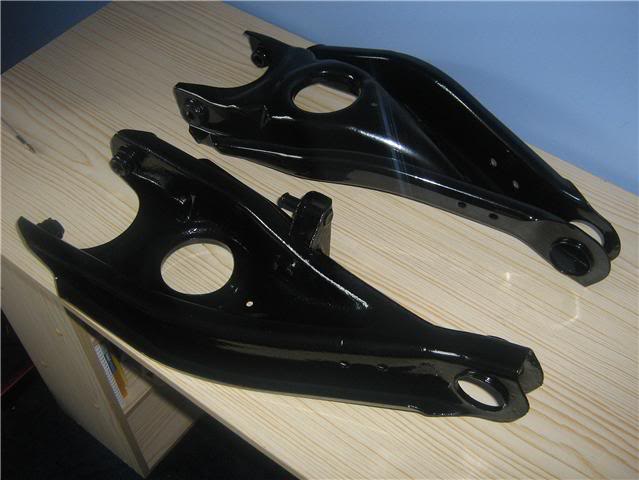
Then parts back from powdercoating - looking good
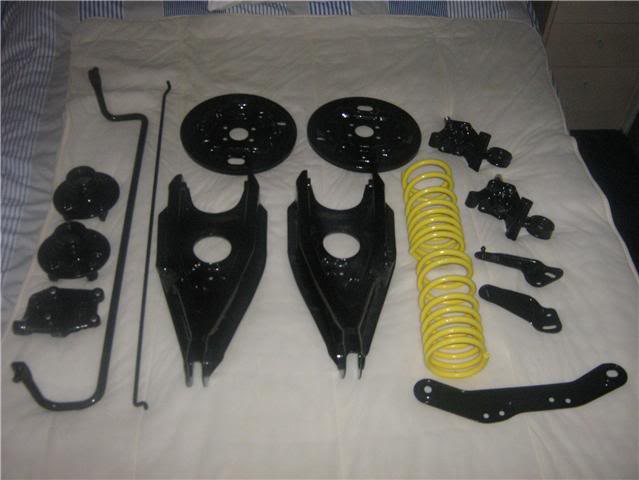
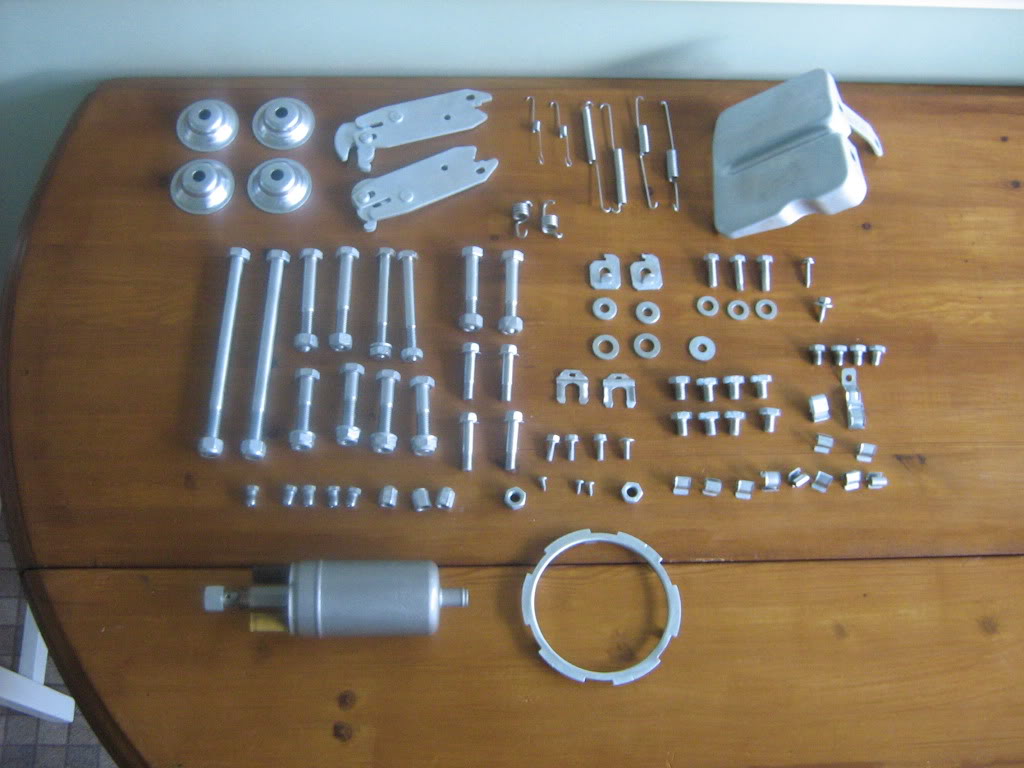
and from zincing - again have come up really well
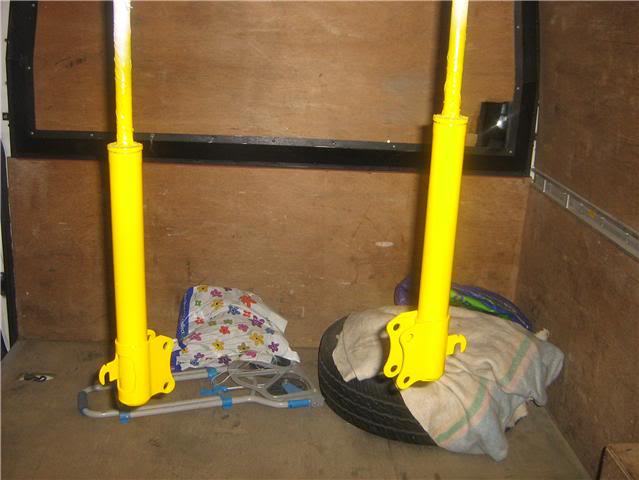
also gave the shocks a lick of paint
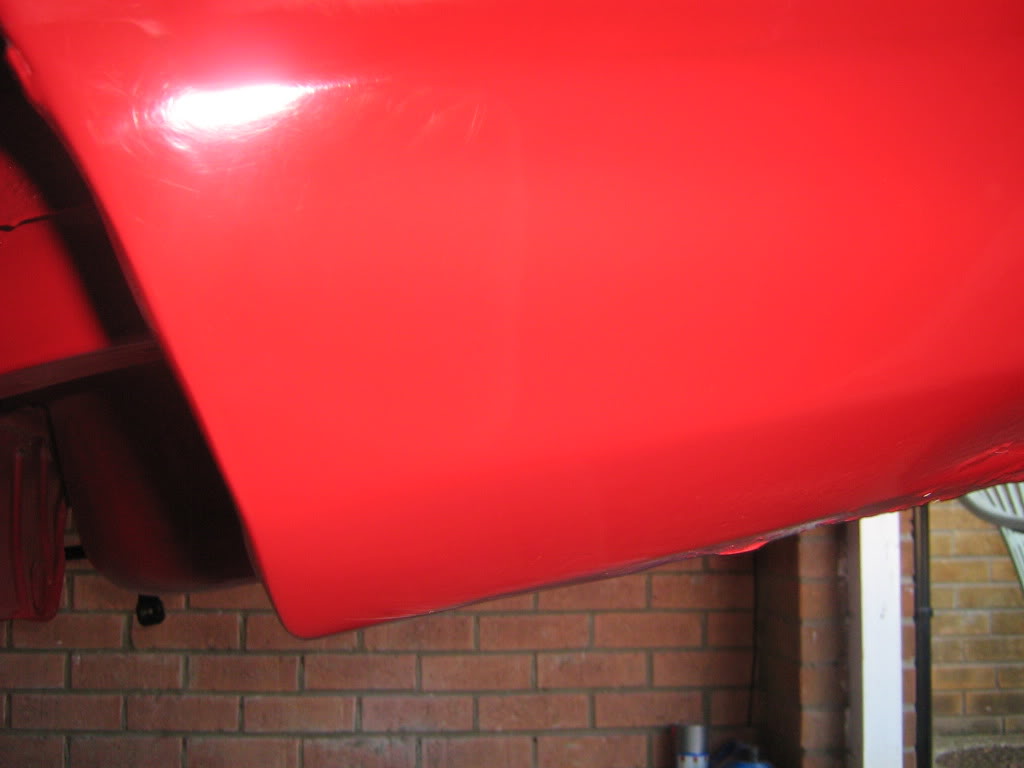
and sorted the panel either side behind the rear bumper
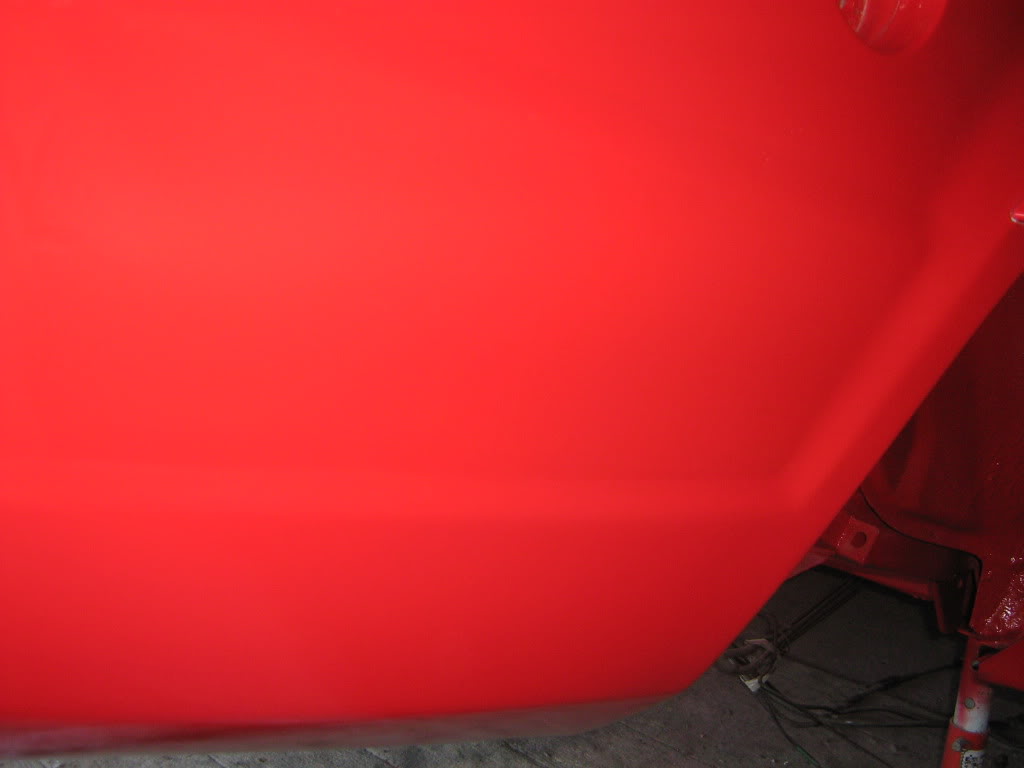
The started mounting clips etc I got from Ford and all of a sudden it starts to take shape
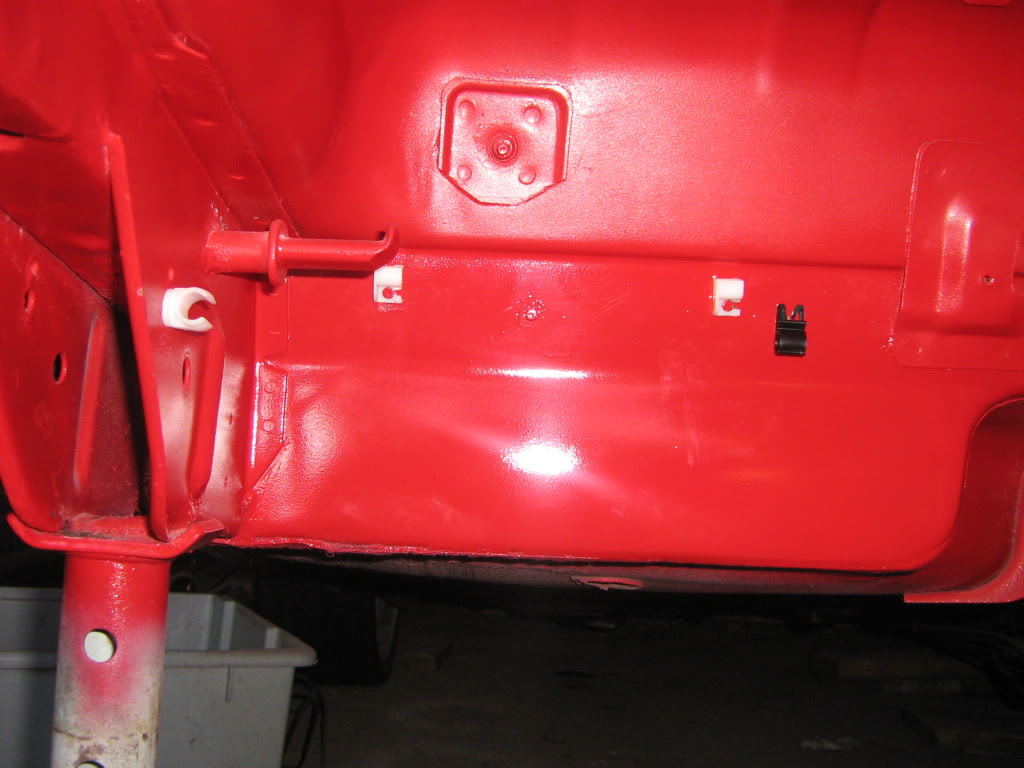
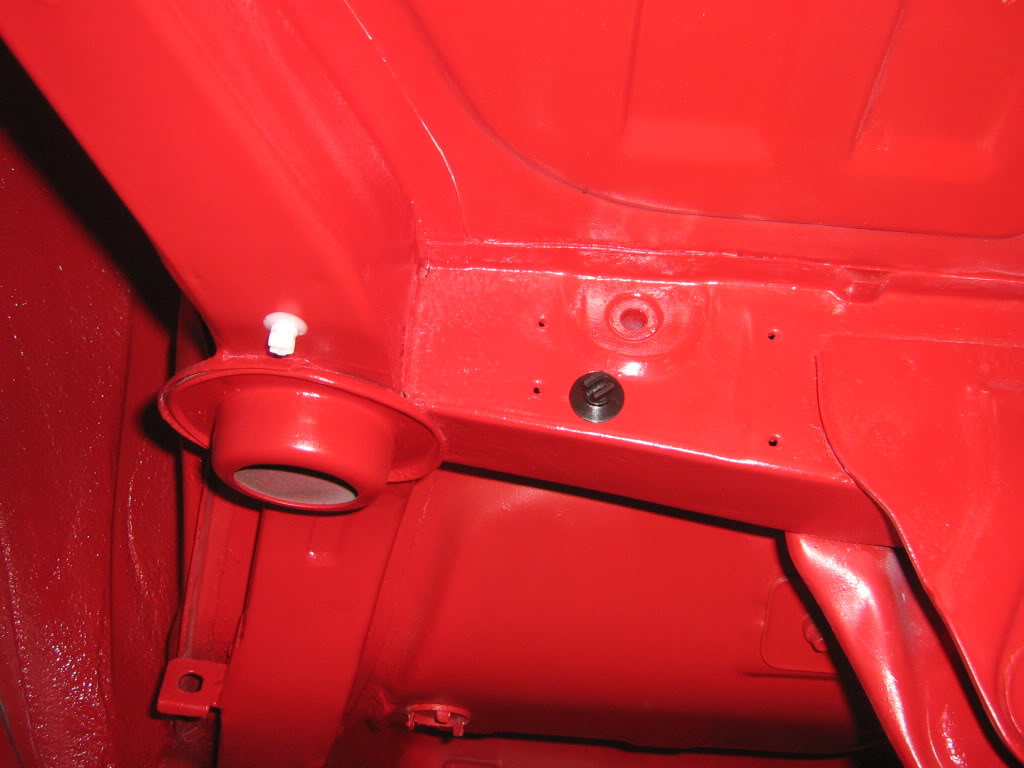
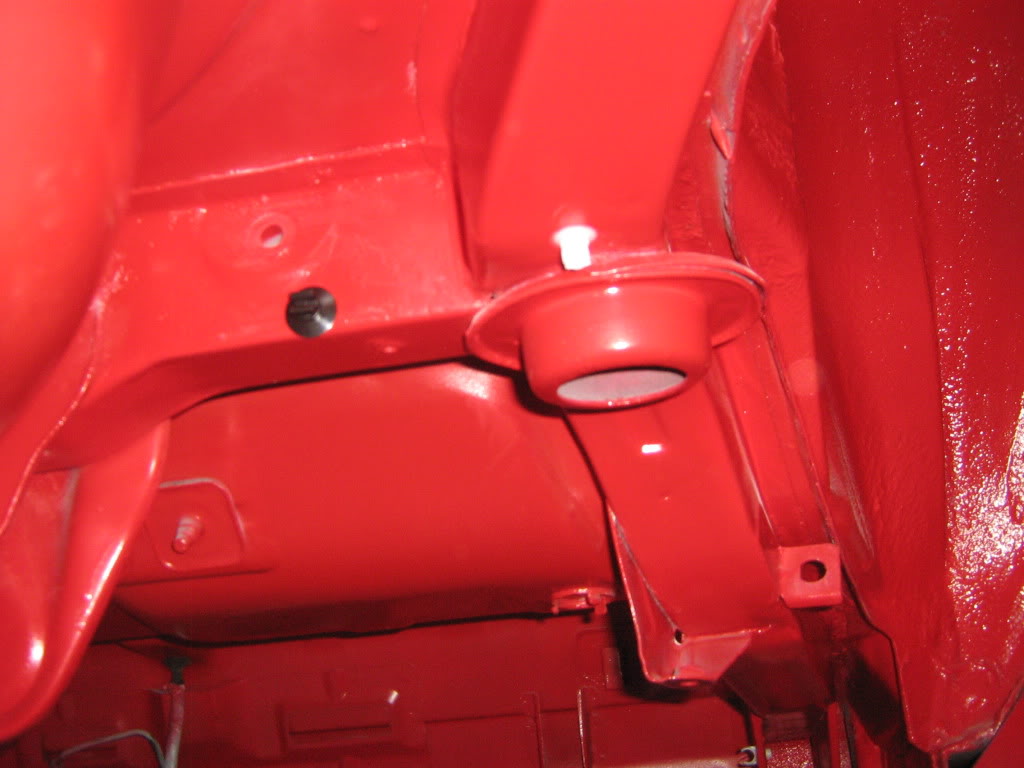
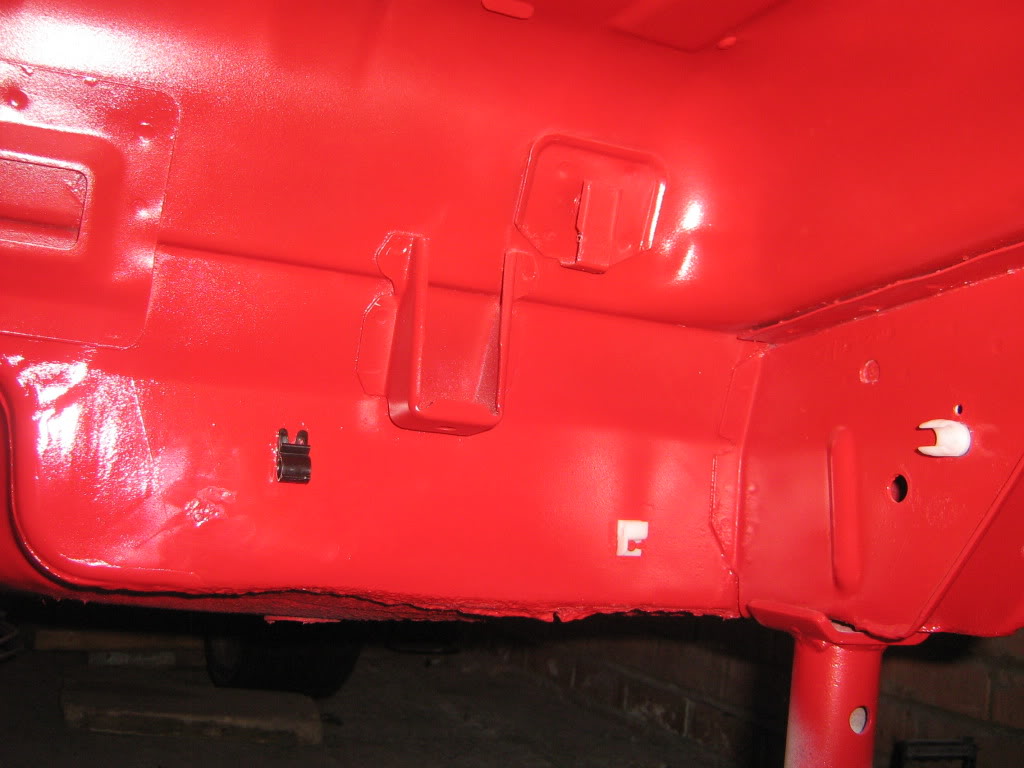
then the heat shield placed back on
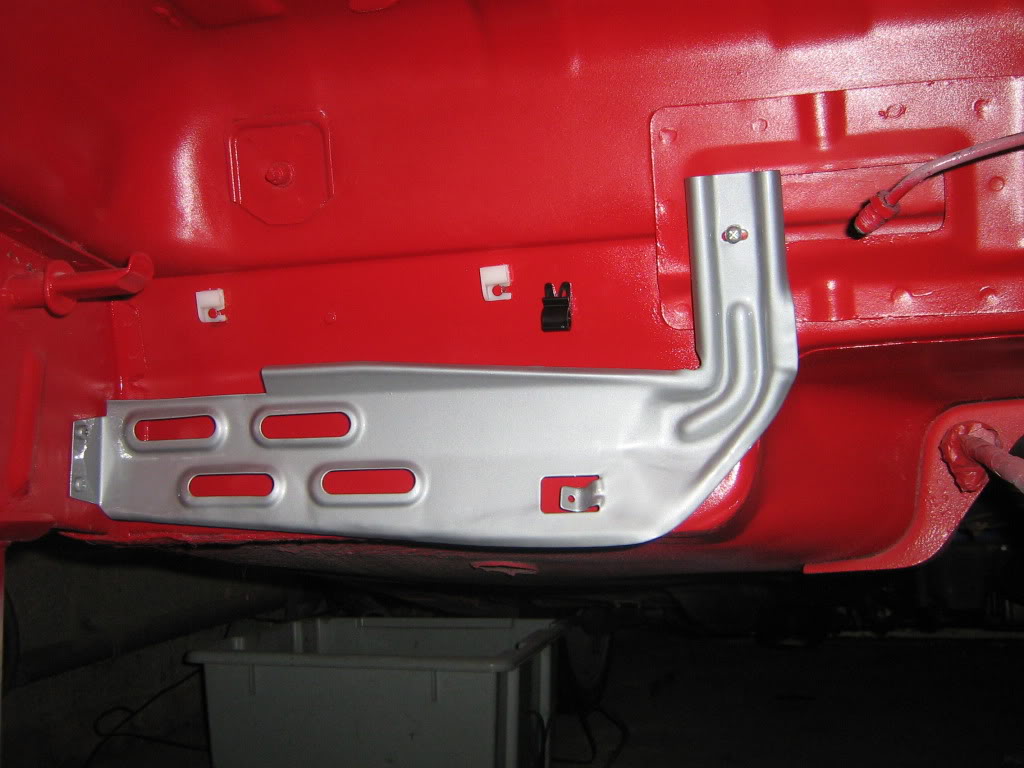
rear anti roll bar with nice new shackles
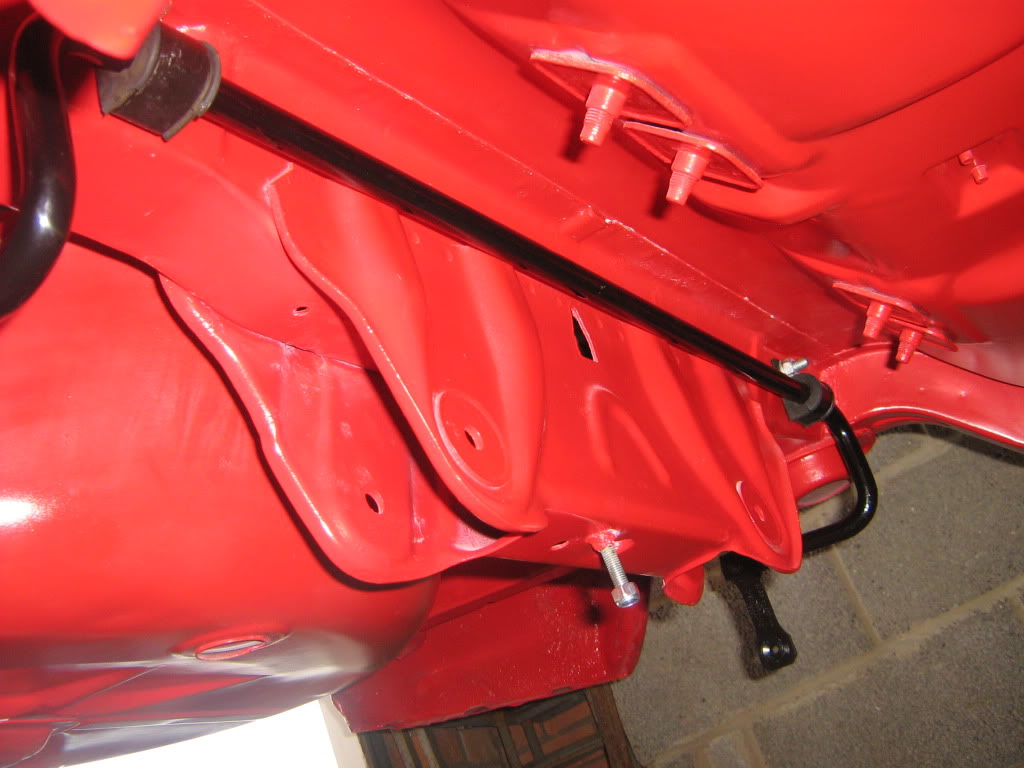
and rear load sensors tidied up
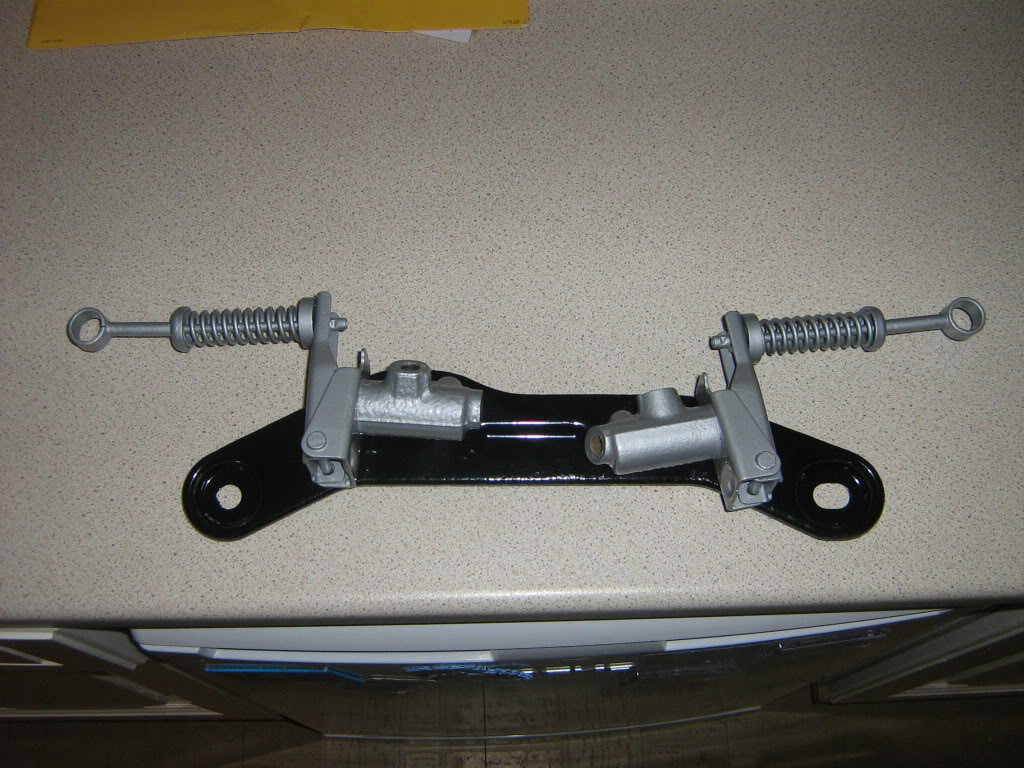
So at the moment that is about it hope you like it so far - more updates as and when I can.
Next move is to finish cleaing the middle of the car as access is a nightmare in my small garage so need to getting rolling so I can manovere it into a better position.
Anyway sorted new job and in April/May this year got it running and then decided time for a tidy up - plan is to tidy up the rear end up to the engine bay and then in Nov/Dec move onto the engine bay and clean that up as well - so anyway here goes
Now from May 2010 - a few pictures of what I had to deal with underneath
So stripped it down and cleaned off all the underseal................
All nuts/bolts/washers etc etc that were removed to be re zinced - in silver
and all the suspension/wishbones/anti roll bar etc for powdercoating (all looking pretty rough!!)
then the shocks (koni adjustables) ready for a lick of paint
then moved on to the rear on each side behind the bumper - couple of bits to tidy up here - allso shows a spot on the chassis rail that needed welding so plat welded in and eventually tidied up ready for paint
Then decided and priming the bottom and going over this with an overpaintable stone chip protection - no intention of using for anything than fair weather driving so for me this is enough
and then began to put some colour onto it
all in all not too bad and I am more than happy with the result
Then parts back from powdercoating - looking good
and from zincing - again have come up really well
also gave the shocks a lick of paint
and sorted the panel either side behind the rear bumper
The started mounting clips etc I got from Ford and all of a sudden it starts to take shape
then the heat shield placed back on
rear anti roll bar with nice new shackles
and rear load sensors tidied up
So at the moment that is about it hope you like it so far - more updates as and when I can.
Next move is to finish cleaing the middle of the car as access is a nightmare in my small garage so need to getting rolling so I can manovere it into a better position.
Last edited by s2turbsZVH; Jun 26, 2013 at 09:13 AM.


Thread Starter
Will it ever end !!!!!!!
Joined: Jun 2007
Posts: 464
Likes: 1
From: Colchester, Essex
As small update
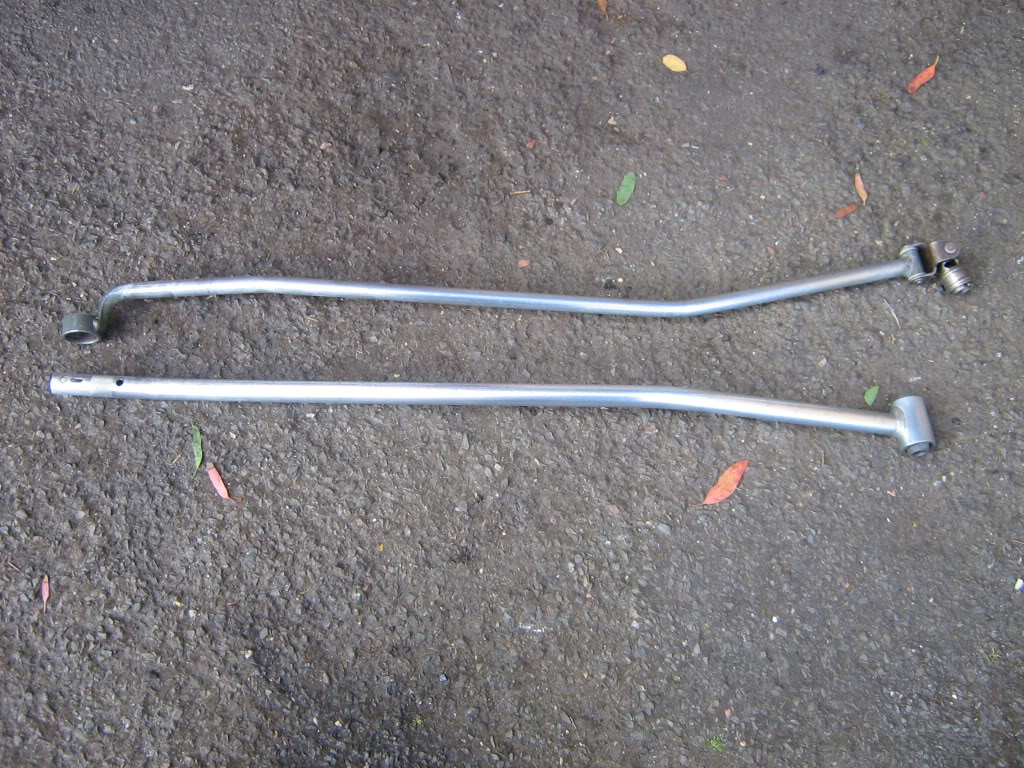
Gear linkage stripped cleaned and ready for zinc to be redone
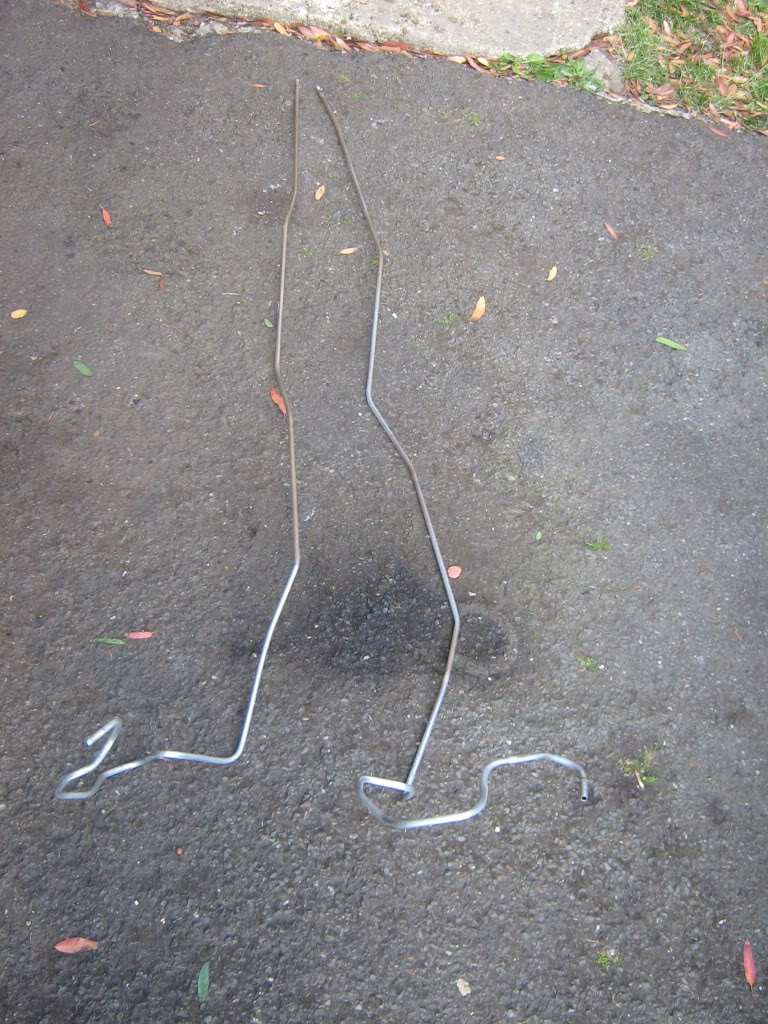
Fuel line stripped cleaned and also ready for zinc plating
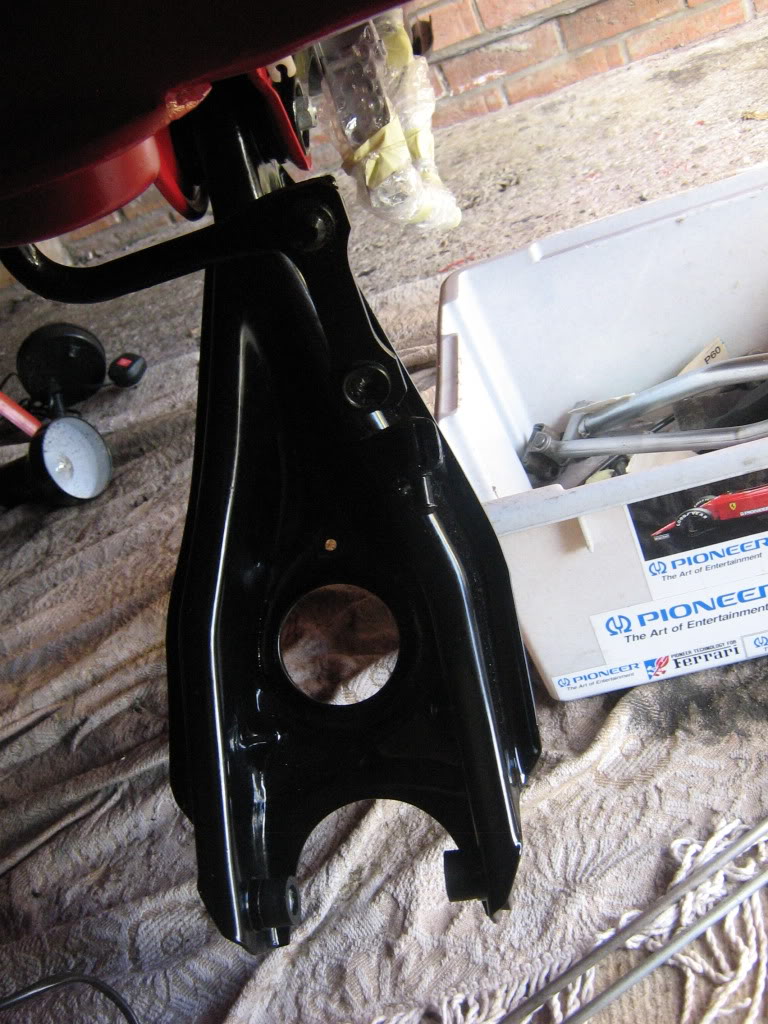
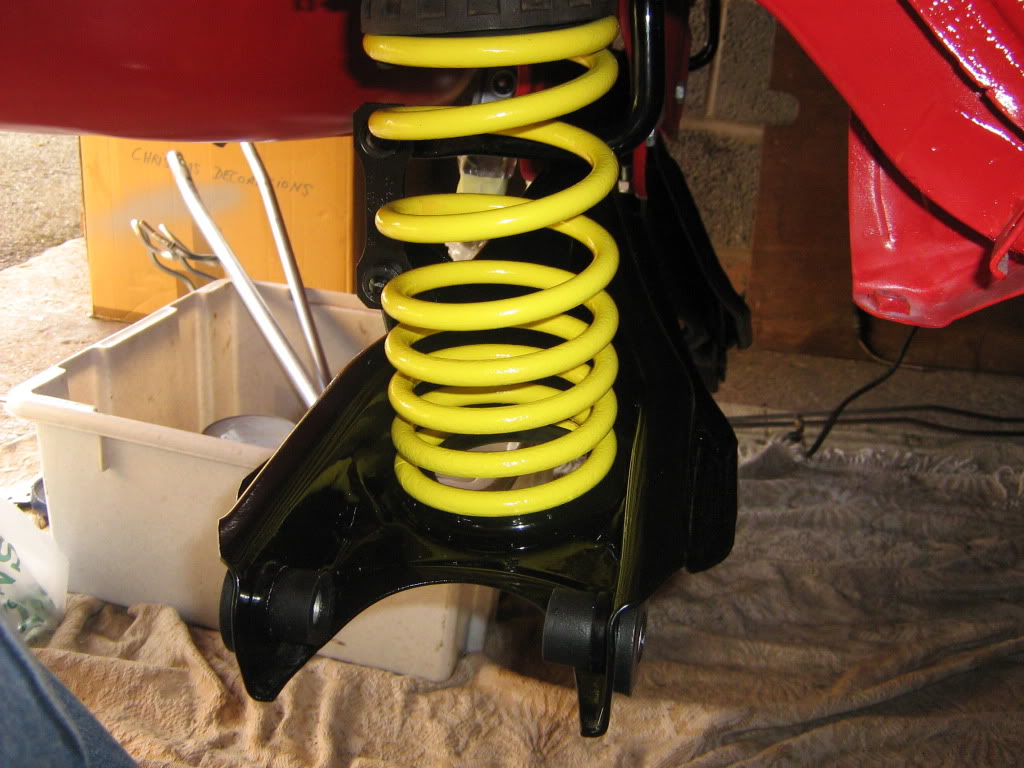
Wishbone lined up ready for fitting with new black polybushes
and wishbone fitted with spring and shackle connected
more to follow soon hopefully - just waiting on the delivery of new fuel line for round the tank, new tie bars and various new clips, bolts, washers etc from Ford.
In the meantime I will press on with repainting and stone chipping the centre of the underside
Gear linkage stripped cleaned and ready for zinc to be redone
Fuel line stripped cleaned and also ready for zinc plating
Wishbone lined up ready for fitting with new black polybushes
and wishbone fitted with spring and shackle connected
more to follow soon hopefully - just waiting on the delivery of new fuel line for round the tank, new tie bars and various new clips, bolts, washers etc from Ford.
In the meantime I will press on with repainting and stone chipping the centre of the underside
Last edited by s2turbsZVH; Jul 3, 2011 at 02:05 PM.


Trending Topics



Thread Starter
Will it ever end !!!!!!!
Joined: Jun 2007
Posts: 464
Likes: 1
From: Colchester, Essex
Thanks for the comments everyone - as for the wheels I still have them (good old classic Wolfrace Voodoo's) but as for the rest of the car the smoked rear lights have gone, the twin headlight conversion has gone and also the blacked out rear windows have gone so personally i think it looks a lot better now - pics will follow when finished.
Thread Starter
Will it ever end !!!!!!!
Joined: Jun 2007
Posts: 464
Likes: 1
From: Colchester, Essex
Got bored last night so decided to start attcking the underseal and seam sealer and all the crap under the car - this is after about 3 hours of effort
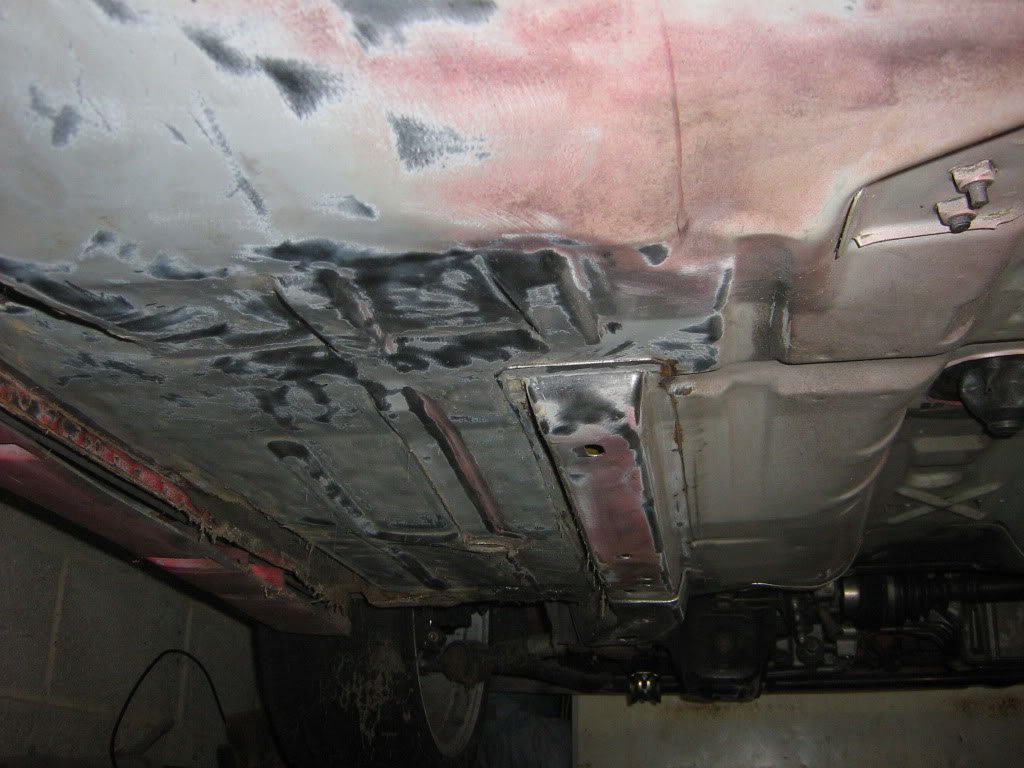
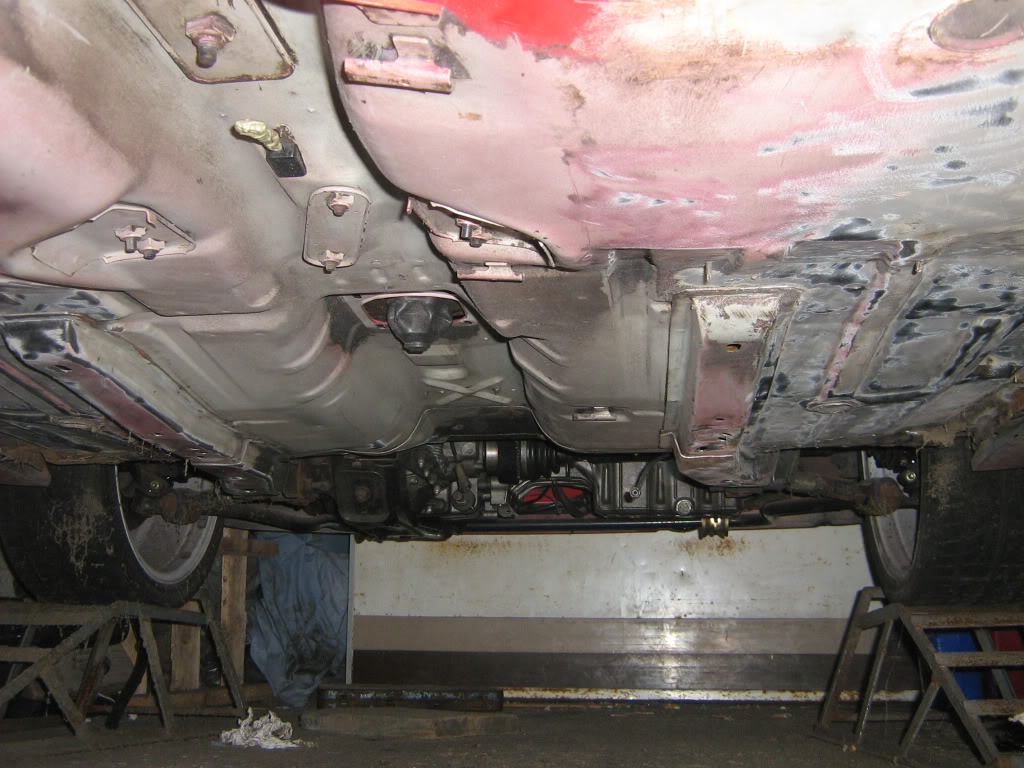
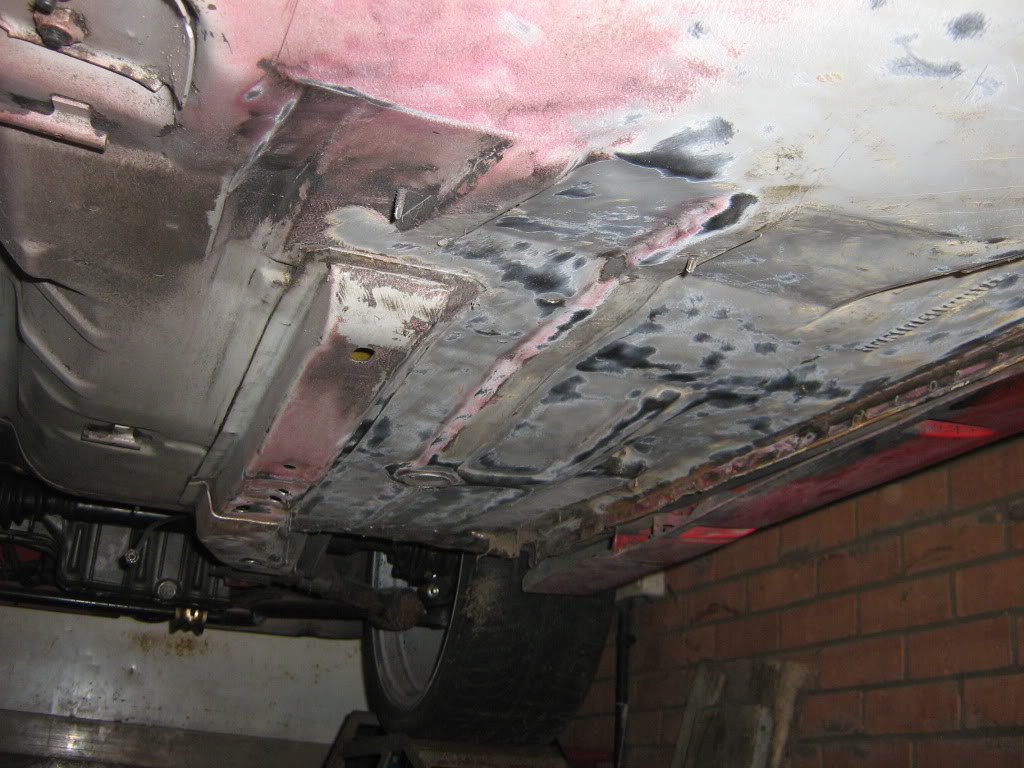
Main thing is that its all pretty solid under there - one previous weld patch found about 3" by 1" to tidy up but other than that all good really.
Sills are sound so fully steam ahead from here.
Main thing is that its all pretty solid under there - one previous weld patch found about 3" by 1" to tidy up but other than that all good really.
Sills are sound so fully steam ahead from here.
Thread Starter
Will it ever end !!!!!!!
Joined: Jun 2007
Posts: 464
Likes: 1
From: Colchester, Essex
Well been busy again this weekend and tonight and placed a few more bit back on the car
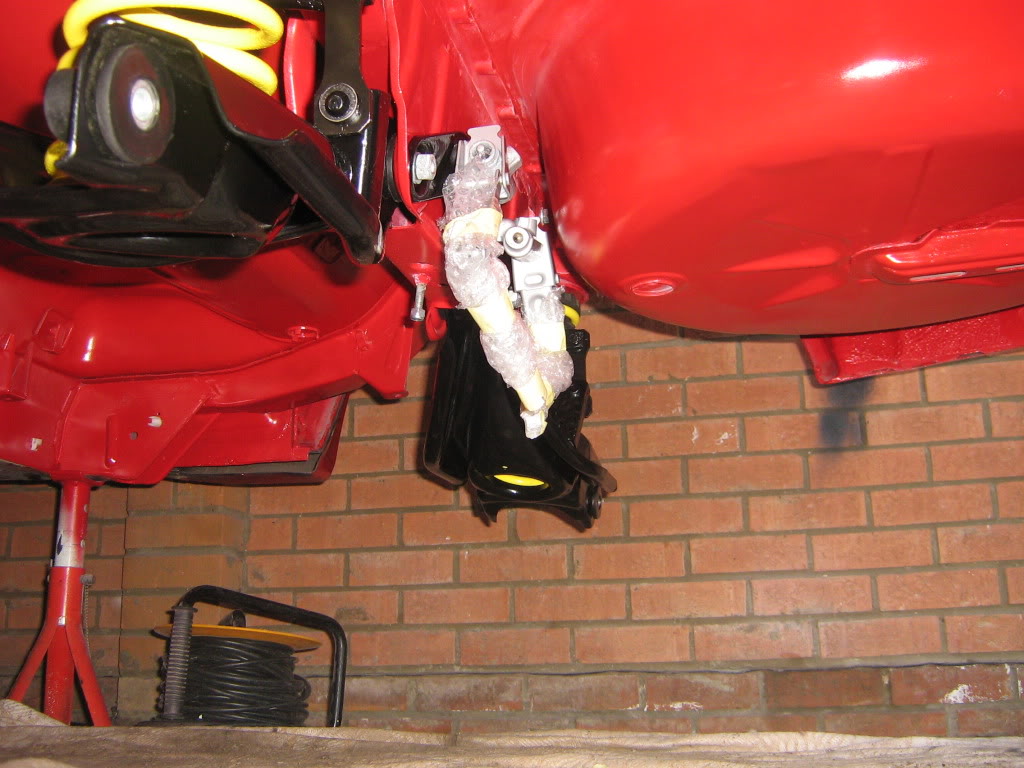
First off finished mounting the n/side wishbone with the shackles all attached
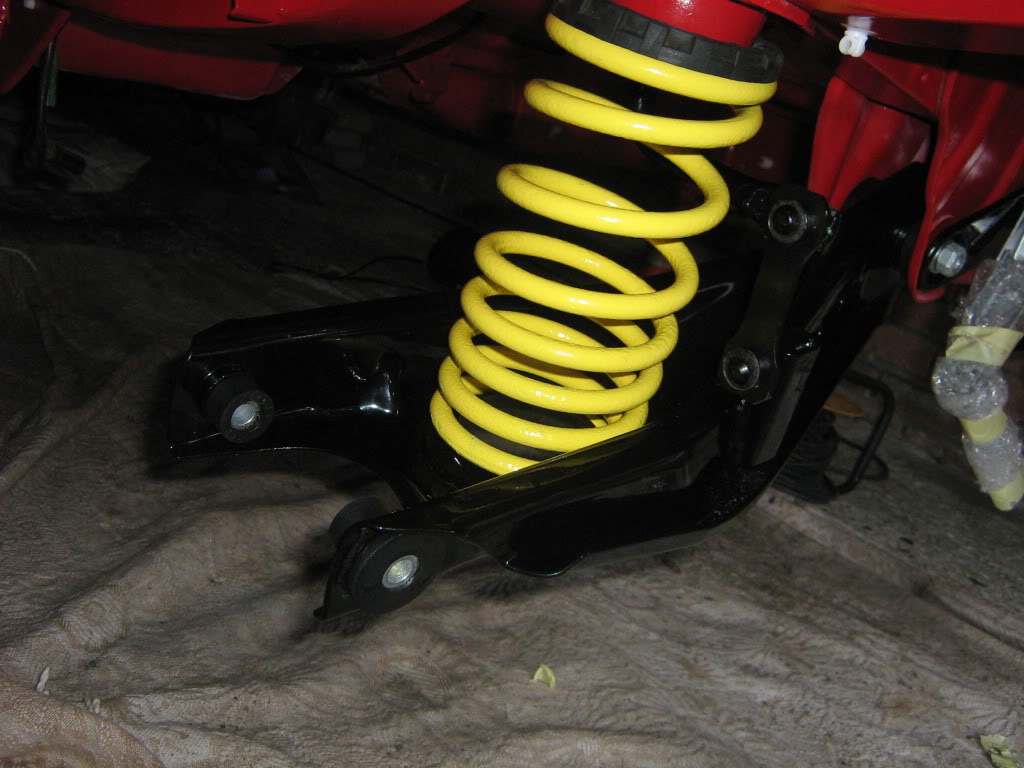
so both in place now
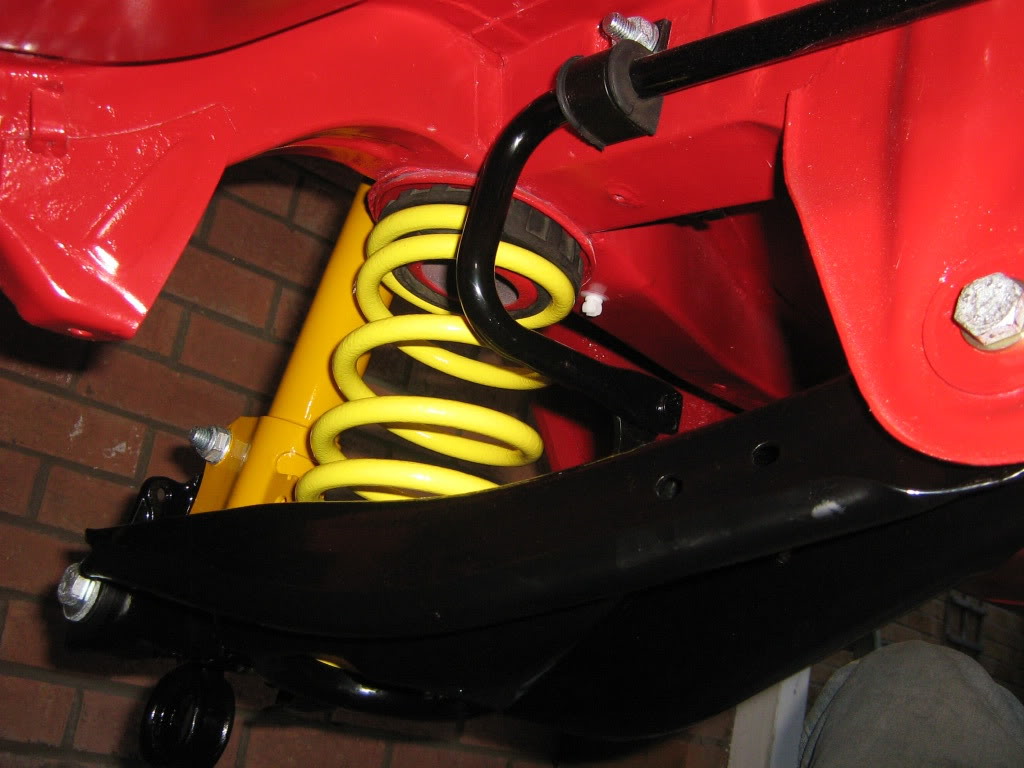
Then cleaned the rubbers for the shocks
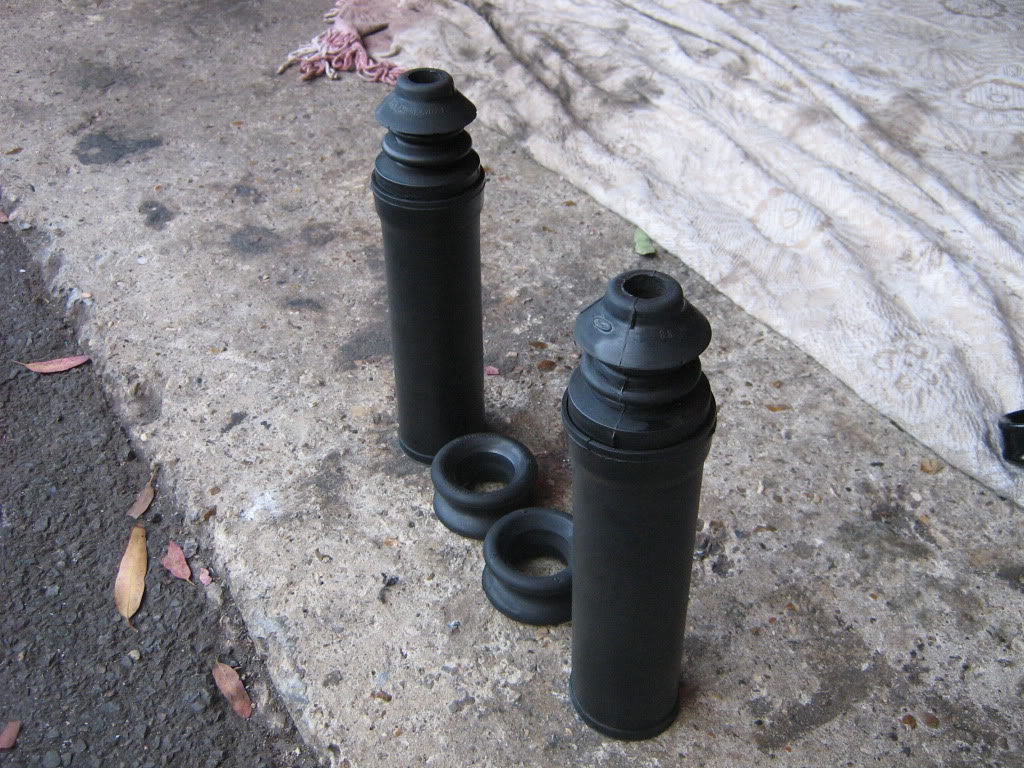
Then placed them on the shocks themselves and mounted the shocks into position
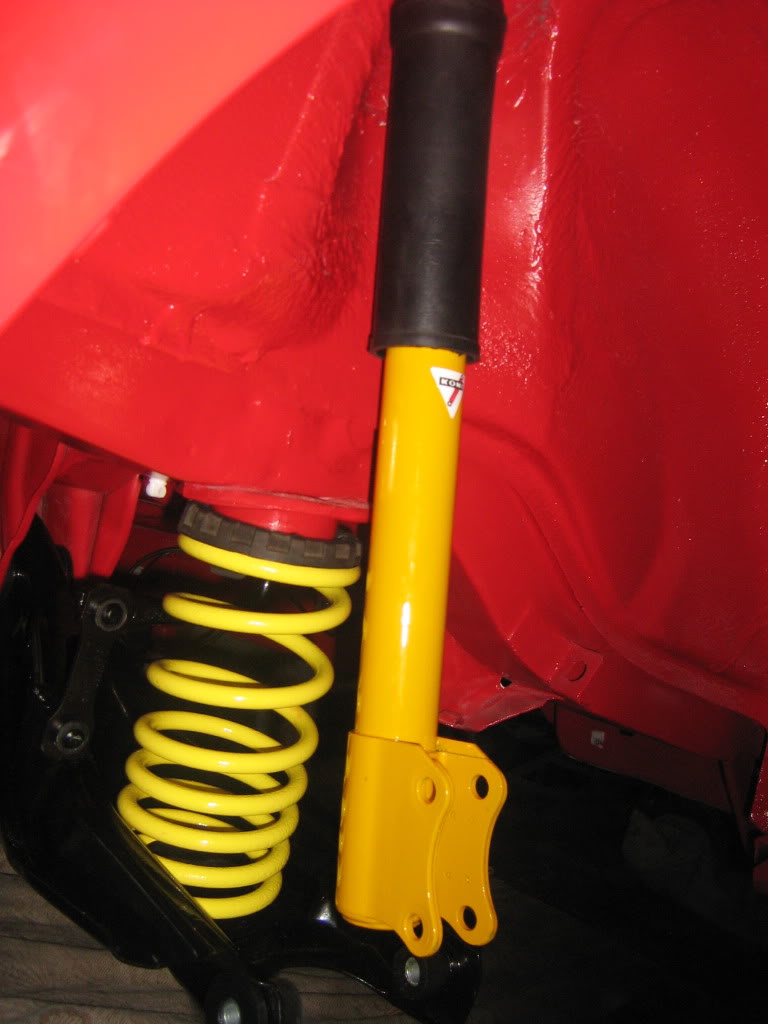
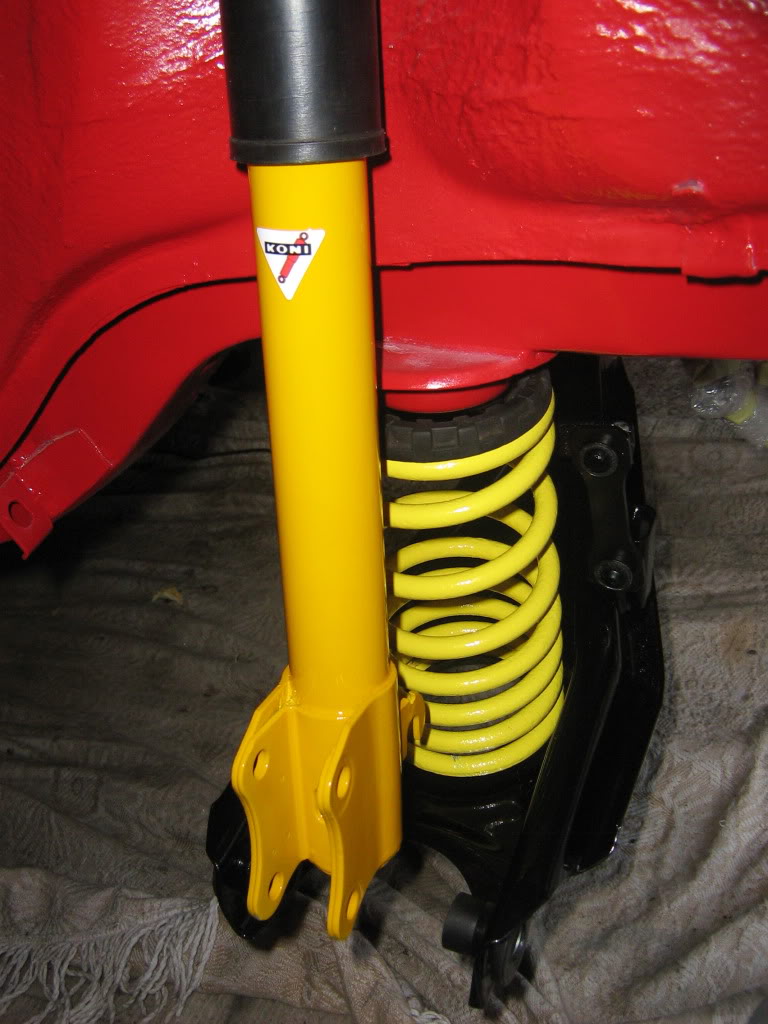
Then the stub axle into place(re zinced nuts and bolts look really good given they were originals taken from the car)
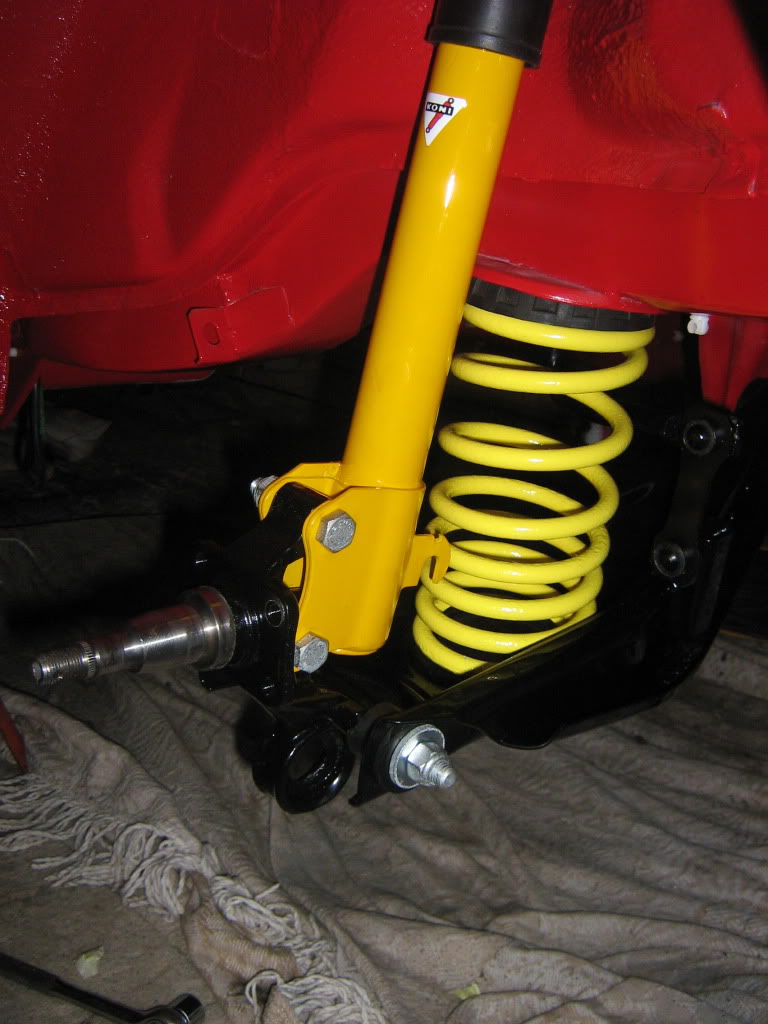
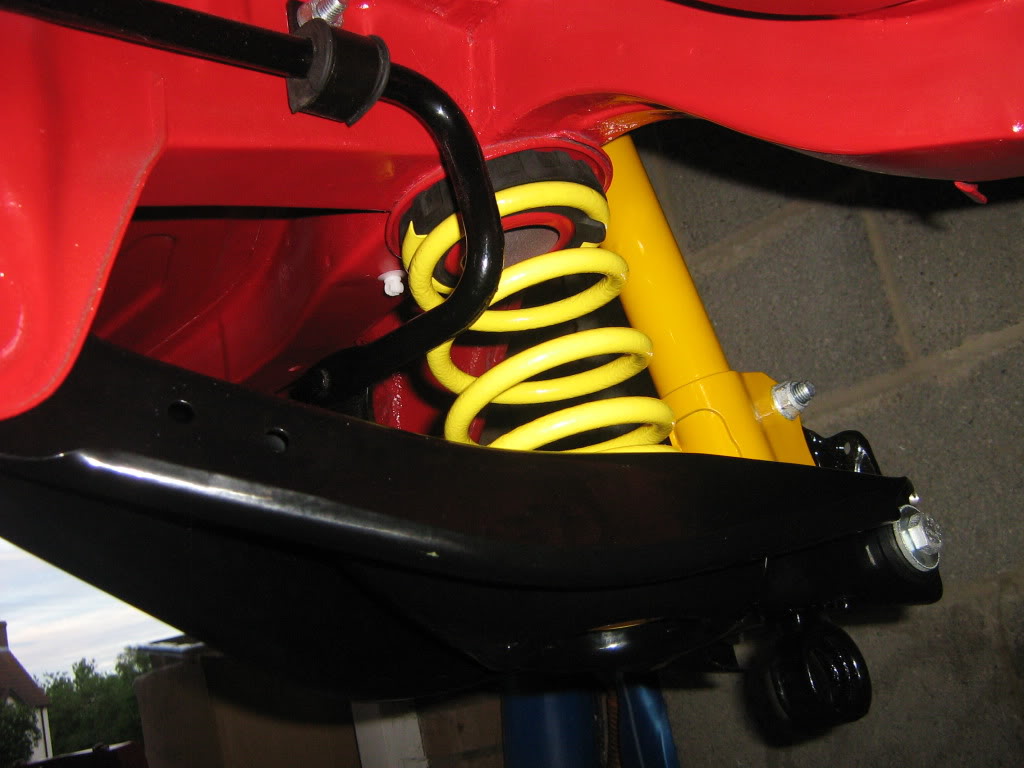
Then the brake mounting plates
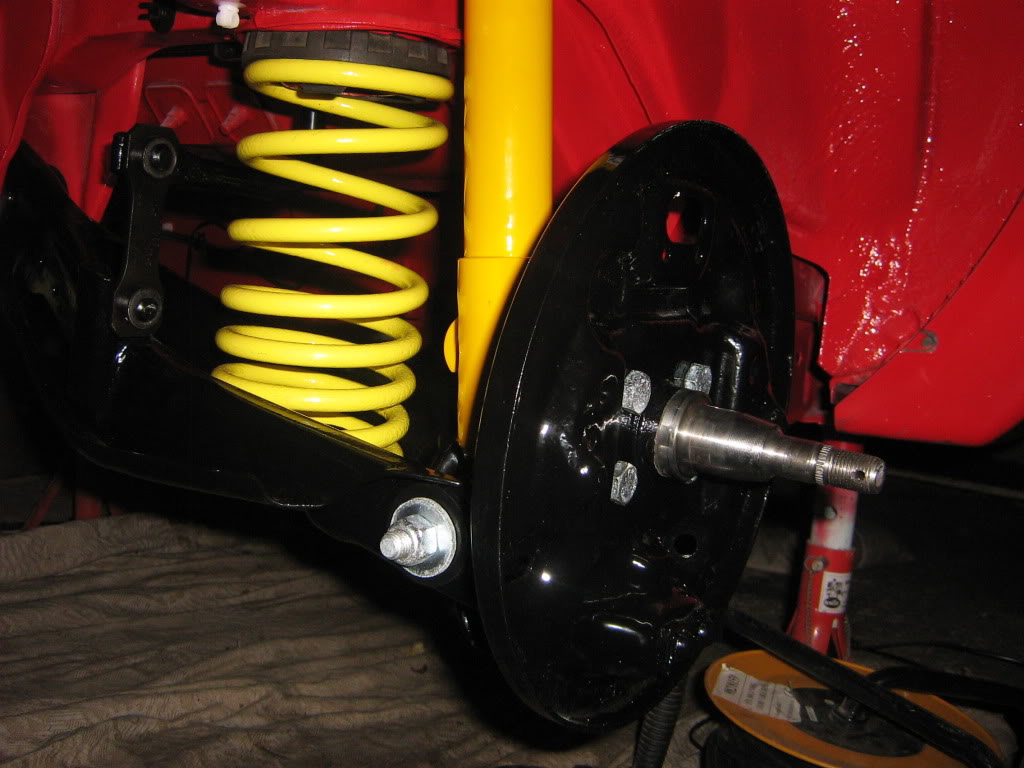
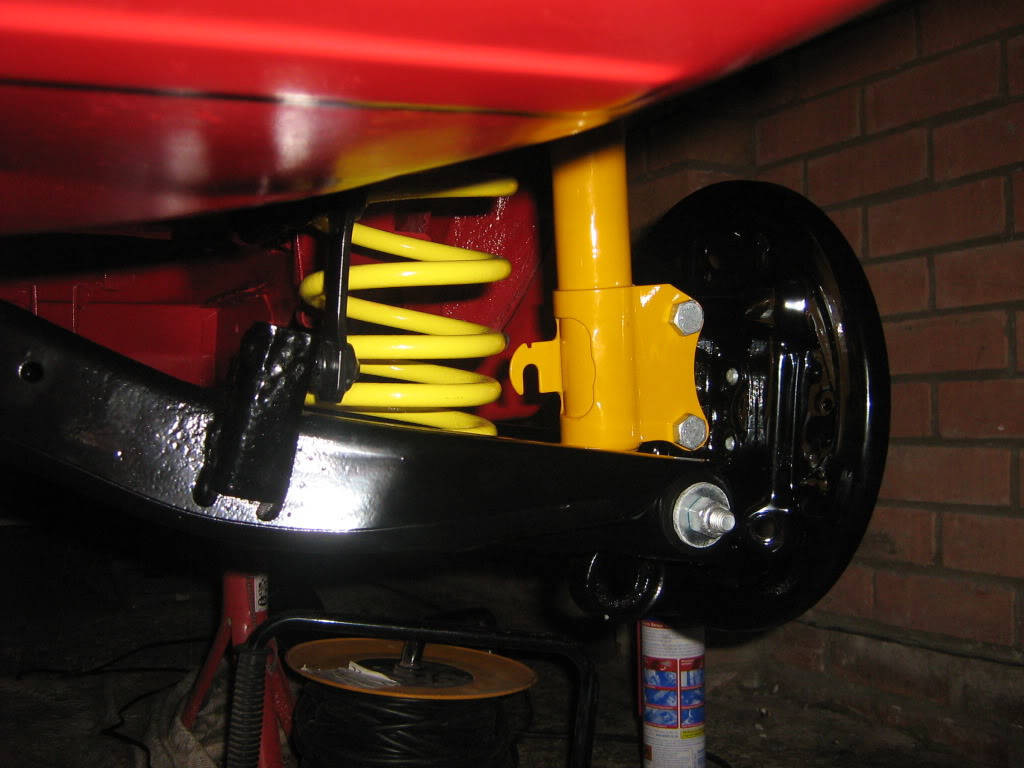
and all in place - i particularly like the black poly bushes i managed to get made up - think its sets it off better than the yellow and orange ones that are fitted to most. Was going to go yellow at first but glad I chose the black ones in the end.
more updates to follow soon..............................................
First off finished mounting the n/side wishbone with the shackles all attached
so both in place now
Then cleaned the rubbers for the shocks
Then placed them on the shocks themselves and mounted the shocks into position
Then the stub axle into place(re zinced nuts and bolts look really good given they were originals taken from the car)
Then the brake mounting plates
and all in place - i particularly like the black poly bushes i managed to get made up - think its sets it off better than the yellow and orange ones that are fitted to most. Was going to go yellow at first but glad I chose the black ones in the end.
more updates to follow soon..............................................
 bufty
bufty

Thread Starter
Will it ever end !!!!!!!
Joined: Jun 2007
Posts: 464
Likes: 1
From: Colchester, Essex
Mr Ford has delivered some presents for me today - looks like the end is near given I now have all the random nuts and bolts and clips etc that I need.
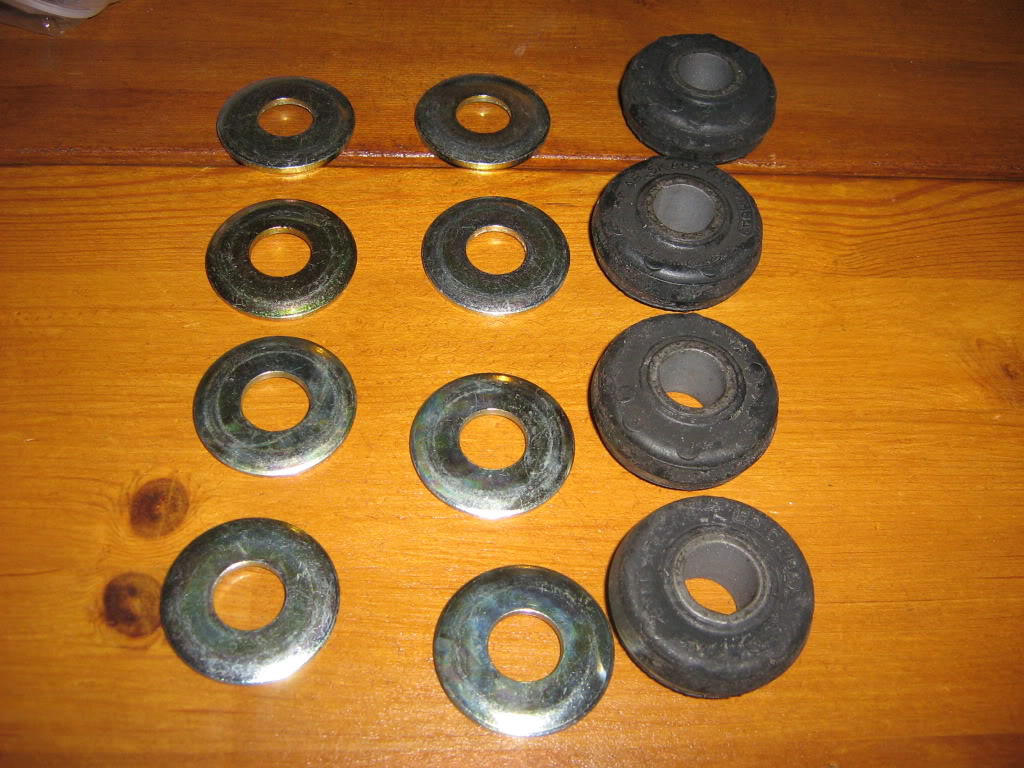
Rear tie bar bushes - genuine ford with tie bar washers for rear tie bar and front ARB
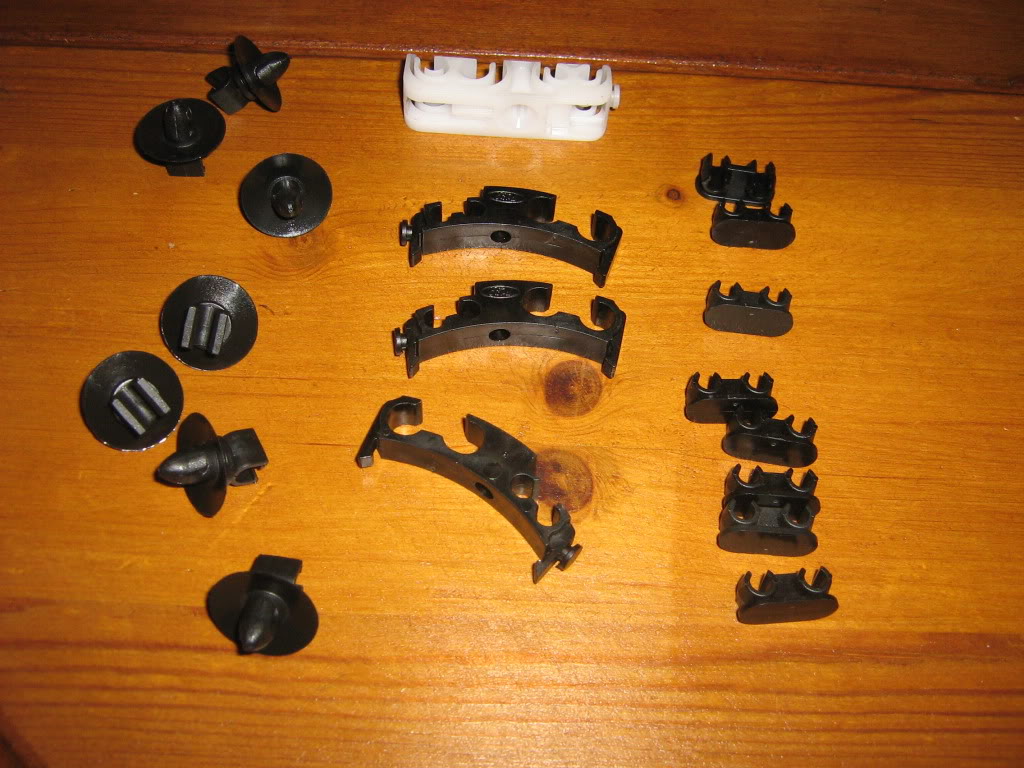
Rear brake clips
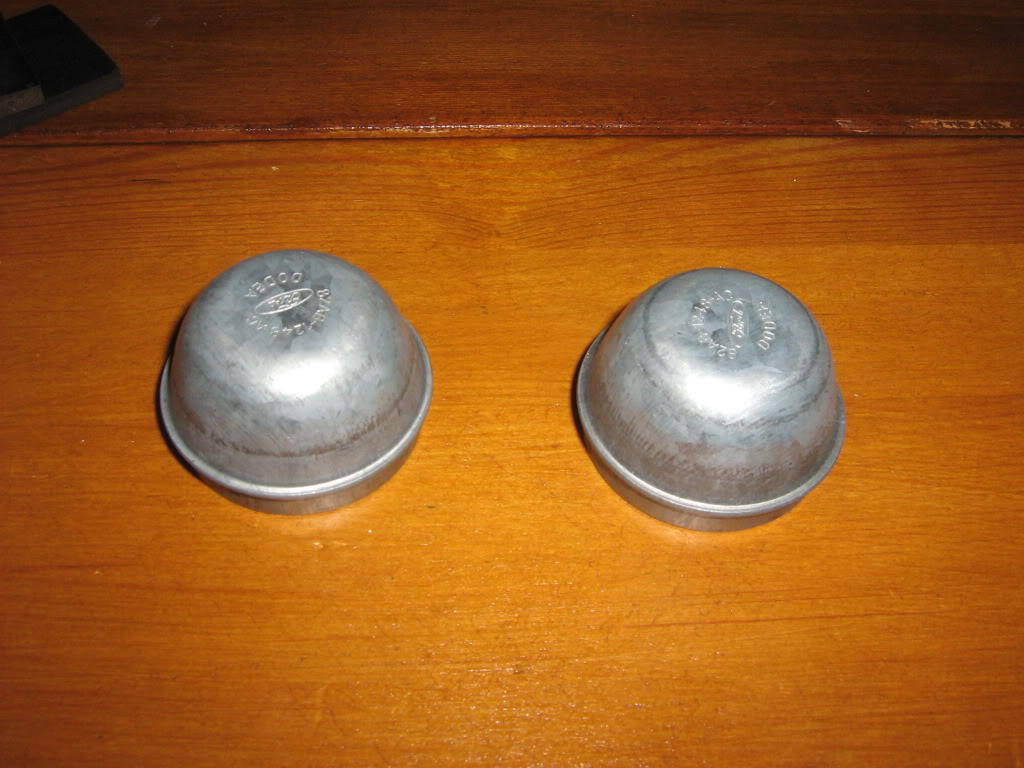
Rear brake dust caps - hub
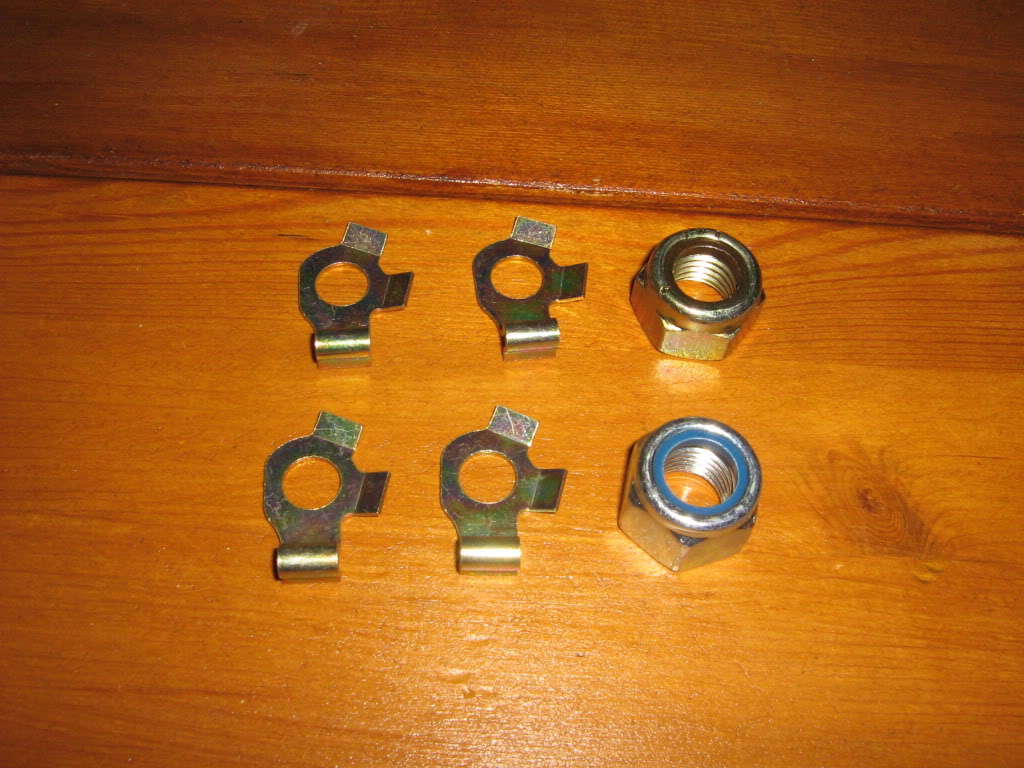
Front anti roll bar retaining clips and nuts
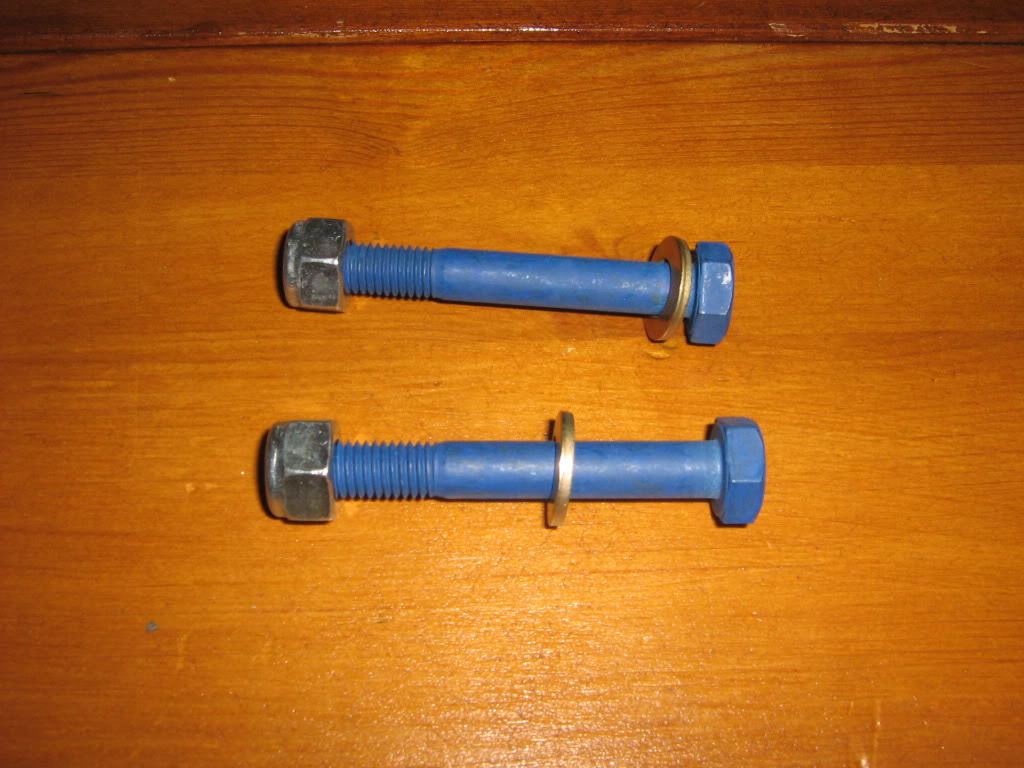
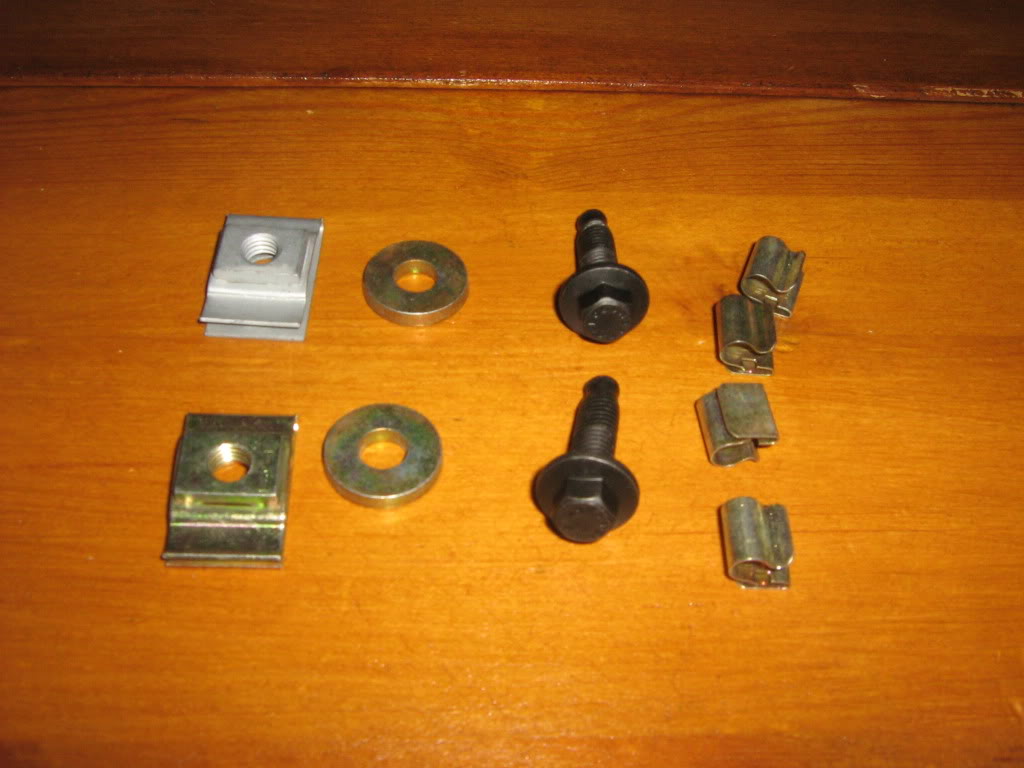
Front TCA to chassis nuts, bolts and washers
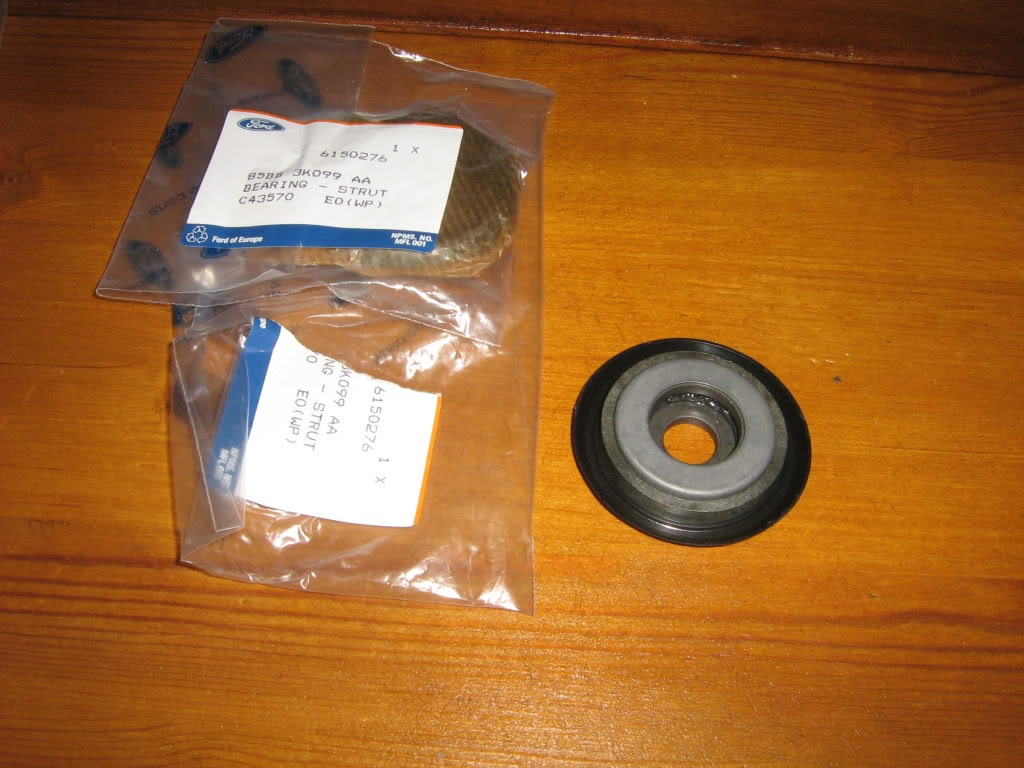
Front shock strut bearings
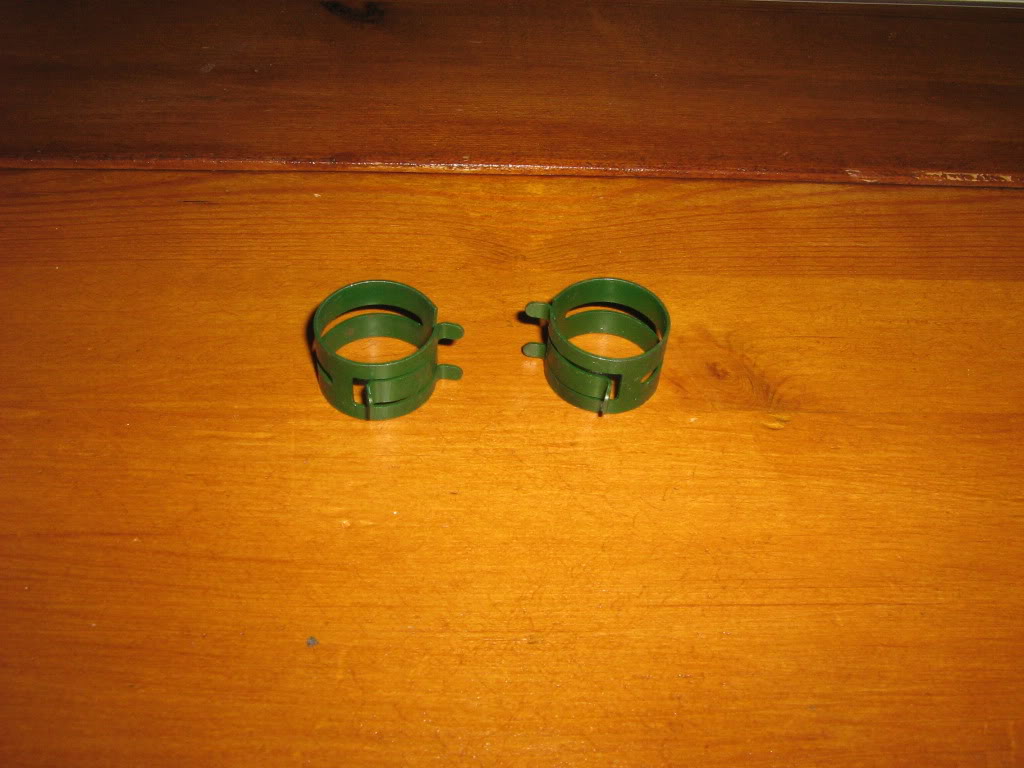
Pipe retaining clips
Fuel tank bolts, washers and retaining brackets along with fuel pipe retaining clips
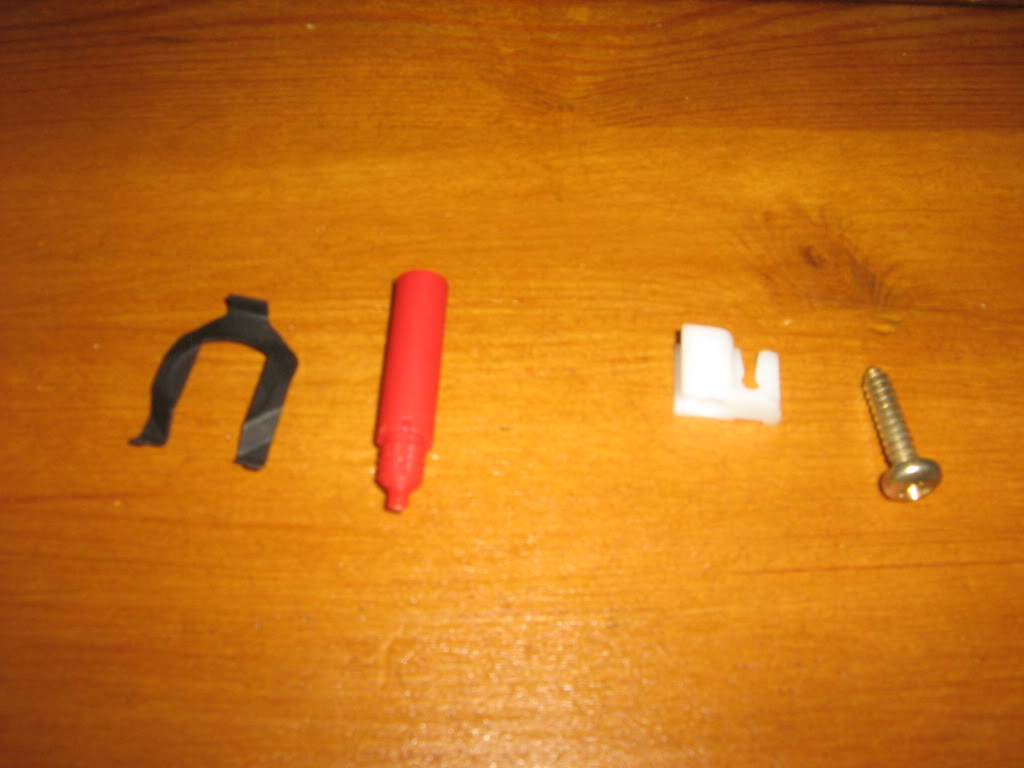
and finally - handbrake retaining nylon clip, handbrake cable retaining clip, brake pipe clip and fuel pipe retaining screw
Yes - before you say it, yes it is becoming an obsession hunting out new genuine ford parts - I had no intention in going to this extreme but hey if you are going to do it do it properly lol
Rear tie bar bushes - genuine ford with tie bar washers for rear tie bar and front ARB
Rear brake clips
Rear brake dust caps - hub
Front anti roll bar retaining clips and nuts
Front TCA to chassis nuts, bolts and washers
Front shock strut bearings
Pipe retaining clips
Fuel tank bolts, washers and retaining brackets along with fuel pipe retaining clips
and finally - handbrake retaining nylon clip, handbrake cable retaining clip, brake pipe clip and fuel pipe retaining screw
Yes - before you say it, yes it is becoming an obsession hunting out new genuine ford parts - I had no intention in going to this extreme but hey if you are going to do it do it properly lol
Last edited by s2turbsZVH; Jul 20, 2010 at 09:44 PM.
Thread Starter
Will it ever end !!!!!!!
Joined: Jun 2007
Posts: 464
Likes: 1
From: Colchester, Essex
Another small update - received some more new items and refurb'd stuff today - again really happy with the results.
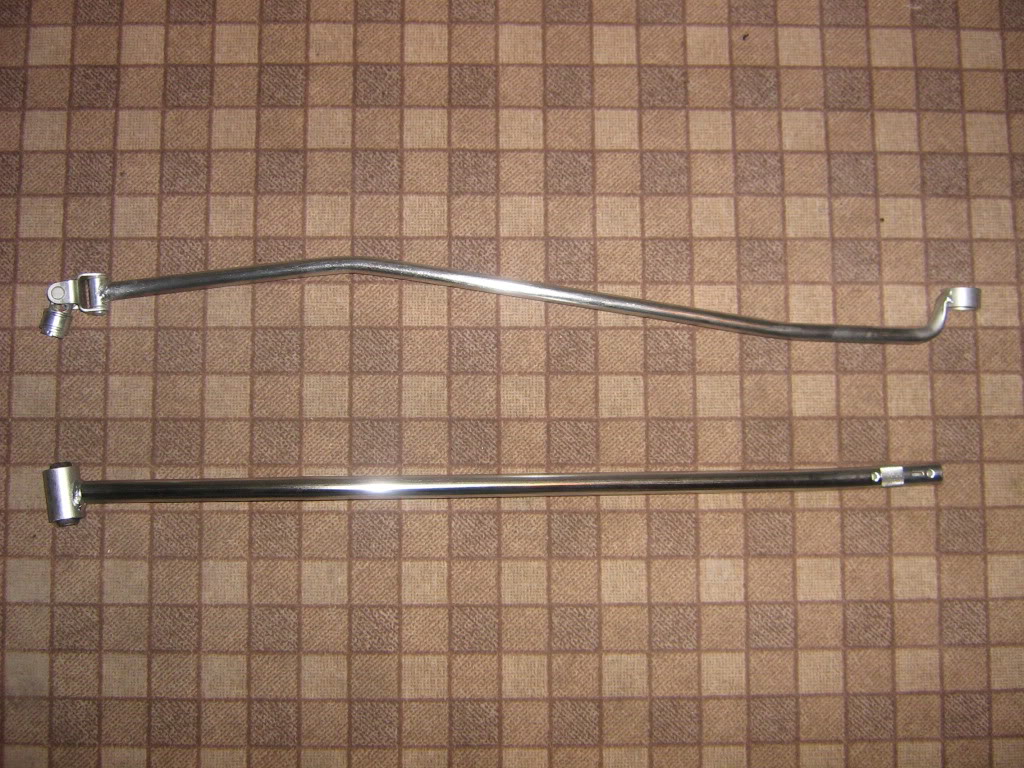
The gear selector and stabalizer bar now in new silver zinc
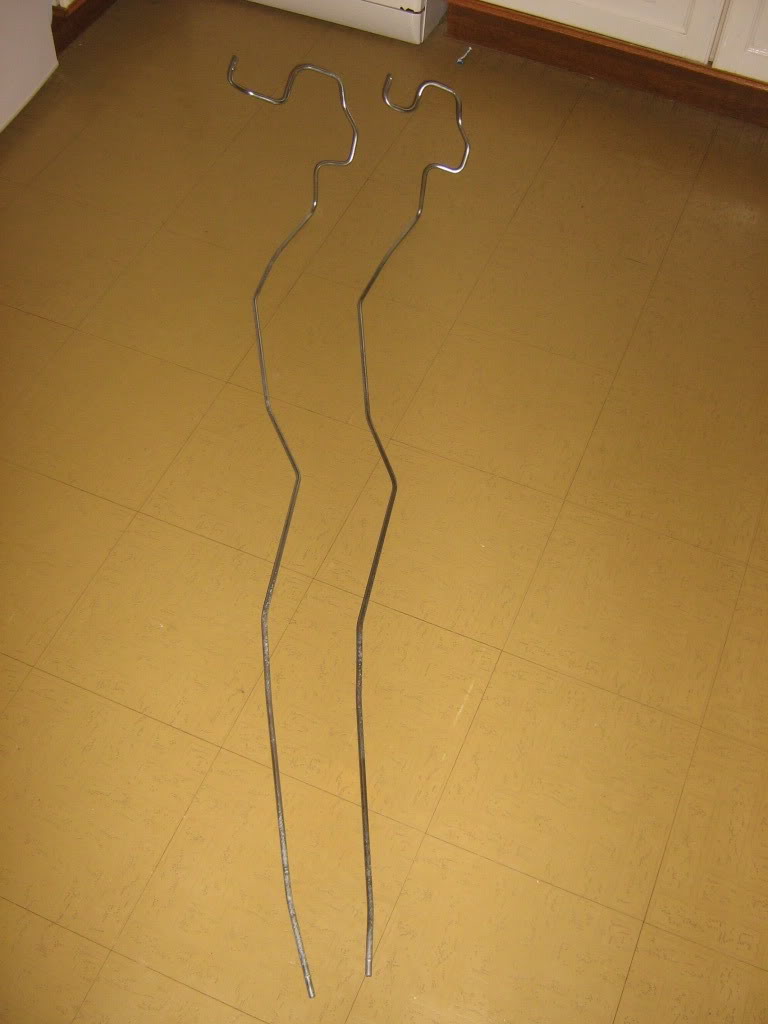
also the metal fuel lines again in new silver zinc
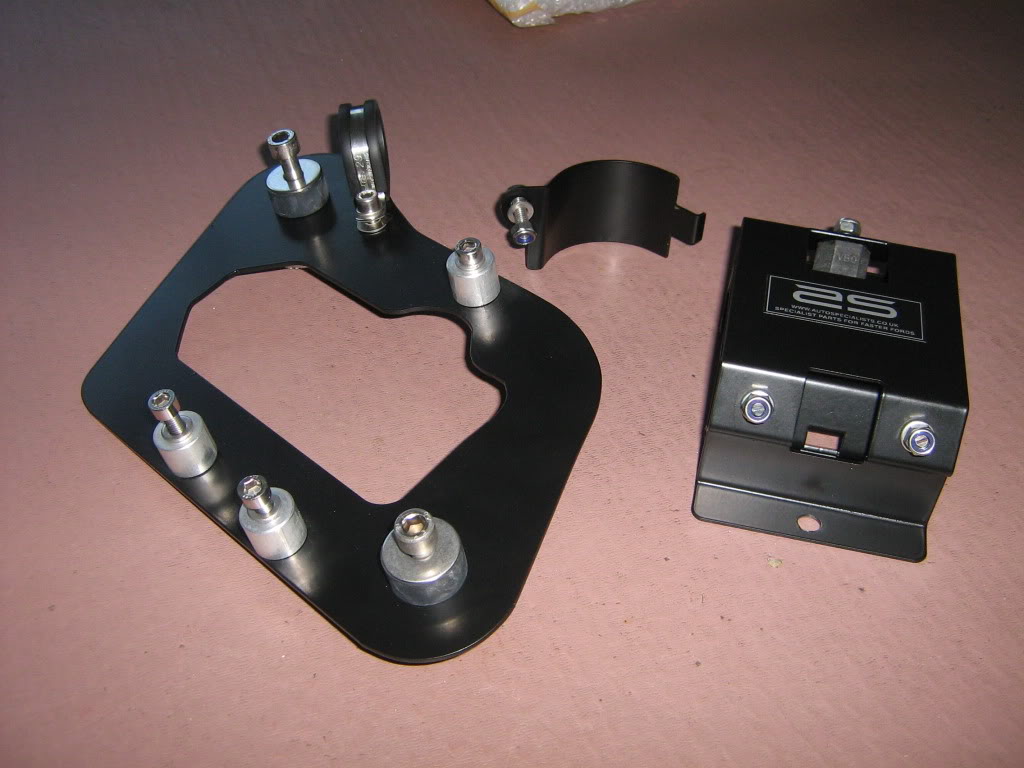
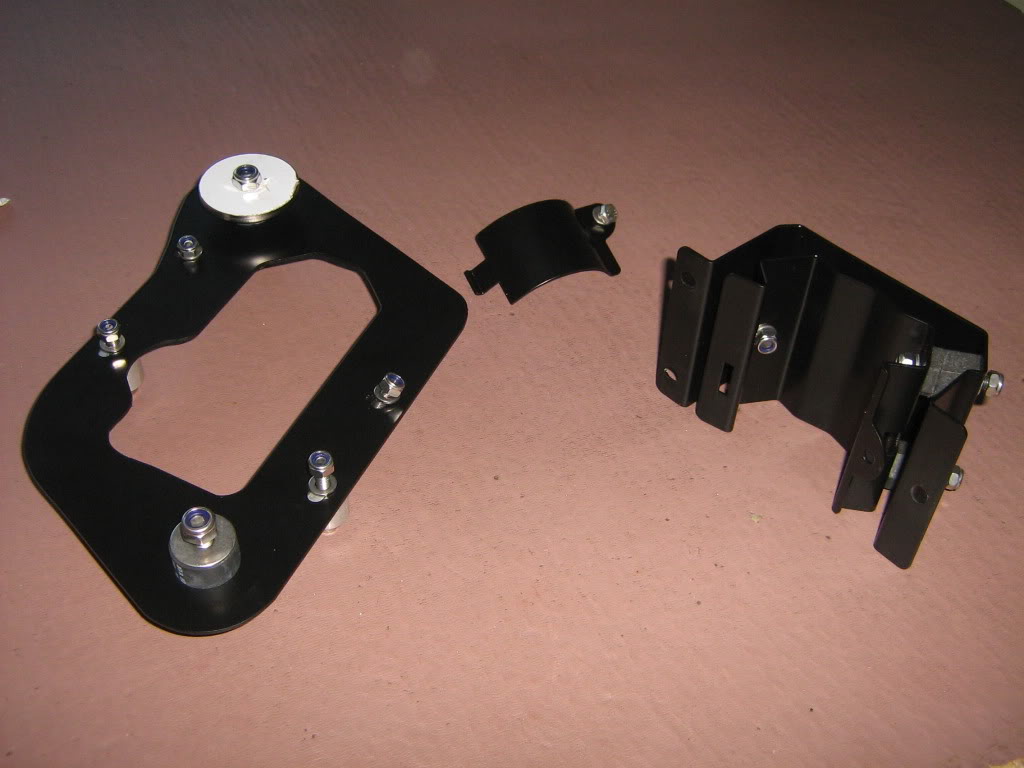
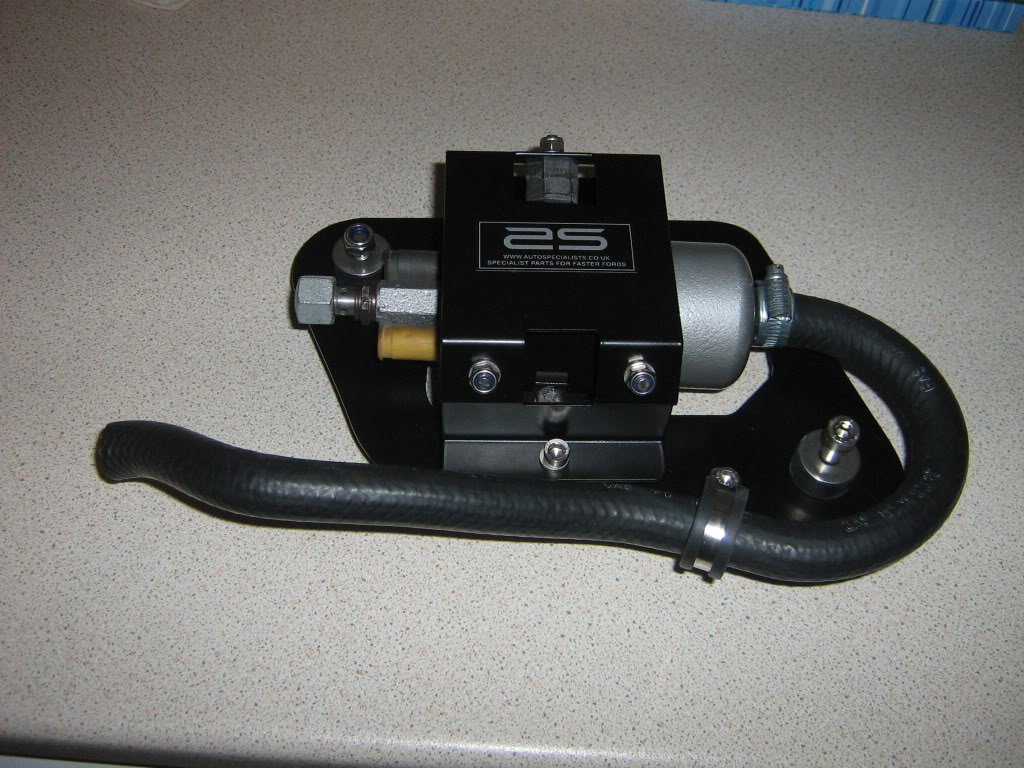
and my favourite item received to replace the usual rotten fuel pump carrie - well worth every penny and great quality item
Helping a friend repaint his 1971 Karmann Ghia at the moment (bit random I know compared to the S2) so will be fitting mine in around this but off work now for the best part of 6 weeks so plenty of time to get it all finished
The gear selector and stabalizer bar now in new silver zinc
also the metal fuel lines again in new silver zinc
and my favourite item received to replace the usual rotten fuel pump carrie - well worth every penny and great quality item
Helping a friend repaint his 1971 Karmann Ghia at the moment (bit random I know compared to the S2) so will be fitting mine in around this but off work now for the best part of 6 weeks so plenty of time to get it all finished
Last edited by s2turbsZVH; Jul 22, 2010 at 09:08 PM.

 keep up with the good work


Thread Starter
Will it ever end !!!!!!!
Joined: Jun 2007
Posts: 464
Likes: 1
From: Colchester, Essex
Sorry mate the other pair have already been sold - cost me £80 cash for the powdercoating and I managed to sell the other pair for £75 so £5 for my powdercoating - result !!!
Thread Starter
Will it ever end !!!!!!!
Joined: Jun 2007
Posts: 464
Likes: 1
From: Colchester, Essex
Its £115 + post from autospecialists but worth every penny and its impossible to get an original ford one from anywhere new - apart from the odd ones that appear overpriced on ebay - must say though its a very good item for the money - definately recommend one.
Thread Starter
Will it ever end !!!!!!!
Joined: Jun 2007
Posts: 464
Likes: 1
From: Colchester, Essex
Thread Starter
Will it ever end !!!!!!!
Joined: Jun 2007
Posts: 464
Likes: 1
From: Colchester, Essex
Just a couple of extra pics that i forgot to upload - basically the load sensors now fitted
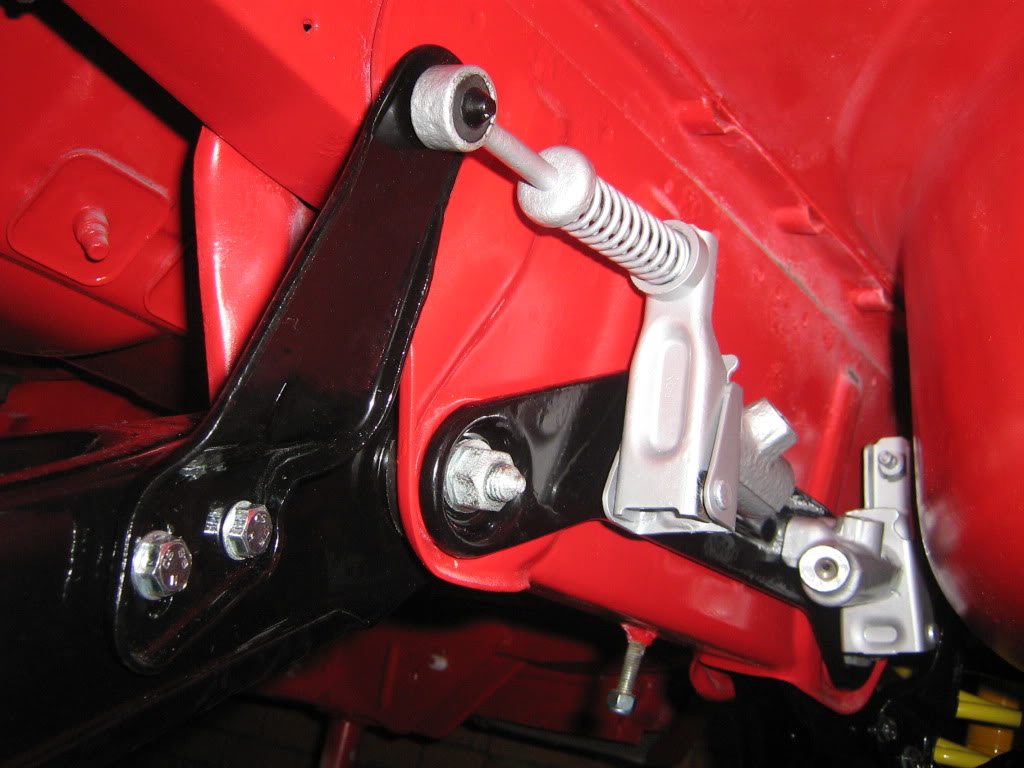
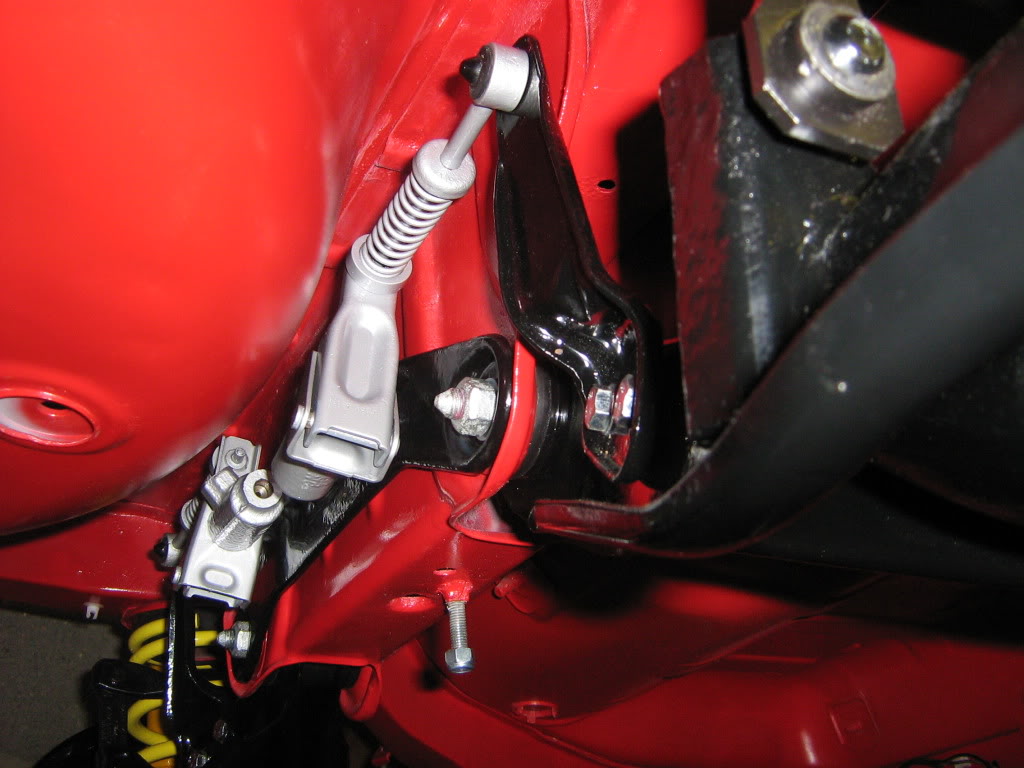
Should be getting a move on this weekend and early next week - aim to have completed and back on the road by 6th Aug
Should be getting a move on this weekend and early next week - aim to have completed and back on the road by 6th Aug


Thread Starter
Will it ever end !!!!!!!
Joined: Jun 2007
Posts: 464
Likes: 1
From: Colchester, Essex
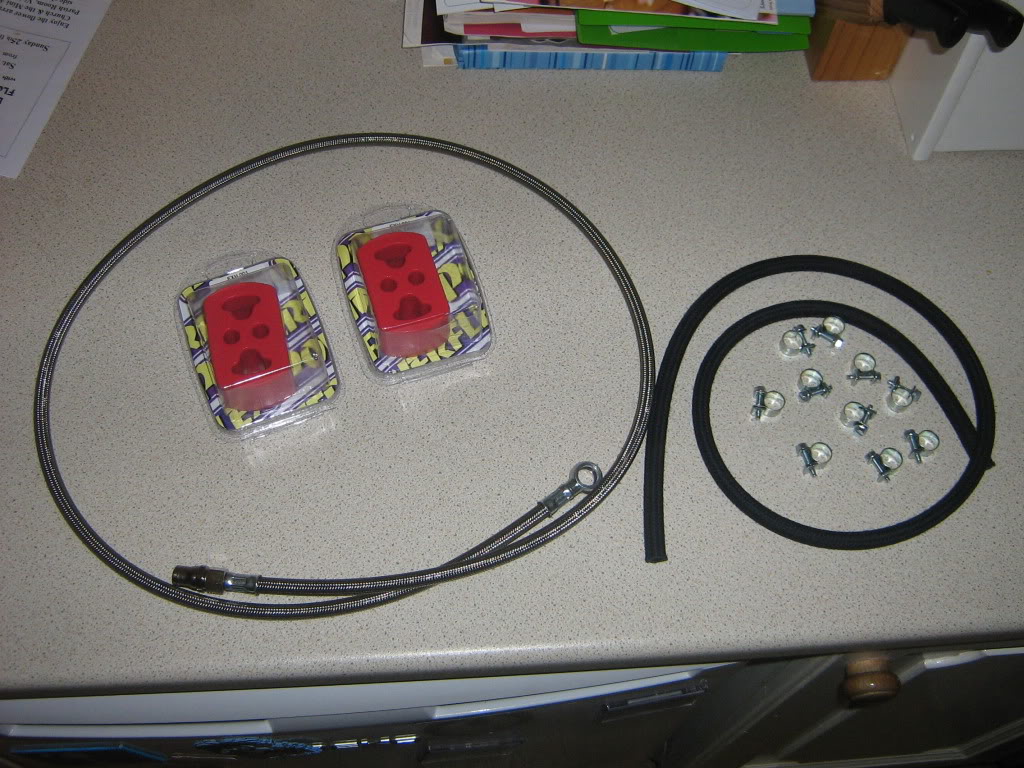
New items
More new items arrived over the weekend including
1) New fuel pipe for around the fuel tank
2) New fuel pipe and jubilee clips to attach pipe to various pipes on the car
3) Two new powerflex exhuast mounts
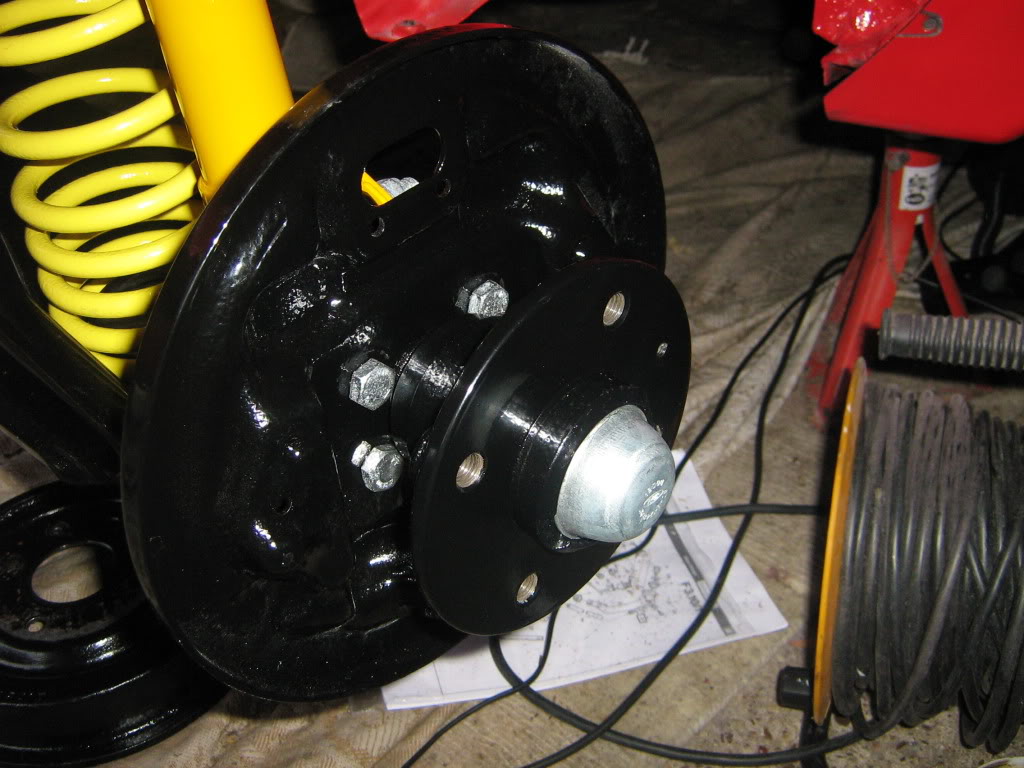
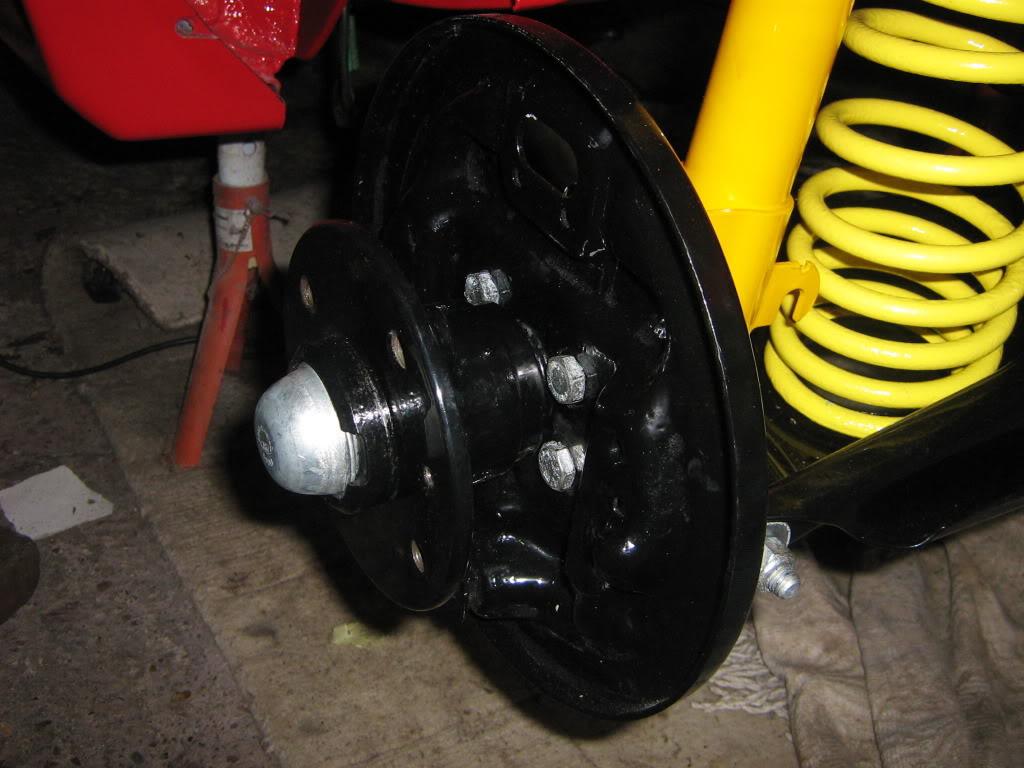
Also had a chance to fit the hubs onto the car as well with new bufty dustcaps
Hpoing to get the middle in paint by the end of wednesday and reassembling car in full from there.
1) New fuel pipe for around the fuel tank
2) New fuel pipe and jubilee clips to attach pipe to various pipes on the car
3) Two new powerflex exhuast mounts
Also had a chance to fit the hubs onto the car as well with new bufty dustcaps
Hpoing to get the middle in paint by the end of wednesday and reassembling car in full from there.



Thread Starter
Will it ever end !!!!!!!
Joined: Jun 2007
Posts: 464
Likes: 1
From: Colchester, Essex
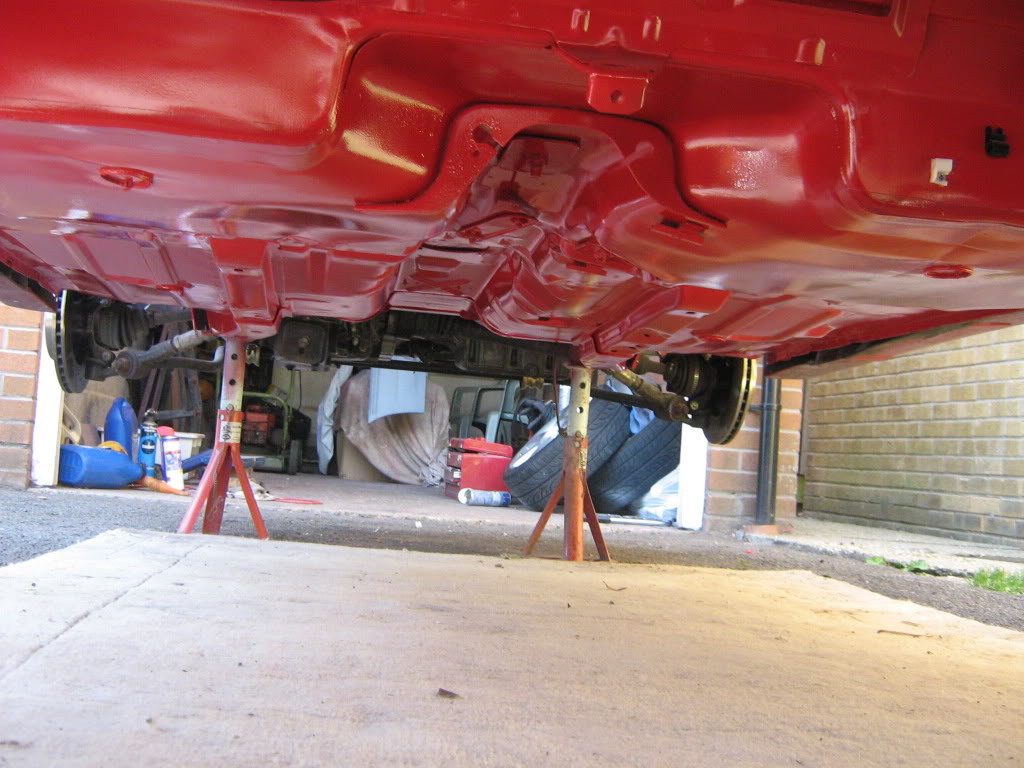
Quick update - been busy again and now got the underside painted and again has come up really well.
One coat of primer, 2 coats of stonechip to underseal and then two coats of colour.
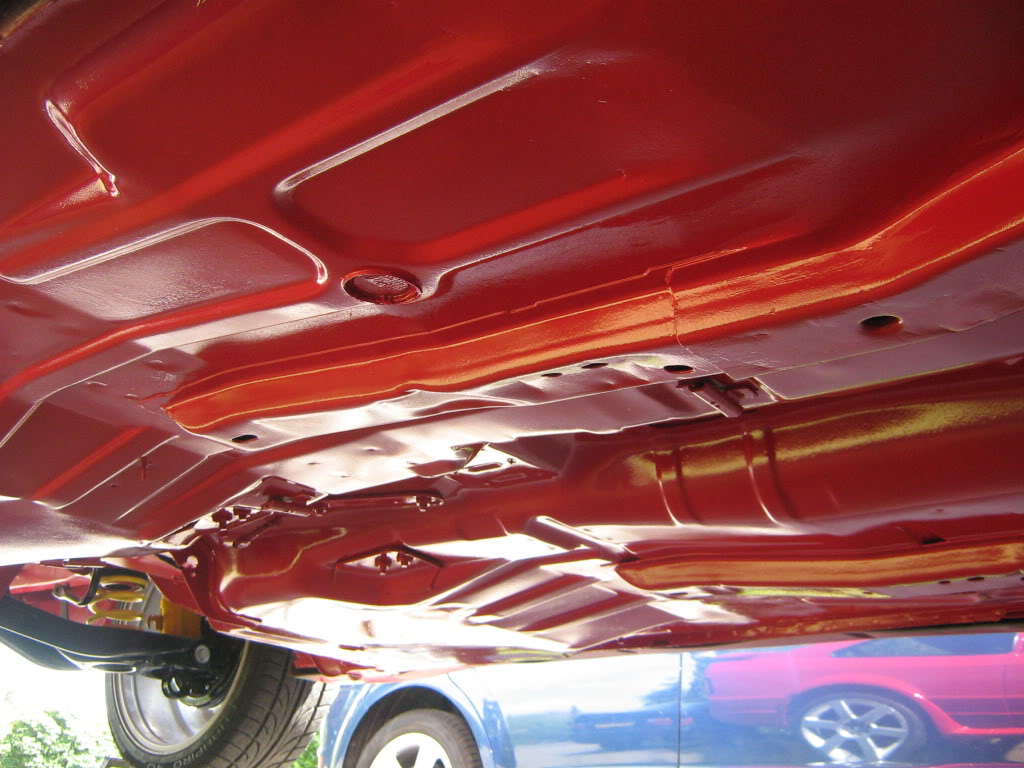
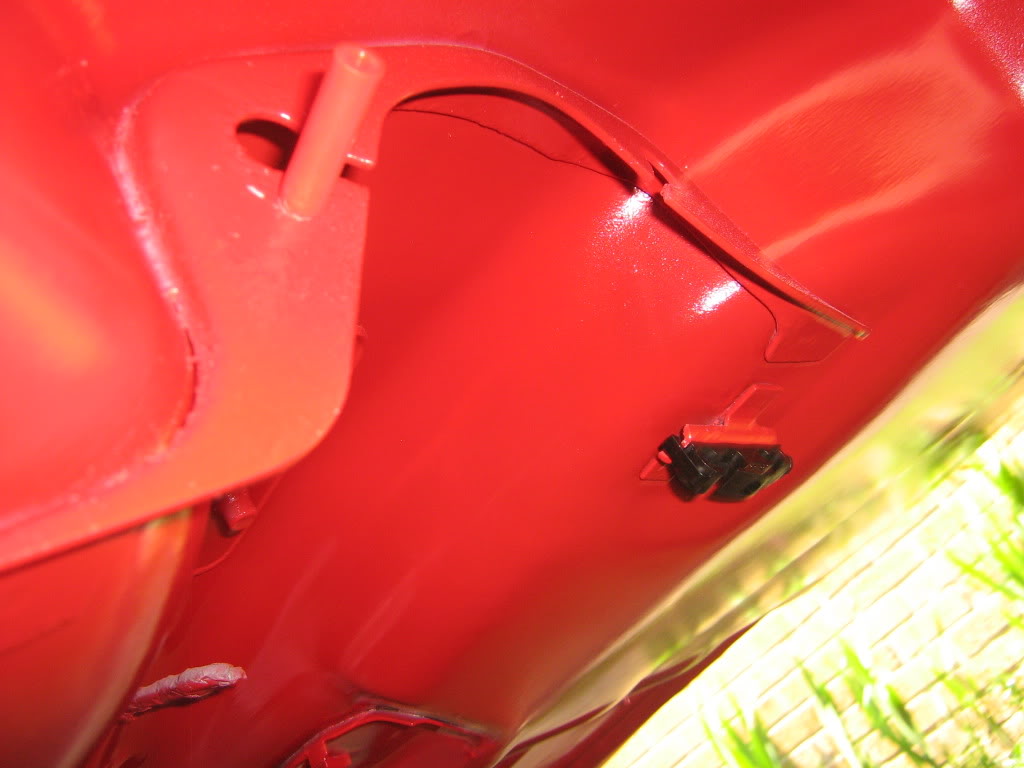
Also placed a few of the new brake/fuel line clips on to give the idea of what its going to look like - tomorrow its brake lines to be made up (pain in the arse they are) and then place them on the car with the new zinc coated fuel lines
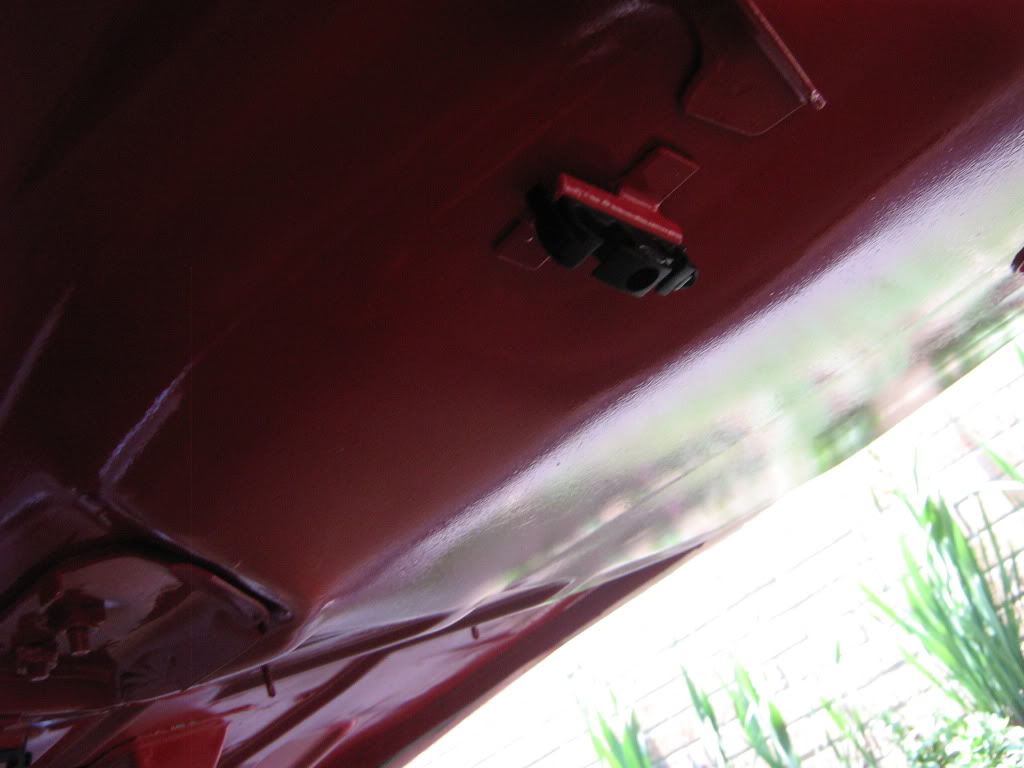
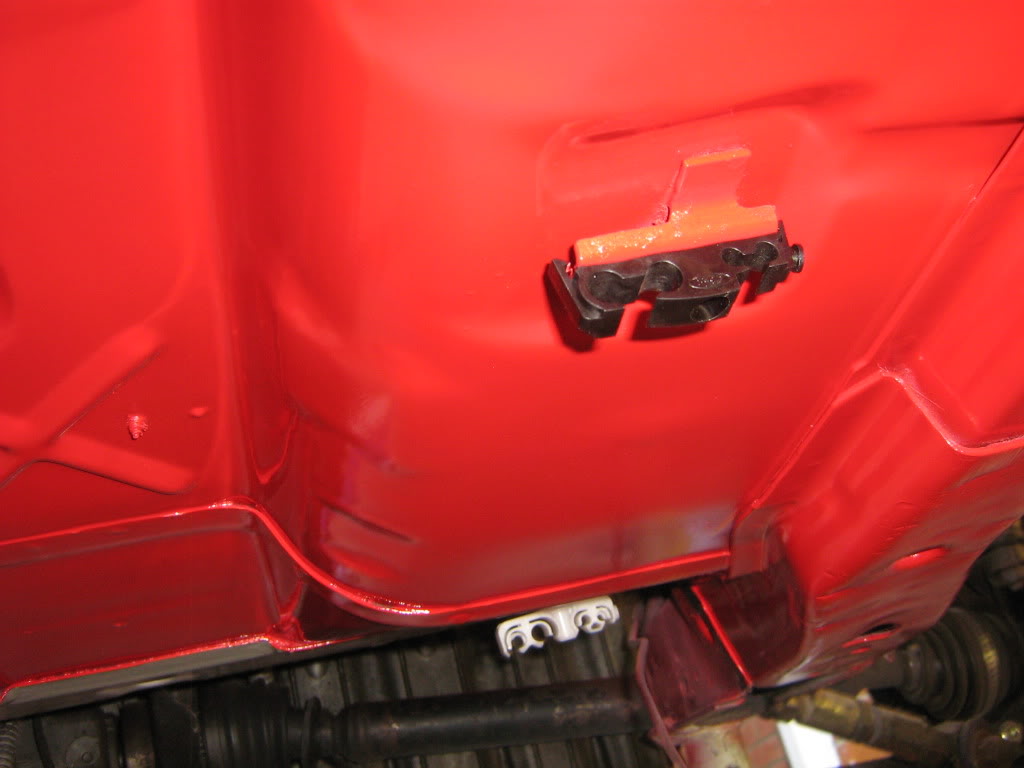
This one shows the clip and the new nylon handbrake locking pin
So I am now in a position to start bolting together and fitting all the parts to get it running and ready for the MOT - hopefully it passes
Made up the fuel pump carrier tonight - looking really really nice
More updates to follow soon - probably early next week once I have had a chance at the weekend to put some more on
One coat of primer, 2 coats of stonechip to underseal and then two coats of colour.
Also placed a few of the new brake/fuel line clips on to give the idea of what its going to look like - tomorrow its brake lines to be made up (pain in the arse they are) and then place them on the car with the new zinc coated fuel lines
This one shows the clip and the new nylon handbrake locking pin
So I am now in a position to start bolting together and fitting all the parts to get it running and ready for the MOT - hopefully it passes
Made up the fuel pump carrier tonight - looking really really nice
More updates to follow soon - probably early next week once I have had a chance at the weekend to put some more on