Building the bottom end of an engine
Right this is a fairly big one, so im going to deal with it in the following chapters which i will add as i get the chance (may change as i go along):
Basic engine assembly
Piston:
clearances
ring gaps
rods:
weighing
length checking
perhaps touch on mods like shot peening and desseming and mention steel rods
little and big end size and ovality
crank:
taper on big ends . mains
end float
checking throw per cylinder
journal size + regrinds
block:
line boring and why its needed
rebores and important issues concerning reboring (ie taper) / ovality
"decking" the block, and piston deck height
the use of piston squirters or spray bars
stress removal
girdles
Basic engine assembly
Big difference between properly building an engine and assembling one,
so I will cover the assembly of one first as thats the easy bit!
Fitting the crank to the block
On the crank there are journals that sit in the bearings (the jounal is the round shiney bit!)

In order to fit the crank into the block, you first remove the "mains caps" form the block
block with mains caps still installed:

Then to fit the crank you first place one half of the bearing shell into the block on each of the mains, then you lift the crank into place, and then you fit the other half the bearings to each of the caps, then refit the caps in place over the crank and torque down.
First half of the bearings installed in the block:

Crank installed in the block, and hte mains caps refitted:

After doing this the crank should spin freely by hand
(a small amount of oil should be used as an assembly lubricant, no precise amounts invovled just smear a little on the bearing face and the journals)
Fitting the pistons to the rods
The pistons are attached to the rods (via the little ends, so called simply cause they are smaller than the big ends!)
There is no bearing here as such, the pin that goes through is the bearing basically.
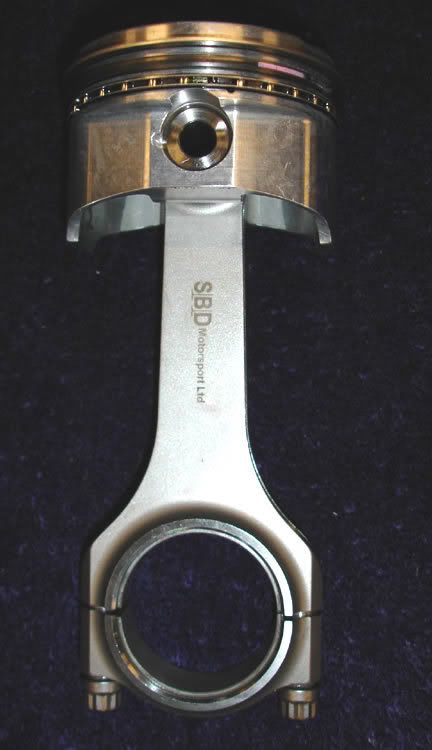
Picture of "floating" type piston + pin + rod:
(sorry for poor quality of this image, i didnt have a decent one of an engine me or stu has built so this is one i googled instead!)

There are two main types of pistons/pins, those where the pins are held in by circlips and can still move around a little in the piston, and those that are an interference fit meaning that they are locked solidly in place within the piston and dont move at all during engine operation.
To fit the "floating" type where you have circlips, its simply a matter of removing the clip from one side of the piston, holding the rod in place, and then pushing the pin through the piston and rod, and then reffitting the second clip to keep it all in place.
To fit the "interference fit" type, its essentially the same process but instead of just pushing the pin in by hand you will need to press it in, typically you will use some heat first to expand the hole to allow the pin to fit in more easily, then when it cools down it will be locked in place.
Fitted together they end up looking like this:
 Attaching the pistons/rods to the crank/block
Im struggling to find any images ive saved of this, and a quick google didnt find any exactly waht im after either, so i will take some next time im building an engine and then update the topic, so its words only for parts of this section im afraid.
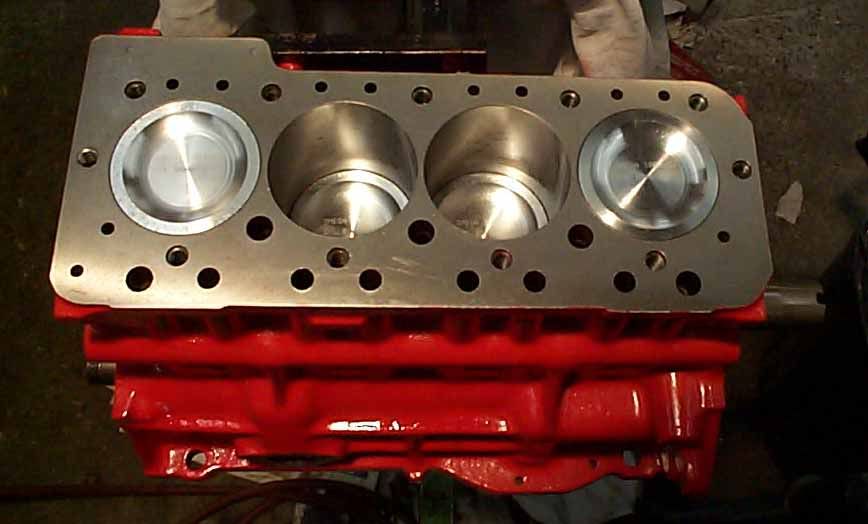
Remove the cap from the conrod and then offer the piston and rod into the bore from the top of the engine, the rings will need to be compressed with a piston ring compressor to allow them to fit into the bore.
You then slide the piston down the bore, so the rod pokes out of the bottom of the block near to the crank.
Install the bearing into the rod, and the position it against the journal on the crank, then fit the cap over this and fit the bolts in palce to hold it together.
From the top it should now end up looking something like this picture of my engine i built for my mini many years ago: