Oldest Rally Sierra. Time for some tlc


 06-08-2011, 05:10 PM
#125
I friend of mine who used to work for CG said some of the lads that work(ed) there were very handy with RS cars - looking at some of the equipment on yours it looks like it
Must have been awesome to drive in the 80's as its pretty high spec'd for the year
Must have been awesome to drive in the 80's as its pretty high spec'd for the year
10-08-2011, 07:16 PM
#126
Rock Out!!
Thread Starter
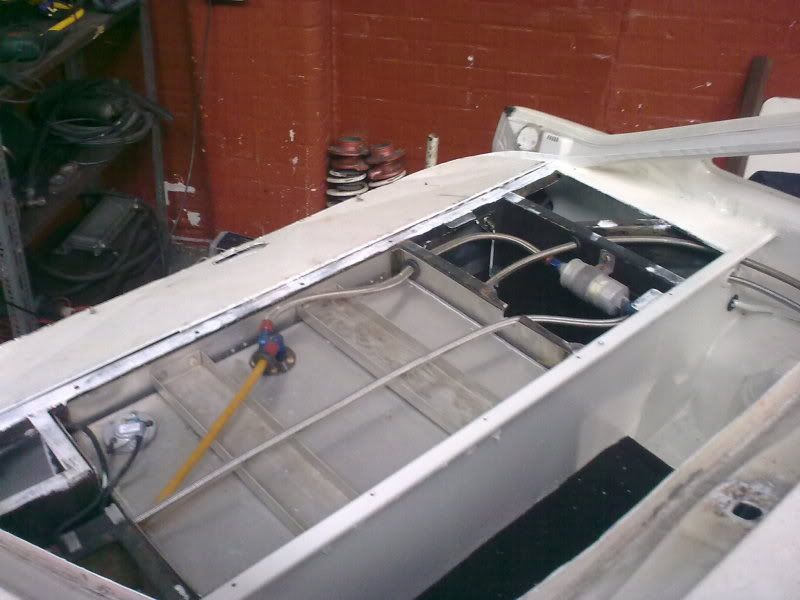
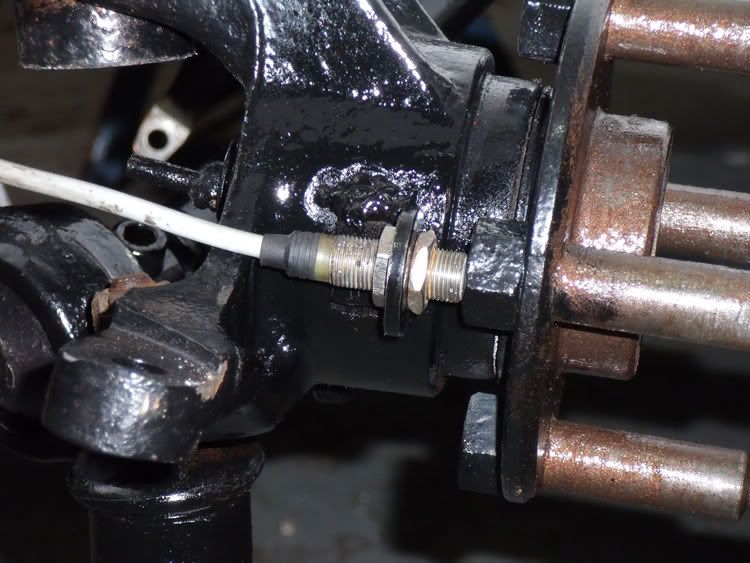
Right this week I fitted a new vdo fuel dip sender and the new fuel return line I got was plumbed into the tank and then fed through the car along with the fuel supply.
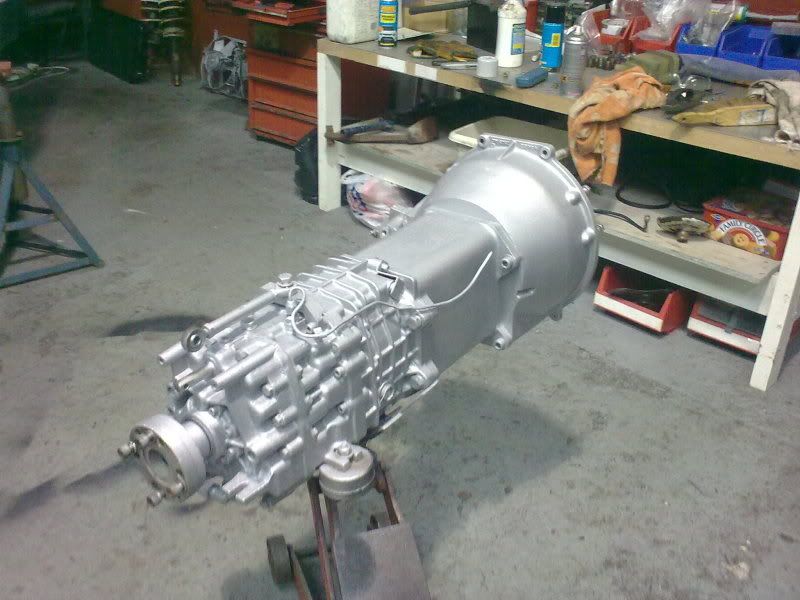
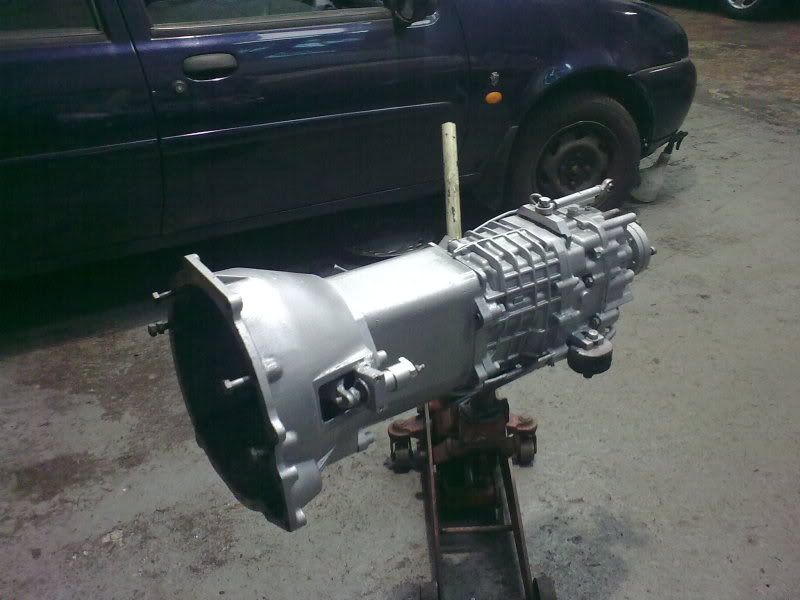
The gearbox that got washed then got painted.
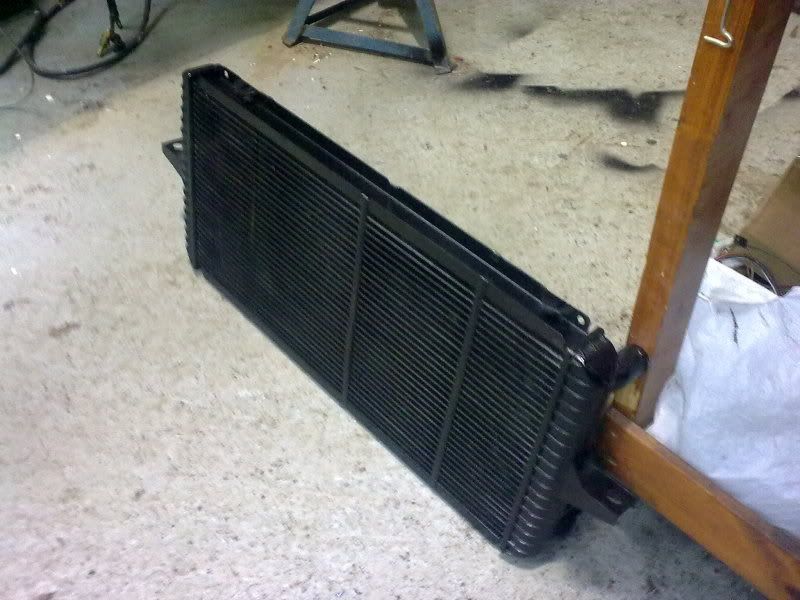
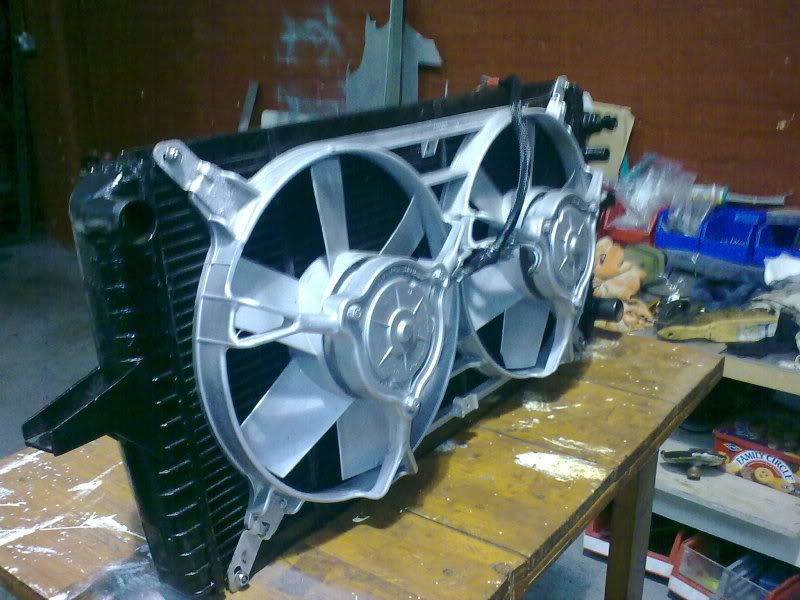
Along wwith the rad...
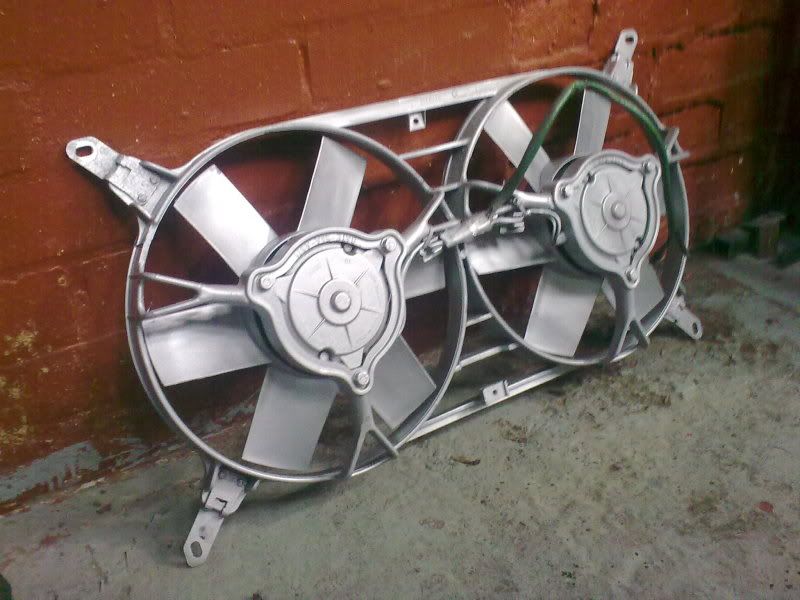
And fans...
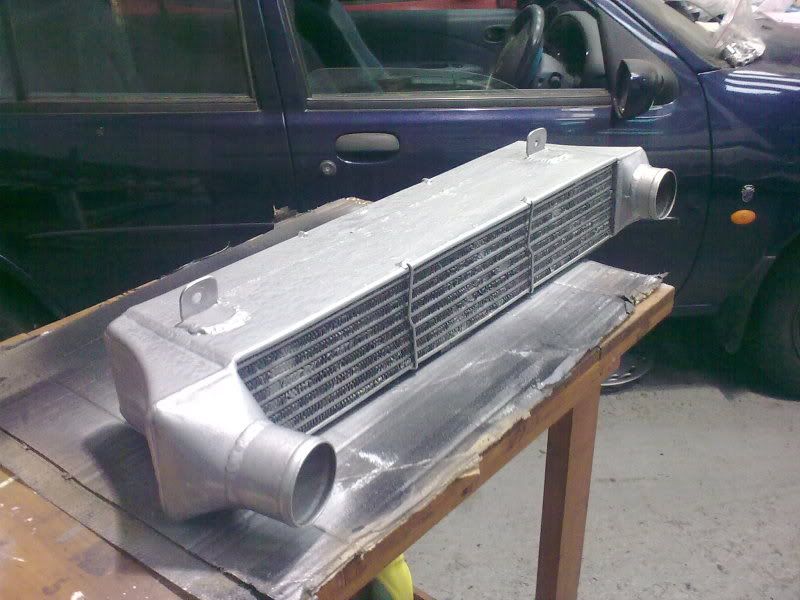
And intercooler...
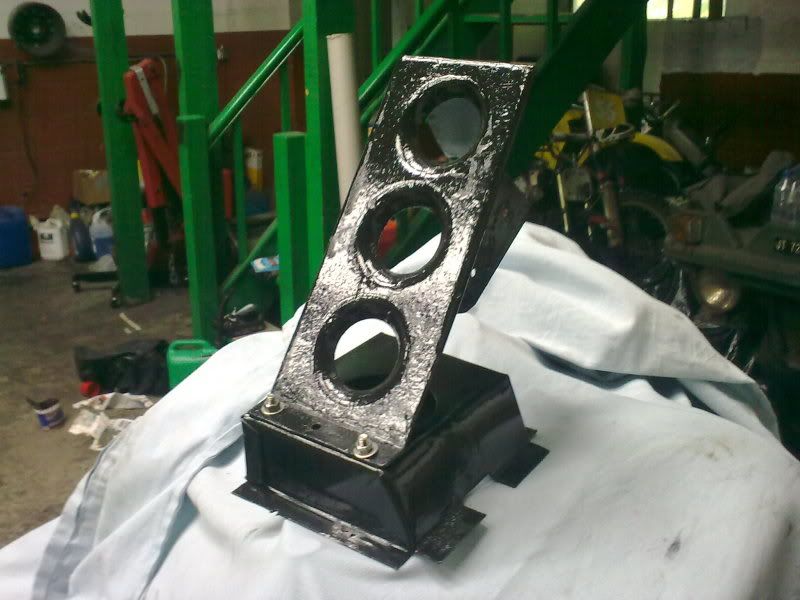
I put together a new footrest as my clutch foot either dragged the pedal or slipped behind it sometimes.
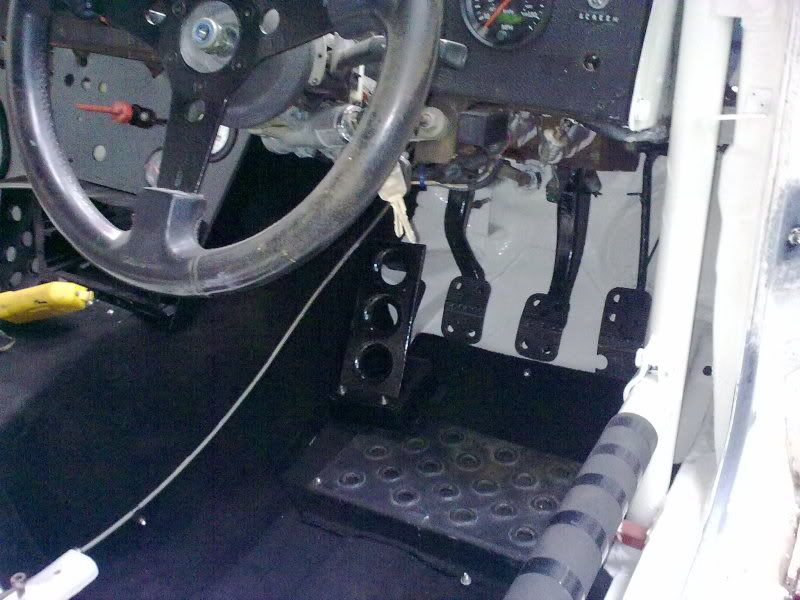
In situ.
Then I fitted the seat rails and my old harnessess for now.
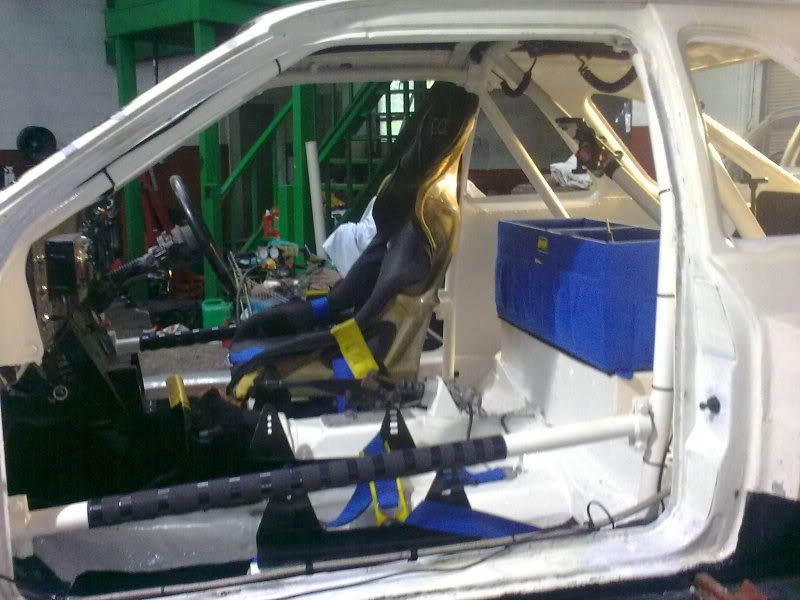
Obviously I couldn't resist puuting my old comfy armchair back in for now.
It seams like an age since I was able to sit in her and play driving
The gearbox that got washed then got painted.
Along wwith the rad...
And fans...
And intercooler...
I put together a new footrest as my clutch foot either dragged the pedal or slipped behind it sometimes.
In situ.
Then I fitted the seat rails and my old harnessess for now.
Obviously I couldn't resist puuting my old comfy armchair back in for now.
It seams like an age since I was able to sit in her and play driving
 24-08-2011, 04:58 PM
#128
Rock Out!!
Thread Starter
Thanks for the encouragement everyone
Right updates.
I had a lot of pics go awol last week, when my phone cam swithed to bizarre setting and just forgot to take the pics I was happily snapping away at.
Didn't lose anything major fortunately.
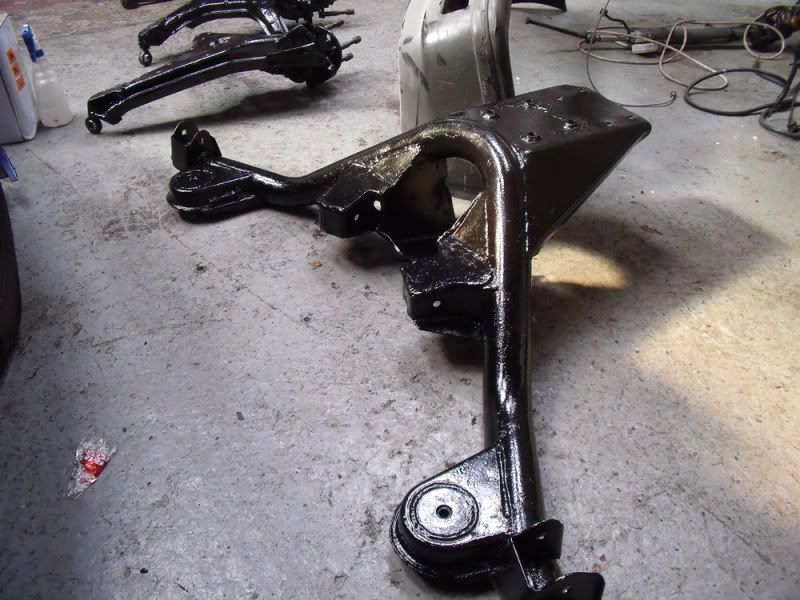
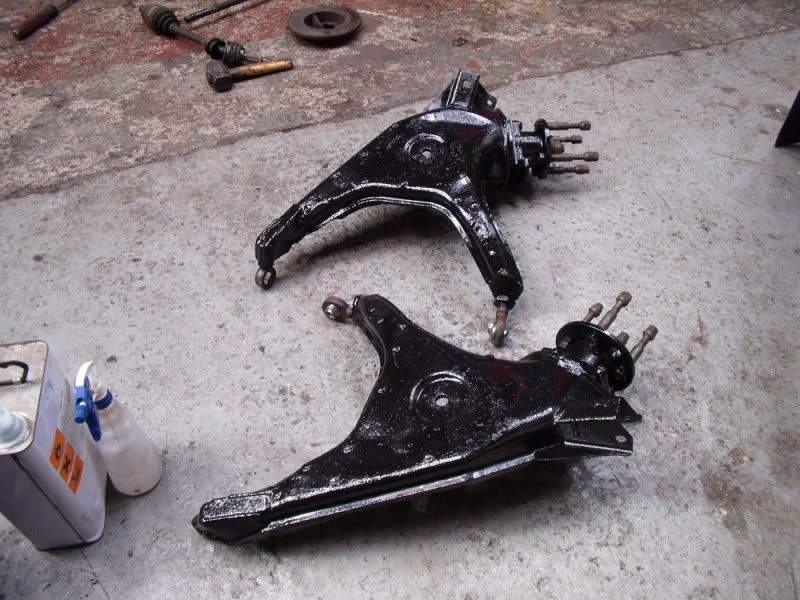
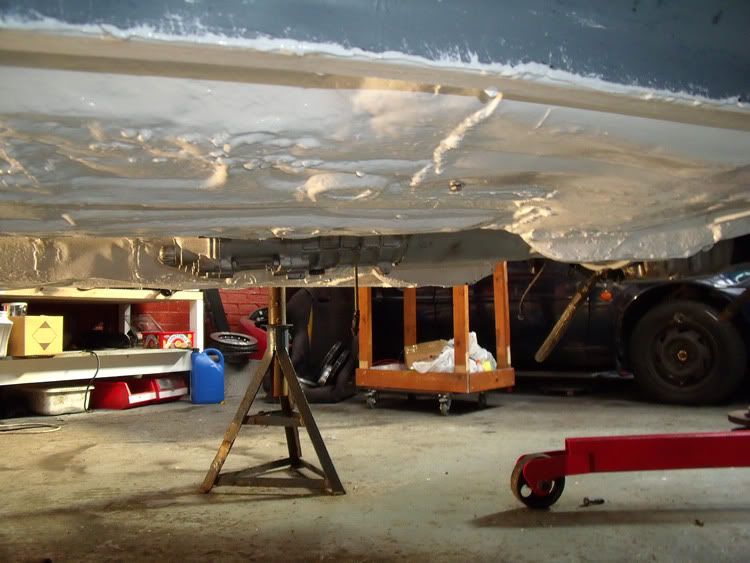
I have been plodding away with painting all the undercarriage for the last few days.
I had to wait to start painting for the diff to come back with new seals in it, but it's all painted with por 15 now.
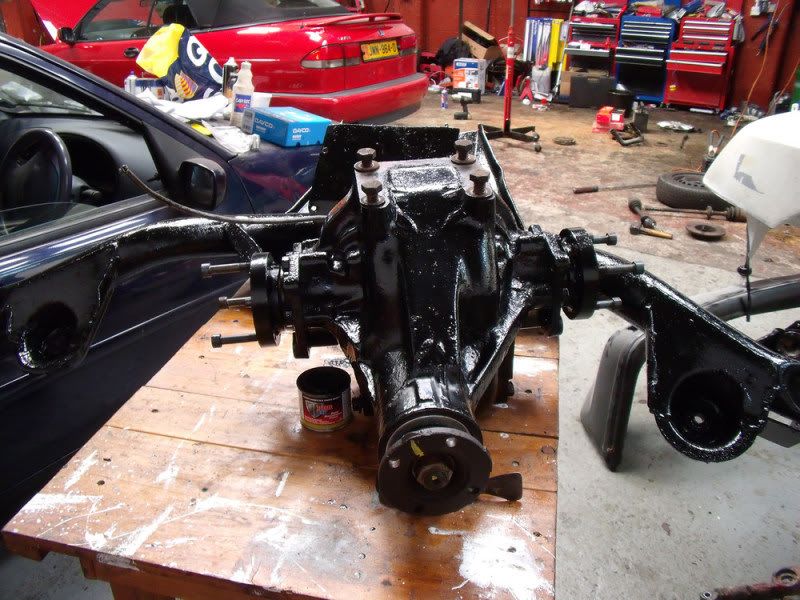
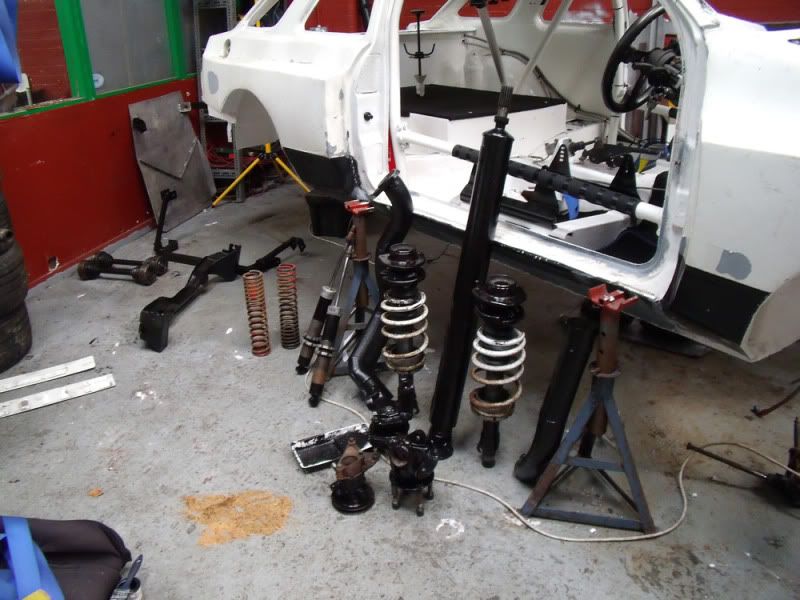
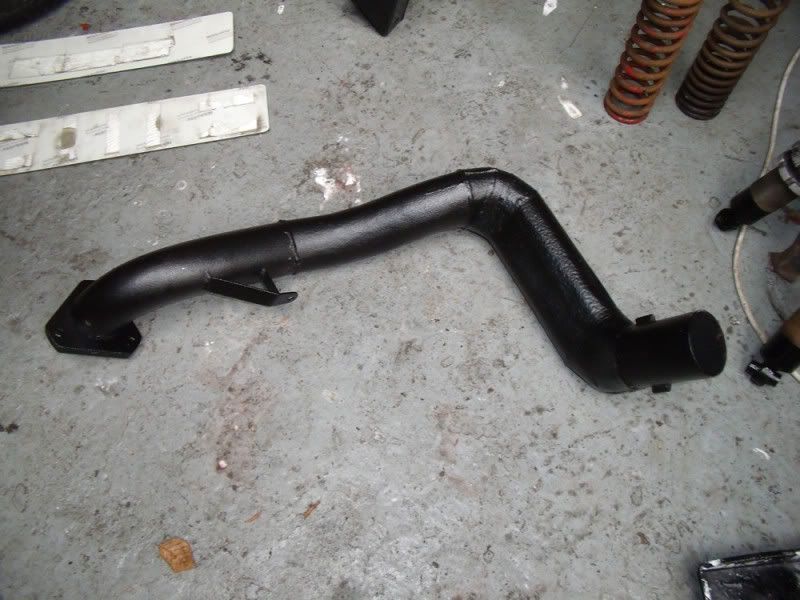
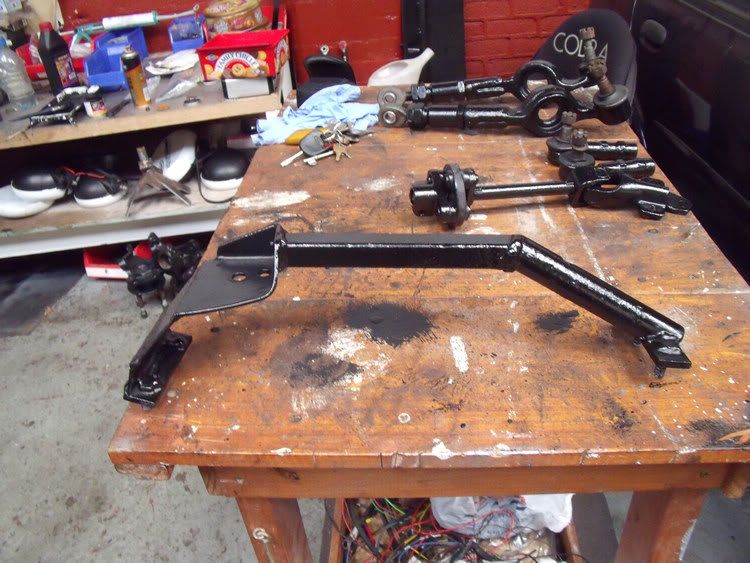
Various selection of bits either painted or awaiting paint.
Exhaust.
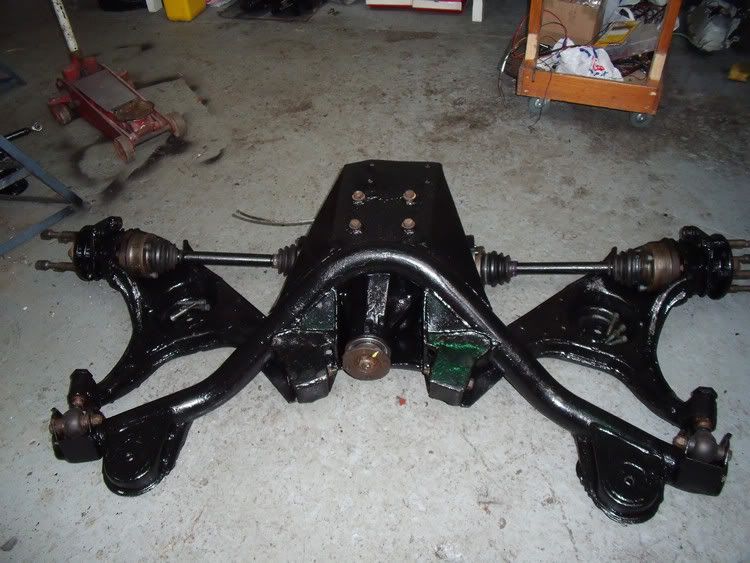
Rear beam.
Rear arms painted and reassembled.
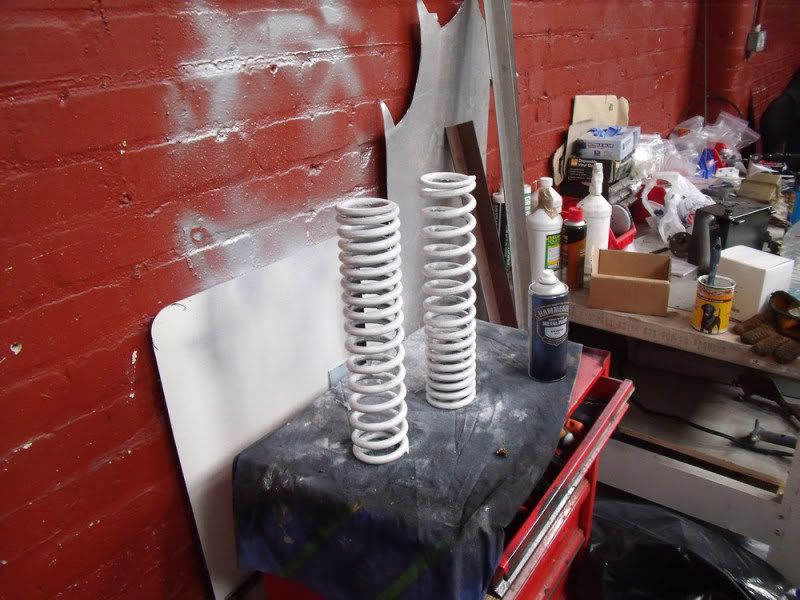
I lashed some hammerite spray on the springs. It wont last, but looks nice for while.
Right updates.
I had a lot of pics go awol last week, when my phone cam swithed to bizarre setting and just forgot to take the pics I was happily snapping away at.
Didn't lose anything major fortunately.
I have been plodding away with painting all the undercarriage for the last few days.
I had to wait to start painting for the diff to come back with new seals in it, but it's all painted with por 15 now.
Various selection of bits either painted or awaiting paint.
Exhaust.
Rear beam.
Rear arms painted and reassembled.
I lashed some hammerite spray on the springs. It wont last, but looks nice for while.
 03-09-2011, 09:16 PM
#130
Rock Out!!
Thread Starter
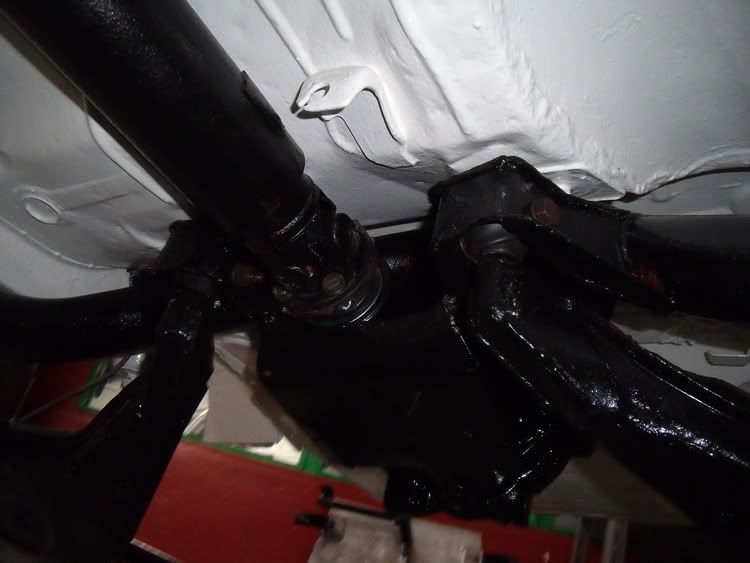
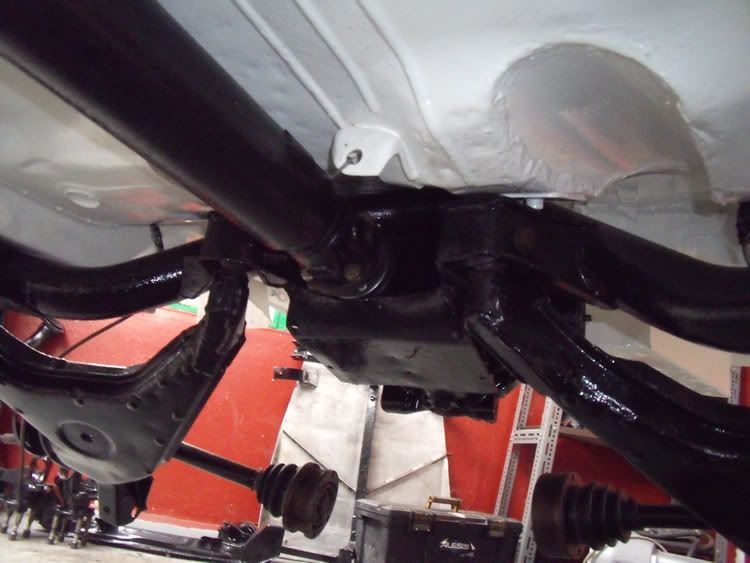
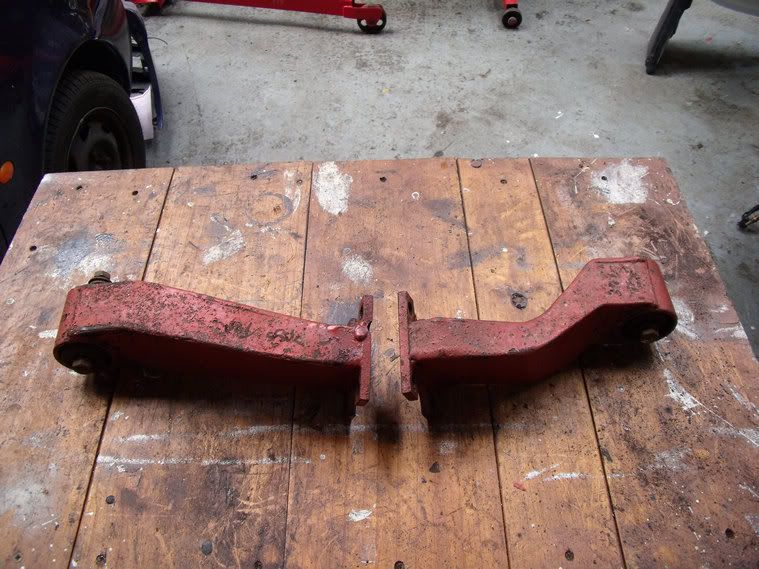
Hi troops, I havn't been idol. The back end has been getting rebuilt and fitted over the last week.
New rubbers on the arms.
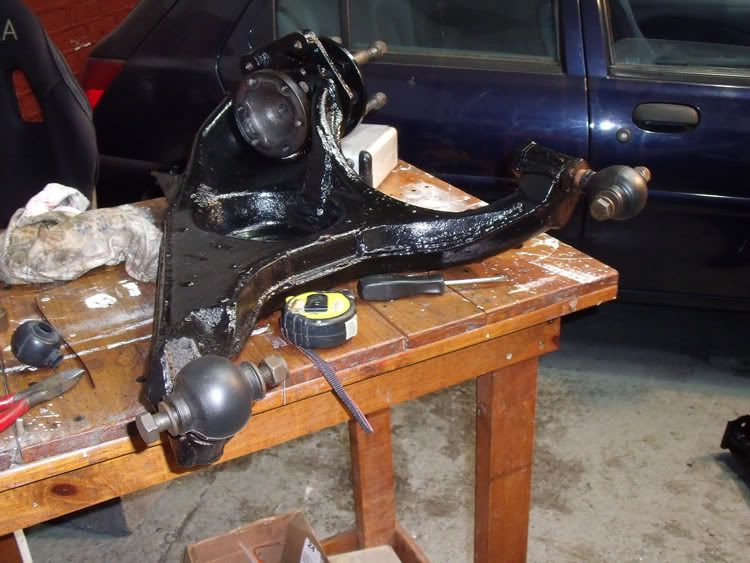
Then the beam and arms were reunited.
And then attached to her bum.
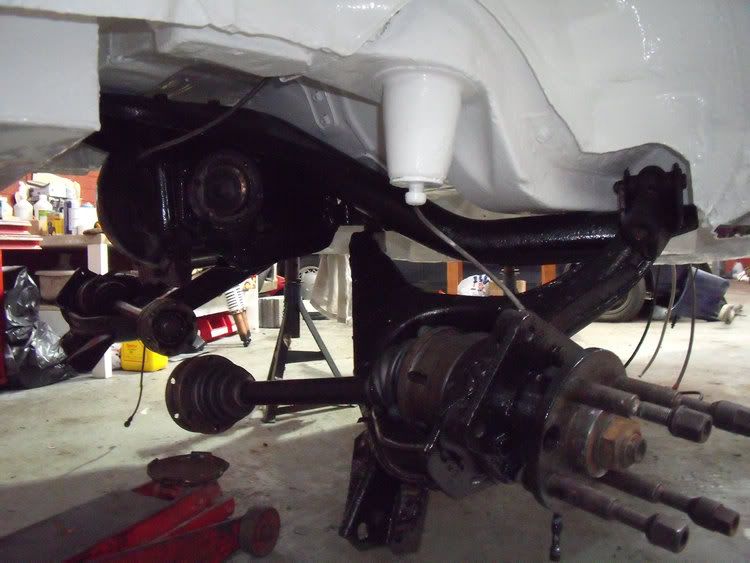
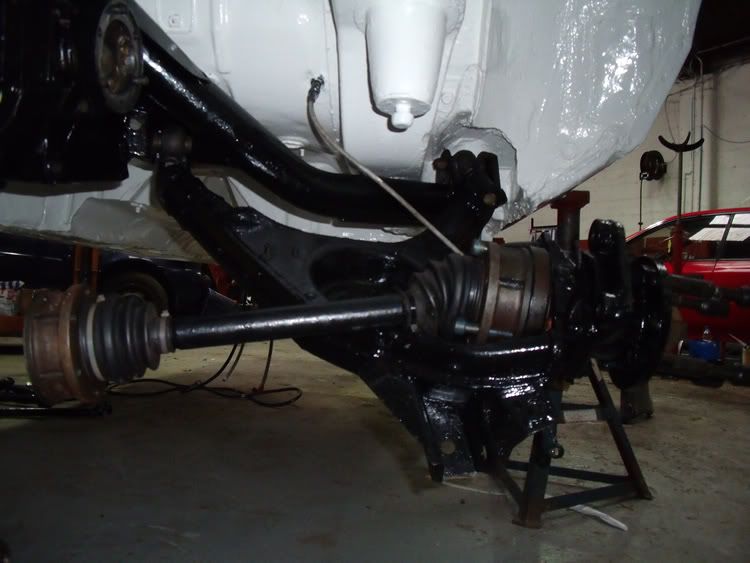
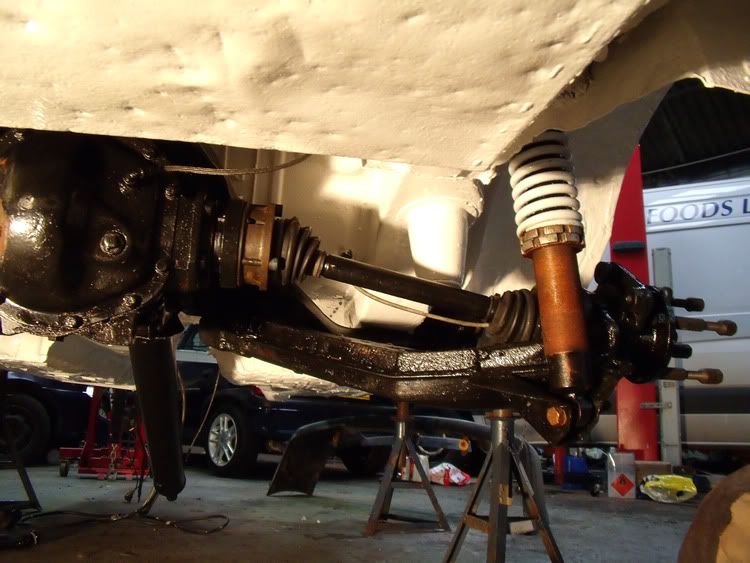
Springs re-built.
Prop back on.
New rubbers on the arms.
Then the beam and arms were reunited.
And then attached to her bum.
Springs re-built.
Prop back on.
04-09-2011, 01:30 PM
#132
Rock Out!!
Thread Starter
Haha, As you know Paul, I could procastinate for Britian, but once I start something it does get finished
To everyone else who has replied, thank you for all the encouragement.
It is great to hear as the work progresses.
To everyone else who has replied, thank you for all the encouragement.
It is great to hear as the work progresses.
09-09-2011, 07:00 PM
#133
Rock Out!!
Thread Starter
Quck update.
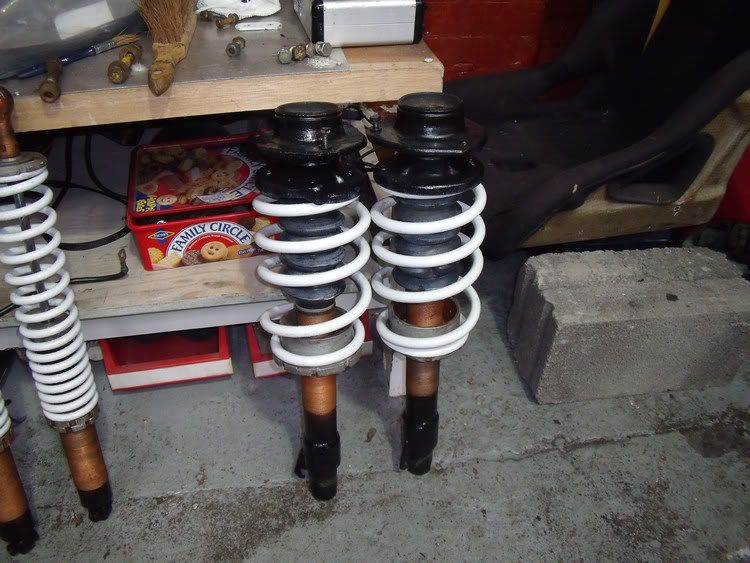
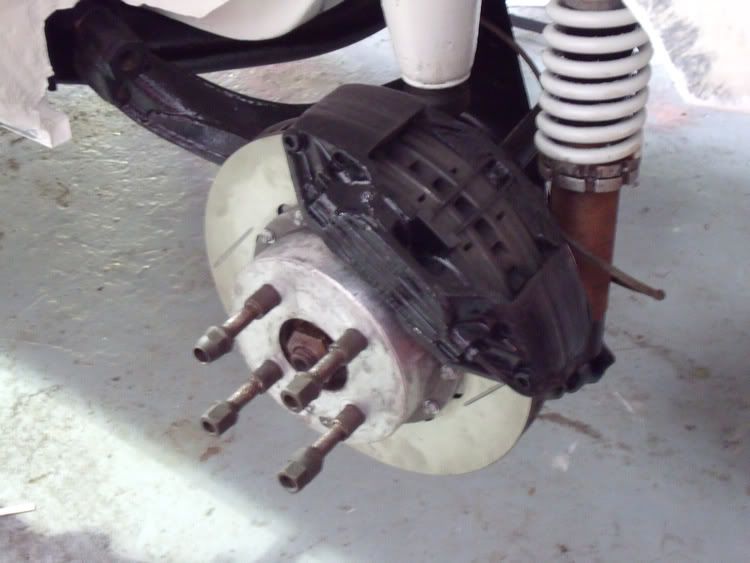
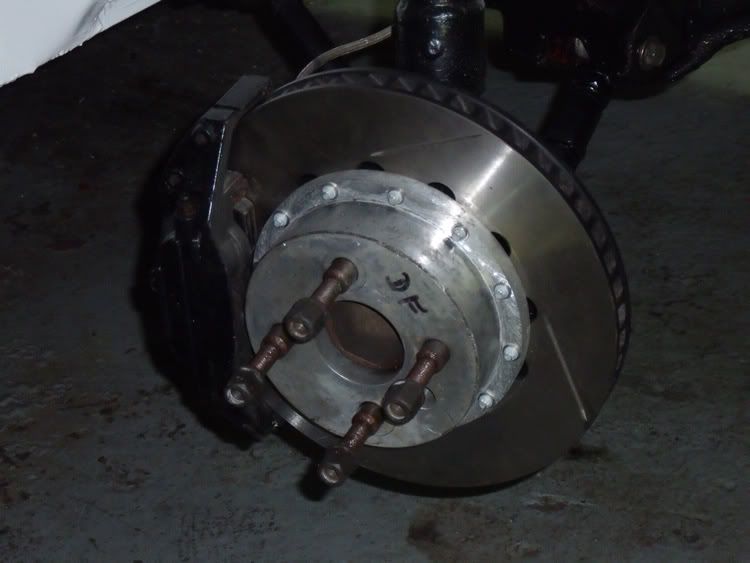
The rear springs are back on and ready for brakes.
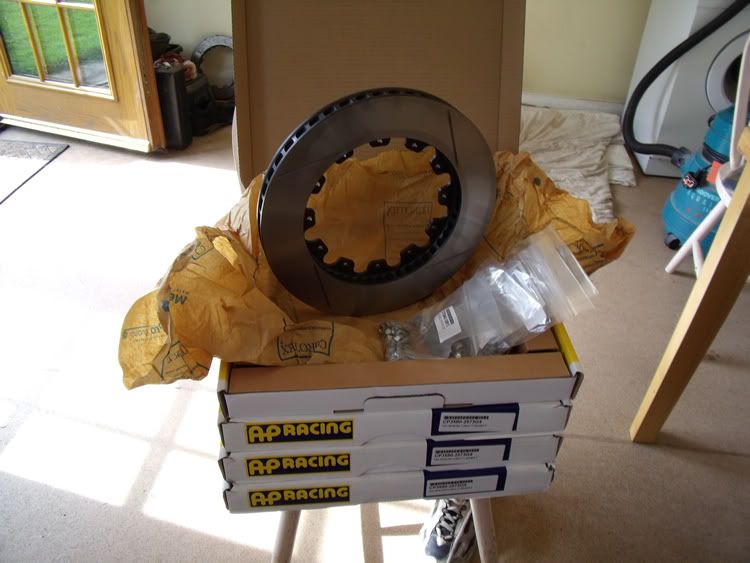
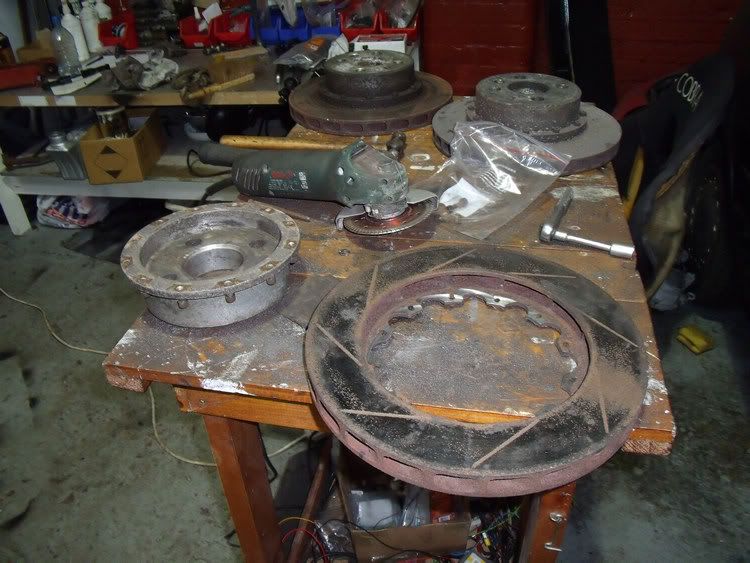
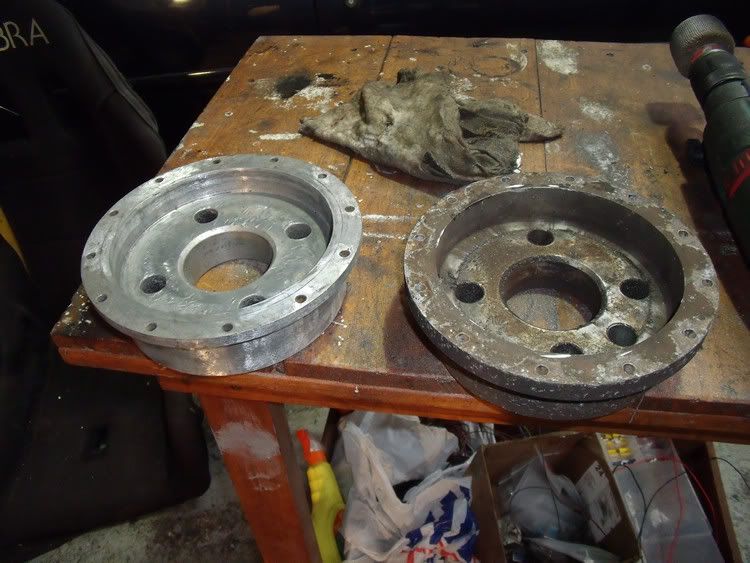
I was going to start cleaning the discs up to go back on, but I think they have reached the end of their days.
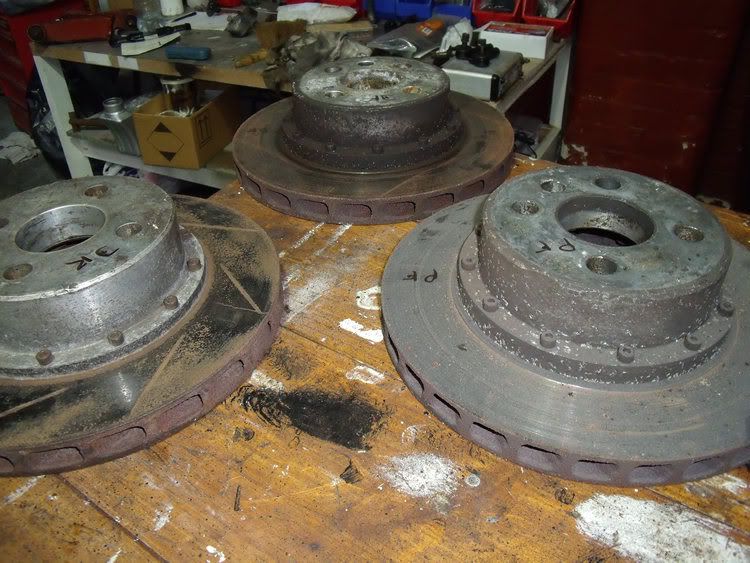
Confirmed.
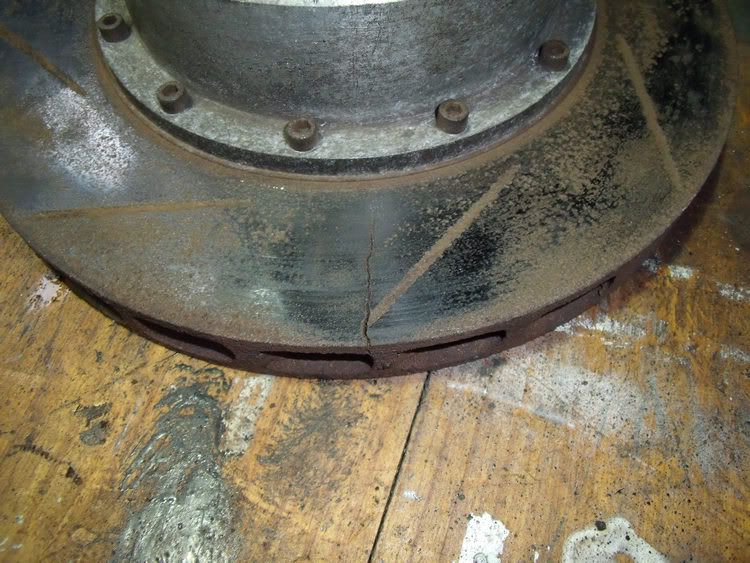
I made enquiries about a new set and as usual for the car, they are/were specials.
AP lightweight rally discs.
They are still made, but with a V big price tag and an eight week wait from AP.
So after much measuring and confirming sizes with Dave from Circuit supplies we found some almost exact matches from the AP range.
The new discs are Identical in size, but have 48 air vanes instead of 24. Which makes them heavier and actually more suited to her new role as a road car.
I wont say what it would have cost to replace the old with exact matches, but the new ones were only just short of a grand for four.
It just keeps adding up.
The clutch went back on (not the paddle, that's err, broken)
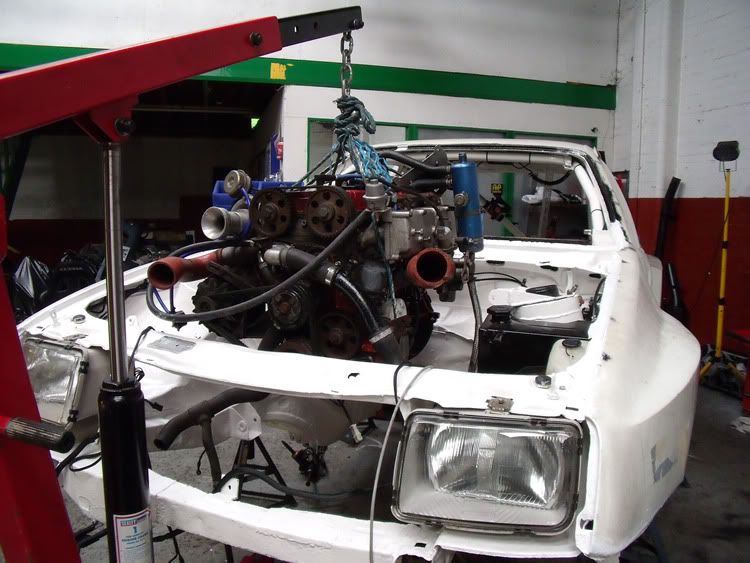
The engine has new oil and filter and is ready to be lowered into place to line up the box and prop.
If you are wondering why the engine is basicly going back as it came out. It is because it is getting a full rebuild later (or a new engine).
And it is the only unaltered part of the car, so I want to concentrate ont the body repairs this time.
(hopefully as nothing has changed on the motor it should run fine again, What a dreamer
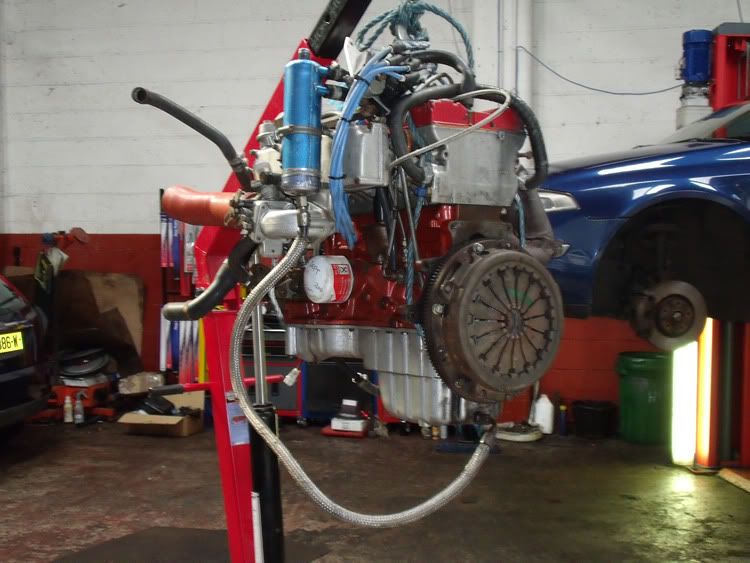
I took the engine mounts off so the motor can be aligned and then the mounts can be refitted, or new made.
As you can see, they are, once again unique to the car.
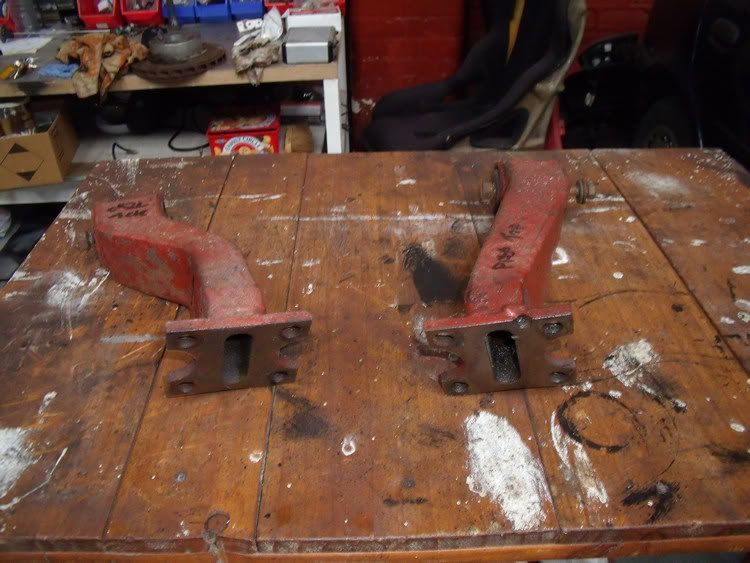
Time to drop the motor in.
What a dropped rod with the engine still attached would look like coming through the bonnet.
Hey, if muscle cars can have big motors sticking out of the 'hood' why not a Sierra.
Can you imagine the handling.

The rear springs are back on and ready for brakes.
I was going to start cleaning the discs up to go back on, but I think they have reached the end of their days.
Confirmed.
I made enquiries about a new set and as usual for the car, they are/were specials.
AP lightweight rally discs.
They are still made, but with a V big price tag and an eight week wait from AP.
So after much measuring and confirming sizes with Dave from Circuit supplies we found some almost exact matches from the AP range.
The new discs are Identical in size, but have 48 air vanes instead of 24. Which makes them heavier and actually more suited to her new role as a road car.
I wont say what it would have cost to replace the old with exact matches, but the new ones were only just short of a grand for four.
It just keeps adding up.
The clutch went back on (not the paddle, that's err, broken)
The engine has new oil and filter and is ready to be lowered into place to line up the box and prop.
If you are wondering why the engine is basicly going back as it came out. It is because it is getting a full rebuild later (or a new engine).
And it is the only unaltered part of the car, so I want to concentrate ont the body repairs this time.
(hopefully as nothing has changed on the motor it should run fine again, What a dreamer
I took the engine mounts off so the motor can be aligned and then the mounts can be refitted, or new made.
As you can see, they are, once again unique to the car.
Time to drop the motor in.
What a dropped rod with the engine still attached would look like coming through the bonnet.
Hey, if muscle cars can have big motors sticking out of the 'hood' why not a Sierra.
Can you imagine the handling.
Last edited by baz walton; 09-09-2011 at 07:03 PM.
10-09-2011, 04:34 AM
#134
Virgin

Join Date: Jan 2009
Location: Isle Of Man
Posts: 11
Likes: 0
Received 0 Likes
on
0 Posts
Hi Baz, Just read through all this,Stupid O clock, Brain wont shut down Can't sleep...
Damm fine job Feller, When you've finished your's You can do mine for me, John Andreas
Damm fine job Feller, When you've finished your's You can do mine for me, John Andreas
10-09-2011, 05:57 PM
#135
Rock Out!!
Thread Starter
Saturday. Dirty day. 
I started out unbolting the fasteners for the discs to the bells.
A few turns and they'll just pop right out.
Ten mins later the grinder was out.
I wasn't keepintg the discs or the bolts/nuts so I got medievil on their asses.
Then it was clean up time. No quick fix for this unfortunately.
It didn't take long whith the wheel on the drill.
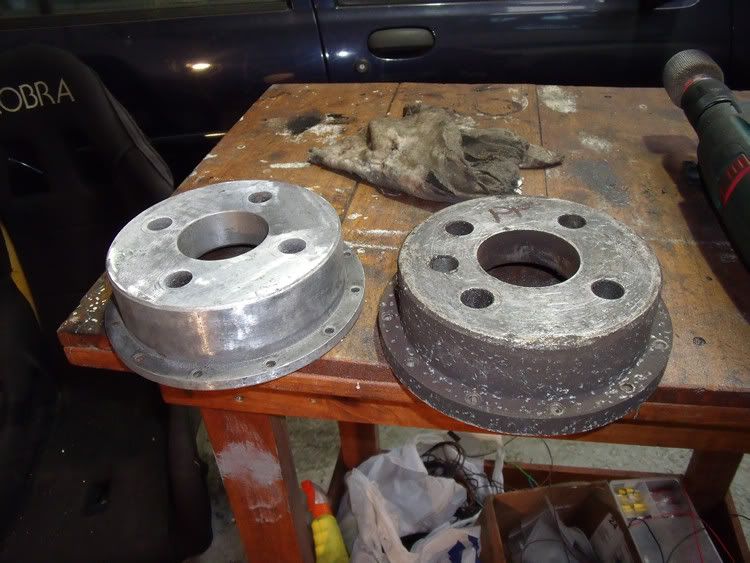
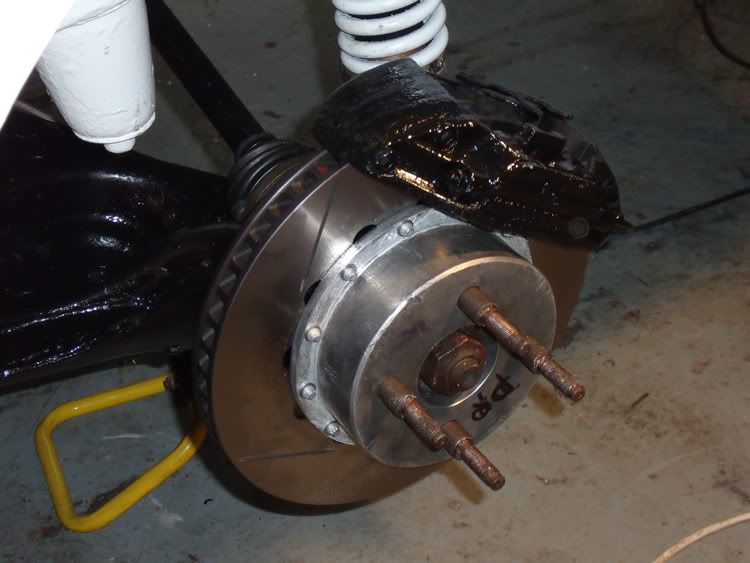
I put one on as a mock up. I haveyet to tighten them all up.
And yes this is the rear drivers side disc on the passenger side. (the light was on this side of the car and the other side disc was the first done, haha.)
After that it was then stand back and think of the holiday I could be on if I hadn't spent all my money on discs.
I started out unbolting the fasteners for the discs to the bells.
A few turns and they'll just pop right out.
Ten mins later the grinder was out.
I wasn't keepintg the discs or the bolts/nuts so I got medievil on their asses.
Then it was clean up time. No quick fix for this unfortunately.
It didn't take long whith the wheel on the drill.
I put one on as a mock up. I haveyet to tighten them all up.
And yes this is the rear drivers side disc on the passenger side. (the light was on this side of the car and the other side disc was the first done, haha.)
After that it was then stand back and think of the holiday I could be on if I hadn't spent all my money on discs.
Last edited by baz walton; 10-09-2011 at 06:13 PM. Reason: Spelling
10-09-2011, 06:18 PM
#136
PassionFord Post Whore!!
iTrader: (2)

Ain't looked at your thread for a while.
Cracking work
Glad to see her so well after seeing the car at the start of your thread I thought you'd got a proper uphill battle on your hands
well done to all involved
Cracking work
Glad to see her so well after seeing the car at the start of your thread I thought you'd got a proper uphill battle on your hands
well done to all involved
 11-09-2011, 09:44 PM
#139
10K+ Poster!!

Top work. How much horsepower are you expecting?
14-09-2011, 10:14 PM
#140
Rock Out!!
Thread Starter
Thanks for the kind words guys
@Gjh, When she is ready she will getting remapped without the restrictor in the turbo, but as the head is on it's last legs (excuse the pun)
The power may well decrease to help save the motor and give better economy as she will be getting used daily in the future.
I have got the motor now susspended in the right place, on the crane.
There are no engine or gearbox mounts in place everything is free to be moved around.
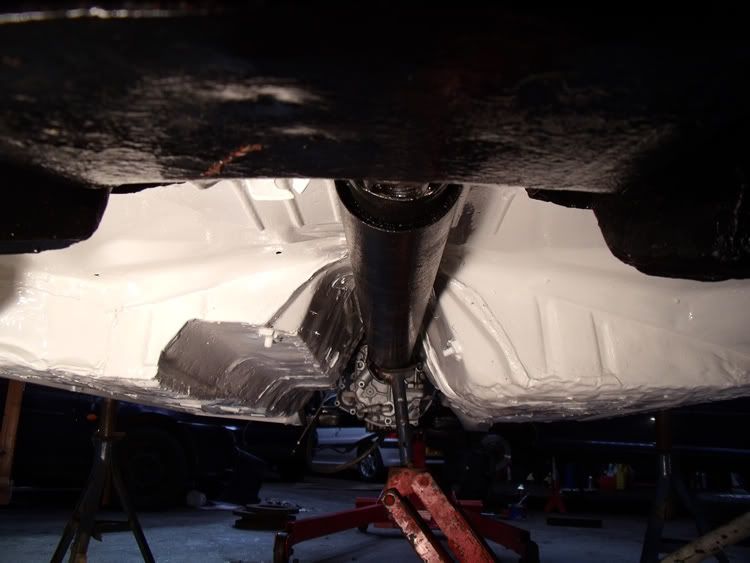
The gearbox and prop are reattatched and I have got the whole assembly lined through from front to back. ( a lot straighter than it used to be)
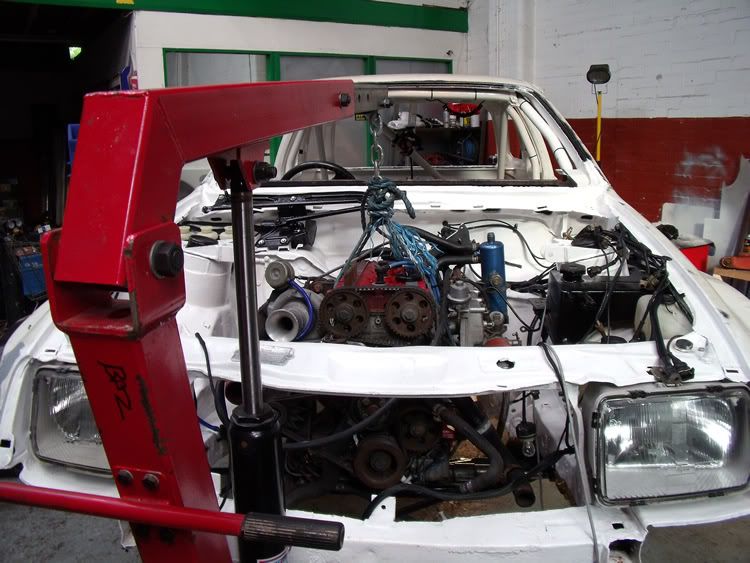
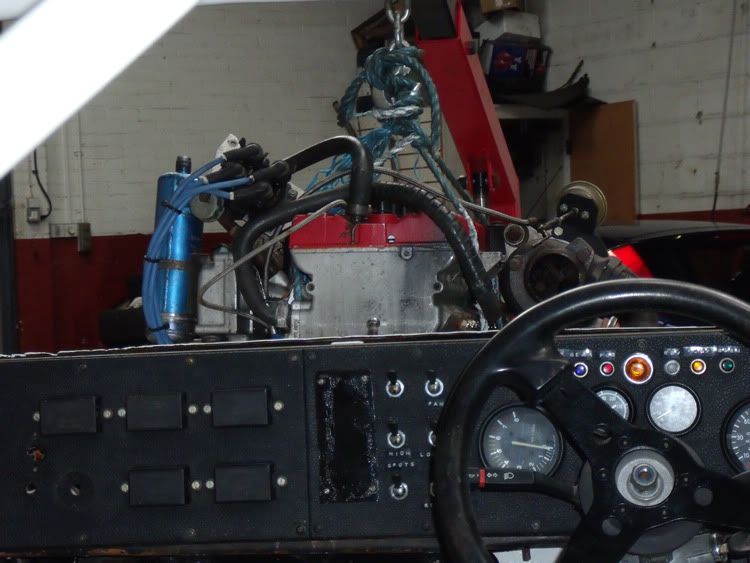
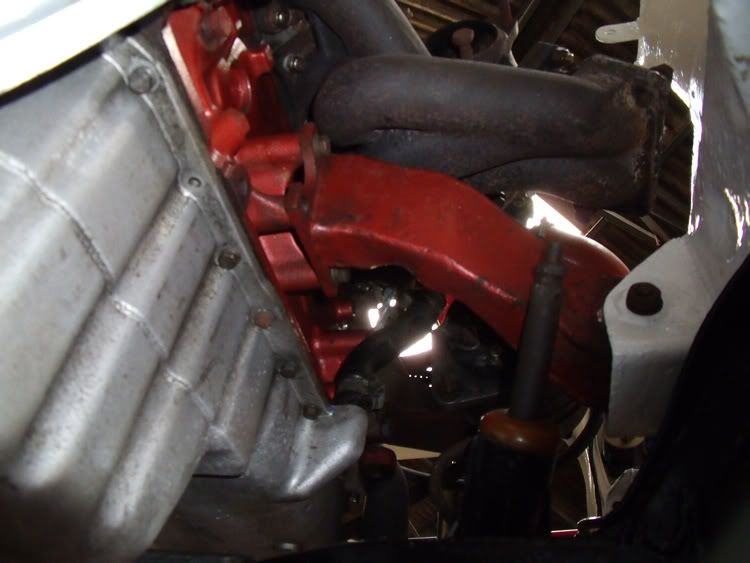
To give you an idea of the missalignment that was happening, here is a pic from earlier in the thread of the prop and box before it was dropped off.
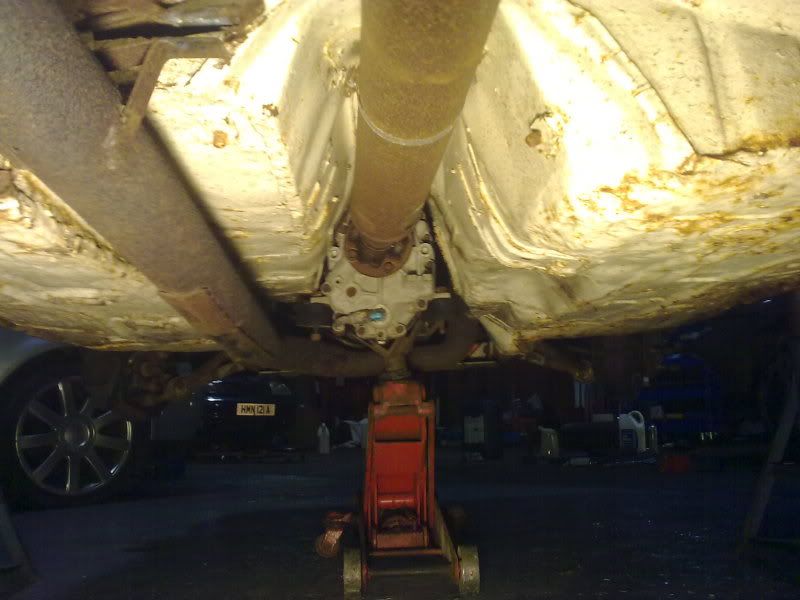
And now that it runs true.
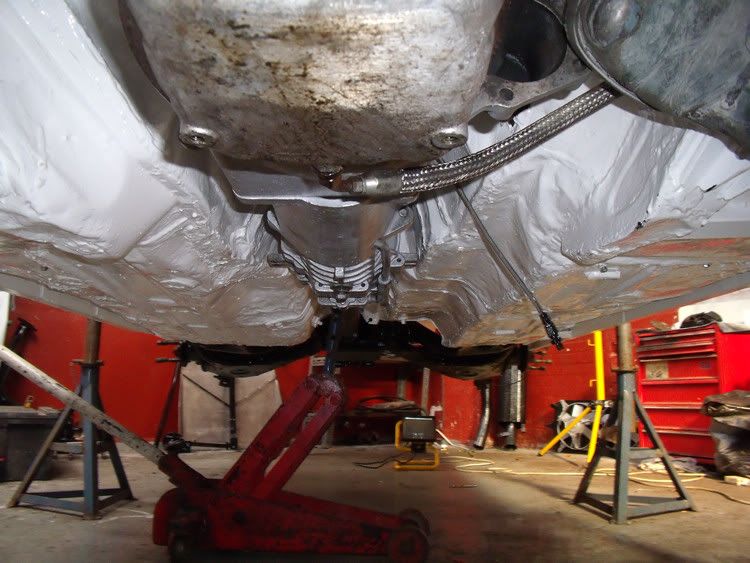
The problem was, as mentioned earlier, the box was too big for the tunnel in width and height.
This meant that when the box was in place it forced the prop to run from right to left under the car ( the diff pinnion is offset on the 9" jag diff, to the right, see the pics of it further back in the thread).
This also meant that the box forced the engine to sit in the bay on an angle.
After the tunnel mods the box is now able to shift over to the drivers side and this allows the prop to run straight (if slightly to one side of the narrow tunnel)
the engine is also now able to sit square in the bay.
The other problem, which unfortunately I cant eliviate completely is the tilt of the engine to the rear.
This is again the box's fault.
The height of the box means it sits on the roof of the tunnel.
This wouldnt be a problem, except that with the power steering in place the engine cannot get any lower and the box any higher to allow a level run through to the prop.
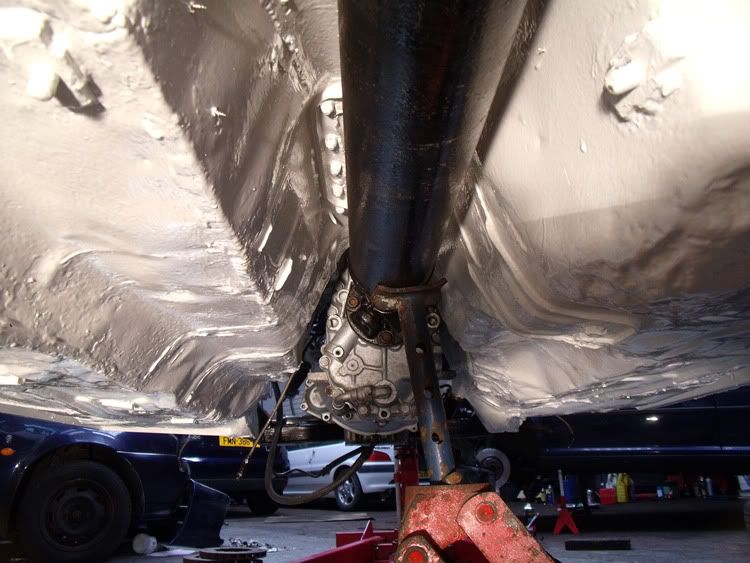
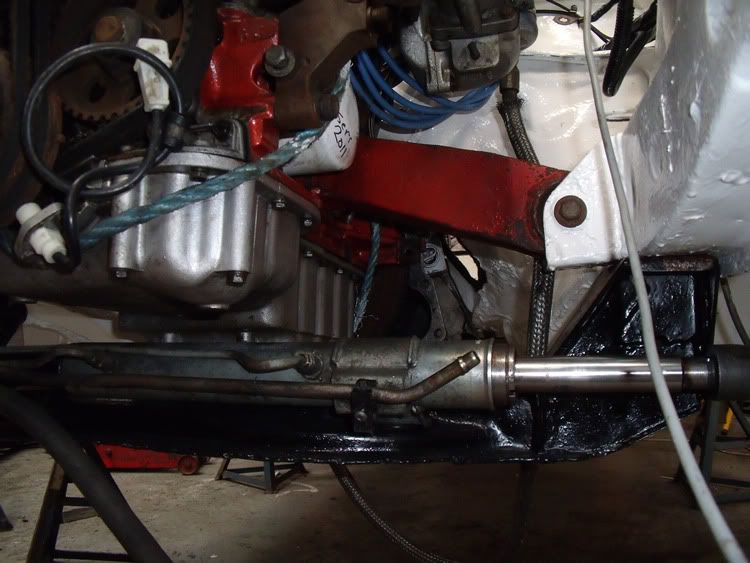
You can see it here in this pic of the box from the side.
It's a tight fit at the front.
I could raise the top of the tunnel to allow the box to rise up, but there is only finger room between the big prop and the top of the rear tunnel.
So in essence I would have to remove the whole top of the tunnel from front to back to get a level run to the diff.
The only other option would be lowering the crossmember,
but that is a whole can of susspension and engine ancillery woes I don't want to contemplate.
Oh the joys eh!
@Gjh, When she is ready she will getting remapped without the restrictor in the turbo, but as the head is on it's last legs (excuse the pun)
The power may well decrease to help save the motor and give better economy as she will be getting used daily in the future.
I have got the motor now susspended in the right place, on the crane.
There are no engine or gearbox mounts in place everything is free to be moved around.
The gearbox and prop are reattatched and I have got the whole assembly lined through from front to back. ( a lot straighter than it used to be)
To give you an idea of the missalignment that was happening, here is a pic from earlier in the thread of the prop and box before it was dropped off.
And now that it runs true.
The problem was, as mentioned earlier, the box was too big for the tunnel in width and height.
This meant that when the box was in place it forced the prop to run from right to left under the car ( the diff pinnion is offset on the 9" jag diff, to the right, see the pics of it further back in the thread).
This also meant that the box forced the engine to sit in the bay on an angle.
After the tunnel mods the box is now able to shift over to the drivers side and this allows the prop to run straight (if slightly to one side of the narrow tunnel)
the engine is also now able to sit square in the bay.
The other problem, which unfortunately I cant eliviate completely is the tilt of the engine to the rear.
This is again the box's fault.
The height of the box means it sits on the roof of the tunnel.
This wouldnt be a problem, except that with the power steering in place the engine cannot get any lower and the box any higher to allow a level run through to the prop.
You can see it here in this pic of the box from the side.
It's a tight fit at the front.
I could raise the top of the tunnel to allow the box to rise up, but there is only finger room between the big prop and the top of the rear tunnel.
So in essence I would have to remove the whole top of the tunnel from front to back to get a level run to the diff.
The only other option would be lowering the crossmember,
but that is a whole can of susspension and engine ancillery woes I don't want to contemplate.
Oh the joys eh!
15-09-2011, 11:18 PM
#141
Rock Out!!
Thread Starter
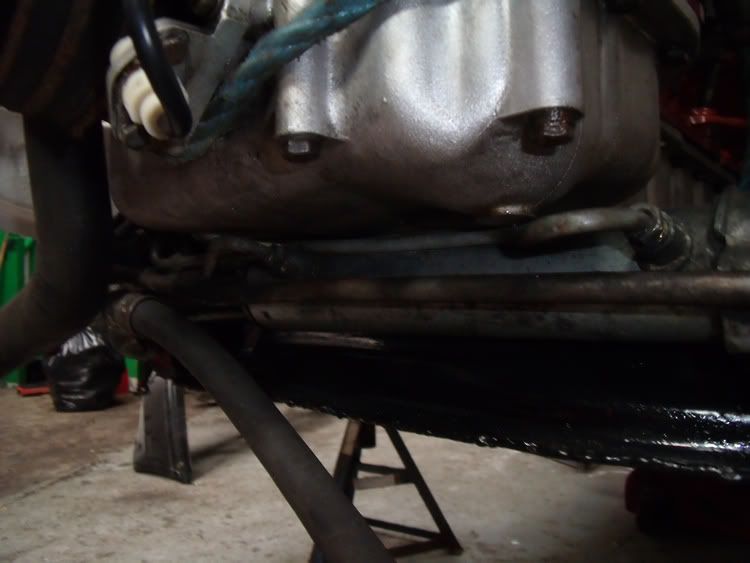
Today was spent messing with the position of the box and engine prior to new mounts being made.
Before I started fabricating I decide to put the old gearbox mount in place. Without any mounts on it to see if it affected the newly set height.
It didn't, cool, it can be refurbished and used.
I then set about deciding to see if either of the original engine mounts would still fit with the engine in its new/better position.
It was fun and games geting the engine mounts into position on the car as they are usually attatched to the motor.
Then dropped from above with the engine into the chasis cups.
I could see once they were in that as I was going to tighten them the motor was going to start turning in the bay.
Towards the drivers side (as it was before)
I tightened them up anyway to see by how much.
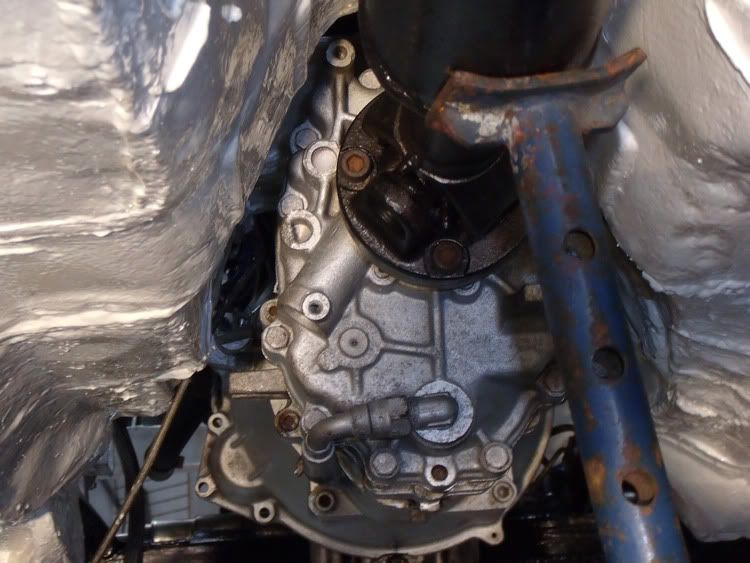
It turned the motor, but only by about 20mm at the rear of the box.
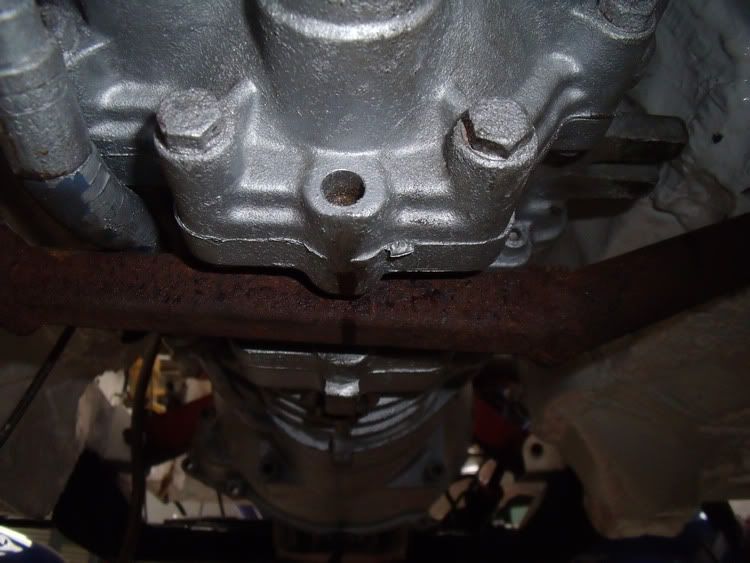
If you look at the photo below you'll see the line on the box and mount.
When the enginge mounts are tight the box moves 20mm to the left of the line.
Fortunately there is enough defflection in the centre rubbers on the engine mounts to allow the box to be pushed back over to the line by hand (just).
Previously the tunnel didnt allow the box to even reach the line.
I think that before it was a combination of the mounts kicking the rear of the box to the passenger side by 20 mm.
And the tight tunnel and old box mounts holding the box even further over to the pass side.
This forced the prop to run from the drivers to the pass side and the engine to point to the drivers side.
Now it all sits straight.
There is more of a gap between the sump and the power steering again.
Now that the engine is on it's mounts.
So i will just have to live with the fact that the engine is canted upwards at the front.
I am curious as to how much it will be off level to the rear once the car is on its wheels.
Before I started fabricating I decide to put the old gearbox mount in place. Without any mounts on it to see if it affected the newly set height.
It didn't, cool, it can be refurbished and used.
I then set about deciding to see if either of the original engine mounts would still fit with the engine in its new/better position.
It was fun and games geting the engine mounts into position on the car as they are usually attatched to the motor.
Then dropped from above with the engine into the chasis cups.
I could see once they were in that as I was going to tighten them the motor was going to start turning in the bay.
Towards the drivers side (as it was before)
I tightened them up anyway to see by how much.
It turned the motor, but only by about 20mm at the rear of the box.
If you look at the photo below you'll see the line on the box and mount.
When the enginge mounts are tight the box moves 20mm to the left of the line.
Fortunately there is enough defflection in the centre rubbers on the engine mounts to allow the box to be pushed back over to the line by hand (just).
Previously the tunnel didnt allow the box to even reach the line.
I think that before it was a combination of the mounts kicking the rear of the box to the passenger side by 20 mm.
And the tight tunnel and old box mounts holding the box even further over to the pass side.
This forced the prop to run from the drivers to the pass side and the engine to point to the drivers side.
Now it all sits straight.
There is more of a gap between the sump and the power steering again.
Now that the engine is on it's mounts.
So i will just have to live with the fact that the engine is canted upwards at the front.
I am curious as to how much it will be off level to the rear once the car is on its wheels.
23-09-2011, 04:21 PM
#143
Rock Out!!
Thread Starter
Hi all,
Quick update.
Rear pads in. The rears are connected and bled. ( will be re done when fronts are on)
I have spent what time I've had this week reattaching wiring and other ancilleries.
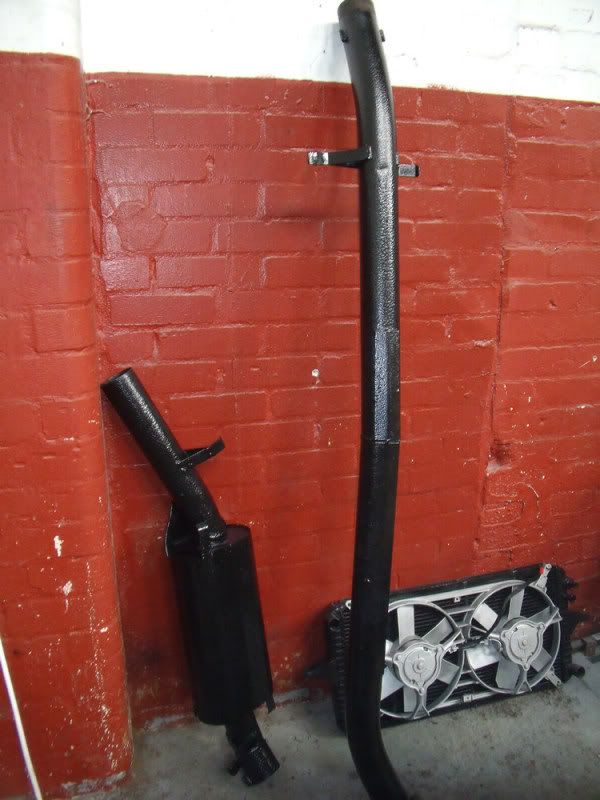
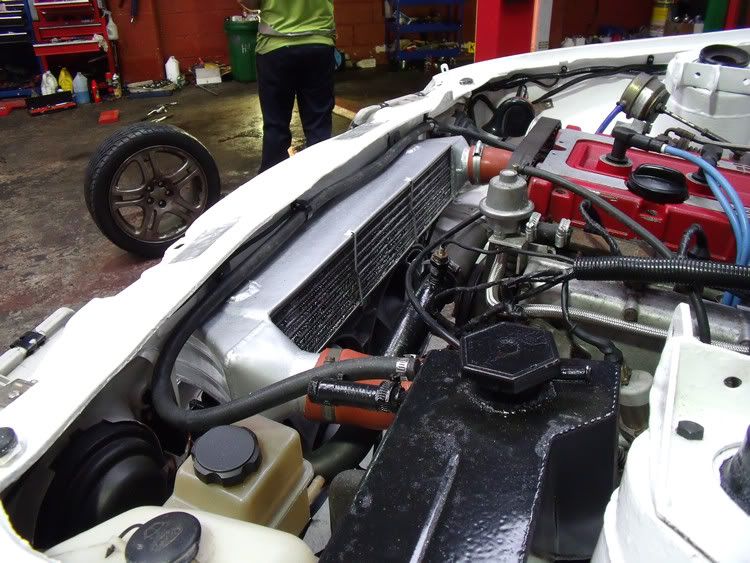
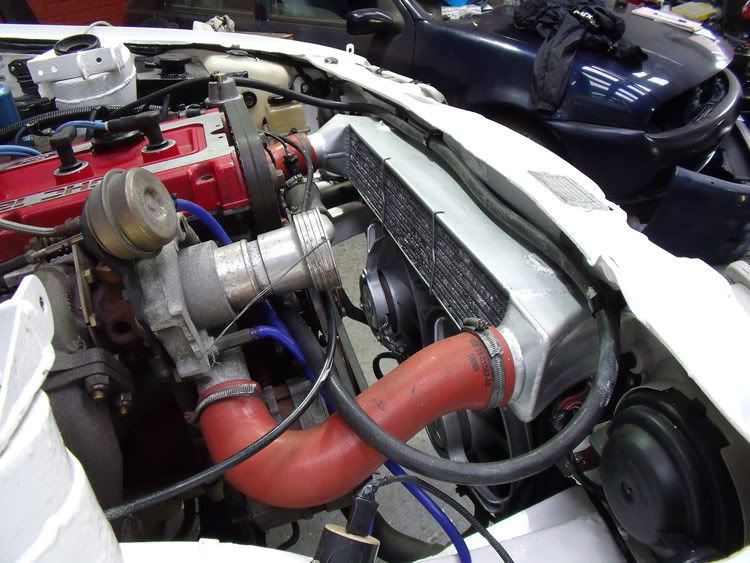
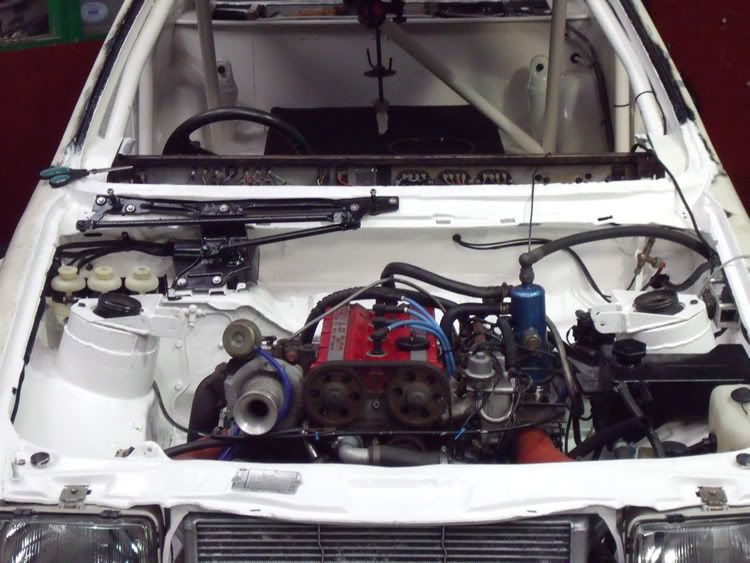
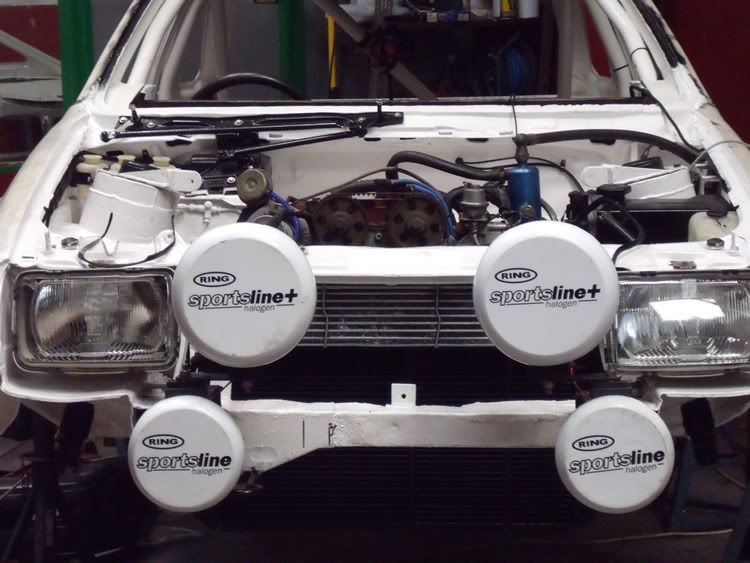
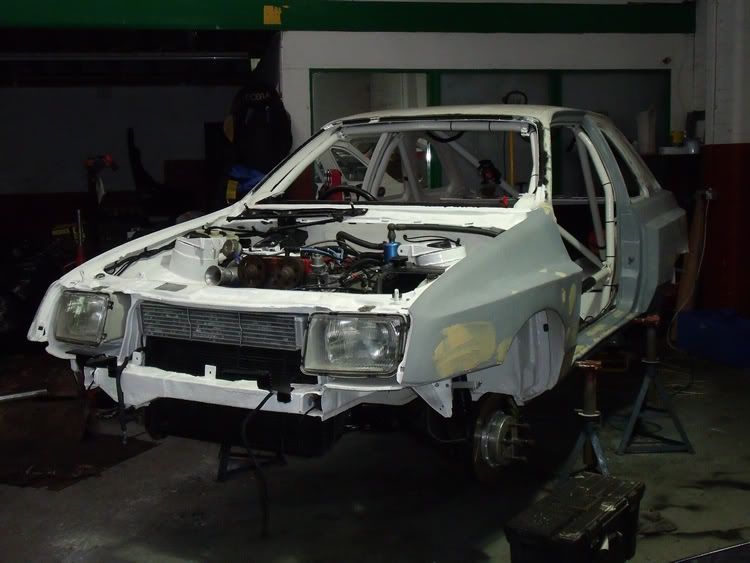
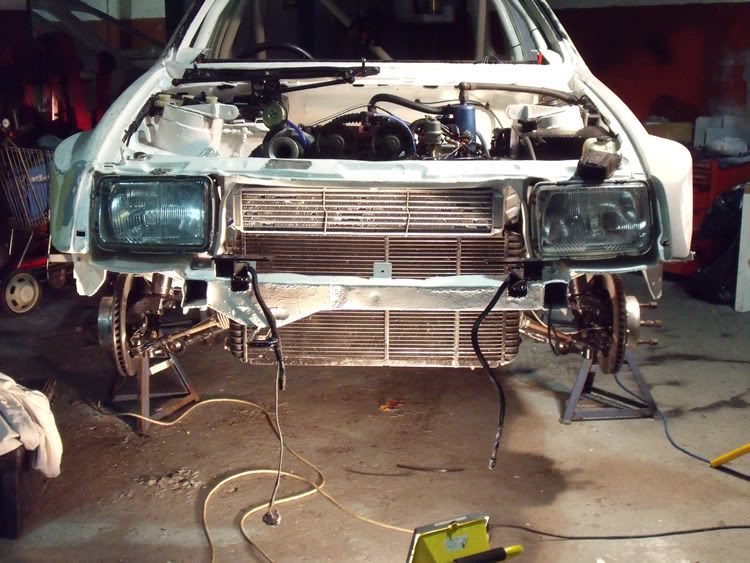
The intercooler is back in. The rad and fans in ( and working)
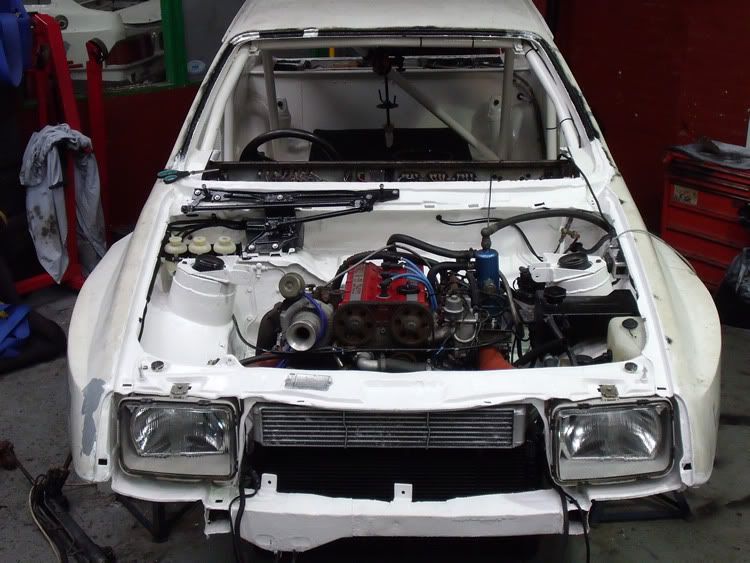
There is oil in the motor along with water, I'll have to save up for fuel.
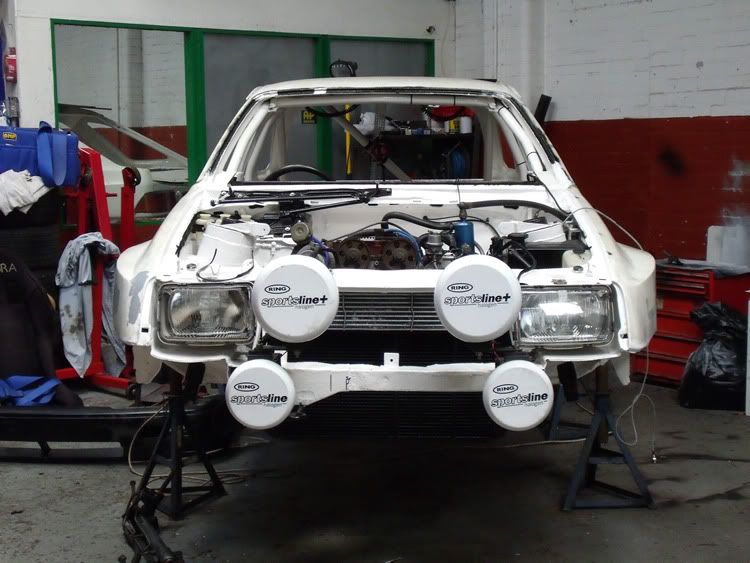
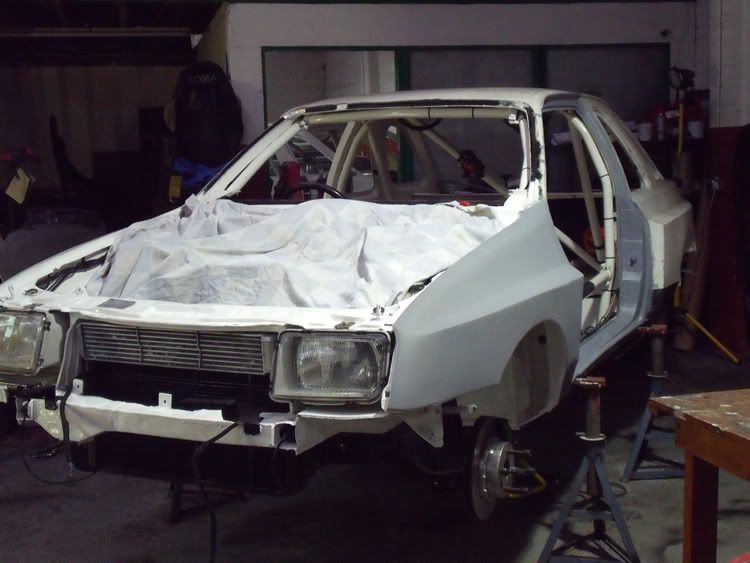
A couple of high up wide shots. Shows just how fat the old girl is. (big boned she calls it)
It must be that this pic is slightly out of focus or something,
but it makes the car look like one of those 1/18 models.
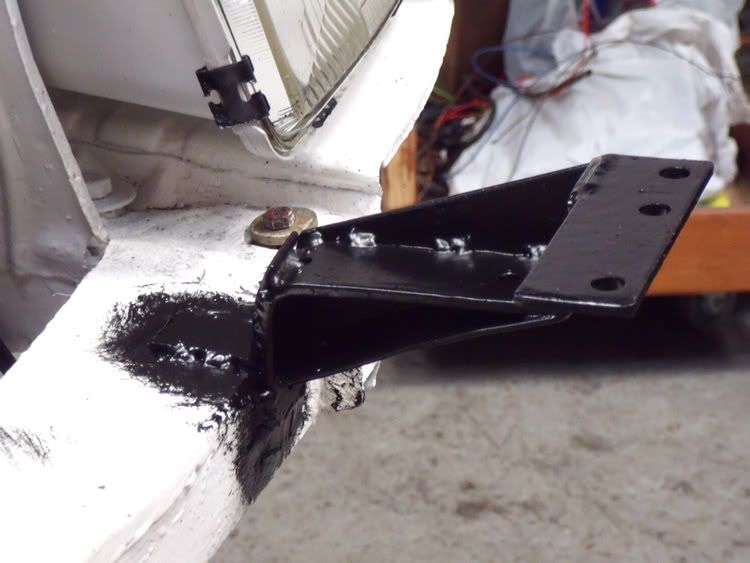
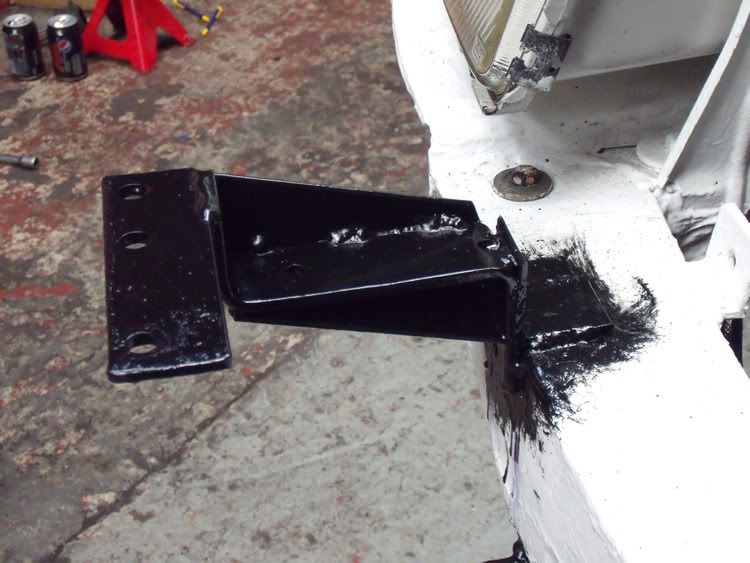
I have started fabricating new lamp brackets. I still have to strengthen and paint them, but I couldn't resist a quick fit up.
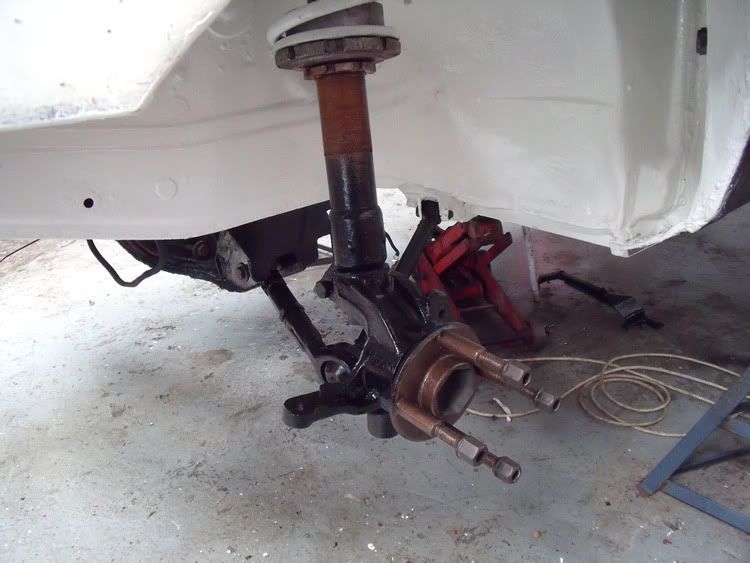
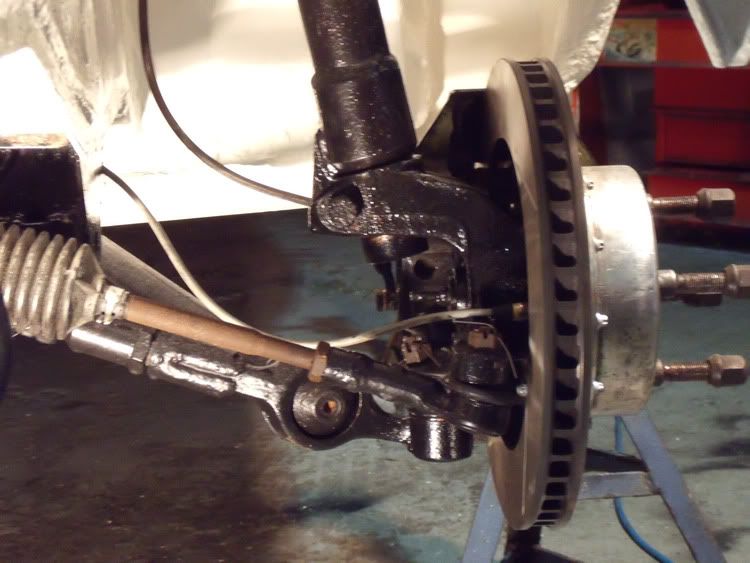
The front susspension has had a second coat of paint today so hopefully I will be able to fit it all up tommorrow.
Along with a few other niggly jobs.
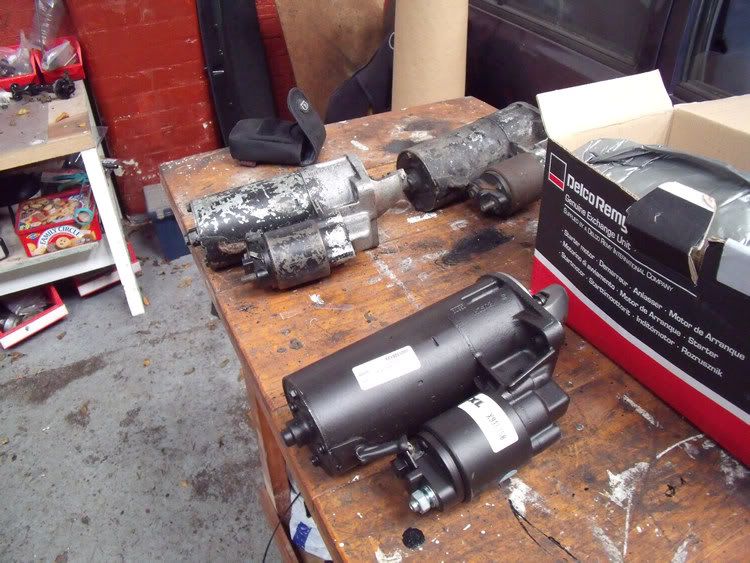
Like changing the F**ked cheap ebay starter that dosn't work, for the new ford one I've got coming.
And re-fitting the diff cover with gasket seal, like it had, before I bought the new 'proper' gasket' that leaks. Oh the joy.
Quick update.
Rear pads in. The rears are connected and bled. ( will be re done when fronts are on)
I have spent what time I've had this week reattaching wiring and other ancilleries.
The intercooler is back in. The rad and fans in ( and working)
There is oil in the motor along with water, I'll have to save up for fuel.
A couple of high up wide shots. Shows just how fat the old girl is. (big boned she calls it)
It must be that this pic is slightly out of focus or something,
but it makes the car look like one of those 1/18 models.
I have started fabricating new lamp brackets. I still have to strengthen and paint them, but I couldn't resist a quick fit up.
The front susspension has had a second coat of paint today so hopefully I will be able to fit it all up tommorrow.
Along with a few other niggly jobs.
Like changing the F**ked cheap ebay starter that dosn't work,
for the new ford one I've got coming.And re-fitting the diff cover with gasket seal, like it had, before I bought the new 'proper' gasket' that leaks. Oh the joy.
24-09-2011, 05:18 PM
#144
Rock Out!!
Thread Starter
Saturdays child is slack and didn't do a massive amount.
I did finish painting the lamp brackets I had made.
Then fitted the front end under carriage back on.

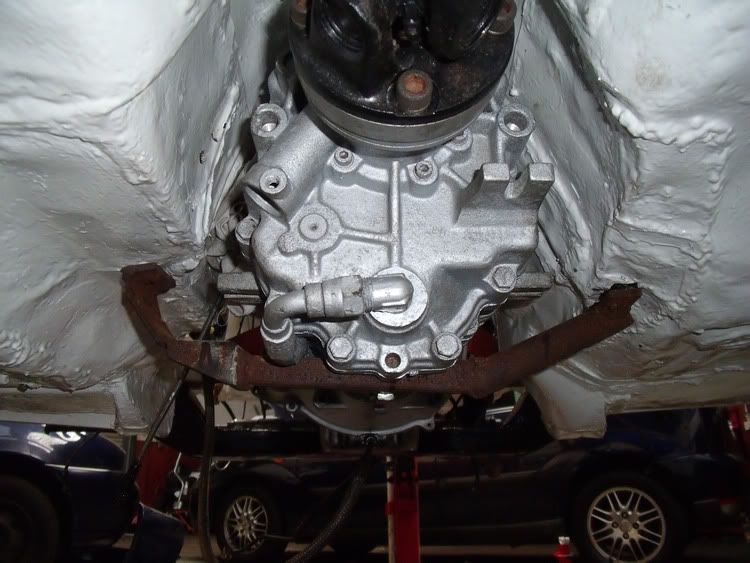
I fitted up the gearbox brace.
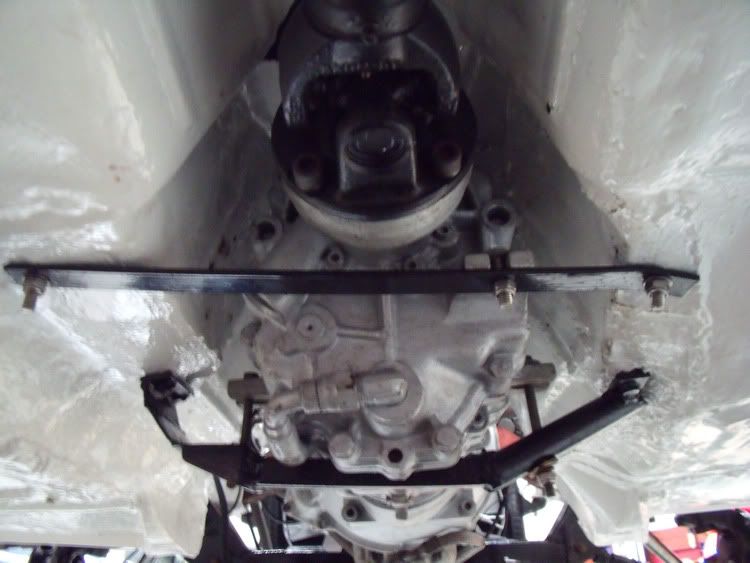
The gearbox sits on the front brace and the bolts stop it moving up or down.
They also seemed to stop any sideways movement,
but I wanted to be sure the box couldn't move at all,
so I added a bar across behind the brace that is bolted to the end lug of the box.
This locks the box from any sideways deflection completely.
I may still build a box section unit that takes in where both braces are. Something that could hold the box in place if the engine was lifted out on it's own. I just need a bit of time to sit and design it.
I did finish painting the lamp brackets I had made.
Then fitted the front end under carriage back on.
I fitted up the gearbox brace.
The gearbox sits on the front brace and the bolts stop it moving up or down.
They also seemed to stop any sideways movement,
but I wanted to be sure the box couldn't move at all,
so I added a bar across behind the brace that is bolted to the end lug of the box.
This locks the box from any sideways deflection completely.
I may still build a box section unit that takes in where both braces are. Something that could hold the box in place if the engine was lifted out on it's own. I just need a bit of time to sit and design it.
05-10-2011, 08:15 PM
#146
Rock Out!!
Thread Starter
I've had to do a bit of work this week to pay for this daft restoration game, so not a lot has been getting done.
I've been waiting for some bolts for the front dics to turn up and a starter motor.
I have been doing odd little jobs, like this bracket for the speedo drive.
And the bumpers have new brackets, the exhaust is back on and a few other bits.
hopefully I'll get back down the unit this weekend so will update the pics.
 05-10-2011, 11:20 PM
#148
Fart of the Purniture
Love this, excellent work.
That rust stuff you used, will it not get burnt off the exhaust? Or is it hardened in - don't really understand how/if it copes with all that heat
Keep up the hard work fella
That rust stuff you used, will it not get burnt off the exhaust? Or is it hardened in - don't really understand how/if it copes with all that heat
Keep up the hard work fella
Last edited by mk22door; 05-10-2011 at 11:29 PM. Reason: Not understanding things that need to be understood.
22-10-2011, 07:14 PM
#149
Rock Out!!
Thread Starter
Finally another update.
Have just had so much on at work, I've only managed a couple of nights in the last weeks.
@mk22door, Simple answer..I hope so. The blurb for it says it will, so I'll report back if it just burns off.
I've managed to get the front brakes on and bled (will need doing properly when I've a spare bod around to pump the pedal)
I started to clean and prime a few areas whilst waiting for the starter motor to turn up.
This morn it turned up and was fitted.
First turn of the key she fired.
Unfortunately things went down hill from there.
I had problems with over fueling which appear to be an earth or wiring fault on the engine loom.
The fun and game cost most of today, but hopefully in the week I will get time to sort it out.
Once that's out of the way the bulk of the mechanical work is done.
Then it's back to painting again.
29-10-2011, 08:27 PM
#152
Rock Out!!
Thread Starter
Little more:
After the fun and games that were the fueling issuses got solved.
It turned out to be nothing more dramatic than the injector cap was on the idle valve and the idle valve cap was on the injector and trying to do each others job.
Note to self, when ever there is a problem, check the idiot in the ill fitting overalls first.
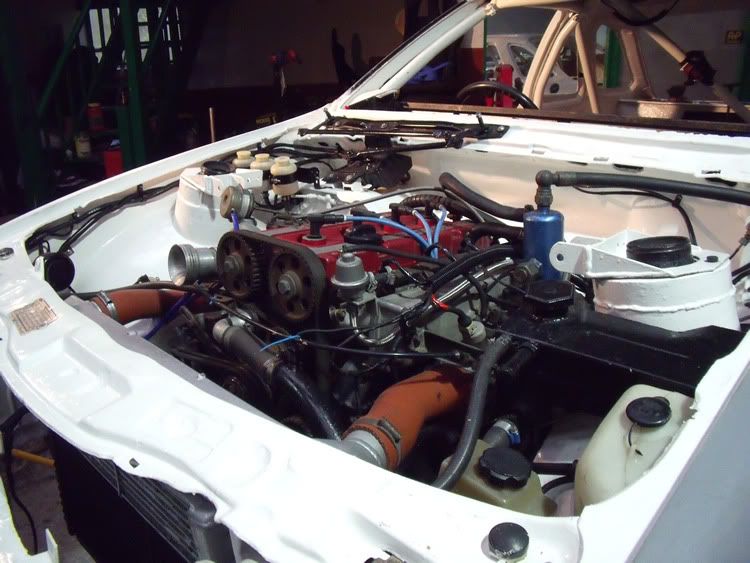
As I had the fuel rail and injectors out I fitted a new set of o rings and wired everything up tidily (this time with red tape for the idle valve )
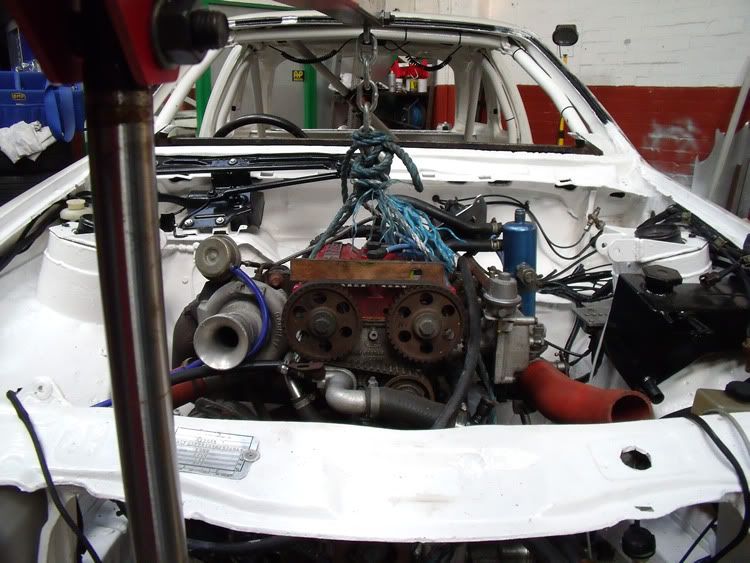
Obviously you cant see the o rings, but that's no reason not to post a pic of a cossie engine.
Now that the engine is purring again, I am just waiting to fix a couple of bits and bobs and then the car can drop on to her wheels for a clutch/ running gear check.
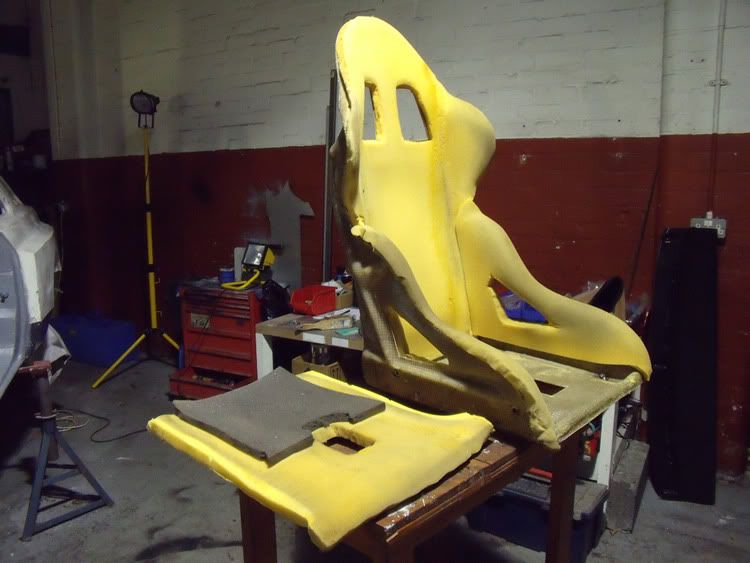
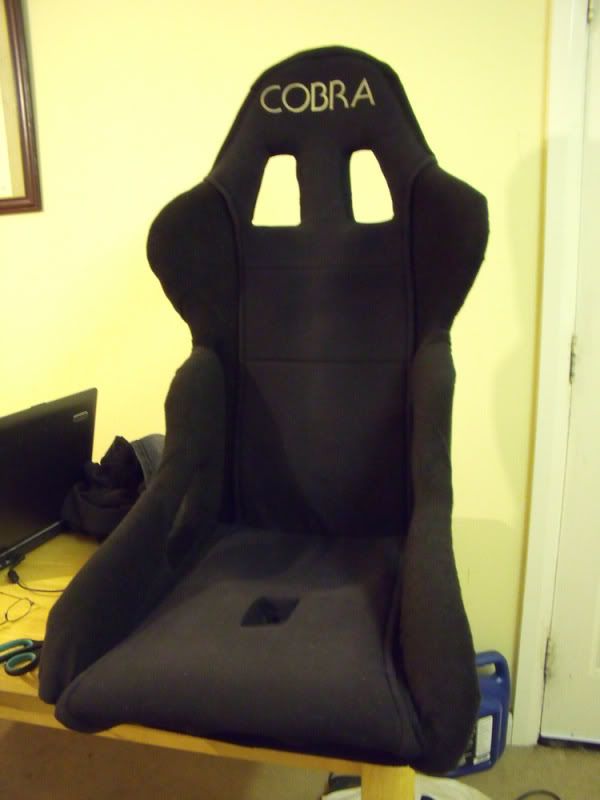
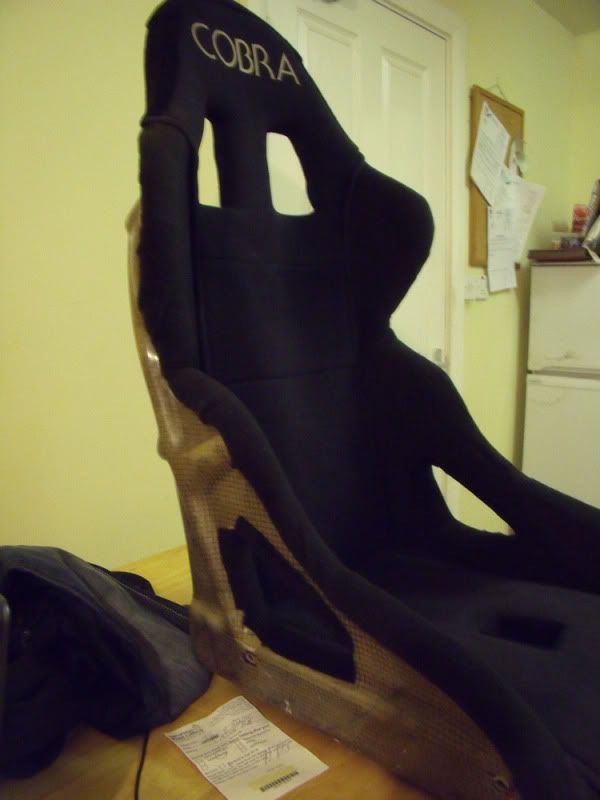
In the meantime I have been doing odds and sods, like stripping the seats for a bit of re upholstery.
I did think of new Cobras for her, but I have got used to the 27yr old seat I have shaped to my fat arse.
Plus I think from the complete lack of weight and weave that they are kevlar. (not cheap to replace)
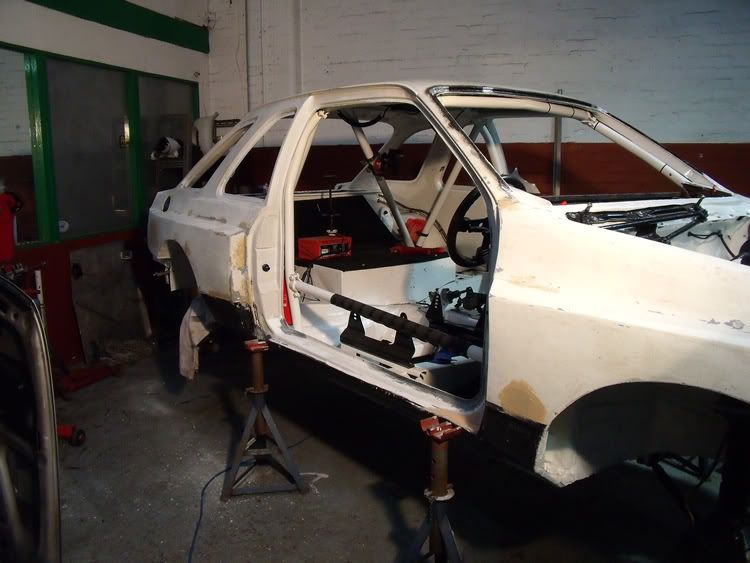
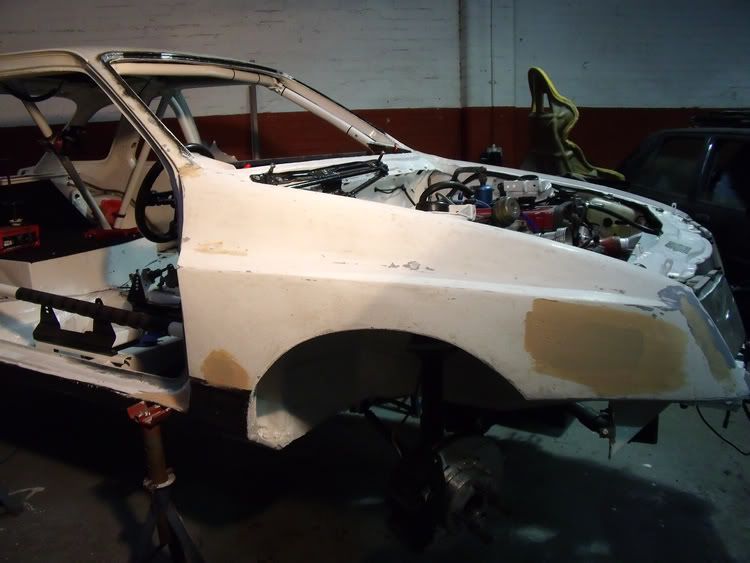
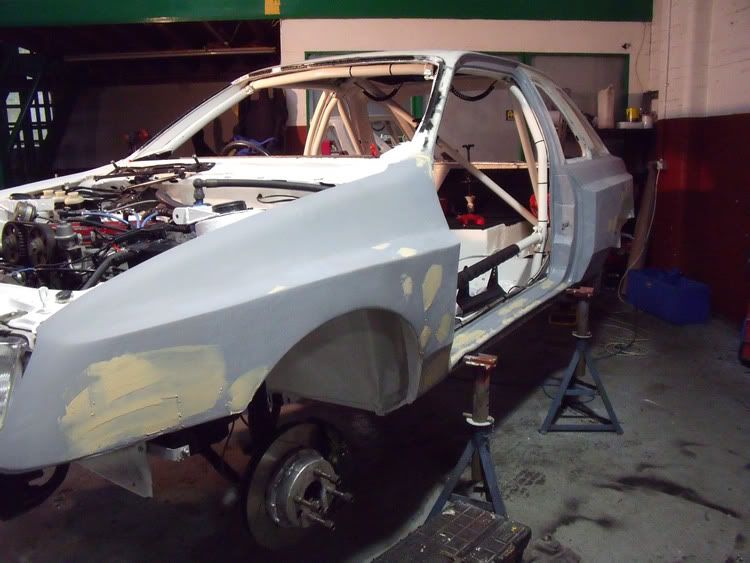
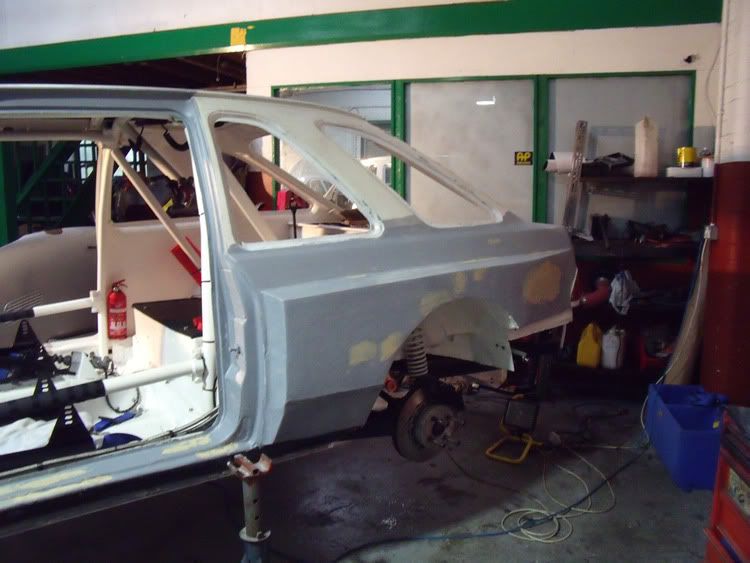
Her body has been getting a bit of a tart up.
I'm not intending to remove any of her major dings and dents, just smooth out some of the cracks that regularly appear as most of the panels are just riveted on.
After the fun and games that were the fueling issuses got solved.
It turned out to be nothing more dramatic than the injector cap was on the idle valve and the idle valve cap was on the injector and trying to do each others job.
Note to self, when ever there is a problem, check the idiot in the ill fitting overalls first.
As I had the fuel rail and injectors out I fitted a new set of o rings and wired everything up tidily (this time with red tape for the idle valve )
Obviously you cant see the o rings, but that's no reason not to post a pic of a cossie engine.
Now that the engine is purring again, I am just waiting to fix a couple of bits and bobs and then the car can drop on to her wheels for a clutch/ running gear check.
In the meantime I have been doing odds and sods, like stripping the seats for a bit of re upholstery.
I did think of new Cobras for her, but I have got used to the 27yr old seat I have shaped to my fat arse.
Plus I think from the complete lack of weight and weave that they are kevlar. (not cheap to replace)
Her body has been getting a bit of a tart up.
I'm not intending to remove any of her major dings and dents, just smooth out some of the cracks that regularly appear as most of the panels are just riveted on.
Last edited by baz walton; 29-10-2011 at 08:29 PM.
10-11-2011, 10:06 PM
#154
Rock Out!!
Thread Starter
Annnnd, back to the garage.
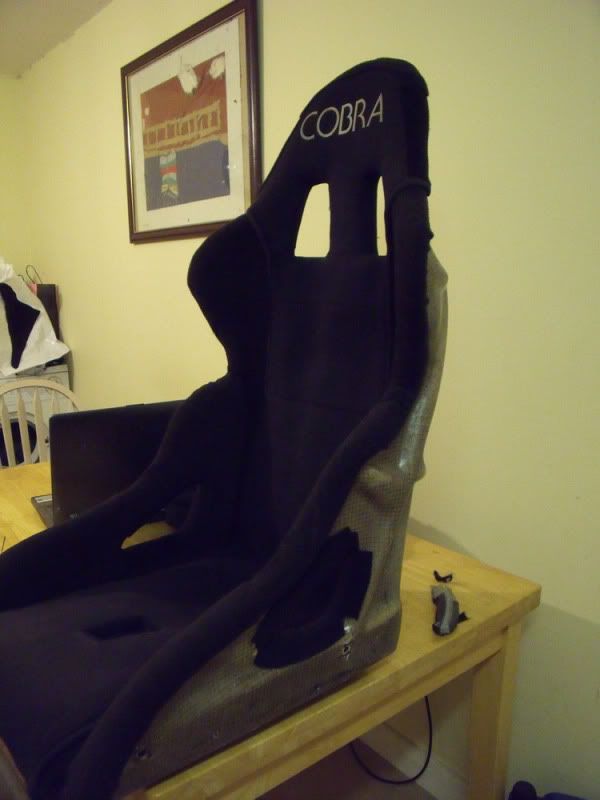
I managed to get the passenger seat recovered.
I had picked up some more sticky back carpet, similer to what I had used on the car.
I covered the seat in it and was happy enough with the results.
But I really wanted the logo to be on the top.
It was then just by accident that, as I was picking up the old cover,
it stuck to some of the carpet on the table and I remembered that the old covers were all held together with velcro.
I flattened out the folded velcro edge and put the old centre piece of the seat cover back over the newly carpeted seat.
The pics dont make it look very good, but I'm well chuffed with it.
Seat looks new for grand total of a couple of hours and twenty quid.
I have been messing around with the brakes as I couldnt get the banjos to seal.
Turned out I had solid washers not crush washers.
I fitted new all round, but they still weep a little.
I think a few heat cycles might soften them into shape and then I'll nip them up.
Now that the enginge turns over and runs happily,
It was time to see if any drive would work.
Clutch worked, but only just, so Saturday will be spent adjusting the rod length on the slave cylinder to get the right amount of travel.
The Joys.
I have fitted a steering rack.
The original had a leeking seal. I was going to buy another rack, but I found one in my spare room (as you do) so have fitted that for now.
It may leak as well, I'll find out soon enough.
11-11-2011, 10:36 AM
#155
Too many posts.. I need a life!!
This photo recently came up from 1984 is this your car or one of the sister cars?
lakeland rally
http://www.flickr.com/photos/1678887...in/photostream
lakeland rally
http://www.flickr.com/photos/1678887...in/photostream
11-11-2011, 11:24 AM
#157
Rock Out!!
Thread Starter
Just looking at some of the other photos on that site, This is the car built by RED at the same time as the CG ford Sierra.
http://www.flickr.com/photos/1678887...n/photostream/
They wern't sister cars as such, but Dougie told me they worked together on the susspension designs and layouts of the two cars. Both were unique and not repeated as the sierra cosworth was released within a couple of years and group A rallying was established.
As far as I'm aware only the CG ford car of the two still exists.
11-11-2011, 03:03 PM
#158
I've found that life I needed.. It's HERE!!
iTrader: (6)

Join Date: Nov 2008
Location: Sussex
Posts: 1,341
Likes: 0
Received 0 Likes
on
0 Posts
Hi Baz,excellent project you have there ,keep up the good work .
I had a few similar jobs to do when i built my car up , it uses the same Gearbox and ive just taken a few shots of how i got it to mount up , the square steel cradle i made up as i didnt really trust the cotton reels that were all that ford used on these in period , the steel plates that bolt up to the chassis use the normal place that a T5 would bolt upto but with an extra arrangement halfway up the tunnel and a bush for the cotton reels ,its 3 pieces in total .Hope these help ...


I had a few similar jobs to do when i built my car up , it uses the same Gearbox and ive just taken a few shots of how i got it to mount up , the square steel cradle i made up as i didnt really trust the cotton reels that were all that ford used on these in period , the steel plates that bolt up to the chassis use the normal place that a T5 would bolt upto but with an extra arrangement halfway up the tunnel and a bush for the cotton reels ,its 3 pieces in total .Hope these help ...
11-11-2011, 04:53 PM
#160
PassionFord Post Whore!!

just seen this thread for the first time,excellent stuff mate.
keep up the hard work.really great history the cars got.
would be great to see it flying through a forrest again but its still good to see it being saved
keep up the hard work.really great history the cars got.
would be great to see it flying through a forrest again but its still good to see it being saved