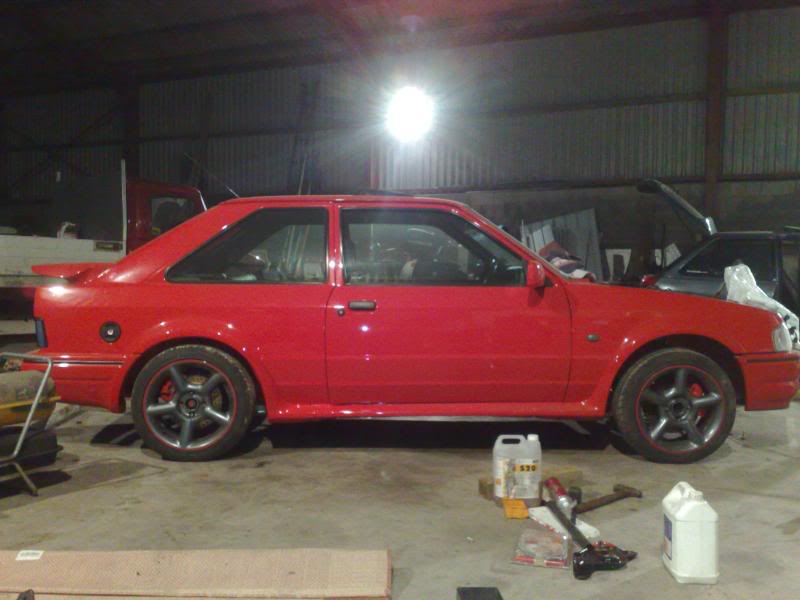
Muz's Escort RS Turbo Track Car. Bumper painted and fitted.
 21-10-2008, 06:15 PM
#41
Wye Valley Hardcore
Thread Starter
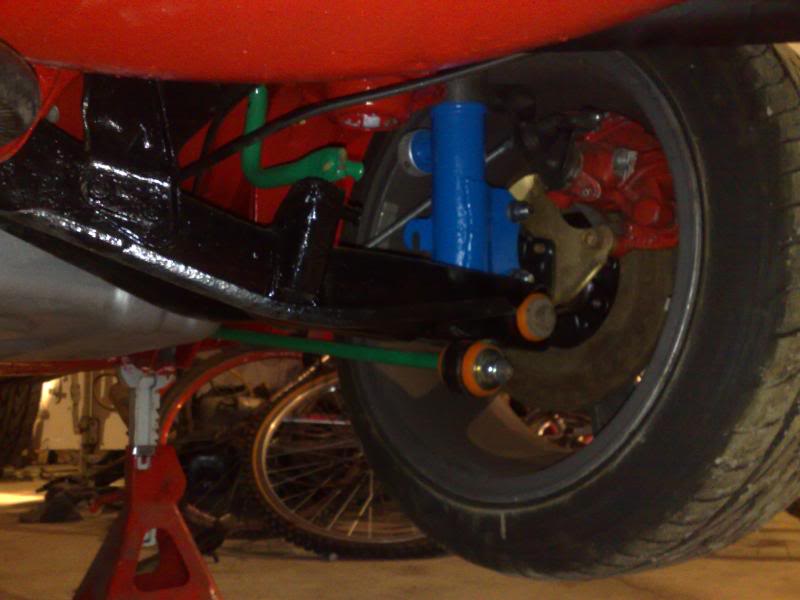
Boring bits I know, but a small step closer. Painted up and re fitted my brake lines and one of the fuel lines.
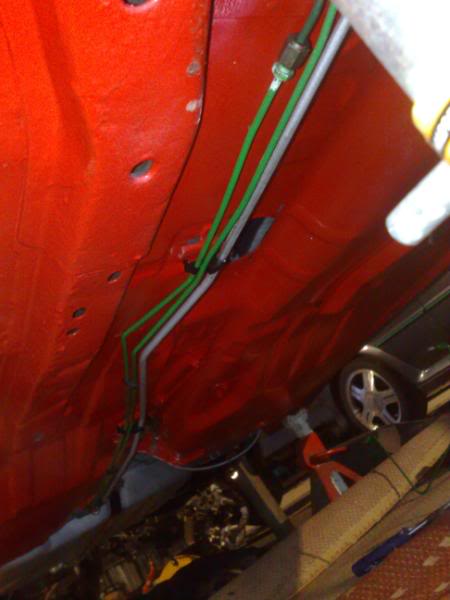
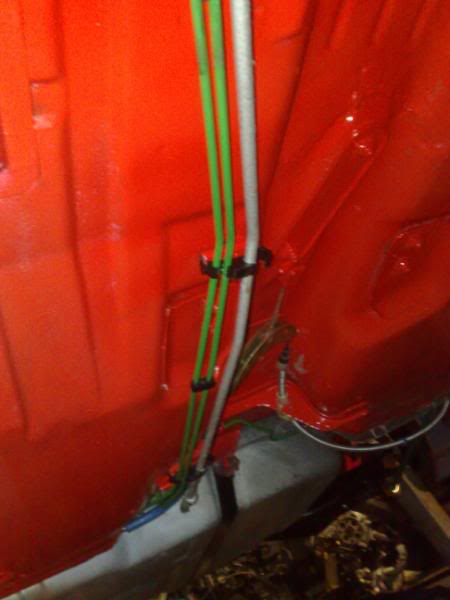
Not concourse, just nice and tidy.
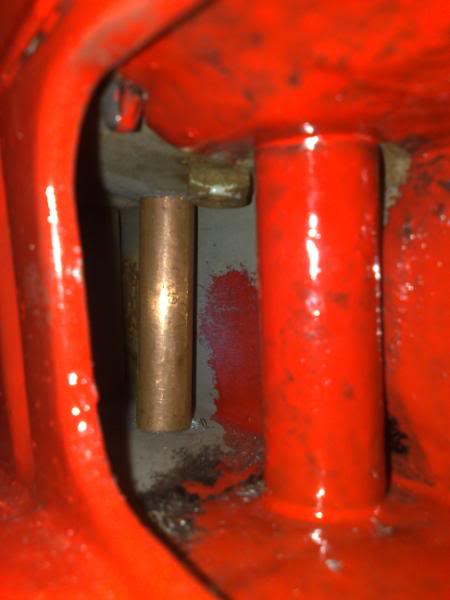
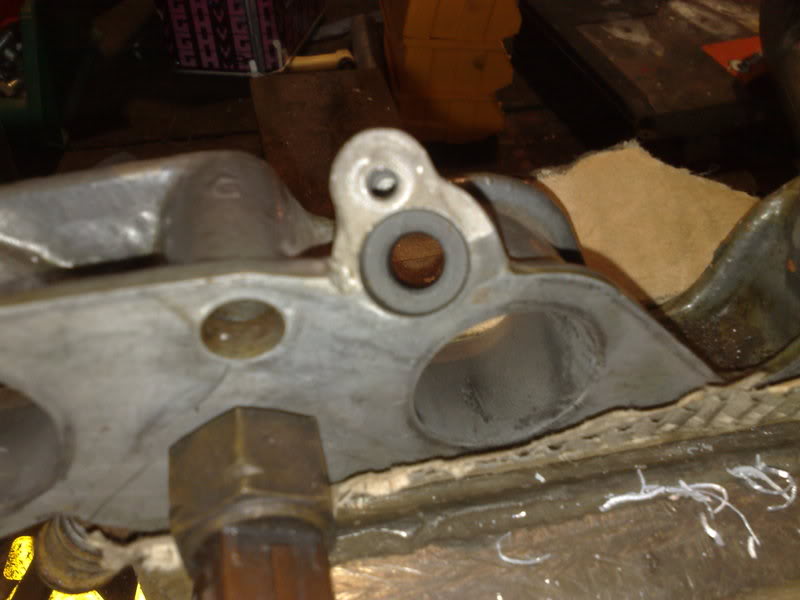
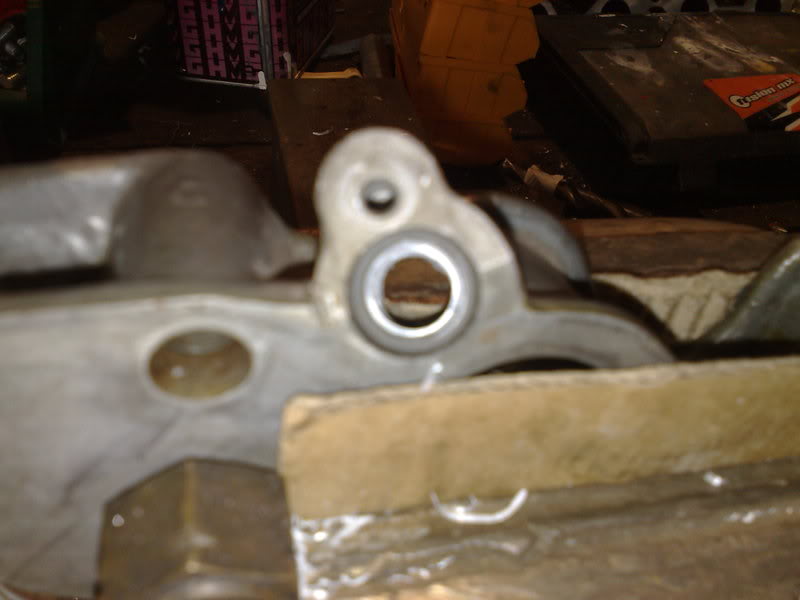
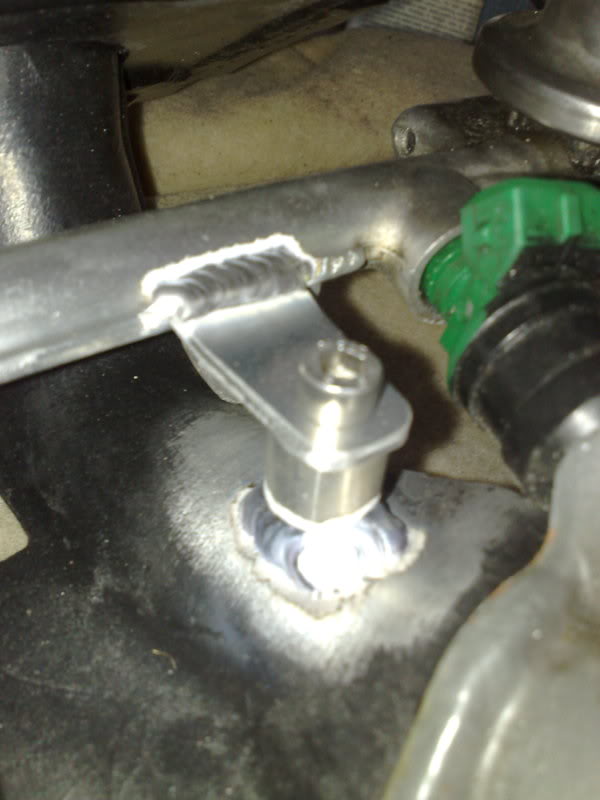
And got another rear ARB bracket so thats on properly
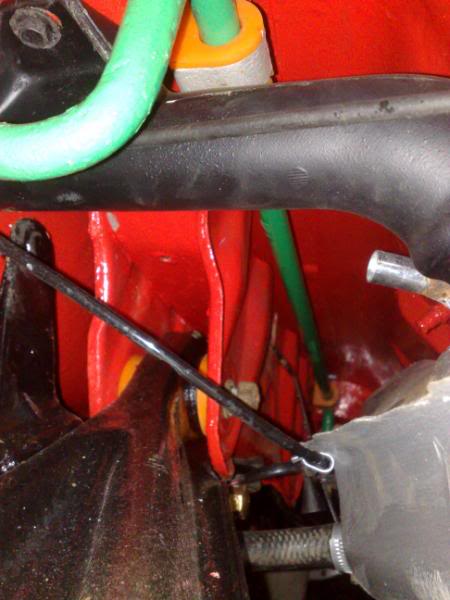
Hopefully be doing some more interesting bits like putting the coilovers and front brakes on in the next few weeks. Should be abit more fun.
Not concourse, just nice and tidy.
And got another rear ARB bracket so thats on properly
Hopefully be doing some more interesting bits like putting the coilovers and front brakes on in the next few weeks. Should be abit more fun.
Last edited by muz; 21-10-2008 at 06:27 PM.
 06-11-2008, 10:28 AM
#43
Wye Valley Hardcore
Thread Starter
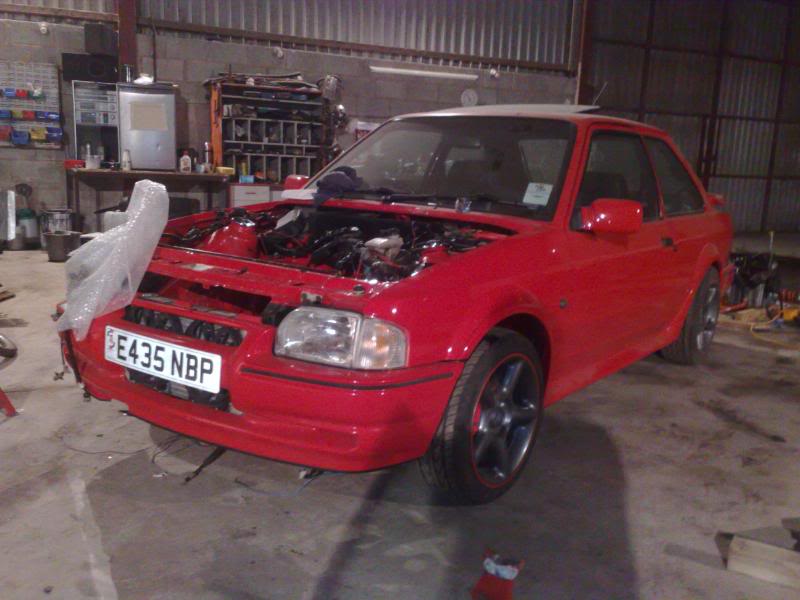
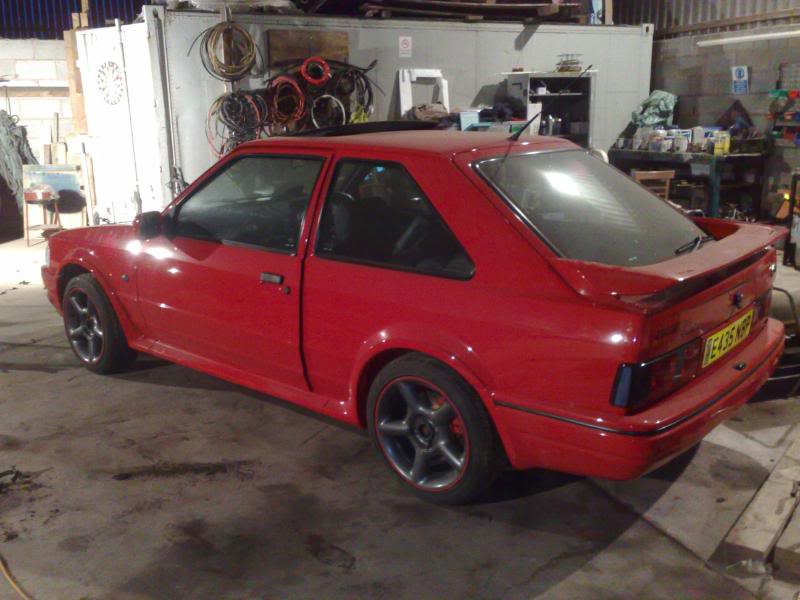
Its starting to resemble a car again.
Stripped the old loom into what I needed to keep and tuck away. and Re taped it. also Fitted the Cossie loom, but that still needs re taping.
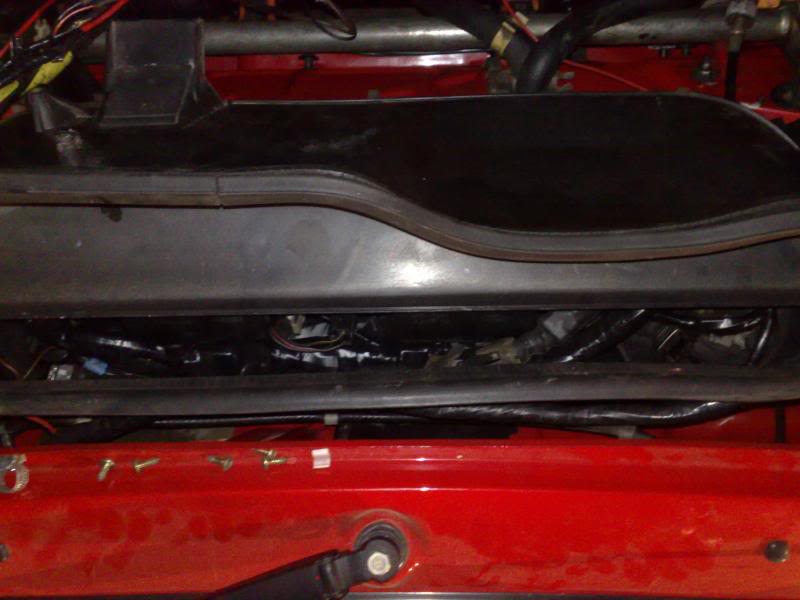
Cossie Loom
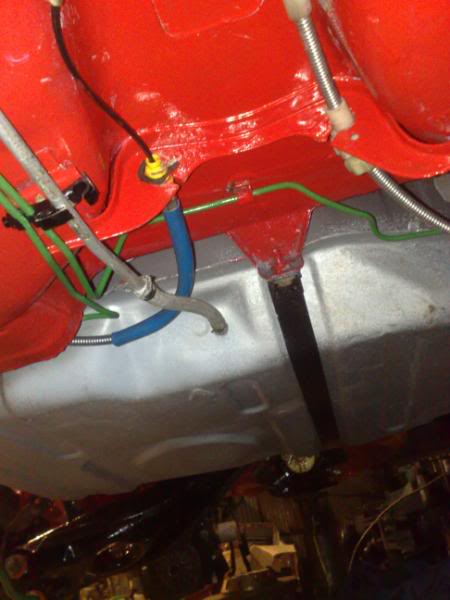
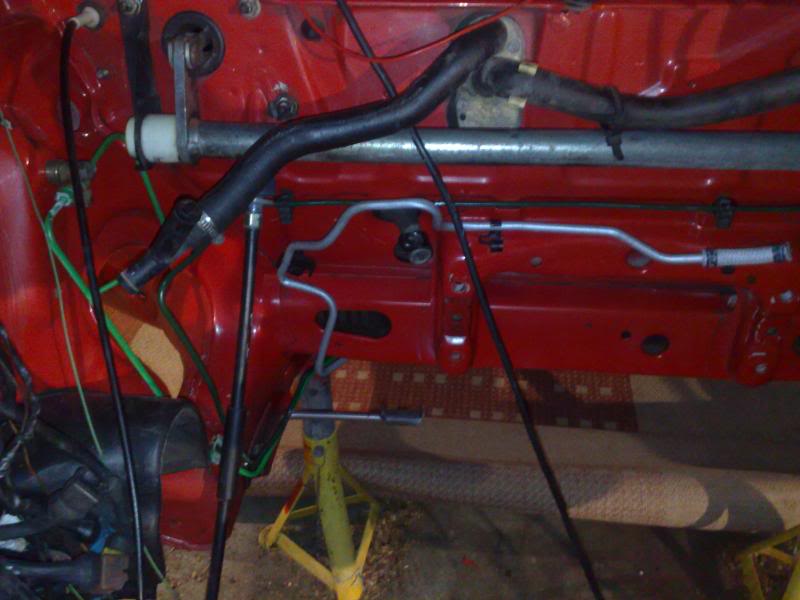
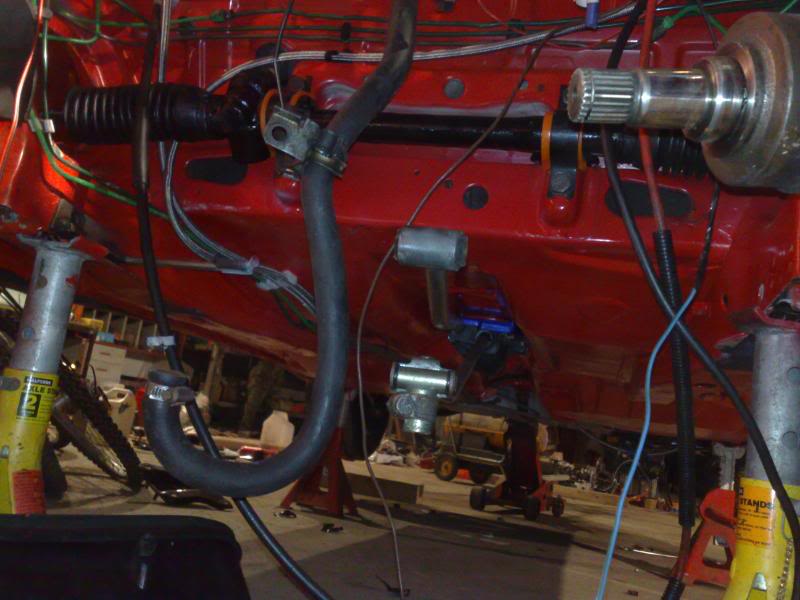
Plumbed in the brake bias valve and connected all the brake lines. They will be replaced with braided line at some point though. Little bits like stearing rack, accumulator etc fitted.
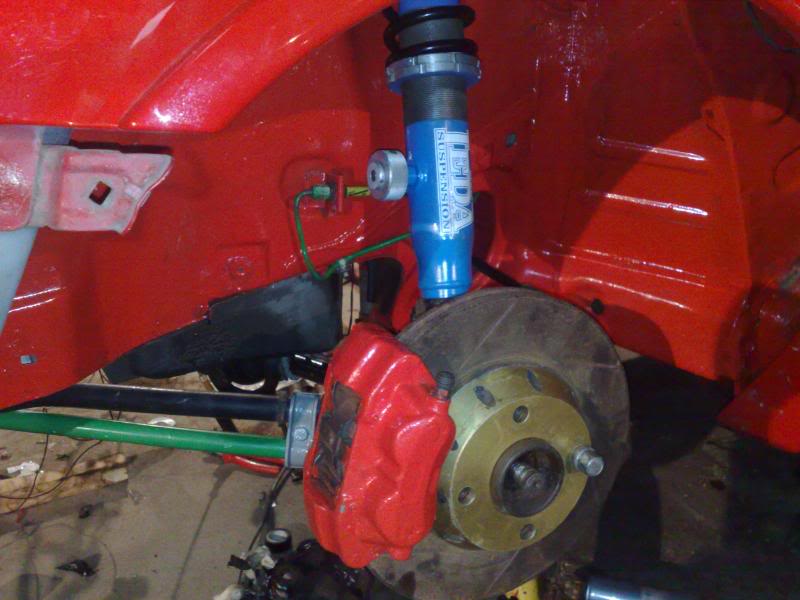
Fitted the RS ARB Along with the front hub, coilover brakes ect on the one side. Other side hub needs a new bearing which I'll get done for tomorrow.

And my braided fuel lines came in the post today. Will have the other side and the rears built up by the end of the week.
Stripped the old loom into what I needed to keep and tuck away. and Re taped it. also Fitted the Cossie loom, but that still needs re taping.
Cossie Loom
Plumbed in the brake bias valve and connected all the brake lines. They will be replaced with braided line at some point though. Little bits like stearing rack, accumulator etc fitted.
Fitted the RS ARB Along with the front hub, coilover brakes ect on the one side. Other side hub needs a new bearing which I'll get done for tomorrow.
And my braided fuel lines came in the post today. Will have the other side and the rears built up by the end of the week.
 09-11-2008, 07:36 PM
#47
Wye Valley Hardcore
Thread Starter
Cheers guys. 
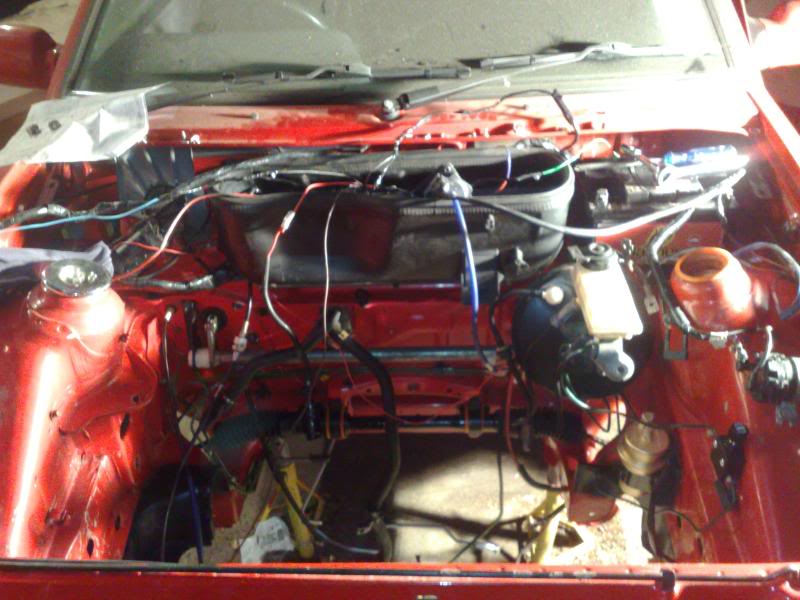
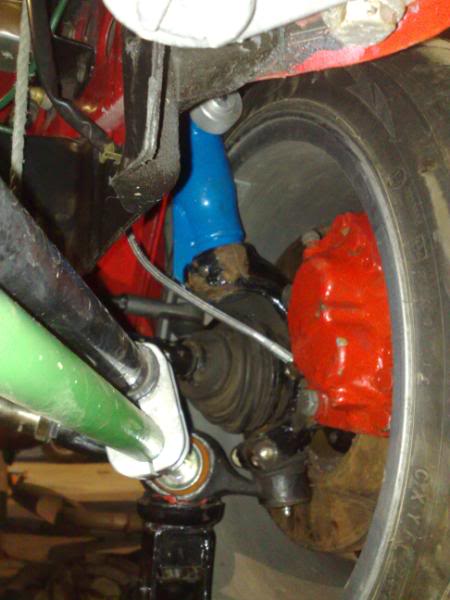
Very happy now. The cars back on it wheels. Was able to roll it out of the way and have a good clear up in the barn.
Had my new rear spring collets arrive from Gaz so could bolt the rear suspention up.
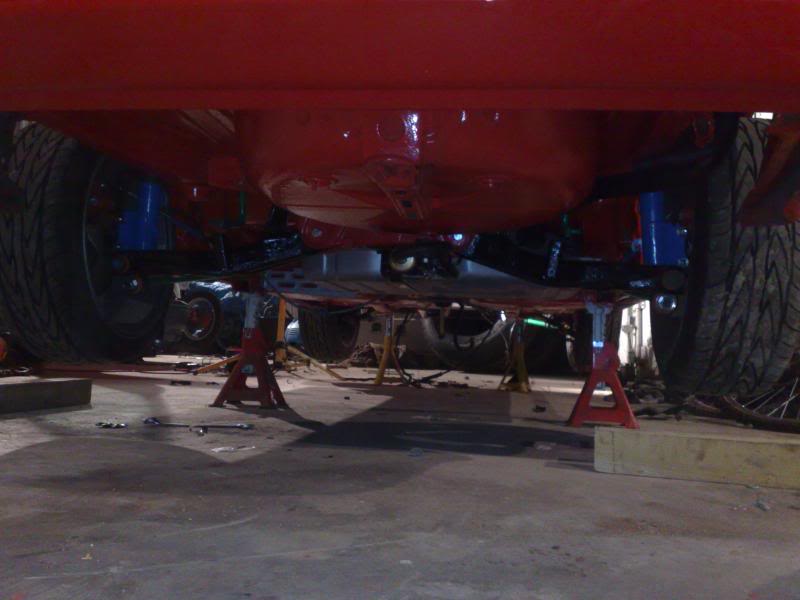
I've gone for 275 LBS front springs and 180 LBS rear springs.
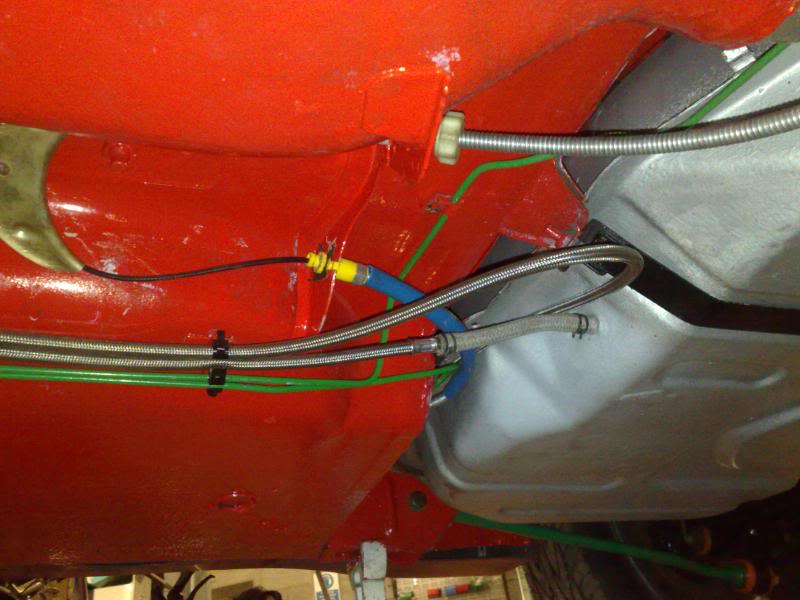
Braided fuel lines and B&M fitted.
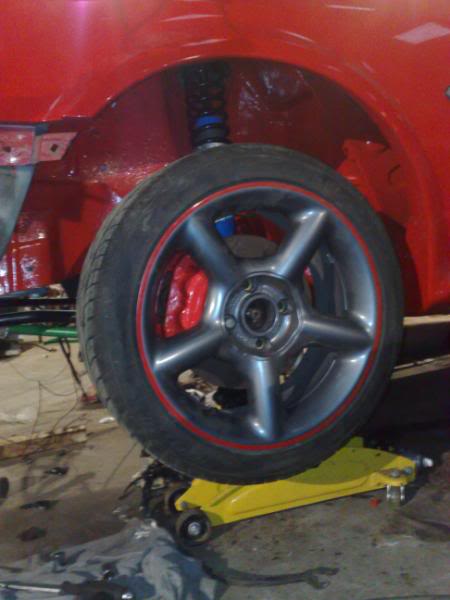
On all fours.
Loving the stance.

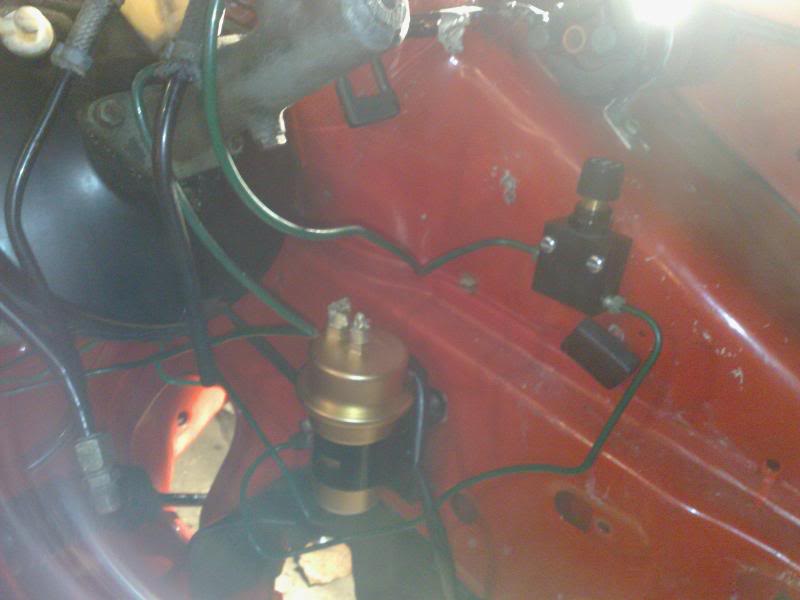
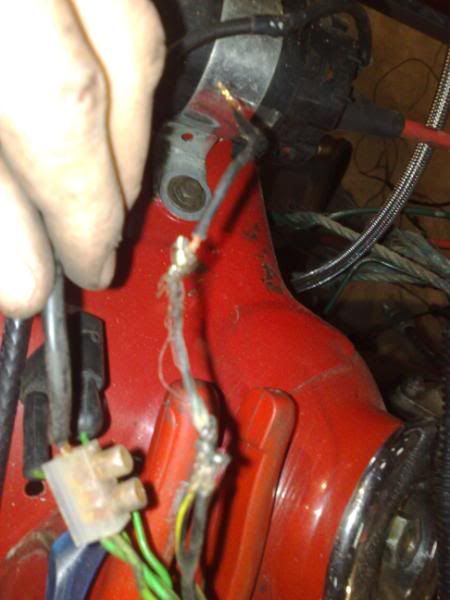
And finally a scarey one of the coil wiring
Theres a few small jobs I still need to do, tighten a few bolts etc and gearbox is off to Bernie at CTS for an end casing swap.

Very happy now. The cars back on it wheels. Was able to roll it out of the way and have a good clear up in the barn.
Had my new rear spring collets arrive from Gaz so could bolt the rear suspention up.
I've gone for 275 LBS front springs and 180 LBS rear springs.
Braided fuel lines and B&M fitted.
On all fours.
Loving the stance.
And finally a scarey one of the coil wiring
Theres a few small jobs I still need to do, tighten a few bolts etc and gearbox is off to Bernie at CTS for an end casing swap.
09-11-2008, 10:47 PM
#49
Wye Valley Hardcore
Thread Starter
Got a full set off a bloke on ebay. His name is rs custom hoses. He's doing me a set of braided brake lines too, but won't have them for a few weeks.
Yep light at the end of the tunnel. My x-mas deadline looks in sight. Won't be mapped etc but it'll be driving.
Yep light at the end of the tunnel. My x-mas deadline looks in sight. Won't be mapped etc but it'll be driving.

 10-11-2008, 12:52 PM
#52
Wye Valley Hardcore
Thread Starter
I bought the shocks as just bare shocks off eBay for �430 posted. Then I got on the phone to Gaz who for �150 supplied me with rear spring collars and 4 springs. So not a bad suspention set up for �580. Not much more than Gaz coilovers.
12-11-2008, 06:49 PM
#53
Wye Valley Hardcore
Thread Starter
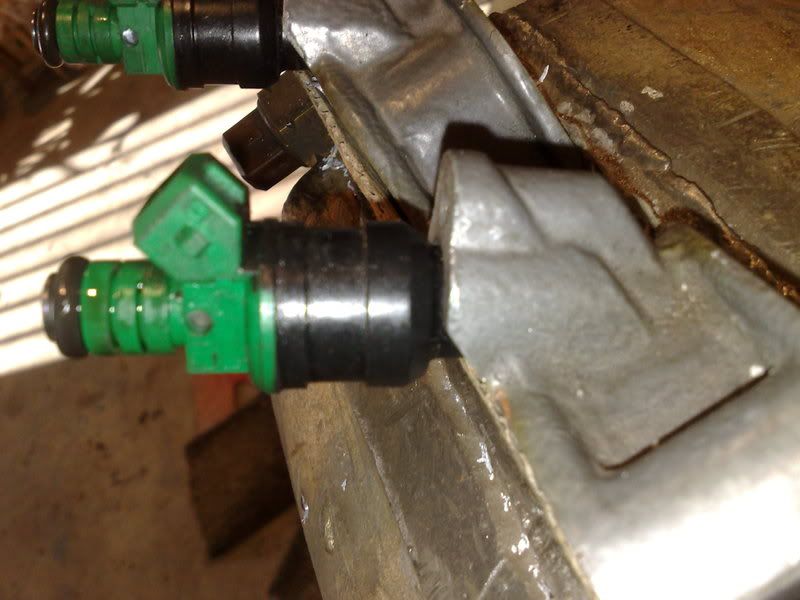
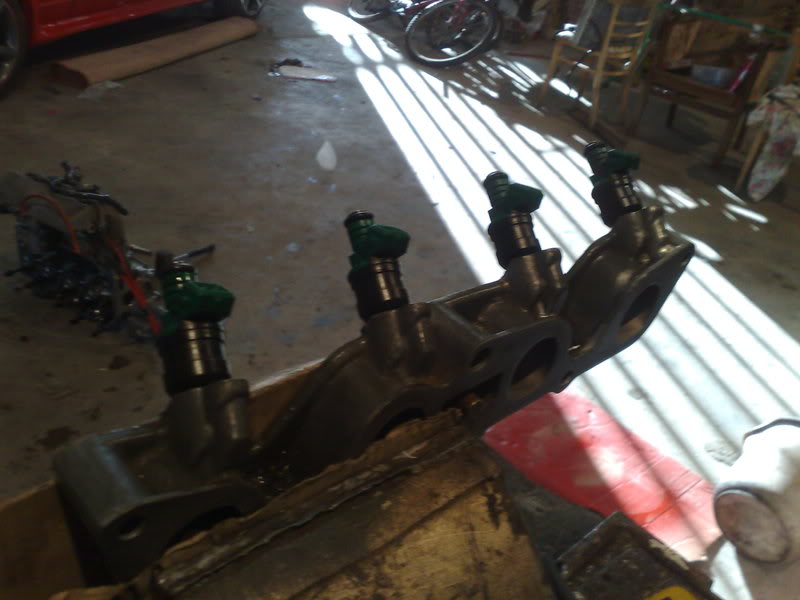
I got my injector sandwhich plate throught he post so could get on with modifying it to accept EFI injectors.
The ports when I started. Much too small for the injectors.
Then I drilled the ports out in 3 stages to accept the nozzle, seal and body of the injector at different stages to end up with this.
Sweet.
I still need to make a mount to hold the fuel rail securely but I'm happy with my handy work.
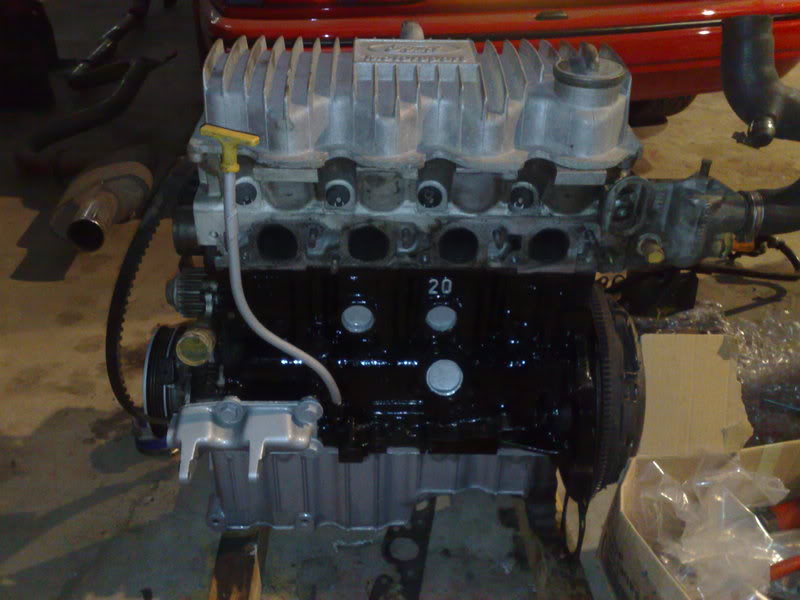
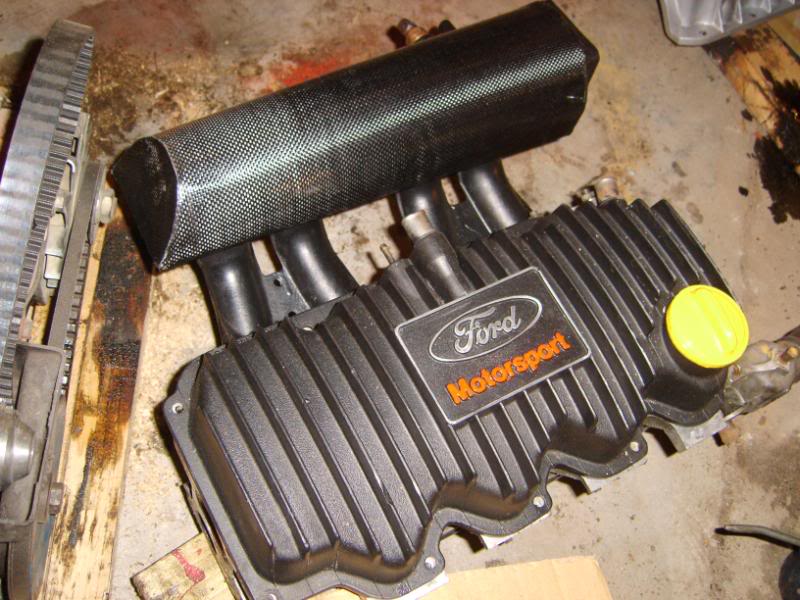
Then I couldn't do much so I desided to paint my block and sump.
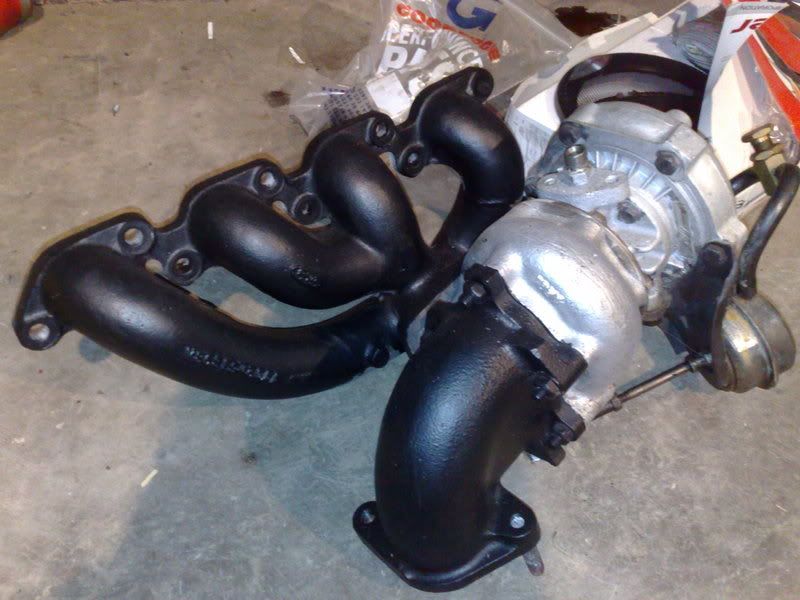
Turbo and manifold.
And then my rocker cover.
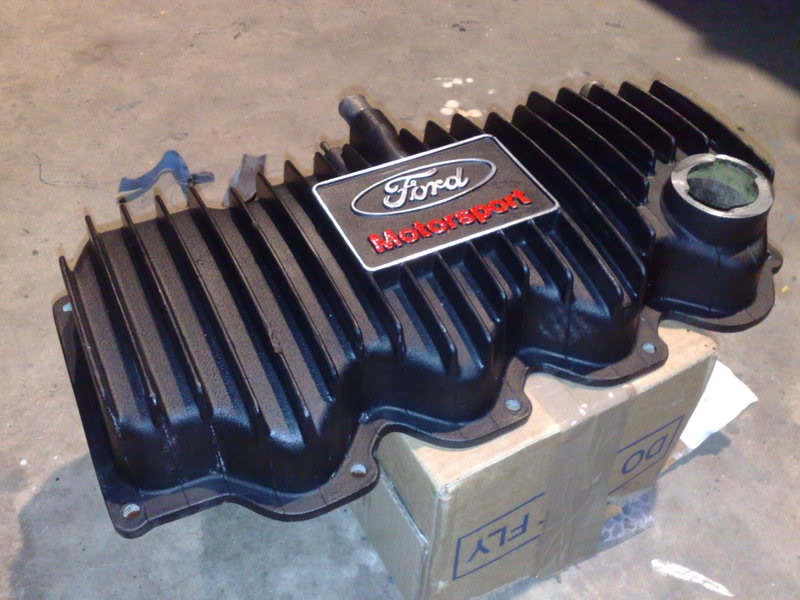
I've gone for matt black, with polished ford logo and red motorsport logo.
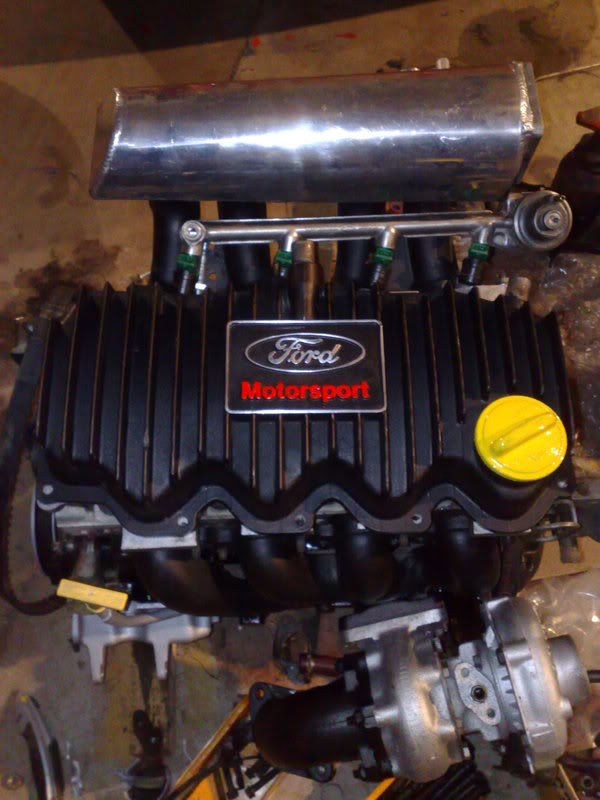
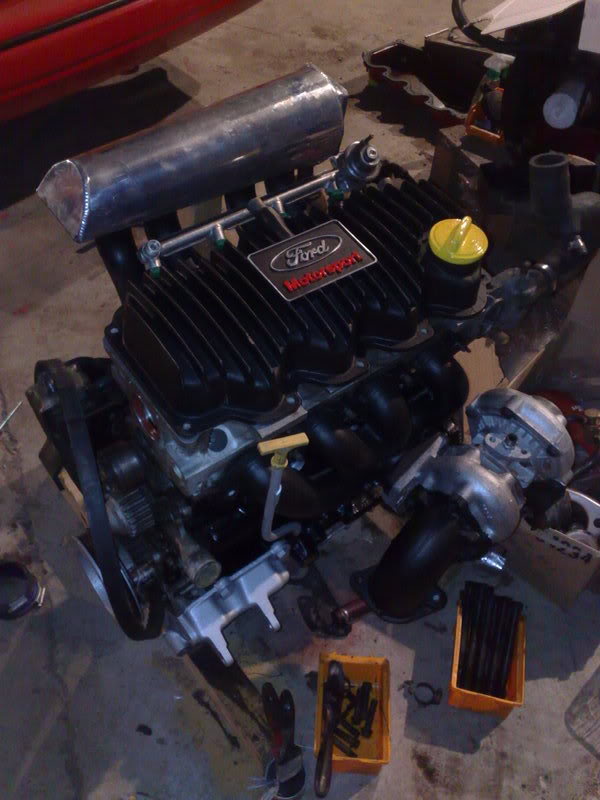
Then with all of these freshly painted parts lying around I couldn't help a dry fit
The ports when I started. Much too small for the injectors.
Then I drilled the ports out in 3 stages to accept the nozzle, seal and body of the injector at different stages to end up with this.
Sweet.
I still need to make a mount to hold the fuel rail securely but I'm happy with my handy work.
Then I couldn't do much so I desided to paint my block and sump.
Turbo and manifold.
And then my rocker cover.
I've gone for matt black, with polished ford logo and red motorsport logo.
Then with all of these freshly painted parts lying around I couldn't help a dry fit
23-11-2008, 05:54 PM
#57
Wye Valley Hardcore
Thread Starter
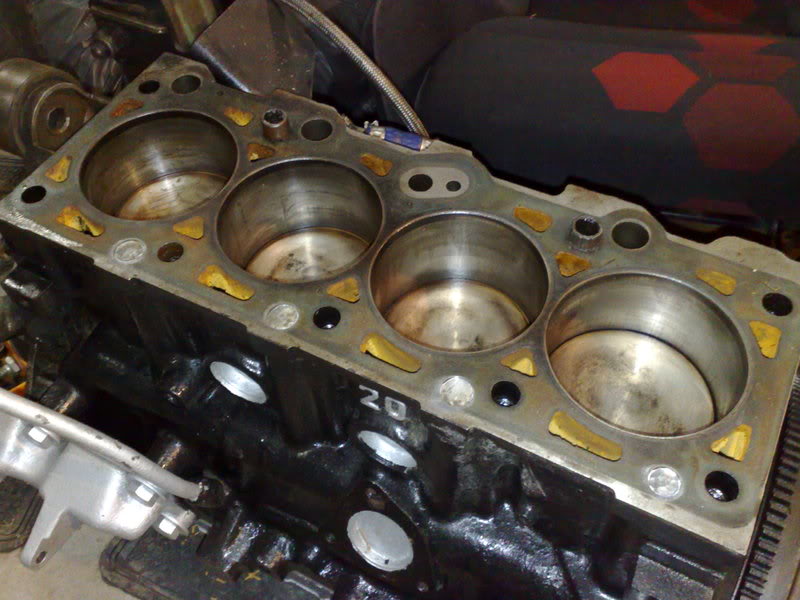
Cheers guys. Got my new head Yesterday. Its an MFI Stage 3 head. Perfect for me as the inlet I'm using is MFI based, so no need for an adaptor plate. Its got huge ports, Stainless oversized valves, and as it didnt come with a cam I've fitted it with my old Kent CVH34 and vernier. Not ideal but the cars costing way more than I budgeted so a new cam will have to wait 
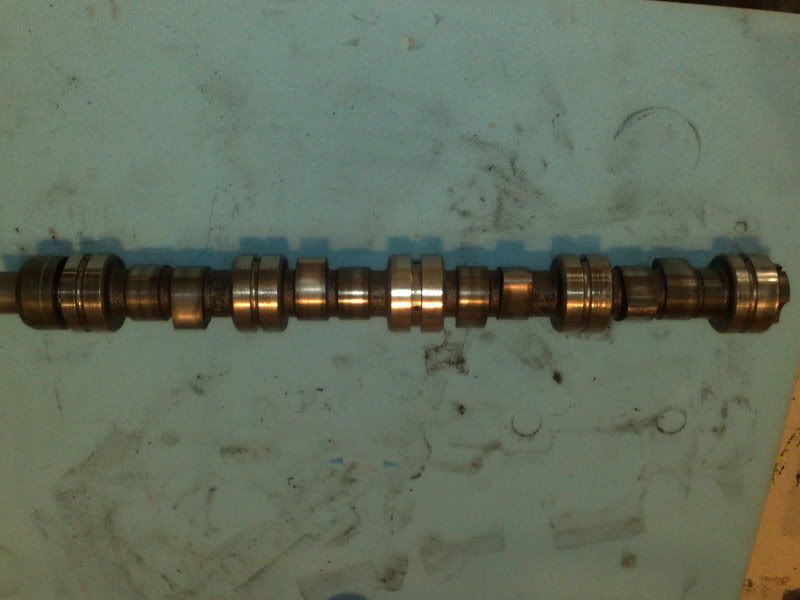
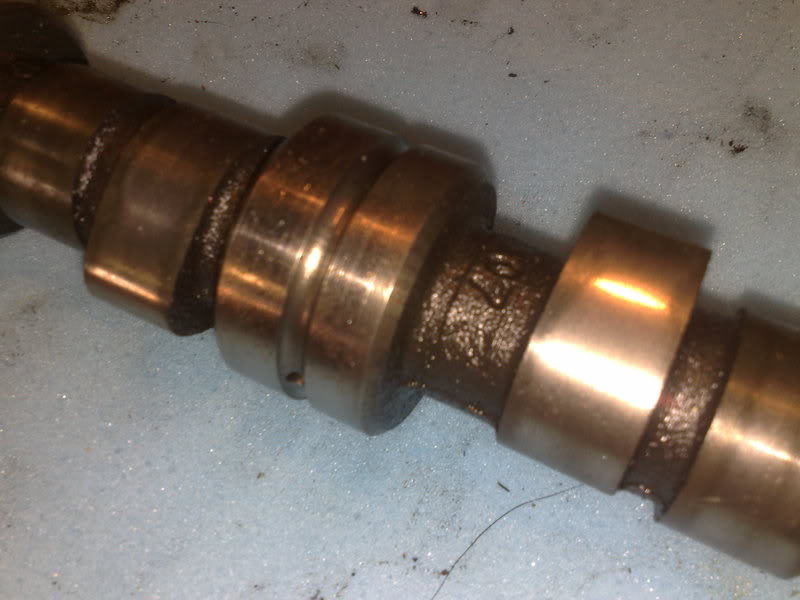
Cam doesn't seem to be in bad shape.
All built up.
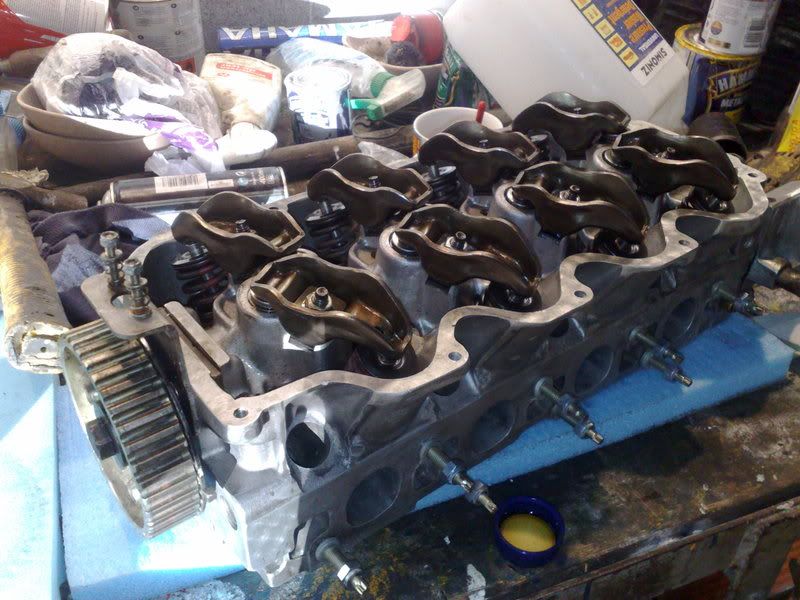
Ports
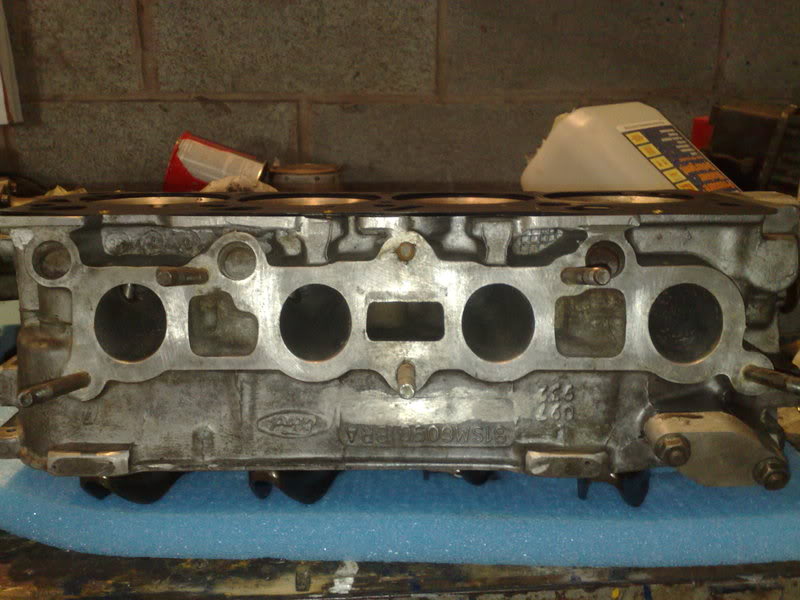
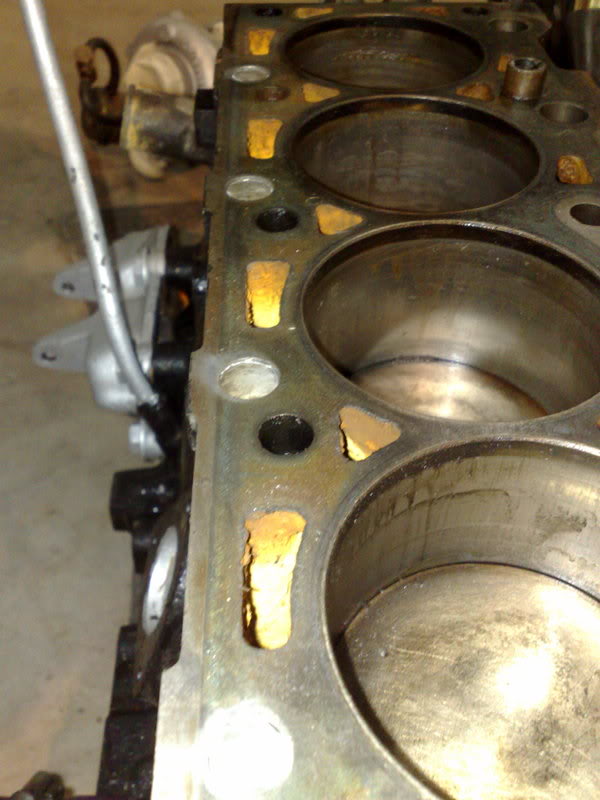
Its also been modified so I can use a Zetec headgasket.
Just so people can see what needs doing I've taken a few photos.
Here is the Zetec gasket on my old CVH head compared to the new modified head.
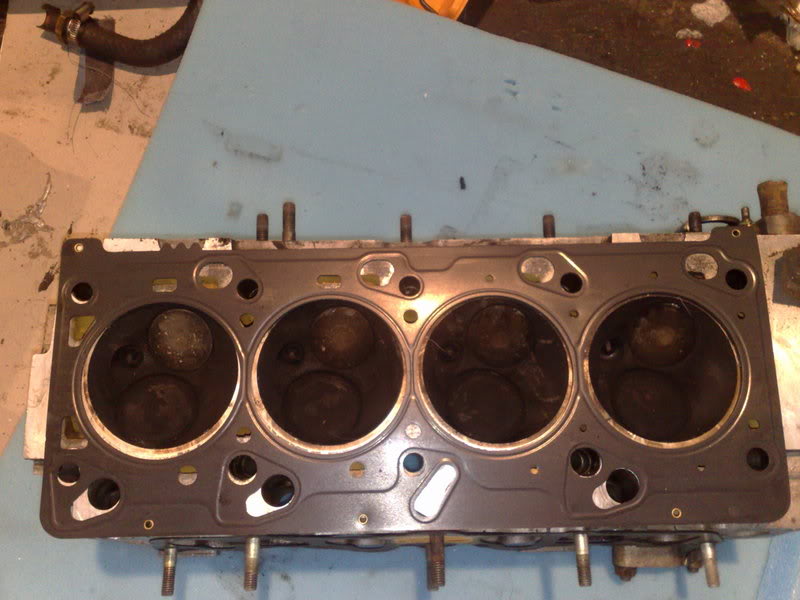
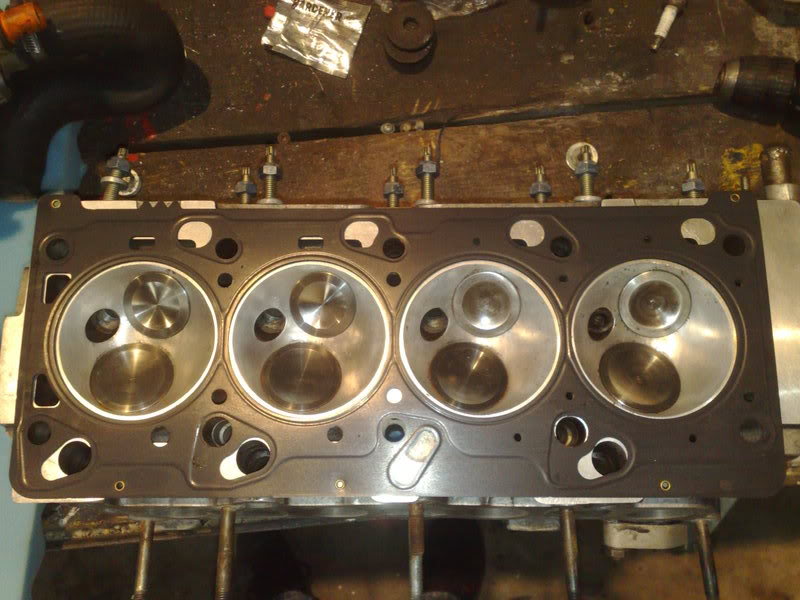
As you can see, the much beigger Zetec oil gallerys run off the end of the head.
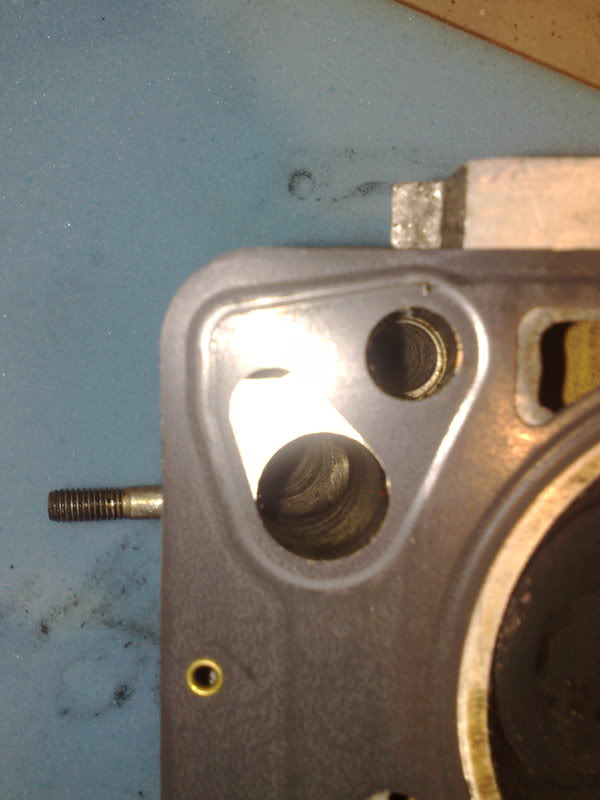
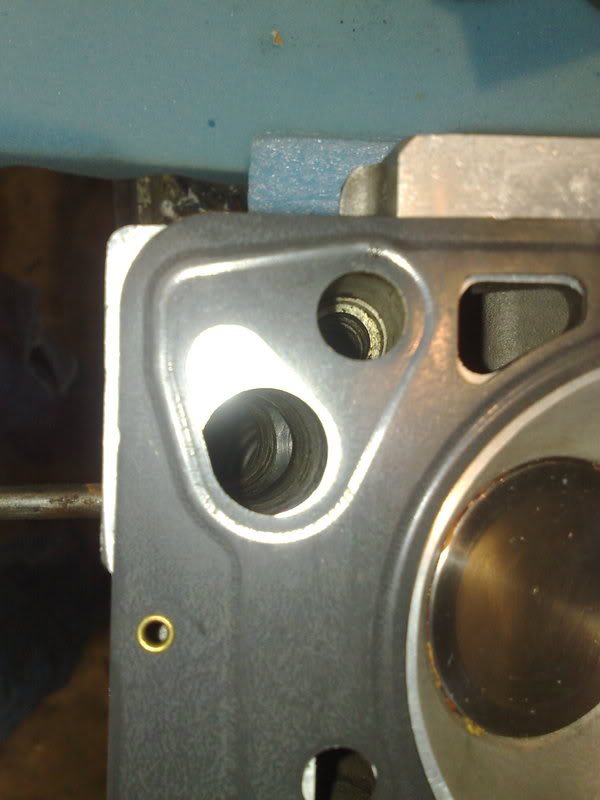
And on this one, you can see just how much has been added to the head.
You can also see why the top oil gallerys need blocking off, as they go straight into the water gallerys.
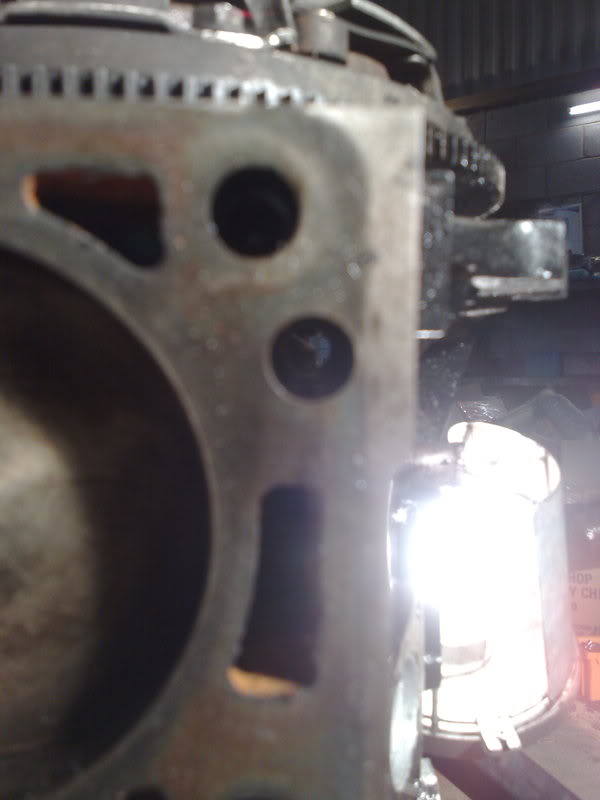
My block though has 3 oilways blocked off, but not the last one, so I need to do it. Does anyone make brass bungs to do this?
Also when removing the sensor forn the back of the inlet it snapped off
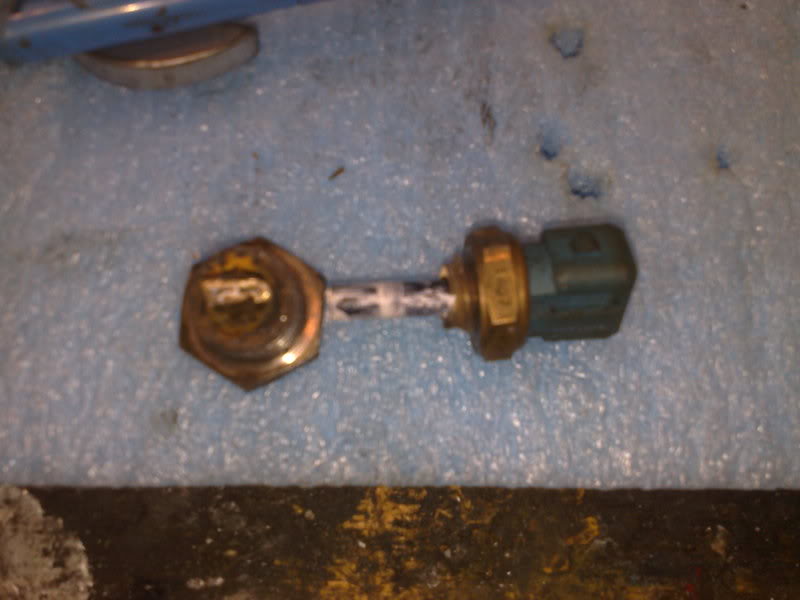
Is this a Cosworth sensor or CVH turbo?
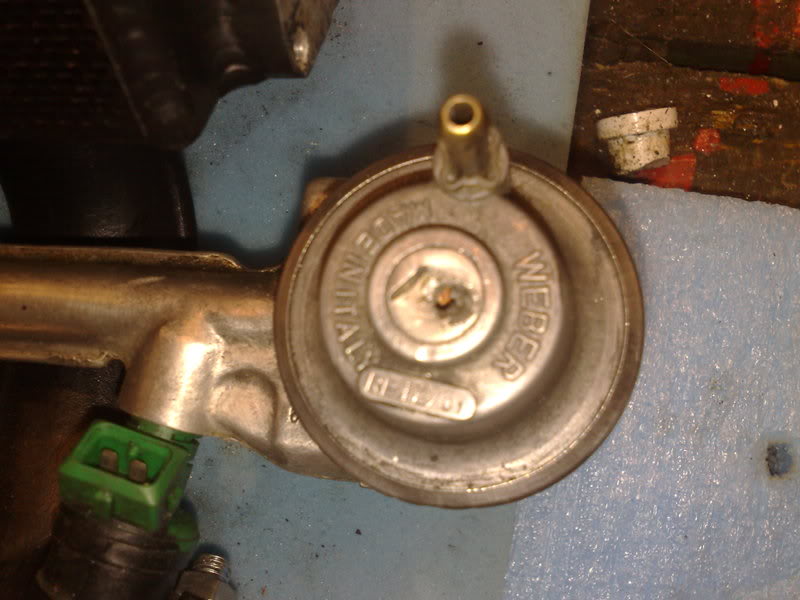
Also I've notced my FPR has had a hole drilled in it??? Any reason for this?
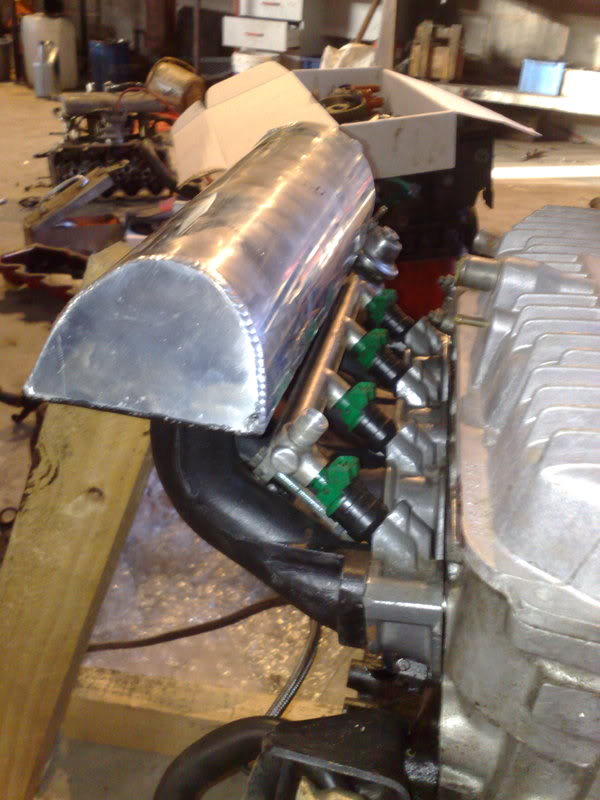
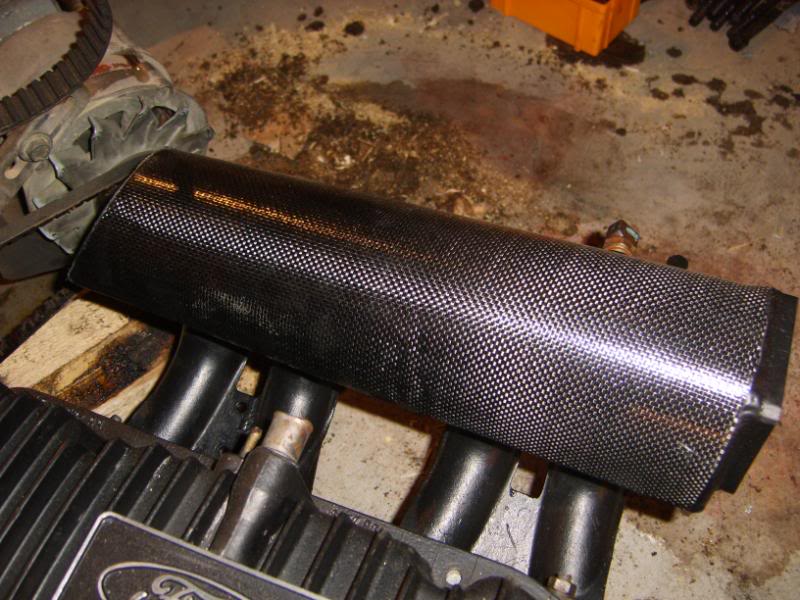
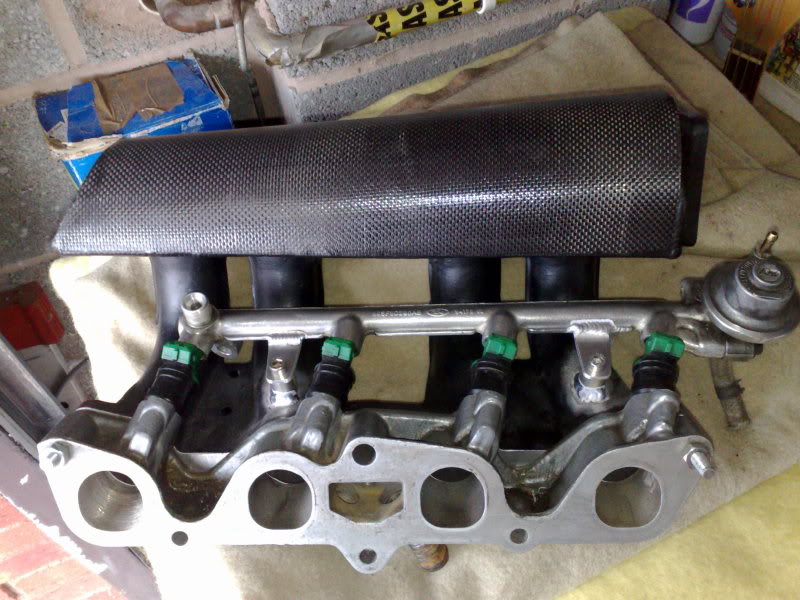
Also started the carbon covering on my inlet.
Cam doesn't seem to be in bad shape.
All built up.
Ports
Its also been modified so I can use a Zetec headgasket.
Just so people can see what needs doing I've taken a few photos.
Here is the Zetec gasket on my old CVH head compared to the new modified head.
As you can see, the much beigger Zetec oil gallerys run off the end of the head.
And on this one, you can see just how much has been added to the head.
You can also see why the top oil gallerys need blocking off, as they go straight into the water gallerys.
My block though has 3 oilways blocked off, but not the last one, so I need to do it. Does anyone make brass bungs to do this?
Also when removing the sensor forn the back of the inlet it snapped off
Is this a Cosworth sensor or CVH turbo?
Also I've notced my FPR has had a hole drilled in it???
Any reason for this?Also started the carbon covering on my inlet.
 07-12-2008, 08:46 PM
#62
Wye Valley Hardcore
Thread Starter
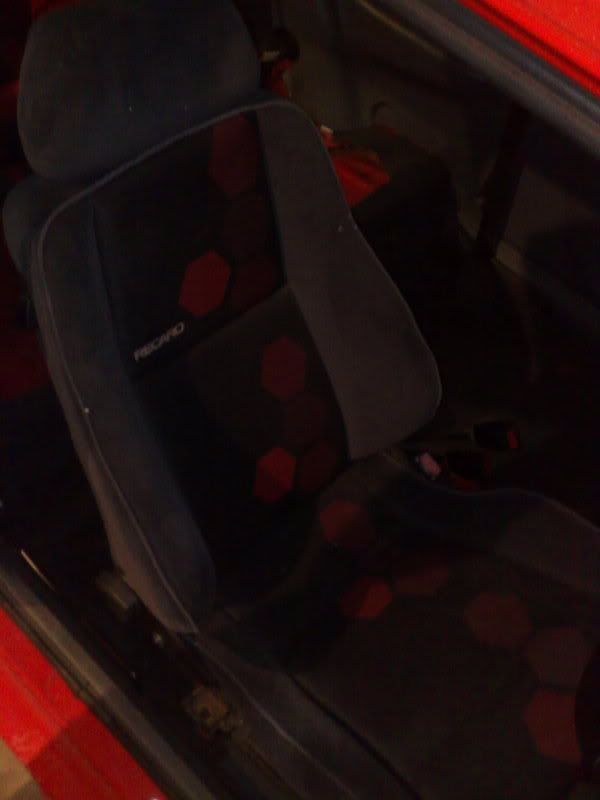
Just a little update. The leather interior has gone. Leather was a nice touch, but after fitting cossie Recaros in my brothers Fiesta I insantly wanted some. So I spent today going up to Manchester and back to pick up these.


08-12-2008, 11:23 AM
#66
Wye Valley Hardcore
Thread Starter
08-12-2008, 12:06 PM
#67
Wye Valley Hardcore
Thread Starter
08-12-2008, 12:21 PM
#68
Advanced PassionFord User
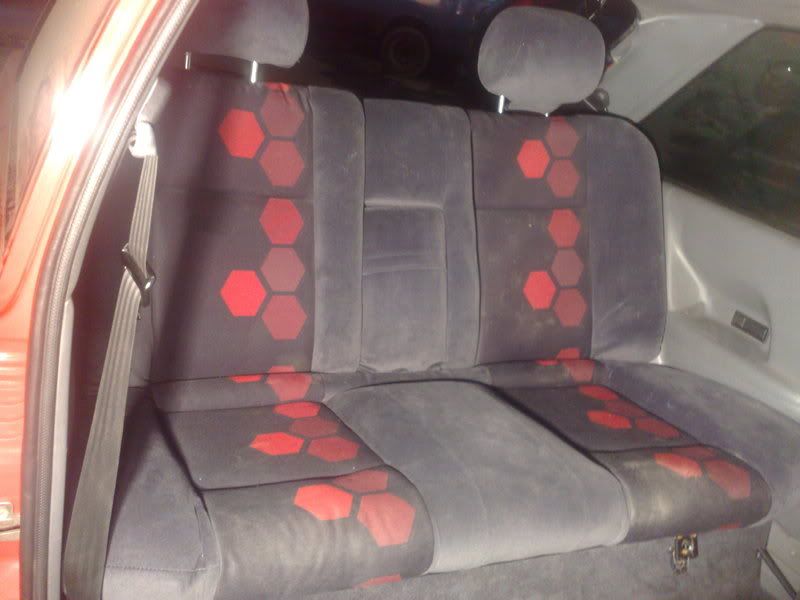
looks good with the red hex mate nice touch.
How long did it take you o get bk after ur sat nav died?
Let me know if u dnt use the door cards cos I'll take em back.
Looks good though!
How long did it take you o get bk after ur sat nav died?
Let me know if u dnt use the door cards cos I'll take em back.
Looks good though!
08-12-2008, 04:47 PM
#69
Wye Valley Hardcore
Thread Starter
The M6 Southbound was busy. 50-70 MPH in the fast lane so I got off the motorway and headed towards Wolves then Kiddy then home. I've had a look at the cards and they look quite similar. Only problem would be door latches etc so probably won't use them. I'll let you now.
10-12-2008, 05:46 PM
#71
Wye Valley Hardcore
Thread Starter
Cheers mate. I started to add up what I've spent in 6 months but when it got to a certain figure I stopped
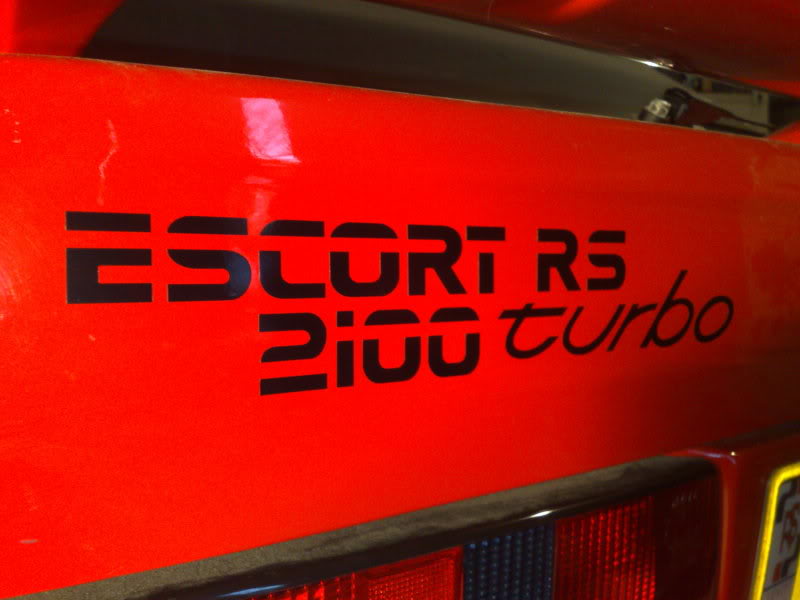
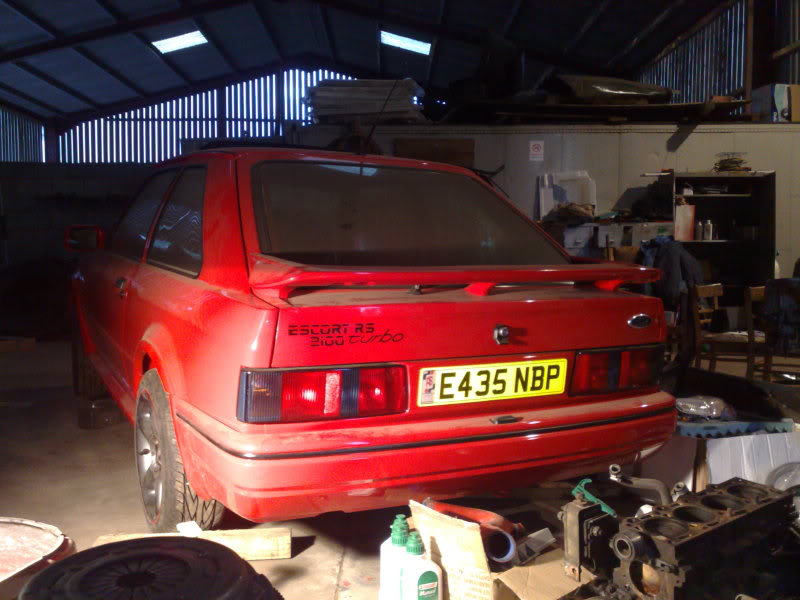
New tailgate decal. Subtle but to people who know it gives a slight hint.
My inlet manifold is at A&H Fabrications being modded for the fuel rail and throttle body, zvh oilway ally bungs being machined and then hopefully the engine can go in. Want to built the enigne in situ before putting it in the bay.
19-12-2008, 11:45 AM
#72
Wye Valley Hardcore
Thread Starter
First off some bad news. I've got a local company making my some aluminium oil gallery bungs. They said they would be ready Wednesday, but they weren't so told me to collect today, so I went and they are closed untill the new year I was hoping to have the engine in before I go away on the 2nd Jan but that won't be ahppening now.
Good news though. Some nice early Christmas presents for me. The girlfriend isn't having any now as I'm broke, but I'm sure she'll understand.
Picked up my inlet from AH Fabrications. Great lads they really are.
I just hope after all this effort it actually works!
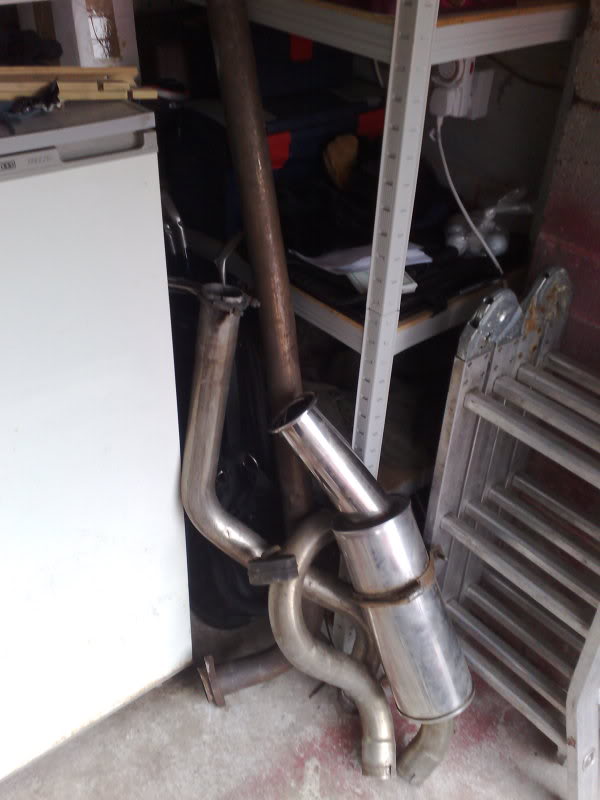
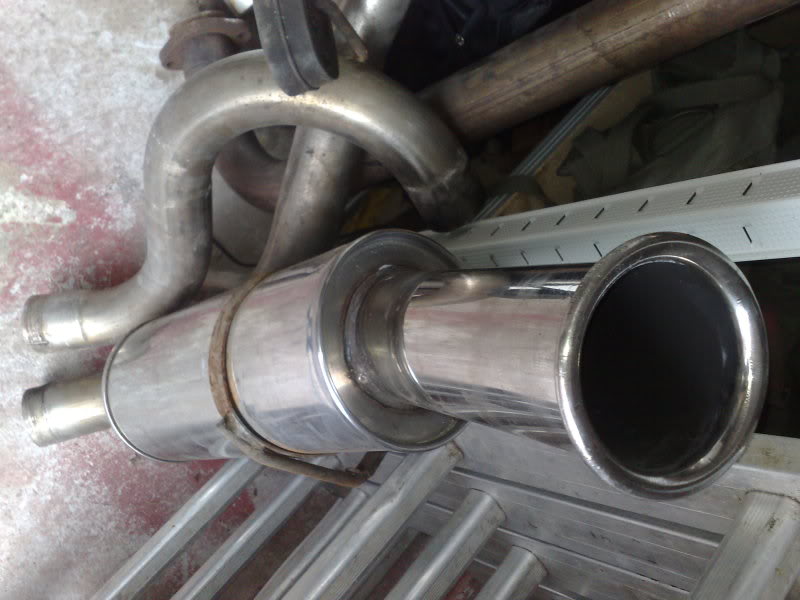
New exhaust. The 3" Magnex just wasn't the look I wanted. It did sound lovely though. So I've opted for a 4" Rolled out Mongoose.
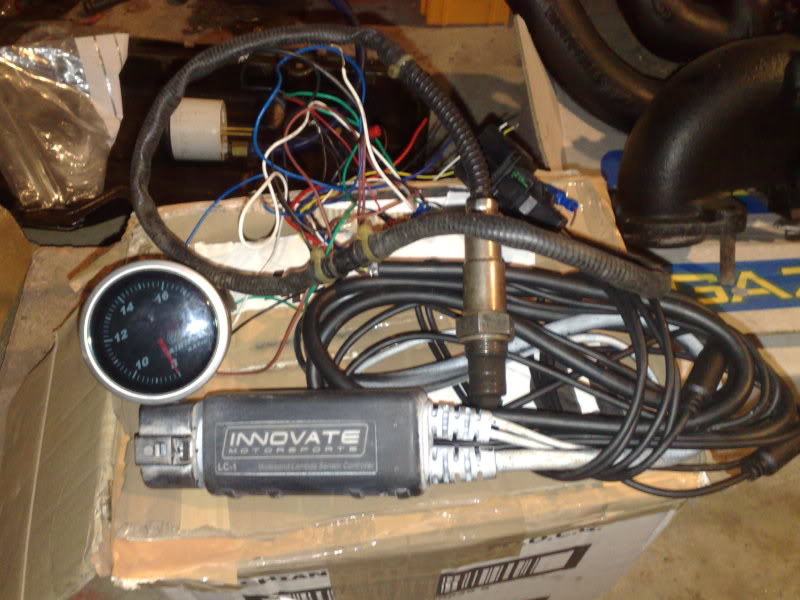
Innovate Motorsports LC1 Wideband Lambda kit.
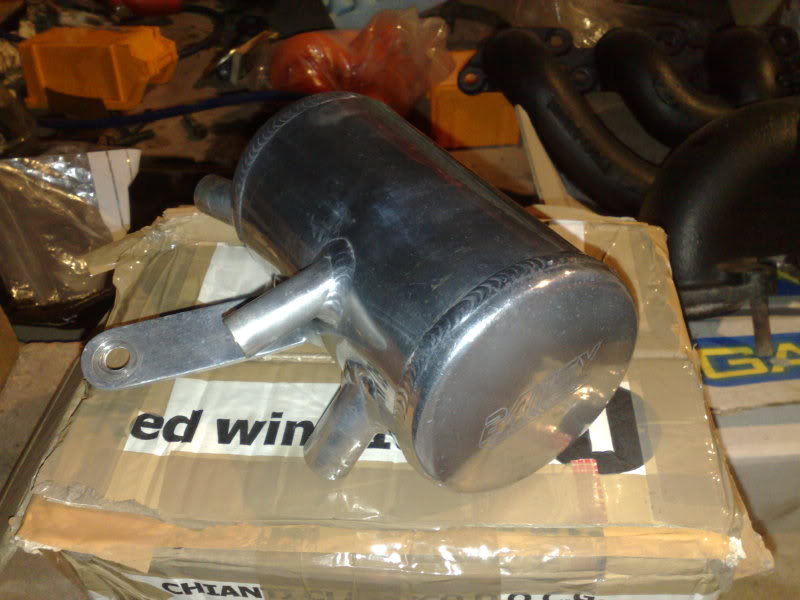
Bailey oil seperator.
And the mess that awaits when I can get some time off.
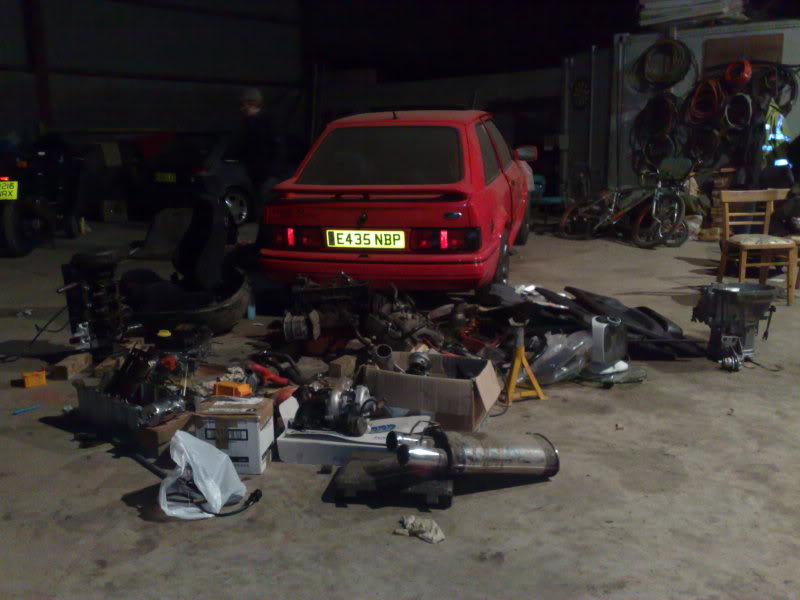
The pile is slowly decreasing though!
One thing though before I build the enigne, as its so dusty up the barn I need to clean the bottom end and head up before I build it up. Whats the best way of doing this? Steam clean?
I was hoping to have the engine in before I go away on the 2nd Jan but that won't be ahppening now. Good news though. Some nice early Christmas presents for me. The girlfriend isn't having any now as I'm broke, but I'm sure she'll understand.
Picked up my inlet from AH Fabrications. Great lads they really are.
I just hope after all this effort it actually works!
New exhaust. The 3" Magnex just wasn't the look I wanted. It did sound lovely though. So I've opted for a 4" Rolled out Mongoose.
Innovate Motorsports LC1 Wideband Lambda kit.
Bailey oil seperator.
And the mess that awaits when I can get some time off.
The pile is slowly decreasing though!
One thing though before I build the enigne, as its so dusty up the barn I need to clean the bottom end and head up before I build it up. Whats the best way of doing this? Steam clean?
21-12-2008, 12:26 PM
#75
Wye Valley Hardcore
Thread Starter
21-12-2008, 01:04 PM
#77
Wye Valley Hardcore
Thread Starter
I've re-wired the coil wiring but when I fit my alarm I'll re wrap it anyway so will check it out.
20-01-2009, 06:40 PM
#78
Wye Valley Hardcore
Thread Starter
Finally got my aluminium blanking plugs. I emailed Ian Howell and he said the best thing to do was get 3x 16mm bungs and 1 x 14mm which is slightly larger than the hole, slightly tapperd on the one end then just hammer the fuck out of them untill they sit flush with the block, so thats what I did.
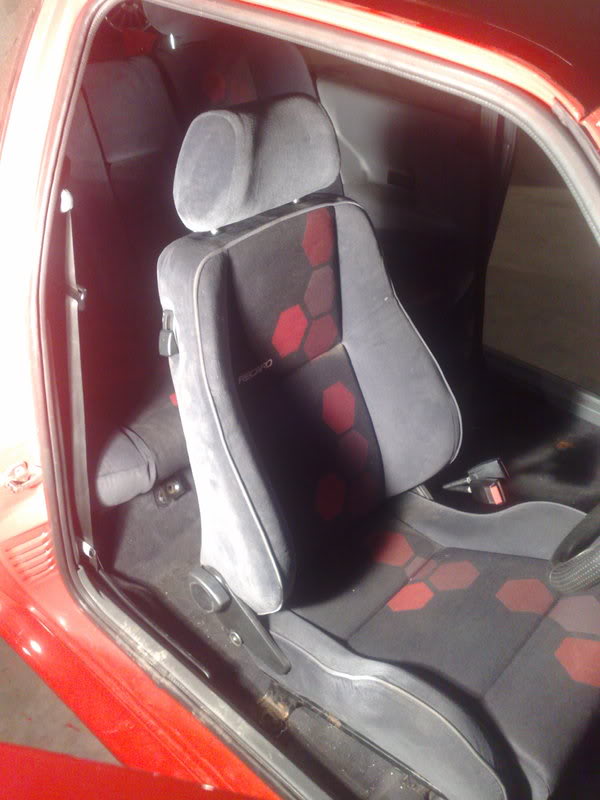
Then with not much else I could do I set about fitting the interior. This was a bit of an arse ache as they had the rear mounts cut off and replaced with home made ones that weren't up to scratch. So I had to make my own rear mounts.
Next problem was the EsCos seats have a tilt mechanisim to optimise the driver position. Sadly, this fouls the chassis rail that runs through the middle of the car.
* Firstly I tried to raise the seat mounts so it would clear the chassis rail. this though made the seat too high. My legs touched the stearing wheel!
* Then I removed it completely and it was very uncomfotable, with the seat tilting too far back.
So I knocked up this;
It's not in situ ajustable as you have to take the seat off to adjust it, but I've set it so I'm comfortable and I'm the only one whos going to be allowed to drive it so suits me.
And in;
With the front in (haven't done passenger side yet, Ran out fo gas on the welder) I set about fitting the rears.
Rear bench is too wide and sat about inch too far foward. So I removed the foam from the tray and looked at what needed cutting.
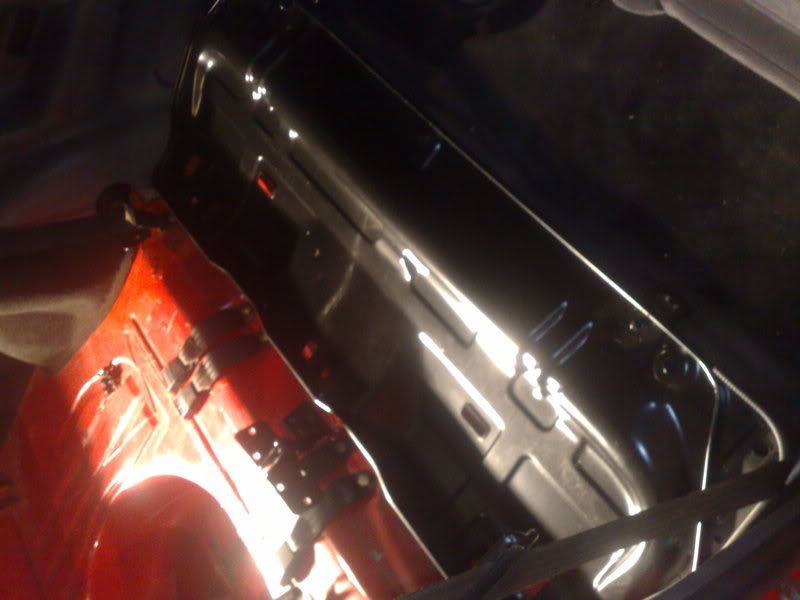
These corners being the reason.
Cut Off
some drilling to the mounts and some fiddling later and Voila. As I ran out of gas I haven't welded the front seat mount tabs to hold the rear bench on. A job for tomorrow.
Only problem is, on the RST bench the backs have a recessed lock with bars on the car and the EsCos have bars that lock into the car. So the backs don't currently lock in place. I'm going to have a look tomorrow if I can cut the lock out of the RST seats and weld them into the EsCos backs then it will lock in place.
More updates no doubt tomorrow.
Then with not much else I could do I set about fitting the interior. This was a bit of an arse ache as they had the rear mounts cut off and replaced with home made ones that weren't up to scratch. So I had to make my own rear mounts.
Next problem was the EsCos seats have a tilt mechanisim to optimise the driver position. Sadly, this fouls the chassis rail that runs through the middle of the car.
* Firstly I tried to raise the seat mounts so it would clear the chassis rail. this though made the seat too high. My legs touched the stearing wheel!
* Then I removed it completely and it was very uncomfotable, with the seat tilting too far back.
So I knocked up this;
It's not in situ ajustable as you have to take the seat off to adjust it, but I've set it so I'm comfortable and I'm the only one whos going to be allowed to drive it so suits me.
And in;
With the front in (haven't done passenger side yet, Ran out fo gas on the welder) I set about fitting the rears.
Rear bench is too wide and sat about inch too far foward. So I removed the foam from the tray and looked at what needed cutting.
These corners being the reason.
Cut Off
some drilling to the mounts and some fiddling later and Voila. As I ran out of gas I haven't welded the front seat mount tabs to hold the rear bench on. A job for tomorrow.
Only problem is, on the RST bench the backs have a recessed lock with bars on the car and the EsCos have bars that lock into the car. So the backs don't currently lock in place. I'm going to have a look tomorrow if I can cut the lock out of the RST seats and weld them into the EsCos backs then it will lock in place.
More updates no doubt tomorrow.
