Wes-Spec 4x4 Sapphire Cosworth
 18-07-2006, 10:39 PM
#1
I've found that life I needed.. It's HERE!!
Thread Starter

It's been a while since I have posted anything new on here, so I thought I'd bring you all up to speed on the saph .
06/01/06:
It's been off the road since the end of September 2005, sitting in my drive, doing nothing.
I had lost all interest in it, and after a string of mishaps last year, I decided I needed a break from it, so I decided to take a year or so off from spending anything on it, which would give me time to pay off the plastic, and think about what I wanted to do next, I already had a rough idea of what I wanted to do, but this time I'm going to do it bit by bit
I have already sold off a few components as they won't be suitable for the next spec, namely the T4 turbo, genuine RS500 intercooler, Pectel Super8 ECU, SECS dizzy-less board, 8x Greens etc.
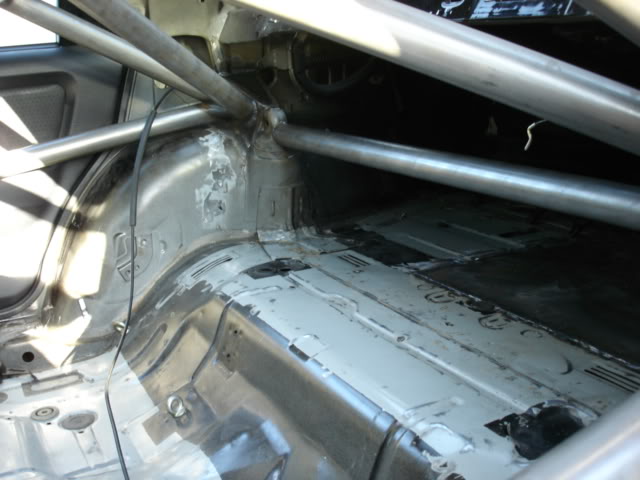
Over the past month, I've been getting more and more motivated to do something to the car again, so I decided to strip the interior / wiring loom / fuel tank / power steering, and a few other odds and sods, and to basically have a good prod around, to see if the shell was suitable for what I have in mind, and thank goodness I haven't found any nasty surprises, there are few areas that will need some attention, but it's nothing major.
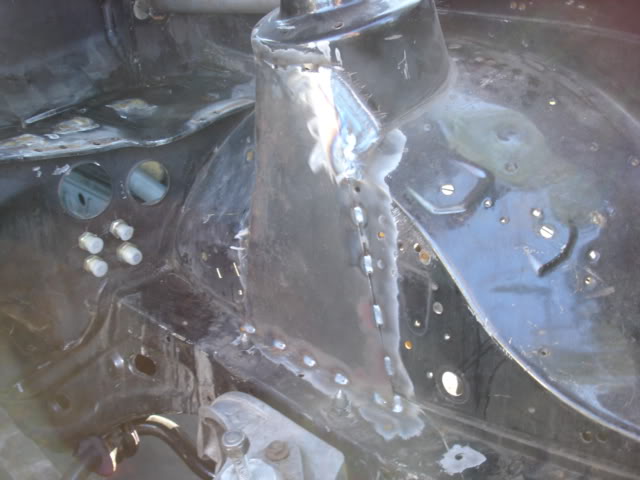
This year, my aim is for the shell to have a multipoint weld in cage fitted, and the whole car will need painting after that, think I will stick with black
I also need to fit a new wiring loom, as the cage goes straight through where the fuse box normally goes, I took the loom out, and was shocked at how heavy (and over complicated!) it is, so I'm going to make a new one from scratch. I will also make my own engine loom, but this will be done when I have got the new ECU and finalised the new engine spec. And the ABS is going in the bin, and a bias pedal box to be fitted, along with some bigger front brakes, the current fronts will be going on the rear.
Right, here are some pics!
Minor hole on the inside of the wing and rust on floor by the tub, rest of boot is OK:
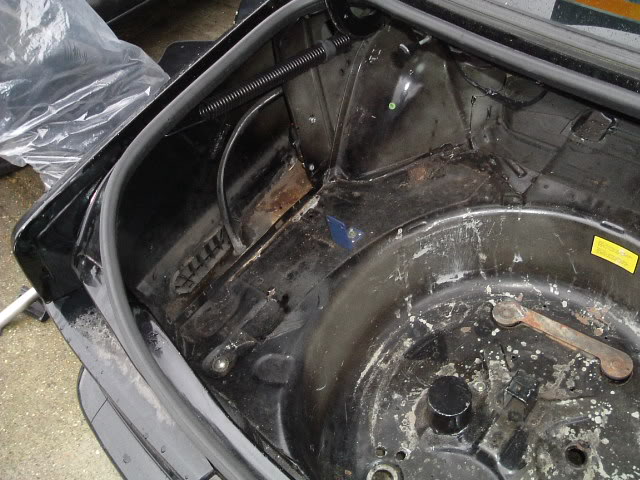
Had a minor bubble on the inner wing, which I have dug out, looks a lot worse than it is in the pic. The holes in the strut tops will be plug welded and ground flat, and new brackets made up for the strut brace:
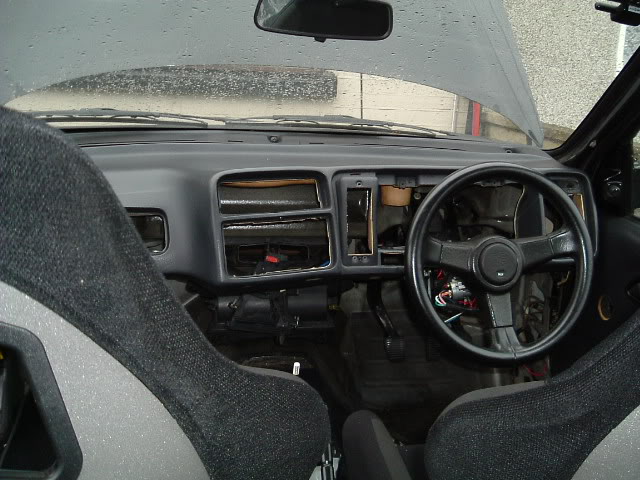
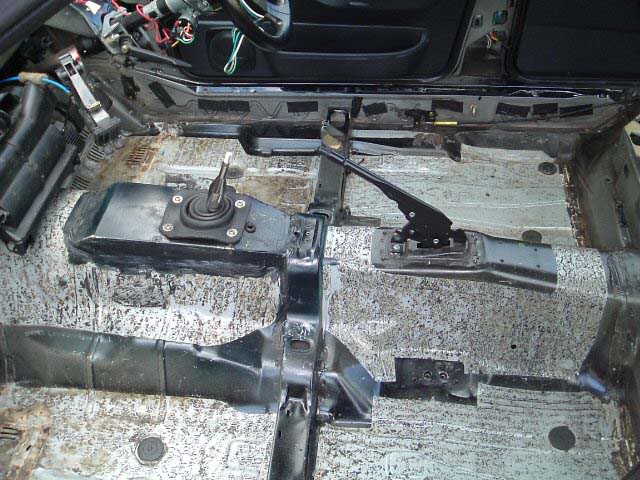
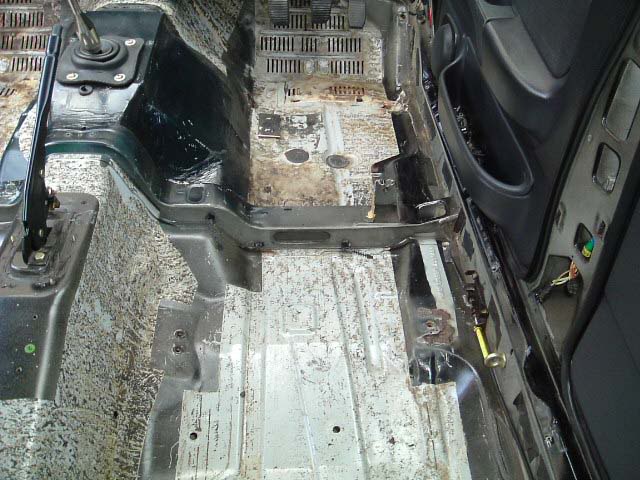
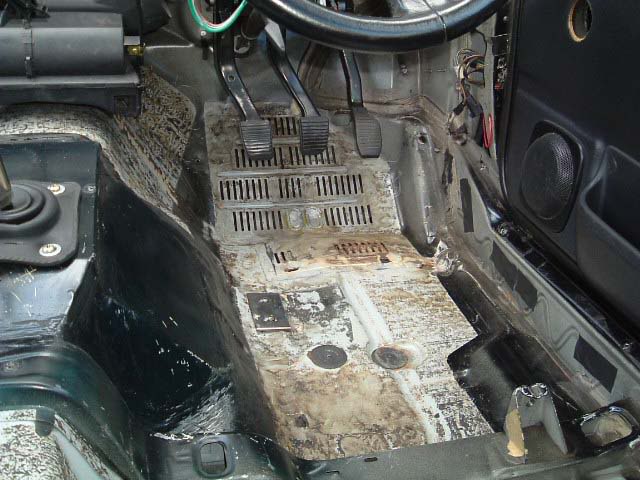
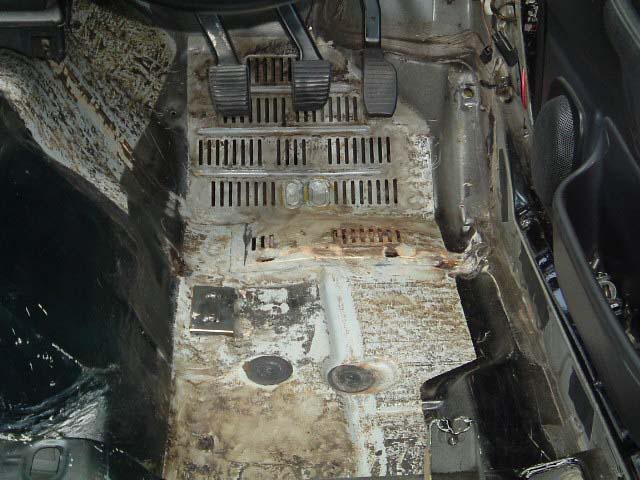
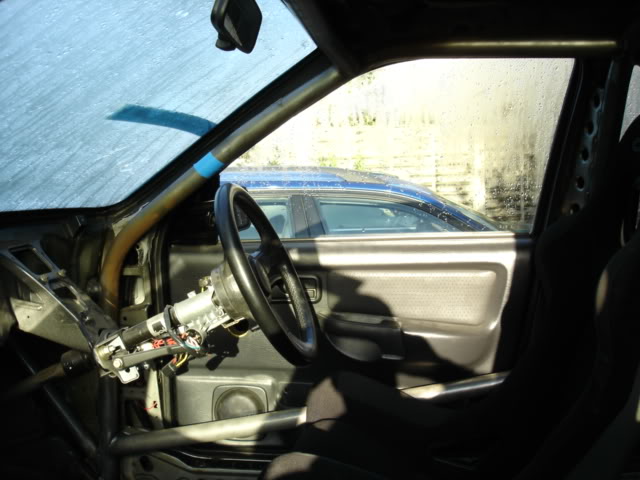
Interior stripped, still got to remove the sound deadening, it's going to be noisy in there :
:
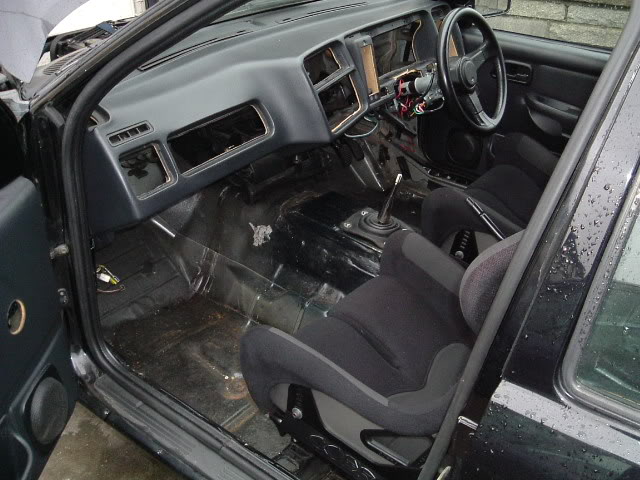
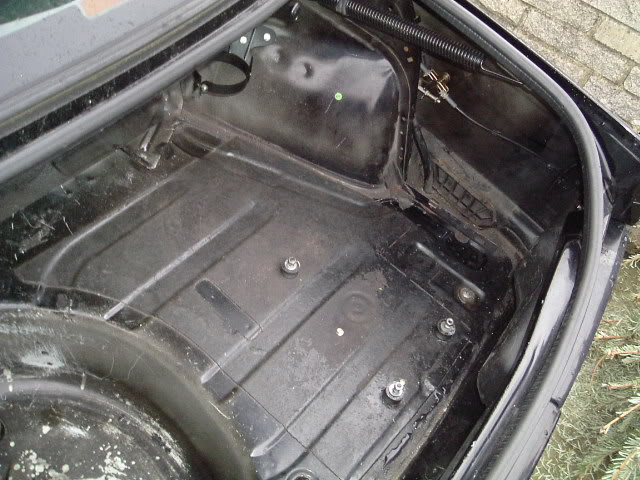
That�s just dust on the floor there!
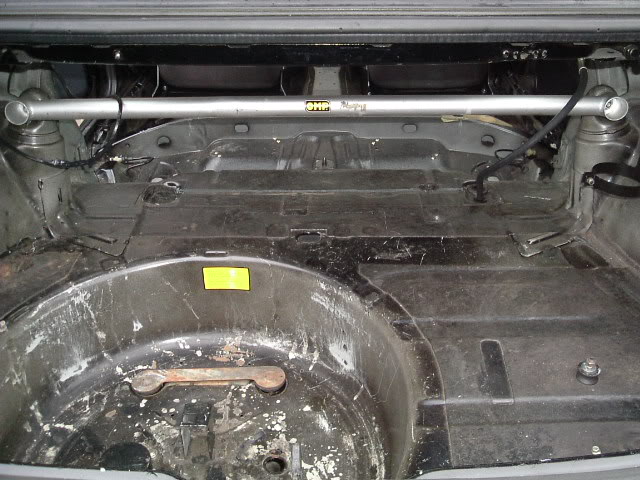
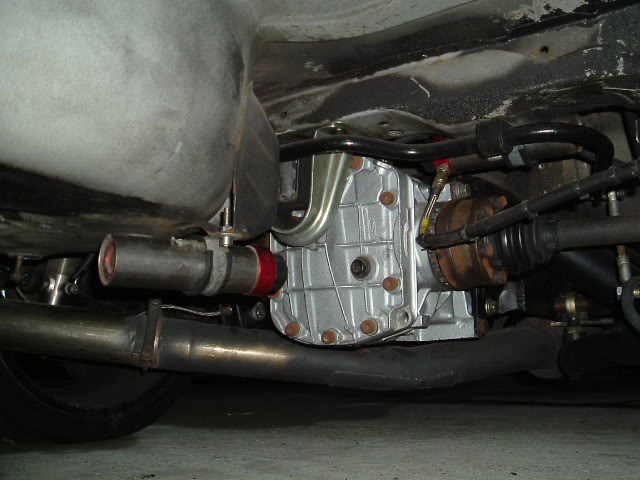
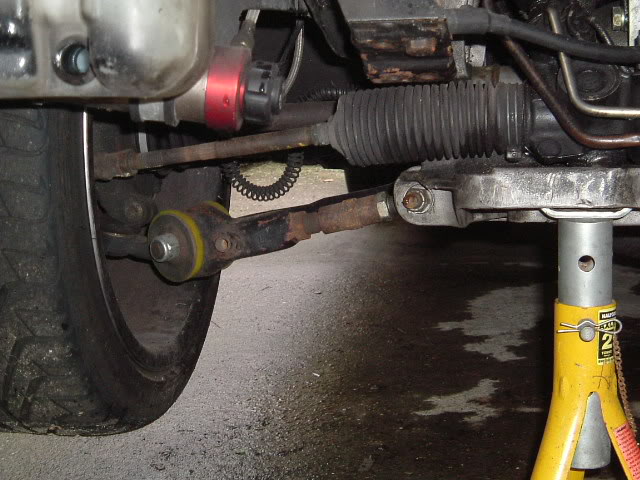
Under the rear-end: (ooh matron)
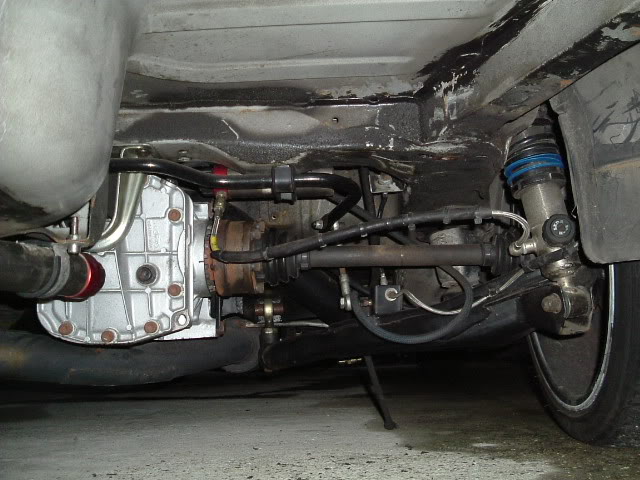
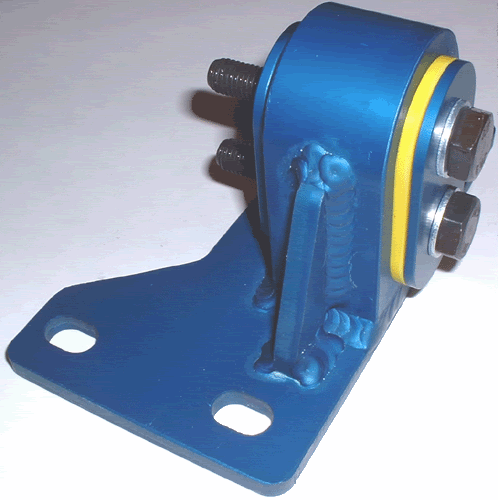
A new rear diff mount has been sourced, which is stiffer than the Grp N item that I wanted to use, but ford motorsport no longer make them, here is the new mount:
Back to the rear end:
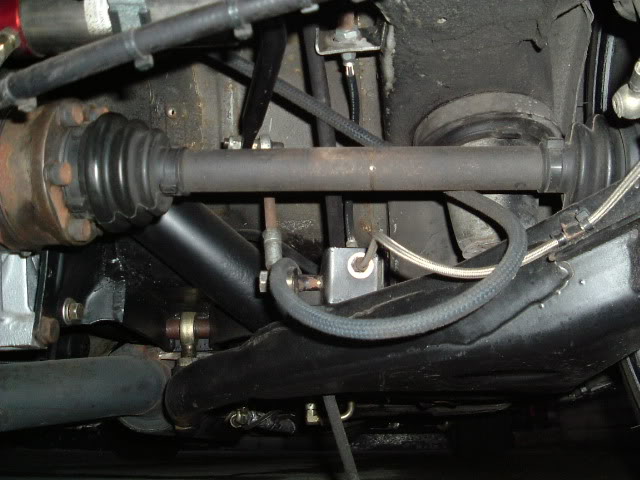
Front Adjustable TCA, will get these powder coated at some stage:
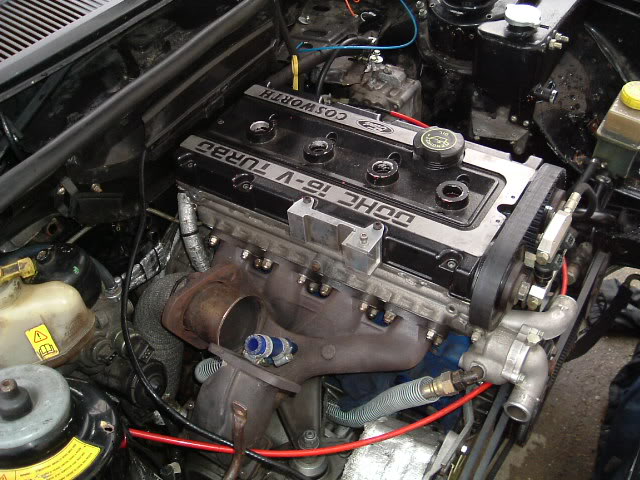
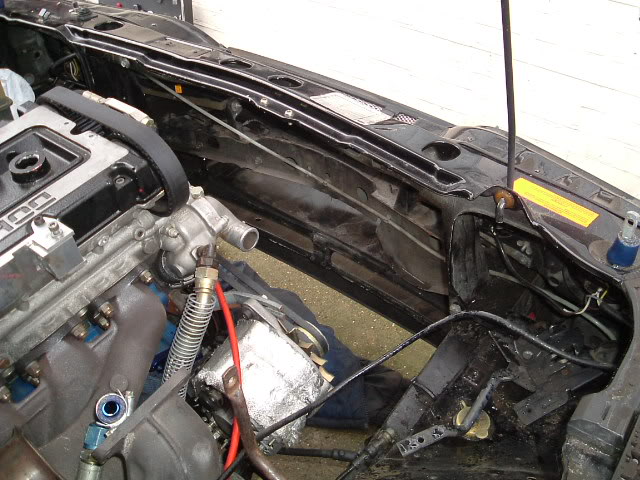
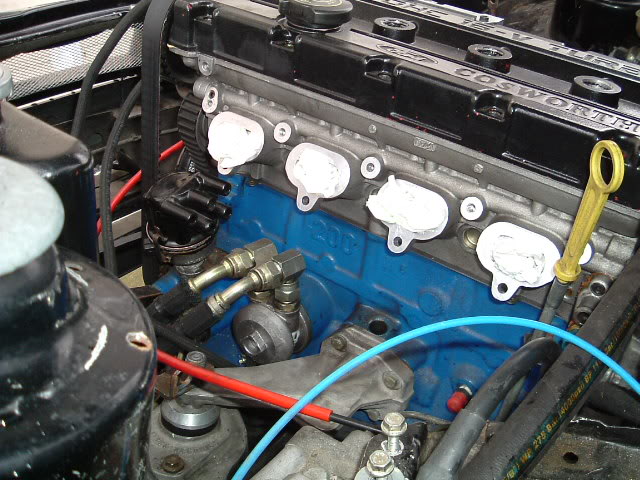
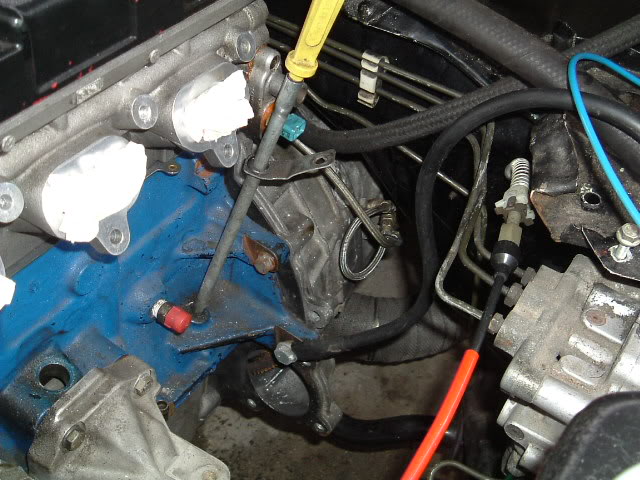
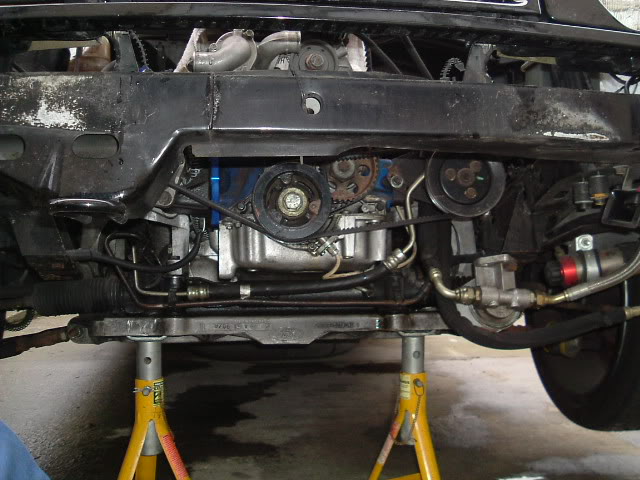
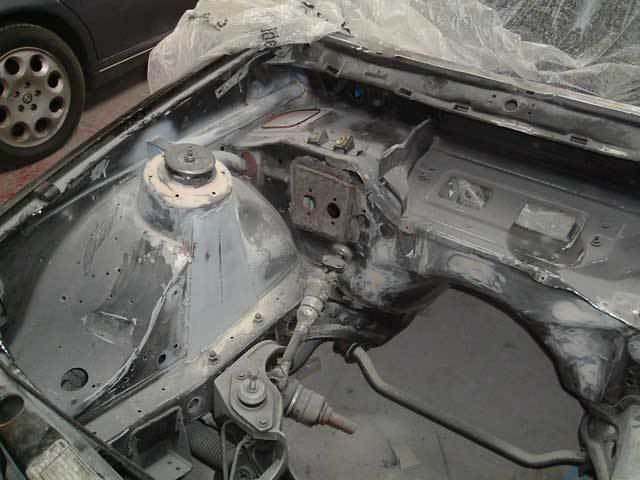
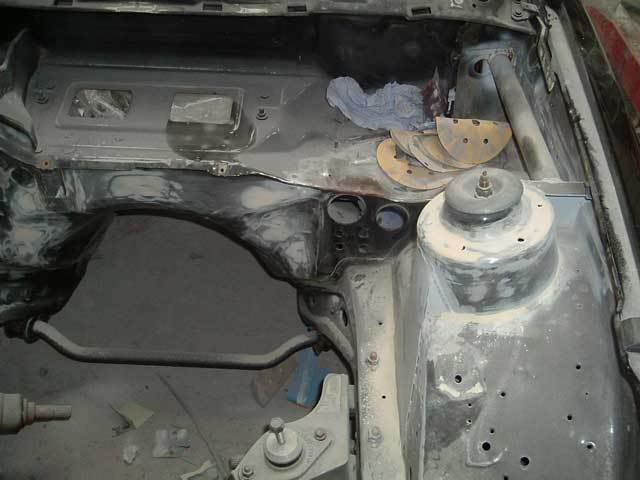
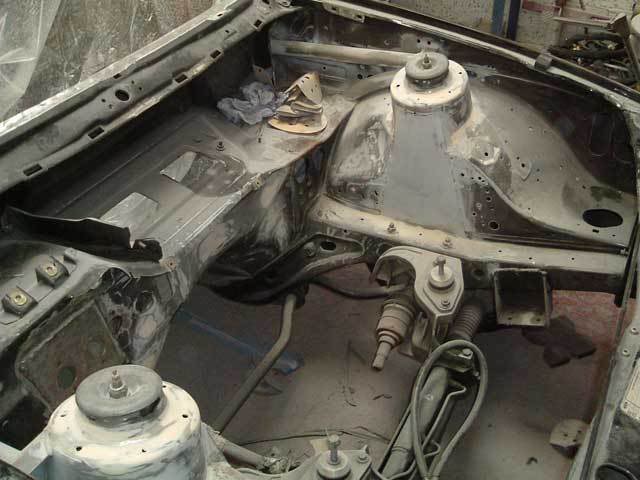
Engine bay, lots of bits missing now
Think I have a fuse or two gone:
06/01/06:
It's been off the road since the end of September 2005, sitting in my drive, doing nothing.
I had lost all interest in it, and after a string of mishaps last year, I decided I needed a break from it, so I decided to take a year or so off from spending anything on it, which would give me time to pay off the plastic, and think about what I wanted to do next, I already had a rough idea of what I wanted to do, but this time I'm going to do it bit by bit
I have already sold off a few components as they won't be suitable for the next spec, namely the T4 turbo, genuine RS500 intercooler, Pectel Super8 ECU, SECS dizzy-less board, 8x Greens etc.
Over the past month, I've been getting more and more motivated to do something to the car again, so I decided to strip the interior / wiring loom / fuel tank / power steering, and a few other odds and sods, and to basically have a good prod around, to see if the shell was suitable for what I have in mind, and thank goodness I haven't found any nasty surprises, there are few areas that will need some attention, but it's nothing major.
This year, my aim is for the shell to have a multipoint weld in cage fitted, and the whole car will need painting after that, think I will stick with black
I also need to fit a new wiring loom, as the cage goes straight through where the fuse box normally goes, I took the loom out, and was shocked at how heavy (and over complicated!) it is, so I'm going to make a new one from scratch. I will also make my own engine loom, but this will be done when I have got the new ECU and finalised the new engine spec. And the ABS is going in the bin, and a bias pedal box to be fitted, along with some bigger front brakes, the current fronts will be going on the rear.
Right, here are some pics!
Minor hole on the inside of the wing and rust on floor by the tub, rest of boot is OK:
Had a minor bubble on the inner wing, which I have dug out, looks a lot worse than it is in the pic. The holes in the strut tops will be plug welded and ground flat, and new brackets made up for the strut brace:
Interior stripped, still got to remove the sound deadening, it's going to be noisy in there
:That�s just dust on the floor there!
Under the rear-end: (ooh matron)
A new rear diff mount has been sourced, which is stiffer than the Grp N item that I wanted to use, but ford motorsport no longer make them, here is the new mount:
Back to the rear end:
Front Adjustable TCA, will get these powder coated at some stage:
Engine bay, lots of bits missing now
Think I have a fuse or two gone:
Last edited by Jay,; 04-05-2016 at 03:28 PM. Reason: date update
 18-07-2006, 10:41 PM
#2
I've found that life I needed.. It's HERE!!
Thread Starter
07/01/06:
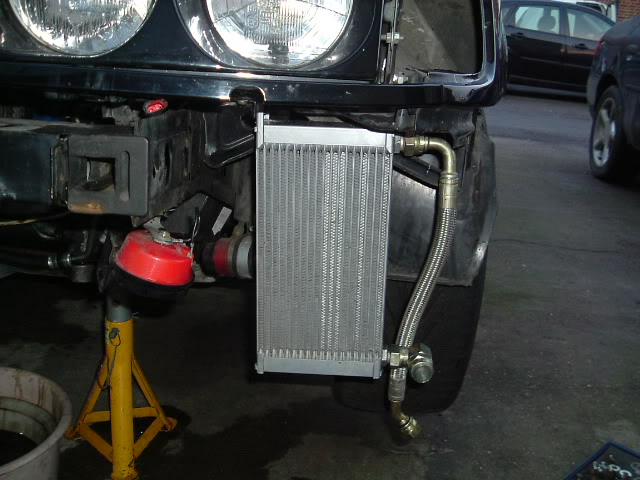
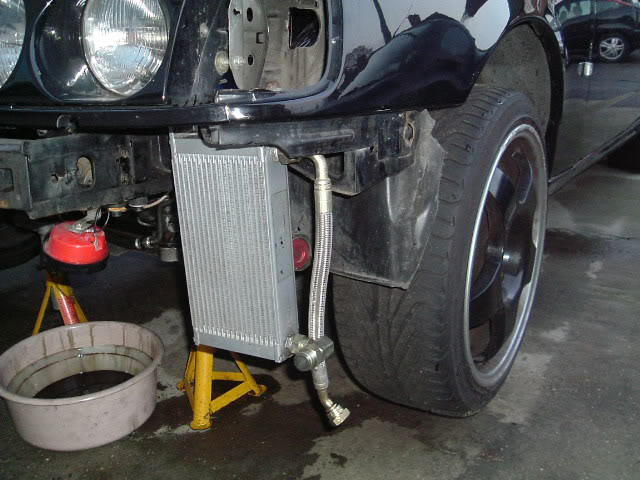
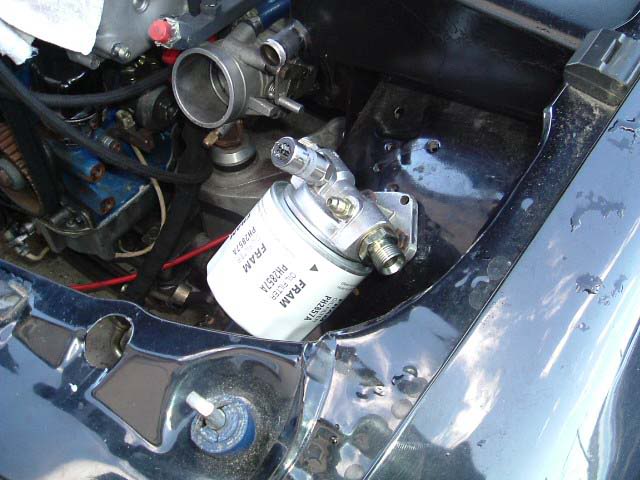
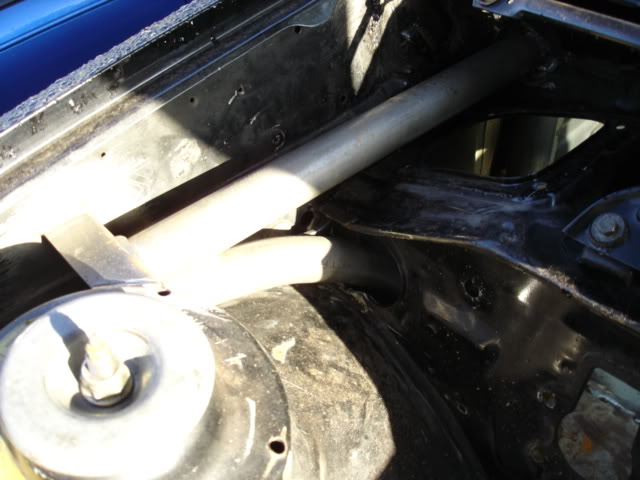
Decided today to sort the oil cooler location and remove the remote mounted oil filter, as when I originally mounted it, only half of the cooler was visible through the hole in the vent, and I'm paranoid about a stone going through the oil filter where it is mounted, so it will be going back to the original location on the end of the 4x4 arm, with the oil cooler sandwich plate staying where it is.
This is the original location of the cooler and filter: (forgot to take pics with bumper fitted ) :
) :
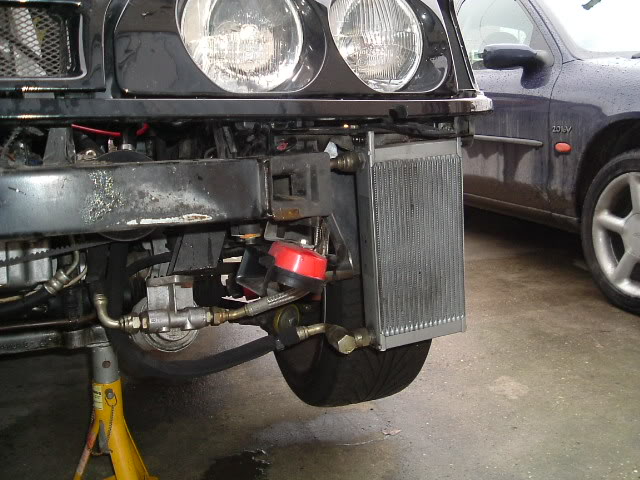
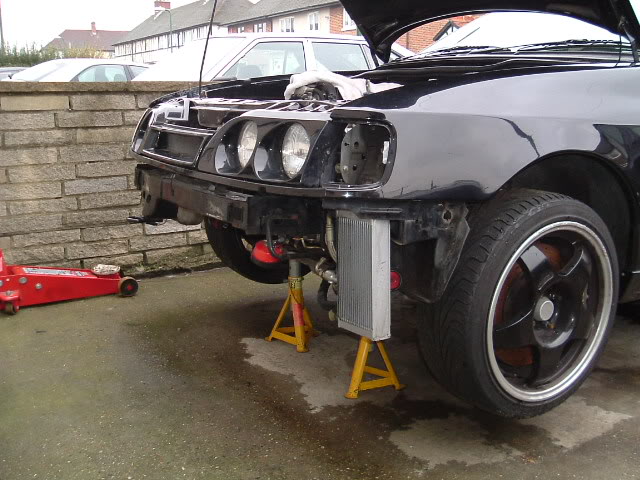
And this is after I finished, I basically turned the cooler the other way round and drilled some new holes for one of the brackets as it was now sitting a lot further in:
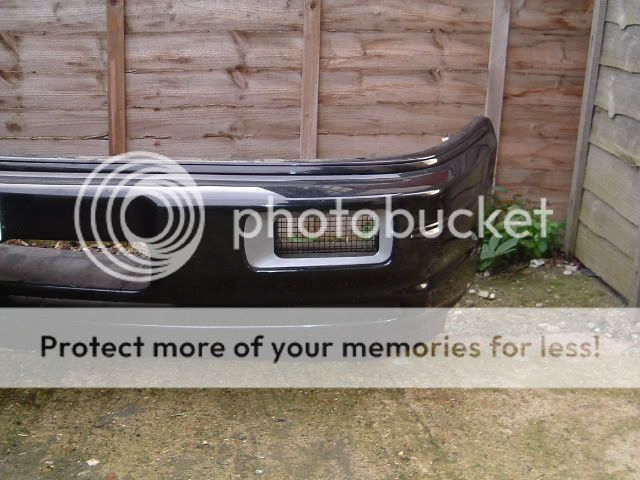
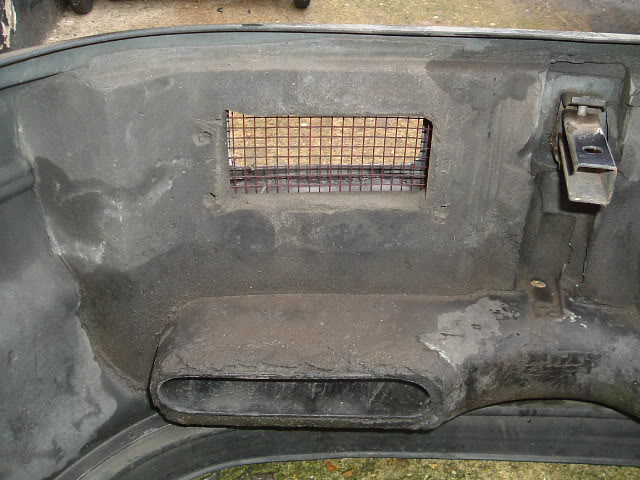
This is the fog light mount, which I cut out from the bumper:
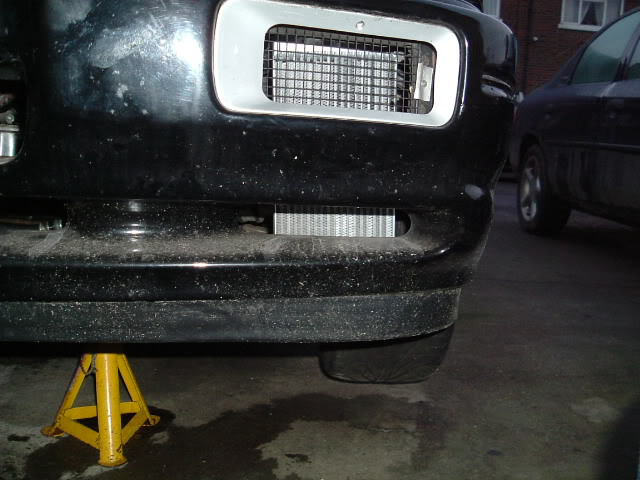
And this is it all back together, now the whole cooler is visible, so it will get twice as much air than before:

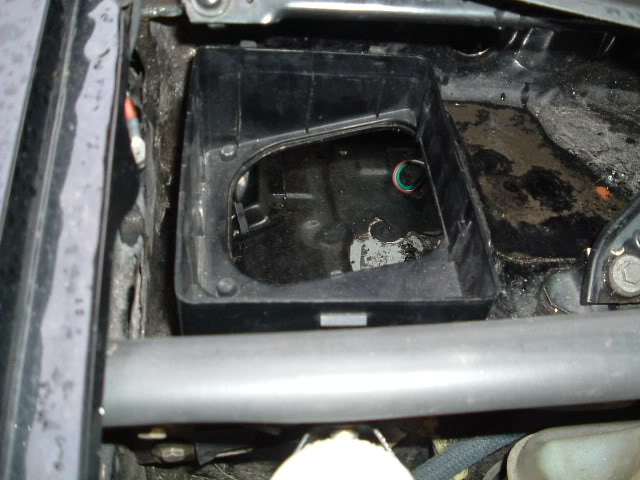
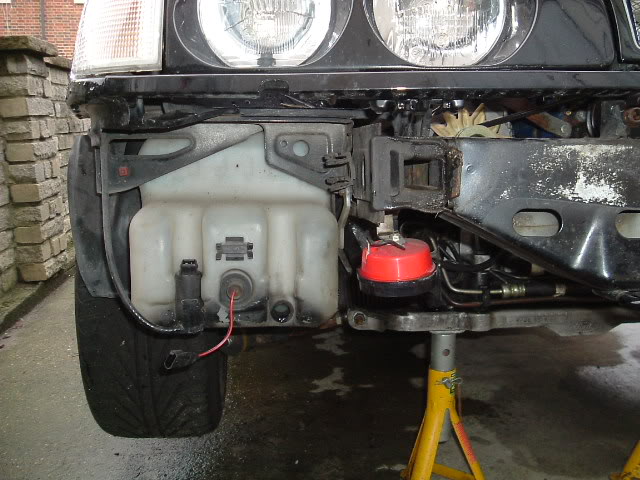
Also removed the washer bottle:
I'm going to cut out the drivers side fog light just like the passenger side, and run some tubing from it up into the air filter area, but that's a job for another day! It's fricken cold out there!
Decided today to sort the oil cooler location and remove the remote mounted oil filter, as when I originally mounted it, only half of the cooler was visible through the hole in the vent, and I'm paranoid about a stone going through the oil filter where it is mounted, so it will be going back to the original location on the end of the 4x4 arm, with the oil cooler sandwich plate staying where it is.
This is the original location of the cooler and filter: (forgot to take pics with bumper fitted
) :And this is after I finished, I basically turned the cooler the other way round and drilled some new holes for one of the brackets as it was now sitting a lot further in:
This is the fog light mount, which I cut out from the bumper:
And this is it all back together, now the whole cooler is visible, so it will get twice as much air than before:
Also removed the washer bottle:
I'm going to cut out the drivers side fog light just like the passenger side, and run some tubing from it up into the air filter area, but that's a job for another day! It's fricken cold out there!
18-07-2006, 10:42 PM
#3
I've found that life I needed.. It's HERE!!
Thread Starter
05/03/06
It's been a while so thought I'd post some progress pictures, been quite busy!
I have removed the power brakes assembly + the ABS unit, along with all the brake lines, these have been placed in the bin! Going to get a bias pedal box assembly when funds allow.
Yesterday I stripped out the gearbox + centre diff oil coolers / pumps / lines, was a messy job, and I forgot to take any pics of these two jobs Not much to see anyway!
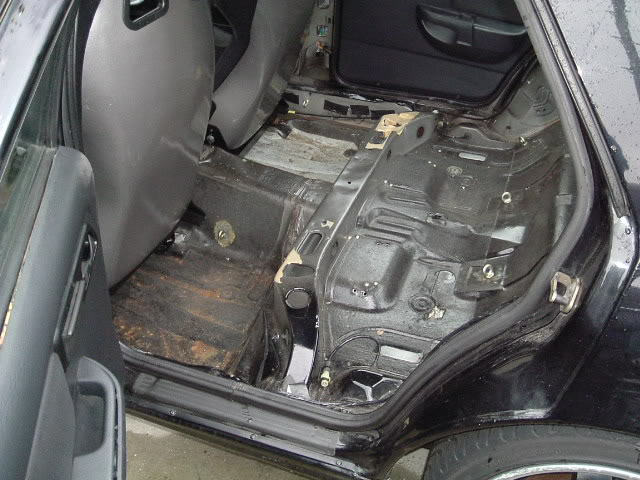
After that I finished of stripping the sound deadening on the gearbox tunnel. The past few weekends I have been stripping the sound deadening material from the rest of the interior, what a horrible job Will save ���'s in labour for when it eventually goes for the cage + paint though, so can't grumble too much. Still got to remove the residue, will use petrol / thinners for this, when I get around to it:
Floor is slightly "raised" from where the car has been jacked up / lifted on 2 poster ramps via the jacking point from underneath in it's life, these will be "fixed"
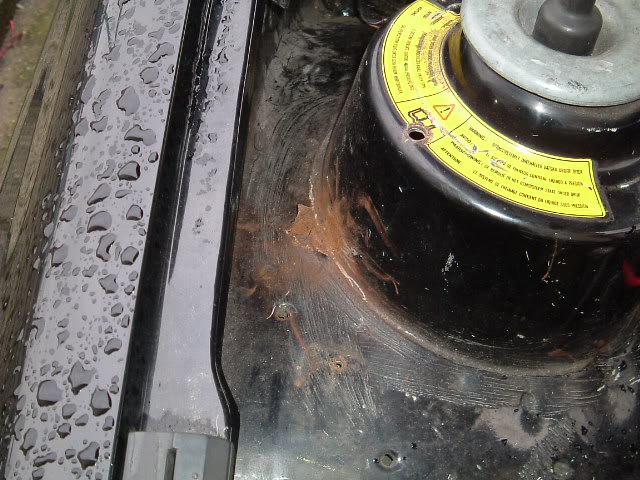
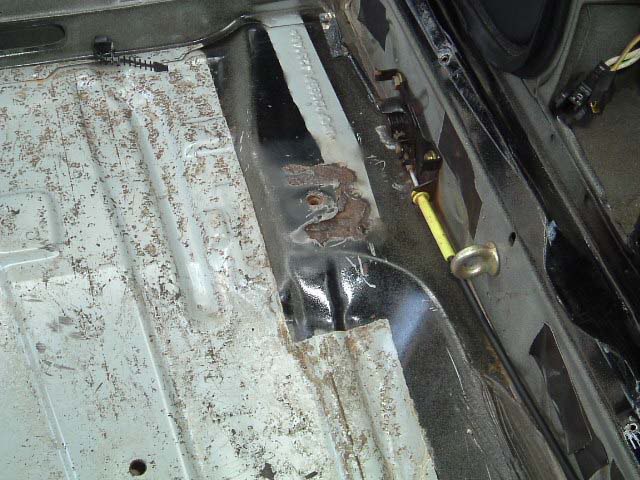
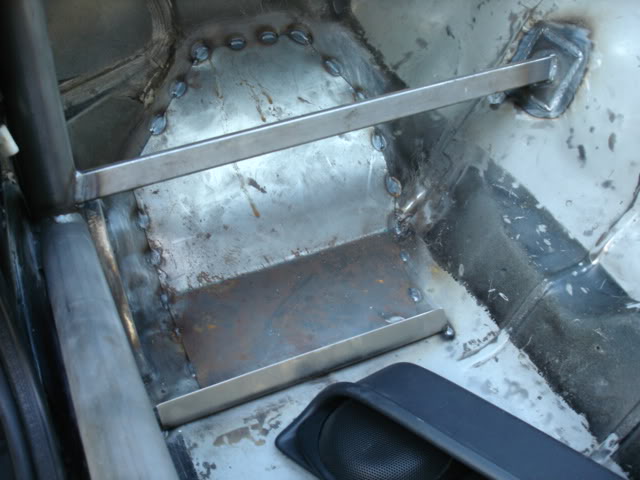
Found another bit of rot, luckily the seats will be mounted on bars when cage gets fitted:
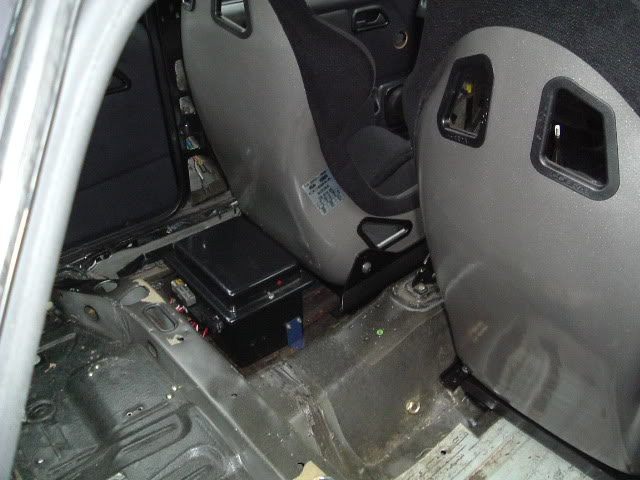
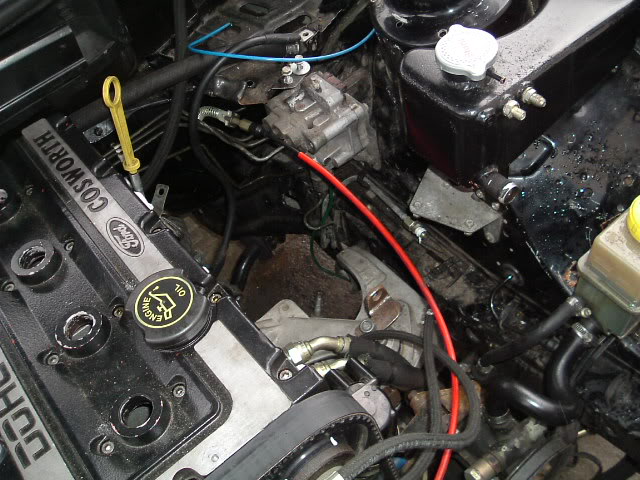
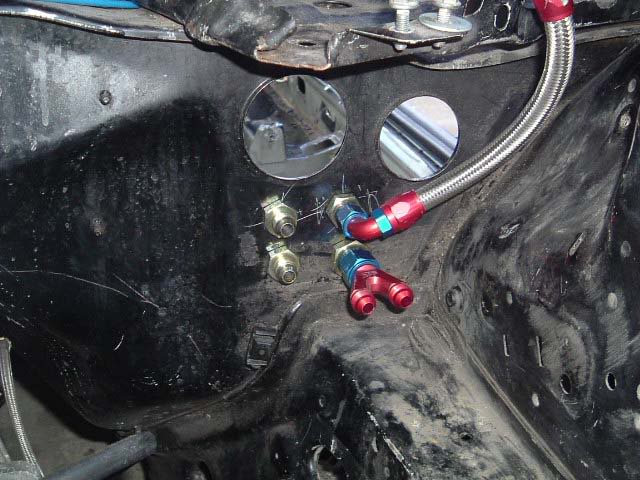
Installed the bulkhead fittings, -8 JIC (splits into 2x -6 JIC, one for each fuel rail) for fuel supply, -6 JIC for fuel return (2 fittings on the right), and 2x -6 JIC (2 fittings on the left) for the power steering pump, which will be mounted in the passenger foot well:


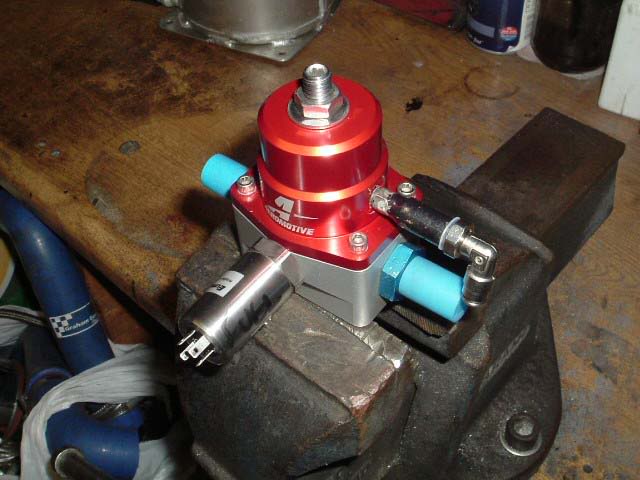
Fitted the fuel pressure sensor straight into the FPR:
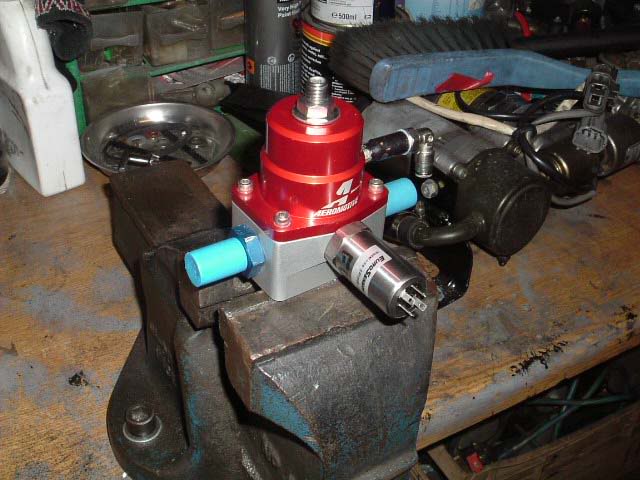
And also modified the remote oil filter housing, fitting the oil pressure sensor straight into it (before the filter), and fitting a -4 JIC fitting after the filter, this will be the oil feed for the turbo, so no need to use an aftermarket turbo oil filter:

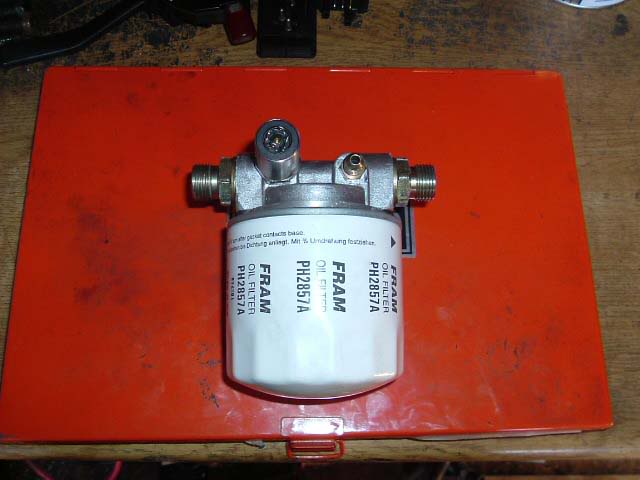
This is where it will live:
There�s not much more I can really do to the car now, there�s the sound deadening in the boot + under the rear seat area to remove, the engine + gearbox to come out (when I have somewhere to put them), start removing the waxoil I put on under the car (that�ll teach me ), then I have got to save abit of cash and send it off to have a cage fitted + painted, so there won�t be any updates for a while, but my aim was to get the shell finished this year, so I�m on target for that, still had no joy finding a roof skin with no sunroof, so will probably leave the sunroof in, as a non functioning item, unless someone makes carbon fibre roof skins, hmmmmm
It's been a while so thought I'd post some progress pictures, been quite busy!
I have removed the power brakes assembly + the ABS unit, along with all the brake lines, these have been placed in the bin! Going to get a bias pedal box assembly when funds allow.
Yesterday I stripped out the gearbox + centre diff oil coolers / pumps / lines, was a messy job, and I forgot to take any pics of these two jobs Not much to see anyway!
After that I finished of stripping the sound deadening on the gearbox tunnel. The past few weekends I have been stripping the sound deadening material from the rest of the interior, what a horrible job
Will save ���'s in labour for when it eventually goes for the cage + paint though, so can't grumble too much. Still got to remove the residue, will use petrol / thinners for this, when I get around to it:Floor is slightly "raised" from where the car has been jacked up / lifted on 2 poster ramps via the jacking point from underneath in it's life, these will be "fixed"
Found another bit of rot, luckily the seats will be mounted on bars when cage gets fitted:
Installed the bulkhead fittings, -8 JIC (splits into 2x -6 JIC, one for each fuel rail) for fuel supply, -6 JIC for fuel return (2 fittings on the right), and 2x -6 JIC (2 fittings on the left) for the power steering pump, which will be mounted in the passenger foot well:
Fitted the fuel pressure sensor straight into the FPR:
And also modified the remote oil filter housing, fitting the oil pressure sensor straight into it (before the filter), and fitting a -4 JIC fitting after the filter, this will be the oil feed for the turbo, so no need to use an aftermarket turbo oil filter:
This is where it will live:
There�s not much more I can really do to the car now, there�s the sound deadening in the boot + under the rear seat area to remove, the engine + gearbox to come out (when I have somewhere to put them), start removing the waxoil I put on under the car (that�ll teach me
), then I have got to save abit of cash and send it off to have a cage fitted + painted, so there won�t be any updates for a while, but my aim was to get the shell finished this year, so I�m on target for that, still had no joy finding a roof skin with no sunroof, so will probably leave the sunroof in, as a non functioning item, unless someone makes carbon fibre roof skins, hmmmmm
 18-07-2006, 10:44 PM
#5
I've found that life I needed.. It's HERE!!
Thread Starter
11/07/06:
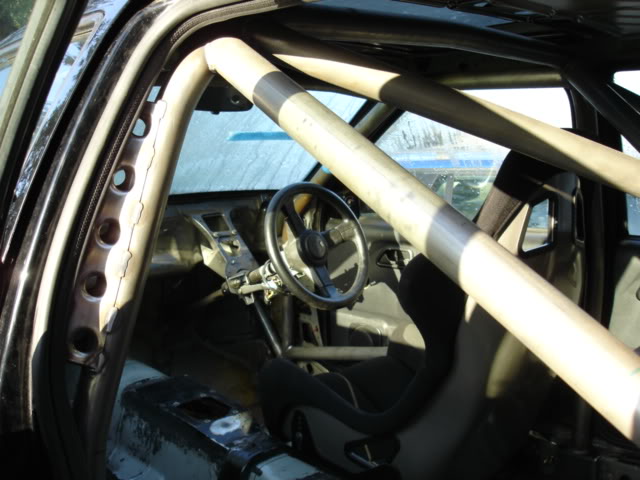
Cage has now been fitted:
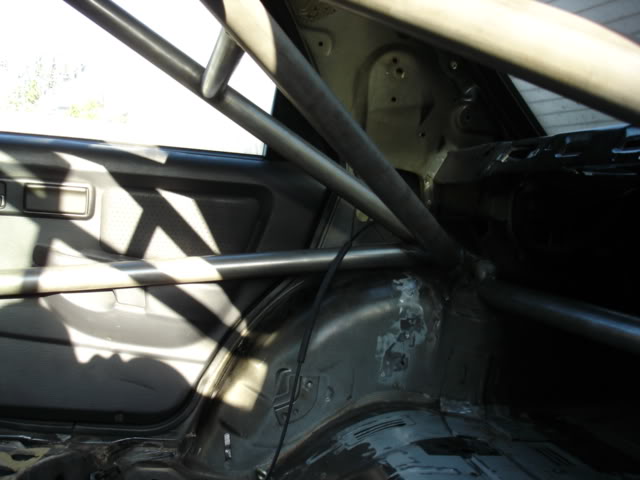
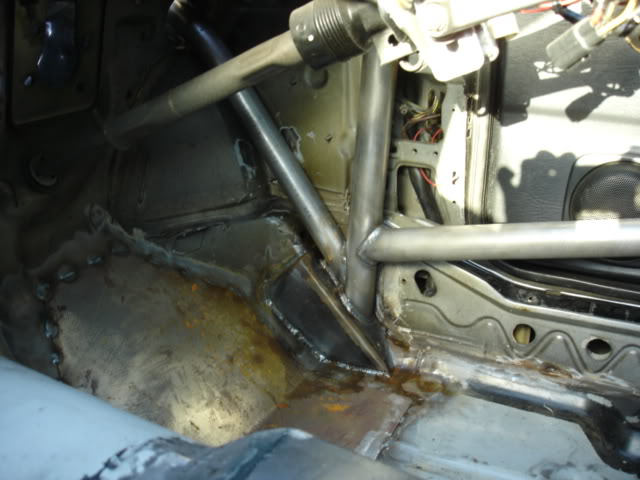
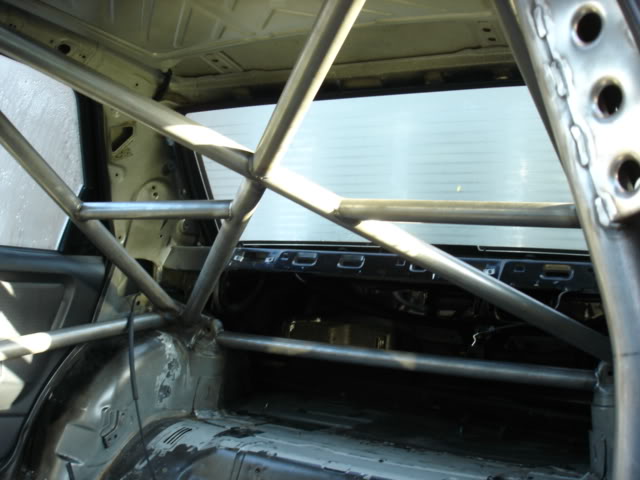
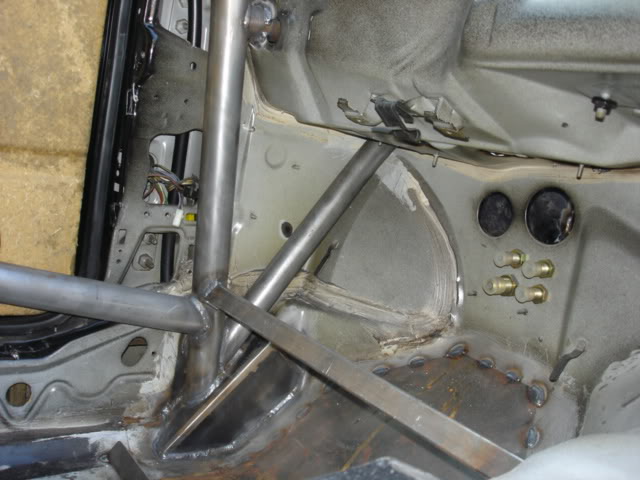
Many thanks to Martoon for sorting this out and the use of his trailer
I also managed to get hold of a proper Grp A pedal box from a saph rally car, no pics of it yet as it needs to be stripped down and painted.
Now the real fun begins, prepping for paint
Cage has now been fitted:
Many thanks to Martoon for sorting this out and the use of his trailer
I also managed to get hold of a proper Grp A pedal box from a saph rally car, no pics of it yet as it needs to be stripped down and painted.
Now the real fun begins, prepping for paint


Trending Topics


 28-01-2007, 09:47 AM
#25
I've found that life I needed.. It's HERE!!
Thread Starter
I'd forgotten all about this thread
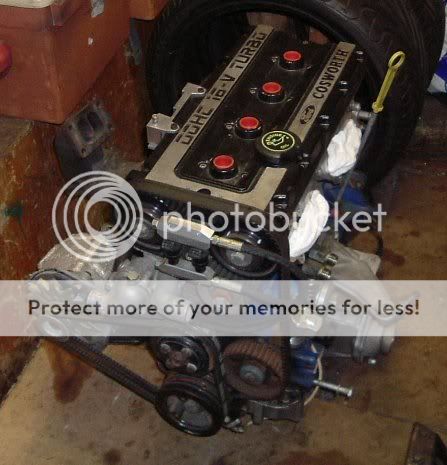
The cage was done by the same guy that did Martins (Reyland) cage, i'm undecided as to what to do with the engine yet, do i go for GT30 with 550bhp + gas to keep it really responsive, or GT35 for 600bhp + gas and blow my diffs to pieces?
Car is currently in the paint shop getting the engine bay and interior painted, and tidying up the exterior abit. The inside will be black, and the bars (i think) will be done in silver to show them off abit, would look wrong if they were black too.
18-02-2007, 01:08 PM
#28
I've found that life I needed.. It's HERE!!
Thread Starter
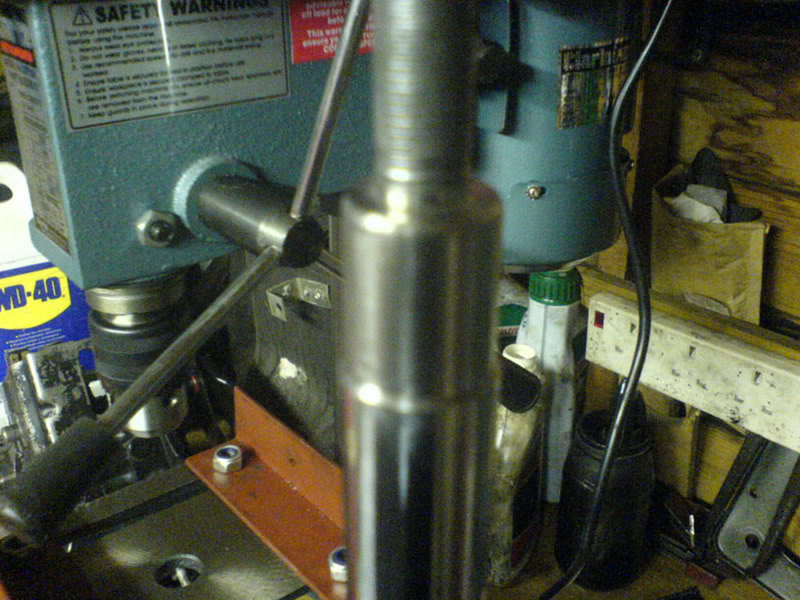
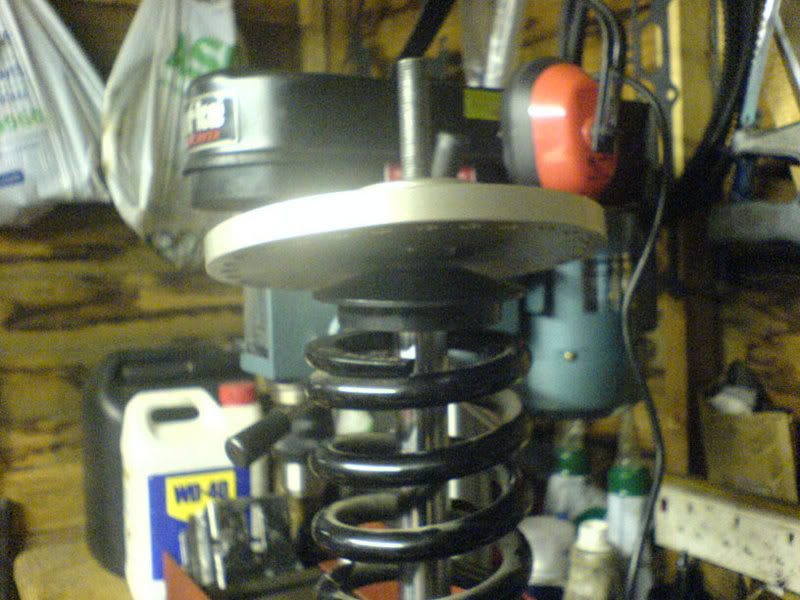
Top mounts:
I got some eccentric top mounts from Brom @ Zoo a while ago, they are thinker and have a proper metal bearing fitted, not like the ones you get from Rally design (as Brom showed me!)
The kit came with some spacers:
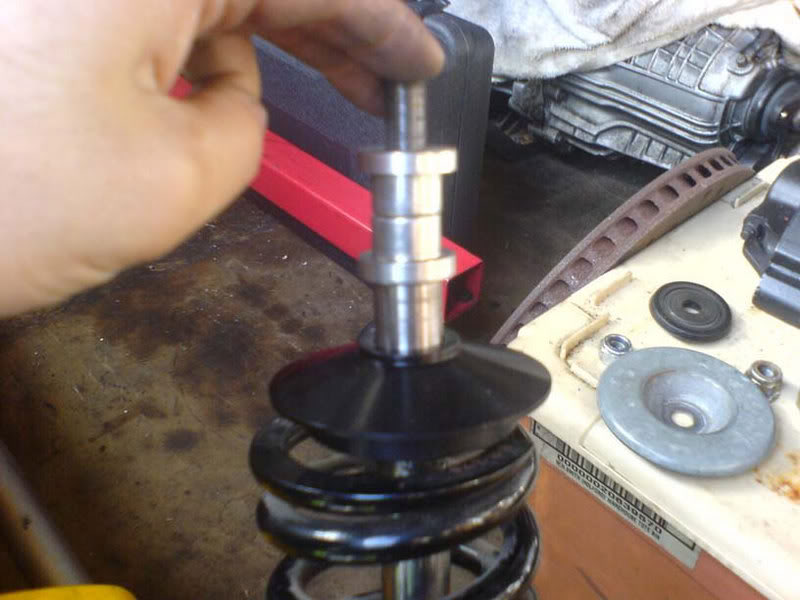
But I saw what can happen to the struts if you use them, basically the threaded part of the strut can snap at the base as the threaded section is quite thin compared to the rest of the strut:
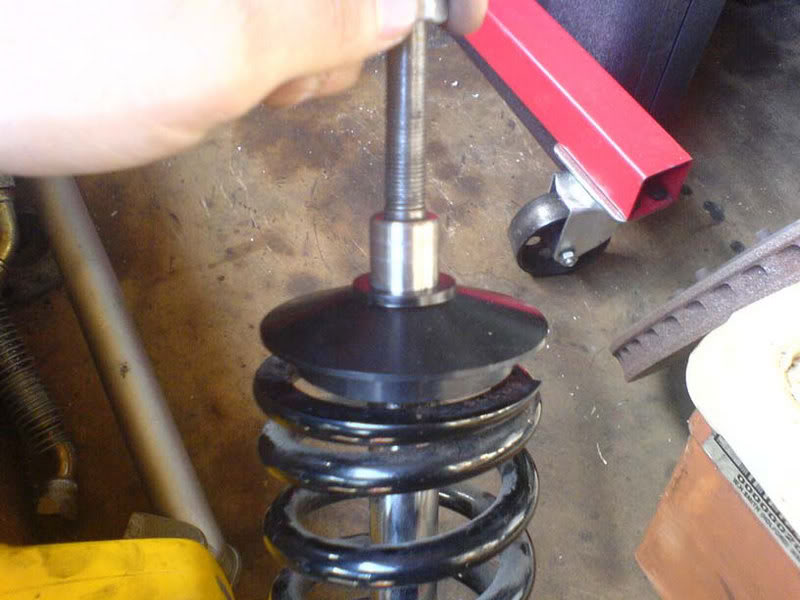
Brom said this is quite common when fitting them this way and showed me a box full of dampers that this had happened to.
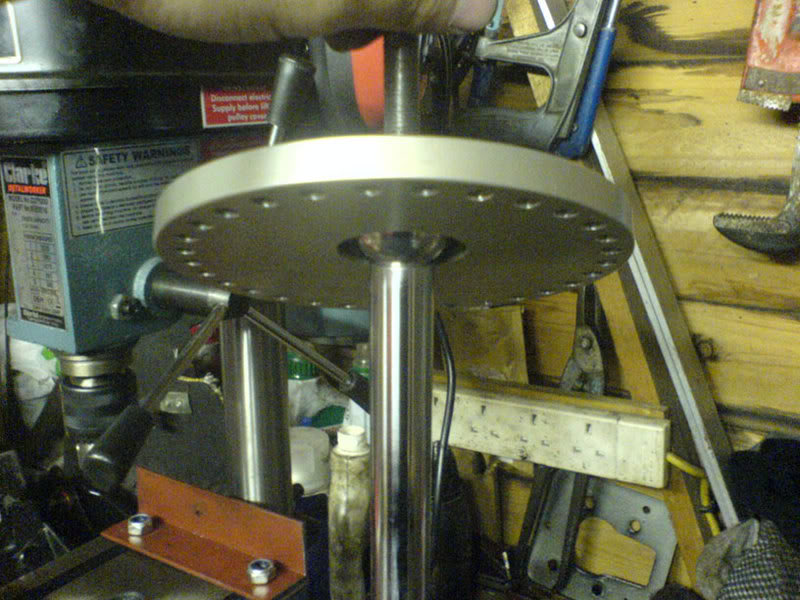
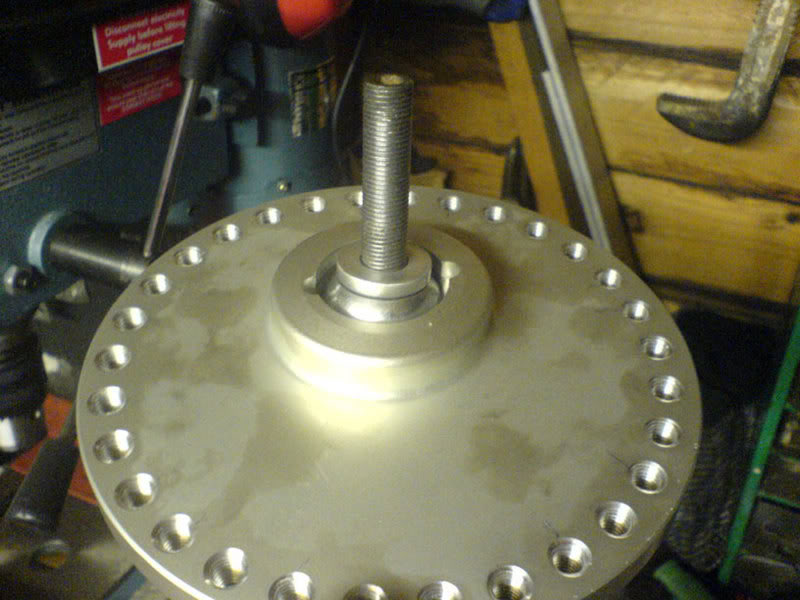
This also left me with another problem, I was left with a 19.5mm gap between the top spring cup and the bottom of the spacer:
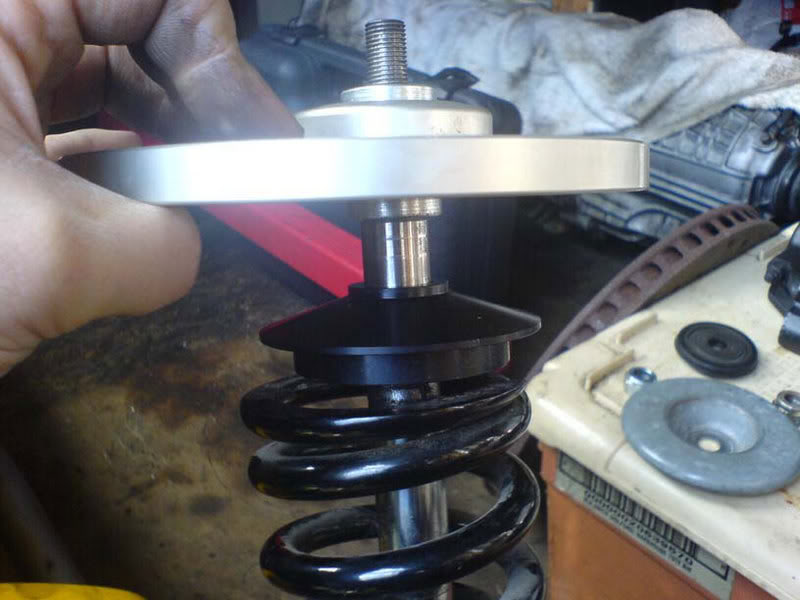
The Leda�s have a recess machined in the strut which is meant to fit inside the bearing, unfortunately they were very fractionally to large to fit in the bearing. I was going to have a new bottom spacer machined up which took up the gap and gave some strength to the threaded section, but then a mate asked how big the difference between the recess and the bearing was, I measured it and it was tiny, so I got out the emery cloth and set to work on the strut, after about 15 minutes the bearing now fits over the strut nicely with no play whatsoever, pain in the RS but the best solution I think:
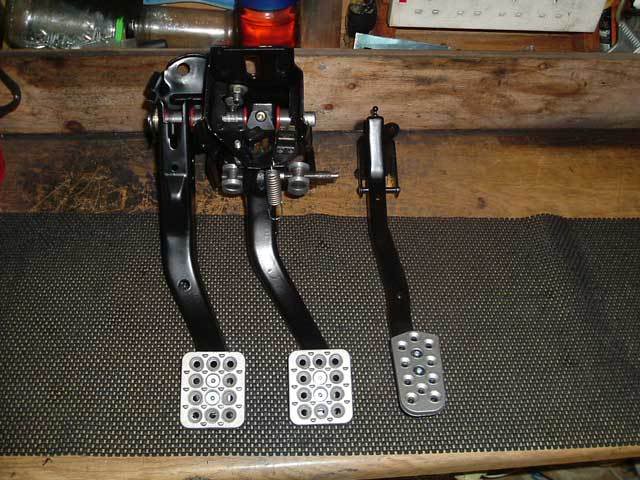
Pedal box:
I got this pedal box from TF a few months ago on e-bay, when I got it it was looking very used, so I stripped it down to component form, took the old paint off, welded some plates to the bottom of the arms so I could easily mount the new pedals I had got for it, then primed, painted, and sealed them all up:
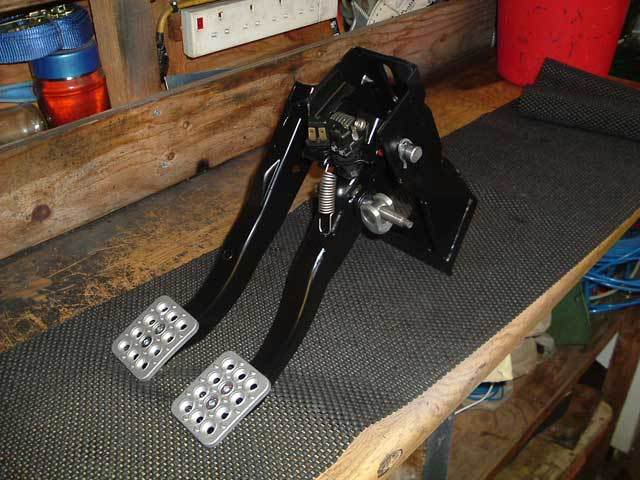
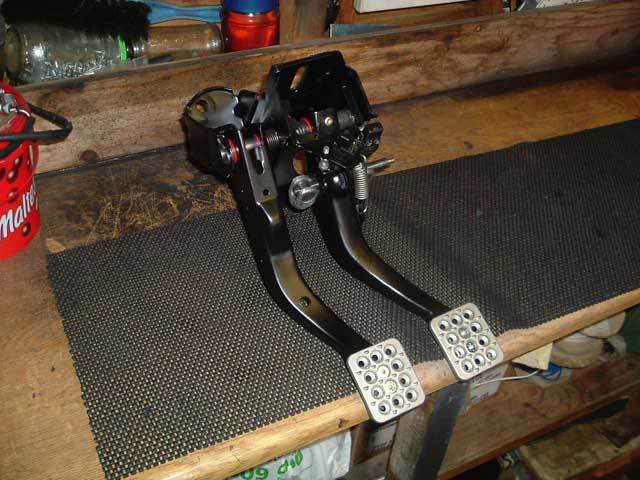
I did the same for the throttle pedal too, I had to modify the pedal that cam with the kit as it was huge, so I cut it down and filed it so it looked neat:
Paint:
The car is currently in the paint shop being prepped, engine bay and interior are being painted black, with the roll cage bars being done in silver to make them stand out abit, they are too nice to hide away. I�m going to get them to do something with the front wings so I can run 235/40x17�s on the front too.
I only have a couple of pics of the engine bay prep, hopefully they will do abit more work on it soon
Well that�s it for now, just have to wait for the paint shop to finish up and then I can start putting things back together.
I got some eccentric top mounts from Brom @ Zoo a while ago, they are thinker and have a proper metal bearing fitted, not like the ones you get from Rally design (as Brom showed me!)
The kit came with some spacers:
But I saw what can happen to the struts if you use them, basically the threaded part of the strut can snap at the base as the threaded section is quite thin compared to the rest of the strut:
Brom said this is quite common when fitting them this way and showed me a box full of dampers that this had happened to.
This also left me with another problem, I was left with a 19.5mm gap between the top spring cup and the bottom of the spacer:
The Leda�s have a recess machined in the strut which is meant to fit inside the bearing, unfortunately they were very fractionally to large to fit in the bearing. I was going to have a new bottom spacer machined up which took up the gap and gave some strength to the threaded section, but then a mate asked how big the difference between the recess and the bearing was, I measured it and it was tiny, so I got out the emery cloth and set to work on the strut, after about 15 minutes the bearing now fits over the strut nicely with no play whatsoever, pain in the RS but the best solution I think:
Pedal box:
I got this pedal box from TF a few months ago on e-bay, when I got it it was looking very used, so I stripped it down to component form, took the old paint off, welded some plates to the bottom of the arms so I could easily mount the new pedals I had got for it, then primed, painted, and sealed them all up:
I did the same for the throttle pedal too, I had to modify the pedal that cam with the kit as it was huge, so I cut it down and filed it so it looked neat:
Paint:
The car is currently in the paint shop being prepped, engine bay and interior are being painted black, with the roll cage bars being done in silver to make them stand out abit, they are too nice to hide away. I�m going to get them to do something with the front wings so I can run 235/40x17�s on the front too.
I only have a couple of pics of the engine bay prep, hopefully they will do abit more work on it soon
Well that�s it for now, just have to wait for the paint shop to finish up and then I can start putting things back together.
19-02-2007, 12:45 PM
#32
I've found that life I needed.. It's HERE!!
Thread Starter
Cheers fellas
Smitsturbo: Read the 1st post about the cage to find out who did it
Brooksey: The seats are Cobra Suzuka's (i got them in GT width), they are the nicest bucket seats i've ever sat in, and very comfortable when doing long journeys, shame the gearbox is so loud
Smitsturbo: Read the 1st post about the cage to find out who did it
Brooksey: The seats are Cobra Suzuka's (i got them in GT width), they are the nicest bucket seats i've ever sat in, and very comfortable when doing long journeys, shame the gearbox is so loud
 20-02-2007, 05:12 PM
#36
I've found that life I needed.. It's HERE!!
Thread Starter
Originally Posted by ricky_3dr
Great work wes, looking forward to see it out an about in 2008 or is it 2007???