


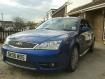
mk1 fez turbo



Have a look here mate http://www.retrofiesta.co.uk/
Go to INFORMATION on the right hand side
Then at the bottom MK2 FIESTA TURBO KNOWLEDGE CENTRE
Hope this helps
Brian
Go to INFORMATION on the right hand side
Then at the bottom MK2 FIESTA TURBO KNOWLEDGE CENTRE
Hope this helps
Brian

I'm Finding My Feet Here Now
Joined: Oct 2005
Posts: 119
Likes: 0
nicholas cage 

In-depth Electrical Guide
Well by this I would guess you would like a further look into the wiring side of things and you have a big mess on the floor and it looks a little like this
Fear not, it's actually quite straight forward and in a couple of hours you'll have a lovely labeled ready to install loom.
First things first look for three main components the two ecu plugs and the purple/blue relay holder this you'll probably find in the dash part of the loom after the fuse box. This is the fuel pump relay, the relay itself is prone to burning out especially if placed within the engine bay.
If you can't find the relay which is bright pink, it is identifiable by the following numbers 69125 followed by 8566 9P704 AA and 6HB30 stamped on the side.
Once you have found these items you will need to pull them out and away from the rest of the loom.
One particular Green/Black wire which originates from the ECU plug will lead you to a relay on the fuse box, it will be Brown and have KE in big letters on the top obviously the wire will need to be cut but also remove the Relay as this will be needed later. The relay is also identified with the following 86AGION323-AB, DIODE SRG PROTECTION, 72UF001 and 9J05 down the side.
Another noticeable set of wires is the 3x Yellow and Black these all meet together and join a large Red/Black and Blue/Black these can be cut at the join.
The rest of the separation process is a case of removing the lights, indicators, temp sender and cooling fan feed (you will use the existing XR2 ancillaries to perform these functions). You will now be left with ignition lives, permanent lives and earths.
Now is a good time to tidy things up start with the two ECU plugs and work your way down just taping every 150mm to keep things in order and also taping around where groups of wires branch off to their sensors.
Okay now that's the hard part out the way. Once the engine and components are in place start putting the plugs on. On the below picture I have labeled all them which should make life a little easier.
The rest as they say is history just get your soldering iron out and make those connections a list of which is below.
3x Browns together (from sensors) - to be connect to earth
1x Black (from ECU) - to be connected to black on coil
1x Black/Green (from ECU) to connect to pin87 on Brown relay
1x Green (from ECU) - to connect to Green lead on coil
2x Brown (from sensors) - to be connected to earth
3x Yellow/Black (feed to sensors) - connect to 10Amp fused ignition live
1x Black (from Amal valve connector) - connect to black lead on coil
From the Fuel Pump relay
1x Thick red - This requires a 25Amp feed
1x Thick Black/Red - This will need to be connected to the live on your fuel pump
1x thin Black/Red - This will be on the same terminal as the above but will go direct to your ECU
1x Green/Red - this will be from the middle terminal and again go directly to your ECU
Note: Both these wires should have remained connected to the ECU and fuel pump relay holder when the loom was removed, if they were cut then just look at the ecu plug and you should find somewhere along the loom the other end of the two wires(where it was cut)as it will be the same coloured wiring. solder these back togeather or extend them if you wish to relocate the fuel pump relay else where.
1x Brown - connect this to Earth
1x Black - connect to Black on coil
From the Brown Relay
Pin 87 - connects to Black/Green wire describe in above from the loom
Pin 86 - requires 10A live ignition feed
Pin 85 - connect to earth
Now a word of advise - I wouldn't tape everything up just yet as it's best to check everything works first.
If you don't fancy doing this yourself it's best to find someone who has done this before or they'll probably include their research and development in their costs, I have had quotes from £80 to £900 for the wiring alone so be warned. I ( Andy ) can strip label and post back for £50 if required.
In-depth Electrical Guide
Well by this I would guess you would like a further look into the wiring side of things and you have a big mess on the floor and it looks a little like this
Fear not, it's actually quite straight forward and in a couple of hours you'll have a lovely labeled ready to install loom.
First things first look for three main components the two ecu plugs and the purple/blue relay holder this you'll probably find in the dash part of the loom after the fuse box. This is the fuel pump relay, the relay itself is prone to burning out especially if placed within the engine bay.
If you can't find the relay which is bright pink, it is identifiable by the following numbers 69125 followed by 8566 9P704 AA and 6HB30 stamped on the side.
Once you have found these items you will need to pull them out and away from the rest of the loom.
One particular Green/Black wire which originates from the ECU plug will lead you to a relay on the fuse box, it will be Brown and have KE in big letters on the top obviously the wire will need to be cut but also remove the Relay as this will be needed later. The relay is also identified with the following 86AGION323-AB, DIODE SRG PROTECTION, 72UF001 and 9J05 down the side.
Another noticeable set of wires is the 3x Yellow and Black these all meet together and join a large Red/Black and Blue/Black these can be cut at the join.
The rest of the separation process is a case of removing the lights, indicators, temp sender and cooling fan feed (you will use the existing XR2 ancillaries to perform these functions). You will now be left with ignition lives, permanent lives and earths.
Now is a good time to tidy things up start with the two ECU plugs and work your way down just taping every 150mm to keep things in order and also taping around where groups of wires branch off to their sensors.
Okay now that's the hard part out the way. Once the engine and components are in place start putting the plugs on. On the below picture I have labeled all them which should make life a little easier.
The rest as they say is history just get your soldering iron out and make those connections a list of which is below.
3x Browns together (from sensors) - to be connect to earth
1x Black (from ECU) - to be connected to black on coil
1x Black/Green (from ECU) to connect to pin87 on Brown relay
1x Green (from ECU) - to connect to Green lead on coil
2x Brown (from sensors) - to be connected to earth
3x Yellow/Black (feed to sensors) - connect to 10Amp fused ignition live
1x Black (from Amal valve connector) - connect to black lead on coil
From the Fuel Pump relay
1x Thick red - This requires a 25Amp feed
1x Thick Black/Red - This will need to be connected to the live on your fuel pump
1x thin Black/Red - This will be on the same terminal as the above but will go direct to your ECU
1x Green/Red - this will be from the middle terminal and again go directly to your ECU
Note: Both these wires should have remained connected to the ECU and fuel pump relay holder when the loom was removed, if they were cut then just look at the ecu plug and you should find somewhere along the loom the other end of the two wires(where it was cut)as it will be the same coloured wiring. solder these back togeather or extend them if you wish to relocate the fuel pump relay else where.
1x Brown - connect this to Earth
1x Black - connect to Black on coil
From the Brown Relay
Pin 87 - connects to Black/Green wire describe in above from the loom
Pin 86 - requires 10A live ignition feed
Pin 85 - connect to earth
Now a word of advise - I wouldn't tape everything up just yet as it's best to check everything works first.
If you don't fancy doing this yourself it's best to find someone who has done this before or they'll probably include their research and development in their costs, I have had quotes from £80 to £900 for the wiring alone so be warned. I ( Andy ) can strip label and post back for £50 if required.

Thread
Thread Starter
Forum
Replies
Last Post
Focosmitch
Ford Focus RS Parts for Sale.
1
Jun 2, 2016 06:46 PM
Focosmitch
Ford RS Cosworth Parts for Sale
36
Oct 9, 2015 07:38 PM
Matt Baxter
Ford RS Cosworth Parts for Sale
6
Sep 16, 2015 08:30 PM
Ben26
Pictures, video & Photoshop Forum
10
Aug 27, 2015 08:56 PM
