Sill fitment, finished result and guide of what I did :D


Thread Starter
PassionFord Post Whore!!
Joined: Sep 2010
Posts: 4,559
Likes: 19
From: Uk
 Sill fitment, finished result and guide of what I did :D
Hi all, In a few days I might be coming up to fitting my outer sill, and I am a bit stuffed.
My dad says that I should place the sill under the top of the original, if that makes sense. So a tiny lip is inside the first and the replacement is underneath.
I said that i should butt weld it upto the original and weld along the original line, or just under it.
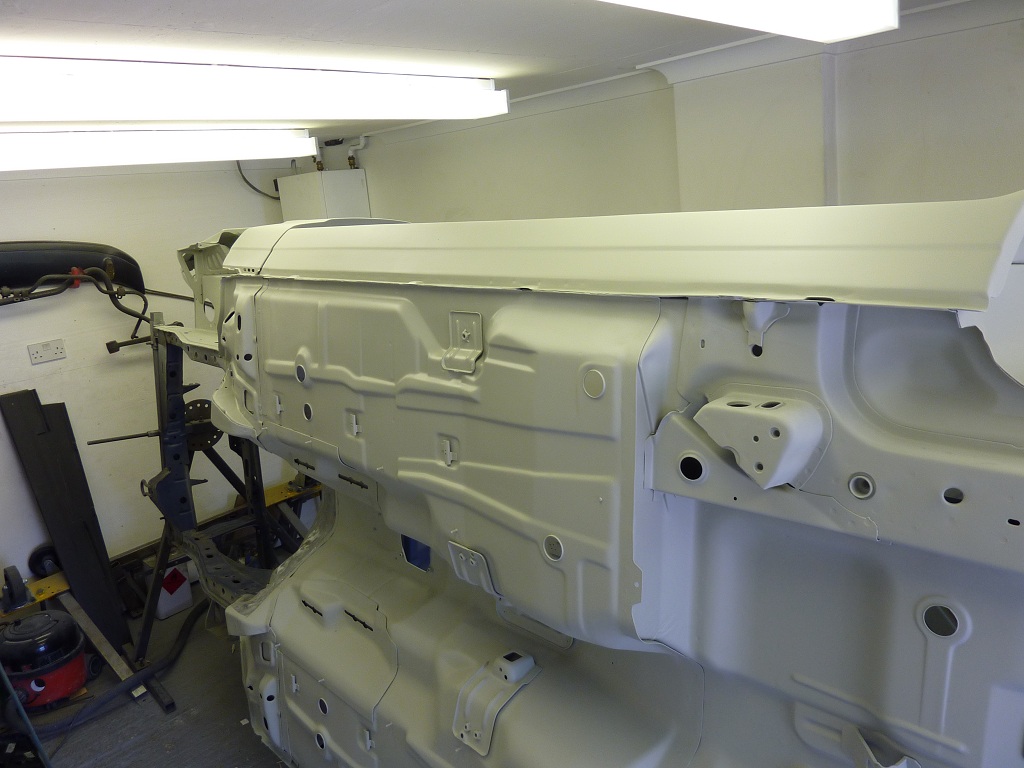
Here are the pics of the sill in question
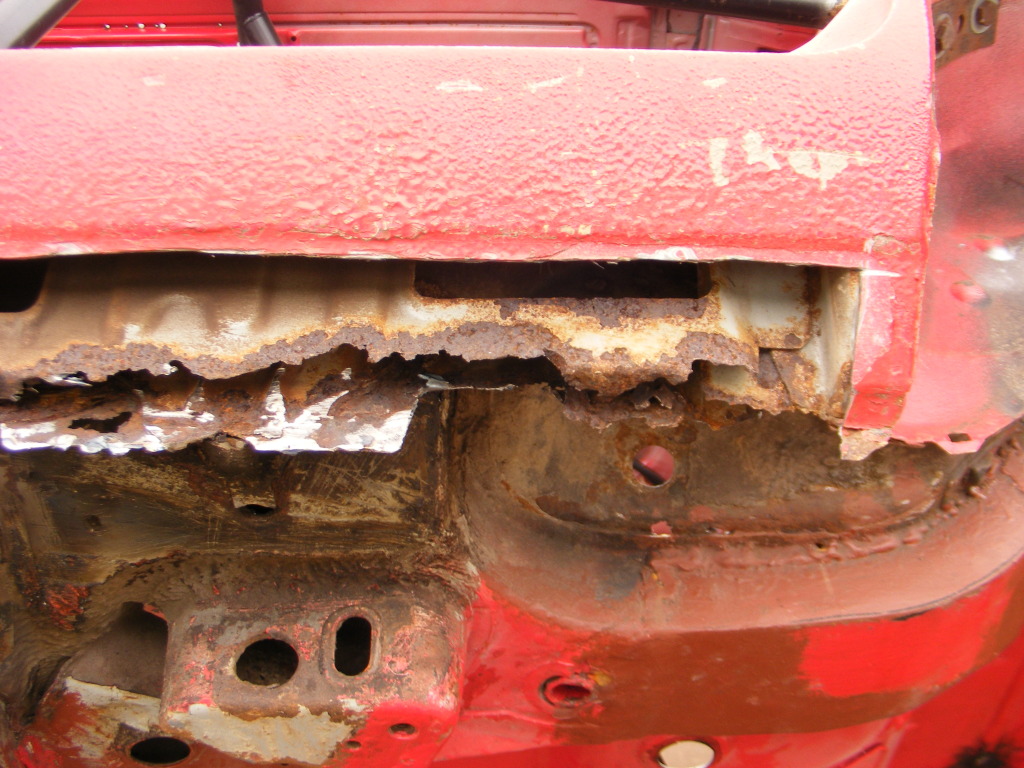
All the inner and other stuff is welded now by the way, its just the outer I need to fit.
But what advice can you give me? Any tips?
What is the best way to about this?
I am using an after market Hadrian outer sill by the way. So I am unsure it it will be a perfect fit, but nothing a wee bit of filler won't cure I'm sure.
Any help greatly appreciated
My dad says that I should place the sill under the top of the original, if that makes sense. So a tiny lip is inside the first and the replacement is underneath.
I said that i should butt weld it upto the original and weld along the original line, or just under it.
Here are the pics of the sill in question
All the inner and other stuff is welded now by the way, its just the outer I need to fit.
But what advice can you give me? Any tips?
What is the best way to about this?
I am using an after market Hadrian outer sill by the way. So I am unsure it it will be a perfect fit, but nothing a wee bit of filler won't cure I'm sure.
Any help greatly appreciated
Last edited by SMILER258; Aug 30, 2012 at 10:38 PM.


if it were me id remove the entire outer sill and replace with the entire new one welded as per original. Its the neater way to do it, although probably harder work than patching in a section.
Thread Starter
PassionFord Post Whore!!
Joined: Sep 2010
Posts: 4,559
Likes: 19
From: Uk
The rest of the sill is sollid as a rock and not rotten, so I'm not really up to removing the lot, just the piece from where I cut down. and it's all the way across to the very front of the sill. Although if it comes to it, I think I will do that.

PassionFord Post Whore!!
iTrader: (2)
Joined: Jan 2010
Posts: 5,904
Likes: 26
From: in someone elses garage
Id join it a touch higher then the swage line otherwise youll have to grind down all the welds to much so you can keep the swage the way it is at the mo.
Id set it up as if you were doing a but joint but put a strip of steel at the back of the joint to give it strength and something to weld to.
hold the strip or steel to the original sill by welding it or screw
it in place then remove them and weld up the holes afterwards
Id set it up as if you were doing a but joint but put a strip of steel at the back of the joint to give it strength and something to weld to.
hold the strip or steel to the original sill by welding it or screw
it in place then remove them and weld up the holes afterwards
 Thanks

first things first as mentioned above above cutting the whole sill of, i say dont, never cut off more metal than you need to
i would butt weld that you shouldnt need another strip of steel inside unless you dont trust your welding. i would zinc spray the inside of the sill first and the inside of the part you are welding in, then waxoil inside the sill when finished
i wouldnt do a lap joint on any part of a car i can not get to both sides of to seal afterwards as lap joints are notorious for being moisture traps
i would butt weld that you shouldnt need another strip of steel inside unless you dont trust your welding. i would zinc spray the inside of the sill first and the inside of the part you are welding in, then waxoil inside the sill when finished
i wouldnt do a lap joint on any part of a car i can not get to both sides of to seal afterwards as lap joints are notorious for being moisture traps
Trending Topics


I butt welded mine and held the new bit in place with a load of small magnets while I tacked it.
http://www.ebay.co.uk/itm/25-Strong-...item25740a4f51
http://www.ebay.co.uk/itm/25-Strong-...item25740a4f51
Thread Starter
PassionFord Post Whore!!
Joined: Sep 2010
Posts: 4,559
Likes: 19
From: Uk

Advanced PassionFord User
Joined: May 2010
Posts: 1,908
Likes: 0
From: Somerset
well shrinkage along the weld line try it on some scrape and weld from one end then the other then back to the other end if you have no fine gap the gap can close on the weld line an you get puckering .

I'm Finding My Feet Here Now
Joined: Apr 2009
Posts: 124
Likes: 6
From: Southend
buy yourself a joggler tool to put a swage in the new panel of about 10 mm deep,drill holes in the existing sill,use self tapping screw to hold repair panel,tack the panel where it butts up then remove screws and plug weld the screw holes. nice and strong this way. HTH

Joined: Jun 2009
Posts: 8,308
Likes: 25
From: catterick/sunny yorkshire
I wouldn't remove any more metal than needed as the replacement is
Made out off thinner steel place the new sill section
On top clamp it , then use a very fine disc1mm and cut throw
Both new an old panel that way ur left with a perfect but joint
To weld
Made out off thinner steel place the new sill section
On top clamp it , then use a very fine disc1mm and cut throw
Both new an old panel that way ur left with a perfect but joint
To weld
Thread Starter
PassionFord Post Whore!!
Joined: Sep 2010
Posts: 4,559
Likes: 19
From: Uk

do this


st170 breaking
Joined: May 2004
Posts: 5,298
Likes: 1
From: norfolk
i too would joggle it and tack til correct but you need to spray a shit load of stuff in there to keep it right, copper spray the panel before fitting then spray in a paint type stuff then a wax oil stuff but make sure you still have drain holes
mmmm im sure patching in a panel is fine on a normal car and plenty strong enough but for a decent car or RS or similar collectors car, i still advocate the complete replacement with an OE spec new panel.
eg when i worked on my rs1800 fez and did a part resto, I replaced the whole passenger front floor pan rather than bodge it with patches, same with the front wings that had rotted out at the bottom. sure the repairs would have been invisible under the body kit, but IMO its still a repair rather than a replacement with new.
maybe i have stronger bufty tendancies than most
eg when i worked on my rs1800 fez and did a part resto, I replaced the whole passenger front floor pan rather than bodge it with patches, same with the front wings that had rotted out at the bottom. sure the repairs would have been invisible under the body kit, but IMO its still a repair rather than a replacement with new.
maybe i have stronger bufty tendancies than most
Trouble is the car is originally dipped in primer after spot welding, if you start chopping out good metal just for the sake of it you loose the original protection.
Sure the weld through zinc spray will help but it will not be as good as it came from the factory.
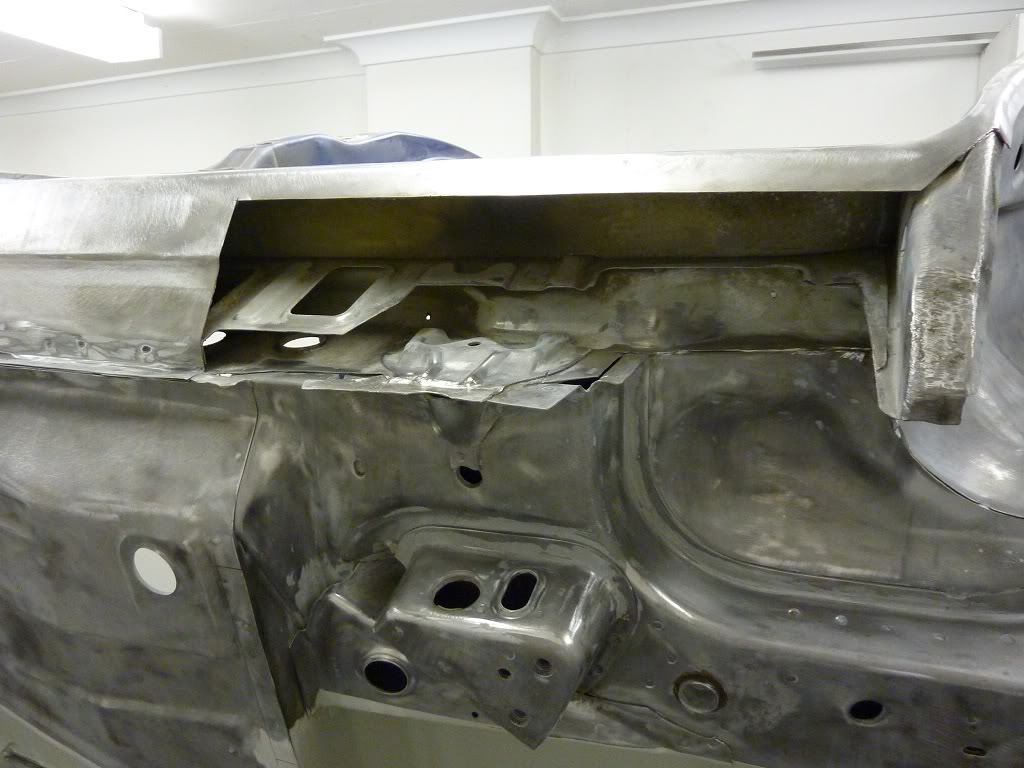
mine came out OK with a patch job
Sure the weld through zinc spray will help but it will not be as good as it came from the factory.
mine came out OK with a patch job
Joined: Jun 2009
Posts: 8,308
Likes: 25
From: catterick/sunny yorkshire
mmmm im sure patching in a panel is fine on a normal car and plenty strong enough but for a decent car or RS or similar collectors car, i still advocate the complete replacement with an OE spec new panel.
eg when i worked on my rs1800 fez and did a part resto, I replaced the whole passenger front floor pan rather than bodge it with patches, same with the front wings that had rotted out at the bottom. sure the repairs would have been invisible under the body kit, but IMO its still a repair rather than a replacement with new.
maybe i have stronger bufty tendancies than most
eg when i worked on my rs1800 fez and did a part resto, I replaced the whole passenger front floor pan rather than bodge it with patches, same with the front wings that had rotted out at the bottom. sure the repairs would have been invisible under the body kit, but IMO its still a repair rather than a replacement with new.
maybe i have stronger bufty tendancies than most
I would never replace hole thing always repair as little as
Pos I am a panel beater an jigged cars before packing in
I done quite a few restos on rs models even the mk2 escort I'm welding
We have replaced as little floor ect as possible
st170 breaking
Joined: May 2004
Posts: 5,298
Likes: 1
From: norfolk
the pattern parts bobbing about these days seem to be made of tissue too
ive never seen a good mk4 escort wing for instance, the swage where it goes back in about 1/3 way up the door is never right on a wing so recently i have found its better to just do a good job with a repair than to replace a wing for a bubbled area or crease on the bend
and theres plenty out there to keep it good
ive never seen a good mk4 escort wing for instance, the swage where it goes back in about 1/3 way up the door is never right on a wing so recently i have found its better to just do a good job with a repair than to replace a wing for a bubbled area or crease on the bend
and theres plenty out there to keep it good
Thread Starter
PassionFord Post Whore!!
Joined: Sep 2010
Posts: 4,559
Likes: 19
From: Uk
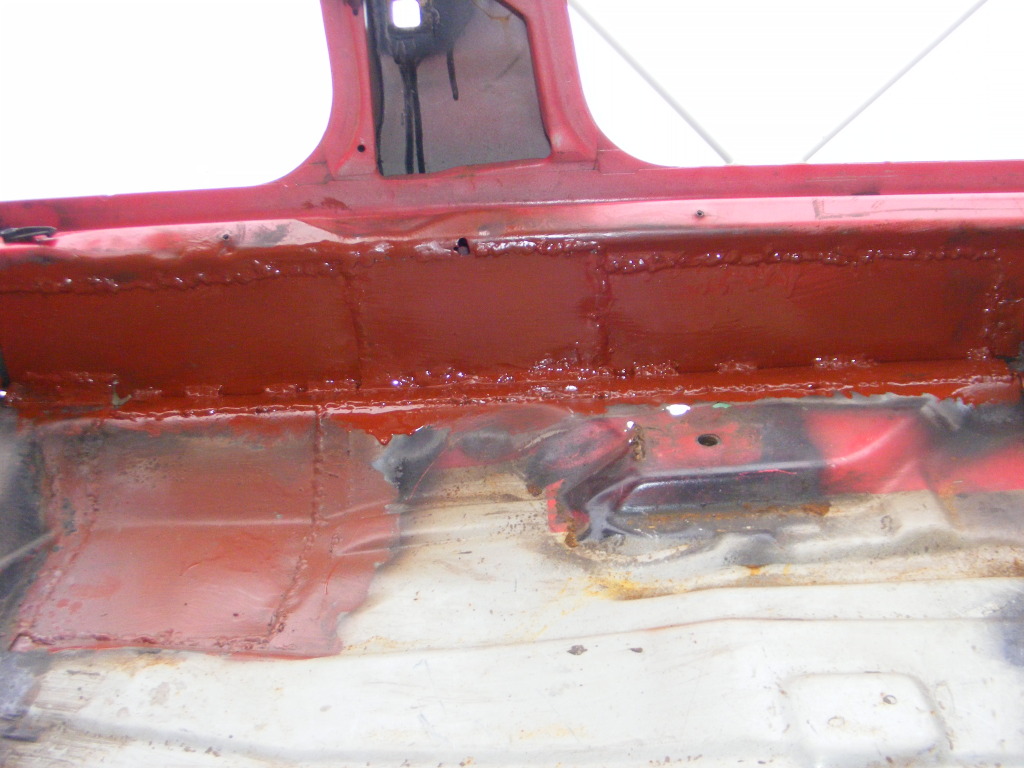
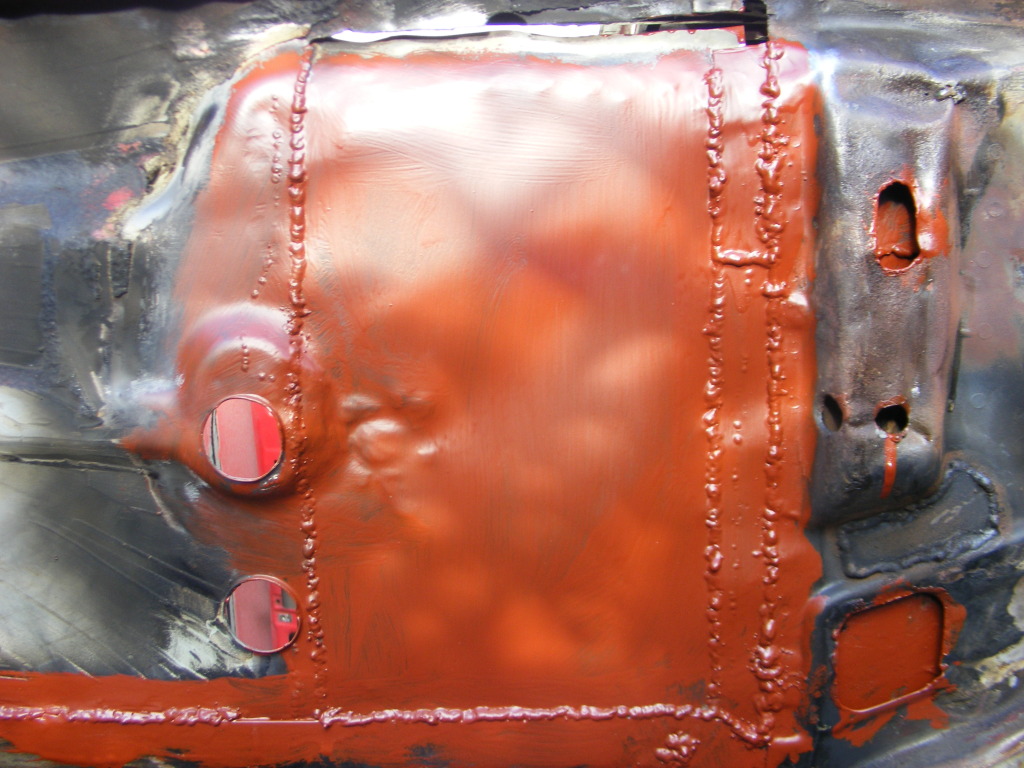
The only problem is with my car, it has never been cared for, so I have replaced both front floor pans with home made jobbies, and it's a patchwork quilt. I'm not fussed, as I'd love the car even if it was a ruin, and it's an XR, so not worth much in all honesty. I would replace all rotten stuff with new if I could, but sweet F.A is available for the Sierra. I think I'm going to go by Dinglas suggestion. Thanks for the input though

PassionFord Post Whore!!
iTrader: (1)
Joined: Jun 2008
Posts: 6,807
Likes: 0
From: south wales, swansea
Dingla has given some great advice but drilling and plug welding is also fine,although normally used for replacing panels like wings etc although I've done a few sills like that and they were fine.
Seam seal it after you've done it or it will rot through again,especially as your stone guarding then painting it will never show but last forever.
Seam seal it after you've done it or it will rot through again,especially as your stone guarding then painting it will never show but last forever.
Thread Starter
PassionFord Post Whore!!
Joined: Sep 2010
Posts: 4,559
Likes: 19
From: Uk
Dingla has given some great advice but drilling and plug welding is also fine,although normally used for replacing panels like wings etc although I've done a few sills like that and they were fine.
Seam seal it after you've done it or it will rot through again,especially as your stone guarding then painting it will never show but last forever.
Seam seal it after you've done it or it will rot through again,especially as your stone guarding then painting it will never show but last forever.
Then hopefully won't have to restore the car again for a very very long time
And yes, i think I will seam seal every seam on the car.
Can anyone reccomend a seam sealer?
mmmm im sure patching in a panel is fine on a normal car and plenty strong enough but for a decent car or RS or similar collectors car, i still advocate the complete replacement with an OE spec new panel.
eg when i worked on my rs1800 fez and did a part resto, I replaced the whole passenger front floor pan rather than bodge it with patches, same with the front wings that had rotted out at the bottom. sure the repairs would have been invisible under the body kit, but IMO its still a repair rather than a replacement with new.
maybe i have stronger bufty tendancies than most
eg when i worked on my rs1800 fez and did a part resto, I replaced the whole passenger front floor pan rather than bodge it with patches, same with the front wings that had rotted out at the bottom. sure the repairs would have been invisible under the body kit, but IMO its still a repair rather than a replacement with new.
maybe i have stronger bufty tendancies than most
Thread Starter
PassionFord Post Whore!!
Joined: Sep 2010
Posts: 4,559
Likes: 19
From: Uk
The reason my car is so patchy, as I have a deadline as things might go tits up for my dad at the end of this year, but that's another story. If I could, I would have cut every panel I needed out of rot free cars and welded them in

Thread Starter
PassionFord Post Whore!!
Joined: Sep 2010
Posts: 4,559
Likes: 19
From: Uk
Update, my sill is fitted, and apart from a car fire all went well.
A little guide of the steps.
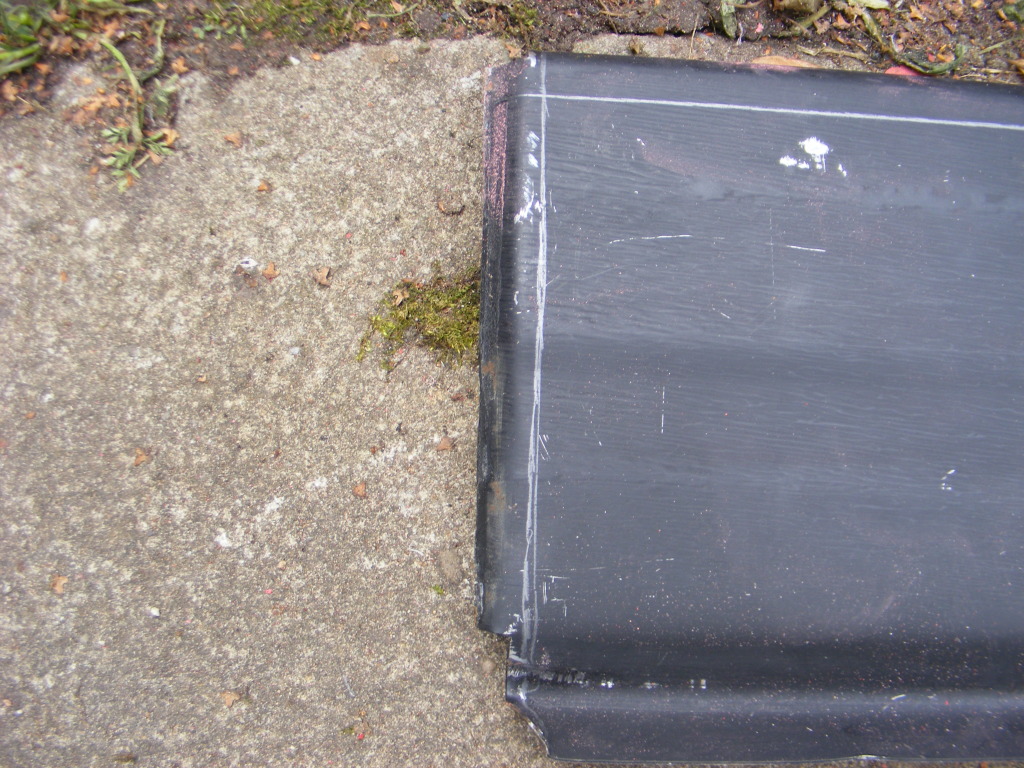
Firstly, I got my sill, and cut the parts thhat I didn't need off. these were the ones that got in the way. The top curve thing and the front of the sill that curves in.
Marked out and cut with a regular cutting disc.
Done
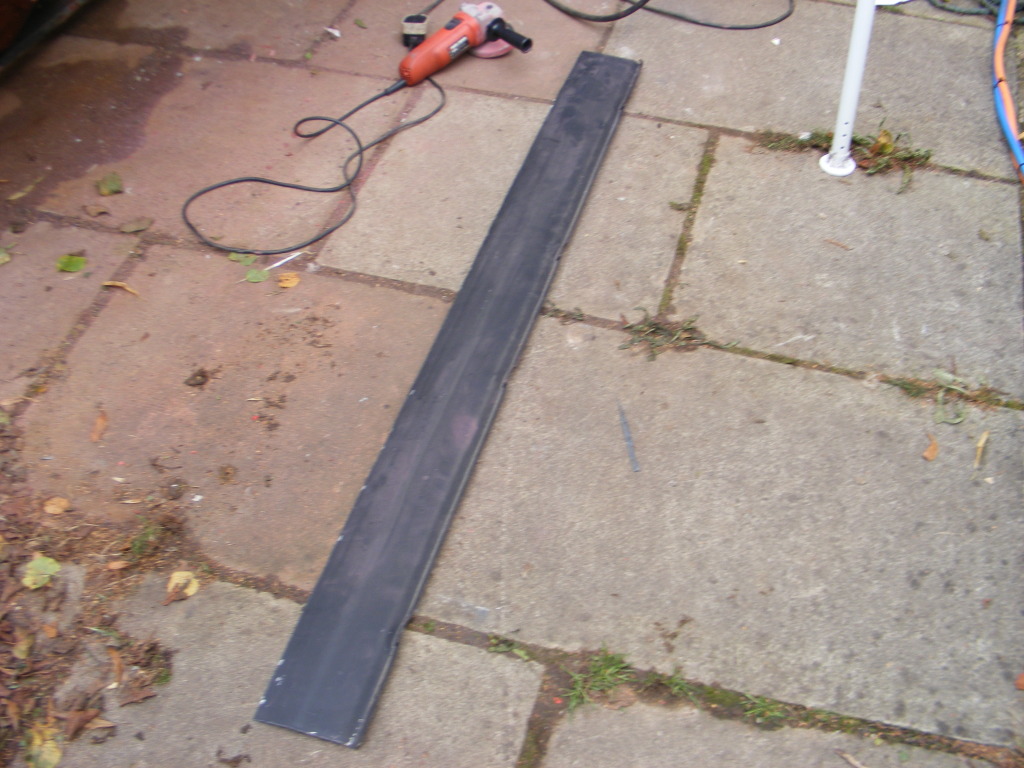
Now I offered it up, adjusting it to fit with the original swage line, then I marked out where to cut, and prepped the area I was welding to.
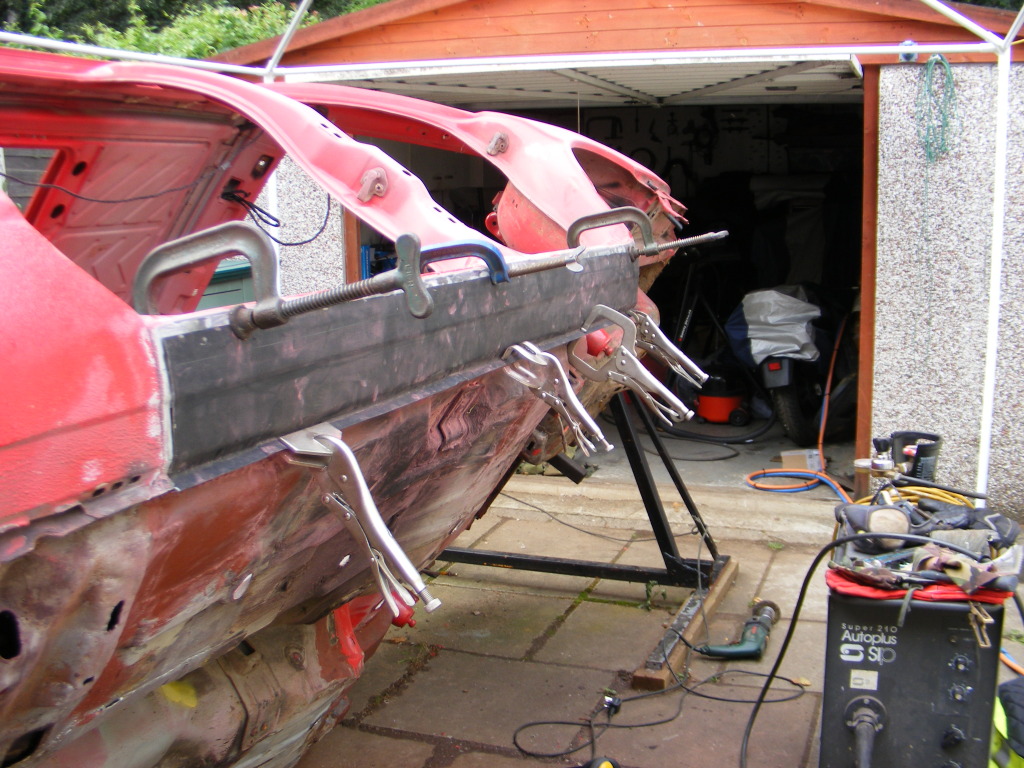
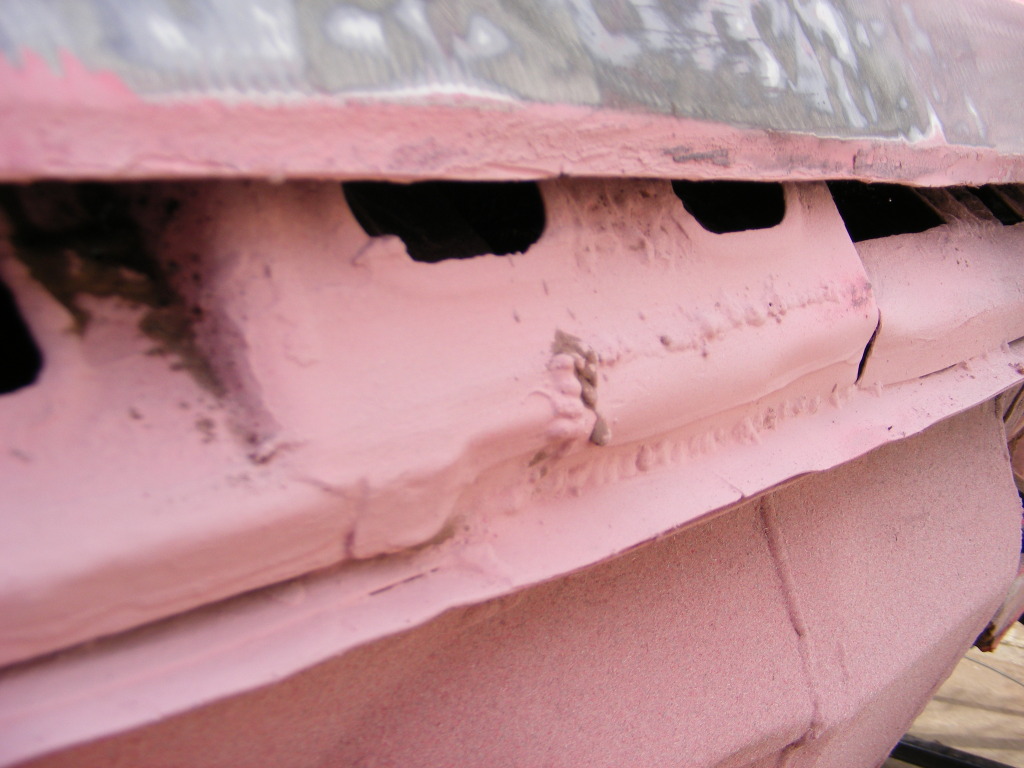
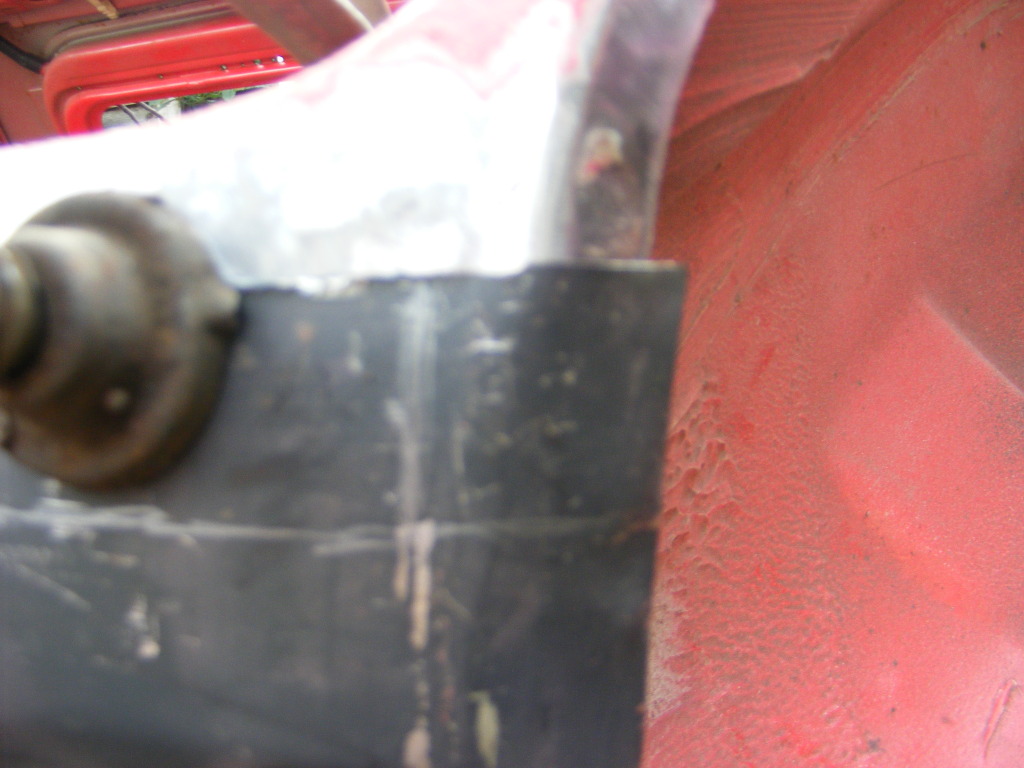
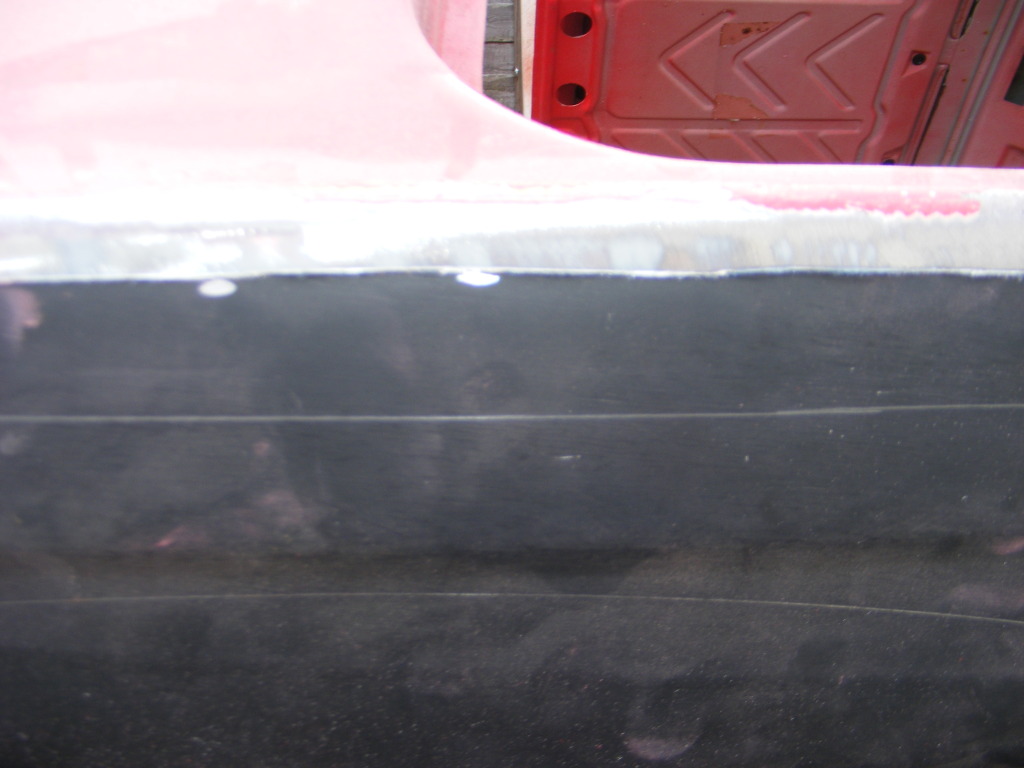
Now I needed to what Dingla advised. I cut through both skins. But before that I drilled holes for plug welding.
Also just a reminder for you, WEAR SAFETY GEAR,
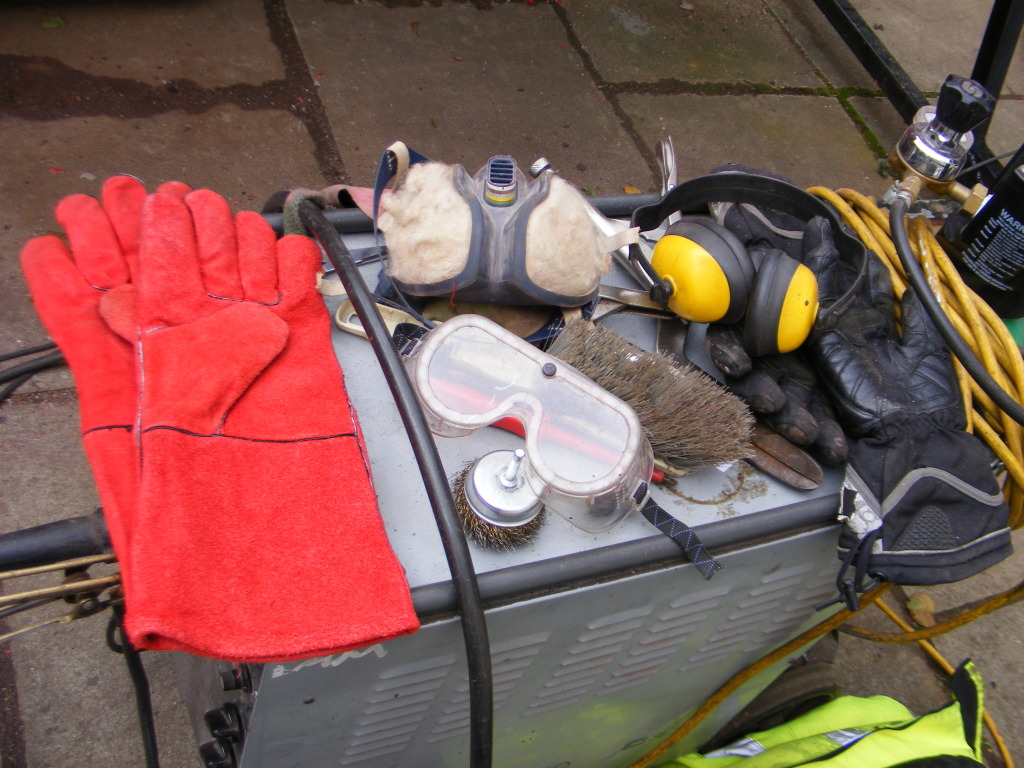
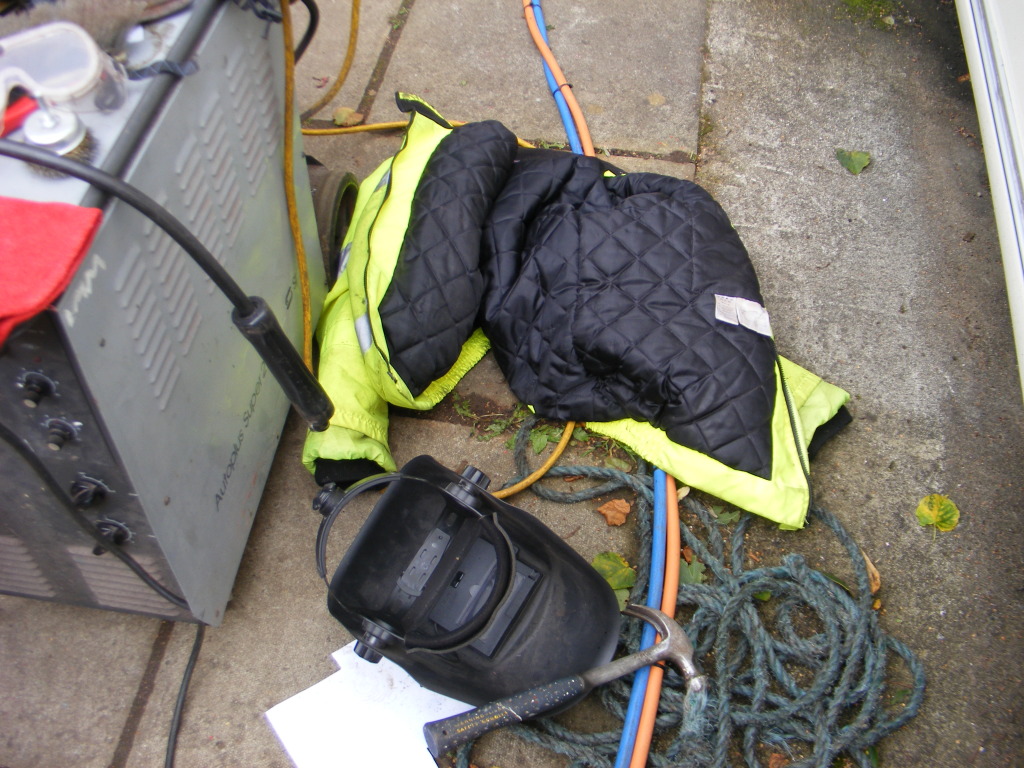
Then I did the deed and welded it on, Final checking everything. This when I had my fire. My dad was outside luckily, and as I was welding, a little bit of waxoil that was on the bit I was welding caught fire, and that shit spreads quick, then within about 5 seconds, waxoyl was onfire in half the sill, and we were running for the hose pipe, as the air line didn't do a thing apart from feed it. Lesson learnt. If you put Waxoyl in your sill, have a fire extinguisher, hose and an airline there just in case and have someone on fire duty, ready to put any little flame out!!!!
Any how here's the finished result
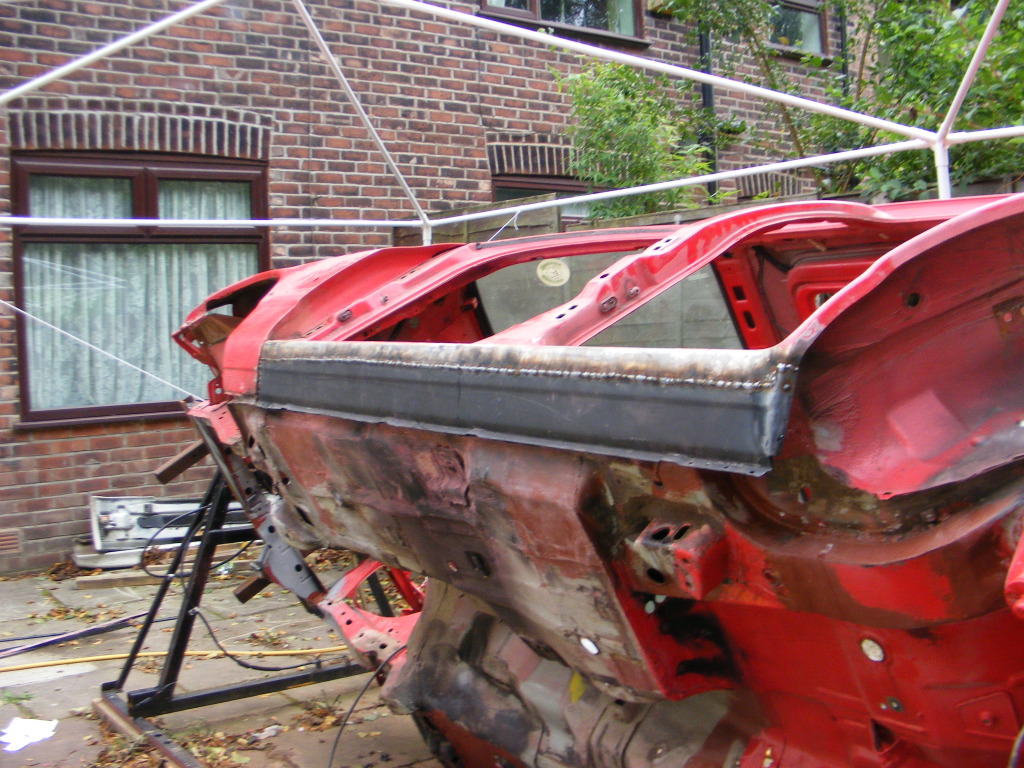
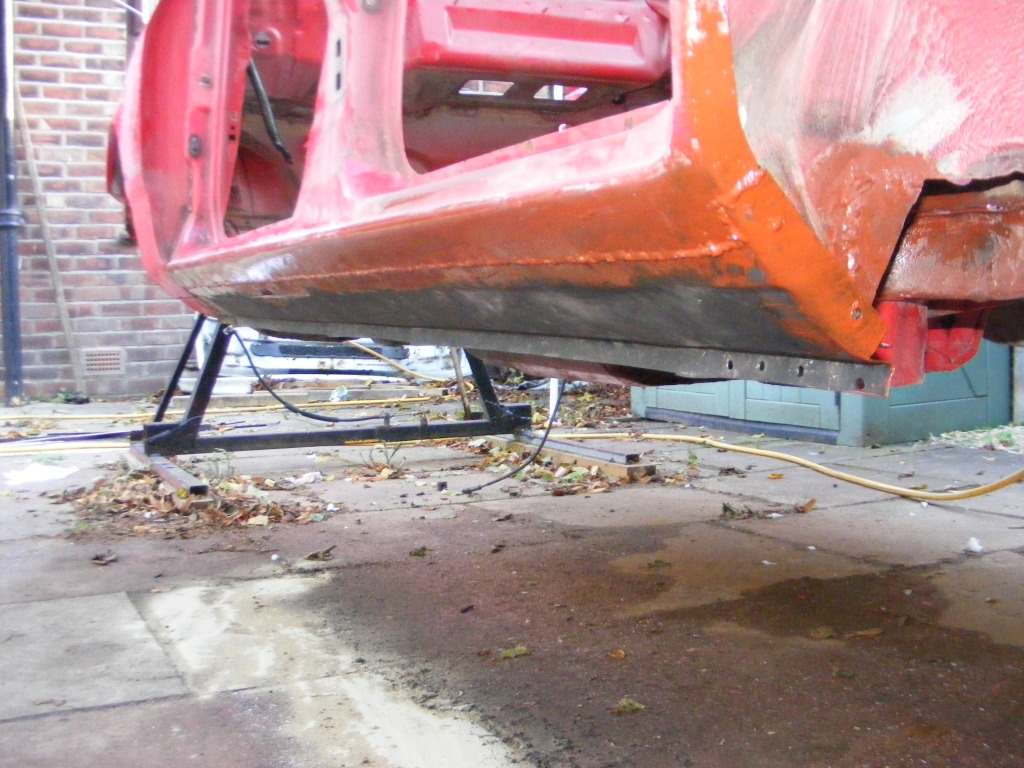
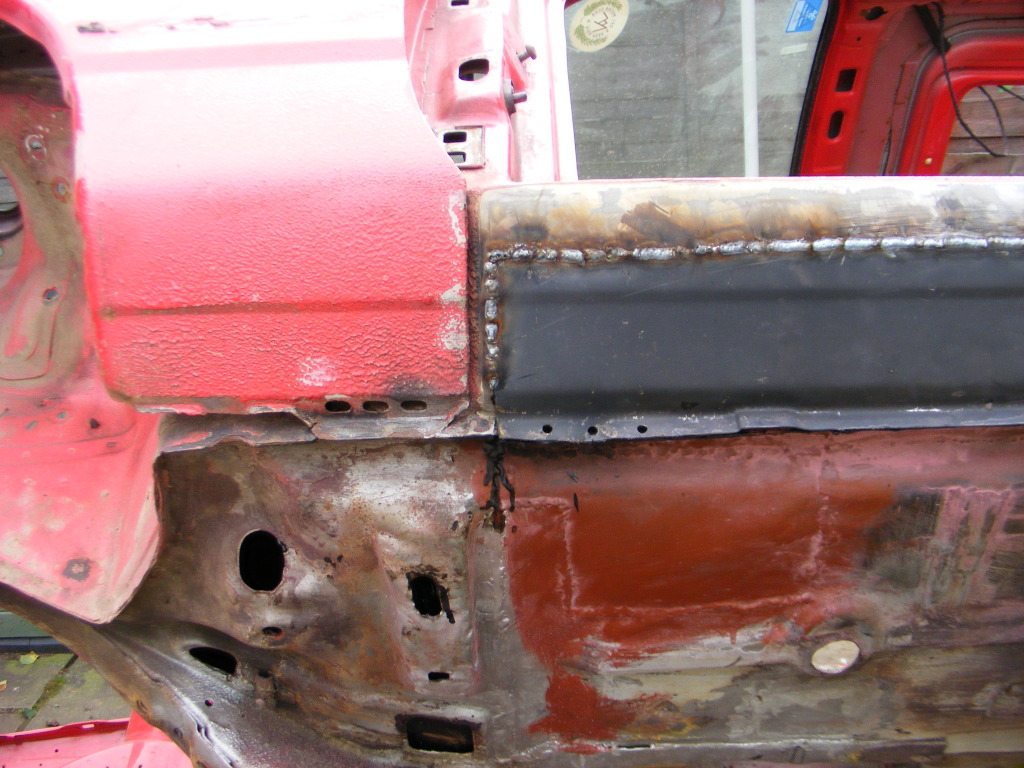
Not a bad fit if I say so myself.
*Disclaimer*
This is a guide of what I did. I am not responsible for anything you do, and what ever happens when you do what ever you do to your car, is not my resposibility or fault if it goes wrong. As i'm sure in this sue-a-guy country, someone will try and take me to court. And I was 14 when I did this, as it's just been my birthday
Thanks to all that helped, and a big thanks to dingla for the advice, it has worked perfectly.
Cheers all
A little guide of the steps.
Firstly, I got my sill, and cut the parts thhat I didn't need off. these were the ones that got in the way. The top curve thing and the front of the sill that curves in.
Marked out and cut with a regular cutting disc.
Done
Now I offered it up, adjusting it to fit with the original swage line, then I marked out where to cut, and prepped the area I was welding to.
Now I needed to what Dingla advised. I cut through both skins. But before that I drilled holes for plug welding.
Also just a reminder for you, WEAR SAFETY GEAR,
Then I did the deed and welded it on, Final checking everything. This when I had my fire. My dad was outside luckily, and as I was welding, a little bit of waxoil that was on the bit I was welding caught fire, and that shit spreads quick, then within about 5 seconds, waxoyl was onfire in half the sill, and we were running for the hose pipe, as the air line didn't do a thing apart from feed it. Lesson learnt. If you put Waxoyl in your sill, have a fire extinguisher, hose and an airline there just in case and have someone on fire duty, ready to put any little flame out!!!!
Any how here's the finished result
Not a bad fit if I say so myself.
*Disclaimer*
This is a guide of what I did. I am not responsible for anything you do, and what ever happens when you do what ever you do to your car, is not my resposibility or fault if it goes wrong. As i'm sure in this sue-a-guy country, someone will try and take me to court. And I was 14 when I did this, as it's just been my birthday
Thanks to all that helped, and a big thanks to dingla for the advice, it has worked perfectly.
Cheers all