Zetec Ka


Thread Starter
Ka driver
Joined: Apr 2005
Posts: 93
Likes: 0
From: Hereford
 Zetec Ka
been browsing the site for many months now so thought I would introduce my ka's I know its not an RS or cossie so wont interest many of you but hey ho lol
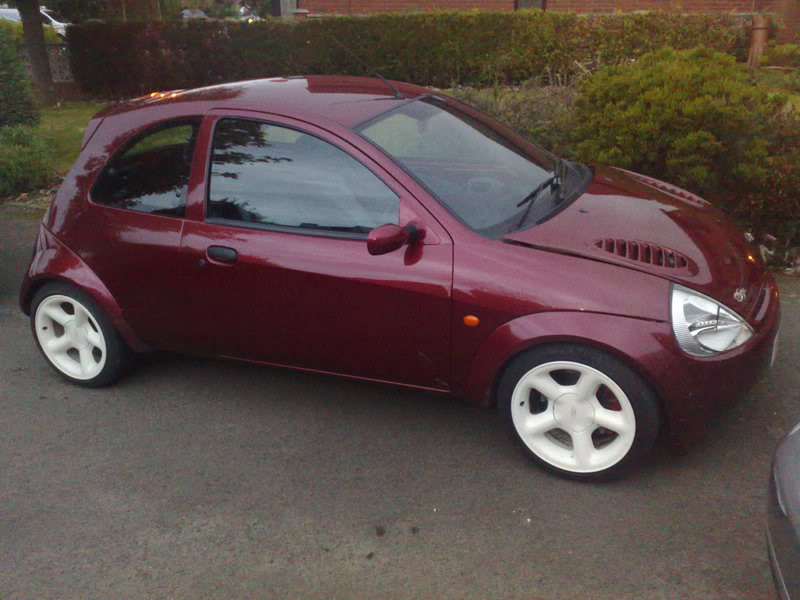
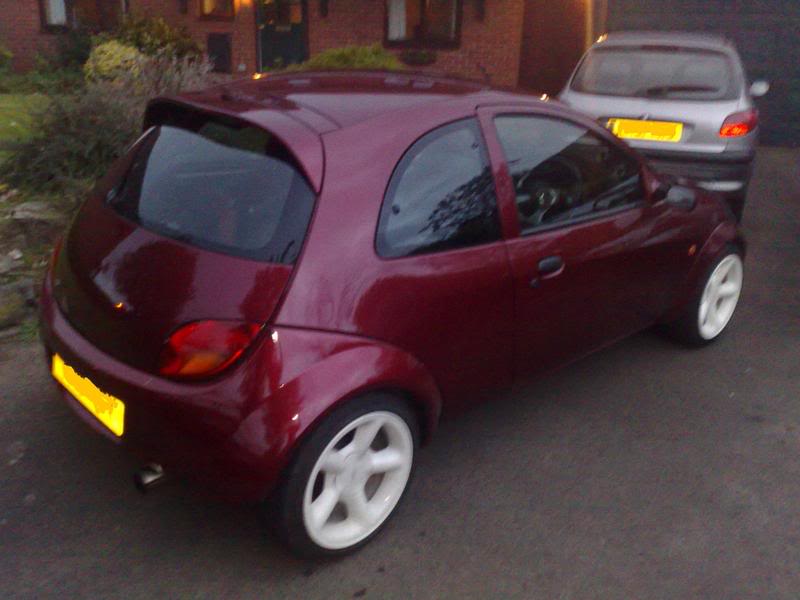
My first ka ended up looking like this....


nothing fancy just a little different, new wheels, bigger brakes, coil overs, nice interior, respray, new sills, wings petrol cap surround all due to rust!!!
the plan was always to drop a larger engine into it but then this came along and I couldnt say no it had all the bits I wanted so off me and my Dad went to fetch it October 08
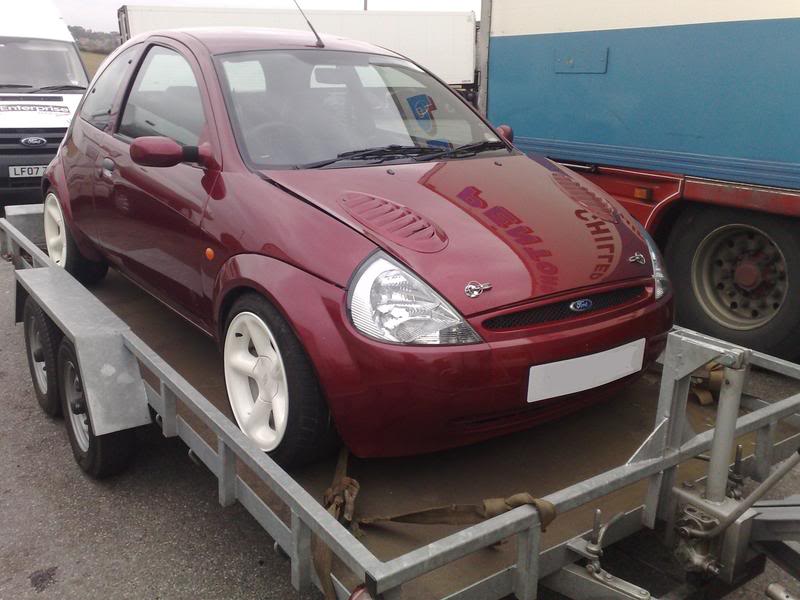
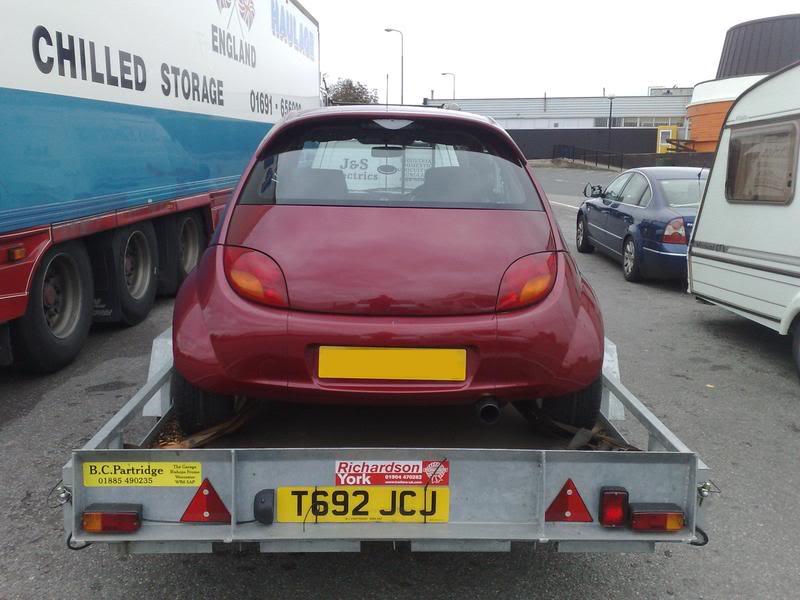
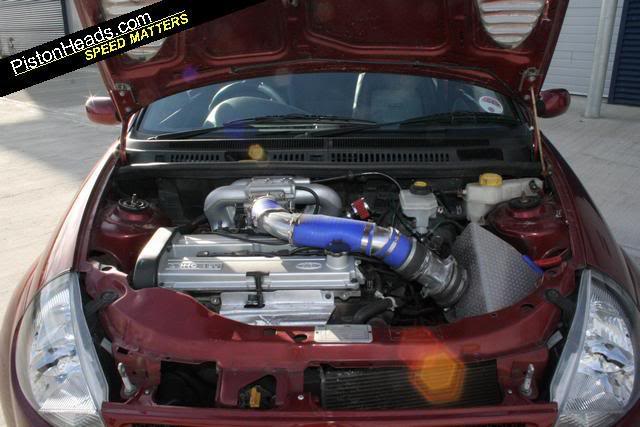
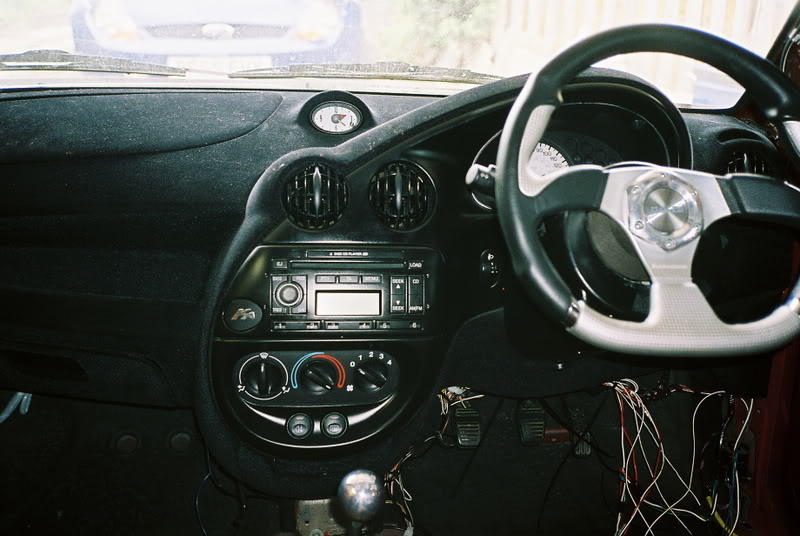
plan is to do a complete restoration on it and follow the same theme as my current project ka lol
My first ka ended up looking like this....
nothing fancy just a little different, new wheels, bigger brakes, coil overs, nice interior, respray, new sills, wings petrol cap surround all due to rust!!!
the plan was always to drop a larger engine into it but then this came along and I couldnt say no it had all the bits I wanted so off me and my Dad went to fetch it October 08
plan is to do a complete restoration on it and follow the same theme as my current project ka lol
Thread Starter
Ka driver
Joined: Apr 2005
Posts: 93
Likes: 0
From: Hereford
work started as soon as we got it home, has had omex management wired in and running a base map at the mo and will be live mapped when all the work is complete so should see 130 bhp as the engine is up to rs1800 spec
have got a new inlet pipe made up so the bonnet can be fitted without the need for bonnet rasiers too
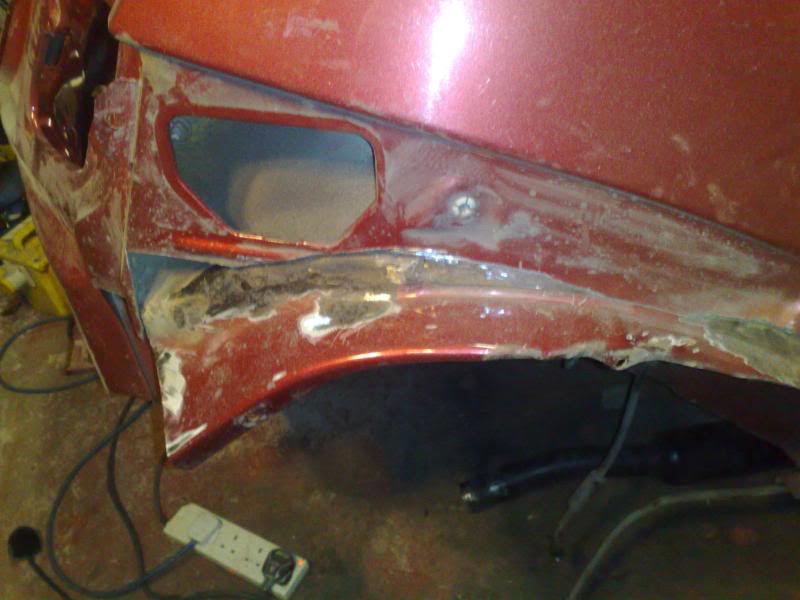
also been cutting the rust out and have put a complete new sill on the drivers side and have sorted the rust issues out that were present behind the rear bumper
have also steamed cleaned and stripped the rear axle off, fuel tank spare wheel
Over christmas the passenger side sill will be replaced and the petrol cap surround replaced too and them time to weld in the custom made battery box to sink into the boot floor and weld in a rear strut brace Then time to remove the engine and hopefully get some paint on the underside by mid Feb.
some work in progress pics a few weeks old now
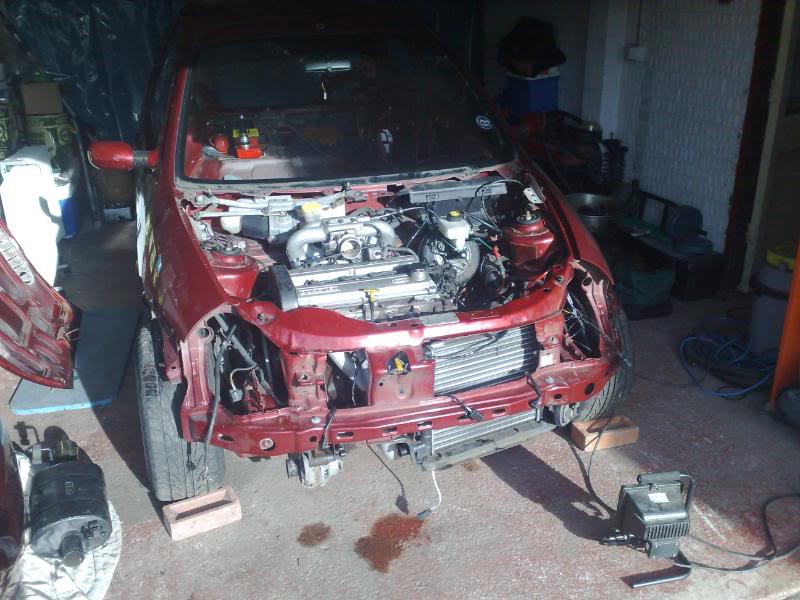
have got a new inlet pipe made up so the bonnet can be fitted without the need for bonnet rasiers too
also been cutting the rust out and have put a complete new sill on the drivers side and have sorted the rust issues out that were present behind the rear bumper
have also steamed cleaned and stripped the rear axle off, fuel tank spare wheel
Over christmas the passenger side sill will be replaced and the petrol cap surround replaced too and them time to weld in the custom made battery box to sink into the boot floor and weld in a rear strut brace
Then time to remove the engine and hopefully get some paint on the underside by mid Feb.some work in progress pics a few weeks old now
Thread Starter
Ka driver
Joined: Apr 2005
Posts: 93
Likes: 0
From: Hereford
got the filler on the drivers side where the sill was attached and the work behind the bumper, looks much better but forgot to take any pics, shall take some tomorrow lol
cut the petrol cap surround out and realised the inner panel was rotten too so got a new panel from ford and got it fitted today along with the repair panel for the surround
reverse of the surround when cut off
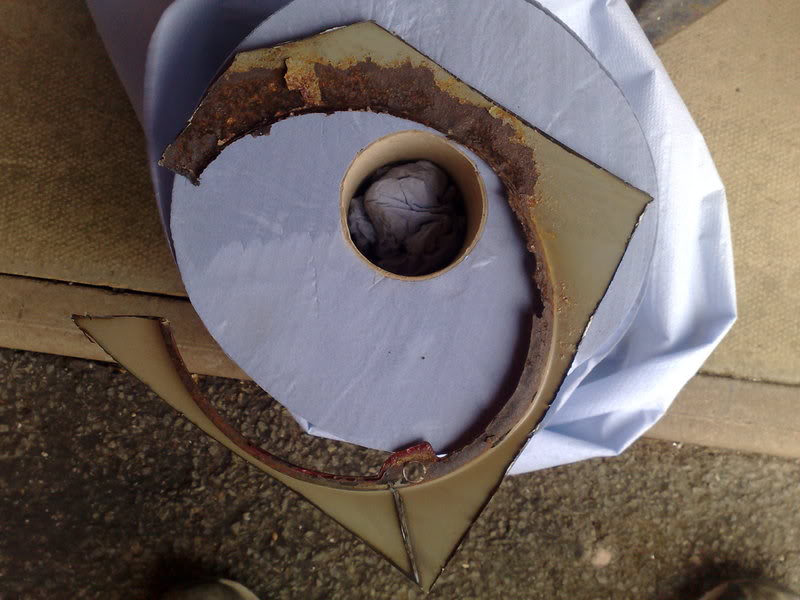
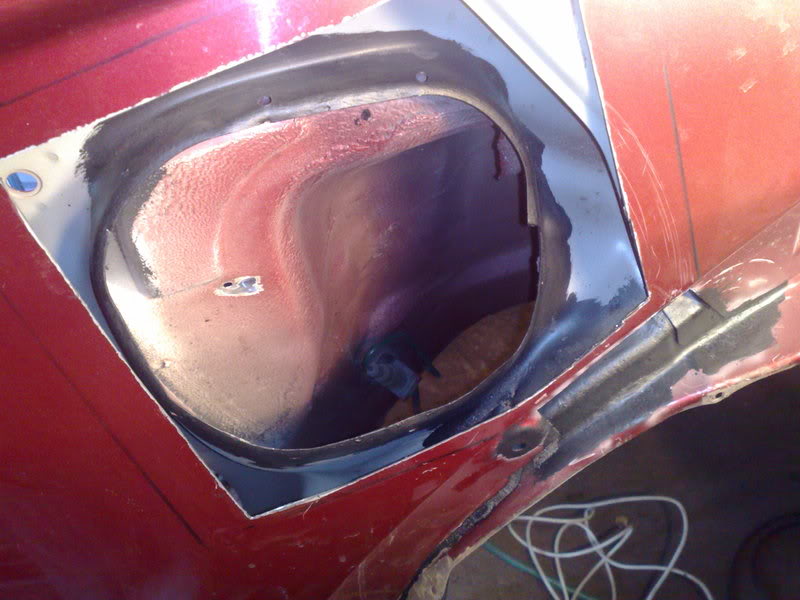
the surround and the inner panel cut out no more rust just a big hole haha
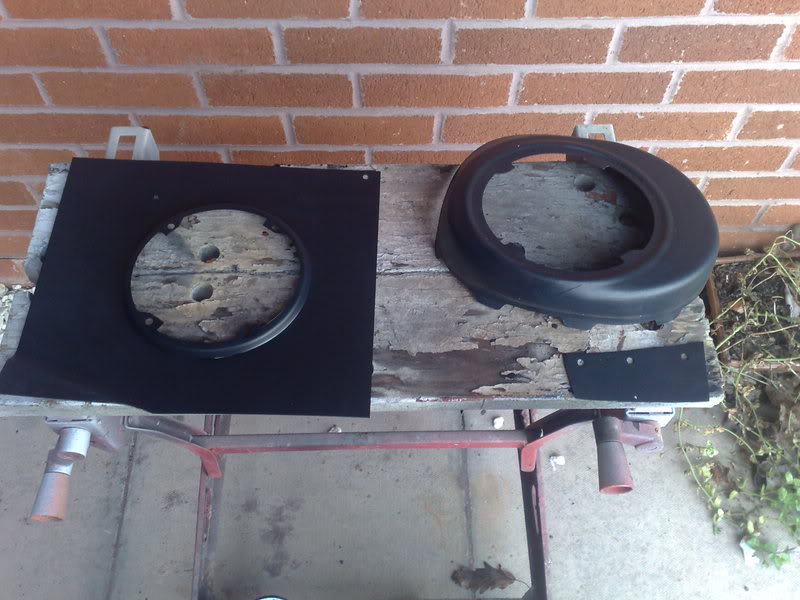
all the new panels had the primer removed and then coated in weld through primer to hopefully prevent rust around the spot welds later on
then the new panels welded on
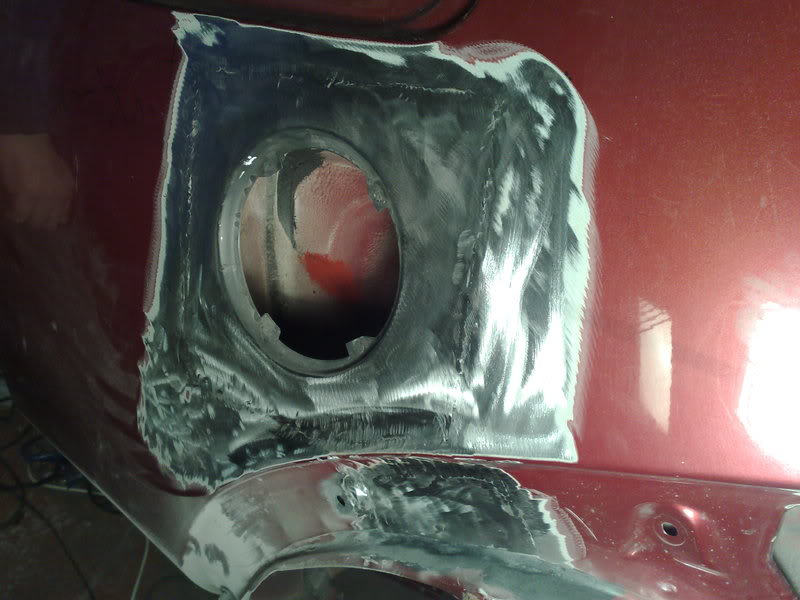
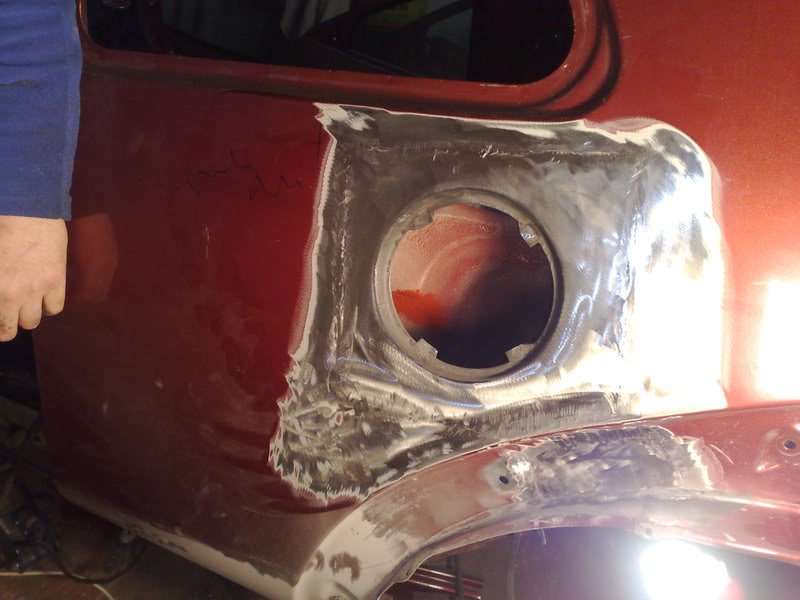
and finally a coat of filler applied
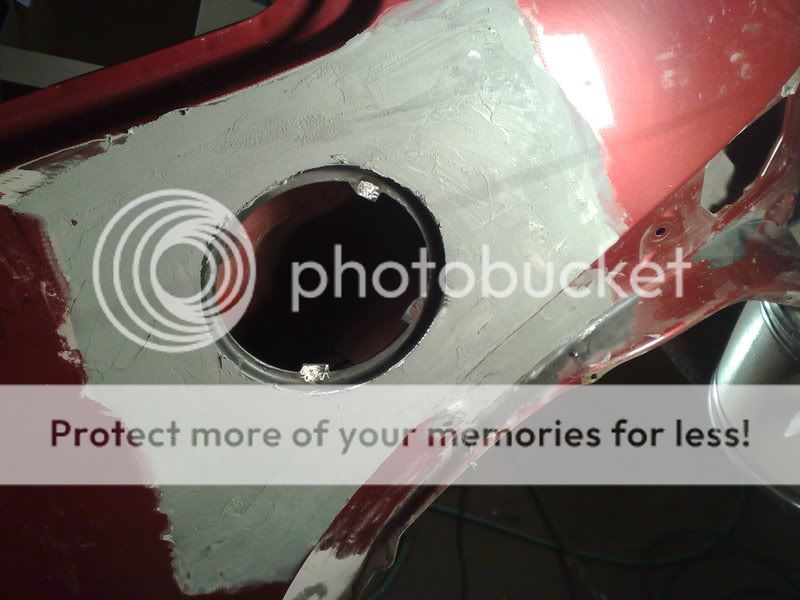
cut the petrol cap surround out and realised the inner panel was rotten too so got a new panel from ford and got it fitted today along with the repair panel for the surround
reverse of the surround when cut off
the surround and the inner panel cut out no more rust just a big hole haha
all the new panels had the primer removed and then coated in weld through primer to hopefully prevent rust around the spot welds later on
then the new panels welded on
and finally a coat of filler applied
Thread Starter
Ka driver
Joined: Apr 2005
Posts: 93
Likes: 0
From: Hereford
made some more progress on the ka the last few evening :thumbsup:
the passenger side sill is on and the first layer of filler applied onto the butt joints
oh and I purchased these, not to everyone's taste but I have always wanted a set but wasn't prepared to pay £200 price tag!!
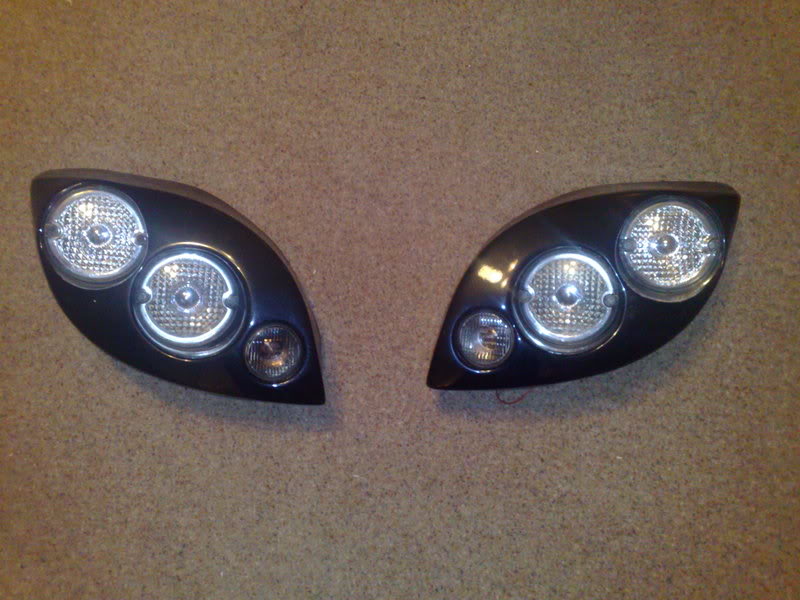
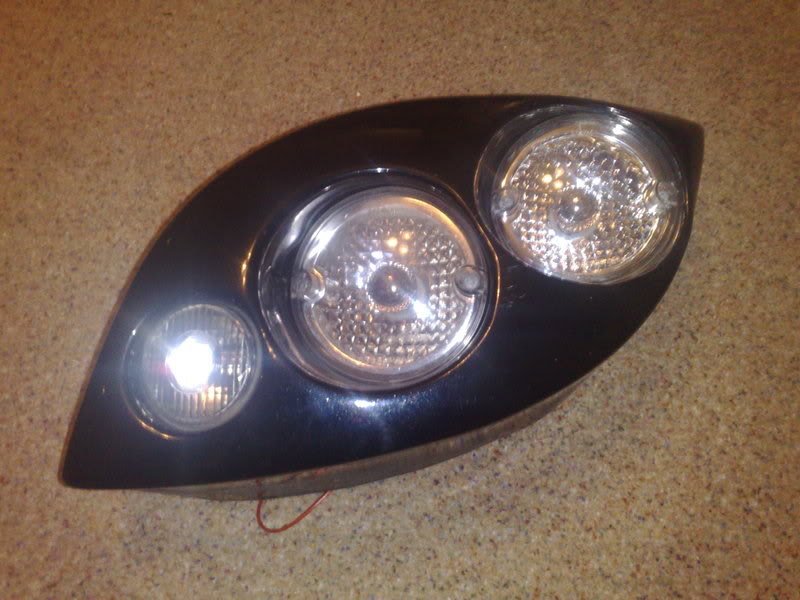
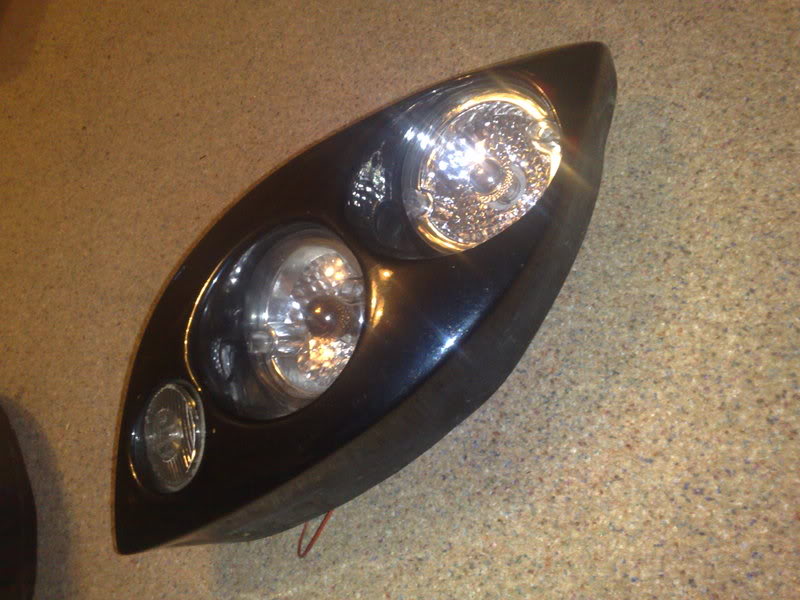
haven't got much I can get on with this weekend though as yet again the fabricators have not made my sunken battery box so all I can do is make and weld in the rear strut brace and start to prep the underside and remove the spare wheel hangers!!!! very annoyed with them atm
the passenger side sill is on and the first layer of filler applied onto the butt joints
oh and I purchased these, not to everyone's taste but I have always wanted a set but wasn't prepared to pay £200 price tag!!
haven't got much I can get on with this weekend though as yet again the fabricators have not made my sunken battery box so all I can do is make and weld in the rear strut brace and start to prep the underside and remove the spare wheel hangers!!!! very annoyed with them atm
Thread Starter
Ka driver
Joined: Apr 2005
Posts: 93
Likes: 0
From: Hereford
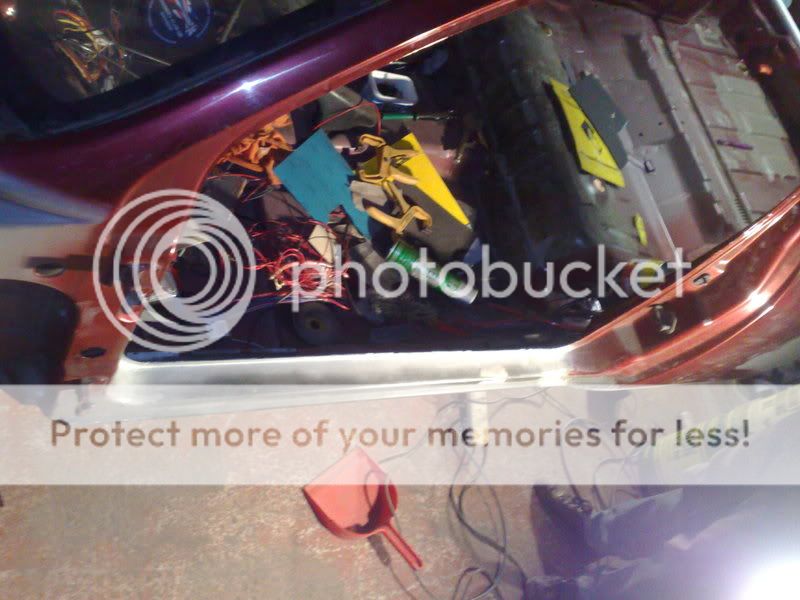
got the rear strut brace welded in today and finally got a picture of the passenger side sill, be it a very poor one lol
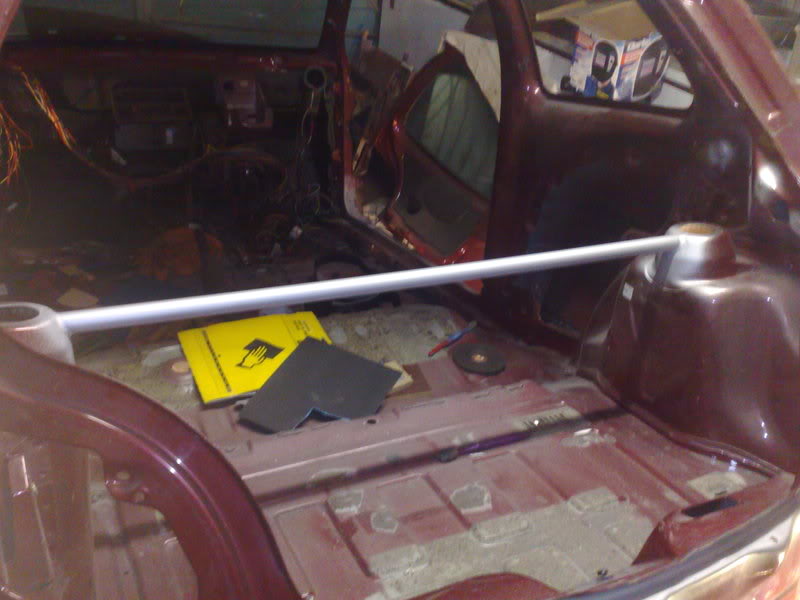
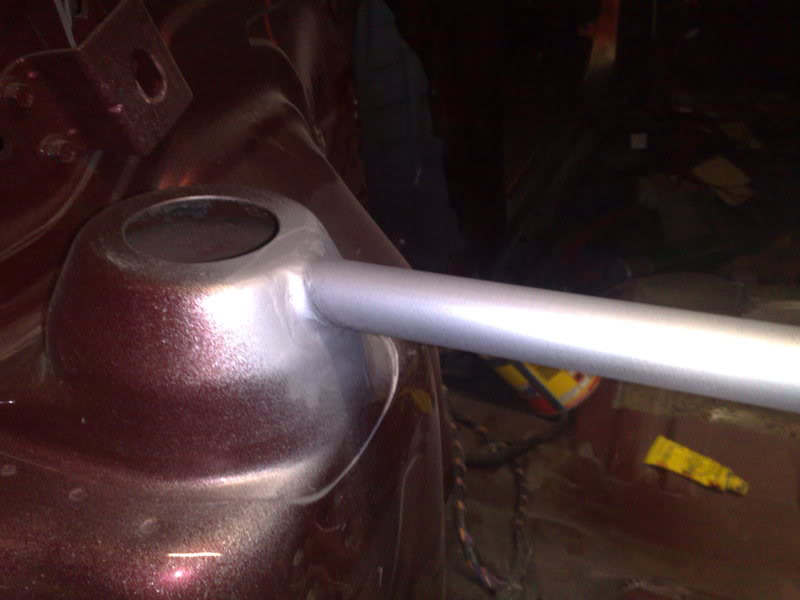
just a rough coating of a zinc primer to prevent rust for the time being
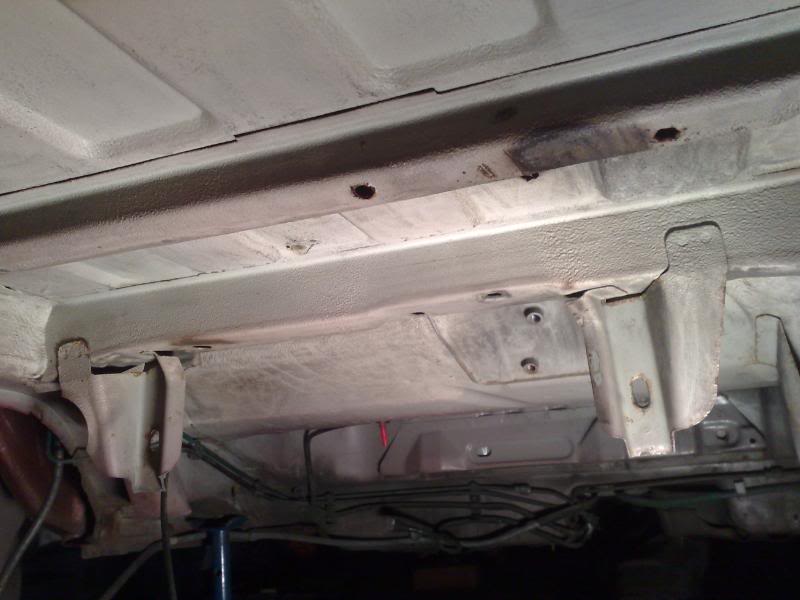
also got around to repairing the rear chassis rail, got it all cut out, well the outer two layers and now its all ready to be shot blasted and welded back up tomorrows job!!!
just a rough coating of a zinc primer to prevent rust for the time being
also got around to repairing the rear chassis rail, got it all cut out, well the outer two layers and now its all ready to be shot blasted and welded back up
tomorrows job!!!
Thread Starter
Ka driver
Joined: Apr 2005
Posts: 93
Likes: 0
From: Hereford
got the rear chassis rail sorted
both outer layers were rotten around the rear beam mounting points all due to a drainage hole that has been blocked for many years by the looks
haven't got any pics of it in its worse state but it wasn't pretty
so with it all cut out and the inner layer in weld through primer after being shot blasted
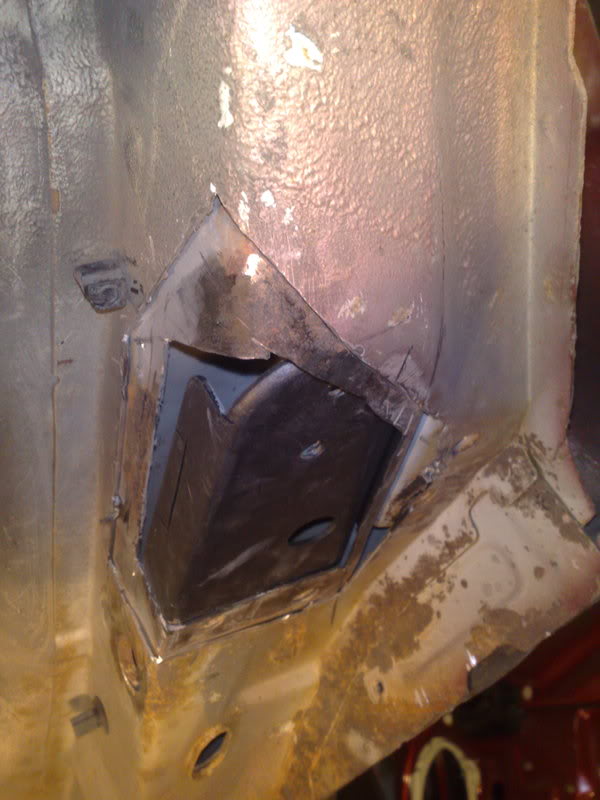
then the first layer welded in just before it was coated in weld through primer
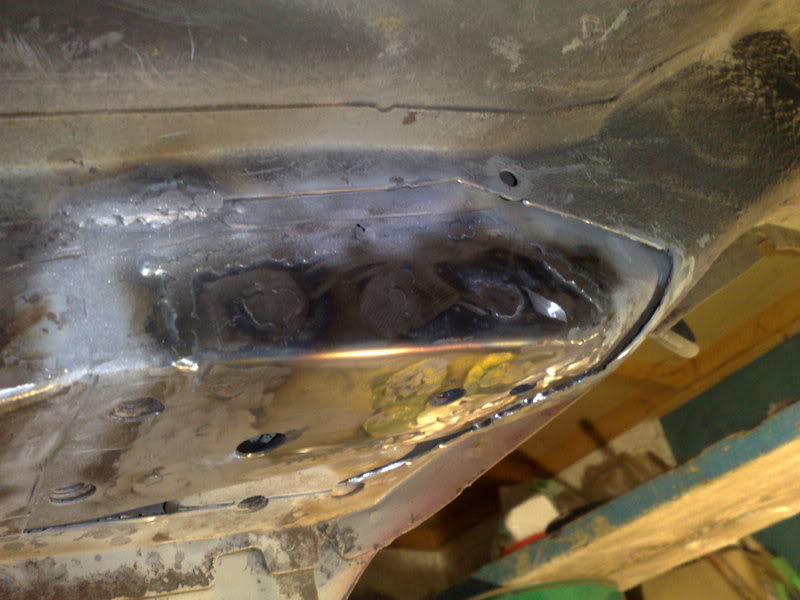
then the outer plate all cut out and ready for a coat of WTP
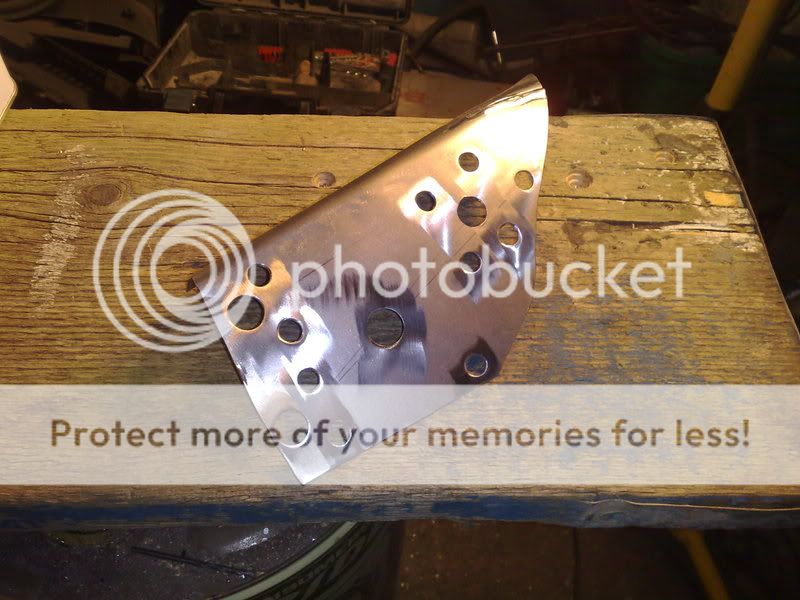
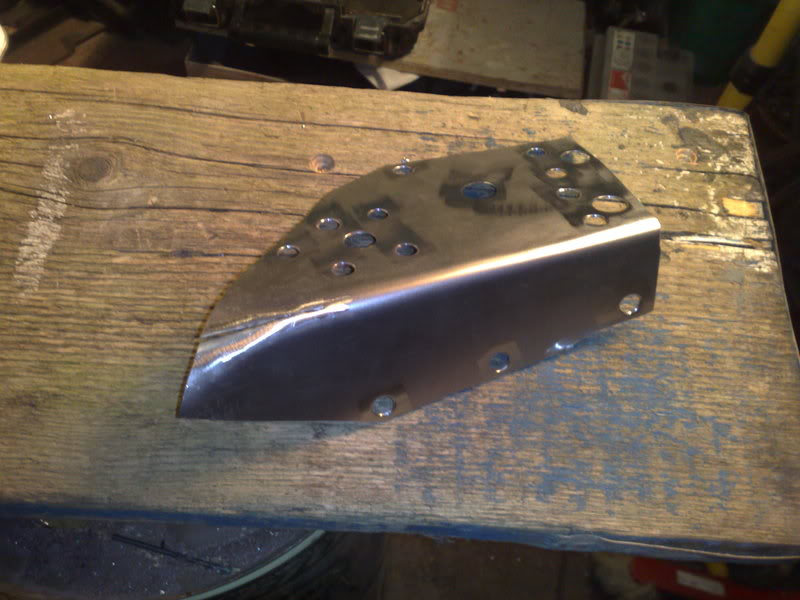
then all welded up
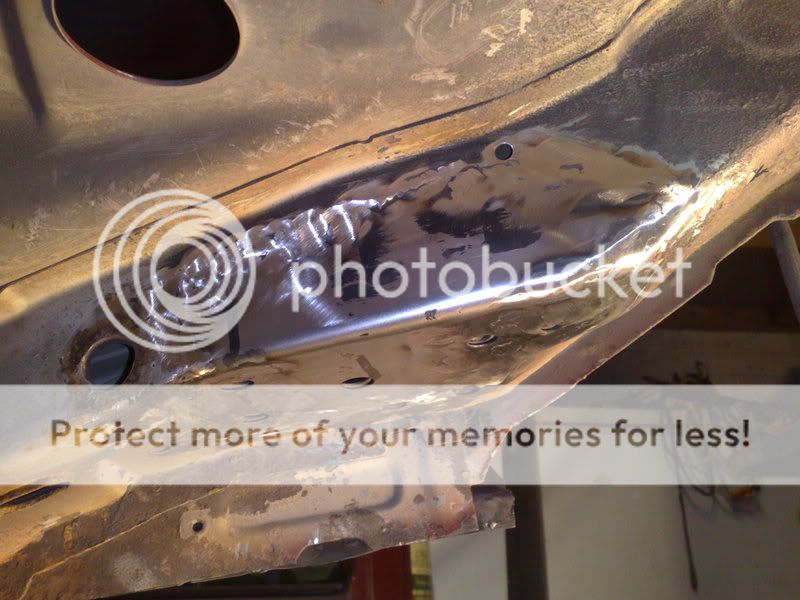
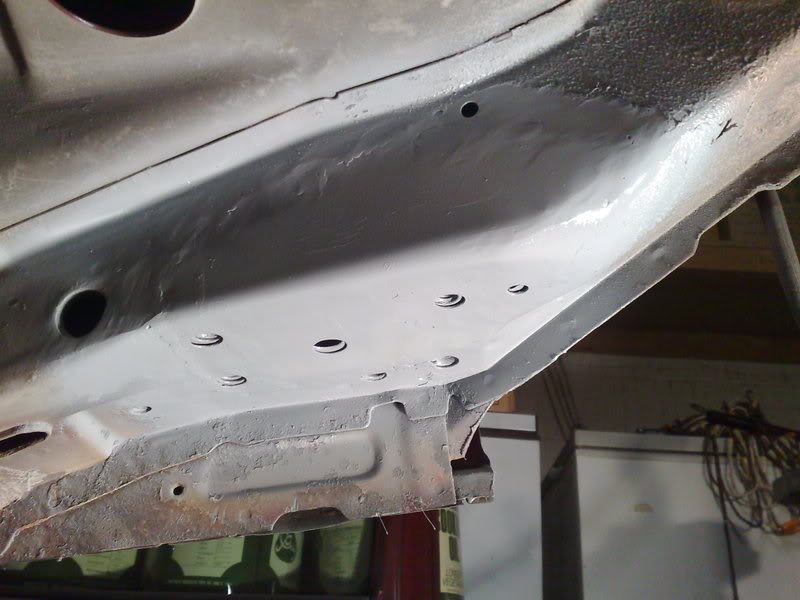
the rest of the underside will be done when the engine is out and the car is higher up in the air will be all shot blasted but bar two holes near the front of the car on the drivers side the rest is all surface rust
both outer layers were rotten around the rear beam mounting points all due to a drainage hole that has been blocked for many years by the looks
haven't got any pics of it in its worse state but it wasn't pretty
so with it all cut out and the inner layer in weld through primer after being shot blasted
then the first layer welded in just before it was coated in weld through primer
then the outer plate all cut out and ready for a coat of WTP
then all welded up
the rest of the underside will be done when the engine is out and the car is higher up in the air
will be all shot blasted but bar two holes near the front of the car on the drivers side the rest is all surface rust
Thread Starter
Ka driver
Joined: Apr 2005
Posts: 93
Likes: 0
From: Hereford
Finally had the time today to get some pics of my ka related Christmas presents
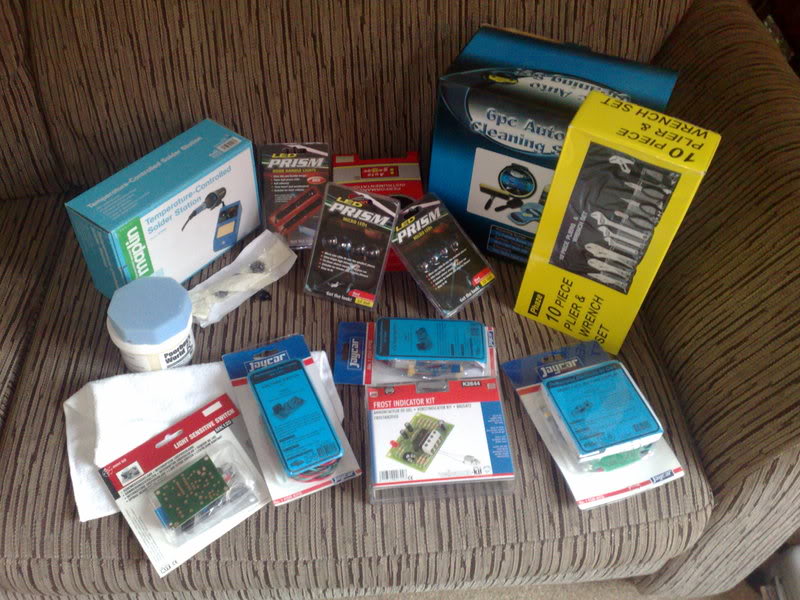
some cleaning stuff, black alloy window bolts, tools and 4 self build electronic circuits!!!! oh and a volt gauge
and today some packages arrived
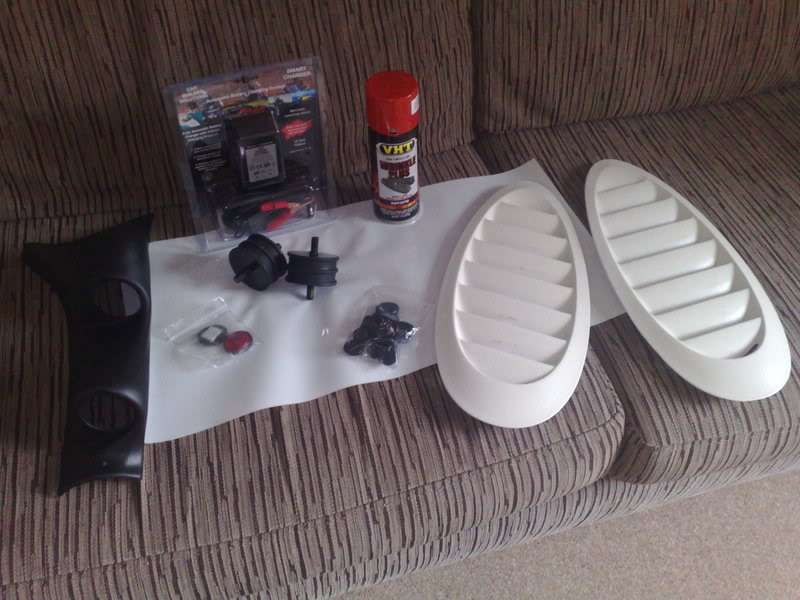
some cossie vents for my new bonnet as I sold the old one as it had horrible bonnet pins on it,
2 rubber engine mounts (1 spare) for funnily enough the engine lol we shall be making another mount for the front of the engine off the rs1800 alternator and PAS pump bracket like the rs1800 has fitted as imo the engine rocks too much and putting too much stress on the main engine mount at the back
some stone chip film for the arches etc
battery charger as the ka is a summer toy I shall need one of these to keep the battery in good condition
red wrinkle paint for the cam cover and air filter
red reflectors for the rear to be fitted flush in the bumper either side of the number plate to make the car legal as the afterburner rear lights have no red reflectors
twin gauge pod to hold a coolant temp and volt meter gauge, the volt gauge is a little pointless but I wanted two gauges lol
and finally some rubber bungs for when we have cavity waxed the car would like to bung the holes up neatly
some cleaning stuff, black alloy window bolts, tools and 4 self build electronic circuits!!!! oh and a volt gauge
and today some packages arrived
some cossie vents for my new bonnet as I sold the old one as it had horrible bonnet pins on it,
2 rubber engine mounts (1 spare) for funnily enough the engine lol we shall be making another mount for the front of the engine off the rs1800 alternator and PAS pump bracket like the rs1800 has fitted as imo the engine rocks too much and putting too much stress on the main engine mount at the back
some stone chip film for the arches etc
battery charger as the ka is a summer toy I shall need one of these to keep the battery in good condition
red wrinkle paint for the cam cover and air filter
red reflectors for the rear to be fitted flush in the bumper either side of the number plate to make the car legal as the afterburner rear lights have no red reflectors
twin gauge pod to hold a coolant temp and volt meter gauge, the volt gauge is a little pointless but I wanted two gauges lol
and finally some rubber bungs for when we have cavity waxed the car would like to bung the holes up neatly
Trending Topics
Thread Starter
Ka driver
Joined: Apr 2005
Posts: 93
Likes: 0
From: Hereford
well finally the battery box was made :thumbsup:
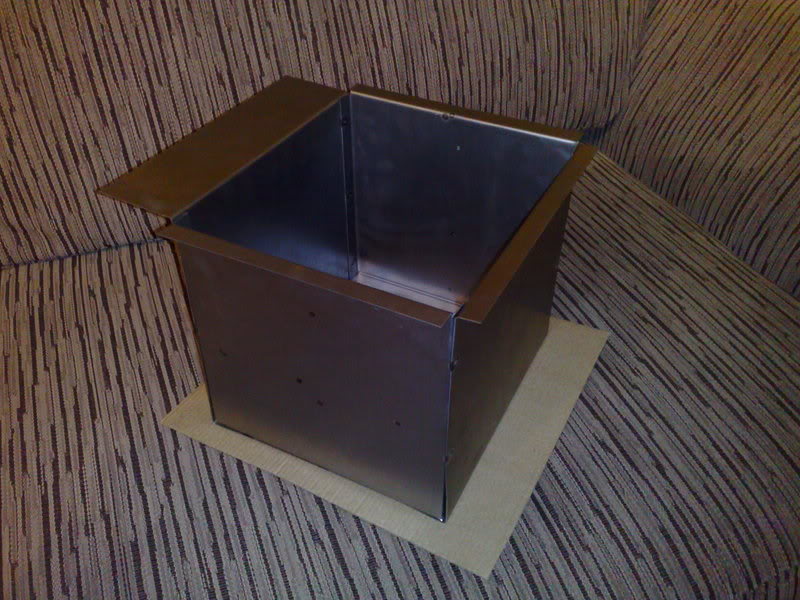
so got that welded in roughly tonight
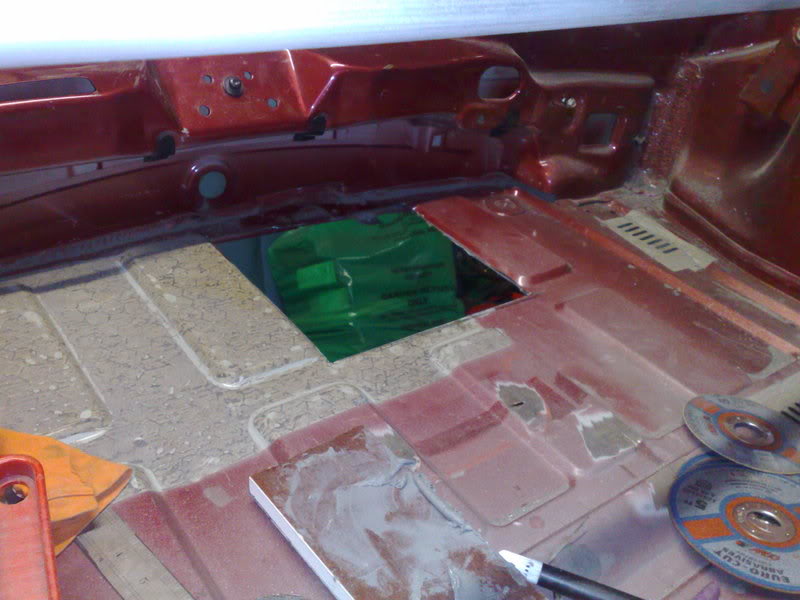
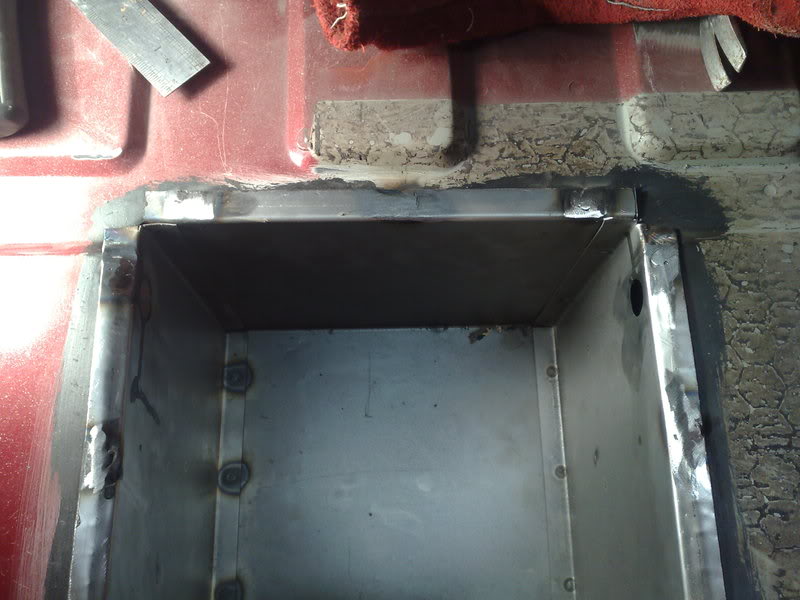
so pleased its in, just got to weld the corners etc up tomorrow then onto the front engine mount as all the metal for that is cut up so just got to tack it all in place and then out comes the engine!!!
so got that welded in roughly tonight
so pleased its in, just got to weld the corners etc up tomorrow then onto the front engine mount as all the metal for that is cut up so just got to tack it all in place and then out comes the engine!!!
Thread Starter
Ka driver
Joined: Apr 2005
Posts: 93
Likes: 0
From: Hereford
some pics of the engine out :thumbsup:
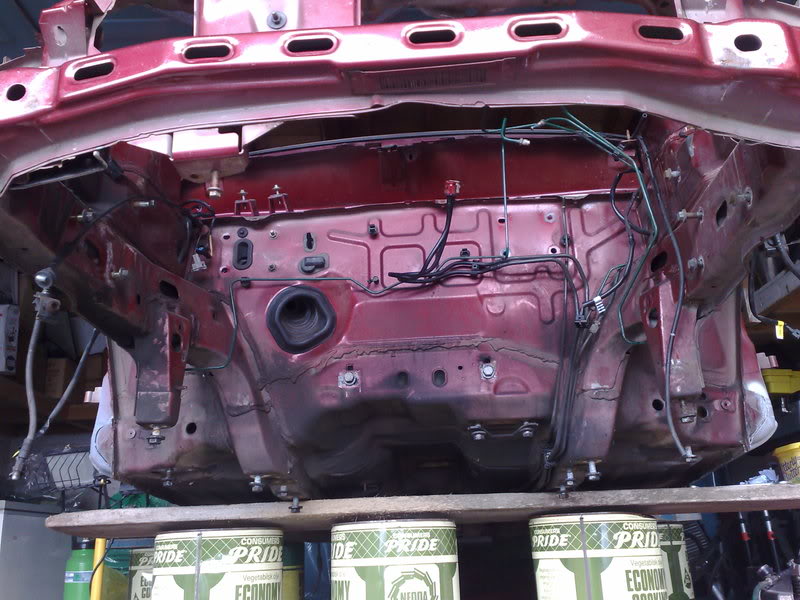
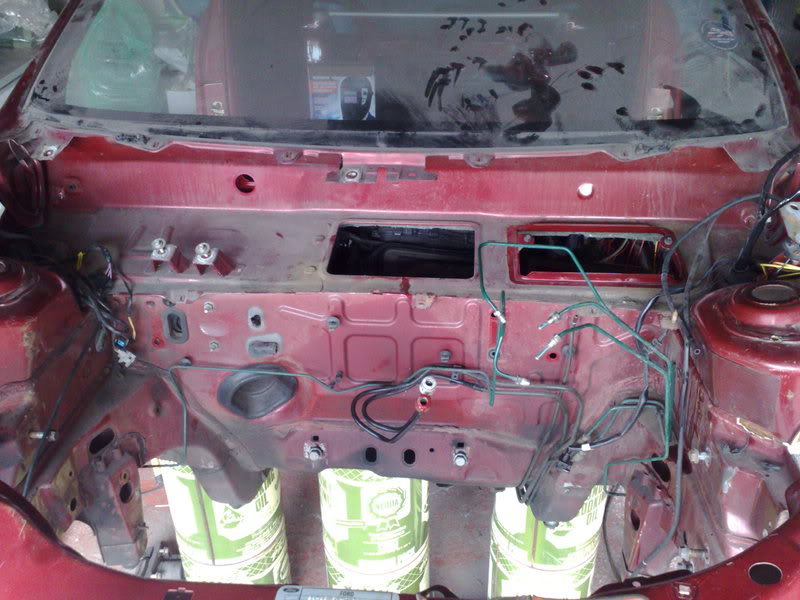
the brake lines have since been taken out as well :thumbsup:
the car is now ready to be shot blasted underneath, that will happen hopefully valentines weekend if lunch with the g/f doesn't turn out to be a day out lol
the list of bits left to get is getting shorter by the day need to raid a scrapped ka for some clips and little things, then its off to for for loads of new nuts and bolts :thumbsup:
also found out that the engine was missing one bolt on the rear engine mount, so the engine mount had been damaged so that has been dropped off to my Dads mate who runs his own specialist welding company to see if they can fix it (its cast ally)
the whole car was a death trap to be fair, no main fuse from the battery which is located in the boot, brake lines rubbing on the wheels, live 12v wires floating around the engine bay, the rotten rear chassis rail, main engine bolt missing, the list goes on........
the brake lines have since been taken out as well :thumbsup:
the car is now ready to be shot blasted underneath, that will happen hopefully valentines weekend if lunch with the g/f doesn't turn out to be a day out lol
the list of bits left to get is getting shorter by the day need to raid a scrapped ka for some clips and little things, then its off to for for loads of new nuts and bolts :thumbsup:
also found out that the engine was missing one bolt on the rear engine mount, so the engine mount had been damaged so that has been dropped off to my Dads mate who runs his own specialist welding company to see if they can fix it (its cast ally)
the whole car was a death trap to be fair, no main fuse from the battery which is located in the boot, brake lines rubbing on the wheels, live 12v wires floating around the engine bay, the rotten rear chassis rail, main engine bolt missing, the list goes on........
Thread Starter
Ka driver
Joined: Apr 2005
Posts: 93
Likes: 0
From: Hereford
Managed to remove all the underseal from the main floor plan and shot blast all that and give it a coat of etch, also seam welded most the engine bay just in case I feel like adding more power later on! We only did inch long welds then an inch gap and then another inch but better than nothing!
Didnt mange to shot blast the entire underside as the compressor we hired out kept tripping out so we gave up with it in the end. We had to hire one because my dads hobby one isnt big enough for shot blasting but after the issue we had at the weekend we got a full refund off speedy the hire company and Dad went to machine mart and purchased a 12.2 CFM compressor lol Should do the job and make spraying the car much easier.
Manged to fix the gas bonnet struts on too, welded some brackets onto the top of the turret and the bonnet hinge, shall get some pics up soon.
Also order some fog light surrounds off the net from a company in Mexico which have arrived and are shown below

should look good all colour coded etc
My goodridge braided lines arrived as well along with a rear amplified FM aerial as I fancy having one at the rear and welding over the hole at the front!!!
Next on the ordering list is a set of powerflex poly bushes and sending stuff off to be powder coated
oh and looking through fast ford last night I recognised this car lol
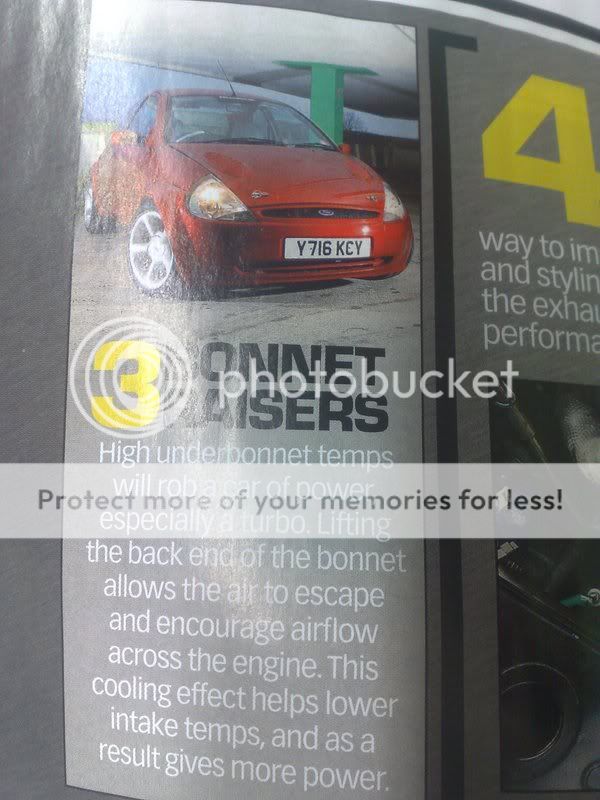
I hate to dissappoint but the bonnet raisers will not be going back on, I hate the things!!!!!!!
I am hoping for it be at Ford Fair but that's if it all goes to plan! Should be on the myka.org stand!
Didnt mange to shot blast the entire underside as the compressor we hired out kept tripping out so we gave up with it in the end. We had to hire one because my dads hobby one isnt big enough for shot blasting but after the issue we had at the weekend we got a full refund off speedy the hire company and Dad went to machine mart and purchased a 12.2 CFM compressor lol Should do the job and make spraying the car much easier.
Manged to fix the gas bonnet struts on too, welded some brackets onto the top of the turret and the bonnet hinge, shall get some pics up soon.
Also order some fog light surrounds off the net from a company in Mexico which have arrived and are shown below
should look good all colour coded etc
My goodridge braided lines arrived as well along with a rear amplified FM aerial as I fancy having one at the rear and welding over the hole at the front!!!
Next on the ordering list is a set of powerflex poly bushes and sending stuff off to be powder coated
oh and looking through fast ford last night I recognised this car lol
I hate to dissappoint but the bonnet raisers will not be going back on, I hate the things!!!!!!!
I am hoping for it be at Ford Fair but that's if it all goes to plan! Should be on the myka.org stand!
Thread Starter
Ka driver
Joined: Apr 2005
Posts: 93
Likes: 0
From: Hereford
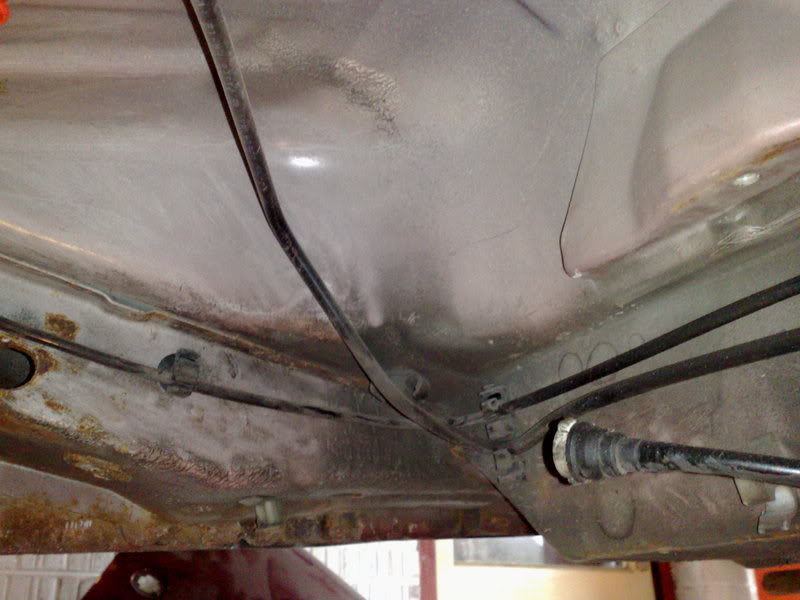
the underside before
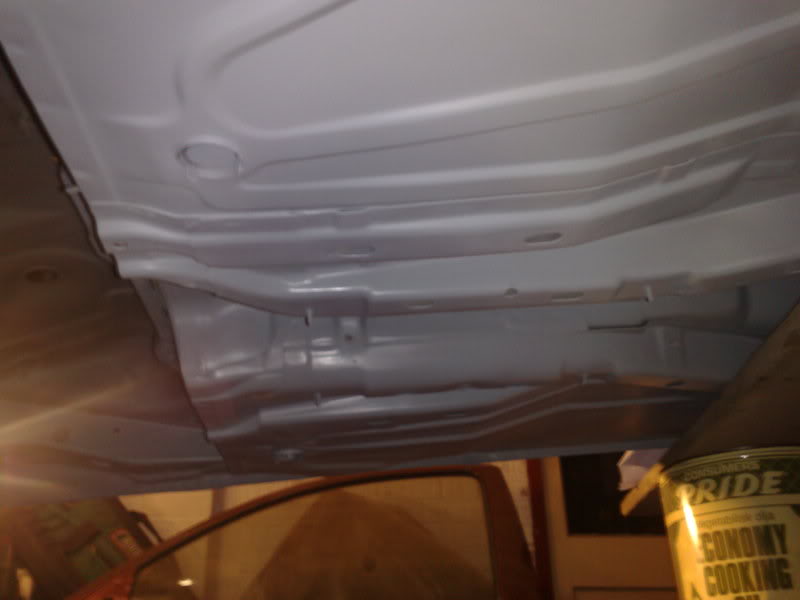
the underside after it had been shot blasted and a coat of etch :thumbsup:
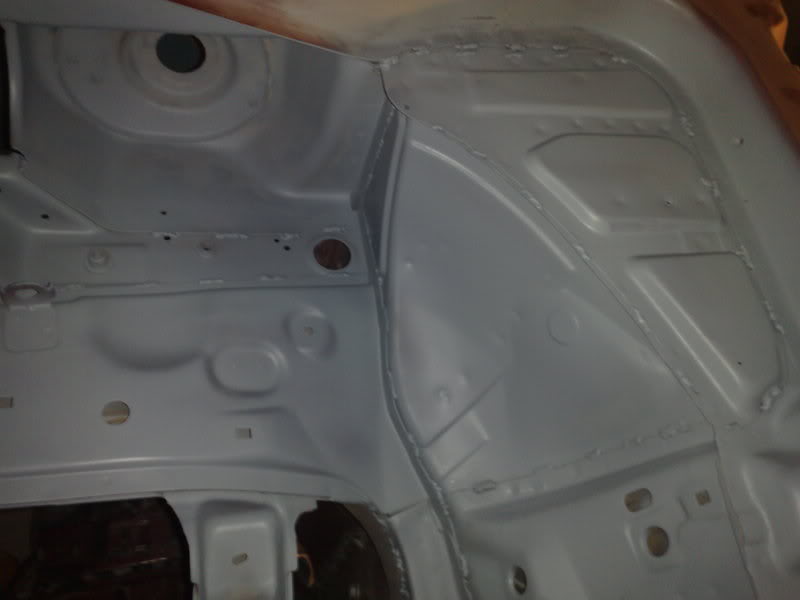
the nearside arch after some seam welding, shot blasting and a coat of etch
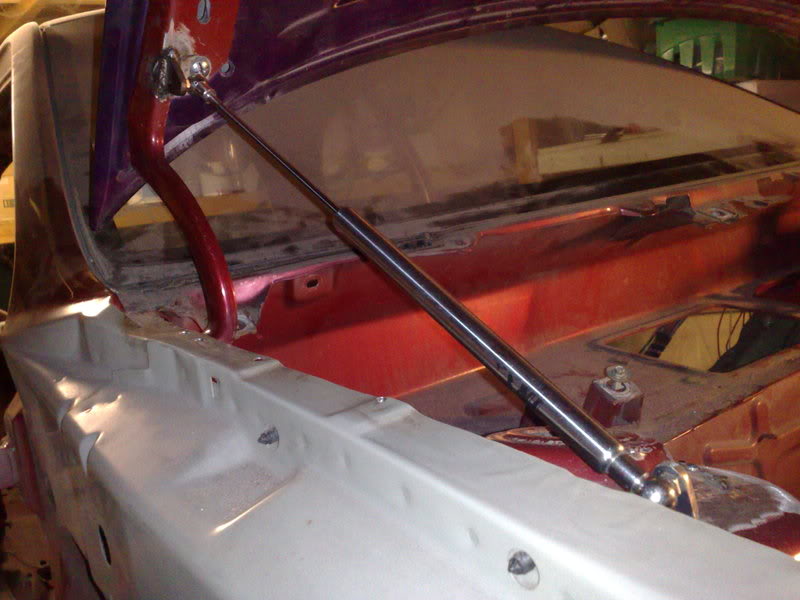
bonnet gas struts
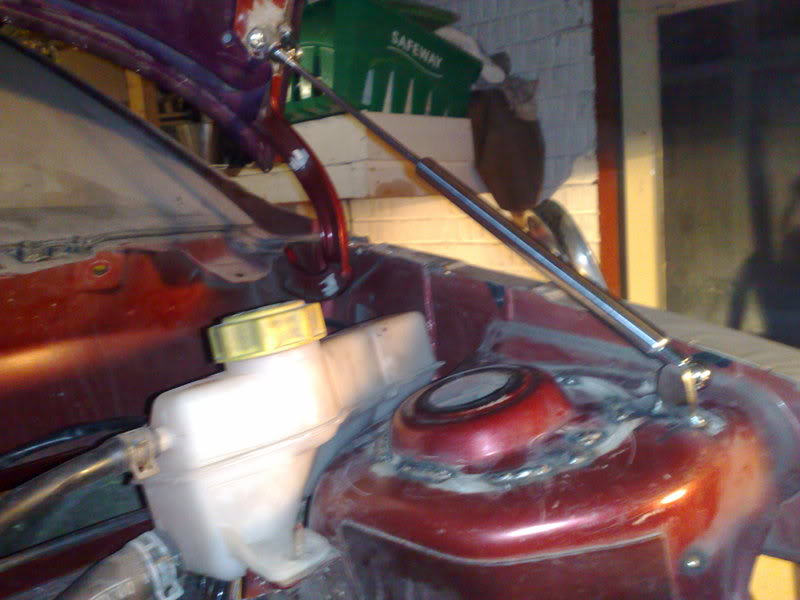
bonnet struts showing the custom made brackets, going to neaten up the welds later :thumbsup:
Thread Starter
Ka driver
Joined: Apr 2005
Posts: 93
Likes: 0
From: Hereford
purchased these, they require a paint job but so does the whole car lol They have had new lamps both headlights and indicators and got them at an ok price.
I know they wont be to everyone's tastes but I like them and they are better in terms of light output than than the standard units :thumbsup: Plus I have a plan regarding them :thumbsup:
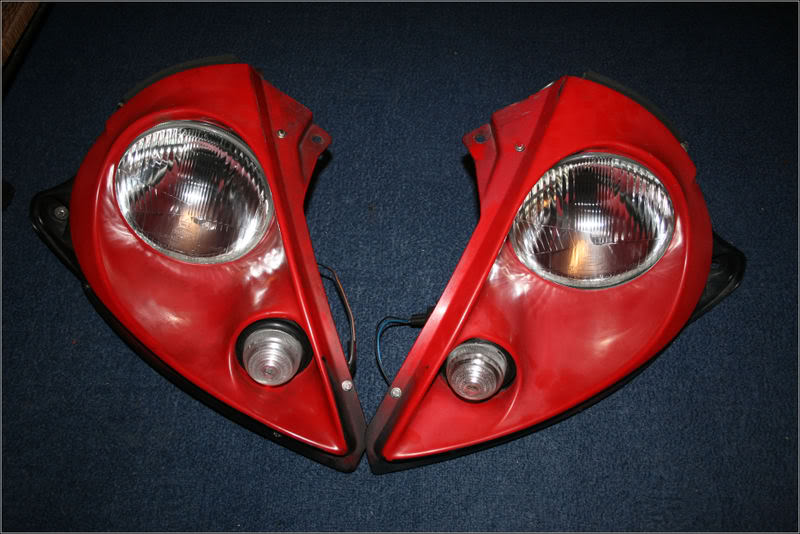
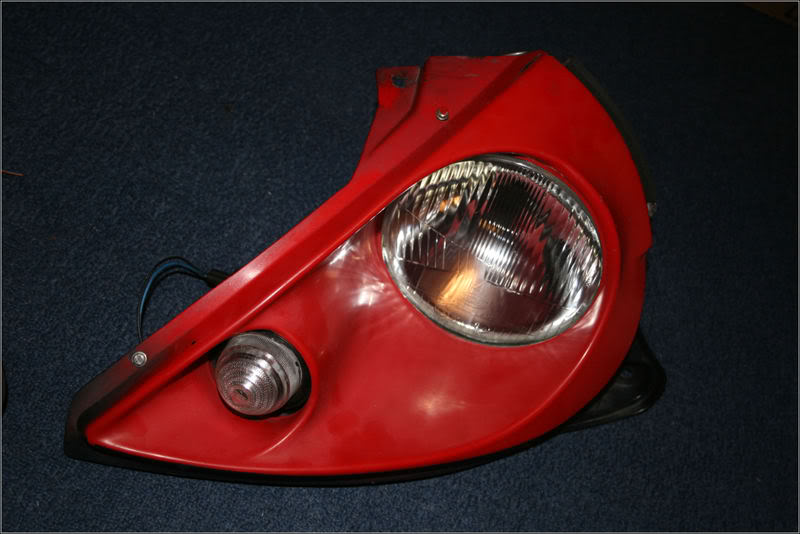
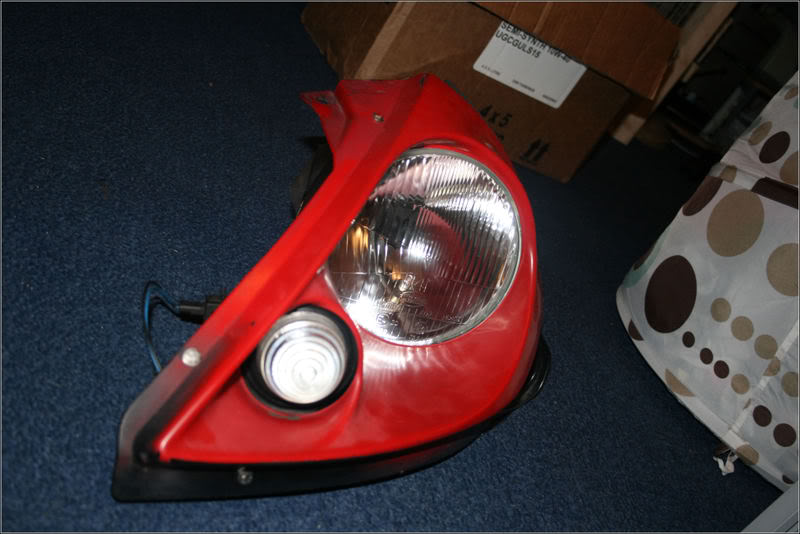
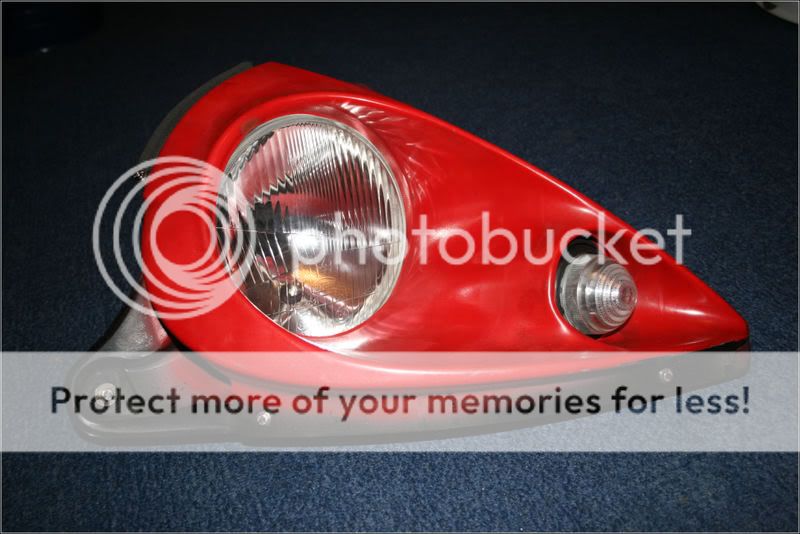
I know they wont be to everyone's tastes but I like them and they are better in terms of light output than than the standard units :thumbsup: Plus I have a plan regarding them :thumbsup:
Thread Starter
Ka driver
Joined: Apr 2005
Posts: 93
Likes: 0
From: Hereford
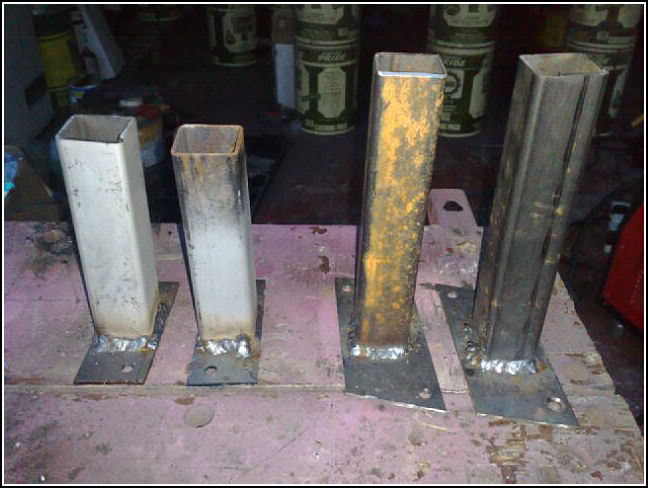
My Dad made some stands today, which will bolt onto the rear beam mounting points and the front wishbone points to help lift the car up and allow me to paint around 99% of the underside in one go and the areas that these stands take up will be hidden by the rear beam and wishbone brackets but they will still be painted
They just need squaring up now
Thread Starter
Ka driver
Joined: Apr 2005
Posts: 93
Likes: 0
From: Hereford
my Dad and I got all the little jobs like sorting out the bolt on wings and welding studs on to allow the battery cable to be secured to the floor pan and a few other nice little jobs!!!! Then it was onto some colour in the engine bay and underneath :thumbsup:
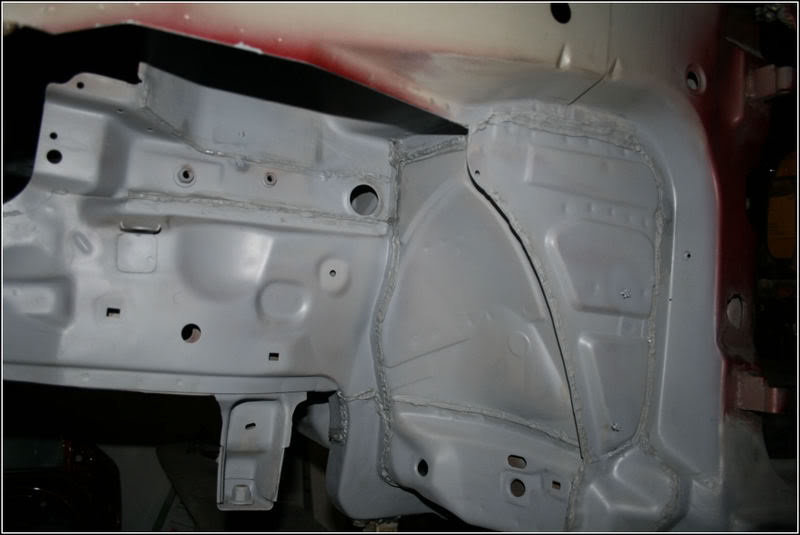
the front arch seamed sealed up
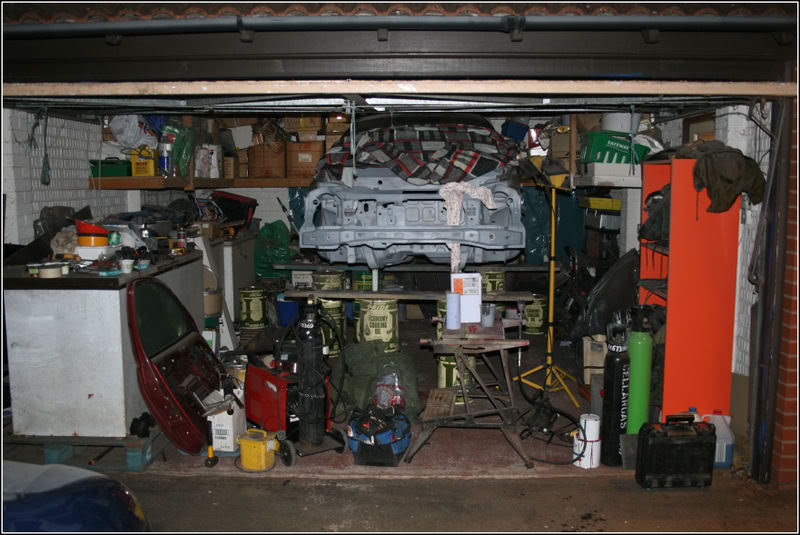
general shot of the garage after a hard days work! shows how high the car is!
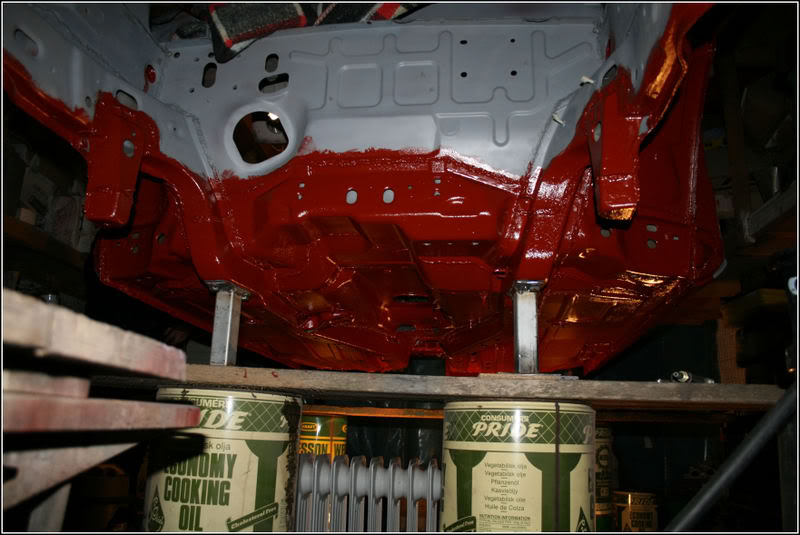
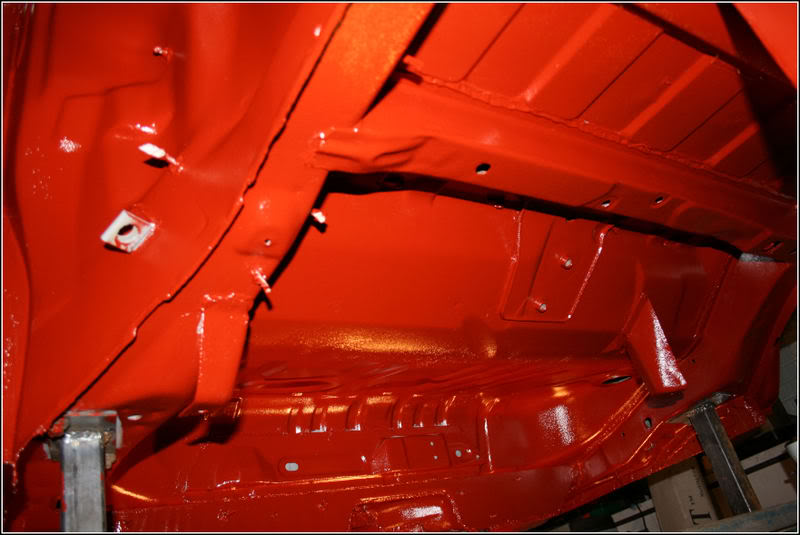
epoxy mastic 121 applied on the underside, 2 coats in each arch and one on the underside
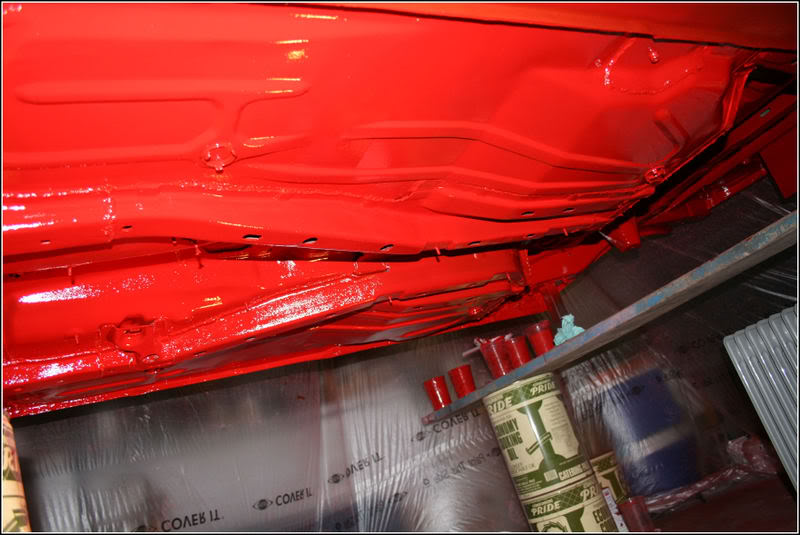
another shot of just the epoxy
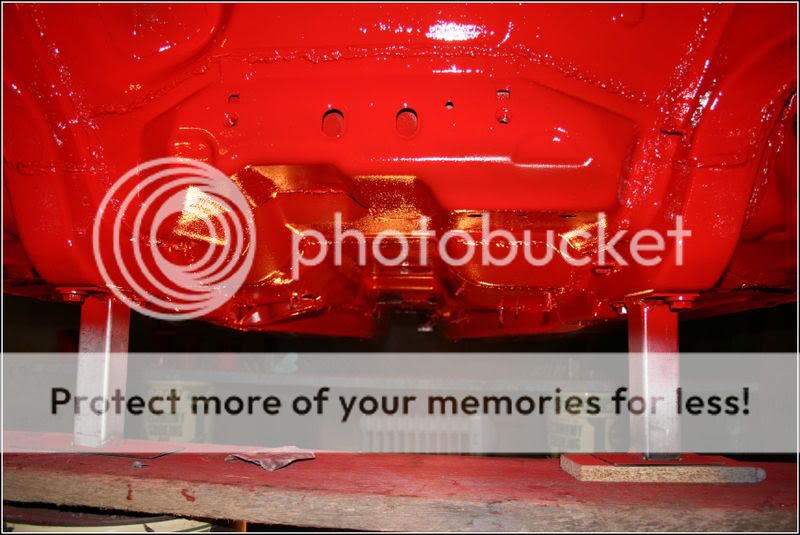
top coat, 2 coats of adhesion promoter/red base coat primer and 2 coats of 2 pack radiant red (all with a flexible additive to allow it to flex with the 121 mastic!)
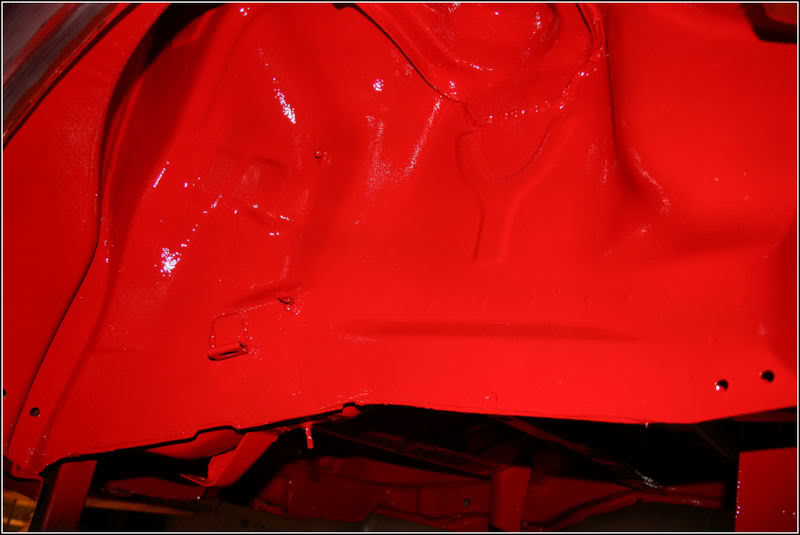
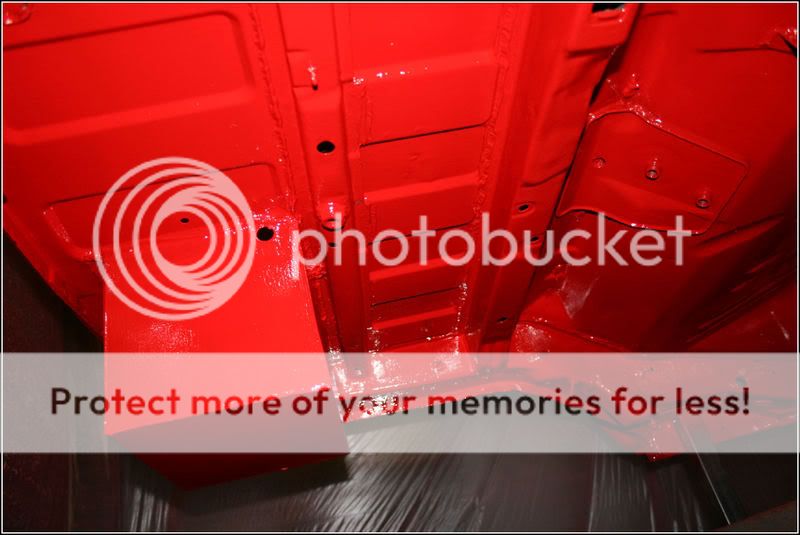

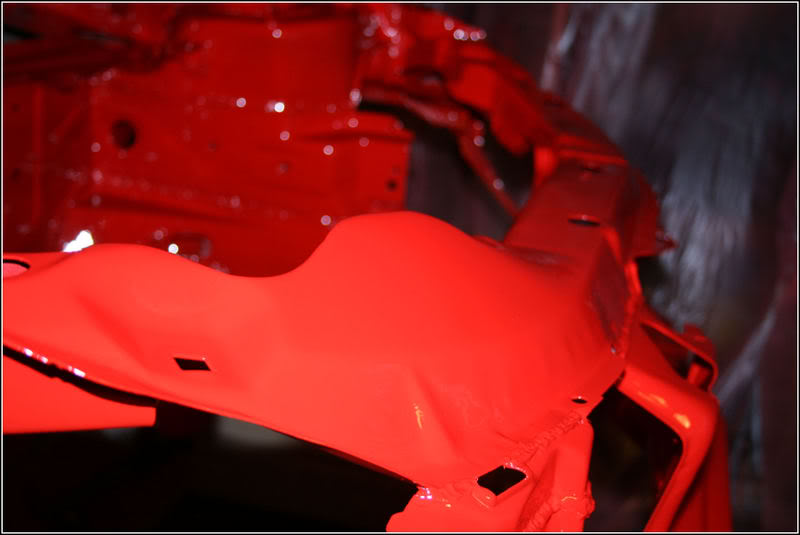
the front slam panel with modified cut out to clear the cam cover!
To say I am happy would be an understatement!!!!!!
the front arch seamed sealed up
general shot of the garage after a hard days work! shows how high the car is!
epoxy mastic 121 applied on the underside, 2 coats in each arch and one on the underside
another shot of just the epoxy
top coat, 2 coats of adhesion promoter/red base coat primer and 2 coats of 2 pack radiant red (all with a flexible additive to allow it to flex with the 121 mastic!)
the front slam panel with modified cut out to clear the cam cover!
To say I am happy would be an understatement!!!!!!
Thread Starter
Ka driver
Joined: Apr 2005
Posts: 93
Likes: 0
From: Hereford
only a small update with no pics
got the fuel tank sandblaster by my fiancée (cheers hun) :thumbsup: then painted in some special fuel tank paint to replicate the OEM finish
Also managed to get the inside painted up so that's all red
Have been ordering parts again now ready for the Easter break
- Full poly bush set from Kev @ powartek should be nice when these are fitted to my freshly powder coated wishbones and beam
- I have been to Ford as well and got a nice long list of new bolts and clips oh and a ford starter button + bezel and axle spacers both the 10mm ad 20mm should make the rear wheels sit flush with the arches
- got some new sound deadening sheets too, not the tar ones tho, these are plastic
- some stainless P-clips for the brake hoses
- more paint supplies for the brake lines (green) and some chassis black paint for the front hubs
- 2 pairs of coil over covers
oh and I finally managed to get hold of the inner arch liners for the boot sides, these are only fitted to the sportka's and the lux models but got them second hand for an OK price. Should make the boot area that little bit neater :thumbsup:
so just got to wait for all of the above to arrive and my powder coated bits to come back and the rear end and the tank and lines should all be back together by the end of Easter :thumbsup:
got the fuel tank sandblaster by my fiancée (cheers hun) :thumbsup: then painted in some special fuel tank paint to replicate the OEM finish
Also managed to get the inside painted up so that's all red
Have been ordering parts again now ready for the Easter break
- Full poly bush set from Kev @ powartek should be nice when these are fitted to my freshly powder coated wishbones and beam
- I have been to Ford as well and got a nice long list of new bolts and clips oh and a ford starter button + bezel and axle spacers both the 10mm ad 20mm should make the rear wheels sit flush with the arches
- got some new sound deadening sheets too, not the tar ones tho, these are plastic
- some stainless P-clips for the brake hoses
- more paint supplies for the brake lines (green) and some chassis black paint for the front hubs
- 2 pairs of coil over covers
oh and I finally managed to get hold of the inner arch liners for the boot sides, these are only fitted to the sportka's and the lux models but got them second hand for an OK price. Should make the boot area that little bit neater :thumbsup:
so just got to wait for all of the above to arrive and my powder coated bits to come back and the rear end and the tank and lines should all be back together by the end of Easter :thumbsup:
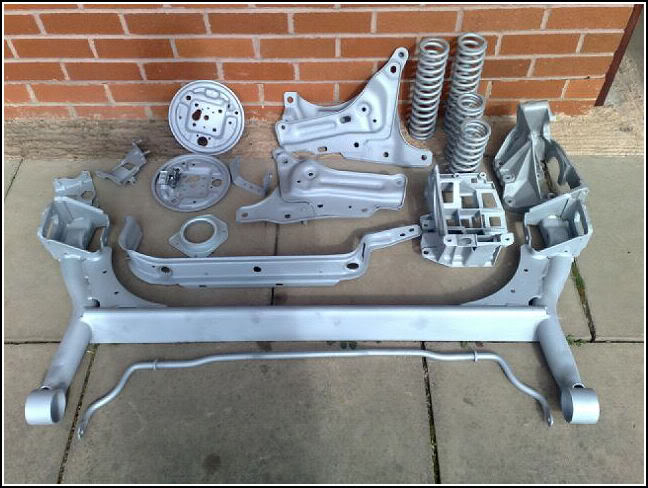
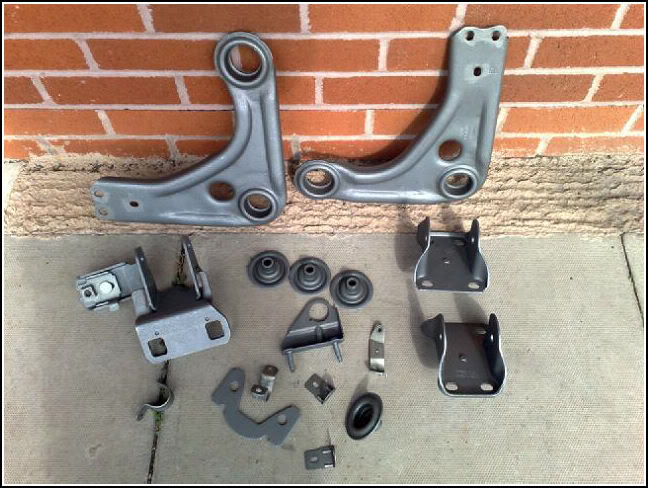
Thread Starter
Ka driver
Joined: Apr 2005
Posts: 93
Likes: 0
From: Hereford
only just realised I hadnt put any pictures of the insde painted, I have also took some pics of it with the garage door open and the sun on it
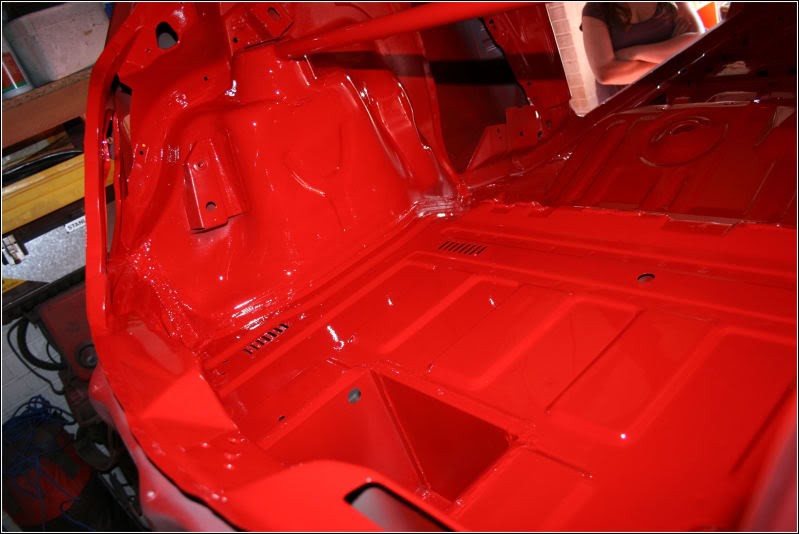
boot floor showing the painted battery box
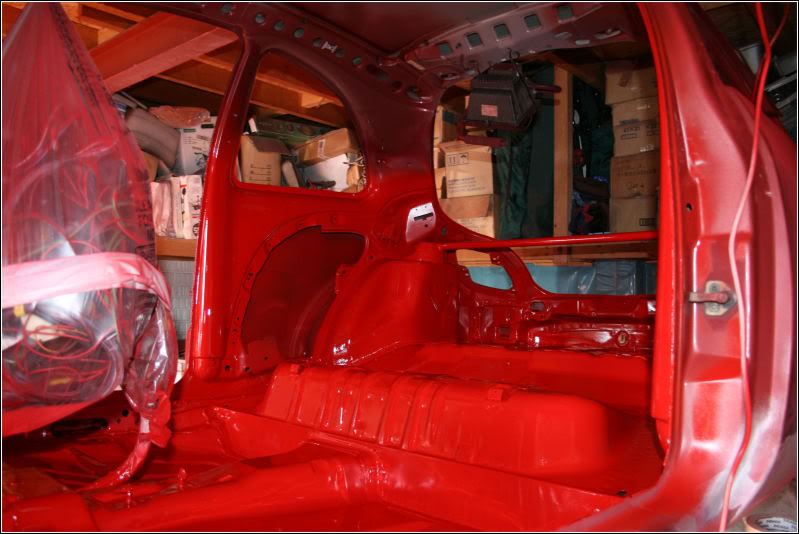
looking through the passenger door (ignore the top of c pillar and b pillar they are to be painted black like the outside
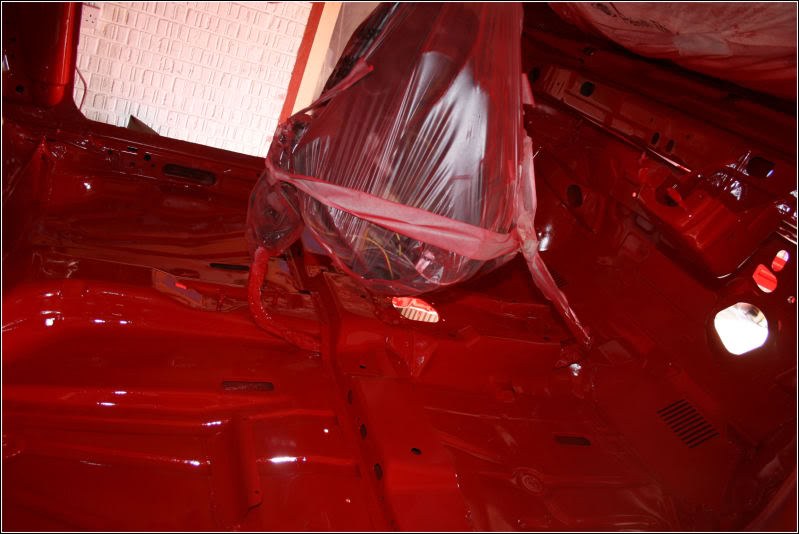
floor pan
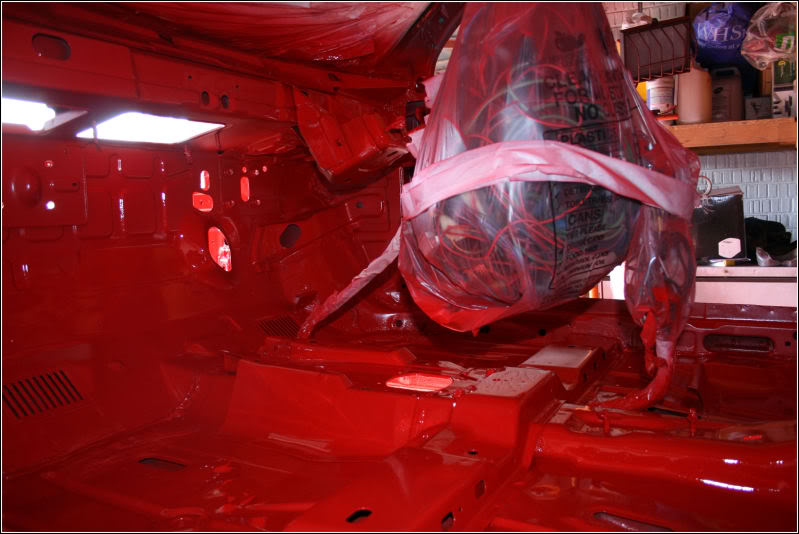
more of the floor pan
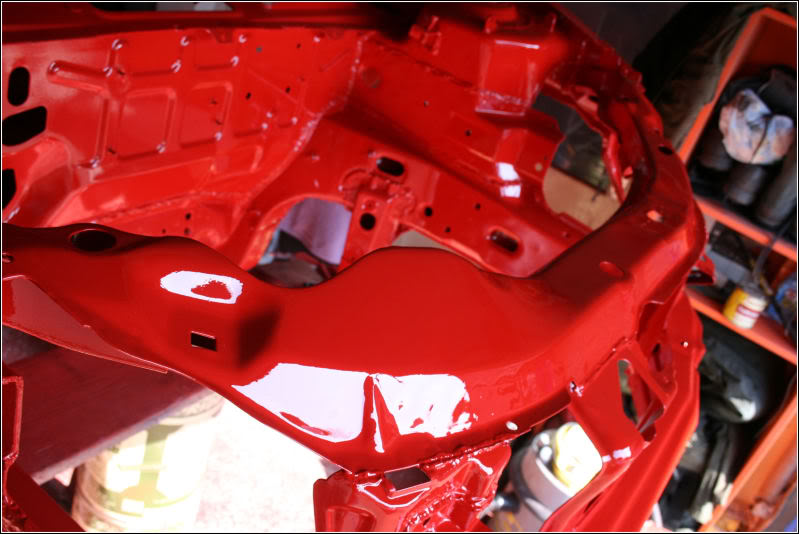
front slam panel
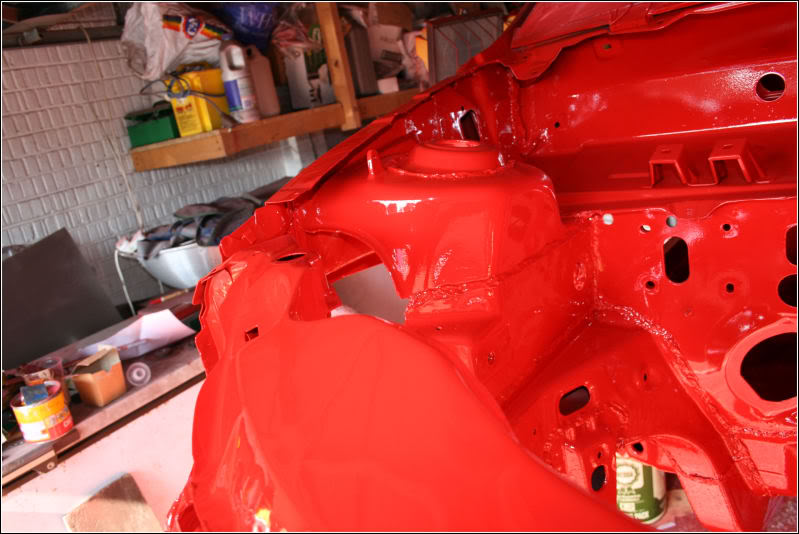
front turret
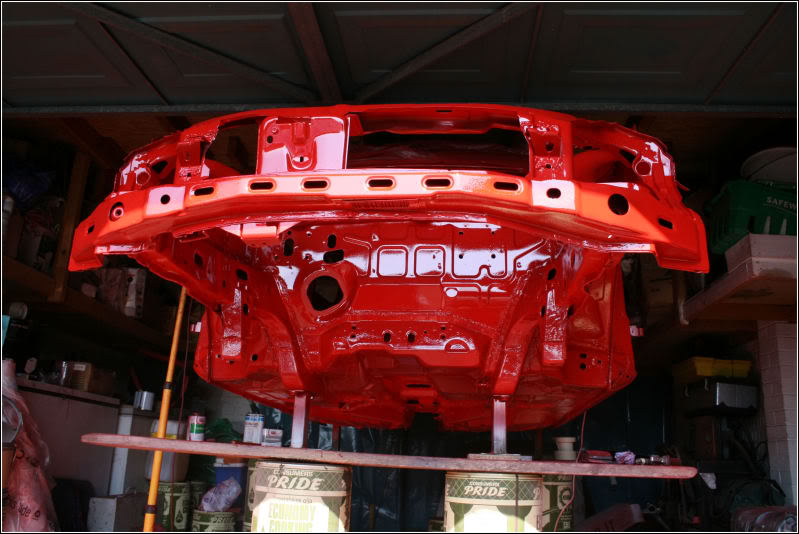
overall view of the car
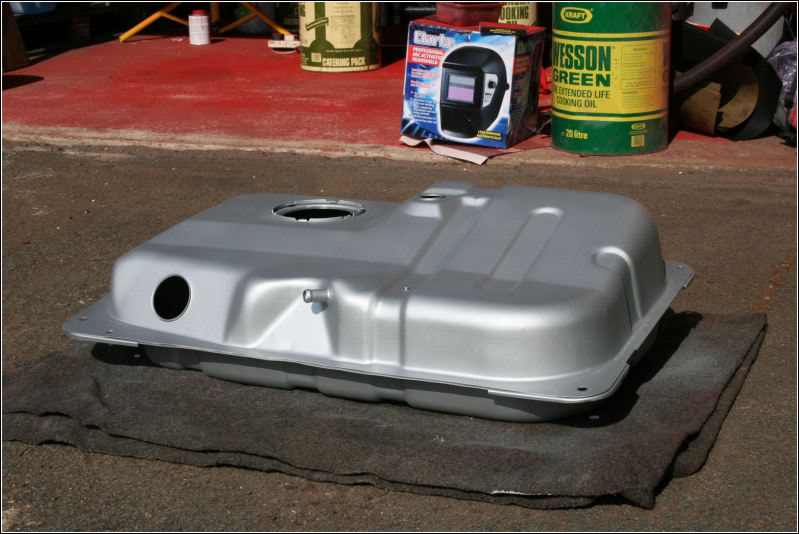
the shot blasted and then painted fuel tank!!!! Looks ace, hoping to get the rest of the bolt on parts to this standard before they are fitted
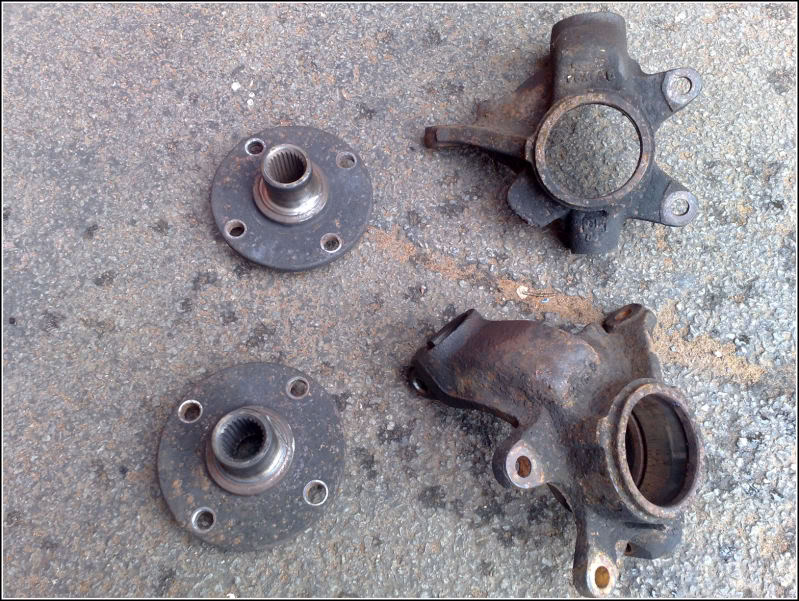
the front hubs have been split and the old bearings removed just need to be shot blasted, going to be painted so they can be touched up after the new bearings have been pressed in as it took 5 ton to press the old ones out
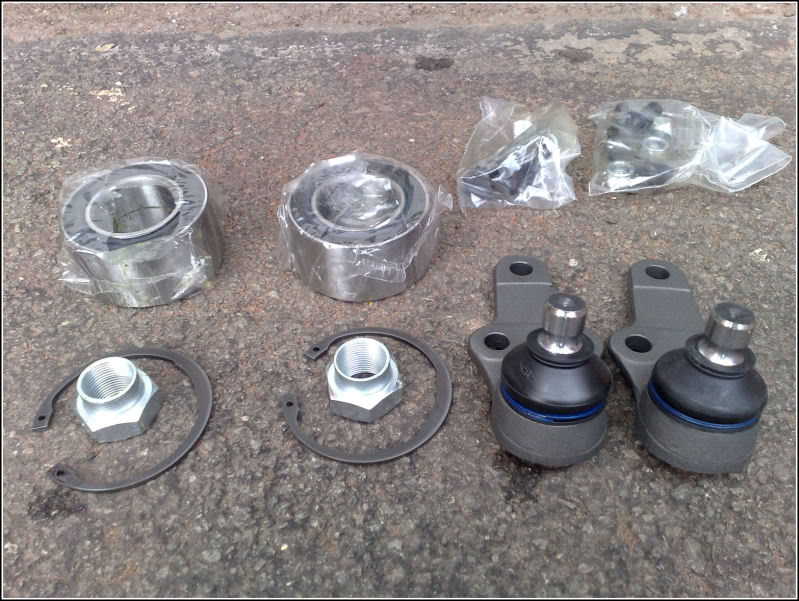
new ball joints and front wheel bearings and hub nuts
Just awaiting for £450 worth of stuff bushes, paint, cavity wax, sound deadening, coil over covers to arrive which the most should be here by later part of next week
the first job will be to cavity wax it all up with Dinitrol Cavity Wax, only the best (it is a ford after all don't take much to rust lol)
boot floor showing the painted battery box
looking through the passenger door (ignore the top of c pillar and b pillar they are to be painted black like the outside
floor pan
more of the floor pan
front slam panel
front turret
overall view of the car
the shot blasted and then painted fuel tank!!!! Looks ace, hoping to get the rest of the bolt on parts to this standard before they are fitted
the front hubs have been split and the old bearings removed just need to be shot blasted, going to be painted so they can be touched up after the new bearings have been pressed in as it took 5 ton to press the old ones out
new ball joints and front wheel bearings and hub nuts
Just awaiting for £450 worth of stuff
bushes, paint, cavity wax, sound deadening, coil over covers to arrive which the most should be here by later part of next week the first job will be to cavity wax it all up with Dinitrol Cavity Wax, only the best
(it is a ford after all don't take much to rust lol)
Thread Starter
Ka driver
Joined: Apr 2005
Posts: 93
Likes: 0
From: Hereford
just a little update
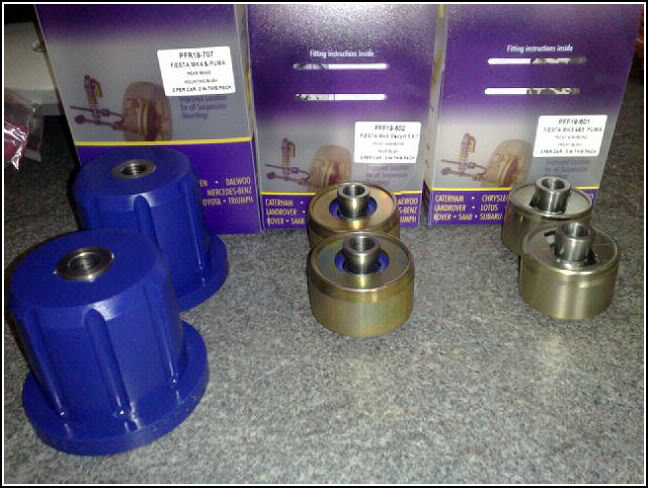
have received the bushes
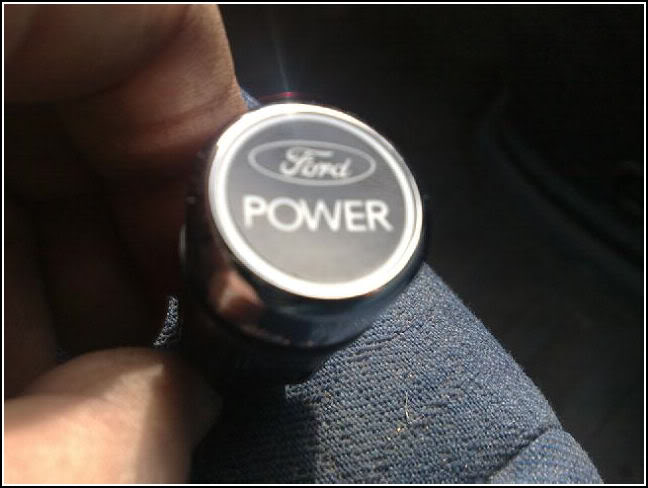
oh and have been collecting parts from ford the last few days, new heat shields for the exhaust, clips, all new bolts for the underside and a ford started button which happens to light up red got the surround too. Long way off from fitting it but it looks nice lol
Should be back home Friday so should actually be able to get it all cavity waxed up and start preparing and painting the brake/fuel lines and the shocks
have received the bushes
oh and have been collecting parts from ford the last few days, new heat shields for the exhaust, clips, all new bolts for the underside and a ford started button which happens to light up red
got the surround too. Long way off from fitting it but it looks nice lolShould be back home Friday so should actually be able to get it all cavity waxed up and start preparing and painting the brake/fuel lines and the shocks
Thread Starter
Ka driver
Joined: Apr 2005
Posts: 93
Likes: 0
From: Hereford
painted up all the fuel and brake lines fitted them with all new clips, fitted the fuel tank and poly bushed rear beam and managed to get the drum back plates on and my 10mm axle spacers
anyways onto the pics
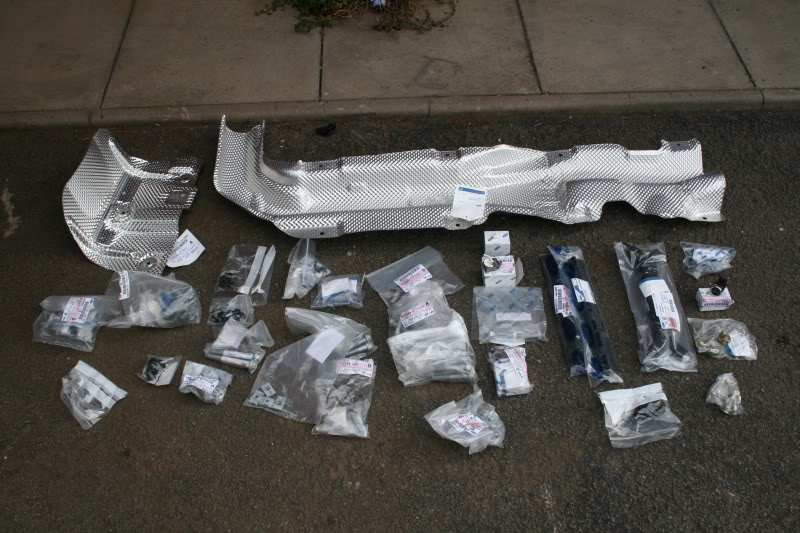
the collection of parts from Ford, over £200 worth :0
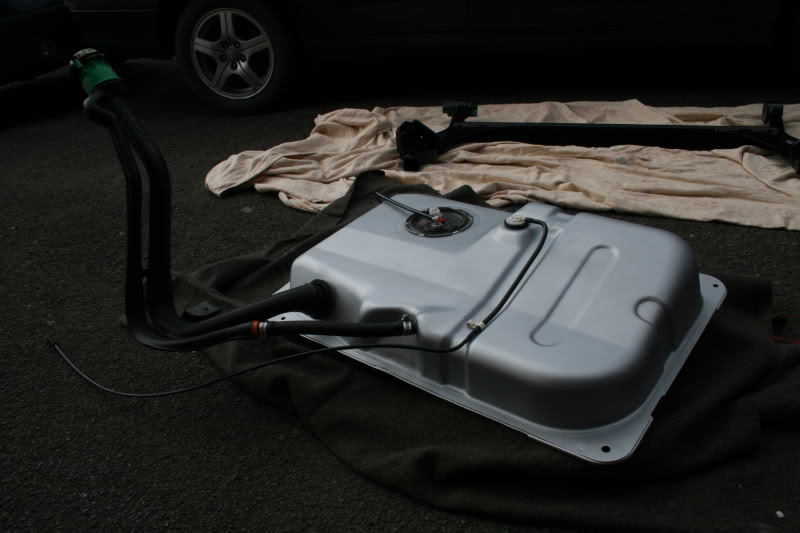
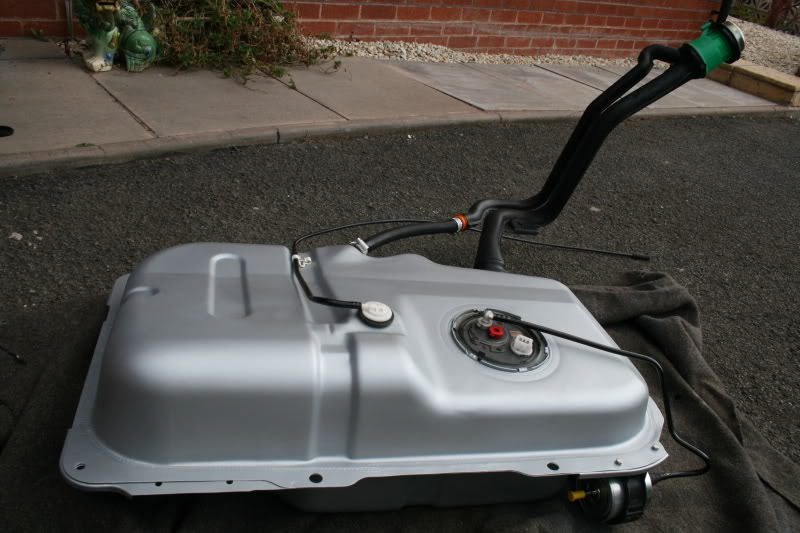
couple of shots of the fuel tank complete with filler neck
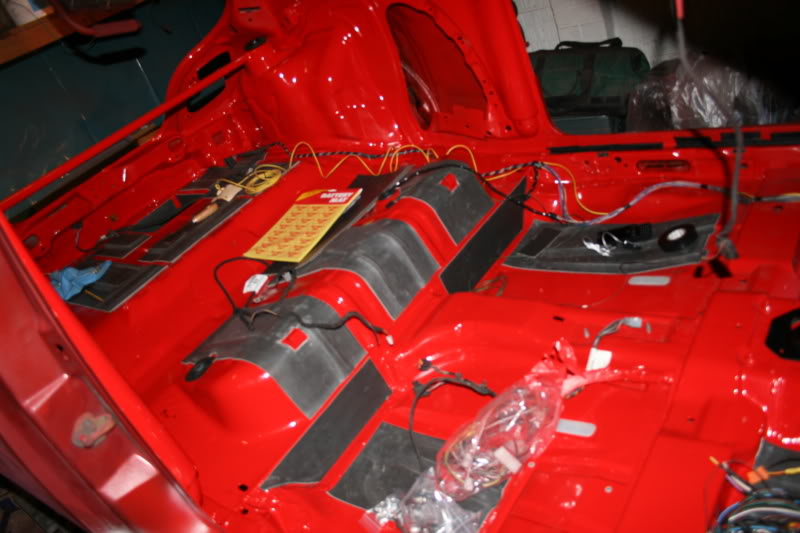
sound deadening applied to the inside
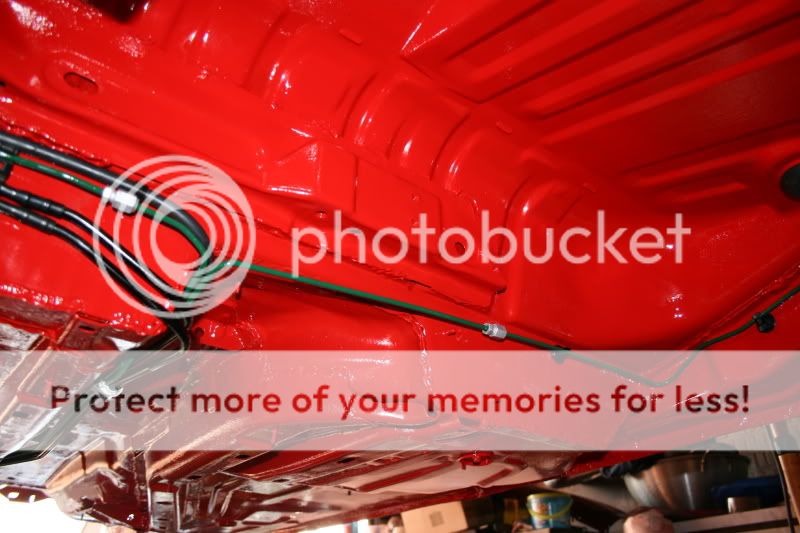
where the fuel tank sits showing painted lines
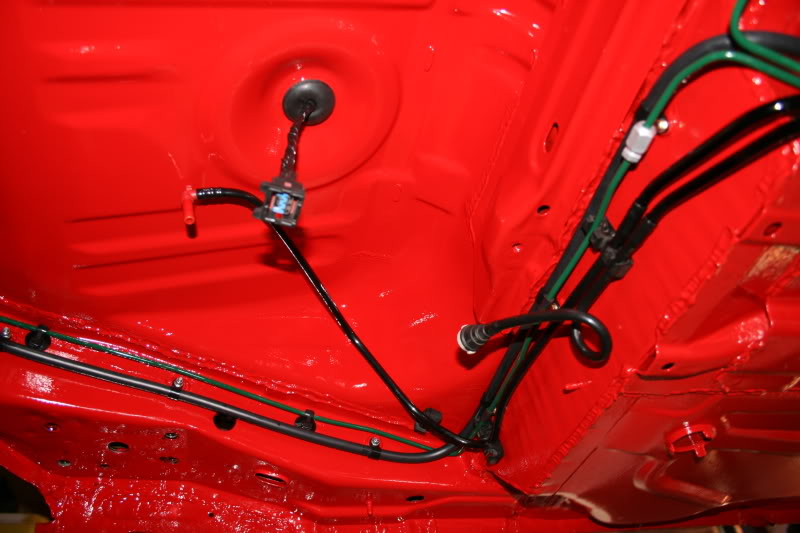
showing the other side of the fuel tank area
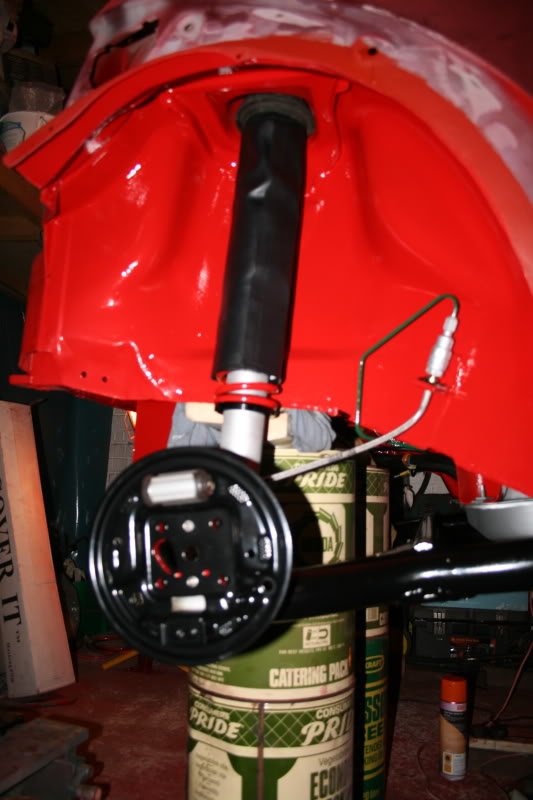
drivers side wheel arch nearly complete
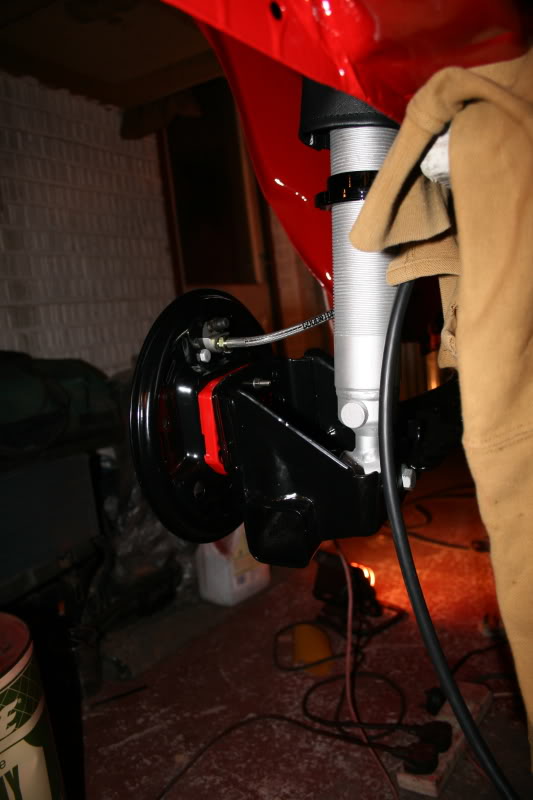
behind the passenger arch
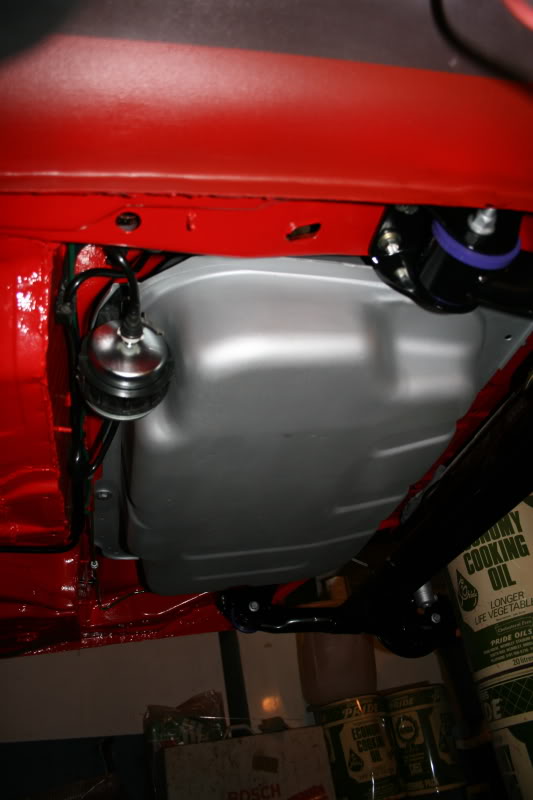
the fuel tank and new filter and the poly bushed beam
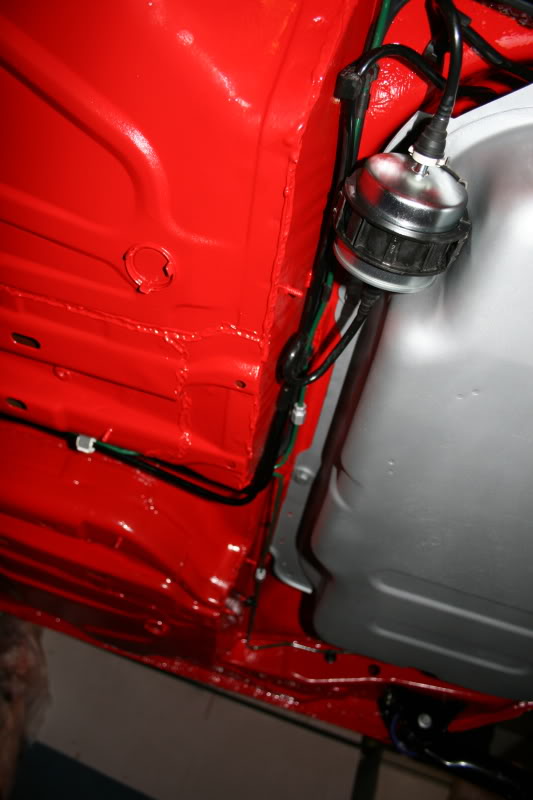
another random shot of the underside
will get some better pics soon, it has also been cavity waxed well the rear end and the sills, have used 1.5 ltrs so far :thumbsup:
its coming together slowly
anyways onto the pics
the collection of parts from Ford, over £200 worth :0
couple of shots of the fuel tank complete with filler neck
sound deadening applied to the inside
where the fuel tank sits showing painted lines
showing the other side of the fuel tank area
drivers side wheel arch nearly complete
behind the passenger arch
the fuel tank and new filter and the poly bushed beam
another random shot of the underside
will get some better pics soon, it has also been cavity waxed well the rear end and the sills, have used 1.5 ltrs so far :thumbsup:
its coming together slowly

Thread Starter
Ka driver
Joined: Apr 2005
Posts: 93
Likes: 0
From: Hereford
cheers :thumbsup:
only a little update recieved a parcel today :thumbsup:
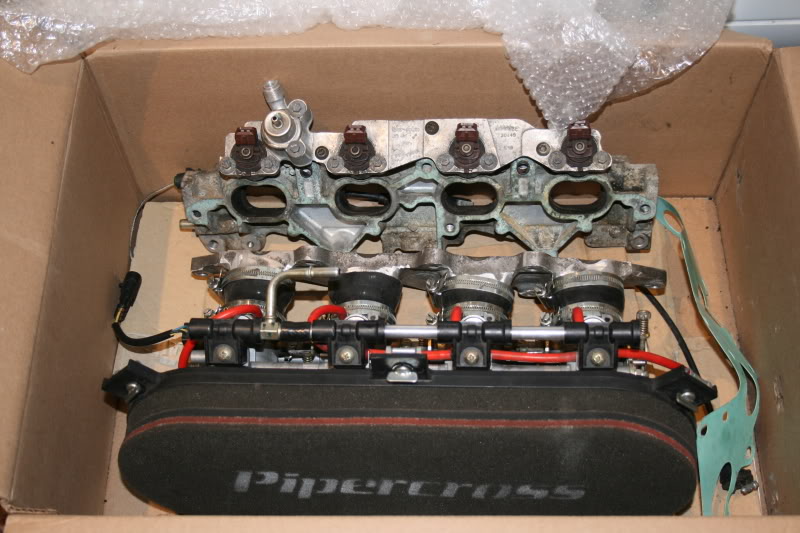
gsxr750 throttle bodies, I knew i went for omex for a reason rather than a standard ford ecu :thumbsup: :whistle:
that brings this thread up to date
only a little update recieved a parcel today :thumbsup:
gsxr750 throttle bodies, I knew i went for omex for a reason rather than a standard ford ecu :thumbsup: :whistle:
that brings this thread up to date


Thread Starter
Ka driver
Joined: Apr 2005
Posts: 93
Likes: 0
From: Hereford
cheers guys
progress has been kinda slow this weekend (uni dissertation is due in next week :O), got the wishbones on and all the front brake lines back on, painted the engine block, also painted the steering rack and the gearbox with aluma blast (lovely stuff to apply)
will update with pictures as soon as I get a spare moment
progress has been kinda slow this weekend (uni dissertation is due in next week :O), got the wishbones on and all the front brake lines back on, painted the engine block, also painted the steering rack and the gearbox with aluma blast (lovely stuff to apply)
will update with pictures as soon as I get a spare moment
Thread Starter
Ka driver
Joined: Apr 2005
Posts: 93
Likes: 0
From: Hereford
right not much has been happening to the ka, all my time seems to be going into uni work or sleeping but we have managed to get the brake servo back in and the wishbones and steering rack, shall post some pics soon.
I am on the hunt for some fuel injectors, there are two routes I could go:
- find some top fed injectors that will flow enough for 150-155bhp at 85% duty rate, that also fit the zetec fuel rail (the 2.0ltr mondeo ones that the ITB came with don't flow enough!)
or
- get hold of some 2001 gsxr750 injectors that the kit car boys seem to run because they fit and flow enough and means I don't need the sandwich plate between the head and the ITB manifold so should save me some space!! Its just where to find some gsxr 750 injectors????
opinions appreciated guys
but we have managed to get the brake servo back in and the wishbones and steering rack, shall post some pics soon.I am on the hunt for some fuel injectors, there are two routes I could go:
- find some top fed injectors that will flow enough for 150-155bhp at 85% duty rate, that also fit the zetec fuel rail (the 2.0ltr mondeo ones that the ITB came with don't flow enough!)
or
- get hold of some 2001 gsxr750 injectors that the kit car boys seem to run because they fit and flow enough and means I don't need the sandwich plate between the head and the ITB manifold so should save me some space!! Its just where to find some gsxr 750 injectors????
opinions appreciated guys
Last edited by Wellz!!!!; Apr 28, 2009 at 04:59 PM.
Thread Starter
Ka driver
Joined: Apr 2005
Posts: 93
Likes: 0
From: Hereford
right I have now finished uni, handed in my final year report, so am back at home with my parents for the summer and made some good progress on the ka this week
engine and gearbox is back in, rocker cover painted up, remote filter head fitted, oil cooler fitted, hoses made up for the oil, exhaust heat wrapped with 100ft of wrap
have ordered the silicon hoses for the coolant and all the wiring parts that will be needed
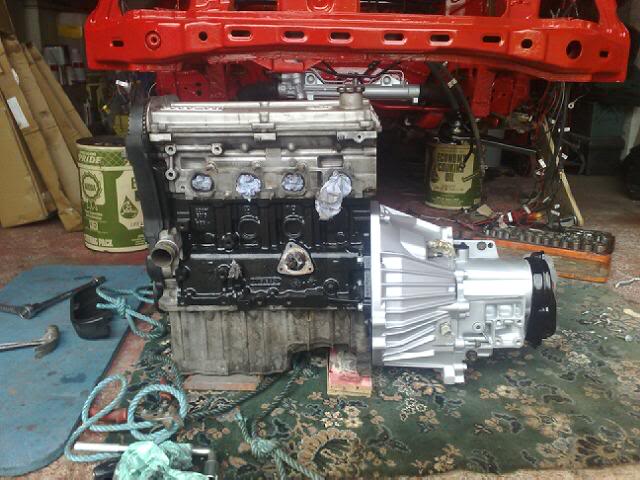
engine ready to go in
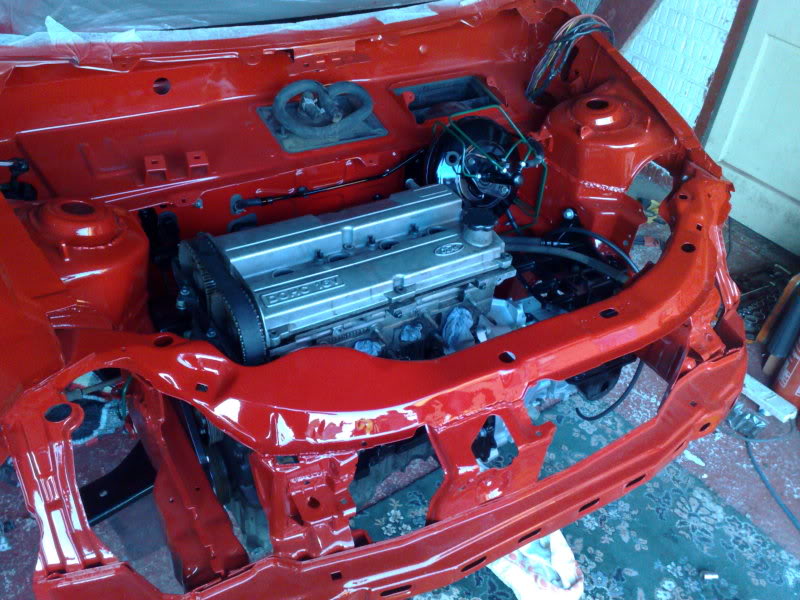
engine in
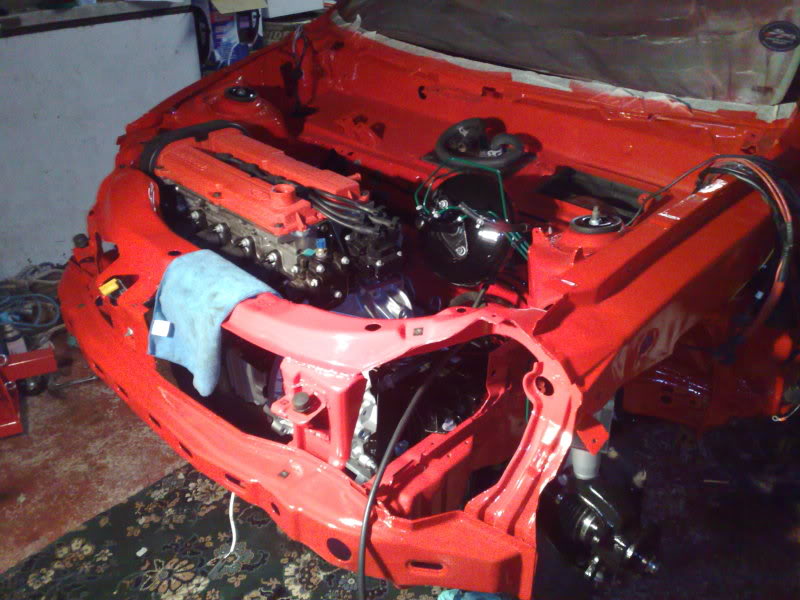
rocker cover painted, crackle effect
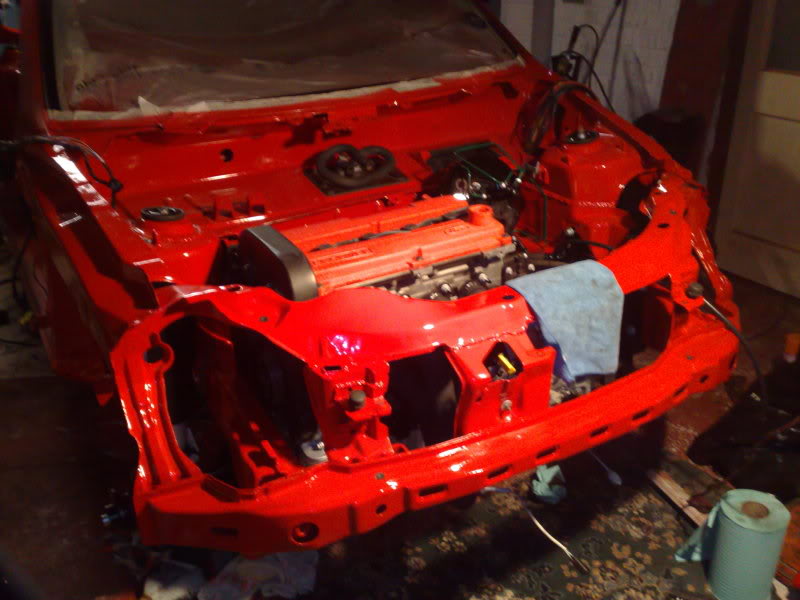
overall shot of the bay
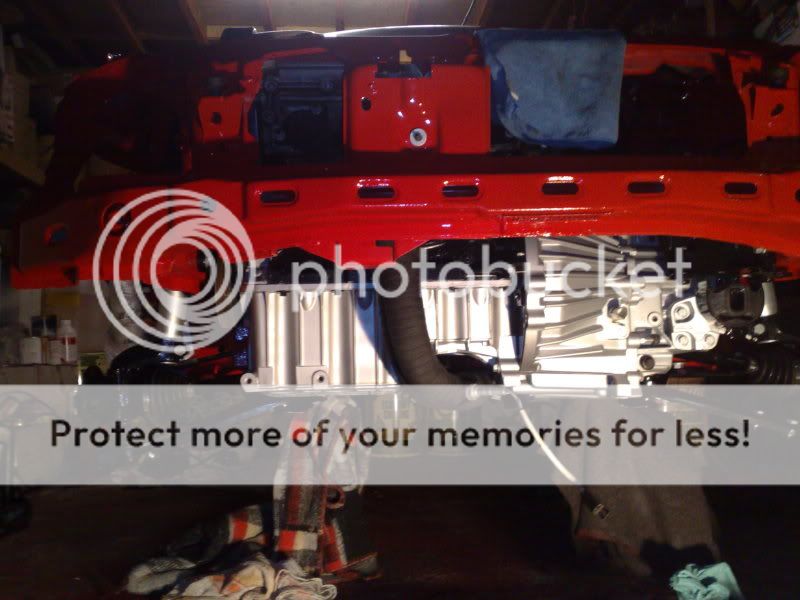
sump and manifold
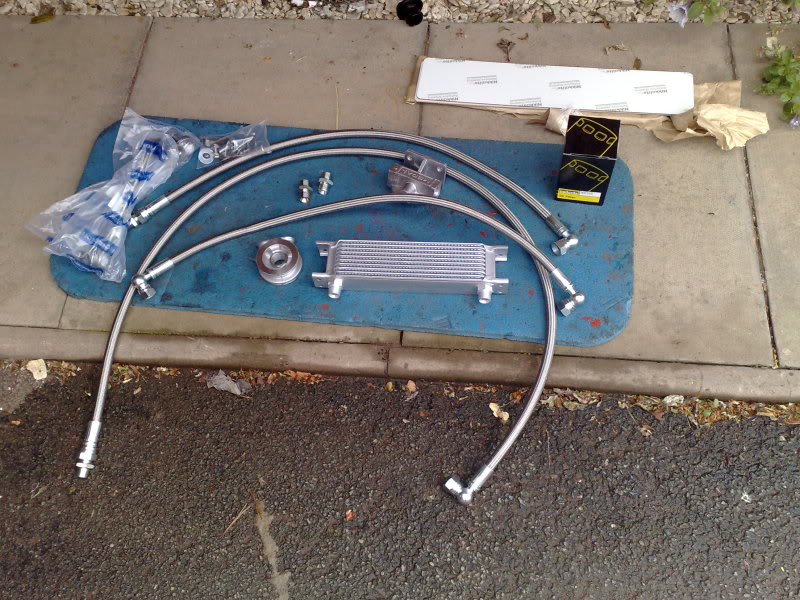
oil related parts and new drop links, new number plates for personalised reg
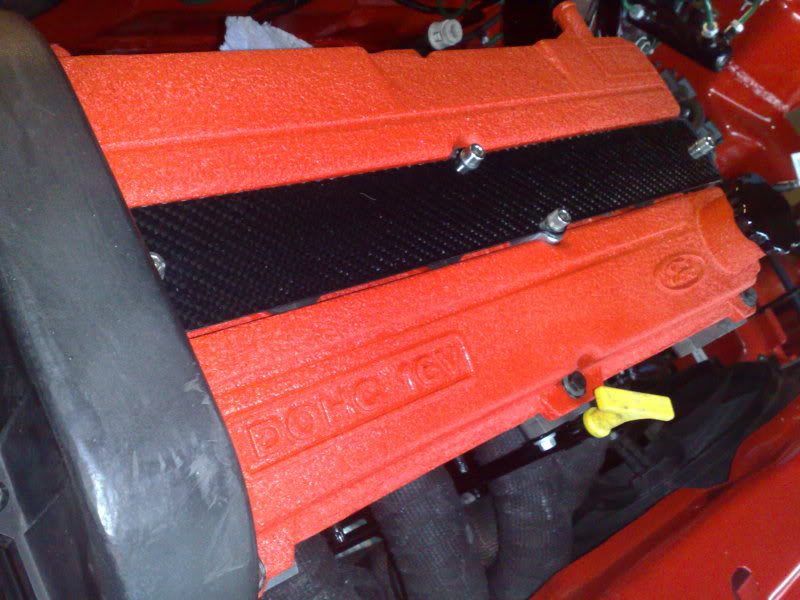
carbon fibre
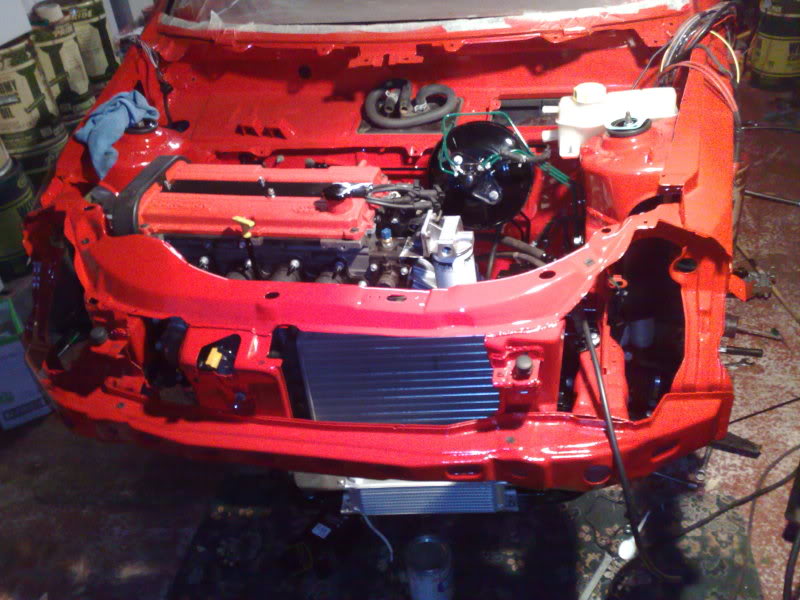
oil cooler fitted and remote filter head, brackets to be painted tomorrow
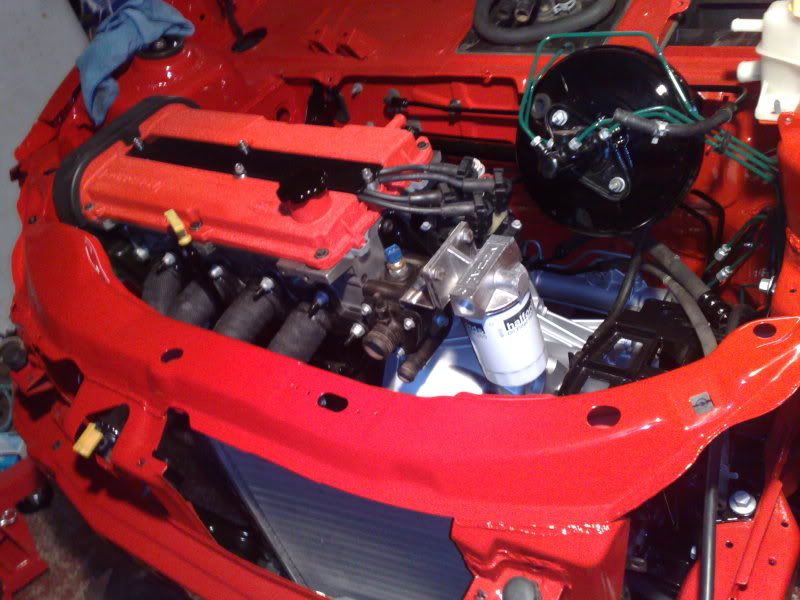
closer shot of the remote filter housing
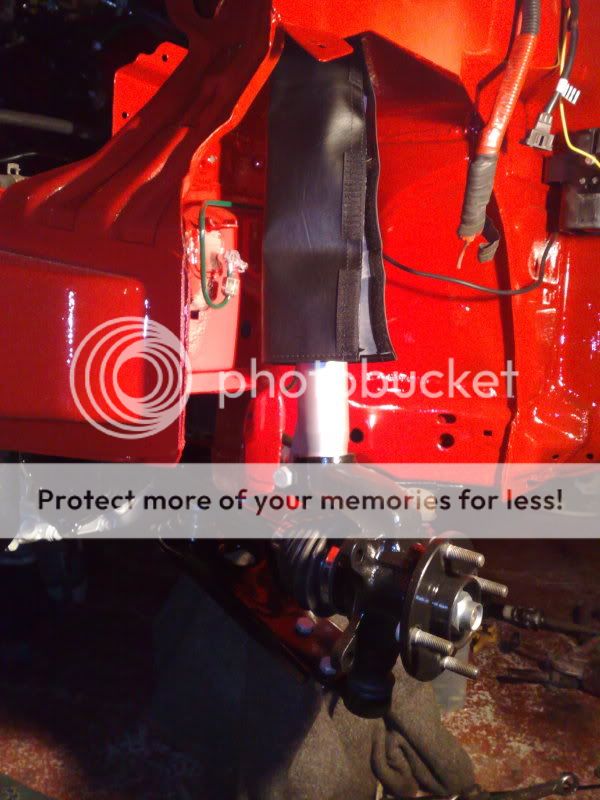
engine and gearbox is back in, rocker cover painted up, remote filter head fitted, oil cooler fitted, hoses made up for the oil, exhaust heat wrapped with 100ft of wrap
have ordered the silicon hoses for the coolant and all the wiring parts that will be needed
engine ready to go in
engine in
rocker cover painted, crackle effect
overall shot of the bay
sump and manifold
oil related parts and new drop links, new number plates for personalised reg
carbon fibre
oil cooler fitted and remote filter head, brackets to be painted tomorrow
closer shot of the remote filter housing
Thread Starter
Ka driver
Joined: Apr 2005
Posts: 93
Likes: 0
From: Hereford
just got a few things done to the ka the last few days
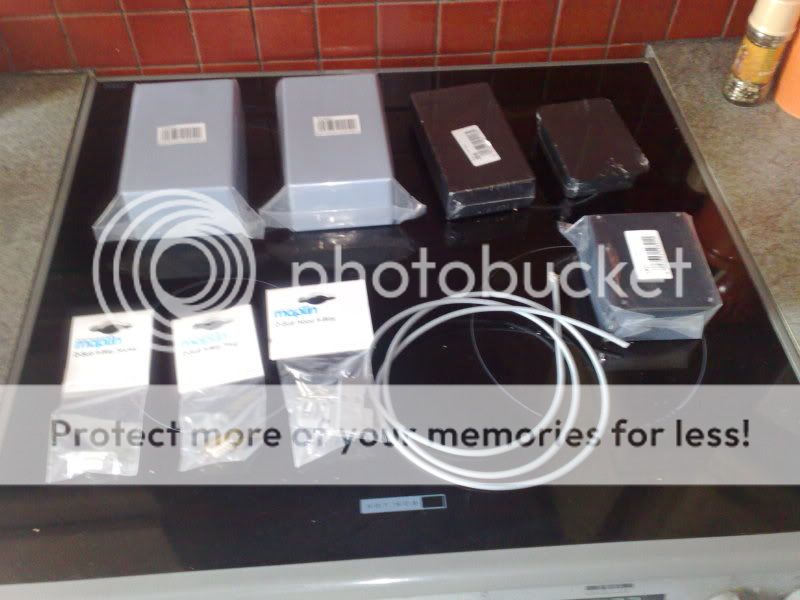
purchased this little lot from maplins to box up the electronics (auto lights, frost indicator, fuel/air fuel ratio kit, cooling fan controller)
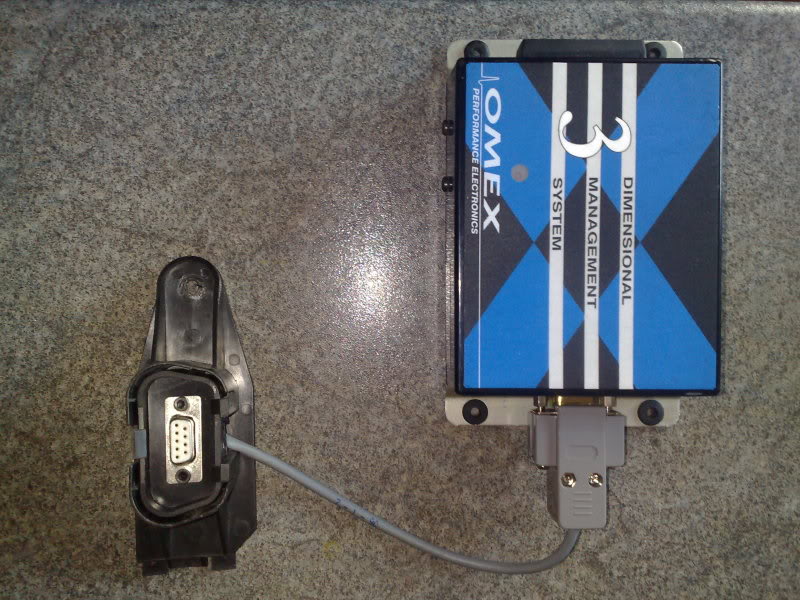
Also managed to create an extension cable for the omex unit so for mapping I can just remove the bung in the carpet and plug the comm cable straight in without having to remove anything other than what would have been to get to the standard diagnostics socket
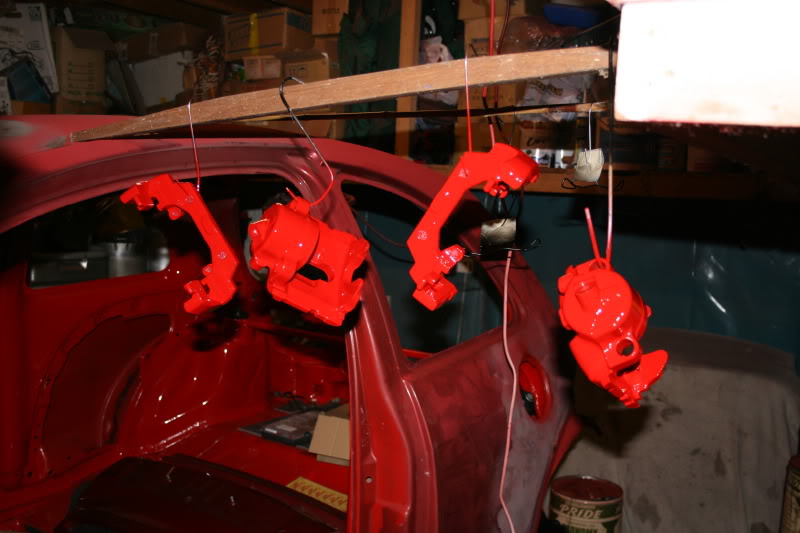
got the brake calipers sand blasted (new seals on order)
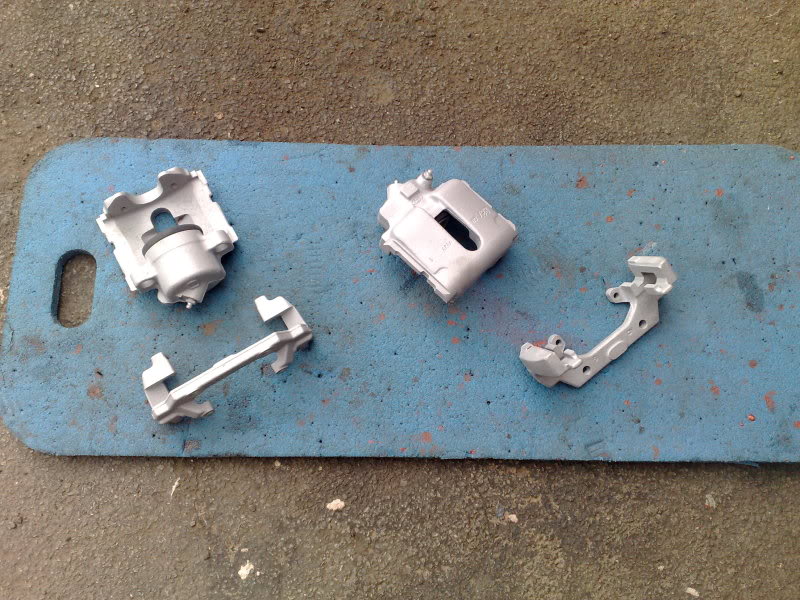
then etched and painted them up red
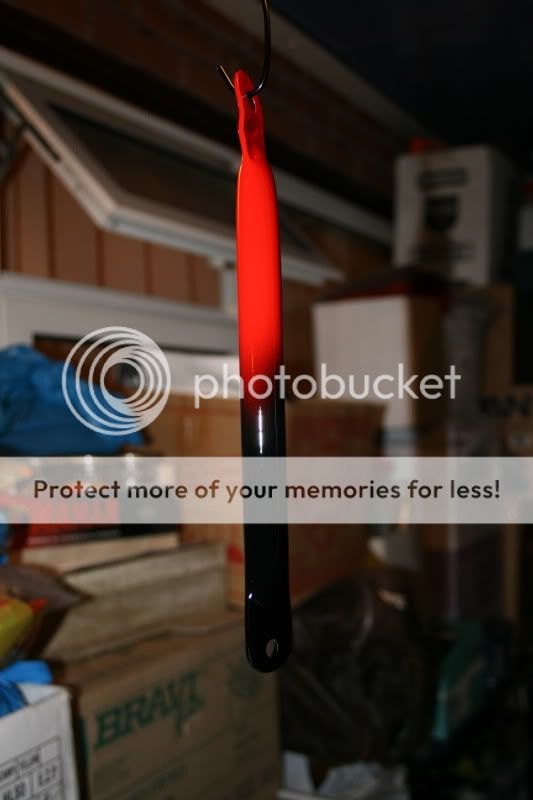
made up a brake servo support to stop it flexing on its mounts
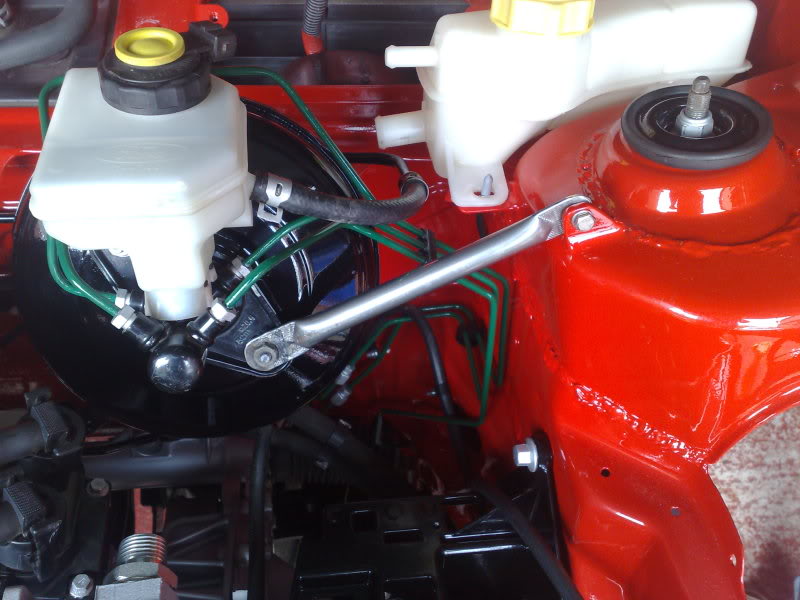
then painted it up
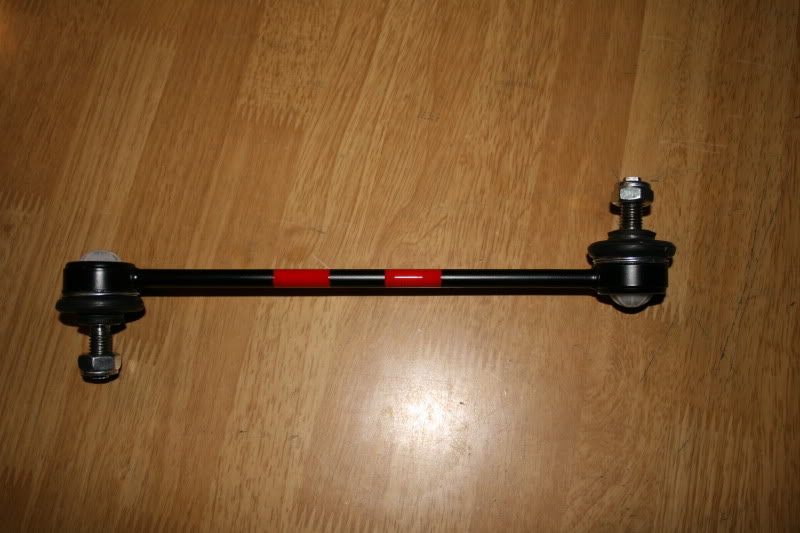
painted up the new drop links, arrived in a zinc coated finish so painted them satin black and then painted the red stripes
started motor painted up and fitted (poor photo lol)
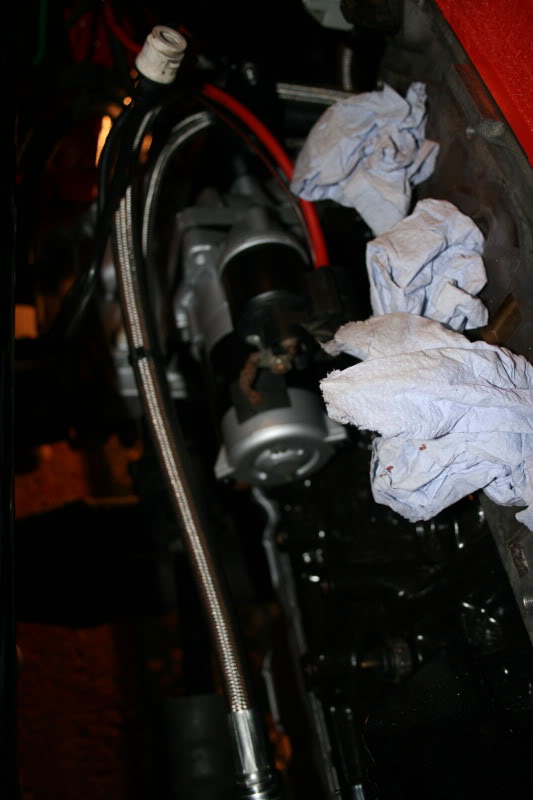
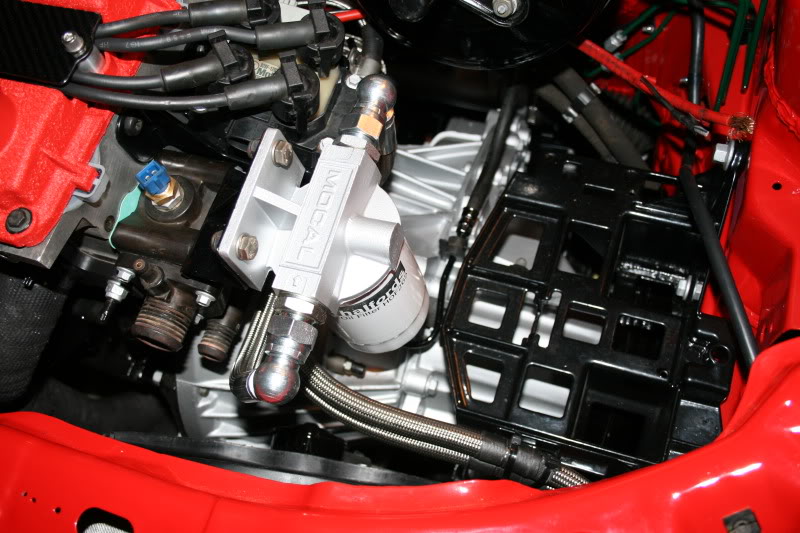
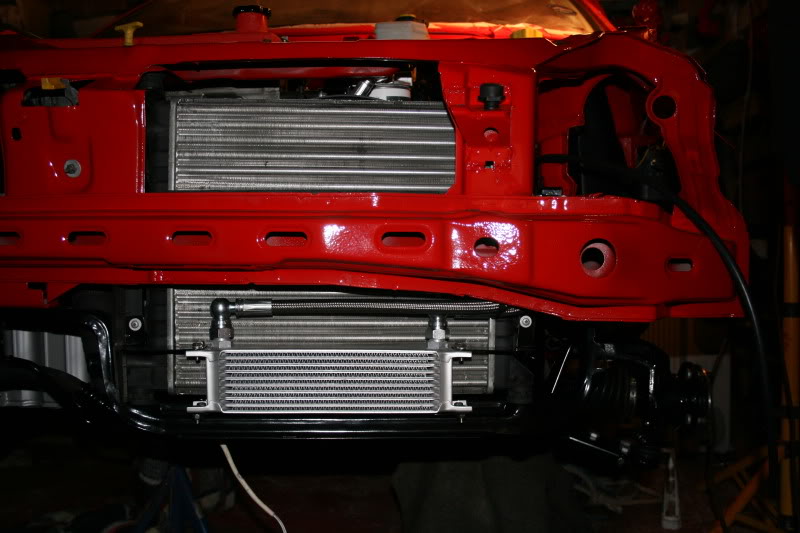
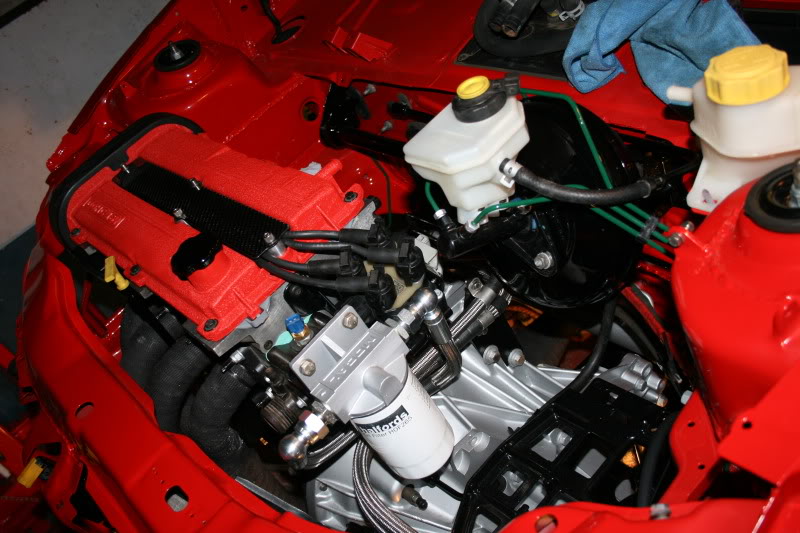
some overall shots of the ka in its current state with the oil pipes to the cooler and remote filter
my bluetooth car kit arrived today and so did my silicon hoses for the coolant pipes also ordered some gasket paper and hose clips
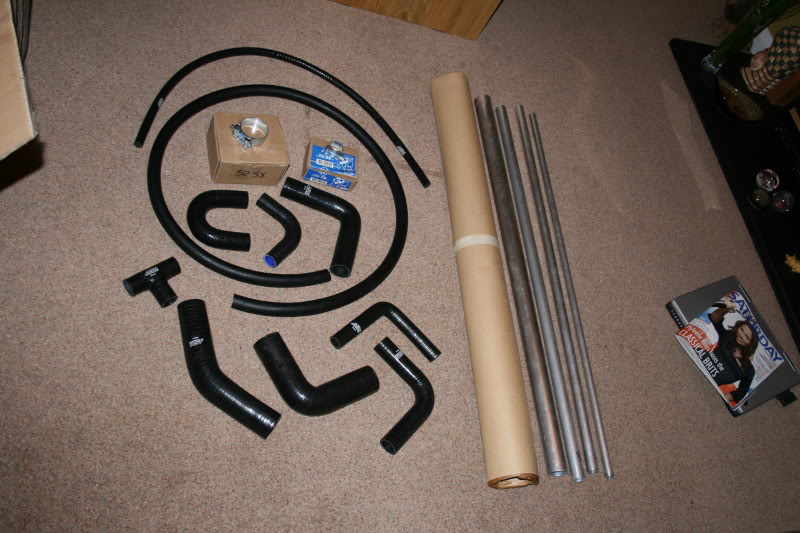
my electrical stuff has also arrived, but I am off back to our uni house for a week as my Fiancée is yet to finish her uni year so nothing will get done for a week or so
stuff waiting to be delivered:
-magnetic sump plug (16mm as the 14mm hole in the sump was stripped )
-inline oil breather filter
-exhaust paint(ordered 2 cans for the manifold thinking it would be enough but used all of it on the 4-2-1 mainfold, the heat wrap just kept absorbing it, so need another for the exhaust itself)
-new seals for the front calipers
-new front speakers and amp
purchased this little lot from maplins to box up the electronics (auto lights, frost indicator, fuel/air fuel ratio kit, cooling fan controller)
Also managed to create an extension cable for the omex unit so for mapping I can just remove the bung in the carpet and plug the comm cable straight in without having to remove anything other than what would have been to get to the standard diagnostics socket
got the brake calipers sand blasted (new seals on order)
then etched and painted them up red
made up a brake servo support to stop it flexing on its mounts
then painted it up
painted up the new drop links, arrived in a zinc coated finish so painted them satin black and then painted the red stripes
started motor painted up and fitted (poor photo lol)
some overall shots of the ka in its current state with the oil pipes to the cooler and remote filter
my bluetooth car kit arrived today and so did my silicon hoses for the coolant pipes
also ordered some gasket paper and hose clips my electrical stuff has also arrived, but I am off back to our uni house for a week as my Fiancée is yet to finish her uni year so nothing will get done for a week or so
stuff waiting to be delivered:
-magnetic sump plug (16mm as the 14mm hole in the sump was stripped
)-inline oil breather filter
-exhaust paint(ordered 2 cans for the manifold thinking it would be enough but used all of it on the 4-2-1 mainfold, the heat wrap just kept absorbing it, so need another for the exhaust itself)
-new seals for the front calipers
-new front speakers and amp
Last edited by Wellz!!!!; May 19, 2009 at 12:50 AM.

Ford Focus Specialist
Joined: Jul 2007
Posts: 516
Likes: 5
From: Saudi Arabia/Southampton
Absolutely phenominal build mate!
Really liking this, got a thing for Ka's, my kid sister has a SportKa and they are massive fun but they are all crying out for more power!
Really liking this, got a thing for Ka's, my kid sister has a SportKa and they are massive fun but they are all crying out for more power!

Regular Contributor
Joined: Jun 2003
Posts: 253
Likes: 0
From: West Yorkshire
great build - really like the attention to detail.
I love KA's also - wish I had the time and skills you and your dad have got so I could do one myself also.
I am looking to buy a sportKA for a bit of fun, but also keeping my eye out for existing modified / turbod one - but I couldnt take on that amount of work.
well done - I look forward to pics of the end product.
I love KA's also - wish I had the time and skills you and your dad have got so I could do one myself also.
I am looking to buy a sportKA for a bit of fun, but also keeping my eye out for existing modified / turbod one - but I couldnt take on that amount of work.
well done - I look forward to pics of the end product.



Thread Starter
Ka driver
Joined: Apr 2005
Posts: 93
Likes: 0
From: Hereford
thanks a lot everyone makes all the hard work worth it