This thread started back in 09/07, and the last update was only the other day!!
******** = the end of a post
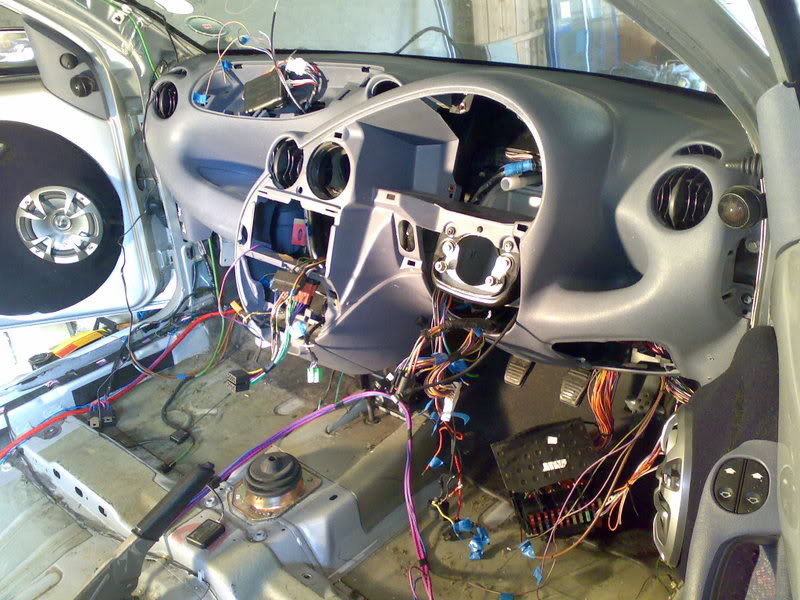
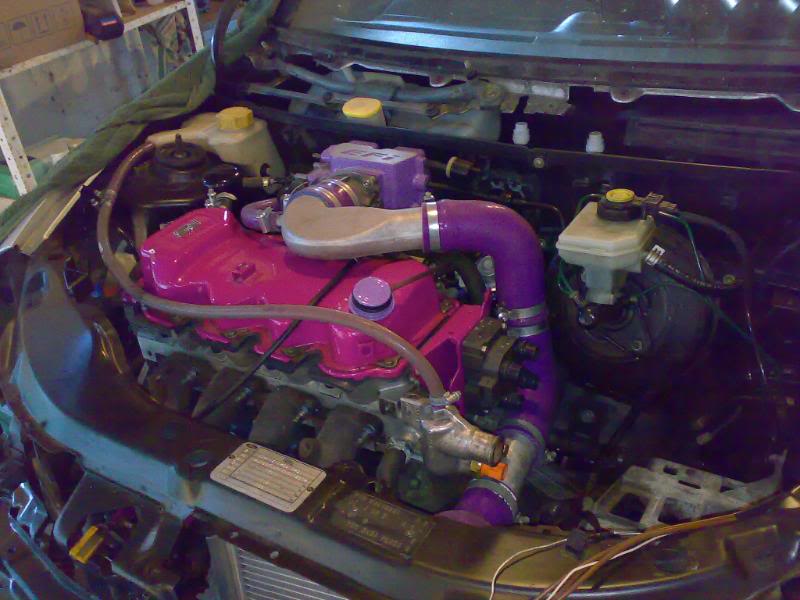
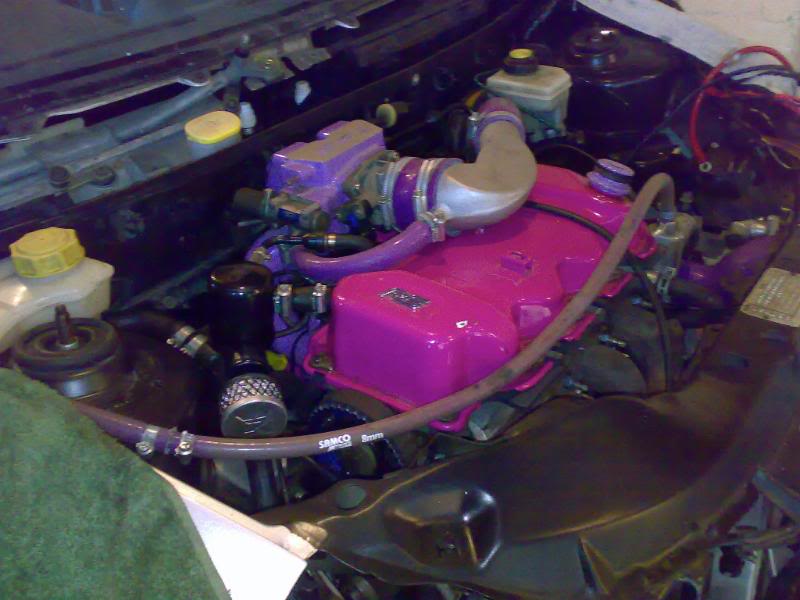
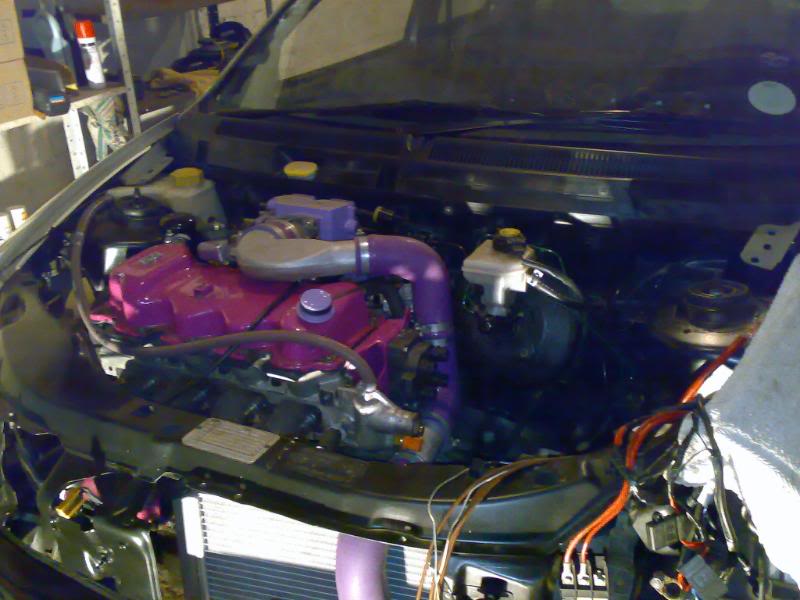
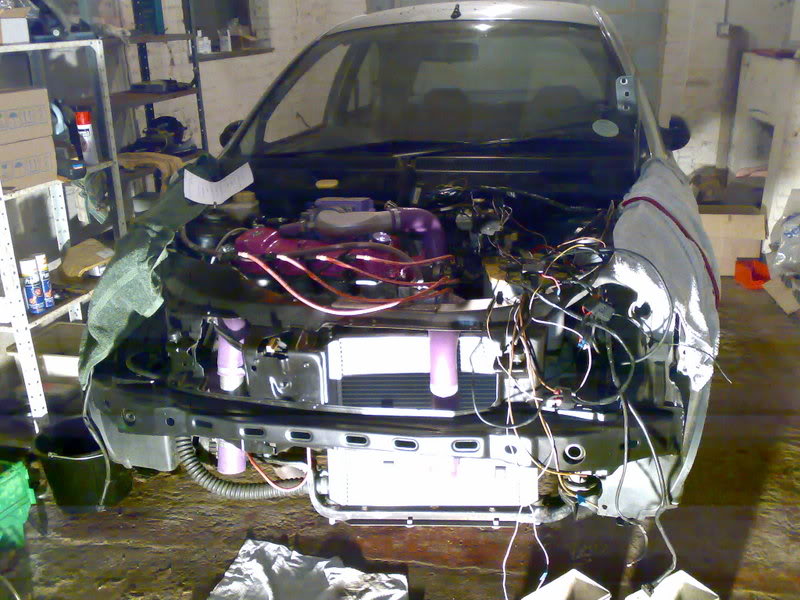
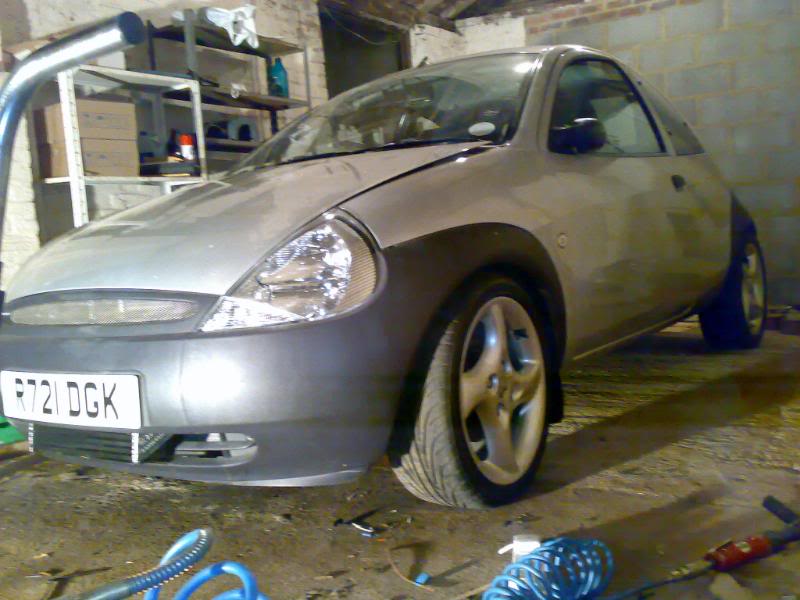
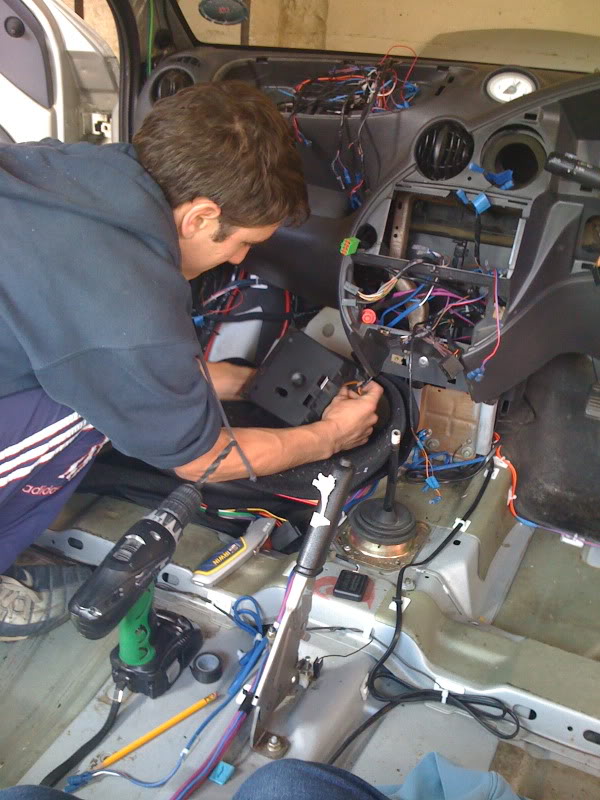
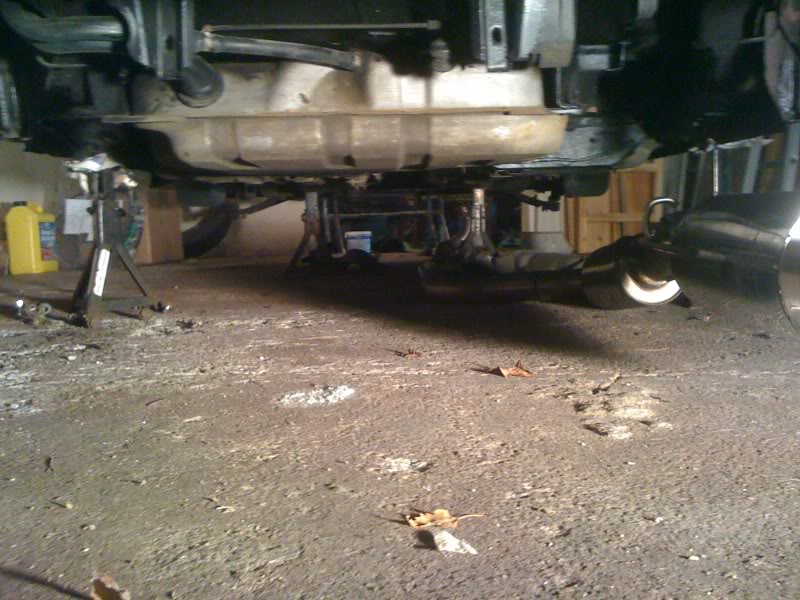
Well, the conversion is underway and made good progress today thanks to craig, his gf and my brother
Don't think i need say anymore as the pictures speak for themselves!
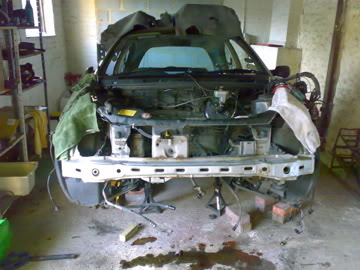
Next, the dash needs to come out so the wiring can be done properly, the steering column and PAS rack, anti roll bar needs changing ove, then I can start thinking about the getting the engine in once the gearbox is built up!
*****************************
Right I've planned to get this relatively finished and working in about 3 weeks. Half term comes up at college in 2 weeks so I hope to be on every hour of the day when that comes. (What a stupid thing i said back then - as if that was gonna happen! ha)
As progress goes..
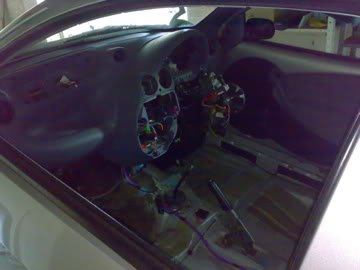
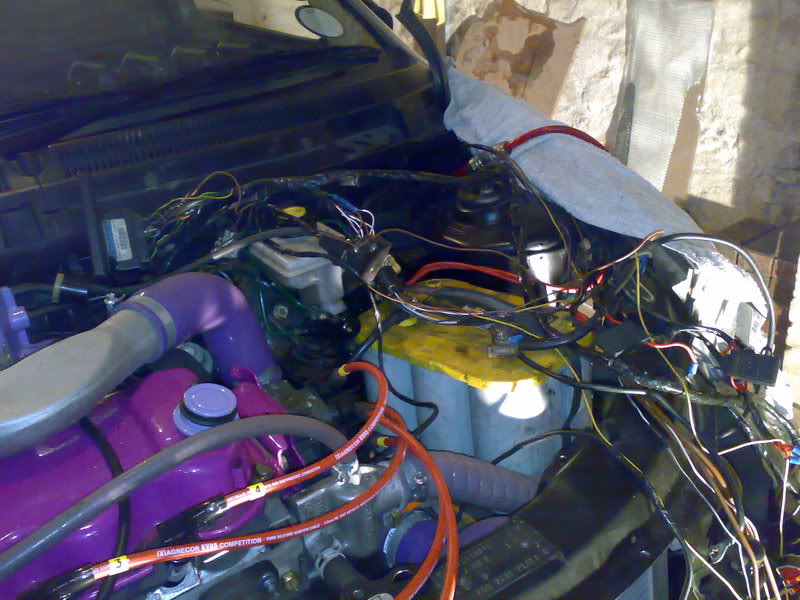
The wiring is almost there, all old wires are stripped out, and all new circuits put in part from a couple i think. The fiesta ECU has been lengthened and bound back up (took a good 3 hours!).
The very last of the wiring needs to be done now, with new circuits into a another fuse box.
The gearbox is underway, just need all new bearings from ford, and then put back together, with the new diff and st150 gears 1-4, and ka 5th.
As soon as that is done the engine will go in - should only take a couple of hours to do that.
Next update will be with pictures as visible progress takes place!!
*****************************
The alarm is gonna be a bitch, that could be the biggest hitch. So many wires for it. I'll be lucky if my windows work and especially the remote start.
I'll be happy it reaches 150bhp, but there's no reason it shouldnt reach 160. And If I wanted, �800 will see me to near 200.
I've already put the motorsport fueld pump in ready for any other mods
*****************************
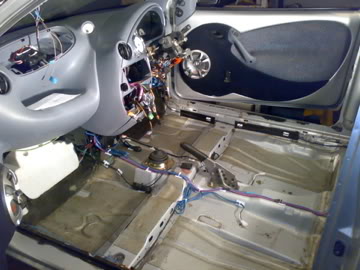
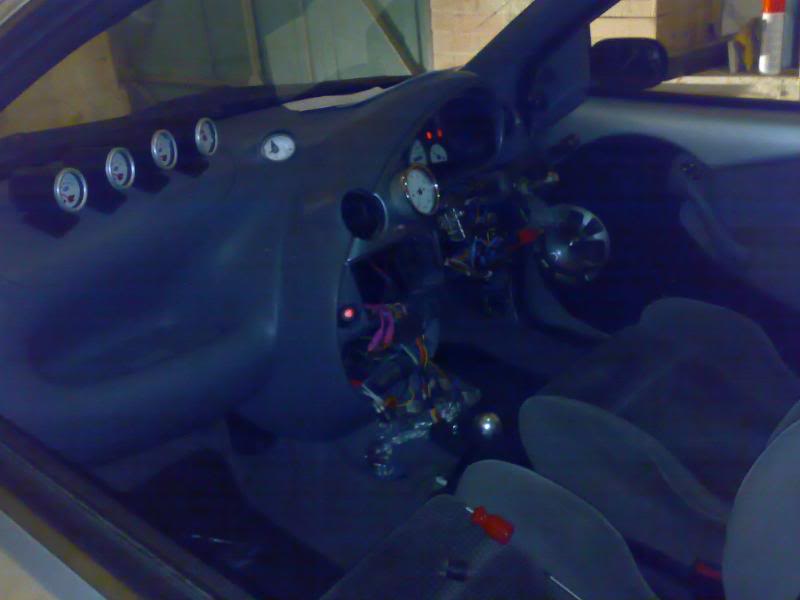
Managed to get this pic up, my photobucket is rubbish! though this is a couple of weeks old, just the wiring which has got a little tidyer
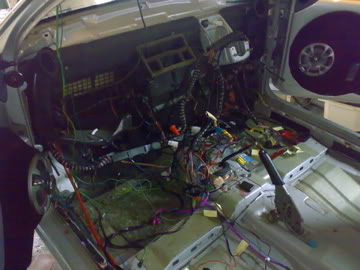
All the black bundles on the bottom, if you can make them out, are all for the alarm! There are so many!
*****************************
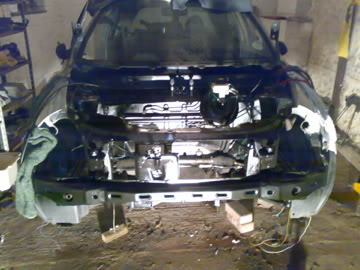
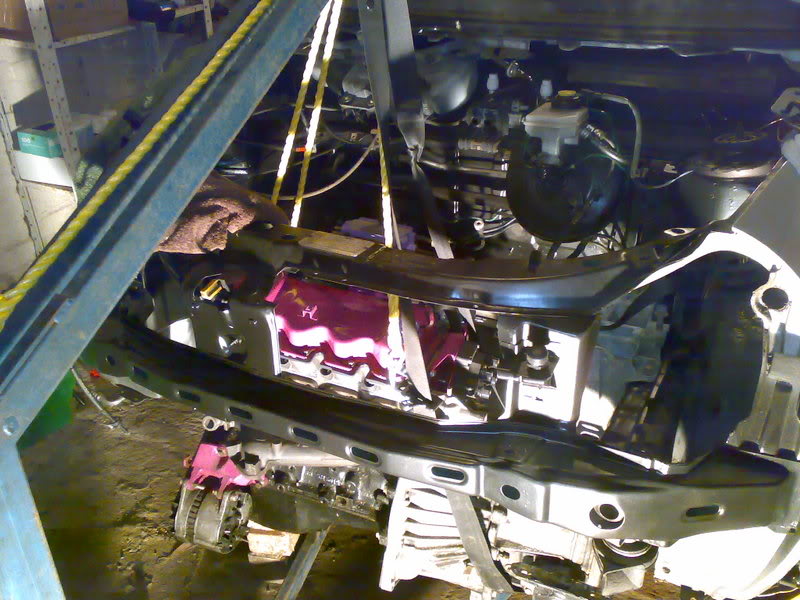
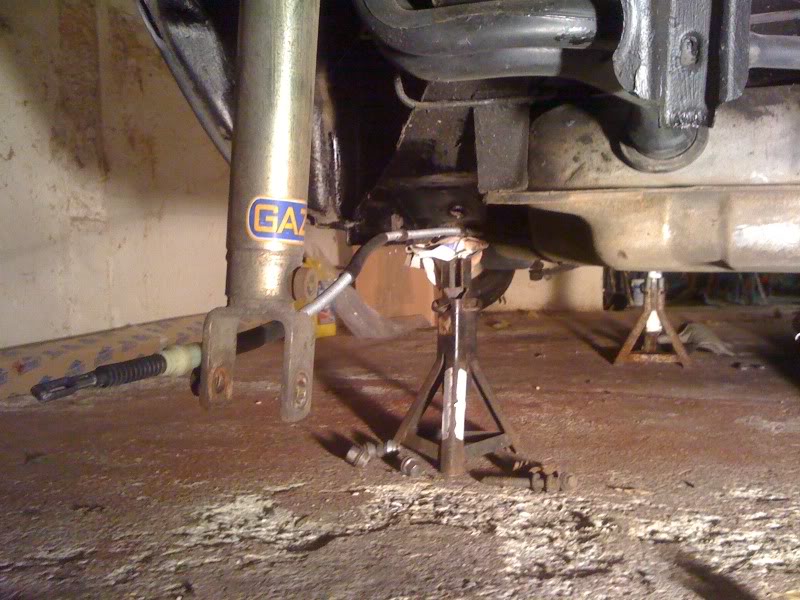
Sprayed the bay in satin black, so not glossy, but not matte. Not the best finish in the world, i'll admit, but it's not gonna rust anywhere.
It was already dark grey from factory if anyone's wondered why i sprayed it black. So I did the cross member as you don't really see this, unless you look through the grille.
*****************************
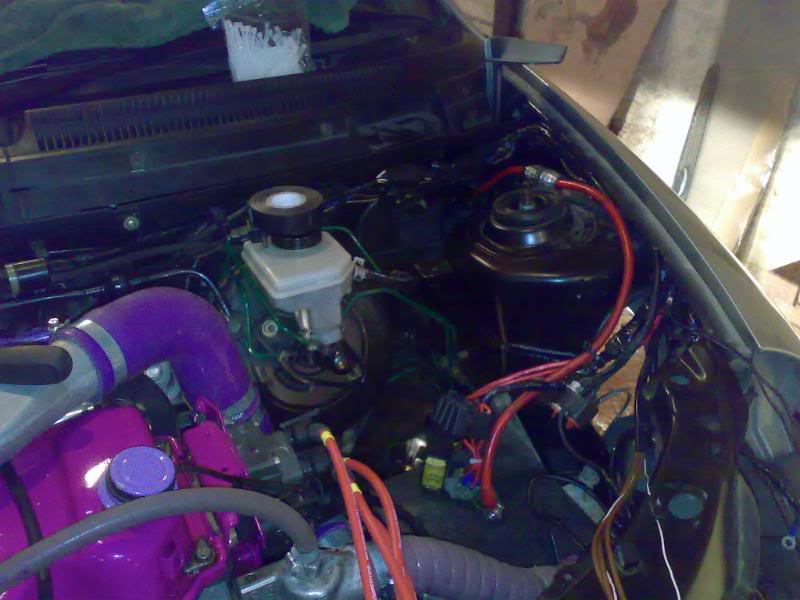
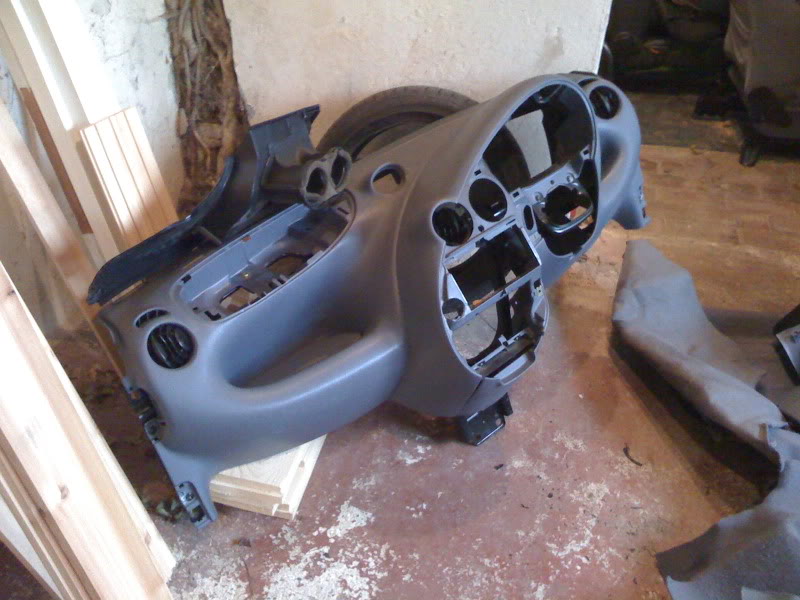
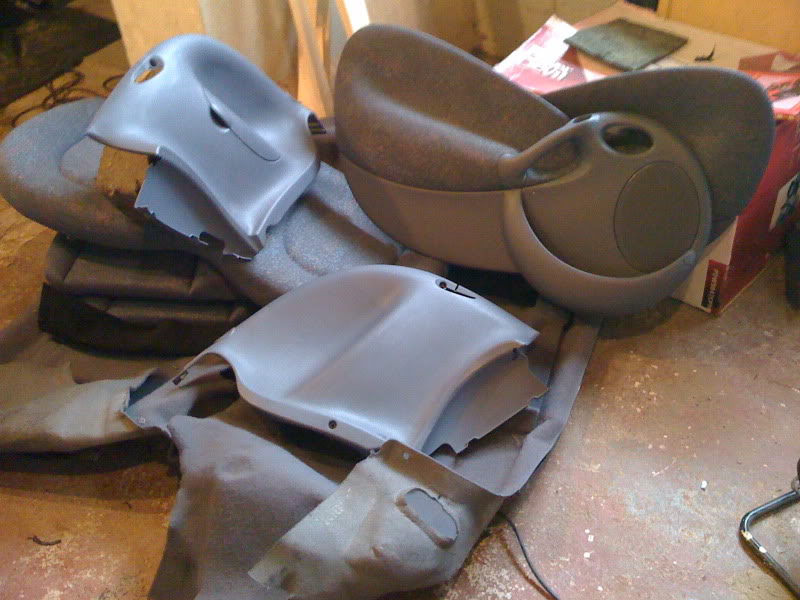
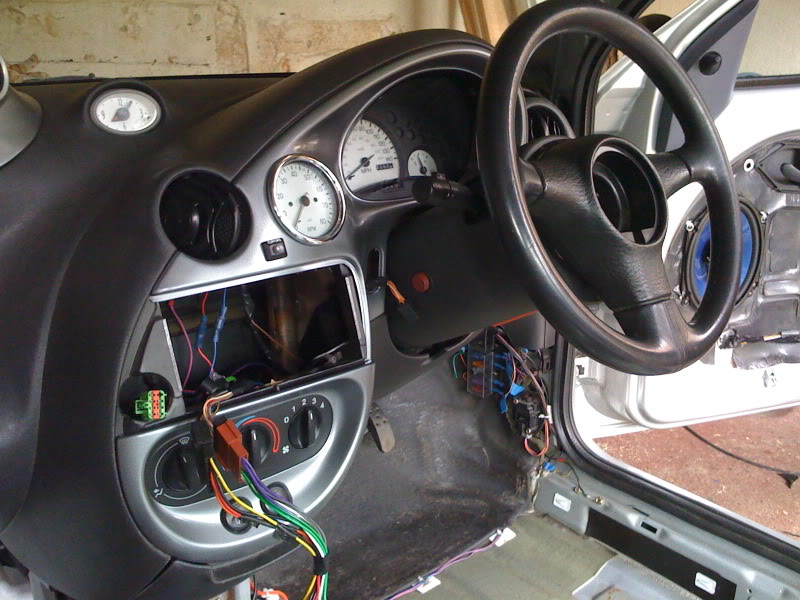
Dash is back in now.. wiring is really quite tidy now.
*****************************
It's even mroe tidy than that now after I spent about 6 hours in there.. All wires that run down the car are all cable tied to self adhesive bases. All parts of the alarm are now sorted, and the relay for the fan over ride.
Last of the wiring to be done now.. The gauges on the passenger air bag, fuse box number 2. (Then there's the wires in the engine bay, but the engine needs to go in before me or dan can start sorting those out.
So, as you asked, either the rest of the wiring or the gearbox has to built up, both by dan, cos I've hit a wall, so to speak. Though i reckon i could do the fuse box and that.
So, if he decides to do the gearbox, the engine will go in next , then it should all be done pretty fast from then on, cos I'm pretty ok with the mechanics side of it. Potentially I could have it relatively done by the end of next week, but maybe the week after.
*****************************
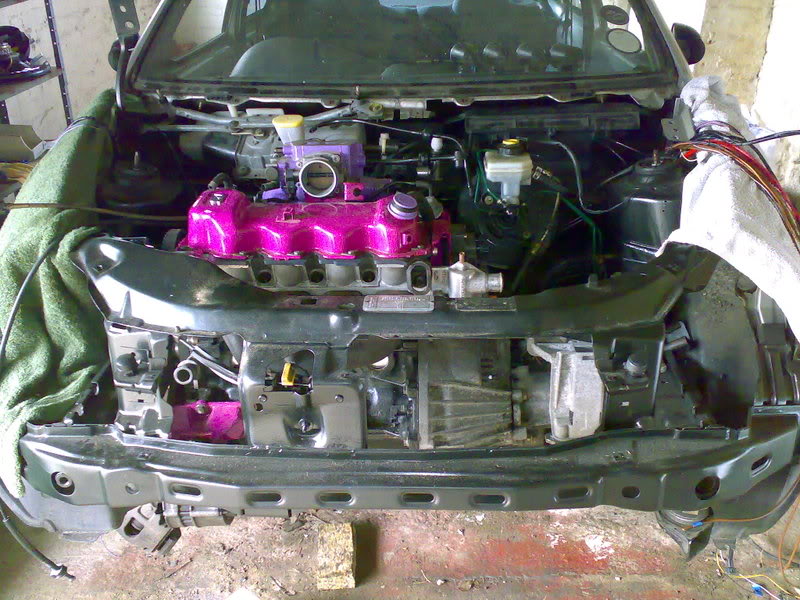
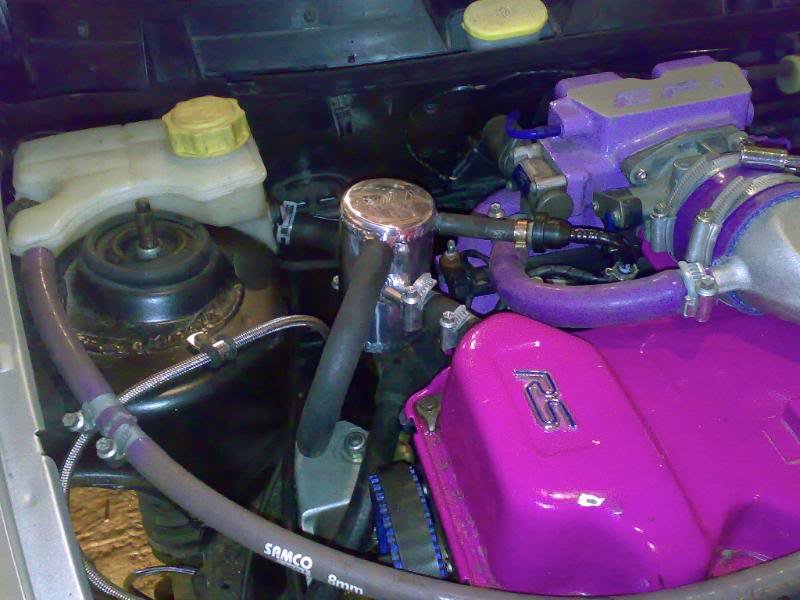
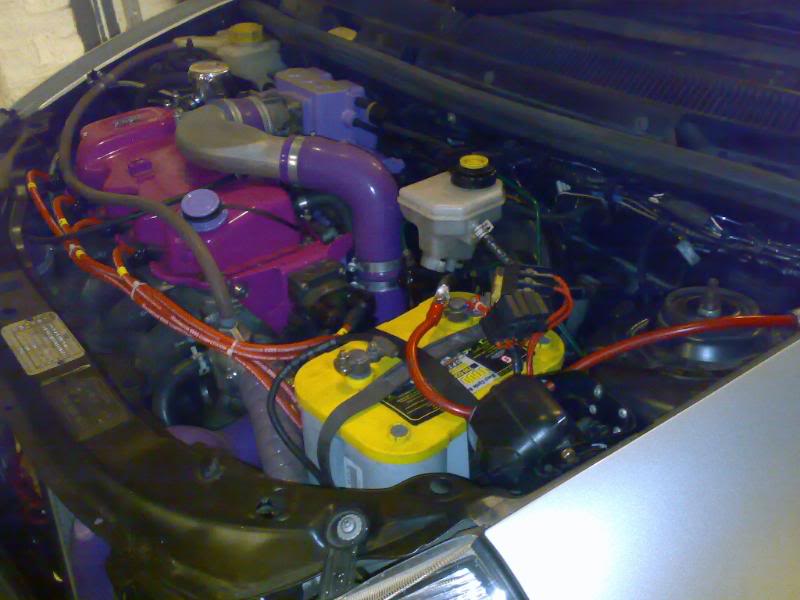
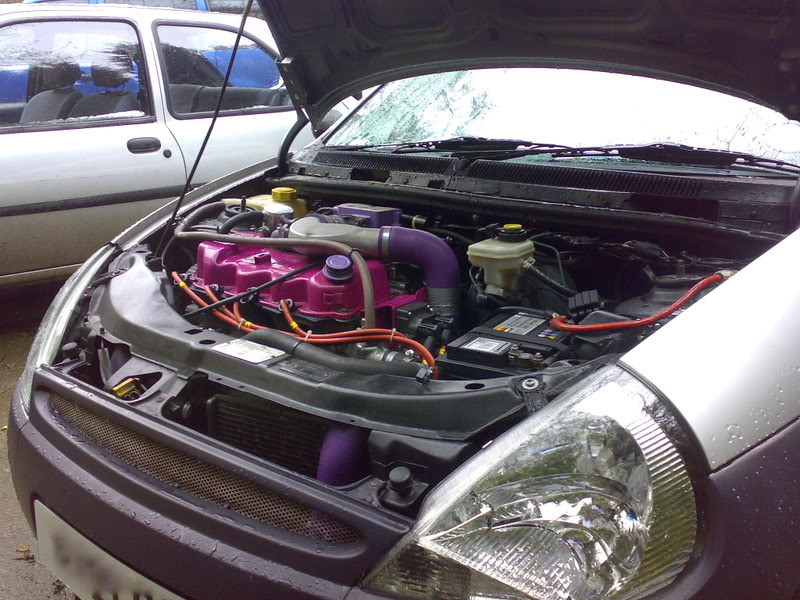
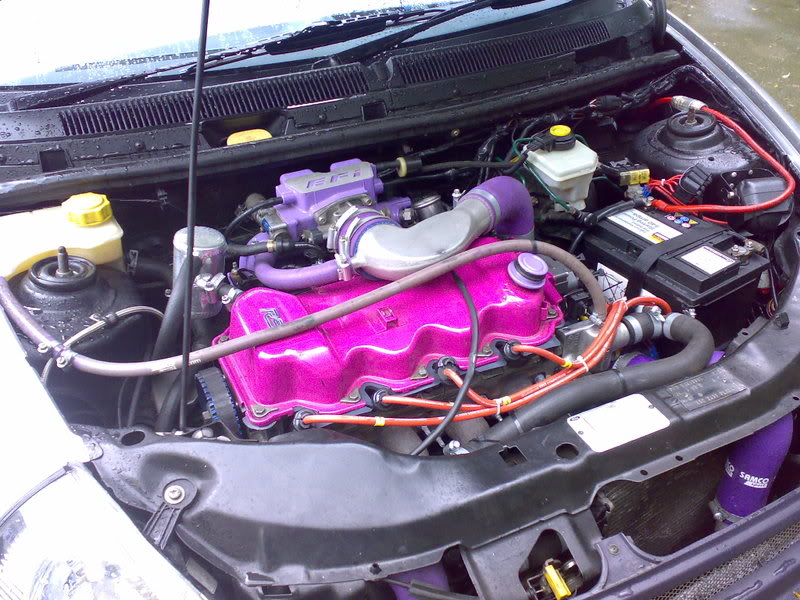
I've got a custom GRS rad.. Sy's old one. Got a Pacet fan on it too. Would have been expensive to buy new. And all Samco/SFS hoses for boost. Standard water hoses from FRST. Some braided oil feeds etc. Basically, whatever Sy had in his, cos I bought the whole lot
*****************************
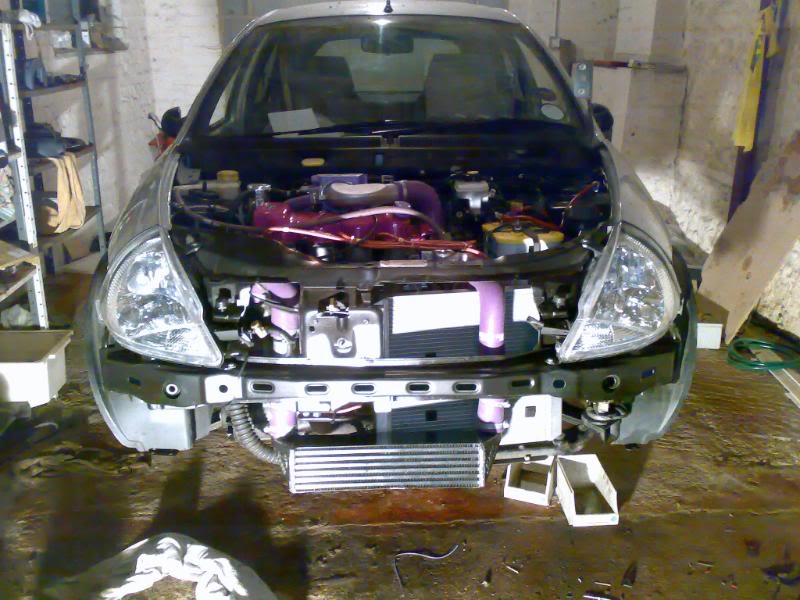
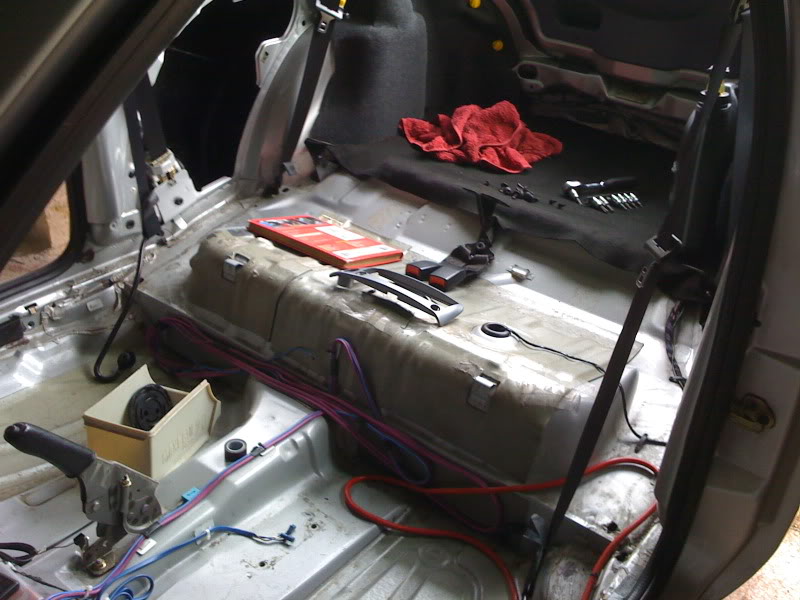
Second fusebox is done, part of the dash, and although the picture doesn't show it, the carpet is now in too..
Hopefully, some engine progress should be happening soon
*****************************
Just an update� (sorry no pics � even though they would have helped explain loads! I didn�t take any!)
My progress on the car has slowed down a bit � I hoped to have the engine in by now, but the gearbox has taken longer and we came across a few major problems with it � though I now understand how it works after some explaining from dan�s nextdoor neighbour and couldn�t have put it together without him really.
Right, there is a difference between the gearboxes made between 96-98 inclusive (mines a 97 and dan�s is a 99). The internals have changed slightly.
The differences are that the bearing for the shaft that holds the gear set has a bigger collar in mine, meaning it�s stronger, however, the crown wheel and pinion is a fair amount smaller and therefore weaker.
The Fiesta ST150 shares the same size pinion and crown wheel as Ka�s from 99 onwards (well unless they�ve changed it again since, but I doubt it seeing as the ST is the same).
This meant that the crown wheel fouled against the casing around the bearing of the gear set, but not by much. I think what ford did was to make the bearing for the gear set smaller so the bigger crown wheel and pinion could fit.
So, what the neighbour did, was to dremel down the metal edge of the bearing, only round a quarter of it by a few mm so the crown wheel didn�t foul and hey presto the whole thing fits, spins and doesn�t foul it anymore.
The only other alternative was to use the Ka gears again and crown wheel. But the crown wheel isn�t as strong. And I�d have to sell the ST150 gears. In turn, meaning slower acceleration (providing I can get the grip ) By using the Ka gears it meant that I would have to buy new bearings on the other end (opposite end to the pinion and crown wheel). The ST150 gears are all new and so are the bearings with them.
Reason for replacing all bearings is that you don�t know how worn the old ones are. If they are worn and something happens to them then they will ruin a �550 diff and the gears!
So I�ve now kinda got a hybrid box, with a strong bearing for the gear set, and the stronger crown wheel and pinion with all new bearings throughout.
Cost of it all, well, the new bearings (the ST150 gear set comes with 2 of them) cost me �140, but I made a mistake buying one of them as it was for dan�s box, a 99 onwards (the one for the gear set, pinion end)
These gearboxes end up being very expensive!
I hope to get the engine in soon, latest, at the weekend.
Sorry for the essay here, but im bored in my IT class at college and this is far more interesting than writing evaluations to building a website
*****************************
Hit a MASSIVE problem...
The engine mount i got from sy is screwed... The thread for the bolt that bolts the CVH engine mount on is shredded, all the thread has gone! So i can't bolt the mount on.
The engine is now underneath resting on supports, with the hoist all tied up to it.
So, I either need a new mount or i've got to somehow get a new bigger bolt, skim the inside of it with a drill to make it smooth, and tap a new thread - lucky i've got a tap and die set. then i'll have to make the hole of the mount slightly bigger to allow for the bigger bolt.
(For some reason this sounds worse than it actually was, think i was panicking - but read on, because it gets sorted pretty easy!)
*****************************
I've got a new bolt now, with a slightly larger thread which is deeper so should be stronger.
If the mount was steel, no one would ever have the problem, but it's probably a lot more expensive!
*****************************
I have sorted it.. new bolt and tapped a new thread.
Engine will go in tomorrow hopefully
*****************************
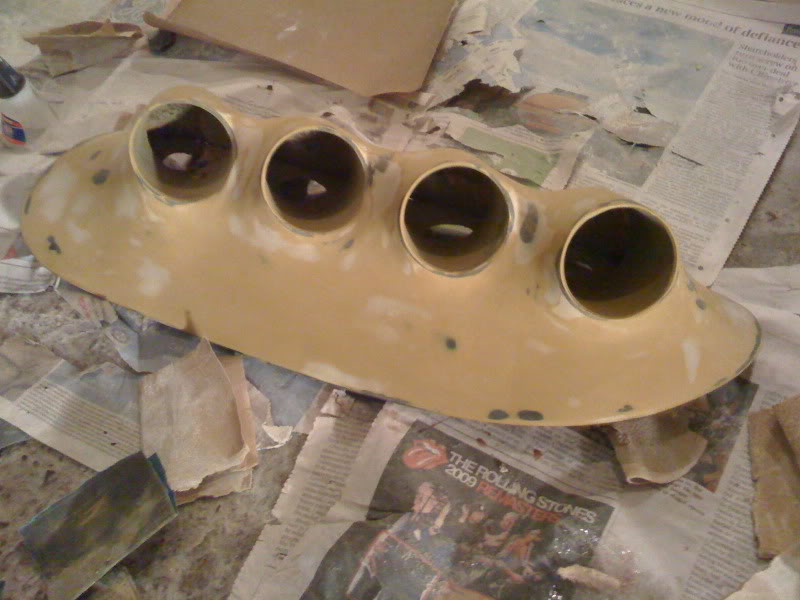
This was after i found the mount was buggered:
Then, today, with the mount all sorted and the engine bolted up:
Oh, and the driveshafts are in, along with the quickshift. So hubs are back together apart from brakes.
My diff seems to be really really stiff though, can barely turn the driveshafts by hand.
Hopefully it will loosen when i drive it.
*****************************
Yet another set back..
The gearbox has got to come off again. There's something not quite right with it. I took the driveshafts out again and put some ends cv joint ends in incase in was the force of the driveshafts pushing that was causing it, but no. It's too stiff..
It could be that the casing is too tight around the whole thing, but not really sure. So it'll have to come off and be taken apart again
Such a bitch of a job... now i know why garages charge so much to change a clutch, cos the gearbox is so annoying to get off once the engine is in.
Really should have checked the diff before the gearbox was bolted on, but as it was new i didn't expect any problems. Could be the diff bearings (they're new) that are too tight.
Hey-ho
*****************************
The gearbox is apart again and we found out why it was so tight..
The gear shaft is too long!! only by a fraction so that when you tighten 5th gear housing to the casing it clamps down on it.
So, dan's nextdoor neighbour, an absolute life saver, is making up a spacer, thickness of about 25 thou. Slightly under a mm. It needs to go just before the 5th gear housing goes on and this should sort the problem nicely.
So, the lesson here to everybody is, if you're thinking of changing the gearbox internals, don't do it to an IB5 box before 1999!! Because you will have to modify it. Ford use the same box in the fiesta st150 as those ka's after 99. The casing must be the same as everything fits perfect in dan's one.
Hopefully, it'll go back together, mostly tonight Maybe get it back on the engine on the weekend. I'll be happy when i know the engine is held in there properly rather than half hanging on an engine hoist!
*****************************
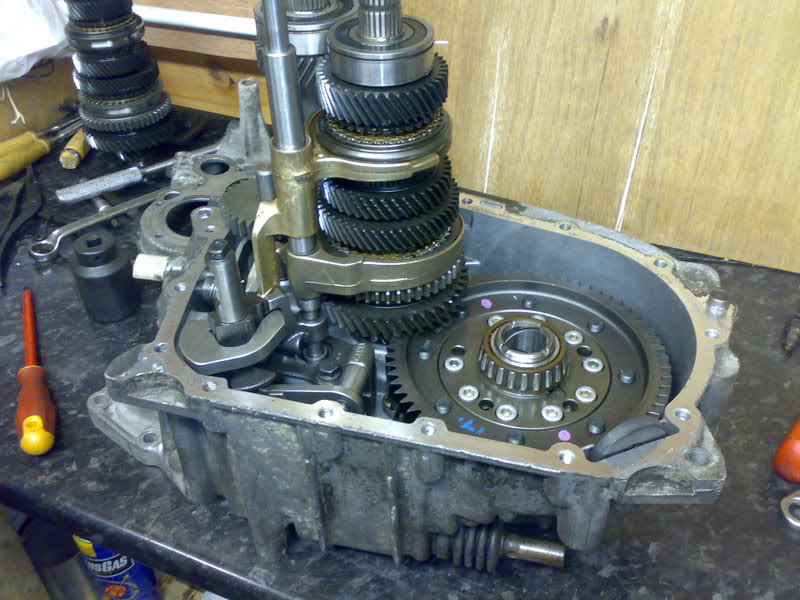
Pictures of the gearbox apart since it had to come off. First shaft on the left is the one that the engine turns, second in is the gearset and the diff and crown wheel are on the right.
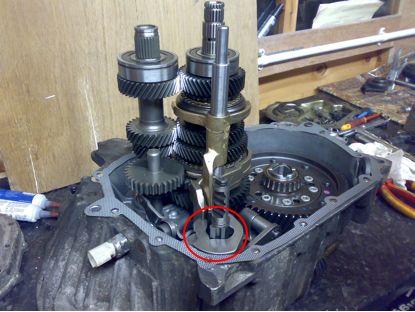
The bit circled red is upside down! It is now the other way up as when you try to put the casing on, your cant move the gear selectors. So that problem was sorted, but had to take the gearset and selectors off to do it!
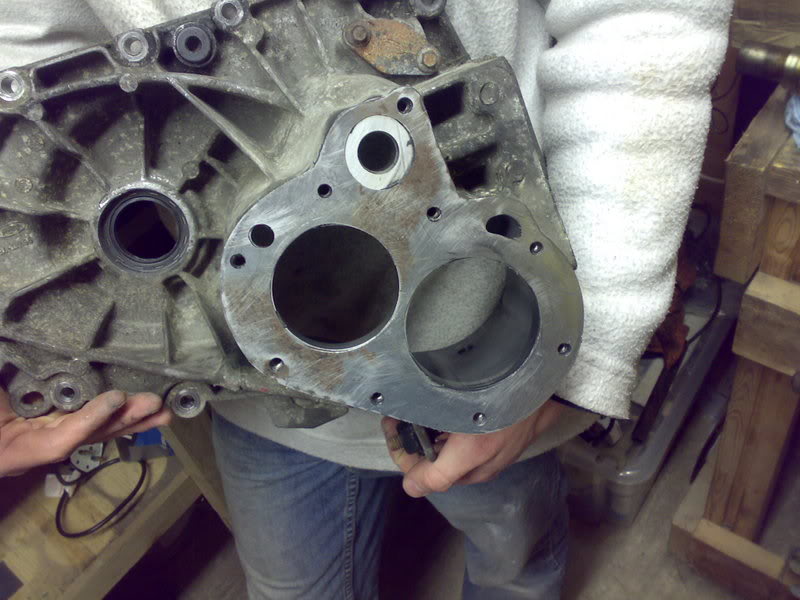
These last two pics are off the spacer plate (25 thou) that dan's legend of a nextdoor neighbour made up by hand!!! took him about 6 hours in total - boy do i owe him!
This was the reason the shafts were stiff to turn, the gearset was clamped down too much by 5th gear housing. So the plate holds it at the right height and hey presto, turns nicely now.
The gerabox is now back on the car. Dan and I did that this evening. Driveshafts and ball joints knocked in too.
More progress to follow thursday and friday this week
*****************************
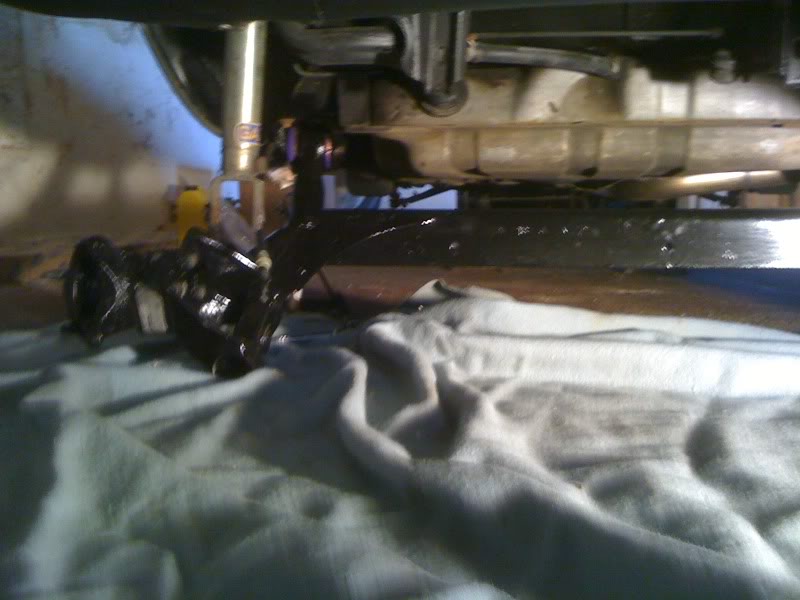
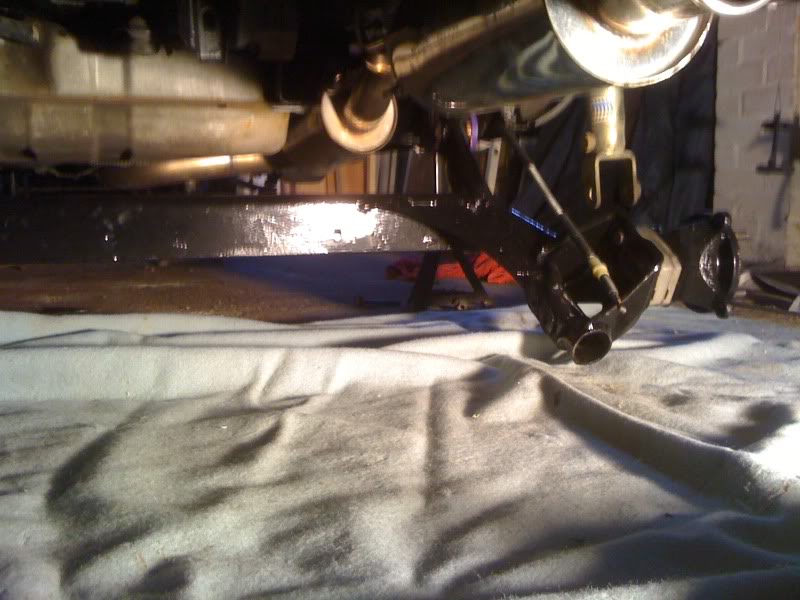
We're getting there, not gonna say much as I've got pictures and they're always better than words!
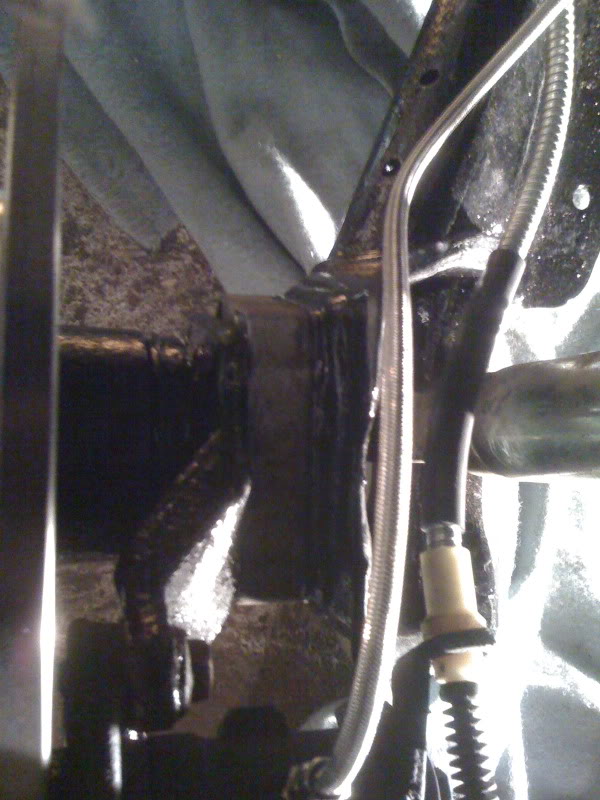
Braided hoses for the drums
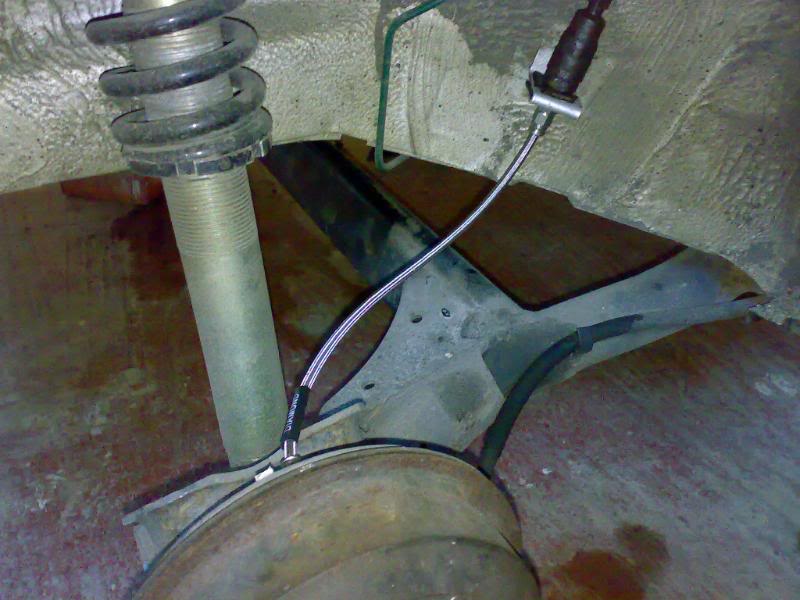
Sport Ka Front brake setup: Black diamond braided hoses, black diamond drilled and drooved discs with the pads to go with. Should be enough for the Ka
*****************************
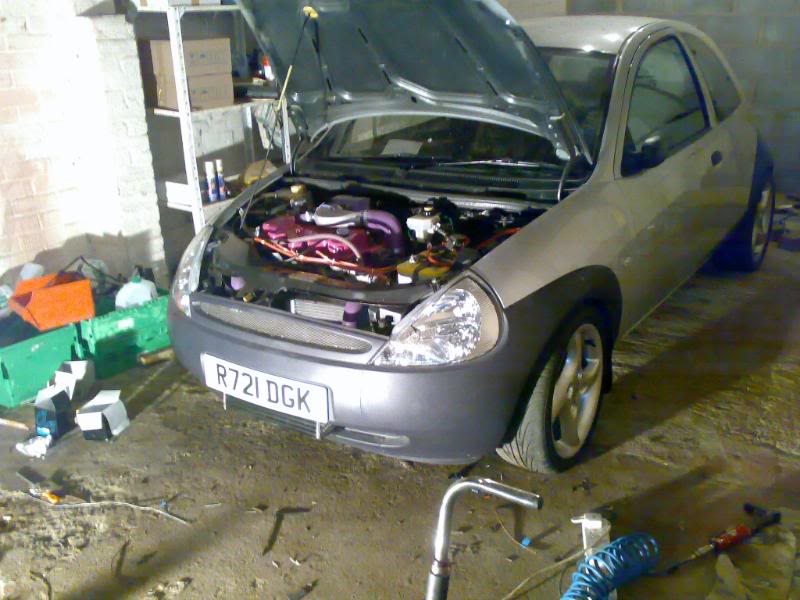
Next update!! Things moving nice and quickly now! (no college work, its great!)
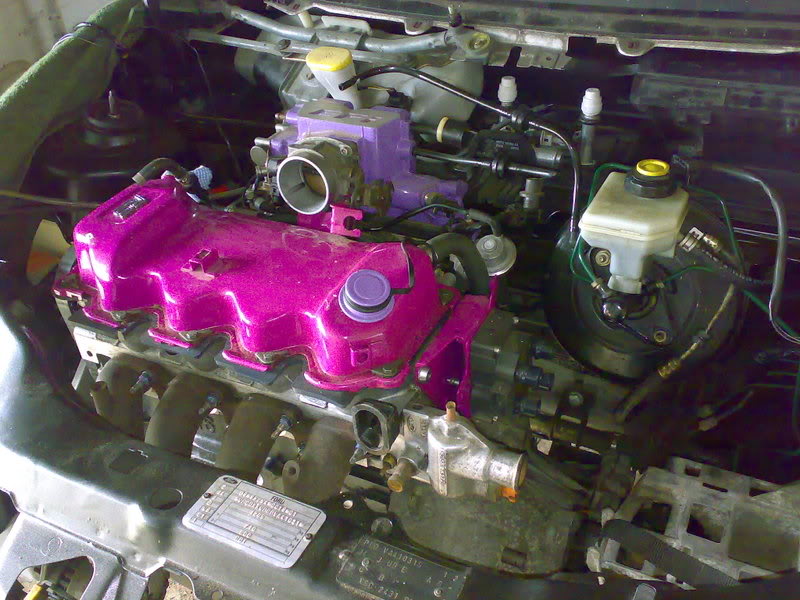
Got the engine running!! Wiring isn't sorted as you can see by the pics, but wanted to make sure it worked ok. Took a while to get going, after we'd sorted the starter out. Cut a long story short, my bro told me to connect the wires the wrong way round and so the starter wouldnt engage. Anyways took a few goes turning over, then one turn of the key 3rd or 4th time, and it went..
Sweet as nut.. got a bit of squealing from my release bearing for the clutch, but it is new so just gonna see what happens - I'm not taking that bloody box off again!
One problem.. my bro rebuilt my turbo, and so i can't thrash it about yet, it's pissing oil down my downpipe! Apart from that.. everythings coming along nicely!
*****************************
Next update...
Getting more tidy
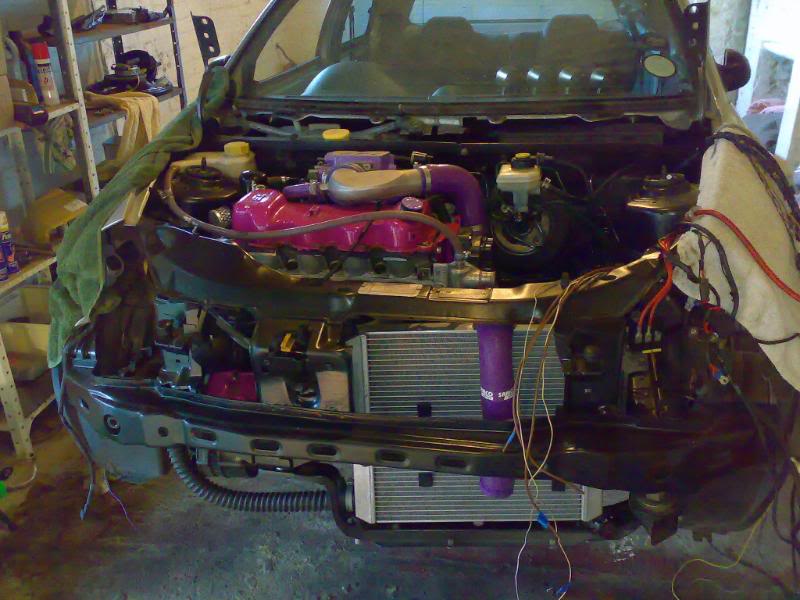
Decided to stomach the cost of one of these as it'll help the general running of the engine and hopefully help my turbo to seal when i get it out on the road.


The front wheels are also on and so is the exhaust... but the exhaust will have to be tied up somehow until it goes for its MOT where they'll weld on the hangers properly and get it to sit right.
It's still up in the air, just waiting on some new tyres for the rear and I've finally sorted my V5 (took me a while to find the engine number and to find it underneath the paint!) A few weeks and it should be insured ready to go for its new MOT (only had one late august - shame i can't use that!

)
*****************************
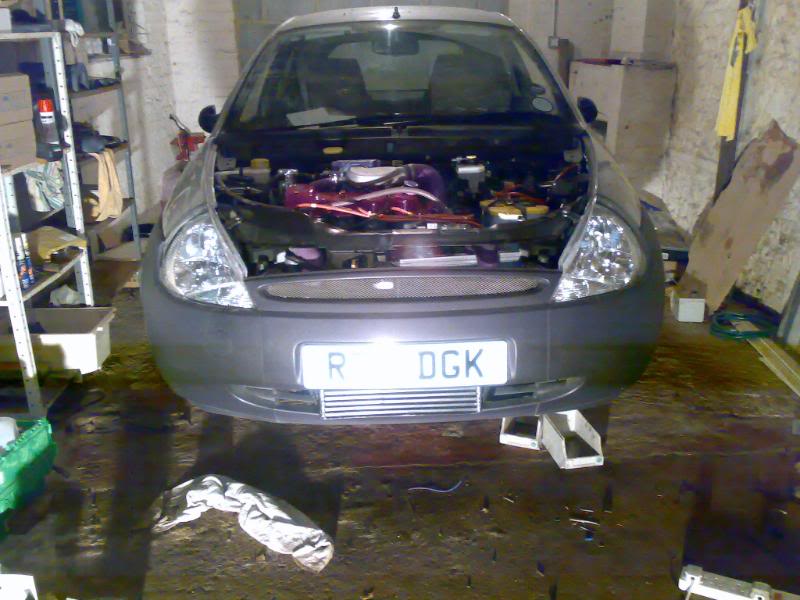
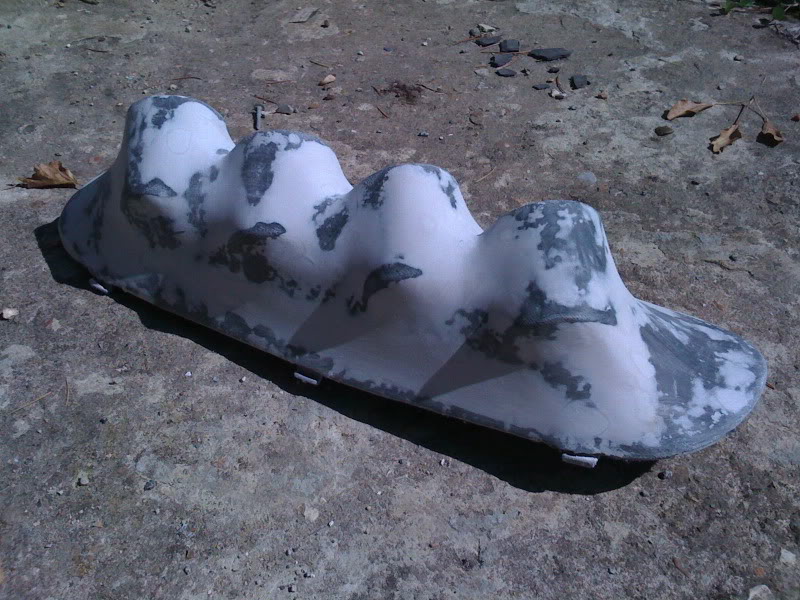
Recognise this?

It's back down on the ground at last!
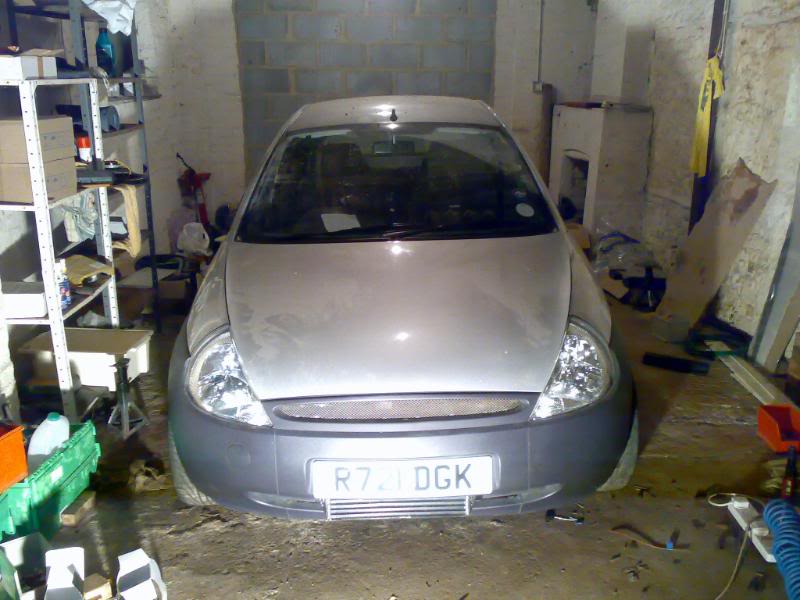
Think these will be the last pictures until it's all cleaned up and actually "on the road".
Ah, and now I've finished it, I have added a nice luxury, as has dan to his. Anyone guess? Craig knows already

Something I've done to the inside - nothing that special but just nice to have!
*****************************
Well, its finally time for an update. The Ka has now got an MOT, its exhaust is all hung properly, and the turbo now boosts, but a bit late.
Well that's some of the good news. Now for the bad news:
The bill was �294! The thing is over-fuelling and misfiring past 4000 rpm or thereabouts. I think it's the chip that's causing it. I phoned Engine Advantages and it'll go for a set up. The cam, turbo and boost will get set up properly and we'll see what the thing is running, eeek! .. but at the cost of �155.
More good news!
The heater dial works! the heater dial needs a tacho feed for the heater matrix to open and close. My heated seats work
still ned to sort out the power to the gauges, but the head-unit can go back in. Everything all works a lot better since the battery and alternator have been replaced

So, need to get it booked into engine advantages and also, I should have all the gauges and head-unit working by then. Hopefully when it comes back from Paul Hills it'll be running sweet.
*****************************
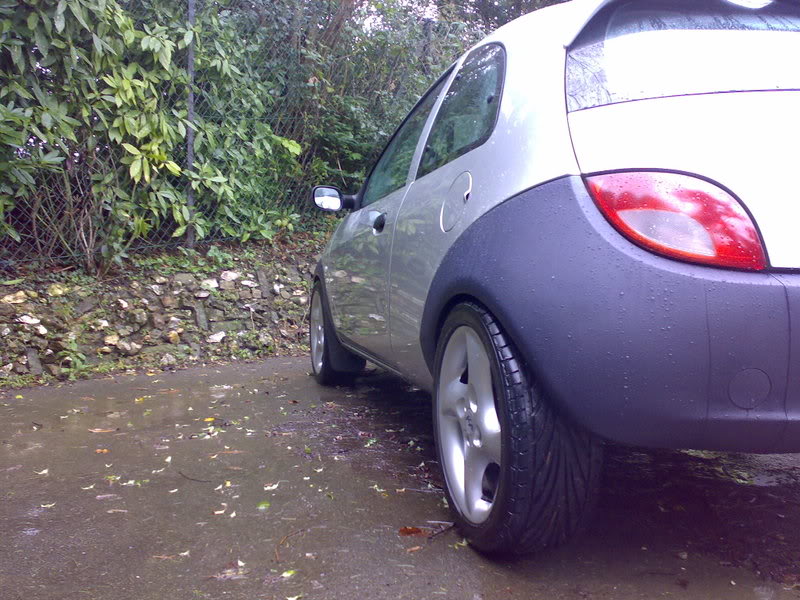
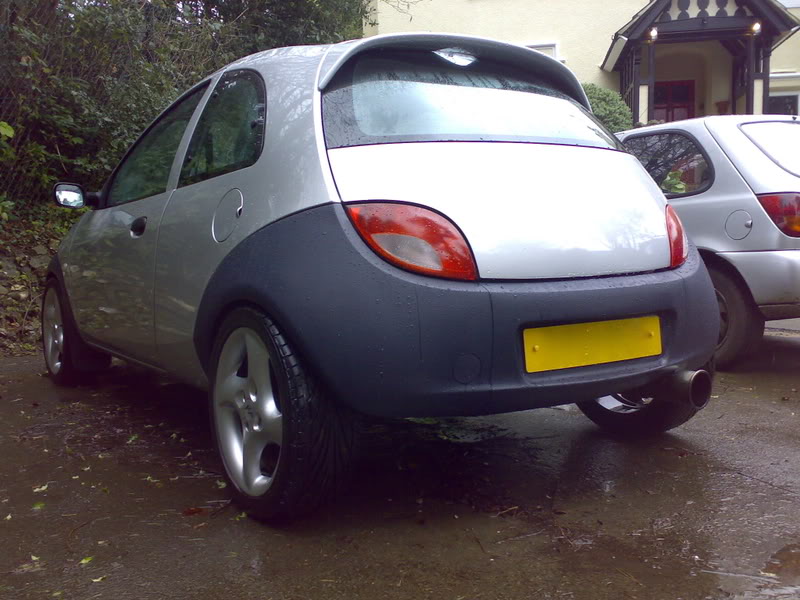
Finally, the next update is due - now that the car is running nicely and I'm driving it around
Bits I got since last post:
Hybrid T2 turbo
Kent CVH35 cam (as the Piper one was shagged and it was this that was causing the misfiring)
After this i then had it set up again. The whole spec of the car is as follows (with power and torque figures):
Engine:
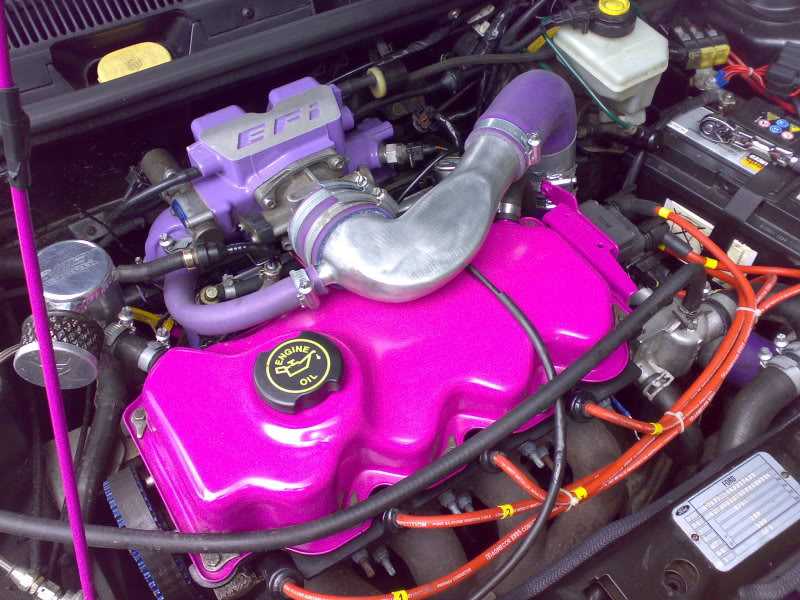
1991 1600 CVH Fiesta Turbo
Turbo Technics hybrid T2 turbo (12 psi)
Custom intercooler (Blakey Conversions)
Bailey Motorsport oil separator pot
Kent CVH35 cam
Piper vernier
Uprated valve springs
Escort Cosworth fuel pump
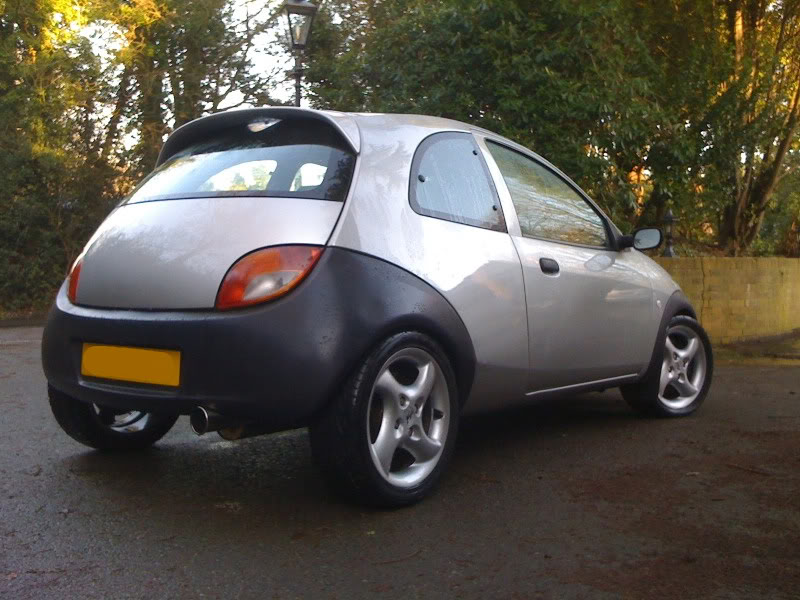
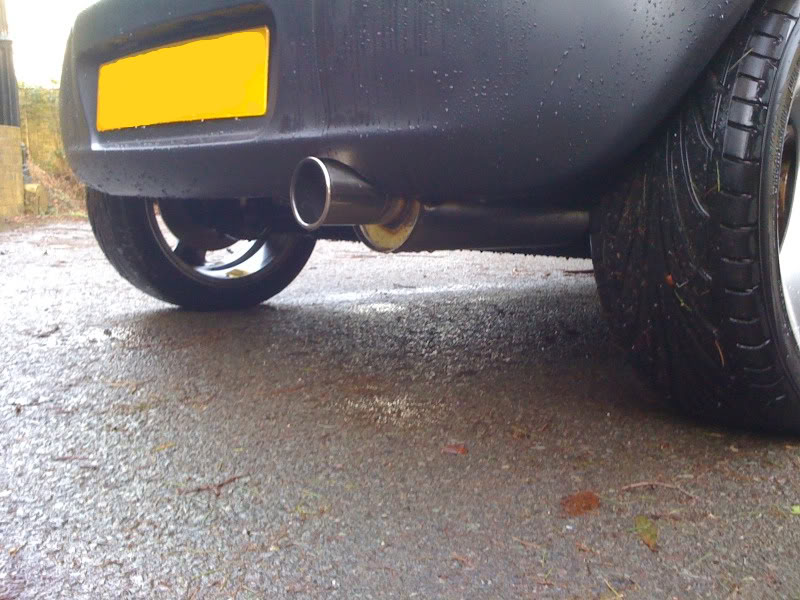
Full Scorpion exhaust with 4" outwardly rolled tailpipe
OFAB mangement
165 Superchip
Engine loom patched into car loom and extended to allow ECU to sit in original Ka location
Transmission:
Ka IB5 gearbox
Quaife ATB differential
Fiesta ST 150 gears 1-4
Ka 5th gear
TAS quick-shift gear linkage
Power:
160 bhp
172 lbs/ft of torque
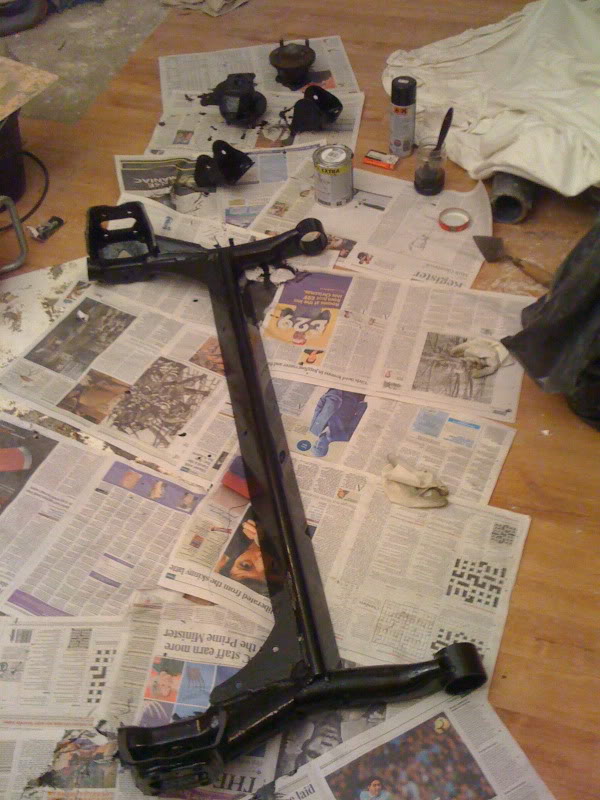
Suspension:
Lowered on fully adjustable Gaz coilovers all round
SportKa anti-roll bar
Polybushed lower arms
Polybushed anti-roll bar
Brakes:
SportKa front setup
Black Diamond discs and pads
Black Diamond braided hoses all round
Standard rear drums
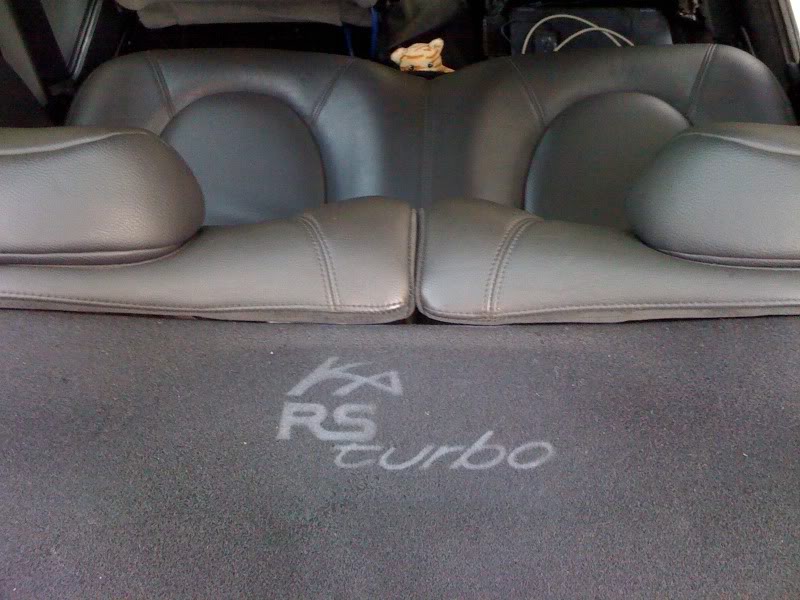
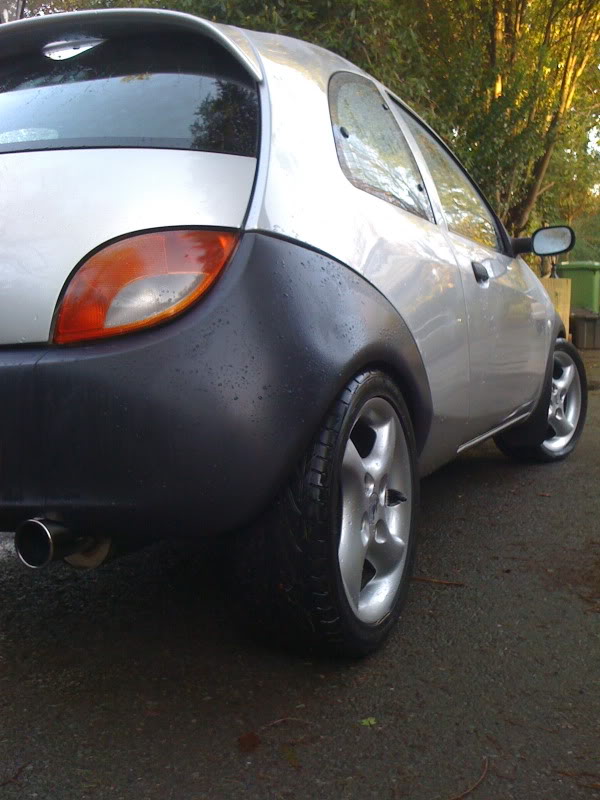
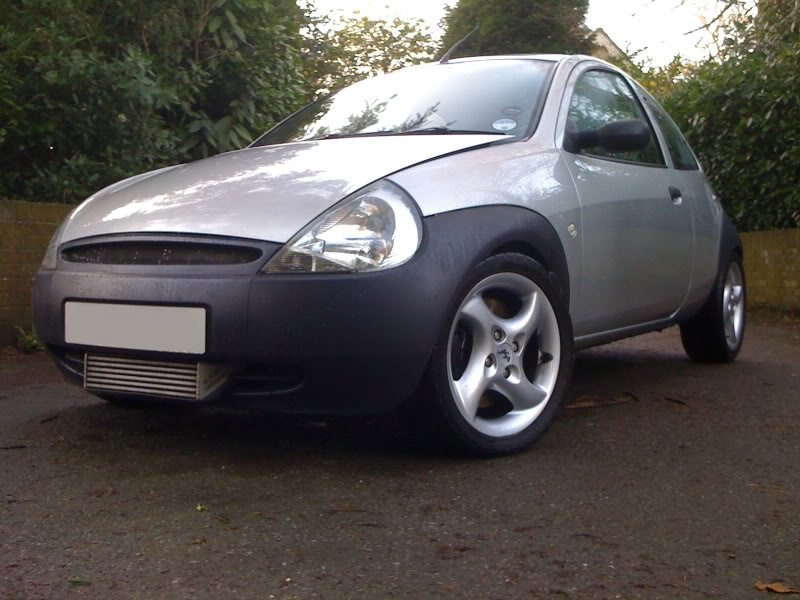
Exterior:
Smoothed tailgate (de-locked and de-wipered)
De-locked doors
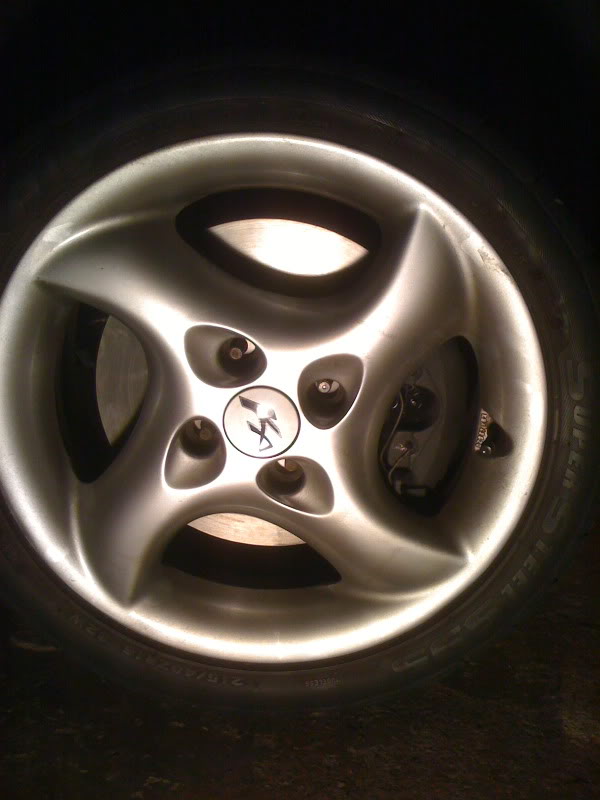
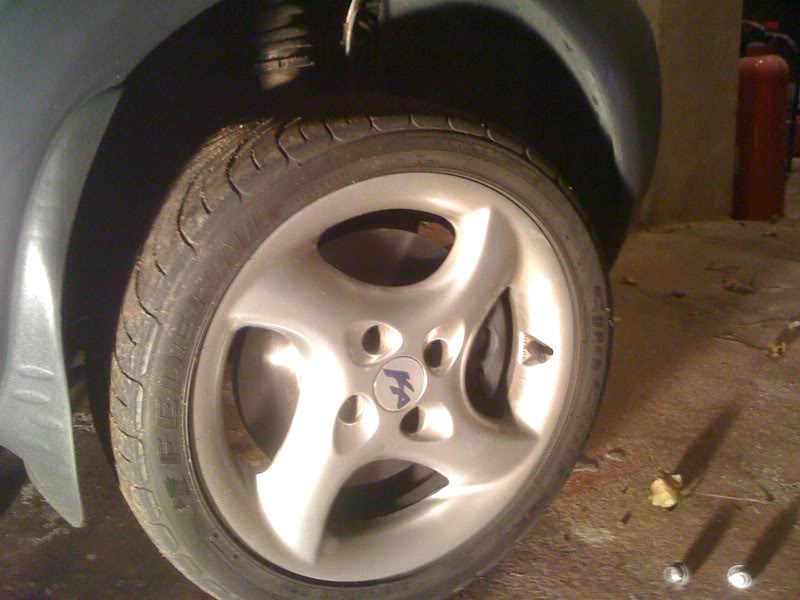
Mondeo ST24 alloys (215/40/16s on the rear, 205/40/16s on the front)
Rear beam spaced 20 mm either side with Ford spacers.
Front alloys spaced 5 mm
Aluminium mesh replaced the standard grille
Ford front mud-flaps added
Clear front headlights
Custom rear lights (clear indicators)
Crystal side repeaters
Bonnet raisers
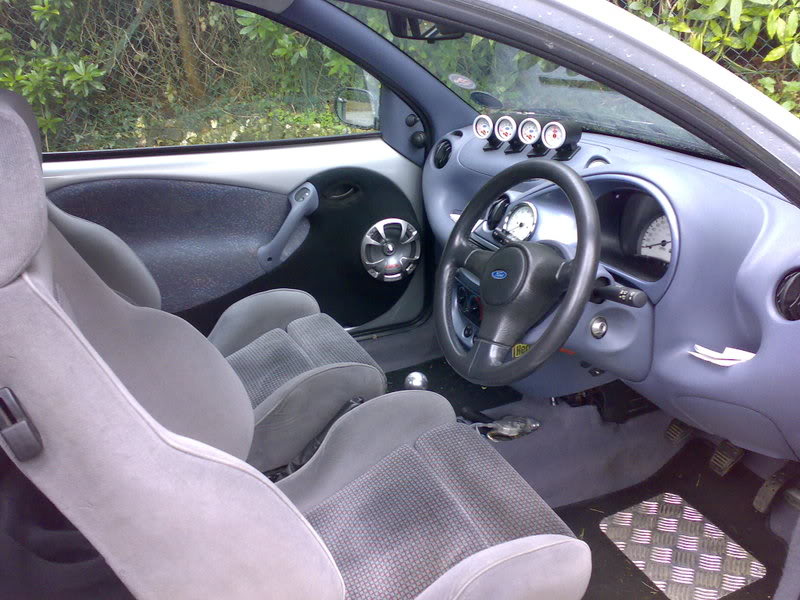
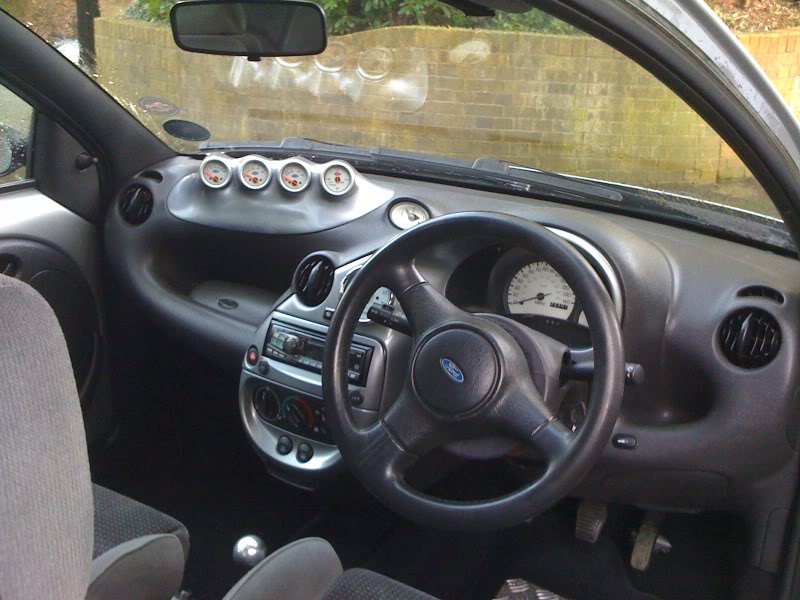
Interior:
Fiesta RS1800 steering wheel
Horn relocated to steering column shroud
SportKa gearknob
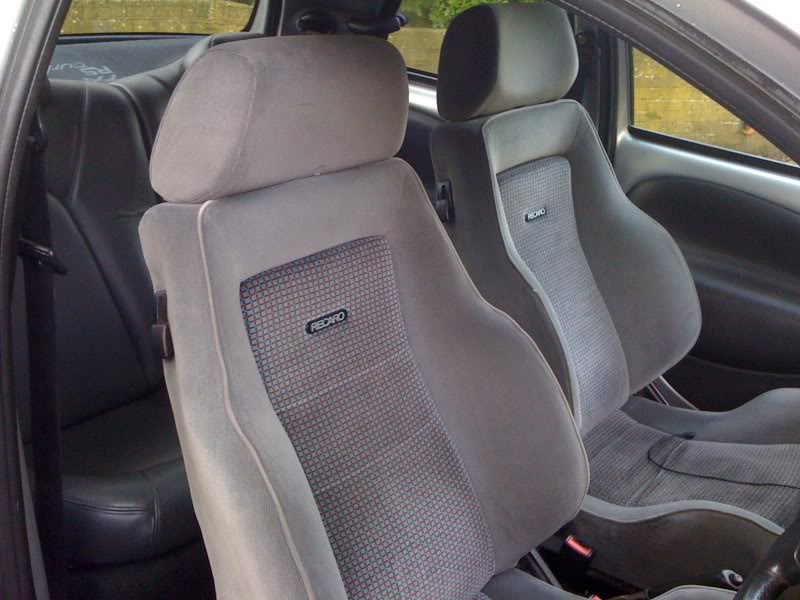
Fiesta XR2i Recaros bolted to custom subframes
Heated elements added to Recaros with 2 heat settings
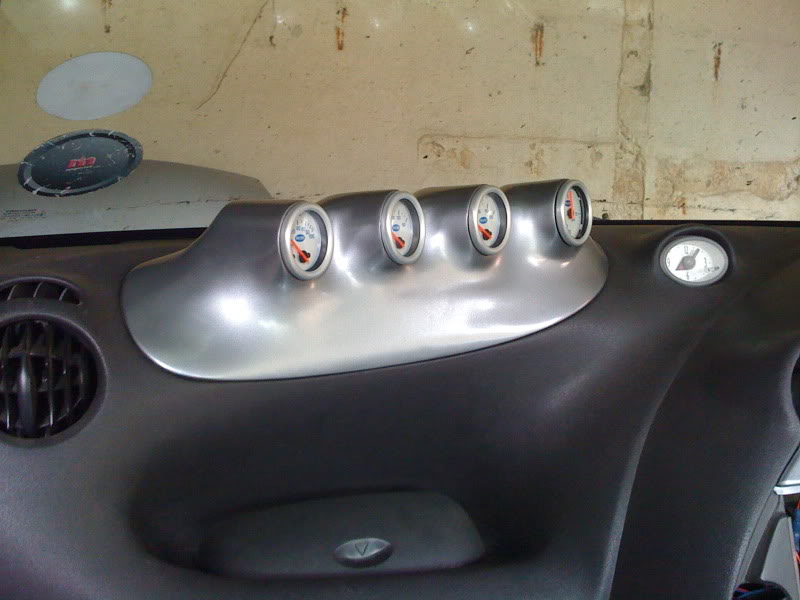
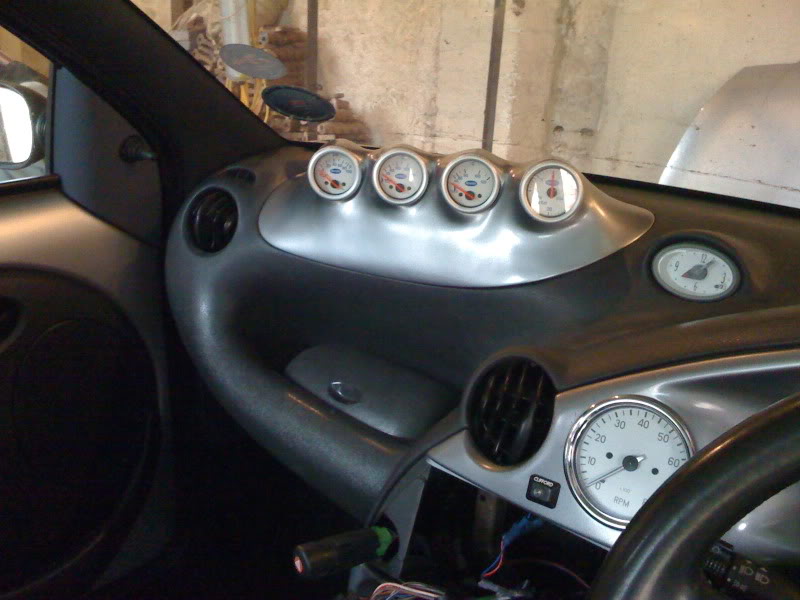
ETB instruments Tachometer where air vent used to be
Revotec gauges in TIM gauge holders:
Oil pressure
Oil temperature
Water temperature
Turbo boost pressure
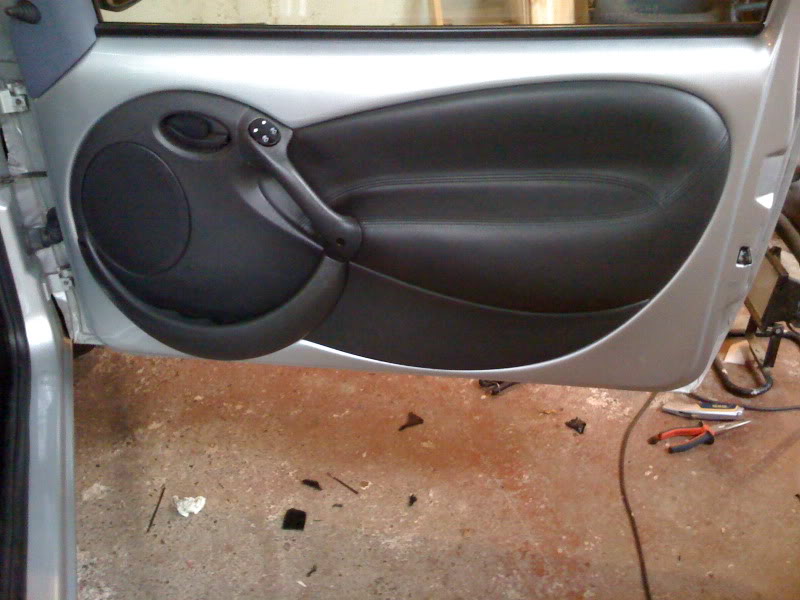
Custom front door cards to house Alpine components
Alpine Headunit
Clifford Concept 650 with:
Remote start
Remote lights
Remote windows
Total closure
Boot pop
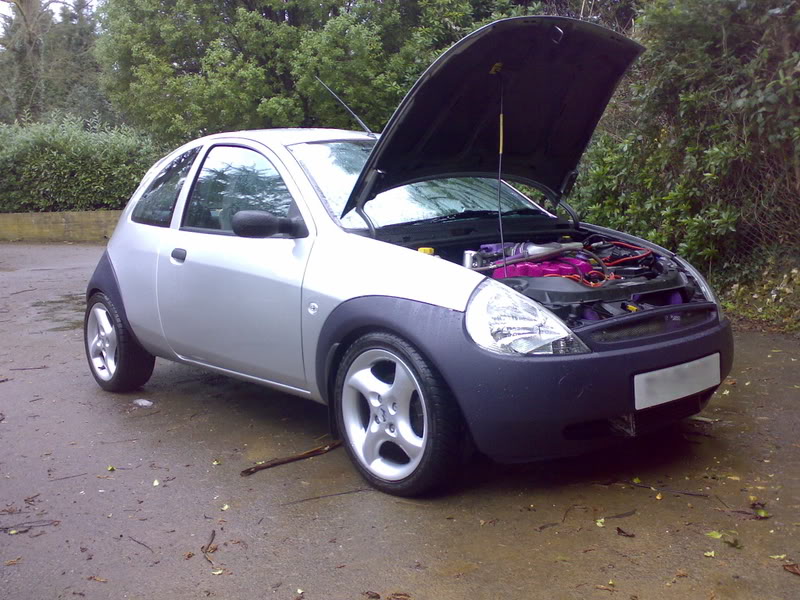
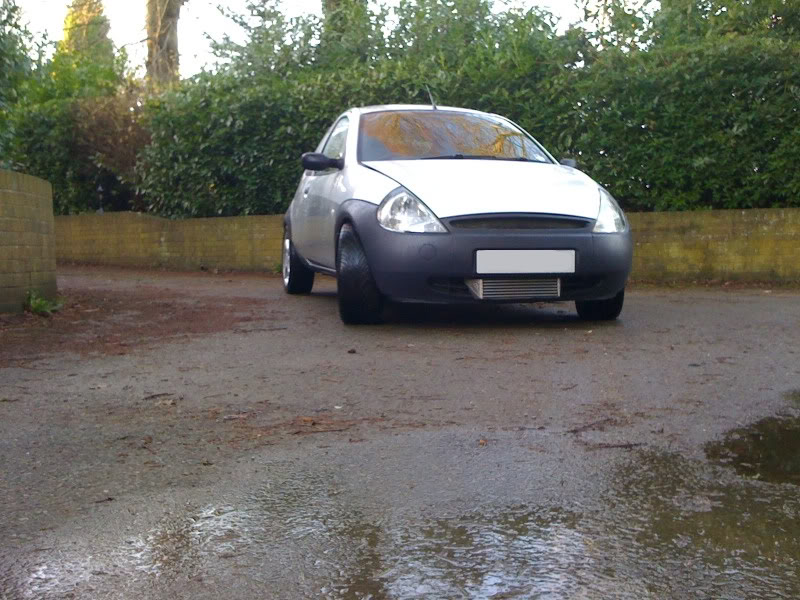
Think that's everything.. now for the pictures! Just a quick wash, as the weather is so bad, there's no point in shining it all up!


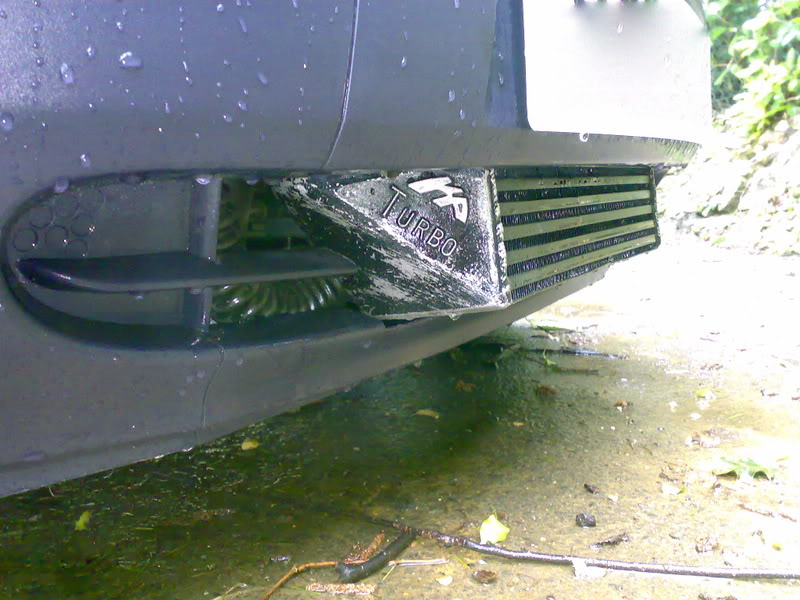
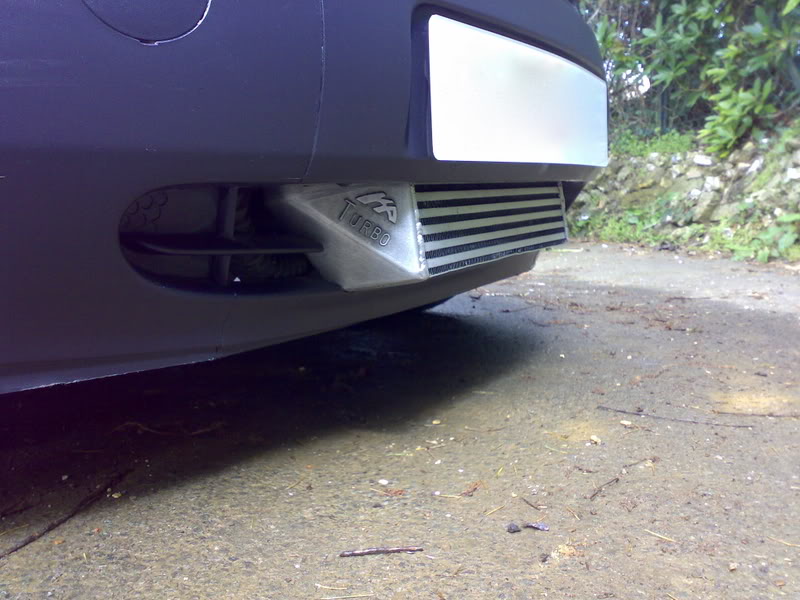
Going to get that intercooler sprayed up in the same colour as the car too, as it has seen better days!
But that's it now.. there's always going to be stuff i want but funds aren't going to allow for a long time! It'll have a re-trim one day
*****************************
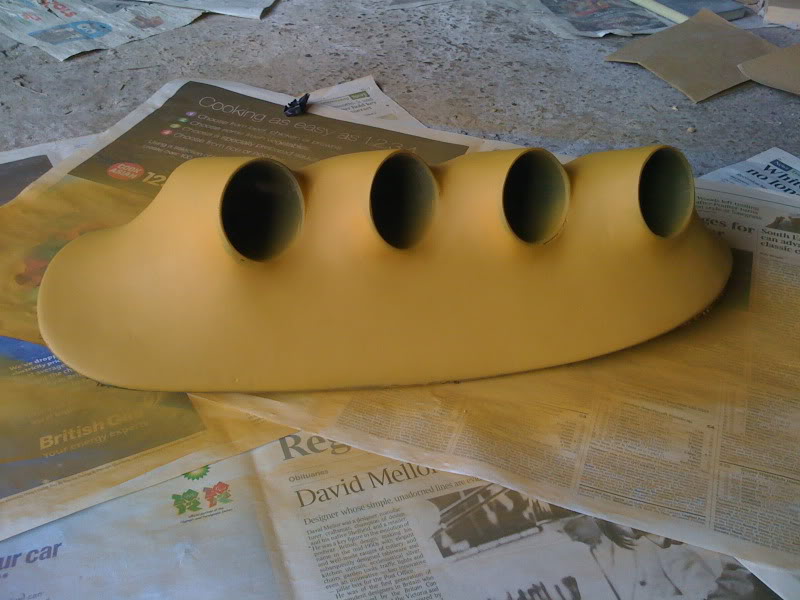
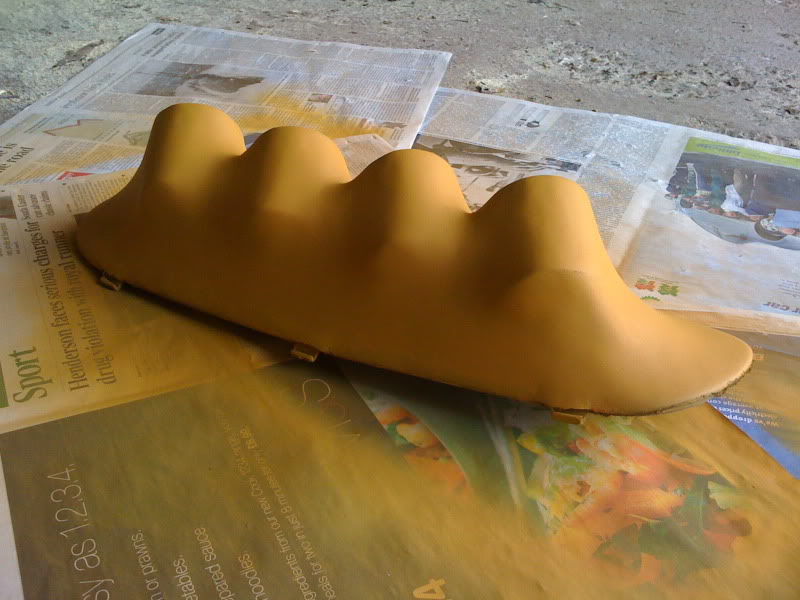
Despite what others have said
I decided to do it. From this:
To this:
It's not sprayed or anything, but i got it all back to bare alley with a wire brush, some nitromors and some sanding blocks.
I'm also in the process of re-doing my top rad hose, but i only got sent 1 silicone 'U' bend so I can't finish it.
I've also put in an 82 degree thermostat and a new fan switch as i had to switch the fan on manually.
*****************************
Time for a rather big update
It's been a while and things have changed quite a bit over the past year, although the car still looks the same...ish
First things first, some more recent pics
Although the intercooler isn't straight in this pic
it is now..

Polished Charge Carrier - the original one, but I just spent some time smoothing it off working my way through the grades of sand paper on an angle grinder
Worked well!

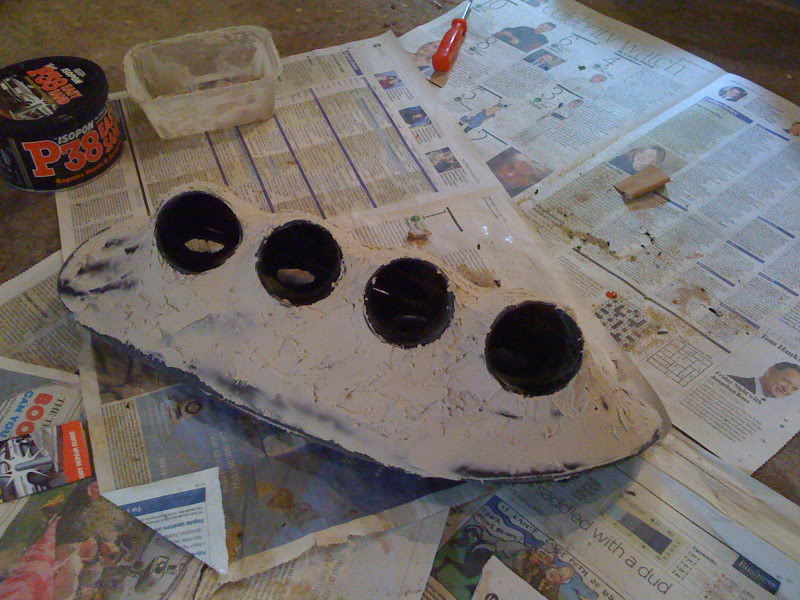
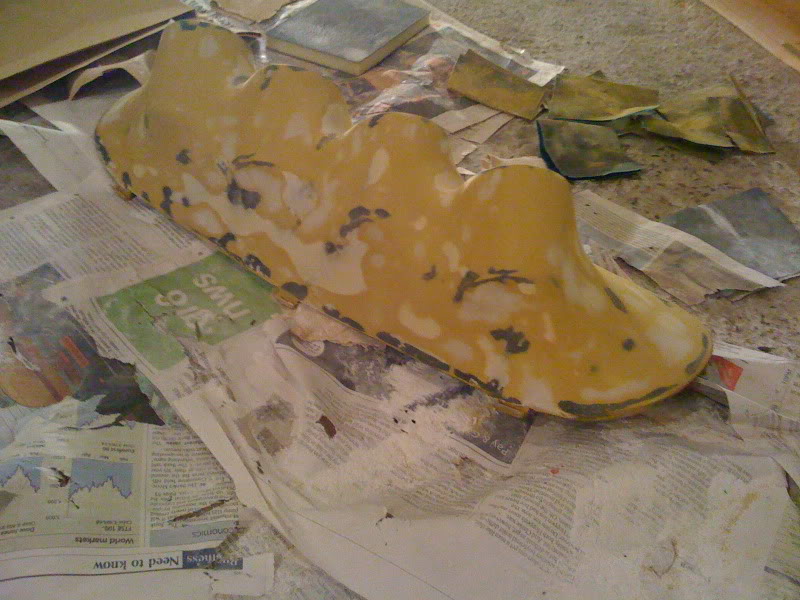
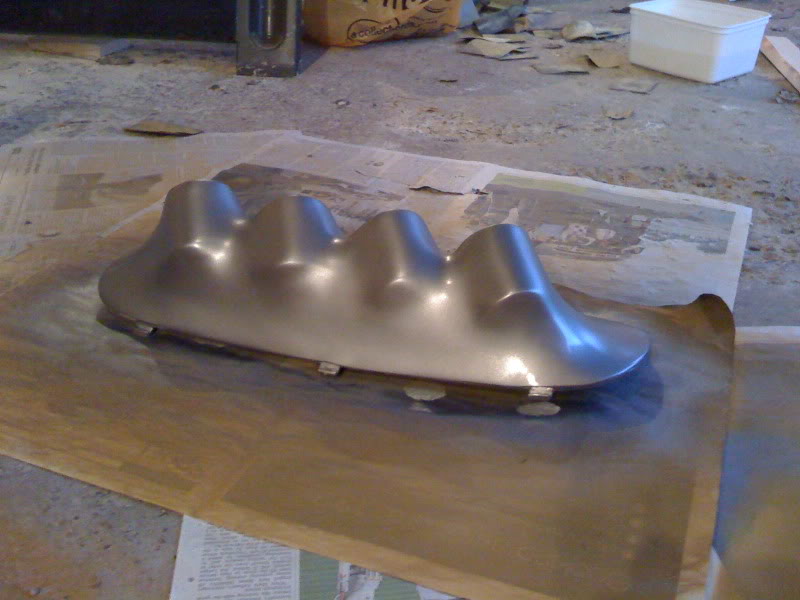
And now... more recently, this new piece I have been working on..... Haven't quite got any photos of the very beginning:
I started by chopping the backs of the gauge pods, taking the bases off and then screwing them down onto the cover, then I got some of my sisters tights and put the whole thing down one leg! And this is it with its first coat of resin. There are some steps missing in this, like i repeated a few steps over and over!
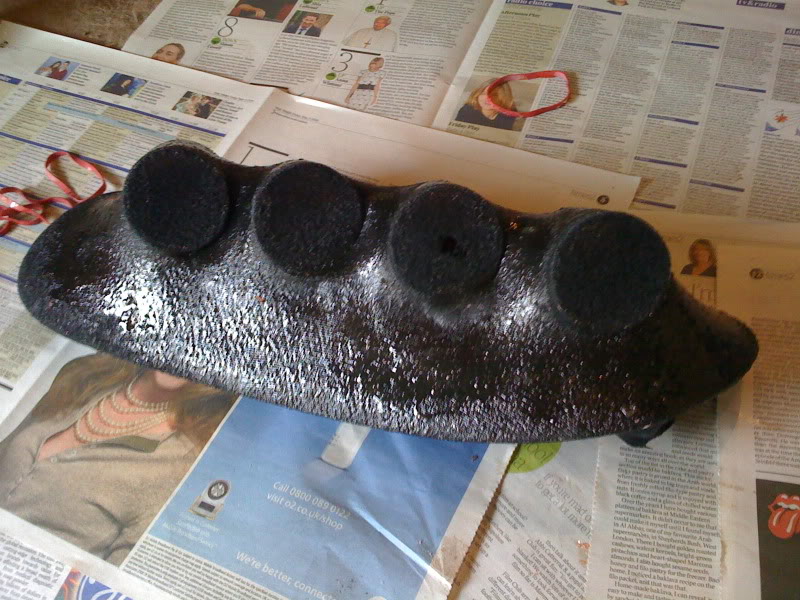
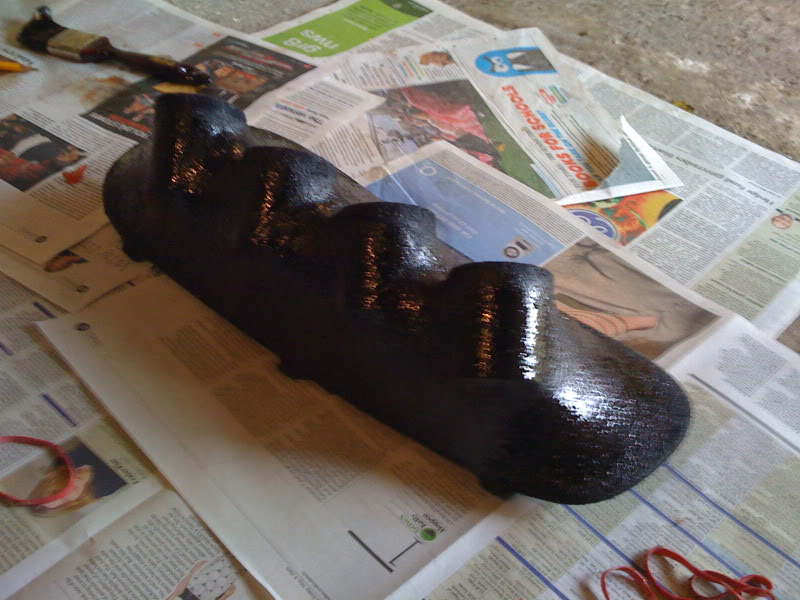

Luckily my sanding skills are much better than my filler skills!! I used the old angle grinder trick with this again - I had to be brutal!
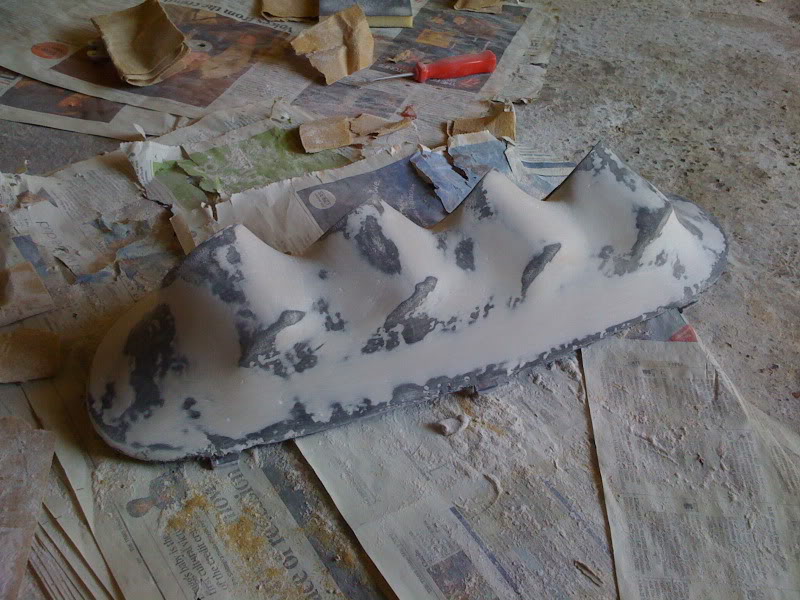
More filler, and another sand....
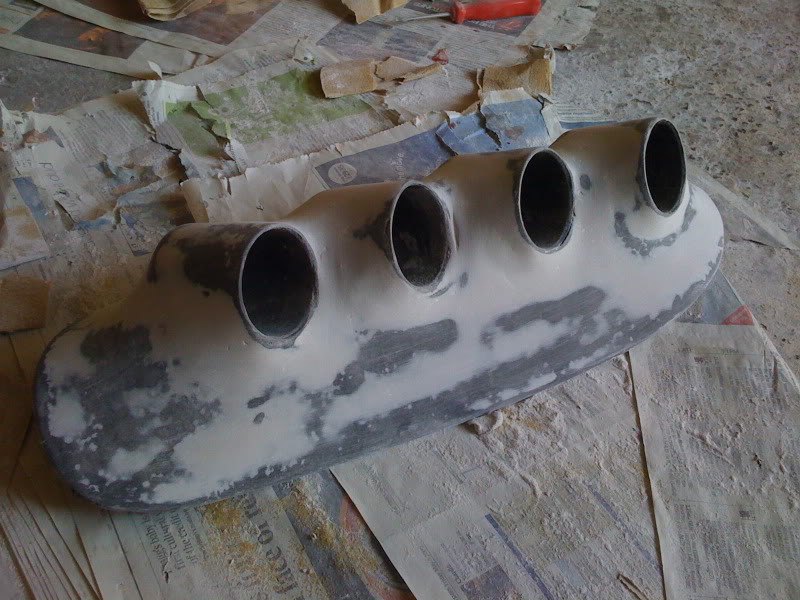
First coat of filler primer...
Sanding.. and more filler, and more sanding!
More filler primer..
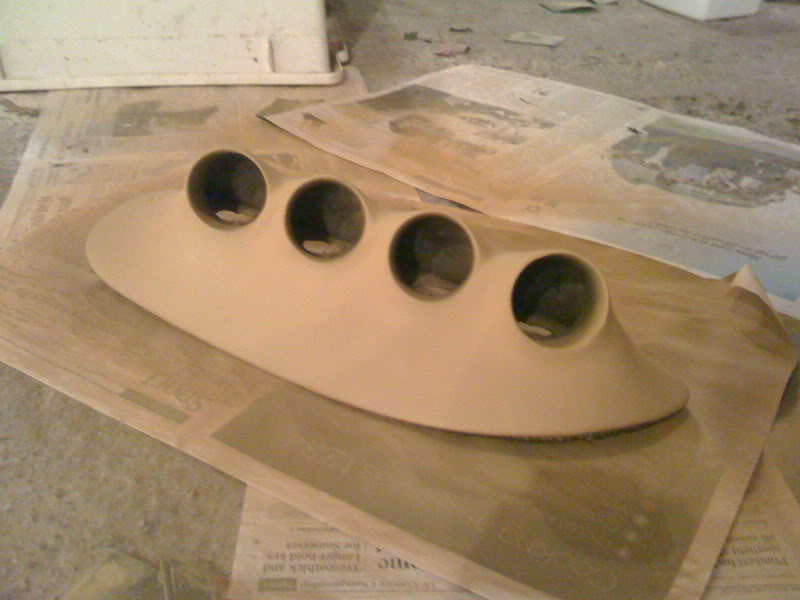
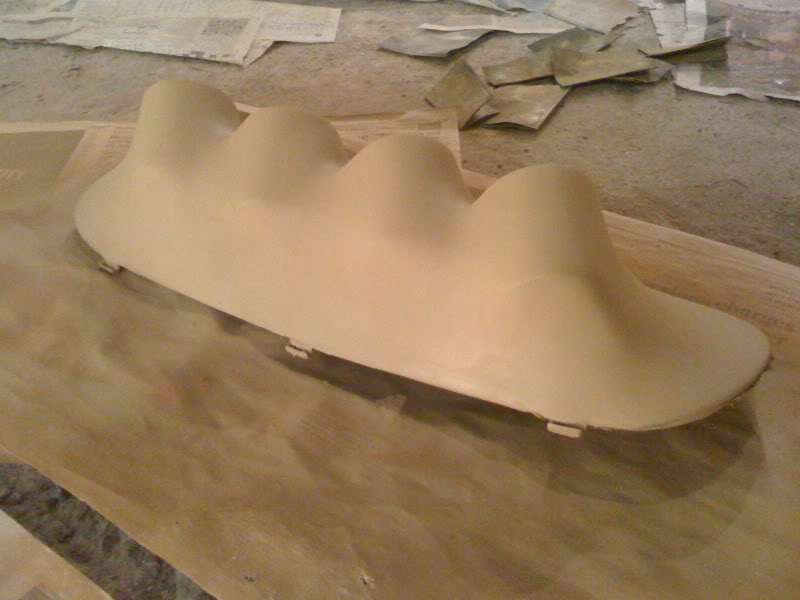
Now, before I got some colour on I repeated the last 4 pics and went over any imperfections with knifing putty, then sanded and then the coat of filler primer!
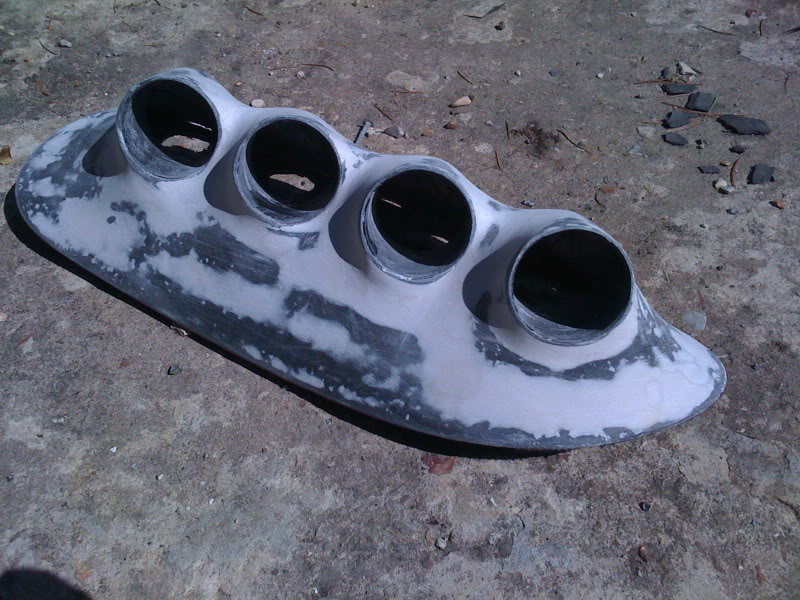
First couple of coats..
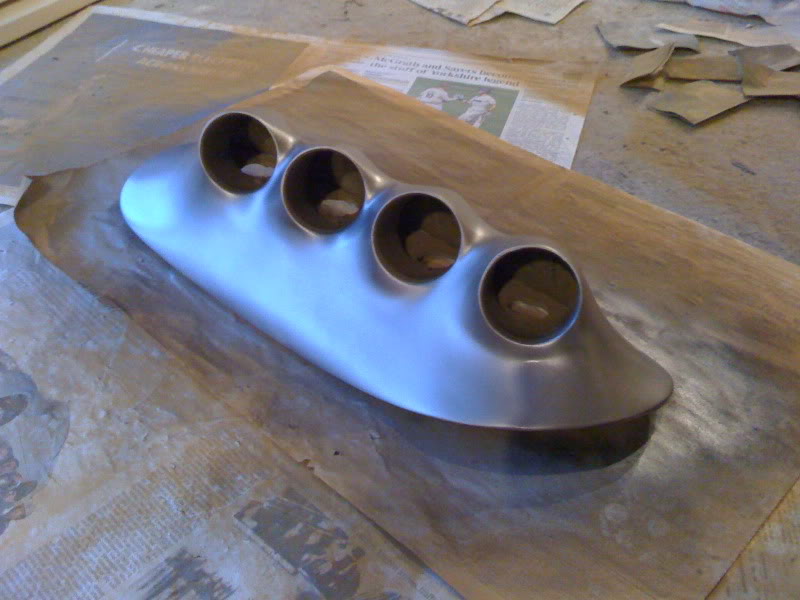

I think I flattened back the paint on this here and then sprayed in afterwards again,
The finished result is in the car along with some other changes!
Now, I'm nearly there with the interior, but still got the recaros because they need to be re-trimmed and after buying a full interior and trying the leather fronts i decided to sell them hence my for sale post! Next pictures are self explanatory!
Then i uncovered some rust!! Bottom of drivers A-pillar compared to the passenger side!
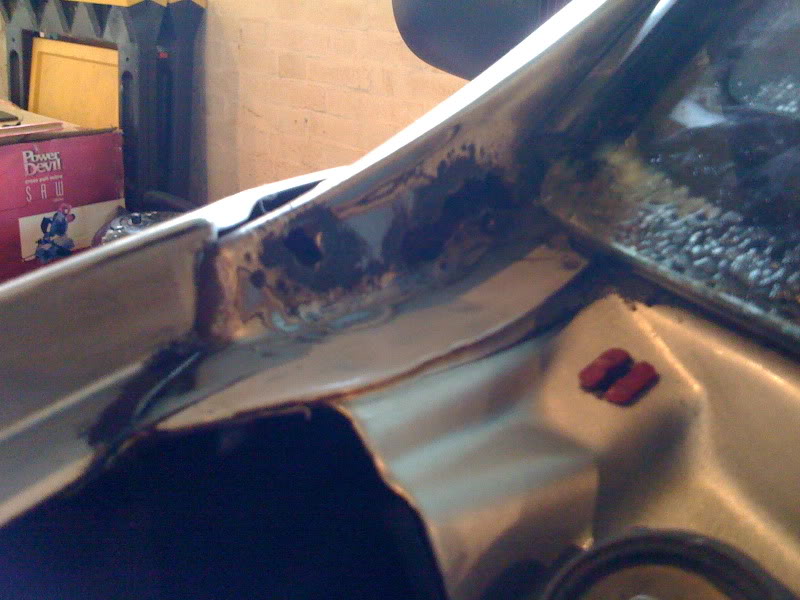
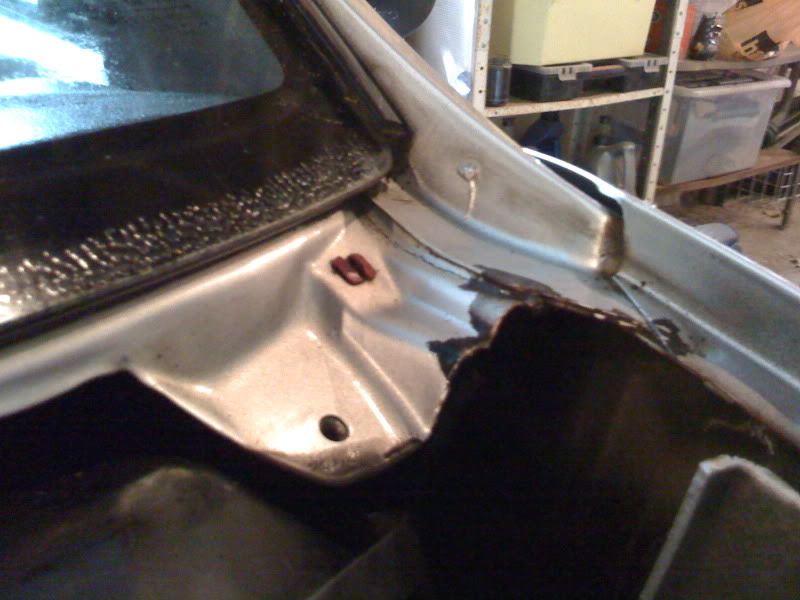
The black marks are where I brushed some kurust on and then hammerite which seems to have stopped some light surface rust i found when i did the conversion.
Now, people, don't get me wrong, this is a bit of a bodge of bodywork and really it should be welded and the screen taken out, but that was very costly and at the moment I've planted into getting the engine done! Cos it's a bit foobarred at the mo.
Anyways...

That's all sprayed in now too..
Moving on!! My girlfriend decided to take some pics of me! While the dash was being changed i decided to sort some wiring which I wanted to change for the new dash.. things that were a bit short from last time the loom was moved around, so i arranged it properly.
Out with the old!
In with the new!
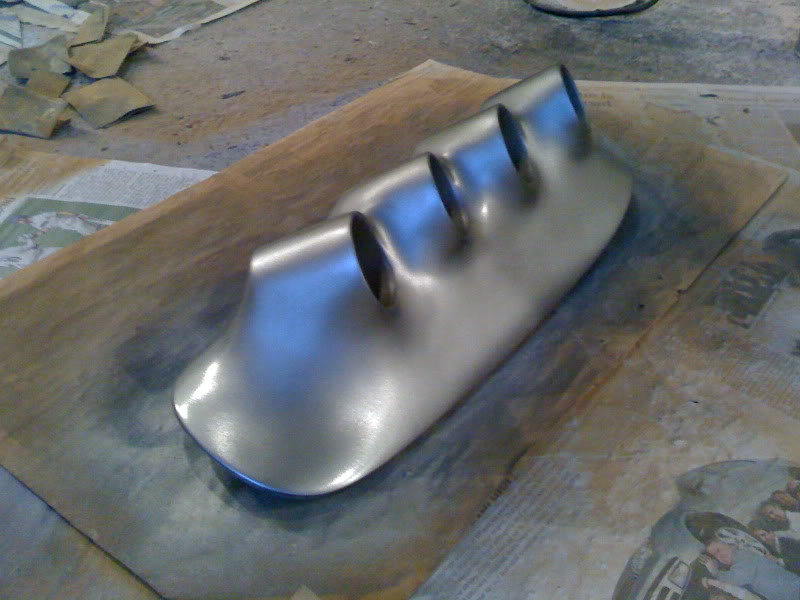
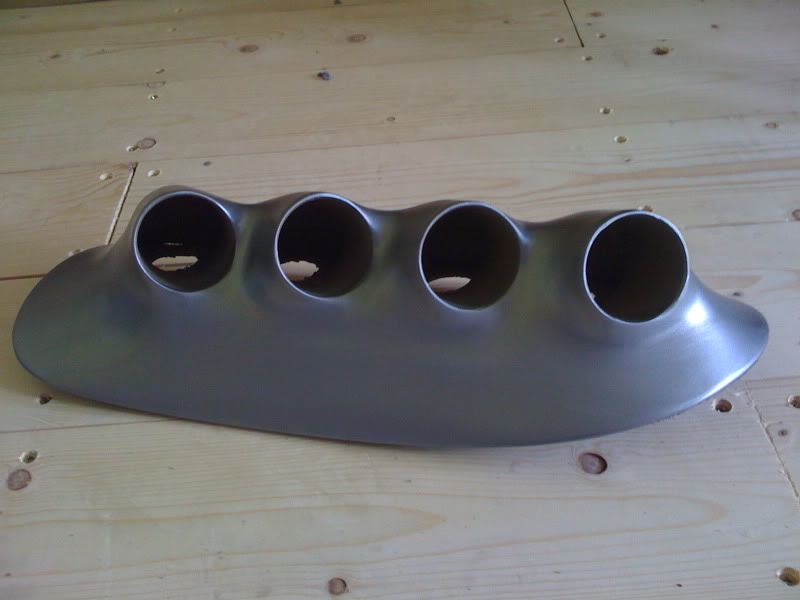
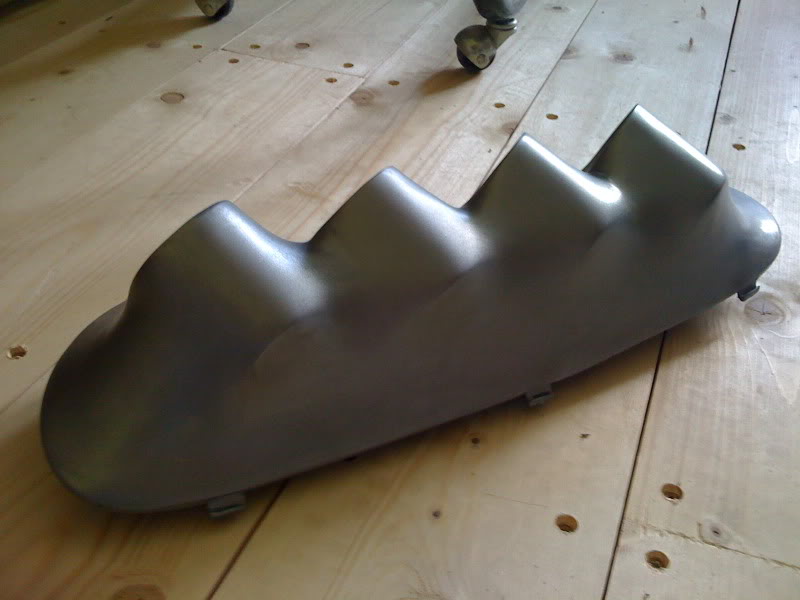
And now some pics showing the gauge pod, which took forever.. I worked out I'd spent a solid 25 hours making it!! mostly sanding!!!
It doesn't have any lacquer on cos the ford stuff isn't that glossy finish.. So it's all just paint..and i obviously masked and re-sprayed the rest as you can see!!
Anyway, that's about it for now.. the interior is all back together and I do have black mirror interior bits on too
Just need a black parcel shelf?! Or can you get like fabric paint so i can spray the original blue one?
As for the engine... I've got a high pressure oil pump to go tomorrow hopefully - i'll take some pics if i remember!!
And then it's booked into Torque of the devil for a newman camshaft and solid lifters + re-map :twisted:
I had a tappet go and took a cam lobe with it.. so the car still runs and everything but it's a loud tick from one of them which is worn!
But this is booked in for july 16th! Which is miles away and I have only driven the car once in the last 4 weeks and thats cos i had to get the paint done on that patch. I did try myself and it went all wrong, so wrong the thinners had to come out
no evidence of that luckily!! anyway, that was only 1.5 miles up the road. So it'll be 8 weeks it hasn't gone anywhere for!!
sad times! But it'll be good when its done.
Oh and the reason for the High pressure oil pump is to give everything the best of chances with the amount of abuse that engine suffers regularly! If an engine is running and setup properly etc, they mostly fail due to bad oil pressure. Now my pressure wasn't bad but it wasn't fantastic, just satisfactory. Dan has had a High pressure pump from start and hasn't had any problems like this (touch wood).
That's it for now... hopefully another update soon.
*****************************
I've done the oil pump now, it took
3 hours alone just to get the bloody thing on the end of the crank! Either the gasket kept falling off while i was trying to wiggle it on or the bolts fell out, then the gasket dropped or the seal wasn't on properly, or it just wouldn't locate centrally and slide all the way on. Absolute nightmare, I don't think I've cursed and sweared that much ever! haha Anyway, all on now, need some new oil and filter then i can start it to see the difference and also check for leaks!
*****************************
Next update

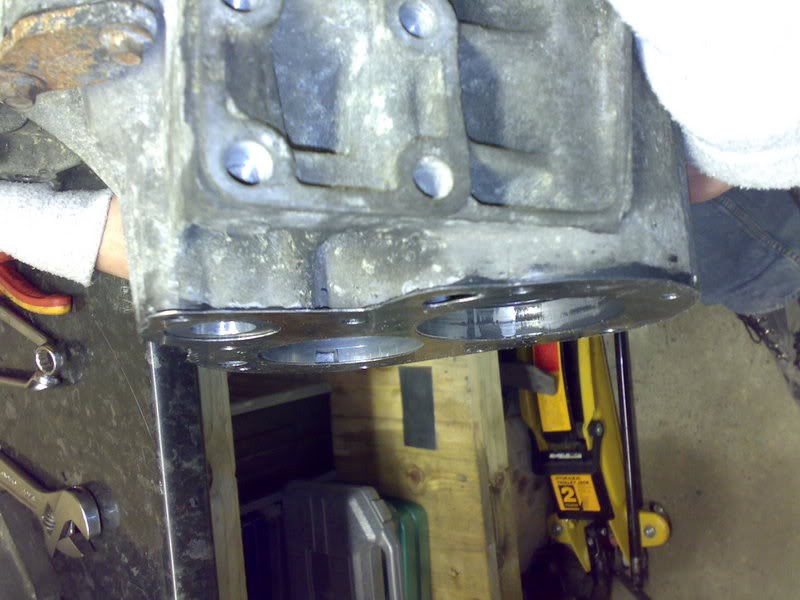
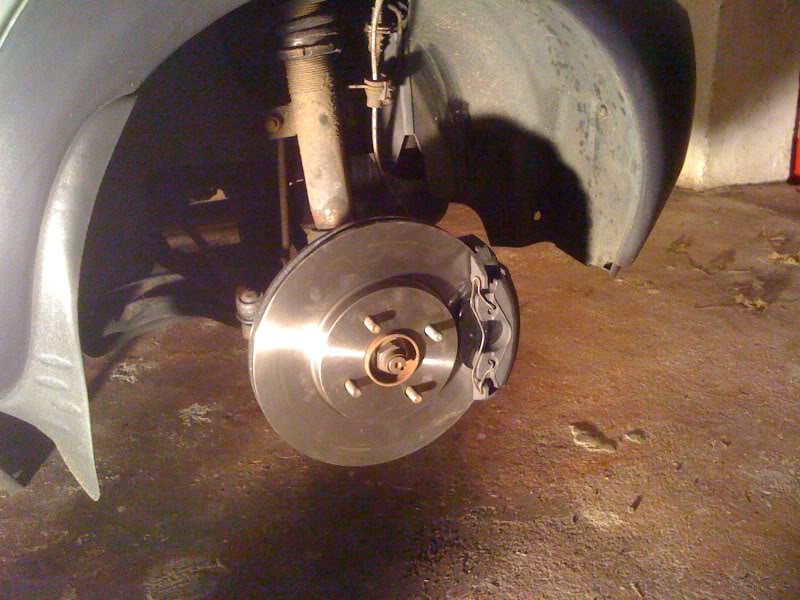
I haven't got many pics.. But this is my next little project for the car. Big Brake Upgrade!
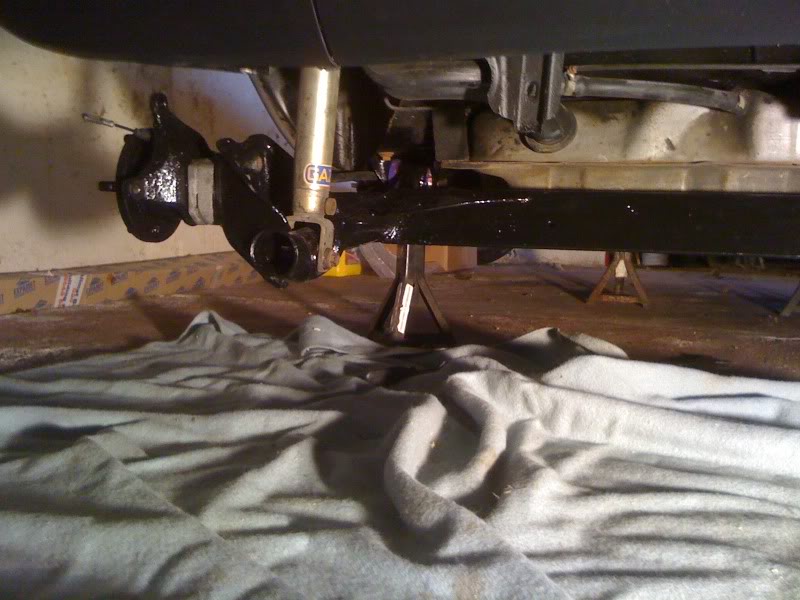
The car is currently up on axle stands and all wheels off (which will be for sale! when i find some suitable comps for a decent price)
Exhaust is off, heatshields are off, handbrake cable out, rear beam off the car and brake drums in the bin!!
Rear beam is painted up, and got some polybushes for i too.. Along with focus hubs. And here's some pics.. Will take more from now on I think!
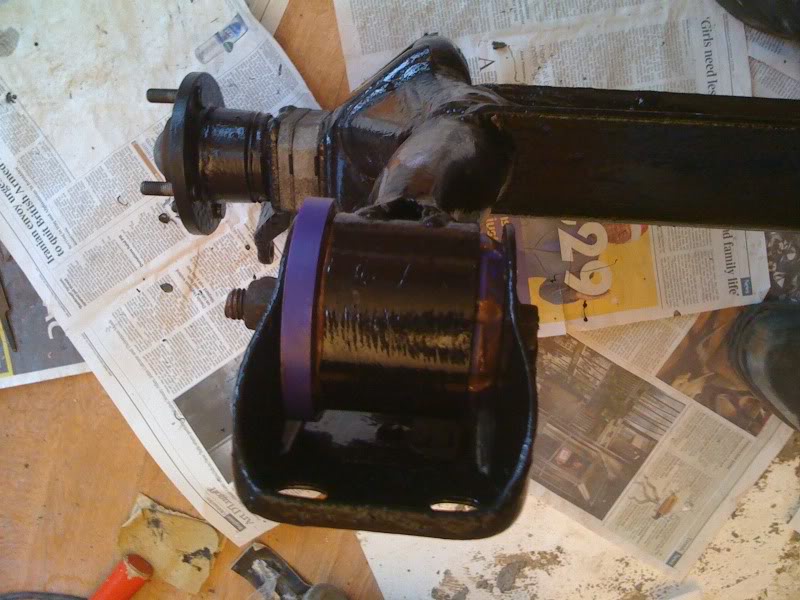
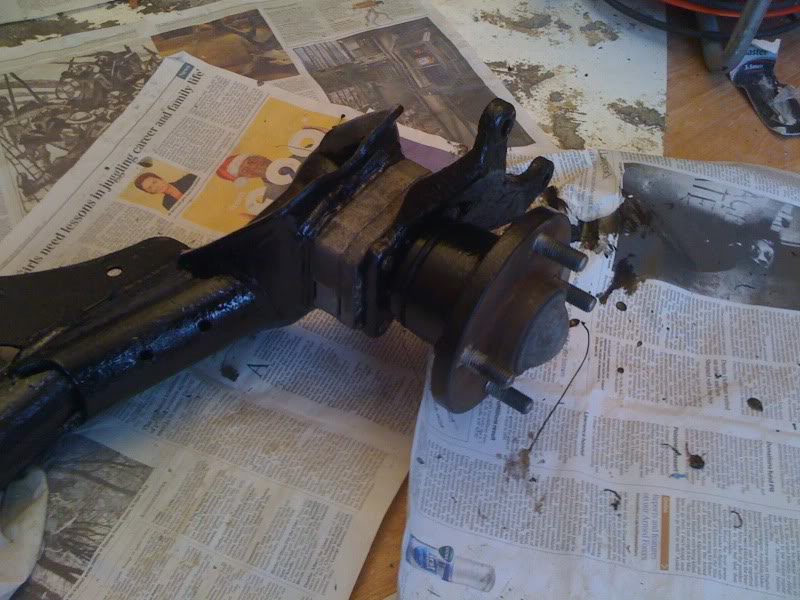
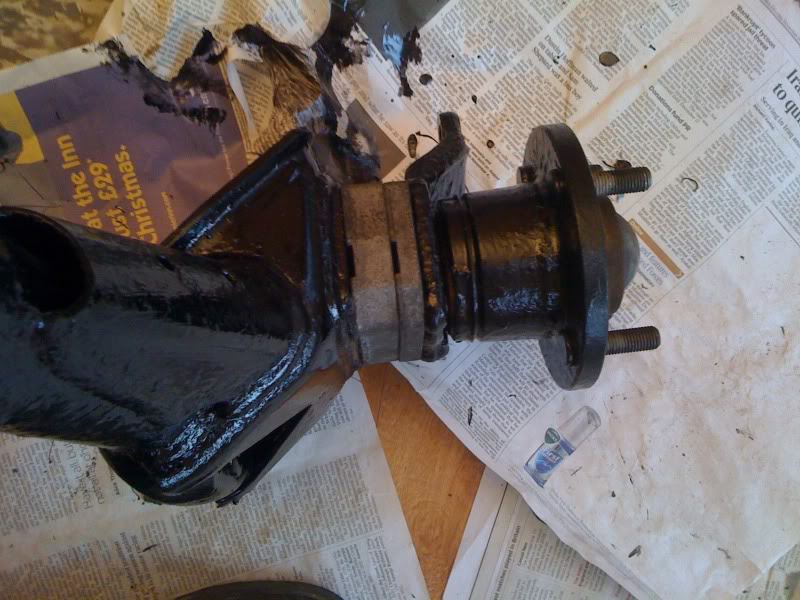

Have painted all the Callipers too
will get pics
*****************************
I ordered this yesterday and my mum very kindly picked it up for me today
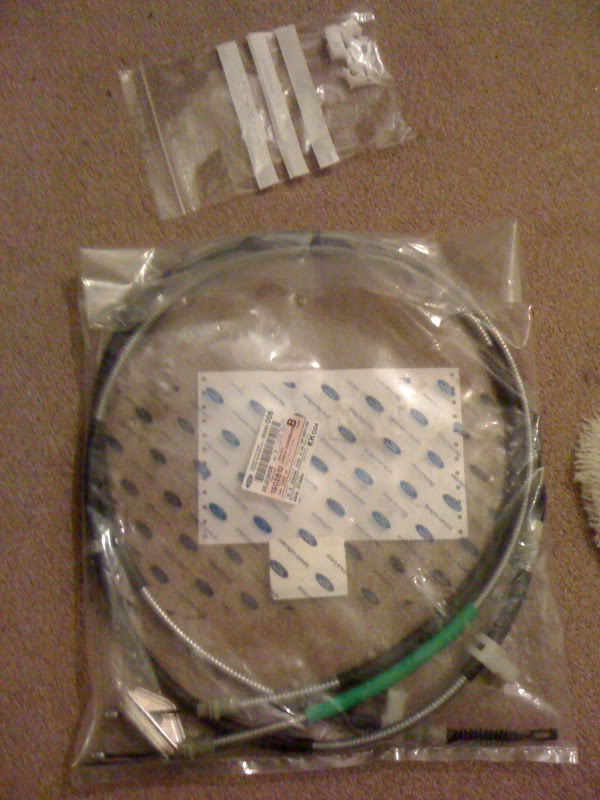
A Fiesta ST handbrake cable that will be the right length and work with discs :twisted:
And a few new clips!
Hopefully I can get most of it back on, on sunday!
*****************************
I'll let the pictures speak for themselves for most of this
Sorry about some being blurry! Poor light where the car is too..


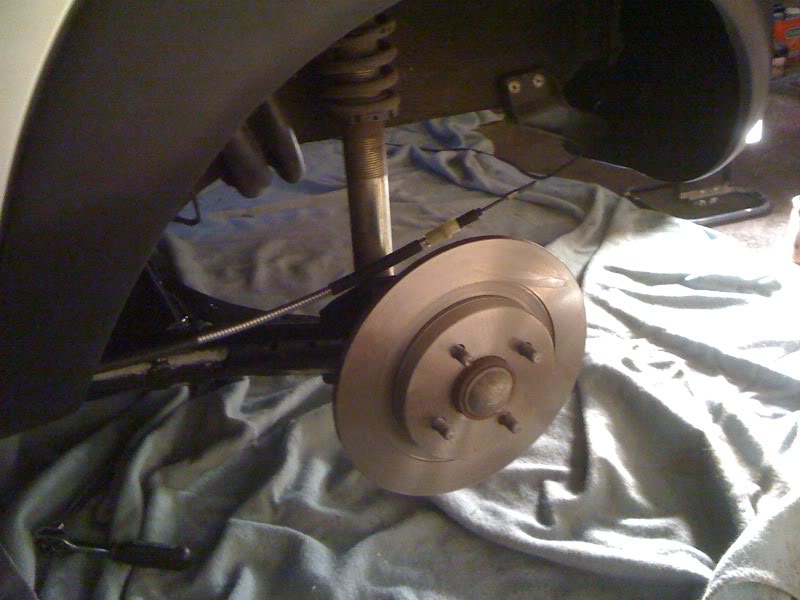


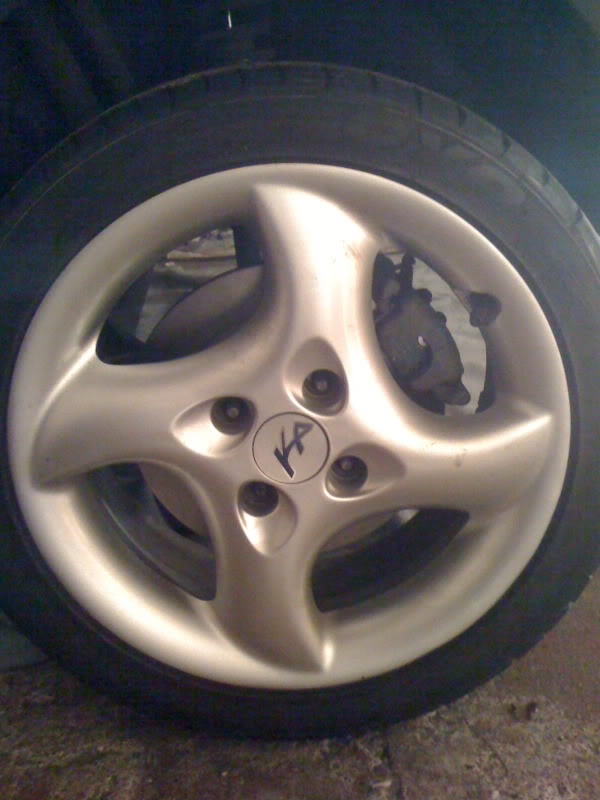
Front:
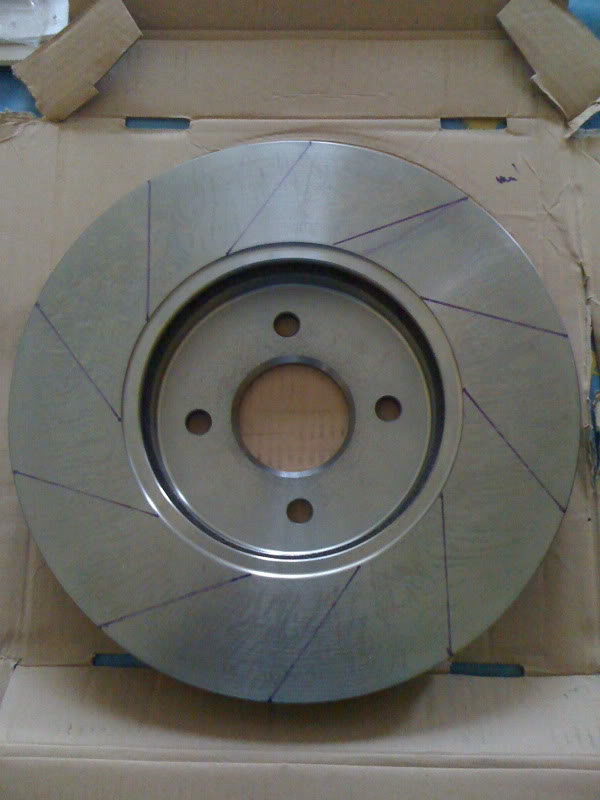
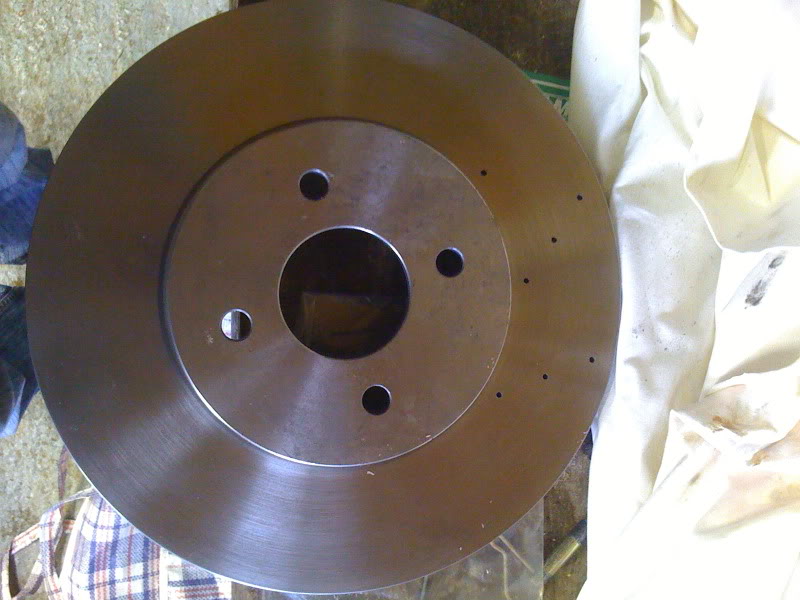
Old front disc against the new rears!
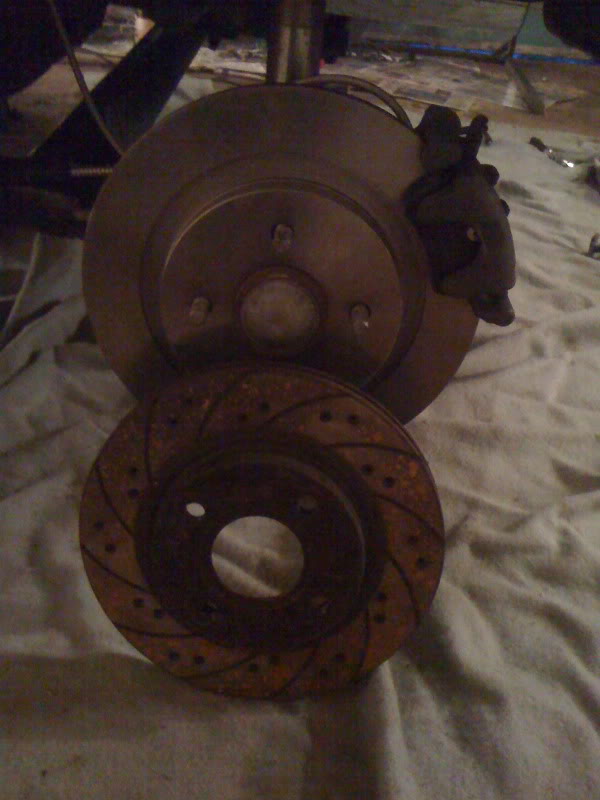
Disc looking a bit boring/plain - one solid bit of metal! I sorted this out though later...

Doesn't look all that great with a plain disc, just too big
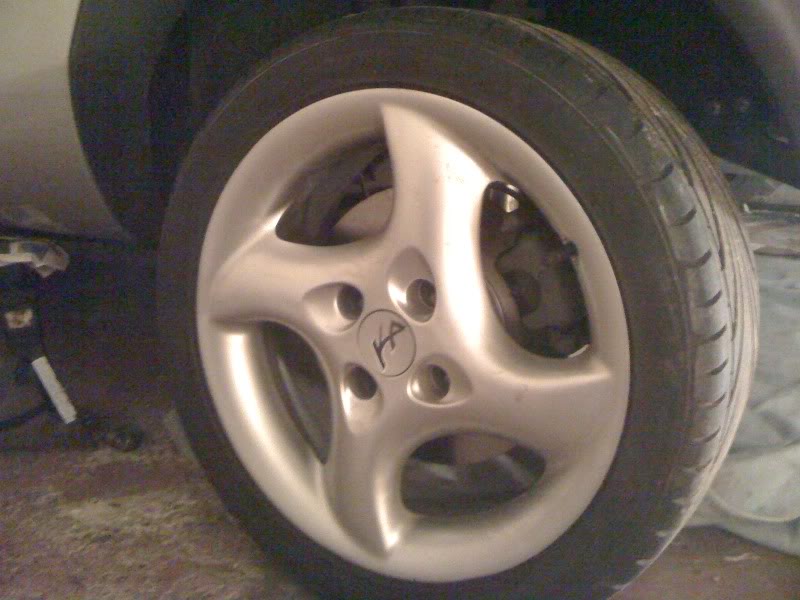
Rear:
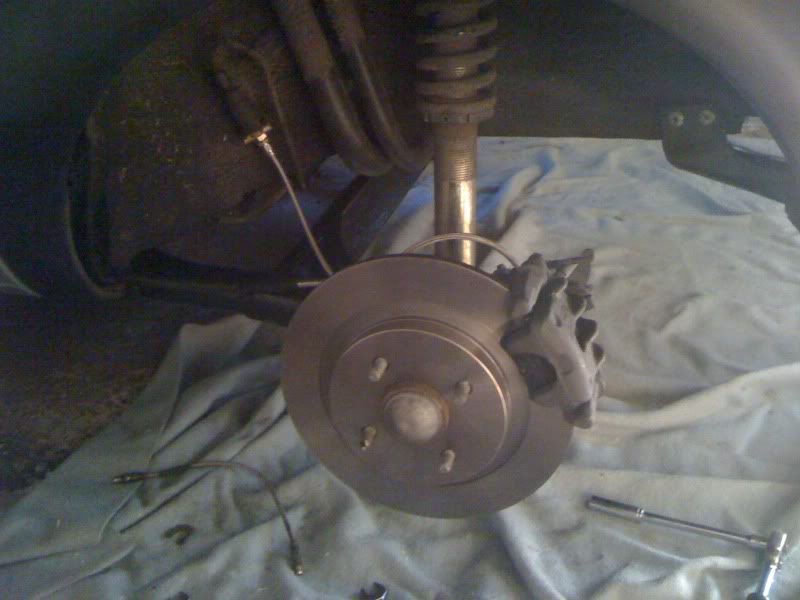
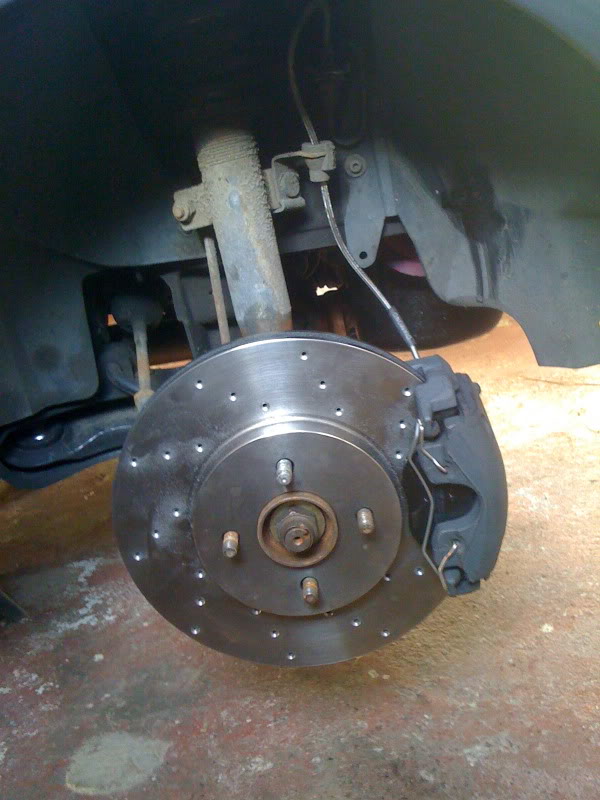
So, I wanted to spice up the front discs - I have a pillar drill and suitable drill bits.. I decided to drill them!!
Marking them out was a little tricky at first, but here goes! The pictures tell the process I think.

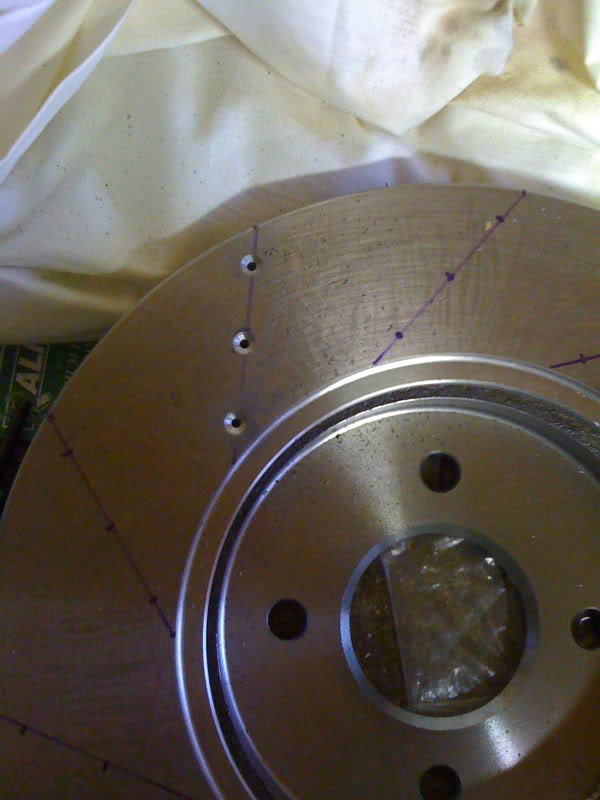

I drilled one side, all the way through.
Finished with 3mm holes...
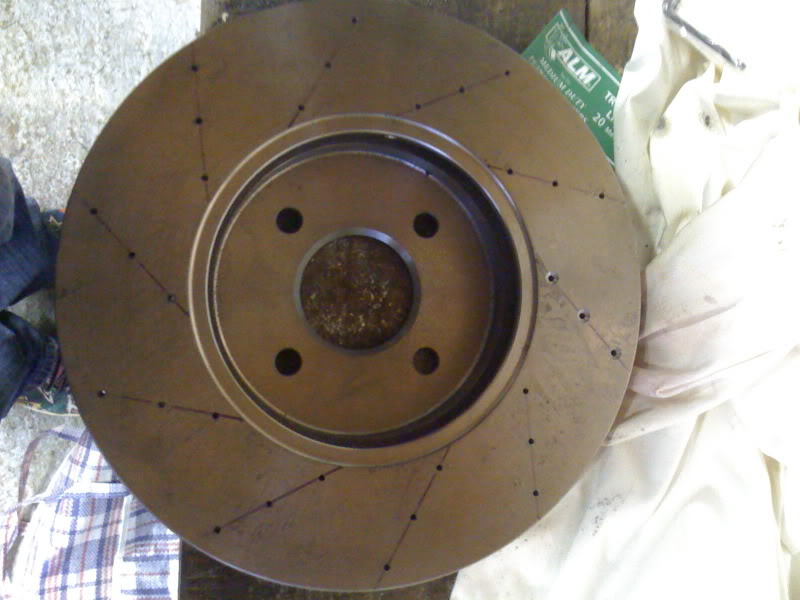
Then drilled through again with a 3.5mm bit (this is what my old sportka discs are)
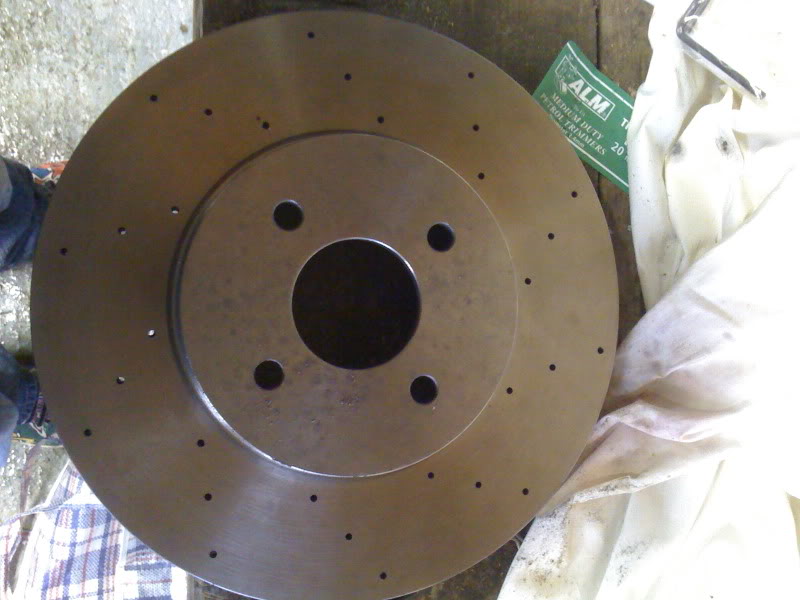
Then countersunk with an 8mm drill bit..
Got to do the other tomorrow. I admit there is 1 error on it though - just hope it's going to be ok. See if you can spot it
The disc must have shifted position on the pillar drill. Anyway, also I was being impatient and drilled both sides at the same time so as to get them even too, which meant that for 3-4 holes they cut the web a bit..
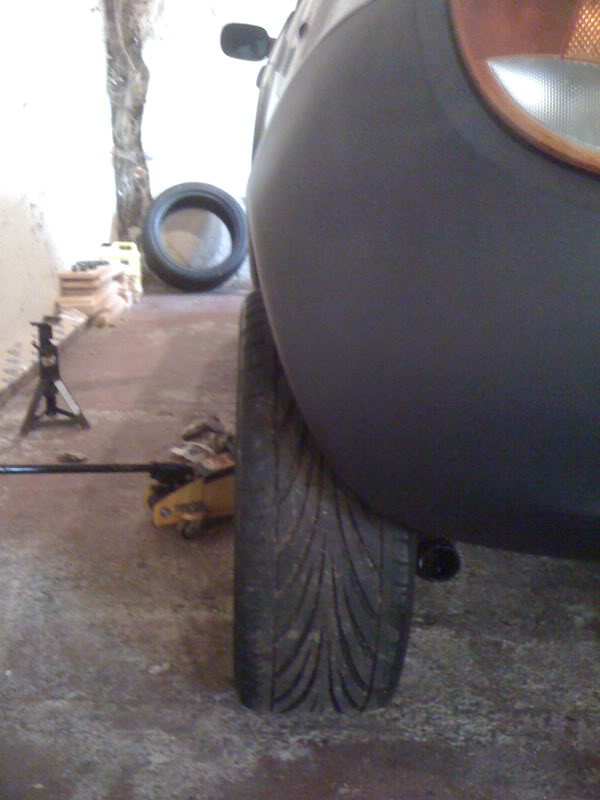
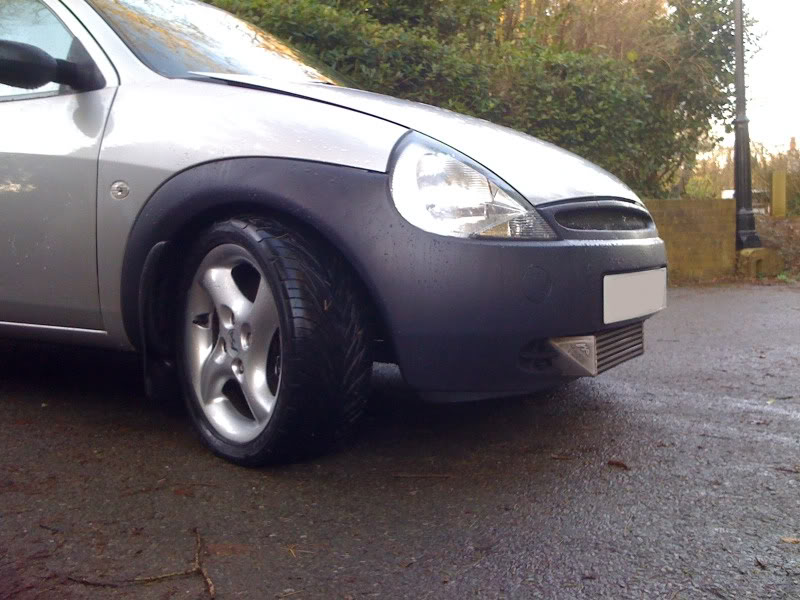
Oh and my car with a mates 15" compomotive mo with Toyo r888 8)
Just to see if it would over the 300mm discs and calliper!
*****************************
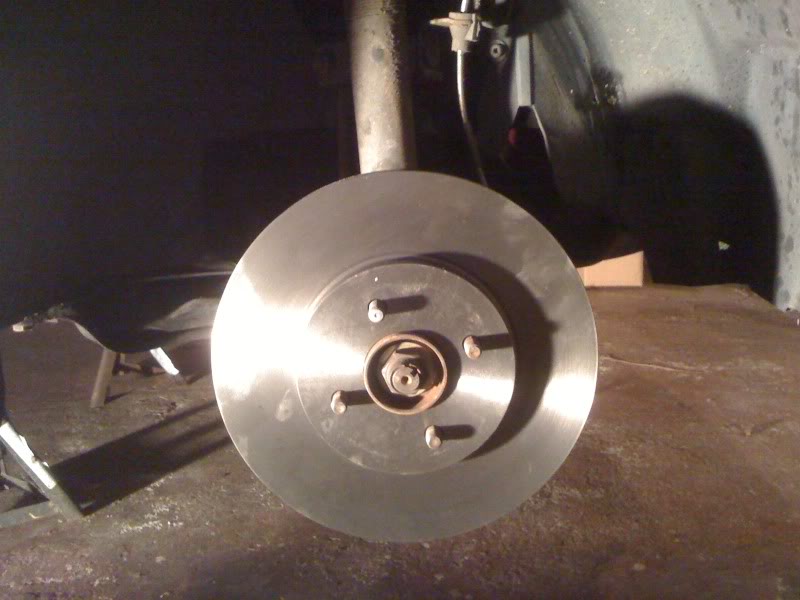
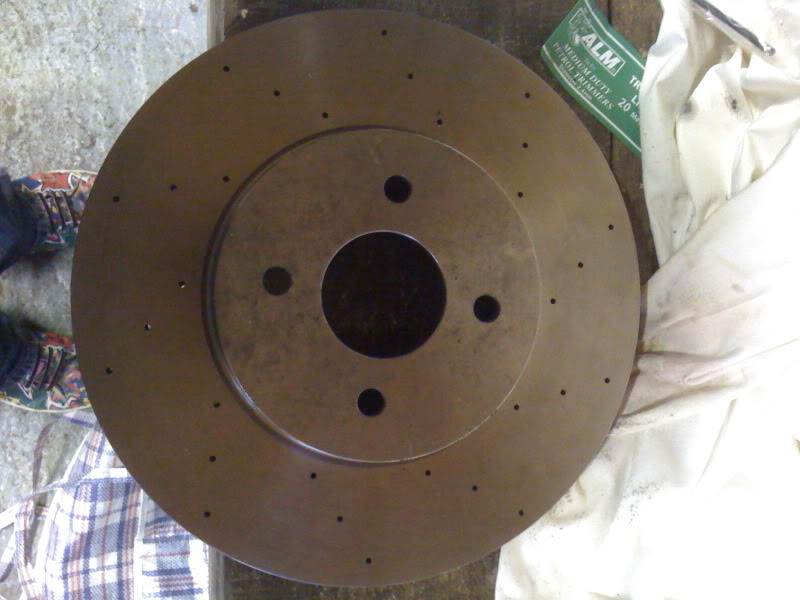
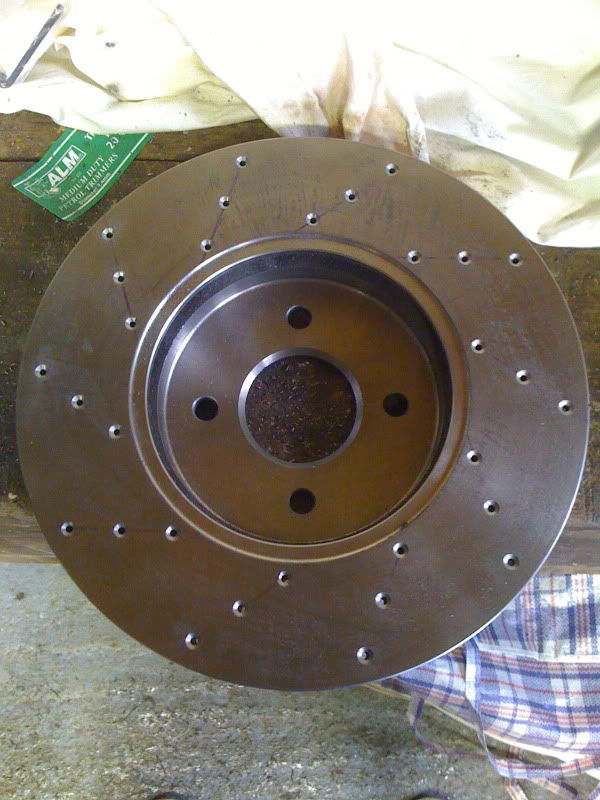
More pics!
Discs look better now..
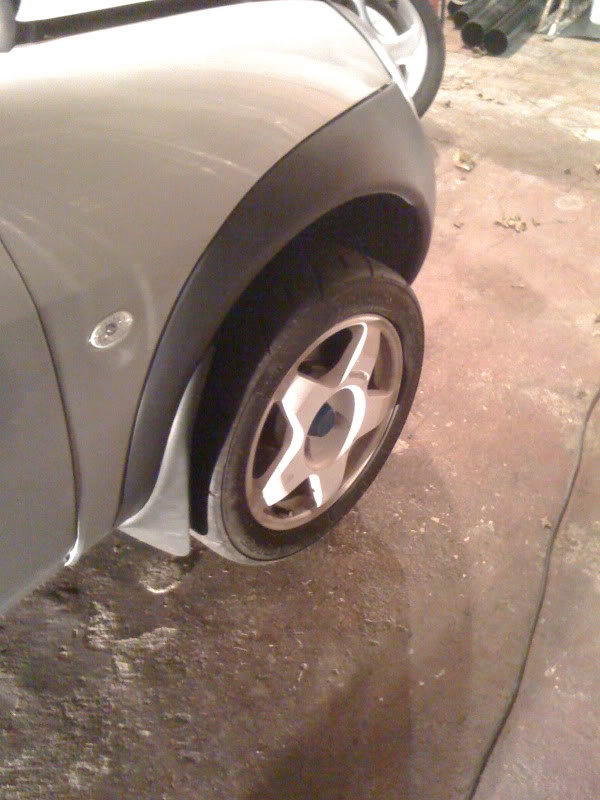
Then when i went to put my rear wheels on I found a problem
So, I had to take a spacer off.. (the 10mm one, which leaves this 20mm) Mine came with 10 standard, so now with a 20mm, only increased by 10.. the focus hub makes the other 10mm. Which is better actually, less stress on bolts as not as long now!
So now, just need to clean the thing! (if the weather every gets any better) And get some proper finished photos!
*****************************
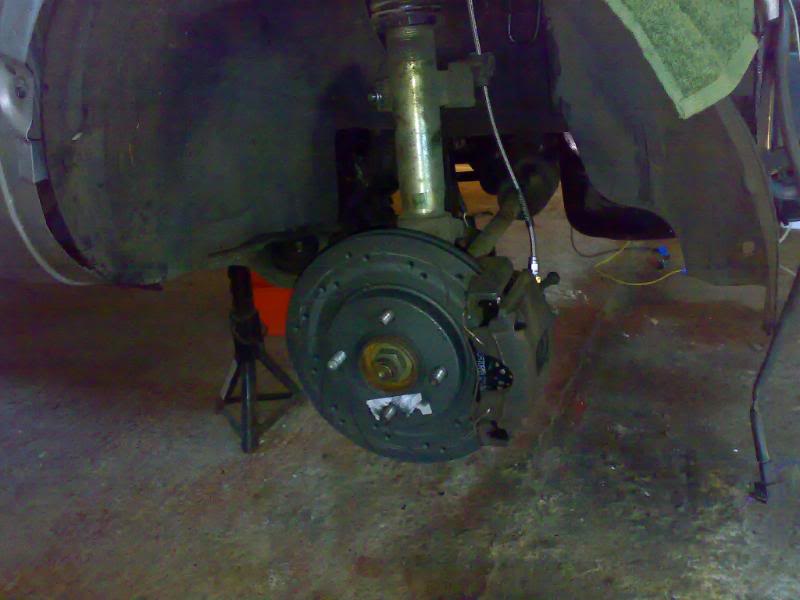
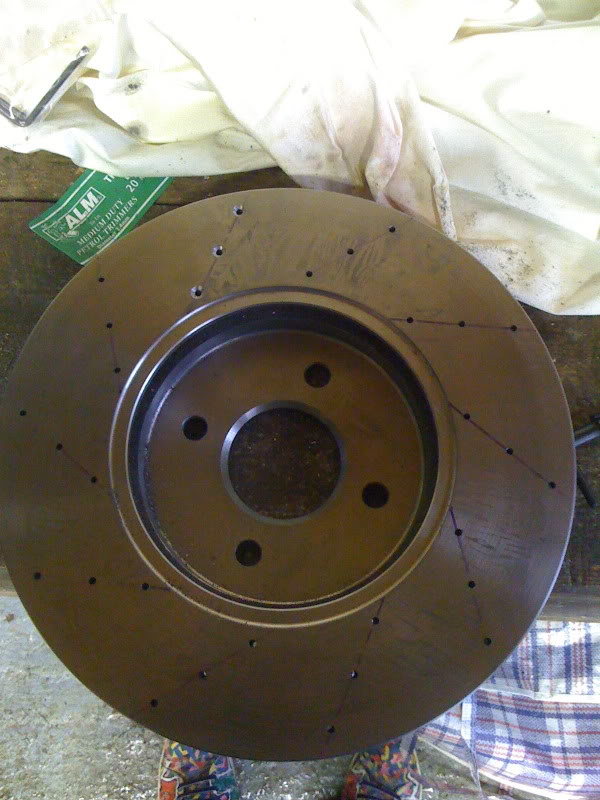
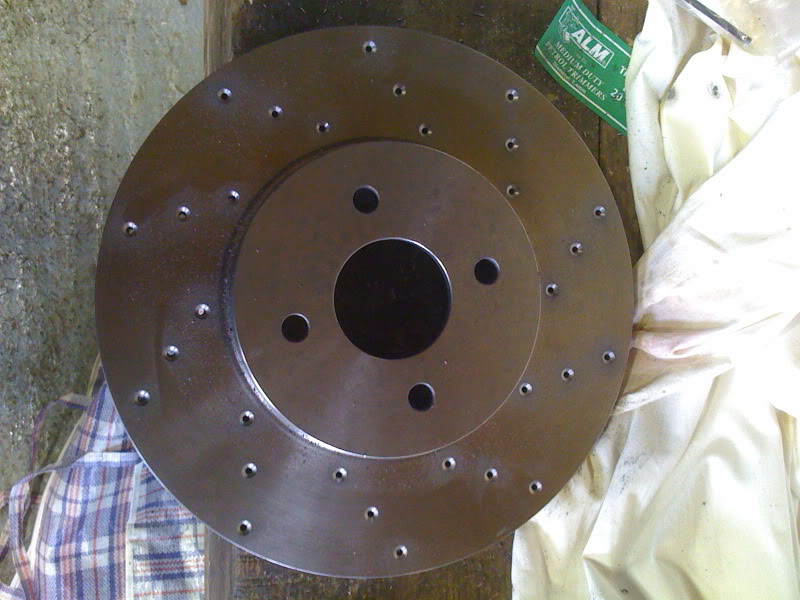
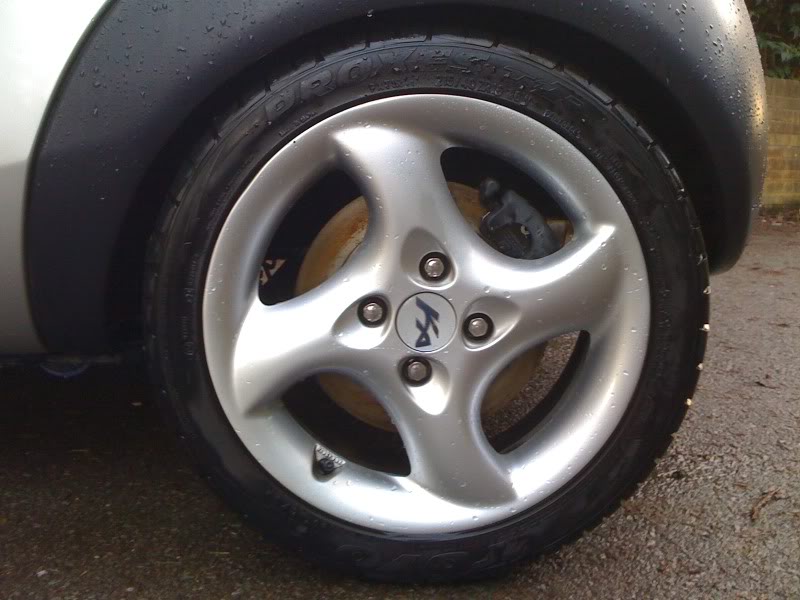
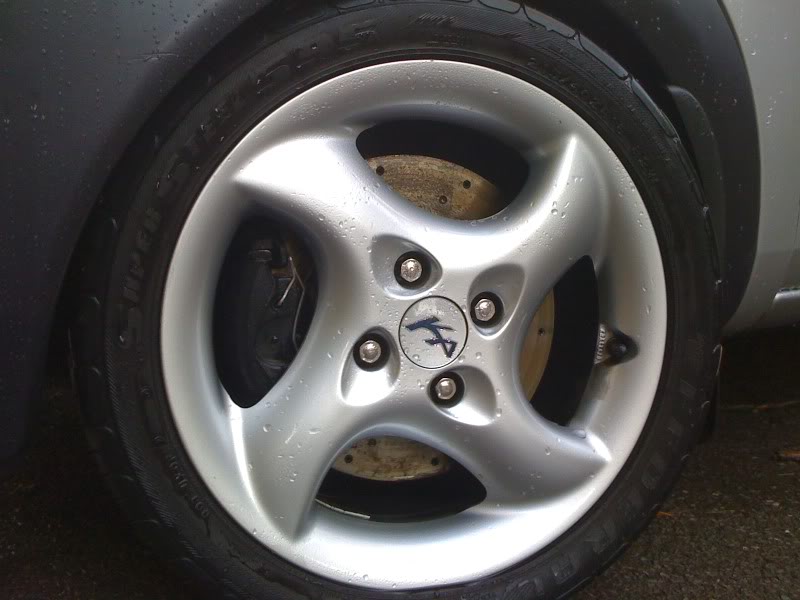
Got some pics now I've washed it - just a quick wash though! All my discs are rusty colour already
So in no particular order...
Compare this!!
To this....


*****************************