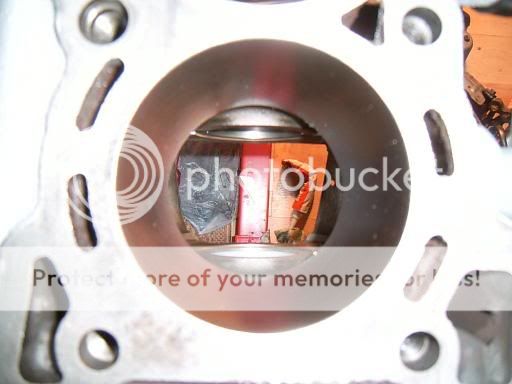
with the head now prepped and ready for lapping the parts have arrived to start the block
as mentioned previously the pistons were all either damaged or had suspected fractures on the ringlands...to replace these with stock items would cost �70 each from nissan but TBH they aint great pistons so i have gone with a larger bore with a set of JE forged items i bought from the american ebay site, worked out about �470 with shipping and customs tax
going 1mm oversize works out to be 2628cc (stock being 2568cc), this will not increase power by any noticable margin
the engine needs a good jetting out after any work like this, making sure no swarf has found a corner to hide in, all of the oilways and water ports blown through with the coreplugs removed for 30mins or so followed by some compressed air to dry it off is a must, dont want to allow any corrosion to get into the oilways, finish off with some WD40 on the oilports, journals and mating surfaces
i gave it a coat of silver high temp paint whilst it was outside and dry
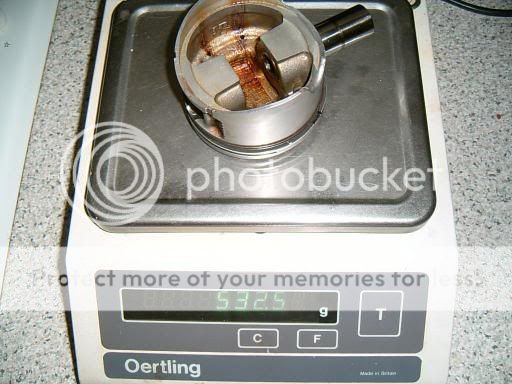
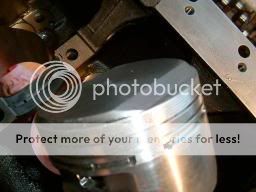
moving on to the pistons....i weighed and bagged every piston and recorded the weight, i done the same with the pins and the rods with the old bearings removed
i found about 1 gram difference on the new JE's and about 4 gram on the rods, i am not going to balance the rods or pistons but i did do some basic blueprinting which is setting the heaviest piston with the lighest rod and so on
i took a record of the stock piston weight vs the new ones for no other reason than curisoty..
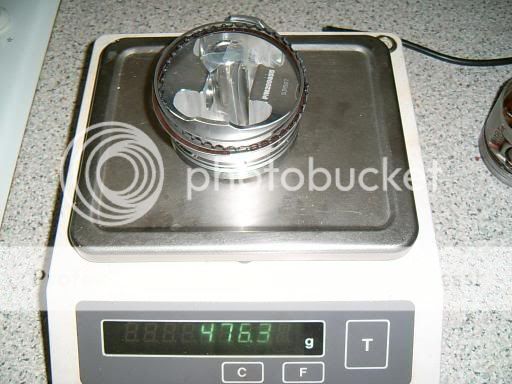
nice set of scales eh and perfect for this application....i got hold of this during the time i was made redundant from a closeing down sugar factory
the stock rods averaged out at about 640g IIRC
there are some sharp edges on the pistons that id prefer removed, i used some fine wet and dry to round off all of the sharp edges on the face of the piston, basicially its minimising the amount of hotspots which will go some way to deter detonation
i went with the recommended 4 thou bore clearance and ring clearances for "street car turbo/nitrous", the clearances have to be worked out by inch of bore, in this case its 87mm so thats 3.4 inches roughly, this does not apply to the oil control ring cluster though!
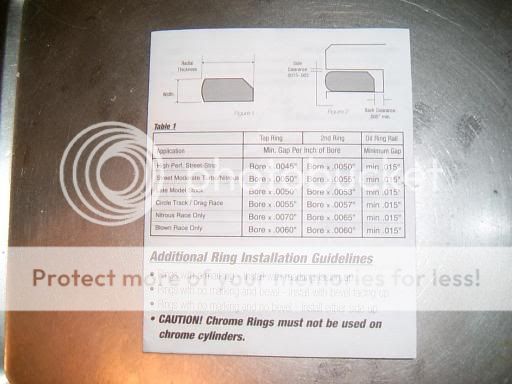
TBH i would prefer to see a more reasonable description of the application, there are too many variables on a turbo/nitrous engine to just throw it all into one part of the scale IMHO
on a previous engine i used the max clearance for turbo/nitrous on the bore and also on the rings........that was an engine that was designed to last ten thousand miles and no more so remember that if you want bigger cleances, lifespan will decrease at an unbelieveable rate the bigger your clearances are as they only allow good sealing of the rings at very high temps (which is what you would want on a 10 second drag car but this is a road car...)
so i have gone with a clearance of 17-18 thou on the top ring, 23 thou on the middle ring and the stock gapping on the oil ring which is ok provided its over 15 thou
the rings are file fit so its just a matter of filing gently on one side of the ring until you can fit the feeler guage through the gap in the ring with just a tiny bit of resistance when it is installed in the bore for your desired clearance
i always chase the ring up and down the bore clecking the clearance after i have finished filing the ring, if the clearance on your ring increases or discreases as you do this the bore has a "taper" to it
the JE pistons seem to have a lot of failures where the pin (or circlip) jumps ship and allows the gundgeon pin to slide out, there isnt any info supplied with the piston set as to how to fit them but after looking at their site and speaking to people on forums the general method is to place the open ends into the groove facing away from the face of the piston and push in with your fingers, it shouldnt be hard to push them in if you are using the right technique...they just slide in real easy and hopefully make a nice click when they seat to let you know they are home, i still rotate them a few times just to make sure though as you really dont want to make a mistake here
with any rod/gudgeon pin there should be roughly 1 thou clearance...its not easy to measure this without specialised mics but if you oil and then place the gudgeon pin into the rod it should slowly glide through *slowly under gravity alone
although there was no crank failure on my engine i still wanted to get the crank checked over, it came back "all ok" but i had the jounals polished up whilst it was there
the bearings are a bit tricky on these engines...normally its just a case of ordering a new stock set but these are all graded
there is a beraring grade stamped into the sump face for each main bearing and another for the cranks mains jounals, these numbers are listed on the flywheel end of the crank

top-mains journals
bottom-rod journals
left to right nos 1-7/1-6
you add the numbers on the block to the numbers on the crank and thats the grade of bearing you need
same thing with the rods and the pistons (obviously the piston grade does not apply if you have a rebore)
also remember that cylinder 4 mains has the thrust bearing bit on it and you will need to mention that when you order
these bearing grades should still only be used as a guide, the bearings will still require checking with "plastigauge" if we are to be sure that clearances are correct and that the crank journals are not eliptical, it was given the "ok" by the rebore company but ill trust my own measurements only!, the crank is SO important you cant just take it for granted......double checking here will prevent the engine coming back out again in a few weeks time
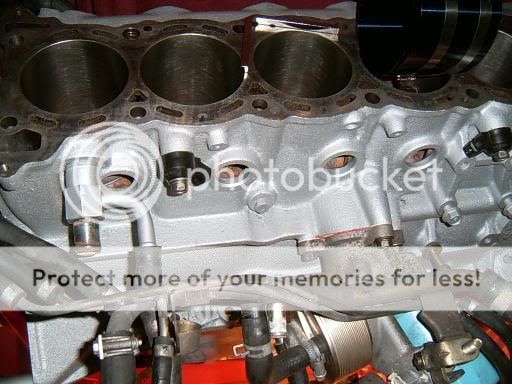
after installing the mains bearings (prior to checking) we started to install the oil squirters..pretty cool items by all accounts and its a wonder why they are not fitted to all engines, they have an oilway and valve inside the bolt so make sure you fit the right ones in lol, the piston is also supplied with oil by the rod
one of mine had been damaged somehow, it wasnt until it was positioned along with the others that we noticed the bend...and then the crack on the shaft
cant be too careful eh:nonono:
i doubt it would have led to an immediate engine failure as the squirter is pressure dependant....if oil pressure drops under 3 bar (guess) the oil squirters are shut down, it may have led to failure at full throttle with lots of heat in the piston though
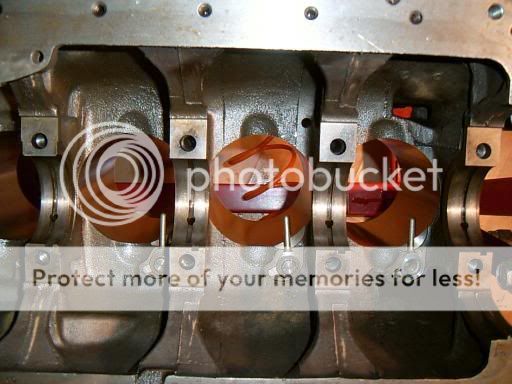
also from the above picture you should be able to see the block "cast lines"...these are basicially strees points that we could removed if we wished....this would be a very useful mod on a block that is on the brink of its power level but on this engine 500bhp would take you nowhere near that stage so i have mostly left them alone but i did take the shap edge off them....just a tickle with the dremmel to radius the stress point
there is more infomation on this subject on
www.max-boost.co.uk under "advanced"