USA Focus RS Build.......for track days.

 01-05-2013, 02:47 PM
#122
Regular Contributor
Thread Starter

Do you think Customs had fun searching my wheels? 

I am checking them tonight and hopefully they are alright.
Big thanks to doga-ot for helping me out with these!

I am checking them tonight and hopefully they are alright.
Big thanks to doga-ot for helping me out with these!
 01-05-2013, 02:55 PM
#124
Regular Contributor
Thread Starter
Getting the suspension back together:

And as much as I like the standards I can't get over how good these look on this car:

I need to decide as I want to mount up tires soon. The plan was to use the RS wheels for show and these for track.

And as much as I like the standards I can't get over how good these look on this car:

I need to decide as I want to mount up tires soon. The plan was to use the RS wheels for show and these for track.
Last edited by thielt1; 01-05-2013 at 02:57 PM.
01-05-2013, 02:57 PM
#125
Regular Contributor
Thread Starter
There was no pallet LOL! Customs must have needed to ship something out. They still feel like they are wrapped well on the inside though so I'm not too worried.


 06-05-2013, 01:27 PM
#129
Regular Contributor
Thread Starter
Put in the front washer bottle and sorted some more of the wiring in the front:

tightened up the rear suspension and removed anything that wasn't needed:


tightened up the rear suspension and removed anything that wasn't needed:
 19-07-2013, 07:09 PM
#130
Regular Contributor
Thread Starter
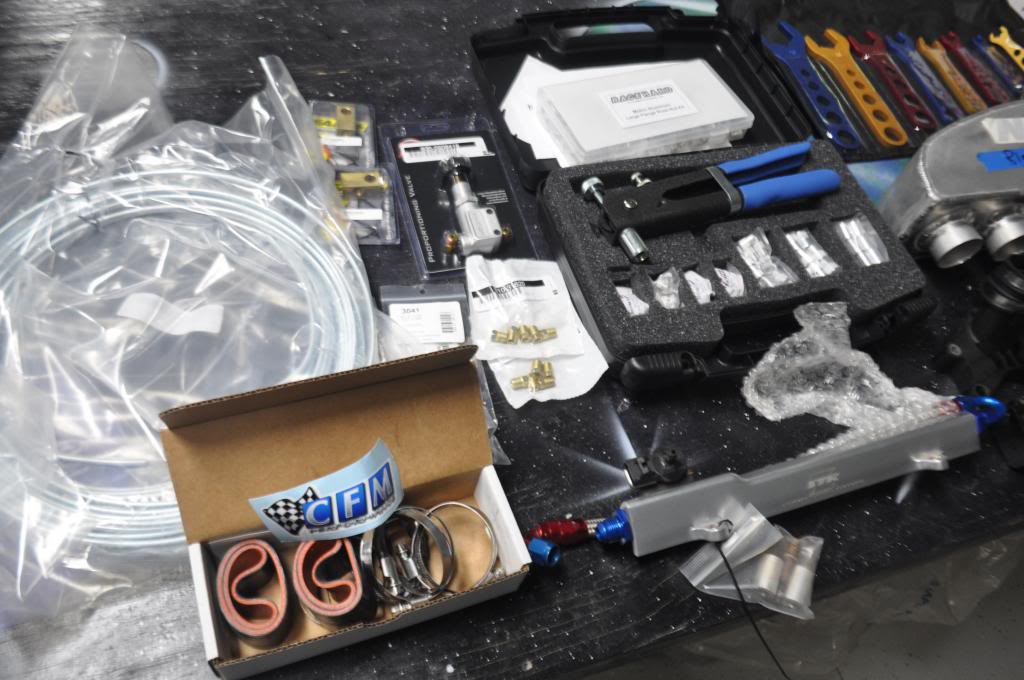
Purchases are starting to show up, build will resume next weekend starting with brake lines and continuing onto the fuel setup
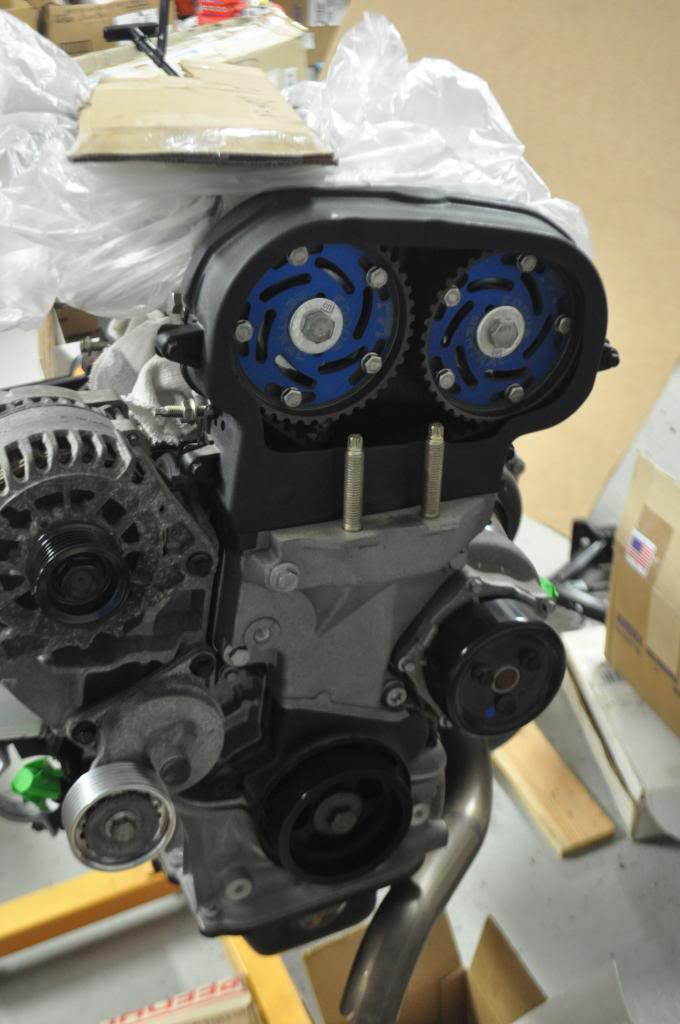
Slowly assembling the engine and cleaning up and painting any bolts that needed it.
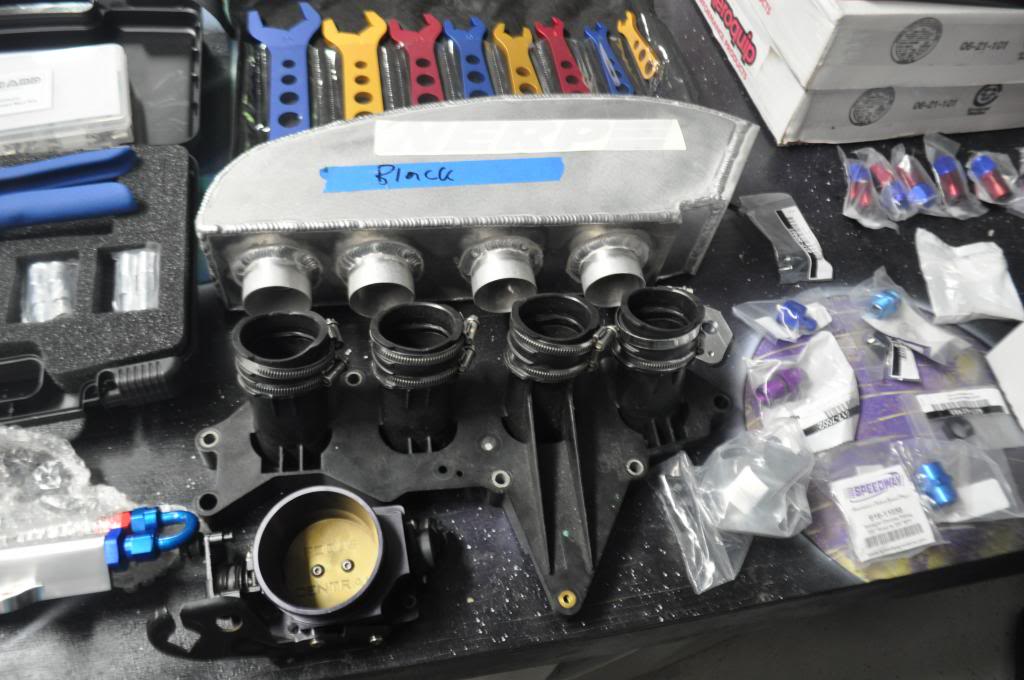
intake test fit, I will be powder-coating the manifold black. (intake is an NERP design)
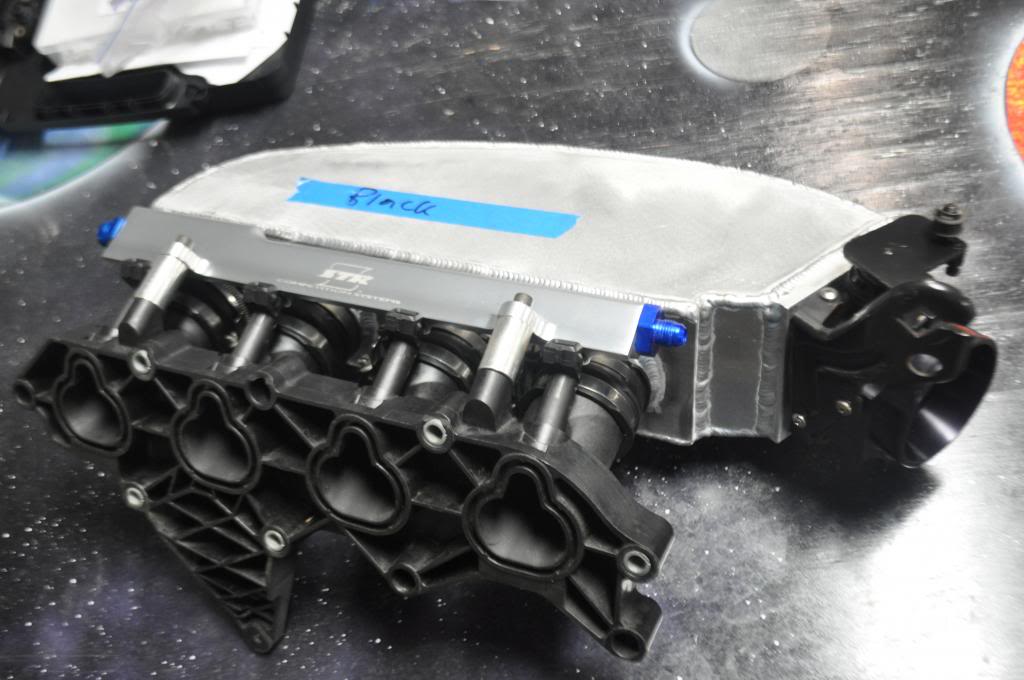
here is the runner design inside, the throttle body side also is machined like this.


Slowly assembling the engine and cleaning up and painting any bolts that needed it.

intake test fit, I will be powder-coating the manifold black. (intake is an NERP design)

here is the runner design inside, the throttle body side also is machined like this.

Last edited by thielt1; 19-07-2013 at 07:11 PM.
08-08-2013, 03:11 PM
#135
Regular Contributor
Thread Starter
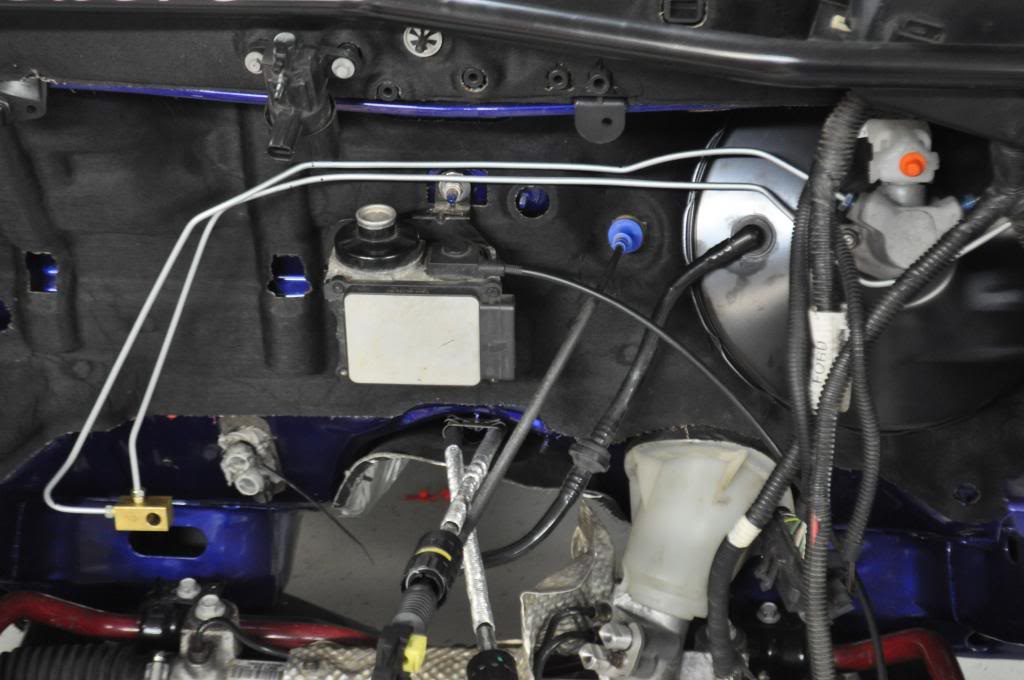
Started work on the brake lines, I will go into detail on this as it was very difficult to find out which brake nut sizes are used on our cars so some of it was trial and error. Also if you didn't know, many of these brake lines are either discontinued or hard to find so you will either need to make them or have a shop make them for replacements. I ended up picking an OTC master brake line kit as it had everything I needed for this job and its semi portable if I have to make any flares inside the car.
Brake nuts used:
Metric Bubble Flare 10 x 1.0 (2 on master cylinder, 2 for front brake lines, 6 for rear brake lines (SVT))
Metric Bubble Flare 12 x 1.0 (2 on Master cylinder)
I will also be using 3/16 double flare nuts for the T going into the cabin, Wilwood Proportioning valve, and the T to the rear calipers.
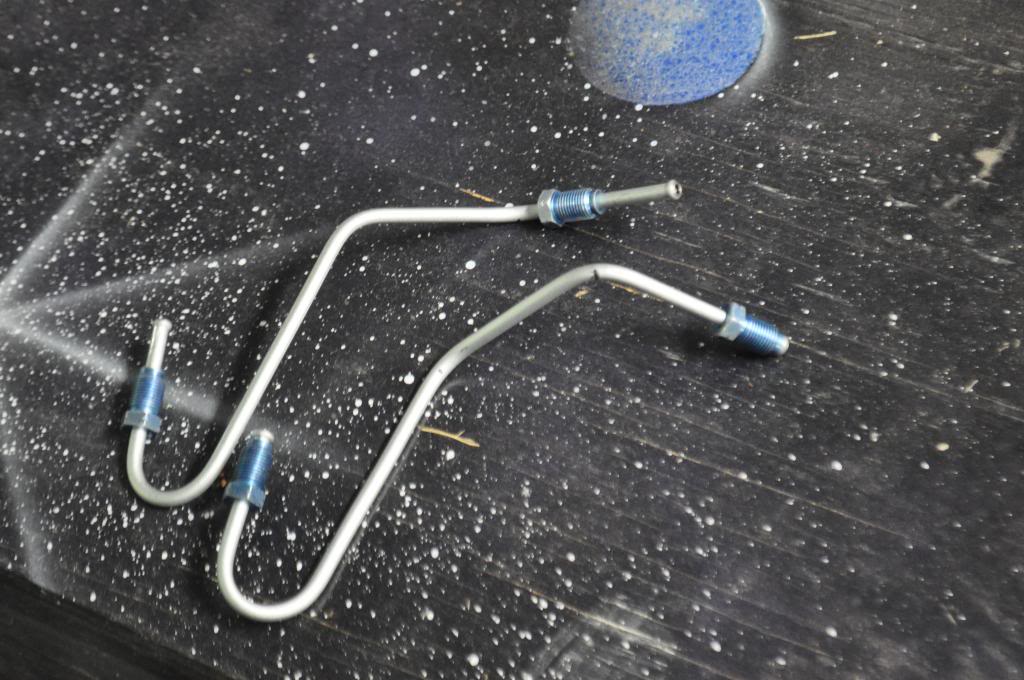
Rear brake lines:
I also made a block off plate out of the existing sensor for my return fuel rail:
Mounted up the intake and fuel rail, I think I am going to do a quick dryfit of the engine for when I size all of the fuel lines and fit the last of the electrical:

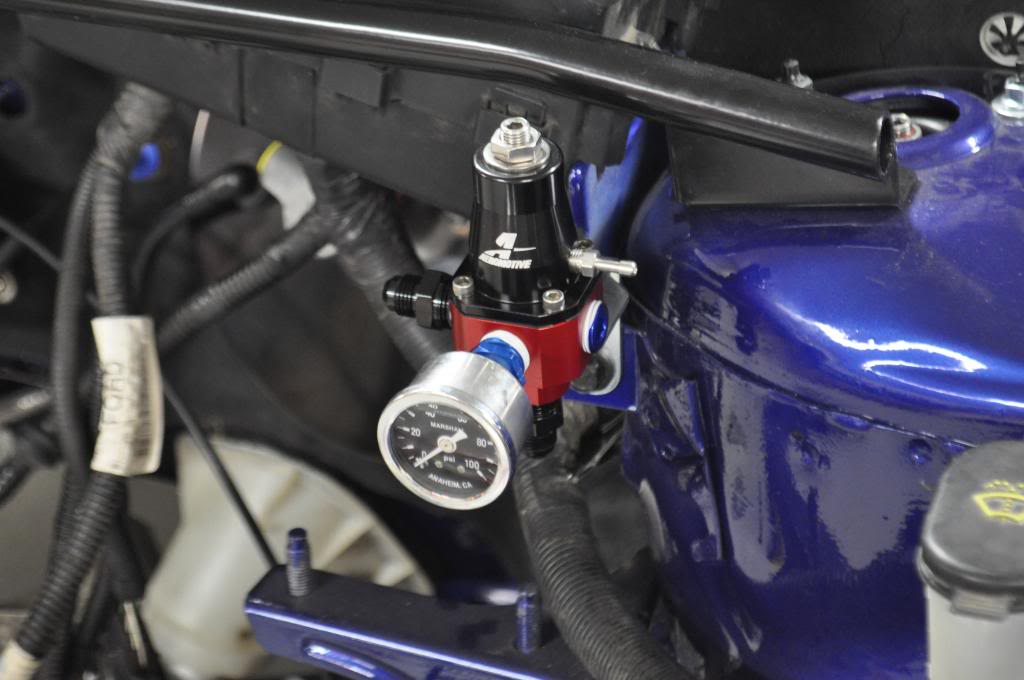
Picked a spot for the Fuel Pressure Regulator:
Brake nuts used:
Metric Bubble Flare 10 x 1.0 (2 on master cylinder, 2 for front brake lines, 6 for rear brake lines (SVT))
Metric Bubble Flare 12 x 1.0 (2 on Master cylinder)
I will also be using 3/16 double flare nuts for the T going into the cabin, Wilwood Proportioning valve, and the T to the rear calipers.
Rear brake lines:

I also made a block off plate out of the existing sensor for my return fuel rail:

Mounted up the intake and fuel rail, I think I am going to do a quick dryfit of the engine for when I size all of the fuel lines and fit the last of the electrical:

Picked a spot for the Fuel Pressure Regulator:
 08-08-2013, 06:31 PM
#136
PassionFord Regular

This is FANTASTIC mate. Every single bit sexually painted up and all the small details taken care of too. Wheels look awesome and bonnet looks superb too. Great work.

 11-09-2013, 02:41 PM
#141
Regular Contributor
Thread Starter
As some of you know I have been competing in the SCCA FB National Championship for the last year. This next week will be the final race of the year so if anyone makes it to Road America be sure to stop by and say Hi. (It might be a ways for you guys to travel so I would suggest the HD Feed LOL!)
The SCCA Runoffs officially begin next Monday!
Here is my Schedule:
Monday Practice 2:50
Tuesday Qualifying 10:00
Wednesday Qualifying 5:30
Thursday Qualifying 2:00
Friday Race Day 9:45
This is the largest ever Formula B Field (23 cars) and it will be live in HD at: www.speedcasttv.com
This is the 50th anniversary of the Runoffs and so far over 700 cars are entered for the weekend!
To view the car here is a link to my page:
https://www.facebook.com/pages/Tyler...31380003697779
Last edited by thielt1; 11-09-2013 at 02:42 PM.
 03-10-2013, 06:34 PM
#143
Regular Contributor
Thread Starter
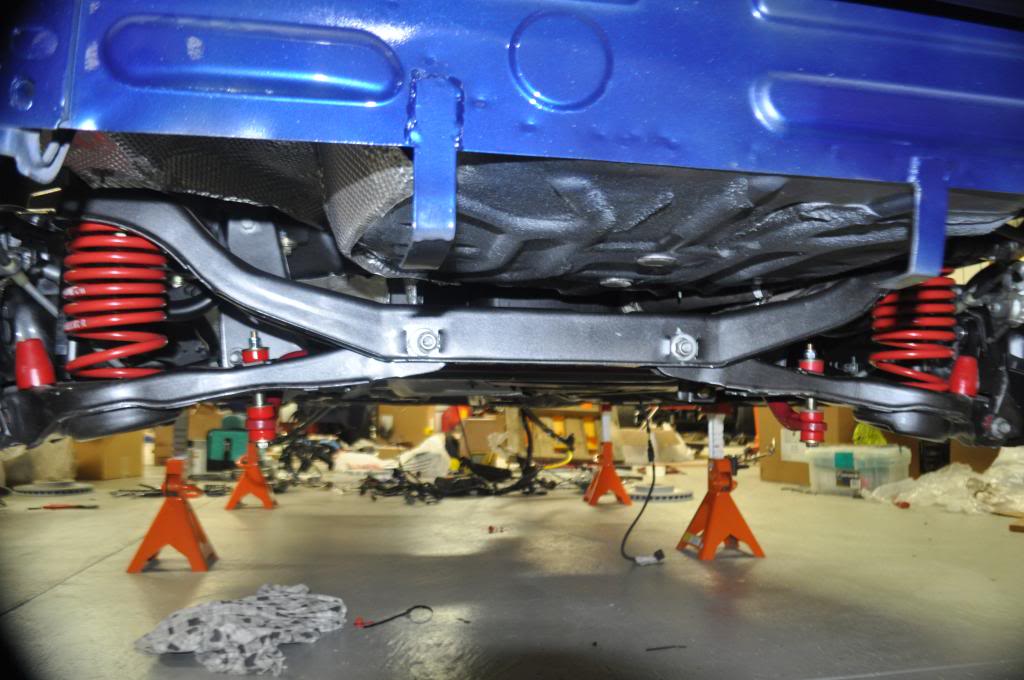
Well Since I am waiting for parts I decided to do another update earlier than what I was going to:
rear suspension changed out:
New fronts being created:
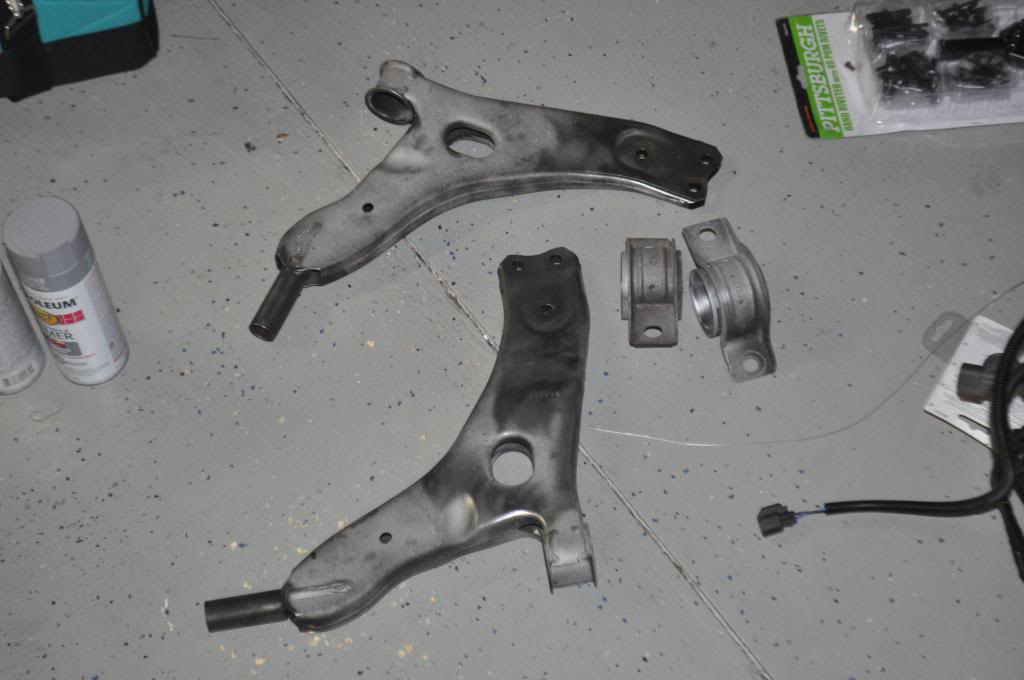
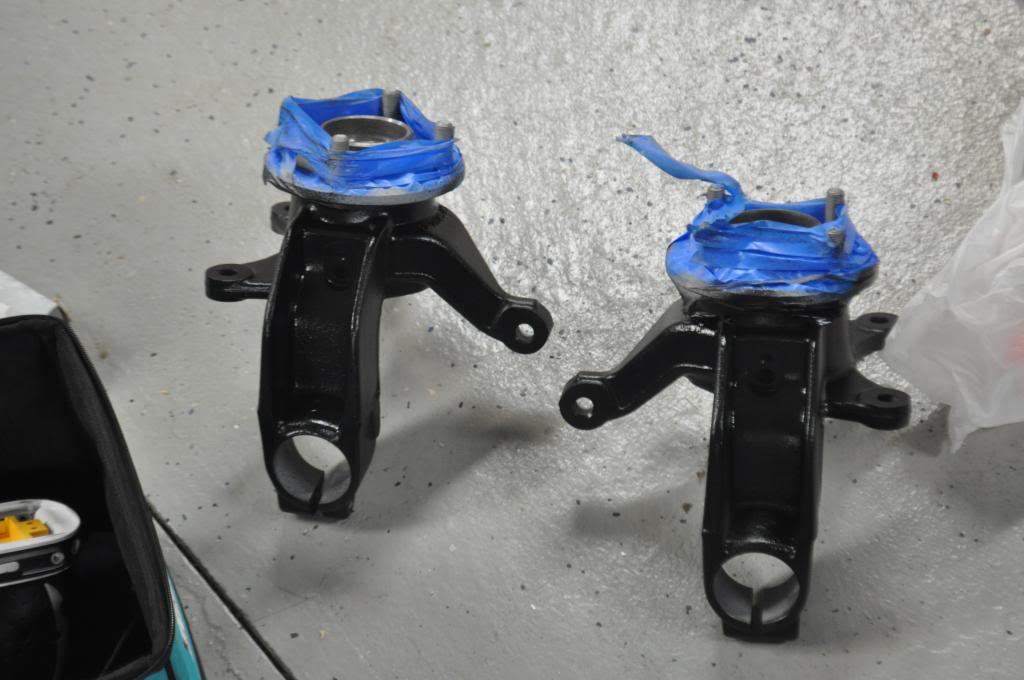
Painted front carriers because they developed surface rust:
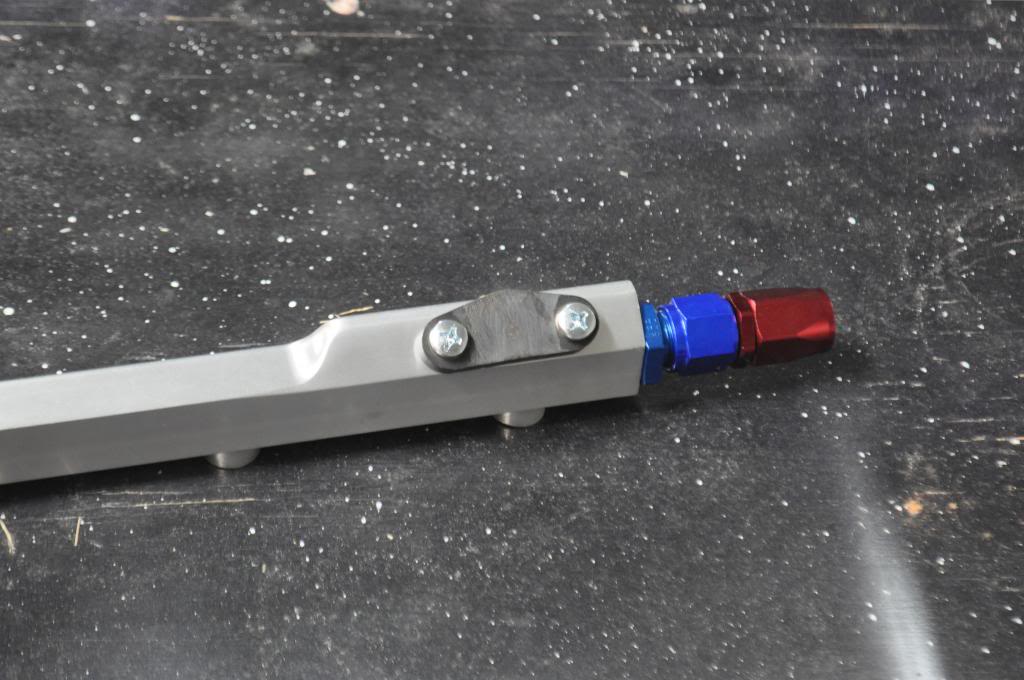
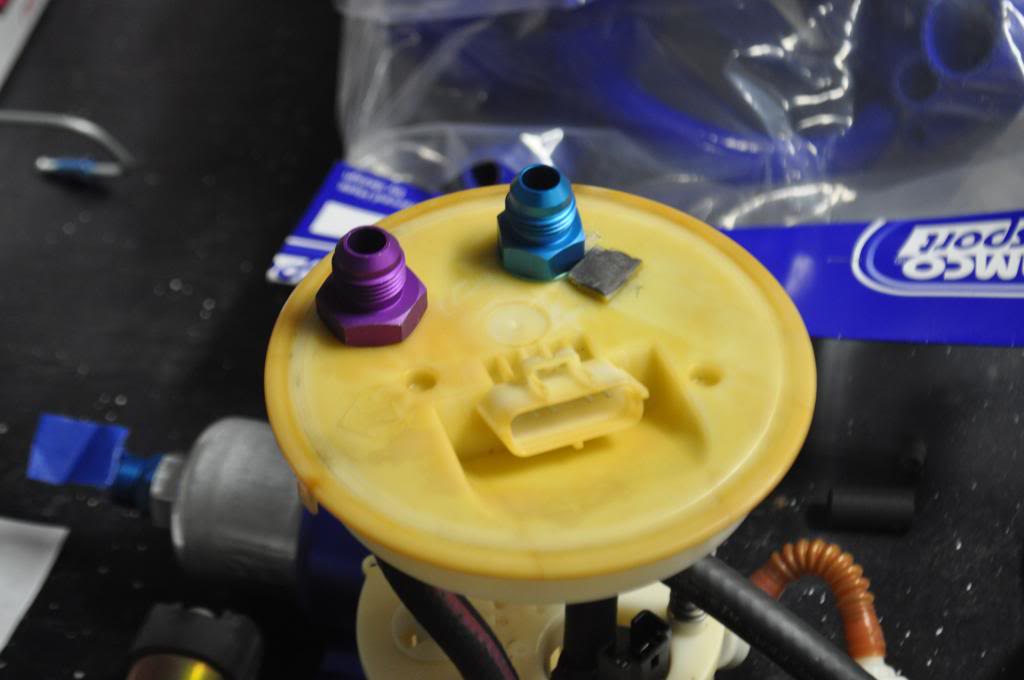
AN fittings added for fuel delivery and return, this is the second one I had to do because the first version I did lacked the spring bars. :screwy:
All my front lines are now bent just deciding how to go about doing the ones through the car and to the rear because of the difficult bends.
rear suspension changed out:

New fronts being created:

Painted front carriers because they developed surface rust:

AN fittings added for fuel delivery and return, this is the second one I had to do because the first version I did lacked the spring bars. :screwy:

All my front lines are now bent just deciding how to go about doing the ones through the car and to the rear because of the difficult bends.
 10-10-2013, 11:44 PM
#146
Regular Contributor
Thread Starter
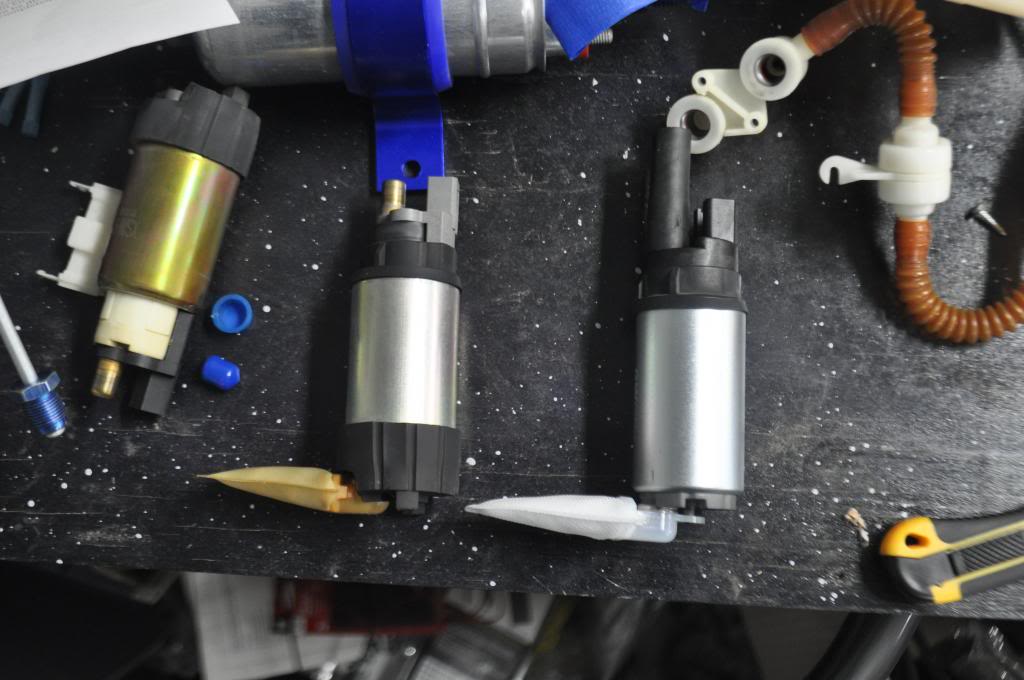
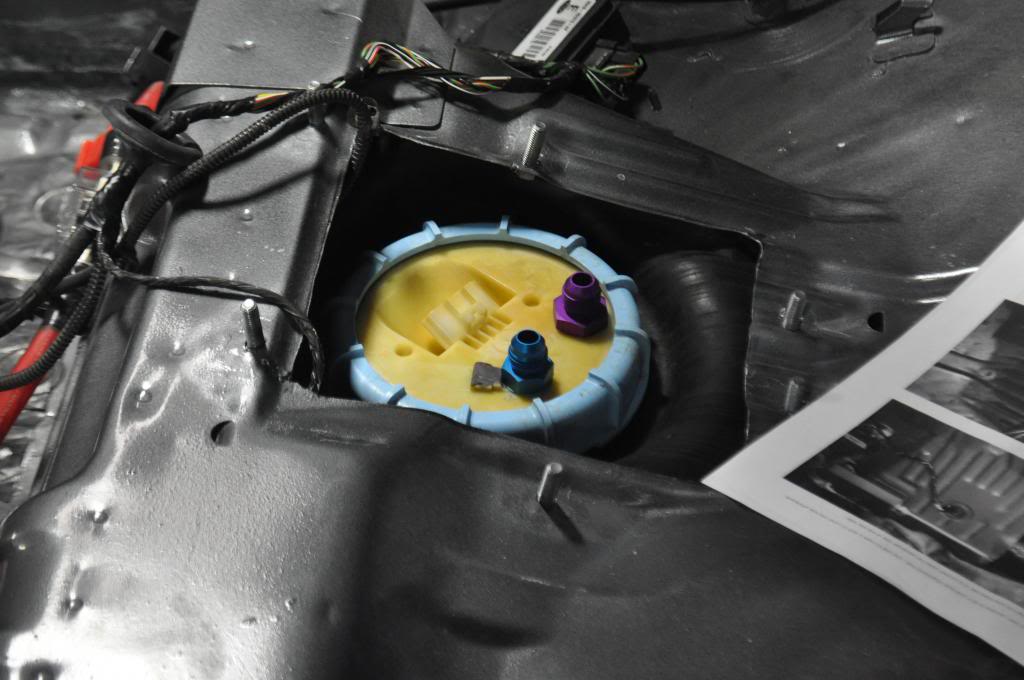
I figured while I have everything out, why not fit a new pump as I don't know the mileage of my other two pumps.
Comparison of how close the Deatchwerks (dw65) pump is to oem: (even the rubber covers fit)
Modified Fuel basket:
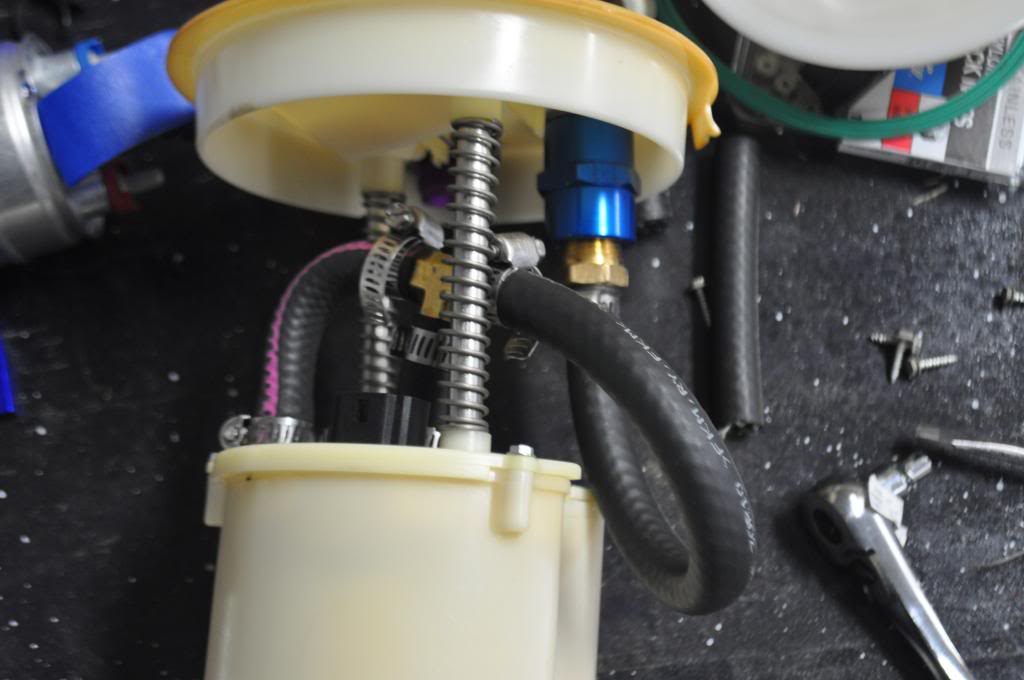
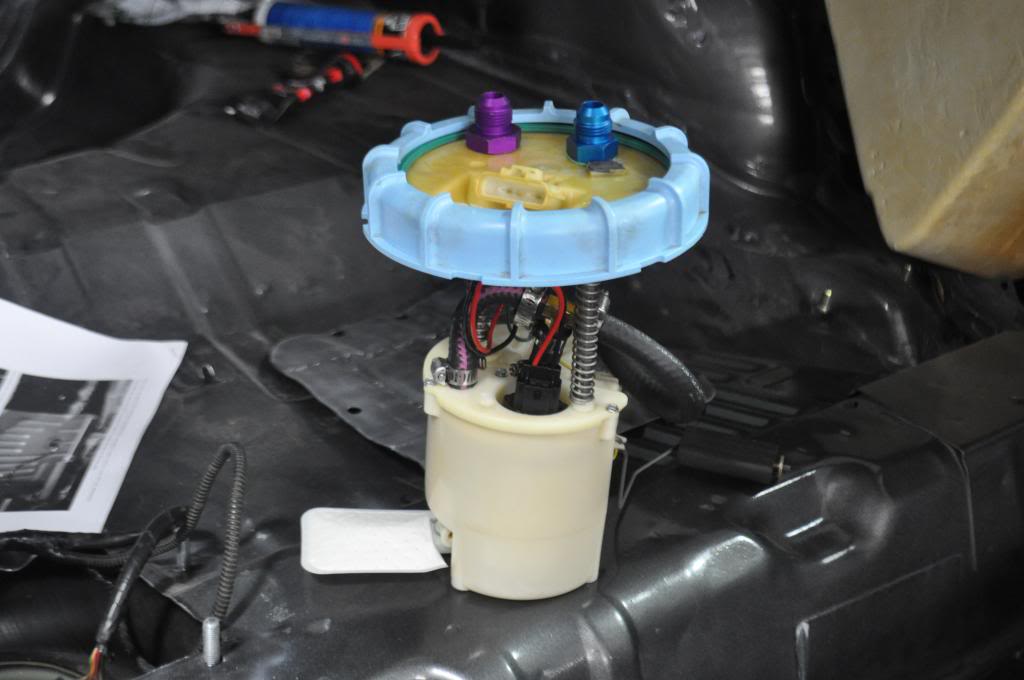
Back in place, hopefully I can get the lines to fit in there so I don't have to raise the cover to much. I will Probably use some type of rubber seal so fumes don't enter the car:
Comparison of how close the Deatchwerks (dw65) pump is to oem: (even the rubber covers fit)

Modified Fuel basket:


Back in place, hopefully I can get the lines to fit in there so I don't have to raise the cover to much. I will Probably use some type of rubber seal so fumes don't enter the car:
 11-10-2013, 06:59 AM
#148
Advanced PassionFord User

Why have you changed the rear suspension arms Tyler?
 11-10-2013, 01:17 PM
#149
Regular Contributor
Thread Starter
11-10-2013, 01:21 PM
#150
Advanced PassionFord User
Shame you're in the US, I've just asked a mate to build me some just the same as the ones you've removed. Doms kit looks quality, I wish someone in the UK would start making similar
29-10-2013, 06:24 PM
#151
Regular Contributor
Thread Starter
Brake lines are now all fitted for the most part.
For the rears I used an existing bolt location so part of the line had to be pre-bent before it was put into the car while the second part was bent and flared after:
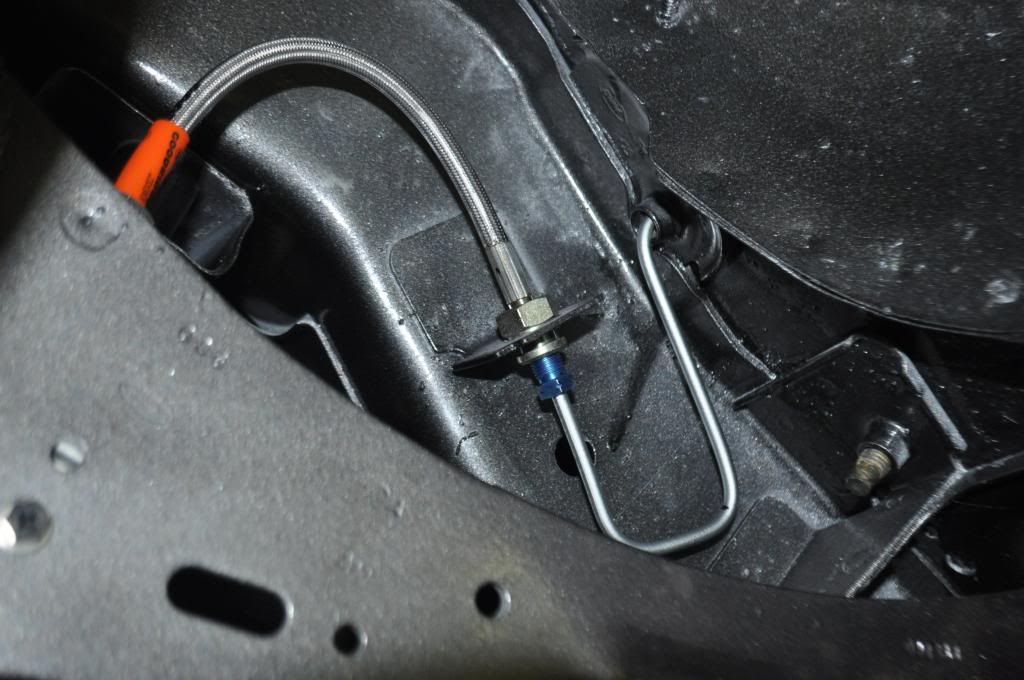
Here is where it comes through:

Together:
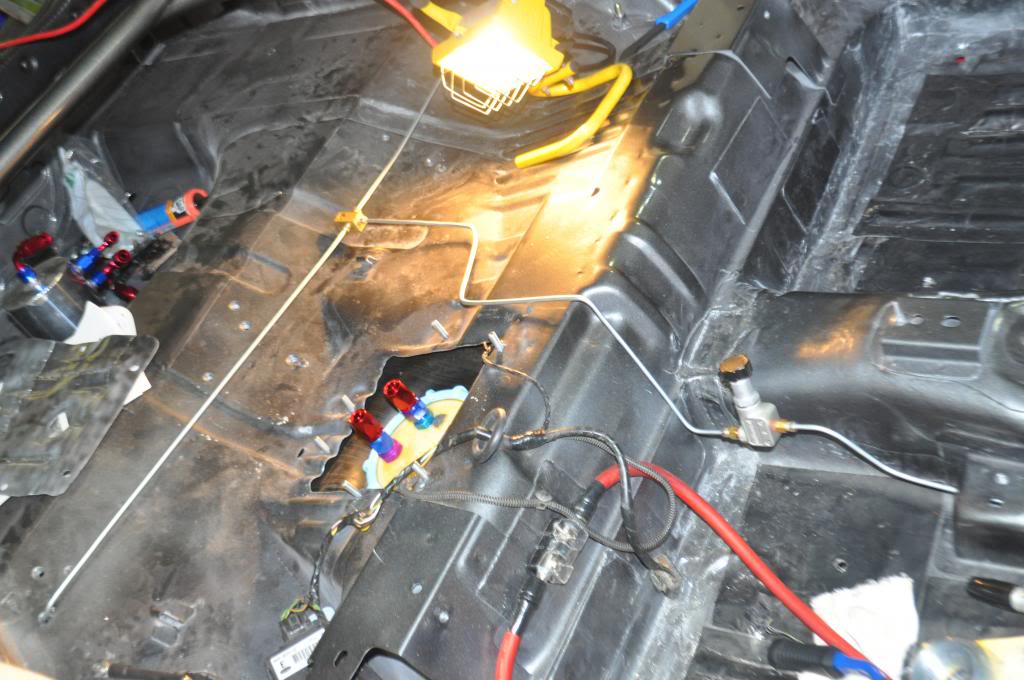
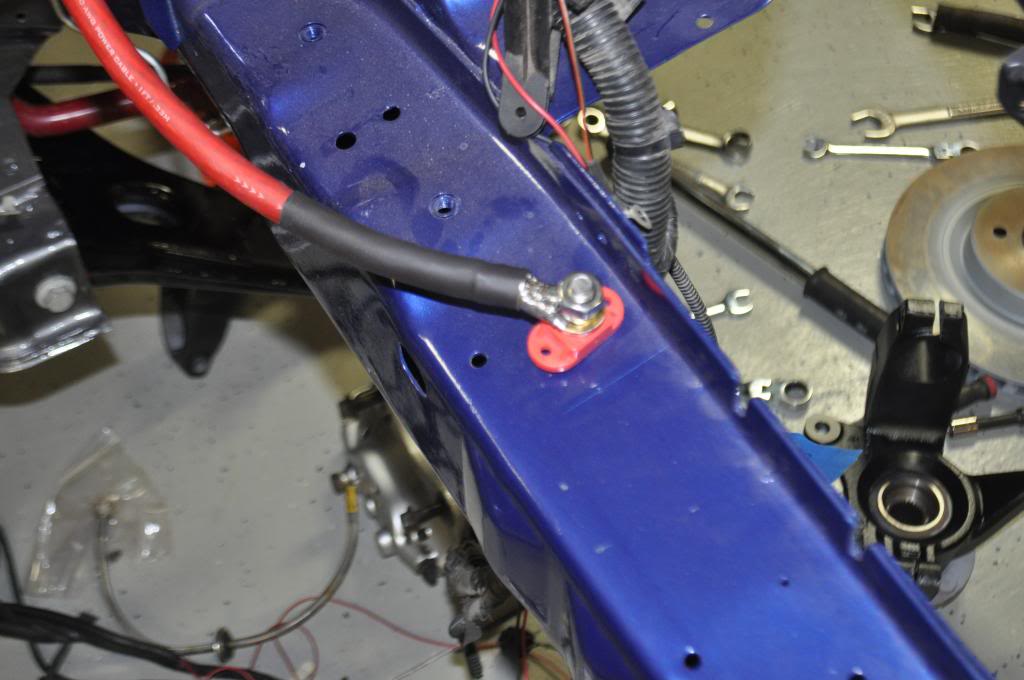
I ran the main electrical through the car now as well. It will come up to one of the center air vents where I am going to have my master cutoff switch. It then goes through the firewall where it will end up near the standard batter location where I am going to have a central hub.
For the rears I used an existing bolt location so part of the line had to be pre-bent before it was put into the car while the second part was bent and flared after:

Here is where it comes through:

Together:

I ran the main electrical through the car now as well. It will come up to one of the center air vents where I am going to have my master cutoff switch. It then goes through the firewall where it will end up near the standard batter location where I am going to have a central hub.

 06-01-2014, 05:47 PM
#155
Regular Contributor
Thread Starter
Wrapped my Header, what a PITA!
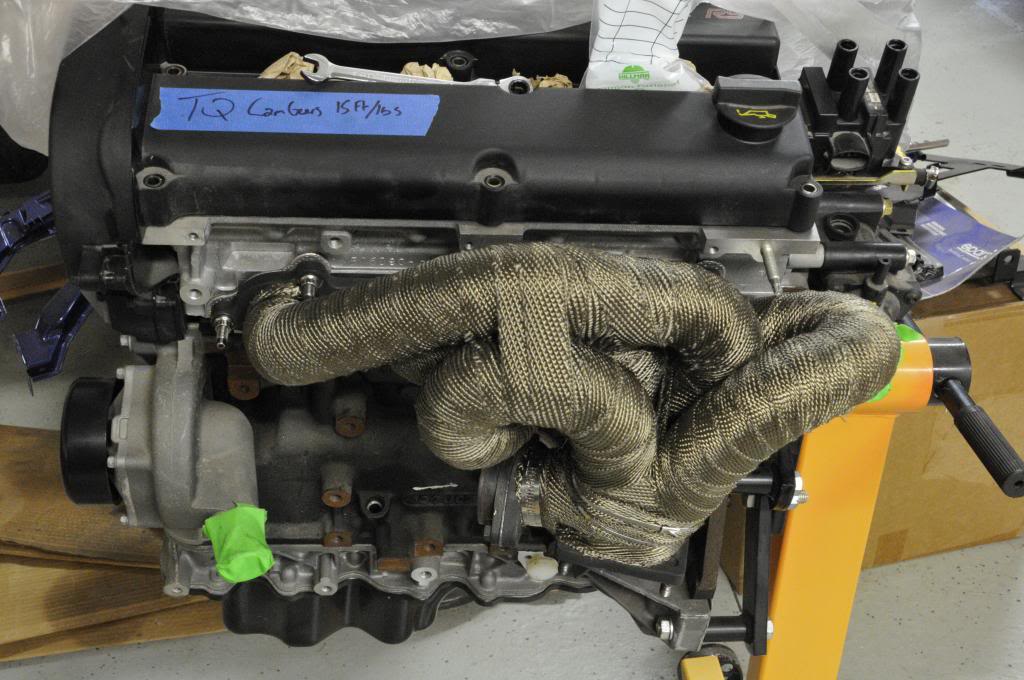
Also needed to modify the PS Bracket in order to fit the Top Speed Header.
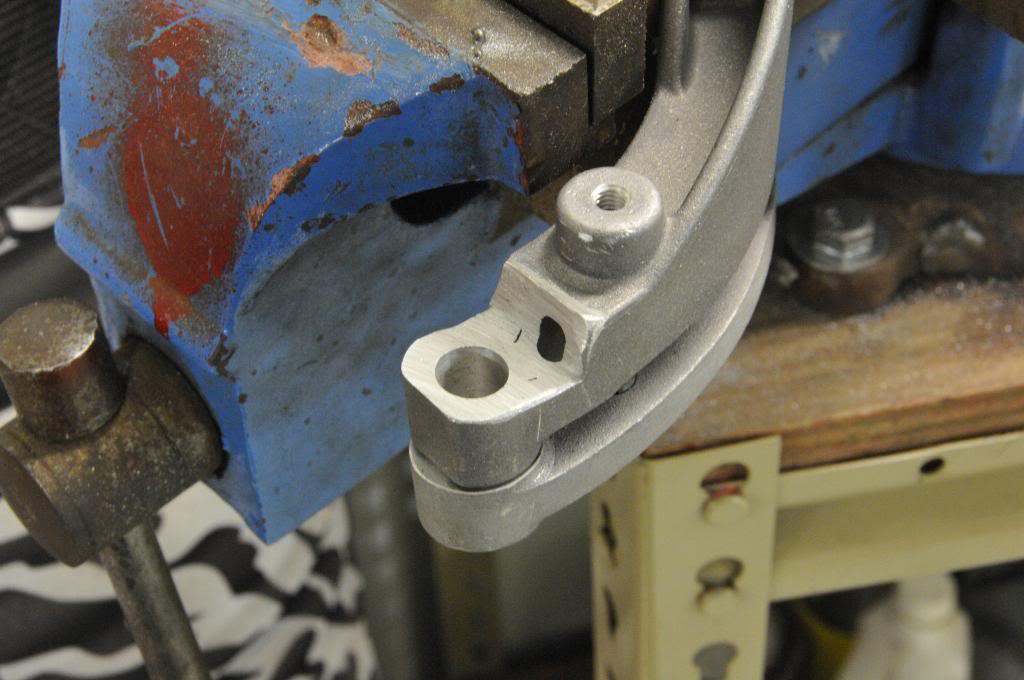
I will probably fill it in with some aluminum on the backside to make sure the strength remains there.

Also needed to modify the PS Bracket in order to fit the Top Speed Header.

I will probably fill it in with some aluminum on the backside to make sure the strength remains there.
08-01-2014, 03:32 PM
#156
Regular Contributor
Thread Starter
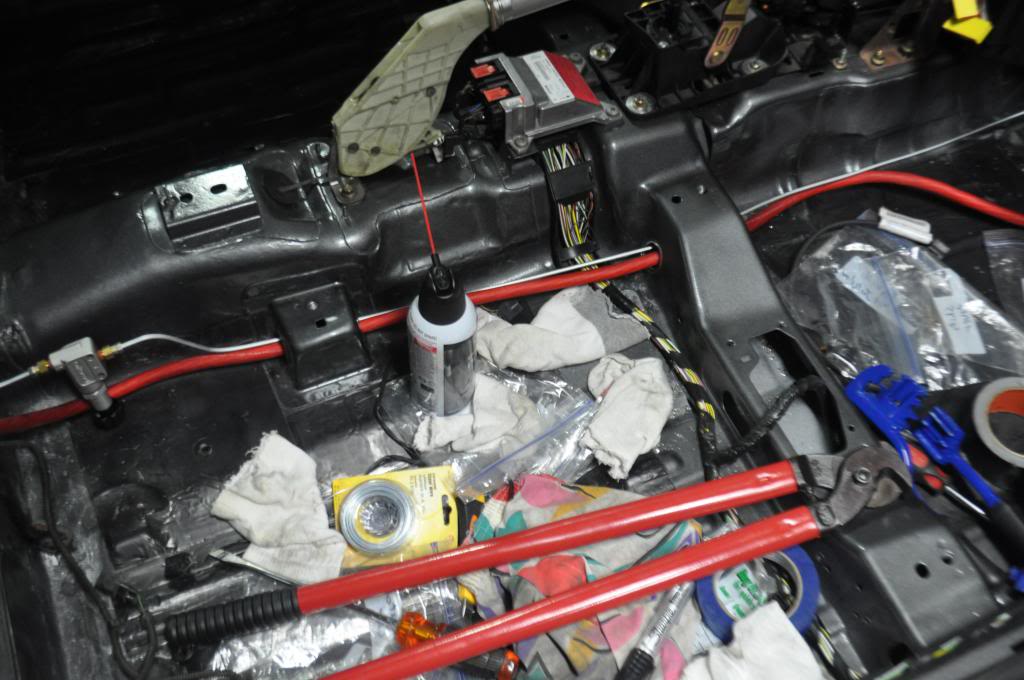
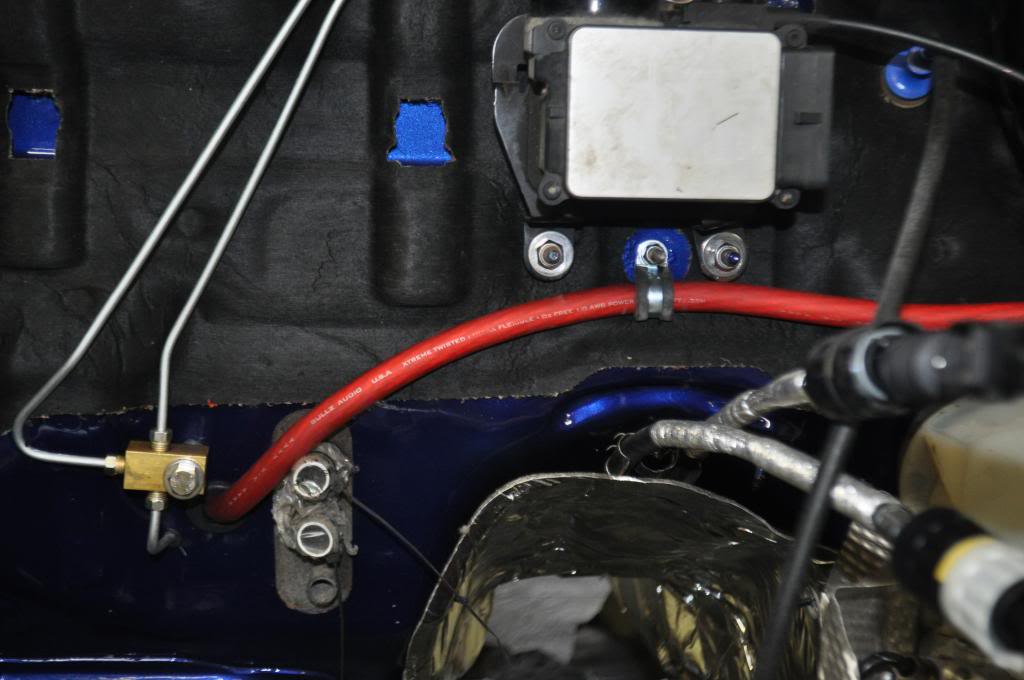
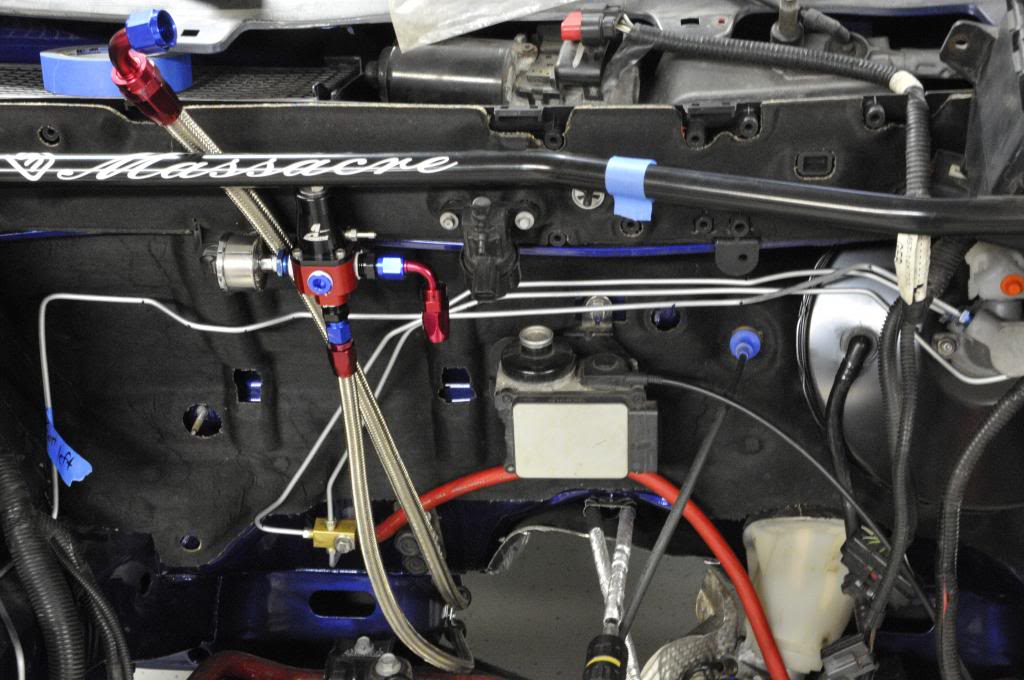
Here are the pictures of the routing and the distribution block that I forgot to put up:
The header tank that I acquired from Italo, powersteering/coolent. This is was also changed my mind on going back to AN fittings and cooling for my powersteering:
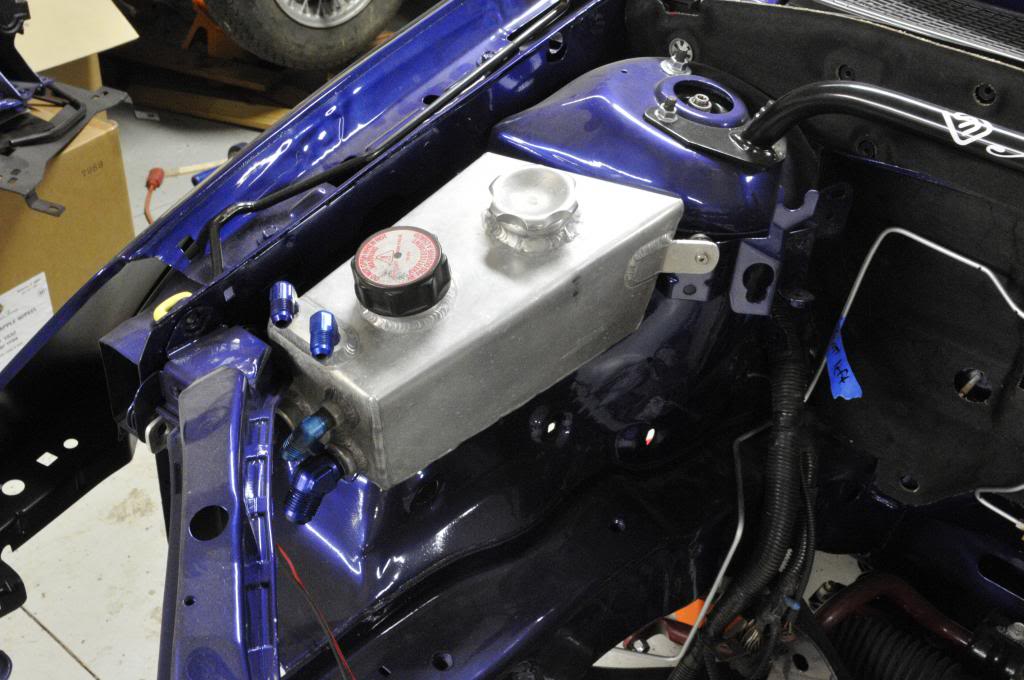


The header tank that I acquired from Italo, powersteering/coolent. This is was also changed my mind on going back to AN fittings and cooling for my powersteering:
 08-01-2014, 04:45 PM
#157
you cant fix stupid
great progress mate. somehow iv missed the last few updates but caught up now. iv noticed how you done the fuel pump and i done a similar thing with mine but iv had lots of problems splitting hoses.where i see a problem for you is the pipe that connect to the pump itself bends at 90degrees and i found im splitting at that exact same area because the pipe is bent. my pump runs up to 60psi so the pressure on that kinked pipe is a lot. iv now built up a copper pipe junction so all bends are are copper and not kinked pipe. you may fare better than i have though but if your car dies after some time just remember that pipe as your first place to check
edit, oops i just checked again and i can see its the return bent not the pipe from pump. i should really open my eyes lol
edit, oops i just checked again and i can see its the return bent not the pipe from pump. i should really open my eyes lol
Last edited by The Underdog; 08-01-2014 at 04:49 PM.
20-01-2014, 10:10 PM
#158
Regular Contributor
Thread Starter
Finally started routing the fuel system. This was mainly do to the fact I couldn't make up my mind on several things. I had to order a few more things from speedway but as long as everything arrives on time this should be fully routed by the weekend. I will have to alter and re-weld the cover for the fuel access door but there are some other things that need to be done as well so it shouldn't be to much of an issue. Another thing I was deciding on was whether to place the swirl pot under the floor or not. In the end I decided to keep it in the spare tire area and I will be adding a removable firewall with rivnuts once everything is up and running.
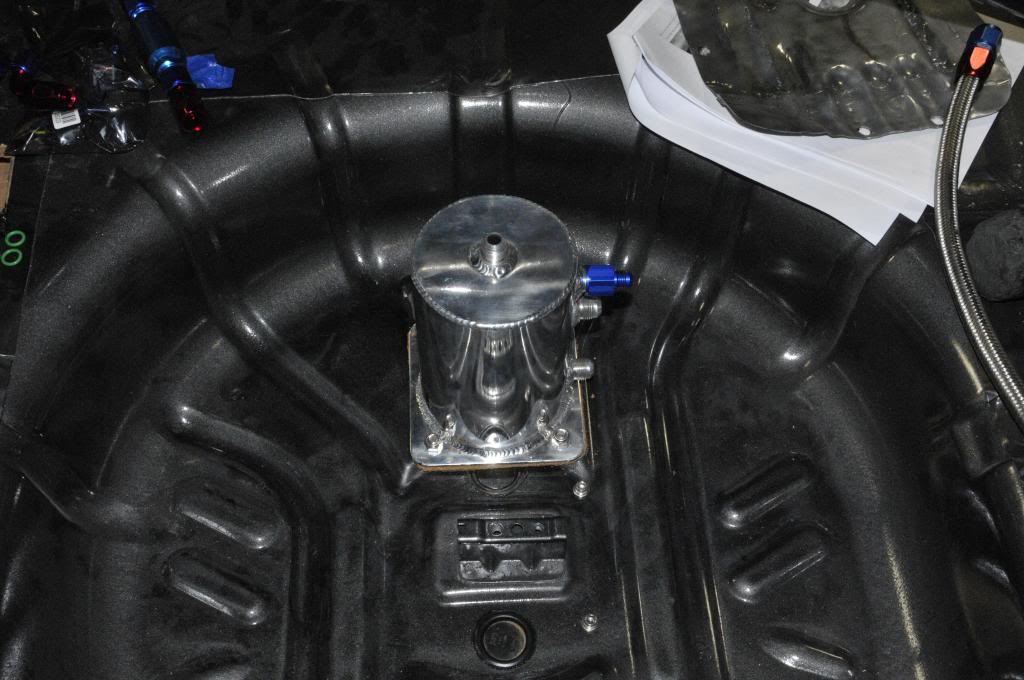
Added cork under swirlpot for a little give:
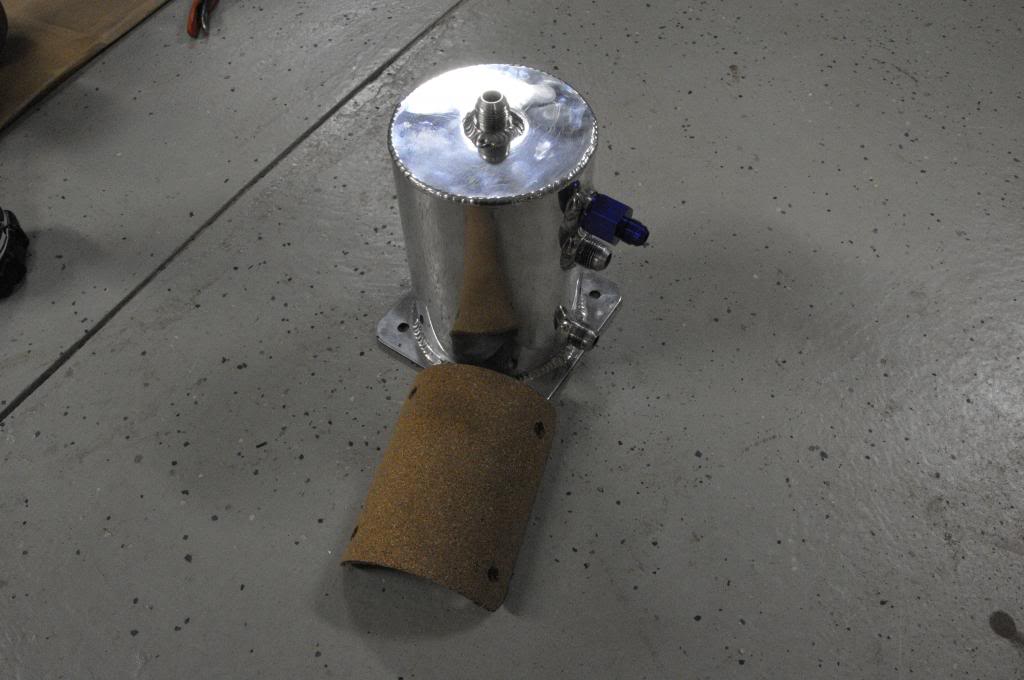
Mounted:
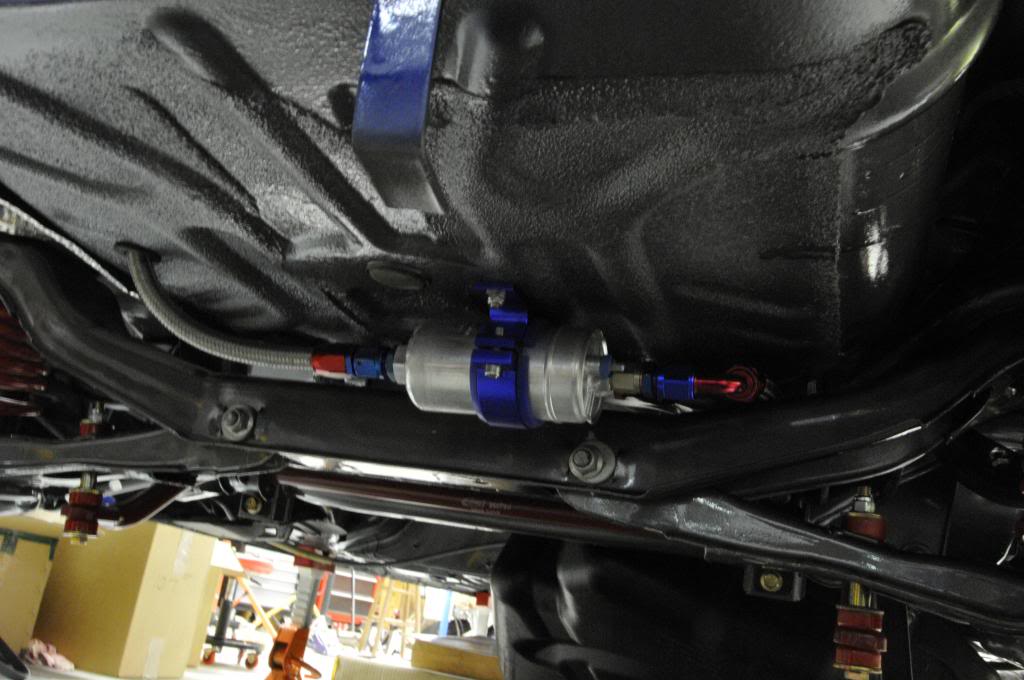
Fuel pump (mounted underneath to keep some noise out of the cabin)
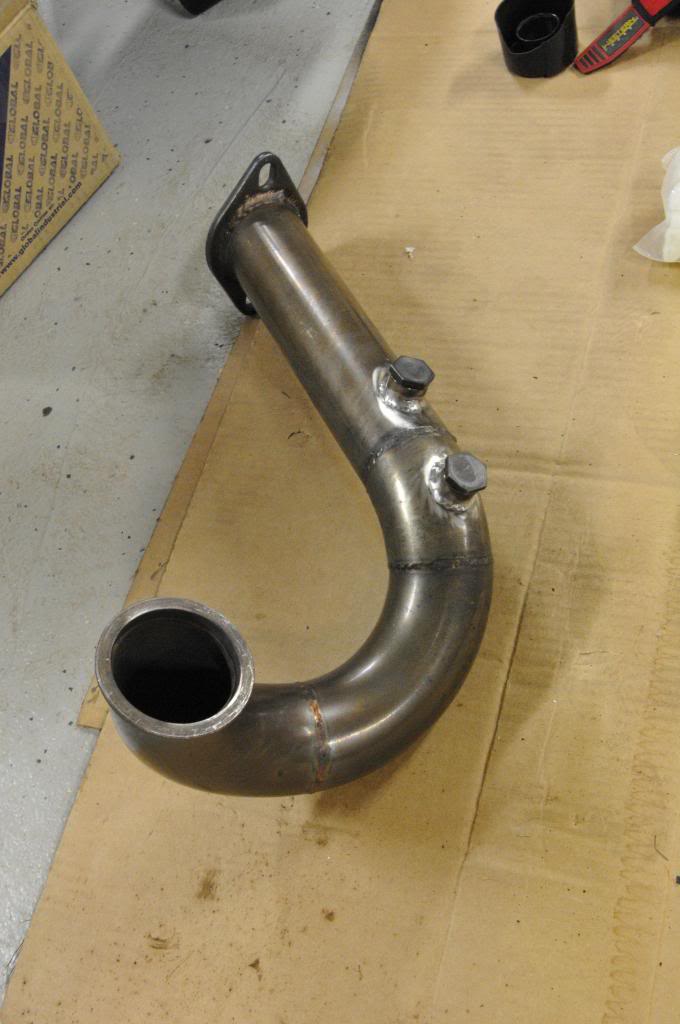
Also had two more o2 bungs placed on the down pipe
Added cork under swirlpot for a little give:

Mounted:

Fuel pump (mounted underneath to keep some noise out of the cabin)

Also had two more o2 bungs placed on the down pipe
 27-01-2014, 02:40 PM
#159
Regular Contributor
Thread Starter
A couple of things I learned while doing stainless hose and fittings:
-its not as fun as I thought it was going to be
-AN wrenches are made for tightening nuts to other fittings and not for assembly (they will mar or bend before they do a good job)
-I ended up using a crescent wrench of which they do make a aluminum version that I would like to try, but I am sure it would bend as well
-The magnetic aluminum vice clamps are a must!
-AN wrenches do not fit all parts of the fittings as the fittings sometimes vary (this was very frustrating as I bought all parts from speedway and they varied across the same fittings)
-the best way to cut Stainless line is with a grinder and a cutting blade. This will make for a little more clean up but you are going to flush the lines anyway. (the better you prep your cuts the easier the assembly is)
I actually bought another brand off of ebay (Redhorse) for the 120 8 AN fittings because it saved me $60 over the speed way fittings (keep in mind this was for 3 120 degree fittings) and they were actually better quality, they didn't mar, and they assembled easier because of the interior angle on their ends.
Swirl Pot Mounted:
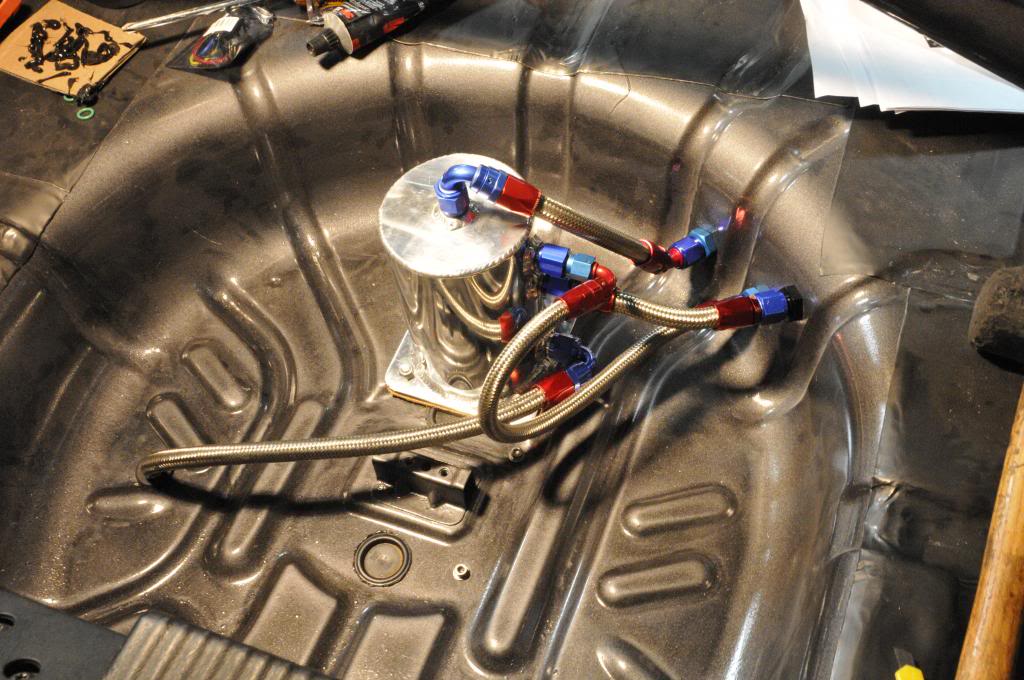
How I finally decided to do my fuel tank, this will keep all lines out of the inside of my car:
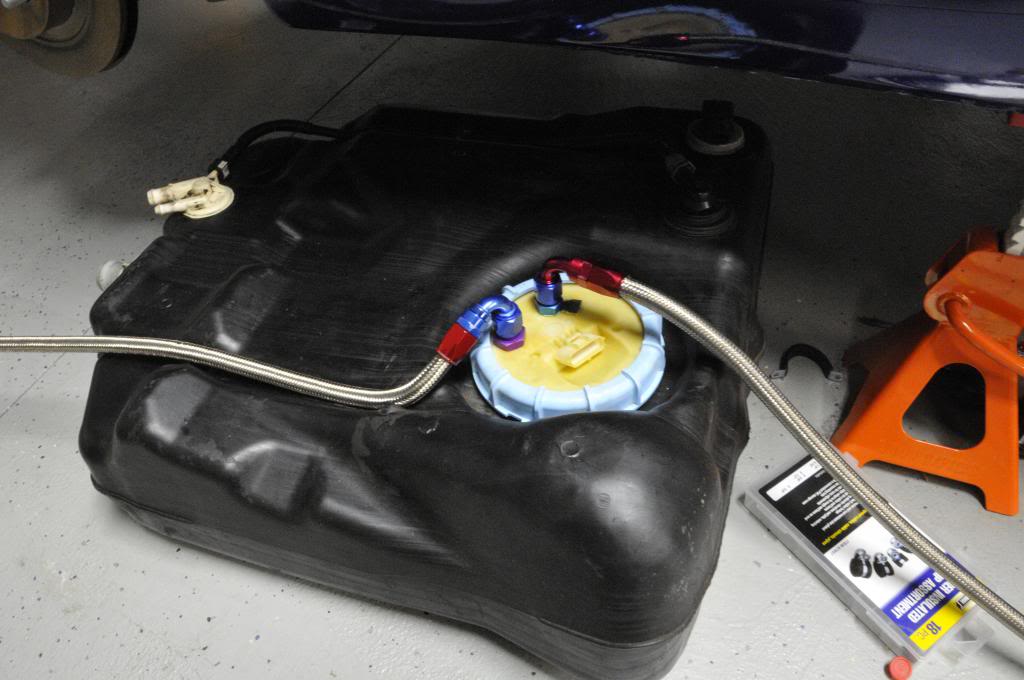
Here is where the lines pass the fuel tank, this is also where the filter will be. I am still waiting for my rivnut inserts so I can finish mounting where any lines go over tube steel:
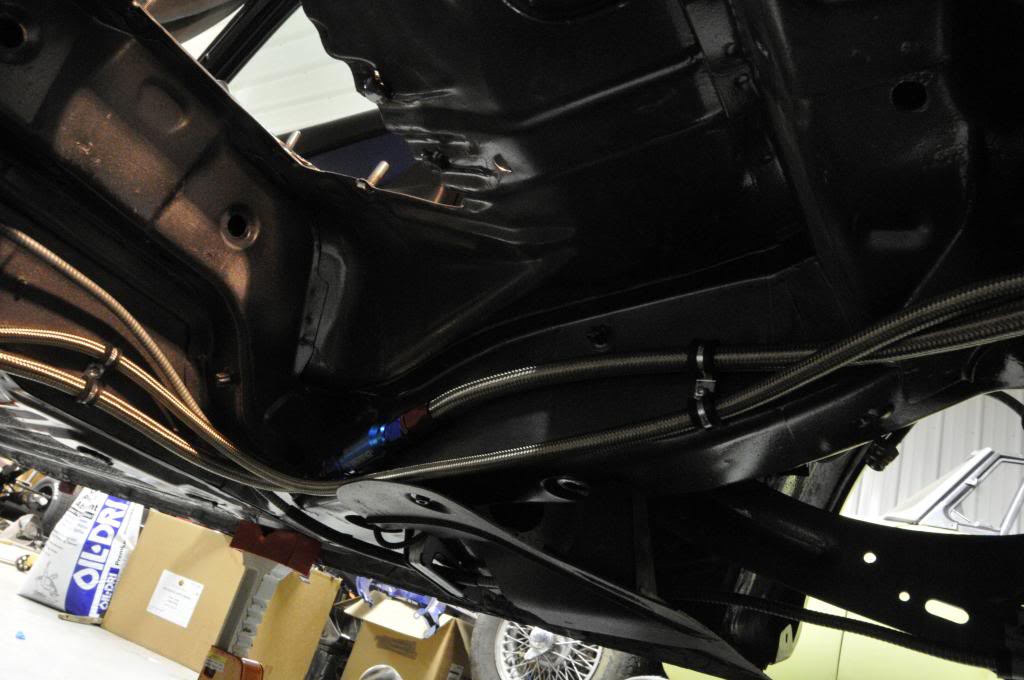
Line routing making sure to avoid harness mounts:
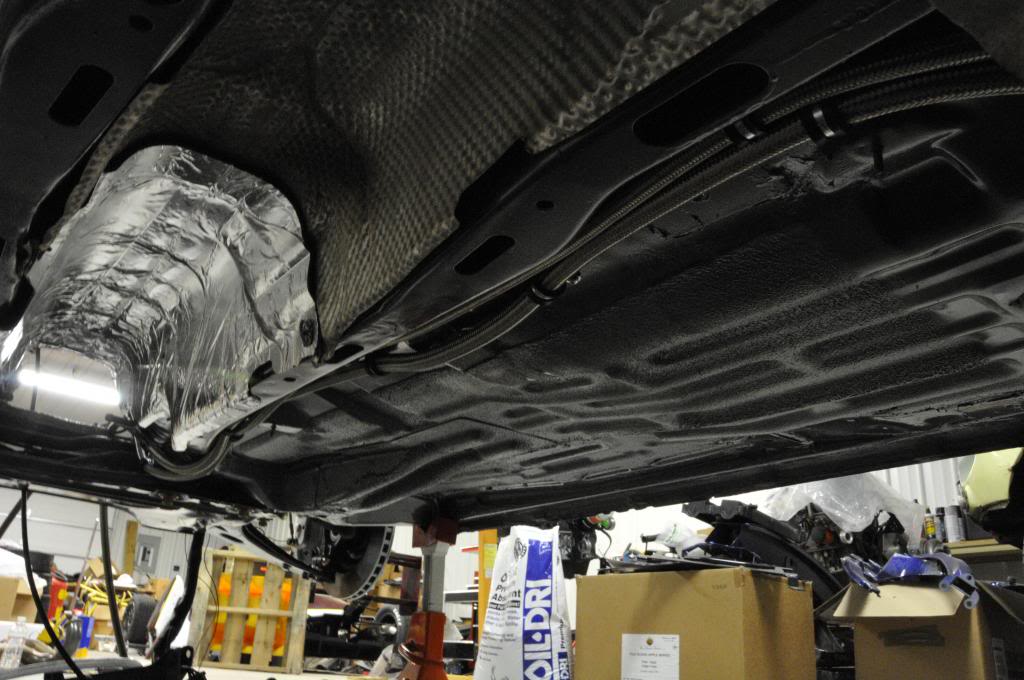
One More:
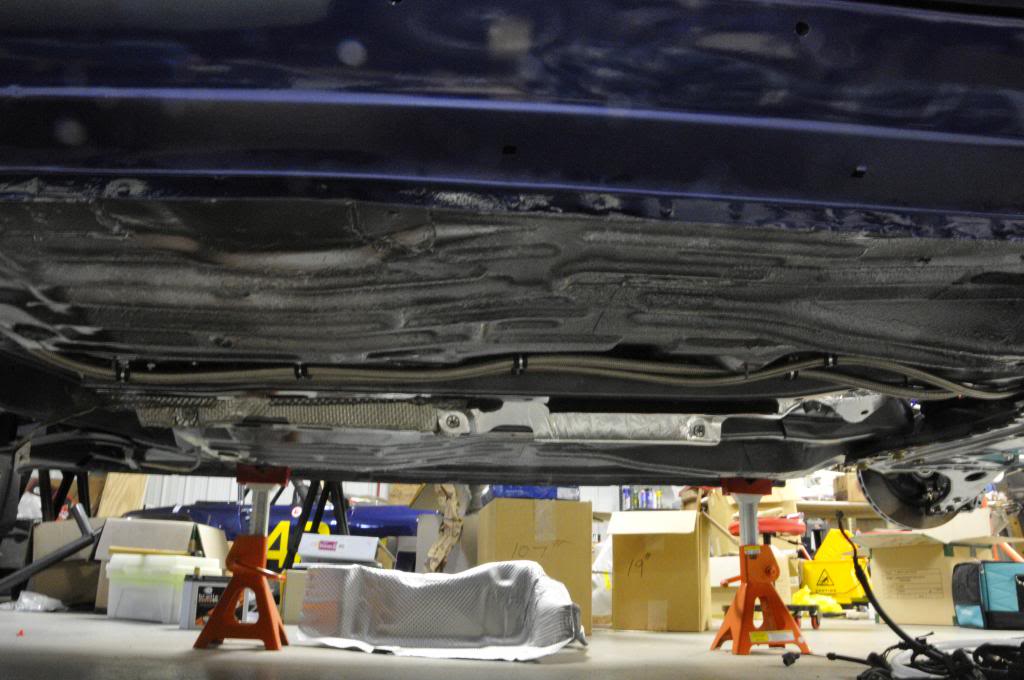
Here is where they come out, I moved the fuel pressure regulator so I wouldn't need to run the lines all the way across and now I will have more room for the oil separator:
