Retro's project the mk3 Escort rwd
 28-12-2009, 10:57 AM
#1

I havn't posted much on this Forum but was thinking you may like the project im doing at the moment ? (this thread is also on T/S).
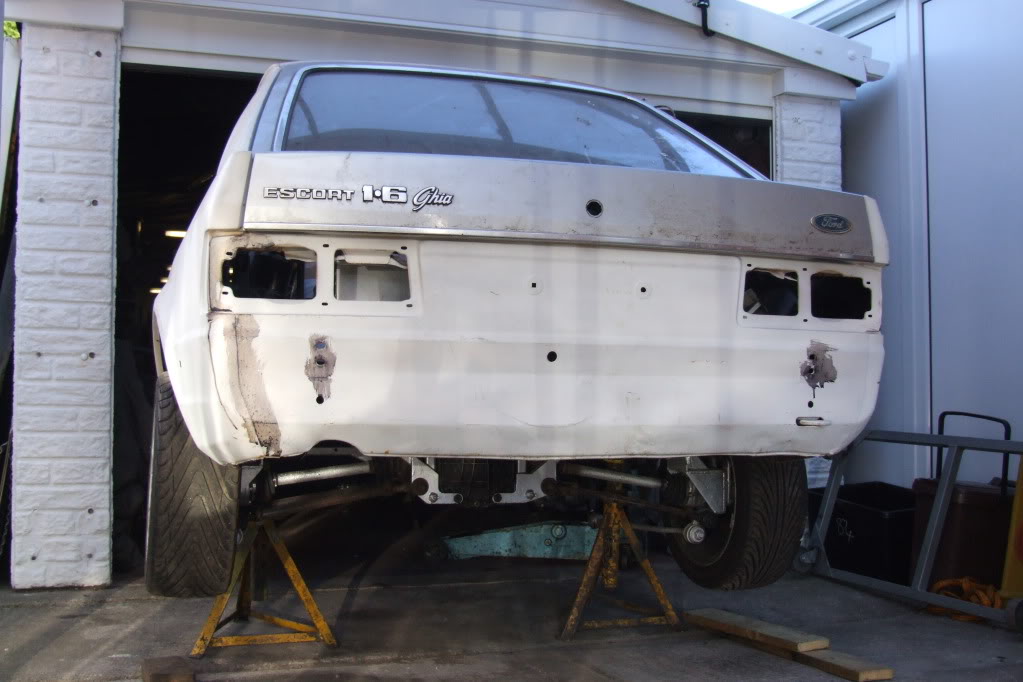
Okay this is Ronnie a mk3 Escort rwd, I've had this for over a year now and have only just got round to starting it, its a long road ahead but im finding it keeps my mind busy and i'm looking forward to the winter times in the garage.

This project is something ive been after for a long time now its a good start for me, the shell has been passed around the country over the last 10 years or more and no-one has yet got this car on the road since its conversion to RWD.

So where do I start and what's my plans ? well i'm going to fit a cosworth engine and box to it of course and keep the front running gear based on the mk2 escort.
*JOBS TO DO
*make gearbox tunnel bigger as it was designed for the type9 box and not the t5 cosworth
*Fit engine and box
*sort out a front cross member/engine mounts probably chassis mount now
*New wings Front panel
*roof skin
*sort out roll cage weld in place
*fuel tank
*brakes
And thats as far as I can think for now lol.
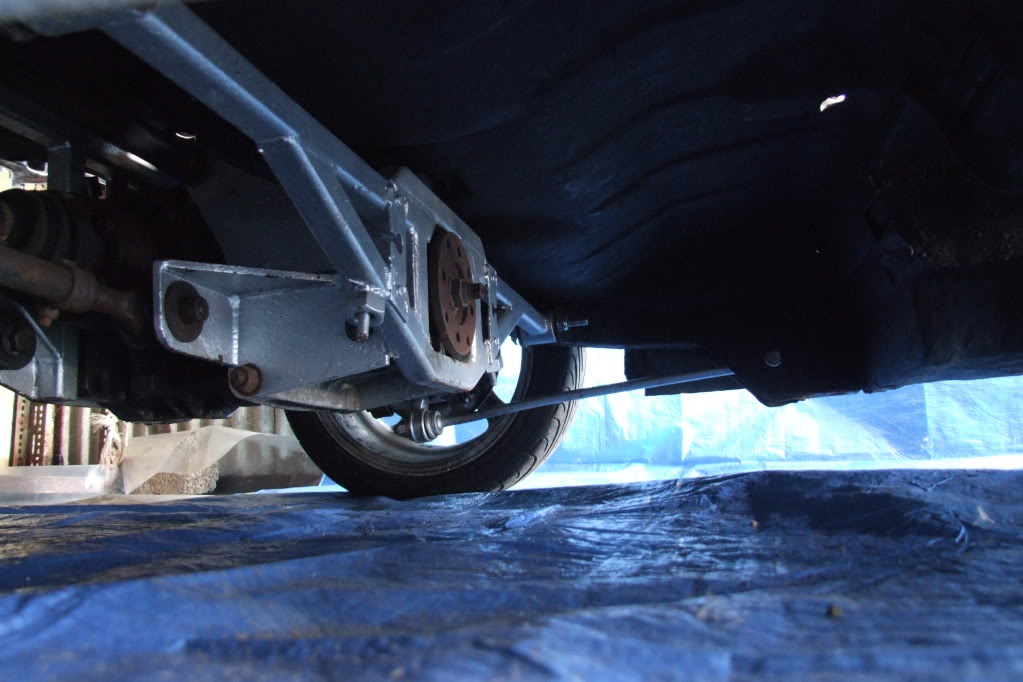
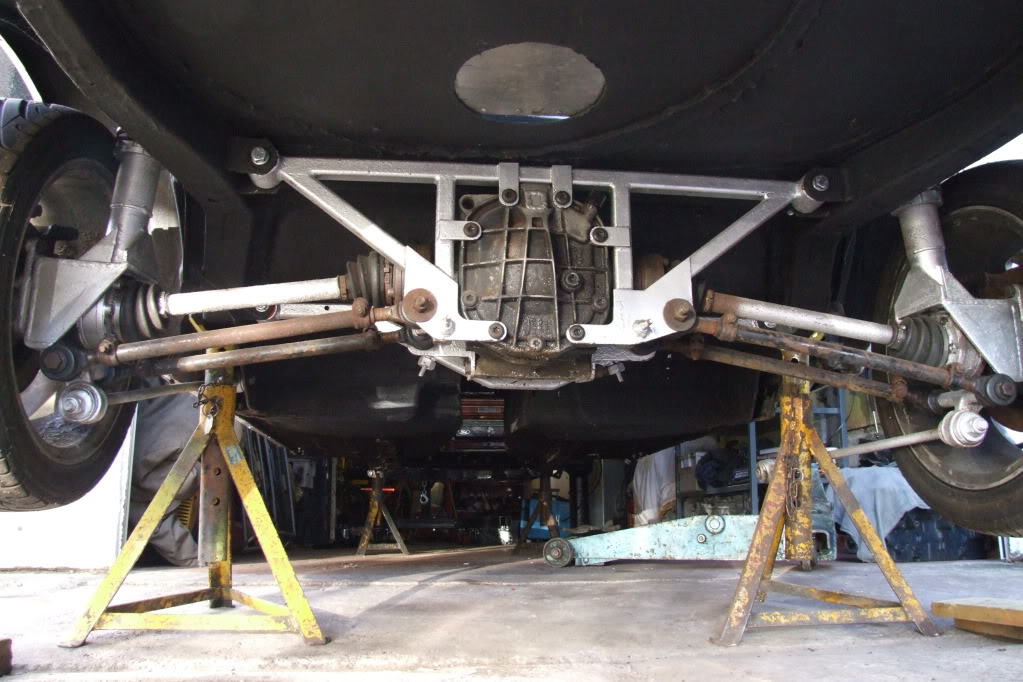
Cosworth rear axle setup linked up

Roll cage in and gearbox tunnel sadly this needs moding to fit the t5 box

Back in the garage after storage and being half way round the world lol ready to start .
.
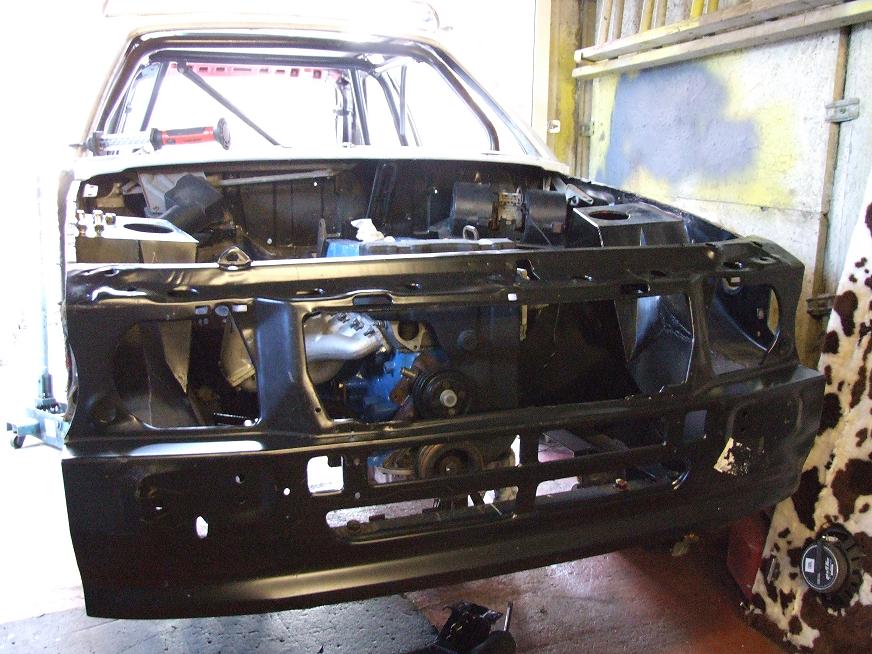
First I attacked the wings as they need a fresh set, as you can see the front corners have been cut earlyer in its life this was to fit a 1700 turbo kit.


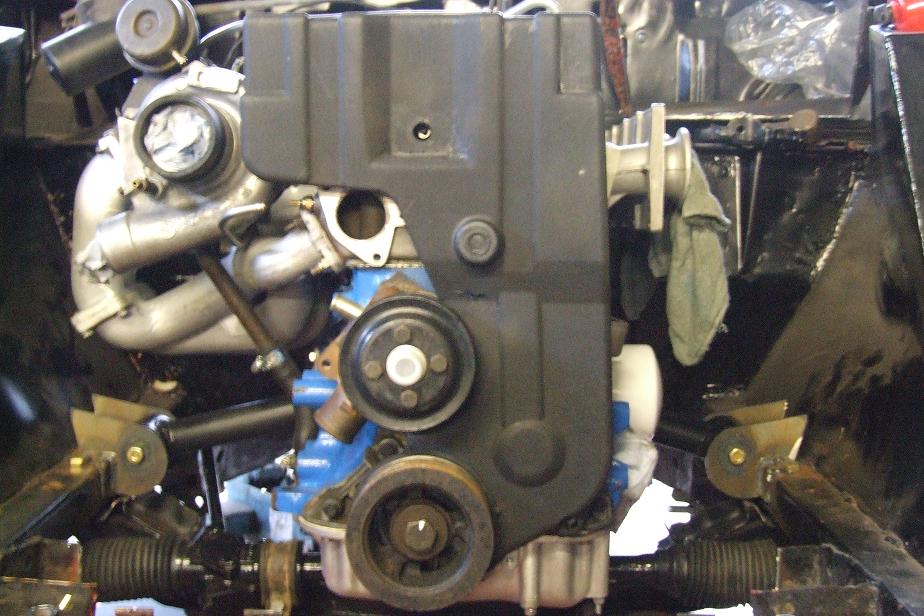
Okay so now the front panel and wings are off its time to offer the YB in.

It fits but its very close with the xmember/mounting the engine to it, so im now going to cut the mounts off and use a chassis mount kit.

By this time the engine has been in and out more times than ive had a cuppa.

Looks like a capri xmember fits good to the chassis also so does the steering rack as this is longer than the Escort type. just need to lob off the engine mounts now.

Engine back out and ready to mod the gearbox tunnel and play around with the x member/chassis mounts.
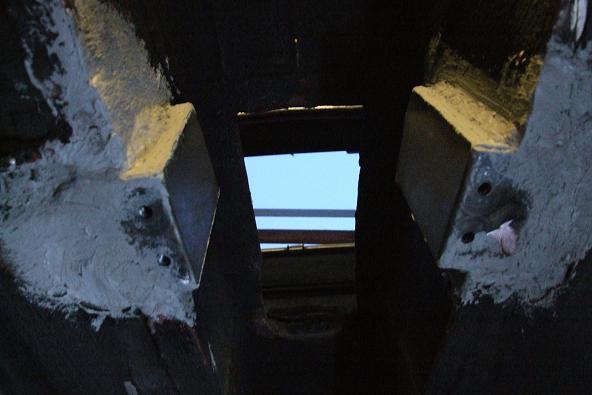
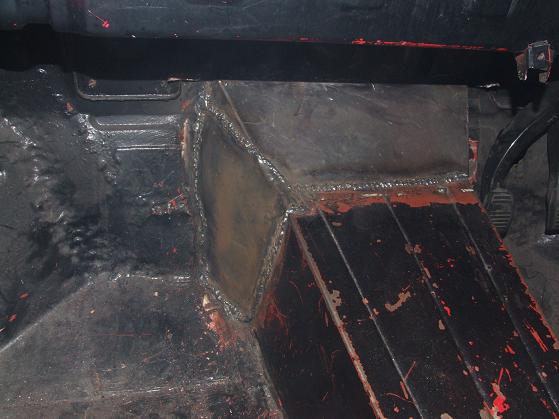
Started marking out the tunnel for cutting as i'm only removing the front section and about 9ich back, just to clear the clutch from and bellhousing etc.

Then cut the new fabrication g/box tunnel to bits as this was no way going to be a direct fit lol.
Welded the pieces of metal together and held in place with screws just to offer the engine in and see how it fits for now.

Well I now have plenty of room around the box and the clutch arm clears nice.
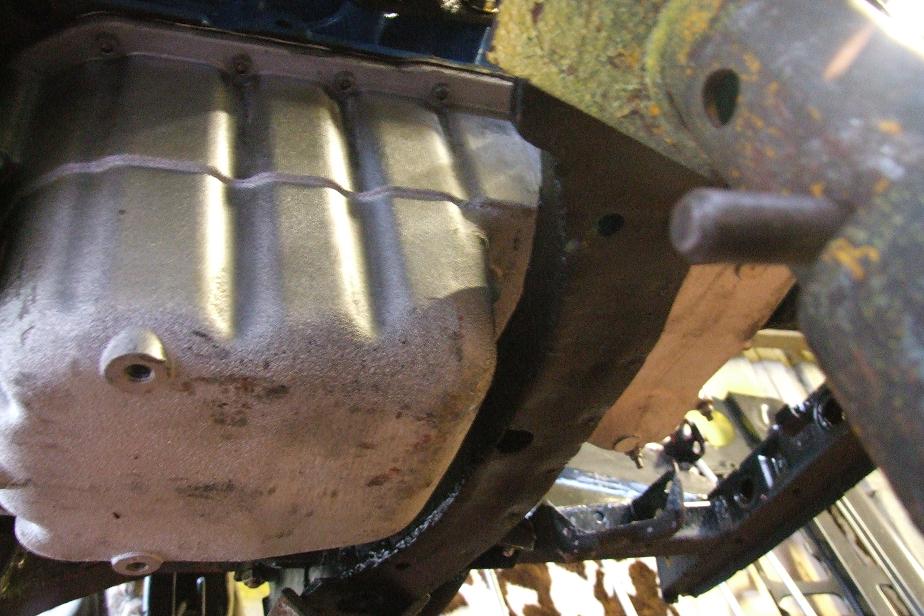
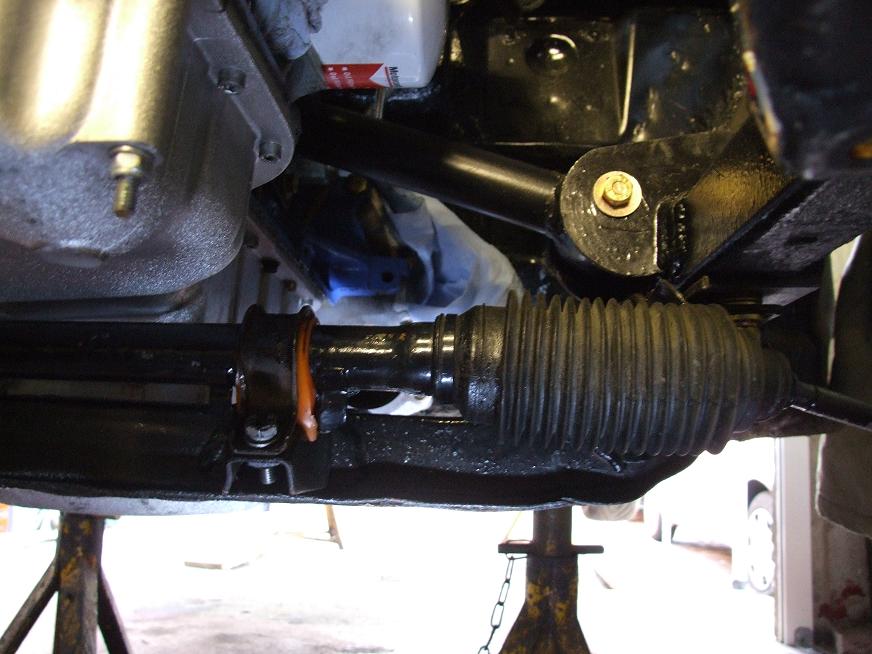
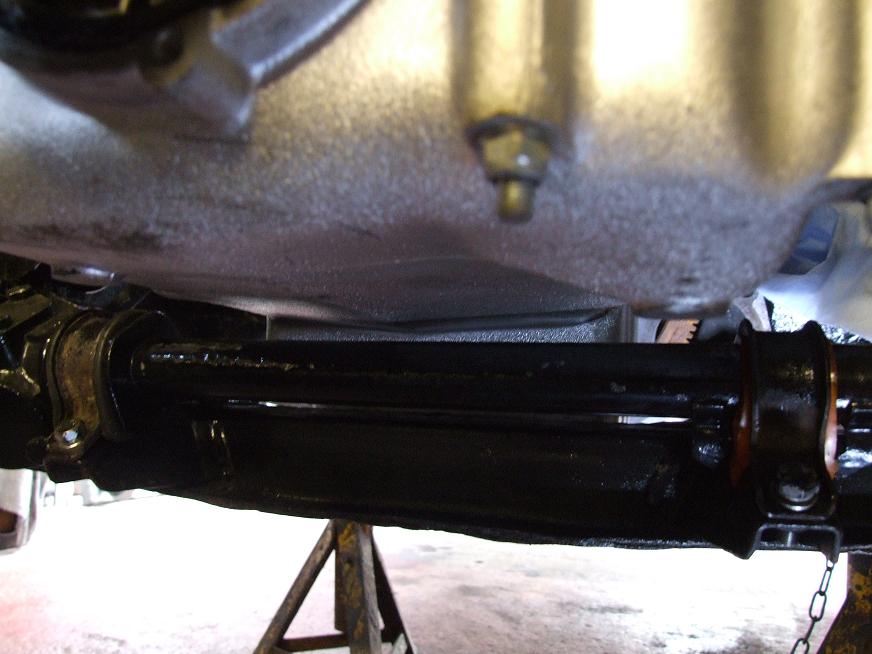
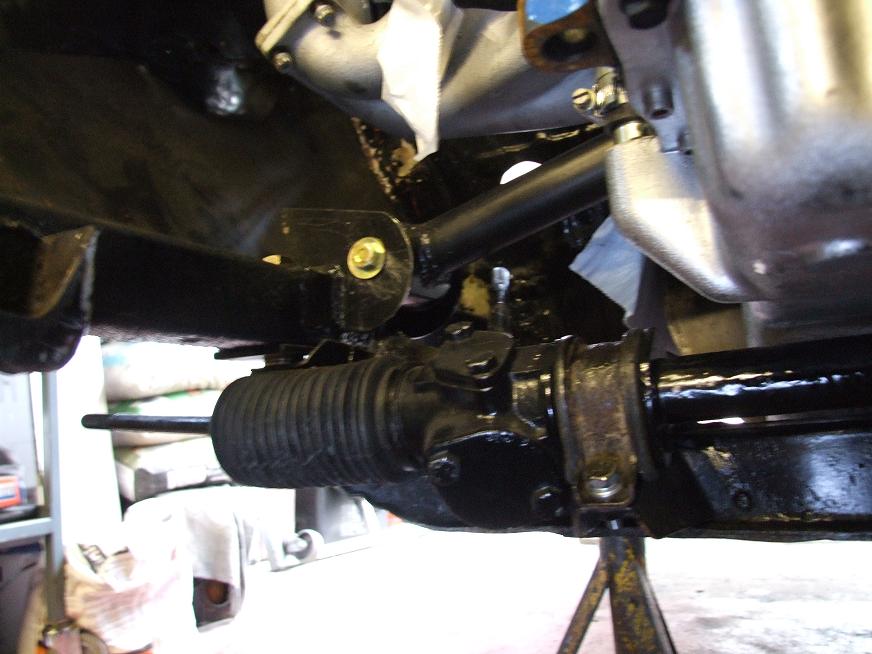
Got myself a new capri steering rack and offered up the xmemeber and it just clears the sump. wahhoo.
Next on the list is...weld the tunnel up fit engine (Again) and weld chassis mounts.
Modid and fitted xmember/steering rack, slotted engine in ready for chassis mount kit.

Just tacked in place for now will weld up properly when I remove the engine next.
Couldn't fit the eye bushes into the mount arms, as they are a press fit. (job for monday at work).
At least the engine is still sat in place, not on the floor..

Okay this is Ronnie a mk3 Escort rwd, I've had this for over a year now and have only just got round to starting it, its a long road ahead but im finding it keeps my mind busy and i'm looking forward to the winter times in the garage.
This project is something ive been after for a long time now its a good start for me, the shell has been passed around the country over the last 10 years or more and no-one has yet got this car on the road since its conversion to RWD.
So where do I start and what's my plans ? well i'm going to fit a cosworth engine and box to it of course and keep the front running gear based on the mk2 escort.
*JOBS TO DO
*make gearbox tunnel bigger as it was designed for the type9 box and not the t5 cosworth
*Fit engine and box
*sort out a front cross member/engine mounts probably chassis mount now
*New wings Front panel
*roof skin
*sort out roll cage weld in place
*fuel tank
*brakes
And thats as far as I can think for now lol.
Cosworth rear axle setup linked up
Roll cage in and gearbox tunnel sadly this needs moding to fit the t5 box
Back in the garage after storage and being half way round the world lol ready to start
.First I attacked the wings as they need a fresh set, as you can see the front corners have been cut earlyer in its life this was to fit a 1700 turbo kit.
Okay so now the front panel and wings are off its time to offer the YB in.
It fits but its very close with the xmember/mounting the engine to it, so im now going to cut the mounts off and use a chassis mount kit.
By this time the engine has been in and out more times than ive had a cuppa.
Looks like a capri xmember fits good to the chassis also so does the steering rack as this is longer than the Escort type.
just need to lob off the engine mounts now.Engine back out and ready to mod the gearbox tunnel and play around with the x member/chassis mounts.
Started marking out the tunnel for cutting as i'm only removing the front section and about 9ich back, just to clear the clutch from and bellhousing etc.
Then cut the new fabrication g/box tunnel to bits as this was no way going to be a direct fit lol.
Welded the pieces of metal together and held in place with screws just to offer the engine in and see how it fits for now.
Well I now have plenty of room around the box and the clutch arm clears nice.
Got myself a new capri steering rack and offered up the xmemeber and it just clears the sump. wahhoo.
Next on the list is...weld the tunnel up fit engine (Again)
and weld chassis mounts. Modid and fitted xmember/steering rack, slotted engine in ready for chassis mount kit.
Just tacked in place for now will weld up properly when I remove the engine next.
Couldn't fit the eye bushes into the mount arms, as they are a press fit. (job for monday at work).
At least the engine is still sat in place, not on the floor.
.Was out in the garage today got the engine mounts welded into place and all level, very snug fit on the steering rack but plenty of room round the back of the xmember.
Im using the Escort mk2 upgrade mount for the type9 gearbox with the weld on brackets.
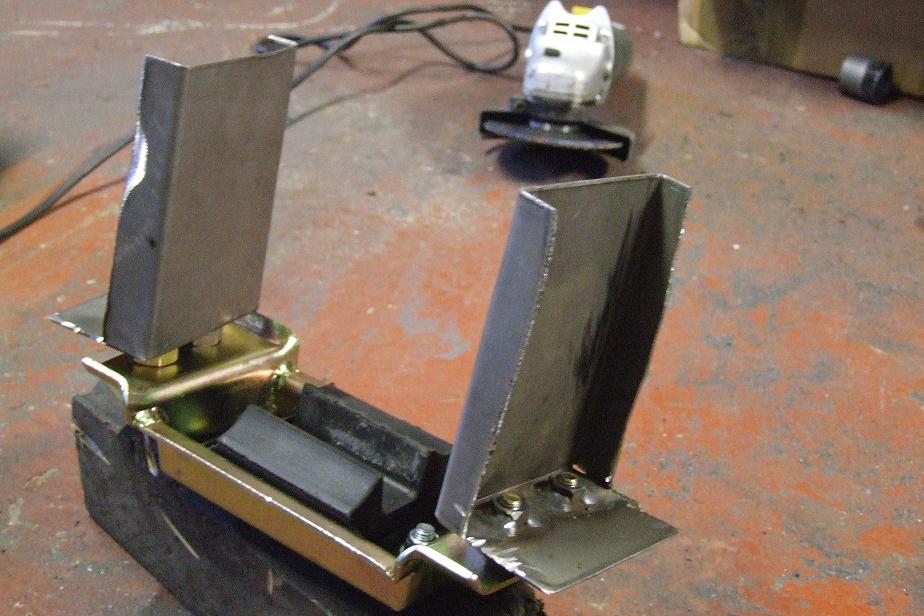

Now All in place and welded up.
but plenty of room round the back of the xmember. Im using the Escort mk2 upgrade mount for the type9 gearbox with the weld on brackets.
Now All in place and welded up.


 29-12-2009, 10:11 AM
#7
PassionFord Post Whore!!
Gonna be fun
Trending Topics
 03-01-2010, 05:11 PM
#9
Another day in the garage.
Removed engine welded up chassis and g/box mounts properly, just need to sort the tunnel out then prep engine bay so the lump can finally stay in place.
Will add fresh pics soon.
Removed engine welded up chassis and g/box mounts properly, just need to sort the tunnel out then prep engine bay so the lump can finally stay in place.
Will add fresh pics soon.
Last edited by retro d; 03-01-2010 at 05:13 PM.
 17-01-2010, 10:30 AM
#11
Okay havn't posted up for a while now, just a quick update.
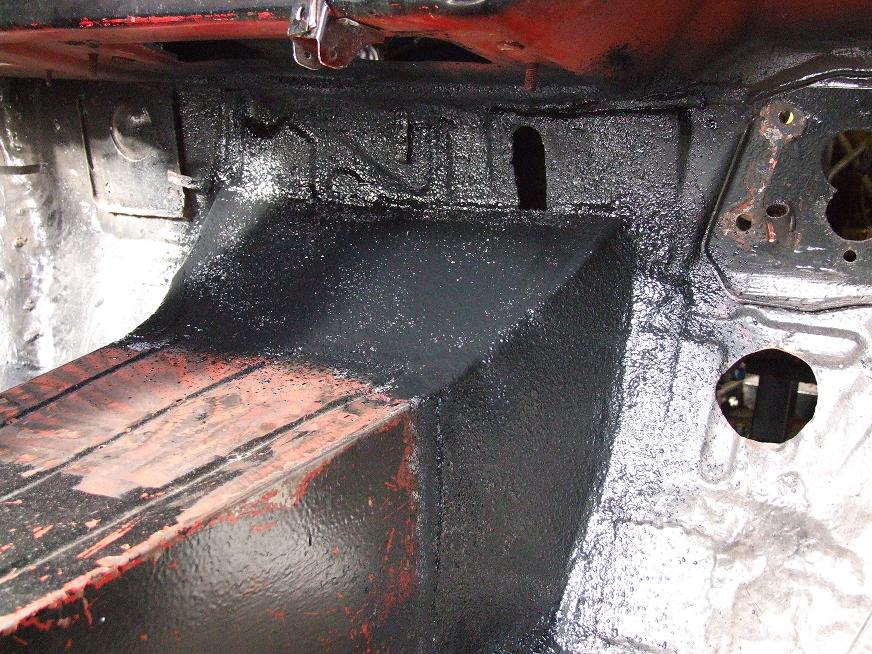
finished up the gearbox mount with seam sealer, just needs protecting now with stone guard etc.
Started to make a new gearbox tunnel just need to do the drivers side plate, im not the best at fabricating parts but at least I give it ago.
finished up the gearbox mount with seam sealer, just needs protecting now with stone guard etc.
Started to make a new gearbox tunnel just need to do the drivers side plate, im not the best at fabricating parts but at least I give it ago
.  20-02-2010, 06:06 PM
#15
Okay so things have gone quiet on this lately due to not putting much time in on the project tut tut, its time for an update.
Had a good day in the garage today got lots done.
G/box tunnel all protected and done
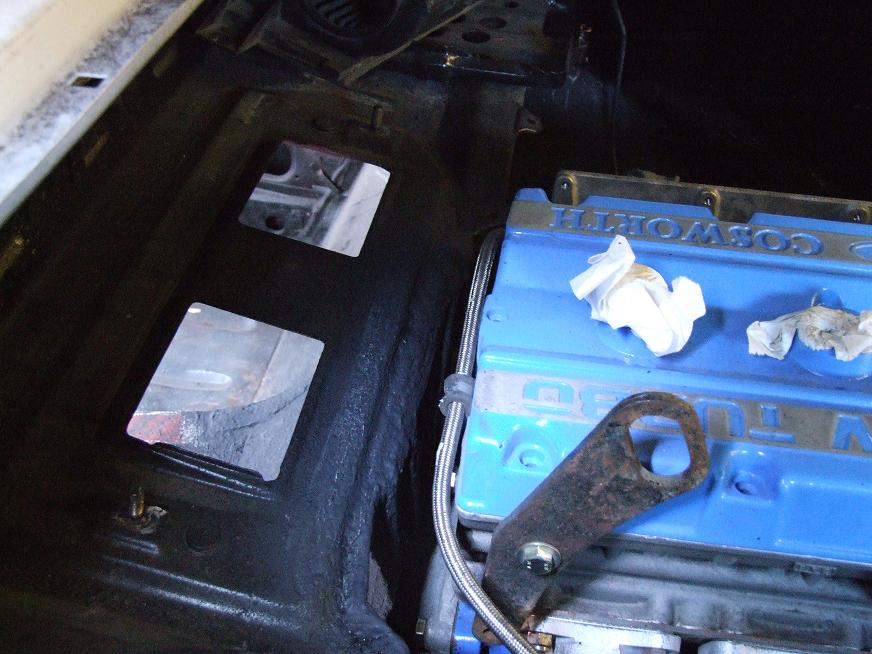
Bulkhead cut back for more room and welded up.
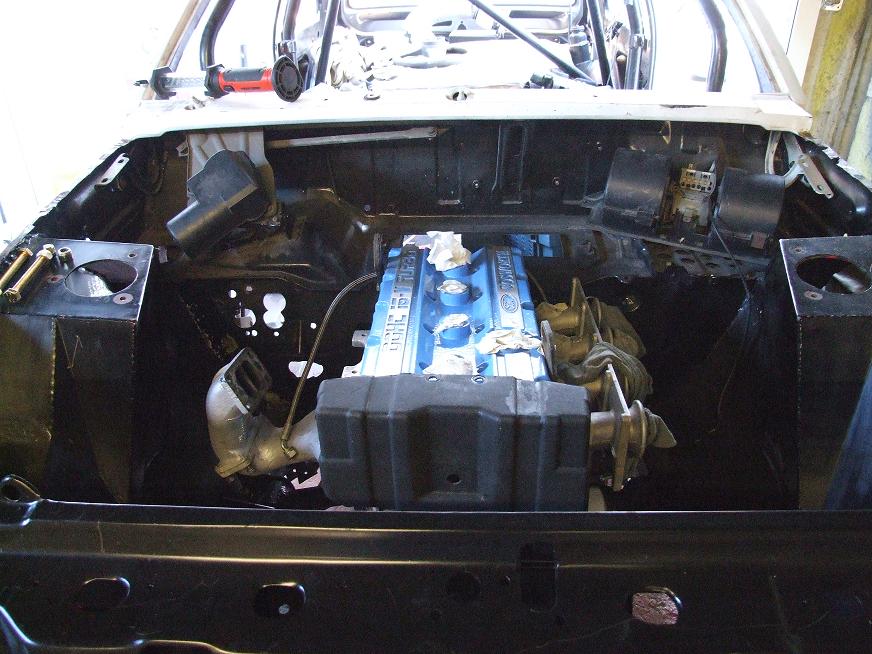
Engine in and this time should be for good ???
Gearbox mount all a nice fit.
Clutch fork now clears g/box tunnel wahoo.
Chassis mounts
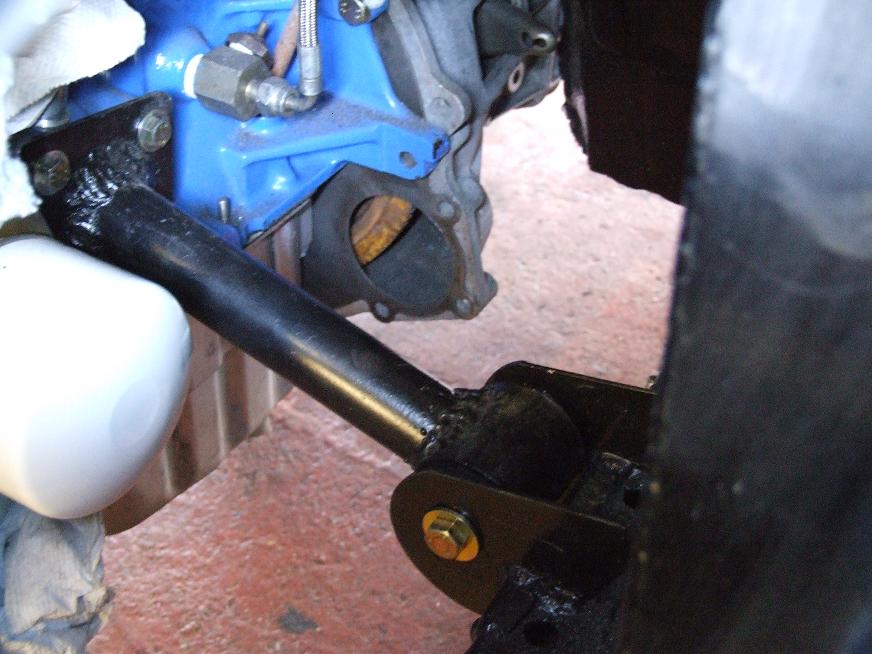
Capri xmember and steering rack all fitted and clears the sump
New front panel to fit, its looking more together now.
Hope you like the project anyway ?
This has taken me lots of saturdays to get this far, but im well happy with it and im not in a massive rush to get finished.
Cheers Chaps and thanks for looking.
Had a good day in the garage today got lots done.
G/box tunnel all protected and done
Bulkhead cut back for more room and welded up.
Engine in and this time should be for good ???
Gearbox mount all a nice fit.
Clutch fork now clears g/box tunnel wahoo.
Chassis mounts
Capri xmember and steering rack all fitted and clears the sump
New front panel to fit, its looking more together now.
Hope you like the project anyway ?
This has taken me lots of saturdays to get this far, but im well happy with it and im not in a massive rush to get finished.
Cheers Chaps and thanks for looking.


 29-09-2010, 09:46 PM
#25
Hey mate yeah I know lol, its a winter project and ive let other things get in the way over this year.
Im going to start this again in a month or so and ive just Started to empty the garage out after the shell became a place to store parts .
.
Tbh im not sure on the look probably just simple as a 1.3 body with compo's etc, at the moment im heading towards just a track car but will see how it goes.
Thanks.
Im going to start this again in a month or so and ive just Started to empty the garage out after the shell became a place to store parts
.Tbh im not sure on the look probably just simple as a 1.3 body with compo's etc, at the moment im heading towards just a track car but will see how it goes.
Thanks.
Last edited by retro d; 29-09-2010 at 09:50 PM.
29-09-2010, 09:46 PM
#26
10K+ Poster!!

 29-09-2010, 10:19 PM
#30
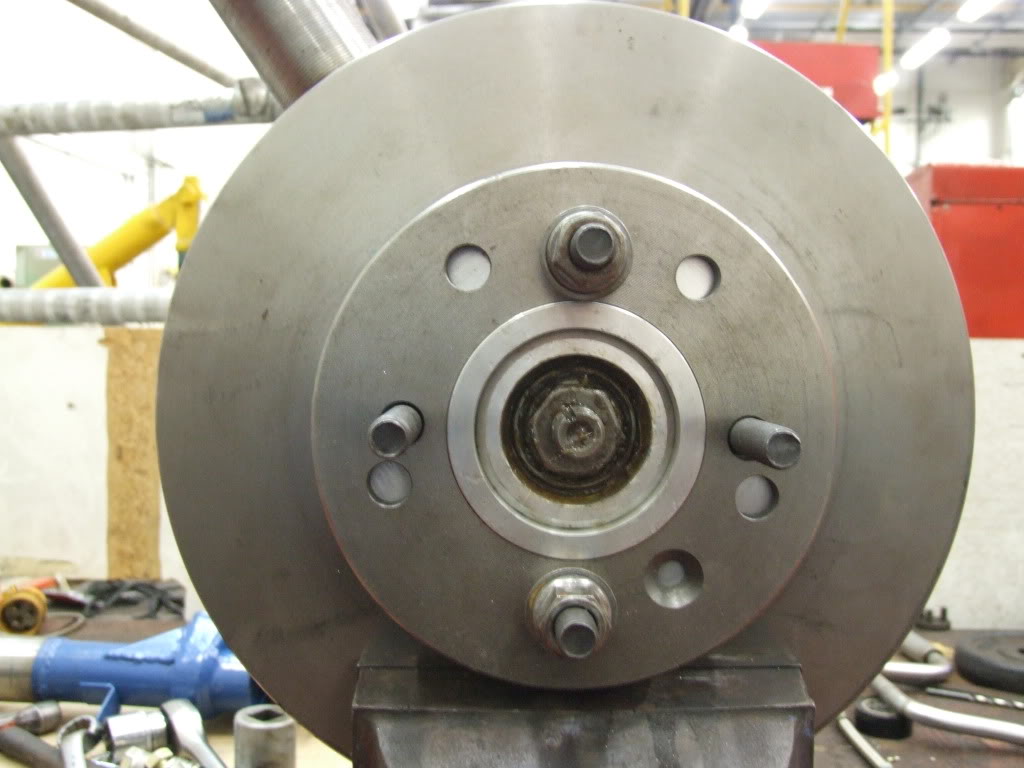
Cheers  , as for the hubs they are the same bearings as a 2wd cosworth type but the caliper anchor bracket are smaller so im not sure what they are off any ideas.? I will be fitting new hubs/bearings anyway so probably going to fit the 2wd cosworth one's so I can upgrade the brakes.
30-09-2010, 10:17 AM
#32
Most the fab work was done when I got it and its never been on the road since the conversion  , apparently only two (including this one) idendical shells where made from the same fabricator and one is used as a rally car.
The axle was bolted in just need securing etc new bushes and recon the coilovers.
It was made to fit the Escort mk2 front struts, I got a nice pair of coilovers with Brembo calipers to go on.
, apparently only two (including this one) idendical shells where made from the same fabricator and one is used as a rally car.The axle was bolted in just need securing etc new bushes and recon the coilovers.
It was made to fit the Escort mk2 front struts, I got a nice pair of coilovers with Brembo calipers to go on.
Last edited by retro d; 30-09-2010 at 10:20 AM.
30-09-2010, 10:35 AM
#33
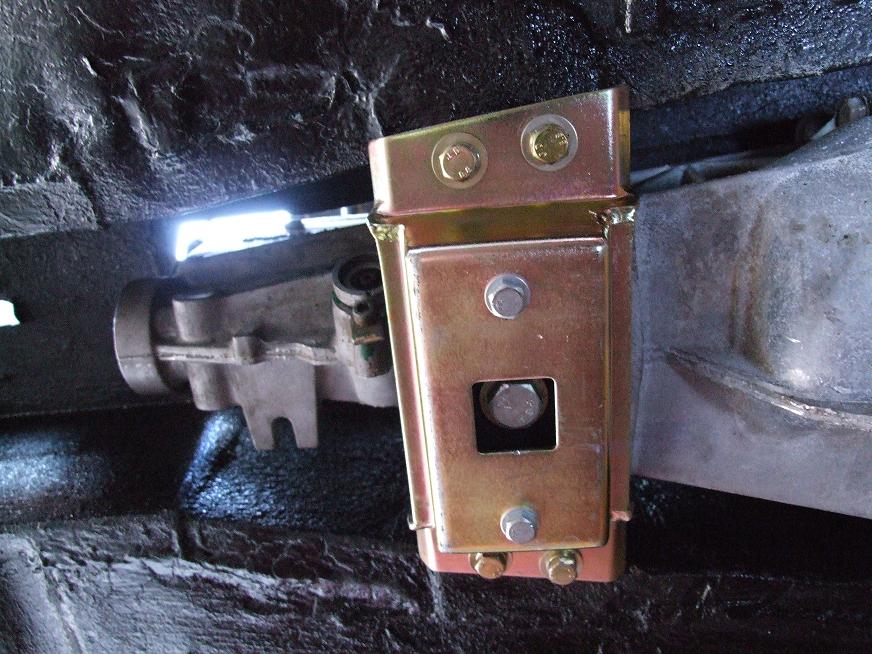
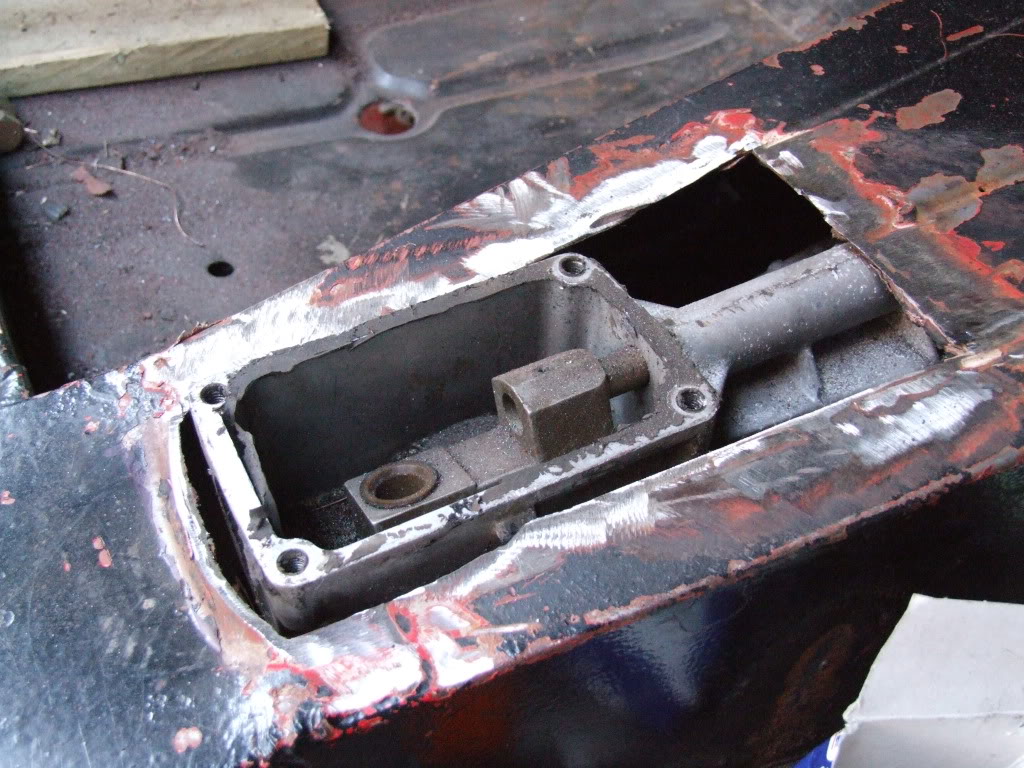
Im using the escort mk2 uprated g/box mount with the weld in plates.
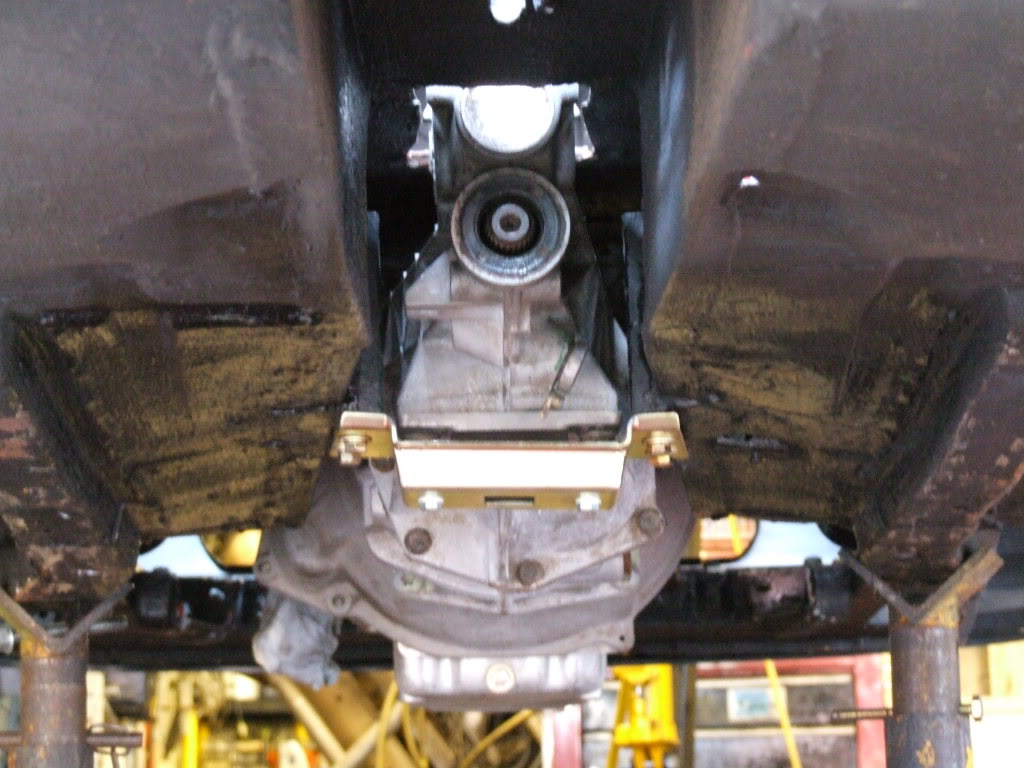
As you can see it was made for the smaller type9 5speed g/box.
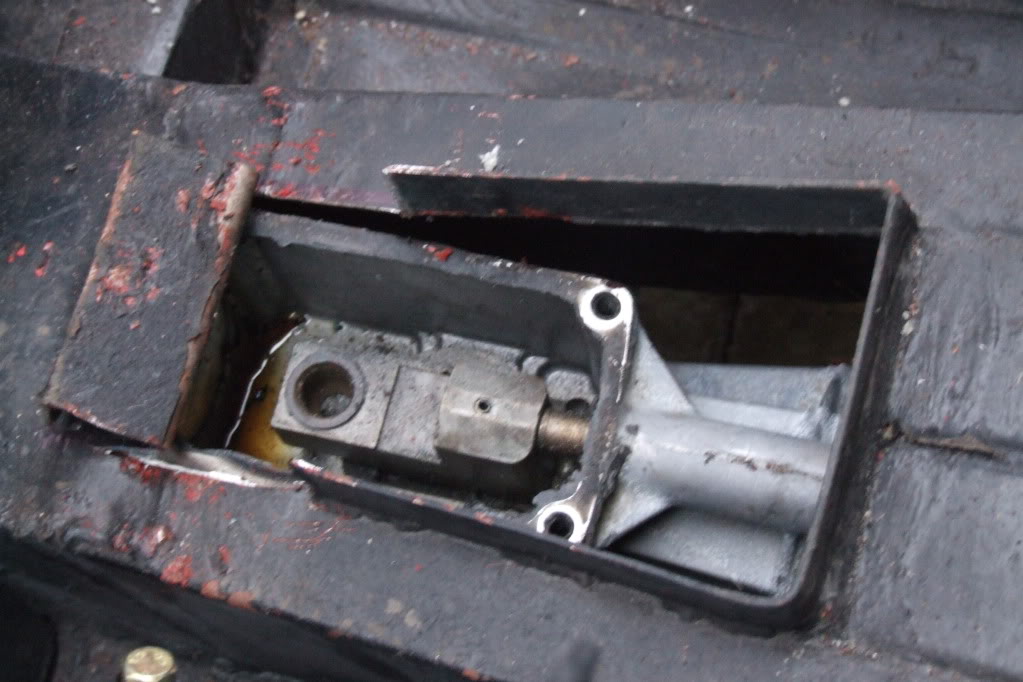
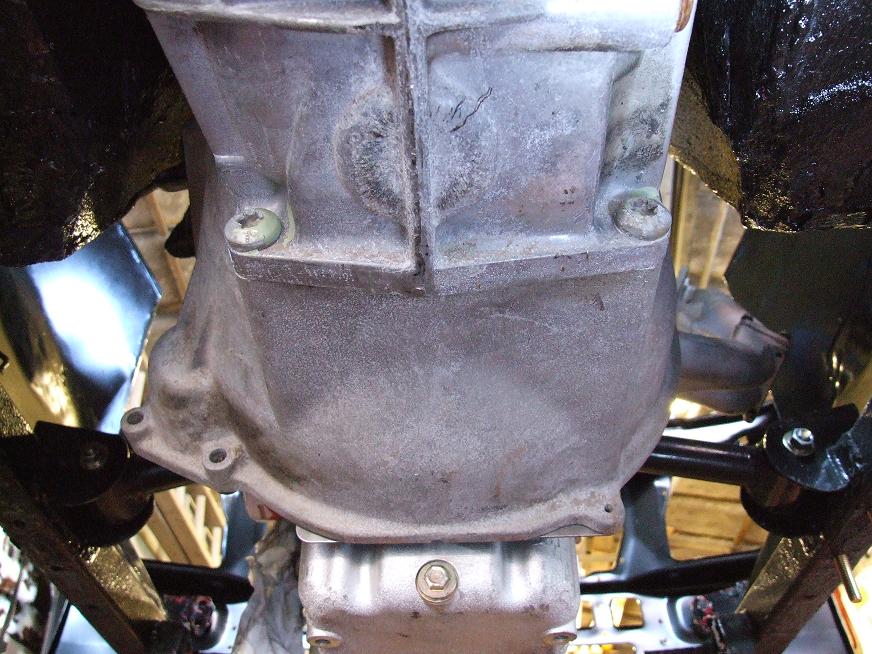
With abit of cutting and a new tunnel the big t5 fits a treat, I have now droped it lower on spacer plates to clear the top of the g/box on the body.
As you can see it was made for the smaller type9 5speed g/box.
With abit of cutting and a new tunnel the big t5 fits a treat, I have now droped it lower on spacer plates to clear the top of the g/box on the body.
03-10-2010, 10:46 AM
#37
d tbh i havent a clue ,
although if when u take them off you get a cpl pics up may be eaiser to see ,
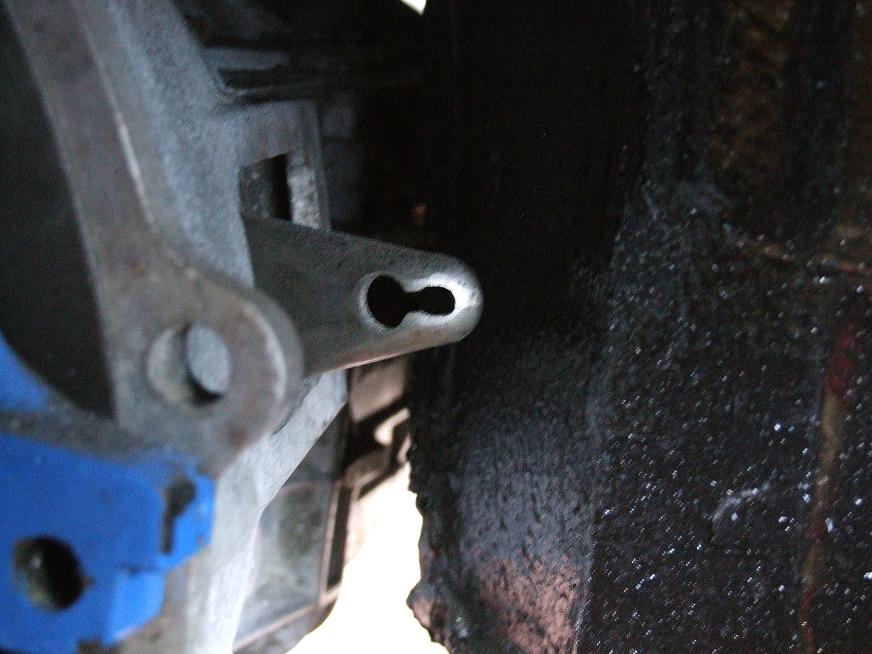
from what i can see , theve modded the bottom of the shock to house a plate , then bolted the hub assembly to it ,
looks a simple and effective setup
keep up the progress mate
although if when u take them off you get a cpl pics up may be eaiser to see ,
from what i can see , theve modded the bottom of the shock to house a plate , then bolted the hub assembly to it ,
looks a simple and effective setup
keep up the progress mate
03-10-2010, 04:25 PM
#38
d tbh i havent a clue ,
although if when u take them off you get a cpl pics up may be eaiser to see ,
from what i can see , theve modded the bottom of the shock to house a plate , then bolted the hub assembly to it ,
looks a simple and effective setup
keep up the progress mate
although if when u take them off you get a cpl pics up may be eaiser to see ,
from what i can see , theve modded the bottom of the shock to house a plate , then bolted the hub assembly to it ,
looks a simple and effective setup
keep up the progress mate
03-10-2010, 05:14 PM
#39

Nice project, love the detailed pics, really helps!
Escpecially as I need in enlarge the tunnel on my car soon as it's got a Type 9 in there but needs a T5 as soon as I fit the new engine.
That rear diff mounting looks a lovely bit of kit too!
Escpecially as I need in enlarge the tunnel on my car soon as it's got a Type 9 in there but needs a T5 as soon as I fit the new engine.
That rear diff mounting looks a lovely bit of kit too!
22-10-2010, 10:25 PM
#40
Okay well I havn't had time to start work again in the garage, so ive been taking parts into work and building things when I can.
I got myself some nice converted coilovers for the front, also some alloy hubs and Brembo's with 300mm discs.
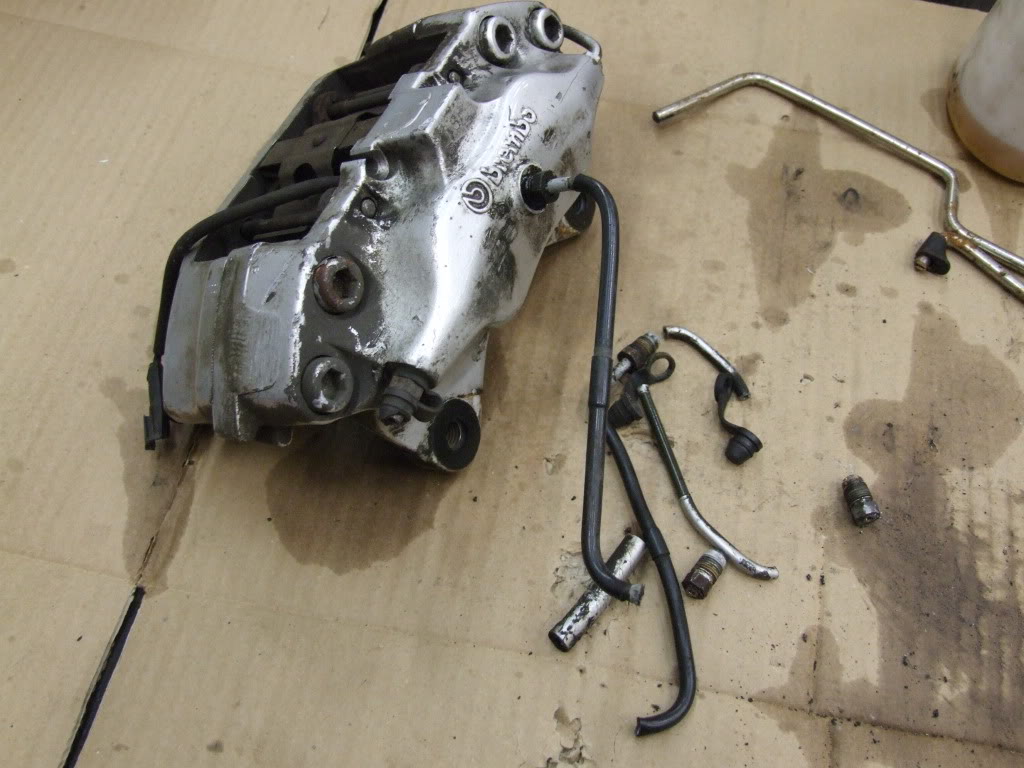
The calipers needid new pipes fitted as the bleed screws sat at the bottom and not at the top.
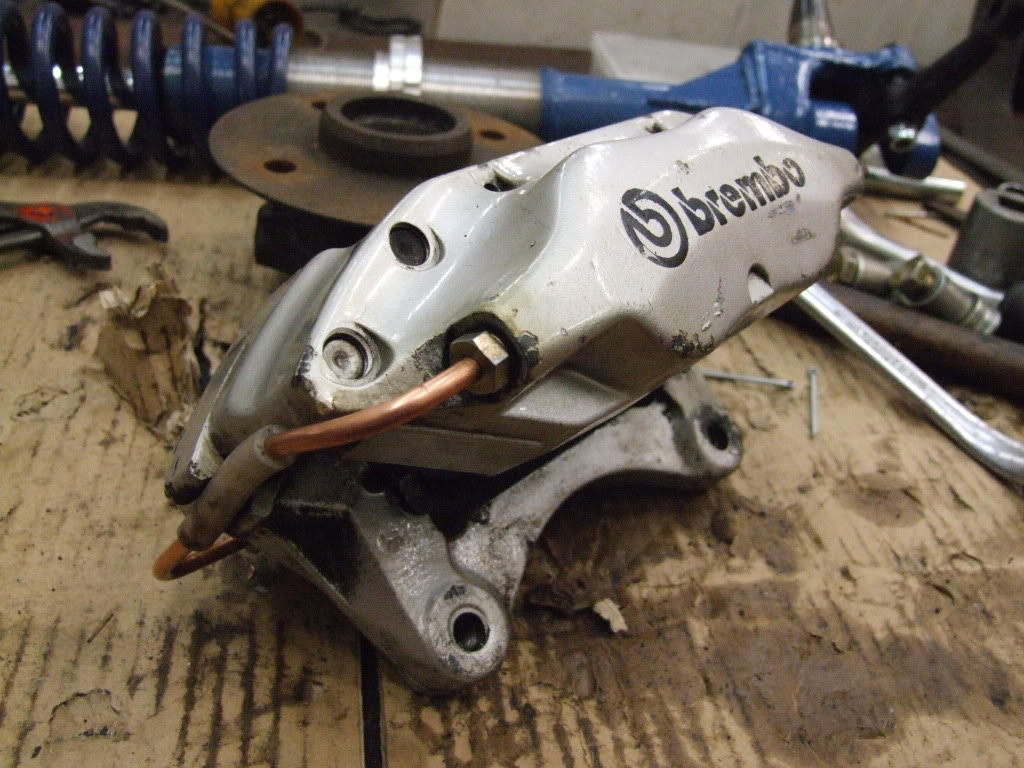
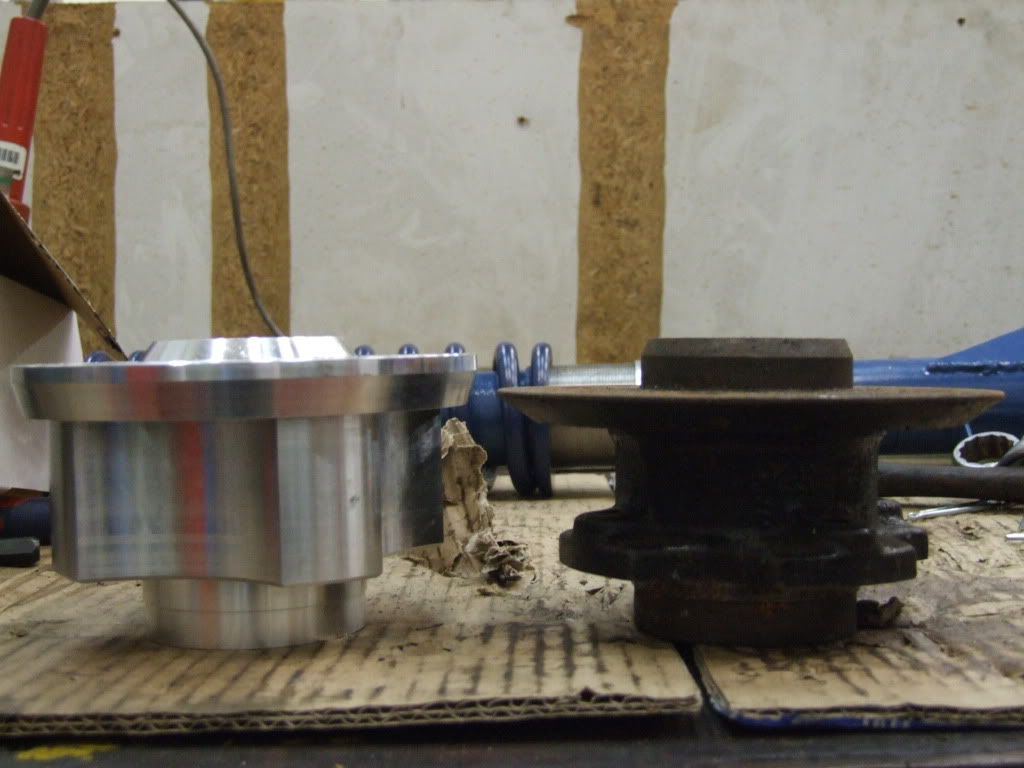
The alloy hubs are thicker than the standard type so I needid to bring the calipers out about 10mm more, plus im fitting the discs on the outside of the hub.
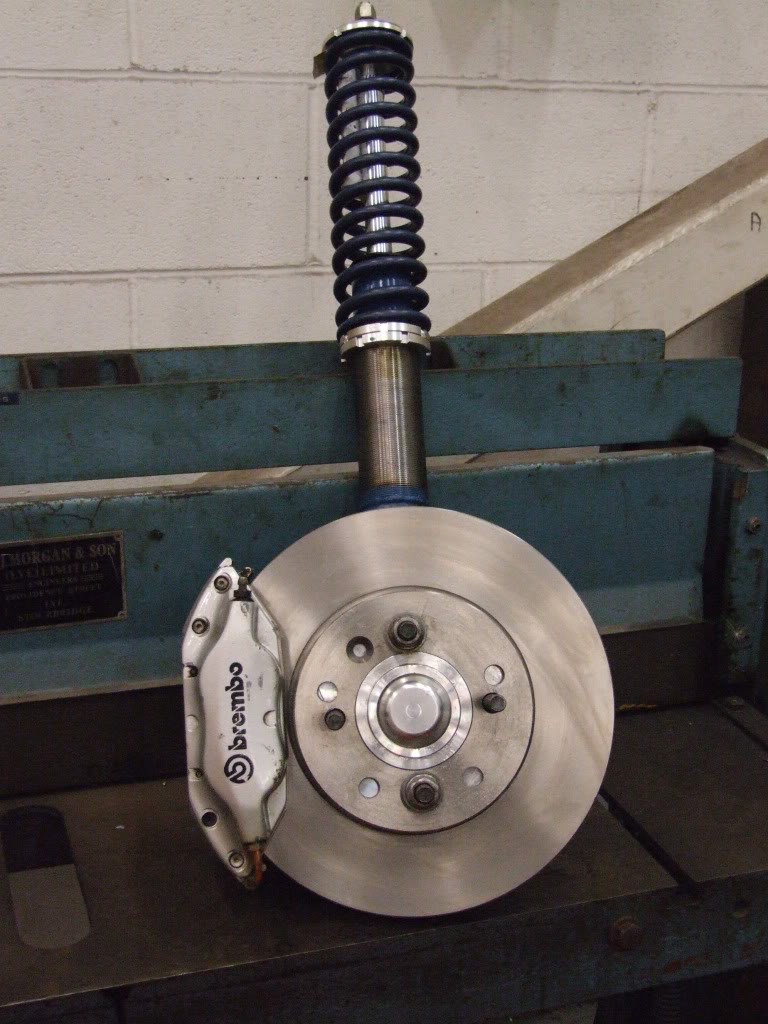
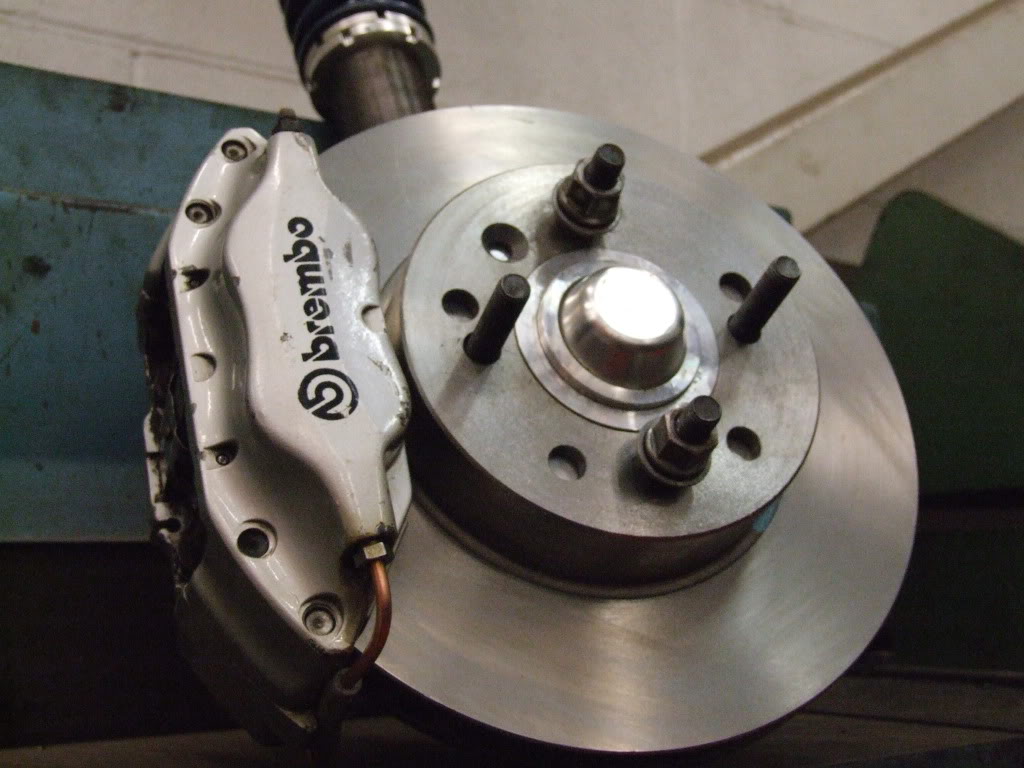
And thats the one side built up now just waiting on some top mounts, not a massive update but it all helps gets this thing rolling.
I got myself some nice converted coilovers for the front, also some alloy hubs and Brembo's with 300mm discs.
The calipers needid new pipes fitted as the bleed screws sat at the bottom and not at the top.
The alloy hubs are thicker than the standard type so I needid to bring the calipers out about 10mm more, plus im fitting the discs on the outside of the hub.
And thats the one side built up now just waiting on some top mounts, not a massive update but it all helps gets this thing rolling.
Last edited by retro d; 22-10-2010 at 10:43 PM.