When you click on links to various merchants on this site and make a purchase, this can result in this site earning a commission. Affiliate programs and affiliations include, but are not limited to, the eBay Partner Network.
if i want my photo to be public again, i have to pay a ransom of 400usd per year for a service which once was free. (not the only one in this catch).
nice move, bunch of greedy fucktards...
many thanks for the support, to anyone who's answered on here .
for the ones interested in this, working on a new thread opening soon. just let me the time to copy and paste everything...
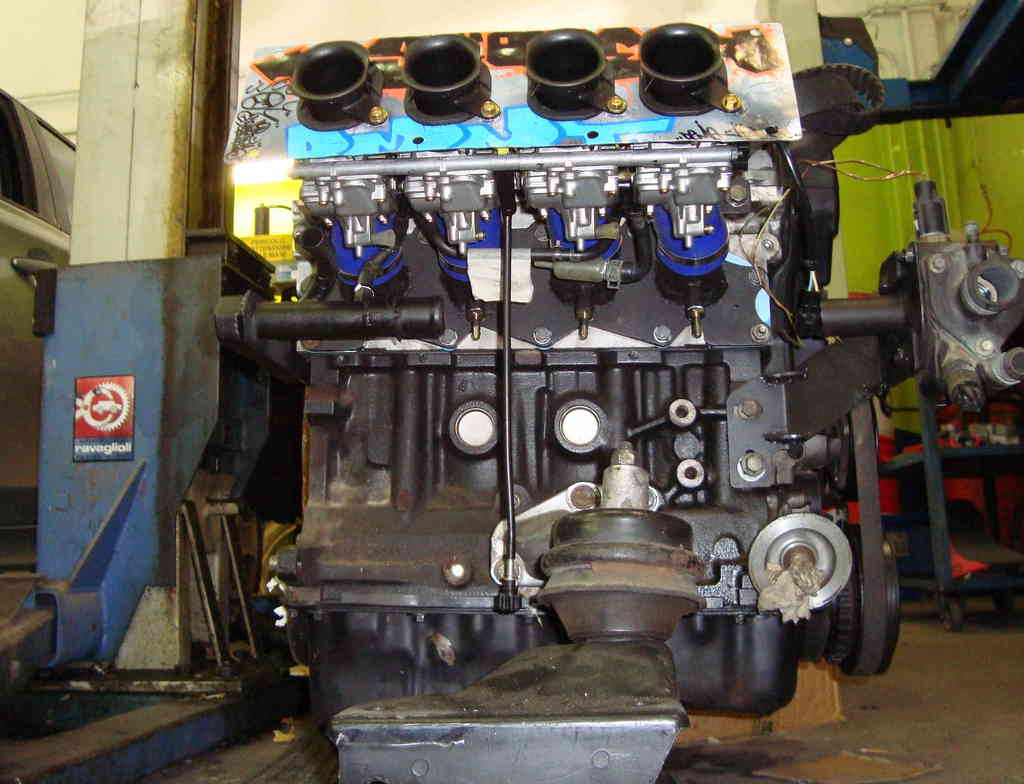
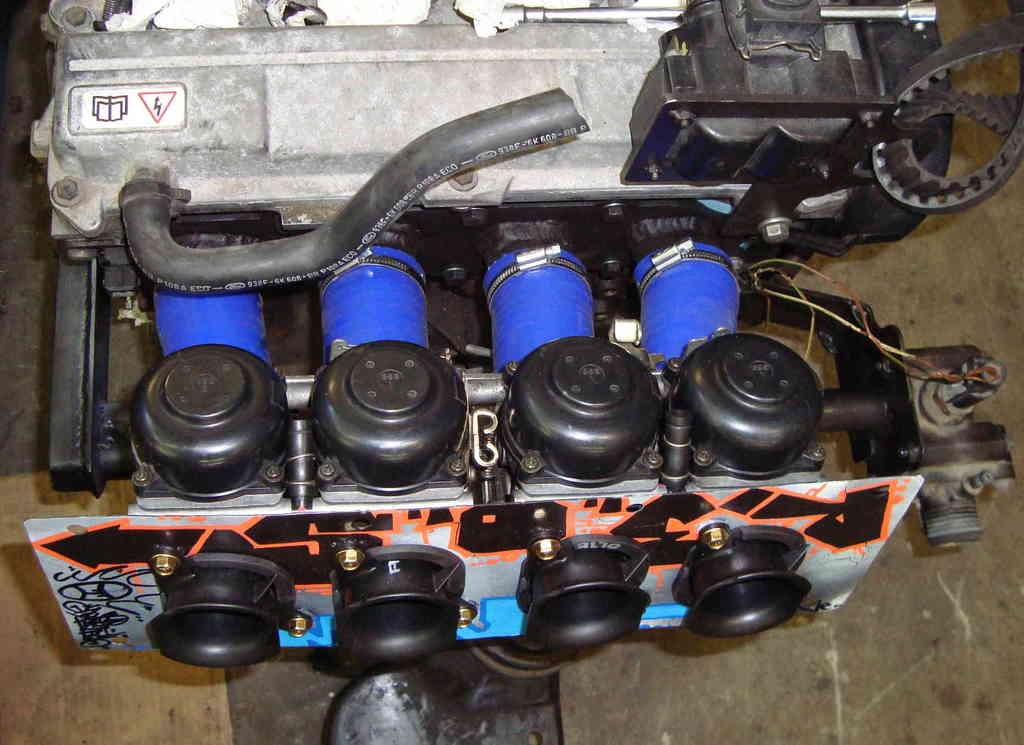
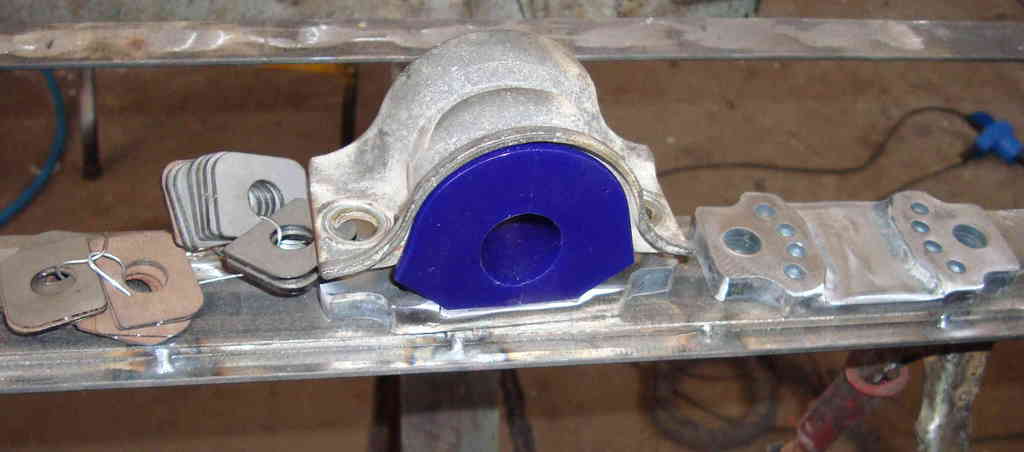
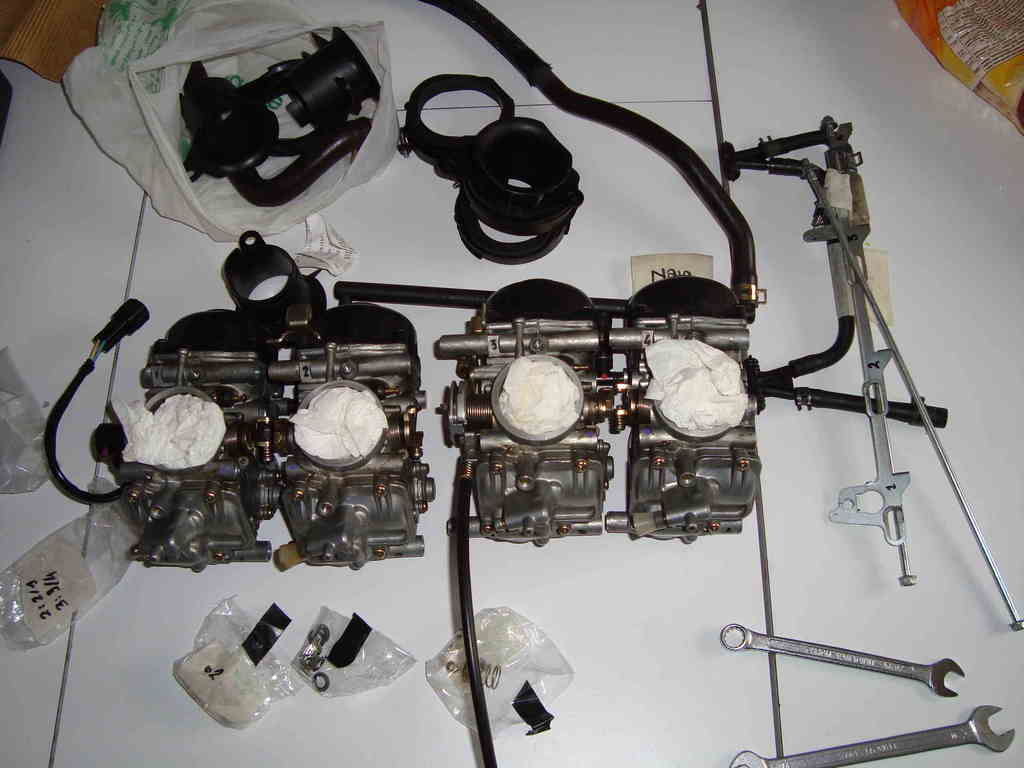
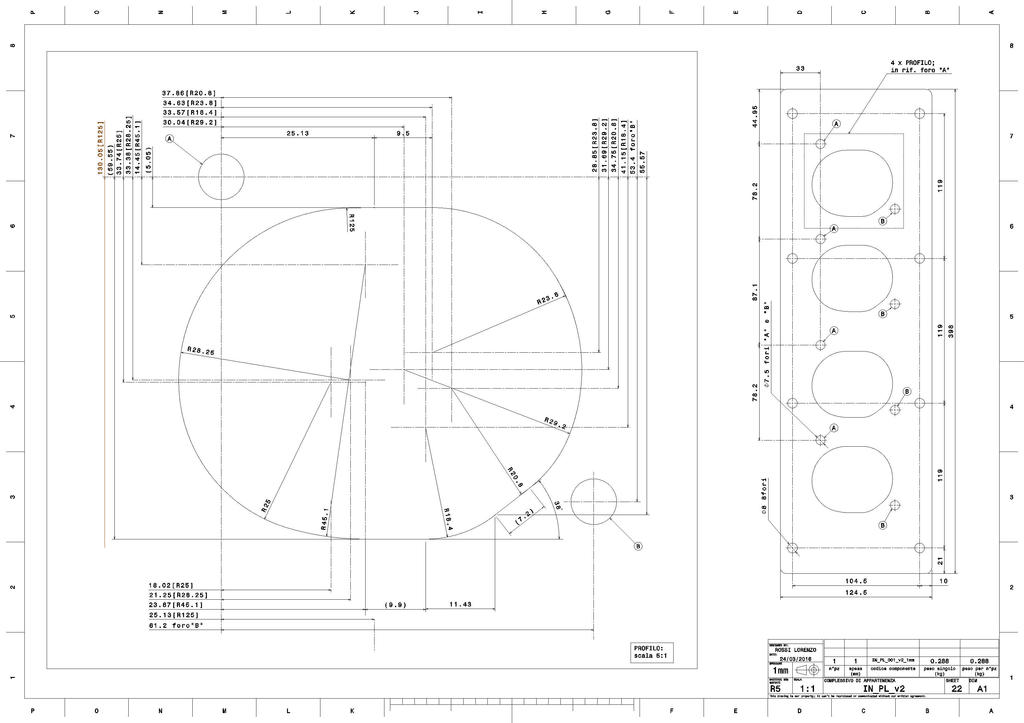
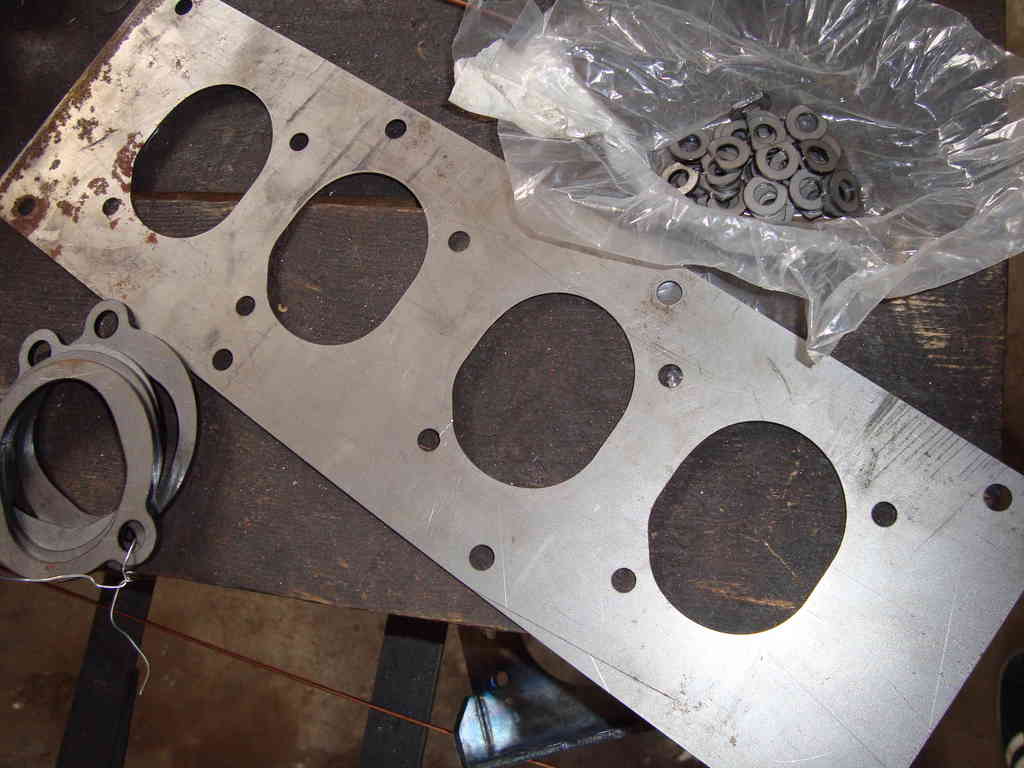
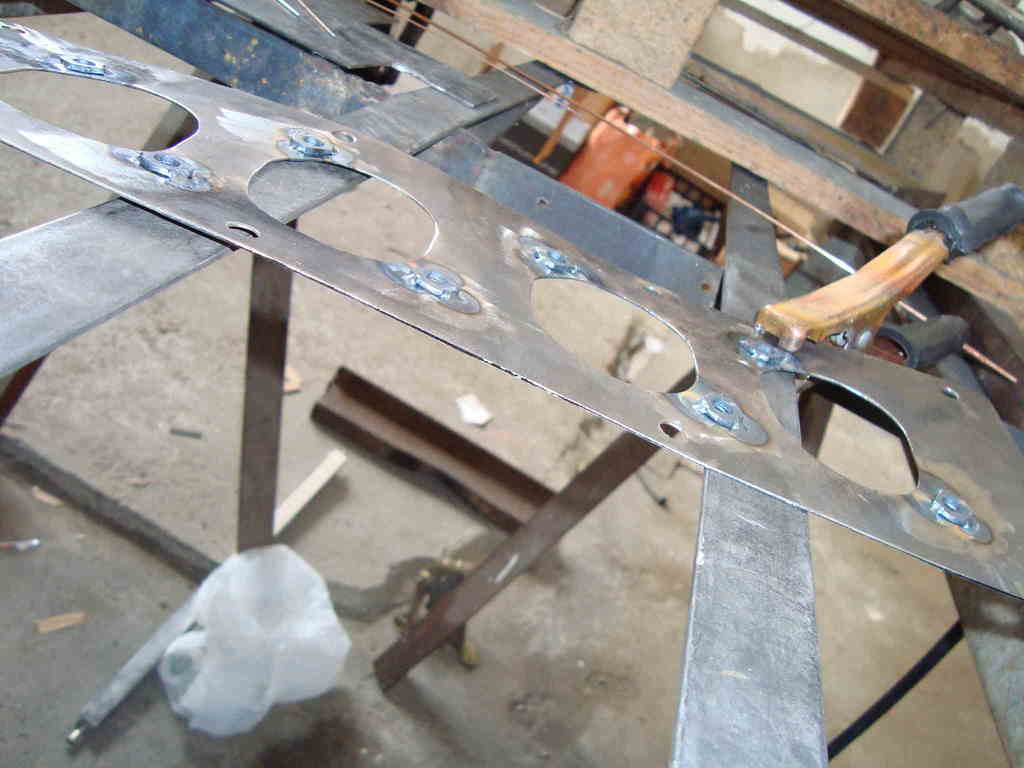
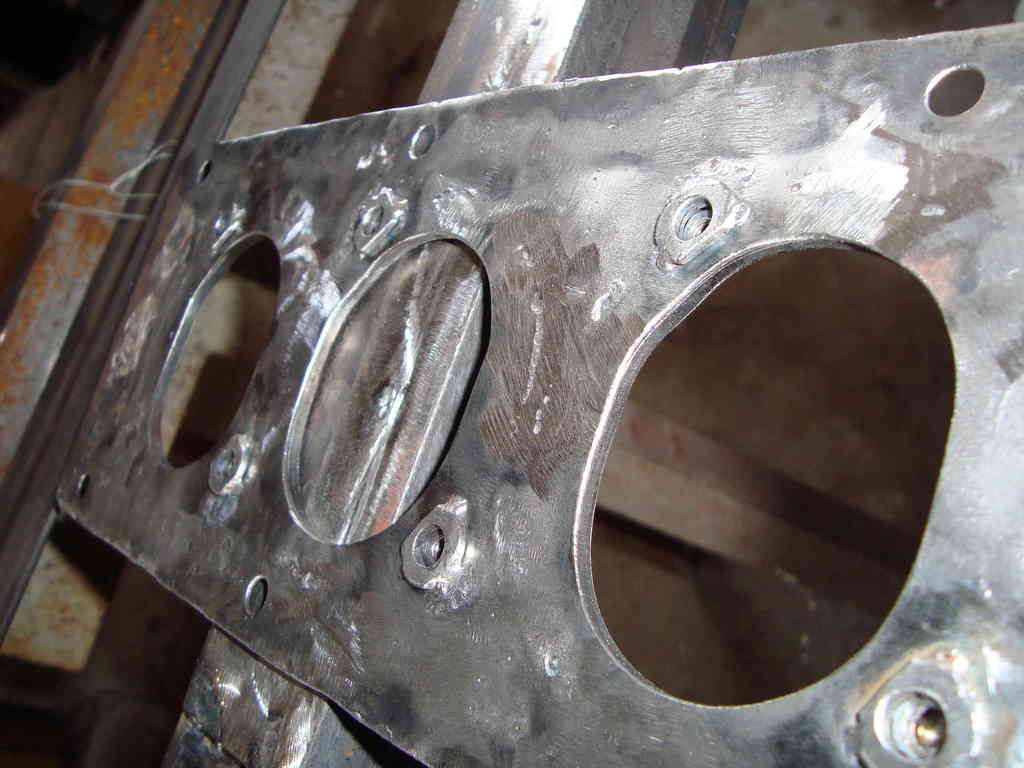
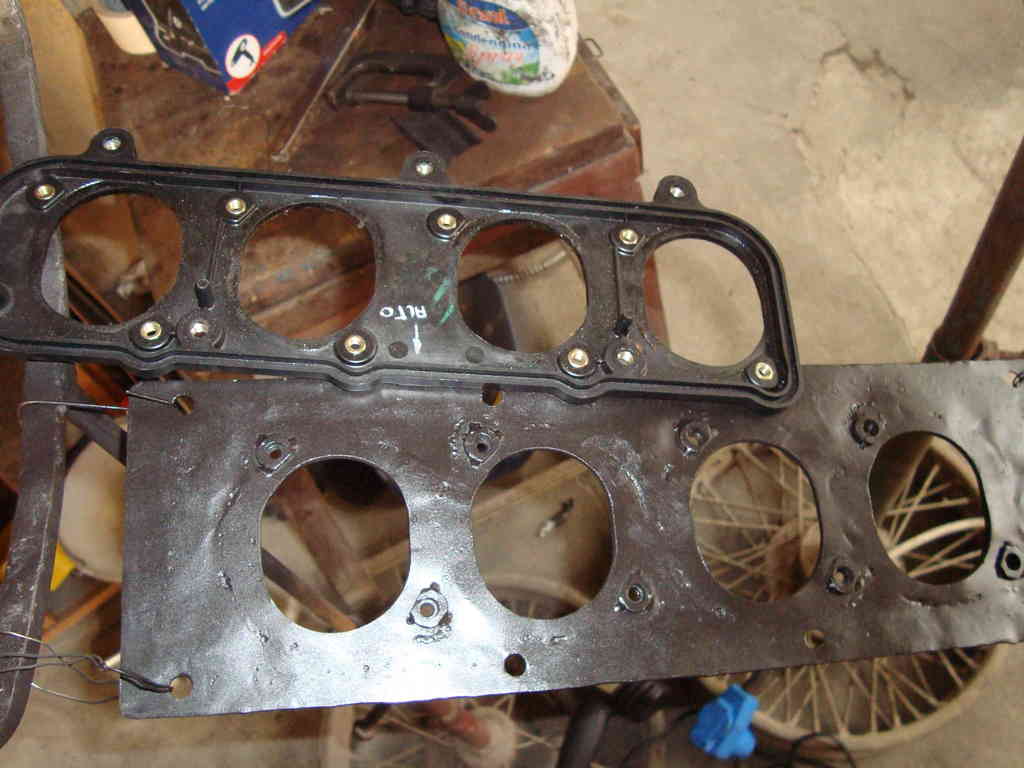
whoops: little mismatch problem. actually these parts were designed for outdistanced carbs...
(first project was to make a 92mm space between carbs to match head ports)
no big deal, took down 2mm with the angle grinder.
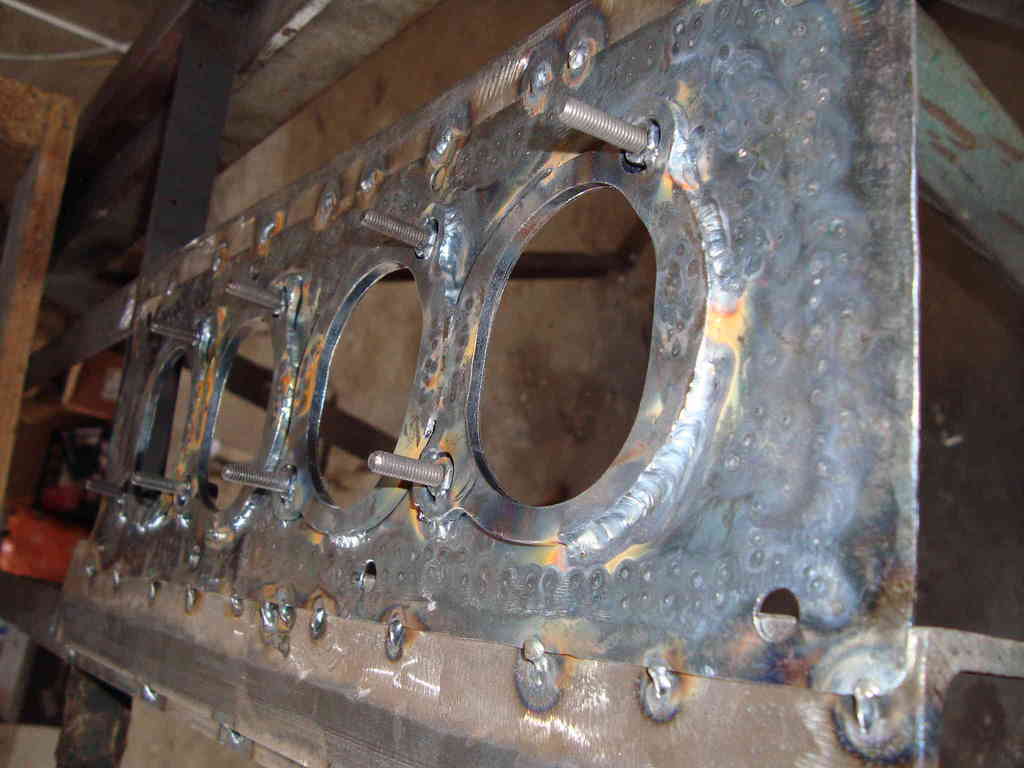
tack weld them washers was enough to warp the 1mm sheet.
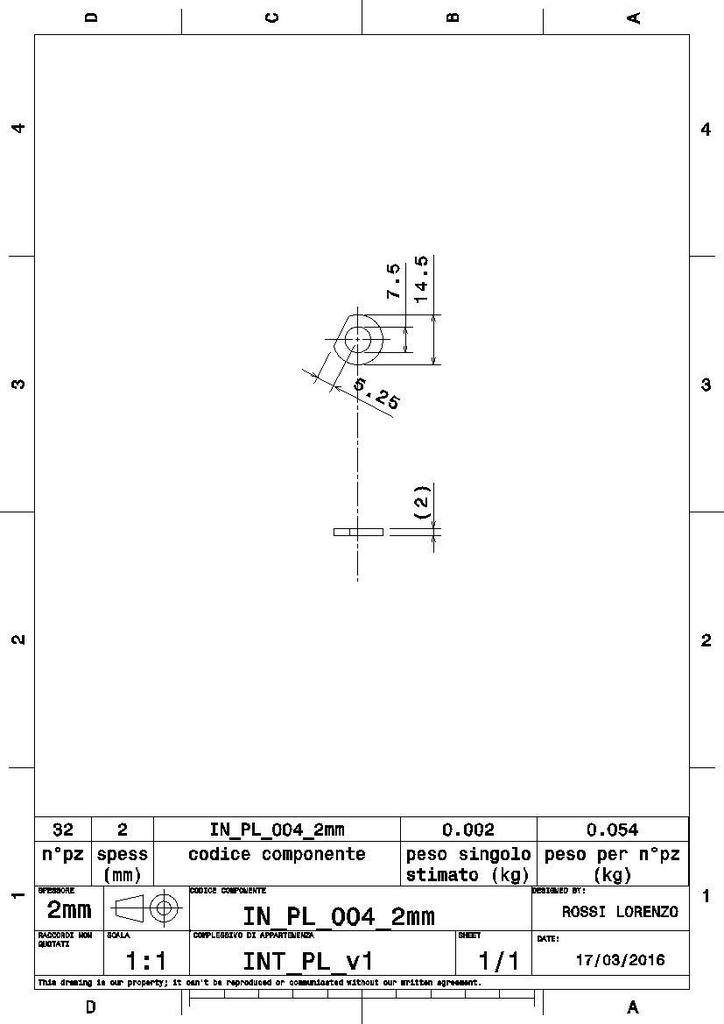
positoned the 8 M5 nuts with the std plastic plate...
damn cheap tools
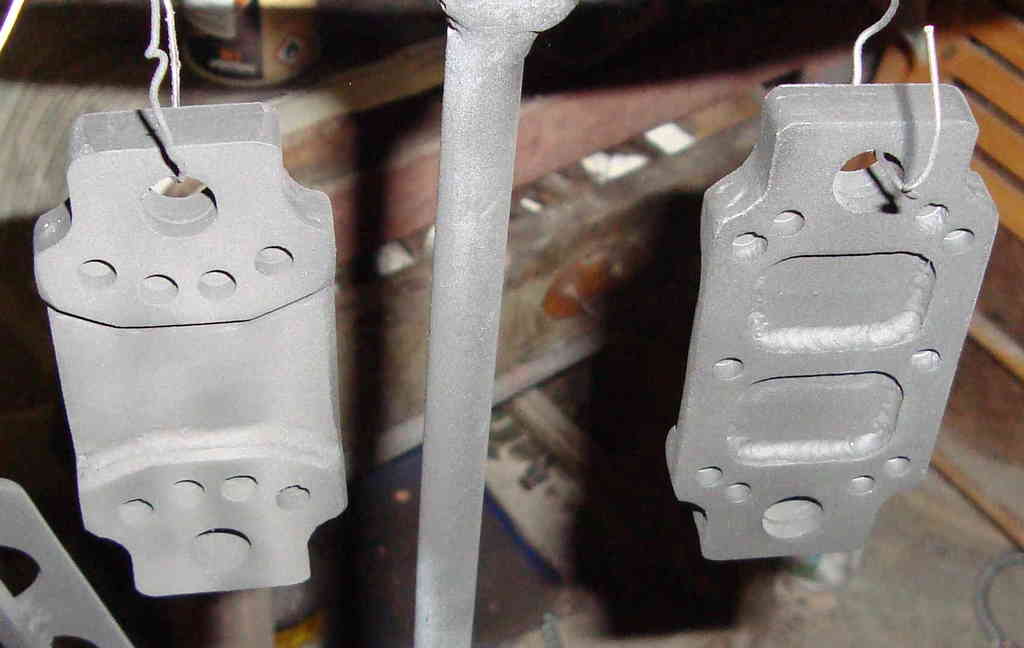
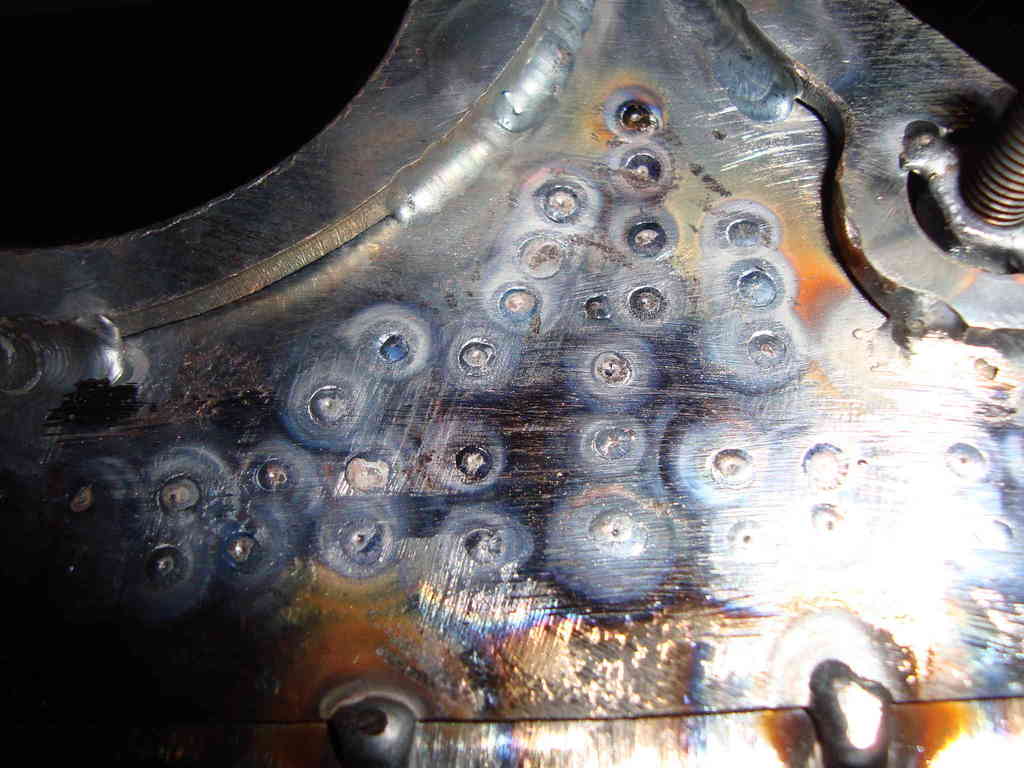
gave it some hot spots, ...
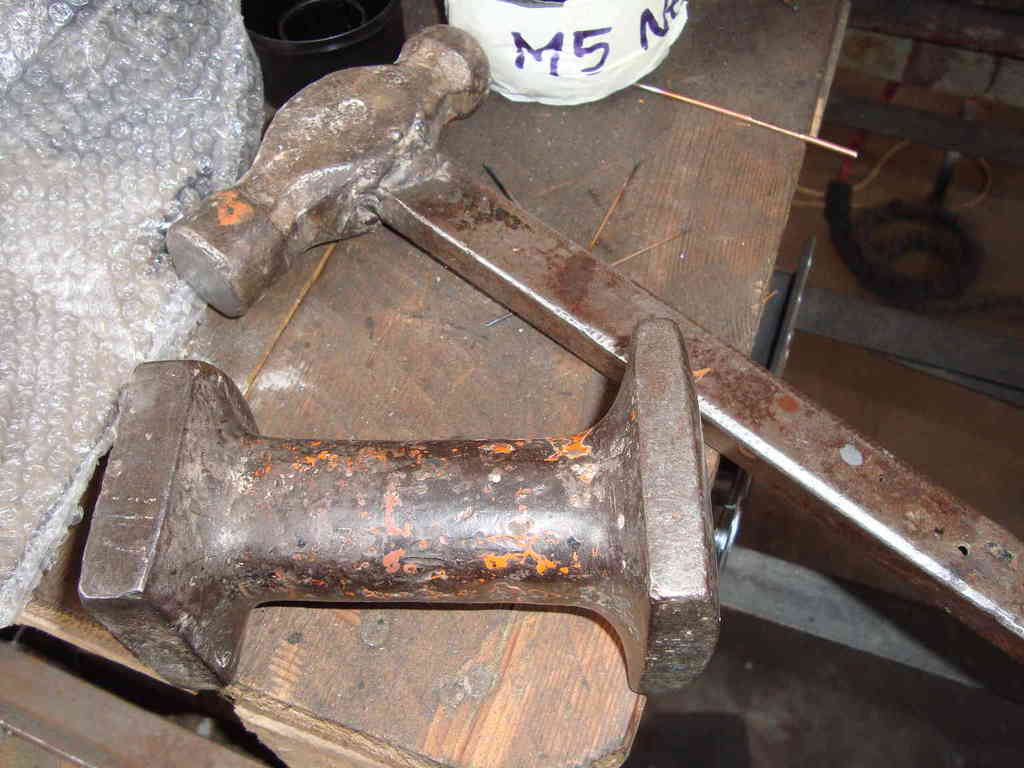
...then i worked on it with hammer and hand-anvil (sorry, donno the exact word for it).
here some other pics of the process.
hi-temp black covered...
warp and weld-breakthrough issues were garanteed with my low skills.
i knew i'd been ashamed of the results .
i could've done better if i'd done:
-4mm thick plate, same design,
-custom washers tack welded in the same positions,
-4.5mm holes to be simply tapped M5.
BUT..
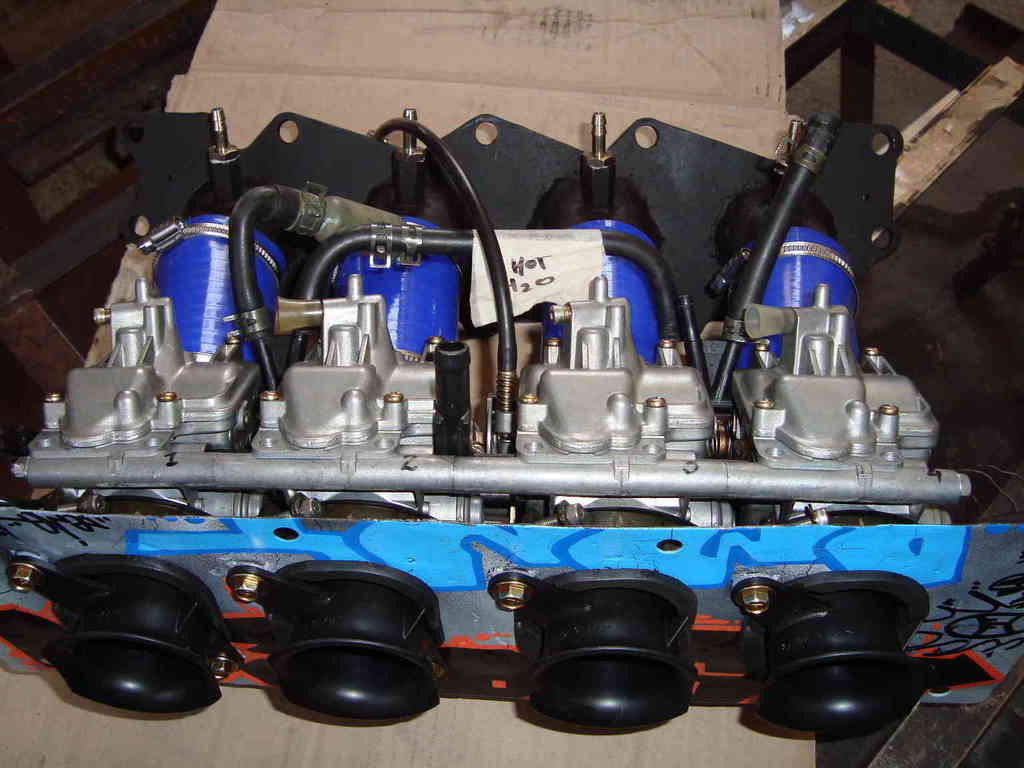
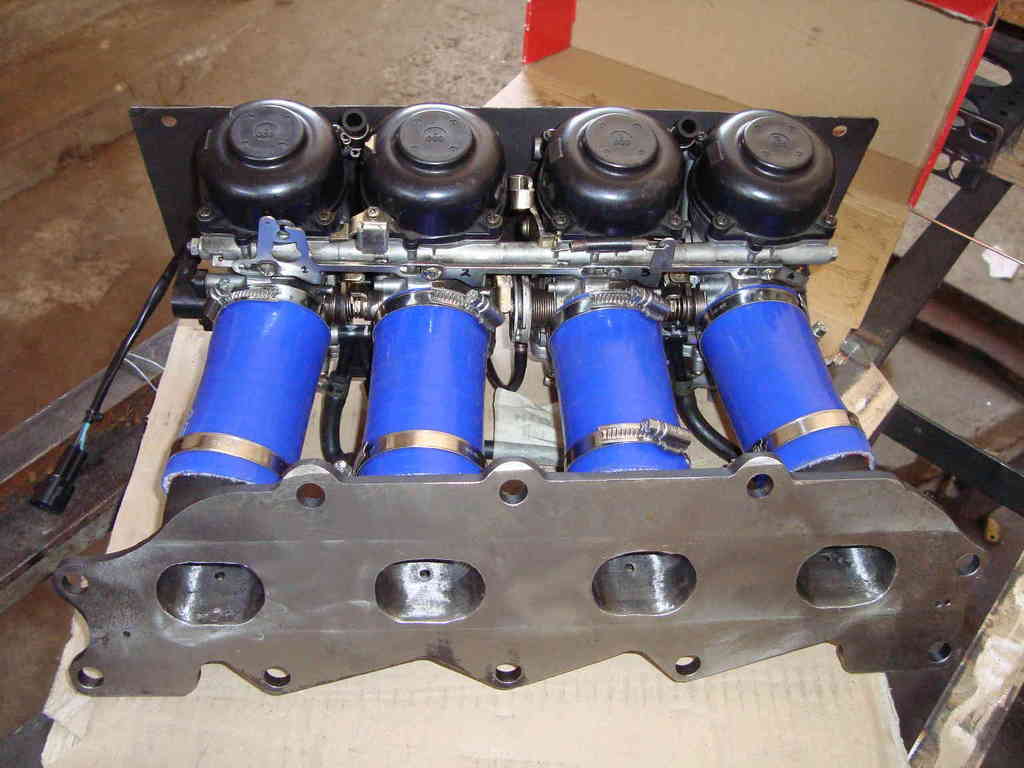
the real point here was going light-weight, rather than being cool and good looking.
it weight almost the same than the plastic one, ugly but it doesn't overload the hoses supporting the carbs from the manifold.
(the 4mm thick plate would've weight a lot more. checked with cad)
BODY pt.I
not painting her in silly colours, don't wanna silly stickers nor silly body kits.
don't wanna change colour...
i'm a liar !
spent an half an hour to make it worse today.
i already knew it, fuel fumes will dissolve off the whole paint. but actually i don't give a sh*t...
let's see what happens, if it happens...
hot season's coming...
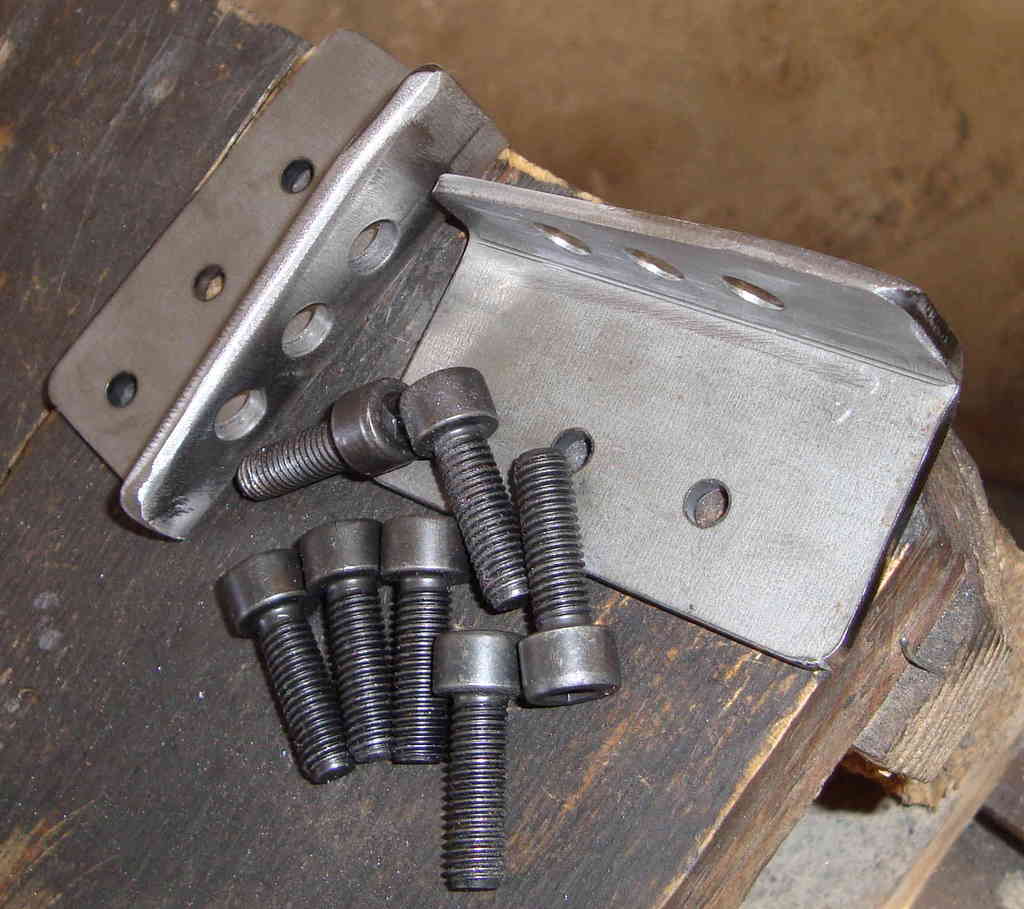
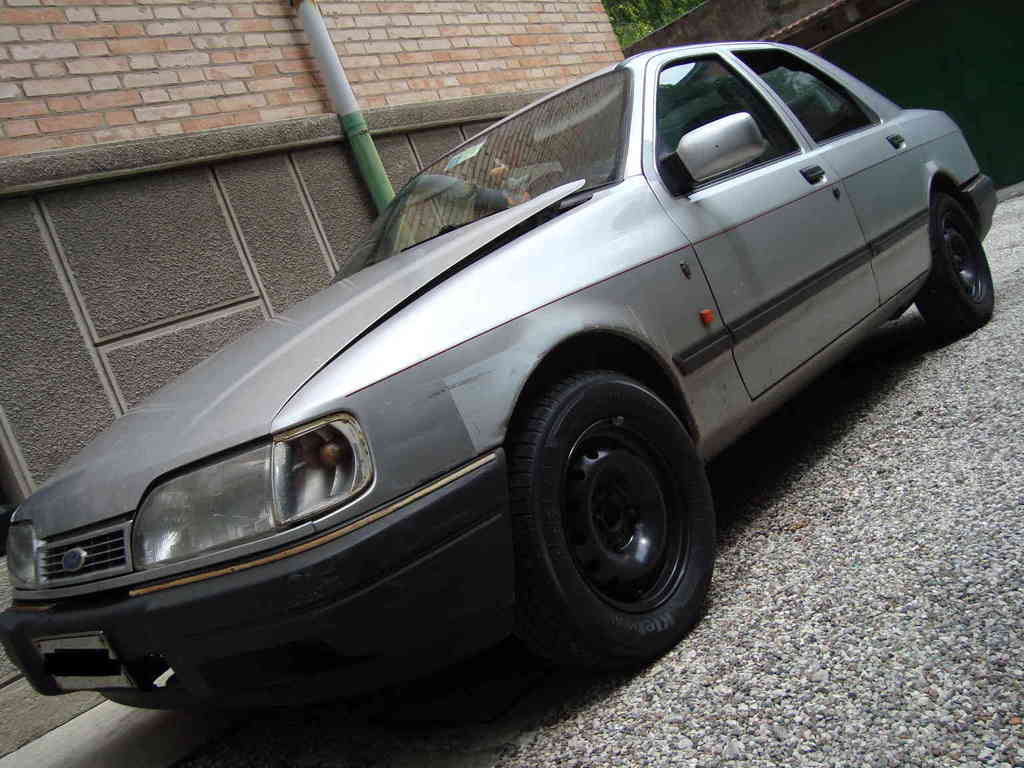
ford sierra sapphire bonnet lifters.
(still no tip top aligned, but as usual it was a rush job).
(now wearing junkyard citroen's steelies, 5.5jx14 ET24, on both front and rear axle. still 185/65 14 tyres and stock suspensions).
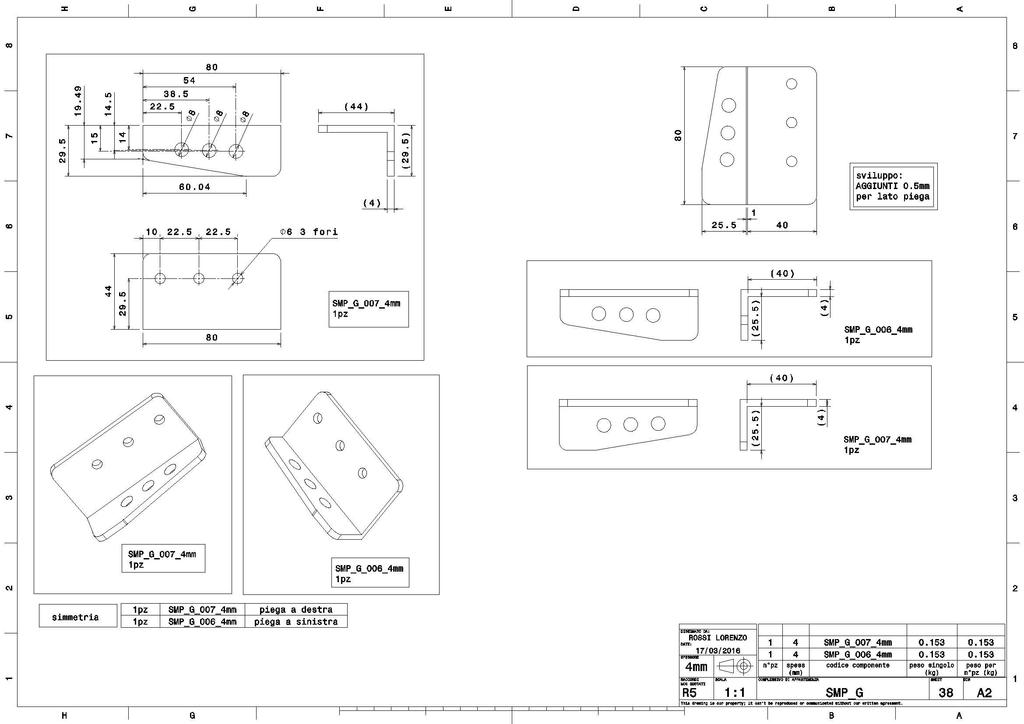
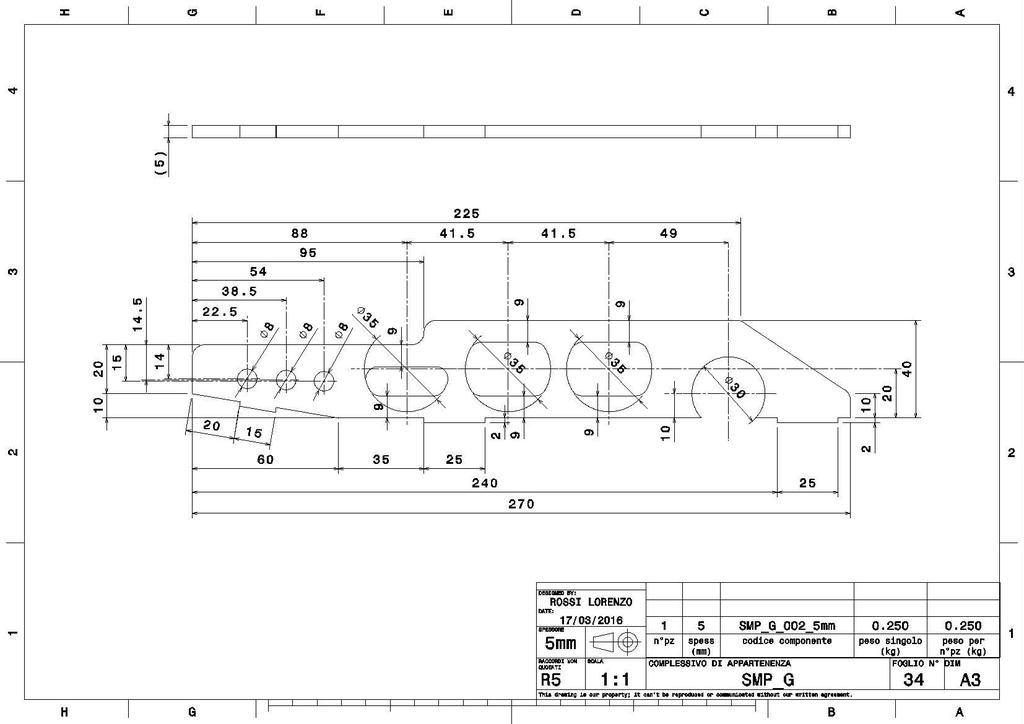
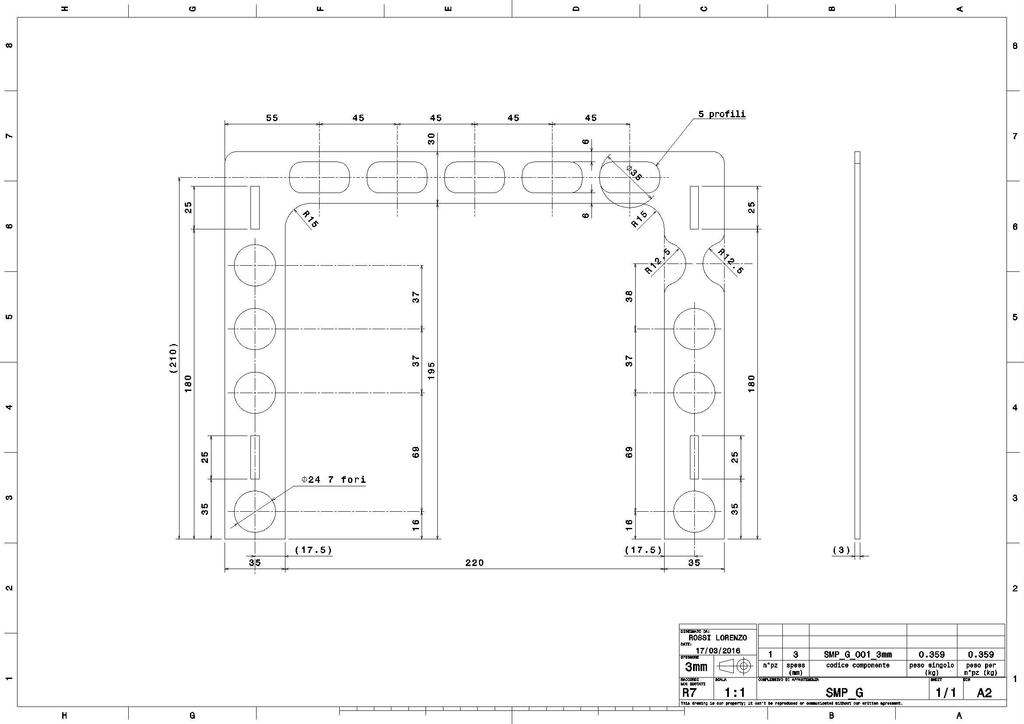
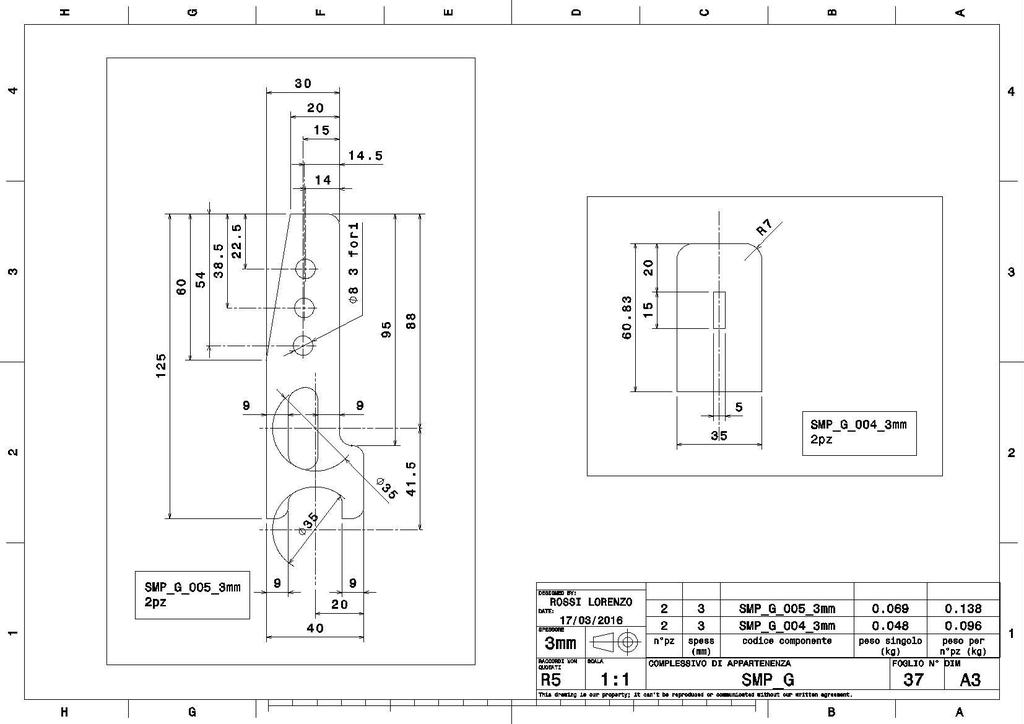
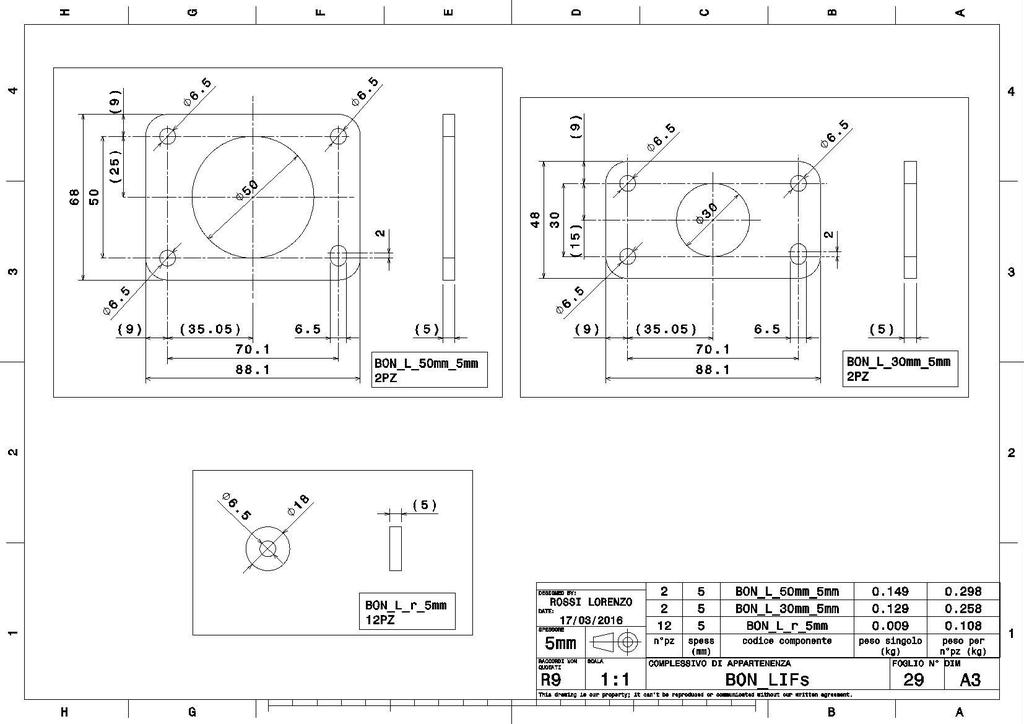
dedicated to anybody who needs 'em.
if you don't wanna bother and spend time by cutting and drilling, just bump this one to your local laser cut shop.
it may be cheaper than purchasing a set. here definitely it is.
obviously the cheapest is do it yourself. do your math...
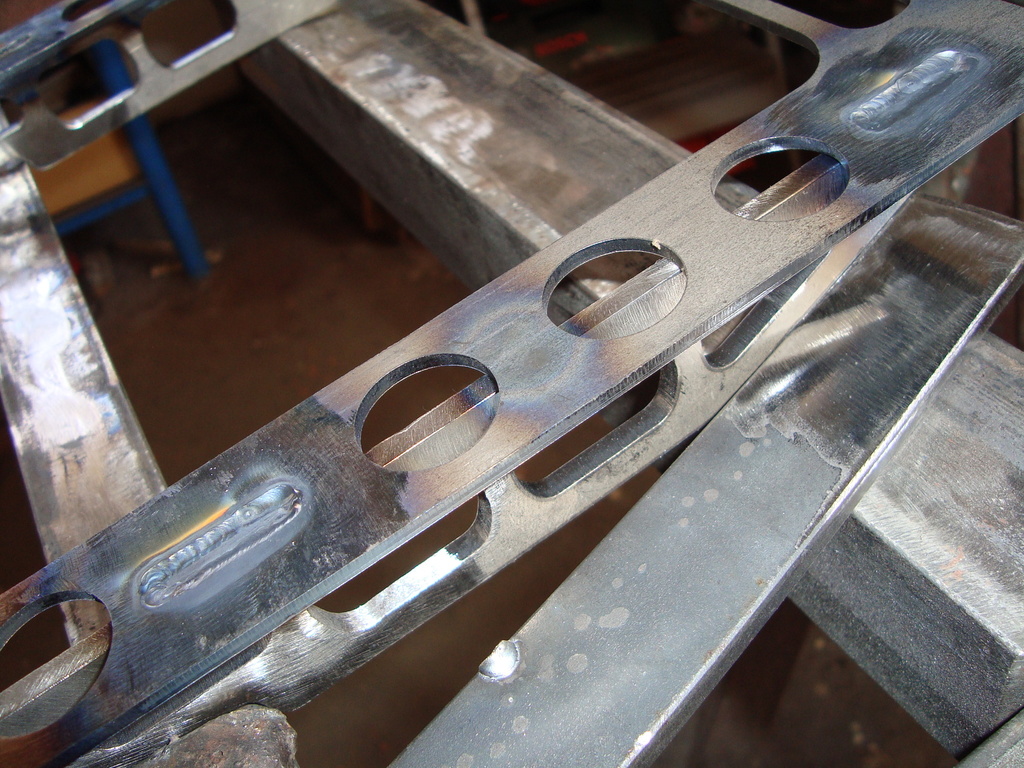
i made a +30mm set and a +50mm set (5mm thick).
each set needs four M6 washers, 5mm thick. because they'll fit like this.
these washers could be either left loose or tack welded on the plates, as i did...
when welding, just remember to keep a simmetric picture in reference to the slotted hole.
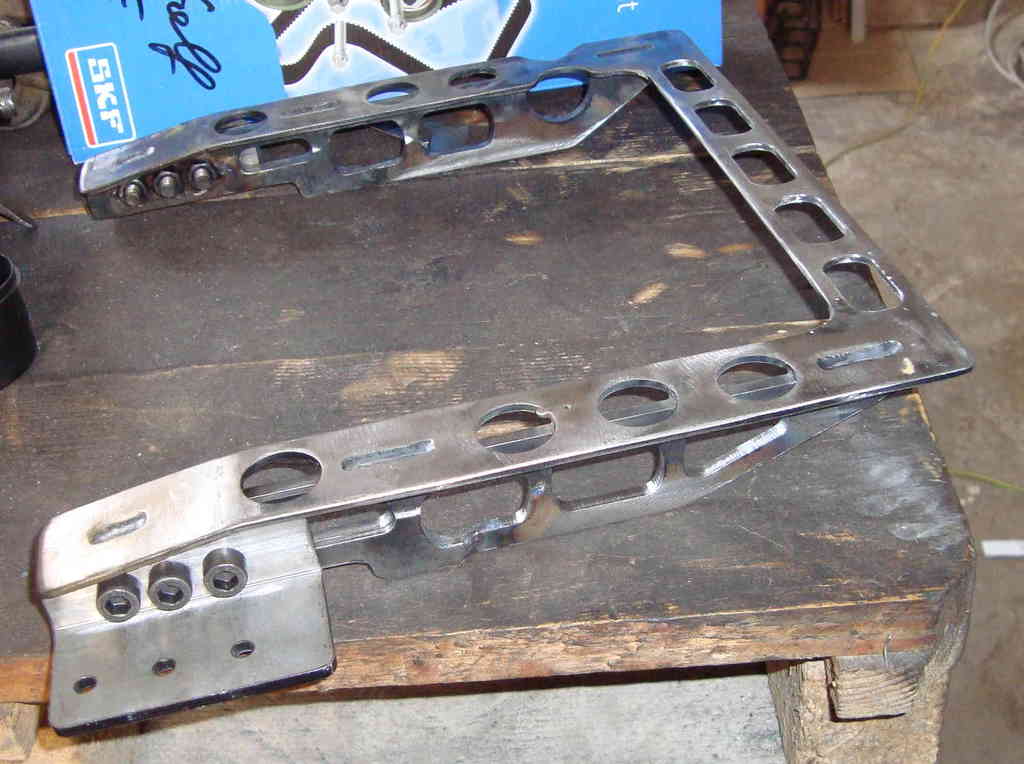
the +30mm set...
the +50mm set...
there's also a tongue inside each fender which might need to be pressed in with a soft hammer, but no big deal. (sorry no pics of this, you'll see when working on it...)
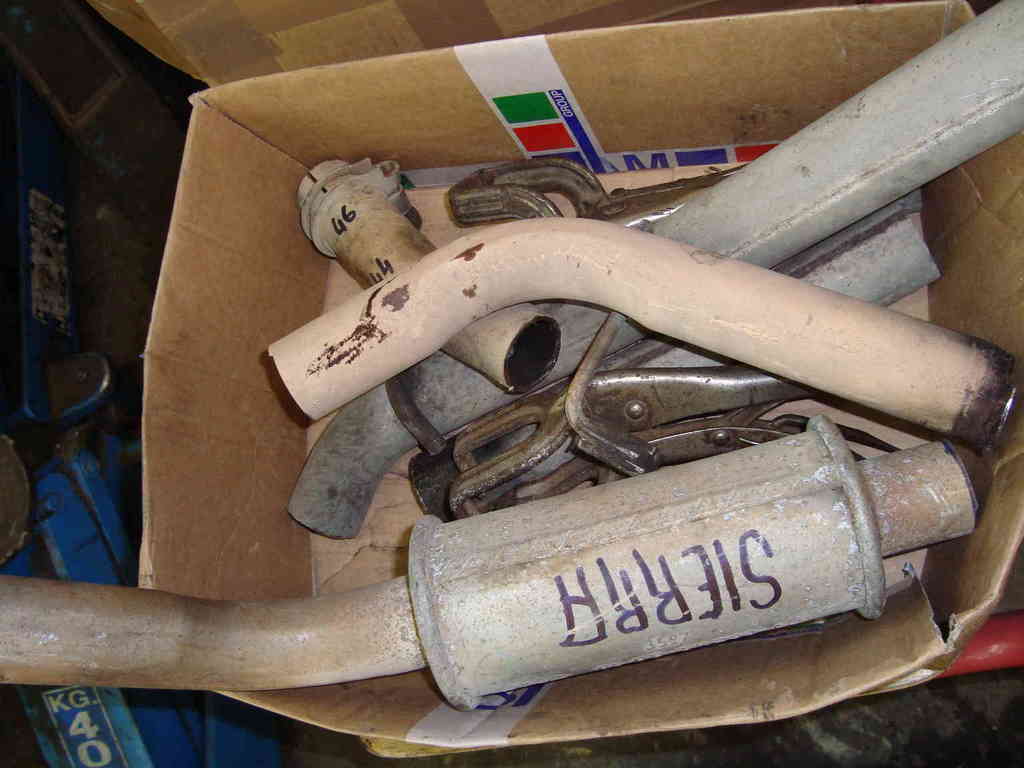
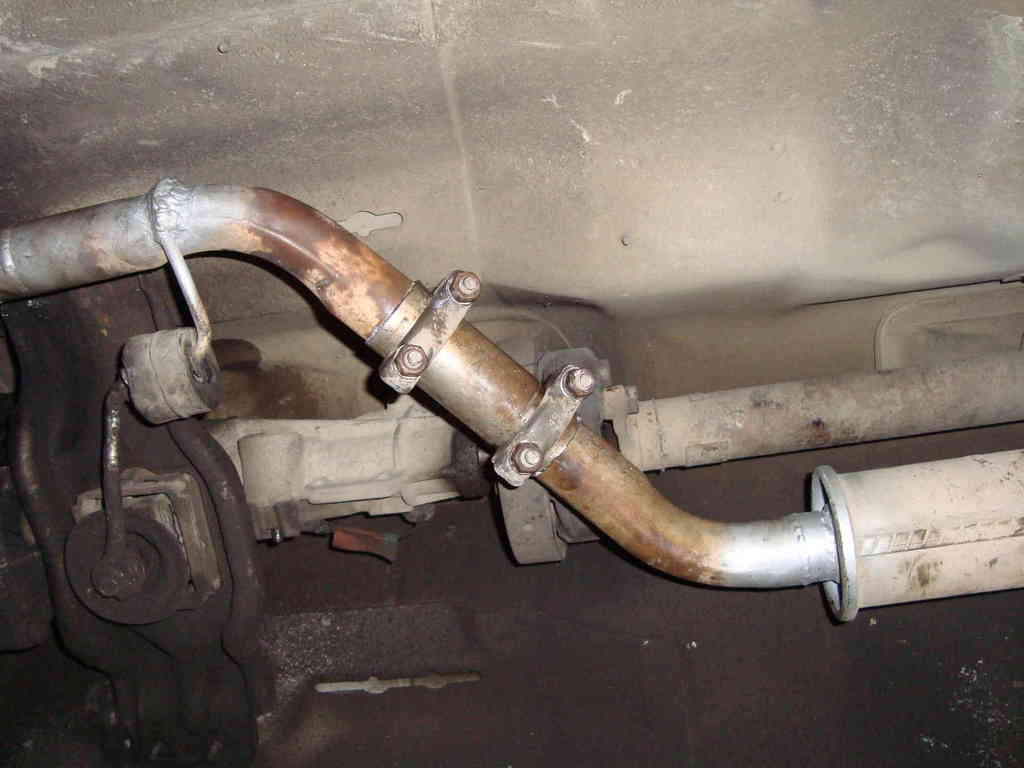
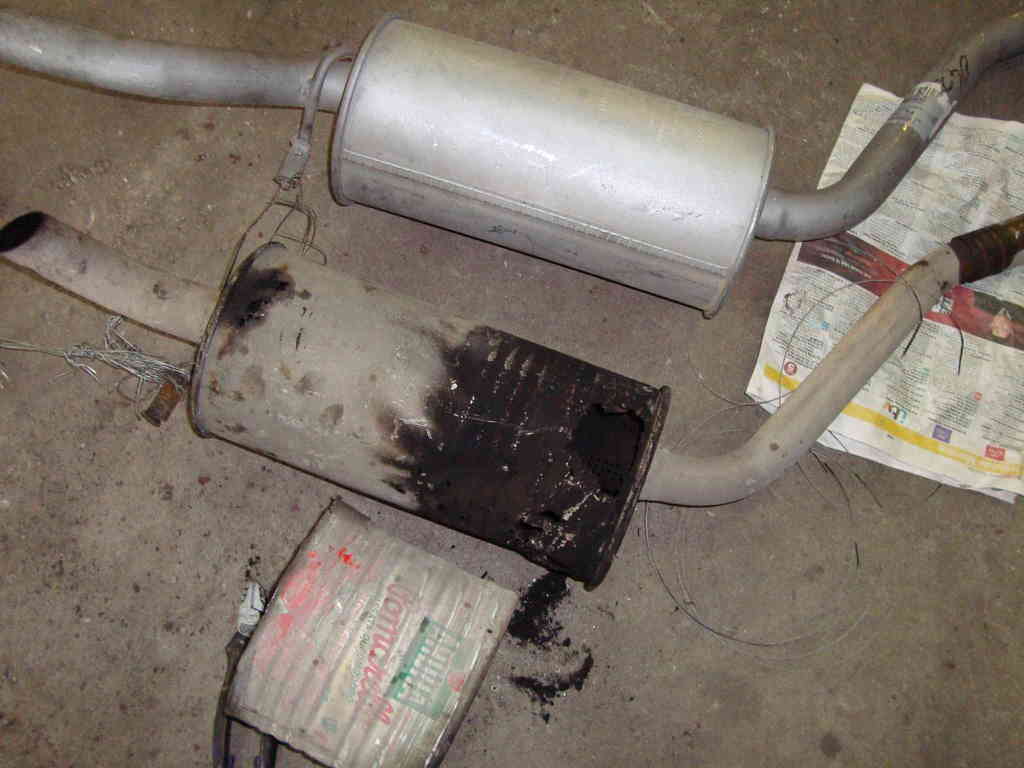
can't believe i bought a brand new muffler!
there's still such a lot of good metal on the old one.
it was kinda full 10 hours job in order to straighten everything out.
but the big deal was always clean it all up for the tig welding.
i hate zinc, damn i hate it !!!!!
now i have a silent car, which doesn't fart loud and drown you off with burnt oil monoxide in cabin.
...and i'm appreciating it.
am i getting old?
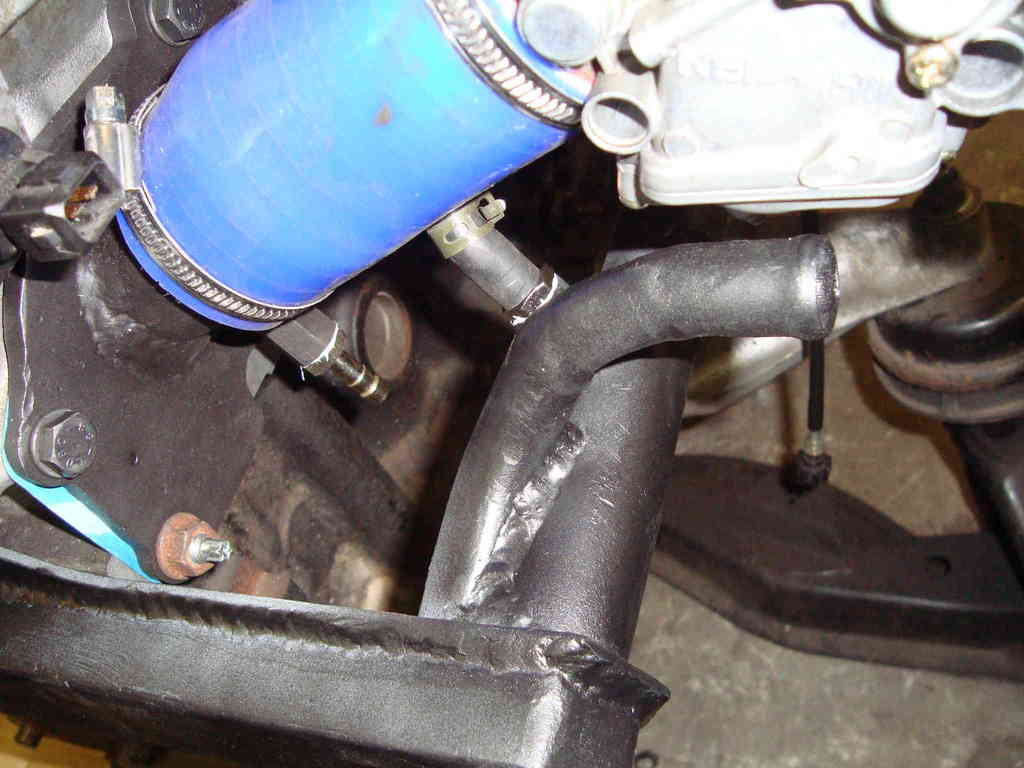
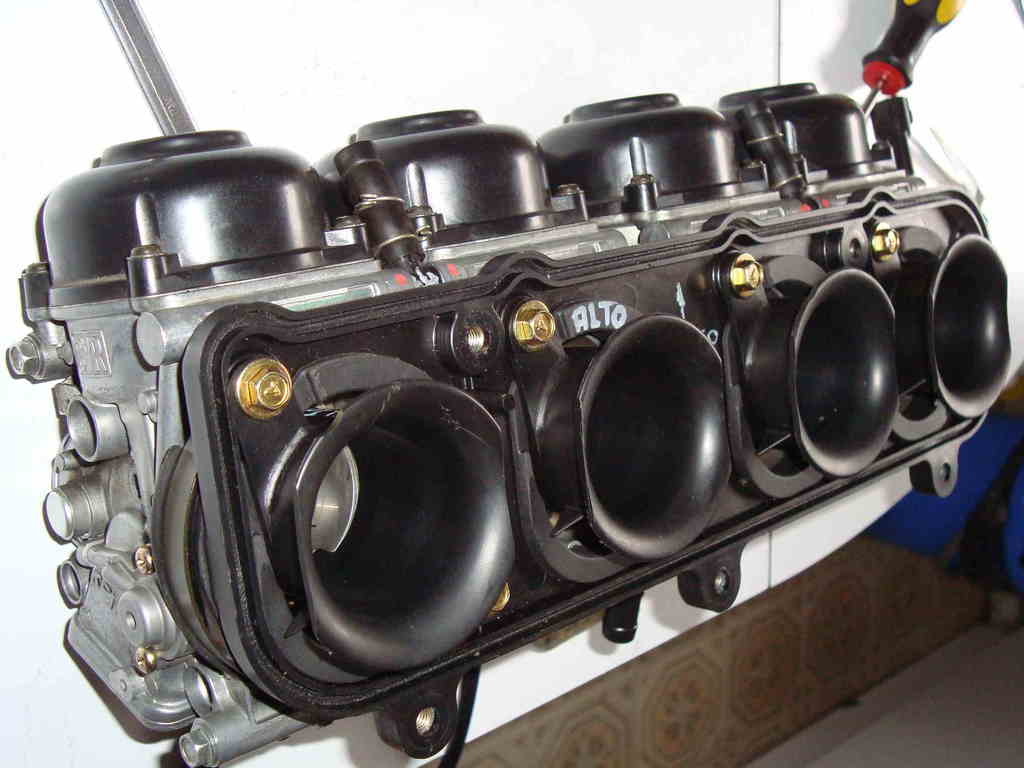
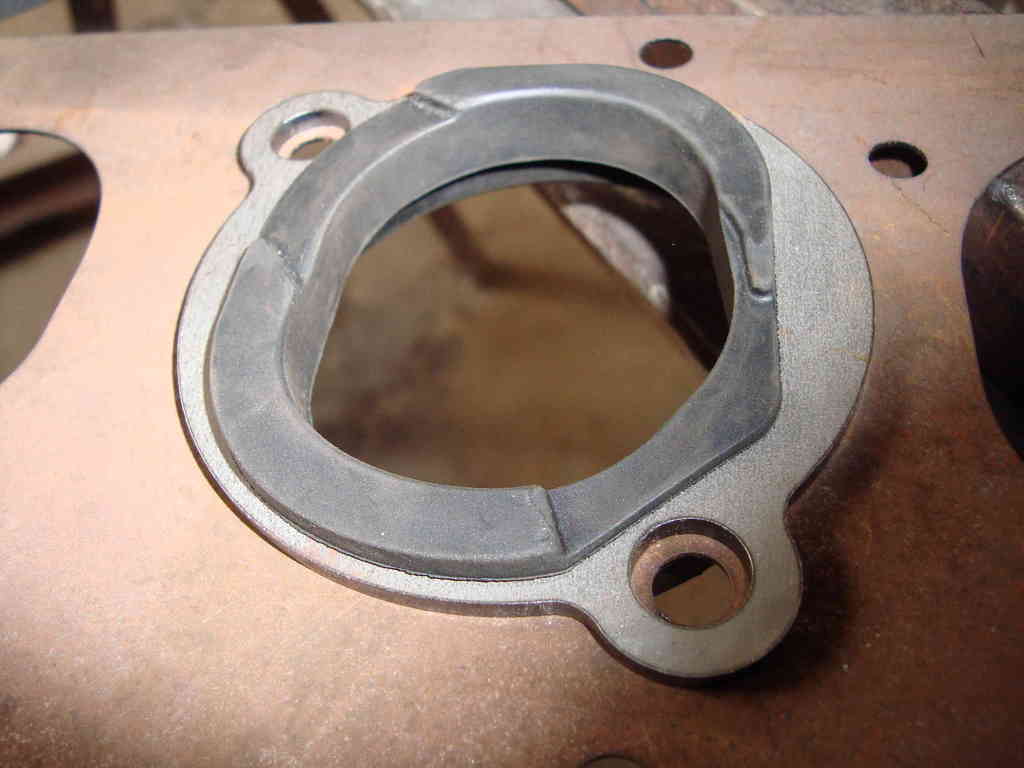
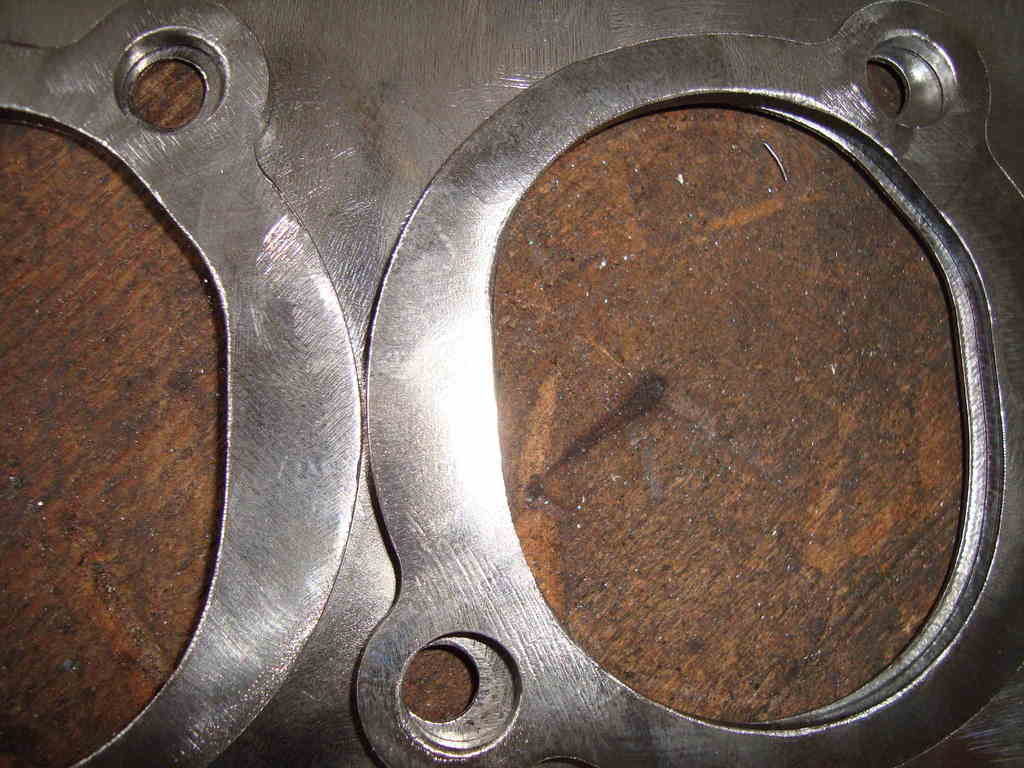
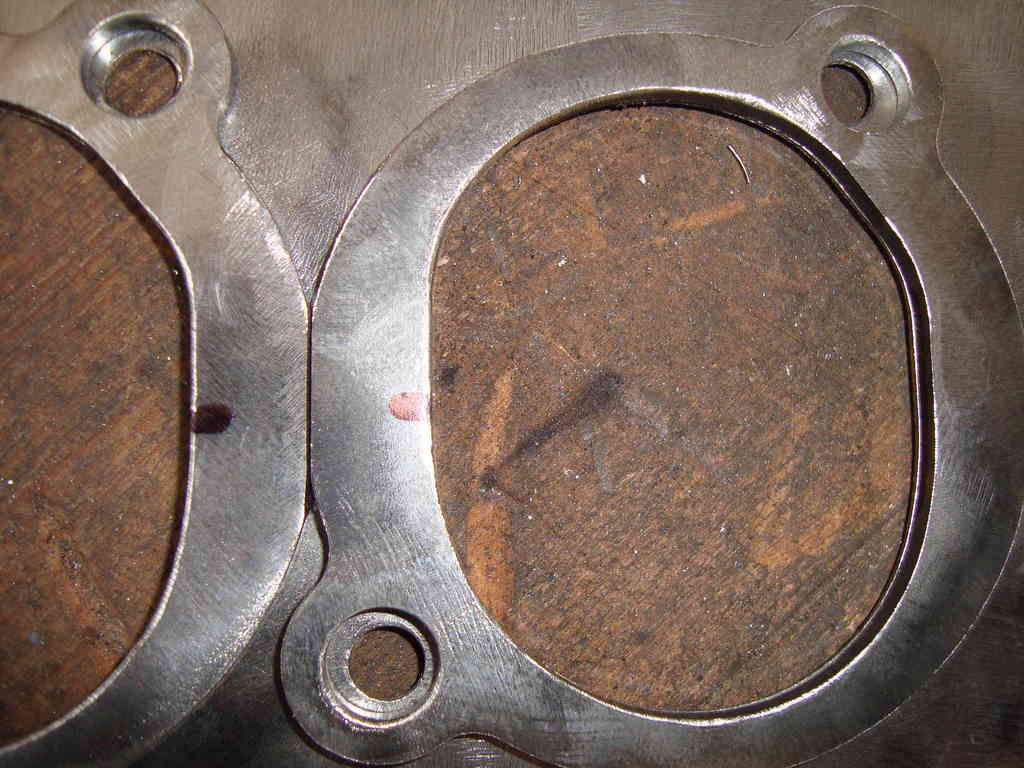
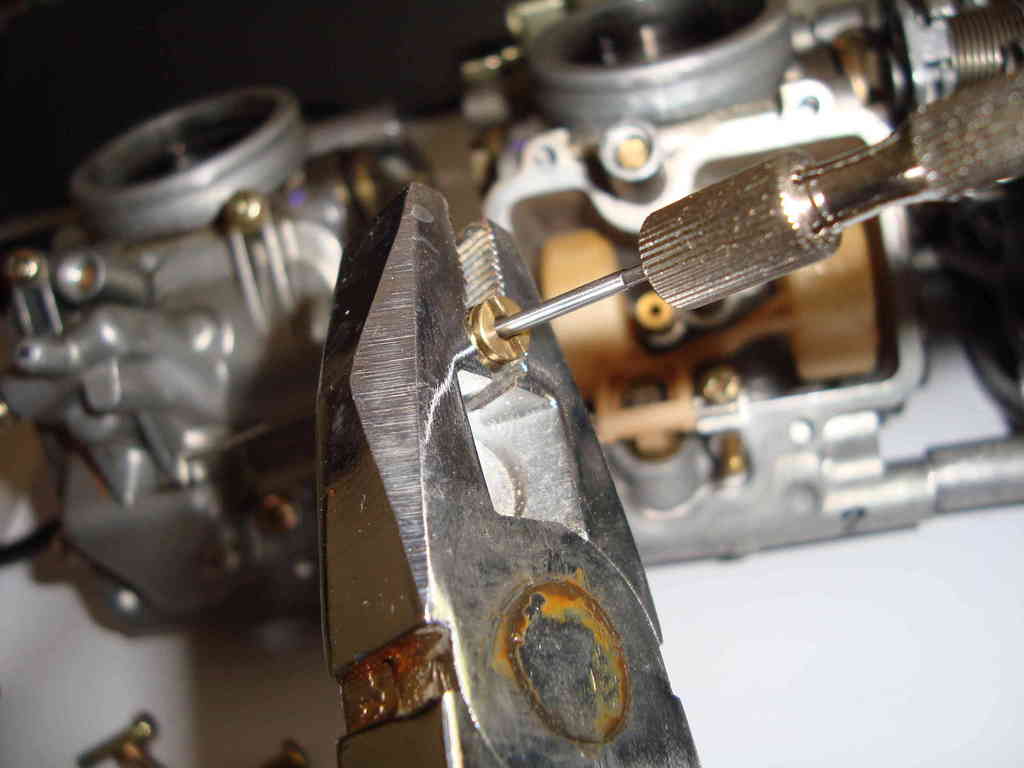
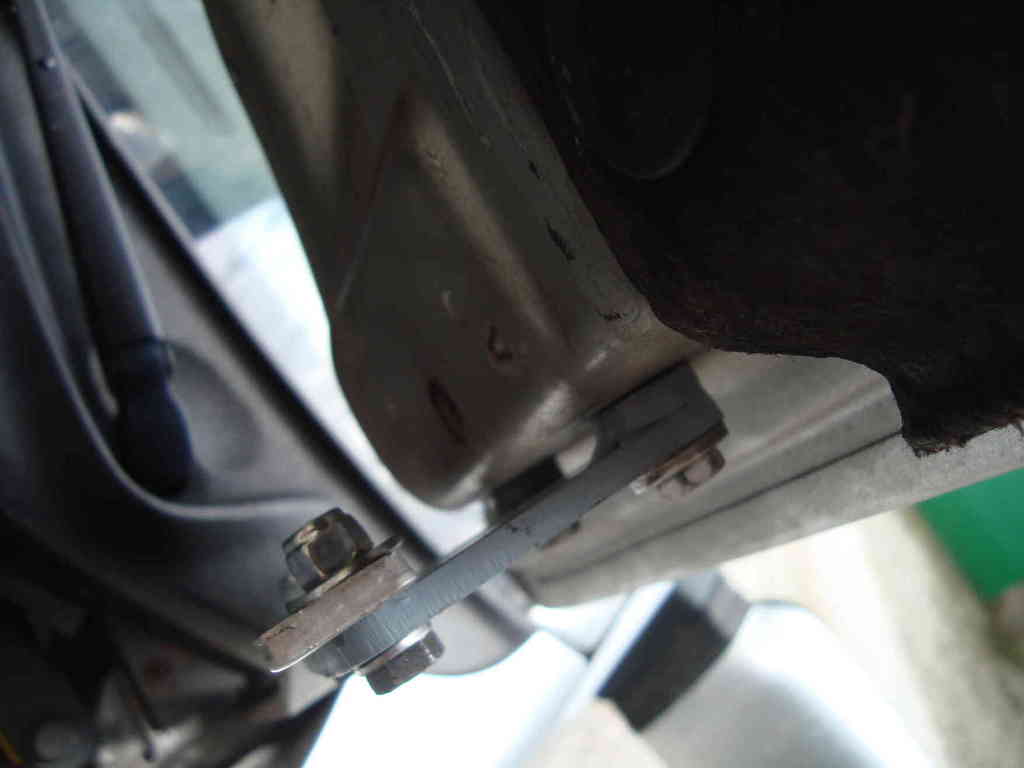
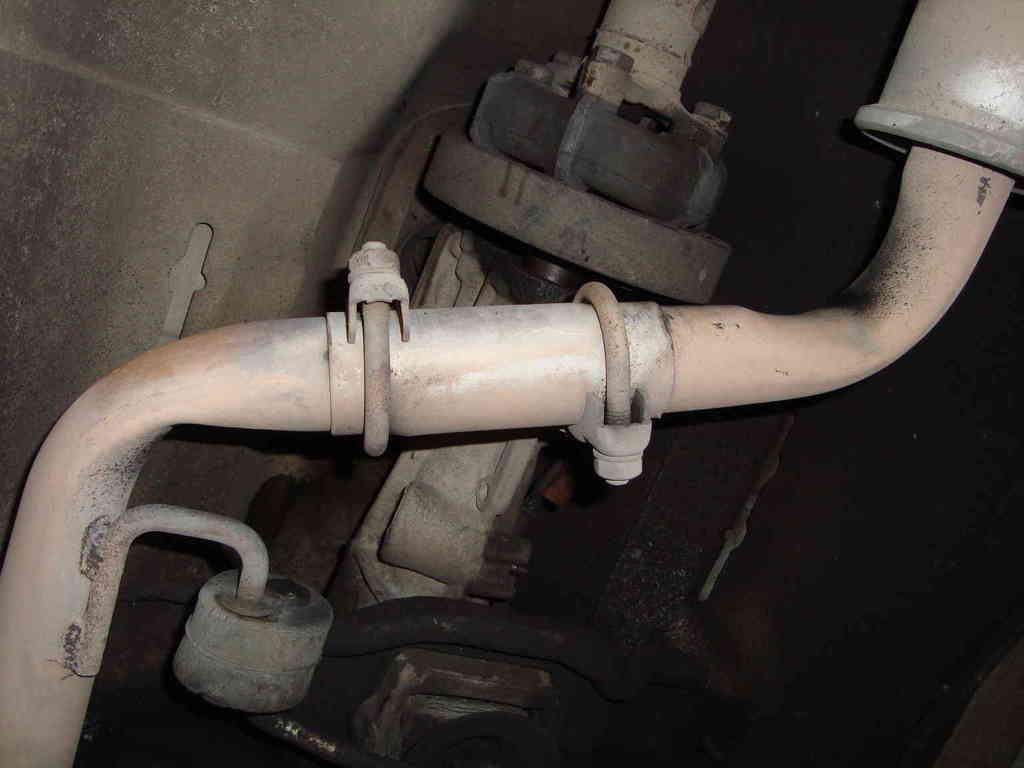
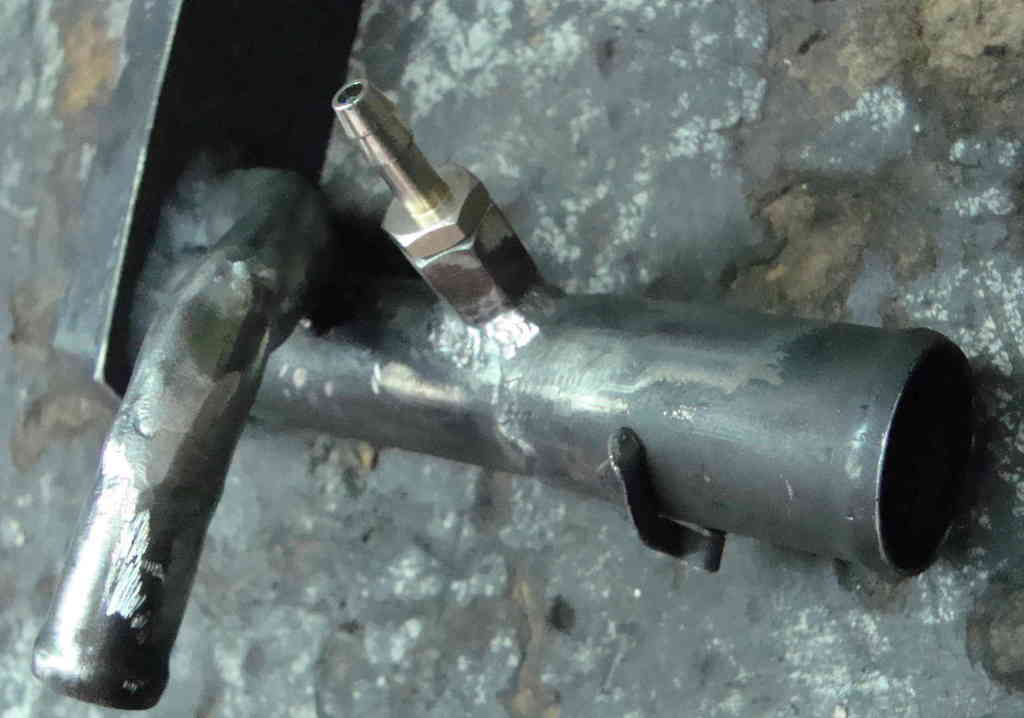
i had to do some little mods on this one, 'cause i've found out some assembly mismatch with the intake sistem.
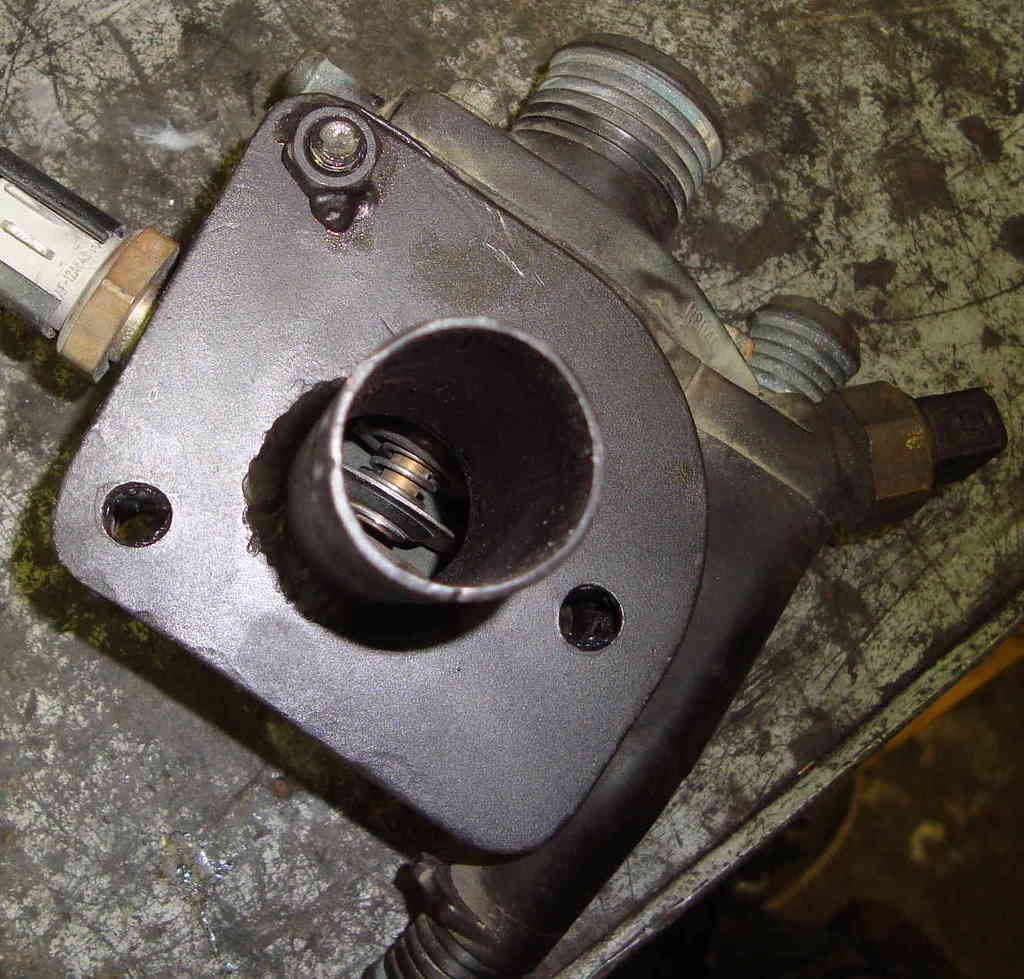
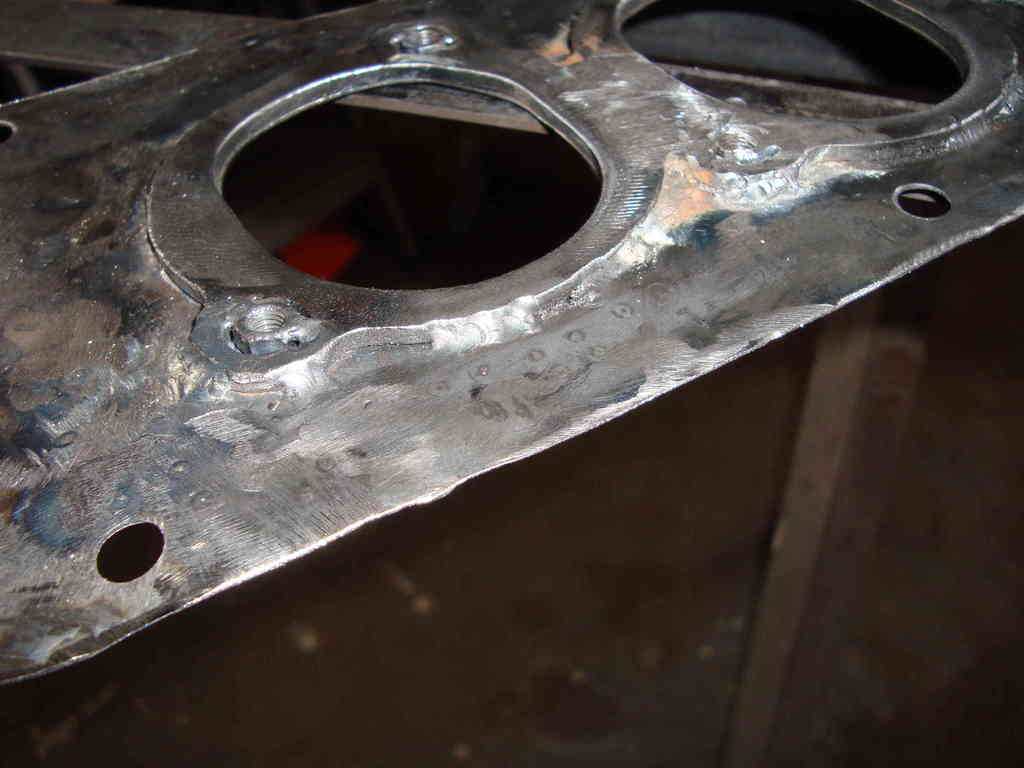
i also made another pick up to directly feed the carbs with hot water, ...
...and welded a big nut on the lower hole.
after brushing, the porosity on the upper weld seems got bigger, but the inner one is still in good shape.
just to be sure, i'll close 'em with some black paste or liquid metal.
What tig welder are you using mate? Been wanting a tig machine for a while now, and you are getting pretty good results with it - does it have foot pedal control, and can it be configured for aluminium?
What tig welder are you using mate? Been wanting a tig machine for a while now, and you are getting pretty good results with it - does it have foot pedal control, and can it be configured for aluminium?
thanks mate!
here's my story:
SHORT VERSION
i bought the cheapest brand-new-piece-of-crap i'd found. but it's held on pretty good, in these 7 months.
with it i'm welding 4-10 hours a week, (swich on - swich off time).
i have something to complain, but overall i'm really satisfied of the purchase.
it came for very very very cheap, i'm having pretty good results and looks quite reliable.
i just could've been lucky...
LONG VERSION (pop a beer, this is a long one)
i'm a beginner too, giving you full description, just so you know what you have to expect...
i'm using this one:
tig mig 200 hf, it came for 250 euros. not watercooled, just a 220V inverter and hf (hi-frequency) start.
DC (direct current) machine, just mild and stainless steel. (maybe copper or others, never tried).
i was told it was made in italy, but then i found out it's china-made italian-stickers...
or it might be kinda assembled here with chinese components.
check here... http://www.jinslu.com/
this has become an issue when i broke the 6mm ceramic nozzle.
i've found them only on aliexperss, (10 pcs for 9usd), but delivered in a month, with free ordinary mail.
they're using different attachments from the european standards, as you can see in the torch pics.
so it's the same story for the other parts. they don't exist on ebaay, and i still haven't found an european distributor.
this machine is not compatible with pedal switch. actually i don't feel like i need it...
the swich is this:
looks shit, but it can be rotated and moved up and down on the torch.
this means it's a looot more comfy way to work, than with the ones fixed on the torch. (that's why i don't need pedal)
the heat melt down some of the wire insulator, but the rush-patch-up i made 2months ago still holds.
(this is what's inside this switch).
they can also provide you mask and pressure reducer for cheap.
mask works fine, but my advice is to avoid to purchase the reducer from them,
they let you see this:
then you find this in the delivered box.
a friend of mine dumped it after 2 weeks, but mine's doing its work.
also recently, argon cylinders come with an integrated reducer, (down here is fantascience).
before buy one, find a good and cheap argon distributor, and ask him...
they also have AC (alternate current) machines for aluminum, they start from kinda 700euros.
can't say any about those...
you also have to put in budget:
-argon (a 14lt cylinder lasts me kinda 3months, 4-10 hours a week...)
-consumabiles,
-tungstein electrode.
-anything you find to grind surfaces
a good results depends on:
-start (hf start is the good one, avoid scratch starts).
-accuracy of the surface cleaning, especially on mild steel.
i'm experiencing more difficult welding mild rather than stainless, due to rust, anti-rust and zinc coat.
with mild, the surfaces must be througly grinded top and bottom (not just brushed).
(you'll also need dremel grinders for the pipe inside surf_).
this is the ass-aiche of tig. it steals lots of hours just for the clean up. lot of people prefere mig on mild because of this.
-set up of the machine, 15-25amps per mm thick would work, (to be regulated with the span of the surface).
potential of the machine => max thickness weldable.
-hand. start with junk, not too small pieces 'cause they're too difficult to be cleaned.
don't worry ! in a couple of week you'll start growing. in a month or two, you'll be able to make pressure-water-proof welds .
-for non pros, cost of the machine is marginal on the results, just on the reliability...
hope this helps you find out a way to stick metal.
any other tip you need, just holler, glad to be helpful if i can! (...in my bad english, sorry)
Thanks for taking the time to write that detailed reply mate, really appreciated! Also your English is superb; saw you apologise for it in the opening post... you probably write better English than most of us hahaha
I have actually done a fair bit of TIG in the past, many moons ago - but the machines were already in place, pretty high level ones, so I have no idea how well the cheaper ones perform. I've always wanted to get one of my own because out of all the welding methods I've tried, it felt the most natural to me... like knitting metal together. So controllable. I like the footpedal because it isn't just an on/off (at least, it isnt on higher end machines) it actually varies the current like the throttle on a car so you can actually get it hotter - or back off - mid weld. So intuitive.
However, for the money your machine sounds very good, and definitely that kind of thing is more affordable to me in my current situation - full featured machines are damned pricey.
I do have MIG but... I don't know... just never felt "right". I think its because you can't adjust easily mid weld, who knows.
I do love acetylene, but its just too much heat input for thinner stuff IMO, plus means renting the equipment... ok if you use it all the time, but not so good for the hobbyist.
Although not being able to get spares for your machine is a bit of a pain!
cheers rs007!
we're the same on this one... i tried other means, but tig is the one which better suits me.
if you tig'd before, you wouldn't have any problem handling it again .
it's like riding a bike, once you've learnt it...
obviously acetylene, who doesn't? makes you feel like B.A.Baracus , but it's pretty difficult to reach down here too.
spares' story looks quite a bitch. but now i'm playing in advance and it won't be a problem any more... (ordering now what i may need in the future, they're not so expensive)
still working on the car.
keeping you posted as soon as i have some good pics...
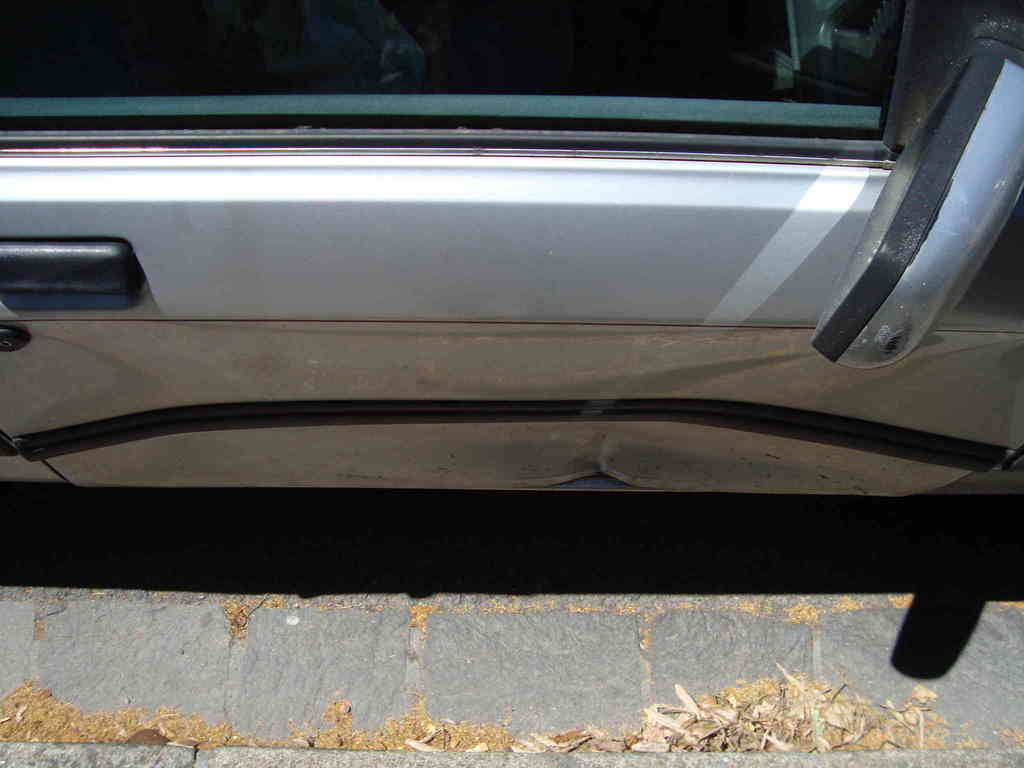
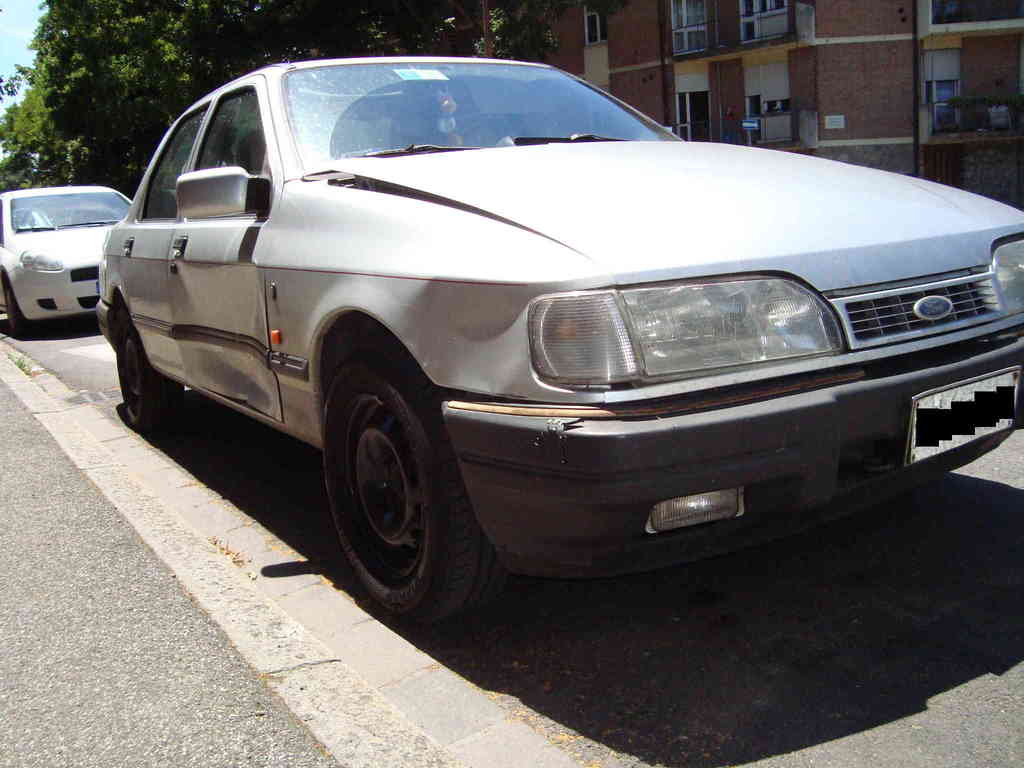
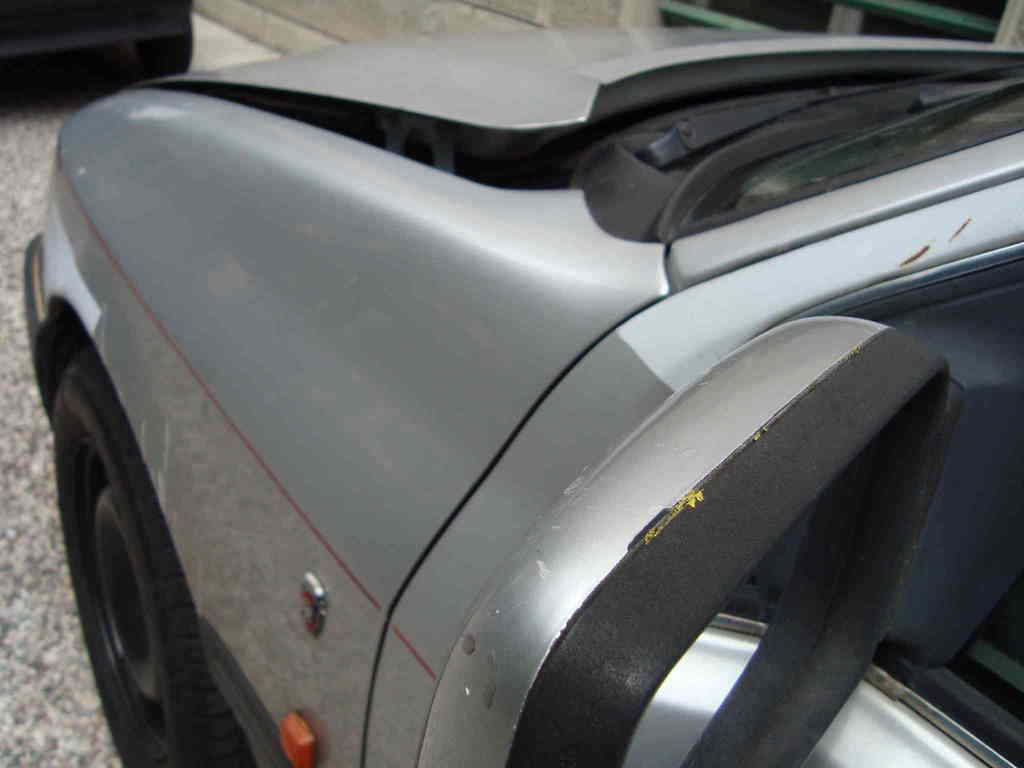
another one?
shit happens, this was a friend of mine manouvering.
can't blame him. sleepiness does strange things to people... it could've happened to anybody.
he also offered to give me an hand fixin' it...
i hope i have enough time to do it before the next millenium.
electric window and key still work (dangerous 'cause the other side key never did).
it doesn't affect mot in here. so it jumped off to the bottom of the to do list.
but i did have to drink over it. just a bit.
the rest was just for my pleasure...
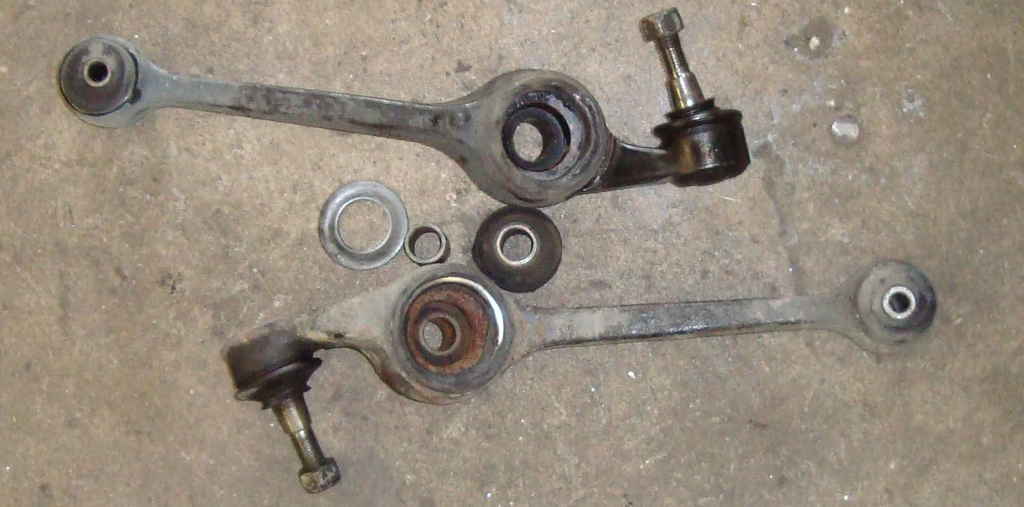
worn lower arms...
since i'm going to a toe service, means it's a good moment for some front end mods..
or i'd rather better say, to f*ck it up for good...
the plan:
going down as soon i can afford it, but:
stanced + shitty roads = fucked up oil pan.
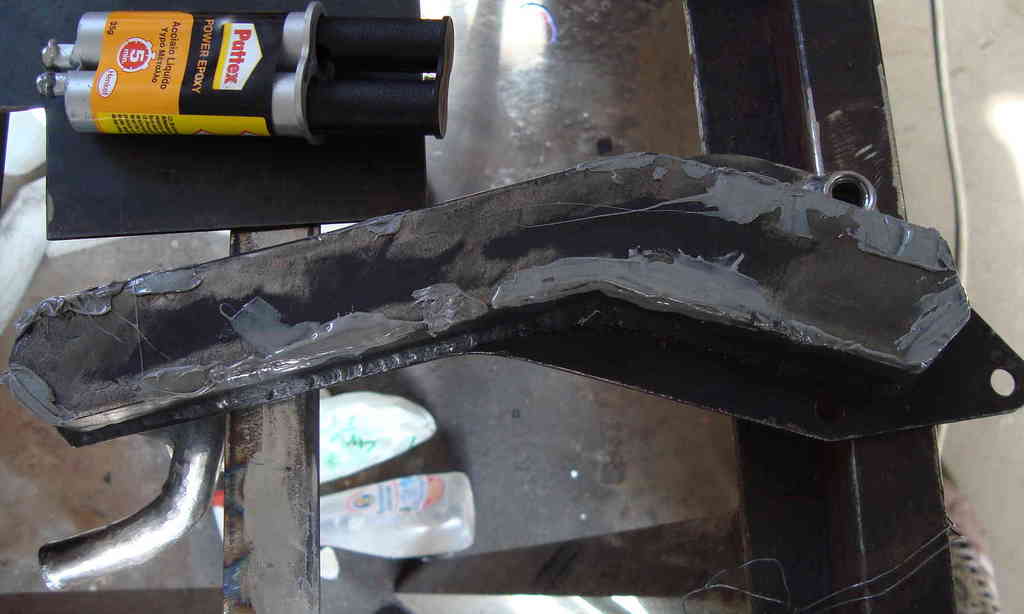
this one is going to be welded beneath the front chassis crossmember.
lpg means welds are banned beneath the car, unless the cylinder's off it.
this time, planning a toe in, i can dismantle the crossmember from the car, and put it in the same expense.
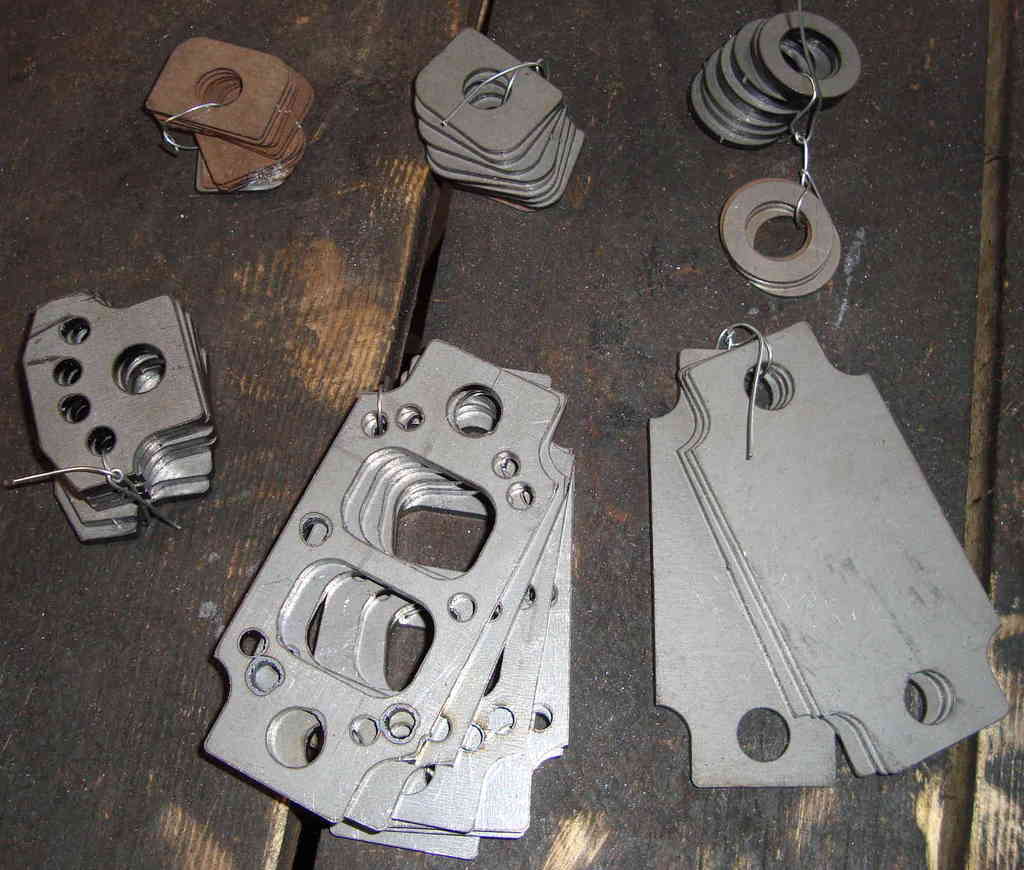
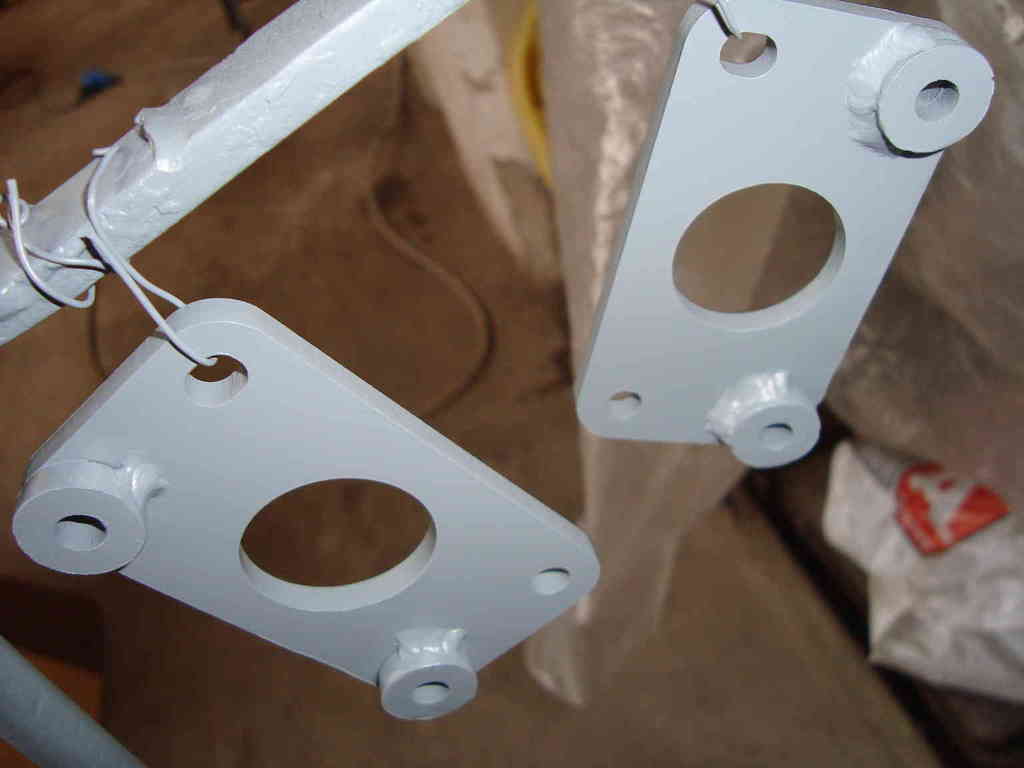
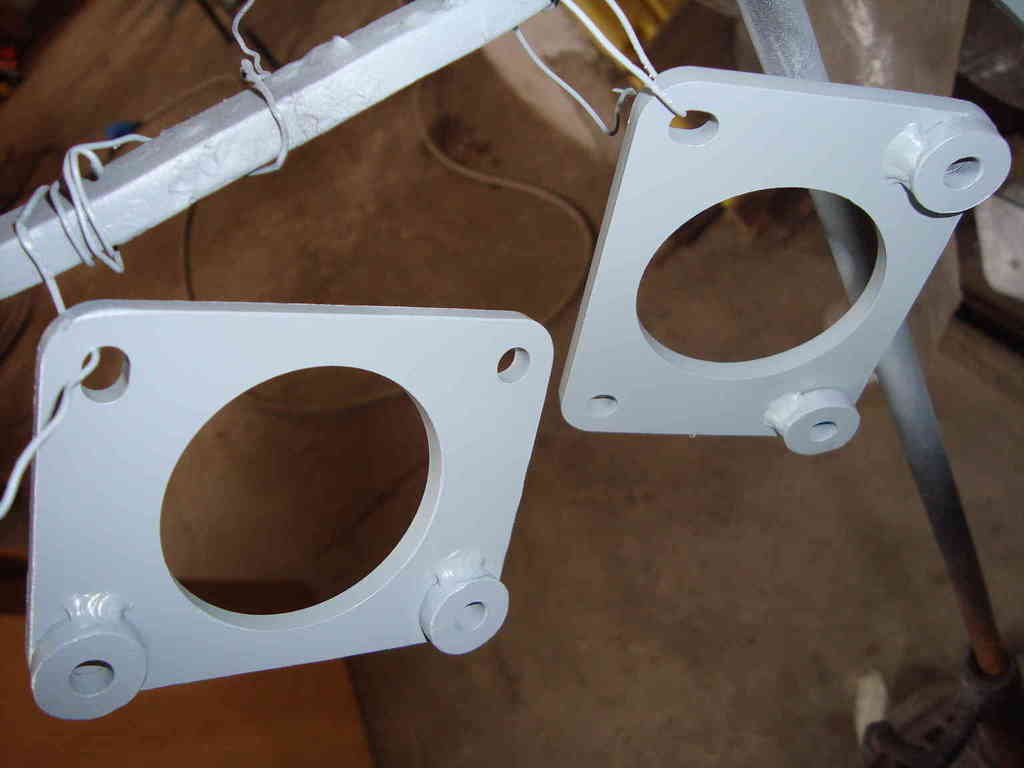
i had these laser cut for me
Last edited by rooos; 04-07-2016 at 07:32 PM.
Reason: one useless pic...
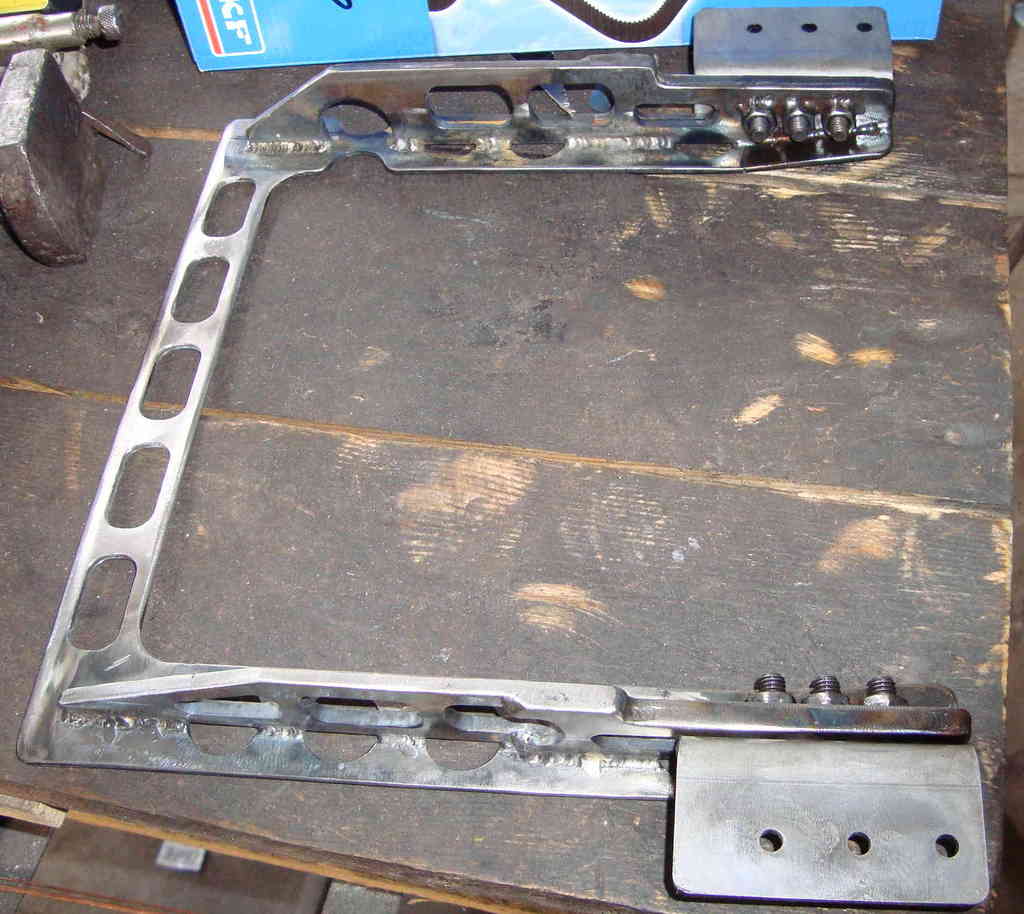
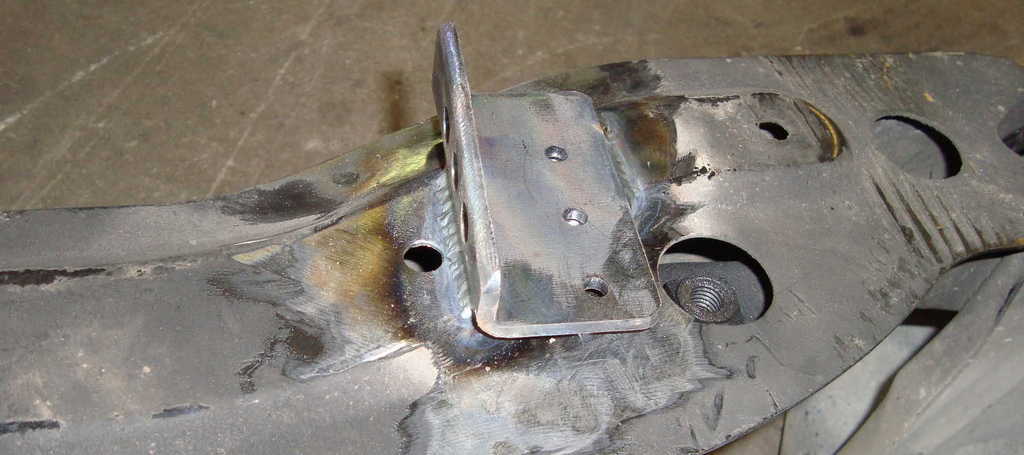
it's designed to be assembled lego-like.
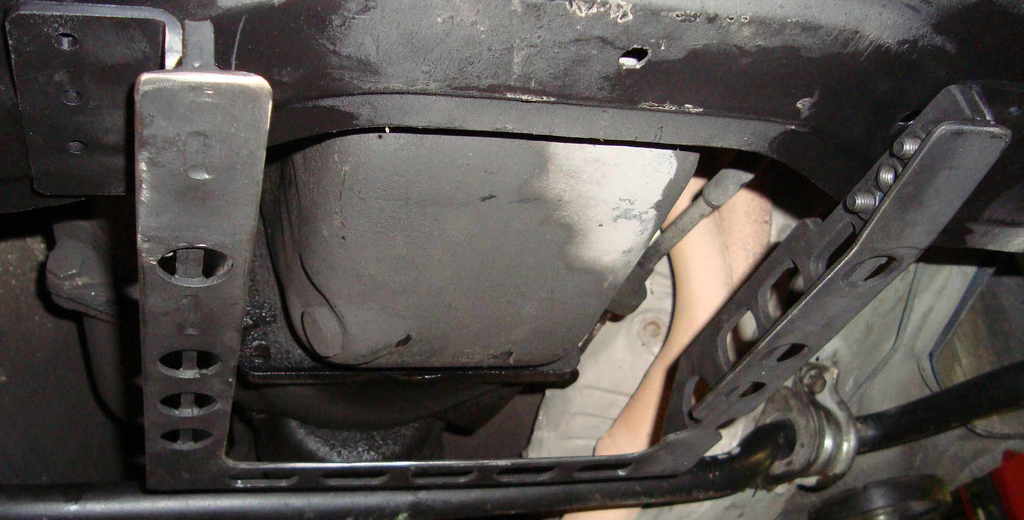
(wrongly assemblded upside down !!! see in the next posts. do not attempt to build it like this one)
these two wings are going to be welded beneath the front crossmember.
this end has been shaped like an airfoil, for more aerodinamicity...
wanna disturb as less as i can the air flow around the oil pan.
the whole assembly: not the clearest weldin' job ever made.
this would be an experimental one. the real plan is destroy it, (at least is what i'm attempting), to see how it works.
i designed it to fit the sierra 1.8cvh (r2a) oil pan.
let's see if it really fits...
Last edited by rooos; 04-07-2016 at 07:35 PM.
Reason: advice due to a mistake found during assembly
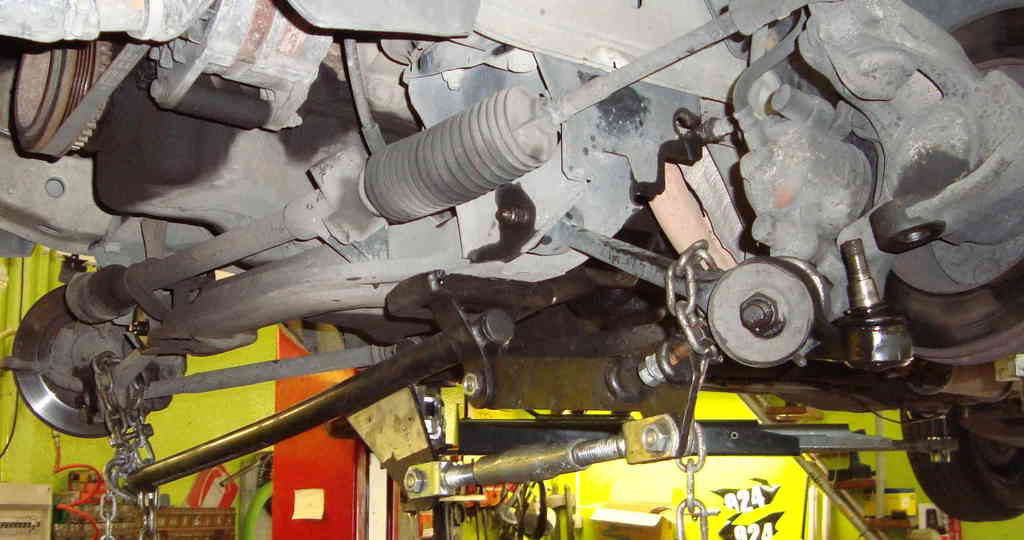
with the shorter steering rack ends you will end up with exccessive ackerman angle on the wheels. You need the steering rack closer to the crossmember to make the change in steering angle work.
But its not possible to move the steering rack much on the sierra. The easy way is to use an offset steering arm spacer as pic below. Also make sure you dont over centre the steering arm as it will lock up on full lock.
with the shorter steering rack ends you will end up with exccessive ackerman angle on the wheels. You need the steering rack closer to the crossmember to make the change in steering angle work.
But its not possible to move the steering rack much on the sierra. The easy way is to use an offset steering arm spacer as pic below. Also make sure you dont over centre the steering arm as it will lock up on full lock...
thanks man ! but...
sorry: i've stolen your time because of my mistake!
in the rush i wrote it wrong, so it might be misinterpreted...
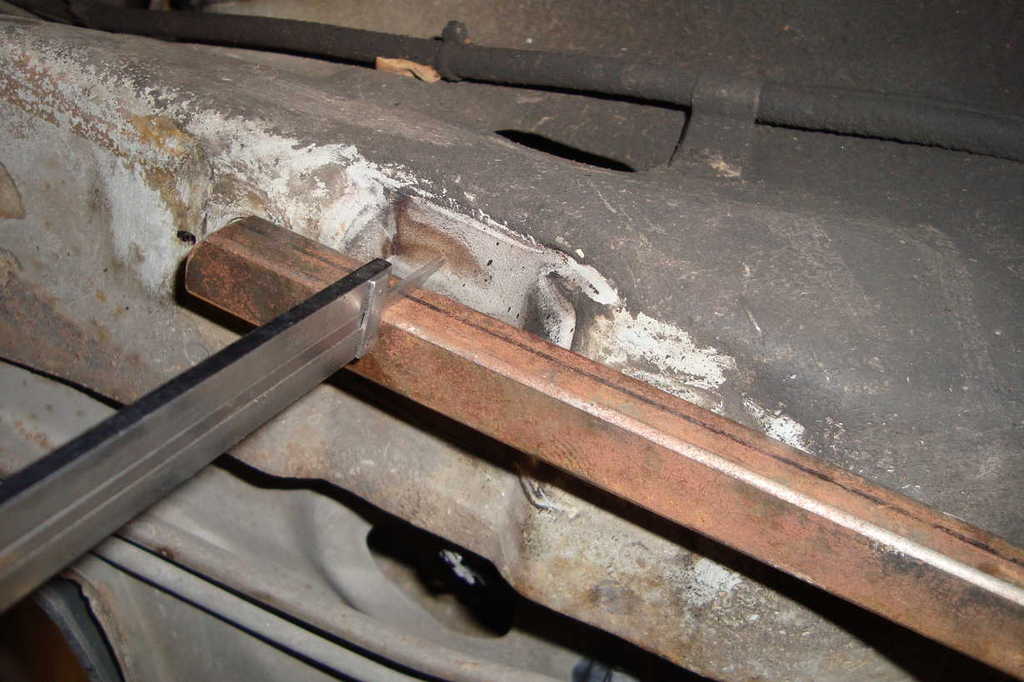
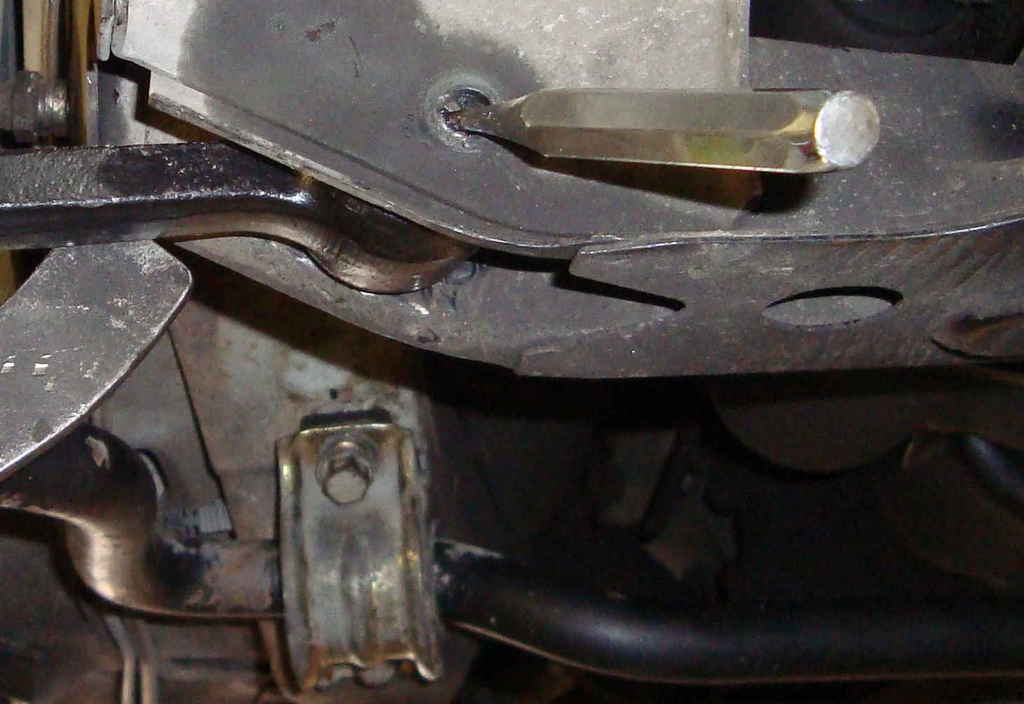
i've not sawn the rack, but i did a 12.5mm cut on the steering rack "chassis",
(not a 15mm one, because i might have bigger issues trying to put the driver side boot on).
the steering mechanism and ackerman are unchanged, but...
the rack now can go further, because the bump stops, on the s_r_chassis, let the tie rods free to move 12.5mm more.
this pic might explain better what i'm saying...
anyway, this your tip is very useful. many thanks for it !
(if it's you who's thought about that tie rod rig, you're a genius !)
i'm just start thinking about some future mods...
but, i still haven't understood how, if i saw the rack ends, ackermann will change...
if after the toe-in service, i keep the standard toe, the steering joints on the knuckles will remain in the same position.
as far as i know, a sawn rack rod may cause bump steering, due of the tie rod inner joint position changing.
to explain me better i put these, from t.gilles - automotive chassis.
(in the toe change paragraph they just go down, but the principle is more or less the same...
tie rod joints moved inboard may cause some pull on the knukles, due to suspension bump.
toe-in or toe-out, depends if the s_rack is located in front of or back the front wheels axle)
however "antisway shims for more caster" will push steering knuckles forward, changing their position VS the rear axle center... and this will affect ackermann (i hope not big deal).
or do you just mean: annoying "excessive ack_ angle" with the steer at full lock?
robrs2, i'm a huge fan of your work, man !
that amazing 24v 3dr of yours inspired me when my project was just some mental masturbation, i love it .
any top tip or reply from you is really appreciated !!!
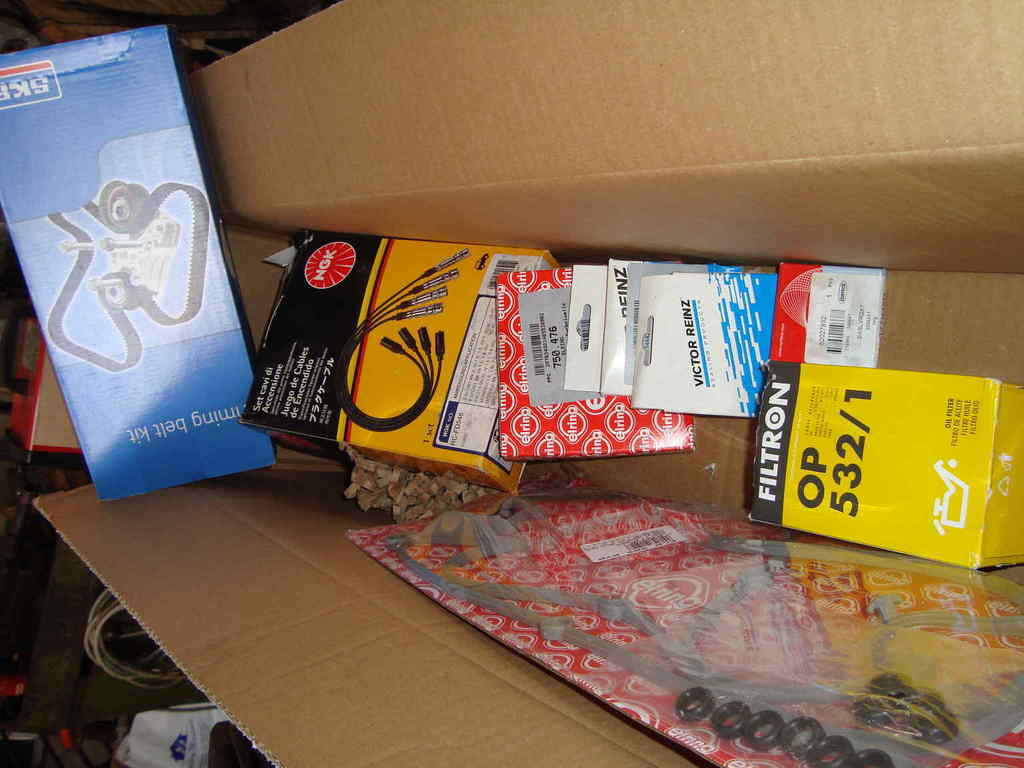
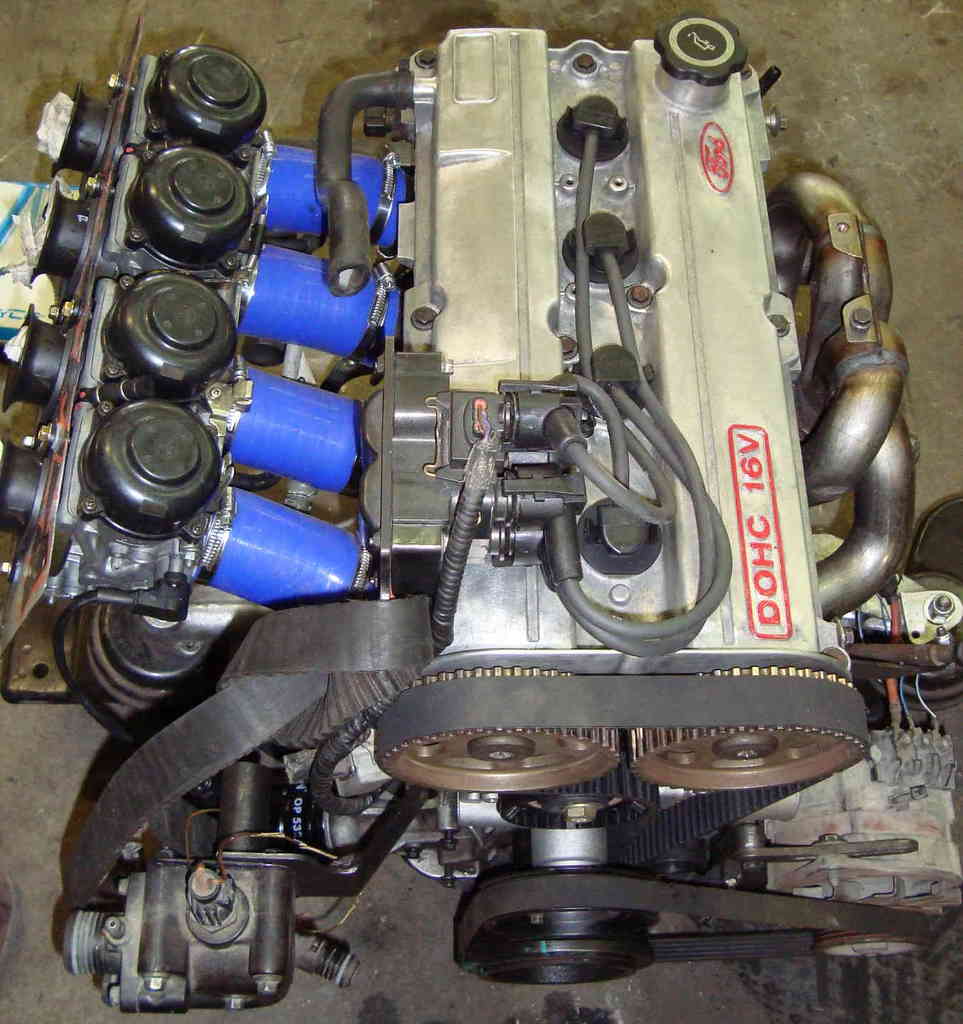
brand new:
-oil filter,
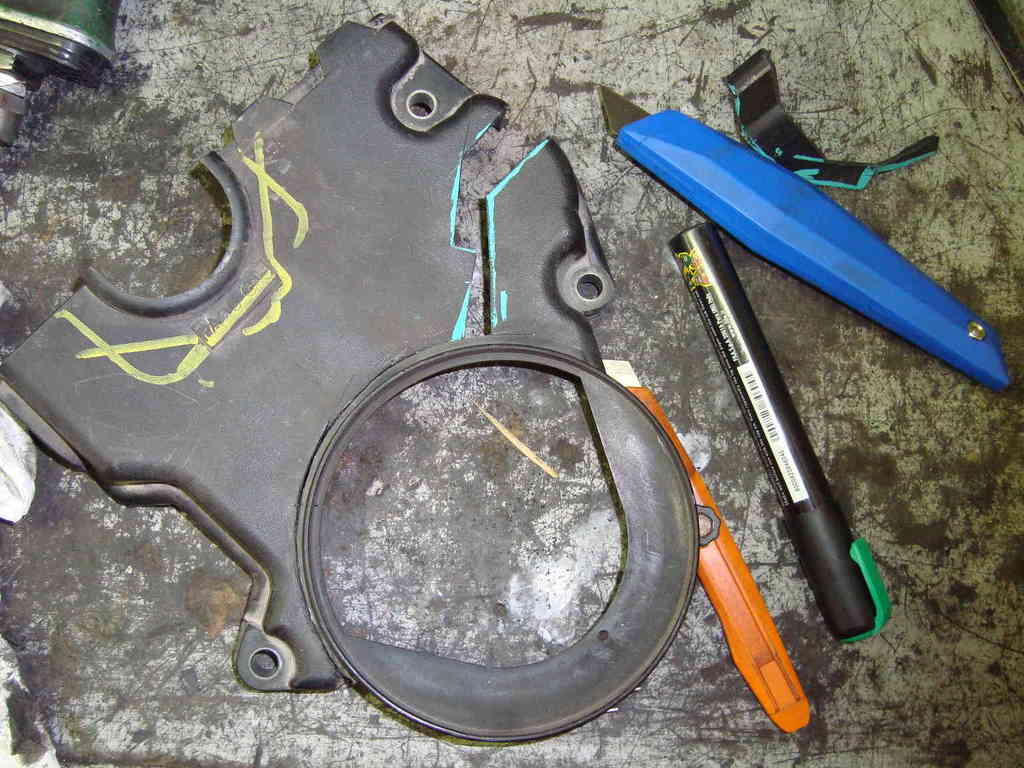
-camshaft seals,
-crankshaft seals, (both transmission and belt side),
-camcover gasket kit,
-skf timing belt kit, (w/o water pump, im using the retro ford reverse w_p_ purchased time ago),
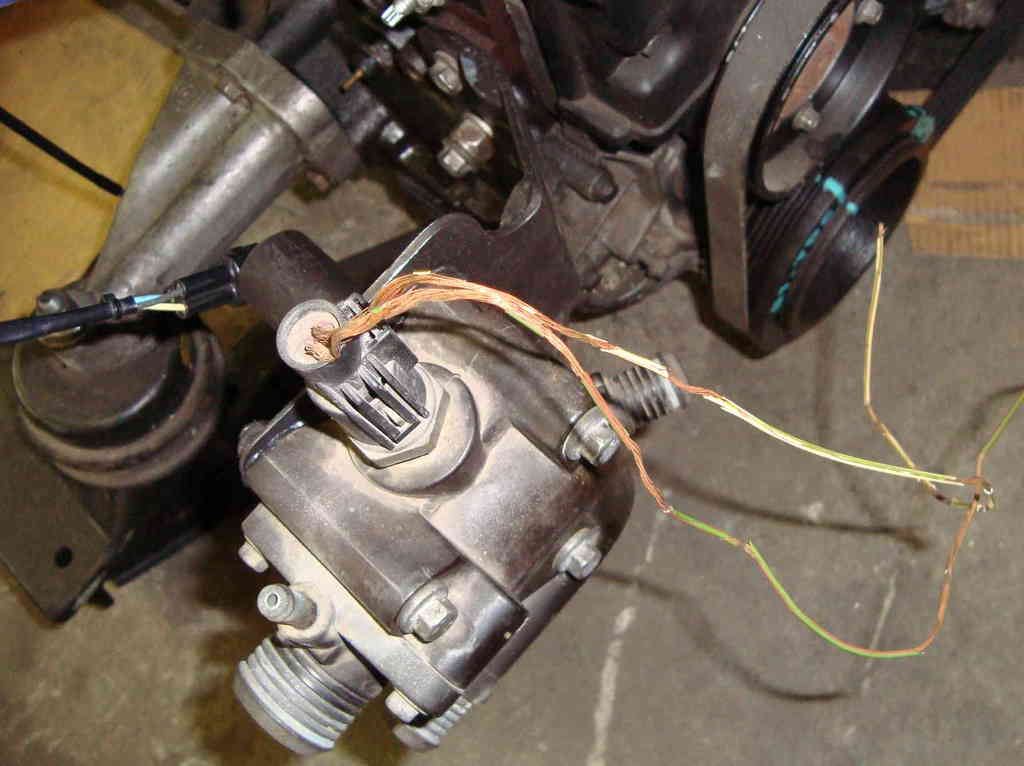
-ngk ht leads (code ngk RC-FD546. they're also a bit longer, to fit better the relocated coilpack).
[camcover brushed and refined with "wd40 + scotch-brite"]...
some bit done on the transmission side:
new crankshaft seal on,...
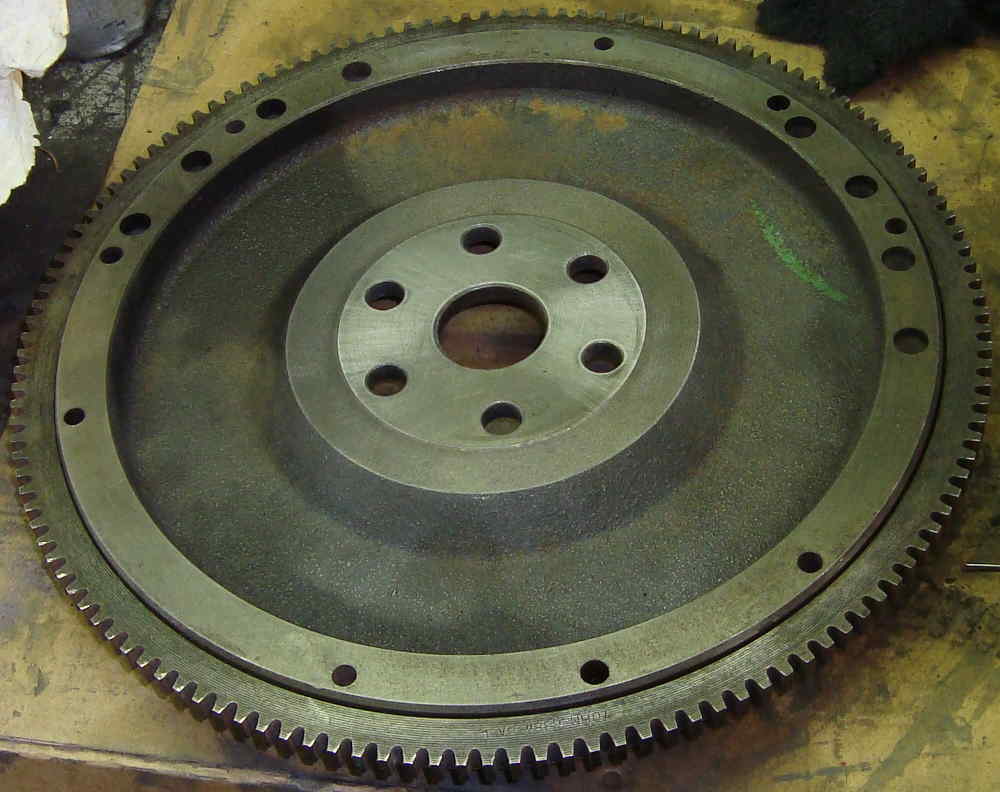
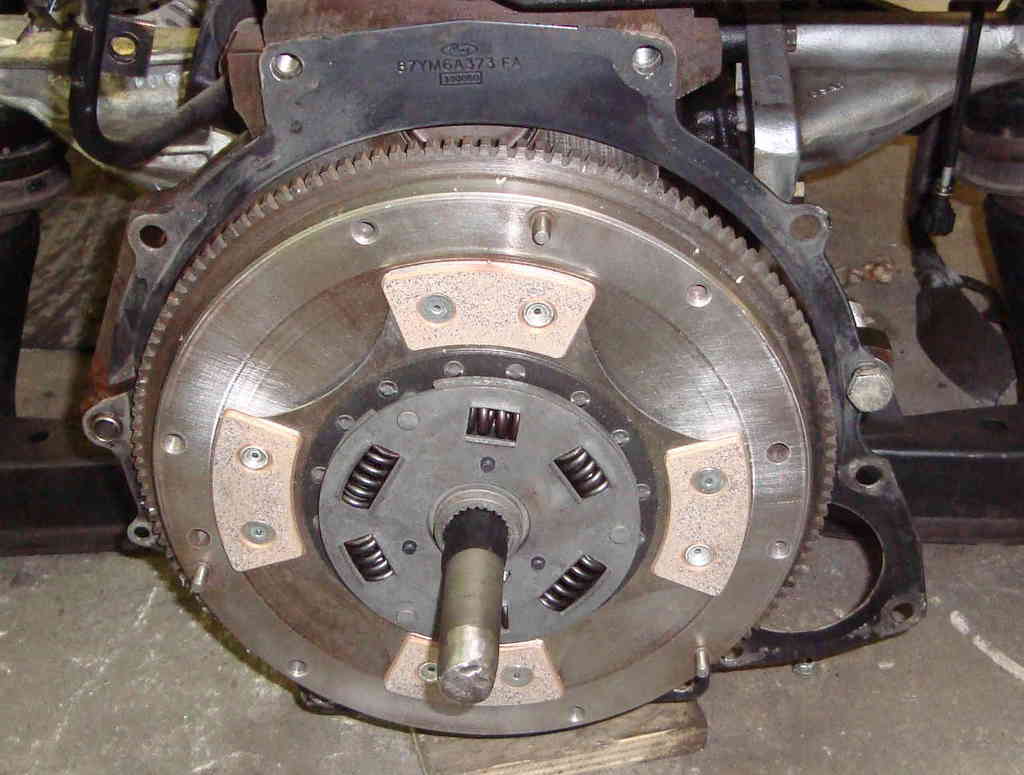
from another 1.8cvh r2a (ford sierra one):
- flywheel (hole drilled up to 12mm),
- engine to transmission plate, (lhd, starter motor on the intake side!).
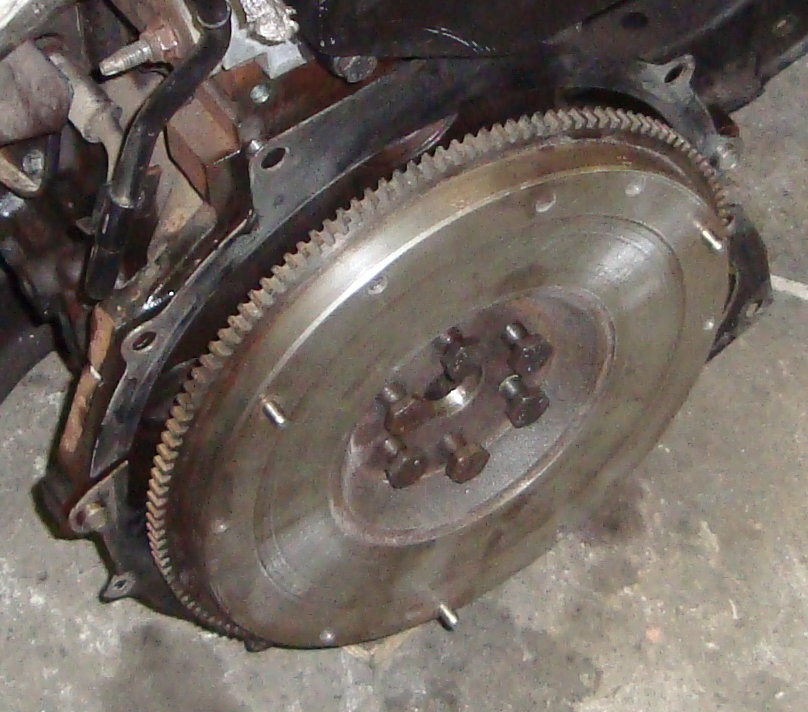
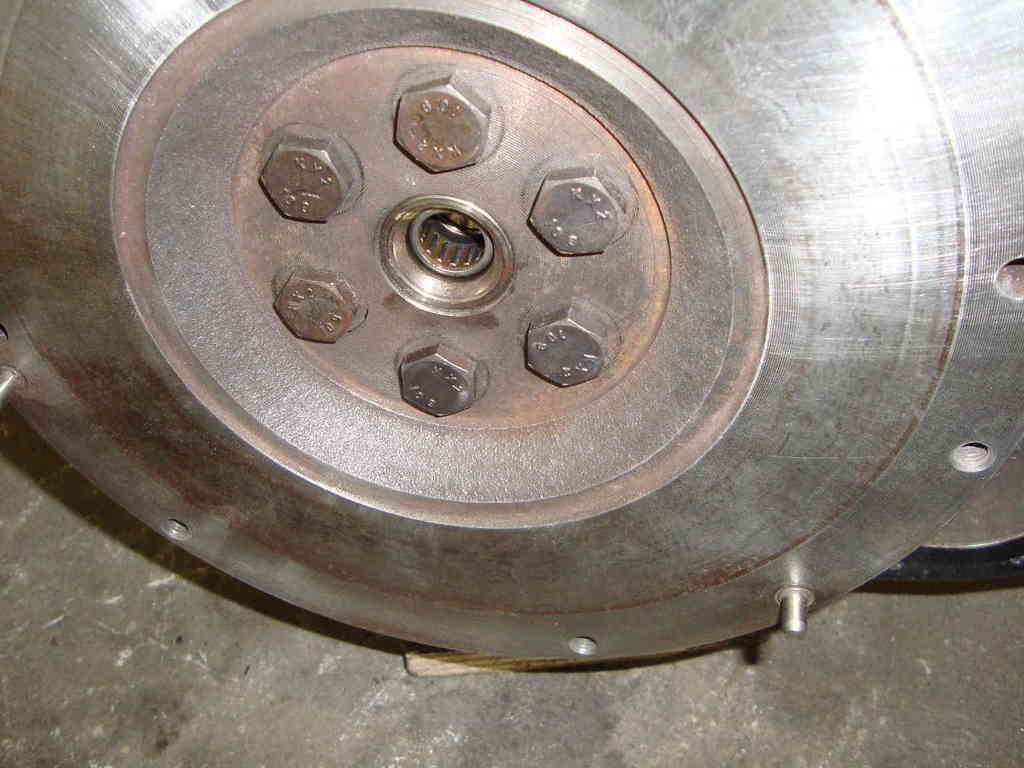
from retro-ford
-brand new flywheel bolts @ 115Nm torque,
-zetec crankshaft-to-t9 gearbox spigot bearing.
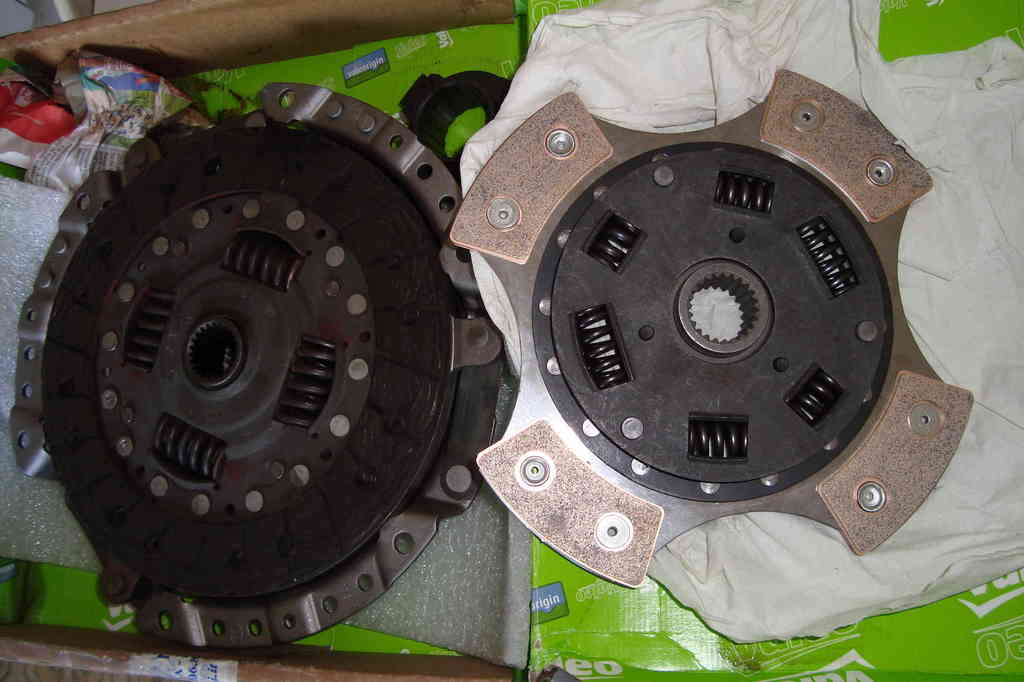
from fiorentini frizioni roma: (fiorentini clutches rome)
-215mm sintered copper clutch disc (not solid: dampened, with springs)
-reworked pressure plate, more preloaded brand new diaphragm spring.
not too much preload thoug: still no huge hp + don't wanna overload the clutch pedal-cable mechanism.
-brand new pressure plate bolts from retro-ford @30Nm
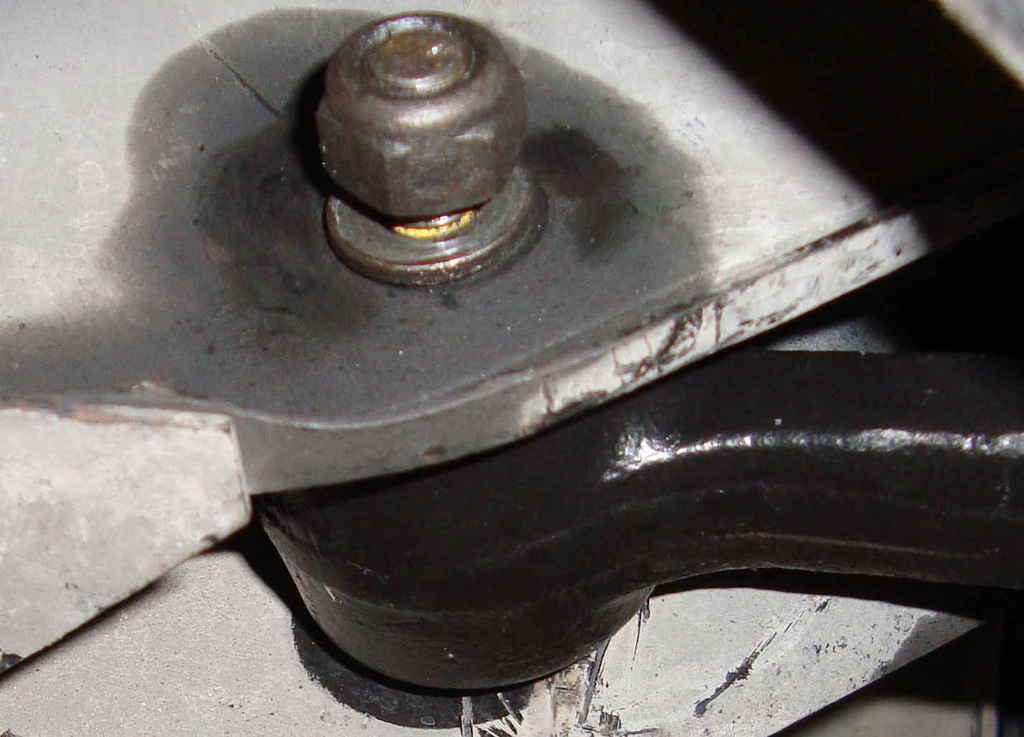
different conicity on peugeot-citroen steelies has deformed the taper on the std ford wheel nuts.
they became so tight that, even with stud threads flooded with wd40, they require chuck norris to be screwed off.
(not so comfy if you're changing tyres every rainy night).
maybe not clear in the pic, but the thread in the conical end proximity, on the right one, is quite warped...
purchased 16 plugged nuts, for ford alloy wheels, at the junk (10euros).
still conical, but very tough. they'll handle better the psa steelies conicity.
thanks fury !
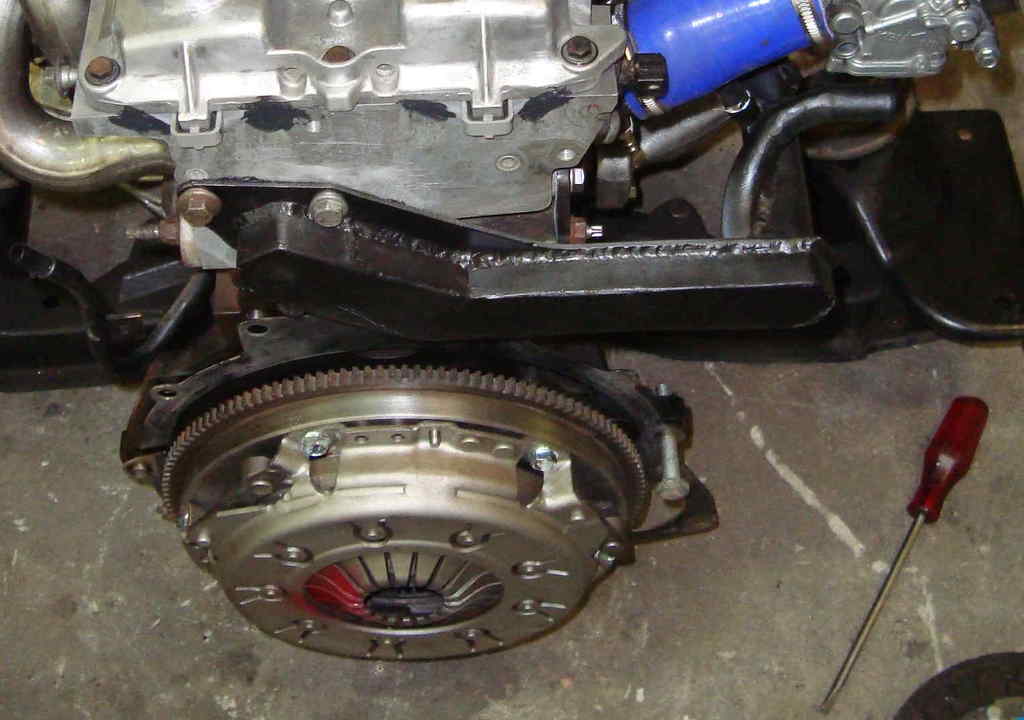
the plan for the engine:
i "just" have to figure out how to loom the megajolt ecu.
after a first bench-start-up, i'll complete the swap.
i hope no unexpected. there's not so much to be done on this side...
but also front end and half-shafts need some care...
dismantled anything, the program was to put on:
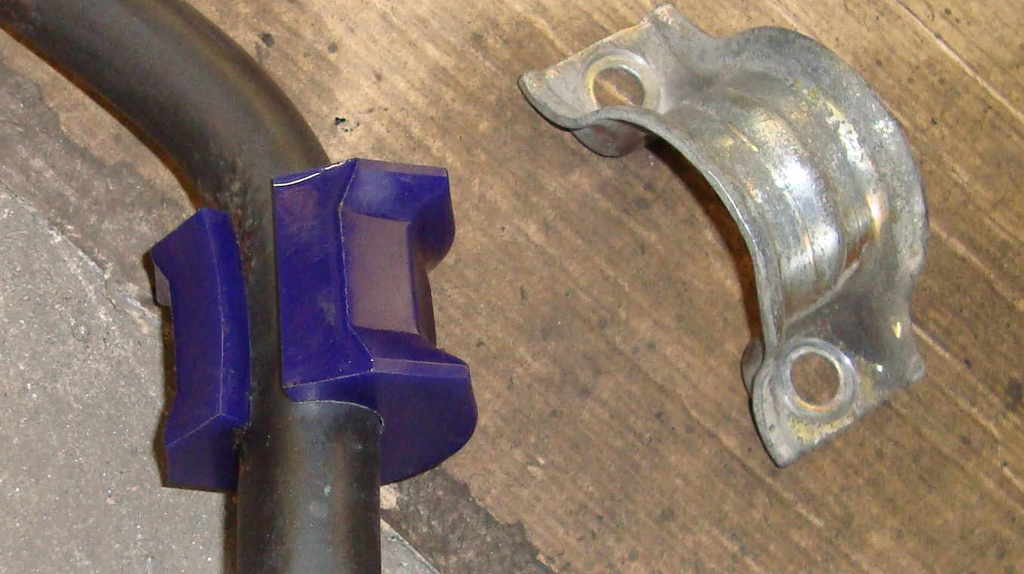
-antisway bar poly-bushings
-antisway bar shims and washers
-modified rack
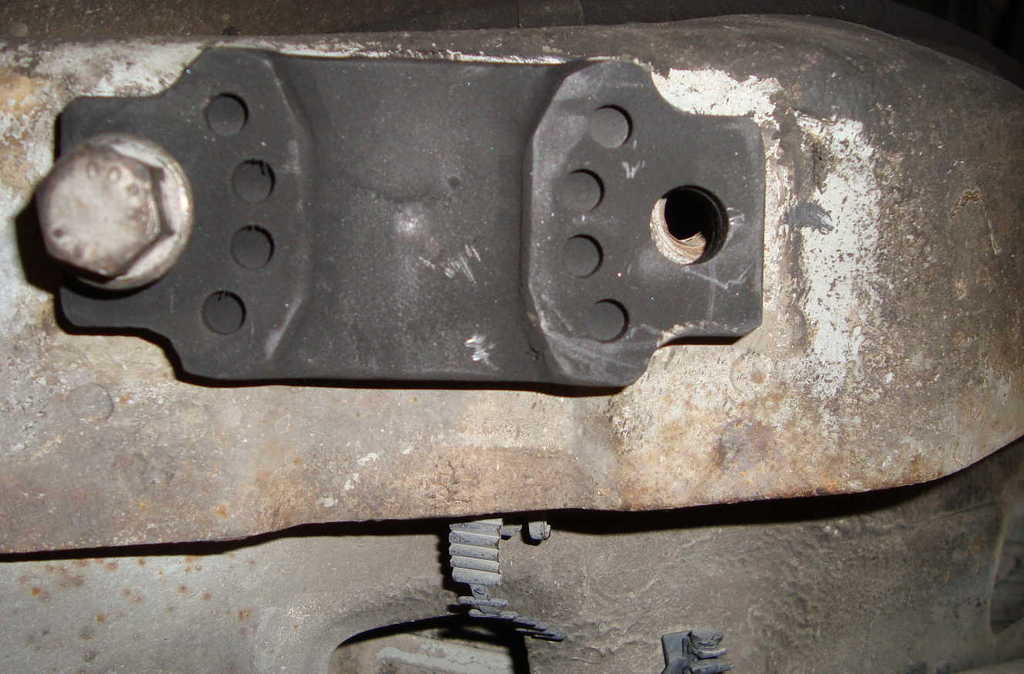
-sump guard
-brand new tca arms
-brand new steering joints
ANTISWAY BAR SHIMS AND WASHERS pt.II BIG FAILURE!!!
1-purchased the wrong antisway-bar poly bushings.
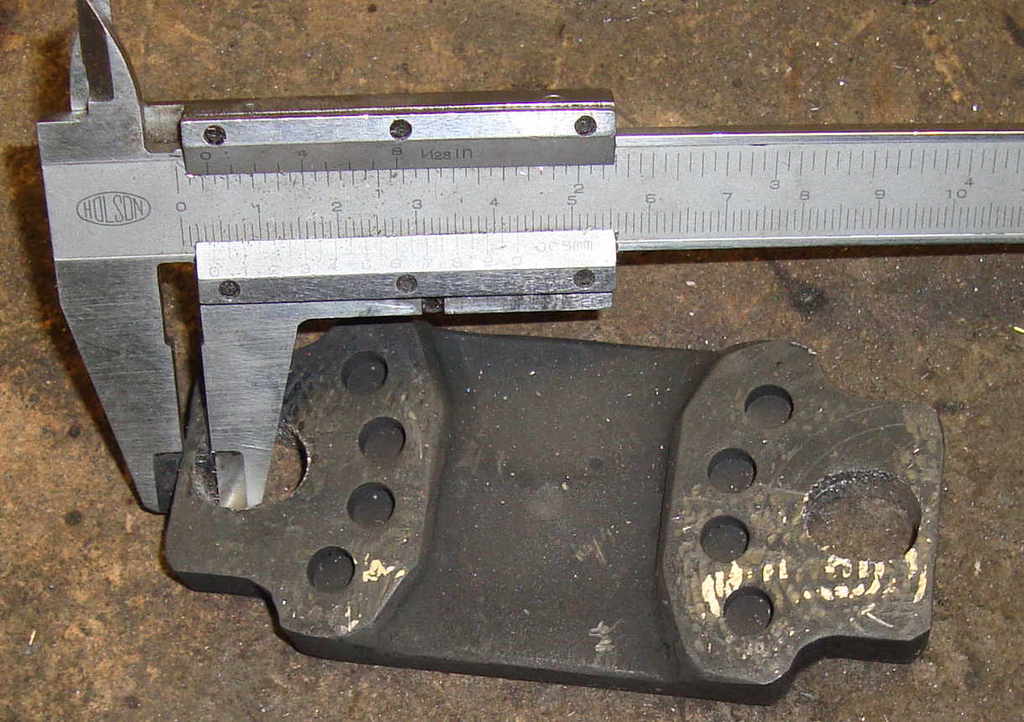
i always thought i had the 24mm one, 'cause the spare one i pulled down from a mate car is a 24.
but the car under my ass is wearing a 28mm thick antisway-bar.
half full glass: can't say how it comes, i have a 28mm bar on my 1.8cvh sapph...
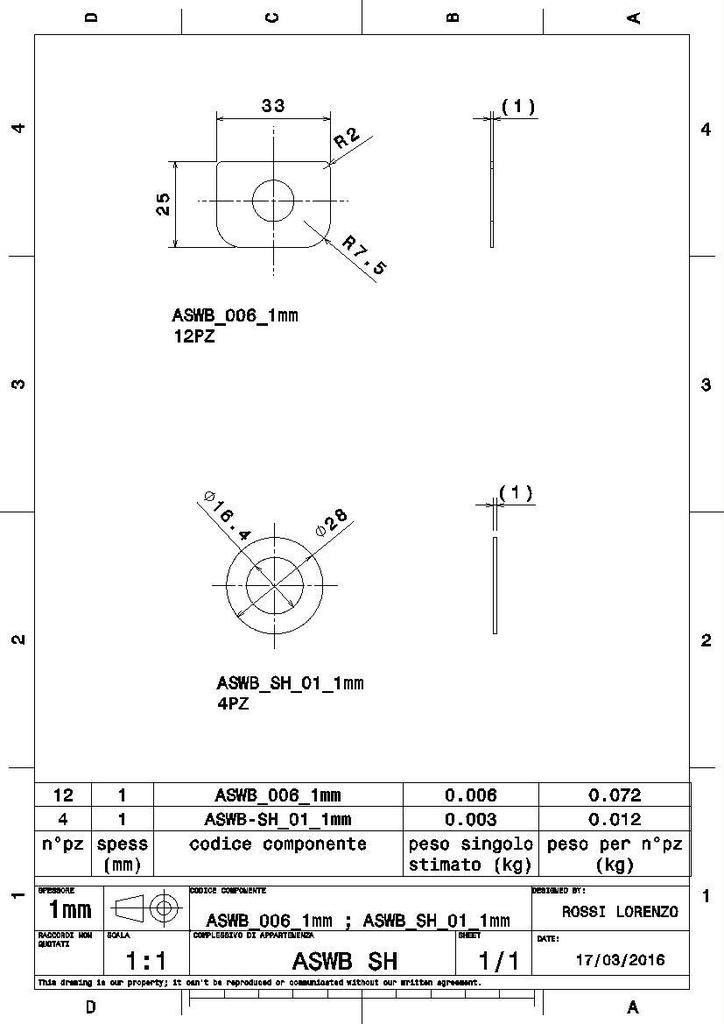
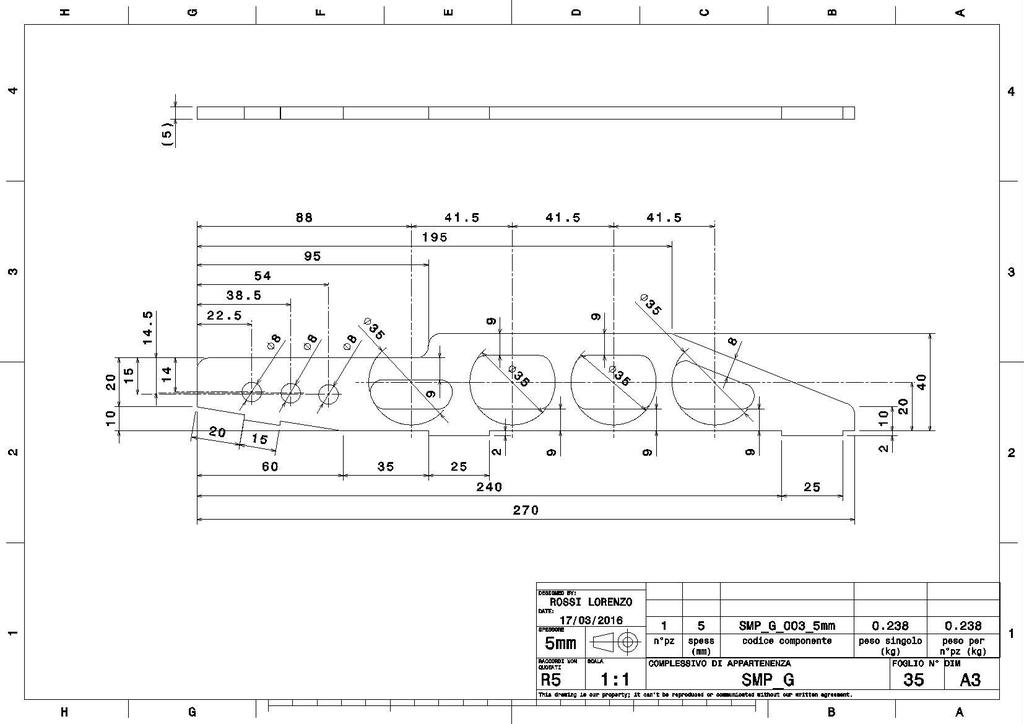
2-did wrong measurement, so i had wrong laser cut...
(i took down them draftings. don't wanna people attemping to do wrong things because of my mistakes)
i opened them holes up till this measurement checks 2-2.5mm on both sides:
withstanding this measurement (7mm),...
...i just need one of these 1mm shims to keep the standard compression on the bushings (just a little more compression).
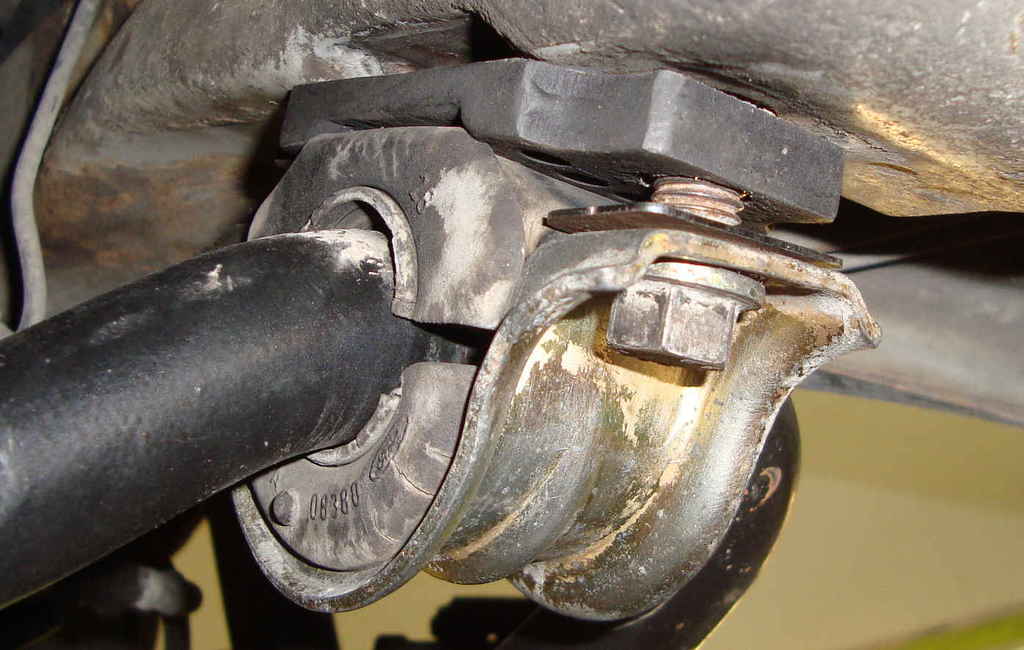
the assembly would be this:
3-tried anything, but i've just managed to put on just one 2mm thick washer per tca.
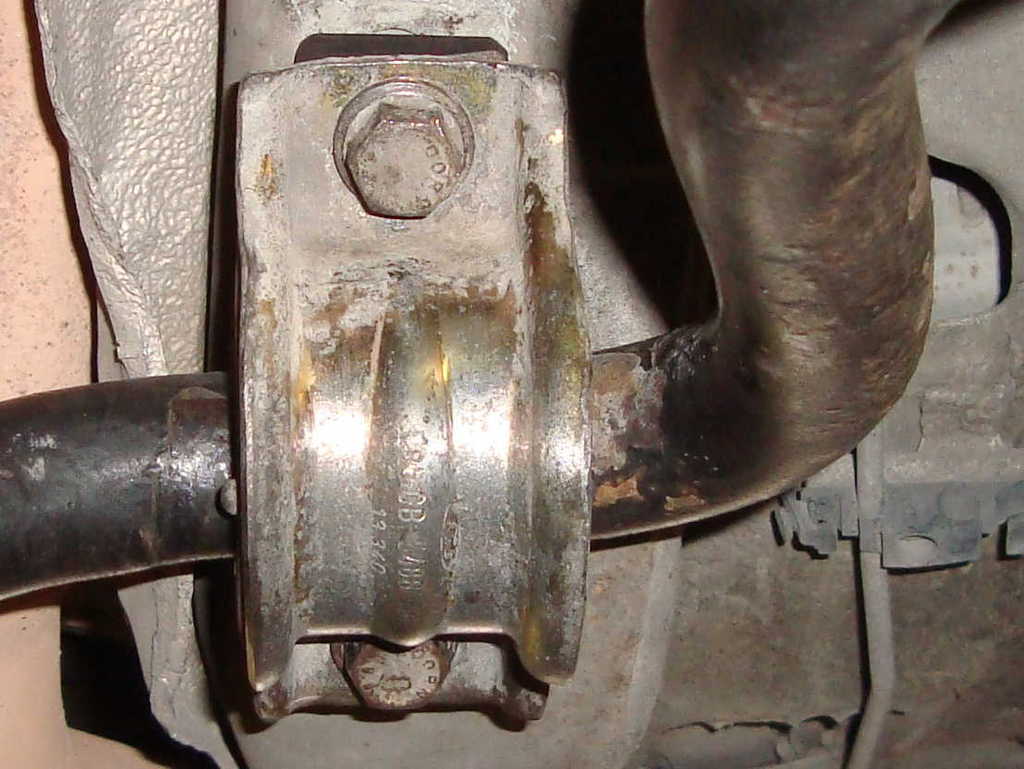
the antilock nut rubber lip grips on the 28mm antisway-bar, even with 3x2mm washers (total 6mm spacer). it ain't the problem...
the real issue was pulling everything in centre, as you can see by the very antisway-bar, (there is some left-to-right difference).
also the tca-to-crossmember bushings would work too much off-centre, damaging themselves in short time, if i had left the shims and washers on...
this mod would be a whole a lot more comfy, if i had a couple of adjustable tca... maybe in the next expenses.
at the end i gave up. no shims on, just 2mm washer per tca on the antisway.
it's a pity, 'cause i would've gained a lot of caster and steer turning back.
this how she looks with 5mm shims and 5mm washers per each tca...
haven't gave up at all, i'll give it a second chance in the next future.
i just have other things to focus on at this time...
lpg cylinder still on the car, welds still banned.
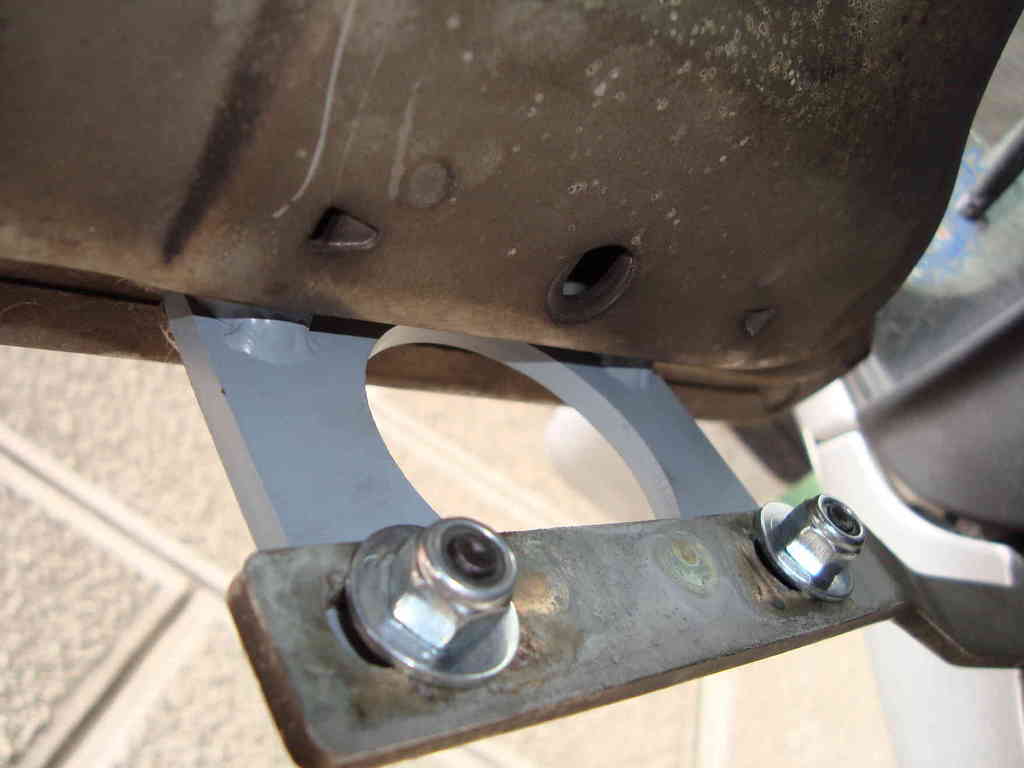
crossmember down...
...welded the 2 supports,
hadn't cleaned up anything. just the weld spots...
didn't wanna wipe out the crossmember position marks i did with a felt-tip pen.
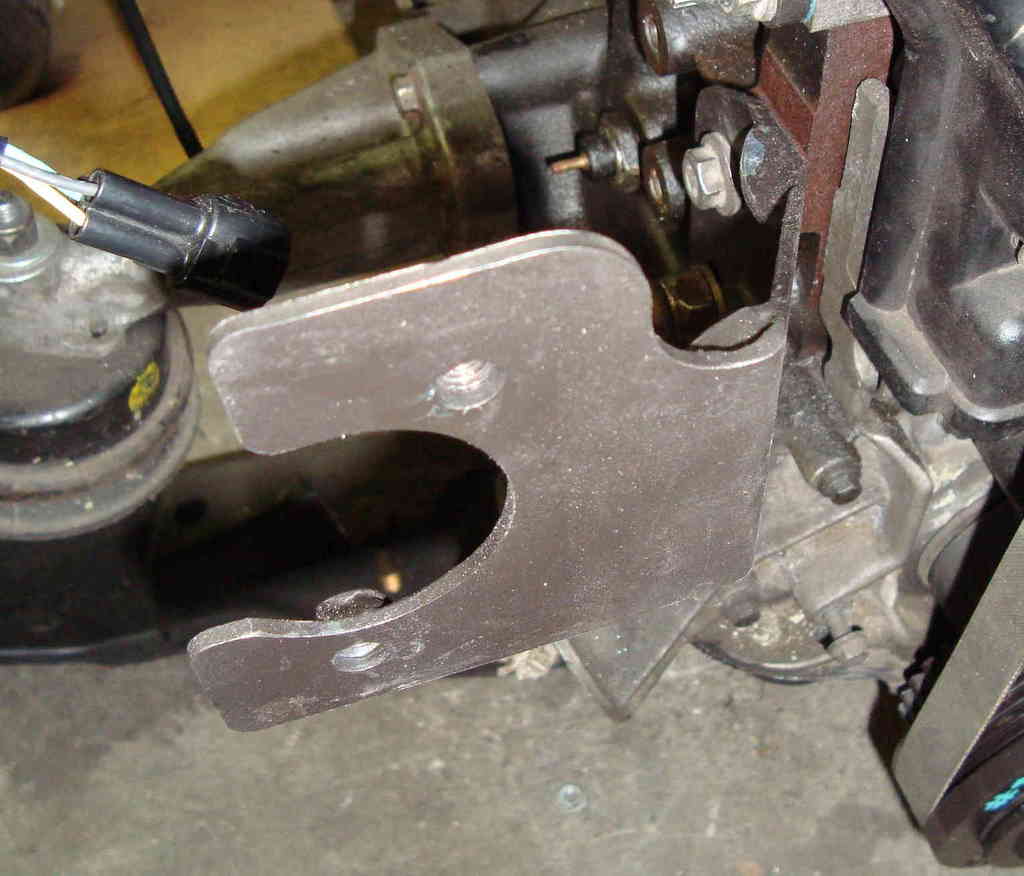
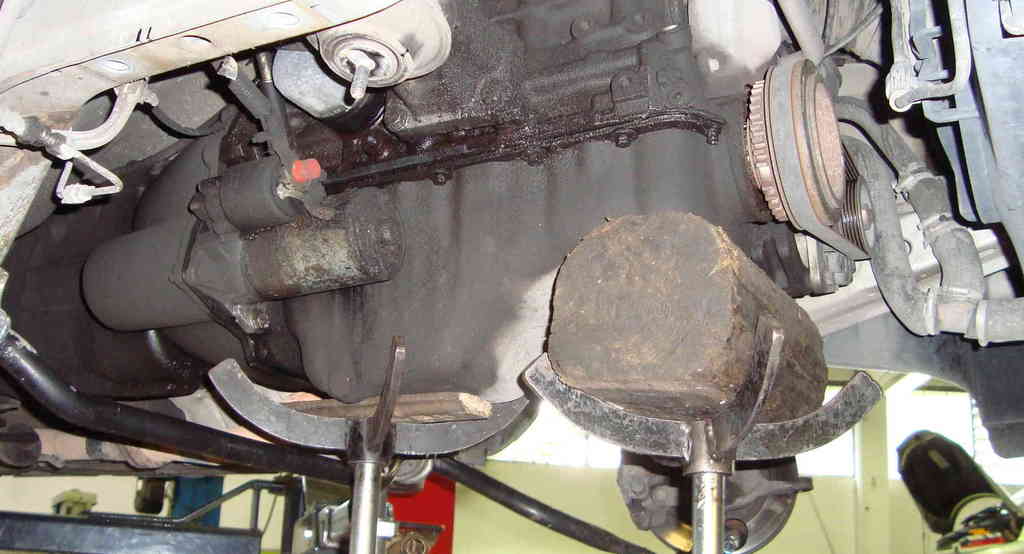
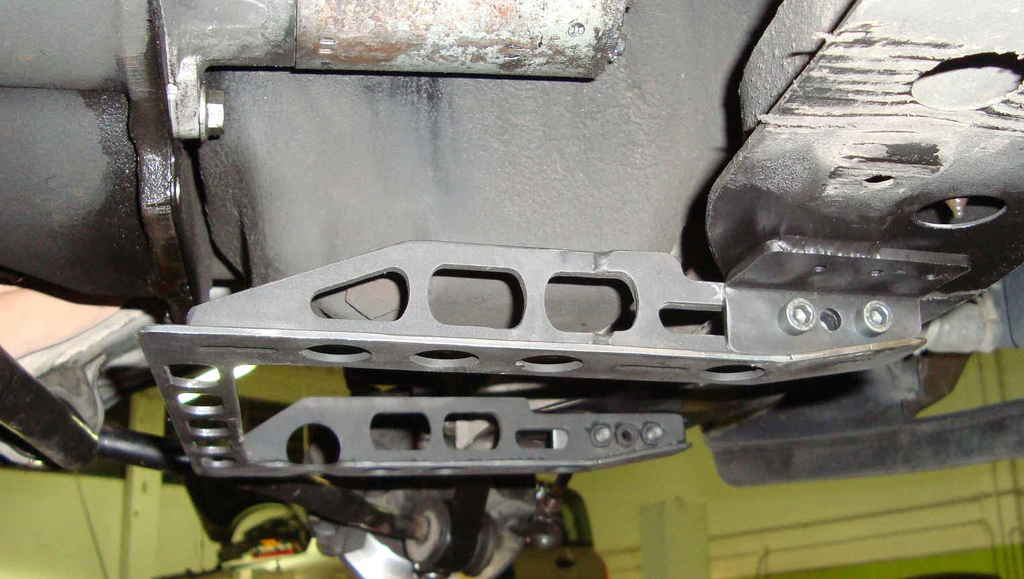
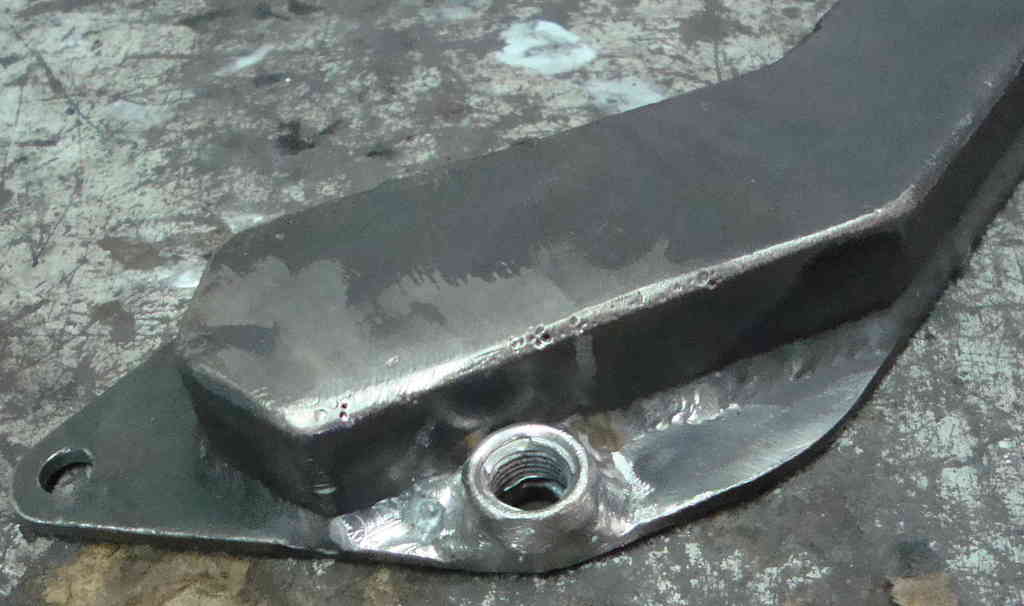
then i found out i wrongly assembled the sump guard, (top-bottom and left-right).
this slot was designed to work more easily on the oil plug.
I'M AN IDIOT! i knew i had to check before tack weld the sh*t...
i knew it...
i knew it...
i knew it...
i knew it...
the sump guard looks a bit warped.
truth is that the crossmember is a bit dented, in its bottom, due to a touch-down i did time ago, while speeding on shitty roads.
 02-06-2016, 07:48 AM
 .
.


 .
.


 !!!
!!!


 .
.


 ! in a couple of week you'll start growing. in a month or two, you'll be able to make pressure-water-proof welds