Escort RS Turbo S2 Restoration
 13-10-2014, 09:24 AM
#1
Wahay!! I've lost my Virginity!!
Thread Starter

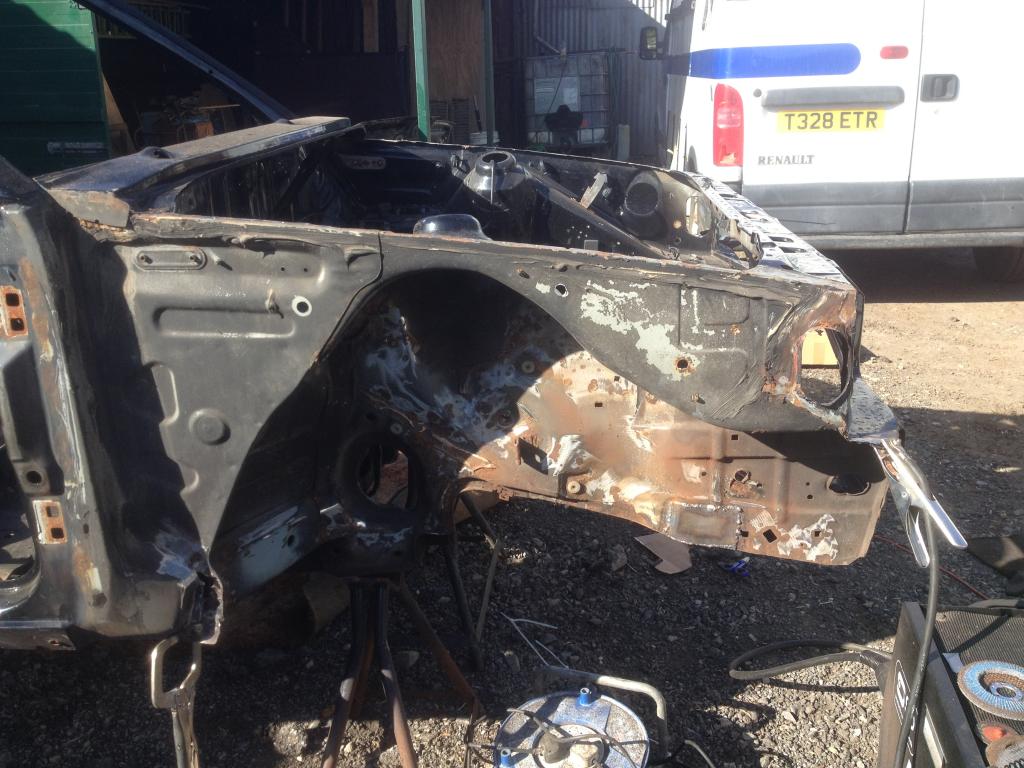
After 7 years of the turbo sat in a barn heading further and further to the back and looking really sorry for its self, a very good friend of mine talked me into “Getting It On The Road” back in march (2014) and so the project commences
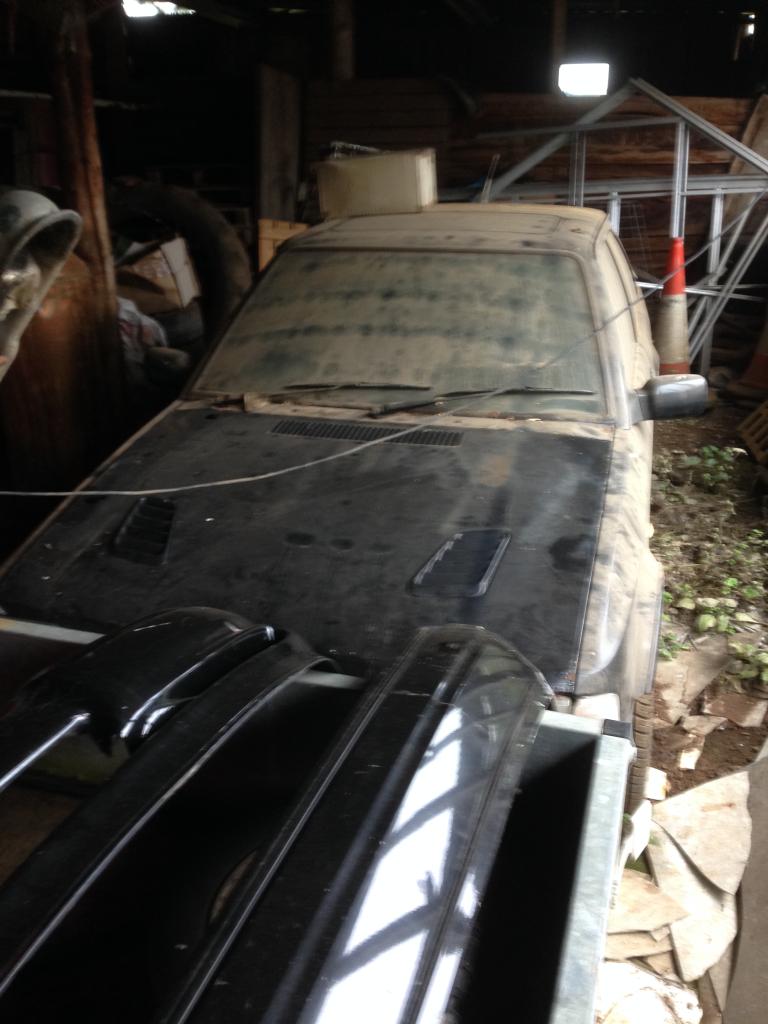
Before long, I have just a bare shell with a list longer than both my arms of welding and the thoughts of just getting it on the road are long gone.
So… after 6months all welding and under body painting is complete and I thought I should share my photos for those like me who will spend many hours researching PF for information or simply after inspiration to keep going.
Being this is my first post I just want to check this looks ok before I upload the rest
Cheers
 13-10-2014, 10:46 AM
#2
Wahay!! I've lost my Virginity!!
Thread Starter
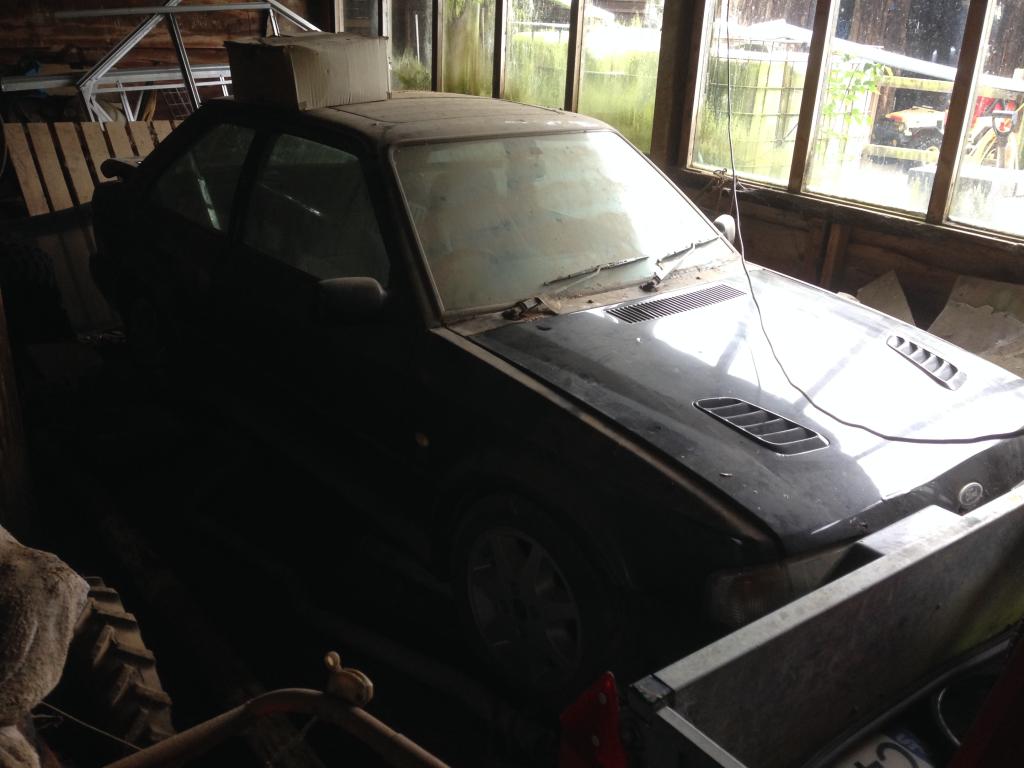
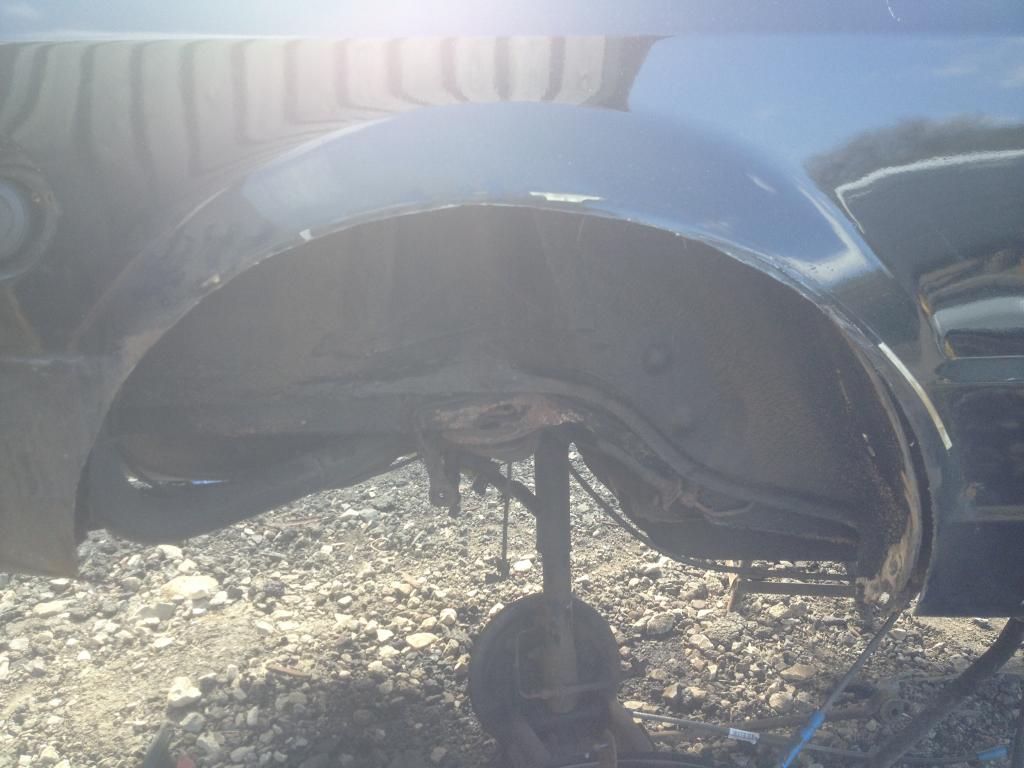
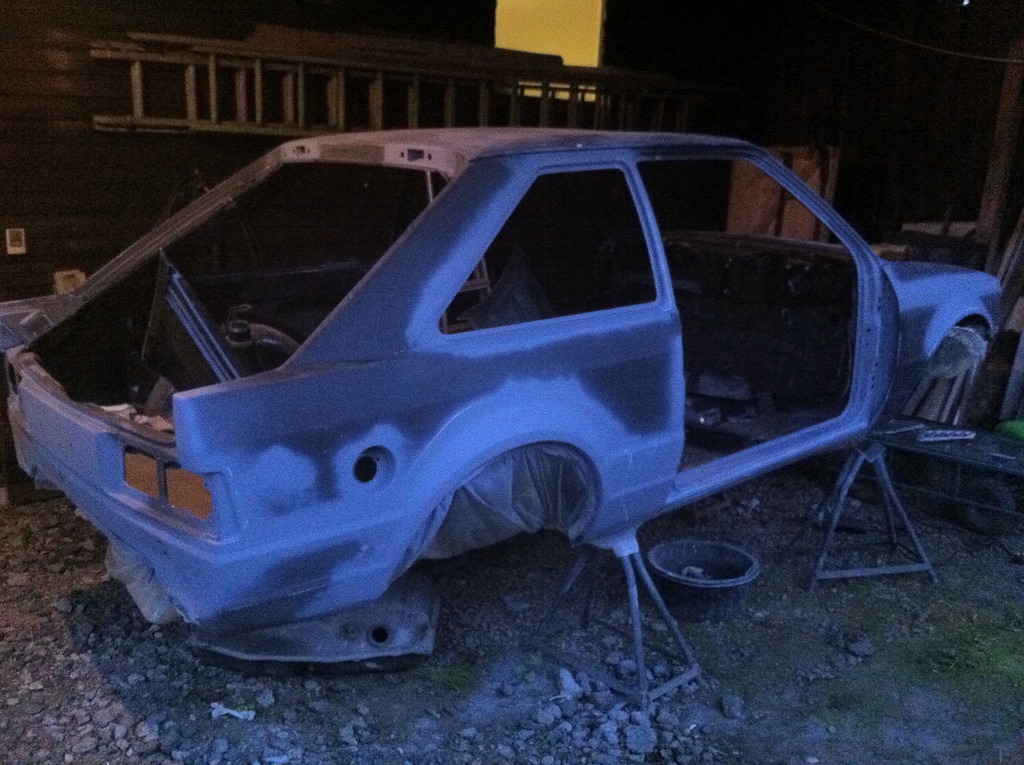
This is the shell in its new home for 3 months, almost stripped and ready
Welding carried out was as follows … I don’t have photos for all works complete because I put my phone through the wash and lost a load of them
Repairs to front panel
Repairs to inner wings
New outer wings
Repairs to bulkhead
Battery tray
Repairs to both foot wells
Repairs to inner cills
New outer cills
Repairs to floors both sides (desperately trying to keep the chassis number in tack)
New inner and outer rear arches
Repair section for n/s chassis leg
New (ish) o/s chassis leg
Repairs to lower rear corners
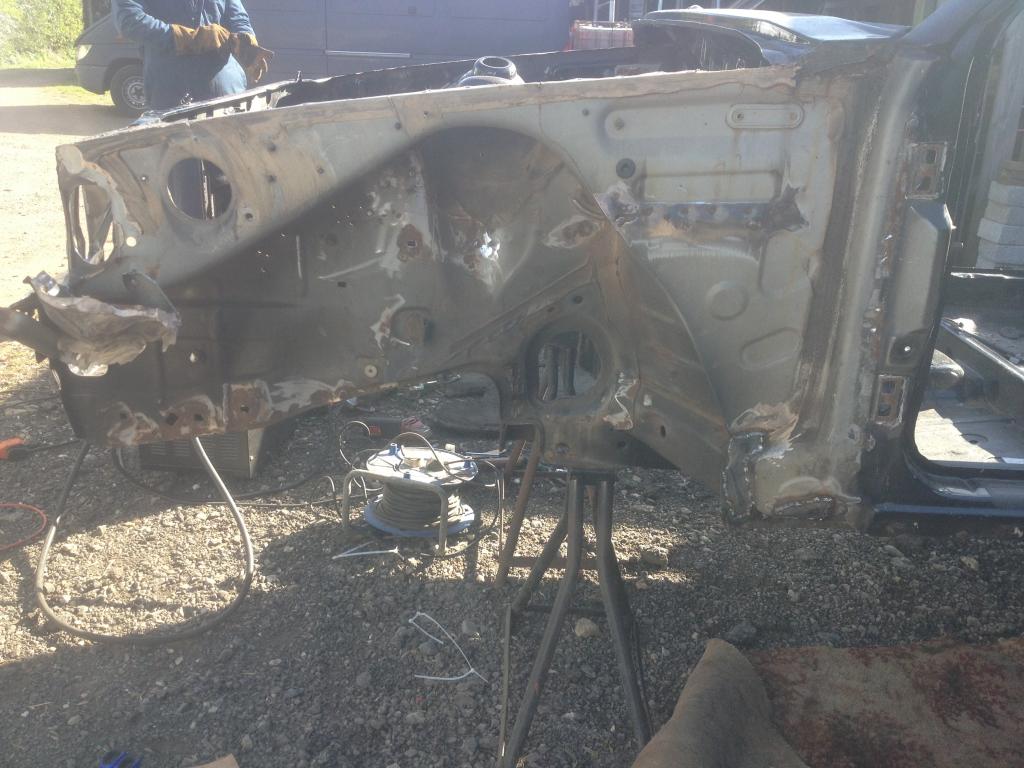
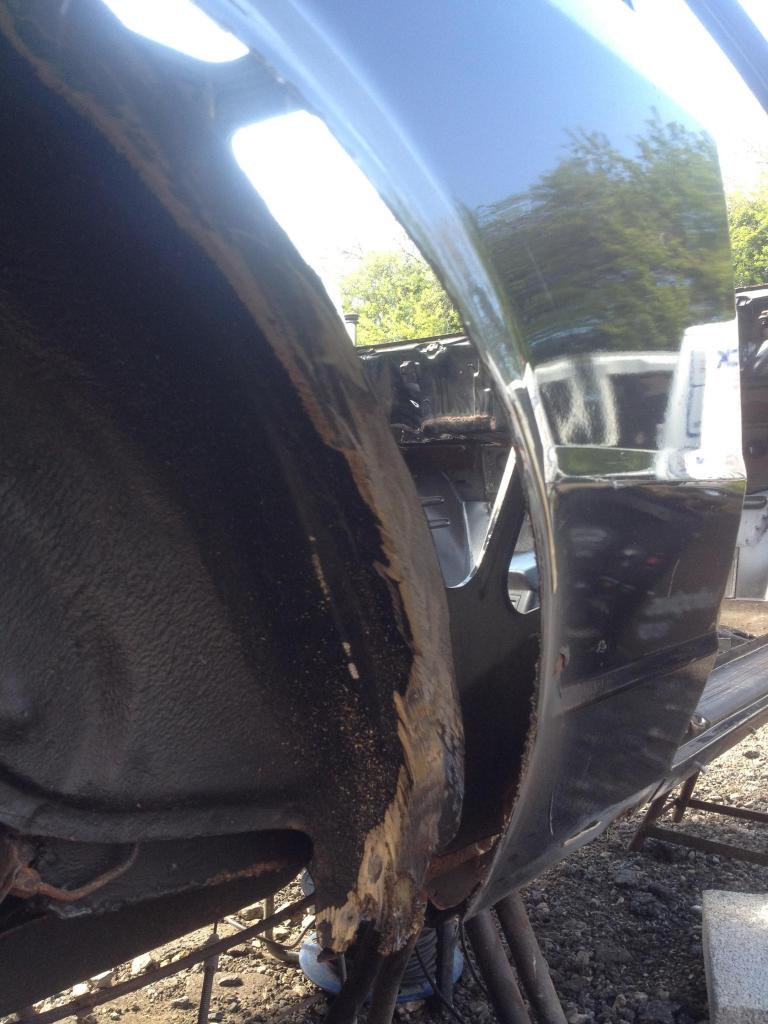
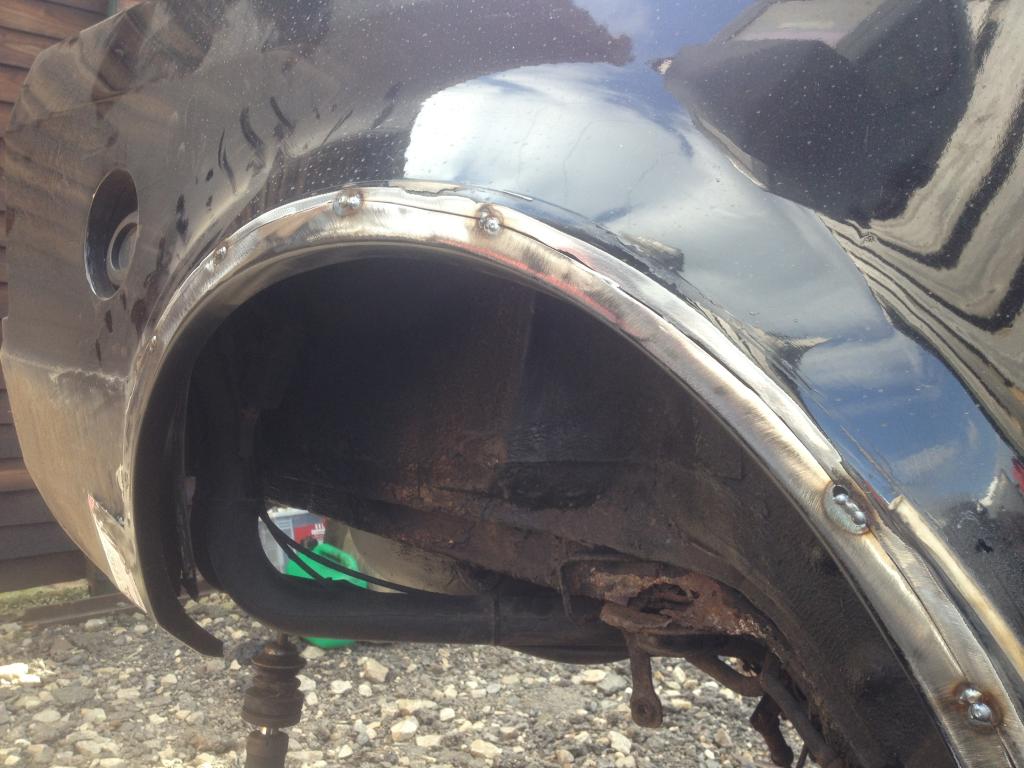
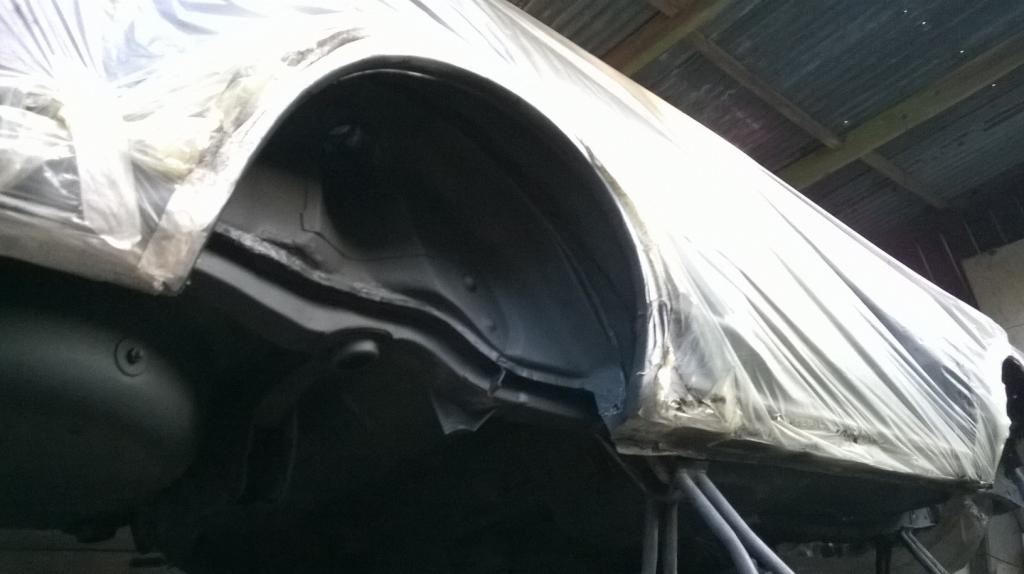
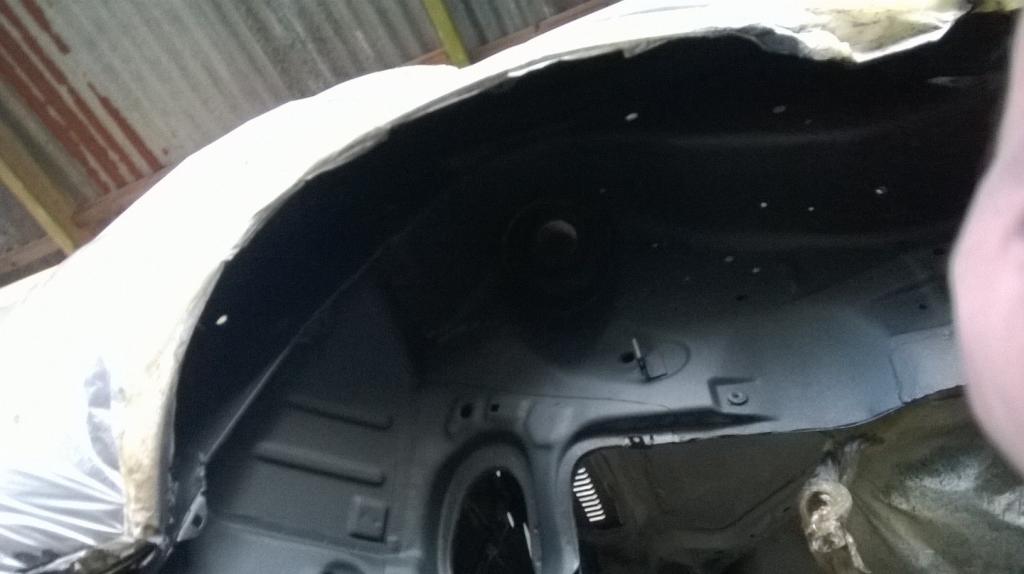
you can see in this photo I have blacked the inner arches with Shultz this was a mistake and cost me a few hours cleaning it back off you will understand later
New (ish) chassis leg… I bought a new repair section but notice they aren’t double skinned and as I needed to replace the entire length I bought a pair of legs that someone had cut out of another mk4
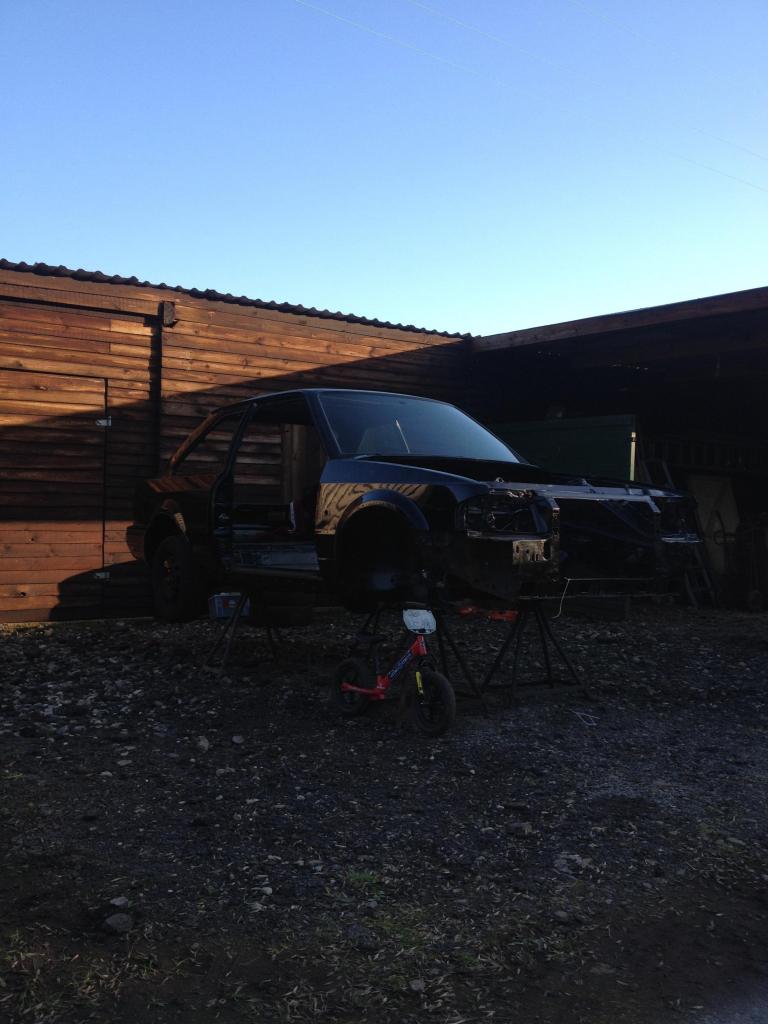
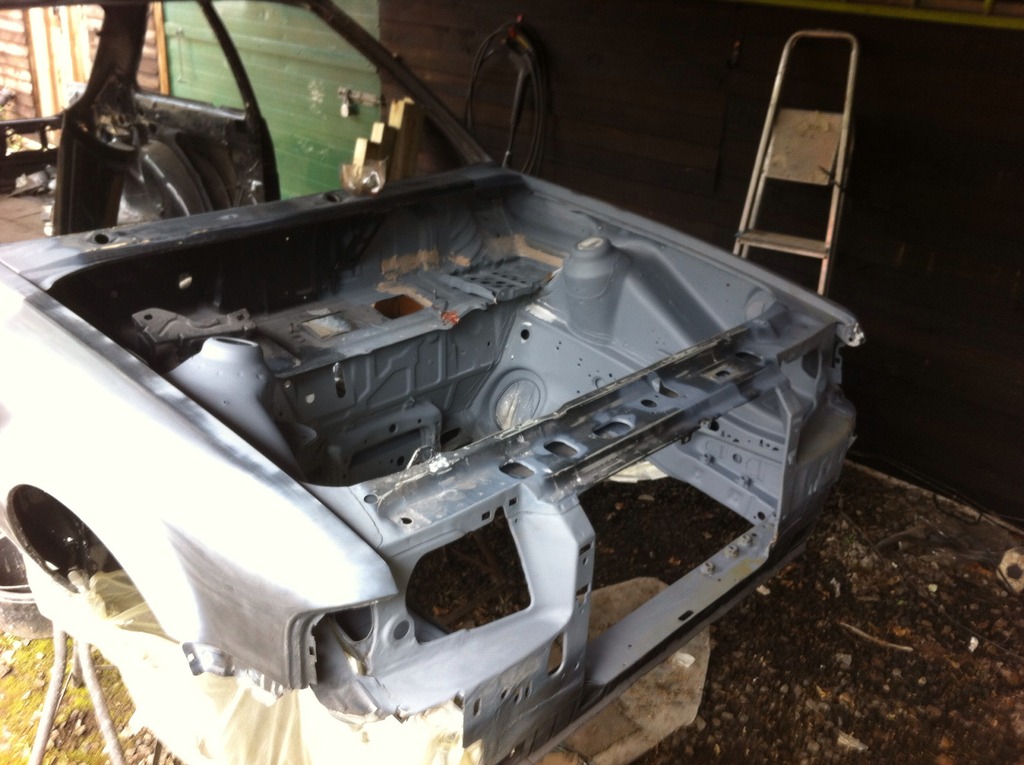
Welding now complete
Again sorry for the lack of photos

Welding carried out was as follows … I don’t have photos for all works complete because I put my phone through the wash and lost a load of them
Repairs to front panel
Repairs to inner wings
New outer wings
Repairs to bulkhead
Battery tray
Repairs to both foot wells
Repairs to inner cills
New outer cills
Repairs to floors both sides (desperately trying to keep the chassis number in tack)
New inner and outer rear arches
Repair section for n/s chassis leg
New (ish) o/s chassis leg
Repairs to lower rear corners


you can see in this photo I have blacked the inner arches with Shultz this was a mistake and cost me a few hours cleaning it back off you will understand later


New (ish) chassis leg… I bought a new repair section but notice they aren’t double skinned and as I needed to replace the entire length I bought a pair of legs that someone had cut out of another mk4

Welding now complete

Again sorry for the lack of photos
13-10-2014, 11:26 AM
#3
Wahay!! I've lost my Virginity!!
Thread Starter
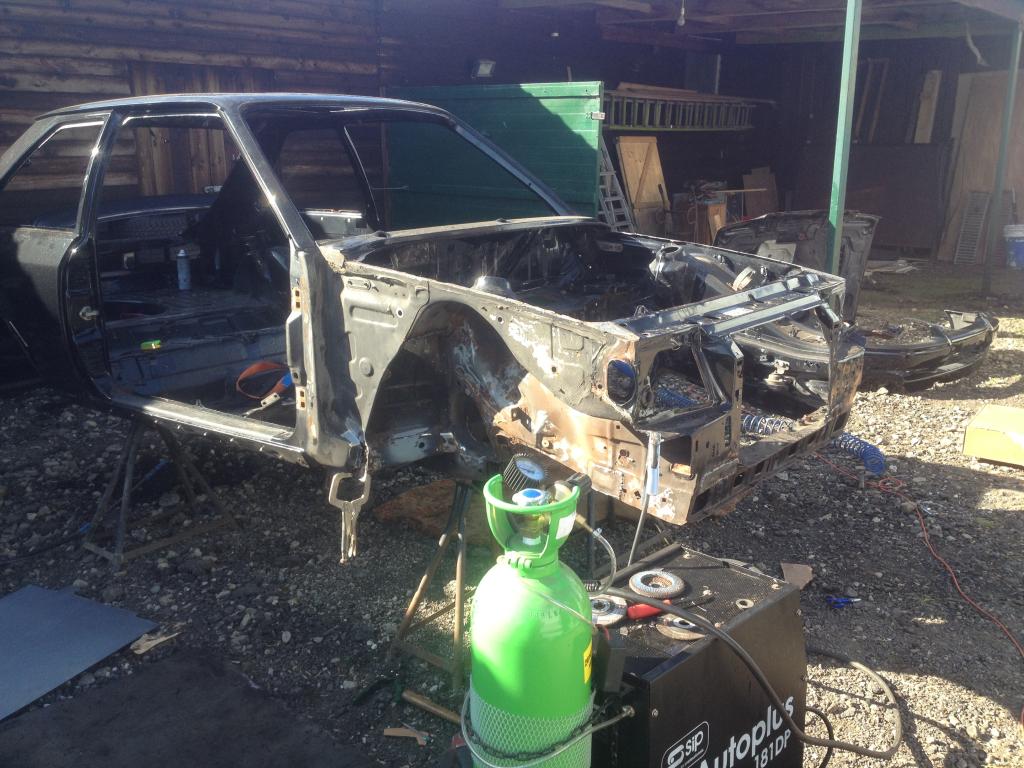
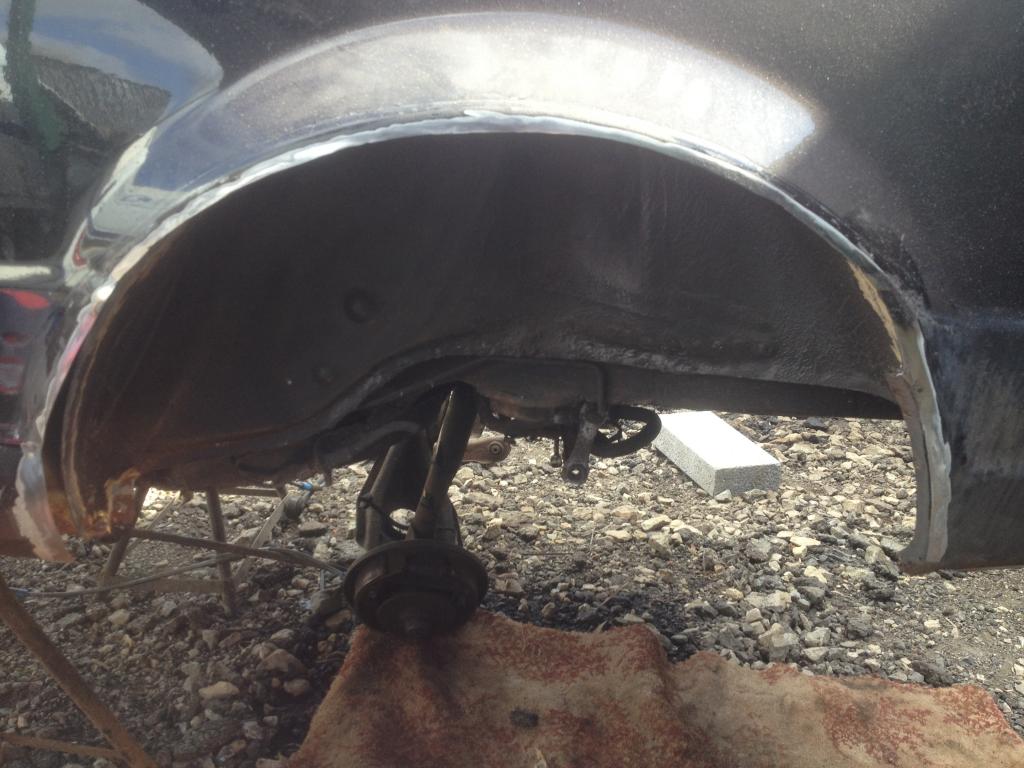
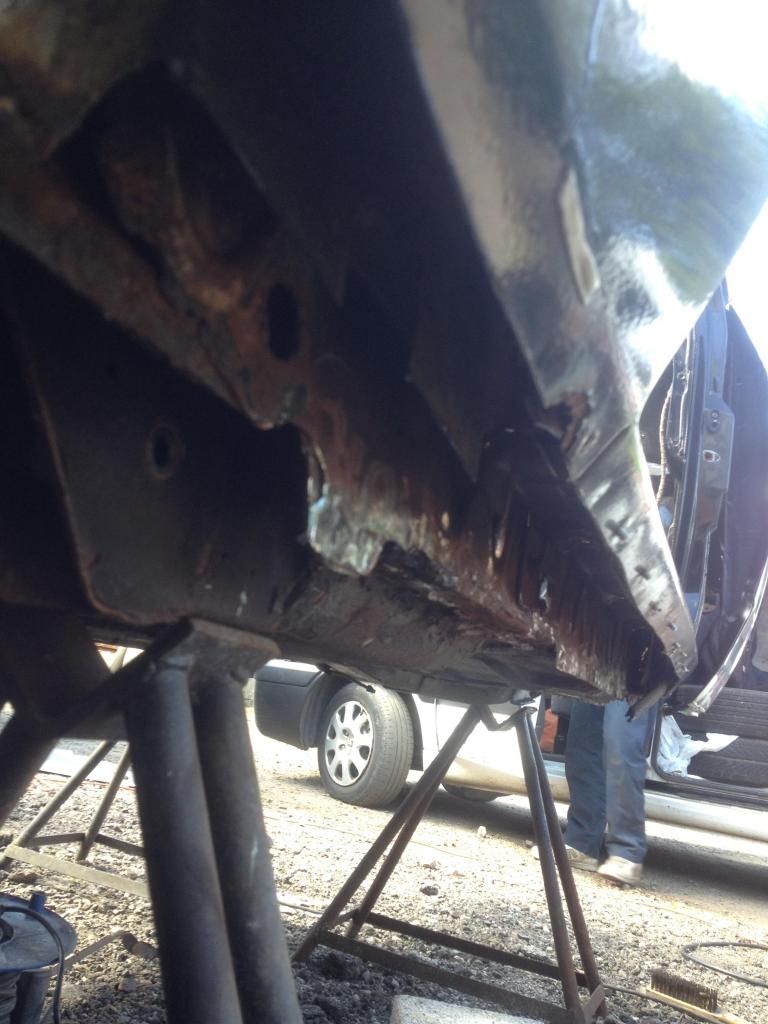
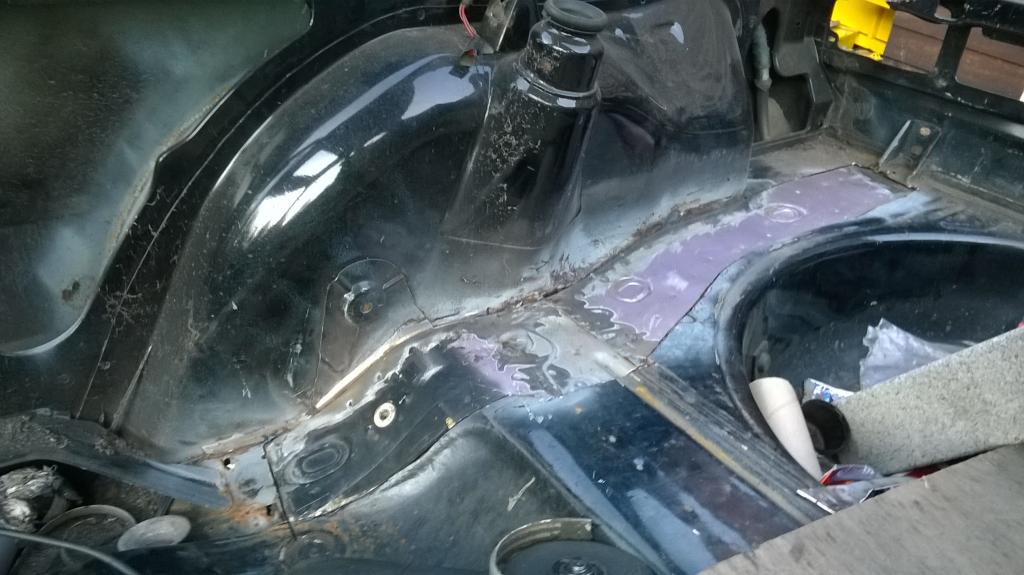
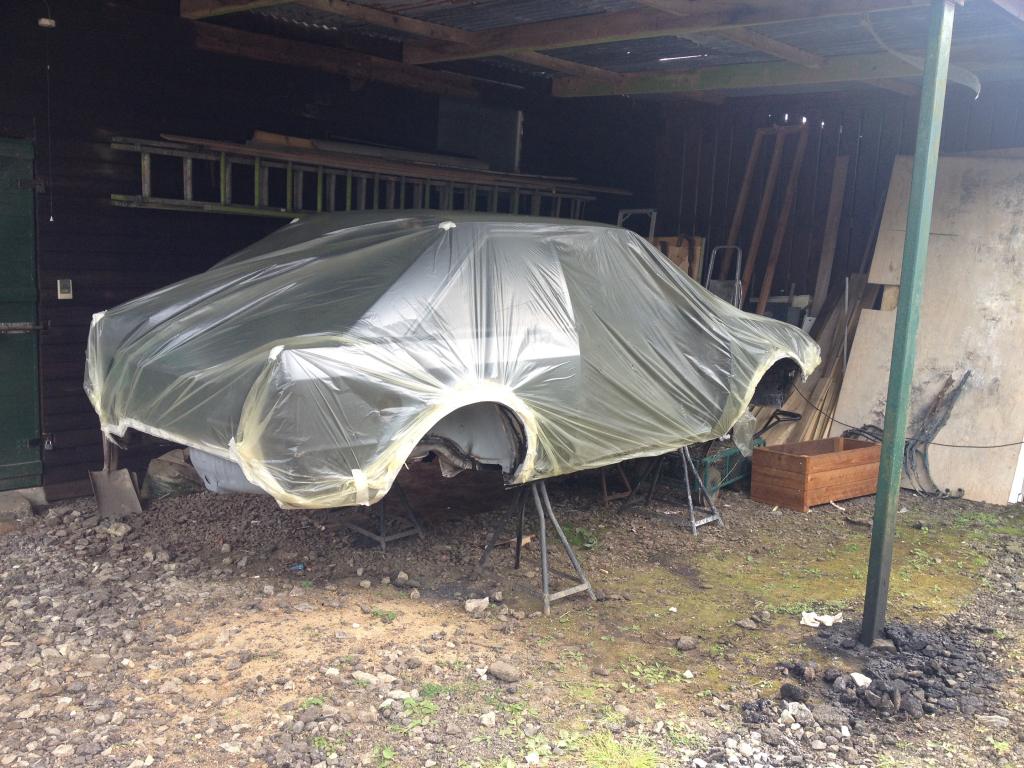
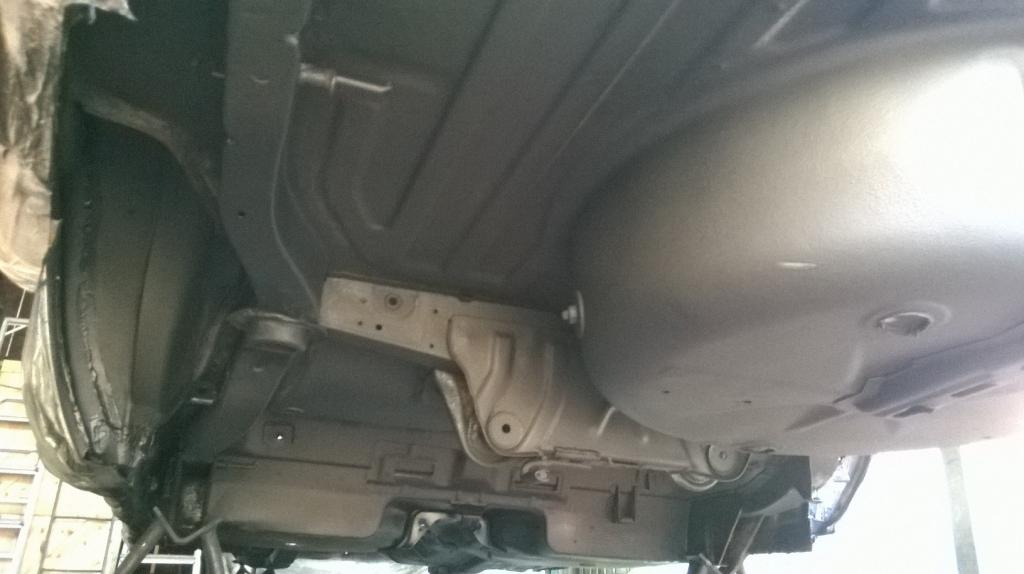
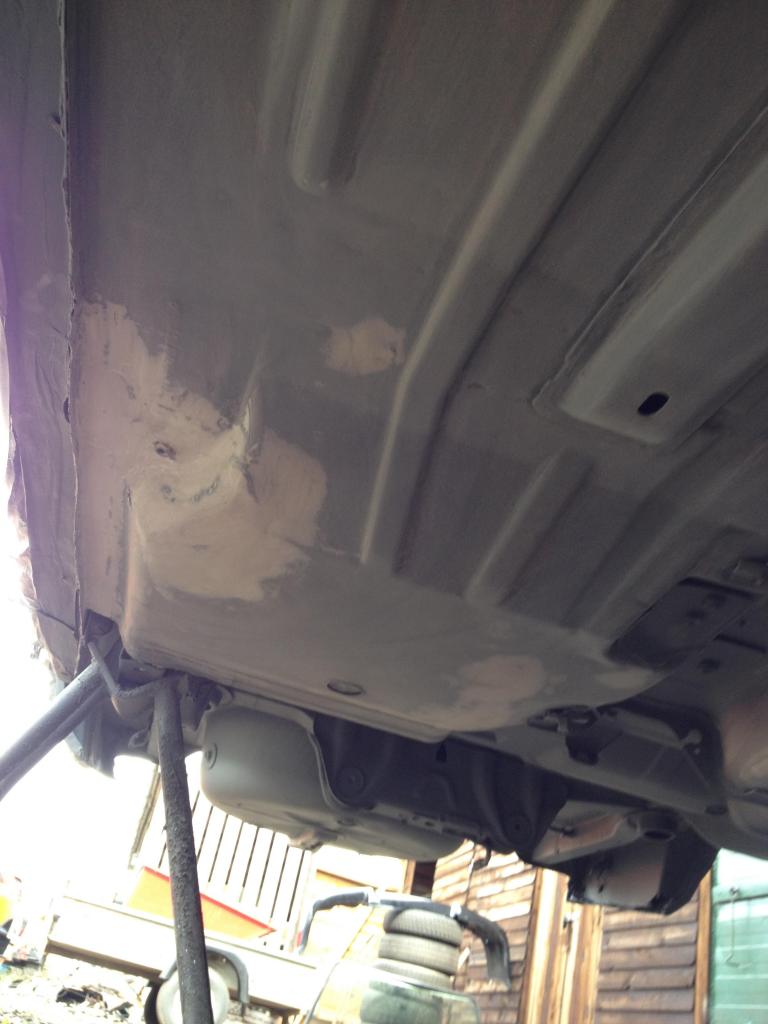
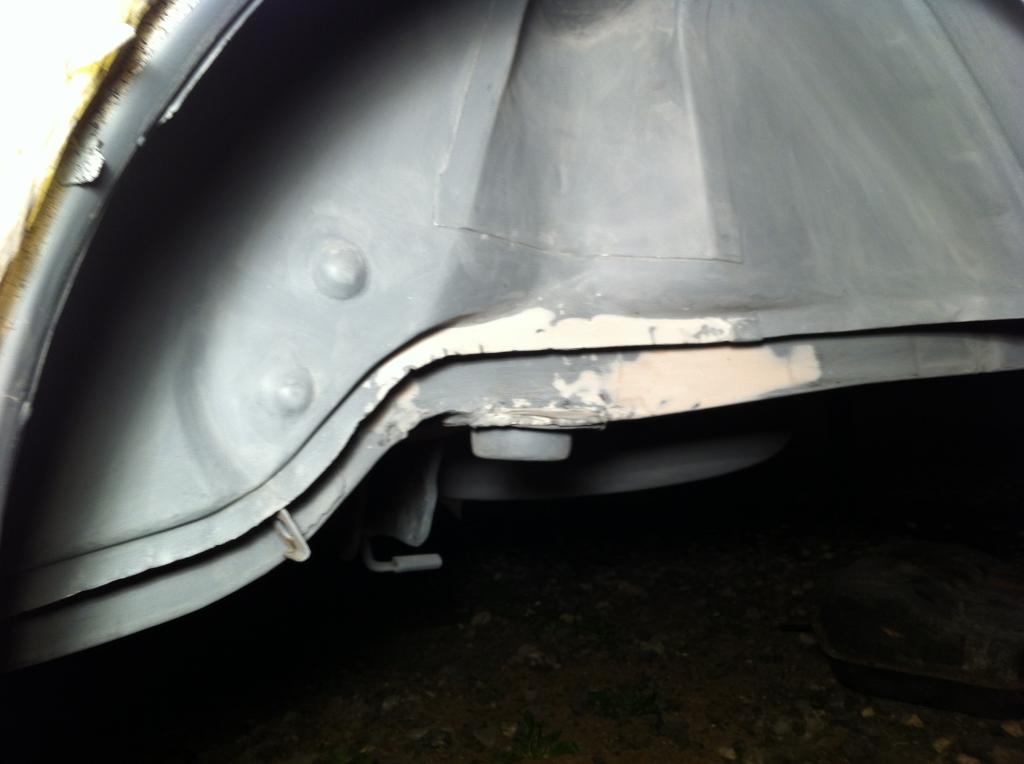
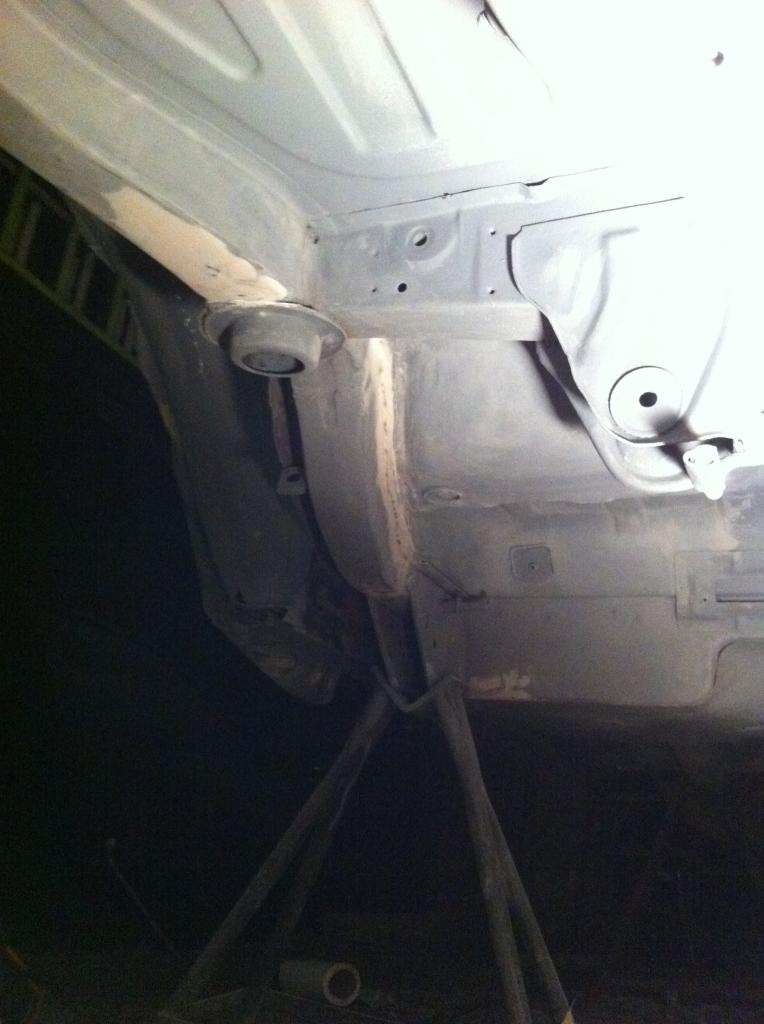
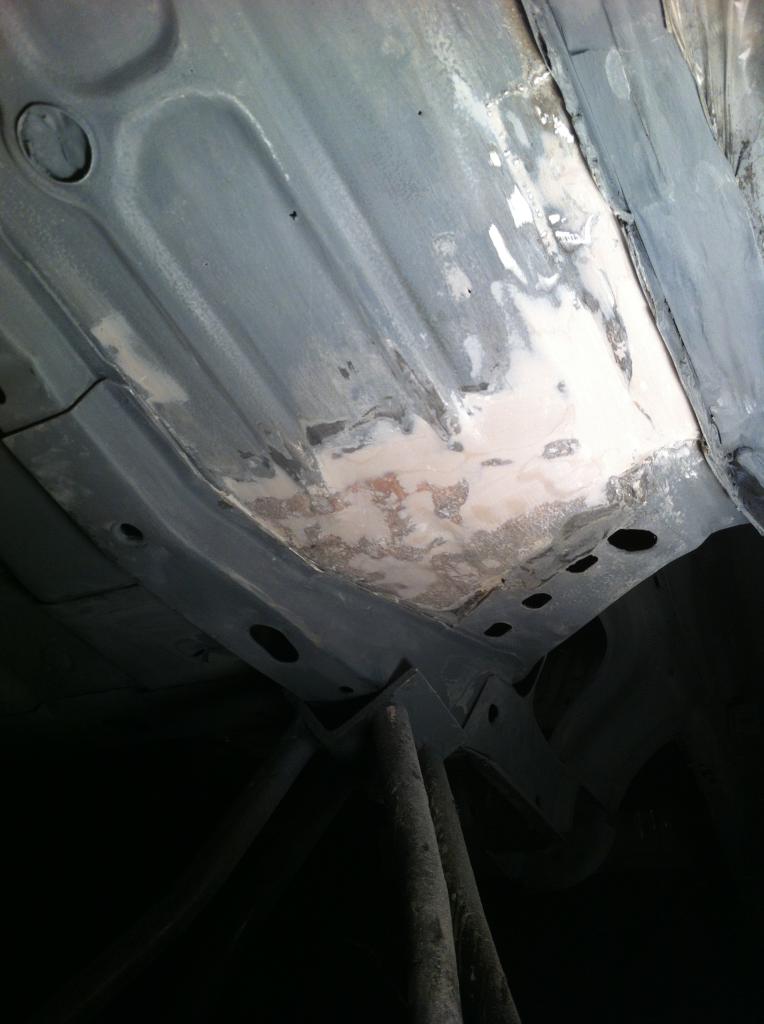
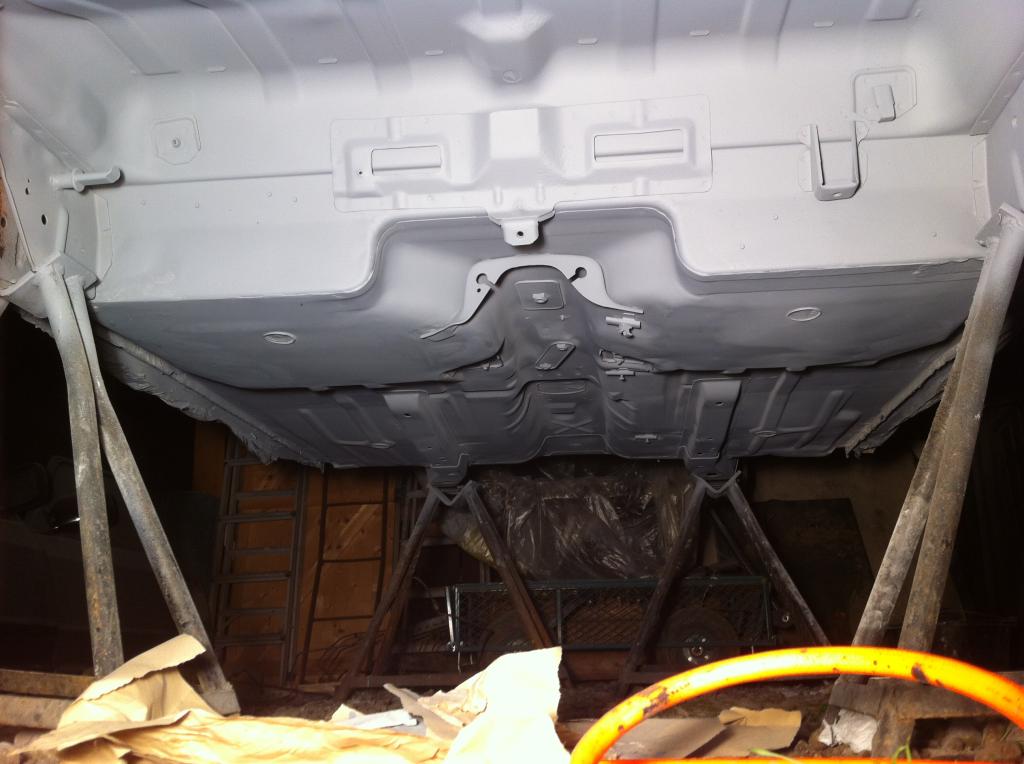
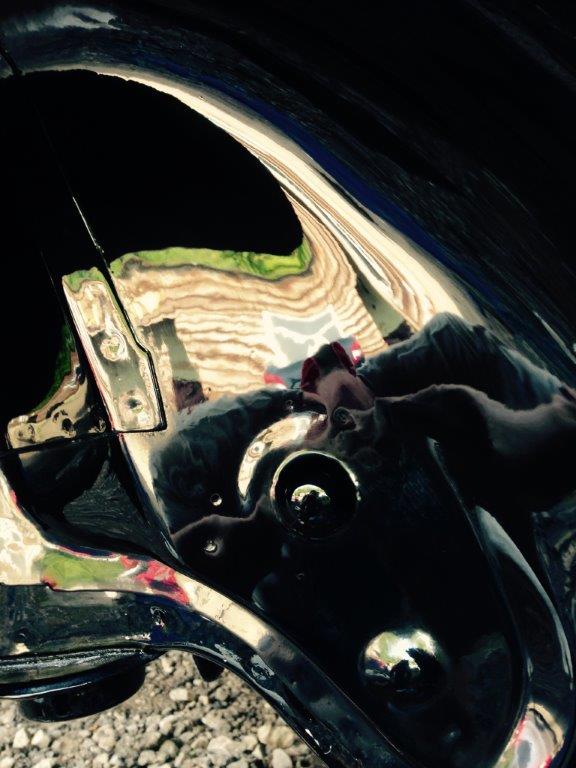
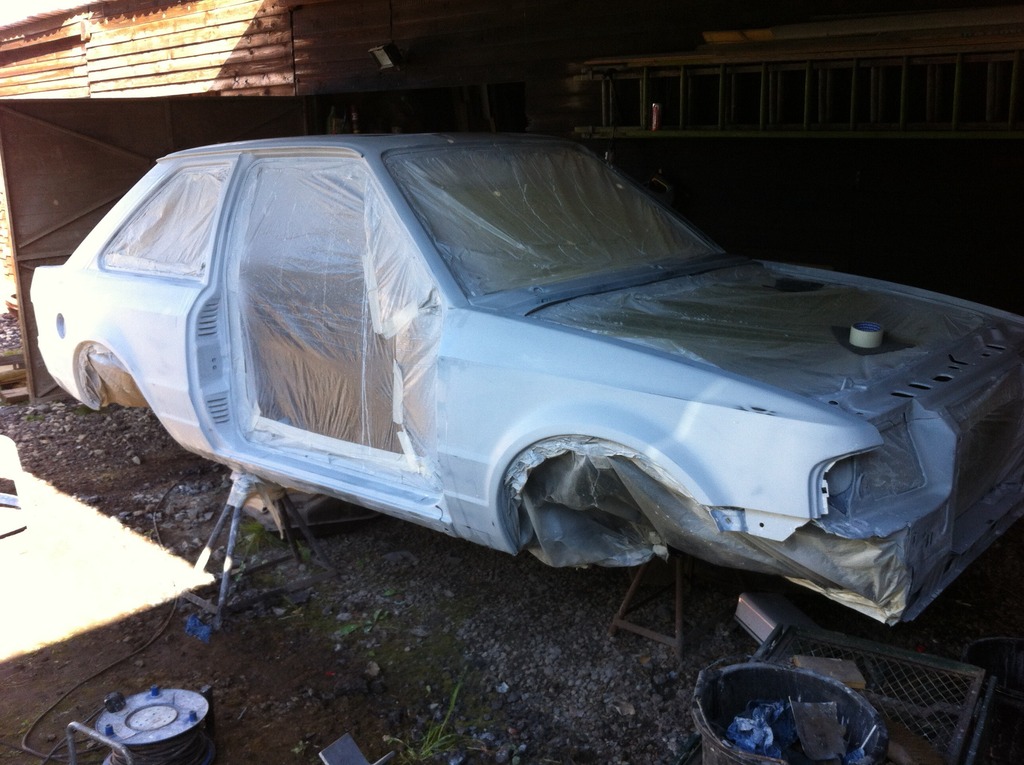
Because of all the work that has been done to get this shell rot free I wanted to clean off the underside of all its original under seal and have a close inspection…. so 3 weeks down the line and one angle grinder later it looks like this
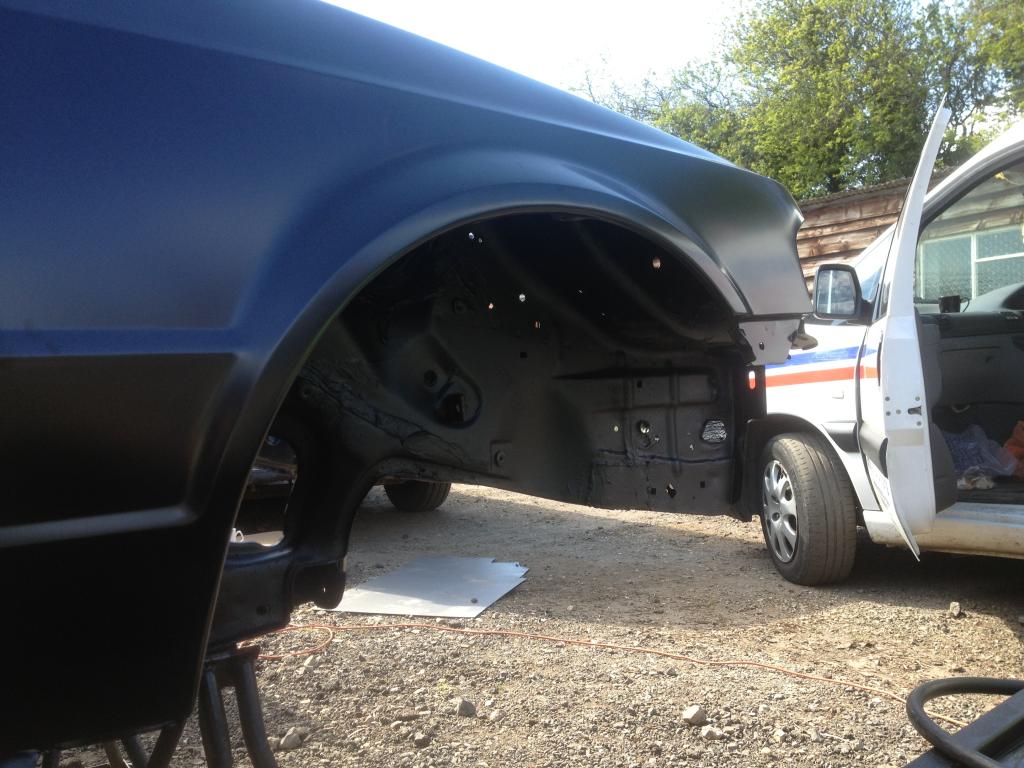
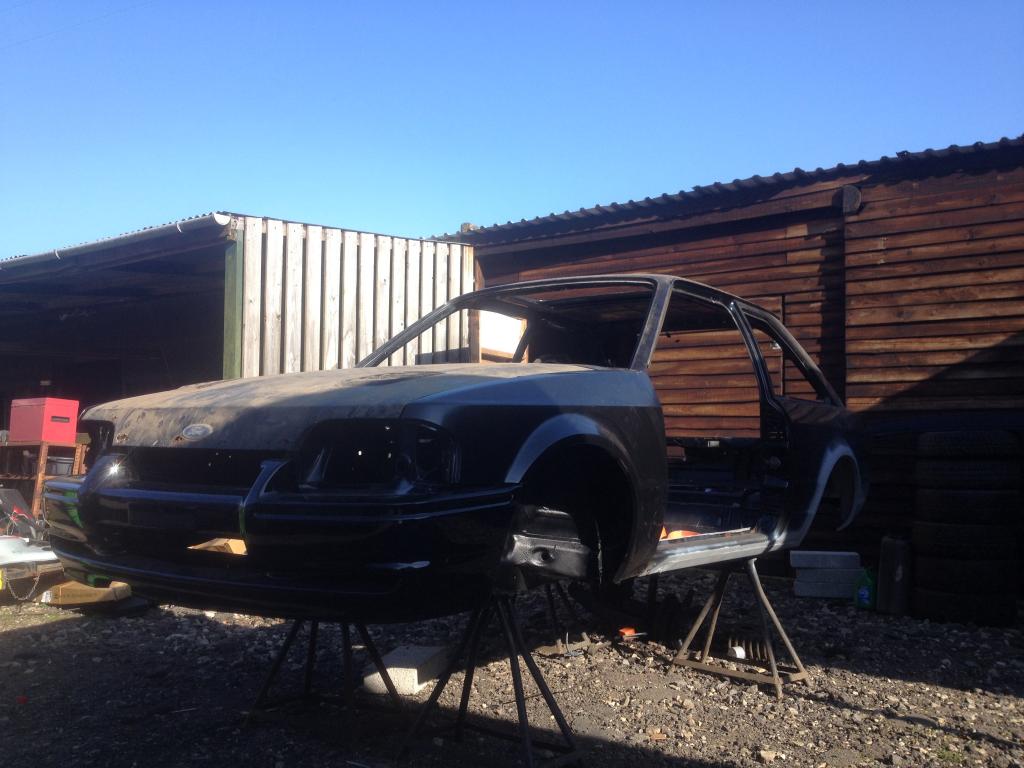
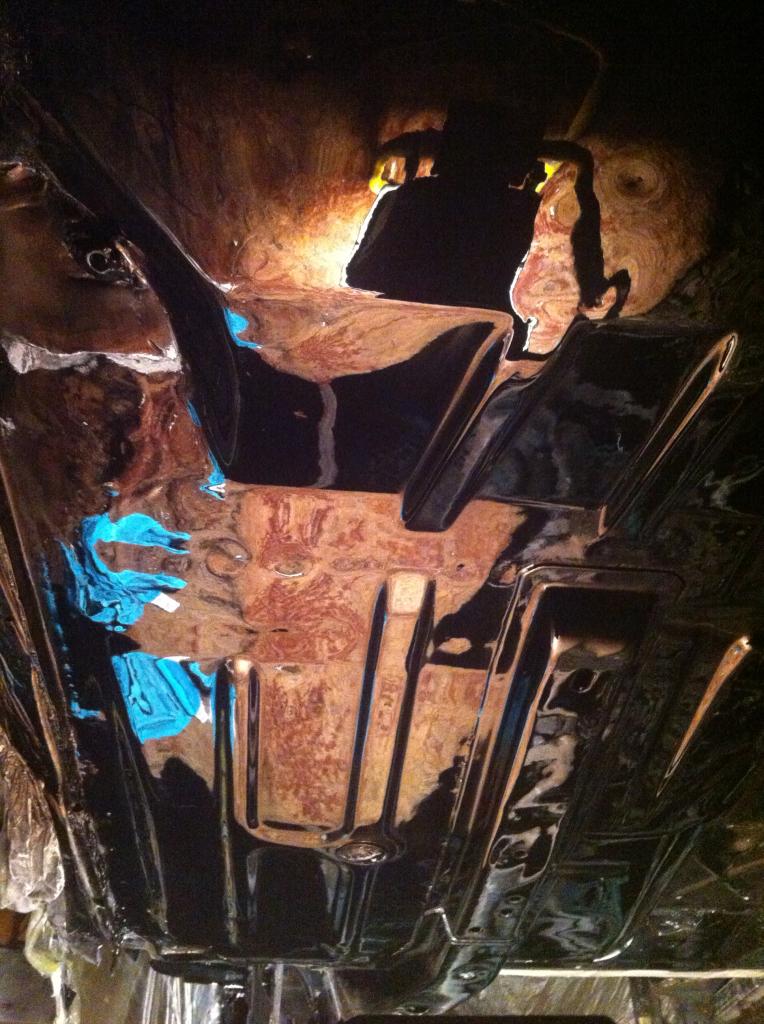
It’s now middle of June and I have moved the shell so it’s a little more undercover so I can start with painting the underside.
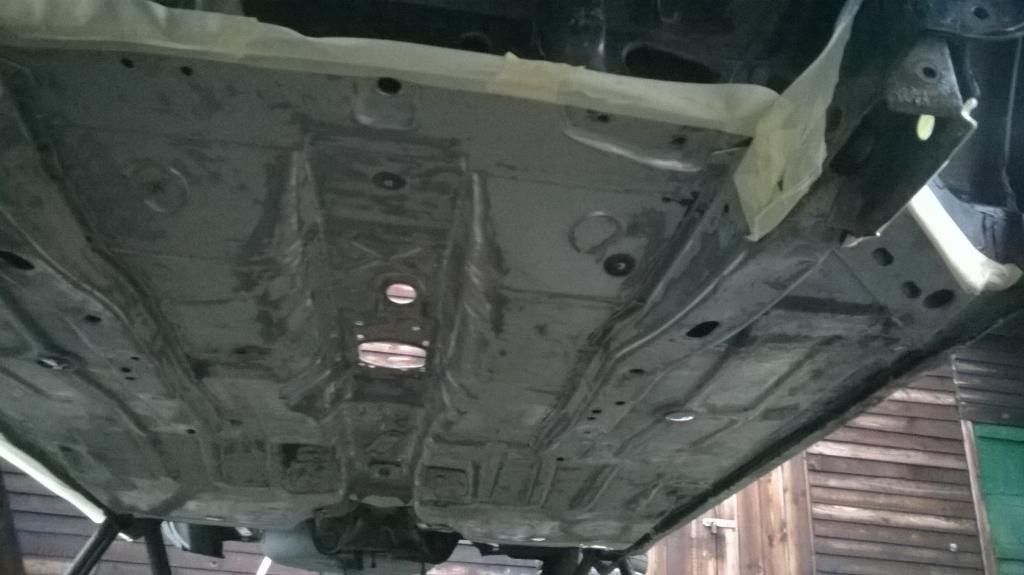
Paint is finally going on….4 cans of stone guard covered nicely (I did use a splash of thinners to stop it bobbling as much)
Above I mentioned about the Shultz, as you guys probably know you can’t stone guard over Shultz

It’s now middle of June and I have moved the shell so it’s a little more undercover so I can start with painting the underside.

Paint is finally going on….4 cans of stone guard covered nicely (I did use a splash of thinners to stop it bobbling as much)


Above I mentioned about the Shultz, as you guys probably know you can’t stone guard over Shultz


 13-10-2014, 12:01 PM
#5
Wahay!! I've lost my Virginity!!
Thread Starter
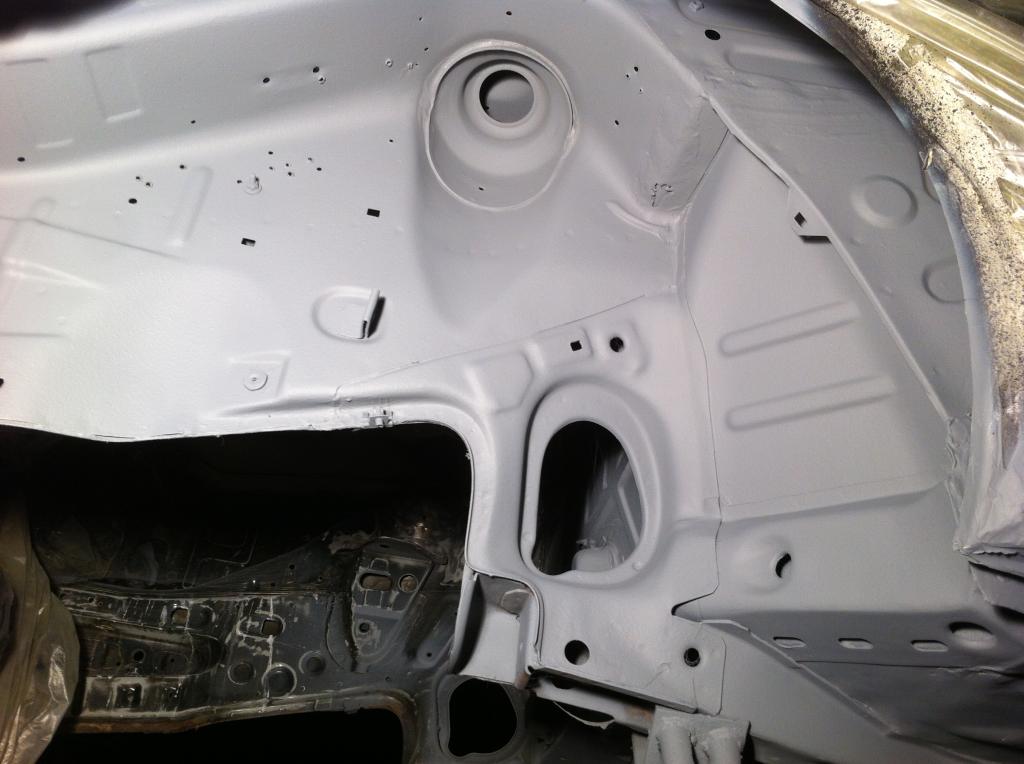
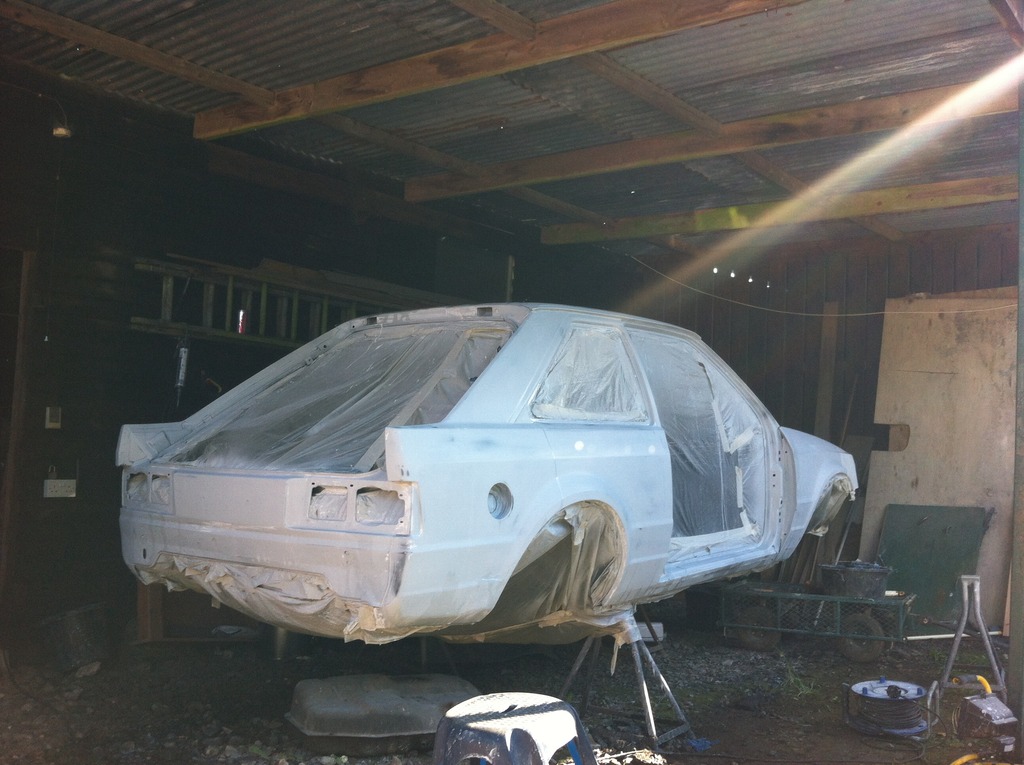
This is now where it gets interesting
After watching a lot of you tube vids I decided to paint the underside in base and clear (I didn’t appreciate how much work was involved with this)
So first coat of high build went on, whilst the photo makes this look good, unfortunately the light paint showed how beaten the underside was

Undeterred, I progressed with the original idea and busted out the fibre glass and filler
It felt like this stage would never end, anyhow 5 litres of high build later and I have smoothed out all the stone guard…….ready for base coat
 #
#
Base coat going on
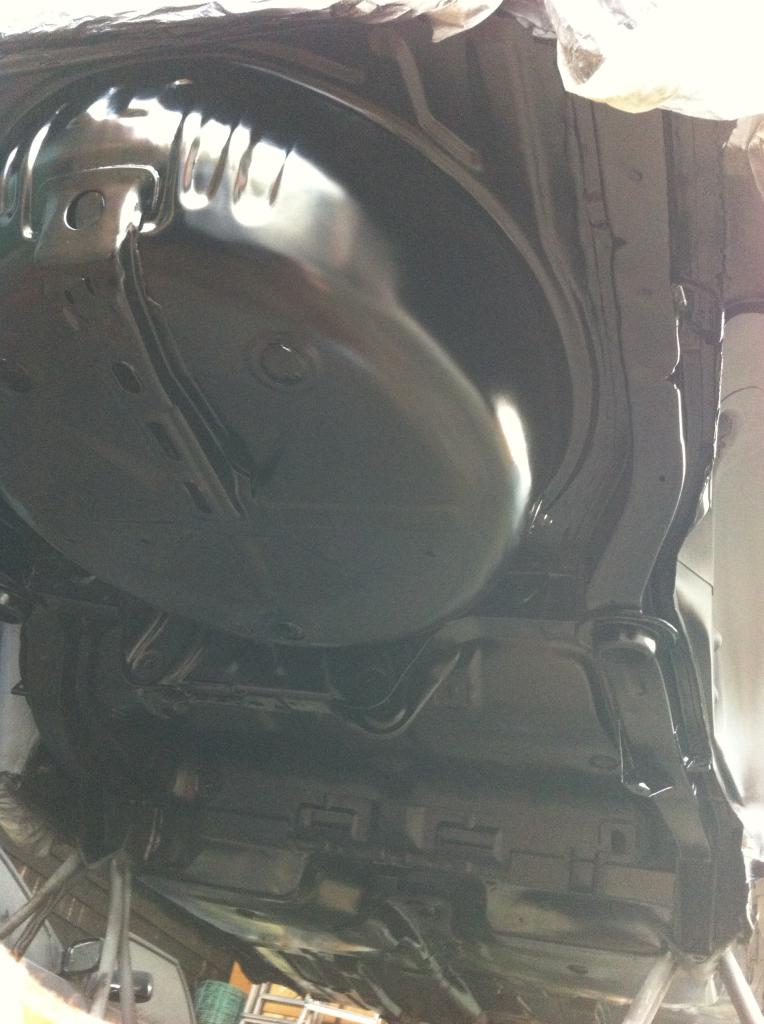
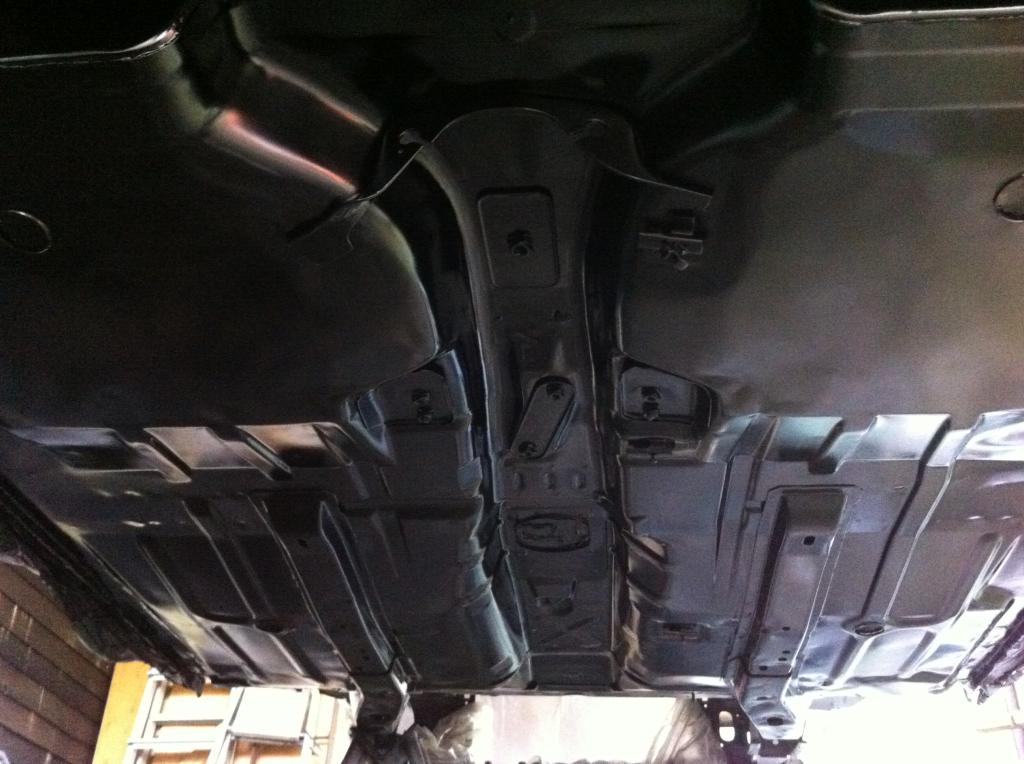
Now clear coated…. and I’m pretty happy with the finish considering I have been lead on my back with not much space
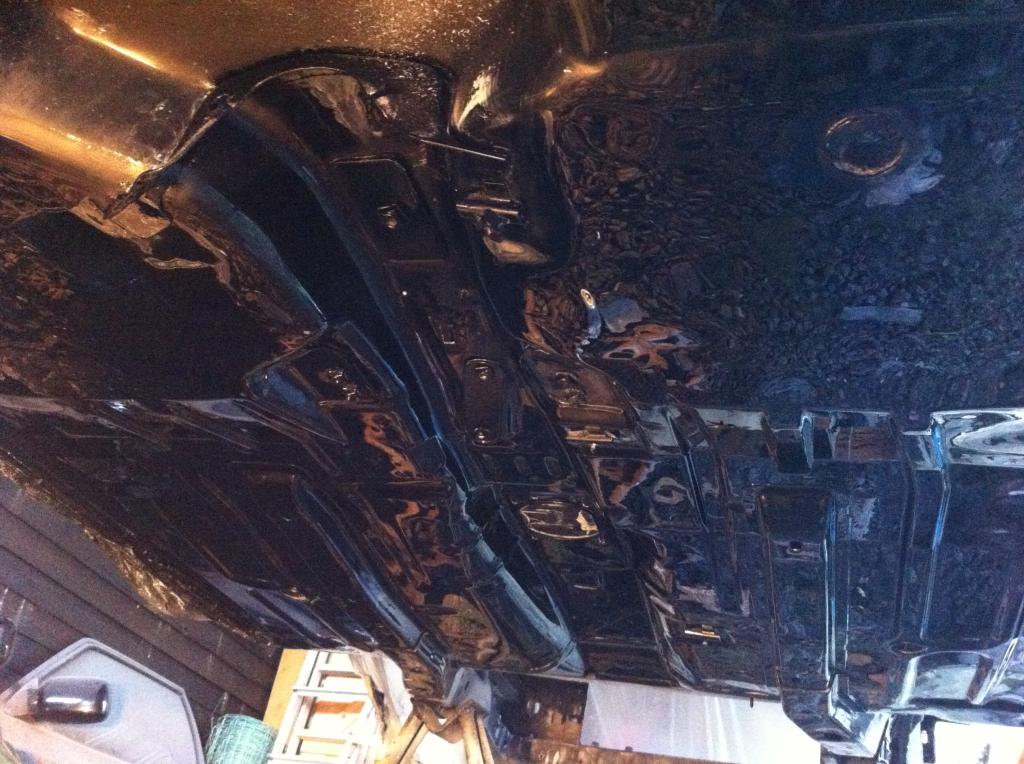

I’m currently stripping down all the rear end so I can send off for powder coating hopefully I can get this organized soon so I can start to bolt bits back together
This is not concours (I don’t have deep enough pockets) but I would like to think once all finished it should be pretty decent example of a 90spec turbo
After watching a lot of you tube vids I decided to paint the underside in base and clear (I didn’t appreciate how much work was involved with this)
So first coat of high build went on, whilst the photo makes this look good, unfortunately the light paint showed how beaten the underside was

Undeterred, I progressed with the original idea and busted out the fibre glass and filler


It felt like this stage would never end, anyhow 5 litres of high build later and I have smoothed out all the stone guard…….ready for base coat

 #
#Base coat going on


Now clear coated…. and I’m pretty happy with the finish considering I have been lead on my back with not much space


I’m currently stripping down all the rear end so I can send off for powder coating hopefully I can get this organized soon so I can start to bolt bits back together
This is not concours (I don’t have deep enough pockets) but I would like to think once all finished it should be pretty decent example of a 90spec turbo

Trending Topics
13-10-2014, 07:28 PM
#8
Wahay!! I've lost my Virginity!!
Thread Starter
13-10-2014, 08:43 PM
#9
Regular Contributor

nice work fella, keep going, its all about time and money really, the rest is nuts and bolts, if you got the money its just finding the time, keep going, if you get stuck we are all here to help no mater the query


 30-05-2015, 10:06 PM
#16
Wahay!! I've lost my Virginity!!
Thread Starter
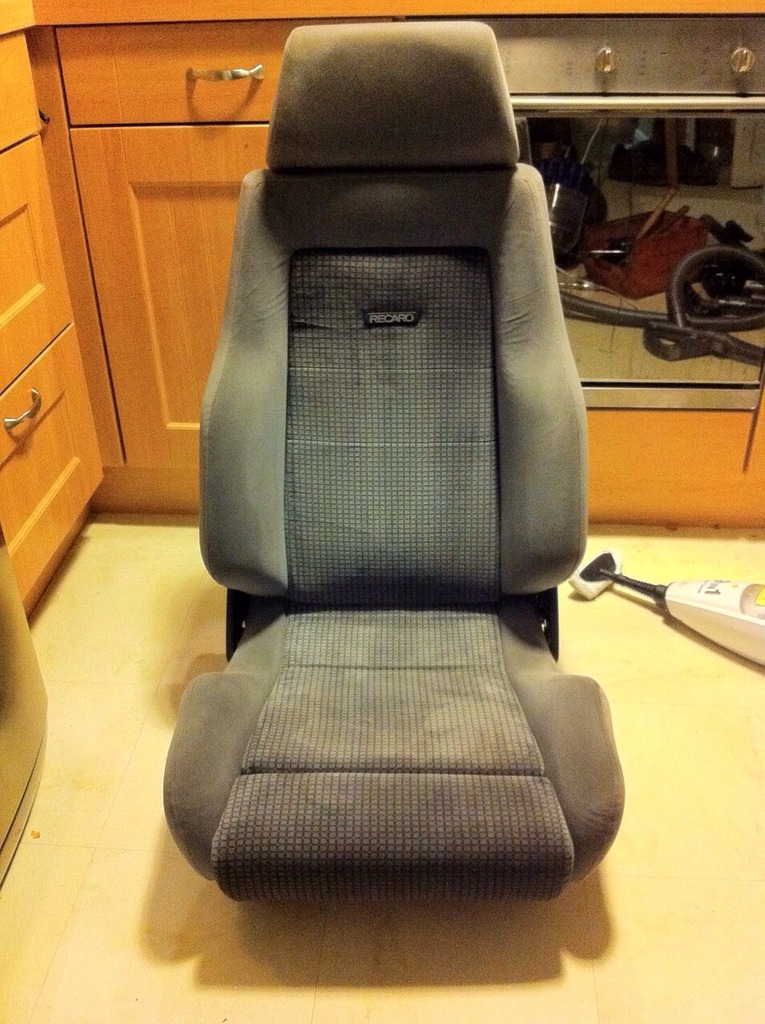
ive managed to build a really nice pair of front seats
these have been striped and re-built with new foam bolsters etc...the creases in the material was my fault I effectively ironed them in with the steamer, whoops
I have sorted now but never took another photo
these have been striped and re-built with new foam bolsters etc...the creases in the material was my fault I effectively ironed them in with the steamer, whoops
I have sorted now but never took another photo
 30-05-2015, 10:22 PM
#17
Wahay!! I've lost my Virginity!!
Thread Starter
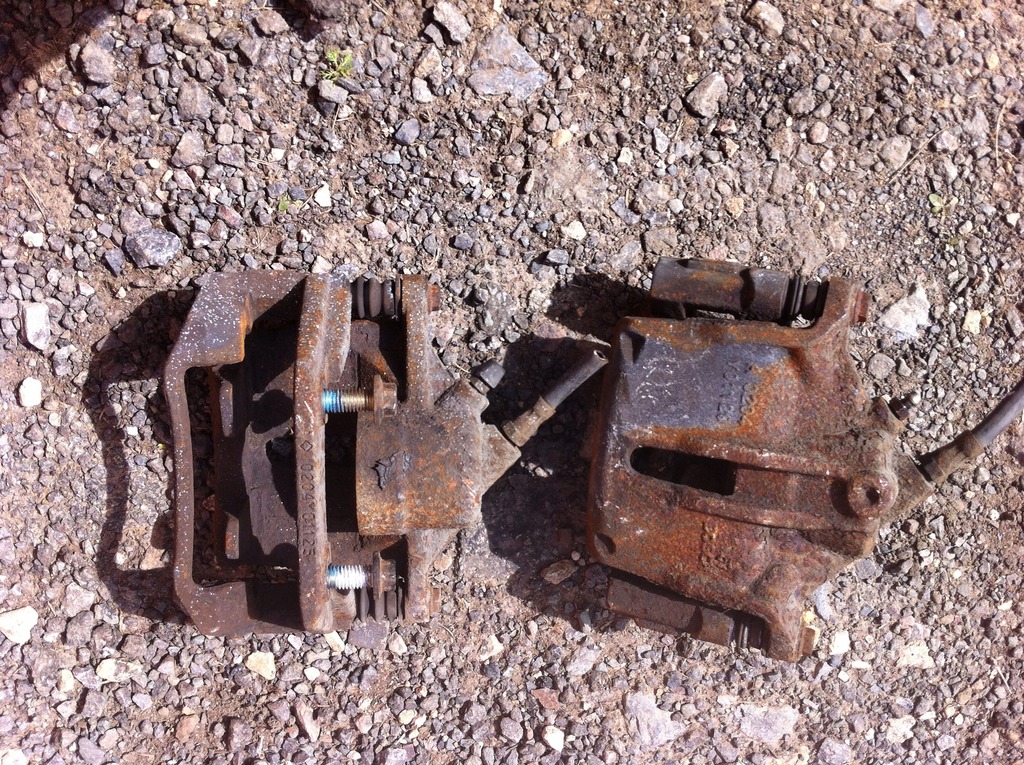
ive once owned an st220 and had some old callipers for the front which need blasting and painting
and bought this compbrake pedal box off muz last year
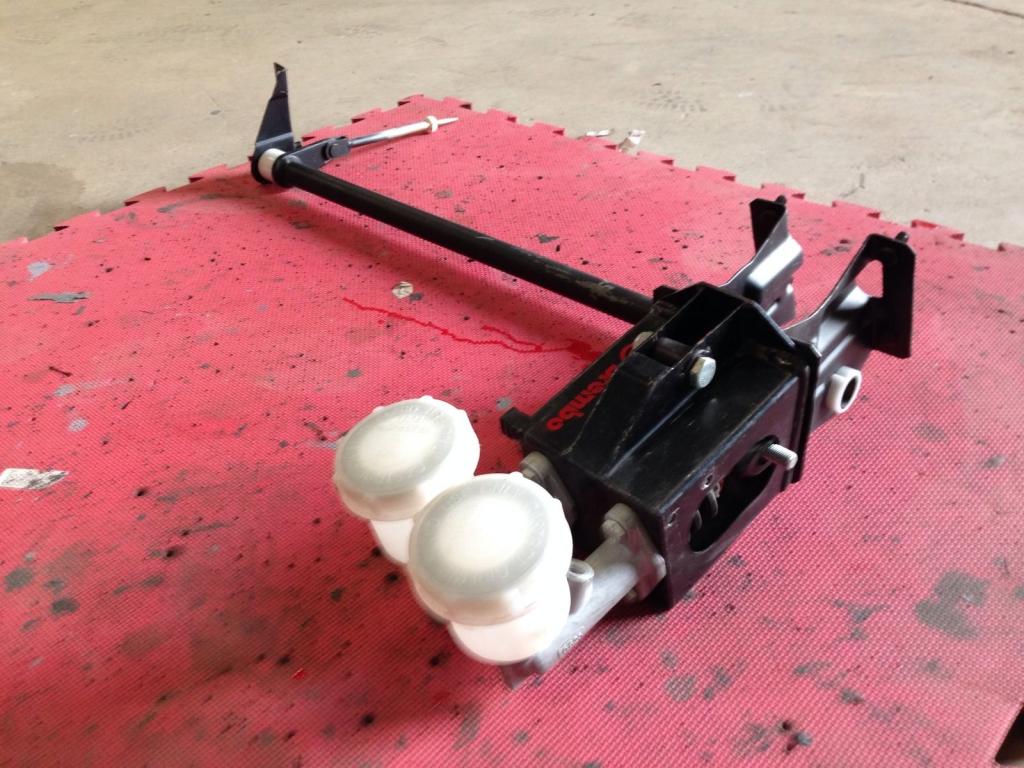

and bought this compbrake pedal box off muz last year

 11-06-2015, 10:27 PM
#19
Wahay!! I've lost my Virginity!!
Thread Starter
So....started to rub down and prep the body, The majority now complete and etched primed although it's taking a long time
I'm hopping to be finish over the weekend (if I can dodge the rain) so I can catch the decent weather at the end of next week and throw some primer on it
Thanks
I'm hopping to be finish over the weekend (if I can dodge the rain) so I can catch the decent weather at the end of next week and throw some primer on it

Thanks
 14-06-2015, 06:49 PM
#23
Wahay!! I've lost my Virginity!!
Thread Starter
Managed to find a bit of time this afterrnoon to work on the escort and started to kick the engine bay into shape

Last edited by perm1; 14-06-2015 at 07:30 PM.

 05-07-2015, 10:05 PM
#27
Wahay!! I've lost my Virginity!!
Thread Starter
ive had a small amount of misfortune Monday this week
The bus (parked on the right hand side) decided to remodel the bmw, Nissan, and my focus
possible future resto!

The bus (parked on the right hand side) decided to remodel the bmw, Nissan, and my focus
possible future resto!
 19-07-2015, 10:17 PM
#28
Wahay!! I've lost my Virginity!!
Thread Starter
My focus st has now been written off and is now parked up until I can decide what to do with it....I'm thinking kit car donor
So to get me going again I have just bought number 67 of 100 gb270 wagon
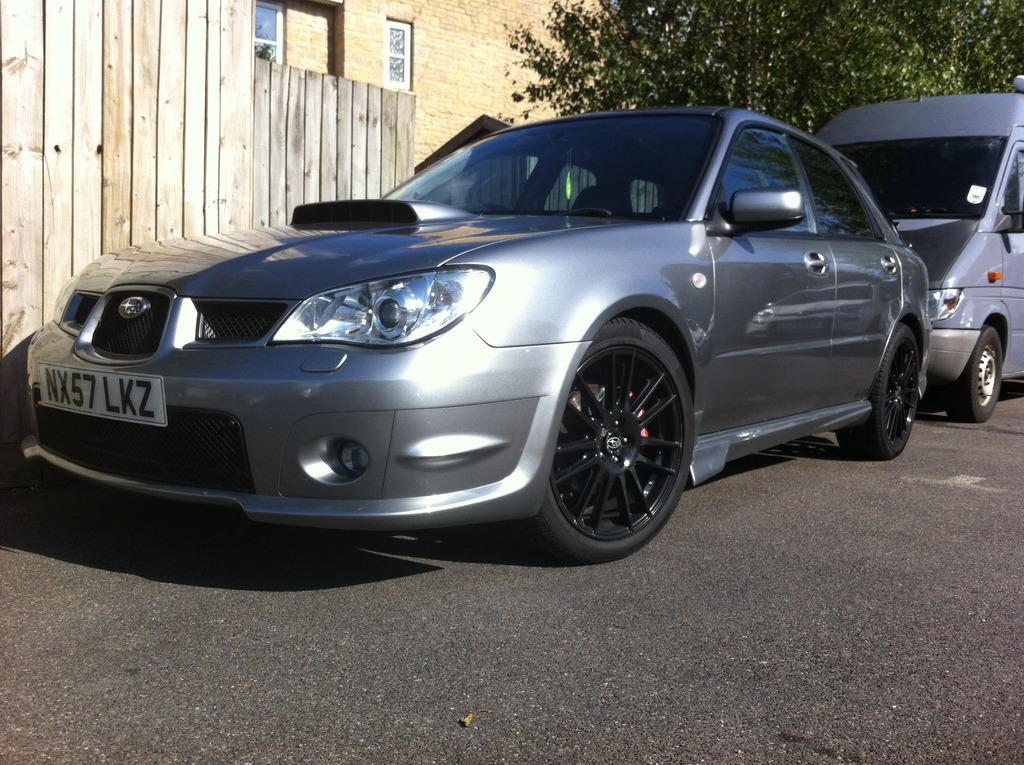
So to get me going again I have just bought number 67 of 100 gb270 wagon

 20-07-2015, 08:14 AM
#31
Wahay!! I've lost my Virginity!!

great progress, love a Scooby wagon too! i'm thinking of one for my next daily whilst I work on my S2 as i've had 5 impreza's before in various guises
 20-07-2015, 10:13 AM
#33
Wahay!! I've lost my Virginity!!
Thread Starter
but show the wagon some corners on a steep hill ...... Wow
So I think this is the start of many for me
Thanks for the reply
20-07-2015, 03:58 PM
#35
Passionford Addict
Keep up the good work,your doing a cracking job by the looks of it. Will definetly be keeping an eye on this. Must be gutted about your focus tho? Did you get to keep it from the insurance company?
Here's a little thought for you if you did,2.5 s2
Here's a little thought for you if you did,2.5 s2
21-07-2015, 10:15 AM
#36
Wahay!! I've lost my Virginity!!
Thread Starter
so putting the t5 lump into the escort was the first thing that popped into my head, unfortunately after a quick measure the conclusion was its just too long.... I’m not saying it’s impossible, just too much of an headache for me.
second thought was...RWD T5 RS Turbo but I couldn't bring myself to destroying all the work i have put into this shell already
i do however have a 88spec turbo which is a rather ripe so this could be on .... I believe my shopping list would look something like this: -
sierra floor stitched in (as they do for the cosworth conversions)
Cosworth rear axle complete with diff etc
T5 Gearbox
Gearbox adaptor plate (these can be purchased from the Swedish)
volvo 960 (i think) engine mounts and bell housing (depending on set up)
running standard management
being as I have the heart already it would be an affordable build
not sure on clutch, although there is plenty of information from the volvo forums.....this set up is the in-thing with old Volvo's, sorry the following link is not a ford one! http://forums.turbobricks.com/showthread.php?t=163457 there is also a thread on this forum of a P100e it’s a great read https://passionford.com/forum/restor...-addition.html
the reality is, im not going to touch it until my escort is finished, if funds run low (my Mrs controls the purse....you all know what i mean!) i would sell to ensure this gets completed....
cheers
 23-07-2015, 09:06 AM
#38
Wahay!! I've lost my Virginity!!
Thread Starter
nice shiny engine bay (inside looks like this also but didn't get a photo)
im glad to be finished with all internal painting.....it was a bit fiddly and a nightmare if im being honest

im glad to be finished with all internal painting.....it was a bit fiddly and a nightmare if im being honest
 03-08-2015, 08:10 AM
#39
Wahay!! I've lost my Virginity!!
Thread Starter
primer and block sanded with 800 paper
the panels are looking really flat now
base and clear to go on hopefully this weekend
im looking to put 3 coats of clear on so i can 2000grit block sand to a perfect flat finish .......never done this before, so should be interesting to see
it will probably be at this point that i will realize i should have paid someone to do the job!
the panels are looking really flat now


base and clear to go on hopefully this weekend
im looking to put 3 coats of clear on so i can 2000grit block sand to a perfect flat finish .......never done this before, so should be interesting to see
it will probably be at this point that i will realize i should have paid someone to do the job!
