Sierra Mk1 3dr ´86, home-built "Group A" *Brakes upgrade etc.*
 04-08-2014, 06:57 PM
#1
RalliArttu
Thread Starter
Hello from Finland again!
In my previous Sierra project topic I mentioned that if and when I´m going to get next one it´ll be Mk1 Sierra.. So I kept my promise!
I got plenty of plans for this car. First of all, it´s gonna be a track day toy. This is also kinda budget-built, but that doesn´t mean I´d save in build quality that means I had to do most of the things by myself As the title tells you, there are some Group A- style modifications up to come; at least roll cage and compression strut arms to the front. And a lot more. But below, how this all strated:
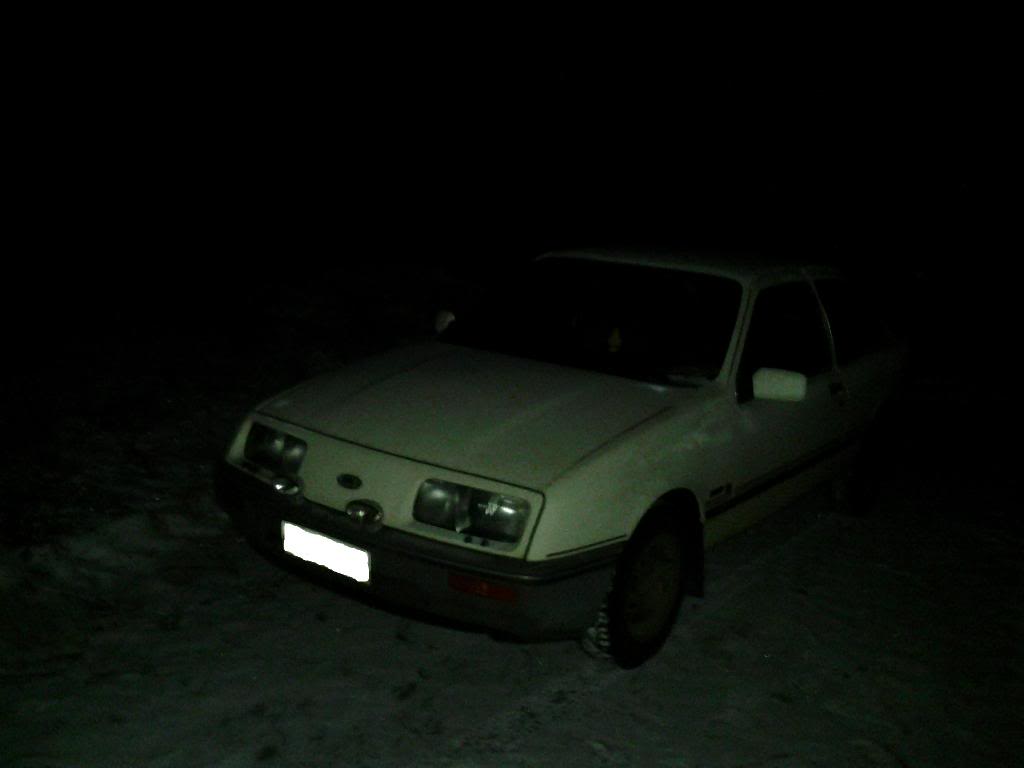
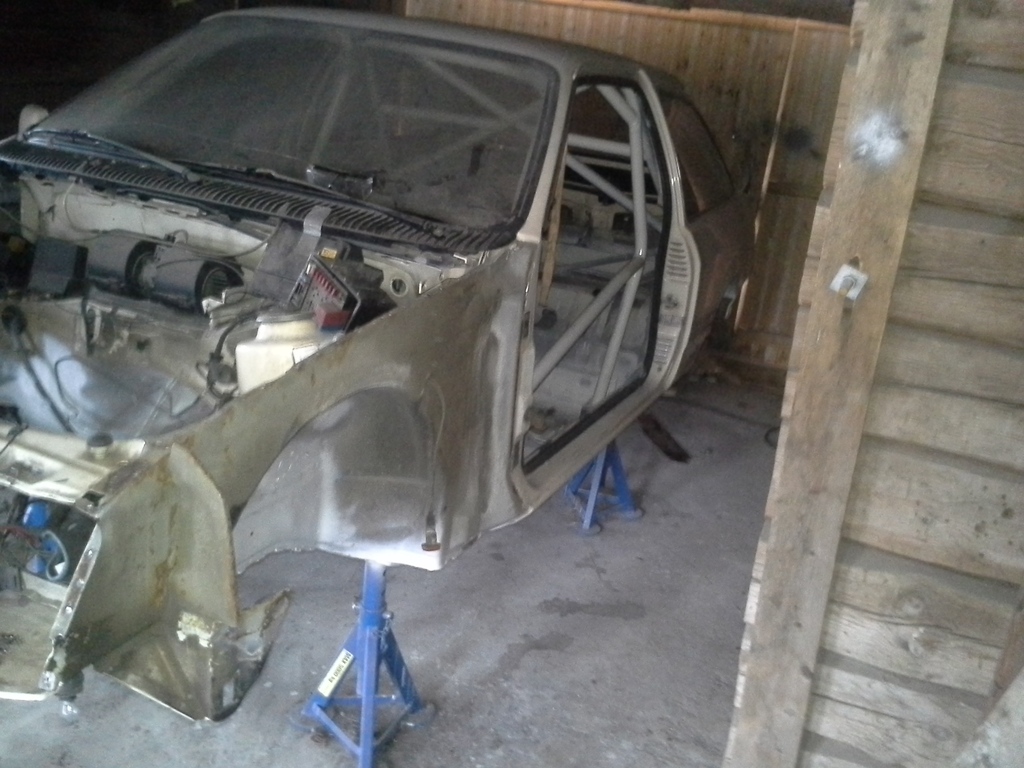
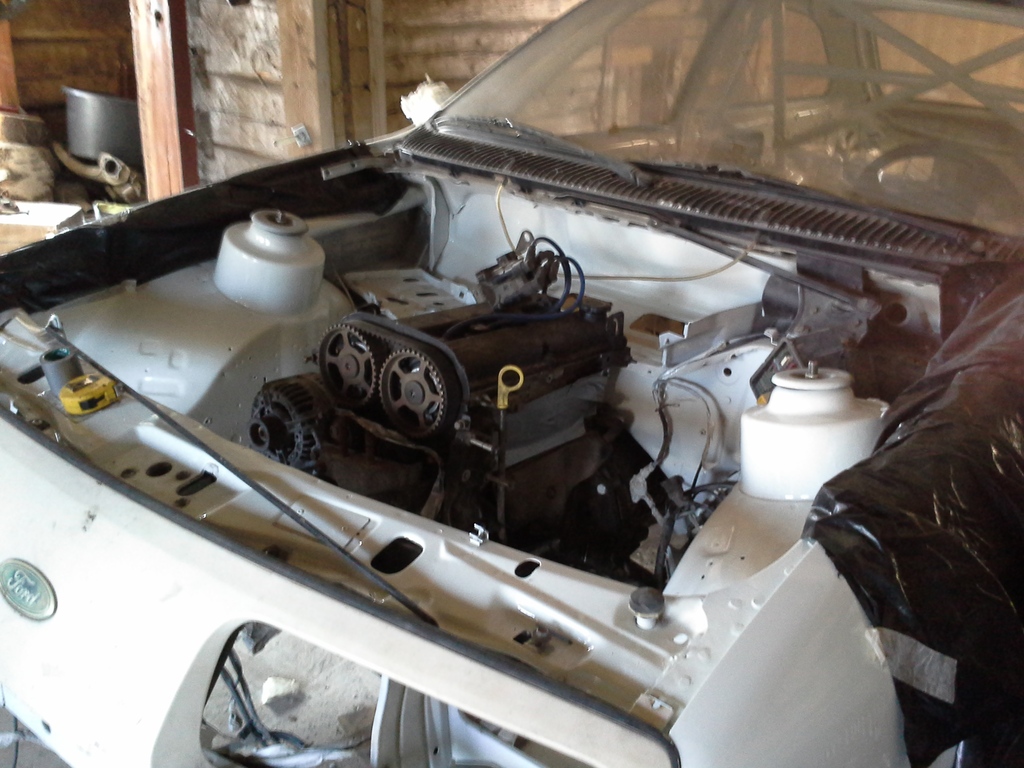
I bought this in last December, and it went to garage in January, because before that I had to made some service to that other Sierra, what is still in my use.
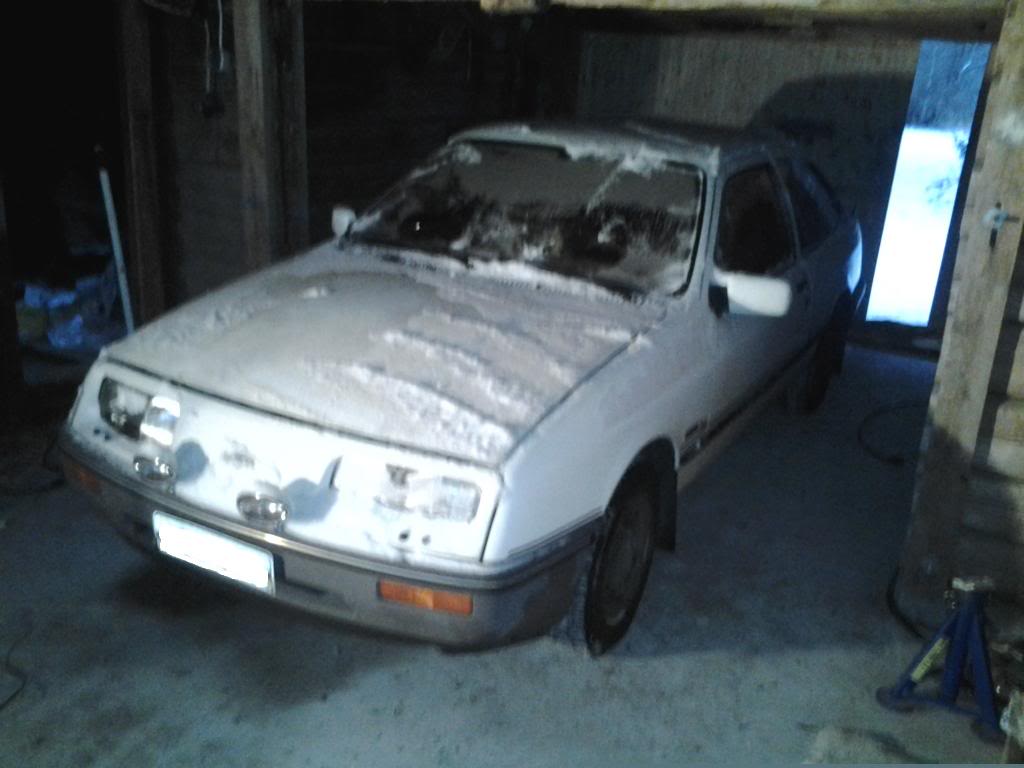
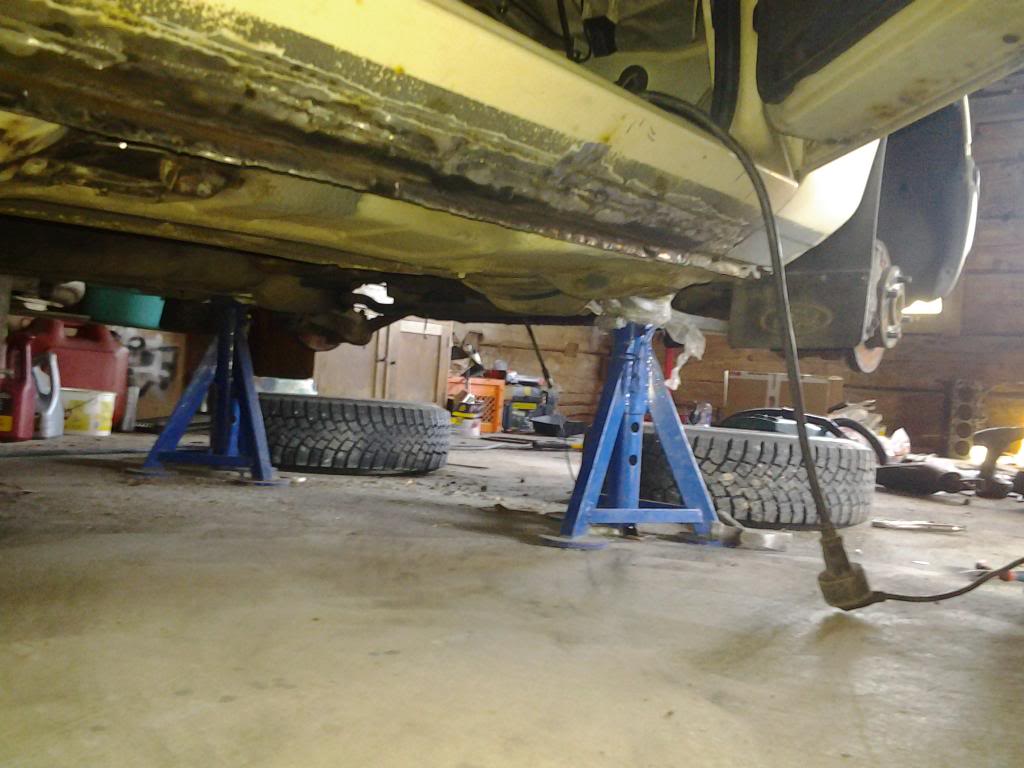
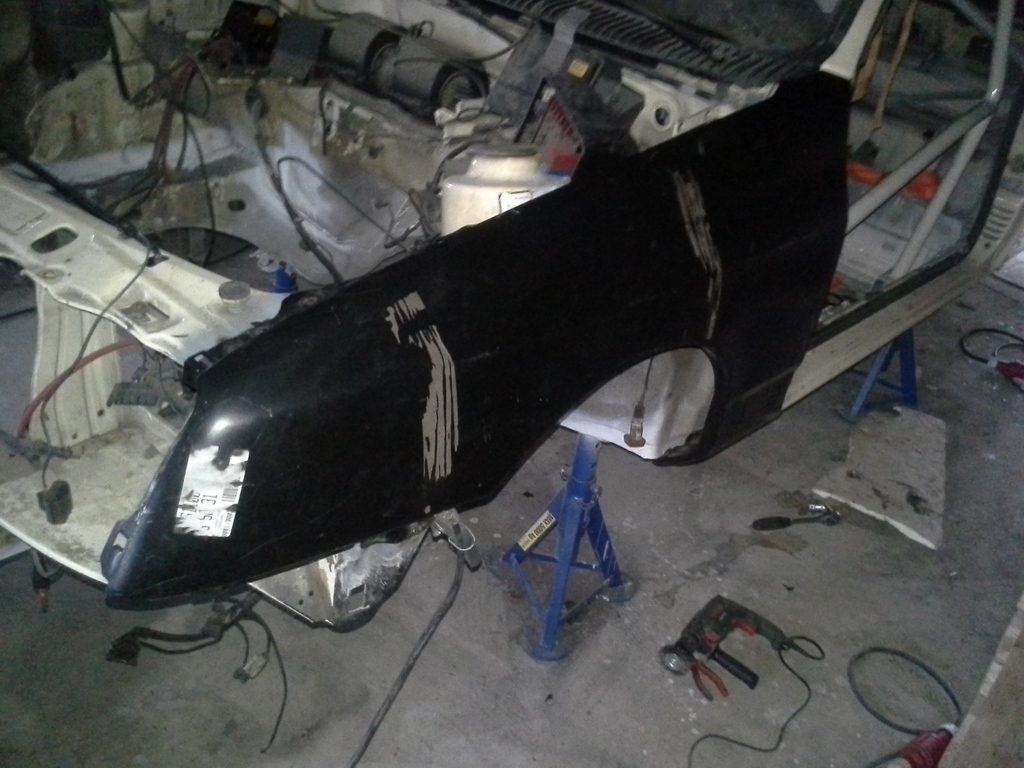
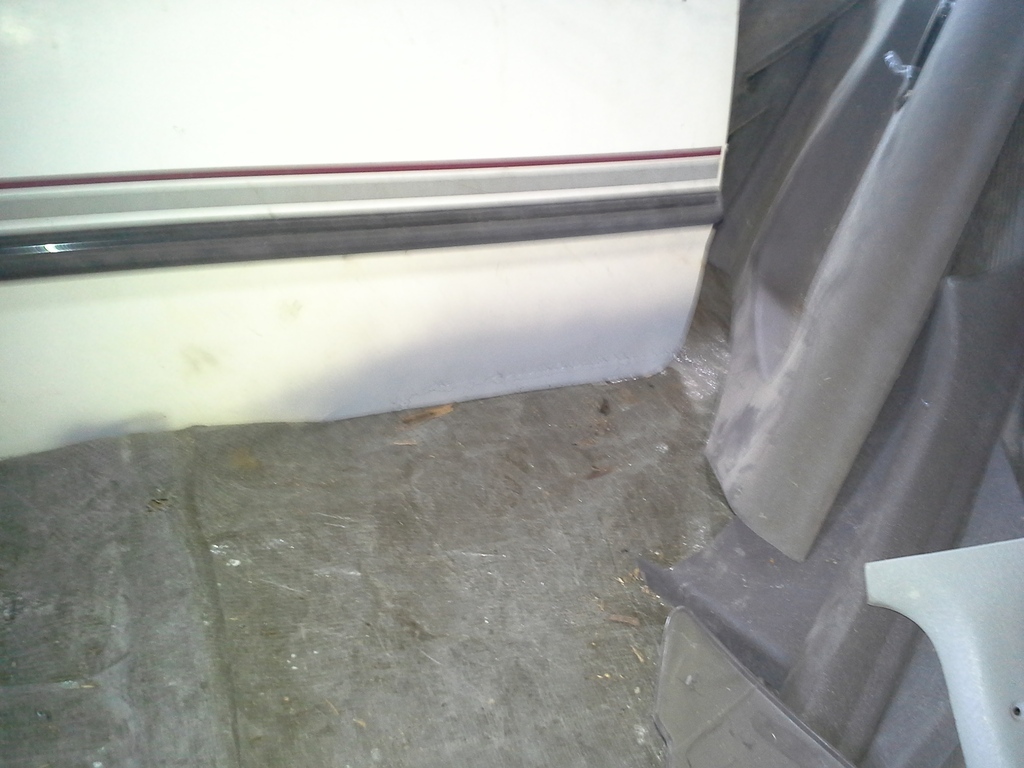
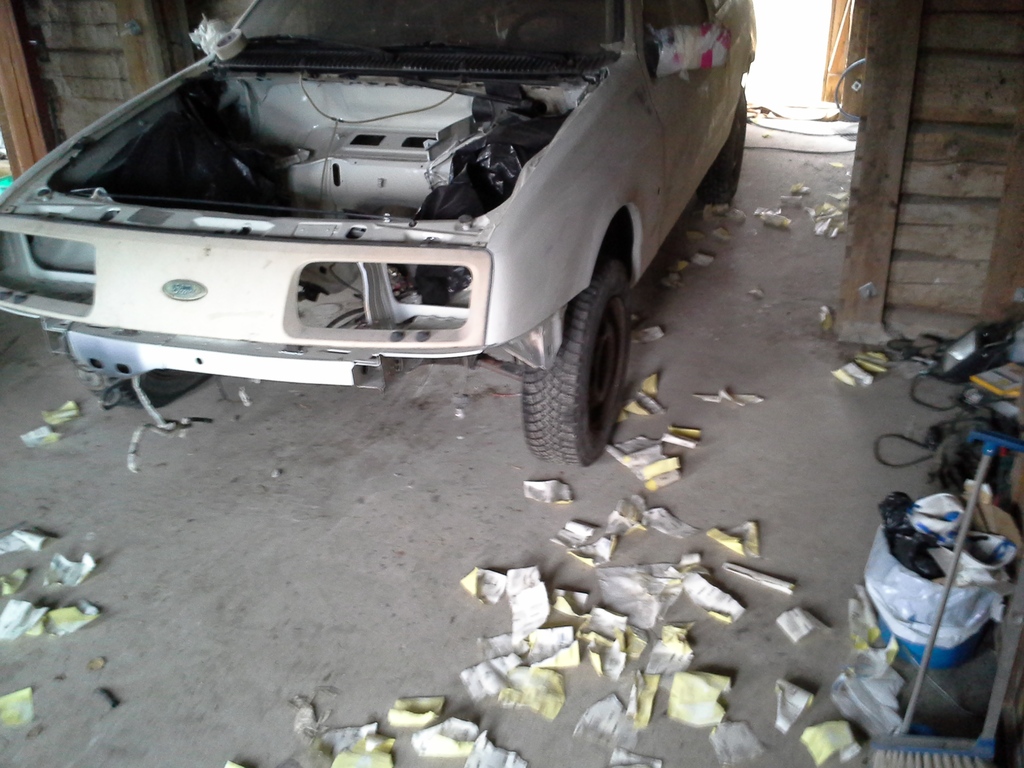
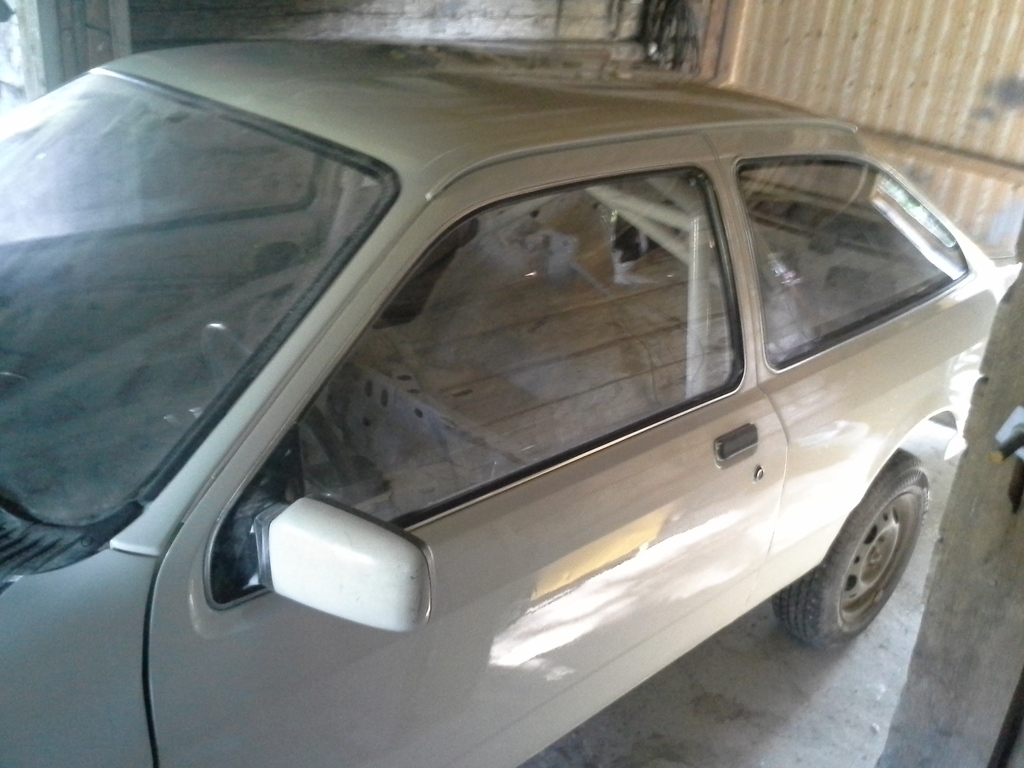
That´s what it look like when it had driven in...
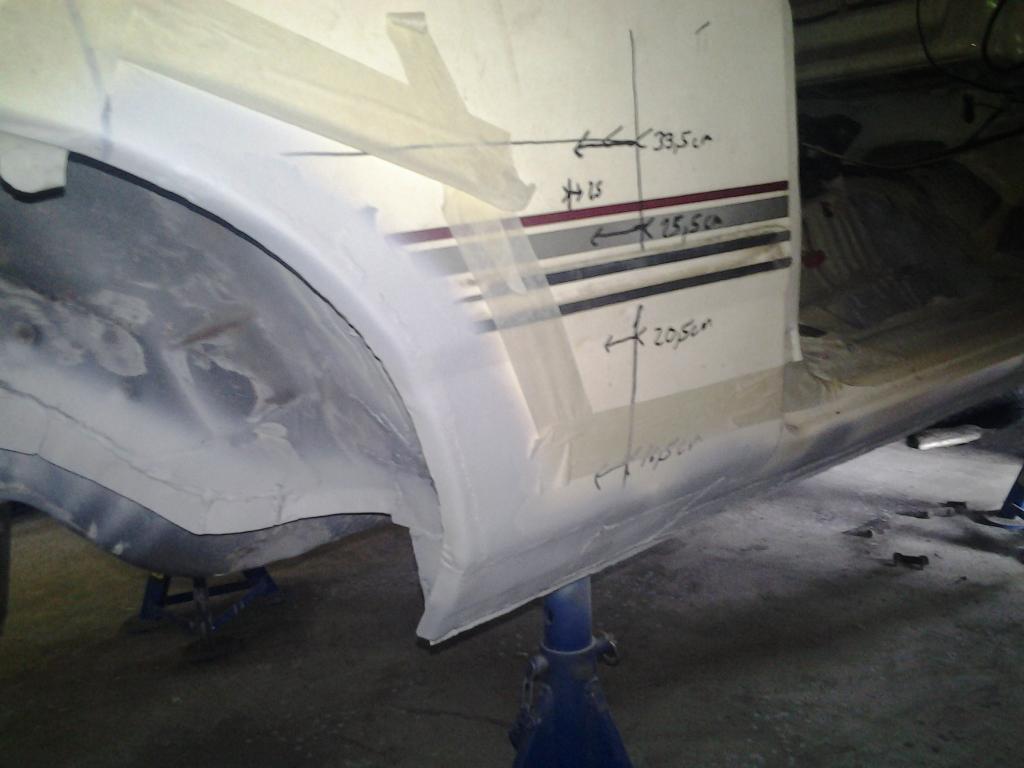
With a quick view, the bodyshell wasn´t that bad shape, except these rusted wheel arches.
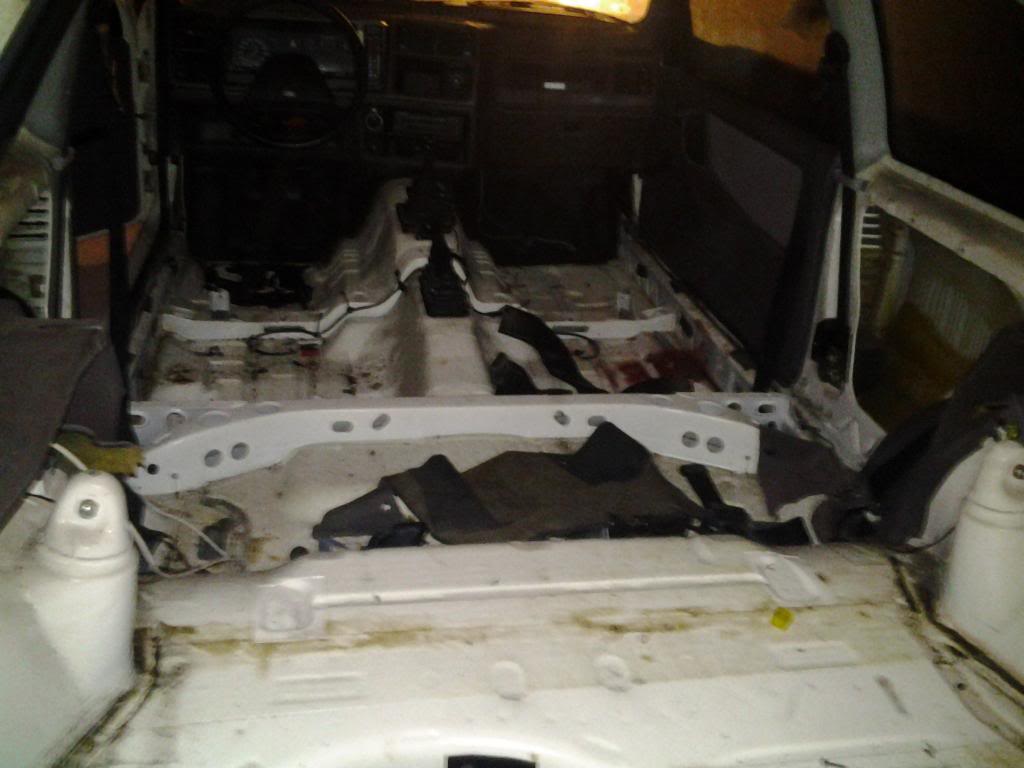
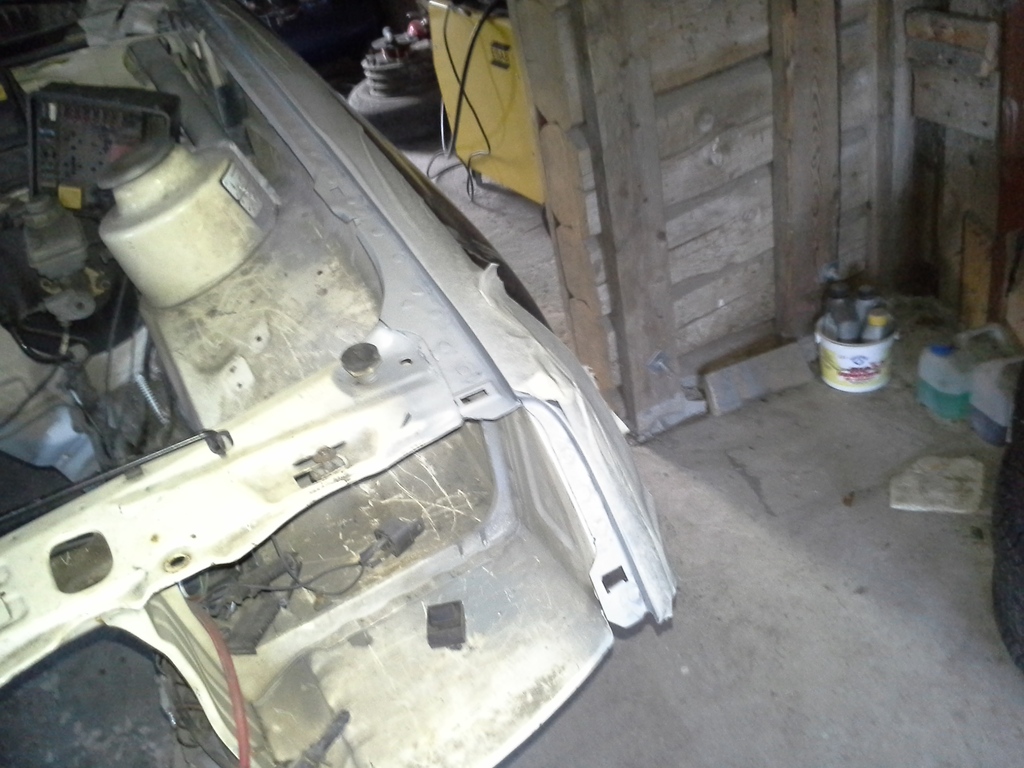
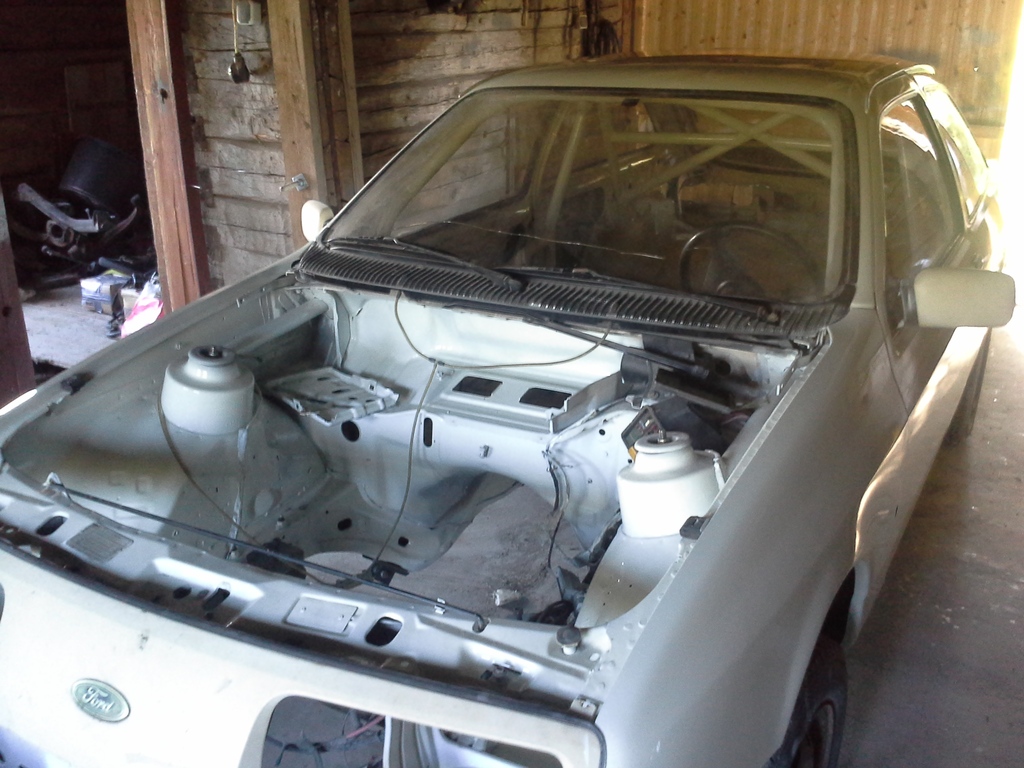
First job was strip the bodyshell, for welding.
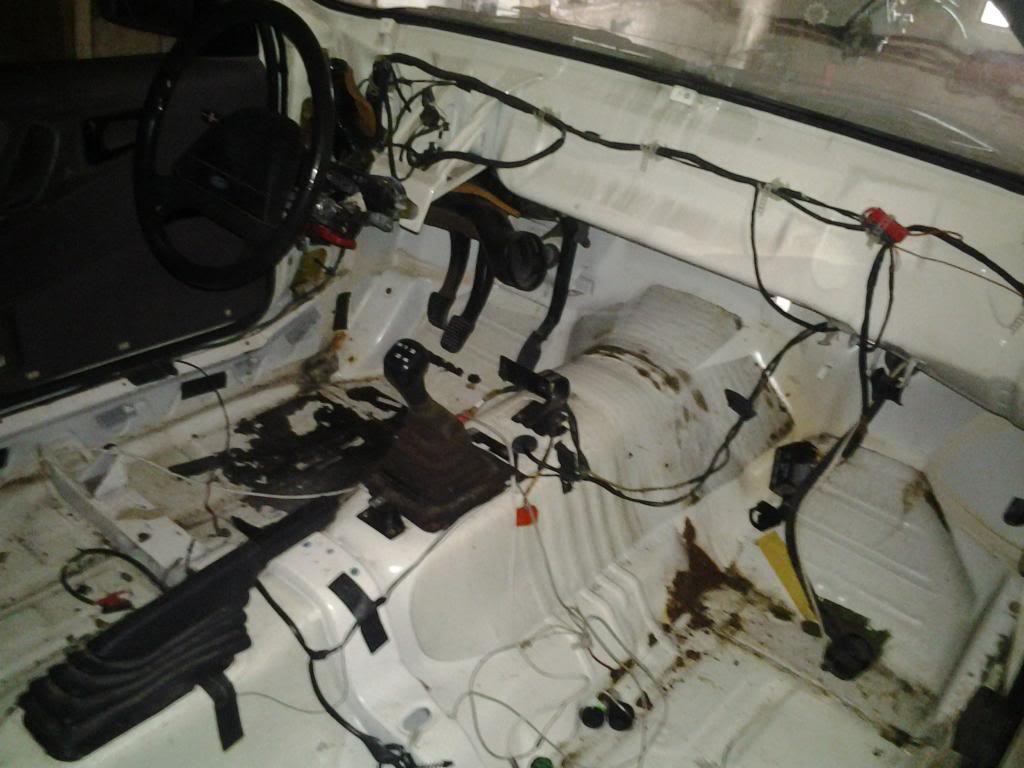
Another pic from stripped out interior.
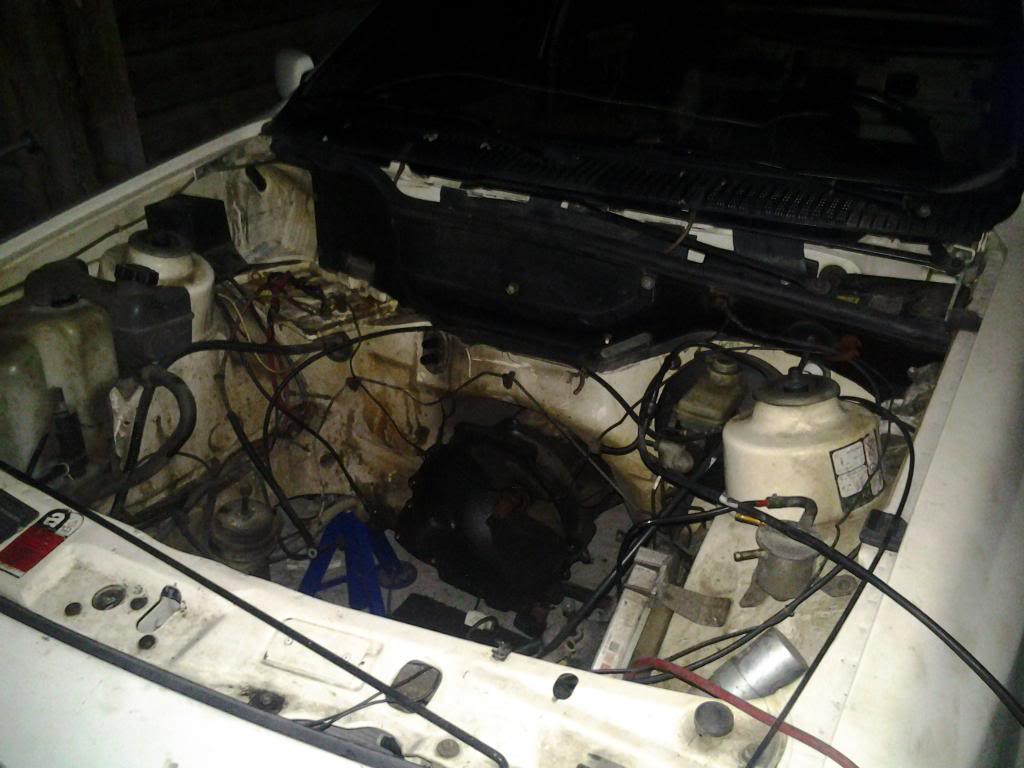
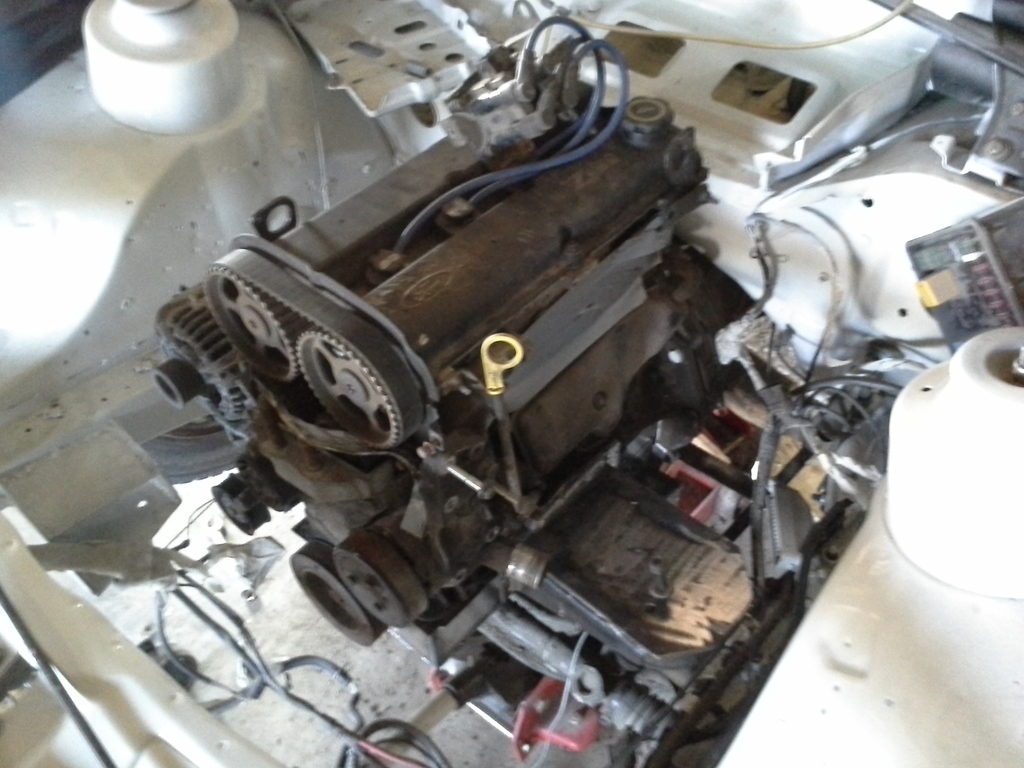
Engine and also fuel tank were removed.
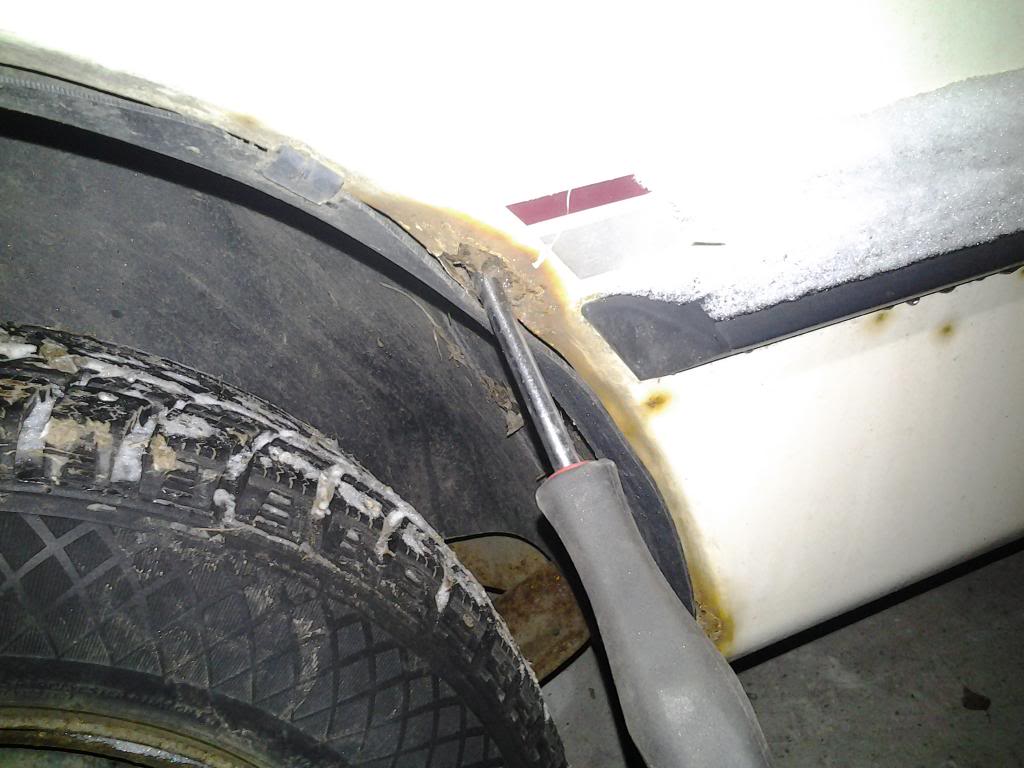
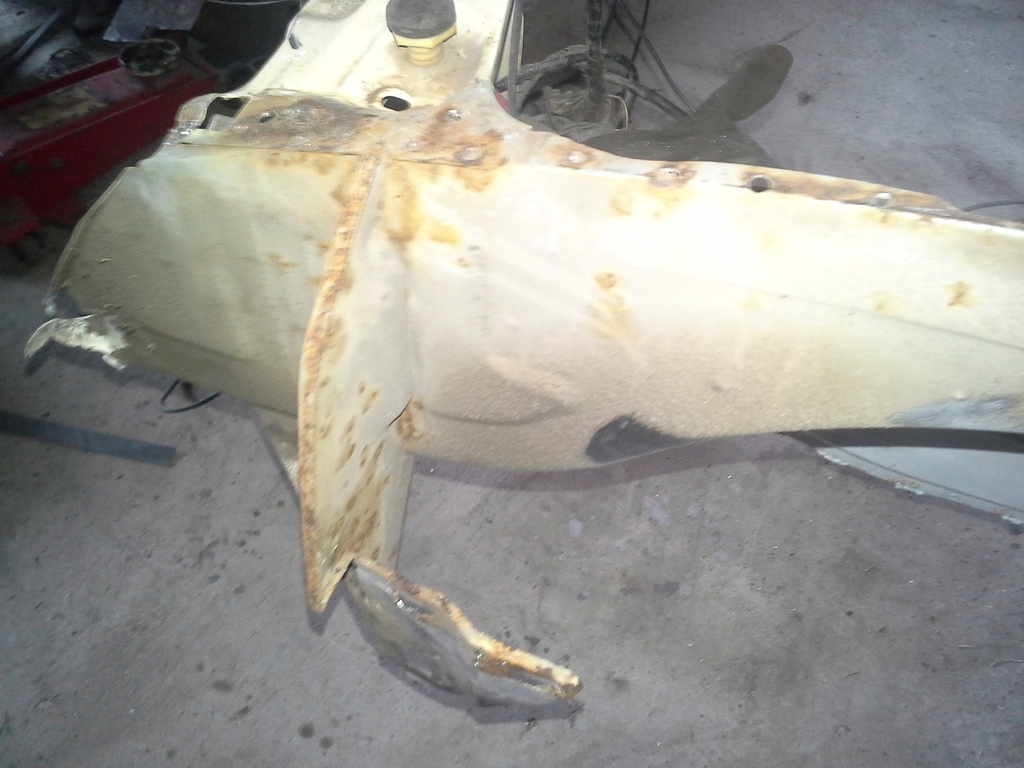
And that famous rust had gone in several places as you can see below...
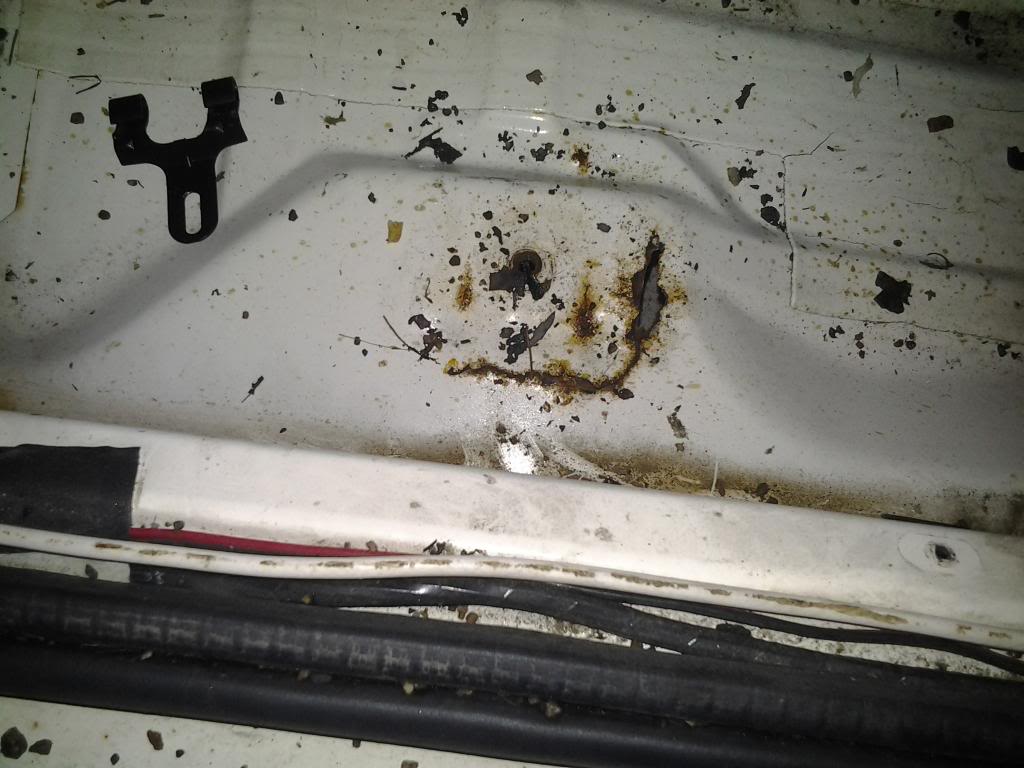
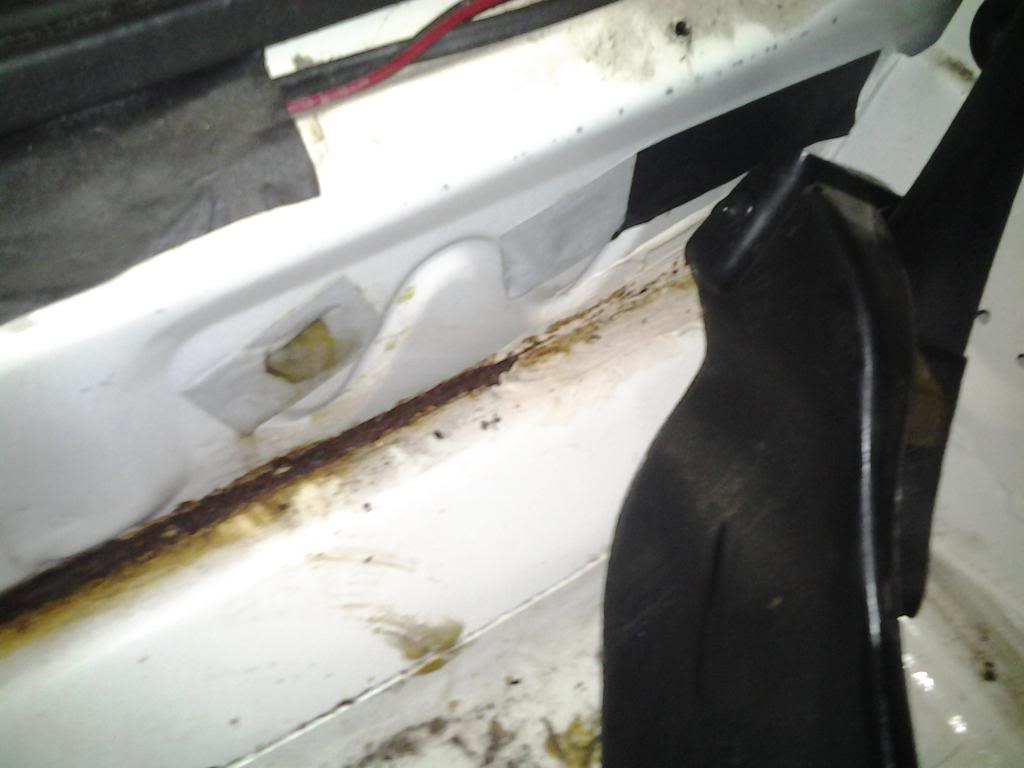
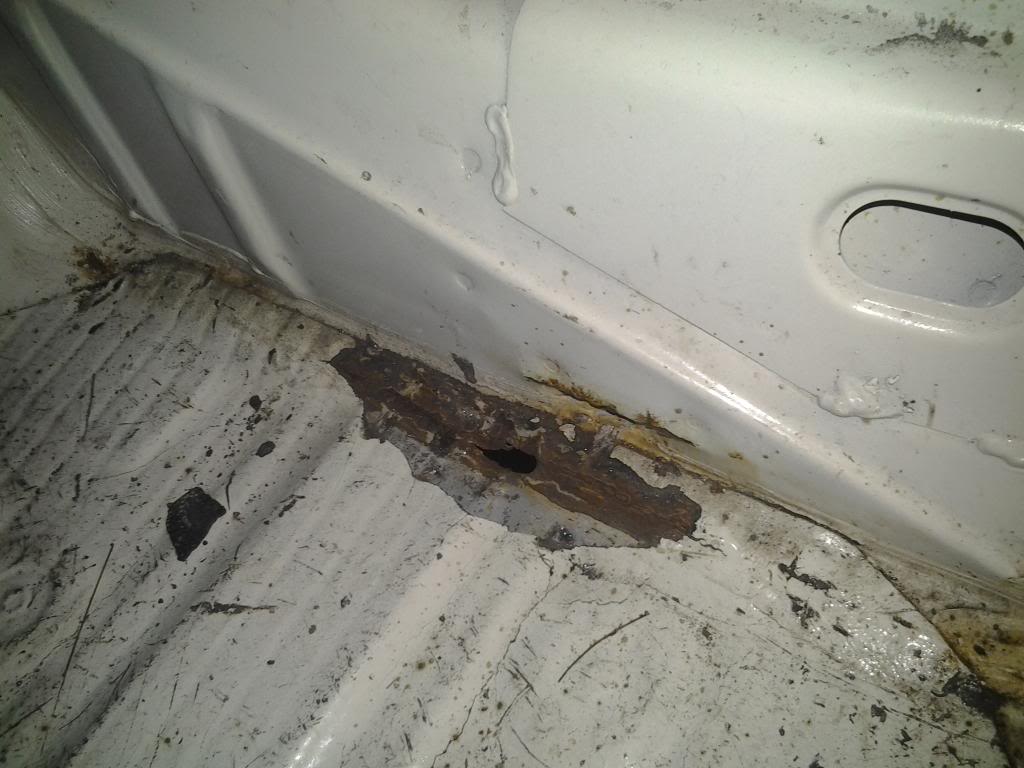
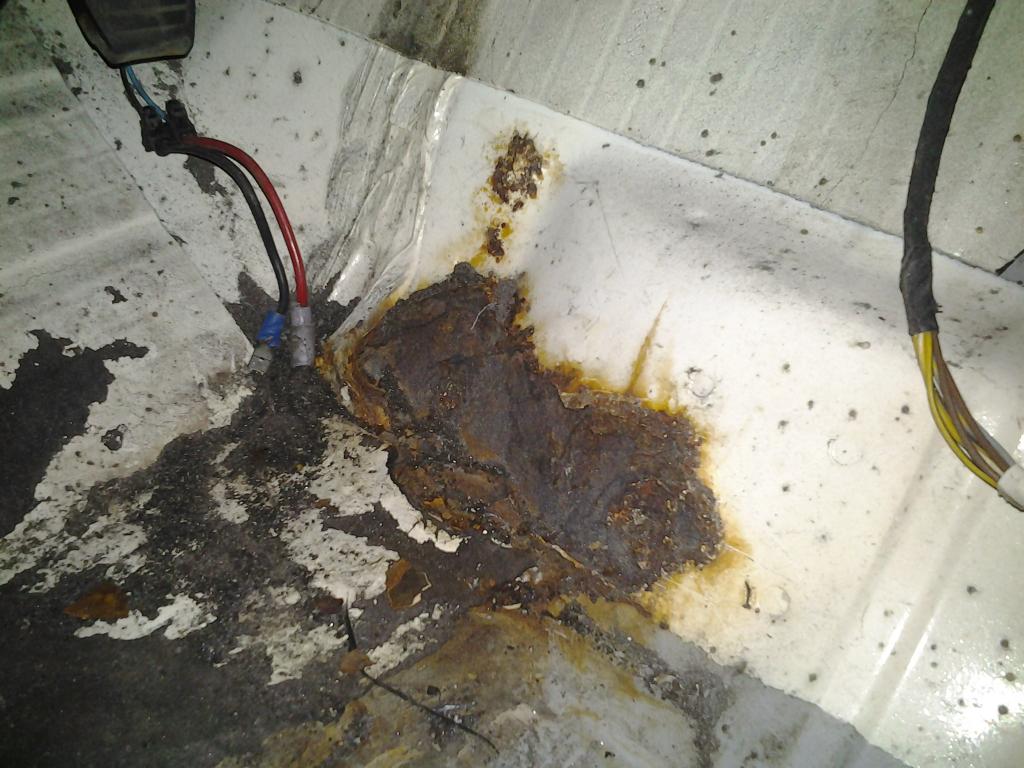
There was just few examples.
Last spring I bought parts for 2wd Cosworth rearbeam (incl. the diff, brakes etc.), only driveshafts missing now.. Also I´ve bought lots of sheet metal and burned a looooot of wleding wire during this summer
More pics coming up, this was just the beginning
In my previous Sierra project topic I mentioned that if and when I´m going to get next one it´ll be Mk1 Sierra.. So I kept my promise!
I got plenty of plans for this car. First of all, it´s gonna be a track day toy. This is also kinda budget-built, but that doesn´t mean I´d save in build quality that means I had to do most of the things by myself
I bought this in last December, and it went to garage in January, because before that I had to made some service to that other Sierra, what is still in my use.
That´s what it look like when it had driven in...
With a quick view, the bodyshell wasn´t that bad shape, except these rusted wheel arches.
First job was strip the bodyshell, for welding.
Another pic from stripped out interior.
Engine and also fuel tank were removed.
And that famous rust had gone in several places as you can see below...
There was just few examples.
Last spring I bought parts for 2wd Cosworth rearbeam (incl. the diff, brakes etc.), only driveshafts missing now.. Also I´ve bought lots of sheet metal and burned a looooot of wleding wire during this summer
More pics coming up, this was just the beginning
Last edited by RalliArttu; 03-03-2020 at 07:41 AM.
 05-08-2014, 12:39 PM
#3
RalliArttu
Thread Starter
And up next some images what happened this summer:
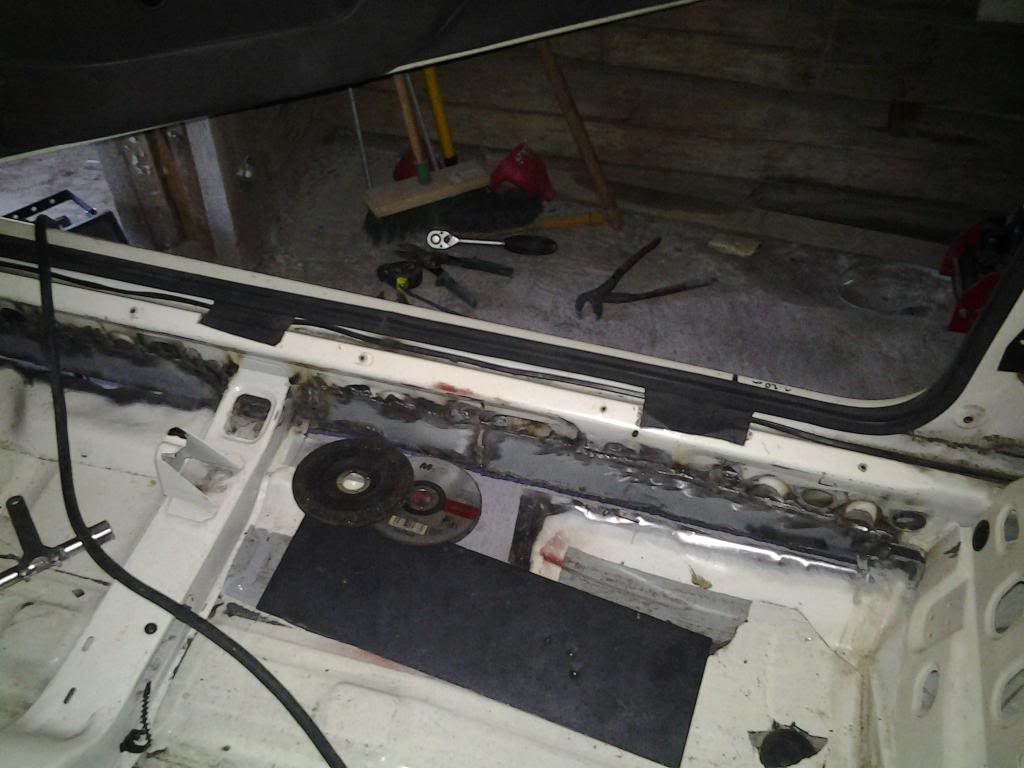
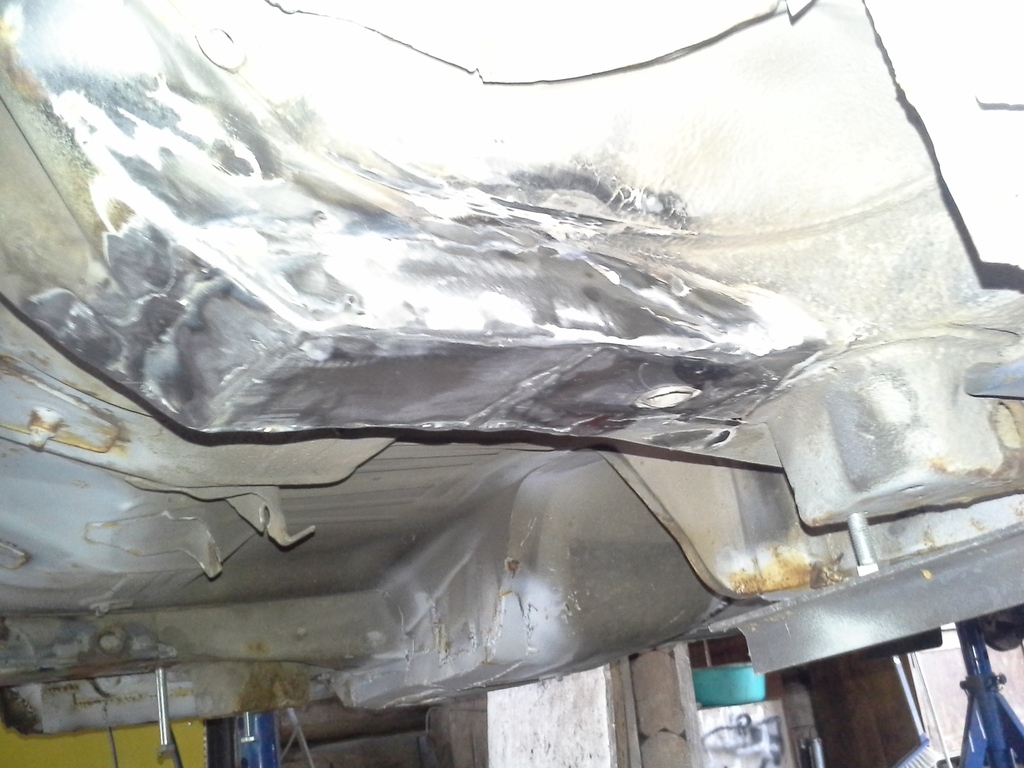
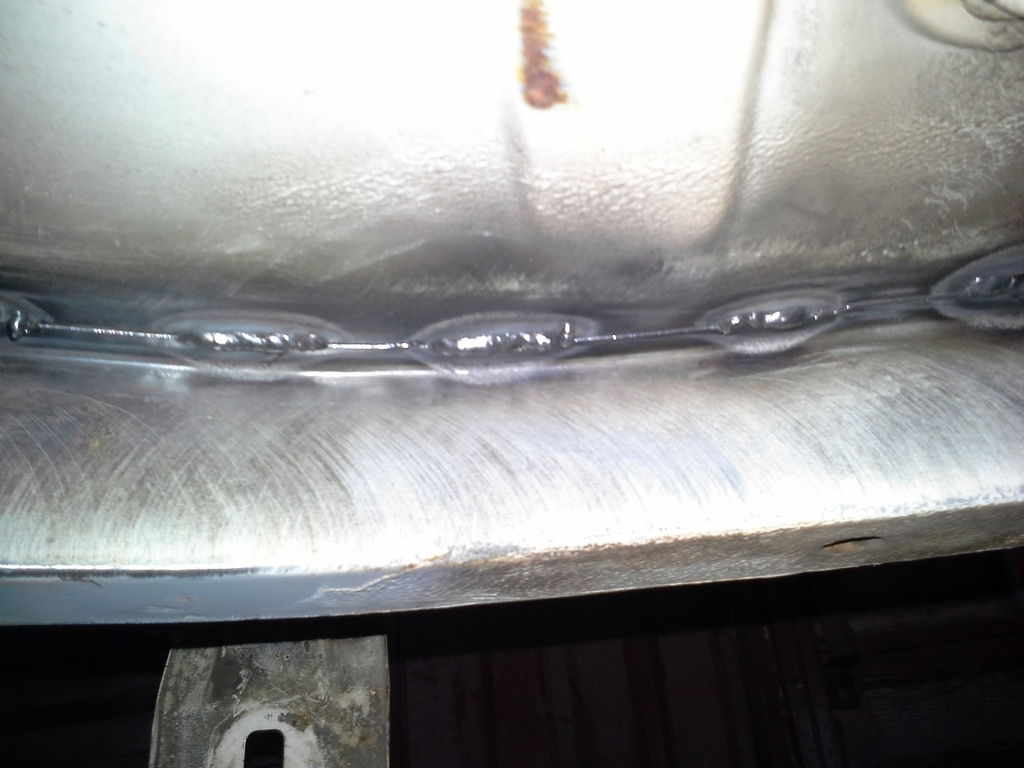
I welded passengers side skirt, and the floor.
Also drivers side was fixed.
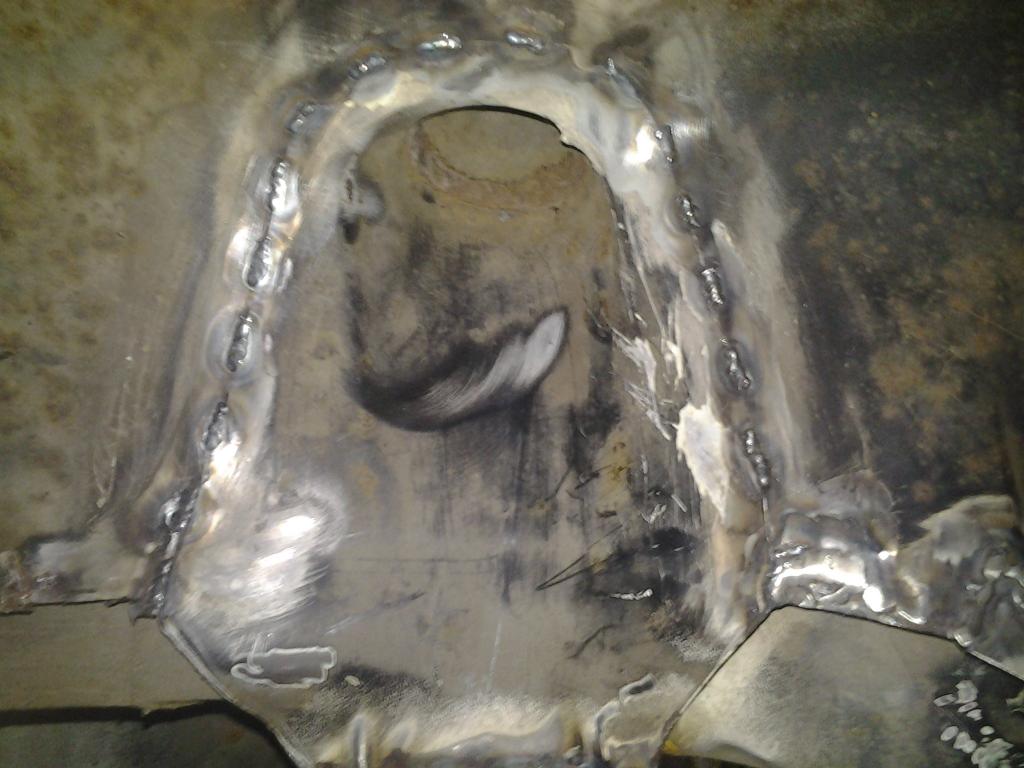
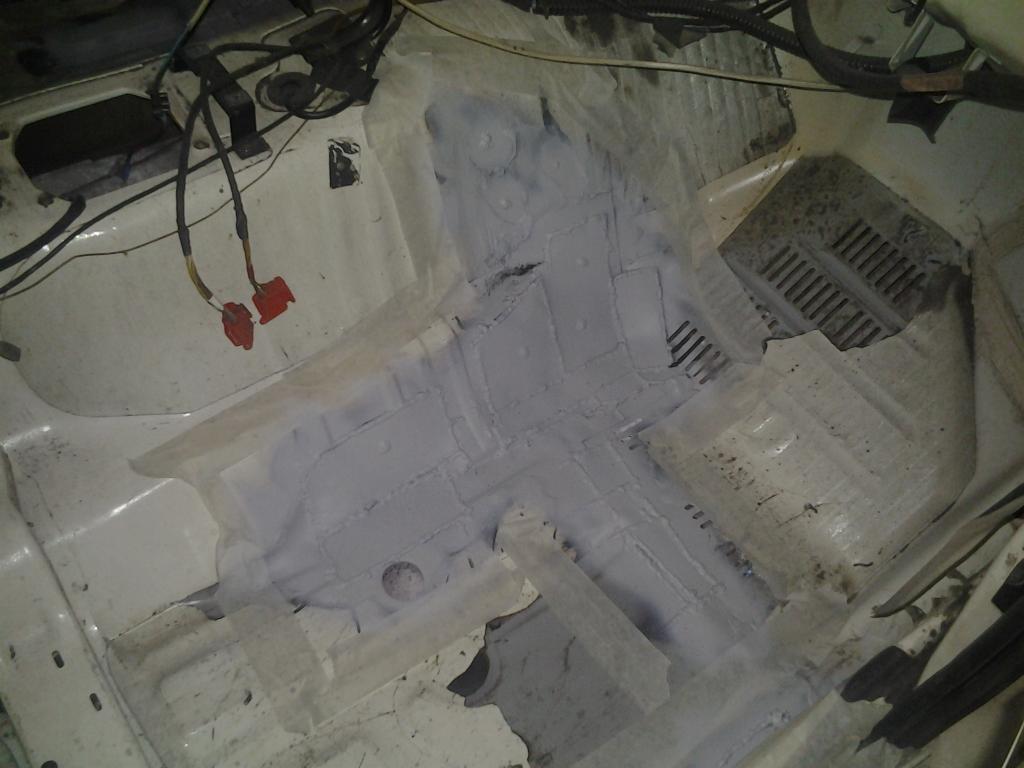
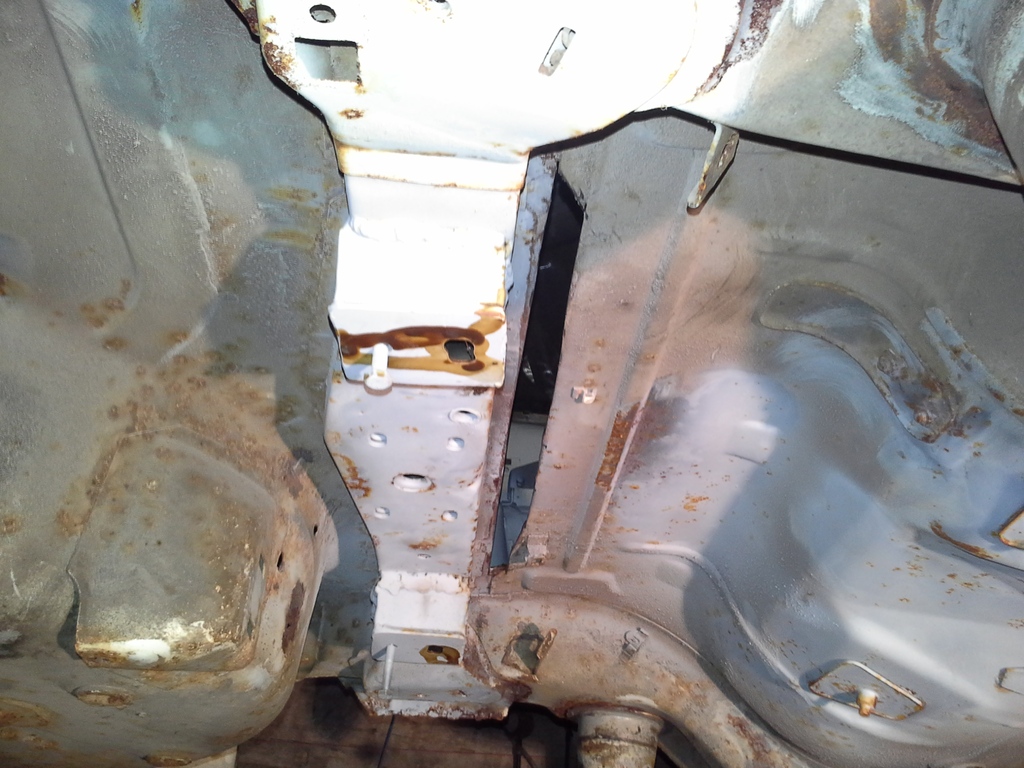
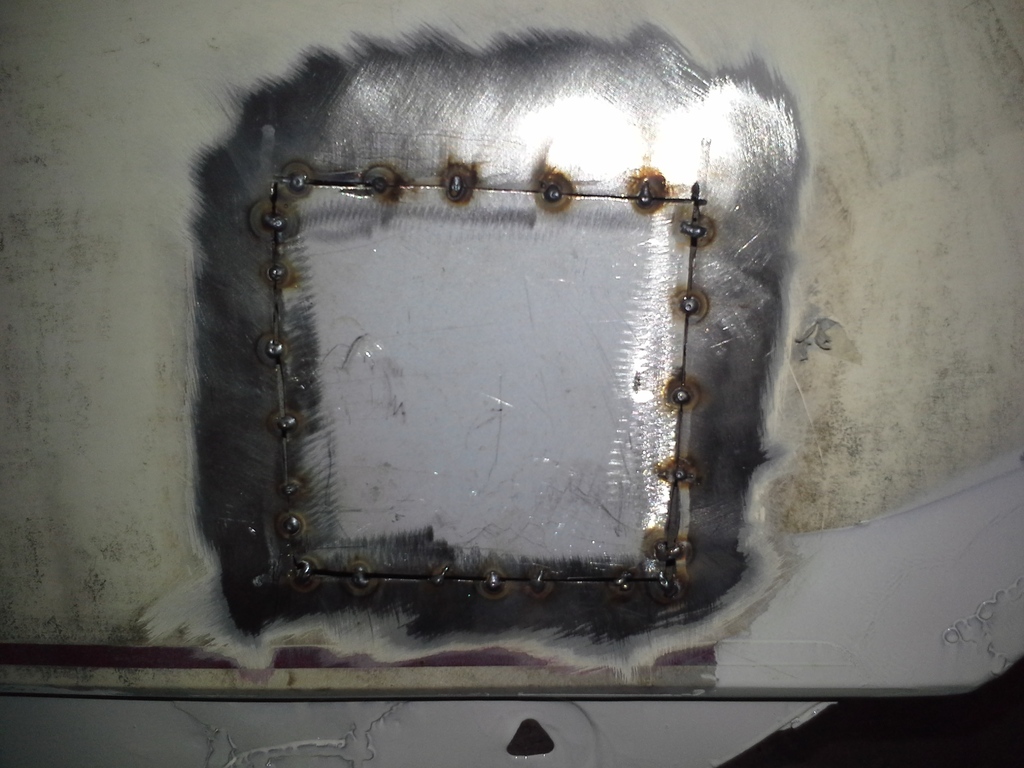
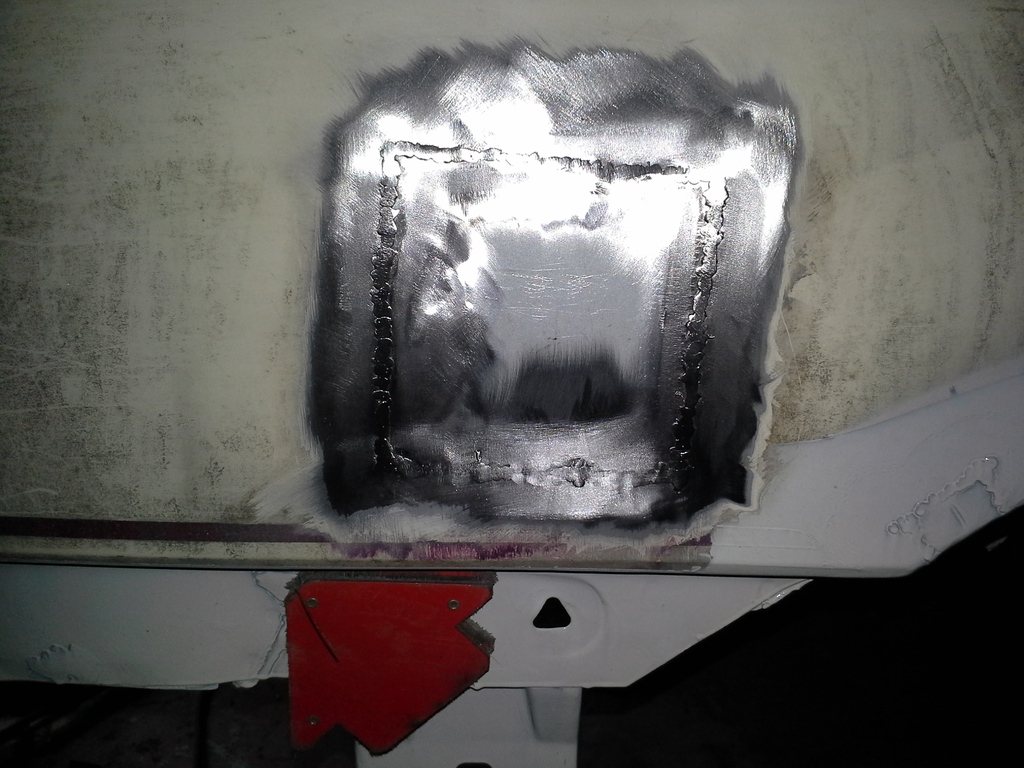
I took some work to get all the rusted metal away, from transmission tunnel.
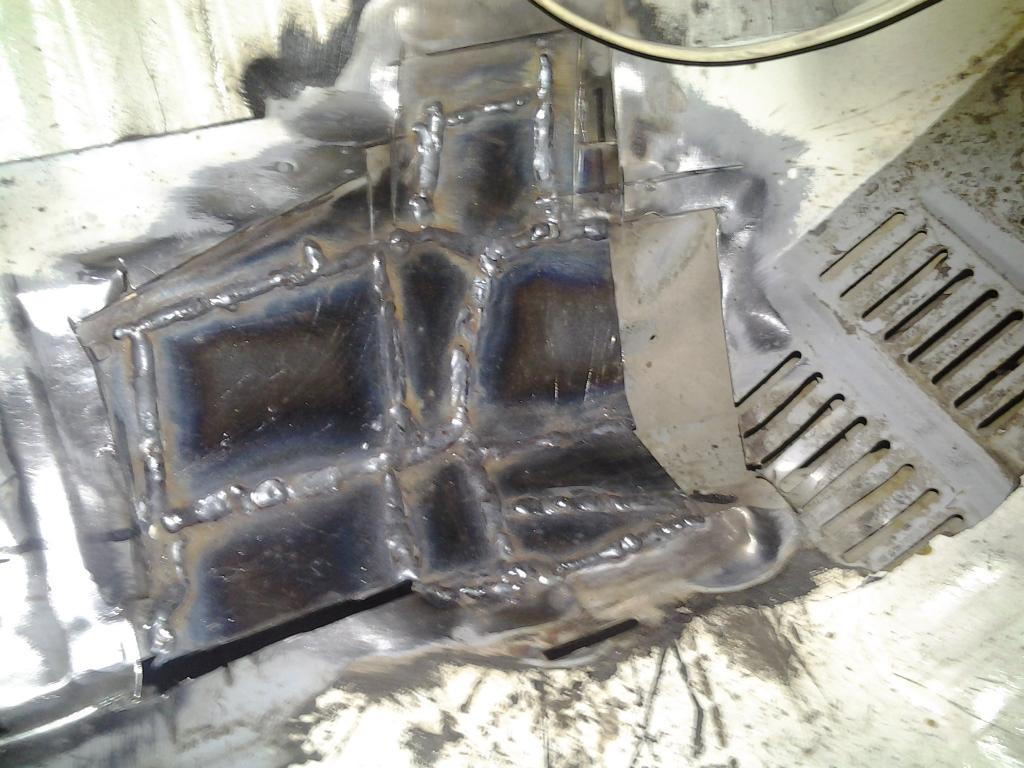
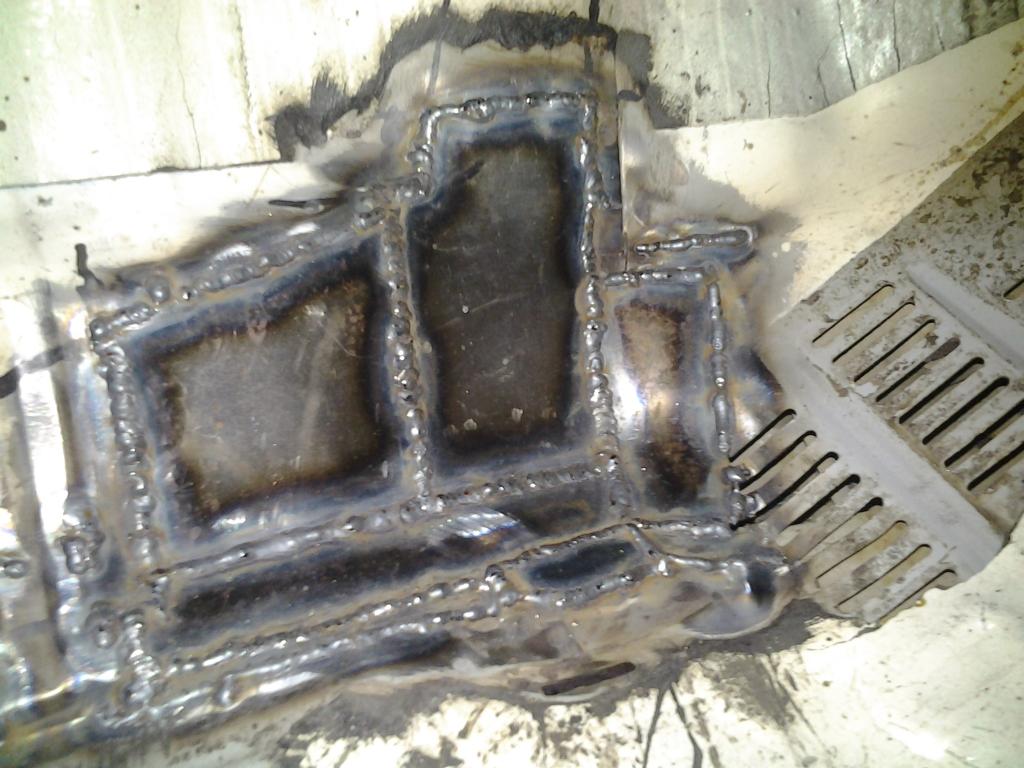
I fixed both sheets of metal seperately.
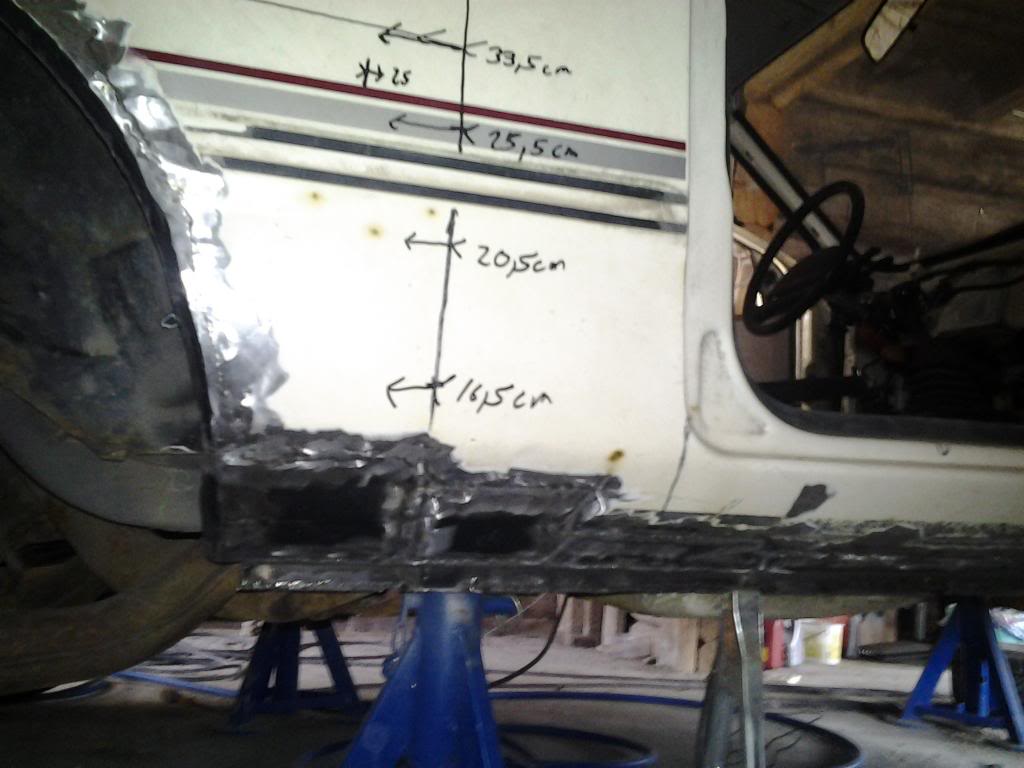
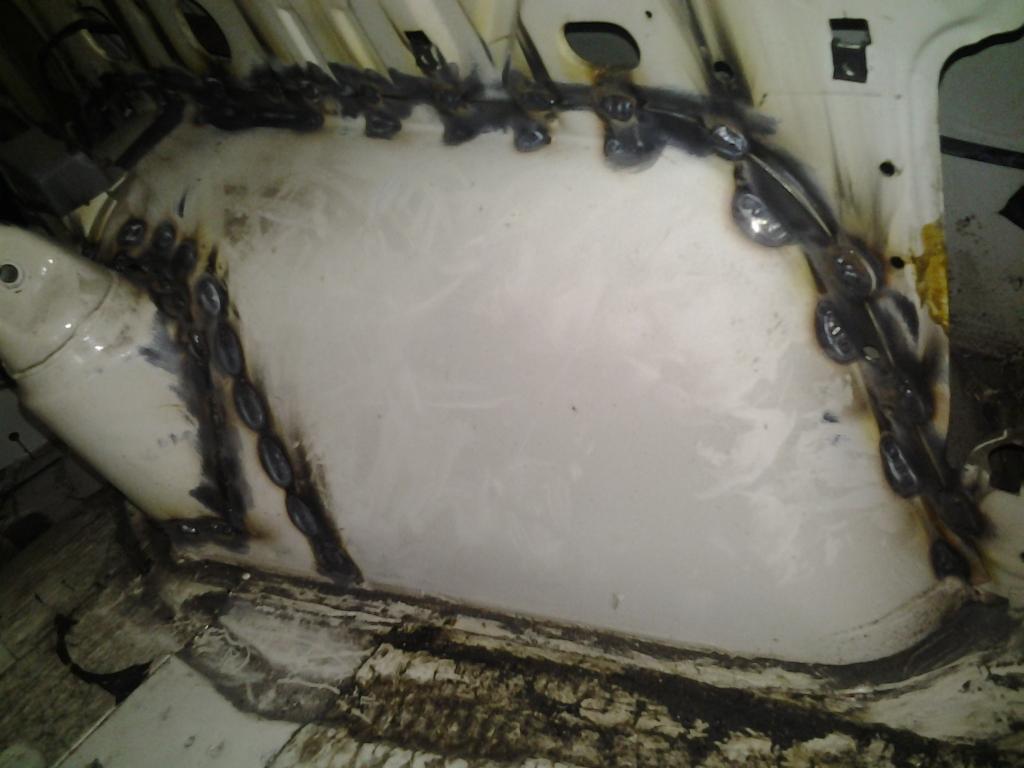
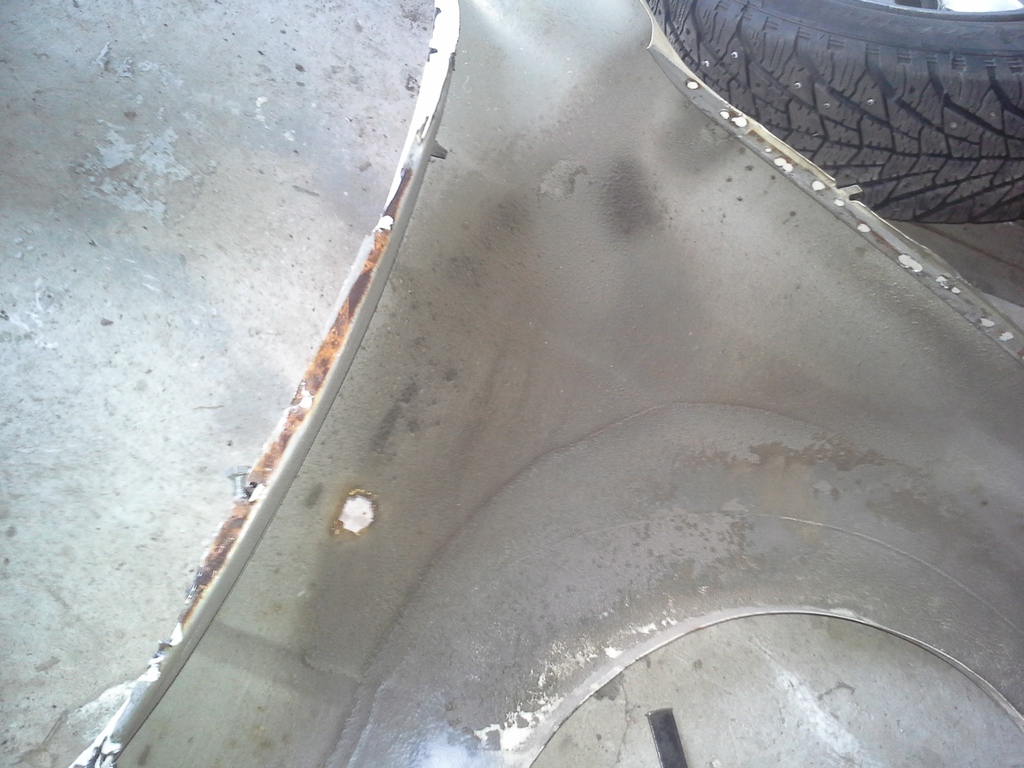
Right side rear wheel arch fixed, looks a bit mesy in this point...
To get more space, I did few jobs while welding:
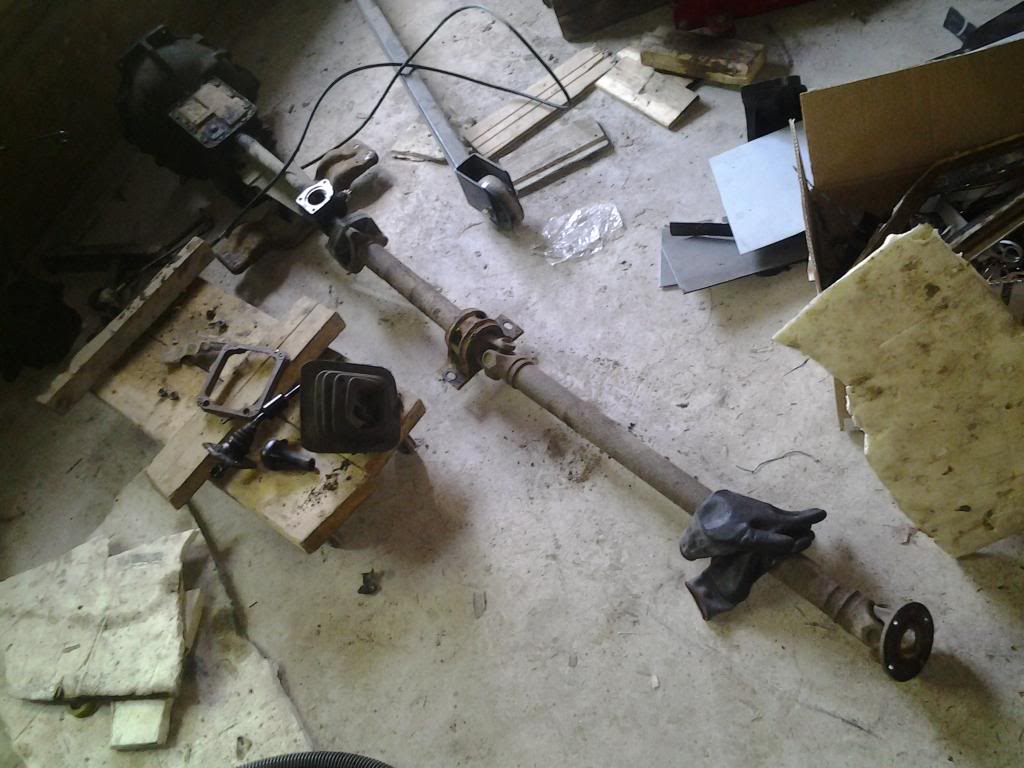
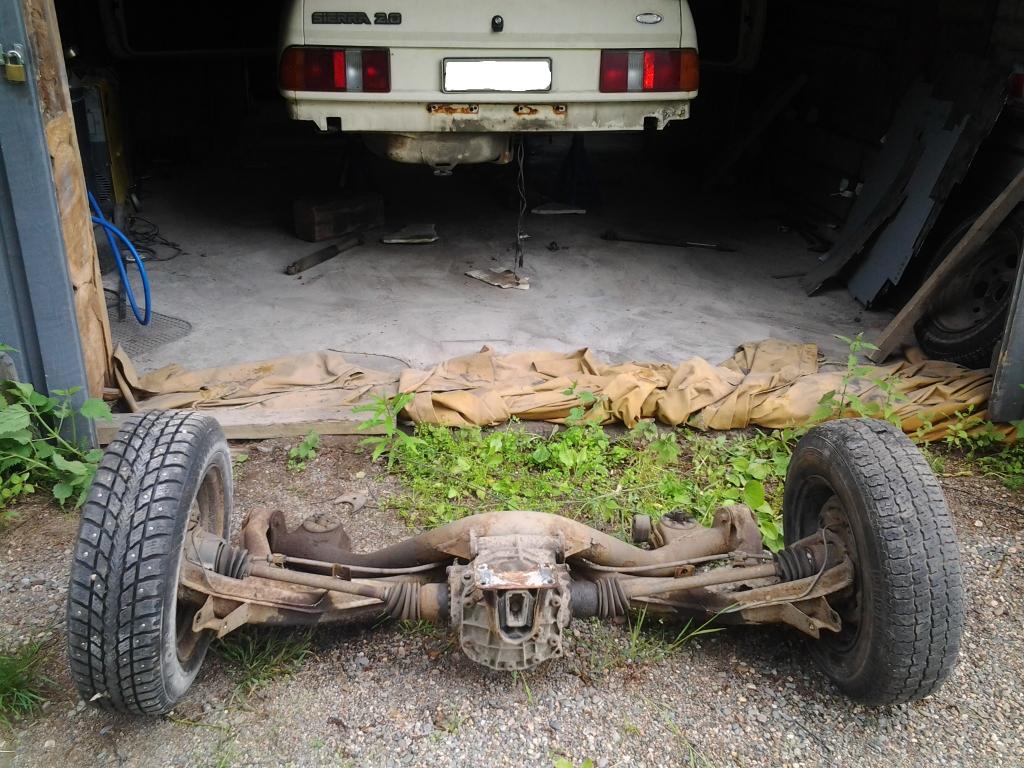
So rear beam, gearbox and propshaft had to go.
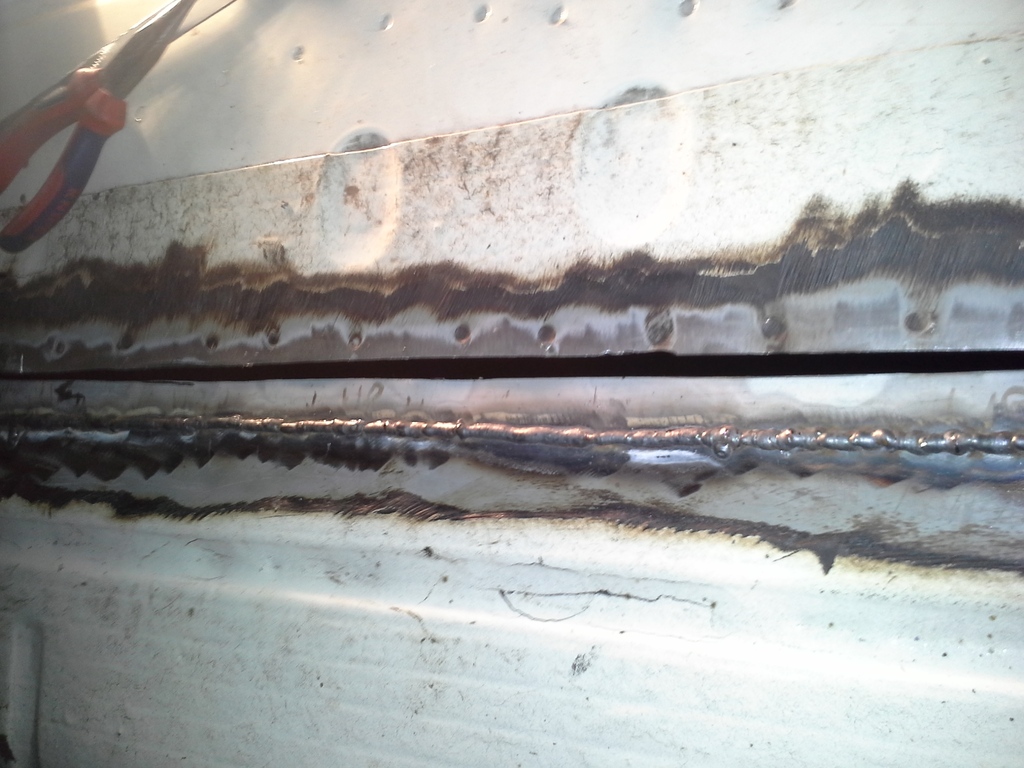
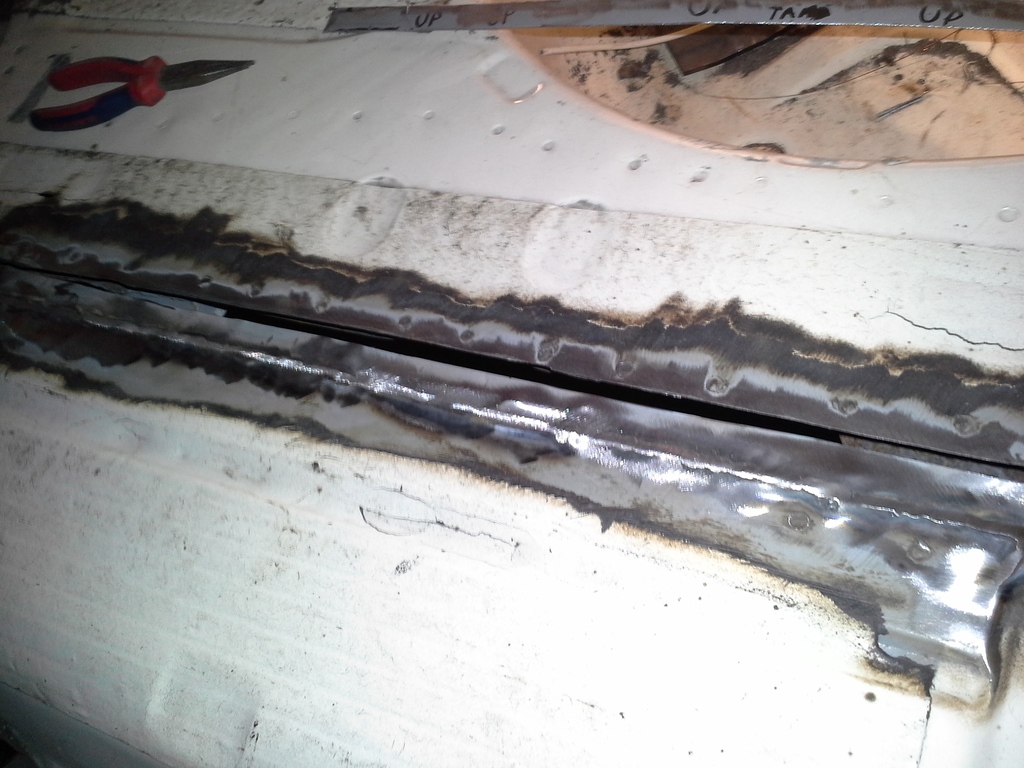
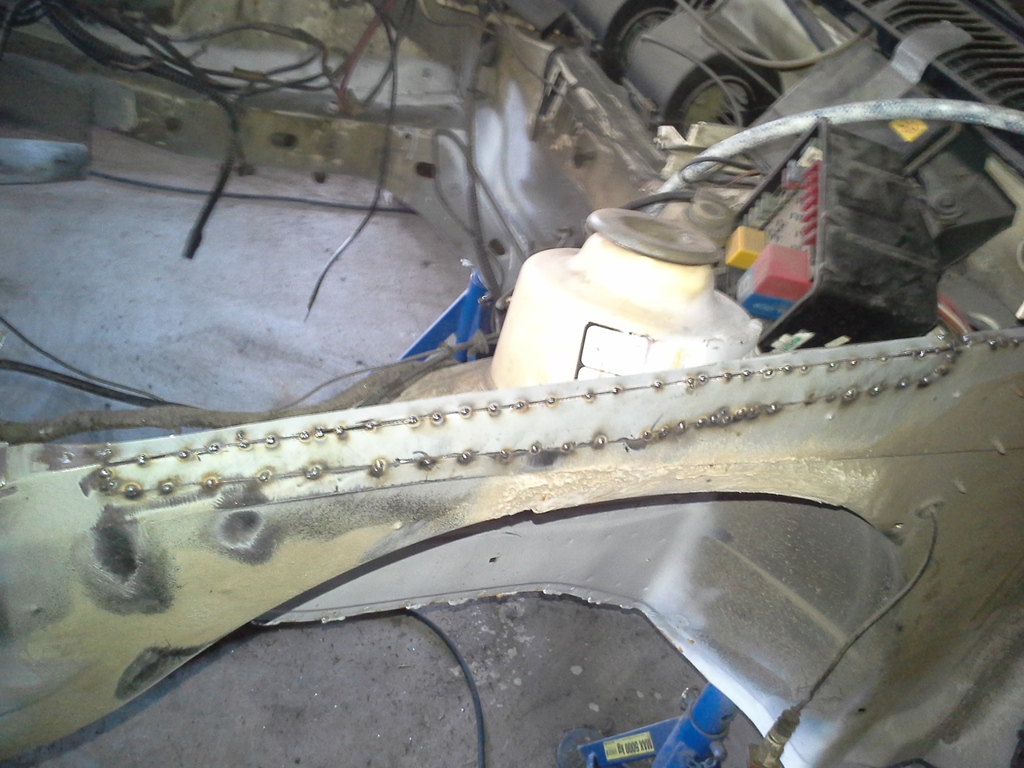
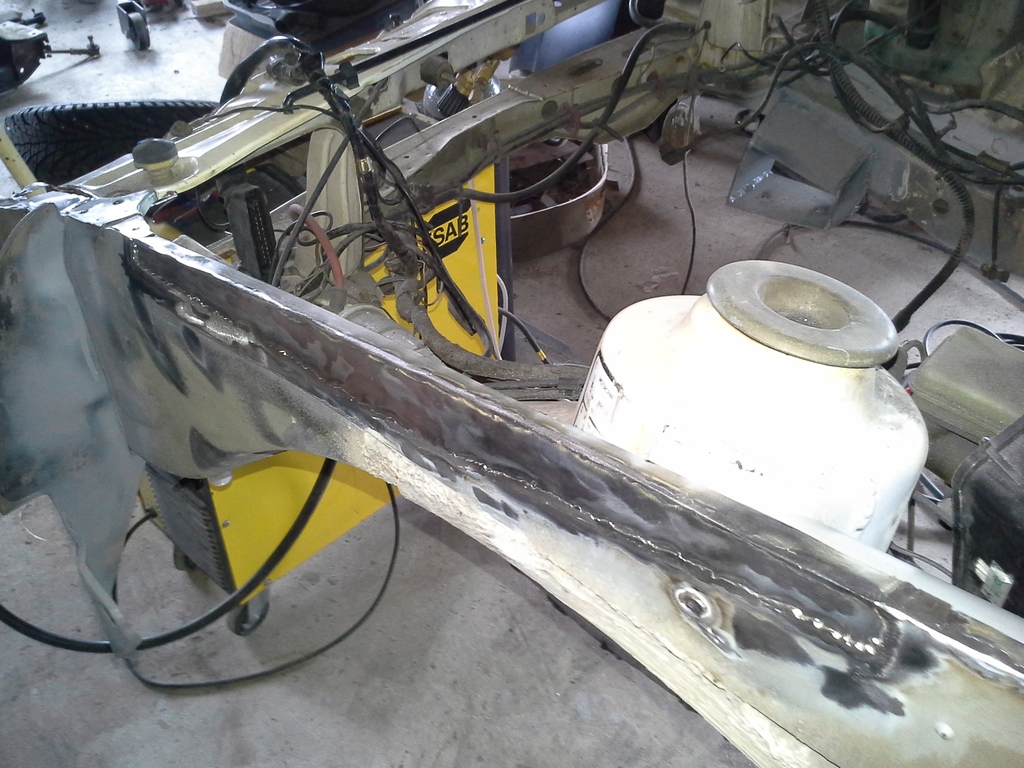
Few years ago I bought manual called "How to prepare Sierra for motorsport", and it inspired me to one modification that is made to Group A Sierras.
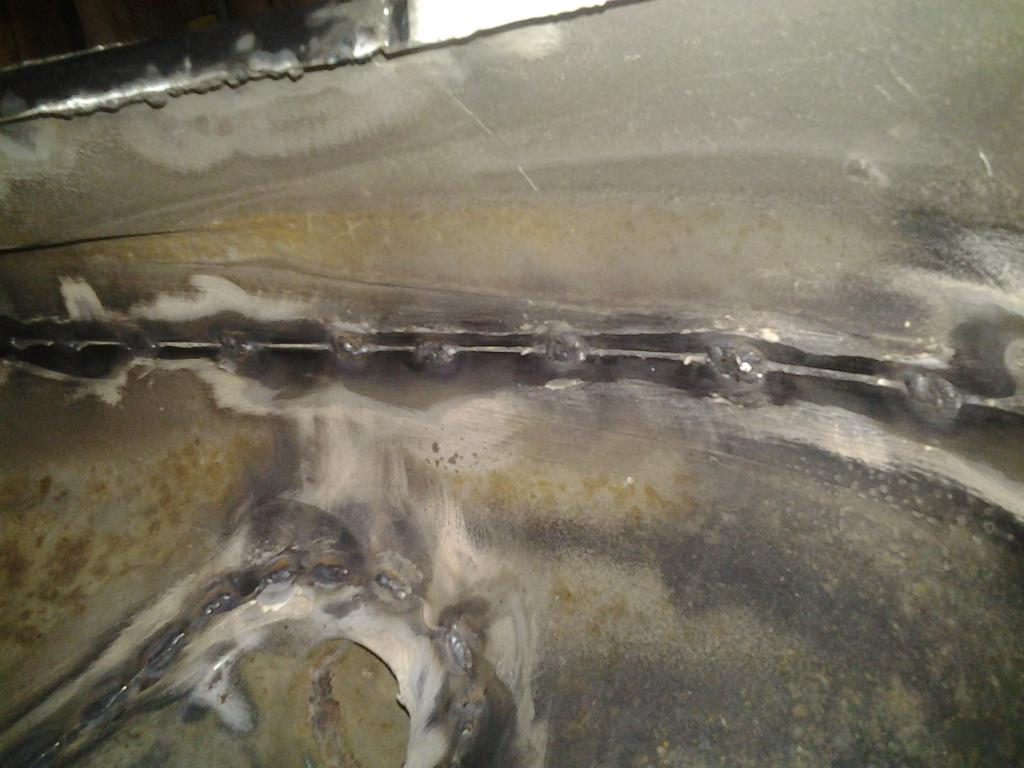
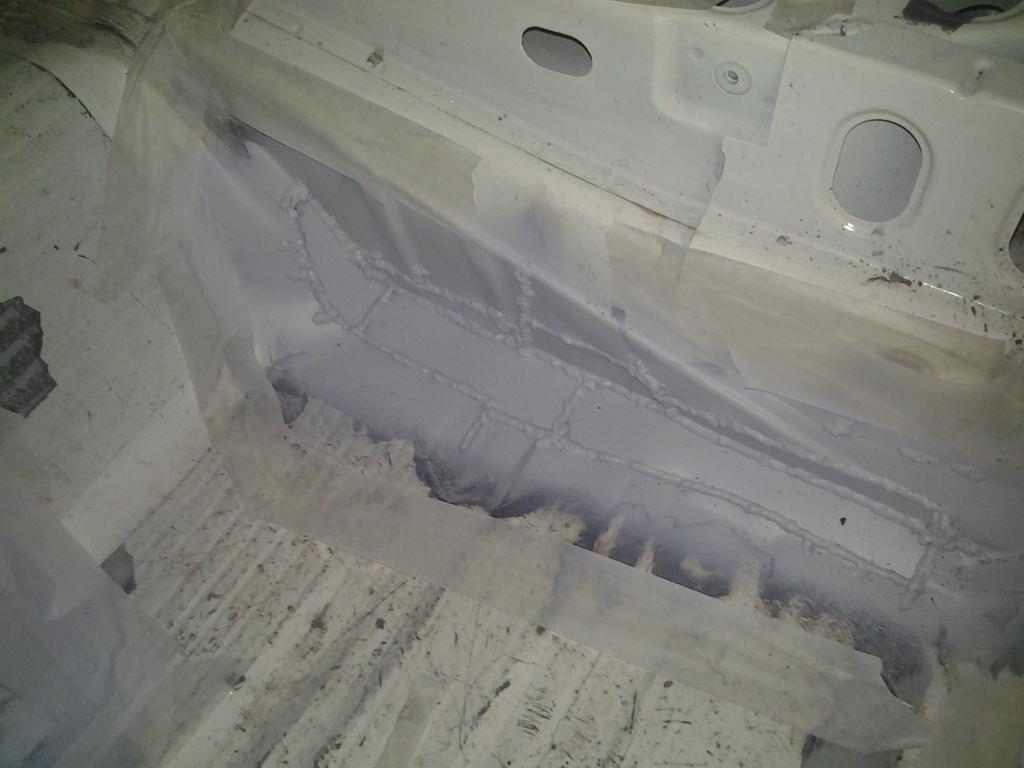
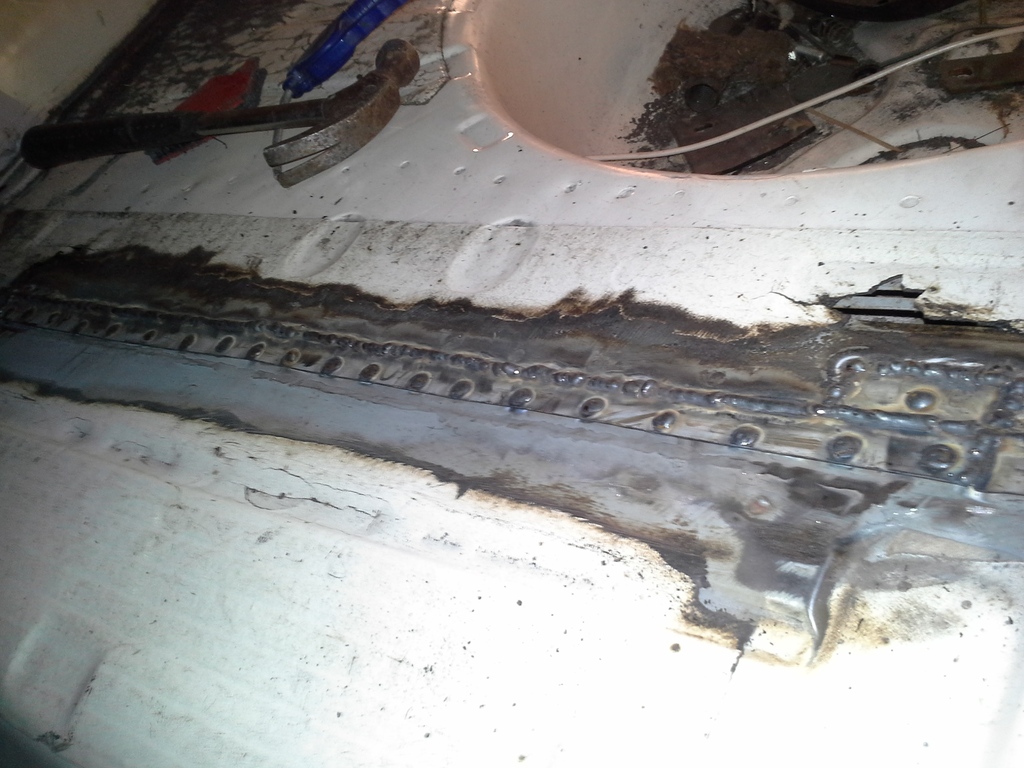
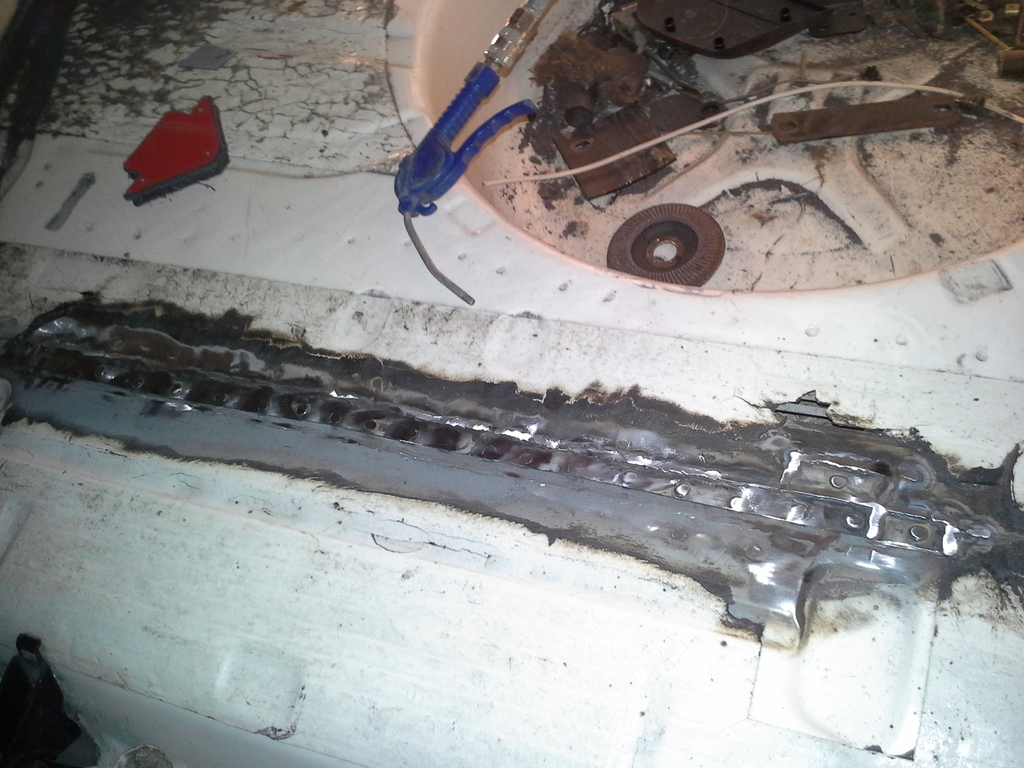
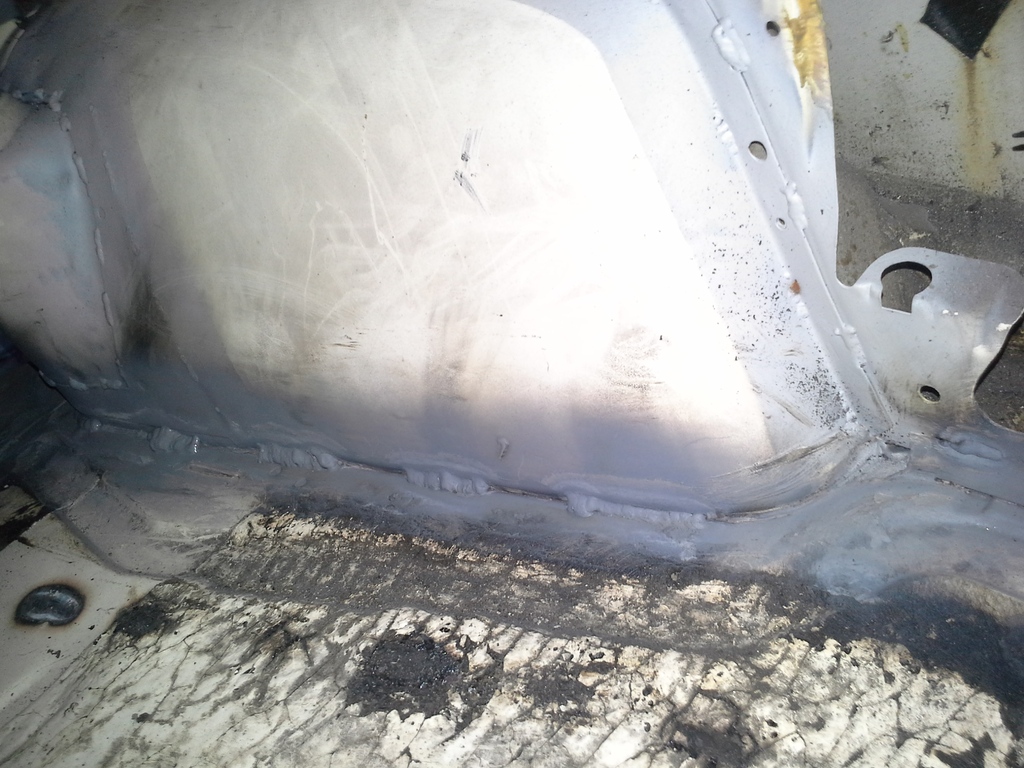
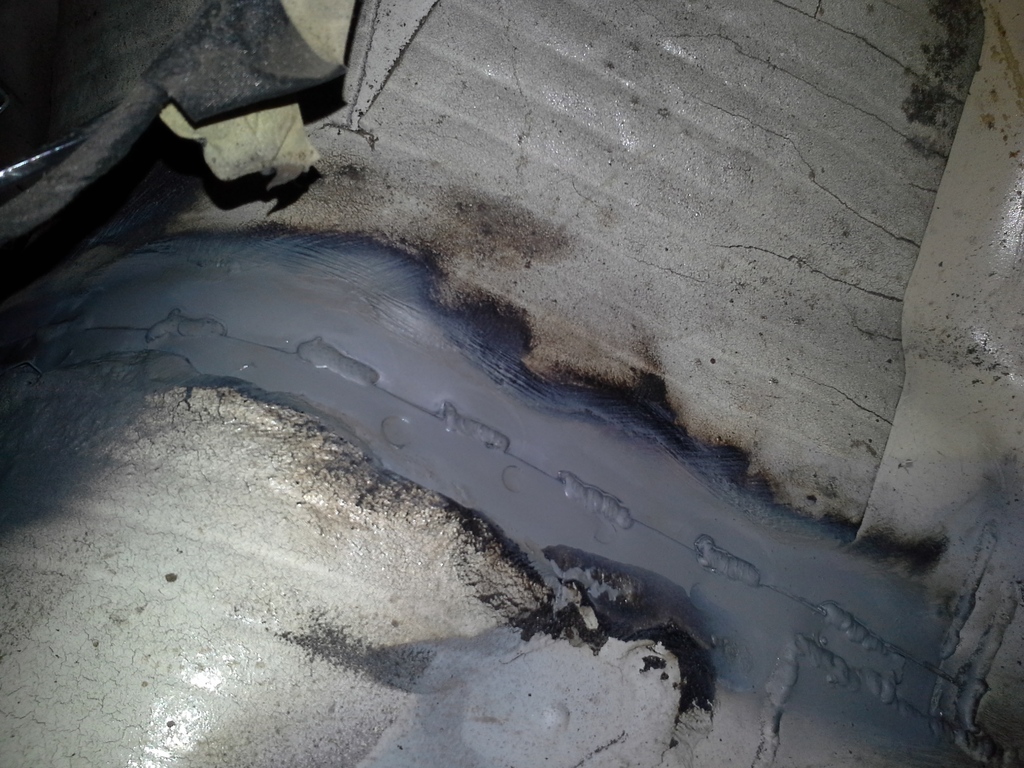
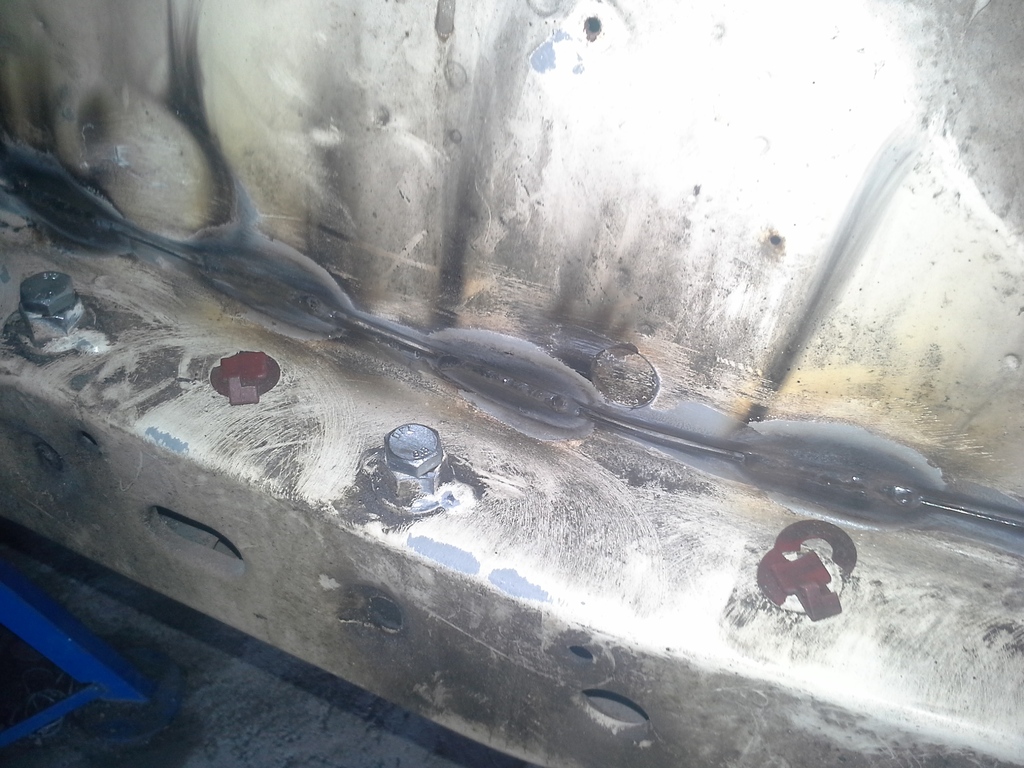
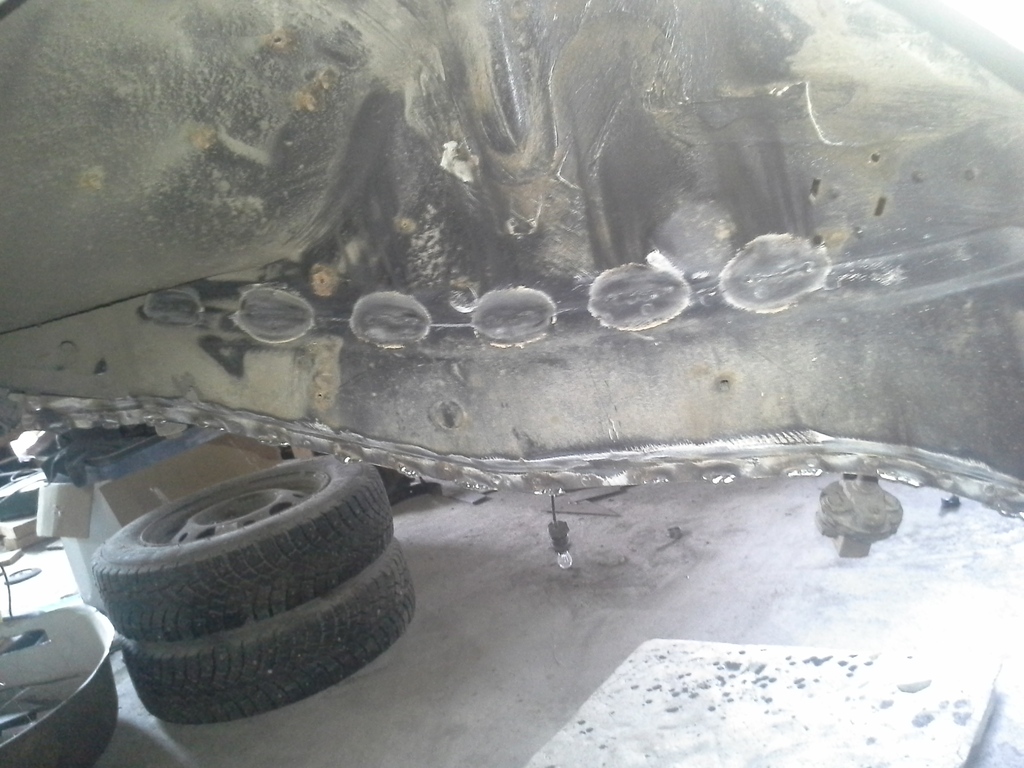
I made re-inforce joints at rear to made body stiffer, allthough there are many other places left to re-inforce, but all finish them later...
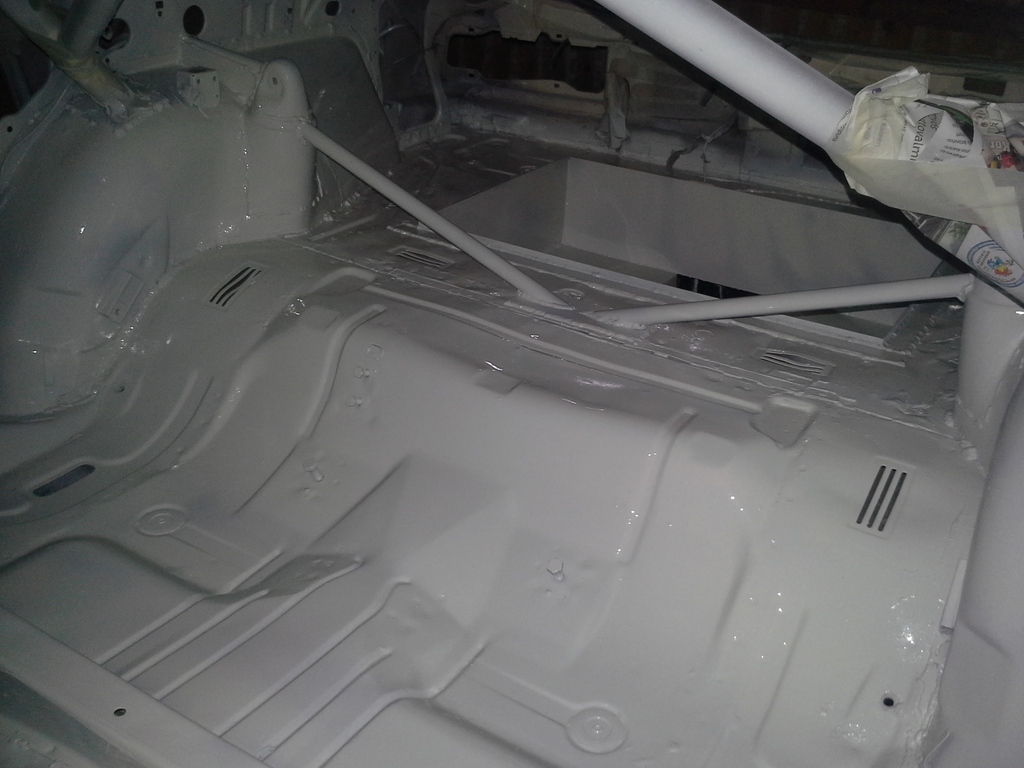
Last week I sparyed epoxy primer layer on to all repaired/welded/grinded places in bodyshell. Some pictures below:

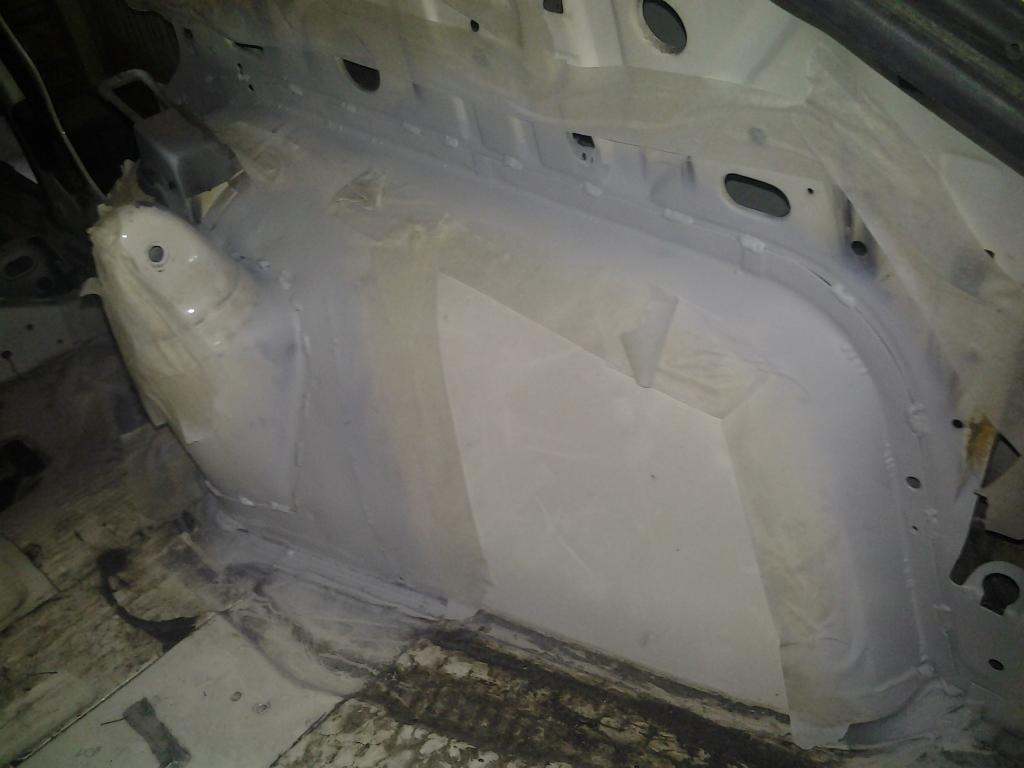
Right now I would say 70% of the cars body has been fixed, there is still some work in boot floor and in left side front fender. And ofcourse some body stiffening.
I welded passengers side skirt, and the floor.
Also drivers side was fixed.
I took some work to get all the rusted metal away, from transmission tunnel.
I fixed both sheets of metal seperately.
Right side rear wheel arch fixed, looks a bit mesy in this point...
To get more space, I did few jobs while welding:
So rear beam, gearbox and propshaft had to go.
Few years ago I bought manual called "How to prepare Sierra for motorsport", and it inspired me to one modification that is made to Group A Sierras.
I made re-inforce joints at rear to made body stiffer, allthough there are many other places left to re-inforce, but all finish them later...
Last week I sparyed epoxy primer layer on to all repaired/welded/grinded places in bodyshell. Some pictures below:
Right now I would say 70% of the cars body has been fixed, there is still some work in boot floor and in left side front fender. And ofcourse some body stiffening.
11-08-2014, 12:20 PM
#4
RalliArttu
Thread Starter
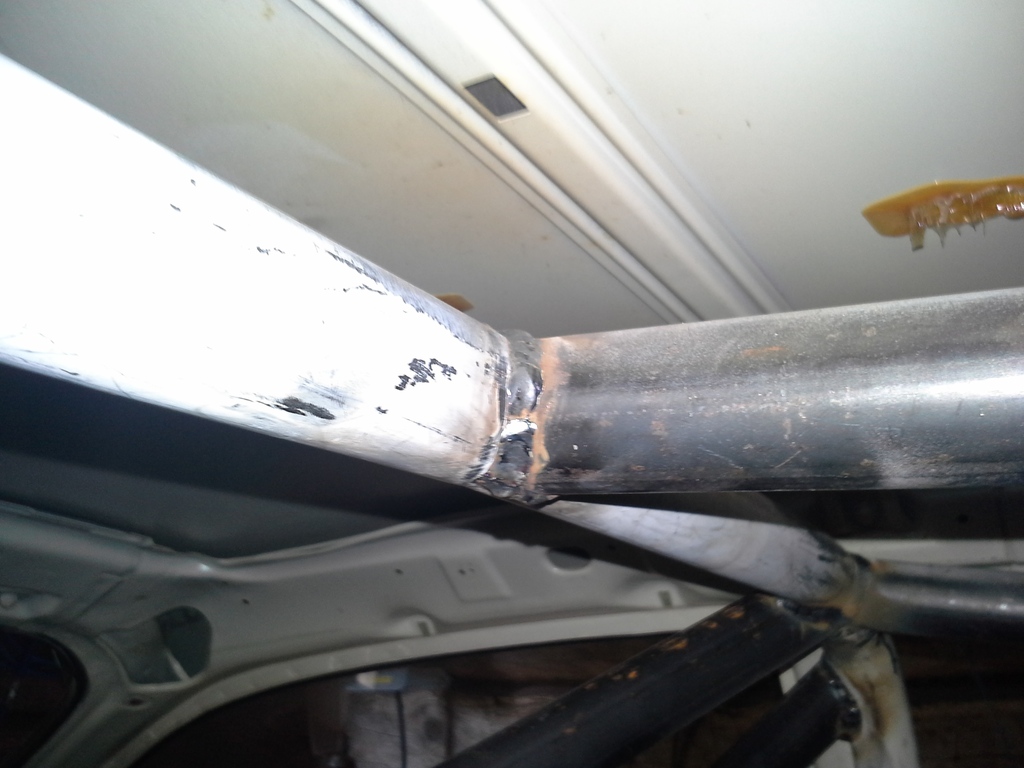
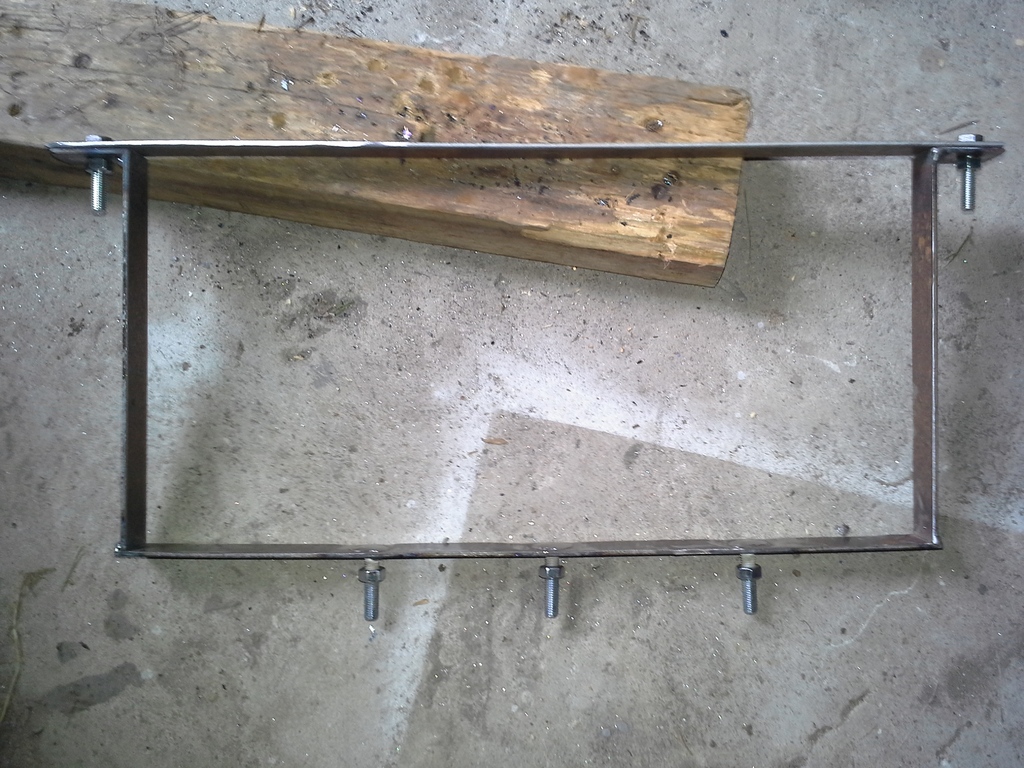
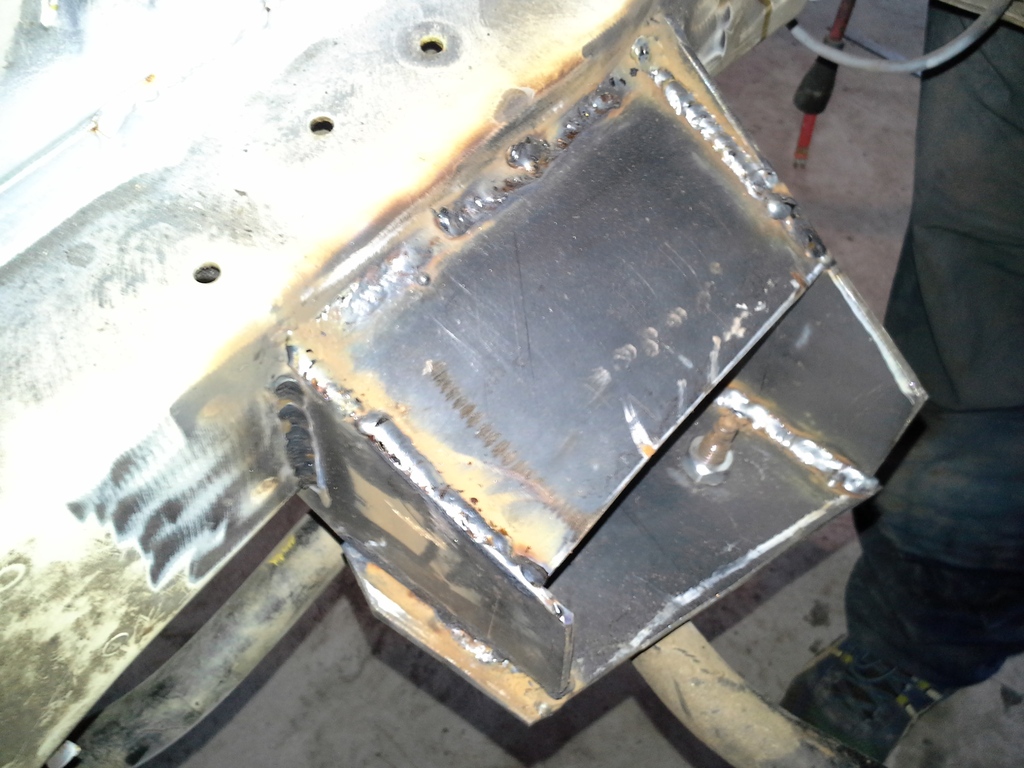
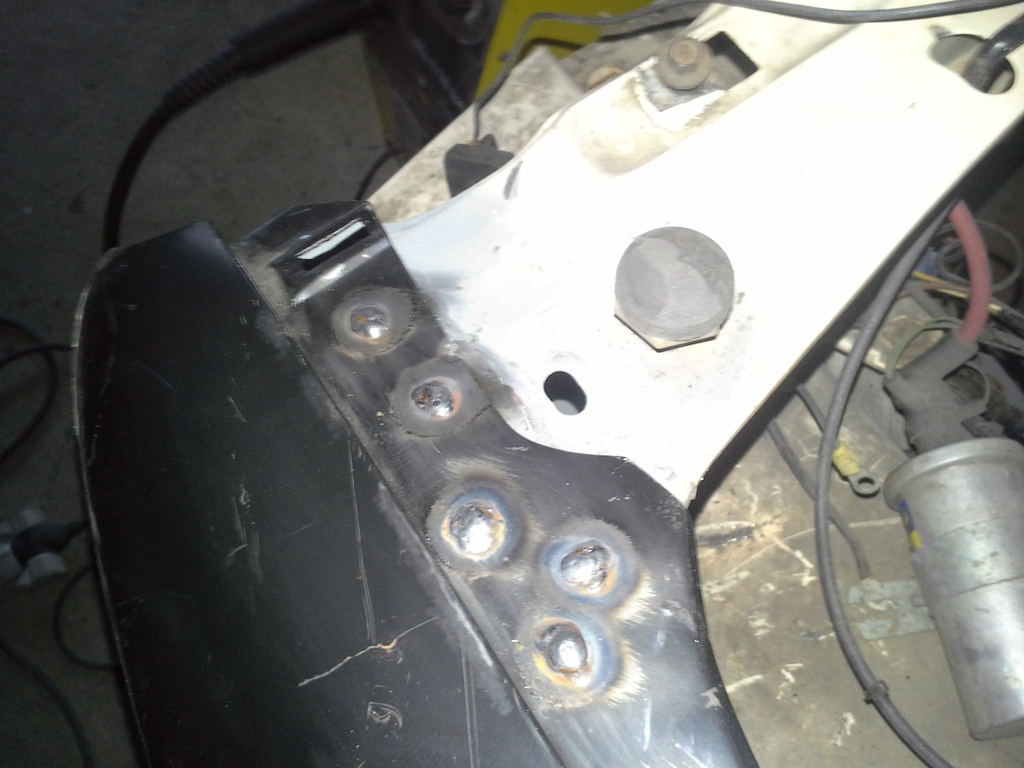
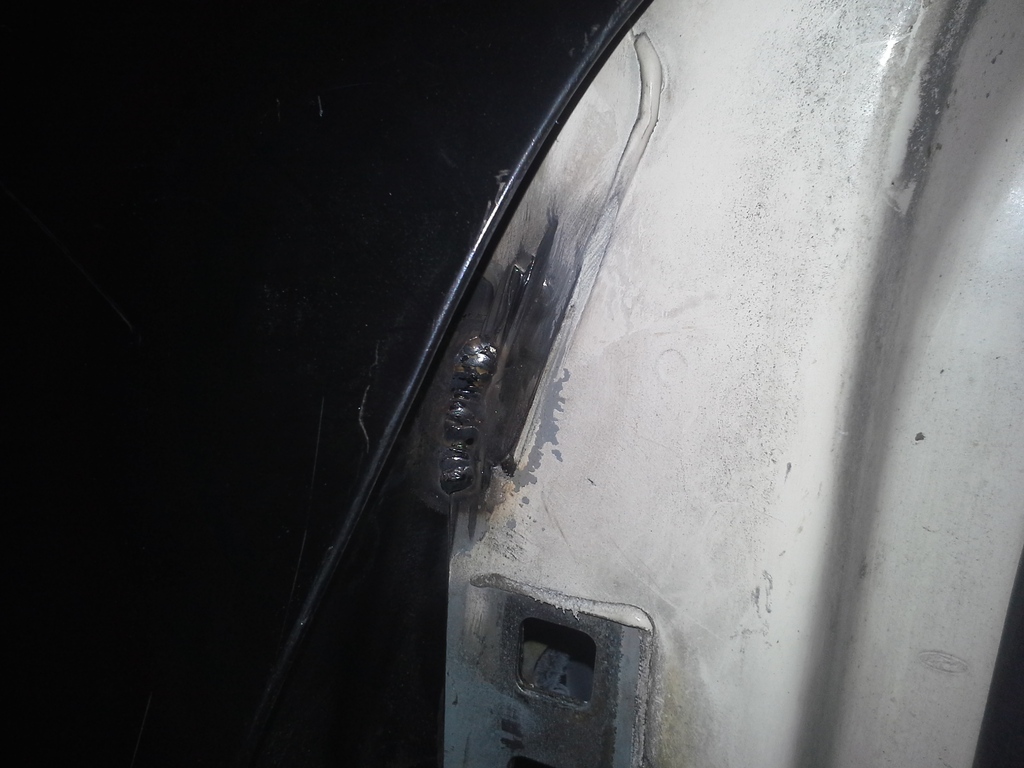
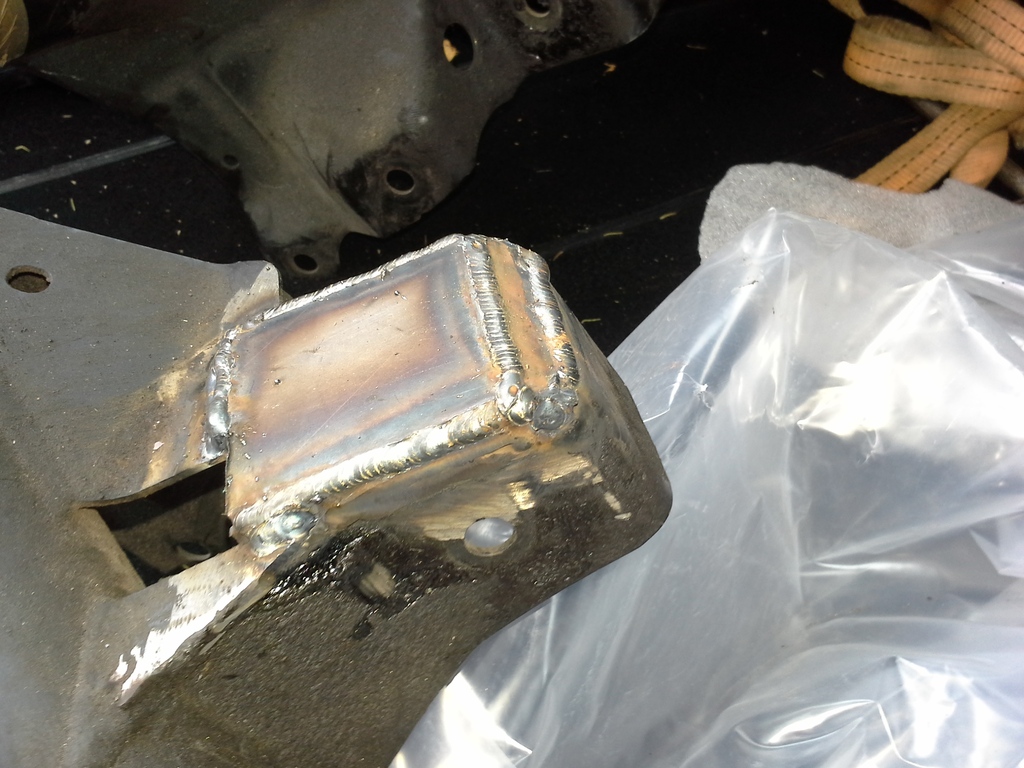
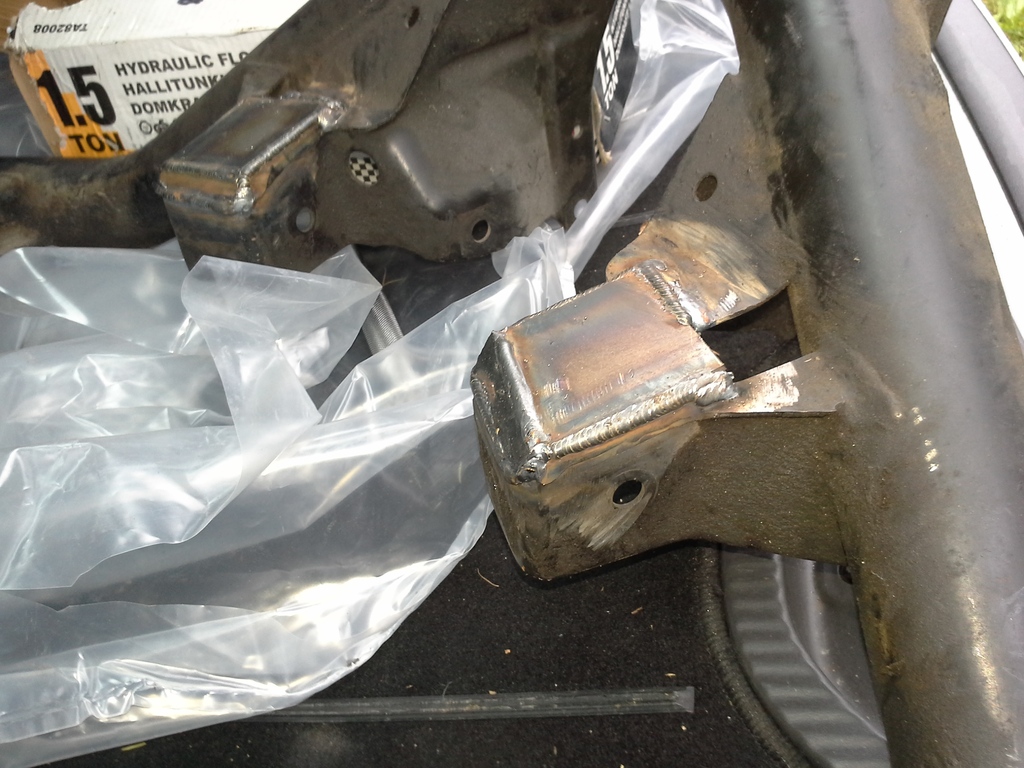
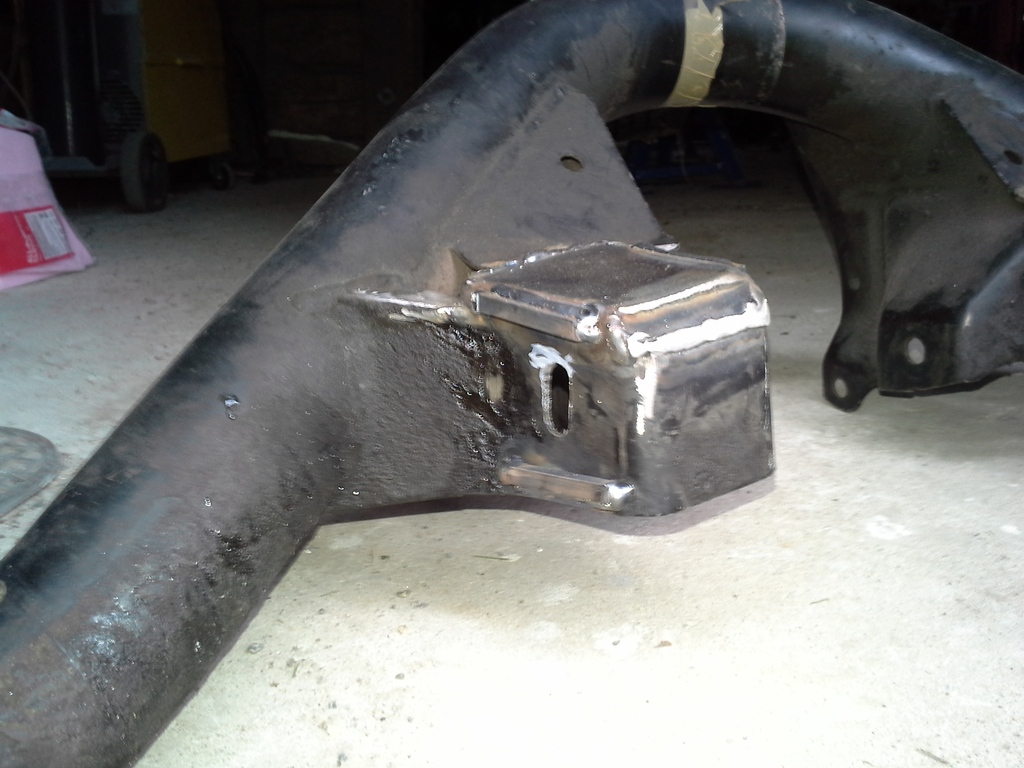
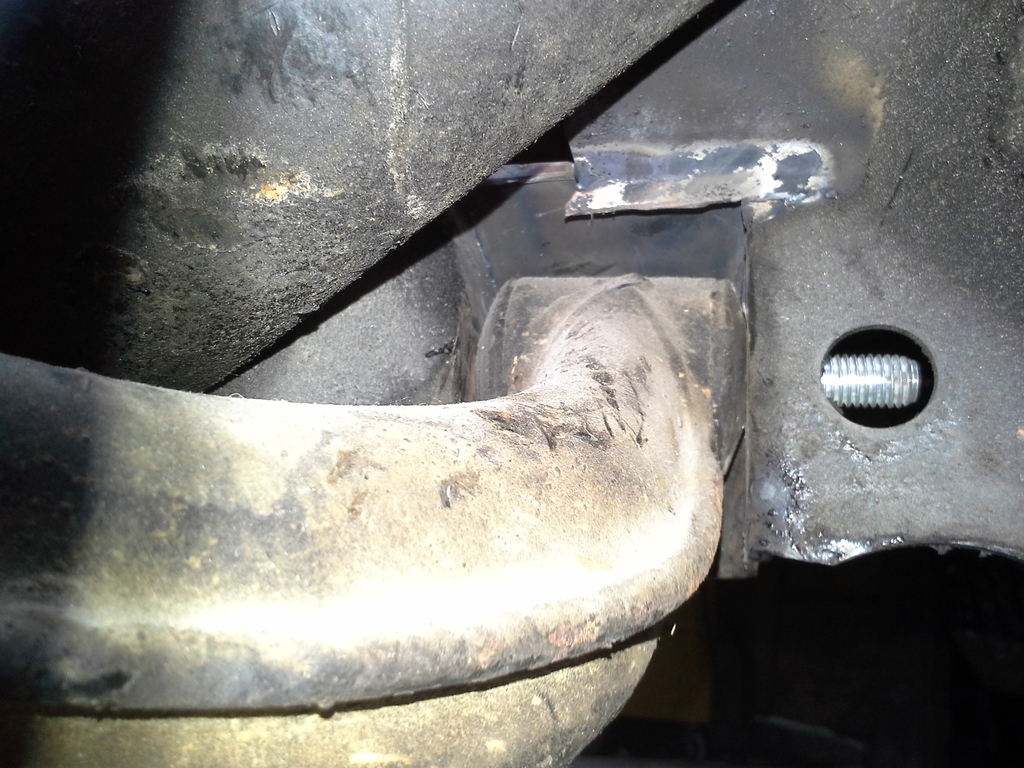
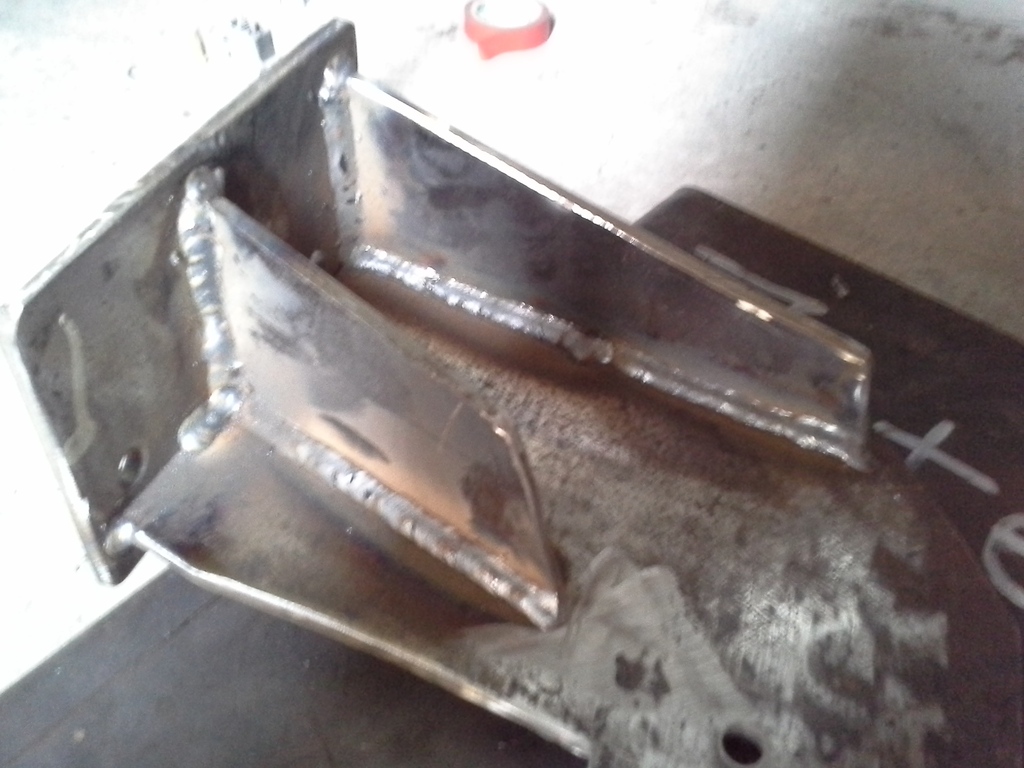
I managed to make one actual upgrade for the cars suspension. As we all know the "narrrow" anti-rollbar from Mk2 Sierra/Mk1 Scorpio doesn´t fit into Mk1 Sierra just like that, so I welded mounts for "proper" ARB.
I fabricated the mounting "blocks", and they aren´t that beuatiful but they are my own desing (maybe that´s why), and made the by that way I saw the reasonable fot this.
And there they are! I did some trial fitting, to see that everything is fine.
I fabricated the mounting "blocks", and they aren´t that beuatiful but they are my own desing (maybe that´s why
And there they are! I did some trial fitting, to see that everything is fine.
20-08-2014, 10:30 AM
#6
RalliArttu
Thread Starter
Thanks, I´ll do everything for her
Today I decided to protect panels inside that are welded by this far.
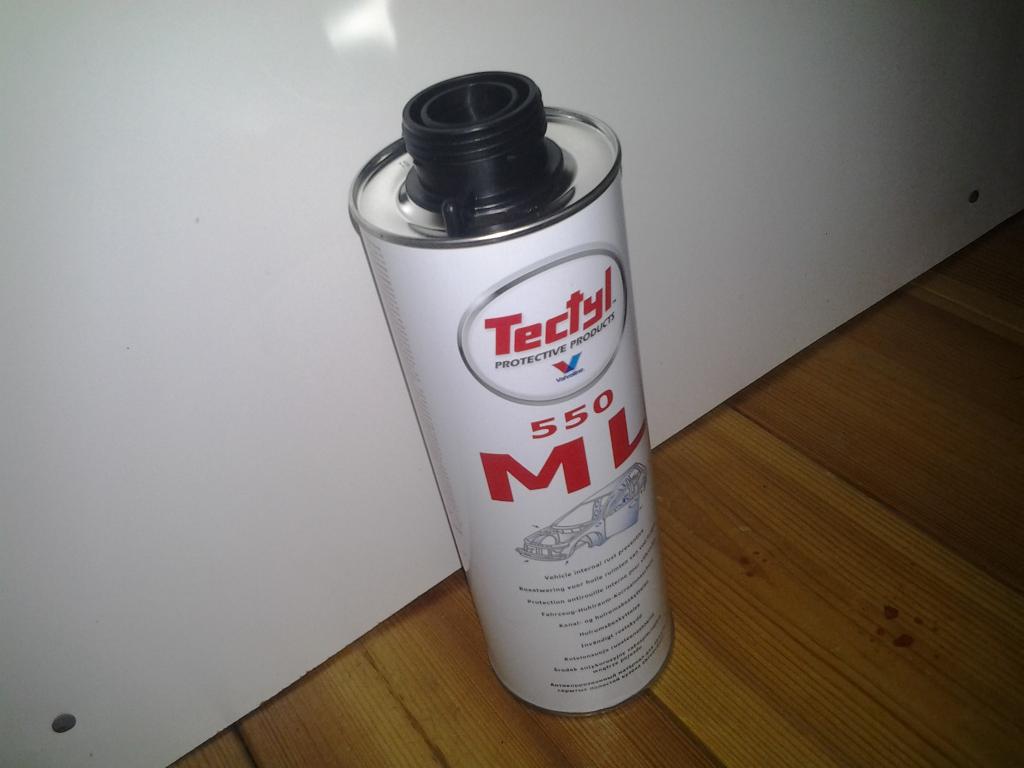
They say this is good stuff, so I spread Tectyl ML inside panels, to prevent corrosion. Allthough in next spring this may cause issues, when I´ll weld the rollcage, but hopefully I won´t burn whole car
Today I decided to protect panels inside that are welded by this far.
They say this is good stuff, so I spread Tectyl ML inside panels, to prevent corrosion. Allthough in next spring this may cause issues, when I´ll weld the rollcage, but hopefully I won´t burn whole car
Trending Topics
27-08-2014, 11:52 AM
#8
RalliArttu
Thread Starter
Thanks. By this far all the Sierras, I´ve owned, are Mk1 3-doors
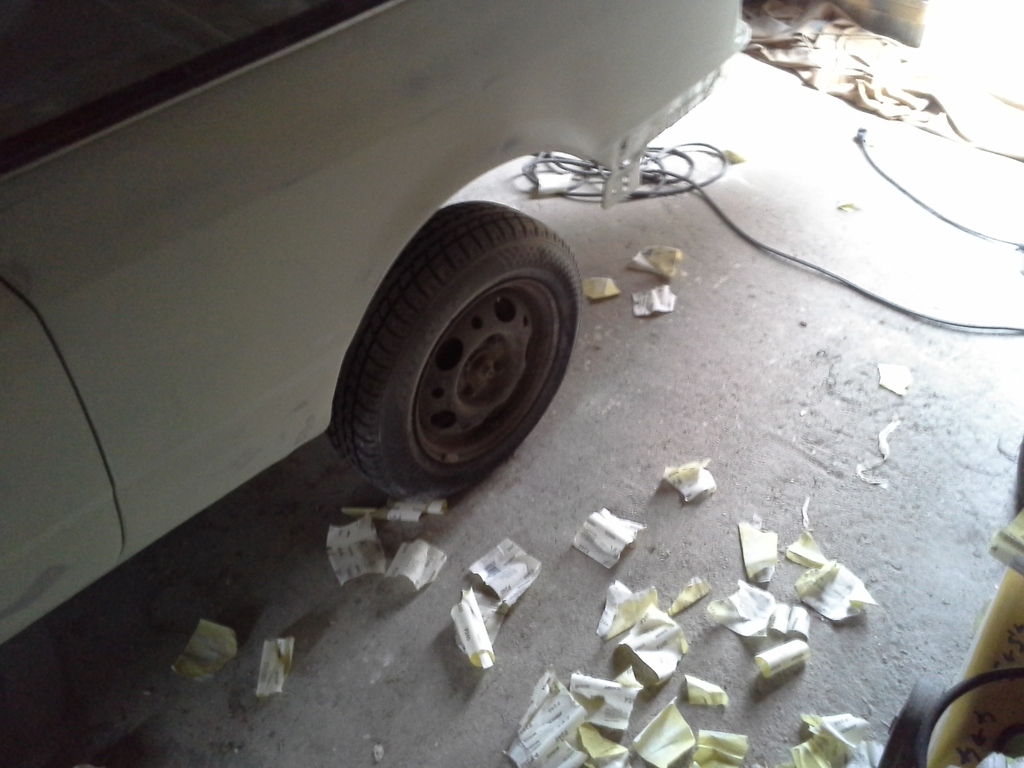
Recently I remowed tapes from car and cleaned up my messy garage.
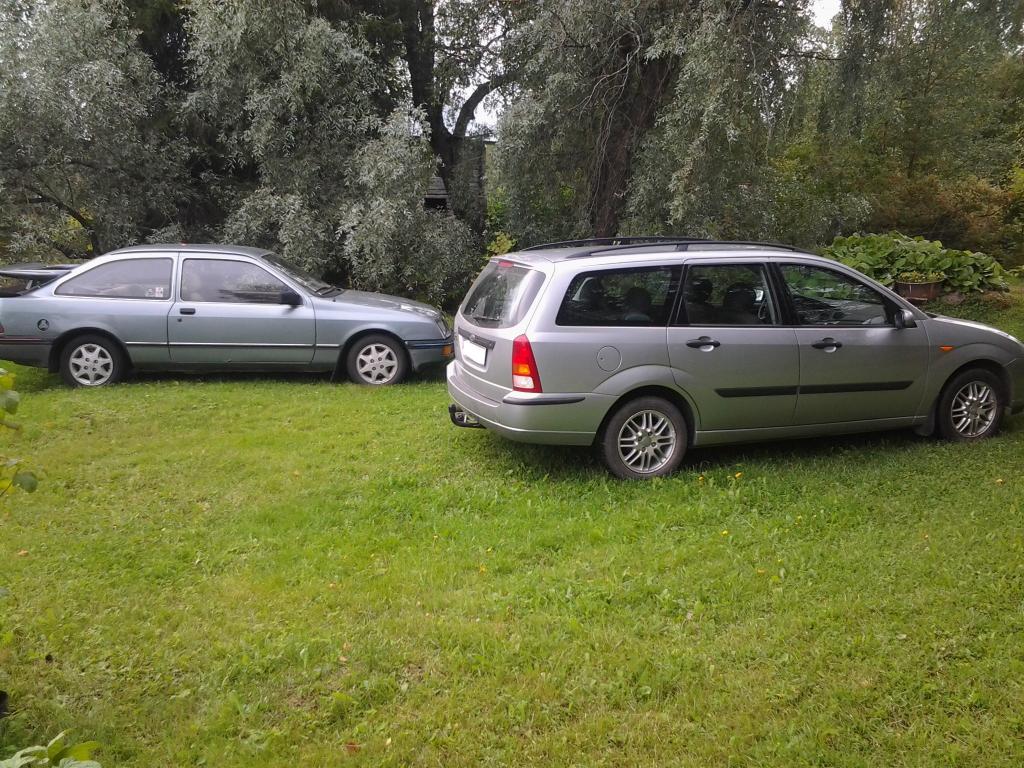
Right now this project is waiting (I´ll finish the bodywork during next spring), cause I got one Ford to play with and another one for transporting me from place A to place B.
So...

Recently I remowed tapes from car and cleaned up my messy garage.
Right now this project is waiting (I´ll finish the bodywork during next spring), cause I got one Ford to play with and another one for transporting me from place A to place B.
So...
29-03-2015, 04:53 PM
#10
RalliArttu
Thread Starter
Summer is making its way, even here "northern"-Finland, so it´s time to "turn it on again", and I mean this project During winter I bought few parts:

Cossie-replica bumper
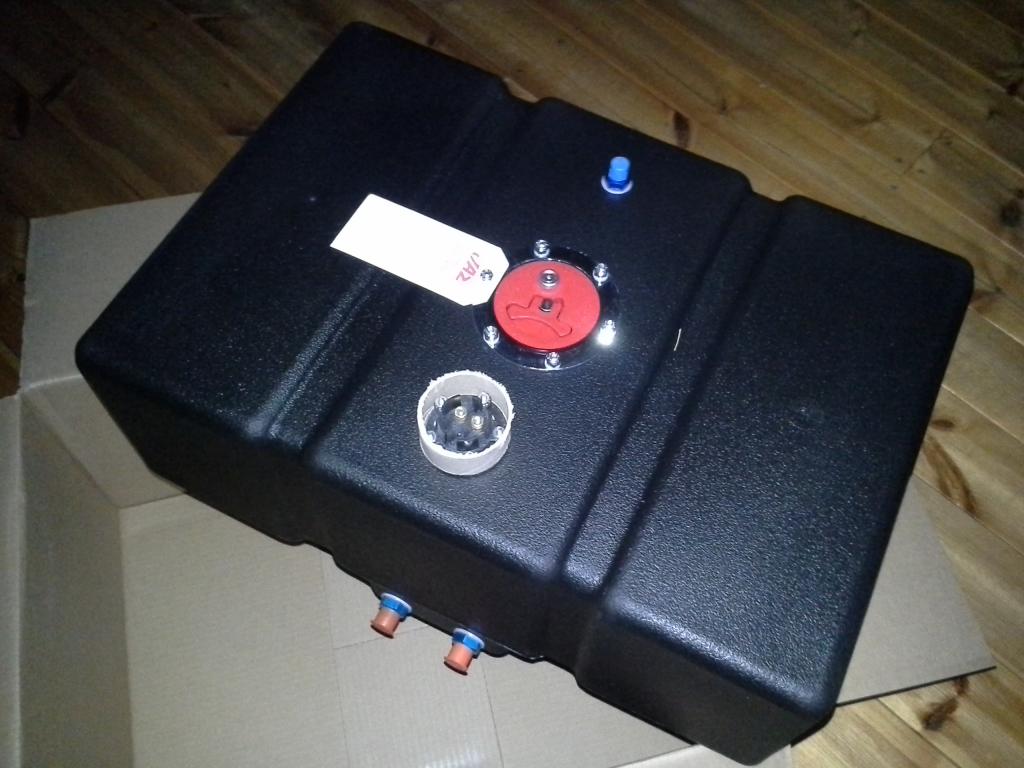
JAZ-safety fuel cell, 4wd cos rear calipers, Mk5 escort master cylinder and some little things for transmission.
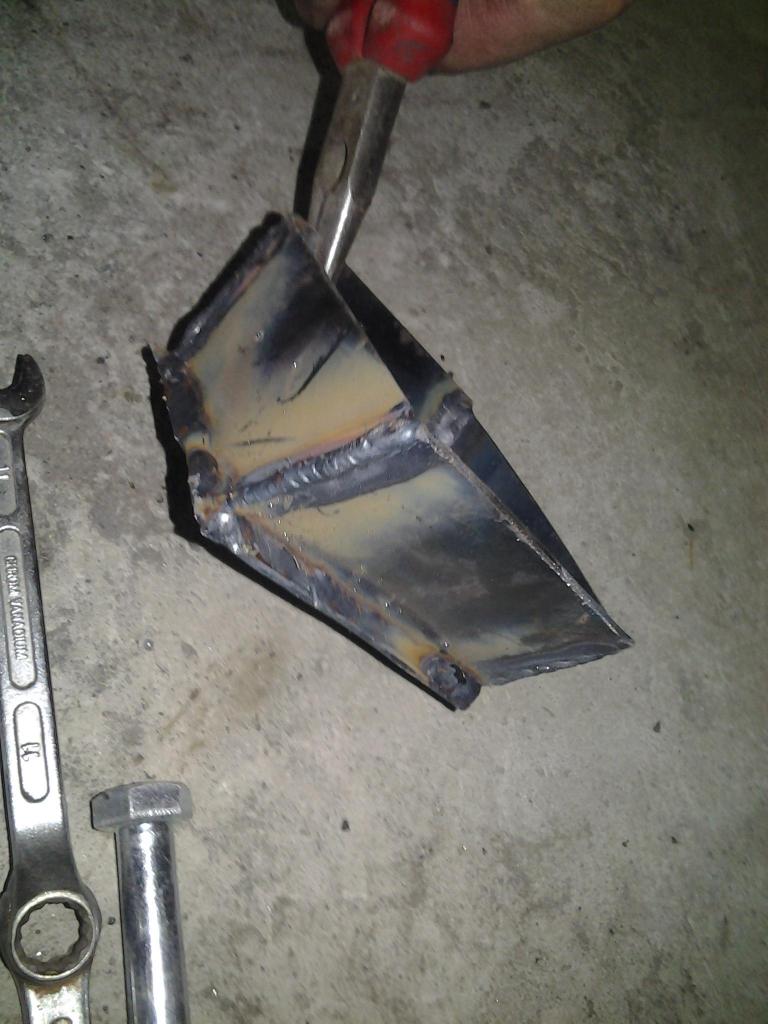
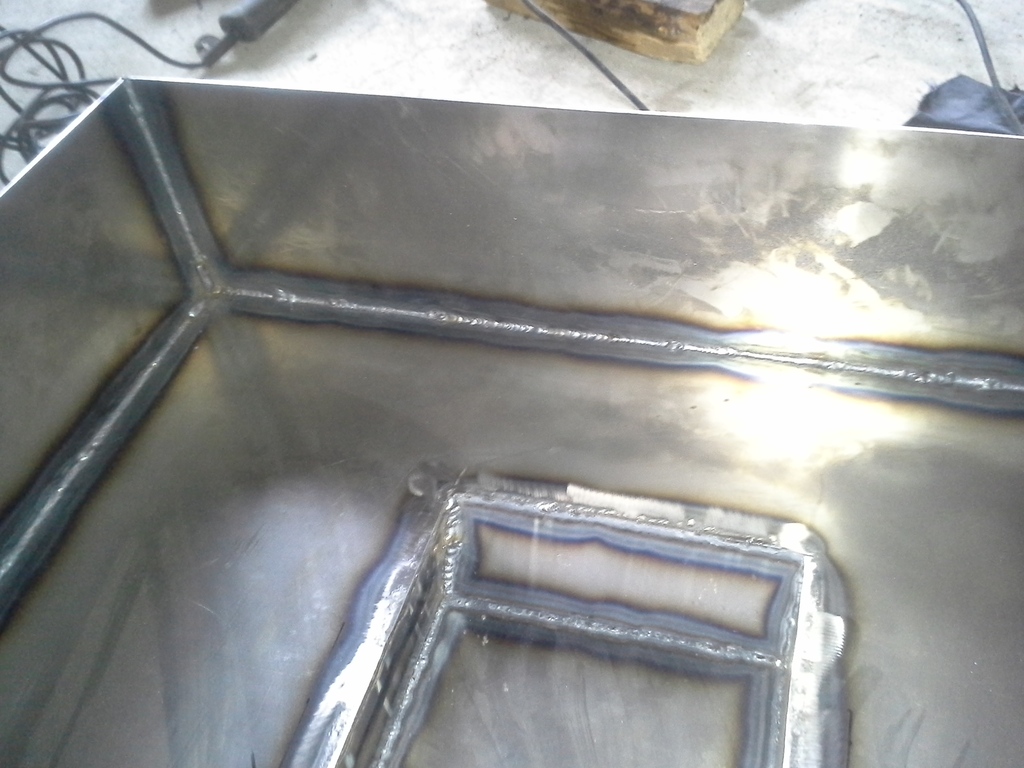
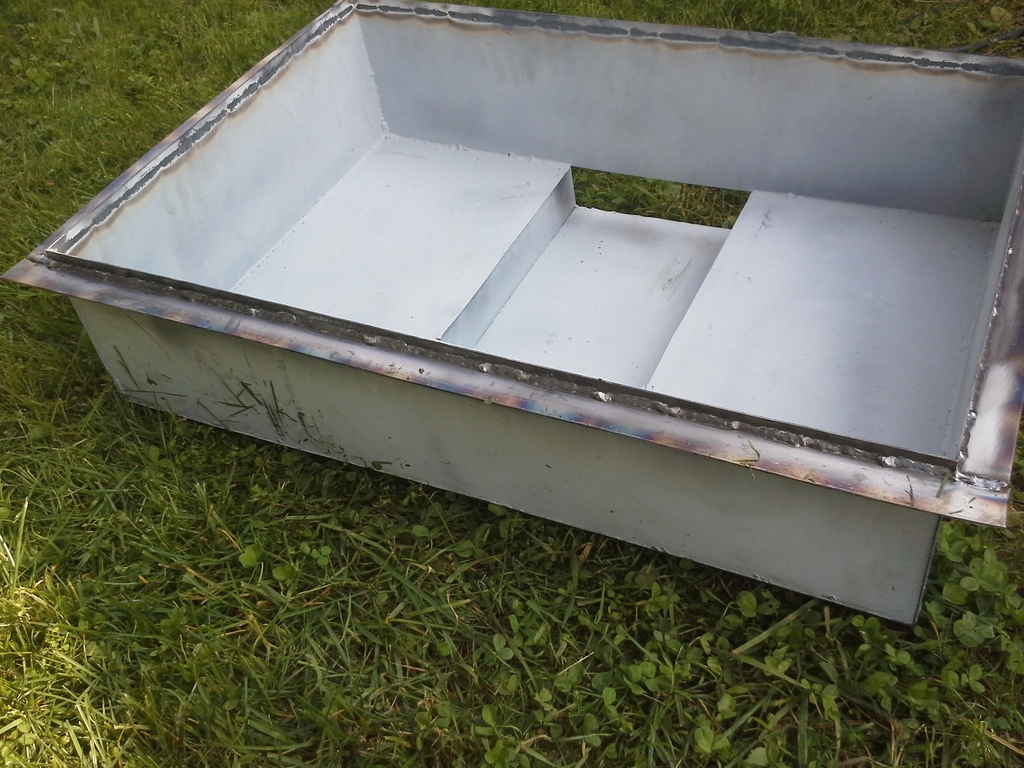
Last week I fabricated sort of basket for fuel cell:
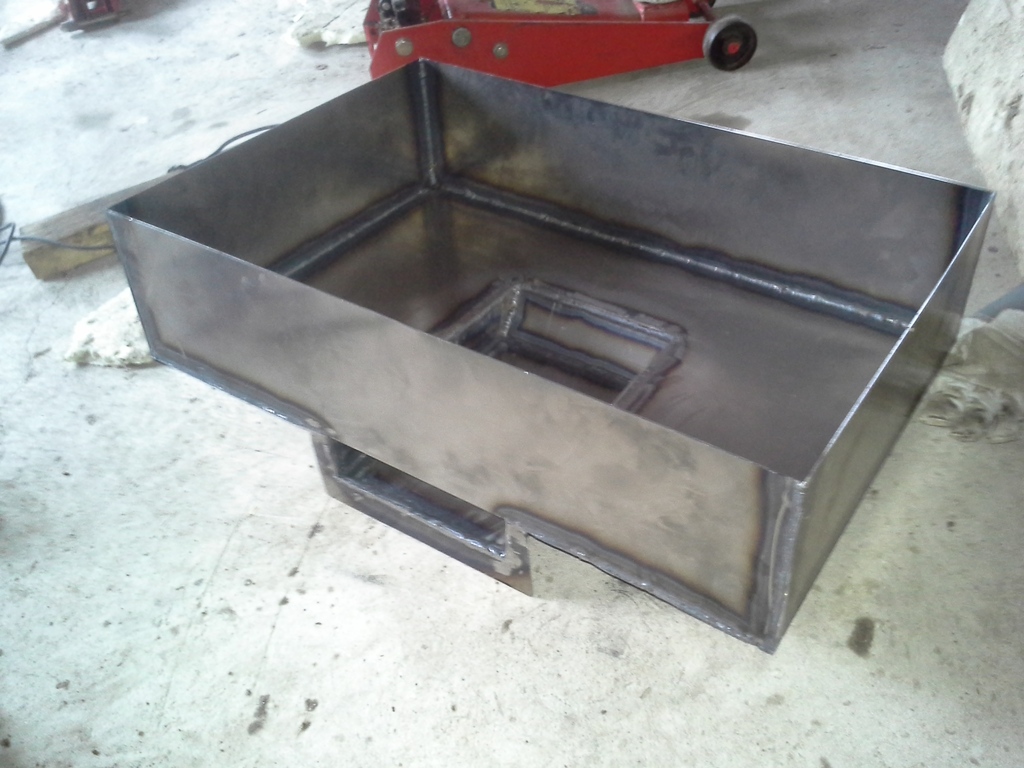
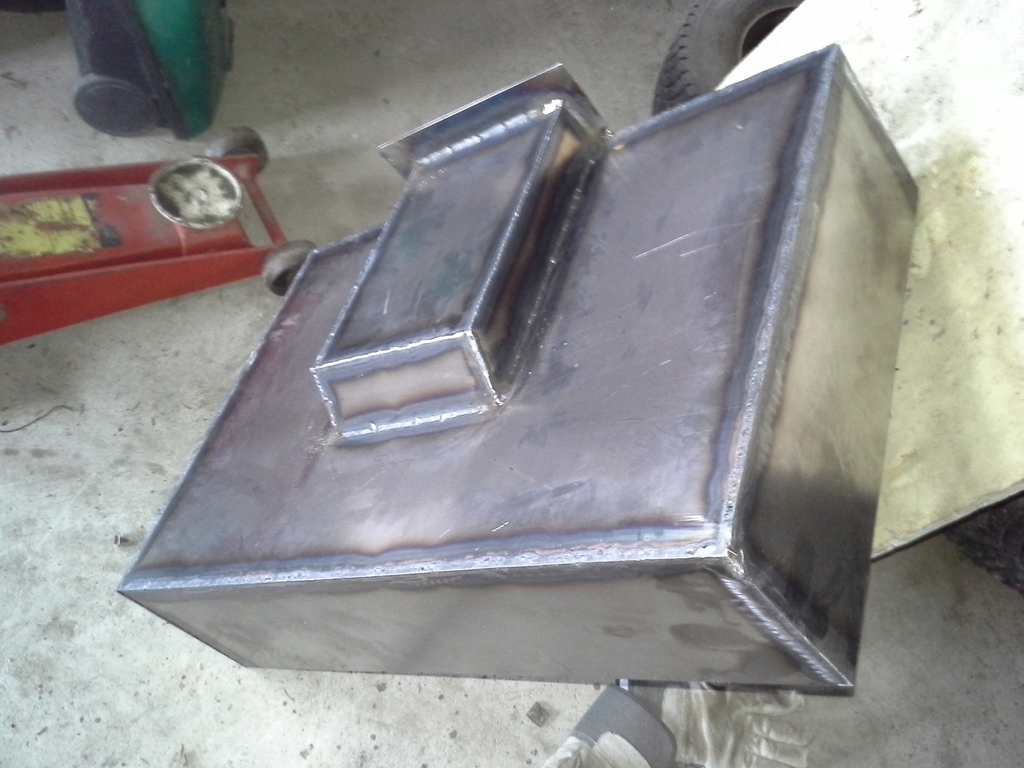
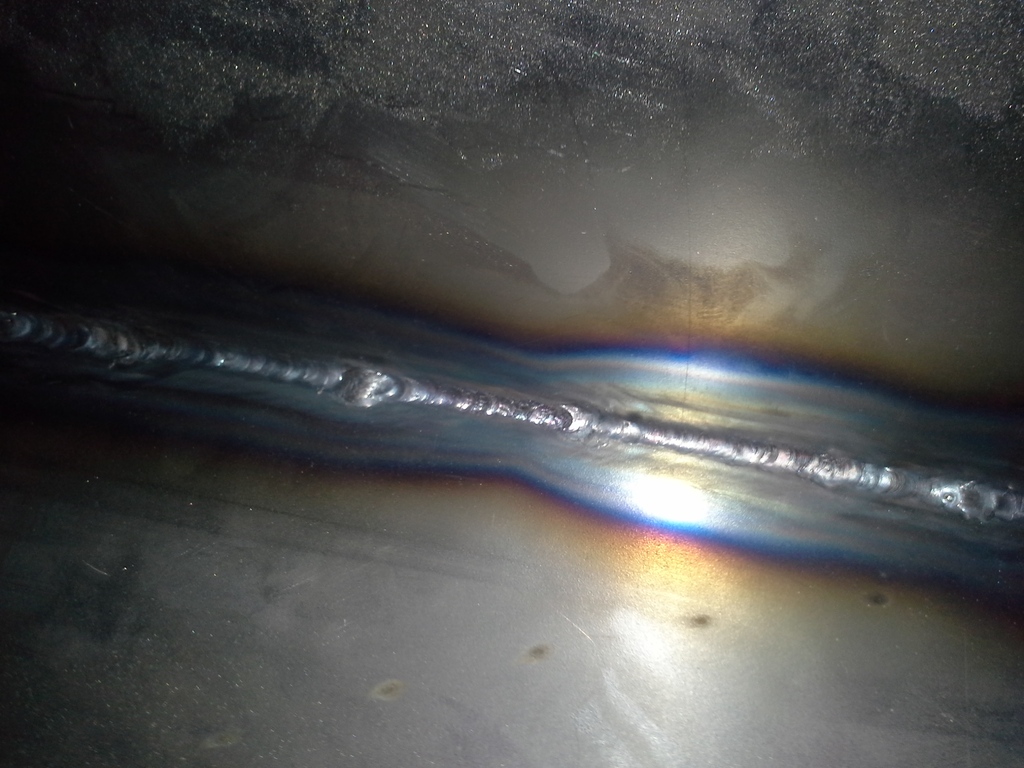
I welded it mostly by TIG
Up next I´m gonna start repairing the rear of the car, there is rust spot near mounting of sub frame and also corrosion damage on boot floor, so I´ll do some welding again
Cossie-replica bumper
JAZ-safety fuel cell, 4wd cos rear calipers, Mk5 escort master cylinder and some little things for transmission.
Last week I fabricated sort of basket for fuel cell:
I welded it mostly by TIG
Up next I´m gonna start repairing the rear of the car, there is rust spot near mounting of sub frame and also corrosion damage on boot floor, so I´ll do some welding again
 30-03-2015, 02:30 PM
#12
RalliArttu
Thread Starter
31-05-2015, 02:48 PM
#13
RalliArttu
Thread Starter
I´ve spent most of the hours with this car to welding, so there you go some pics what have I been doing recently:
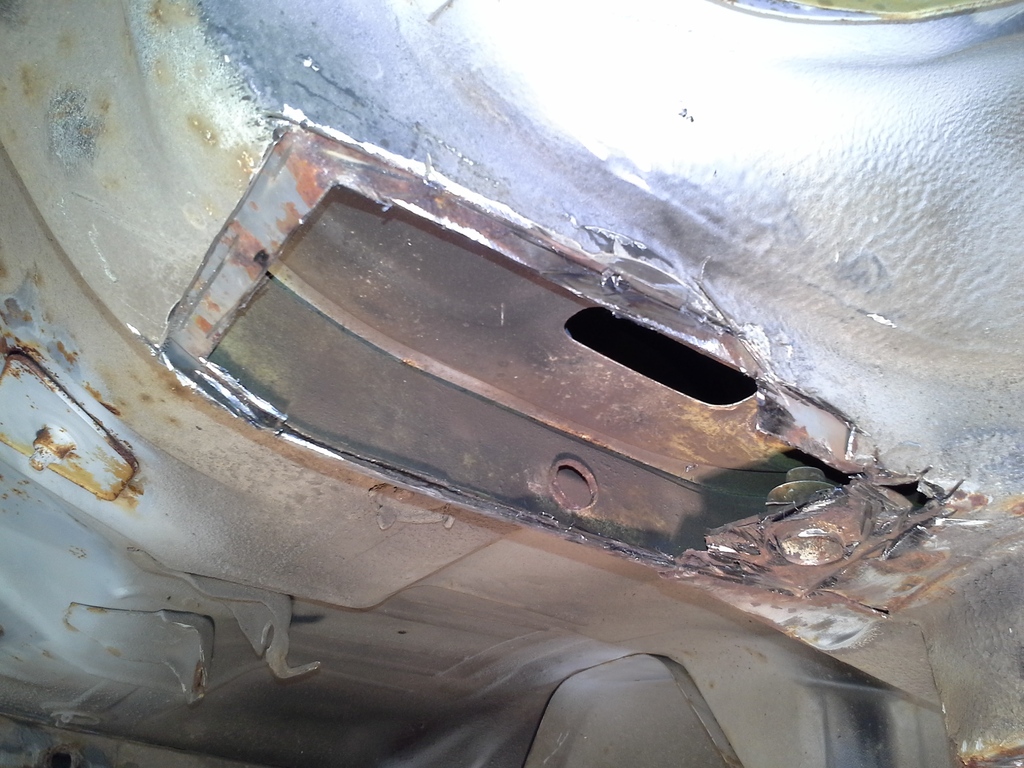
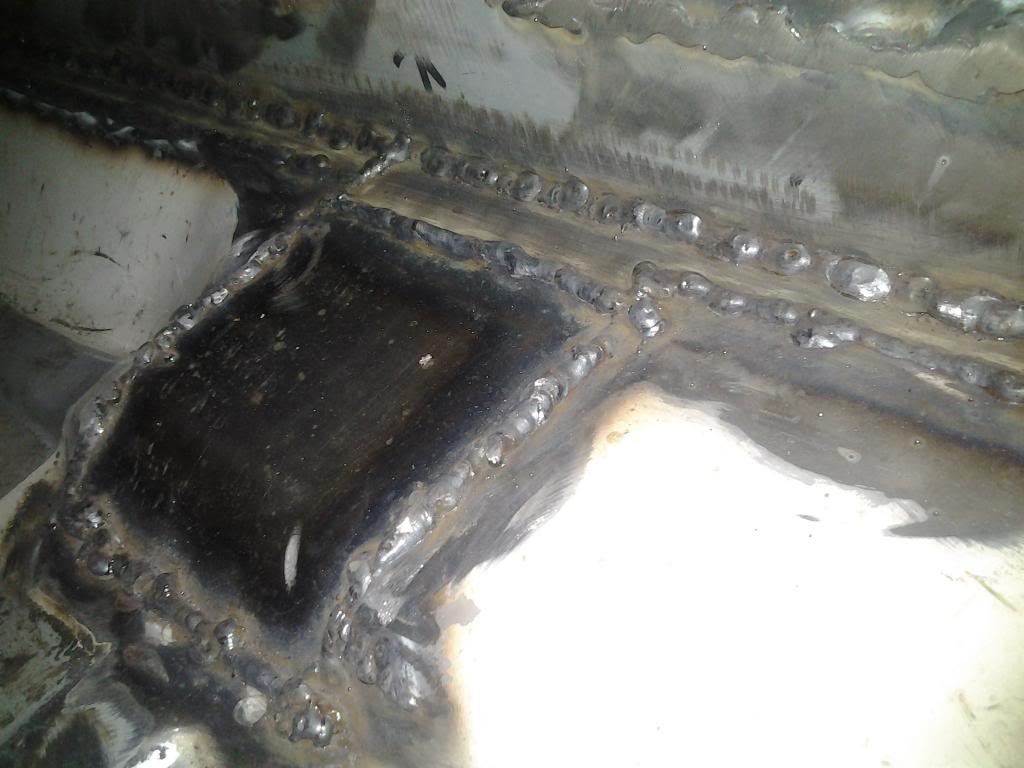
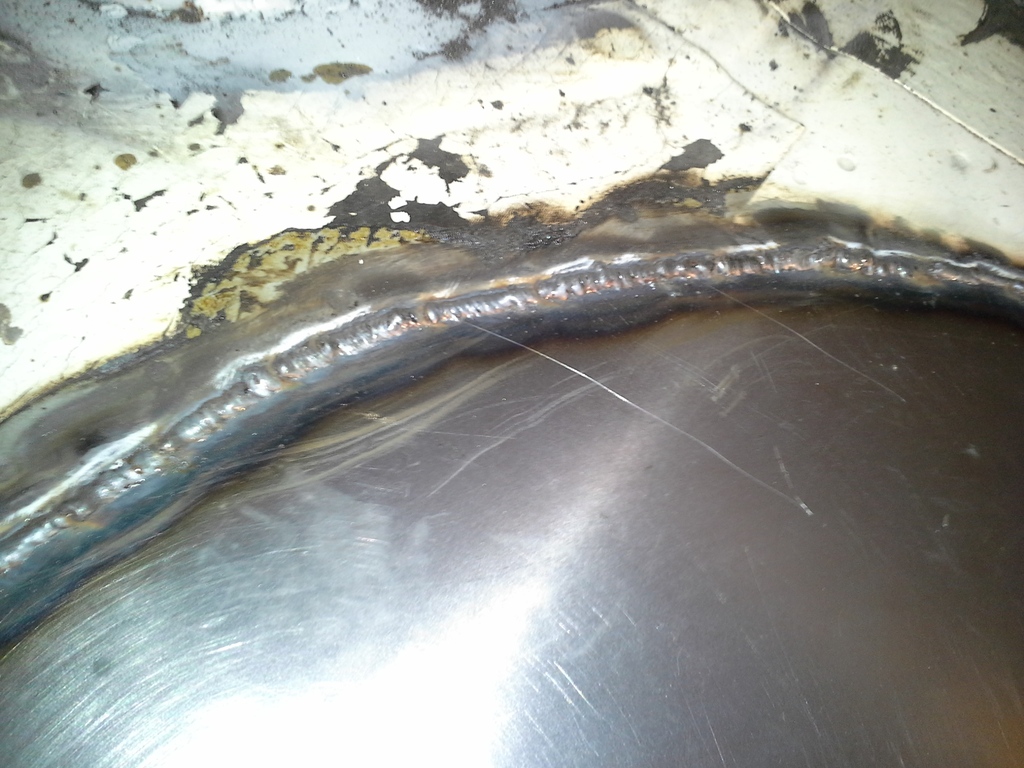
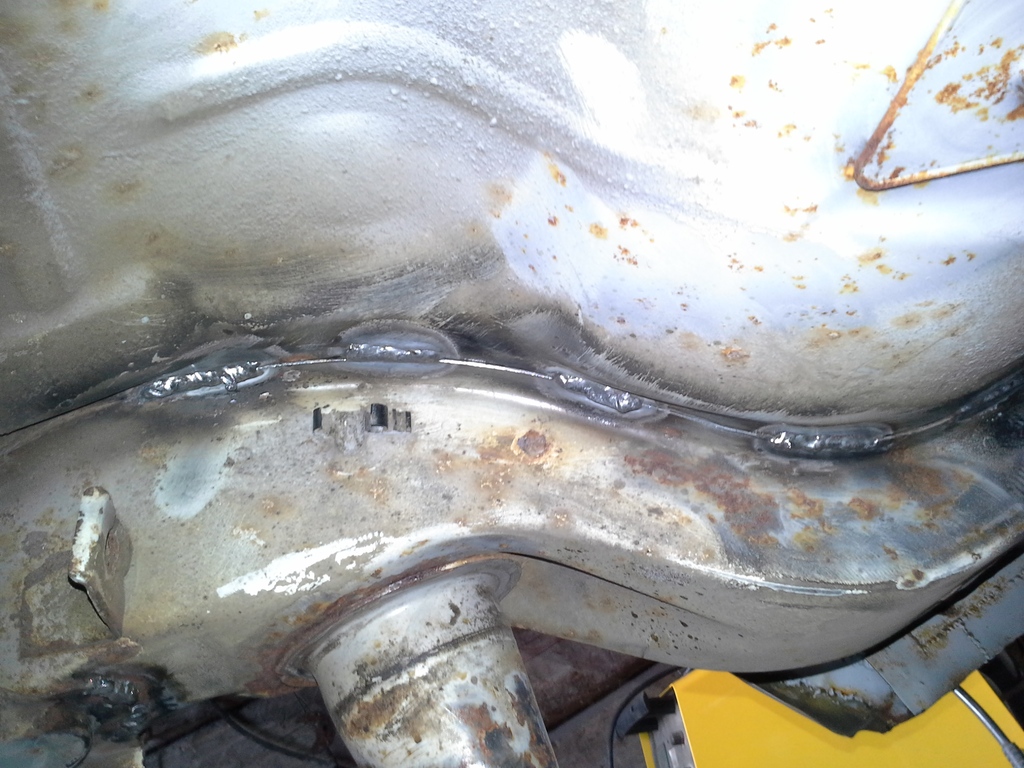
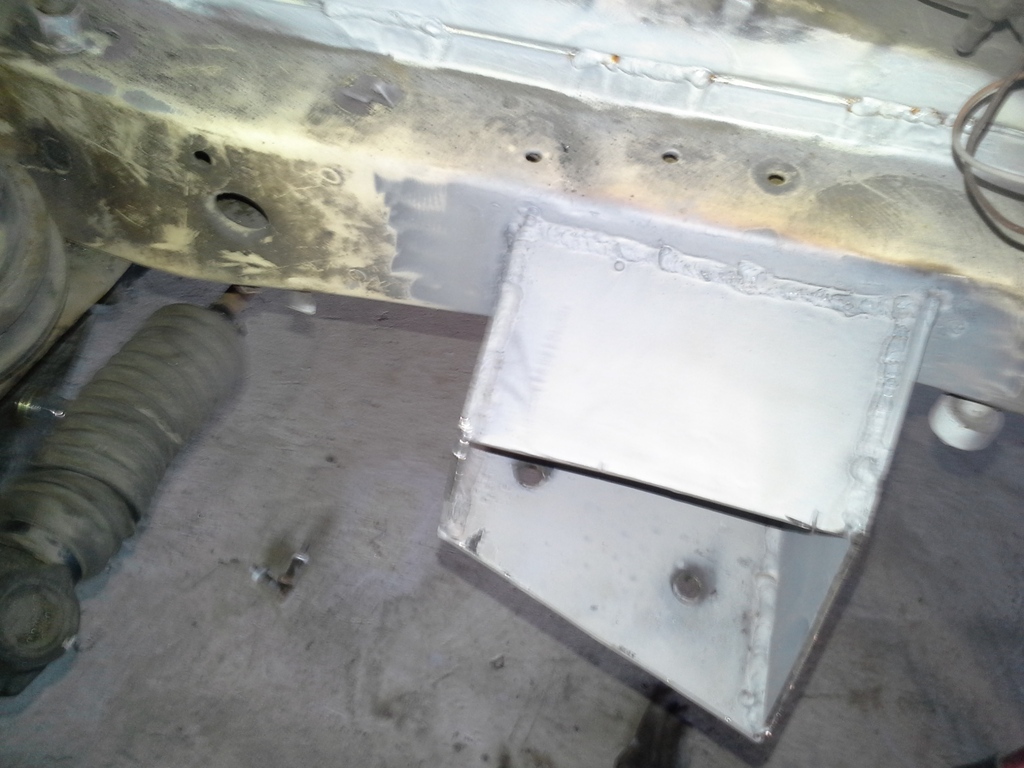
First job was to repair a panel near of sub frame mounting.
Welded.
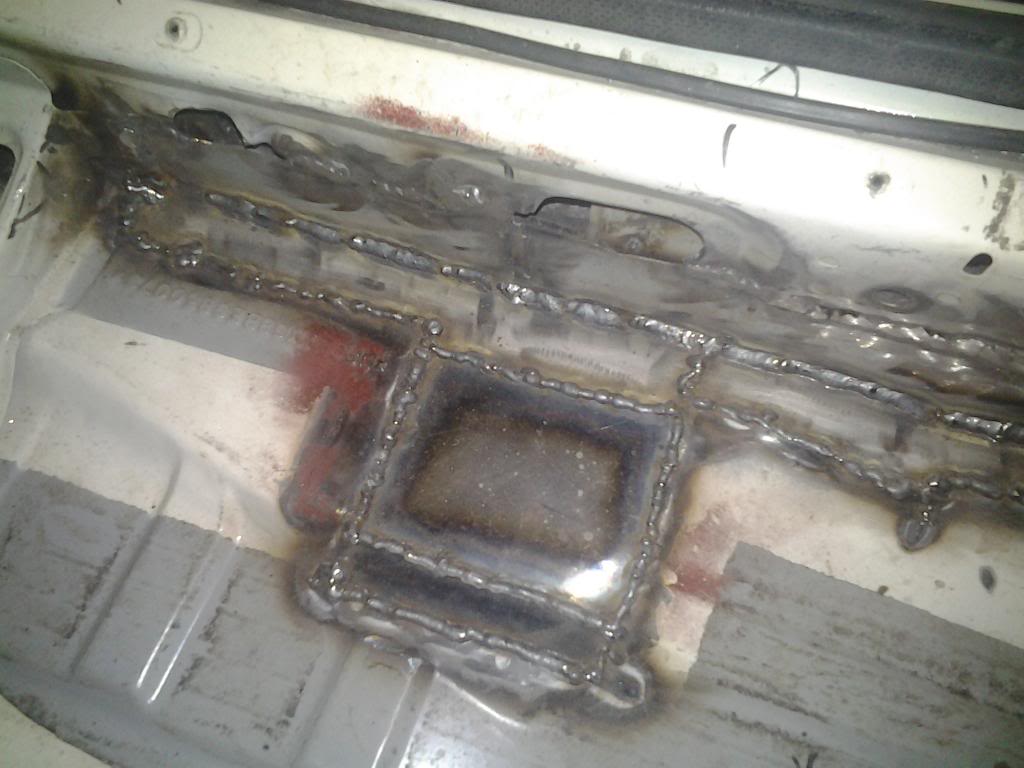
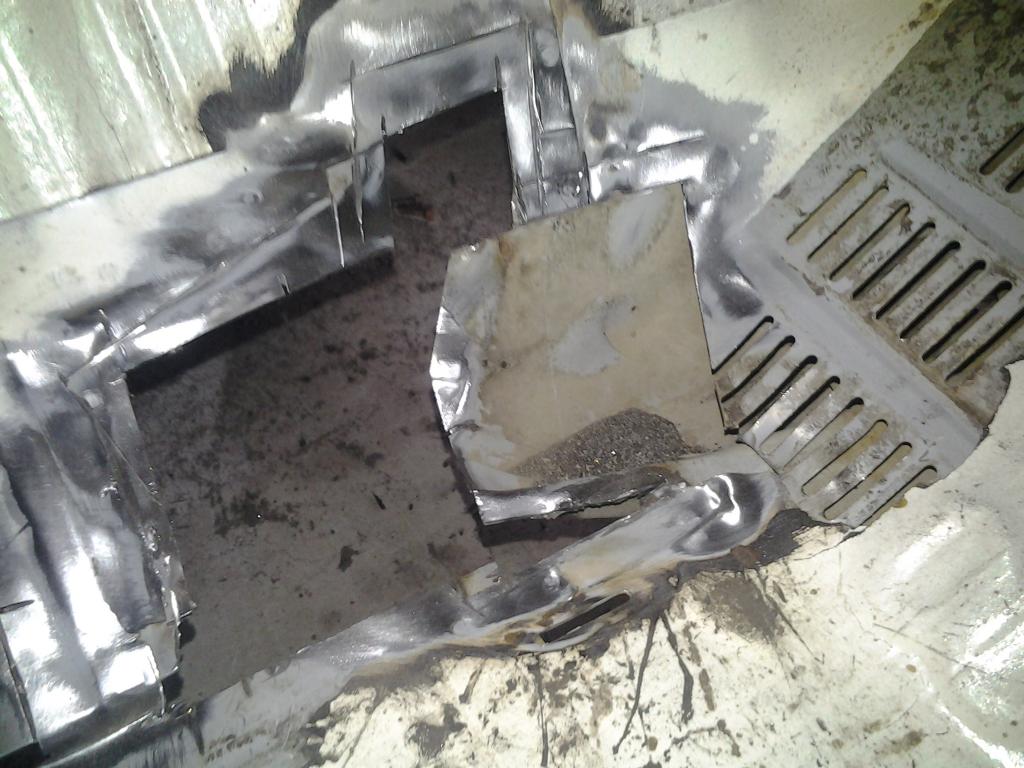
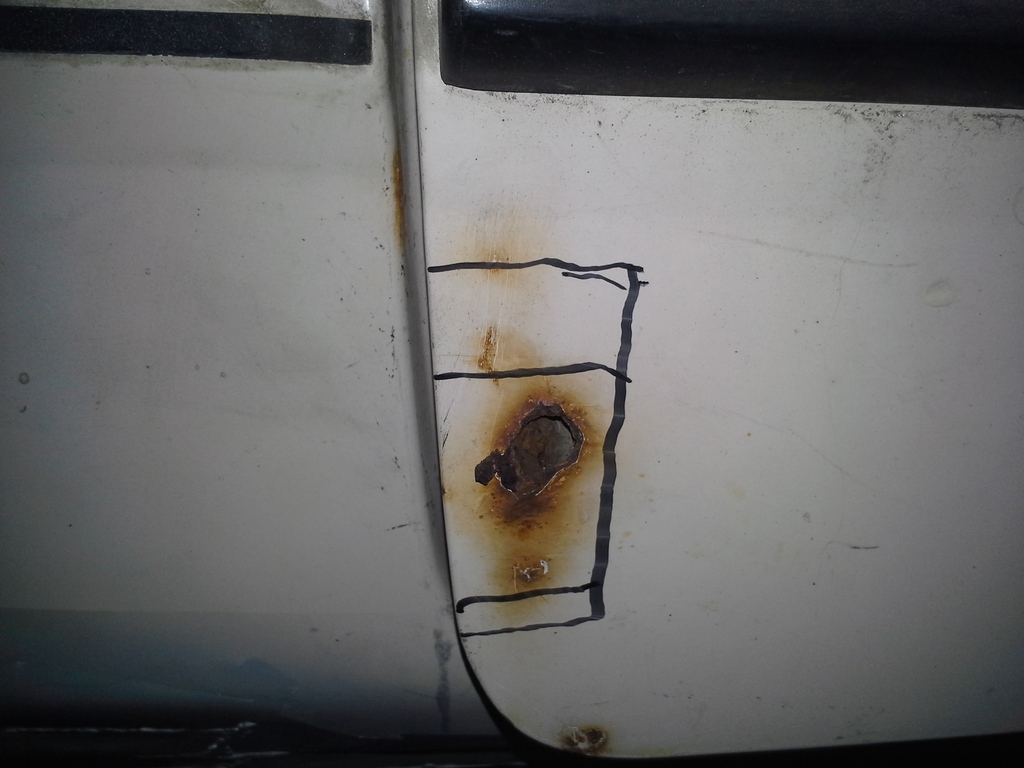
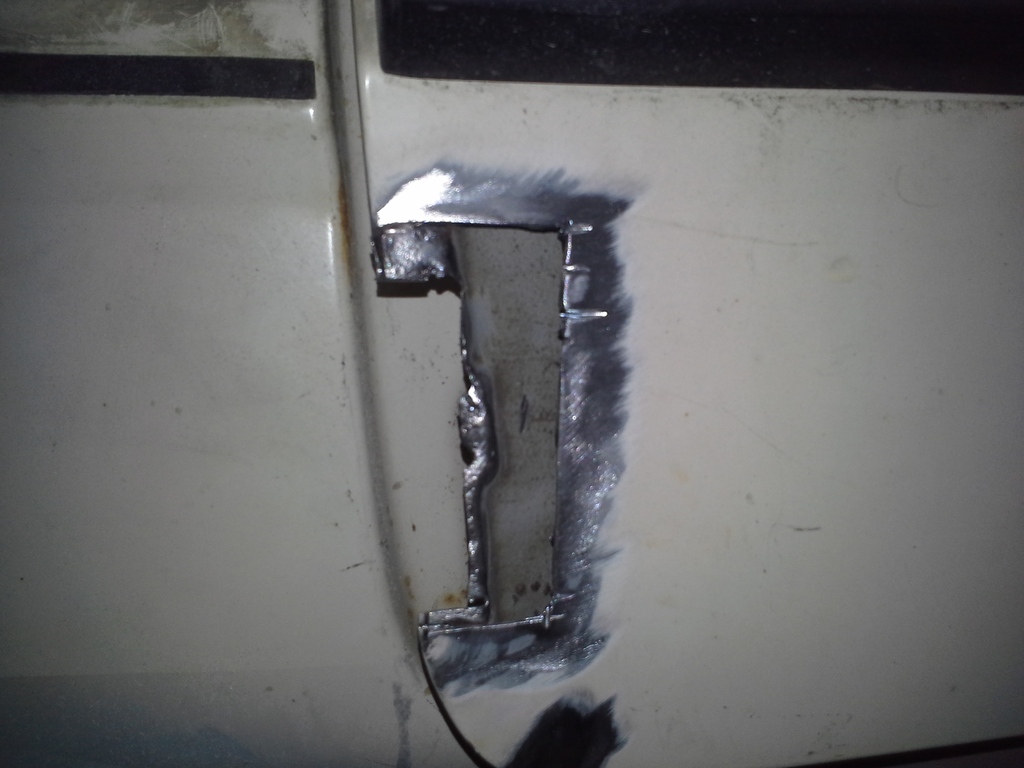
Then I fixed boot floor joint:
Little hole first
Idea was to repair both sheets seperately, to have same idea than in the factory/production line when this cars was made

I also removed the spare wheel arch
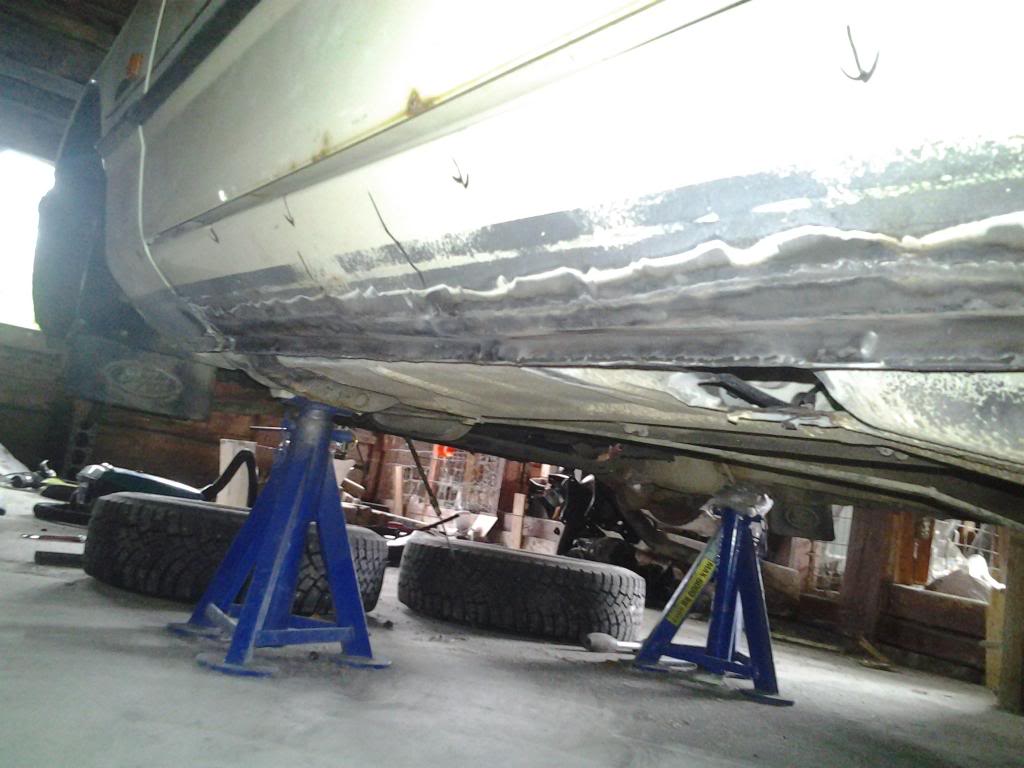
Then it was time the reinforce rest of the cars platform joints, like Group A- style:

And.. done!
I´ve already bought roll cage and next jos is to weld it in to car. That´s all by this far...
First job was to repair a panel near of sub frame mounting.
Welded.
Then I fixed boot floor joint:
Little hole first
Idea was to repair both sheets seperately, to have same idea than in the factory/production line when this cars was made
I also removed the spare wheel arch
Then it was time the reinforce rest of the cars platform joints, like Group A- style:
And.. done!
I´ve already bought roll cage and next jos is to weld it in to car. That´s all by this far...
07-07-2015, 06:22 AM
#14
RalliArttu
Thread Starter
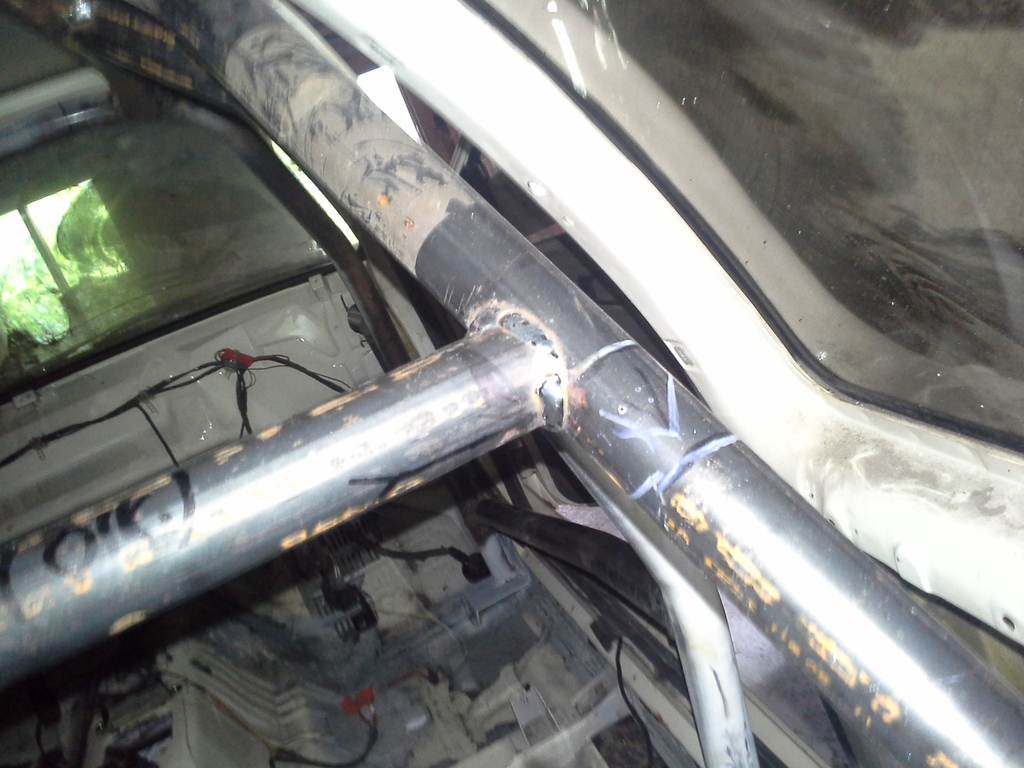
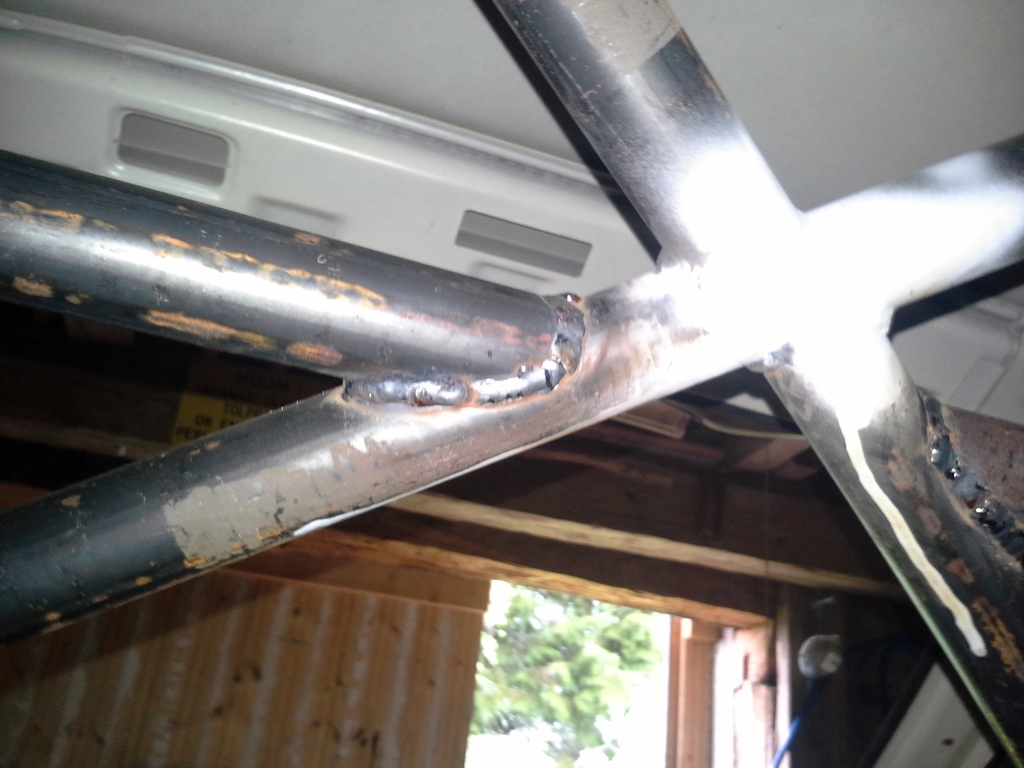
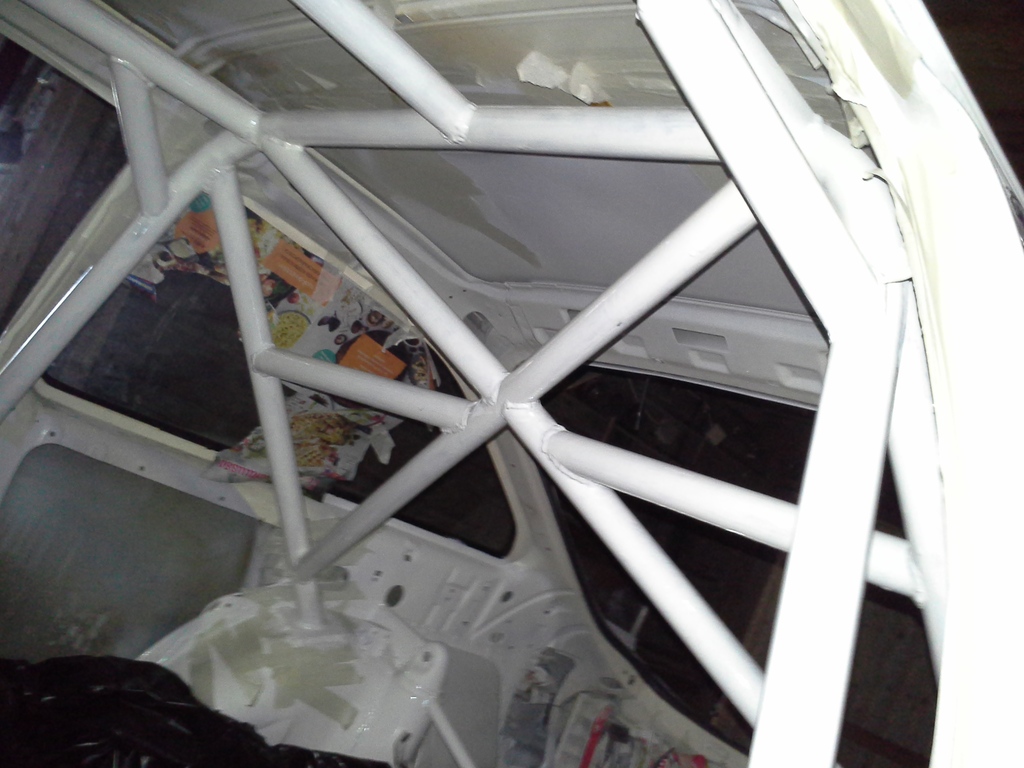
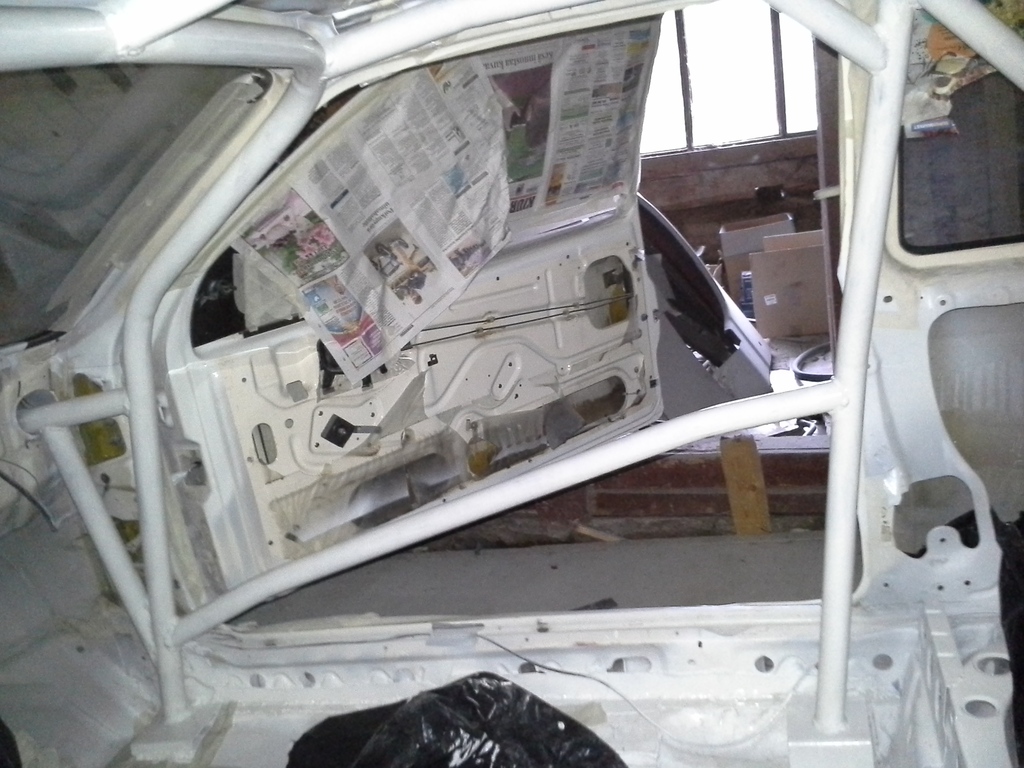
Finally I managed to do something important with this car I bought sort of a clubman roll cage, but I modified it to multipoint- cage by adding extra tubes through bulkhead. Below some pics how this all went tube tube:
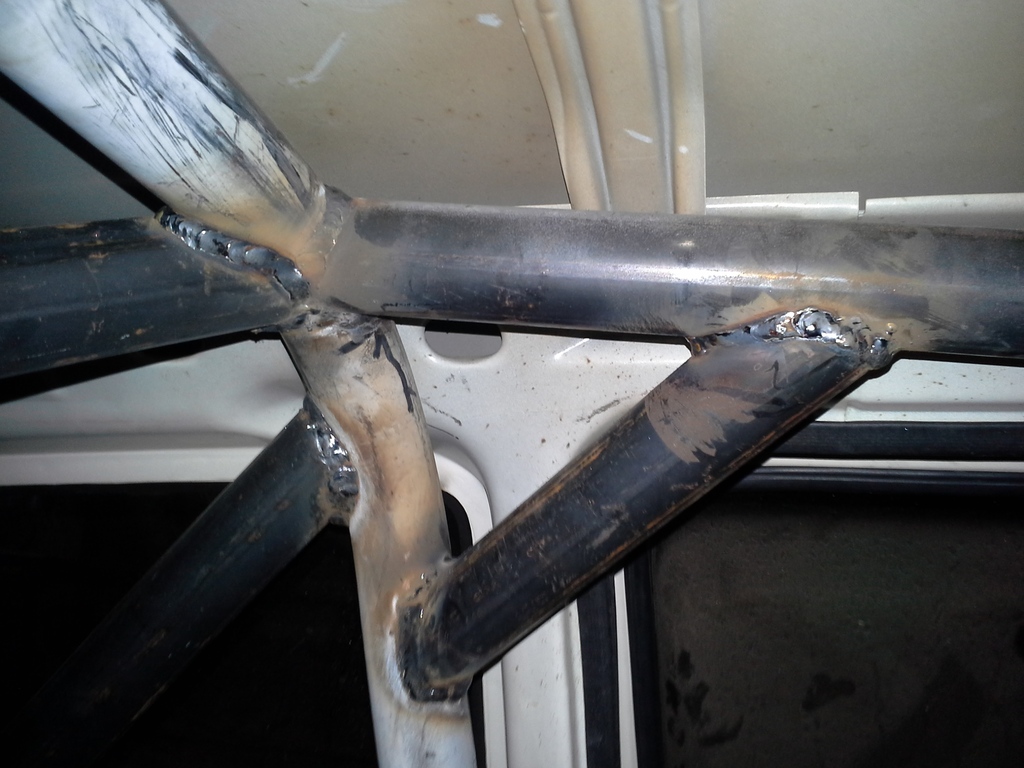
I should be well protected
Few shots from forward facing bars.
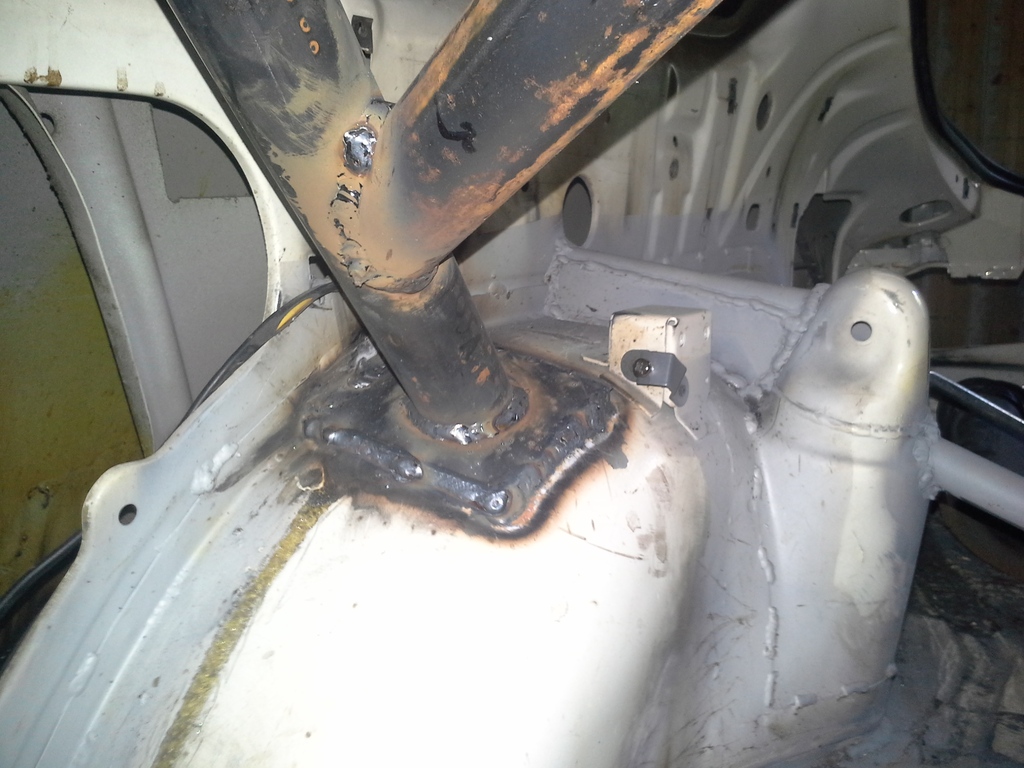

Attached to bodyshell and yes some dirt in one tube...
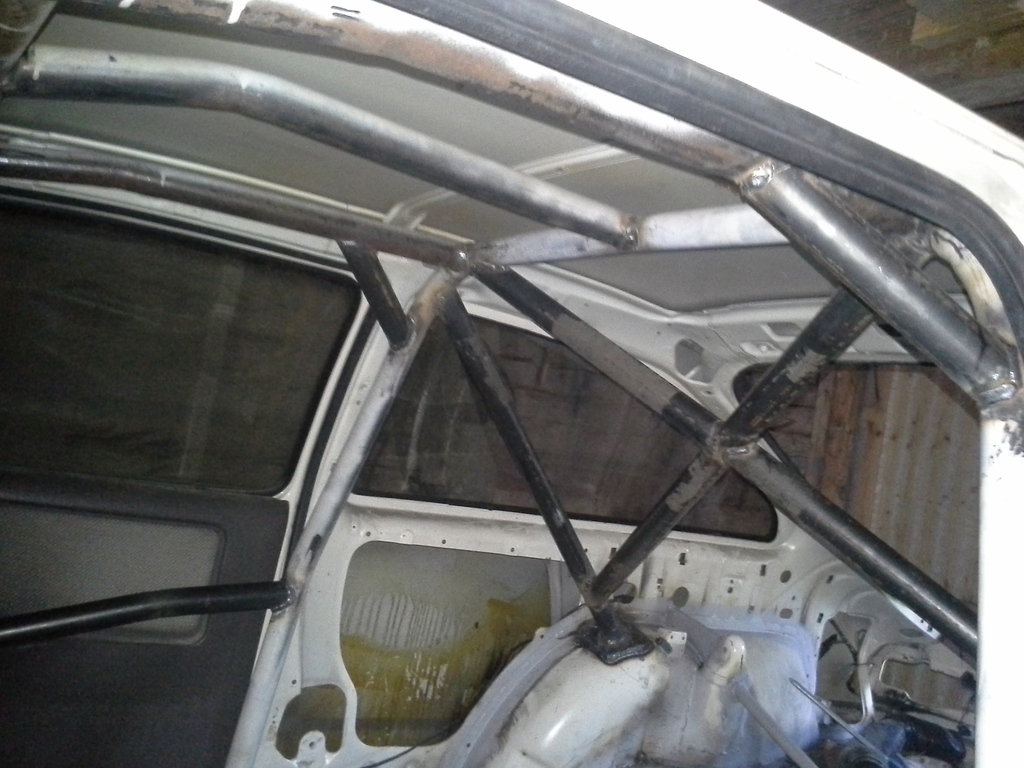
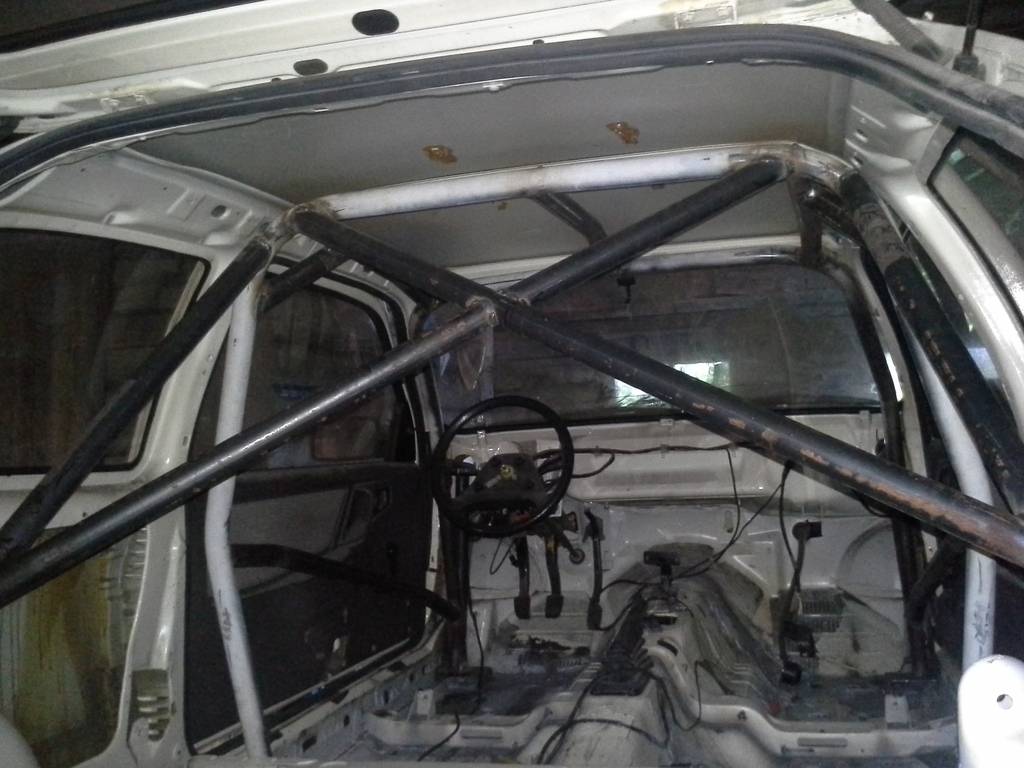
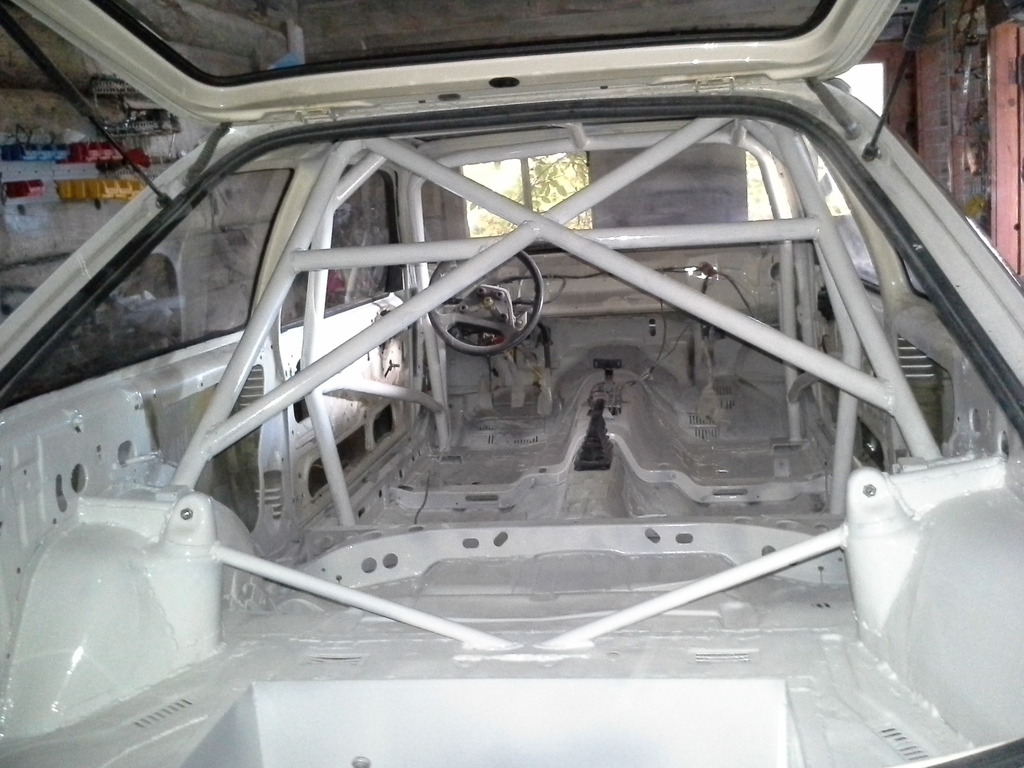
Couple layout pics. Rollcage is now welded in, but there is still lots of work left with this car
I should be well protected
Few shots from forward facing bars.
Attached to bodyshell and yes some dirt in one tube...
Couple layout pics. Rollcage is now welded in, but there is still lots of work left with this car
03-08-2015, 12:25 PM
#17
RalliArttu
Thread Starter
Thanks guys!
As you may notice, it has been while, since I´ve last visited here But there has been some work going on recently...
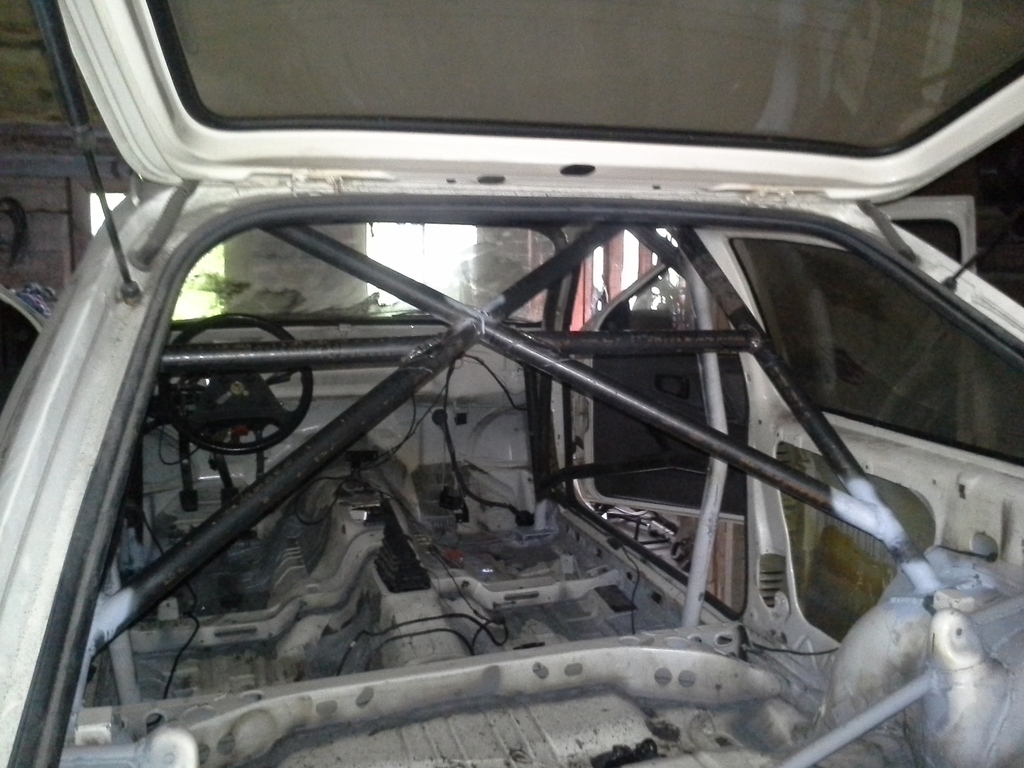
I added tubes for upper seatbelts.
Couple closer shots from passenger.. or should I say from co-drivers side
Another small job project was to weld fuel cells basket to boot floor:
Narrow sheets of metal jointed to basket.
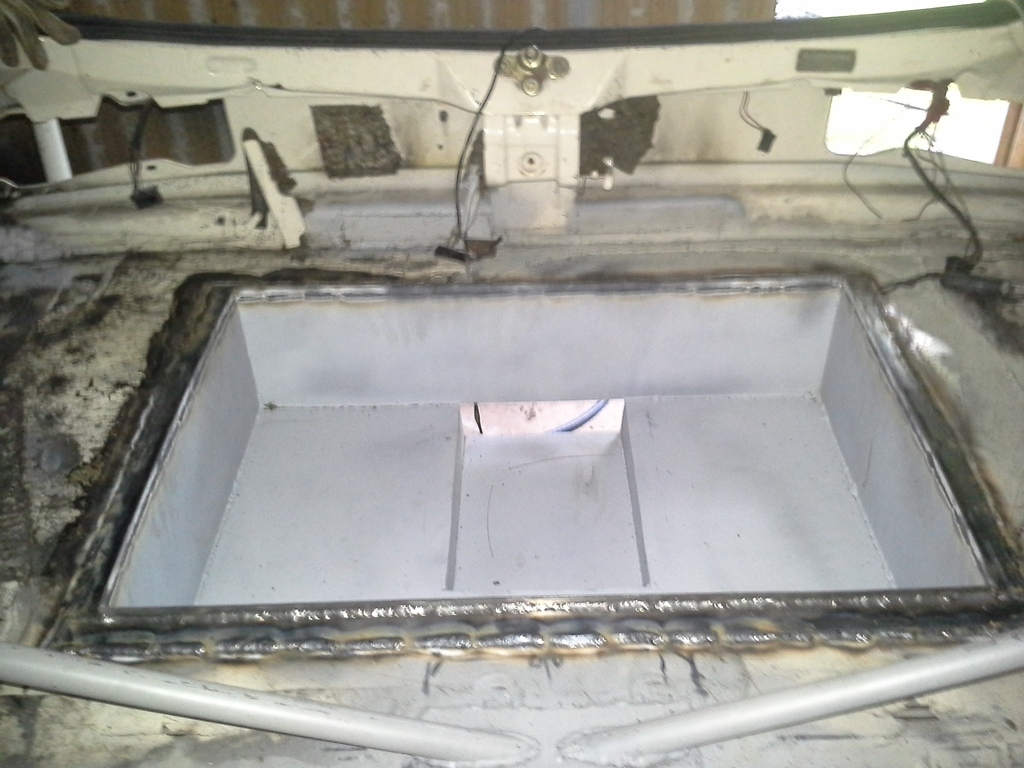
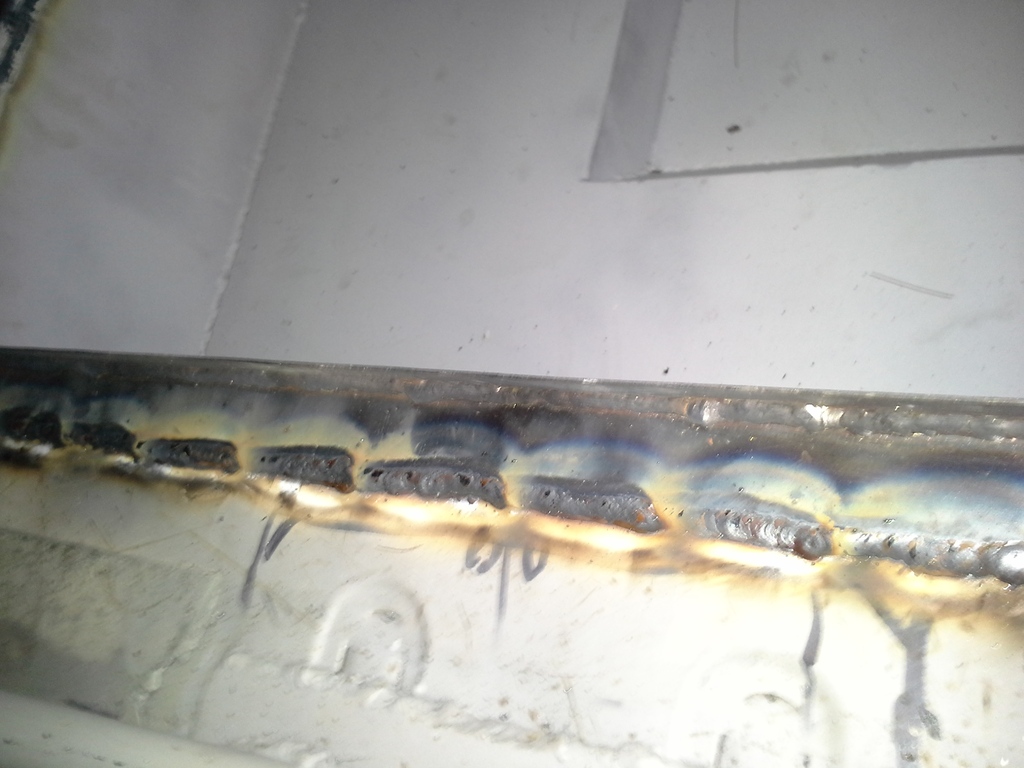
Welded to boot floor
Then I did some painting...
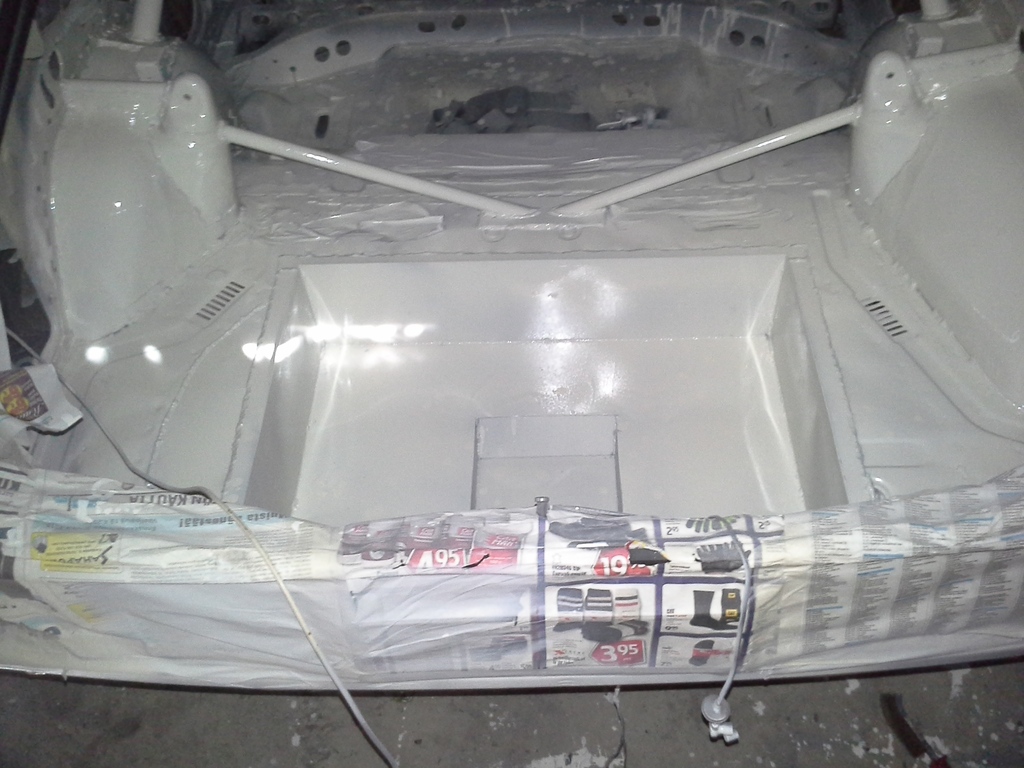
Rearboot.
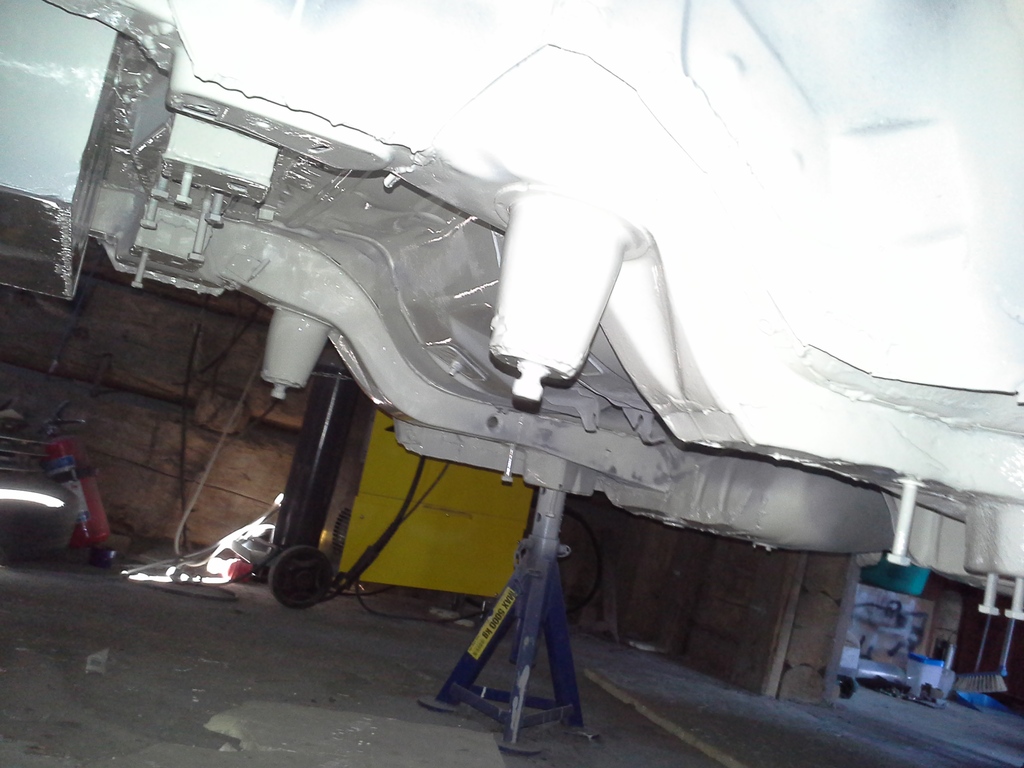
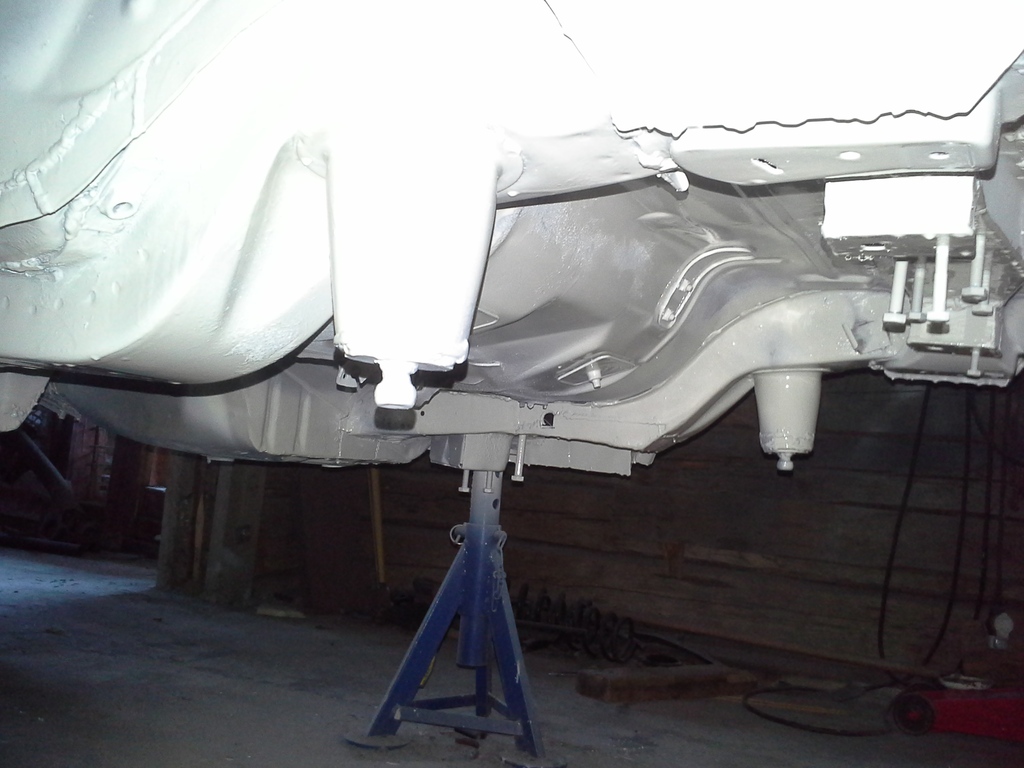
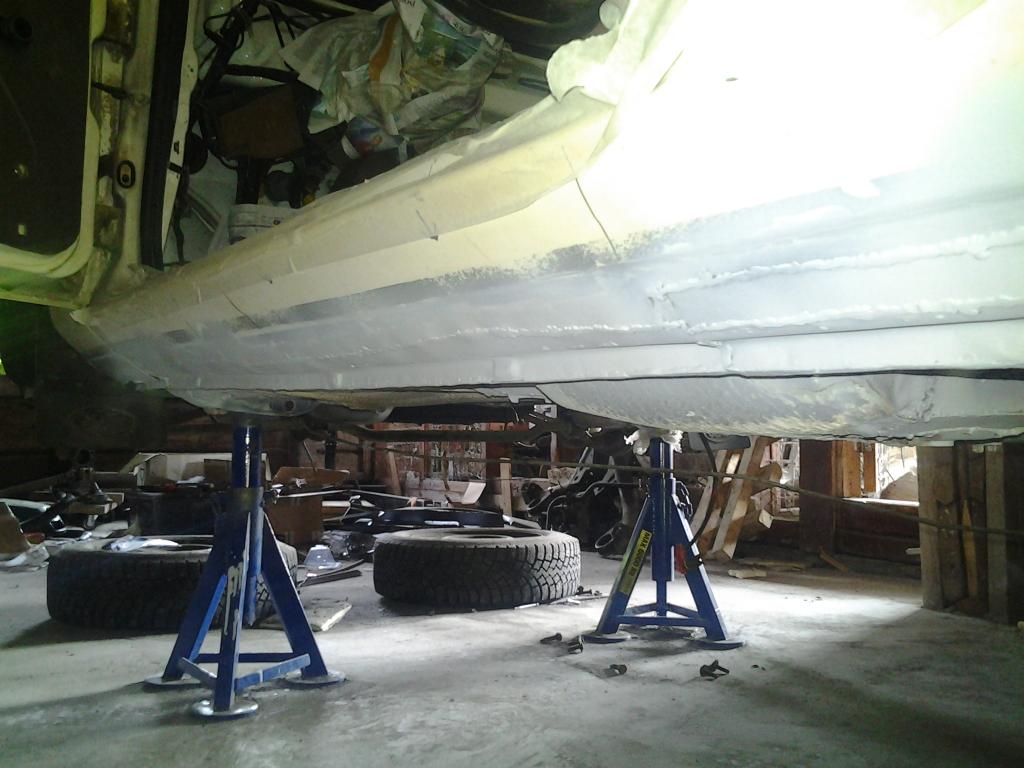
Underside. The color is Diamond White by the way, and it´s also going to be color for rest of the car later
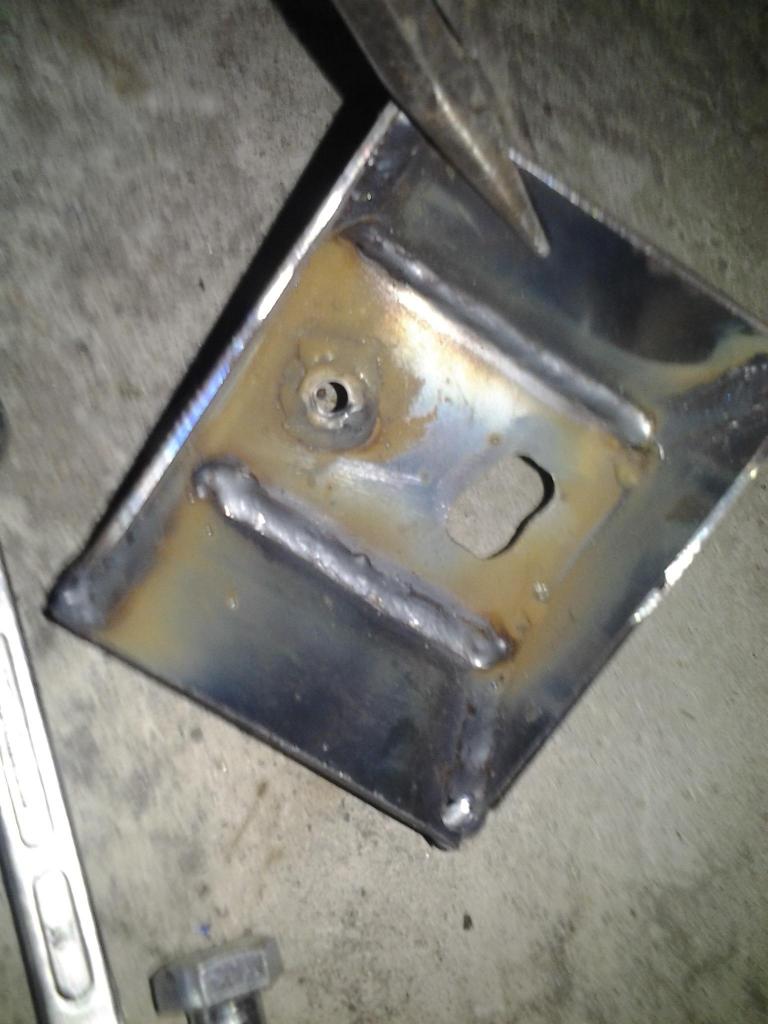
I also fabricated these brackets to fuel cell and saved some cash
Only frontend left to repair and re-inforce...
As you may notice, it has been while, since I´ve last visited here
I added tubes for upper seatbelts.
Couple closer shots from passenger.. or should I say from co-drivers side
Another small job project was to weld fuel cells basket to boot floor:
Narrow sheets of metal jointed to basket.
Welded to boot floor
Then I did some painting...
Rearboot.
Underside. The color is Diamond White by the way, and it´s also going to be color for rest of the car later
I also fabricated these brackets to fuel cell and saved some cash
Only frontend left to repair and re-inforce...
13-09-2015, 12:56 PM
#18
RalliArttu
Thread Starter
Rest of the chassis done:

I also spread some cheap primer, to protect those points temporately.
Left fender needen some new metal, so I fixed that too:
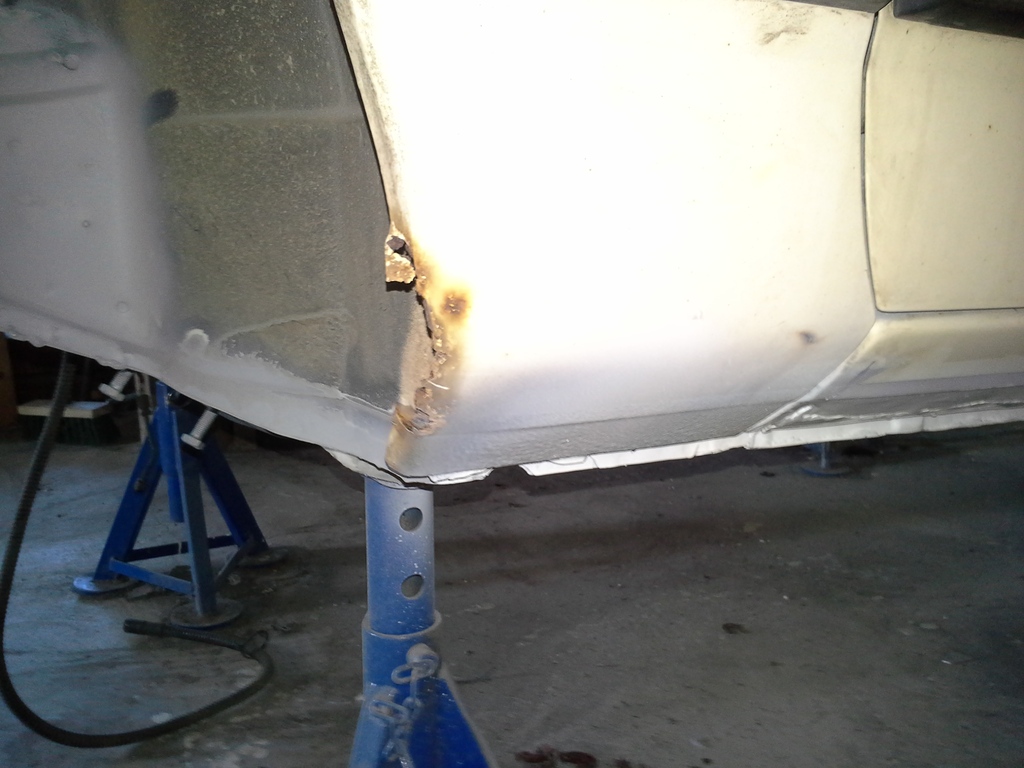
As you can see corrosion has done its job
I´ve got a cheap Mk2 replace fender, so I took piece of it for this one...
After carelul welding (and grinding) I was in this phase. Later I primered this, like I did earlier.
Recently I protected all of the panels inside, and I´ll propably take a little break from the bodywork. But next I need to took becoming engine apart, and also I have to found inner driveshaft flanges for the rear diff.
That´s all by this far
I also spread some cheap primer, to protect those points temporately.
Left fender needen some new metal, so I fixed that too:
As you can see corrosion has done its job
I´ve got a cheap Mk2 replace fender, so I took piece of it for this one...
After carelul welding (and grinding) I was in this phase. Later I primered this, like I did earlier.
Recently I protected all of the panels inside, and I´ll propably take a little break from the bodywork. But next I need to took becoming engine apart, and also I have to found inner driveshaft flanges for the rear diff.
That´s all by this far
10-02-2016, 04:10 PM
#19
RalliArttu
Thread Starter
During this winter I´ve once again been hunting parts...
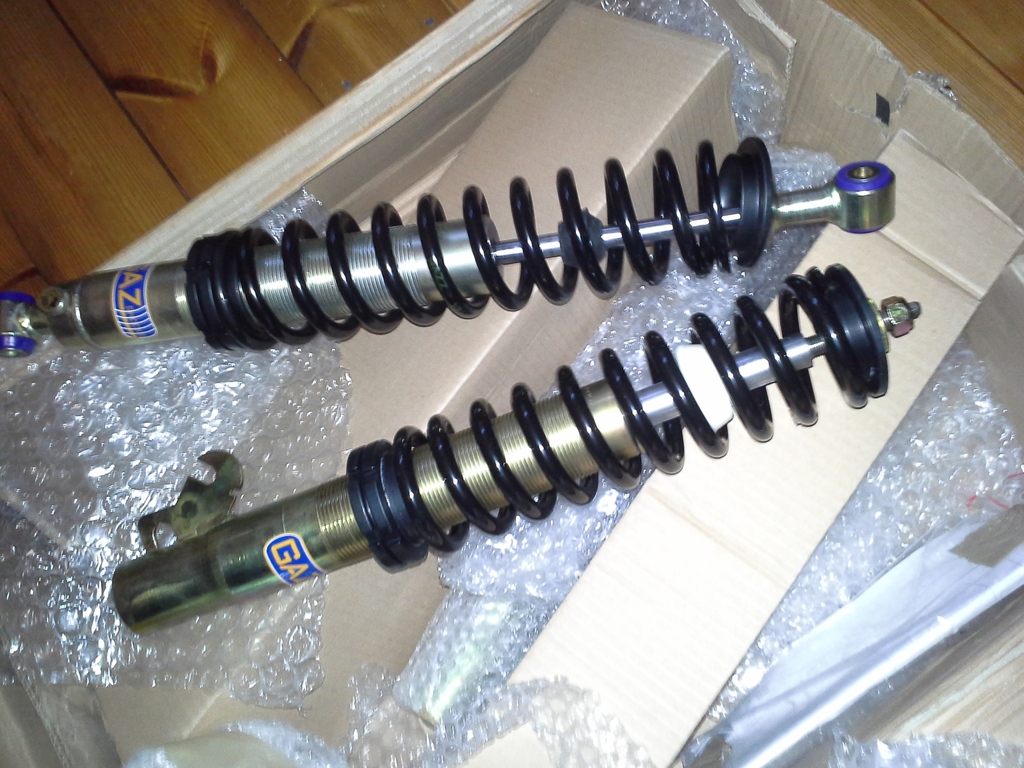
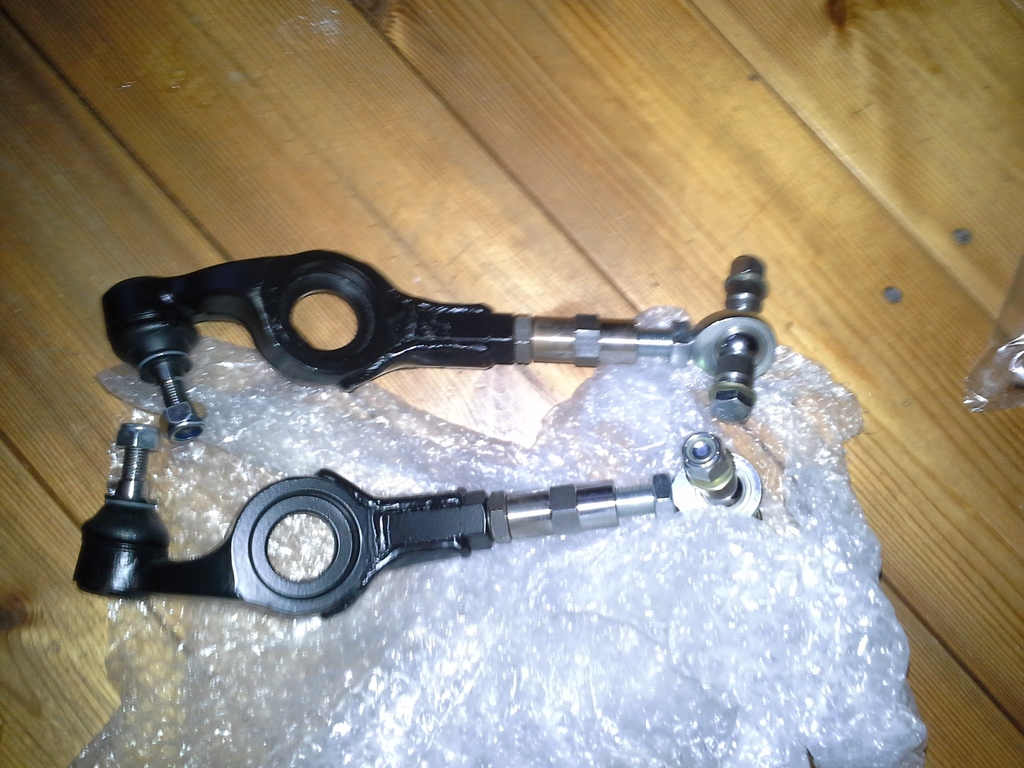
...for suspension.

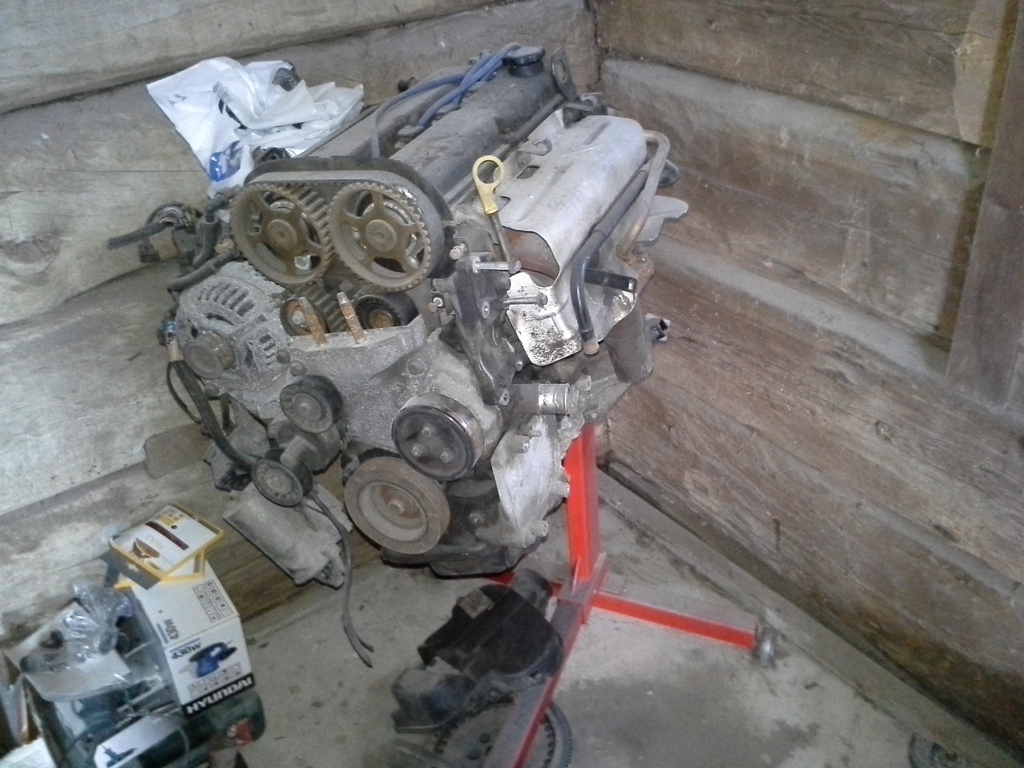
And yes I bought 2.0 litre Black top

There is something in those letters, right?
I´ve also preparated the frontend for CSA- mod, next thing to do is re-locate the ARB. Few ideas already under consideration
...for suspension.
And yes I bought 2.0 litre Black top
There is something in those letters, right?
I´ve also preparated the frontend for CSA- mod, next thing to do is re-locate the ARB. Few ideas already under consideration
15-03-2016, 08:14 PM
#20
RalliArttu
Thread Starter
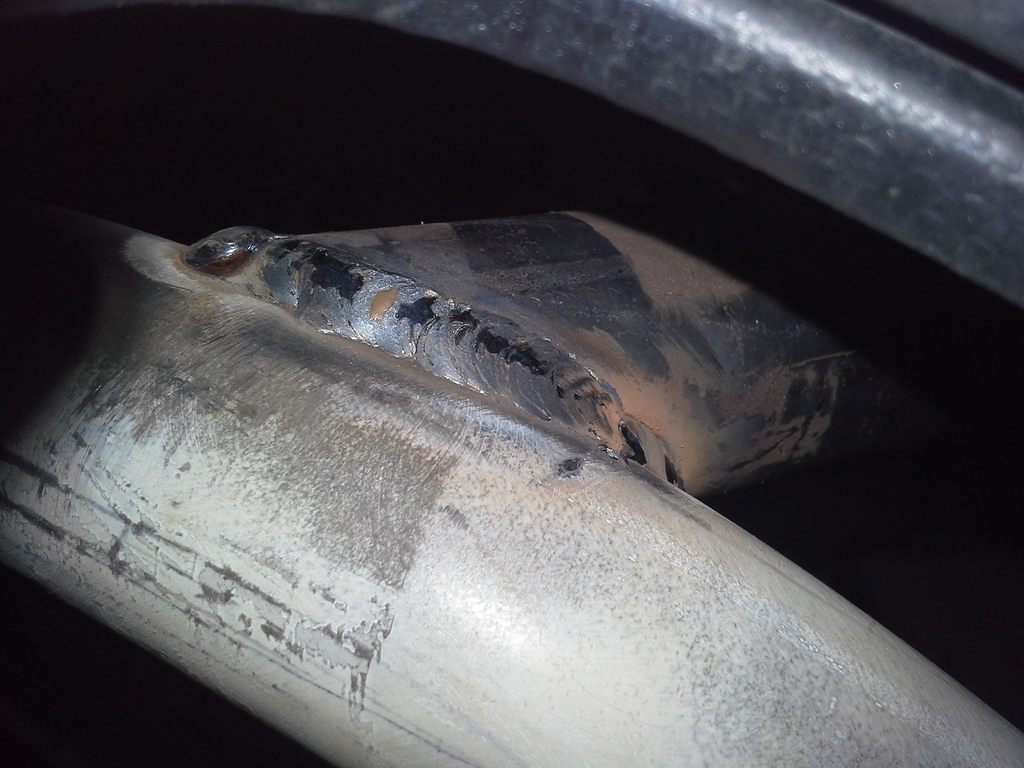
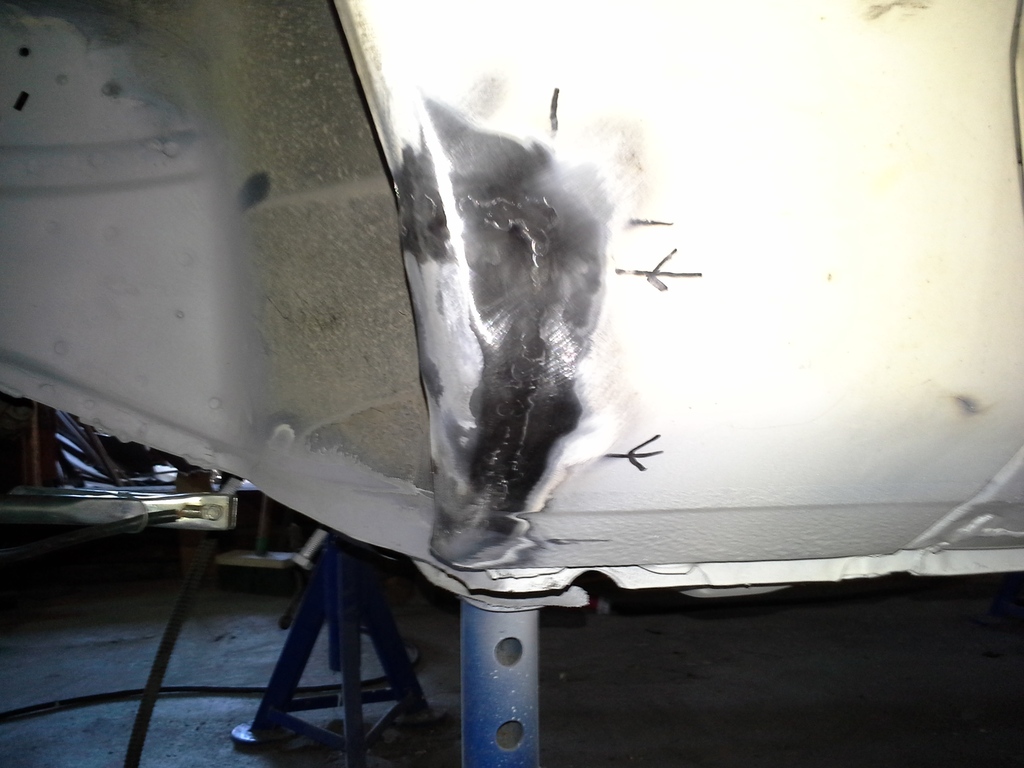
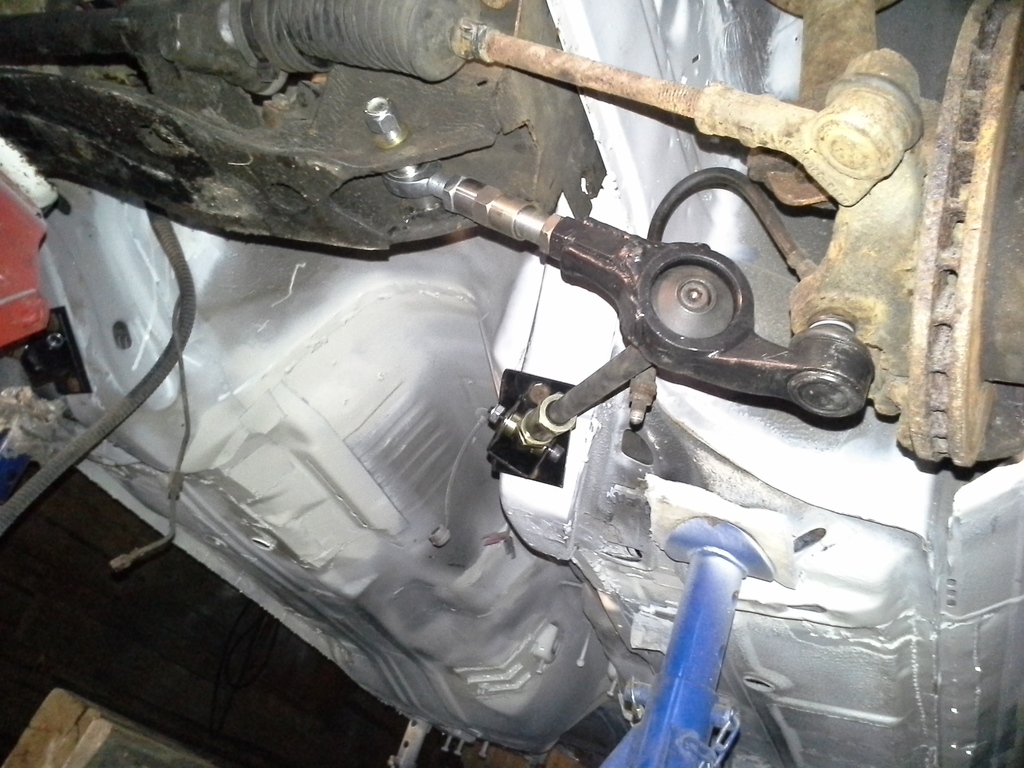
I started to work on something (almost) group A style modification I quess the right word or words to describe this little operation woulde be "alternative positioned antirollbar" Anyway, after lots of measuring and figuring I got few things done:
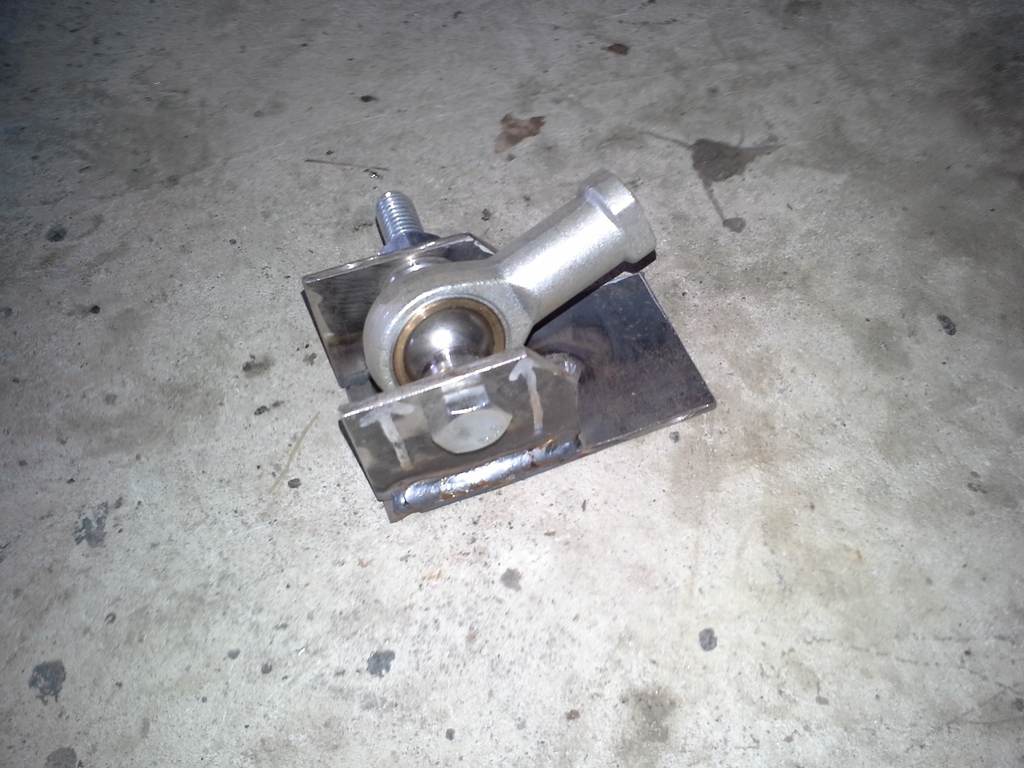
At first I made these brackets for rosejoints that are connected to compression strut arms.
The biggest change was to re-locate current ARB and weld new mounts for it. I will still give some final touch for that later by cutting unnecessary extra metal away.
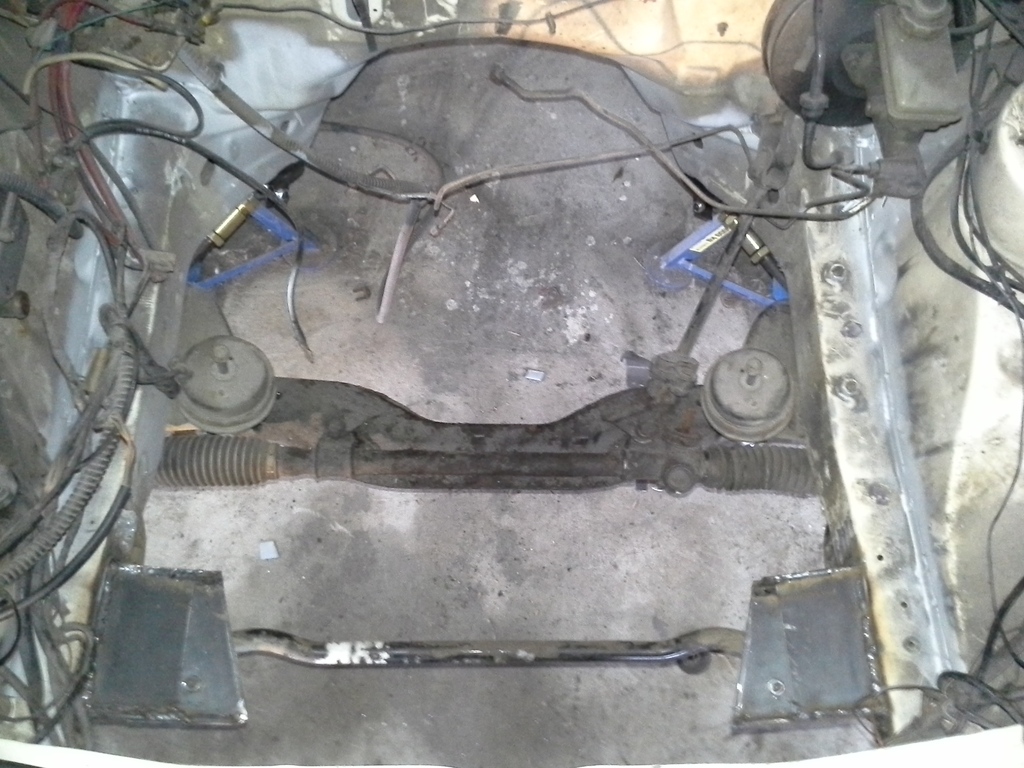
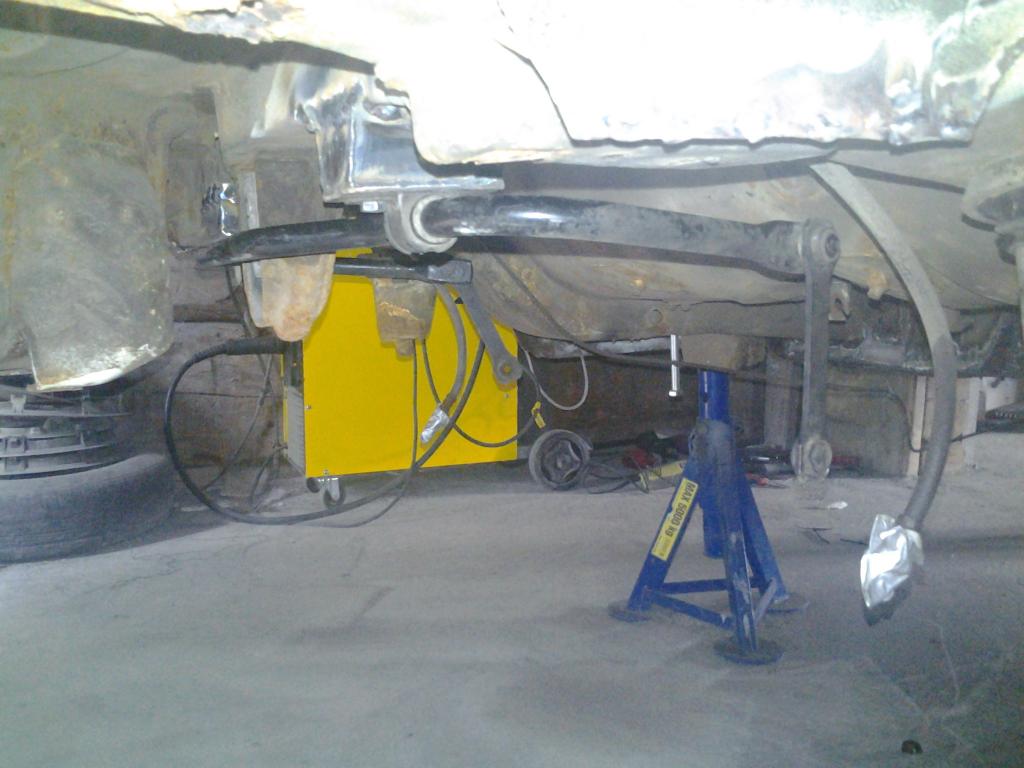
Layout shot how ARB is hanging on.
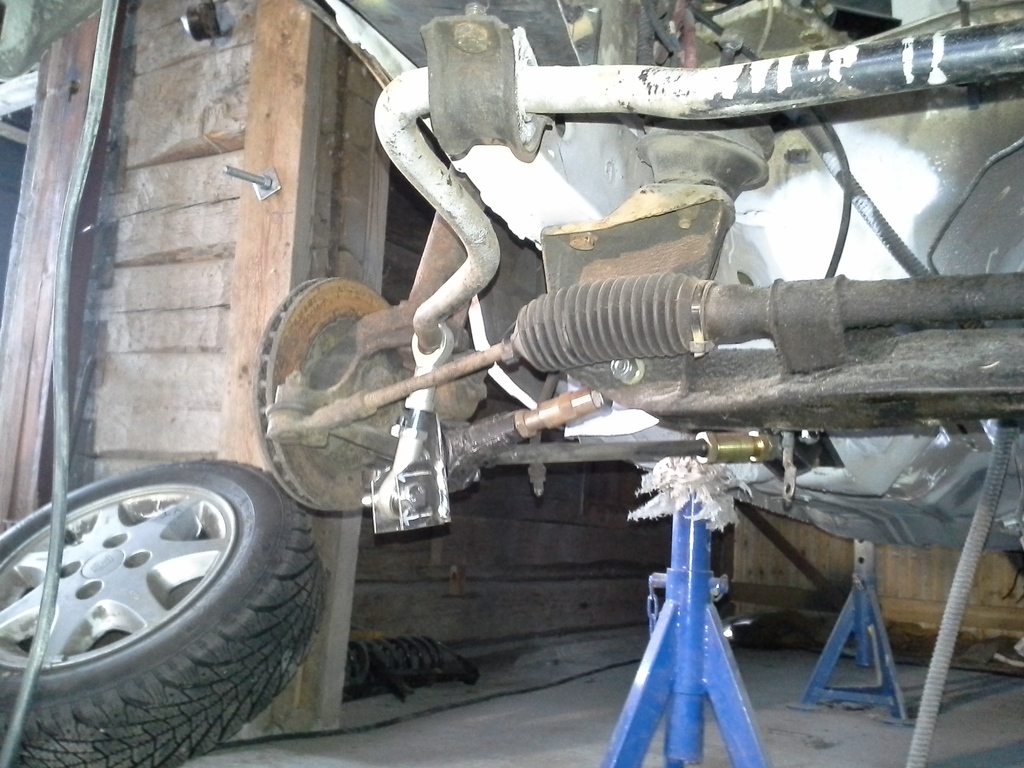
Very tight fit I would say
In this point I´ll have say that blade arb would be more Gr. A, but right now it´s bit out of my budget, all though I haven´t abandoned that idea either
Up next; rest of the bodywork, maybe THIS summer I got it finished
At first I made these brackets for rosejoints that are connected to compression strut arms.
The biggest change was to re-locate current ARB and weld new mounts for it. I will still give some final touch for that later by cutting unnecessary extra metal away.
Layout shot how ARB is hanging on.
Very tight fit I would say
In this point I´ll have say that blade arb would be more Gr. A, but right now it´s bit out of my budget, all though I haven´t abandoned that idea either
Up next; rest of the bodywork, maybe THIS summer I got it finished
Last edited by RalliArttu; 15-03-2016 at 08:22 PM.
 26-06-2016, 01:12 PM
#22
RalliArttu
Thread Starter
Wow, it´s been for while again from last visit... Well, let´s began from those arb mounts:
I cut the unnecessary metal away and spred some cheap primer in this point.. I also decided to attach arb-rosejoints to csa by bolt, but I haven´t bought smaller joint yet.
Then it was time to continue the bodywork to get rest of the car done:
I took front fender away...
To see underneath of it
The fender itself was rusty, so I bought a new one from another Ford-enthusiasist, who sold that me with friendly price
Firts I started to fix wheel inner arch/well, tacked in...

...some welding...
...and cleaned up.
Welding in the new fender...
Also these joints were done.
Spot welds grinded.
There it is!

Sits nicely enough for after market panel
Doors were also rusted, so few pics from those too:
This is from passengers door
Rust cutted away
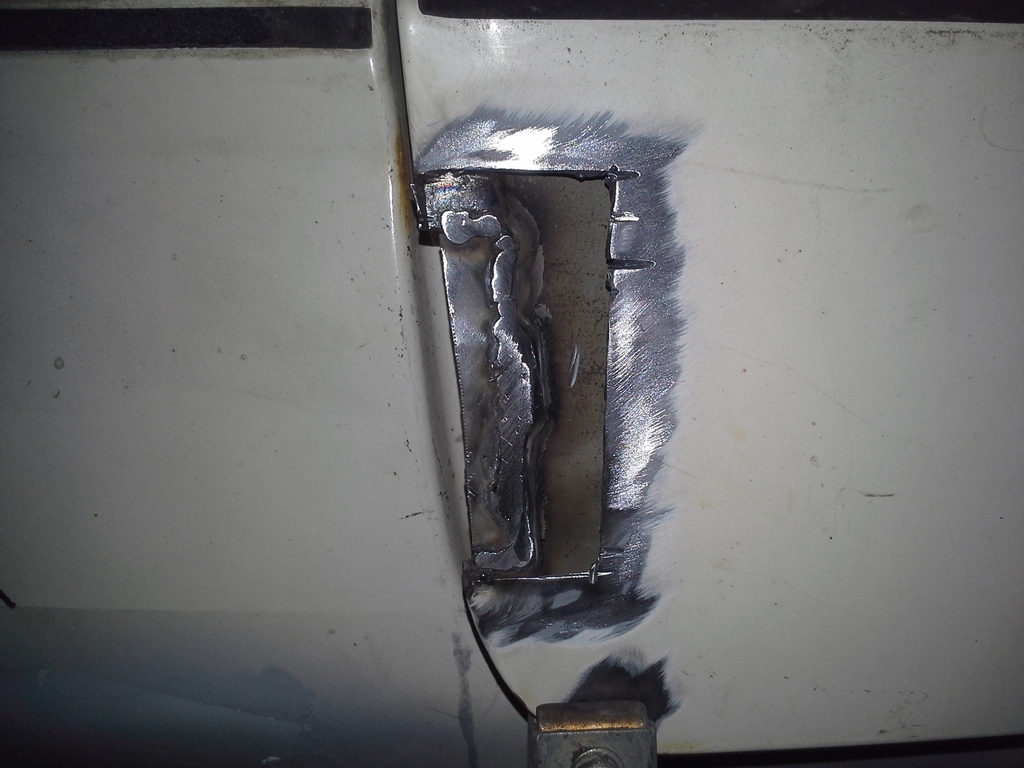
Inner frame fixed/welded.
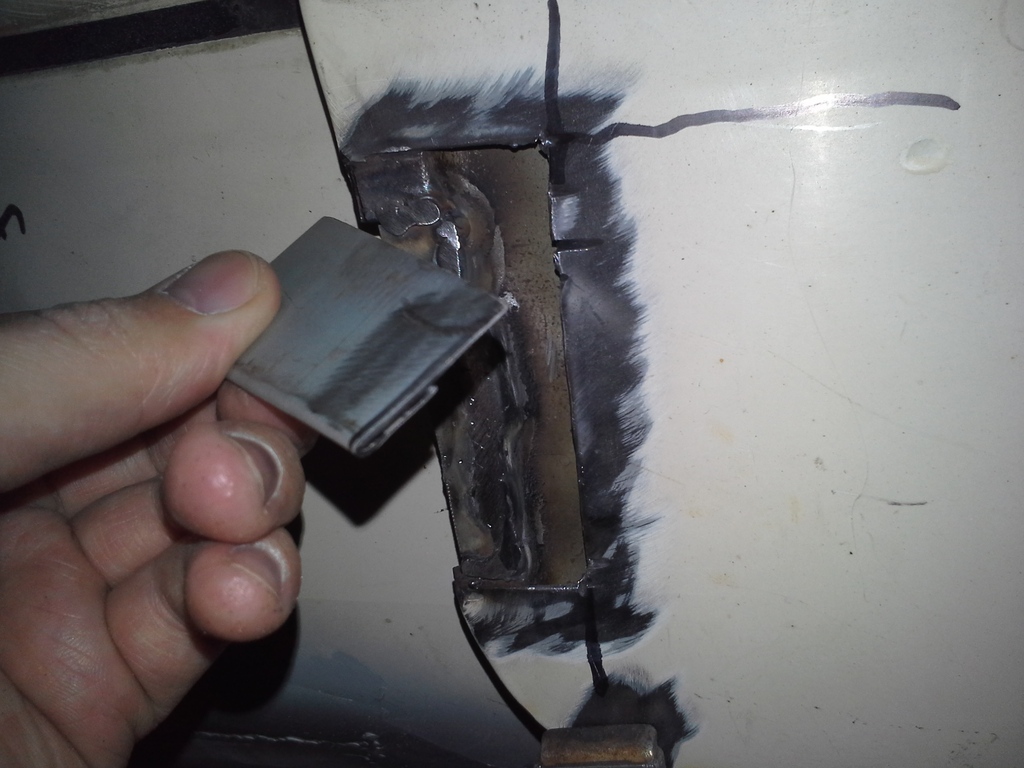
Fabricating fix-up piece.
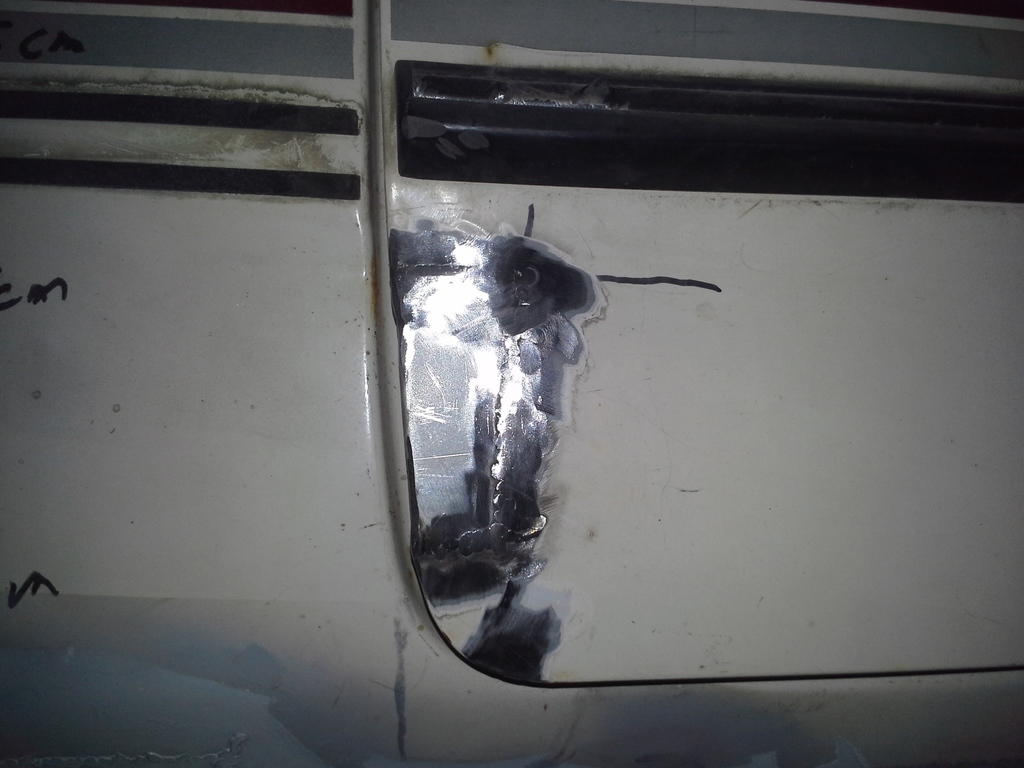
Welded and grinded.
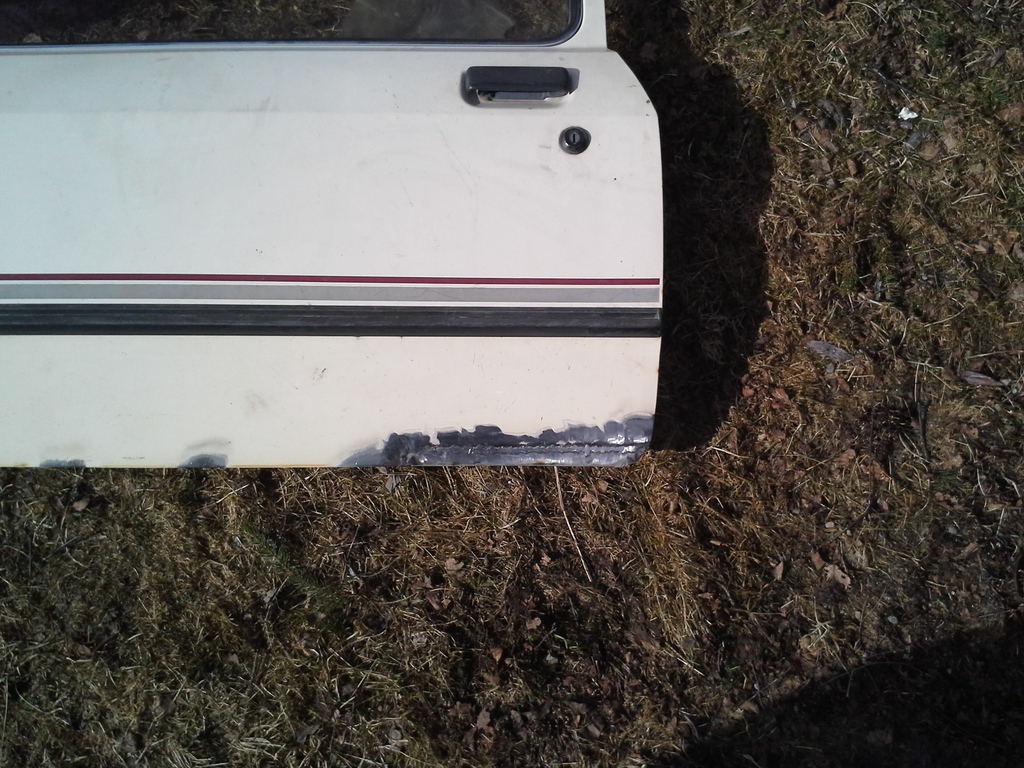
Drivers door welded
Spred some primer in to this one too. In this shot the door looks curving from some unknown reason in my crappy camera...
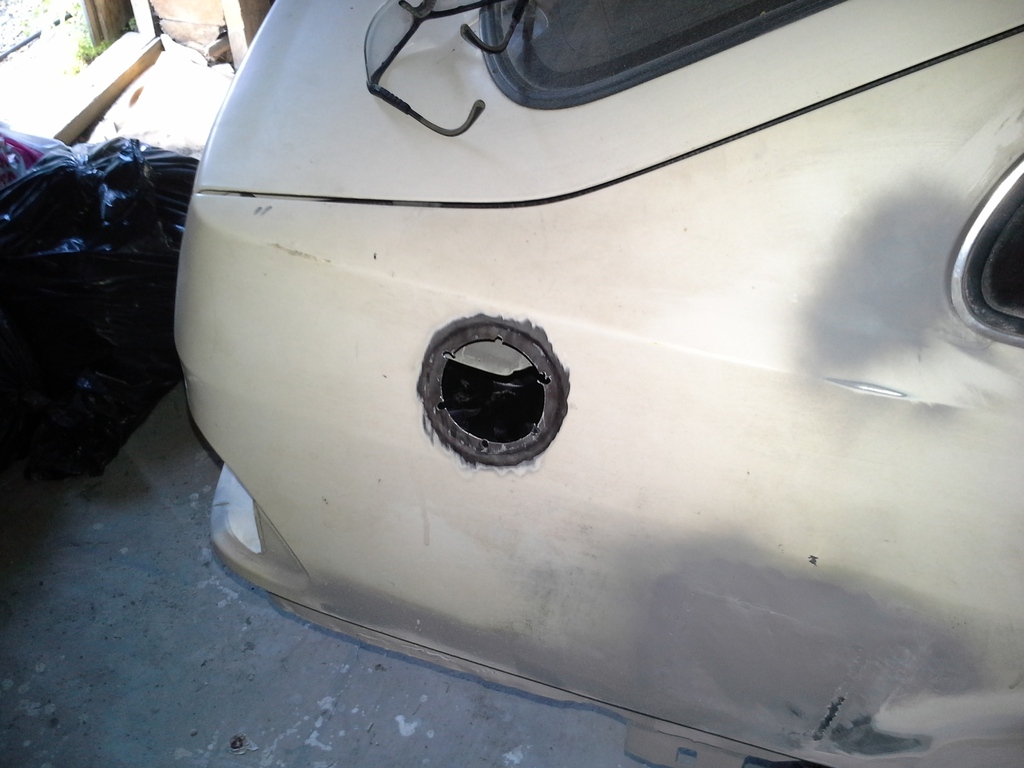
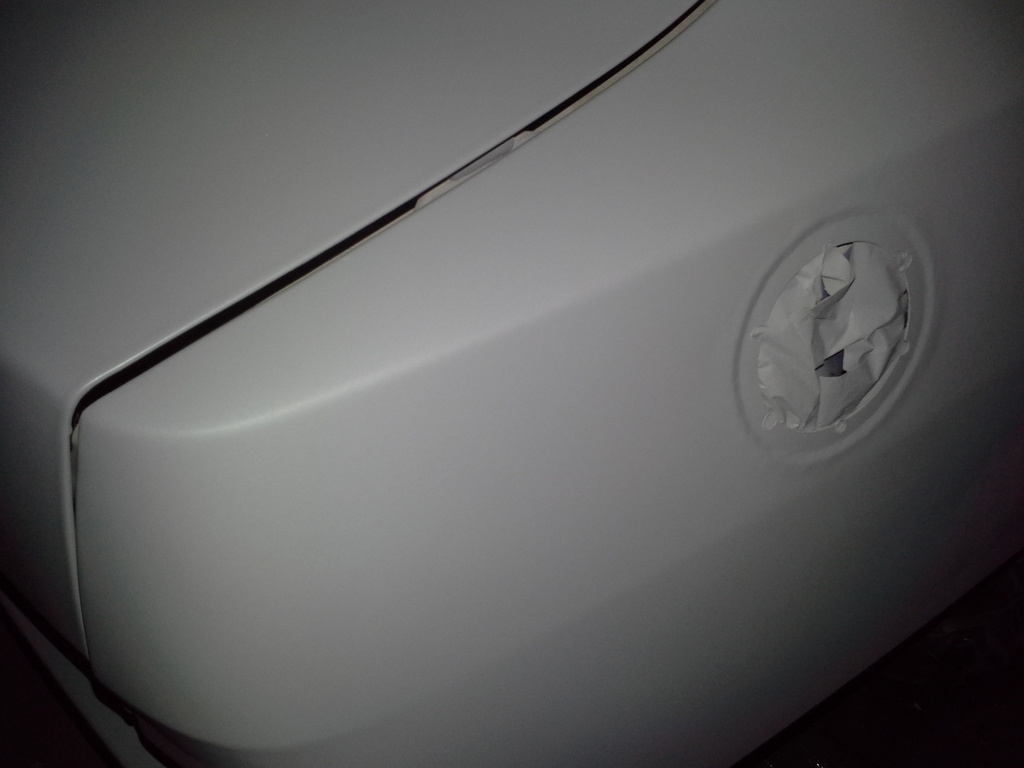
I noticed that I don´t need the original fuel filling hole anymore, so...... This is how I solved the case:
On course I need make a new hole, for safety tank filling pipe, but it will be propably to left side like in group A Sierras
Some paint work too:
To interior.
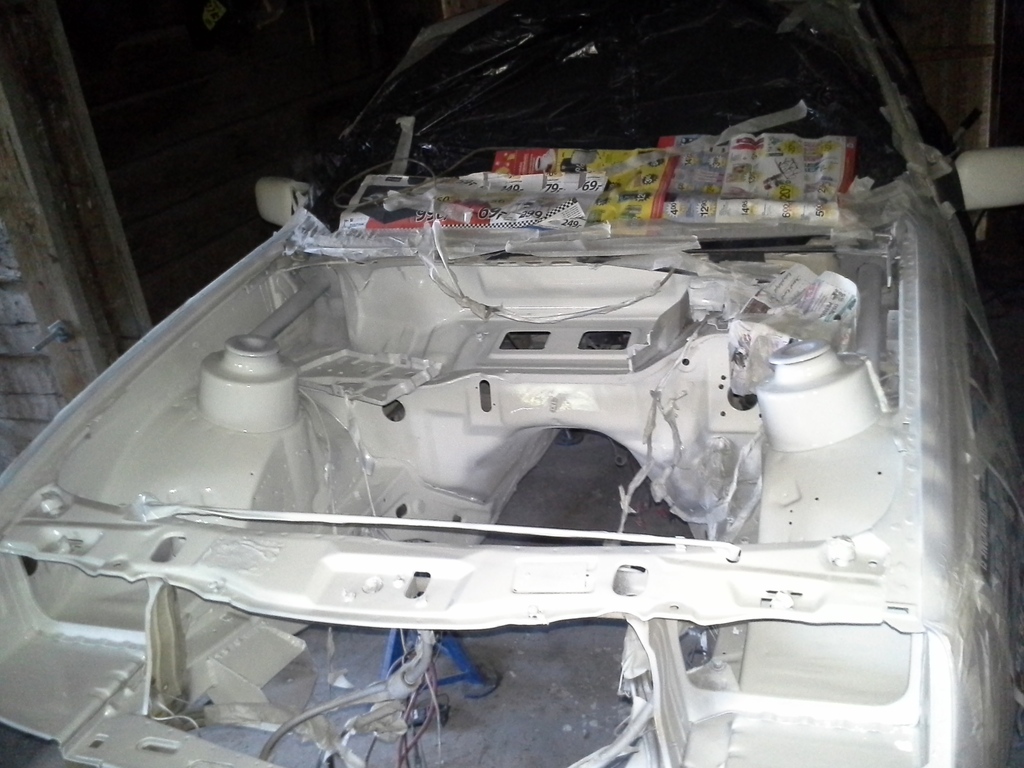
And to engine bay.
Next job is to get the whole car painted to that same color (Diamond White), but that´s all by this far
I cut the unnecessary metal away and spred some cheap primer in this point.. I also decided to attach arb-rosejoints to csa by bolt, but I haven´t bought smaller joint yet.
Then it was time to continue the bodywork to get rest of the car done:
I took front fender away...
To see underneath of it
The fender itself was rusty, so I bought a new one from another Ford-enthusiasist, who sold that me with friendly price
Firts I started to fix wheel inner arch/well, tacked in...
...some welding...
...and cleaned up.
Welding in the new fender...
Also these joints were done.
Spot welds grinded.
There it is!
Sits nicely enough for after market panel
Doors were also rusted, so few pics from those too:
This is from passengers door
Rust cutted away
Inner frame fixed/welded.
Fabricating fix-up piece.
Welded and grinded.
Drivers door welded
Spred some primer in to this one too. In this shot the door looks curving from some unknown reason in my crappy camera...
I noticed that I don´t need the original fuel filling hole anymore, so...... This is how I solved the case
On course I need make a new hole, for safety tank filling pipe, but it will be propably to left side like in group A Sierras
Some paint work too:
To interior.
And to engine bay.
Next job is to get the whole car painted to that same color (Diamond White), but that´s all by this far
Last edited by RalliArttu; 26-06-2016 at 01:17 PM.
The following users liked this post:
XR4i - Sebastian (30-06-2016)
26-06-2016, 03:14 PM
#23
Advanced PassionFord User
This is a brilliant looking project, thanks for sharing
26-06-2016, 03:47 PM
#24
RalliArttu
Thread Starter
Thanks! Tho sometimes I wish that I could spent more of my time for this project.. For example in this spring I changed head gasket to my other Mk1, and made exhaust it, and did some other fine tuning for it, but there´s still few thigs to figure out before MOT.
Hopefully I got enough time to get this one painted during next month
Hopefully I got enough time to get this one painted during next month
13-08-2016, 09:49 AM
#25
RalliArttu
Thread Starter
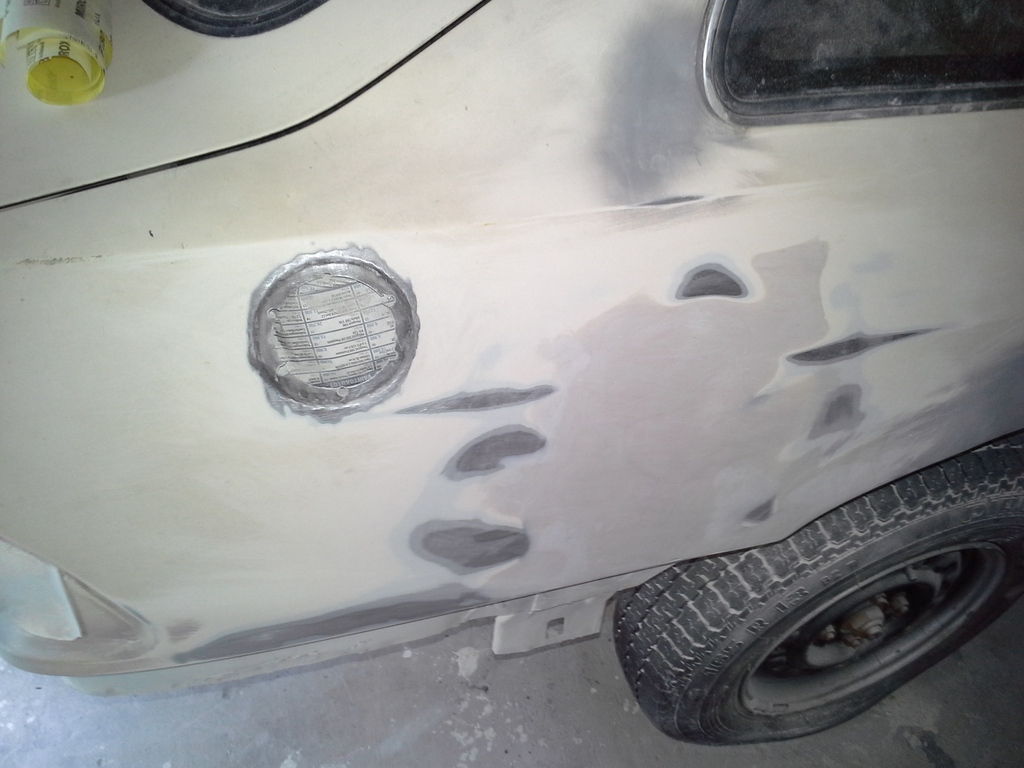
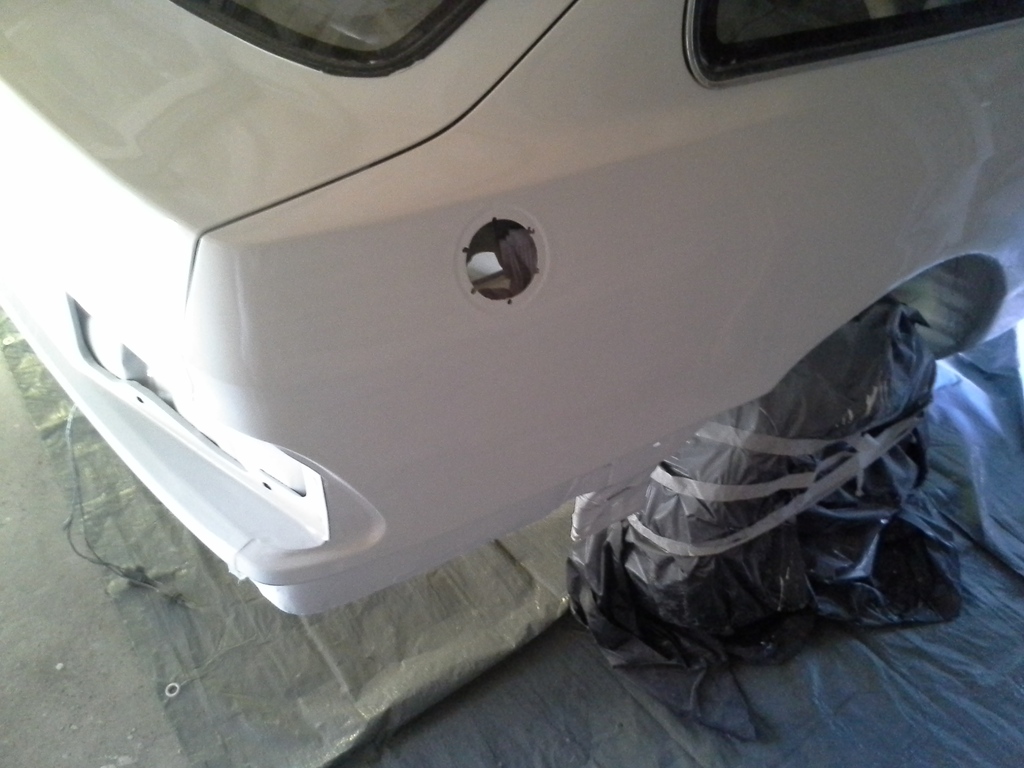
Few weeks ago I got a part, for figuring out that new fuel filling hole, which was quite simple after all:

Yes its on right side, meaning = wrong side, if thinking group A Sierras, but at least I don´t have to drive car any different way to gas station
...and then I gave final touch to bodyshell by adding body filler and doing lot of sanding:

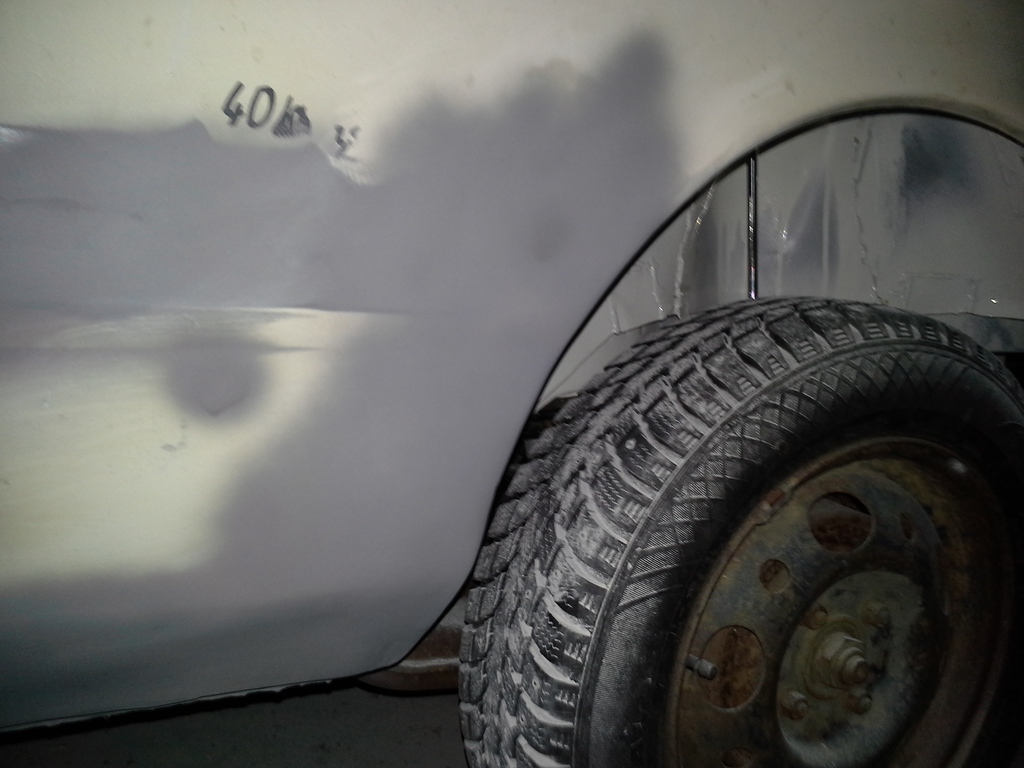
I checked that places were smooth by spreading some cheap primer. As everything seemed to be enough fine.
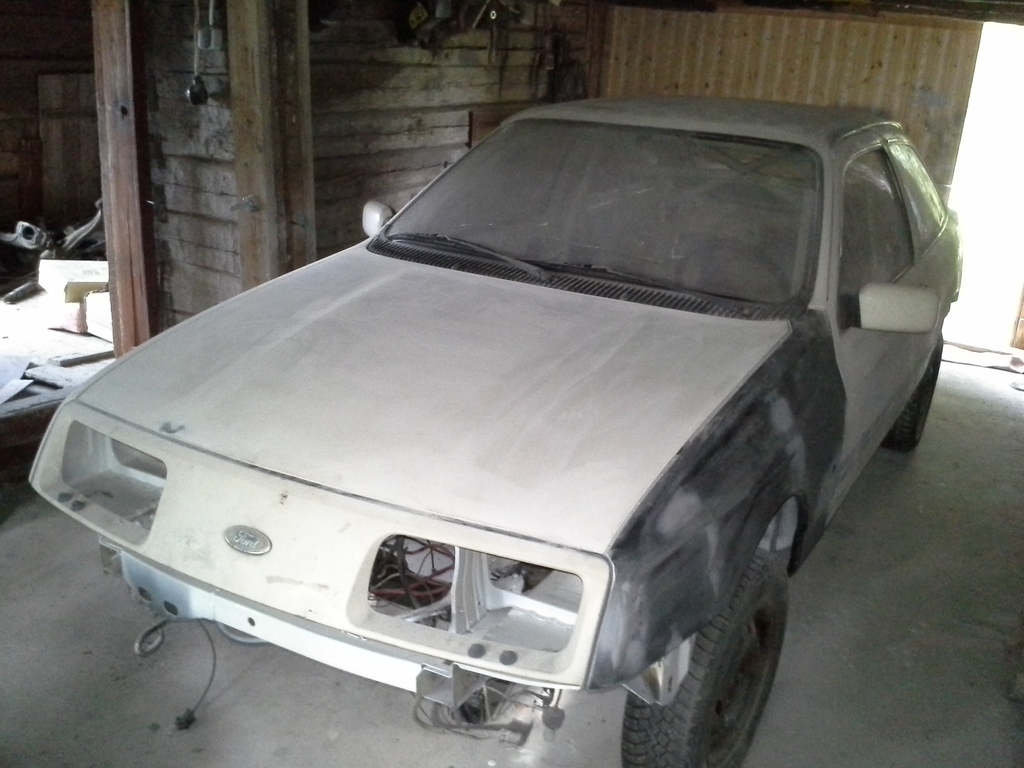
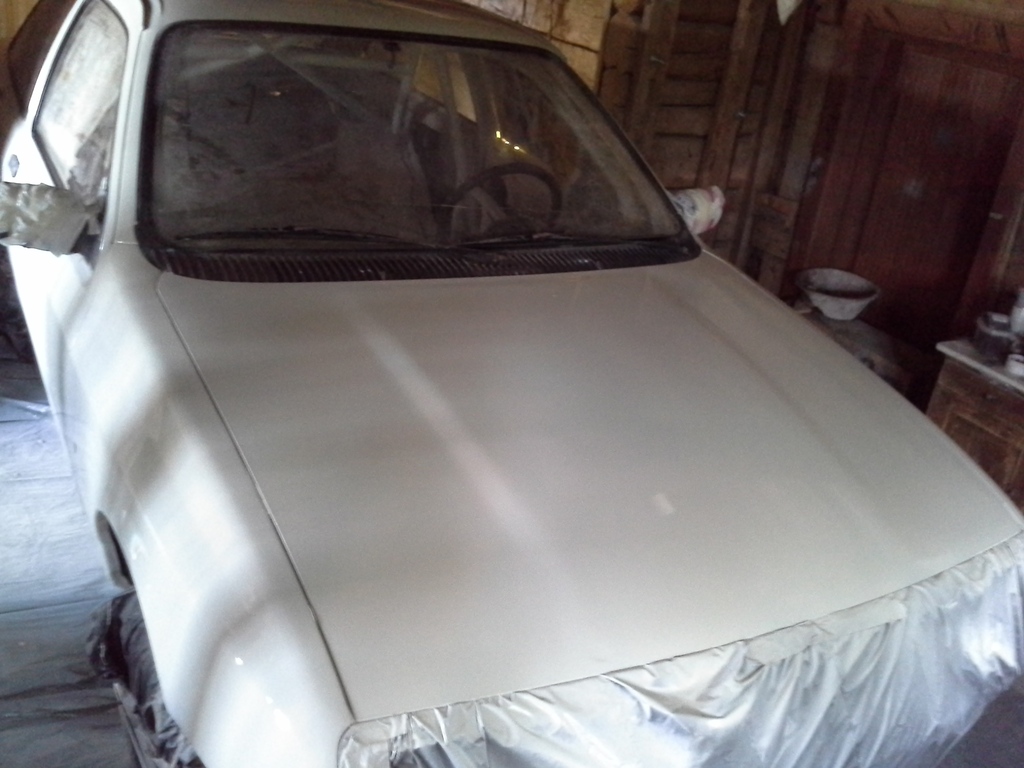
Whole car ready for layer of epoxy. Note: bonnet found its way back to original place
To be honest, I was suprised how easy this Troton´s Master epoxy (2-pack, of course) was to paint/spray, even for amateur like me
More pics coming up pretty soon, this was just part of work that I´ve done
Yes its on right side, meaning = wrong side, if thinking group A Sierras, but at least I don´t have to drive car any different way to gas station
...and then I gave final touch to bodyshell by adding body filler and doing lot of sanding:
I checked that places were smooth by spreading some cheap primer. As everything seemed to be enough fine.
Whole car ready for layer of epoxy. Note: bonnet found its way back to original place
To be honest, I was suprised how easy this Troton´s Master epoxy (2-pack, of course) was to paint/spray, even for amateur like me
More pics coming up pretty soon, this was just part of work that I´ve done
13-08-2016, 02:02 PM
#27
RalliArttu
Thread Starter
14-08-2016, 03:29 PM
#29
RalliArttu
Thread Starter
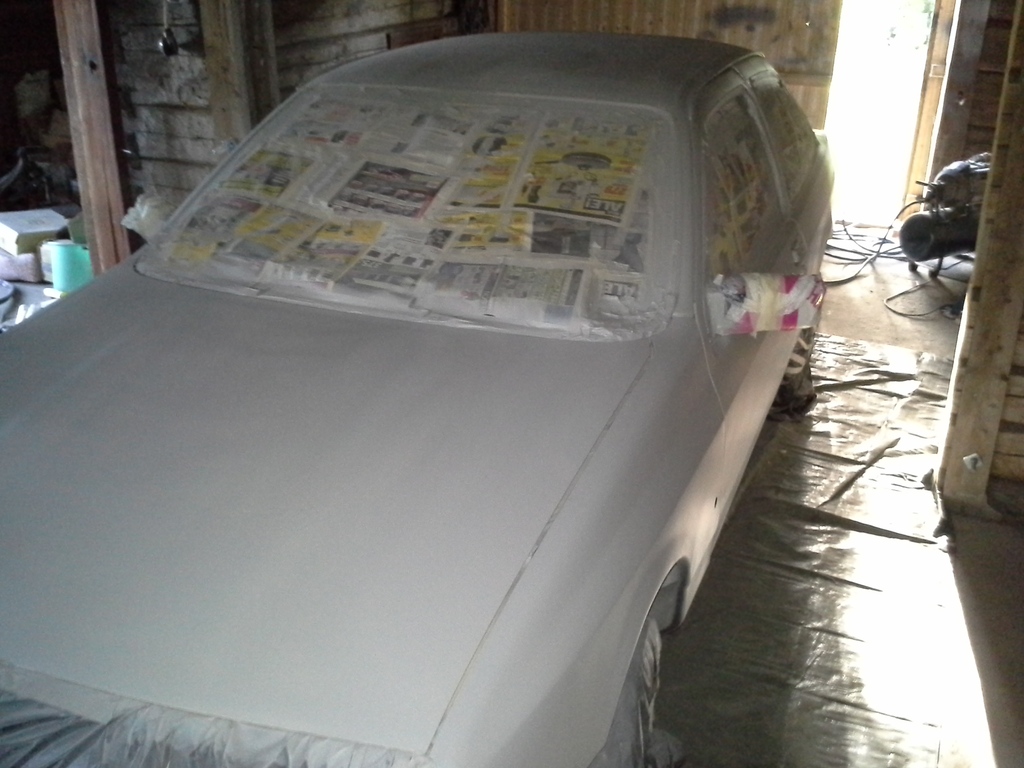
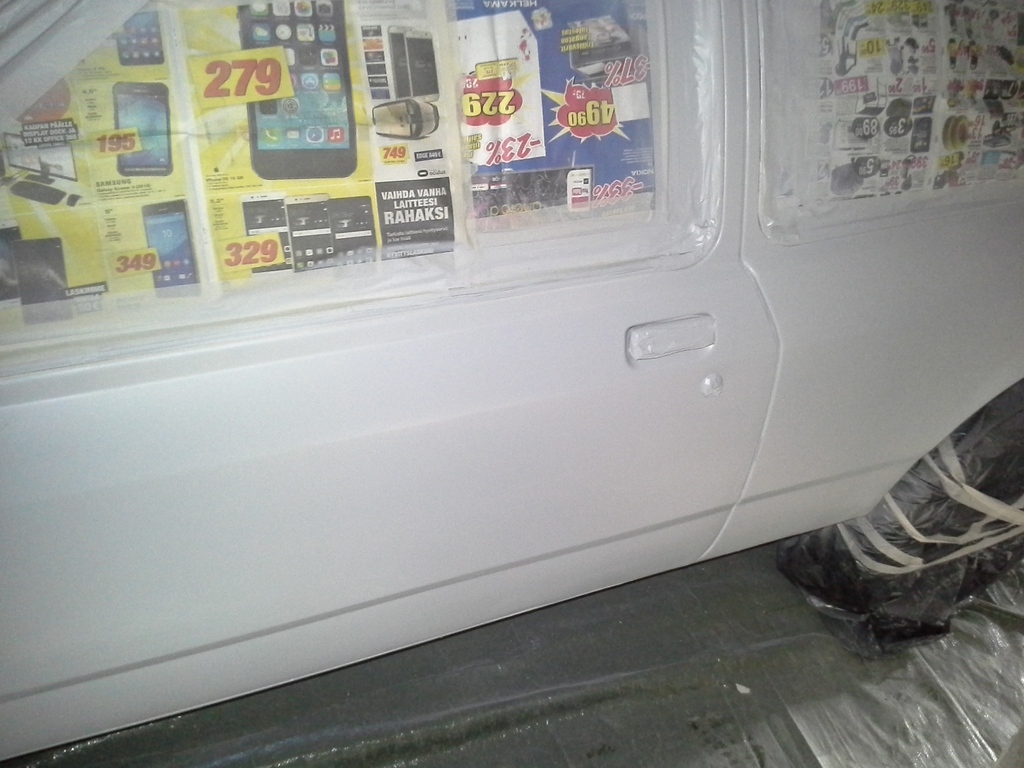
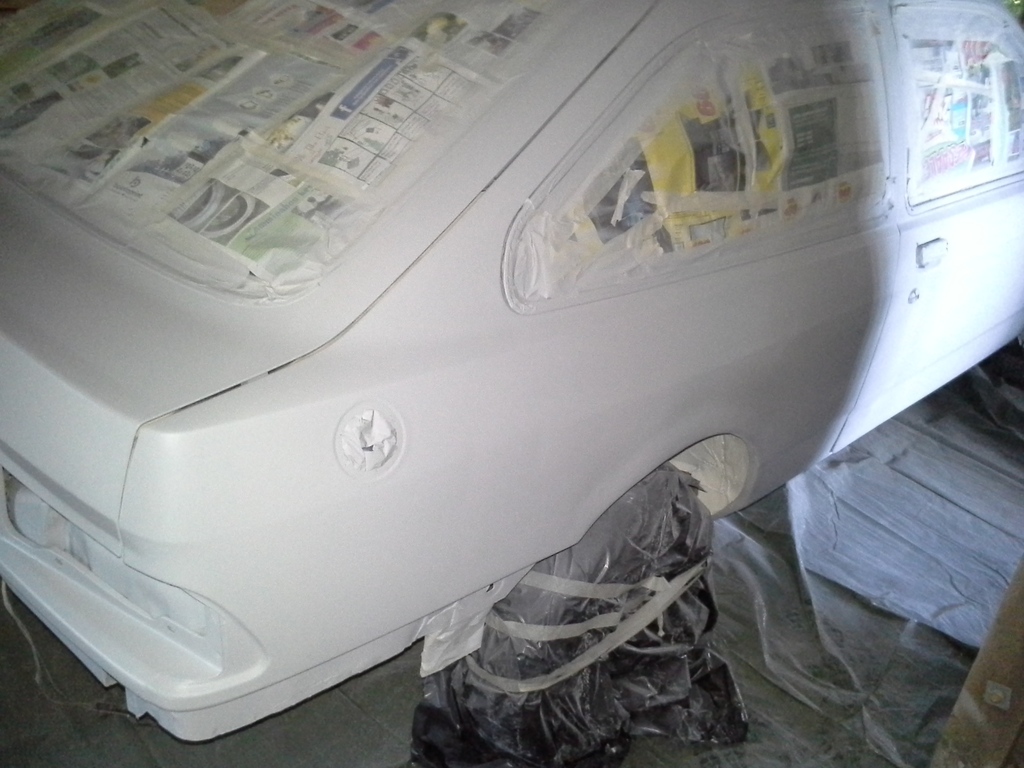
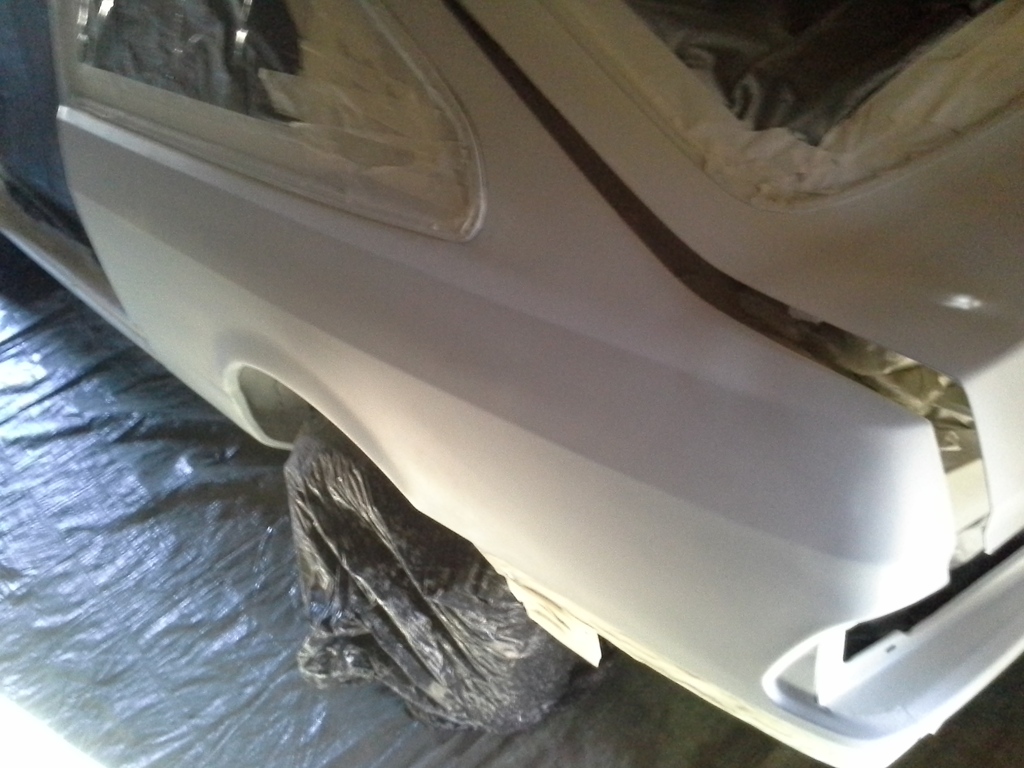
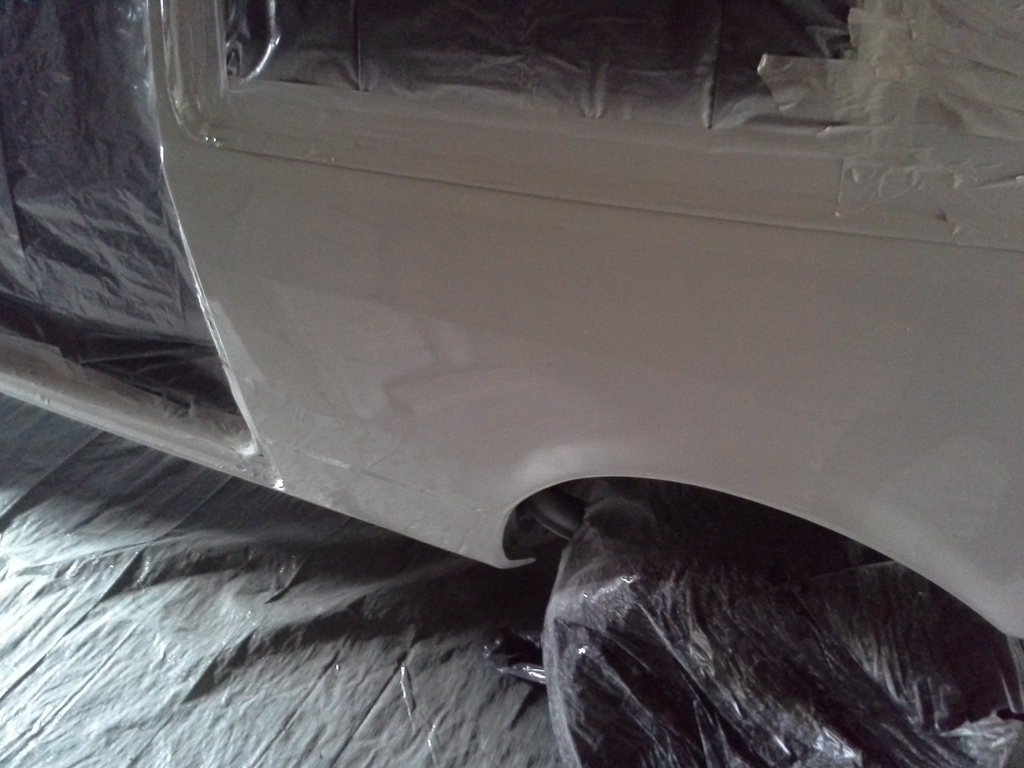
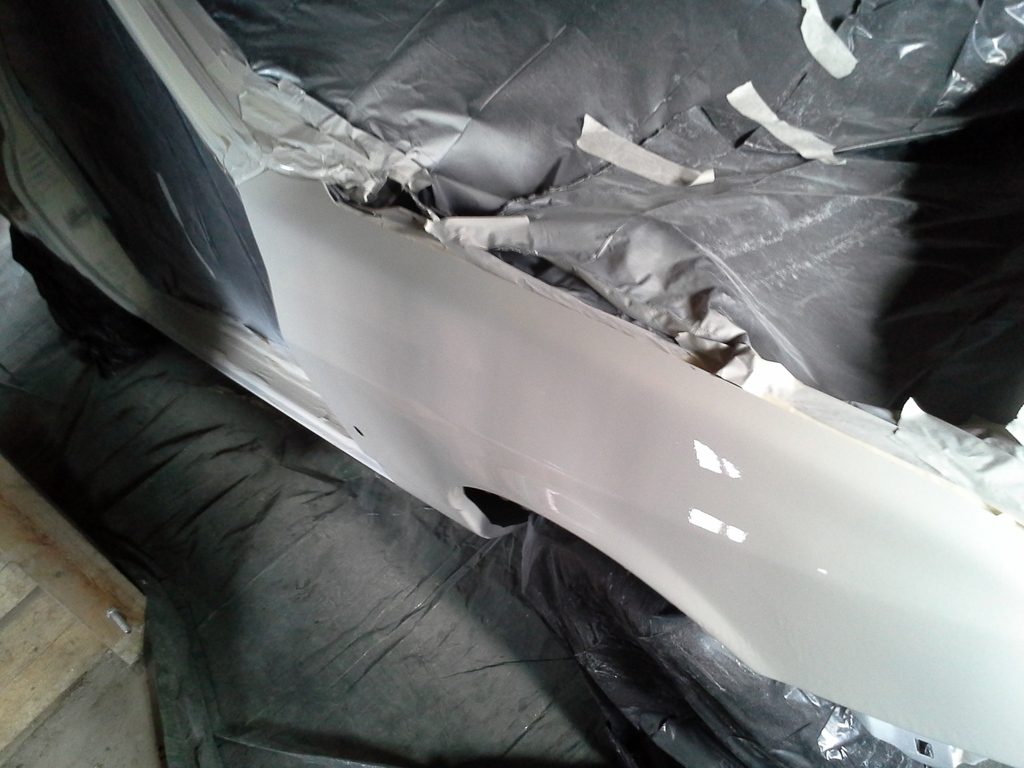
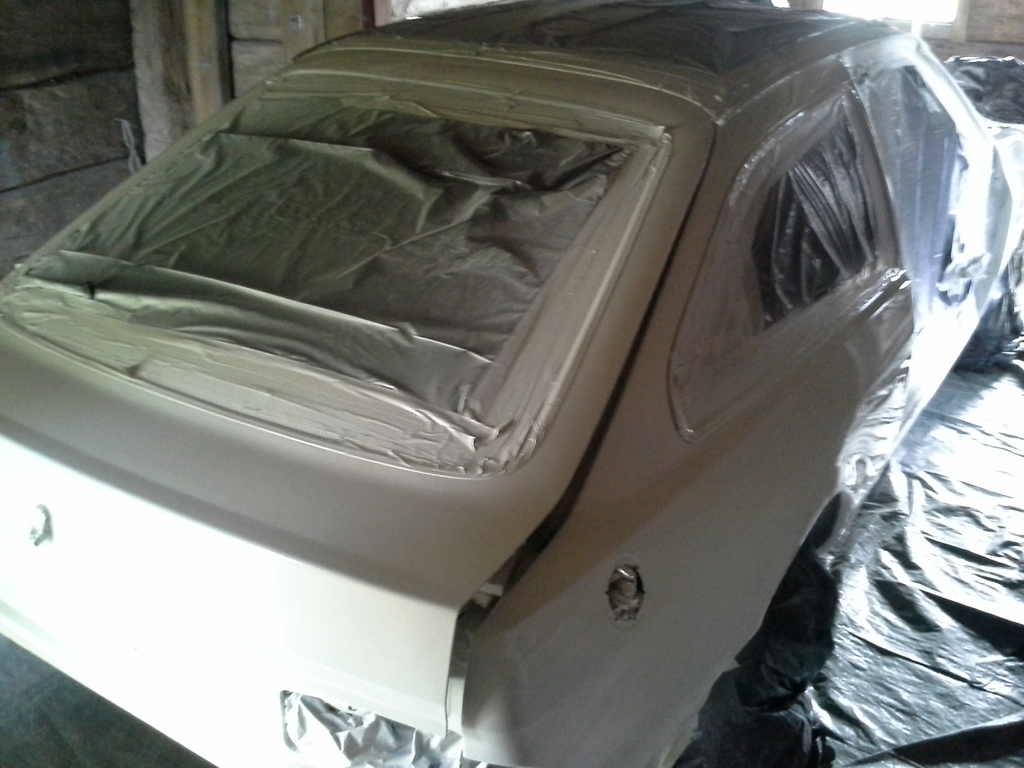
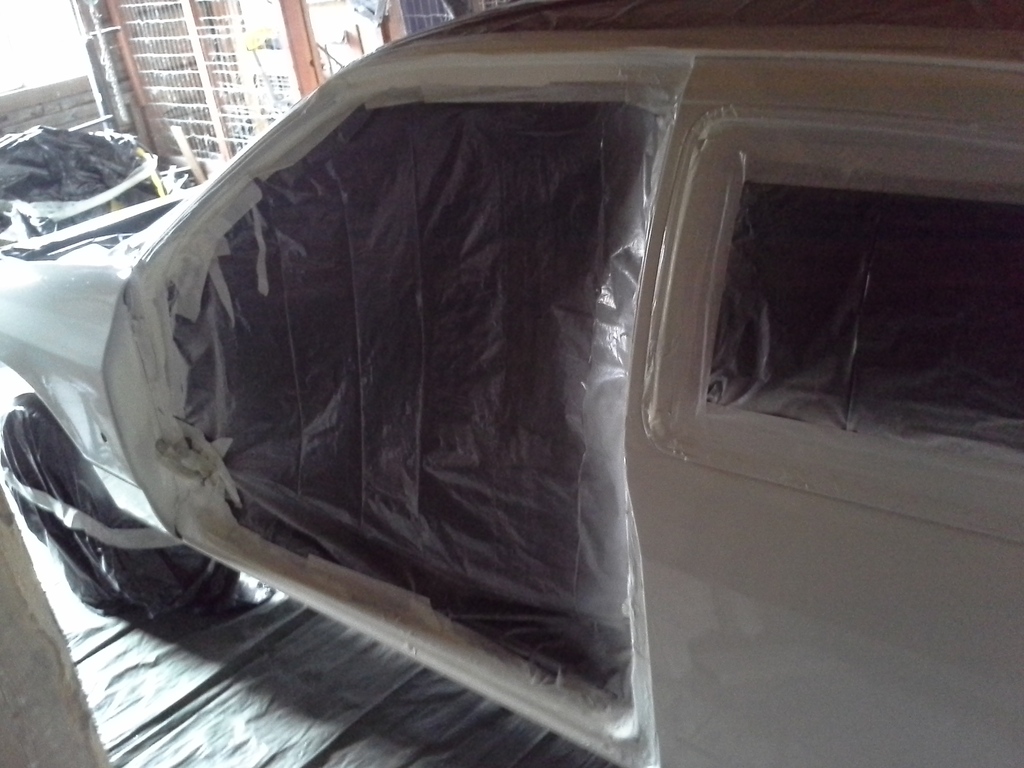
Thanks, and sorry to keep you guys waiting.. because car has been painted with Diamond White:
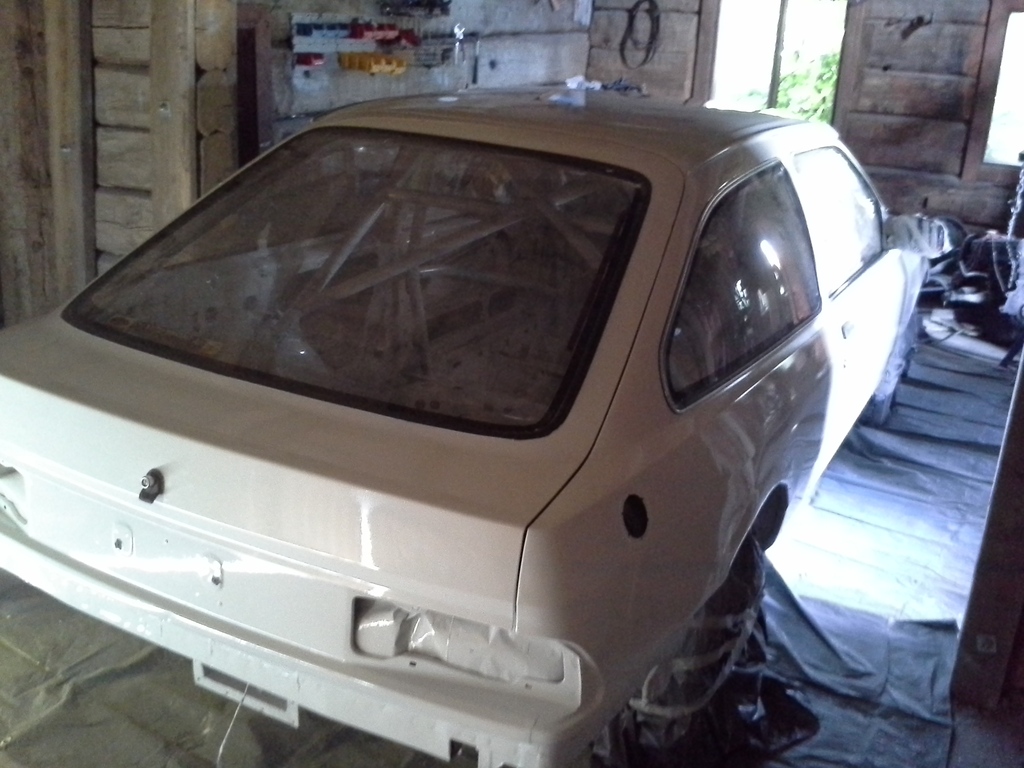

Yes it does still need some final touch, cause I managed to made few runs to paint layer (not in those pics), that I have wet sand away.
Bodywork almost done I quess
Yes it does still need some final touch, cause I managed to made few runs to paint layer (not in those pics), that I have wet sand away.
Bodywork almost done I quess
14-08-2016, 05:22 PM
#30
PassionFord Regular
cracking plan there... i like it!
keep us posted mate!
keep us posted mate!
18-10-2016, 02:30 PM
#33
RalliArttu
Thread Starter
Long time no see... Few pics rest of the work that I´ve done for this car:
Painted the rollcage with some white Hammer- paint.
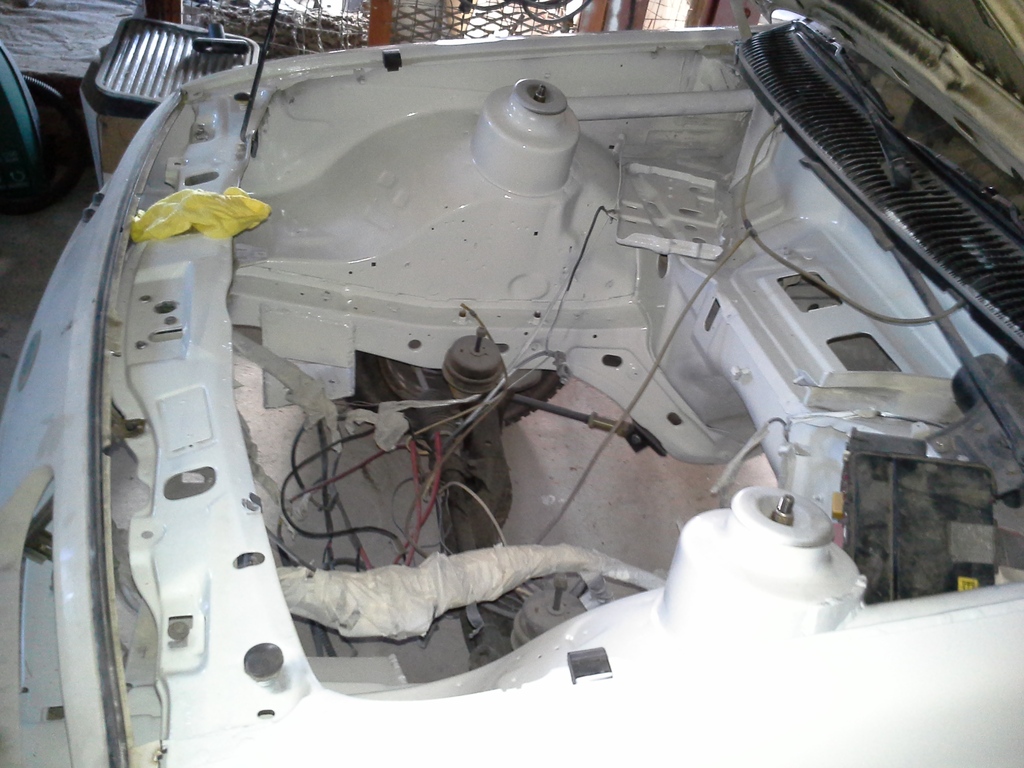
Random pic from the empty engine bay, note those mounts for re-positioned ARB
I also solved the becomming camber issue at the rear. Instead of adding shims between tracking arm and bearing hub, I took bit more legal way
Point was to modify those mounts in subframe. Cause there is not much space, I raised both of those "boxes" just a little, by cutting top parts off and then welding new metal to make them higher.
Both mounts raised.
Then I grinded those holes upwards half an inch, and added those stoppers that will lock up the camber adjust. I will use washers between those stoppers, and the hole for bolt, can be made high or low if using standard ride height for some reason.
Some testing with tracking arm. Fits nicely!
Also bought MT-75 gearbox:
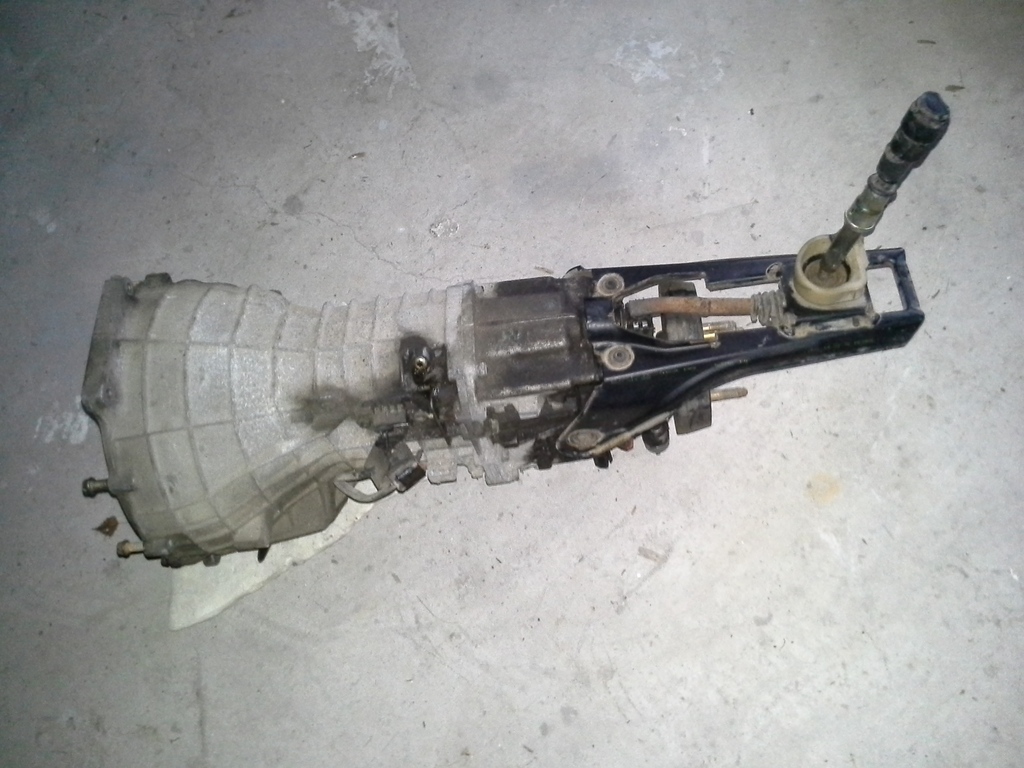
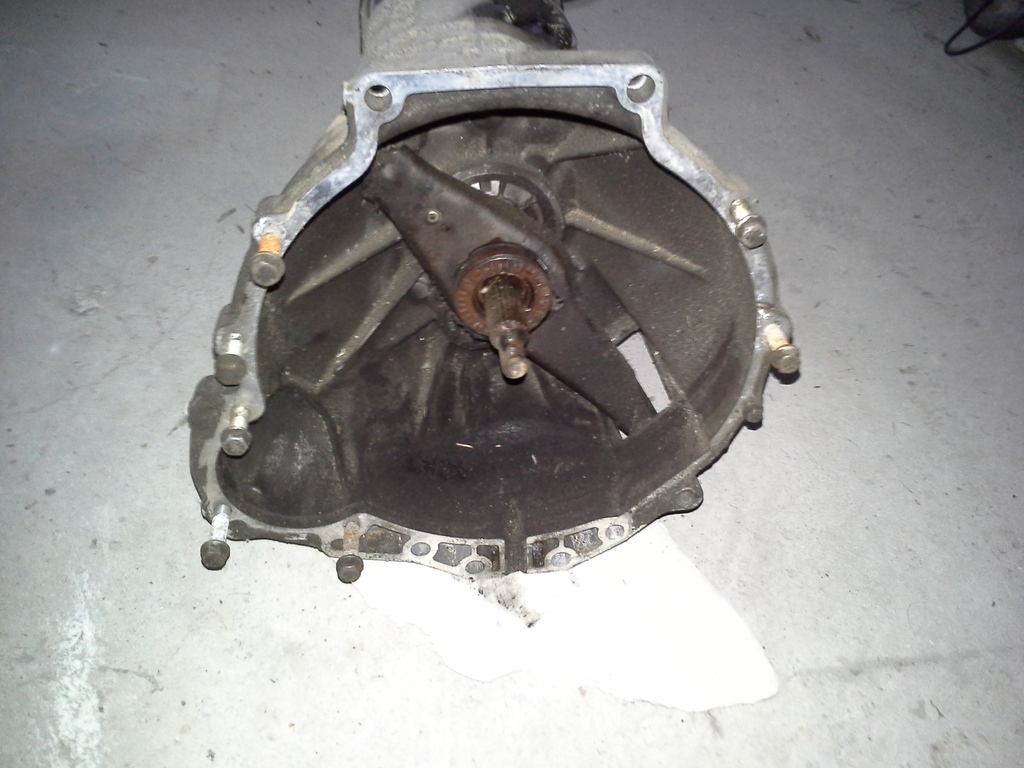
Should sit well behind Balcktop Zetec. Needs propably release bearing from Transit as I´m using Mondeos clutch...?
Next things to do, is to make new oil sump for that engine and other preparation for RWD installation
Painted the rollcage with some white Hammer- paint.
Random pic from the empty engine bay, note those mounts for re-positioned ARB
I also solved the becomming camber issue at the rear. Instead of adding shims between tracking arm and bearing hub, I took bit more legal way
Point was to modify those mounts in subframe. Cause there is not much space, I raised both of those "boxes" just a little, by cutting top parts off and then welding new metal to make them higher.
Both mounts raised.
Then I grinded those holes upwards half an inch, and added those stoppers that will lock up the camber adjust. I will use washers between those stoppers, and the hole for bolt, can be made high or low if using standard ride height for some reason.
Some testing with tracking arm. Fits nicely!
Also bought MT-75 gearbox:
Should sit well behind Balcktop Zetec. Needs propably release bearing from Transit as I´m using Mondeos clutch...?
Next things to do, is to make new oil sump for that engine and other preparation for RWD installation
18-10-2016, 08:46 PM
#34
PassionFord Regular

Cars looking good
Tried to do the same as you and put a zetec engine and mt75 box together using a 1.8 flywheel and Mondeo clutch, you either need to extend the pivot point or extend the release bearing neither which work very well, best is to drill the flywheel for a pinto clutch or buy a flywheel designed for the job
The sump can be made or use the 1.8 sierra one, the problem is the oil pickup pipe that has to be the correct shape, the 1.8 sierra one does not seem to fit very well in a blacktop engine
I would recommend buying the correct conversion parts from retro-ford, I now have and should have done so at the beginning saving a lot of time and hassle
Good luck
04-04-2017, 10:52 AM
#35
RalliArttu
Thread Starter
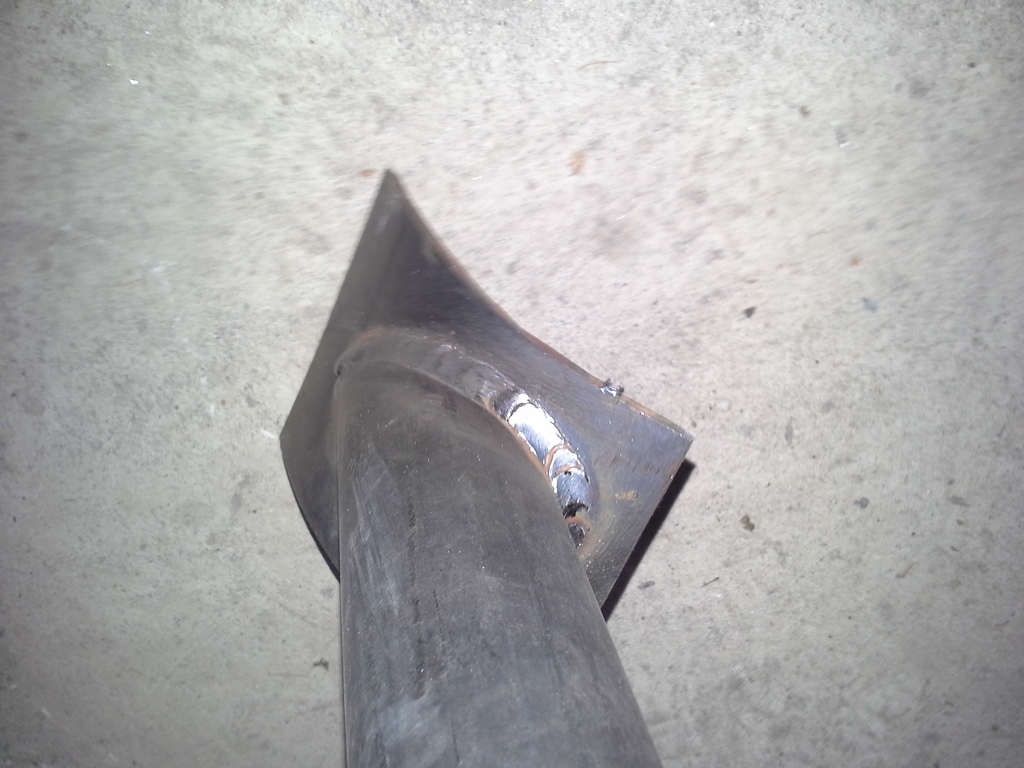
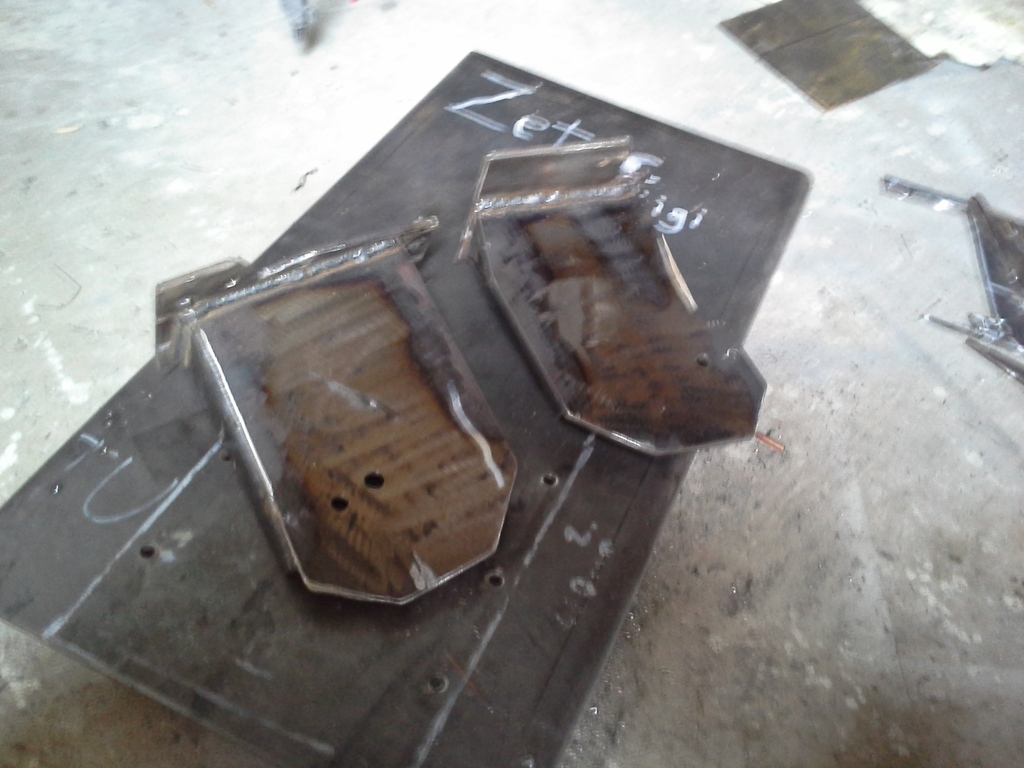
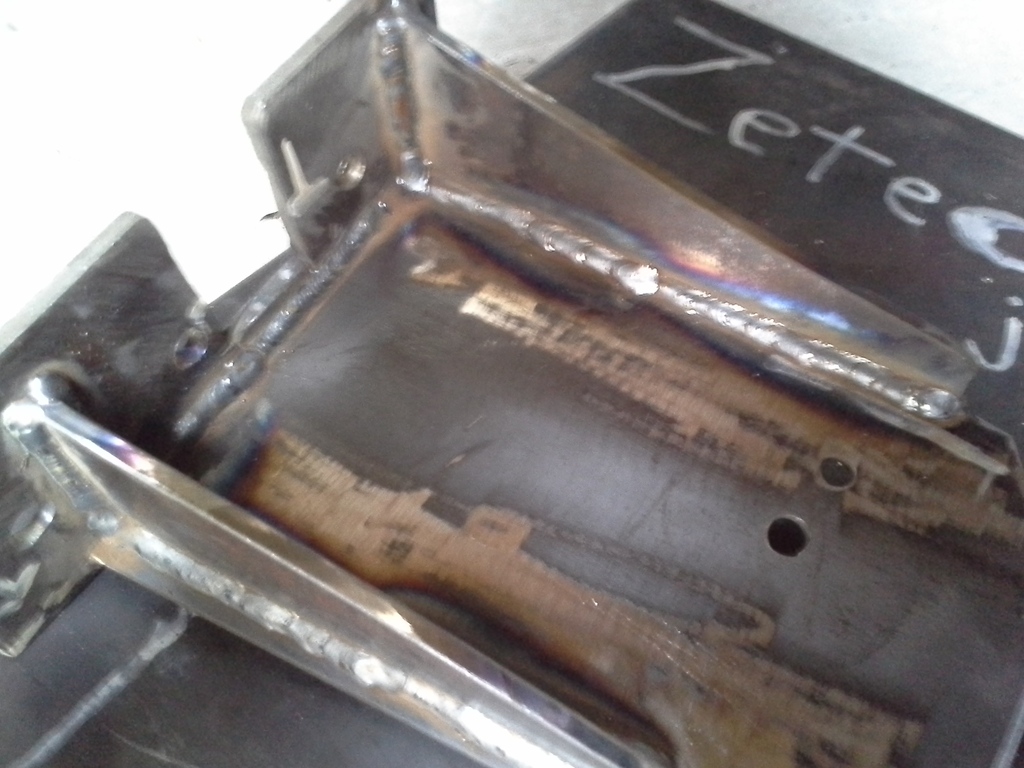
Hello once again! Finally I´ve started to work on those extra valves for cylinder head, meaning that becoming Zetec installation. First job, and propably the hardest DIY- part, was the fabrication of oil sump for Sierra.
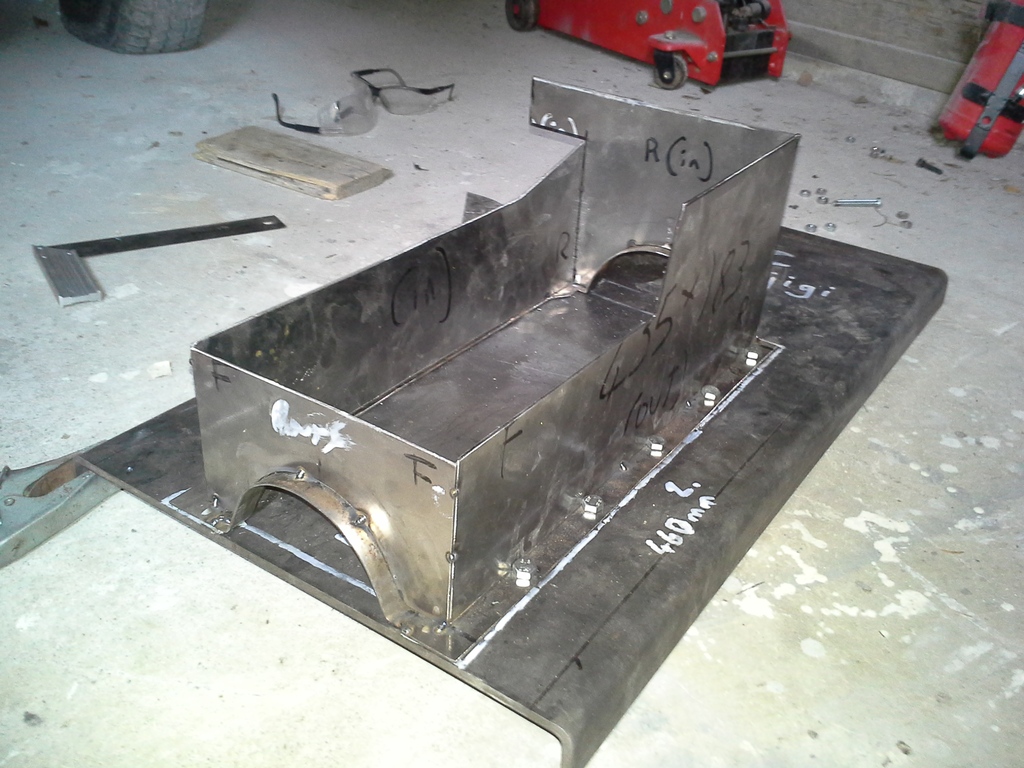
Carefully meseamarised bits and pieces of sheet metal tacked together and bolted to jig. Only few of the parts are missing in this point.
After hours of welding, I got what I was looking for as can be seen below:
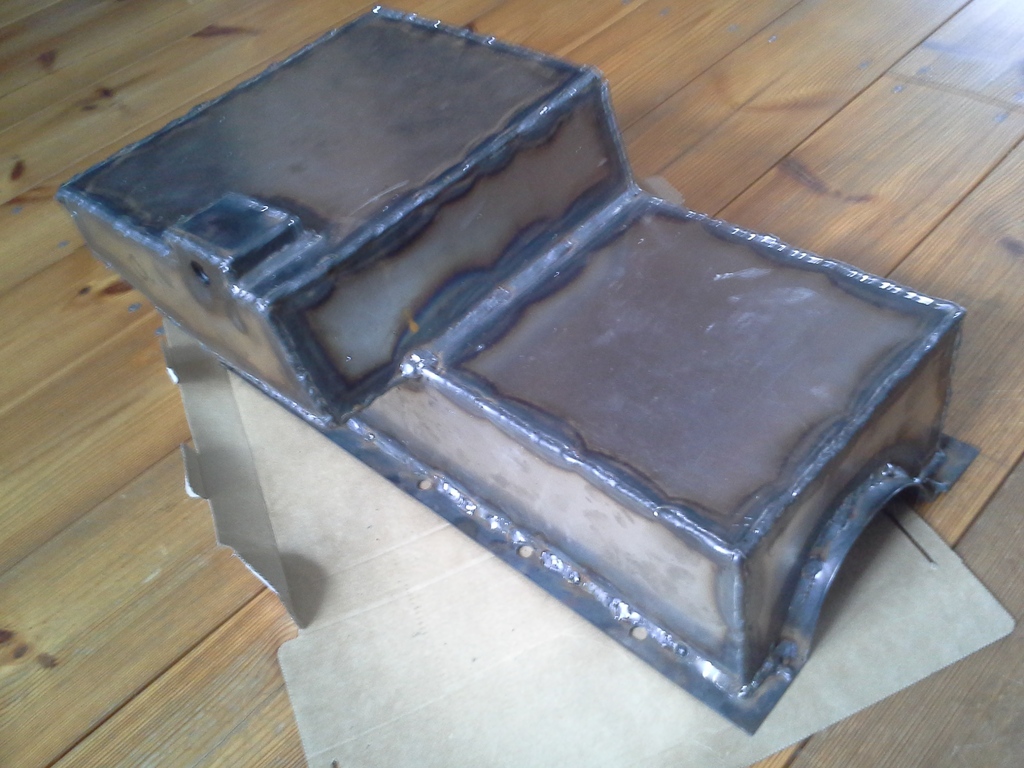
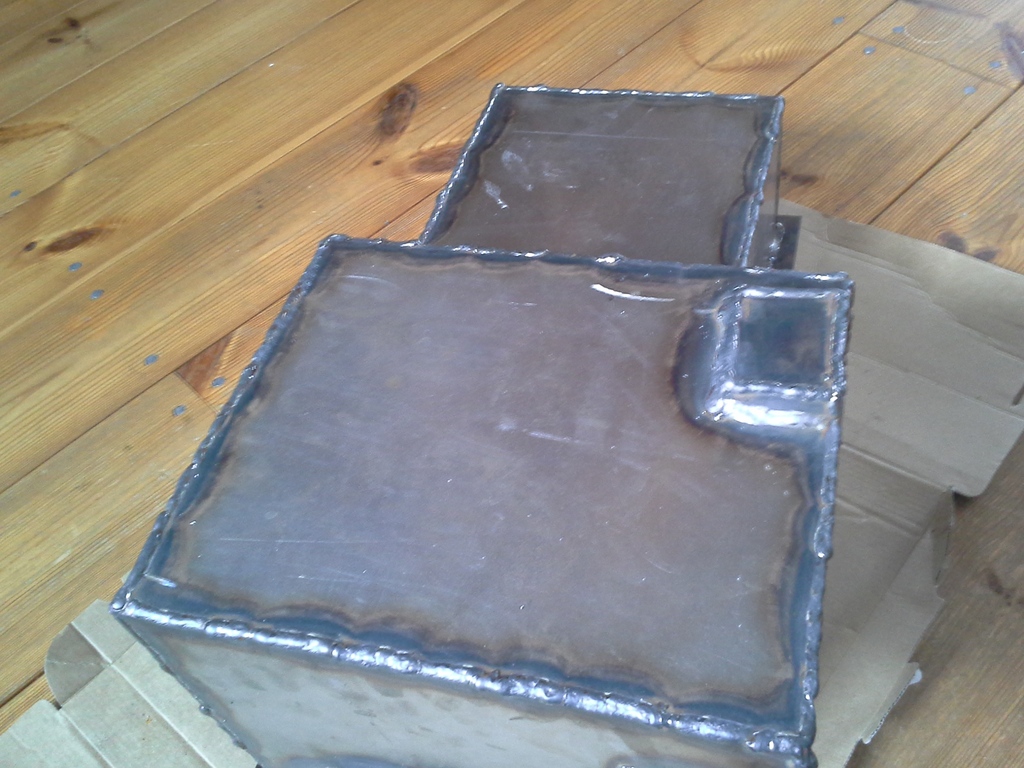
I don´t own a sheet metal bender, and actually the sheet that I´m using is 2mm thick, so it can´t be bended without a proper CNC-operated machnine. So that´s why all the sharp edges has been welded.
I quess up next I need do those engine mounts to go furher in this mod
Carefully meseamarised bits and pieces of sheet metal tacked together and bolted to jig. Only few of the parts are missing in this point.
After hours of welding, I got what I was looking for as can be seen below:
I don´t own a sheet metal bender, and actually the sheet that I´m using is 2mm thick, so it can´t be bended without a proper CNC-operated machnine. So that´s why all the sharp edges has been welded.
I quess up next I need do those engine mounts to go furher in this mod
04-04-2017, 11:50 AM
#36
PassionFord Regular
 love your job, mate... keep it going!
07-04-2017, 08:31 AM
love your job, mate... keep it going!
07-04-2017, 08:31 AM
#38
RalliArttu
Thread Starter
Thanks guys!
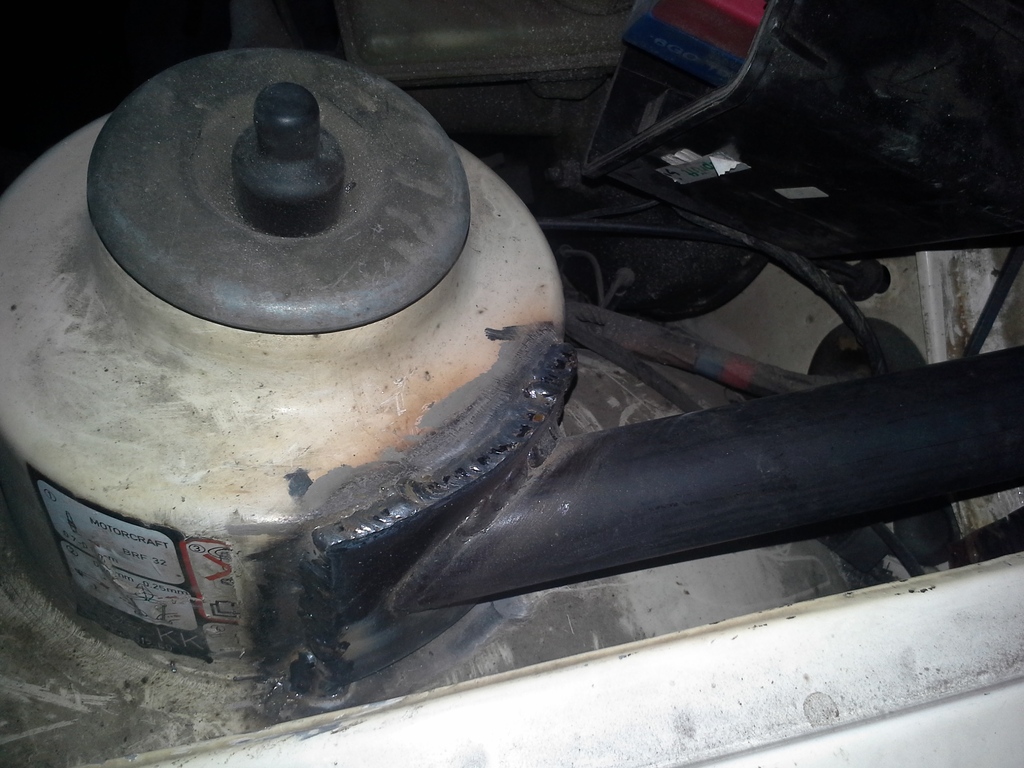
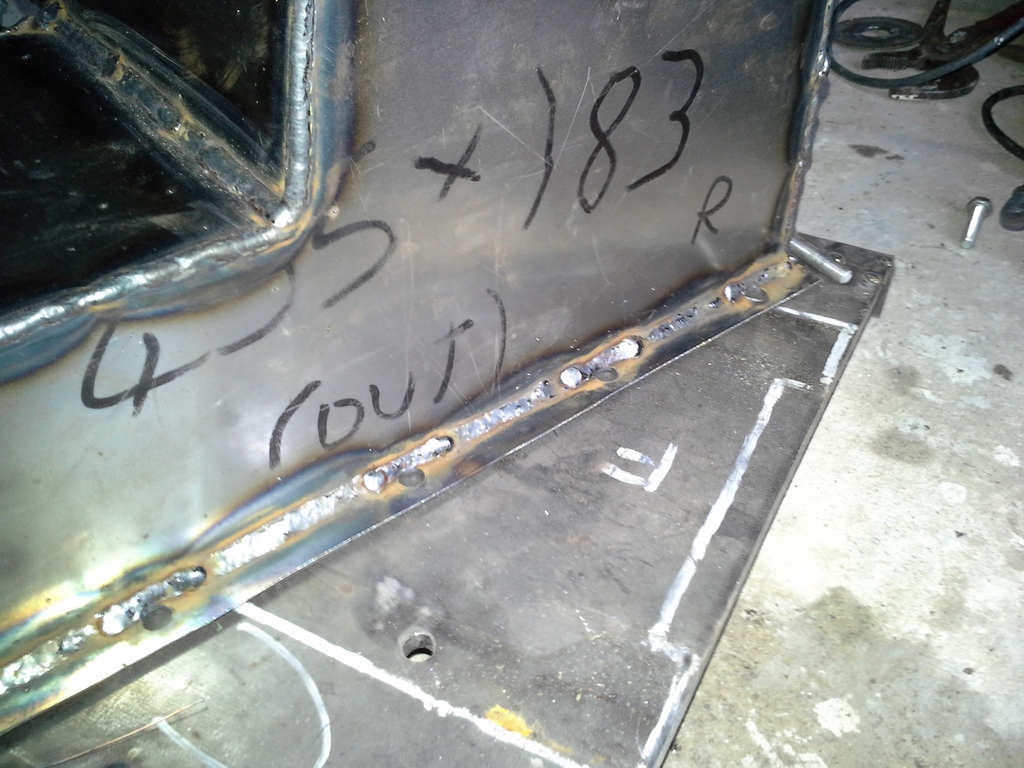
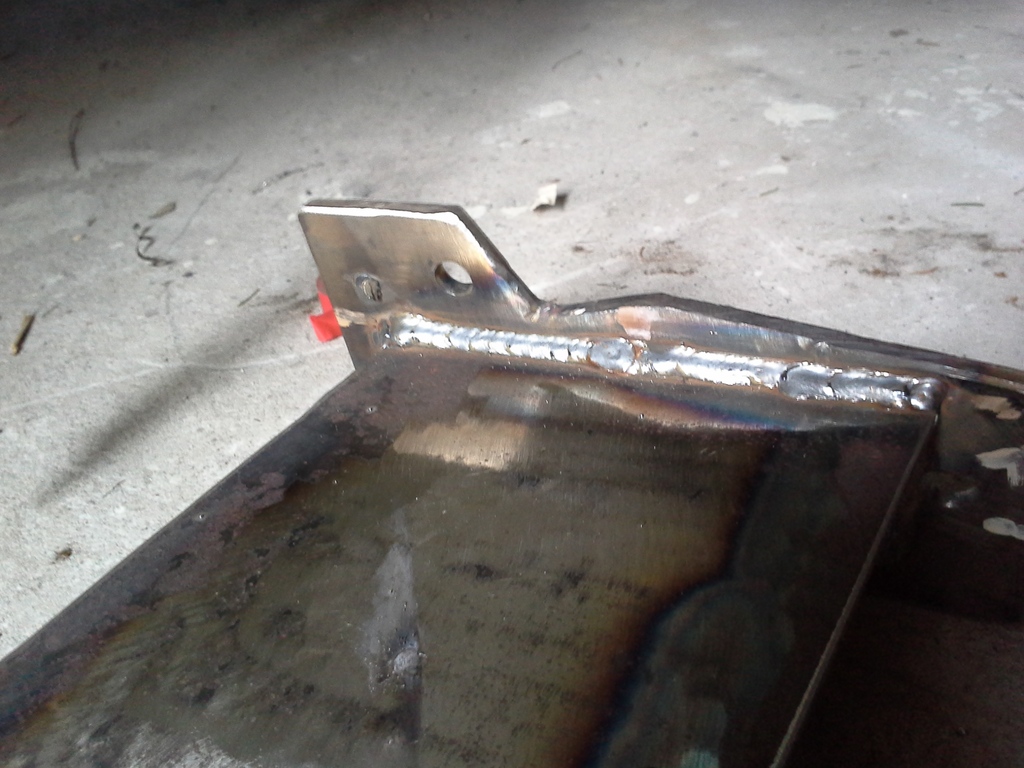
Allthough cutting and welding wasn´t over yet
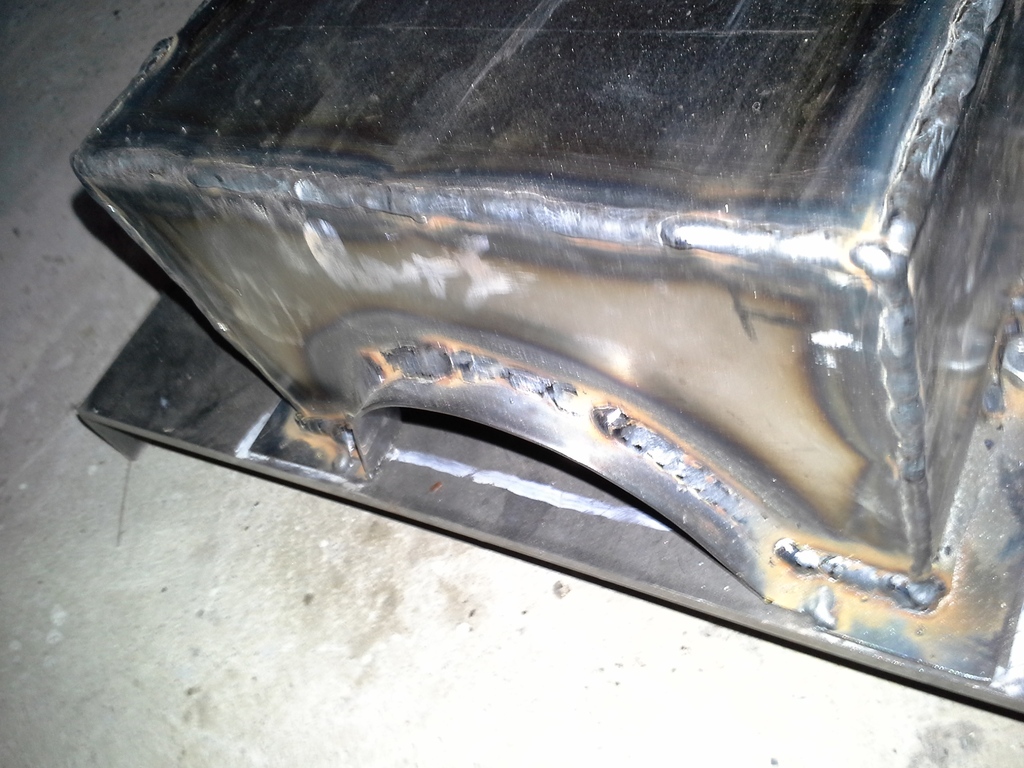
My custom made oil sump, was taking contact with bellhousing... So I had made more space for it. After taking few measurements, I cut away some stuff, and welded new sheet of metal in there.
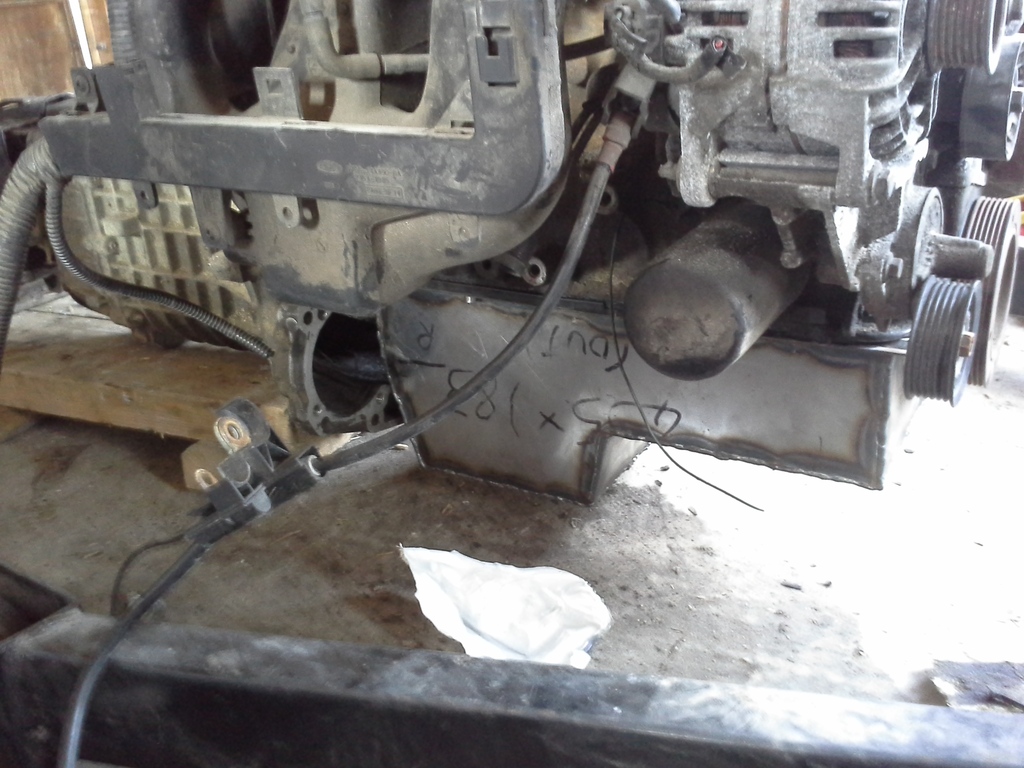
Finally it fits there. Still there aint´t too much extra space.
Allthough cutting and welding wasn´t over yet
My custom made oil sump, was taking contact with bellhousing...
Finally it fits there. Still there aint´t too much extra space.
25-04-2017, 07:24 PM
#39
RalliArttu
Thread Starter
Installed gearbox and propshaft into car earlier, and finally I managed to fabricate those side mounts for Zetec:
Few closer pics:
From the right side I had to do it different way:
May not be pretty, but at least keeps my engine in stragiht line...
...and then there were 16...
Valves I mean
Fits well.
Few closer pics:
From the right side I had to do it different way:
May not be pretty, but at least keeps my engine in stragiht line...
...and then there were 16...
Valves I mean
Fits well.
08-06-2017, 06:50 PM
#40
RalliArttu
Thread Starter
Attemp of fixing runs went out of my hands:
Lots of sanding...........

Luckily I got some epoxy primer left, just enough for this
And finally repaint was done (except the roof and bonnet, which were already in good enough shape):
Bodyshell done. Of course as the paint layer gone better, I noticed couple mistakes on primer work, but for track day car I`ll accept those few issues.
It´s me!
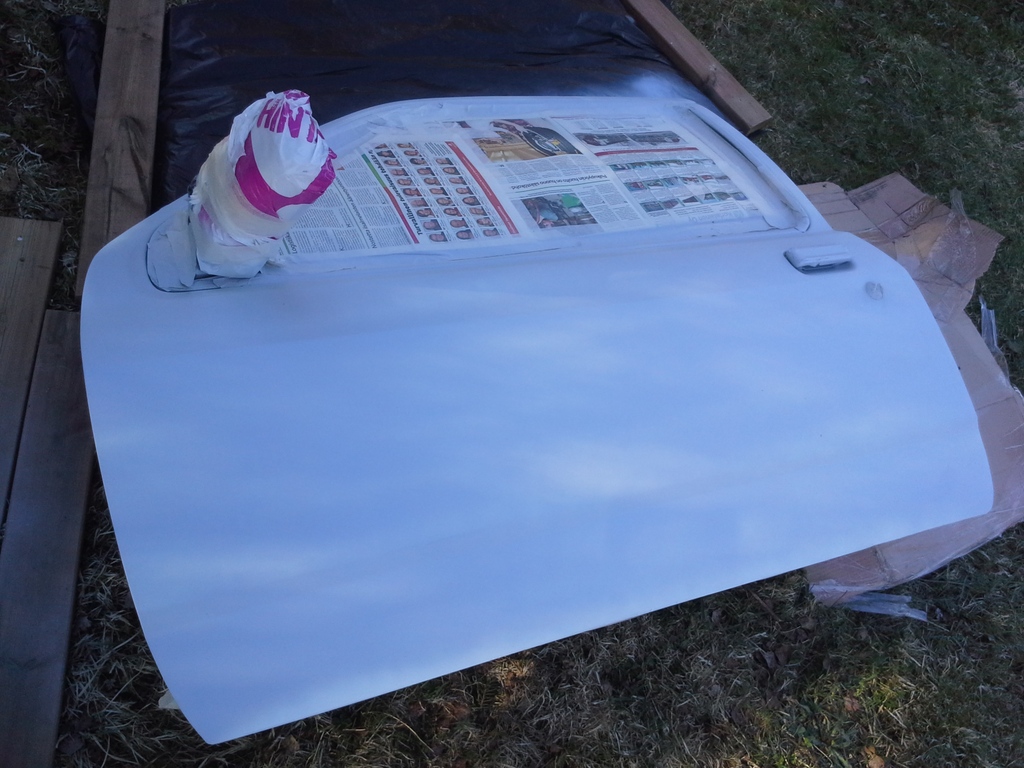
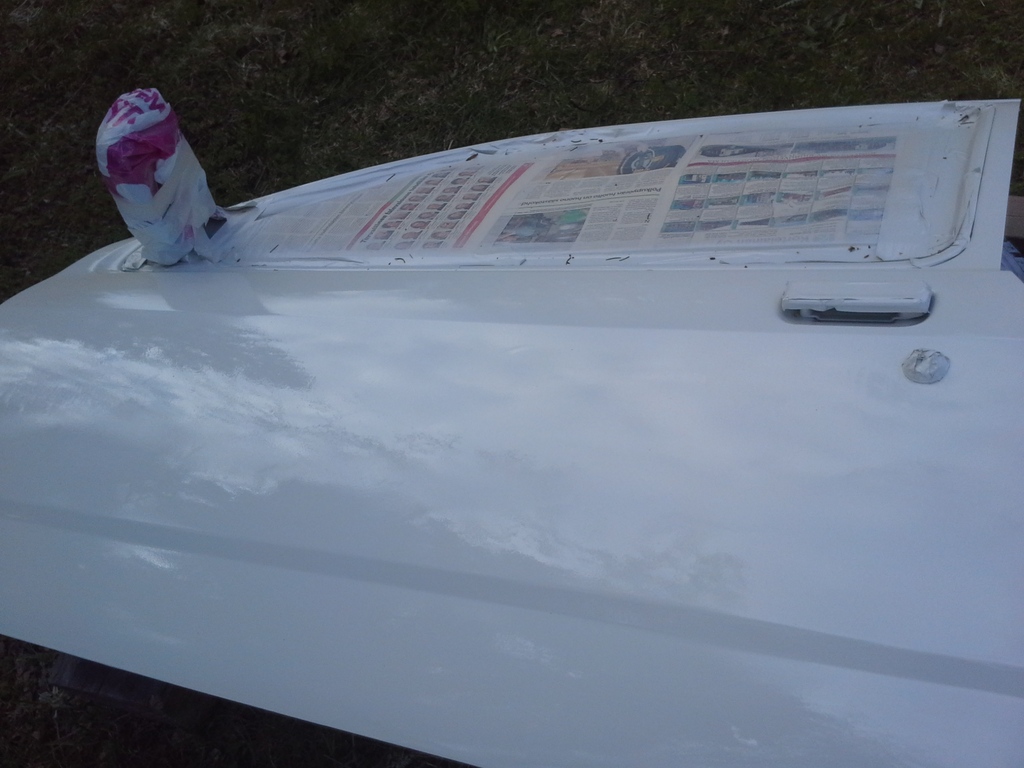
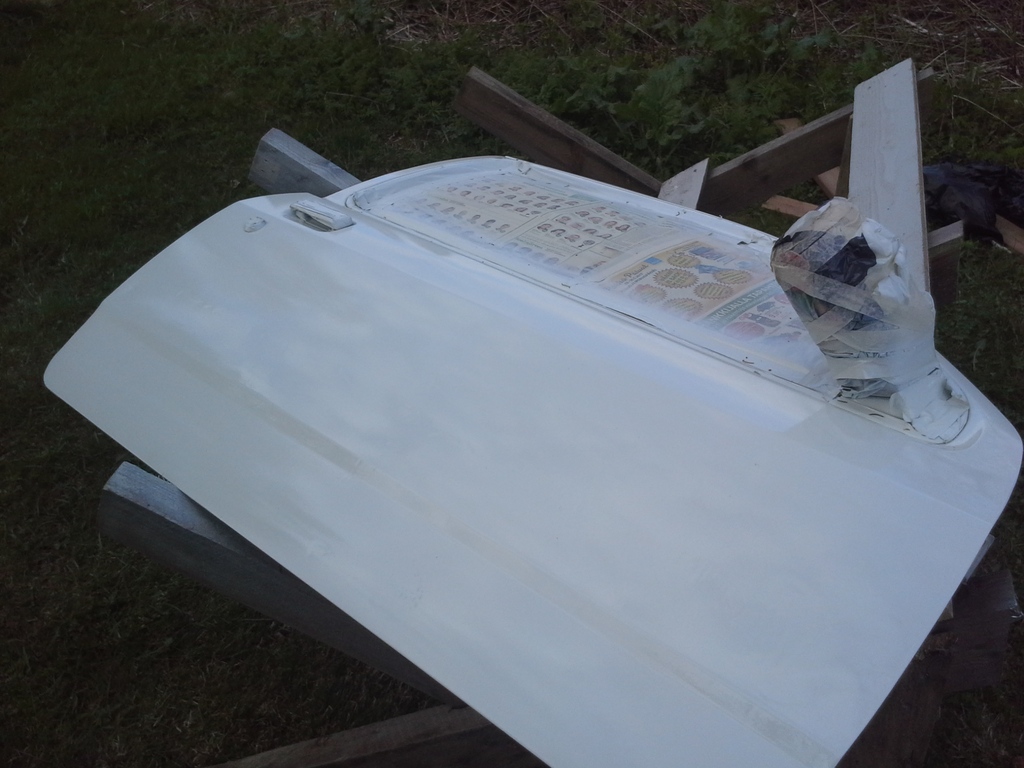
I painted doors seperately:
First on epoxy...
...and then on Diamond White.
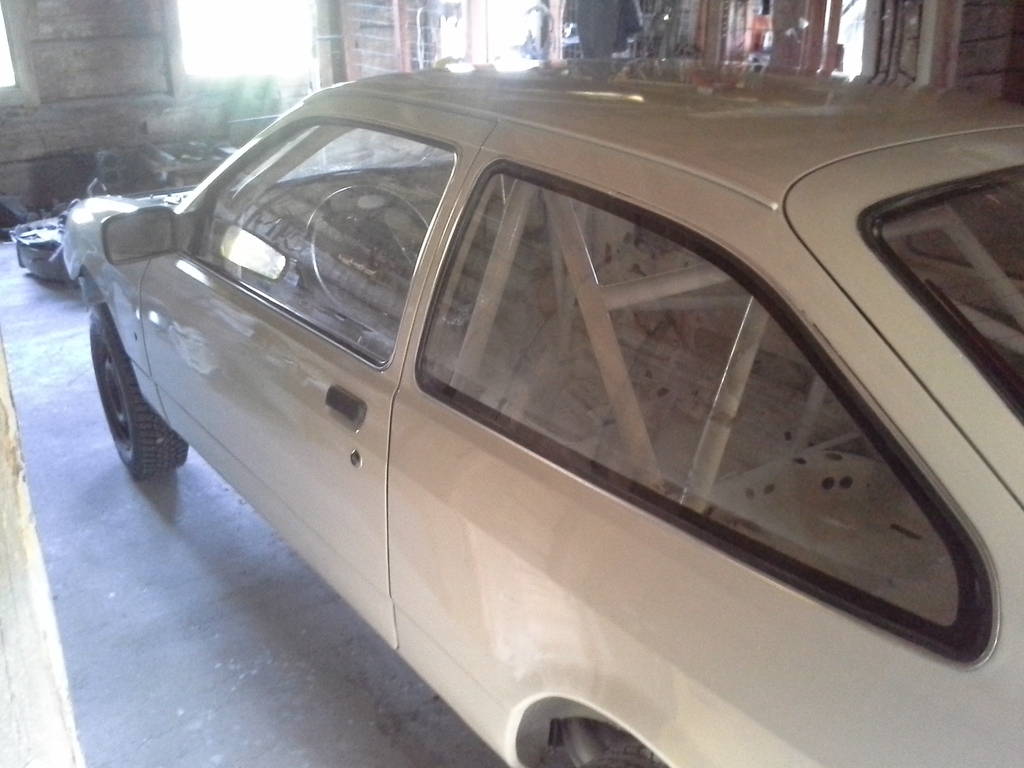
Today got the doors installed back to the car, and some pics for that:
Something is missing from the enginebay...
I`ll propably start to modify pickup pipe, for Zetec to finish its RWD installation, but.. that´s all.... by this far
Lots of sanding...........
Luckily I got some epoxy primer left, just enough for this
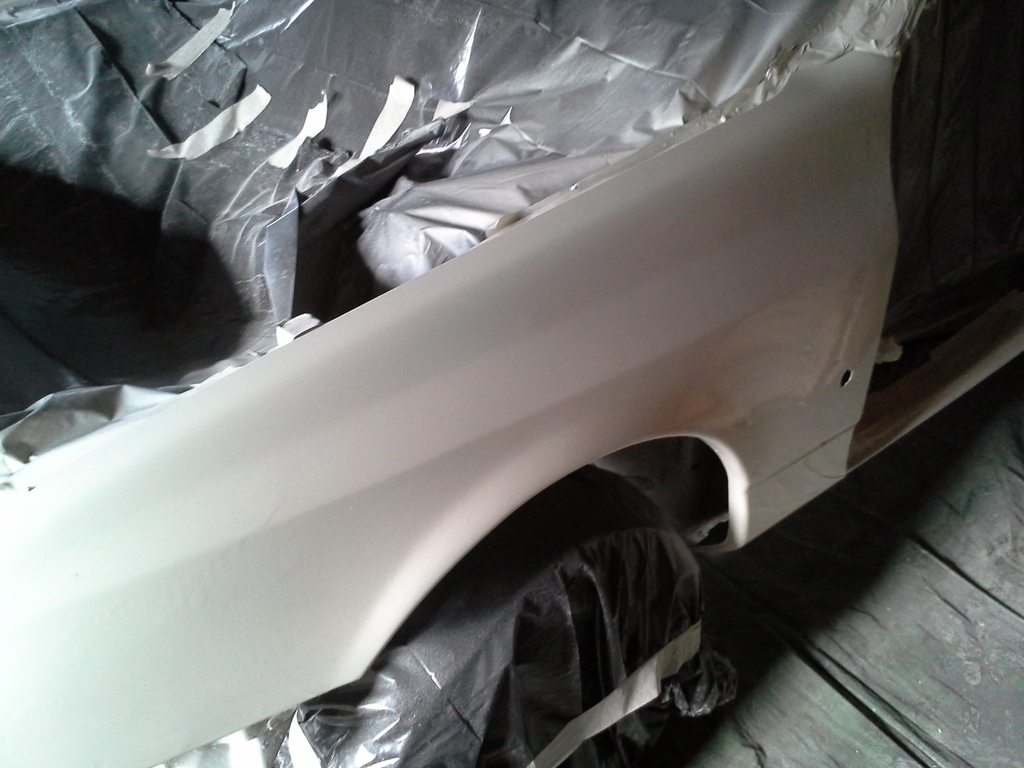
And finally repaint was done (except the roof and bonnet, which were already in good enough shape):
Bodyshell done. Of course as the paint layer gone better, I noticed couple mistakes on primer work, but for track day car I`ll accept those few issues.
It´s me!
I painted doors seperately:
First on epoxy...
...and then on Diamond White.
Today got the doors installed back to the car, and some pics for that:
Something is missing from the enginebay...
I`ll propably start to modify pickup pipe, for Zetec to finish its RWD installation, but.. that´s all.... by this far
Last edited by RalliArttu; 08-06-2017 at 06:56 PM.

