the story of my sapphire, welding nearly done, going all out and building a cossie ;)
 16-02-2014, 10:00 AM
#1
PassionFord Regular
Thread Starter
iTrader: (1)
Join Date: May 2009
Location: eastbourne
Posts: 477
Likes: 0
Received 0 Likes
on
0 Posts
hi people, right ive had this sierra for over a year now and theres abit of a story with it. Ive been meaning to start a thread on it since I got it so better late than never, however I might take me a while to remember everything and organise photos, heres my little story
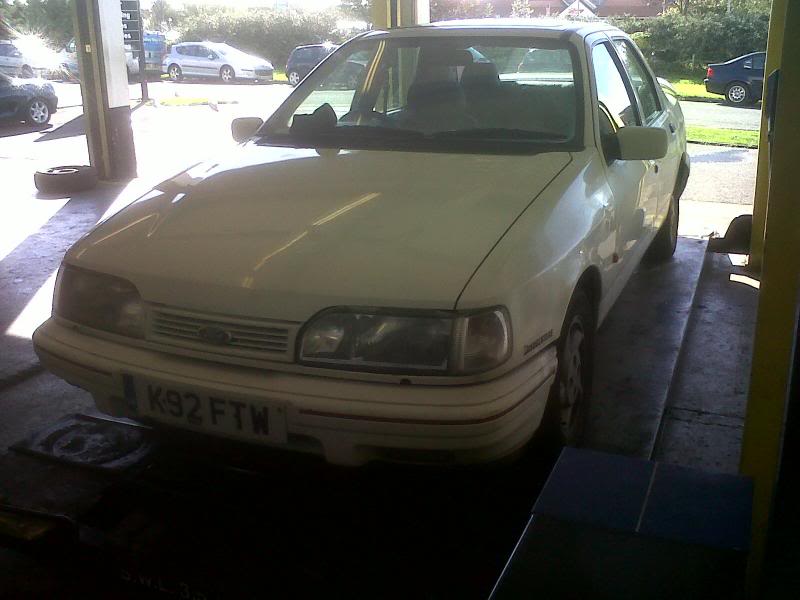
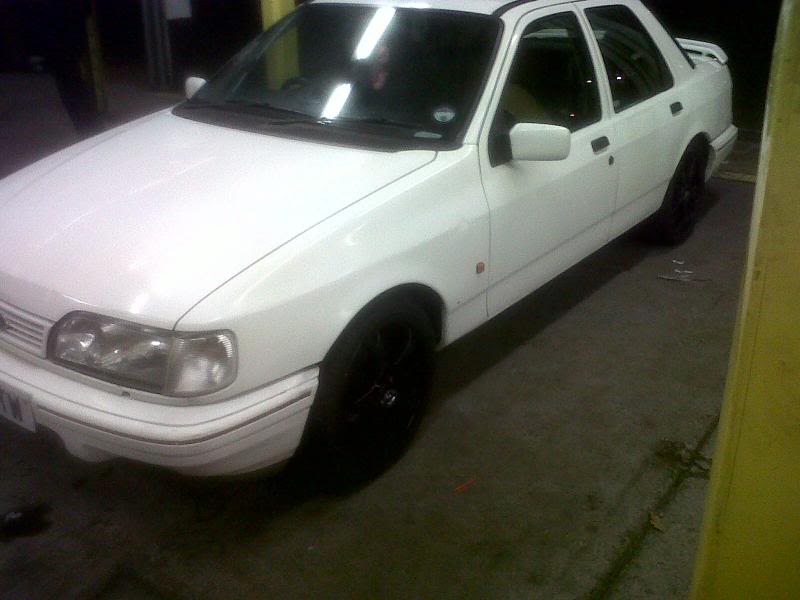
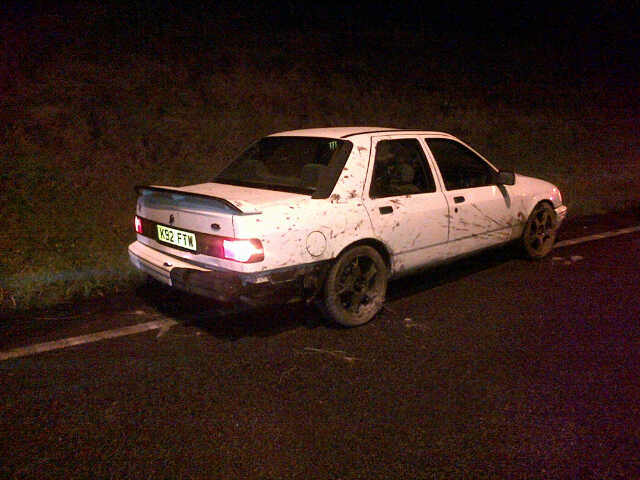
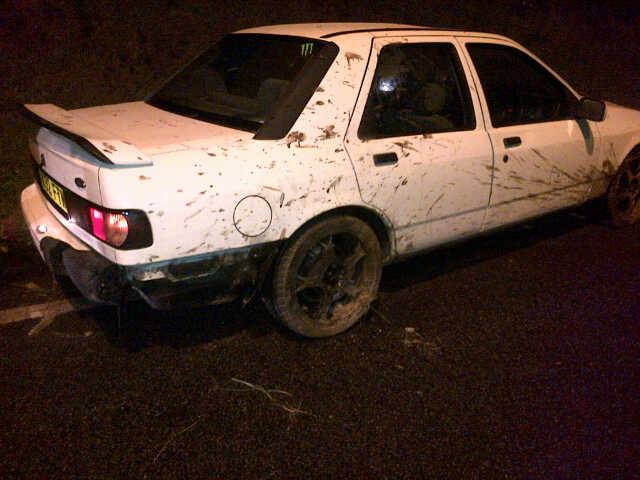
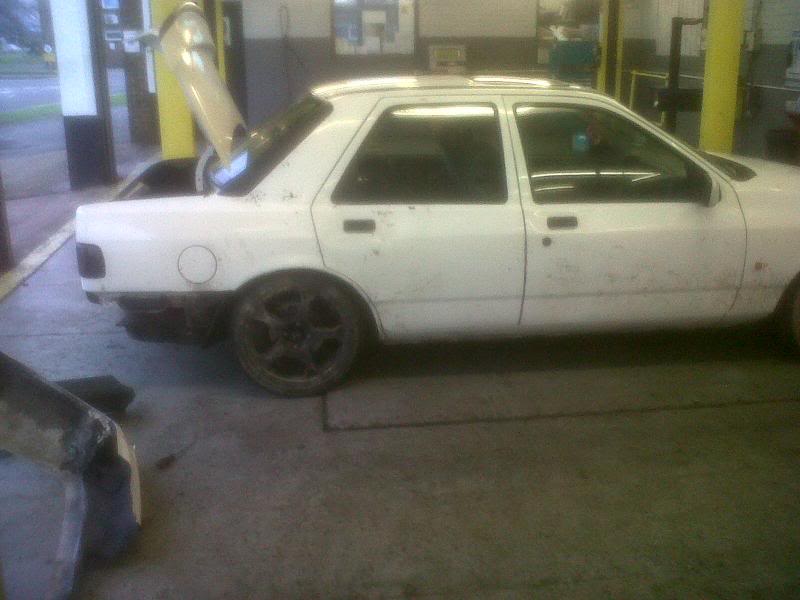
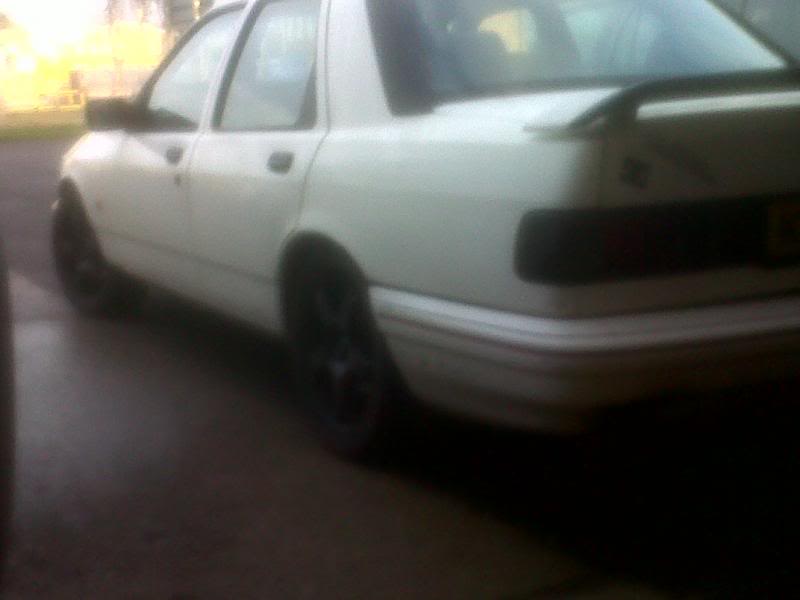
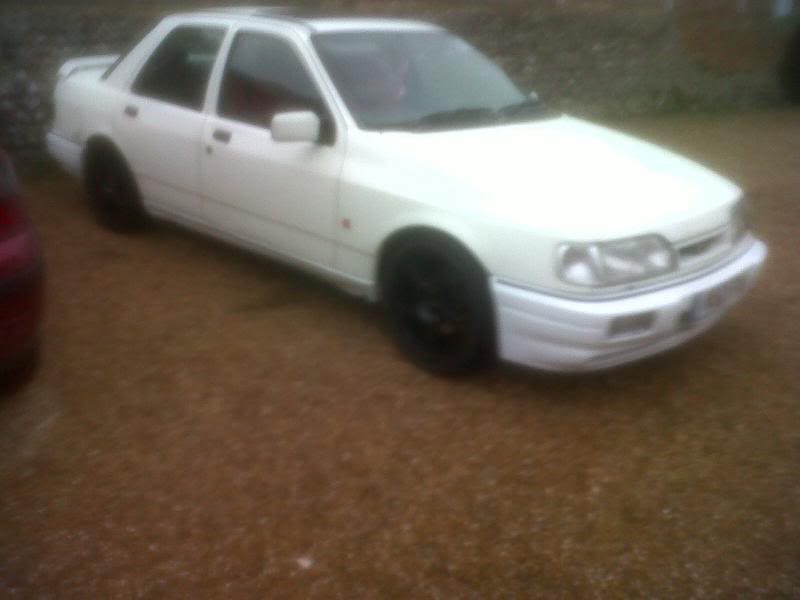
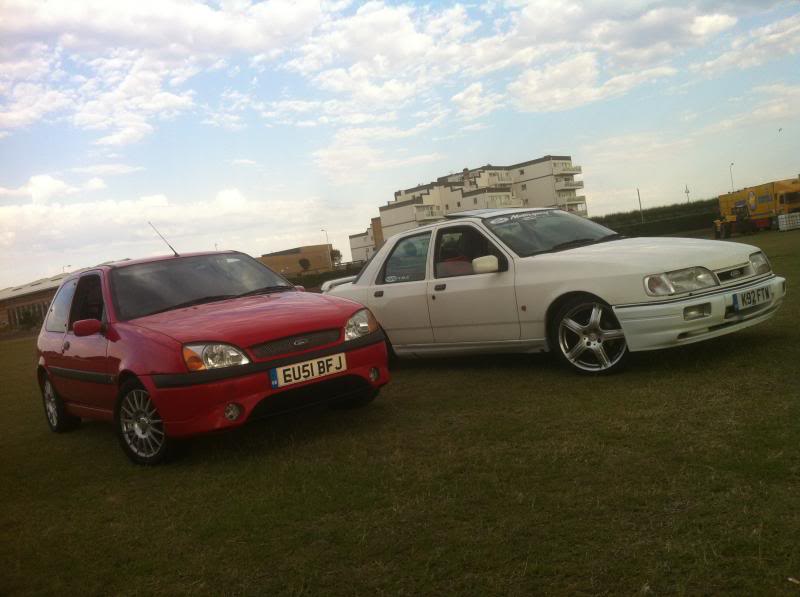
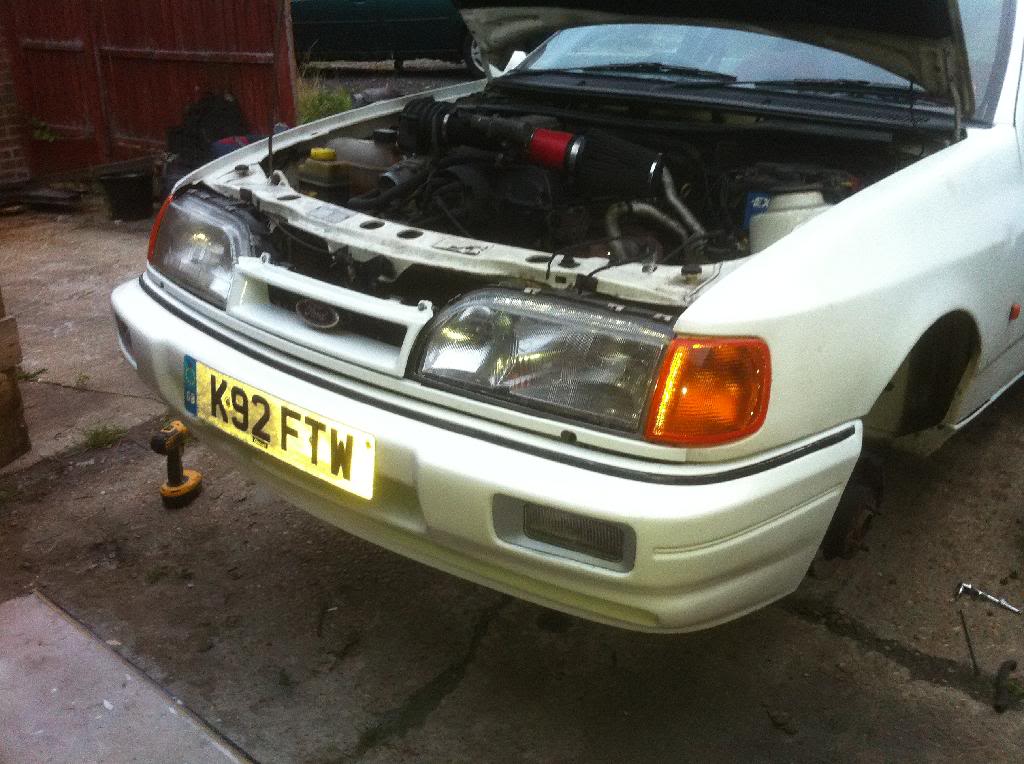
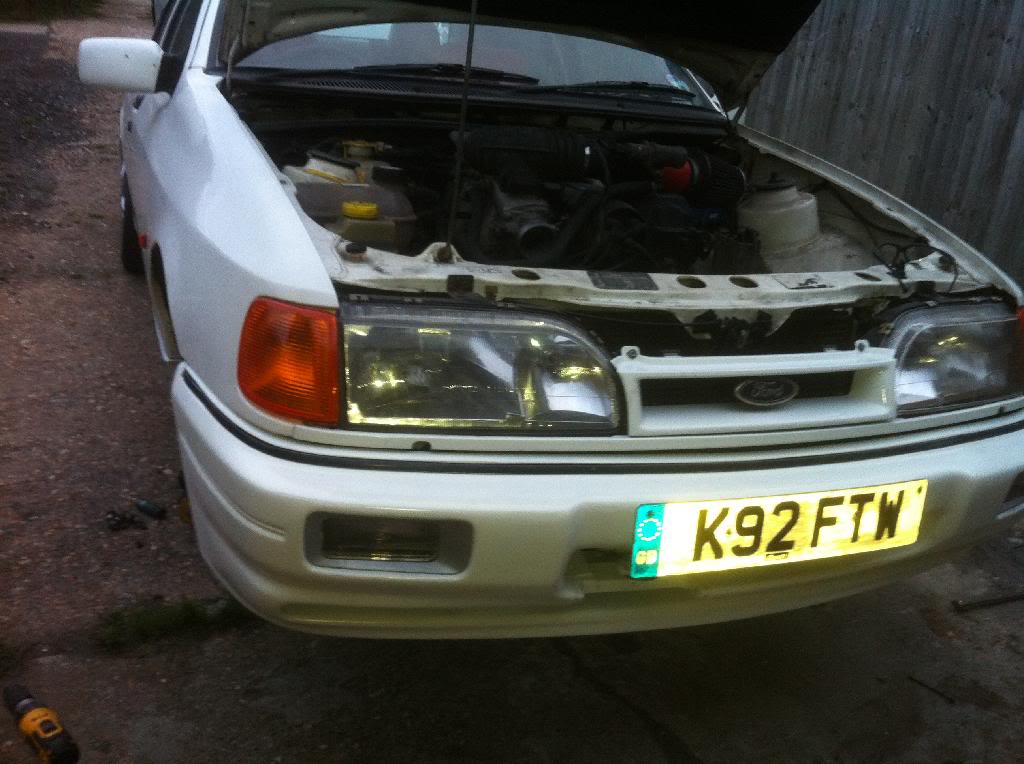
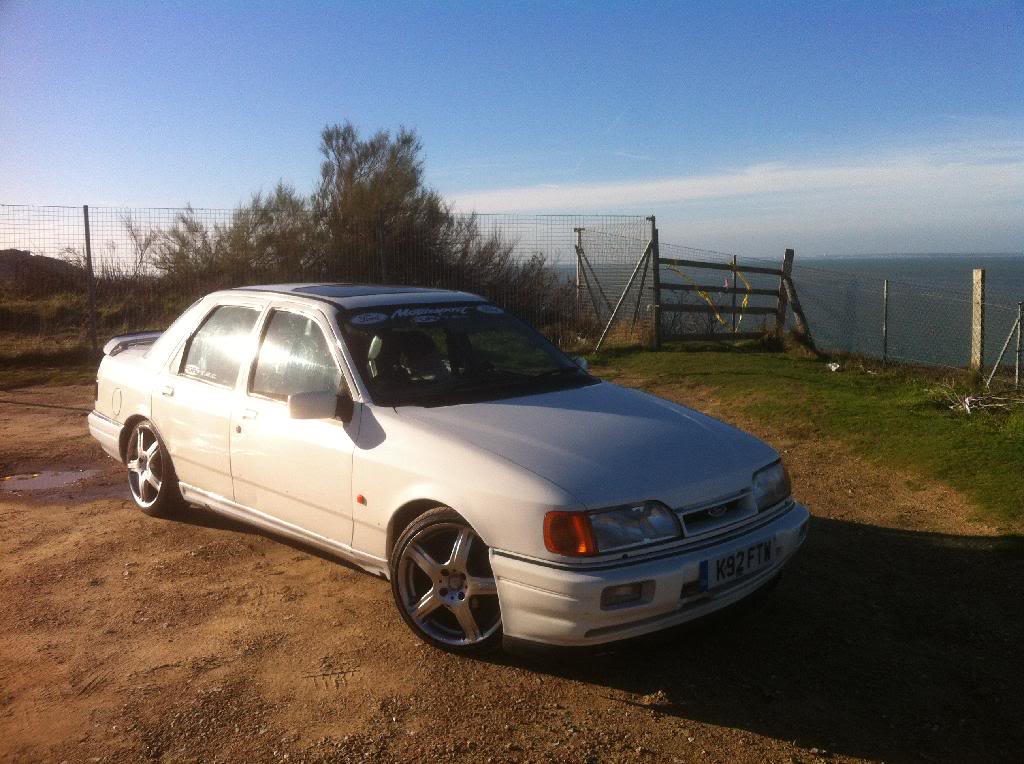
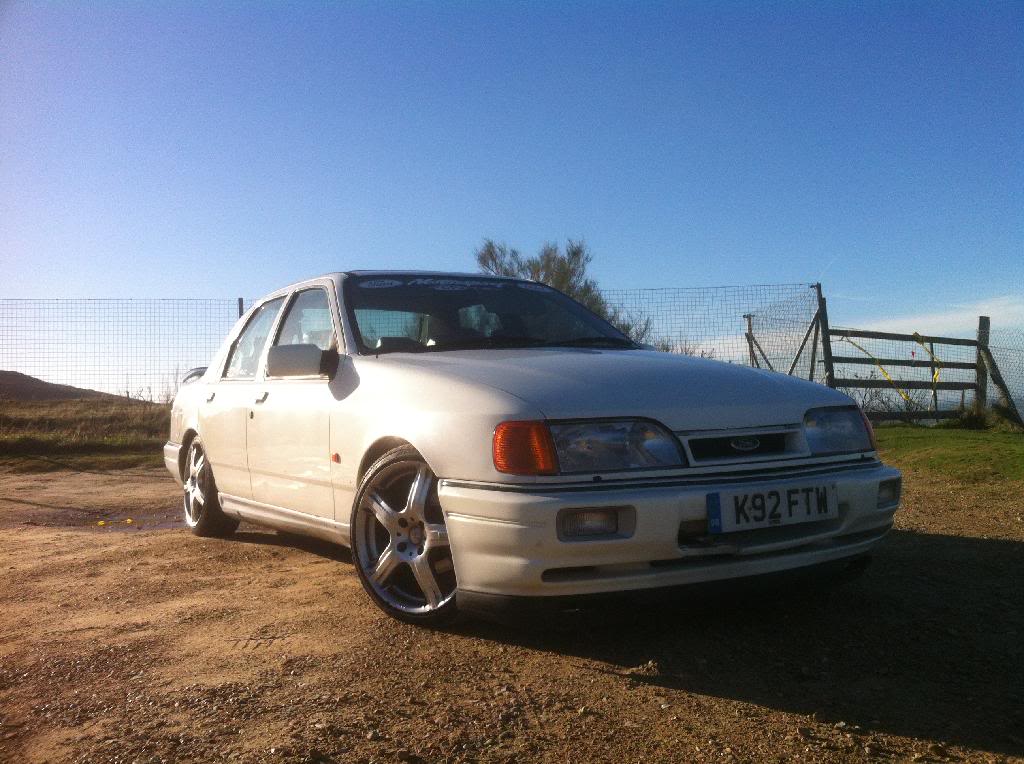
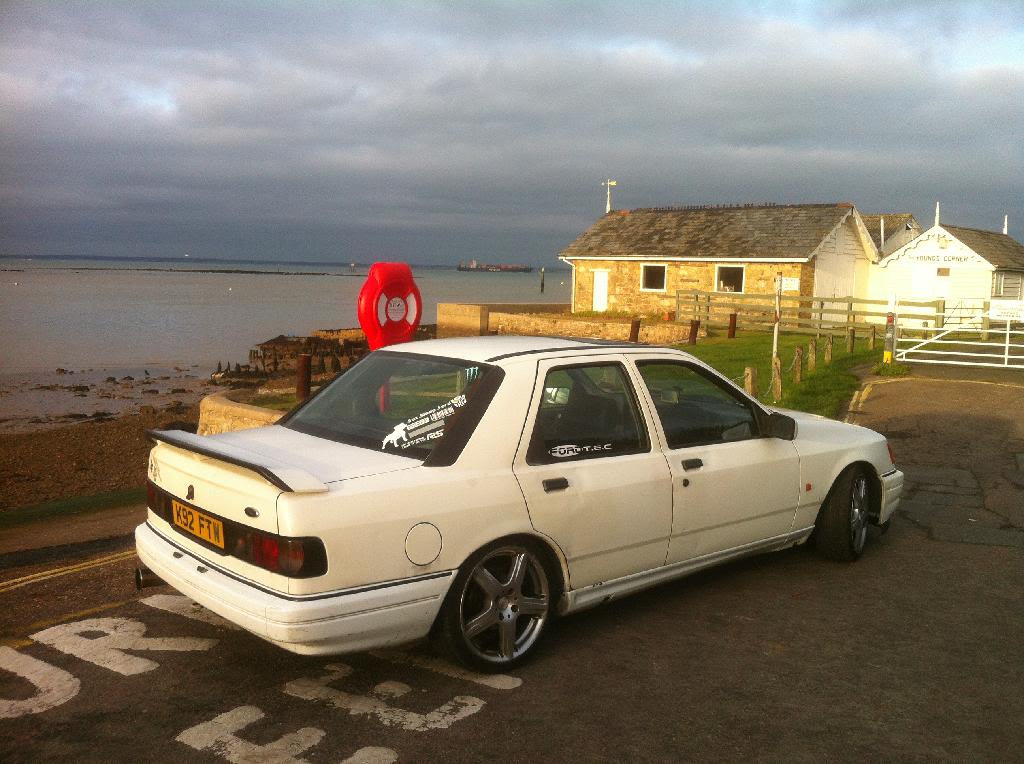
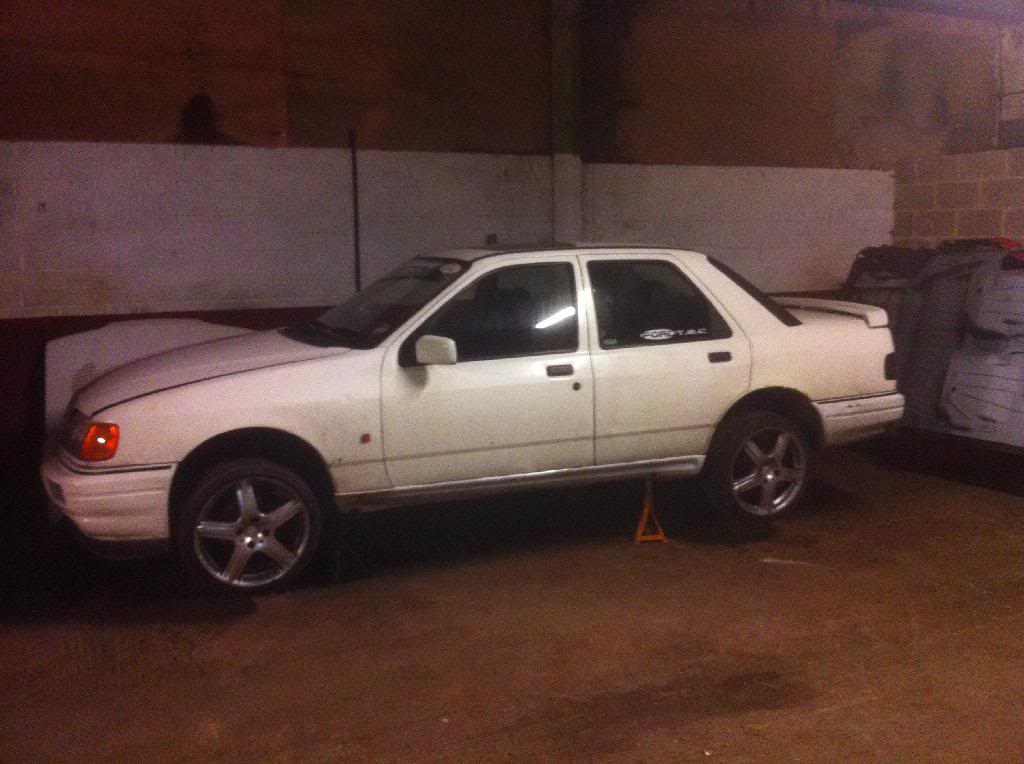
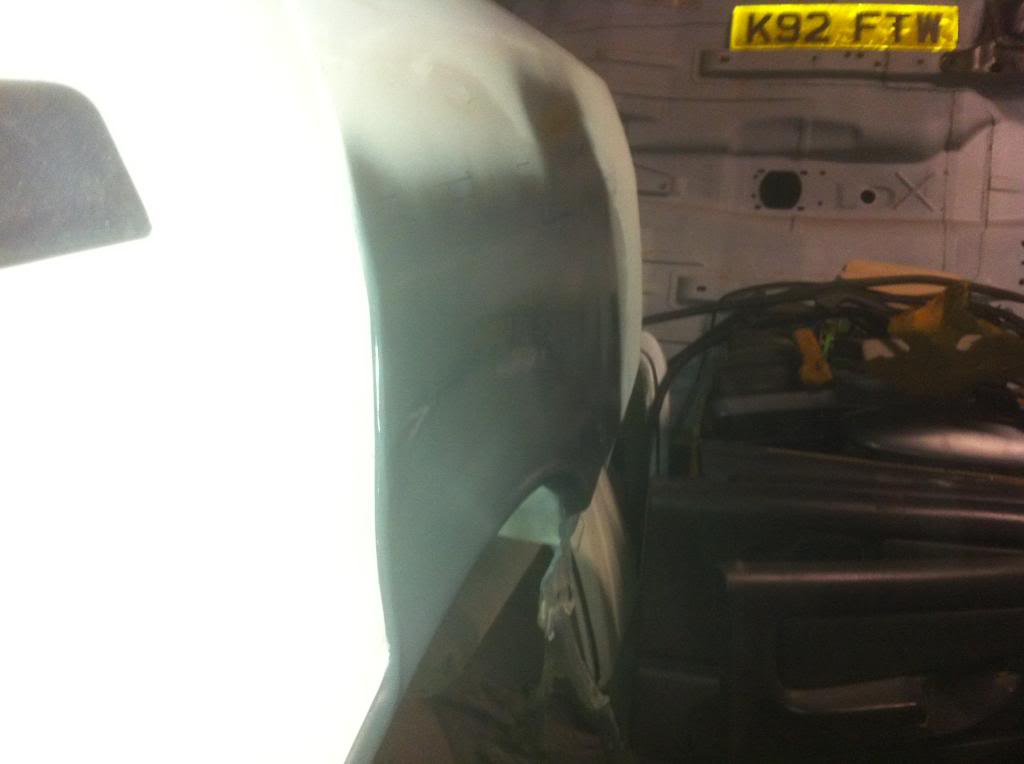
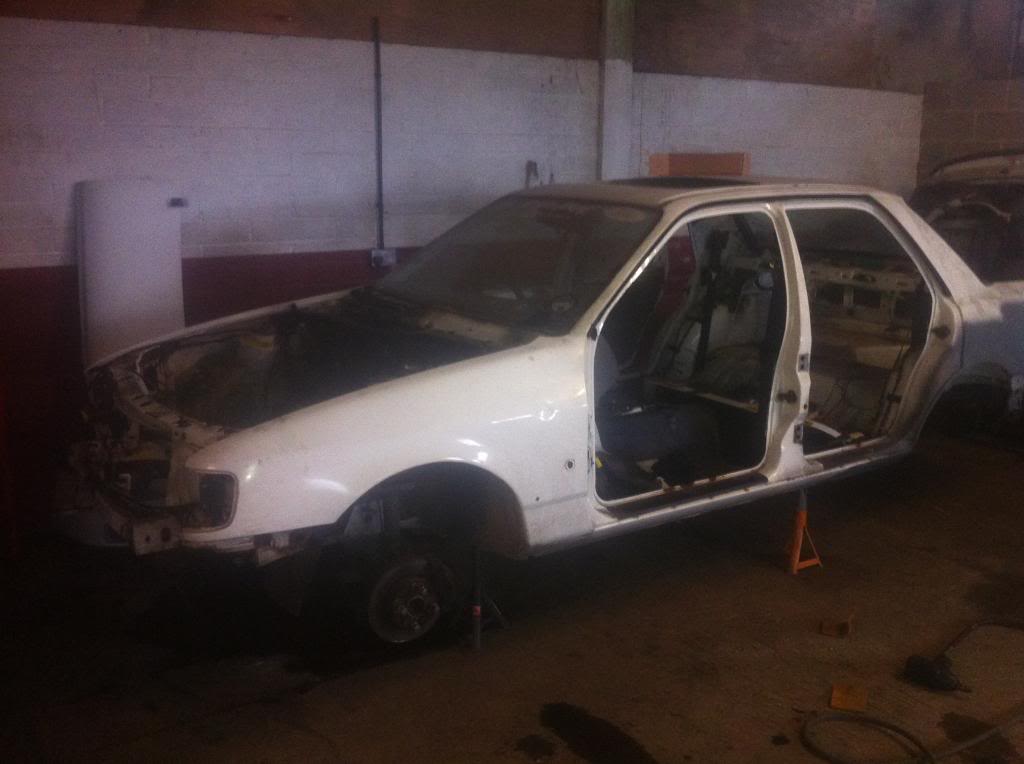
2012 was the hardest year of my life due to leaving my ex of ten years and going at it alone, I found managing money very difficult and ended up having to sell my lovely grey frst, after that I had a short period of really bad cars (just bought anything to get me about). I managed to get hold of a good car in the shape of a ford cougar but the v6 was a killer. When the tax was coming up for renewal I couldn't afford it and while having a peak on ebay I stumbled apon this sierra for a bargain 500 quid with a years tax and test. I begged my dad to lend me the money until I sold the cougar which he did so off I when from Essex to Coventry to get it. Once I got there I found it was not in great shape which was sort of expected with the price and also noticed the number plate of ftw (for the win). I bought the car and drove it back to Essex happy as larry. here she is as I bought her
Two days past and one day on my first day of work in Essex was a bad day. I had a couple of chavs that took a disliking to me decide to tell my current girlfriend that if they don't get me they will get her instead, cos of this I walked straight out of my new job and straight to the door of one of the chavs. typically he wouldn't do anything until his mate was there too and I ended up in a pathetic fight, one guy was so weak it was unreal, I was moving him about like a dolly and the other tripped me from behind and set about kicking me in wearing fucking flip flops!!! I got back to the flats following these 'hard' men, once back the now ex had loaded my stuff into my car so I took the hint, got in the saph and fucked off, ten mins down the road I realised my fone was missing too great! so I one day I get in a fight with two chavs, loose my job, girl friend, home, and fone! for the win my arse!! the only thing I still had was my car.
im not one to sit about feeling sorry for my self so once back in Eastbourne I went to a mates who hooked me up with a room to stay in and an old fone to get me conactable and by the end of the day I had a job at a garage I worked at a few years before, for the win!!
though a month of no money and aready in a bit of debt I started doing a kebab delivery job aswell which the good old girl was faultless despite the fact I hadn't done any maintence atall
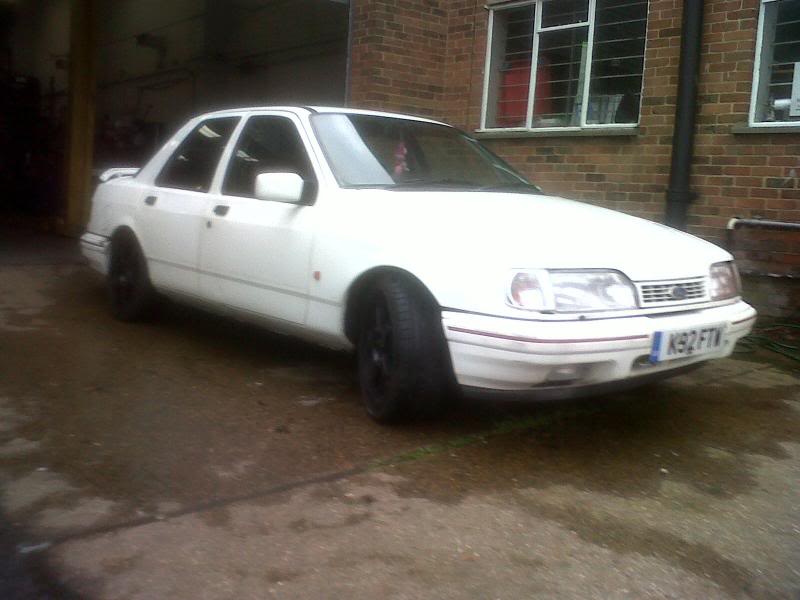
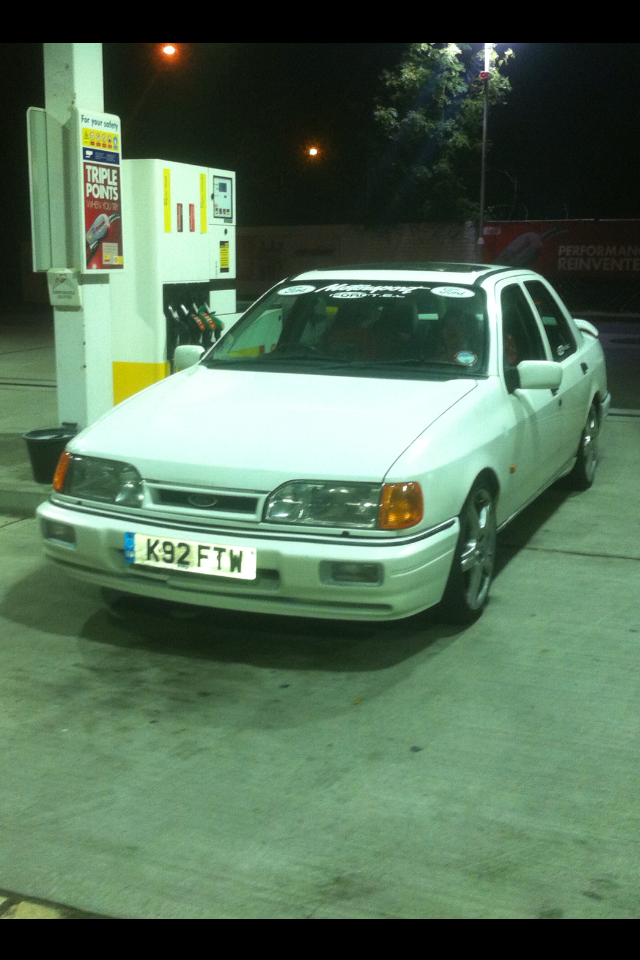
my plan is to keep this old girl as she has served me so well and show her a huge amount of tlc and eventually do a full cosworth conversion
I got hold of abit of spare money just before xmas 2012 and before I pissed it up the wall I spent it on the saph, I bought,
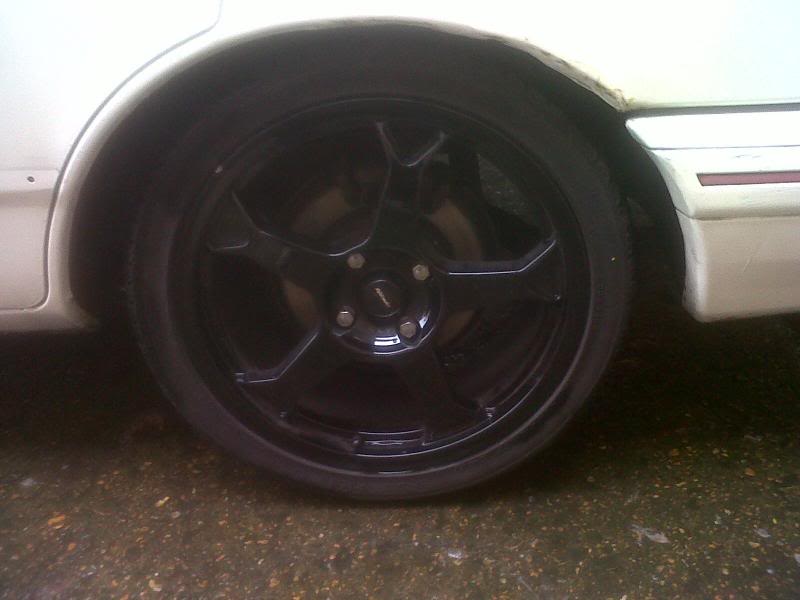
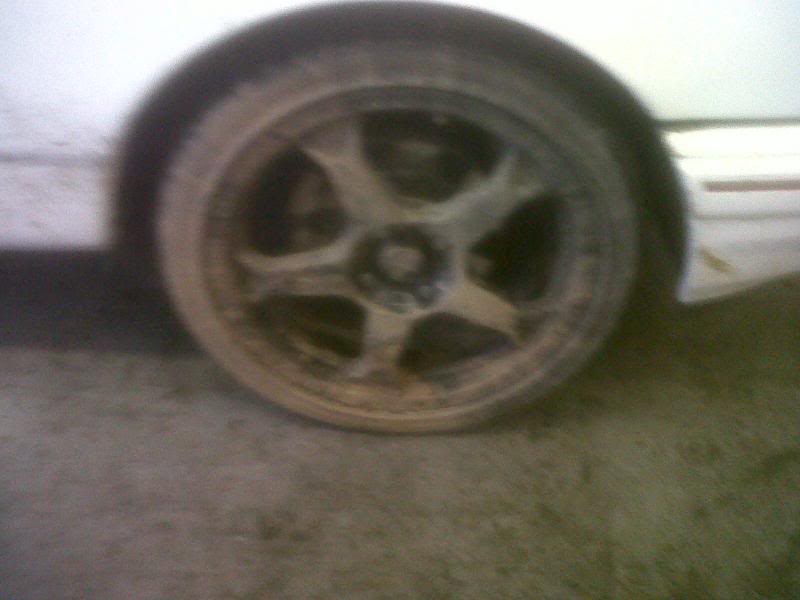
17" team dynamics black wheels,
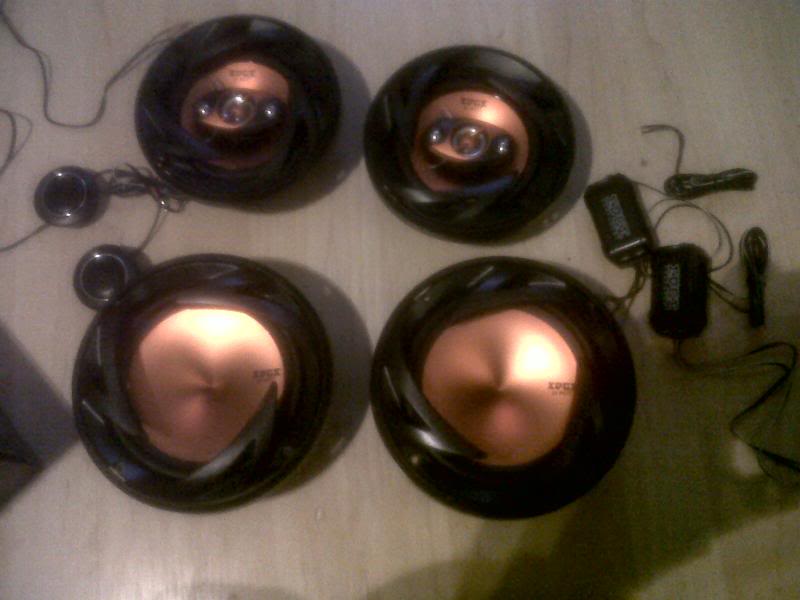
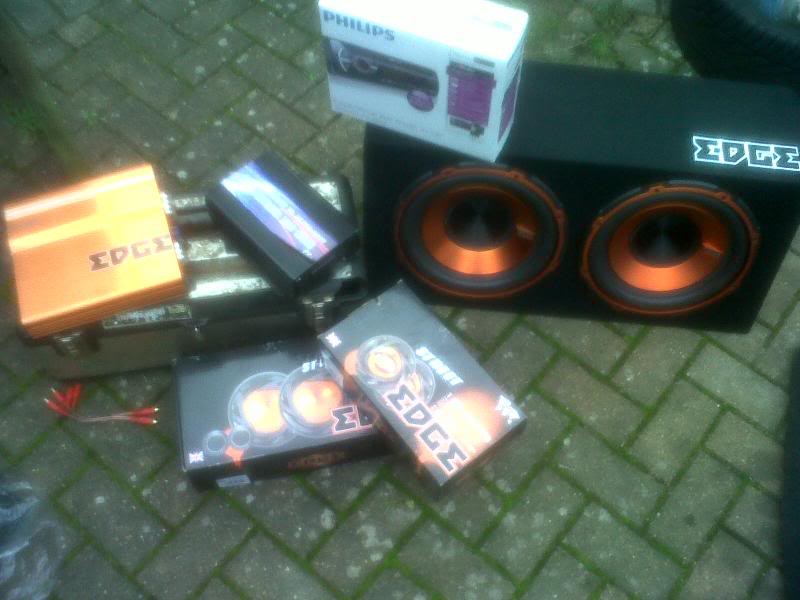
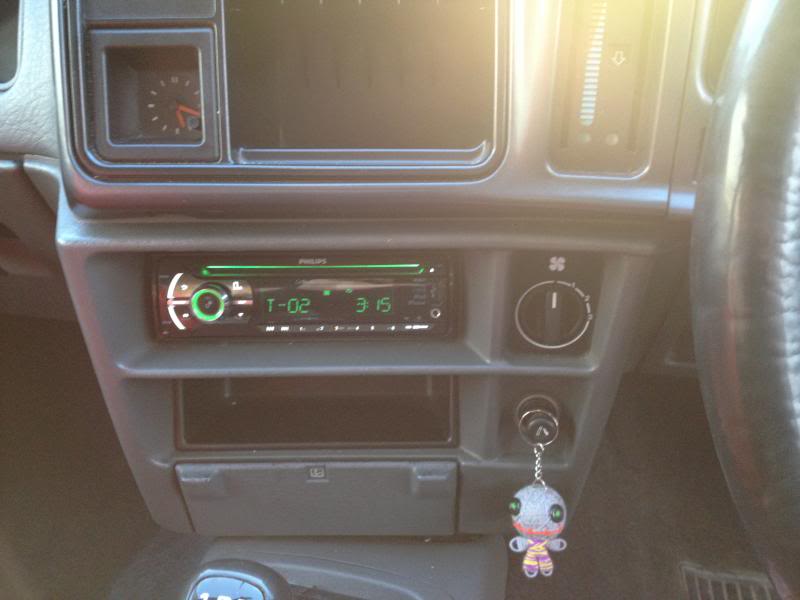
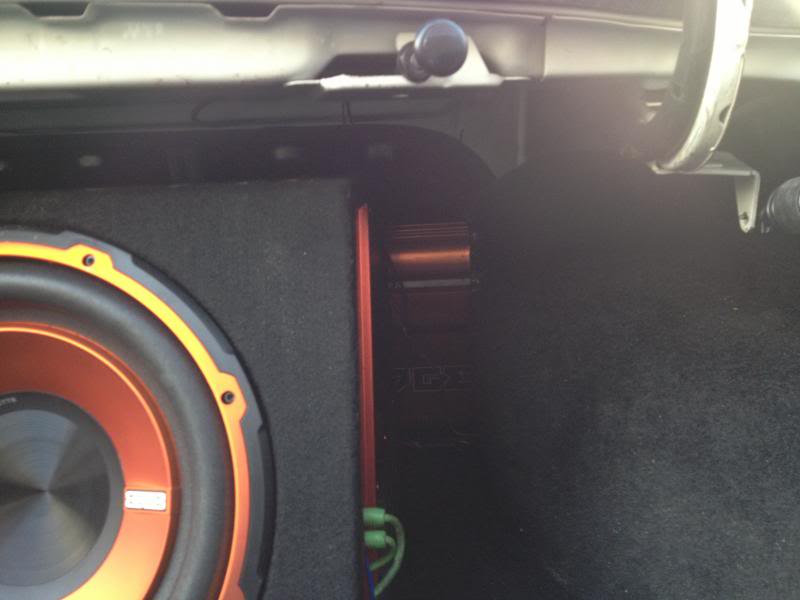
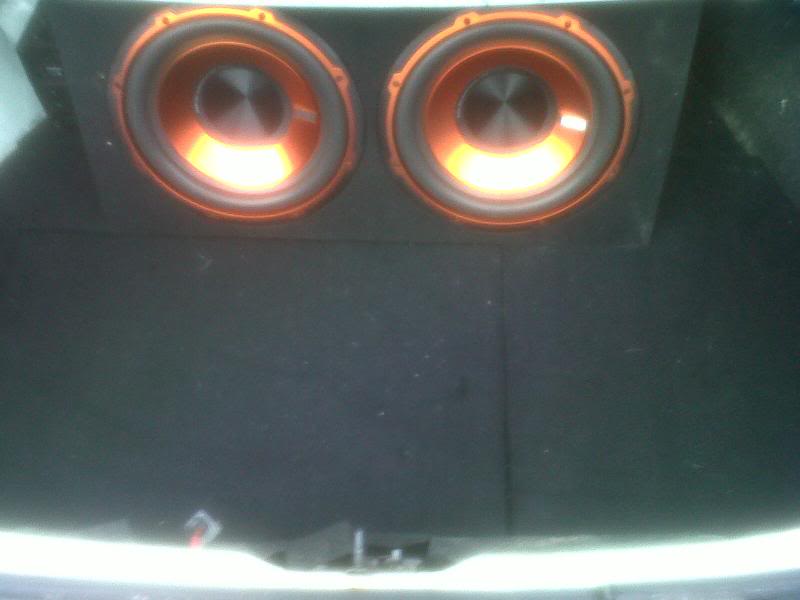
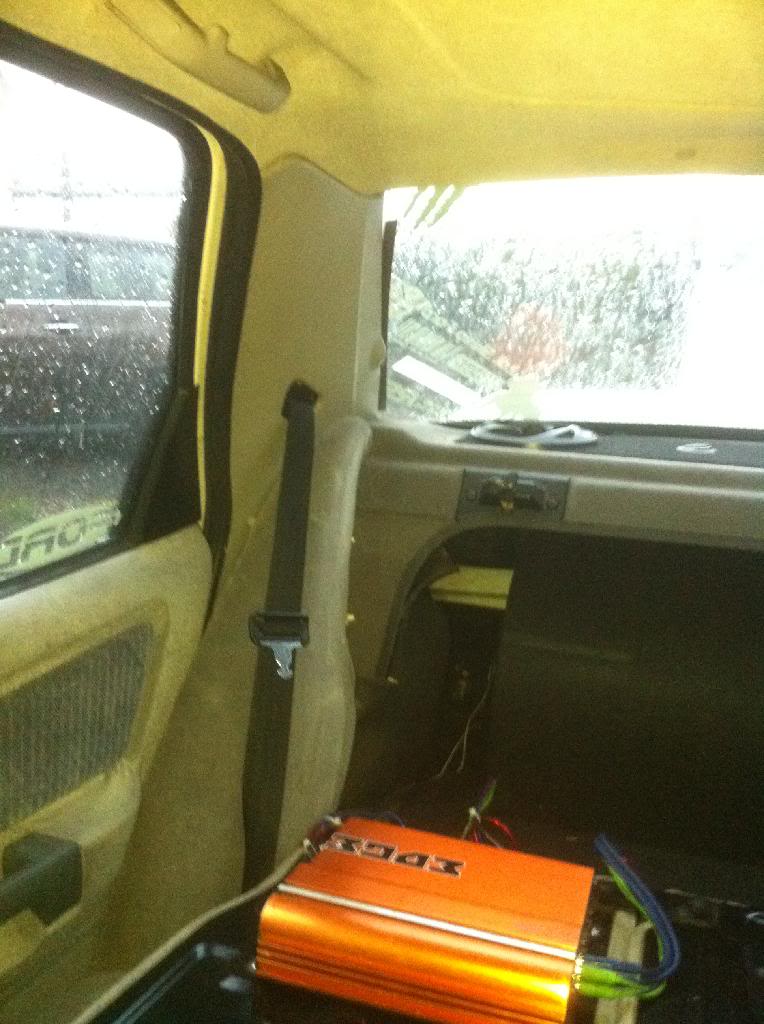
full edge audio (I love my choons lol)
rear shocks
full service bits
all oils
rear arch repair panels


I removed the very annoying immobiliser and also I cut one coil off each spring to help it sit a little better (the coils are still compressed in the shocks so its not dodgy)
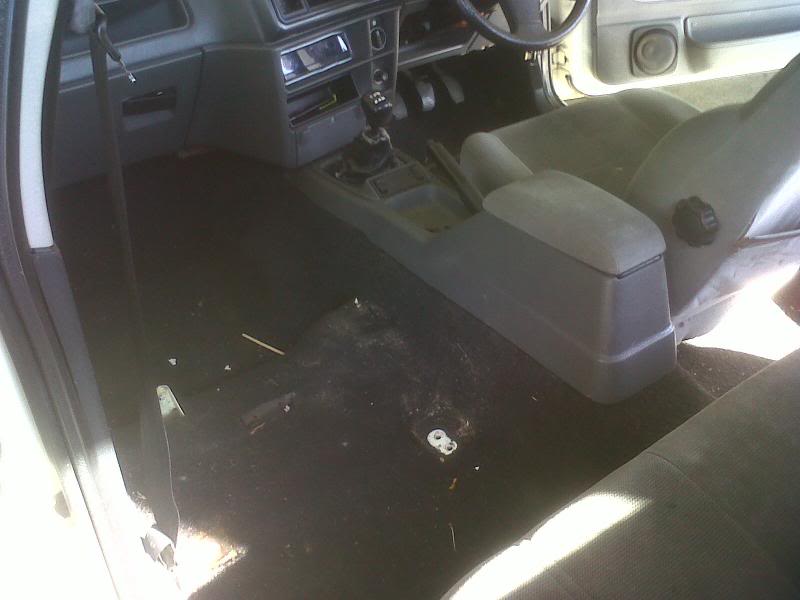
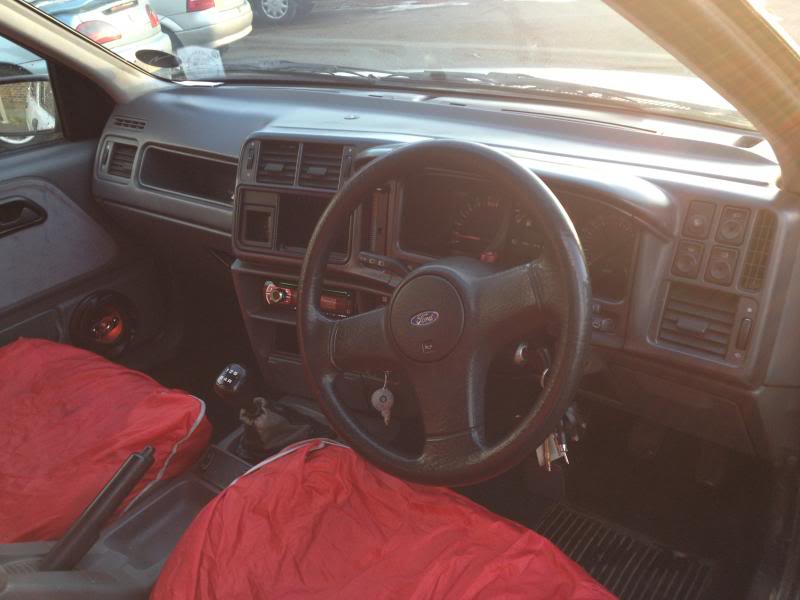
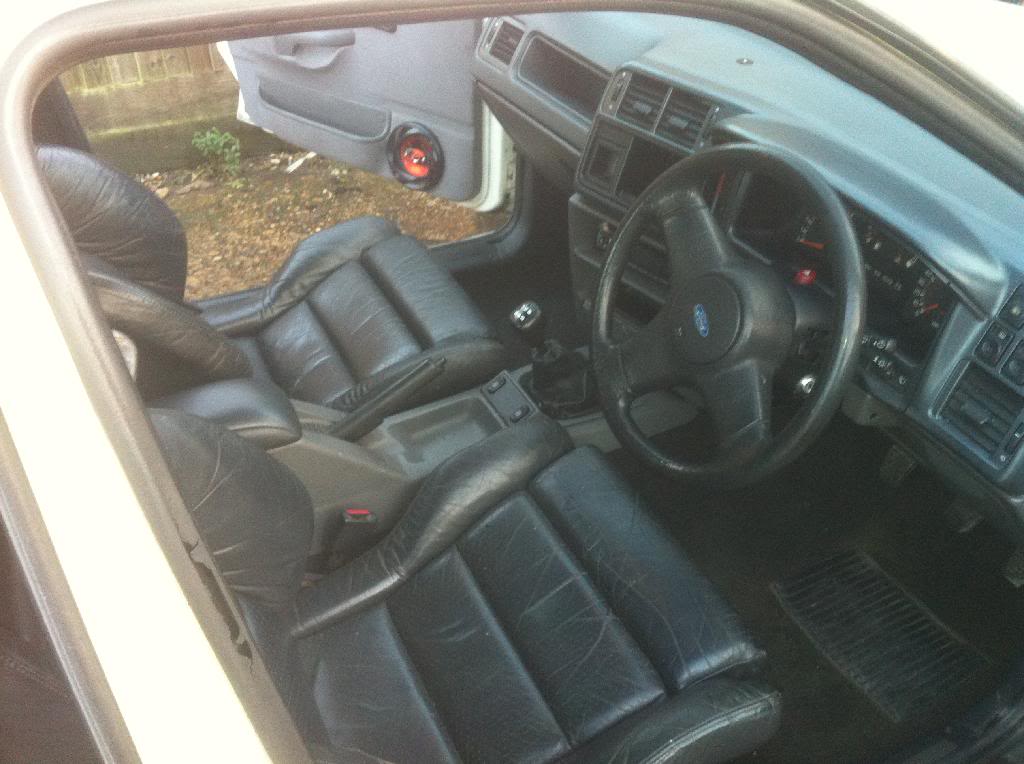
also the car was in a pretty shite condition inside and out so I removed the seats and cleaned her right out and gave her a good clean and attacked it with some g3 compound and found white paint under the greyish layer of crap.
one day at the garage I removed a jap can style rear box off a 206 and then thought hmmmm that will go on the saph pretty easy, so on it went, free mods are free mods lol
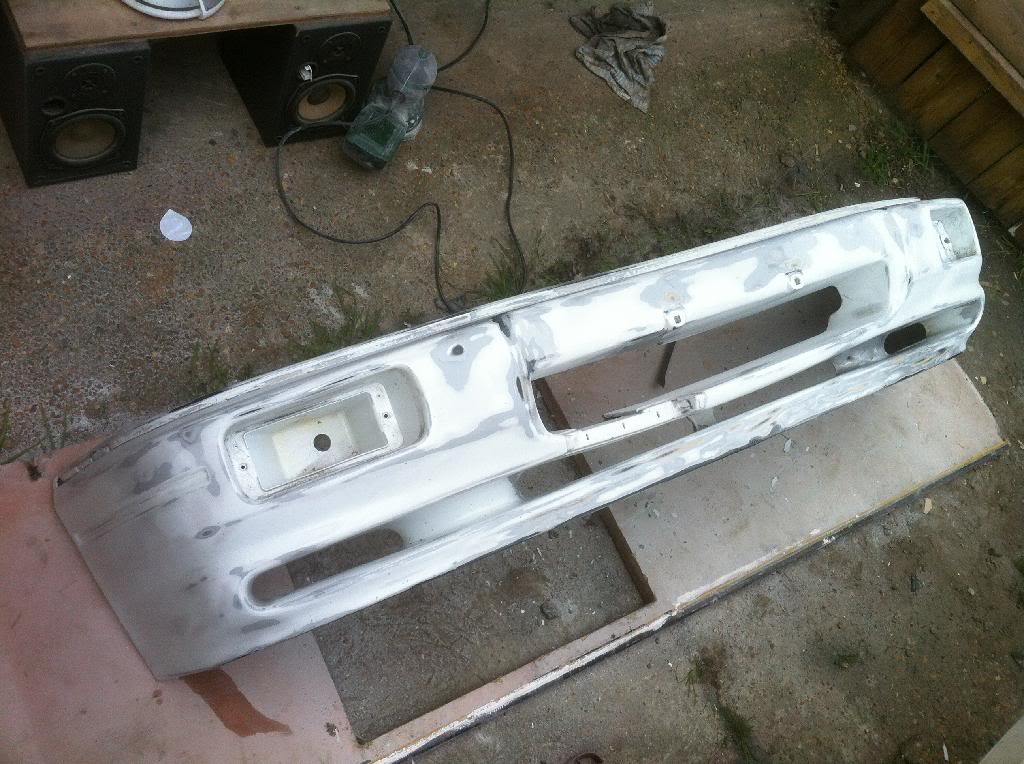
during the xmas period me and a mate was out larking about and I kind o f fell off the bypass! I spun and ended up backward up a grass inbankment and trashed the rear bumper. ooops lol
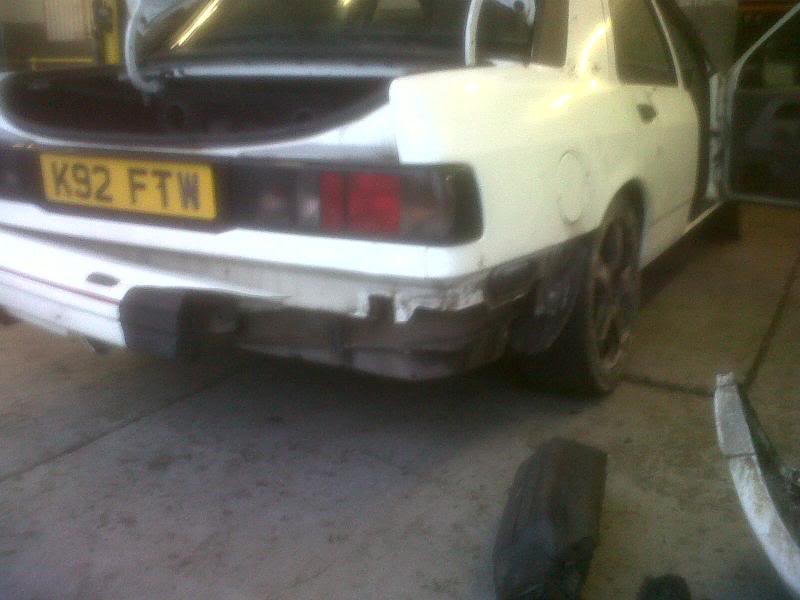
due to the time period and a lack of funds I had no choice but to try and refit the snapped in half bumper and didn't do to badly imo lol.

there is tons more to up load and I will continue later, thanks for looking
2012 was the hardest year of my life due to leaving my ex of ten years and going at it alone, I found managing money very difficult and ended up having to sell my lovely grey frst, after that I had a short period of really bad cars (just bought anything to get me about). I managed to get hold of a good car in the shape of a ford cougar but the v6 was a killer. When the tax was coming up for renewal I couldn't afford it and while having a peak on ebay I stumbled apon this sierra for a bargain 500 quid with a years tax and test. I begged my dad to lend me the money until I sold the cougar which he did so off I when from Essex to Coventry to get it. Once I got there I found it was not in great shape which was sort of expected with the price and also noticed the number plate of ftw (for the win). I bought the car and drove it back to Essex happy as larry. here she is as I bought her


Two days past and one day on my first day of work in Essex was a bad day. I had a couple of chavs that took a disliking to me decide to tell my current girlfriend that if they don't get me they will get her instead, cos of this I walked straight out of my new job and straight to the door of one of the chavs. typically he wouldn't do anything until his mate was there too and I ended up in a pathetic fight, one guy was so weak it was unreal, I was moving him about like a dolly and the other tripped me from behind and set about kicking me in wearing fucking flip flops!!! I got back to the flats following these 'hard' men, once back the now ex had loaded my stuff into my car so I took the hint, got in the saph and fucked off, ten mins down the road I realised my fone was missing too great! so I one day I get in a fight with two chavs, loose my job, girl friend, home, and fone! for the win my arse!! the only thing I still had was my car.
im not one to sit about feeling sorry for my self so once back in Eastbourne I went to a mates who hooked me up with a room to stay in and an old fone to get me conactable and by the end of the day I had a job at a garage I worked at a few years before, for the win!!
though a month of no money and aready in a bit of debt I started doing a kebab delivery job aswell which the good old girl was faultless despite the fact I hadn't done any maintence atall
my plan is to keep this old girl as she has served me so well and show her a huge amount of tlc and eventually do a full cosworth conversion
I got hold of abit of spare money just before xmas 2012 and before I pissed it up the wall I spent it on the saph, I bought,
17" team dynamics black wheels,
full edge audio (I love my choons lol)
rear shocks
full service bits
all oils
rear arch repair panels


I removed the very annoying immobiliser and also I cut one coil off each spring to help it sit a little better (the coils are still compressed in the shocks so its not dodgy)
also the car was in a pretty shite condition inside and out so I removed the seats and cleaned her right out and gave her a good clean and attacked it with some g3 compound and found white paint under the greyish layer of crap.


one day at the garage I removed a jap can style rear box off a 206 and then thought hmmmm that will go on the saph pretty easy, so on it went, free mods are free mods lol


during the xmas period me and a mate was out larking about and I kind o f fell off the bypass! I spun and ended up backward up a grass inbankment and trashed the rear bumper. ooops lol


due to the time period and a lack of funds I had no choice but to try and refit the snapped in half bumper and didn't do to badly imo lol.


there is tons more to up load and I will continue later, thanks for looking
Last edited by jon_ross; 05-06-2014 at 08:22 AM.
 16-02-2014, 10:25 AM
#2
PassionFord Regular
Thread Starter
iTrader: (1)
Join Date: May 2009
Location: eastbourne
Posts: 477
Likes: 0
Received 0 Likes
on
0 Posts
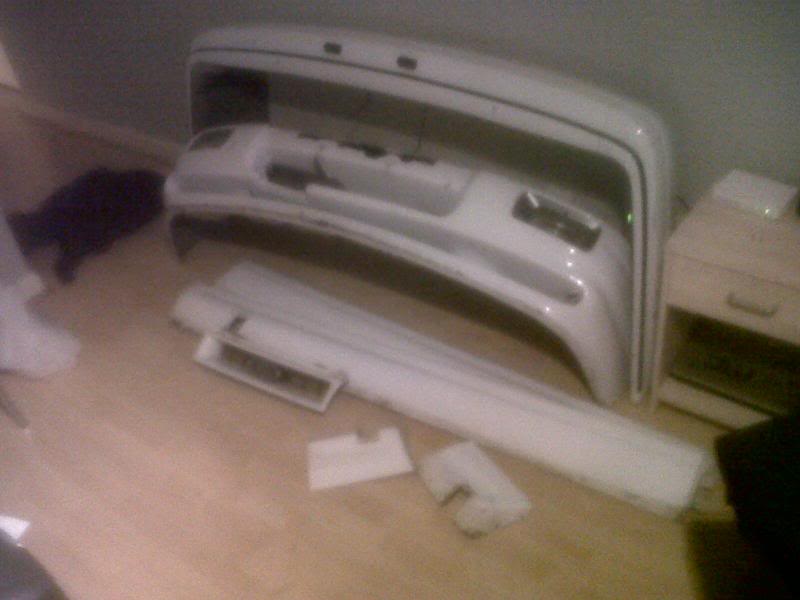
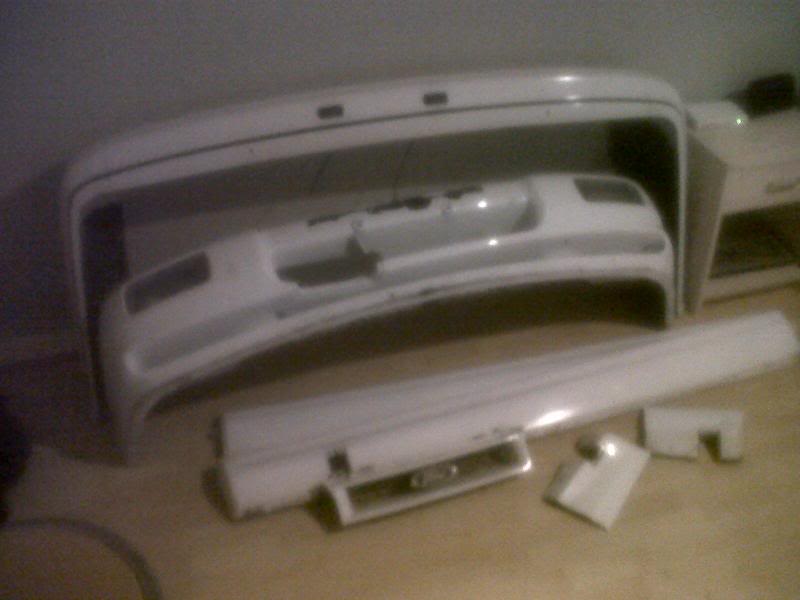
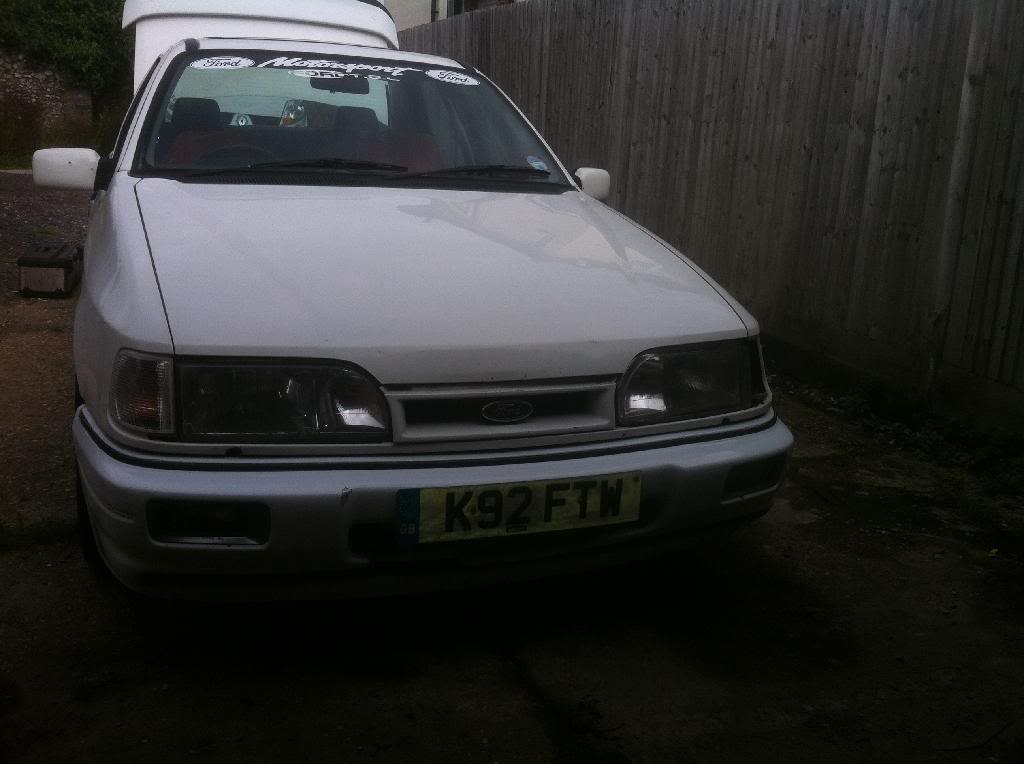
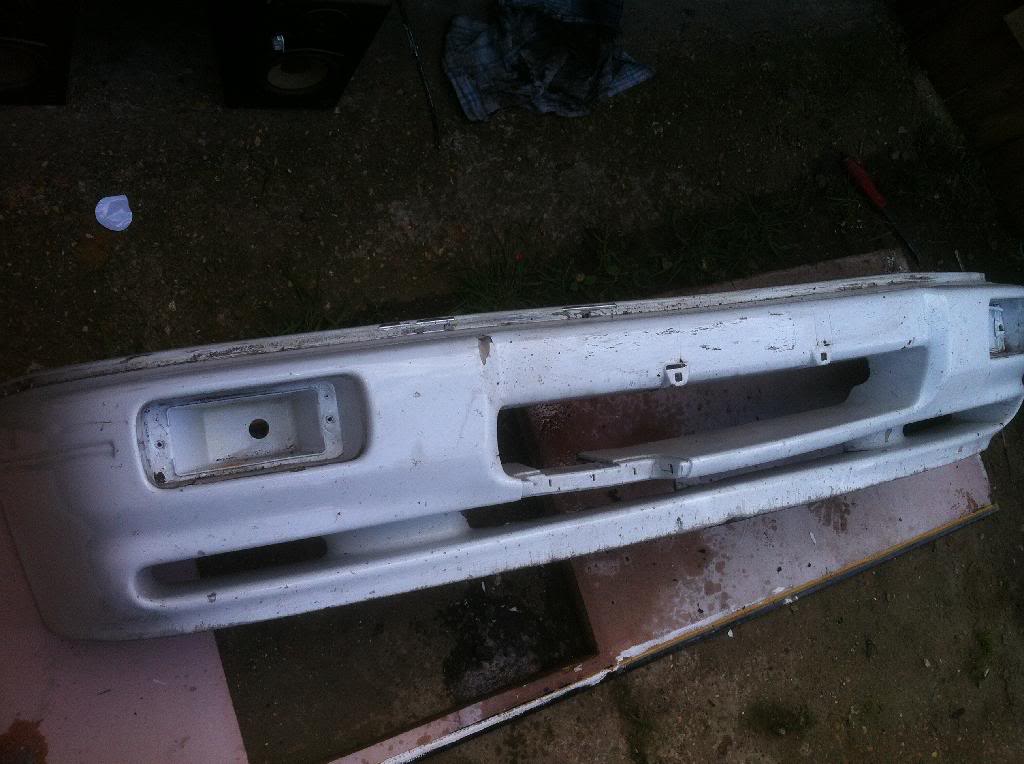
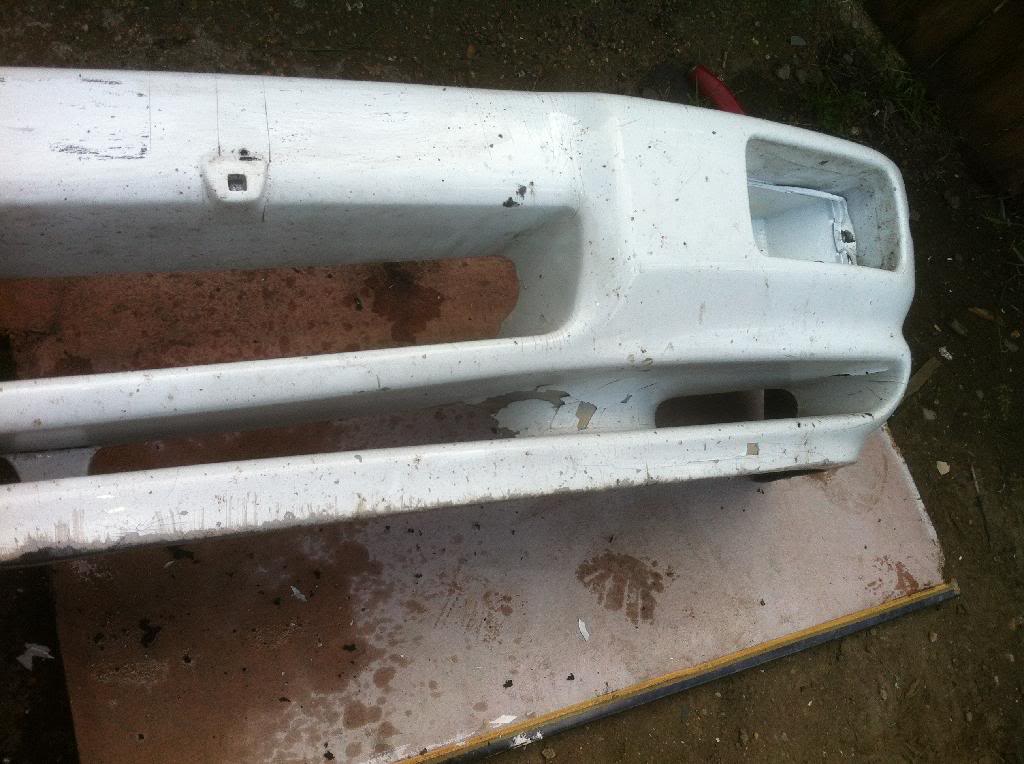
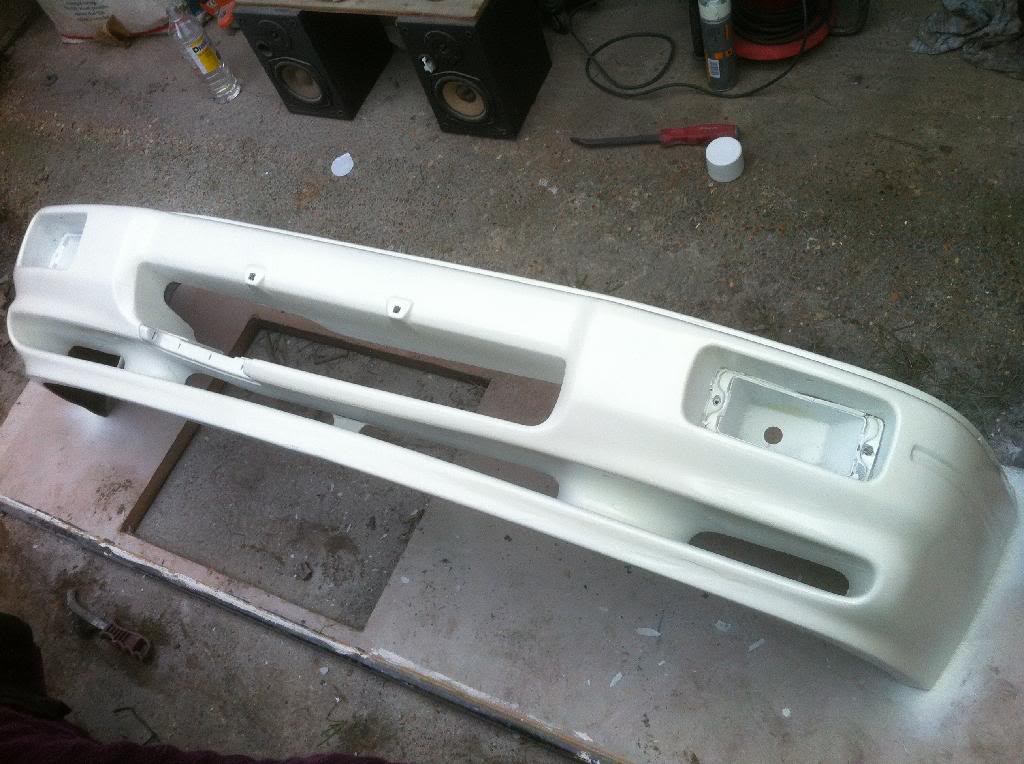
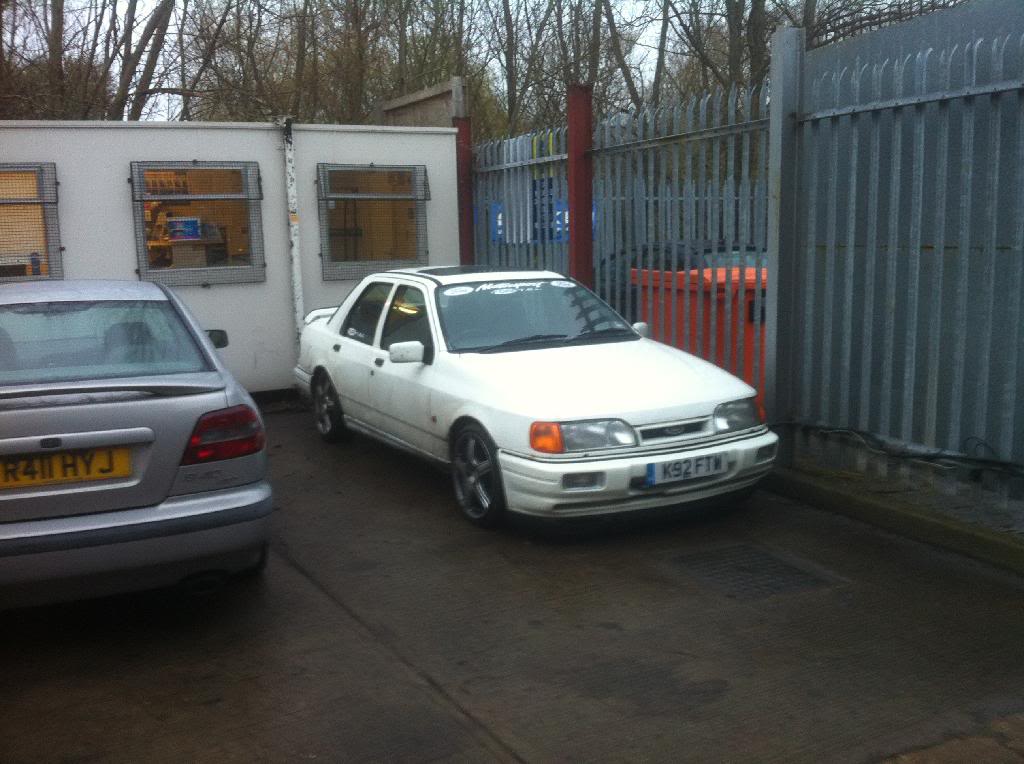
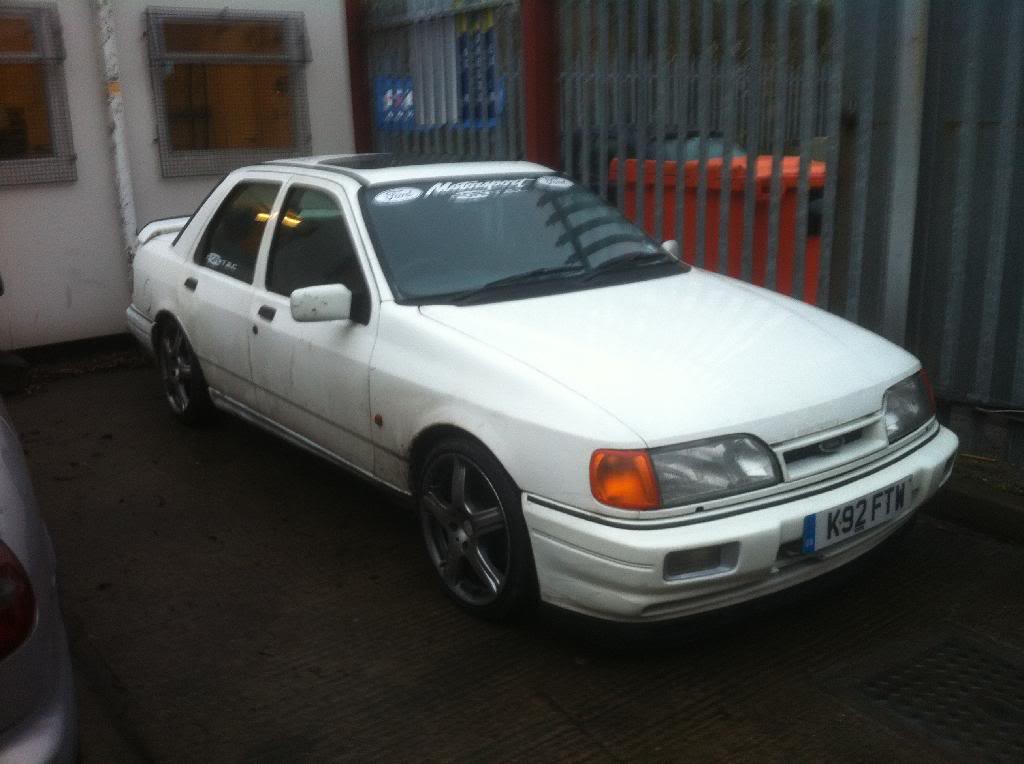
after the bumper mishap I couldn't stand having a awfull looking car looking even worse o I went on a hunt for a cosworth rear bumper atleast but I spoke to a mate and he had a full kit that wasn't in amazing condition but very cheap at 120 for the lot!! o it was snapped up and fitted the next day


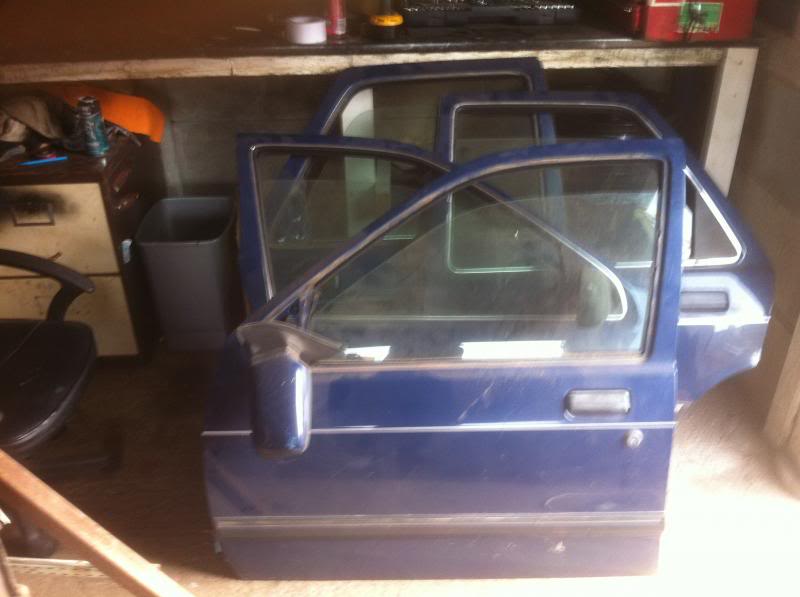
whilst on ebay looking for door actuator and a lock set due to me loosing my keys on the beach and the actuators didn't let the doors shut first time I bought the lock set and actuators and then found 4 doors for a tenner start bid, so I bid and no one else did so I got 4 mint complete doors for a tenner! sweet!
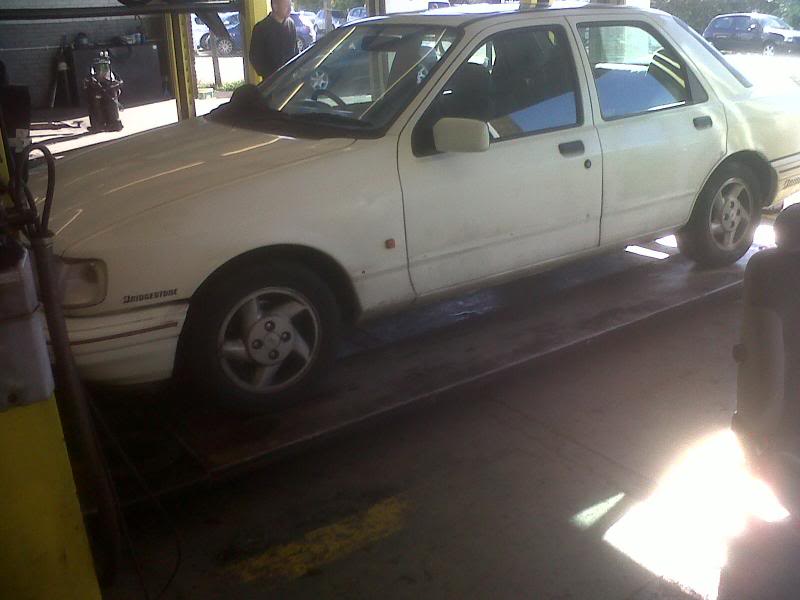
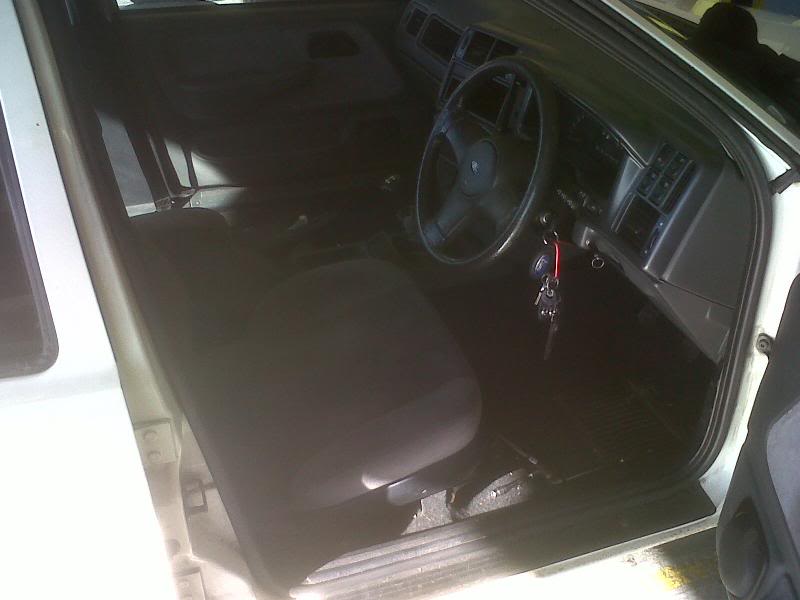
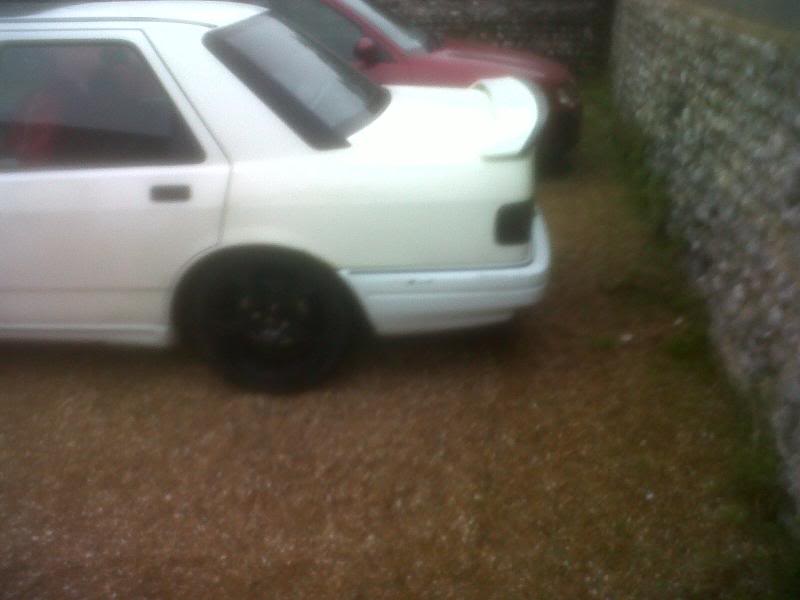
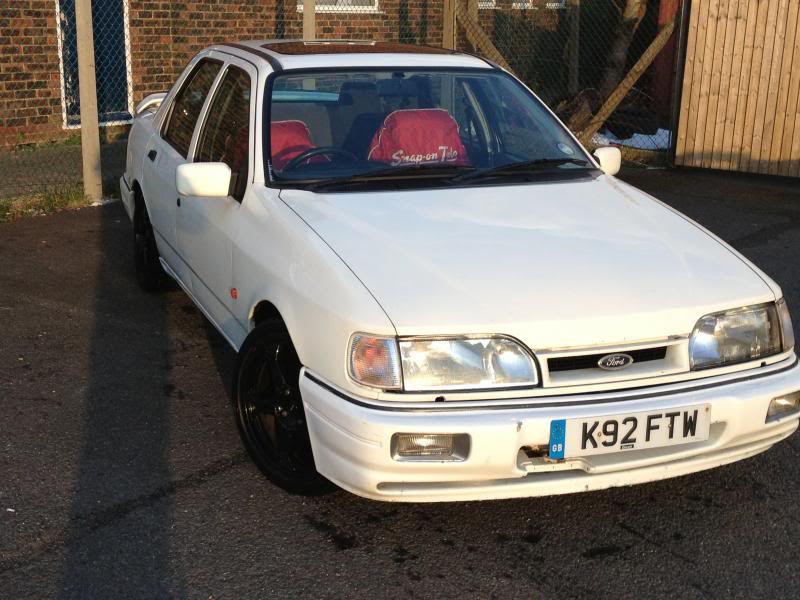
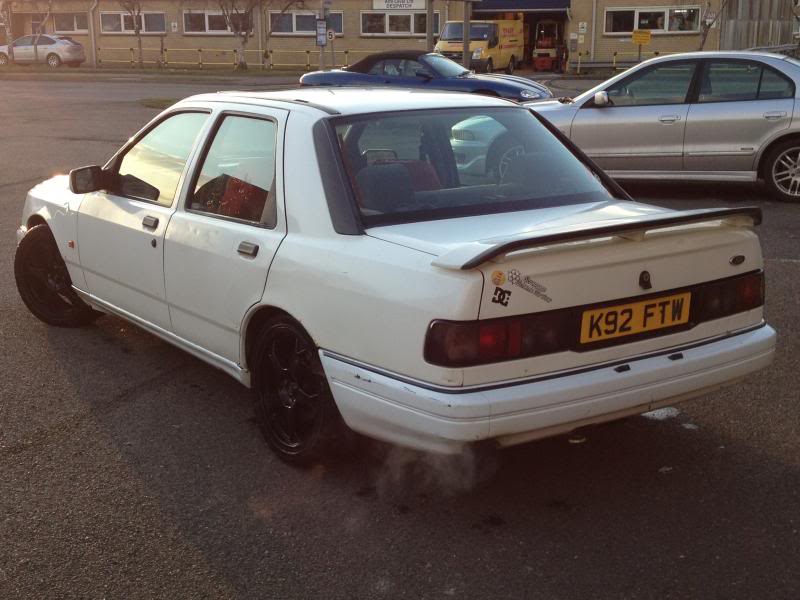
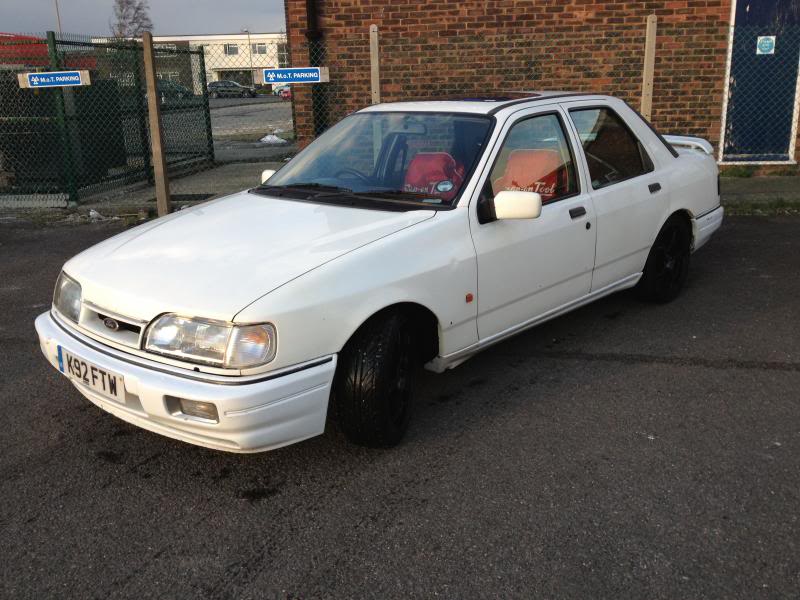
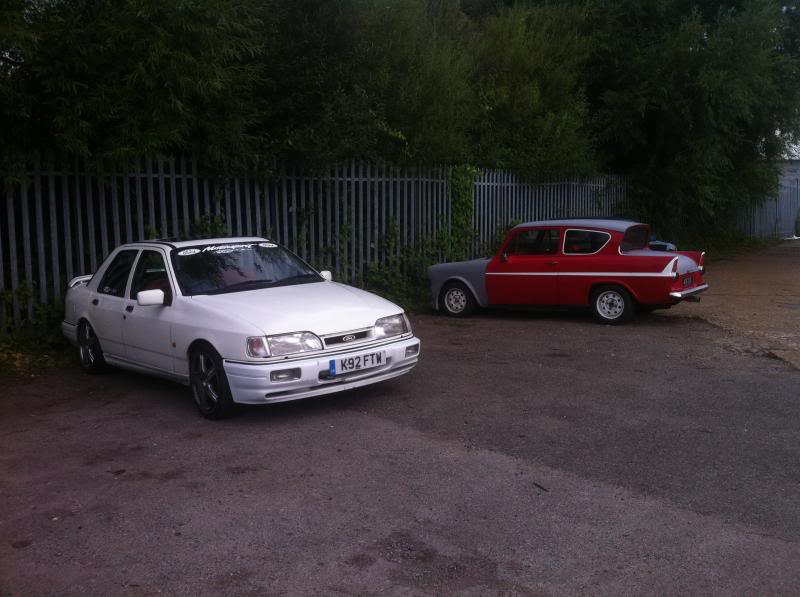
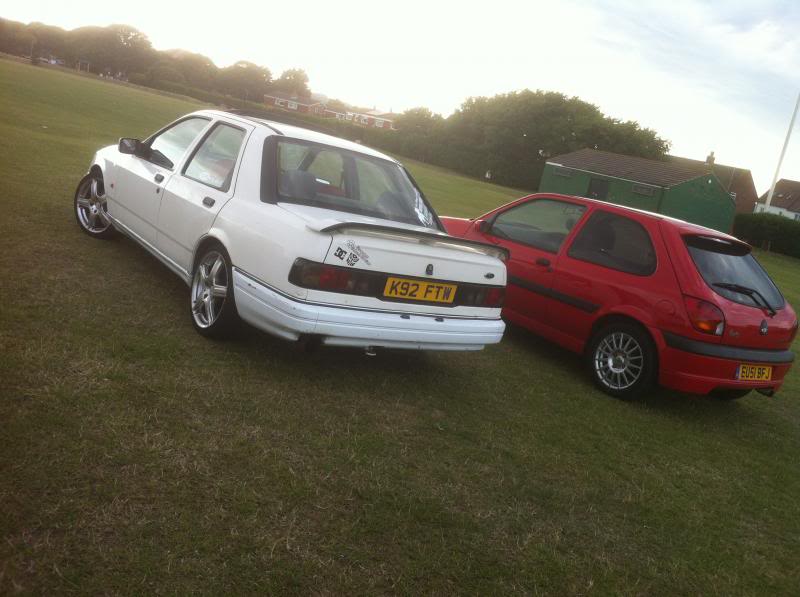
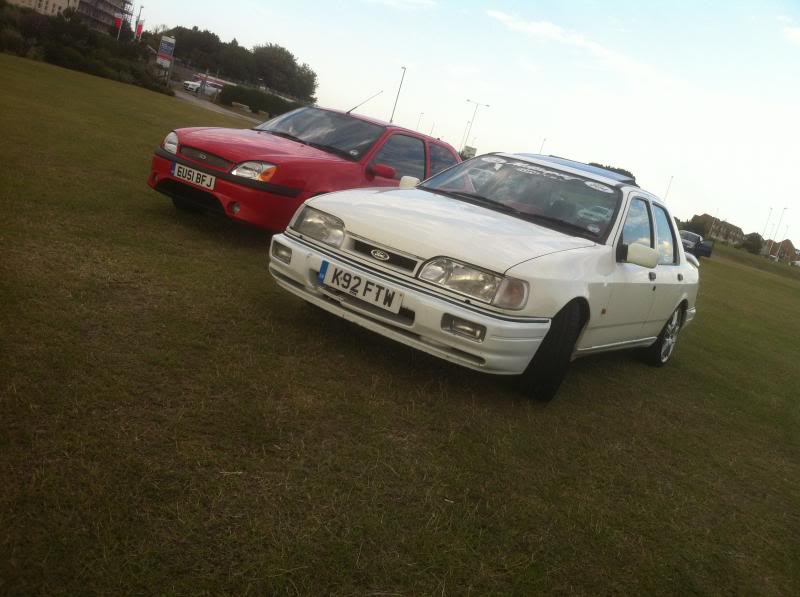
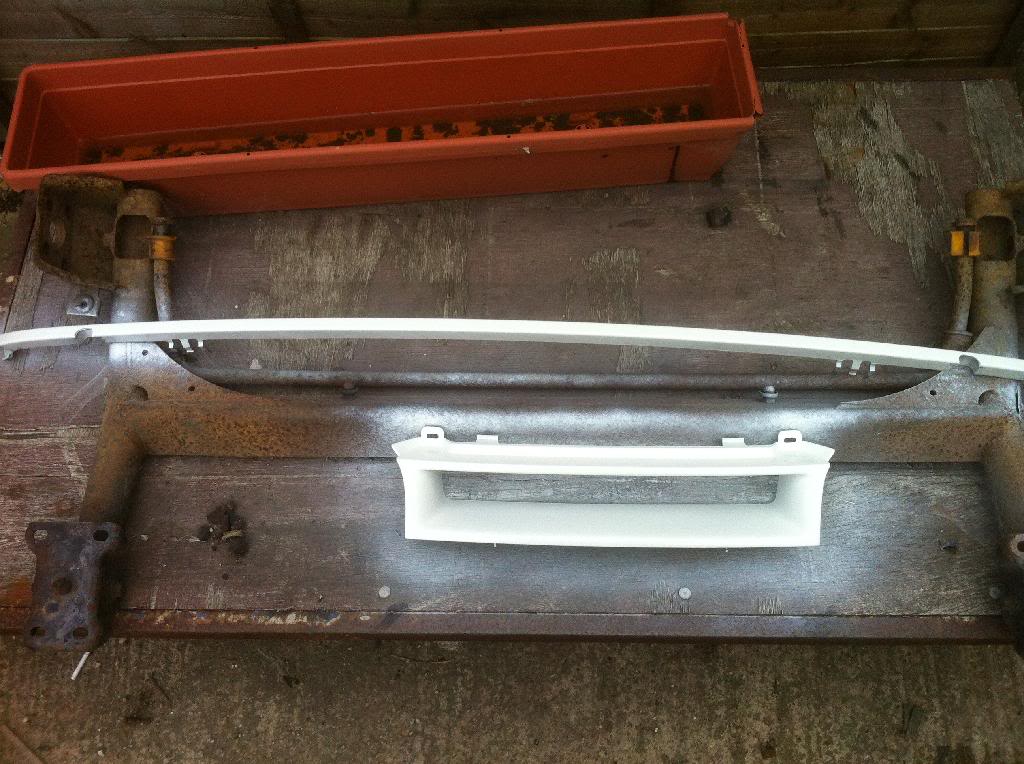
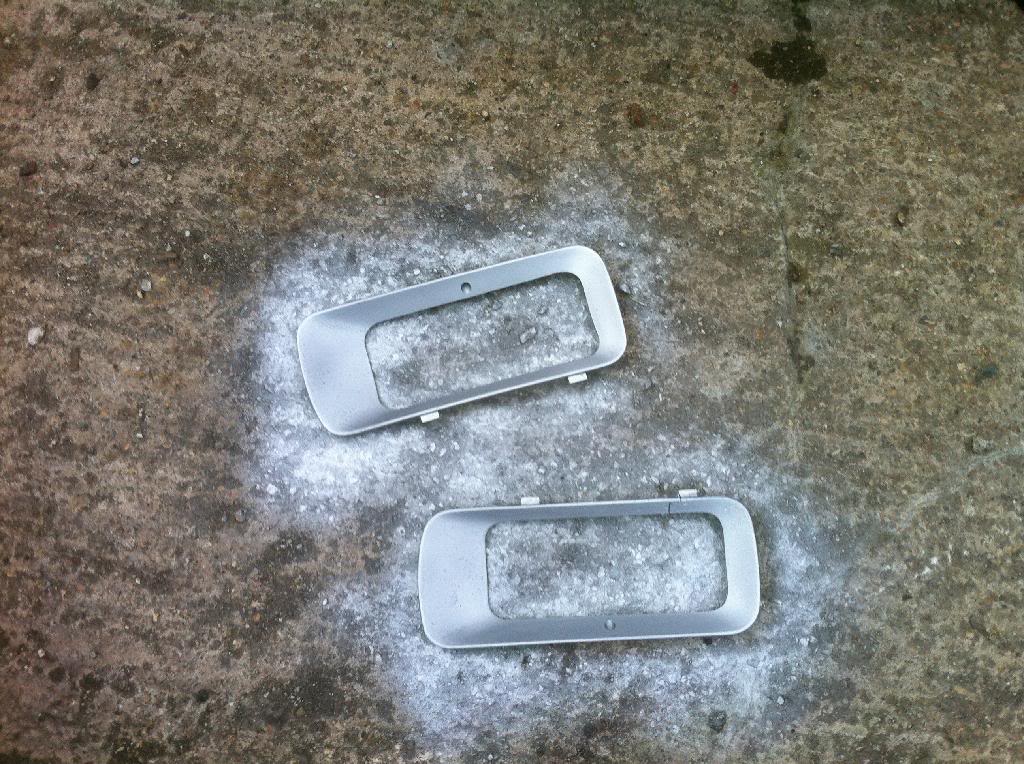
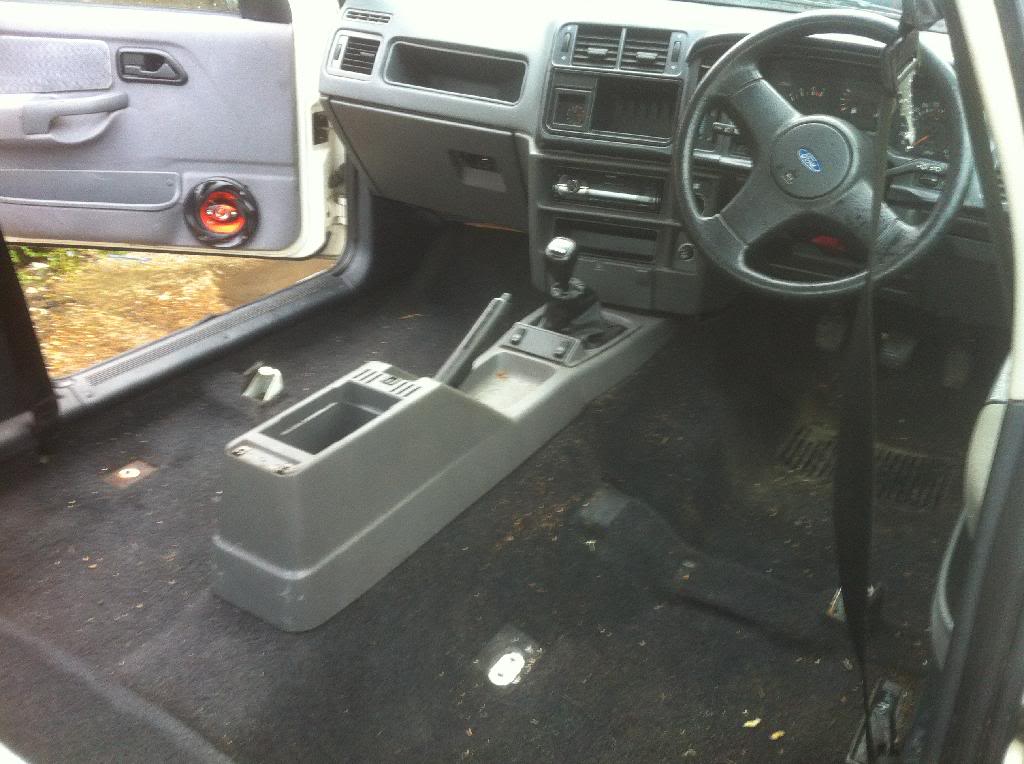
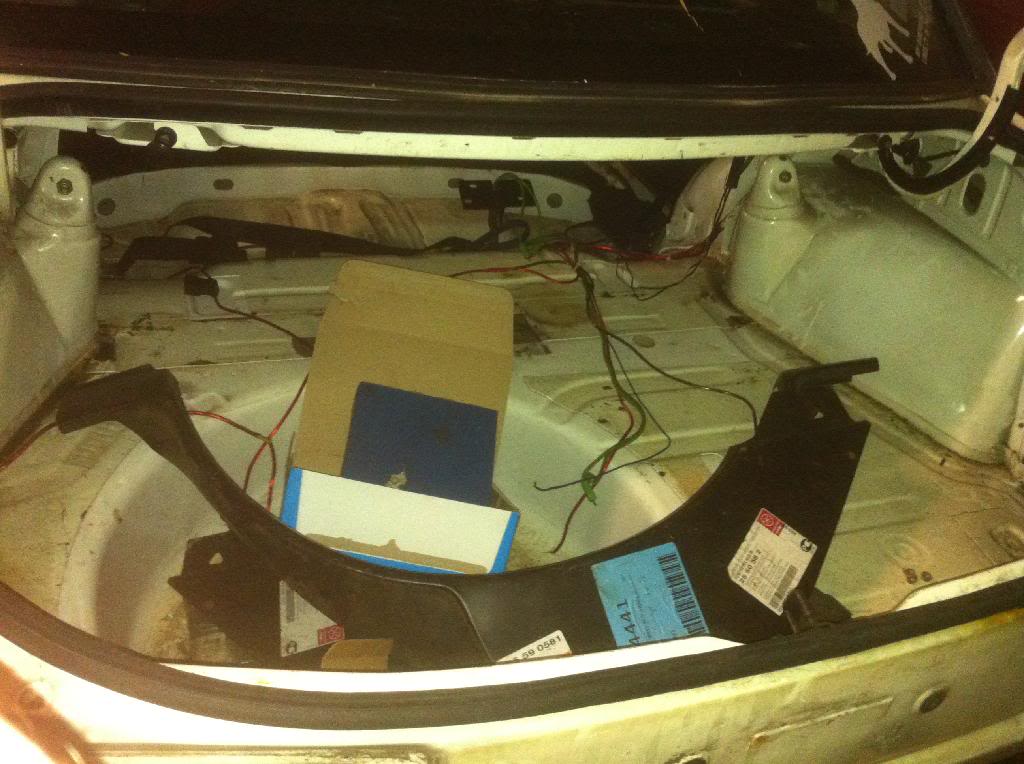
here just a few random pics for you, ive still got to upload a ton more photos as ive till got to catch up just under a years ownership lol


whilst on ebay looking for door actuator and a lock set due to me loosing my keys on the beach and the actuators didn't let the doors shut first time I bought the lock set and actuators and then found 4 doors for a tenner start bid, so I bid and no one else did so I got 4 mint complete doors for a tenner! sweet!

here just a few random pics for you, ive still got to upload a ton more photos as ive till got to catch up just under a years ownership lol


 16-02-2014, 08:54 PM
#3
Glennvestite
iTrader: (1)
Join Date: Jul 2006
Location: Darlington county durham
Posts: 62,755
Received 1,042 Likes
on
996 Posts
Cool car matey. Lol at you smashing your back bumper.
I love sound systems in cars too. What does yours Sound like. I found it hard to hear the bass from my bass box in my saff
I love sound systems in cars too. What does yours Sound like. I found it hard to hear the bass from my bass box in my saff
16-02-2014, 09:05 PM
#4
PassionFord Post Whore!!
Nice to see you back mate
Keep up the good work with the car
Keep up the good work with the car
16-02-2014, 10:08 PM
#5
PassionFord Regular
Thread Starter
iTrader: (1)
Join Date: May 2009
Location: eastbourne
Posts: 477
Likes: 0
Received 0 Likes
on
0 Posts
Yea i had the same problem as i had a crappy single sub in it before from my old car but the two 12" subs with 1800w amp does the trick lol. I listen to alot of rock and arctic monkeys and stuff so not overly bassy music anyway
16-02-2014, 10:10 PM
#6
PassionFord Regular
Thread Starter
iTrader: (1)
Join Date: May 2009
Location: eastbourne
Posts: 477
Likes: 0
Received 0 Likes
on
0 Posts
Thanks mate and im back with a vengence lol. Im starting my own garage atm aswell so busy busy.
The car is much further along the line now and the thread will be updated soon so watch this space
Good to hear from you mate. Its been a while!
The car is much further along the line now and the thread will be updated soon so watch this space
Good to hear from you mate. Its been a while!

Trending Topics
17-02-2014, 11:35 AM
#8
PassionFord Regular
Thread Starter
iTrader: (1)
Join Date: May 2009
Location: eastbourne
Posts: 477
Likes: 0
Received 0 Likes
on
0 Posts
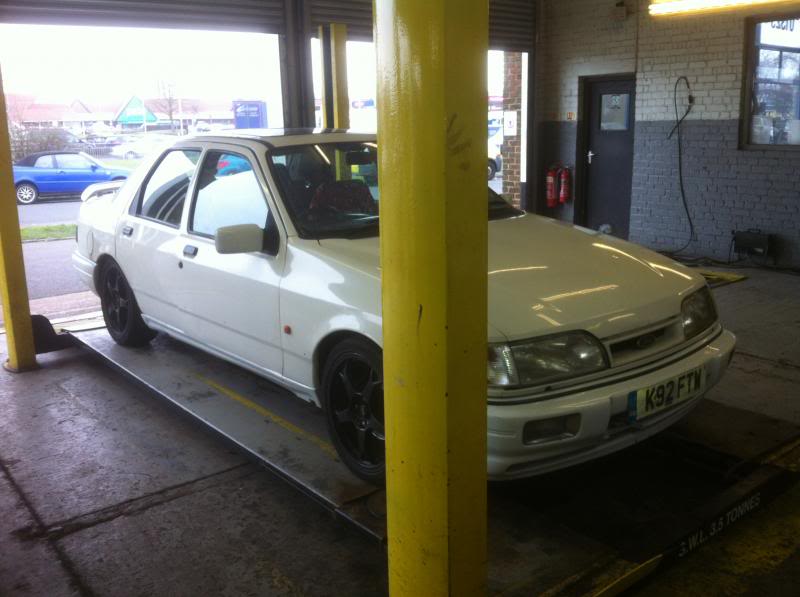
Cheers mate. Yea im pretty much sorted now. The car has had a freshen up on the front and ambers fitted and it also got full leather interior. Agm shes being stripped for paint and having quite abit of tlc. I make sure i get atleast half hour a day on her. Im driving a diesel 306 estate about atm so im despriate to get back in my saph lol
 17-02-2014, 07:01 PM
#12
PassionFord Regular
Thread Starter
iTrader: (1)
Join Date: May 2009
Location: eastbourne
Posts: 477
Likes: 0
Received 0 Likes
on
0 Posts
Lol once i was blaring born this way by gafa out of my grey frst in traffic on a hot sunny day with windows open and a bloke just laughed and called me a cunt. It was hilarious!
Yea shes been a good old girl. Time to show my apreciation lol
Yea shes been a good old girl. Time to show my apreciation lol
18-02-2014, 04:55 PM
#13
PassionFord Regular
Thread Starter
iTrader: (1)
Join Date: May 2009
Location: eastbourne
Posts: 477
Likes: 0
Received 0 Likes
on
0 Posts
Right, next bit,
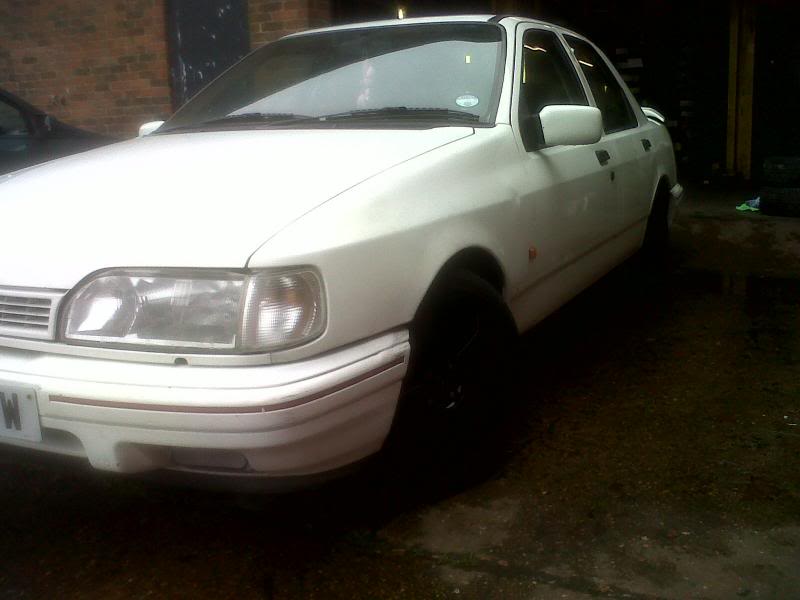
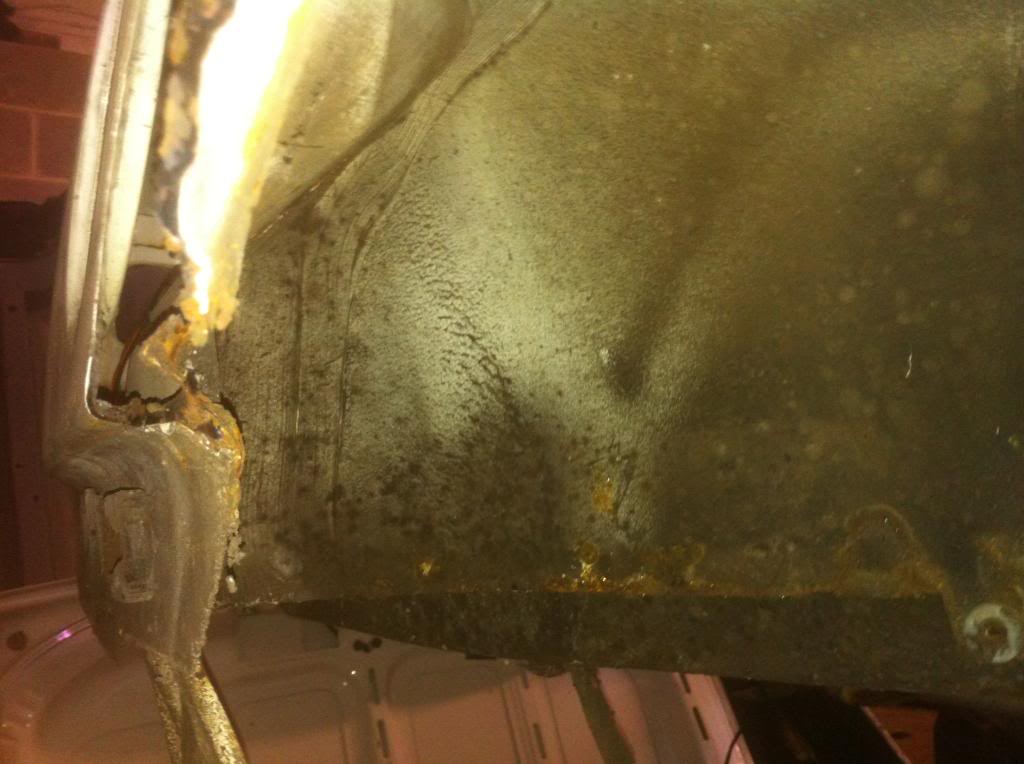
My car was happily parked up at home and one night some little twat kicked my indicator in and broke the headlamp mount at the bottom, so i thought id get a set of amber indicators.
I found second hand ones wernt far off the cost of new ones so i got new ones and when they came i thought that a front end freshen up was in order. So i got some paint and got to it
I then made up some little brackets as a temp measure for the grill as it was insecure due to having non cosworth headlights. Also i made a bracket to hold the nearside headlamp in place
Then fitted my new ambers and turned my attention to the bumper, grill and bumper strip thing
And then painted in halfords ford diamond cream! Which actually matched the car better than the diamond white car it ment for
And put back together

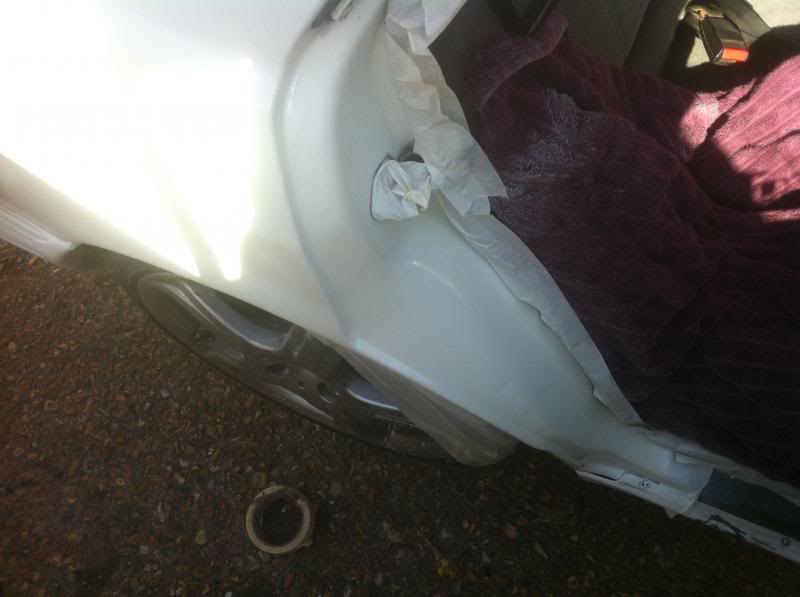
The next day i noticed that my seat was deooping to one side so i had a look and found one of the rear seat mounts had rotten away, so on with fixing that
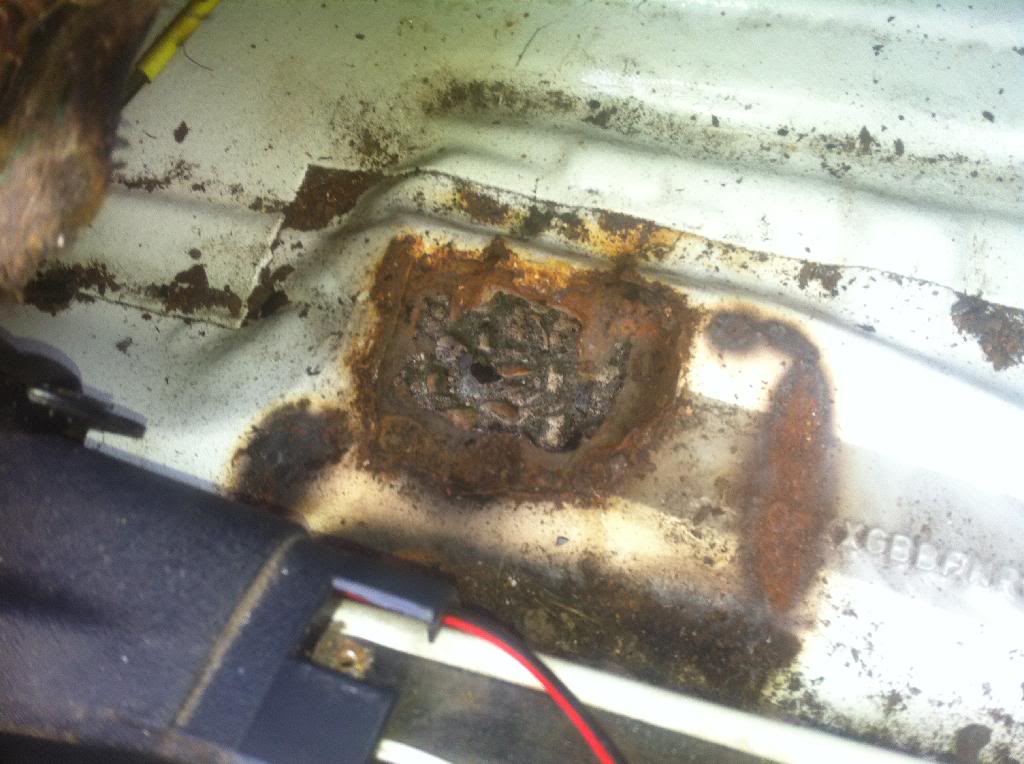
I welded in two skins of 1mm thick metal, one on top and one underneath
Then painted and sealed it inside, refitted carpet and seat then drilled a hole and nut and bolted it down and spot welded nut on the underside and painted
Still more to come but fone battery is dying now lol
My car was happily parked up at home and one night some little twat kicked my indicator in and broke the headlamp mount at the bottom, so i thought id get a set of amber indicators.
I found second hand ones wernt far off the cost of new ones so i got new ones and when they came i thought that a front end freshen up was in order. So i got some paint and got to it


I then made up some little brackets as a temp measure for the grill as it was insecure due to having non cosworth headlights. Also i made a bracket to hold the nearside headlamp in place


Then fitted my new ambers and turned my attention to the bumper, grill and bumper strip thing


And then painted in halfords ford diamond cream! Which actually matched the car better than the diamond white car it ment for


And put back together


The next day i noticed that my seat was deooping to one side so i had a look and found one of the rear seat mounts had rotten away, so on with fixing that


I welded in two skins of 1mm thick metal, one on top and one underneath


Then painted and sealed it inside, refitted carpet and seat then drilled a hole and nut and bolted it down and spot welded nut on the underside and painted

Still more to come but fone battery is dying now lol
18-02-2014, 08:59 PM
#15
PassionFord Regular
Thread Starter
iTrader: (1)
Join Date: May 2009
Location: eastbourne
Posts: 477
Likes: 0
Received 0 Likes
on
0 Posts
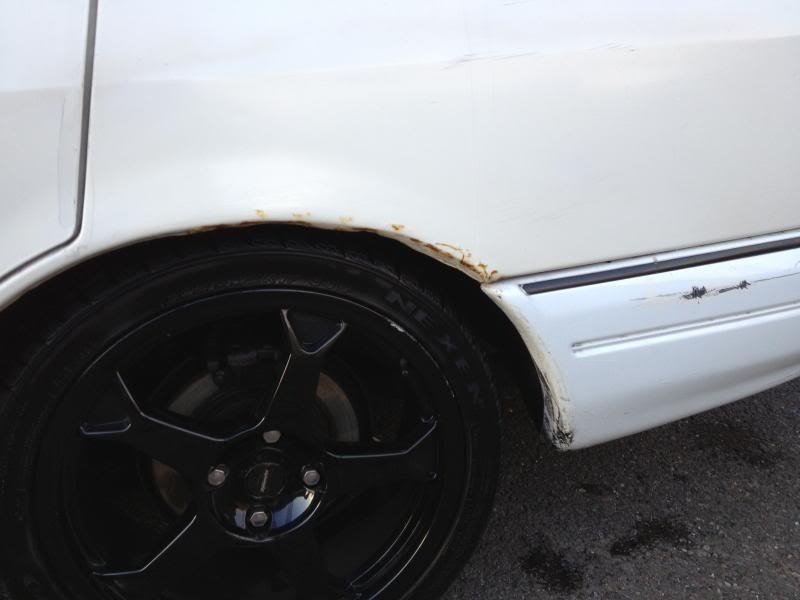
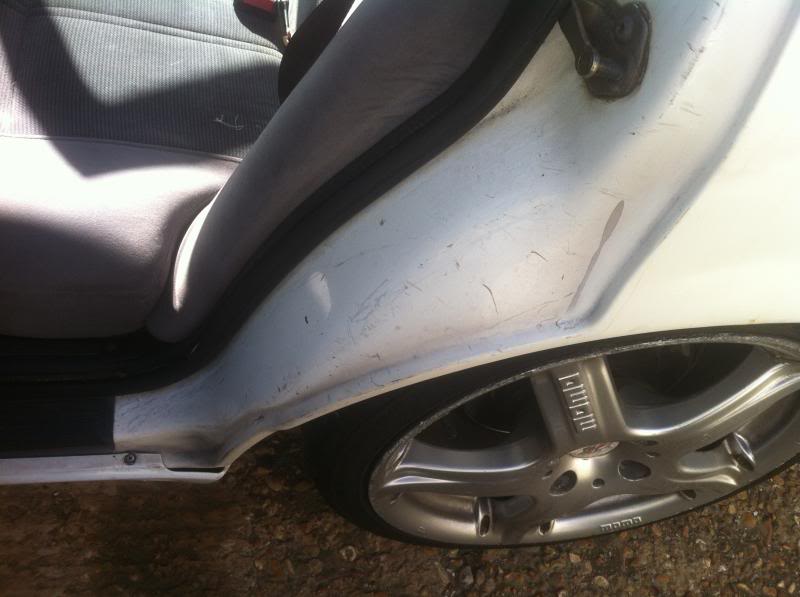
Nah proberly not lol. This ones pretty solid. Thats the only bit of welding its had. The arches are full of filler and thats why i got arch panels and now over a year down the line ive made a start on them. So all in all shes pretty good tbh
19-02-2014, 10:02 AM
#16
PassionFord Regular
Thread Starter
iTrader: (1)
Join Date: May 2009
Location: eastbourne
Posts: 477
Likes: 0
Received 0 Likes
on
0 Posts
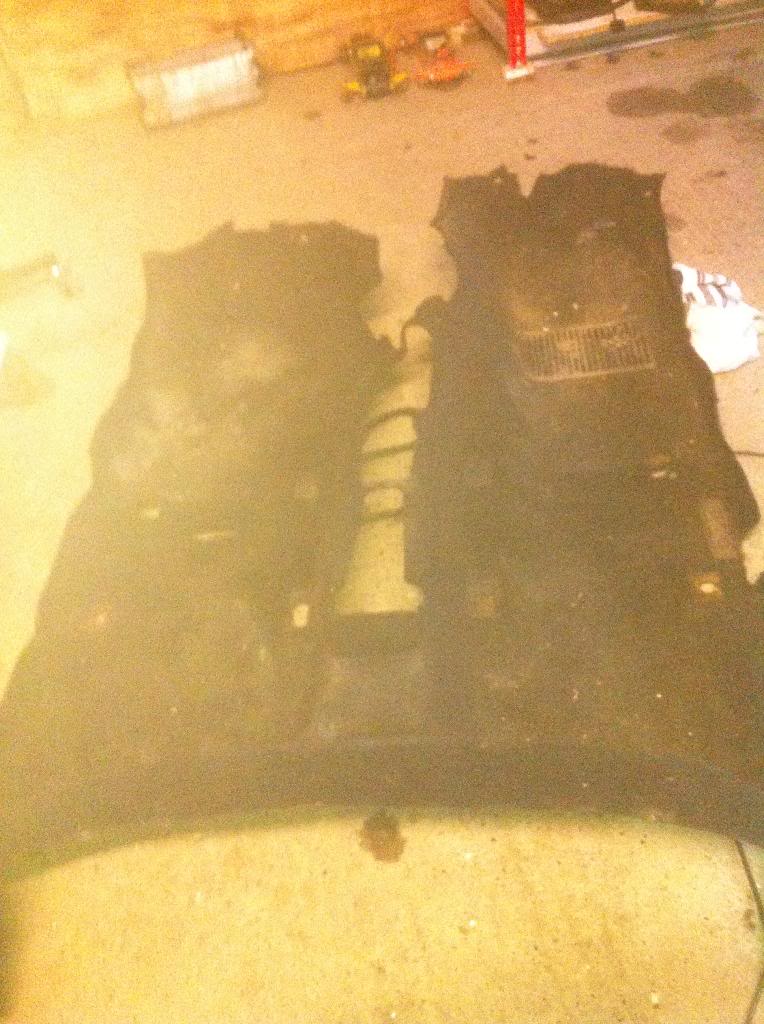
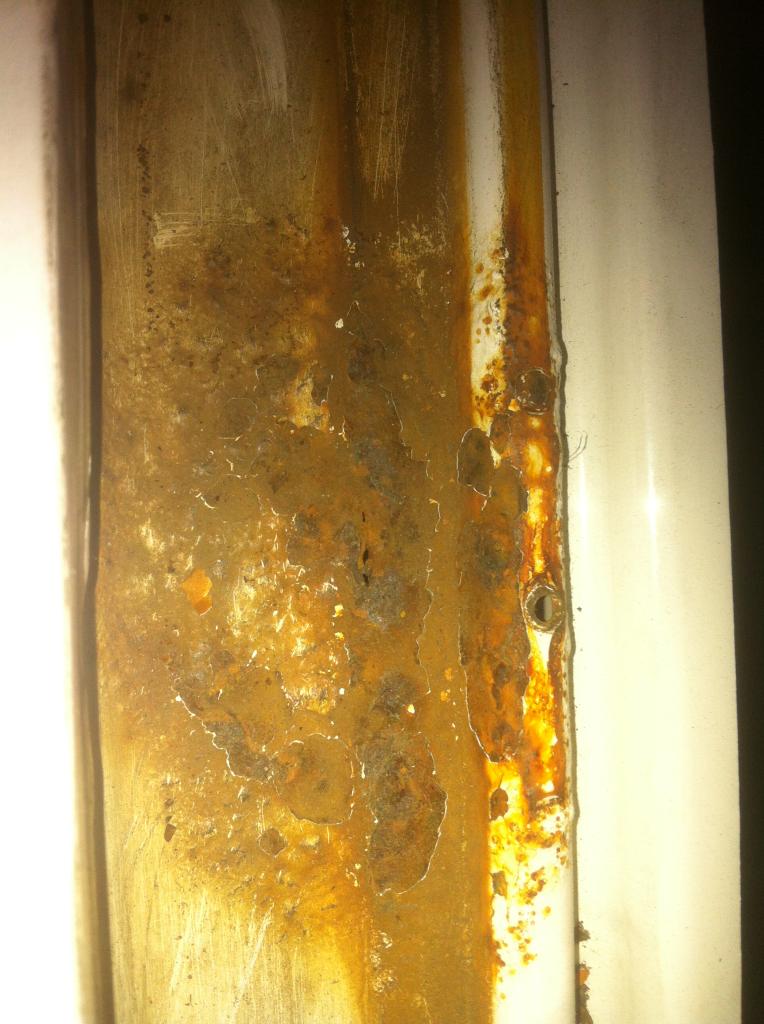
As you may have noticed by the fuel cap there was some black splatter marks and the rear door shuts were in a bad way, so one saturday afternoon i thought id try and make it look abit better. My initial plan was to paint the whole car panel by panel with arosol and after that afternoon i realised id just make the car look worse, so now ive decided that paint will wait untill shes off the road and i can do it properly with 2k paints. Heres what i did that day
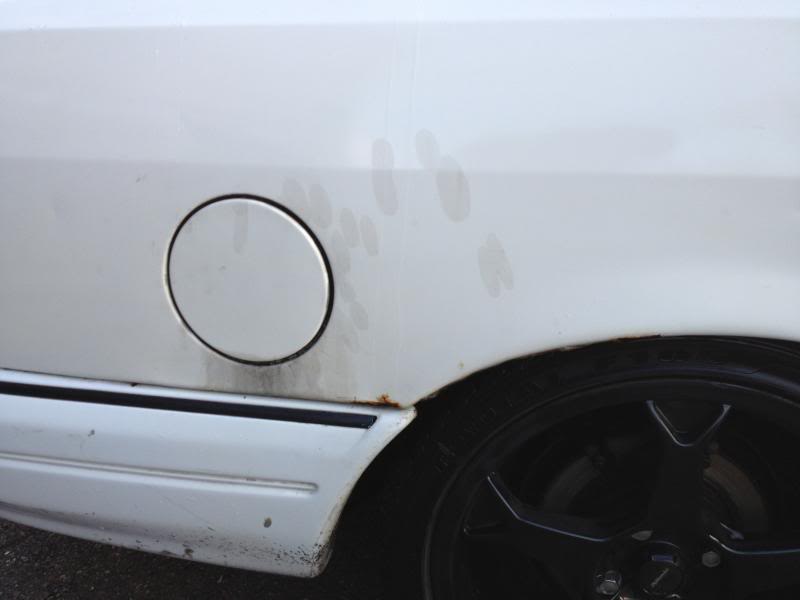
I did have a pic of the end result but i have no idea were it went. The job was neat and tidy but i later found that spilt fuel just ate straight into the paint
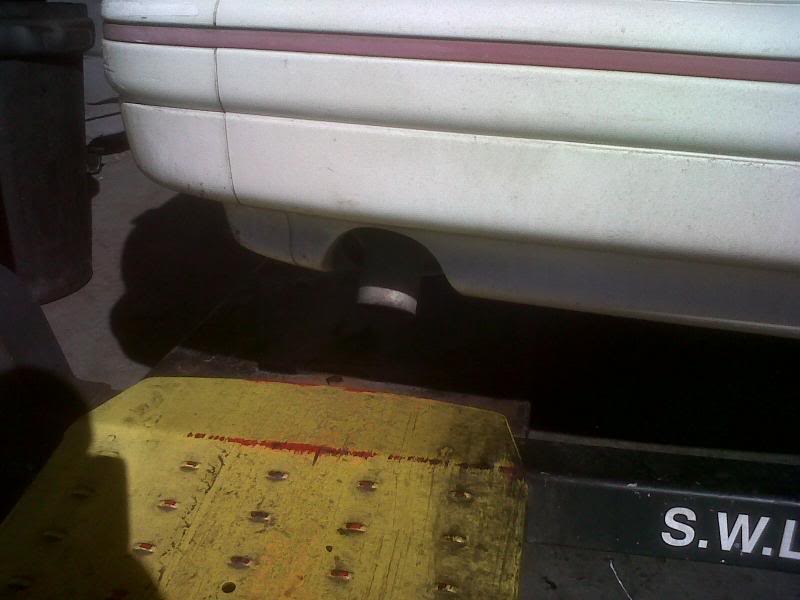
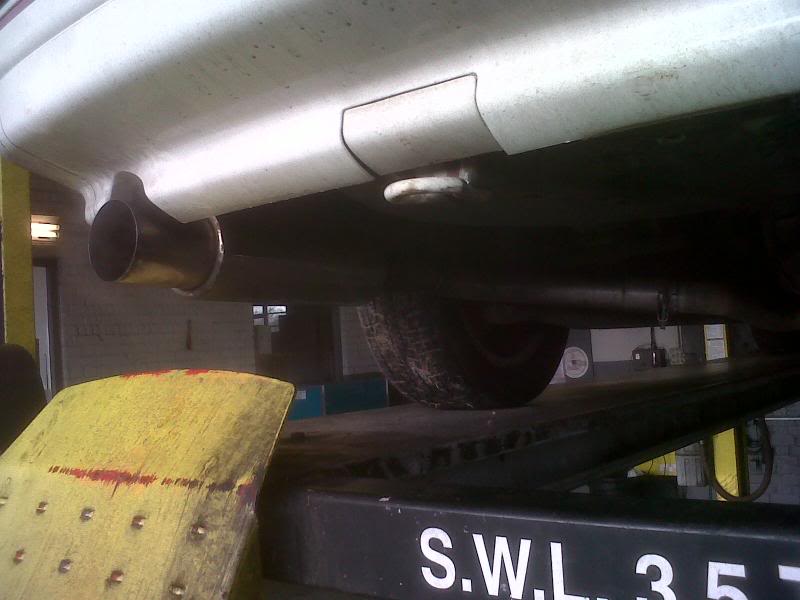
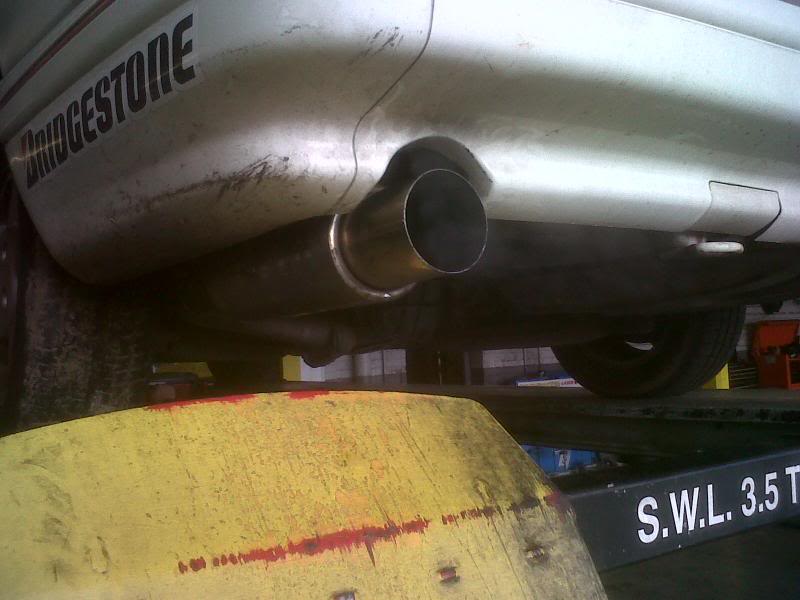
Also i found a full stainless exhaust with a 4" outward tip on ebay and that was mine for 66 quid so the manky jap can is now gone. Sorry no pics.
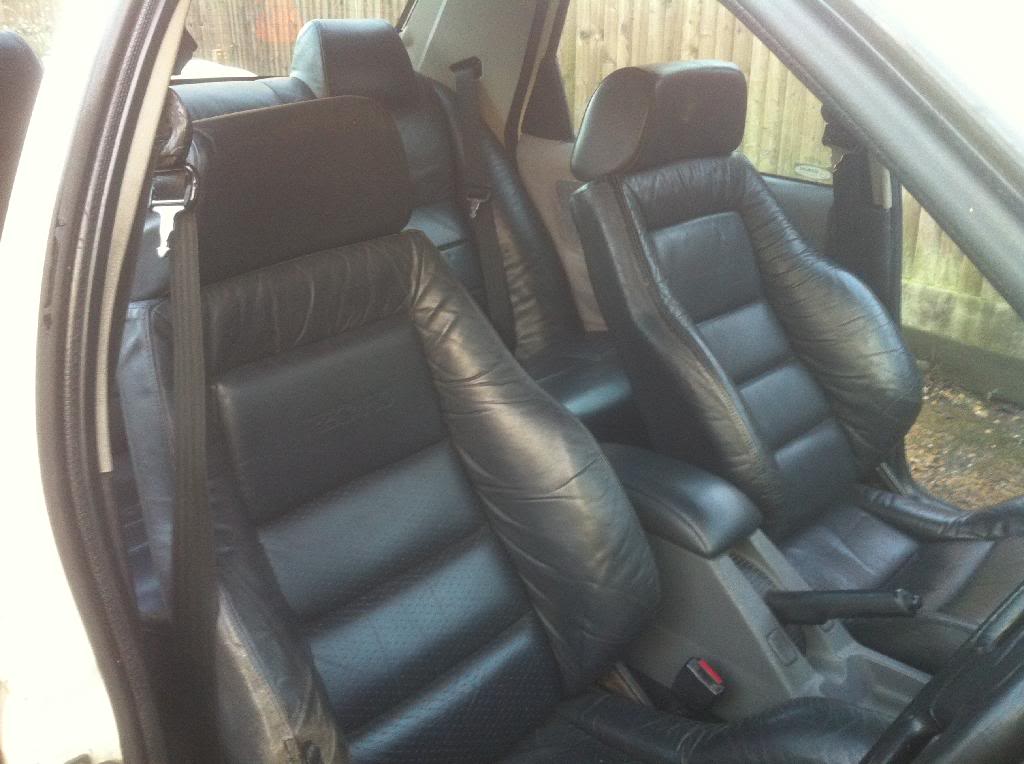
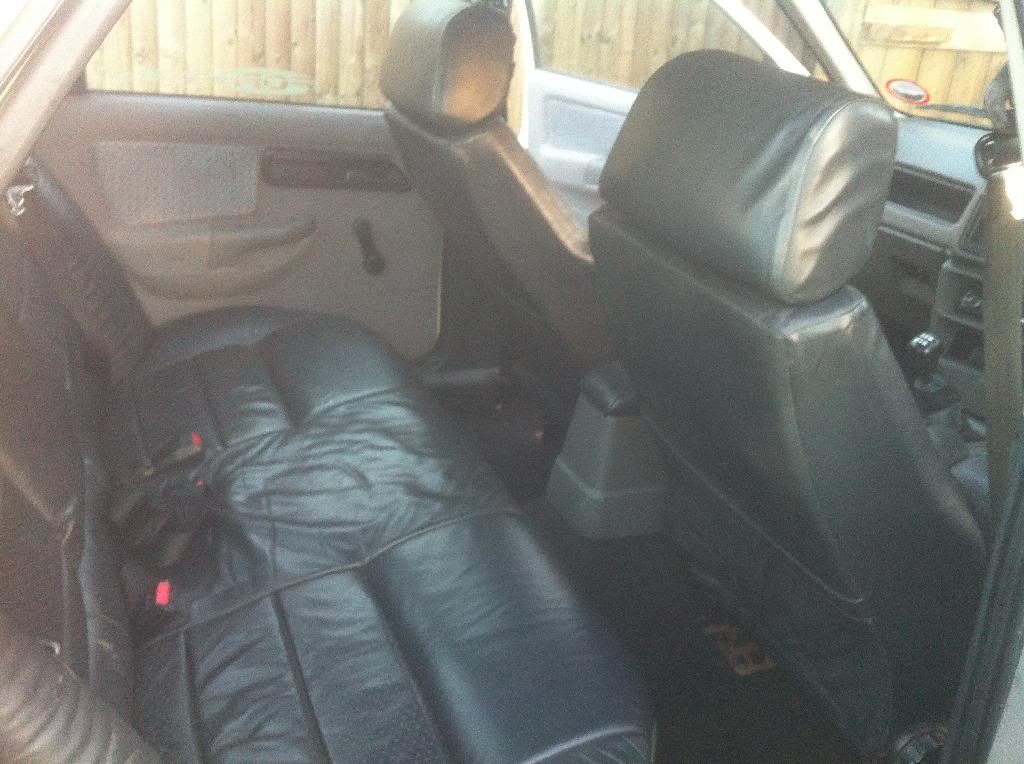
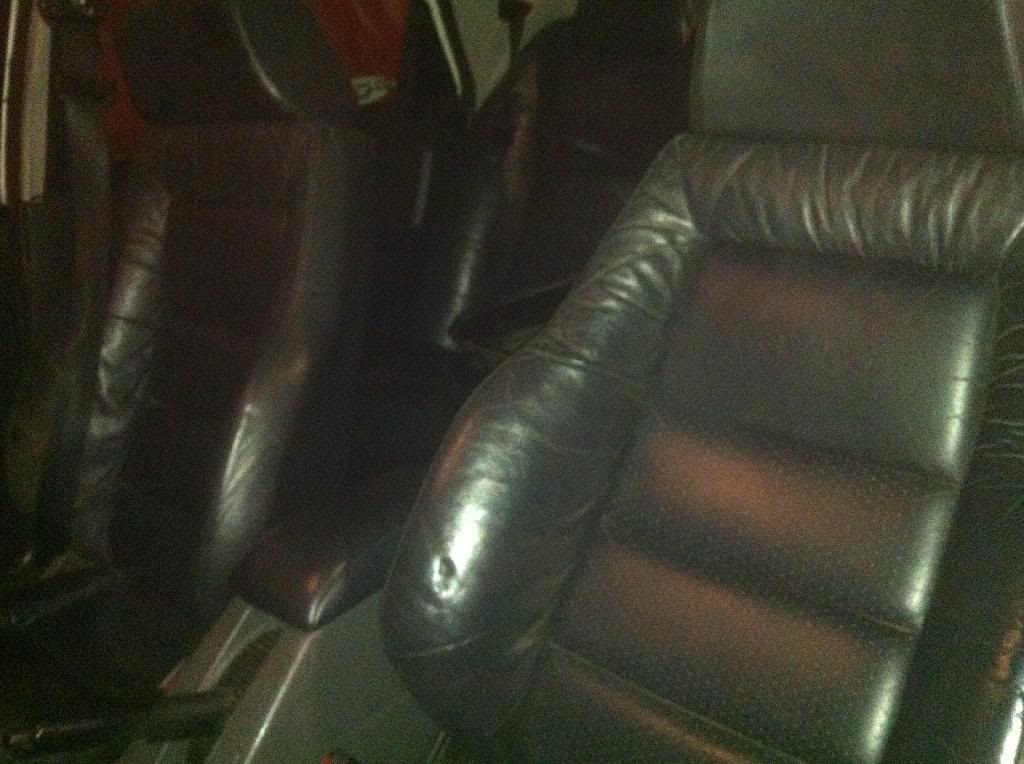
One day on ebay i stumbled across a full leather interior going cheap and the selker willing to post so an email asking a buy it now price was sent. 270 posted was the reply, so i snapped it up, although not mint a damn site better that the shoddy glx interior currently fitted and with a trip to the isle of wight looming i had to have it!


One interior out. I did have pics of before but yet again have no idea were they have gone. If i find these pics ill edit the thread
During the job the heavens opened big time so i was taking shelter in the car and just cleaning bits up
So out with the old and in with the new
I do have the door cards aswell but yet again lost pics!!
Heres a few shots i got at the isle of whight,
Ah and i almost forgot, i got hold of an espace front splitter just before i went (later found that was a bad idea) lol
That was at the needles
At the dock yard


After that the old girl was getting abit tired so i layed her up at work while i waited for my workshop to be ready to move in
Oh and just a random one i fiddled with on my fone
Still a little more to come but were almost up to date


I did have a pic of the end result but i have no idea were it went. The job was neat and tidy but i later found that spilt fuel just ate straight into the paint
Also i found a full stainless exhaust with a 4" outward tip on ebay and that was mine for 66 quid so the manky jap can is now gone. Sorry no pics.
One day on ebay i stumbled across a full leather interior going cheap and the selker willing to post so an email asking a buy it now price was sent. 270 posted was the reply, so i snapped it up, although not mint a damn site better that the shoddy glx interior currently fitted and with a trip to the isle of wight looming i had to have it!


One interior out. I did have pics of before but yet again have no idea were they have gone. If i find these pics ill edit the thread
During the job the heavens opened big time so i was taking shelter in the car and just cleaning bits up

So out with the old and in with the new


I do have the door cards aswell but yet again lost pics!!
Heres a few shots i got at the isle of whight,
Ah and i almost forgot, i got hold of an espace front splitter just before i went (later found that was a bad idea) lol


That was at the needles
At the dock yard


After that the old girl was getting abit tired so i layed her up at work while i waited for my workshop to be ready to move in


Oh and just a random one i fiddled with on my fone

Still a little more to come but were almost up to date
19-02-2014, 04:09 PM
#18
PassionFord Regular
Thread Starter
iTrader: (1)
Join Date: May 2009
Location: eastbourne
Posts: 477
Likes: 0
Received 0 Likes
on
0 Posts
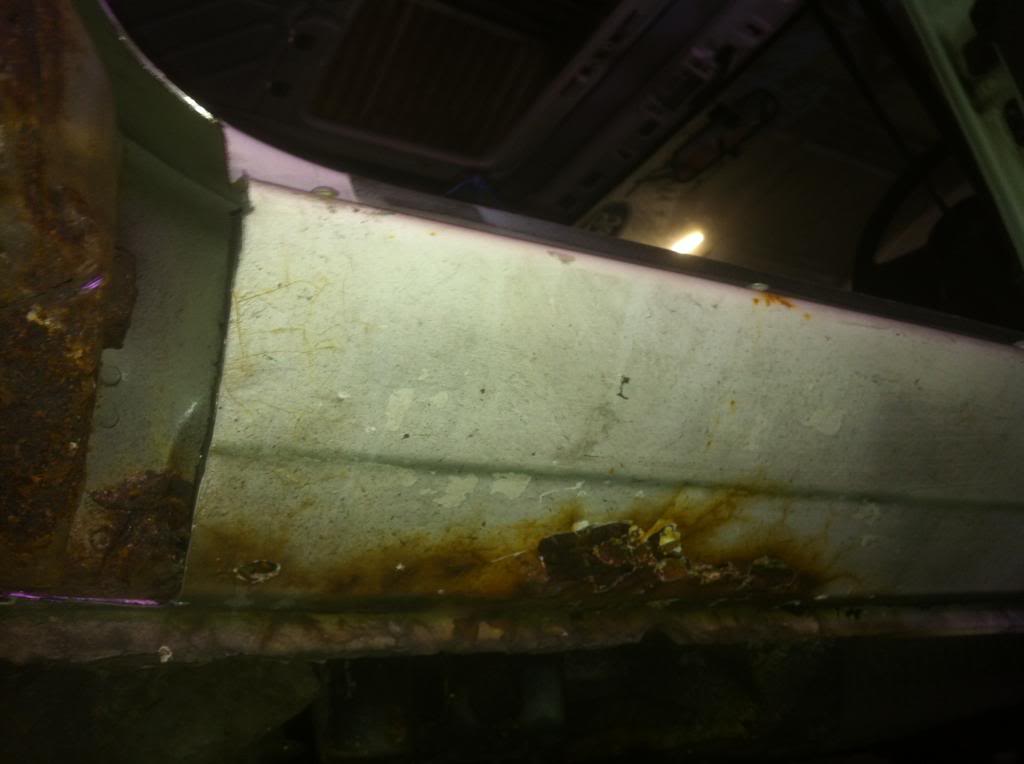
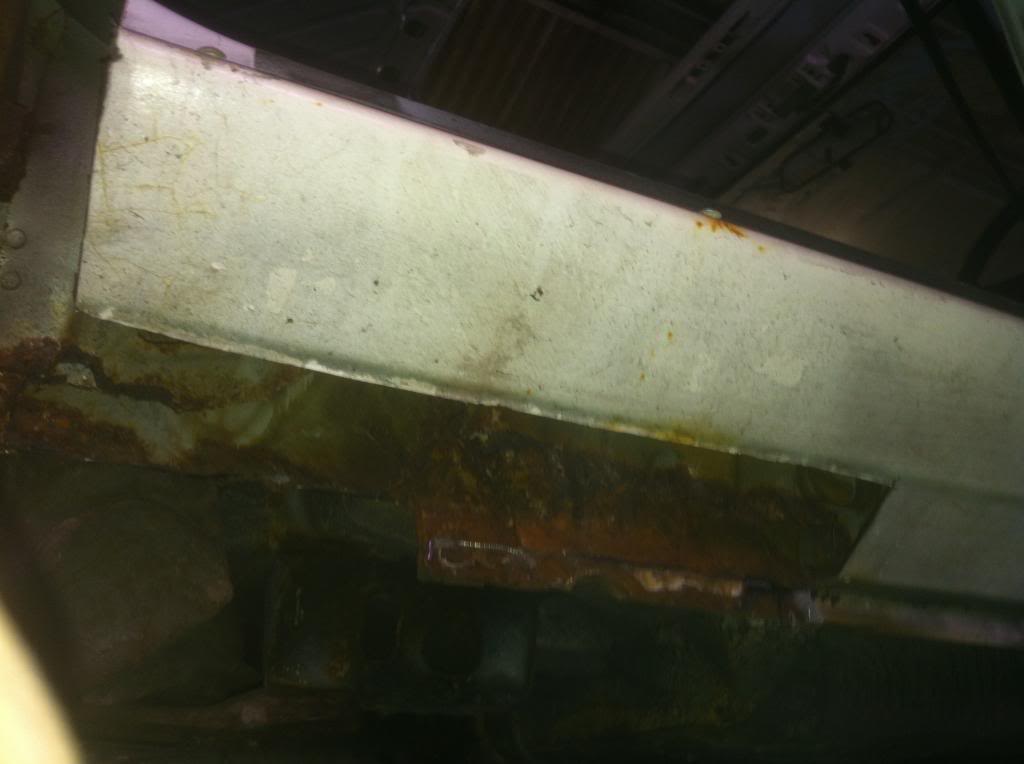
Right at thispoint the car is off the road for sum much deserved tlc, but my attention has turned to the workshop.
Once i got the keys to the workshop the saph was the first thing moved down there. Once semi organised i had a back log of customers to get through and seeing as im still working full time were talking long evenings. Eventually i got an hour here and there to do abit one saph.
Whist in the workshop my plan is to do the following
Replace,
Heater matrix
Head gasket
Clutch
Starter motor
Battery
Some brake pipes
Brake hoses with braided
Rear brakes with 4x4 items
Front brakes with e38 bmw brembos
Bonnet with 4x4 item
All doors
Window seals
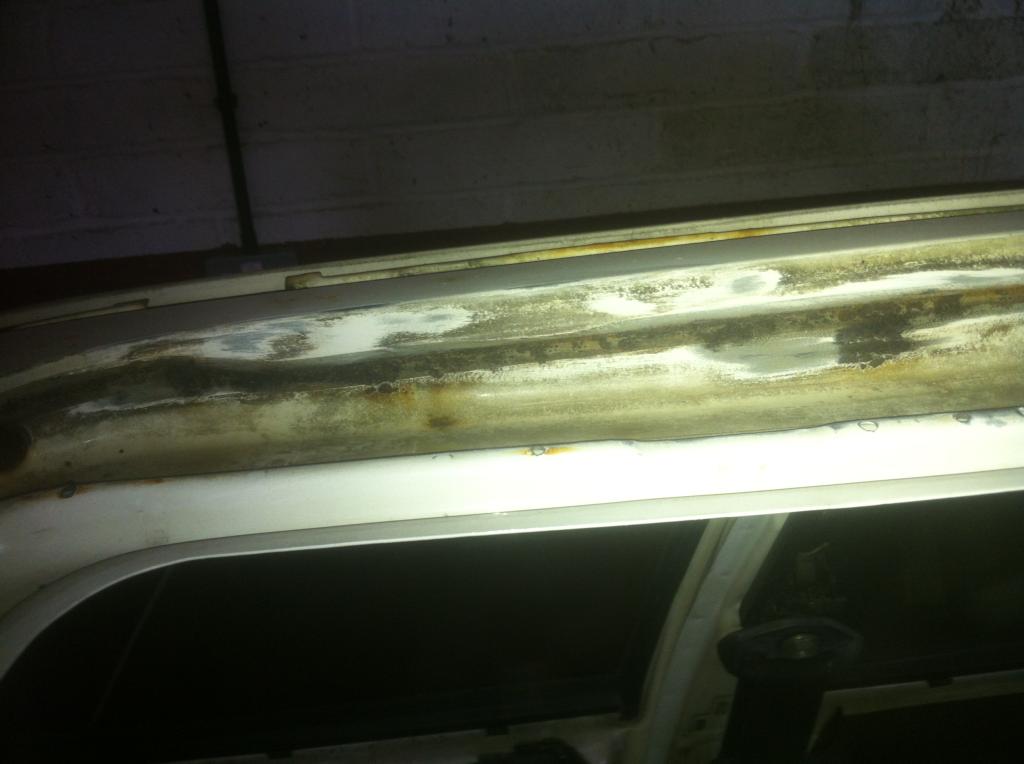
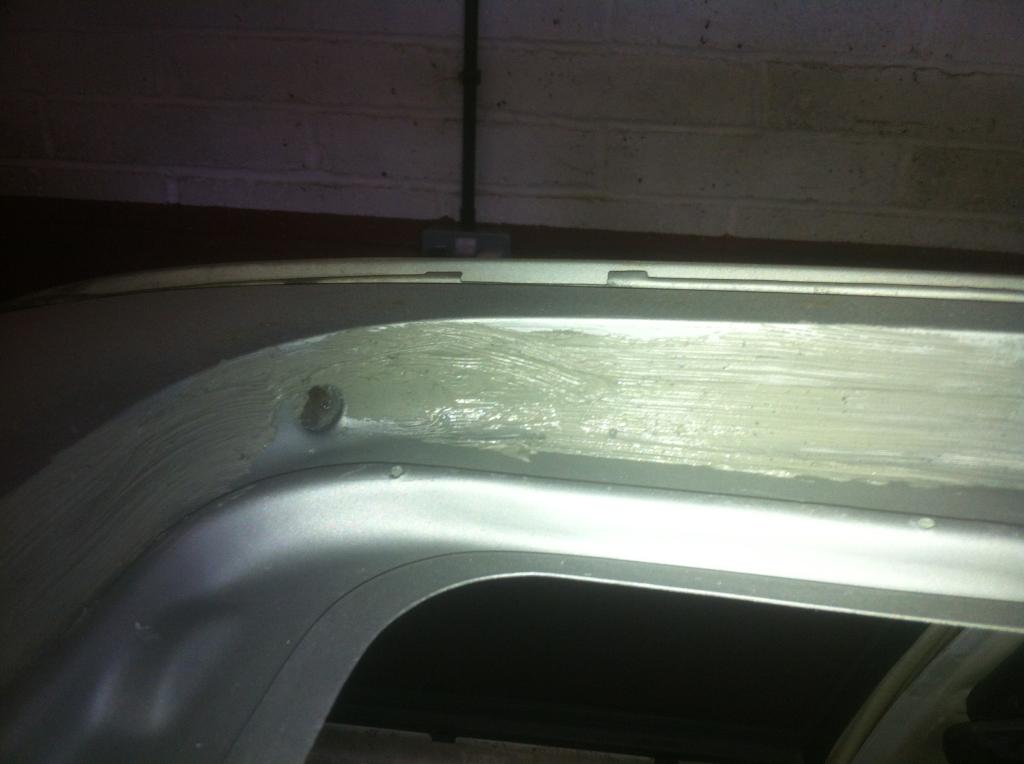
Roof gutter trims
Nearside rear light
Headlights with cossie ones
Steering wheel with cossie one
Rear arches
Prep and paint whole car in frozen white
Get most black bits hydro dipped
Get wheels refurbed
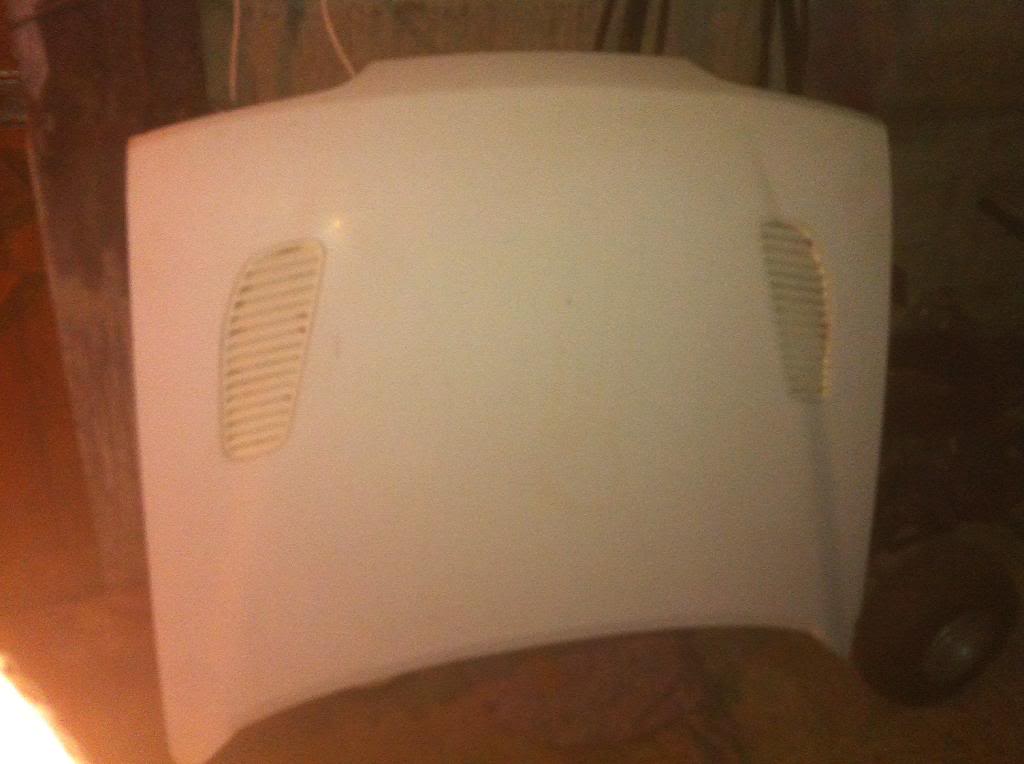
One mint bonnet
One very manky carpet!!
GROSE!!!!
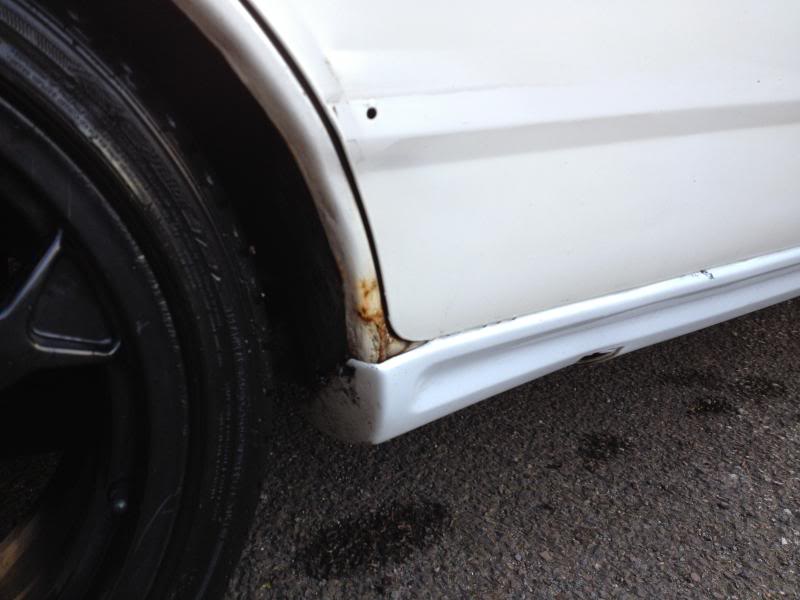
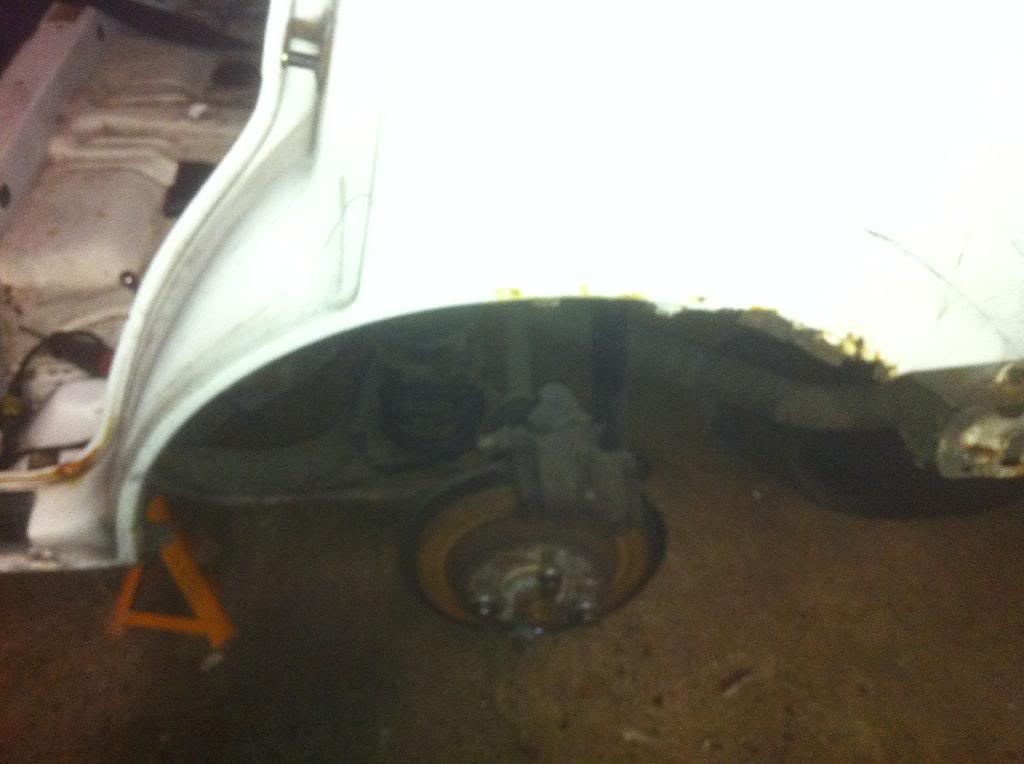
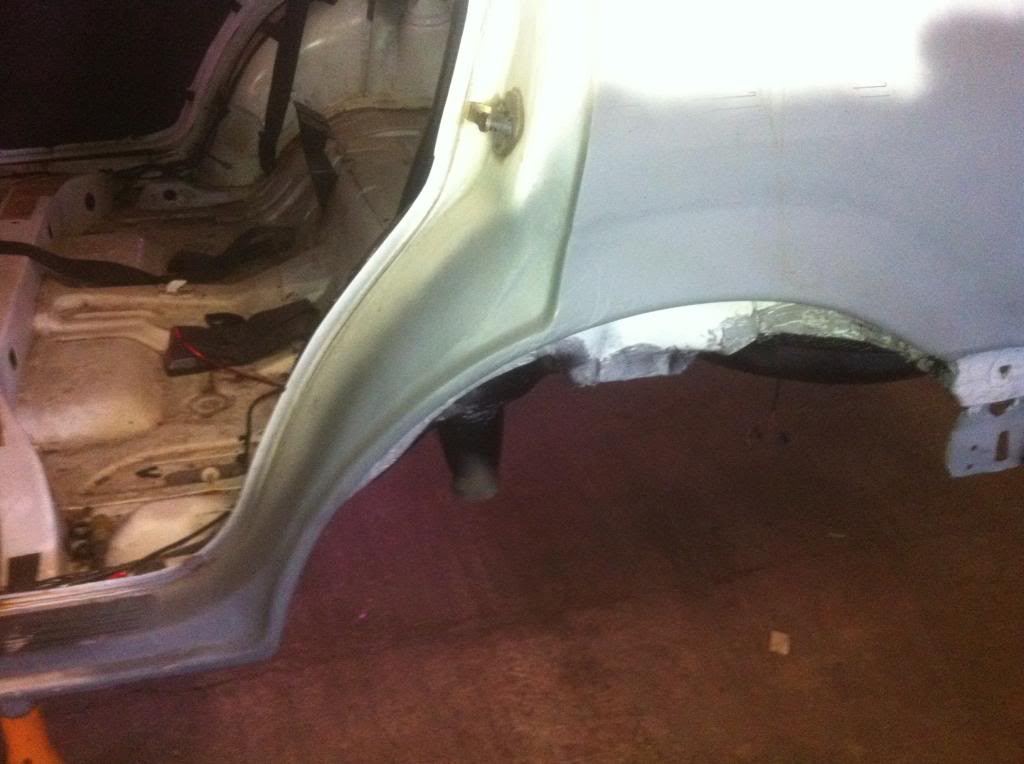
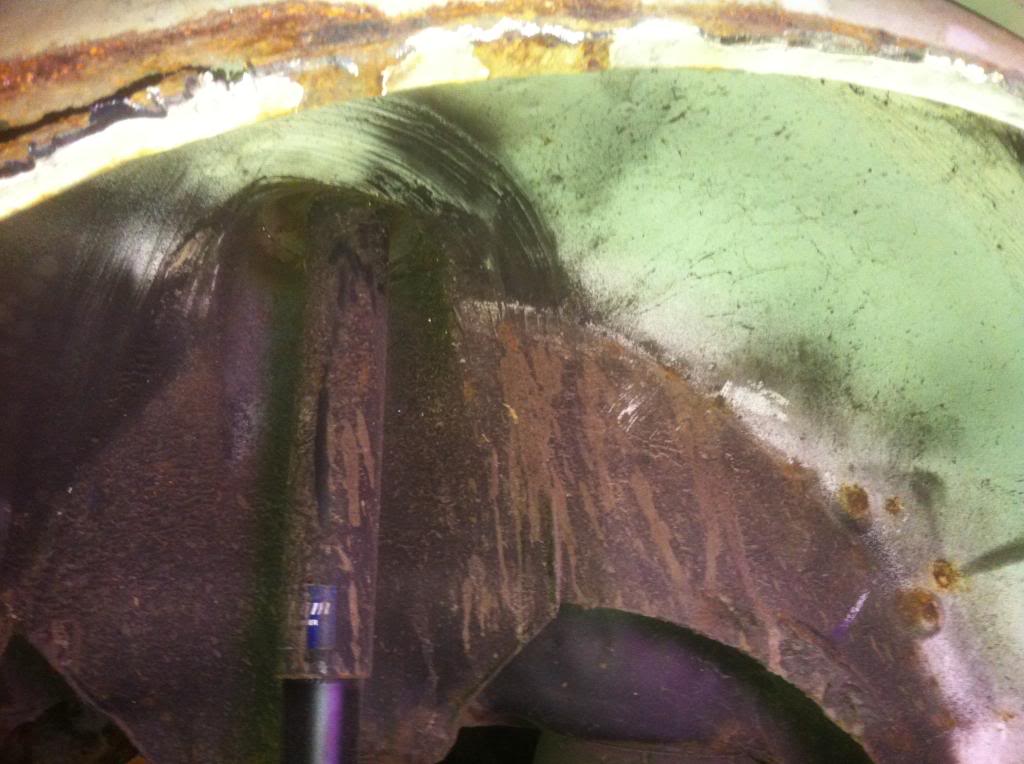
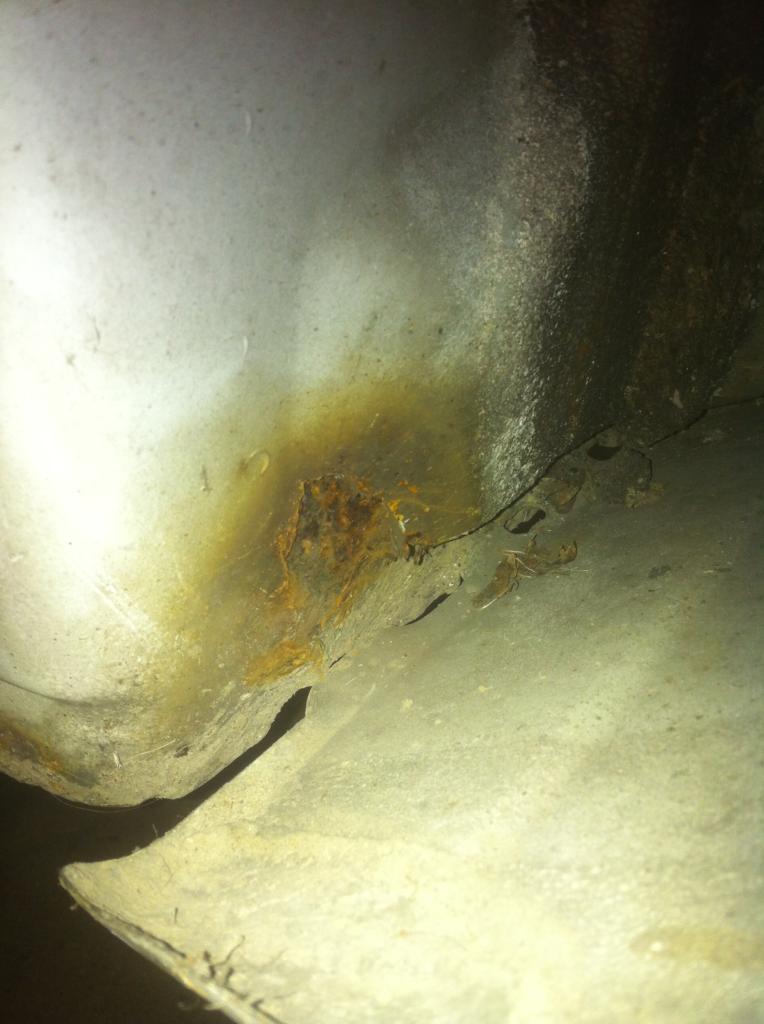
Right so i got tired of pulling the poor old girl apart and thought id best do something to show her im not just stripping her so i made a start on one of the arches
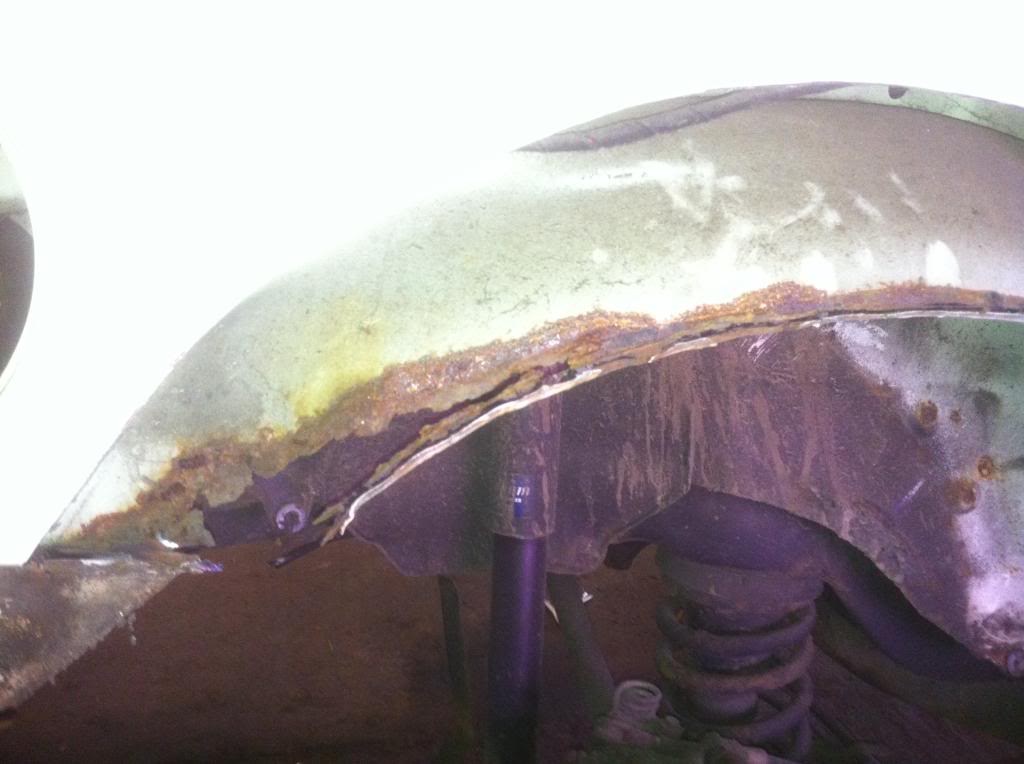
One manky rusty arch full of filler
Then carfully marked up and cut out
And as to be expected, found abit more rot but no bad atal!
So chopped that out too
I knew this bit was there anyway. Its not totally gone but still scabby so out that come
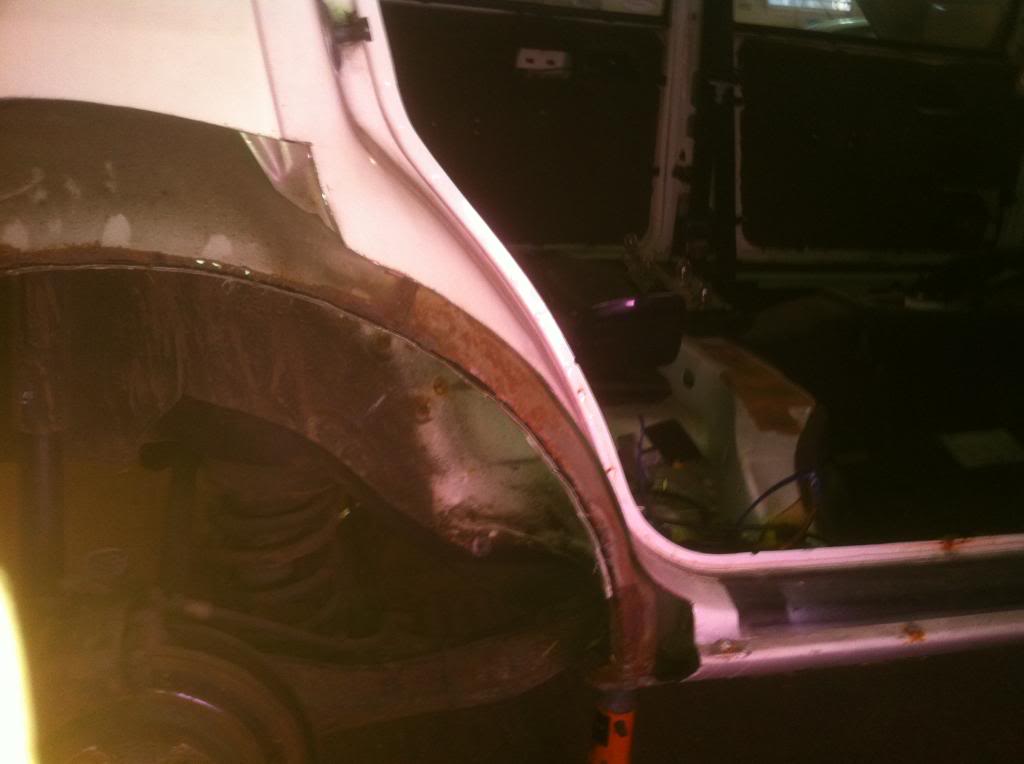
Then i cleaned up the arch and sealed the edges and primed

Then i removed the rest of the arch thats spot welded on and cut the new panel to size and test fitted
Before welding that on im repairing the inner arch using a bit of a mk5 escort inner arch panel which im doing atm so no photos yet
Before i left for the night i was too interested in seeing what the arch would be like in white so i got a can of halfords diamond cream and a quick spray over (will be gone over with frozen white once arch is done)


Thats it for now. All up to date but cracking on as i want my car back lol
Once i got the keys to the workshop the saph was the first thing moved down there. Once semi organised i had a back log of customers to get through and seeing as im still working full time were talking long evenings. Eventually i got an hour here and there to do abit one saph.
Whist in the workshop my plan is to do the following
Replace,
Heater matrix
Head gasket
Clutch
Starter motor
Battery
Some brake pipes
Brake hoses with braided
Rear brakes with 4x4 items
Front brakes with e38 bmw brembos
Bonnet with 4x4 item
All doors
Window seals
Roof gutter trims
Nearside rear light
Headlights with cossie ones
Steering wheel with cossie one
Rear arches
Prep and paint whole car in frozen white
Get most black bits hydro dipped
Get wheels refurbed
One mint bonnet


One very manky carpet!!

GROSE!!!!


Right so i got tired of pulling the poor old girl apart and thought id best do something to show her im not just stripping her so i made a start on one of the arches
One manky rusty arch full of filler

Then carfully marked up and cut out

And as to be expected, found abit more rot but no bad atal!


So chopped that out too

I knew this bit was there anyway. Its not totally gone but still scabby so out that come


Then i cleaned up the arch and sealed the edges and primed


Then i removed the rest of the arch thats spot welded on and cut the new panel to size and test fitted


Before welding that on im repairing the inner arch using a bit of a mk5 escort inner arch panel which im doing atm so no photos yet
Before i left for the night i was too interested in seeing what the arch would be like in white so i got a can of halfords diamond cream and a quick spray over (will be gone over with frozen white once arch is done)


Thats it for now. All up to date but cracking on as i want my car back lol
19-02-2014, 04:16 PM
#19
PassionFord Regular
Thread Starter
iTrader: (1)
Join Date: May 2009
Location: eastbourne
Posts: 477
Likes: 0
Received 0 Likes
on
0 Posts
I can get more pics yea. Yea i did do it myself. I just cut a piece of mdf to fit in the original hole (i had to do a 45 degree angle on the edge to get it to sit in then covered it in carpet and once id fitted the speakers i turned it upside down and used an industrial stapler to pin the section in place. It was easy but took a while lol
19-02-2014, 10:08 PM
#20
PassionFord Post Whore!!
Keep up the good work Jon.
Hope everything works out for you mate.
Will come over and see you once your settled in
Hope everything works out for you mate.
Will come over and see you once your settled in
23-02-2014, 09:24 PM
#26
PassionFord Regular
Thread Starter
iTrader: (1)
Join Date: May 2009
Location: eastbourne
Posts: 477
Likes: 0
Received 0 Likes
on
0 Posts
Right? Ok. Is it better then i guess? Im only doing it cos its leaking oil. I want rid of the engine but i want the car back on the road. Once this stage is done im gunna buy a clapped out 2wd saph and swap all the running gears over and sell the cossie on with this lump judt cheap. Works out a fuck ton cheaper than buying all the bits
24-02-2014, 09:19 PM
#27
Fart of the Purniture
Yes the 16v version is better, fit & forget.
I disagree on your theory though, buying an actual Cosworth is the cheapest way, if you buy a clapped out Cosworth you will have exactly that in parts.
Clapped out engine, gearbox, suspension, wiring, etc
Do this one nice as a twin cam 8v, make a good job of it, then sell it and save up for a proper one.
Good luck either way.
26-05-2014, 11:07 PM
#28
PassionFord Regular
Thread Starter
iTrader: (1)
Join Date: May 2009
Location: eastbourne
Posts: 477
Likes: 0
Received 0 Likes
on
0 Posts
hi guys, sorry its been awhile since any updates, ive been fully self employed at my garage as of april this year so its been a rough road lol
I have been working on the saph still just not as much as id like
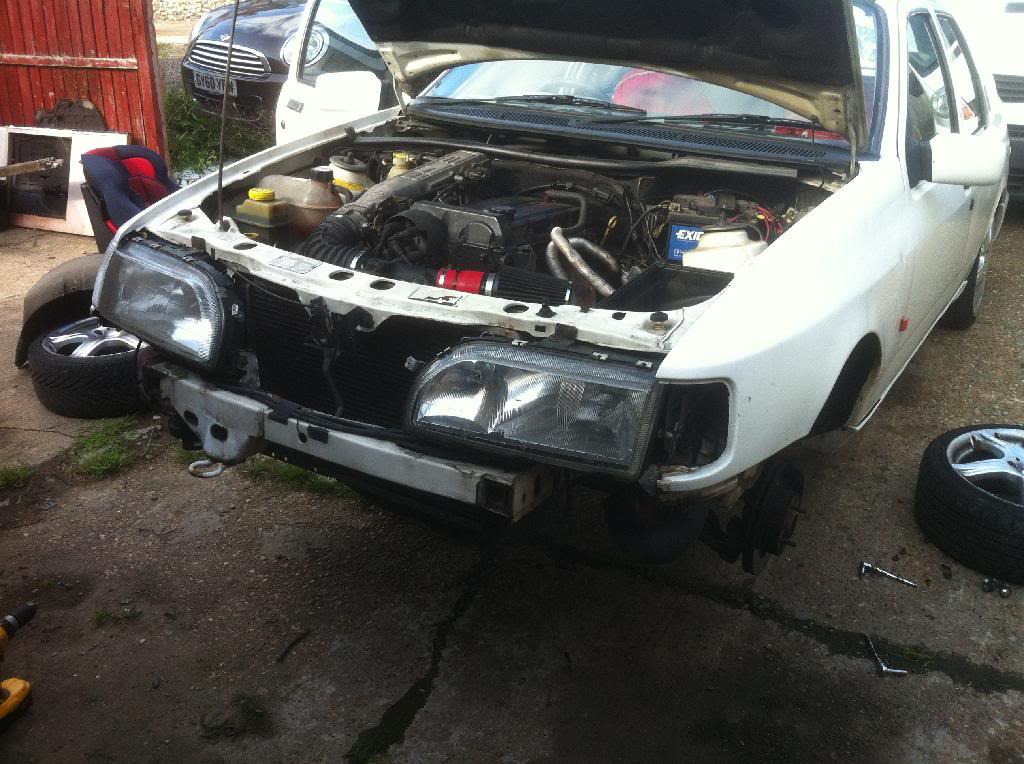
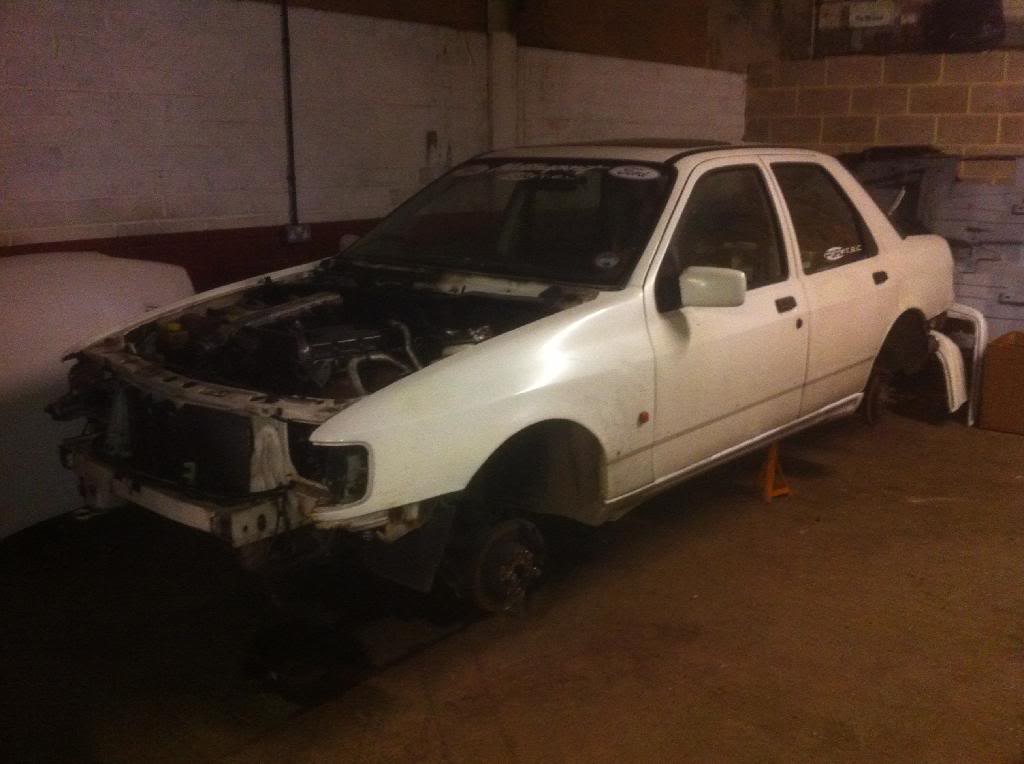
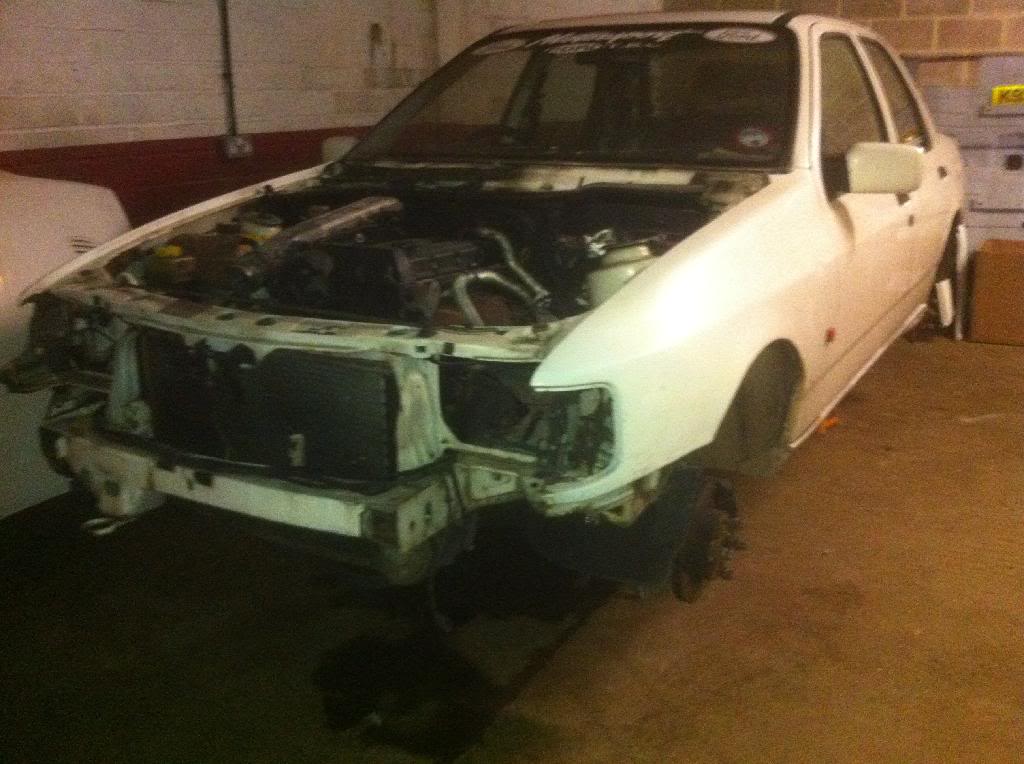
firstly before I carry on the update id just like to say the project has changed a bit. Upon inspecting the engine I discovered that the timing chain guide had snapped and I don't know how the chain didn't come off, also once the head was removed it was aparrent that the engine had seen better days, so choices choices.
repair this old heap?
zetec conversion?
full cossie conversion?
that'll be cossie then!!!
let me just say that im well aware that this will cost me more than a decent genuine cossie but I don't want to do it like that. I want to build one and ive grown to like this saph quite a bit. its not a genuine cossie, its MY cossie lol
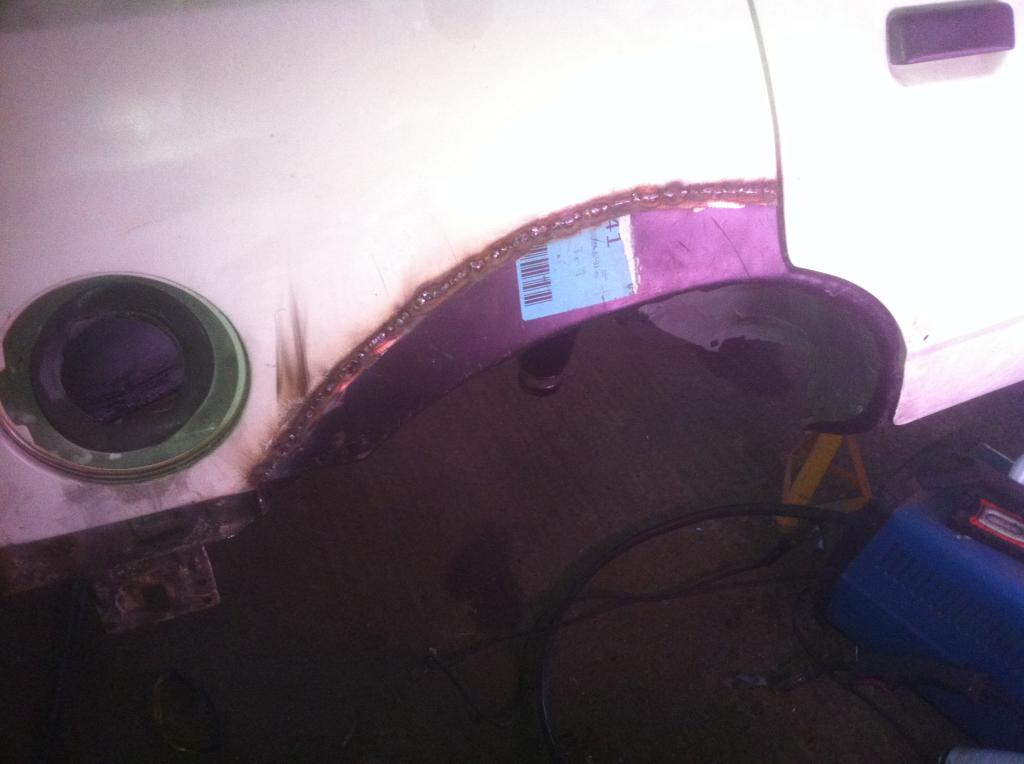
right so lets pick up were we left off, the nearside rear arch
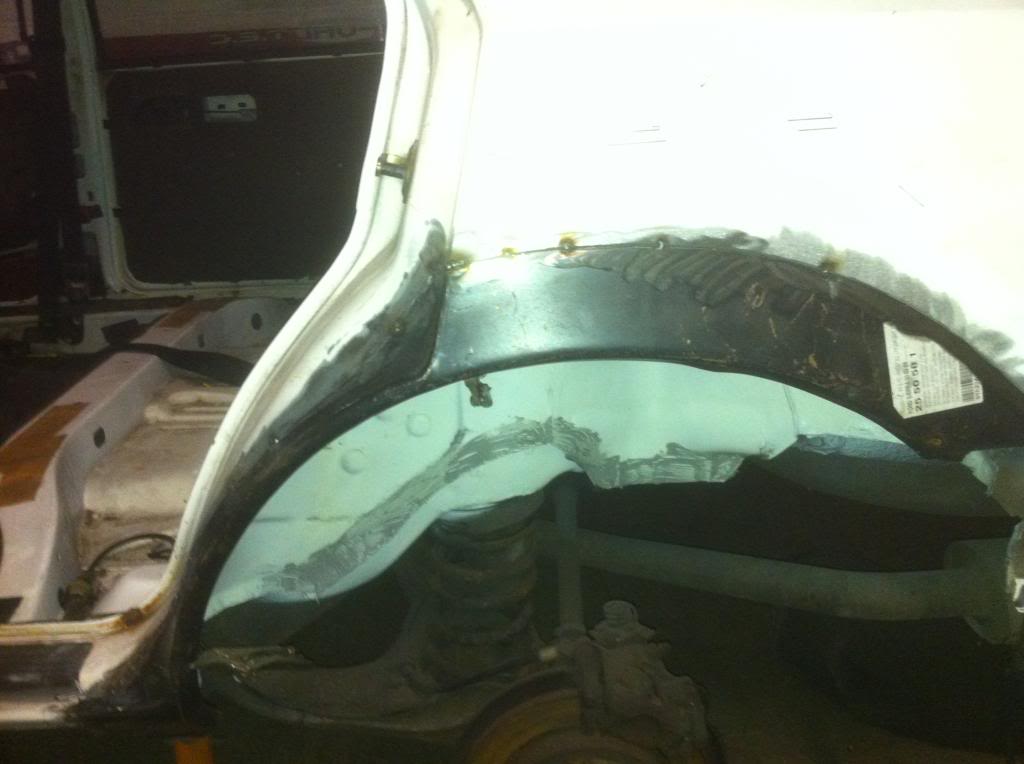
then fully welded and flushed
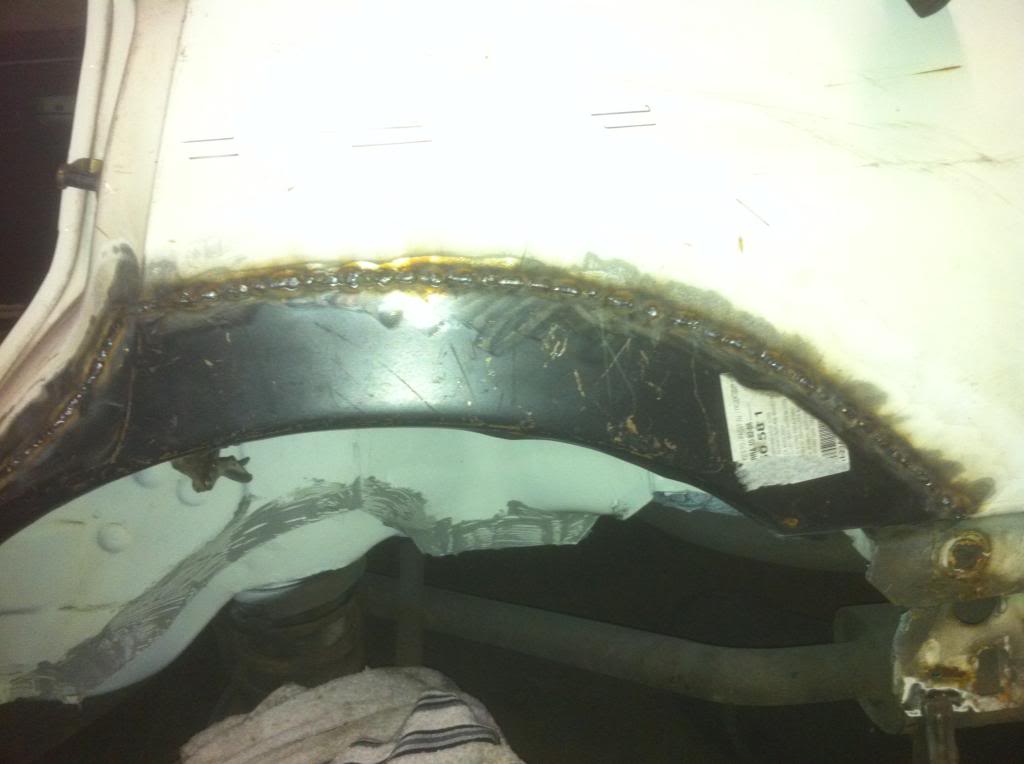
I did do the rear sill part aswell but no pic, next pic is the arch lip, I seam sealed the lip before knocking it in to clear tyres (arches will be painted again)

then primed with zinc primer
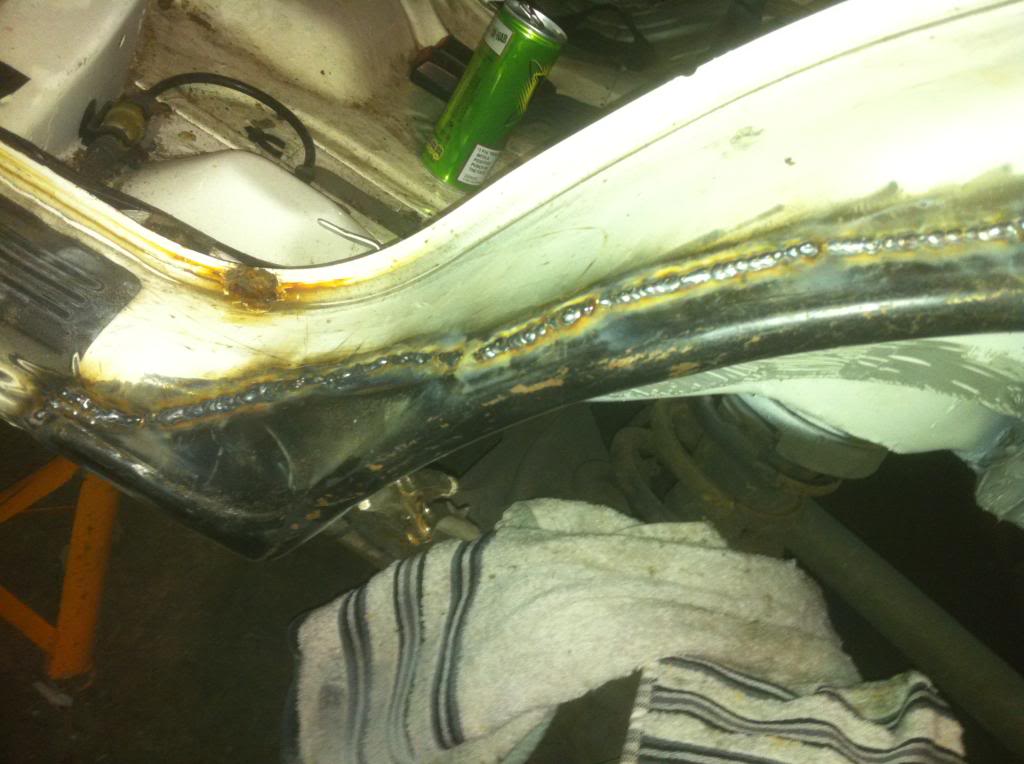
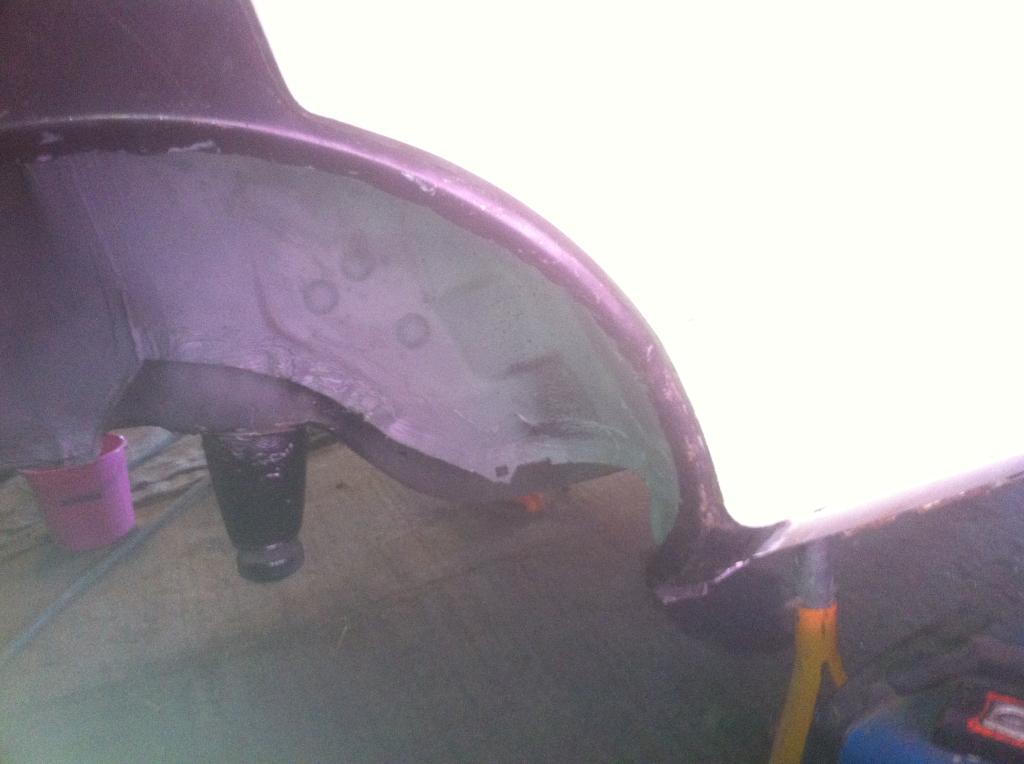
then I started on the offside arch
this side was just as bad as the other side so I did the same, for the inner arch section I used abit of fiesta inner arch panel and welded that in
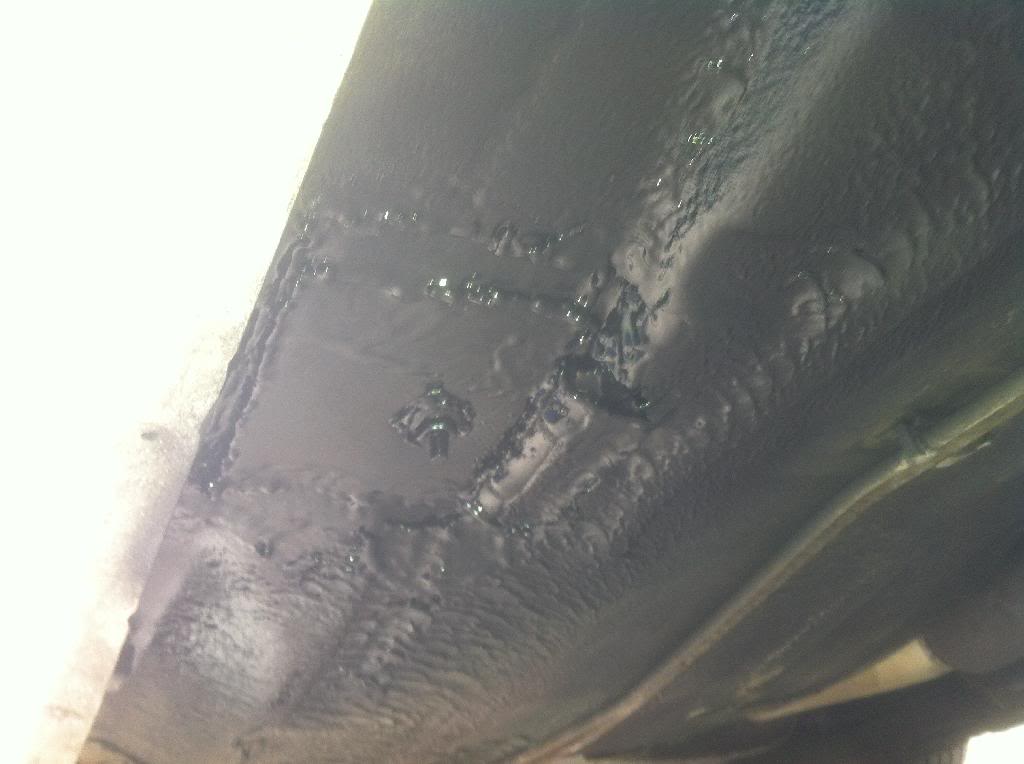
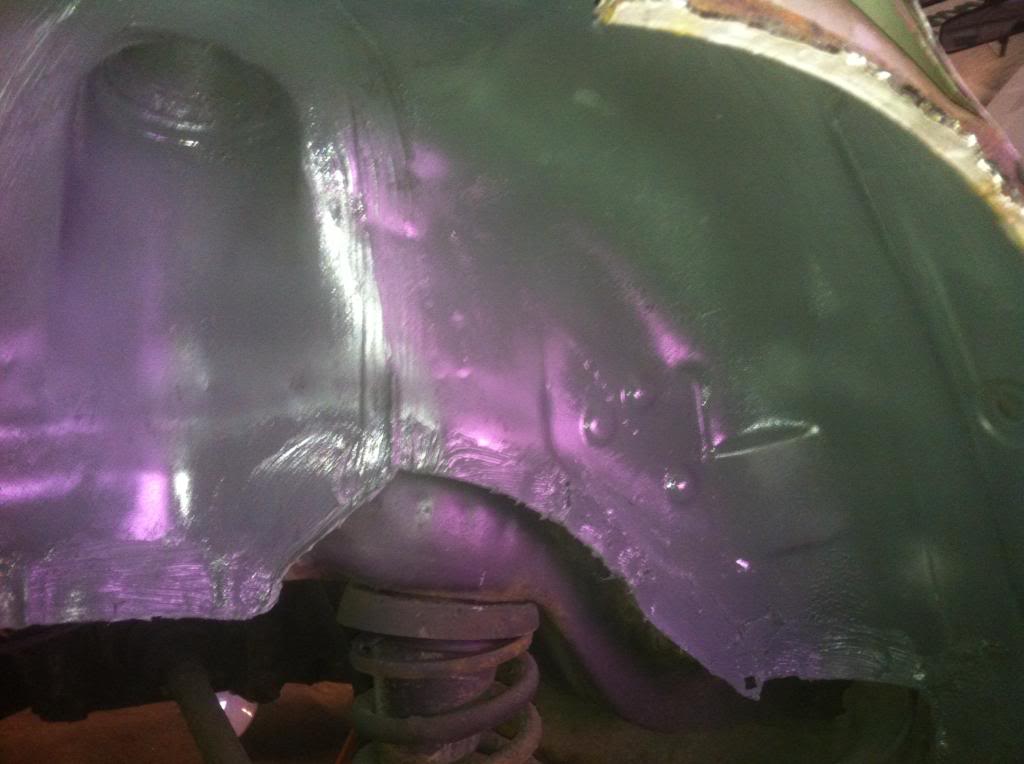
at that point I run out of gas soi thought id give the underside a blast with shutz to see how it comes up, and it wasn't bad for a first coat/ quick lash over
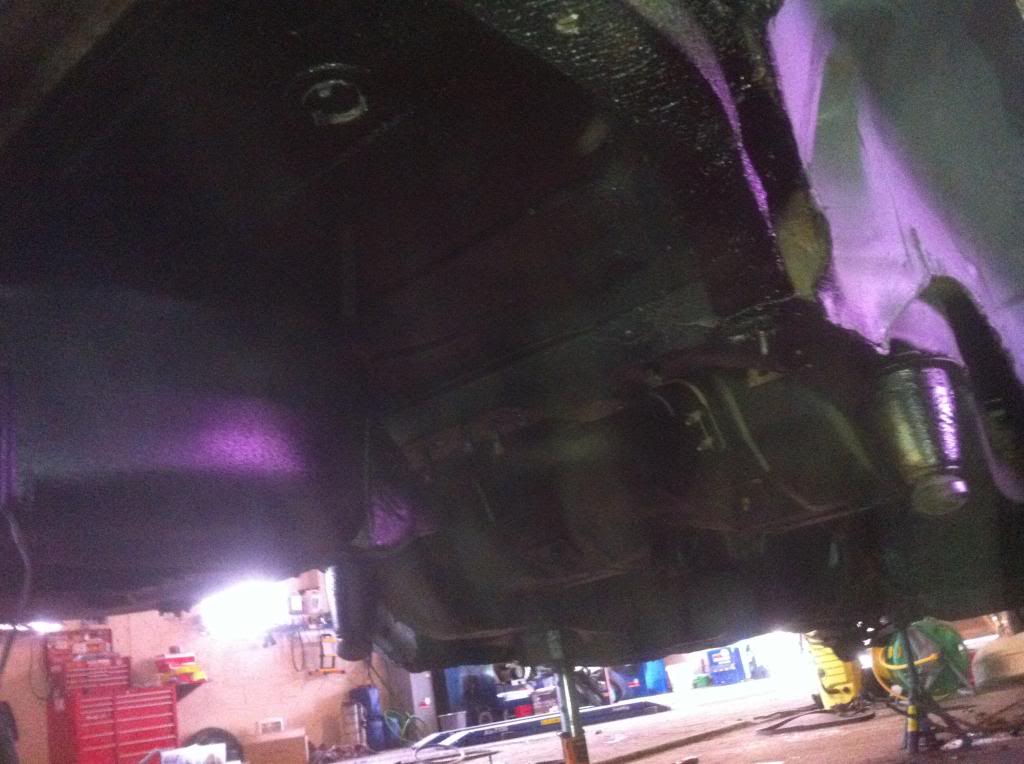
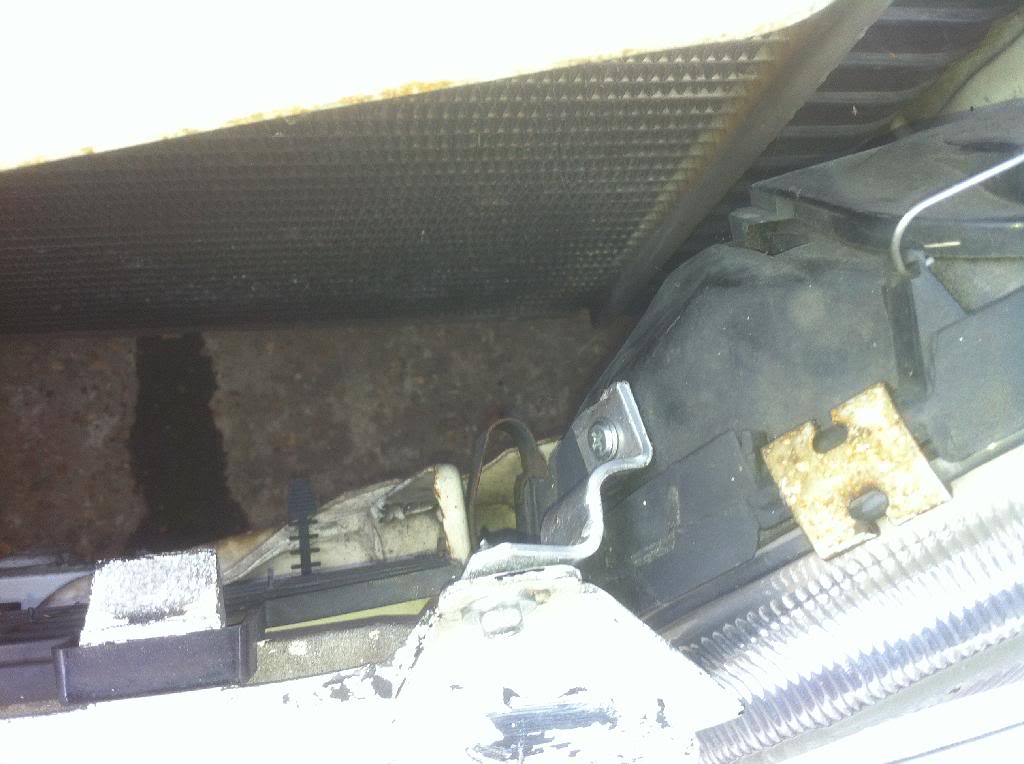
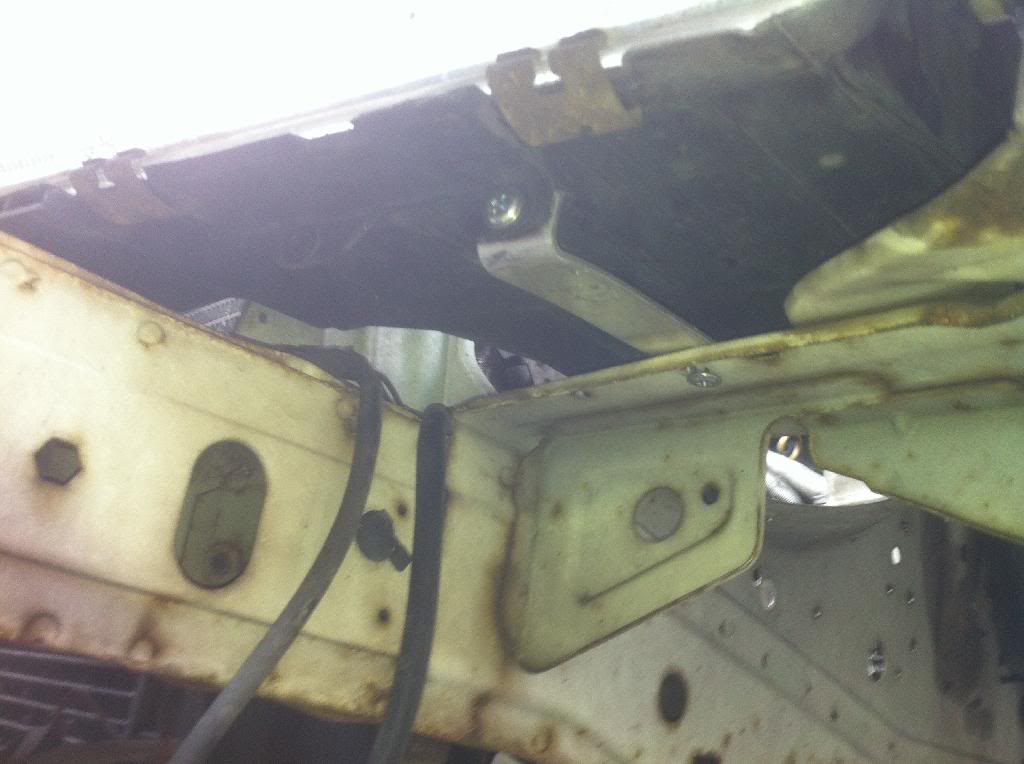
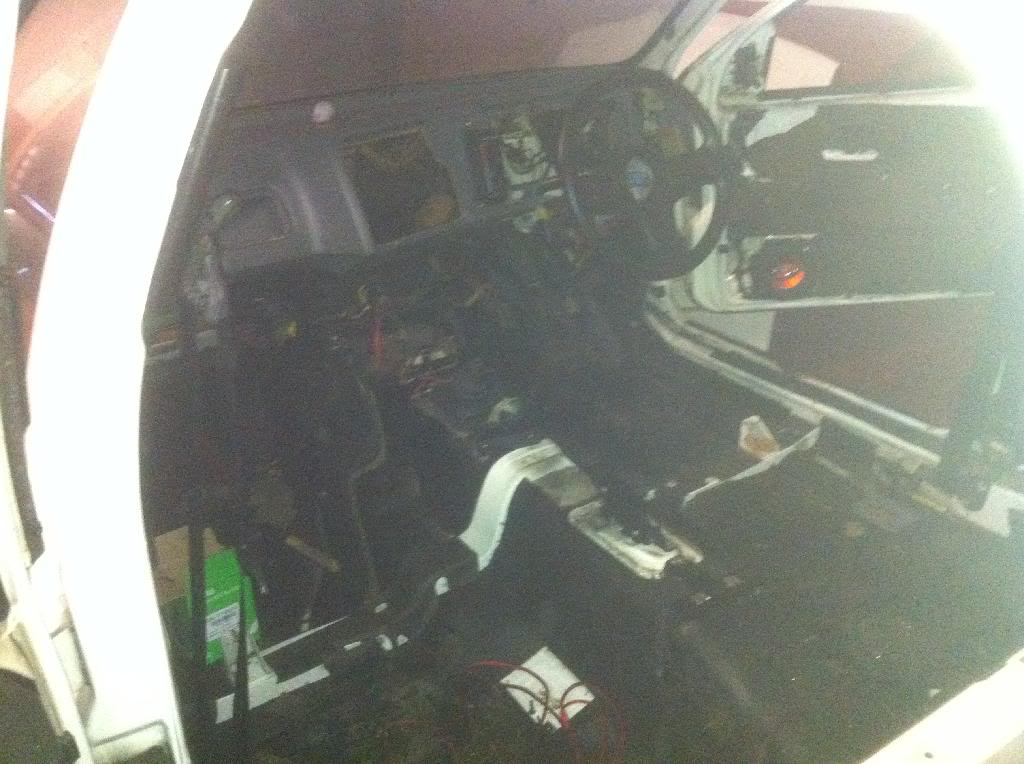
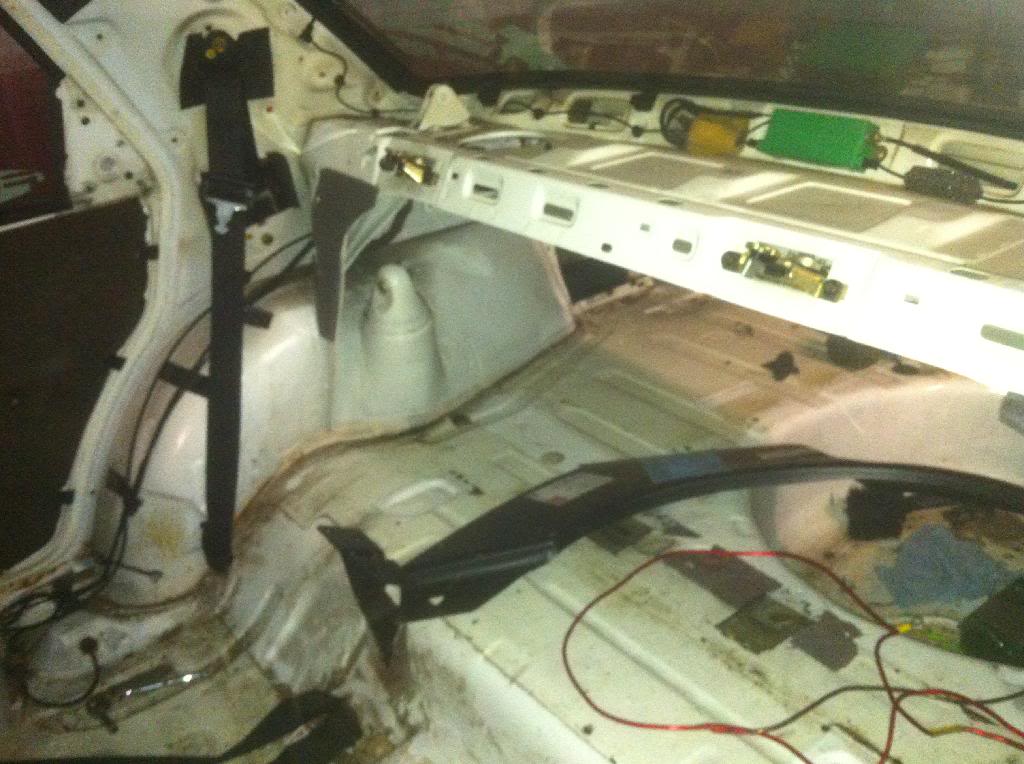
still out of gas so I had a brand new heater matrix in the office so I thought id get that fitted, once I started I found that the matrix pipes were right behind the engine, I could get to them but I thought 'well its gotta come out anyway' so out with the engine it was
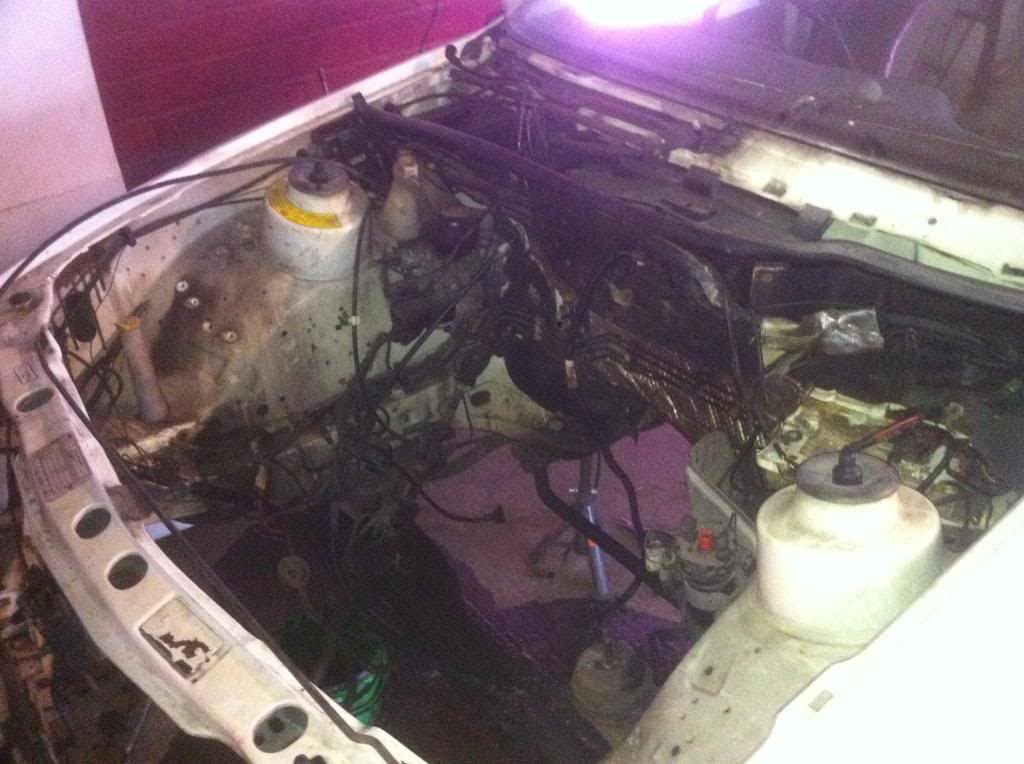
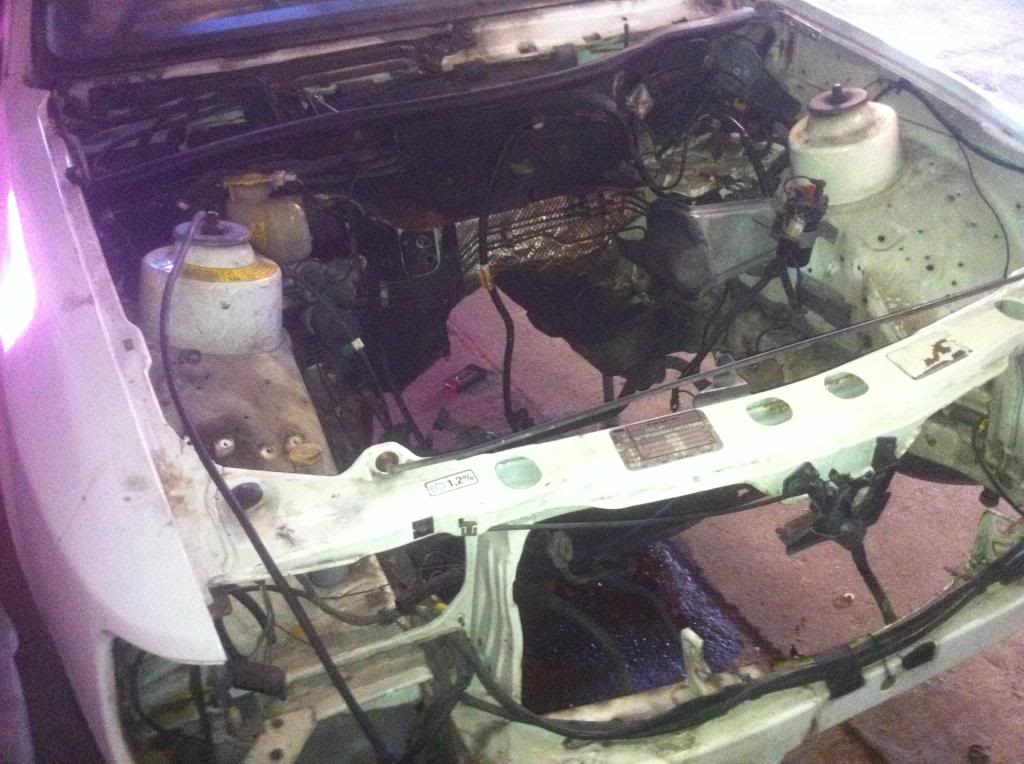
then out with the dash to get to the blower box
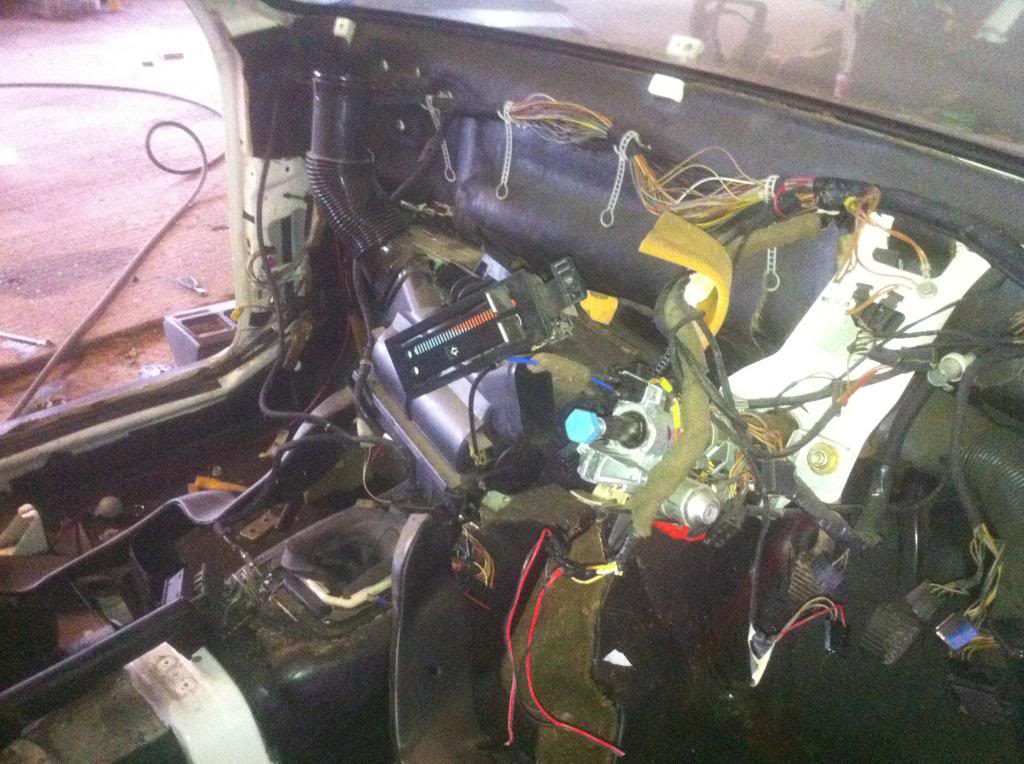
box pulled back to get matrix in
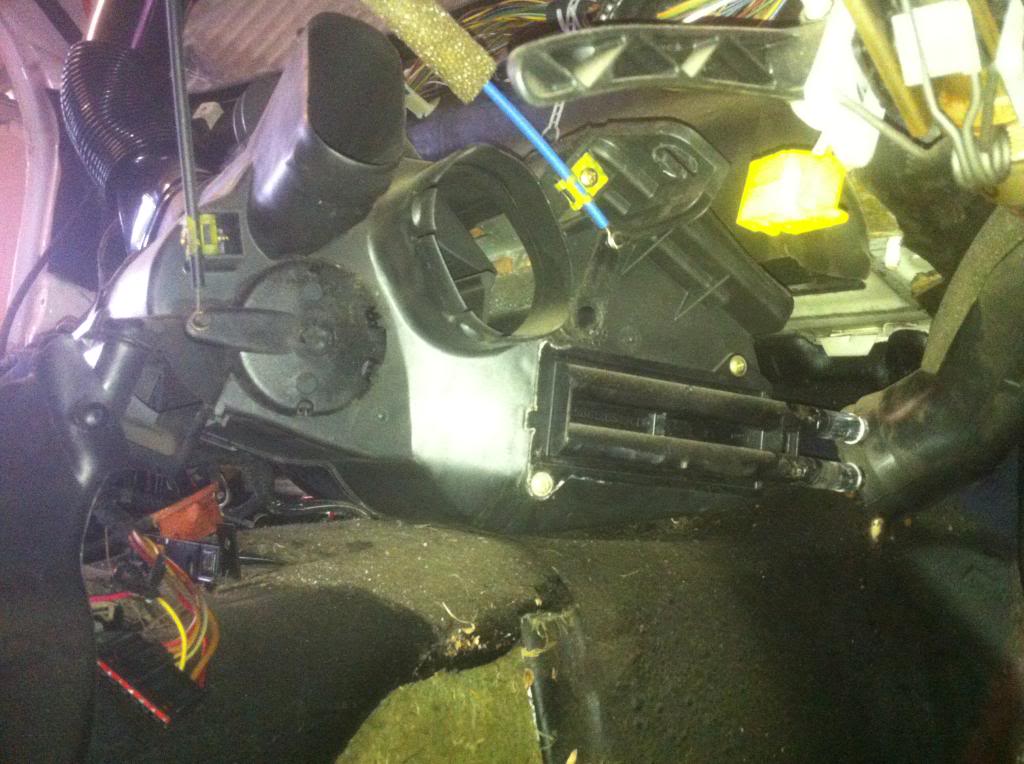
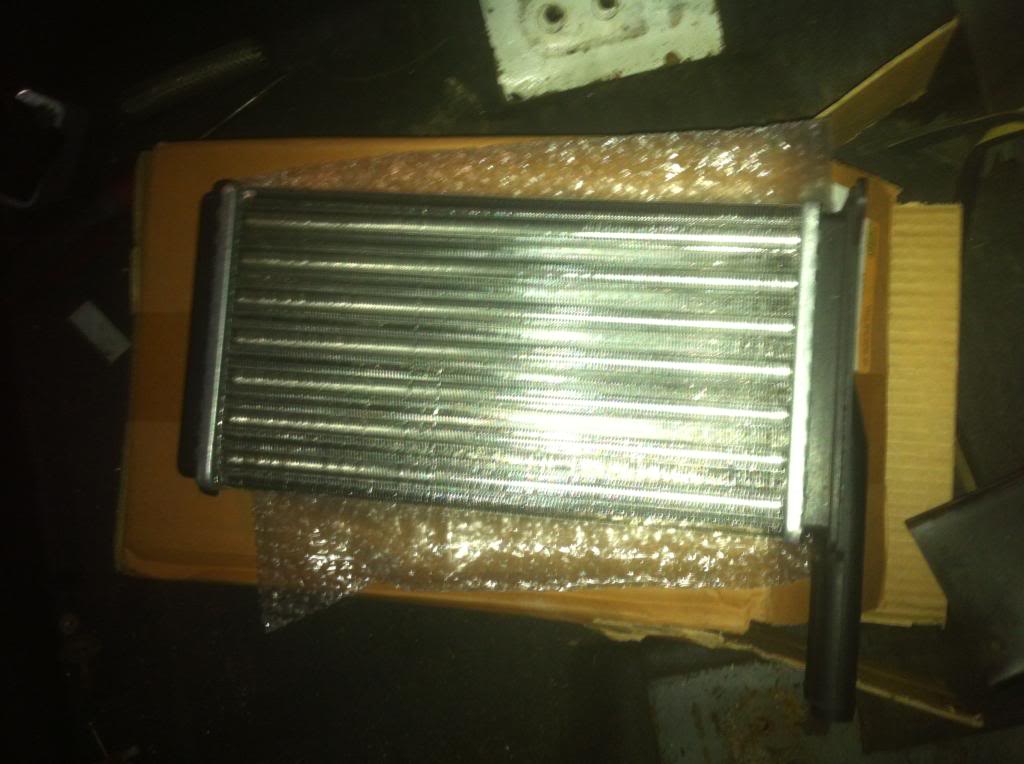
new matrix
and dash back in
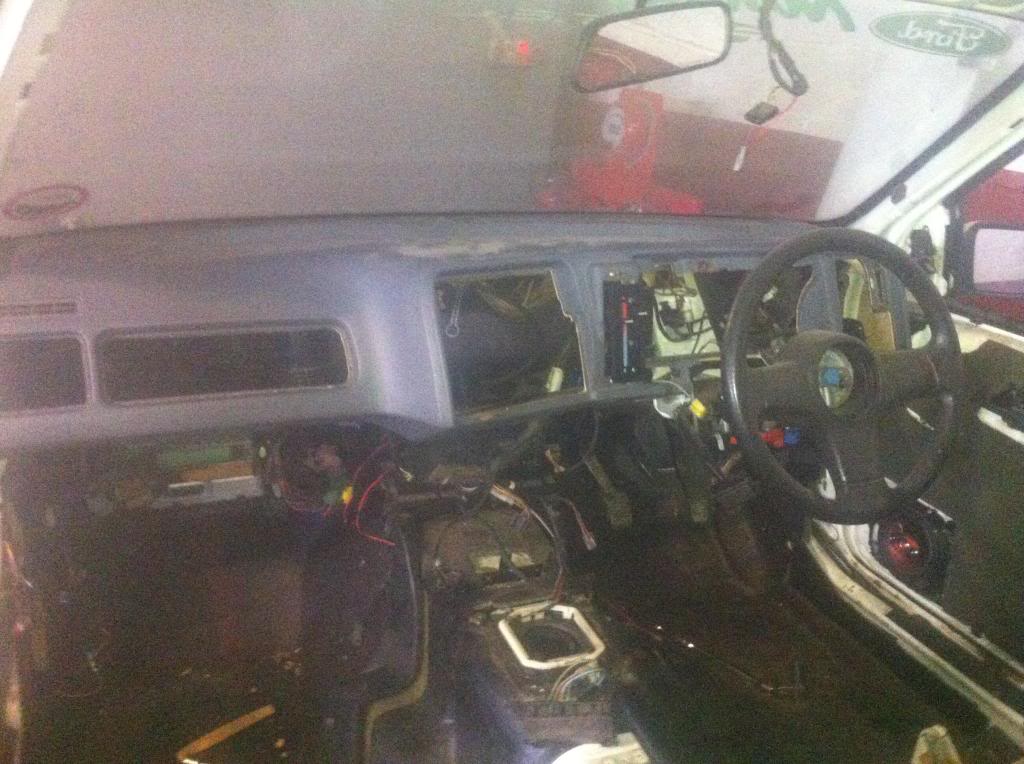
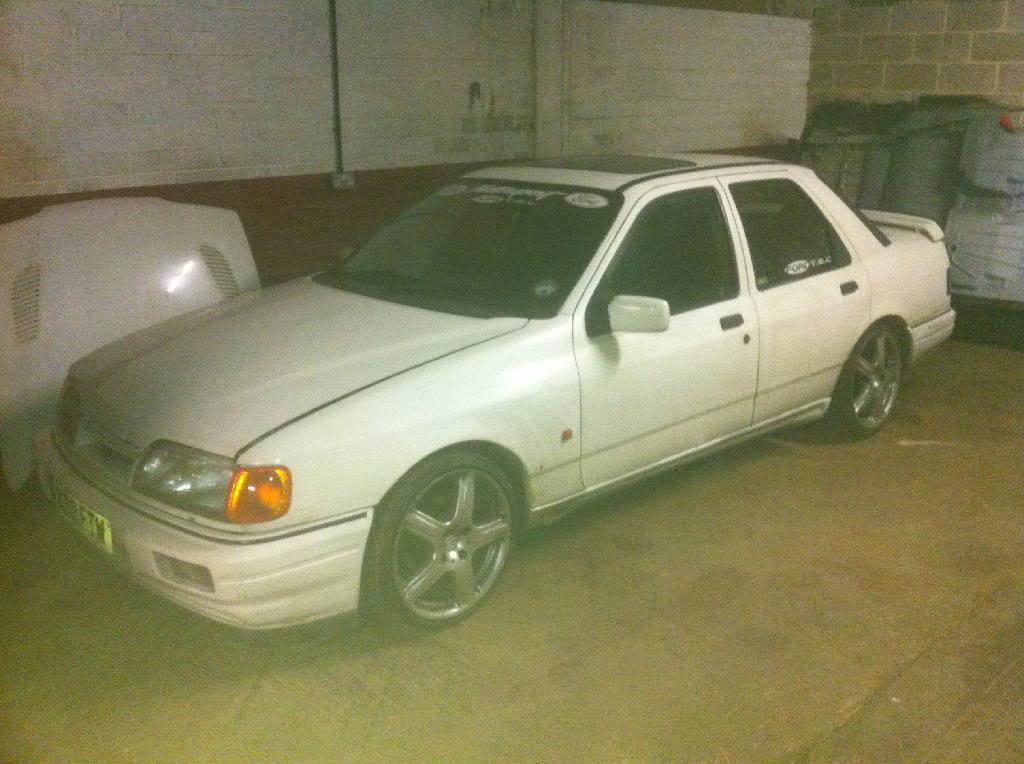
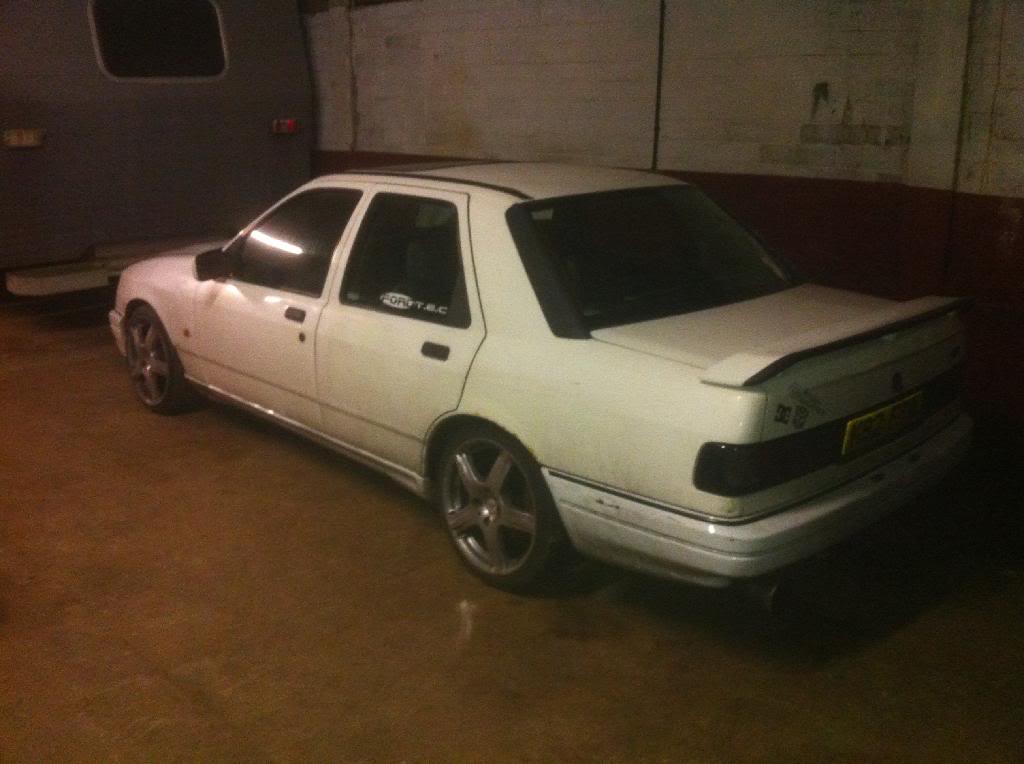
and a random one of how she stands
more to come soon
I have been working on the saph still just not as much as id like
firstly before I carry on the update id just like to say the project has changed a bit. Upon inspecting the engine I discovered that the timing chain guide had snapped and I don't know how the chain didn't come off, also once the head was removed it was aparrent that the engine had seen better days, so choices choices.
repair this old heap?
zetec conversion?
full cossie conversion?
that'll be cossie then!!!
let me just say that im well aware that this will cost me more than a decent genuine cossie but I don't want to do it like that. I want to build one and ive grown to like this saph quite a bit. its not a genuine cossie, its MY cossie lol
right so lets pick up were we left off, the nearside rear arch

then fully welded and flushed


I did do the rear sill part aswell but no pic, next pic is the arch lip, I seam sealed the lip before knocking it in to clear tyres (arches will be painted again)

then primed with zinc primer


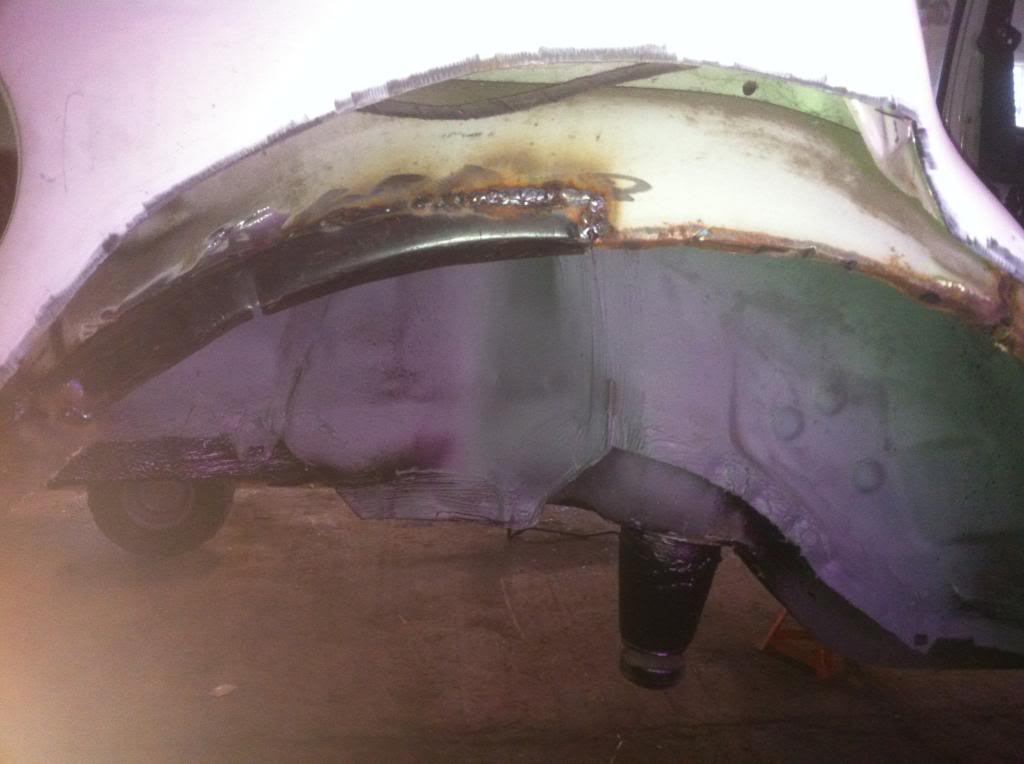
then I started on the offside arch


this side was just as bad as the other side so I did the same, for the inner arch section I used abit of fiesta inner arch panel and welded that in


at that point I run out of gas soi thought id give the underside a blast with shutz to see how it comes up, and it wasn't bad for a first coat/ quick lash over


still out of gas so I had a brand new heater matrix in the office so I thought id get that fitted, once I started I found that the matrix pipes were right behind the engine, I could get to them but I thought 'well its gotta come out anyway' so out with the engine it was


then out with the dash to get to the blower box

box pulled back to get matrix in

new matrix

and dash back in

and a random one of how she stands

more to come soon
05-06-2014, 12:17 AM
#29
PassionFord Regular
Thread Starter
iTrader: (1)
Join Date: May 2009
Location: eastbourne
Posts: 477
Likes: 0
Received 0 Likes
on
0 Posts
hi guys, small update for you
ive been slow at work recently so I thought id crack on with the saph while I have the chance
ive nearly finished all the welding now and should be finished tomorrow.
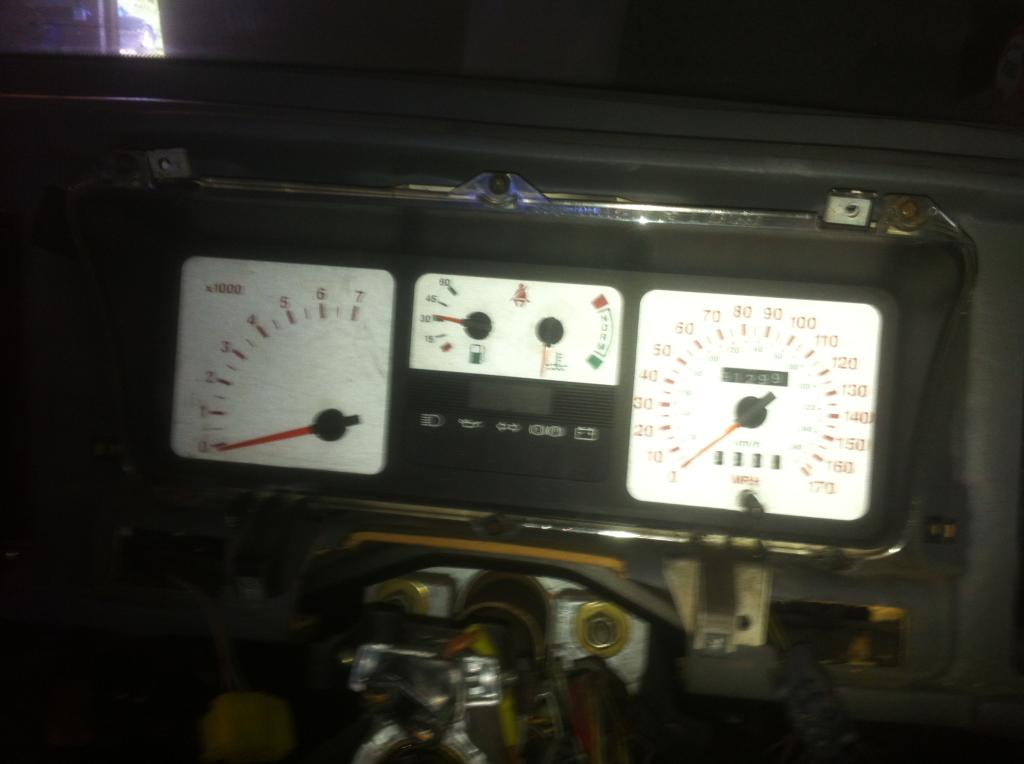
before I pick up were I left off I thought id just show you my cossie clocks ive got. I bought a job lot of cossie bits and took what I wanted and am selling the rest.
out of the lot I got
cossie headlights,
nsr light (mine cracked)
glove box (my handle broke)
white dial cossie clocks
4 switch window switch
lock wood stainless sill covers
I think a few bits more but cant think now lol
heres the clocks
right on with the welding
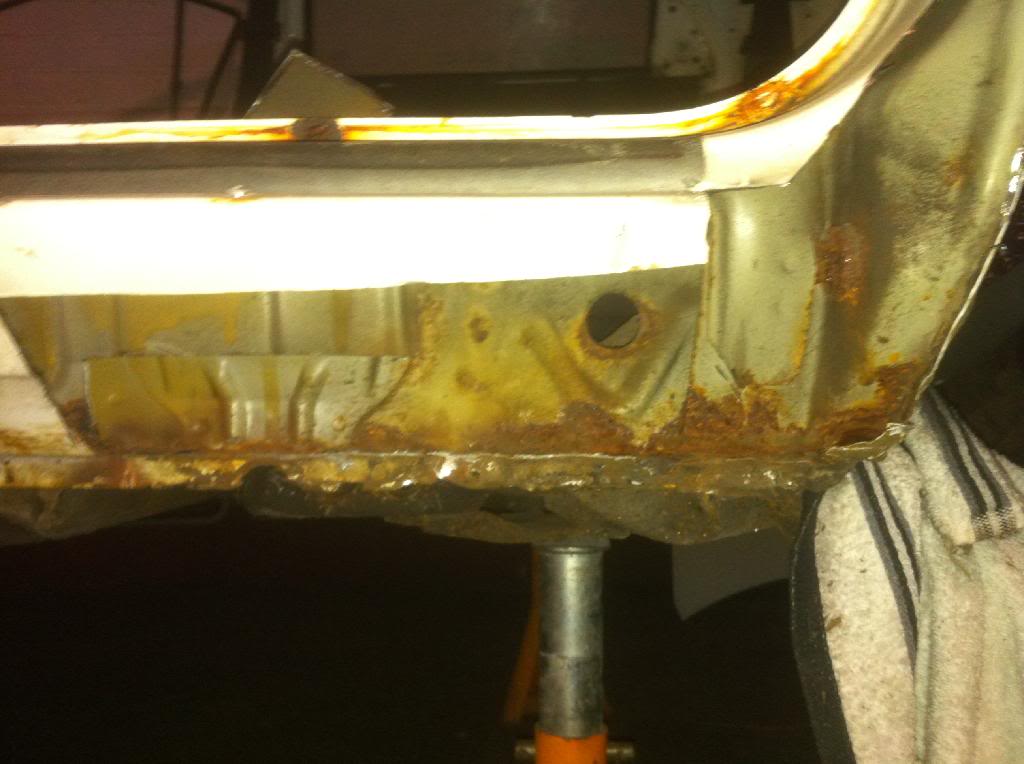
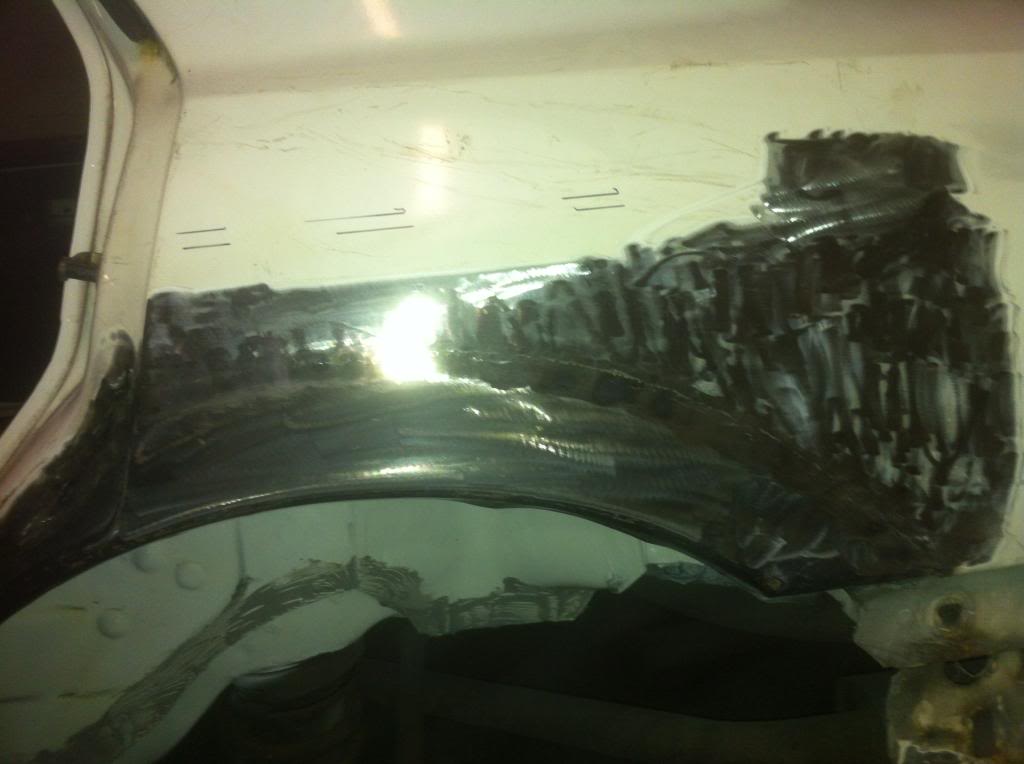
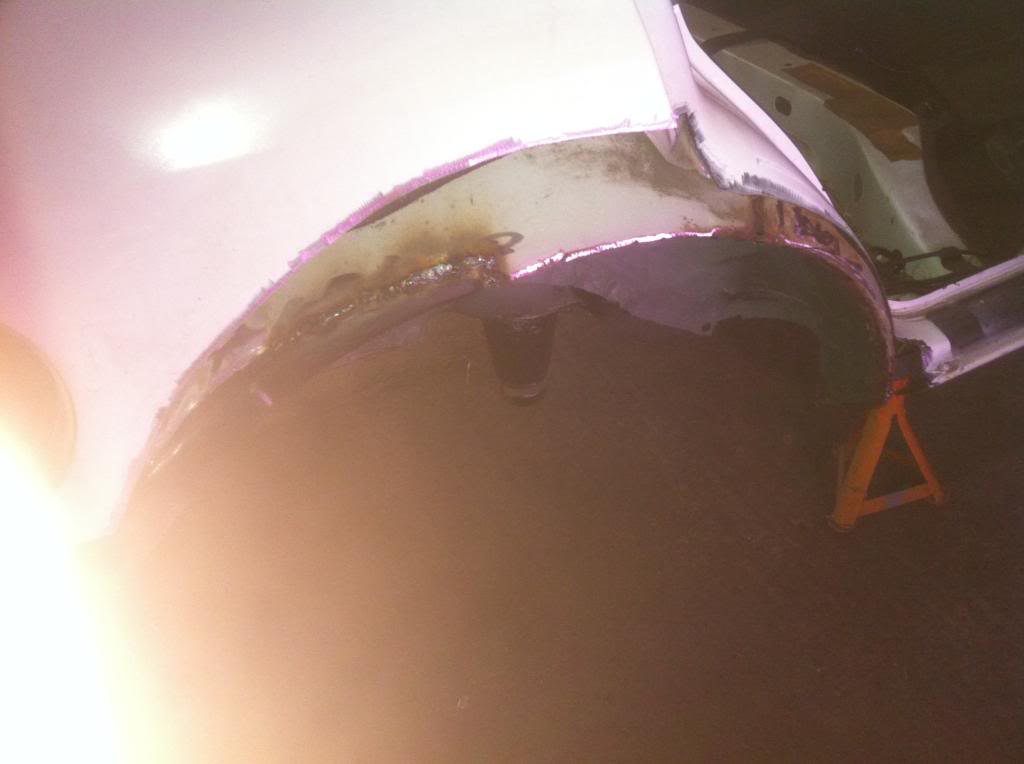
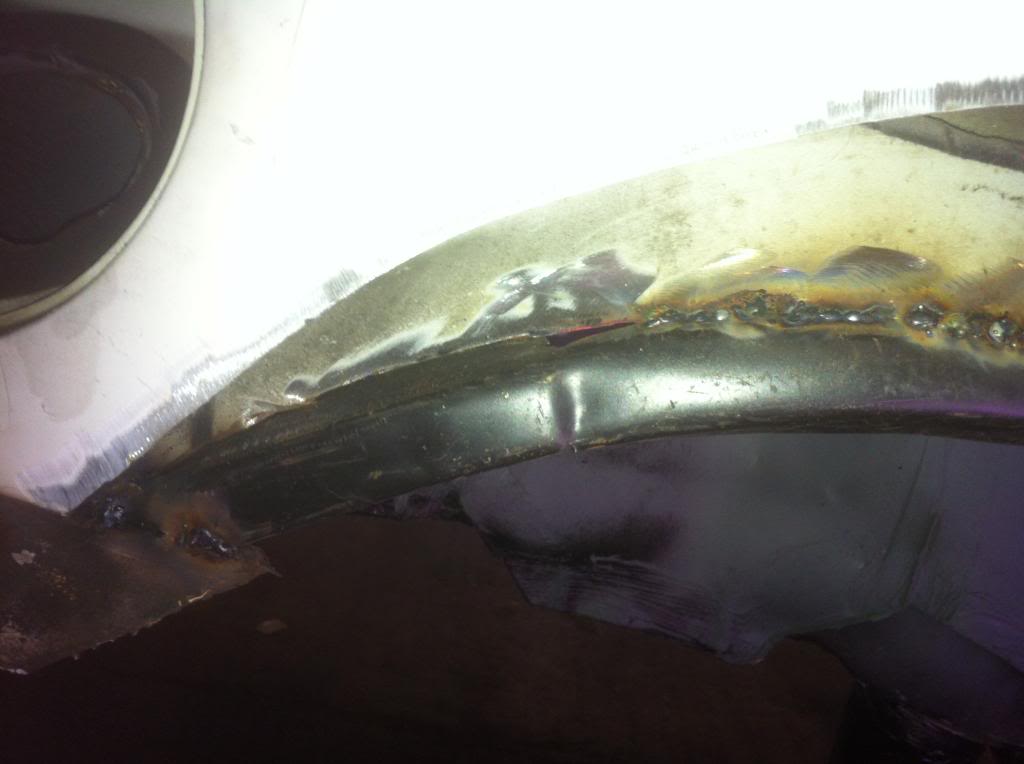
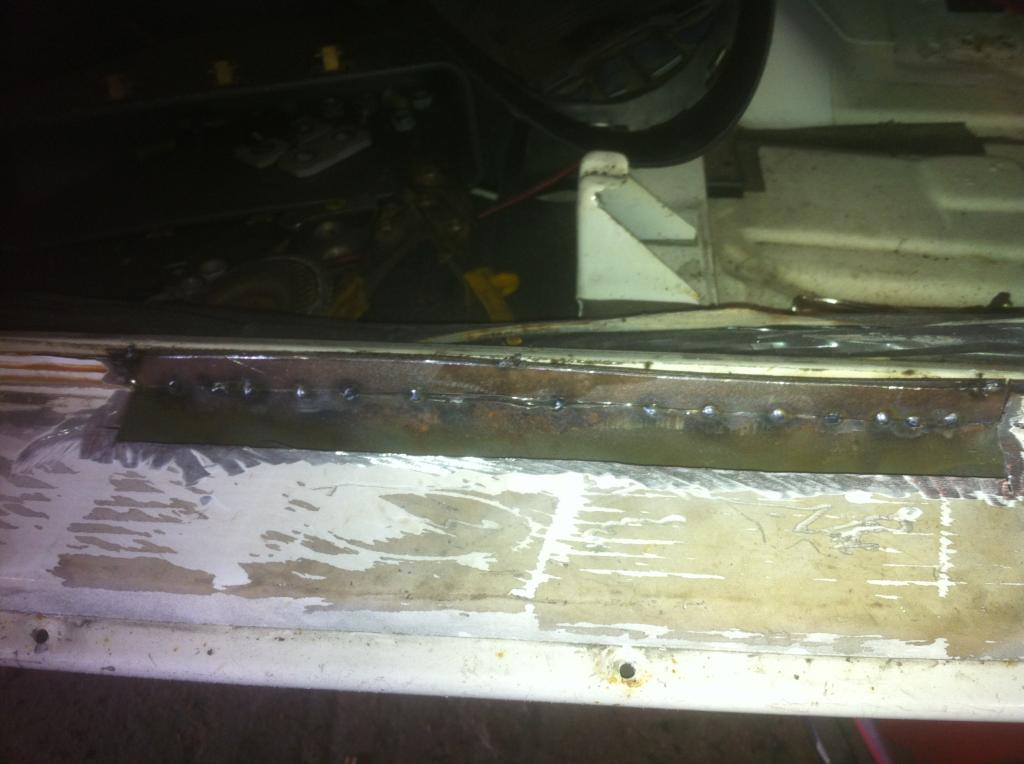
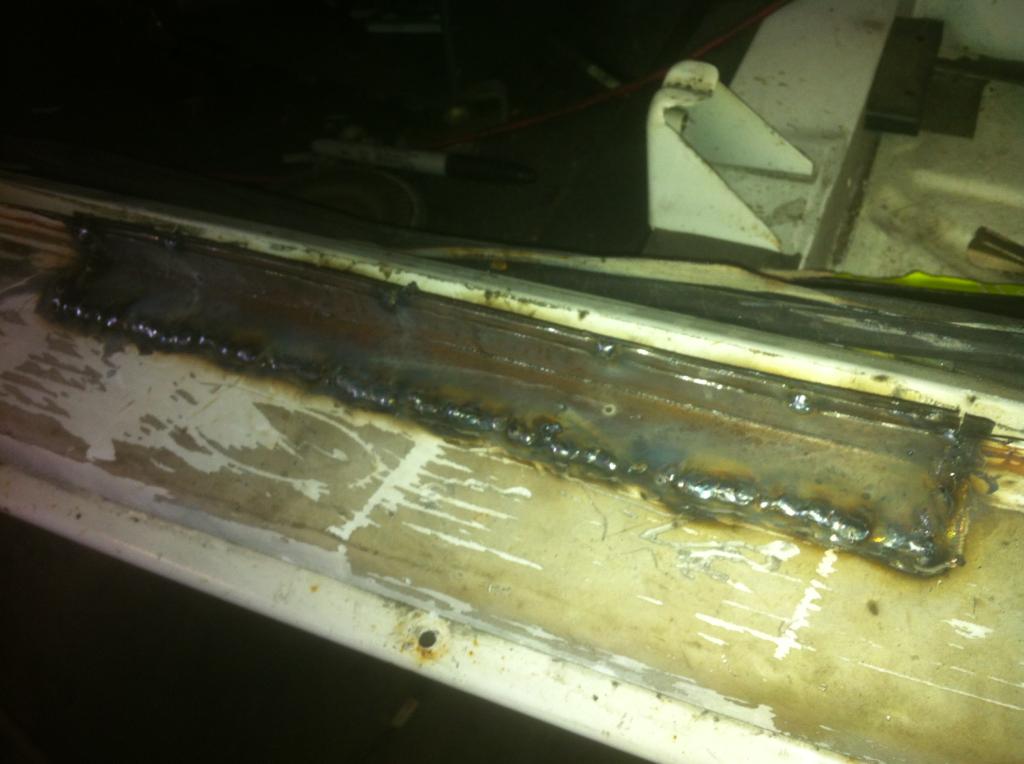
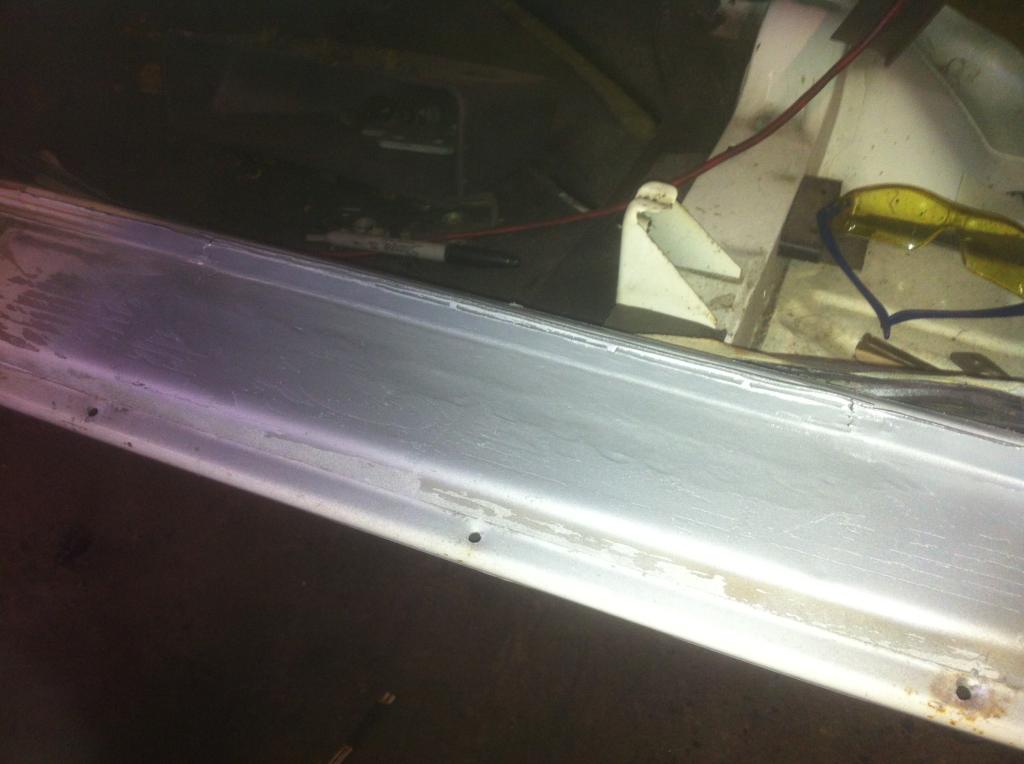
I started by finishing the welding on the arch and rear sill
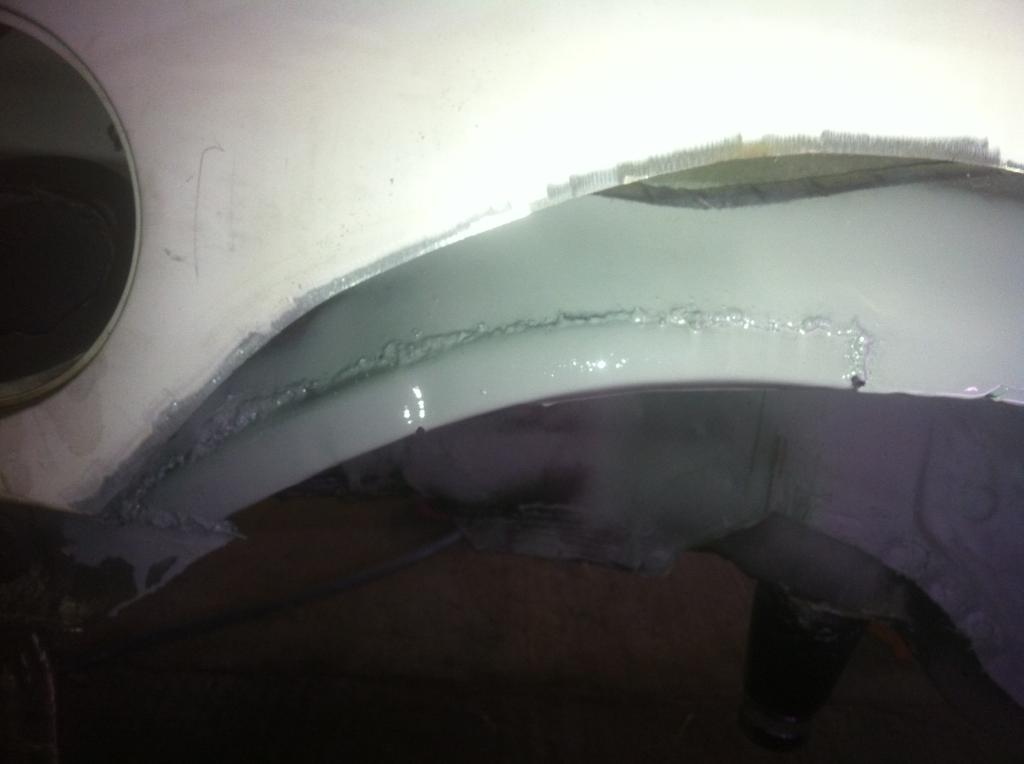
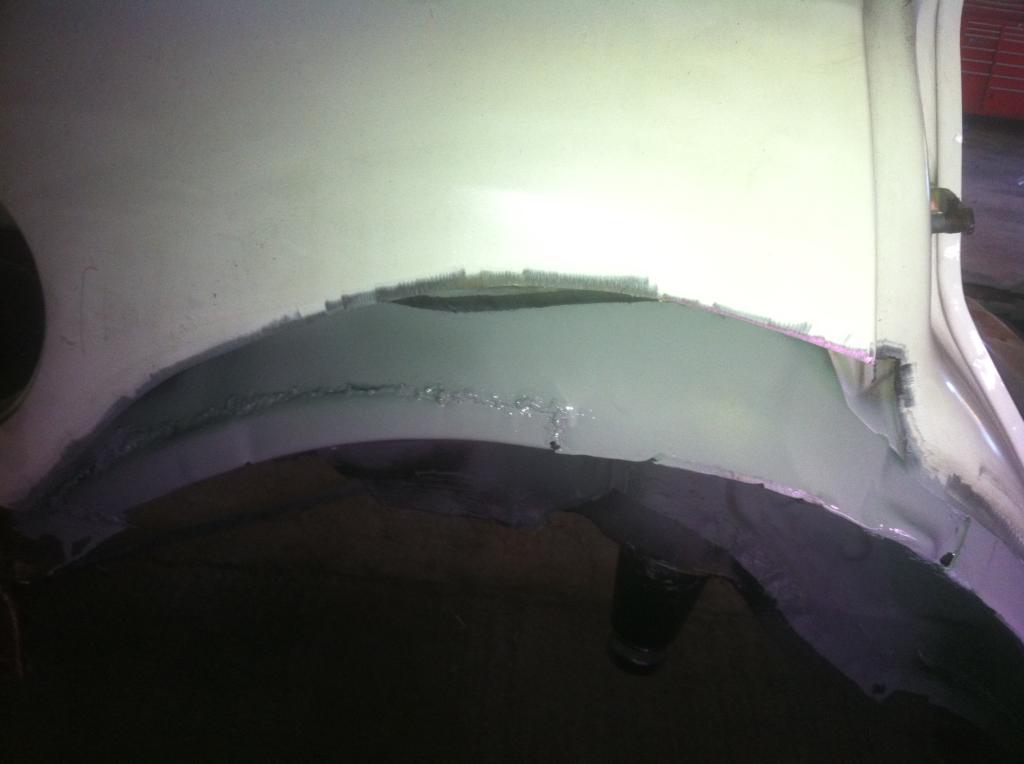
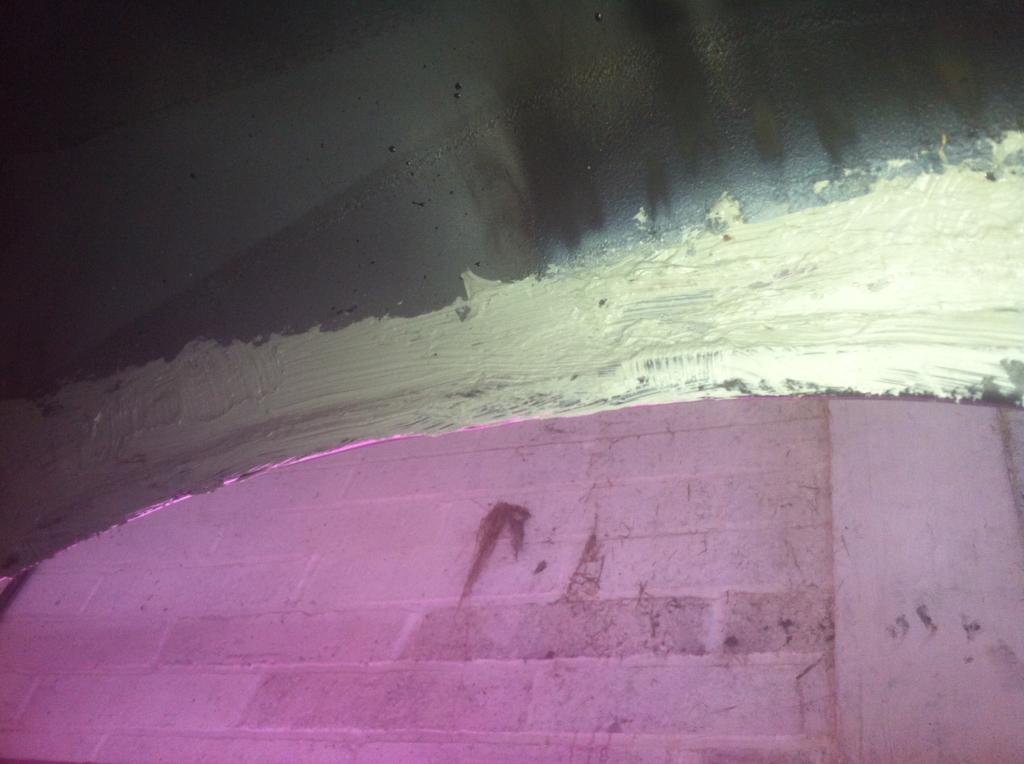
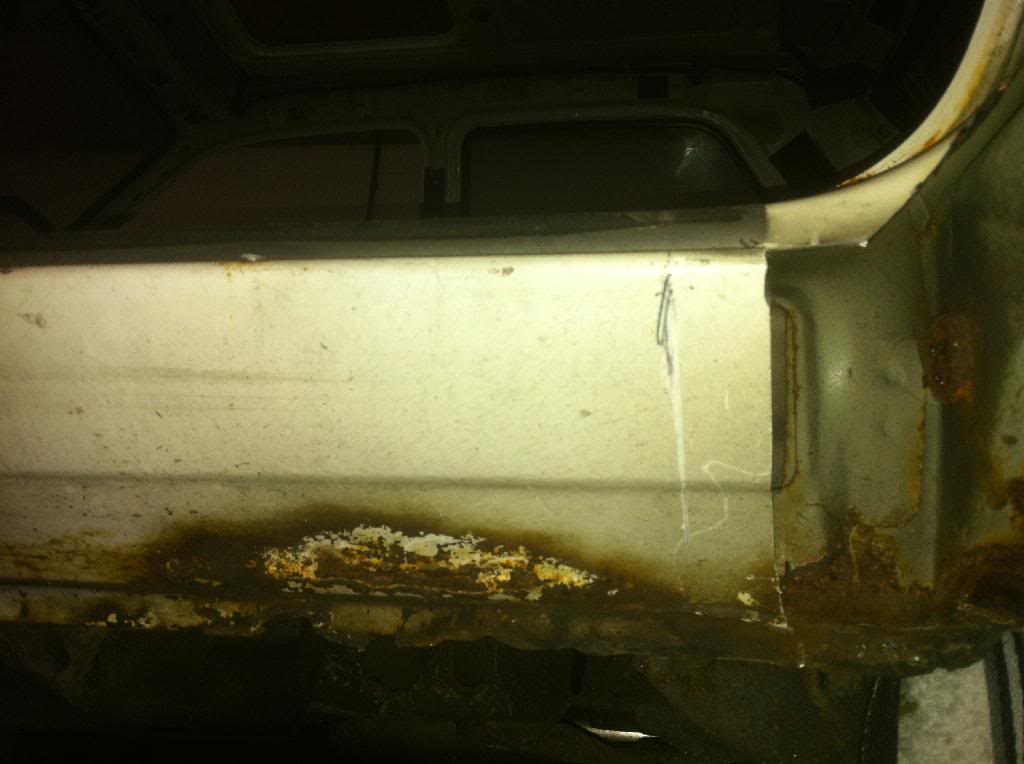
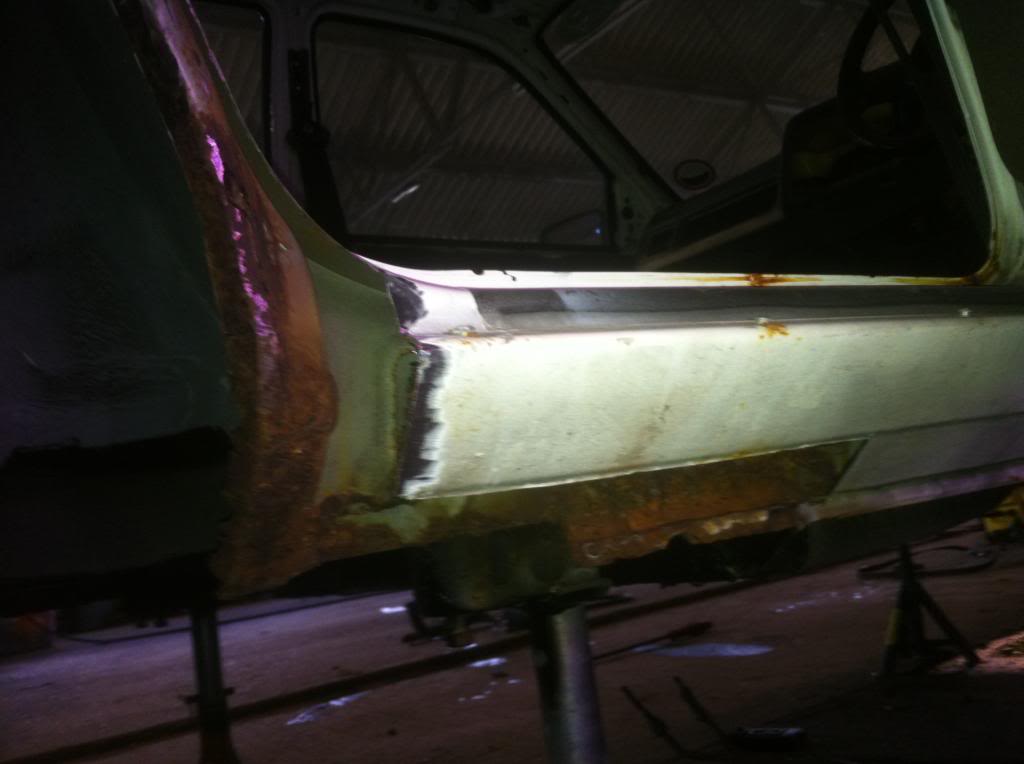
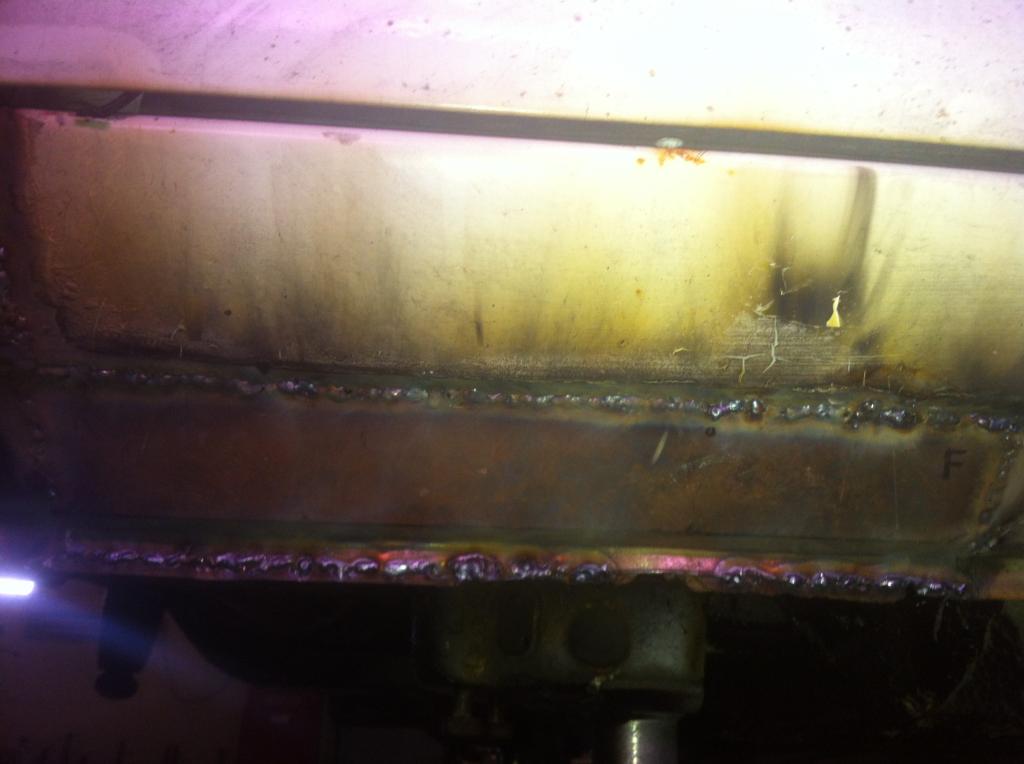
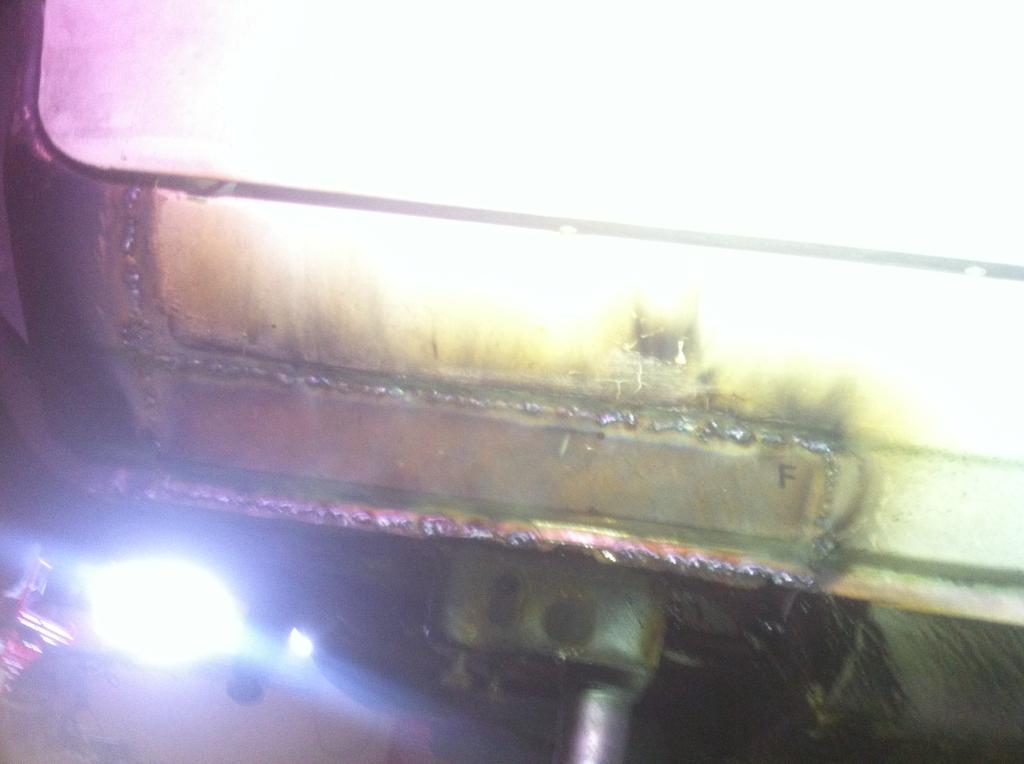
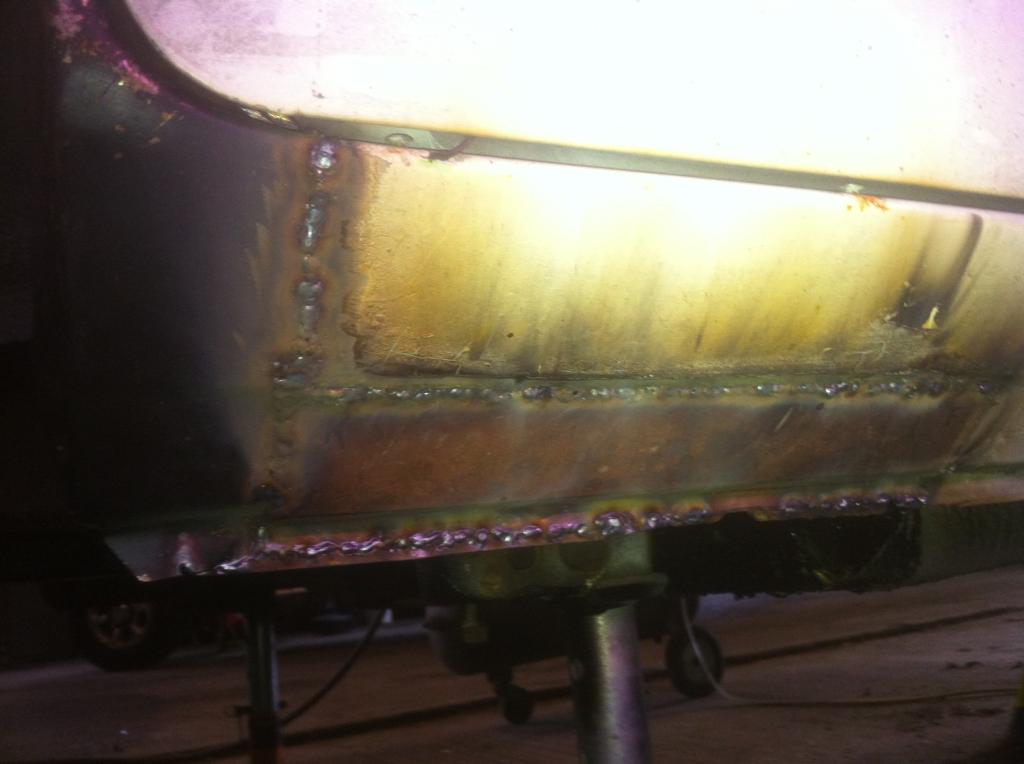
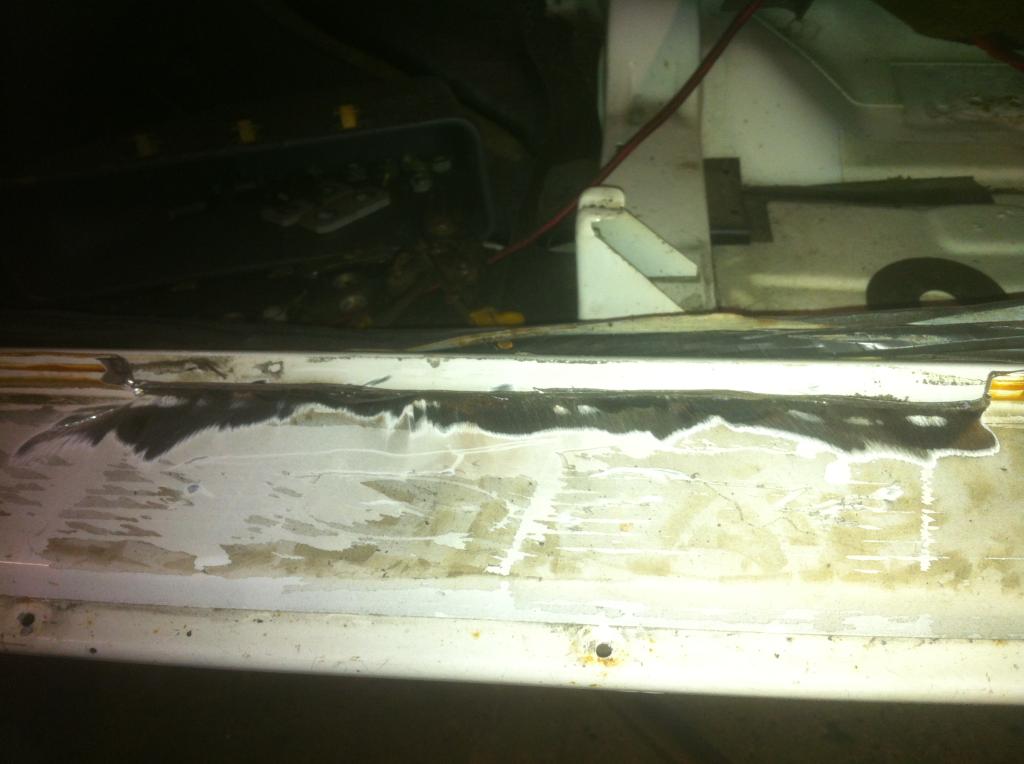
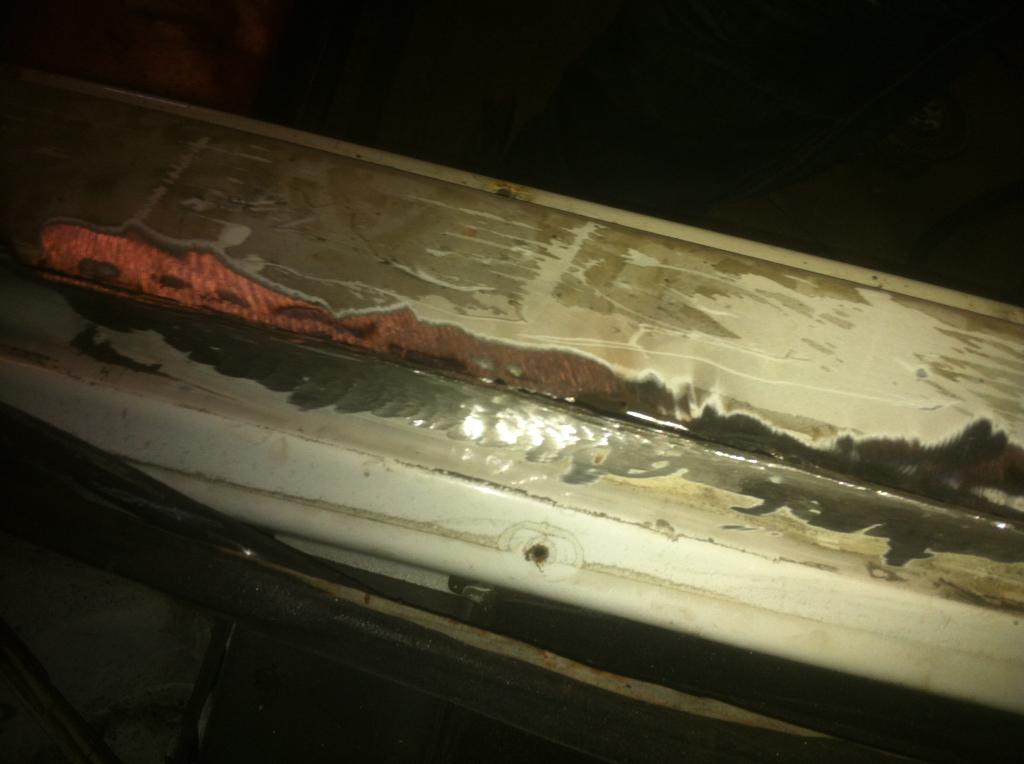
I had a little trouble with this one. I did this side exactly the same as the other side but on this side the repair panel seemed to be a bit twisted, I struggled to get it to line up and still it doesn't line up very well near the fuel cap, so im going to trial fit my rear bumper and see what its like and have a bash at getting the rear quarters flatter and looking good. If I fail ill pay a body shop to prep and prime the car and ill paint it.
here the rear sill part, I know it doesn't look pretty smothered in seam sealer but it protects it well and it will be under a skirt, this will never be a gleaming immaculate cossie, that's going to be a used and abused full cosworth replica.
from this

to this
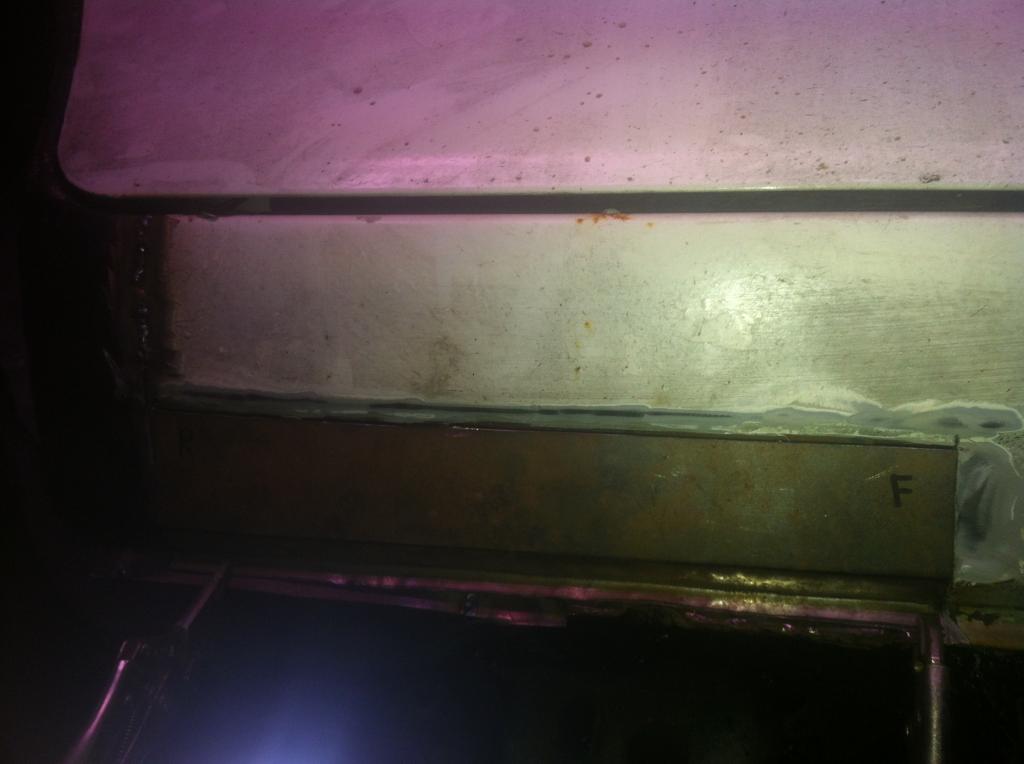
Also today I did an unexpected bit I found, which was the other seat mount on the passenger side, so I got that done, apart from the hole and weld a nut on as the seats are packed away so that can wait
I did put a load of seam sealer on that too but forgot to take pic
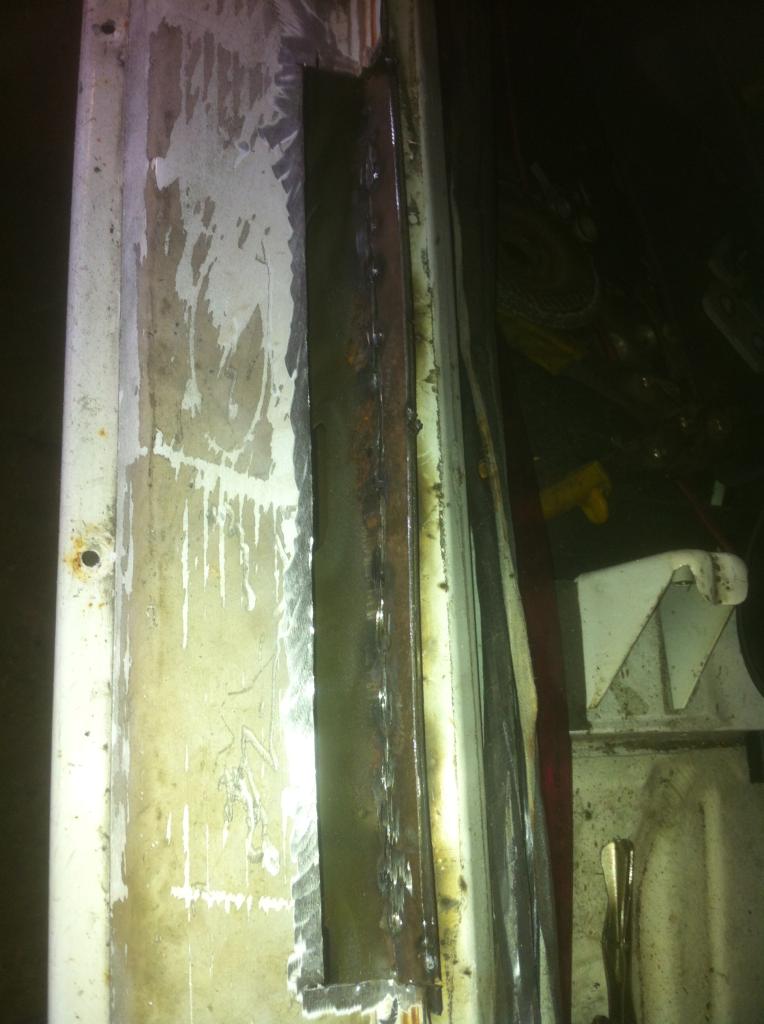
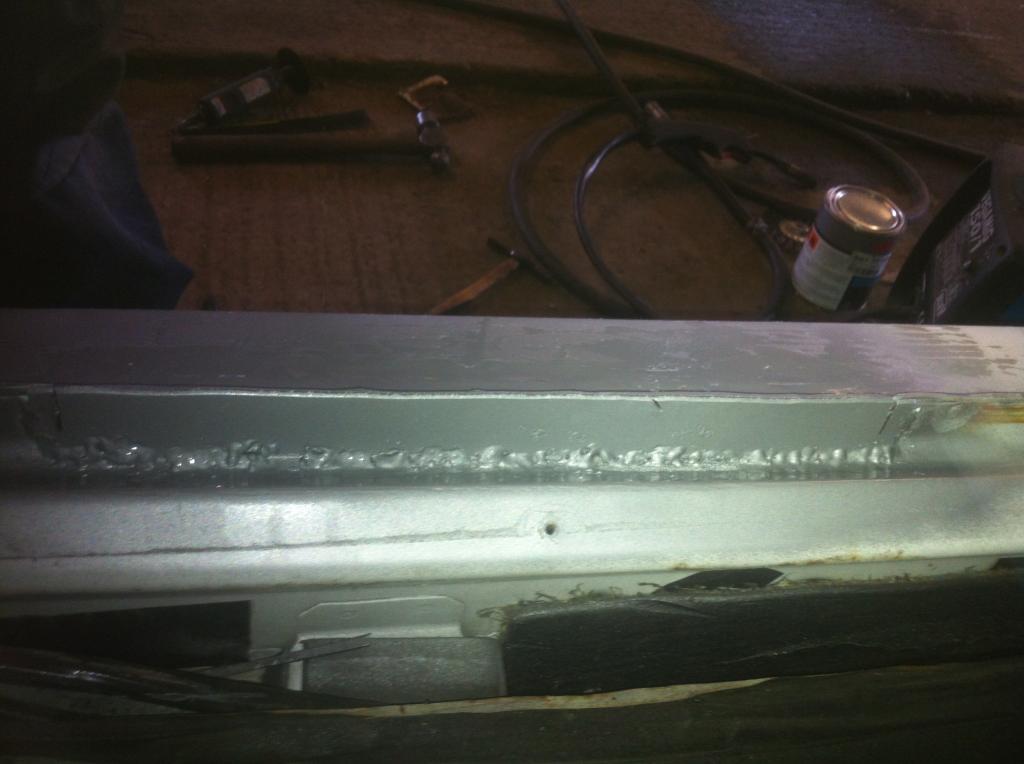
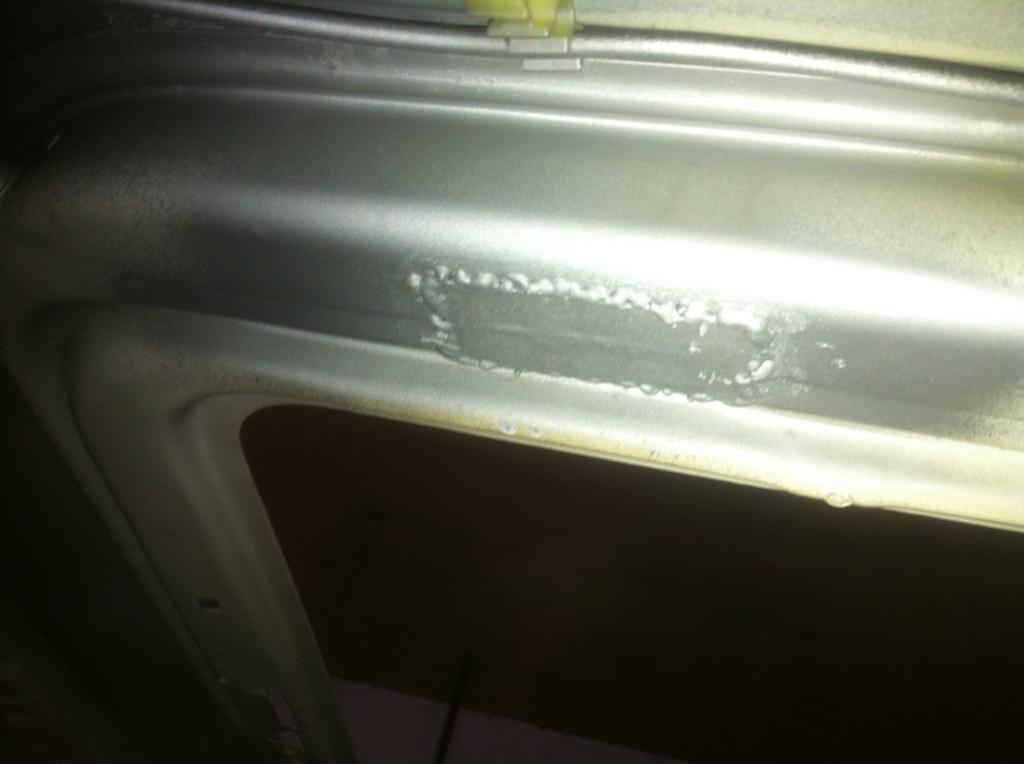
now the last bit I managed to to today took longer than expected but was a little worse than first thought. It was the passenger front door seal lip, it was rotting but hadn't come through the flat part of the sill so I cut the rot out but discover the metal on the flat part of the sill was very thin so I cut that back too. When welding in new metal in did 3 skins for the seal lip so looked as it should, I also took the time to flush the welds as it visual

that's it for now but hopefully ill finish the 3 bits of welding I need to do and remove the cross member, arms, hubs, remove the heat shields and clips on underside and finish shutzing floor pan
see you soon, cheers for looking
ive been slow at work recently so I thought id crack on with the saph while I have the chance
ive nearly finished all the welding now and should be finished tomorrow.
before I pick up were I left off I thought id just show you my cossie clocks ive got. I bought a job lot of cossie bits and took what I wanted and am selling the rest.
out of the lot I got
cossie headlights,
nsr light (mine cracked)
glove box (my handle broke)
white dial cossie clocks
4 switch window switch
lock wood stainless sill covers
I think a few bits more but cant think now lol
heres the clocks

right on with the welding
I started by finishing the welding on the arch and rear sill


I had a little trouble with this one. I did this side exactly the same as the other side but on this side the repair panel seemed to be a bit twisted, I struggled to get it to line up and still it doesn't line up very well near the fuel cap, so im going to trial fit my rear bumper and see what its like and have a bash at getting the rear quarters flatter and looking good. If I fail ill pay a body shop to prep and prime the car and ill paint it.
here the rear sill part, I know it doesn't look pretty smothered in seam sealer but it protects it well and it will be under a skirt, this will never be a gleaming immaculate cossie, that's going to be a used and abused full cosworth replica.
from this
to this


Also today I did an unexpected bit I found, which was the other seat mount on the passenger side, so I got that done, apart from the hole and weld a nut on as the seats are packed away so that can wait


I did put a load of seam sealer on that too but forgot to take pic
now the last bit I managed to to today took longer than expected but was a little worse than first thought. It was the passenger front door seal lip, it was rotting but hadn't come through the flat part of the sill so I cut the rot out but discover the metal on the flat part of the sill was very thin so I cut that back too. When welding in new metal in did 3 skins for the seal lip so looked as it should, I also took the time to flush the welds as it visual


that's it for now but hopefully ill finish the 3 bits of welding I need to do and remove the cross member, arms, hubs, remove the heat shields and clips on underside and finish shutzing floor pan
see you soon, cheers for looking
 05-06-2014, 08:24 PM
#32
PassionFord Regular
Thread Starter
iTrader: (1)
Join Date: May 2009
Location: eastbourne
Posts: 477
Likes: 0
Received 0 Likes
on
0 Posts
I say yes it is or will be, its my cossie, it will have everything and more that a cossie has and will still paint a huge smile on my face!!
with the way cossie prices are going ill never be able to save enough to buy one but I can afford buying one bit by bit lol
05-06-2014, 08:27 PM
#33
PassionFord Regular
Thread Starter
iTrader: (1)
Join Date: May 2009
Location: eastbourne
Posts: 477
Likes: 0
Received 0 Likes
on
0 Posts
ill proberly end up doing what I did with the fez to this, tidy up, modify, use and abuse, strip, proper resto, lol
05-06-2014, 09:08 PM
#35
I've found that life I needed.. It's HERE!!
hehehe you should visit norway then..cause here....about maybe 80 percent of every "cosworth" ..is a converted sierra into a cosworth.kinda shitty regarding the value of the cars for sale...as they drop because of all the converted ones.
05-06-2014, 09:29 PM
#36
PassionFord Regular
Thread Starter
iTrader: (1)
Join Date: May 2009
Location: eastbourne
Posts: 477
Likes: 0
Received 0 Likes
on
0 Posts
managed to do a bit more on the ol girl today.
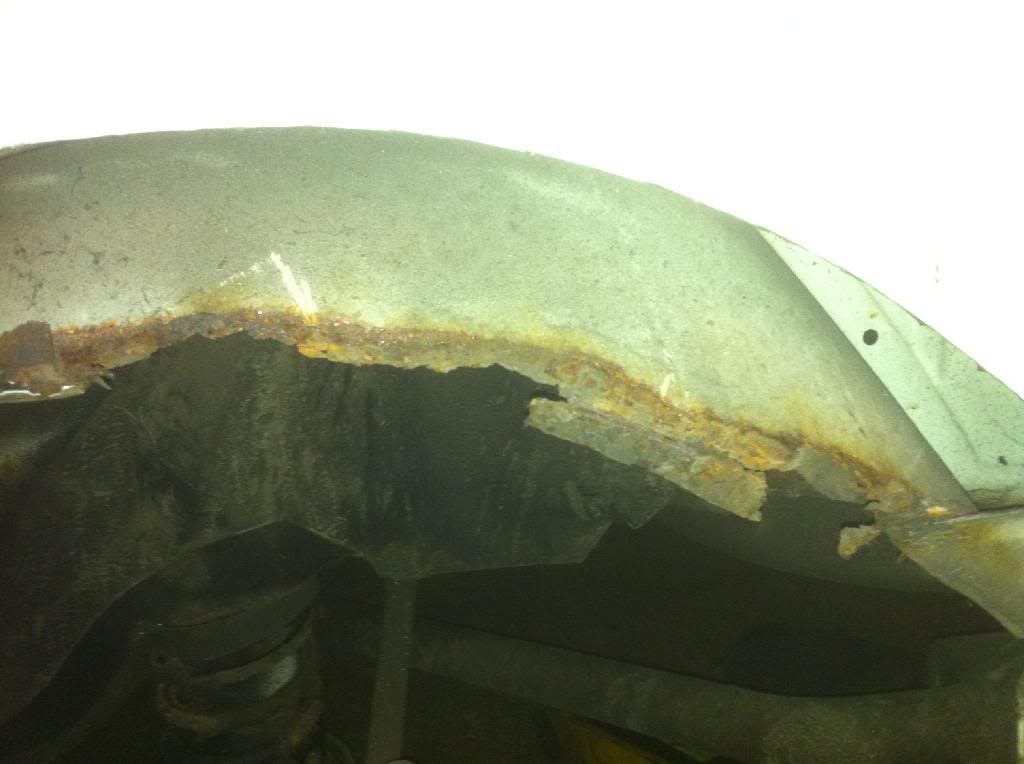
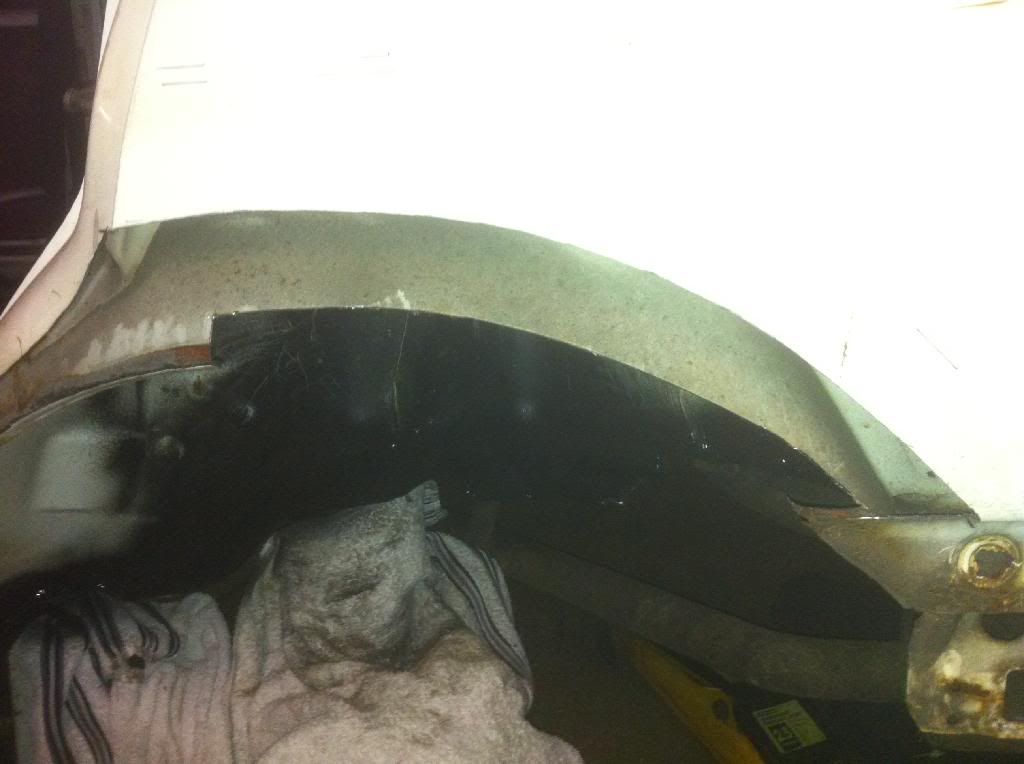
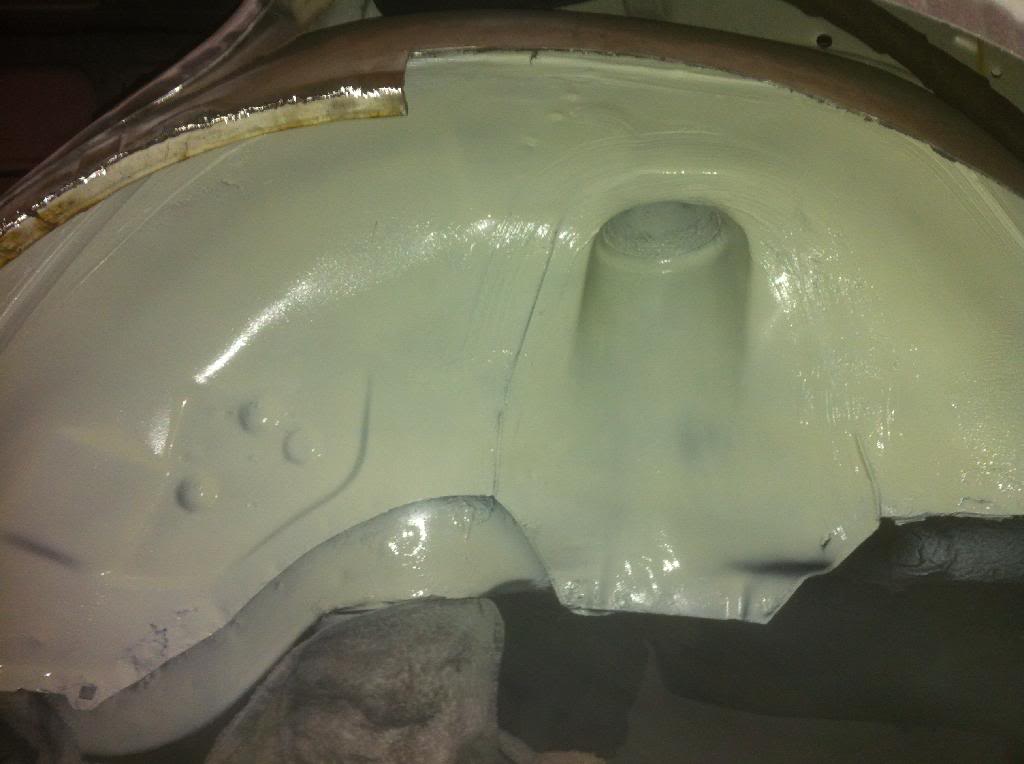
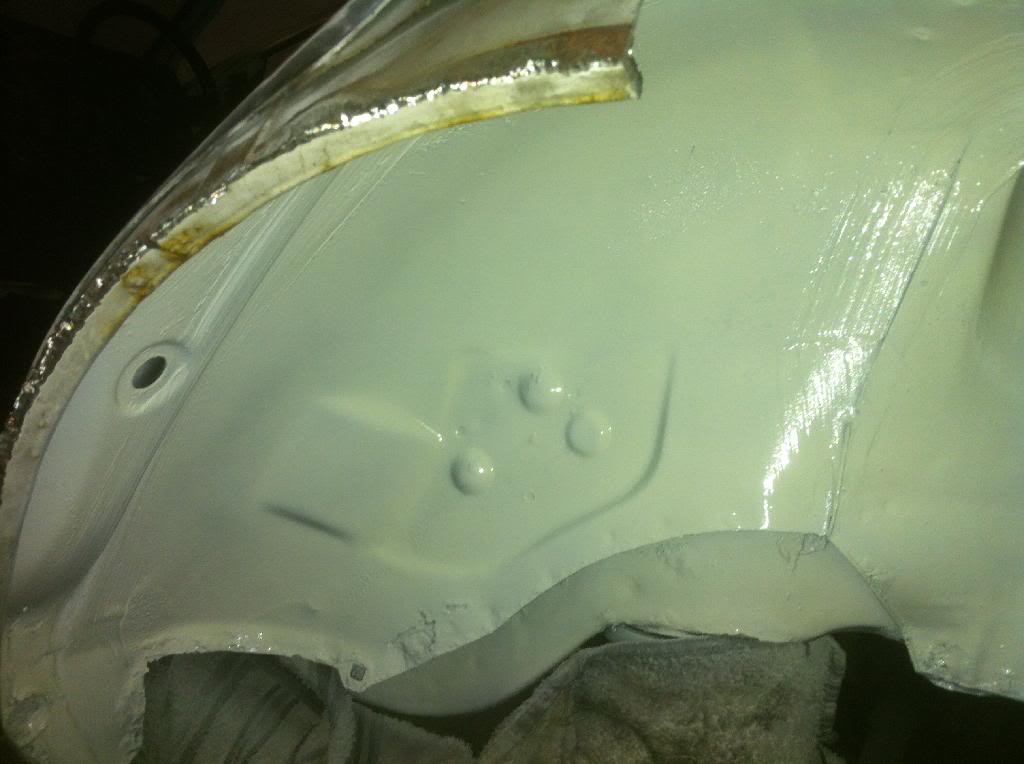
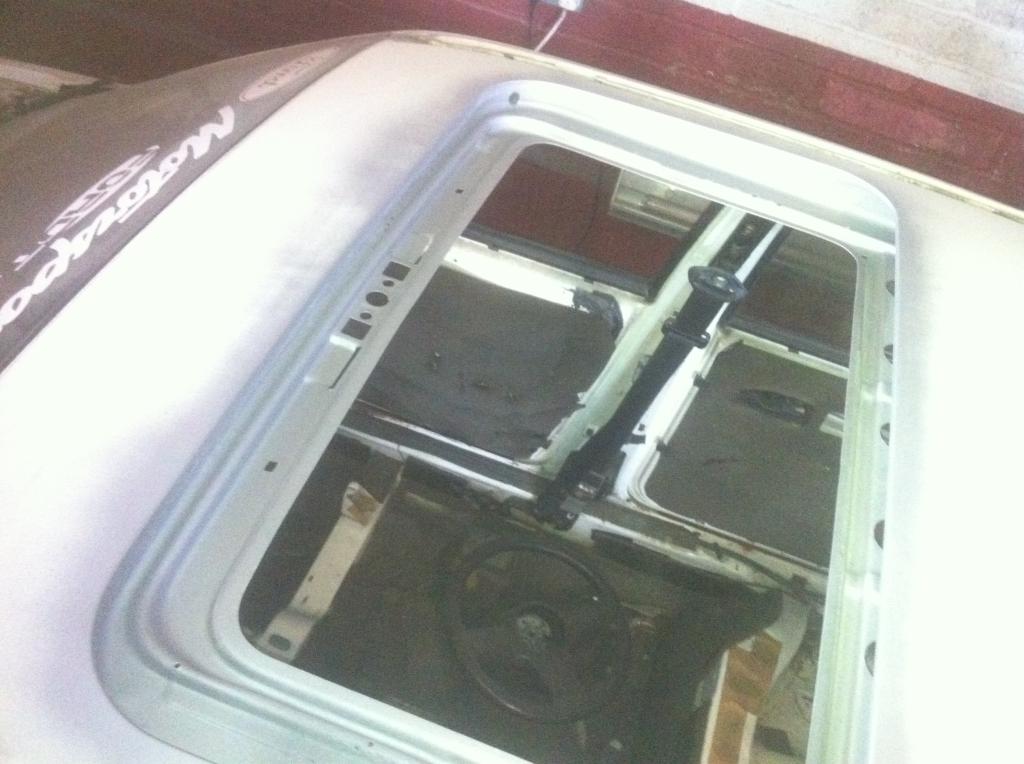
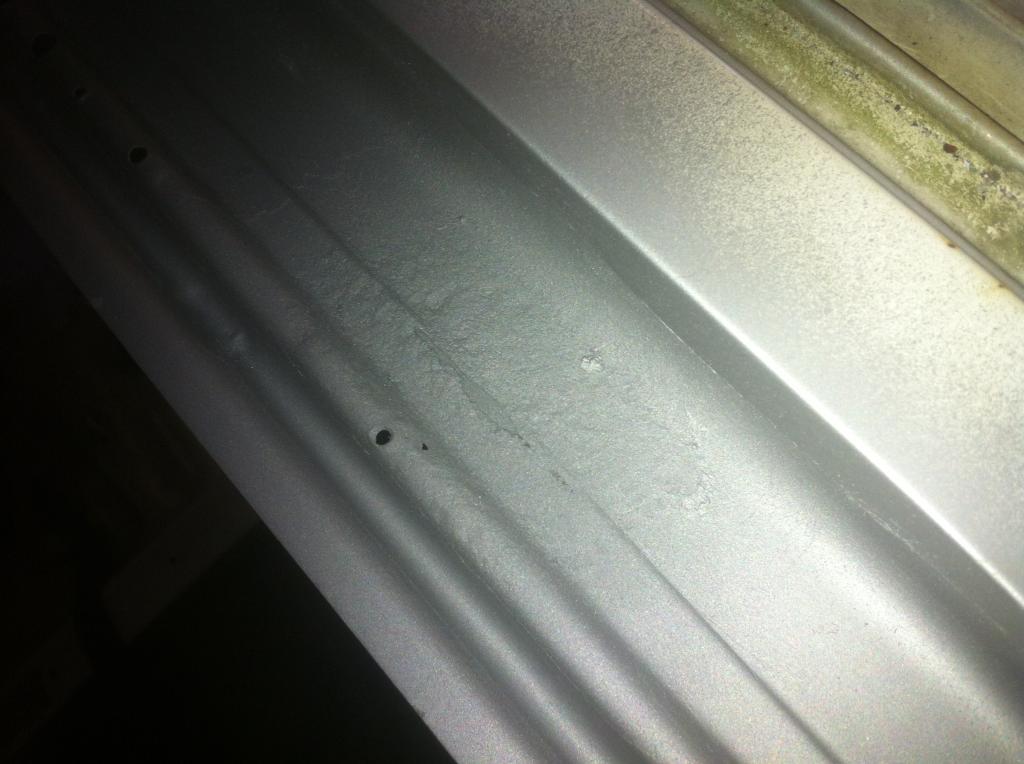
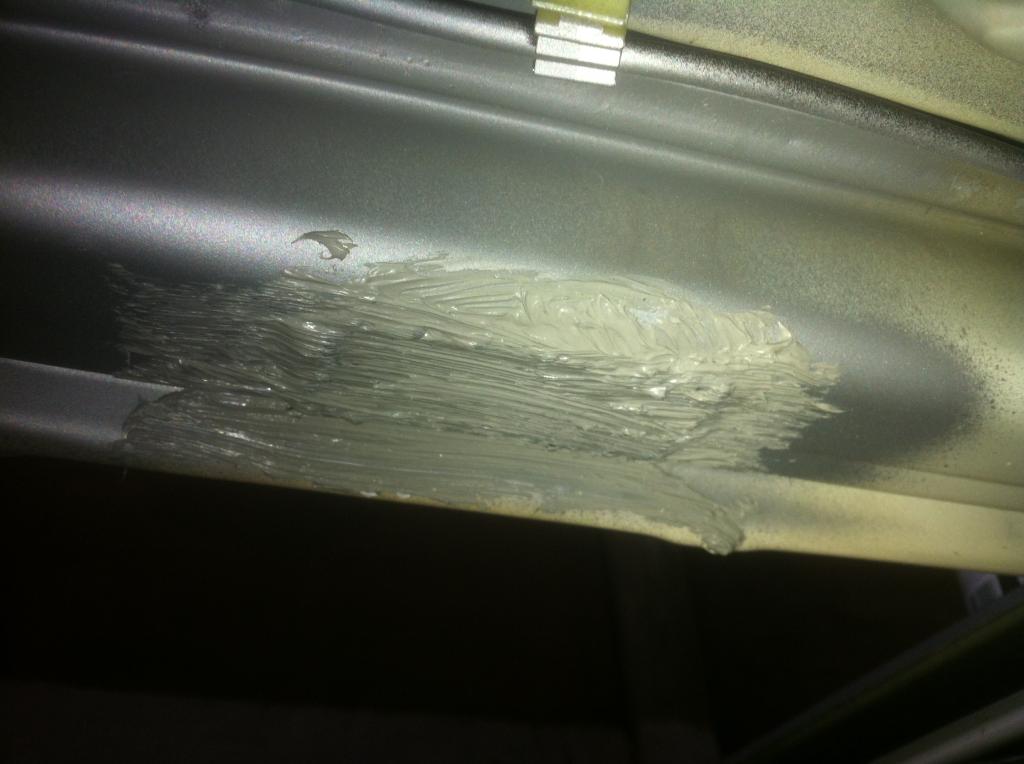
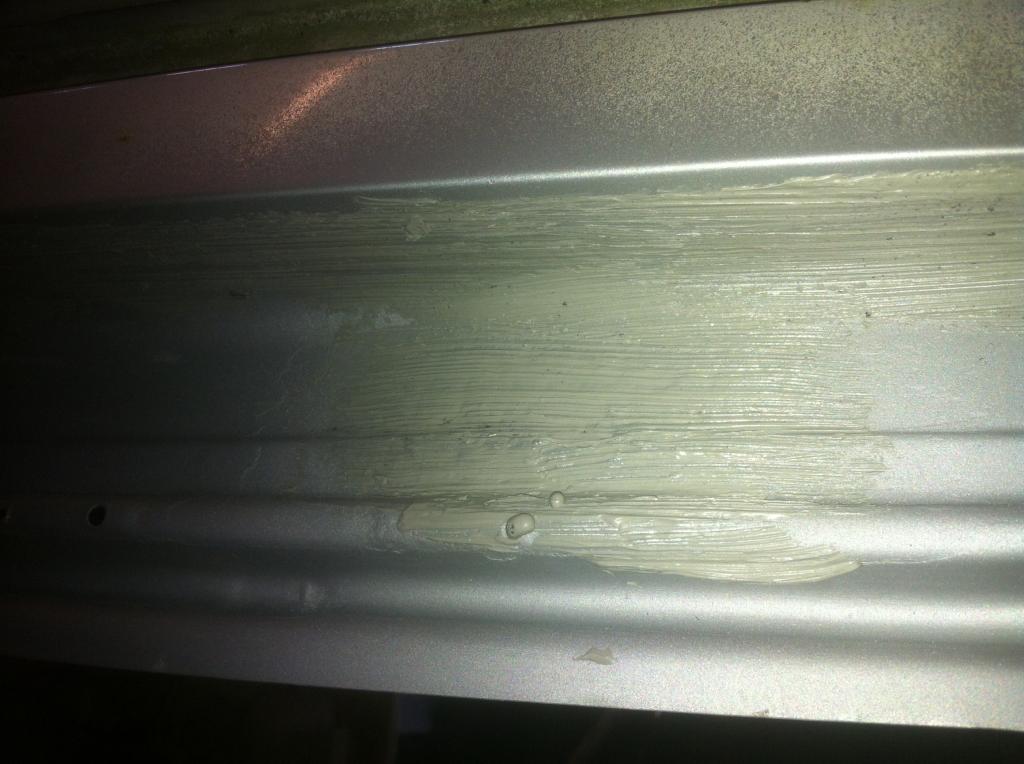
first on the hit list was the sunroof appatchure. The sealed edges were starting to show rust and there was a section that had a big crusty bit with a small hole gone through.
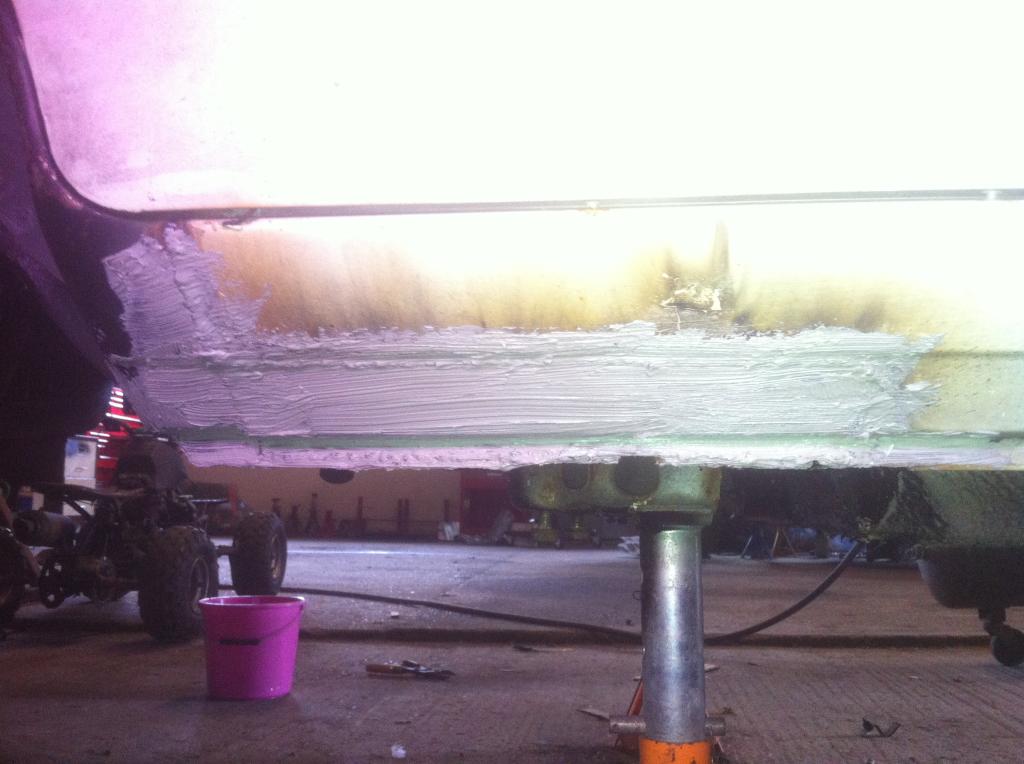
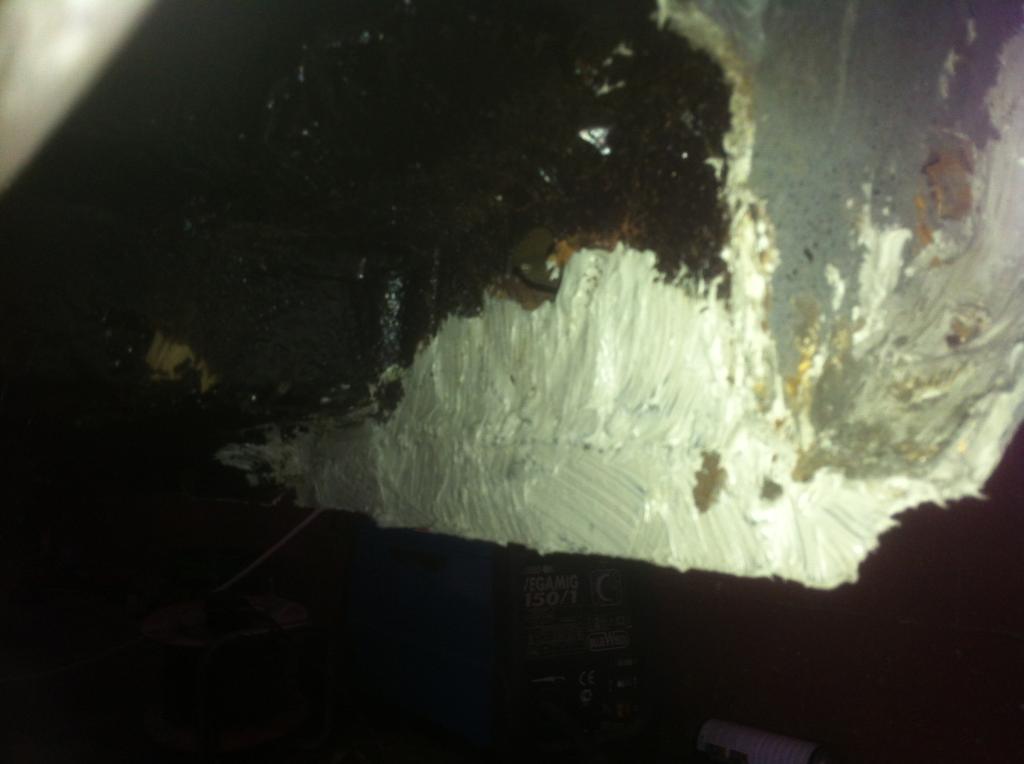
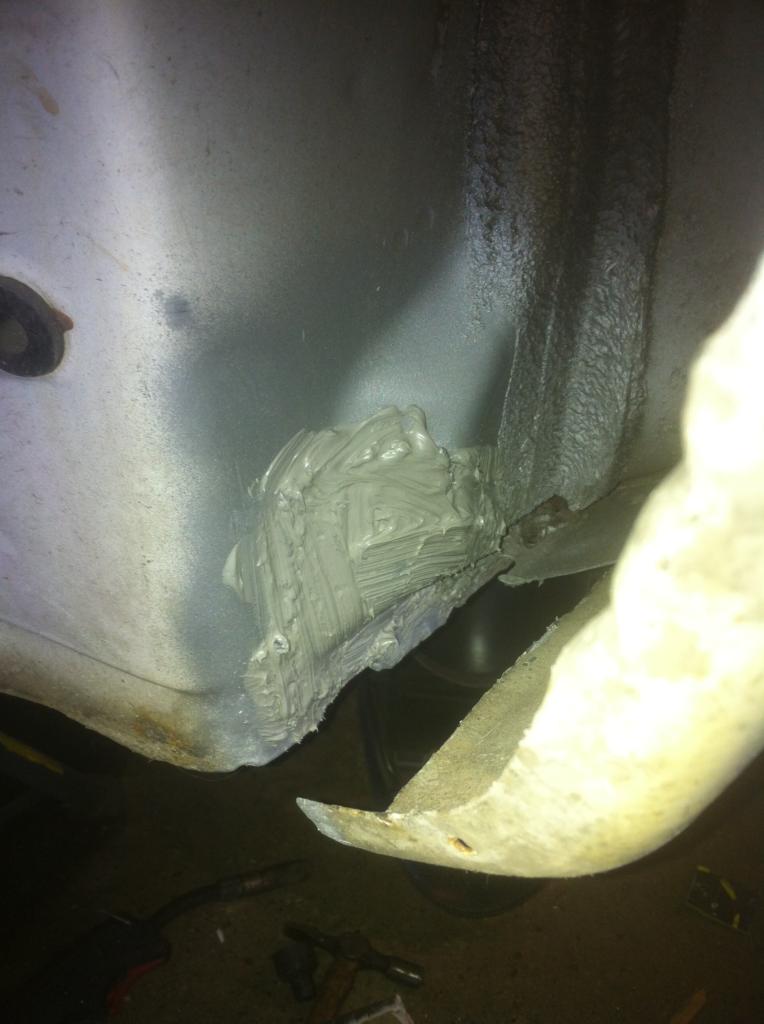
I first cleaned up the areas of concern with the wire wheel on angle grinder and I was surprised to find that the crusty area didn't get that much worse, so I welded a small plate on the inside as I didn't want it to stop the sunroof working, then the area and hole and seams zinc primed and seam sealed and zinc primed over
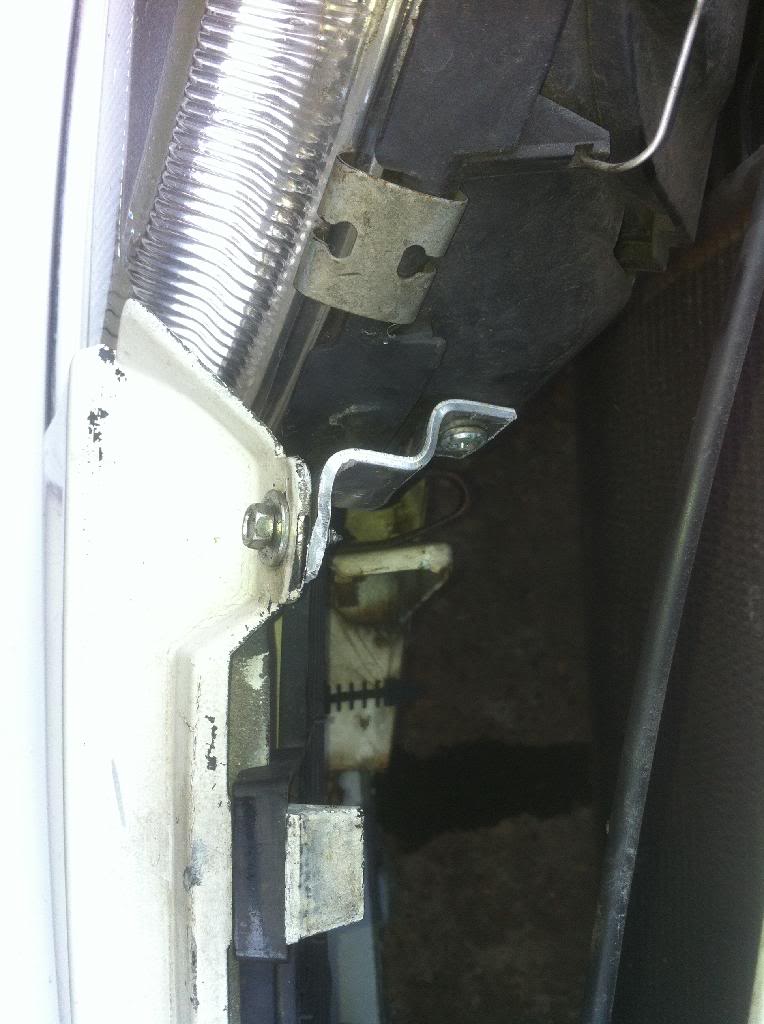
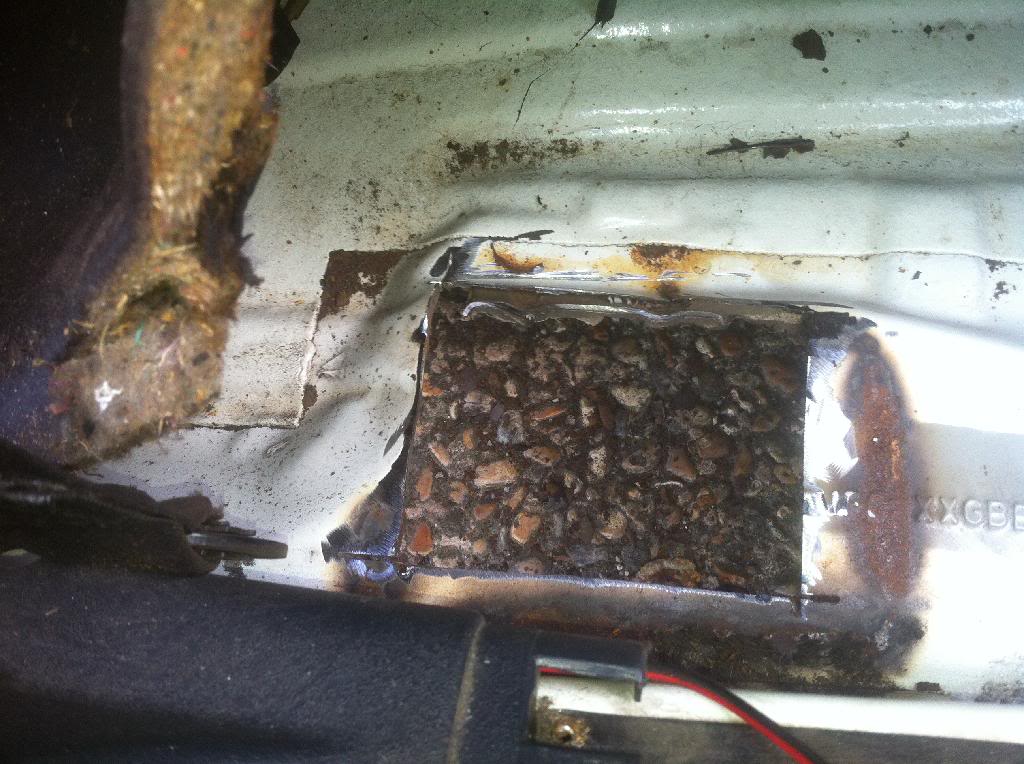
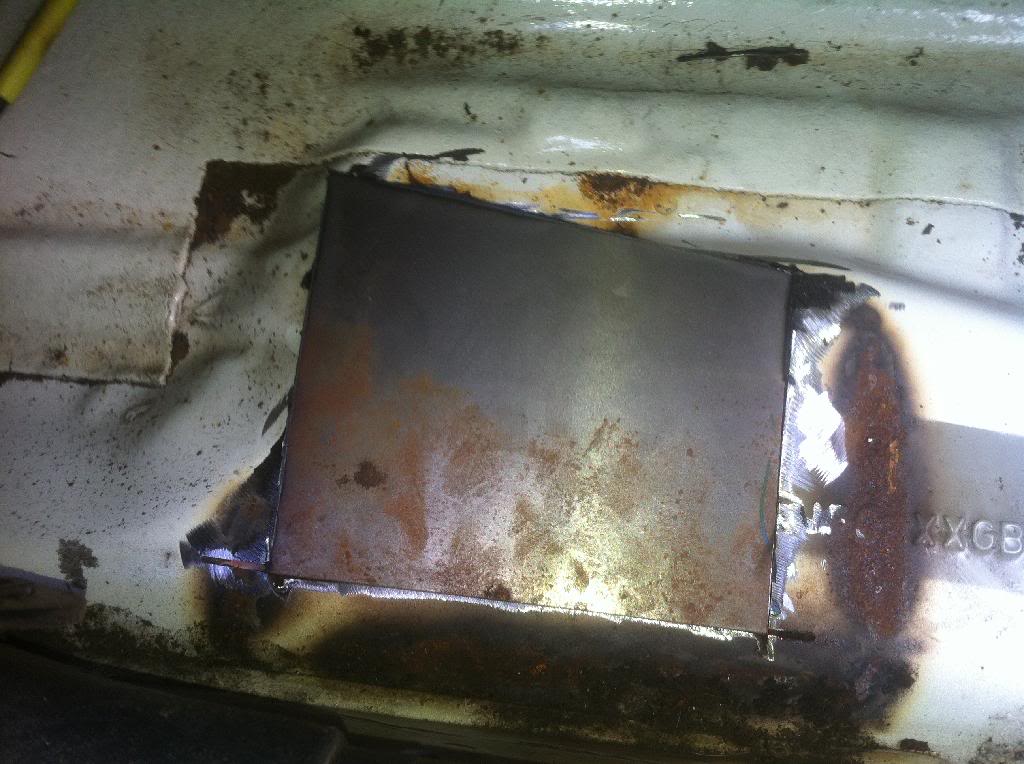
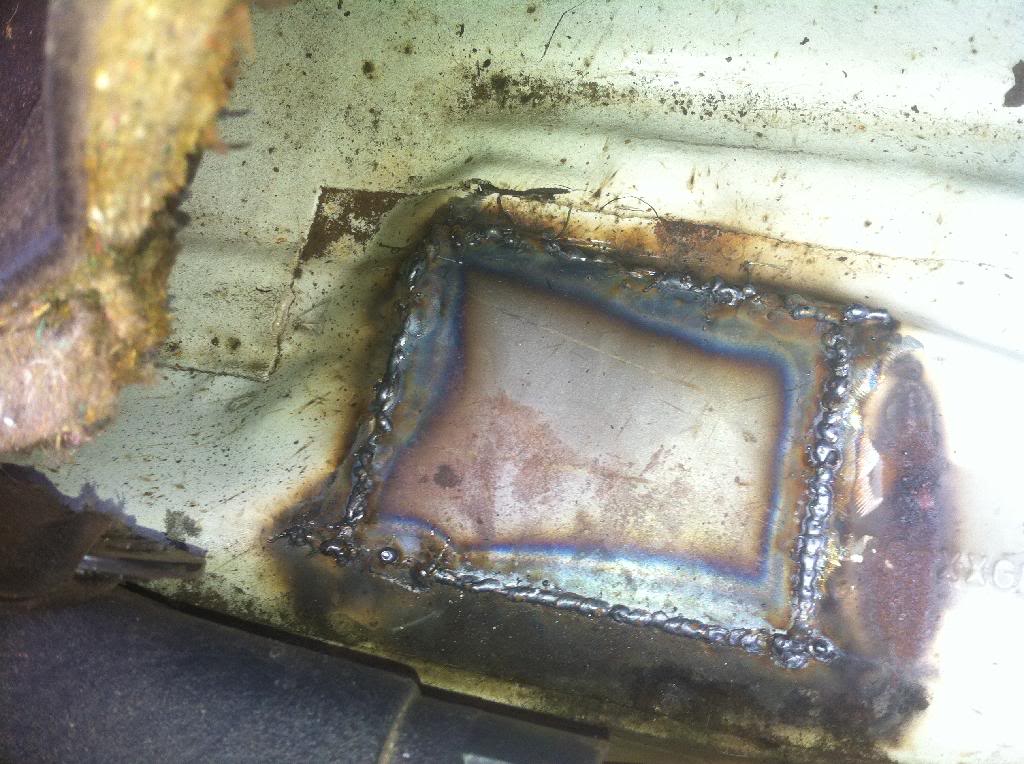
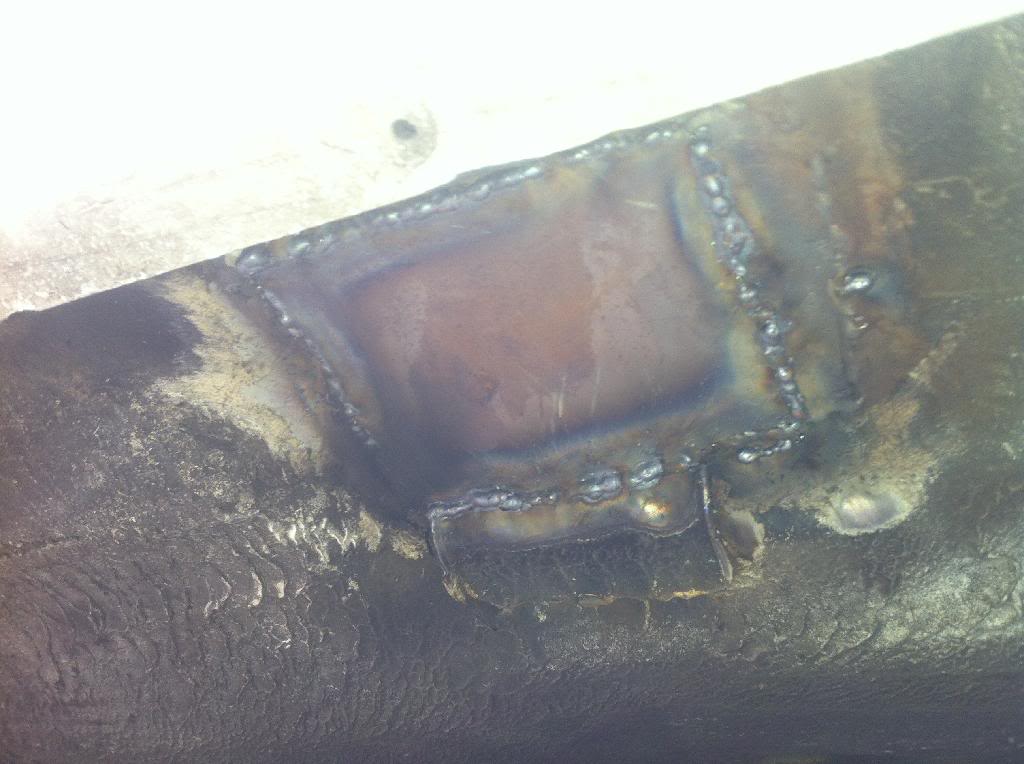
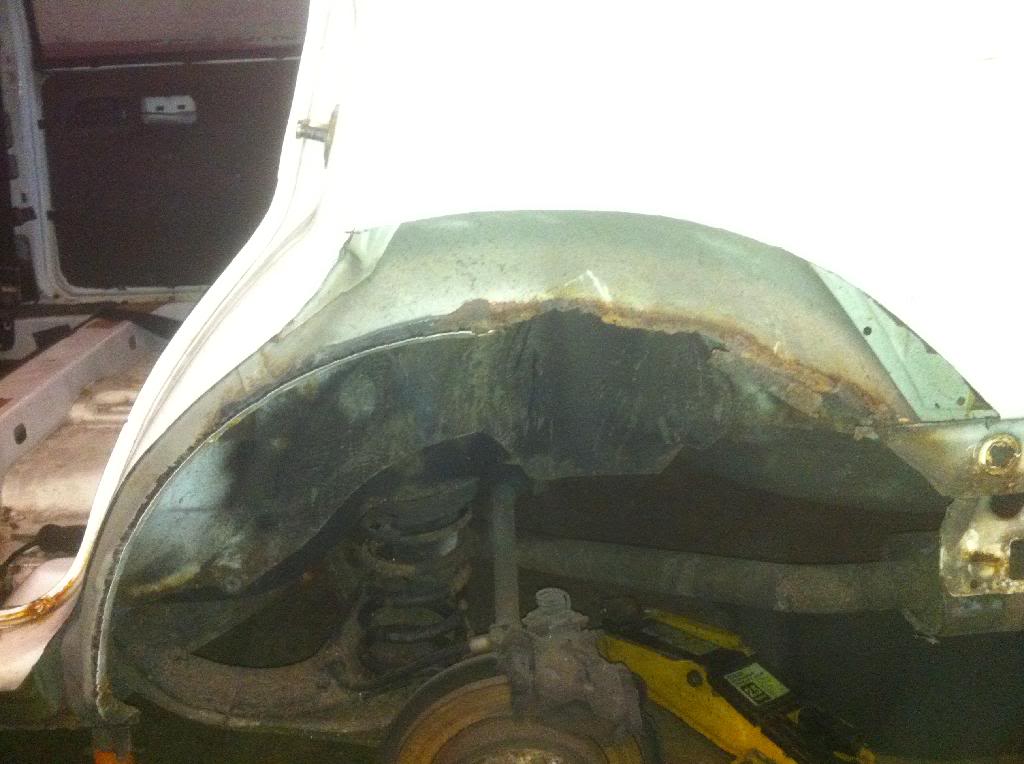
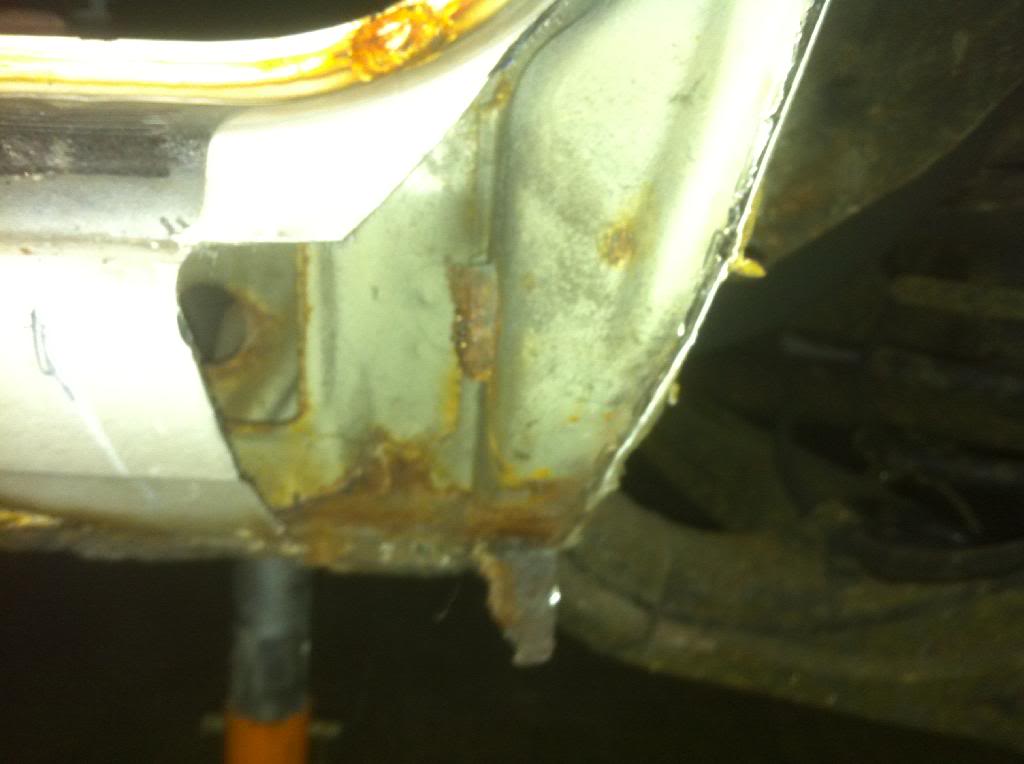
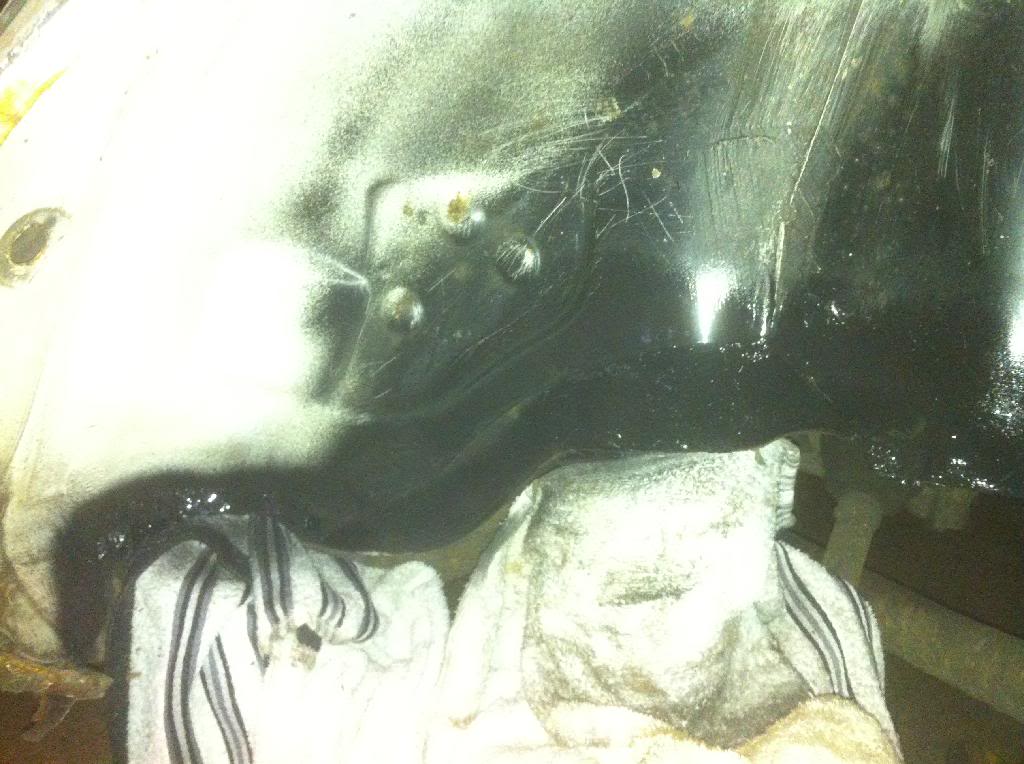
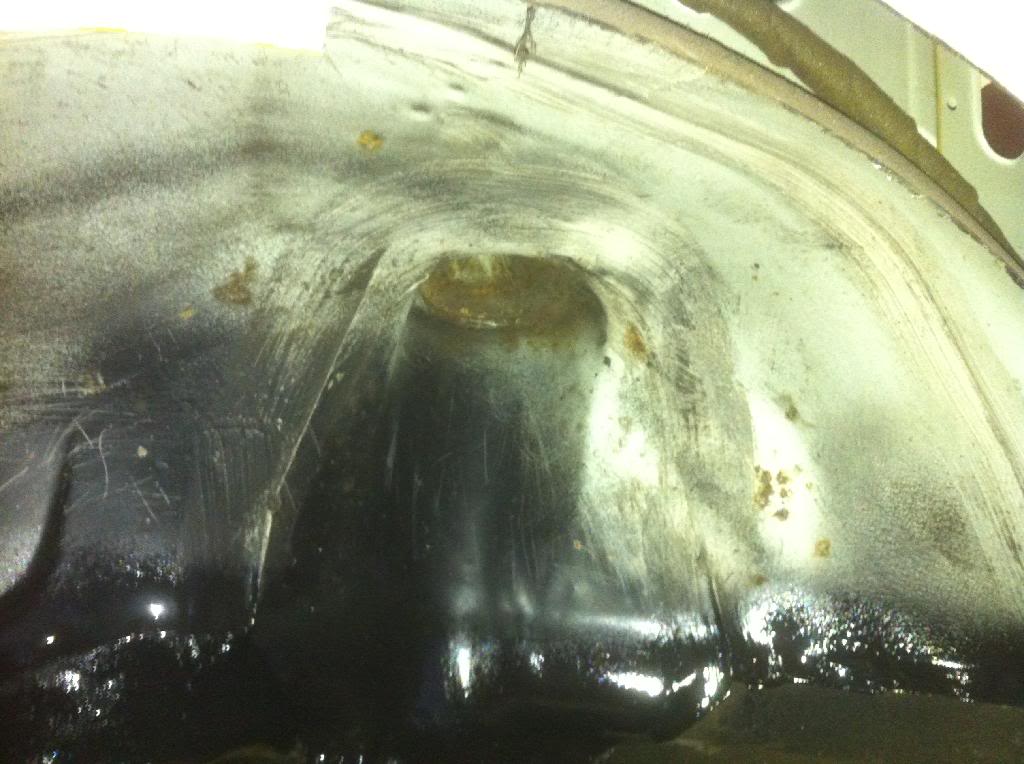
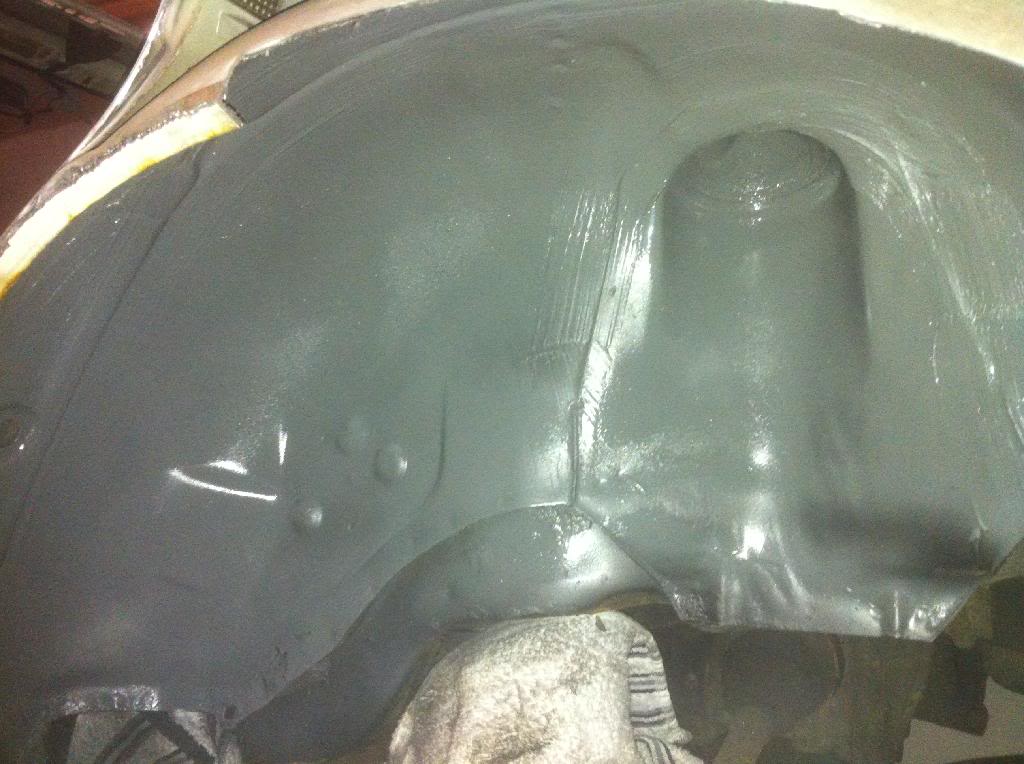
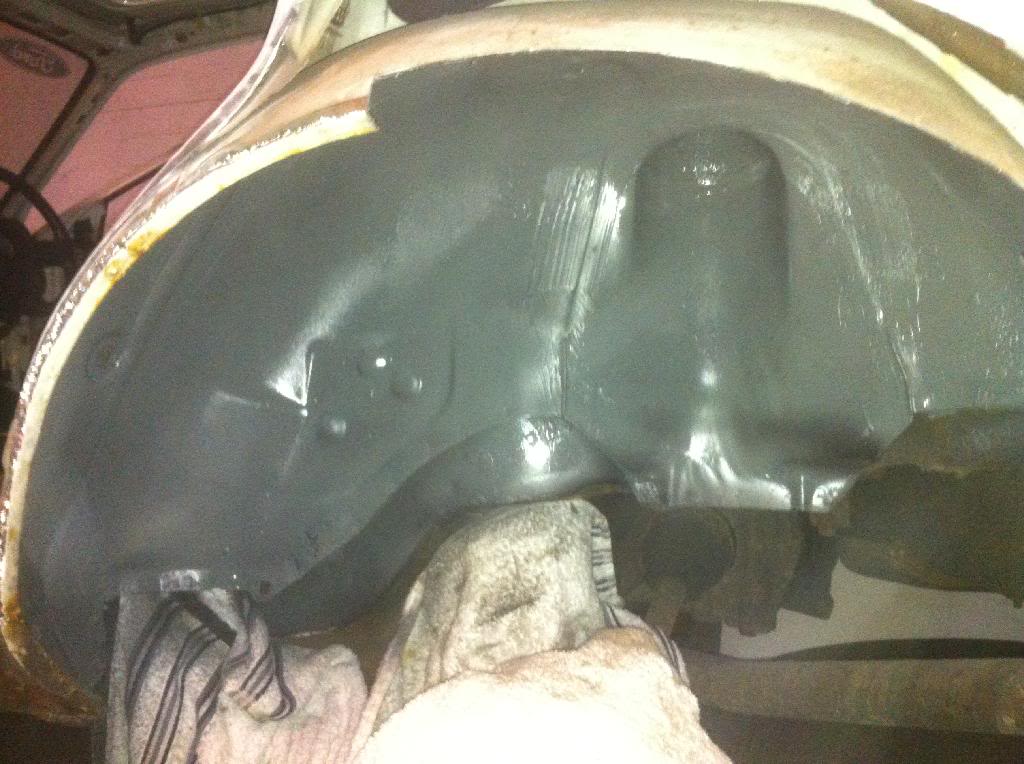
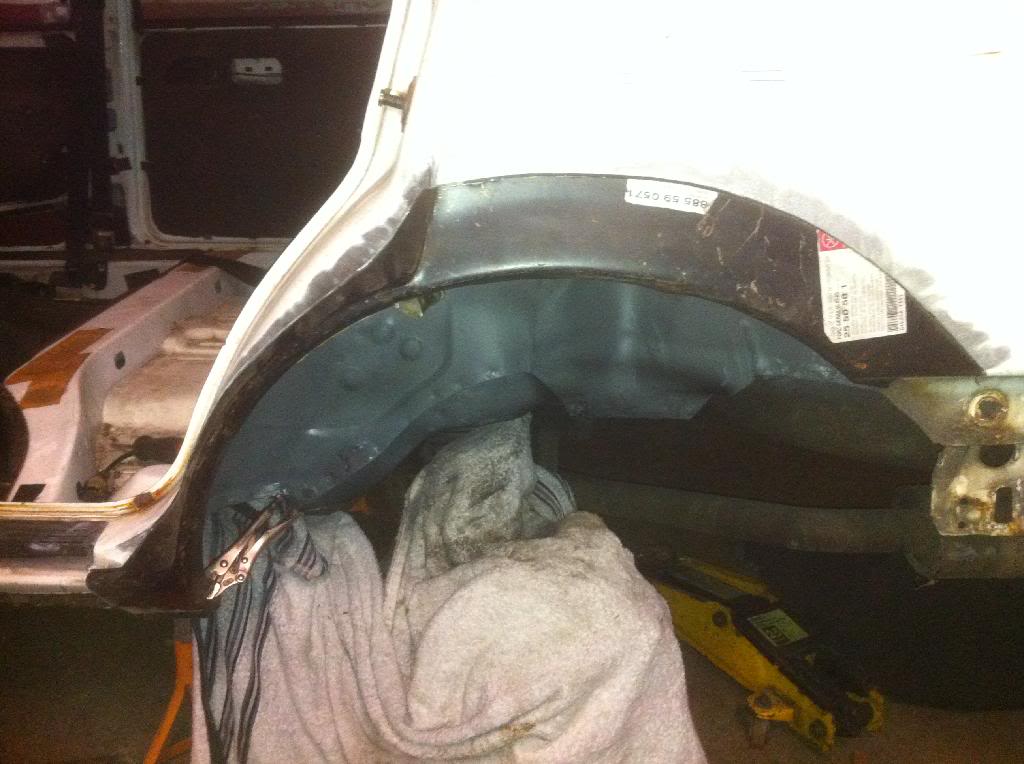
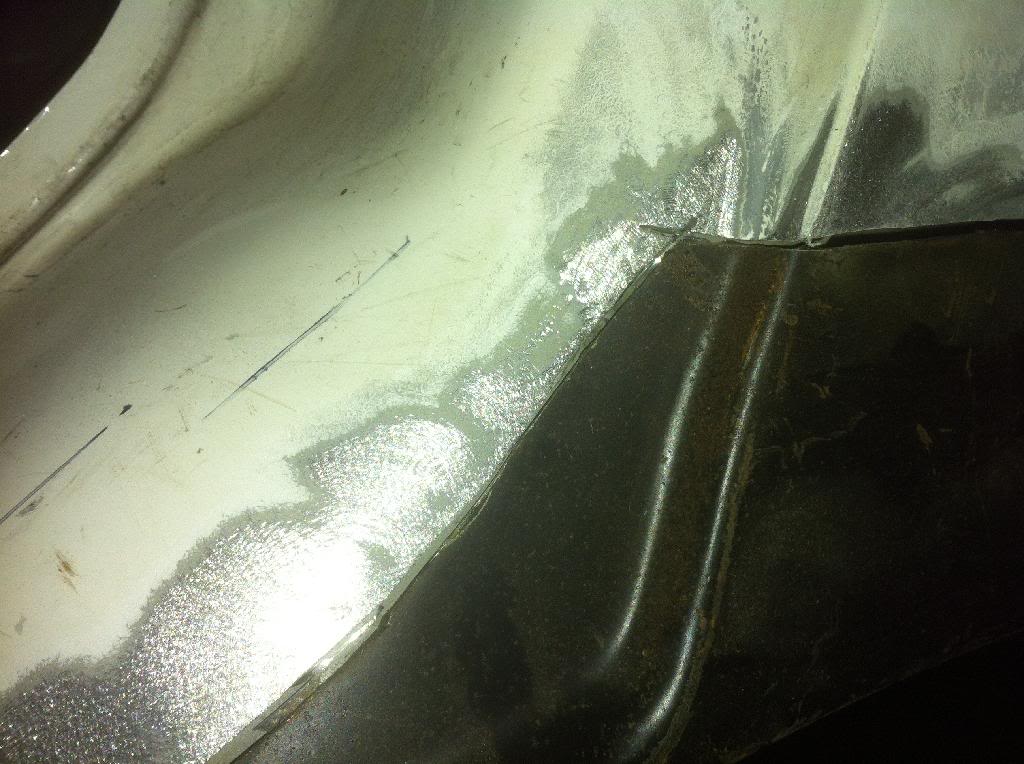
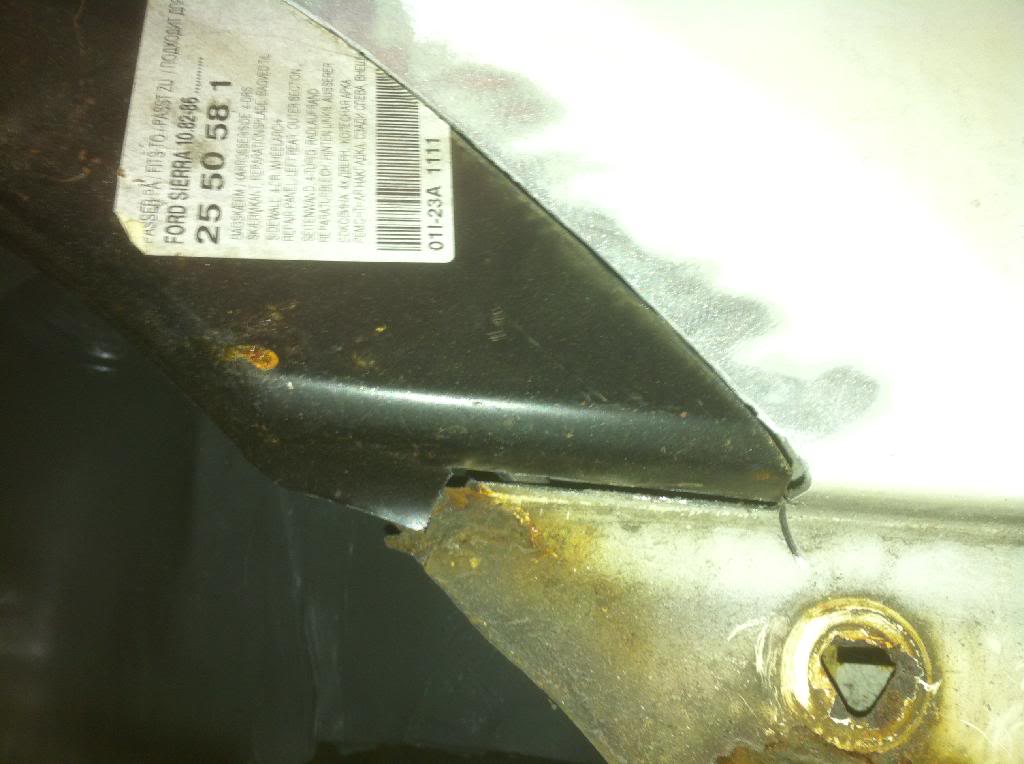
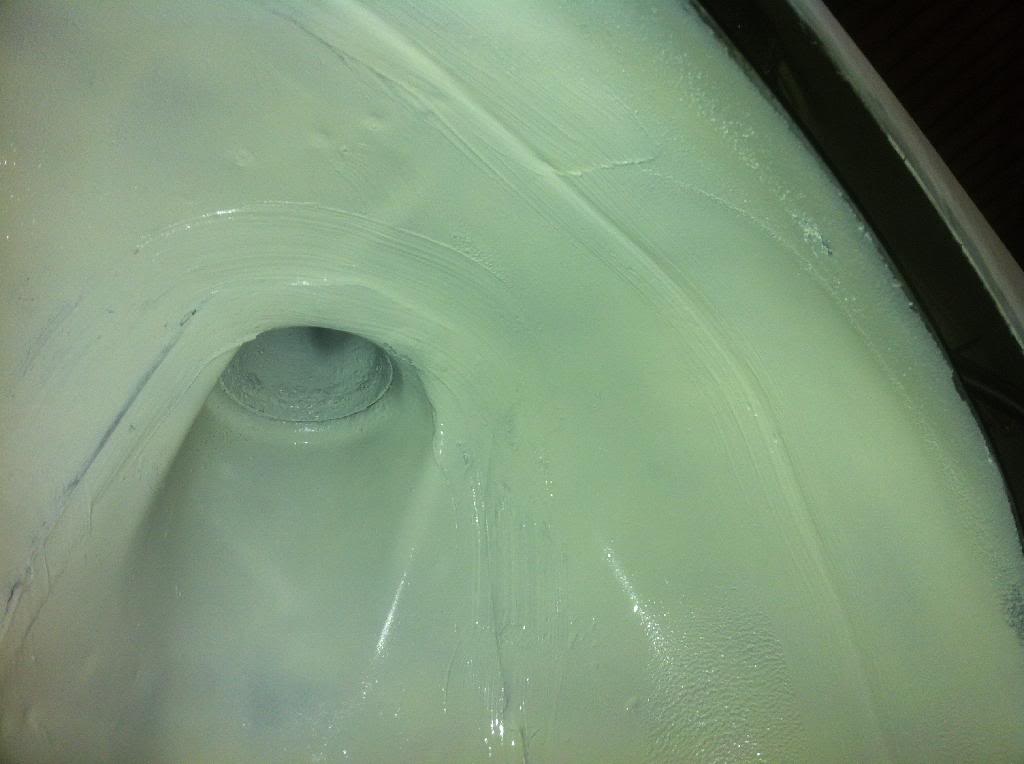
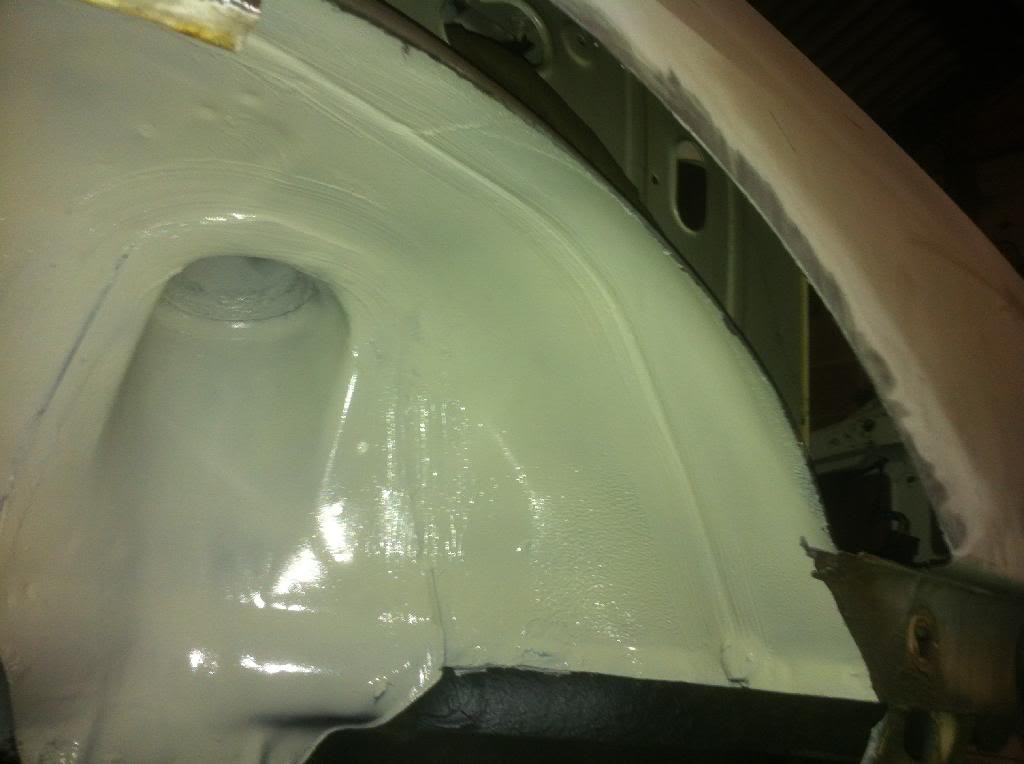
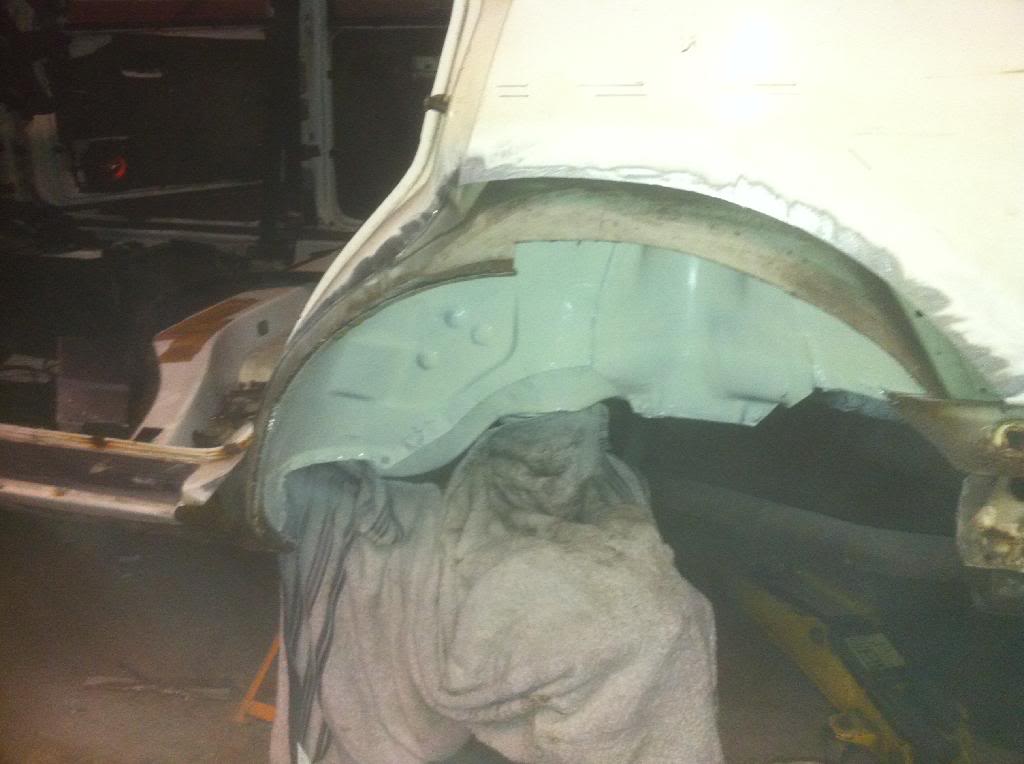
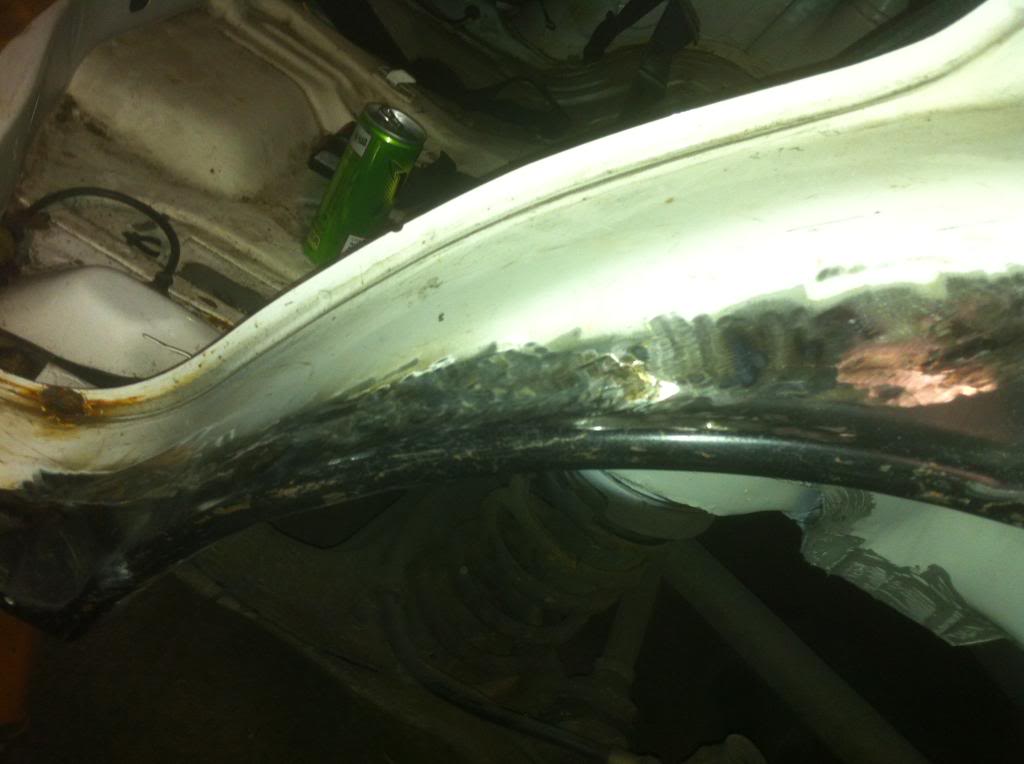
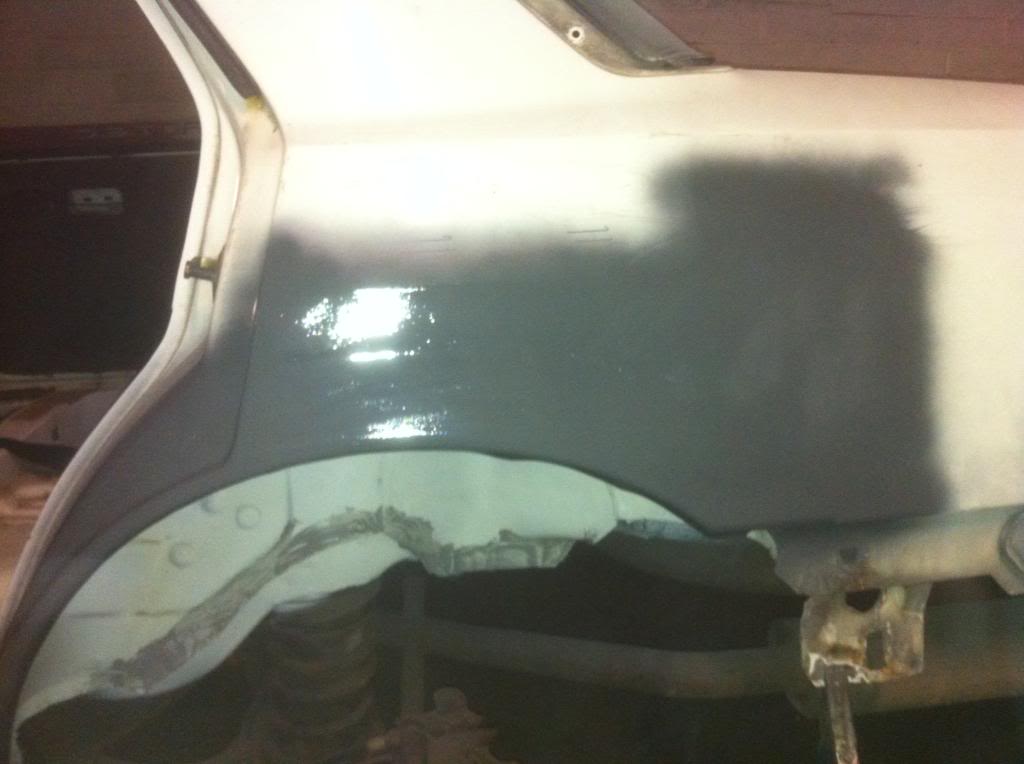
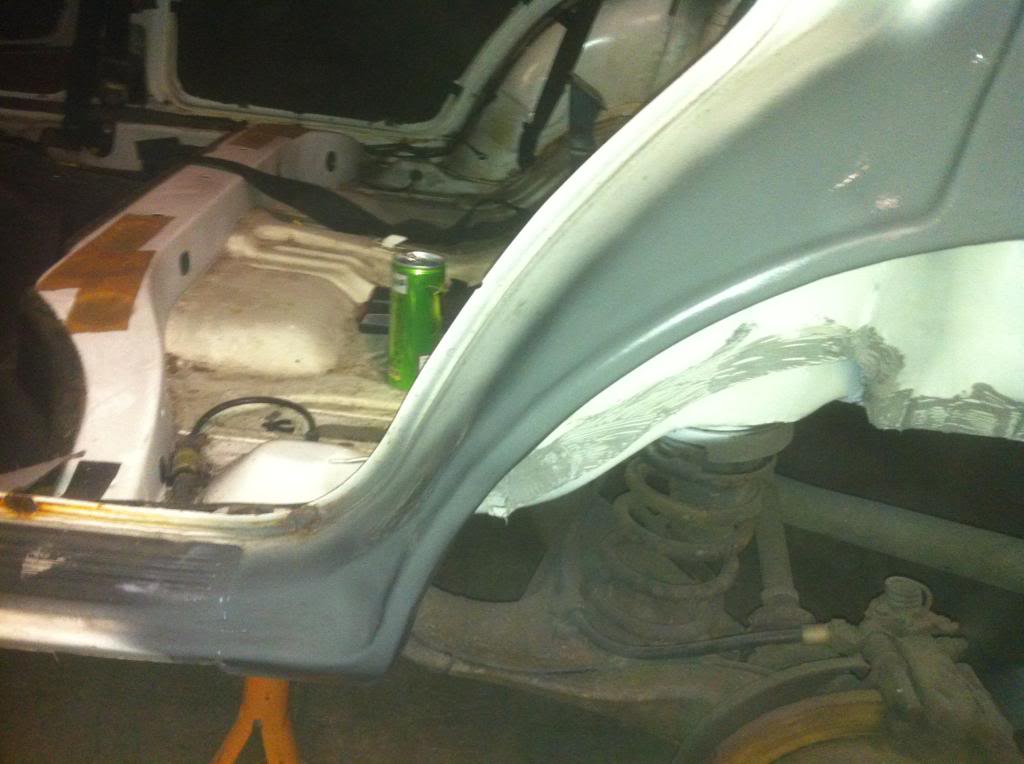
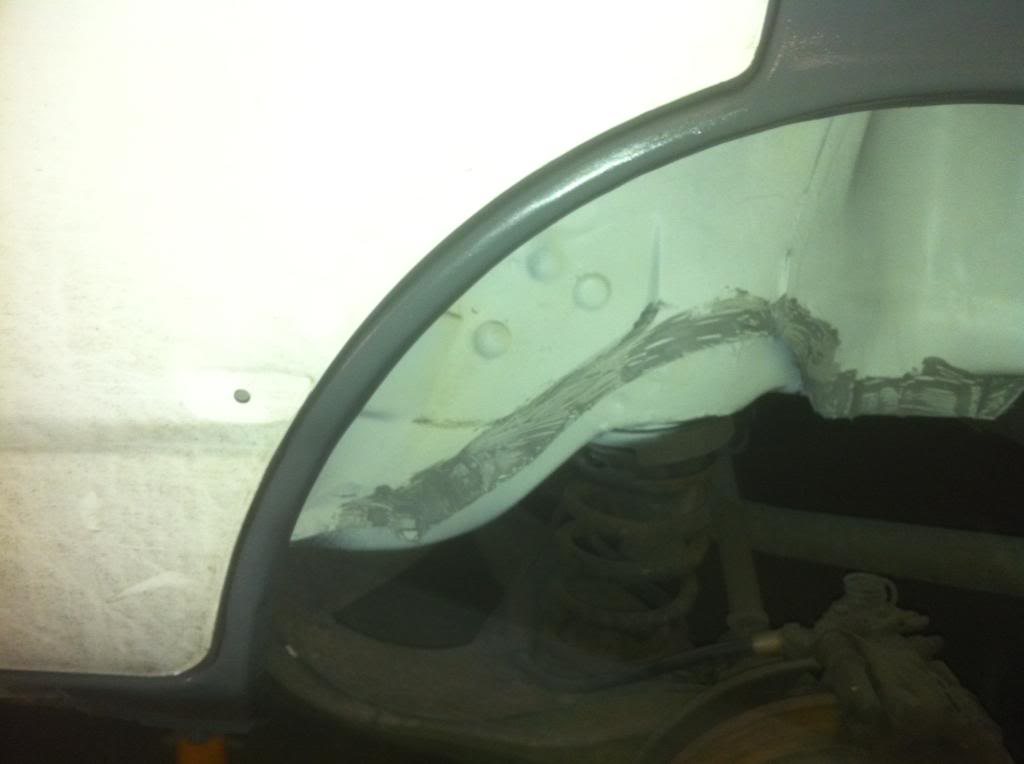
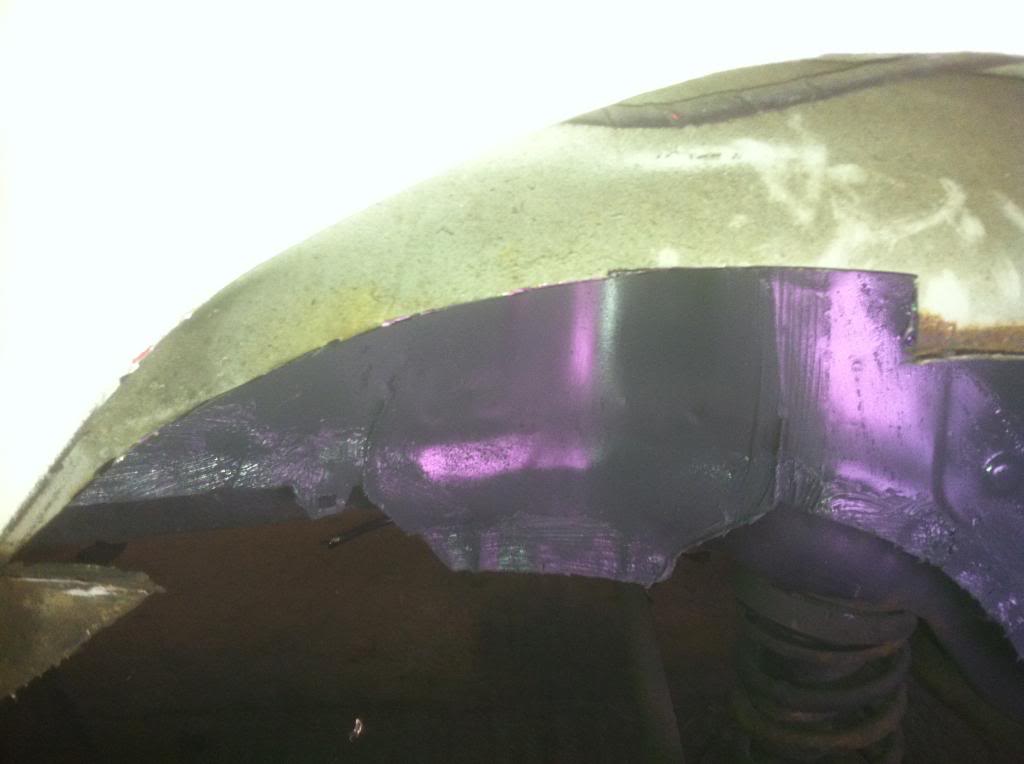
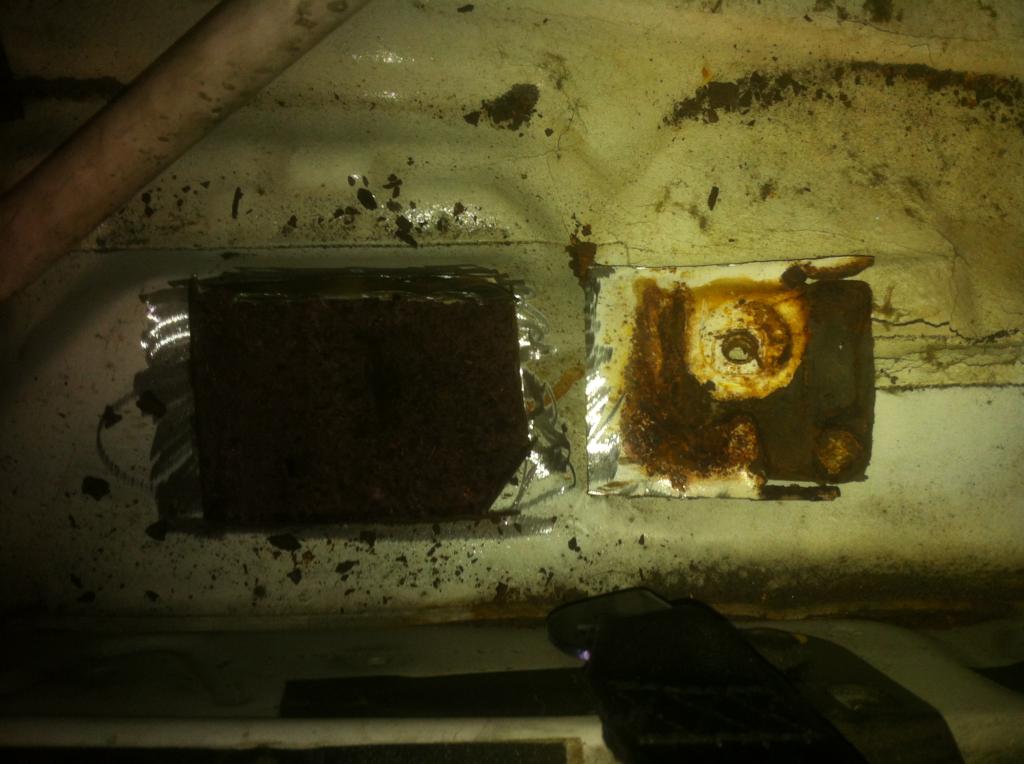
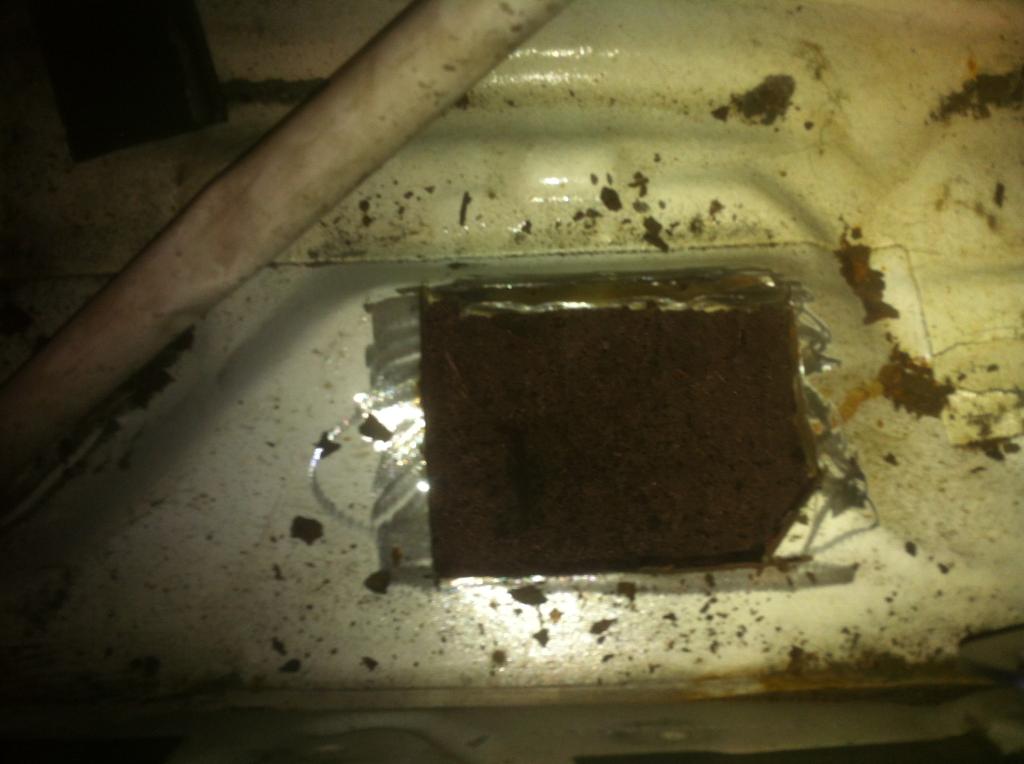
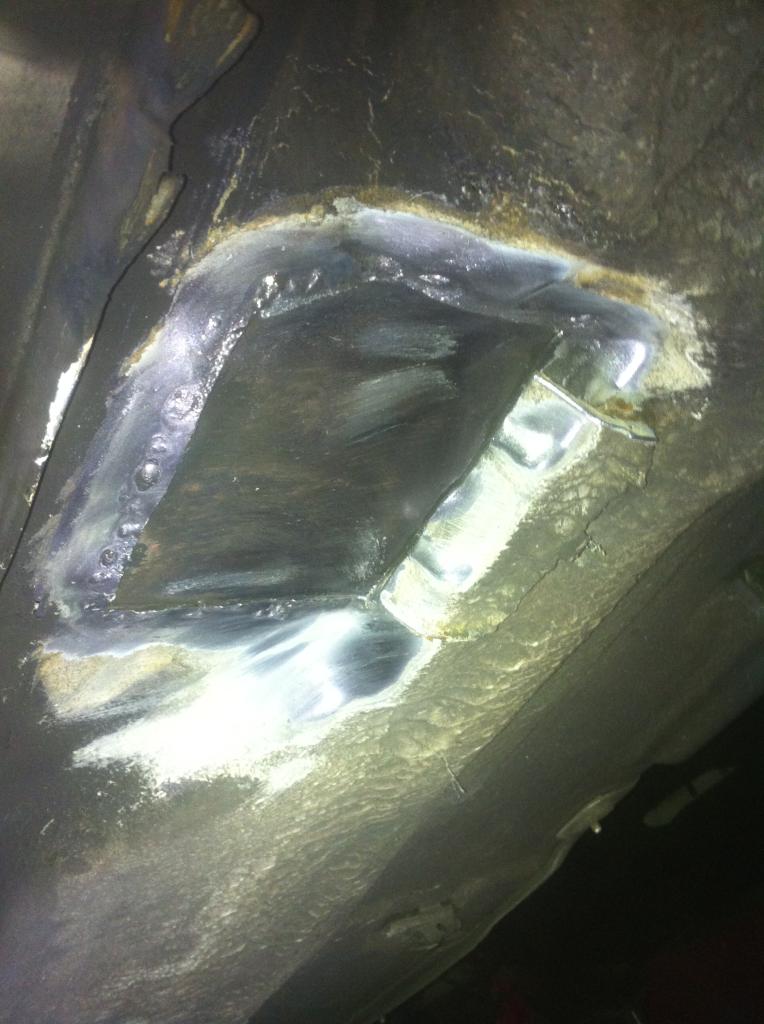
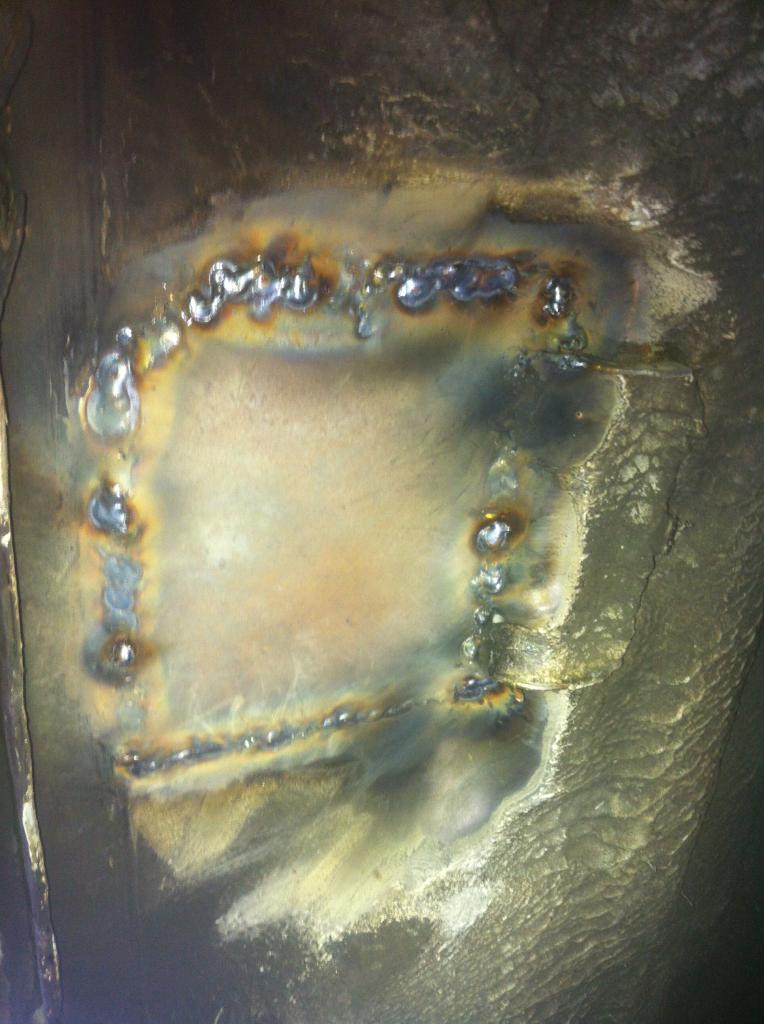
Next was this little hole I found hiding away behind the front wing. It was a nightmare to get to and ended up having to cut a section out of the wing to get to it. I did it below the line of were the side skirt goes so it will be hidden
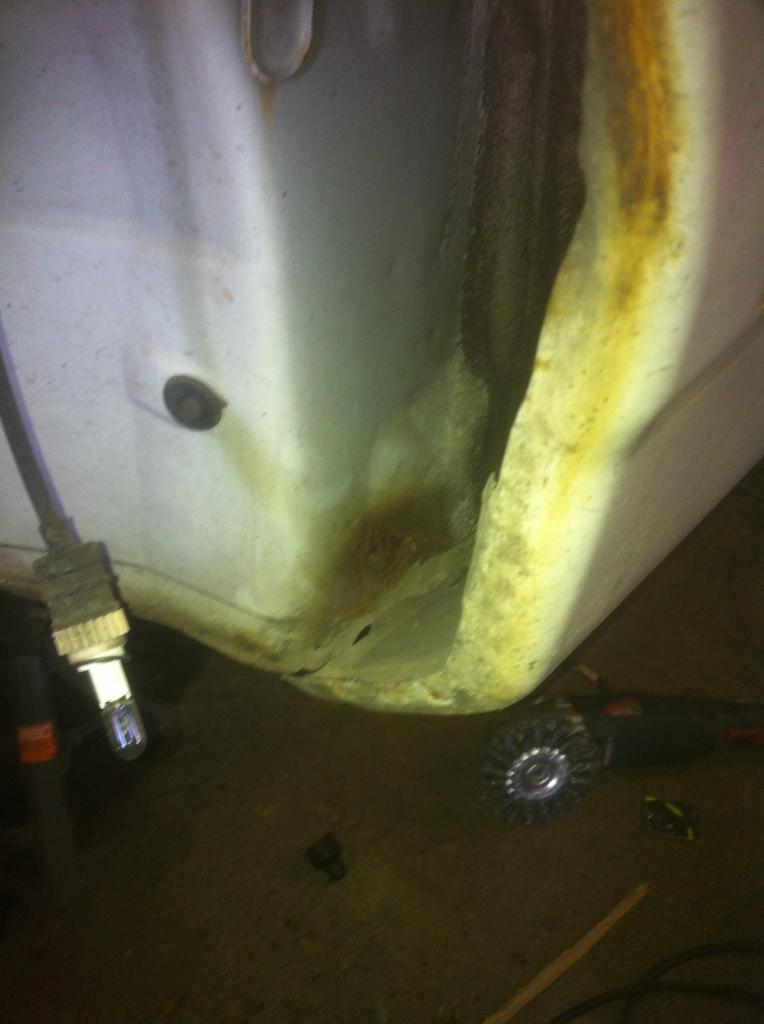
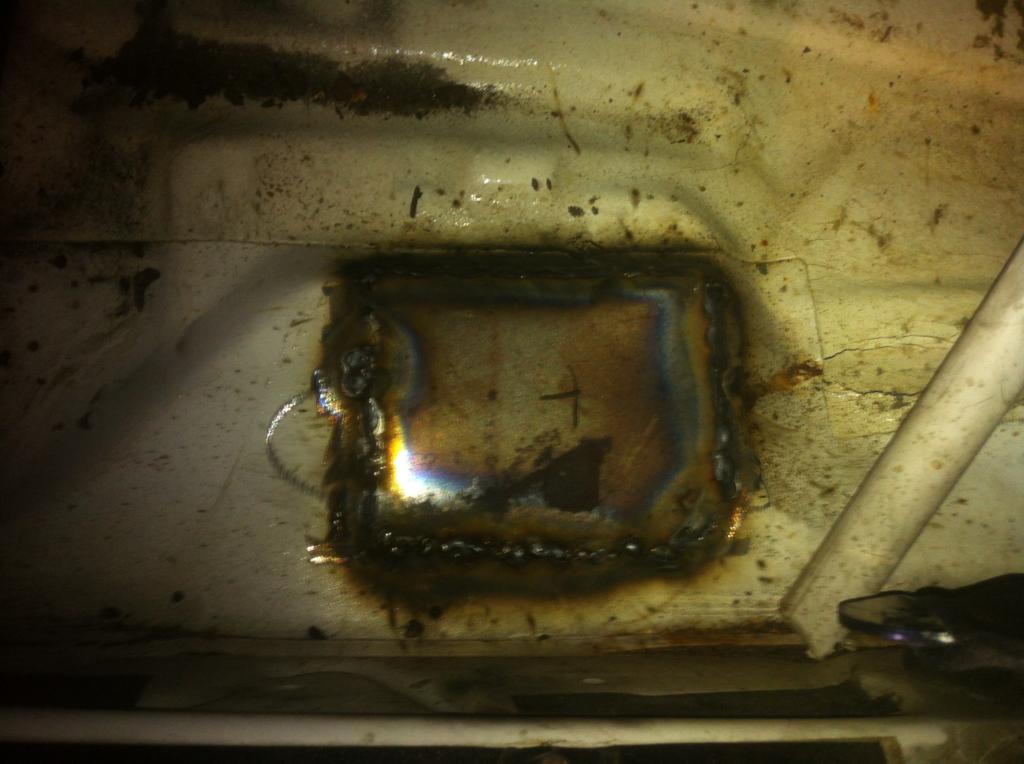
I for got to get a pic during welding and once wing section re welded back on. While I was there I sorted the front arch on that side. I had previously hammered back the arch lip to clear my tyres but I wasn't great and had started rusting on the edge, so I de rusted the arch with the wire wheel and zinc primed, then made a much better job of folding the arch lip in and then seam sealed it making sure no water will ever get in the lip, I will do this to the other side as well.

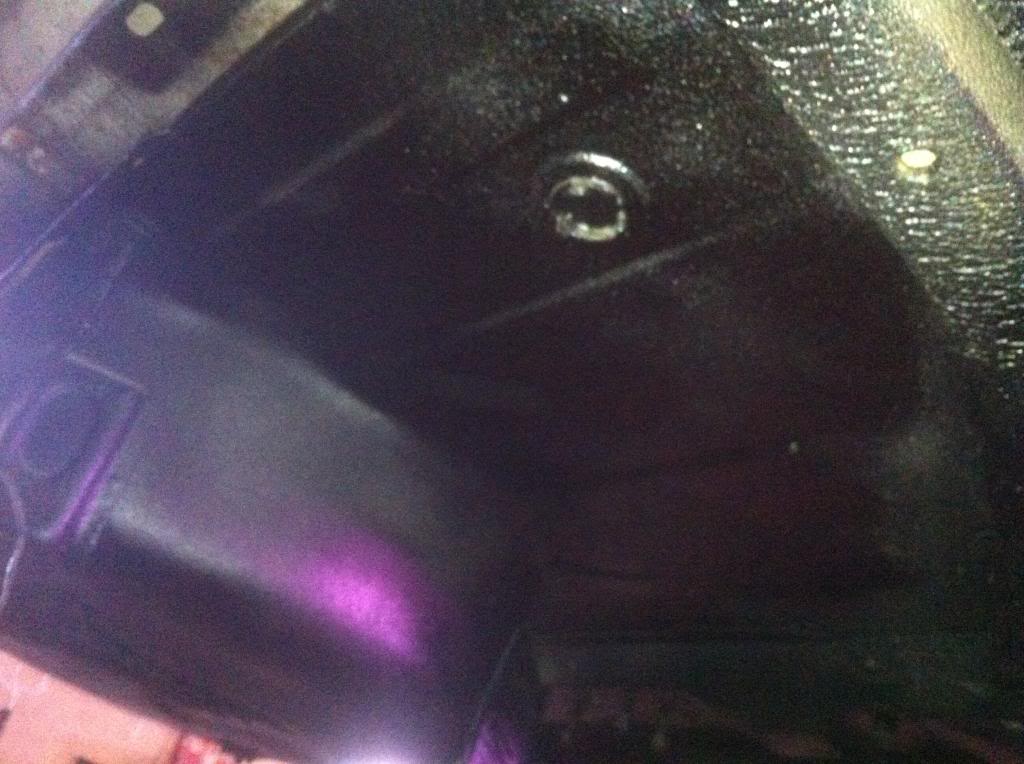
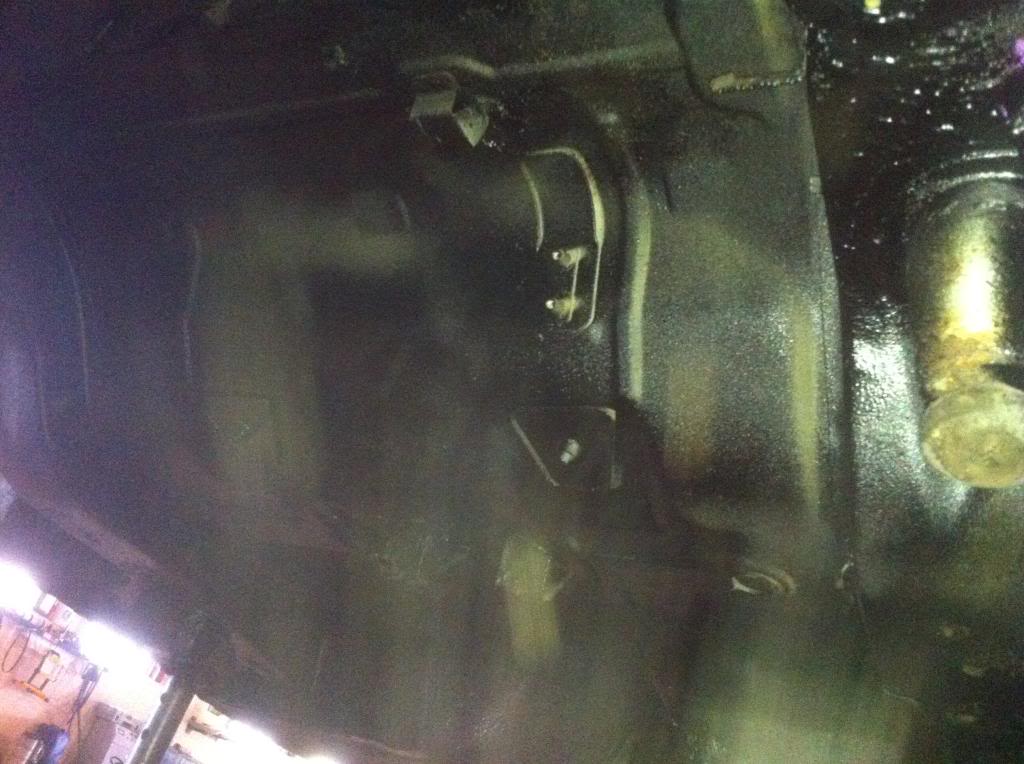
one thing I must mention which I found today. My brake master cylinder has a shit load of movement on part of it. The bit that has the black cylinder attached to it, it looks like its attached to the other bit via a long bolt through a rubber bush so I think its supposed to have movement but im not sure how much, theres about a inch or so play side to side.
first pic is central and as it sits then other two pics are me holding it one side to the other
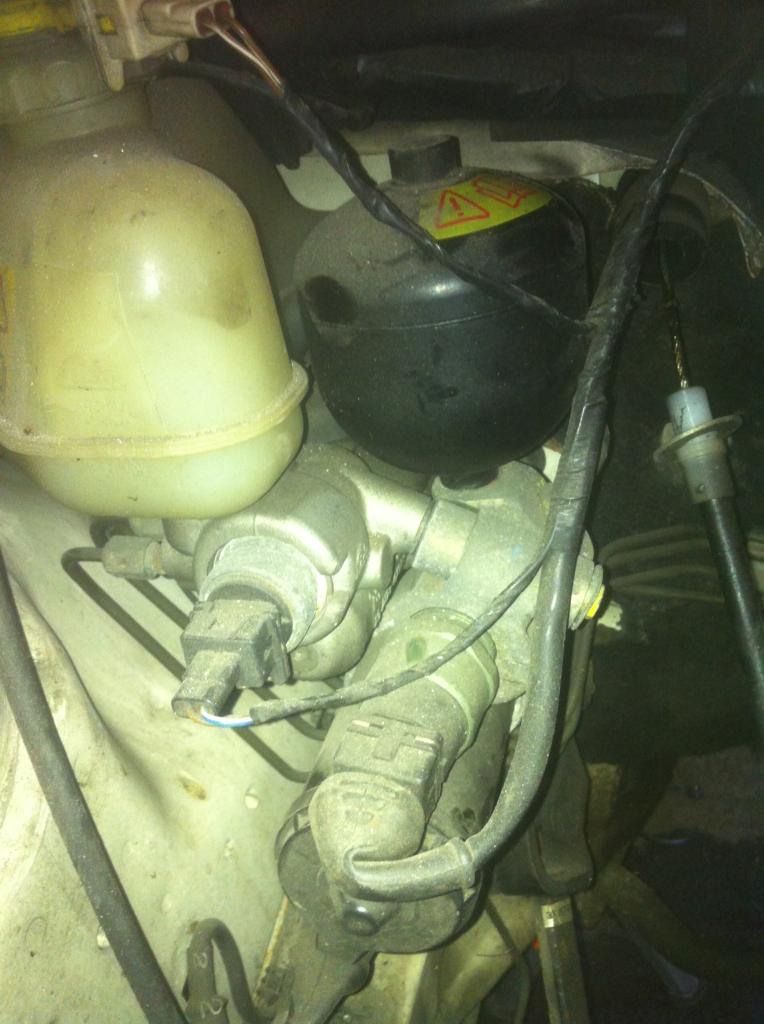
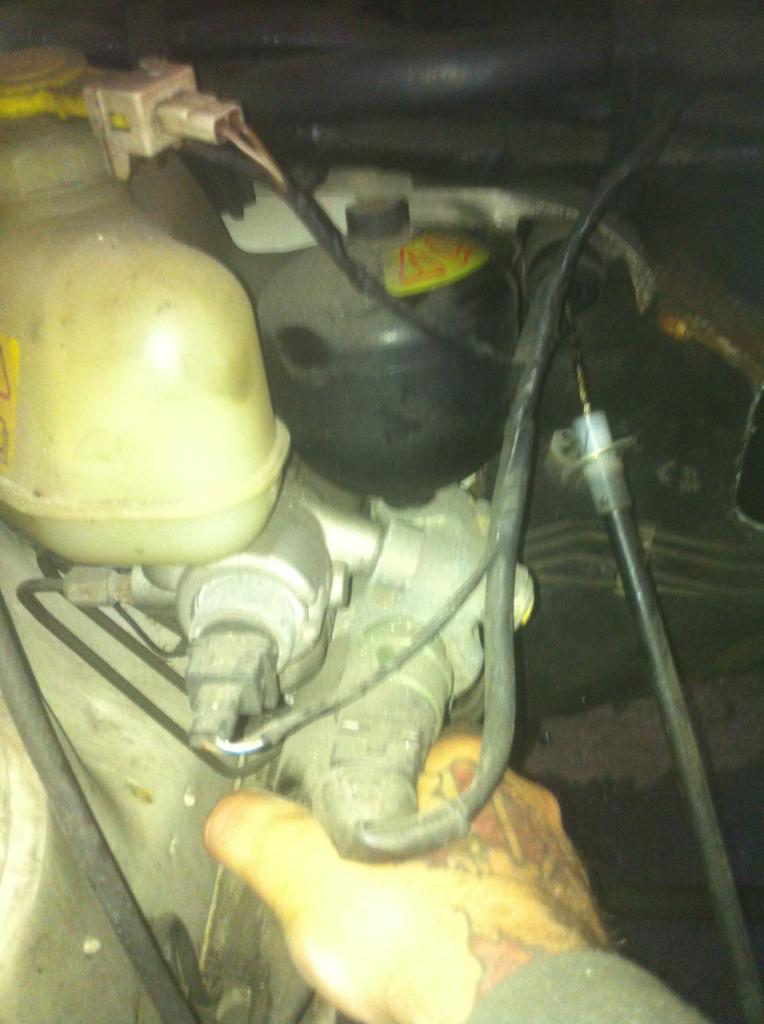
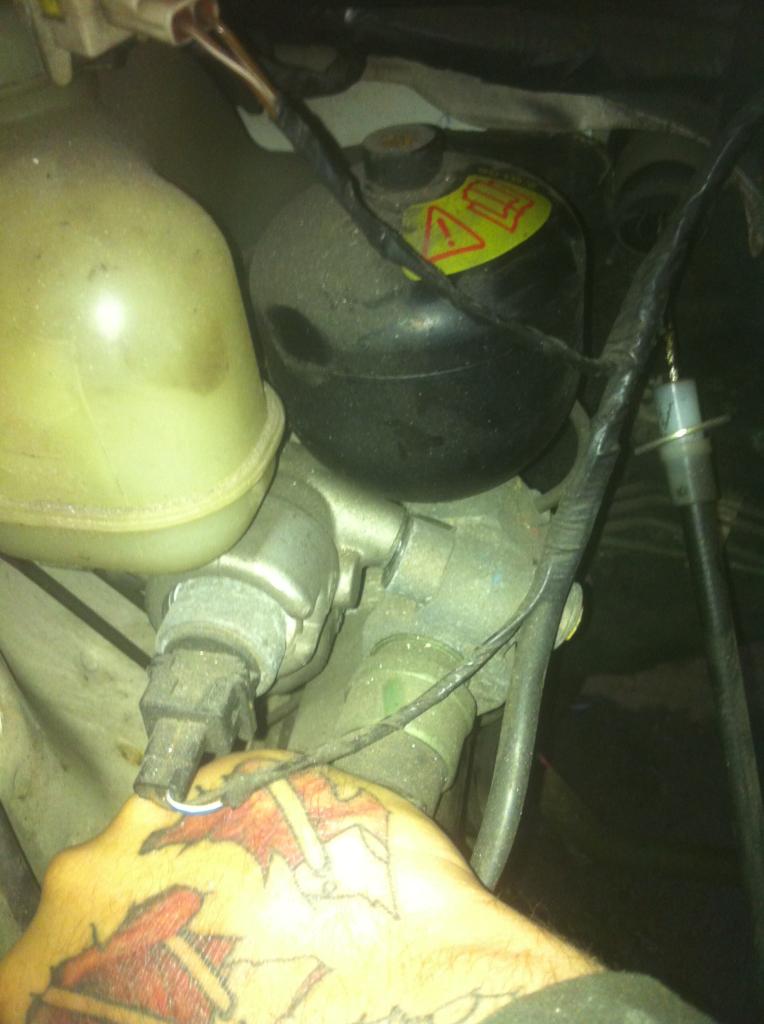
any help would be great, one more bit of welding to do now and then its on with removing a few bits and shutzing the rest of the underside and getting the arches sealed and painted.
thanks for looking
first on the hit list was the sunroof appatchure. The sealed edges were starting to show rust and there was a section that had a big crusty bit with a small hole gone through.
I first cleaned up the areas of concern with the wire wheel on angle grinder and I was surprised to find that the crusty area didn't get that much worse, so I welded a small plate on the inside as I didn't want it to stop the sunroof working, then the area and hole and seams zinc primed and seam sealed and zinc primed over


Next was this little hole I found hiding away behind the front wing. It was a nightmare to get to and ended up having to cut a section out of the wing to get to it. I did it below the line of were the side skirt goes so it will be hidden


I for got to get a pic during welding and once wing section re welded back on. While I was there I sorted the front arch on that side. I had previously hammered back the arch lip to clear my tyres but I wasn't great and had started rusting on the edge, so I de rusted the arch with the wire wheel and zinc primed, then made a much better job of folding the arch lip in and then seam sealed it making sure no water will ever get in the lip, I will do this to the other side as well.

one thing I must mention which I found today. My brake master cylinder has a shit load of movement on part of it. The bit that has the black cylinder attached to it, it looks like its attached to the other bit via a long bolt through a rubber bush so I think its supposed to have movement but im not sure how much, theres about a inch or so play side to side.
first pic is central and as it sits then other two pics are me holding it one side to the other


any help would be great, one more bit of welding to do now and then its on with removing a few bits and shutzing the rest of the underside and getting the arches sealed and painted.
thanks for looking
05-06-2014, 10:27 PM
#38
PassionFord Regular
Thread Starter
iTrader: (1)
Join Date: May 2009
Location: eastbourne
Posts: 477
Likes: 0
Received 0 Likes
on
0 Posts
yea i thought it must do due to the way its attached it just seemed to be quite allot.
lol I tought myself to weld with a cheapy ol gasless welder from boot fair, now 7 years down the line I can pretty much do most metal work without too much agro.
I had to teach myself to weld as I was trained as a mechanic in a dealership and they don't weld and when I left there and went to a normal garage I discovered I needed to teach myself a few things lol
06-06-2014, 11:53 AM
#39
Glennvestite
iTrader: (1)
Join Date: Jul 2006
Location: Darlington county durham
Posts: 62,755
Received 1,042 Likes
on
996 Posts
Im going on a welding course in a few weeks with work. I would like to weld car panels but I would be scared in case I made a mess of it. I wanna learn to spray too. I did the wifes focus rear arches. I just sanded the rust out then treated the rust then sprayed the arches with rattle cans. Its not a bad job, it still needs a bit of work.
06-06-2014, 12:11 PM
#40
PassionFord Regular
Thread Starter
iTrader: (1)
Join Date: May 2009
Location: eastbourne
Posts: 477
Likes: 0
Received 0 Likes
on
0 Posts
With netal panels you just gotta do it very slow with the power tweeked abit and spot weld rather than trying to seam. Ive made a balls up on my rear arches as i spot welded about and inch at a time between cooling and i can see the panel has destorted abit so i might pay a pro to get the rear quarters flat again.
Painting is easyier with a gun as it lays paint more evenly and less likley to run. The jey with getting paint to look good is prep, prep, prep, a bit more prep, prime, smooth primer, paint, let go hard over a few days, flat back with 2000 wet, clean thourghly then, laquer, 5 days or so later machine polish with soft head and smooth compound them hand polish. Missions but worth it.
Painting is easyier with a gun as it lays paint more evenly and less likley to run. The jey with getting paint to look good is prep, prep, prep, a bit more prep, prime, smooth primer, paint, let go hard over a few days, flat back with 2000 wet, clean thourghly then, laquer, 5 days or so later machine polish with soft head and smooth compound them hand polish. Missions but worth it.