
Ka RS Restoration - Updated 08/09/15

 20-07-2013, 05:57 PM
#42
Part of the Furniture

Total girls car 
If you need a hand dude give me a shout. I'm off from the 29th. Hoping the rs might be back and I can carry on removing parts before paint but otherwise in in!

If you need a hand dude give me a shout. I'm off from the 29th. Hoping the rs might be back and I can carry on removing parts before paint but otherwise in in!
21-07-2013, 11:46 AM
#43
PassionFord Regular
Thread Starter

Thanks
22-07-2013, 06:37 PM
#45
Too many posts.. I need a life!!

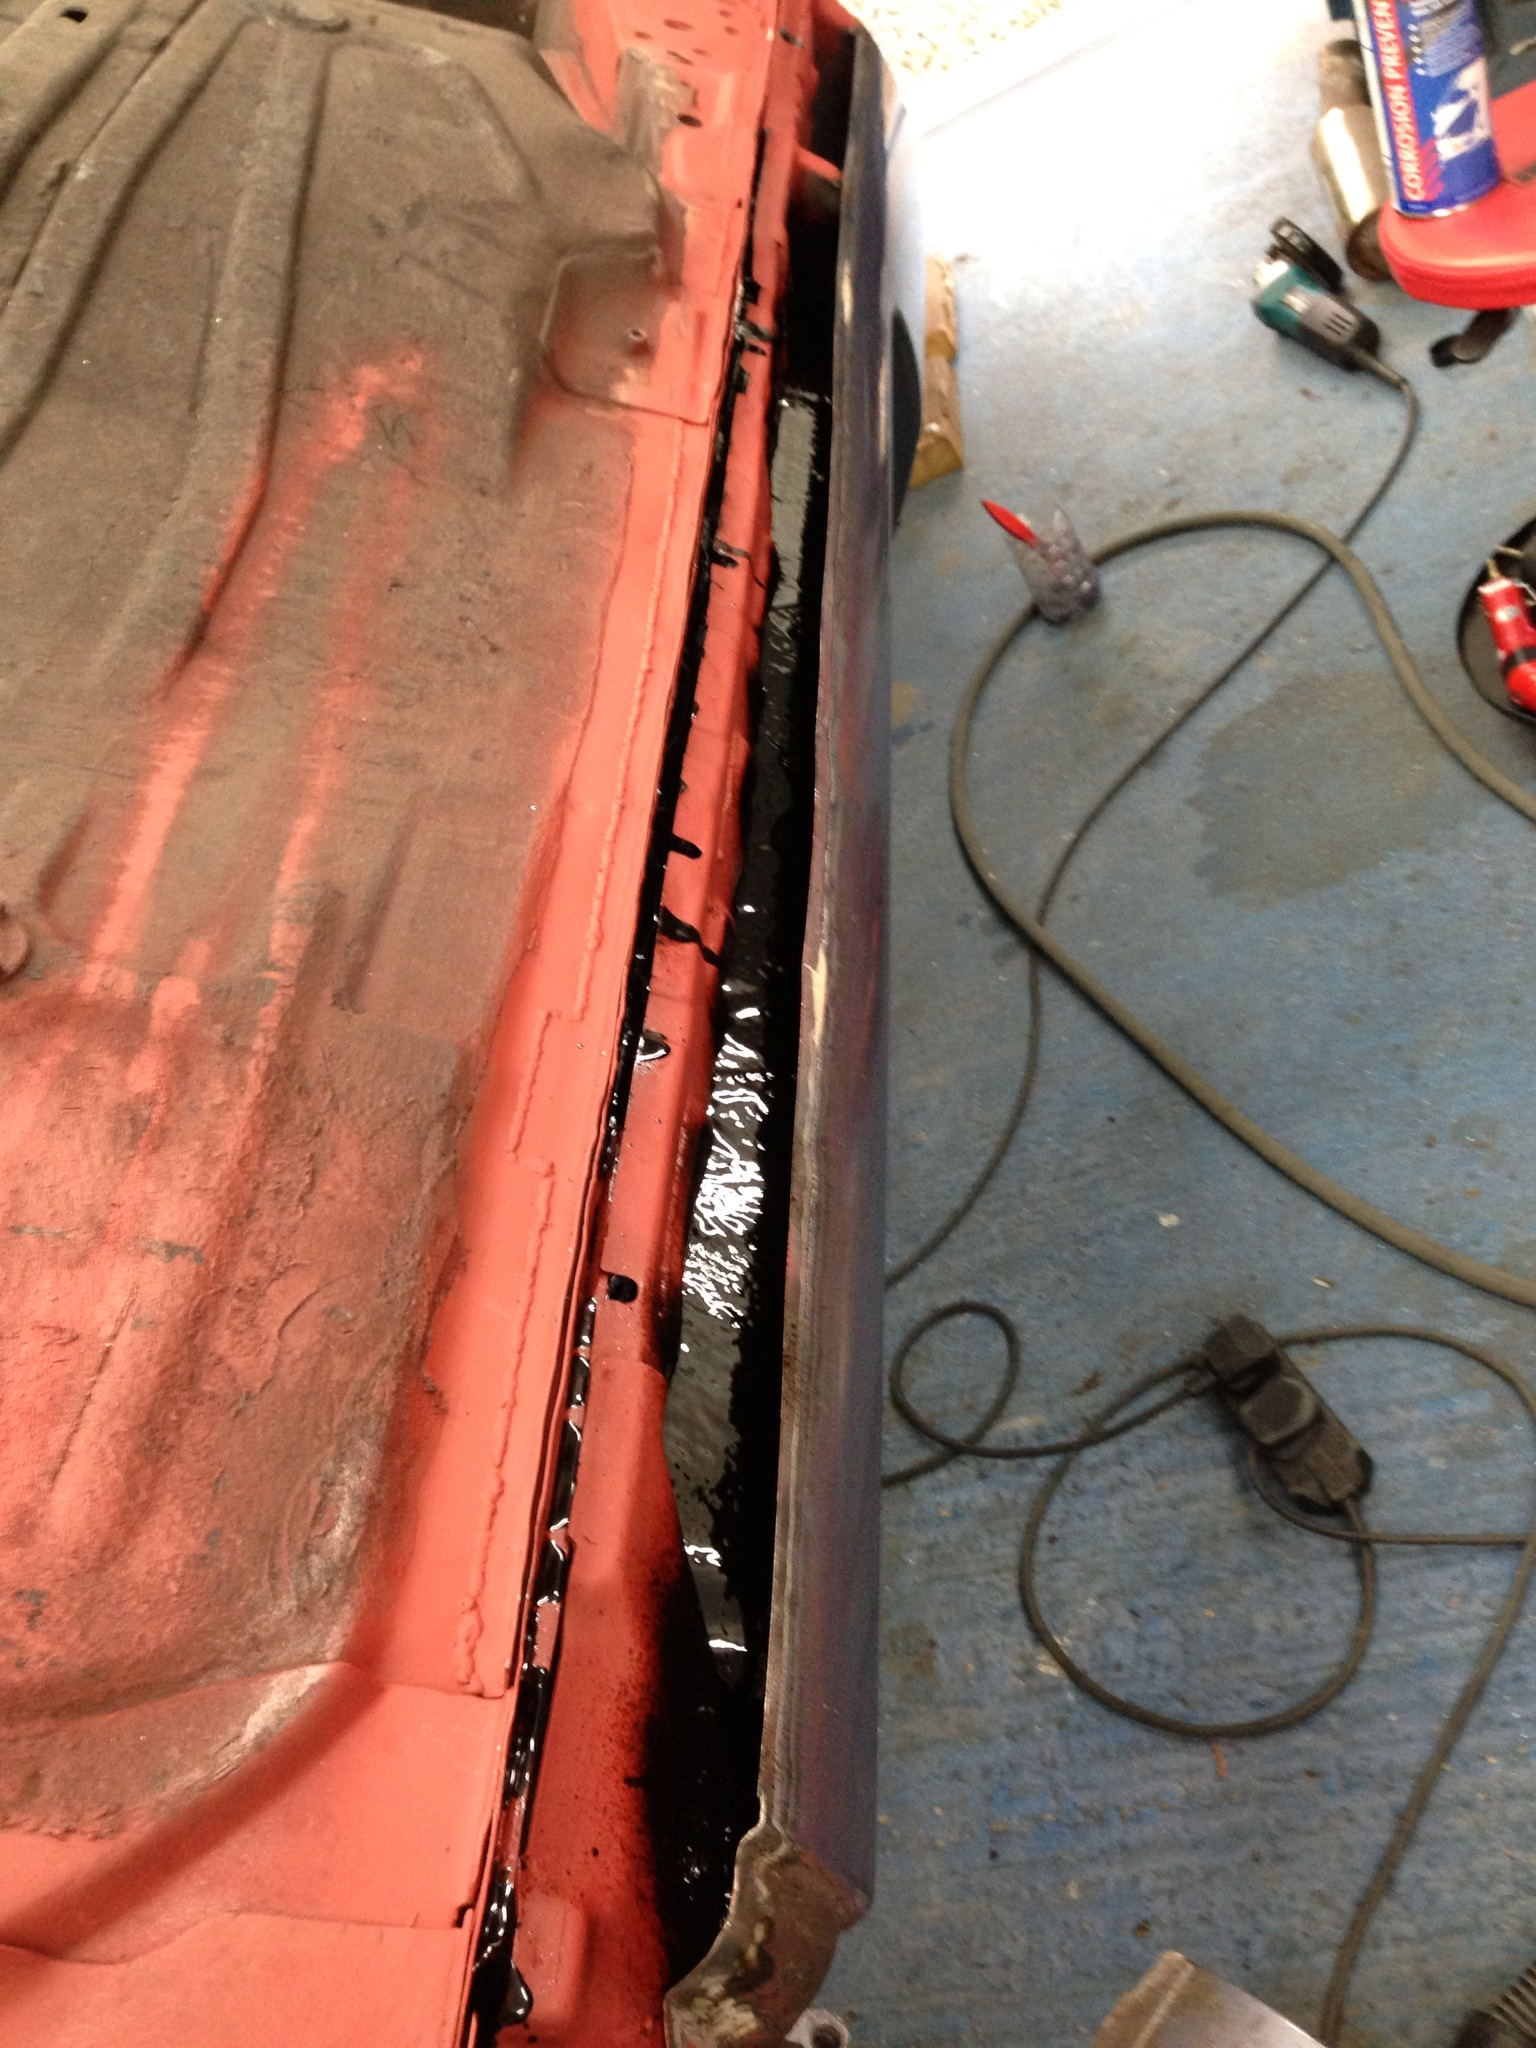
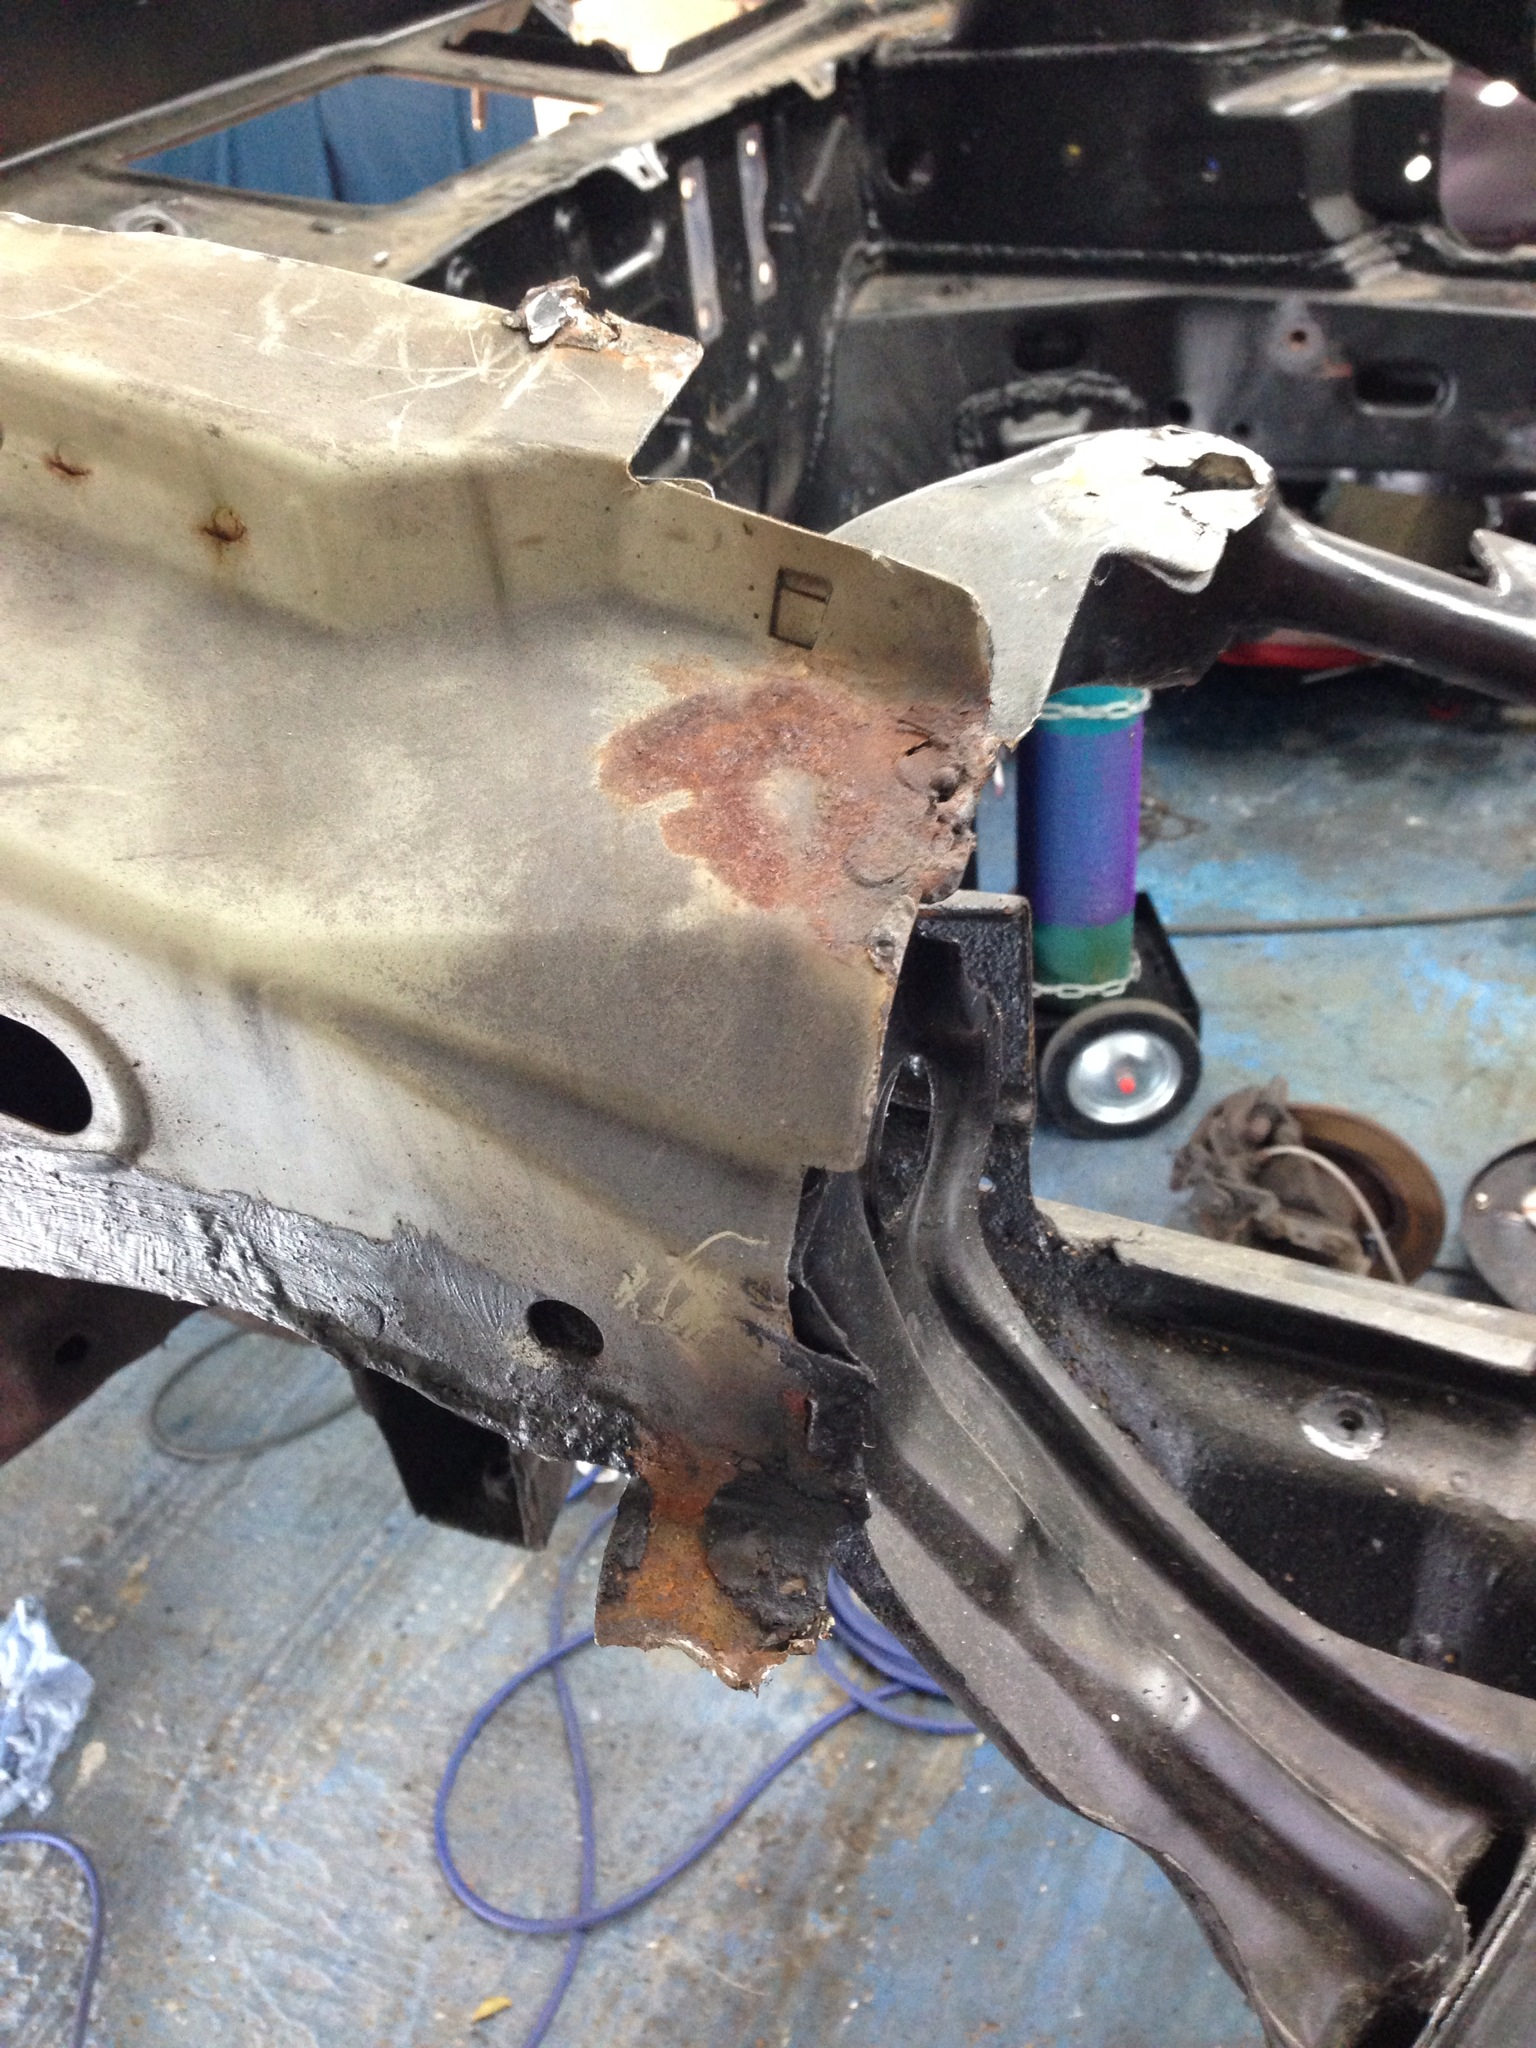
Jammy86 - yes the seam sealer has a habit of hiding the bad bits - my floor looked good from the inside but when I stripped the sealer back the lip had gone through in many places.. Gutted to say the least! I'll take that on board, I am going to be taking all the seam sealer and waxoyl off the underside but will now look at those seams at the front... I know there are patches under the lip of the bulkhead in the engine bay so I'm expecting some repair work there. Looking at your pics again you've got your work cut out! I know how much time it takes to get it all cut out and repaired. Good luck!
I've got my wallet out
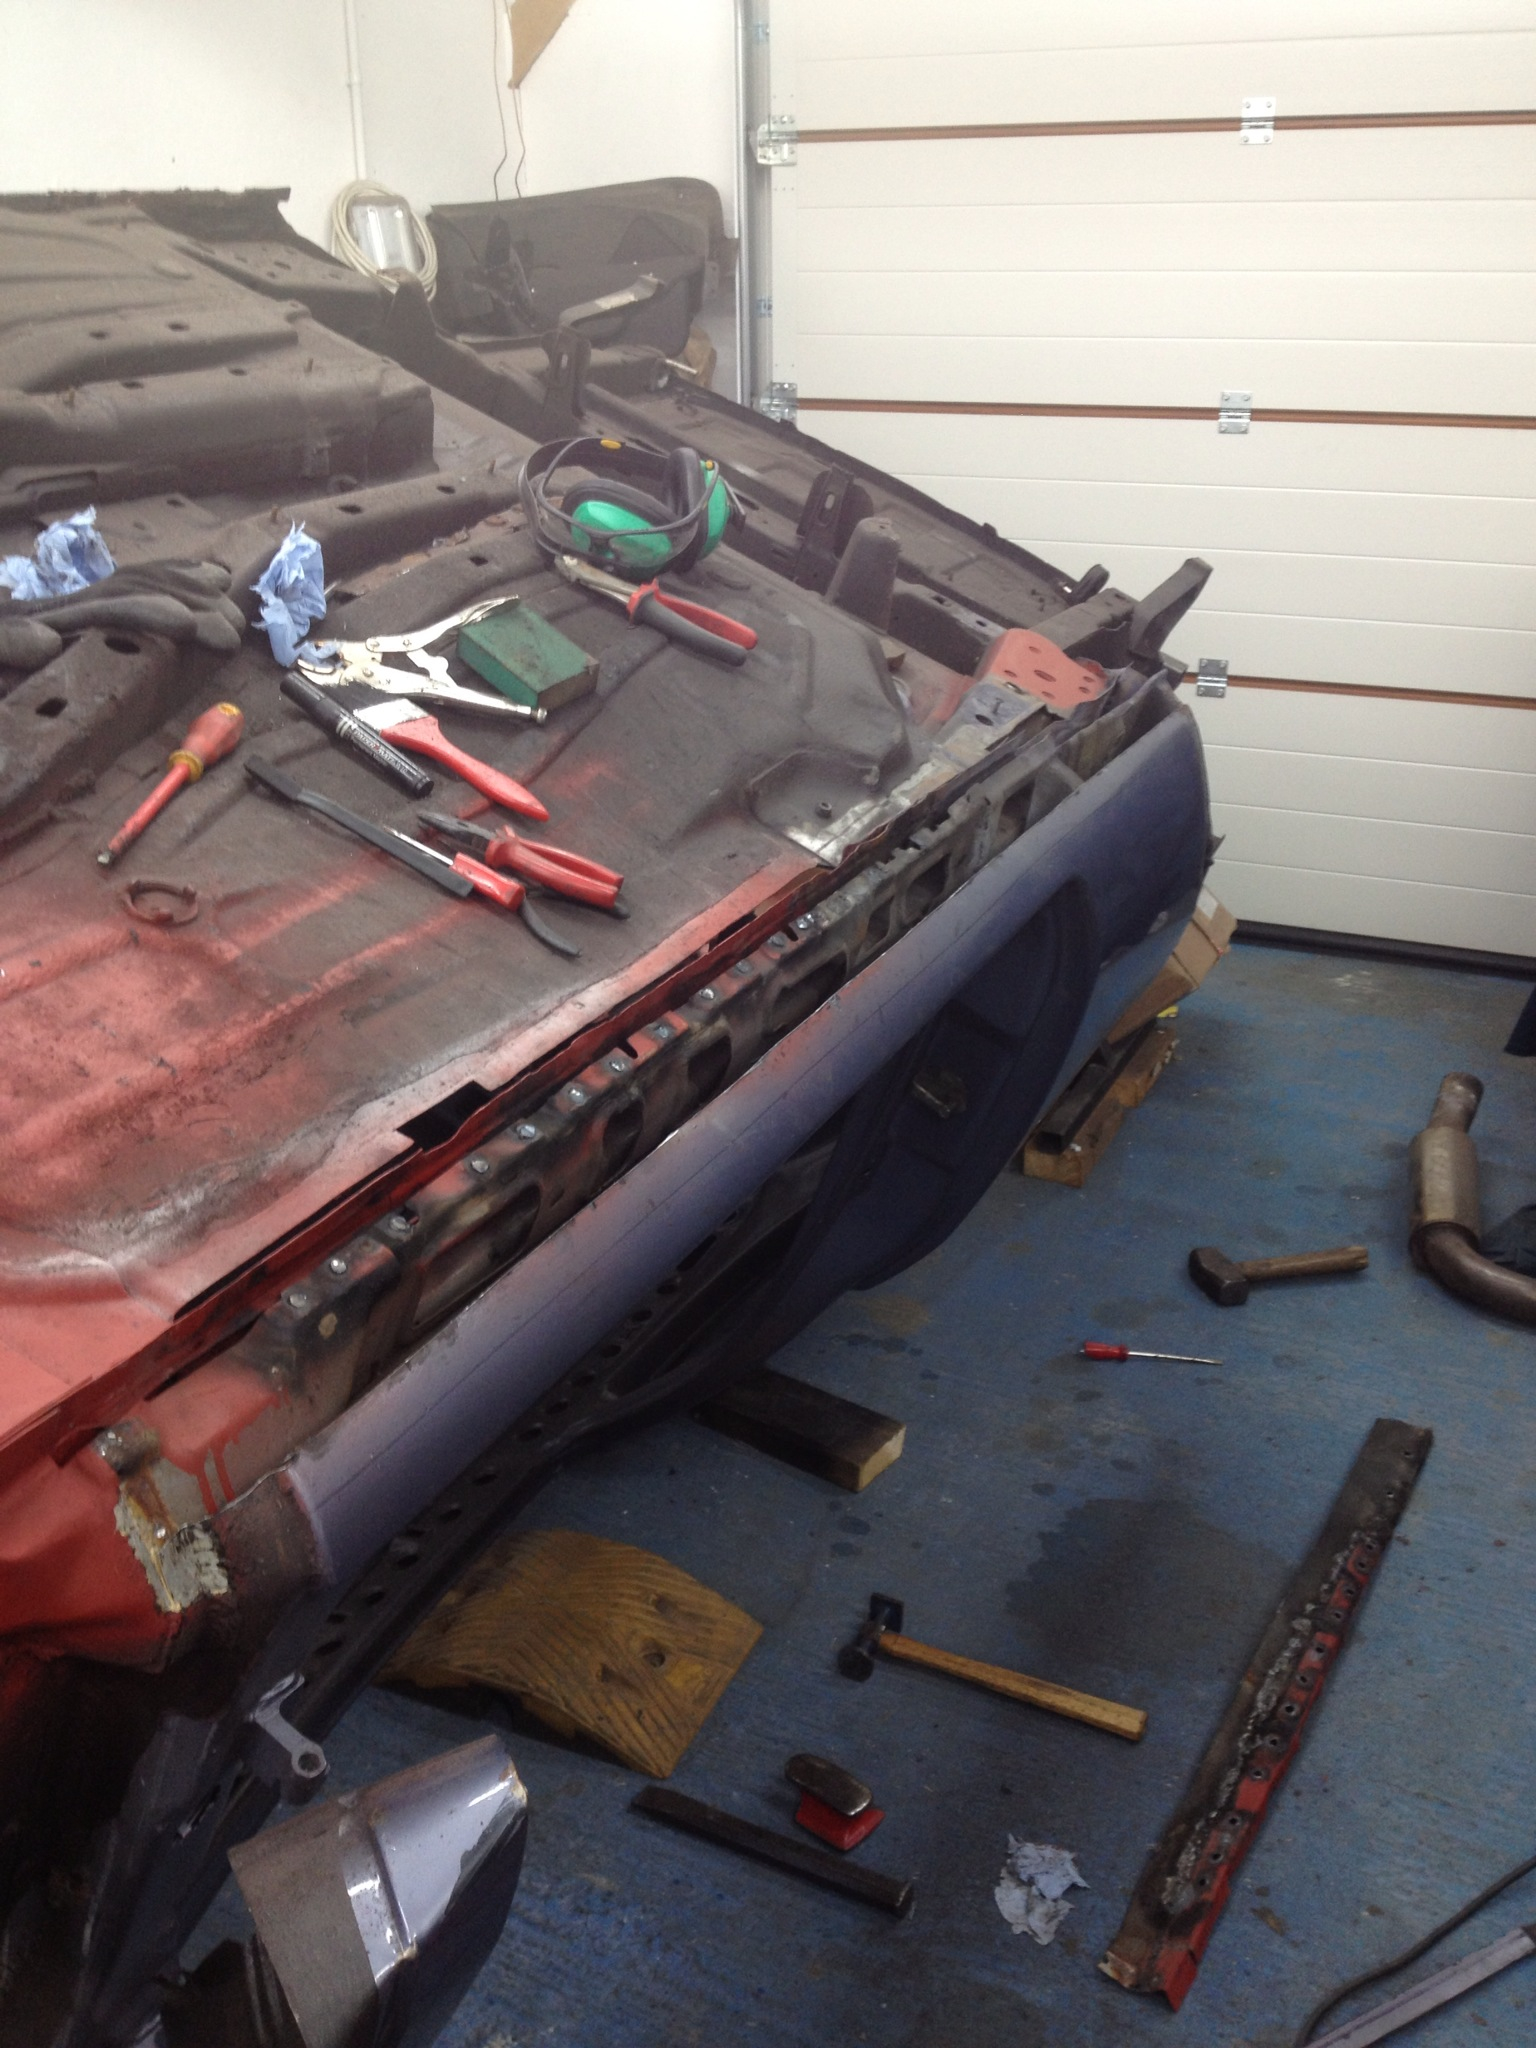
 Work started today. Two full new sides, rear pannel, front pannel and repair to rear chassis leg!

 24-07-2013, 08:35 PM
#47
PassionFord Regular
Thread Starter
Right some more progress.. Or not..
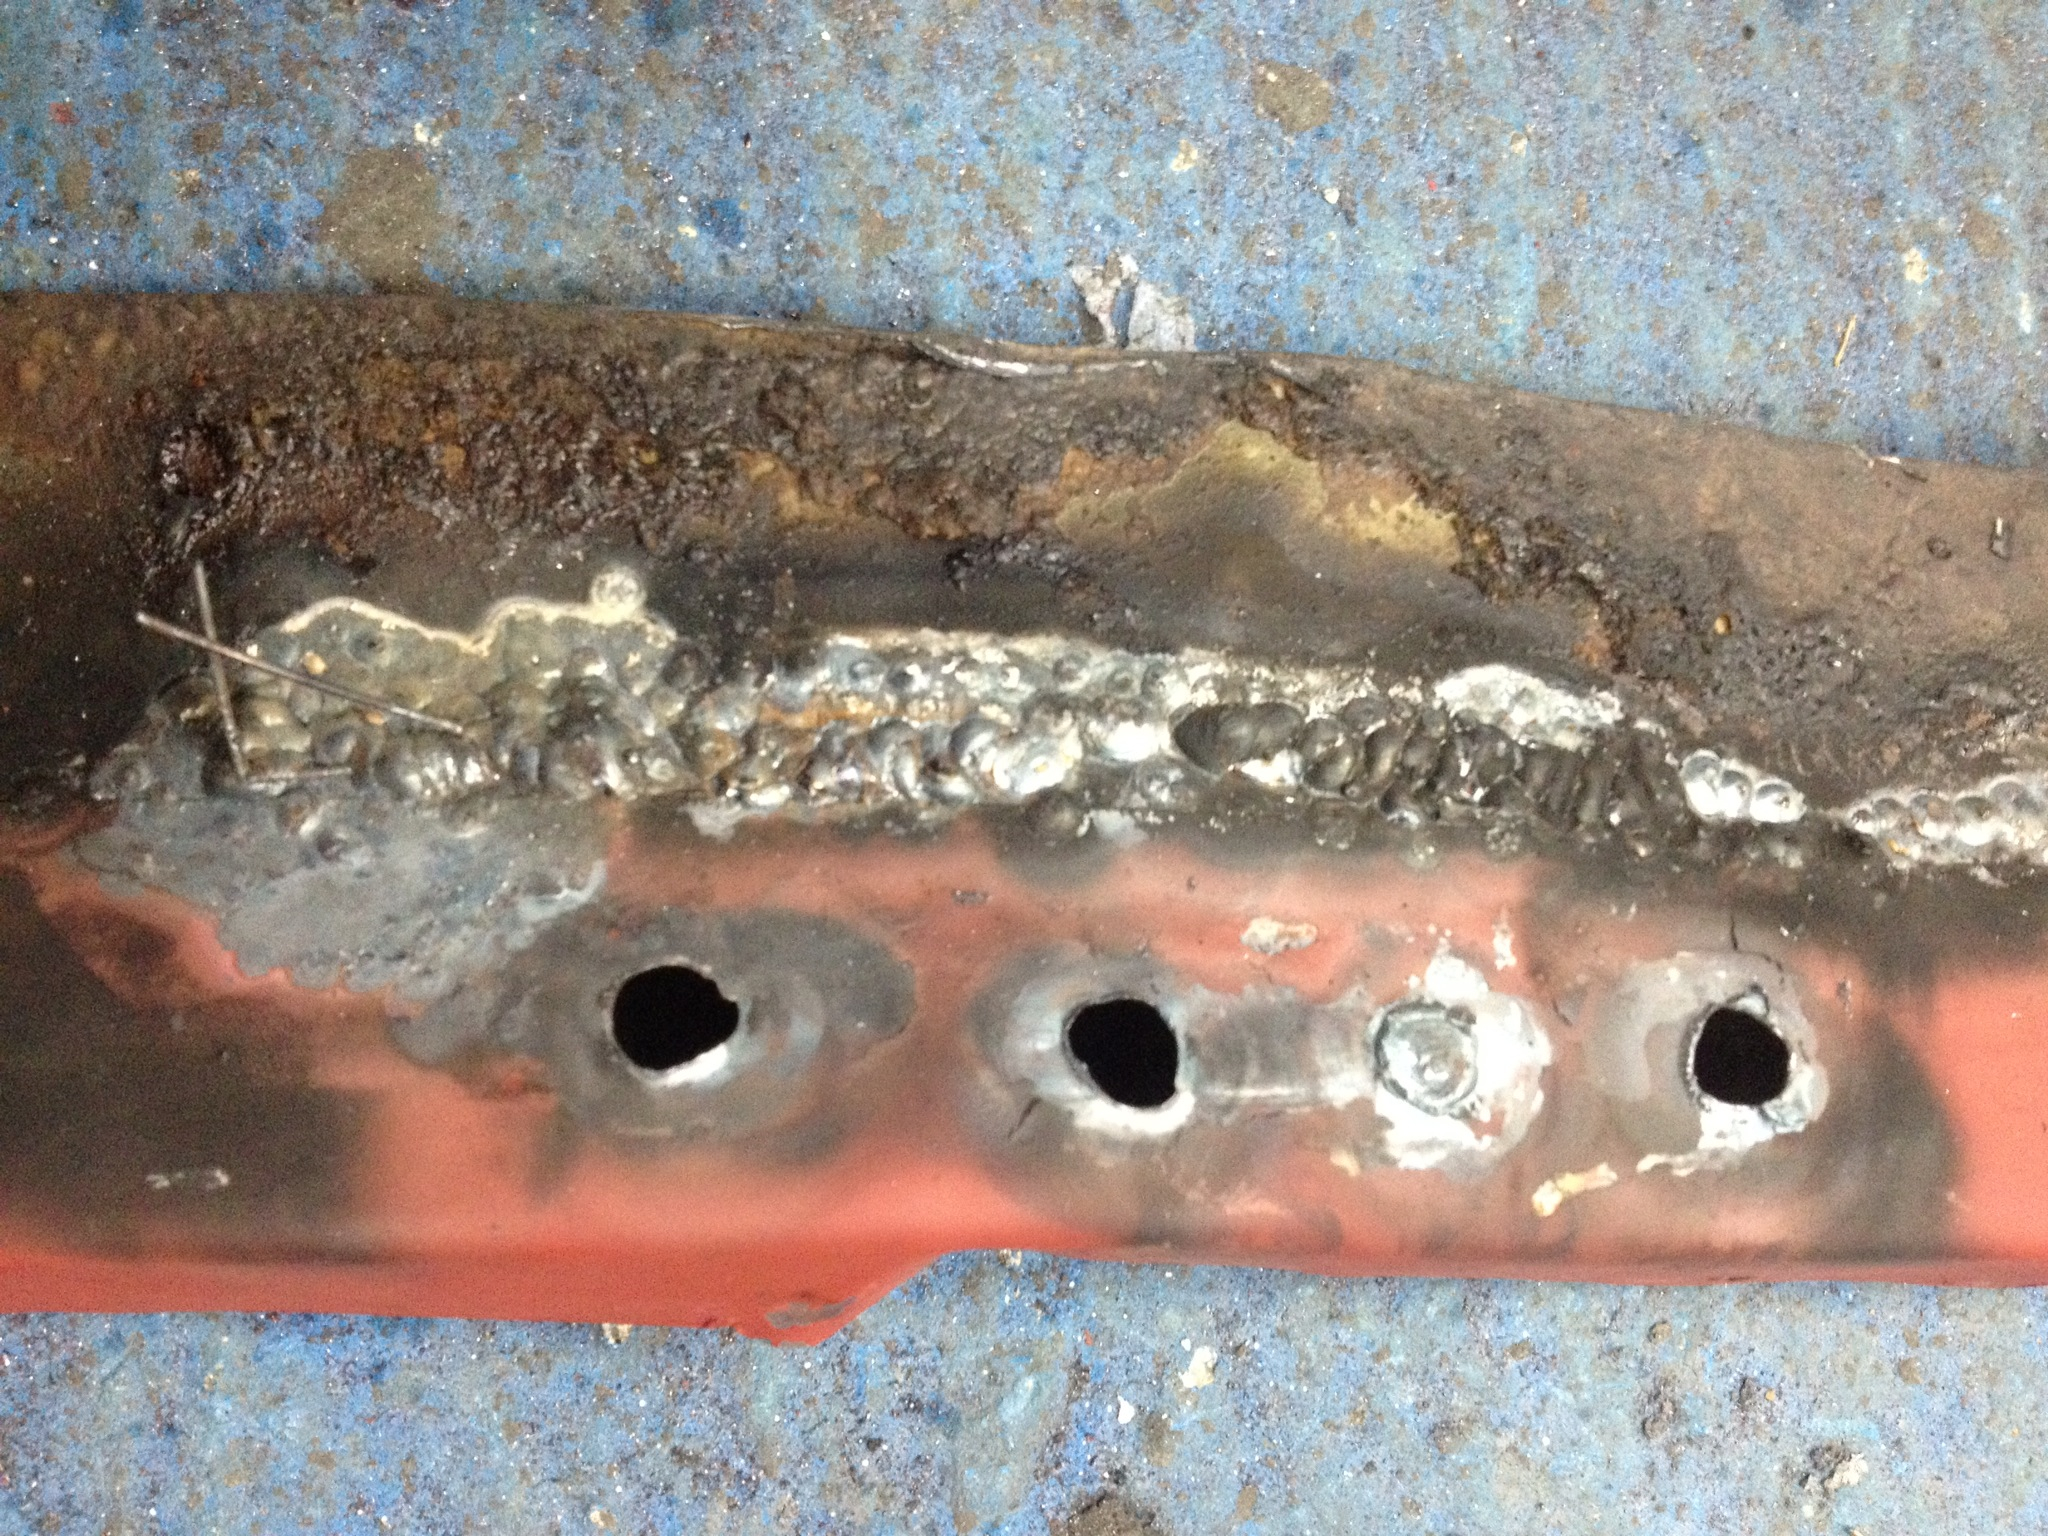
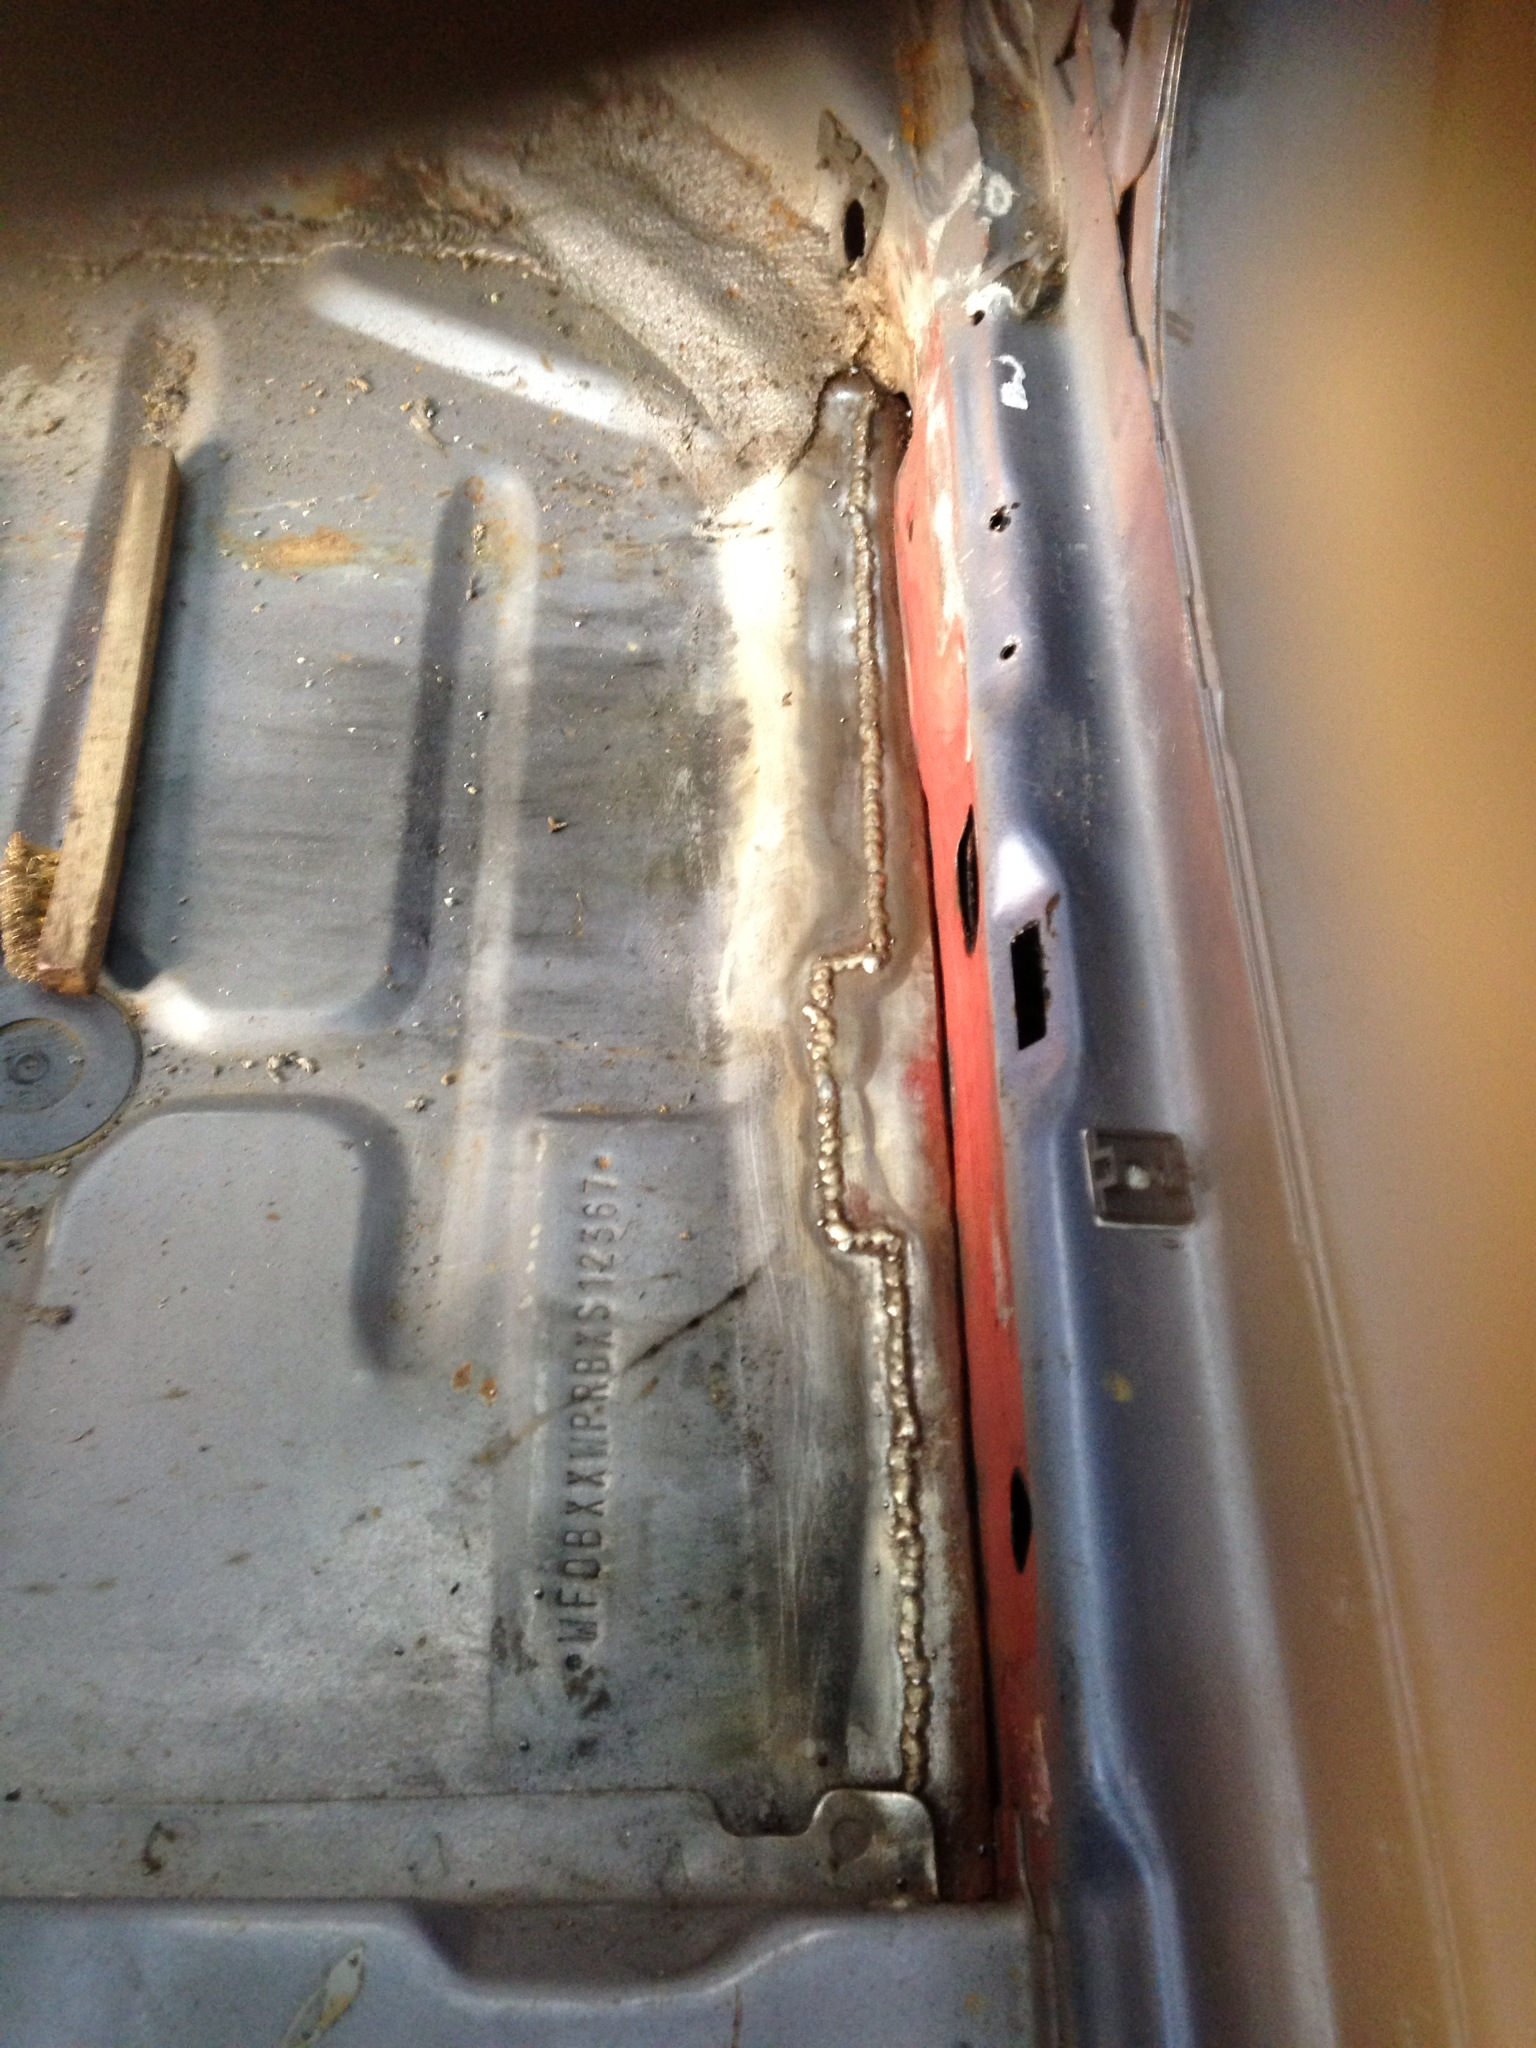
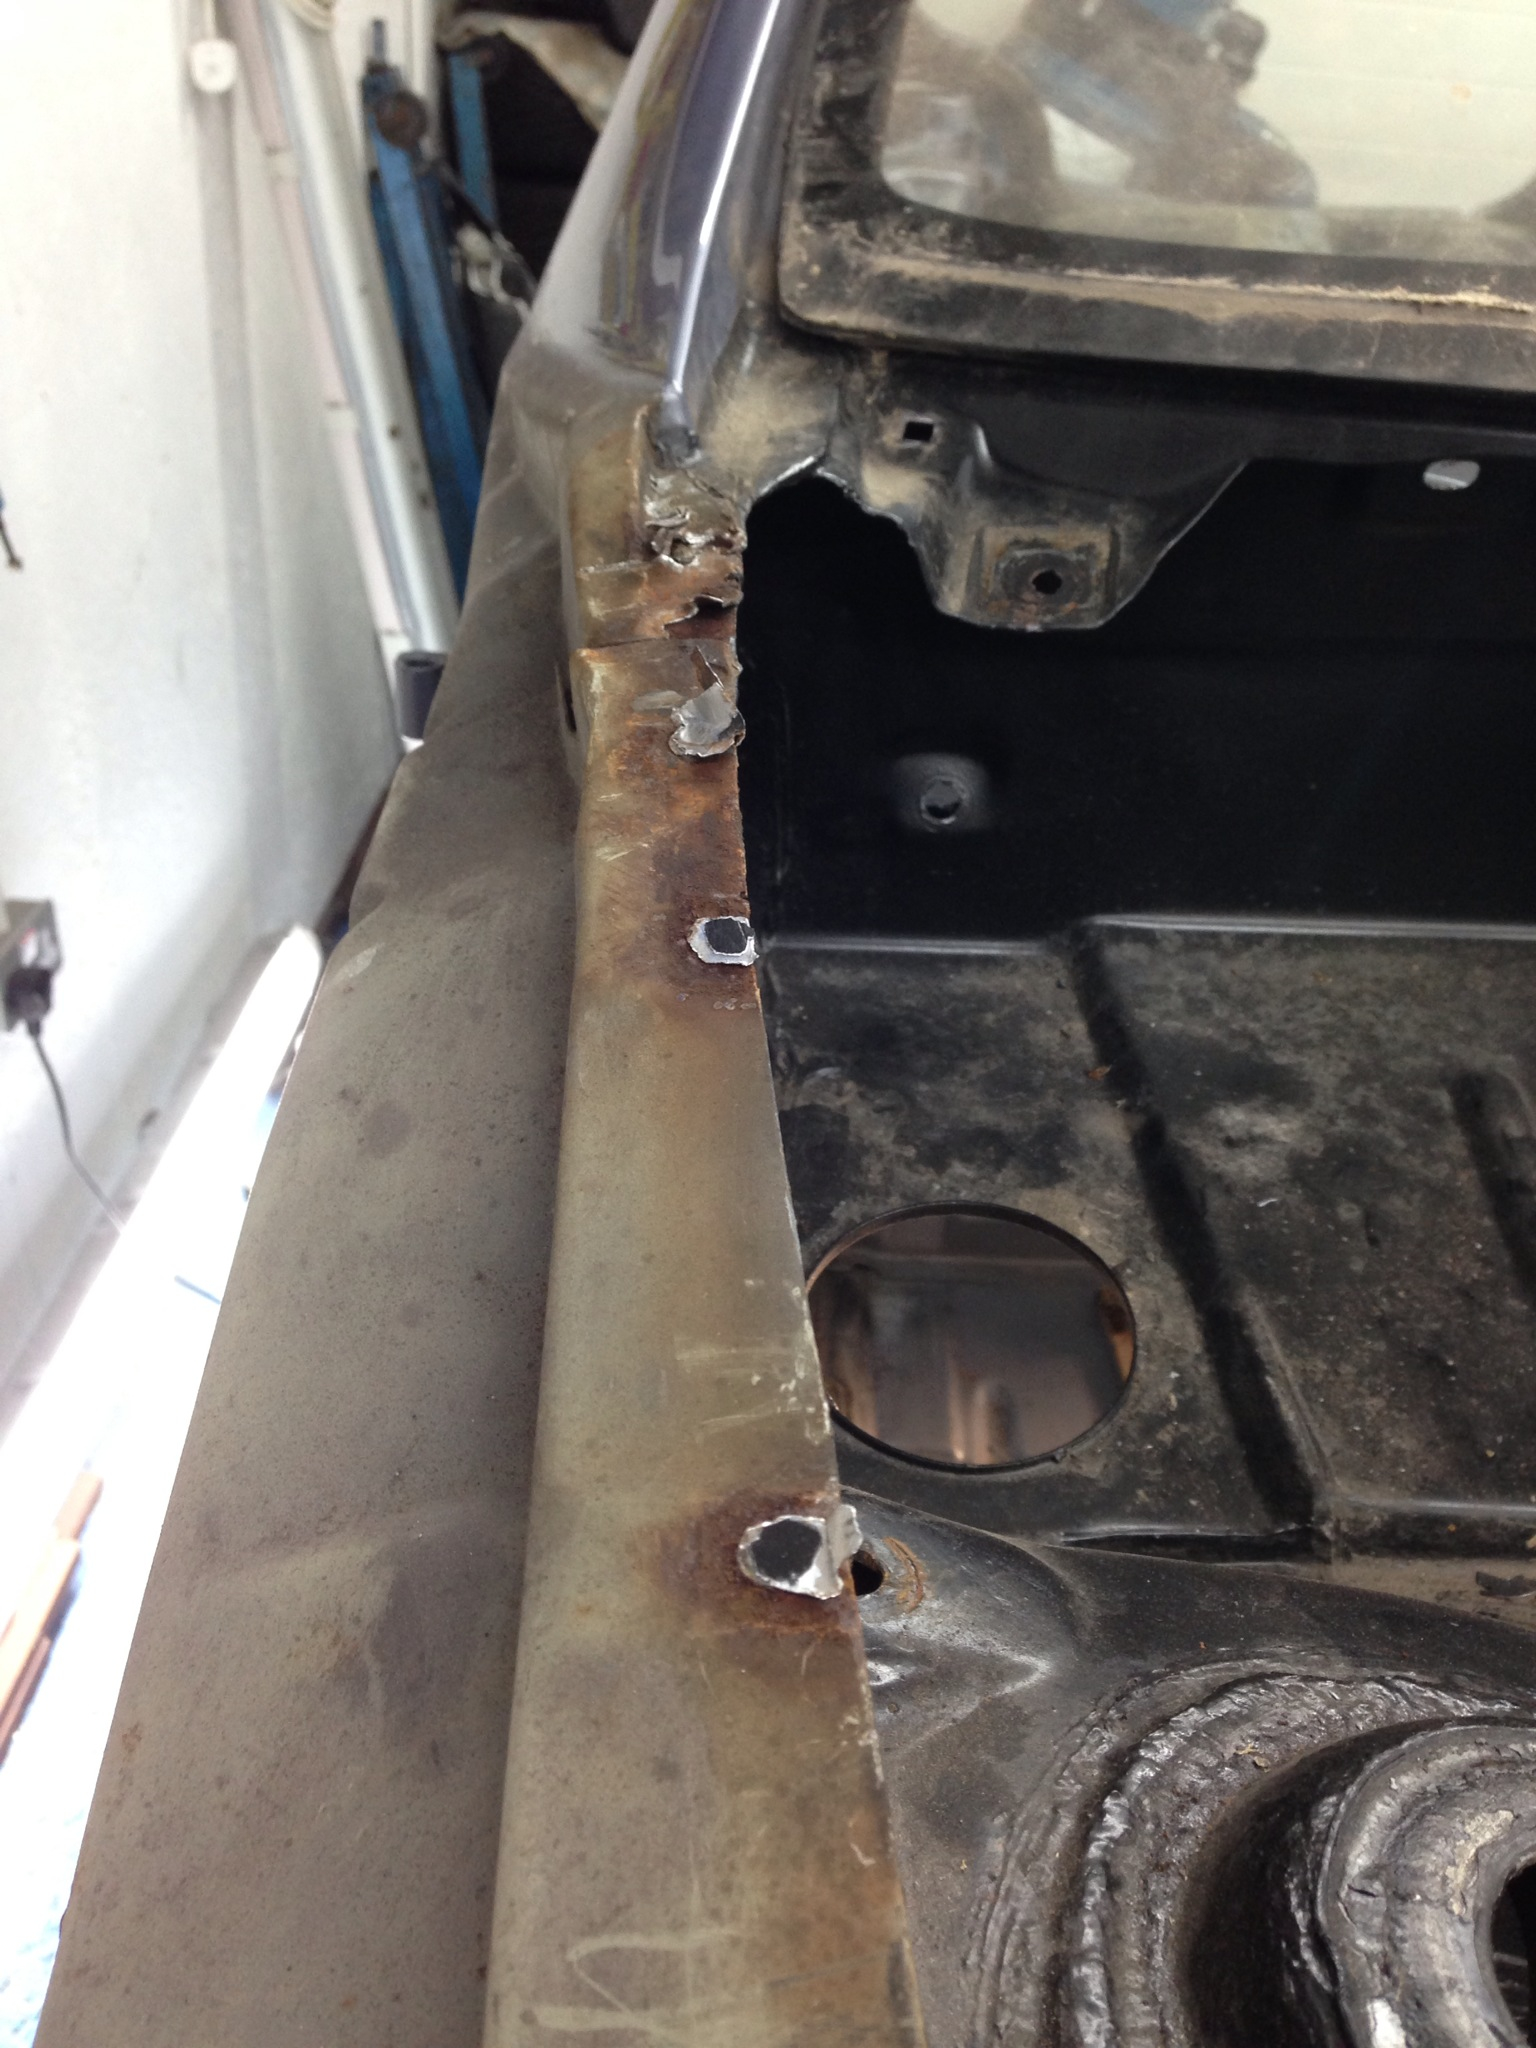
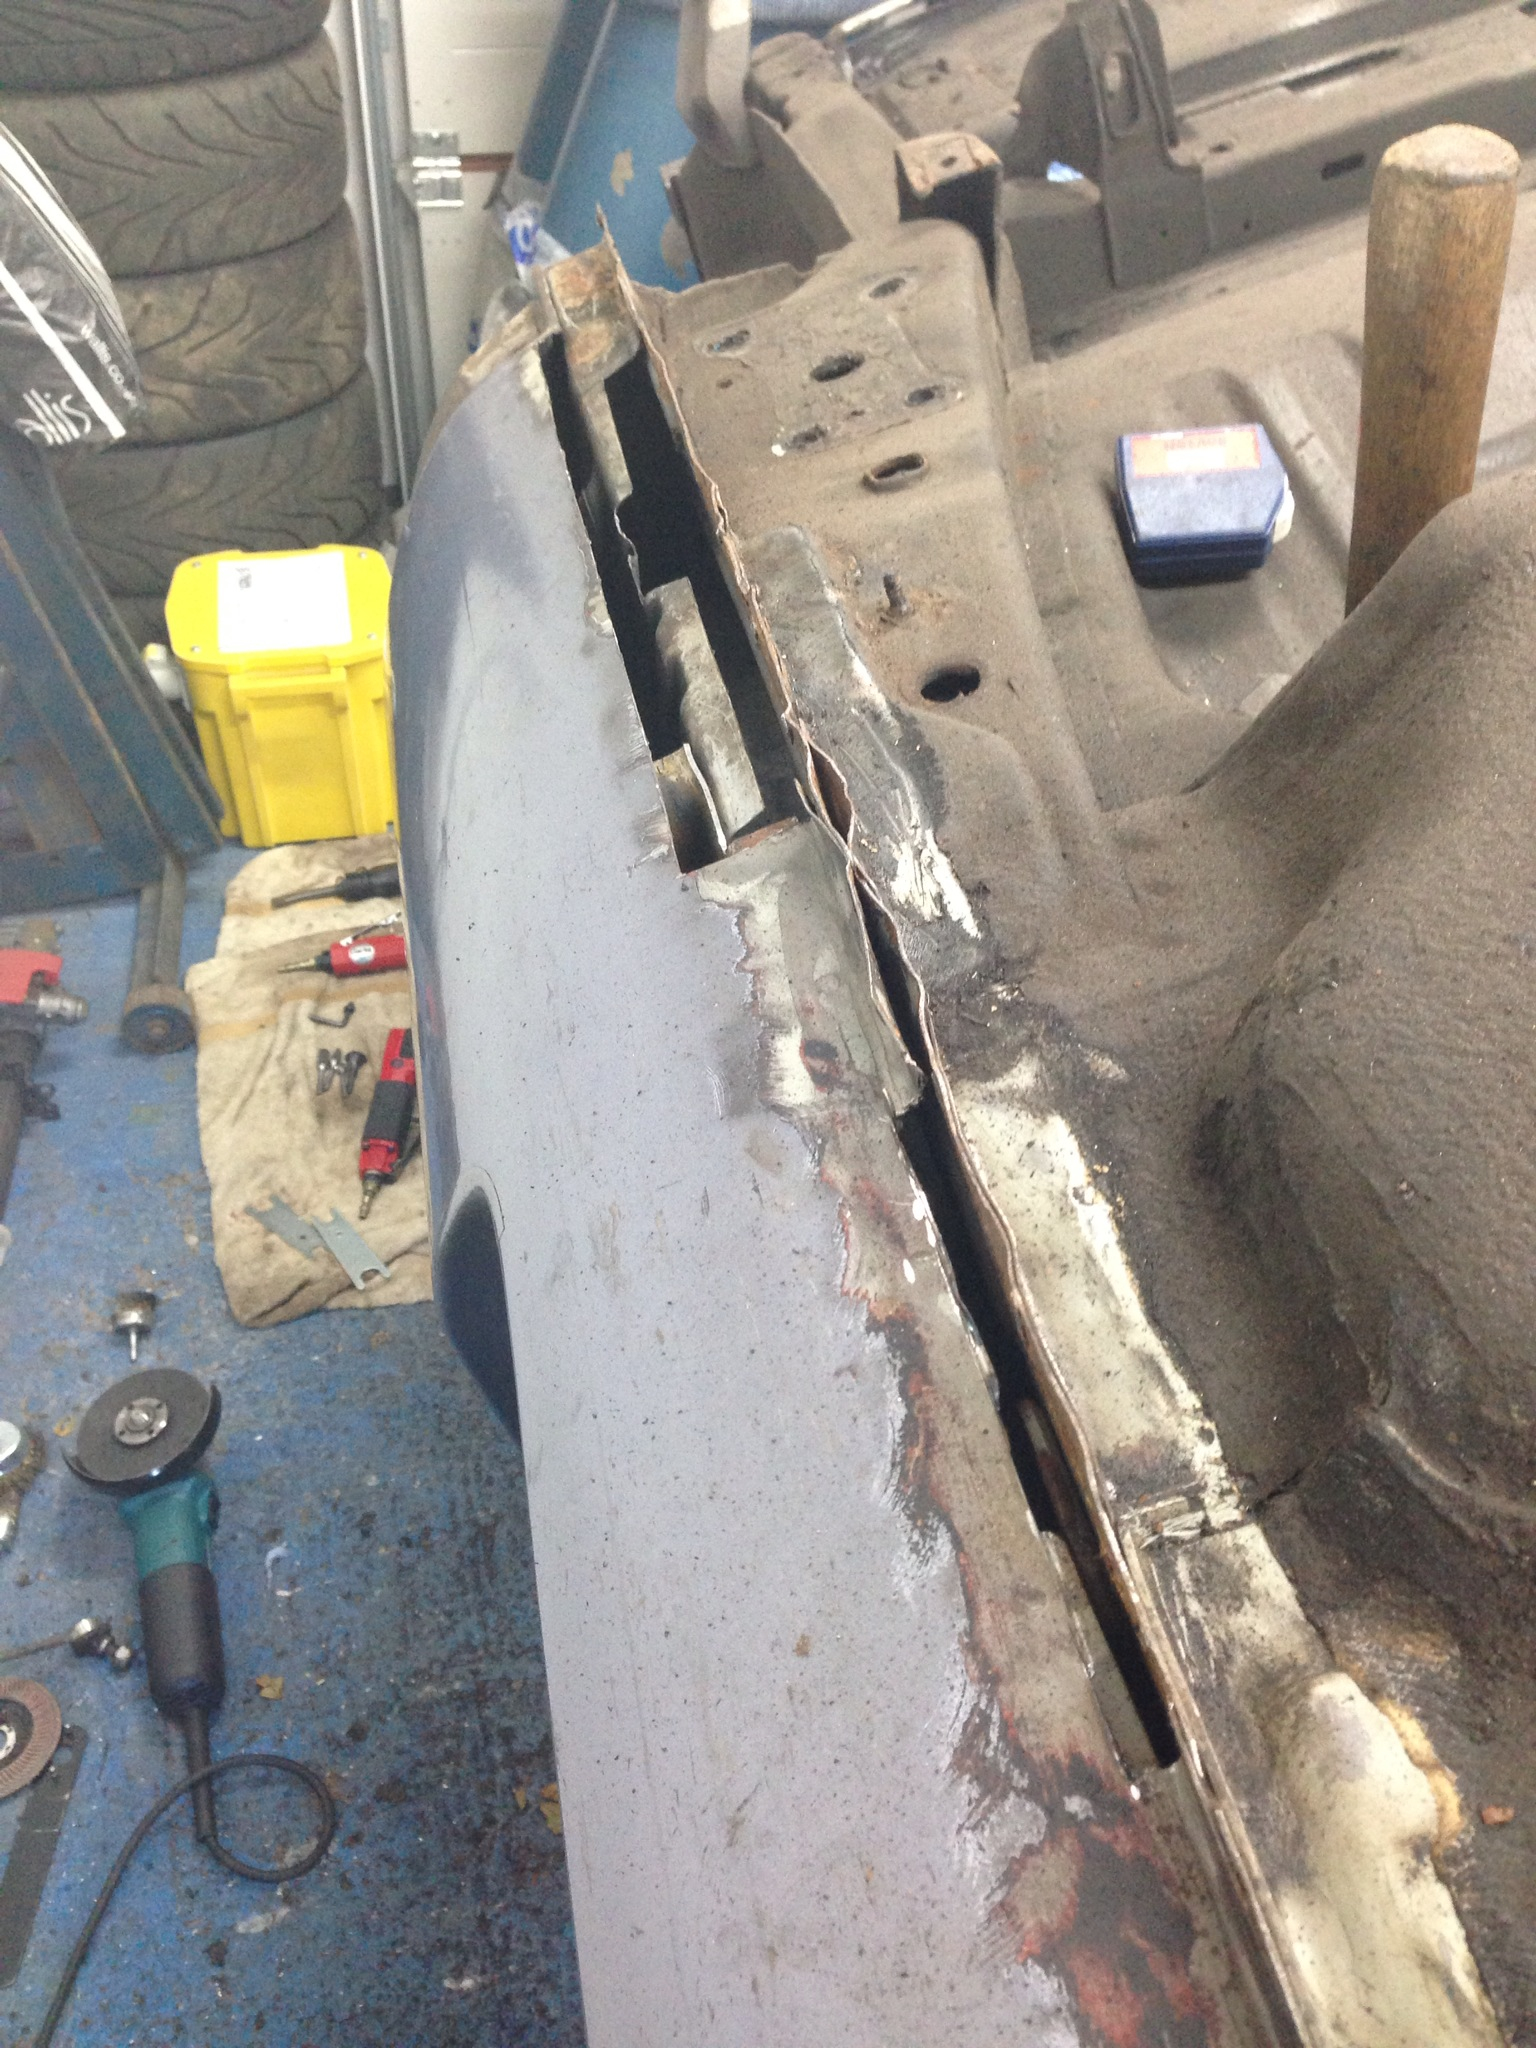
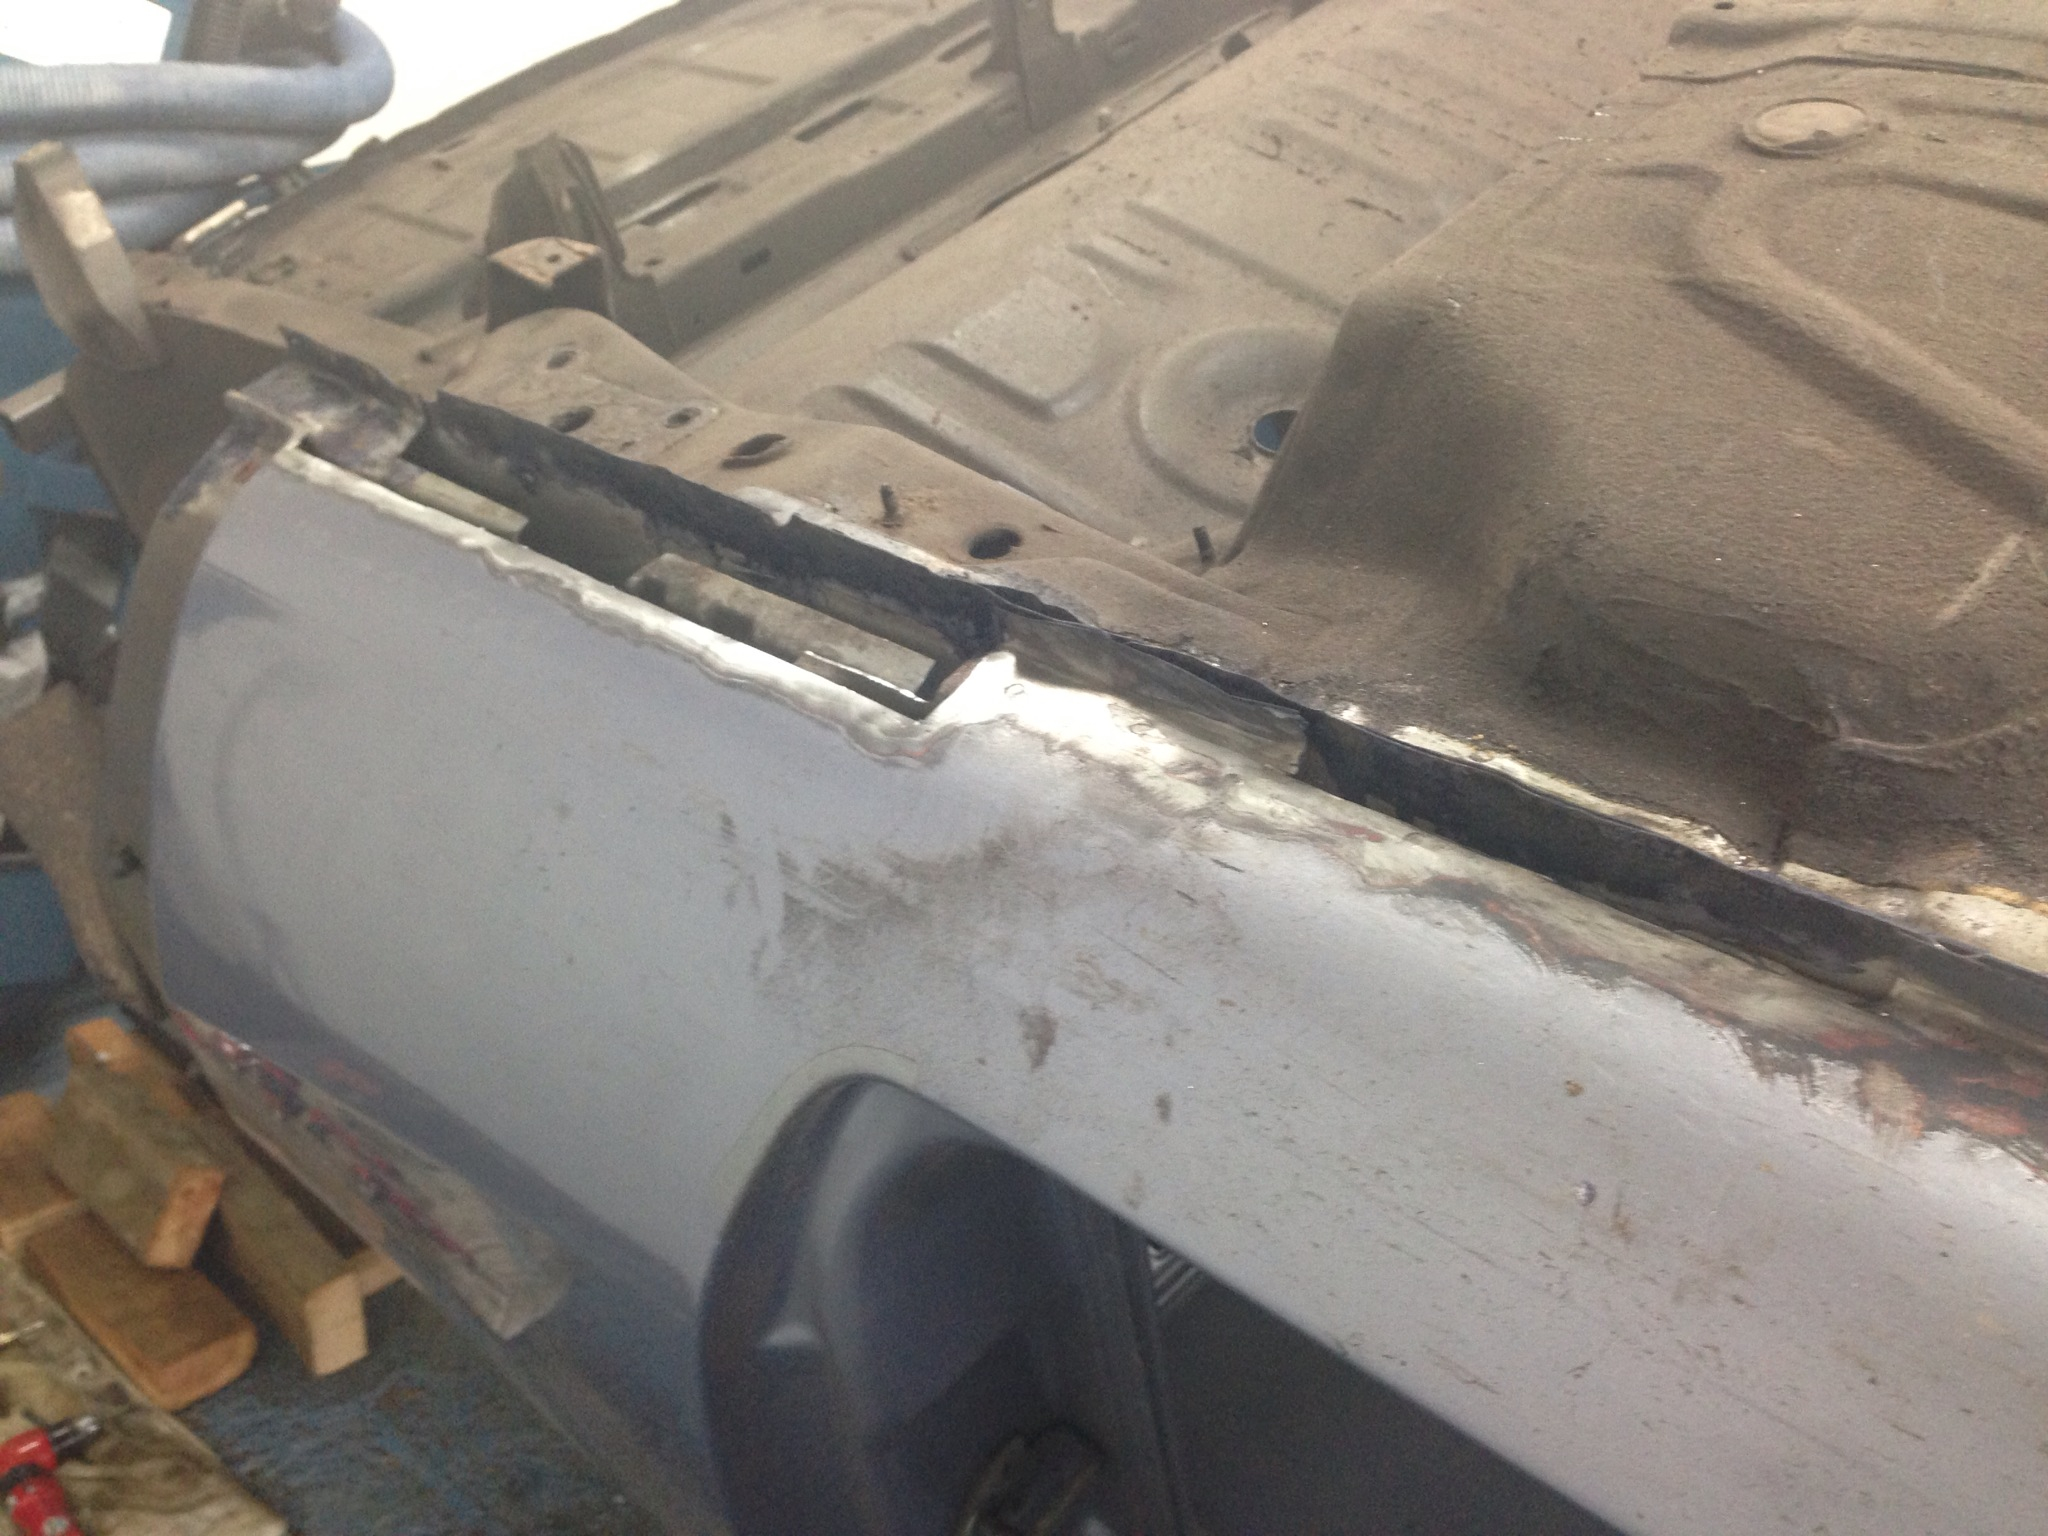
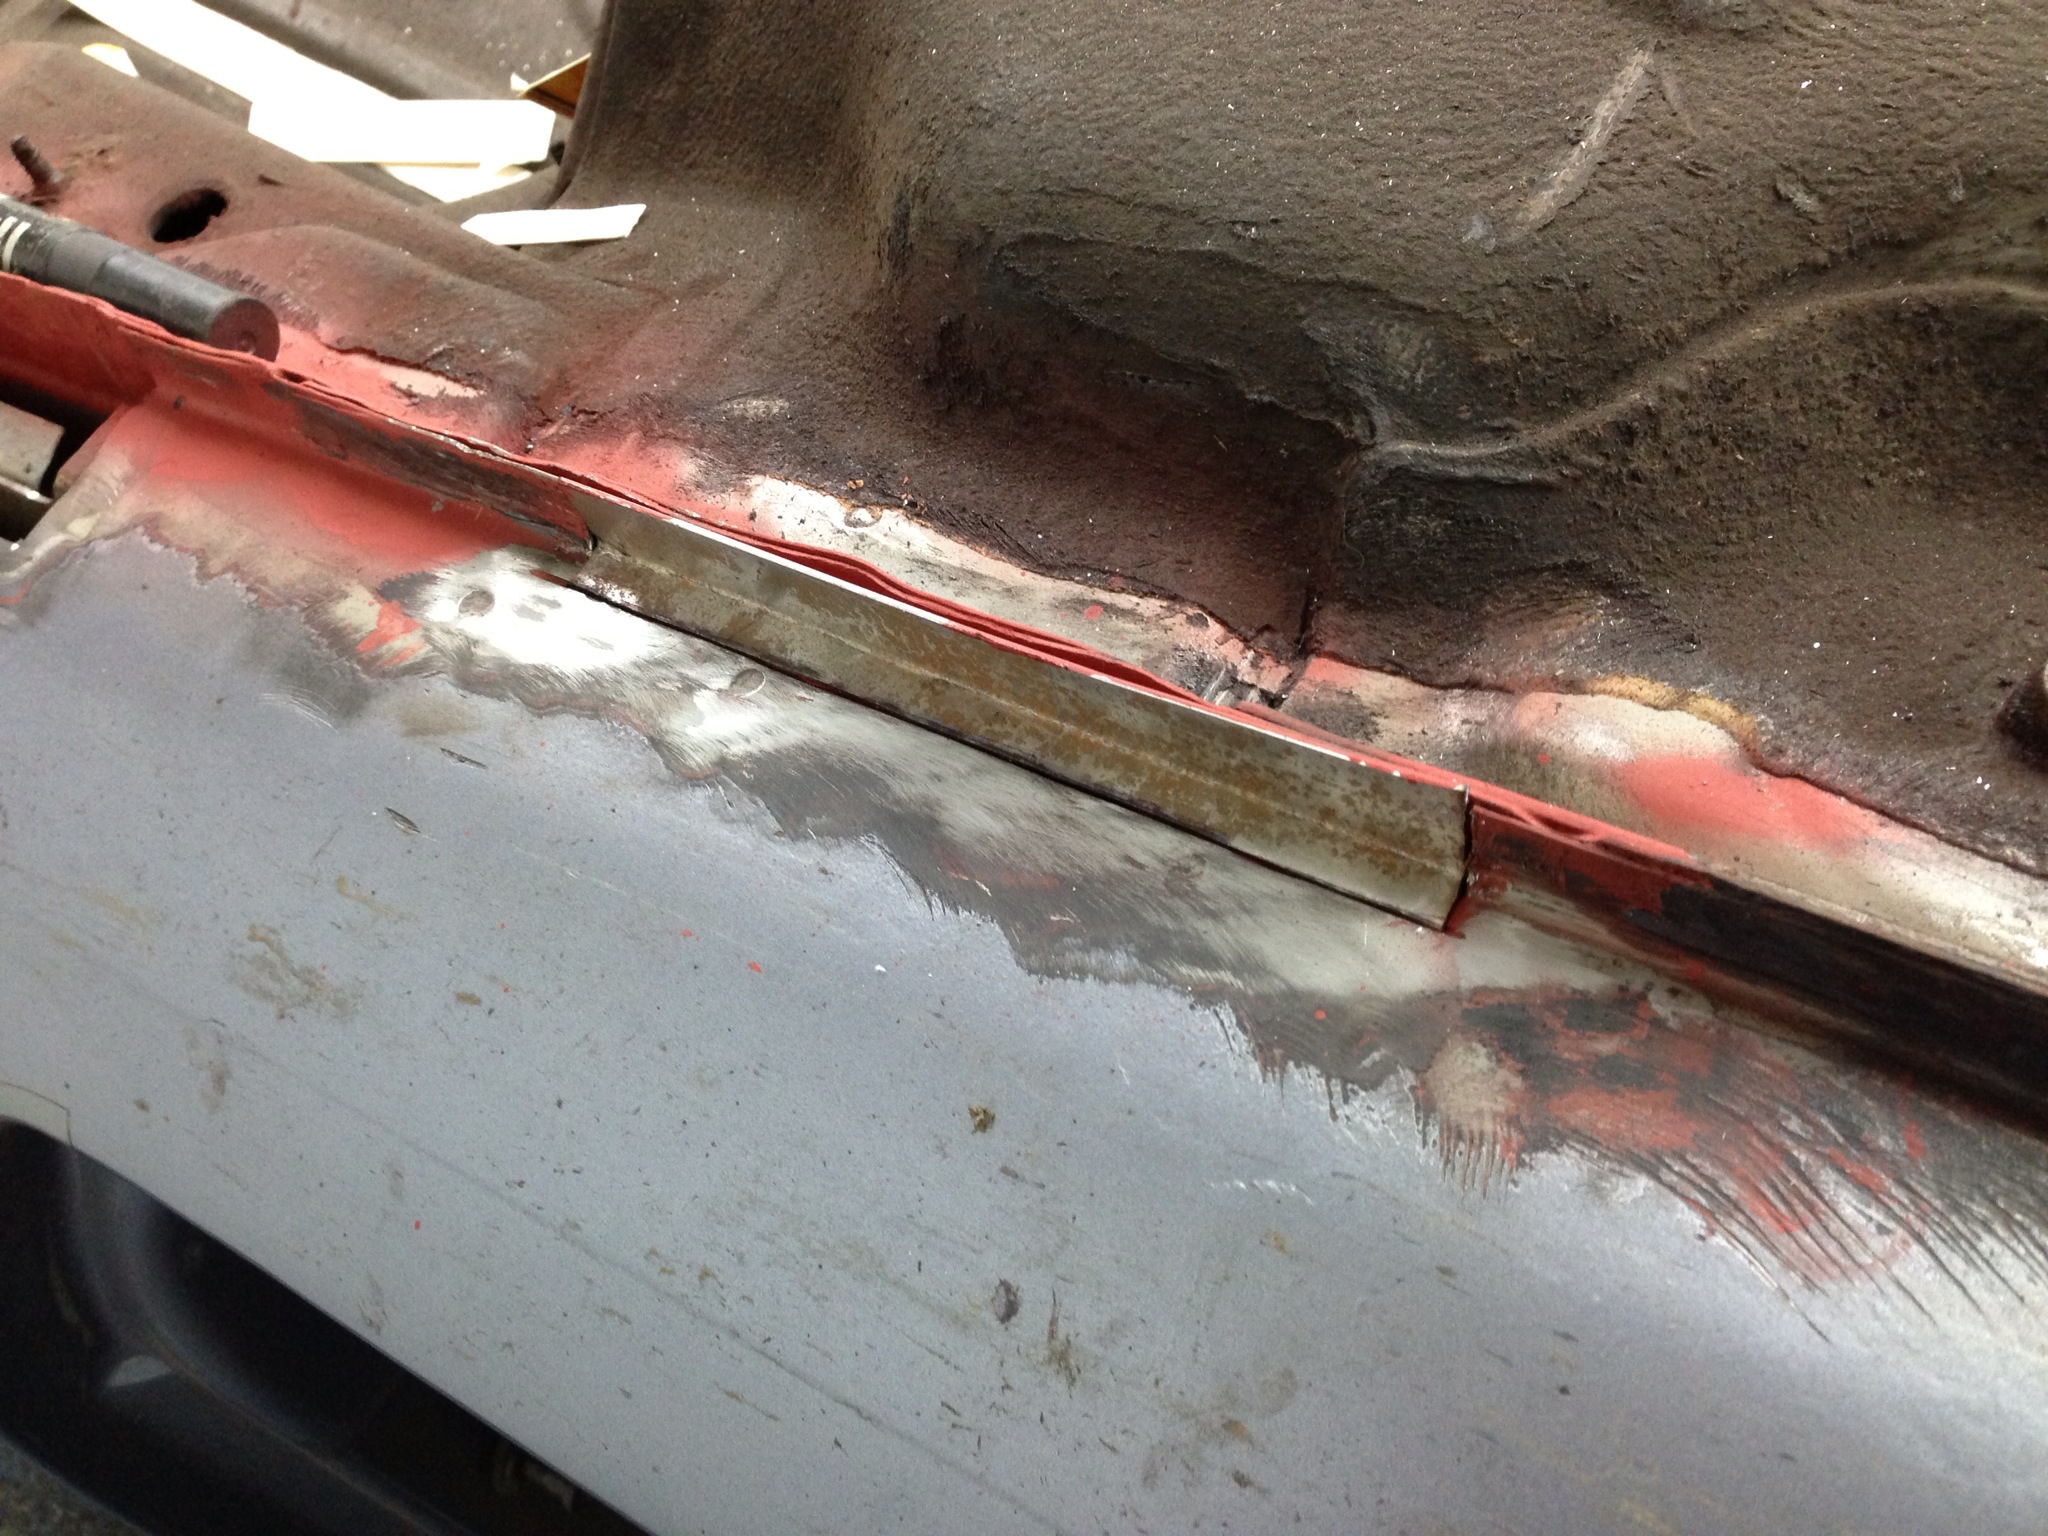
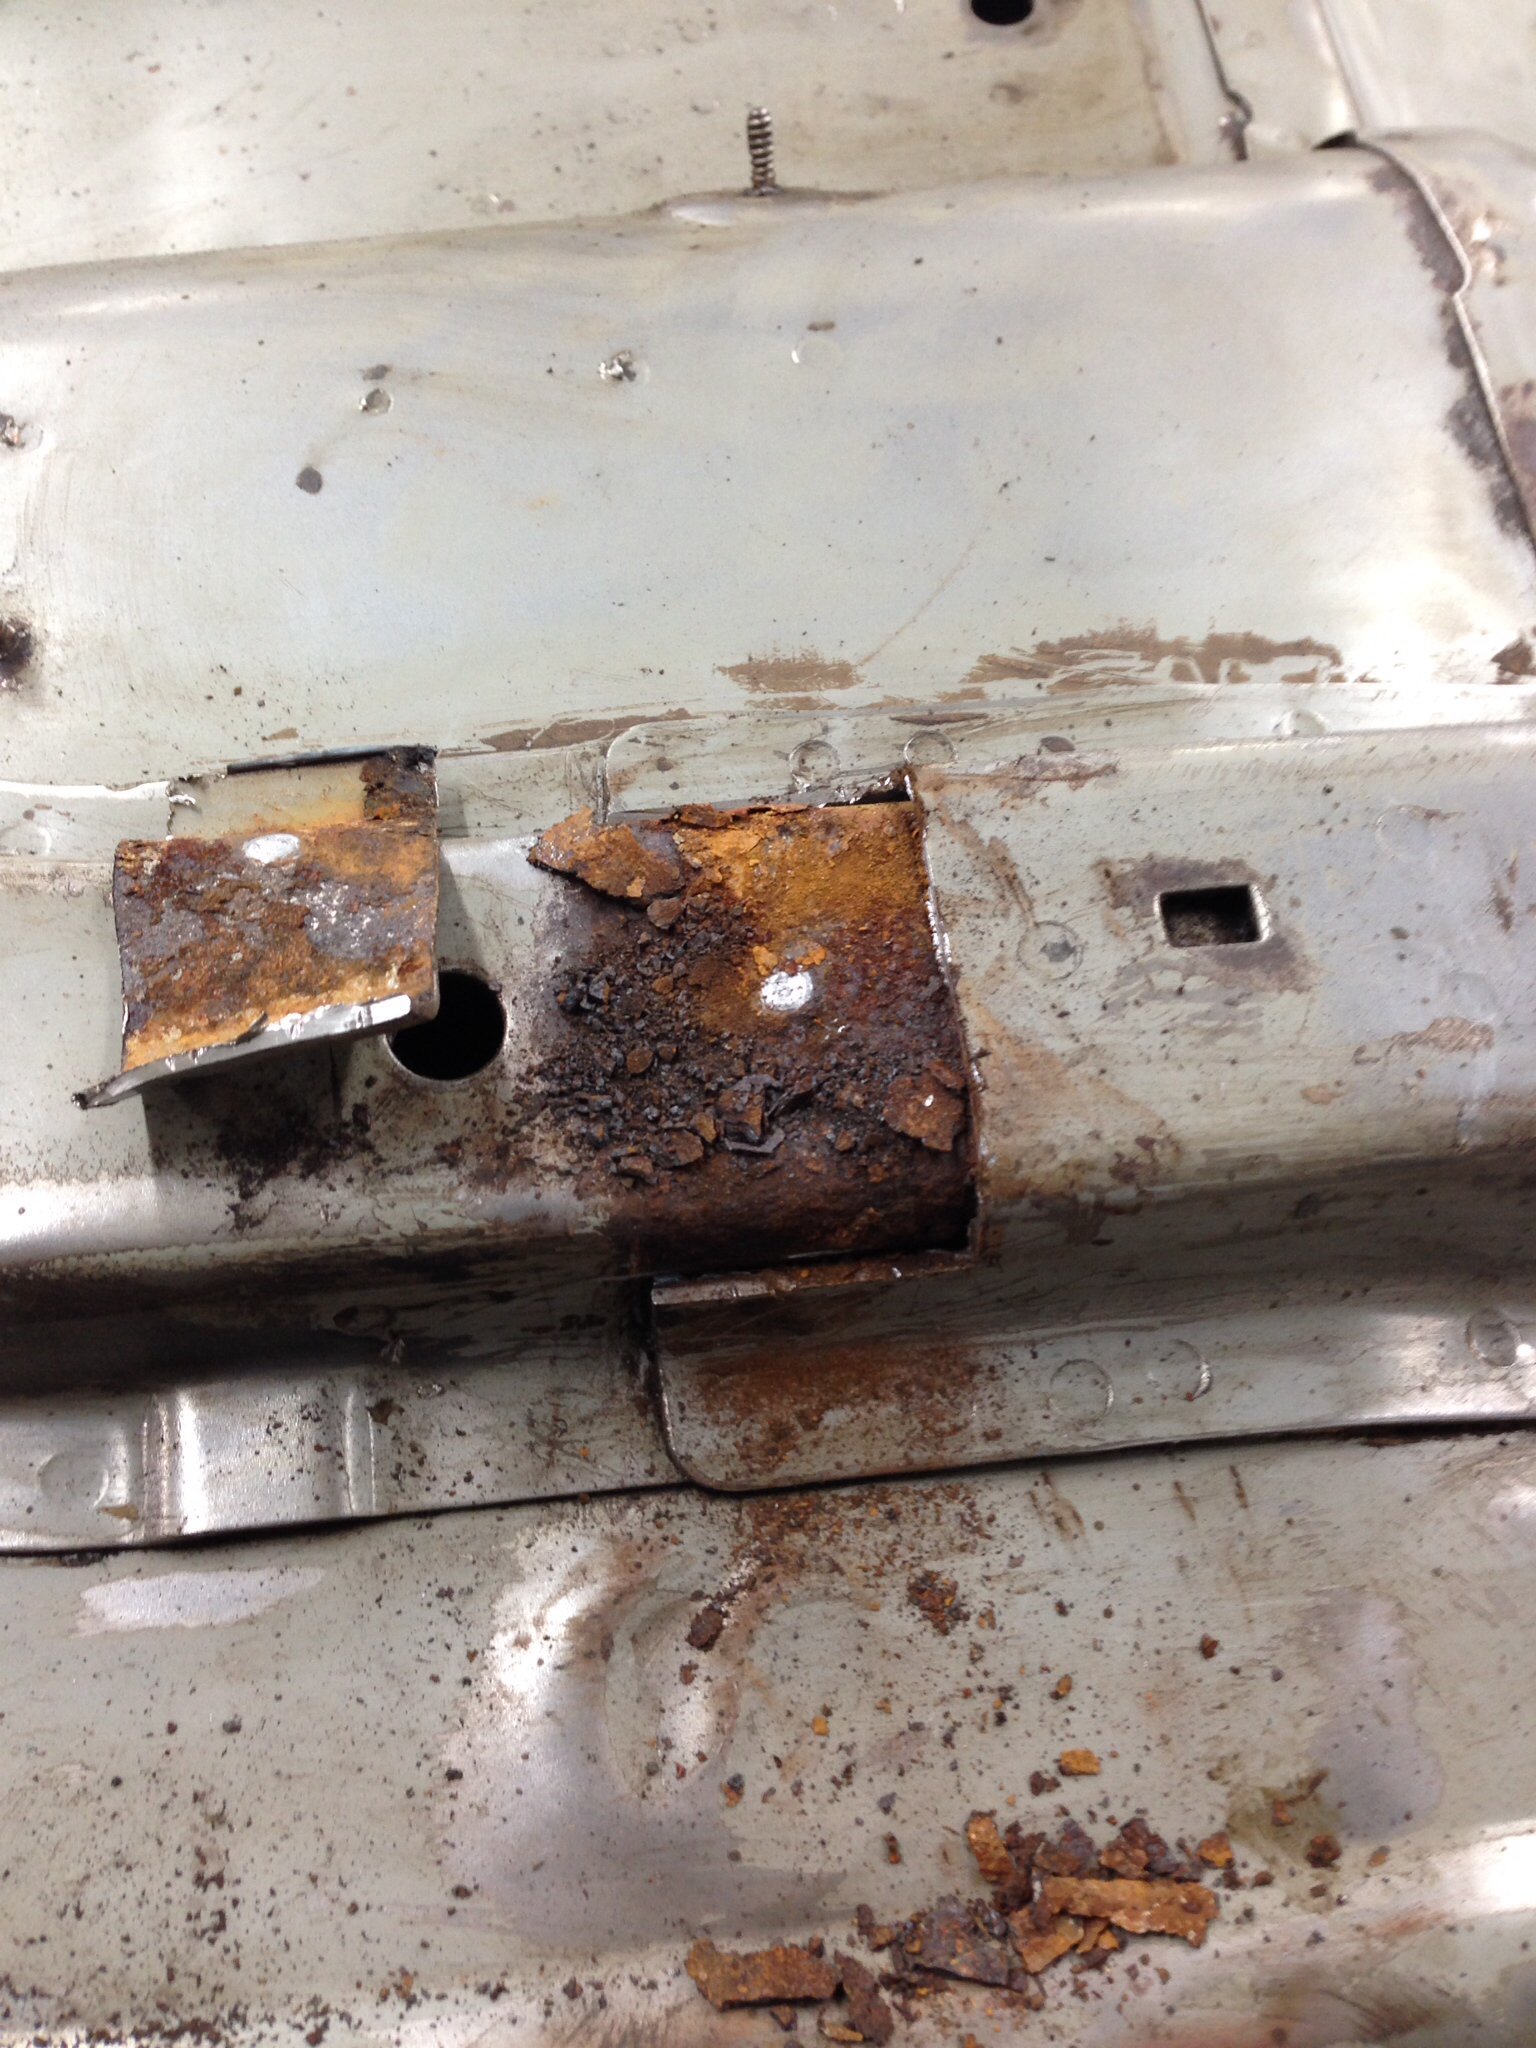
Started to plug weld the outer sill to the internal strengthening panel - in the early years of ownership or even early months! I had an accident with a concrete lamp post.. The car spun, bumped up the kerb and hit the post just behind the drivers door. The car was fully repaired all with ford panels by a reasonable crash repair company. However when the outer panel was fitted they didn't spot weld to the internal strengthening panel due to access so the only way to do it would have been to plug weld.. Which they also didn't do... Not the best idea but in the whole repair it is the only thing I could find that I wasn't too pleased about..

Cardboard template mate
First bit cut and in ready to be trimmed

Metal cut to fit
Begun to be tack welded in
Welded

Flatted back
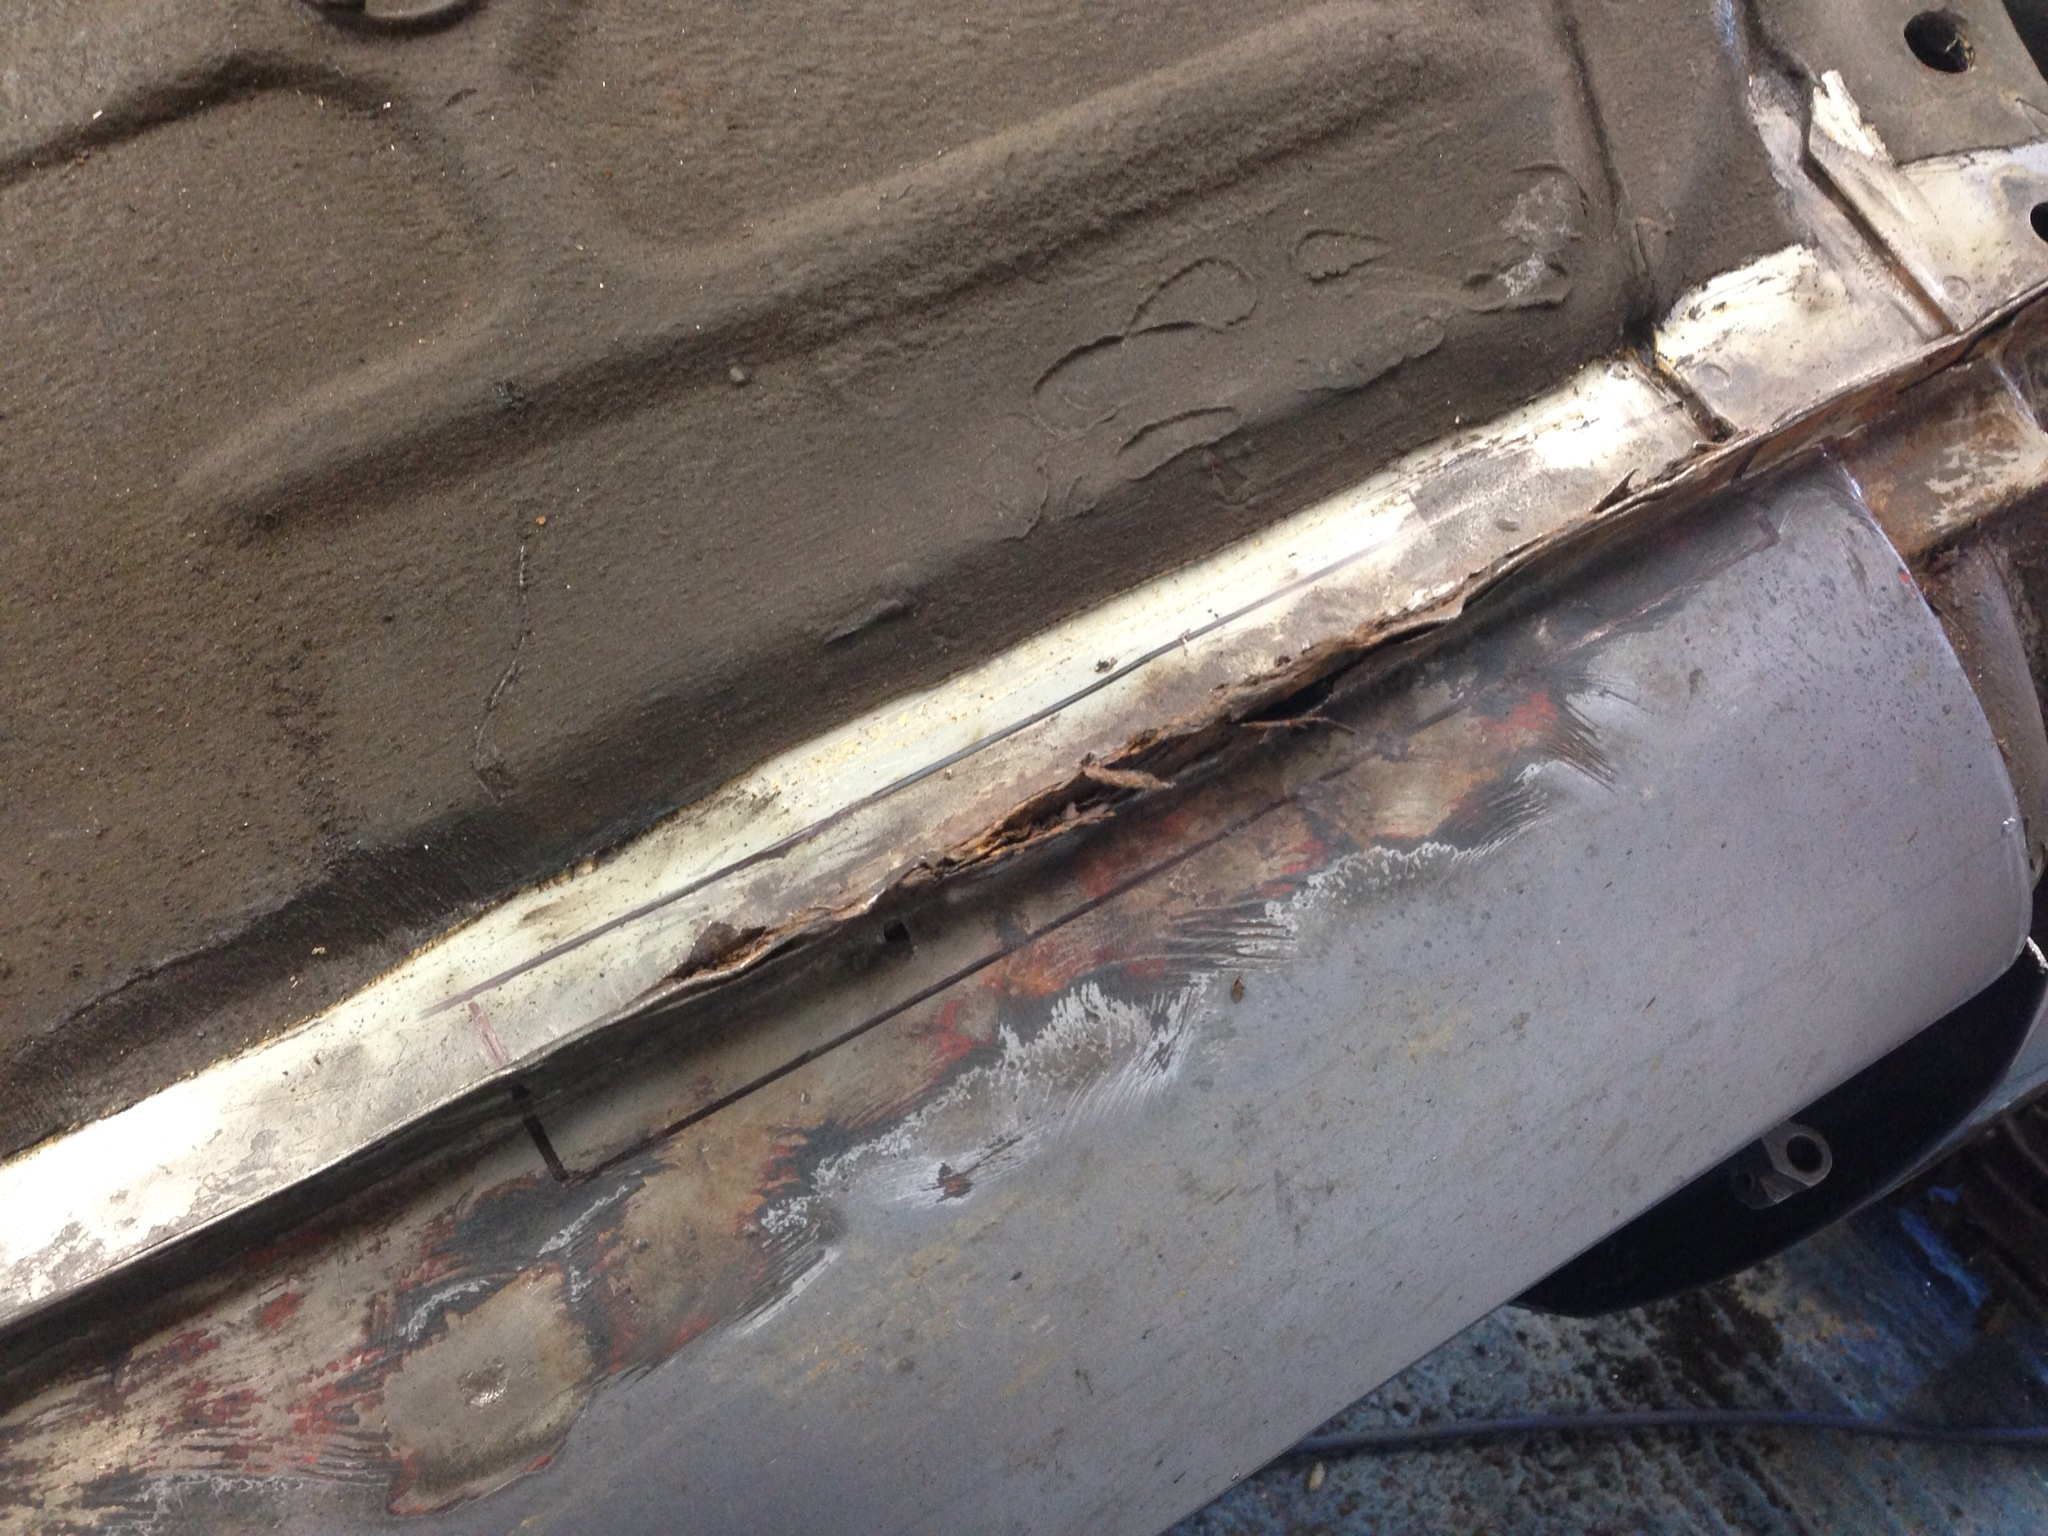
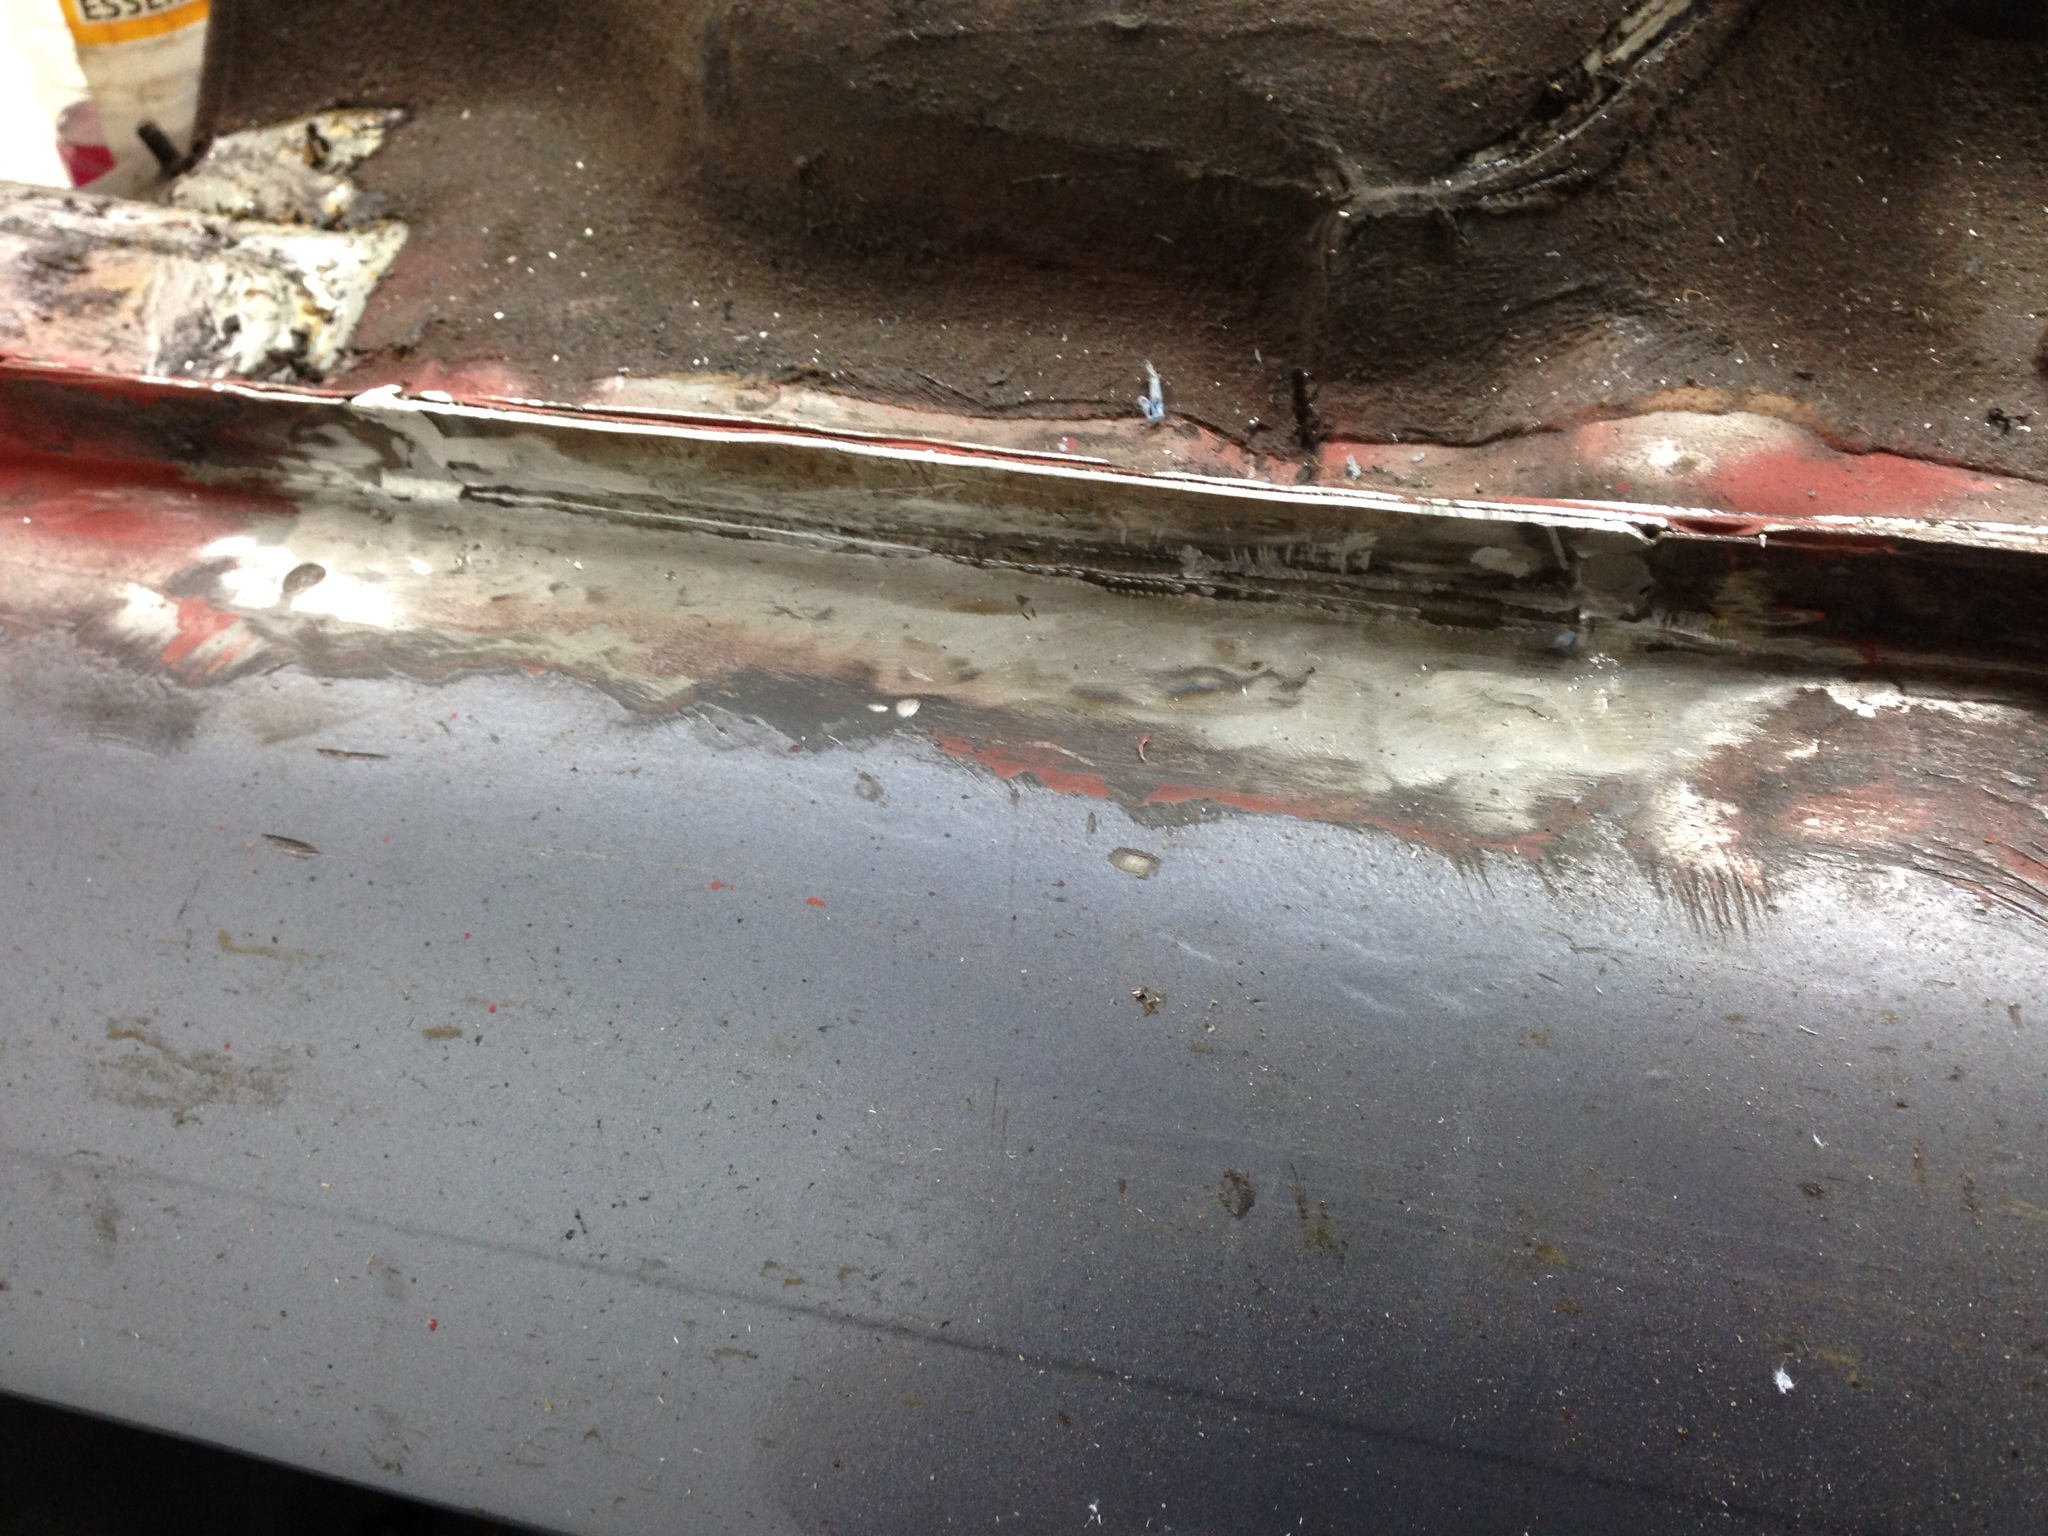
Now at this point I began to become unhappy - I wasn't pleased with the patch when it was flatted back and started to see small pin holes. So tacked those in with the welder and flatted back again.
But the following day I did this
So the whole sill is now cut off - again - and this is why I wasn't happy
This in my opinion is rubbish! So I was glad I cut it off, my rule with this build is that I've gone to these lengths to do it as best as I can and this wasn't good enough.
So with a missing outer sill the work continues...
More to follow.
Started to plug weld the outer sill to the internal strengthening panel - in the early years of ownership or even early months! I had an accident with a concrete lamp post.. The car spun, bumped up the kerb and hit the post just behind the drivers door. The car was fully repaired all with ford panels by a reasonable crash repair company. However when the outer panel was fitted they didn't spot weld to the internal strengthening panel due to access so the only way to do it would have been to plug weld.. Which they also didn't do... Not the best idea but in the whole repair it is the only thing I could find that I wasn't too pleased about..
Cardboard template mate
First bit cut and in ready to be trimmed
Metal cut to fit
Begun to be tack welded in
Welded
Flatted back
Now at this point I began to become unhappy - I wasn't pleased with the patch when it was flatted back and started to see small pin holes. So tacked those in with the welder and flatted back again.
But the following day I did this
So the whole sill is now cut off - again - and this is why I wasn't happy
This in my opinion is rubbish! So I was glad I cut it off, my rule with this build is that I've gone to these lengths to do it as best as I can and this wasn't good enough.
So with a missing outer sill the work continues...
More to follow.
24-07-2013, 09:52 PM
#49
PassionFord Regular

If your putting in this much work, Whats another day or so to do another job, but properly. If you didnt you'd be pissed every time you looked at it and wished you'd of done it in the first place. Look forward to another update.
30-07-2013, 07:12 PM
#50
PassionFord Regular
Thread Starter
So more progress at last..
Building up the rear sill lip again:
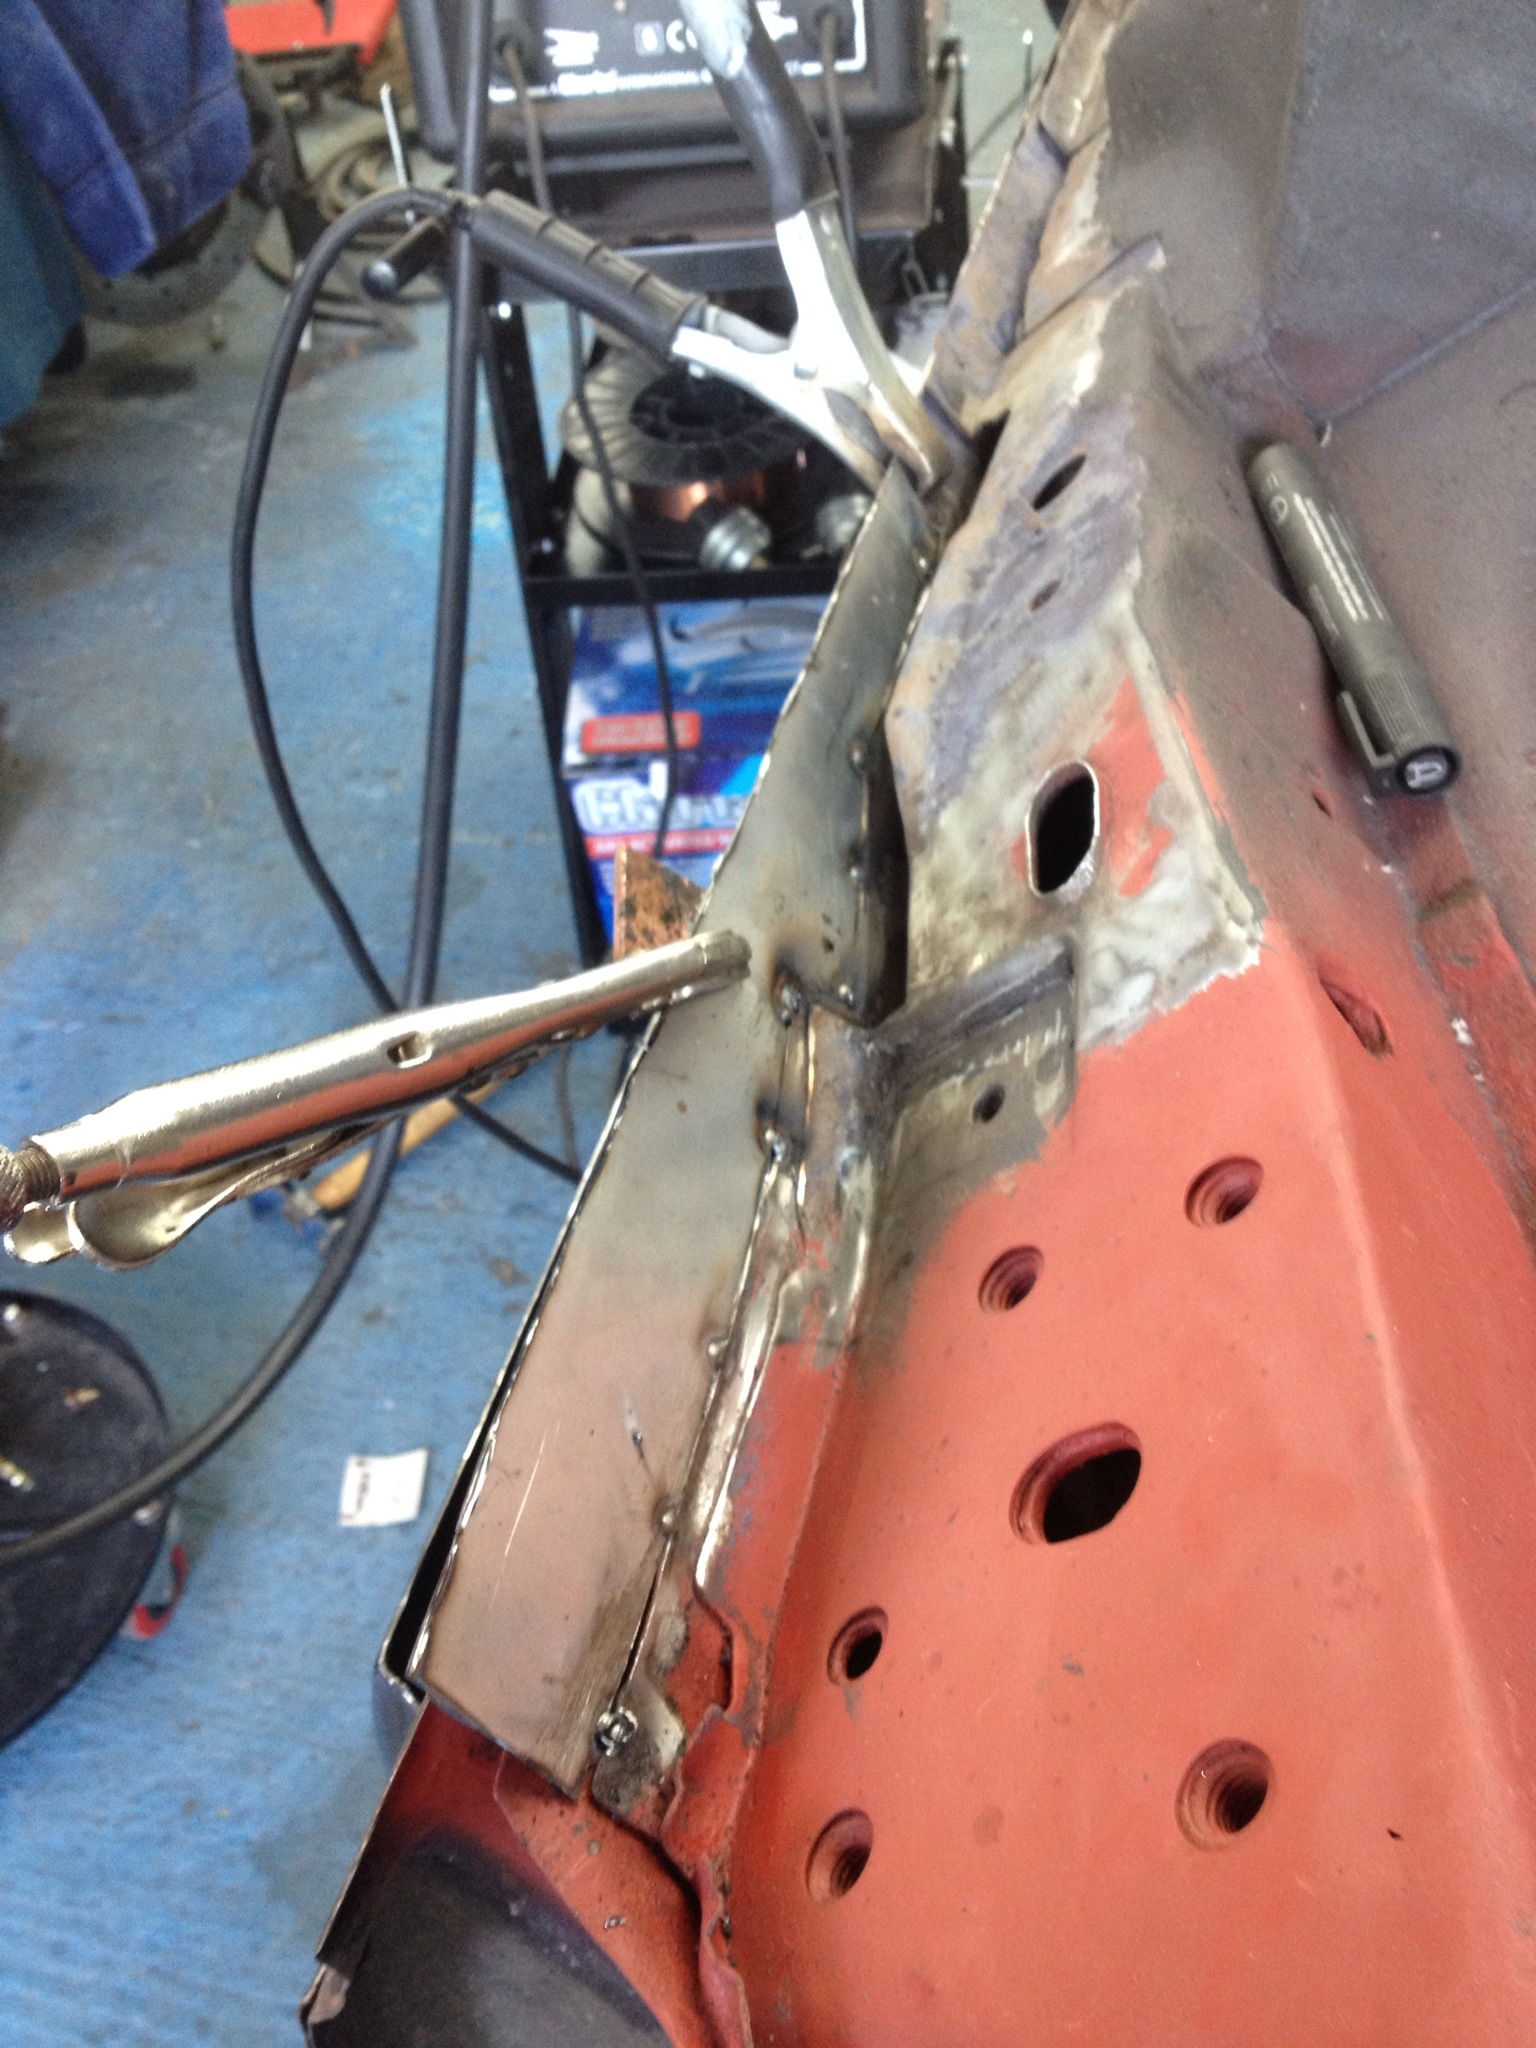
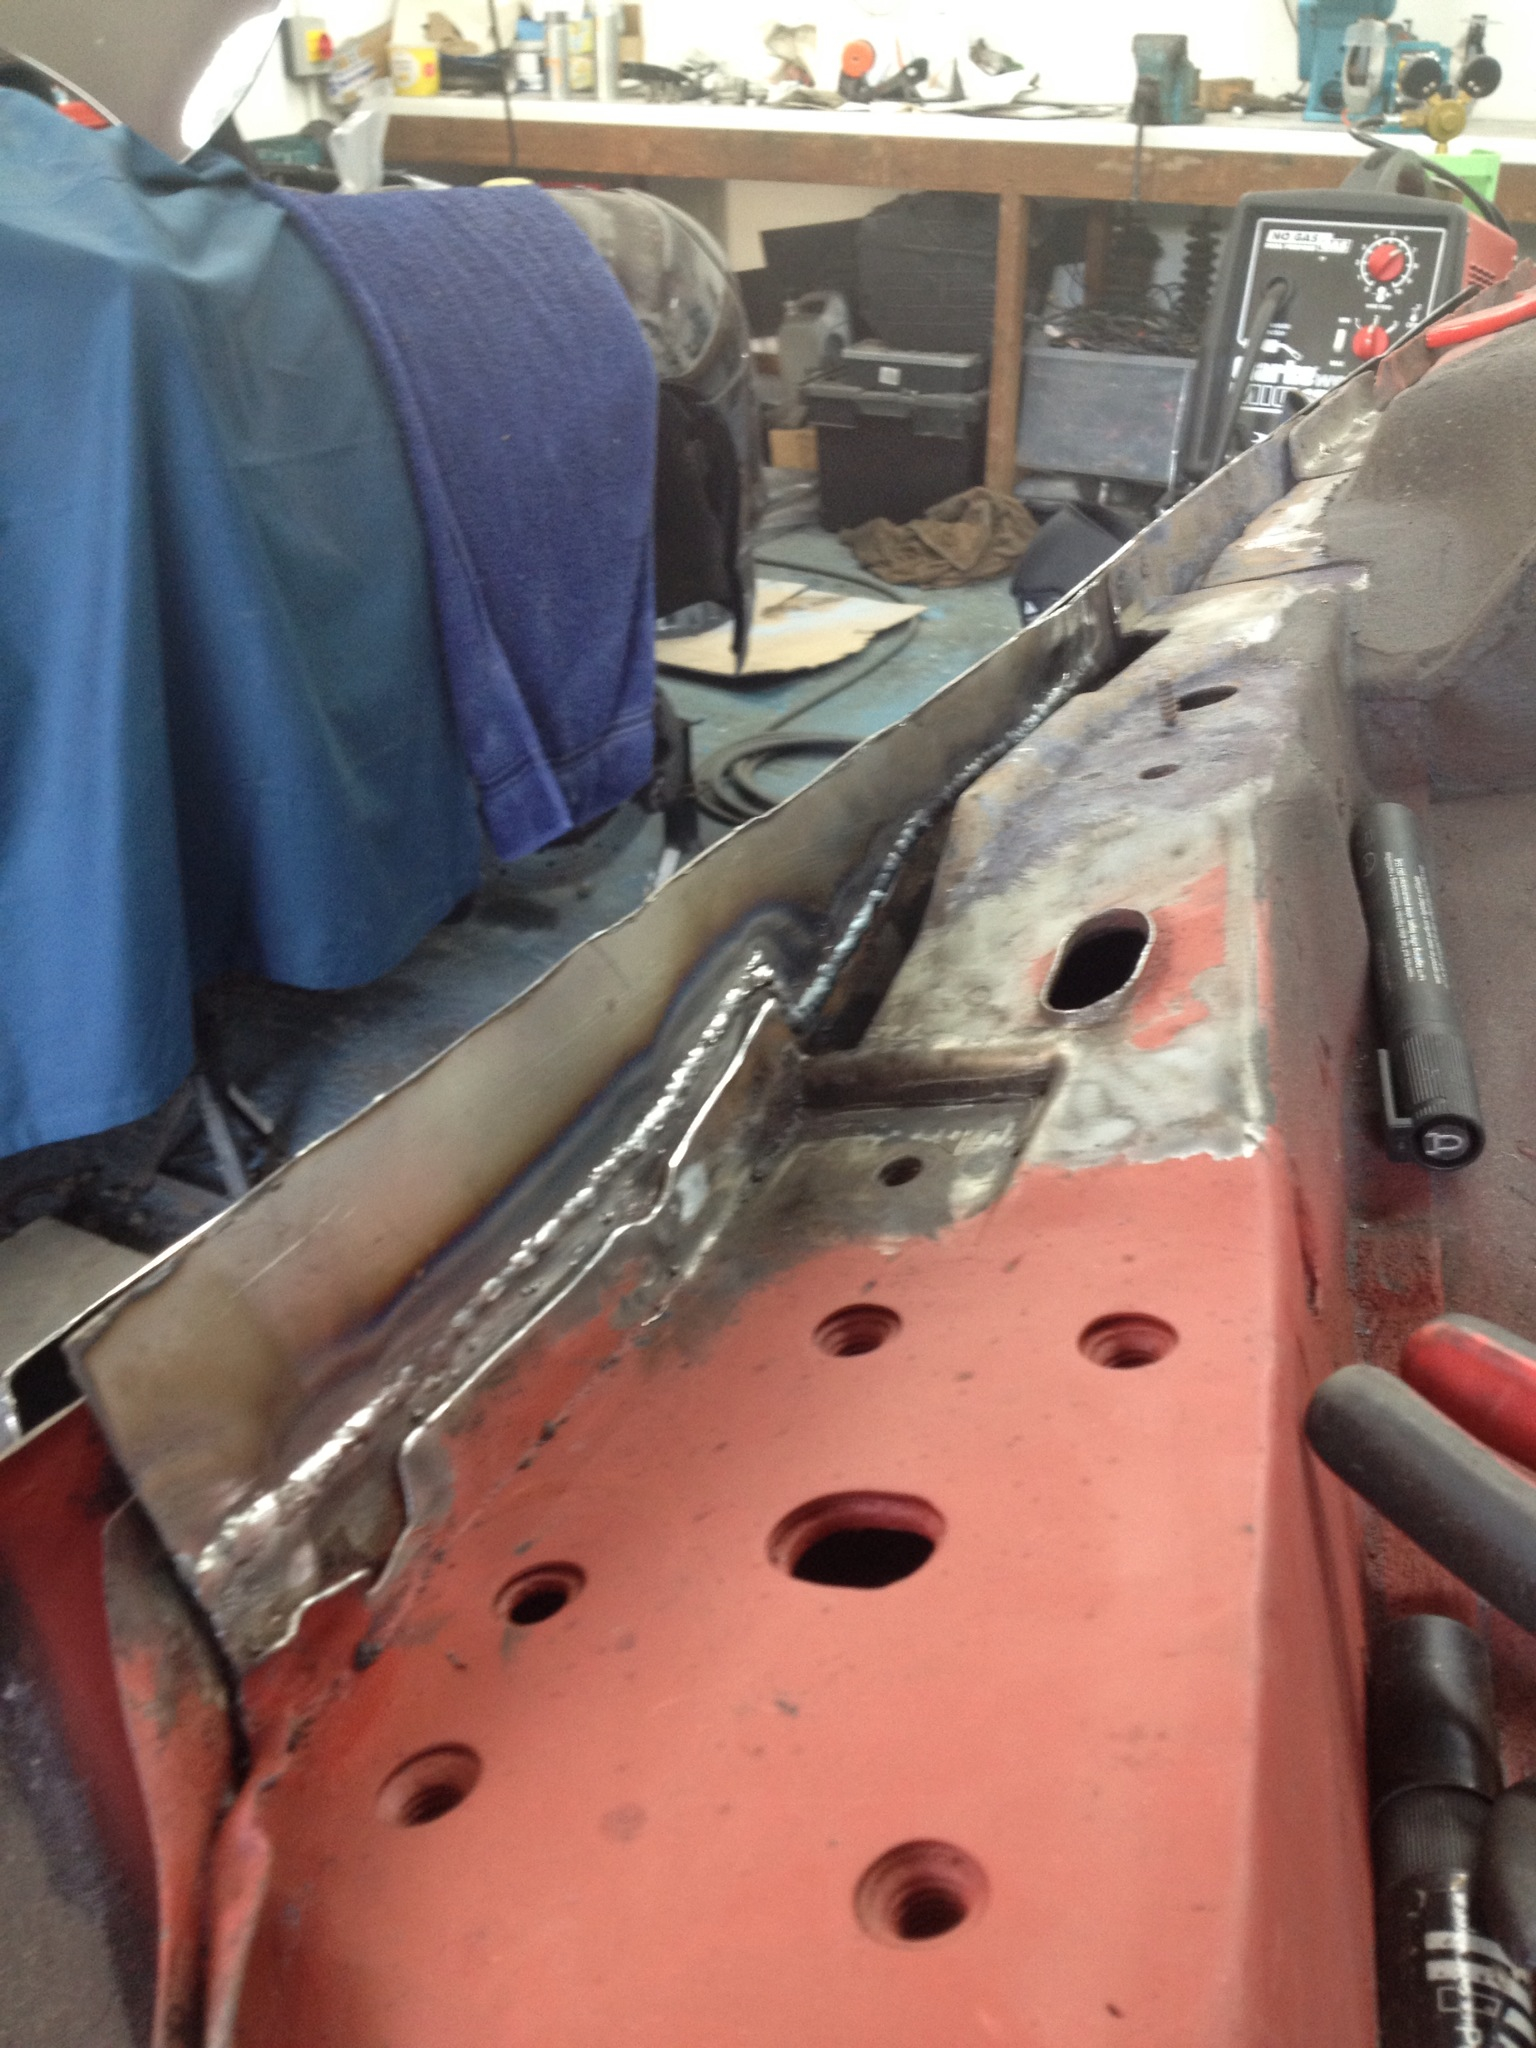

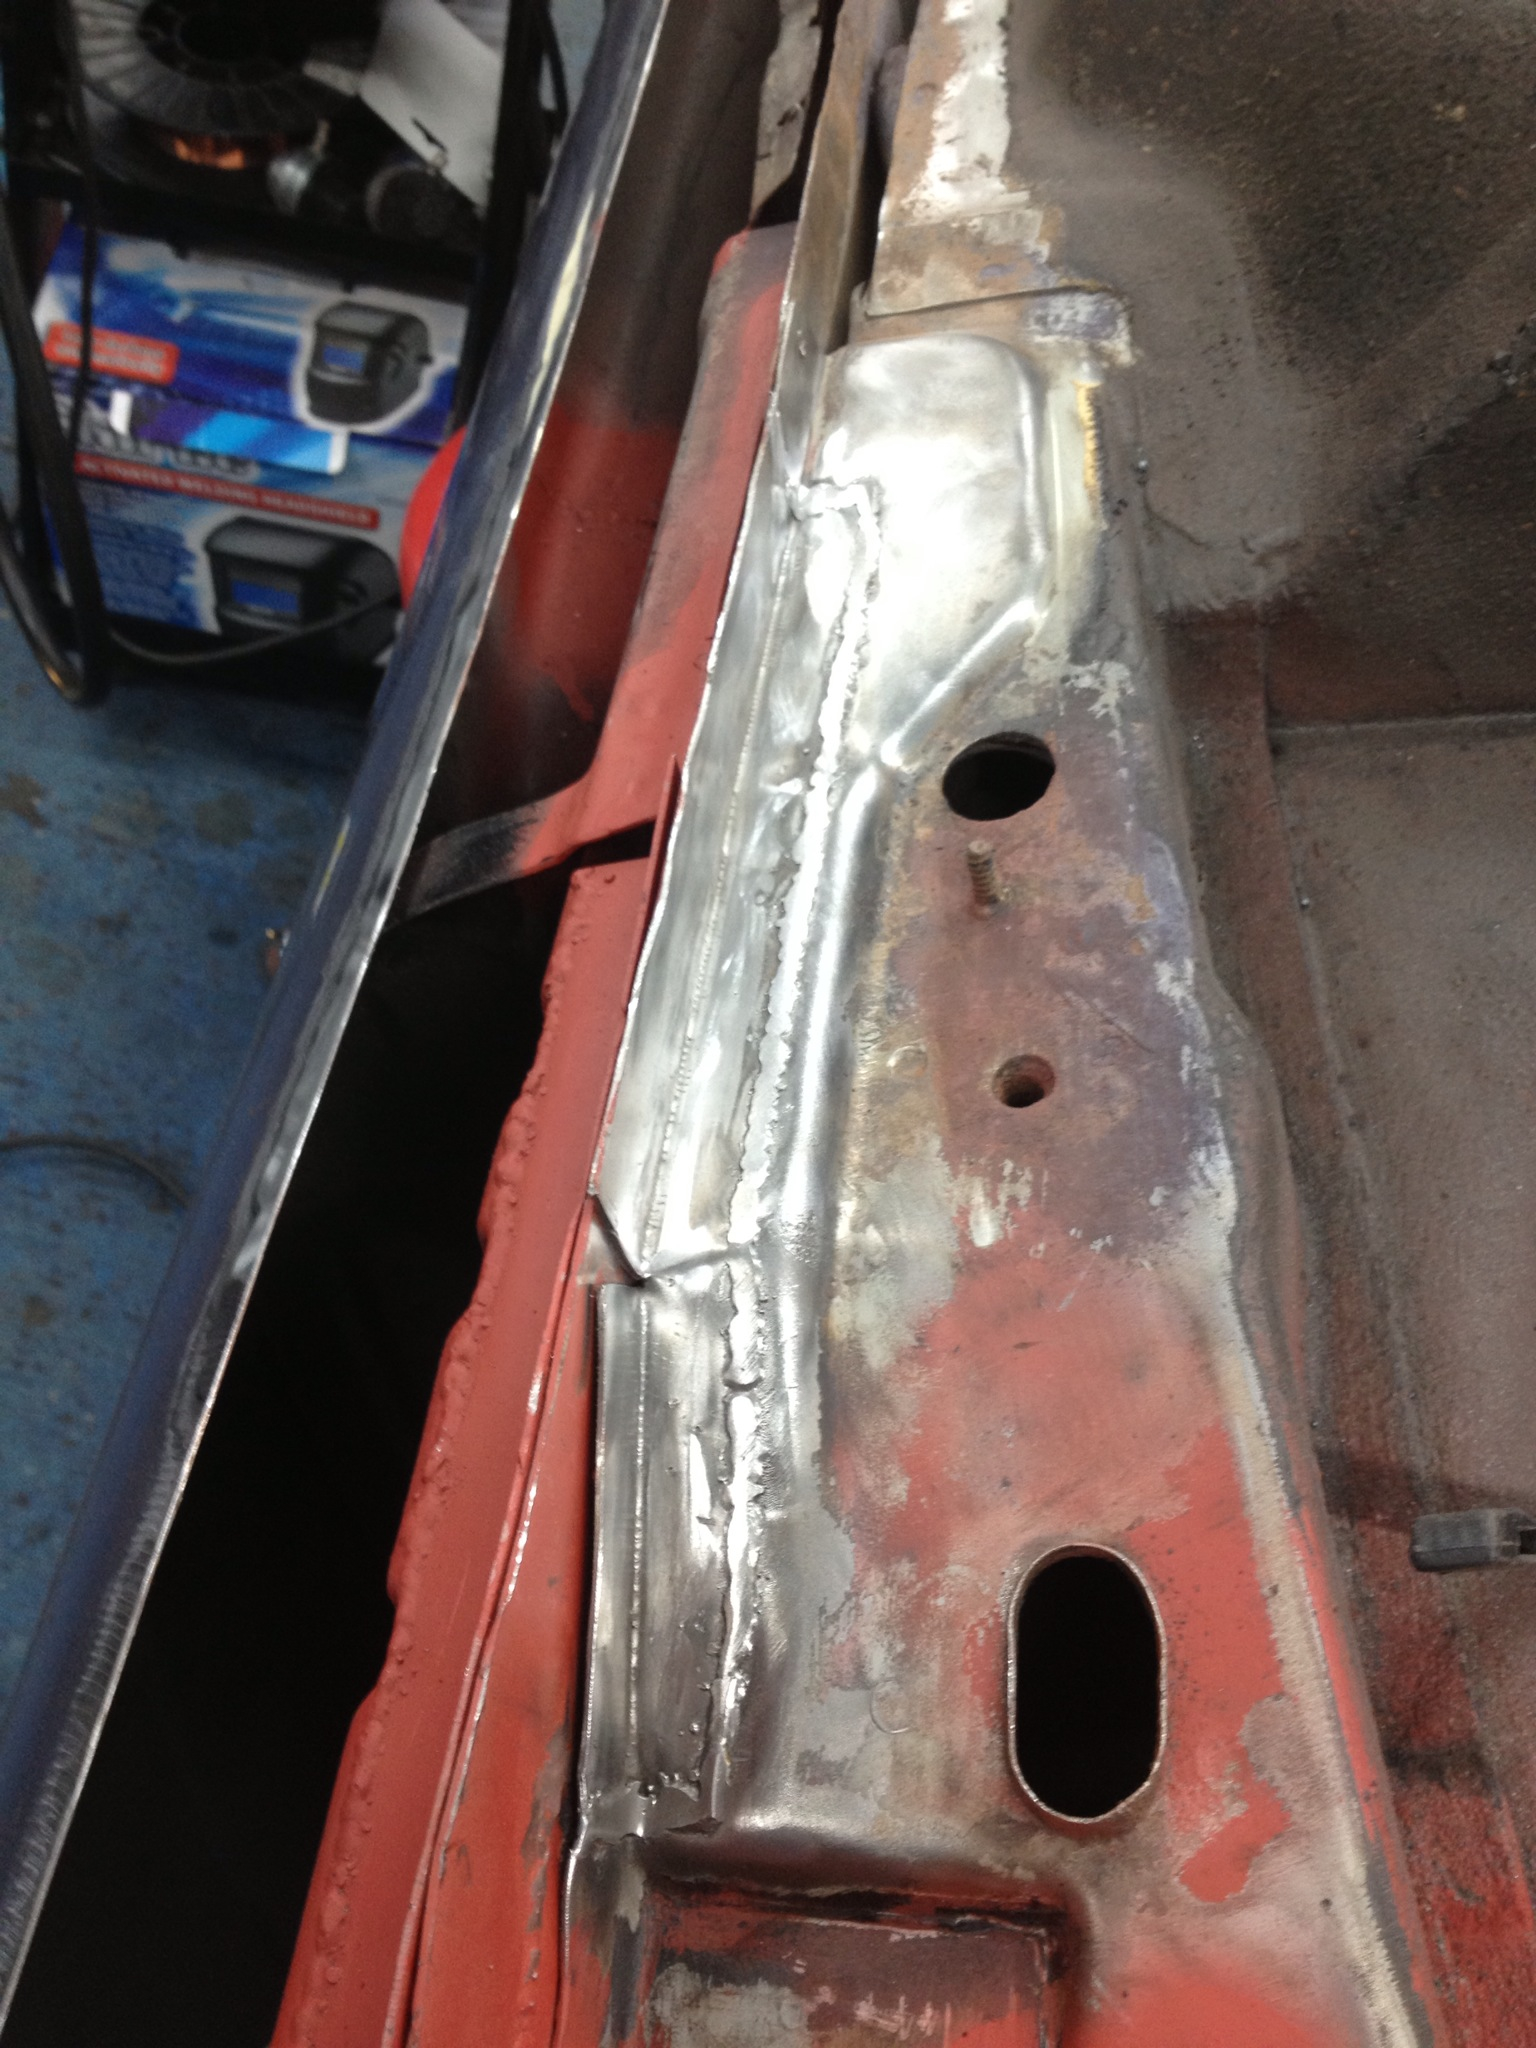
Inner panel repair:
Welded in:
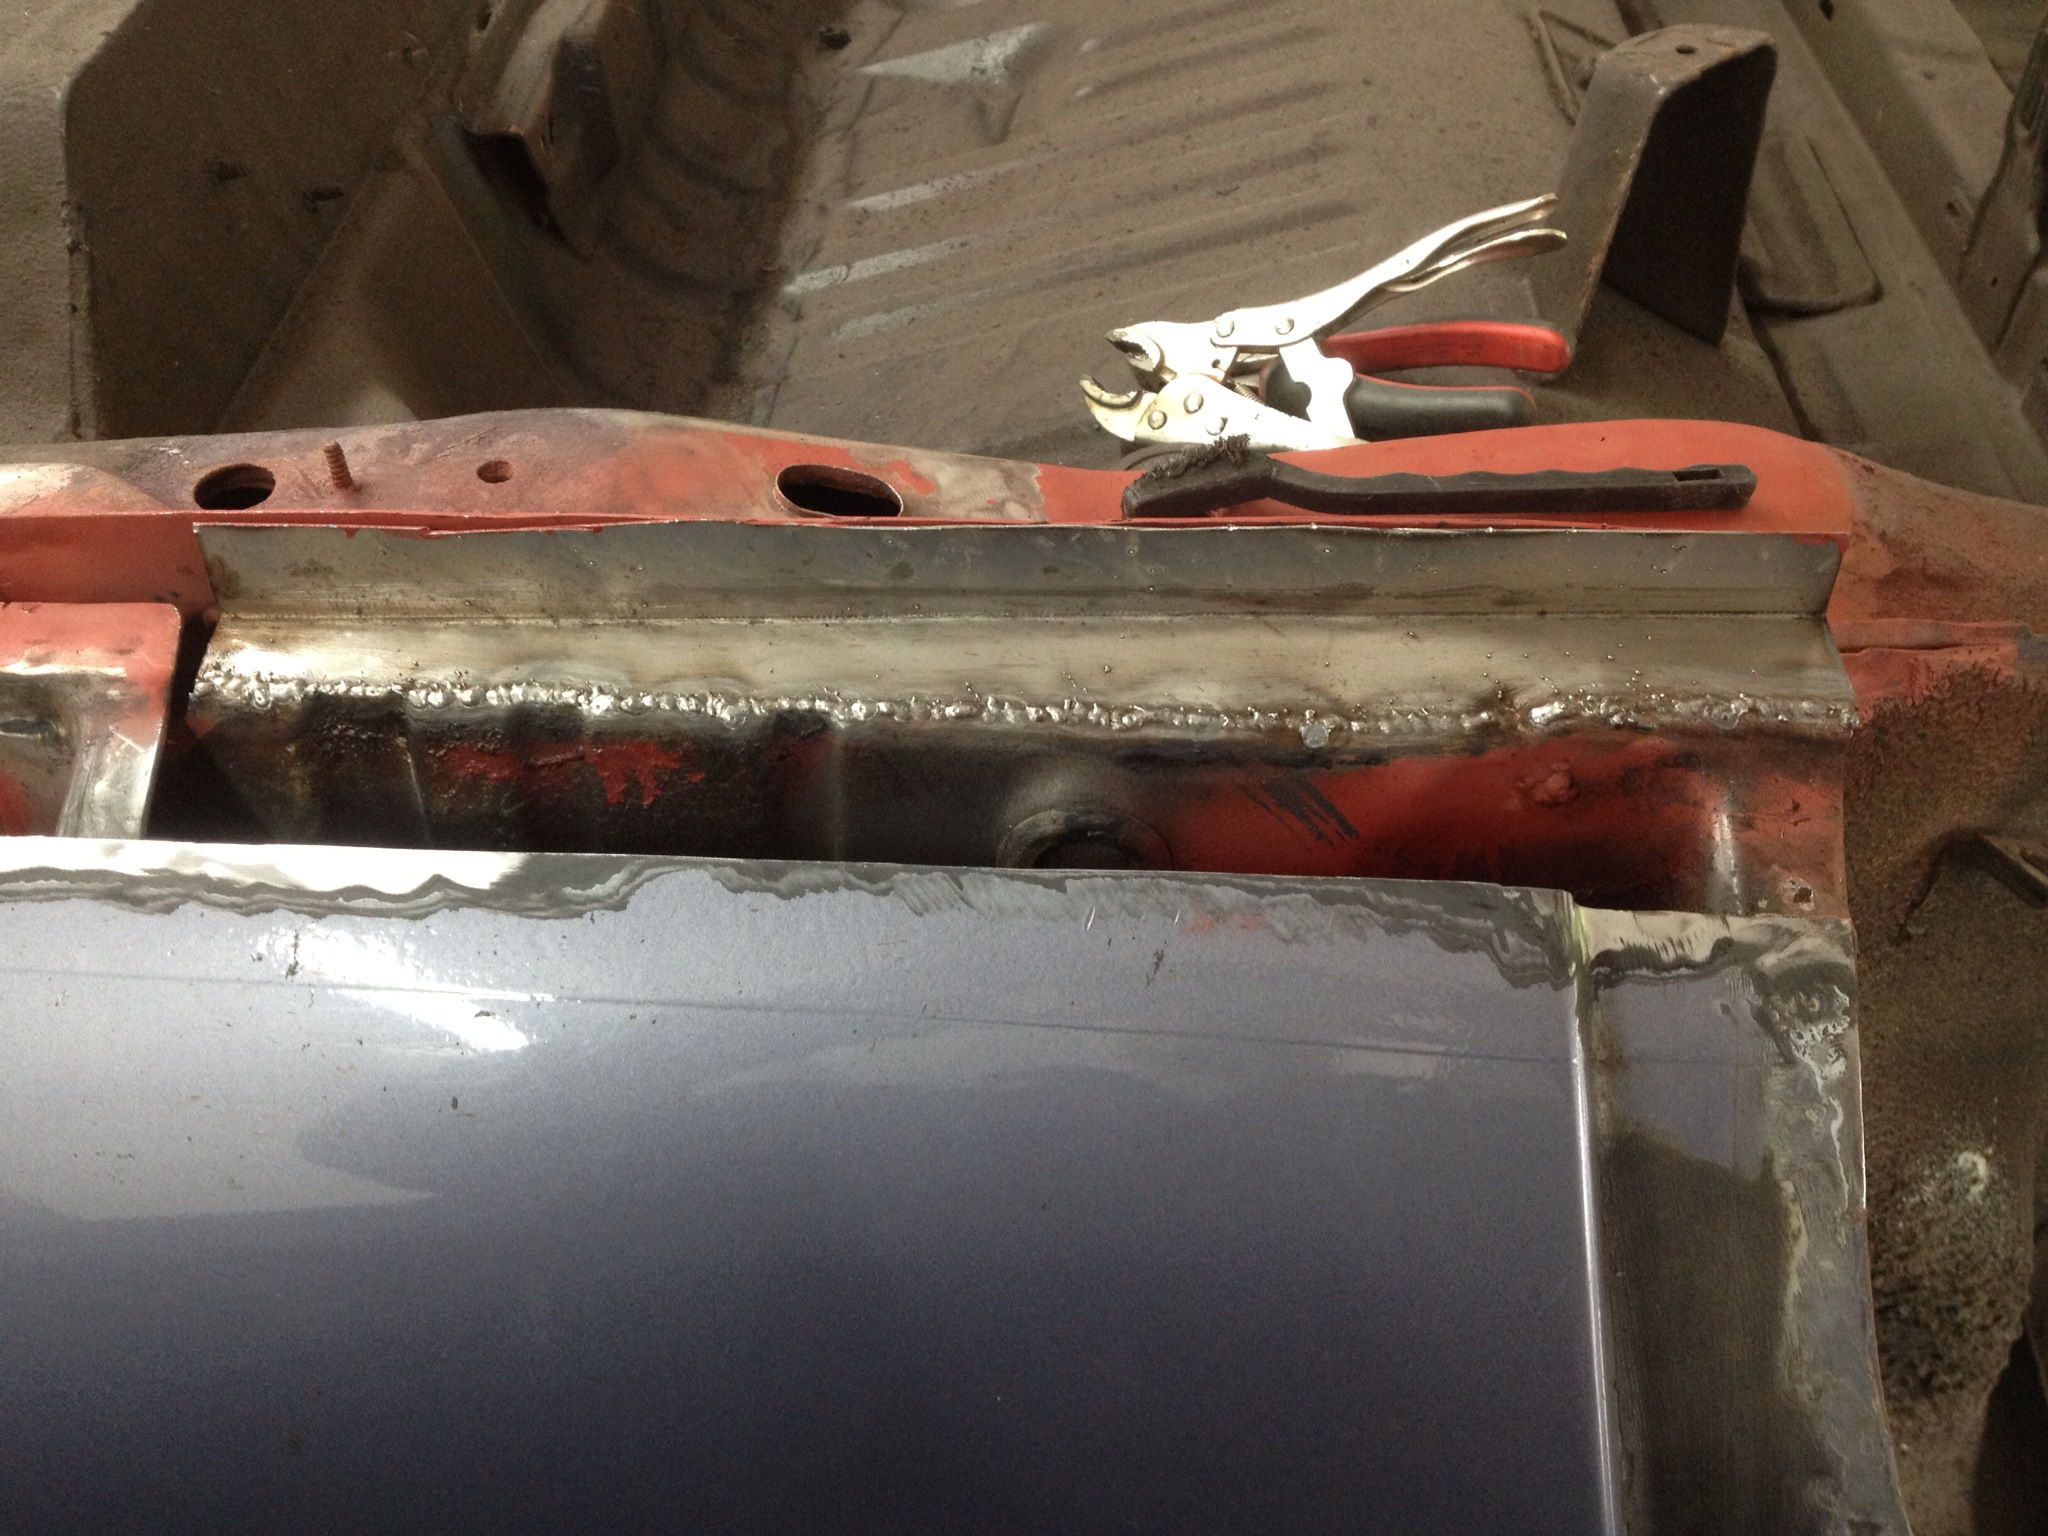
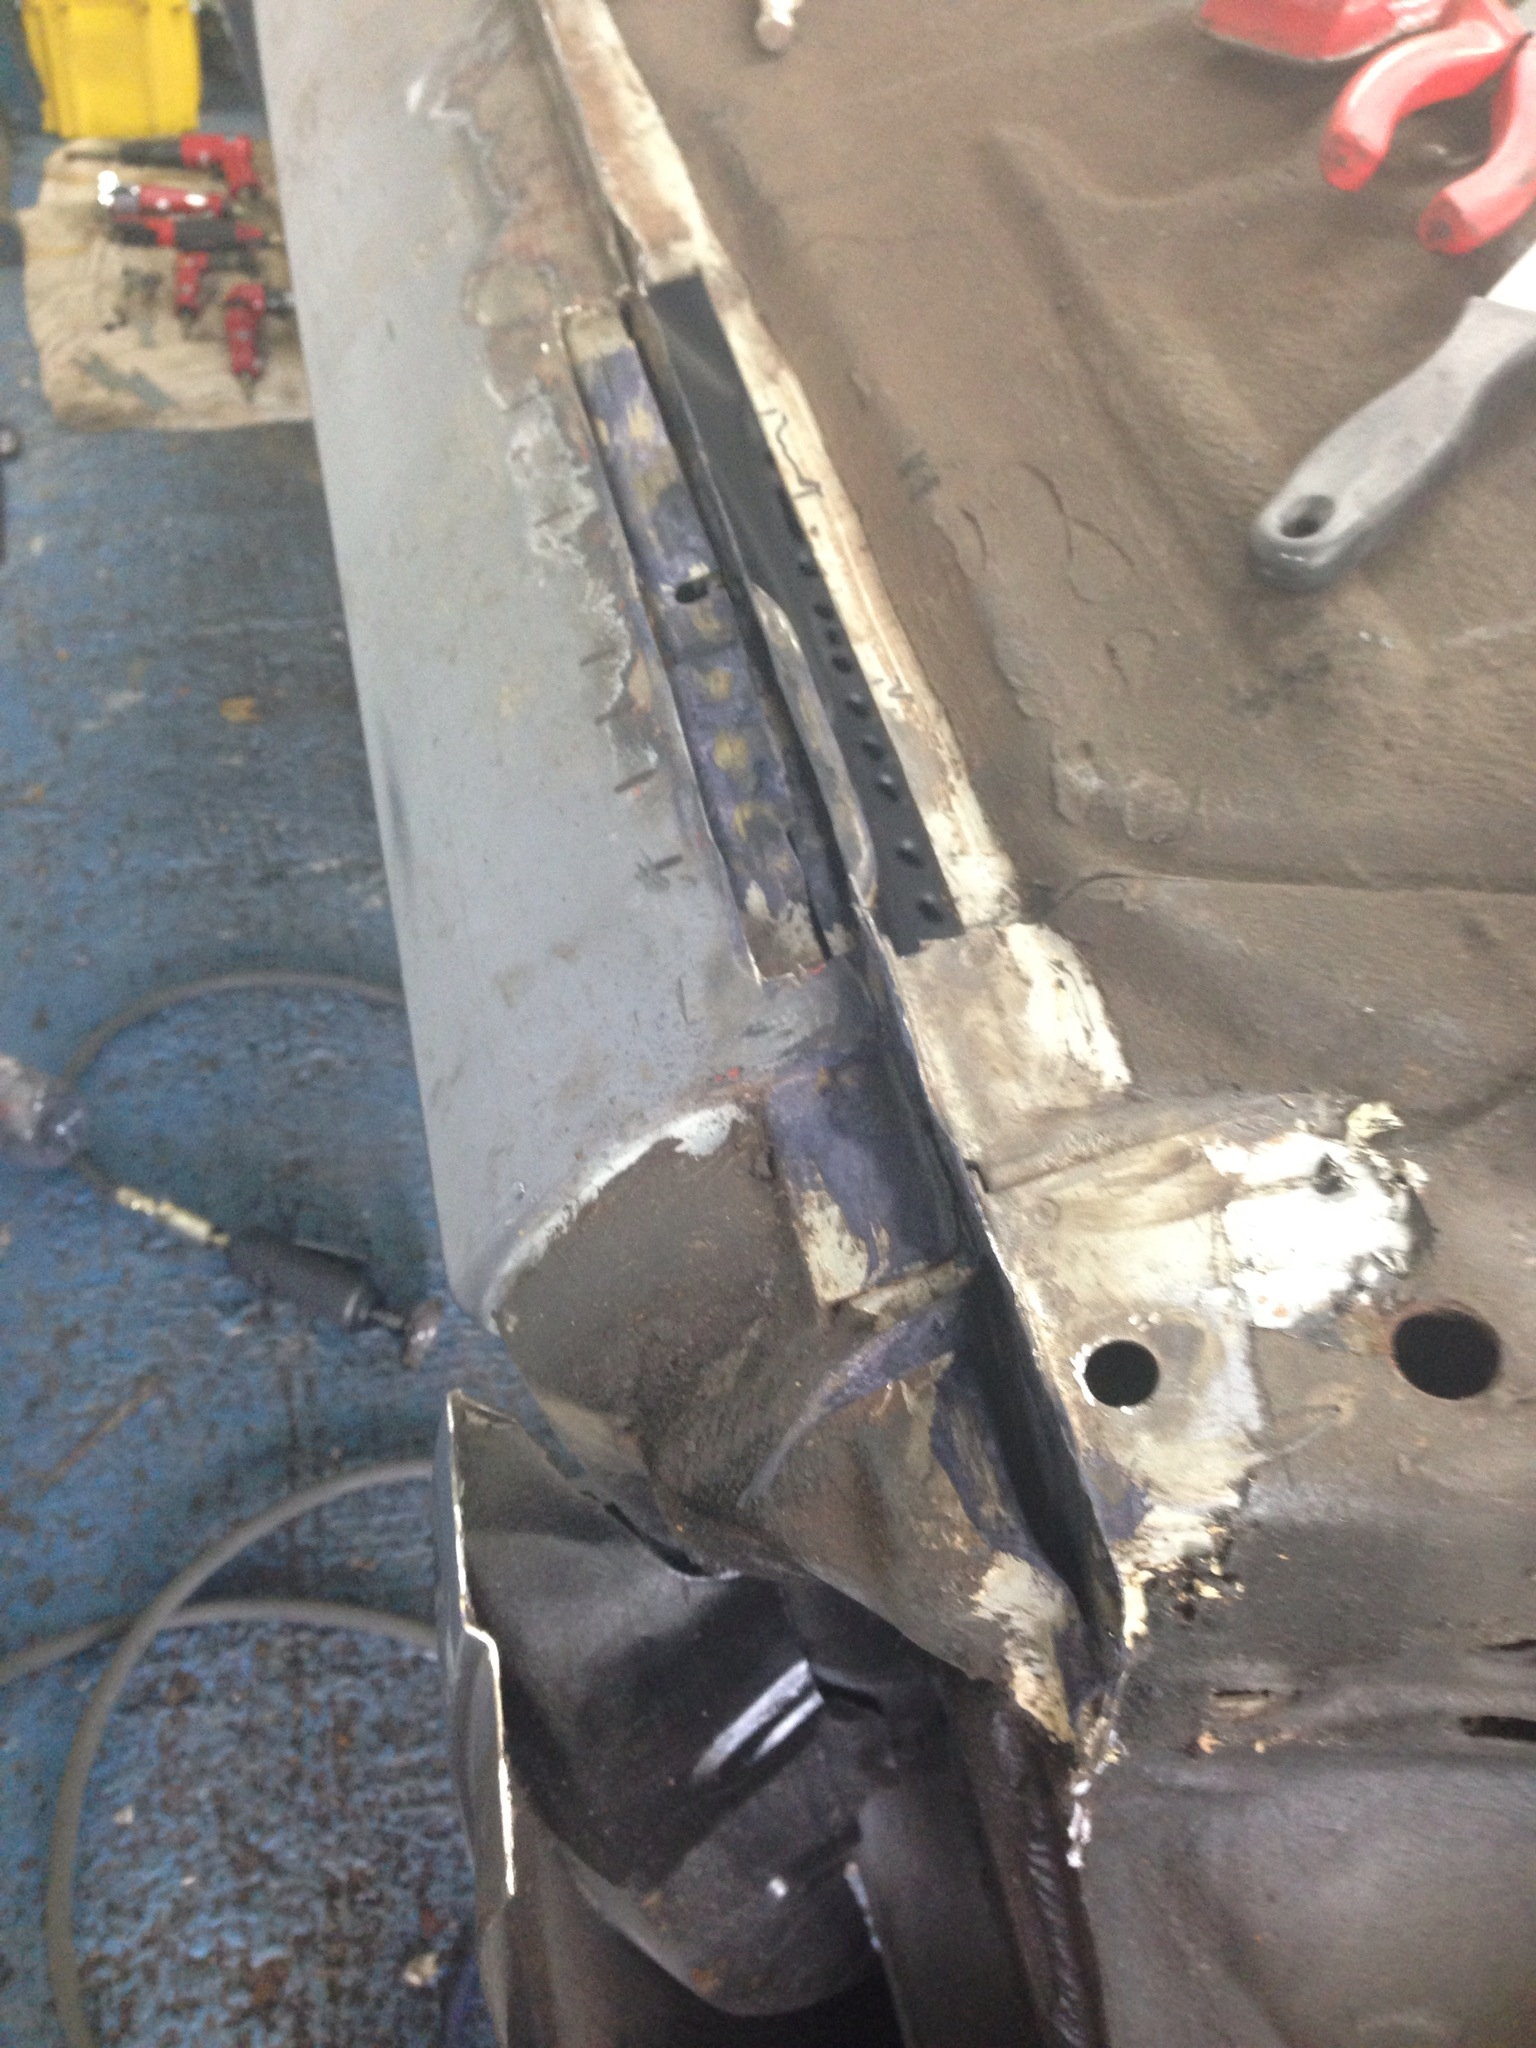
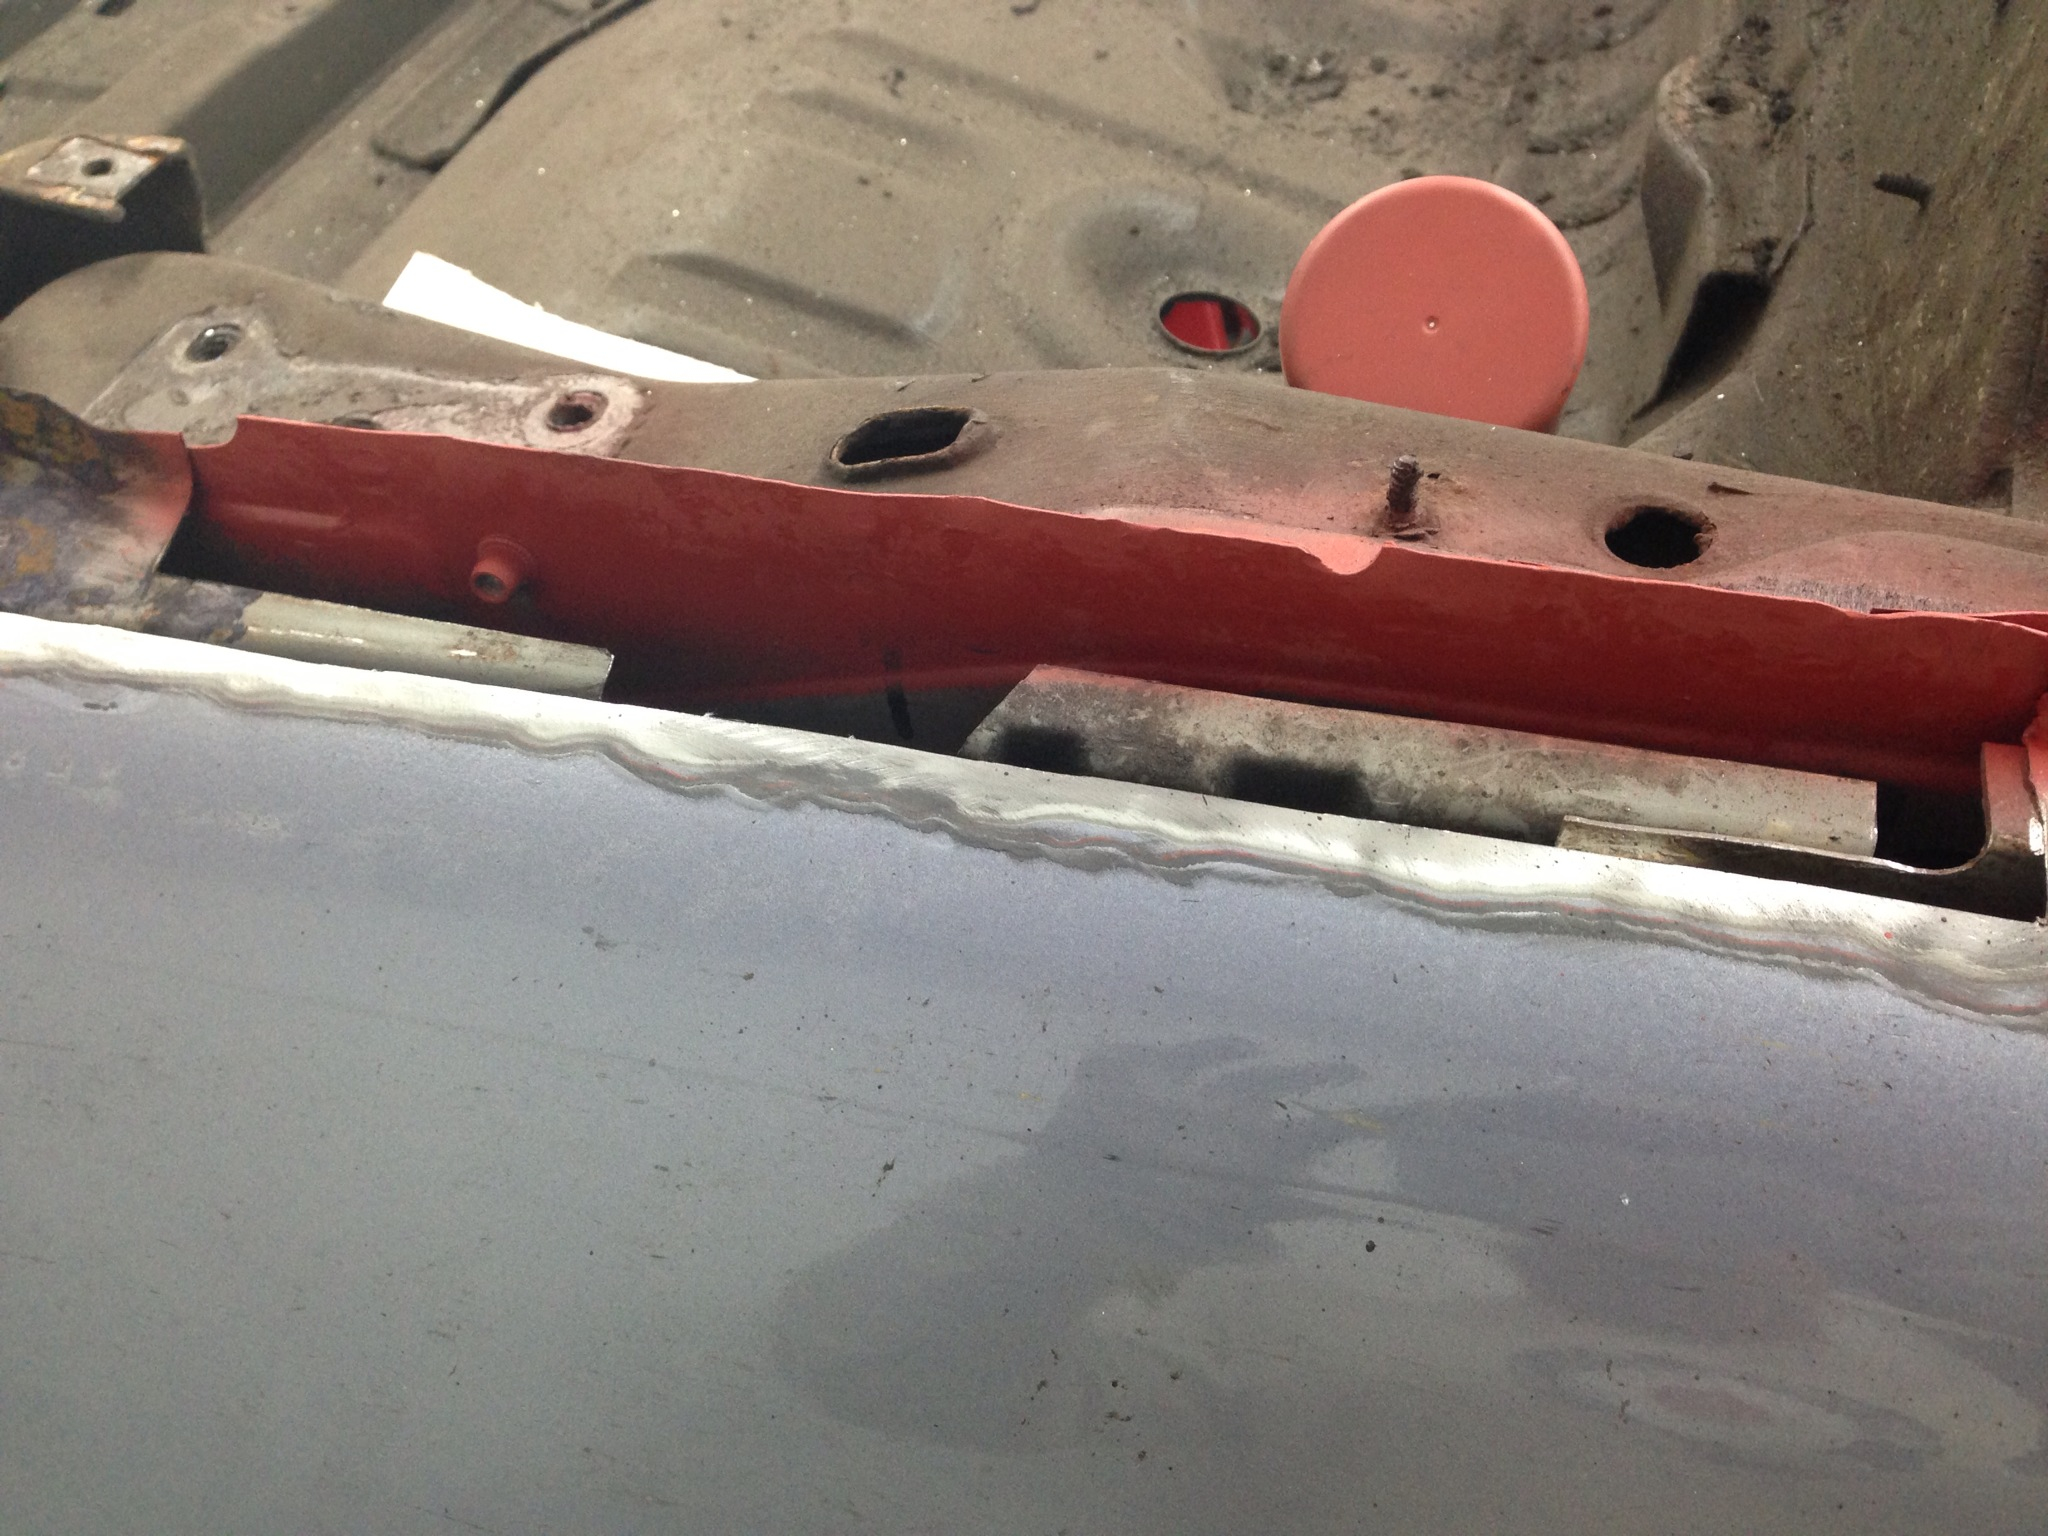
Chassis leg repair:
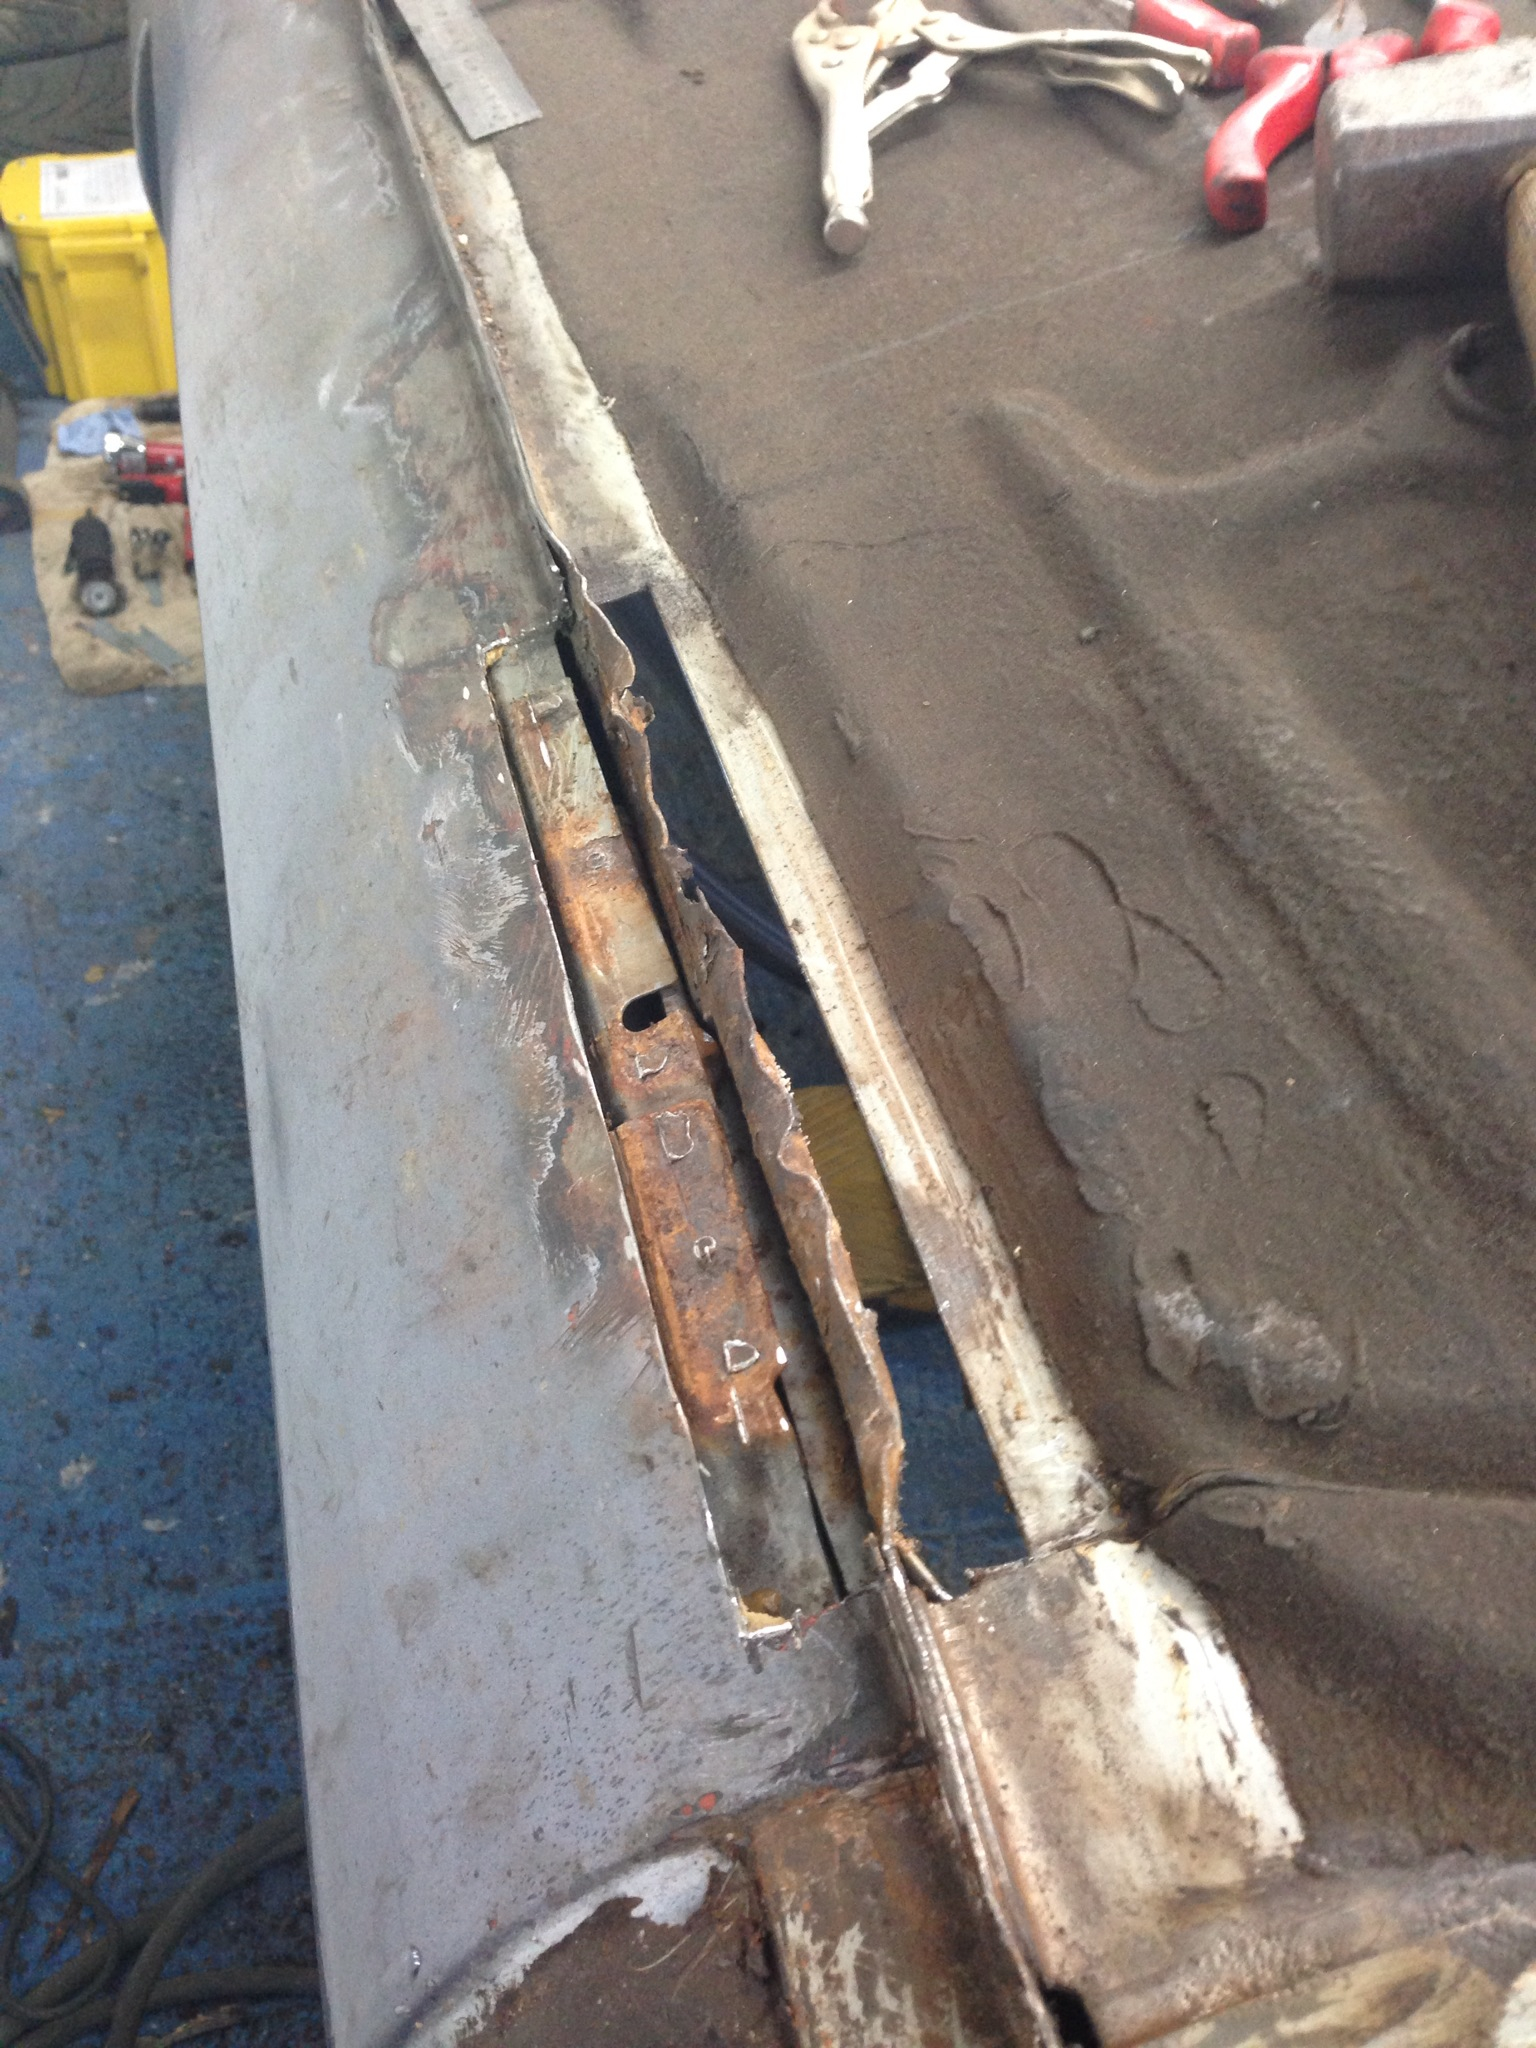
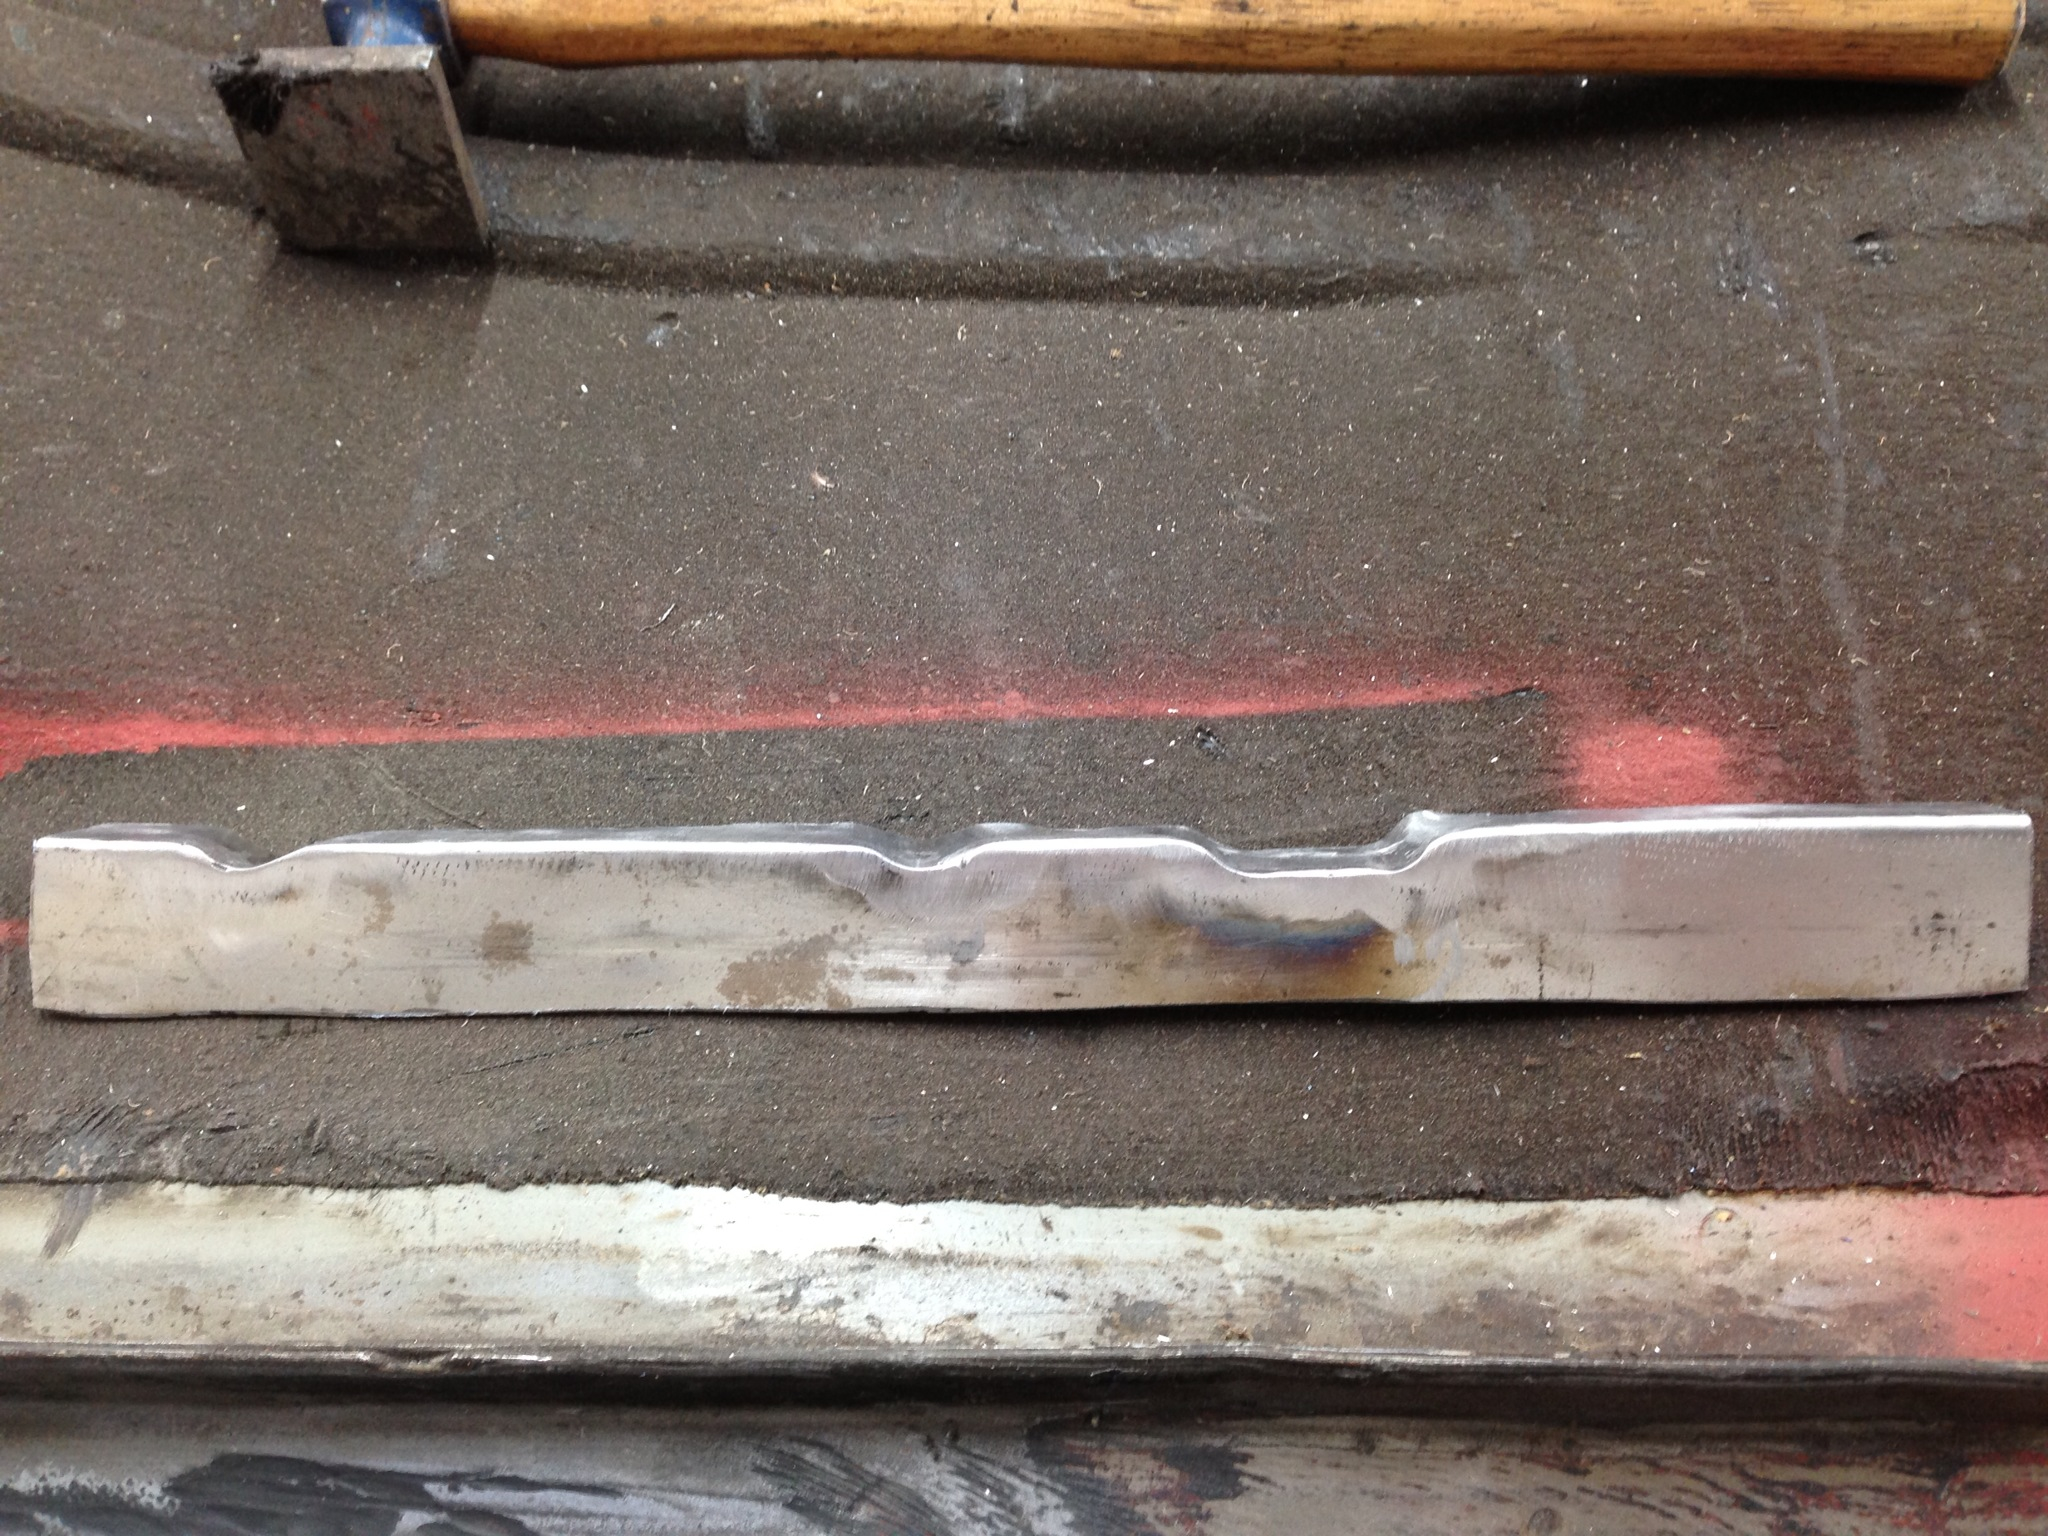
Sill strengthening panel prepped ready:
Floor pan repair:
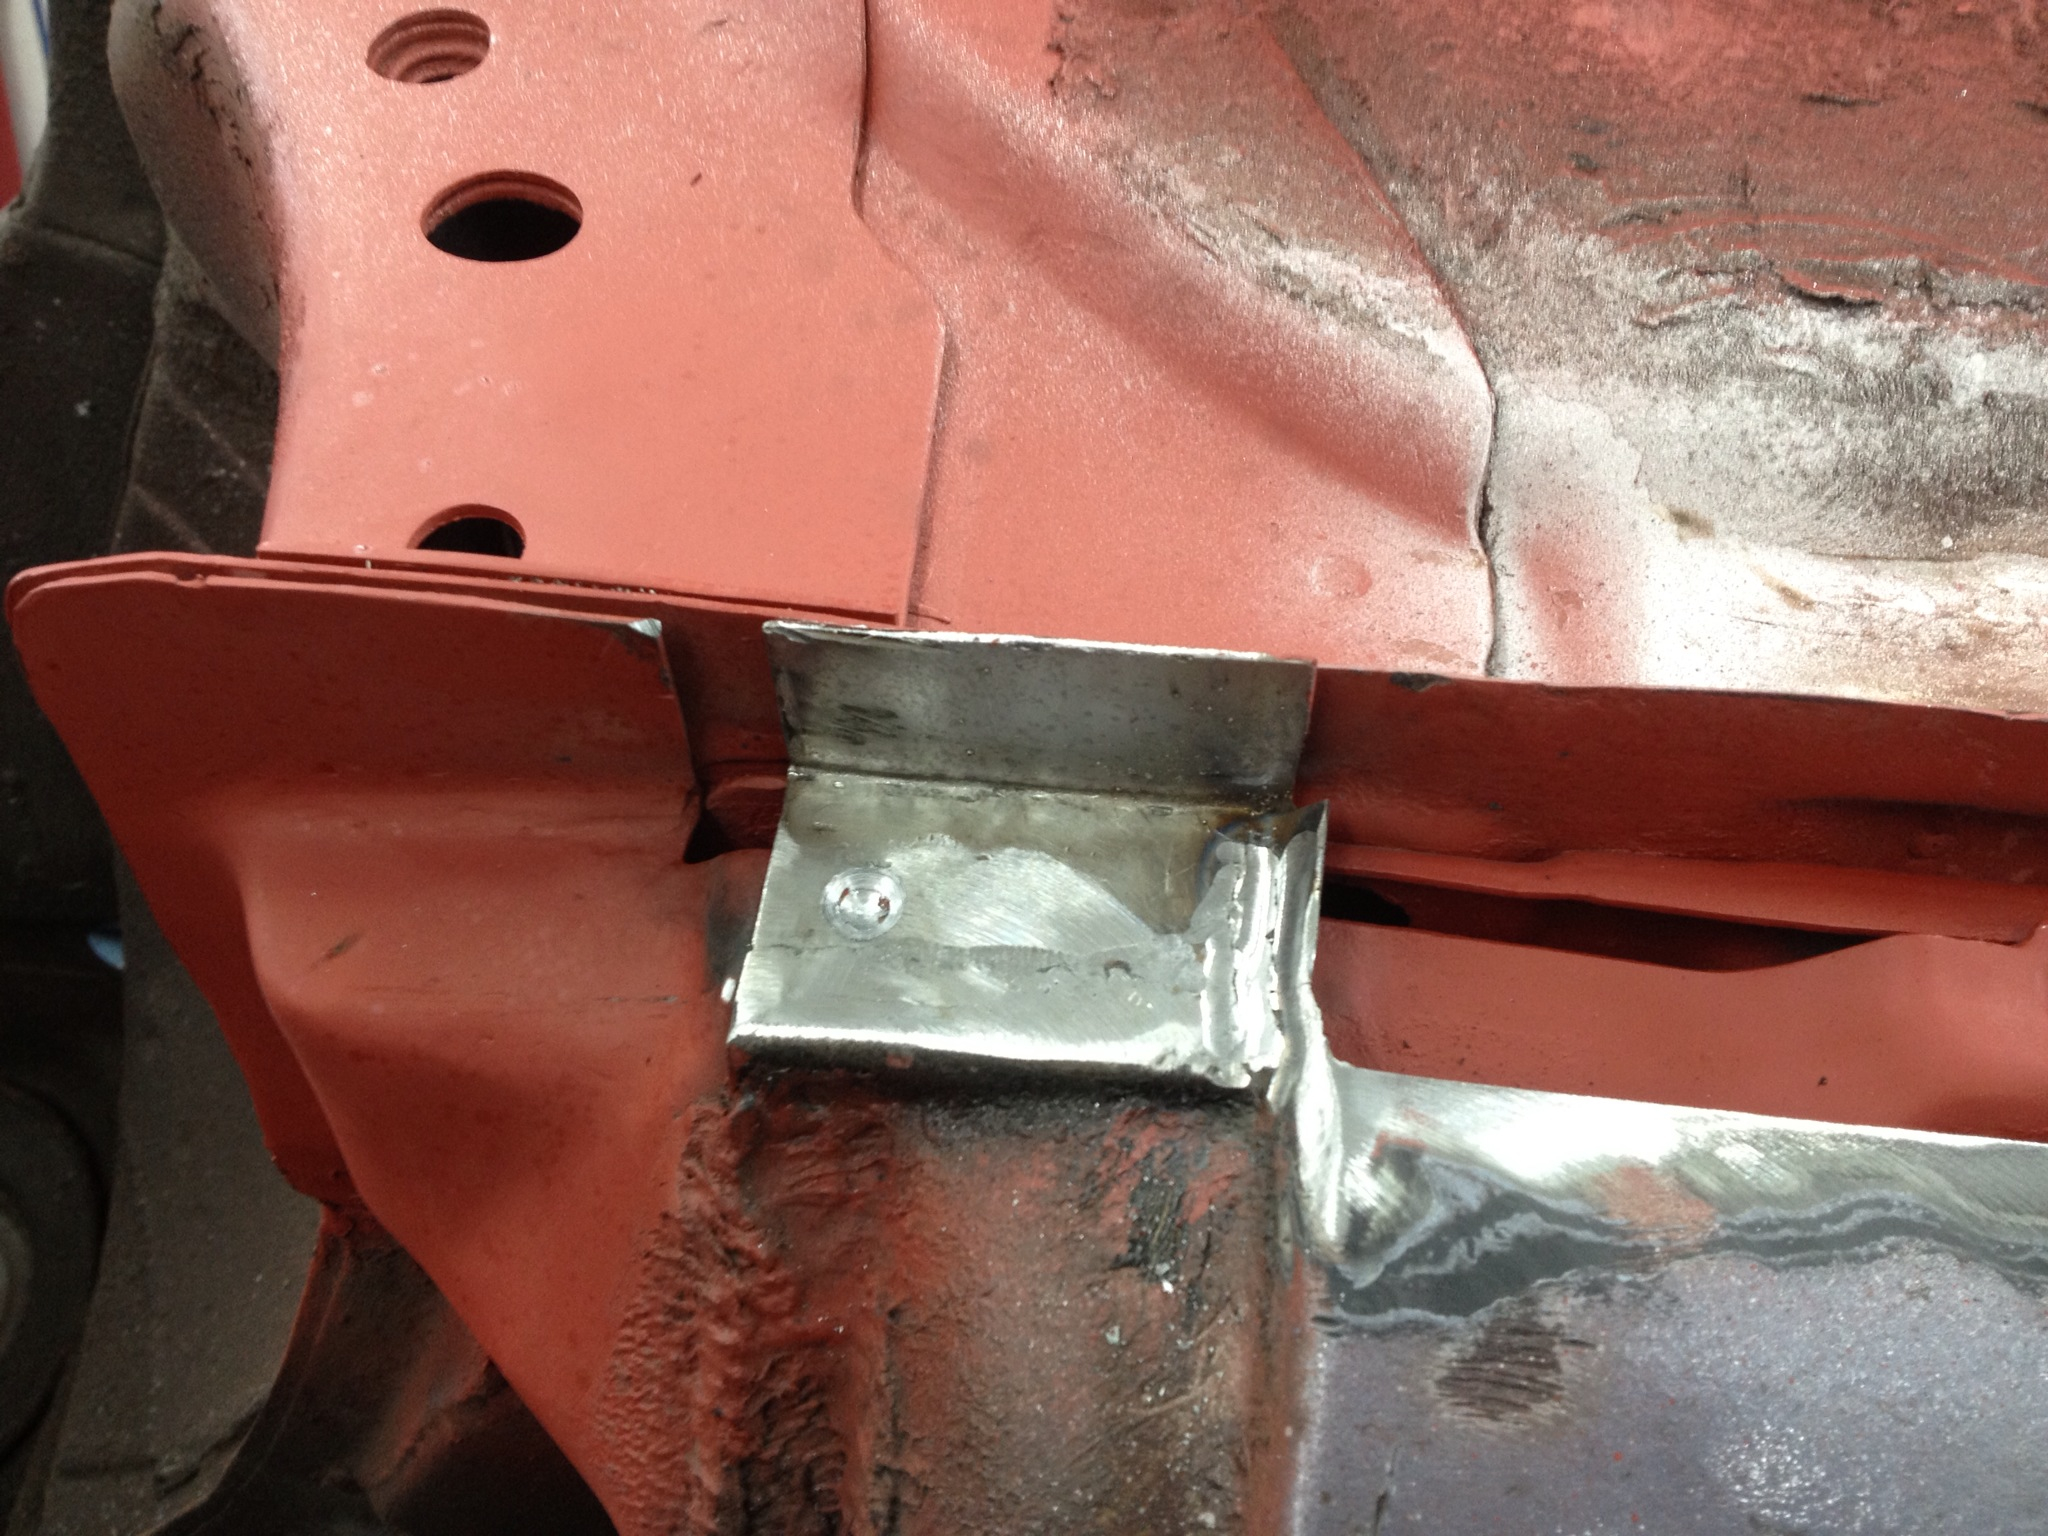
Decided to press in a riv-nut for the handbrake cable to replace the self tapper screw that ford use. Had to make a hole in the inner panel to allow the threads to sit straight:
While the sill was open and just before I sealed it up I sprayed in some Dinitrol cavity wax - more will follow once all the rust repairs are complete:
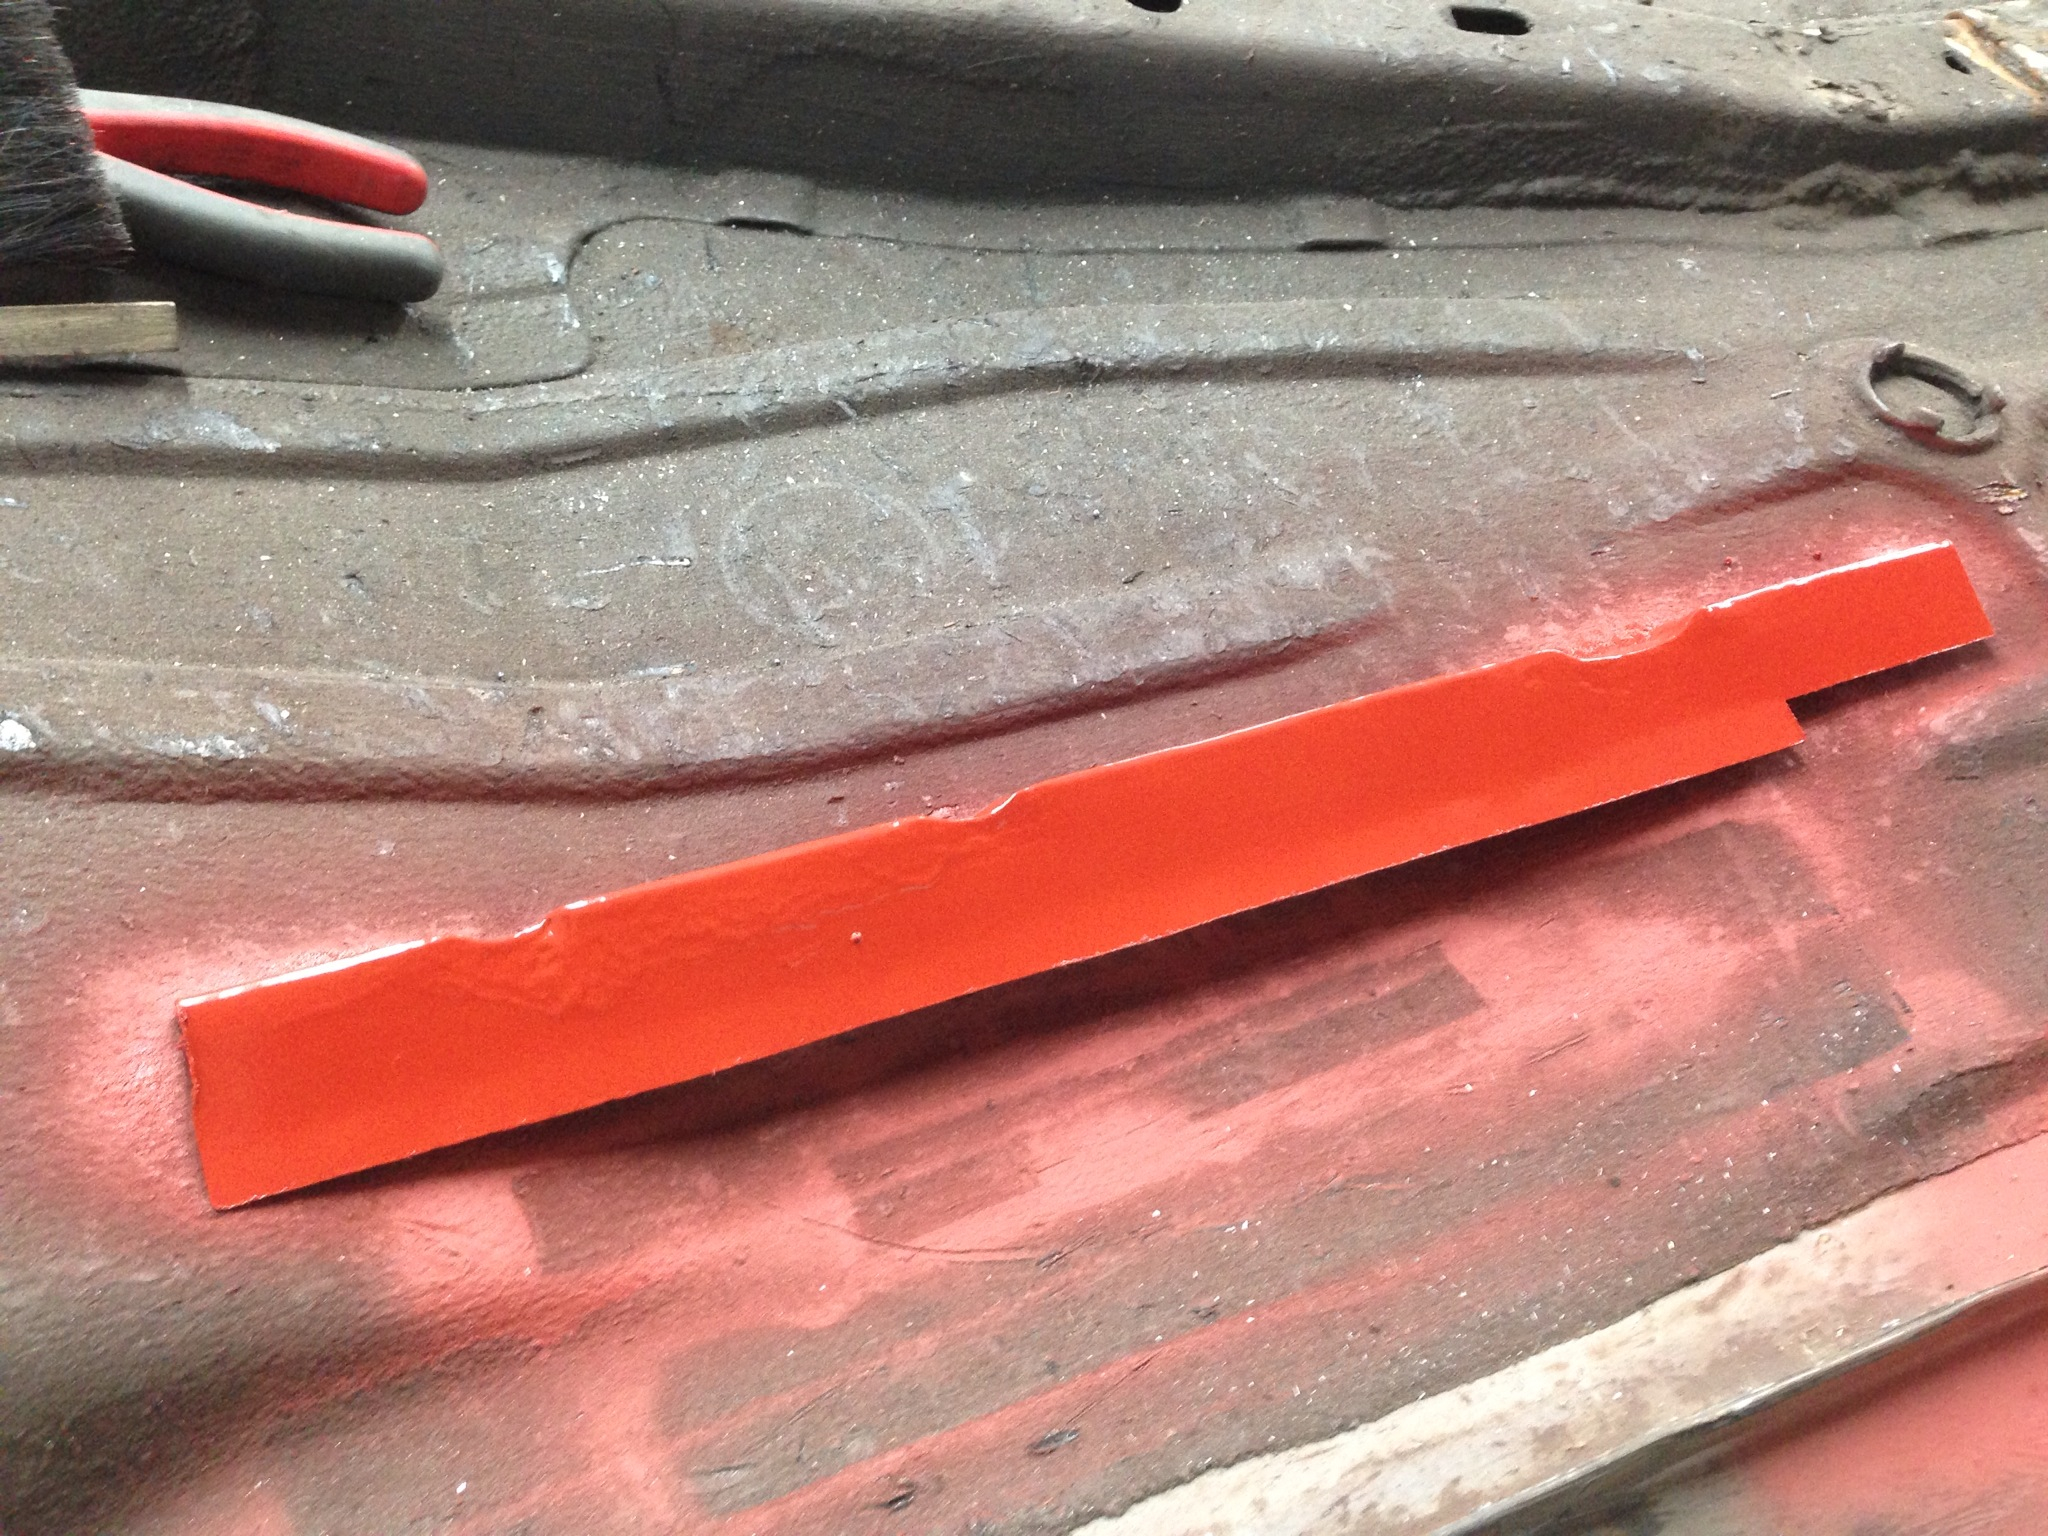
At �215 from Ford!!!! Was the repair panel for the outer sill - typical ford only sell this panel as a replacement for the full outer sill and nothing smaller!
It then took a good hour or so to pluck up the courage to then take an angle grinder to it for the bit I needed:
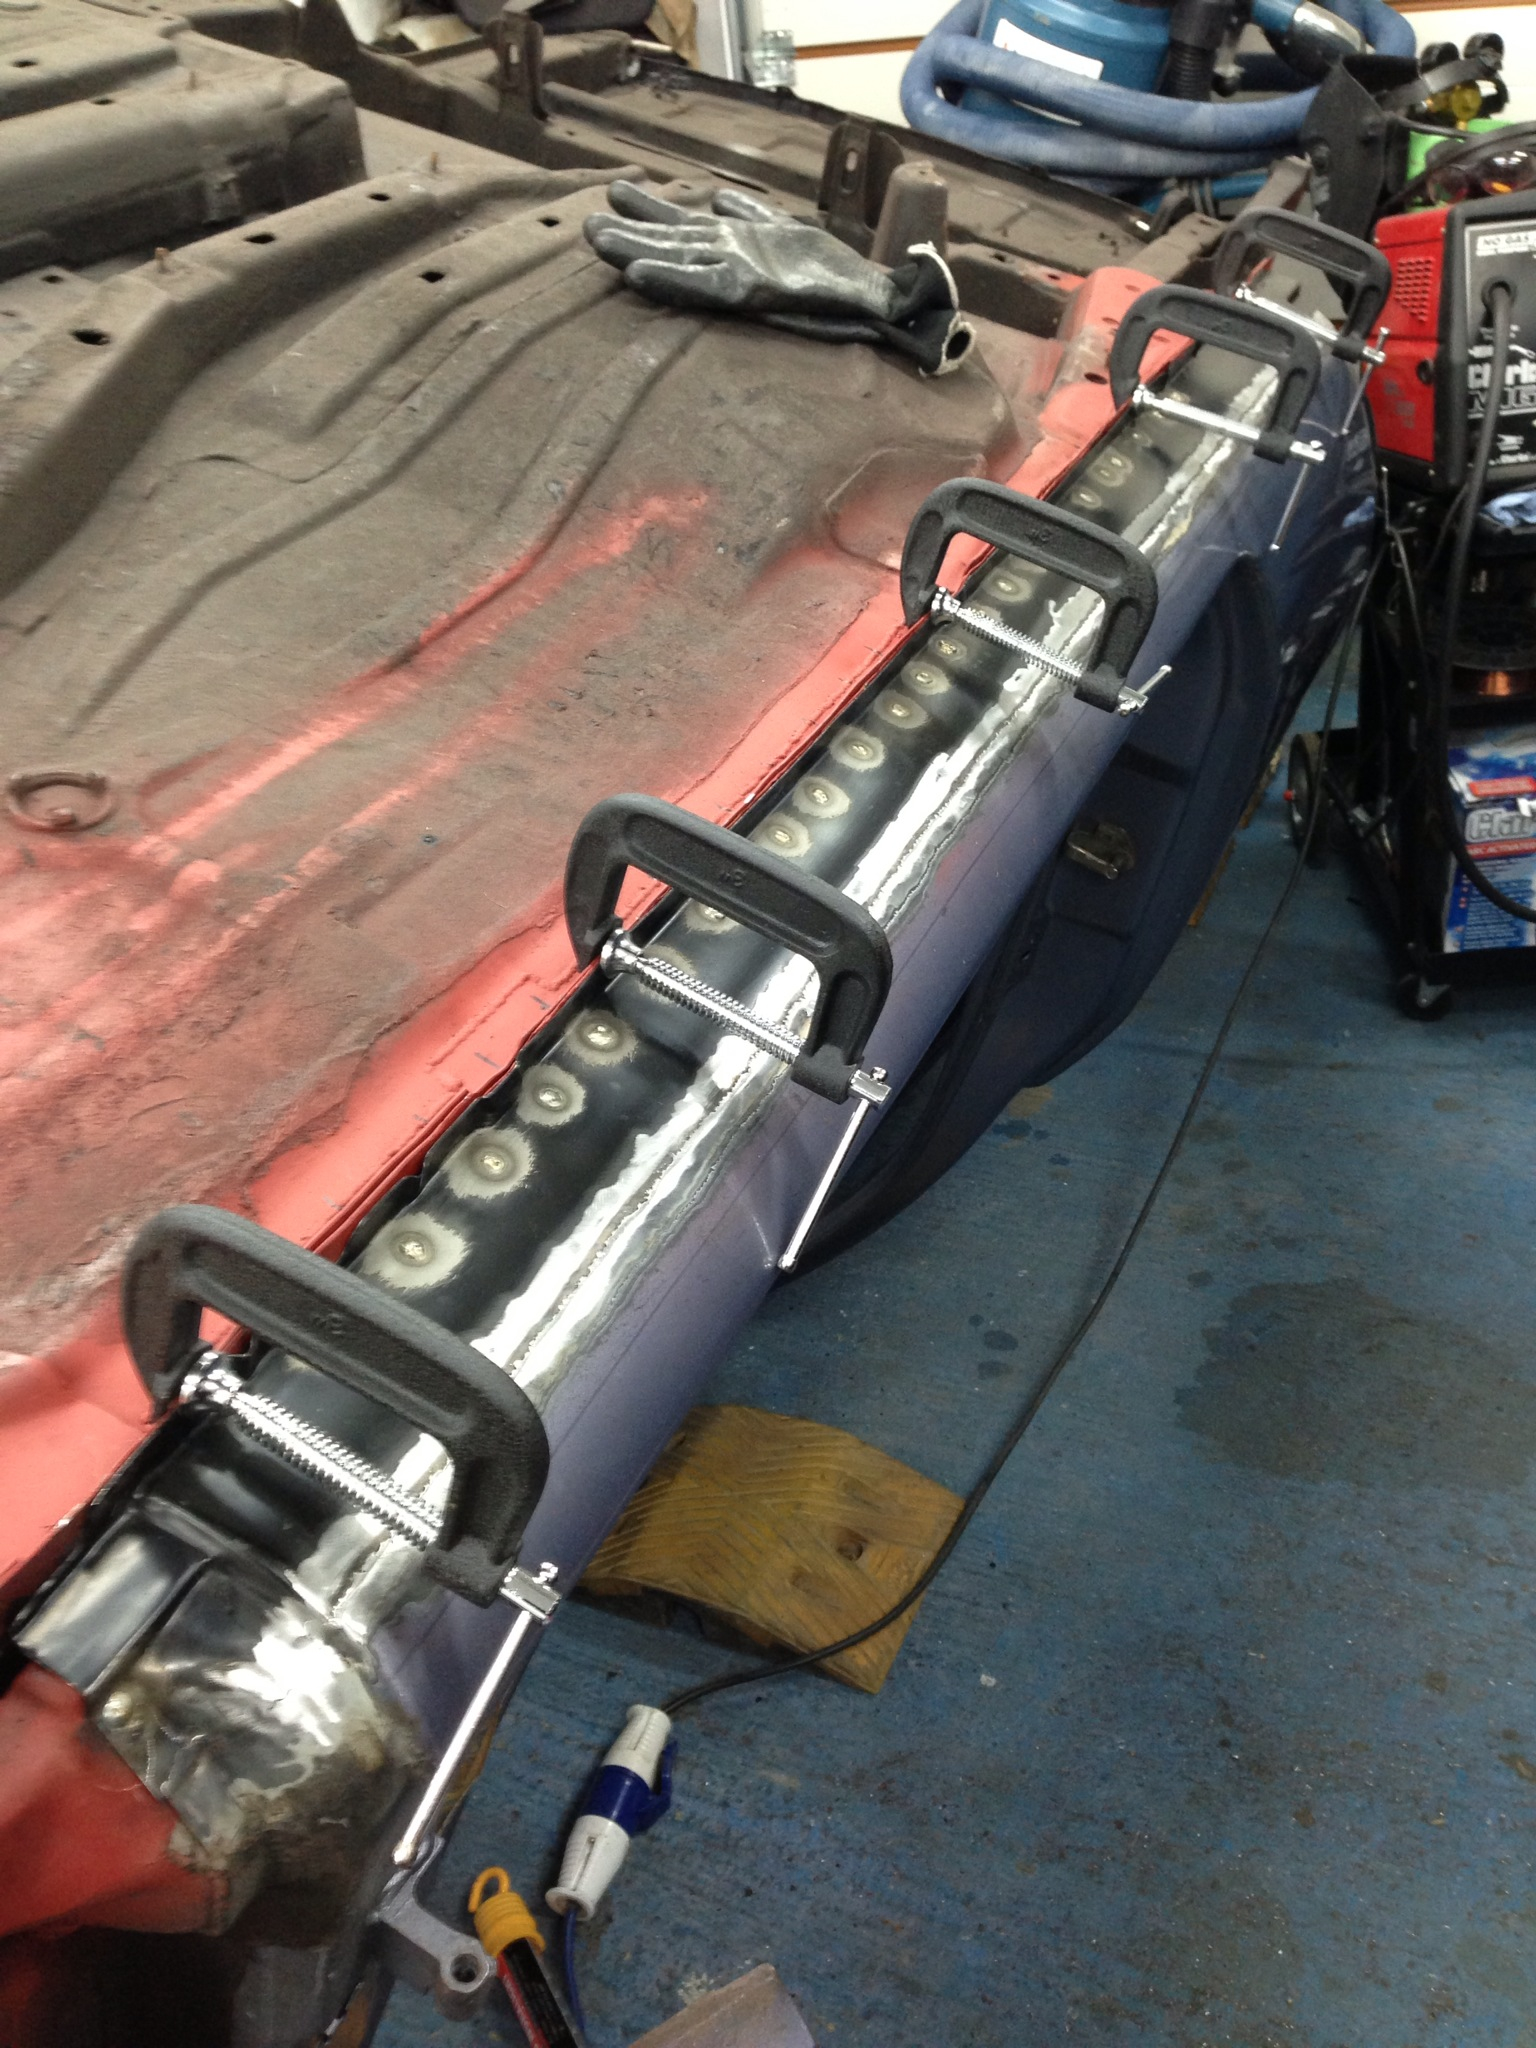
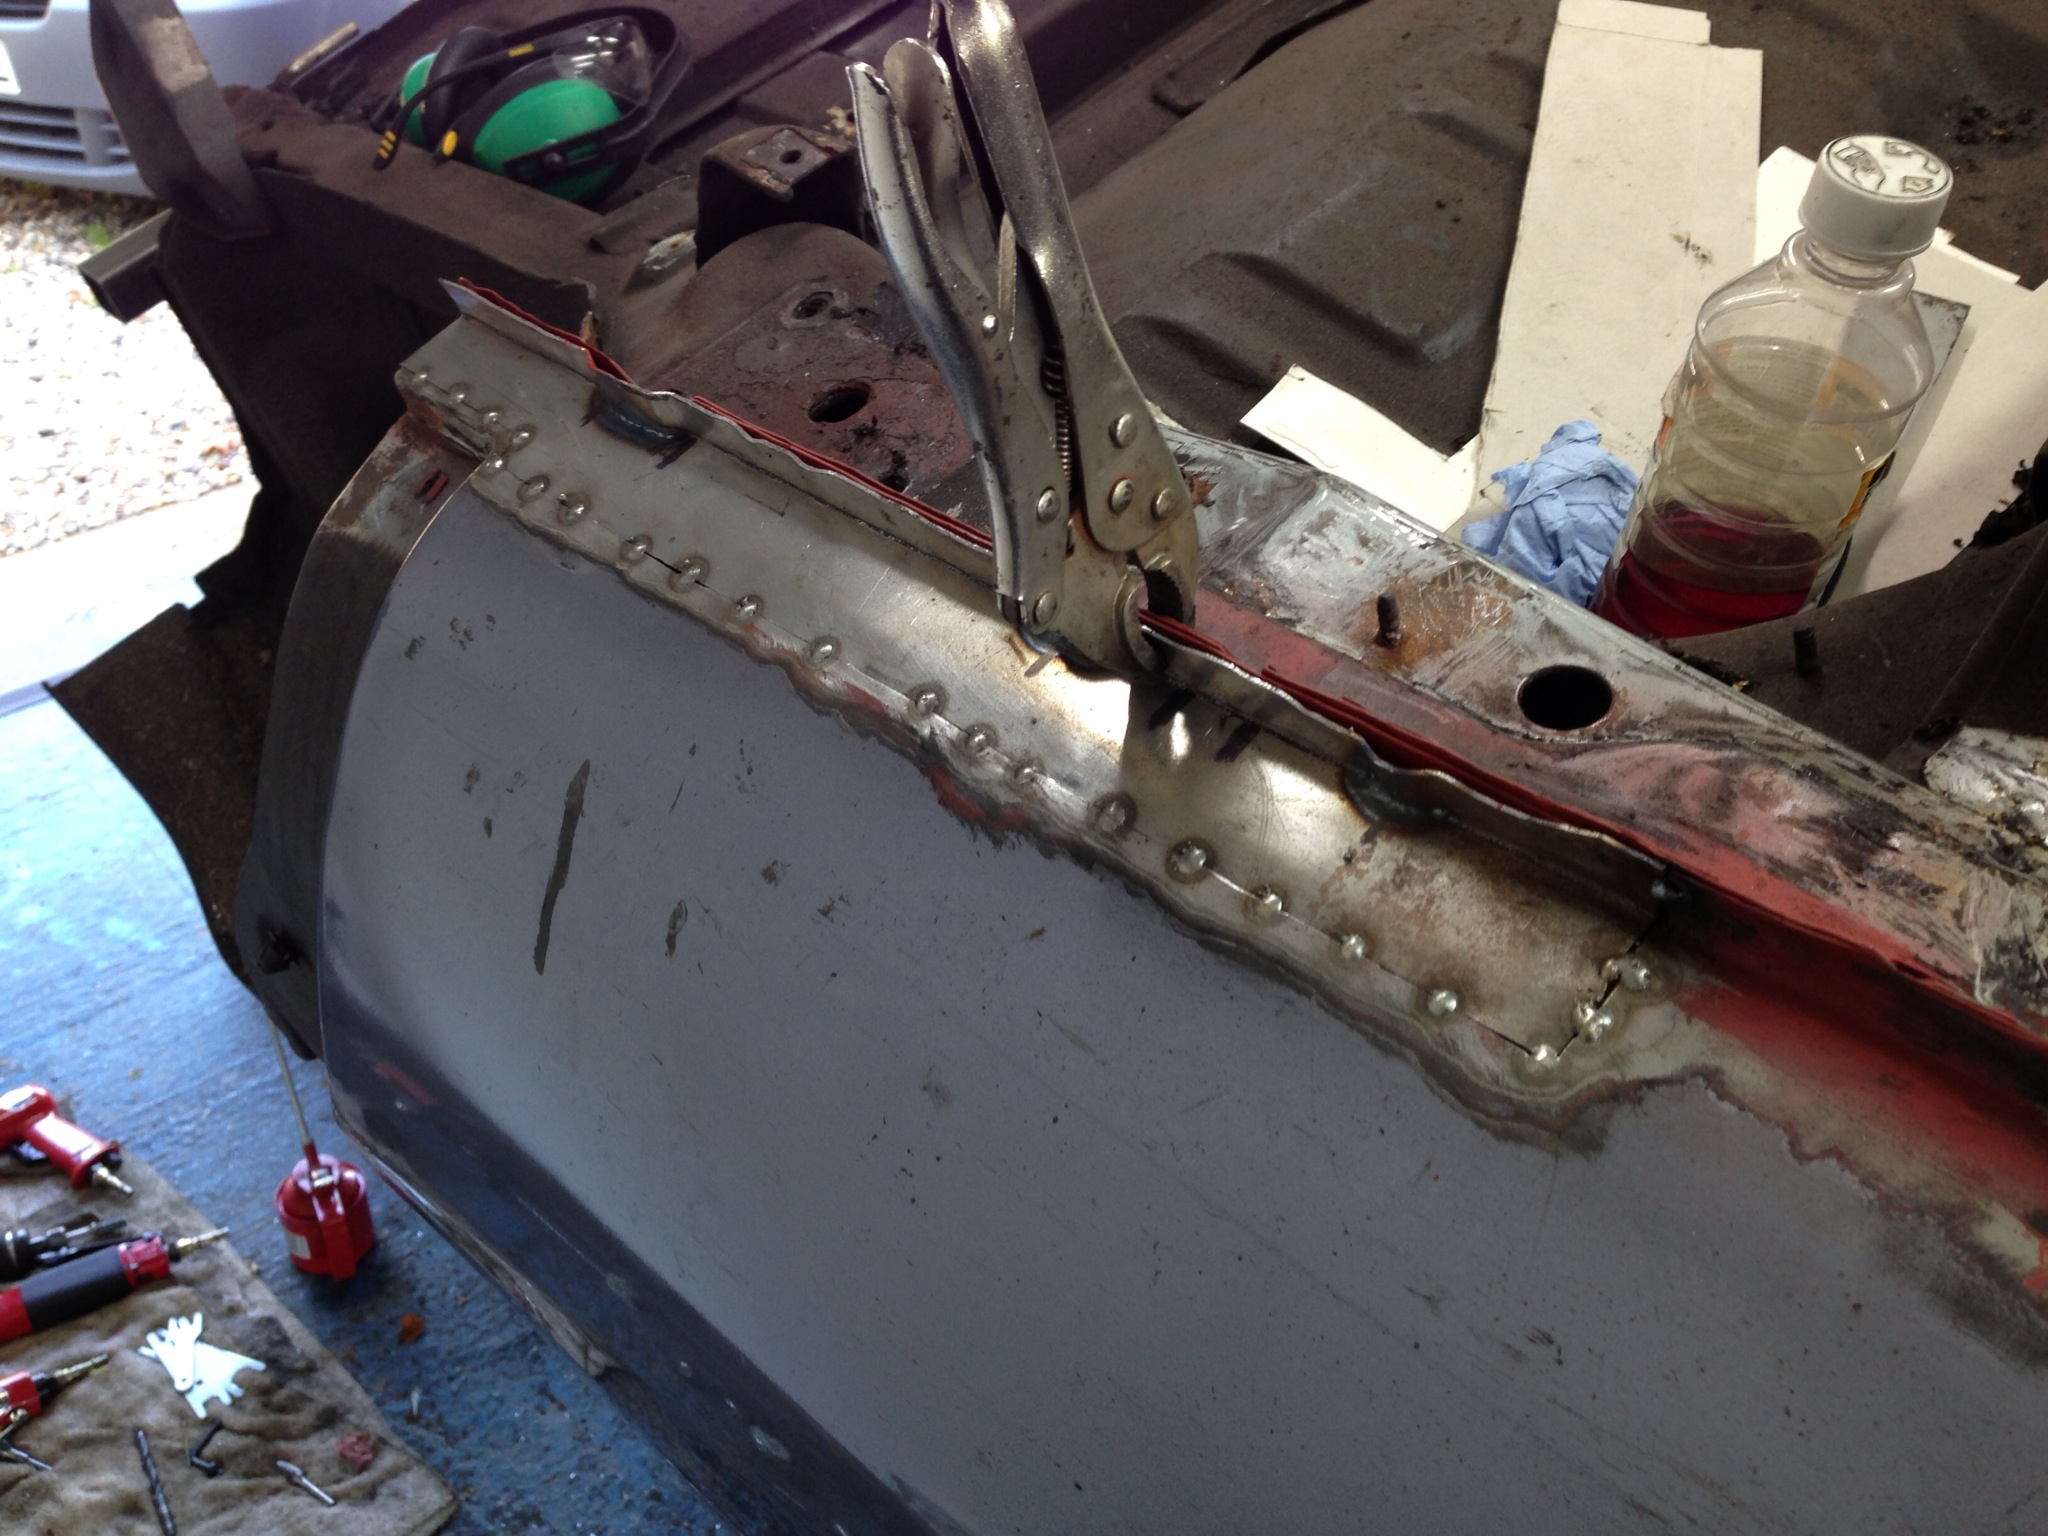
Test fitted and lined up:
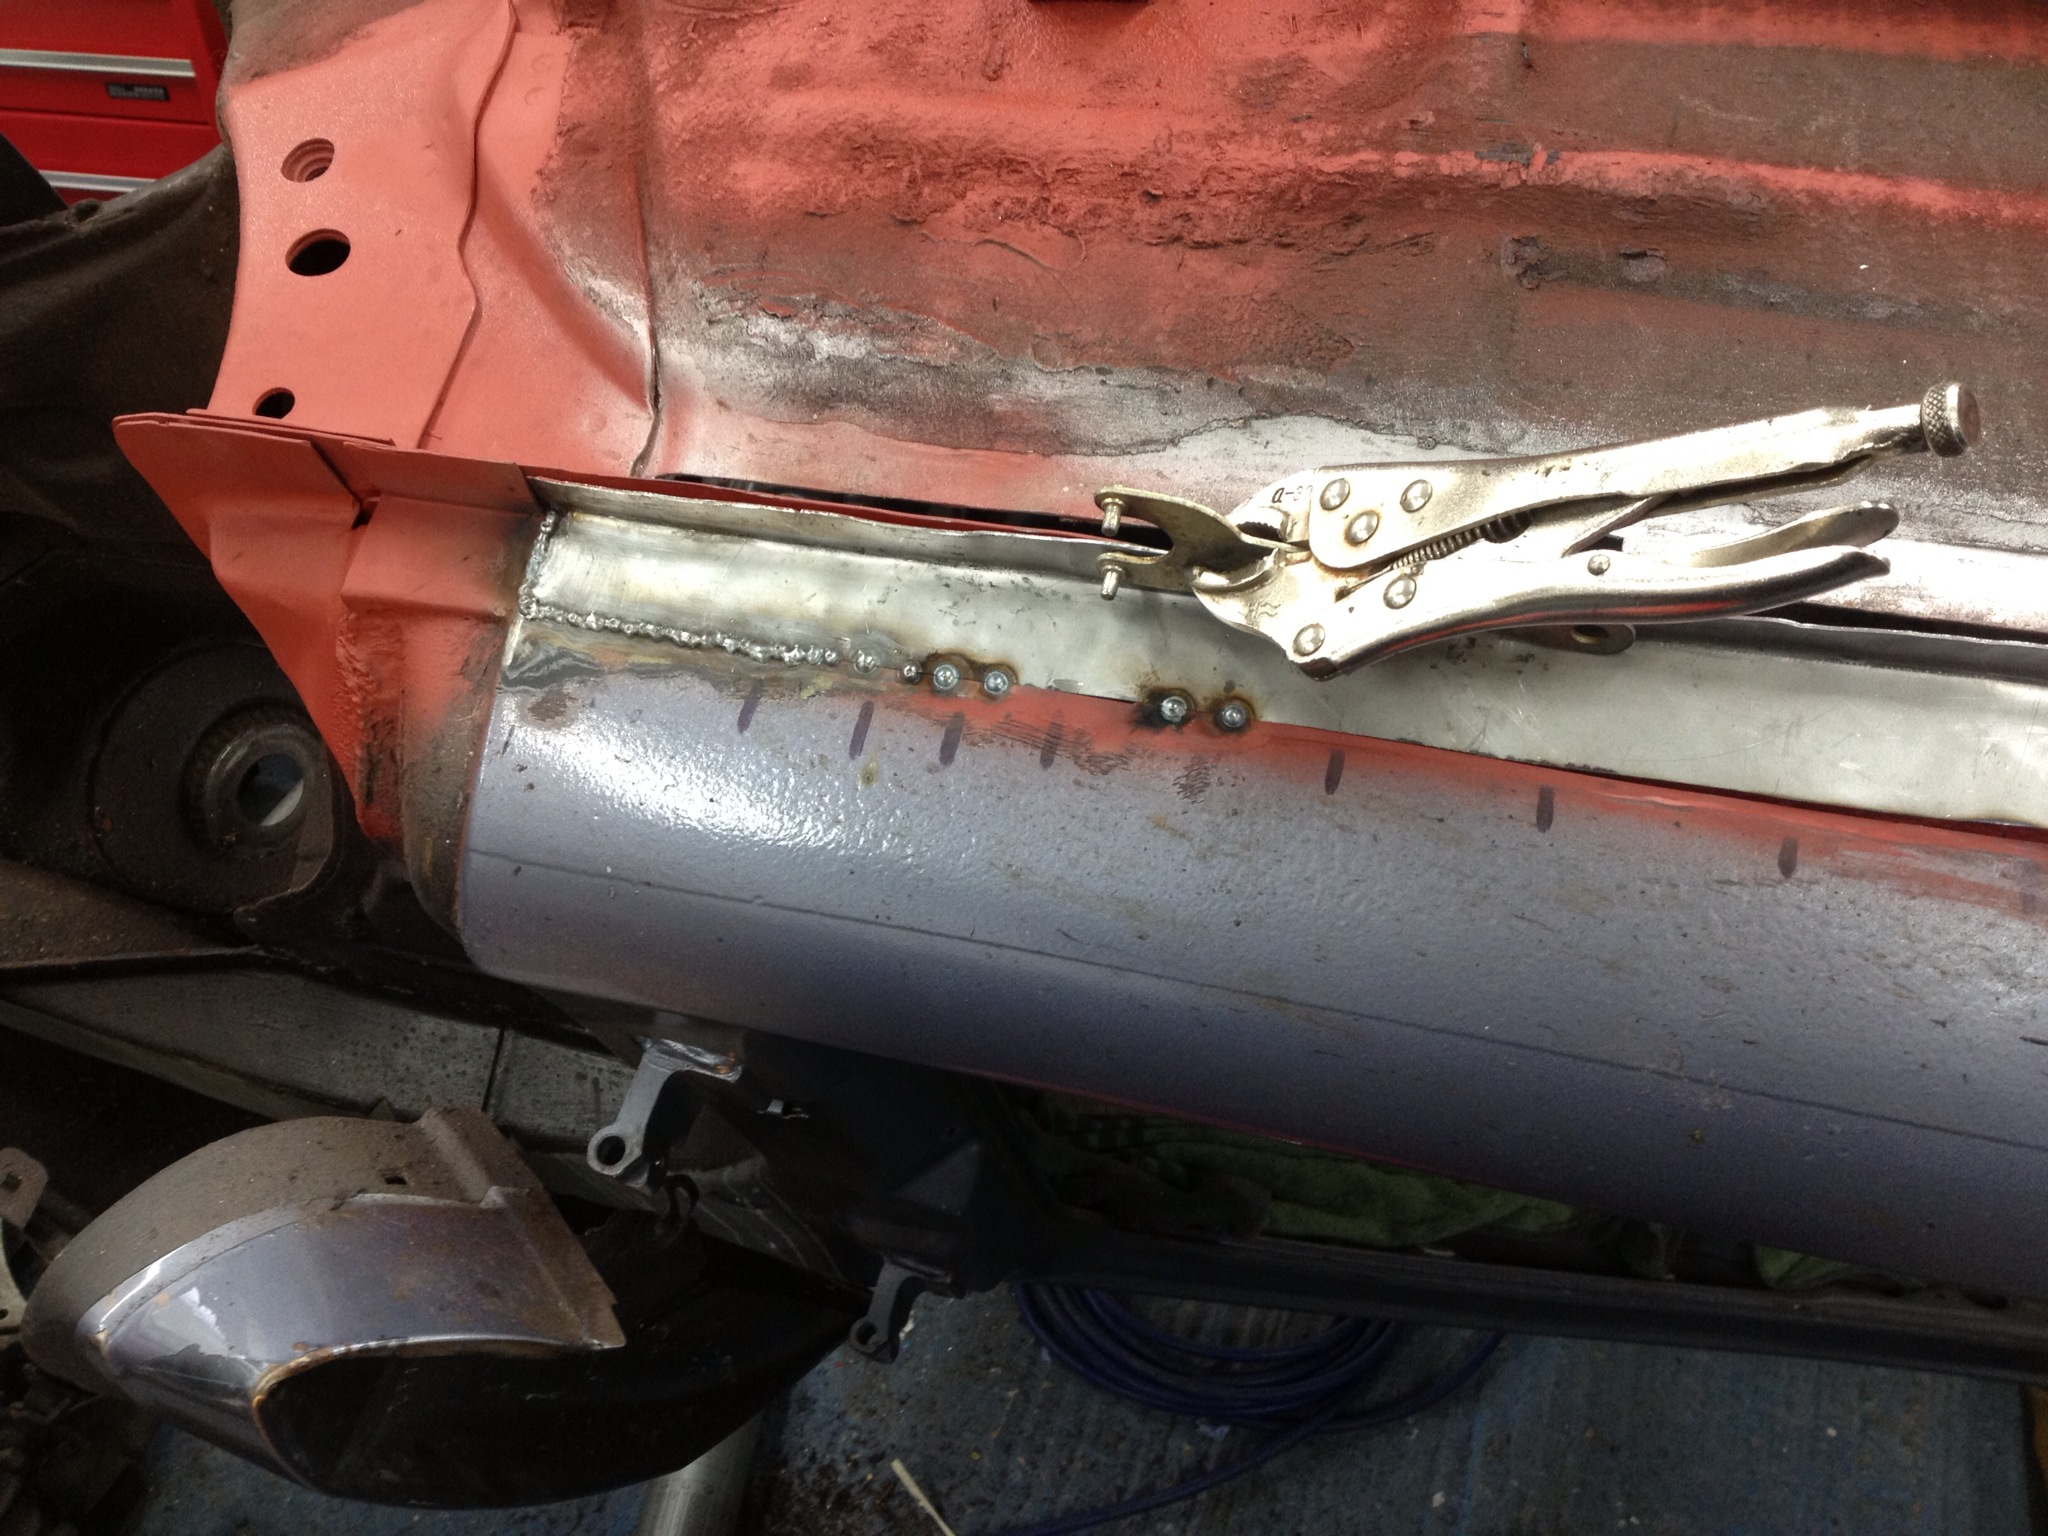
Tacked in:
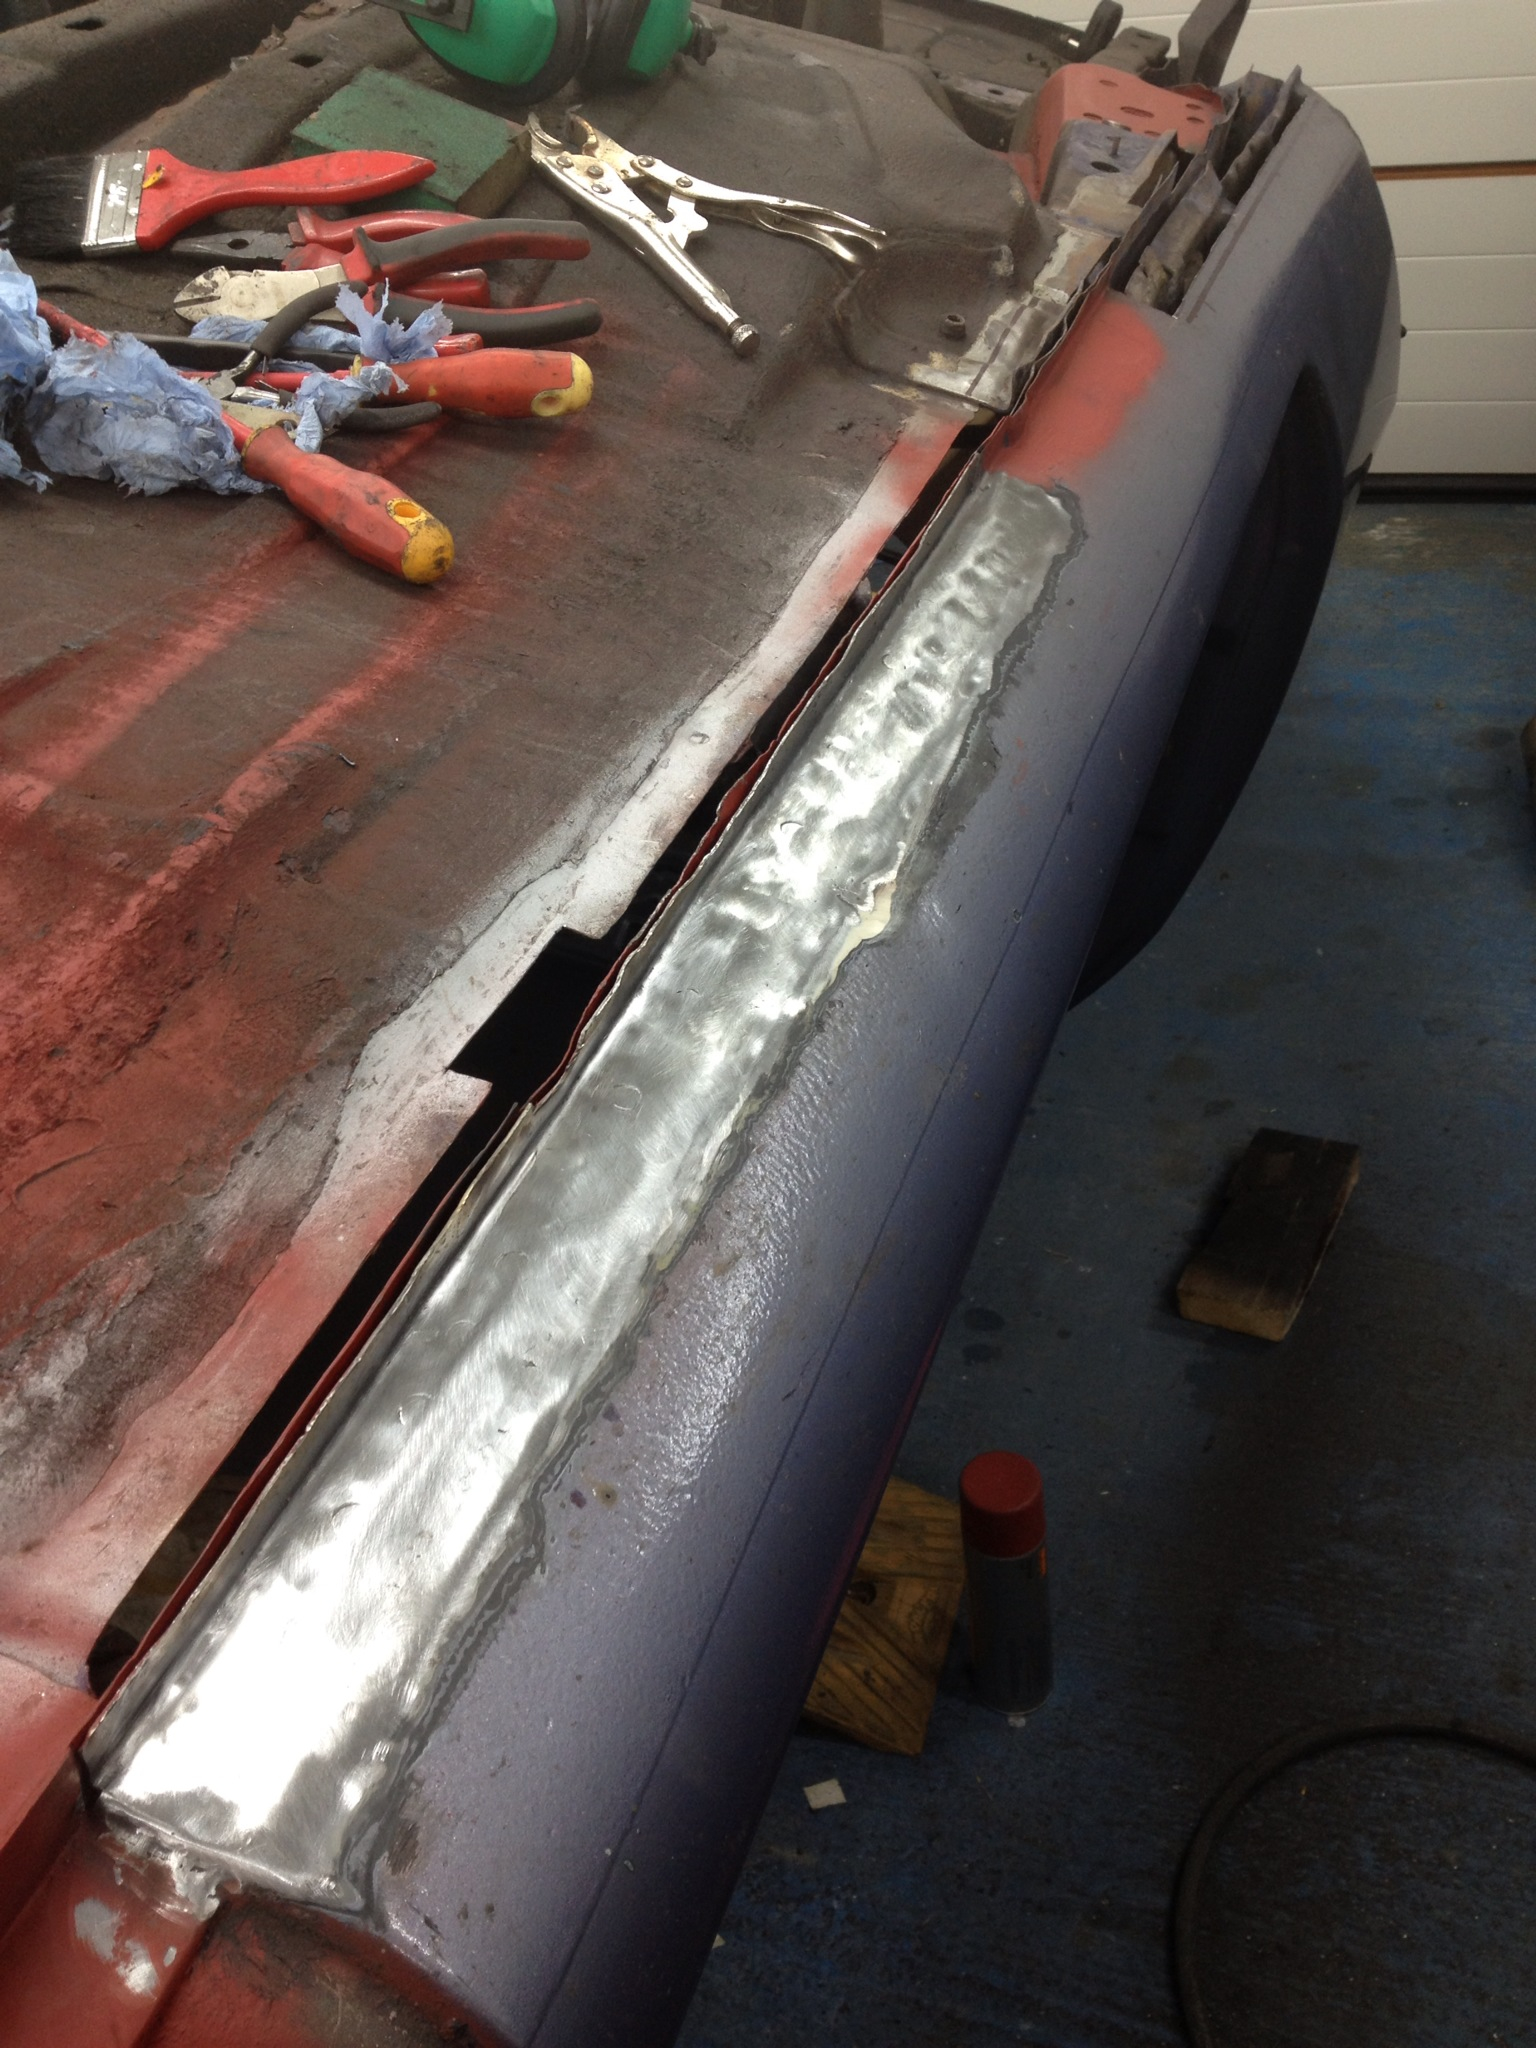
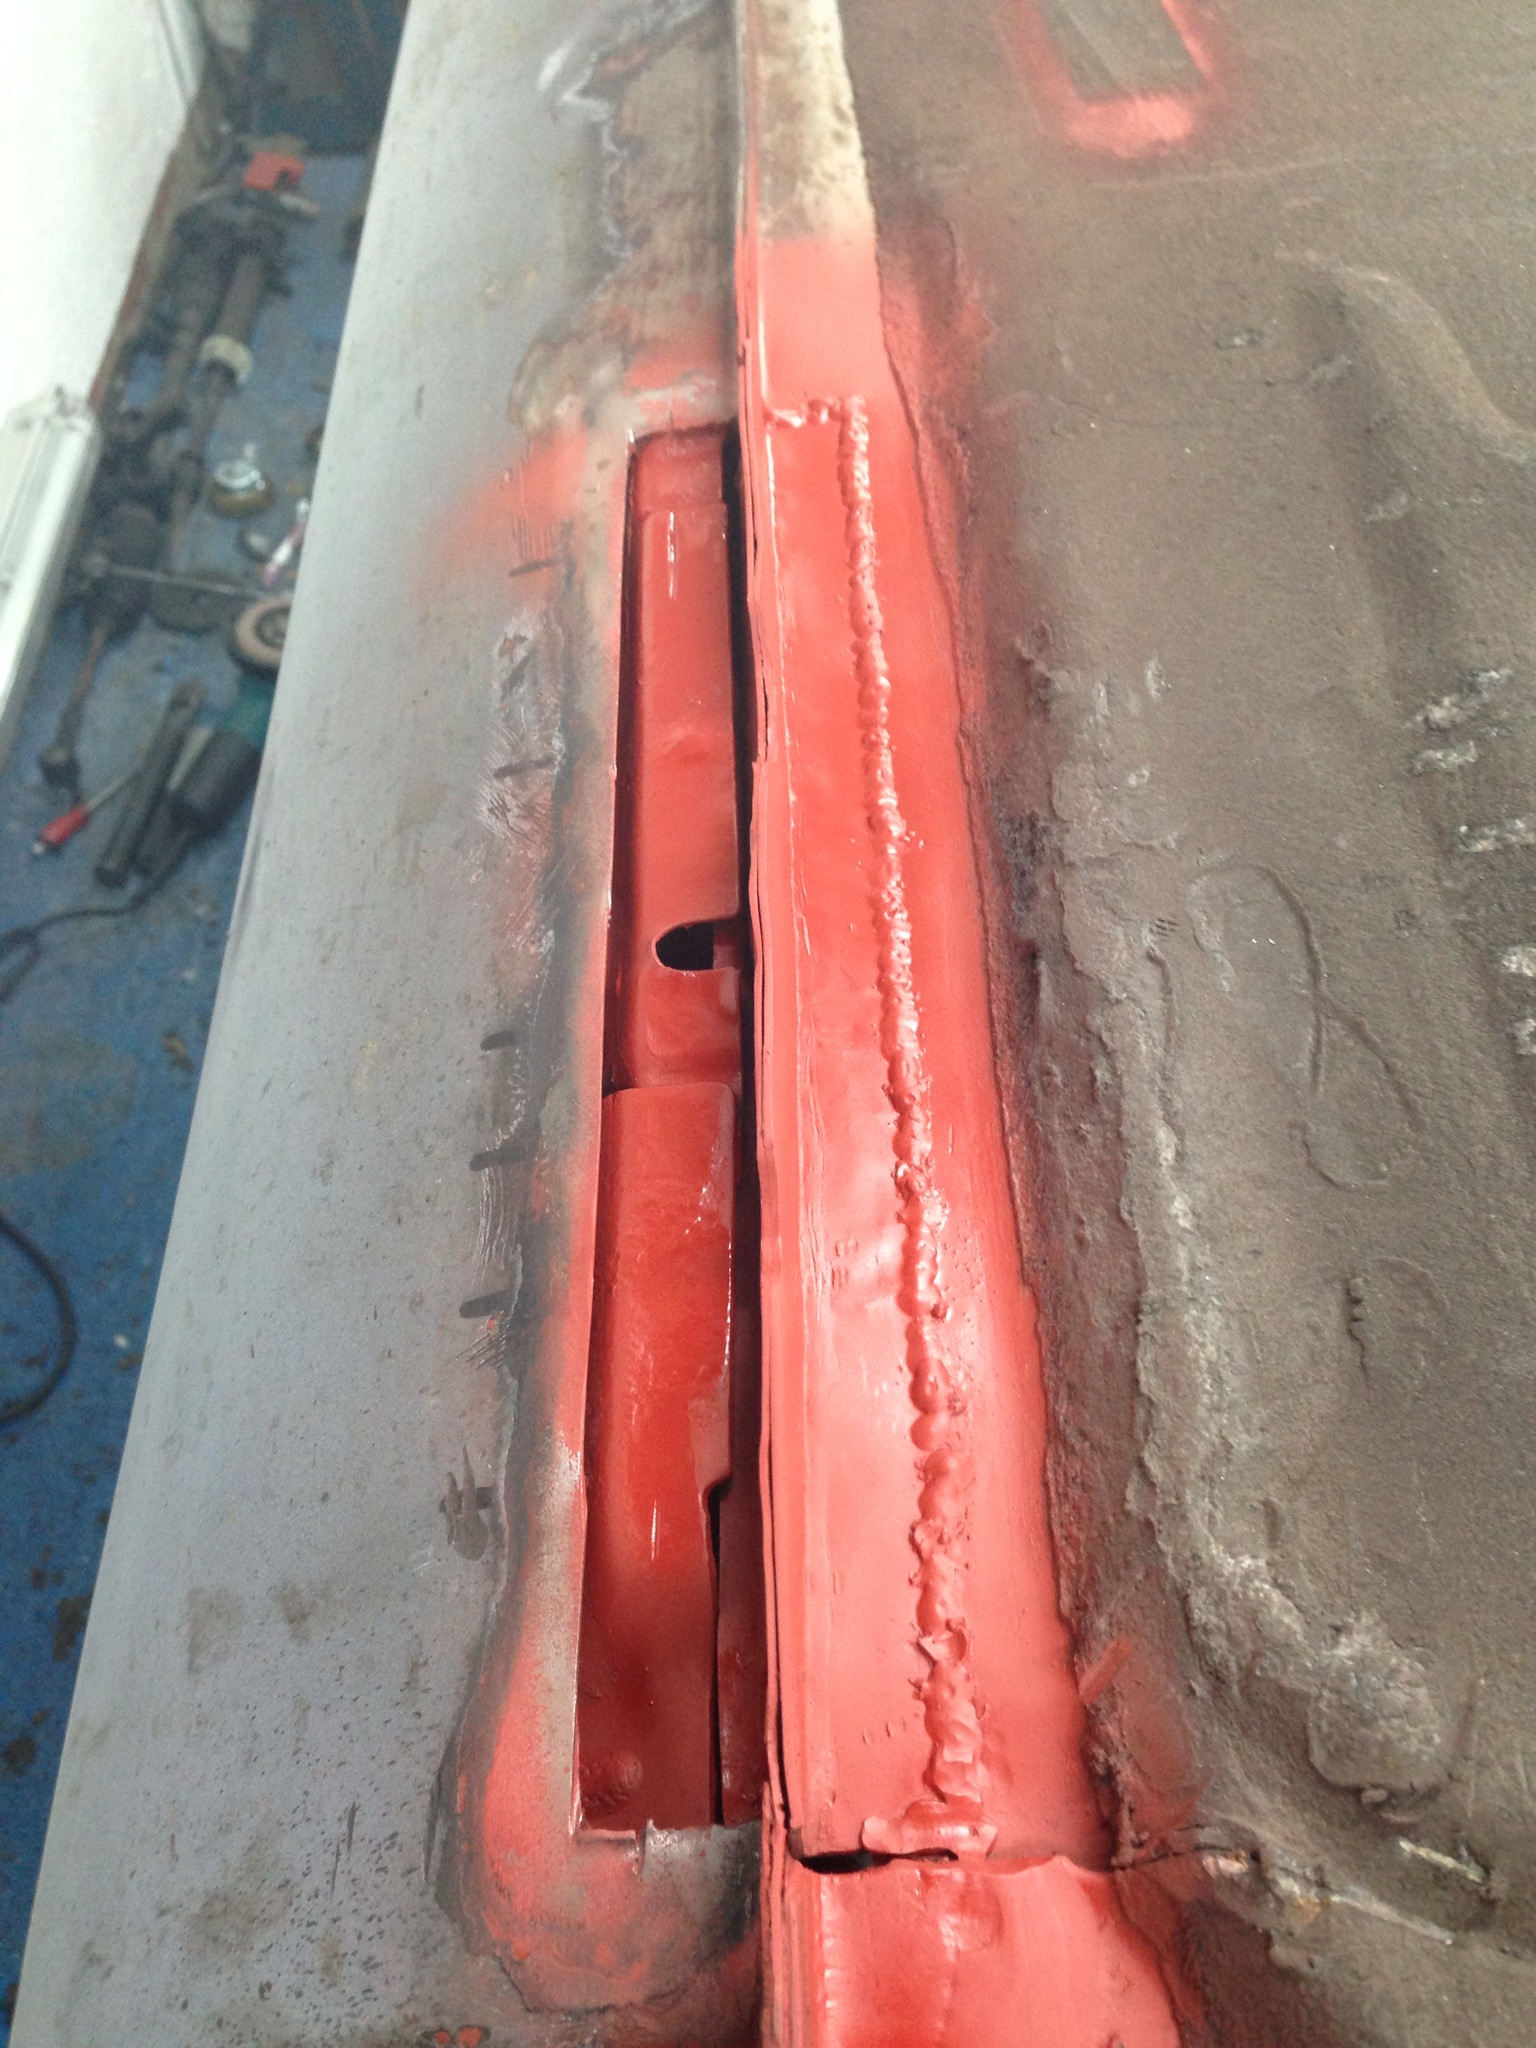
Welding into place:
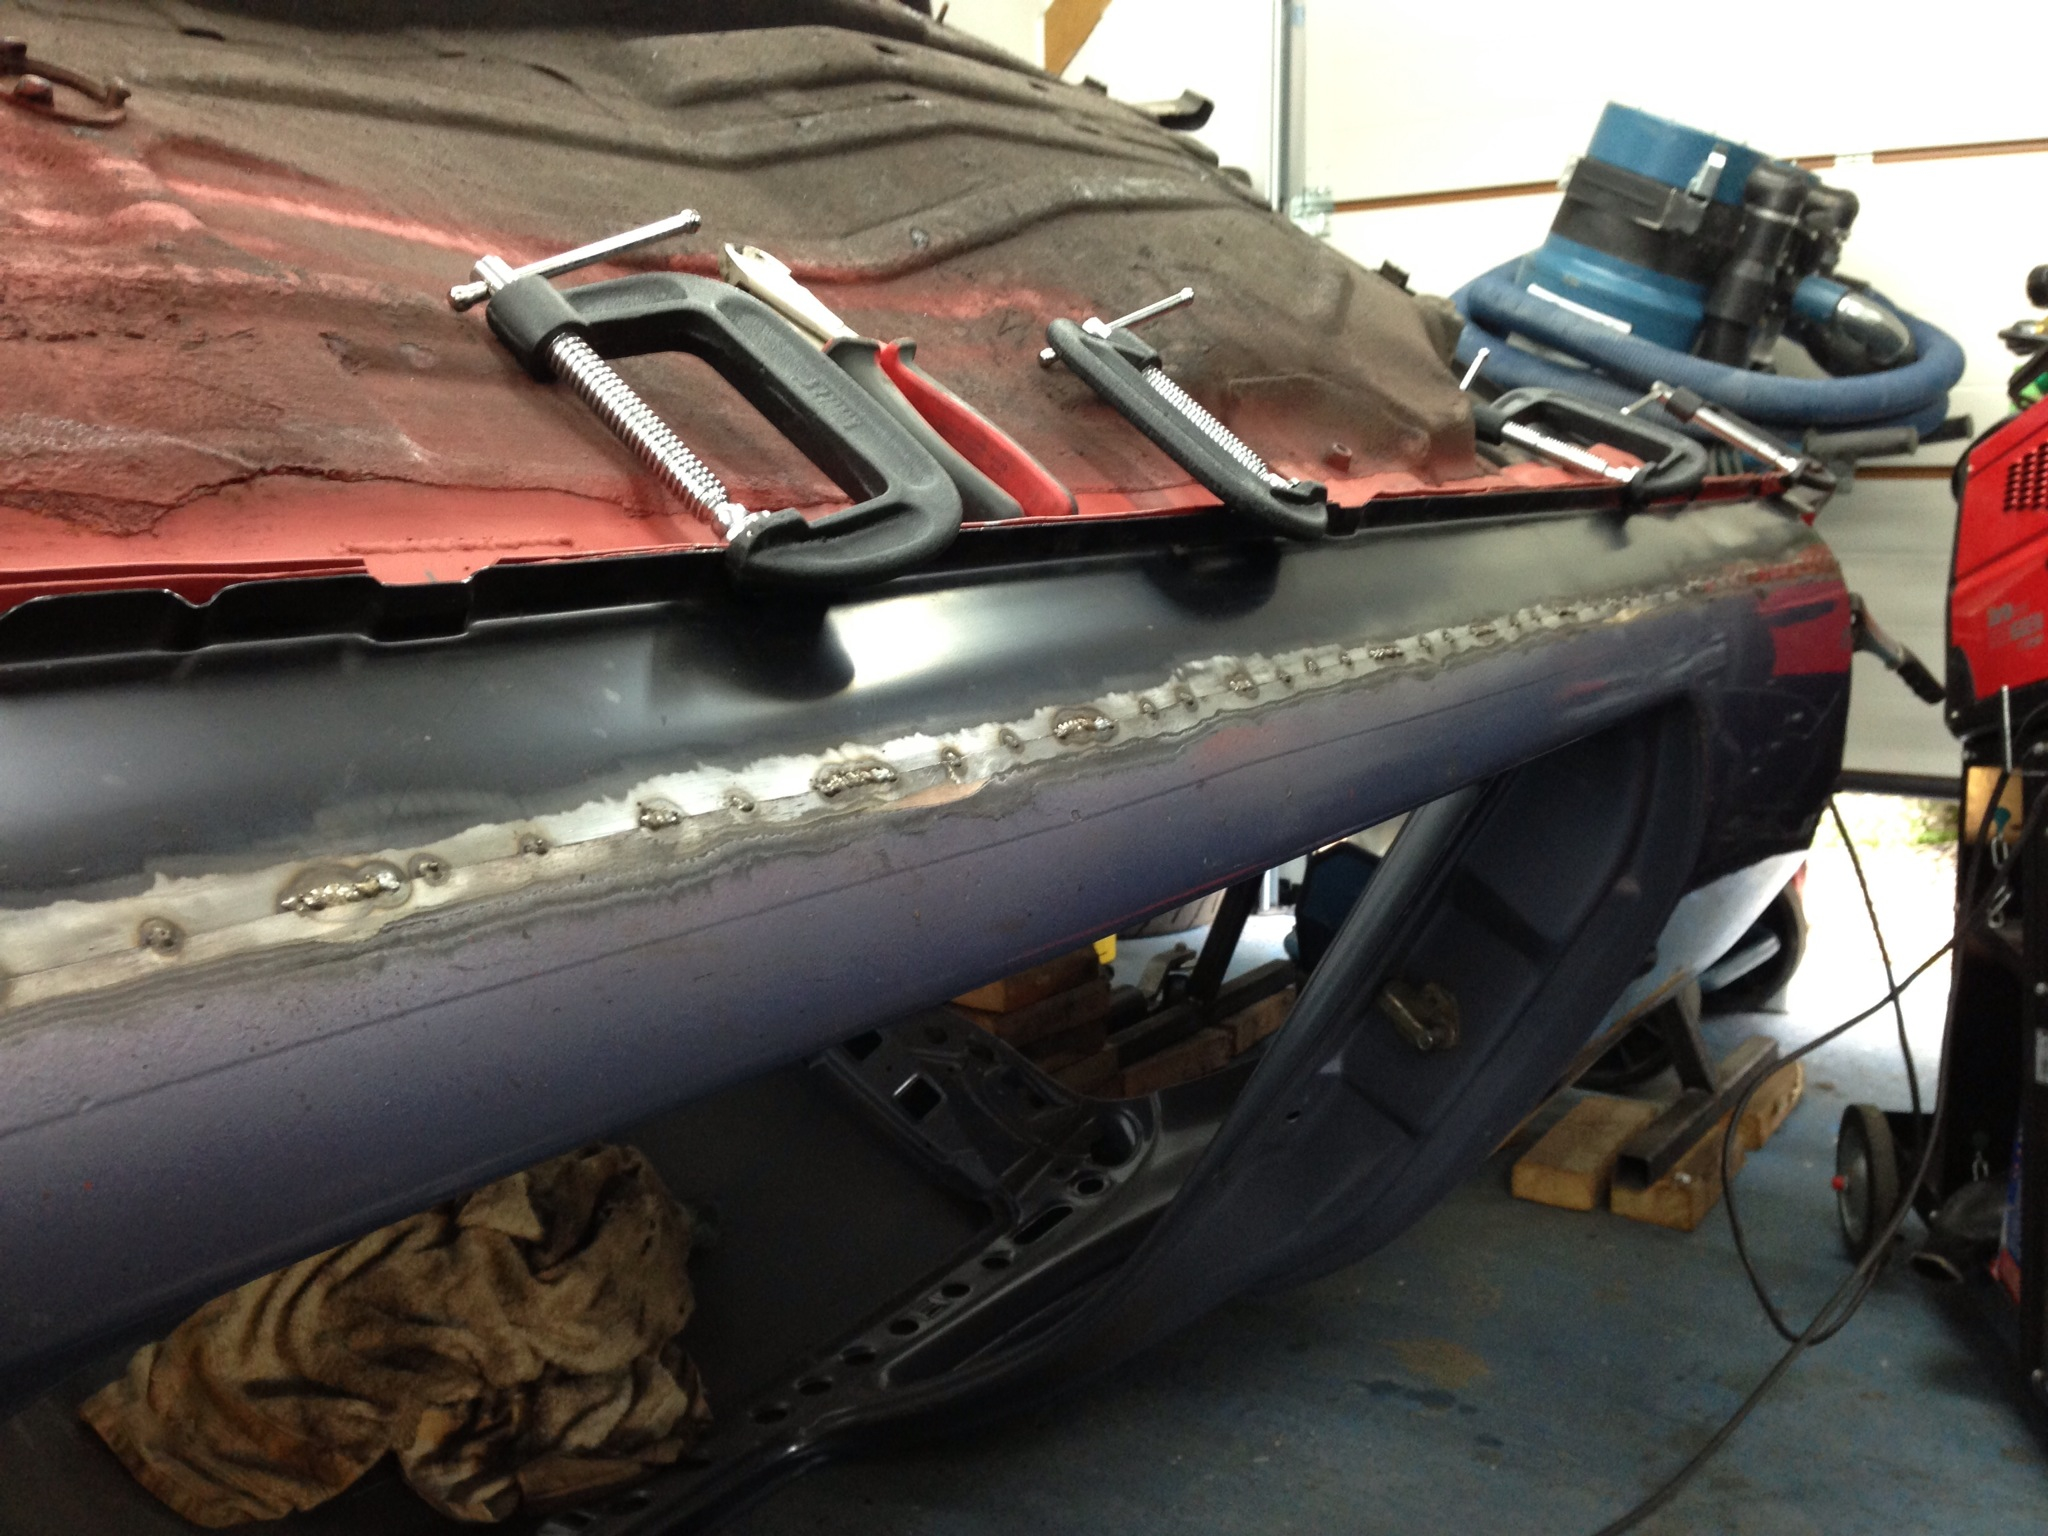
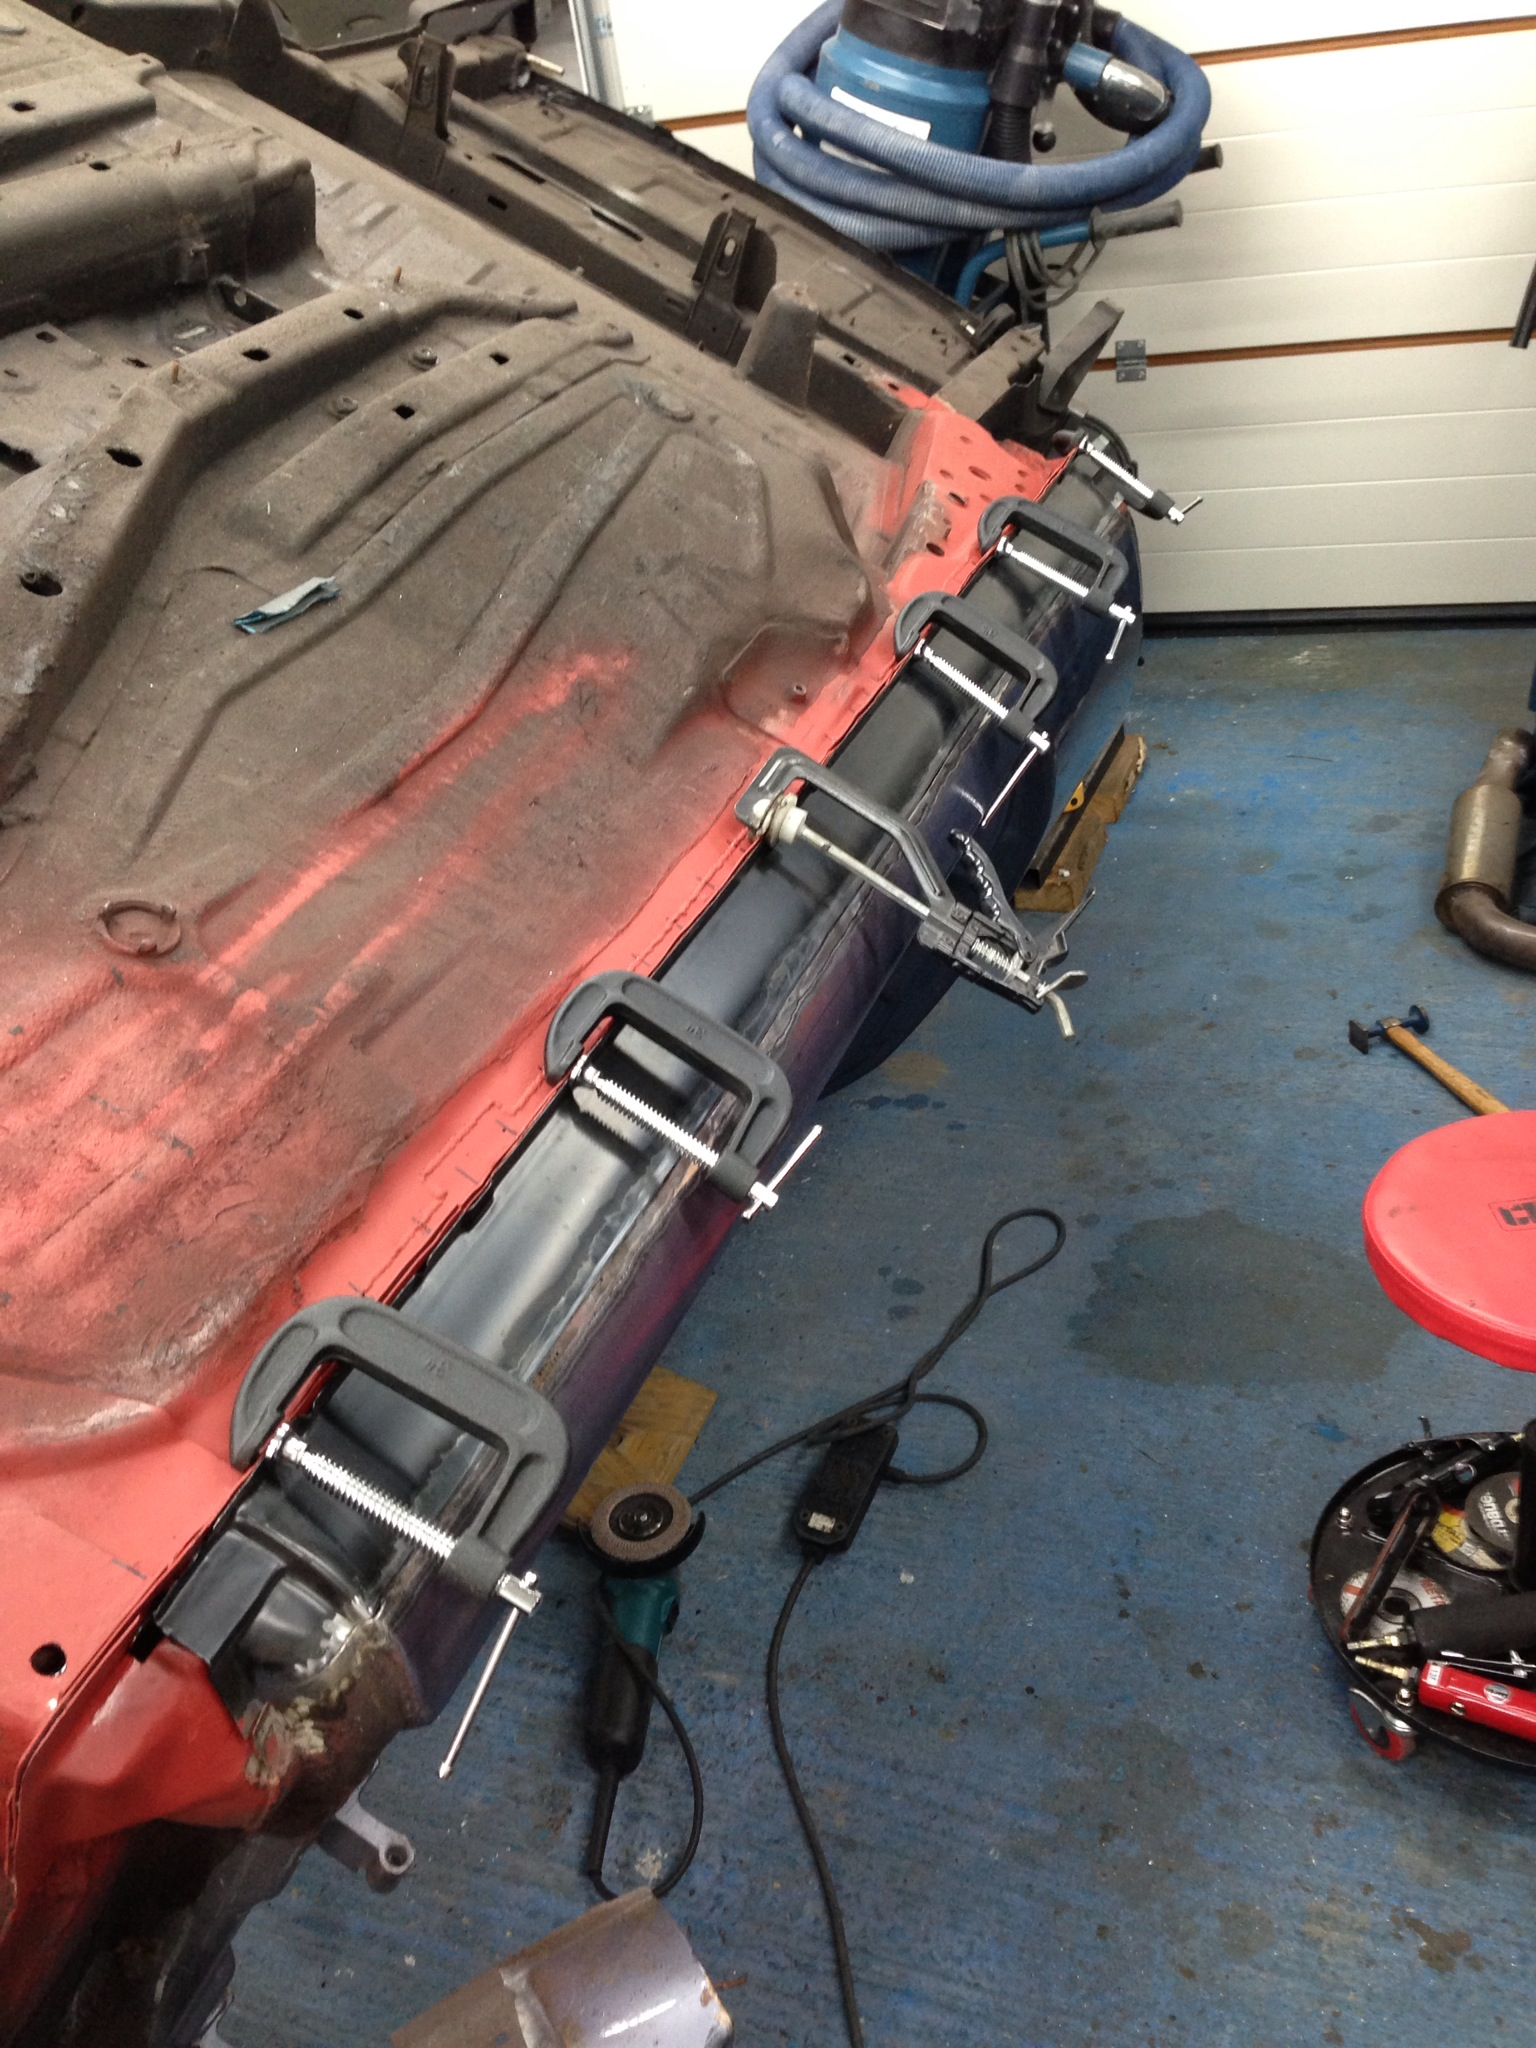
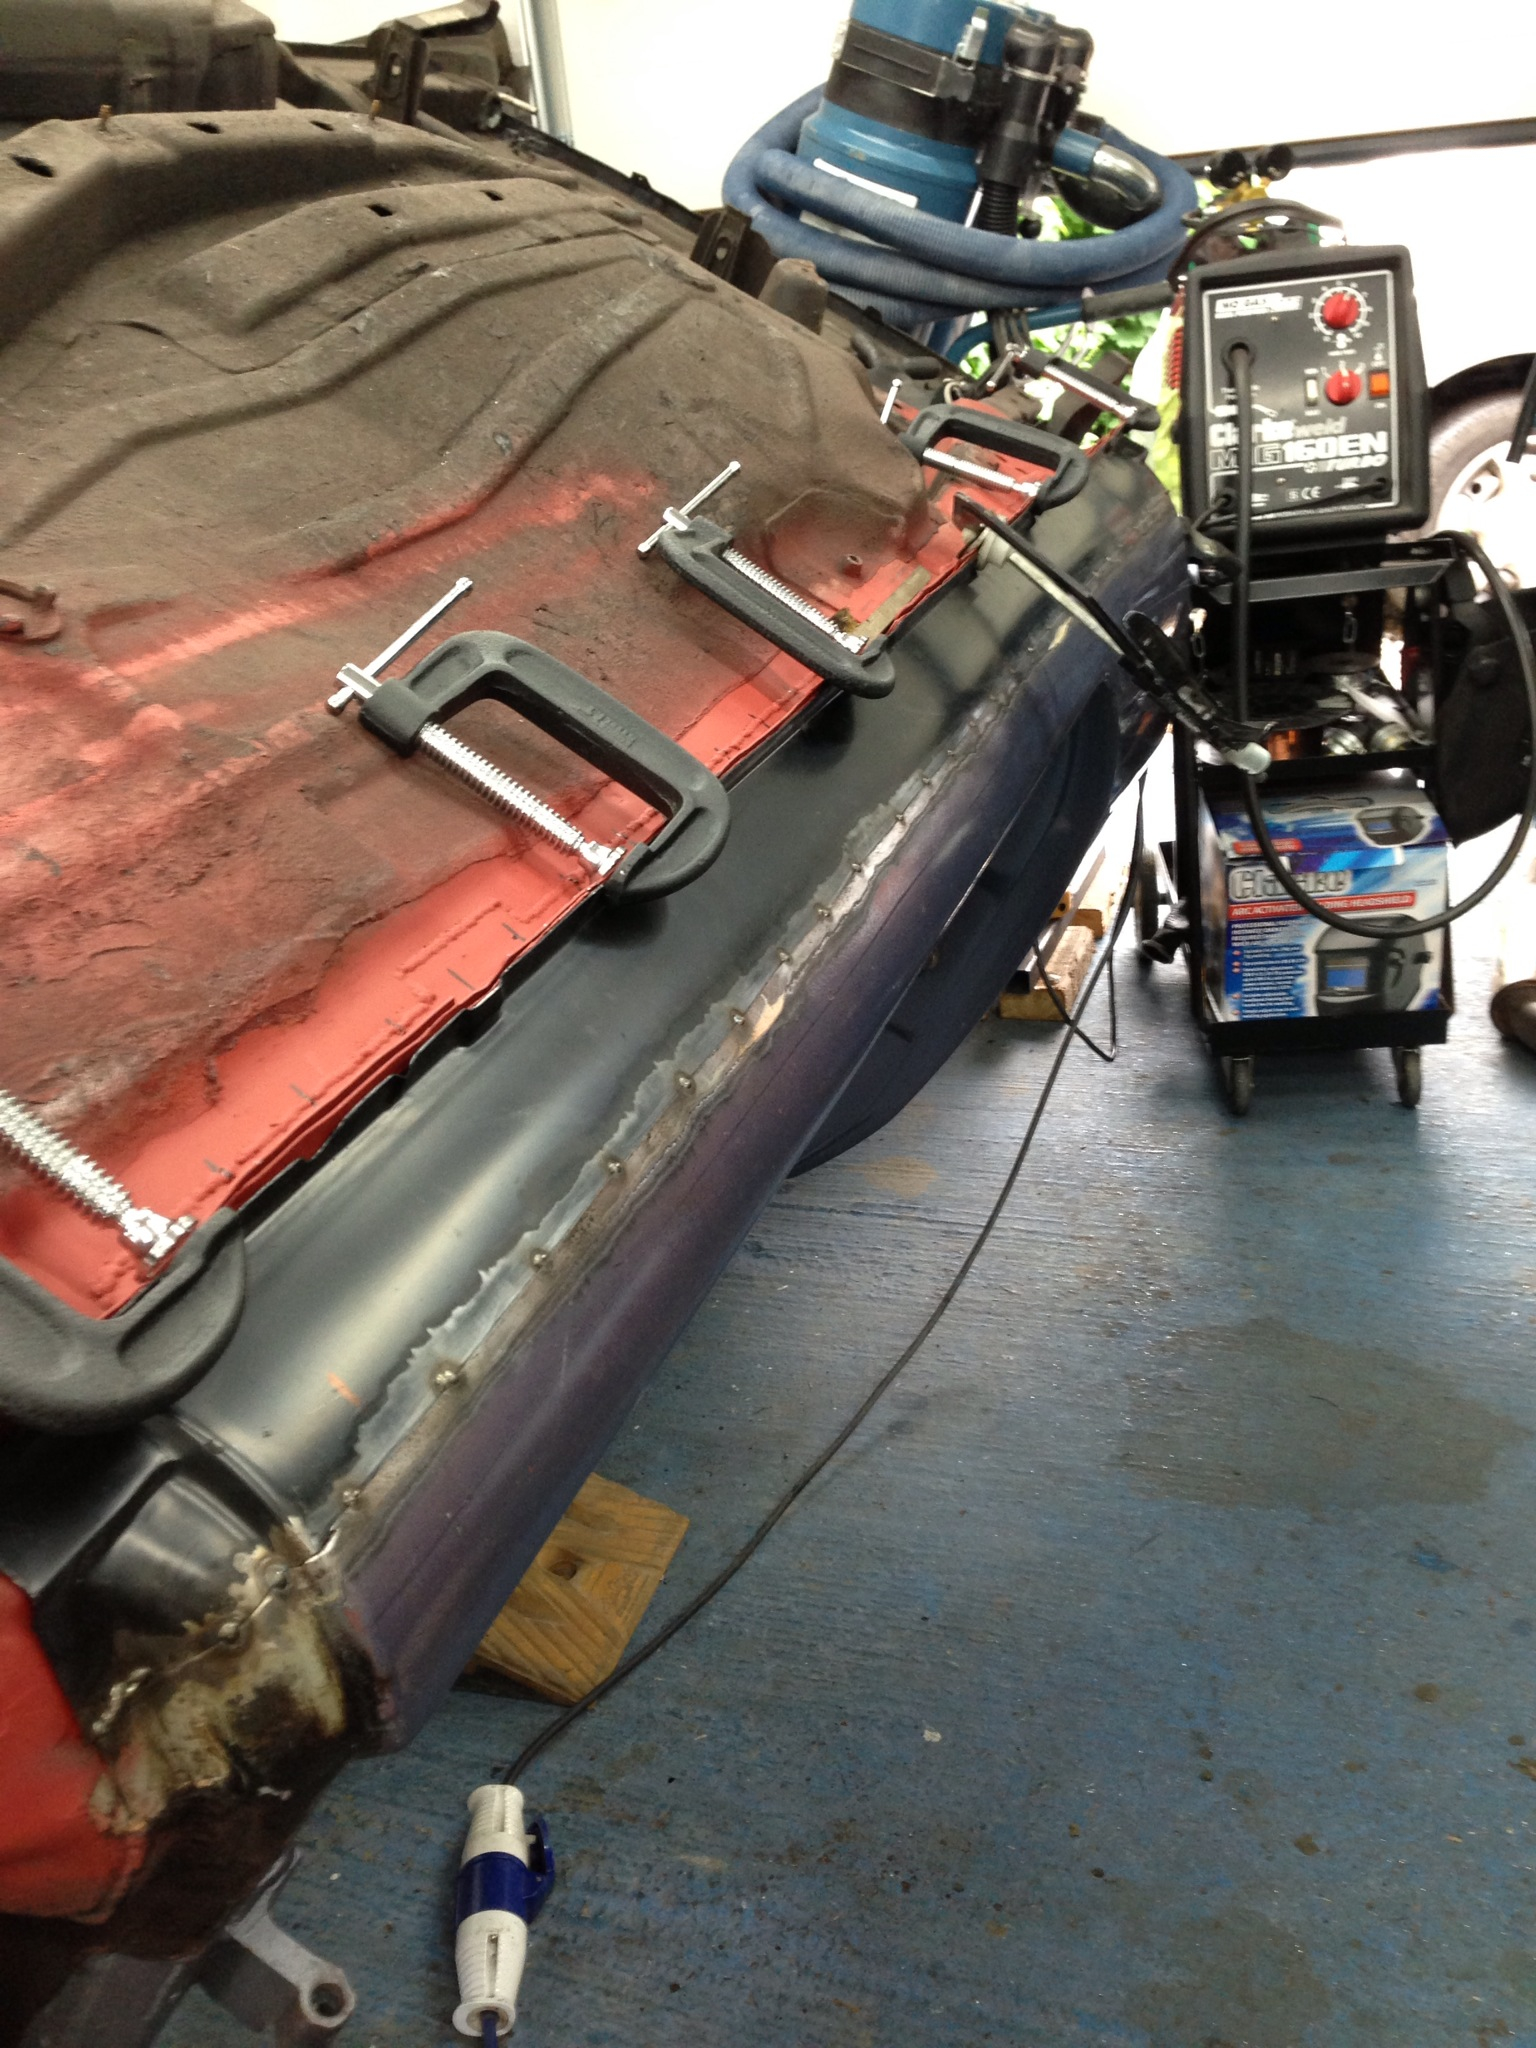
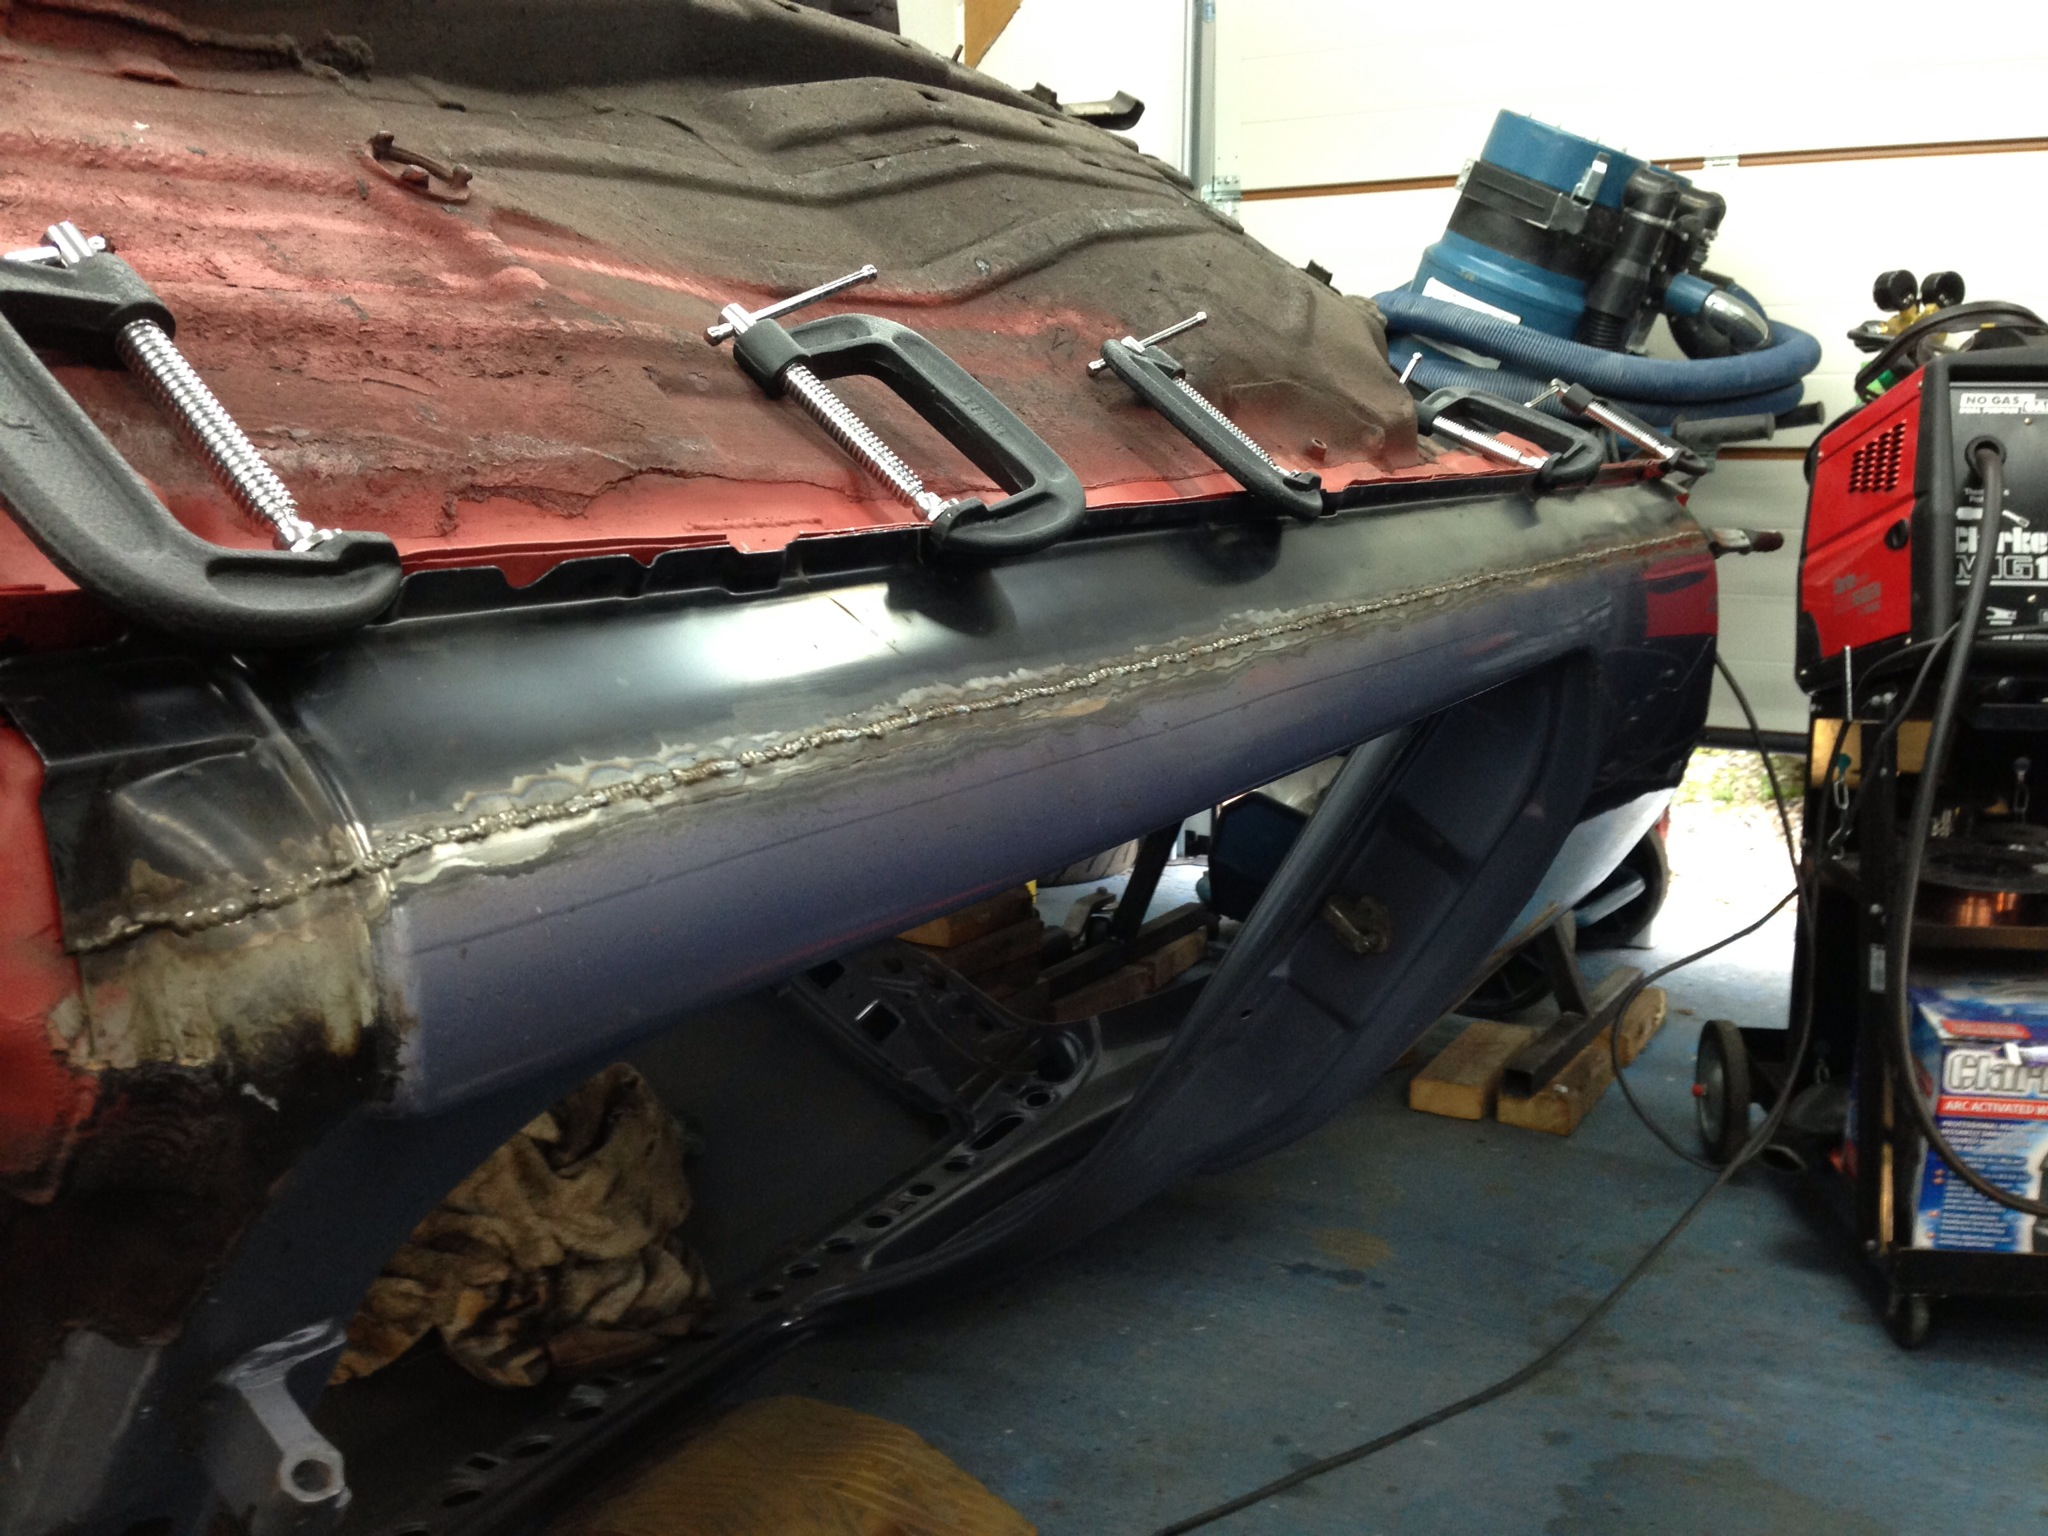
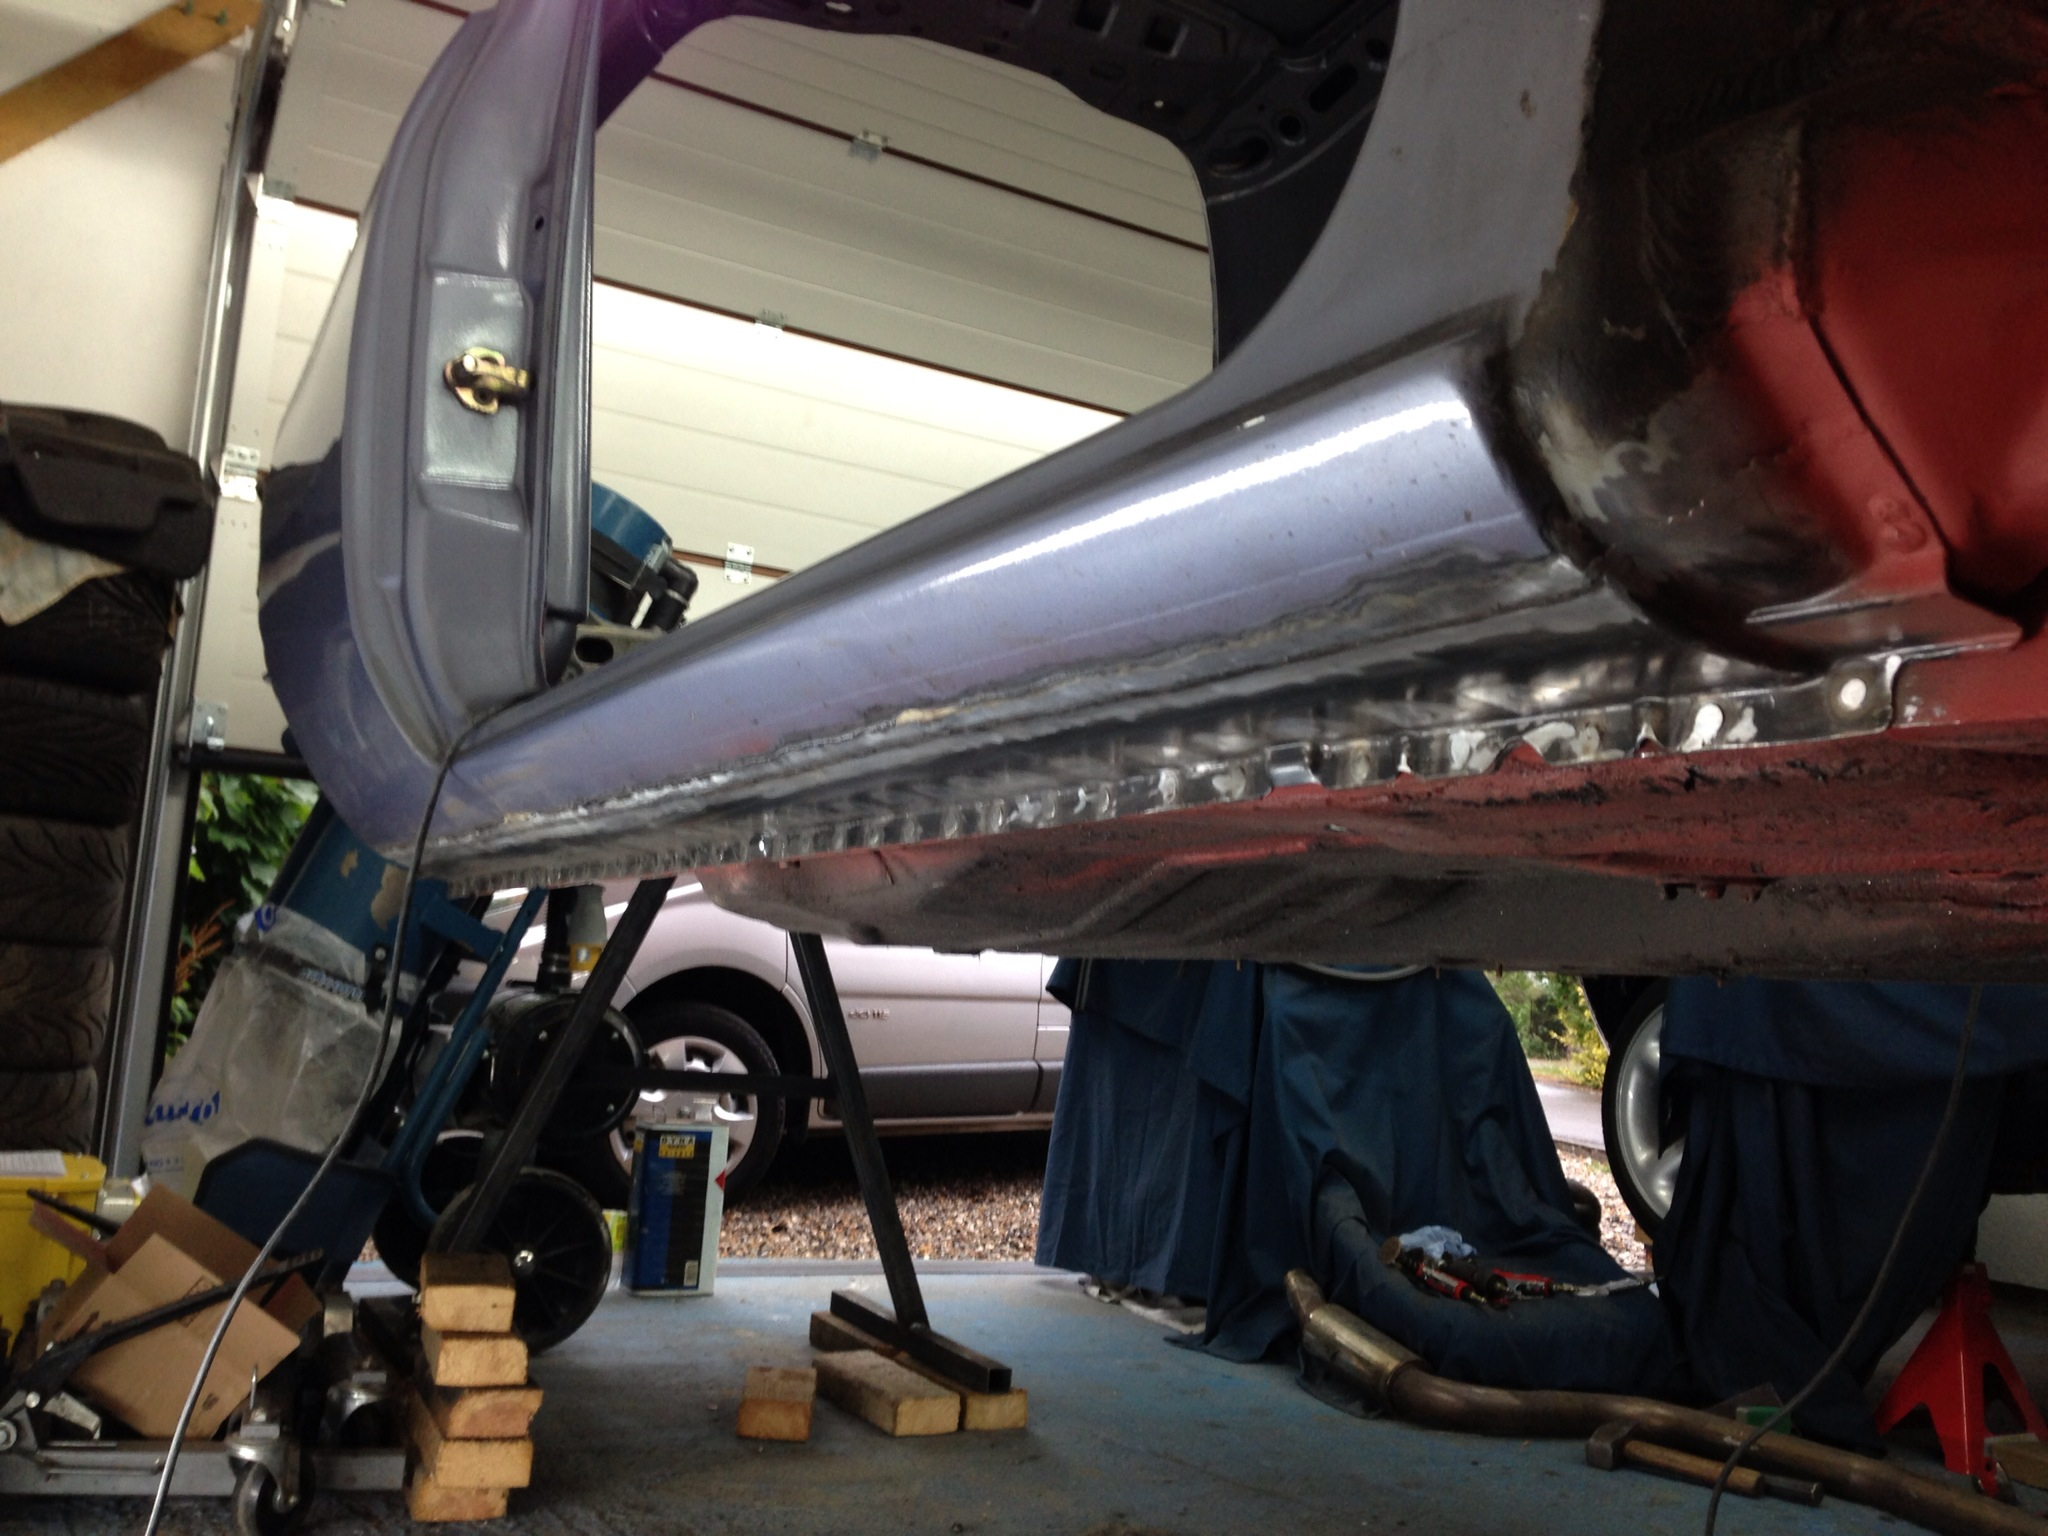
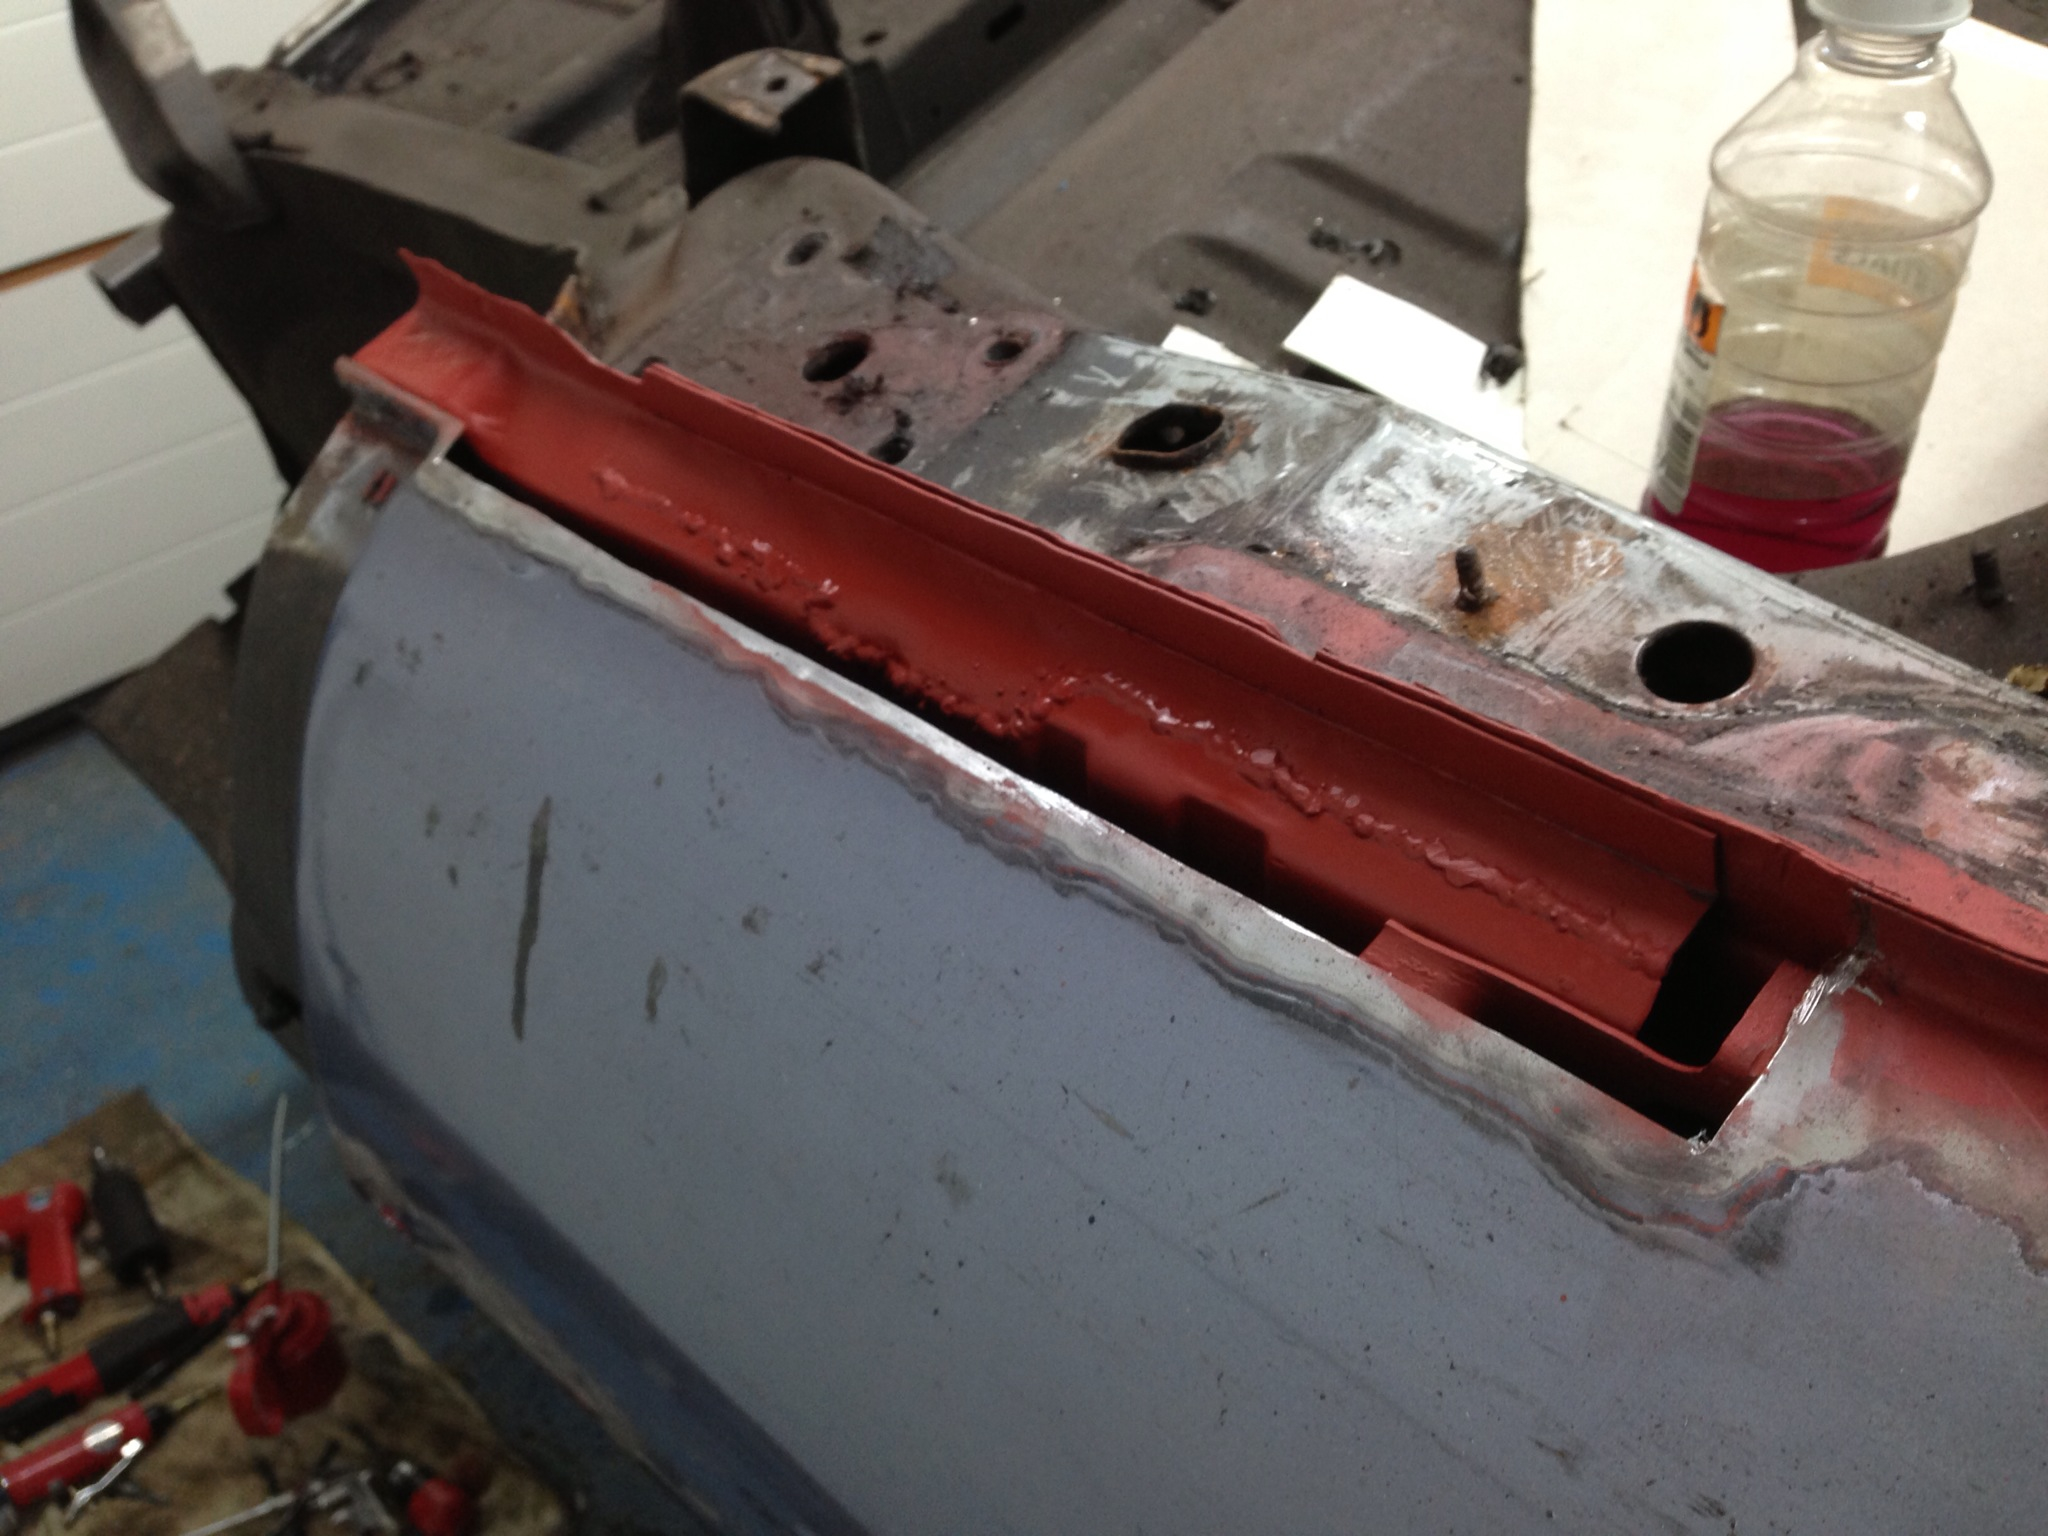
In place - this one seam took me half a day to make sure I didn't put too much heat in the panel:
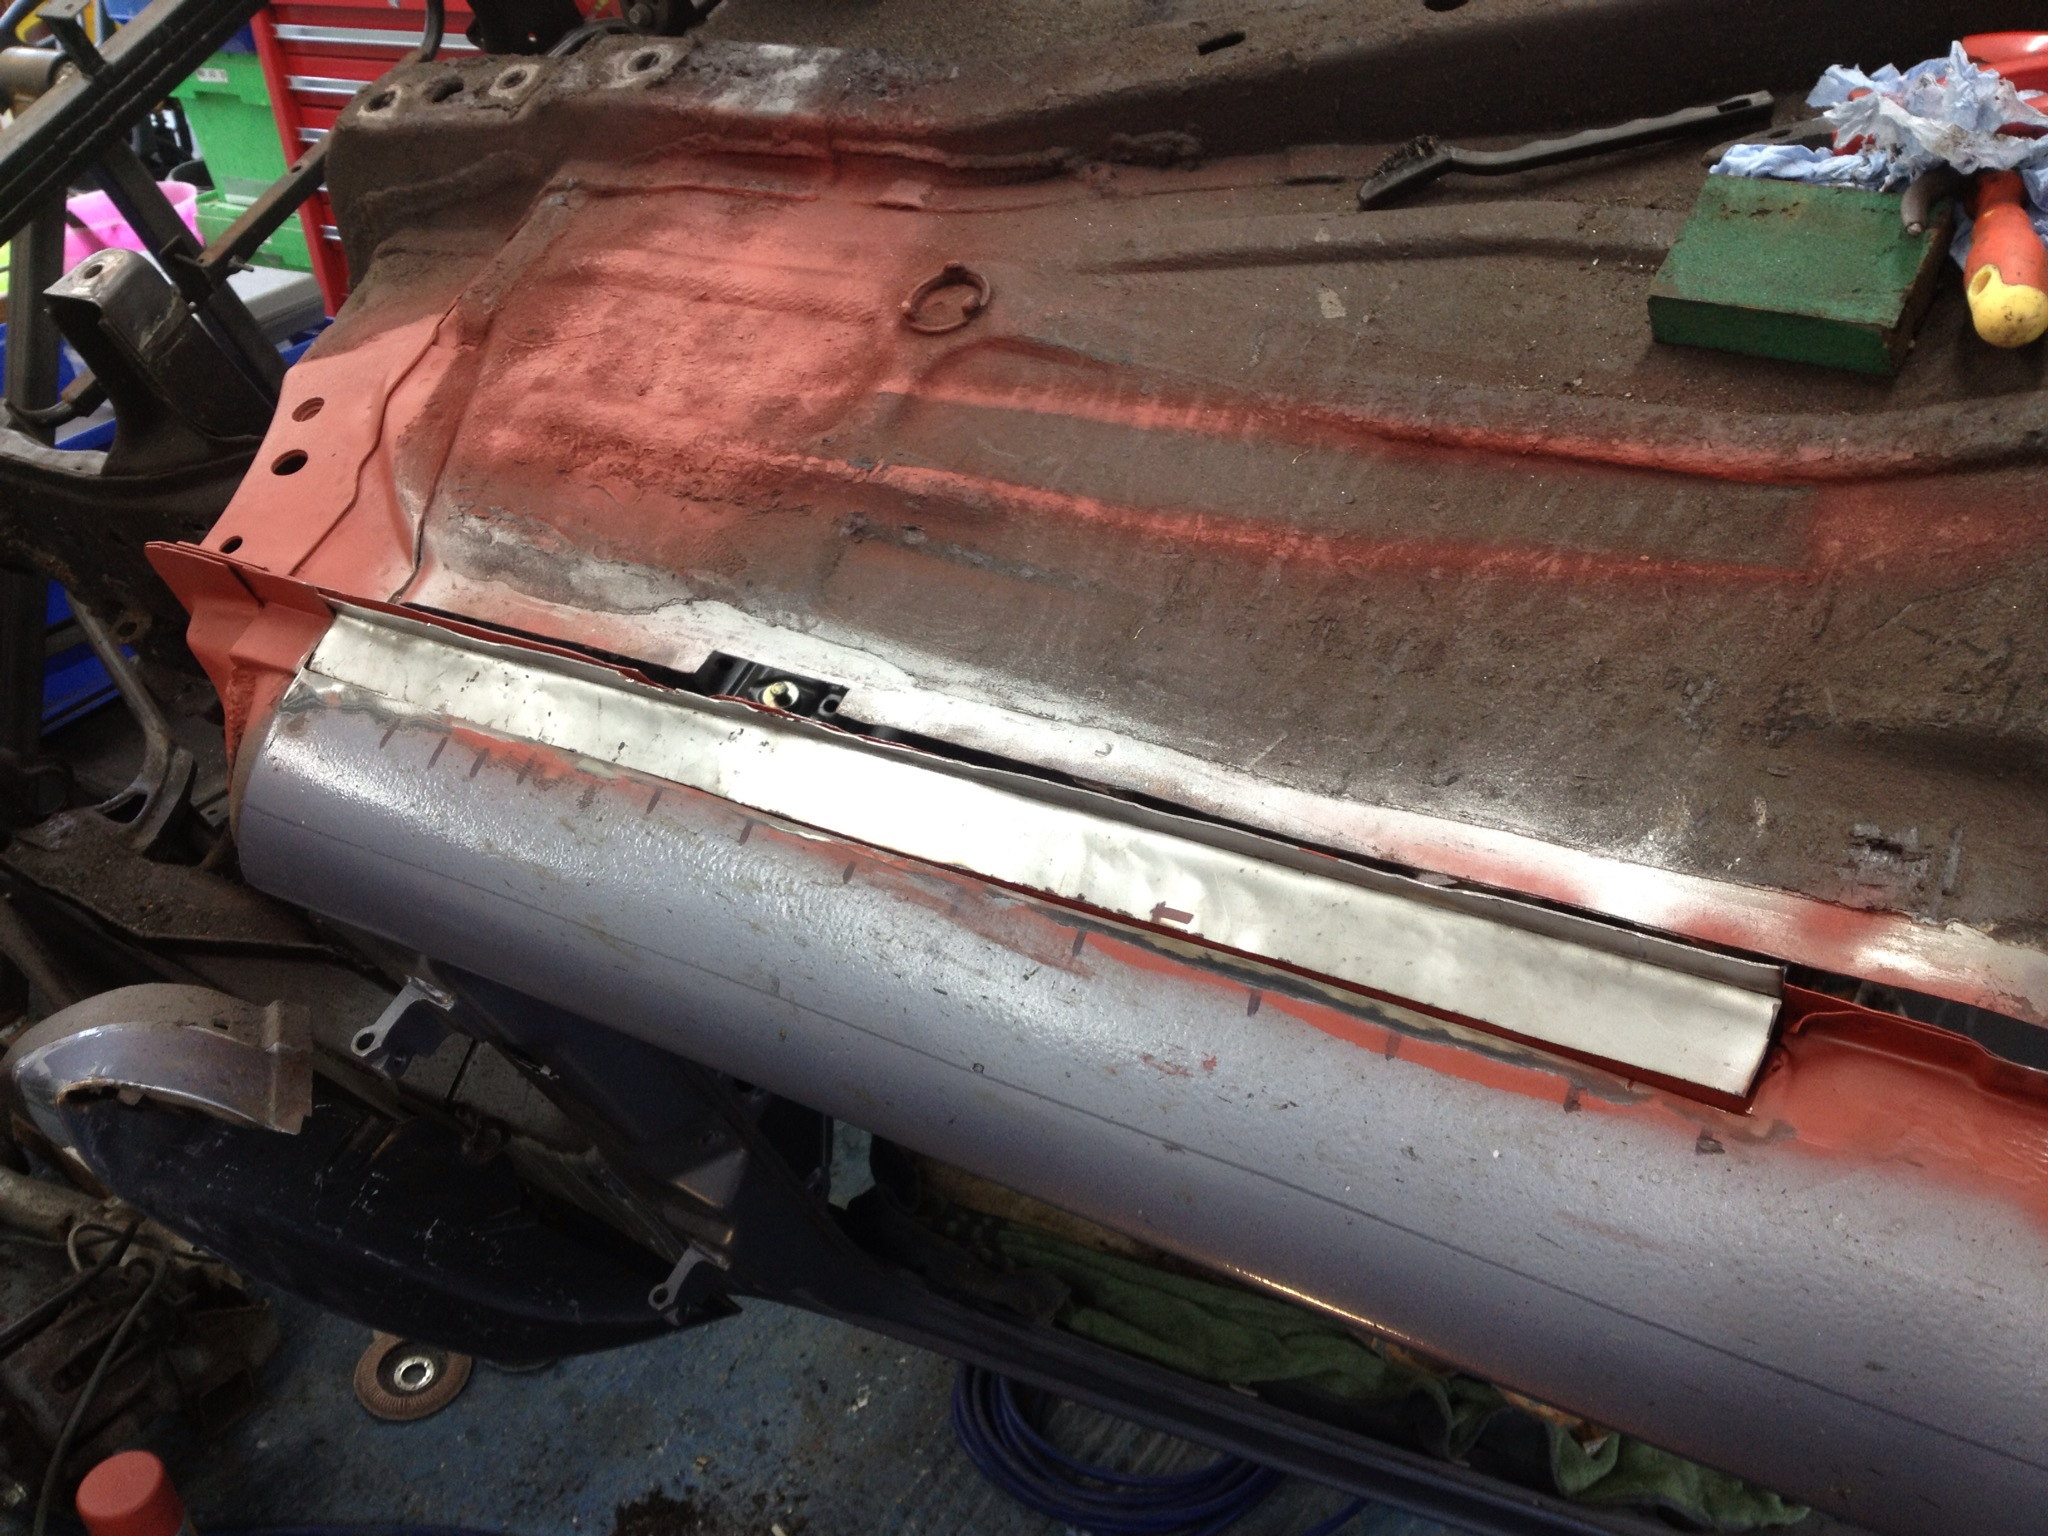
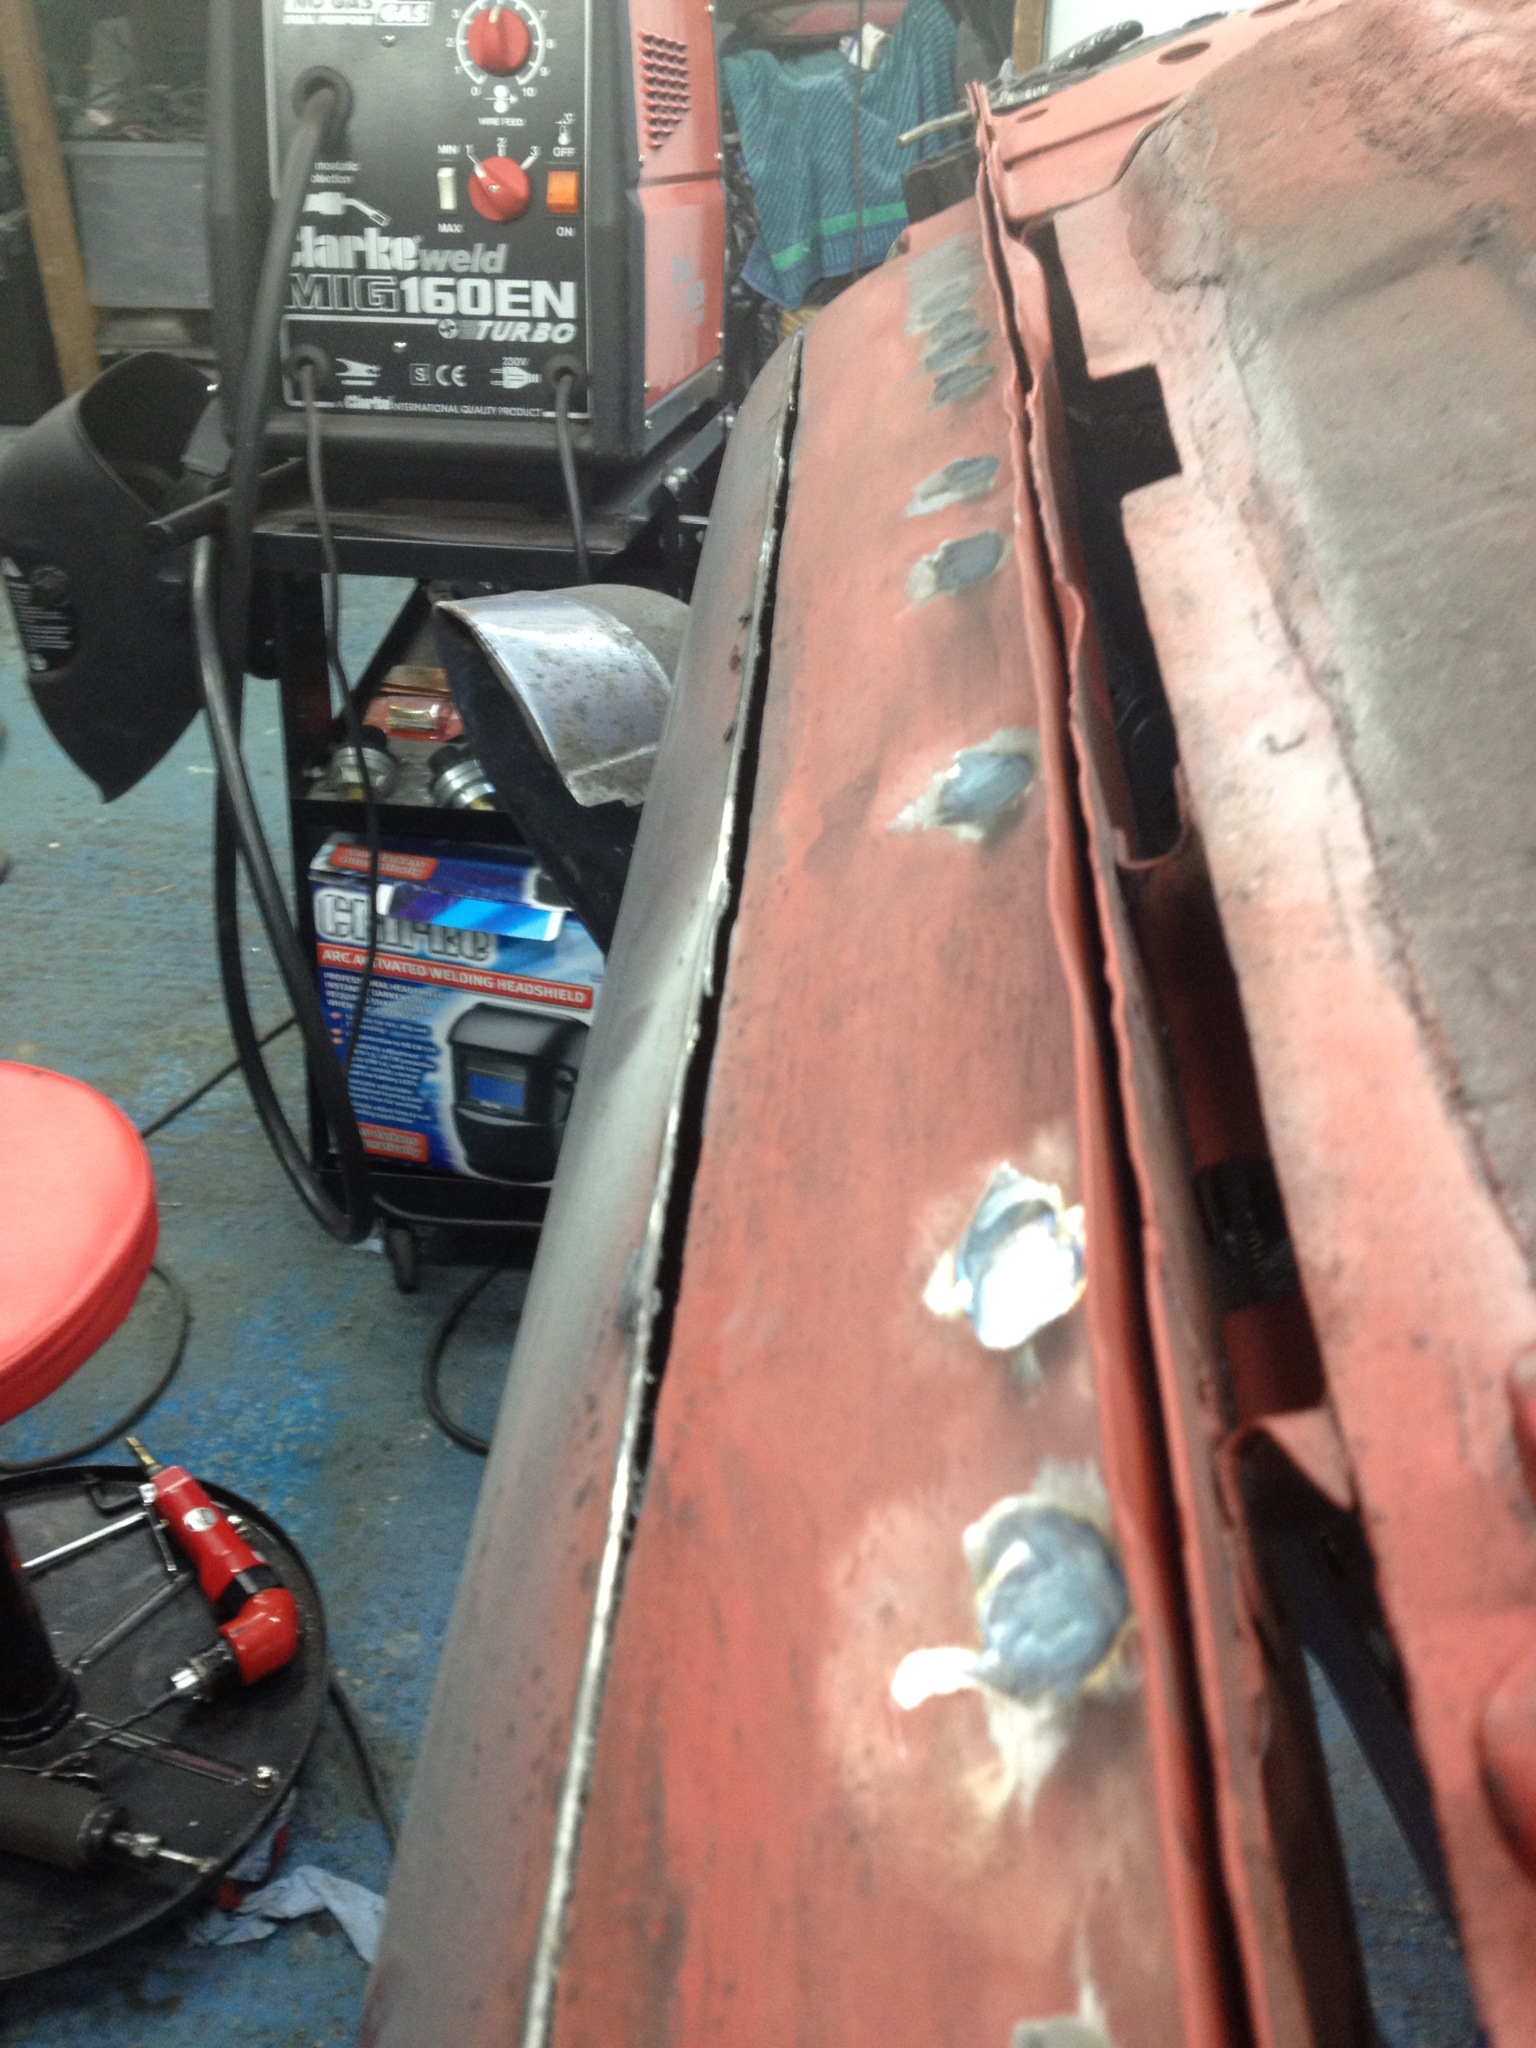
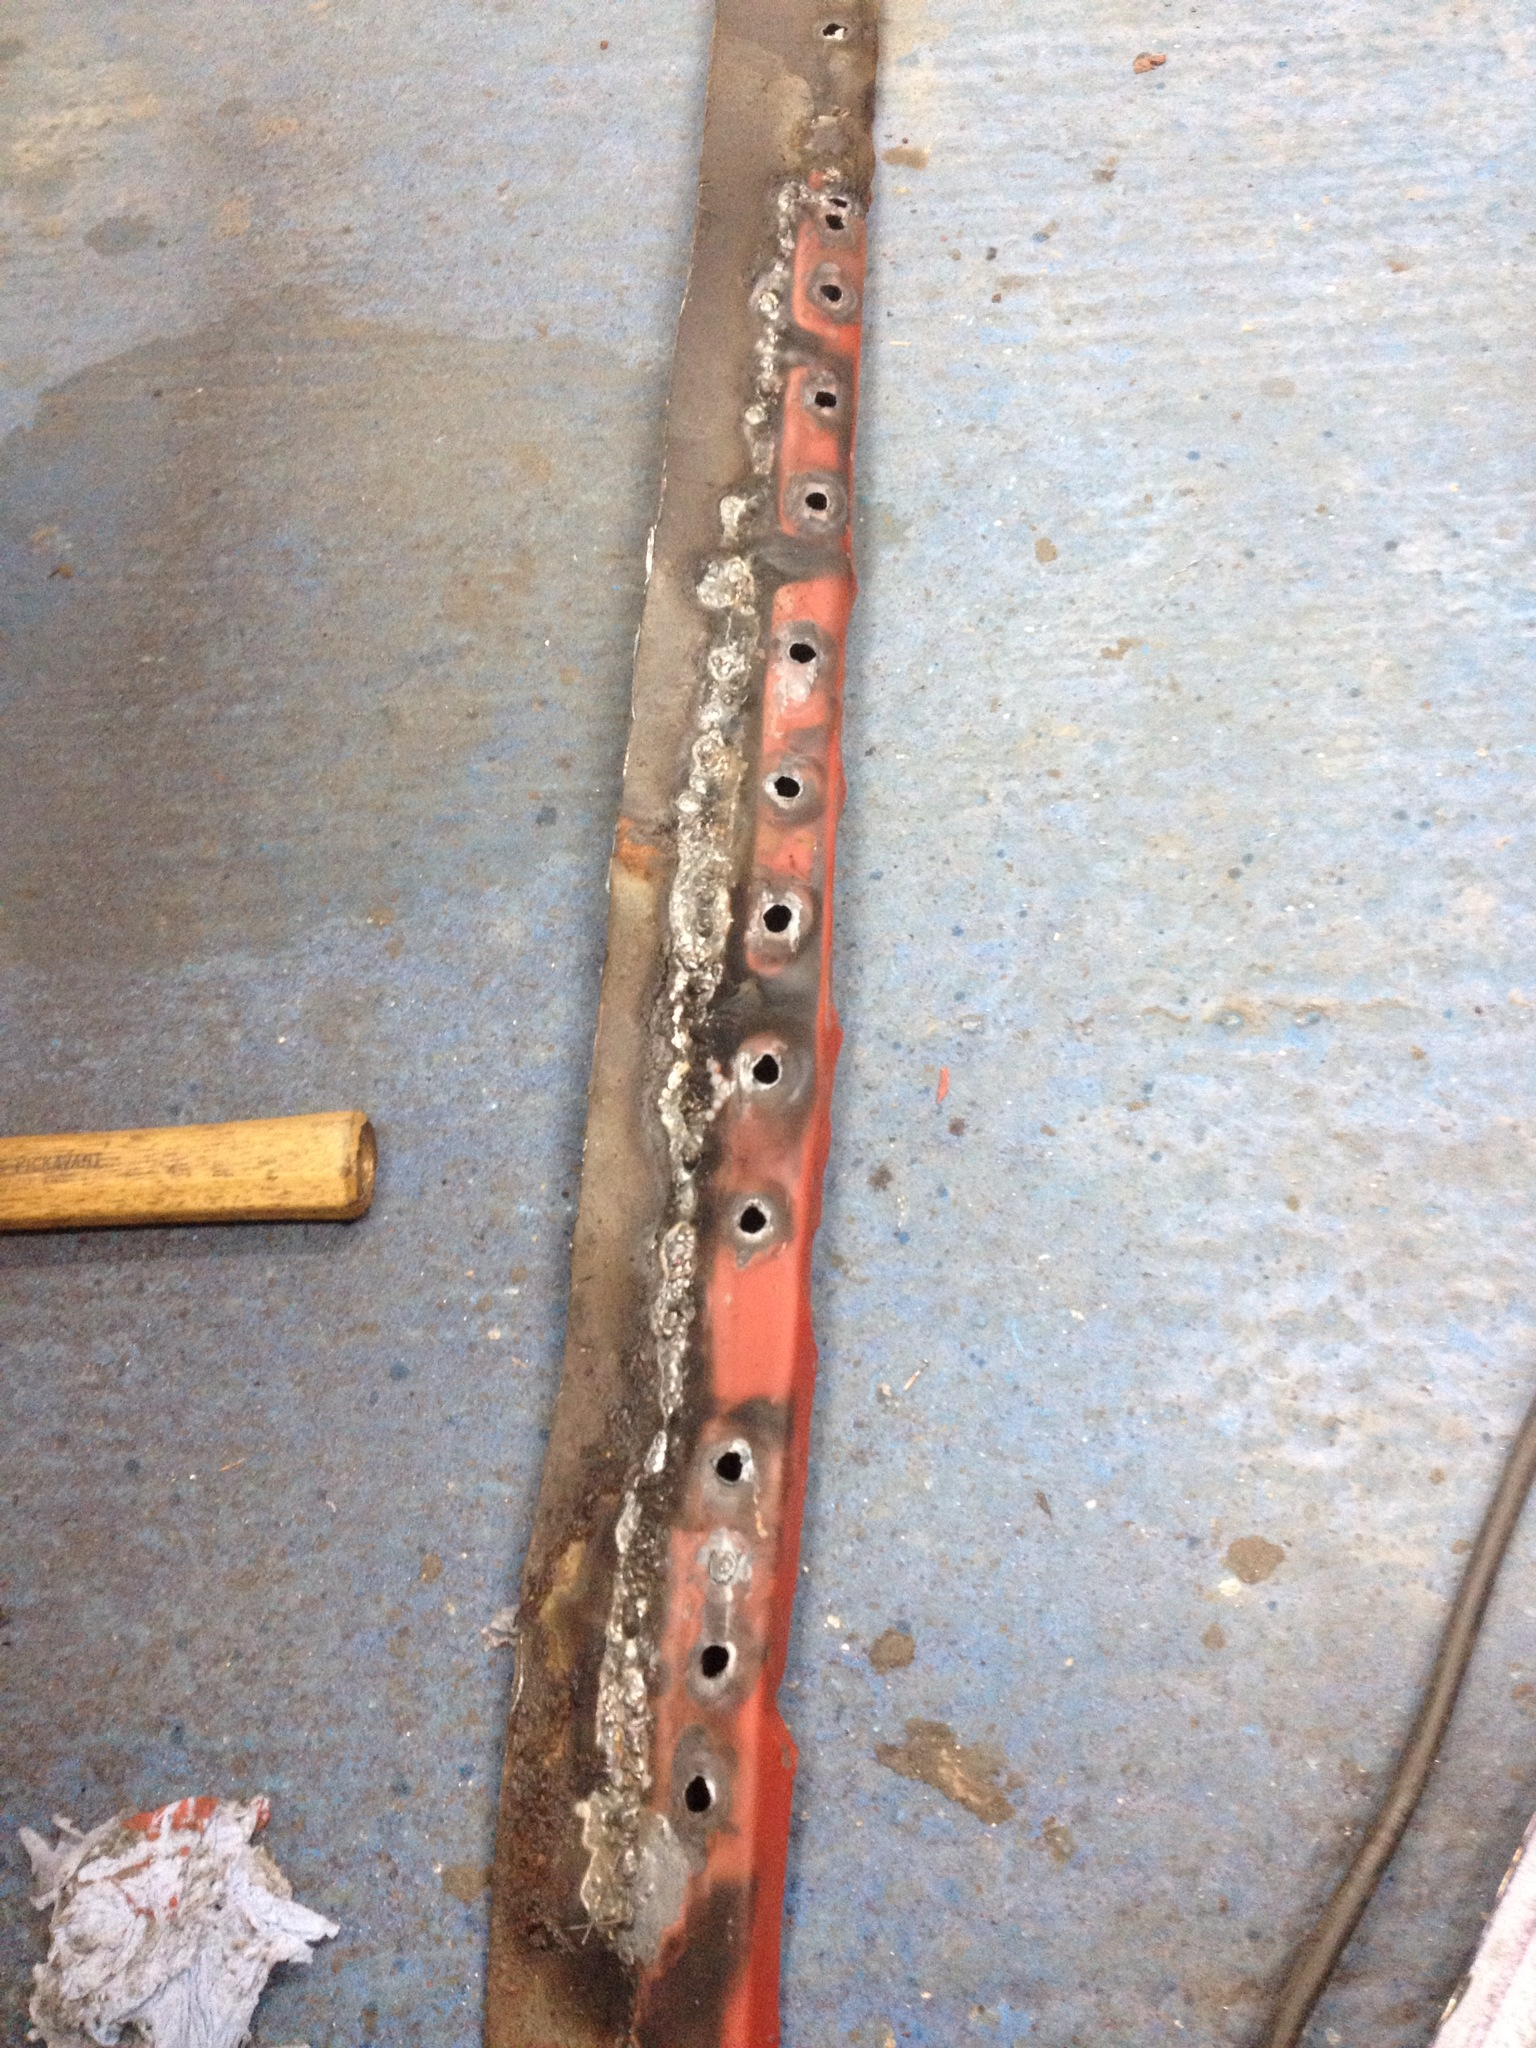
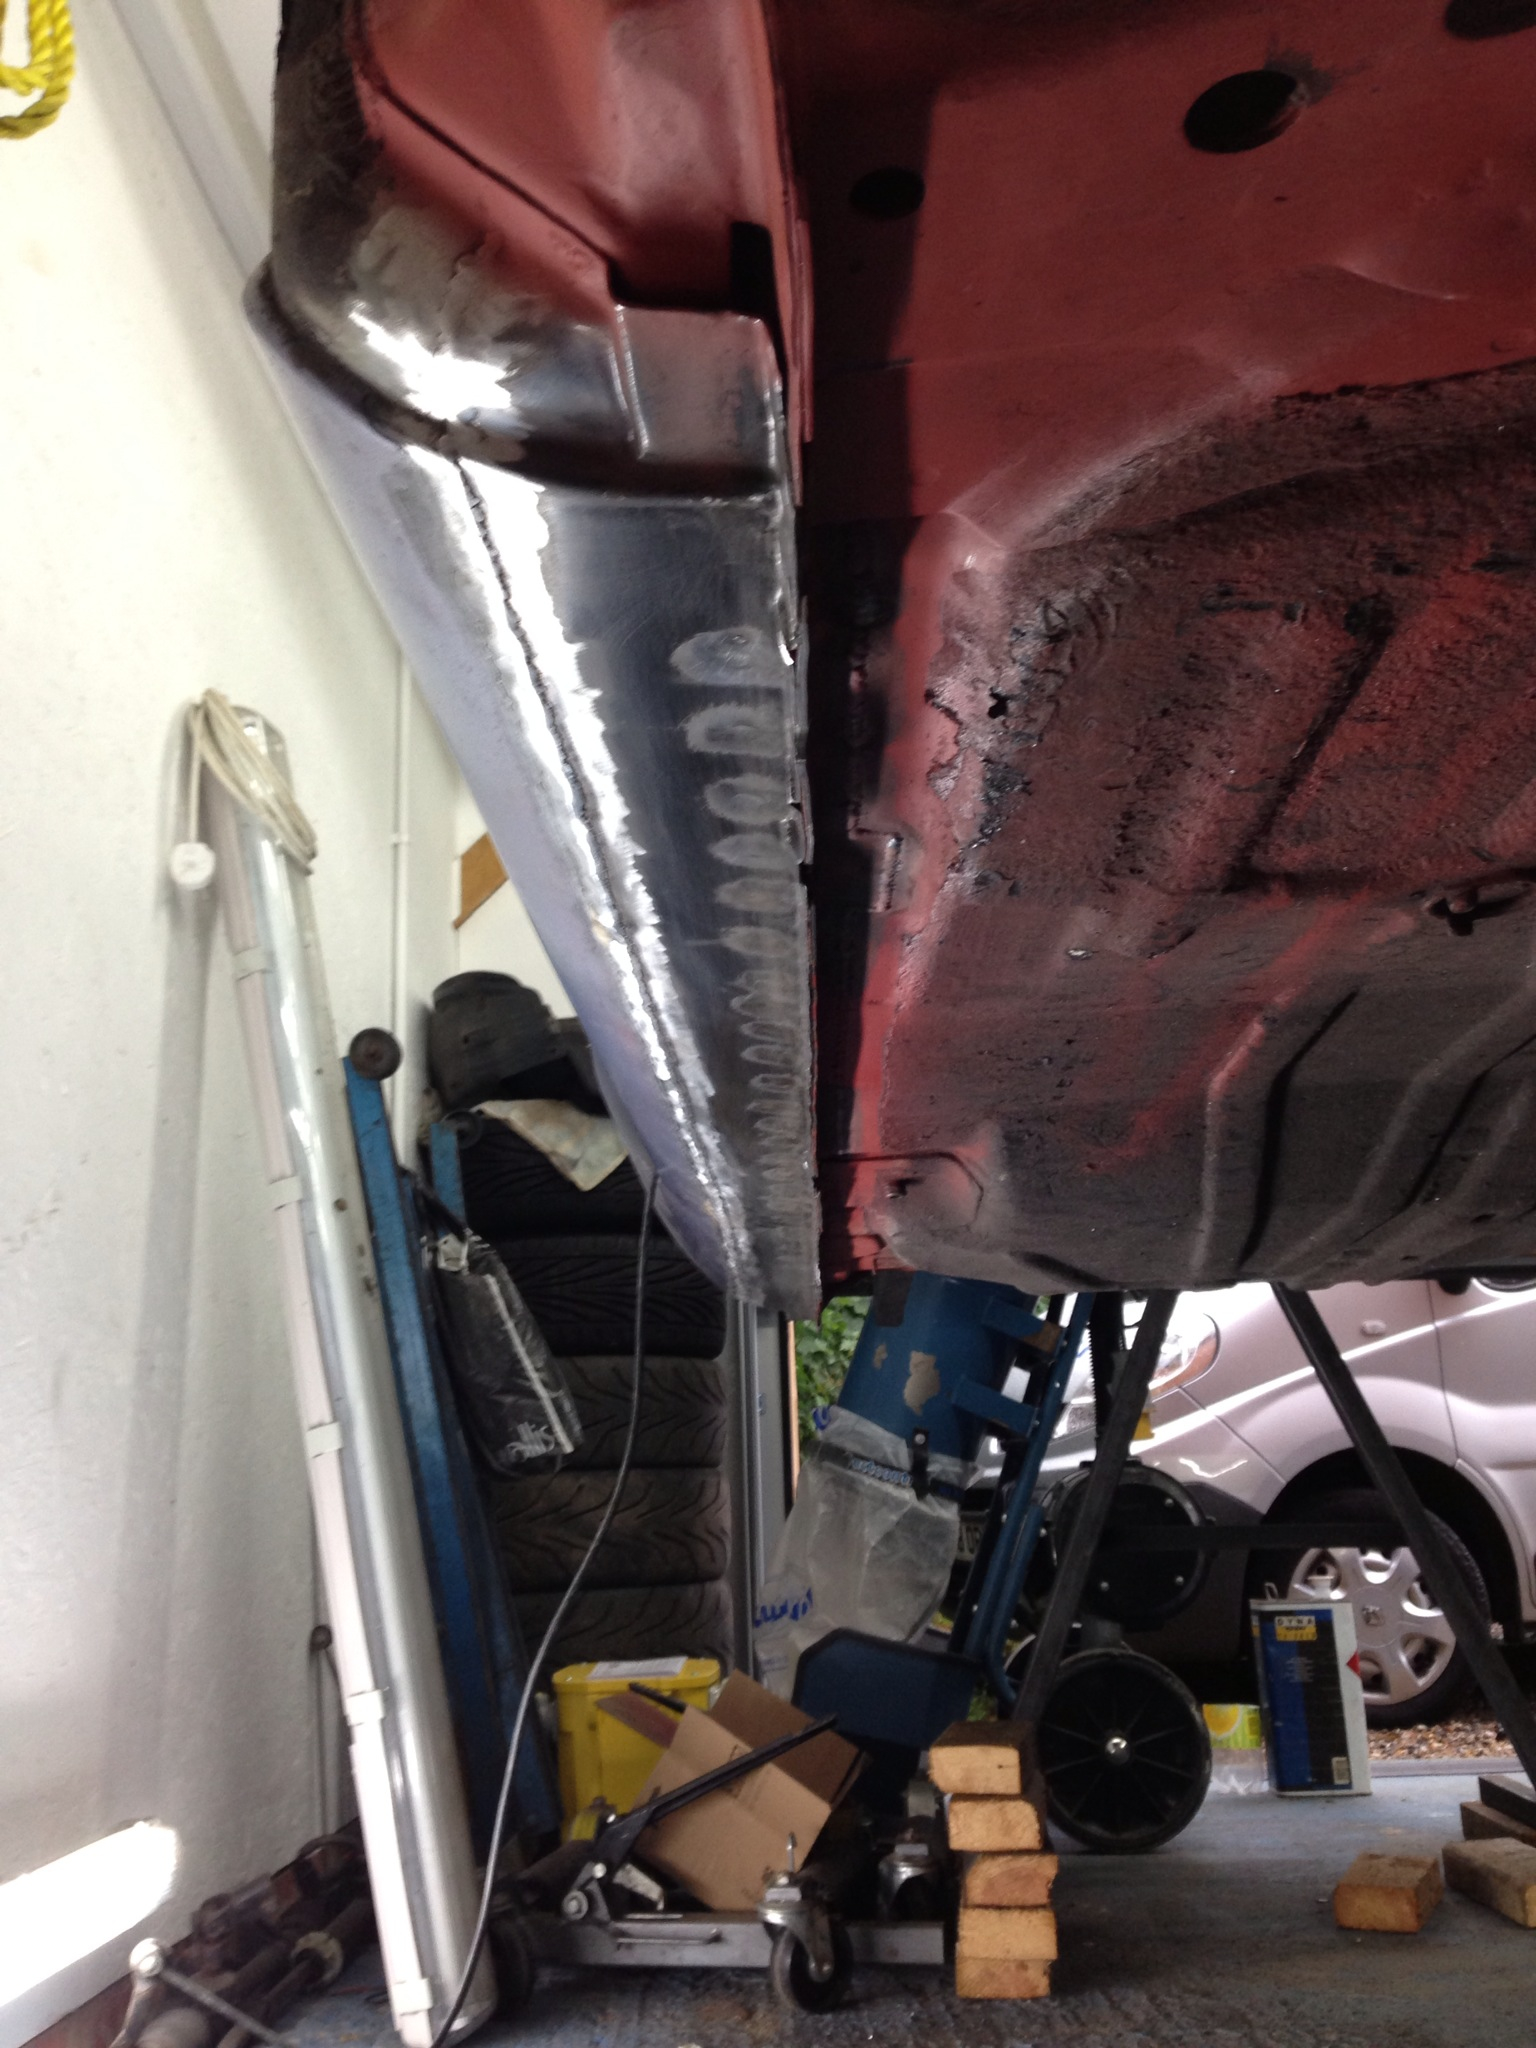
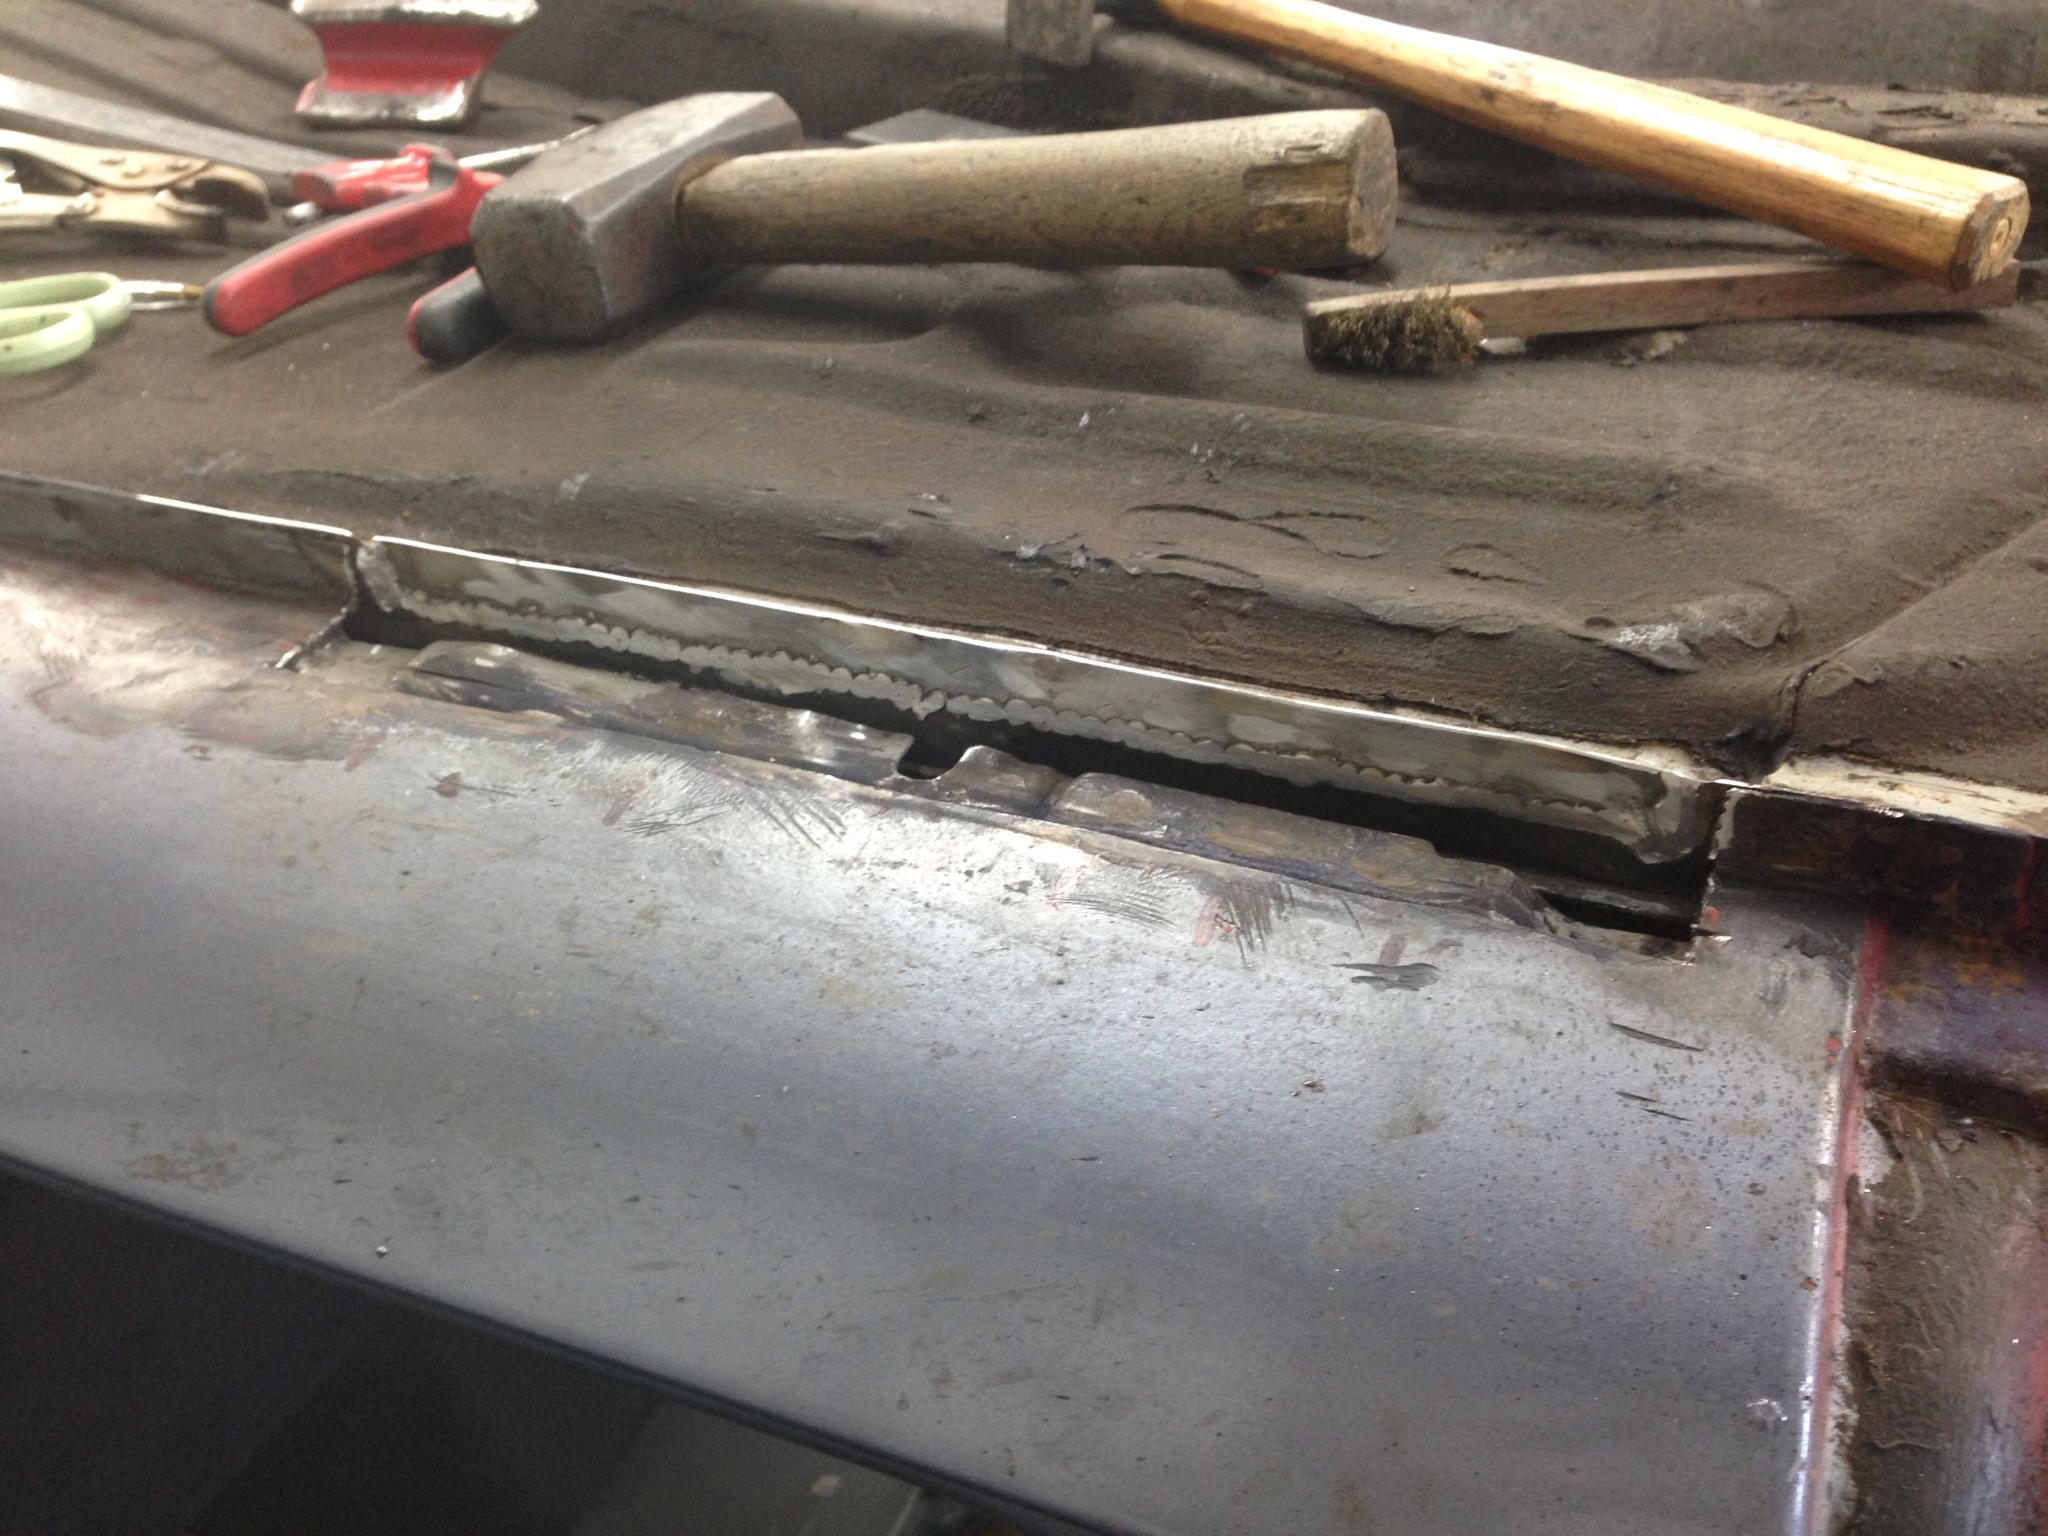
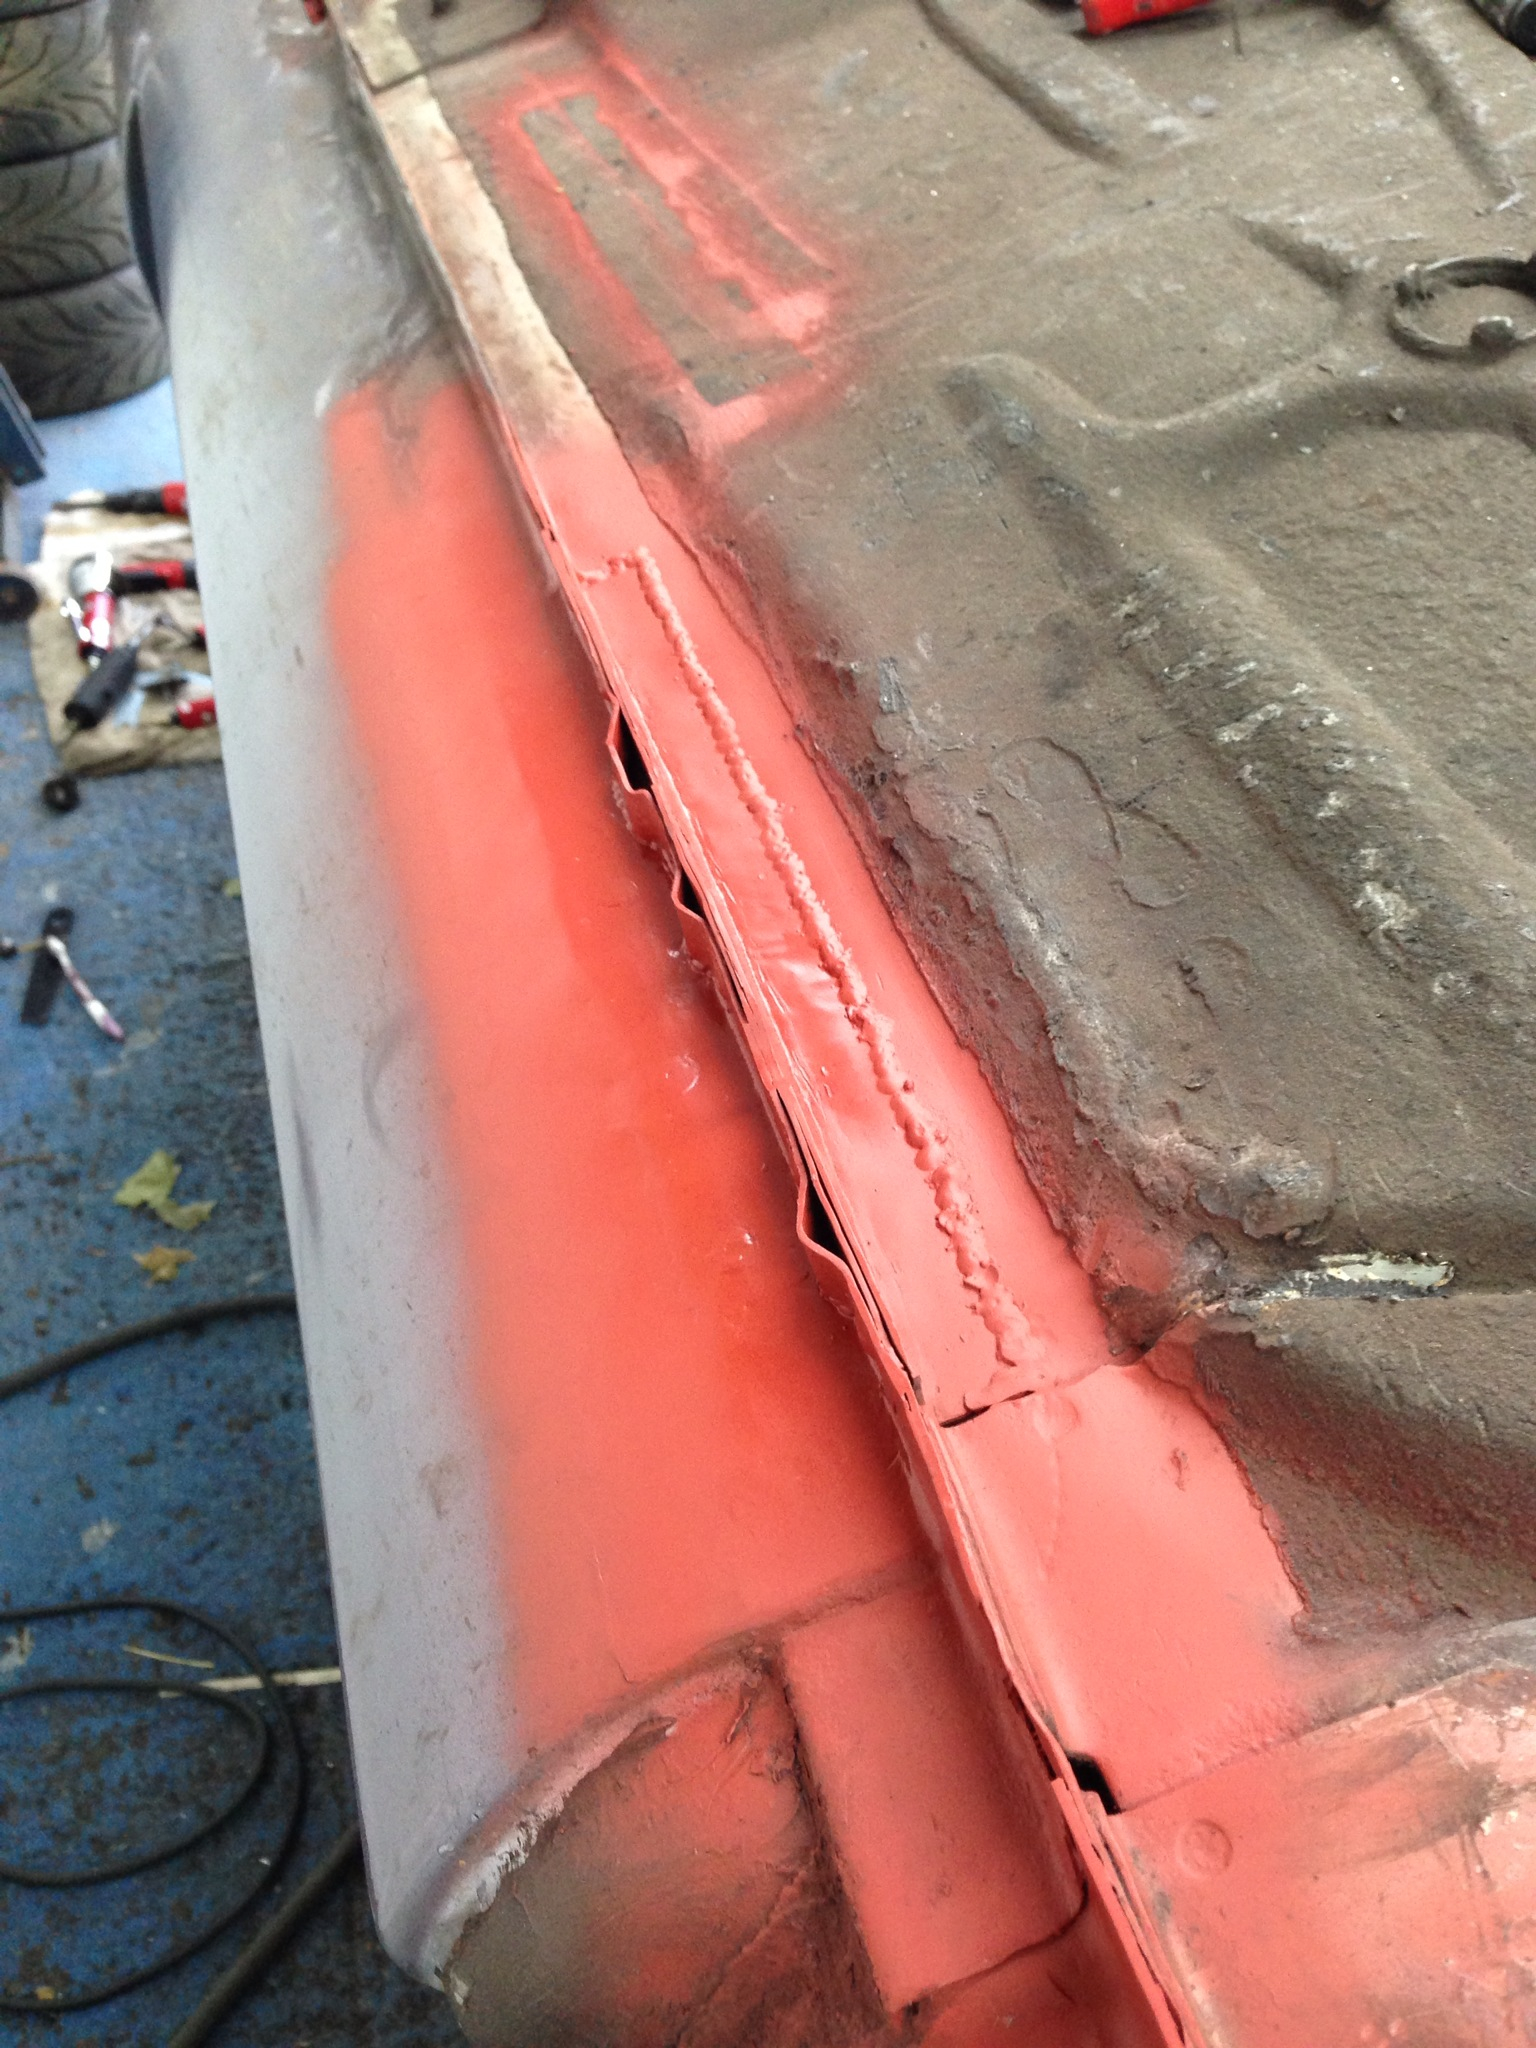
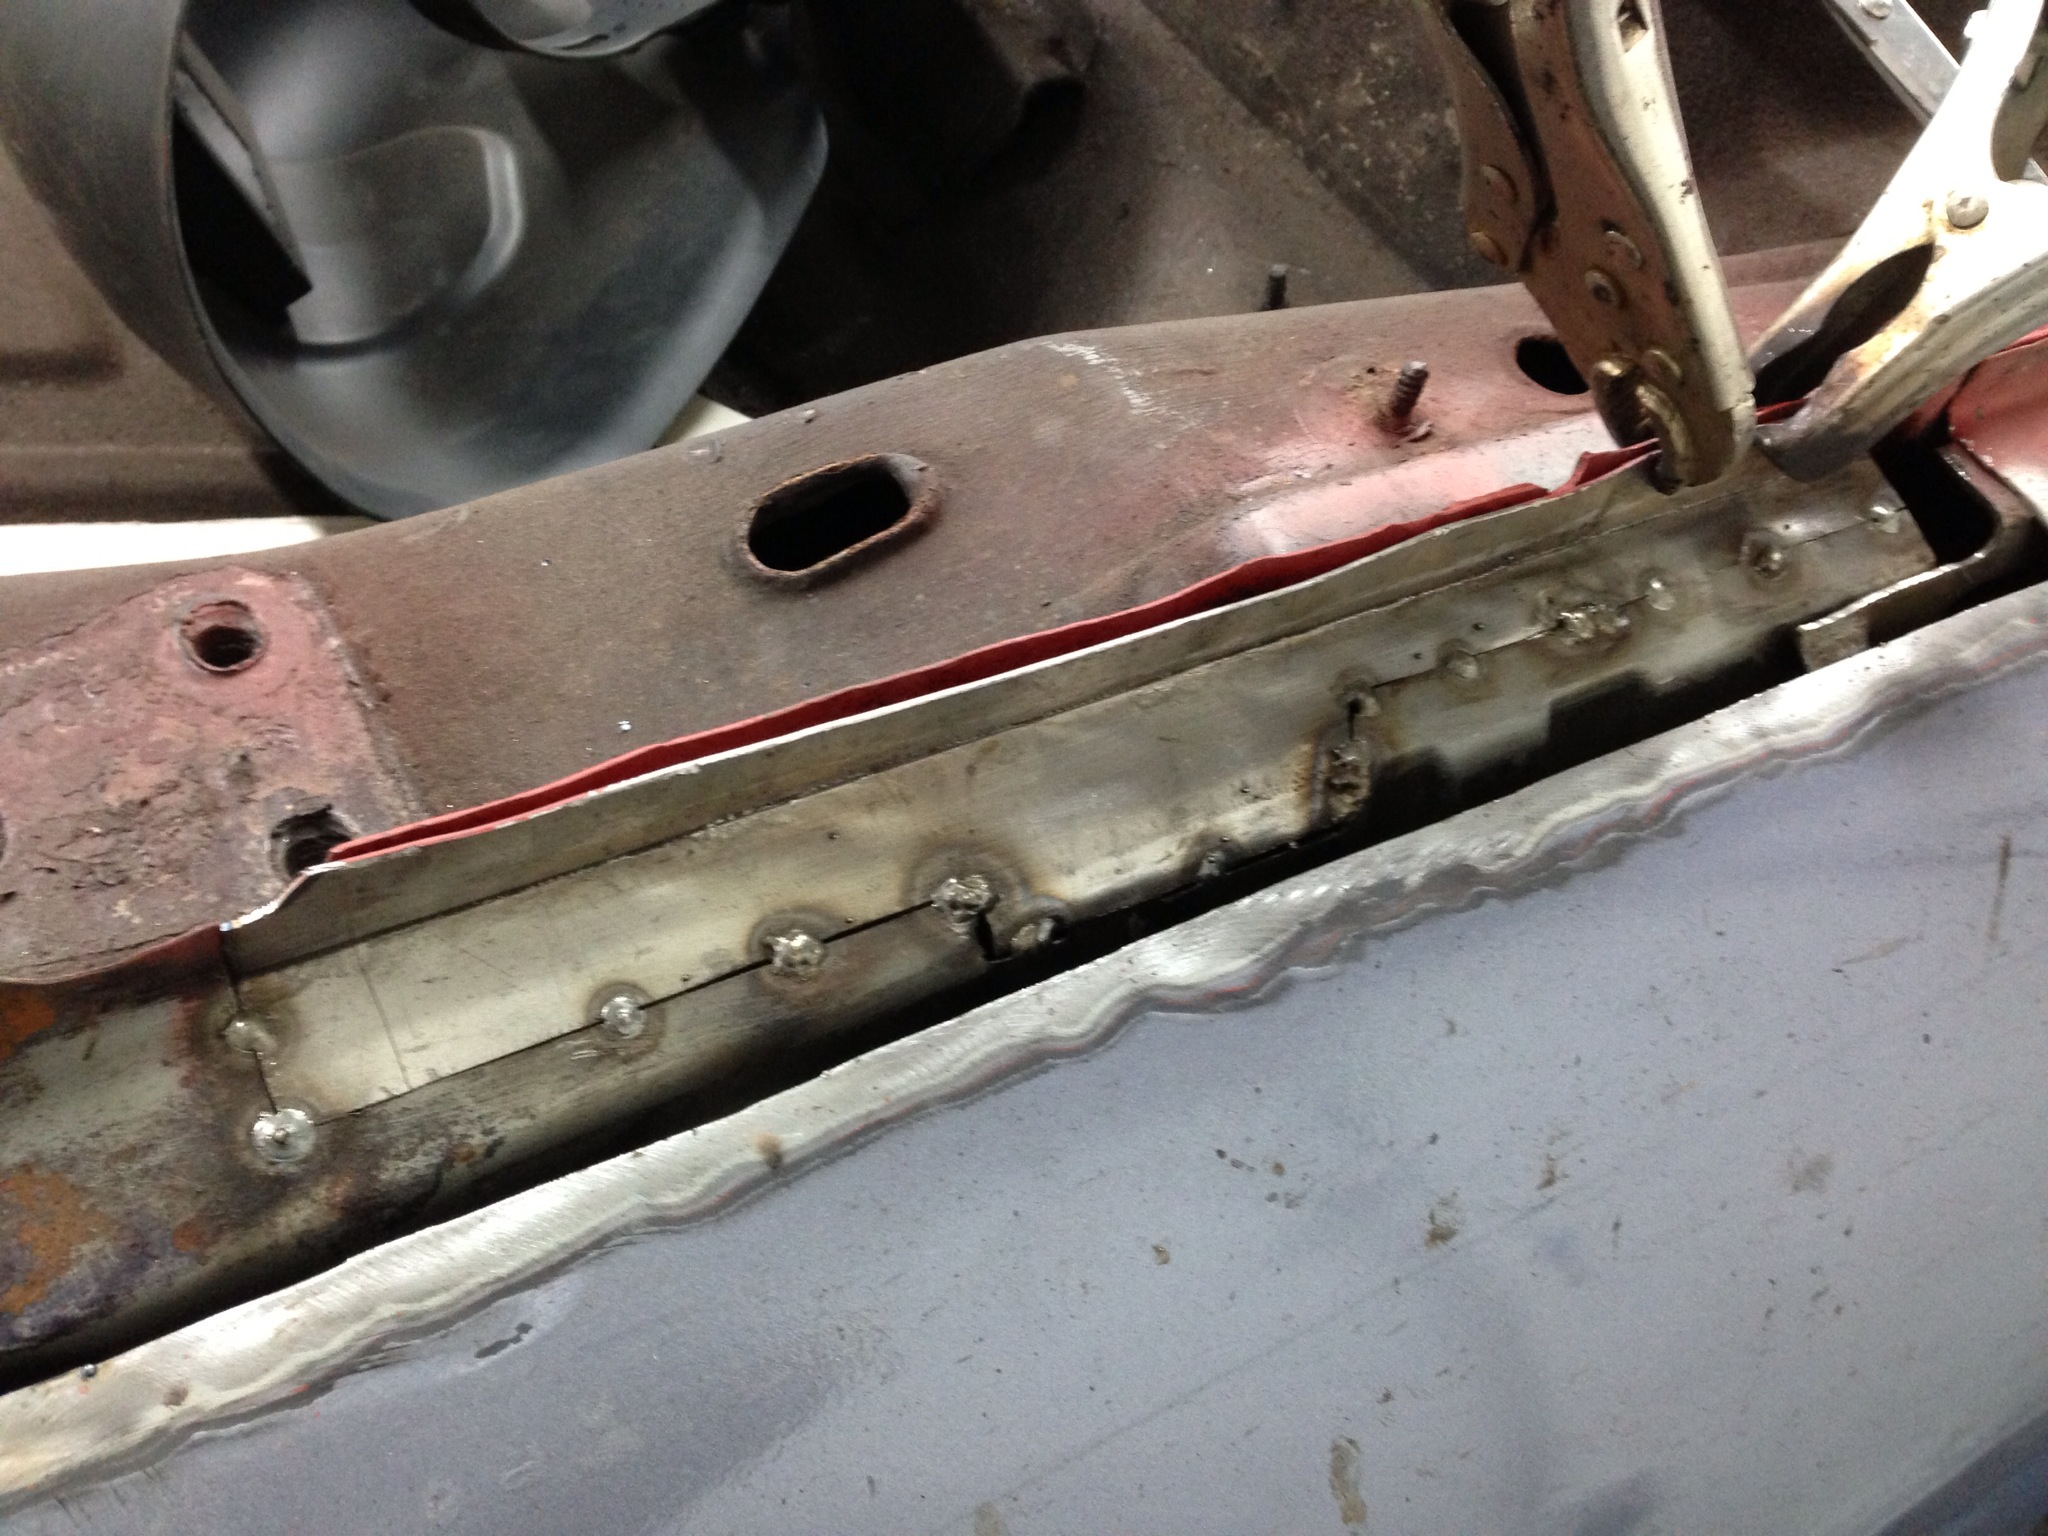
Plug welded to the strengthening panel:
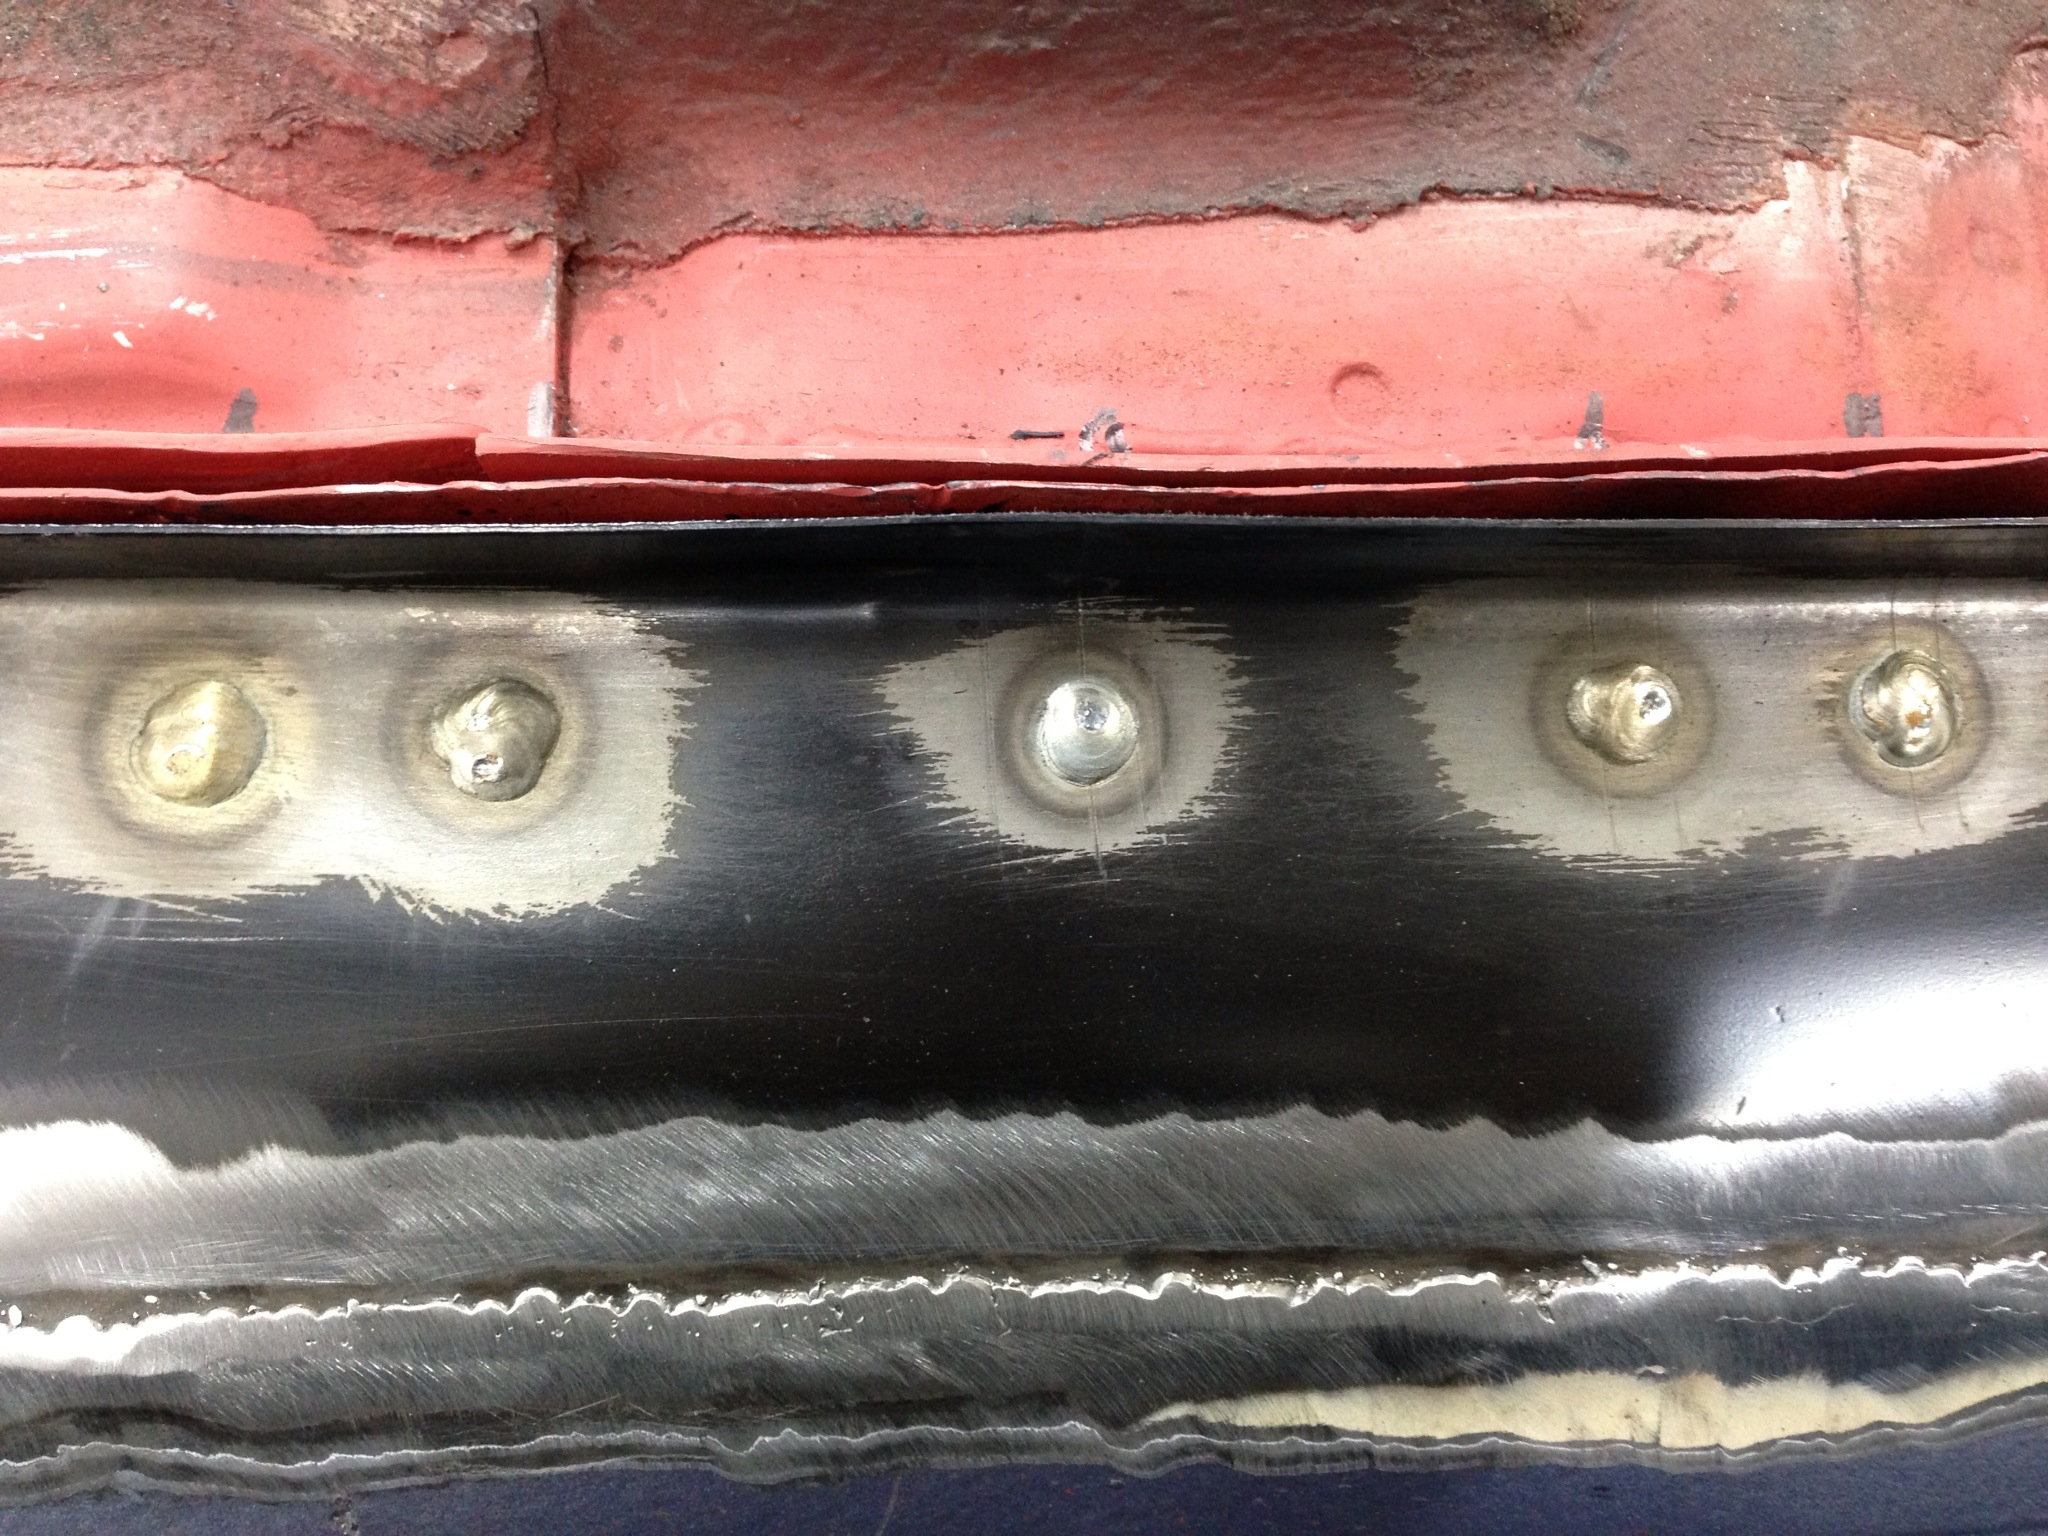
Decided to plug weld the sill lip as I couldn't justify spending the money on a spot welder just for this build:

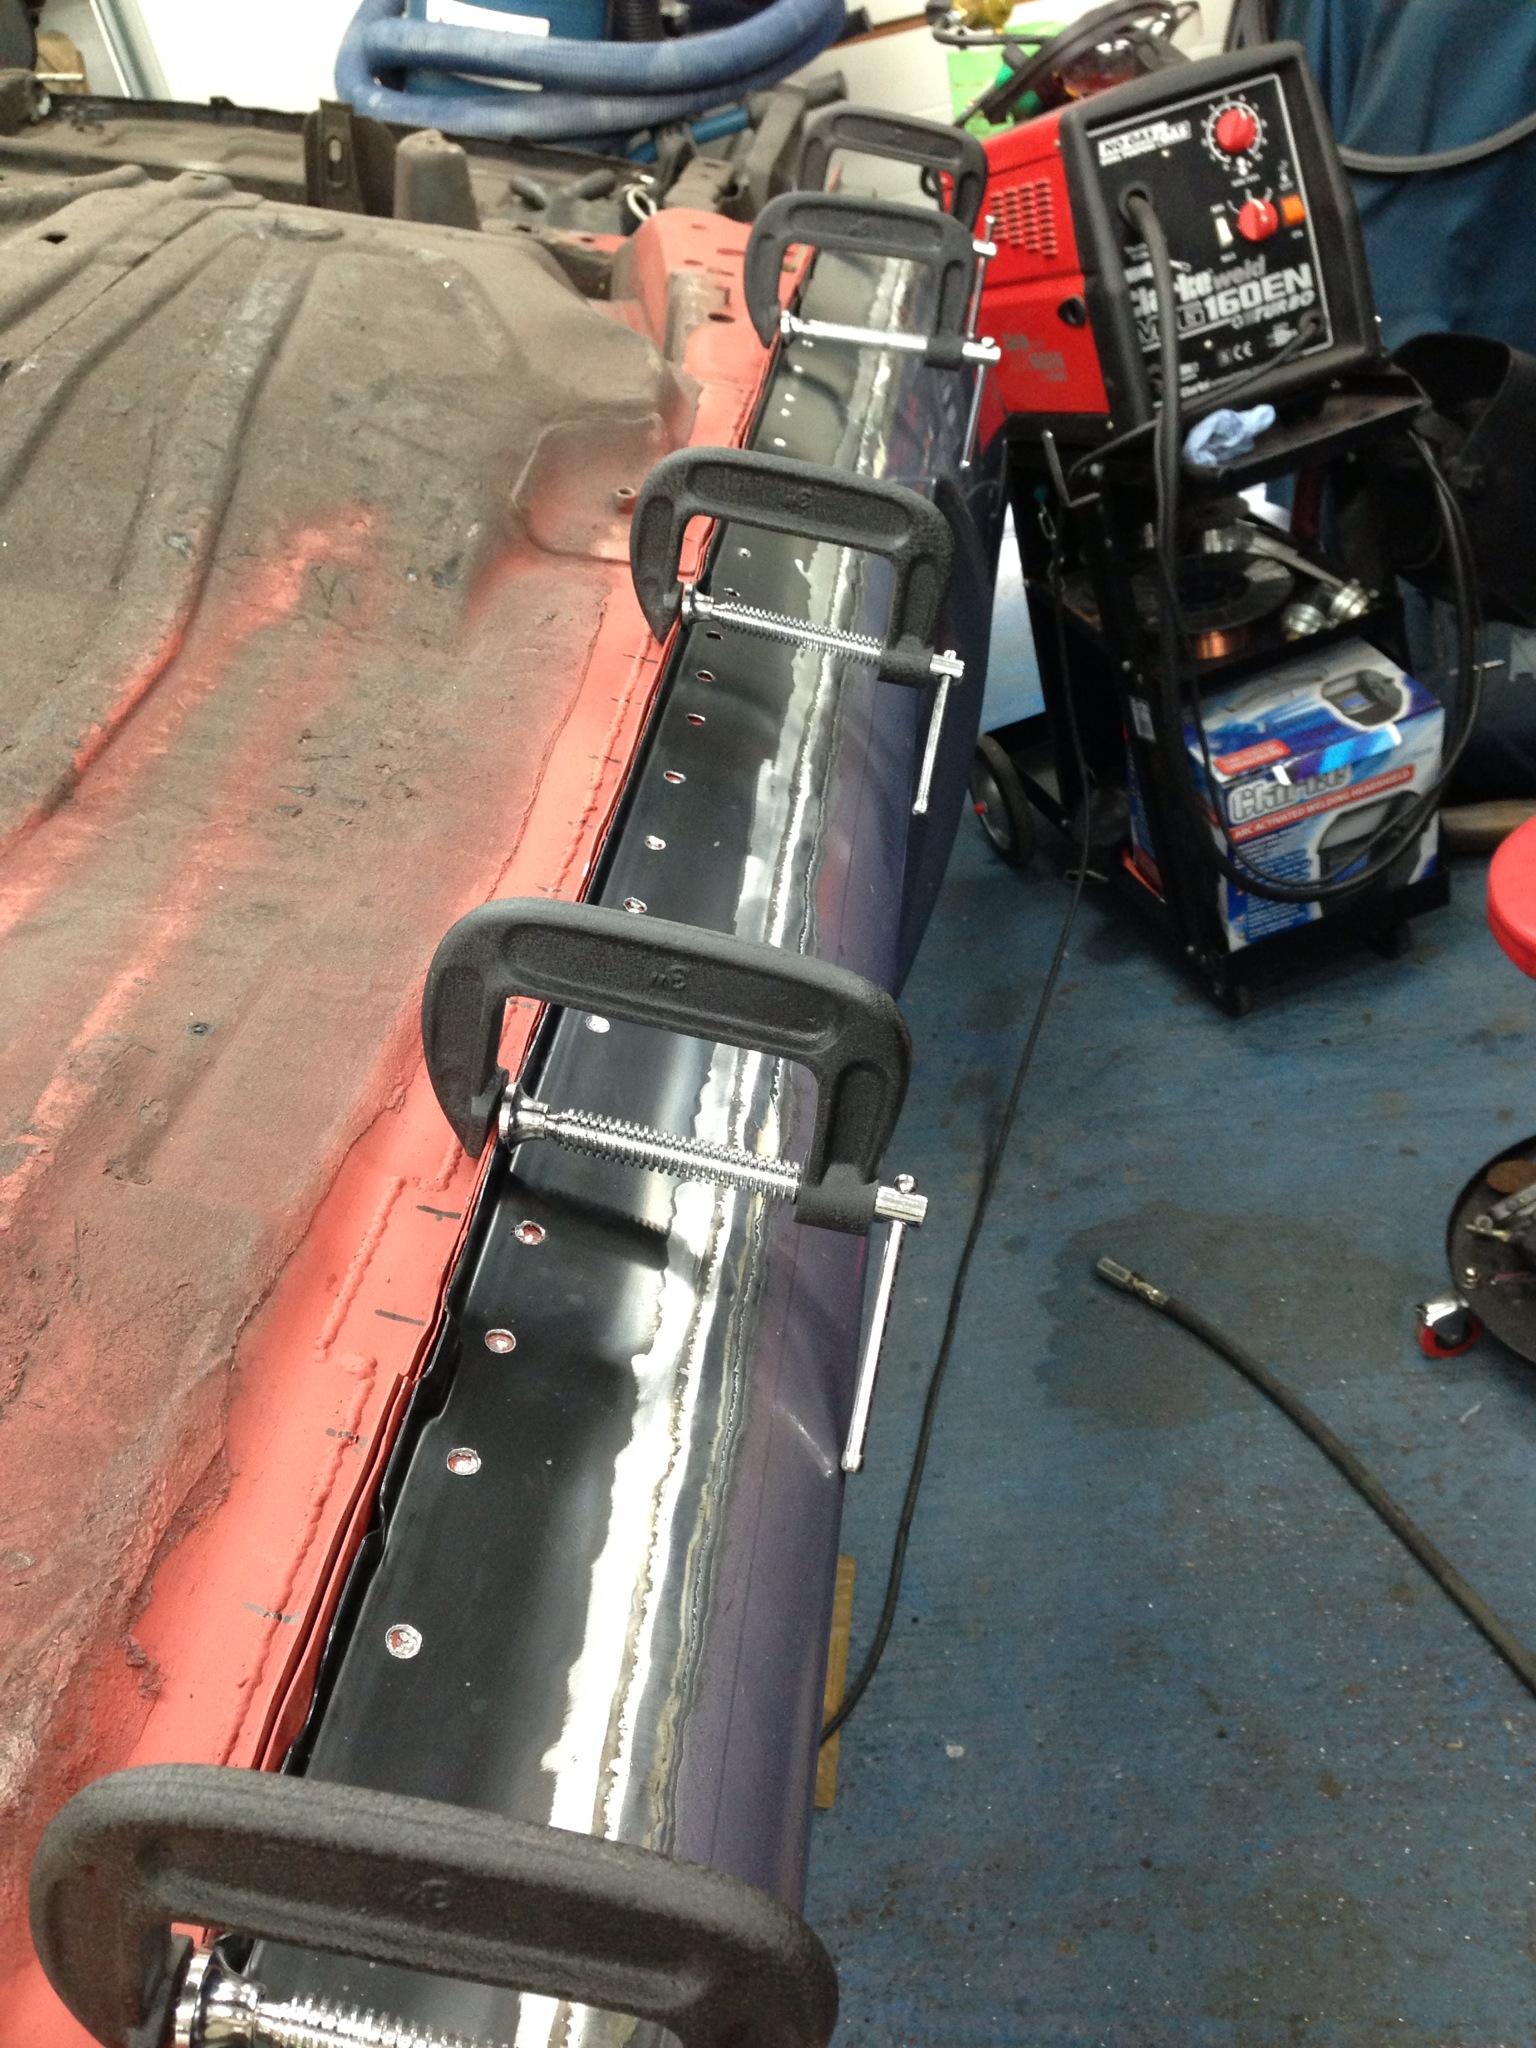
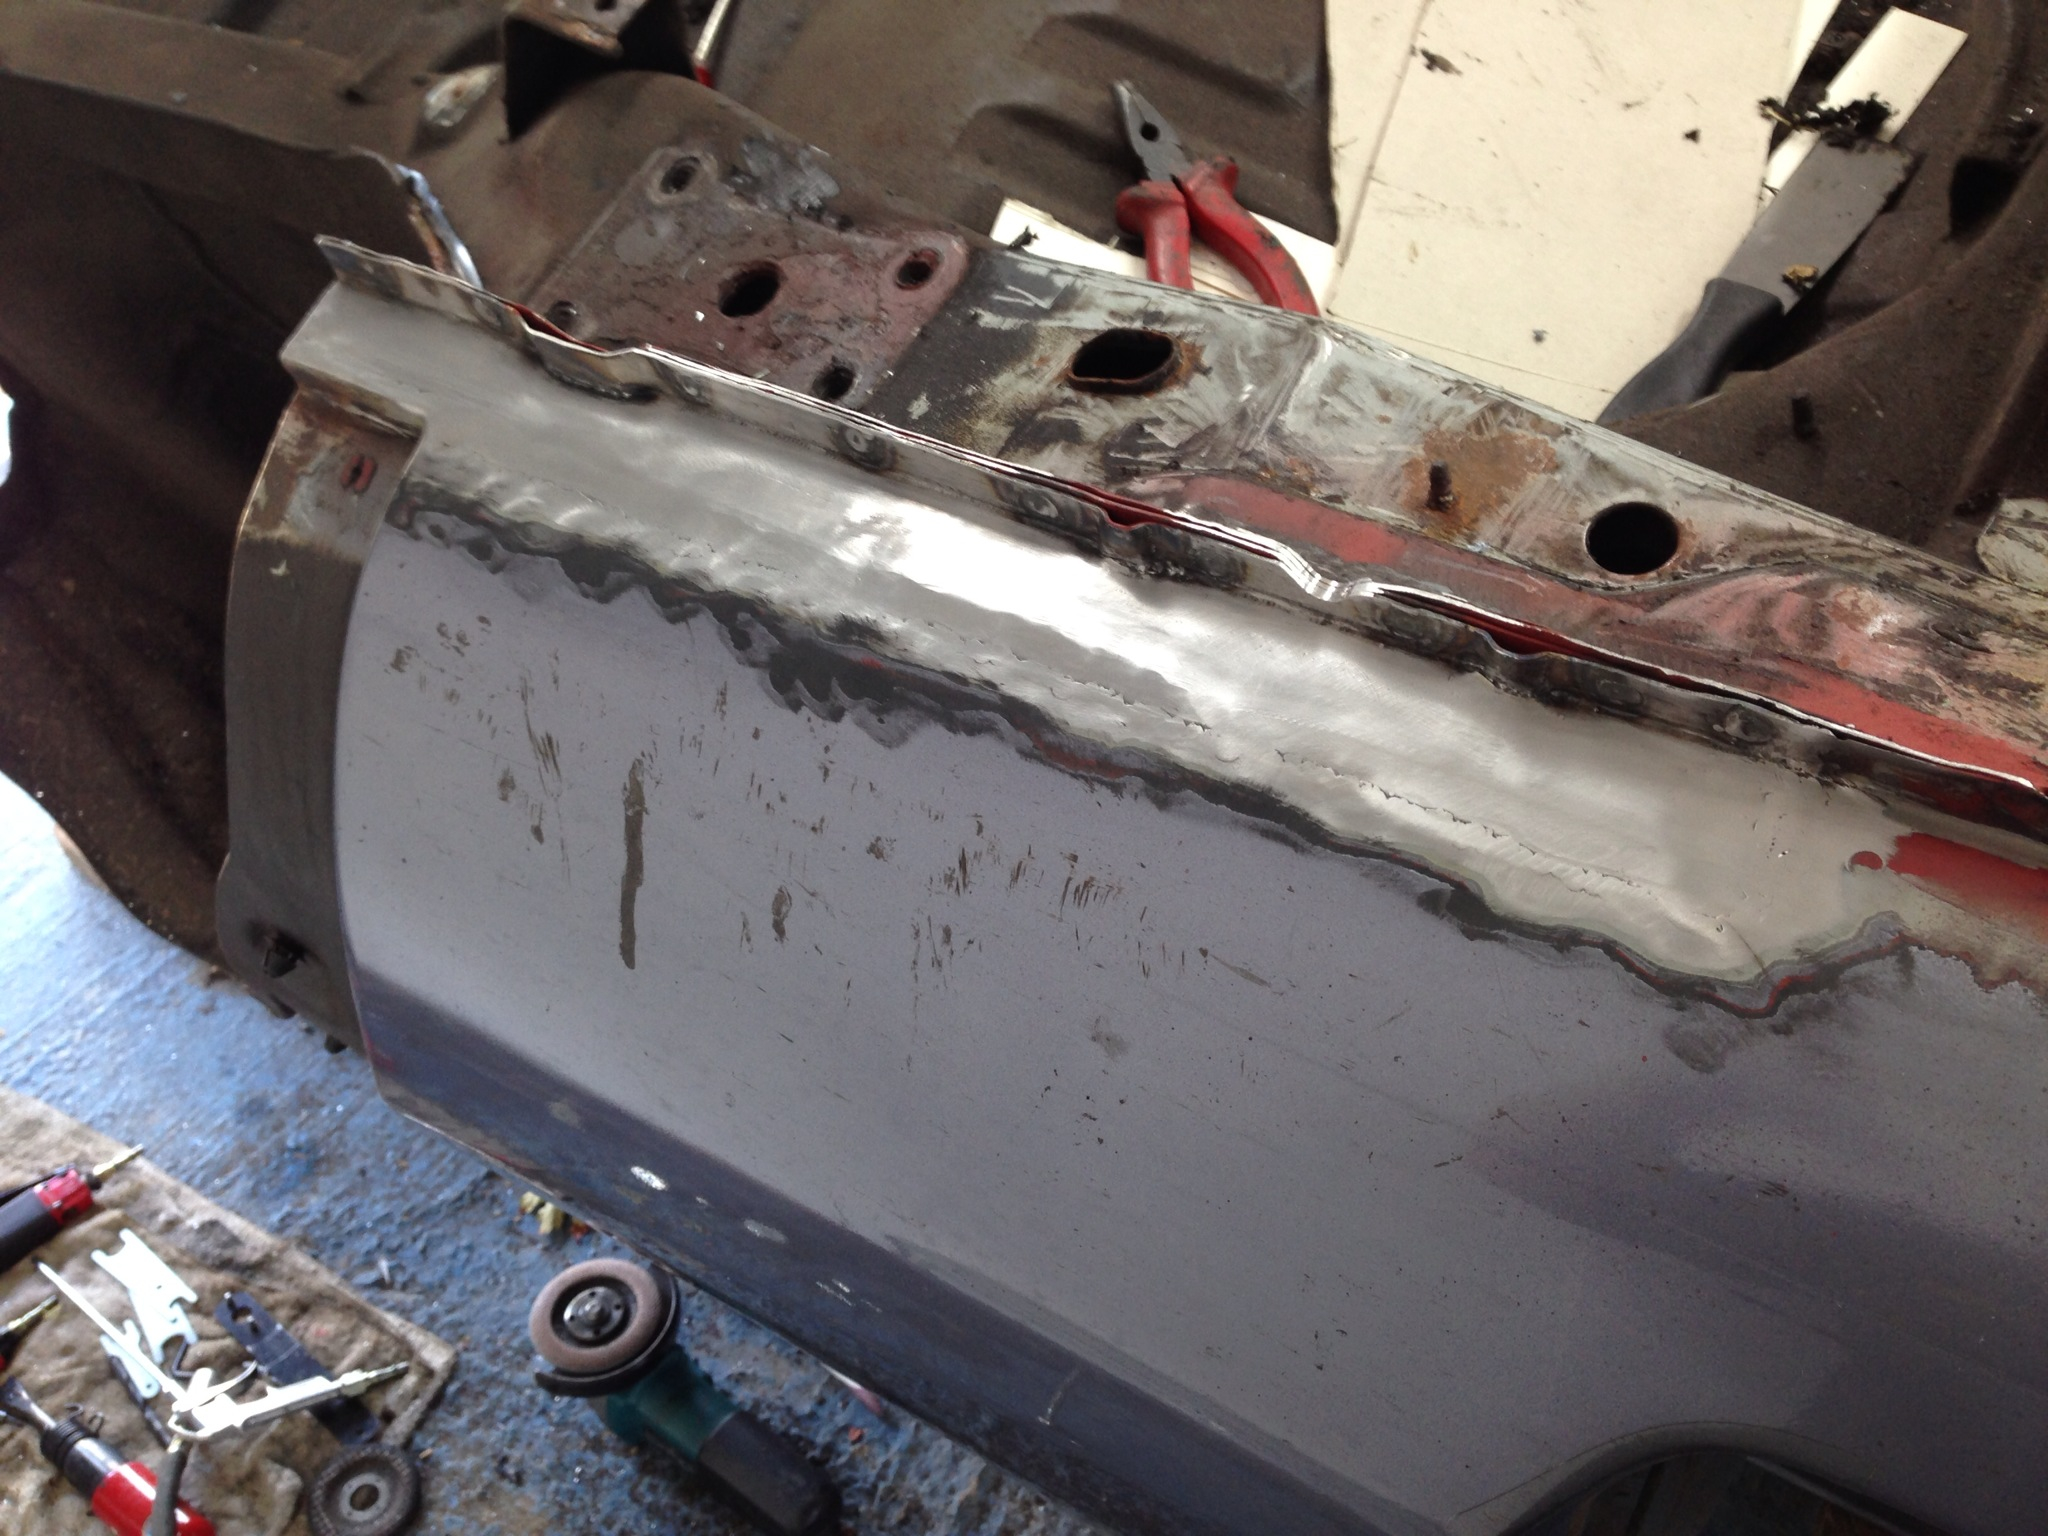
Through to the back side:
Ground back and finished:
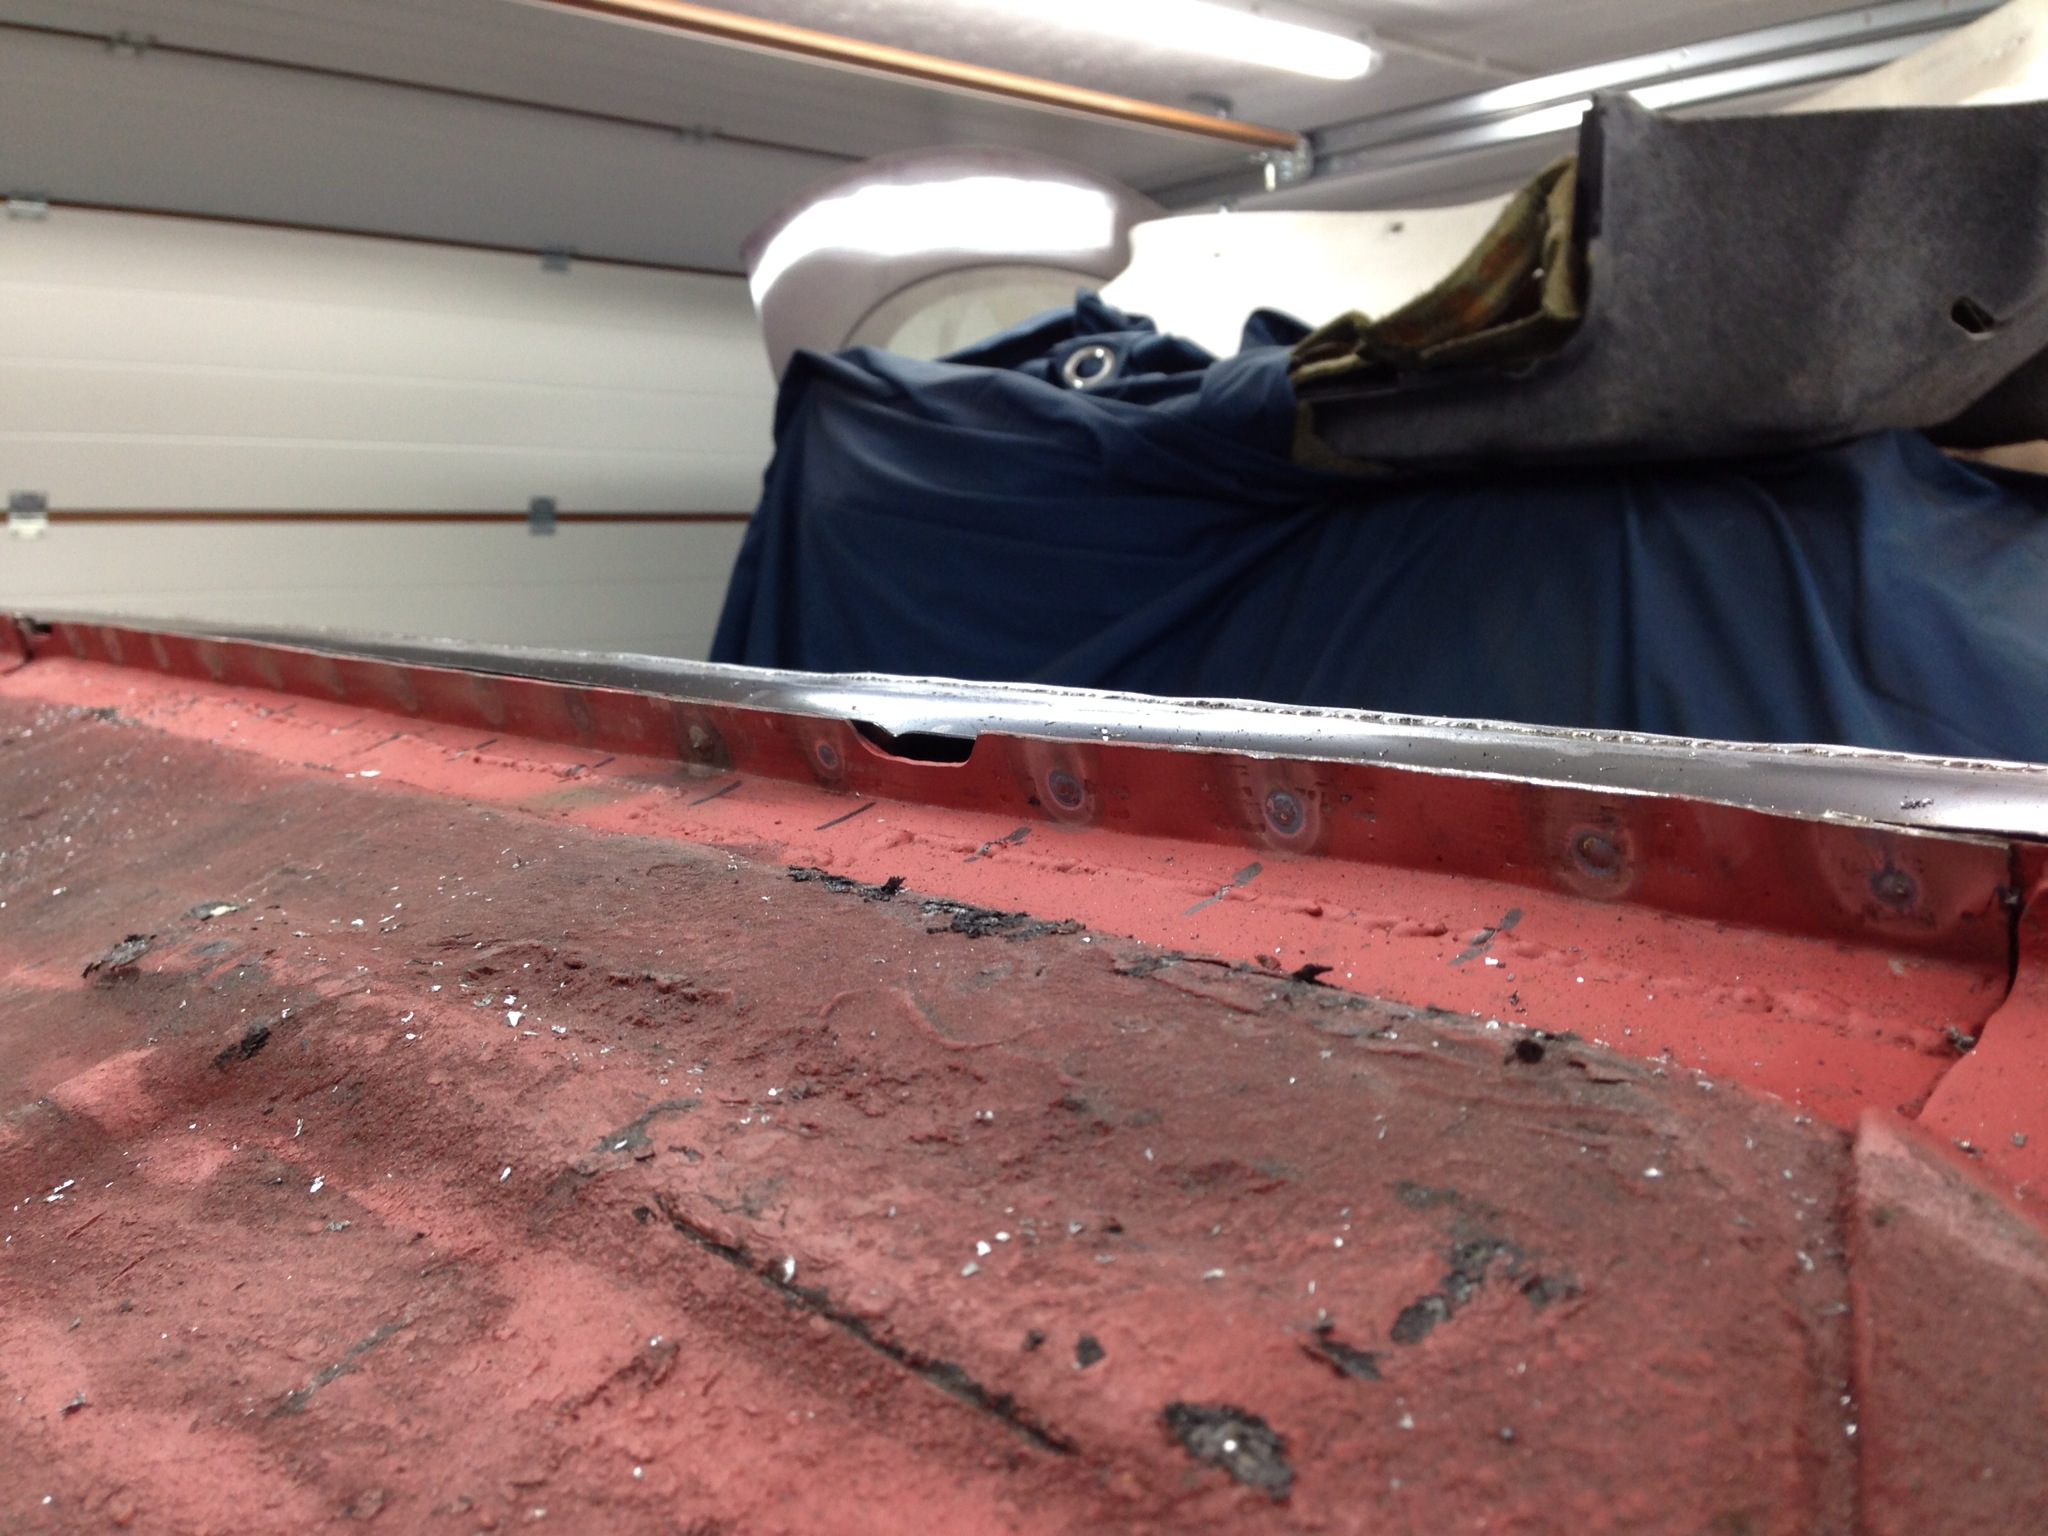
Final bit of welding on the inside:
One completed side and up the right way for a moment:
Much happier with this result, so even though it cost a fortune for the panel I am glad I spent the money, or at least that's what I keep telling myself! I appreciate to some of you it could probably have been done better than this, but hopefully it's good enough and will at least make the car solid again!
More to come..
Thanks for looking.
Building up the rear sill lip again:
Inner panel repair:
Welded in:
Chassis leg repair:
Sill strengthening panel prepped ready:
Floor pan repair:
Decided to press in a riv-nut for the handbrake cable to replace the self tapper screw that ford use. Had to make a hole in the inner panel to allow the threads to sit straight:
While the sill was open and just before I sealed it up I sprayed in some Dinitrol cavity wax - more will follow once all the rust repairs are complete:
At �215 from Ford!!!! Was the repair panel for the outer sill - typical ford only sell this panel as a replacement for the full outer sill and nothing smaller!
It then took a good hour or so to pluck up the courage to then take an angle grinder to it for the bit I needed:
Test fitted and lined up:
Tacked in:
Welding into place:
In place - this one seam took me half a day to make sure I didn't put too much heat in the panel:
Plug welded to the strengthening panel:
Decided to plug weld the sill lip as I couldn't justify spending the money on a spot welder just for this build:
Through to the back side:
Ground back and finished:
Final bit of welding on the inside:
One completed side and up the right way for a moment:
Much happier with this result, so even though it cost a fortune for the panel I am glad I spent the money, or at least that's what I keep telling myself! I appreciate to some of you it could probably have been done better than this, but hopefully it's good enough and will at least make the car solid again!
More to come..
Thanks for looking.
Last edited by McCloud 85; 30-07-2013 at 08:59 PM.
 30-07-2013, 09:18 PM
#53
nice work. it wud be nice to see what the weld on the sill looks like from the inside. I done this on mine too but I feel it will rot again were the weld heated it from the inside and its hard to seal it properly to stop me worrying that I wasted my time welding it and itll be as bad in a couple of years.
How long has this type of repair lasted for others before it rusts again.
Its nice to see a nice bit of welding and proper time spent making patches
How long has this type of repair lasted for others before it rusts again.
Its nice to see a nice bit of welding and proper time spent making patches
30-07-2013, 09:43 PM
#54
PassionFord Regular
Thread Starter
nice work. it wud be nice to see what the weld on the sill looks like from the inside. I done this on mine too but I feel it will rot again were the weld heated it from the inside and its hard to seal it properly to stop me worrying that I wasted my time welding it and itll be as bad in a couple of years.
How long has this type of repair lasted for others before it rusts again.
Its nice to see a nice bit of welding and proper time spent making patches
How long has this type of repair lasted for others before it rusts again.
Its nice to see a nice bit of welding and proper time spent making patches
31-07-2013, 04:34 AM
#55
Glennvestite
iTrader: (1)
Join Date: Jul 2006
Location: Darlington county durham
Posts: 62,764
Received 1,044 Likes
on
998 Posts
Looking at your KA and the work your doing to it makes me realise that the work thats getting done to the saff isnt that bad.Ive been getting a ns sill remade on mine since it was rotton.
31-07-2013, 07:01 PM
#56
Too many posts.. I need a life!!
This was my concern when I was fitting and lining the panel up - the main seam down the outer sill was fitted with an overlap join of about 1mm. This was so that I made sure I didn't have any blow throughs on the weld and to make sure it 'sealed' all the way along. This issue with this is you possibly make a lip on the inside which can catch water/condensation and rot. So my solution to this was to blast as much Dinitrol cavity wax into the box section as possible and where I wasn't sure drill more holes on the inside to get to the more hard to reach places. Hopefully that should make the repairs pretty rust proof... But this is still an old Ford!
I found the panels cheapest from fordpartsuk but you need to get them collected so if your just getting one then it might no be worth it. I was getting 3 of the 4 that make up the two sides plus two new wings so it was worth using them.
Last edited by jammy86; 31-07-2013 at 07:05 PM.
04-08-2013, 07:43 PM
#57
PassionFord Regular
Thread Starter
Bit of an update from this weekend:
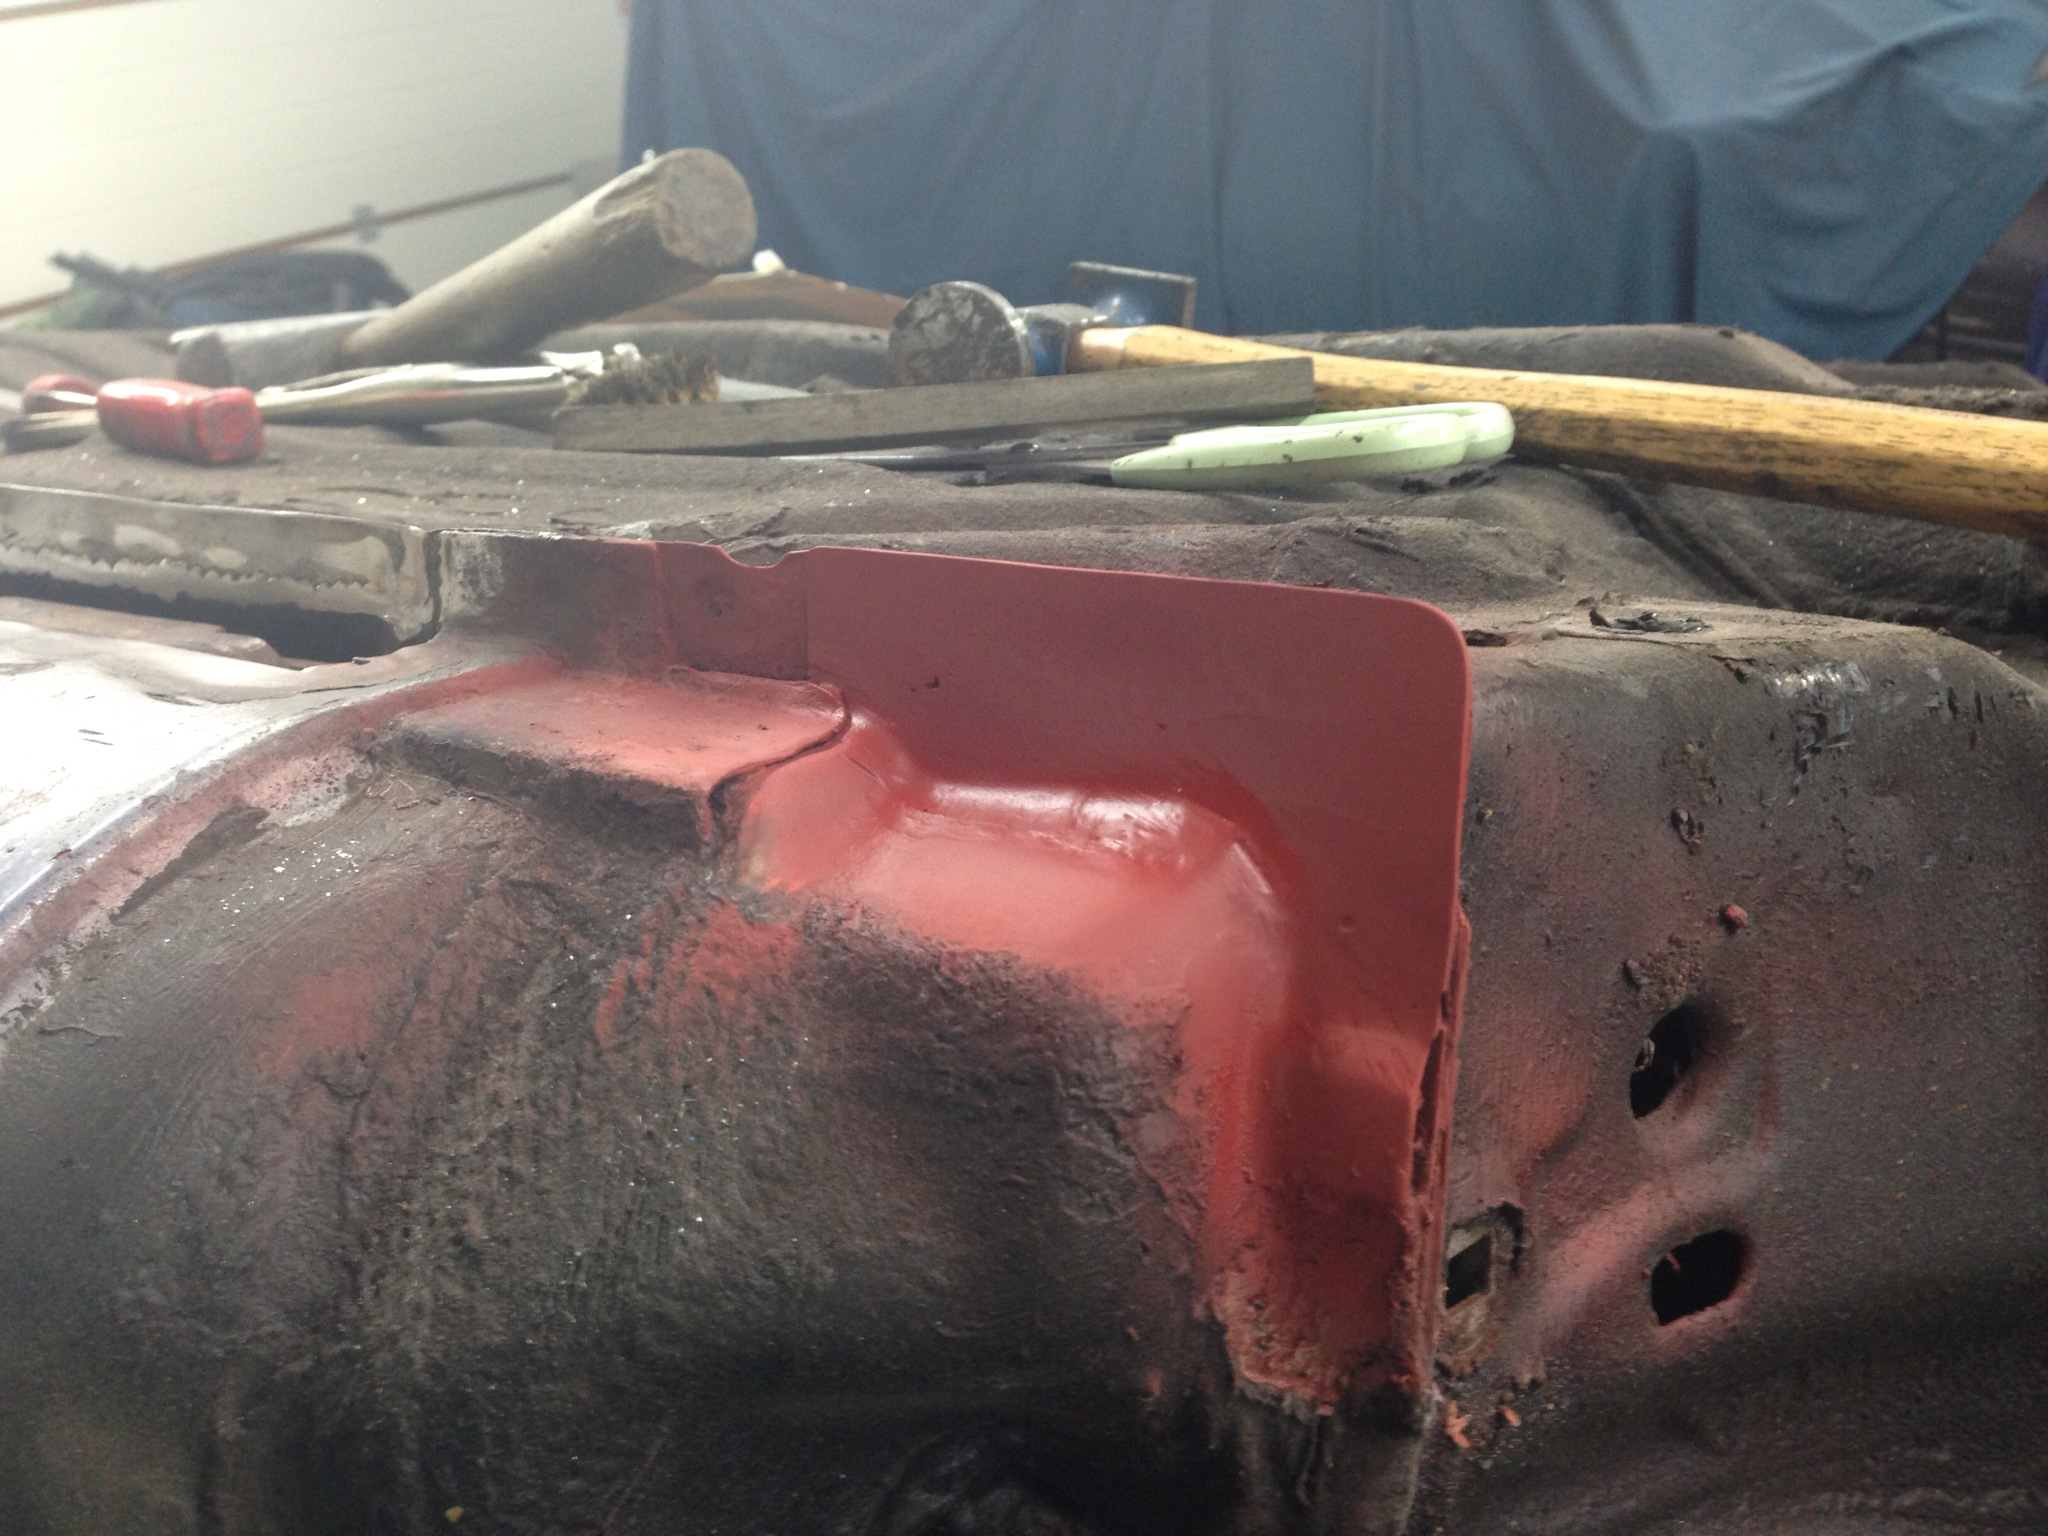
Drivers wing removed:
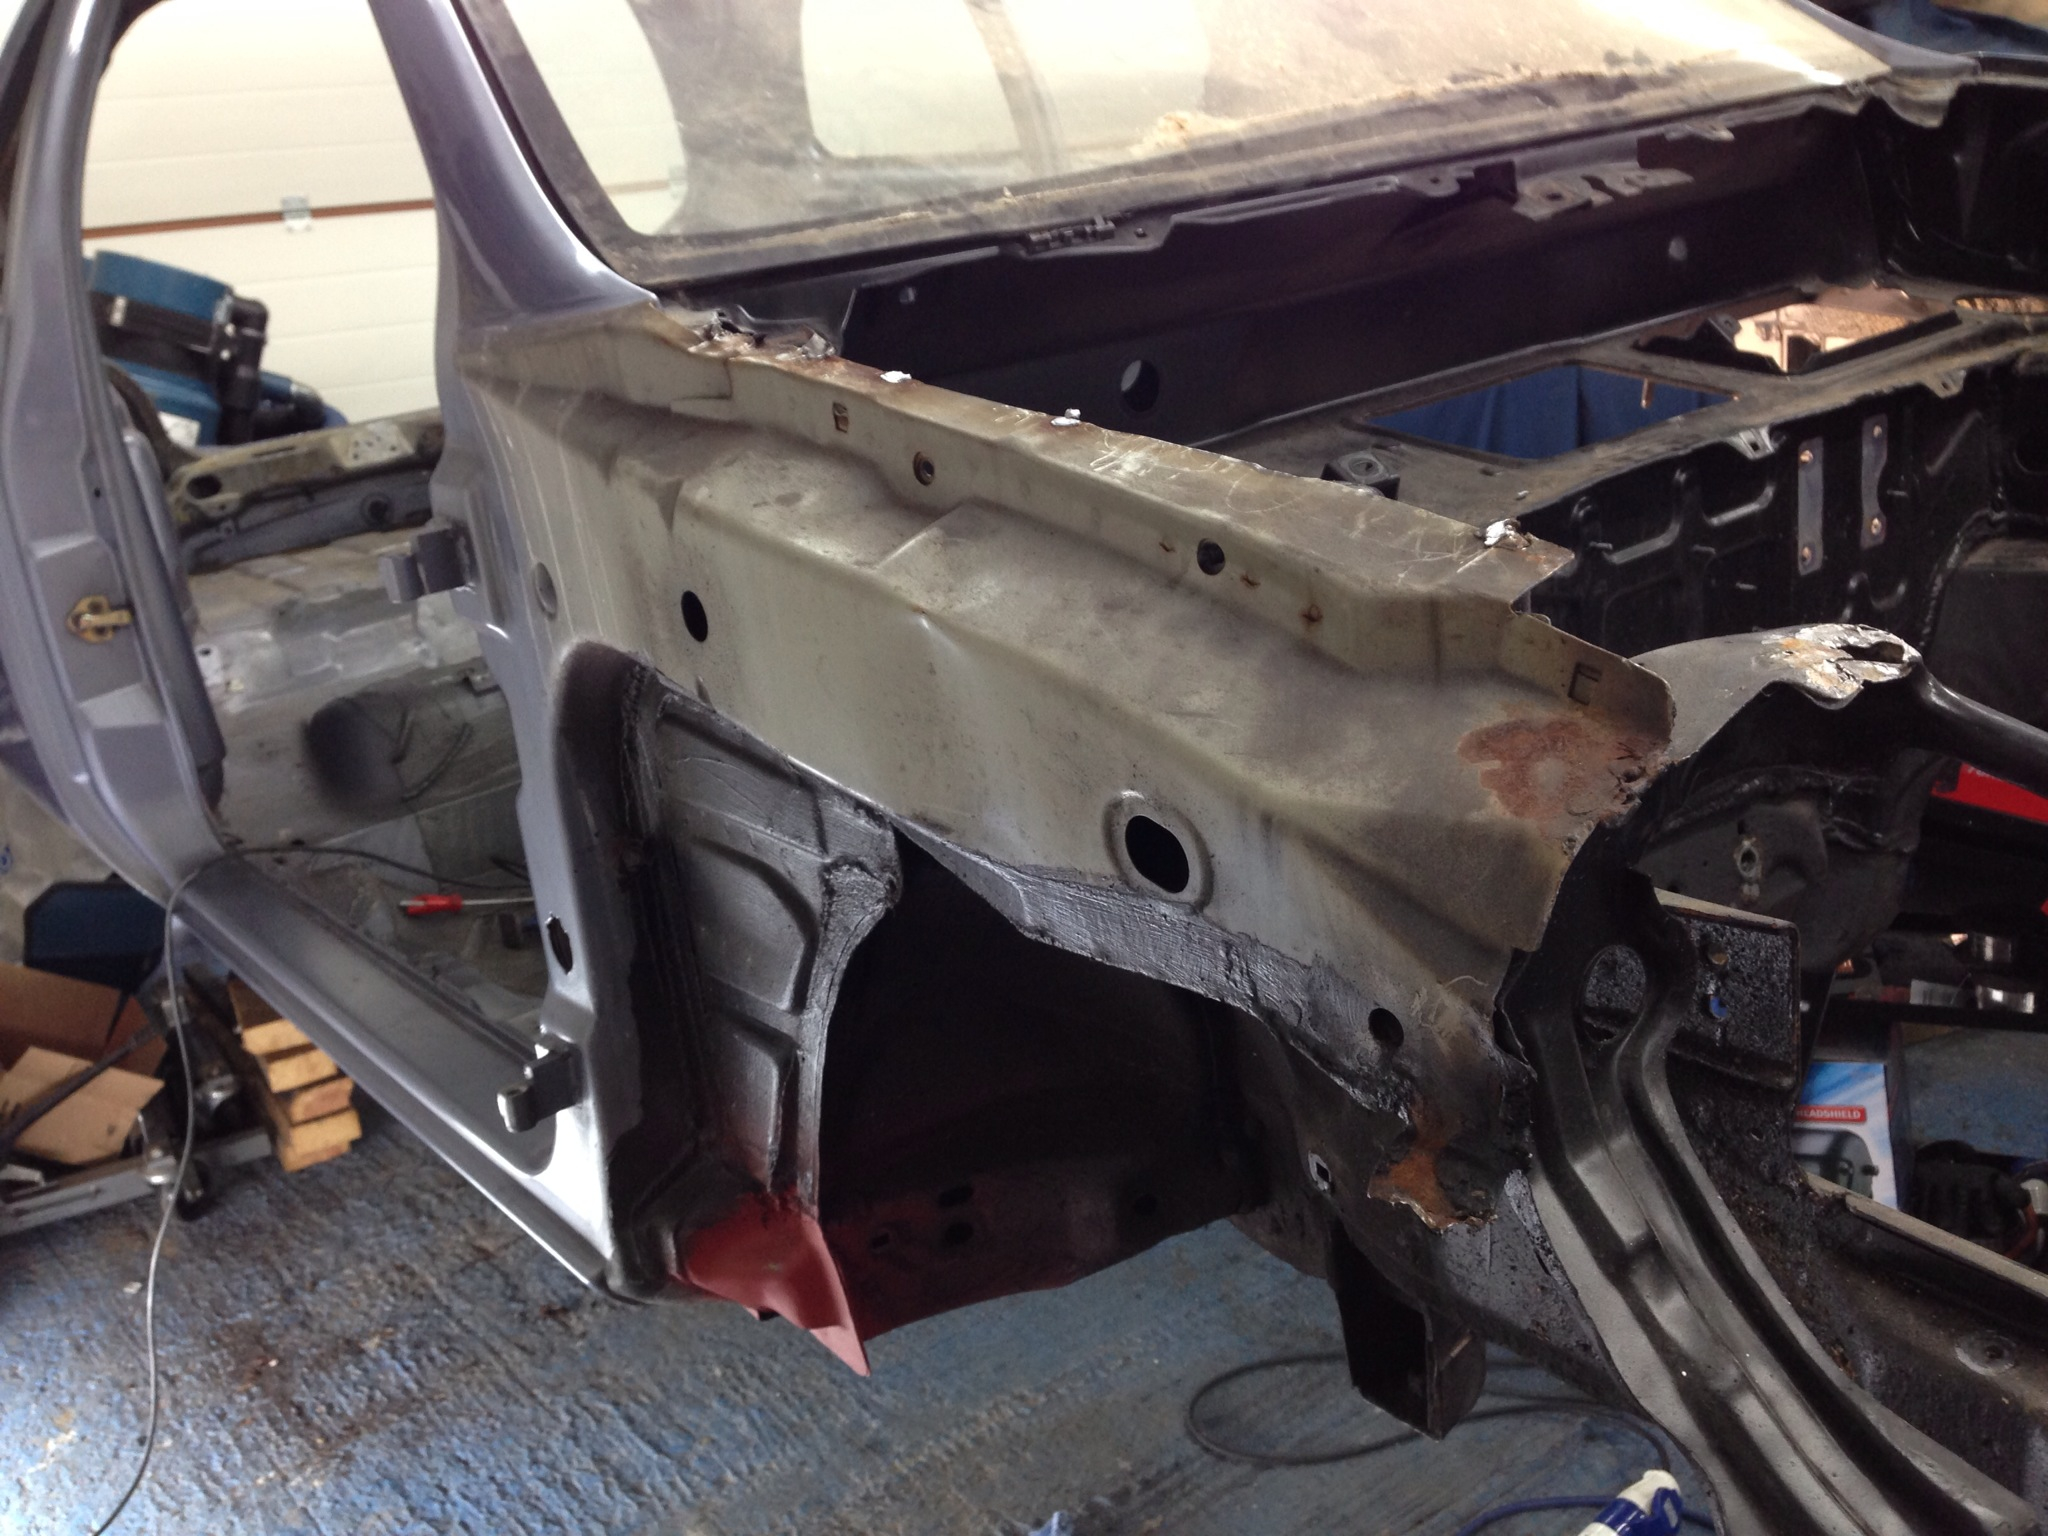
Some minor repair work to do before the new wings.. Though the new panels will be bolt on.
So on to the passenger side:
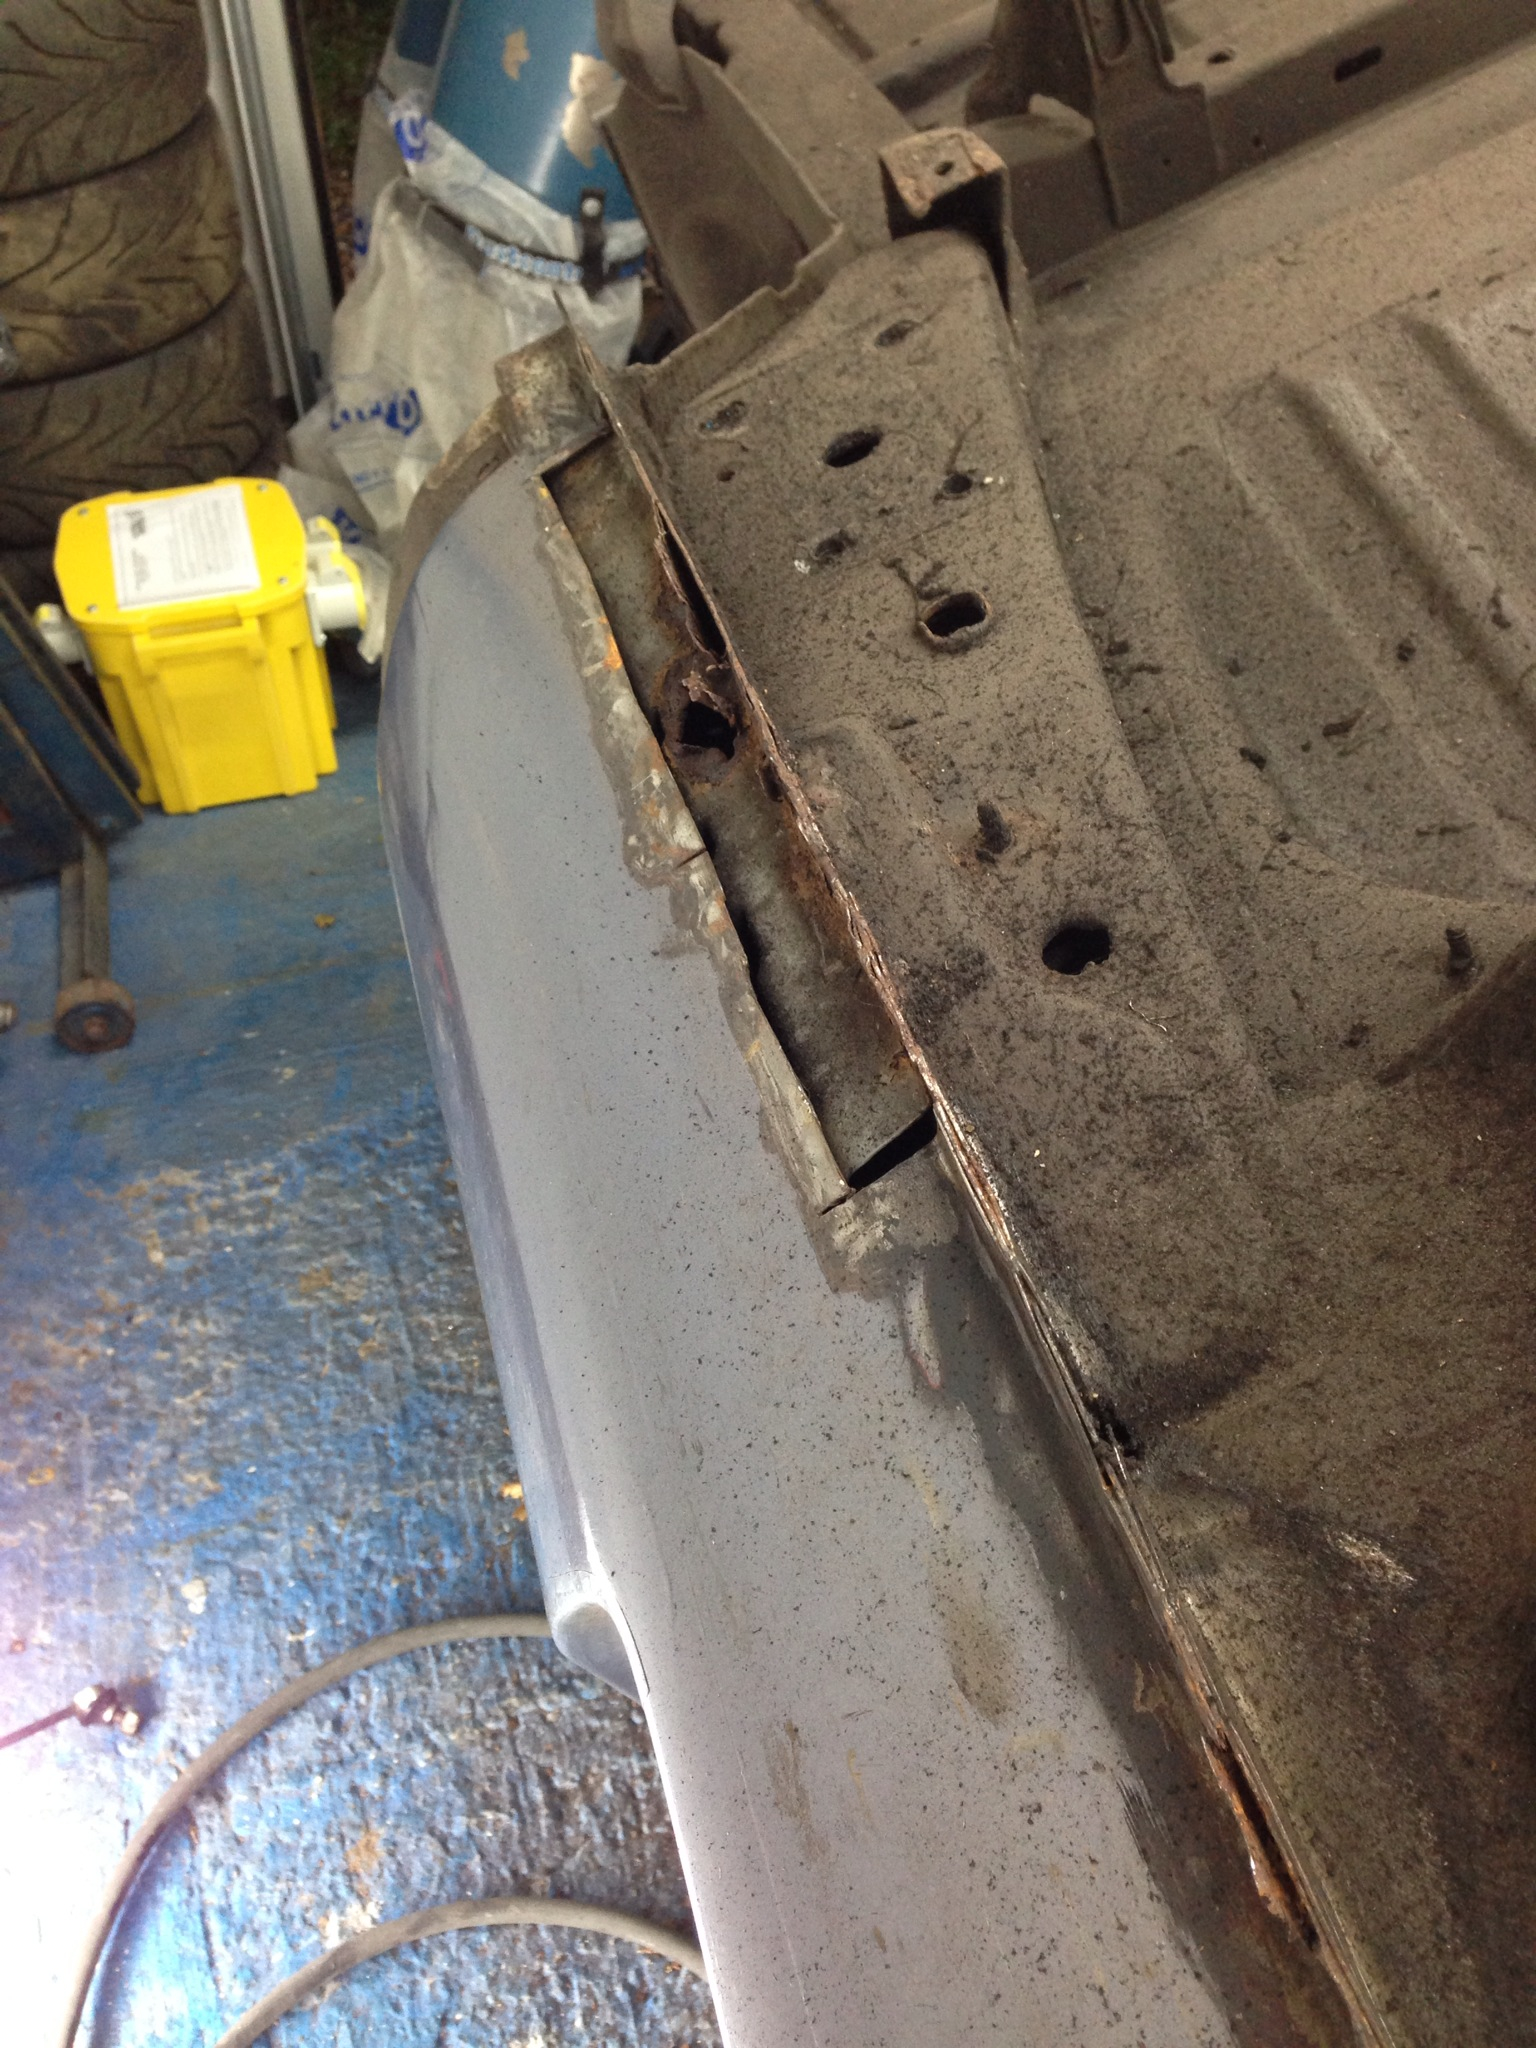
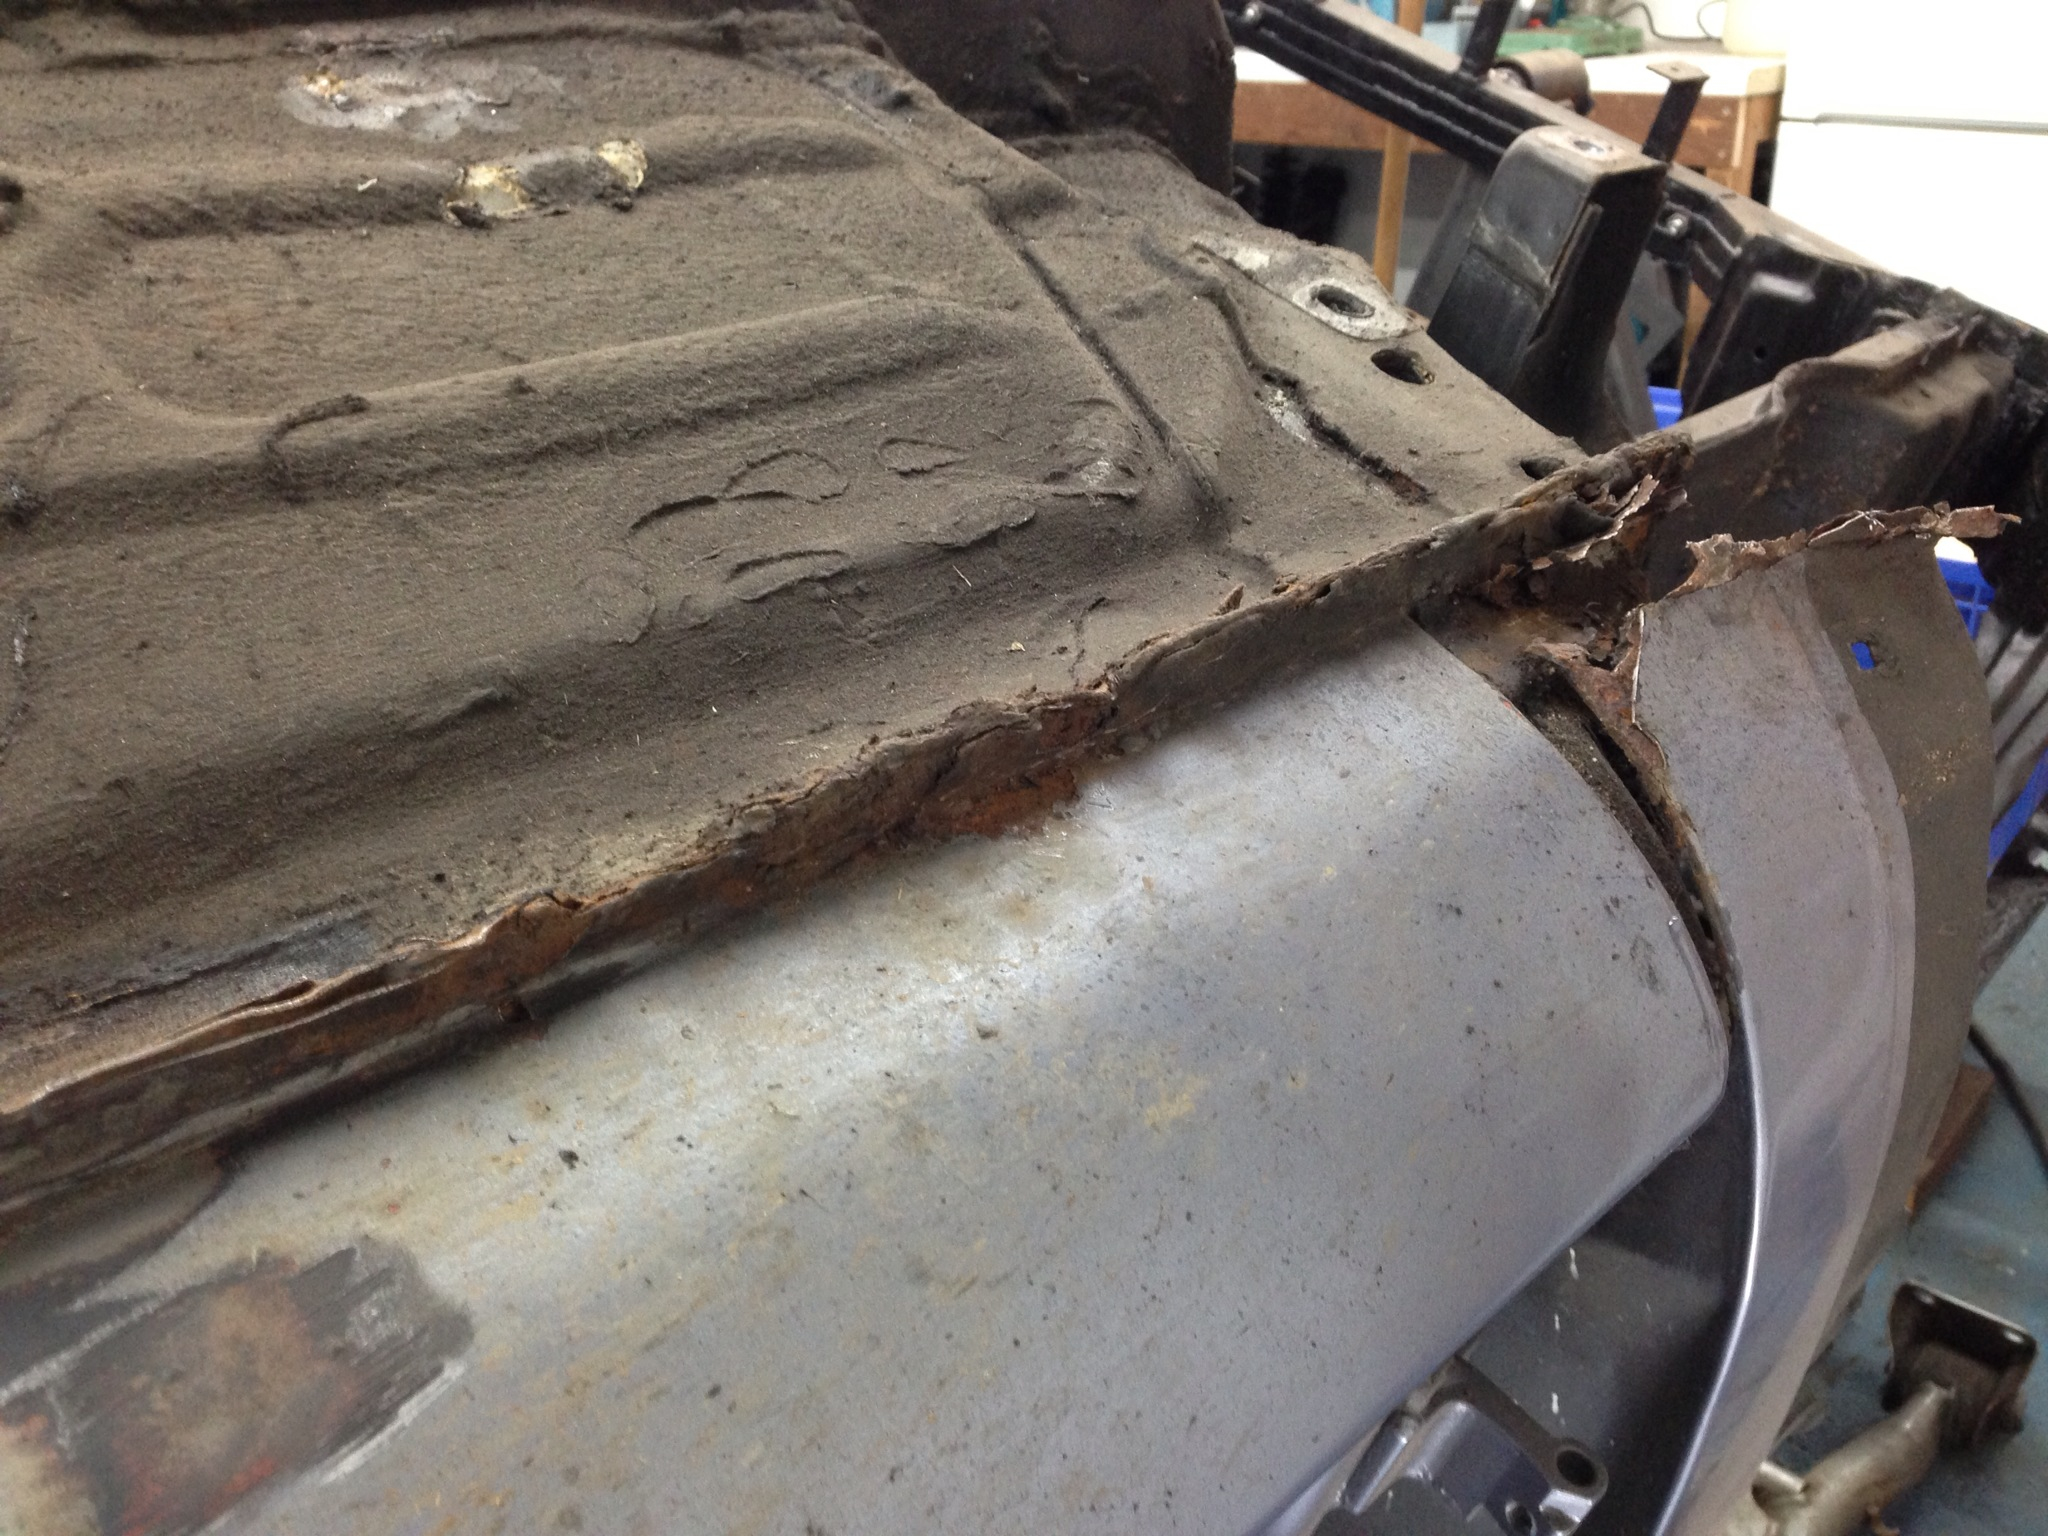
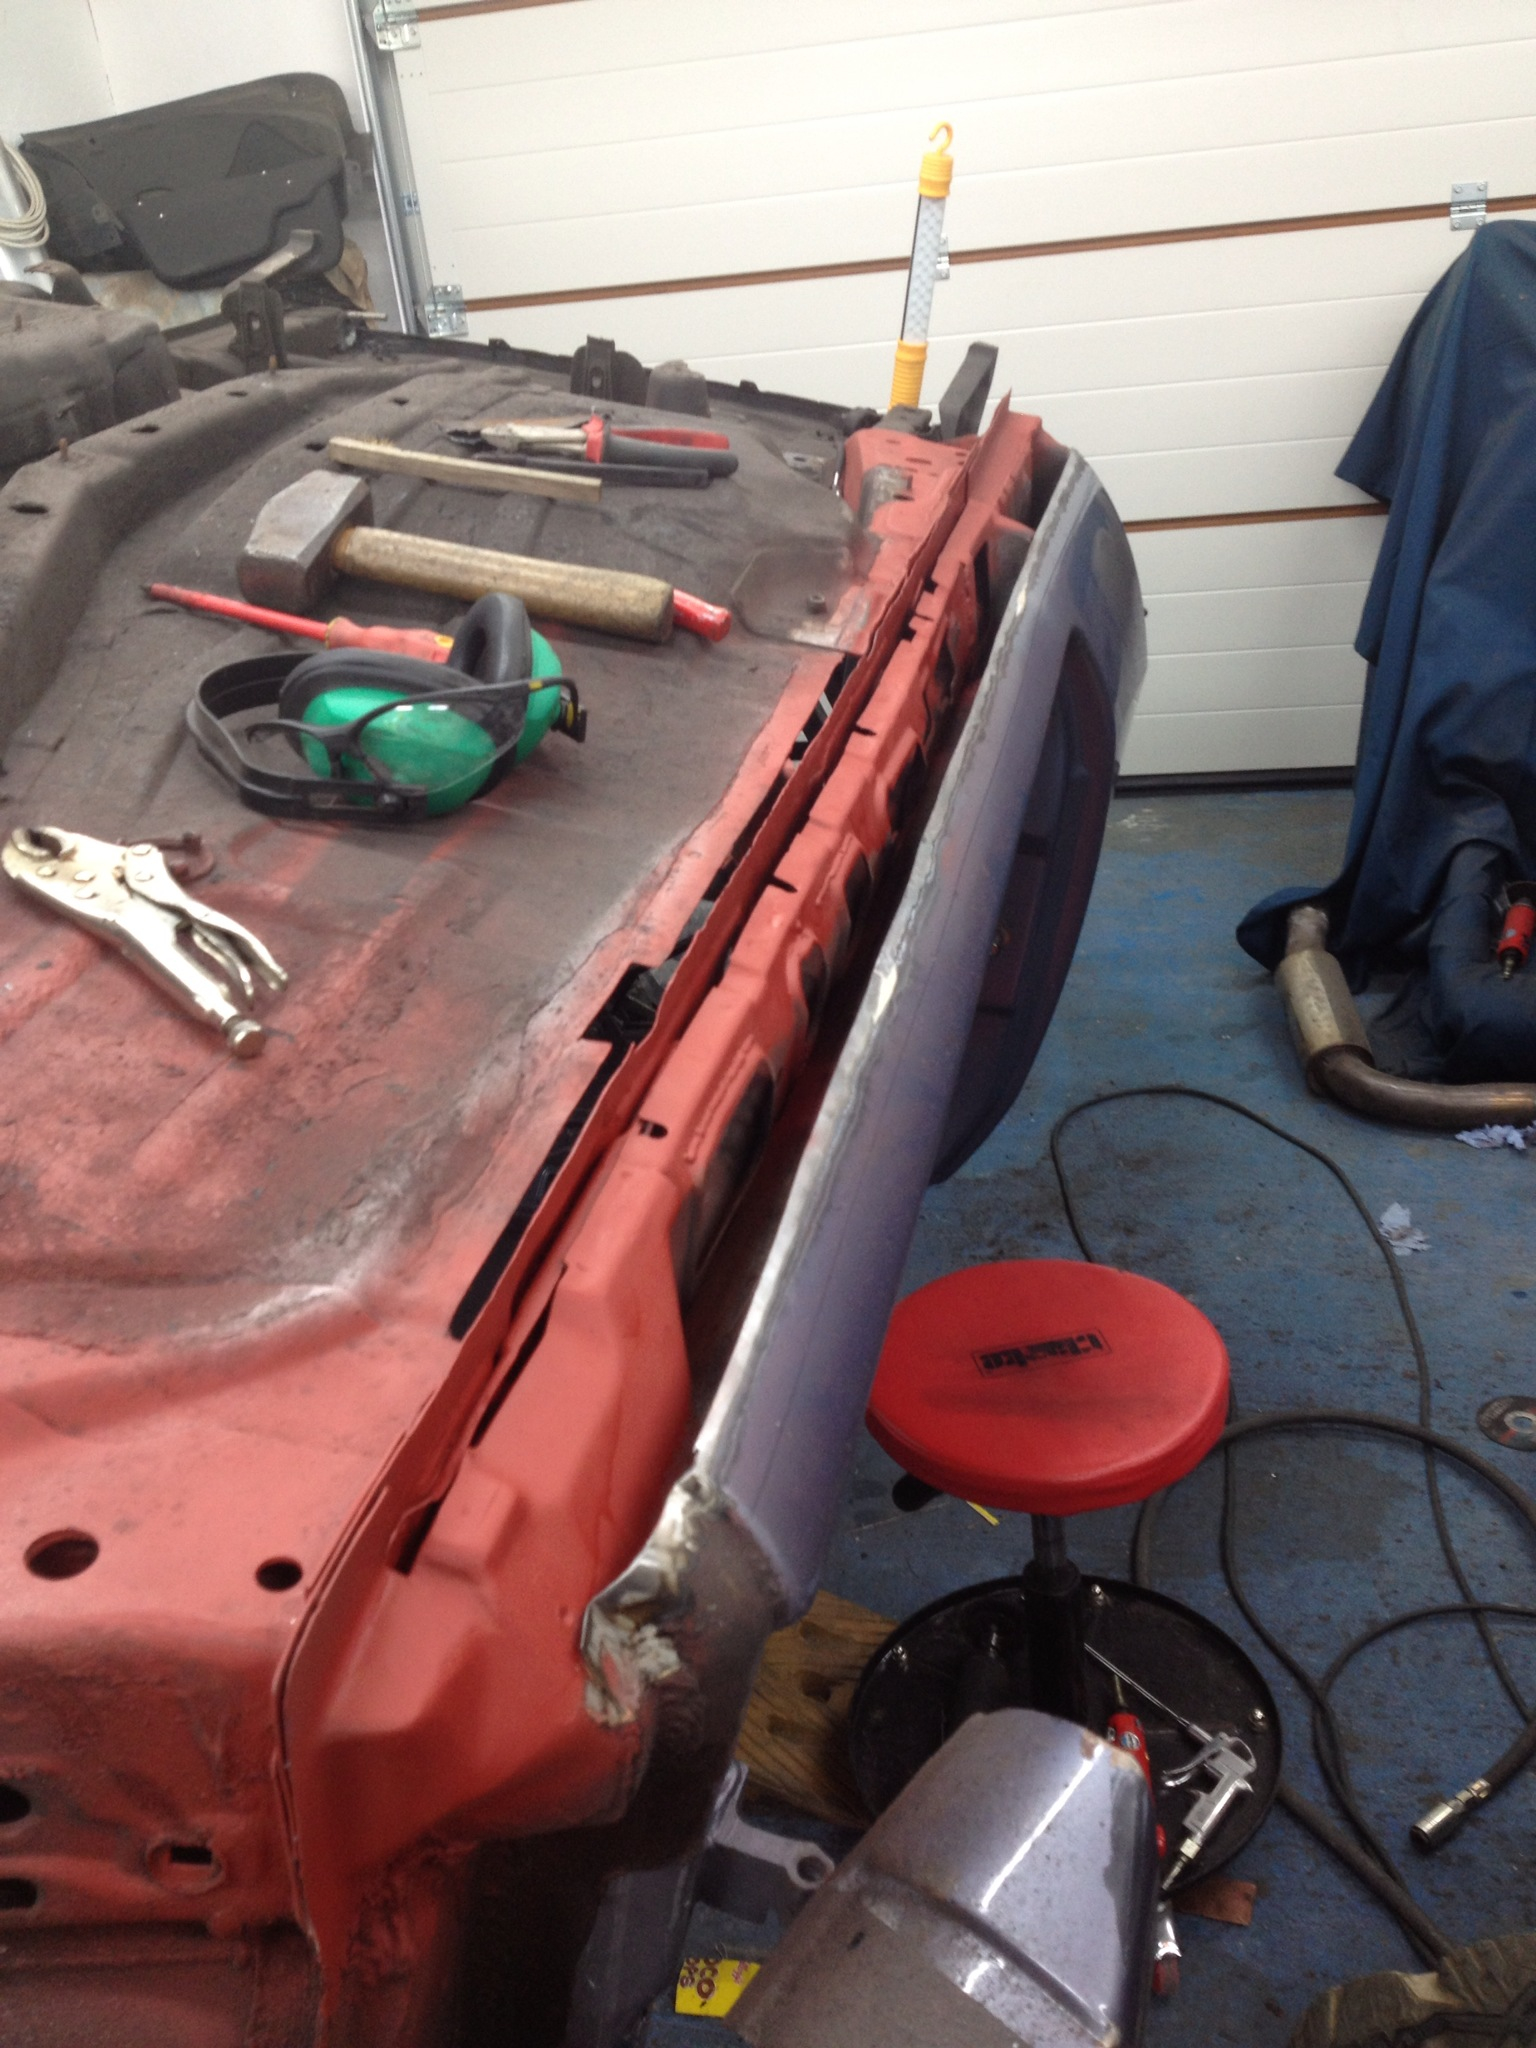
Cutting the rot out:
Areas treated with Dinitrol:
Repair patches going in:

Internal skins primed and rivnut fitted for the handbrake cable:
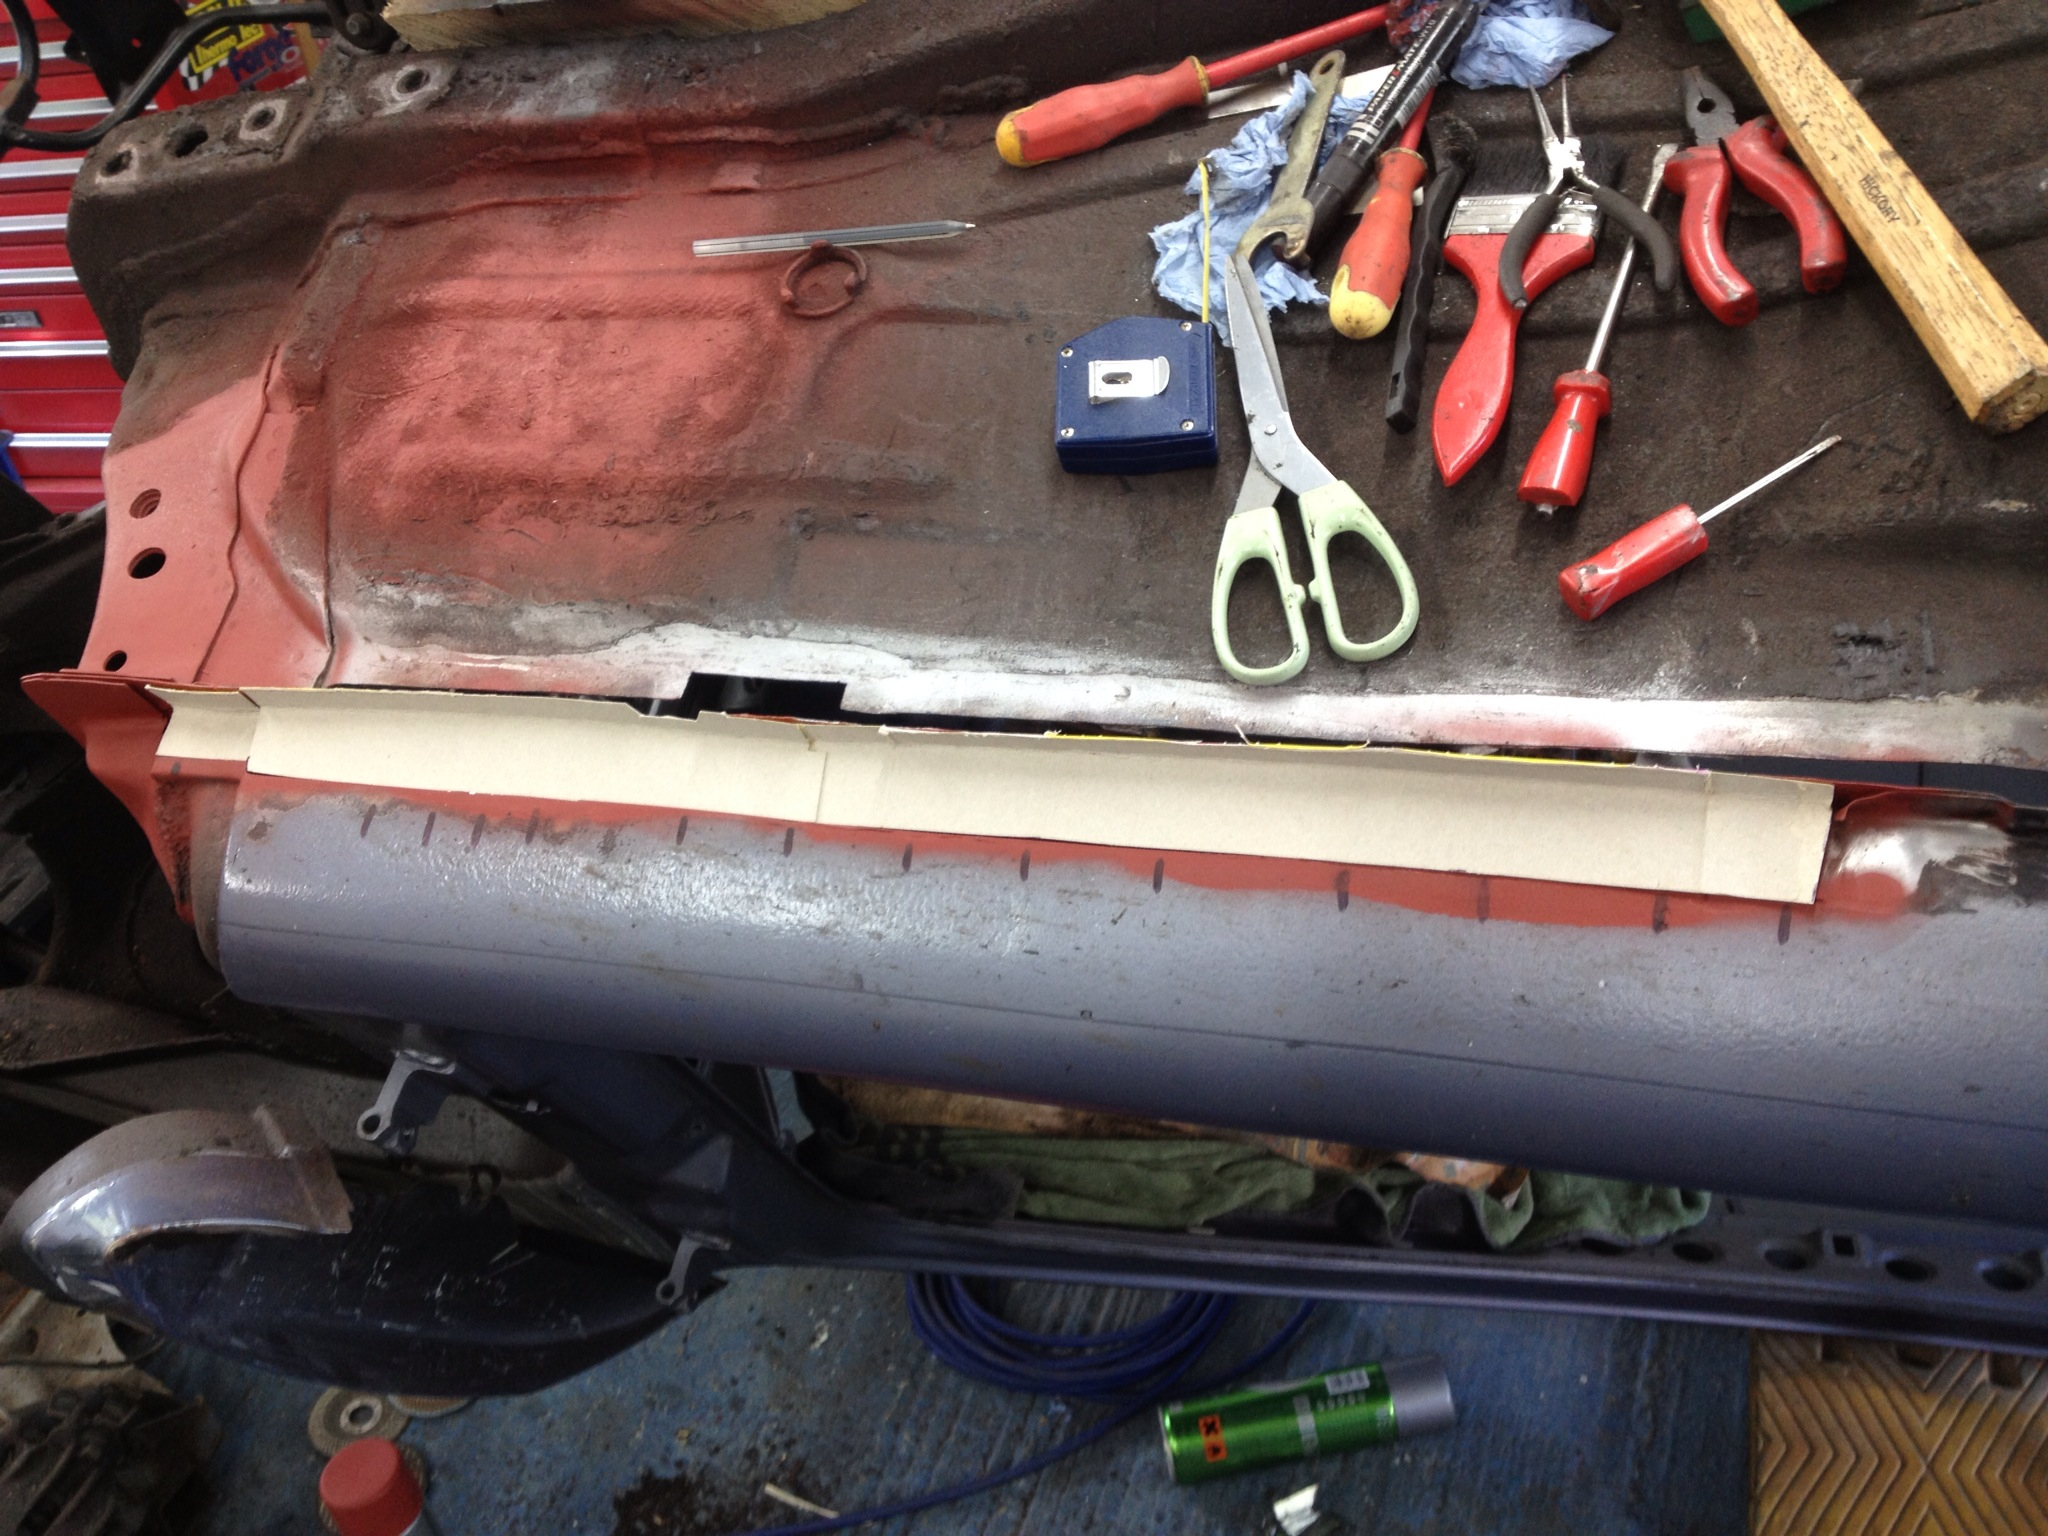
Outer sill patch at the front during trimming.. Still a way to go with this until I'm happy it looks ok. Wont be perfect but needs to be much better than this!
That's as far as I got.. Hopefully will get a bit more time on it during the week.
Thanks for looking.
Drivers wing removed:
Some minor repair work to do before the new wings.. Though the new panels will be bolt on.
So on to the passenger side:
Cutting the rot out:
Areas treated with Dinitrol:
Repair patches going in:
Internal skins primed and rivnut fitted for the handbrake cable:
Outer sill patch at the front during trimming.. Still a way to go with this until I'm happy it looks ok. Wont be perfect but needs to be much better than this!
That's as far as I got.. Hopefully will get a bit more time on it during the week.
Thanks for looking.
Last edited by McCloud 85; 04-08-2013 at 07:45 PM.
05-08-2013, 06:35 AM
#58
Part of the Furniture
keep up the good work danny! my wings are going on this week and will have it back next so will catch up so you can see!
off topic totally - are you doing best of the best??
off topic totally - are you doing best of the best??
05-08-2013, 01:33 PM
#60
PassionFord Regular
Thread Starter
Cheers mate - and yes we are, myself, Ben and Chris Edwards are signed up as the team.. Should be good!
18-08-2013, 07:33 PM
#62
PassionFord Regular
Thread Starter
Some progress at last from this afternoon all be it only very small, progress is painfully slow at the moment but hopefully I've cleared some time over the next few weeks to move it along again.
So patch panel welded and trimmed ready to fit in:
All welded, trimmed and flatted back - painted for time being:
And that's it! Pathetic really but that took around 4-5 hours. Only another 3 areas to weld back in now on this side and then the horrible task of removing all the underseal and waxoyl...
Thanks for looking!
26-08-2013, 08:41 PM
#63
PassionFord Regular
Thread Starter
Managed to get some time this weekend to get some more done on the car..
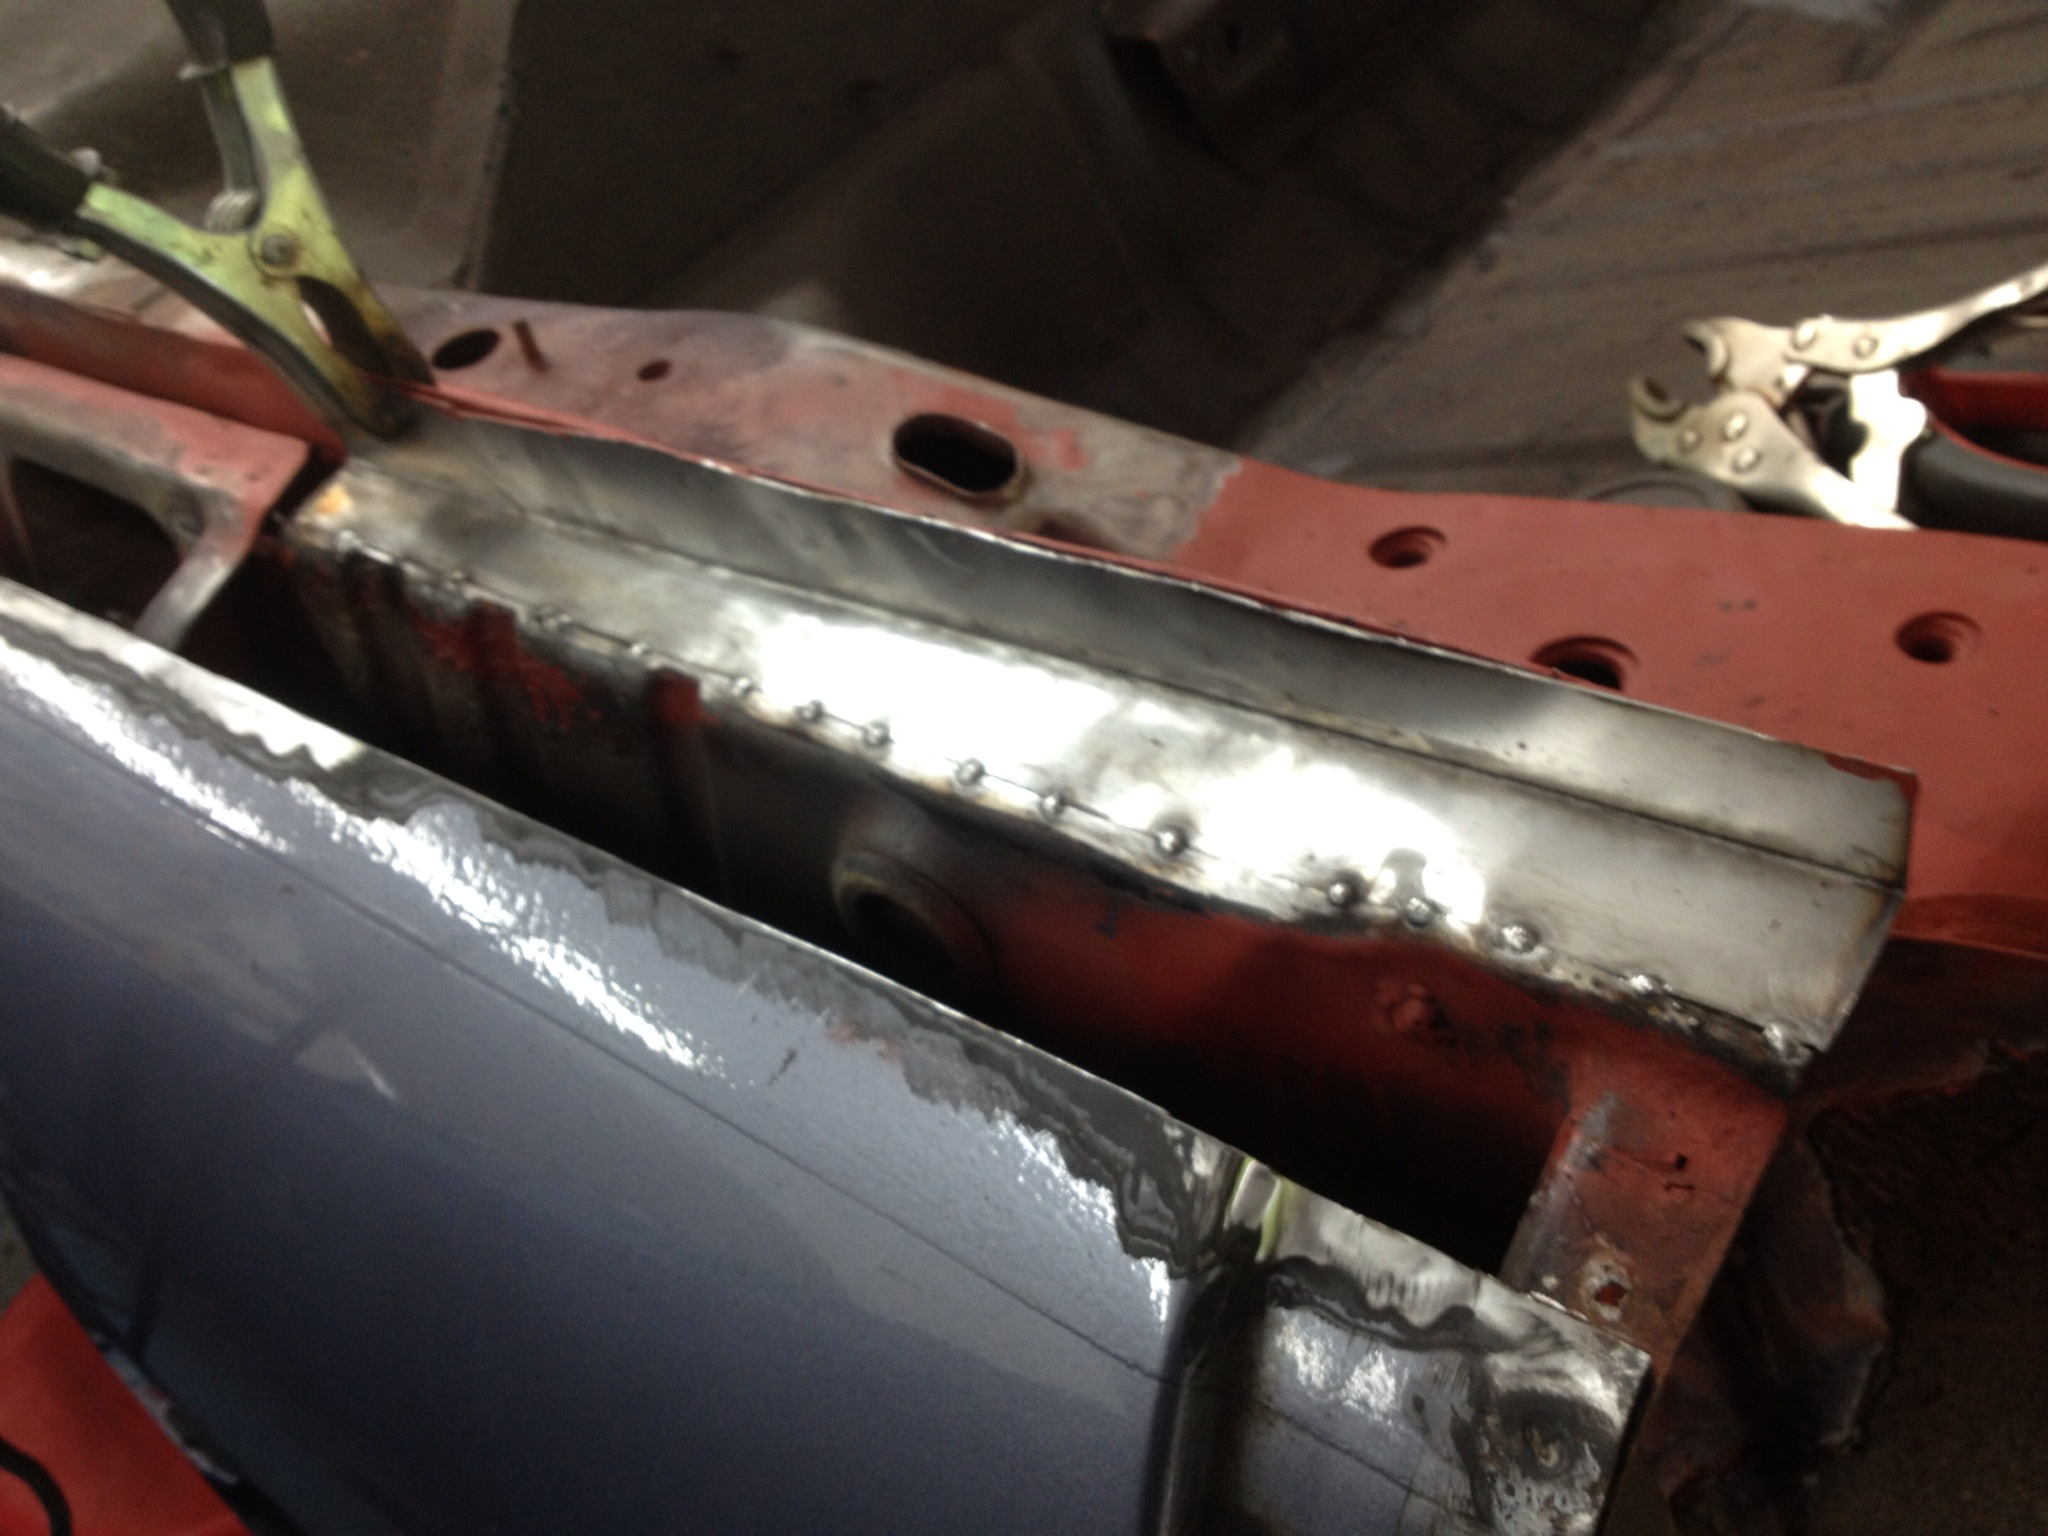
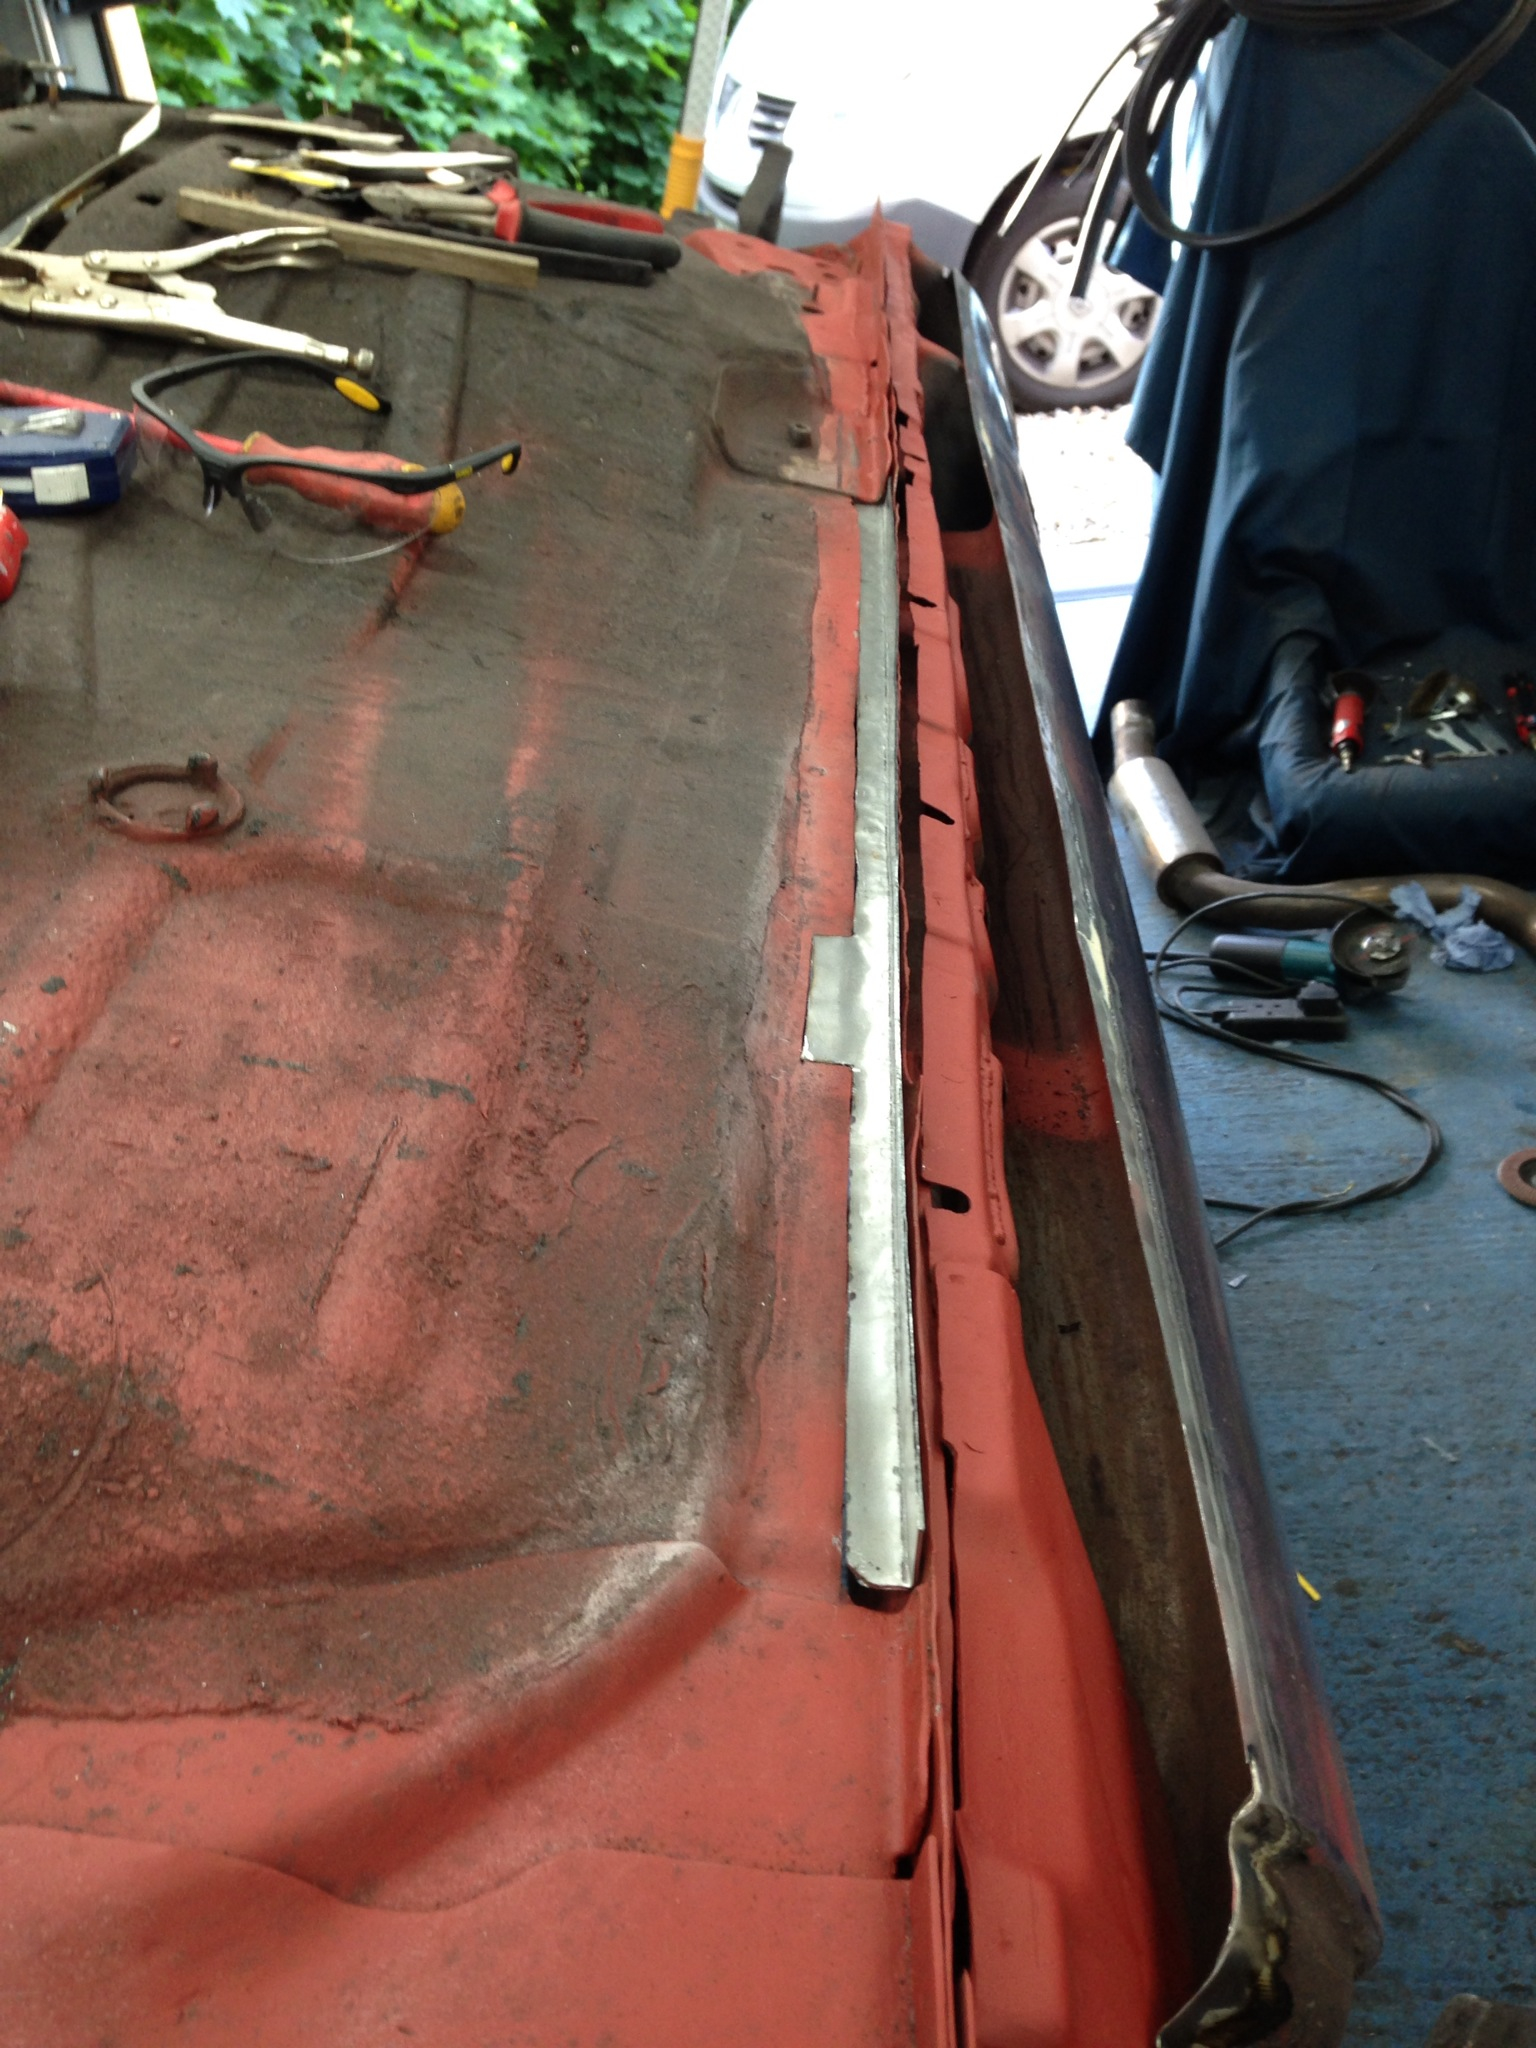
Small middle patch cut and trimmed:
Welded and flatted back:
Internal structure panel at the rear cut and tacked into place:
Welded, flatted where needed and painted:
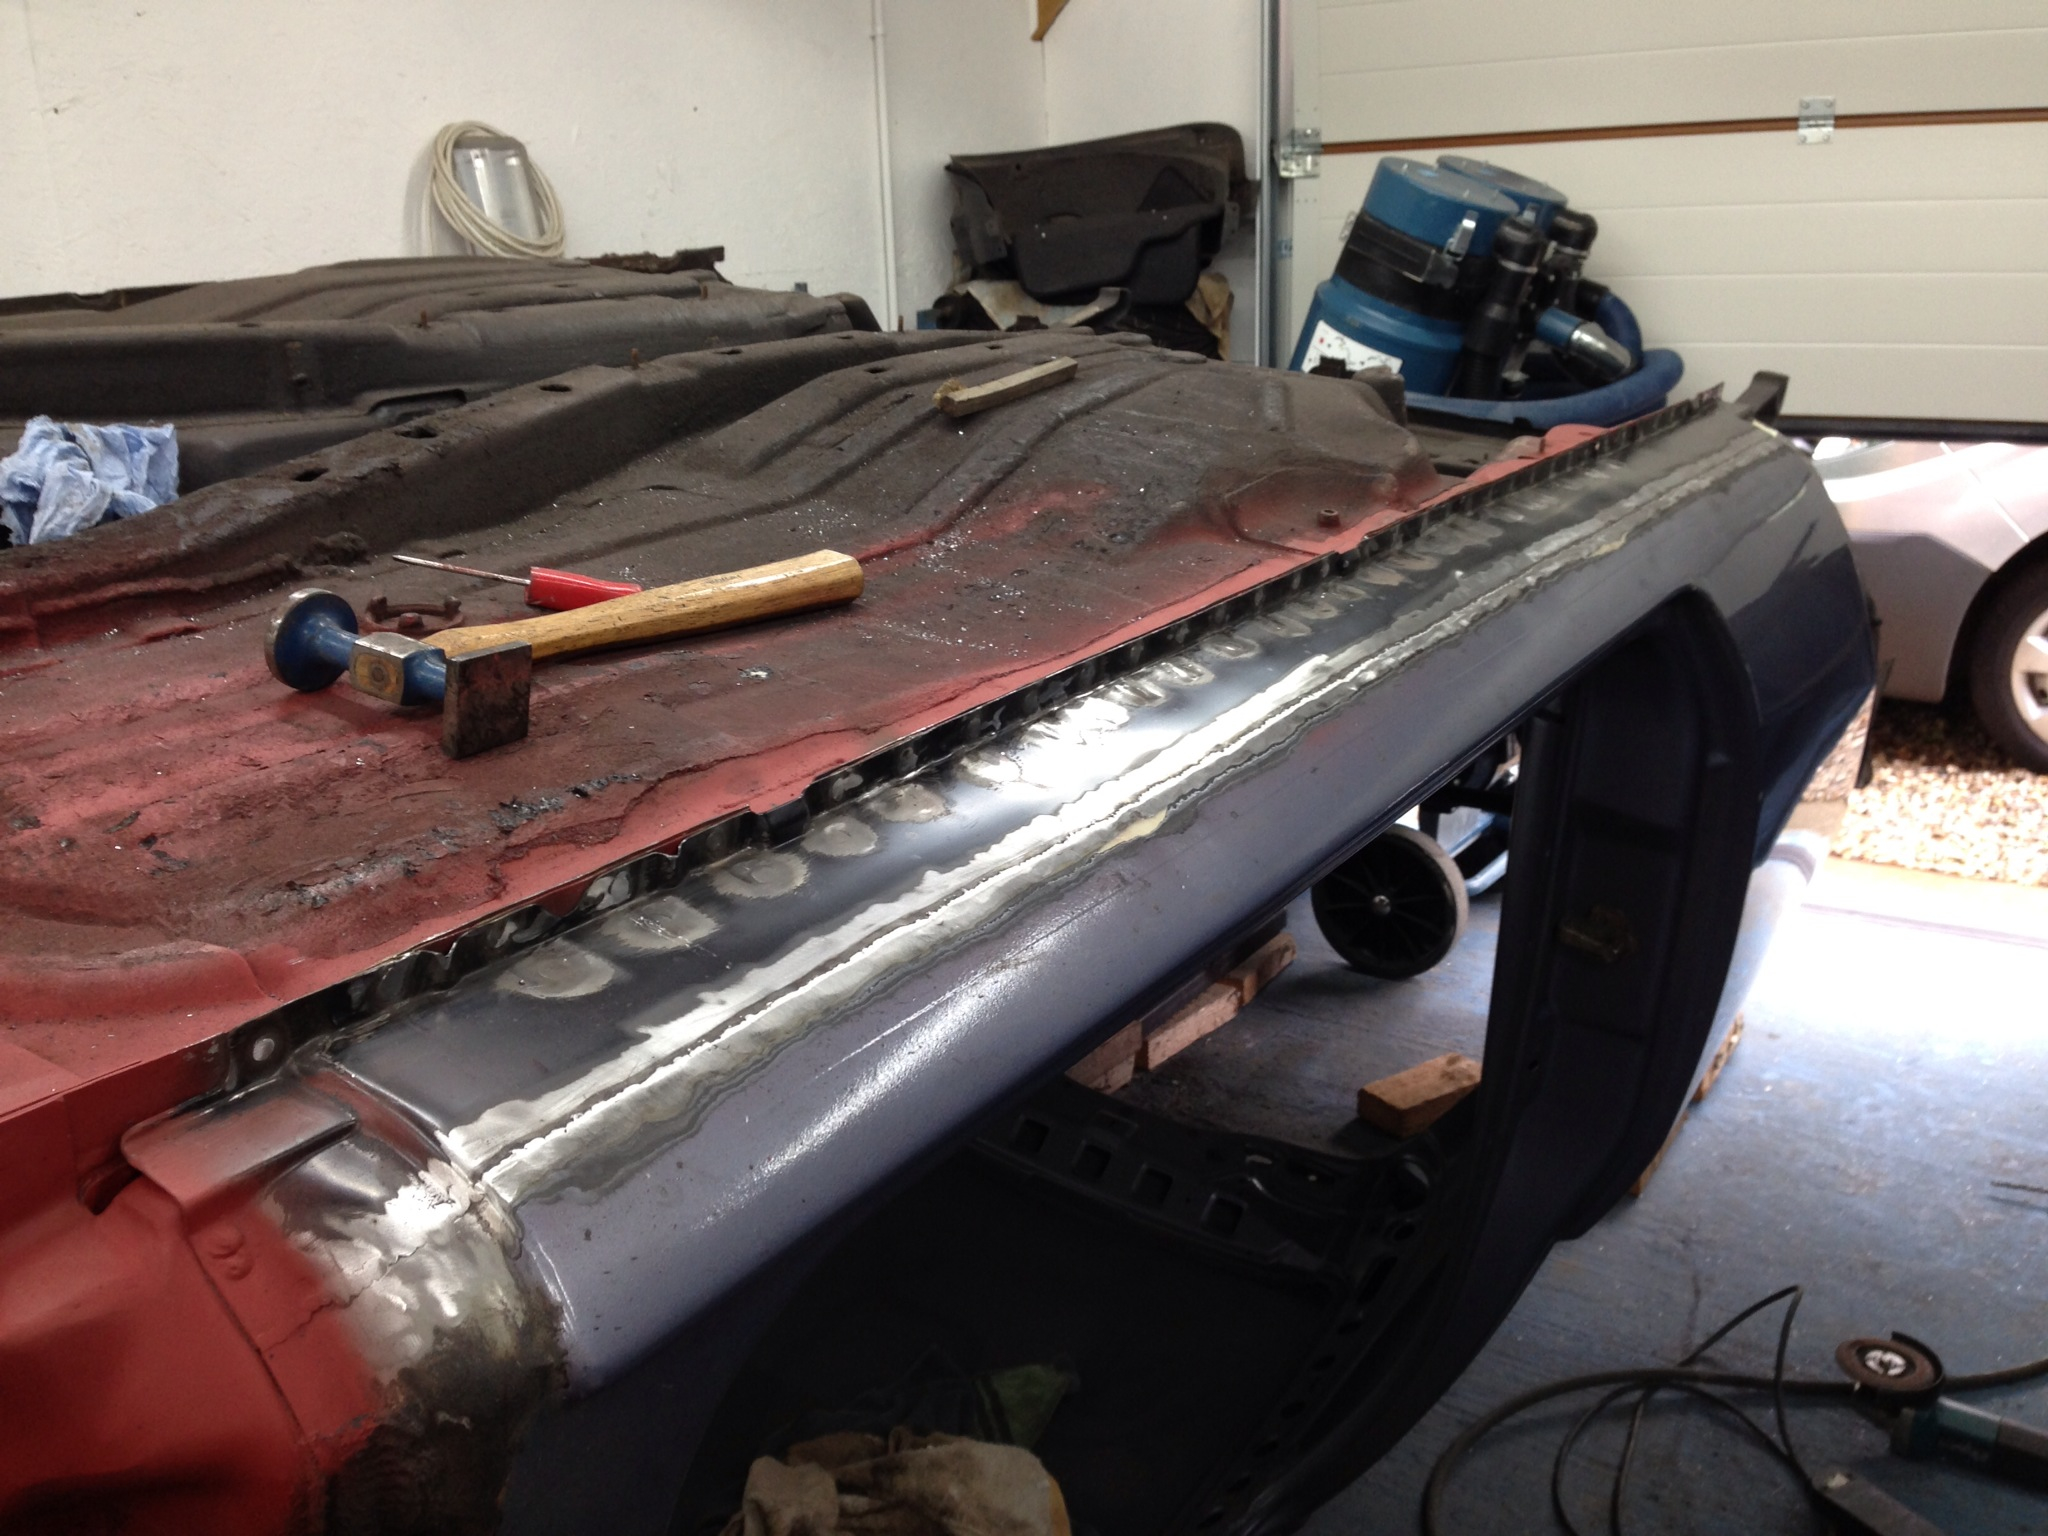
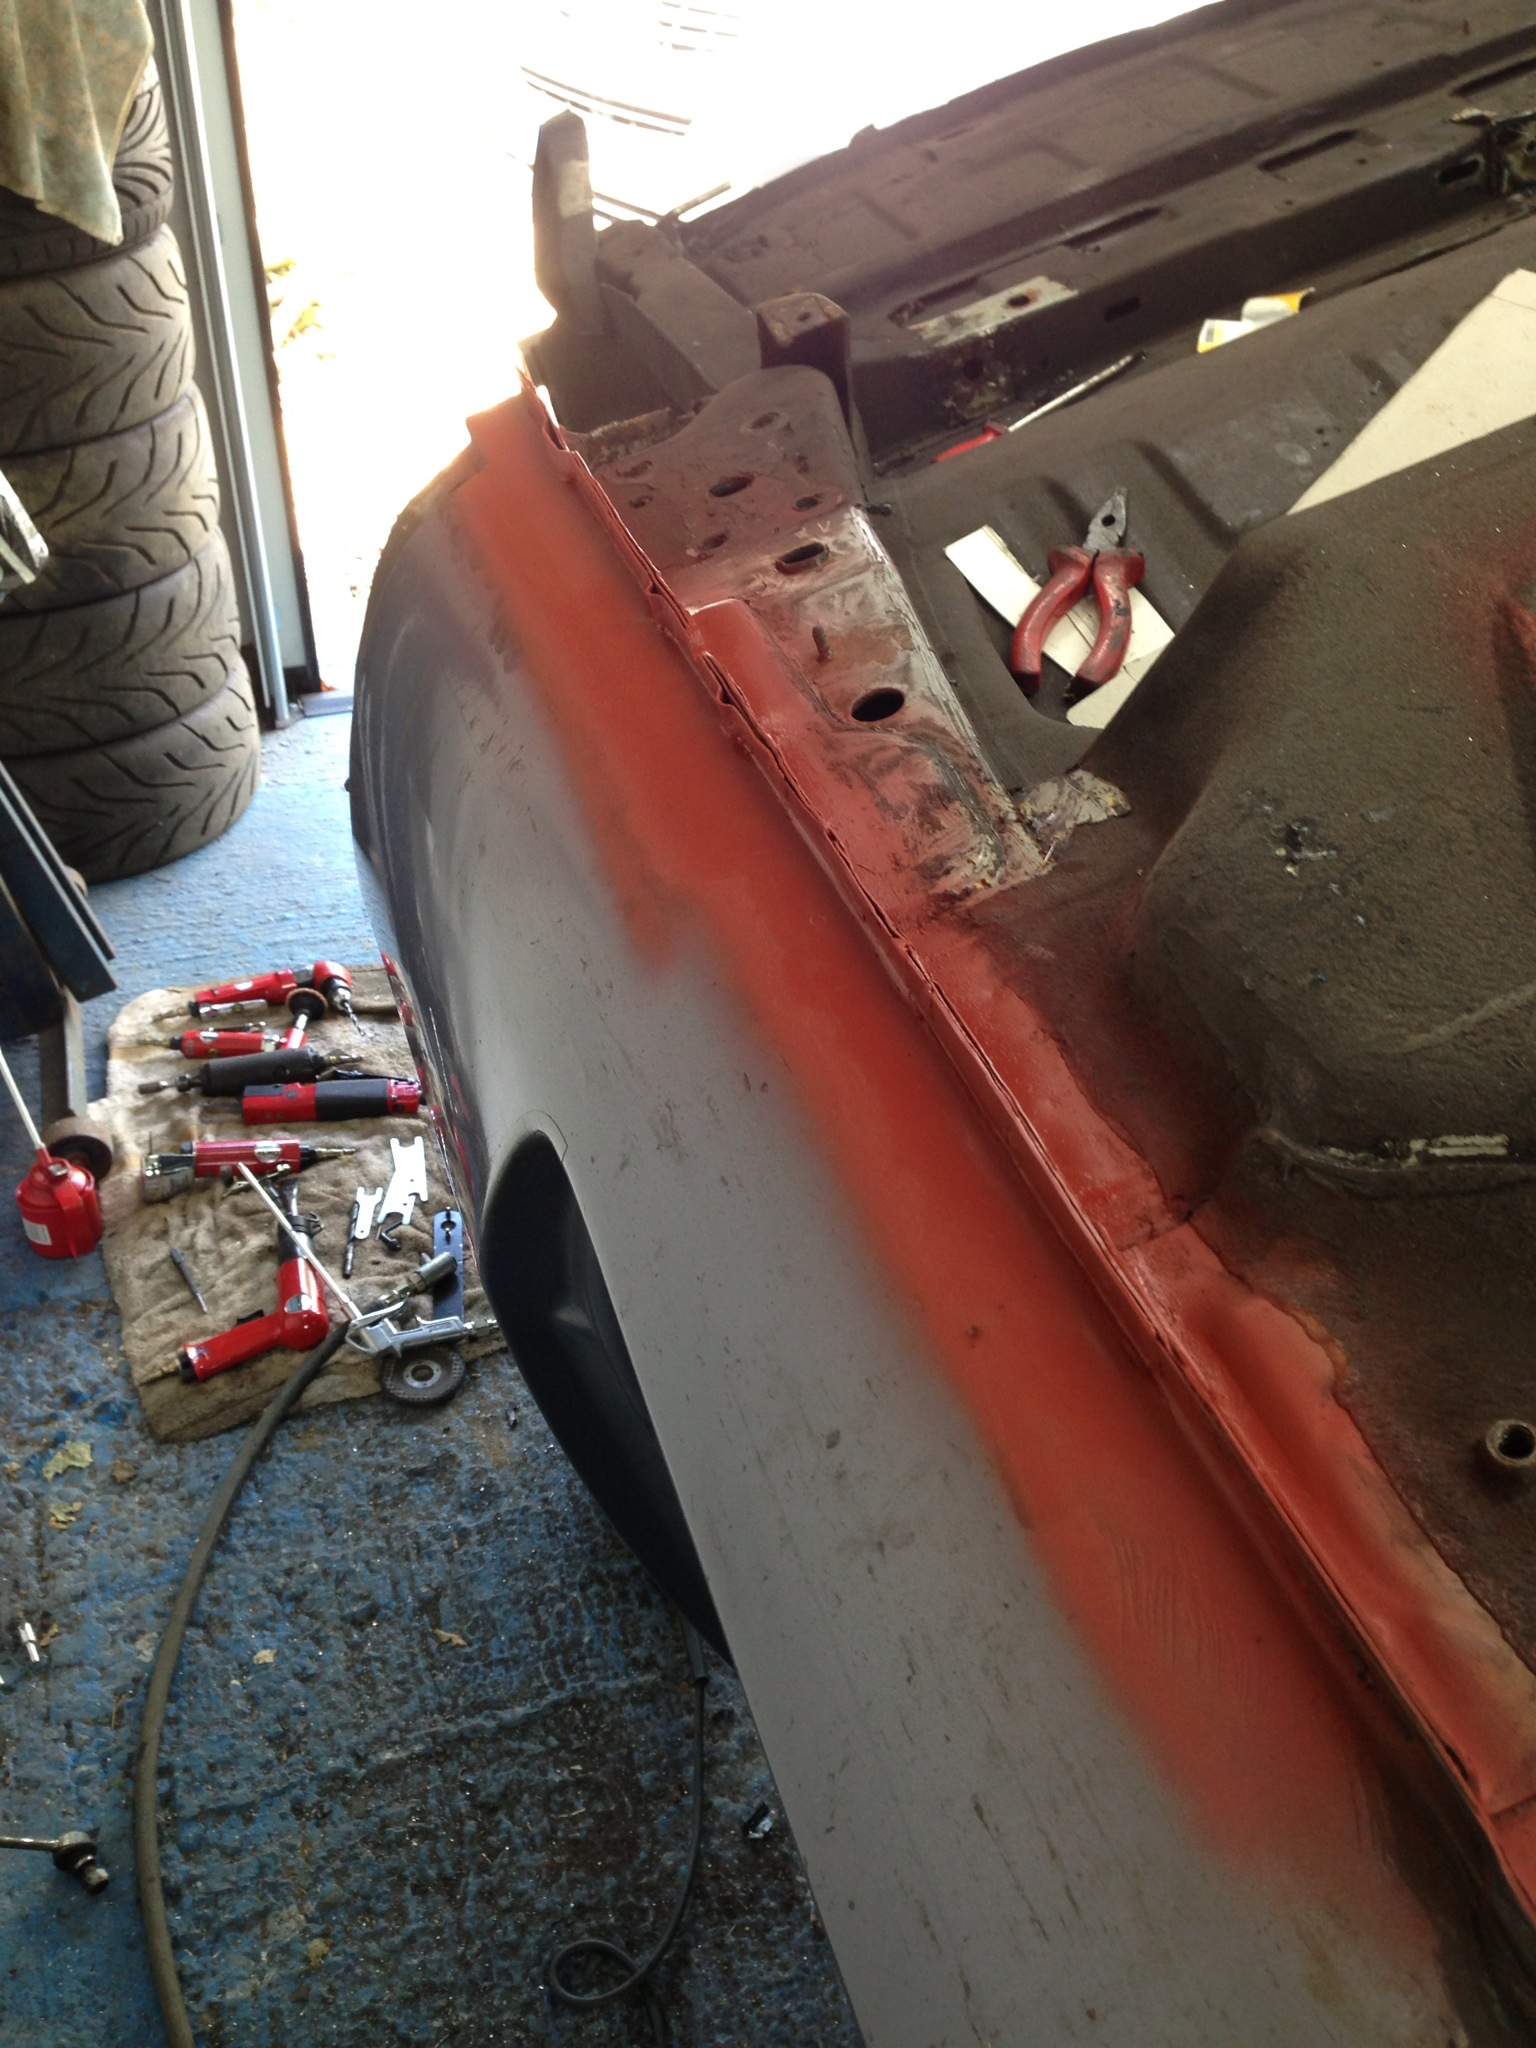
Outer sill patch cut and trimmed ready to fit in, underside painted for a bit of protection like all the rest of the patches:
Tacked in:
All welded in:

Trimmed, flatted back and polished:
The finished sill:
This is a mile stone on the car really. For two years I've known I've had to get this job done and finally the car is solid again. There is still the odd small patch across the rest of the underside but the big part of the rot repair is complete.
That's it for now, hopefully get some more done during the evenings this week.
Thanks for looking.
Small middle patch cut and trimmed:
Welded and flatted back:
Internal structure panel at the rear cut and tacked into place:
Welded, flatted where needed and painted:
Outer sill patch cut and trimmed ready to fit in, underside painted for a bit of protection like all the rest of the patches:
Tacked in:
All welded in:
Trimmed, flatted back and polished:
The finished sill:
This is a mile stone on the car really. For two years I've known I've had to get this job done and finally the car is solid again. There is still the odd small patch across the rest of the underside but the big part of the rot repair is complete.
That's it for now, hopefully get some more done during the evenings this week.
Thanks for looking.
Last edited by McCloud 85; 26-08-2013 at 08:45 PM.
08-02-2014, 04:59 PM
#64
PassionFord Regular
Thread Starter
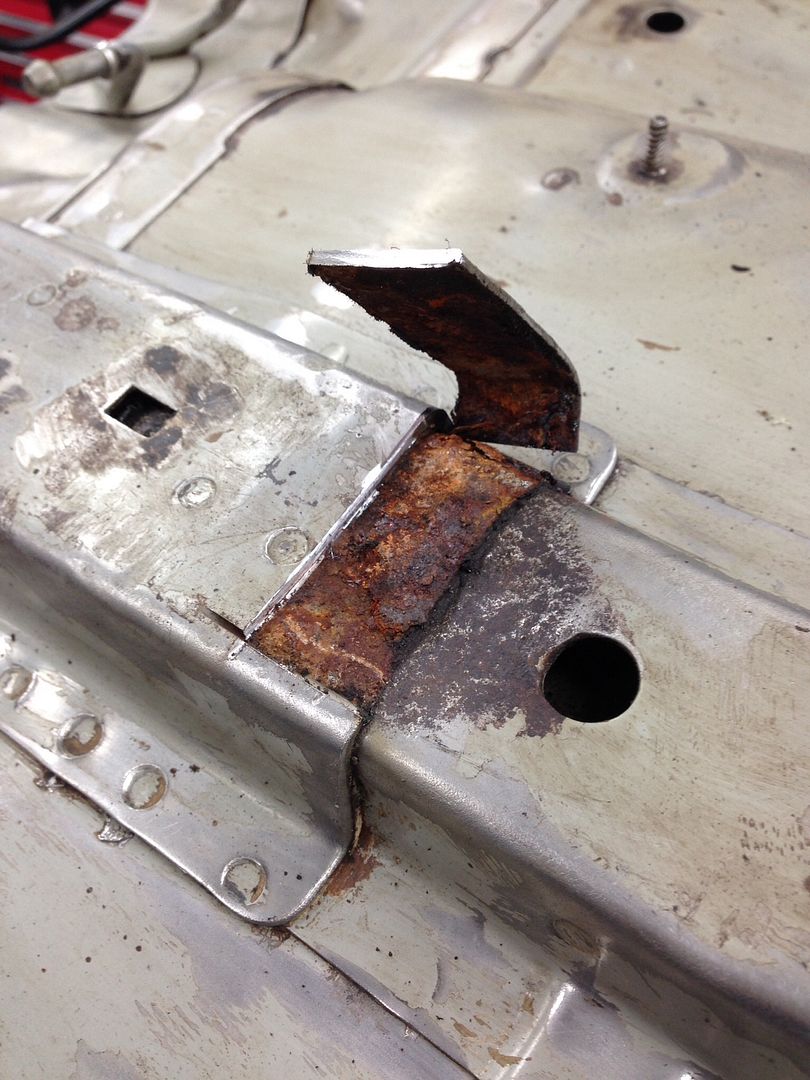
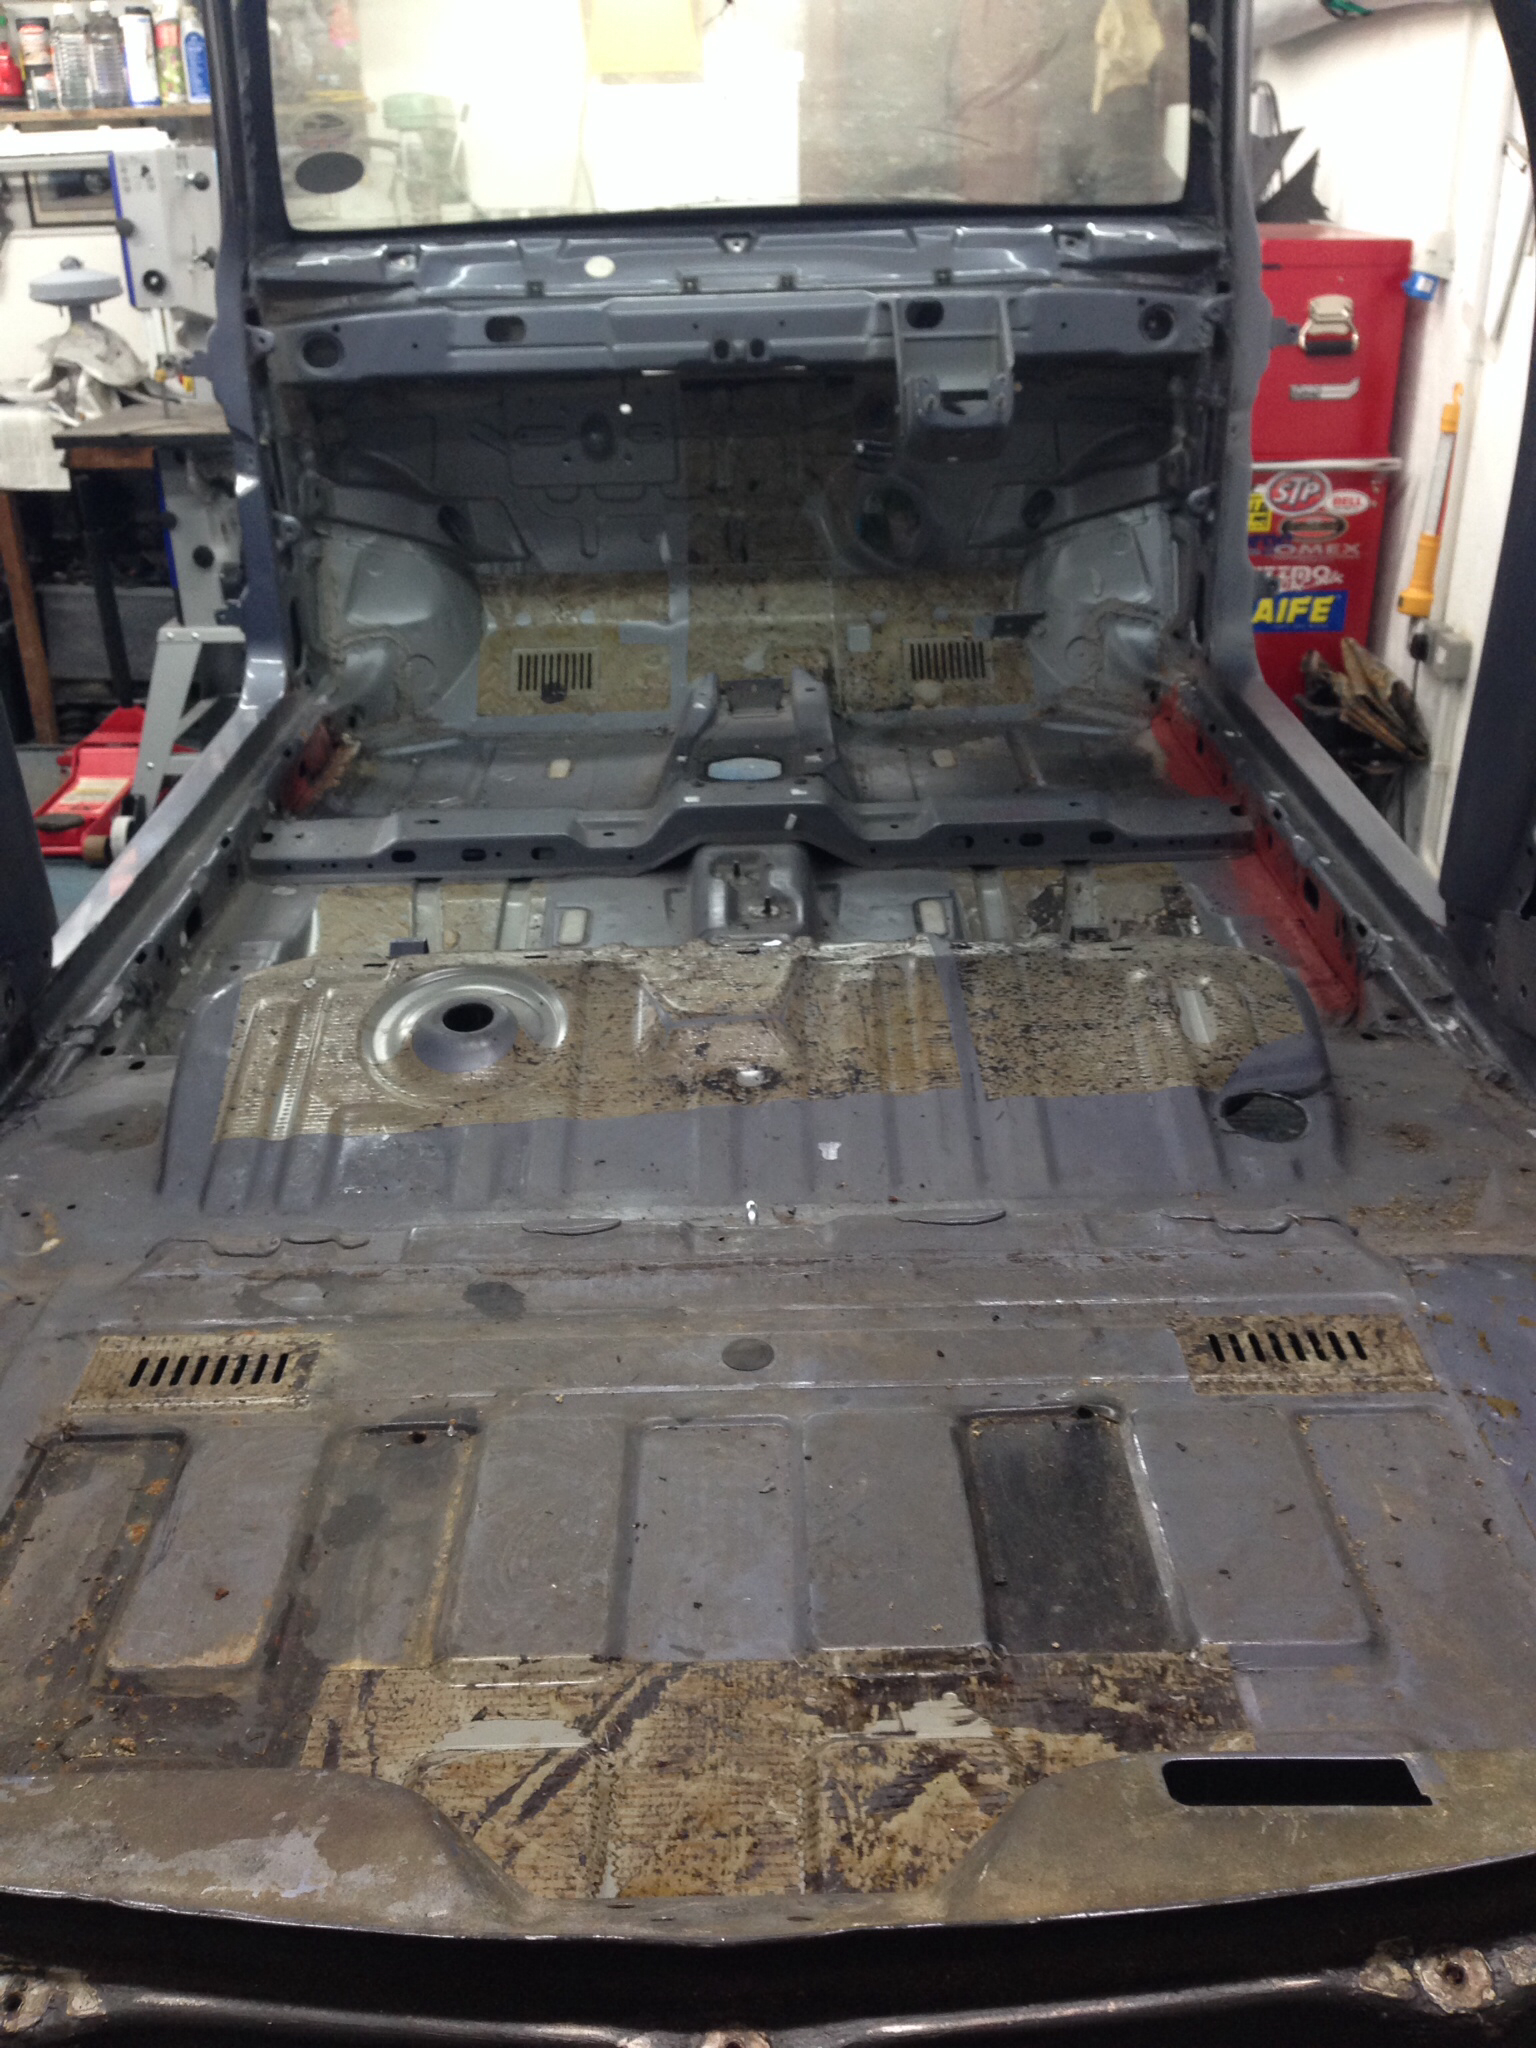
It's been a while so thought I'd post up some photos of what's been going on. Progress is painfully slow but it's moving in the right direction.
Need to remove the old underseal:
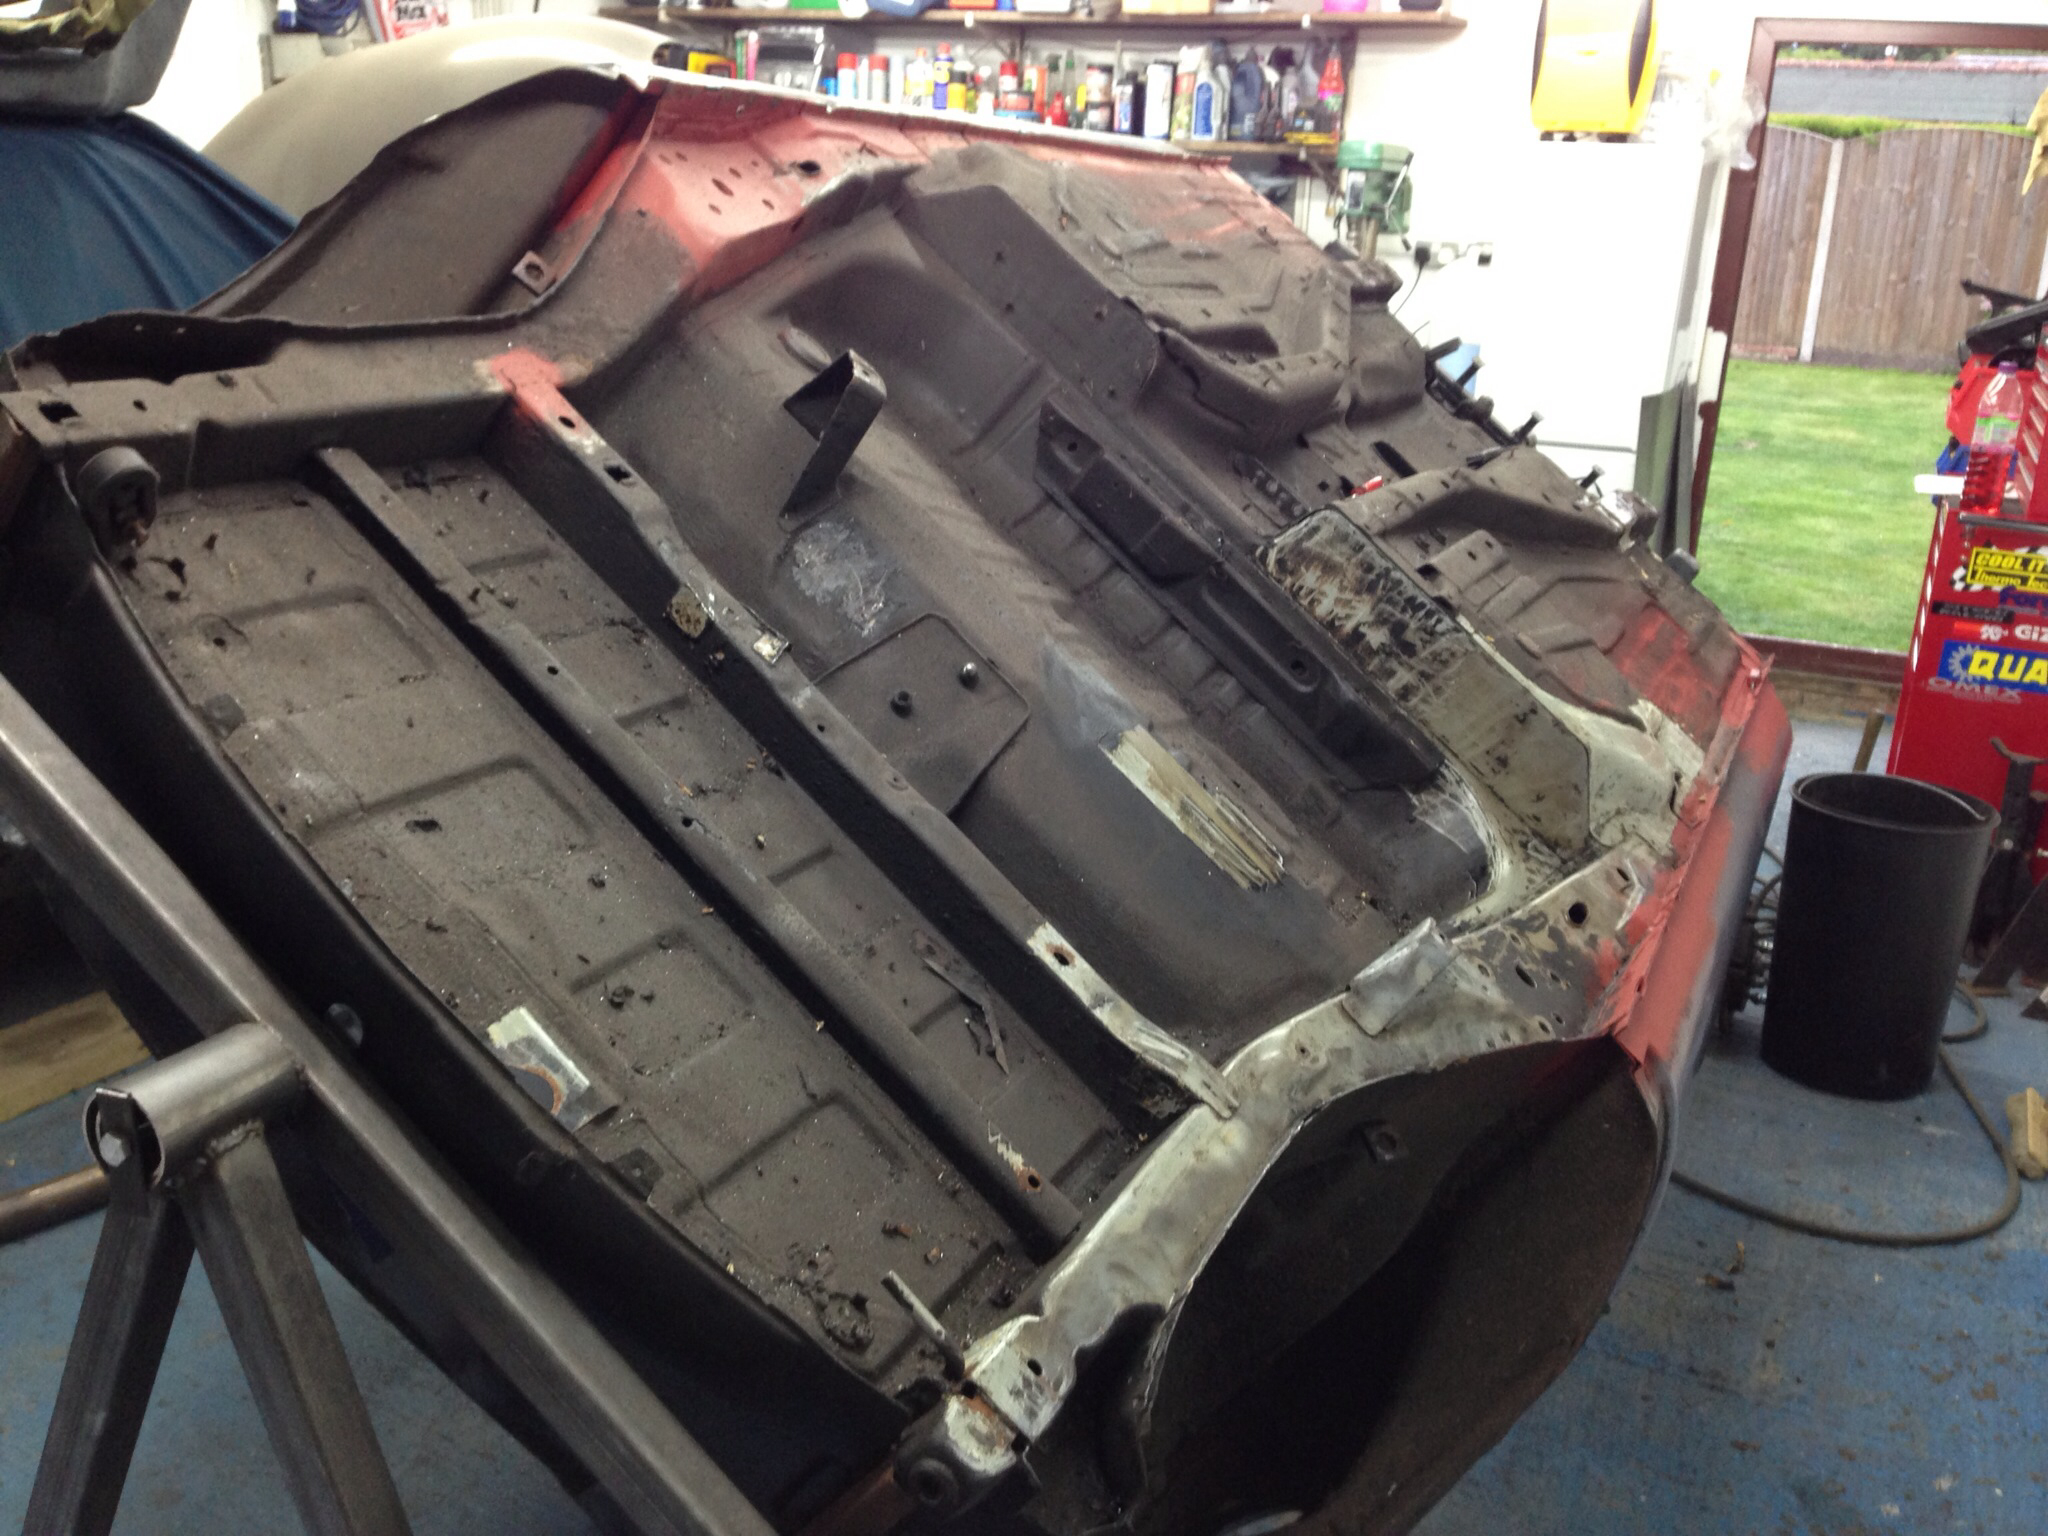
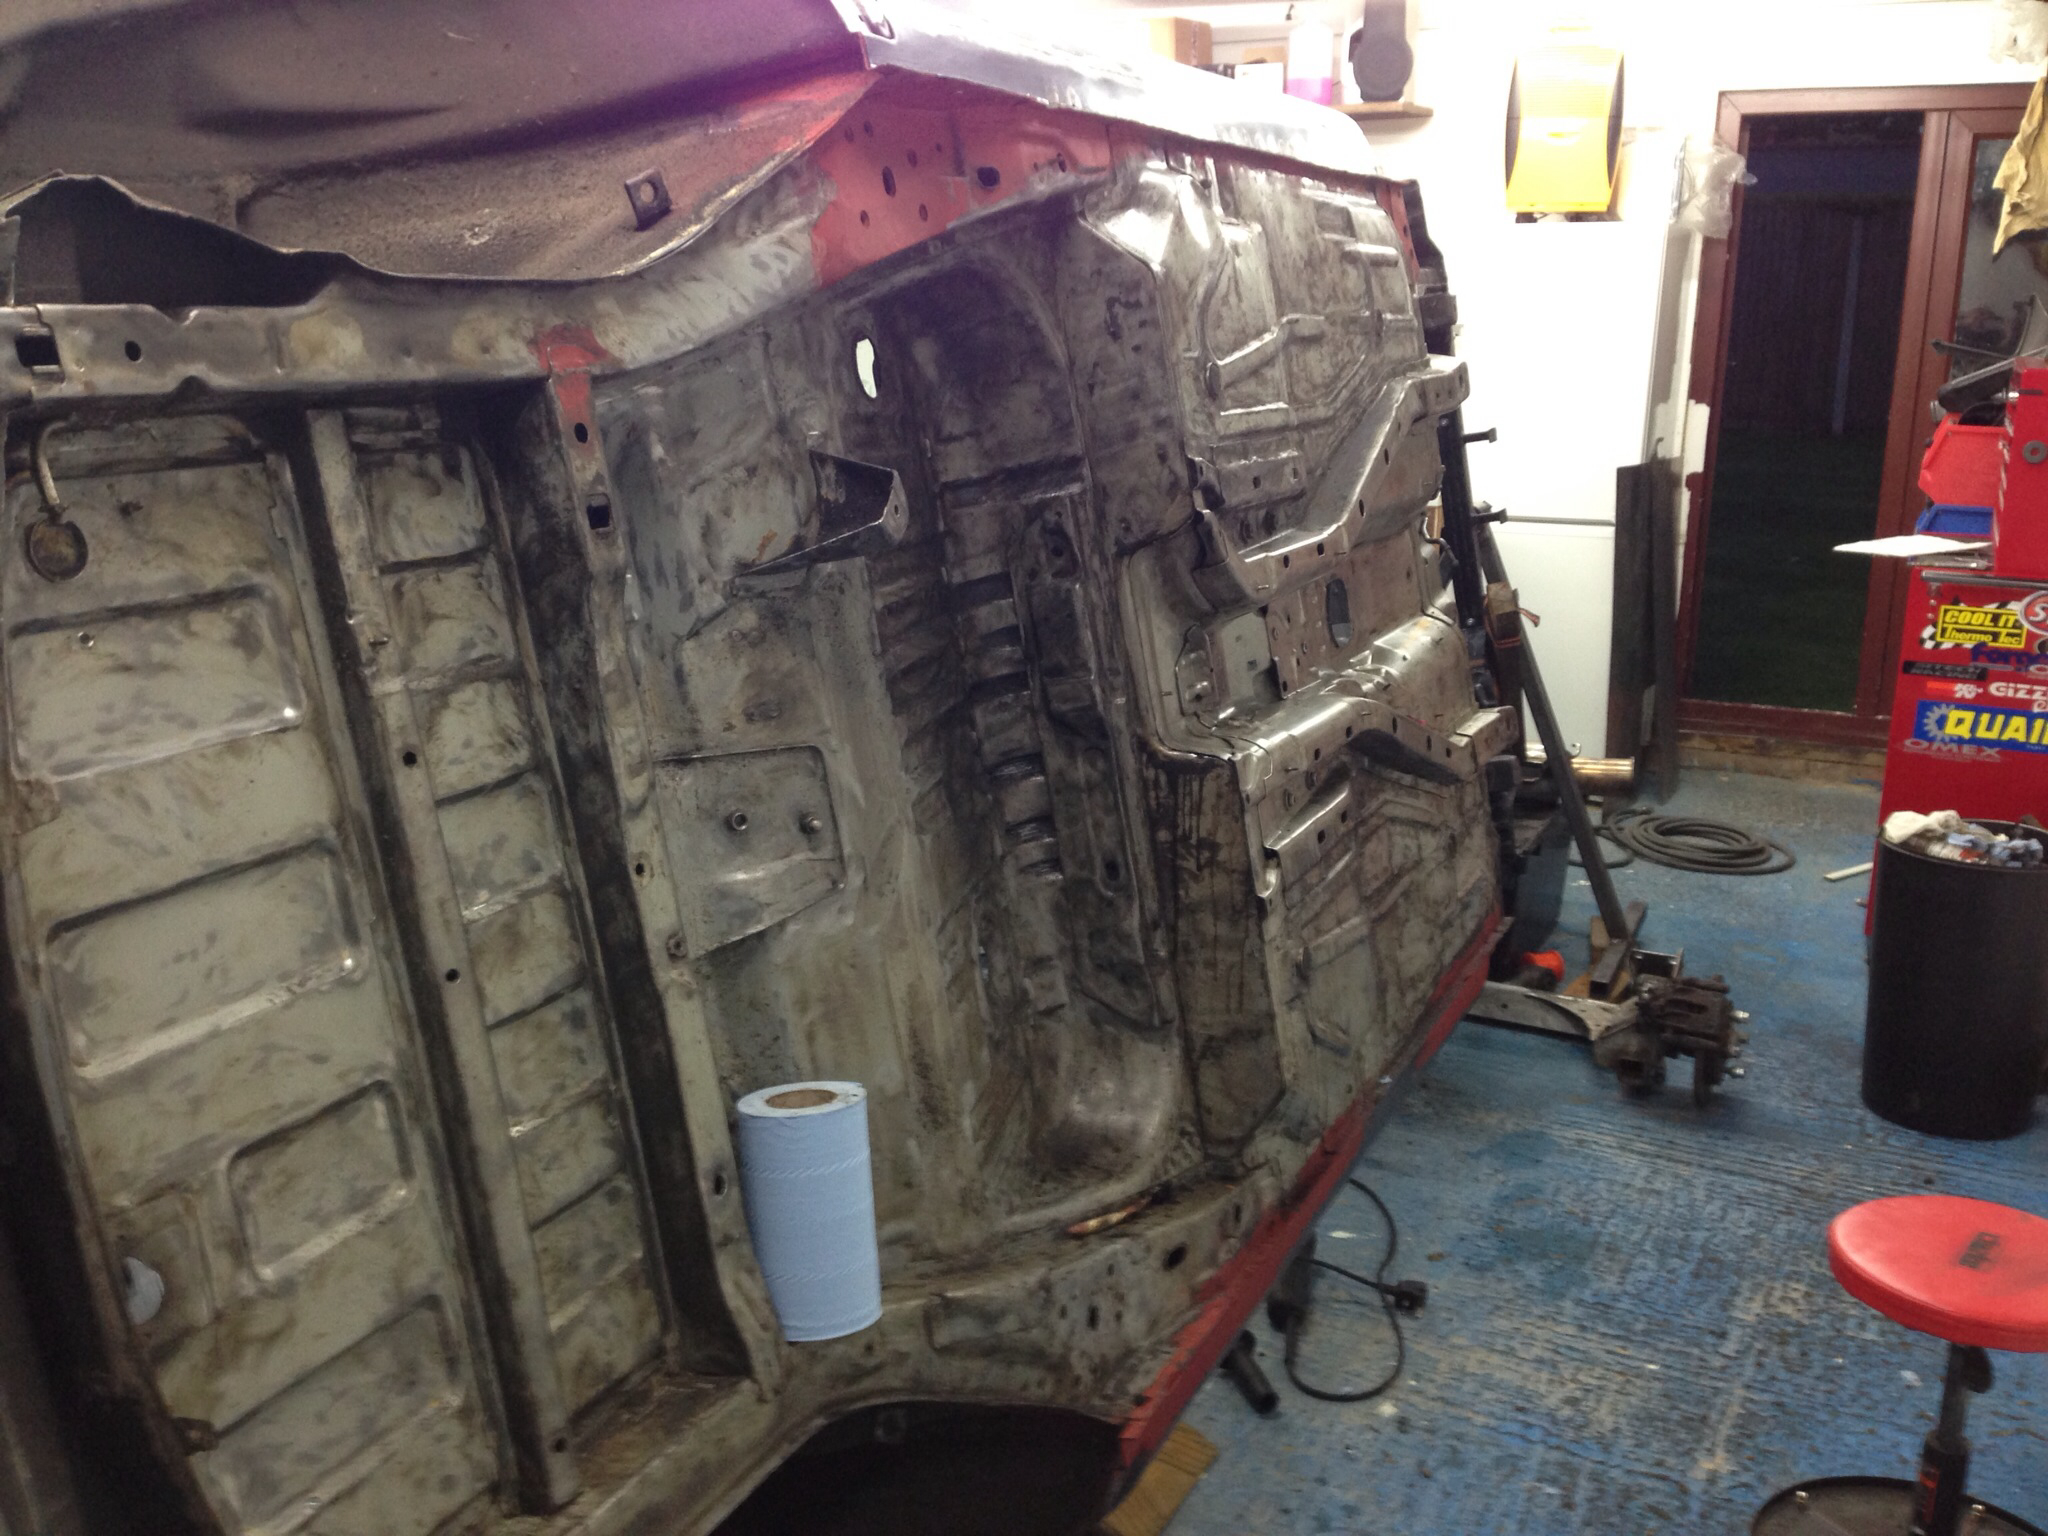
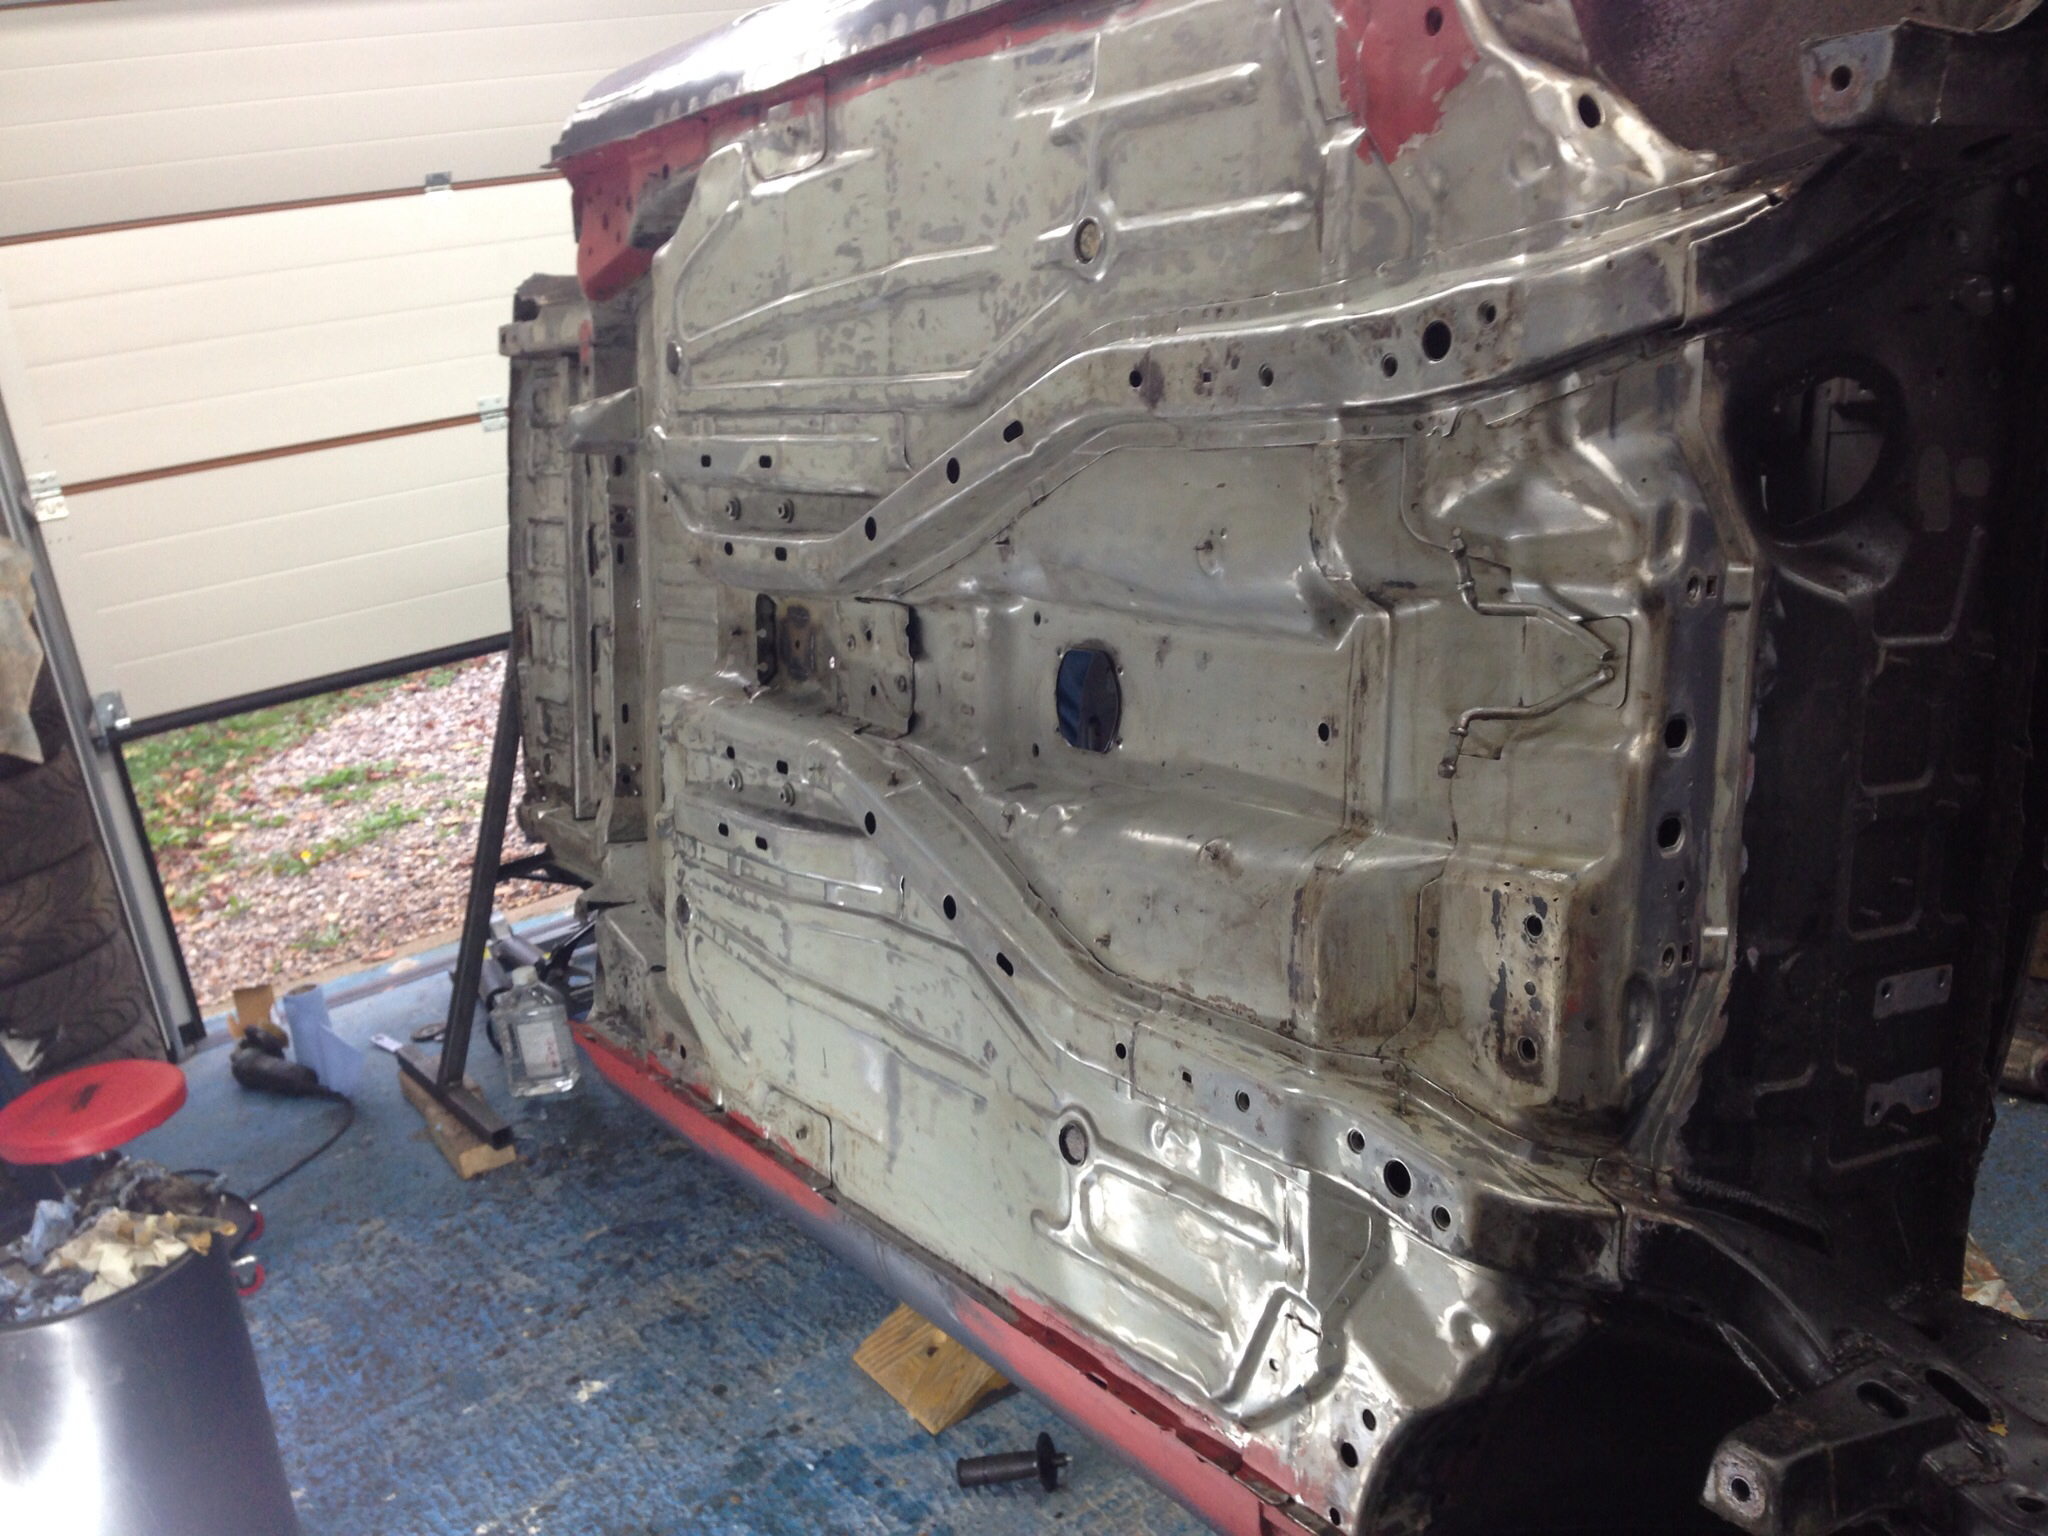
Arches:
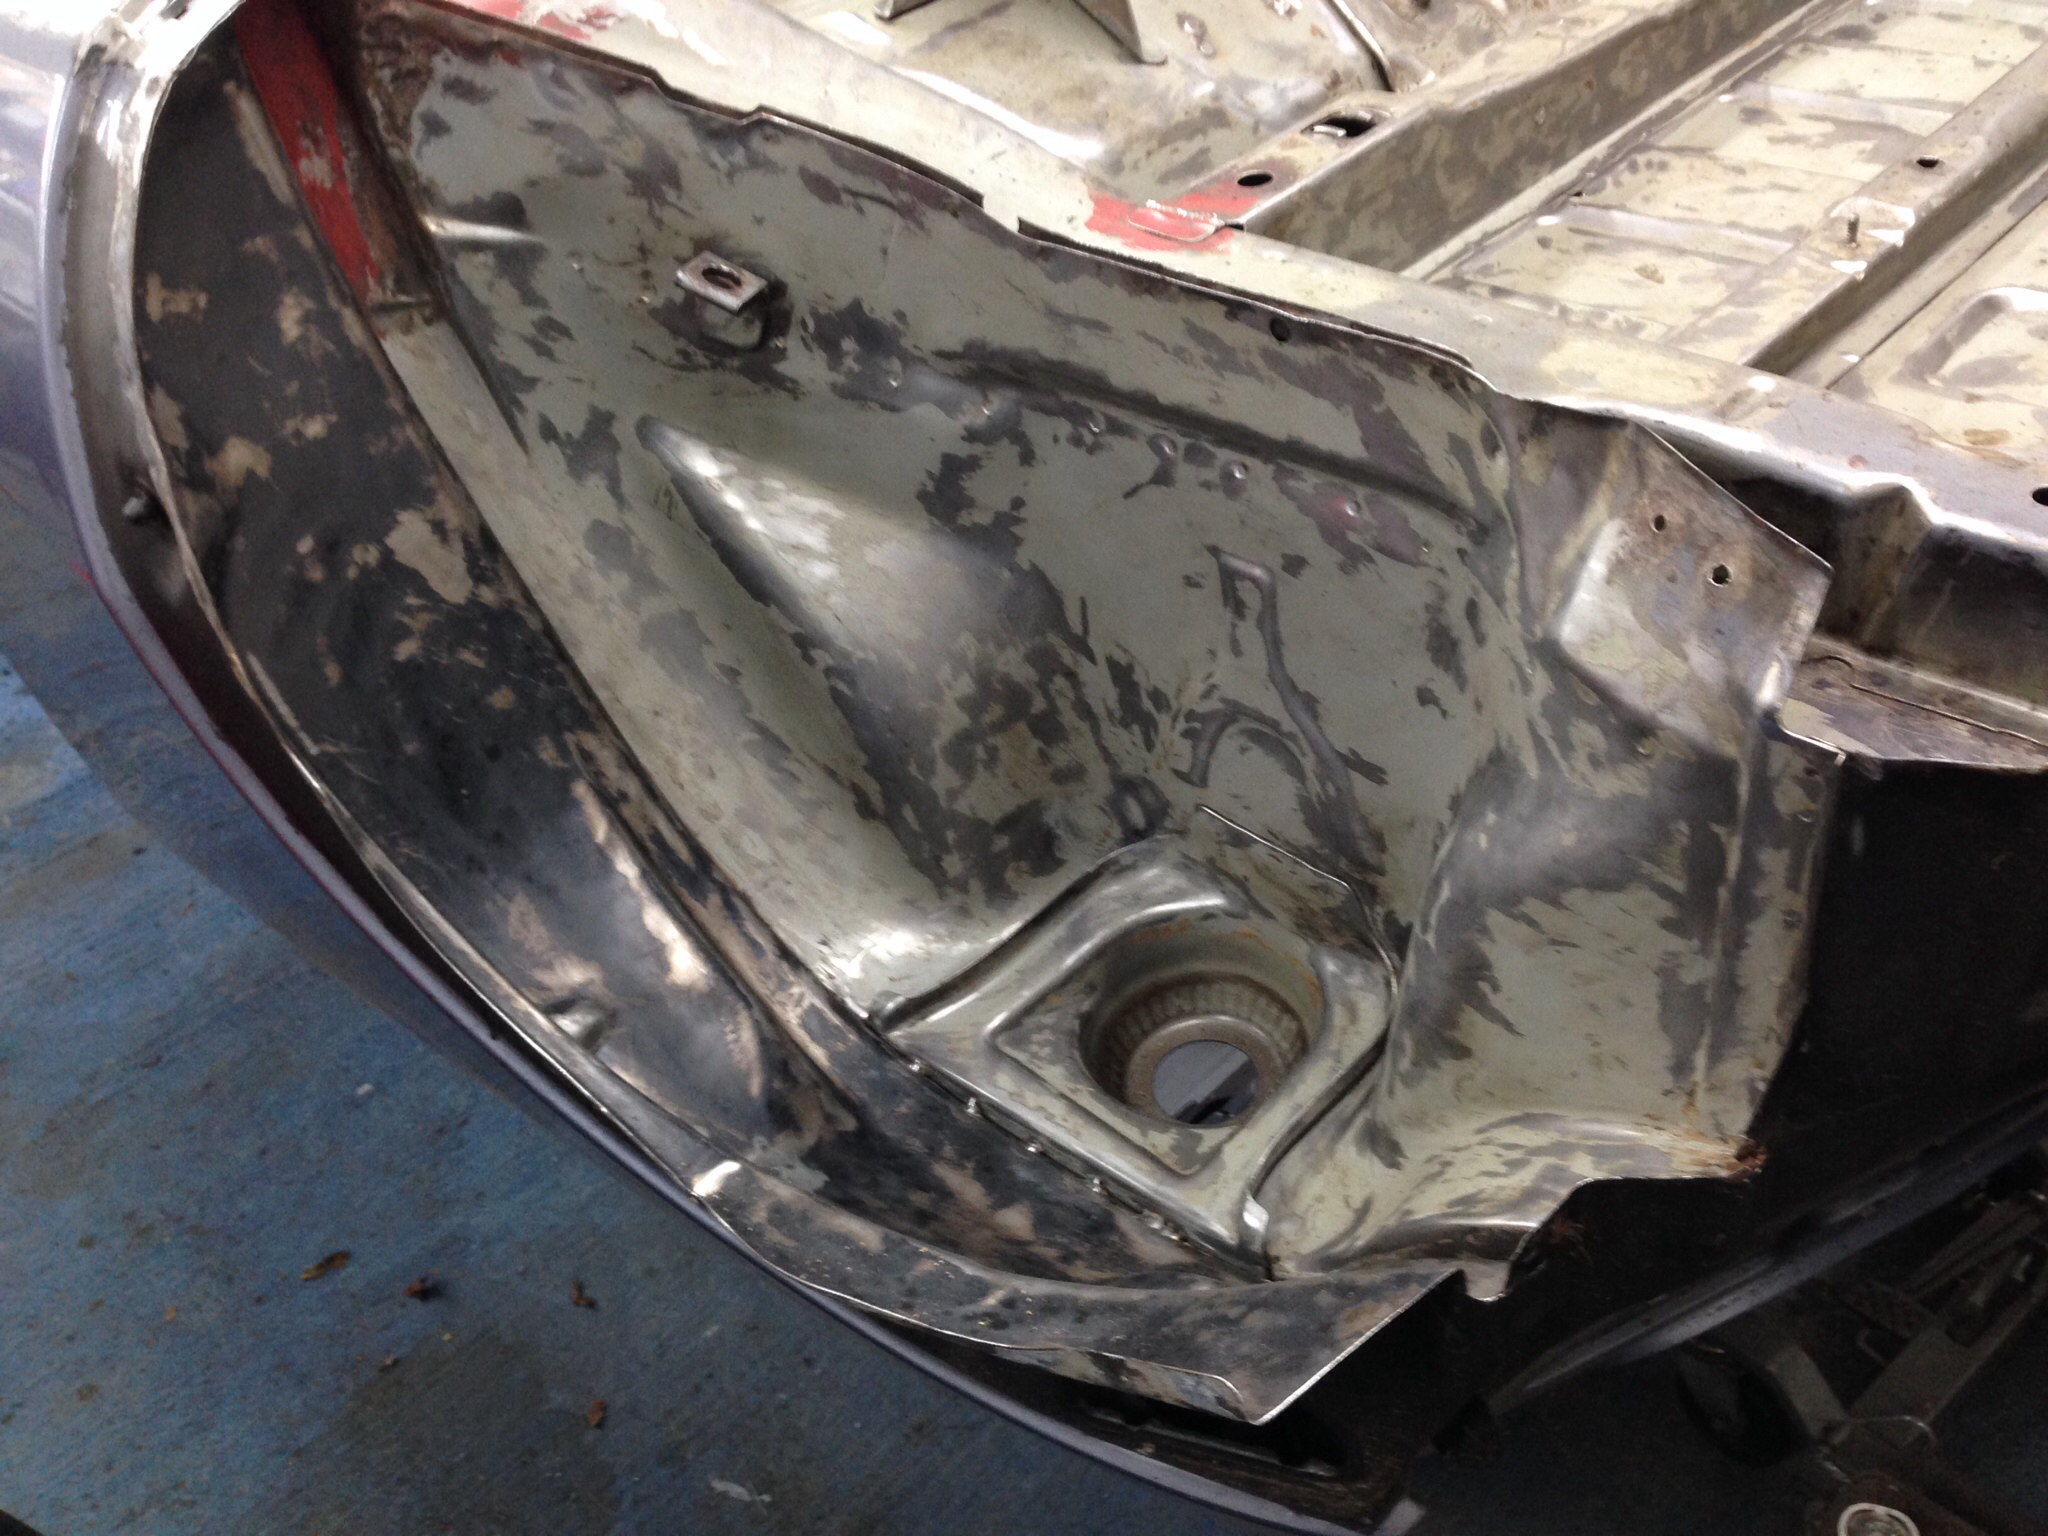
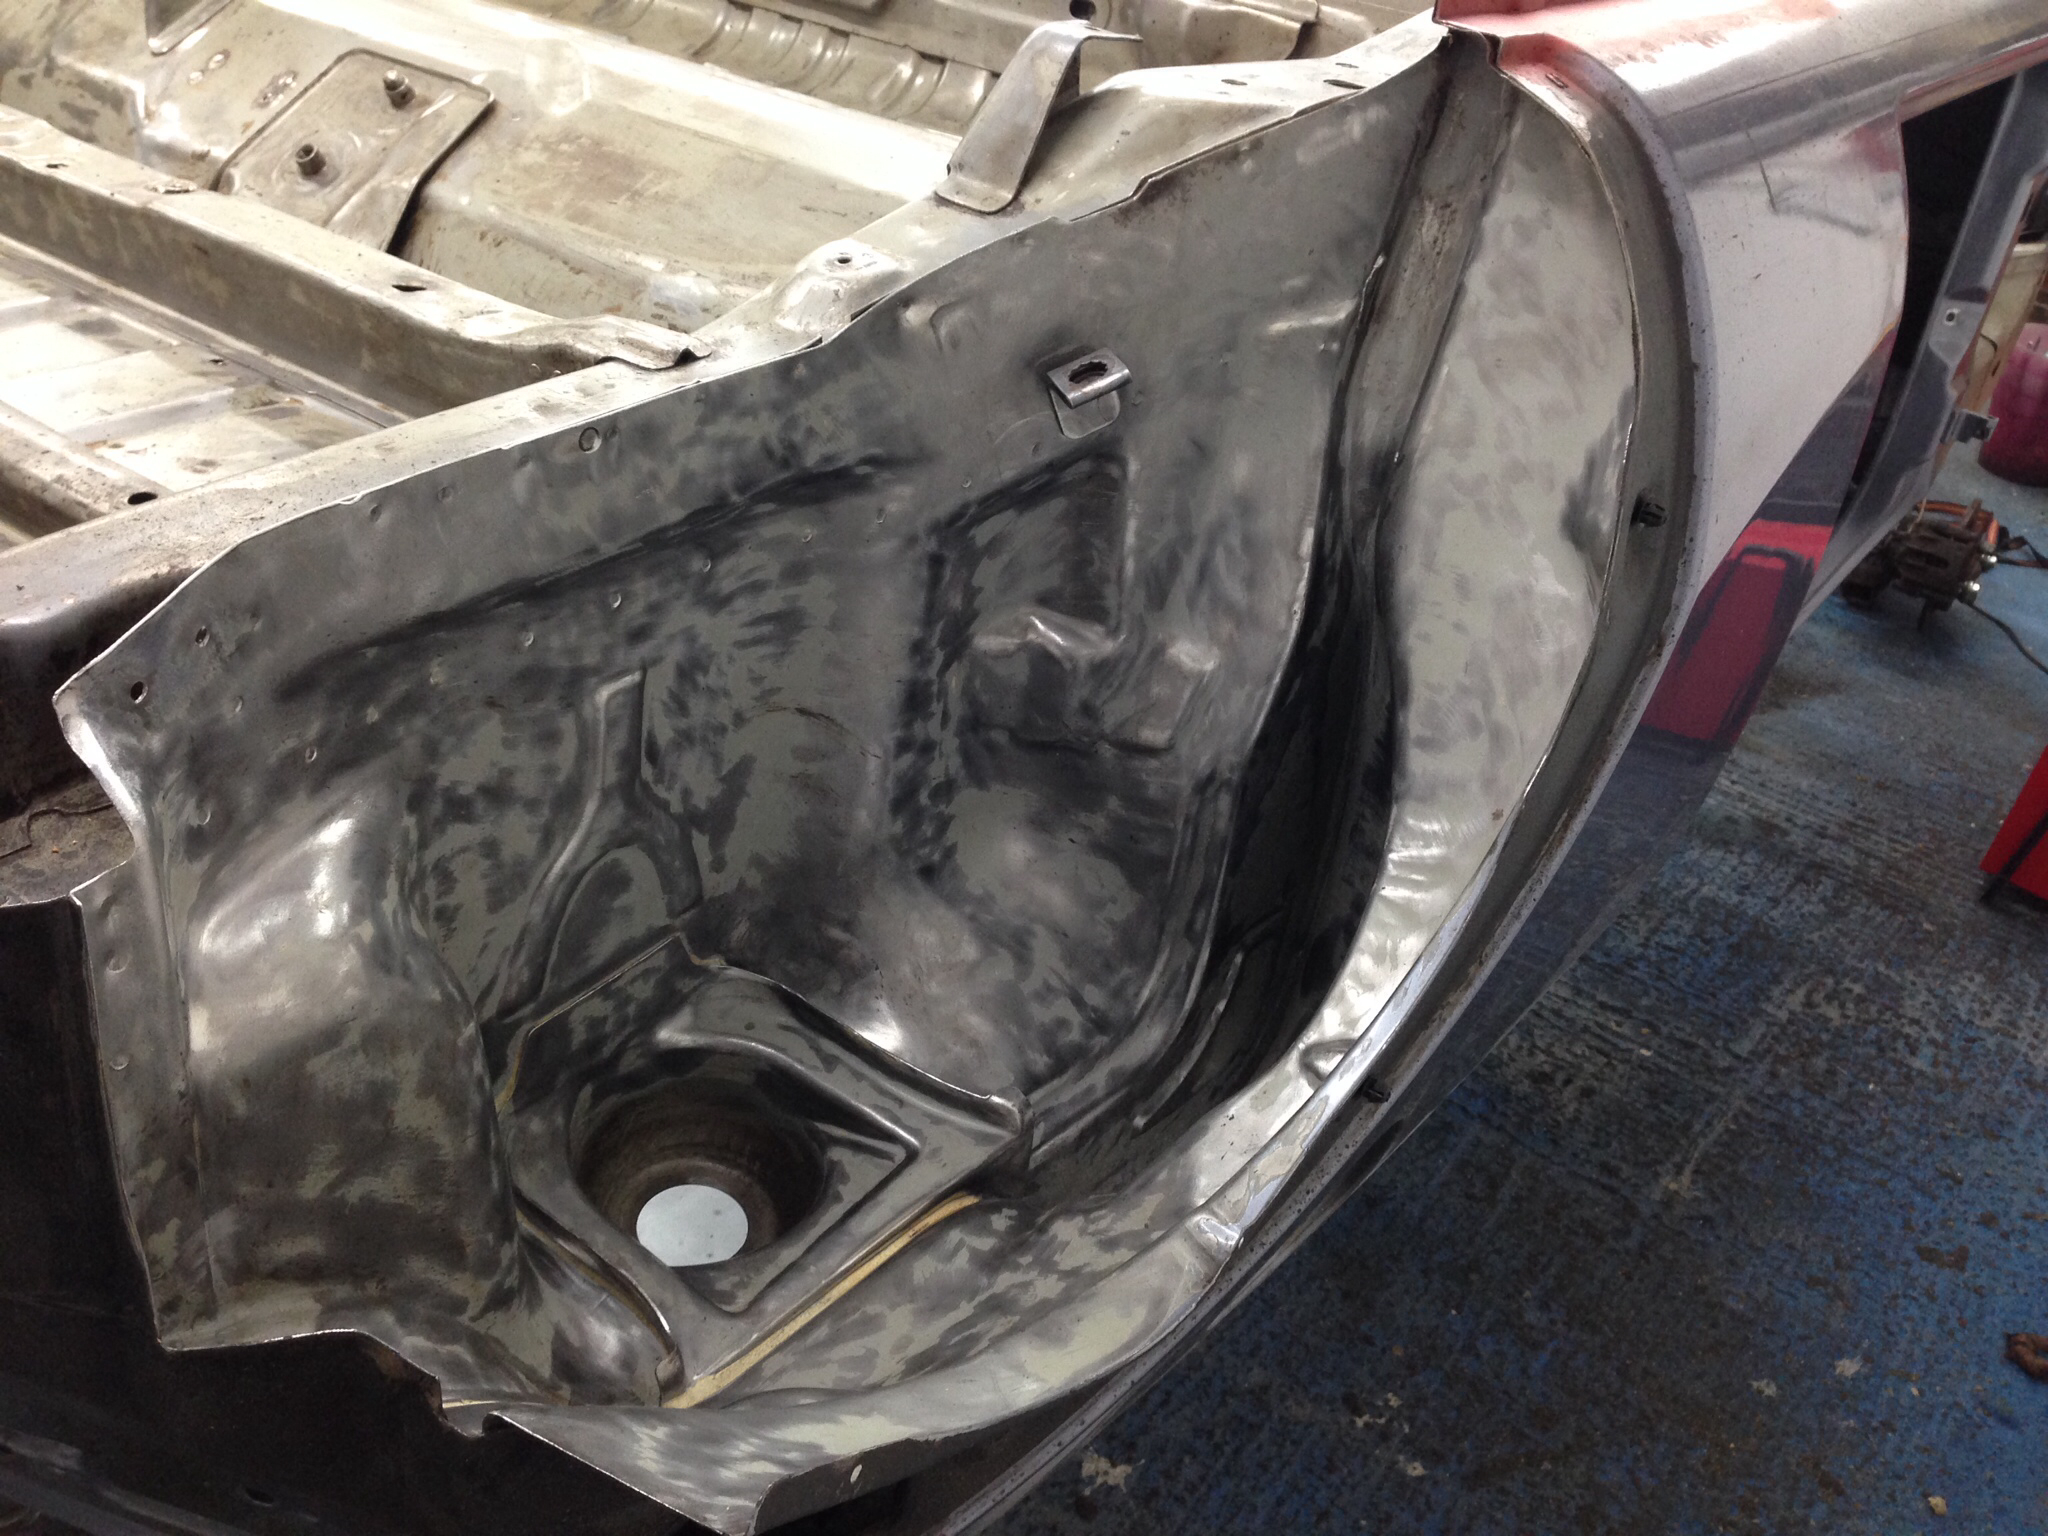
Some minor rust repairs - now finished:
Sound deadening removed:
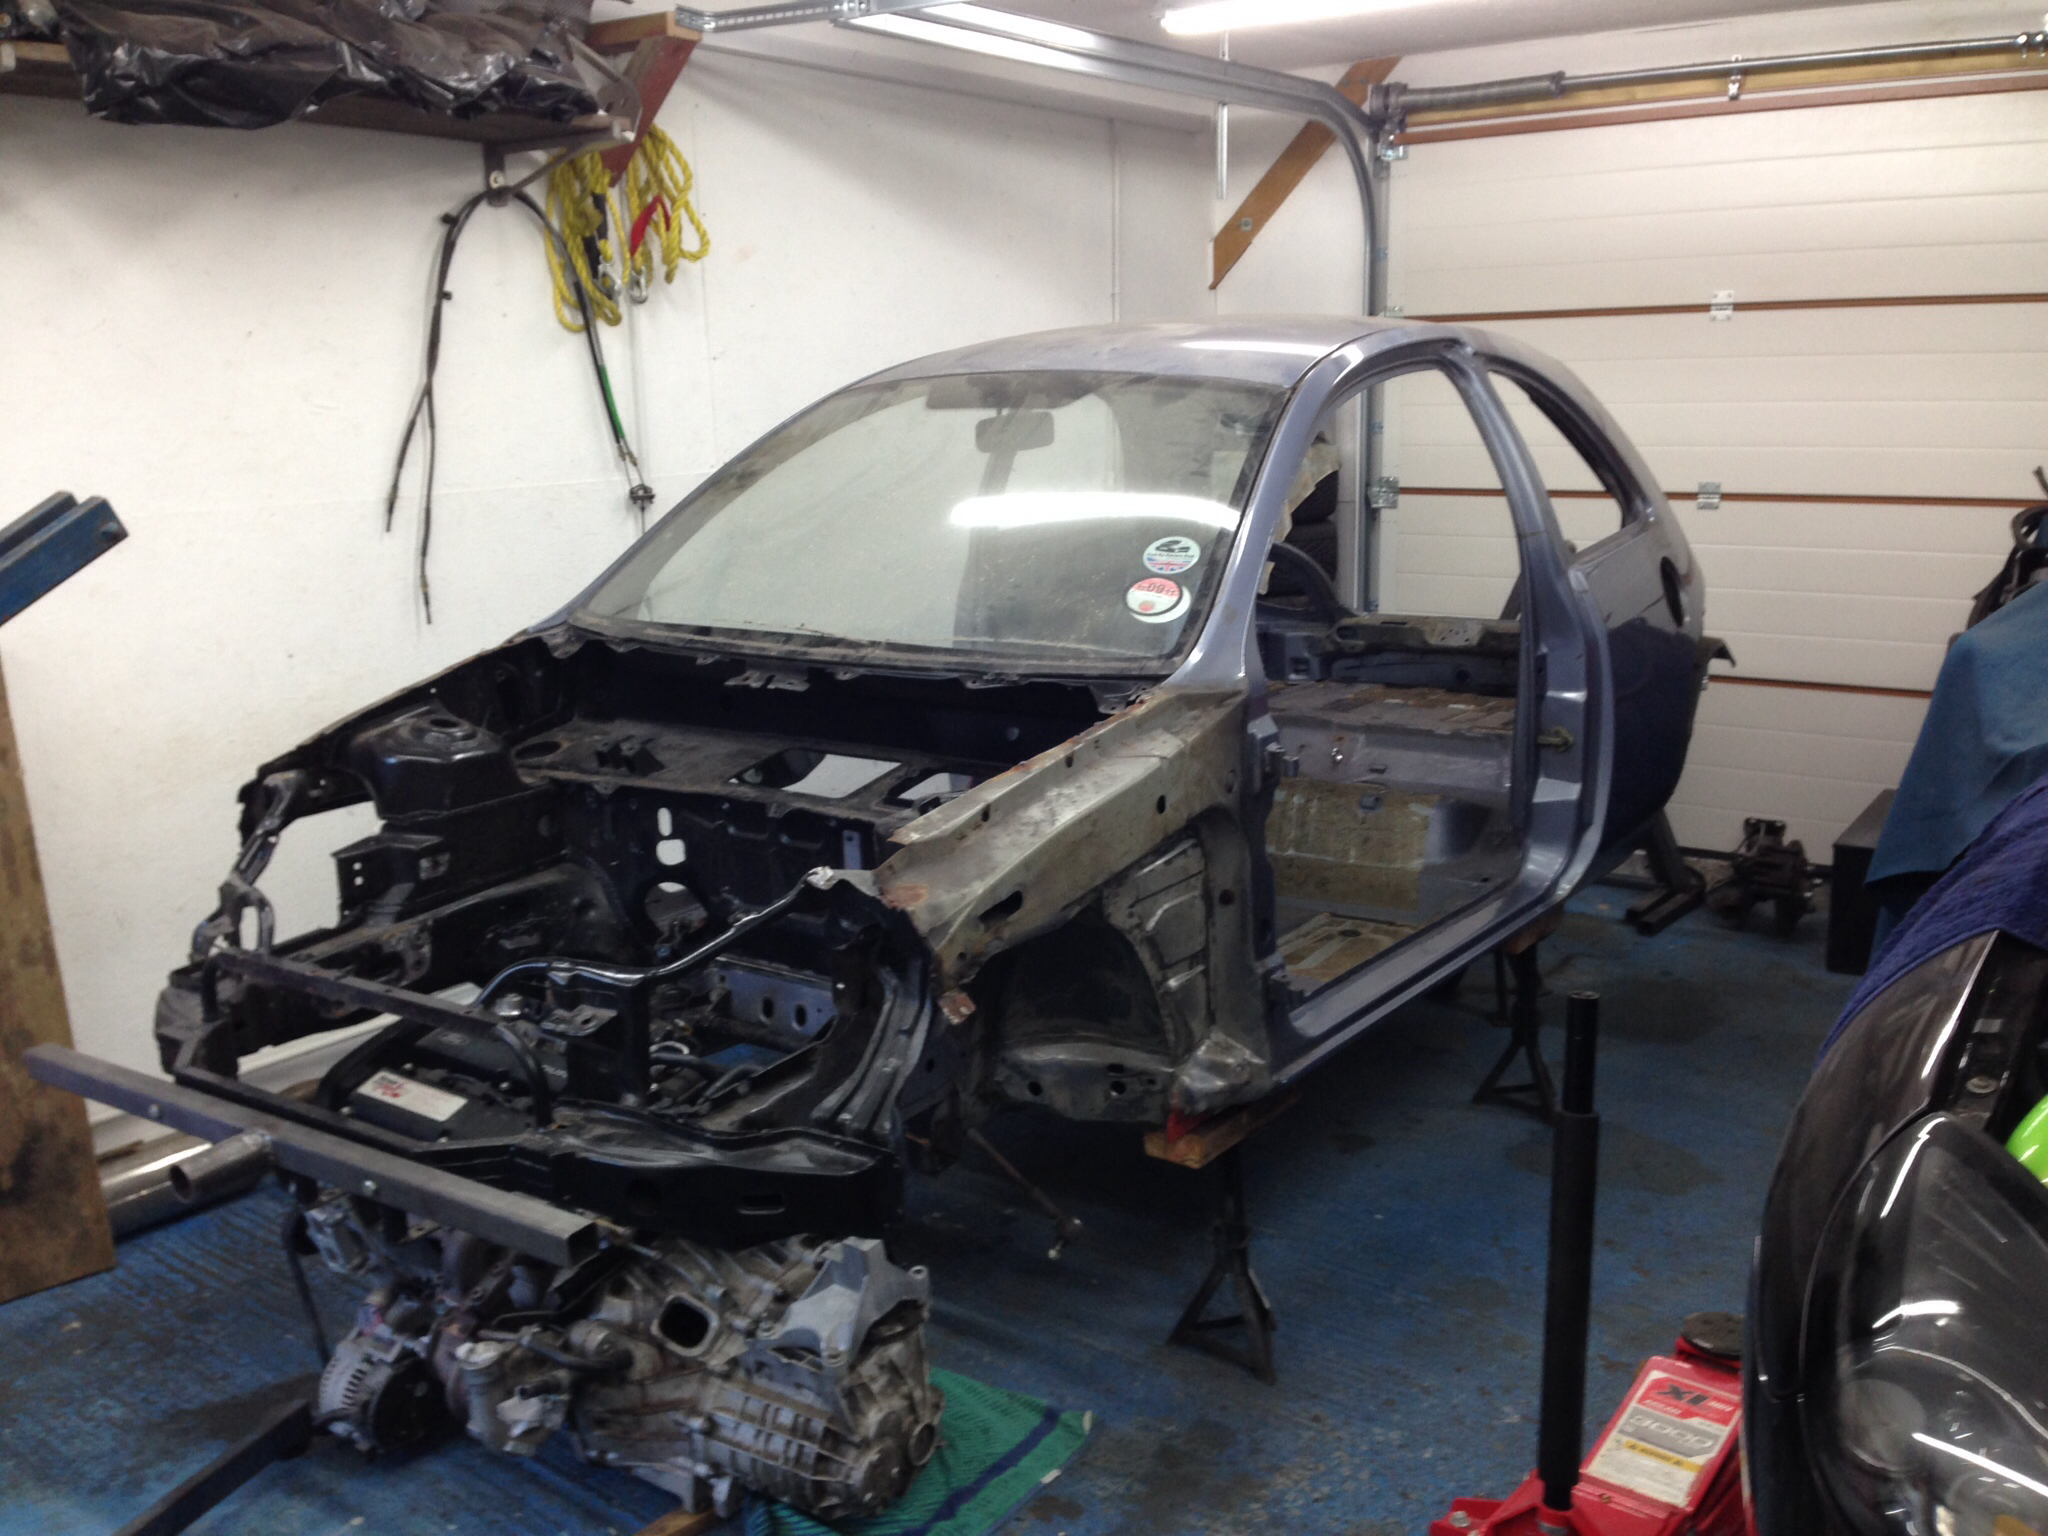
Finally back up the right way and on stands again - ready for the engine and box to be mounted
More to come!
Need to remove the old underseal:
Arches:
Some minor rust repairs - now finished:
Sound deadening removed:
Finally back up the right way and on stands again - ready for the engine and box to be mounted
More to come!
09-02-2014, 01:45 PM
#67
Wahay!! I've lost my Virginity!!

Loving this thread, good to see how much attention to detail you're taking pal.
Car should be a stunner when your done and at least you know its solid top to bottom!
Car should be a stunner when your done and at least you know its solid top to bottom!
09-02-2014, 05:14 PM
#69
I've found that life I needed.. It's HERE!!
Neat and tidy fabrication work. Mental car.
 11-02-2014, 07:16 PM
#71
PassionFord Regular
Thread Starter
It will also get ML wax sprayed in so should be enough to stop it coming back! I hope!
Many thanks for the comments guys - gives me the drive to keep going.
11-02-2014, 07:48 PM
#72
PassionFord Regular
Thread Starter
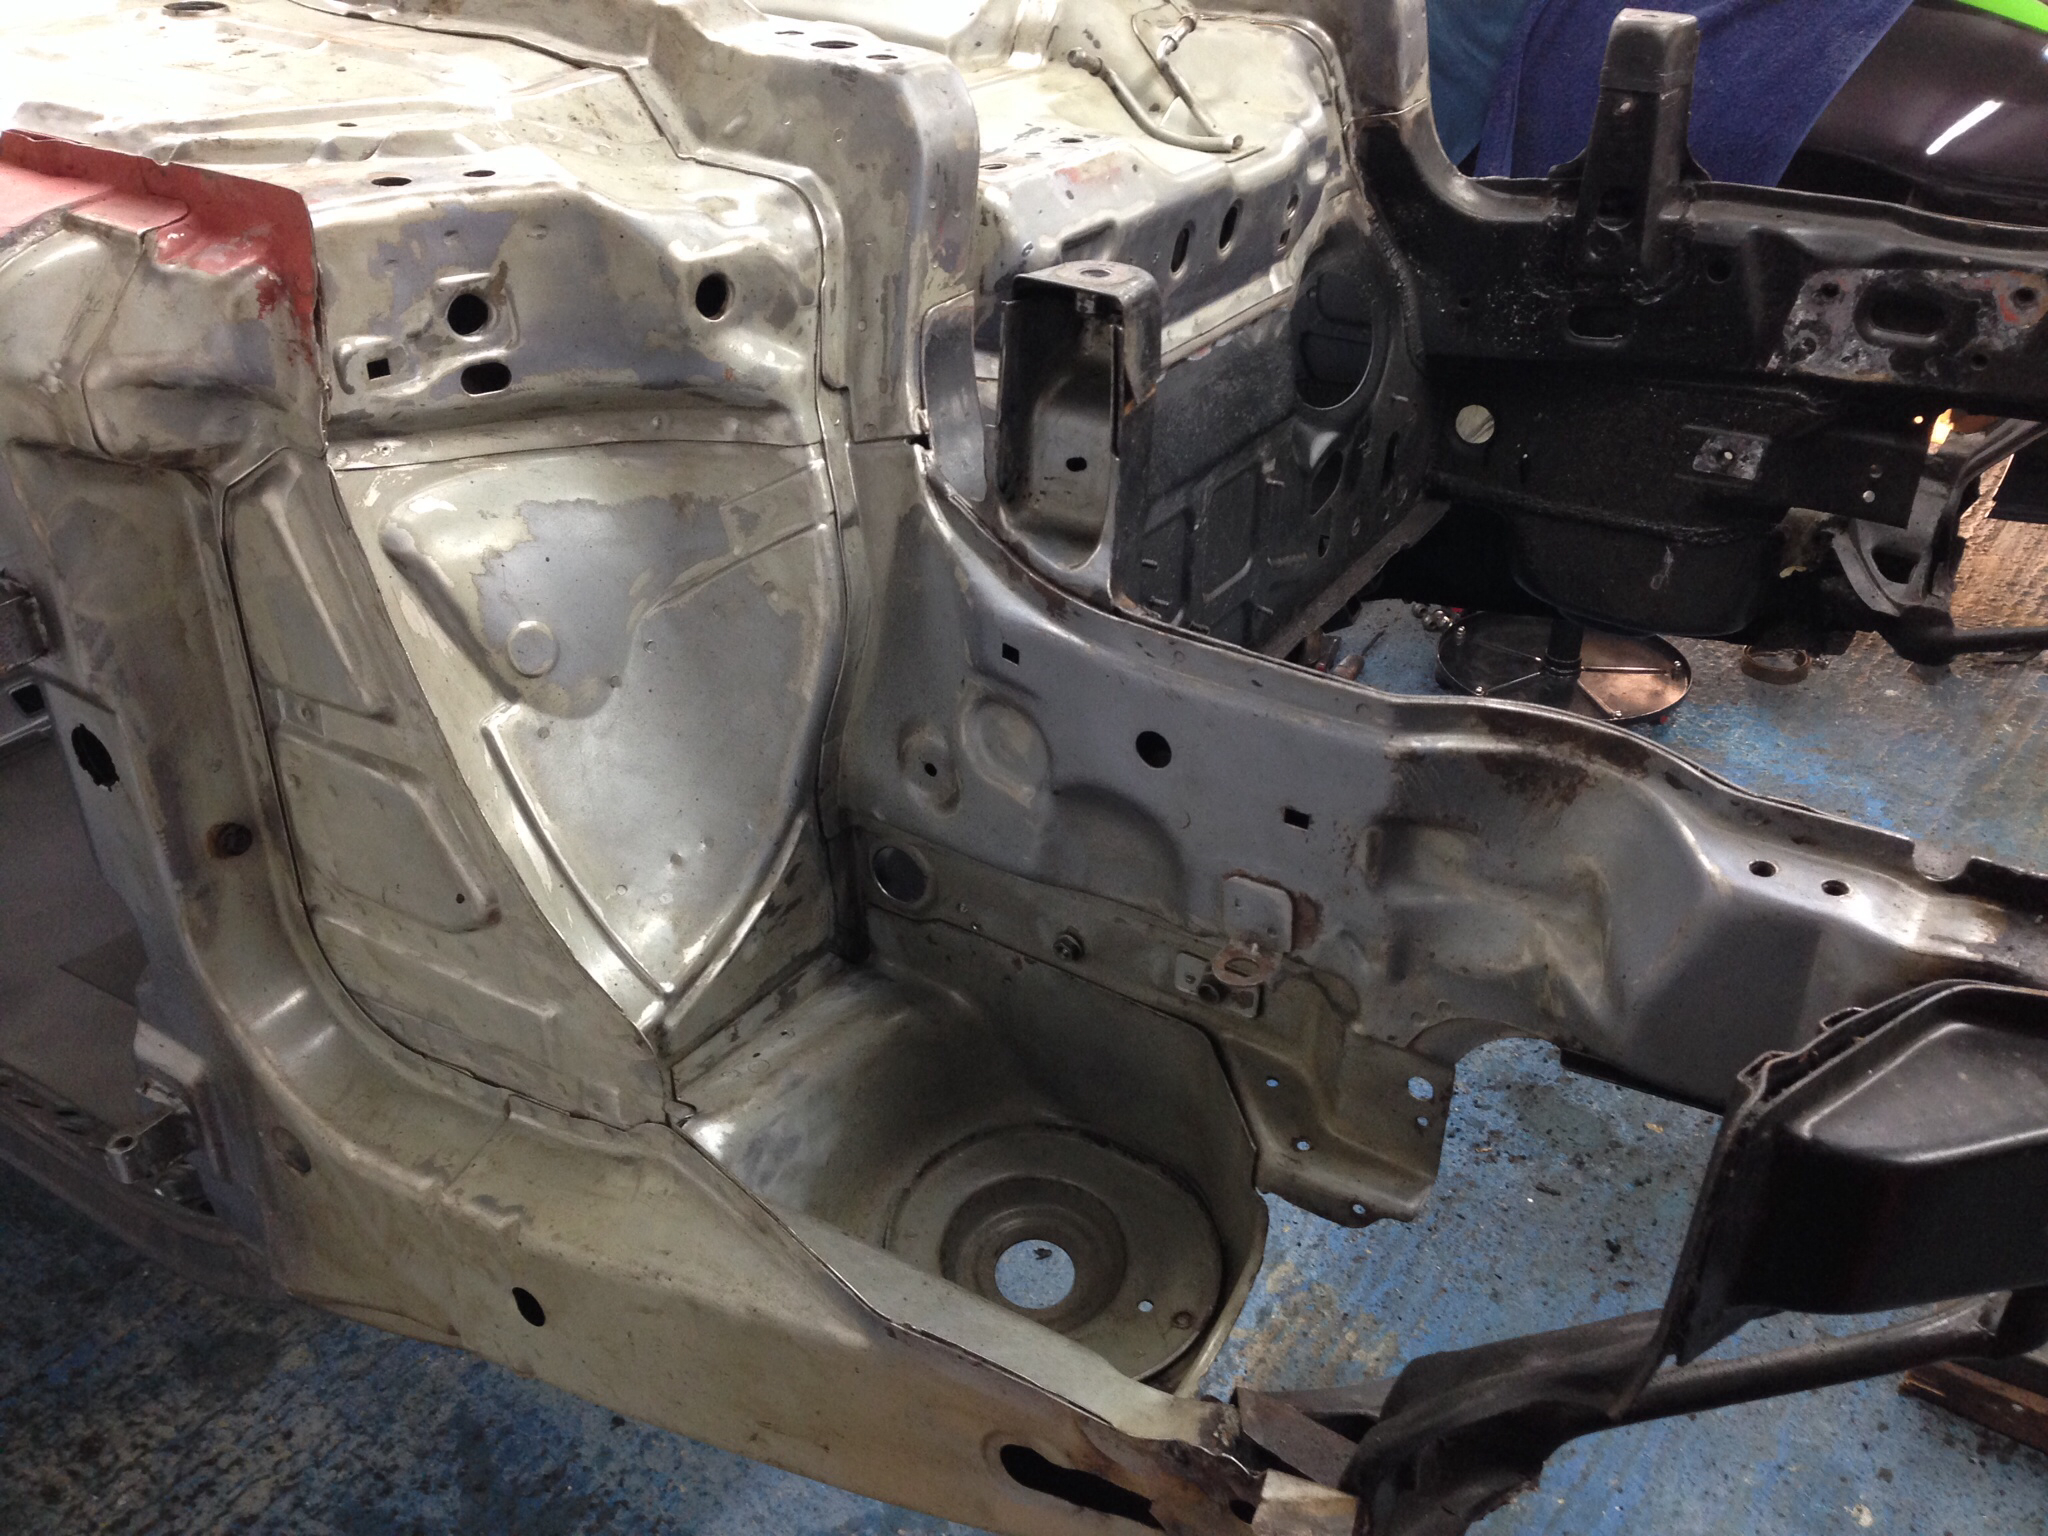
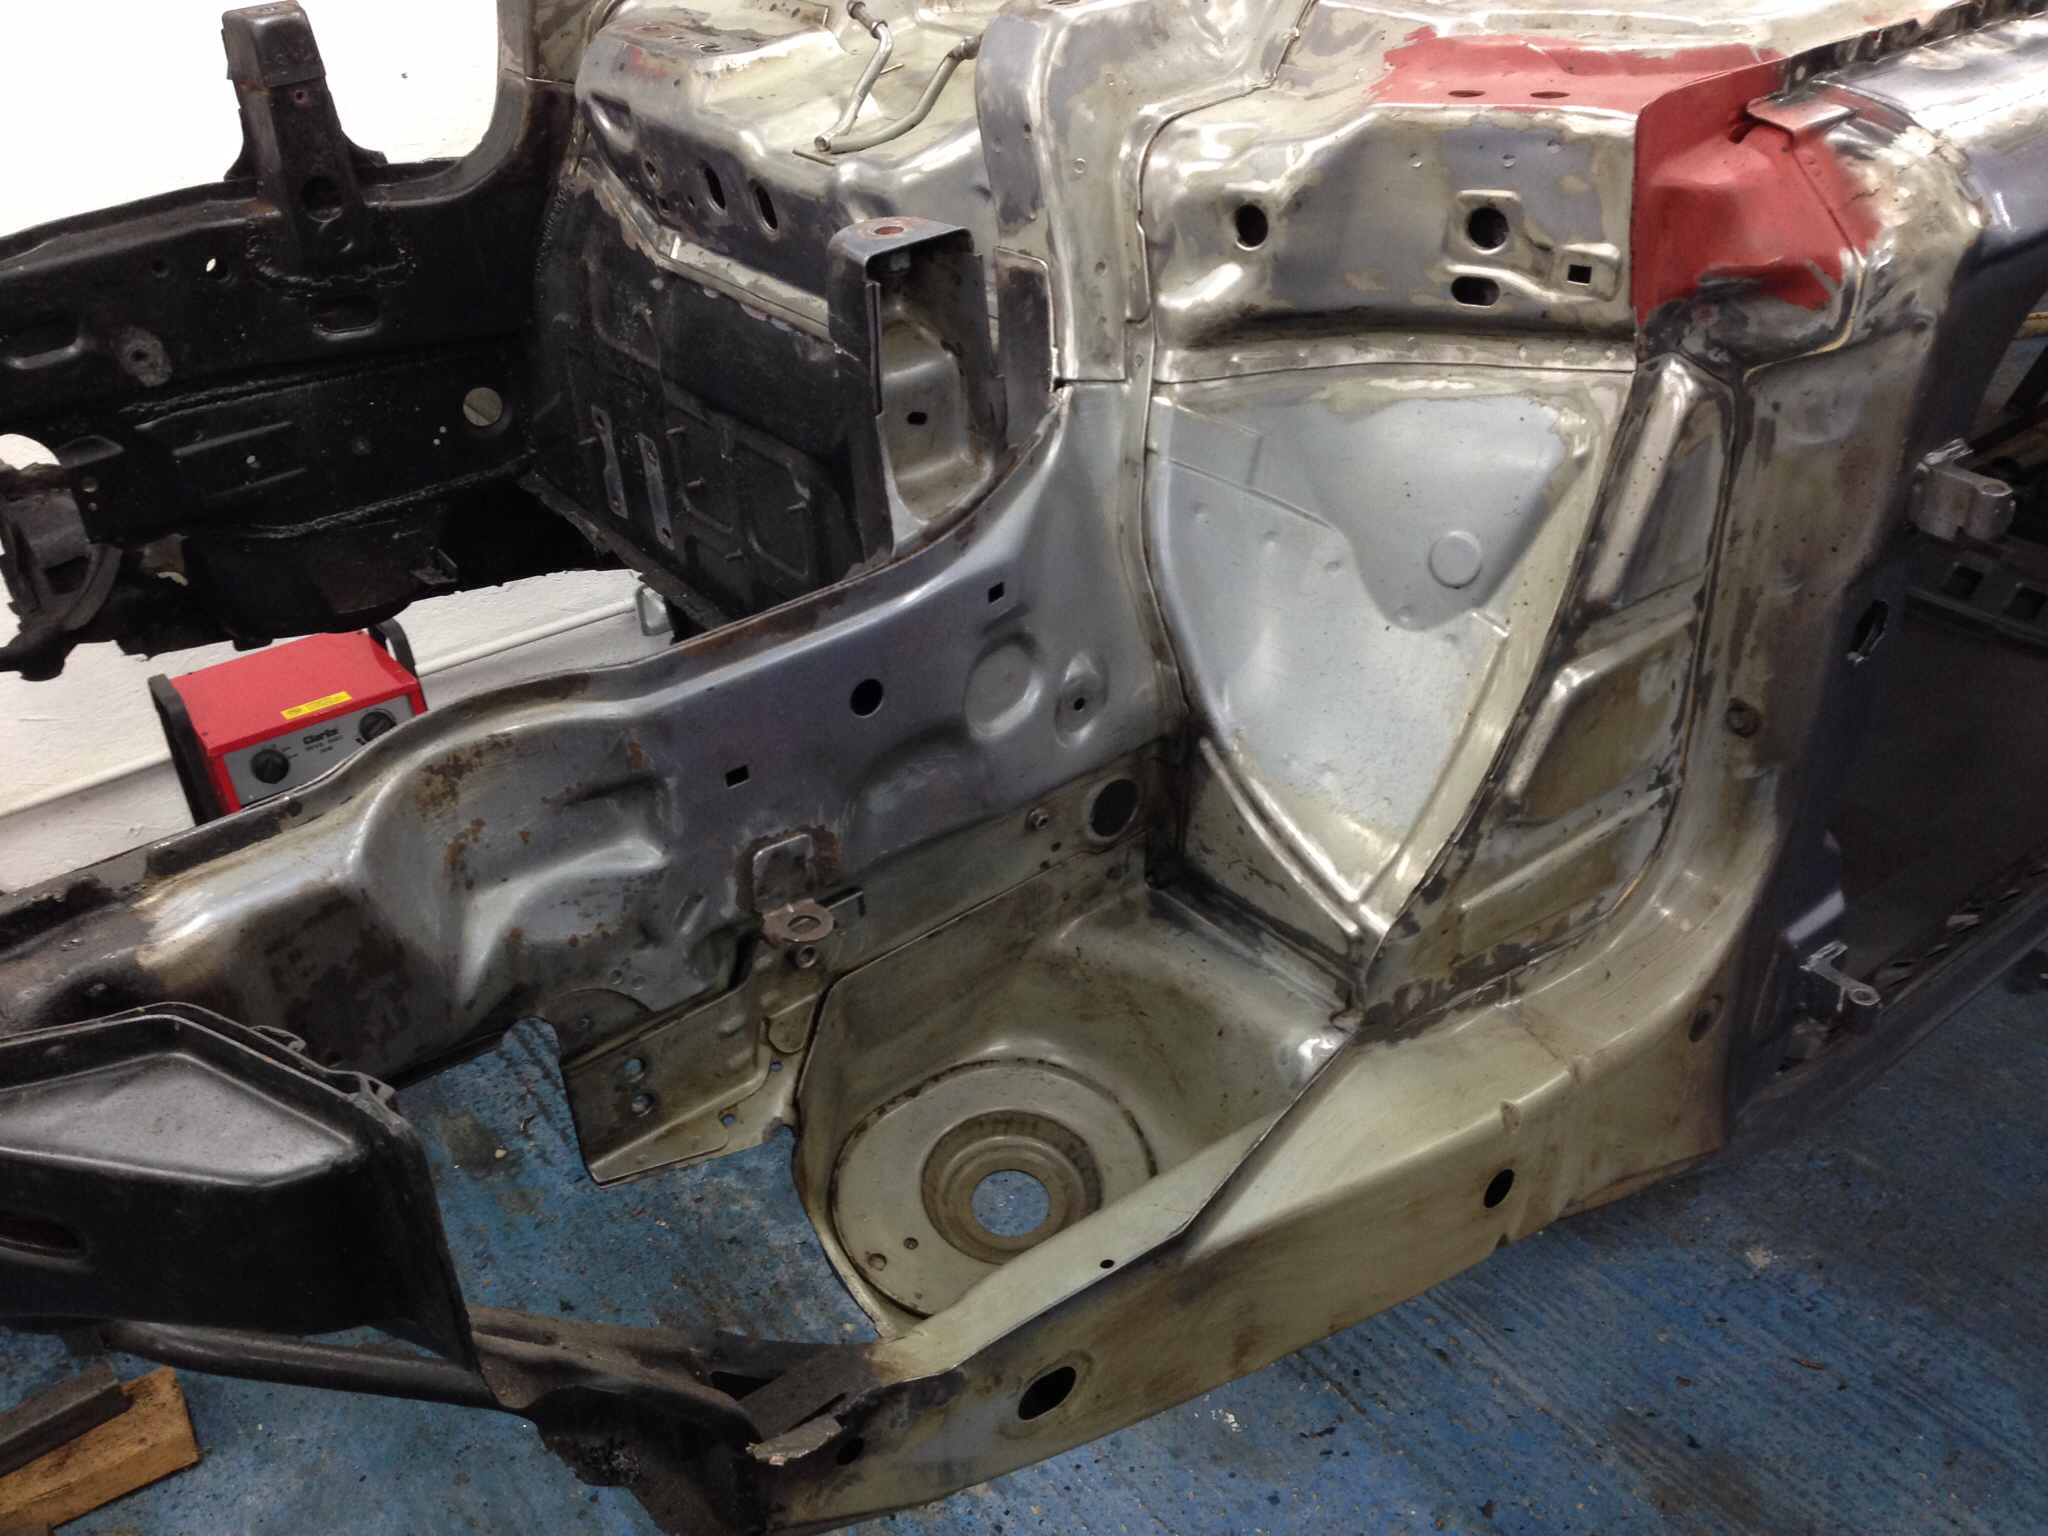
So more progress has been made..
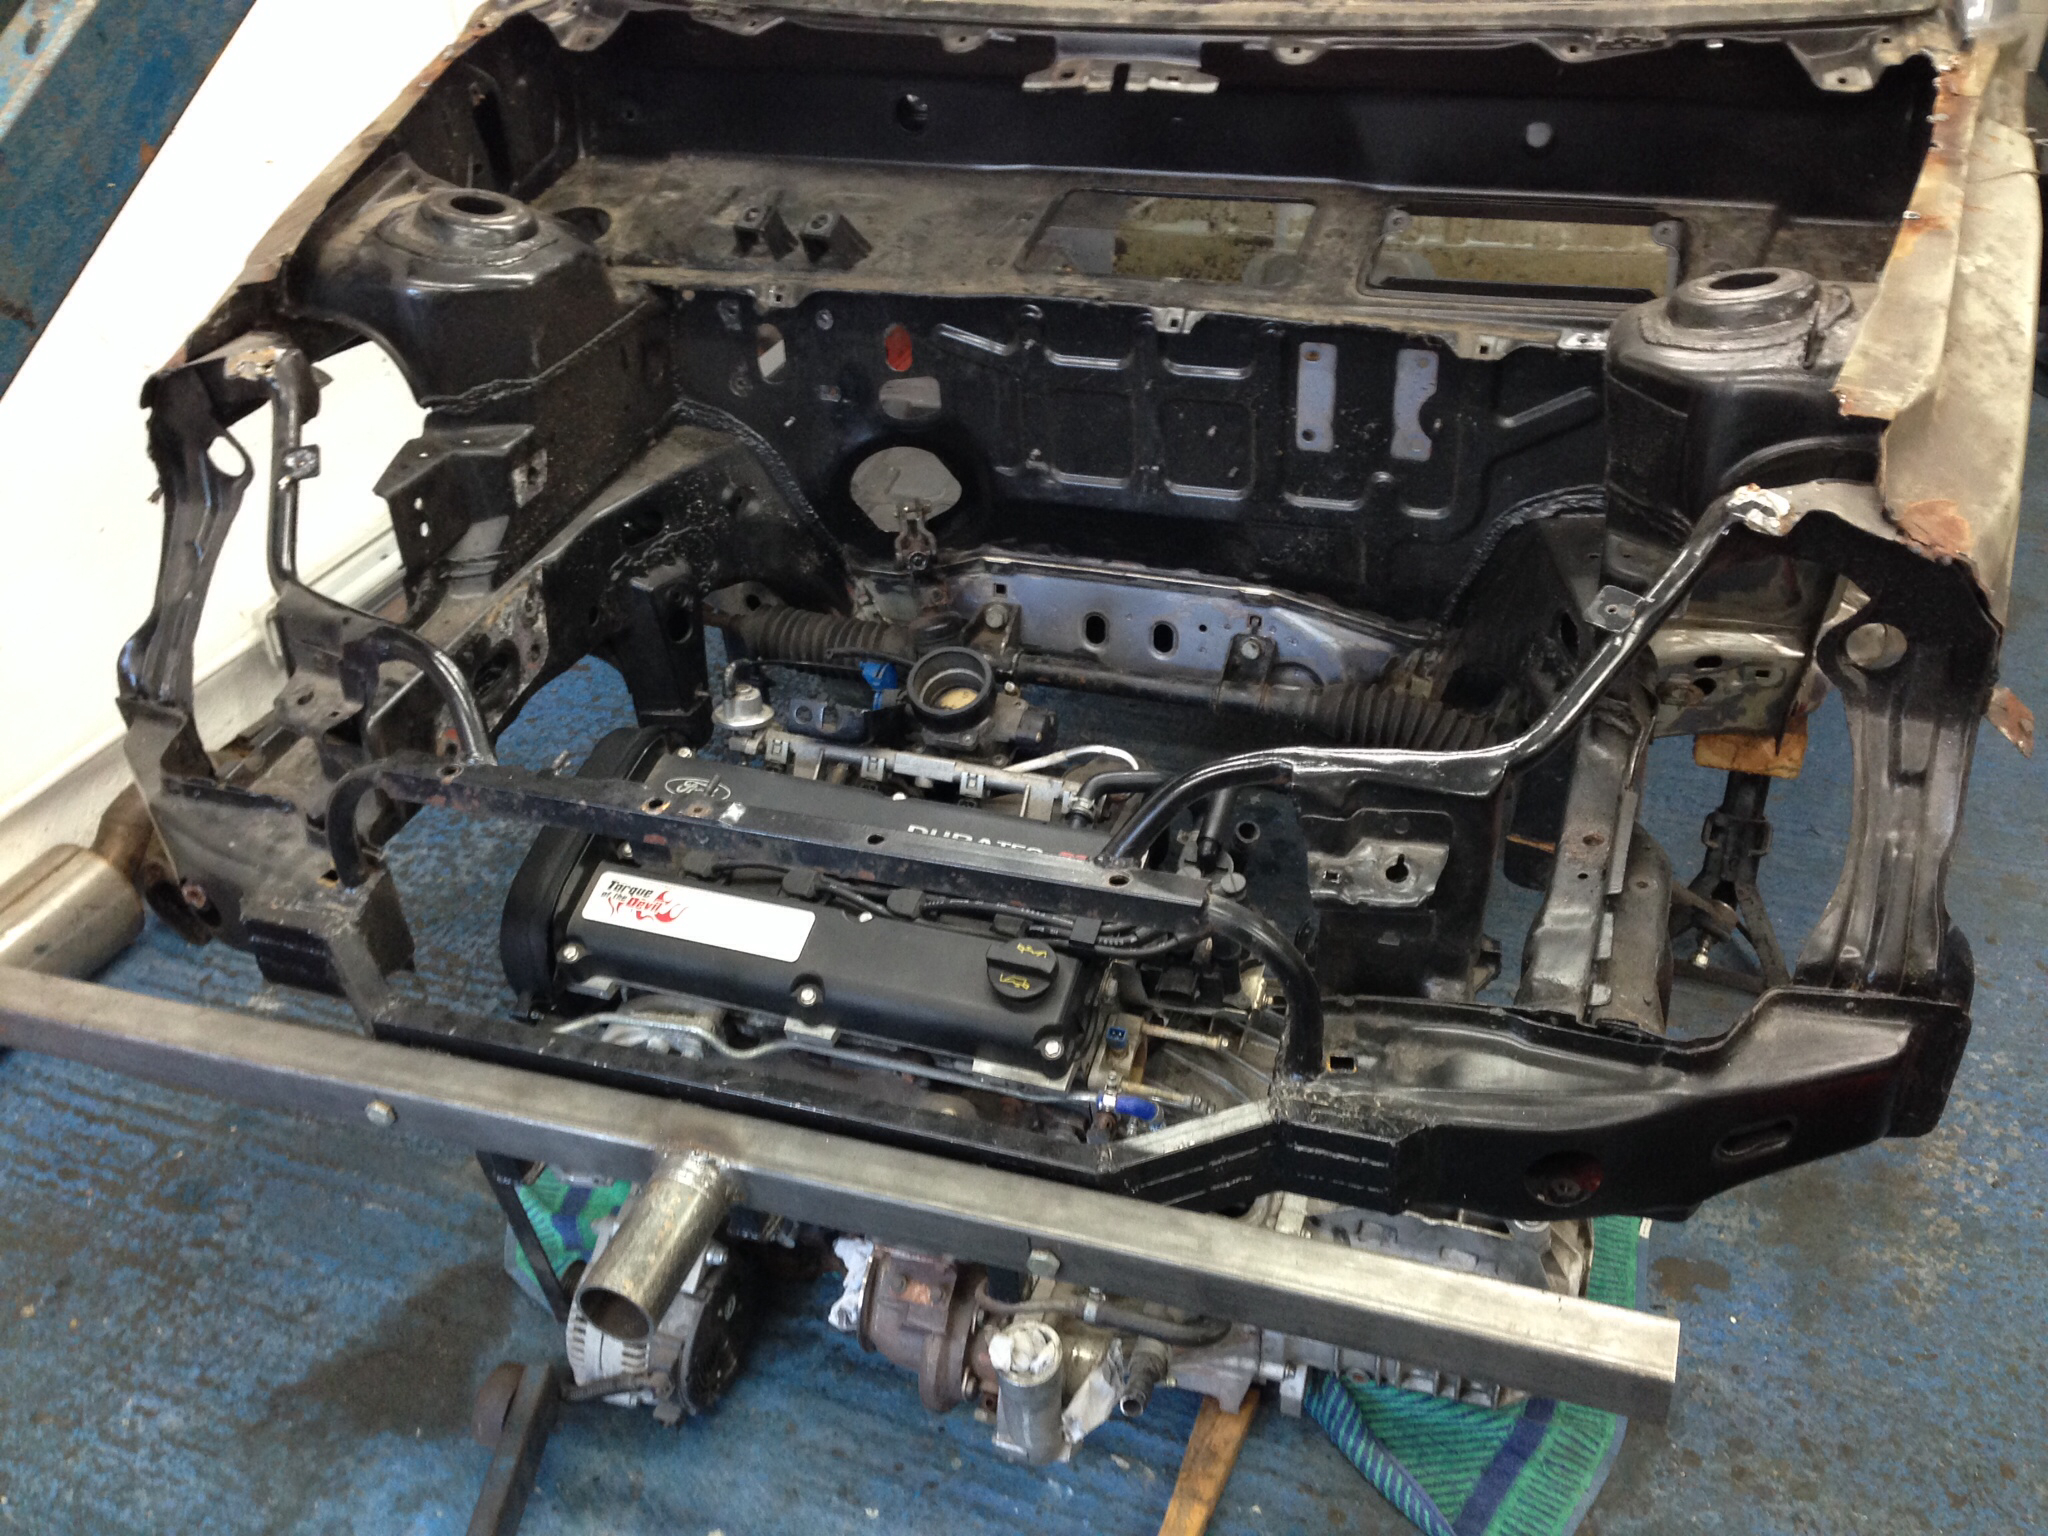
Lining everything up:
Once lifted in I quickly realised this section would need to be cut but I was pretty sure by this stage all the front original fab work will go
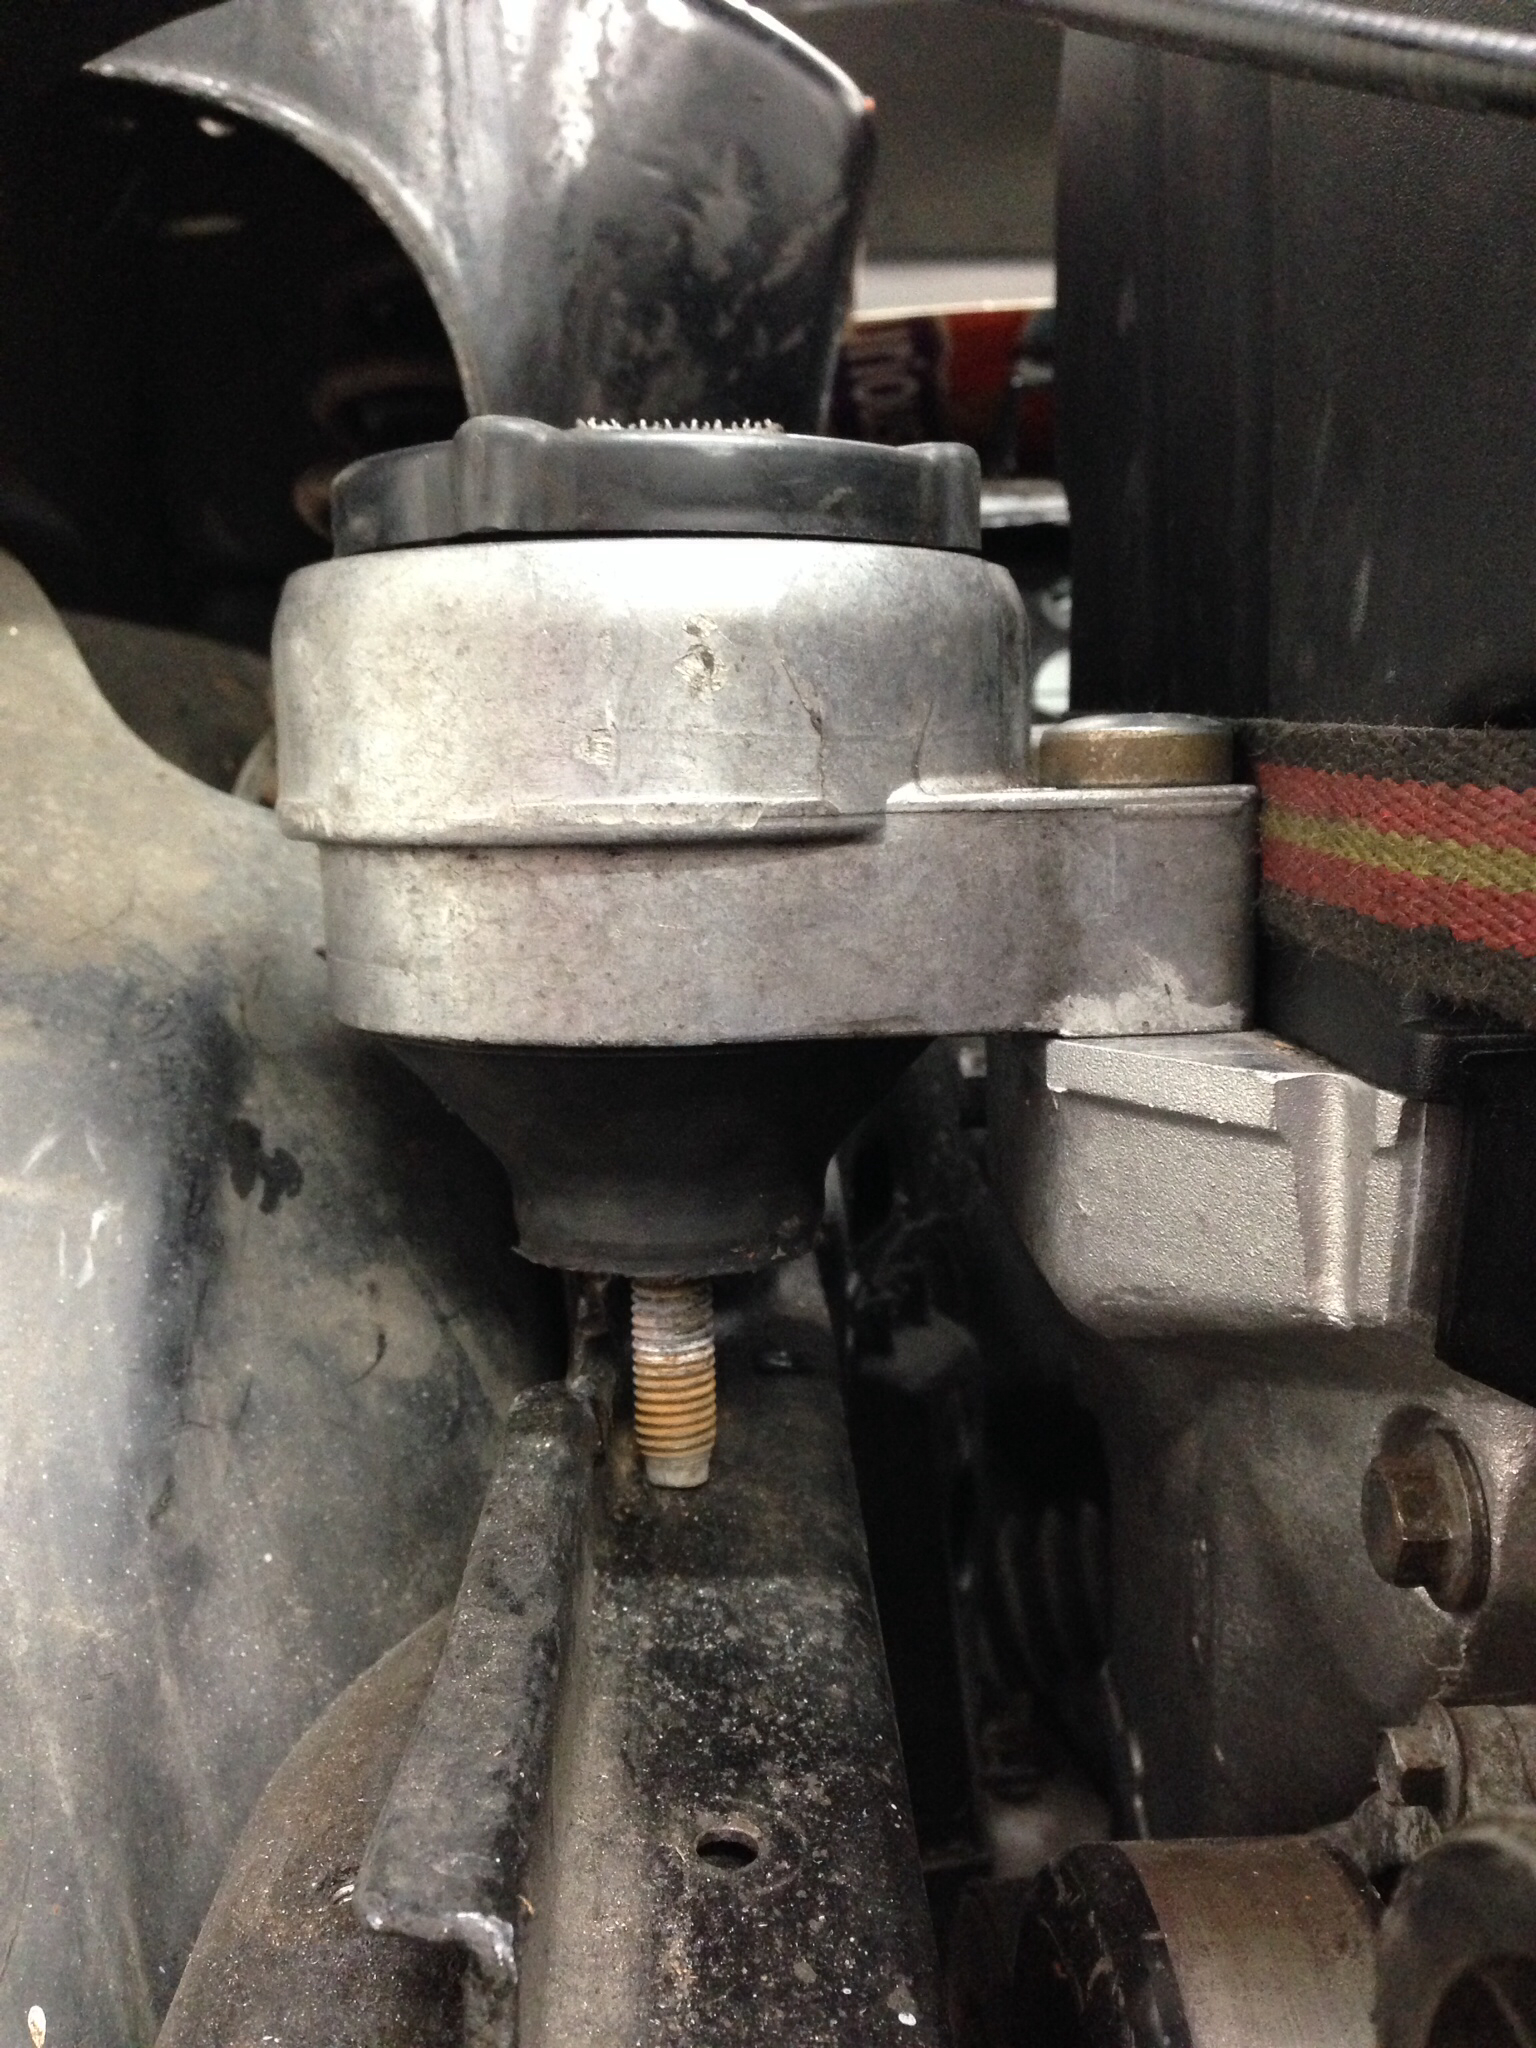
Once in place and held there I started to mock up the mounts:
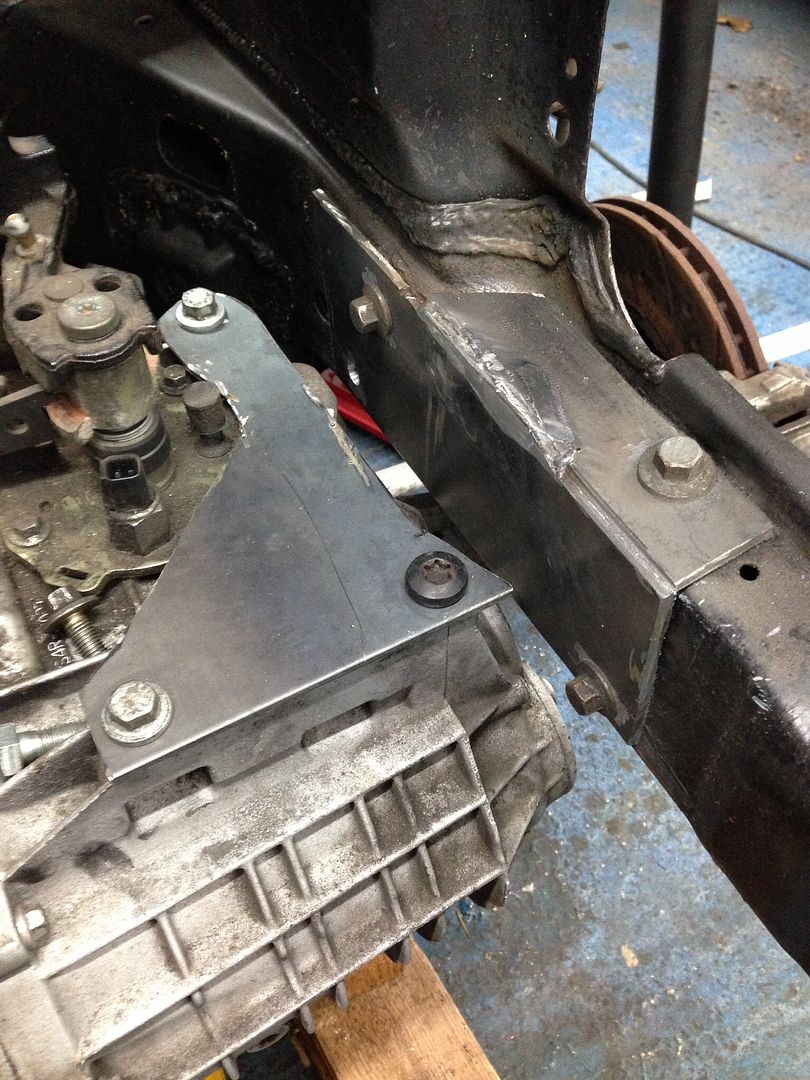
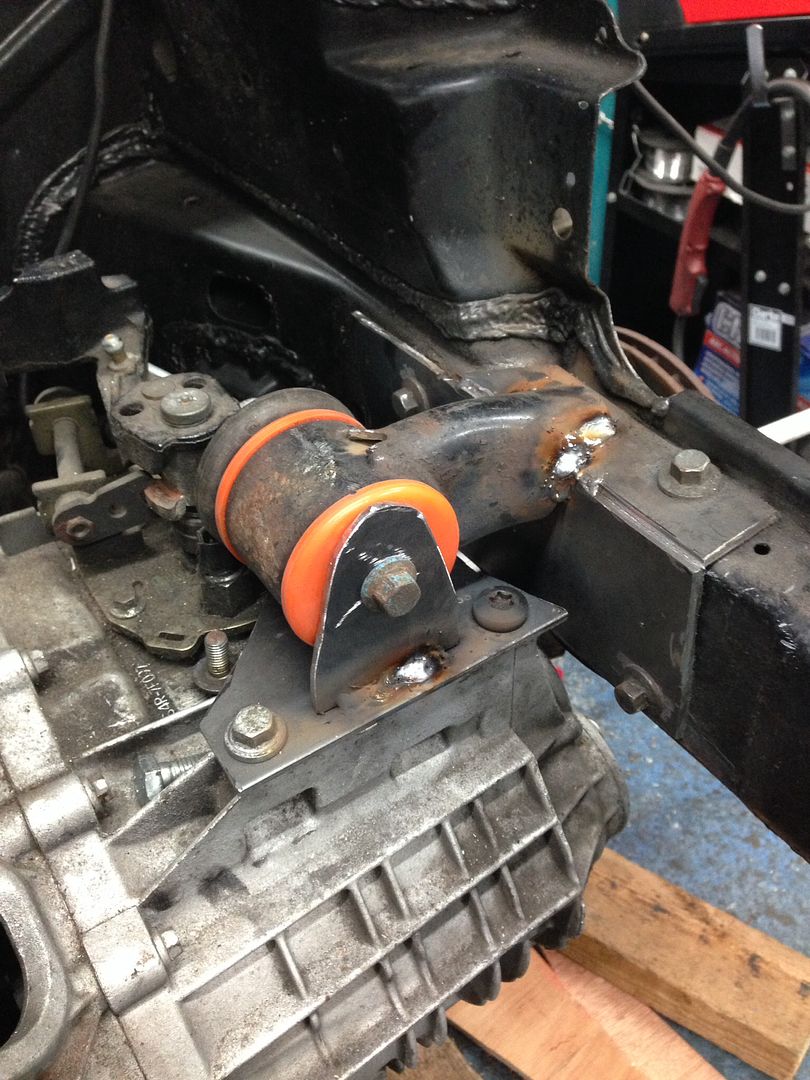
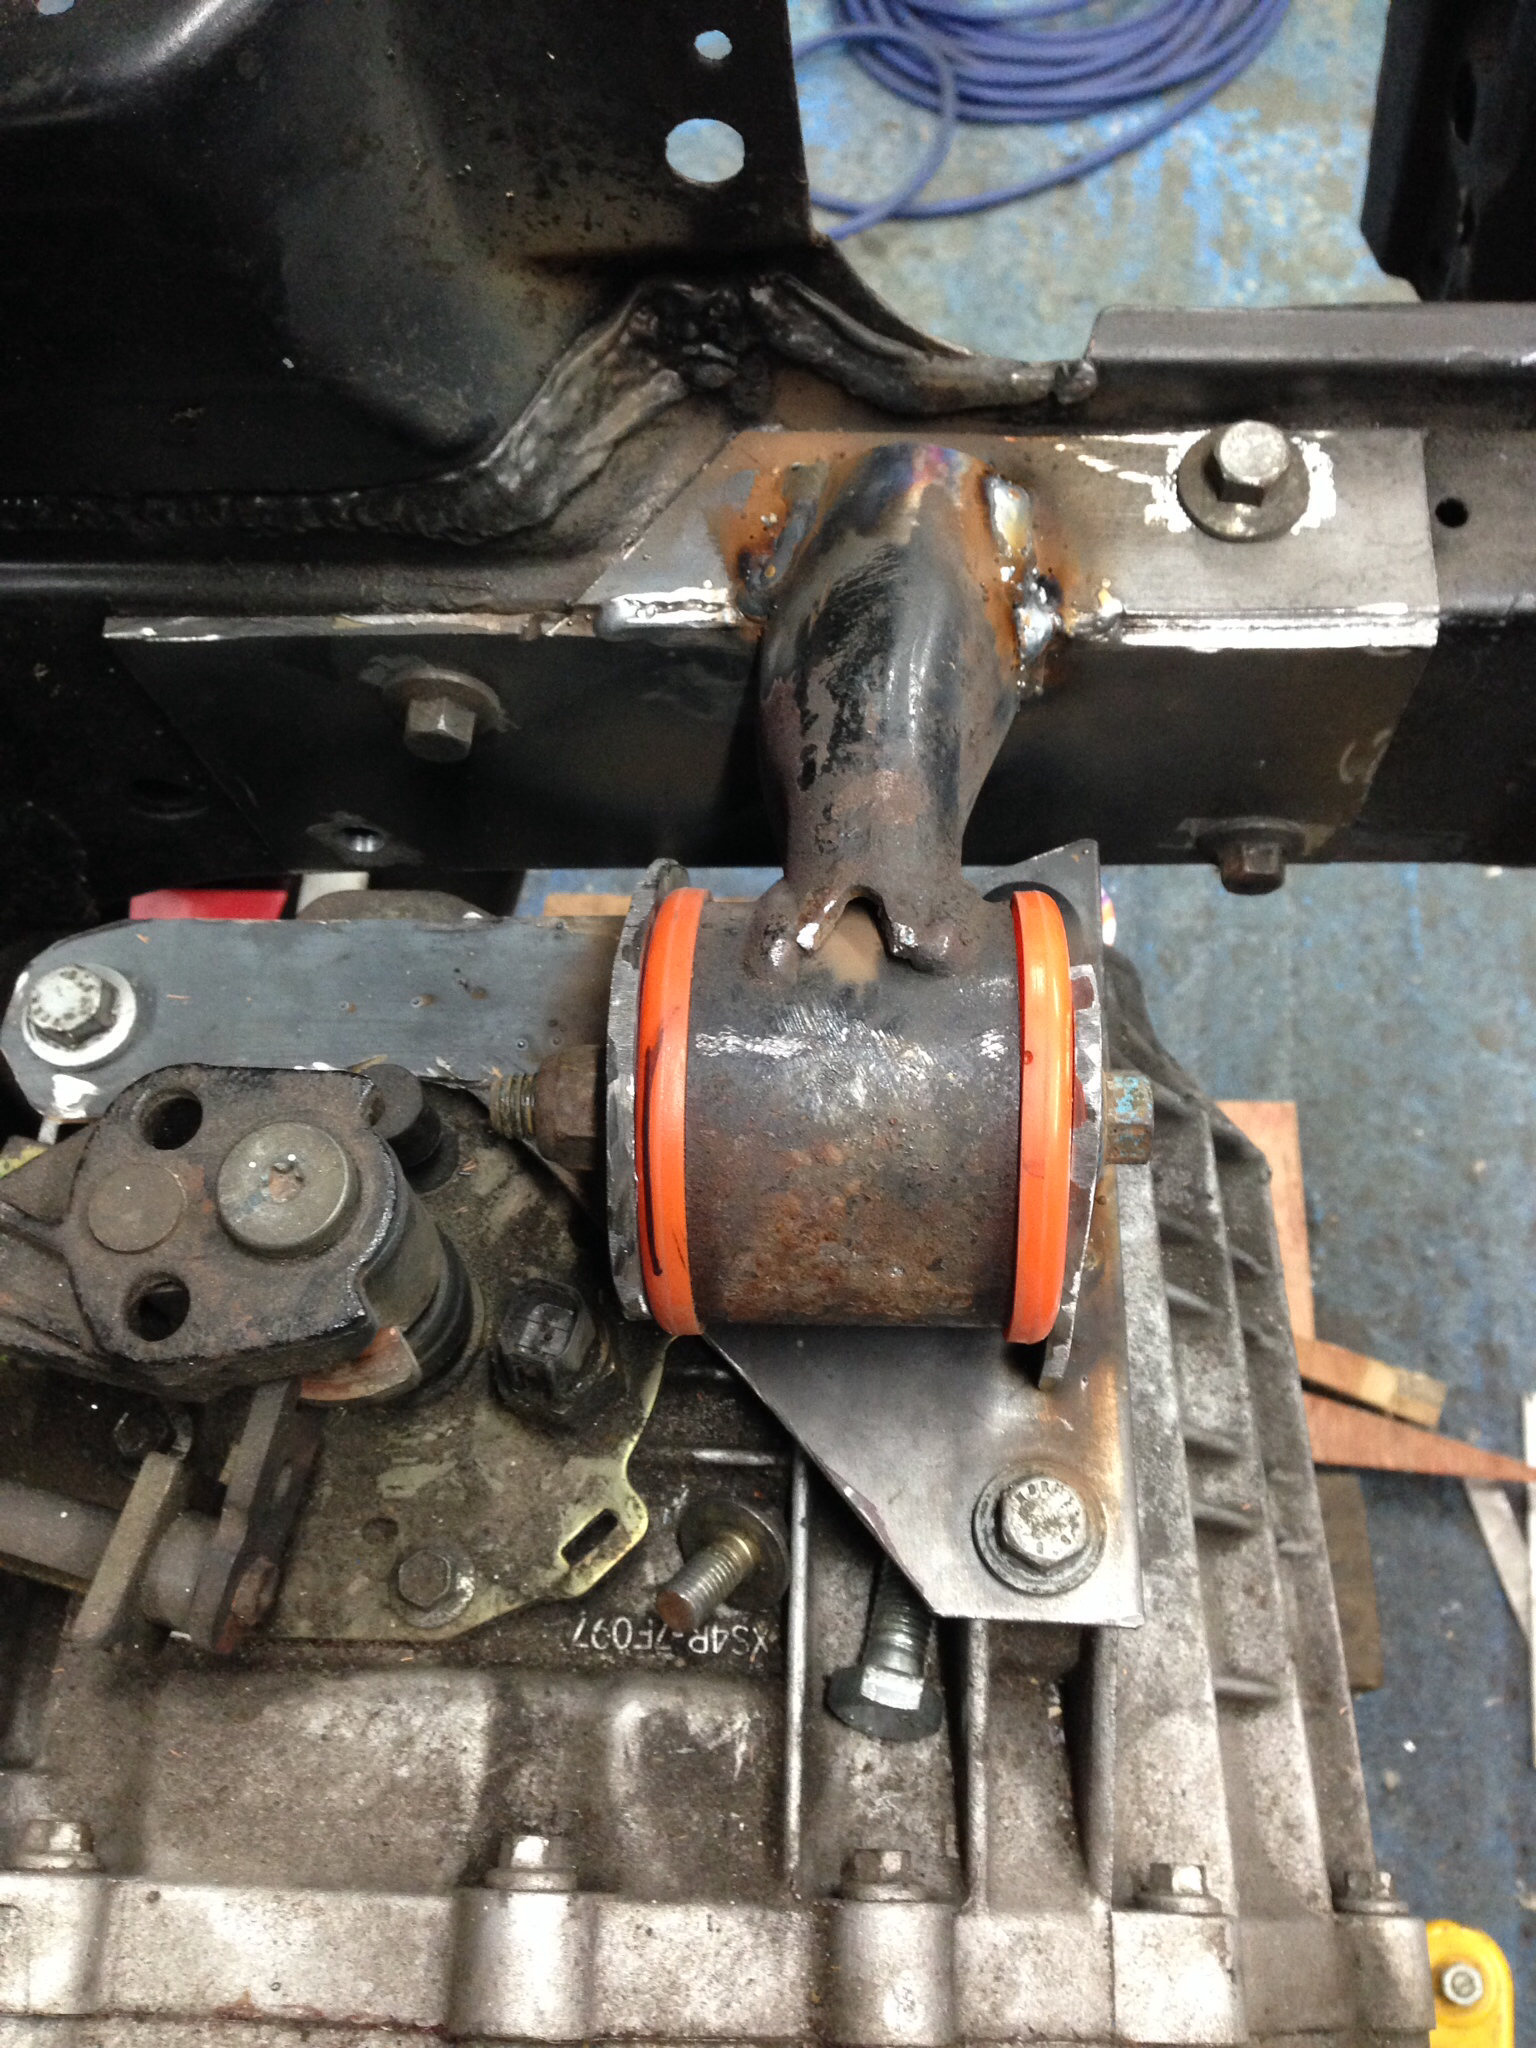
This is only roughly trimmed and tacked in place, once it all comes out I will trim and brace the mount and give it a paint
Engine side - I wanted to use the standard focus mount ( will be swapped for a vibra technics version later) as it's a relatively small mount
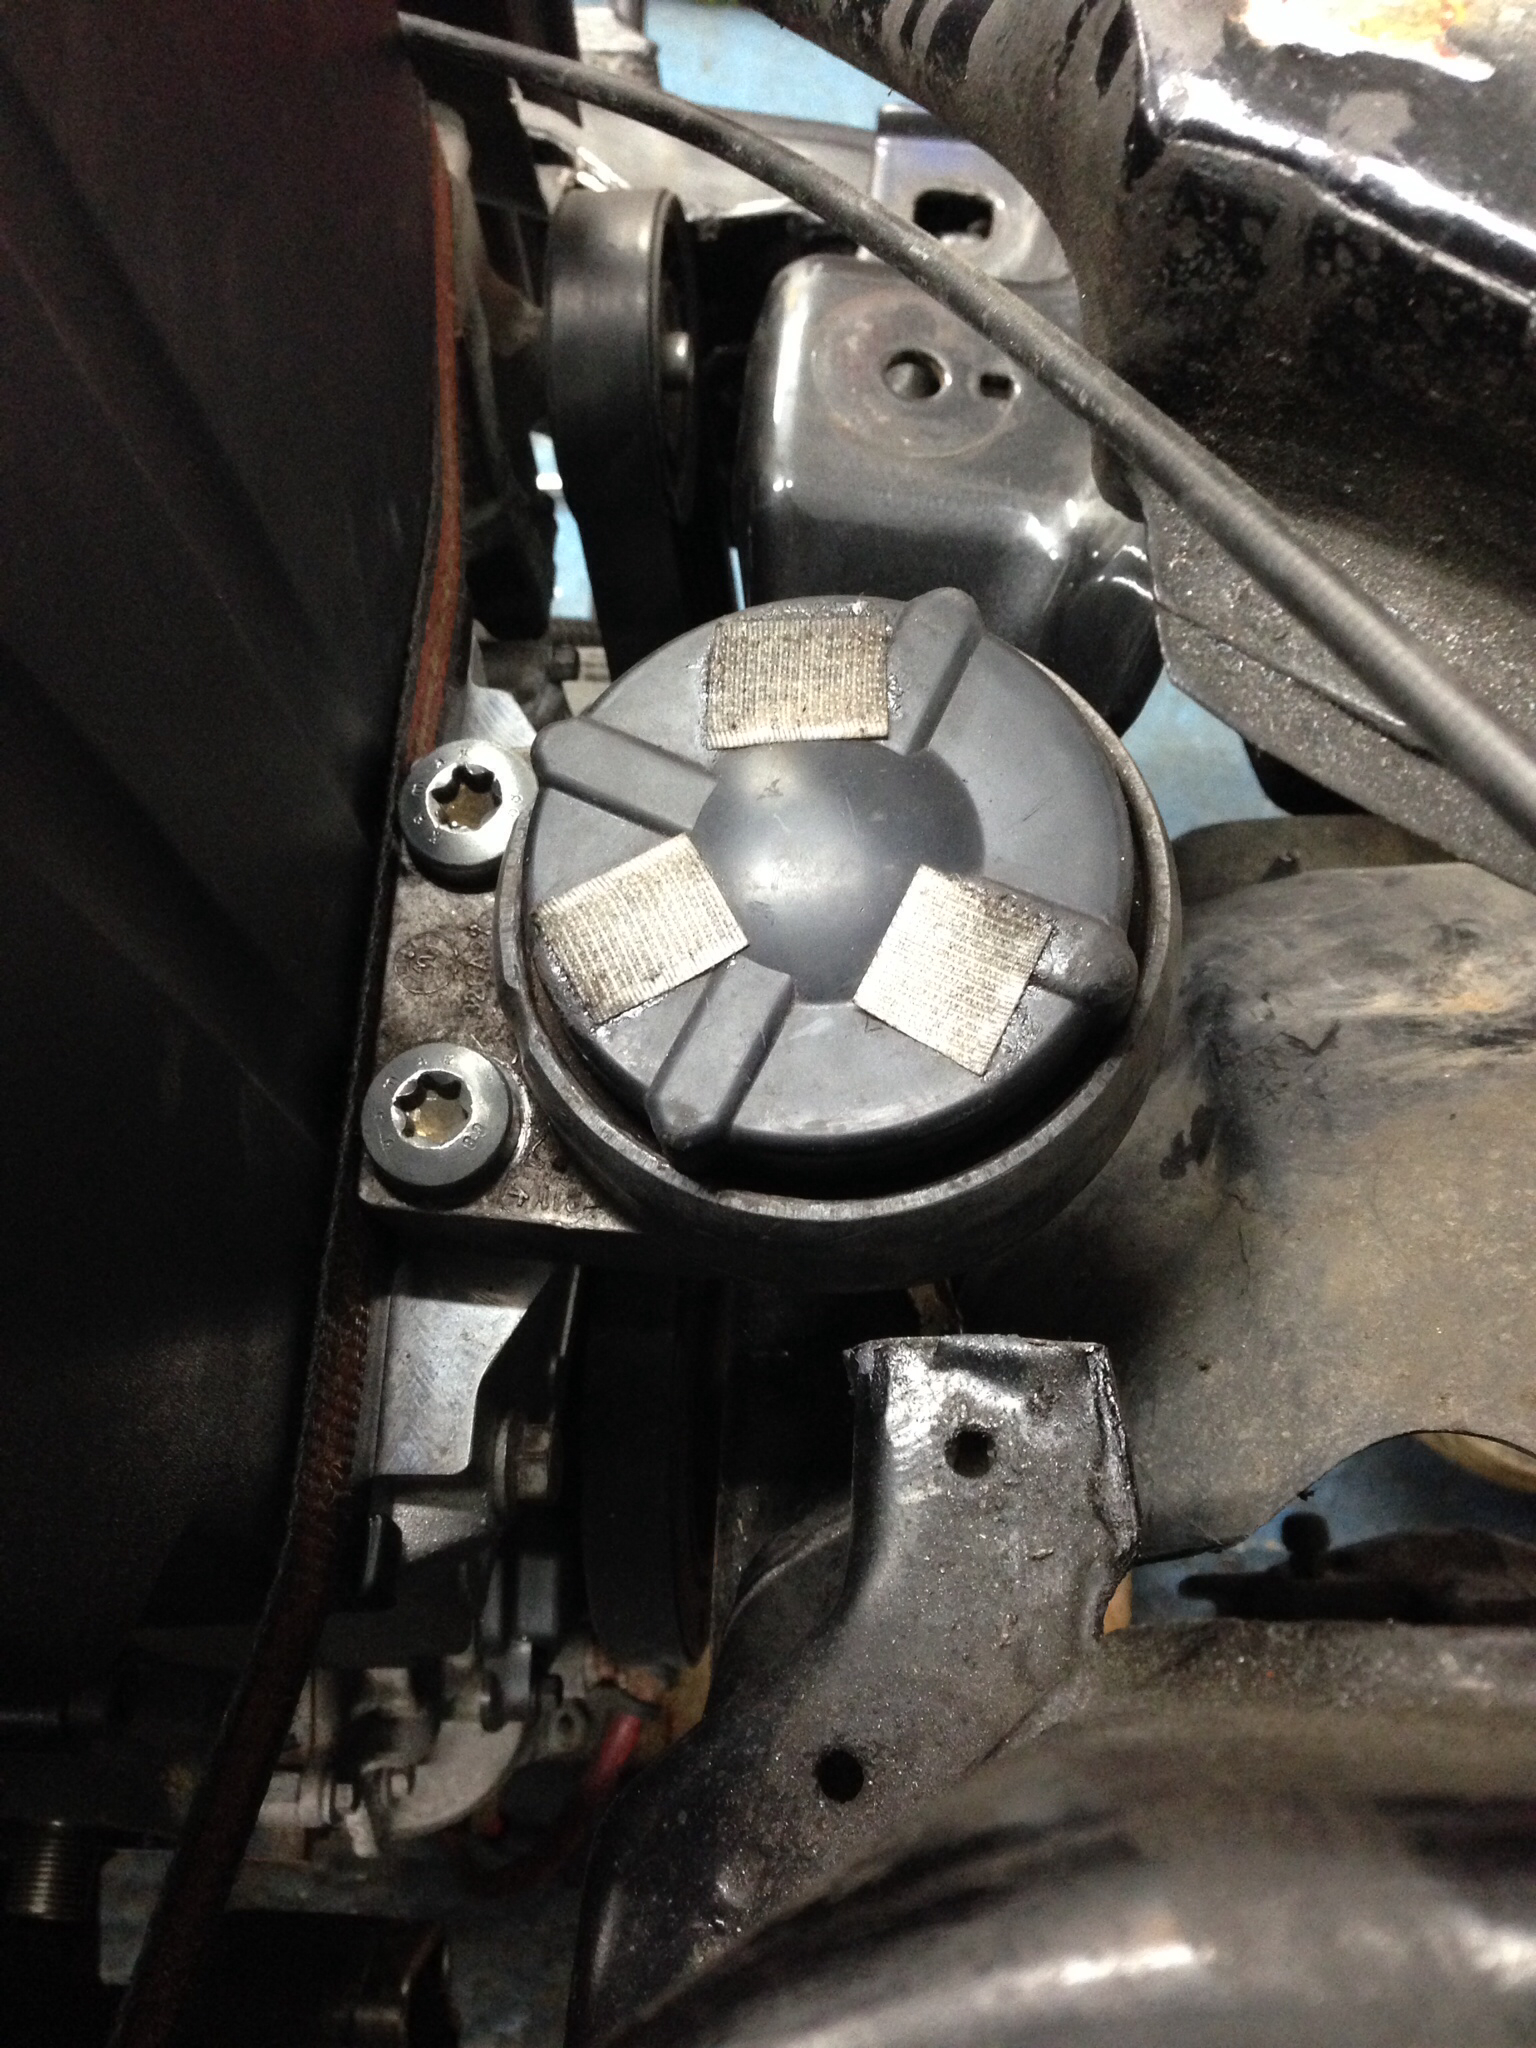
A very trimmed version of the standard focus metal mount plate
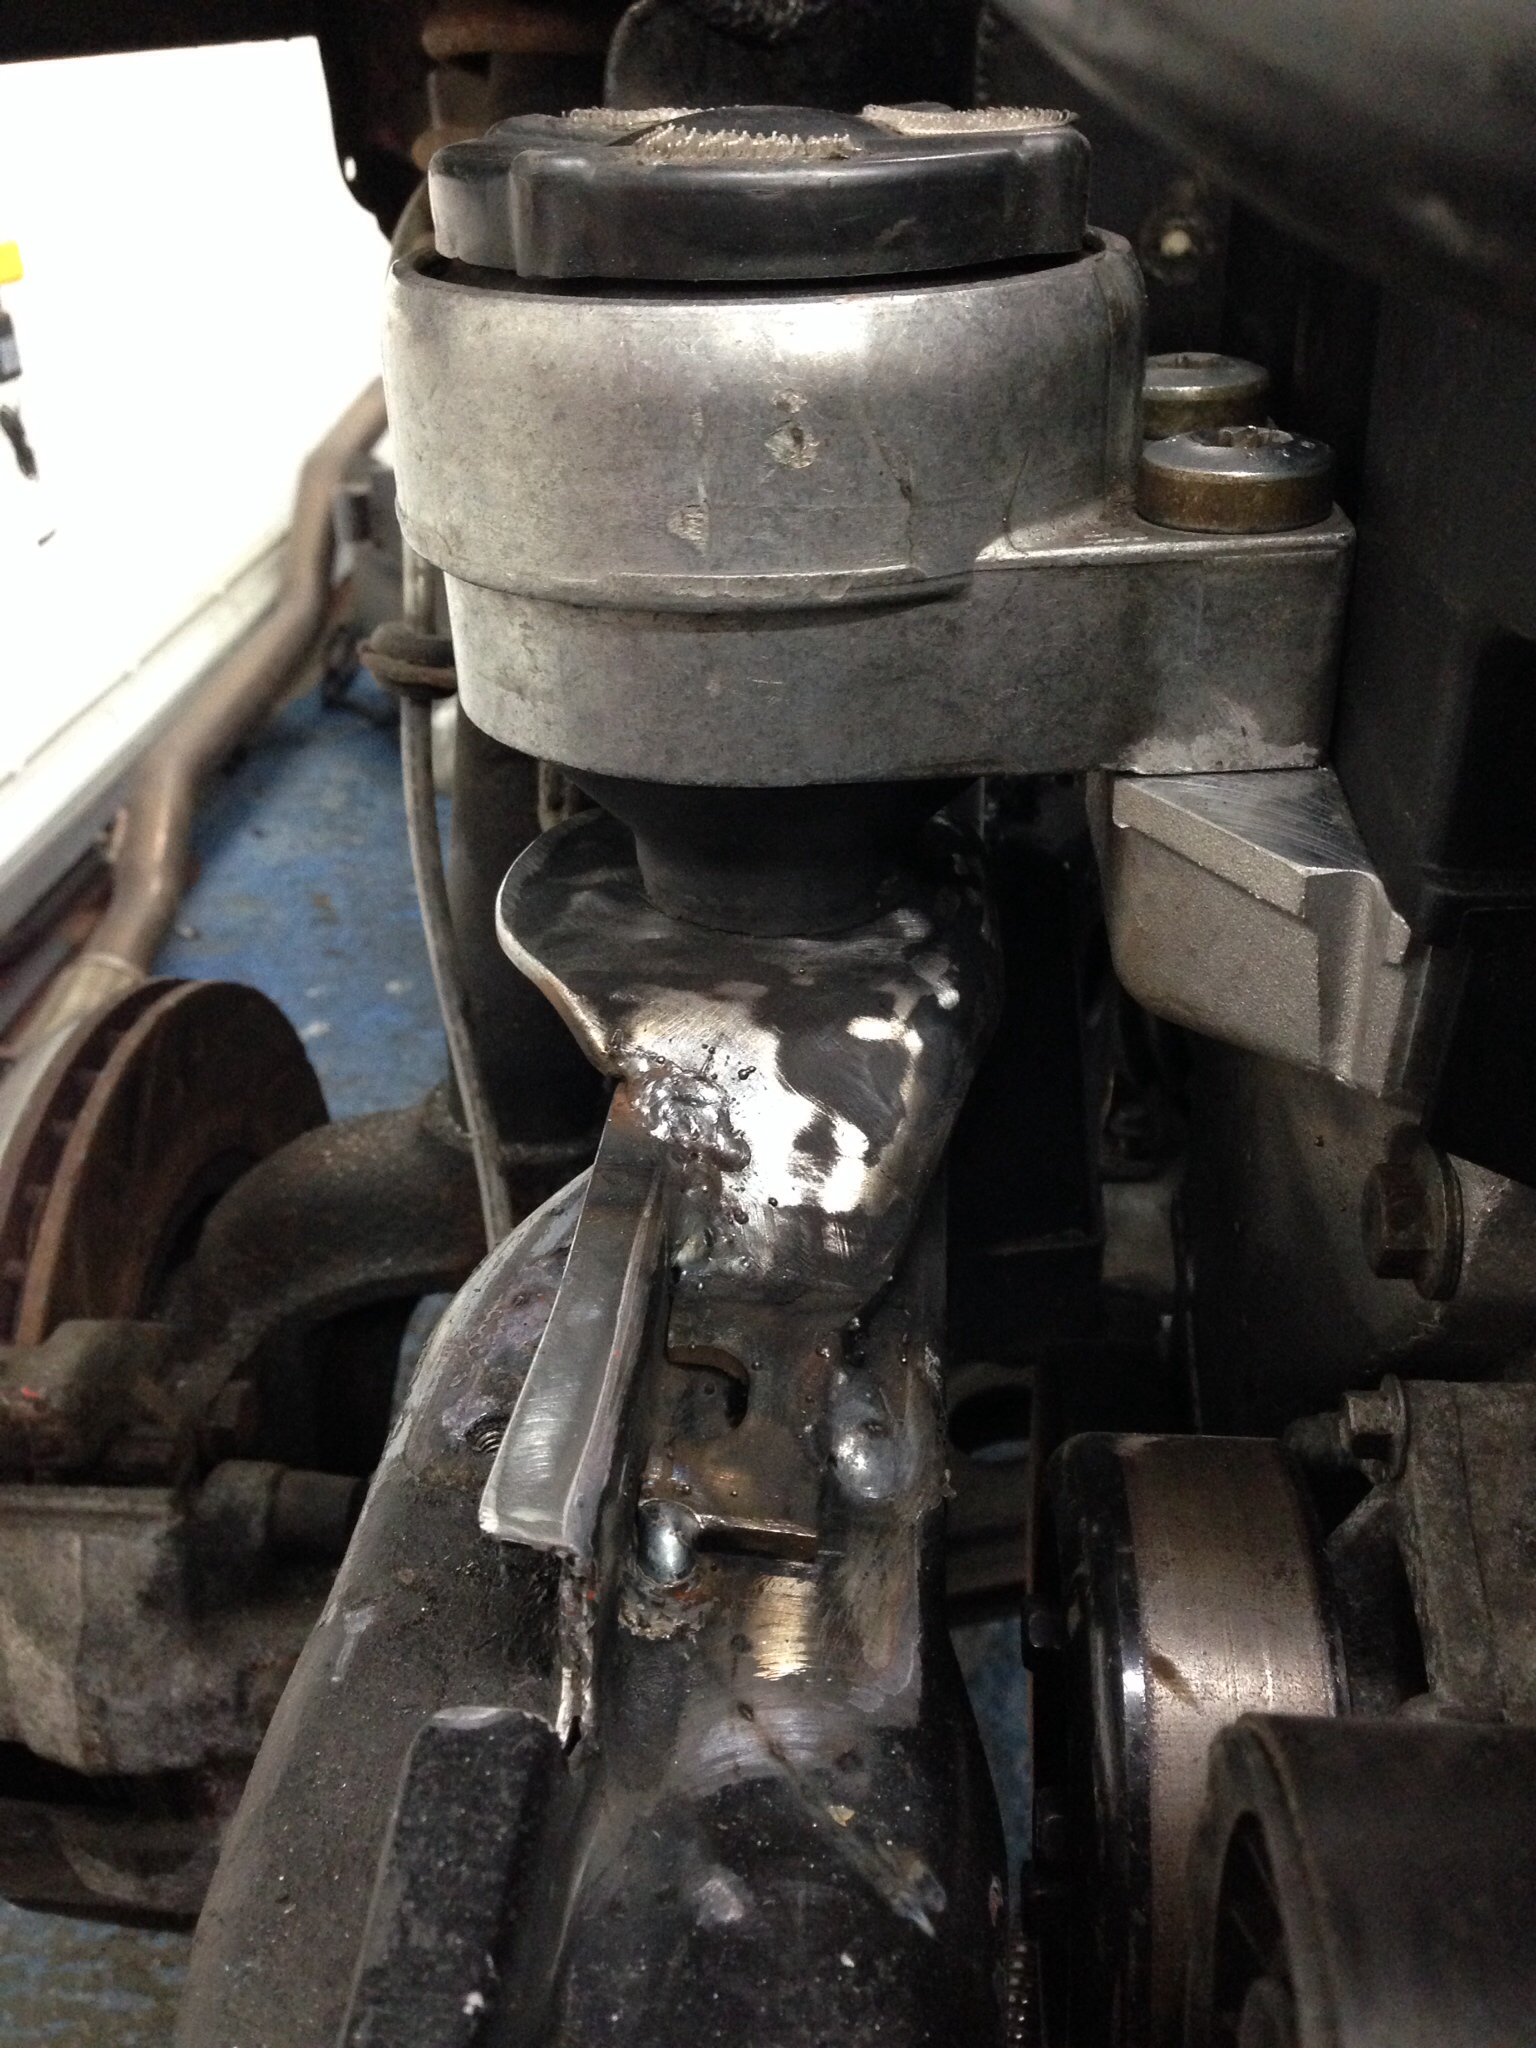
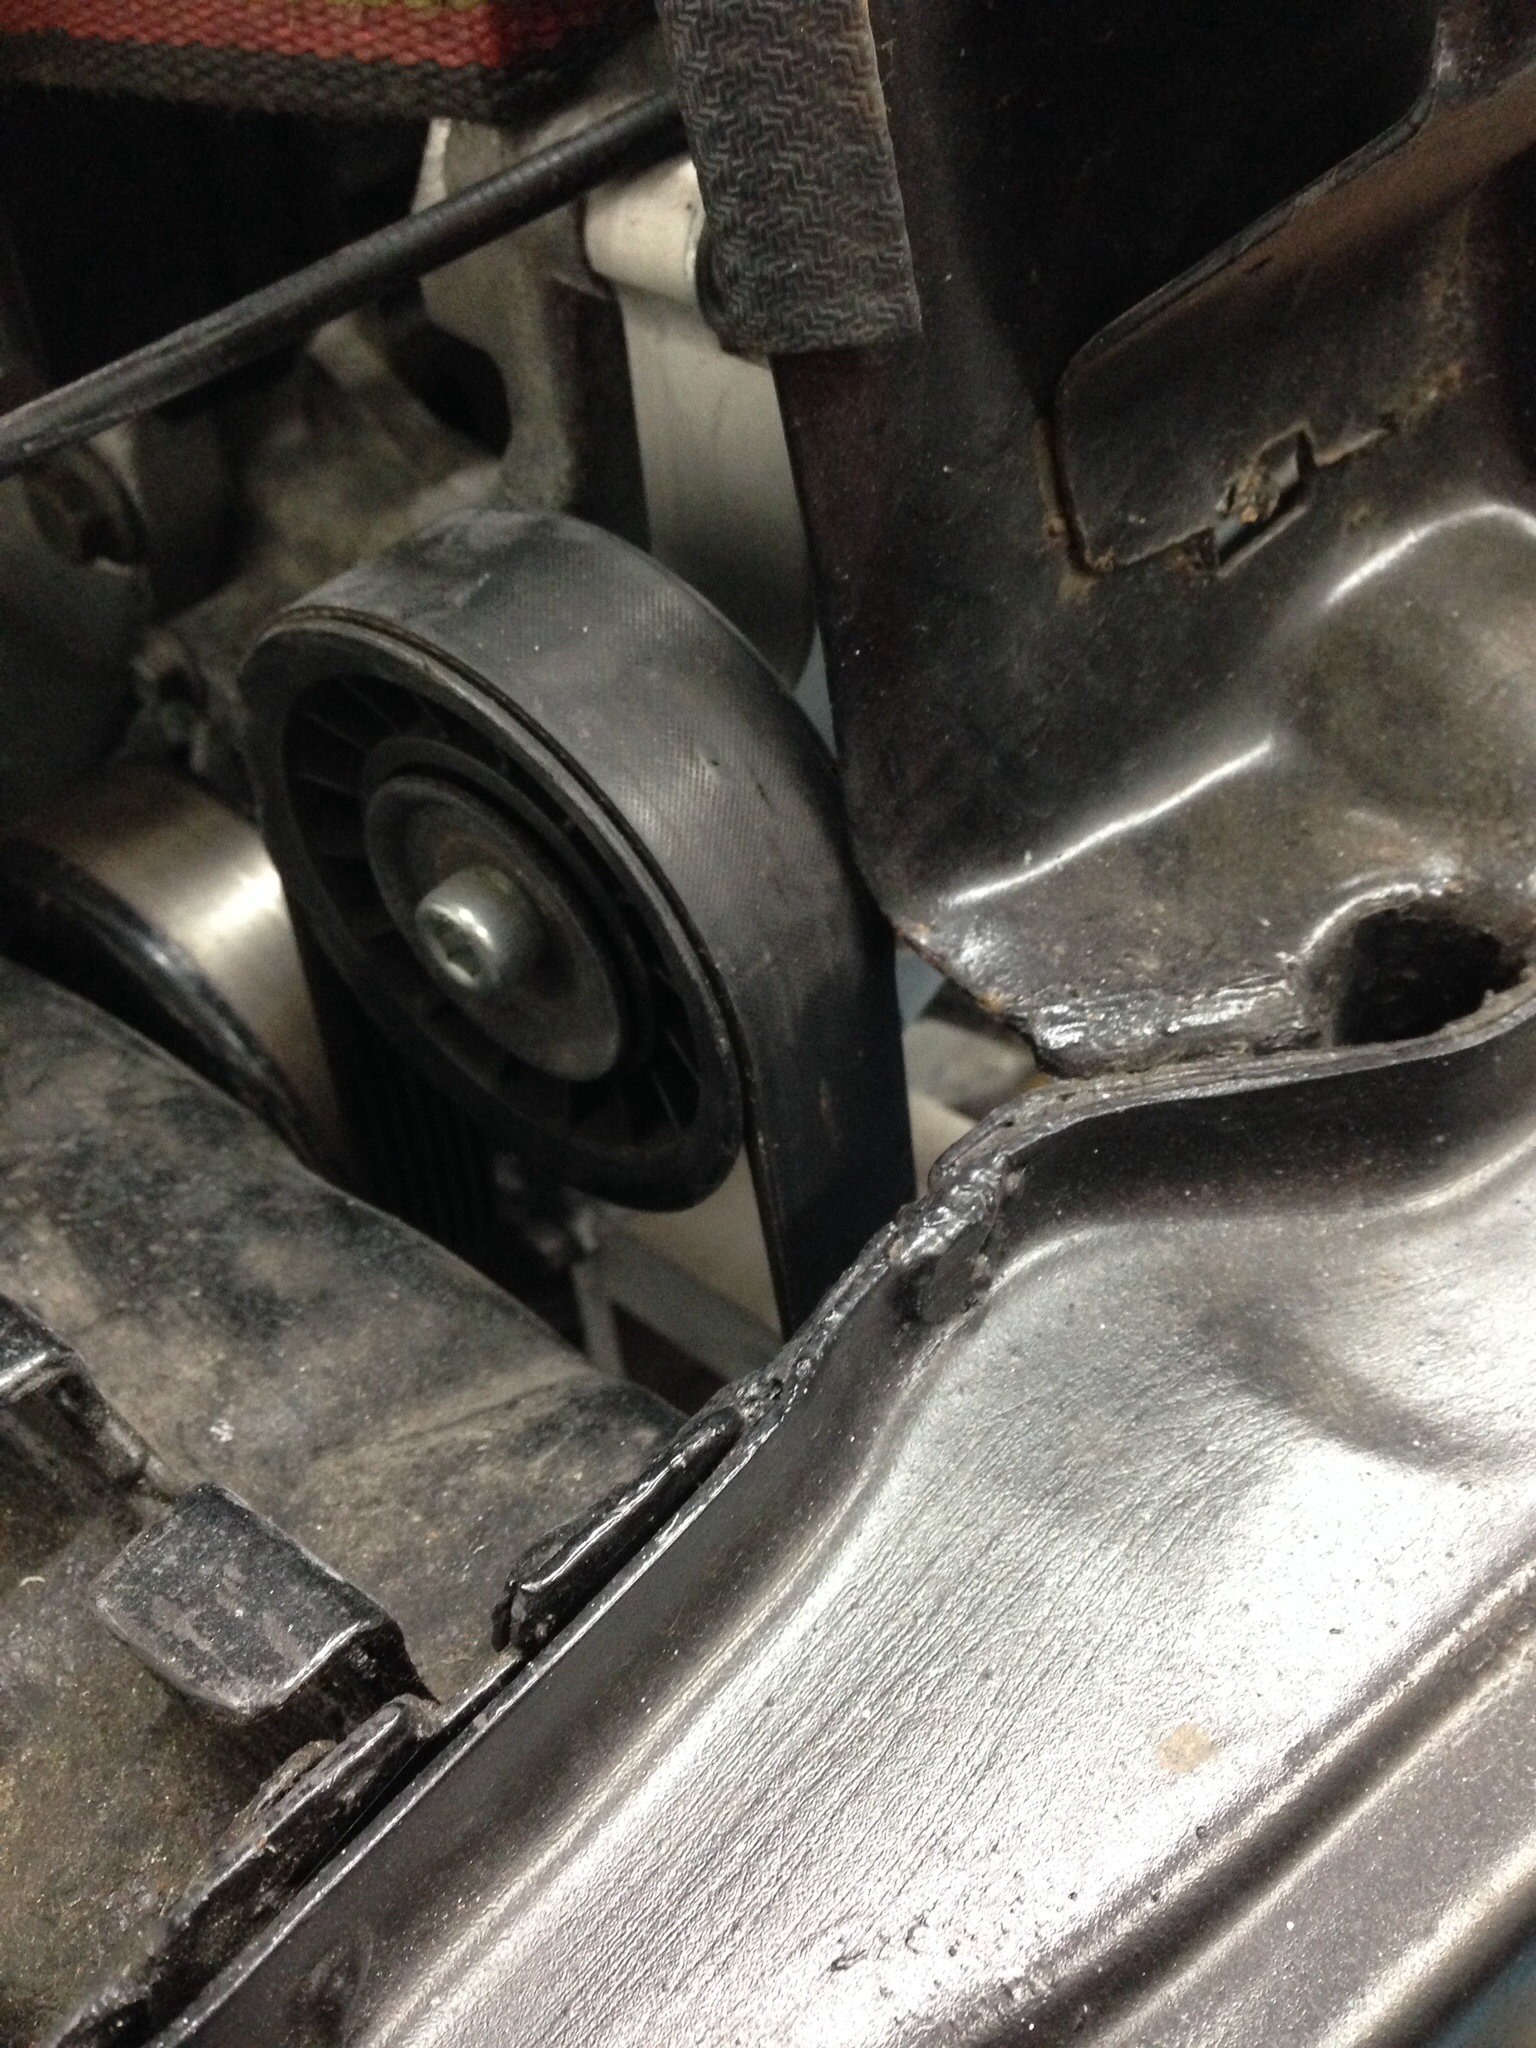
Chassis lip trimmed to allow access to the underside but
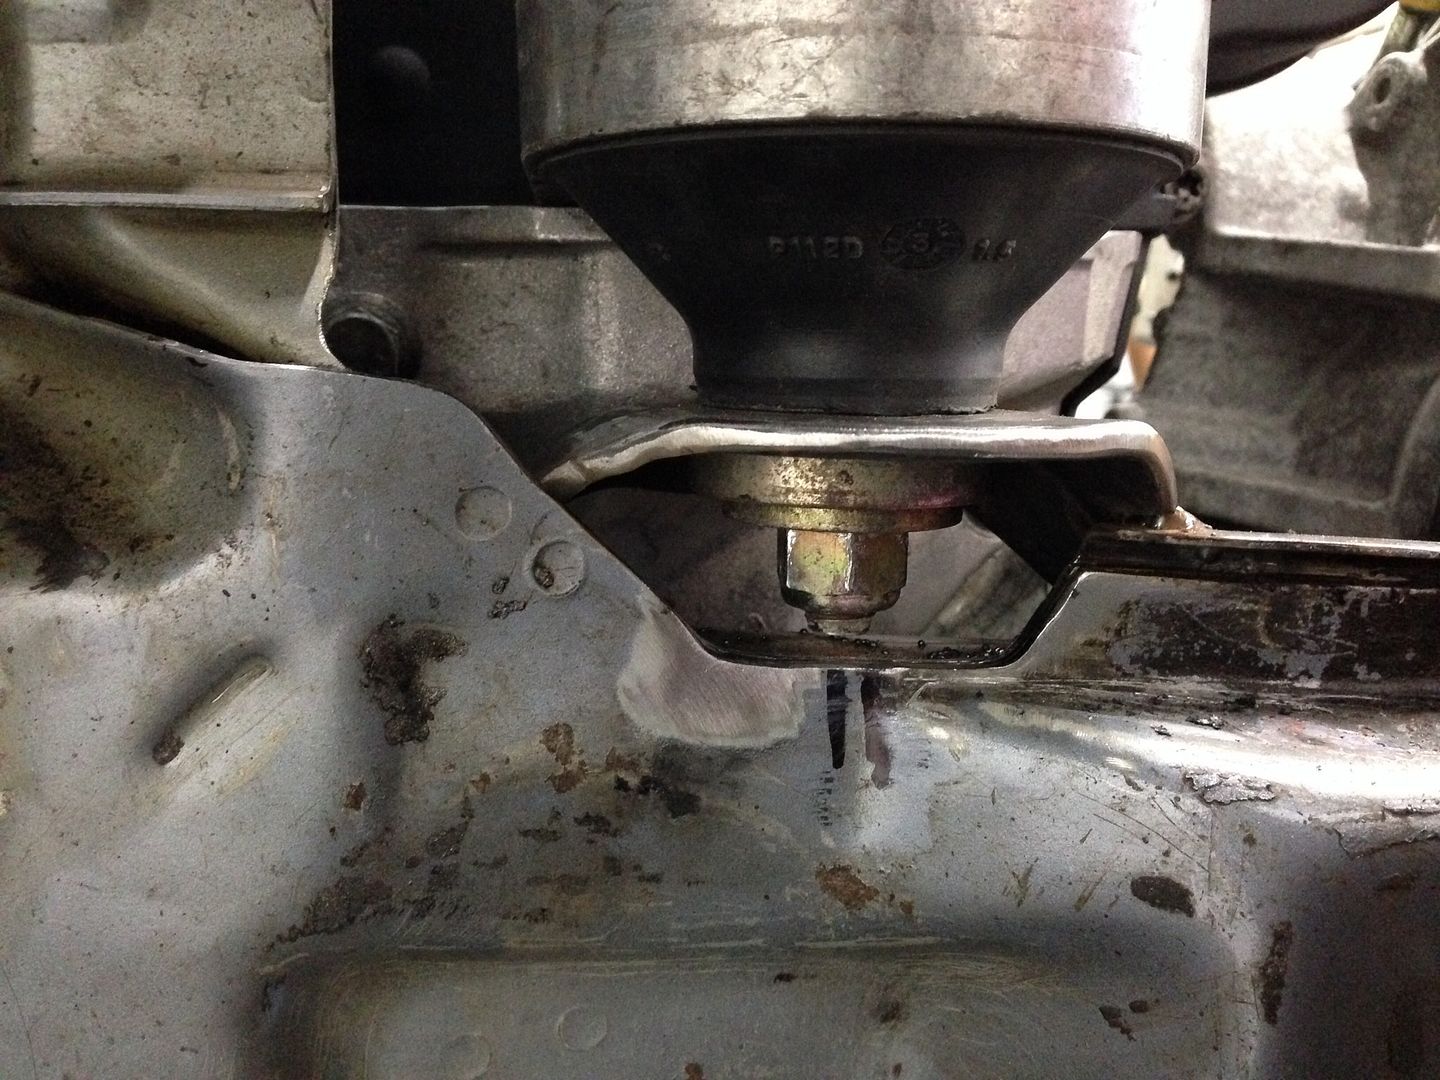
With that tacked in the engine and box would now hang by itself
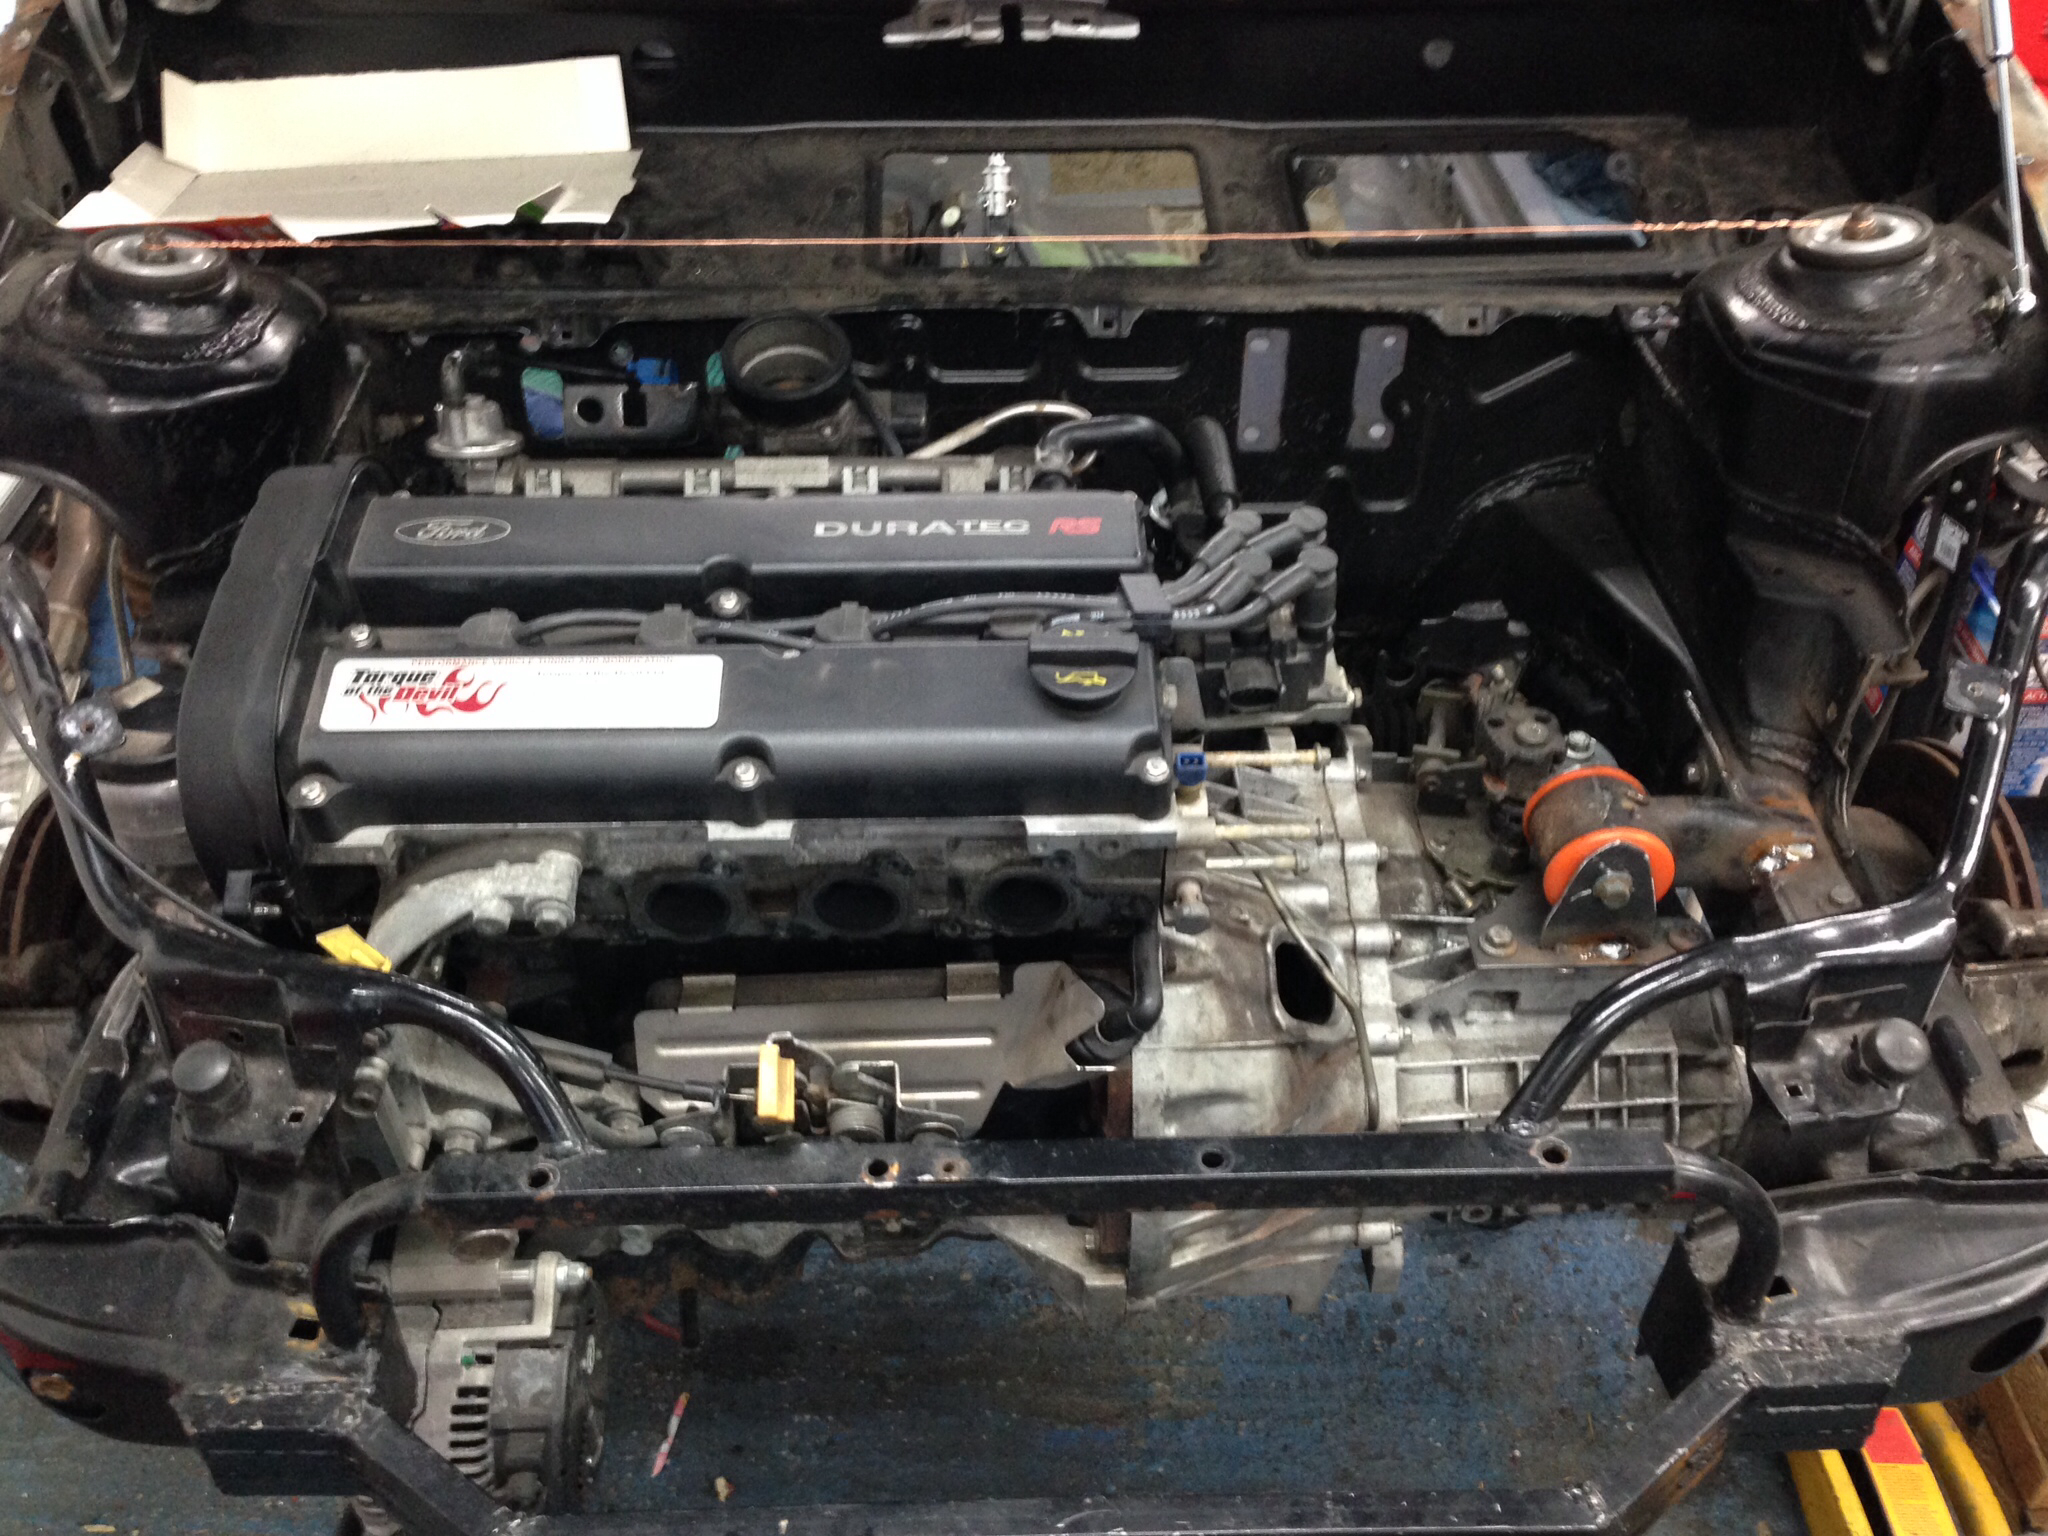
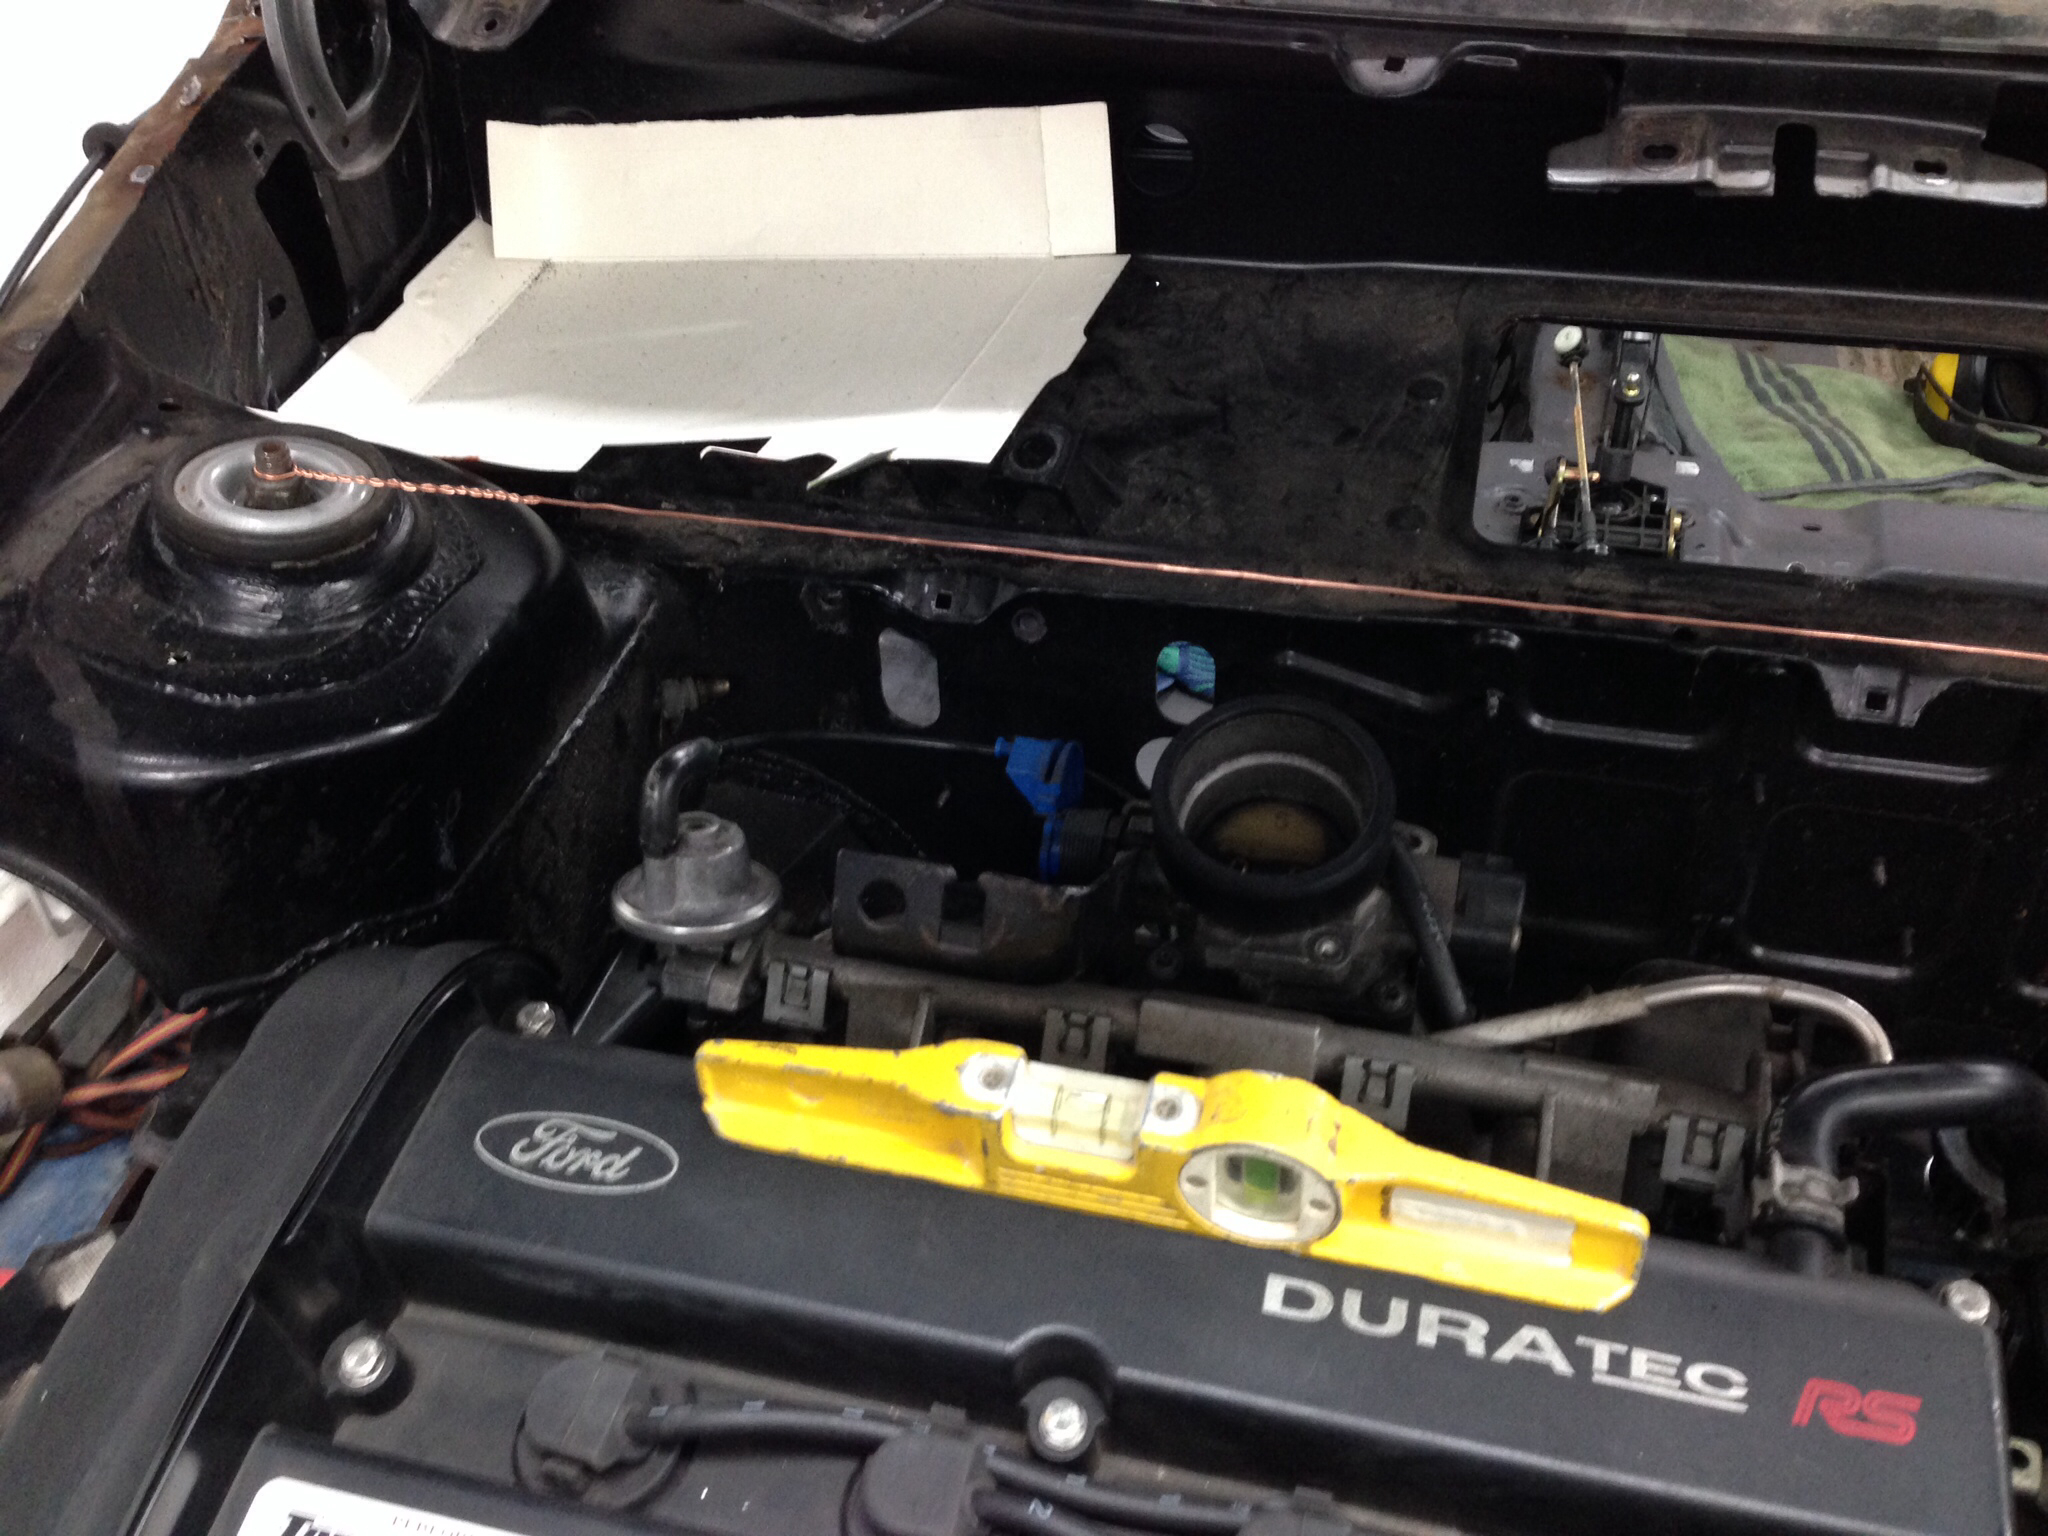
You can see the wire I used between the turret tops to allow me to line the engine up straight in the bay - bit crude I know but did the job pretty well
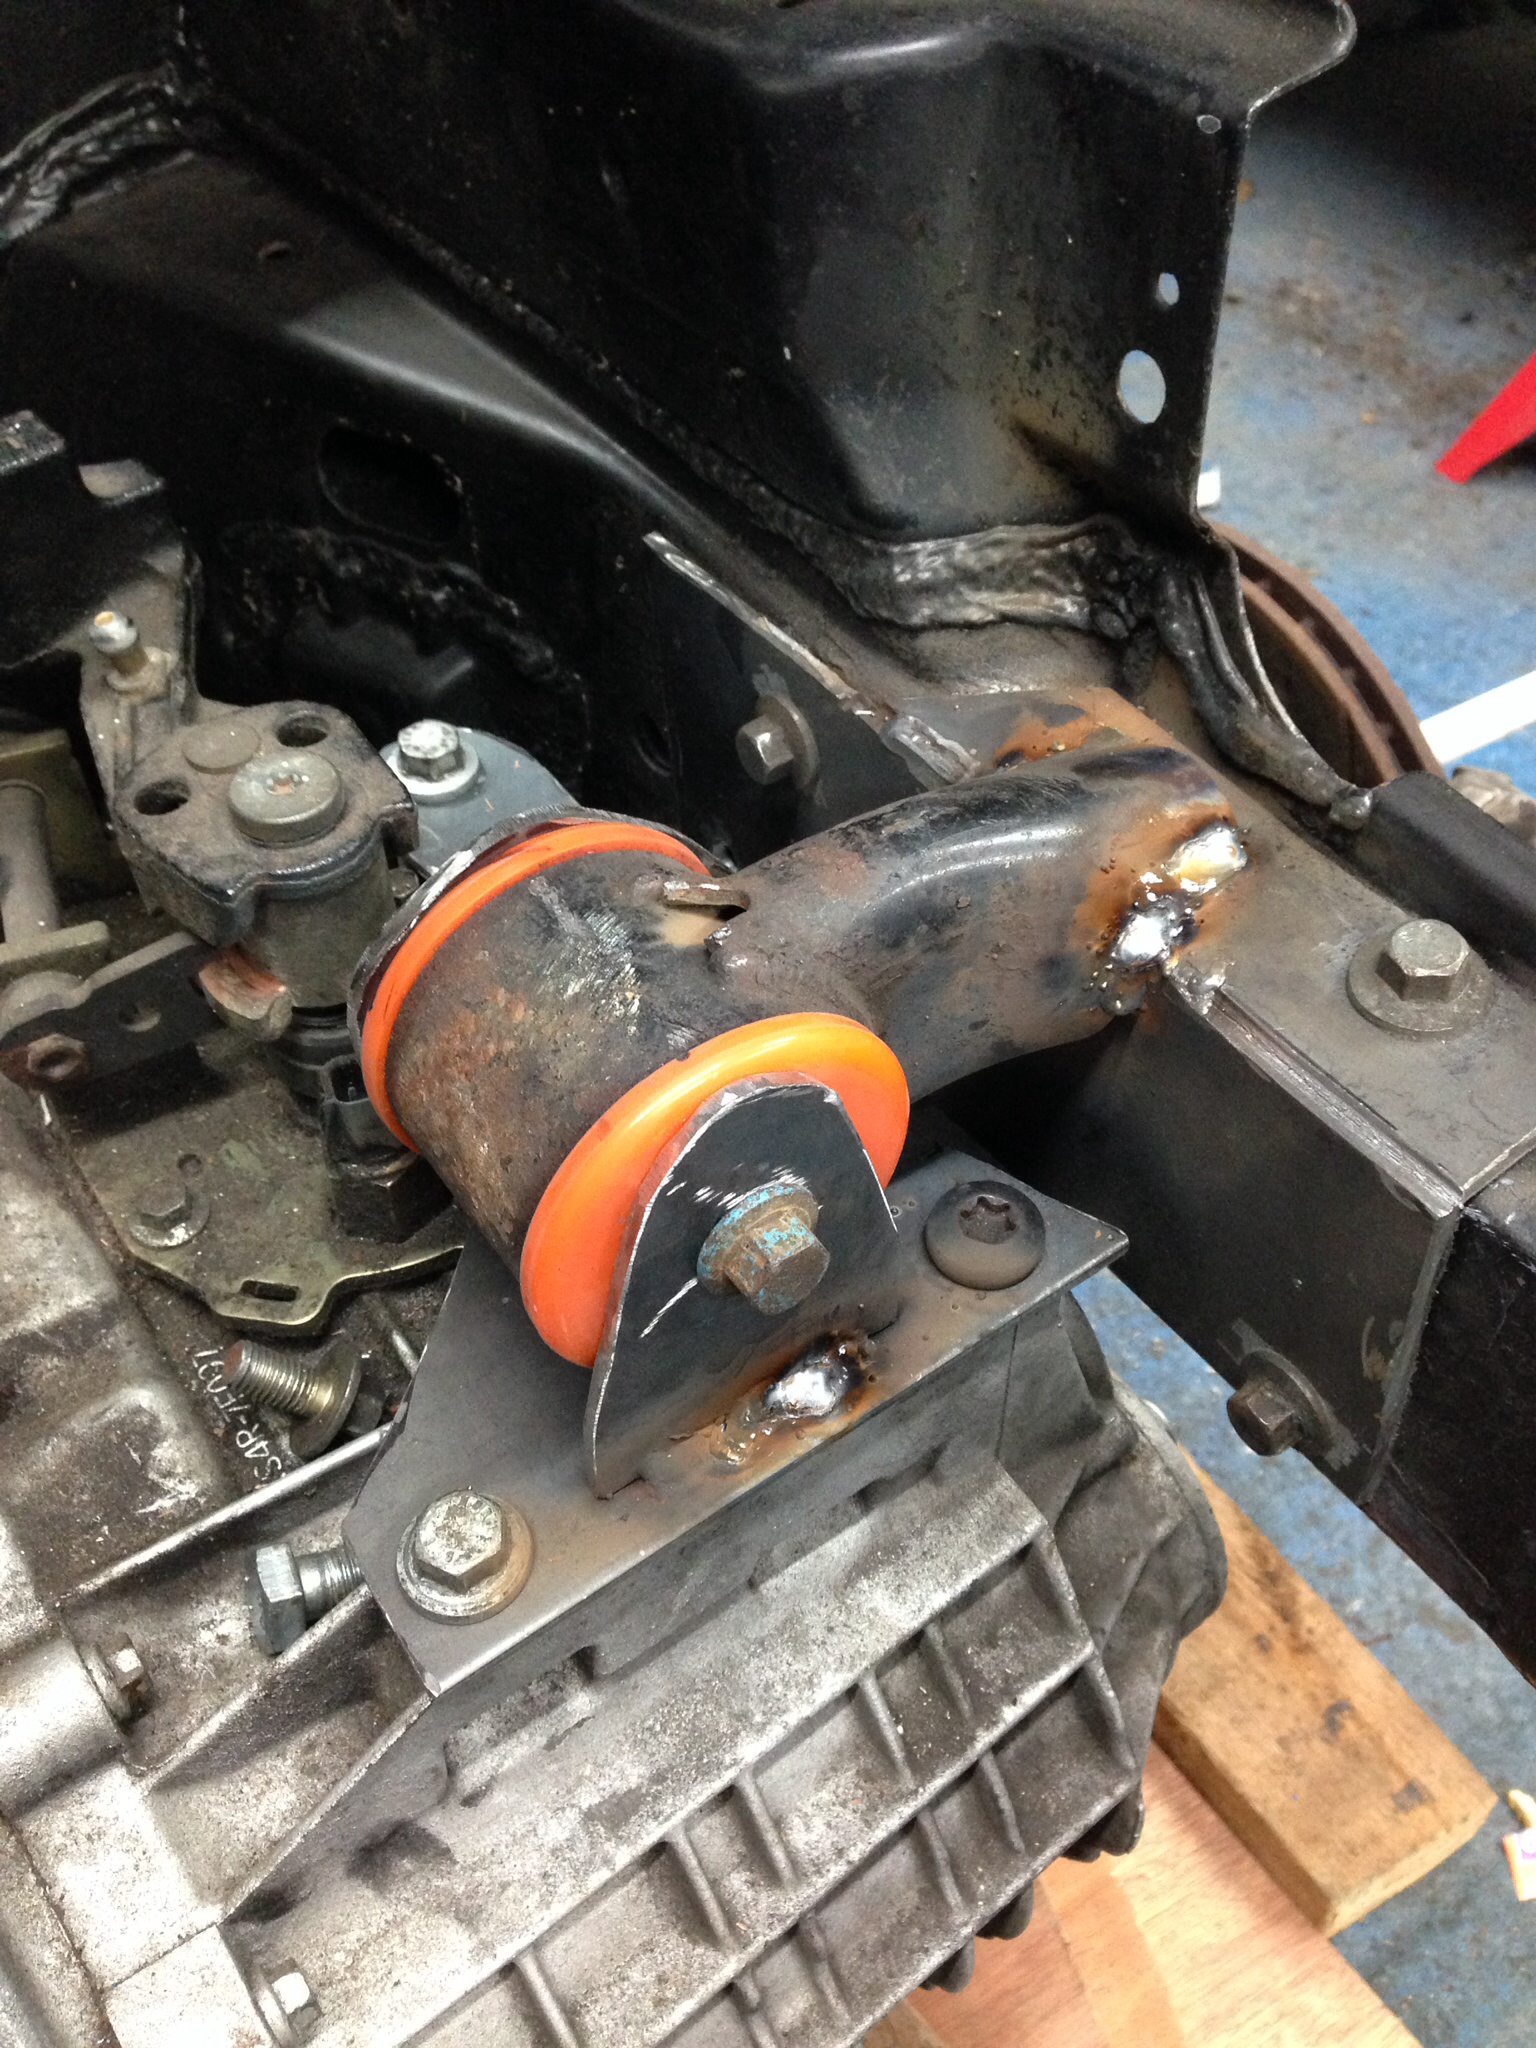
Next up was the torque mount to fabricate from the original mount positions on the bottom of the car
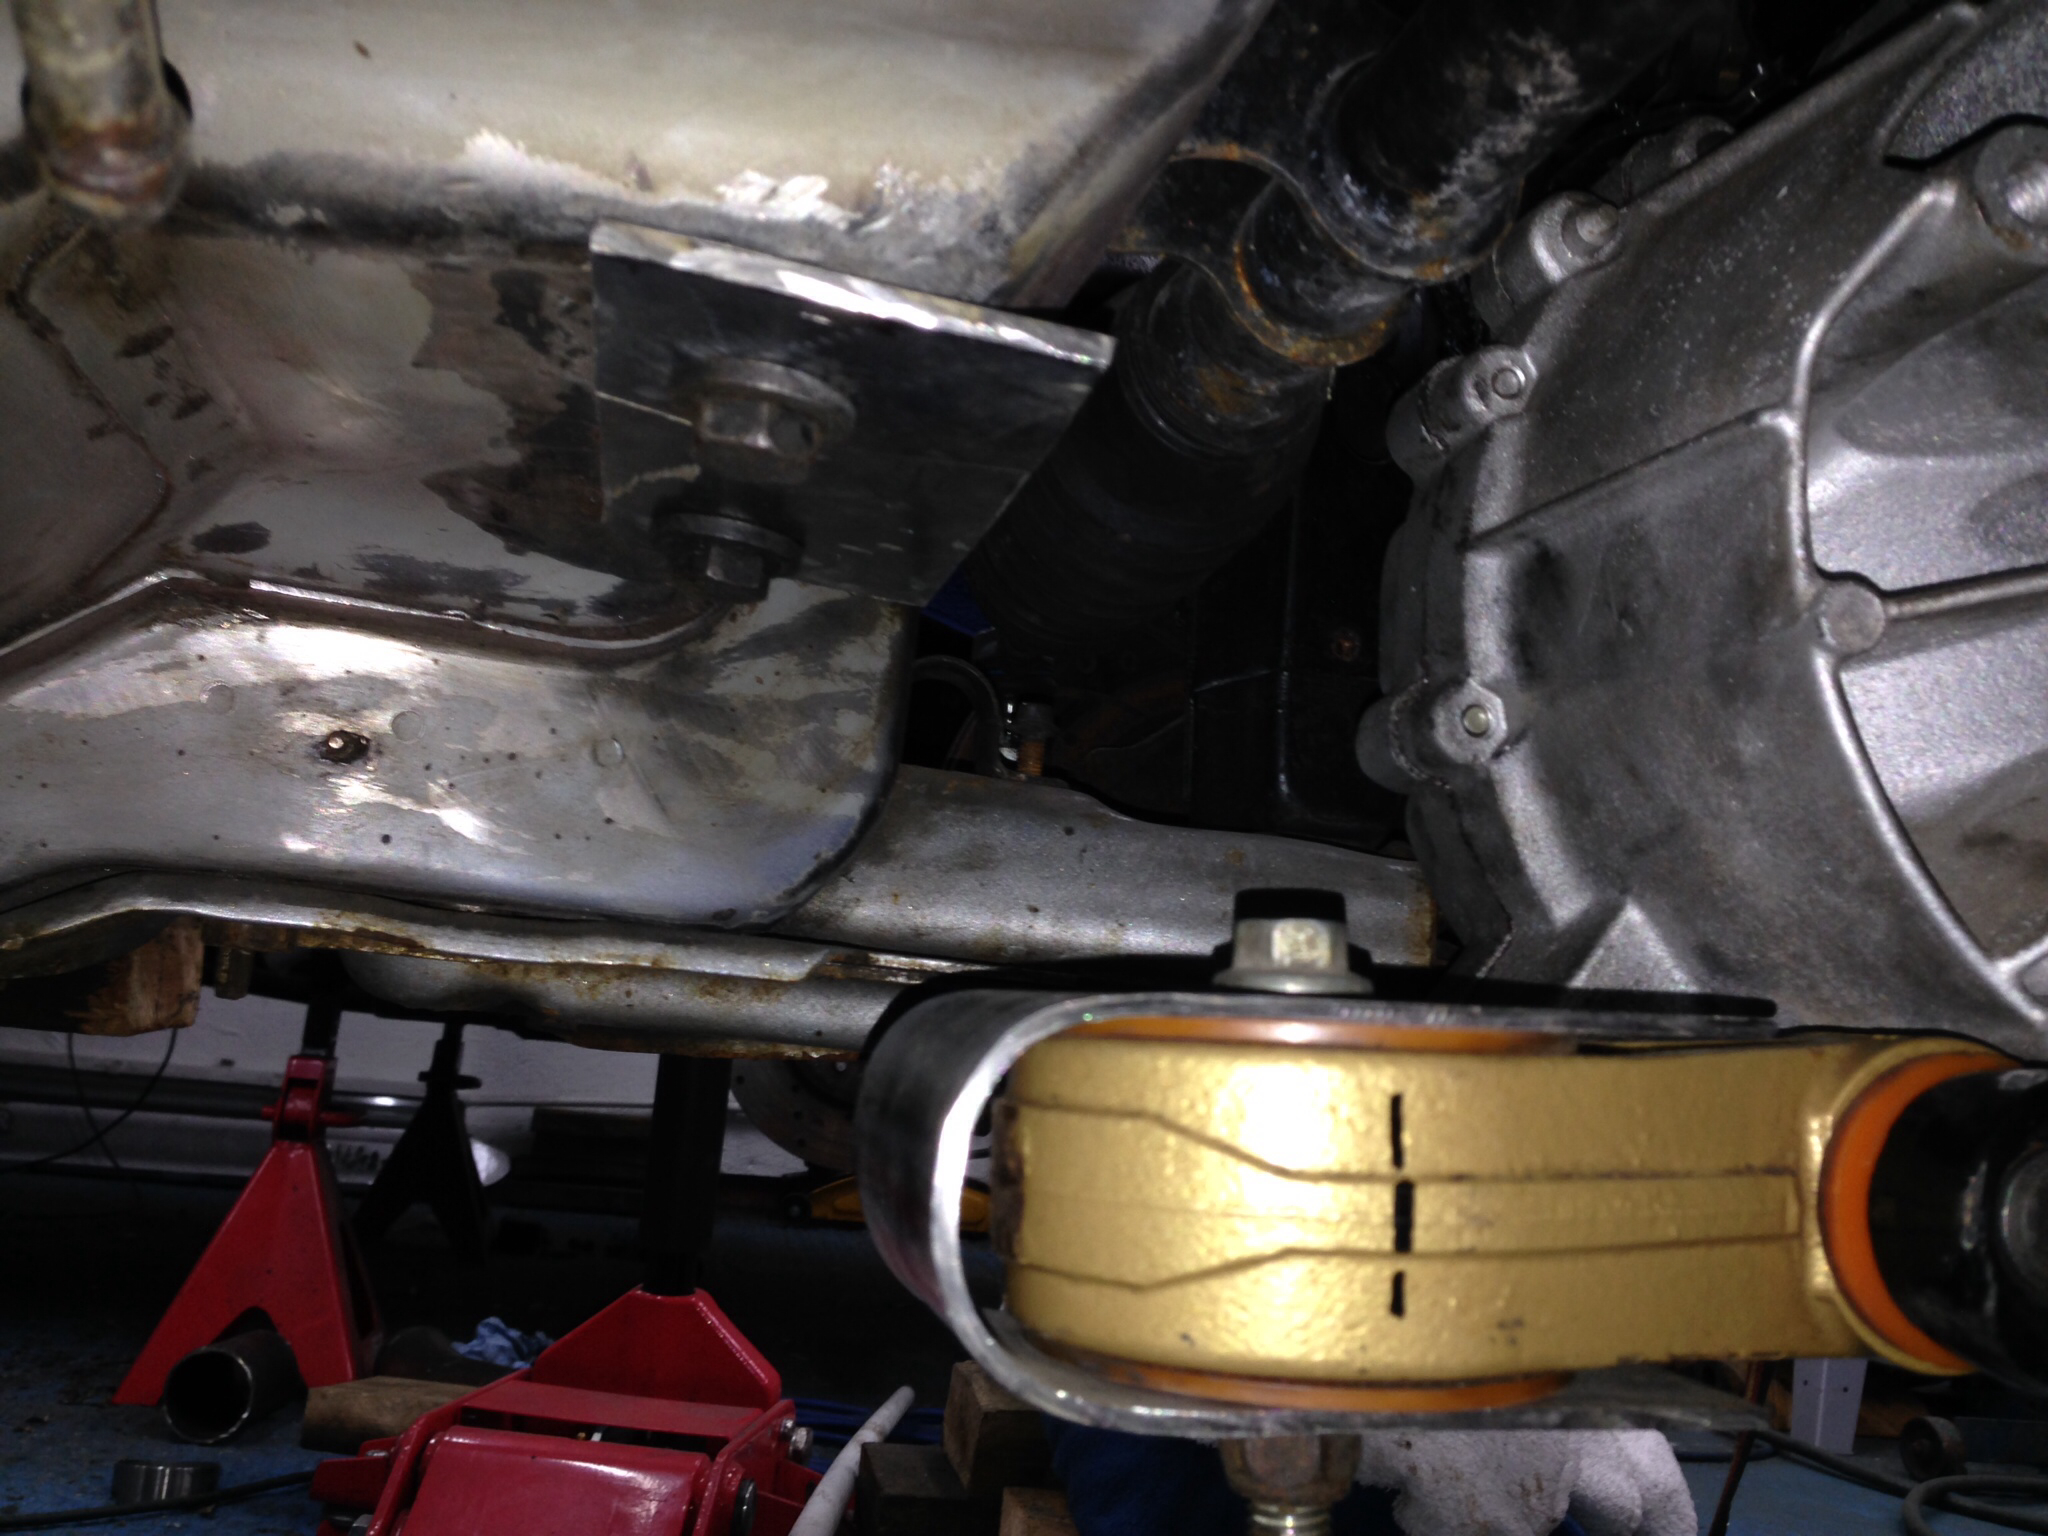
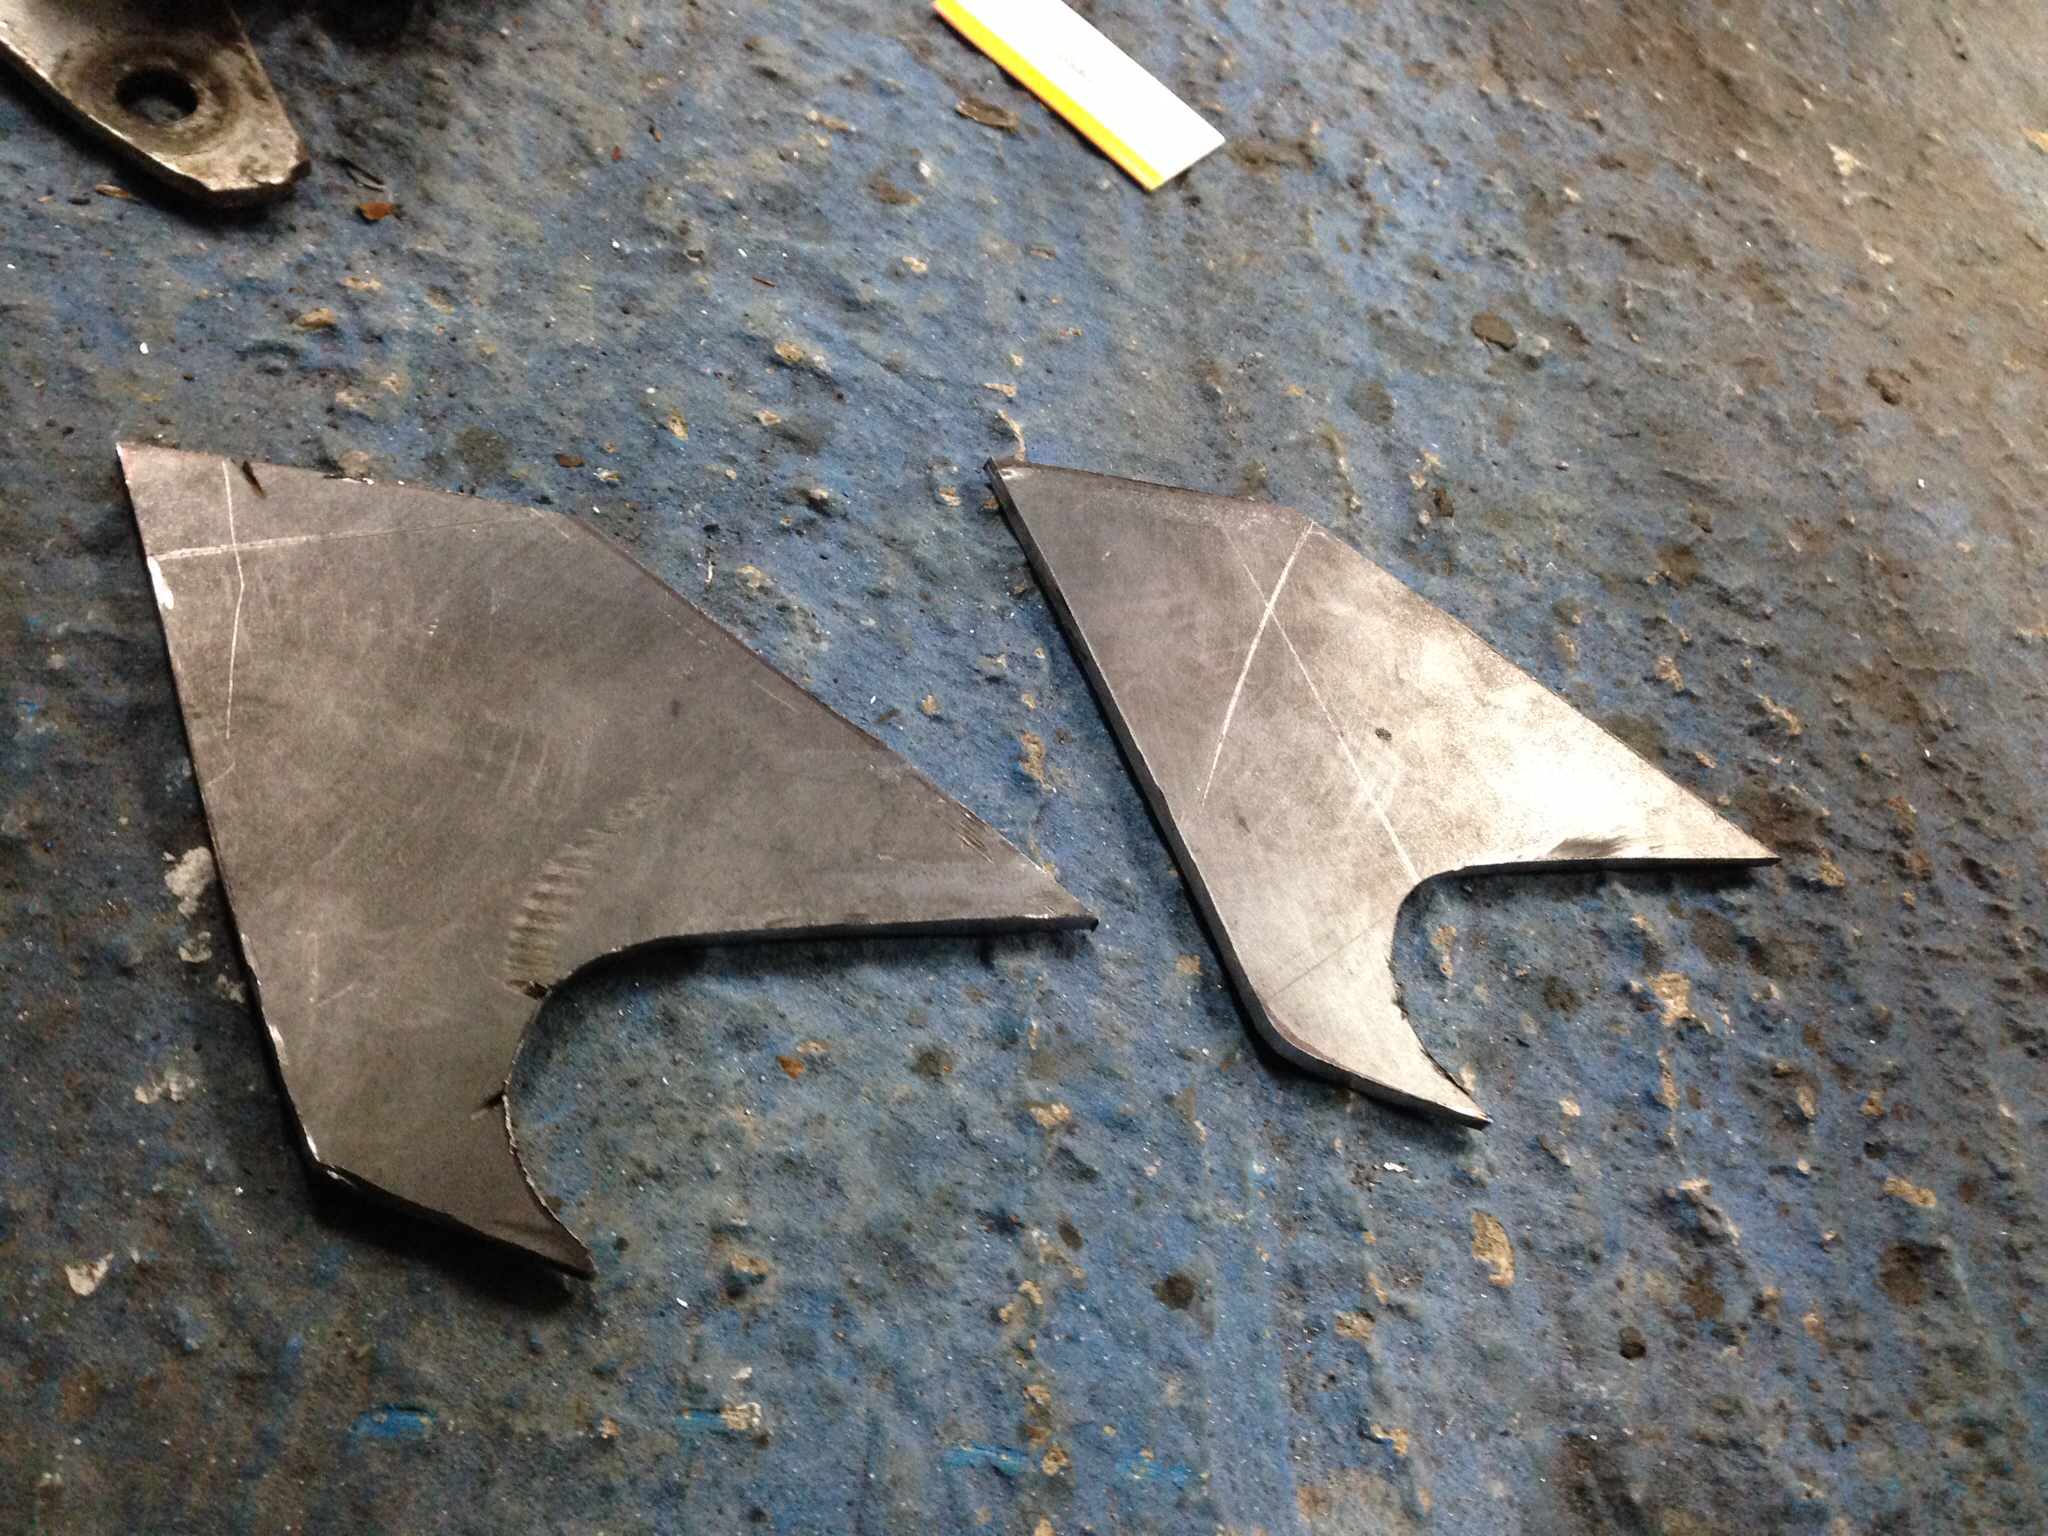
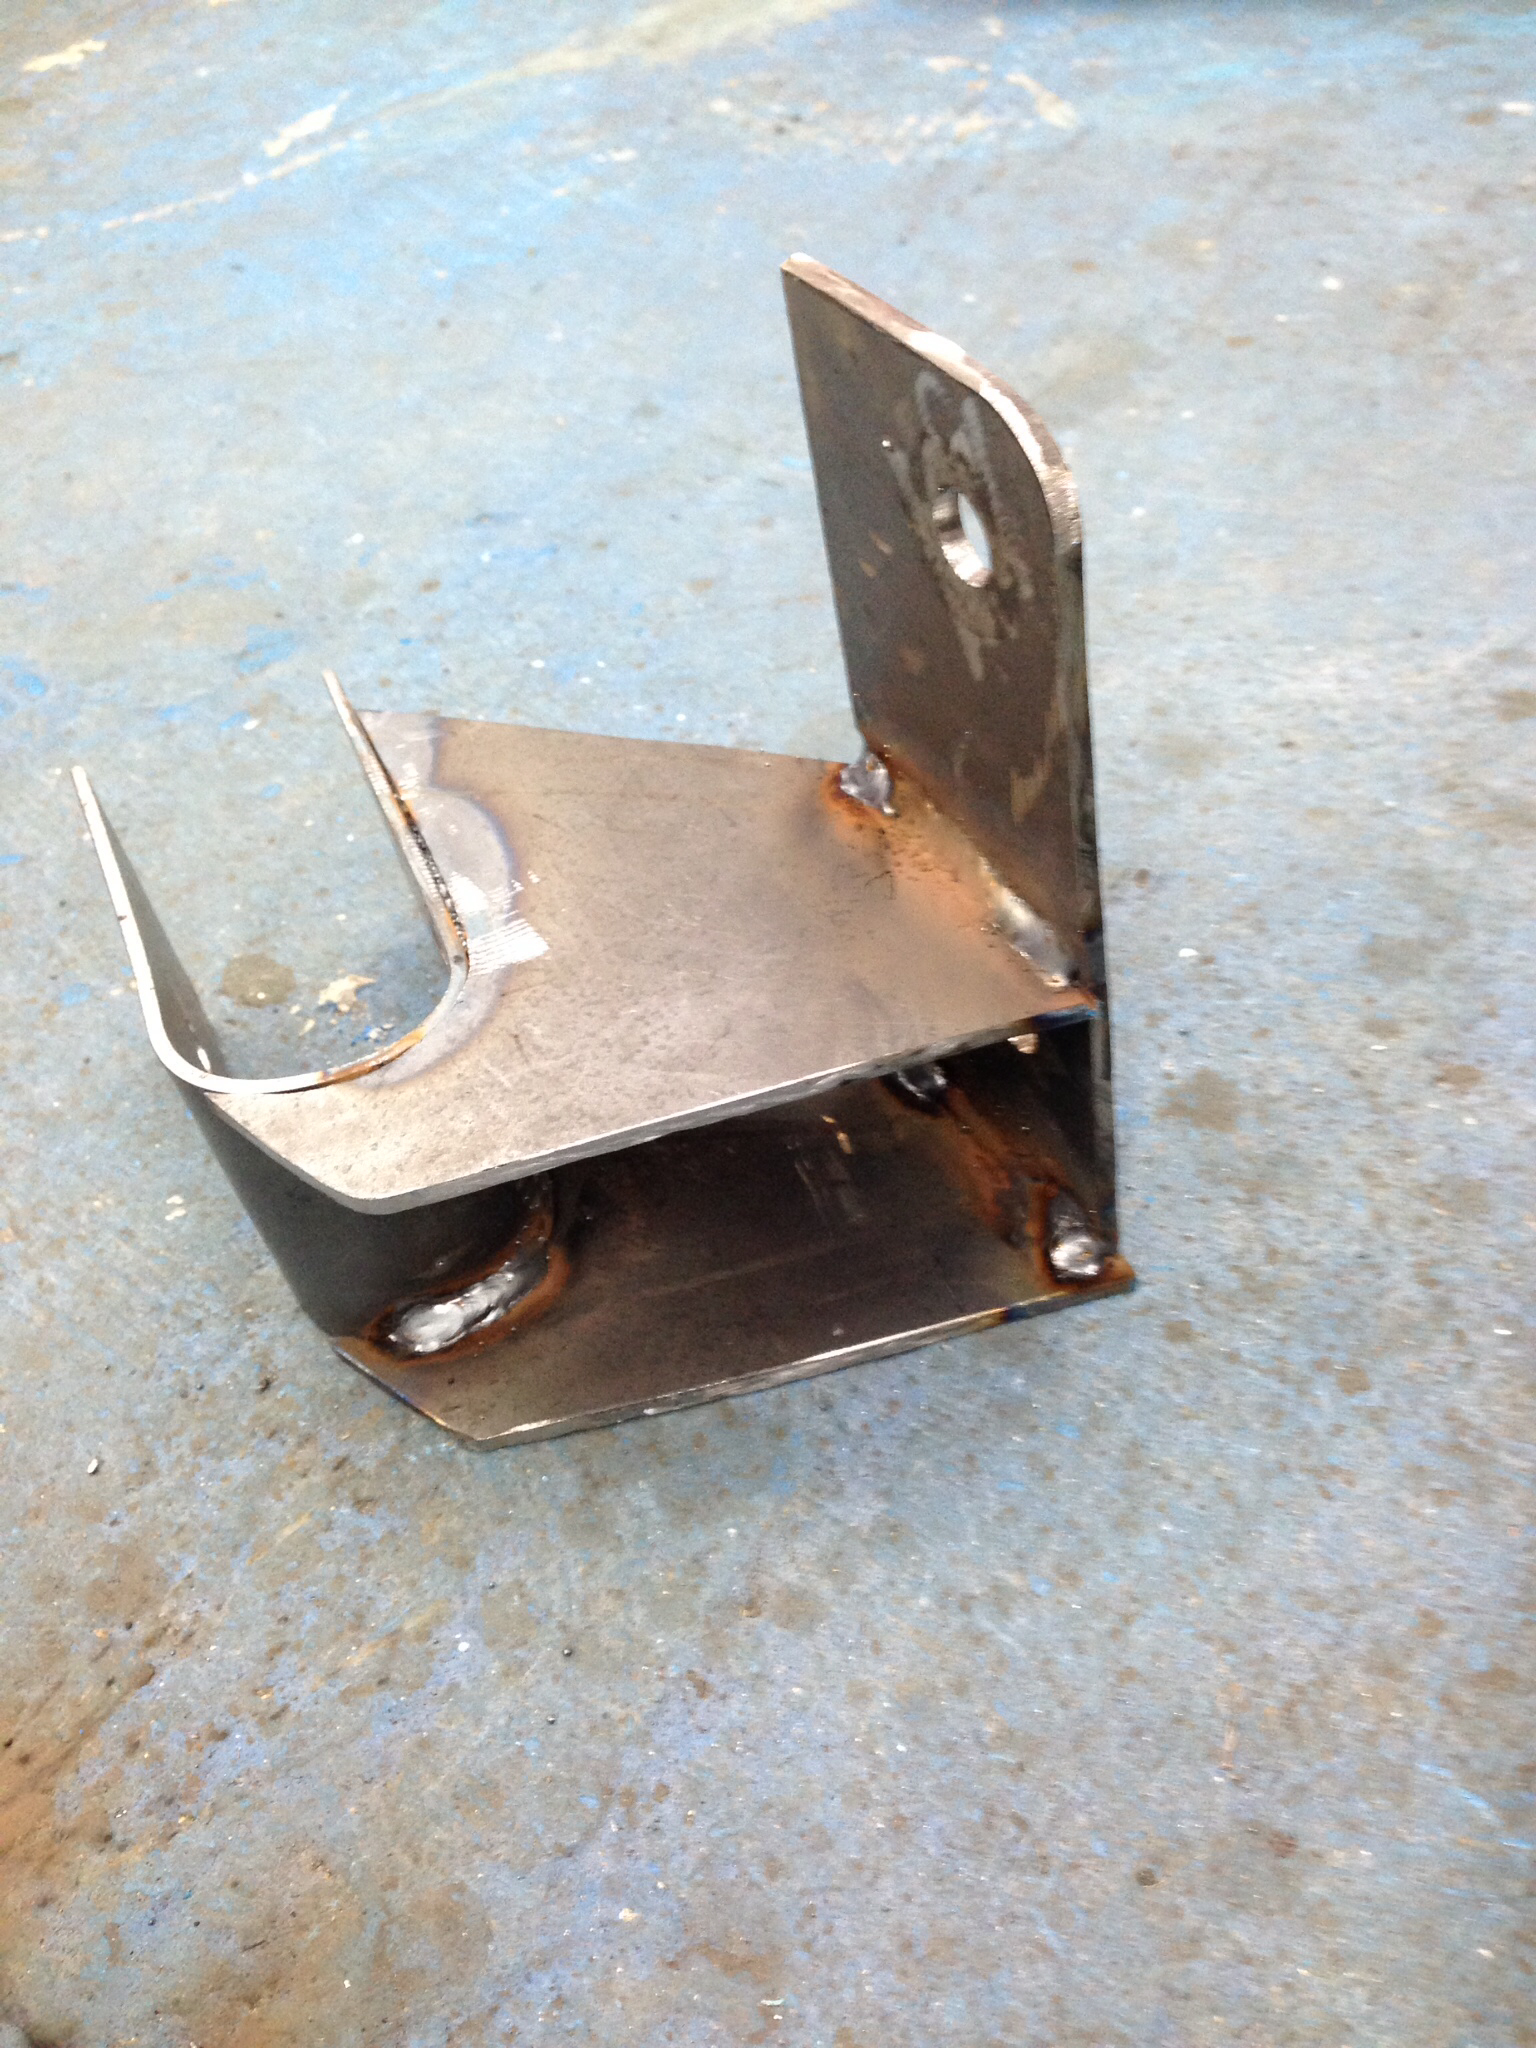
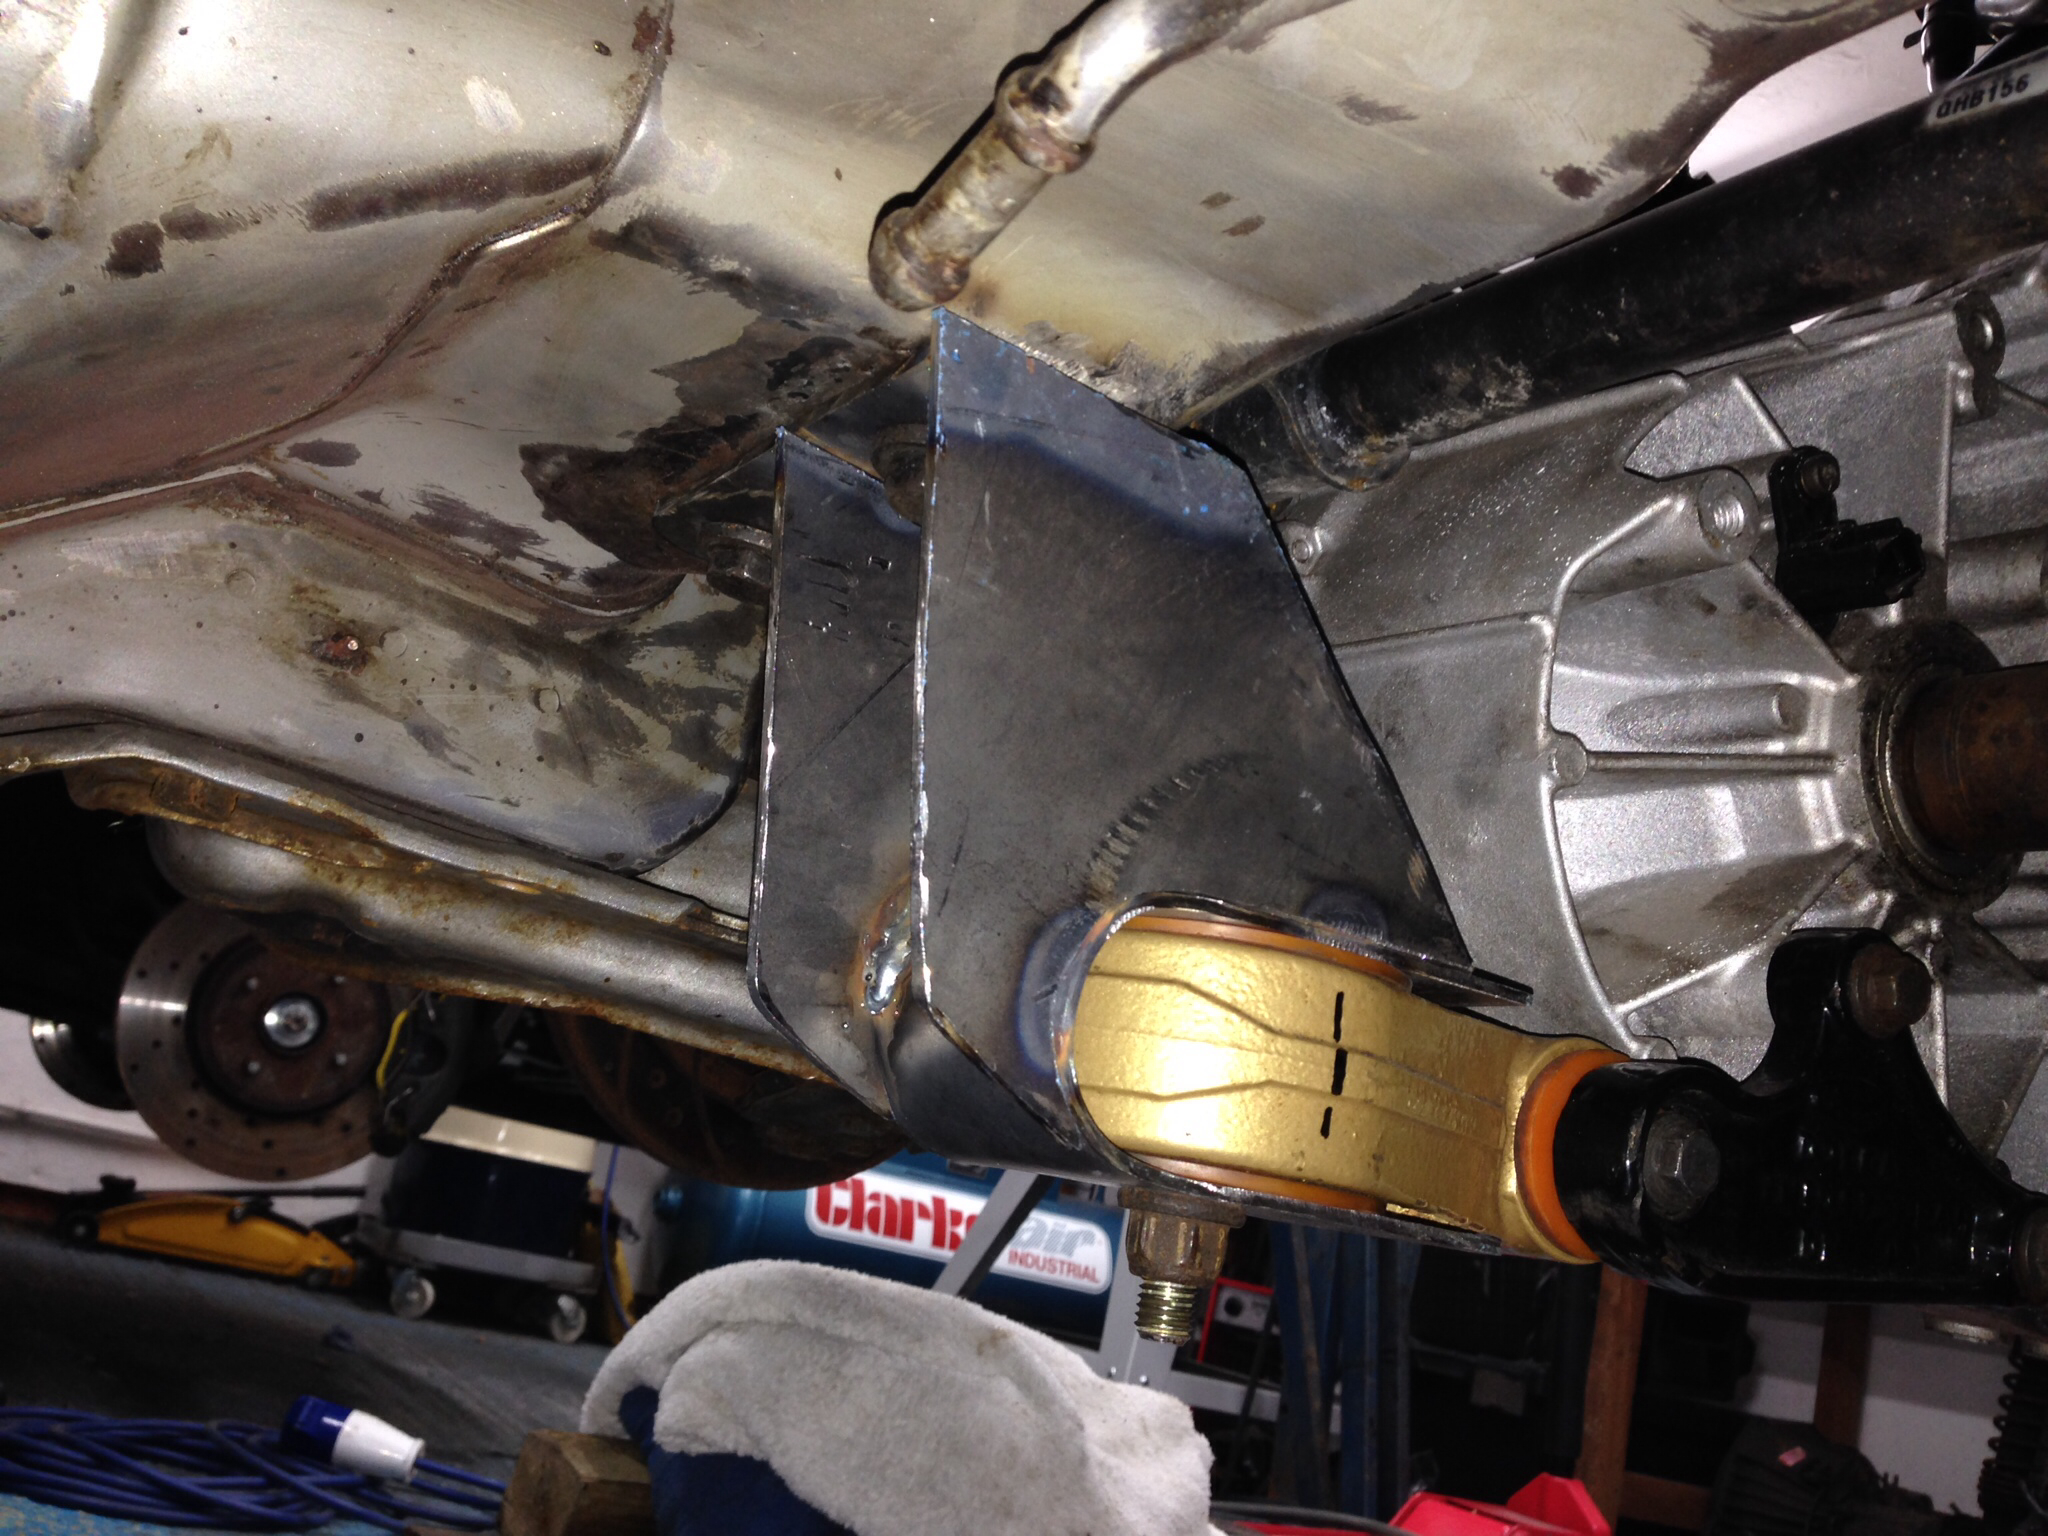
With this in place the engine and box are rock solid as they should be - all in all pretty pleased how it turned out - just still hours to spend finishing them off!!
Thanks for looking.
Lining everything up:
Once lifted in I quickly realised this section would need to be cut but I was pretty sure by this stage all the front original fab work will go
Once in place and held there I started to mock up the mounts:
This is only roughly trimmed and tacked in place, once it all comes out I will trim and brace the mount and give it a paint
Engine side - I wanted to use the standard focus mount ( will be swapped for a vibra technics version later) as it's a relatively small mount
A very trimmed version of the standard focus metal mount plate
Chassis lip trimmed to allow access to the underside but
With that tacked in the engine and box would now hang by itself
You can see the wire I used between the turret tops to allow me to line the engine up straight in the bay - bit crude I know but did the job pretty well
Next up was the torque mount to fabricate from the original mount positions on the bottom of the car
With this in place the engine and box are rock solid as they should be - all in all pretty pleased how it turned out - just still hours to spend finishing them off!!
Thanks for looking.
Last edited by McCloud 85; 12-02-2014 at 09:50 PM.
 12-02-2014, 09:51 PM
#75
PassionFord Regular
Thread Starter
13-02-2014, 08:05 PM
#77
PassionFord Regular
Thread Starter
14-02-2014, 08:01 AM
#79
I've found that life I needed.. It's HERE!!

Join Date: Feb 2006
Location: wakefield
Posts: 1,007
Likes: 0
Received 0 Likes
on
0 Posts
 14-02-2014, 09:44 PM
#80
PassionFord Regular
Thread Starter
Really like that! Always thought if I didn't keep the Ka I would put the engine in something like that. Pleased with it? Must be a hoot to drive!