Fiesta RS Turbo track car project - Dash flock :-)
 15-07-2012, 08:33 AM
#1
Spanner monkey
Thread Starter
Thought i'd start a thread of my project.
Will be updating as and when i can as i have two kids, full time work and all sorts of other stuff always going on so can't always get on it lol.
I did start a MK4 Escort Van but gave up as i wanted to make it a minter and decided that to buy EVERYTHING new for it would be far to expensive and basically unpractical.
So that was E bayed and i decided i wanted to have a track toy which then i wouldn't be fussed about putting 2nd hand / not mint parts onto!
I came across a Fiesta turbo that was advertised on here that had a smoky engine and was cheap, so it seemed the perfect base for me.
A quick look around it, a price agreed, and it was mine
I collected the car on a trailer that i bought to get it around on...
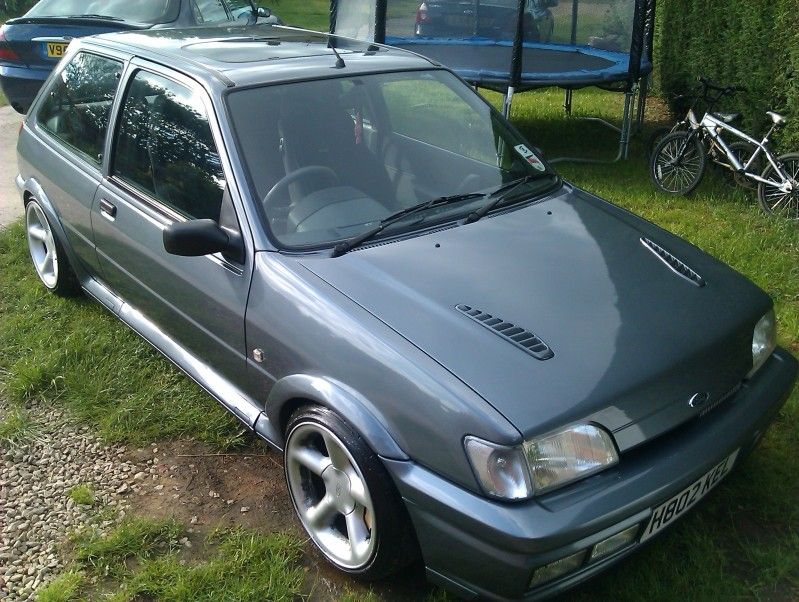
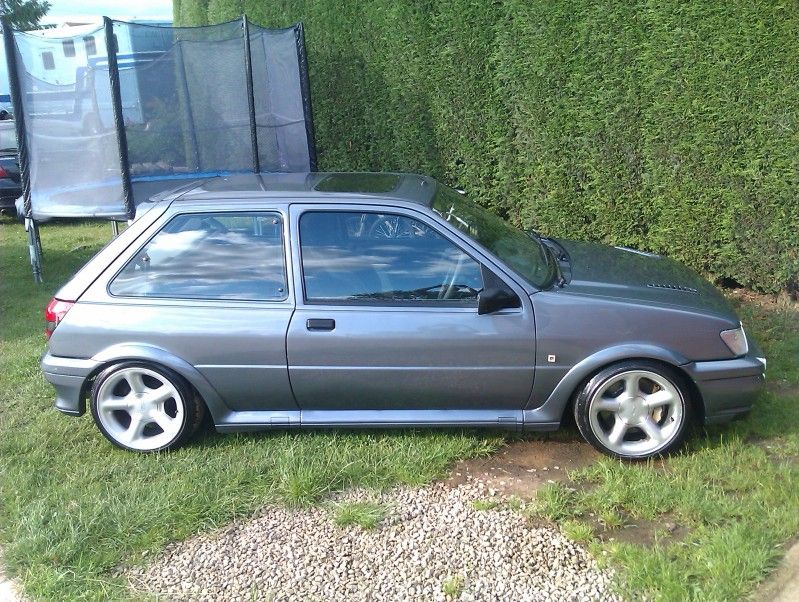
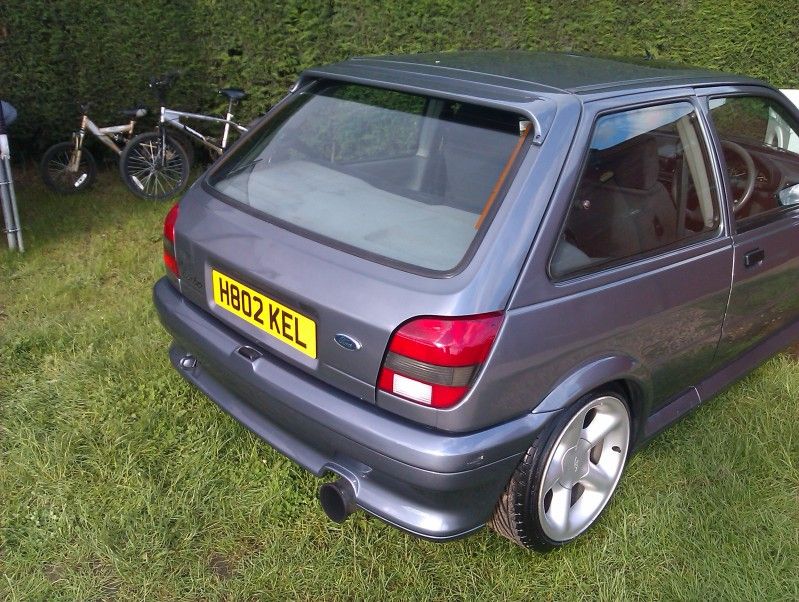
The car has been painted but it is quite a bad job with lots of flat areas and some sunken paint here and there, but it still looks presentable from a few feet away and once it's stickered, it wont notice anyhow!!
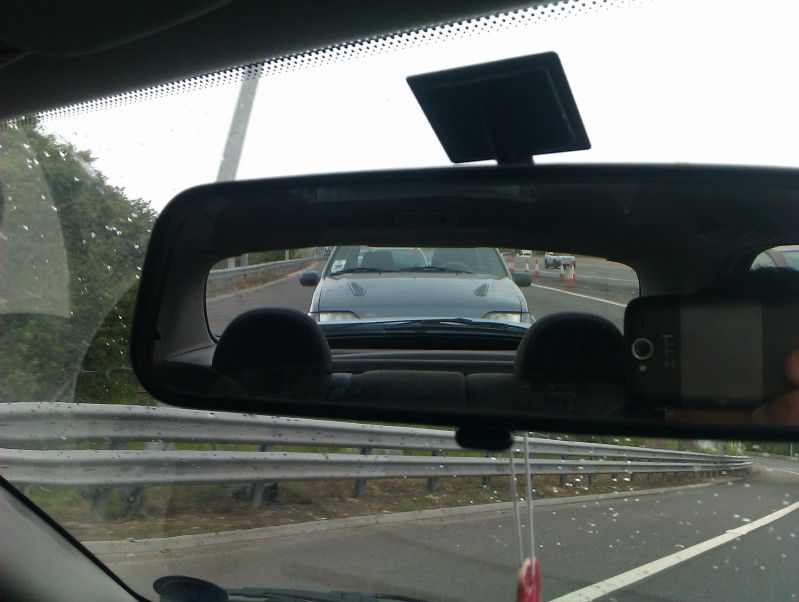
The car..
Also had a right result as the car is fitted with hi spec 6 pots and 300mm discs and a set of avo coilovers so that saves a fair bit of wedge for me
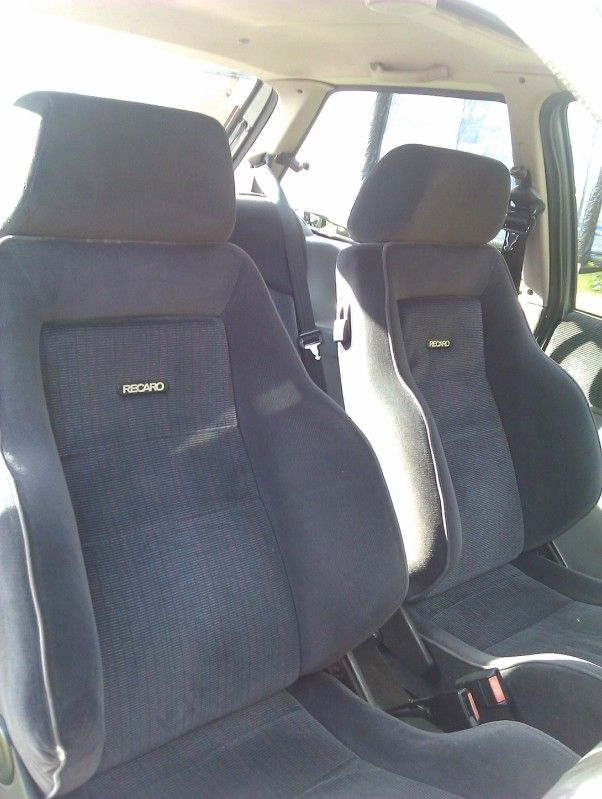
First job i did was to strip the inside, the interior was very tidy and i managed to get �150 for the front and rear seats and �80 for the rest of the panels, carpets and plastics etc so was pretty chuffed with that!!
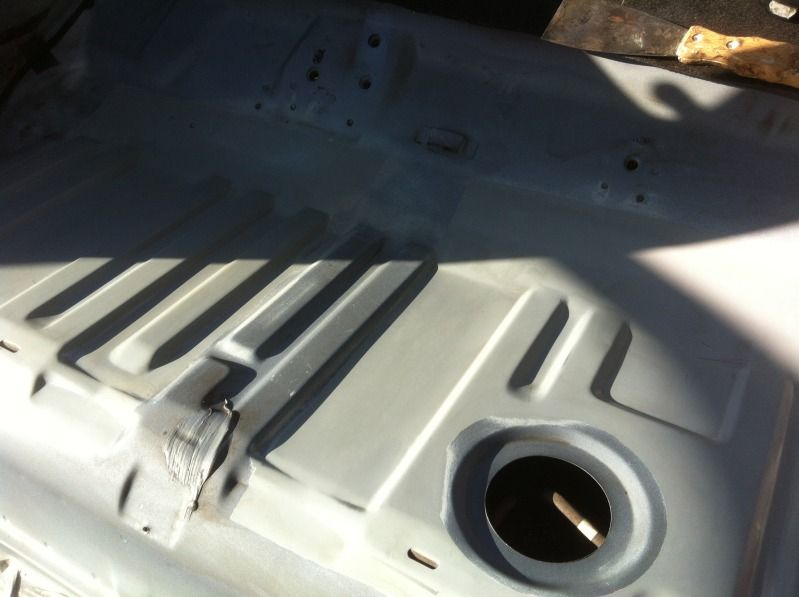
The floor to my surprise was very good, two little plates had been added at some point to the front corners but i want to tidy them a bit in the future.
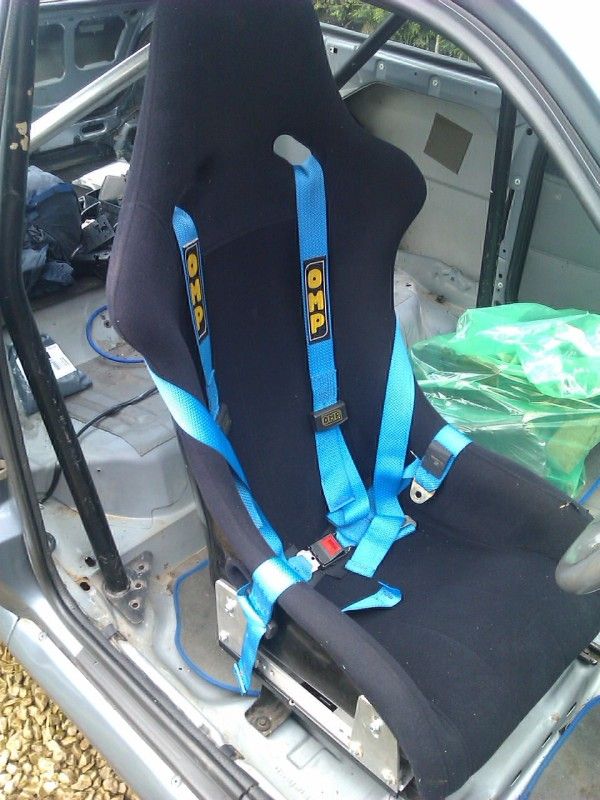
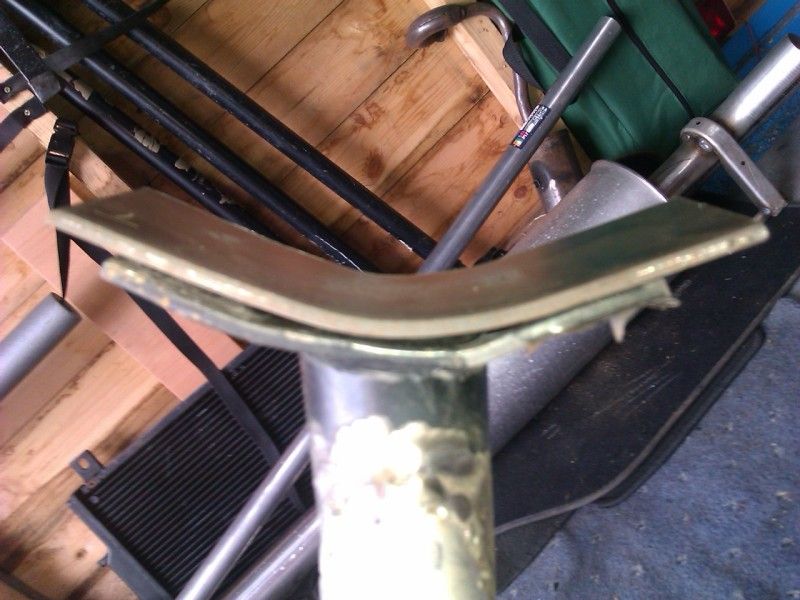
While on e bay one day, i noticed a set of unbranded bucket seats for �250 buy it now, They are fibreglass backed so very light, came with harnesses ( which will be changed to the better type ones and ally side mounts!
I Hit the buy it now button and set off to norfolk to pick them up. To my surprise, they are mint!
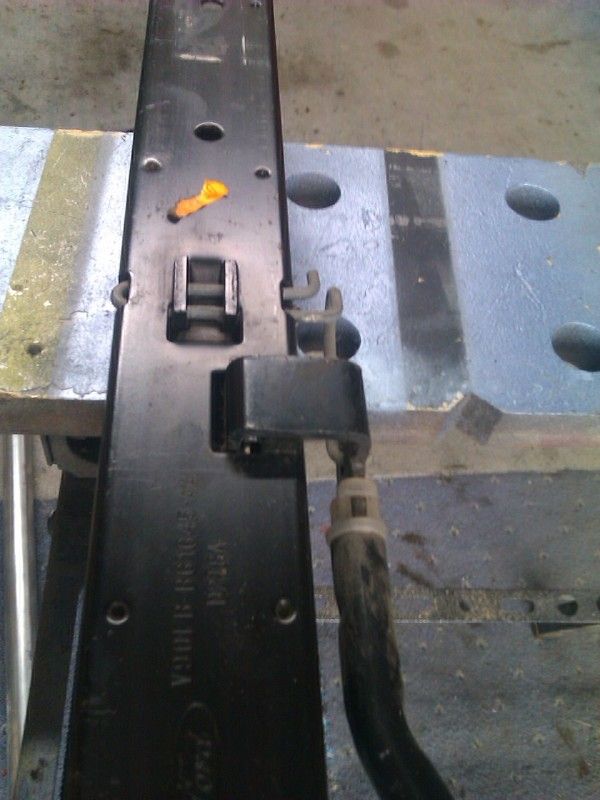
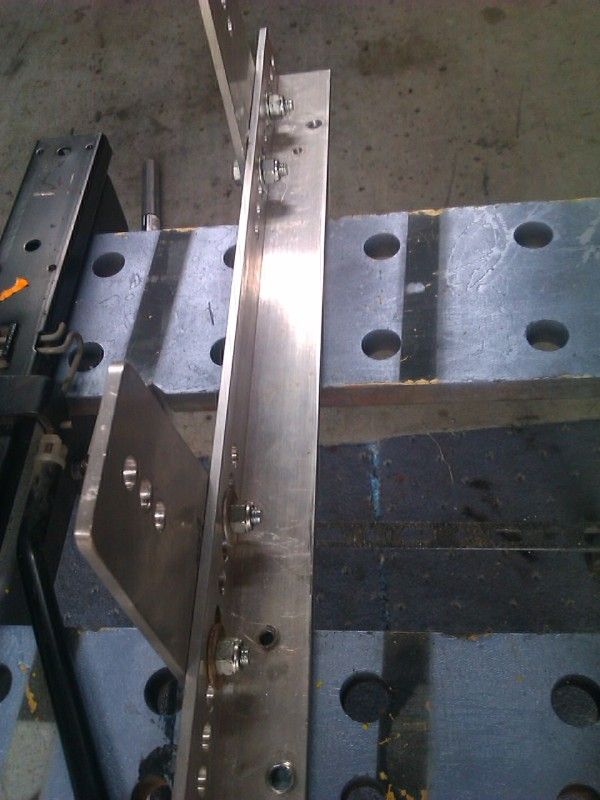
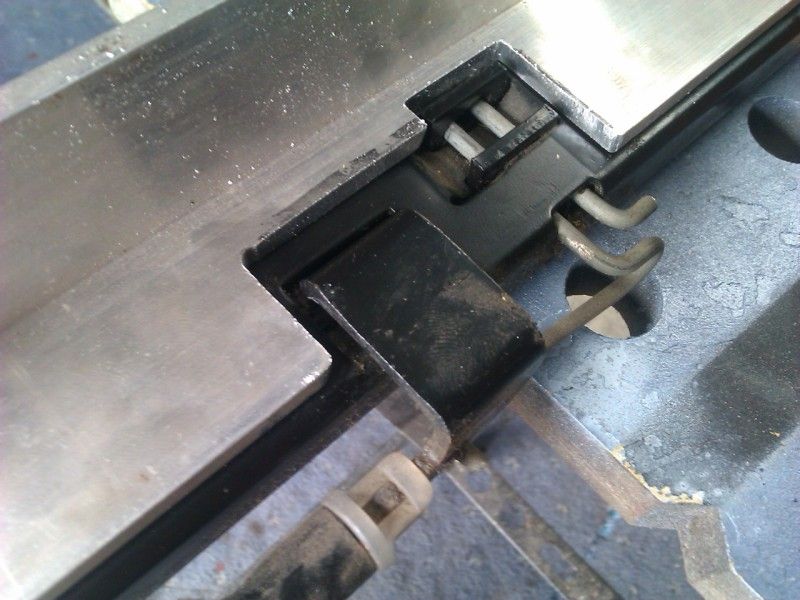
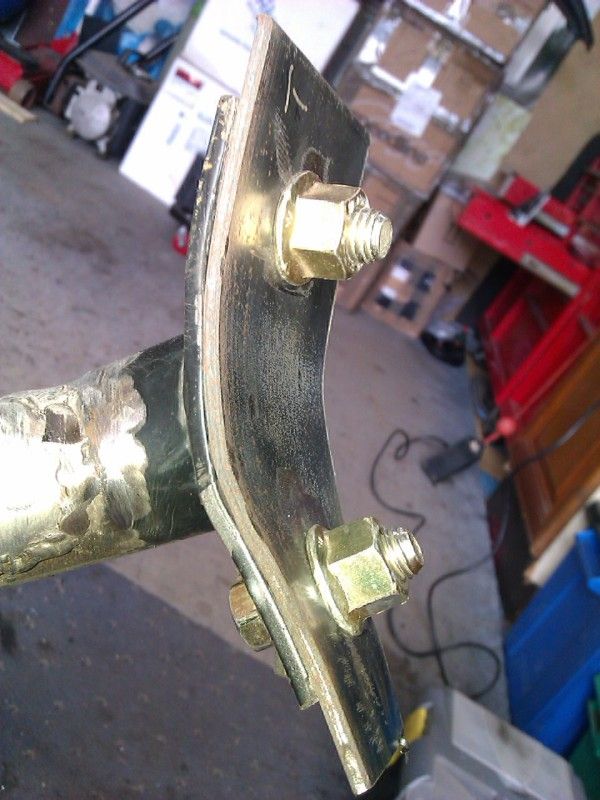
I decided that i wanted to mount the seats on the adjustable runners still for practicality so set about mounting the side mounts to the runners.
I needed to nibble a section out of the side mount plates to clear a raised bit on the RST runners but that was it ( apart from shortening the side mount plates also! )
Raised bit on the rst runners
Ally side mounts
Material removed to fit together
And one seat fitted for trial - Well chuffed with the result and price!!
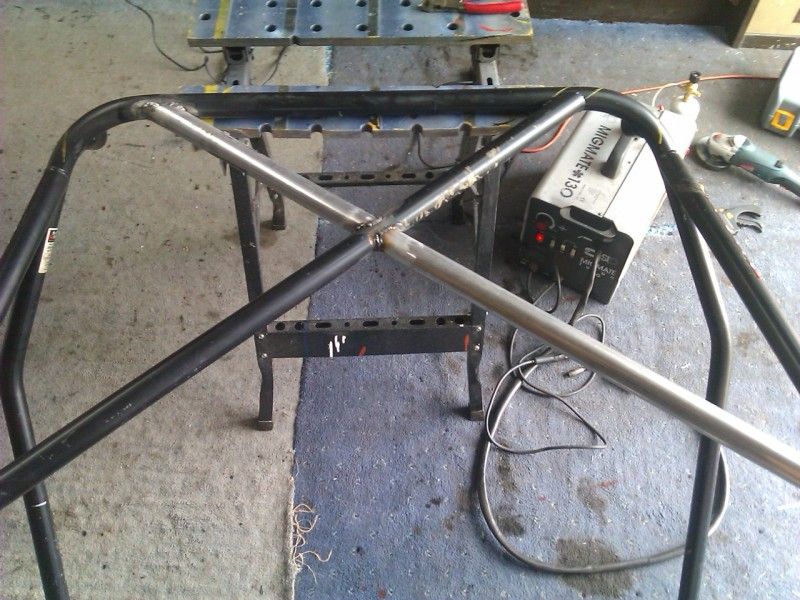
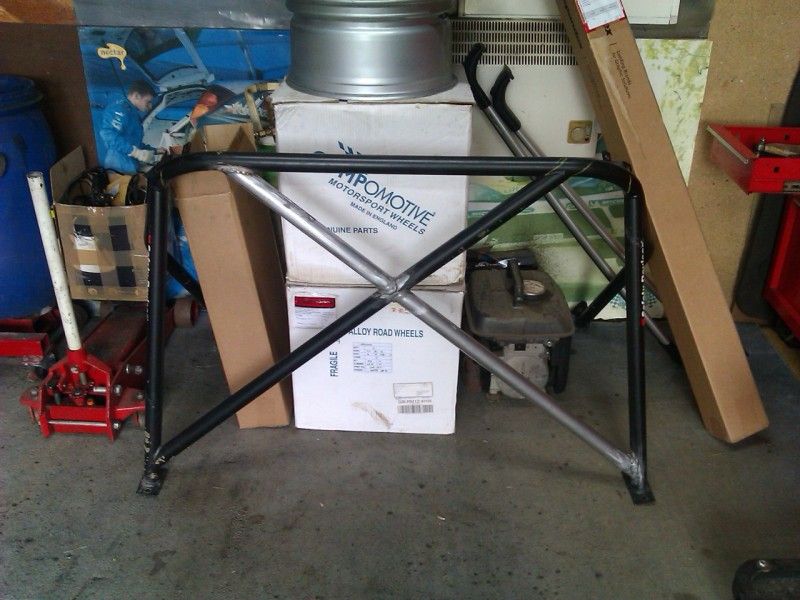
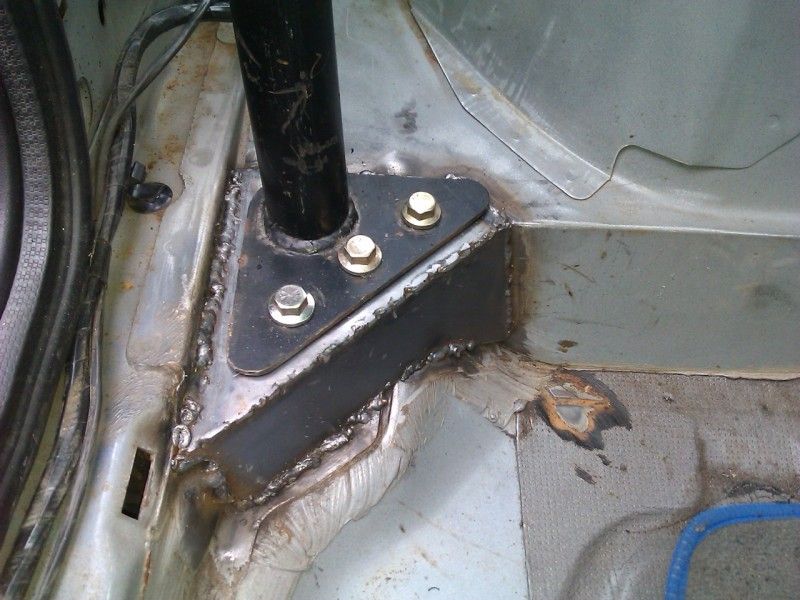
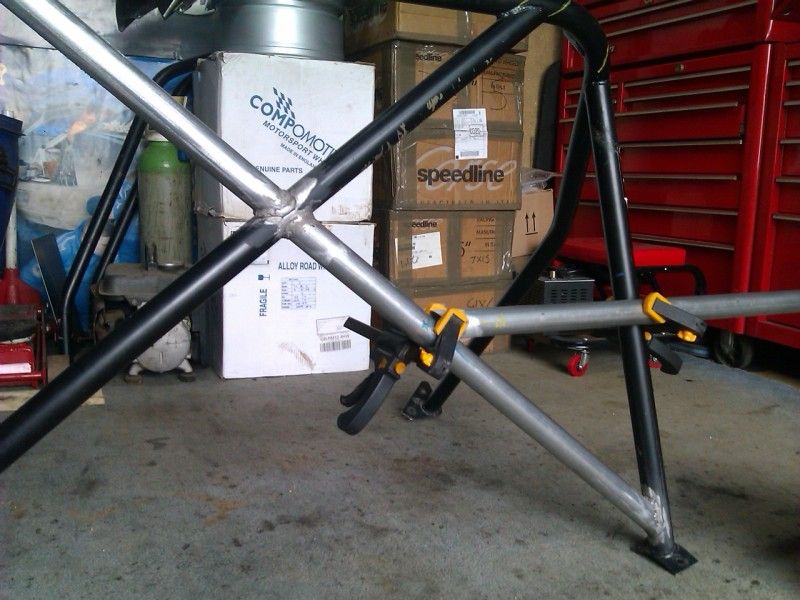
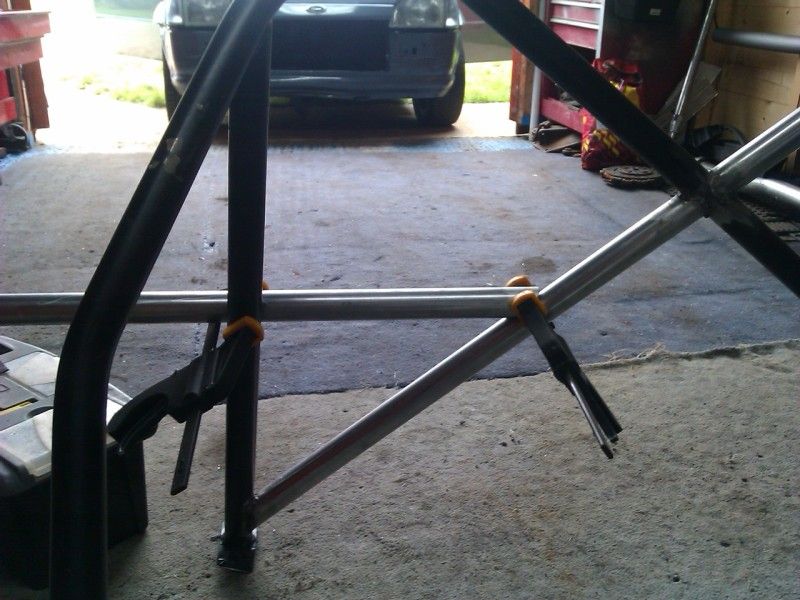
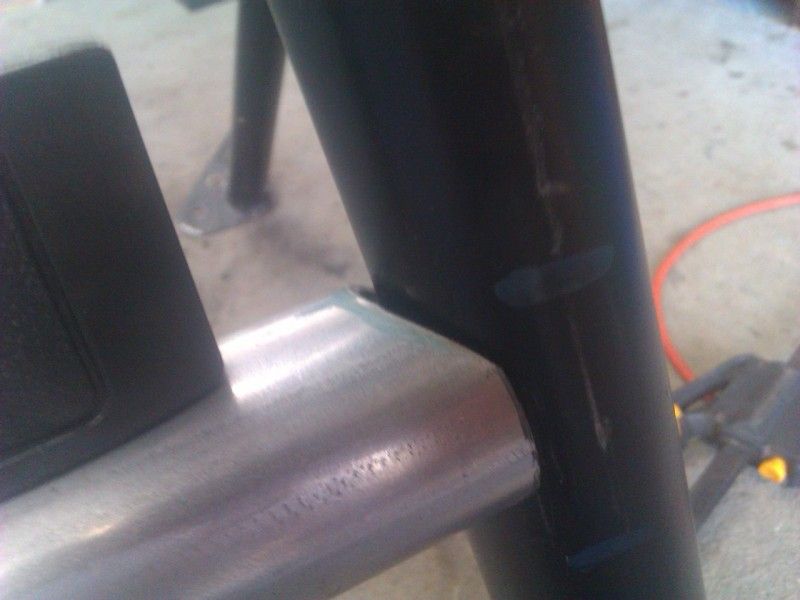
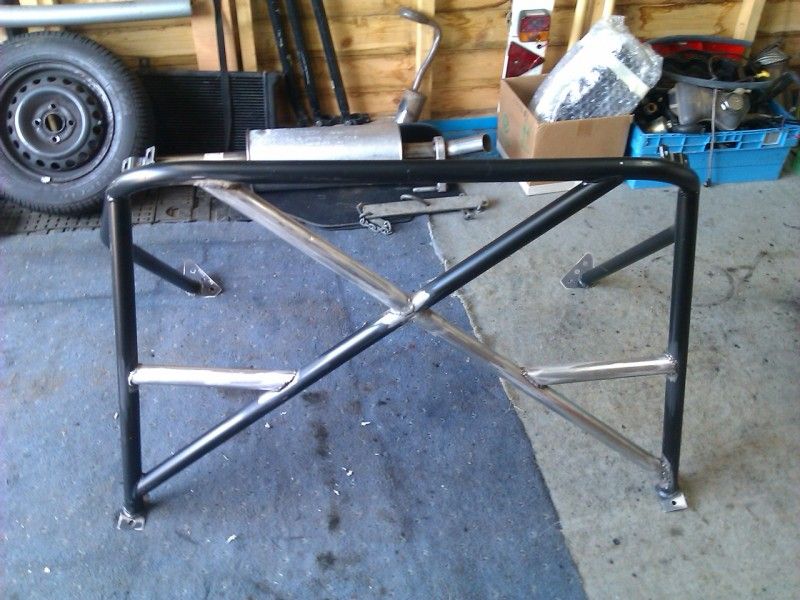
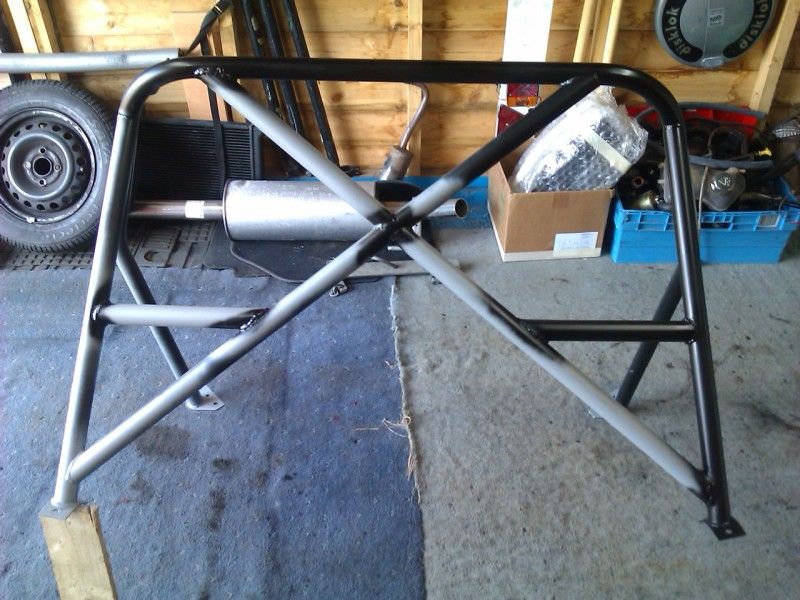
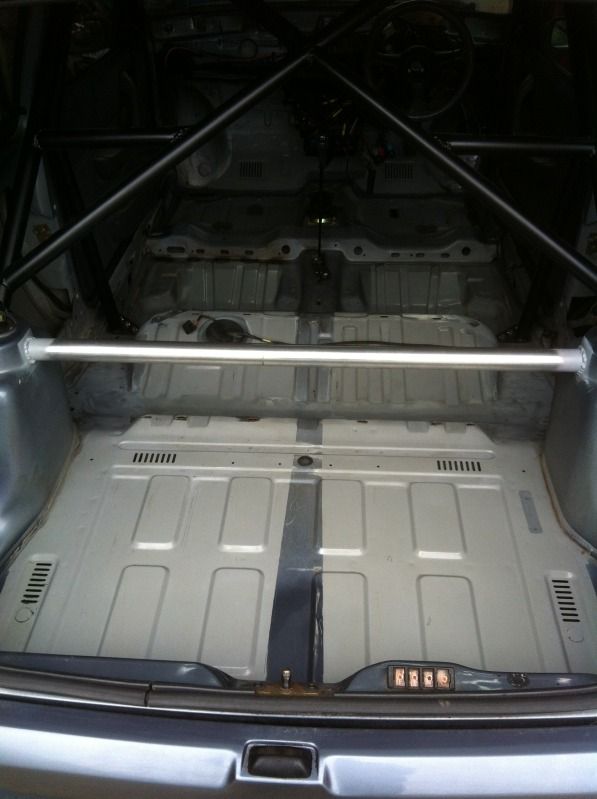
Next up was a cage, I bought RAJ@ Autoflock's cage from his fiesta, had it delivered, then set to work adding another diagonal!
Measured the tube o/d and it's 38mm, so i ordered up some more tubing and set to work when it arrived.
I was a bit paranoid about getting the tube dead straight but it came out perfect after lots of measuring, clamping then re measuring

I thought i had took more pics of the " during progress " but must have deleted them from my phone
Still to do the harness bars ( took the height measurements when i offered the seat in )
)
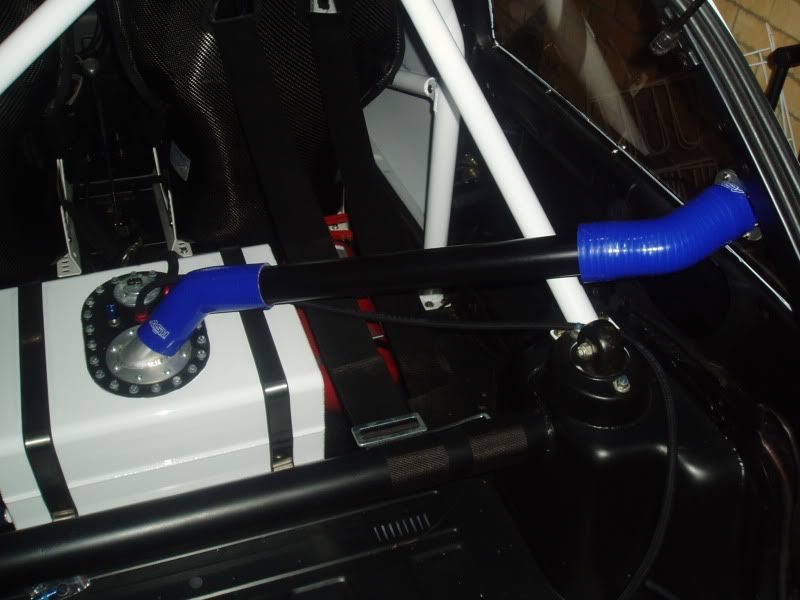
Also will be using the same tubing to weld in a rear strut brace.
As good as they look, I put the Escort cossie rims on e bay as they are far too wide for the track on a fiesta. I got �370 for them which i was well happy with as they were all kurbed and not very nice on the backs.
I found a set of 5 brand new Speedline Corse rims in Et33, 7x15 group a Fitment, I bought them hoping they'd clear my brakes, When they turned up, i offered them up with fingers crossed, they DID fit... PHEW!
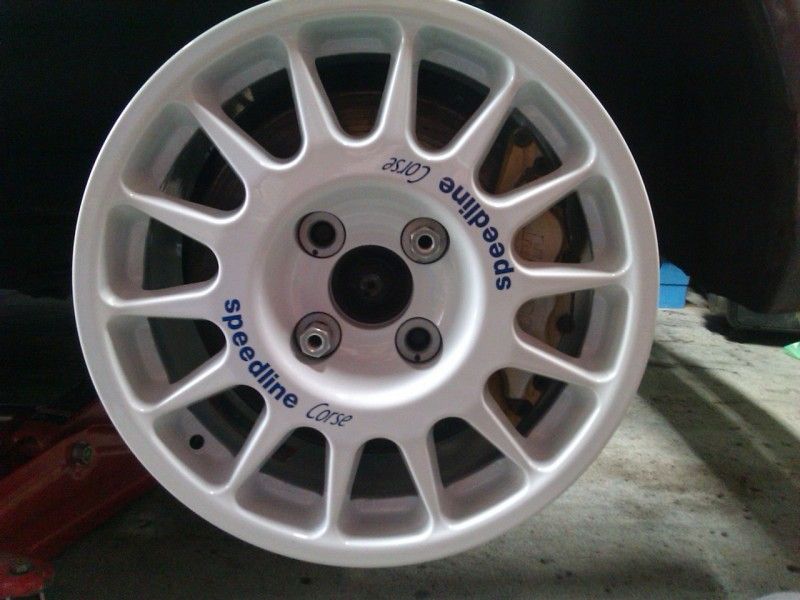
The car is now rolling on 13" rear wheels and i had to remove the calipers to get a ford 15" wheel on the front
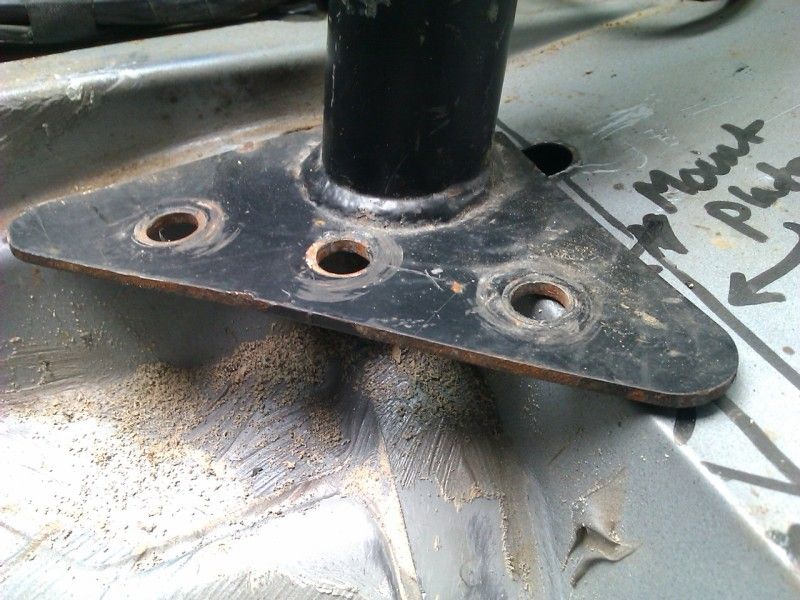
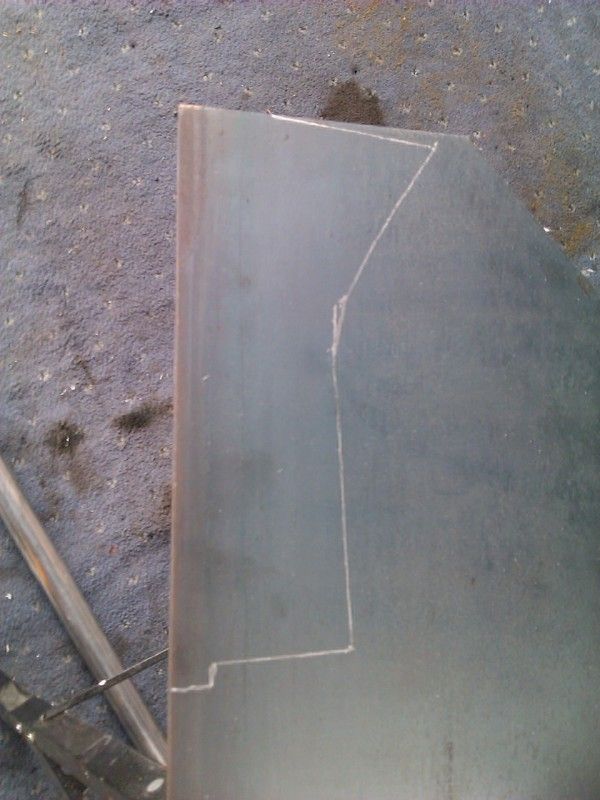
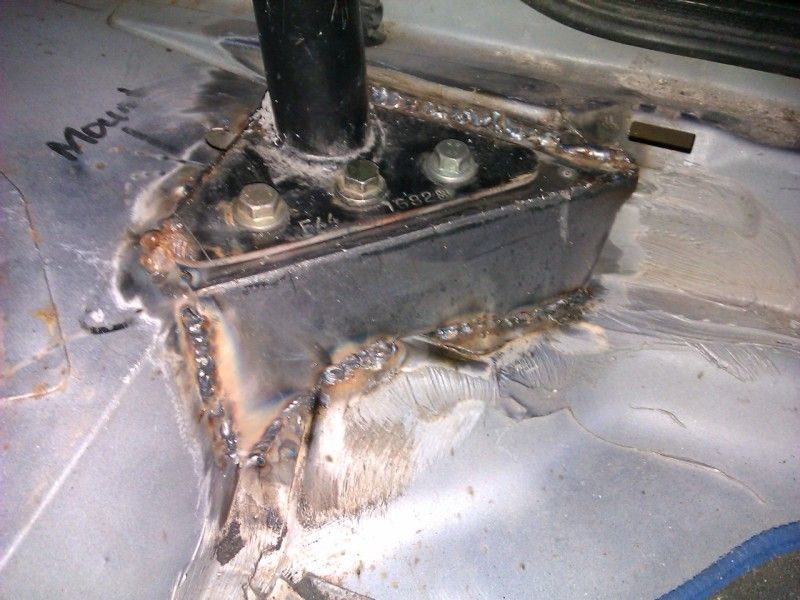
Yesterdays job was to make the mounting plates for the cage as it didn't come with any. I know that i probably could've just just got another set from Safety devices but i wanted to make my own.
I popped down to a welding / metal shop near me and got some 3mm plate.
Started with Blue Peter's finest cardboard template
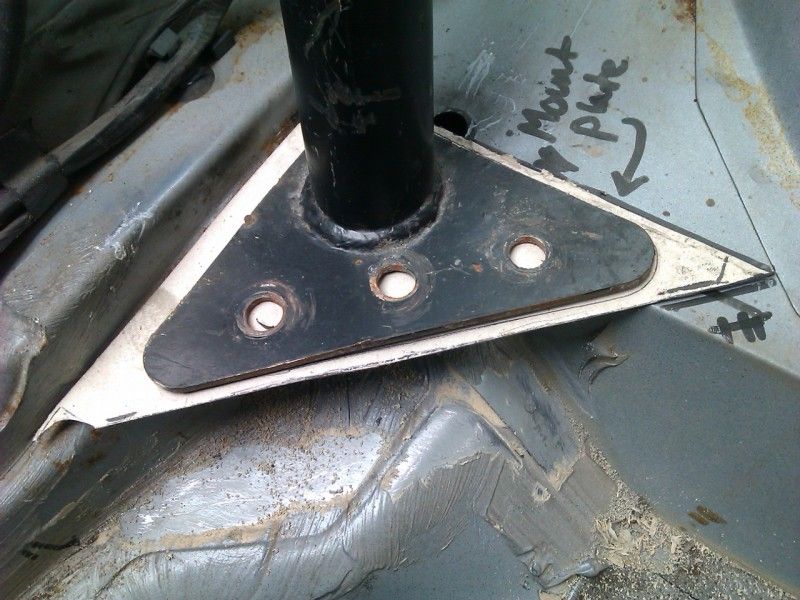
transferred it over to the plate
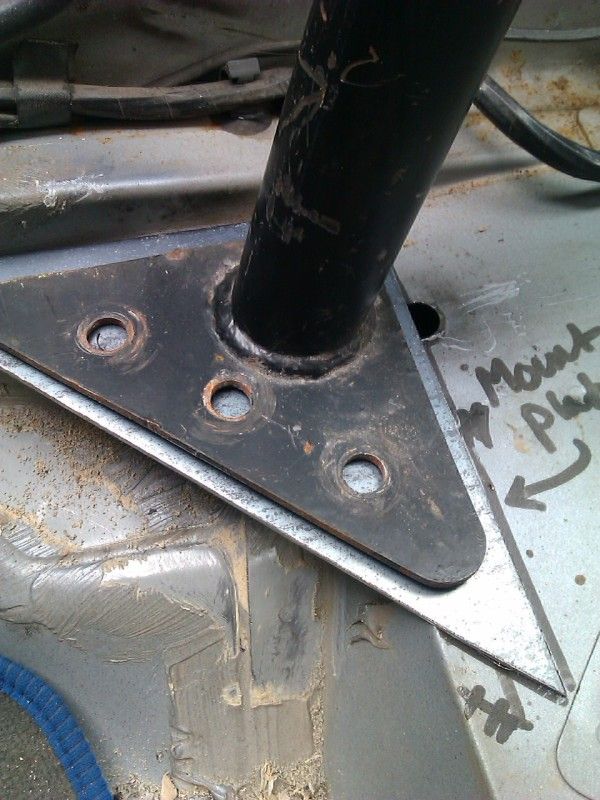
Next piece

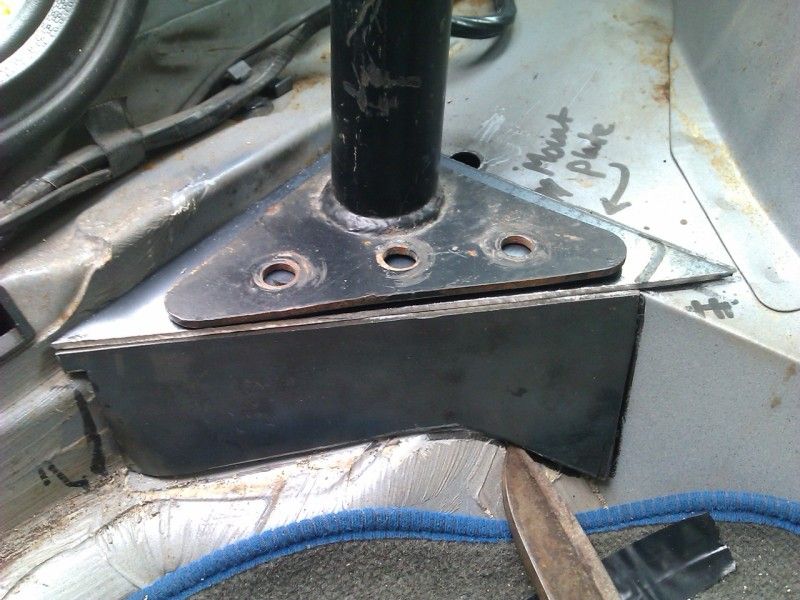
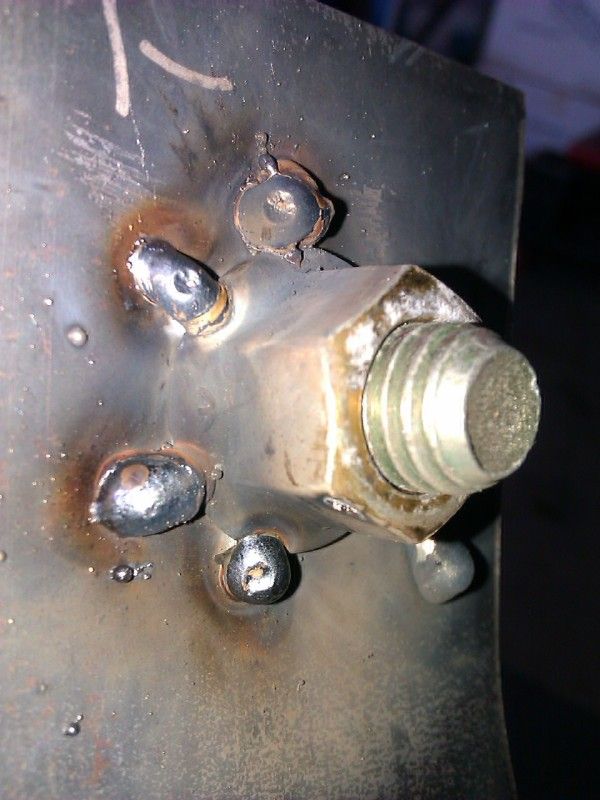
Then i added weld nuts on the back and welded it in
I know i would say it but.... the welding looks real shit in the pics but it's not in the flesh
Anyway, it's still to be seam sealed and painted
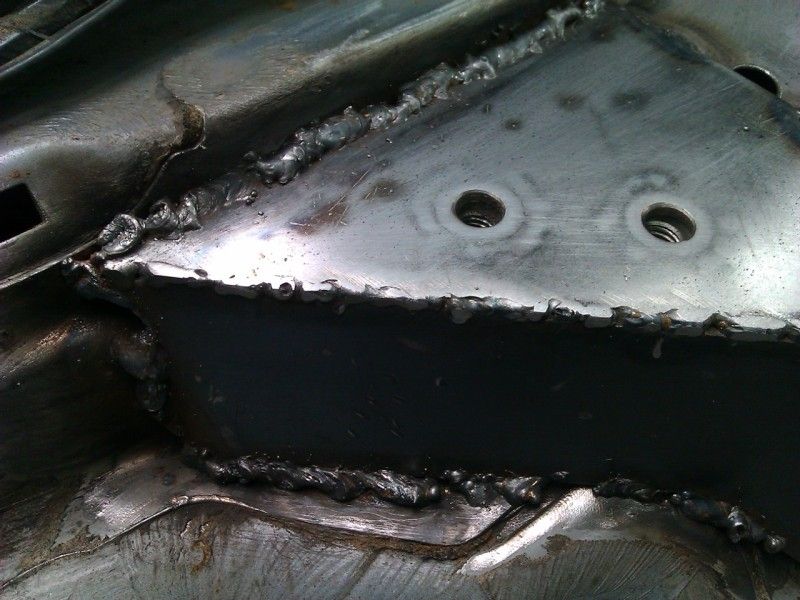
Other side done also
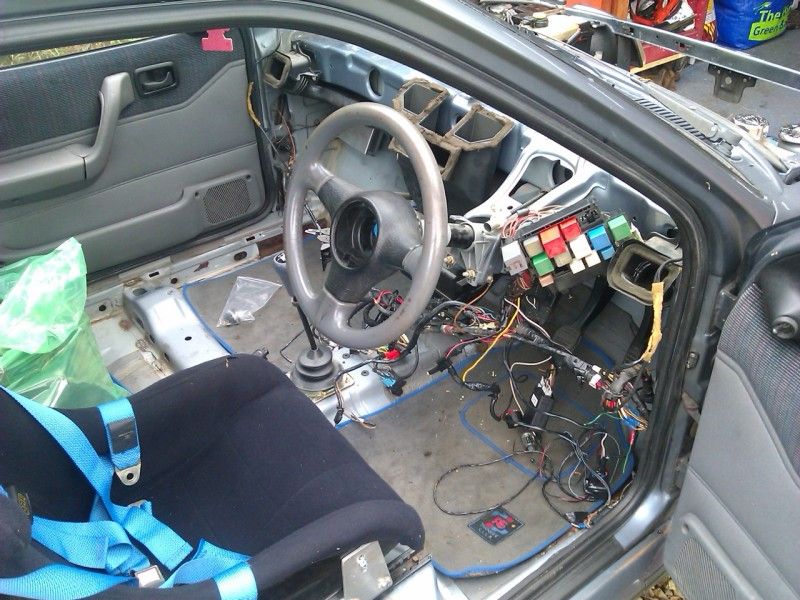
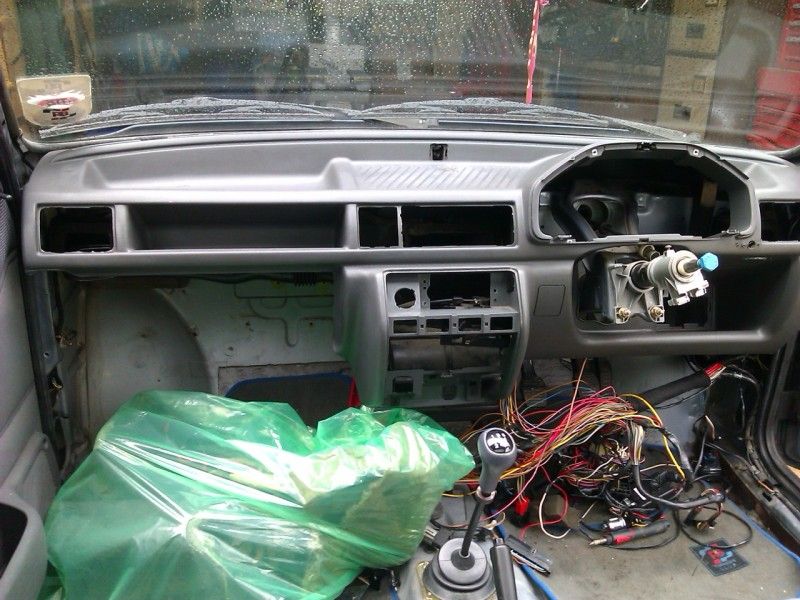
Also i trimmed the dash down a bit losing the glove box

Hopefully today i'll get the rear arch mounts sorted but think we are going out to see Ice Age 4 so we'll see!!
Will be updating as and when i can as i have two kids, full time work and all sorts of other stuff always going on so can't always get on it lol.
I did start a MK4 Escort Van but gave up as i wanted to make it a minter and decided that to buy EVERYTHING new for it would be far to expensive and basically unpractical.
So that was E bayed and i decided i wanted to have a track toy which then i wouldn't be fussed about putting 2nd hand / not mint parts onto!
I came across a Fiesta turbo that was advertised on here that had a smoky engine and was cheap, so it seemed the perfect base for me.
A quick look around it, a price agreed, and it was mine
I collected the car on a trailer that i bought to get it around on...
The car has been painted but it is quite a bad job with lots of flat areas and some sunken paint here and there, but it still looks presentable from a few feet away and once it's stickered, it wont notice anyhow!!
The car..
Also had a right result as the car is fitted with hi spec 6 pots and 300mm discs and a set of avo coilovers so that saves a fair bit of wedge for me
First job i did was to strip the inside, the interior was very tidy and i managed to get �150 for the front and rear seats and �80 for the rest of the panels, carpets and plastics etc so was pretty chuffed with that!!
The floor to my surprise was very good, two little plates had been added at some point to the front corners but i want to tidy them a bit in the future.
While on e bay one day, i noticed a set of unbranded bucket seats for �250 buy it now, They are fibreglass backed so very light, came with harnesses ( which will be changed to the better type ones and ally side mounts!
I Hit the buy it now button and set off to norfolk to pick them up. To my surprise, they are mint!
I decided that i wanted to mount the seats on the adjustable runners still for practicality so set about mounting the side mounts to the runners.
I needed to nibble a section out of the side mount plates to clear a raised bit on the RST runners but that was it ( apart from shortening the side mount plates also! )
Raised bit on the rst runners
Ally side mounts
Material removed to fit together
And one seat fitted for trial - Well chuffed with the result and price!!
Next up was a cage, I bought RAJ@ Autoflock's cage from his fiesta, had it delivered, then set to work adding another diagonal!
Measured the tube o/d and it's 38mm, so i ordered up some more tubing and set to work when it arrived.
I was a bit paranoid about getting the tube dead straight but it came out perfect after lots of measuring, clamping then re measuring
I thought i had took more pics of the " during progress " but must have deleted them from my phone
Still to do the harness bars ( took the height measurements when i offered the seat in
Also will be using the same tubing to weld in a rear strut brace.
As good as they look, I put the Escort cossie rims on e bay as they are far too wide for the track on a fiesta. I got �370 for them which i was well happy with as they were all kurbed and not very nice on the backs.
I found a set of 5 brand new Speedline Corse rims in Et33, 7x15 group a Fitment, I bought them hoping they'd clear my brakes, When they turned up, i offered them up with fingers crossed, they DID fit... PHEW!
The car is now rolling on 13" rear wheels and i had to remove the calipers to get a ford 15" wheel on the front
Yesterdays job was to make the mounting plates for the cage as it didn't come with any. I know that i probably could've just just got another set from Safety devices but i wanted to make my own.
I popped down to a welding / metal shop near me and got some 3mm plate.
Started with Blue Peter's finest cardboard template
transferred it over to the plate
Next piece
Then i added weld nuts on the back and welded it in
I know i would say it but.... the welding looks real shit in the pics but it's not in the flesh
Anyway, it's still to be seam sealed and painted
Other side done also
Also i trimmed the dash down a bit losing the glove box
Hopefully today i'll get the rear arch mounts sorted but think we are going out to see Ice Age 4 so we'll see!!
Last edited by Gadget; 14-04-2014 at 10:25 PM.

Trending Topics
15-07-2012, 07:29 PM
#9
Spanner monkey
Thread Starter
Thanks for the kind replys chaps.
Trying not to go too mad on this as it's a BUDGET build - famous last words lol.
Power wise, I have purchased this lot off of MD Cos https://passionford.com/forum/ford-r...e-dropped.html
along with a black top head and uprated valve springs.
Not chasing any sort of figures, just want a good strong engine and little lag.
Spoke to Mark at Grove Garage and he recommended a 4x4 Cossie T3 and .48 housing so if anyone has a real good / new one for sale, let me know!
When i got the car, i jumped in and started stripping everything all over the car but i thought i better have some sort of plan of attack so have decided i want to try and finish the inside, then each corner stripping / checking and cleaning suspension and brakes, then do all the underside. Then onto the engine bay.
I will be collecting bits along the way as and when they pop up but don't really think i need to much.
off the top of my head, the shopping list is Rear disc conversion, bigger rad, big cooler, I have OFAB and Cossie management but may go Pectel, unsure yet, If Ofab will supply what i need, i'll keep that to keep costs down. Re furb front calipers and tyres. Think thats it!!
Todays antics:
Managed to make the mounting plates for the rear mounts of the cage.
They didn't really fit the shape on the rear to well so i drilled though into the arch and used self tapping bolts to get it near then hammered the plates to the shape of the arch so they fit snug.
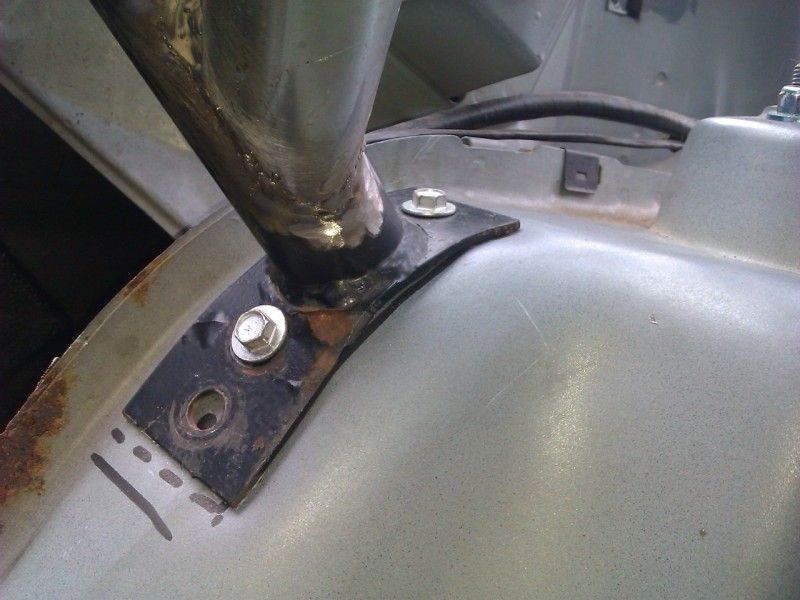

The cage was then removed and some 3mm plate shaped to the feet
Nuts and bolts added
nuts tacked on
welded and painted ( and stamped so i know what side and the top and bottom lol )
Also managed to get the rear strut brace done

Also offered up the harness bars but not sure if they look too short, and whether to mount the harnesses to the strut brace or not
Opinions
Trying not to go too mad on this as it's a BUDGET build - famous last words lol.
Power wise, I have purchased this lot off of MD Cos https://passionford.com/forum/ford-r...e-dropped.html
along with a black top head and uprated valve springs.
Not chasing any sort of figures, just want a good strong engine and little lag.
Spoke to Mark at Grove Garage and he recommended a 4x4 Cossie T3 and .48 housing so if anyone has a real good / new one for sale, let me know!
When i got the car, i jumped in and started stripping everything all over the car but i thought i better have some sort of plan of attack so have decided i want to try and finish the inside, then each corner stripping / checking and cleaning suspension and brakes, then do all the underside. Then onto the engine bay.
I will be collecting bits along the way as and when they pop up but don't really think i need to much.
off the top of my head, the shopping list is Rear disc conversion, bigger rad, big cooler, I have OFAB and Cossie management but may go Pectel, unsure yet, If Ofab will supply what i need, i'll keep that to keep costs down. Re furb front calipers and tyres. Think thats it!!
Todays antics:
Managed to make the mounting plates for the rear mounts of the cage.
They didn't really fit the shape on the rear to well so i drilled though into the arch and used self tapping bolts to get it near then hammered the plates to the shape of the arch so they fit snug.
The cage was then removed and some 3mm plate shaped to the feet
Nuts and bolts added
nuts tacked on
welded and painted ( and stamped so i know what side and the top and bottom lol )
Also managed to get the rear strut brace done
Also offered up the harness bars but not sure if they look too short, and whether to mount the harnesses to the strut brace or not
Opinions
Last edited by Gadget; 08-10-2012 at 06:09 PM.


 16-07-2012, 02:03 PM
#19
I've found that life I needed.. It's HERE!!

hi mate very nice to see its in safe hands whats the plan under the bonnet a L6 or L8 im sures on the cards? My O.Z. mags would look the bollocks on it. Ill be in touch real soon mate maybe we can work something out!
16-07-2012, 08:25 PM
#23
Spanner monkey
Thread Starter
The mags would look nice i agree, Hmmm
 22-07-2012, 05:48 PM
#25
Spanner monkey
Thread Starter
Only managed to get on it for a little while over the weekend, but still made some progress all the same.
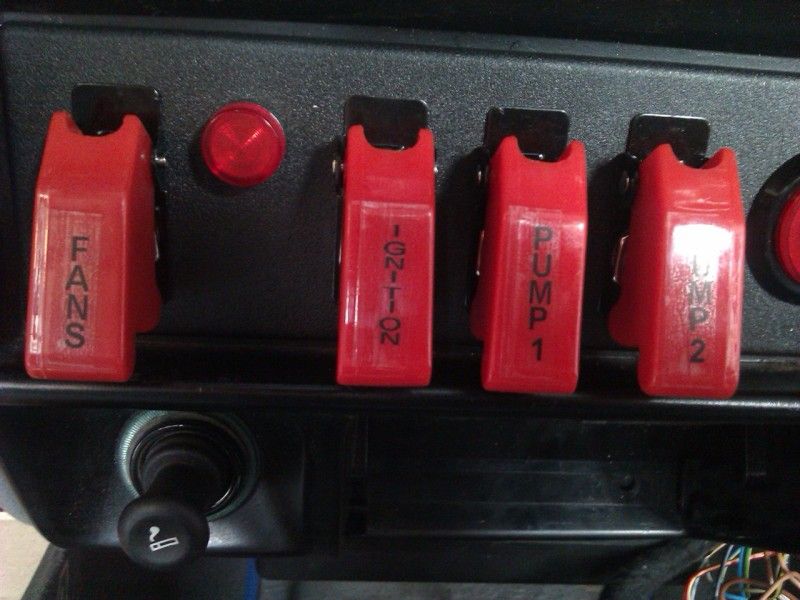
I decided from the start that i didn't want to use a key for the ignition or crank so when i first got the car, i removed the steering lock and cut all the un needed parts from the ignition barrel casing leaving just the minimal parts to allow the fitment of the indicator stalks.
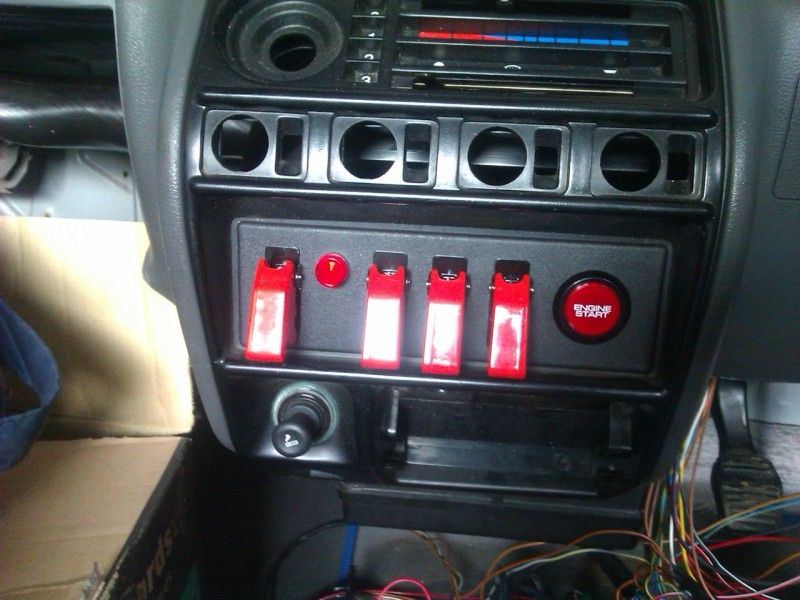
I will be running the fans off of the original fan switch but also want a fan overide switch with an LED to show when the fans are running whether they are over ridden or not, Ignition switch, pump 1 ( standard intank pump ) and pump 2 ( escort turbo / cossie pump ) and the start button.
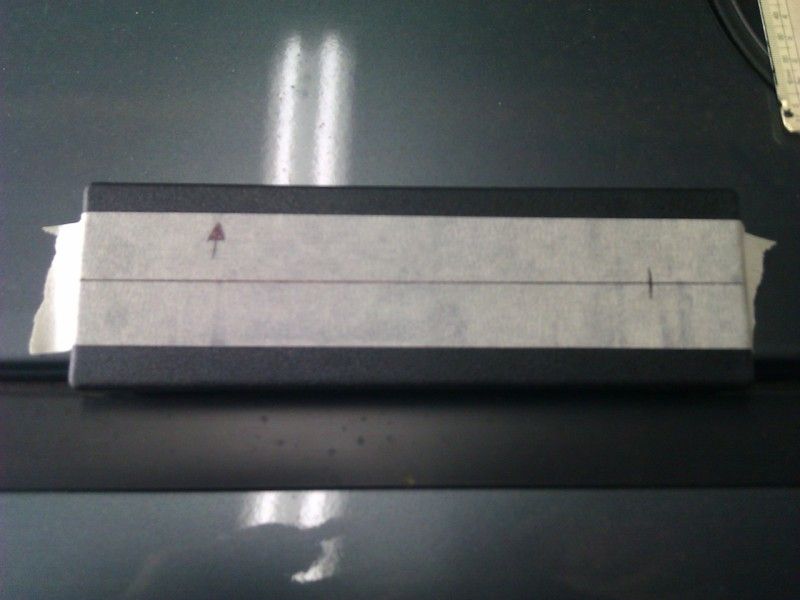
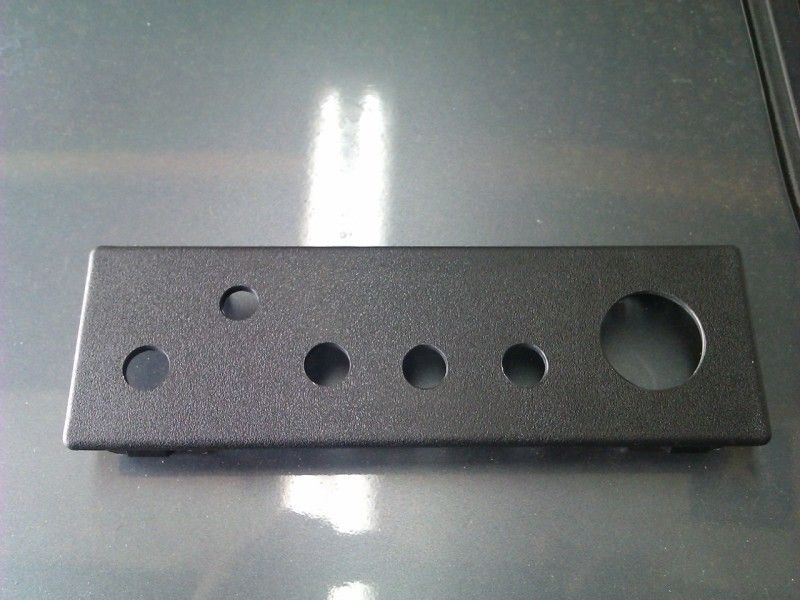
I wanted to mount them in the stereo position and rather than cut some plastic, shape it then paint it, i had a look on e bay and found a blanking plate for �3.99 delivered!
Once it turned up, i put the centre line on it
measured and drilled the holes for the switches and led
mounted the switches and test fitted, i think it looks pretty good
The i got the dynamo out and printed labels
That was saturday's job and todays job was the harness bars on the cage:
finalizing position
cut and offered into postion, and checking level

other side cut, offered in and checked for level

welded in, primed, and bloody run out of satin black lol
I decided from the start that i didn't want to use a key for the ignition or crank so when i first got the car, i removed the steering lock and cut all the un needed parts from the ignition barrel casing leaving just the minimal parts to allow the fitment of the indicator stalks.
I will be running the fans off of the original fan switch but also want a fan overide switch with an LED to show when the fans are running whether they are over ridden or not, Ignition switch, pump 1 ( standard intank pump ) and pump 2 ( escort turbo / cossie pump ) and the start button.
I wanted to mount them in the stereo position and rather than cut some plastic, shape it then paint it, i had a look on e bay and found a blanking plate for �3.99 delivered!
Once it turned up, i put the centre line on it
measured and drilled the holes for the switches and led
mounted the switches and test fitted, i think it looks pretty good
The i got the dynamo out and printed labels
That was saturday's job and todays job was the harness bars on the cage:
finalizing position
cut and offered into postion, and checking level
other side cut, offered in and checked for level
welded in, primed, and bloody run out of satin black lol
30-09-2012, 09:10 PM
#27
Spanner monkey
Thread Starter
Thought i'd better update.
Been doing quite a lot on it lately but nothing really worthy of pics ( and i keep forgetting lol )
Been sorting through the loom, removing unused wires, all the front end is done, just need to do the rear now, things like rear wiper and boot light. I will be removing them right up to the fuse box.
I know it's only a track car but i still want the engine bay to be as free from clutter as possible so will be hiding the engine bay loom which means extending some cables and splitting from the loom.
Like the brake resevoir loom ( probably changing to a mondeo servo and cylinder )
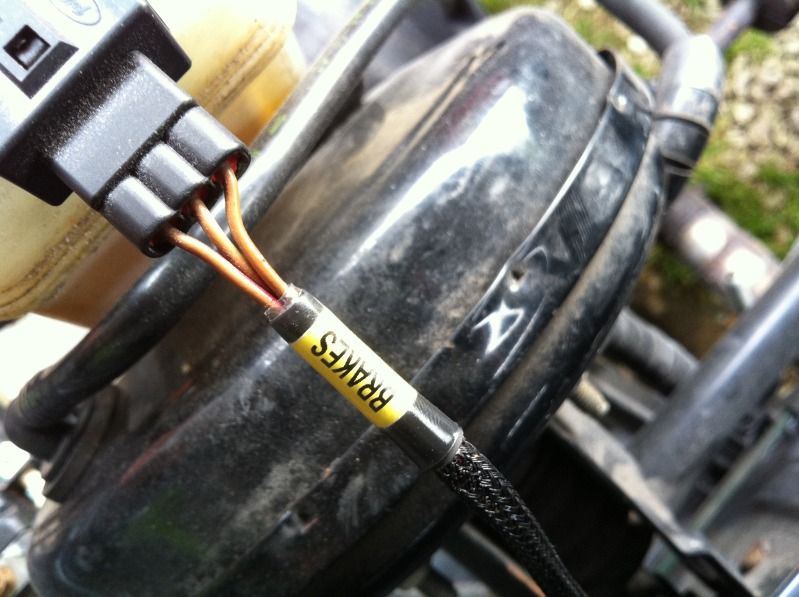
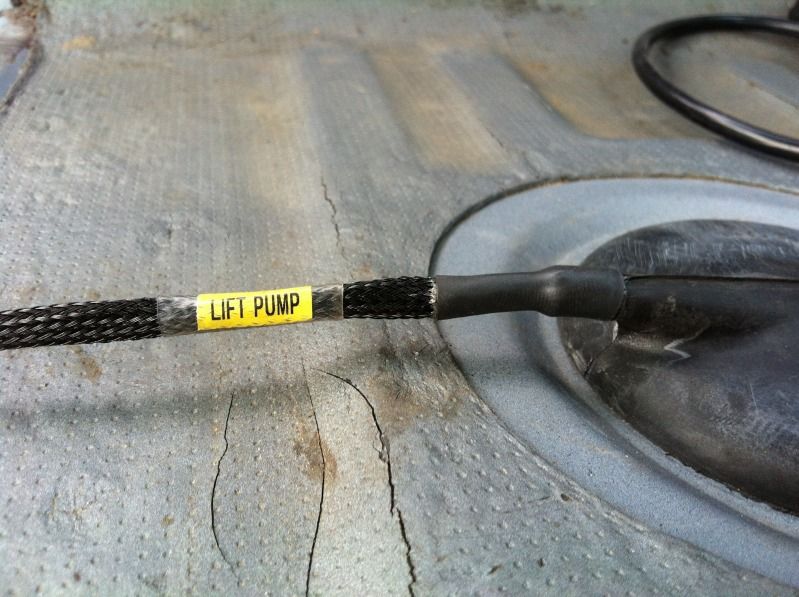
Also thought i'd tidy up the fuel pump loom
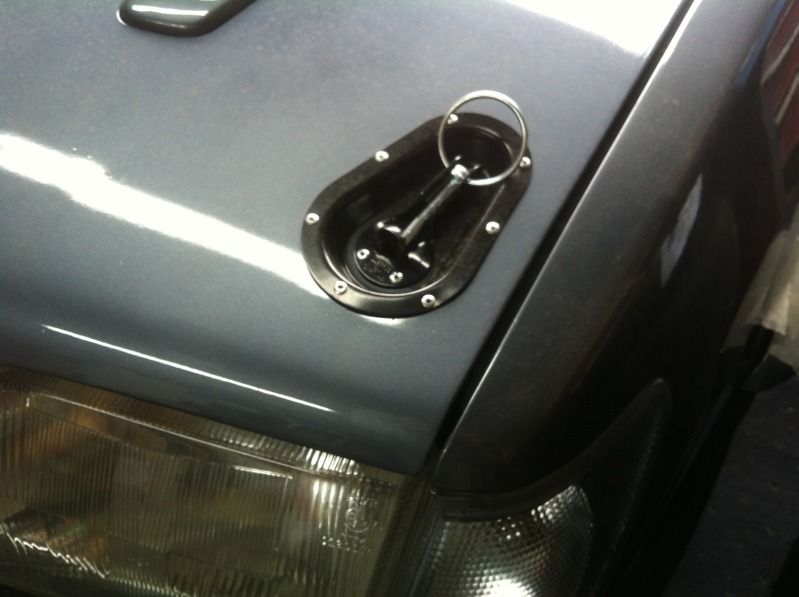
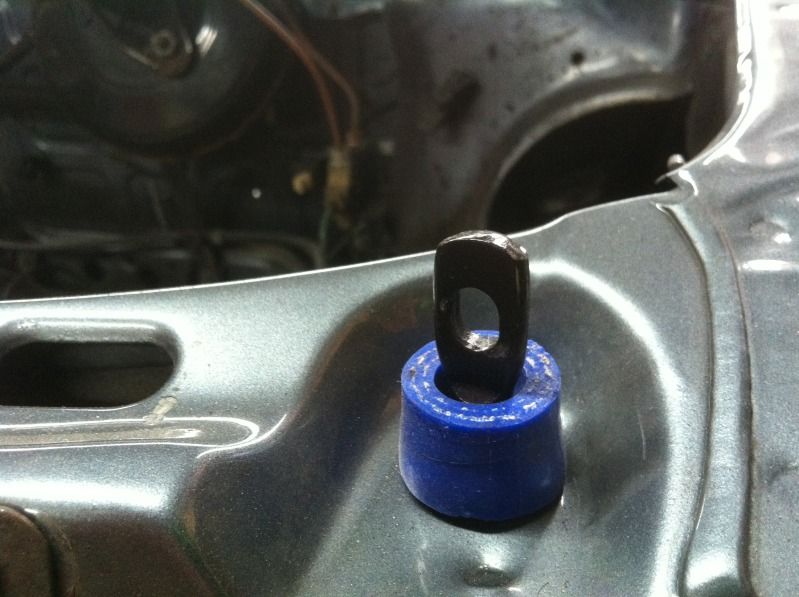
Bonnet pins and recesses have been cut in and fitted, Unsure whether to change the rivets to black ones?
The Twins came over the other week for a BBQ so thought it only right they work on te car while the food is cooking lol.
Dave sorted out my passenger wing which was dented at the bottom - i forgot to take pics but it looks just right now, just needs blowing in!
And Stu started with the heat gun on the floor deadeners. Got the four floor pan deadeners off, just leaving me to finish the last bits with thinners,
Also got the 2 off of the rear seat base and the boot floor pair.
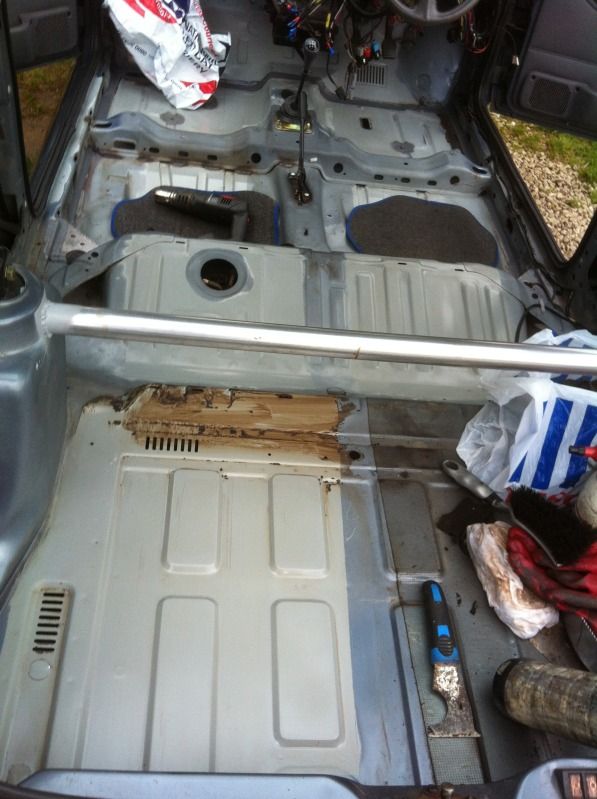
Removed the metal sections between the floor and the seat hump

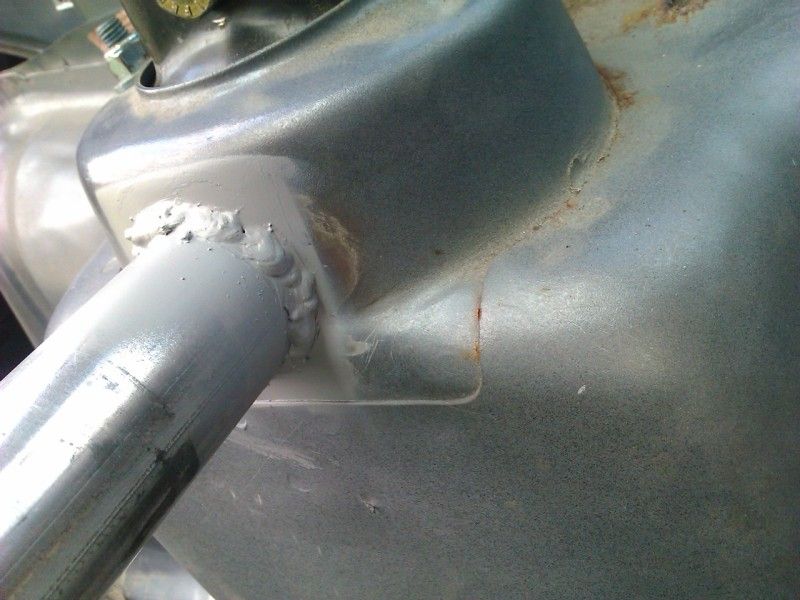
Also had a bit of crud by the o/s front bumper mount so chopped it out
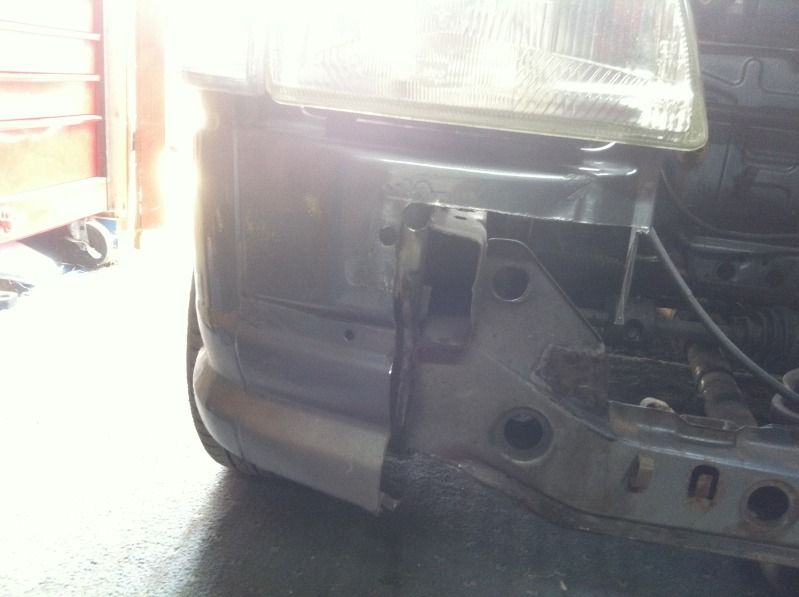
Got a replacement section of ebay for �4 lol, and chopped out the bit i needed
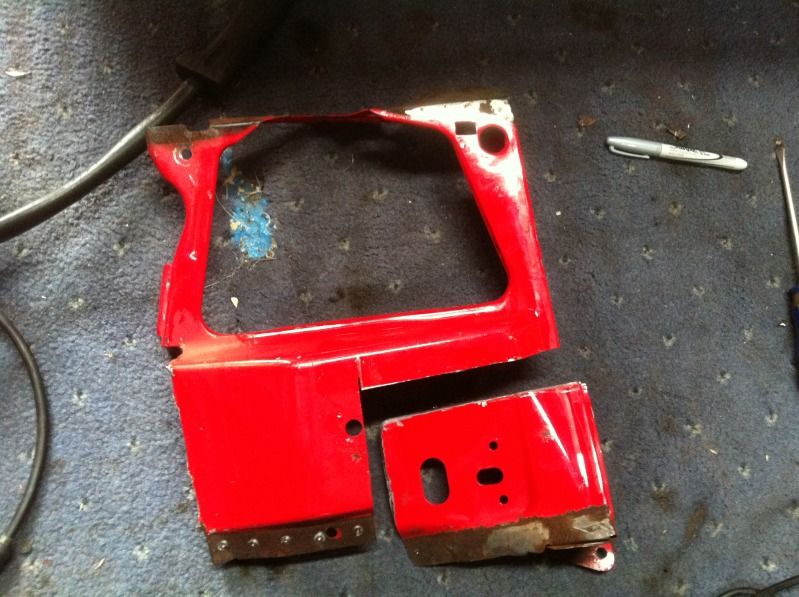
clamped in

and welded in place
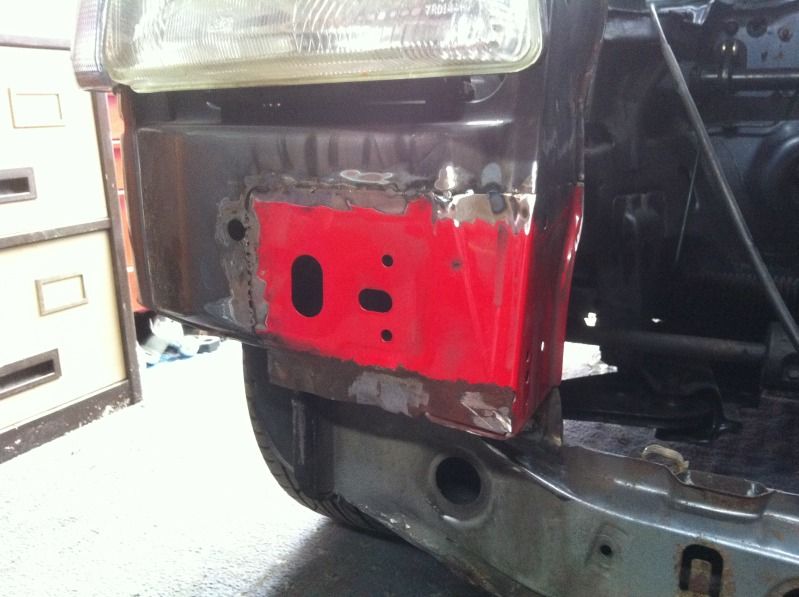
Just need a bit of filler and seam sealer to finish it off.
Still collecting bits too
Got myself a Pectel T2 Ecu and Ahmed braided loom
Zetec S rear beam
Focus St rear discs, calipers and hubs
Front calipers are off for shot blasting then i'll rebuild them
Toyo R888's are in my garage
Tubular exhaust manifold
Front mount cooler
So chipping away still and slowly getting there.
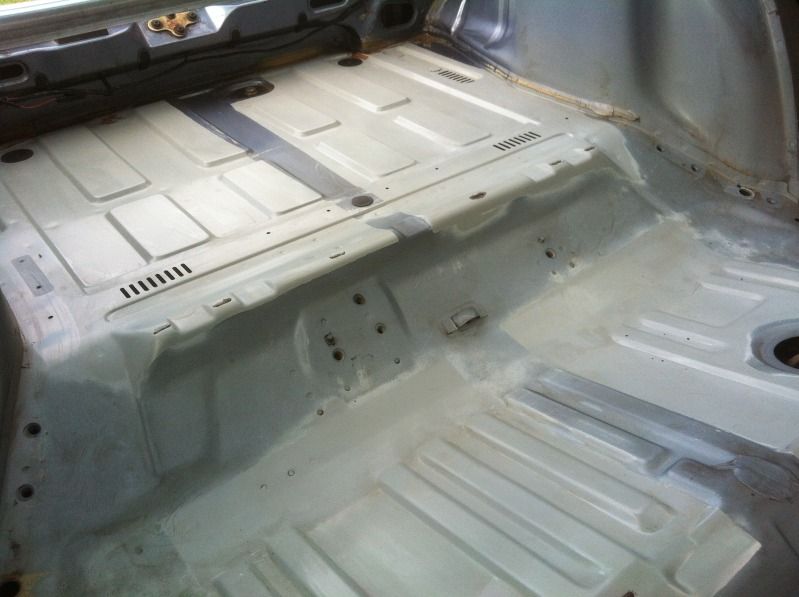
Hoping to get the inside painted soon just to freshen it up a bit then i should be able to fit all the inside back up!
Been doing quite a lot on it lately but nothing really worthy of pics ( and i keep forgetting lol )
Been sorting through the loom, removing unused wires, all the front end is done, just need to do the rear now, things like rear wiper and boot light. I will be removing them right up to the fuse box.
I know it's only a track car but i still want the engine bay to be as free from clutter as possible so will be hiding the engine bay loom which means extending some cables and splitting from the loom.
Like the brake resevoir loom ( probably changing to a mondeo servo and cylinder )
Also thought i'd tidy up the fuel pump loom
Bonnet pins and recesses have been cut in and fitted, Unsure whether to change the rivets to black ones?
The Twins came over the other week for a BBQ so thought it only right they work on te car while the food is cooking lol.
Dave sorted out my passenger wing which was dented at the bottom - i forgot to take pics but it looks just right now, just needs blowing in!
And Stu started with the heat gun on the floor deadeners. Got the four floor pan deadeners off, just leaving me to finish the last bits with thinners,
Also got the 2 off of the rear seat base and the boot floor pair.
Removed the metal sections between the floor and the seat hump
Also had a bit of crud by the o/s front bumper mount so chopped it out
Got a replacement section of ebay for �4 lol, and chopped out the bit i needed
clamped in
and welded in place
Just need a bit of filler and seam sealer to finish it off.
Still collecting bits too
Got myself a Pectel T2 Ecu and Ahmed braided loom
Zetec S rear beam
Focus St rear discs, calipers and hubs
Front calipers are off for shot blasting then i'll rebuild them
Toyo R888's are in my garage
Tubular exhaust manifold
Front mount cooler
So chipping away still and slowly getting there.
Hoping to get the inside painted soon just to freshen it up a bit then i should be able to fit all the inside back up!
30-09-2012, 10:45 PM
#28
Was wondering how this was going looking good and sheding a few pounds too.Are the bonnet pins you"ve used spring loaded?? As i saw some on a subaru wrc car and it had spring loaded ones and i wasn"t sure where to buy them from...
01-10-2012, 07:04 AM
#32
Spanner monkey
Thread Starter
These are just �9 cheapys lol. The sprung loaded ones i think you mean are aero catches?
http://www.ebay.co.uk/itm/Aerocatch-...ht_1347wt_1185
or you can get locking ones
http://www.ebay.co.uk/itm/AEROCATCH-...#ht_3126wt_952
01-10-2012, 07:10 AM
#33
Spanner monkey
Thread Starter
The only pic i have at the mo is near the start of the thread.
The wheels are still in their boxes in my loft at the moment. Was going to leave them off for as long as possible really, as i still want to re furb the front hubs and i've been quoted by AVO �160 to re furb all for shocks so i'll probably get that done as the front adjusters are very tight so thought it could be a good time to get all 4 re freshed for a good start!
The wheels are still in their boxes in my loft at the moment. Was going to leave them off for as long as possible really, as i still want to re furb the front hubs and i've been quoted by AVO �160 to re furb all for shocks so i'll probably get that done as the front adjusters are very tight so thought it could be a good time to get all 4 re freshed for a good start!
 06-10-2012, 07:47 PM
#36
Spanner monkey
Thread Starter
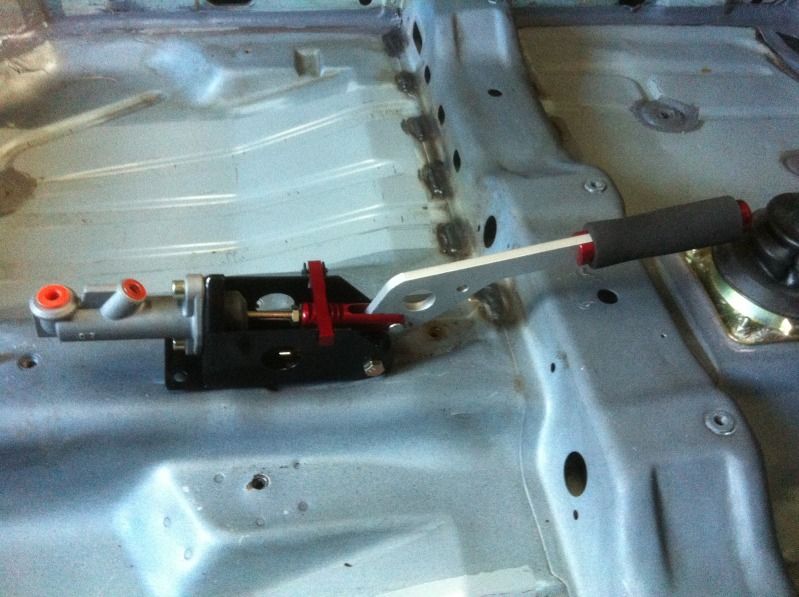
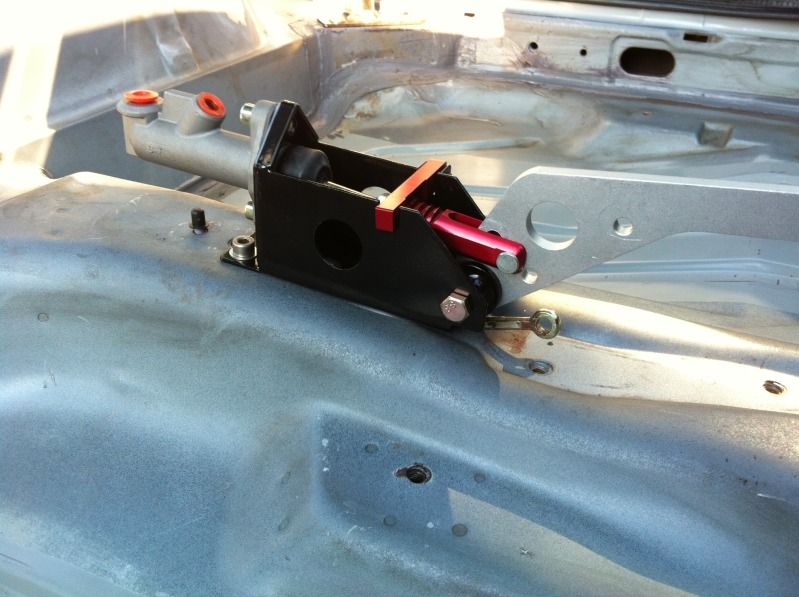
Just a small update for today, As i will be running the brake lines inside the car and using a bias valve, i thought i may aswell also use a hydraulic handbrake!
Handbrake rested in place where i want it
Marked the holes and used M8 rivnuts
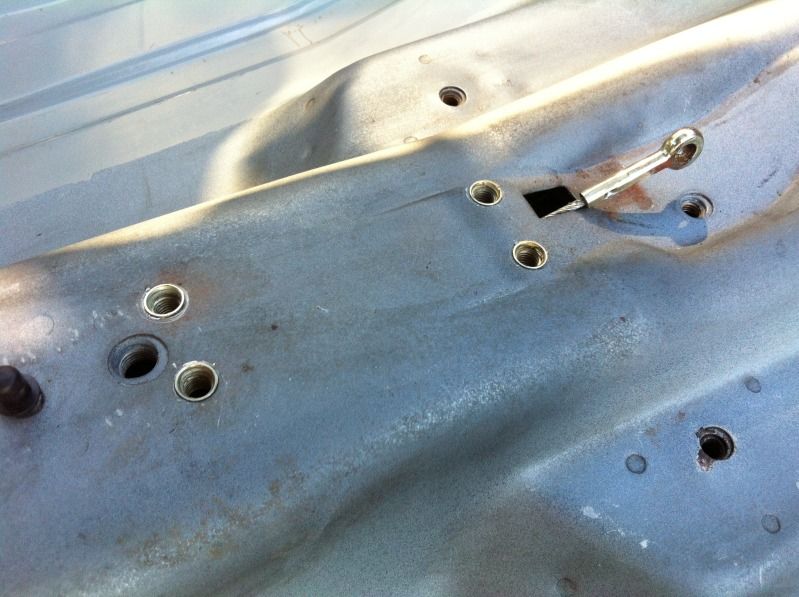
Bolted in with stainless cap heads
Was looking at how to fix the original handbrake cable too , thought about adding a section on the lever then fixing the cable to it but because of where the lver pivots right at the bottom, it wouldn't pull the cable, only move it up.
SO, i mounted it in a position that allows me to unclip the lever and bolts the original handbrake in incase mr MOT'er gets funny about there being no cable fitted, i can fit a cable and lever for an MOT
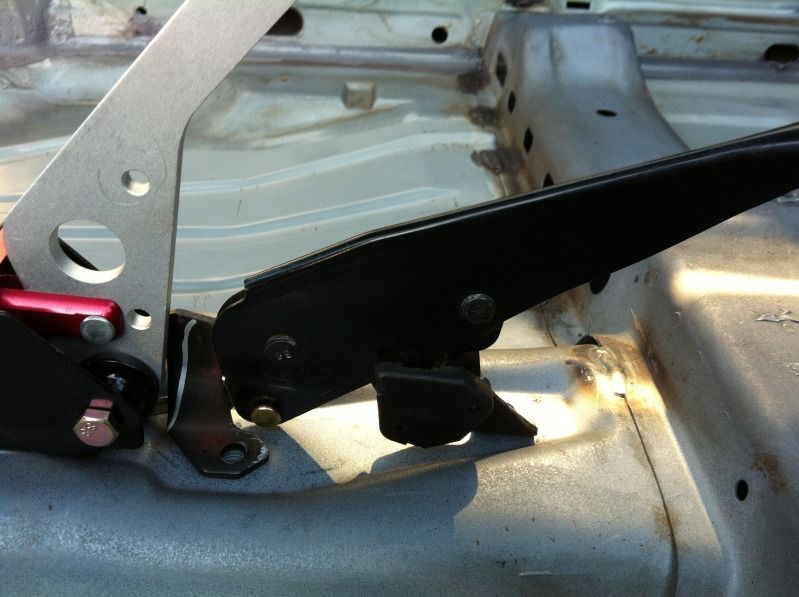
And thought i may aswell mount the bias valve on the side keeping it neat and tidy!
I drilled the bracket and added ally M6 rivnuts. At the moment i've used stainless capheads but i think i'll change them to red anodised ones to keep the silver / red theme!
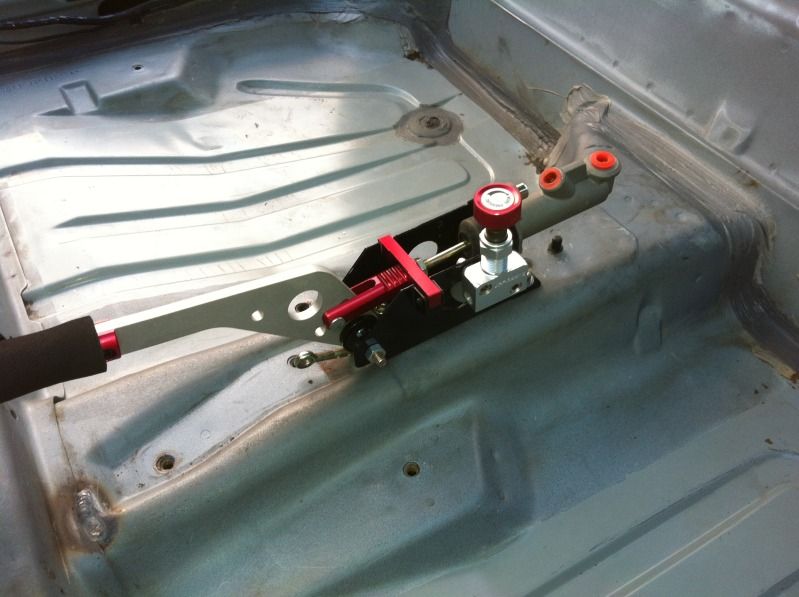
Next up is to order my brake lines and fittings. Will rivnut the brake line clips in with red anodised round headed bolts! Once they are all mocked up, i'll remove everything and get the inside painted
Handbrake rested in place where i want it
Marked the holes and used M8 rivnuts
Bolted in with stainless cap heads
Was looking at how to fix the original handbrake cable too , thought about adding a section on the lever then fixing the cable to it but because of where the lver pivots right at the bottom, it wouldn't pull the cable, only move it up.
SO, i mounted it in a position that allows me to unclip the lever and bolts the original handbrake in incase mr MOT'er gets funny about there being no cable fitted, i can fit a cable and lever for an MOT
And thought i may aswell mount the bias valve on the side keeping it neat and tidy!
I drilled the bracket and added ally M6 rivnuts. At the moment i've used stainless capheads but i think i'll change them to red anodised ones to keep the silver / red theme!
Next up is to order my brake lines and fittings. Will rivnut the brake line clips in with red anodised round headed bolts! Once they are all mocked up, i'll remove everything and get the inside painted
Last edited by Gadget; 07-10-2012 at 06:52 PM.


 07-10-2012, 06:51 PM
#39
Spanner monkey
Thread Starter
Bit more done today,
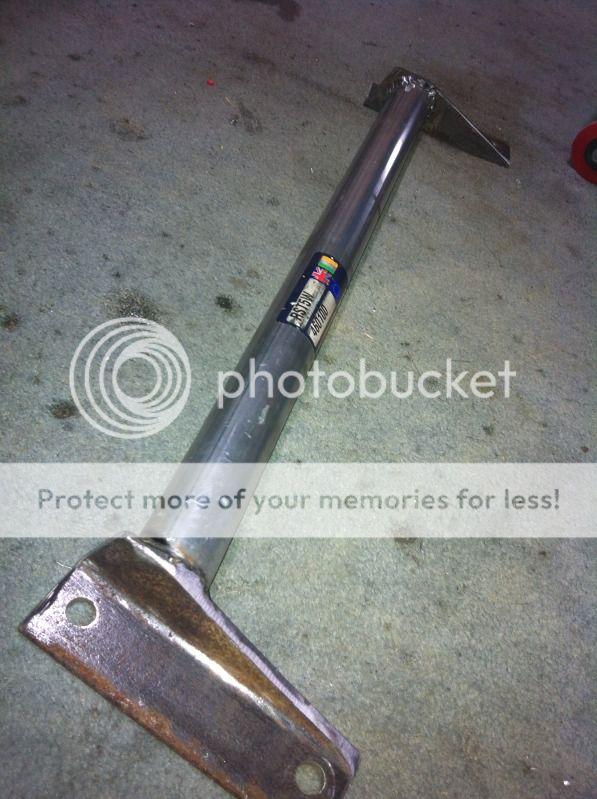
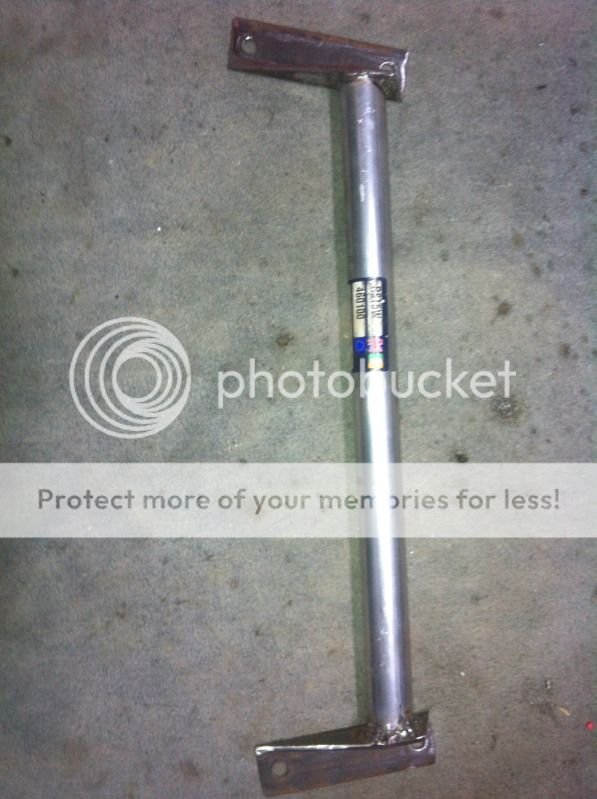
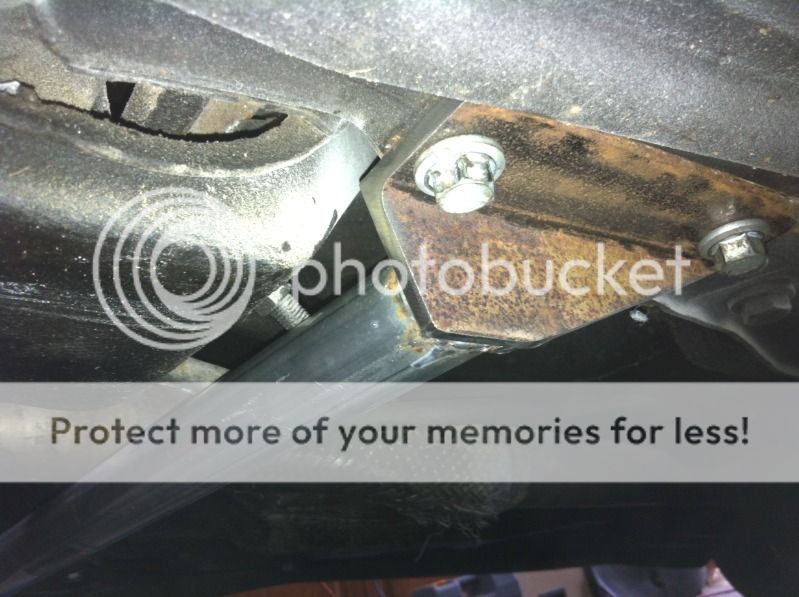
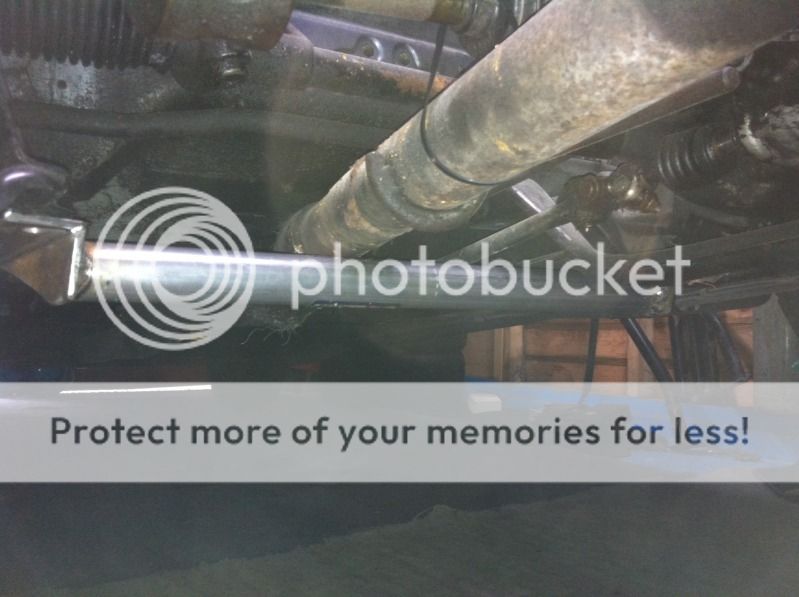
The lower " S " brace was missing from the car that joins the two A arm mounts together so thought i may aswell make my own custom one!
The 4mm angle iron is probably a bit heavy gauge but it's all i had in my garage!
Measured off two pieces at 155mm long with 12.5mm holes at 120mm between centres.
Bolted them up chopped up some 38mm tubing, tacked it in position then removed it to weld all the way round.
I'm pretty chuffed with the result, the only thing i may do is to remove some more material between the mounting holes, maybe drill some big holes or even chop a lump out and shape it - unsure yet.
Will get it powder coated when i get the rest of the suspension parts done.
Pics