Fiesta RS Turbo track car project - Dash flock :-)
 08-10-2012, 06:06 PM
#41
Spanner monkey
Thread Starter
Not a clue really mate. I'm just pottering along with it here and there! I work shifts and married with two kids so don't often get a good long go on it!
That said, another update lol...
only a purchased one though..
When i was under the car the other day, i noticed the roll bar link rods were looking a bit in need of cleaning up.
The ball joints were ok but it thought i would upgrade them.
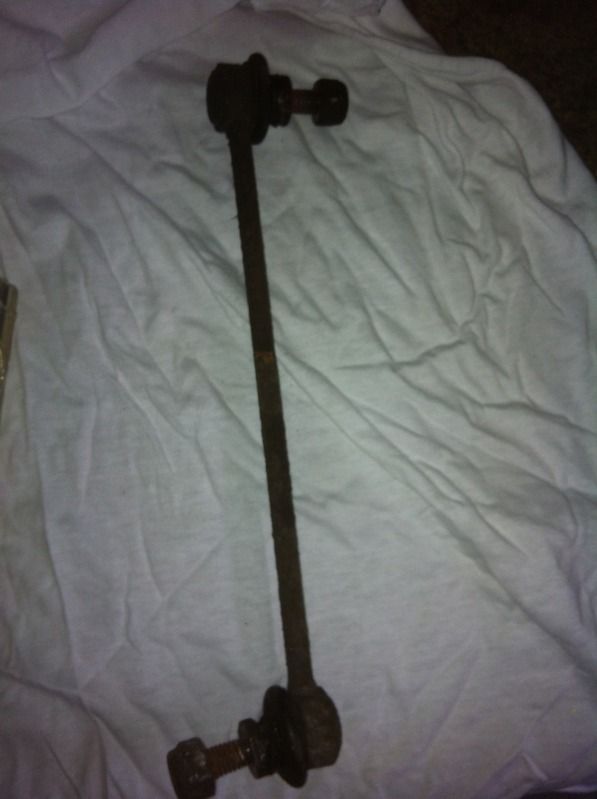
I measured up the length of the rods then looked on McGills website, ordered up myself m10 male and female turnbuckles, rose joints, half nuts and some concentric spacers. Can't see these ever wearing out!
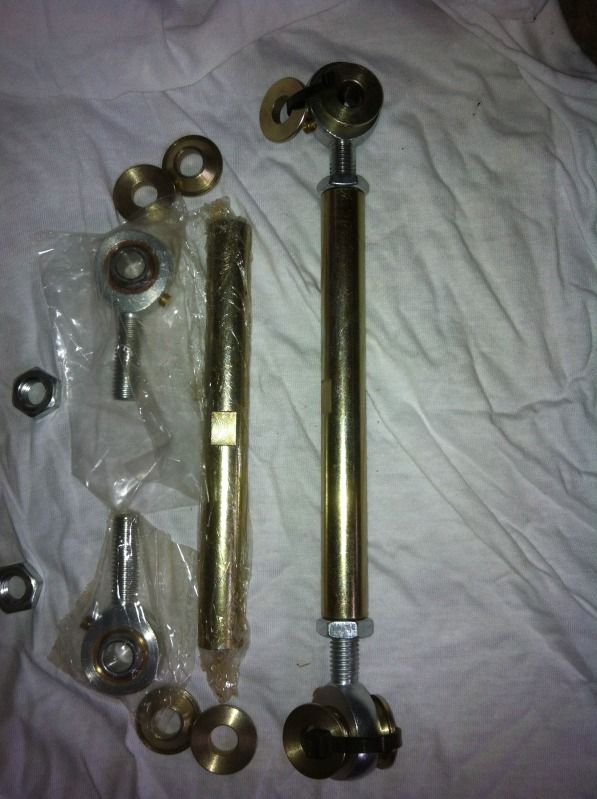
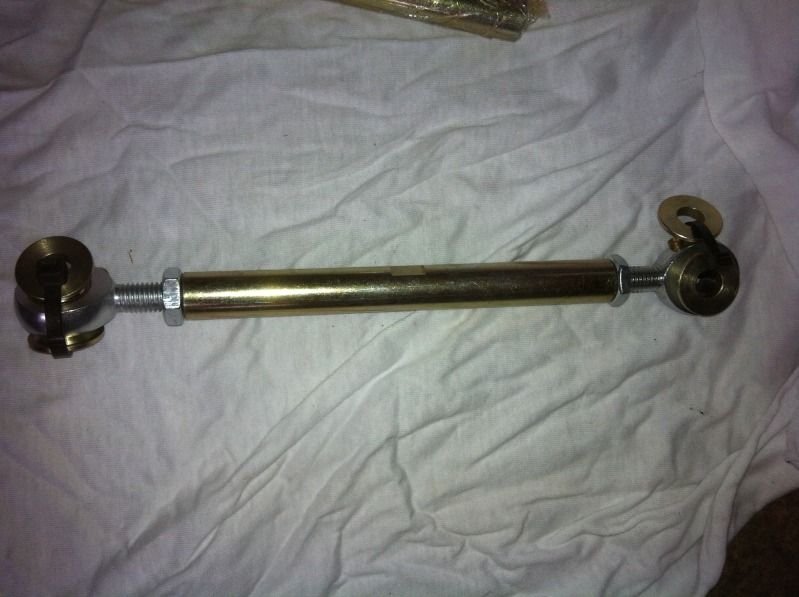
Massive overkill i know but why not? lol.
That said, another update lol...
only a purchased one though..
When i was under the car the other day, i noticed the roll bar link rods were looking a bit in need of cleaning up.
The ball joints were ok but it thought i would upgrade them.
I measured up the length of the rods then looked on McGills website, ordered up myself m10 male and female turnbuckles, rose joints, half nuts and some concentric spacers. Can't see these ever wearing out!
Massive overkill i know but why not? lol.
 08-10-2012, 06:11 PM
#42
Advanced PassionFord User

Done exactly the same myself On my focus RS Gary. Work a treat for per loading the ARB
10-10-2012, 07:53 PM
#43
Spanner monkey
Thread Starter
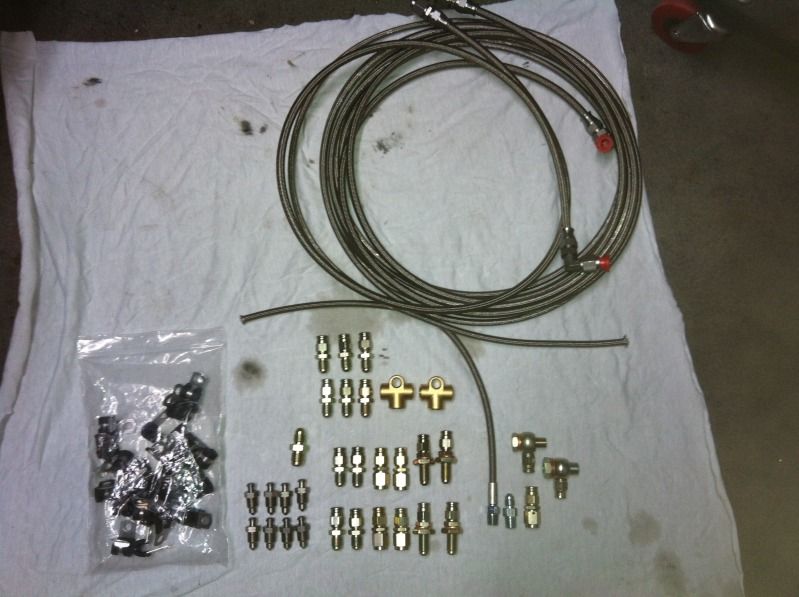
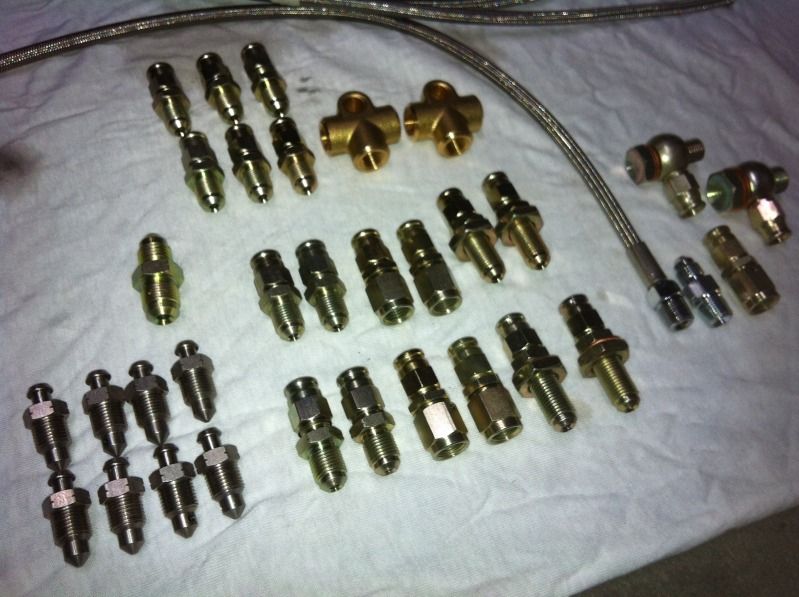
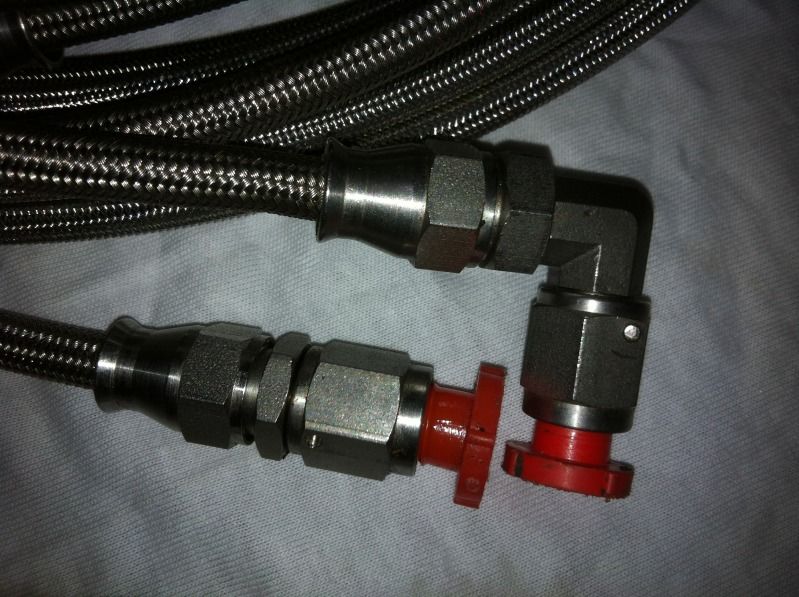
Brake lines and fittings purchased today. Got a bit carried away though Ended up spending �330 AND i already had the stainless fittings that i wanted to use from the master cylinder to the bulkhead!
I dont want any lines running in the engine bay so i'm going from the cylinder, through the bulkead, along the inside behind the dash then back through the arches under the arch liners to the original body bracket, then to the front calipers.
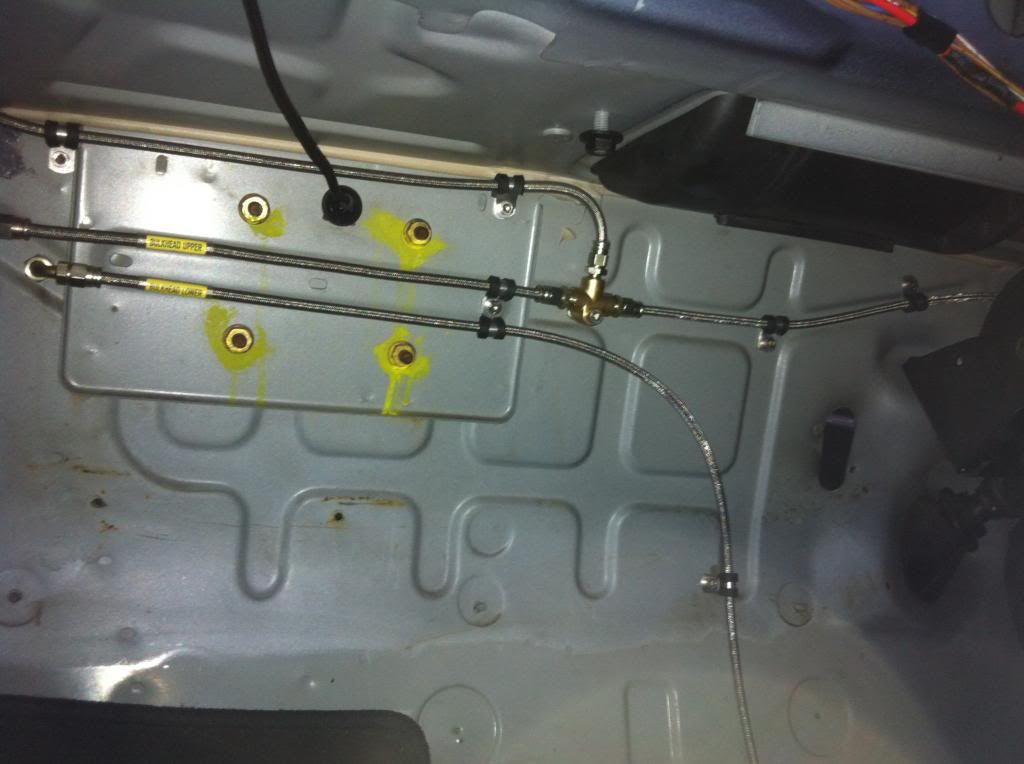
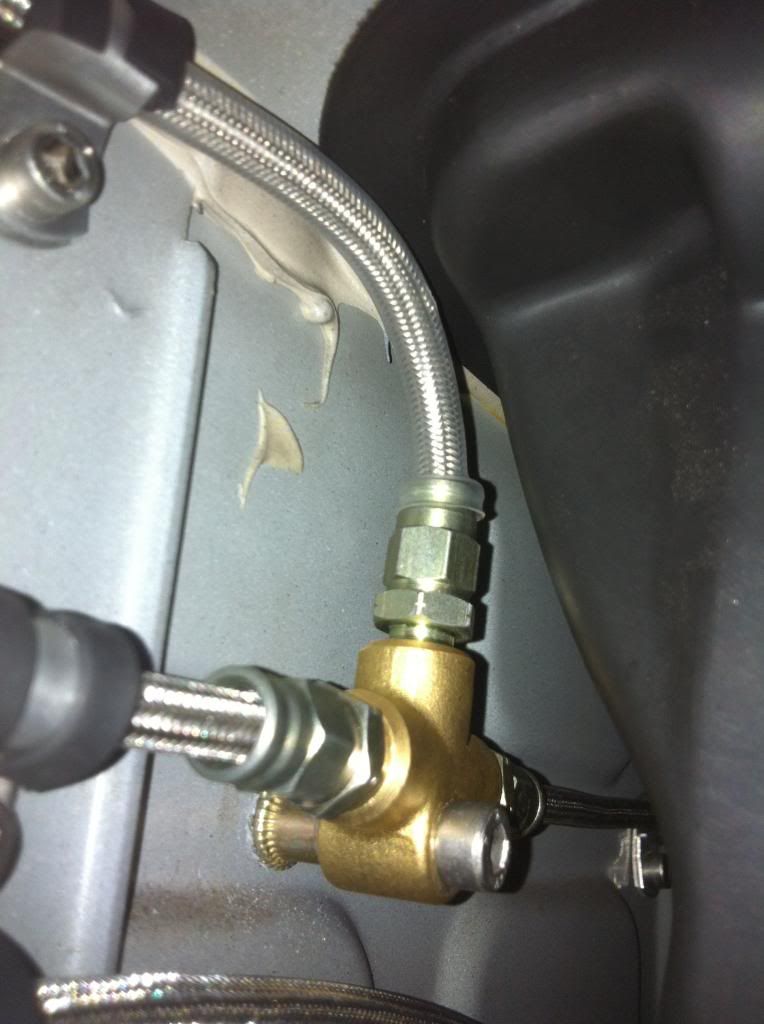
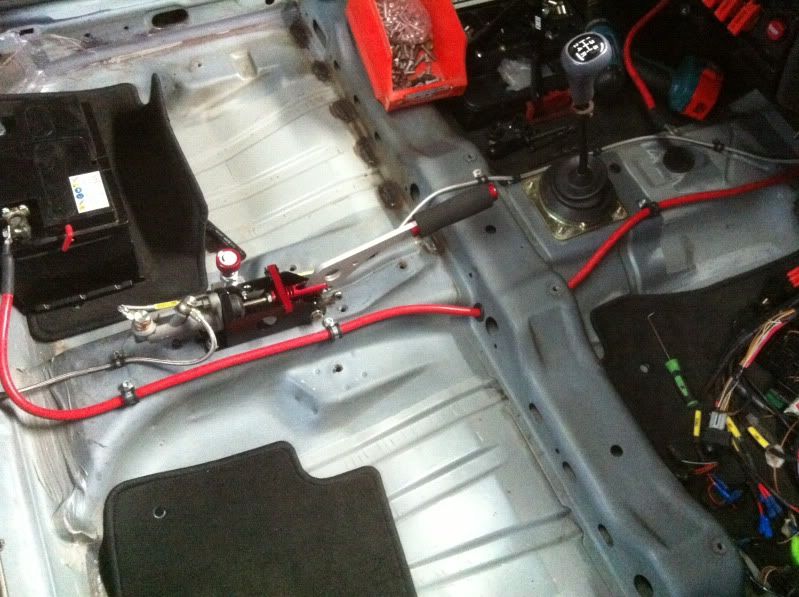
For the rears, i'll be running 1 line to the through the bias valve, through the handbrake, to a t piece, then through the floor to the calipers. rather than just going through the panels using a grommet, I'm using male bulkhead fittings with female swivels ending up with me needing loads of fittings lol, but i wanted to do it right and be able to swivel each pipe allowing it to sit just right.
I also bought 30 stainless and insulated p clips and 8 new bleed nipples for the front calipers and as i'm doing the calipers black with stainless bolts, i bought stainless nipples
Ended up spending �330 AND i already had the stainless fittings that i wanted to use from the master cylinder to the bulkhead!I dont want any lines running in the engine bay so i'm going from the cylinder, through the bulkead, along the inside behind the dash then back through the arches under the arch liners to the original body bracket, then to the front calipers.
For the rears, i'll be running 1 line to the through the bias valve, through the handbrake, to a t piece, then through the floor to the calipers. rather than just going through the panels using a grommet, I'm using male bulkhead fittings with female swivels ending up with me needing loads of fittings lol, but i wanted to do it right and be able to swivel each pipe allowing it to sit just right.
I also bought 30 stainless and insulated p clips and 8 new bleed nipples for the front calipers and as i'm doing the calipers black with stainless bolts, i bought stainless nipples
Last edited by Gadget; 10-10-2012 at 07:56 PM.
 16-10-2012, 08:46 AM
#46
Spanner monkey
Thread Starter
Little bit more done, made the rear brake lines up from the handbrake. I've used M5 rivnuts for the clamps.
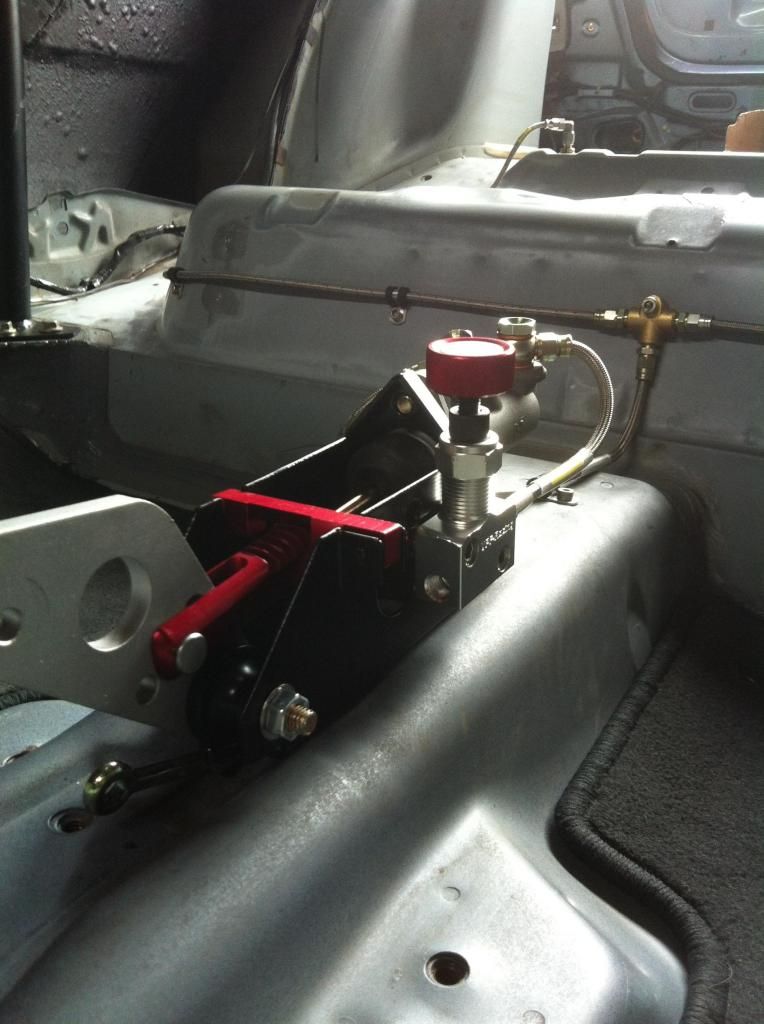
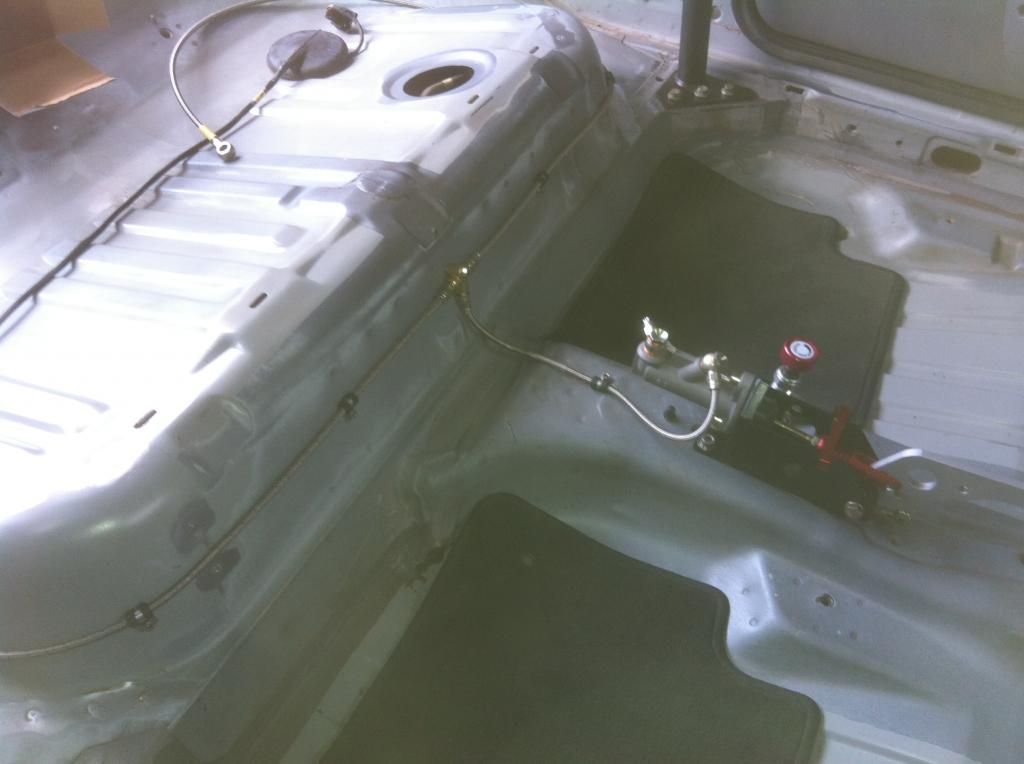
just need to get the front lines made and the rivnuts in so thats another job done ready before painting.
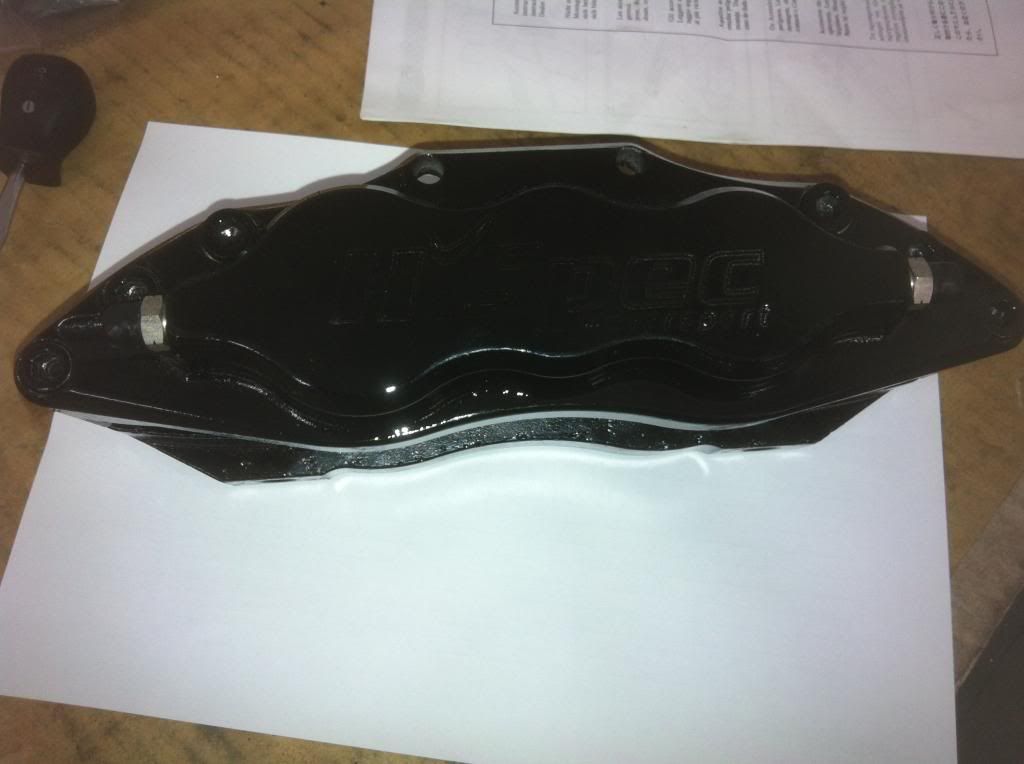
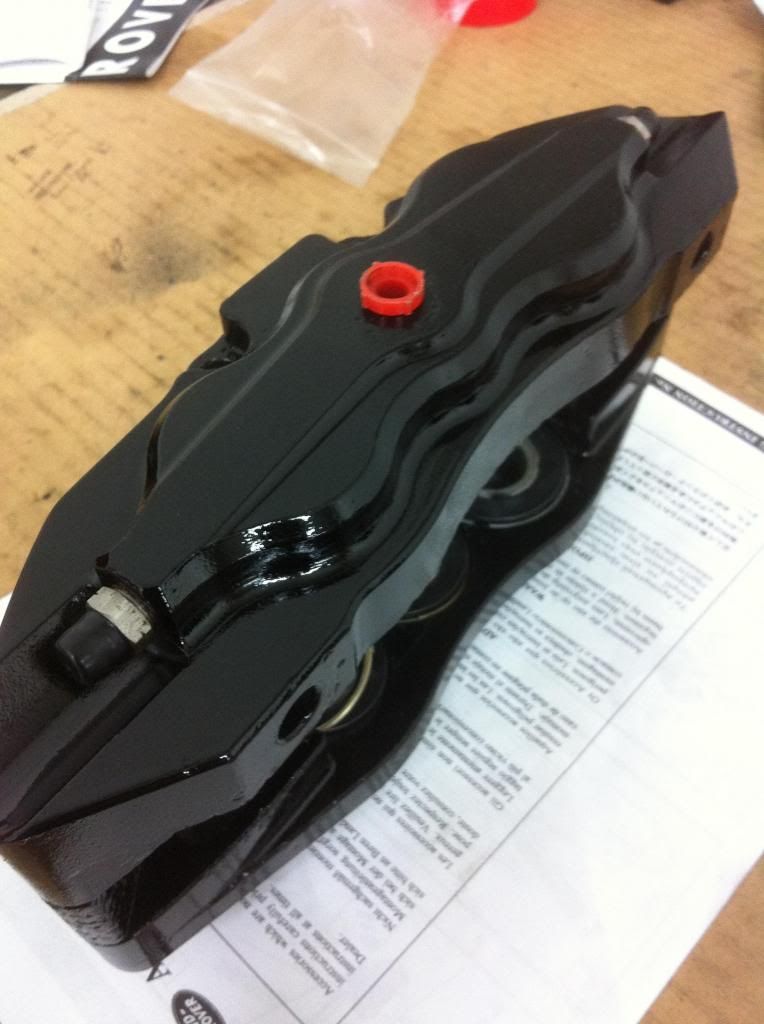
Also received my discs the other day ( i'm using st170 front and rear discs ) so i offered up the caliper to get measurements for spacers as when i got the car, there was a load of washers fitted between the alloy mounting braket and the caliper!!
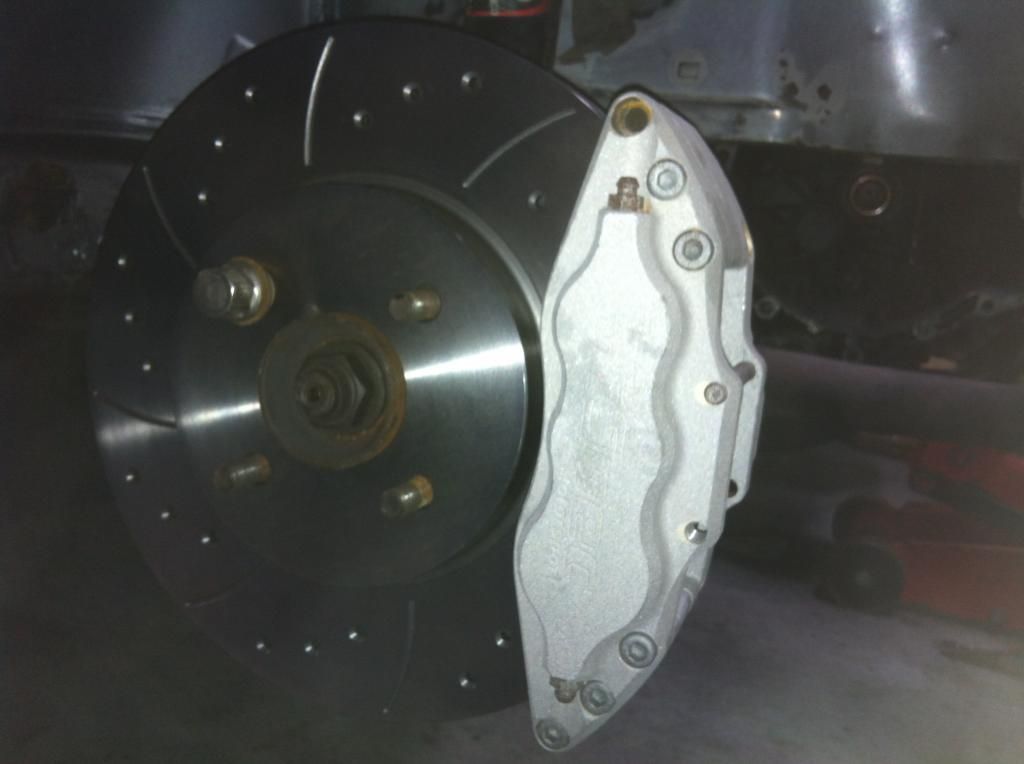
Once bolted up where i want it, it works out i need 11mm spacers between the bracket and caliper so i'll get some turned up in alloy.
I have bought all new stainless bolts and stainless bleed nipples so once i've fitted the new seal kit and painted the calipers in 2k gloss black, they'll be put in and should look nice and fresh!

Next up will be ds2500 pads which i've found for �117 so not too bad i didn't think?
just need to get the front lines made and the rivnuts in so thats another job done ready before painting.
Also received my discs the other day ( i'm using st170 front and rear discs ) so i offered up the caliper to get measurements for spacers as when i got the car, there was a load of washers fitted between the alloy mounting braket and the caliper!!
Once bolted up where i want it, it works out i need 11mm spacers between the bracket and caliper so i'll get some turned up in alloy.
I have bought all new stainless bolts and stainless bleed nipples so once i've fitted the new seal kit and painted the calipers in 2k gloss black, they'll be put in and should look nice and fresh!
Next up will be ds2500 pads which i've found for �117 so not too bad i didn't think?


 21-10-2012, 07:52 PM
#51
Spanner monkey
Thread Starter
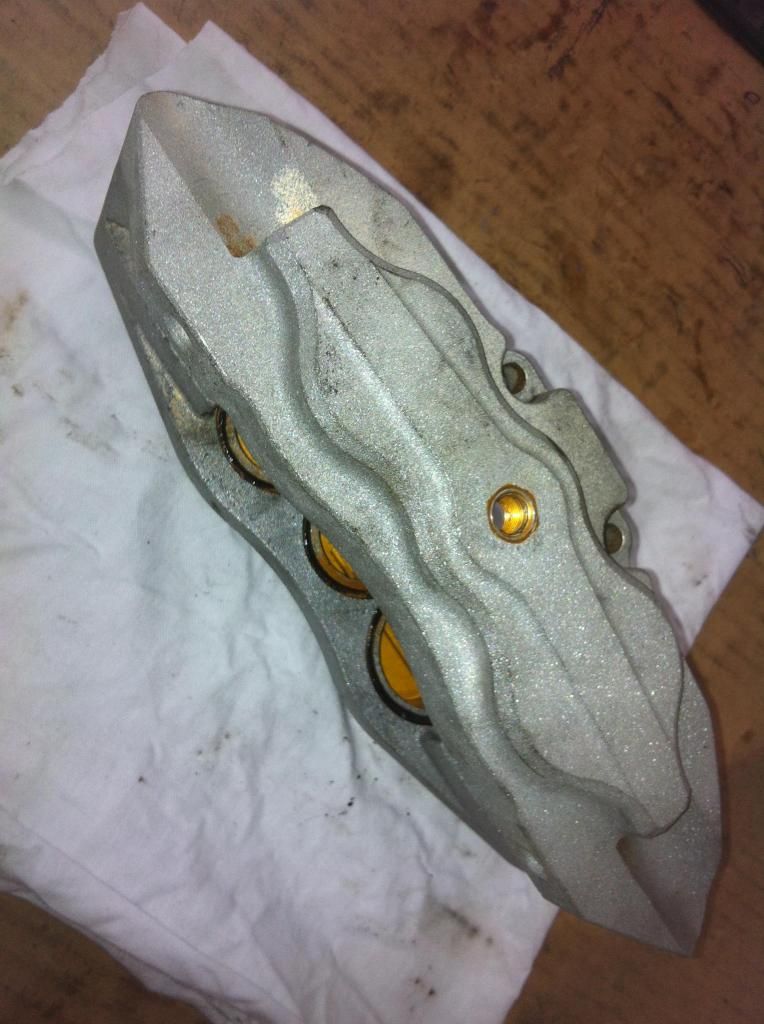
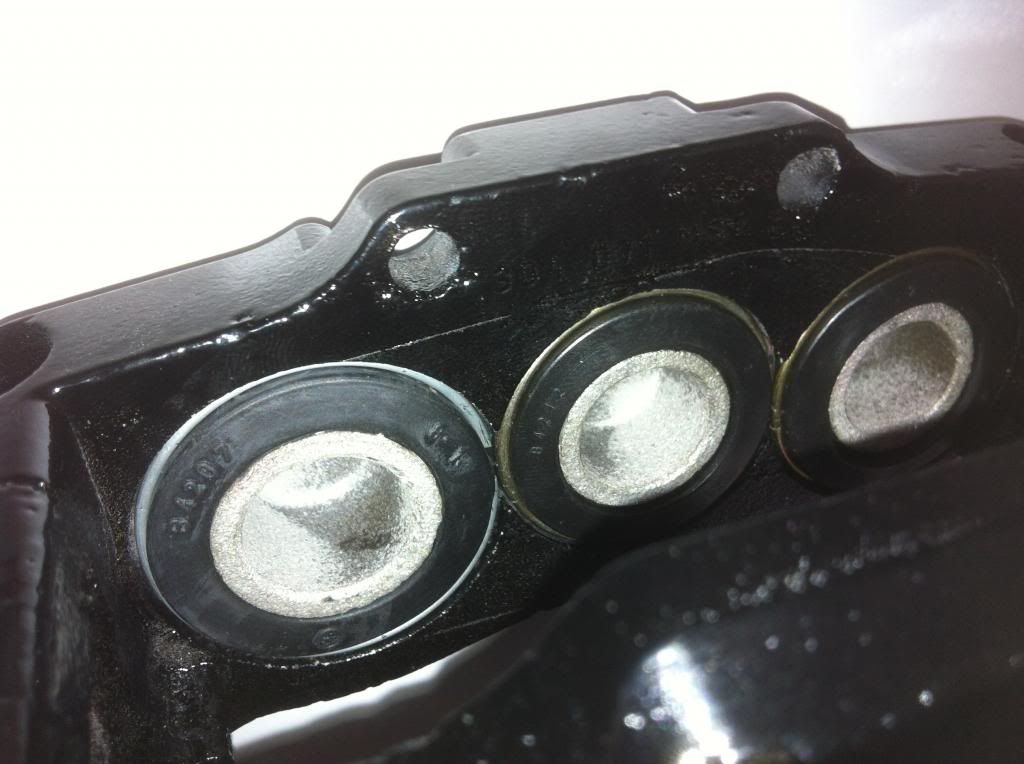
Got some more done. Friday night i got the calipers painted in 2k gloss black and fitted the new seal kits. Unfortunatly, 2 of the bolts holding the two halves of the calipers together just would not budge, they started to round the allen socket heads so i thought stuff it, i'll just paint the bolts also and not replace them with stainless ones. ( if i ever get stuck in the future, i can always drill the heads of and get them out that way! )
Couldn't seem to get a pic to make them look as good as they do in the flesh but here they are anyway.
New seals
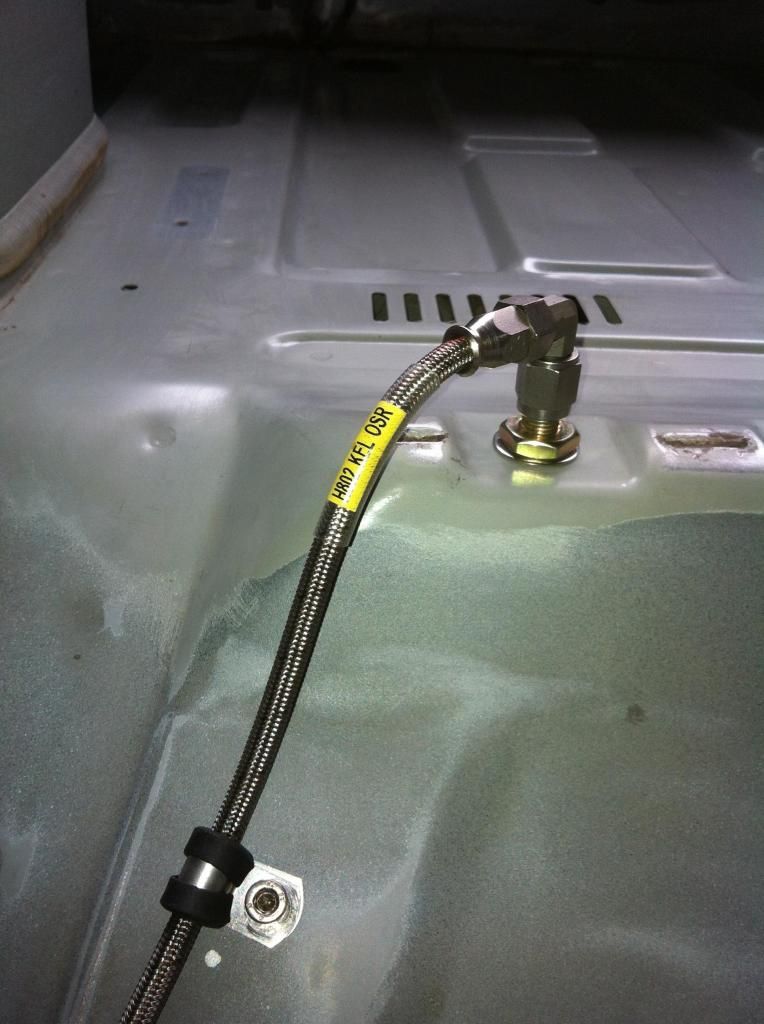
And today i got the front brake lines run inside the car to the arches.
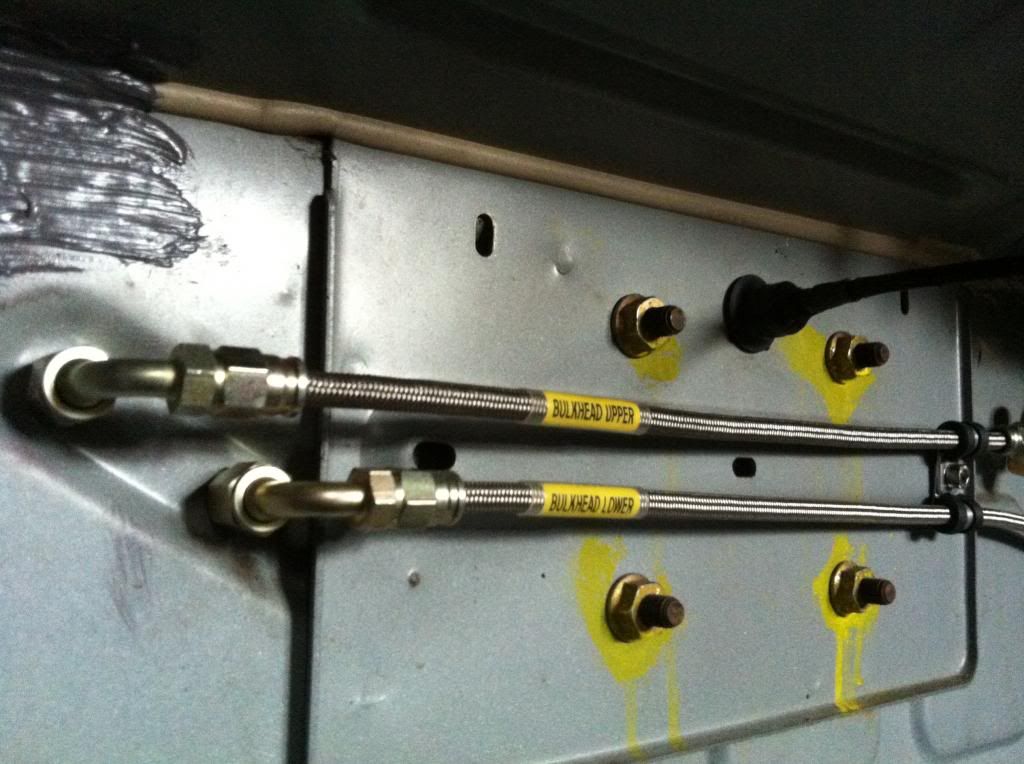
To the passenger side:
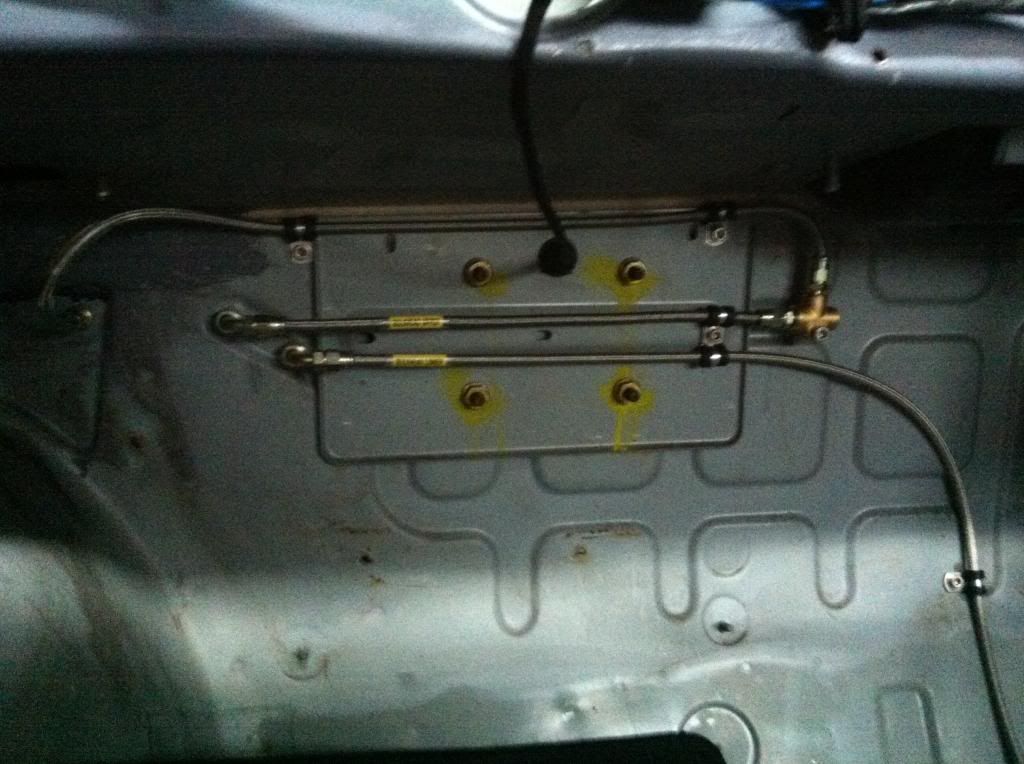
Now added the driver side going over the pedal box
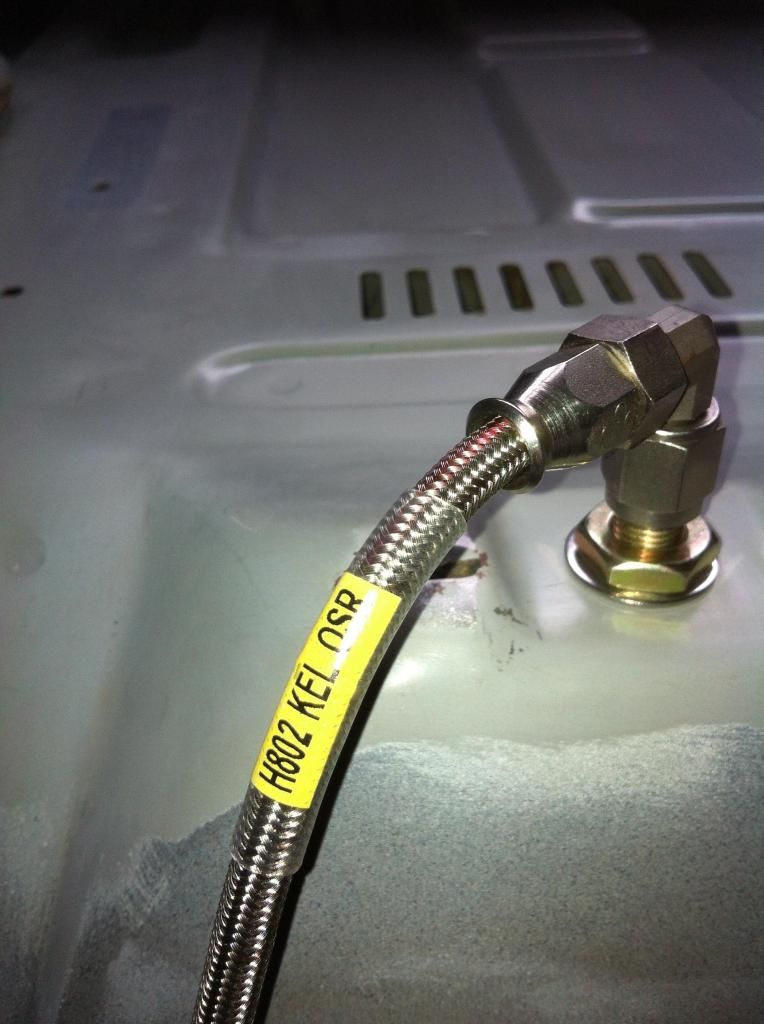
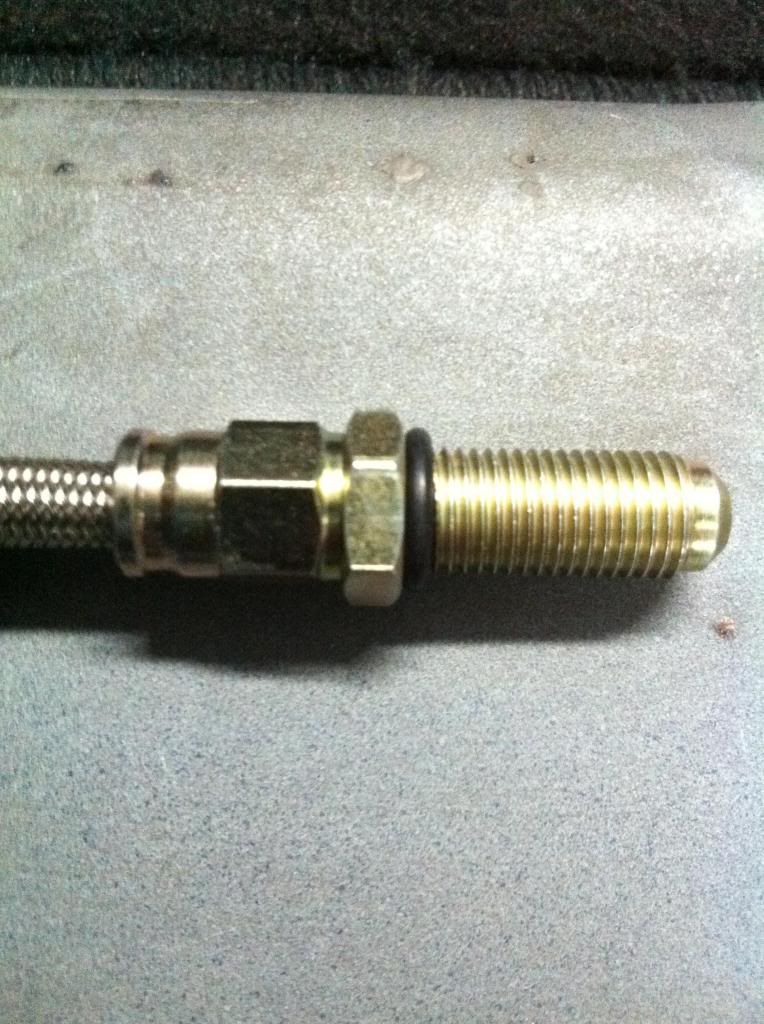
Through the bulkhead into the arch
Bulkhead fitting with an o ring
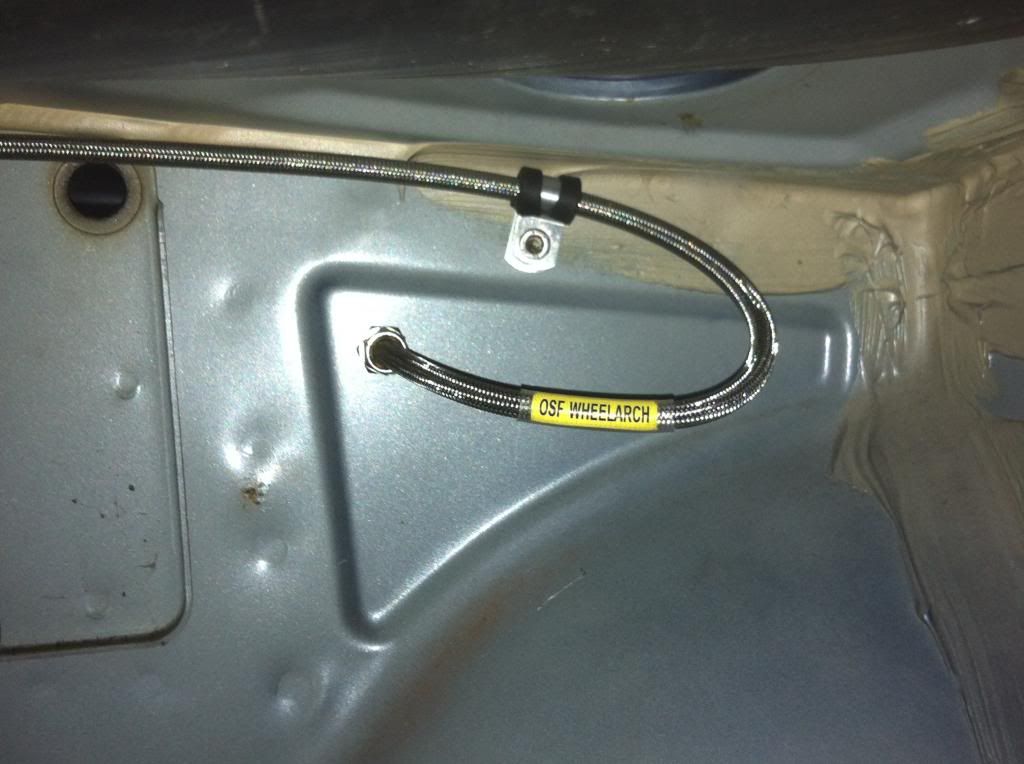
This is where i've put them through the arch ( Arches still to be washed out with thinners, stoneguarded and sprayed!! )
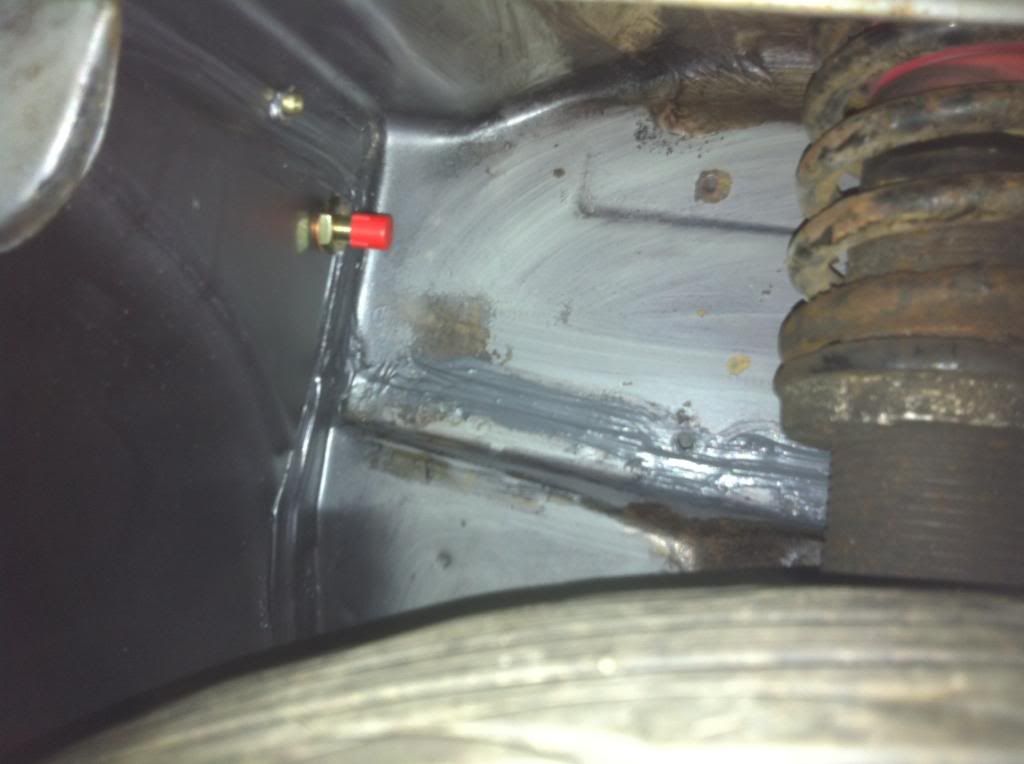

From here, i will use a swivel joint to the original bracket by the shock with another bulkhead fitting, then another swivel to the caliper but won't bother making these up untill the final build up.
Put the heater matrix back in and my measurements were just right, a nice fit here:
You've probably noticed that ive had the label maker out again lol.
Couldn't seem to get a pic to make them look as good as they do in the flesh but here they are anyway.
New seals
And today i got the front brake lines run inside the car to the arches.
To the passenger side:
Now added the driver side going over the pedal box
Through the bulkhead into the arch
Bulkhead fitting with an o ring
This is where i've put them through the arch ( Arches still to be washed out with thinners, stoneguarded and sprayed!! )
From here, i will use a swivel joint to the original bracket by the shock with another bulkhead fitting, then another swivel to the caliper but won't bother making these up untill the final build up.
Put the heater matrix back in and my measurements were just right, a nice fit here:
You've probably noticed that ive had the label maker out again lol.
Last edited by Gadget; 21-10-2012 at 07:59 PM.
18-11-2012, 05:30 PM
#55
Spanner monkey
Thread Starter
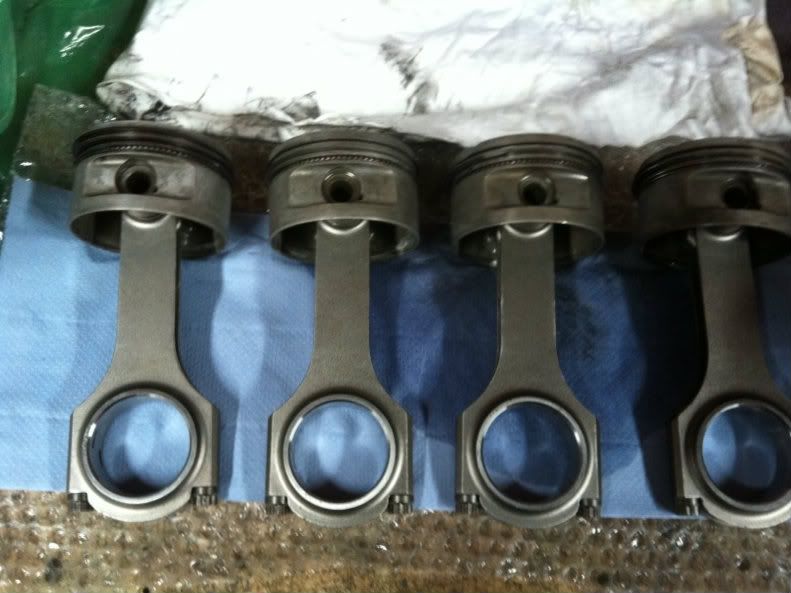
Seeing as the engine is still in pieces, i thought that i would treat it to some steel rods. I know that most people see around 300ish bhp with standard rods but i thought better to be safe than sorry.

A big big thanks for Martin ( MD Cos ) for removing the pistons and pins from my old rods, honing out the new rods to suit the pins and re building them back up making them fully floating!
And, i thought the safest place to store them is in the block along with some ACL bearings
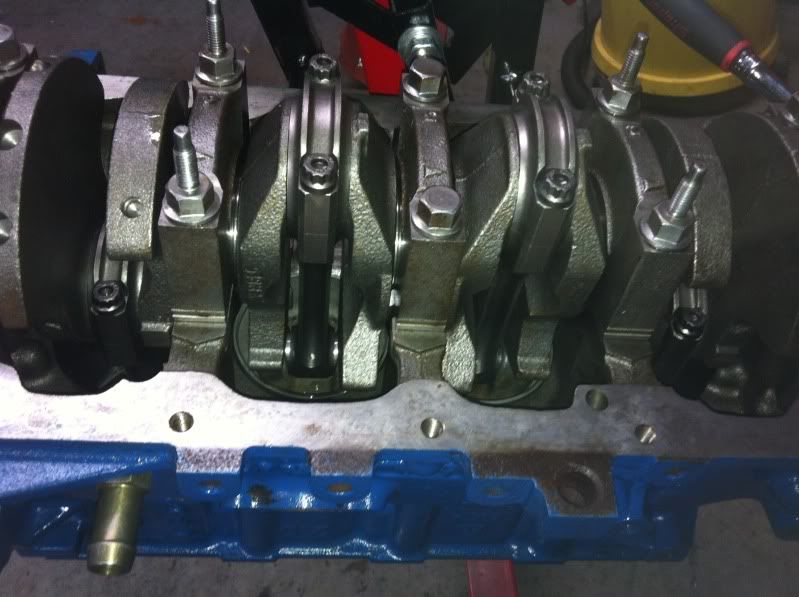
I will be re doing the block gloss black but it was a bit damp and cold today and i wanted to get the car back in the garage lol.
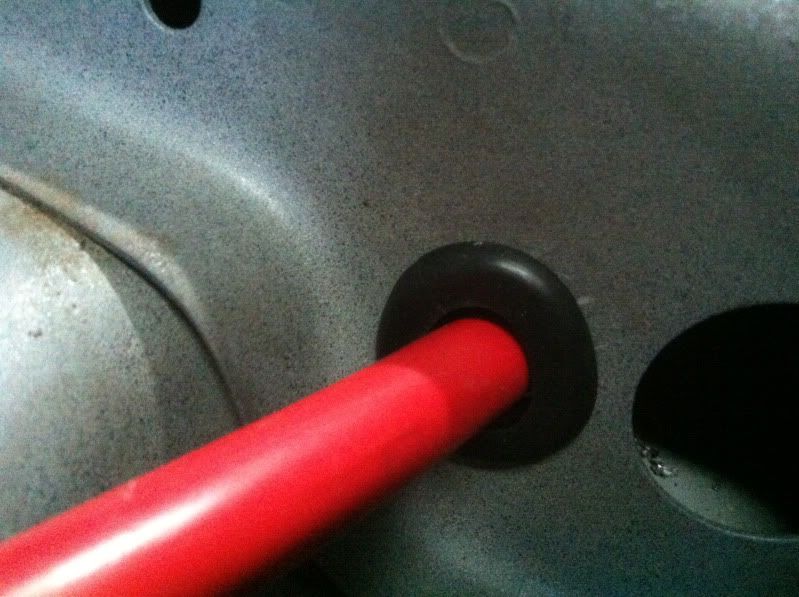
Also got the battery fitted where i wanted it, found a nice alloy battery tray on e bay for �17!! Bolted down using M4 riv nuts in the floor
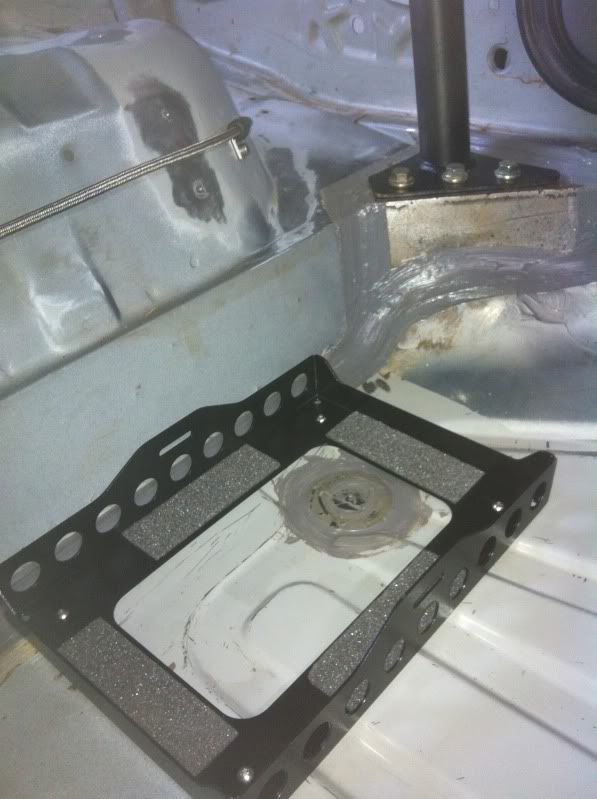

then went through the seat mount box section with grommets and off to the kill switch
A big big thanks for Martin ( MD Cos ) for removing the pistons and pins from my old rods, honing out the new rods to suit the pins and re building them back up making them fully floating!
And, i thought the safest place to store them is in the block along with some ACL bearings
I will be re doing the block gloss black but it was a bit damp and cold today and i wanted to get the car back in the garage lol.
Also got the battery fitted where i wanted it, found a nice alloy battery tray on e bay for �17!! Bolted down using M4 riv nuts in the floor
then went through the seat mount box section with grommets and off to the kill switch

 19-11-2012, 04:40 PM
#62
Spanner monkey
Thread Starter
I'd not seen it done before so i thought i'd try it, personally, i like it
http://www.ebay.co.uk/itm/DYMO-Letra...48b1778&_uhb=1
Just have to trim the label down a bit with scissors
 20-11-2012, 04:04 AM
#65
Spanner monkey
Thread Starter
A basic spec just to get a good usuable power.
Black top 2.1 16v
steel rods
vauxhall LET pistons
ST170 crank
Very mildy ported ( cleaned up ) head
standard black top cams
tubular exhaust manifold
T34 turbo with sierra .48 housing
Pectel T2 Management
Harvey Gibbs reckons it'll see 330 ish fine so thats more than good for the track
Black top 2.1 16v
steel rods
vauxhall LET pistons
ST170 crank
Very mildy ported ( cleaned up ) head
standard black top cams
tubular exhaust manifold
T34 turbo with sierra .48 housing
Pectel T2 Management
Harvey Gibbs reckons it'll see 330 ish fine so thats more than good for the track
 22-11-2012, 09:13 PM
#68
Advanced PassionFord User

Join Date: Oct 2003
Location: essex
Posts: 1,985
Likes: 0
Received 0 Likes
on
0 Posts
looks like great work mate, just wondered how you think the rear brakes will be?
ive had nothing but trouble with rear discs on stripped out cars, if the backs lighter and the fronts are upgraded then really you need to downgrade the standard drums with a bias valve just to stop locking not upgrade to discs, especially on a fiesta! surely it will lock all the time?
ive had nothing but trouble with rear discs on stripped out cars, if the backs lighter and the fronts are upgraded then really you need to downgrade the standard drums with a bias valve just to stop locking not upgrade to discs, especially on a fiesta! surely it will lock all the time?
 23-11-2012, 04:10 AM
#72
Spanner monkey
Thread Starter
looks like great work mate, just wondered how you think the rear brakes will be?
ive had nothing but trouble with rear discs on stripped out cars, if the backs lighter and the fronts are upgraded then really you need to downgrade the standard drums with a bias valve just to stop locking not upgrade to discs, especially on a fiesta! surely it will lock all the time?
ive had nothing but trouble with rear discs on stripped out cars, if the backs lighter and the fronts are upgraded then really you need to downgrade the standard drums with a bias valve just to stop locking not upgrade to discs, especially on a fiesta! surely it will lock all the time?
28-11-2012, 10:28 PM
#73
Spanner monkey
Thread Starter
Done a little bit this morning before work..
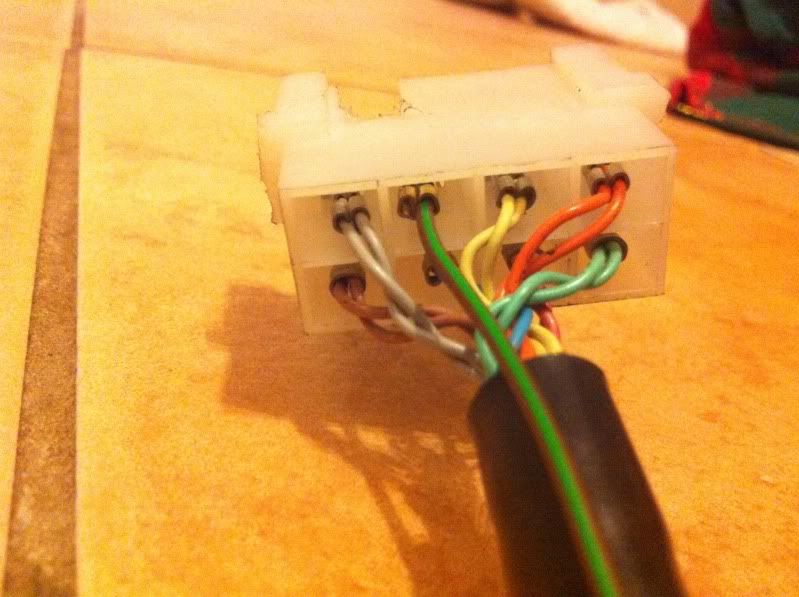
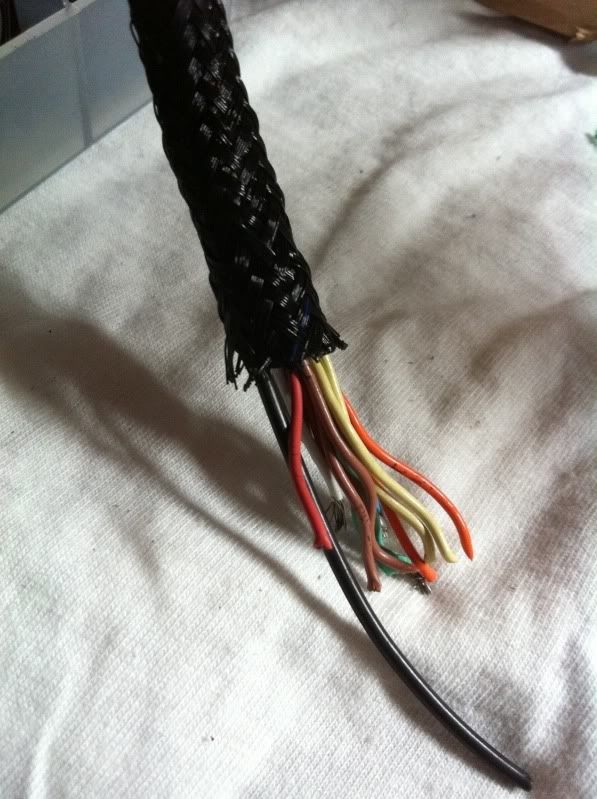
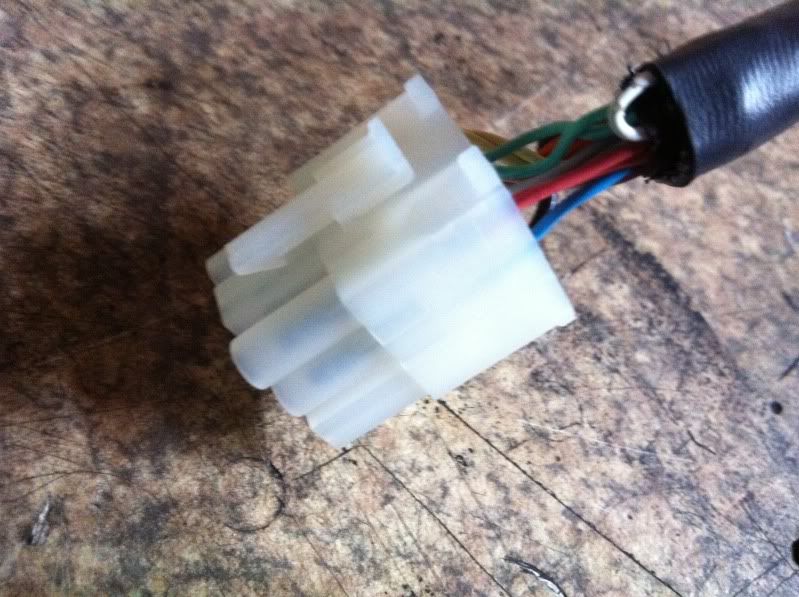
I bought a Pectel T2 loom and Ecu off of Johnjyn and now i've sorted what the wires were in the multiplug that joins the engine loom to the car loom, i thought i'd put a new plug on there as i only had the male side on the loom.
It's an 8 way plug and only 6 are actually required for what i need to function but i wanted to keep the other wires for the unused relay incase in the future i need it for something else!
I've gone for a 9 way multipole connector which gives me another spare if need be.
I wasn't happy with the tacho signal wire running from the ecu plug to the multiplug on the outside of the loom ( the brown / green wire in the pic! ) so i thought now would be a good time to sort it!
Cut the plug off and remove the glue lined heatshrink, then i fed some black cable inside the sheathing up to the " T " in the loom
Then i pulled it out of the sheathing, put it back in the sheathing leading up to the ecu plug
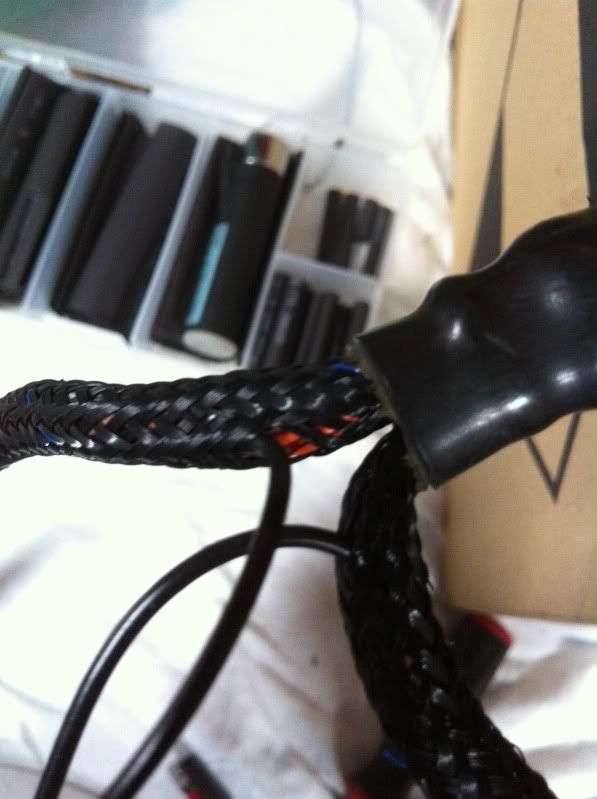
then out by the ecu plug
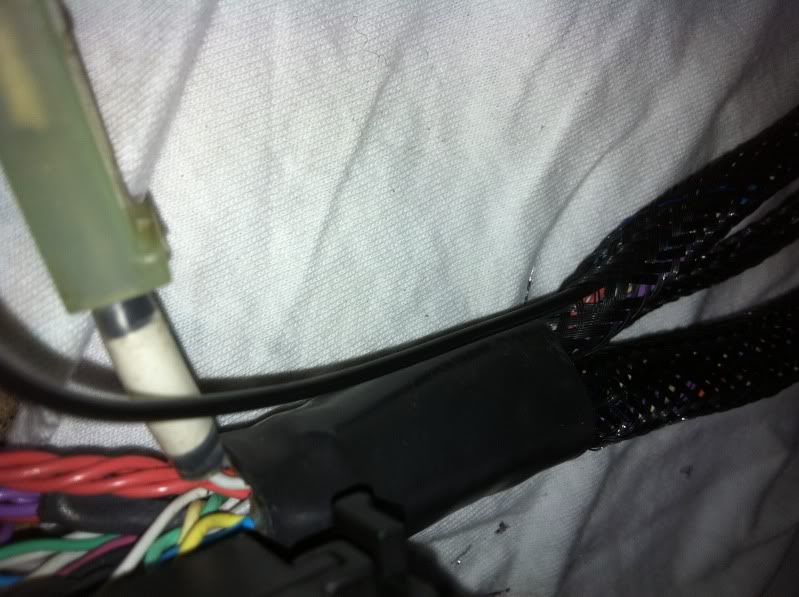
male spade added, heatshrunk and connected the loom plug. then i could pull the cable tight and zip tie the plug down

Glue lined heatshrink at the " T " then zip tied
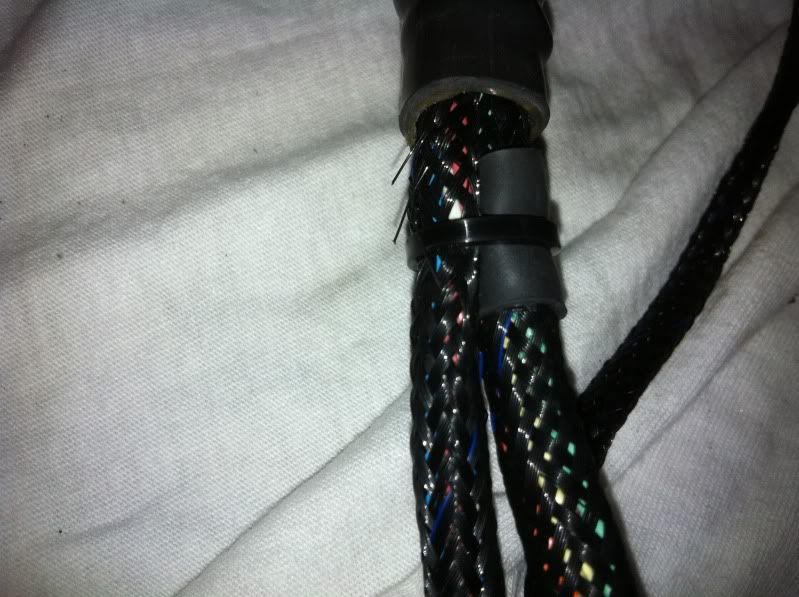
Now i put the new pins onto the cable, ( i soldered and crimped for security ) fitted the new plug and some new glue lined heatshrink
AND..........
I couldn't resist

Only a small update but i'm still plodding along with bits.!
I bought a Pectel T2 loom and Ecu off of Johnjyn and now i've sorted what the wires were in the multiplug that joins the engine loom to the car loom, i thought i'd put a new plug on there as i only had the male side on the loom.
It's an 8 way plug and only 6 are actually required for what i need to function but i wanted to keep the other wires for the unused relay incase in the future i need it for something else!
I've gone for a 9 way multipole connector which gives me another spare if need be.
I wasn't happy with the tacho signal wire running from the ecu plug to the multiplug on the outside of the loom ( the brown / green wire in the pic! ) so i thought now would be a good time to sort it!
Cut the plug off and remove the glue lined heatshrink, then i fed some black cable inside the sheathing up to the " T " in the loom
Then i pulled it out of the sheathing, put it back in the sheathing leading up to the ecu plug
then out by the ecu plug
male spade added, heatshrunk and connected the loom plug. then i could pull the cable tight and zip tie the plug down
Glue lined heatshrink at the " T " then zip tied
Now i put the new pins onto the cable, ( i soldered and crimped for security ) fitted the new plug and some new glue lined heatshrink
AND..........
I couldn't resist
Only a small update but i'm still plodding along with bits.!
29-11-2012, 09:39 PM
#76
Spanner monkey
Thread Starter
http://www.ebay.co.uk/itm/DYMO-Letra...48b1778&_uhb=1
Just have to trim the label down a bit with scissors, then clear heatshrink over the top!!
 30-11-2012, 06:04 AM
#78
Spanner monkey
Thread Starter
 30-11-2012, 08:05 PM
#79
15000

Join Date: Jul 2010
Location: southend-on-sea
Posts: 43
Likes: 0
Received 0 Likes
on
0 Posts
Dymo label maker and clear heatshrink!!
http://www.ebay.co.uk/itm/DYMO-Letra...48b1778&_uhb=1
Just have to trim the label down a bit with scissors, then clear heatshrink over the top!!
http://www.ebay.co.uk/itm/DYMO-Letra...48b1778&_uhb=1
Just have to trim the label down a bit with scissors, then clear heatshrink over the top!!