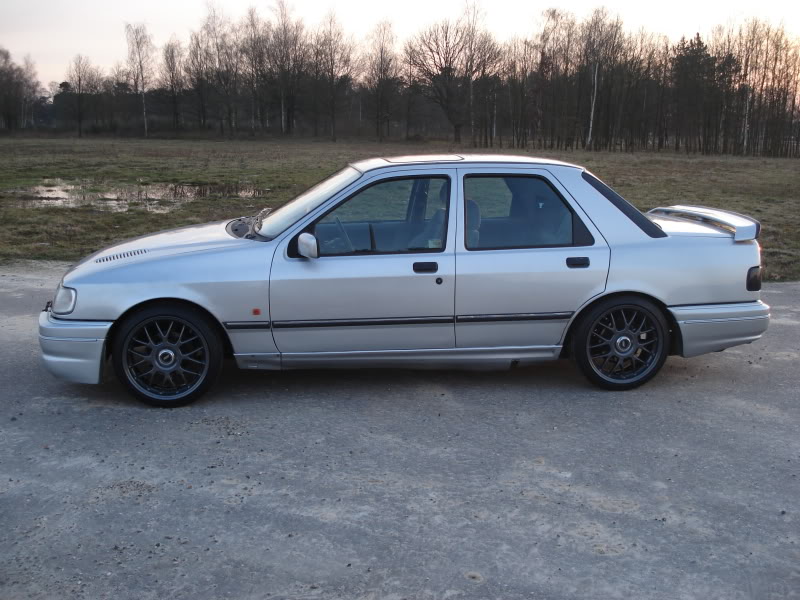
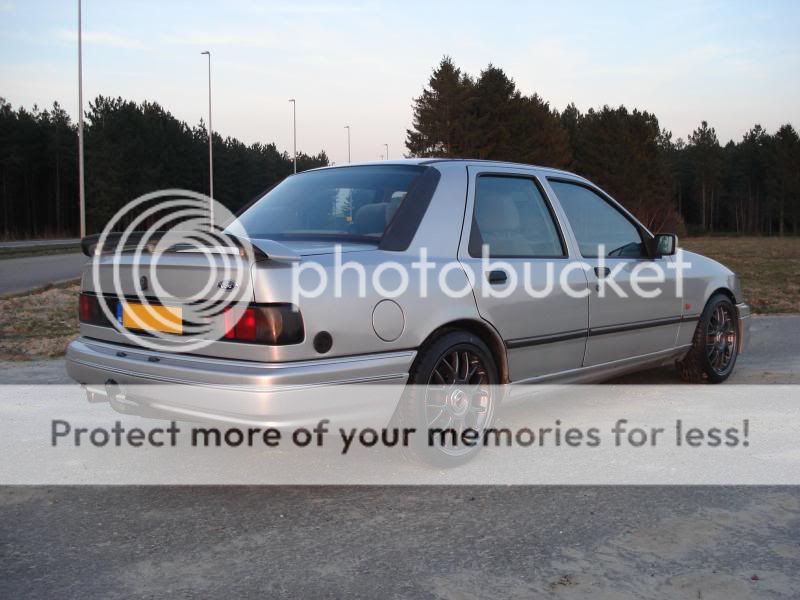
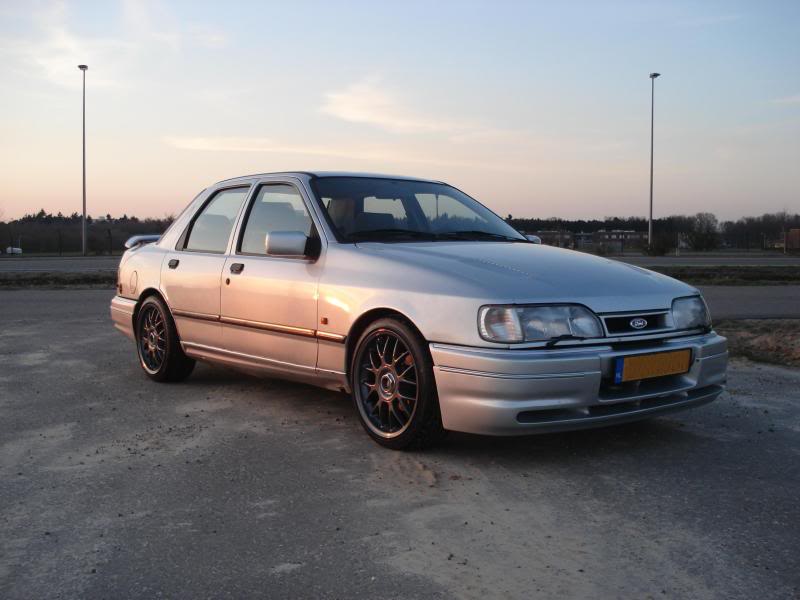
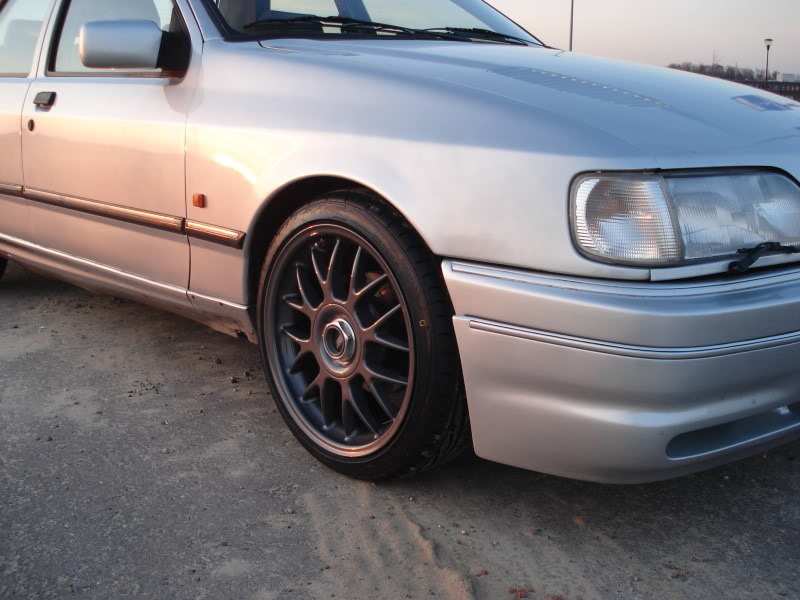
My 24v sapphire, re-shell
 13-09-2012, 08:37 PM
#81

Since the Polyrace bushes from Rally Design were not a tight fit in the arms I had some problems with the rear arms moving under braking and acceleration. After a complaint to Rally Design they sent me a new set, but those had the same problem, after that they gave me a refund.
Then I tried some Floflex bushes, as I have never had any problems with those. But while they movement of the arms was less than with the Polyrace bushes it still didn't feel like it should.
So over to the best but expensive solution, the sferical bearings the cossies have from standard. As I didn't feel like buying 4 new ones (at 80 pounds each) I found a set of rear arms with OK bearings in them. At the end one bearing still had some play in it, so I bought one bush from GGR to replace it. Luckily the local garage was again nice enough to let me use their 15 tons press.
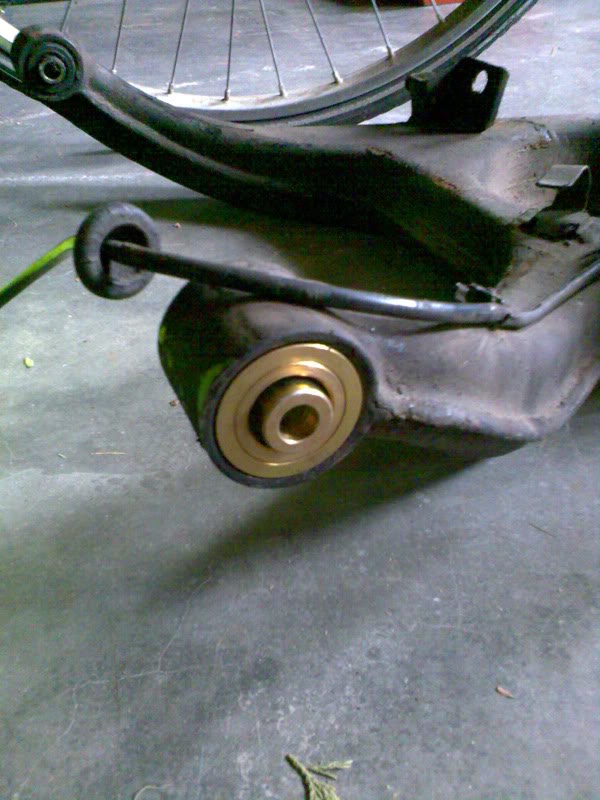
But now it's back on Sierra Cosworth arms instead of Granada Cosworth. I could tell immediately when looking at how the wheels sit in the arches, the rear track is a lot less wide now.
Then I tried some Floflex bushes, as I have never had any problems with those. But while they movement of the arms was less than with the Polyrace bushes it still didn't feel like it should.
So over to the best but expensive solution, the sferical bearings the cossies have from standard. As I didn't feel like buying 4 new ones (at 80 pounds each) I found a set of rear arms with OK bearings in them. At the end one bearing still had some play in it, so I bought one bush from GGR to replace it. Luckily the local garage was again nice enough to let me use their 15 tons press.
But now it's back on Sierra Cosworth arms instead of Granada Cosworth. I could tell immediately when looking at how the wheels sit in the arches, the rear track is a lot less wide now.


 16-09-2012, 08:39 PM
#83
PassionFord Regular
 23-09-2012, 05:23 PM
#85
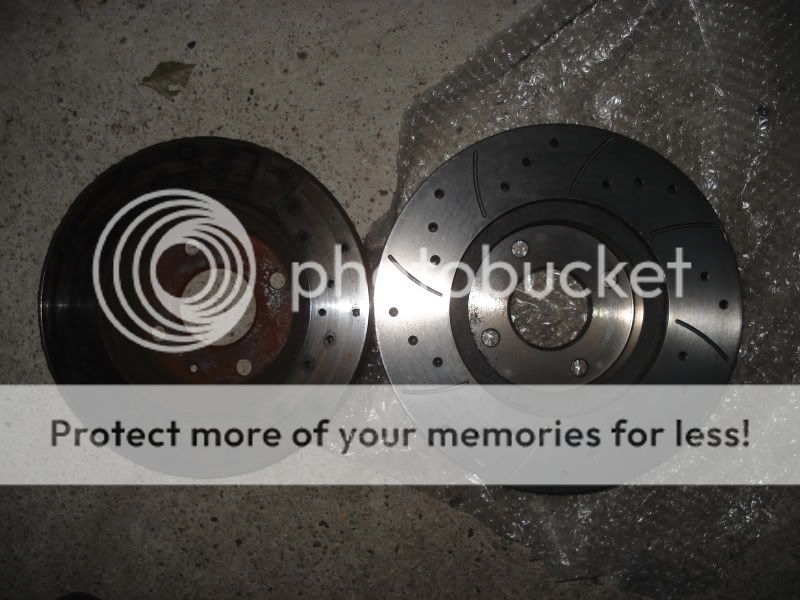
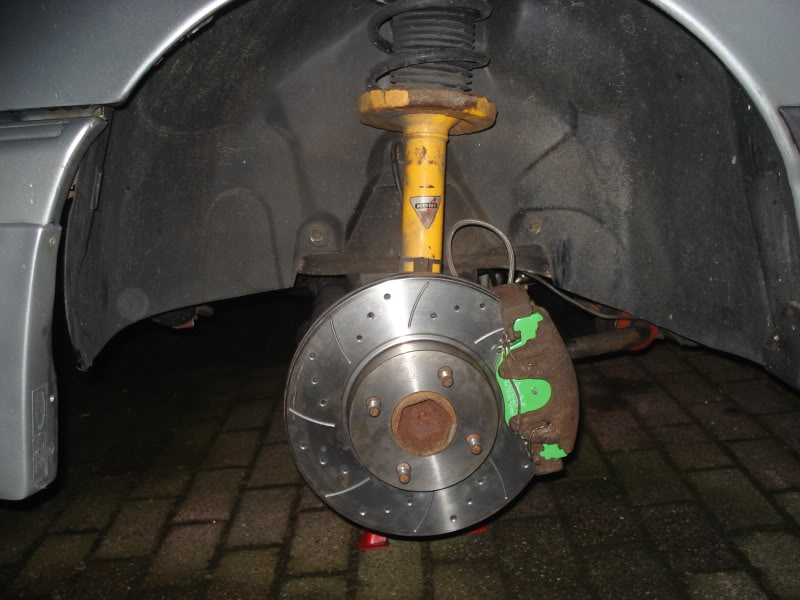
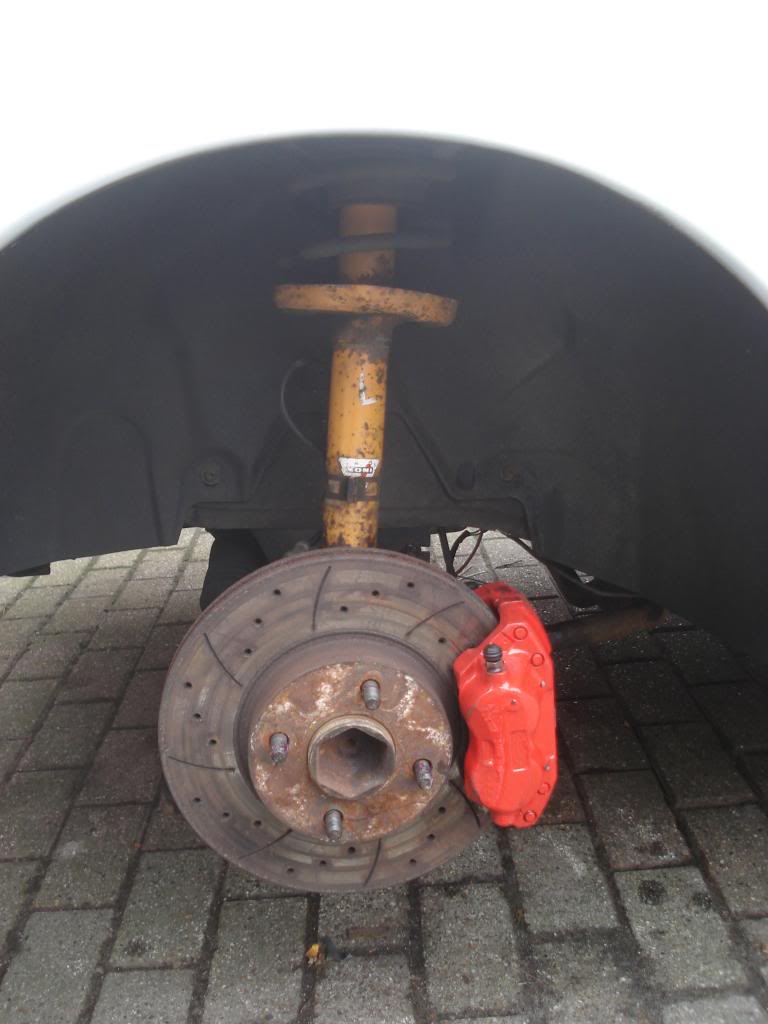
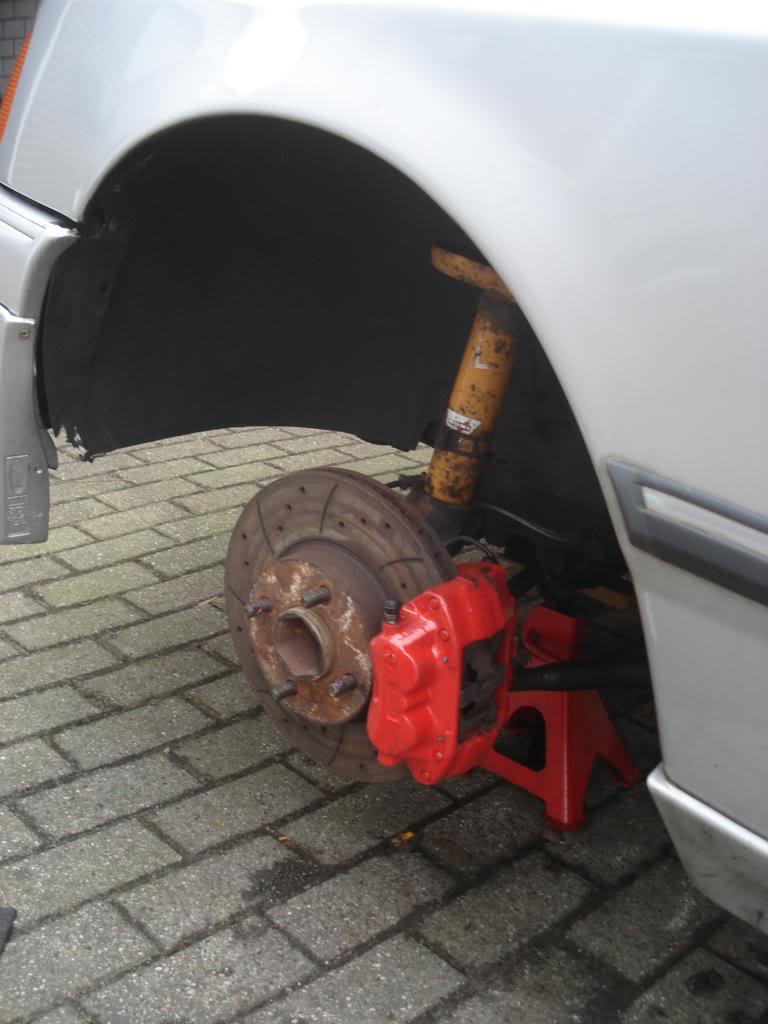
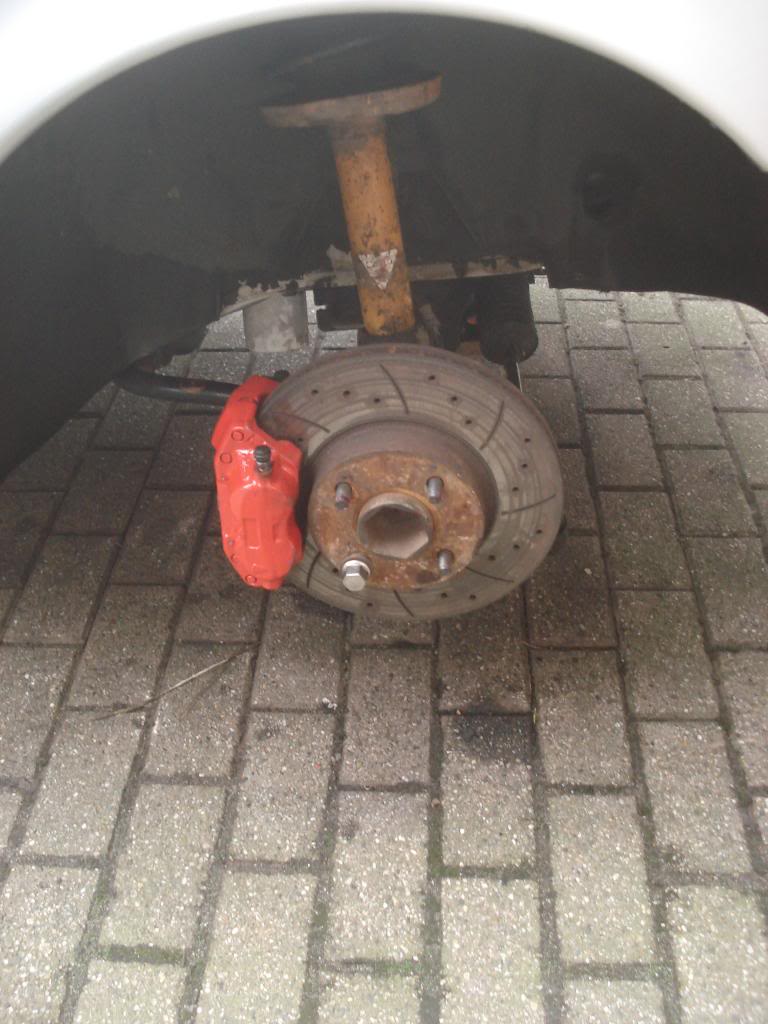
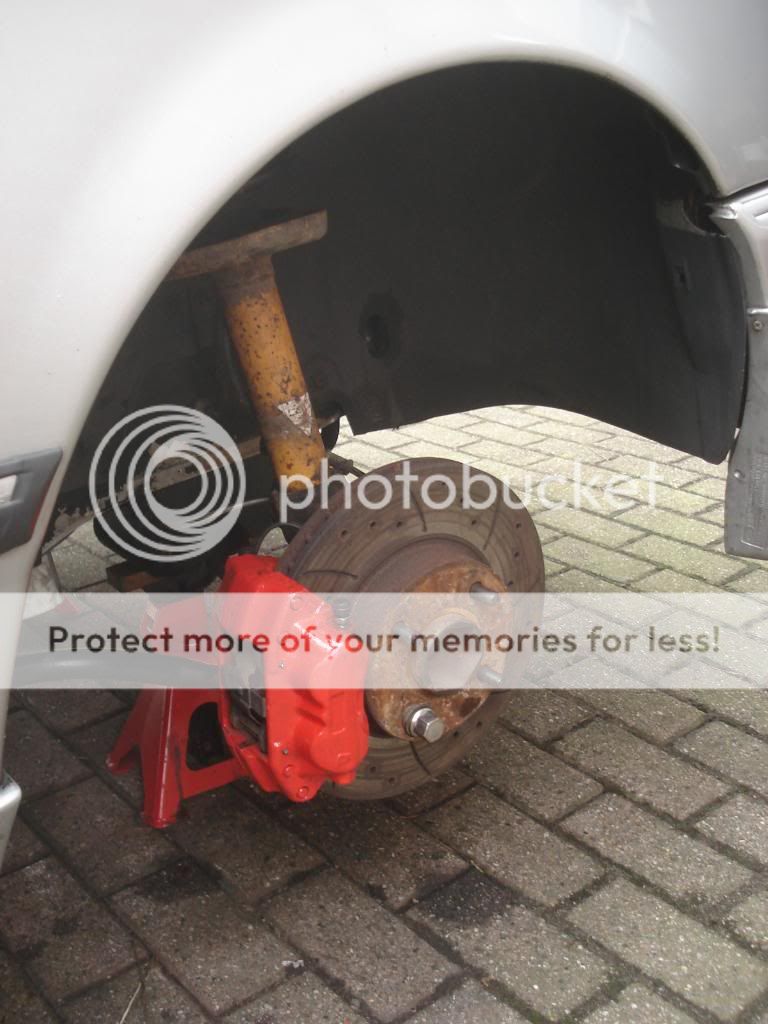
Finally also upgraded the front brakes. The 260 mm discs have been replaced by 283 mm Cosworth 2wd discs. An old an new disc next to each other.
Fitted the disc and the caliper carrier. The bolts of the carriers are M12, so I had to drill the holes in the hub from 10 mm to 12 mm.
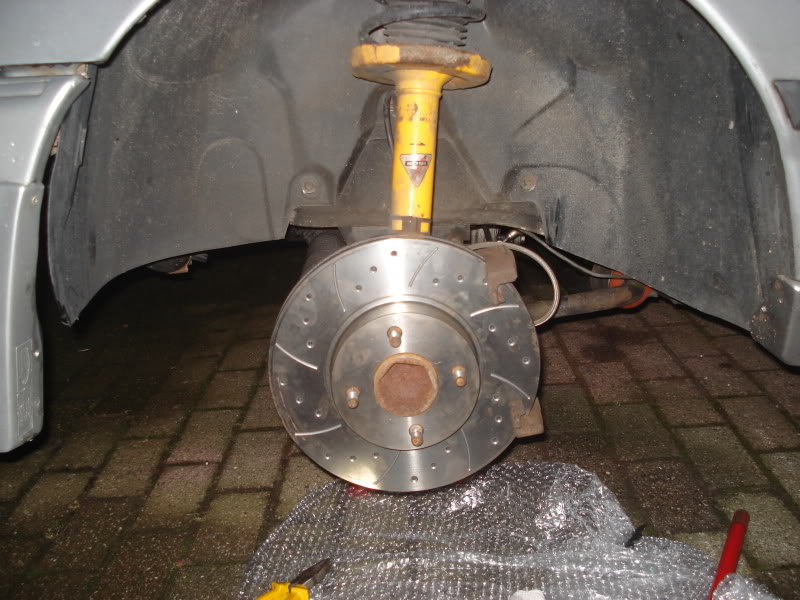
And the caliper with new EBC greenstuff pads.
Fitted the disc and the caliper carrier. The bolts of the carriers are M12, so I had to drill the holes in the hub from 10 mm to 12 mm.
And the caliper with new EBC greenstuff pads.
04-01-2013, 07:59 AM
#86
Finally continued with the aircon install. Last year the problem was that the pipes from the condensor didn't fit due to the fact the condenser was from a Sierra DOHC. As the V6 condenser was no longer available in the Netherlands (yes, still from Ford, for around 900 euros  ), I ordered one in the UK. Unfortunately they put on their site that they have it, but in the end I get send a condenser for an Opel Corsa. And then they still dare to say it also fits a Sierra.
Corsa condenser:

And a drawing of how the Sierra V6 condenser should look like (picture from their own site):

So still no Sierra V6 condensor. In the end I thought of getting the DOHC condenser modified, but that one turned out to be broken. Getting a Granada Mk3 condenser with matching dryer was also no option. So in the end I ordered a condenser for a Sierra OHC with dryer and had the pipe modified to fit the V6 aircon compressor.
So now all pipes, condenser, dryer and compressor are fitted. It's a bit tight, but it all fits.
The pipes near the vaporizer.

Pipe from the compressor to the vaporizer. Not much room to get the pipe through the plate behind the inlet plenum.

And the compressor.

The pipe that was modified.

And the new condenser with dryer.


), I ordered one in the UK. Unfortunately they put on their site that they have it, but in the end I get send a condenser for an Opel Corsa. And then they still dare to say it also fits a Sierra. Corsa condenser:
And a drawing of how the Sierra V6 condenser should look like (picture from their own site):
So still no Sierra V6 condensor. In the end I thought of getting the DOHC condenser modified, but that one turned out to be broken. Getting a Granada Mk3 condenser with matching dryer was also no option. So in the end I ordered a condenser for a Sierra OHC with dryer and had the pipe modified to fit the V6 aircon compressor.
So now all pipes, condenser, dryer and compressor are fitted. It's a bit tight, but it all fits.
The pipes near the vaporizer.
Pipe from the compressor to the vaporizer. Not much room to get the pipe through the plate behind the inlet plenum.
And the compressor.
The pipe that was modified.
And the new condenser with dryer.
04-01-2013, 08:00 AM
#87
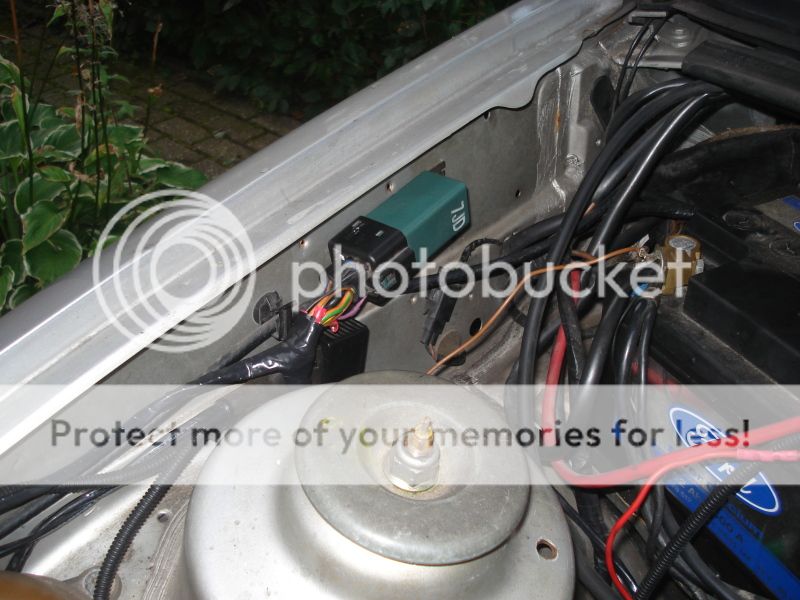
I also needed the engine cooling fans to come on when the aircon is switched on. In the bug-eye Scorpio there's a relay box that controls the fans.

When the coolant temperature switch reaches the first level, both fans switch on in low speed (fans switched in series) and on the second temperature level the fans switch on in high speed (fans switched parallel). When the aircon is on both fans are also in low speed, but when the pressure in the condenser gets too high, the fans switch over to high speed.
Fitted the relay box to a location where there is still room.
04-01-2013, 08:26 PM
#88
Glennvestite
iTrader: (1)
Join Date: Jul 2006
Location: Darlington county durham
Posts: 62,755
Received 1,042 Likes
on
996 Posts
Cool update.I dont know why them cossie rear bushes are so dear for.Have you had a look inside them bushes.There is nowt inside.Take all the grease out then you get loads of movement.
I had a slighty worn one in my arms.I removed the seals and regreased the bush.It was spot on afterwards.
I had a slighty worn one in my arms.I removed the seals and regreased the bush.It was spot on afterwards.
06-01-2013, 09:17 AM
#89
No I never had a look inside the bushes. But it should be just a spherical metal joint inside. I find it hard to believe that regreasing them makes them as good as new. The forces that act on the rear suspension will easily press all the grease out again, so I can't imagine it's still OK after driving it again...
06-01-2013, 03:13 PM
#91
Advanced PassionFord User
A great looking car, well done
07-04-2013, 06:21 PM
#92
After reading about roll centres I was interested in what it was all about. So I started reading up on the subject. I found this site about the BMW E30 very informative since it has the same front and rear suspension setups as the Sierra.
http://www.e30m3project.com/e30m3per...tech/index.htm
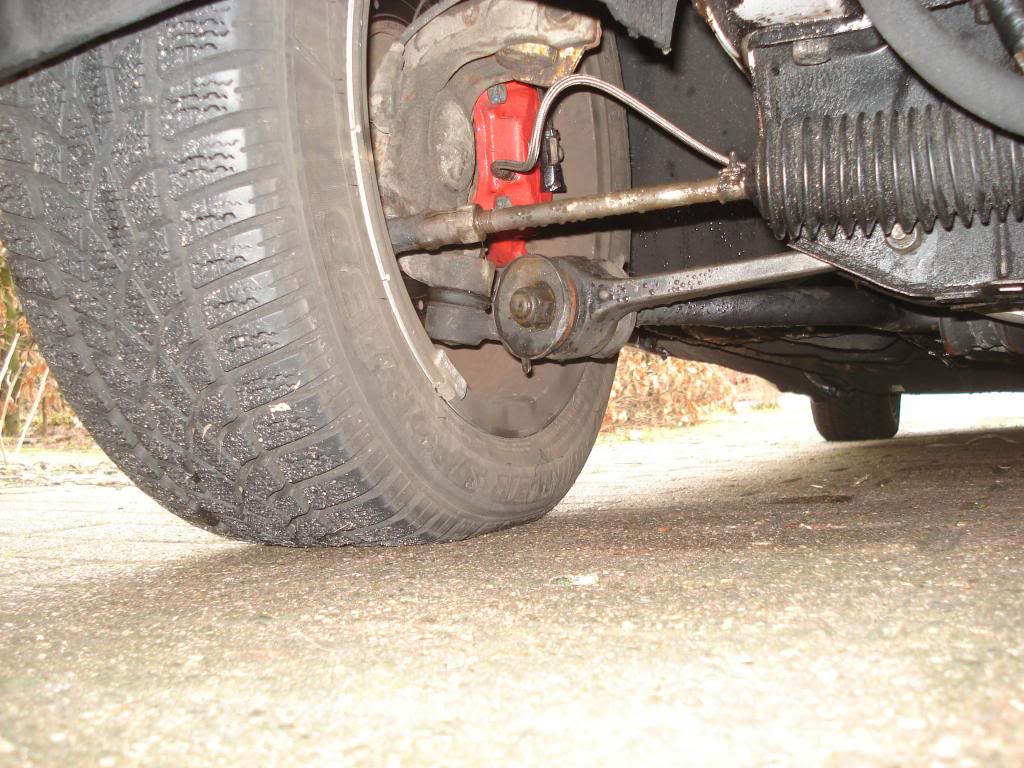
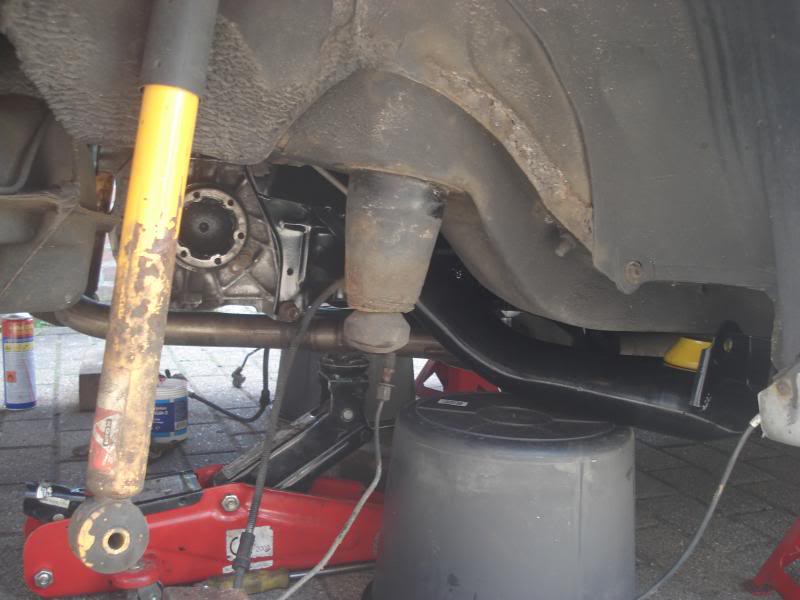
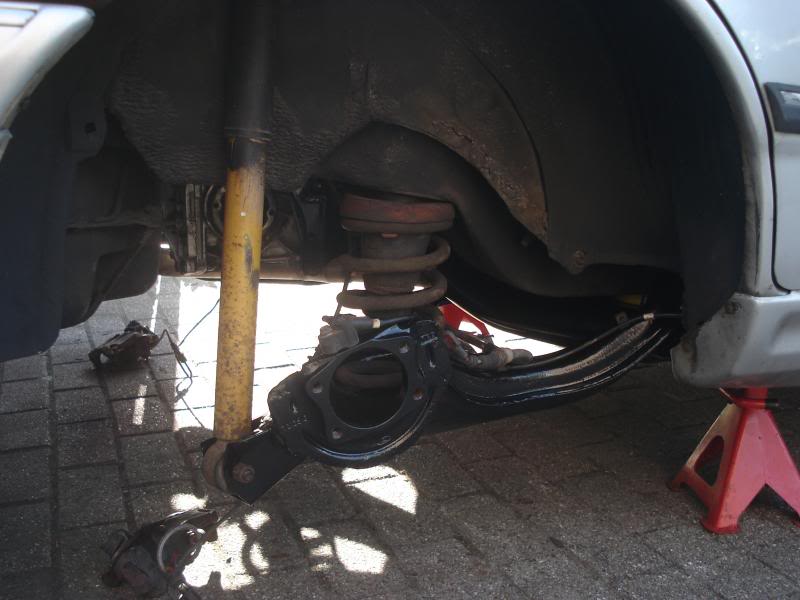
I turned out the tcas should be placed such that they point down slightly from the cross member to the hub, like shown in the pic.
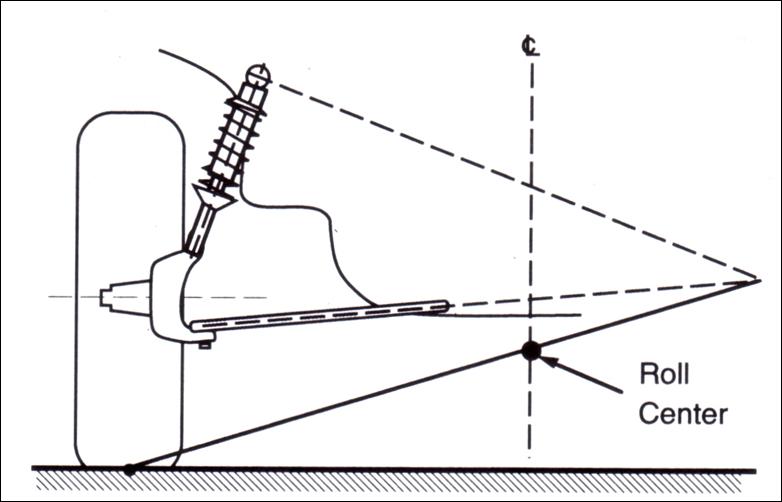
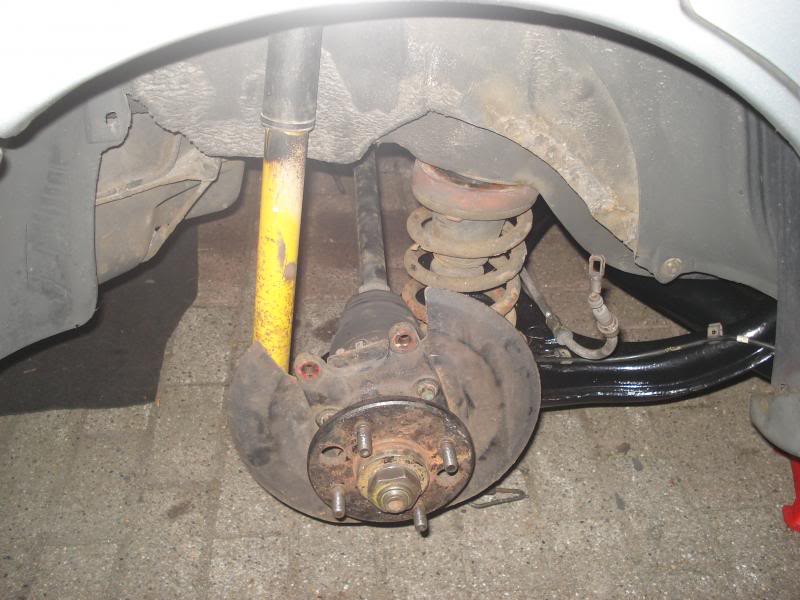
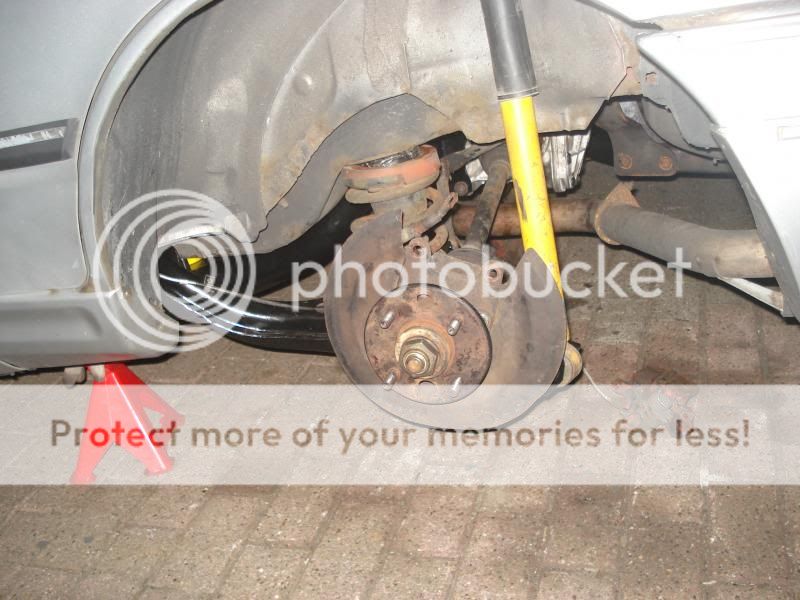
So I took some pics on how the tcas on my sapph were standing. Apparently lowering the car didn't do the roll centre much good.
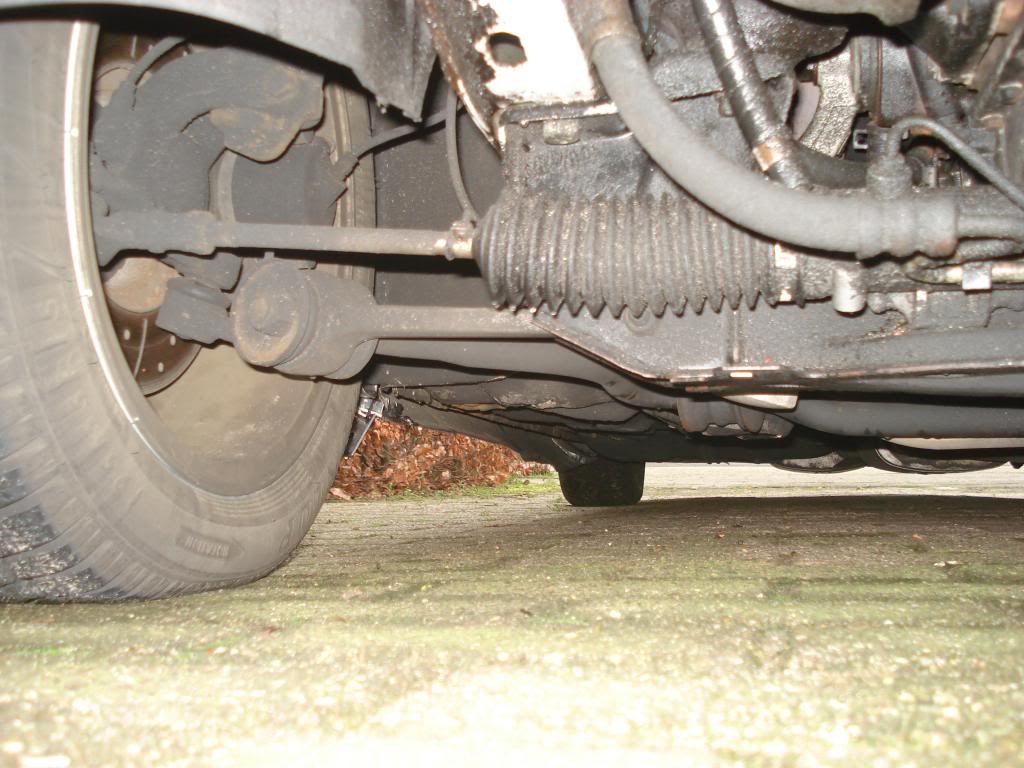
But then the next question was how to fix this, as it isn't really good for the handling of the car. I found out Ford had thought about this themselves and gave the 3dr Cosworth some special front hubs for this matter. As it was a homologation model it had to run the same hubs on the track as the road cars did on the street. But the hard part is to find those hubs for a nice price, as there aren't that many and they are quite sought after...
http://www.e30m3project.com/e30m3per...tech/index.htm
I turned out the tcas should be placed such that they point down slightly from the cross member to the hub, like shown in the pic.
So I took some pics on how the tcas on my sapph were standing. Apparently lowering the car didn't do the roll centre much good.
But then the next question was how to fix this, as it isn't really good for the handling of the car. I found out Ford had thought about this themselves and gave the 3dr Cosworth some special front hubs for this matter. As it was a homologation model it had to run the same hubs on the track as the road cars did on the street. But the hard part is to find those hubs for a nice price, as there aren't that many and they are quite sought after...
07-04-2013, 06:25 PM
#93
A couple of weeks ago I heard a strange noise and felt a knock through the car when braking. So the day after I checked what was wrong. It turned out a brake pad had come loose from the metal back plate. Luckily it was stuck between the brake caliper and caliper carrier. The pads were still quite new, so a bit of a waste. So I send a mail to EBC to see what they had to say about it.

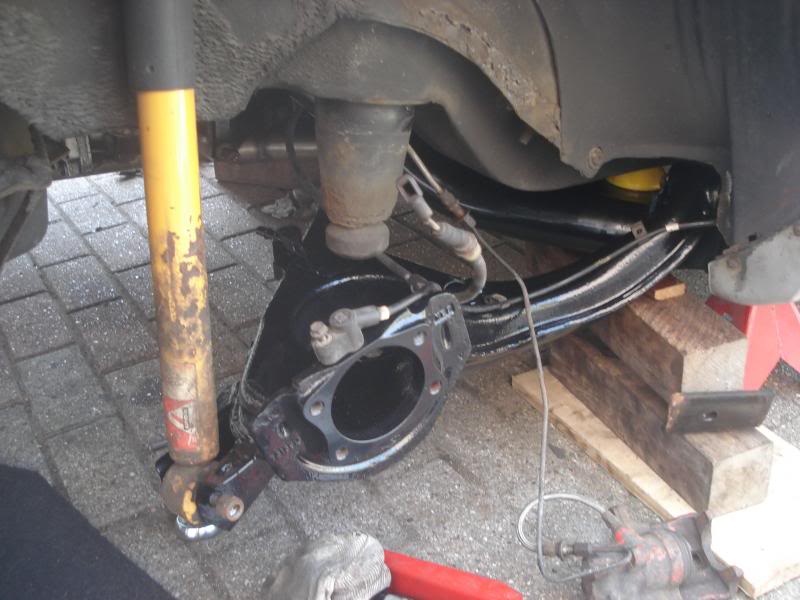
Since I had just found a set of 3dr Cosworth hubs and matching Koni shocks I started fitting those.

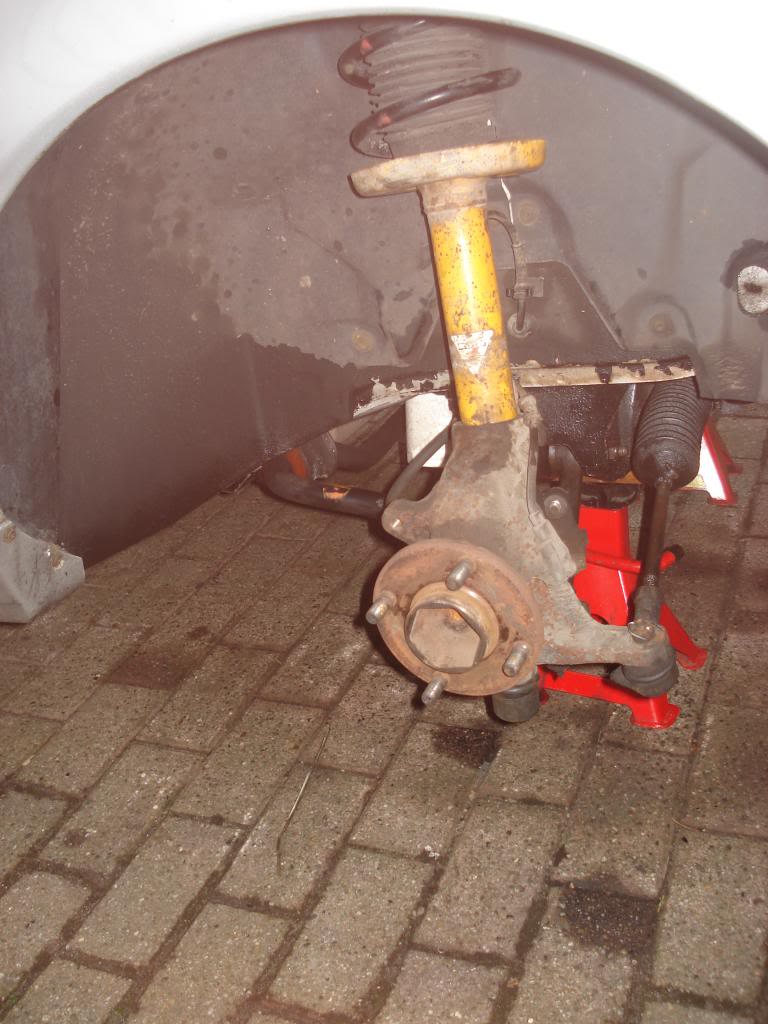
These hubs have different mounting lugs for the calipers so I also got the Cosworth 2wd 4 pot calipers. Unfortunately all pistons were seized, so I had them blasted and refurbished by a friend of a friend. How I got them back.
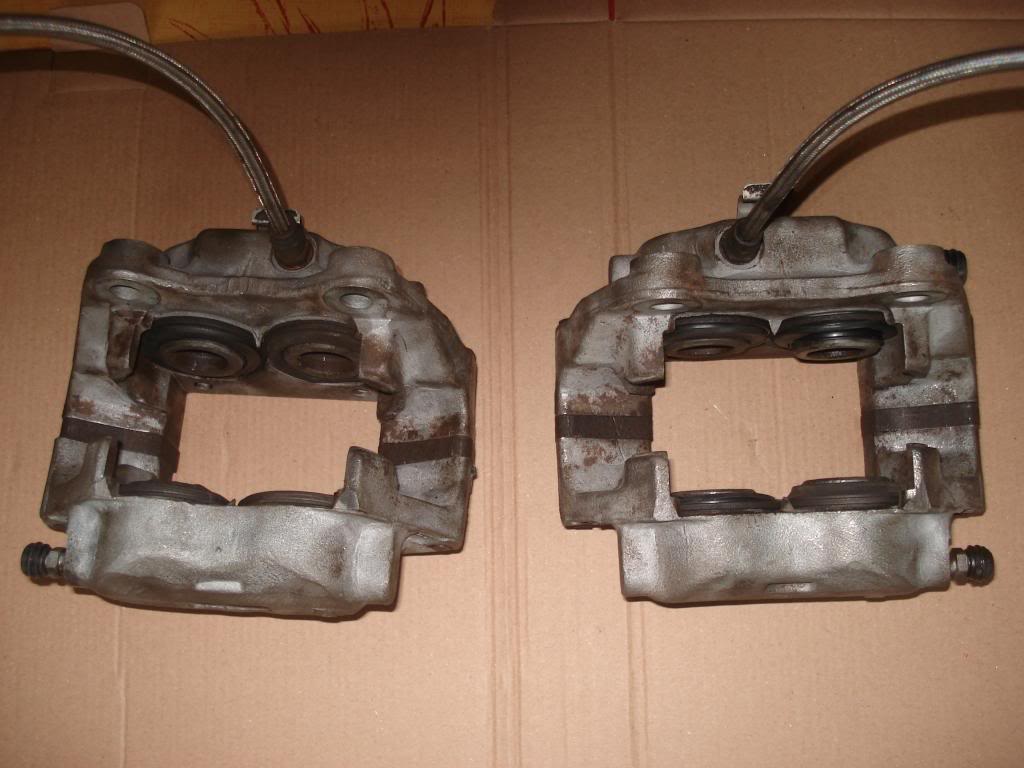
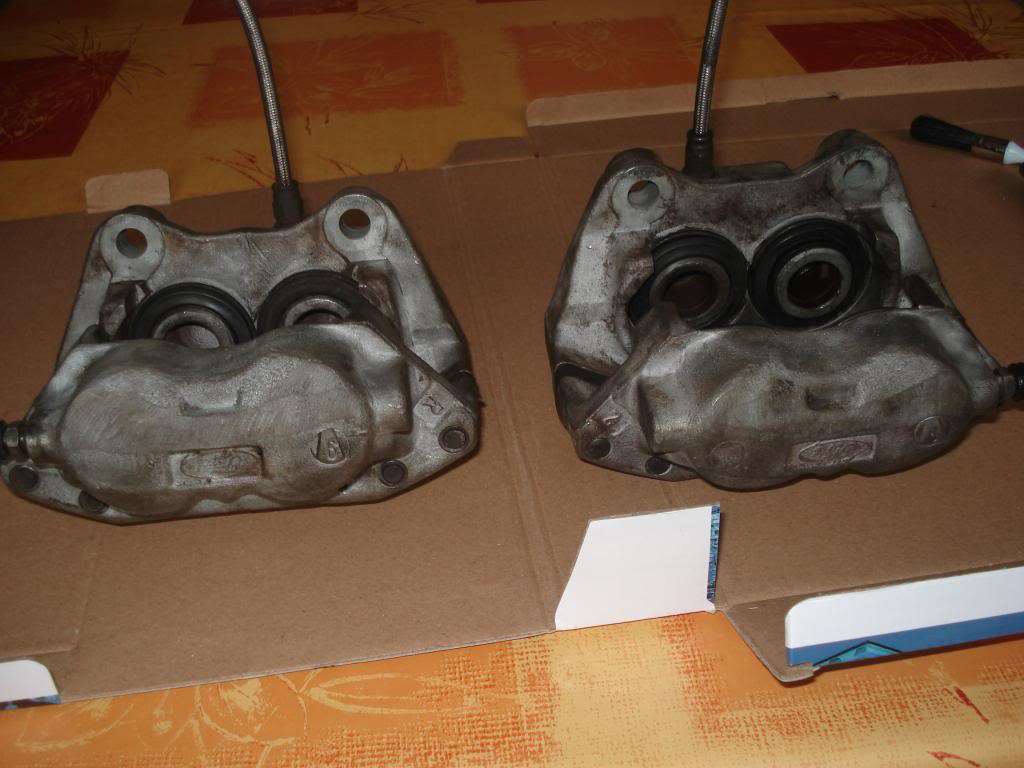
Before putting them on I put some paint on it.
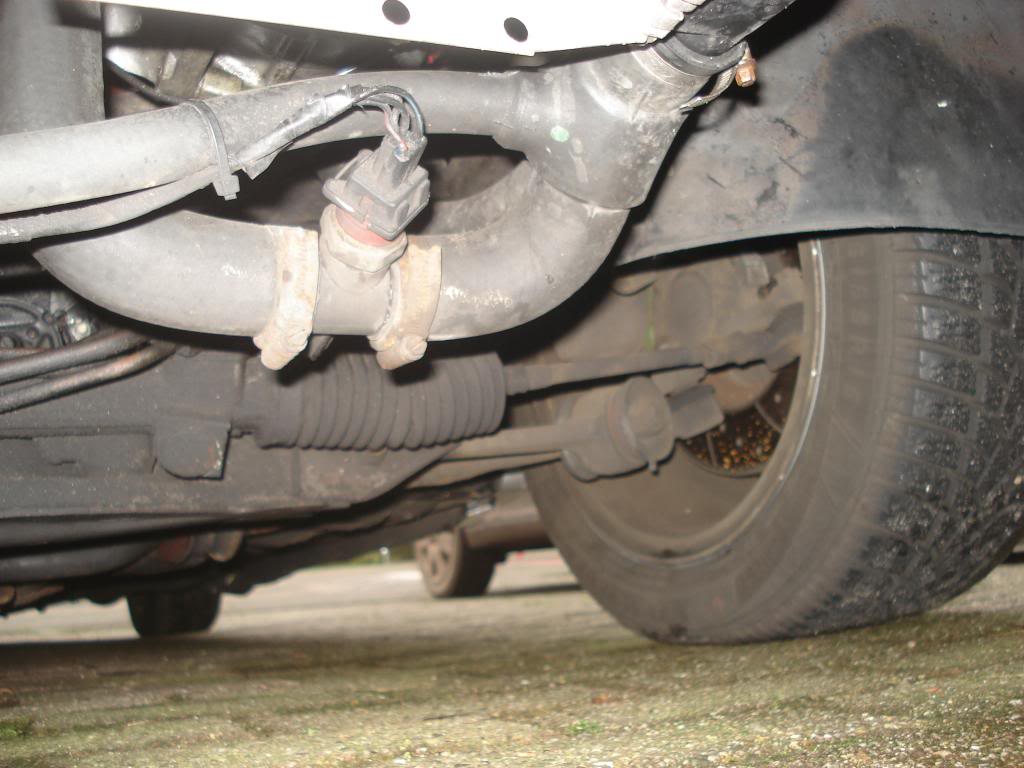
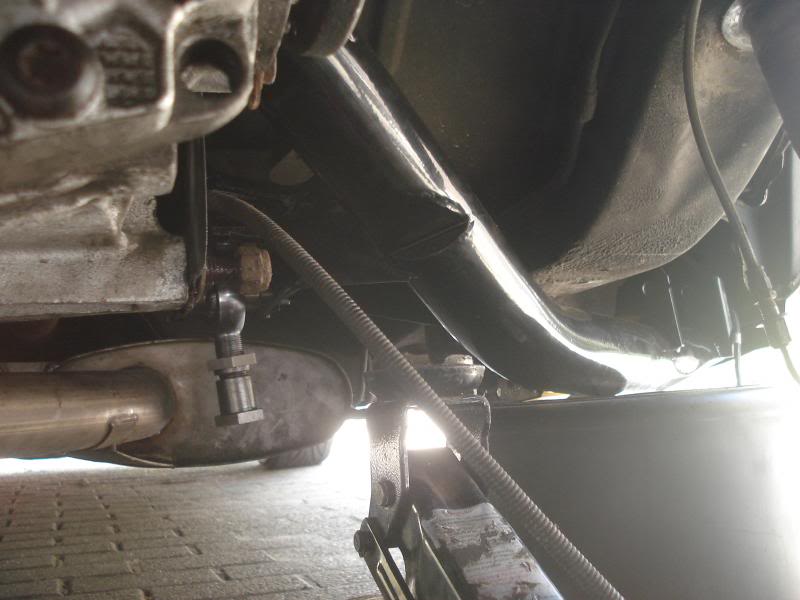
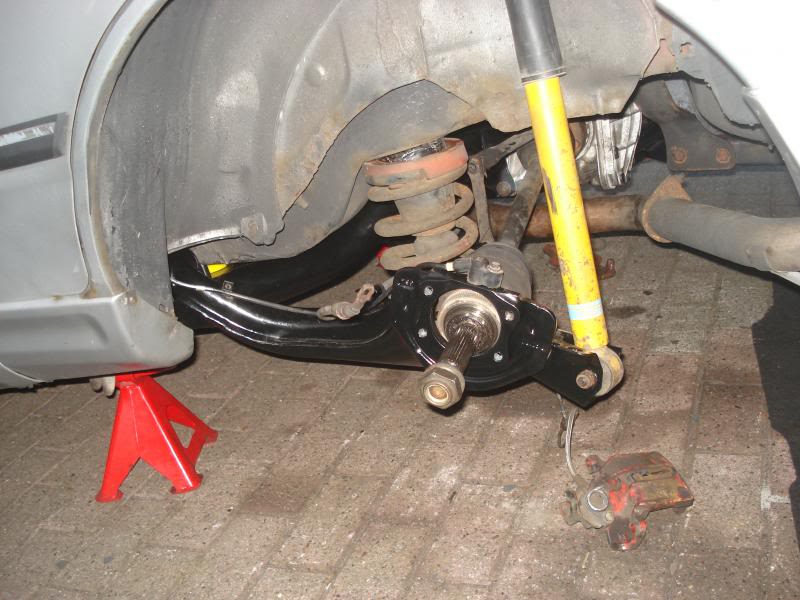
With the 3dr hubs the tcas are back to a more normal position.
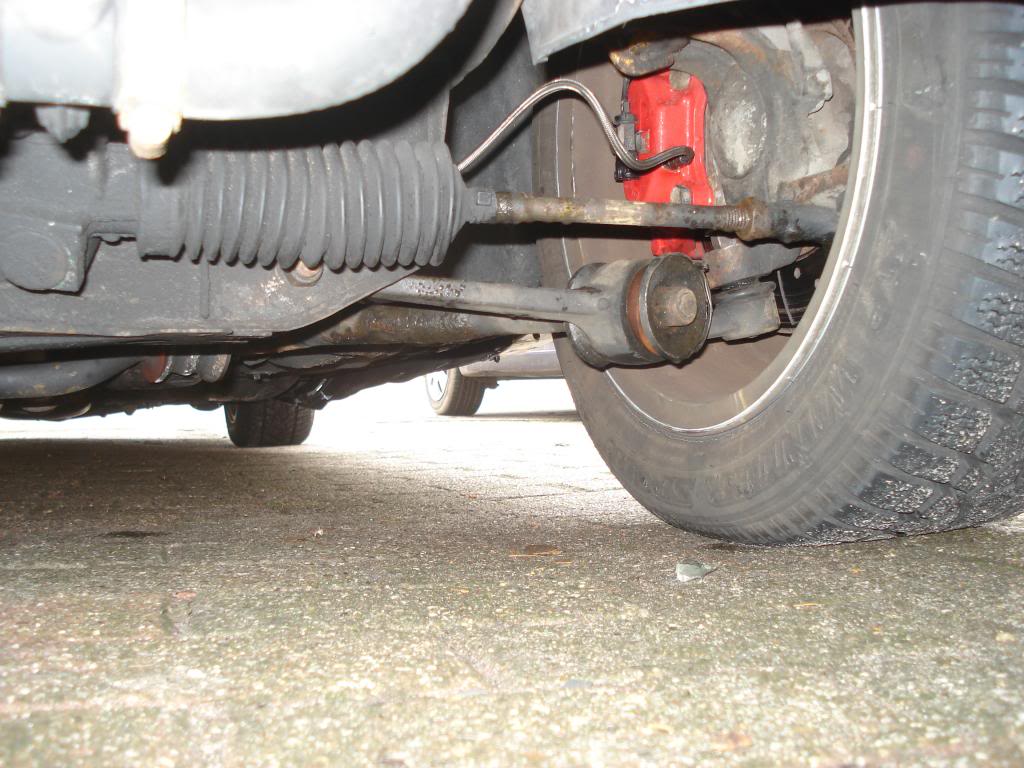
The car now feels quite a lot better. Turn in is more direct, it rolls less and the feedback from the steering also seems better.
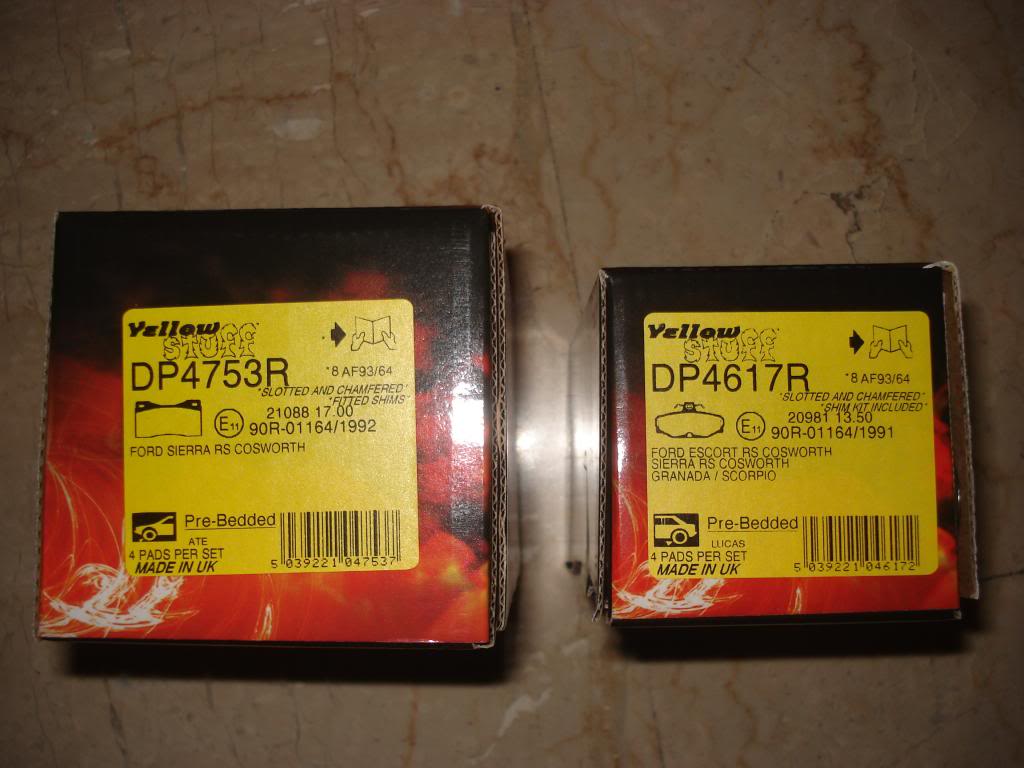
The day after I sent the mail to EBC about the brake pad breaking up I already got a reply. If I gave them the part number of the pads they would send me a new set of pads. But with the new calipers those pads were no longer of use to me, so I asked if I could also get pads for these calipers. That was also OK, but they don't do the Greenstuff for the 2wd Cosworth, instead I could choose from either Yellowstuff or Redstuff. The guy from EBC advised the Yellowstuff pads, but also advised to fit Yellowstuff pads to the rear to maintain the correct brake balance and ABS functionality. And he offered the rear pads with 50% discount, so in the end I got a full set of Yellowstuff pads for the costs of only 50% of the rear pads. I have to say I find it great service from EBC.
Since I had just found a set of 3dr Cosworth hubs and matching Koni shocks I started fitting those.
These hubs have different mounting lugs for the calipers so I also got the Cosworth 2wd 4 pot calipers. Unfortunately all pistons were seized, so I had them blasted and refurbished by a friend of a friend. How I got them back.
Before putting them on I put some paint on it.
With the 3dr hubs the tcas are back to a more normal position.
The car now feels quite a lot better. Turn in is more direct, it rolls less and the feedback from the steering also seems better.
The day after I sent the mail to EBC about the brake pad breaking up I already got a reply. If I gave them the part number of the pads they would send me a new set of pads. But with the new calipers those pads were no longer of use to me, so I asked if I could also get pads for these calipers. That was also OK, but they don't do the Greenstuff for the 2wd Cosworth, instead I could choose from either Yellowstuff or Redstuff. The guy from EBC advised the Yellowstuff pads, but also advised to fit Yellowstuff pads to the rear to maintain the correct brake balance and ABS functionality. And he offered the rear pads with 50% discount, so in the end I got a full set of Yellowstuff pads for the costs of only 50% of the rear pads. I have to say I find it great service from EBC.


 16-06-2013, 08:12 PM
#96
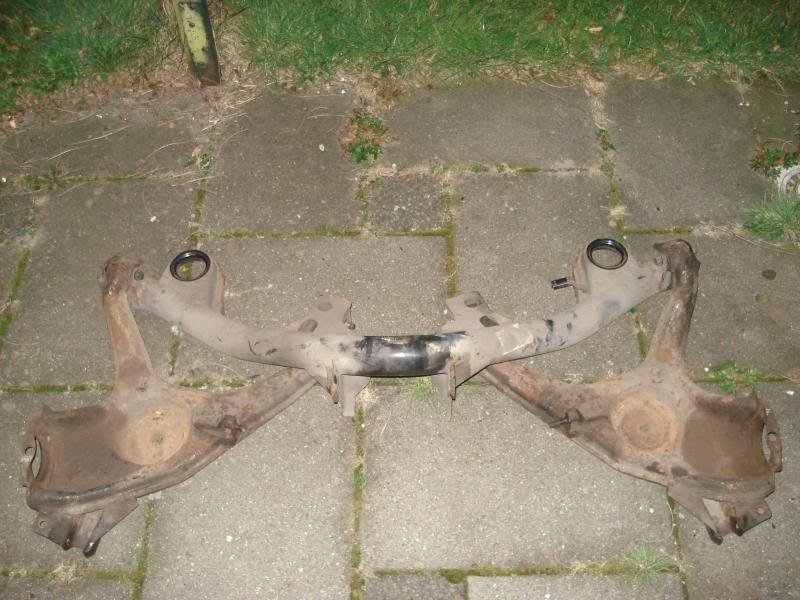
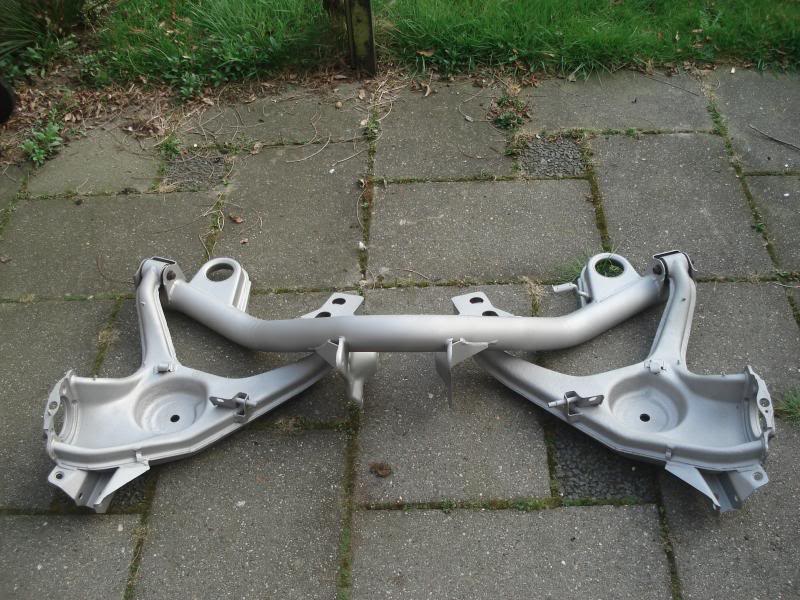
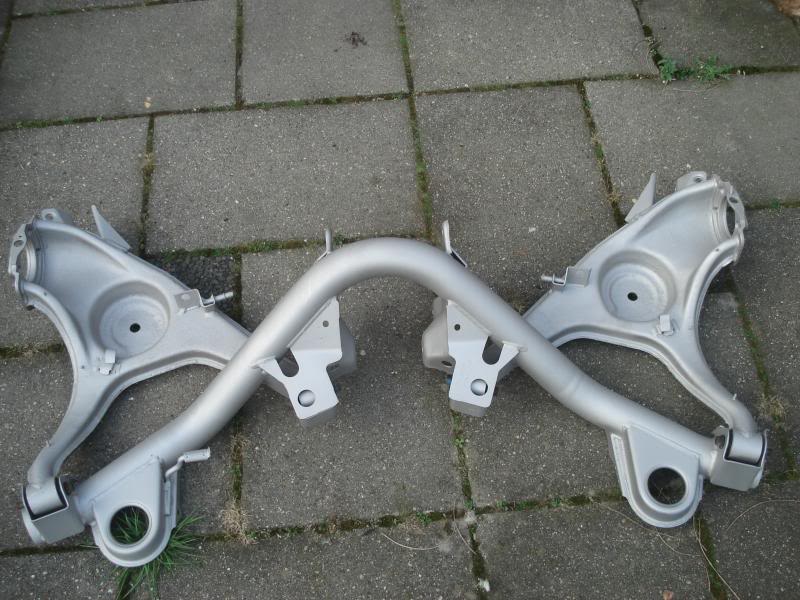
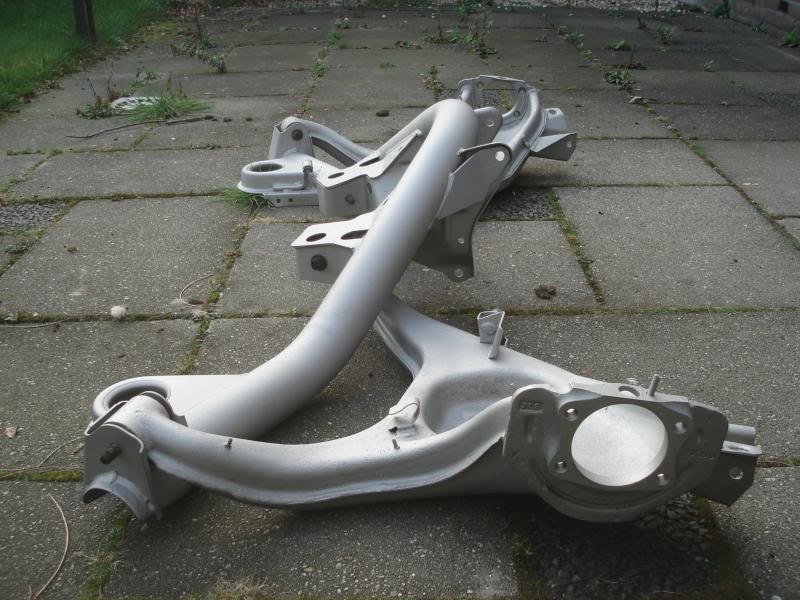
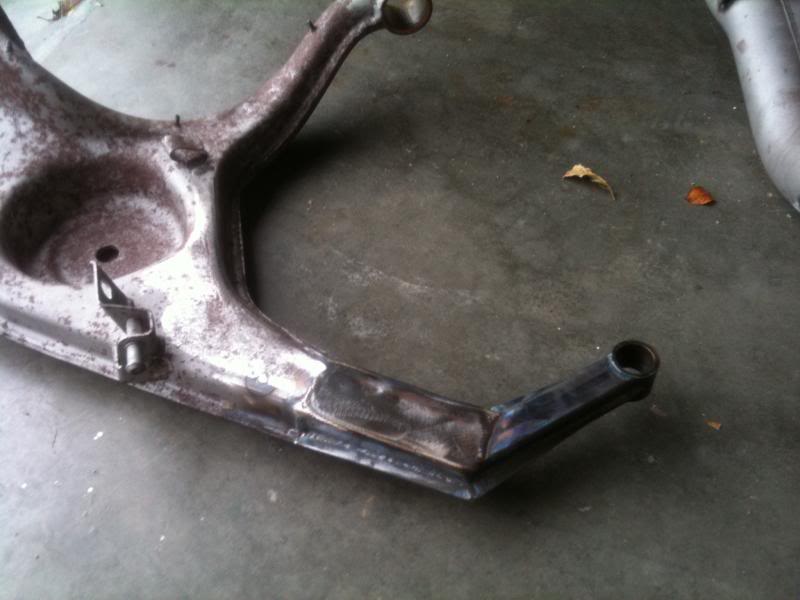
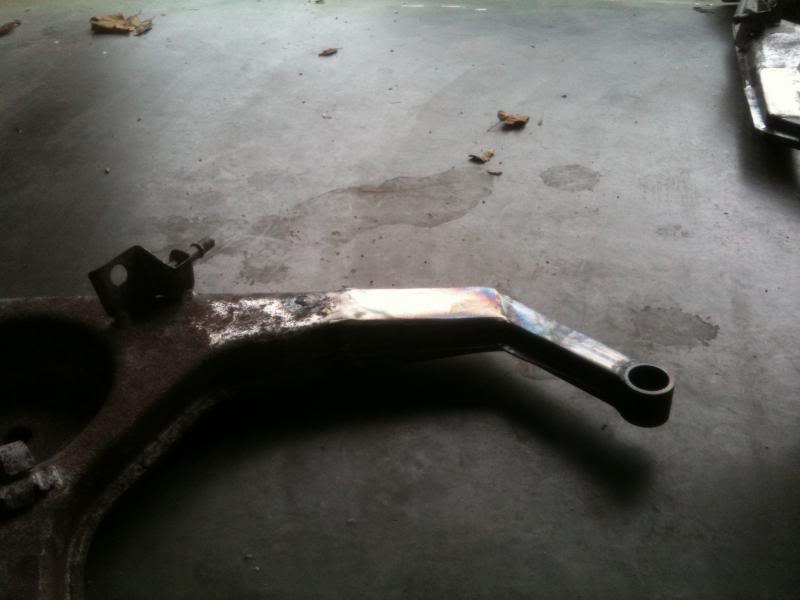
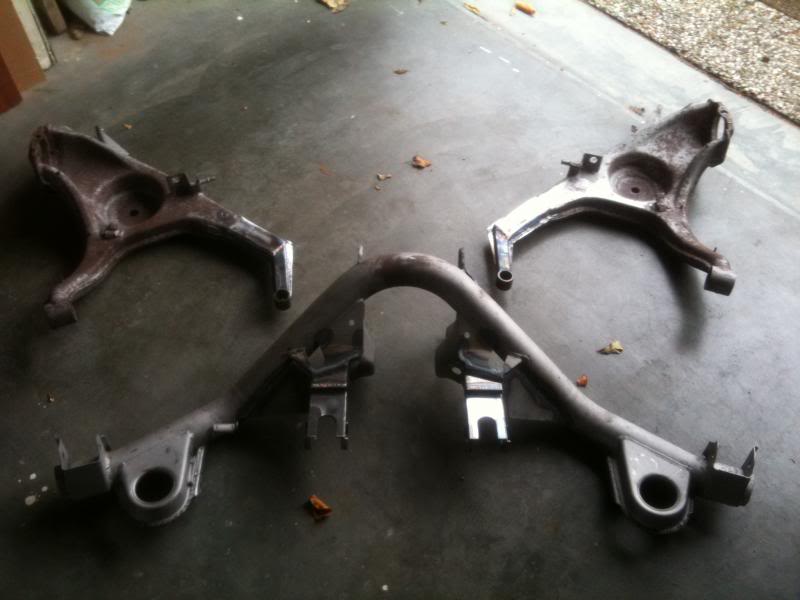
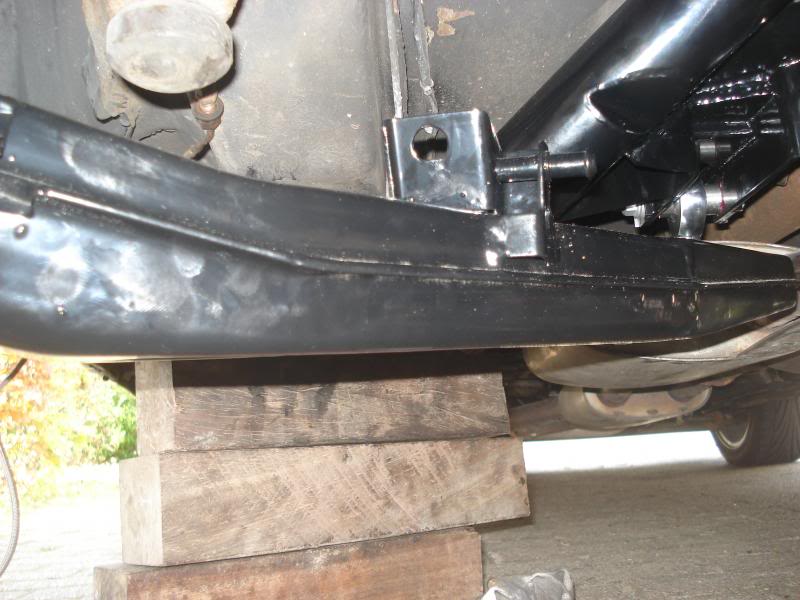
Since the metal above the rose joints was a bit too high and would probably hit the floor of the car that has been lowered a bit. A sort of triangle is also welded to the inner joints to make it a bit more stiff. On the bottom of the beam small cut outs have been made to make sure the arms can't hit it when the arms are in their most upper position. On most locations the new metal is 4 mm thick, which is thicker than the standard beam.
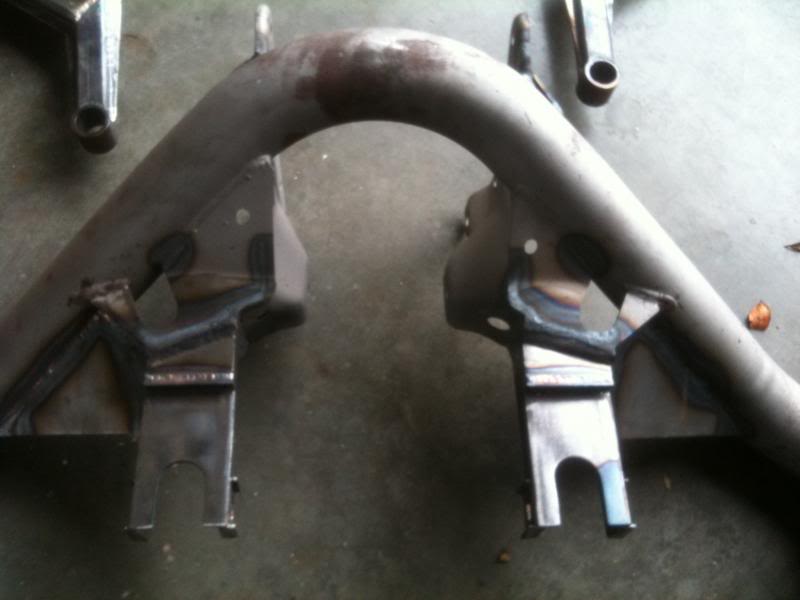
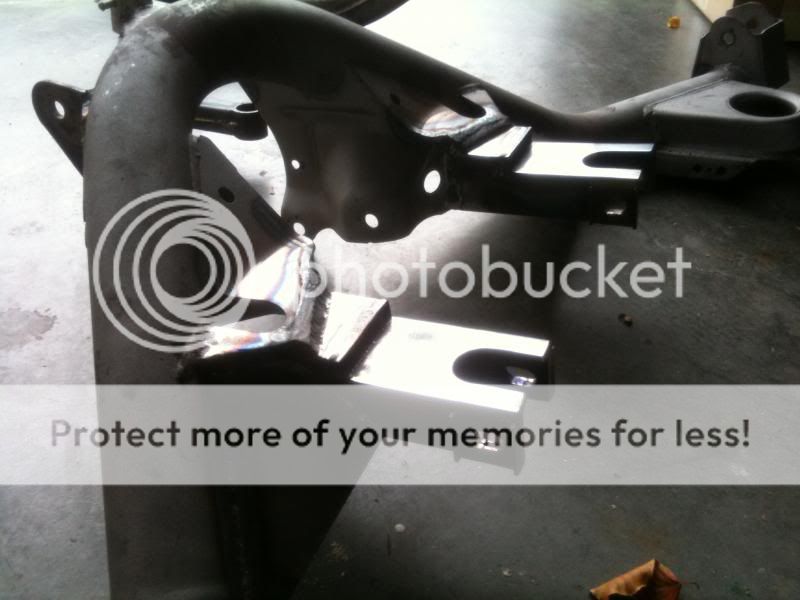
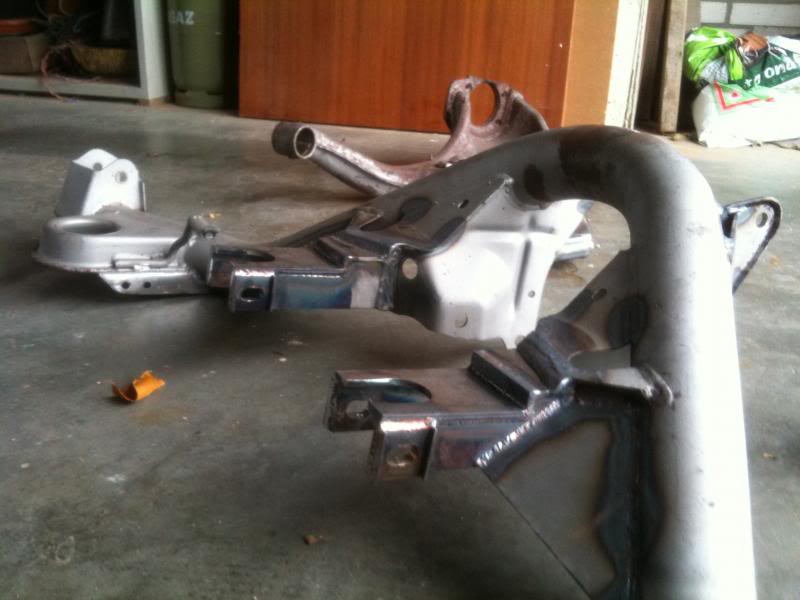
And some original welded parts have welded a bit better to make it stronger.
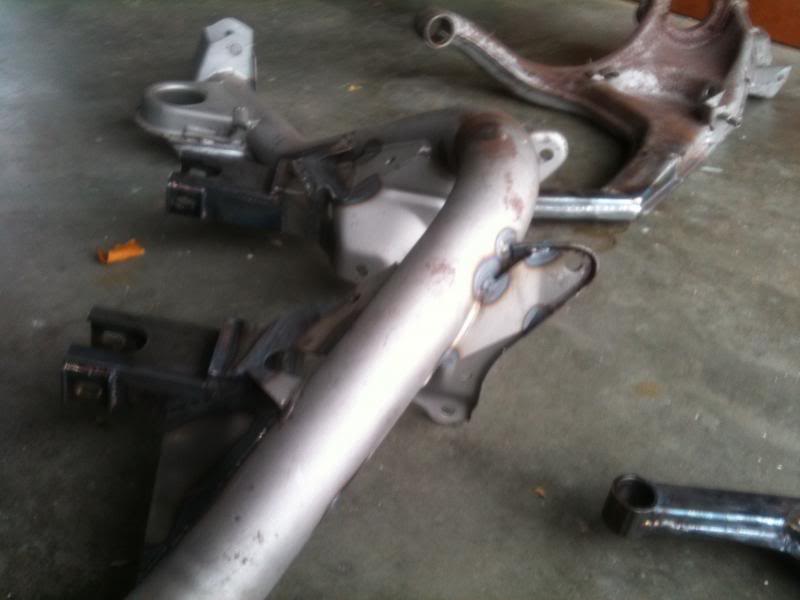
The modified arms.


And some original welded parts have welded a bit better to make it stronger.

The modified arms.


 08-07-2013, 07:44 PM
#102
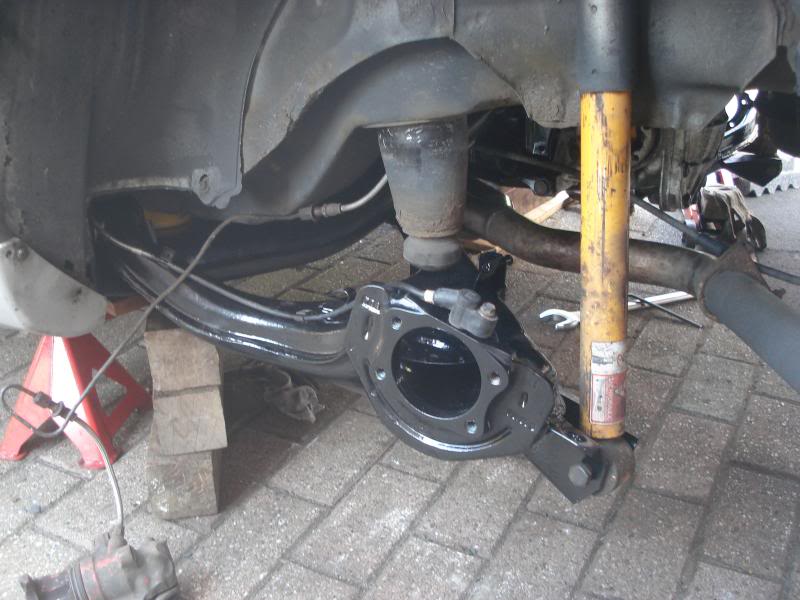
Removed the old rear beam to make place for the new one.
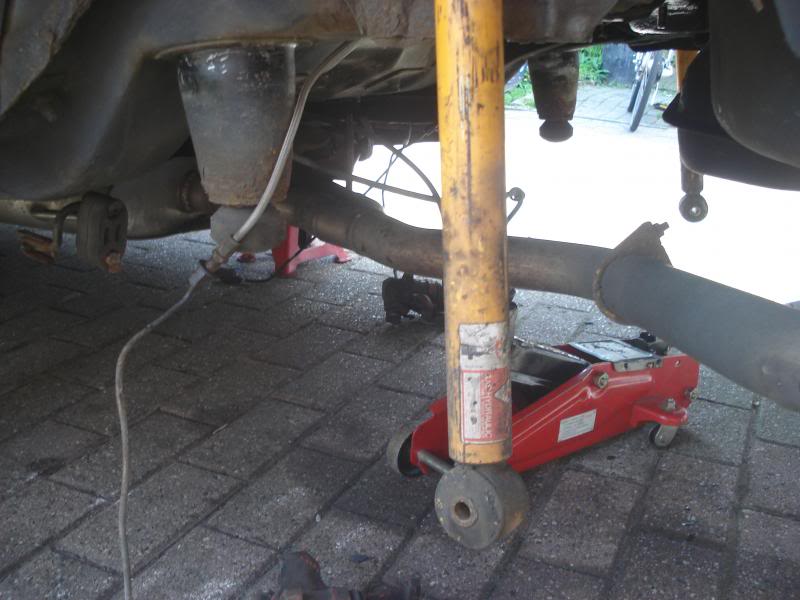
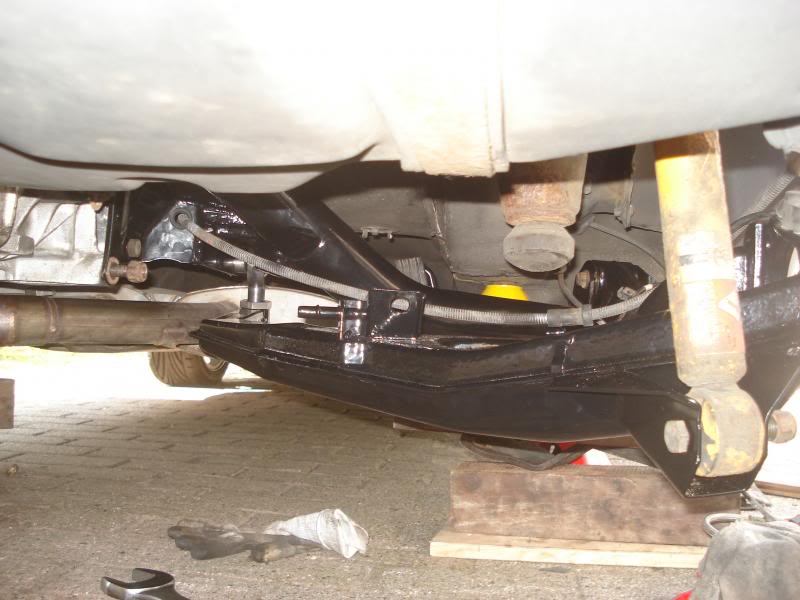
With a lot of fiddling I managed to fit the subframe and diff underneath.
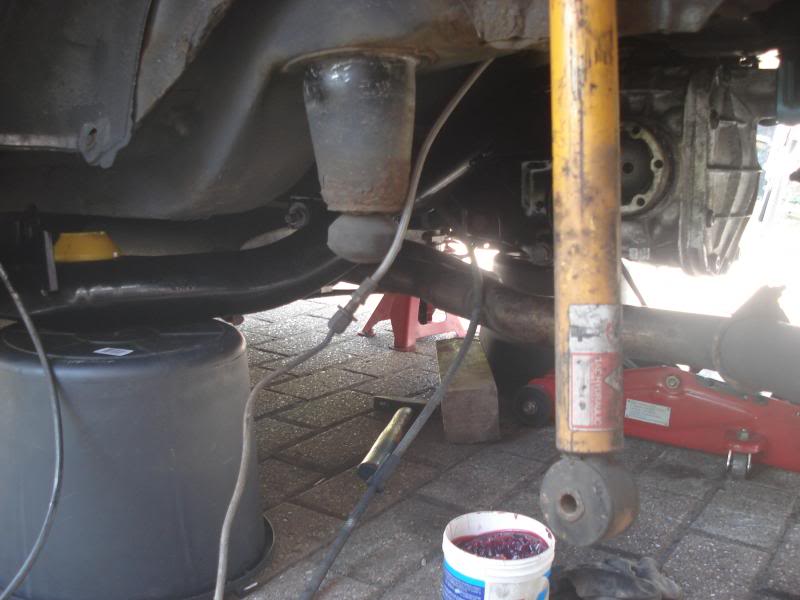
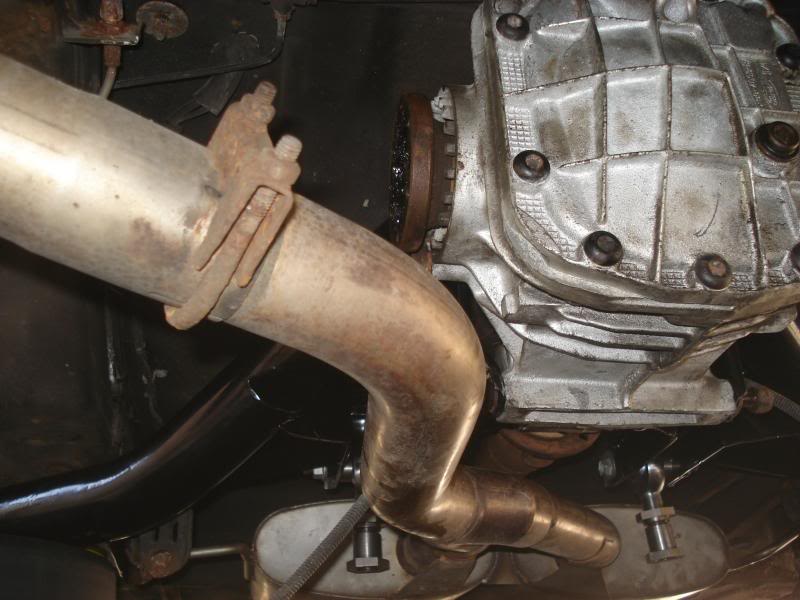
And fitted the rear arms. The springs were not fitted yet so I could check if the arms would not touch the subframe when they are against the bump stops. Small cut-outs have been made on the subframe to make sure this wouldn't happen and luckily this was the case.


 09-07-2013, 07:50 AM
#106
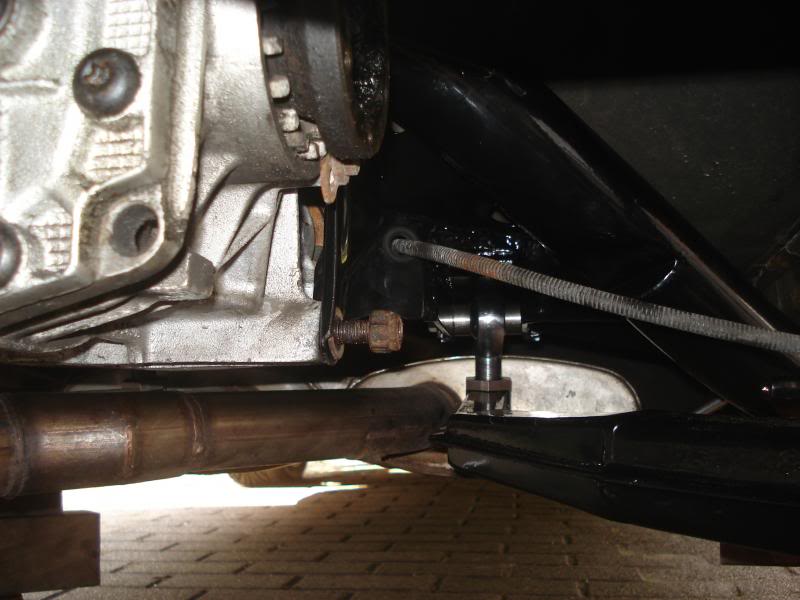
But I'm not sure from what side Ford put the bolt in from standard. It's much easier when it's in from the inside. I know they put the bolt for the inner mount in from the inside. Which is a pain as you cannot take it out without taking the diff out, as the bolt fouls the diff drive flange when you slide it out. That's why I always put the inner bolt in from the outside.
09-07-2013, 10:42 AM
#107
PassionFord Post Whore!!

Oh right! That's useful, as I always have to mount the trailing arms on it and bolt the beam, arms and diff up in one go, usually scratching somethong on the process. Will remmber that bext time! Cheers!!
10-07-2013, 11:13 AM
#108
Put the springs back and replaced the rear Koni dampers with Bilsteins.

Drive shafts put back.
And the bearing carriers with hubs.
Put the brakes back on and painted the calipers red.
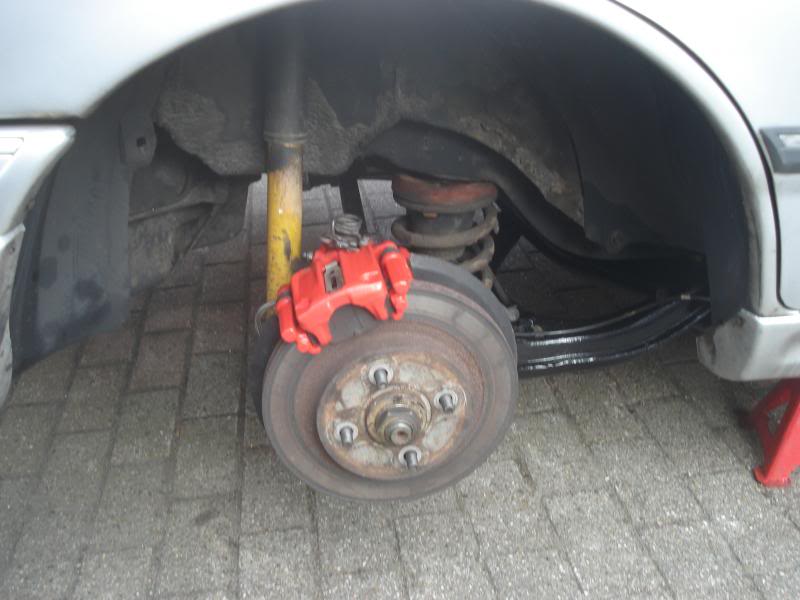
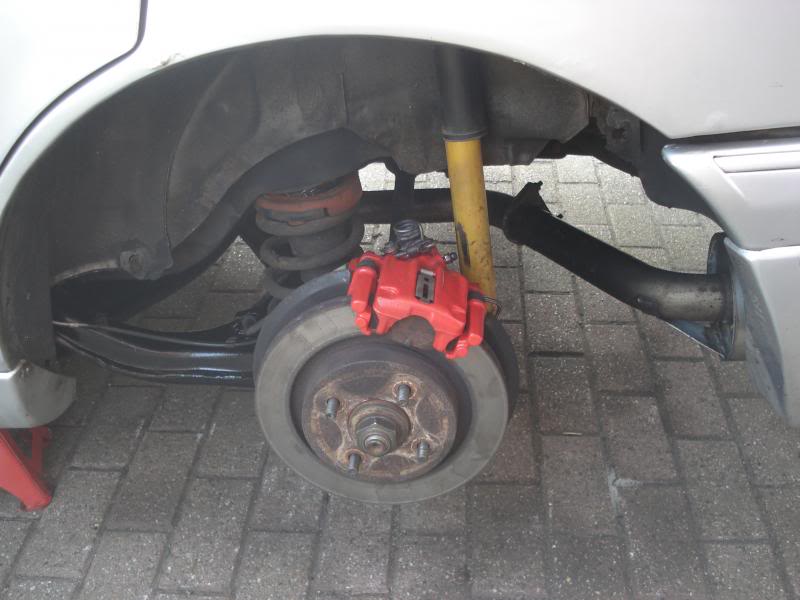
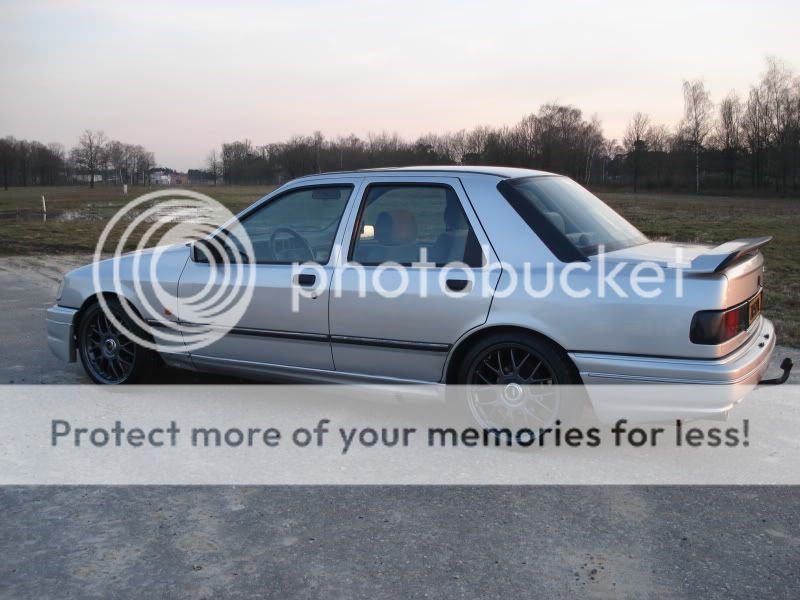
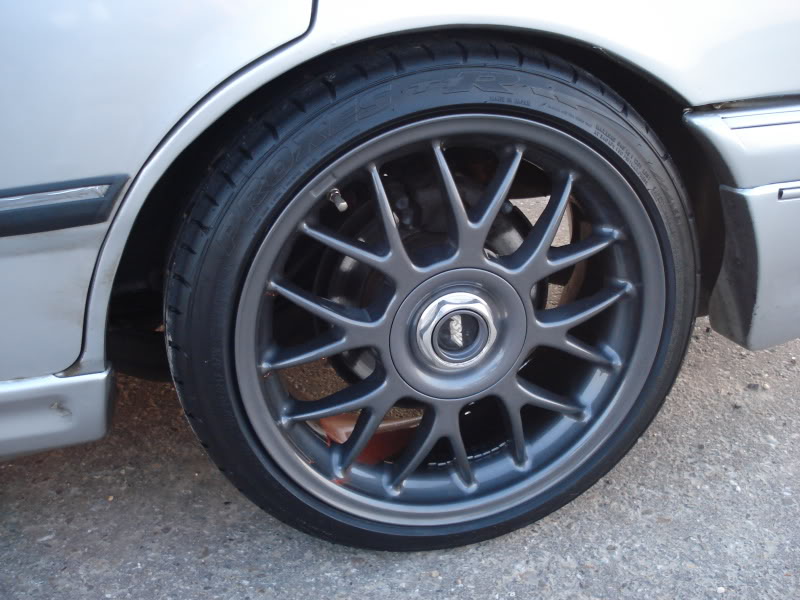
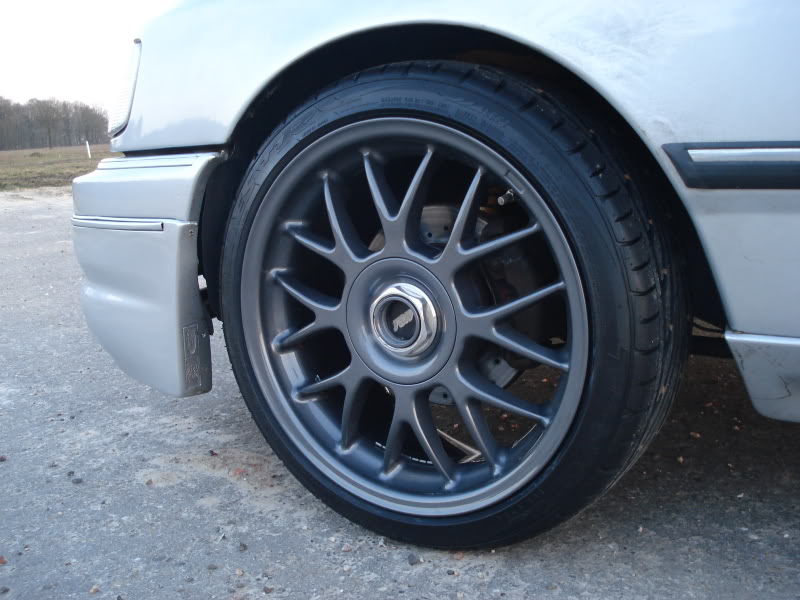
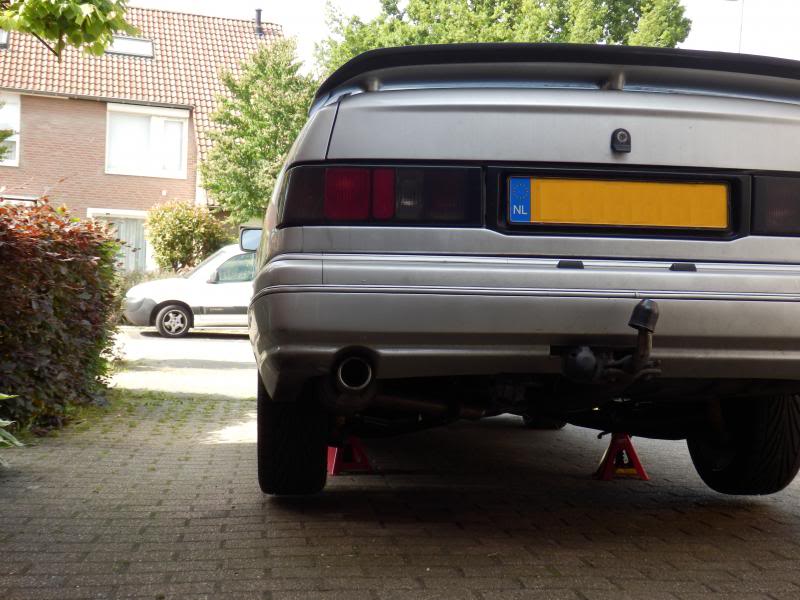
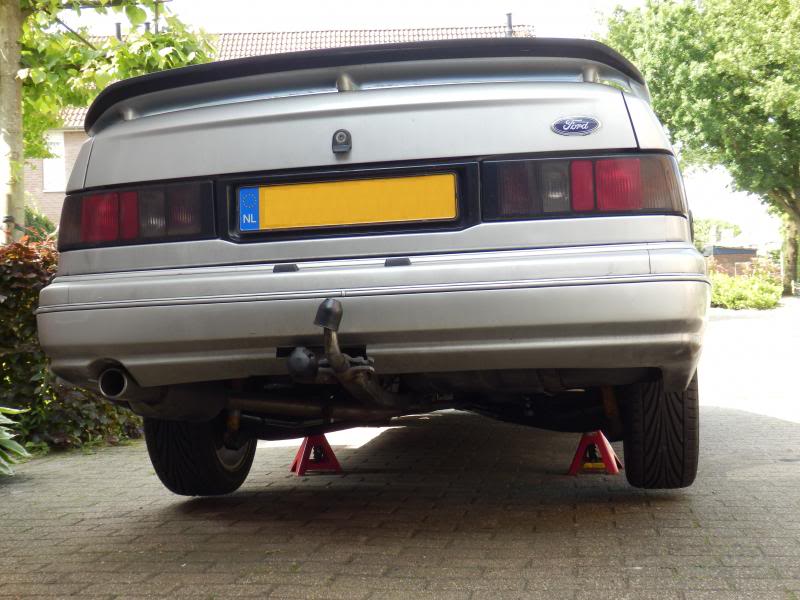
And the wheels on. On the pictures it's quite clear to see the wheels stay much more vertical than normal.


Drive shafts put back.

And the bearing carriers with hubs.


Put the brakes back on and painted the calipers red.


And the wheels on. On the pictures it's quite clear to see the wheels stay much more vertical than normal.

 08-10-2013, 09:28 PM
#109
Totally forgot to update this.
The wheel alignment has been done, it was almost correct straight away. I was quite happy with all the wheel angles, including the front wheels. Only the camber on the front is a bit different.
Front:
left: right:
toe 0�09' toe 0�09'
camber -1�24' camber -1�54'
castor 3�30' castor 3�30'
Rear:
toe 0�12' toe 0�12'
camber -1�30' camber -1�30'
After that I was really interested in how it would drive. Unfortunately it wasn't too good. It steered quite heavy and wasn't very stabile in a straight line, which became worse in time. In the end it turned out the eccentric bolts for the rear toe adjustment turned due to the forces on them while driving.
Later I fitted some toothed washers between the eccentric bolts and the beam, but since the toe setting was no longer correct it wasn't easy to judge whether they stayed in place now. In the end I had some plates welded to the beam to make the toe non-adjustable. A bit of a shame, but now I don't need to worry about the toe setting moving while cornering hard. Welding the plates in the exact position wasn't really easy as the joints moved slightly when the eccentric bolts were replaced by a normal bolt.
Strangely the alignment of the front wheels was quite different from the last time while nothing had been adjusted. This time the alignment was done at a Ford dealer, the other time at a tire service place.
According to the measurements the setting of the front wheels were now:
left: right:
toe 0�10' toe 0�20'
camber -1�31' camber -1�33'
castor 3�07' castor 4�04'
After adjusting everything it's now:
front:
left: right:
toe 0�09' toe 0�10'
camber -1�31' camber -1�33'
castor 3�07' castor 4�04'
rear:
left: right:
toe 0�08' toe 0�08'
camber -1�43' camber -1�36'
Since the rear toe setting wasn't perfect yet I fitted some thin shims of 0.15 mm between the bearing carrier and the rear arm.
The way it drives now is completely different. It steers a lot lighter, probably because it had way too much toe in on the front. It's also much more stabile in a straight line.
The corner speed also seems quite a bit higher than it was before. It is still slightly understeered if you enter a corner too fast, but it settles into a nice neutral behaviour once in the corner. All in all quite happy with the handling now.
The only thing that still bugs me is the fact that the spherical joints make creaking noise when the move. It's gotten less already, especially after greasing them in thoroughly, but it's still there. Strangely enough it seems like it's wore after a long drive, like they heat up a bit. And when the car has stood for a few hours the noise is gone again.
09-10-2013, 05:22 PM
#112
Wahay!! I've lost my Virginity!!
Good update, thanks.
As for the noise from the rose joints you could always consider going for the ptfe or is it neoprene lined versions. They cost more but would eliminate the annoying rattling.
I know from experience too much toe out at the rear of Sierras makes them feel very unstable and nervous in a straight line, I had a bent rear beam causing one rear wheel to tow out, when I changed it the car was transformed, (though it did handle well on right handers...).
Last edited by draftdodgers; 29-12-2015 at 04:59 PM.
09-10-2013, 06:12 PM
#113
These are the ones I used:
http://www.mcgillmotorsport.com/m22-...rformance-113/
They have a teflon/kevlar liner, so it should be OK. The supplier said it could be that the kevlar still needs to bed in and the noise should become less. It indeed has been worse when I just fitted them, but I want it completely gone.
http://www.mcgillmotorsport.com/m22-...rformance-113/
They have a teflon/kevlar liner, so it should be OK. The supplier said it could be that the kevlar still needs to bed in and the noise should become less. It indeed has been worse when I just fitted them, but I want it completely gone.
Last edited by Marc sierra; 09-10-2013 at 07:13 PM.

 04-03-2014, 07:04 PM
#116
A while ago I ordered a Tweecer RT in the US, it took a while but it finally arrived. The Tweecer you can attach to the EEC IV, just like a Superchip, but unlike a Superchip you can alter the mapping of the engine yourself using a laptop. You also have the ability to use 4 different mappings, plus the original mapping by flicking a switch. Another nice thing of the Tweecer is that it lets you datalog a lot of inputs and outputs of the EEC IV.

03-07-2014, 11:18 AM
#117
Lately I have been playing with the Tweecer. I data logged the ignition advance during WOT. It was already known to me that Ford limited the torque and power of the 24v for warranty reasons on the automatic gearbox and also for insurance reasons, as at the time 200 bhp was deemed enough.
Anyway, from the logging it is clear that the WOT ignition advance is retarded between 3000 and 5000 RPM. The lowest number I've seen was even down to 13 degrees.
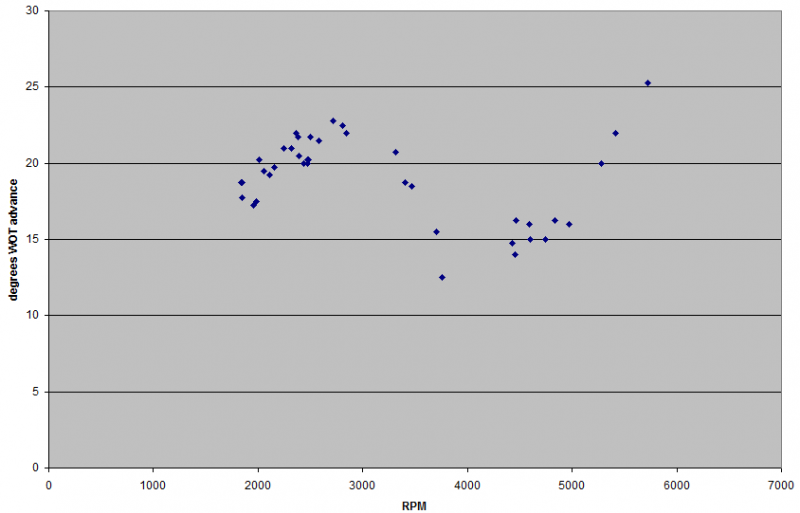
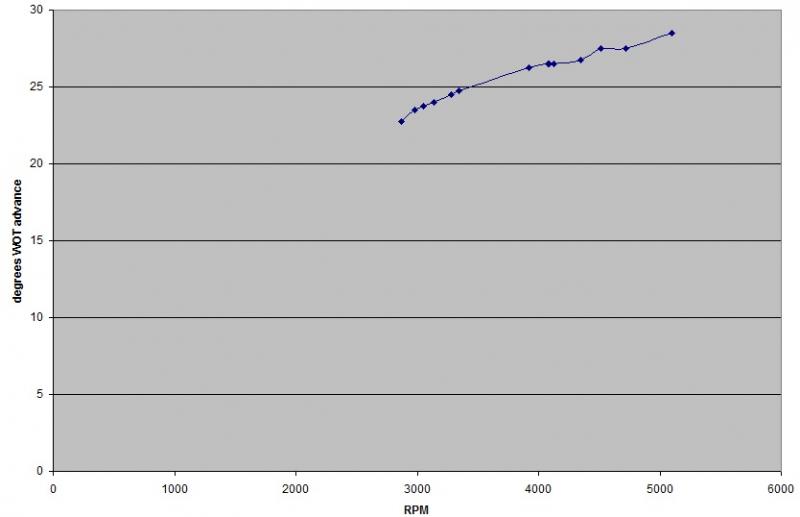
But with the Tweecer you can alter the ignition advance yourself. So I now have a different map where the dip in ignition advance is removed and the advance is now up to about 25 degrees.
The engine now really feels stronger above 3000 RPM. Below 3000 RPM there should also be good gains to be had. But the programming and mapping of the EEC IV is quite difficult and it seems like a different table is used in that situation, so still lots to find out on the Tweecer.
Anyway, from the logging it is clear that the WOT ignition advance is retarded between 3000 and 5000 RPM. The lowest number I've seen was even down to 13 degrees.

But with the Tweecer you can alter the ignition advance yourself. So I now have a different map where the dip in ignition advance is removed and the advance is now up to about 25 degrees.

The engine now really feels stronger above 3000 RPM. Below 3000 RPM there should also be good gains to be had. But the programming and mapping of the EEC IV is quite difficult and it seems like a different table is used in that situation, so still lots to find out on the Tweecer.
03-07-2014, 03:23 PM
#119
Virgin

Join Date: Aug 2010
Location: Prague
Posts: 2
Likes: 0
Received 0 Likes
on
0 Posts
EEC IV (16bit custom cpu, ...) soft (=calibration/strategy) is more complicated than these days ECUs (most often small memory, 8 bit cpu)
EEC calcs spark advance as a total of base advance + temperature comp. + etc. what I know.
Reading of strategy is usefull.
EEC calcs spark advance as a total of base advance + temperature comp. + etc. what I know.
Reading of strategy is usefull.
03-12-2014, 08:37 PM
#120
A while ago I installed a cool app on my iphone. It's called Pocketdyno and it lets you dyno your car by using your phone. The way it works is that you install the phone in a solid mount so the motion sensors can measure the acceleration forces. The app then gives a lot of info like: 0-25 km/h, 0-50 km/h, 0-100 km/h, 0-150 km/h, 60ft, 1/8 mile and 1/4 mile (speed and time) and max g-force.
So last weekend I did a few runs and got the following results:
1st run: 0-100 km/h in 7,50s ; 1/8 mile: 10,03s @ 119,67 km/h
2nd run: 0-100 km/h in 7,32s ; 1/8 mile: 10,06s @ 123,00 km/h ; 1/4 mile: 15,20s @ 155.29 km/h
3rd run: 0-100 km/h in 7,45s ; 1/8 mile: 10,03s @ 120,42 km/h ; 1/4 mile: 15,32s @ 150.14 km/h
4th run: 0-100 km/h in 7,40s ; 1/8 mile: 10,05s @ 120,86 km/h ; 1/4 mile: 15,33s @ 150.45 km/h
Grip was a bit of an issue since the car is now on its winter tyres. I already had a lot of wheel spin when lauching with 2000 rpm. So the times could have been better, but the speeds look ok though.
The following users liked this post:
doga-ot (07-03-2015)