Escort RST S2 RWD Cosworth, update 8/12/16

 26-11-2012, 09:51 PM
#162
.
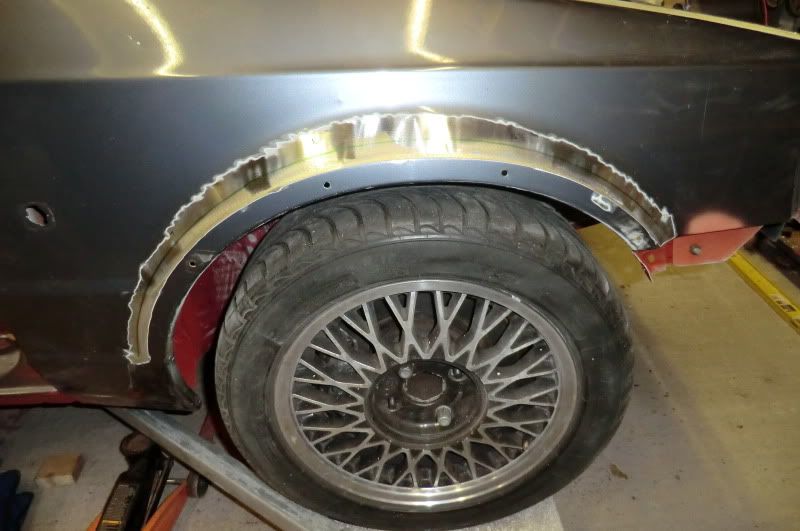
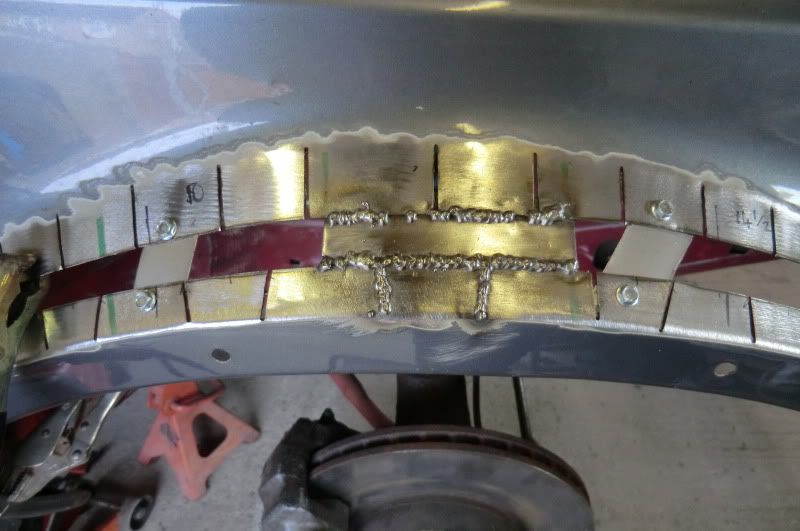
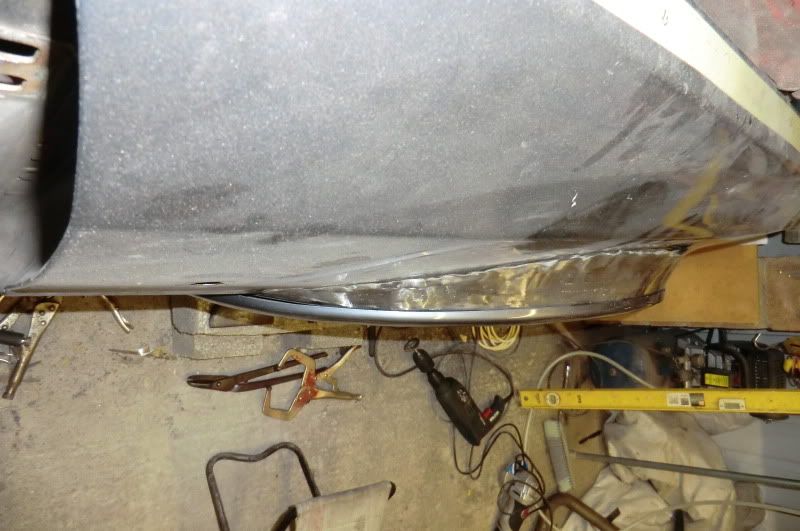
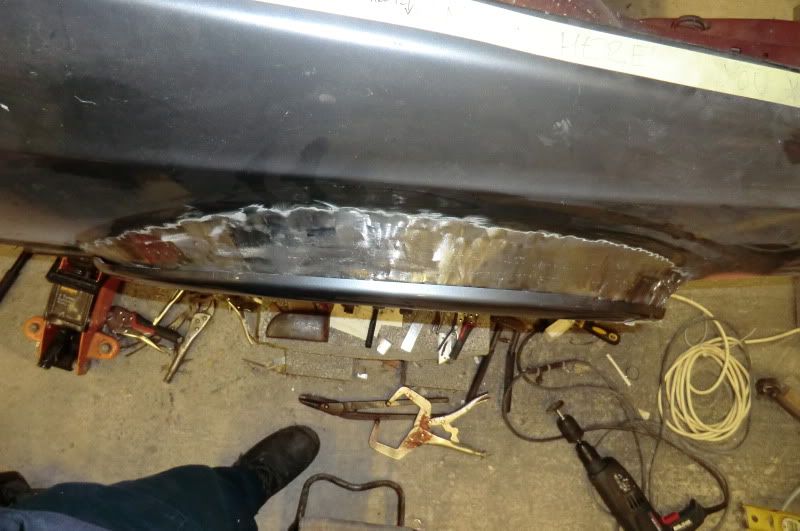
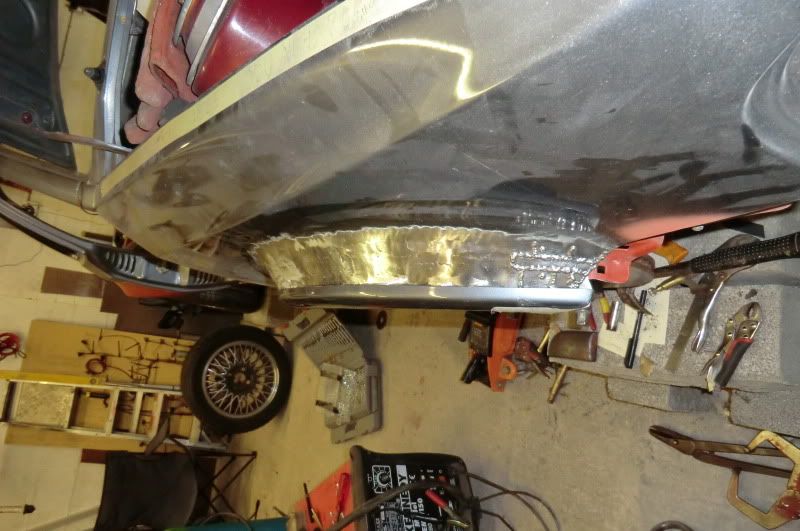
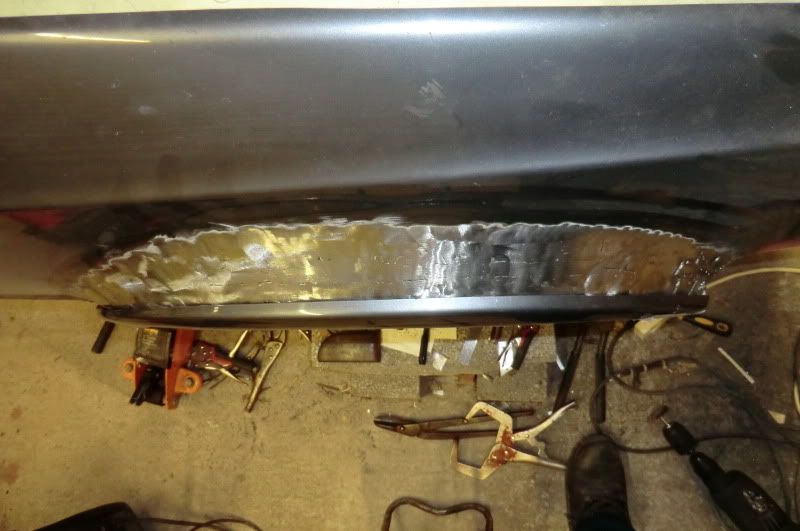
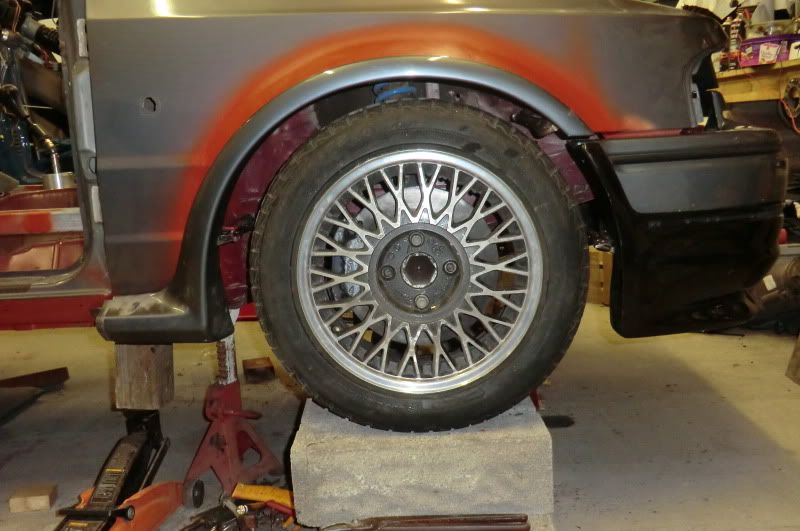
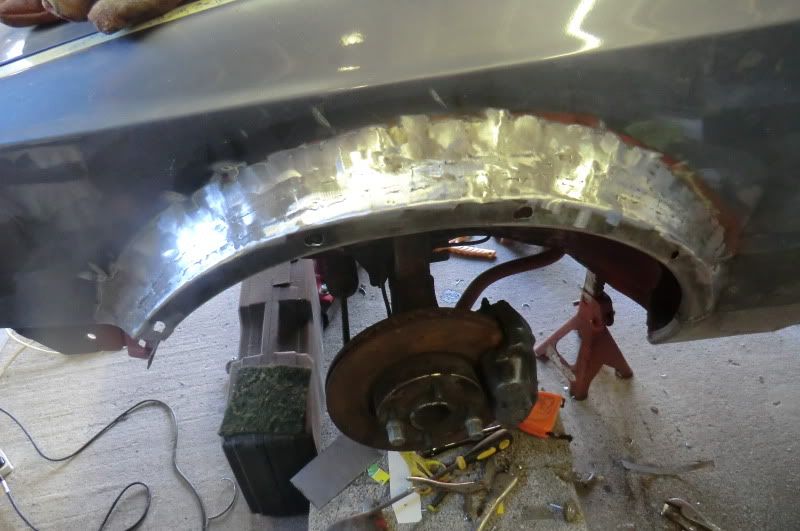
Well been plodding along, so after removing the looms, air box and a few other items I moved the car to gain access to the front end so as to flare the drivers side front arch to match the passenger one.
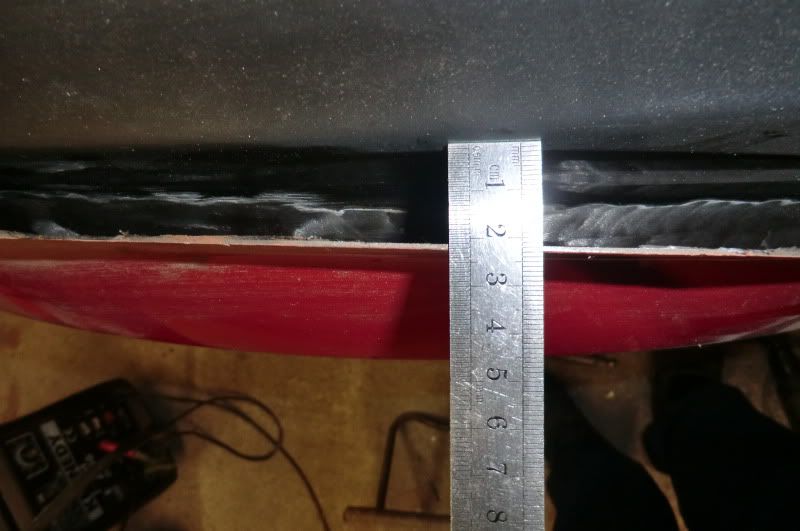
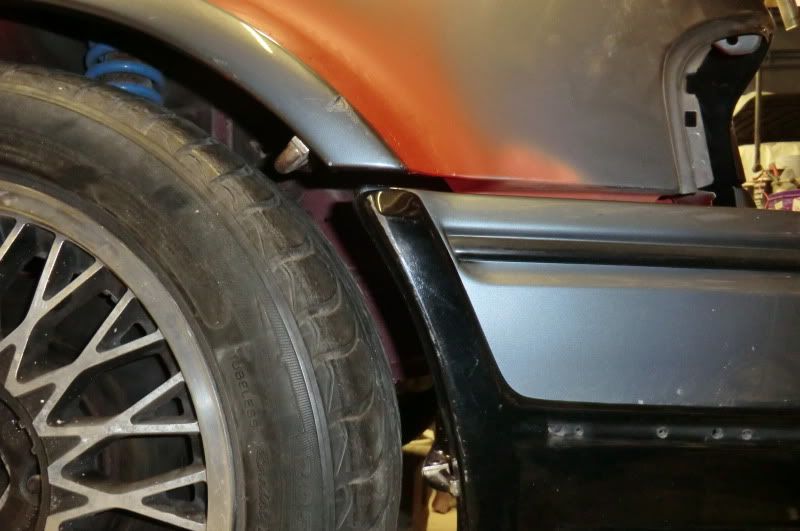
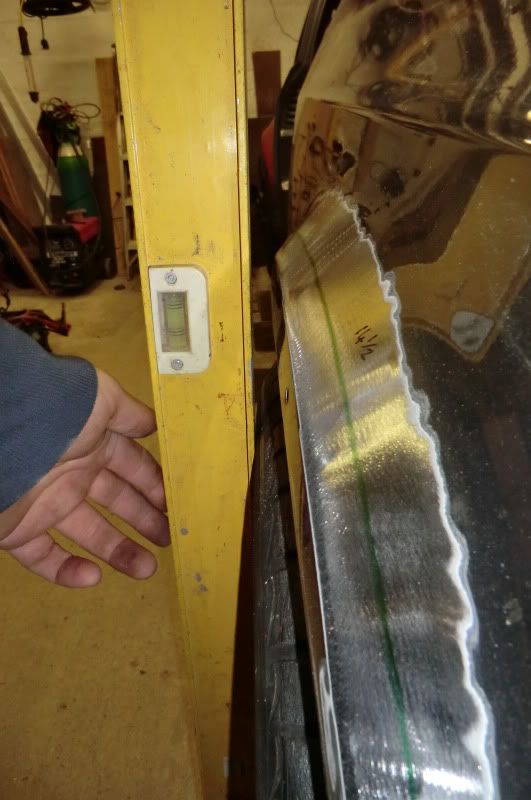
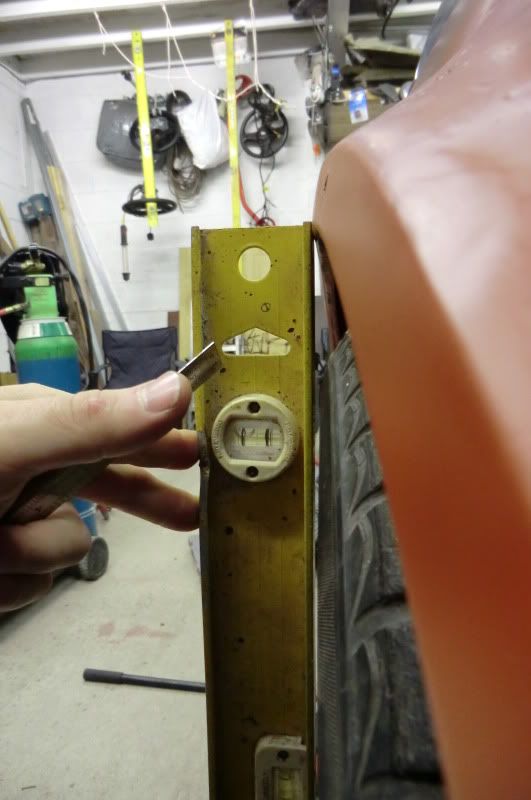
I put the car on all 4 wheels on stacks of blocks as although i have the adjustable top mounts and bottom arms so as i can narrow the track for extra clearence i decided that the 10mm flare on the passenger side just wasn't going to be enough, So decided to try the same process i used on the rear arches by slicing the arch so as to fold/fan the metal out etc. Looking at how much the wheel stuck out i decided to get the arch out at least 20mm.
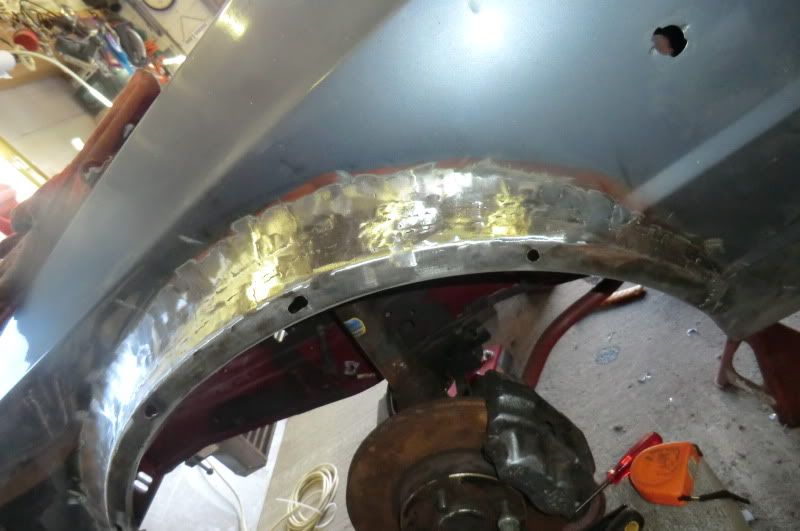
So this is how they started and ended up.
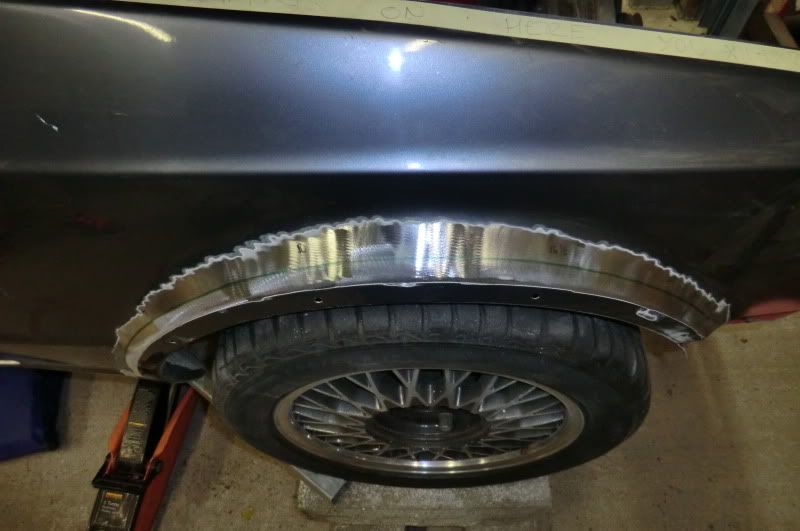

cut
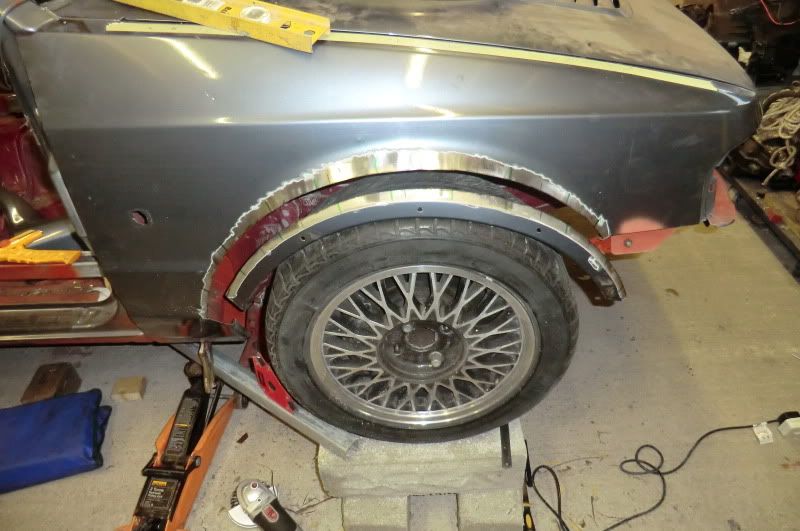
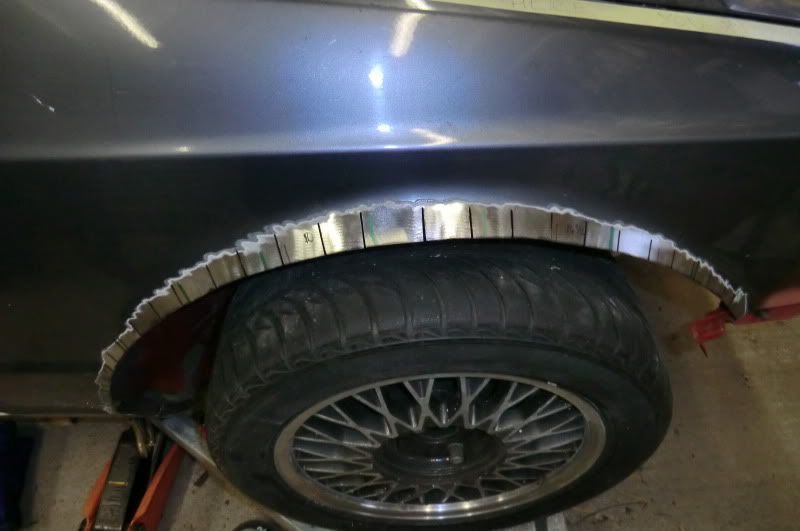
Temporary fixed on

Started plating
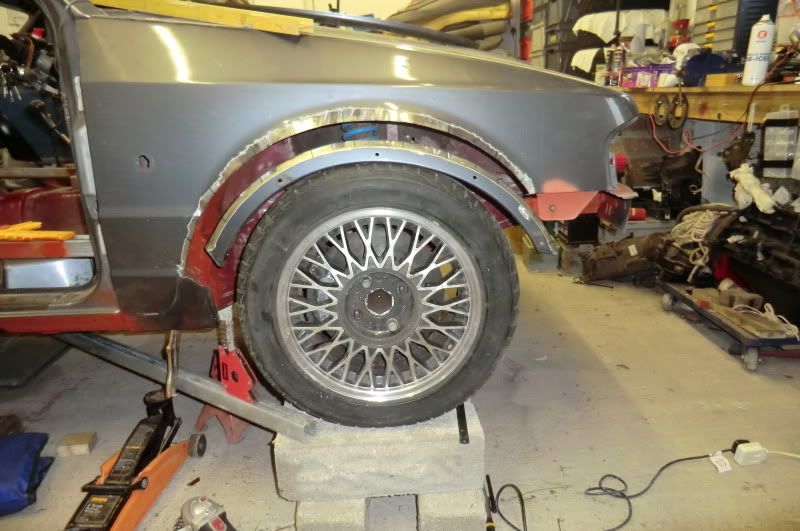
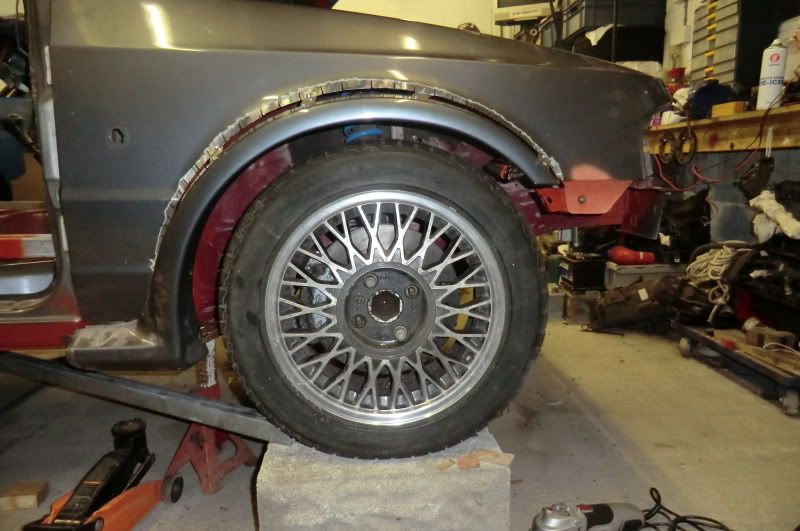
And the end result (not total100% finished, but almost )
)
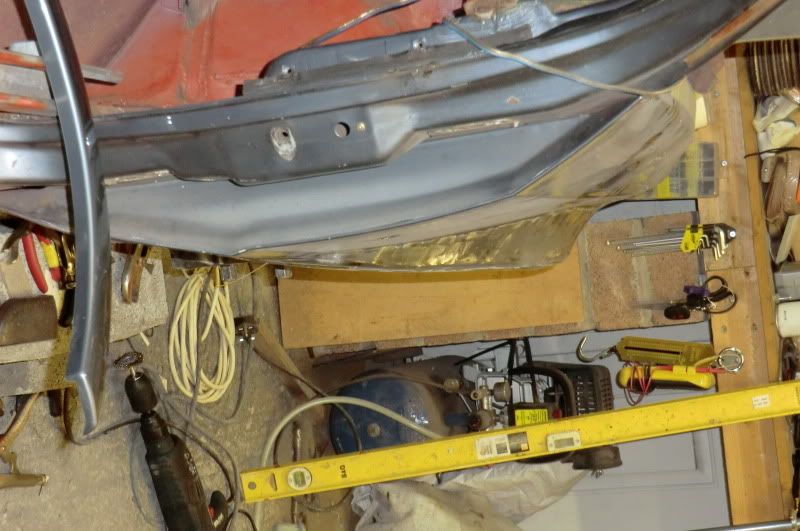
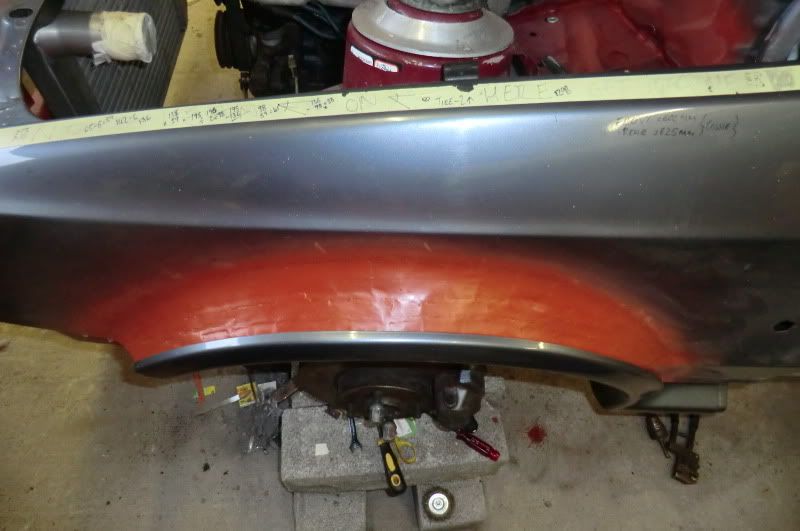
I have a pair of old front arches, so place one over the drivers side to show the extra width off better
Looks awesome in real life, just need to get the bumper on as i need to cut the bumper mounting brack to extend it out to hold the bumper out level with the wing
Gonna get it finished off tomorrow and then start on redoing the passenger one to match.
Ginger
.
Well been plodding along, so after removing the looms, air box and a few other items I moved the car to gain access to the front end so as to flare the drivers side front arch to match the passenger one.
I put the car on all 4 wheels on stacks of blocks as although i have the adjustable top mounts and bottom arms so as i can narrow the track for extra clearence i decided that the 10mm flare on the passenger side just wasn't going to be enough, So decided to try the same process i used on the rear arches by slicing the arch so as to fold/fan the metal out etc. Looking at how much the wheel stuck out i decided to get the arch out at least 20mm.
So this is how they started and ended up.
cut
Temporary fixed on
Started plating
And the end result (not total100% finished, but almost
I have a pair of old front arches, so place one over the drivers side to show the extra width off better
Looks awesome in real life, just need to get the bumper on as i need to cut the bumper mounting brack to extend it out to hold the bumper out level with the wing
Gonna get it finished off tomorrow and then start on redoing the passenger one to match.
Ginger
.
Last edited by GINGExR2 T; 26-11-2012 at 09:52 PM.


 27-11-2012, 05:42 PM
#168
.
Cheers all, as said most people probaly wont even notice unless it's parked next to another S2.
Got a few sets of wheels, but will buy a set to suit the arches in the future, i can get an 8J ET40 with 215/35/18's on the back no problem. 17's will be as big as i go if and when though, saying that 225/40/16's have a 0.4mm larger diameter than the 205/50/15 i have on there at the moment so maybe thats an option.
Really want a set of TH2's
Ginger
.
Last edited by GINGExR2 T; 27-11-2012 at 07:49 PM.
27-11-2012, 06:41 PM
#169
PassionFord Post Whore!!
iTrader: (2)

Great bit of fab work there Ginge
gonna be very subtle when painted and the average joe wont be able to put there finger on why it look's different
Love hard to do subtle changes,It shows inginuity
gonna be very subtle when painted and the average joe wont be able to put there finger on why it look's different
Love hard to do subtle changes,It shows inginuity
27-11-2012, 08:57 PM
#171
.
BT Openreach Engineer .
.
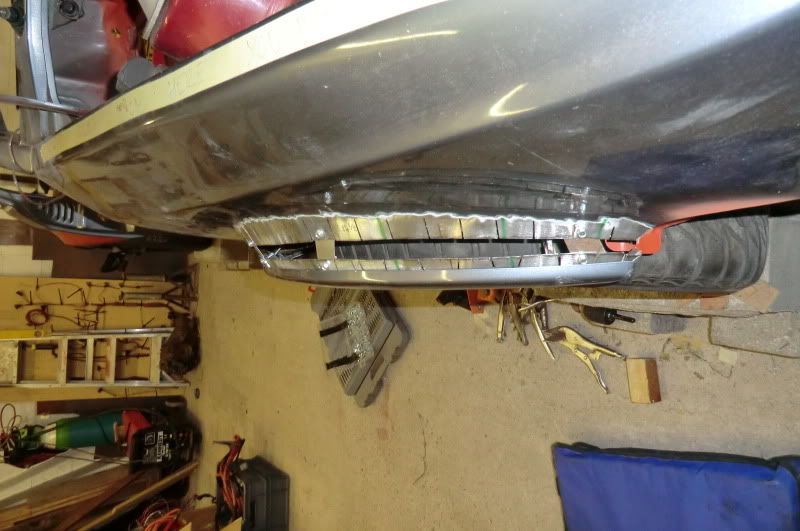
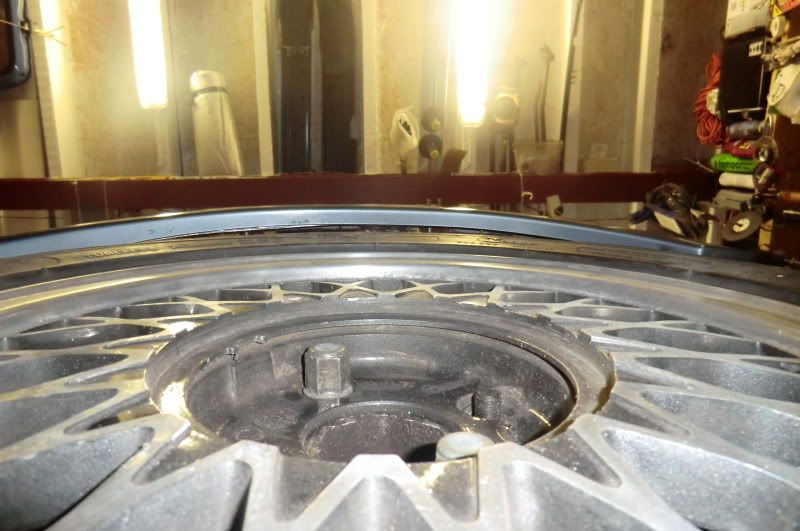
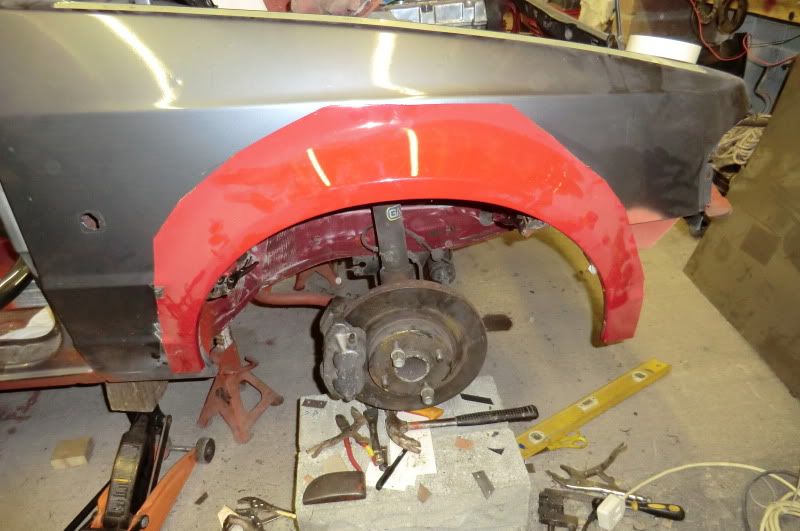
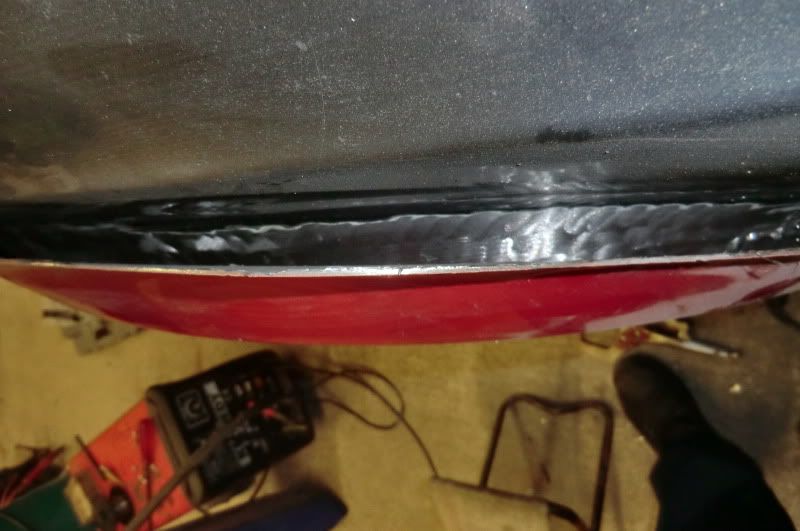
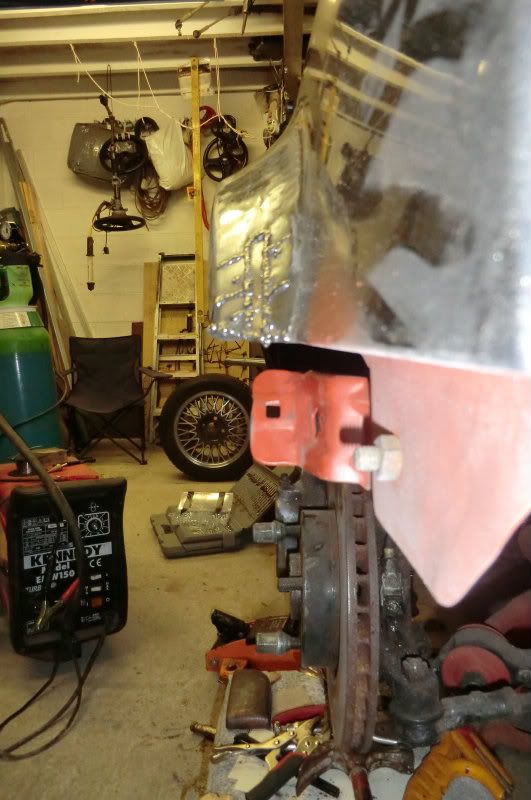
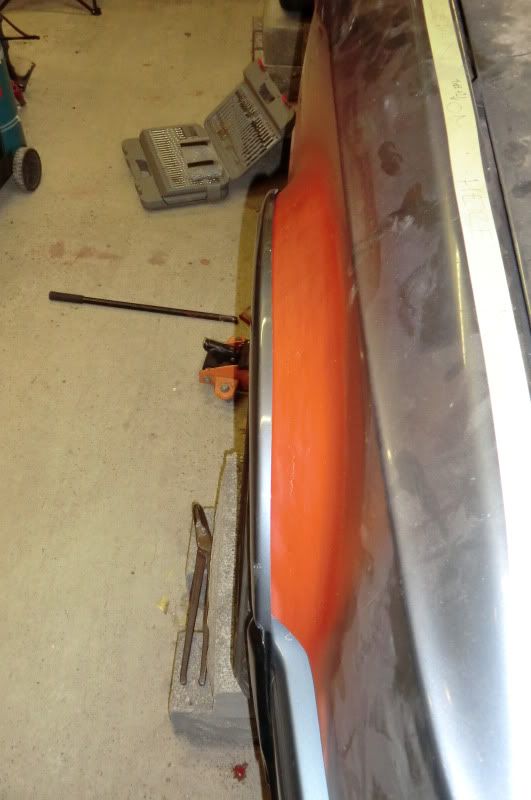
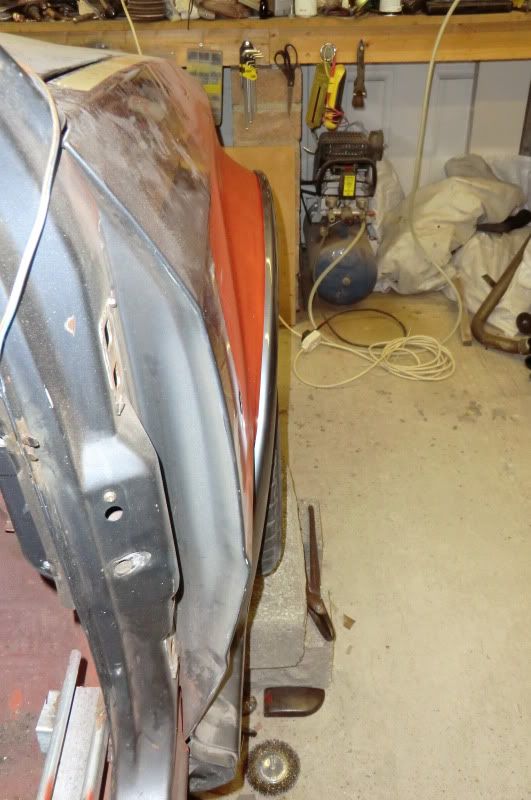
Finished off the arch tonight and got some red oxide in side and out as it's gonna be a little while before i get onto the prep work, also managed to get the bumper, arch and wheel on for a look.
A few pics

and a before and after pic
Before
After
Really happy with how much extra room i have, gonna trim the under lip off at some point on the arch and kit.
Gonna redo the other side over the next few days hopefully
Ginger
.
BT Openreach Engineer
.
Finished off the arch tonight and got some red oxide in side and out as it's gonna be a little while before i get onto the prep work, also managed to get the bumper, arch and wheel on for a look.
A few pics
and a before and after pic
Before
After
Really happy with how much extra room i have, gonna trim the under lip off at some point on the arch and kit.
Gonna redo the other side over the next few days hopefully
Ginger
.
18-12-2012, 08:06 PM
#172
.
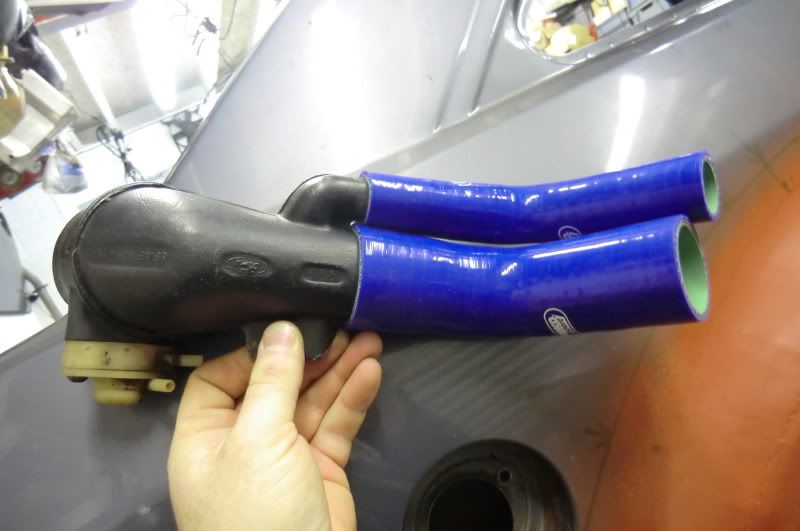
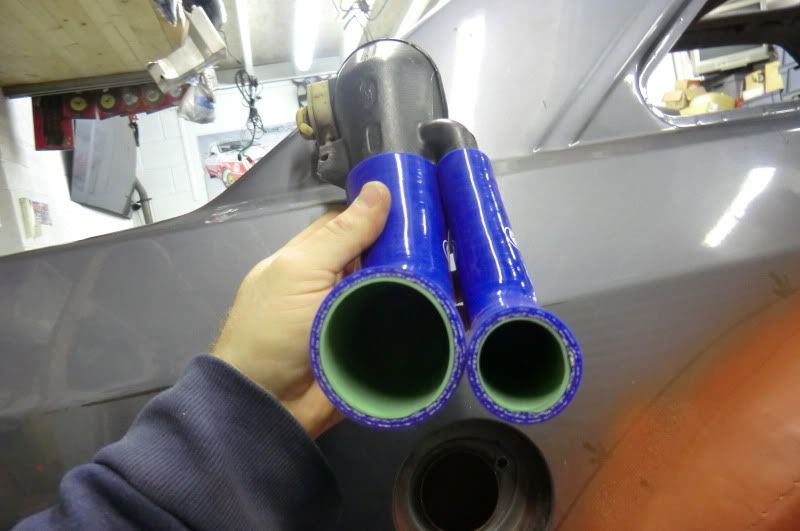
Small update, Samco fuel hoses for the filler neck turned up and fit perfect, will update on the fitting and location of these in a few days.

Also managed to get the left front arch that i had already done once cut off and redone to match the drivers sidewhich was a bit of a mare.
They don't actually look that big in the pic but up close they look huge
This was a replacement wing when the previous owner had the car due to a carpark knock and the holes for the kit were huge so have now been welded up and redrilled.


Hopefully gonna sort out the new plate for the boot floor tomorrow, will see how i get on with that one :-/
Ginger
.
Small update, Samco fuel hoses for the filler neck turned up and fit perfect, will update on the fitting and location of these in a few days.
Also managed to get the left front arch that i had already done once cut off and redone to match the drivers sidewhich was a bit of a mare.
They don't actually look that big in the pic but up close they look huge
This was a replacement wing when the previous owner had the car due to a carpark knock and the holes for the kit were huge so have now been welded up and redrilled.
Hopefully gonna sort out the new plate for the boot floor tomorrow, will see how i get on with that one :-/
Ginger
.
 22-12-2012, 03:11 PM
#177
.
Few pics of the left front arch with the kit fitted for a look
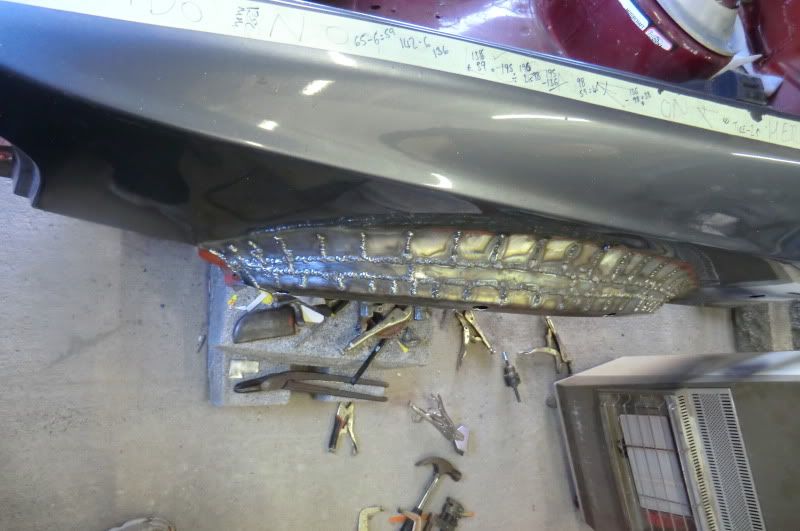
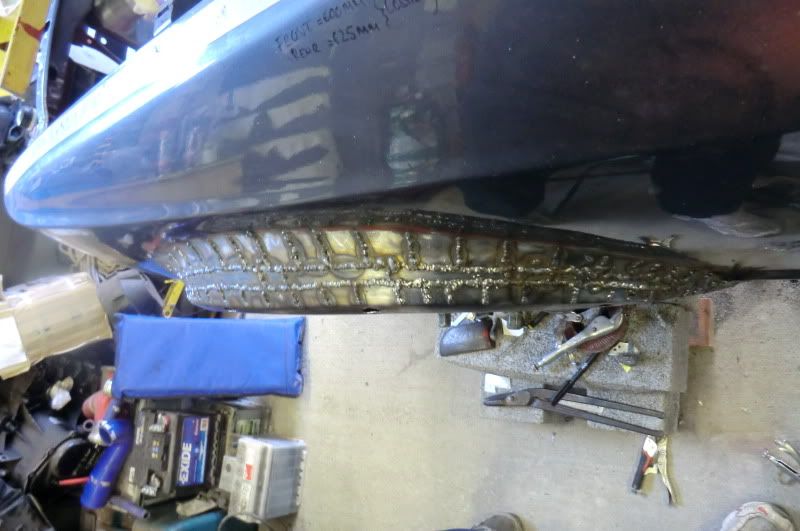
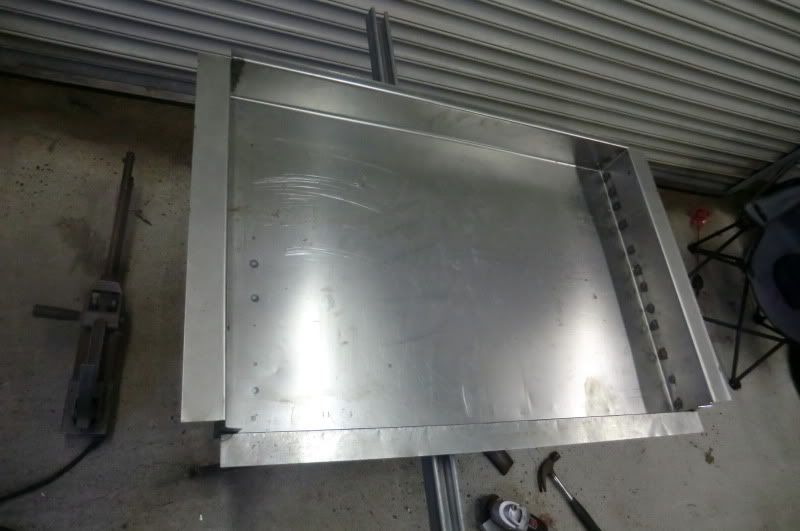
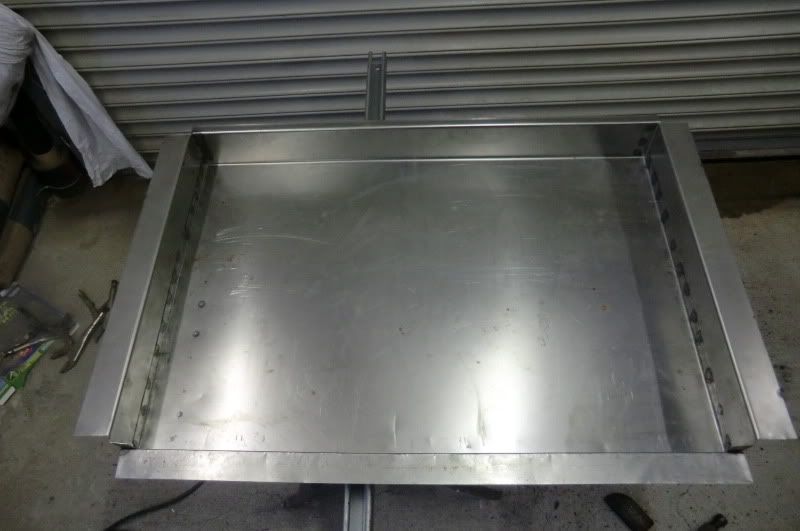
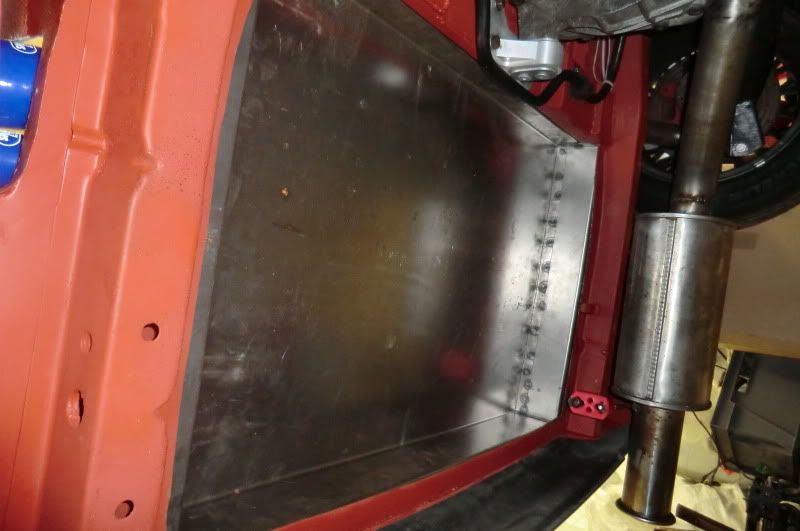
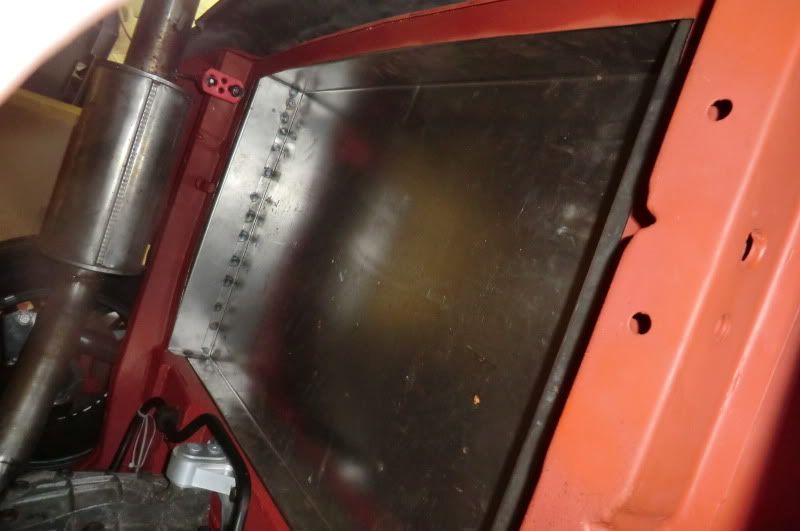
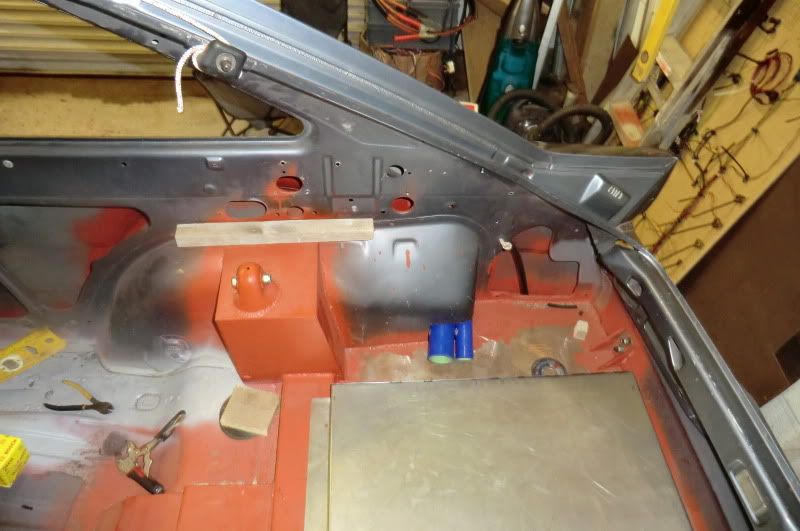
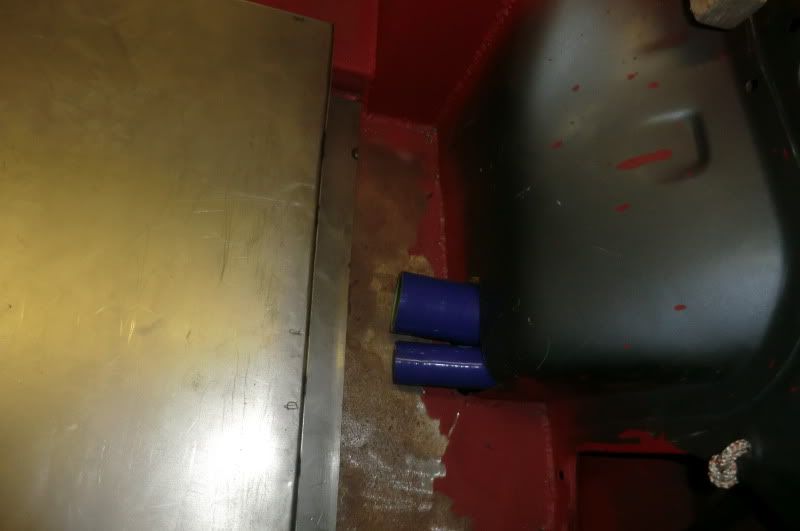
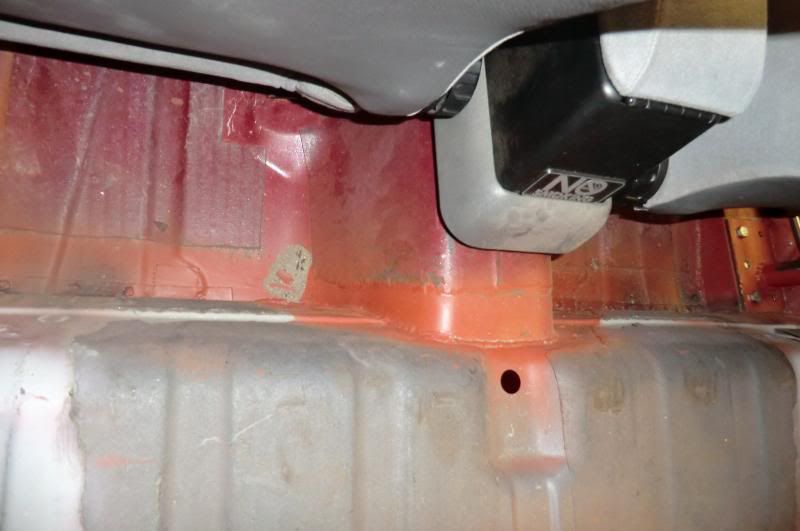
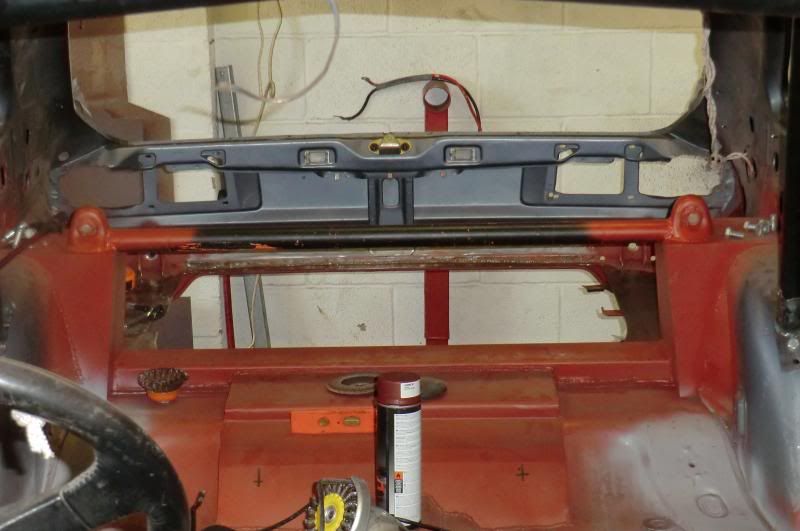
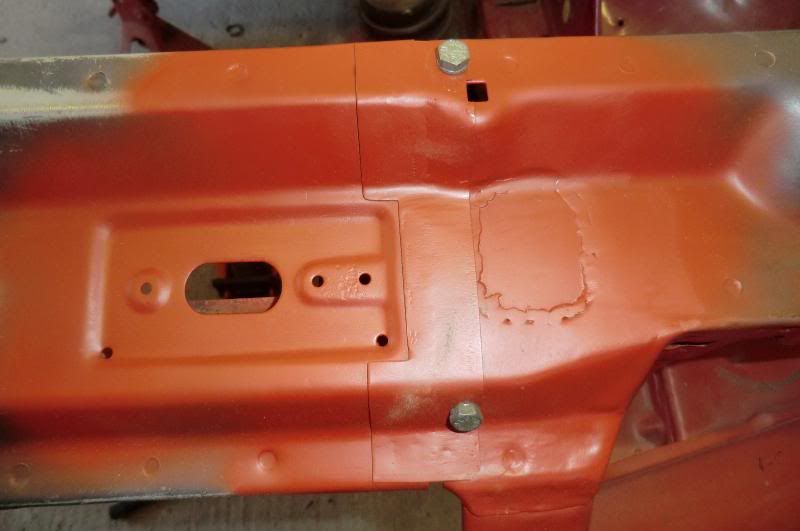
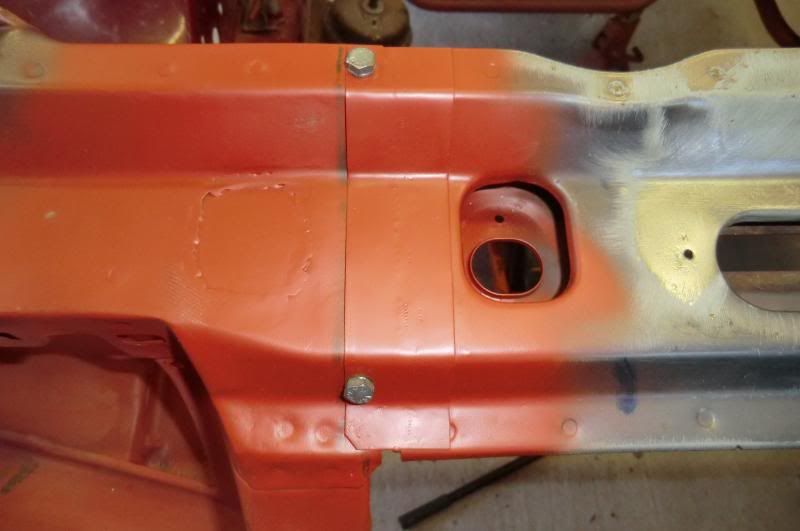
Managed to get the raised boot floor panel made up and test fitted, had to make it it 3 pieces as i couldn't fold all the sides in on piece due to the folder, so the 3 piece's were spotwelded together.
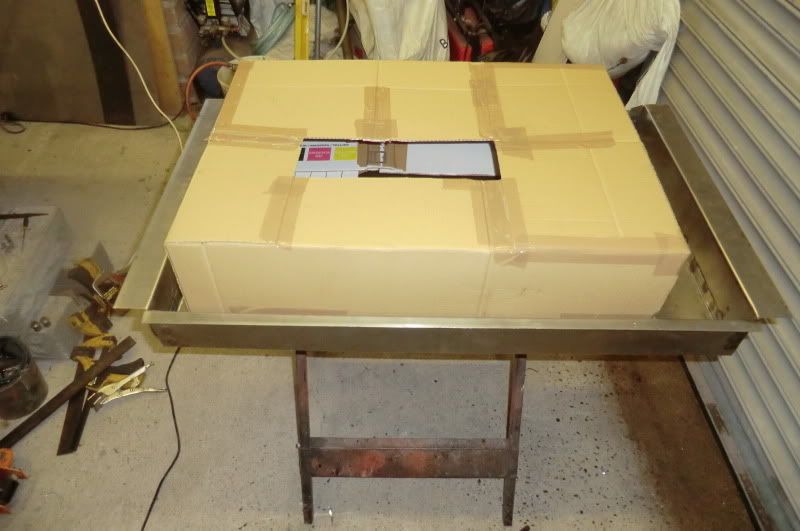
and a test fit of the tank template
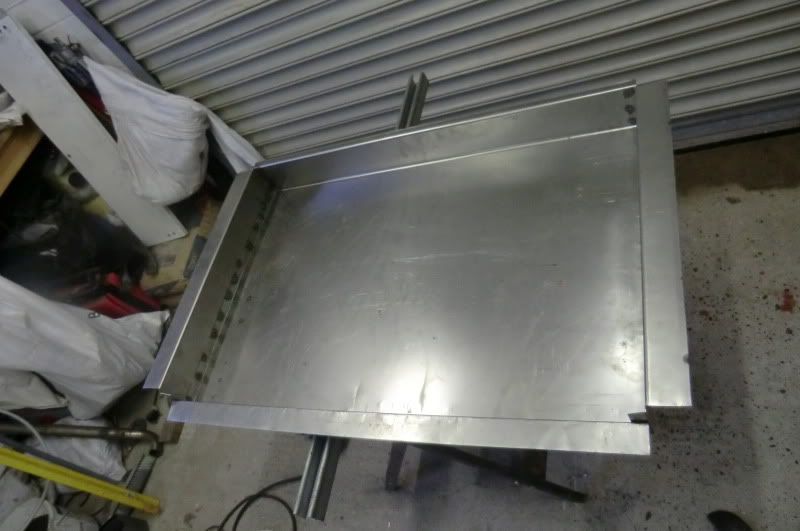
Then fitted into place
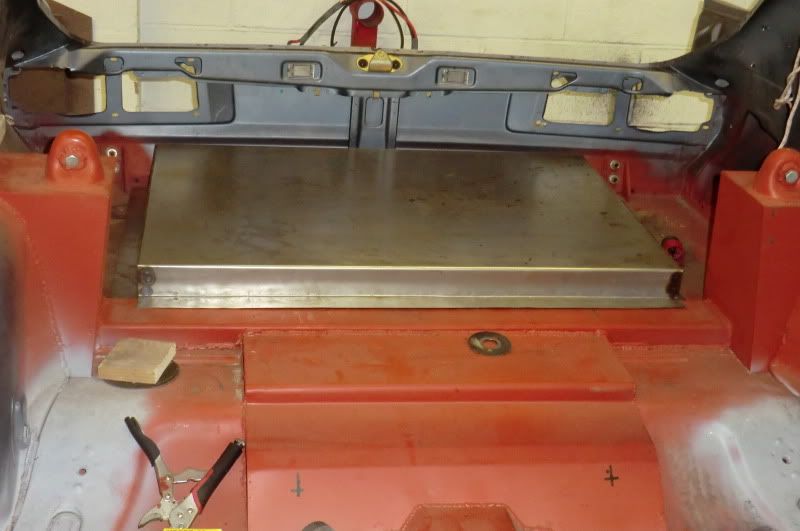
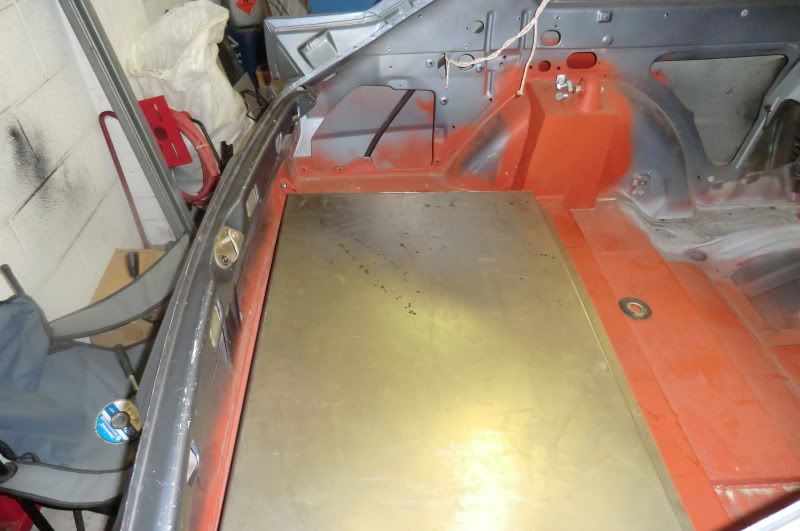
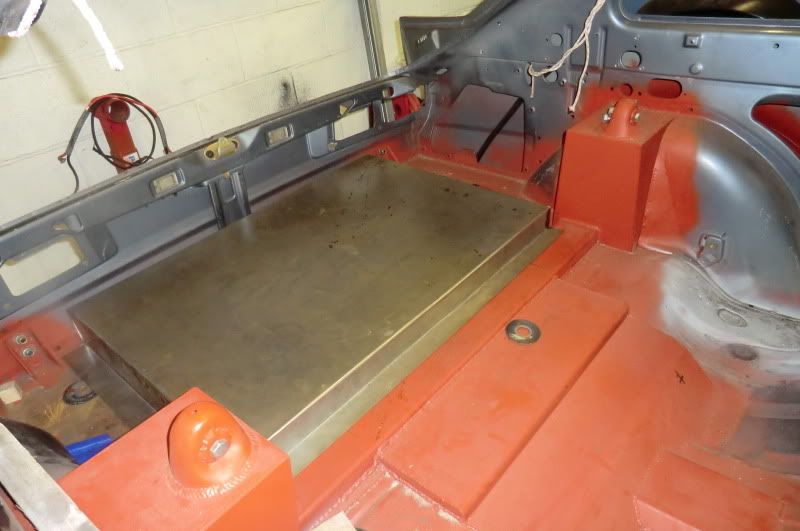
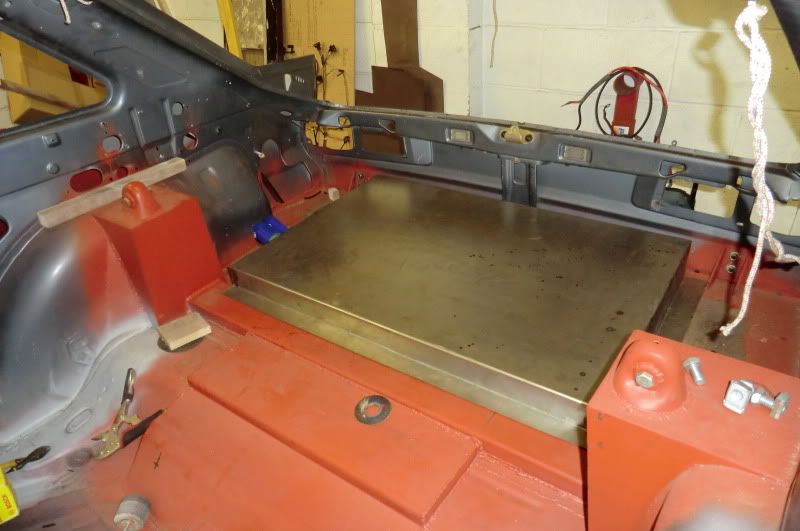
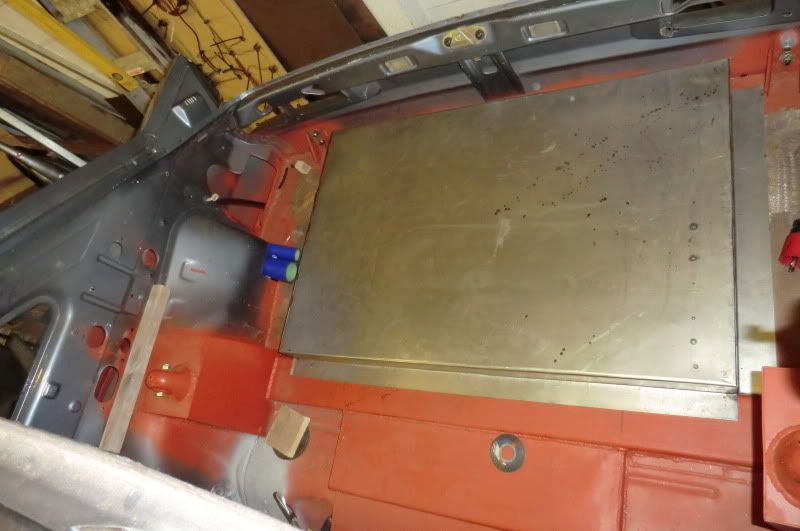
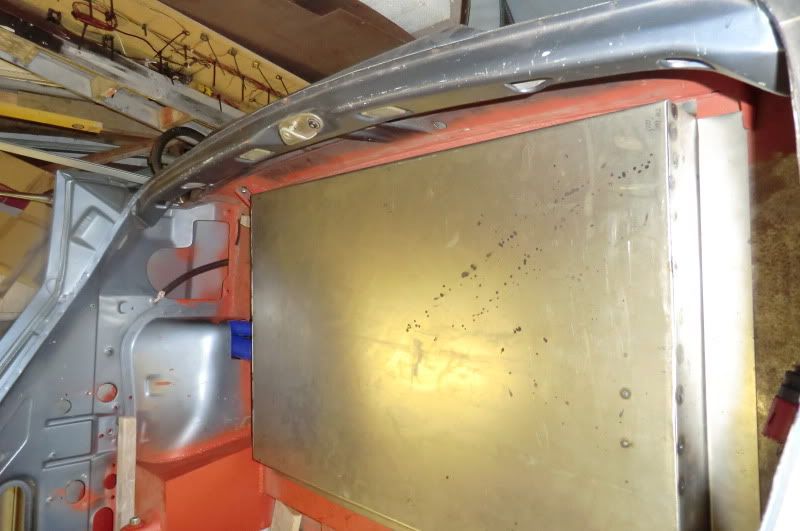
And from underneath
When the car is finished i'm gonna cut poly styrene to fit in all the low points of the boot area so that the floor is level when i recarpet it out, should look really nice and tidy then
And the location of the filler neck and breather/vent which will be boxed over with a removable sealed steel cover.

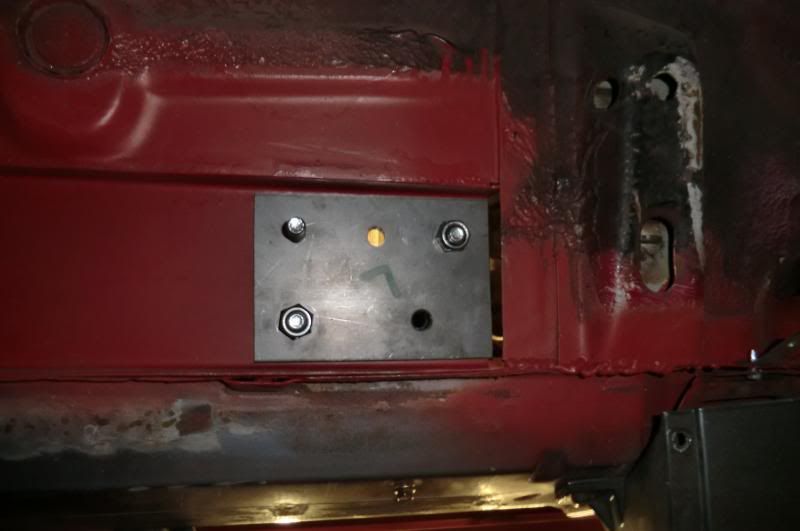
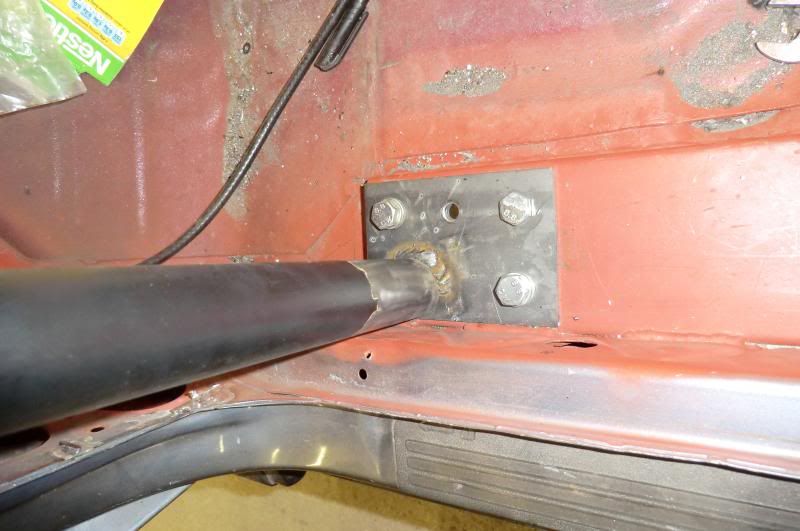
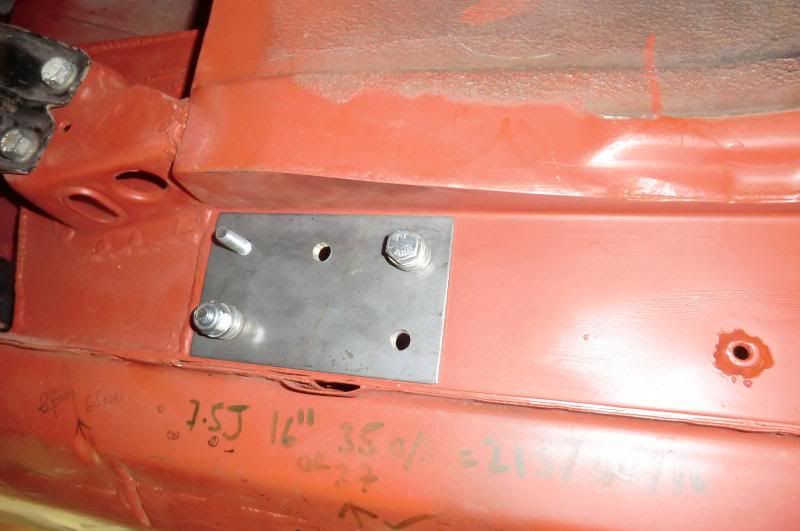
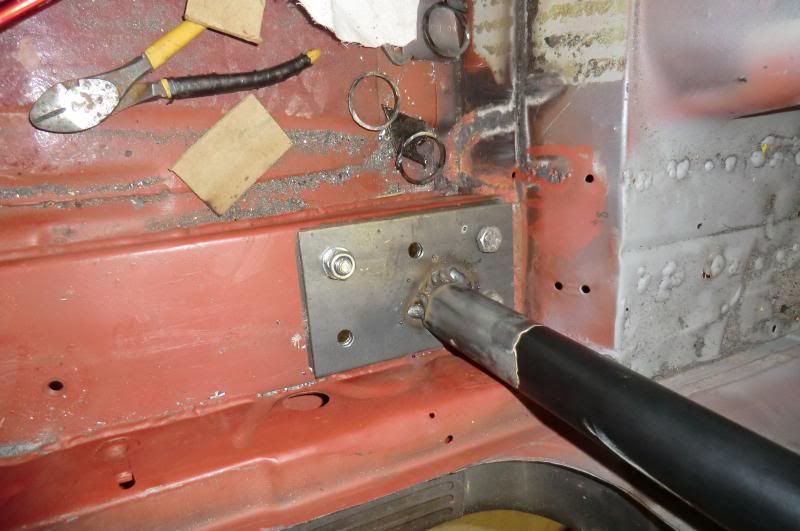
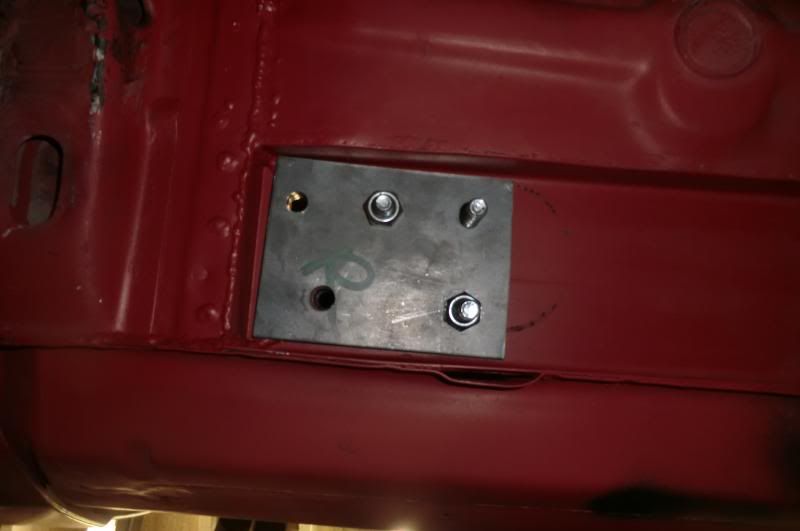
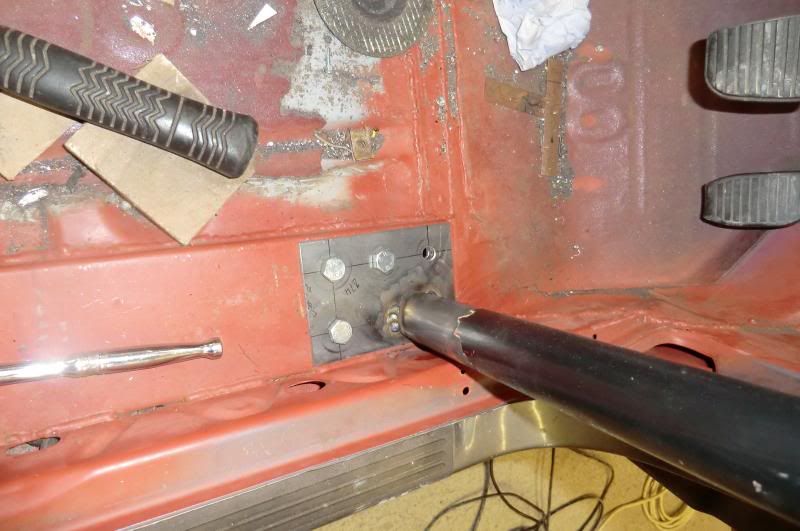
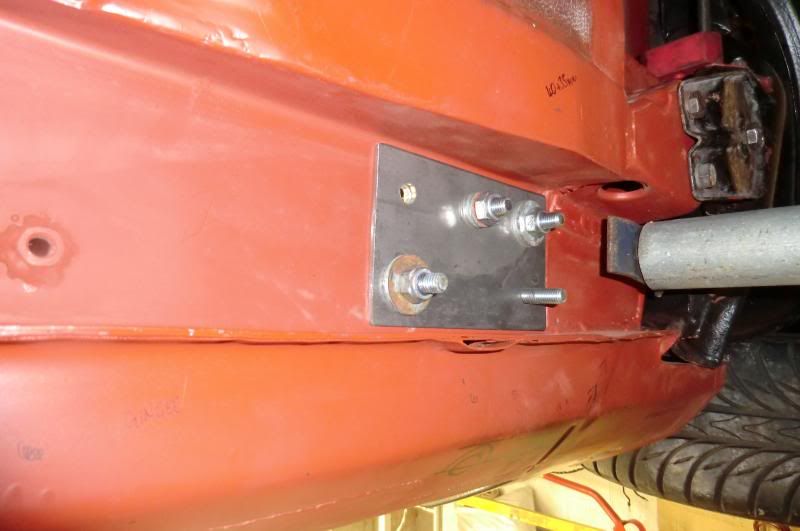
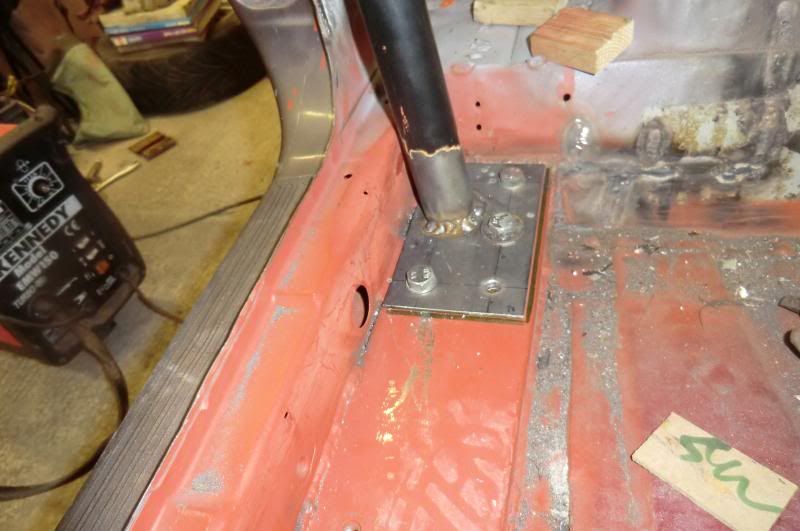
Once the boot floor is welded in i've only got one small 100mm x 30mm plate to do under the car that i forgot to do when it was upside down and a few spot weld holes to sort out and thats all the fabrication work done, so i'll sort that when i get it back on the spit.
All being well and soon as i've tested fitted the MK Supra diff mounting kit i can get the engine and box back out and start on some prep work
Ginger
.
Few pics of the left front arch with the kit fitted for a look
Managed to get the raised boot floor panel made up and test fitted, had to make it it 3 pieces as i couldn't fold all the sides in on piece due to the folder, so the 3 piece's were spotwelded together.
and a test fit of the tank template
Then fitted into place
And from underneath
When the car is finished i'm gonna cut poly styrene to fit in all the low points of the boot area so that the floor is level when i recarpet it out, should look really nice and tidy then
And the location of the filler neck and breather/vent which will be boxed over with a removable sealed steel cover.
Once the boot floor is welded in i've only got one small 100mm x 30mm plate to do under the car that i forgot to do when it was upside down and a few spot weld holes to sort out and thats all the fabrication work done, so i'll sort that when i get it back on the spit.
All being well and soon as i've tested fitted the MK Supra diff mounting kit i can get the engine and box back out and start on some prep work
Ginger
.
23-12-2012, 03:52 AM
#181
Wahay!! I've lost my Virginity!!

Join Date: Nov 2012
Location: uk
Posts: 64
Likes: 0
Received 0 Likes
on
0 Posts
Ginger, you have some superb skills there, matey. I found this thread just tonight and i have sat and read it through from page one. Brilliant work. I have never been a fan of modified cars but i salute you and what you've done here. I love it.
When you get this car finished it'll look like a factory job. Eye for detail and you've nailed it so far. Subtle flaires on the arches instead of some lurid, gaudy bodykit and clever fabrication where it was needed.
I am a die hard fan of keeping things factory standard and all original but i would definitely drive your car. Looking forward to seeing the next update and the completion of this project.
This thread should be made into a Sticky so that anyone else with sufficiently big balls can also carry out their own conversion.
Thanks for posting your progress. Excellent thread.
Keep up the good work and keep the updates coming.


 15-01-2013, 08:29 AM
#190
Ginge, its fatboy, hurry and finish so we can see it sideways#!!!!


 but mind you, ive never actually seen how much work its taken to get to the stage your at now dudee, fairplay your good a what you do best dudee
SAFE
Kylee!!
but mind you, ive never actually seen how much work its taken to get to the stage your at now dudee, fairplay your good a what you do best dudeeSAFE
Kylee!!
19-03-2013, 11:03 PM
#196
.
Been a little while since i've posted an update, Main reason is i've been a bit lazy, and been waiting on bits to arrive.
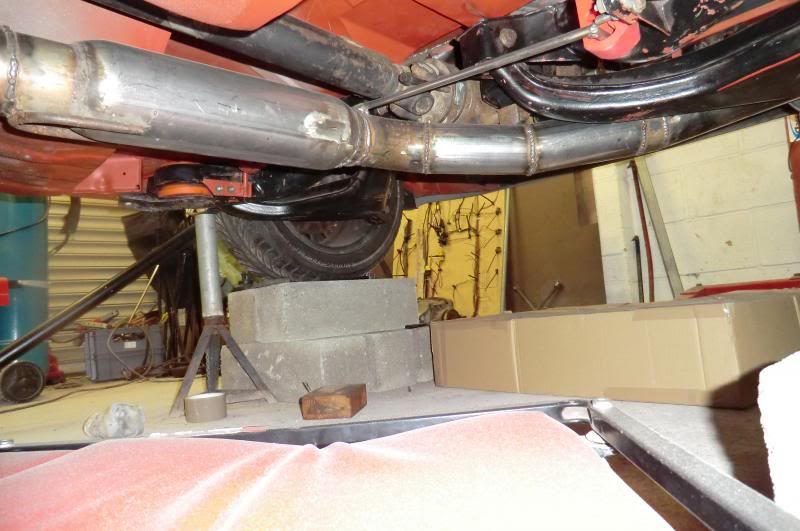
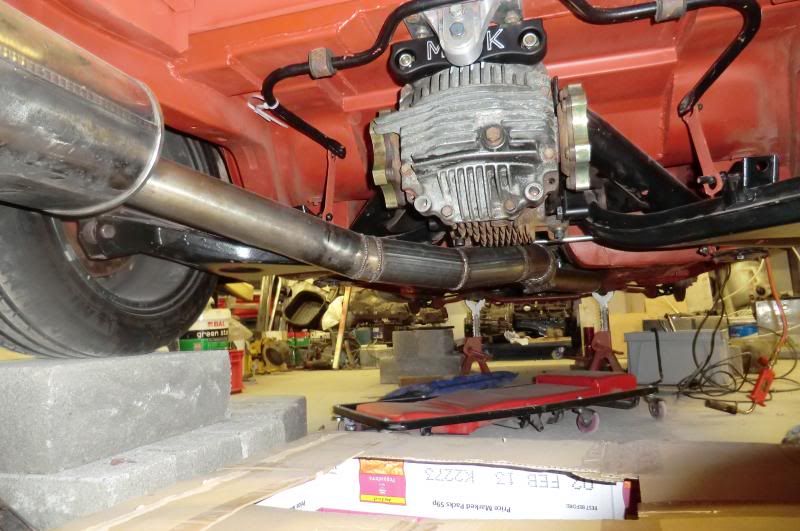
1st off i was on the MK Motorsport Supra Diff kit group buy needed to leave the engine, box, exhaust etc in place until that arrived so i could check everything fitted ok, Well i recieved the kit about 6 weeks or so ago but as my car is shorter than the standard and my prop being shortened 10mm to much MK was going to make my diff to prop spacer that extra 10mm to take up the difference, only problem is i'm still waiting for it :-( So all the kit is fitted but i'm held up taking the engine out to get it back upside down. Gonna have to ring him tomorrow as my message arn't getting answered.
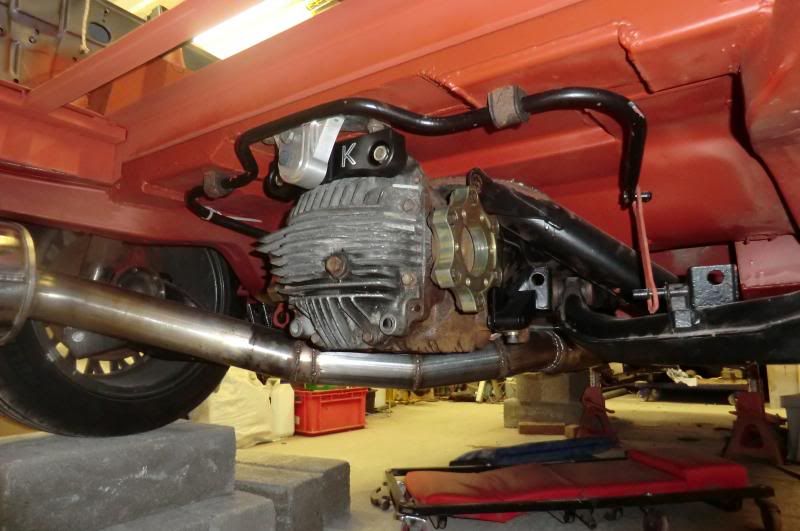
anyway, pics of said diff fitted
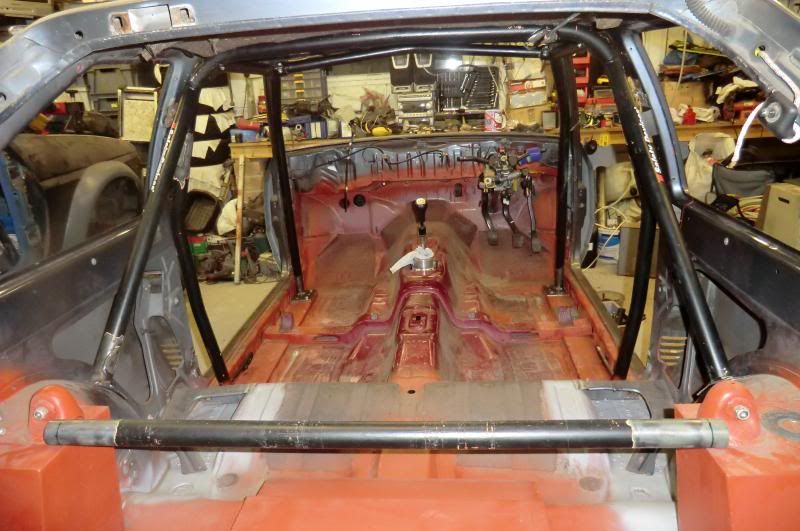
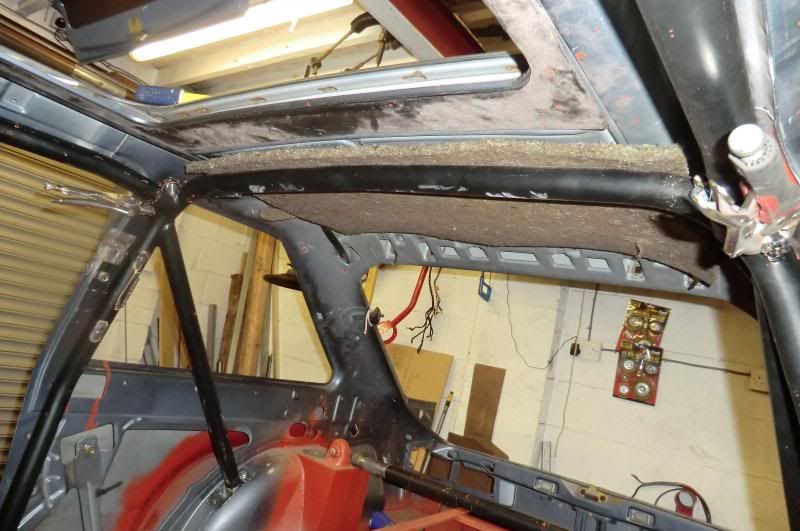
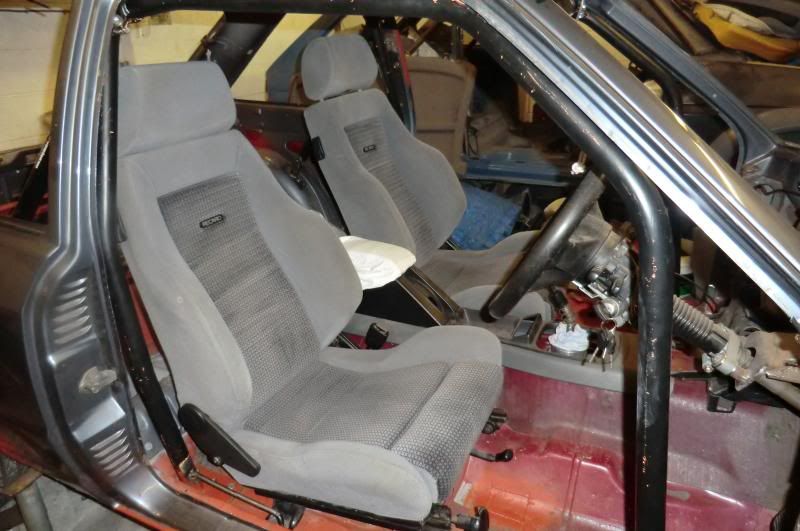
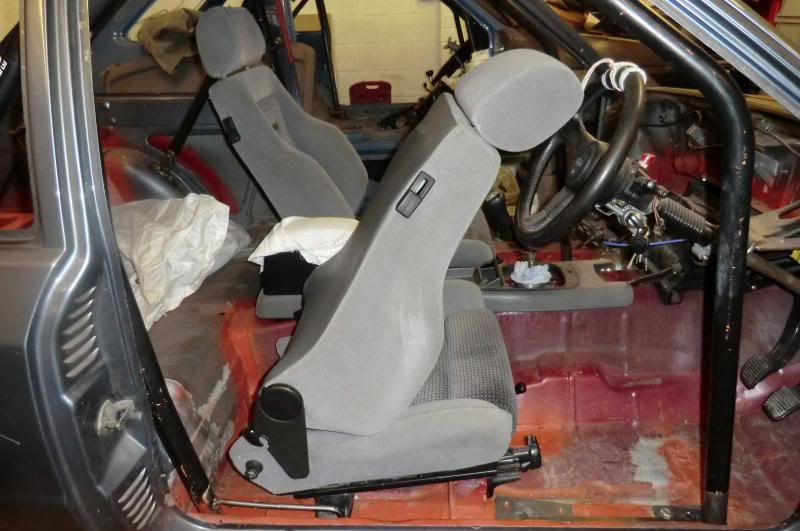
I've been debating since the start of this project on wether or not to fit a 6 point cage as i want a standardish looking car, but after driving my old XR2 turbo which is cage i decided i needed one as it just makes the car feel really tight, So been on the look out for a while as i didn't want to pay to money for one as i needed to cut it up a bit to fit my floor.
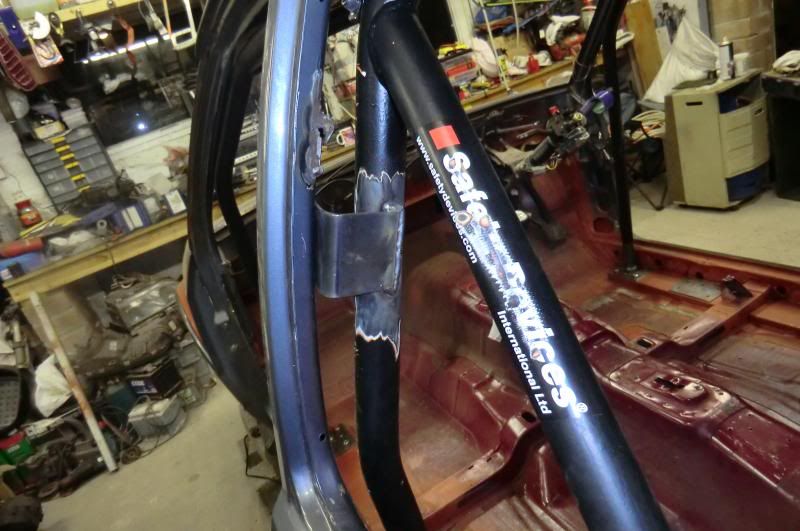
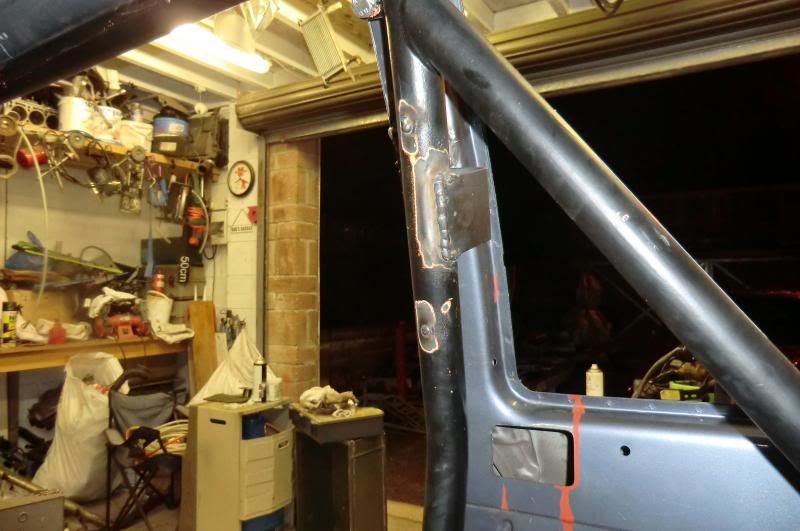
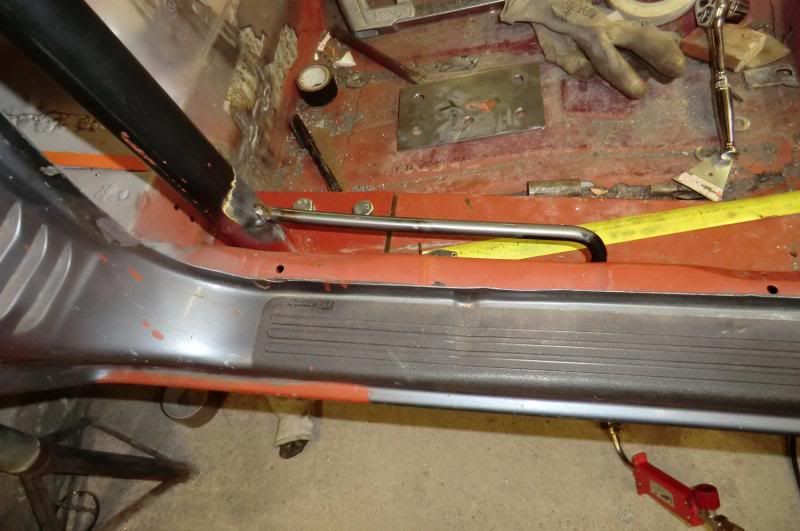
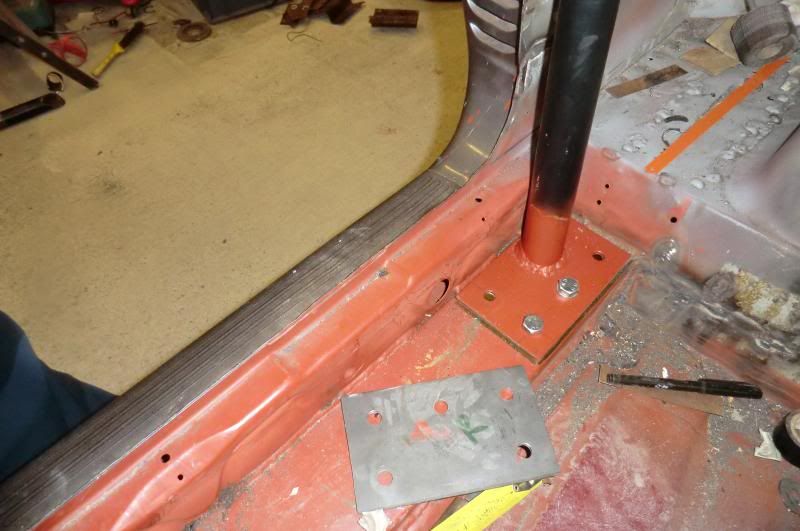
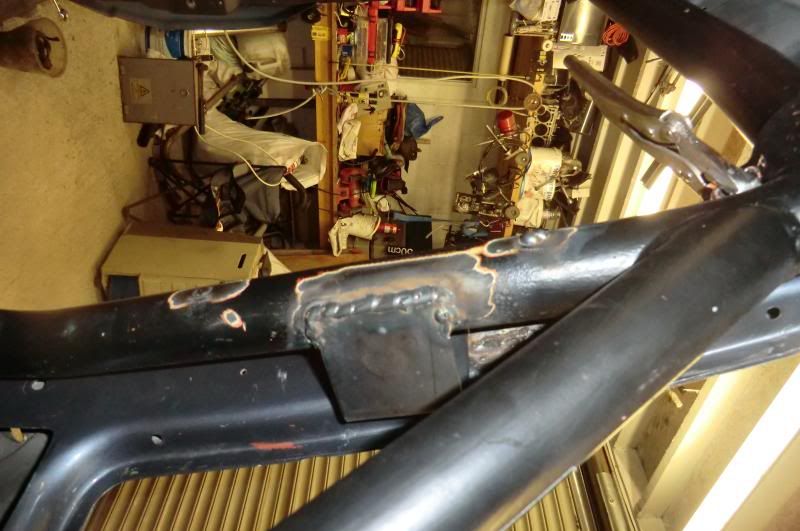
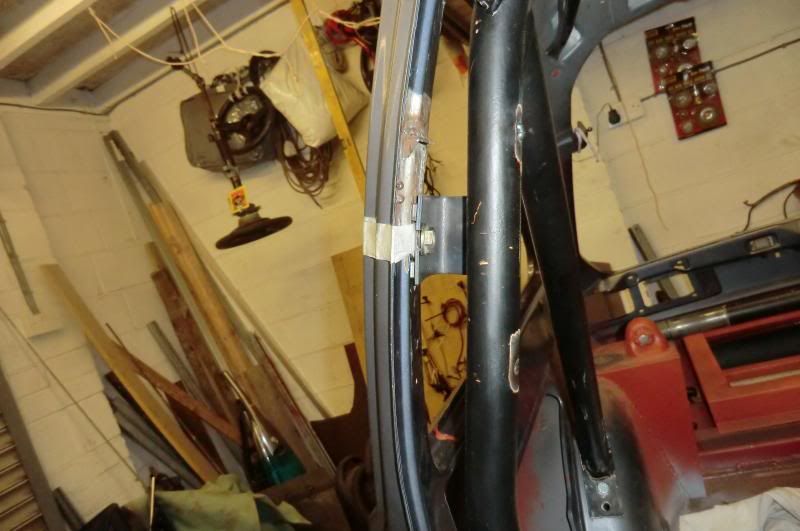
So i managed to get one off a member on here Joe, so a day trip form Cardiff to Preston and i had a 6 point cage with rear diagonal, Now i'm fitting a full interior so the diagonal had to go and the front and middle legs needed shortened to suit the floor, with this done new feet plates were made out of 3mm plate and welded on, and under side plates cut to match, Also managed to get an extra bolt fixing in the front tubes (see pics). Due to the diagonal being removed i decided to add an extra fixing to make it an 8 point by tying the main hoop into the front set belt B pillar fixing.
After i'd finished welding it all back together i realised the lower front seat belt rails would not fit, So they were cut down with a hole drilled into the cage then insert into hole and fully welded so there now part of the cage
PICS
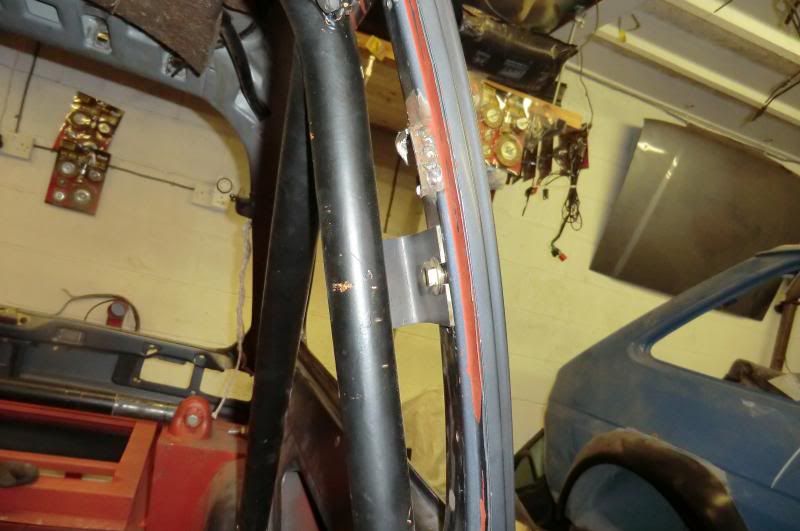

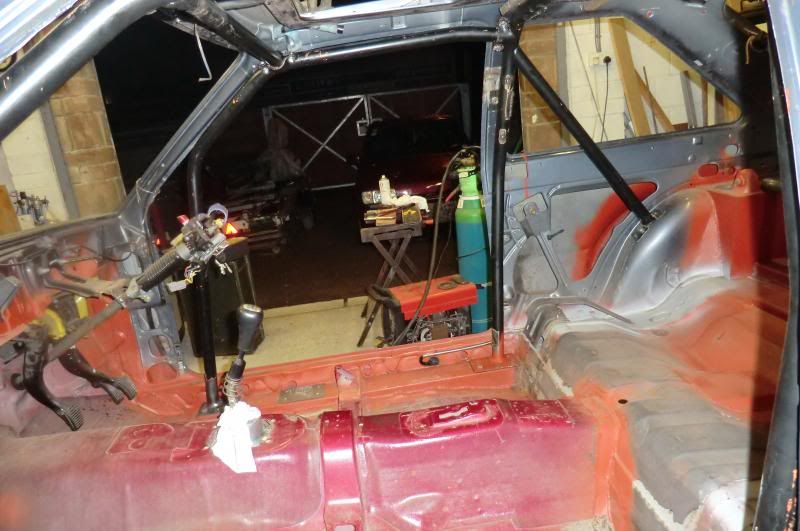
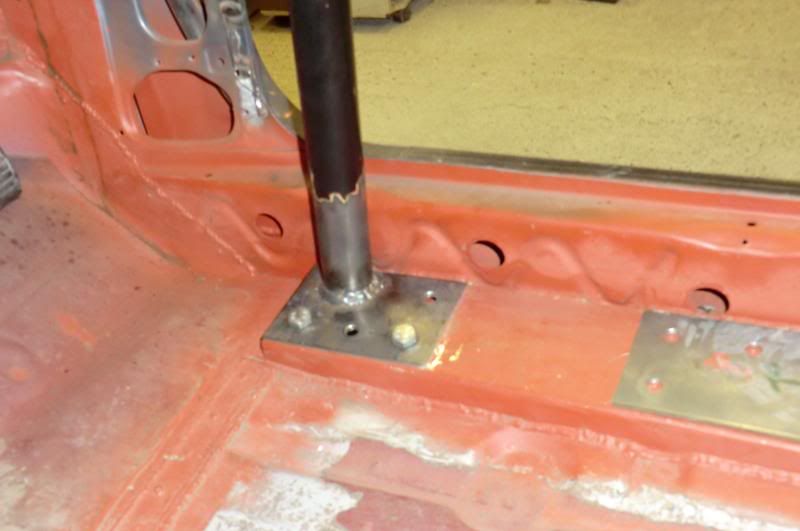

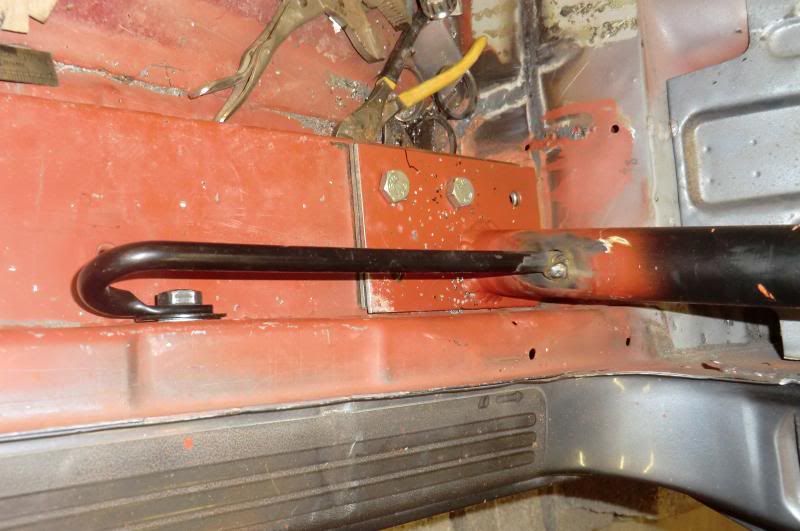
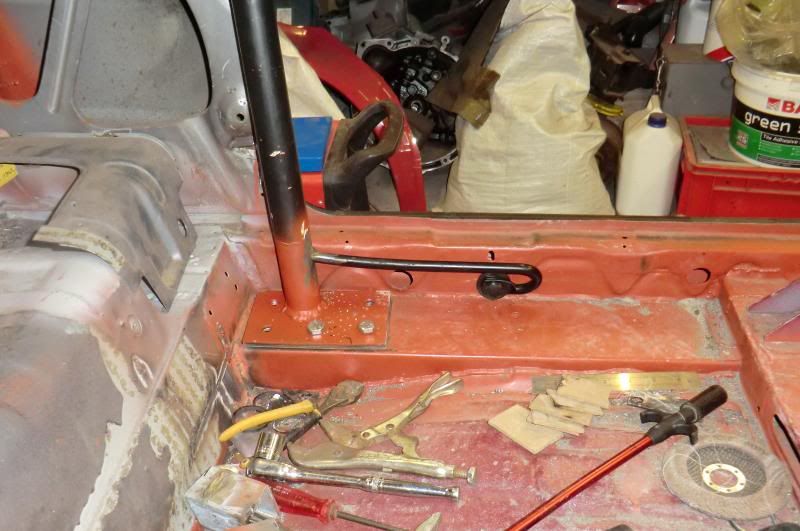

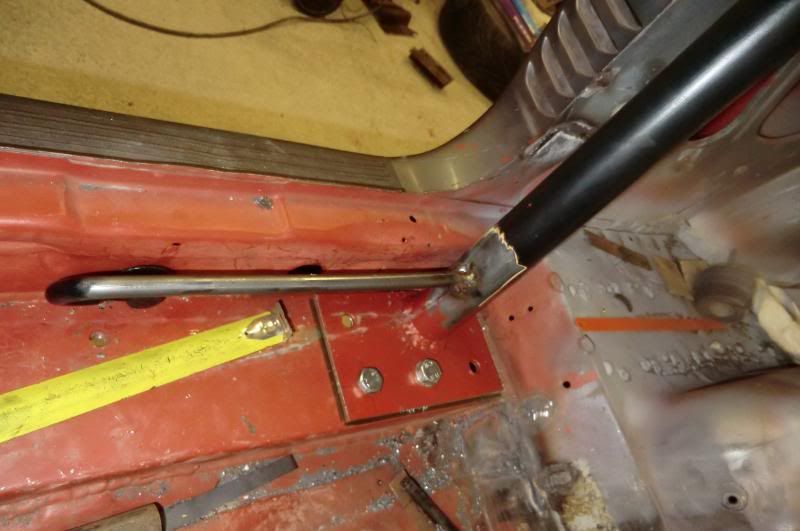
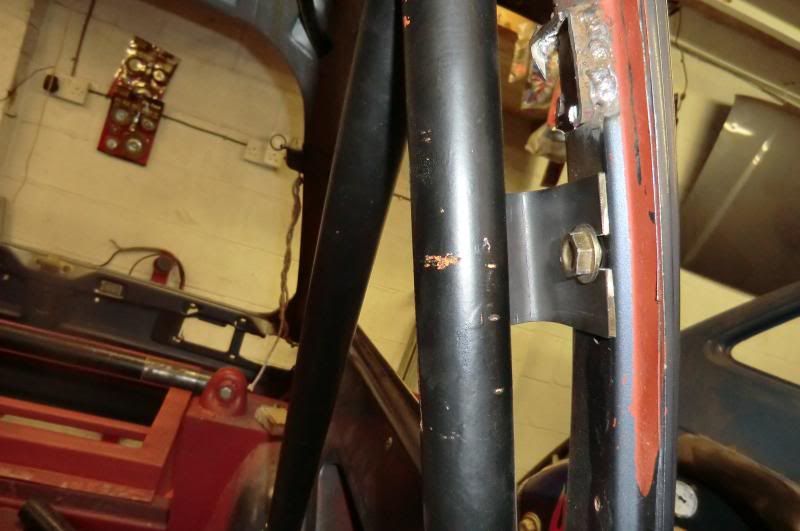

On the front legs i welded a nut to the new foot before welding the foot and leg back together so as to get an extra fixing in
Hopefully it wont be 3 months until the next update
Ginger
.
Been a little while since i've posted an update, Main reason is i've been a bit lazy, and been waiting on bits to arrive.
1st off i was on the MK Motorsport Supra Diff kit group buy needed to leave the engine, box, exhaust etc in place until that arrived so i could check everything fitted ok, Well i recieved the kit about 6 weeks or so ago but as my car is shorter than the standard and my prop being shortened 10mm to much MK was going to make my diff to prop spacer that extra 10mm to take up the difference, only problem is i'm still waiting for it :-( So all the kit is fitted but i'm held up taking the engine out to get it back upside down. Gonna have to ring him tomorrow as my message arn't getting answered.
anyway, pics of said diff fitted
I've been debating since the start of this project on wether or not to fit a 6 point cage as i want a standardish looking car, but after driving my old XR2 turbo which is cage i decided i needed one as it just makes the car feel really tight, So been on the look out for a while as i didn't want to pay to money for one as i needed to cut it up a bit to fit my floor.
So i managed to get one off a member on here Joe, so a day trip form Cardiff to Preston and i had a 6 point cage with rear diagonal, Now i'm fitting a full interior so the diagonal had to go and the front and middle legs needed shortened to suit the floor, with this done new feet plates were made out of 3mm plate and welded on, and under side plates cut to match, Also managed to get an extra bolt fixing in the front tubes (see pics). Due to the diagonal being removed i decided to add an extra fixing to make it an 8 point by tying the main hoop into the front set belt B pillar fixing.
After i'd finished welding it all back together i realised the lower front seat belt rails would not fit, So they were cut down with a hole drilled into the cage then insert into hole and fully welded so there now part of the cage
PICS
On the front legs i welded a nut to the new foot before welding the foot and leg back together so as to get an extra fixing in
Hopefully it wont be 3 months until the next update
Ginger
.
24-03-2013, 10:22 PM
#197
.
Progress report.
Well i've made a cock up not unfixable though, I've got an MK Supra diff kit but i had fitted the centre prop bearing on with a block spacer on the wrong side causing limited forward and backward adjustment, this ment that the prop looked 10mm to short, not an issue as Mark from MK made my diff to prop flange 10mm thicker only to find that it's now 10mm to thick. Not a huge issue as Mark says it can be machined back down.
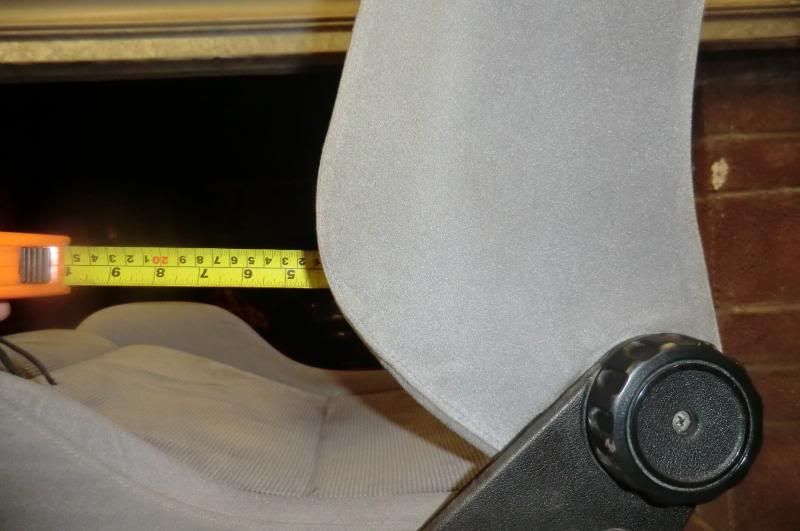
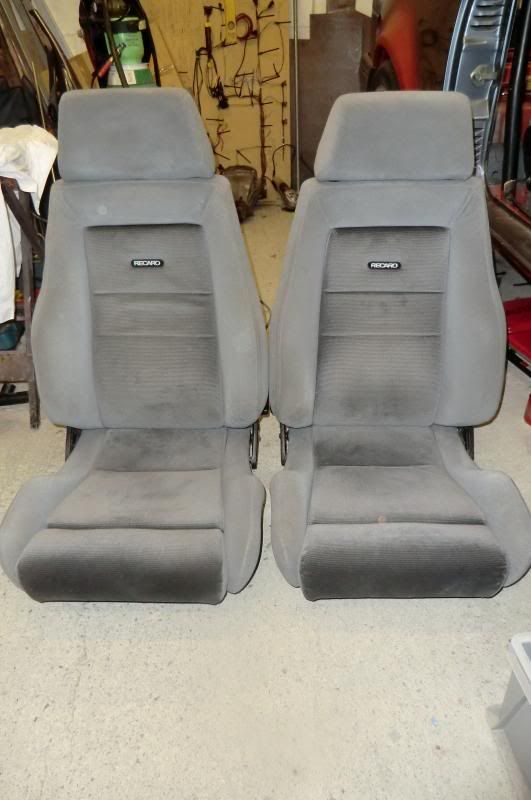
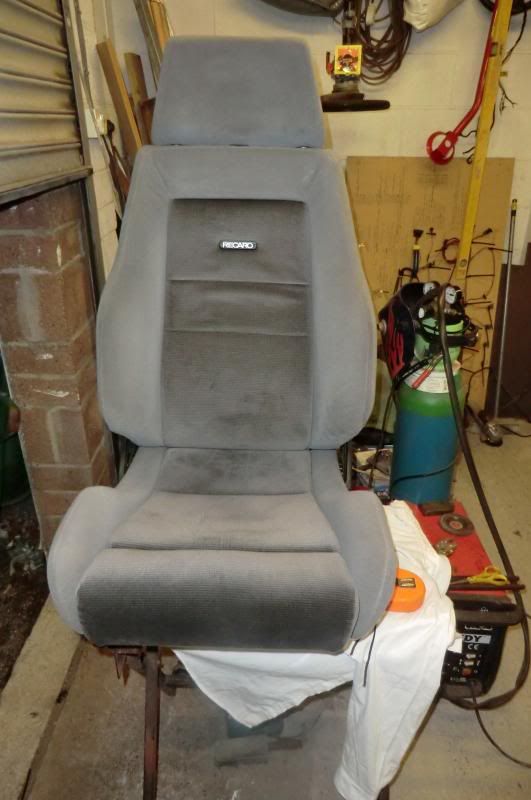
Anyway after being a bit feed up i decided to look at the front Recaros, I have 2 sets Escort and 2wd Saff.
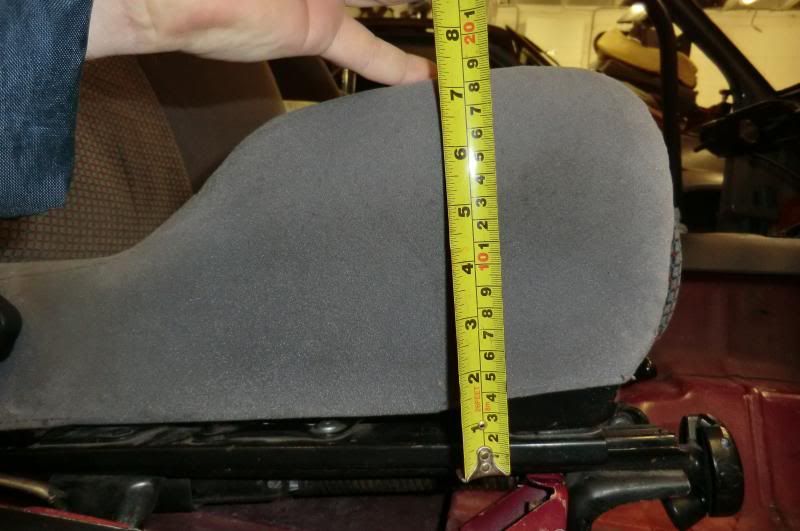
Now i had looked at using the complete Escort seat on the Sierra runner but this pushes the seat 35mm upwards due to the Escort bases being higher
Escort
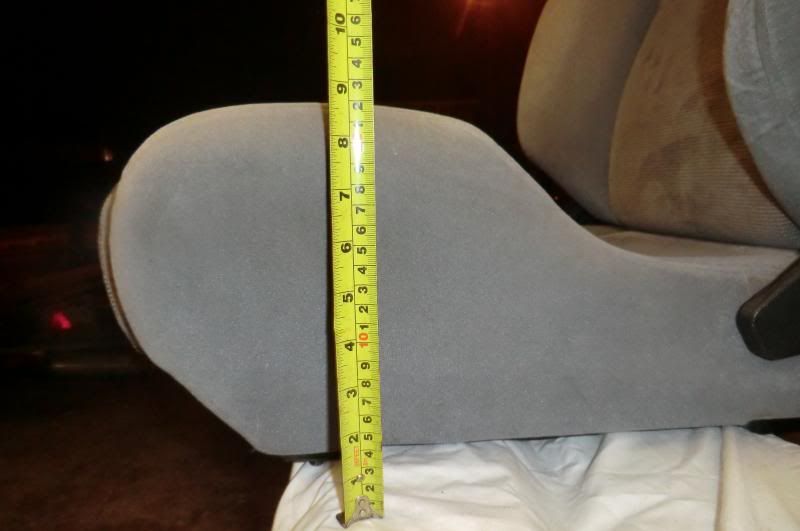
Sierra
So after a good look over the 2 pairs of seats and measurement taken i found that the rear/back rest part of the seats were the same fitment and the base parts you sit on are exactly the same apart from the cloth pattern
So the 2 set were taken apart and i now have Siescort Recaros .
Now i have a Sierra base with the Escort centre with the Escort back section that flips forward
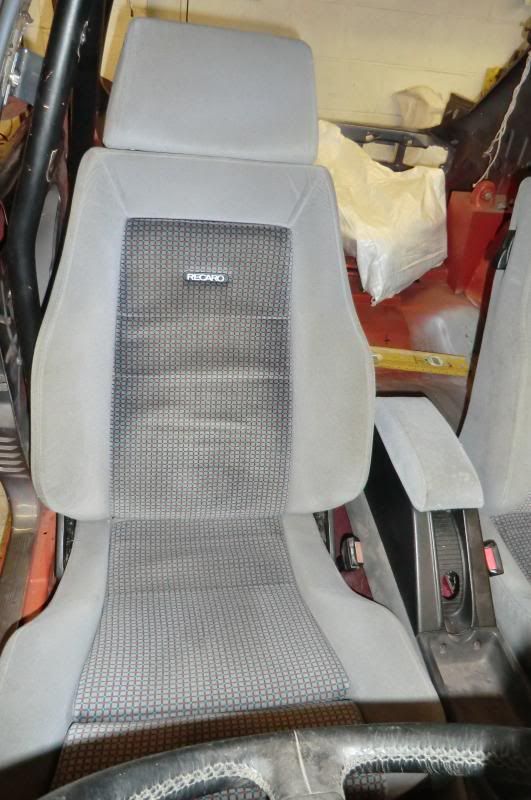

Flip forward
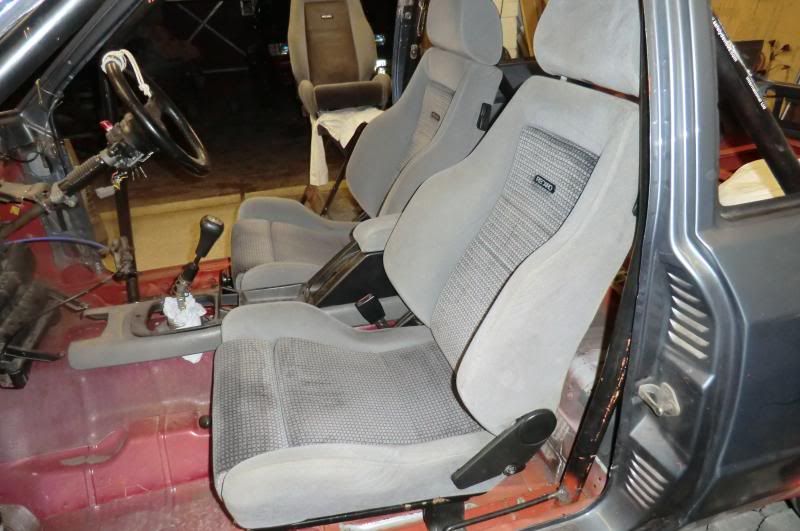
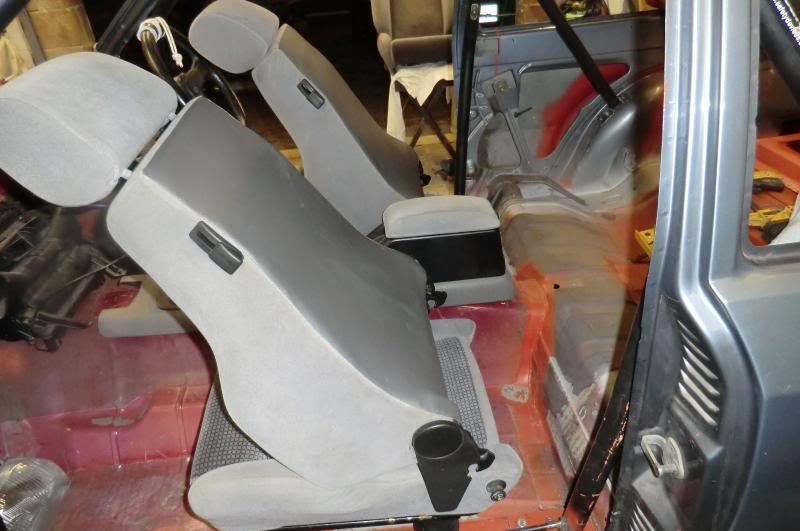
The centre console came out of the donor Sierra and the cloth is a perfect mate
Because i've made my own rear end and not used the Sierra floor i have plenty of room behind the arm rest so should have a gap between it and the rear bench
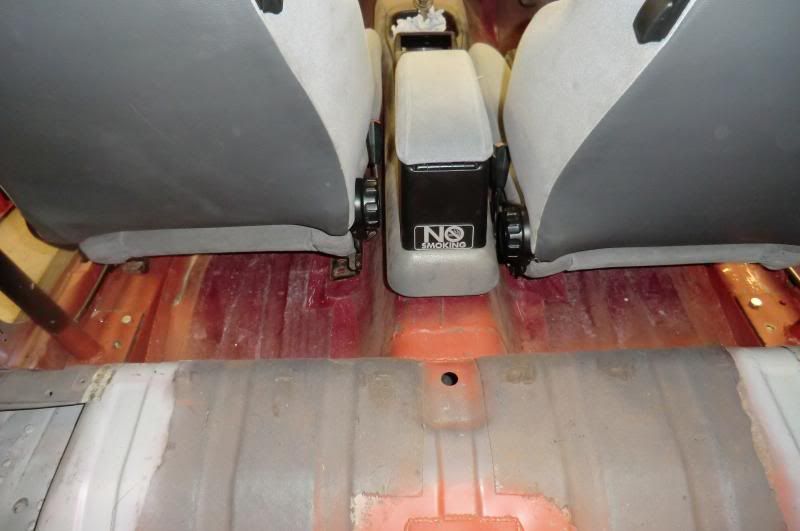
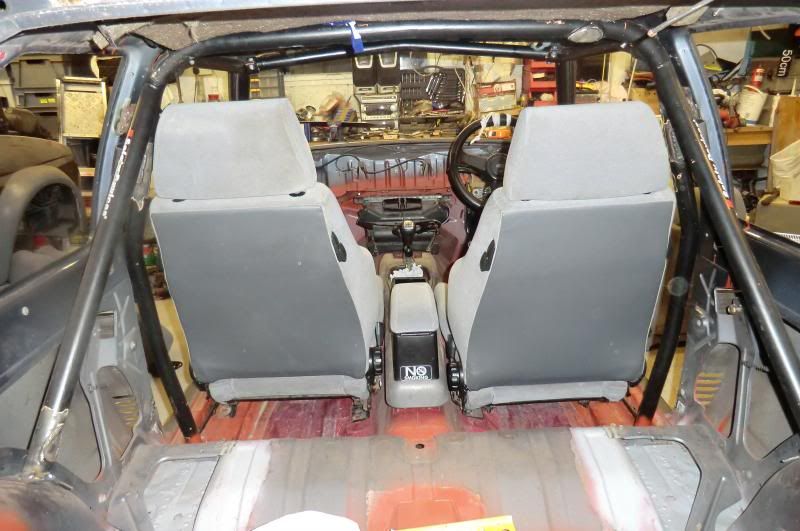
And because of the rollcage i had to fit the seat winders on the inside as the touched the cage

Also never noticed it before but the side bolsters on the Escort seats are deeper than the Sierra ones
Escort
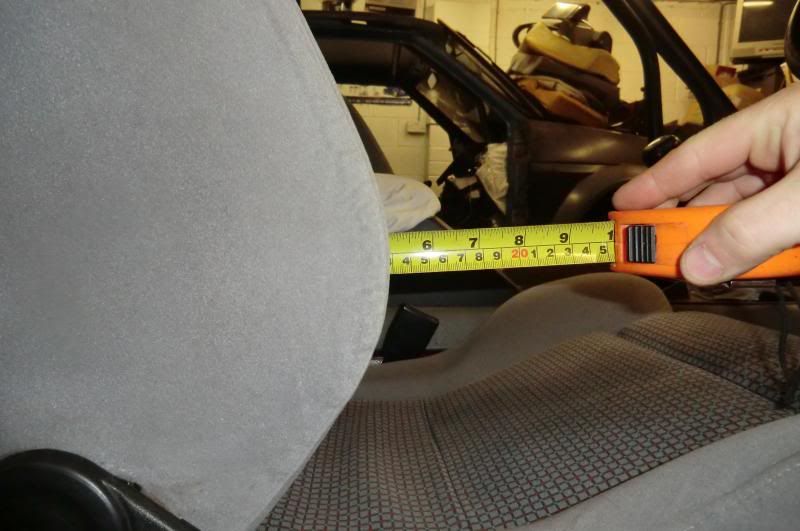
Sierra
And the other pair that'll be perfect for a 4 door or Orion.
Thats another job ticked off
Ginger
.
Progress report.
Well i've made a cock up
Anyway after being a bit feed up i decided to look at the front Recaros, I have 2 sets Escort and 2wd Saff.
Now i had looked at using the complete Escort seat on the Sierra runner but this pushes the seat 35mm upwards due to the Escort bases being higher
Escort
Sierra
So after a good look over the 2 pairs of seats and measurement taken i found that the rear/back rest part of the seats were the same fitment and the base parts you sit on are exactly the same apart from the cloth pattern
So the 2 set were taken apart and i now have Siescort Recaros .
Now i have a Sierra base with the Escort centre with the Escort back section that flips forward
Flip forward
The centre console came out of the donor Sierra and the cloth is a perfect mate
Because i've made my own rear end and not used the Sierra floor i have plenty of room behind the arm rest so should have a gap between it and the rear bench
And because of the rollcage i had to fit the seat winders on the inside as the touched the cage
Also never noticed it before but the side bolsters on the Escort seats are deeper than the Sierra ones
Escort
Sierra
And the other pair that'll be perfect for a 4 door or Orion.
Thats another job ticked off
Ginger
.
 31-03-2013, 07:54 PM
#200
.
Small update,
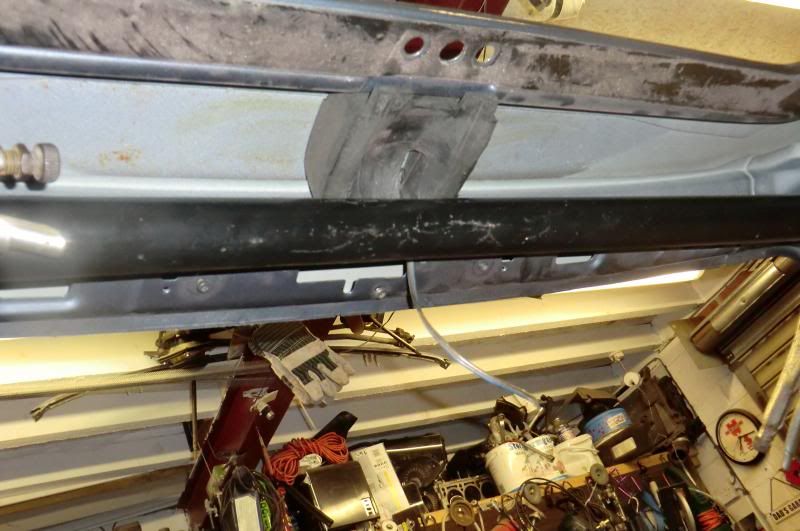
1st off, i had the tubing from the cage diagnol left over so decided to use it as a welded in rear strut brace to tighten the rear end up a bit, might put 2 small diagnols in yet to tie in above the diff hanger. I'll weld the under side when the car is back upside down.
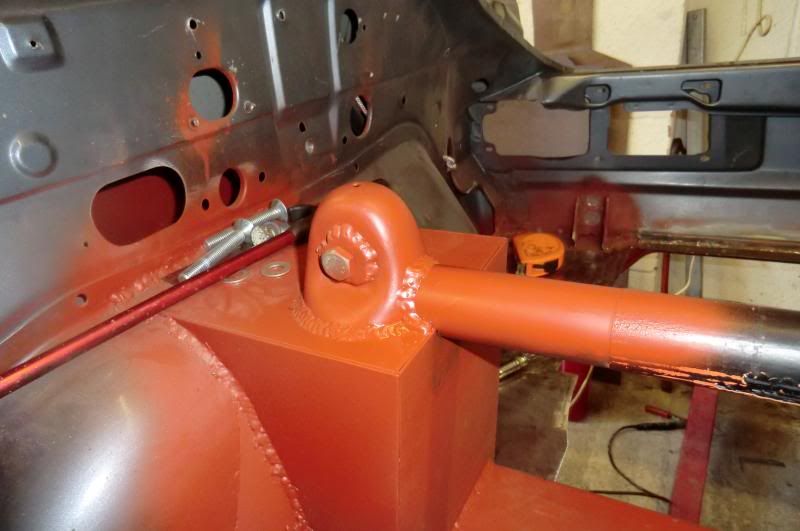
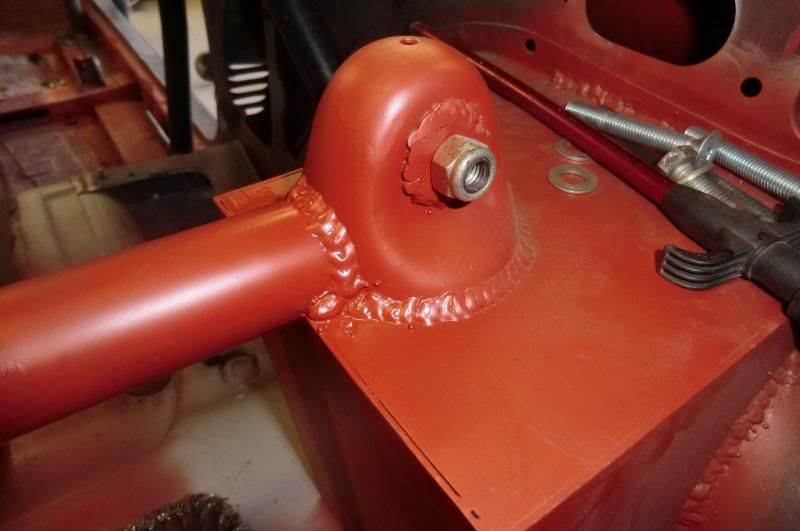

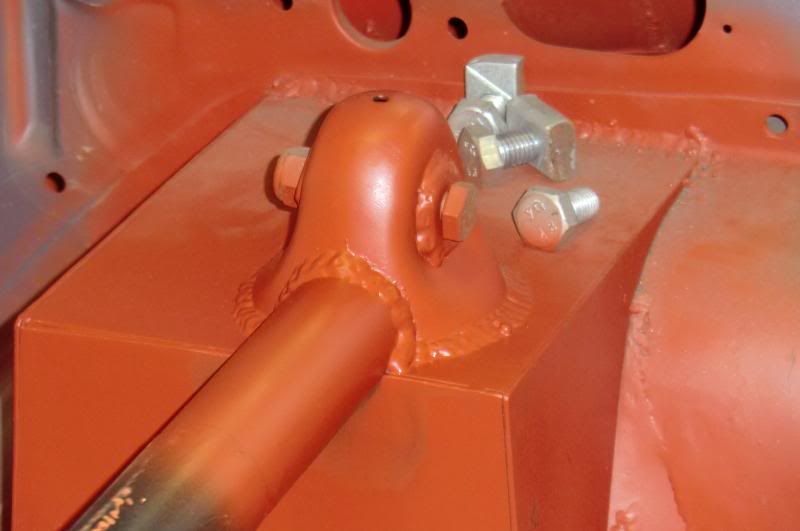
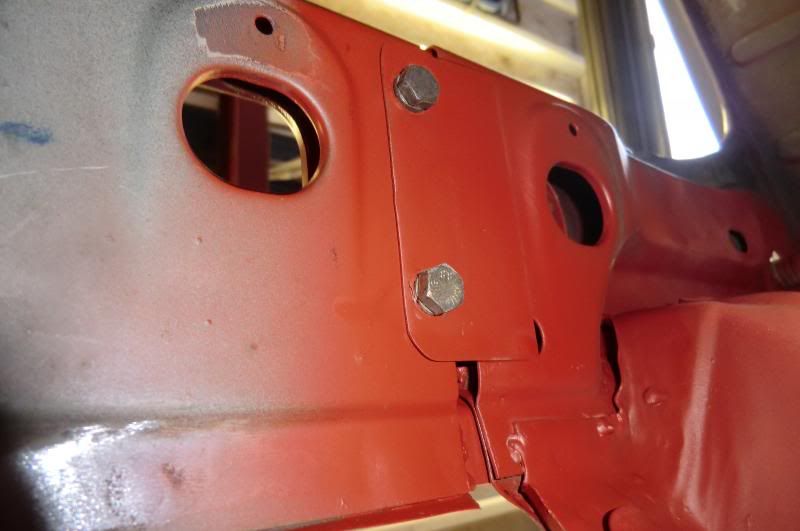
When i put the engine and box in it was a bit of a mission with the front panel so decided to make the centre part removable to make it easier.
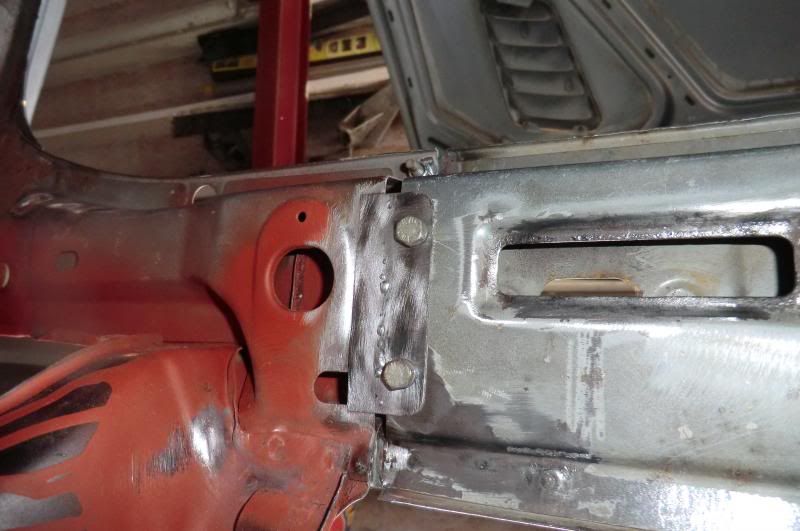
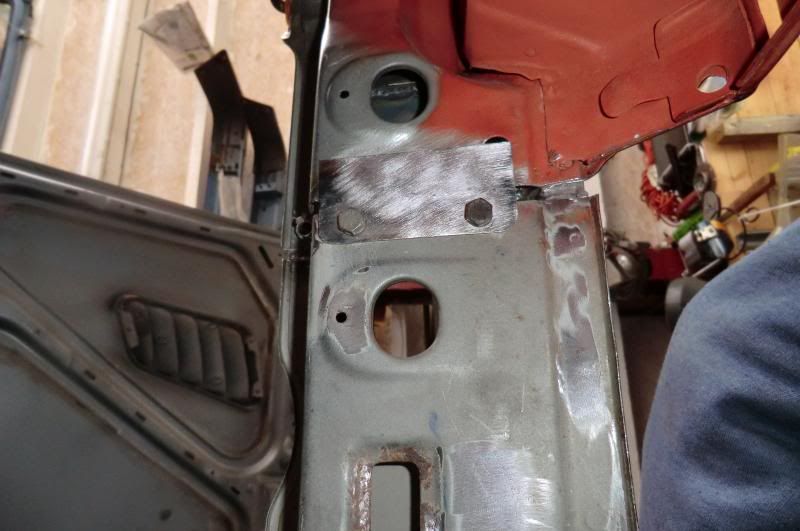
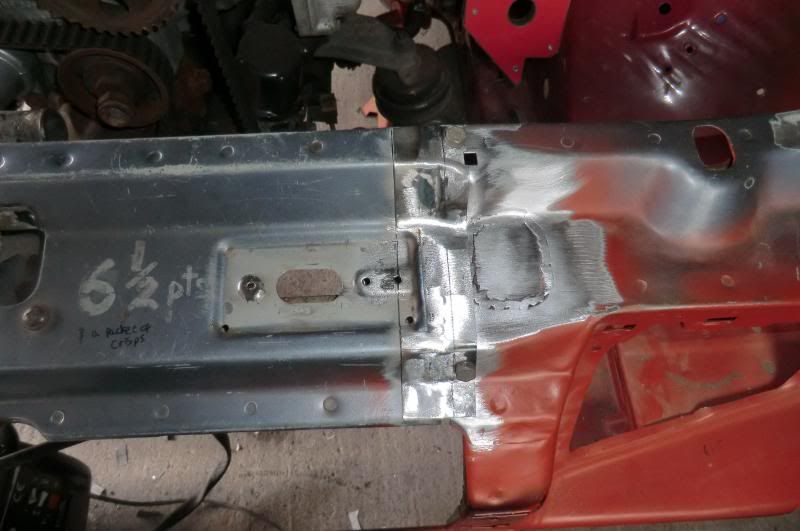
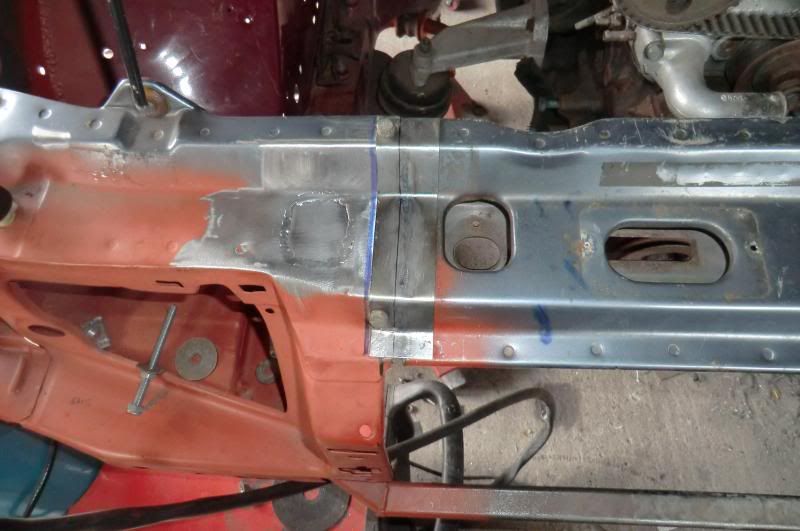
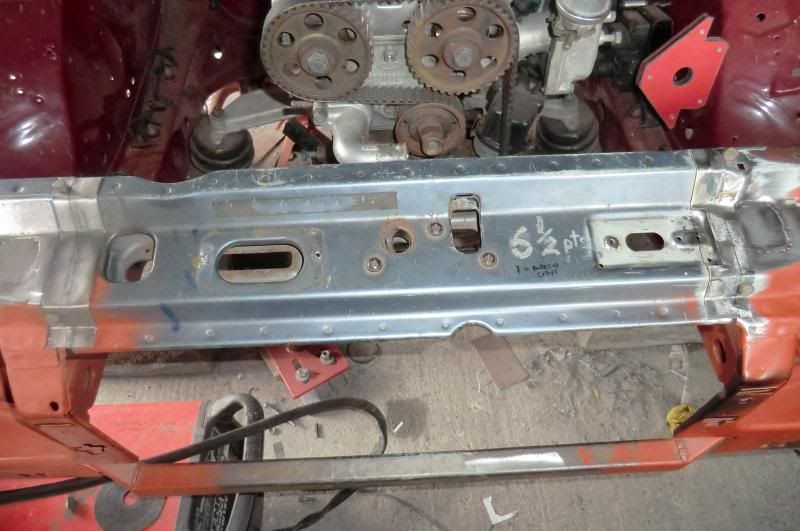


Got a few small welding holes from drilled through spot welds to sort out 1st but hopfully i should have it back on the spit tomorrow, then i can get the rear floor in. Not long now and i can start get seam sealer, stone chip, primer etc on the unders side, in side and the inner arches
Money and time permiting i "SHOULD" have some colour on parts of it by the summer.
Ginger
.
Small update,
1st off, i had the tubing from the cage diagnol left over so decided to use it as a welded in rear strut brace to tighten the rear end up a bit, might put 2 small diagnols in yet to tie in above the diff hanger. I'll weld the under side when the car is back upside down.
When i put the engine and box in it was a bit of a mission with the front panel so decided to make the centre part removable to make it easier.
Got a few small welding holes from drilled through spot welds to sort out 1st but hopfully i should have it back on the spit tomorrow, then i can get the rear floor in. Not long now and i can start get seam sealer, stone chip, primer etc on the unders side, in side and the inner arches
Money and time permiting i "SHOULD" have some colour on parts of it by the summer.
Ginger
.