project xr2 (now painted)
 19-11-2010, 08:40 PM
#1
15000
Thread Starter
Join Date: Sep 2010
Location: Leicester
Posts: 35
Likes: 0
Received 0 Likes
on
0 Posts
Hi, just joined the forum after browsing the site a few times over the past few weeks looking for tips ready for when i get stuck into my first project!
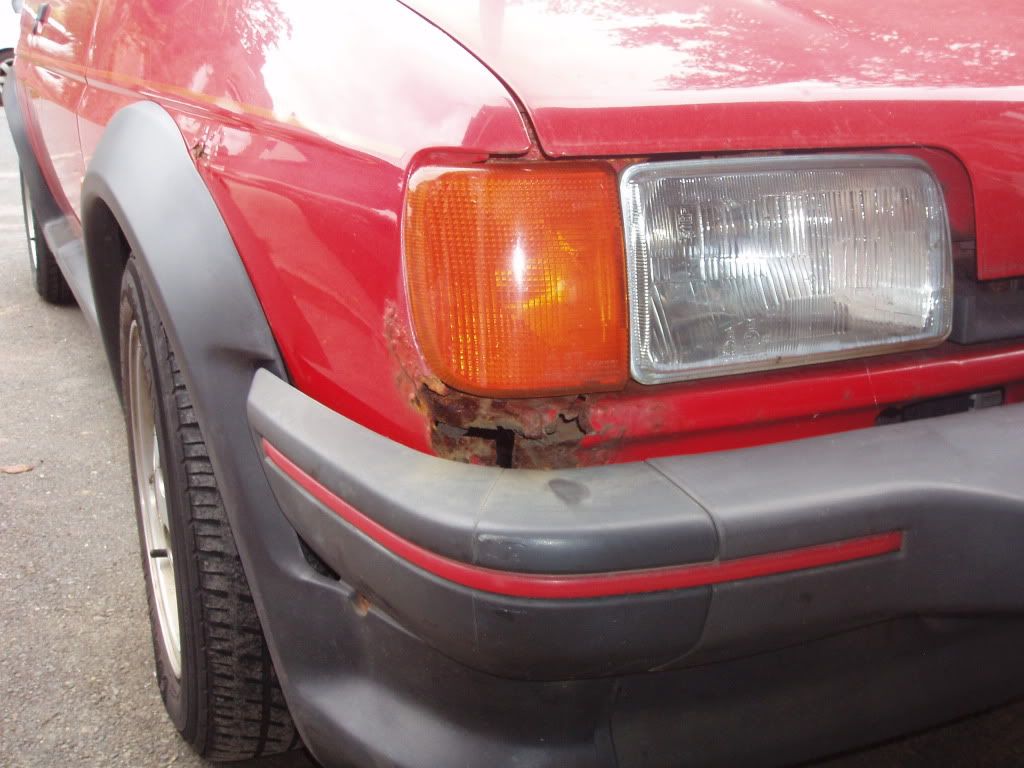
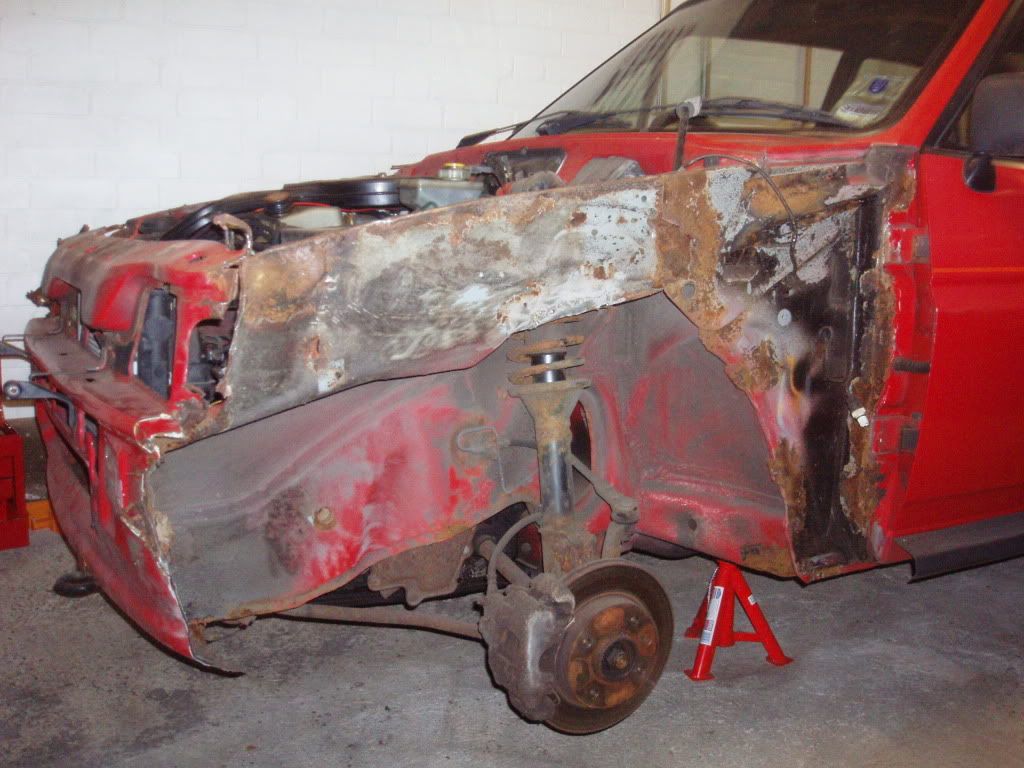
I have recently bought a 1988 fiesta xr2, its in pretty good overall condition with only a small amount of work needed to pass the mot. However one front wing has rotted out the other has a few dents and has started to rot so the plan is to replace both outter front wings and the front pannel. I have started sorcing parts and tools, and im in the process of sorting out the garage ready.
In therory replacing these parts is fairly straight forward but im sure you all know your 80's fords and what I have potentualy let myself in for! basically i am prepared to have to repair/replace at least the inner wing top/mounting sections and possibly the battery tray ect due to the dreaded rot. First of all the plan is to remove the wings and front pannel, remove any surface rust with a grinder and chop out any rot, then take it from there.
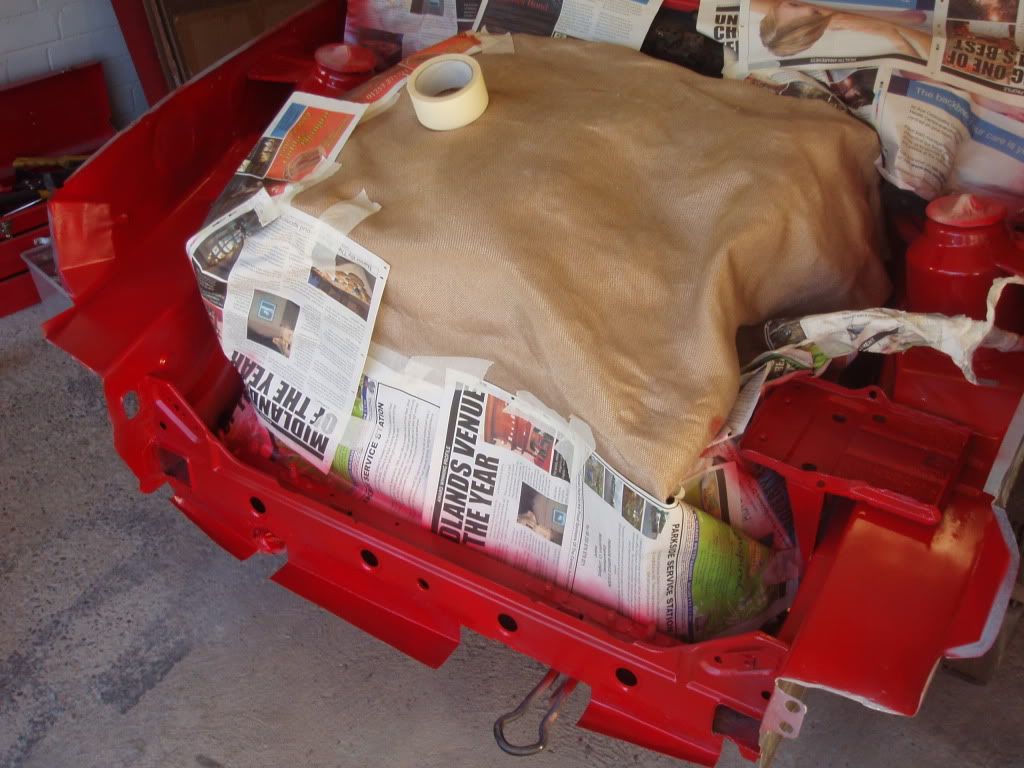
As time is tight i want to remove as little as possible from the engine bay. A friend of mine tells me he just uses wet towels over the engine componets near wear he is working (grinding and welding) however I am usure about this advice especially for welding! how do you guys minimise the risk while grinding and welding around the engine bay?
Any thoughts, tips/advice or questions would be appreciated! and of course pics to follow shortly....
Thanks, Dan.
I have recently bought a 1988 fiesta xr2, its in pretty good overall condition with only a small amount of work needed to pass the mot. However one front wing has rotted out the other has a few dents and has started to rot so the plan is to replace both outter front wings and the front pannel. I have started sorcing parts and tools, and im in the process of sorting out the garage ready.
In therory replacing these parts is fairly straight forward but im sure you all know your 80's fords and what I have potentualy let myself in for! basically i am prepared to have to repair/replace at least the inner wing top/mounting sections and possibly the battery tray ect due to the dreaded rot. First of all the plan is to remove the wings and front pannel, remove any surface rust with a grinder and chop out any rot, then take it from there.
As time is tight i want to remove as little as possible from the engine bay. A friend of mine tells me he just uses wet towels over the engine componets near wear he is working (grinding and welding) however I am usure about this advice especially for welding! how do you guys minimise the risk while grinding and welding around the engine bay?
Any thoughts, tips/advice or questions would be appreciated! and of course pics to follow shortly....
Thanks, Dan.
Last edited by oldscoolmk2; 04-09-2011 at 03:20 PM.


 19-11-2010, 10:13 PM
#7
15000
Thread Starter
Join Date: Sep 2010
Location: Leicester
Posts: 35
Likes: 0
Received 0 Likes
on
0 Posts
this may be a silly question but how do i add pictures.. there doesnt seem to be an option to add picture files and in the posting rules bit at the bottom it says i may not post attatchments?
Trending Topics
19-11-2010, 11:01 PM
#9
15000
Thread Starter
Join Date: Sep 2010
Location: Leicester
Posts: 35
Likes: 0
Received 0 Likes
on
0 Posts
oh right cheers- will do, thought there would be a quick attach file button?
sweet xr by the way saw it on ebay couple of months back.. sounds like you gotta bargain!
sweet xr by the way
19-11-2010, 11:34 PM
#11
15000
Thread Starter
Join Date: Sep 2010
Location: Leicester
Posts: 35
Likes: 0
Received 0 Likes
on
0 Posts
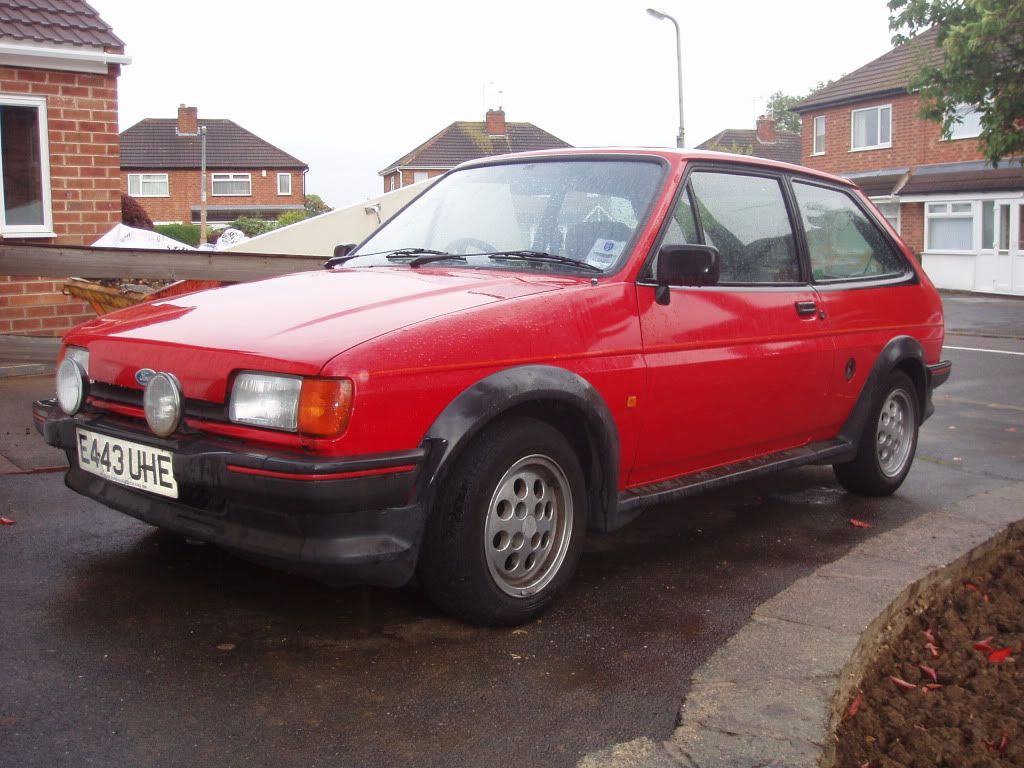
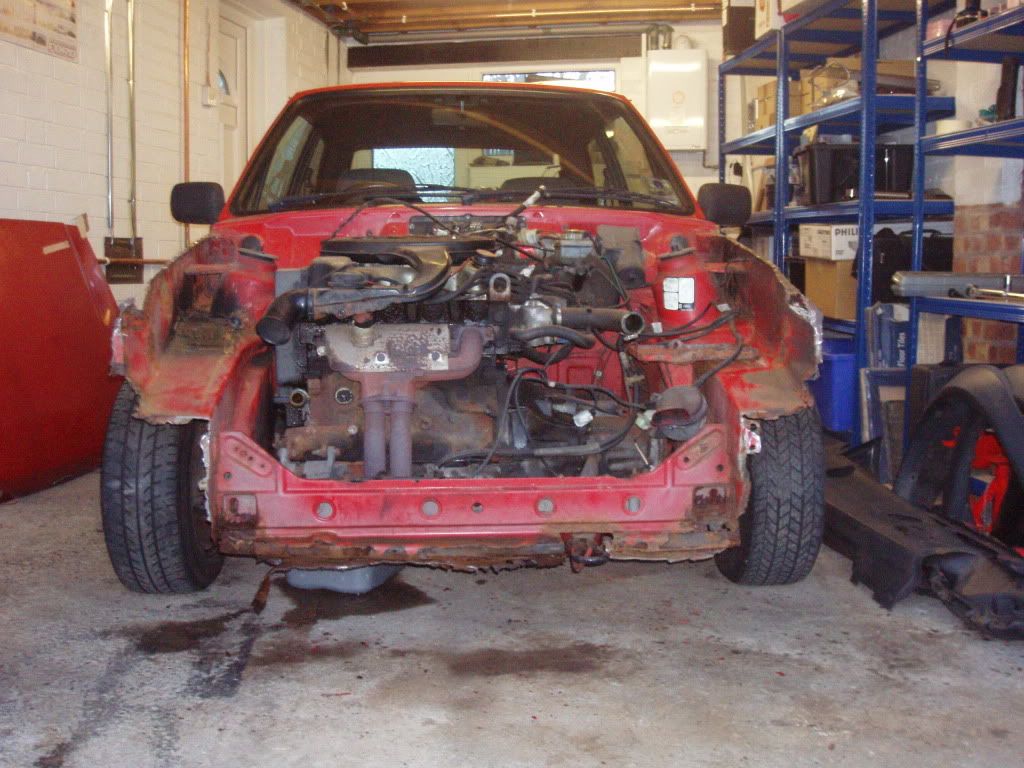
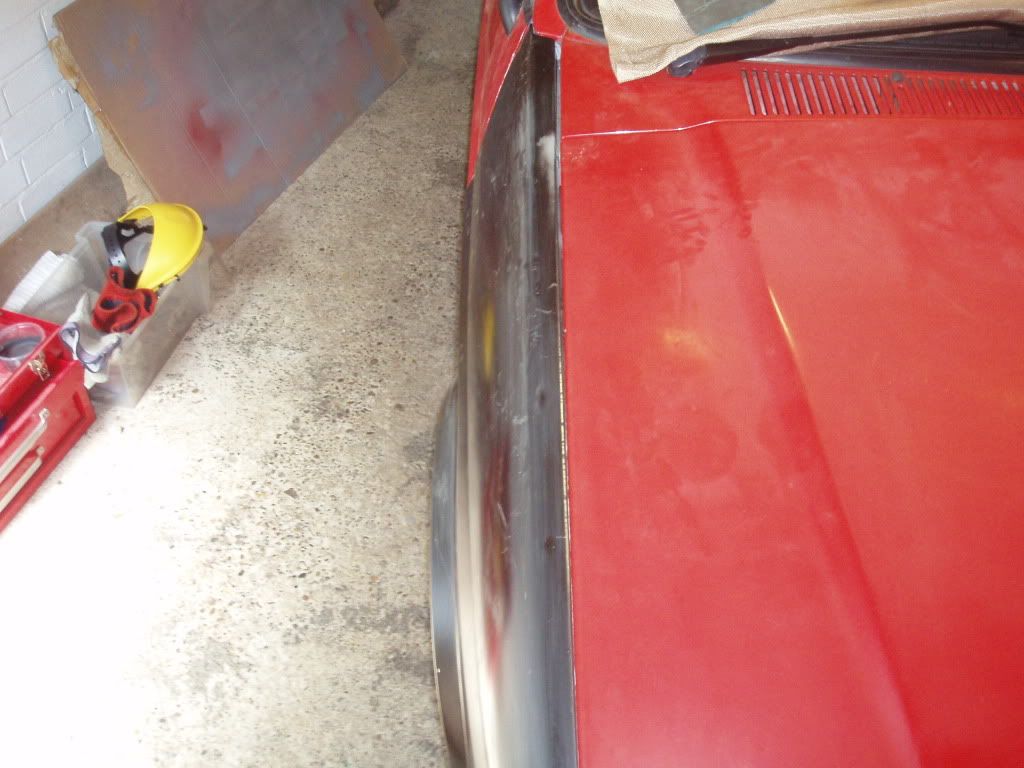
The XR2 as i bought her.. and as she is now only dry in my garage!
will be removing parts next week so fingers crossed! lol
http://s1136.photobucket.com/albums/...t=P1010039.jpg
http://s1136.photobucket.com/albums/...t=P1010042.jpg
will be removing parts next week so fingers crossed! lol
http://s1136.photobucket.com/albums/...t=P1010039.jpg
http://s1136.photobucket.com/albums/...t=P1010042.jpg
24-11-2010, 09:25 PM
#12
15000
Thread Starter
Join Date: Sep 2010
Location: Leicester
Posts: 35
Likes: 0
Received 0 Likes
on
0 Posts
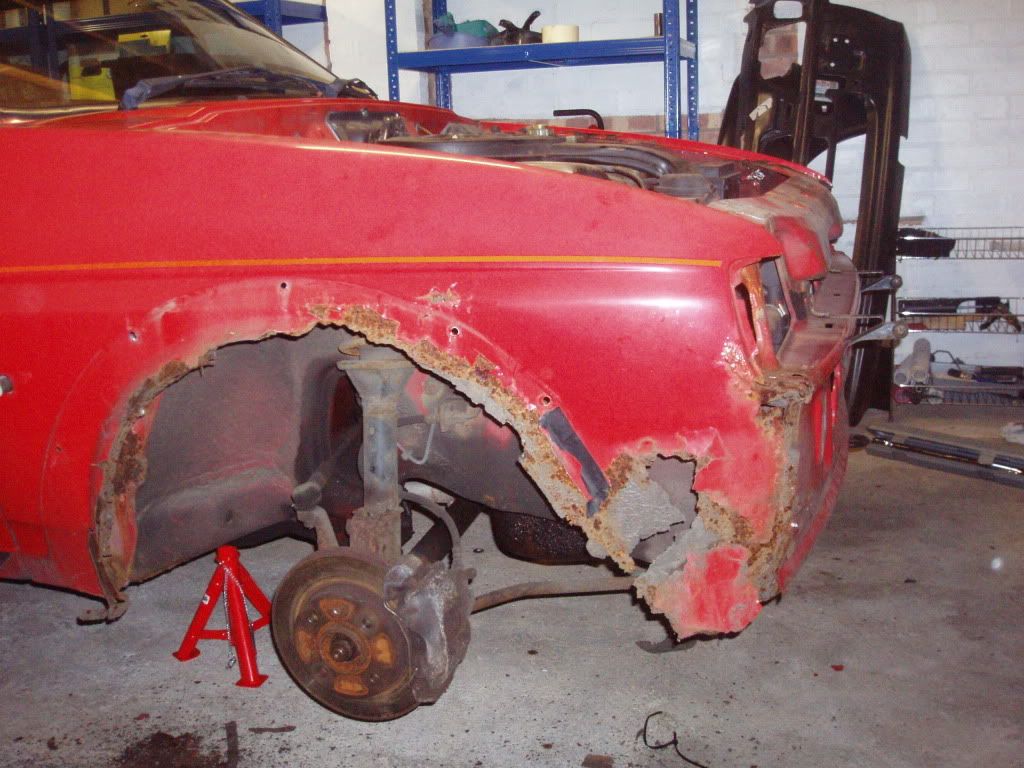
Started work on the her today, striping the front end: I have drilled out the sopt welds on the wing tops and finished them off with a bolster chisel which worked pretty well and seperated the rot from sound metal on the inner wing mounting section!
All seems to be going well on my first project (the rot is not any worse than i thought) However i would like to ask some advice: can anyone who has removed wings from a mk2 fiesta give me some advice on the door area- I had hoped to remove the doors but am having trouble getting the pins out is the wing spot welded all the way down or just sealed? basically can i remove the wing without taking the door off??
here is a couple of pics, more to follow:
http://s1136.photobucket.com/albums/...3DP1010063.jpg
http://s1136.photobucket.com/albums/...3DP1010065.jpg
All seems to be going well on my first project (the rot is not any worse than i thought) However i would like to ask some advice: can anyone who has removed wings from a mk2 fiesta give me some advice on the door area- I had hoped to remove the doors but am having trouble getting the pins out
is the wing spot welded all the way down or just sealed? basically can i remove the wing without taking the door off?? here is a couple of pics, more to follow:
http://s1136.photobucket.com/albums/...3DP1010063.jpg
http://s1136.photobucket.com/albums/...3DP1010065.jpg
 25-11-2010, 10:40 AM
#15
You can get the wings off with the doors on mate, but you might end up damaging the end of the door. If you need to remove the doors unbolt them from inside the car, there are 2 13mm bolts on each hindge. If you get pattern wings you'll have a lot of messing about to get tehm to fit properly but they will fit nice if you take your time. They usually don't push in far enough at the swage line at the door end. There's pics on my resto thread.
I'll be keeping an eye on this one
I'll be keeping an eye on this one
25-11-2010, 06:57 PM
#16
15000
Thread Starter
Join Date: Sep 2010
Location: Leicester
Posts: 35
Likes: 0
Received 0 Likes
on
0 Posts
removed the wings today and started cleaning up the inner wings, just need to remove the radiator and the front panel.
I then plan to treat the corroded areas on the inner wings with kurust, prime the whole area with Zinc 182 or U-POL Etch then paint and finally a coating of 3m bodyschutz over the lot. I may also prime the areas to be welded with U-POL weld 2 primer.
Any thoughts on this process and the chosen products?
few pics of the progress:
http://s1136.photobucket.com/albums/...t=P1010066.jpg
http://s1136.photobucket.com/albums/...t=P1010069.jpg
http://s1136.photobucket.com/albums/...t=P1010070.jpg
25-11-2010, 11:44 PM
#18
PassionFord Regular
Join Date: Aug 2006
Posts: 377
Likes: 0
Received 0 Likes
on
0 Posts
As time is tight i want to remove as little as possible from the engine bay. A friend of mine tells me he just uses wet towels over the engine componets near wear he is working (grinding and welding) however I am usure about this advice especially for welding! how do you guys minimise the risk while grinding and welding around the engine bay?
Any thoughts, tips/advice or questions would be appreciated! and of course pics to follow shortly....
Thanks, Dan.
Any thoughts, tips/advice or questions would be appreciated! and of course pics to follow shortly....
Thanks, Dan.
As per the PM mate drop me a line if you need a hand.

 26-11-2010, 11:19 PM
#20
15000
Thread Starter
Join Date: Sep 2010
Location: Leicester
Posts: 35
Likes: 0
Received 0 Likes
on
0 Posts
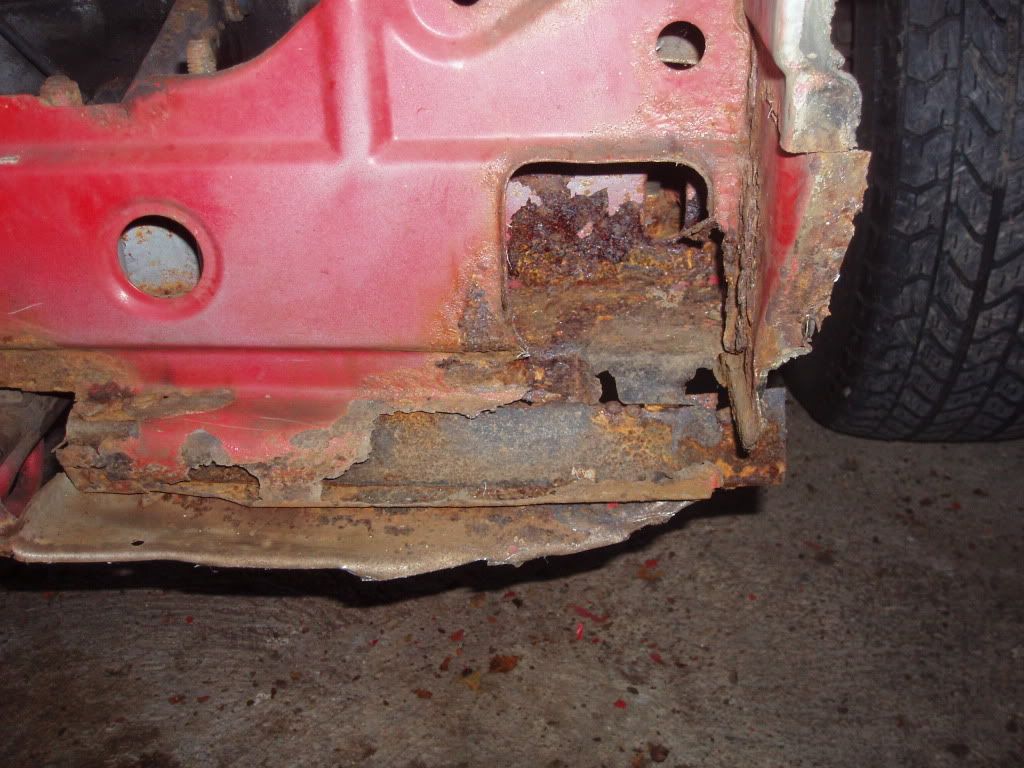
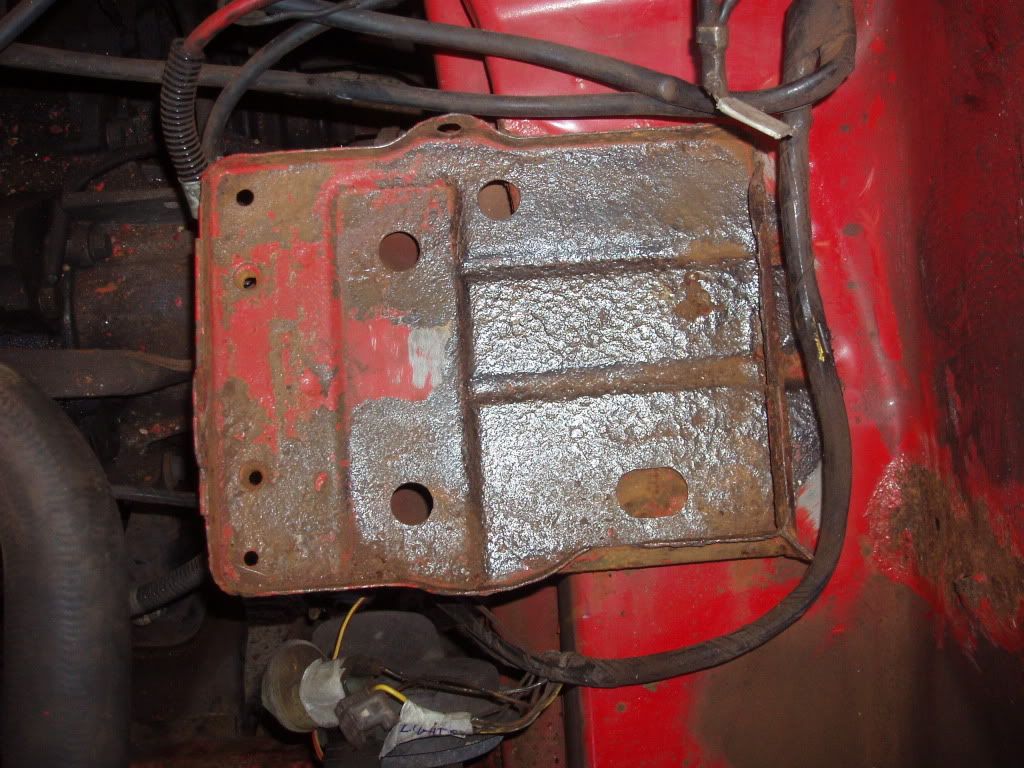
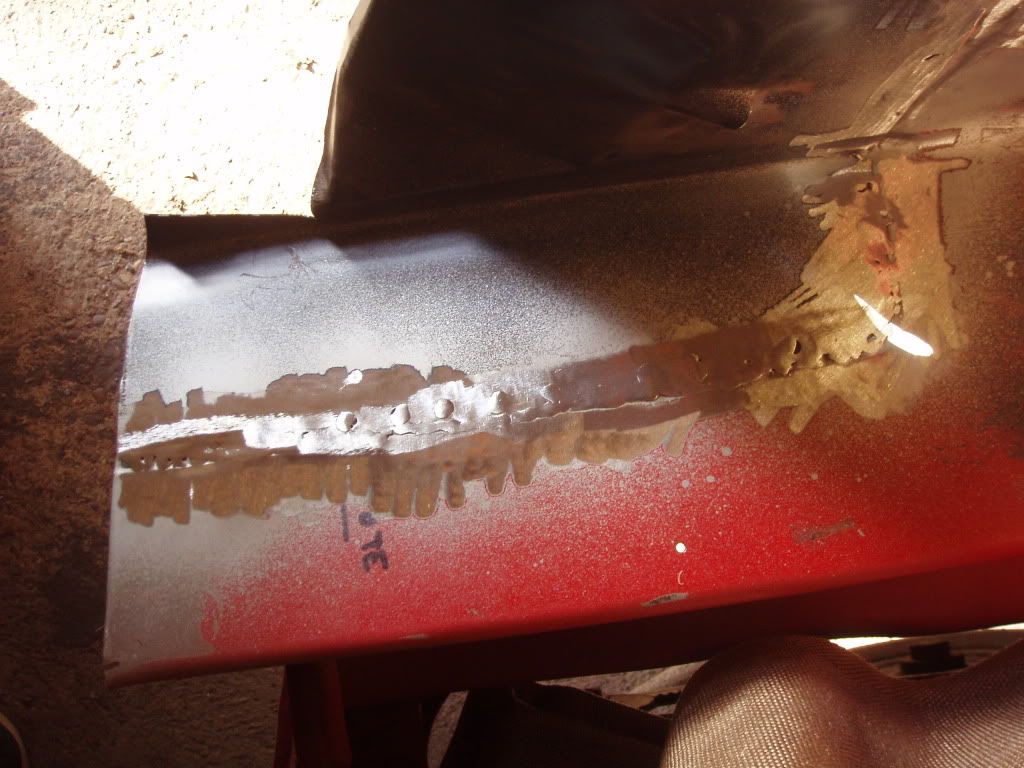
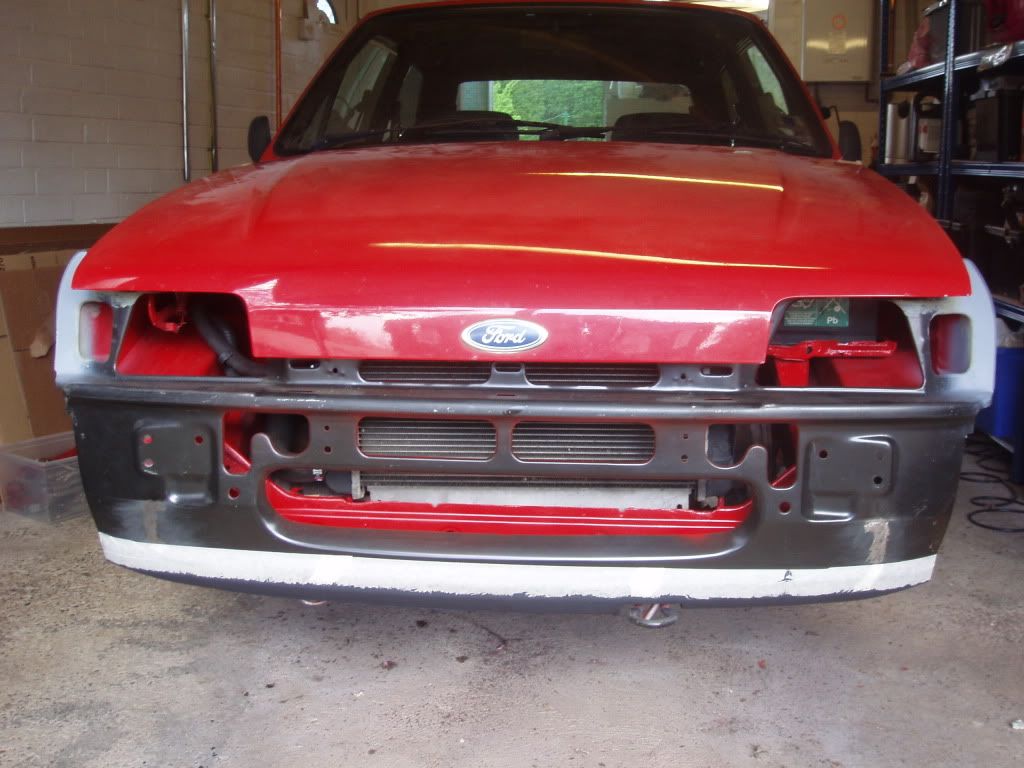
Today have been busy removing the radiator and expansion tank then got the front panel off- no need for the angle grinder as the bolster chisel works like a tin opener! lol a few good and bad finds today, the rad took twice as long to remove as the hose clips were seized so had to rip them off hey ho.
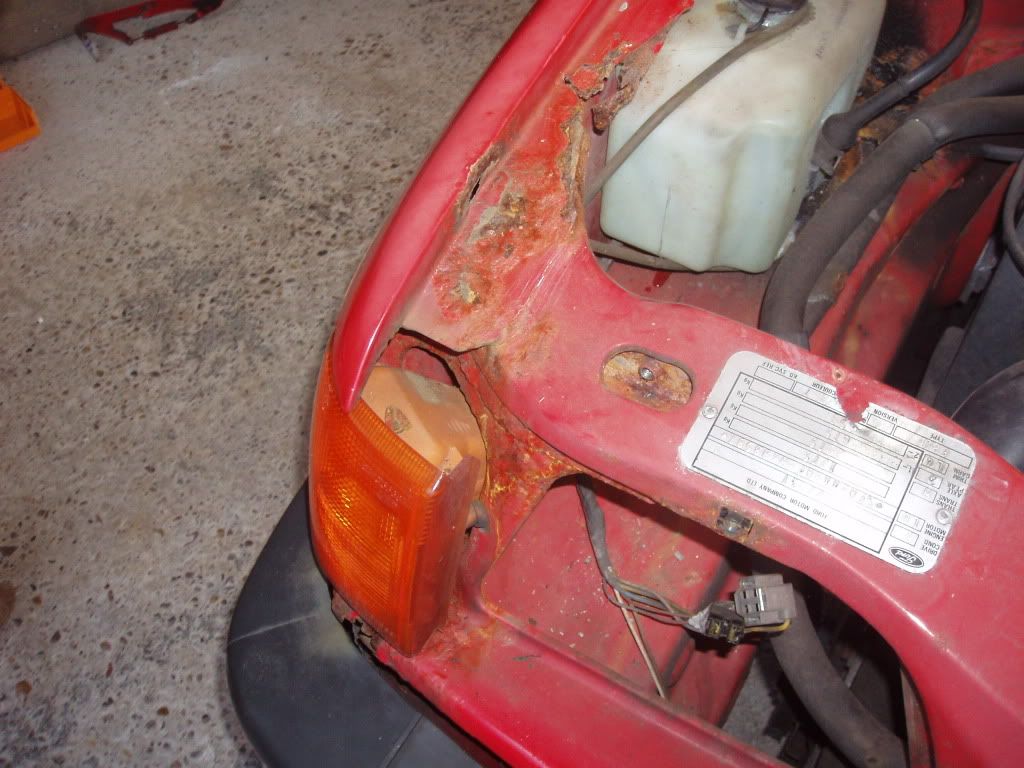
the front panel has been replaced befor and although it looked good on the outside (everything lined up etc) it wasnt a great job a new section of metal like a mounting rail had been welded just above the rot on the back of the inner front panel with no atempt to remove the rot
 the front panel was then seam welded (badly) to the new metal, needless to say its all rotten now and needs cutting right back- hopefully the pics will explain it better!
on a more positive note i had a good look at the battery tray- an area i was openminded towards as to weather i would have to chop it out and start again but it seems solid, i tried ripping it out and the whole car rocked so i decided to give it a clean up and i think it should be ok...
well thats my 3days off work up! time flys wen your having fun lol but i got done pretty much what i had planed, now comes the hard work! lol
lol
hey ho. the front panel has been replaced befor and although it looked good on the outside (everything lined up etc) it wasnt a great job
the front panel was then seam welded (badly) to the new metal, needless to say its all rotten now and needs cutting right back- hopefully the pics will explain it better!on a more positive note i had a good look at the battery tray- an area i was openminded towards as to weather i would have to chop it out and start again but it seems solid, i tried ripping it out and the whole car rocked so i decided to give it a clean up and i think it should be ok...
well thats my 3days off work up! time flys wen your having fun lol but i got done pretty much what i had planed, now comes the hard work!
27-11-2010, 09:40 AM
#21
15000
Thread Starter
Join Date: Sep 2010
Location: Leicester
Posts: 35
Likes: 0
Received 0 Likes
on
0 Posts
does anyone know where i can get genuine ford panels from apart from ebay?
wen i bought the car it came with one wing and front panel so just need passenger wing but they are not genuine and if i can find them for a resonable price would prefer to get the lot genuine...
wen i bought the car it came with one wing and front panel so just need passenger wing but they are not genuine and if i can find them for a resonable price would prefer to get the lot genuine...
30-11-2010, 11:40 AM
#24
15000
Thread Starter
Join Date: Sep 2010
Location: Leicester
Posts: 35
Likes: 0
Received 0 Likes
on
0 Posts
Have just relised after stripping my mk2 that the original inner front panel is missing and a replacement front panel had been welded to the lower x-member. can anyone shed some light on how it was wen it rolled out the factory- i assume the front panel was spot welded along the bottom to the inner panel? should i go down this route or weld straight to the x member after putting a repair section on the bottom?
any help would be great
Dan
any help would be great
Dan
19-02-2011, 07:39 PM
#26
15000
Thread Starter
Join Date: Sep 2010
Location: Leicester
Posts: 35
Likes: 0
Received 0 Likes
on
0 Posts
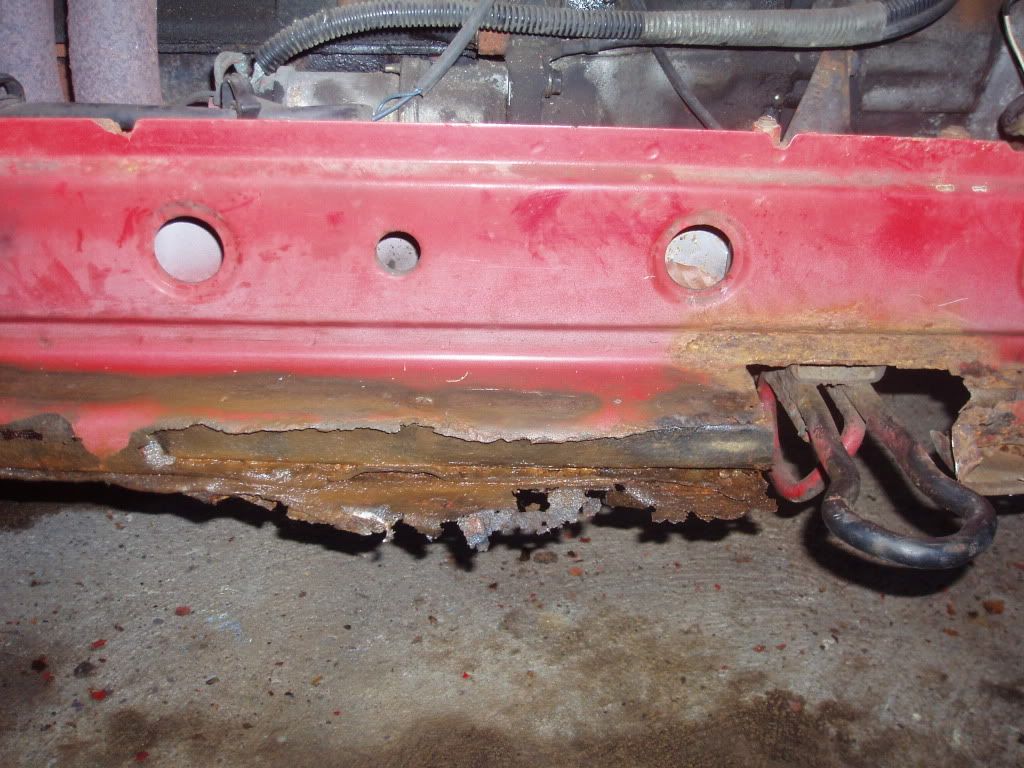
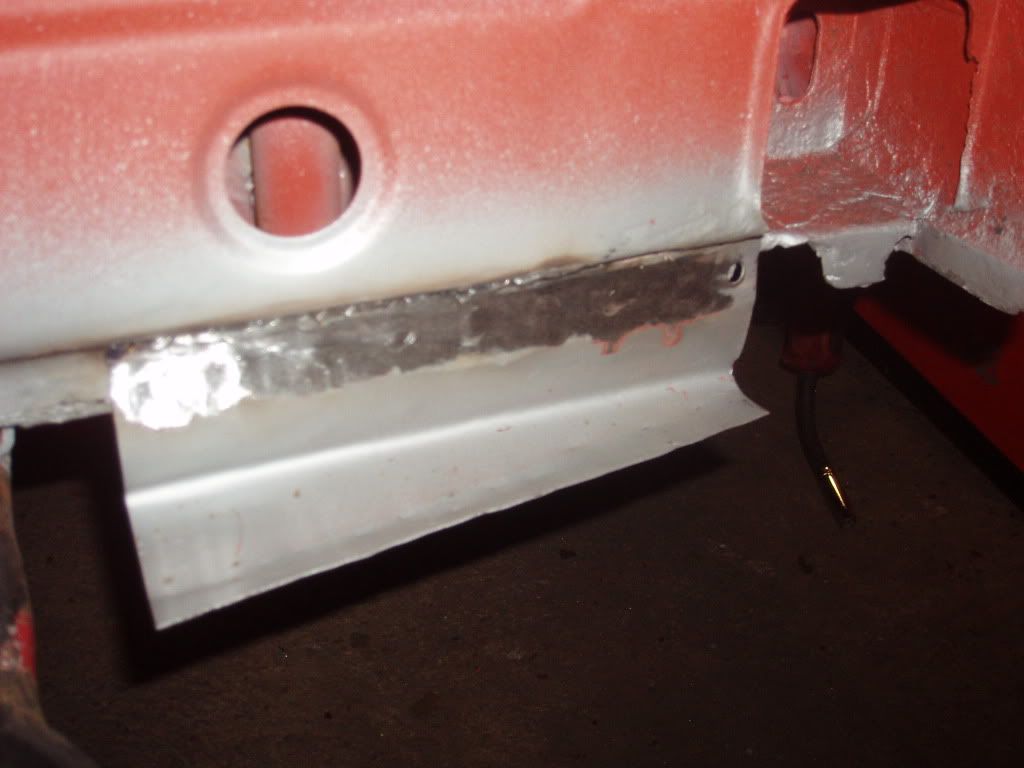
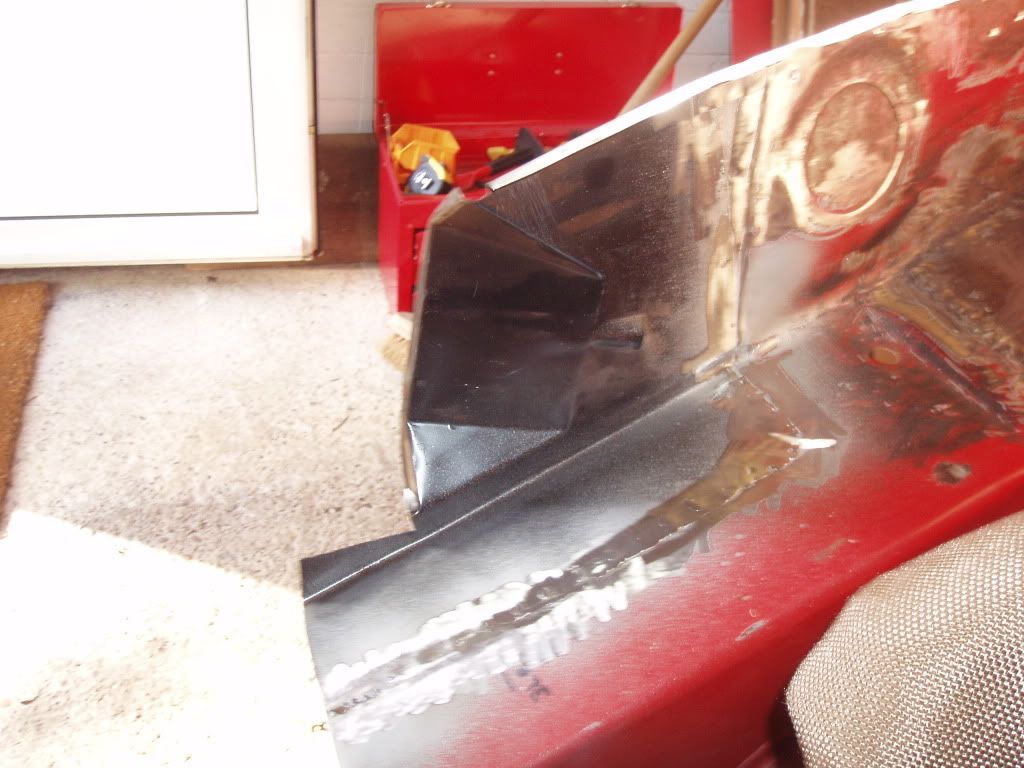
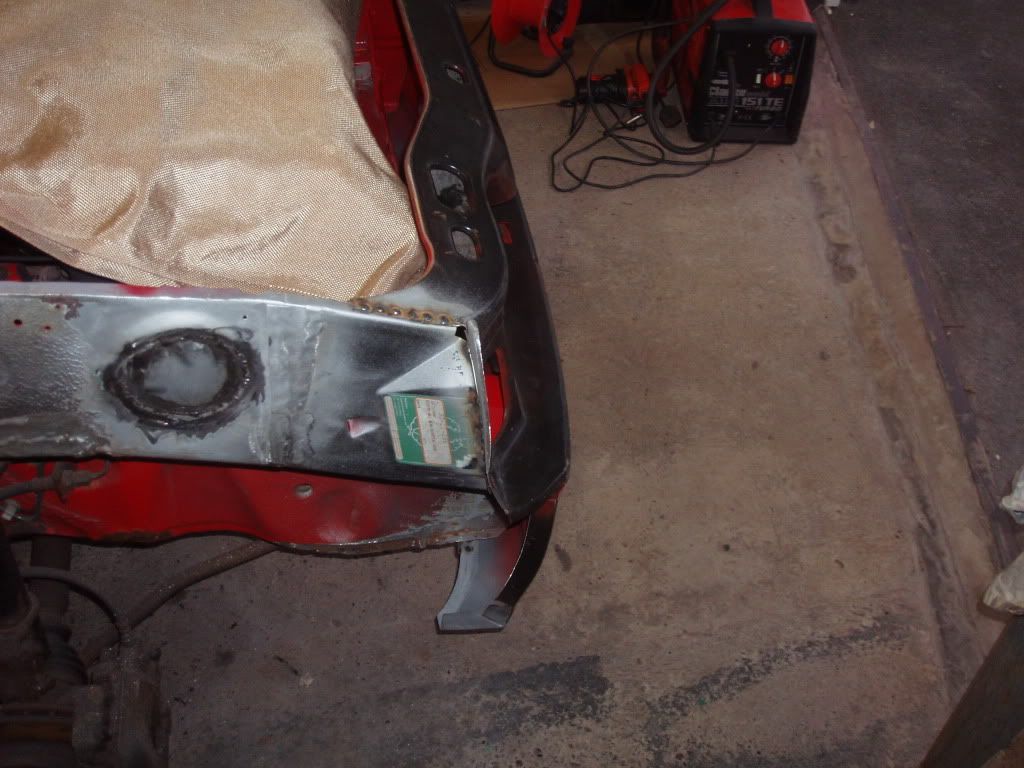
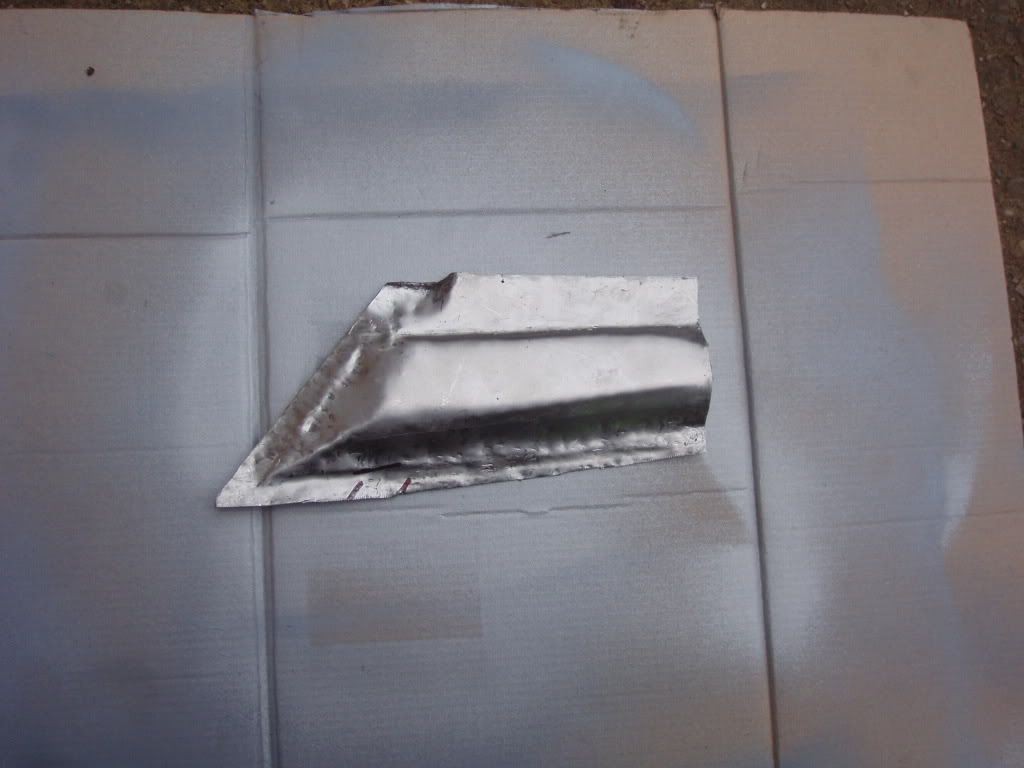
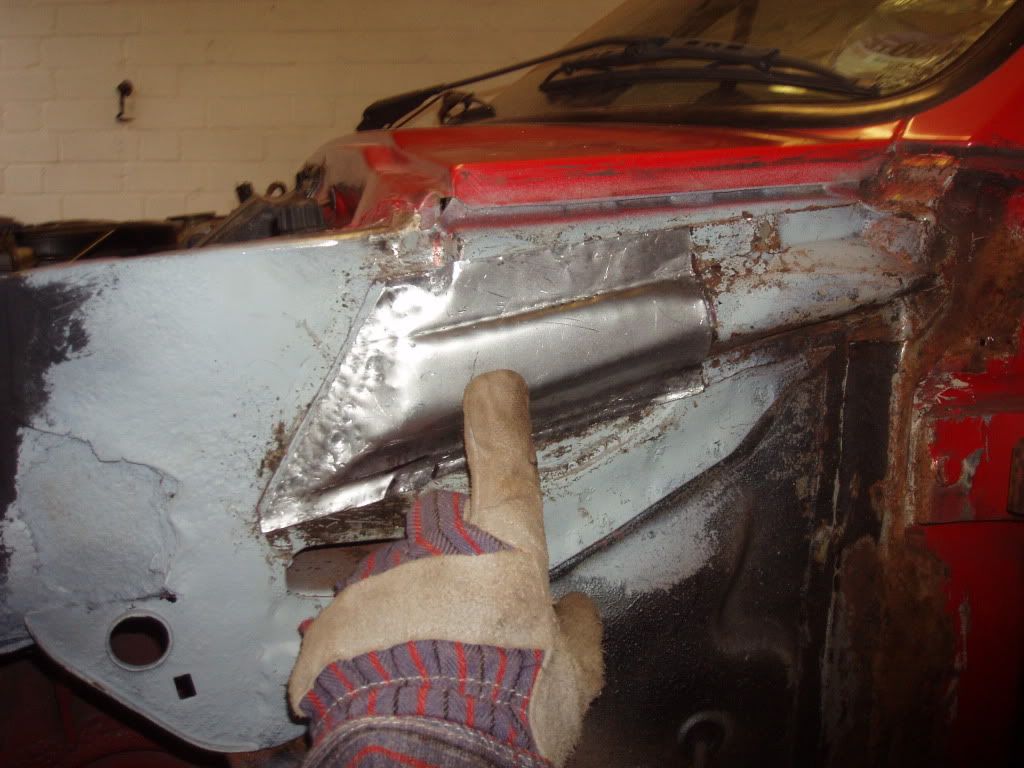
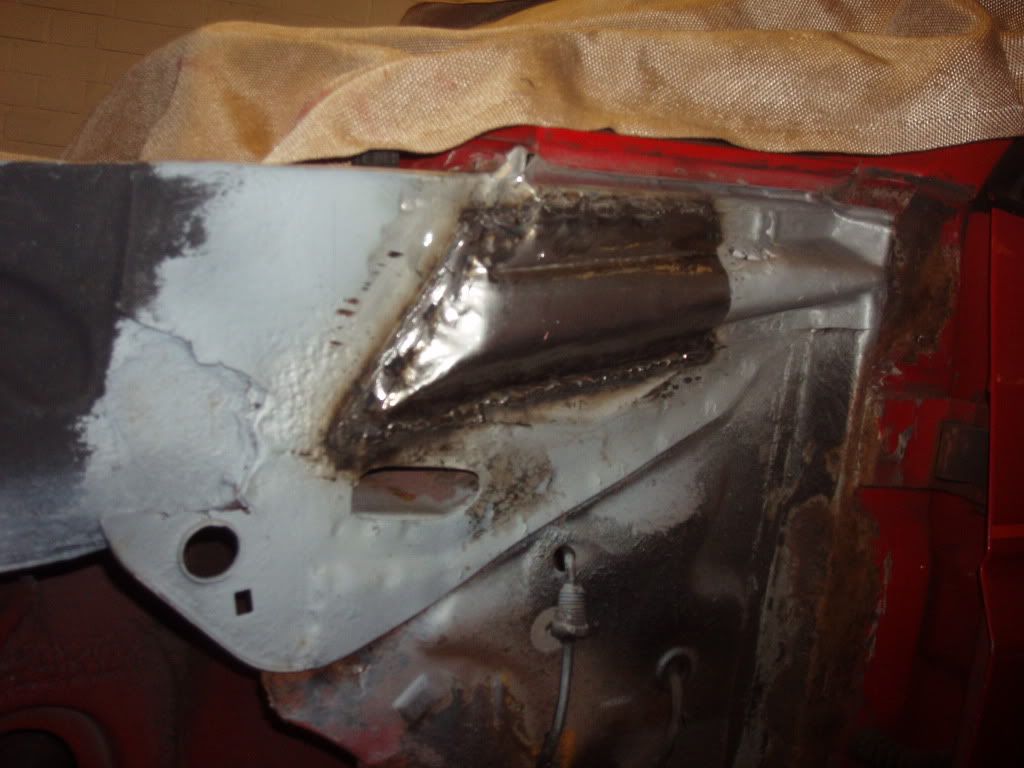
Doesnt looks like too much progress but i only get a few hours a week in the garage and ive done a lot of little jobs and picked up a mig welder here is a few pics of the main bit i have worked on- chopped the rot off the bottom of the cross member and fabricated some repair sections to join the bottom of the front pannel to. next job is to repair the fornt of the inner wings so i can get the front panel mounted up and welded on...

06-03-2011, 03:48 PM
#27
15000
Thread Starter
Join Date: Sep 2010
Location: Leicester
Posts: 35
Likes: 0
Received 0 Likes
on
0 Posts
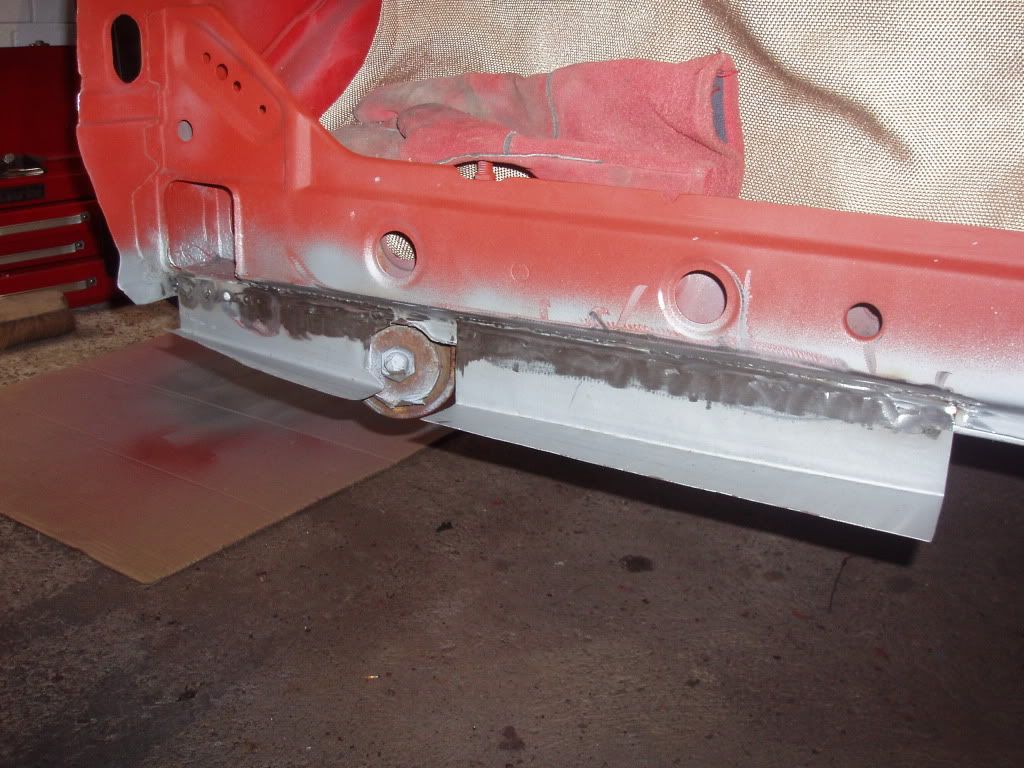
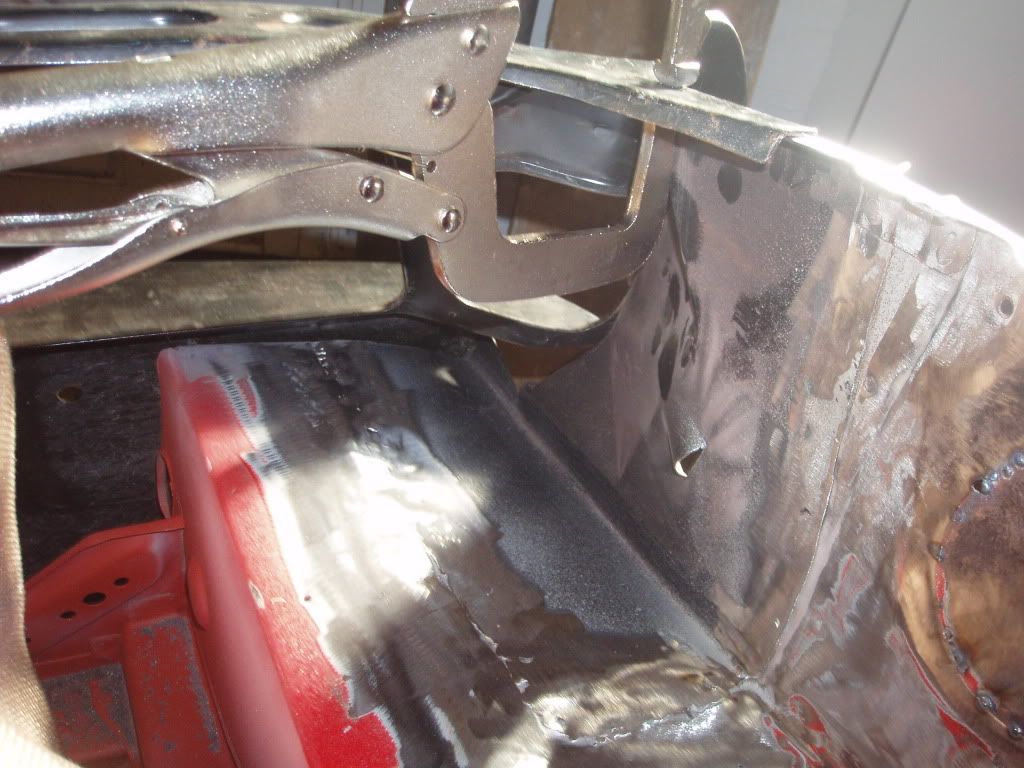
little update, chopped out the rot on the inner wings and welded in repair sections just go to get it all sealed and primed etc and get the front panel on so i can get her running again
06-05-2011, 01:24 PM
#29
15000
Thread Starter
Join Date: Sep 2010
Location: Leicester
Posts: 35
Likes: 0
Received 0 Likes
on
0 Posts
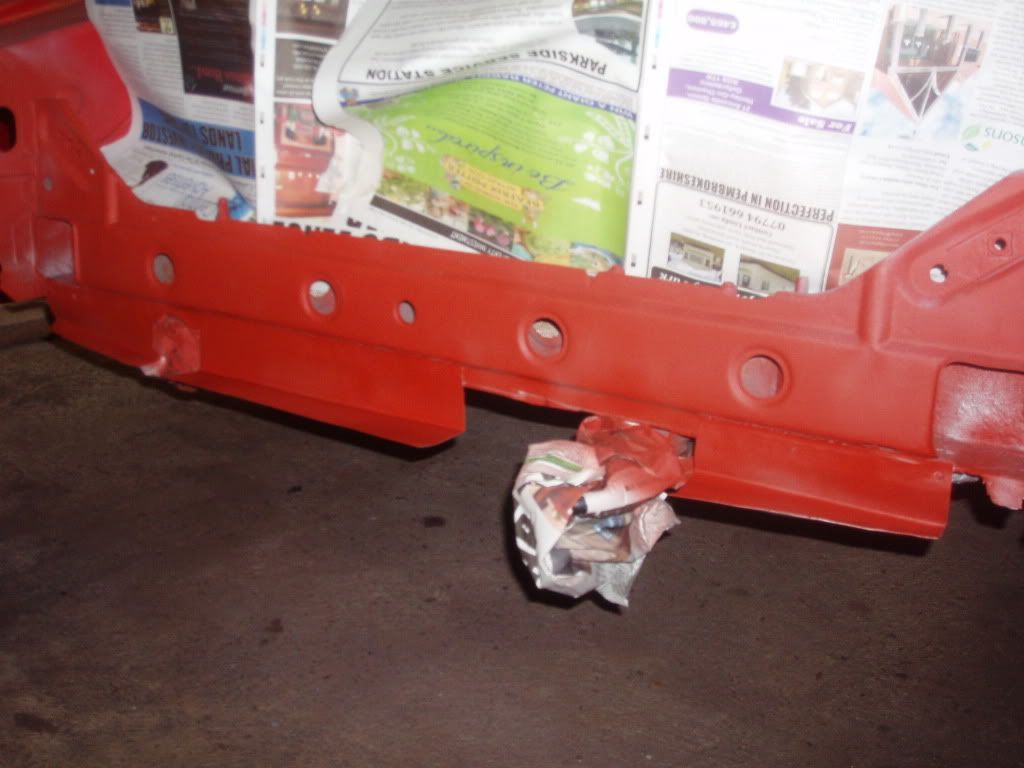
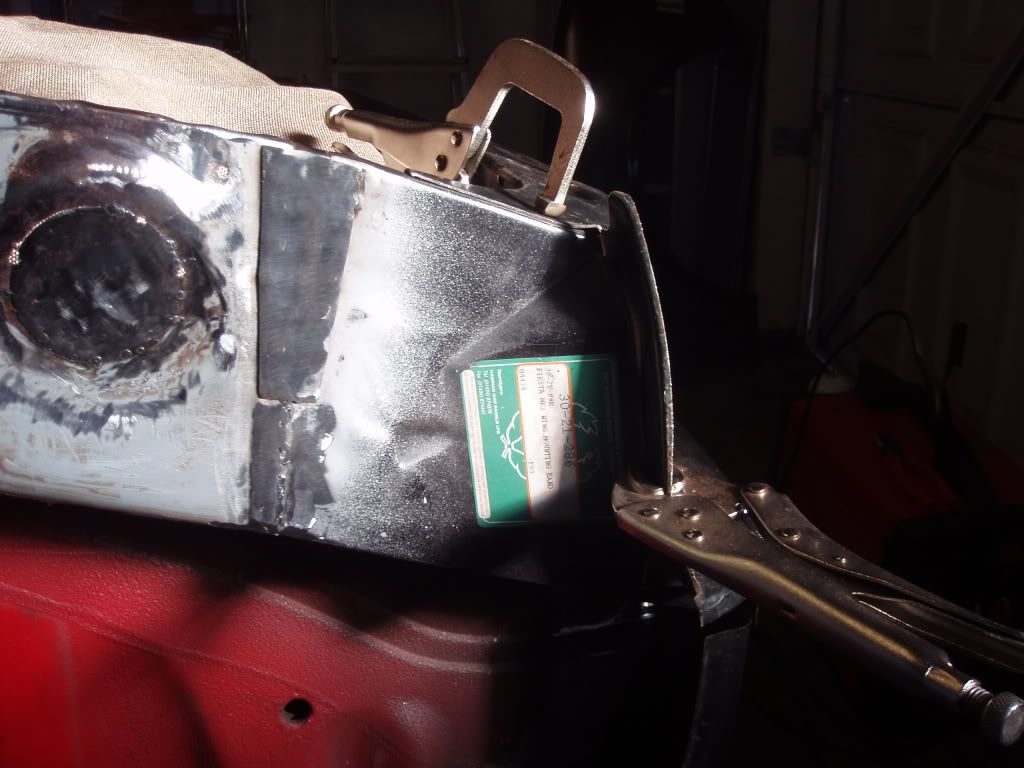
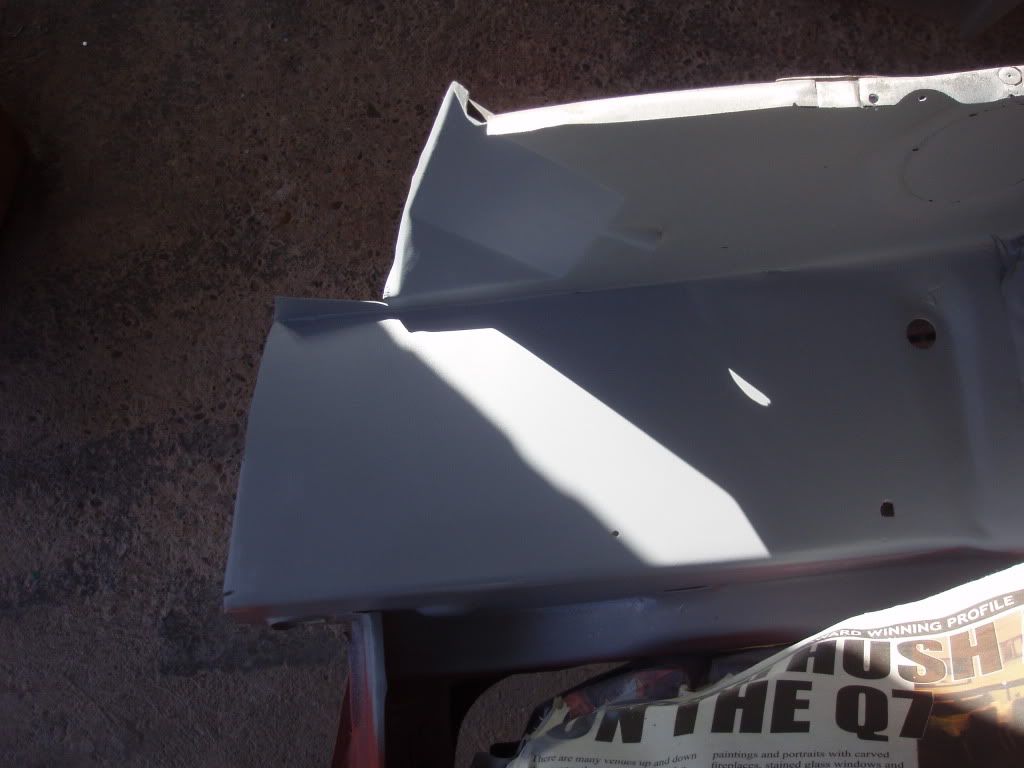
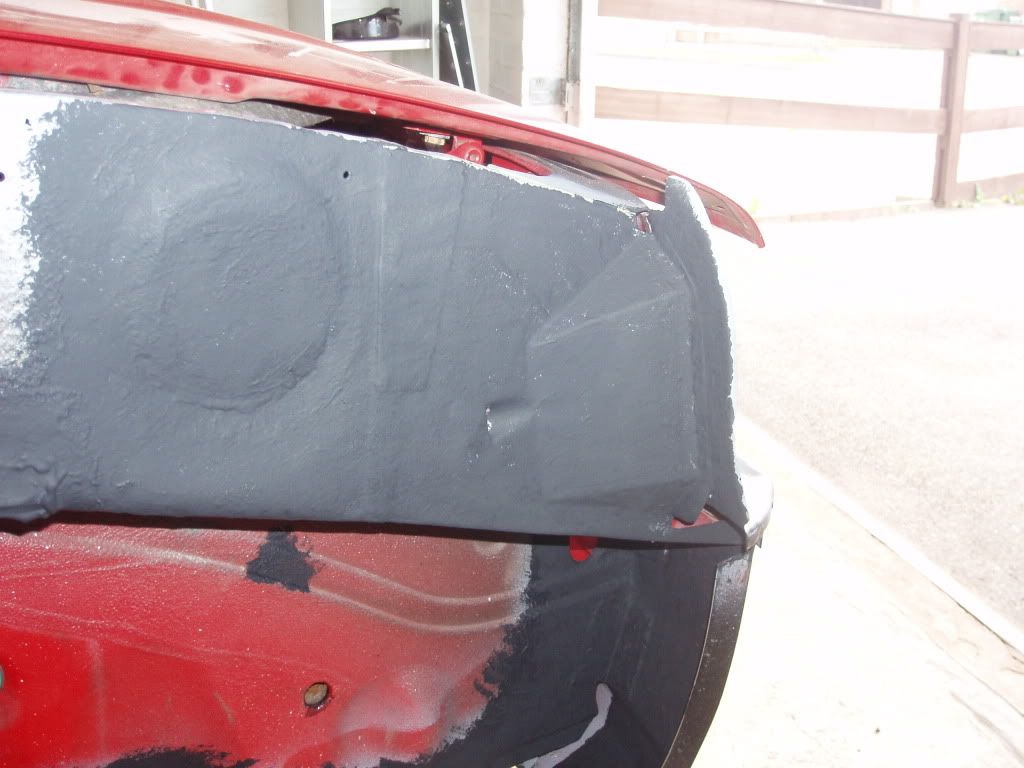
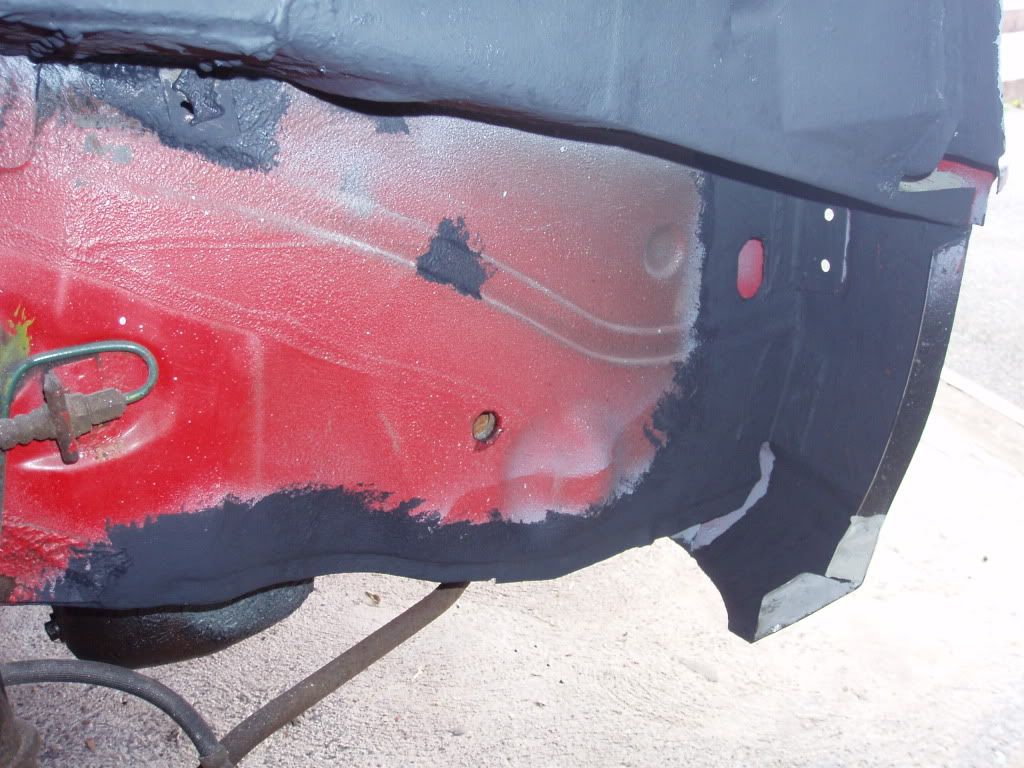
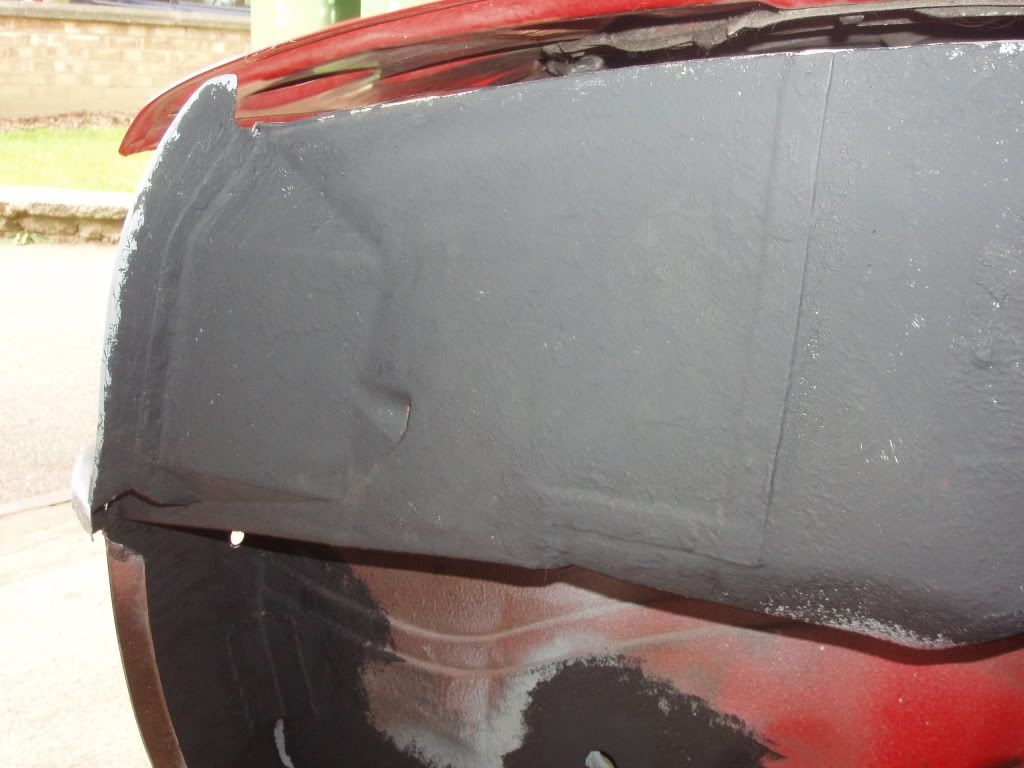
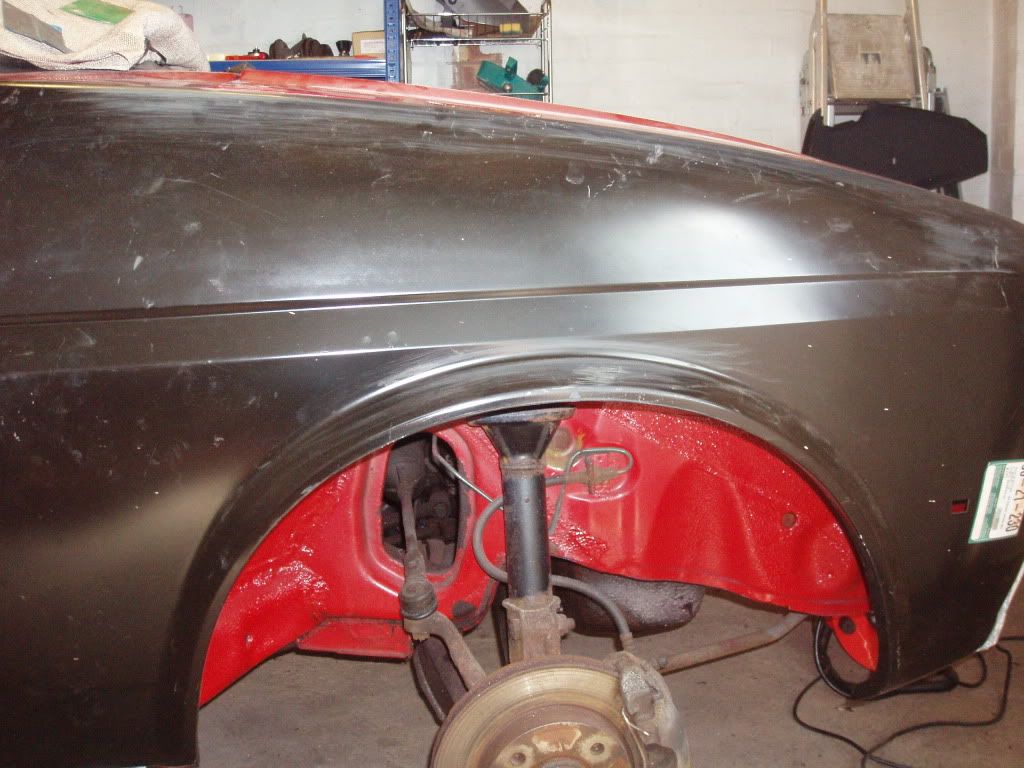
This project is still going! A few pics of the progress, she will be back on the road soon  About ready for the wings to go on now, Ive used gravi tex on the inner wings, just brushed it on in a dabbing motion as i dont have a compressor and the rattle cans of stone guard are useless. its given a pretty good finish but im not sure if i have gone too close to the wing tops where i will be plug welding? should i leave an inch or so gap or is it ok to cover it all? I would appreciate any comments from those who have done his before or those in the know
About ready for the wings to go on now, Ive used gravi tex on the inner wings, just brushed it on in a dabbing motion as i dont have a compressor and the rattle cans of stone guard are useless. its given a pretty good finish but im not sure if i have gone too close to the wing tops where i will be plug welding? should i leave an inch or so gap or is it ok to cover it all? I would appreciate any comments from those who have done his before or those in the know
 11-06-2011, 09:54 PM
#34
15000
Thread Starter
Join Date: Sep 2010
Location: Leicester
Posts: 35
Likes: 0
Received 0 Likes
on
0 Posts
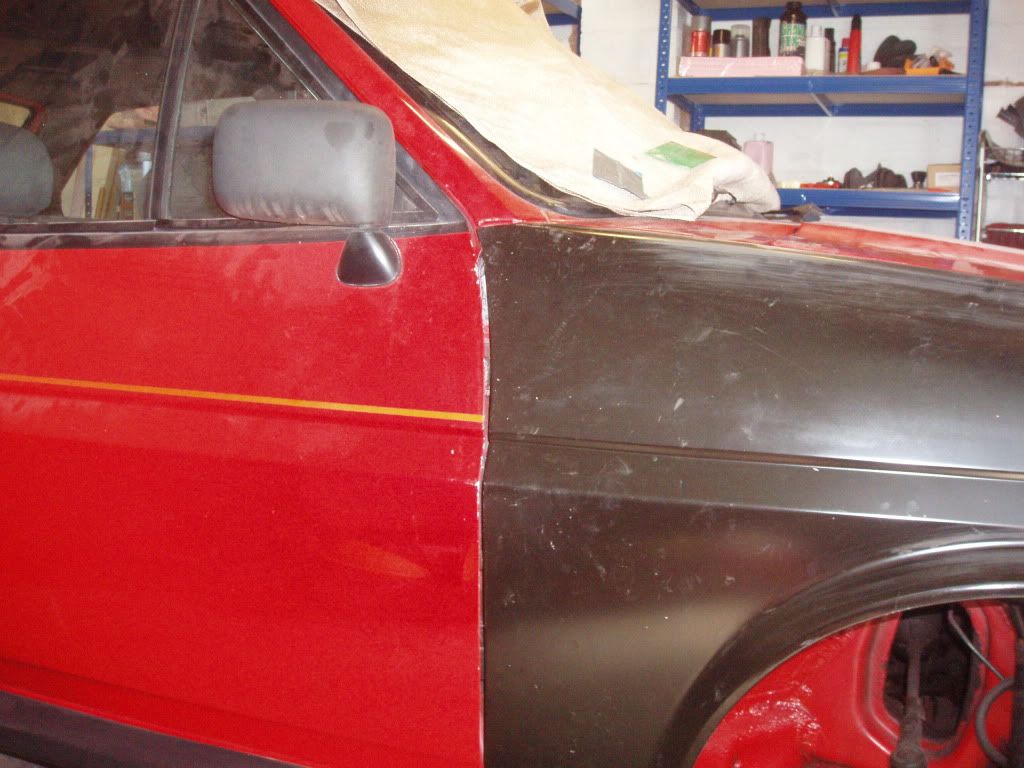
after a bit of tricky fabrication (with limited tools) the wings have been welded onto a solid shell still a fair way to go but its really starting to take shape!
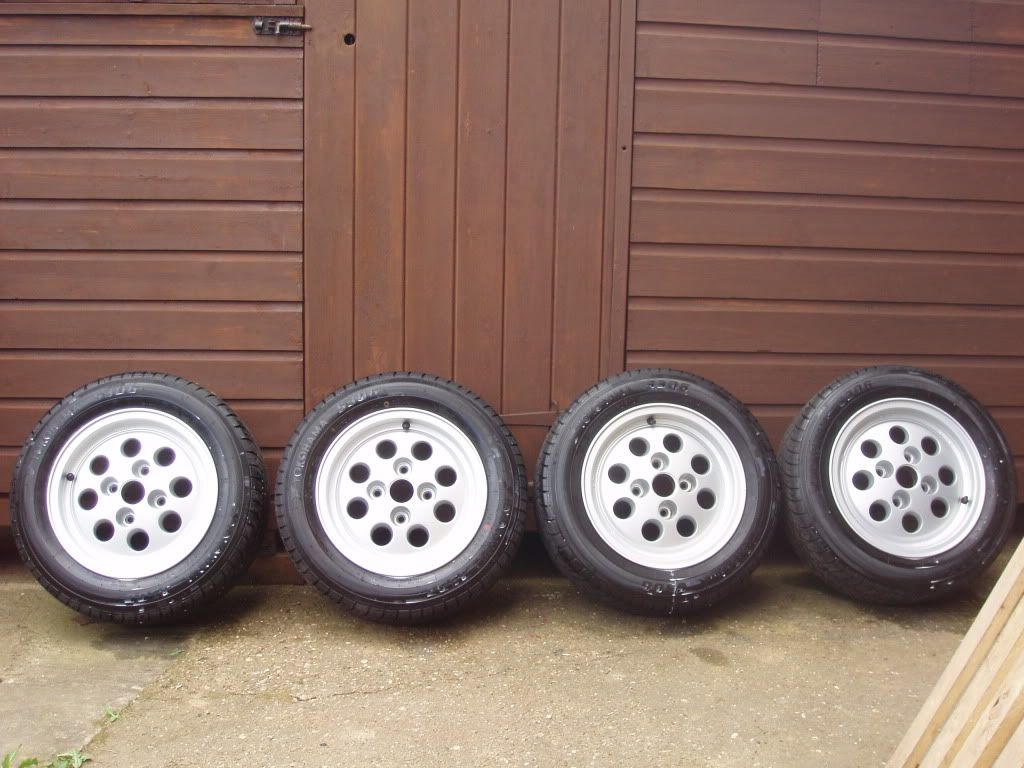
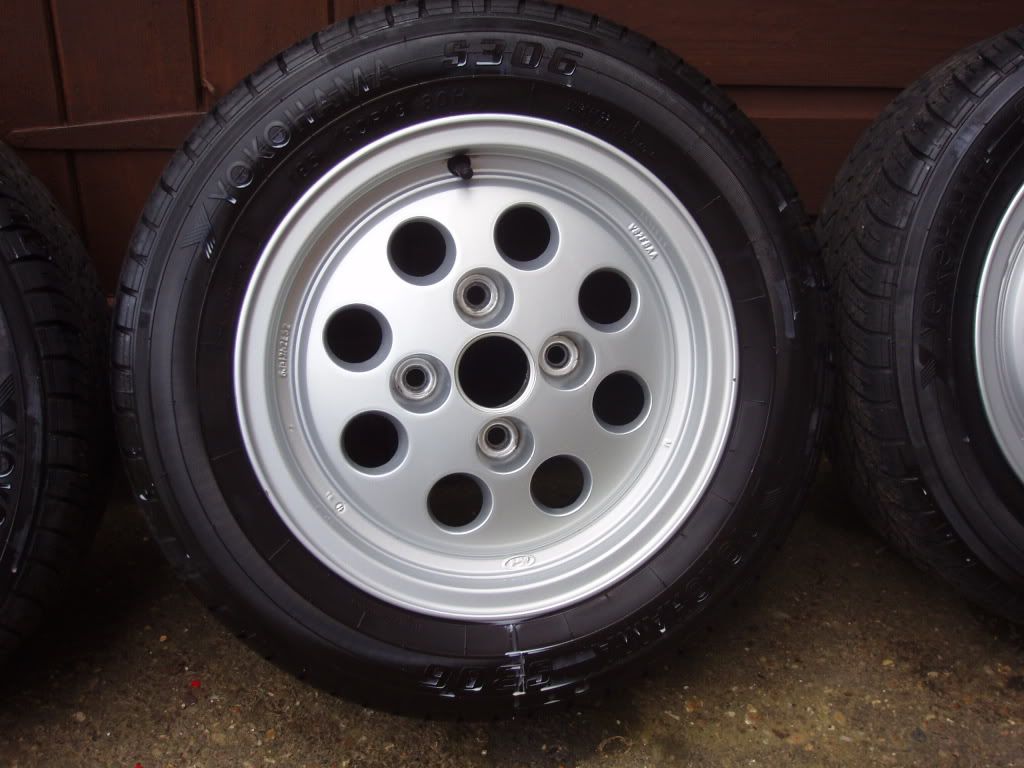
also picked up a minty fresh set of pots
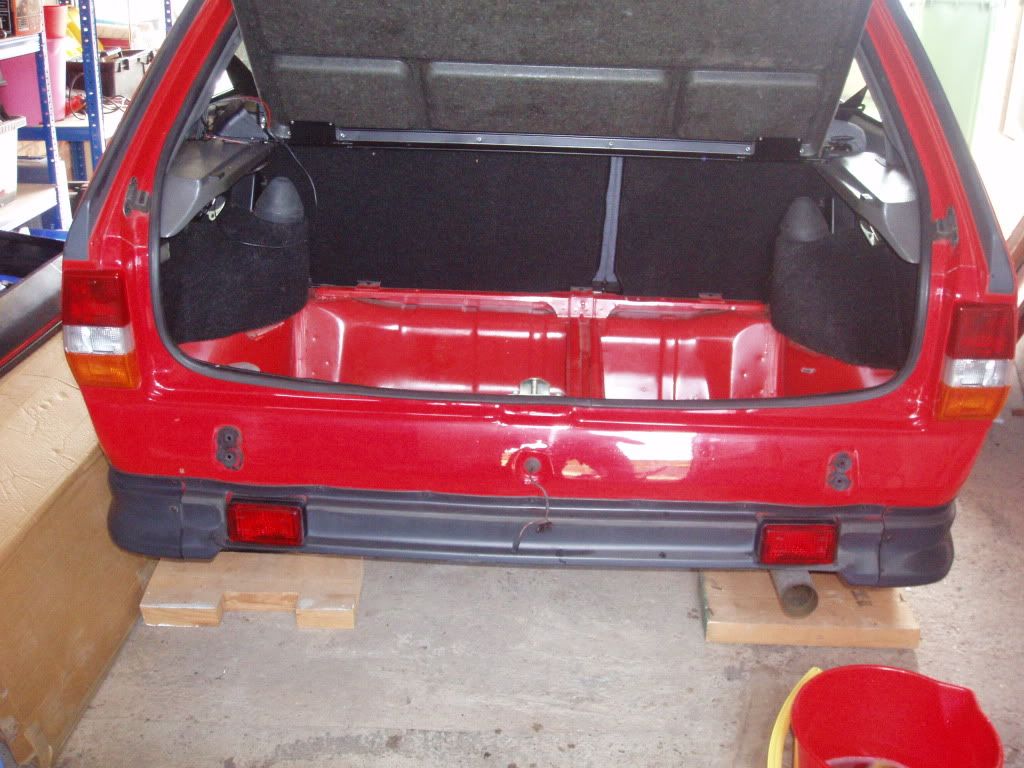
and had a good butchers around and a clean up the rear!
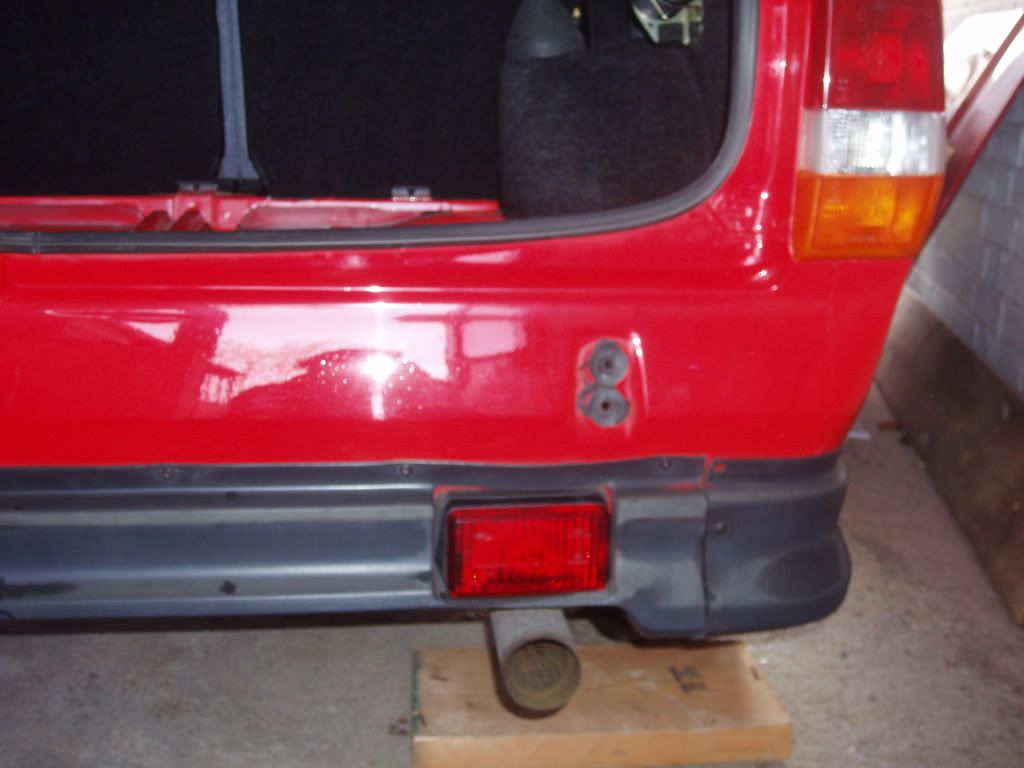
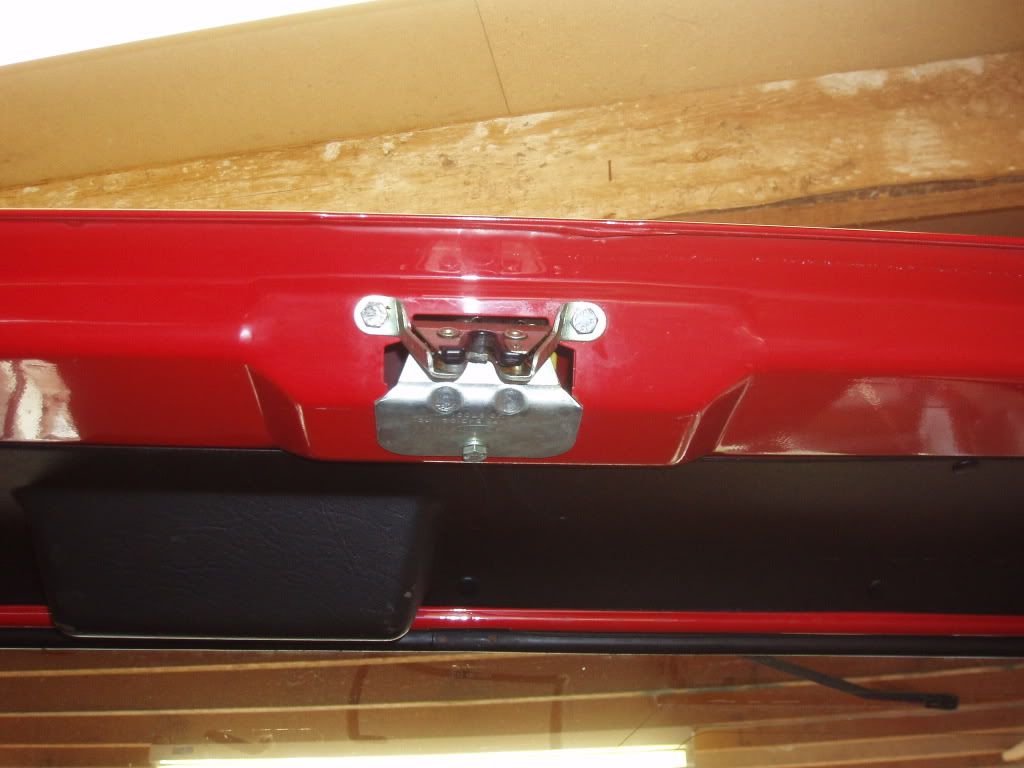
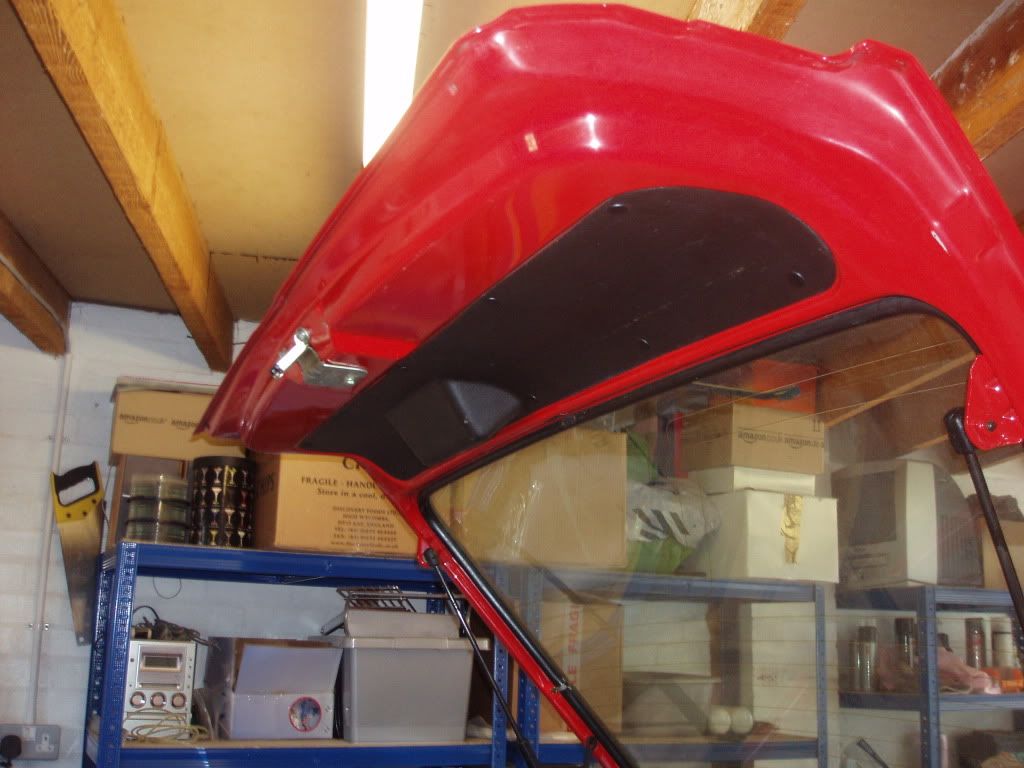
pretty please wih it to be honest
also picked up a minty fresh set of pots
and had a good butchers around and a clean up the rear!
pretty please wih it to be honest

 18-06-2011, 04:06 PM
#37
Wahay!! I've lost my Virginity!!

Awesome job pal, in the throws of buying an XR2 from down london way right now so a thread of my own should be started very soon. Inspired me to get the grinder and the welder back out lol.


