teamSPB Project D*FN U - 4 SMD 18's,SPL D 25kwrms,16v,Air ride, PC, Carsson rims!
 22-07-2010, 04:26 PM
#1
PassionFord Post Troll
Thread Starter

Hi everyone, I thought I would let you in on a project im currently building for myself....It got under way a little while ago, but having to constantly work on customer vehicles/boxes/installs etc etc, its VERY difficult for me to find the time to work on it....
Over the past few weeks, I have cracked on as much as I can...but also had to do around 15 sub boxes for customers, as well as around 4-5installs...on top of answering calls, emails, pms as well as living my life, its been stressful!
The vehicle is still no where near complete, but I thought I would put this up just so you guys can see what we are capable of building....
First up, I have to thank the following people....who without, this wouldnt have been possible!
Am - AA/Fi/Knu Konceptz distro....without you, this dream wouldnt have happened! Thanks for your endless support and answering my million and one questions! Guy is a pure LEGEND in my eyes! Now im gonna bug u with my million and one power supply questions LOL!!!...
Indirectly, although I have never spoken to....a HUGE shout out to Scott...the designer and brains behind AA/Fi...You are simply the best at what you do! Never has a sub brought such a smile to my face...and NEVER have I NOT got bored of a sub/s! Thats a HARD feat on its own LOL!
Mike and Colin - CAD...you guys are AWESOME at what you do! Without you guys I would be VERY stuck at deciding what amps to use! Also thanks for your endless support when things havent gone quiet right on the amp front
or when I needed extra sound deadening at the last minute lol!
Ray @ Rayvern - For all the hard work you guys put into the air ride systems...all the problems we faced with weight issues....I hope when the batteries go in, things are still A OK LOL!
Nikki and Mike - For ALL their hard work on the flocking! They are AMAZING at what they do and I would never go anywhere else for the flocking work!
Loudboy - For the 4mm deadening....Well its 8mm + more in my case!! haha
Dum Dum - Sorting the alts out...im awaiting for them to come back...
Kit - for putting up with my endless spending! Keeping me going when im down...without u, this wouldnt have happened...ever!
Bobby (number 1)/Bobby (number 2)/Hardeep/Sandeep/Rohit/Mr C....basically the WHOLE teamSPB family - Without your help....this project wouldnt have got off the ground...literally when it came to putting the subs and box in LOL!!!
Thank you to ALL the above...your all golden in my eyes!
Now, a message for the haters...I aint going anywhere...im here to stay! Hate all you want...but this project is MY own sweat, blood and tears...if you dont like it...please jog on!
This install is NOT built do smash the mic apart...its also not built to be louder than anyone in particular...just something thats loud for what it is, and gets me noticed more than my Focus! I DO NOT CARE if Am's is louder than mine...just like I dont care if I dont beat Ian Pinder/the joose (Matt)/Mark Smith etc etc etc...If its loud enough for me...its all good!
Another message to you ALL...there is WAY too much hatred in this game! TOO many FALSE whispers! I have respect for EVERYONE in the audio game...if they dont show respect and a mutual understanding back...those are the haters im talking about!
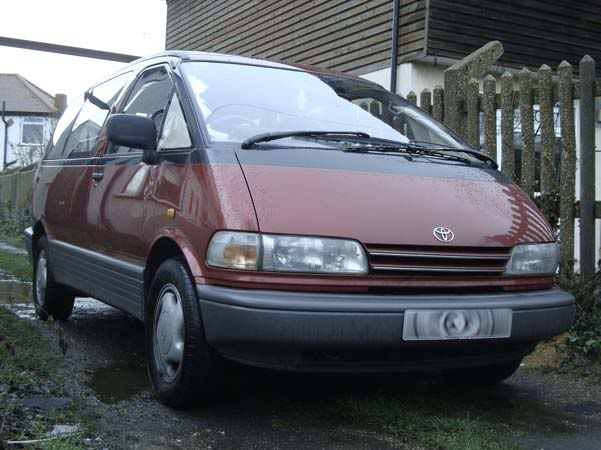
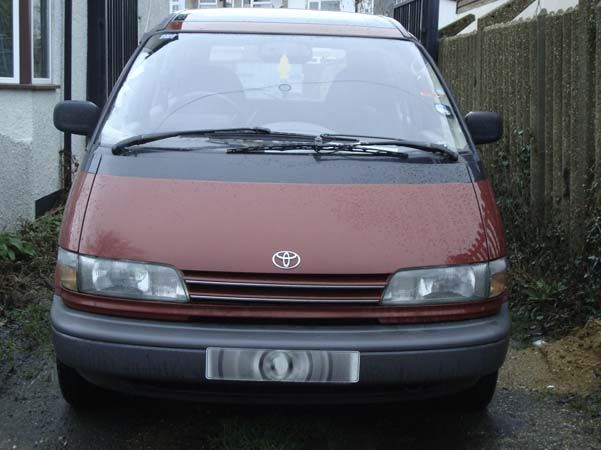
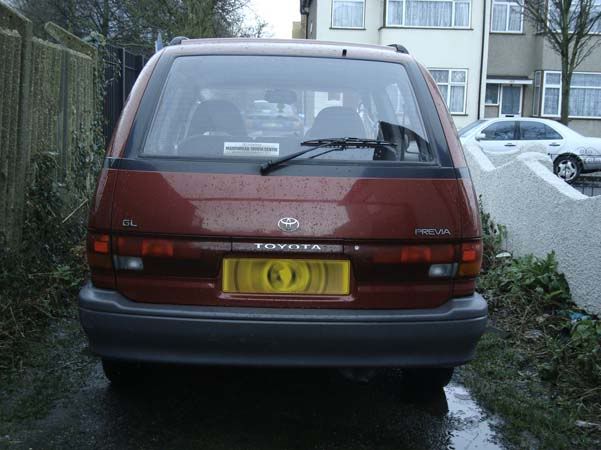
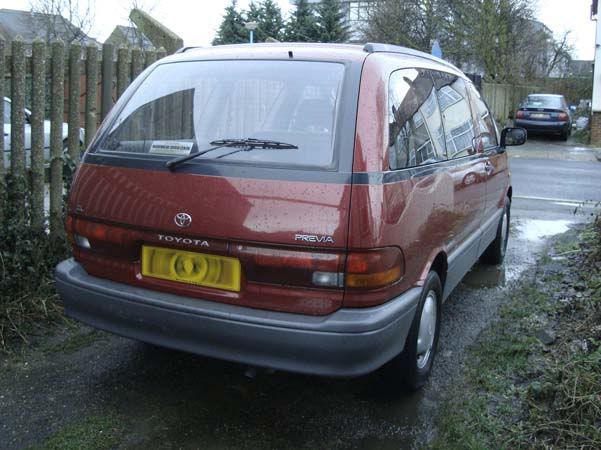
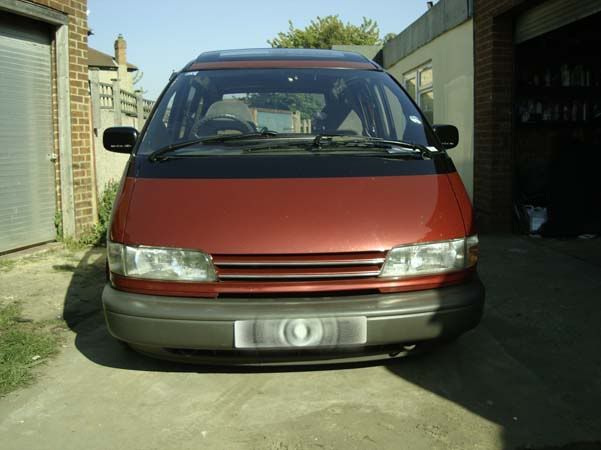
Right...enough of the crap...its time to introduce the vehicle! Which may cause a bit of a stir LOL!!!
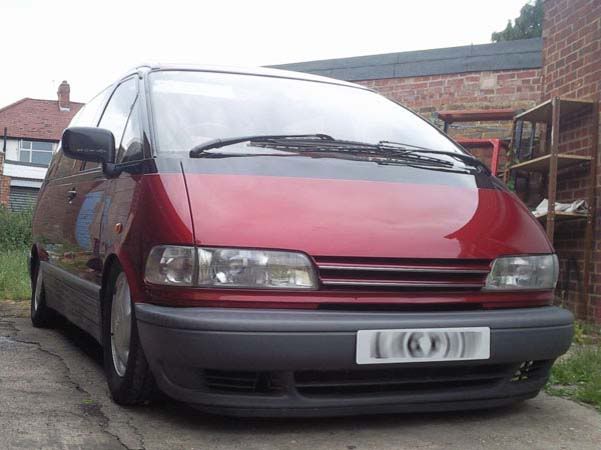
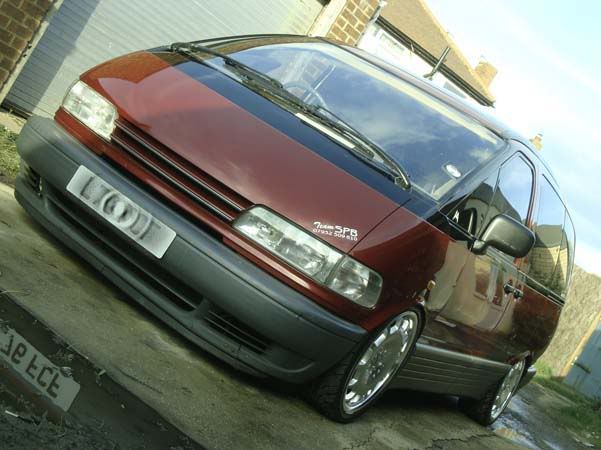
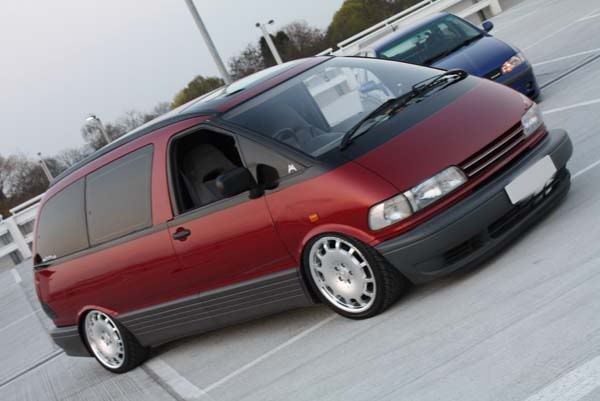
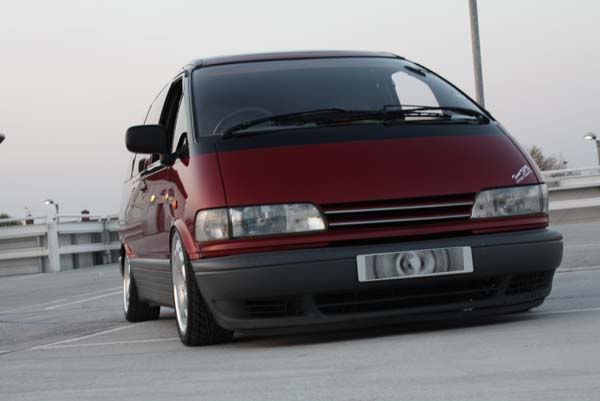
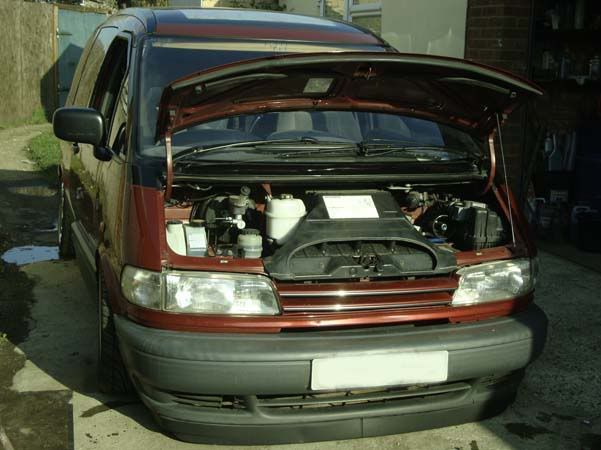
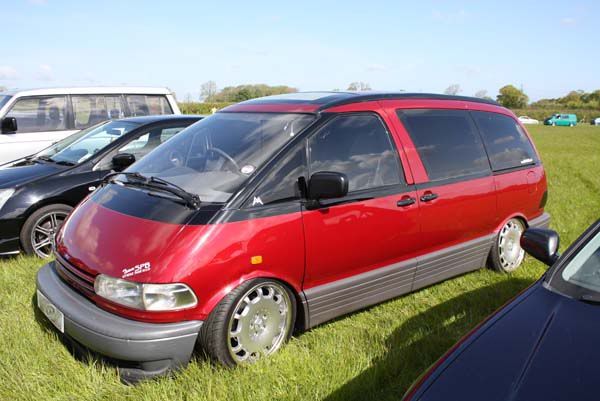
Its a Toyota Previa TCR10!
Check out the sexy ride!
Spec:
Vehicle:
Toyota Previa TCR10 2.4L petrol
Audio
Pioneer P88RS (Used actively)
Custom spec PC with internet connection, Centrafuse interface, touchscreen, GPS, Diagnostics etc etc
Veba DVD player with 'rear view monitor' display
AudioControl Epicenter (Soon to be added)
Line driver (Soon to be added)
2 x SPL Dynamics S6002 amps - 2x500wrms (2000wrms just for the front doors)
16 x Ascendant Audio Havoc Carbon fibre 7" mids
16 x Ascendant Audio Havoc tweeters
8 x SPL Dynamics ICE3500d's - each pair strapped running one sub (6400wrms per sub @ 12-14v...we will run 16v)
4 x Ascendant Audio 18" SMD subs - Numbers 96, 97, 98, 99!
Charging System
3 or 4 x 210a alts running 16+v
10 x XS Power D1400 14v batteries
2 x Dum Dum external regulators
Cabling
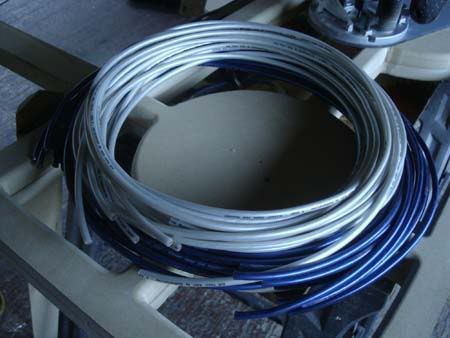
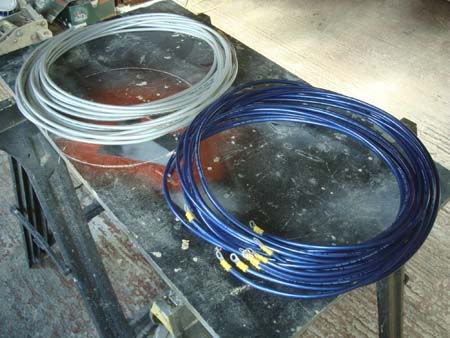
45m Knu Konceptz Fleks Positive 0g
30m Knu Konceptz Fleks Negative 0g
10m Knu Konceptz Fleks Positive 4g
10m Knu Konceptz Fleks Negative 4g
30m Knu Konceptz 10g speaker cable
25m Knu Konceptz Positive 8g
25m Knu Konceptz Negative 8g
Knu Konceptz RCAs
Sound Deadening
10 sheets x Loudboys 4mm stuff - 2 Layers over entire vehicle
6 x Second Skin Damp Pro Bulk kits - 2 Layers over the 4mm stuff
1 x Second Skin Luxury Liner over the SS Damp Pro
1 Layer 18mm bonded directly to floor
Roof is between 36-72mm thick of MDF
Raw Materials
10 x 8ft x 4ft 25mm thick MDF
8 x 8ft x 4ft 18mm thick MDF
25ltrs FG resin
2 Rolls of 450gm CSM
8 x 1ltr PU Glue
8 x 1ltr Wood glue
~20 x brushes
1 x Upol Bodyfiller
5 x Upol FG
2 x Fleece rolls
1 x 5ltr GelCoat
10ltrs Acetone
Other Mods
Rayvern Air ride system with uprated valves, pressure switch and air lines
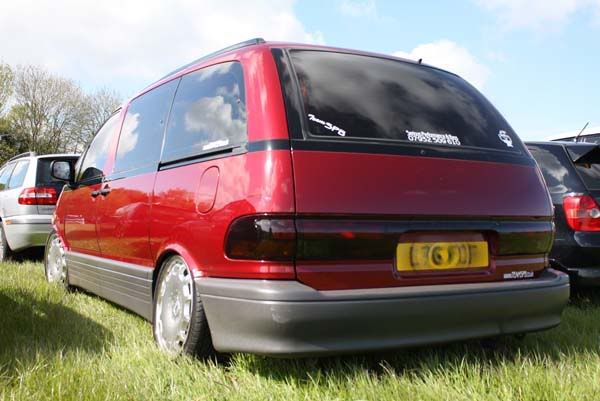
Smoked rear lights
Carsson 8.5x18 rims
IronMan 225/40 XL rated tyres
Clear indicator lights
LED Bulbs
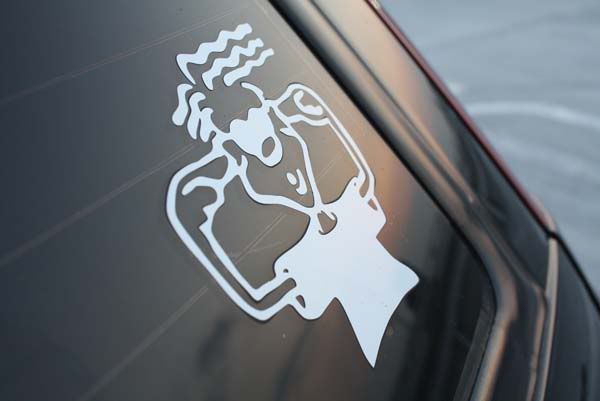
teamSPB stickers
Tinted windows
De-wipered
The above lists are always growing or changing...so they will more than likely change at some point or another!
teamSPB
Over the past few weeks, I have cracked on as much as I can...but also had to do around 15 sub boxes for customers, as well as around 4-5installs...on top of answering calls, emails, pms as well as living my life, its been stressful!
The vehicle is still no where near complete, but I thought I would put this up just so you guys can see what we are capable of building....
First up, I have to thank the following people....who without, this wouldnt have been possible!
Am - AA/Fi/Knu Konceptz distro....without you, this dream wouldnt have happened! Thanks for your endless support and answering my million and one questions! Guy is a pure LEGEND in my eyes! Now im gonna bug u with my million and one power supply questions LOL!!!...
Indirectly, although I have never spoken to....a HUGE shout out to Scott...the designer and brains behind AA/Fi...You are simply the best at what you do! Never has a sub brought such a smile to my face...and NEVER have I NOT got bored of a sub/s! Thats a HARD feat on its own LOL!
Mike and Colin - CAD...you guys are AWESOME at what you do! Without you guys I would be VERY stuck at deciding what amps to use! Also thanks for your endless support when things havent gone quiet right on the amp front
or when I needed extra sound deadening at the last minute lol!
Ray @ Rayvern - For all the hard work you guys put into the air ride systems...all the problems we faced with weight issues....I hope when the batteries go in, things are still A OK LOL!
Nikki and Mike - For ALL their hard work on the flocking! They are AMAZING at what they do and I would never go anywhere else for the flocking work!
Loudboy - For the 4mm deadening....Well its 8mm + more in my case!! haha
Dum Dum - Sorting the alts out...im awaiting for them to come back...
Kit - for putting up with my endless spending! Keeping me going when im down...without u, this wouldnt have happened...ever!
Bobby (number 1)/Bobby (number 2)/Hardeep/Sandeep/Rohit/Mr C....basically the WHOLE teamSPB family - Without your help....this project wouldnt have got off the ground...literally when it came to putting the subs and box in LOL!!!
Thank you to ALL the above...your all golden in my eyes!
Now, a message for the haters...I aint going anywhere...im here to stay! Hate all you want...but this project is MY own sweat, blood and tears...if you dont like it...please jog on!
This install is NOT built do smash the mic apart...its also not built to be louder than anyone in particular...just something thats loud for what it is, and gets me noticed more than my Focus! I DO NOT CARE if Am's is louder than mine...just like I dont care if I dont beat Ian Pinder/the joose (Matt)/Mark Smith etc etc etc...If its loud enough for me...its all good!
Another message to you ALL...there is WAY too much hatred in this game! TOO many FALSE whispers! I have respect for EVERYONE in the audio game...if they dont show respect and a mutual understanding back...those are the haters im talking about!
Right...enough of the crap...its time to introduce the vehicle! Which may cause a bit of a stir LOL!!!
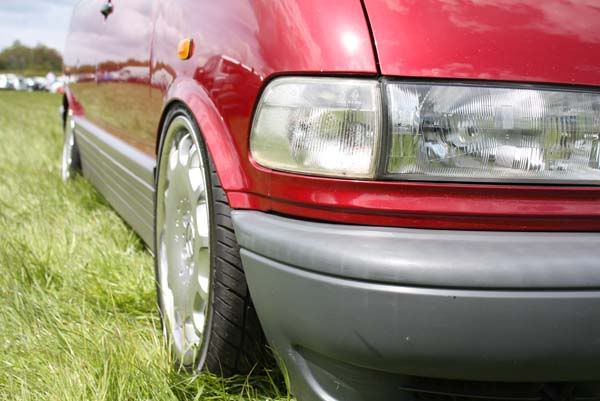
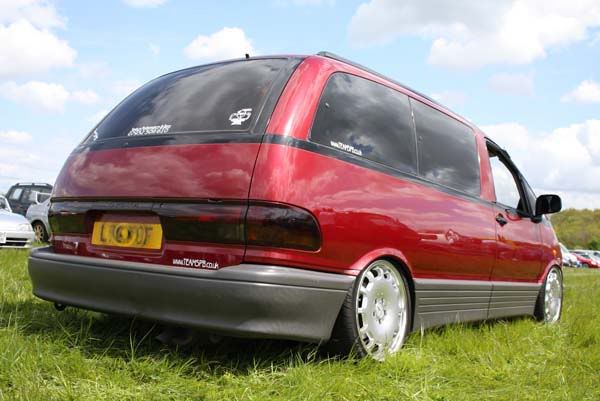
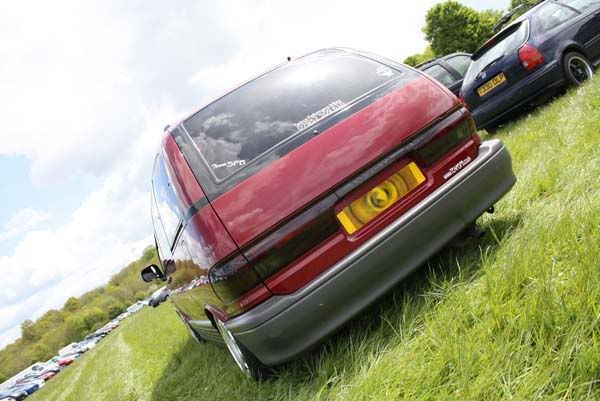
Its a Toyota Previa TCR10!
Check out the sexy ride!
Spec:
Vehicle:
Toyota Previa TCR10 2.4L petrol
Audio
Pioneer P88RS (Used actively)
Custom spec PC with internet connection, Centrafuse interface, touchscreen, GPS, Diagnostics etc etc
Veba DVD player with 'rear view monitor' display
AudioControl Epicenter (Soon to be added)
Line driver (Soon to be added)
2 x SPL Dynamics S6002 amps - 2x500wrms (2000wrms just for the front doors)
16 x Ascendant Audio Havoc Carbon fibre 7" mids
16 x Ascendant Audio Havoc tweeters
8 x SPL Dynamics ICE3500d's - each pair strapped running one sub (6400wrms per sub @ 12-14v...we will run 16v)
4 x Ascendant Audio 18" SMD subs - Numbers 96, 97, 98, 99!
Charging System
3 or 4 x 210a alts running 16+v
10 x XS Power D1400 14v batteries
2 x Dum Dum external regulators
Cabling
45m Knu Konceptz Fleks Positive 0g
30m Knu Konceptz Fleks Negative 0g
10m Knu Konceptz Fleks Positive 4g
10m Knu Konceptz Fleks Negative 4g
30m Knu Konceptz 10g speaker cable
25m Knu Konceptz Positive 8g
25m Knu Konceptz Negative 8g
Knu Konceptz RCAs
Sound Deadening
10 sheets x Loudboys 4mm stuff - 2 Layers over entire vehicle
6 x Second Skin Damp Pro Bulk kits - 2 Layers over the 4mm stuff
1 x Second Skin Luxury Liner over the SS Damp Pro
1 Layer 18mm bonded directly to floor
Roof is between 36-72mm thick of MDF
Raw Materials
10 x 8ft x 4ft 25mm thick MDF
8 x 8ft x 4ft 18mm thick MDF
25ltrs FG resin
2 Rolls of 450gm CSM
8 x 1ltr PU Glue
8 x 1ltr Wood glue
~20 x brushes
1 x Upol Bodyfiller
5 x Upol FG
2 x Fleece rolls
1 x 5ltr GelCoat
10ltrs Acetone
Other Mods
Rayvern Air ride system with uprated valves, pressure switch and air lines
Smoked rear lights
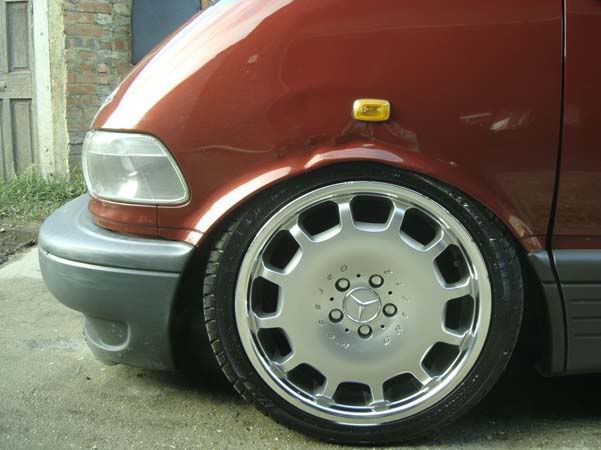
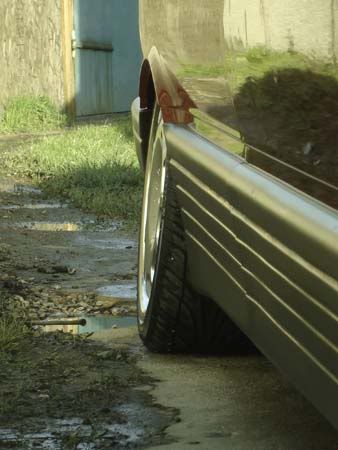
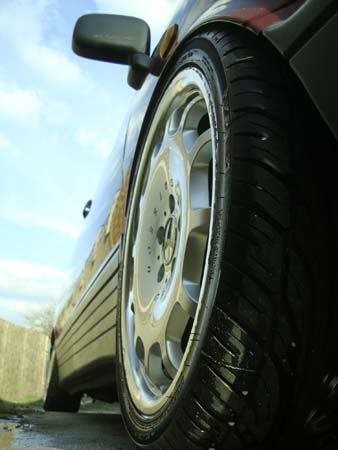
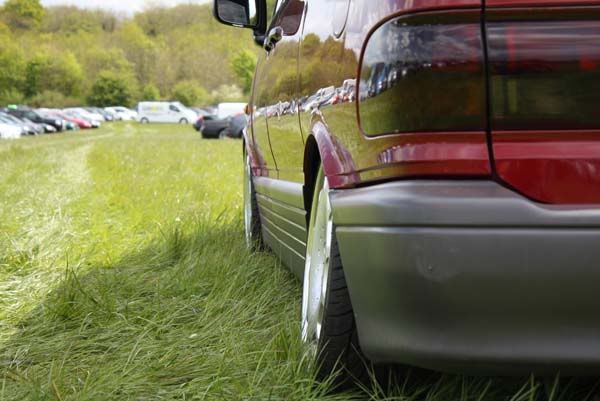
Carsson 8.5x18 rims
IronMan 225/40 XL rated tyres
Clear indicator lights
LED Bulbs
teamSPB stickers
Tinted windows
De-wipered
The above lists are always growing or changing...so they will more than likely change at some point or another!
teamSPB
 22-07-2010, 04:28 PM
#2
PassionFord Post Troll
Thread Starter
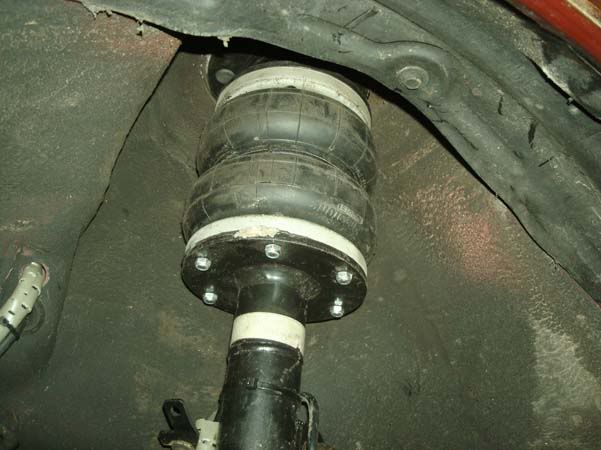
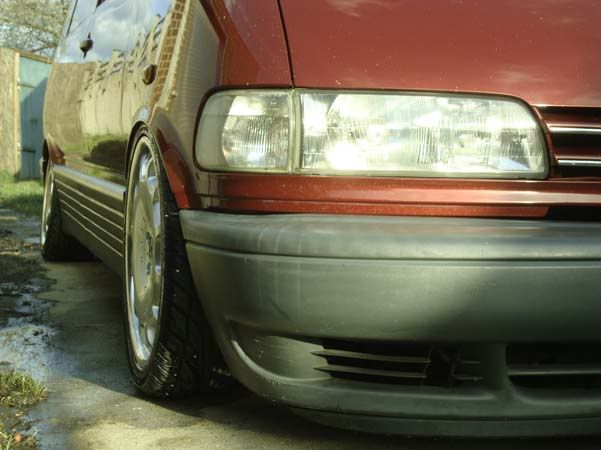
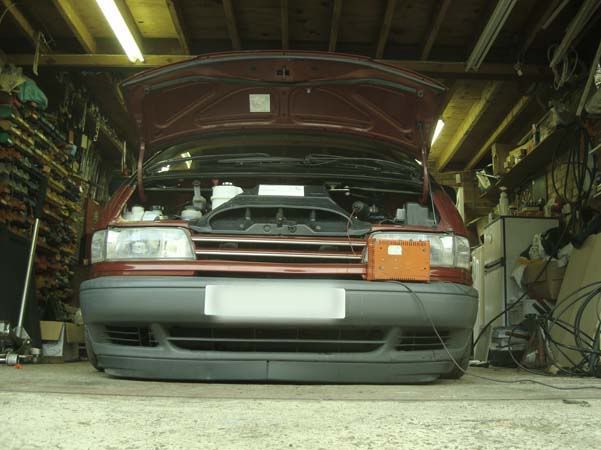
One of the first mods I did, was get Ray from Rayvern to fit the air ride system...
Reason I chose Rayvern...They use the BEST components for air ride system, and have been doing so for YEARS! There work is awesome to the last detail and I wouldnt want anyone else to touch the suspension apart from them...unless I HAD to!
The prices are awesome for the quality of work and quality of components used! Aftersales backup is great to
Parker Valves, Firestone bags, AVO shocks, thicker airlines...were all ordered up and custom built!
Bags in place

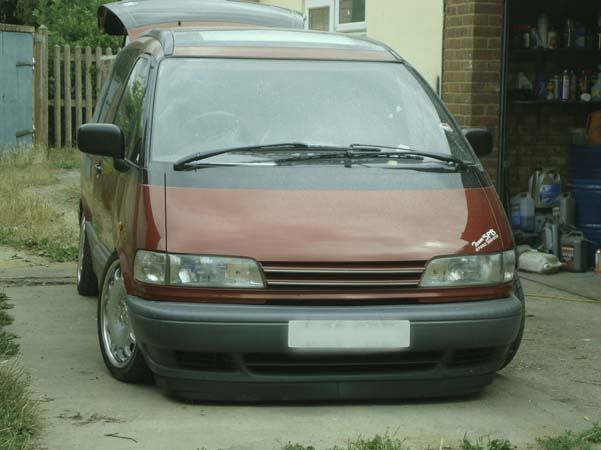
I then decided to put a late spec bumper on the car to as I wasnt a fan of the old one
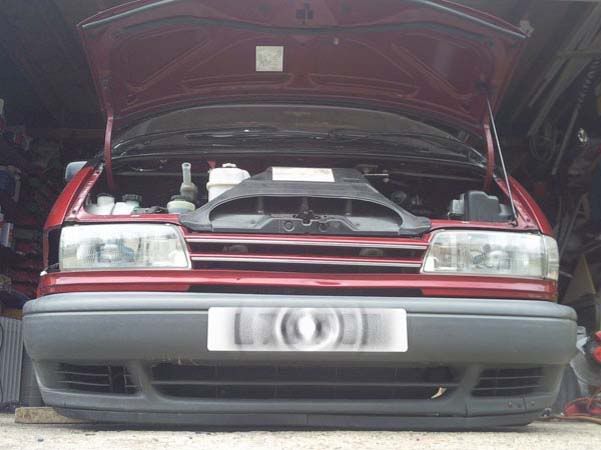
Then it sat like this....
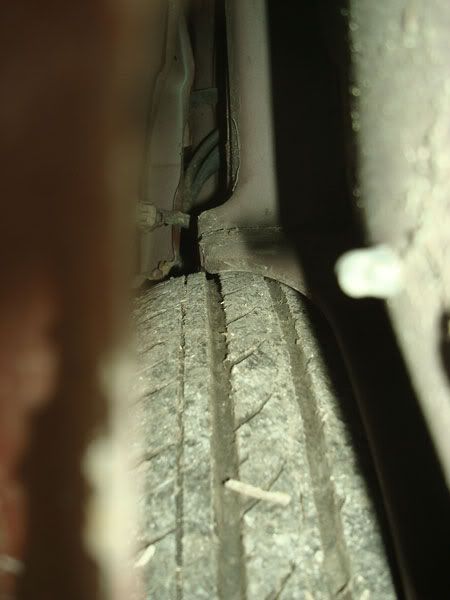
Shots of the inner arches...
Up in the air
Down she goes
teamSPB
Reason I chose Rayvern...They use the BEST components for air ride system, and have been doing so for YEARS! There work is awesome to the last detail and I wouldnt want anyone else to touch the suspension apart from them...unless I HAD to!
The prices are awesome for the quality of work and quality of components used! Aftersales backup is great to
Parker Valves, Firestone bags, AVO shocks, thicker airlines...were all ordered up and custom built!
Bags in place
I then decided to put a late spec bumper on the car to as I wasnt a fan of the old one
Then it sat like this....
Shots of the inner arches...
Up in the air
Down she goes
teamSPB
22-07-2010, 04:29 PM
#3
PassionFord Post Troll
Thread Starter
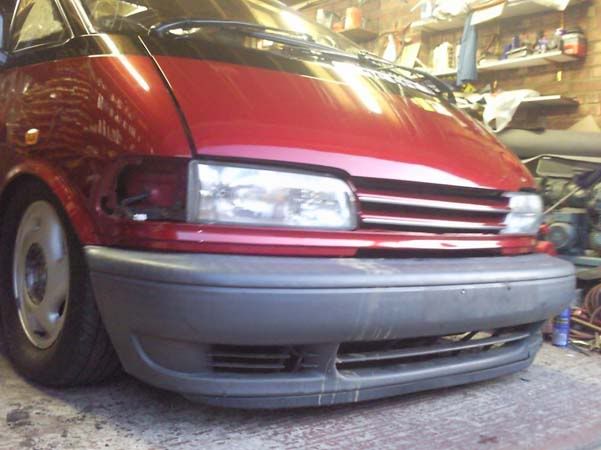
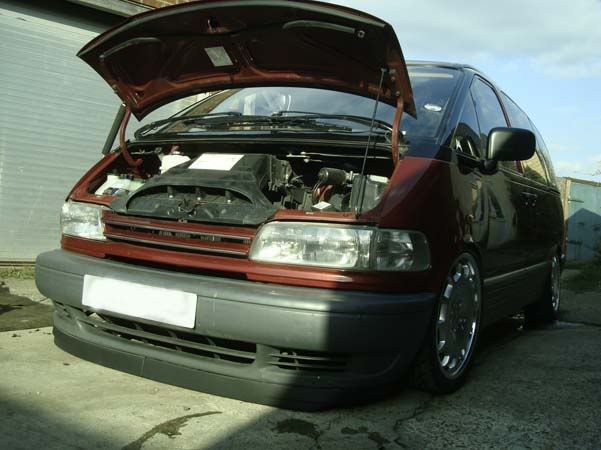
Trialled on some rims...Welcome the Carsson (Carlsson reps)...
Second hand and bought of my cousin Andy for a SILLY cheap price!!! I COULDNT resist!
Test fit before I committed

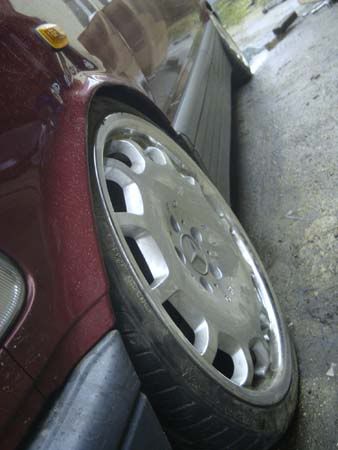
Iron man tyres were bought in (Cheers James!)
I HAD to have them!
teamSPB
Second hand and bought of my cousin Andy for a SILLY cheap price!!! I COULDNT resist!
Test fit before I committed
Iron man tyres were bought in (Cheers James!)
I HAD to have them!
teamSPB

 22-07-2010, 04:38 PM
#5
PassionFord Post Troll
Thread Starter
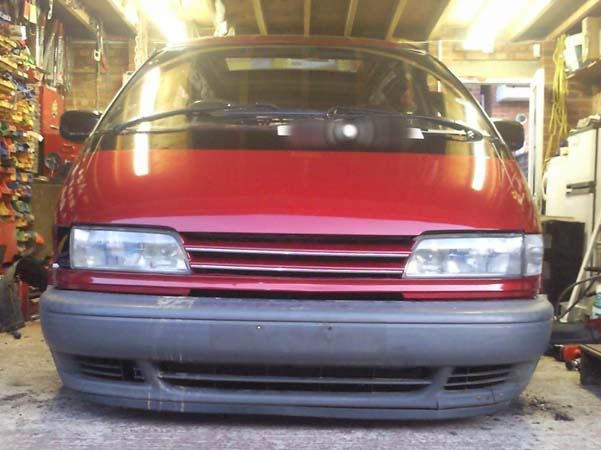
Next up was a splitter change...
The OEM splitter was replaced with a thin MK3 Golf VR6/CL splitter (Cheers to Tanveer for this free gift!!)
Old vs new
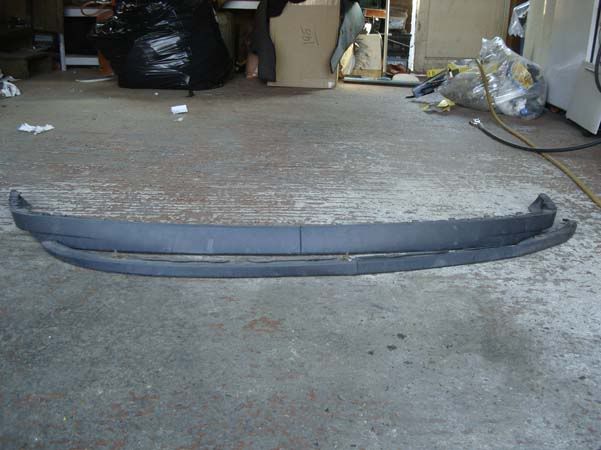
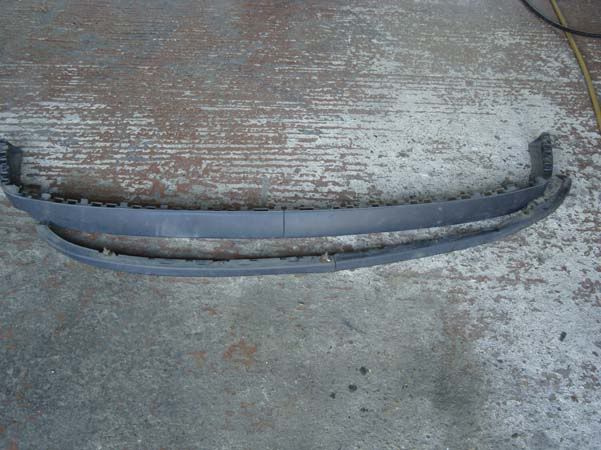

Fitted
teamSPB
The OEM splitter was replaced with a thin MK3 Golf VR6/CL splitter (Cheers to Tanveer for this free gift!!)
Old vs new
Fitted
teamSPB


Trending Topics

 22-07-2010, 06:52 PM
#11
Lucifer II - 666
I am loving that!!! 
22-07-2010, 10:00 PM
#12
PassionFord Post Troll
Thread Starter
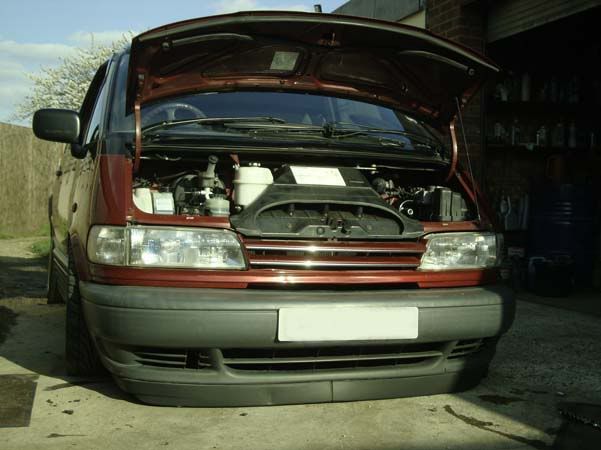
Last few bits and bobs on the exterior....
Bulb change
Not really a fan of orange indicators...
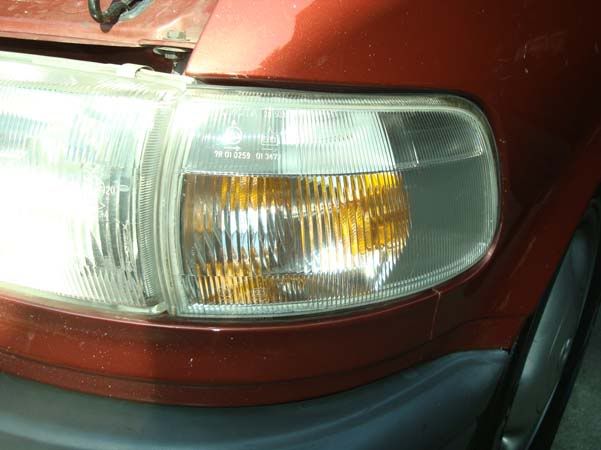
The lights were cut open, and then the orange filter broken and cut out...coupled with some silver bulbs
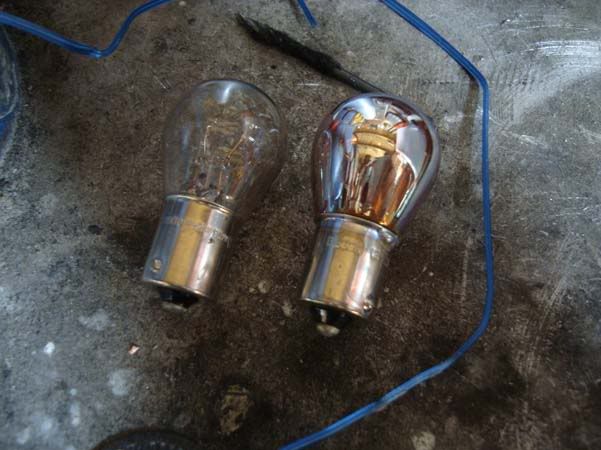
This was the result
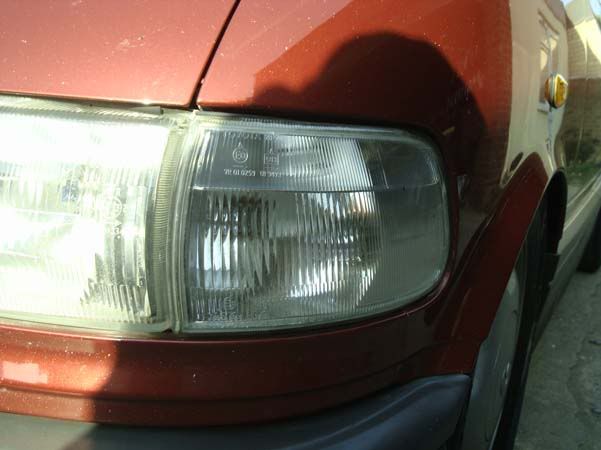
MUCH better

teamSPB
Bulb change
Not really a fan of orange indicators...
The lights were cut open, and then the orange filter broken and cut out...coupled with some silver bulbs
This was the result
MUCH better
teamSPB
 22-07-2010, 10:09 PM
#14
PassionFord Post Troll
Thread Starter
Its on air ride...so can be lifted up to around standard height....or dropped on its ass...or anywhere inbetween!
The joys of air ride...the complaints of the bank balance lol
bassboy
The joys of air ride...the complaints of the bank balance lol
bassboy
 cossie it
 23-07-2010, 09:10 PM
#22
PassionFord Post Troll
Thread Starter
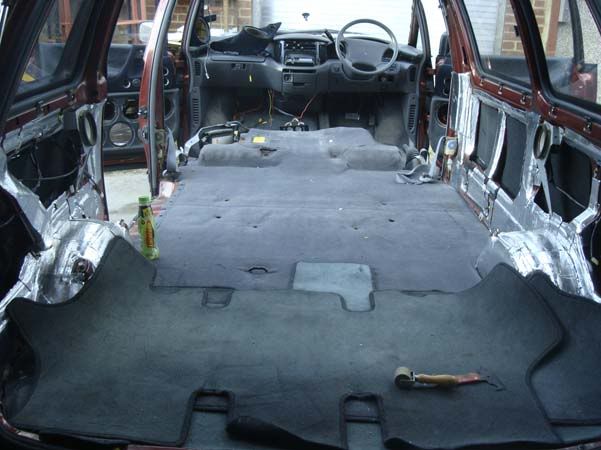
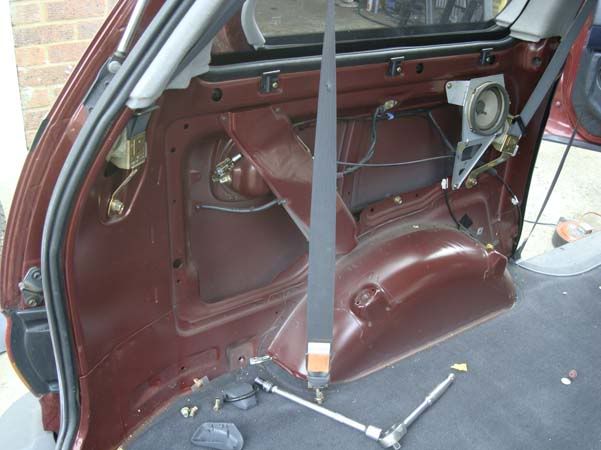
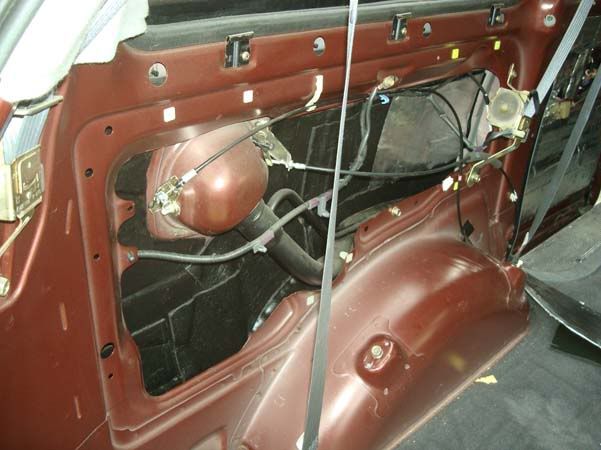
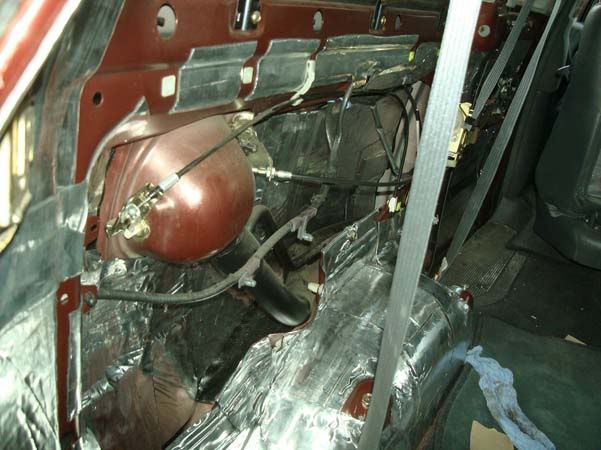
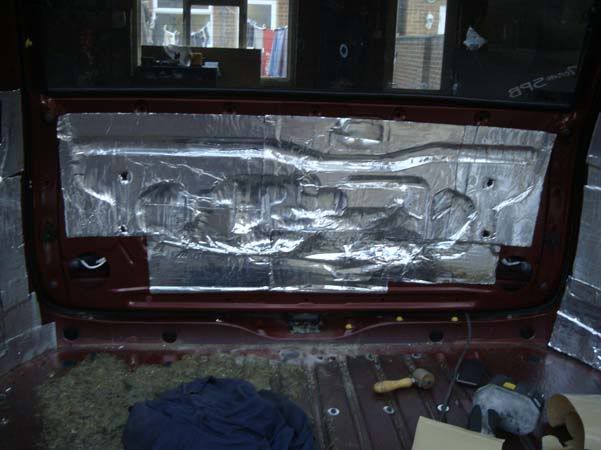
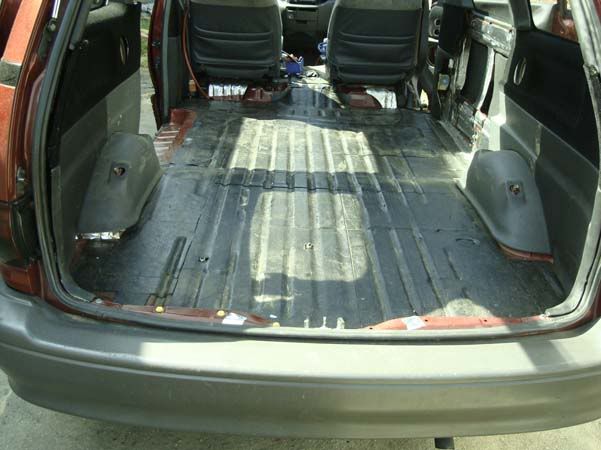
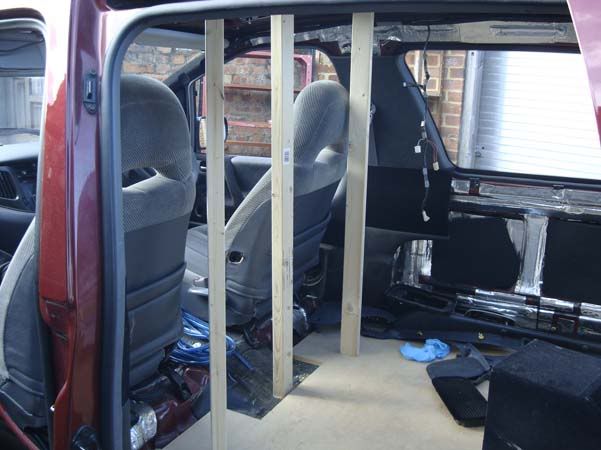
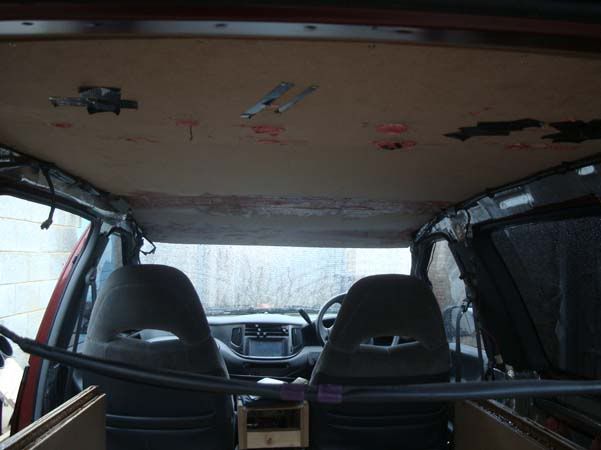
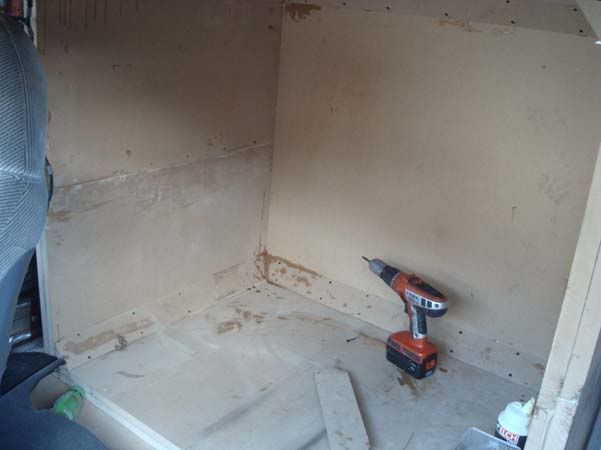
After the air ride project...it was time to strip the vehicle down for some sound deadening....
For some reason I have lost alot of pics of this stage, so will put up what I have...
Right...what was used for sound deadening.....
ALL the sides was done with 2 layers x 4mm Loudboys deadening + 2 layers x Second Skin Damp Pro + SS Overkill (just wanted to test the Overkill product out)
The floor was done with 1 layer x 4mm Loudboys deadening + 1 layer x 18mm MDF
The roof was done with 2-4 layers x 18mm MDF
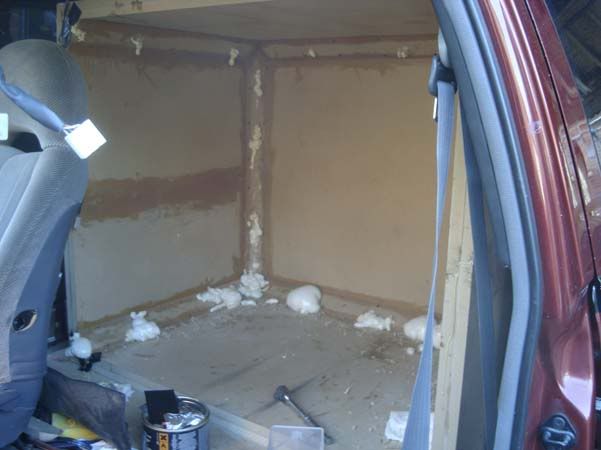
Any gaps were filled with fire retardant expanding foam
Vehicle stripped
2 layers of LD's deadening applied
SS Damp Pro applied

Other side was stripped and done to
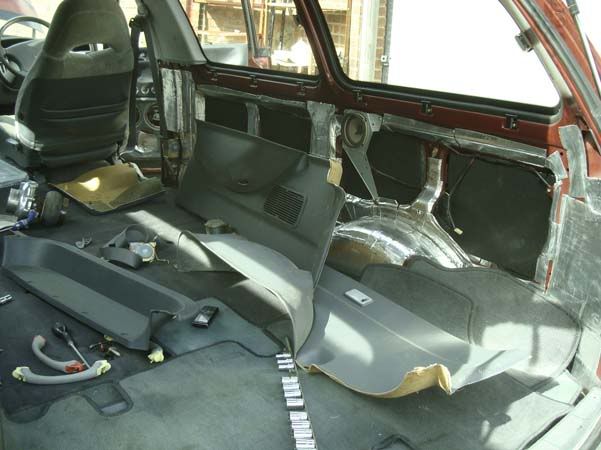
Both sides done...Note the Turbonetics T61 turbo sat there
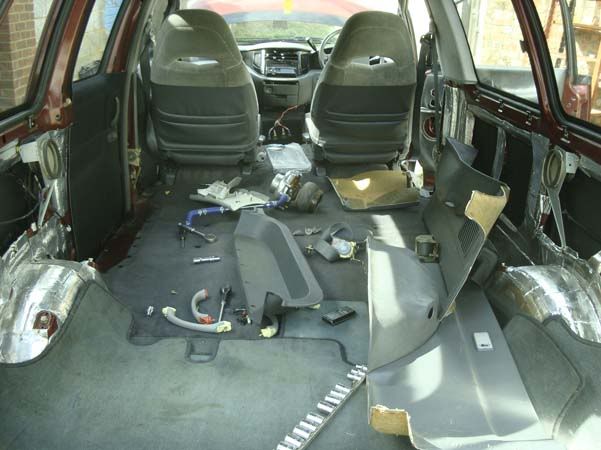
Tailgate is also deadened fully...however, its now too heavy to stay up in the air so a pair of molgrips come in EXTREMELY handy LOL!
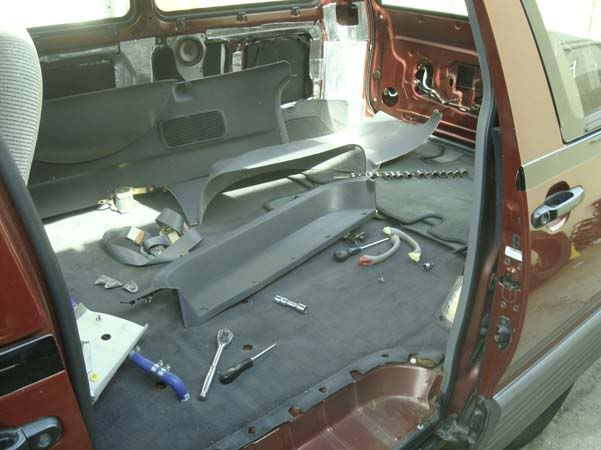
Next up was to attack the floor...
teamSPB
For some reason I have lost alot of pics of this stage, so will put up what I have...
Right...what was used for sound deadening.....
ALL the sides was done with 2 layers x 4mm Loudboys deadening + 2 layers x Second Skin Damp Pro + SS Overkill (just wanted to test the Overkill product out)
The floor was done with 1 layer x 4mm Loudboys deadening + 1 layer x 18mm MDF
The roof was done with 2-4 layers x 18mm MDF
Any gaps were filled with fire retardant expanding foam
Vehicle stripped
2 layers of LD's deadening applied
SS Damp Pro applied
Other side was stripped and done to
Both sides done...Note the Turbonetics T61 turbo sat there
Tailgate is also deadened fully...however, its now too heavy to stay up in the air so a pair of molgrips come in EXTREMELY handy LOL!
Next up was to attack the floor...
teamSPB
23-07-2010, 09:23 PM
#23
PassionFord Post Troll
Thread Starter
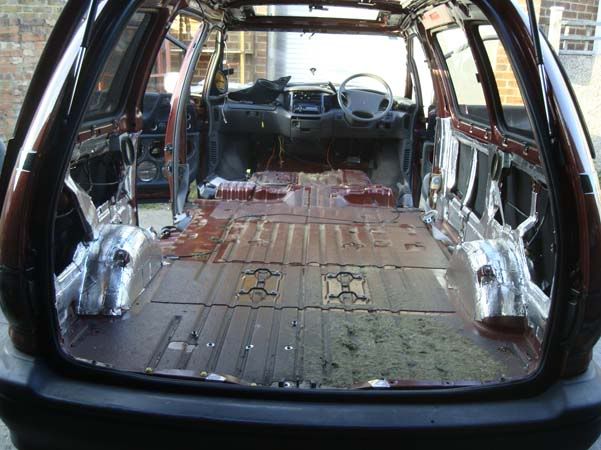
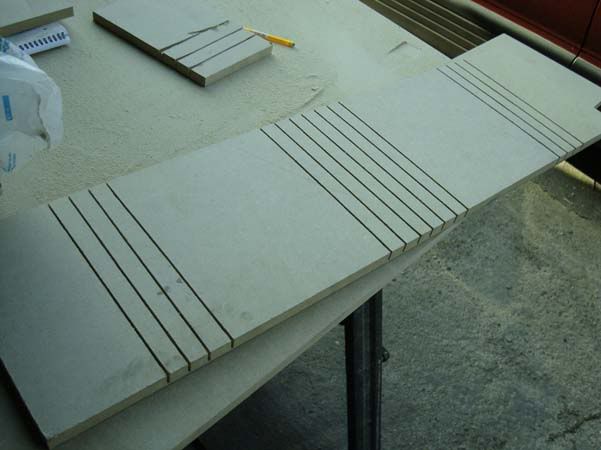
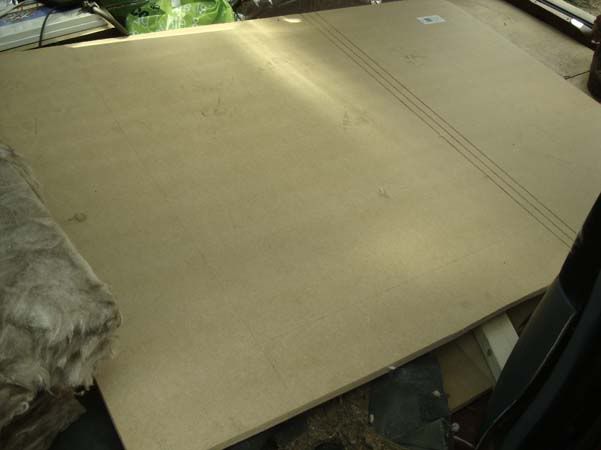
Layer of 4mm deadening going down...
This stuff was a great size for laying down on a large area...no cutting was needed at all thank the lord! LOL! It really is a bit of a pain to work with...but man does it stiffen up panels!!!
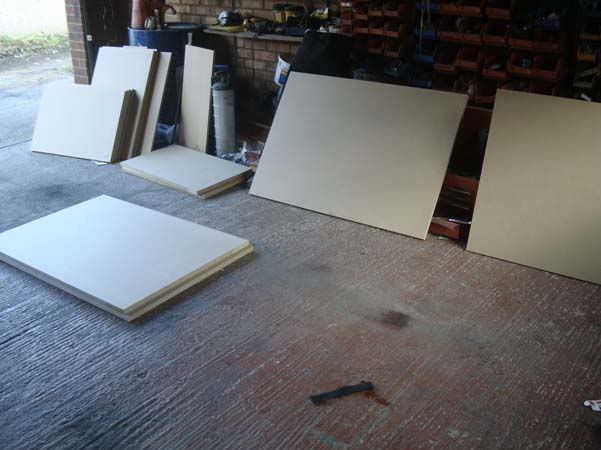
Making MDF panels for the flooring
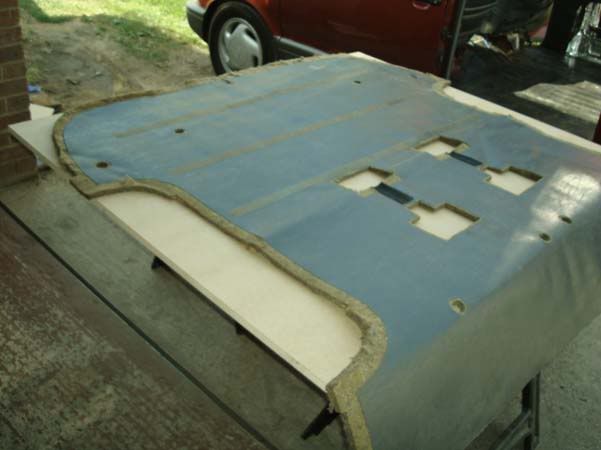
Then bonded and glued into place

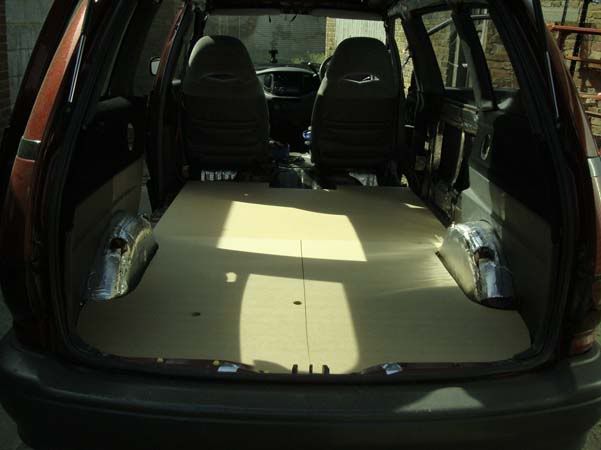
There was then around 100-150kgs of weight added on top of the MDF to help adhere properly to the deadening below...
Once this was cured (I allowed 3 days), I done a test...try to lift up the MDF from the corner with all my force...I did my back in LOL!!!!
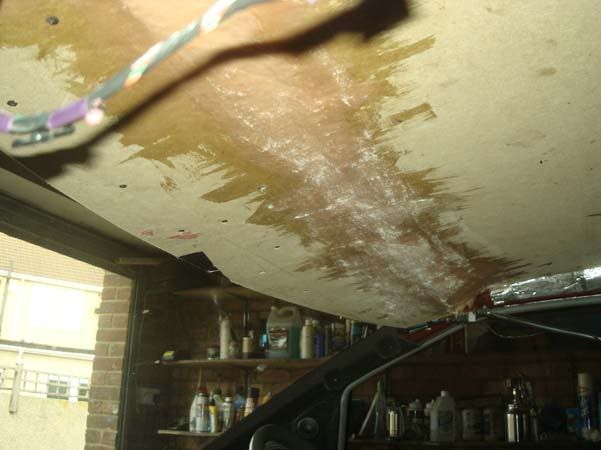
At this point, the next step was the Roof....
It is REALLY weak, AND I had the added bonus of TWO sunroofs which is a pain in the ***!!!
First off was to tackle the thin sheets of metal.....Welcome Mr Singh (Am) to help me with this bit...with the roof sanded down, it was time to cut some MDF and bond it to the roof...

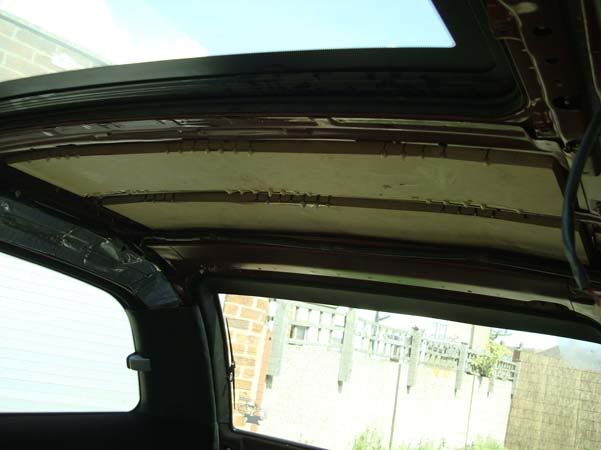
This piece was cut to cover the complete roof section (Well from driver seat back)
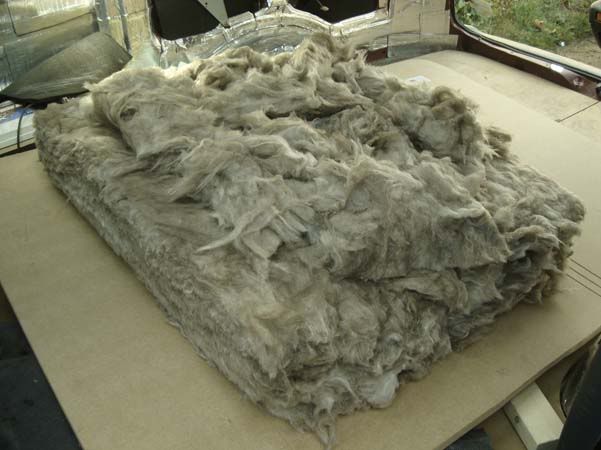
Where the sunroofs are...LOADS and I mean LOADS of insulation was used to keep pressure applied to the glass...this was placed and glued onto the MDF
This picture shows around half the amount used on the second sunroof
On the outside, the glass has been sealed and bonded shut...seems to work a treat!
teamSPB
This stuff was a great size for laying down on a large area...no cutting was needed at all thank the lord! LOL! It really is a bit of a pain to work with...but man does it stiffen up panels!!!
Making MDF panels for the flooring
Then bonded and glued into place
There was then around 100-150kgs of weight added on top of the MDF to help adhere properly to the deadening below...
Once this was cured (I allowed 3 days), I done a test...try to lift up the MDF from the corner with all my force...I did my back in LOL!!!!
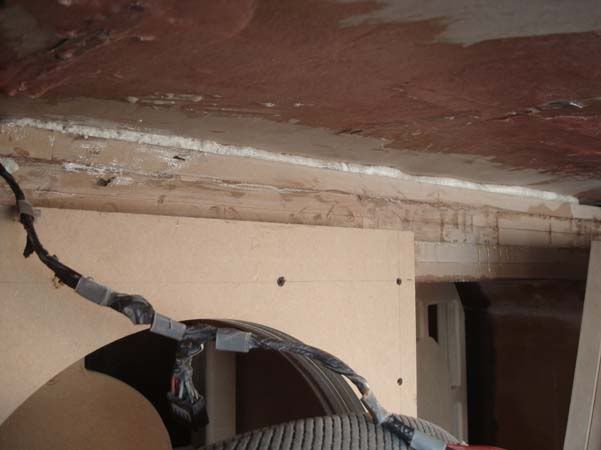
At this point, the next step was the Roof....
It is REALLY weak, AND I had the added bonus of TWO sunroofs which is a pain in the ***!!!
First off was to tackle the thin sheets of metal.....Welcome Mr Singh (Am) to help me with this bit...with the roof sanded down, it was time to cut some MDF and bond it to the roof...
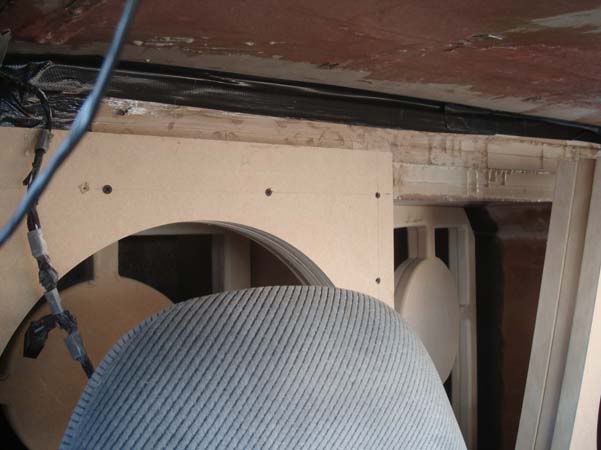
This piece was cut to cover the complete roof section (Well from driver seat back)
Where the sunroofs are...LOADS and I mean LOADS of insulation was used to keep pressure applied to the glass...this was placed and glued onto the MDF
This picture shows around half the amount used on the second sunroof
On the outside, the glass has been sealed and bonded shut...seems to work a treat!
teamSPB
23-07-2010, 09:27 PM
#24
PassionFord Post Troll
Thread Starter
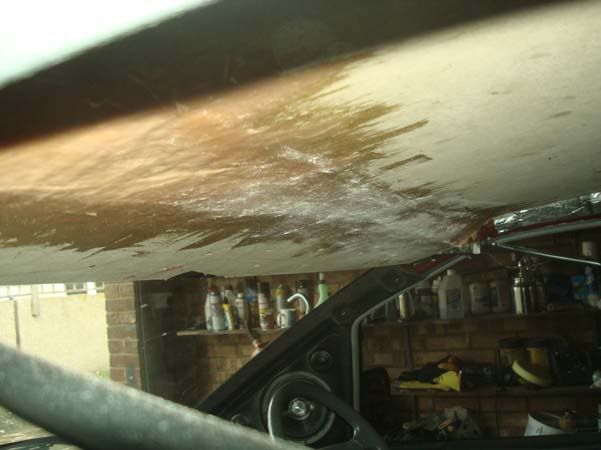
The roof section was then raised....and PACKED....when I say packed...I mean around 8-10cans of expandy foam!! The roof is SOLID!...I got up on it and jumped...and took my weight no problem!
The front sunroof was also covered up and everything was FG'd together...
teamSPB
The front sunroof was also covered up and everything was FG'd together...
teamSPB
23-07-2010, 10:40 PM
#25
PassionFord Post Troll
Thread Starter
23-07-2010, 10:44 PM
#26
PassionFord Post Troll
Thread Starter
Its not as bad as I thought to be honest...however, even when there was no weight in there, the tendency to understeer was quite bad (yes I had a few spirited drives...well as sprited as you can get in a Previa PMSL)...but I would expect that...have it quite low, and the shocks set pretty firm...again its ALOT better than standard....BUT I would not put air ride on my Focus RS LOL!
The shocks, which I didnt mention I dont think, are from Avo and are bound adjustable I believe...so are pretty decent items...however, you just cant beat the traditional spring when it comes to handling!
bassboy
25-07-2010, 10:20 PM
#27
PassionFord Post Troll
Thread Starter
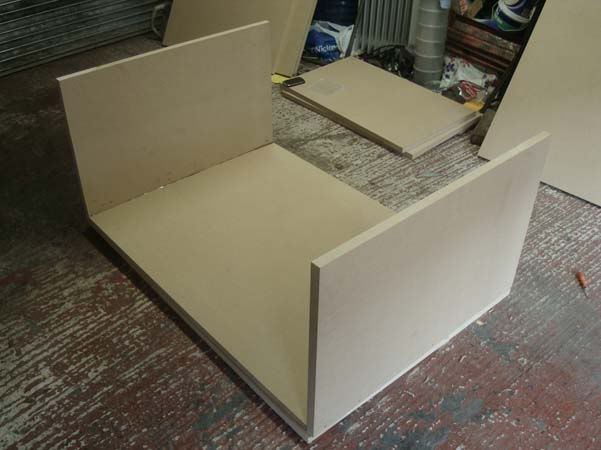
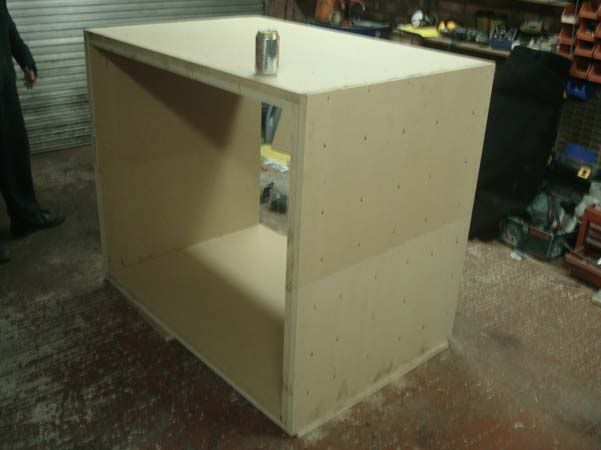
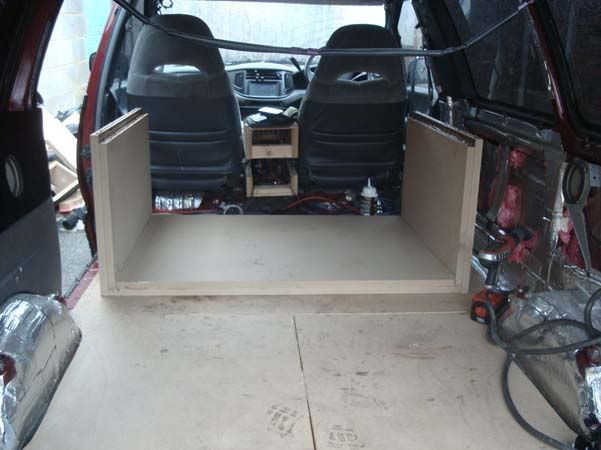
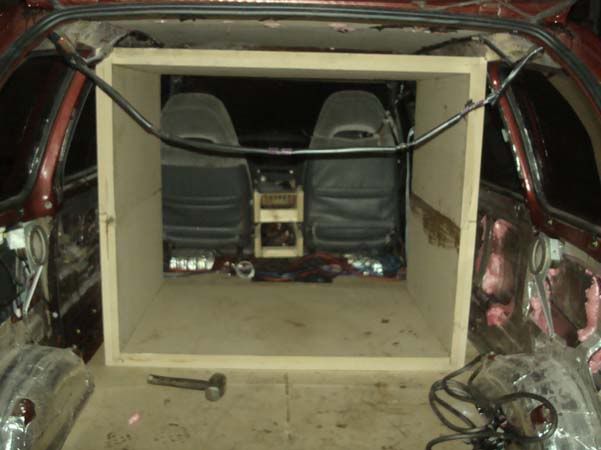
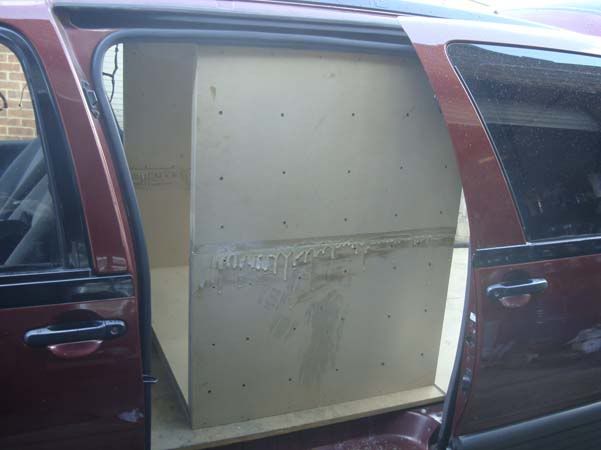
Right, time for an update on the box...
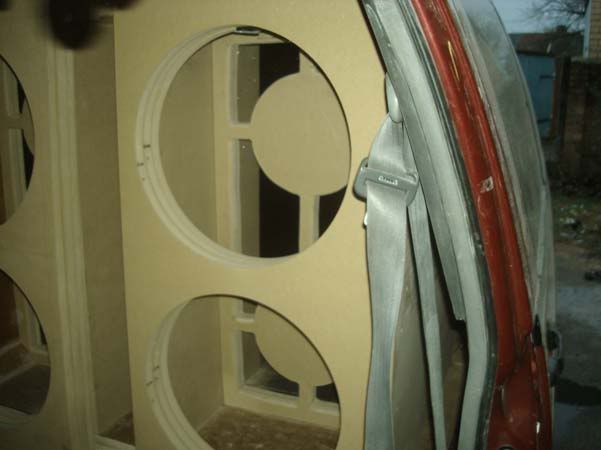
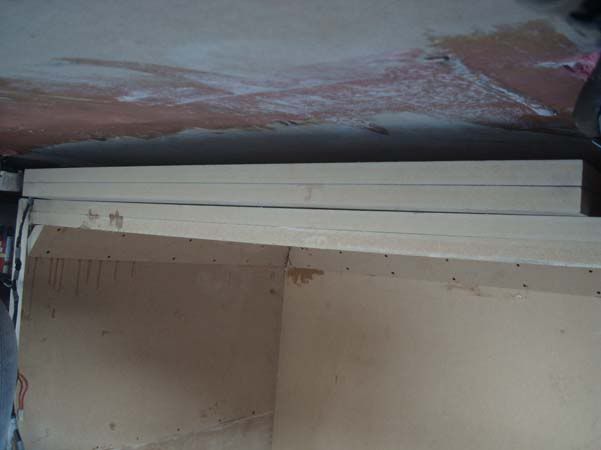
Box is made out of 25mm MDF...Initially, front is 3 layers sides and back are 2 layers
The box was built in 2 halves initially to help slide it into the Previa...then glued, and screwed together inside
Some pics
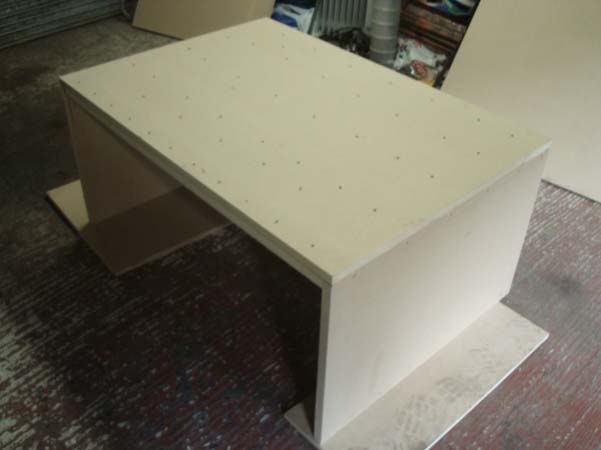

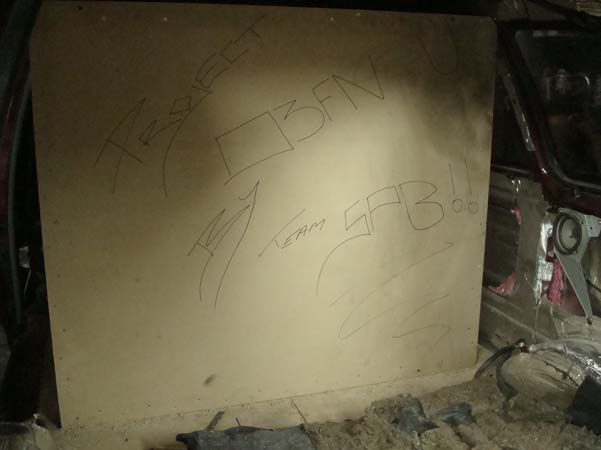
HAVE to say a HUGE HUGE HUGE thanks to Rohit for helping me with the box...helped me out BIG BIG time!
The box doesnt look very big here...But Rohit over well over 6ft tall!!!
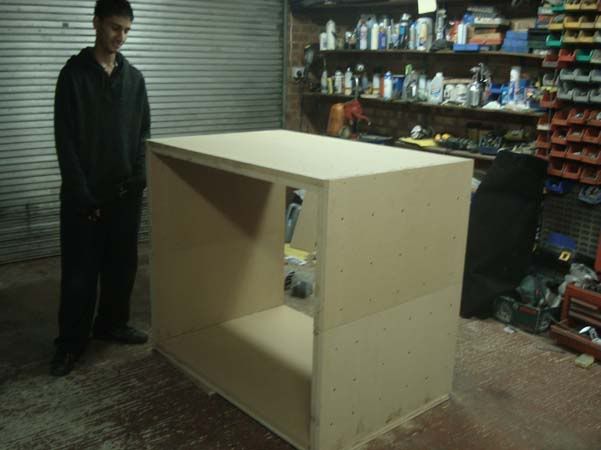
And one next to a coke can lol
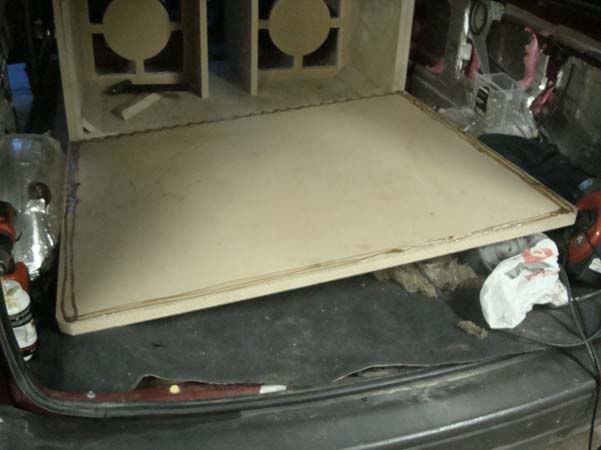
Bottom half in
Glued up ready for the top section
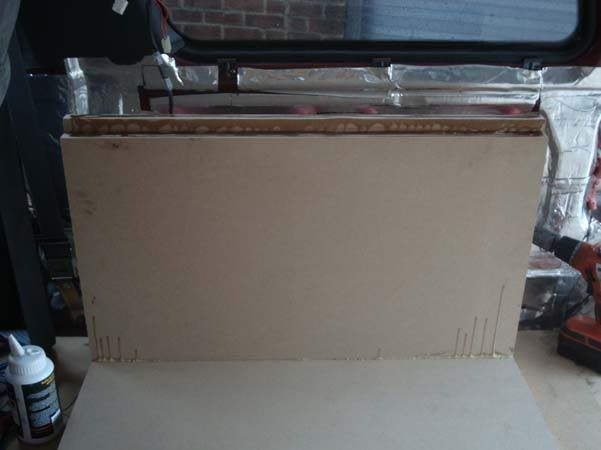
Et Voila!
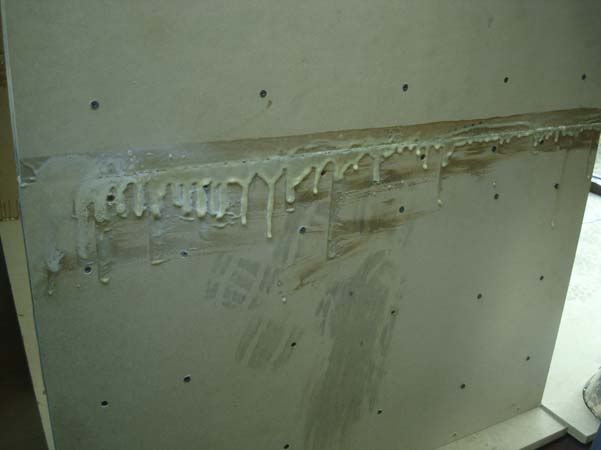
Over run on the glue!
teamSPB
Box is made out of 25mm MDF...Initially, front is 3 layers sides and back are 2 layers
The box was built in 2 halves initially to help slide it into the Previa...then glued, and screwed together inside
Some pics
HAVE to say a HUGE HUGE HUGE thanks to Rohit for helping me with the box...helped me out BIG BIG time!
The box doesnt look very big here...But Rohit over well over 6ft tall!!!
And one next to a coke can lol
Bottom half in
Glued up ready for the top section
Et Voila!
Over run on the glue!
teamSPB
25-07-2010, 10:27 PM
#28
PassionFord Post Troll
Thread Starter
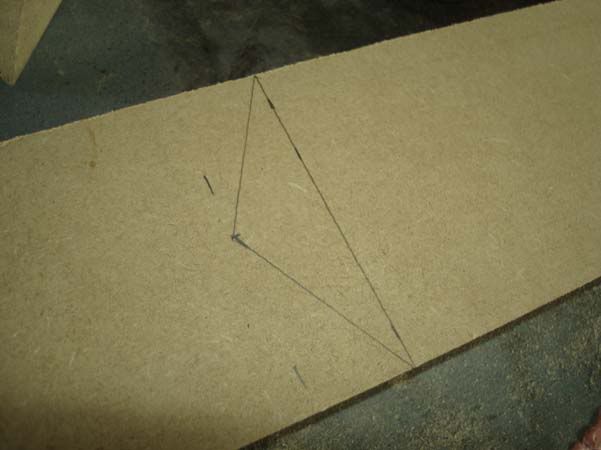
45deg bits were cut (Cheers Andy!)
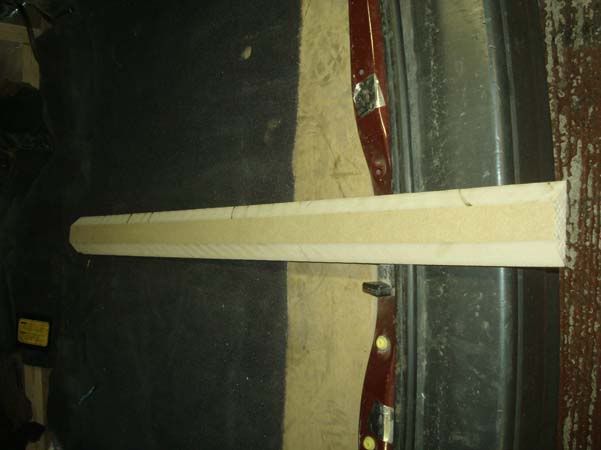
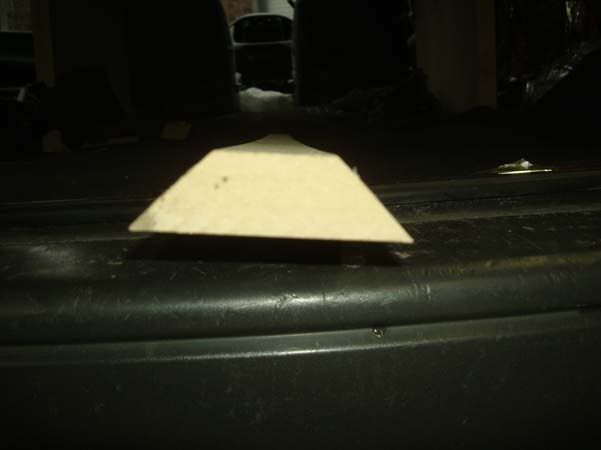
Such a simple job...but so much messing around to getting the angles to meet up...where the 45deg angles from the floor meet the verticles!
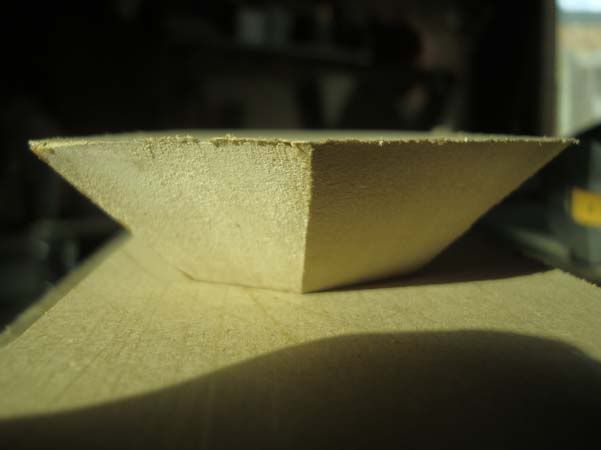
FG'd in place

This bit was yet ANOTHER overkill...but I wanted to do it for piece of mind! Filling the gaps in the 45's with expandy foam
Then all the corners were smoothed over
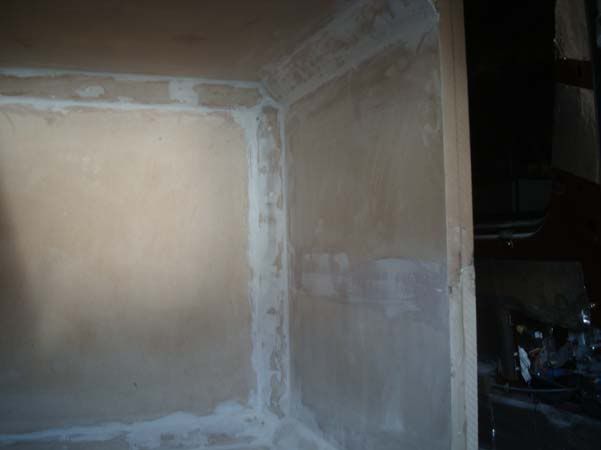
teamSPB

 26-07-2010, 10:47 AM
#32
Too many posts.. I need a life!!

Join Date: Jul 2004
Location: South East
Posts: 731
Likes: 0
Received 0 Likes
on
0 Posts
Singh Top marks to you bro  When you pulled in to the car park at the west london meet a couple months back, people came running, the B-line is Crazyyyyy And when you slap it on the floor

When you pulled in to the car park at the west london meet a couple months back, people came running, the B-line is Crazyyyyy And when you slap it on the floor
26-07-2010, 11:54 PM
#33
PassionFord Post Troll
Thread Starter
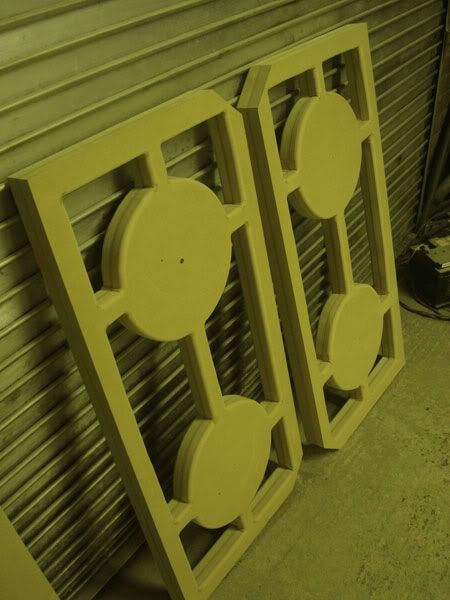
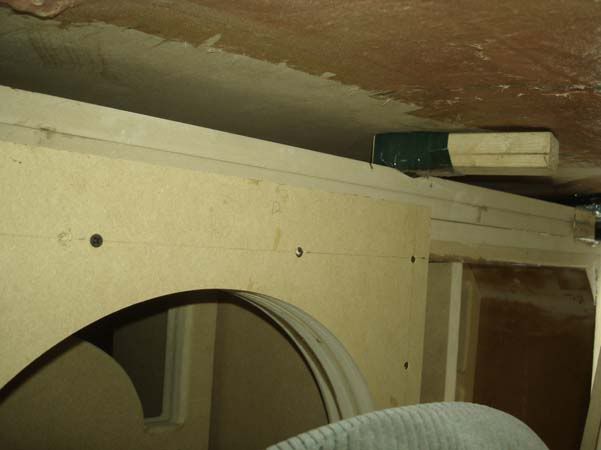
3 Layers in total make up the front baffles...
The inner most edge has a 1/2" radius to help air flow at the back of the woofer

Offering up the baffles to make sure they fit
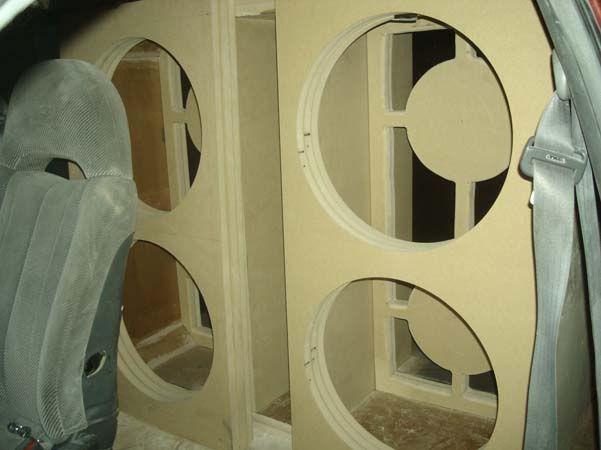
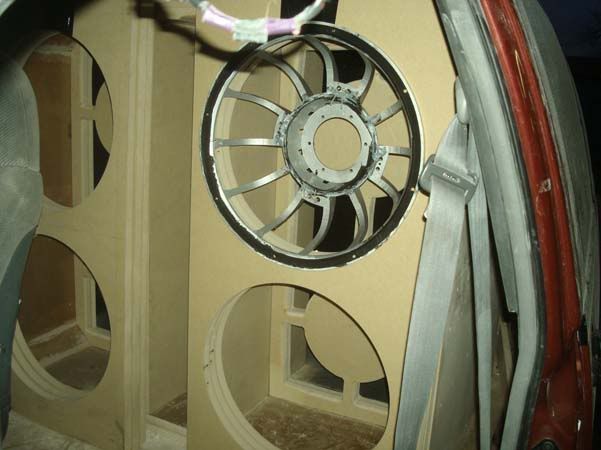
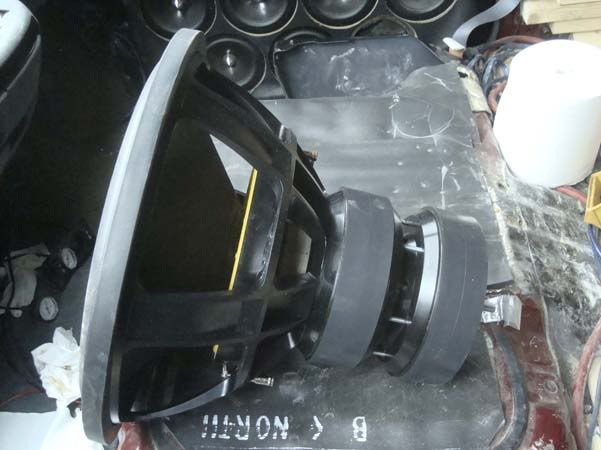
The weird cut outs I showed you before, are the braces for the inside of the box as well as the magnets as the subs weigh around 40-50kgs EACH! Not only are the 18" in diameter....they are nearly 16" DEEP!!!! Imagine the leverage weight on that!
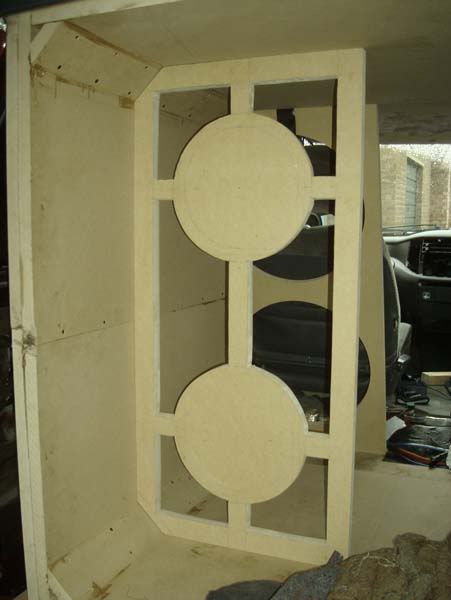
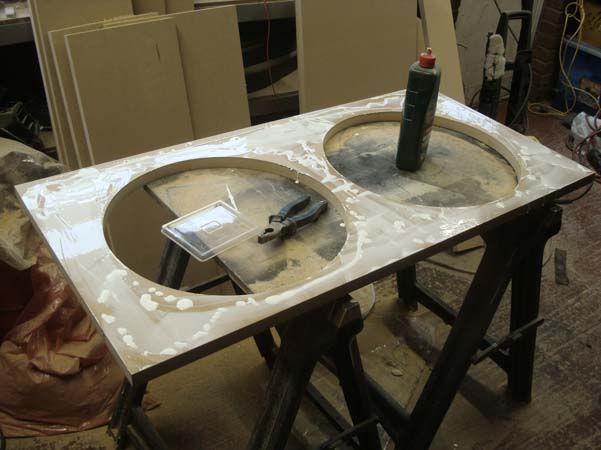
And test fitted with the port
The back panel was then glued up
And joint the rest of the box!
Time to strengthen the top of the box!...An extra 2" of MDF going in
teamSPB
The inner most edge has a 1/2" radius to help air flow at the back of the woofer
Offering up the baffles to make sure they fit
The weird cut outs I showed you before, are the braces for the inside of the box as well as the magnets as the subs weigh around 40-50kgs EACH! Not only are the 18" in diameter....they are nearly 16" DEEP!!!! Imagine the leverage weight on that!
And test fitted with the port
The back panel was then glued up
And joint the rest of the box!
Time to strengthen the top of the box!...An extra 2" of MDF going in
teamSPB
27-07-2010, 12:09 AM
#34
PassionFord Post Troll
Thread Starter
Third layer added...now 5" thick on the top...
And the gap was expandy foamed
And I made sure it was JAM packed in there
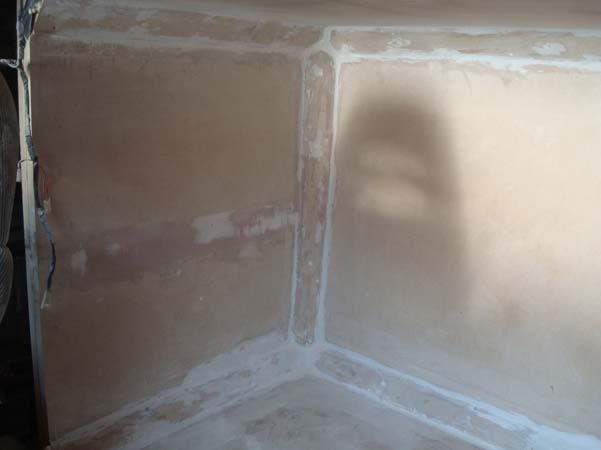
The inside of the box was then Gelcoated black for a SUPER SUPER smooth finish!
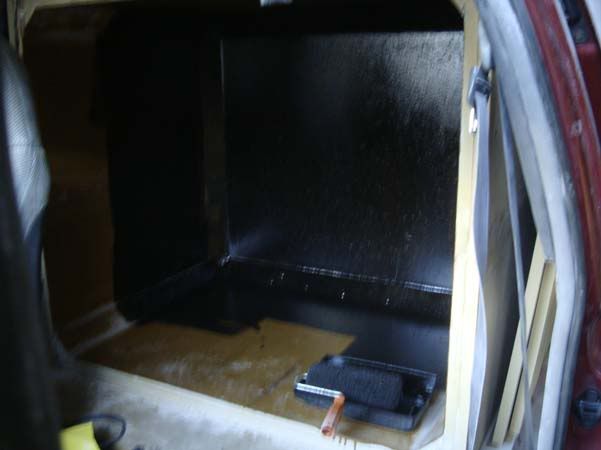
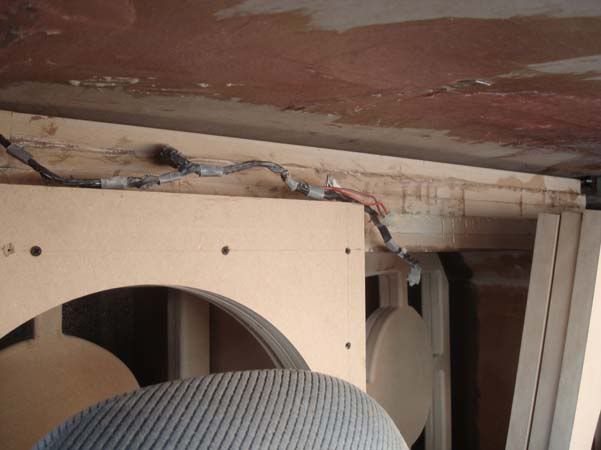
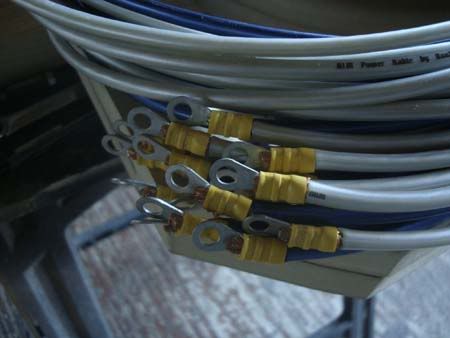
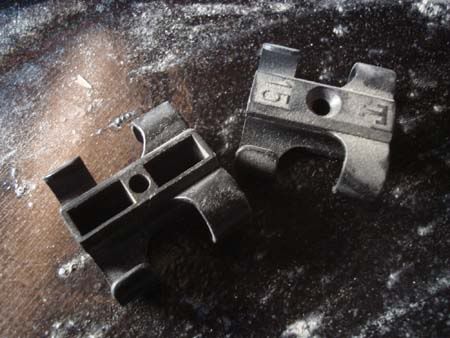
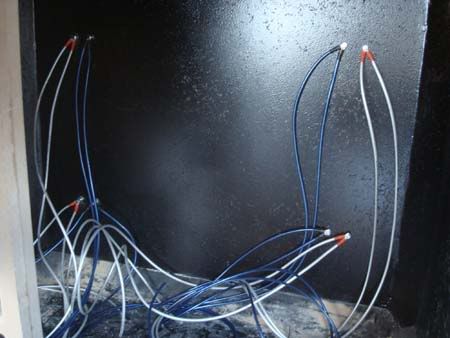
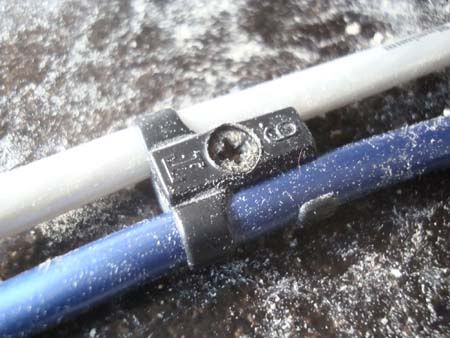
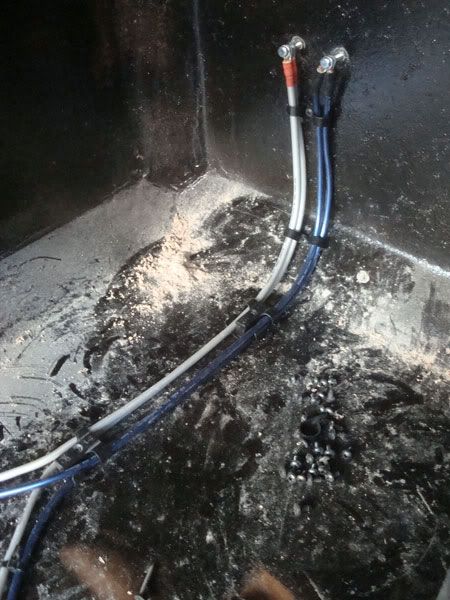
Time for some terminals!
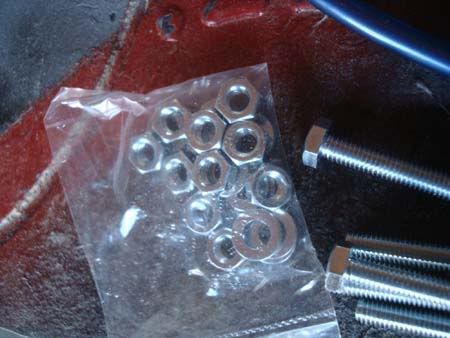
8g Knu Konceptz power cable should be up to the job for speaker cable me thinks!
Crimps on
 27-07-2010, 07:03 AM
#38
PassionFord Post Whore!!
Like the wheels and stance.
Insane stereo going in, will be great
Insane stereo going in, will be great
