MK3 fiesta project - 2.1 zetec turbo - 358bhp-365ftlb for now
 19-03-2010, 06:49 AM
#41
PassionFord Regular
Thread Starter

Join Date: Aug 2003
Posts: 457
Likes: 0
Received 0 Likes
on
0 Posts
as the engine is going to have a full revamp
ian / area six gave me a list of things to get
so i can take them when i drop the engine in for inspection and to discuss a plan of action
also i've bought bits which will help the engine to look new
all i can say i'm very thankfull for employee discount
some pics
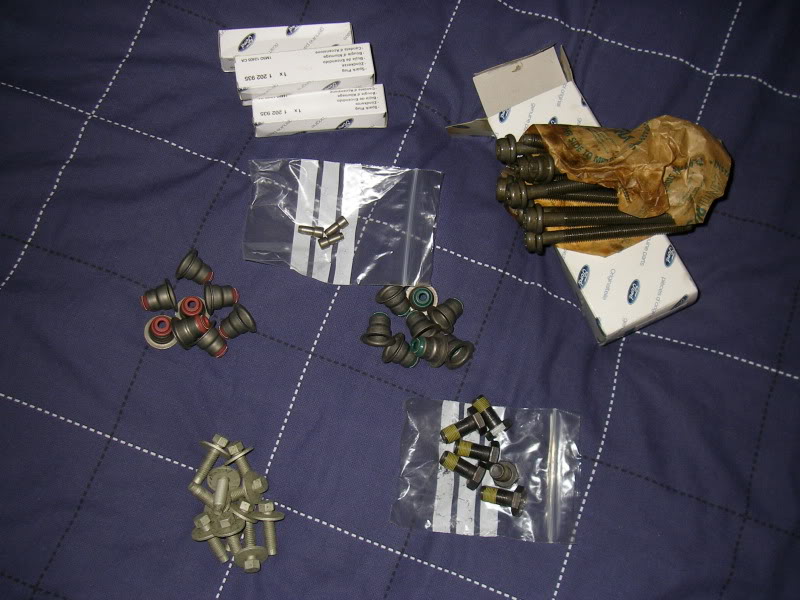
sump bolts,
stem seals (inlet red - exhaust green)
flywheel dowels x3
focus rs spark plugs x4
zetec headbolts x10
flywheel bolts x6
sump gasket
camshaft seals
rocker cover gasket
oil pump seal and gasket
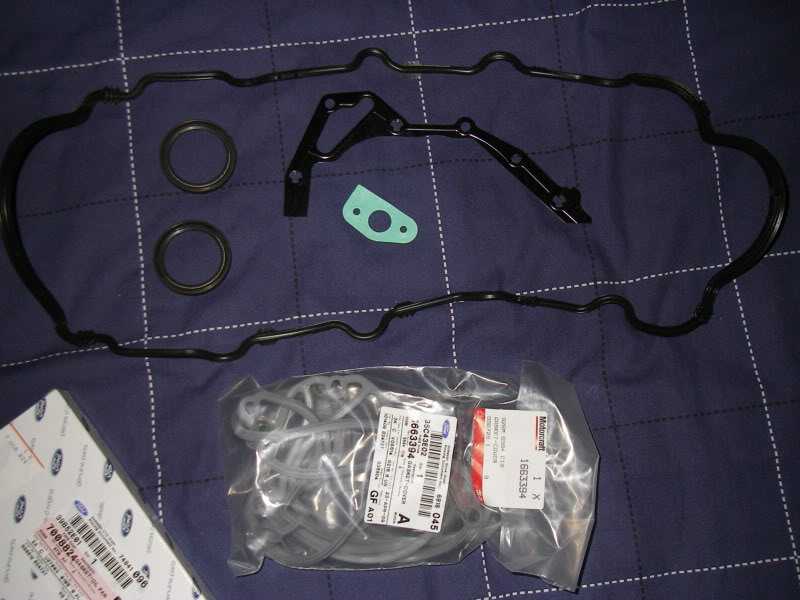
inlet manifold gasket
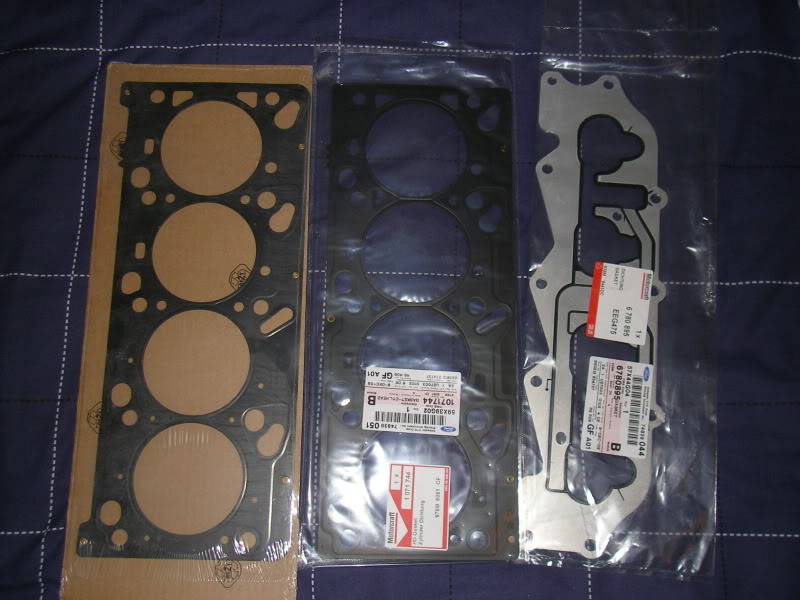
and then two head gaskets
one being a focus rs headgasket as i read this would be needed about a year ago
only to learn once speaking to area six its no good for my engine
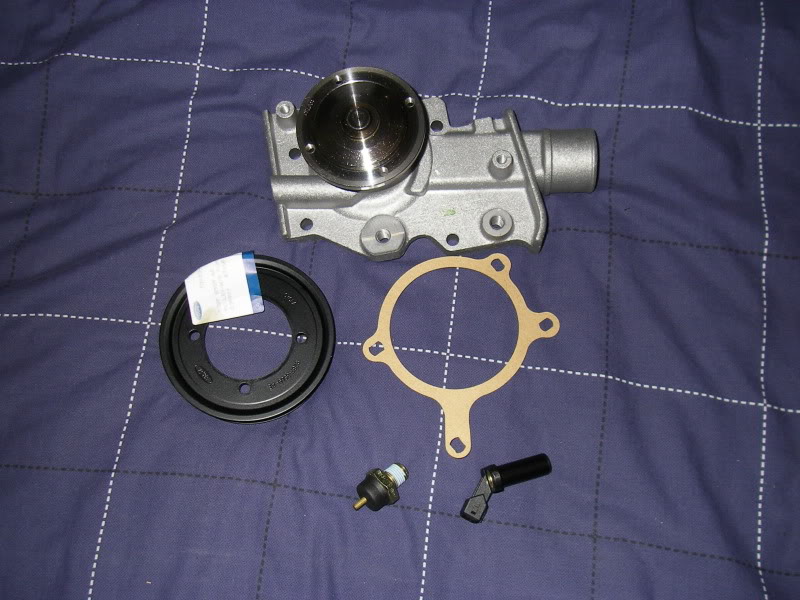
water pump and gasket
water pump pulley
oil pressure switch
cps sensor
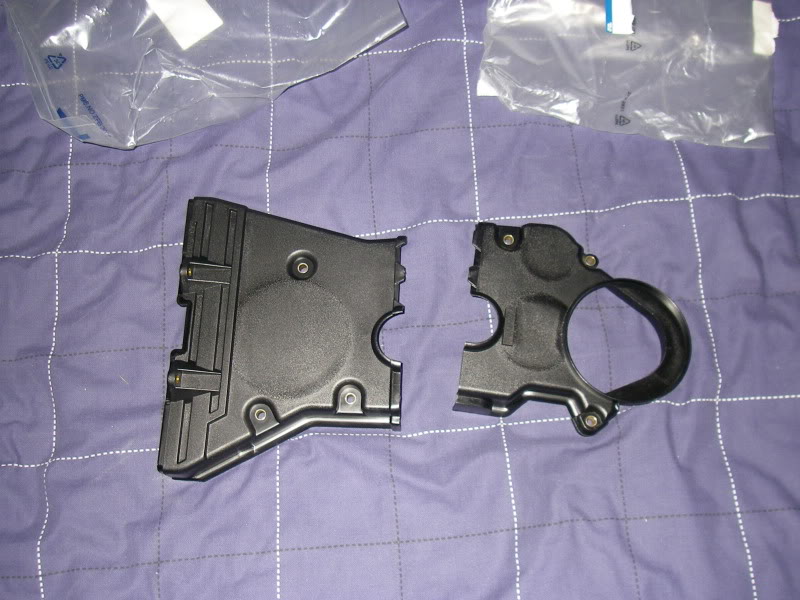
middle and bottom parts of the timing belt cover, as i have a clear top section
ford timing belt kit

heres some parts i have ready for the new engine aswell
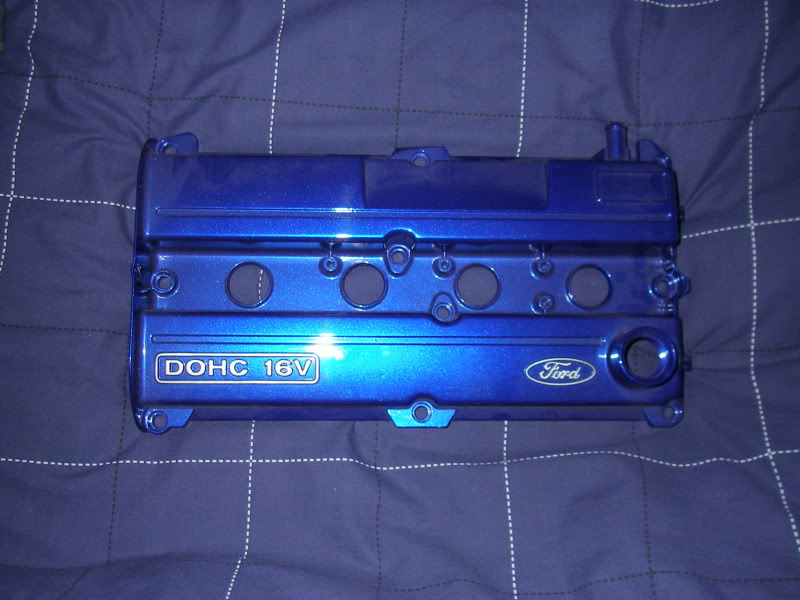
my spare cam cover sprayed the same colour as the car, with the letters polished then laquer'd over
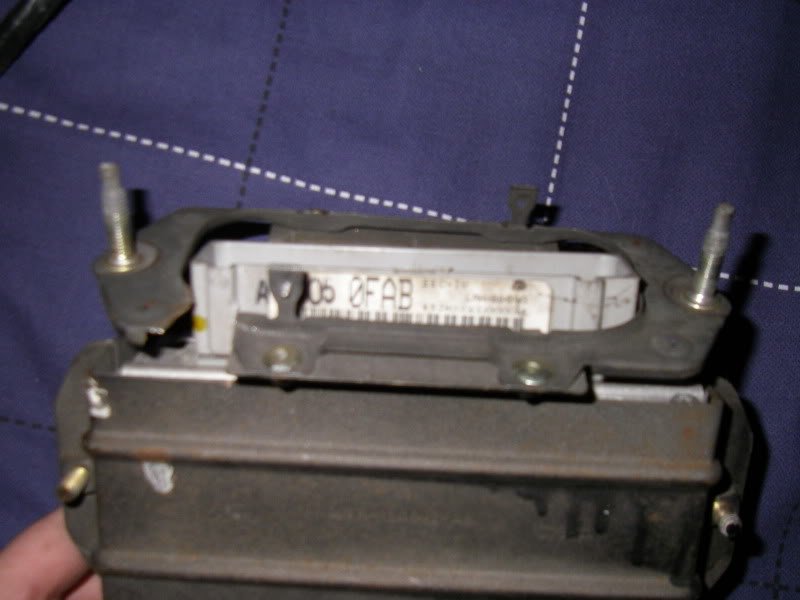
fiesta turbo ofab ecu
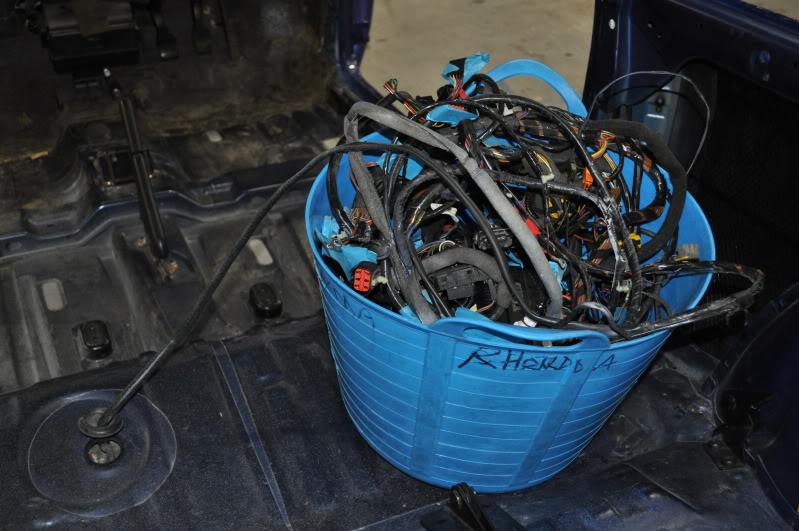
wiring loom, looks scary

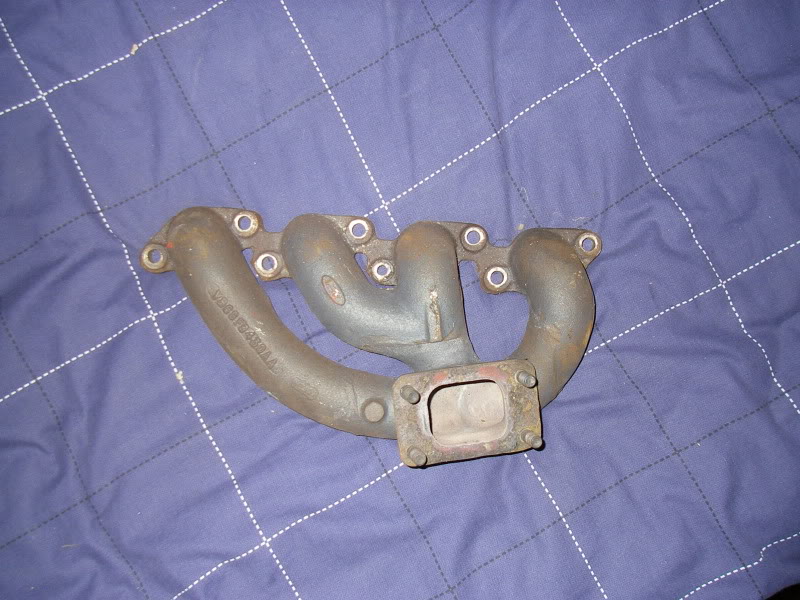
S2 escort turbo T3 manifold
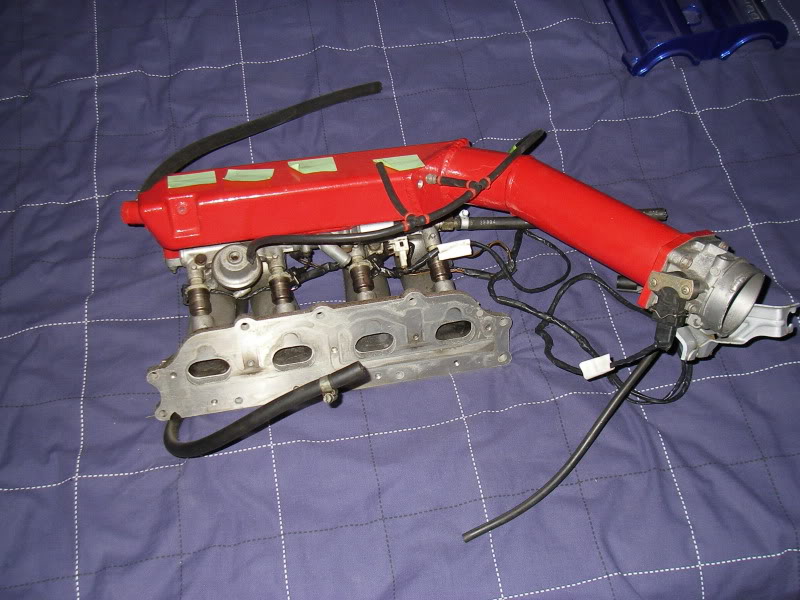
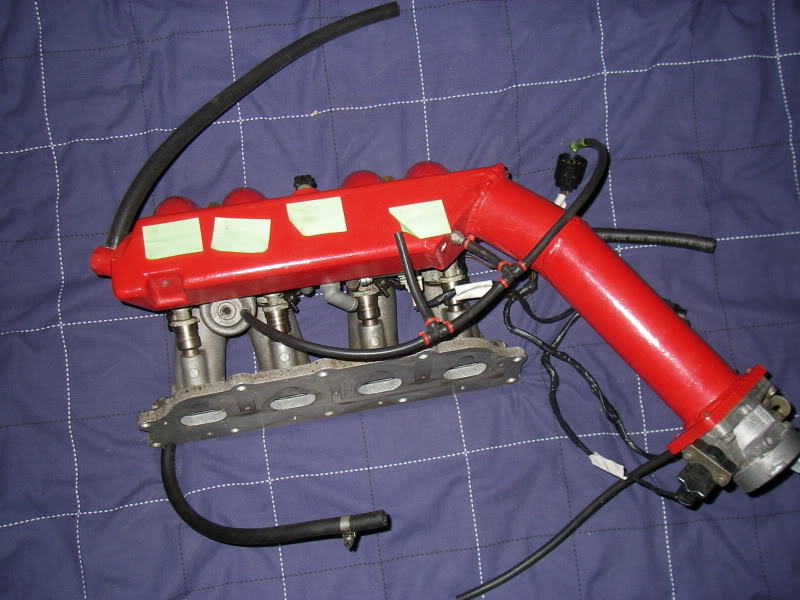
rover turbo M16 inlet manfold,
adapted to fit the zetec by area six
fiesta turbo throttle body
fiesta turbo iscv
ahmed bayjoo spec injectors
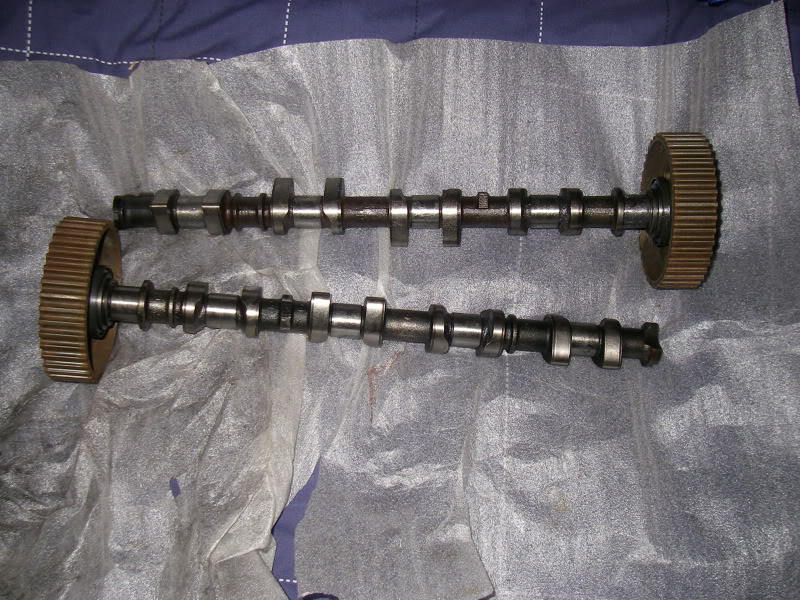
area six spec cams
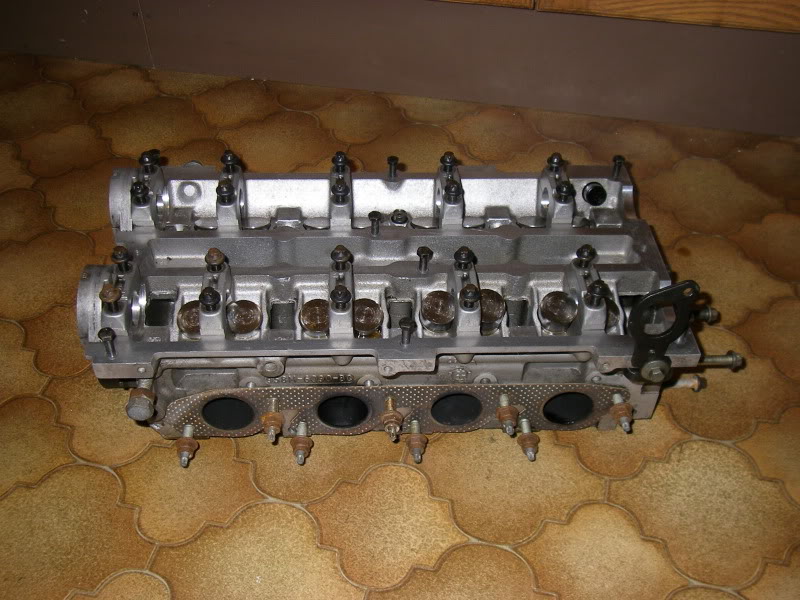
area six modified zetec head
head taped to fit S2 escort manifold
ported by area six
ian / area six gave me a list of things to get
so i can take them when i drop the engine in for inspection and to discuss a plan of action
also i've bought bits which will help the engine to look new
all i can say i'm very thankfull for employee discount
some pics
sump bolts,
stem seals (inlet red - exhaust green)
flywheel dowels x3
focus rs spark plugs x4
zetec headbolts x10
flywheel bolts x6
sump gasket
camshaft seals
rocker cover gasket
oil pump seal and gasket
inlet manifold gasket
and then two head gaskets
one being a focus rs headgasket as i read this would be needed about a year ago
only to learn once speaking to area six its no good for my engine
water pump and gasket
water pump pulley
oil pressure switch
cps sensor
middle and bottom parts of the timing belt cover, as i have a clear top section
ford timing belt kit
heres some parts i have ready for the new engine aswell
my spare cam cover sprayed the same colour as the car, with the letters polished then laquer'd over
fiesta turbo ofab ecu
wiring loom, looks scary
S2 escort turbo T3 manifold
rover turbo M16 inlet manfold,
adapted to fit the zetec by area six
fiesta turbo throttle body
fiesta turbo iscv
ahmed bayjoo spec injectors
area six spec cams
area six modified zetec head
head taped to fit S2 escort manifold
ported by area six
 19-03-2010, 06:51 AM
#42
PassionFord Regular
Thread Starter
Join Date: Aug 2003
Posts: 457
Likes: 0
Received 0 Likes
on
0 Posts
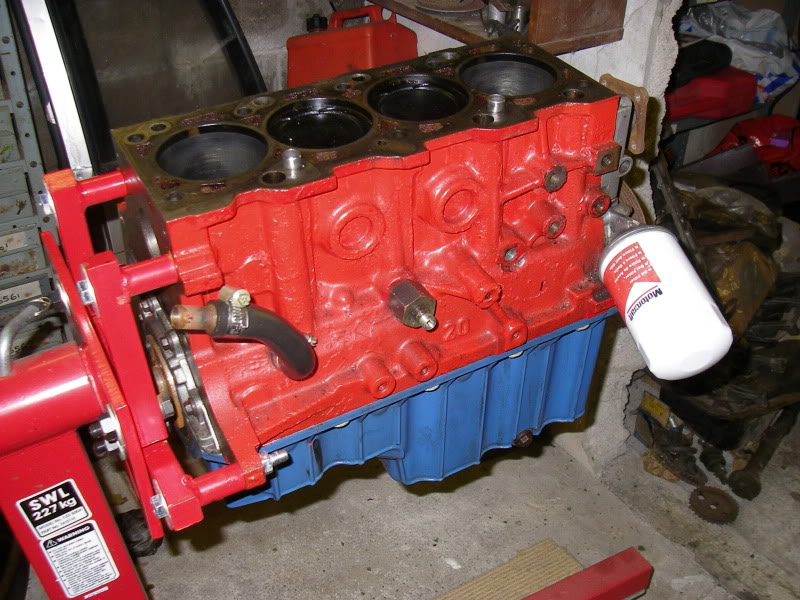
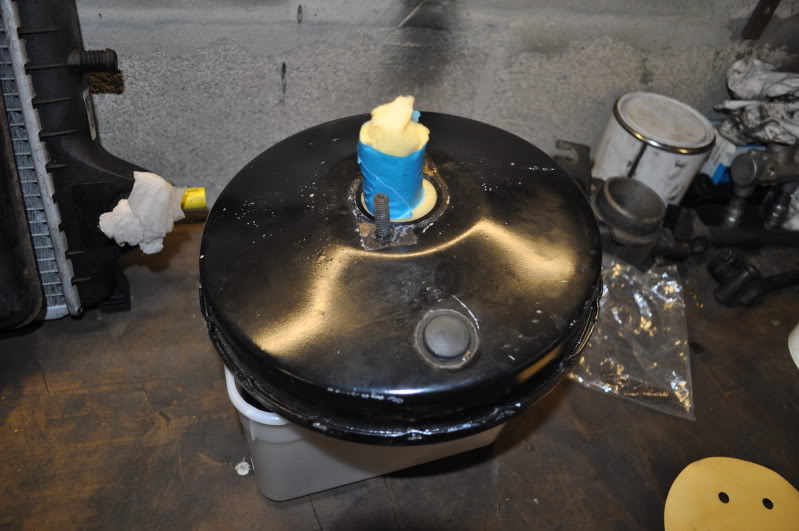
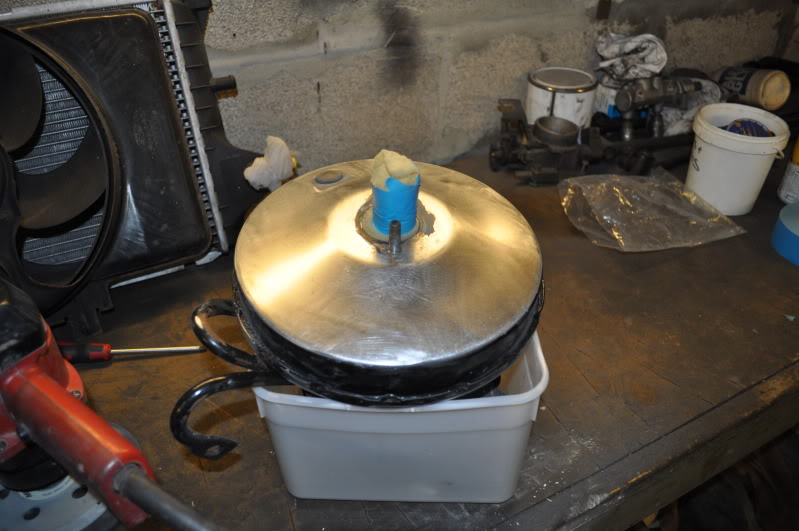
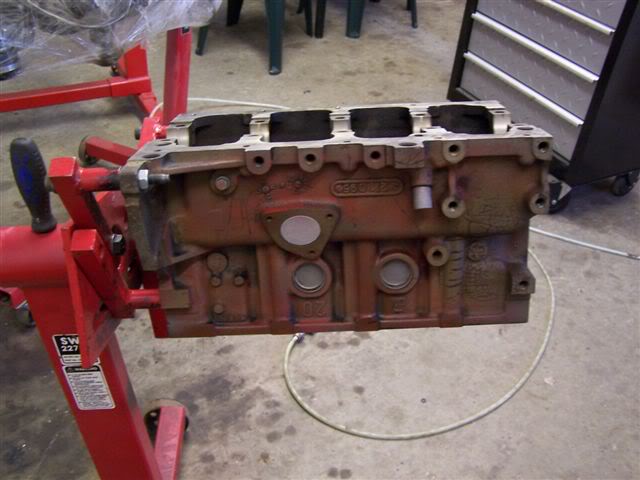
heres some pics of the block, excuse the colours, not my choice at all
heres the block upside down on the engine stand (front breather blocked off)
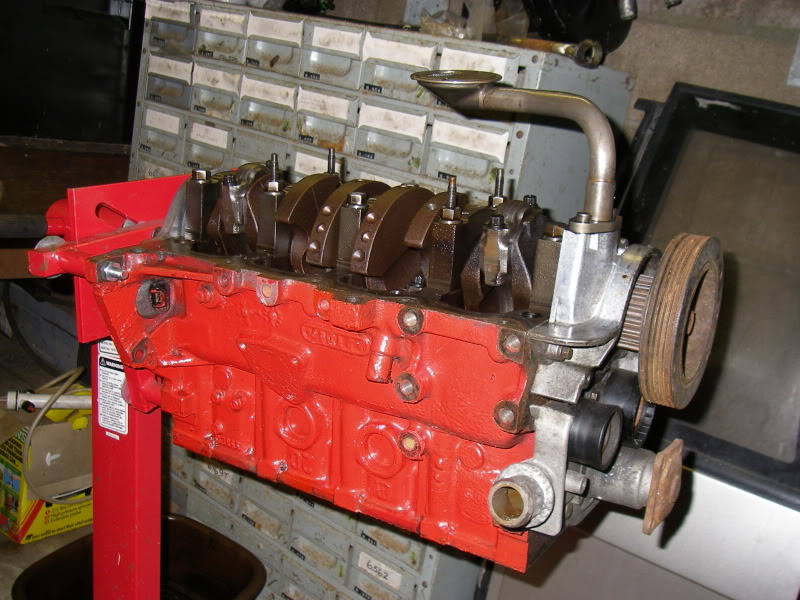
standard zetec rods with arp bolts
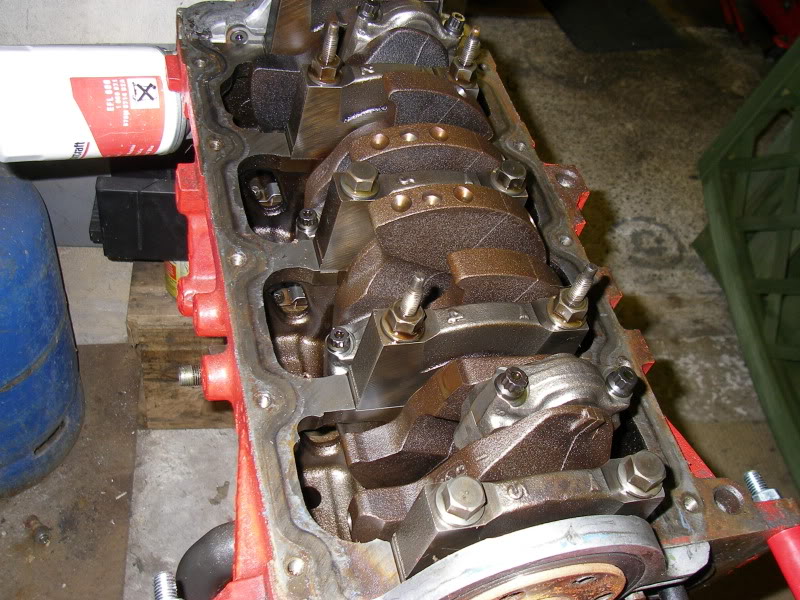
the forged pistons
sump back on, you can see the oil return from the turbo on the sump
the back of the block, showing the breather pipe relocated here also the oil feed for the turbo
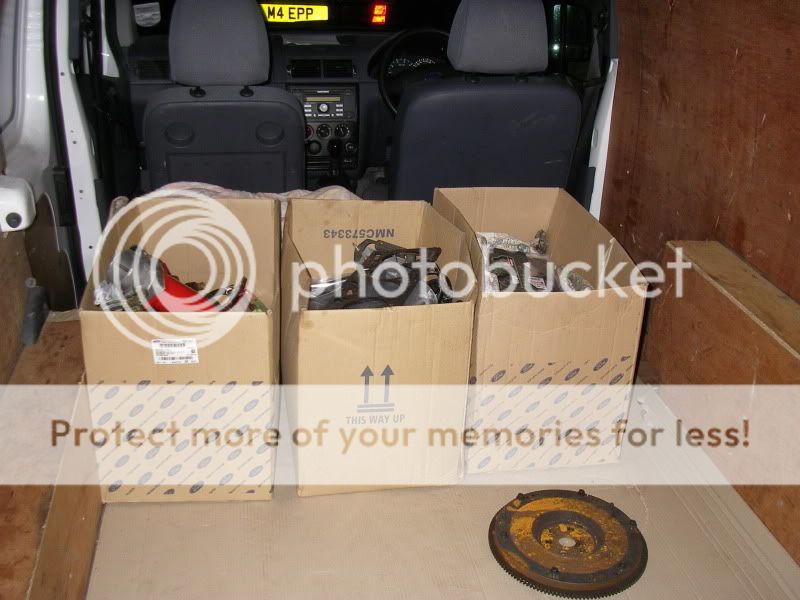
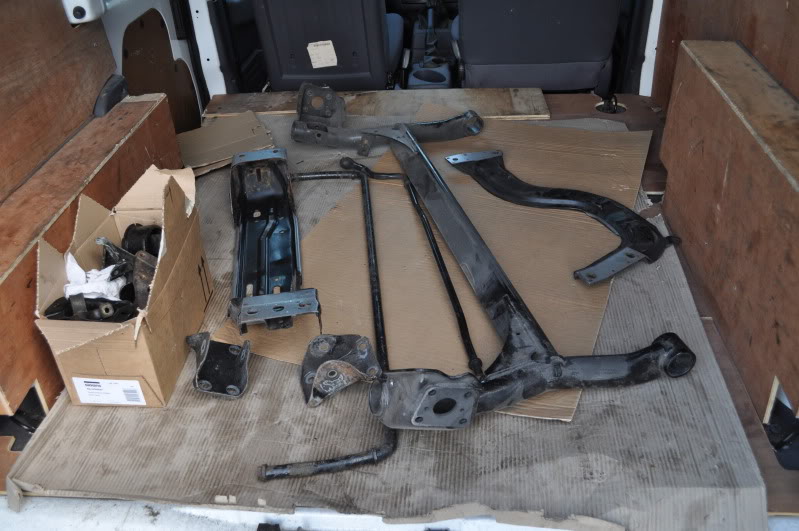
heres the van packed for the trip up to area six
you can also see the flywheel on its own
well the trip to see ian howell or AREA SIX
went really well, stripped the engine further and discussed plans
confirmed if parts were what i was told they were, such as cams being his spec etc
The overall plan is to freshen the engine up to a very standard
heres some of the things being done to the engine
- new valve guides as some of the originals had wear meaning the valve had play in the head
- new tappets , again signs of wear
- clean the valves up
- rehone the bores, possibly a rebore if needed depending on what ian's machine shop say
- crank is being polished
- all new bearings for the bottom end
- head having a fresh skim
- block is also having a fresh skim
- acid dipping the block
- adding an oil drain to the sump
- putting the whole engine back together with all new seals, gaskets, water pump etc
- also timing it up
decided to build the bottom end to a good spec incase i want more power in the future
so i'm having new forged pistons and steel rods with arp bolts (ian's spec of course)
so awaiting what happens with the bores first before the pistons and rods can be oredered
discovered the head has been machined for cossie plugs which is a good thing as they have a much wider range of spark plugs for the cossie lump, which means we can choose a better suited plug which runs at a certain temperatures which is suited to certain boost/power.
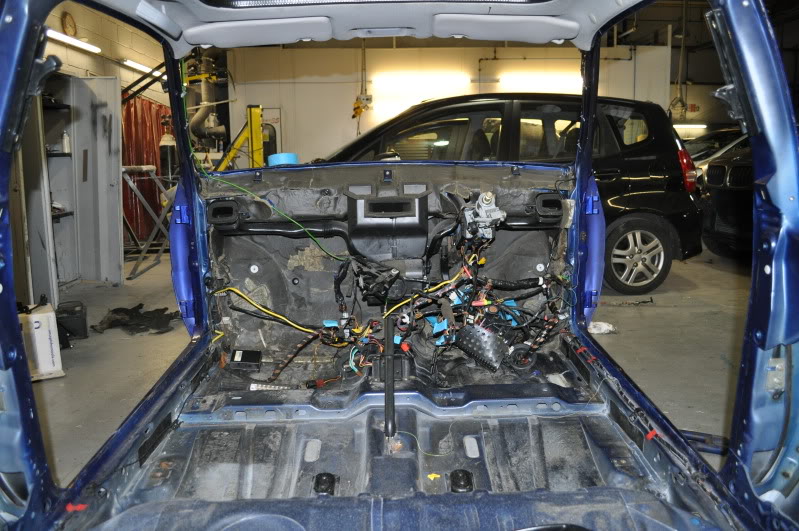
ian also had a look at my loom which i was dreading as it looked a nightmare, much to my suprise he disconnected the bits i did'nt need and helped me lable all the connectors
the loom went from this
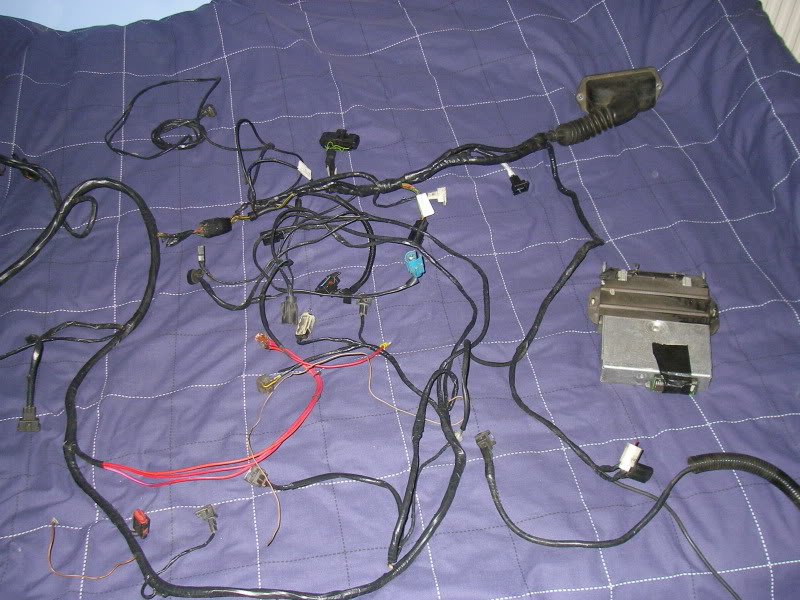
to this, much happier
the parts with the green and yellow tape are not needed as their either diagnostic ports
or parts from the fiesta turbo loom which basically just are not used
i plan to tidy the loom up later on, but before i cut anything i want to make sure the engine runs first

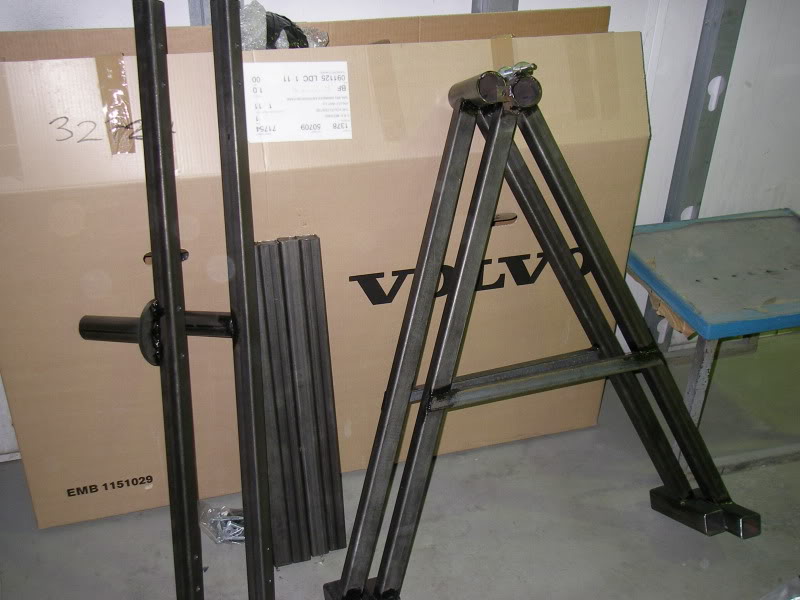
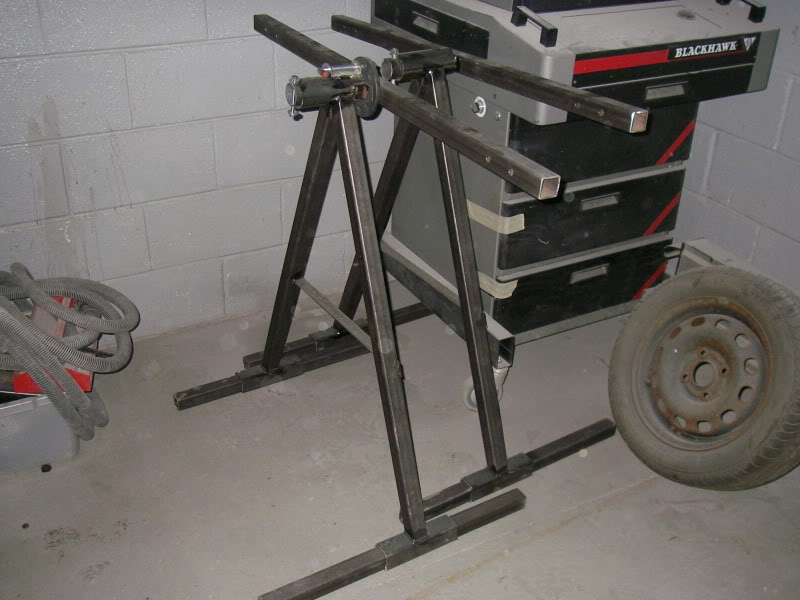
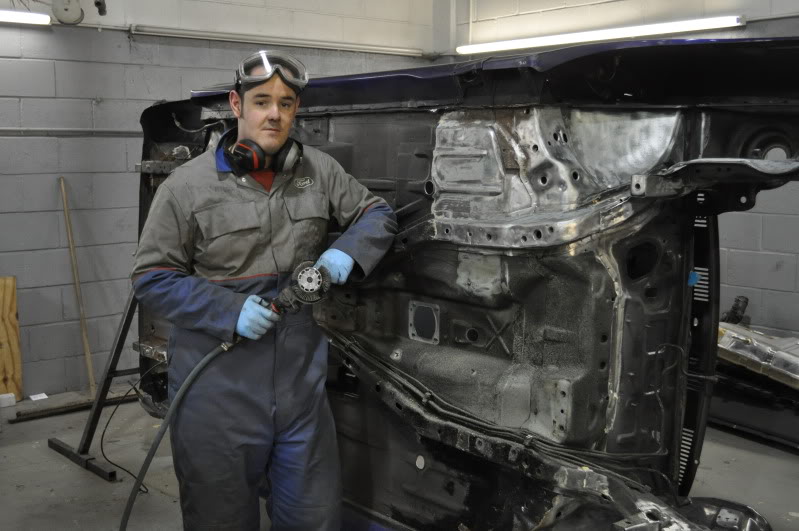
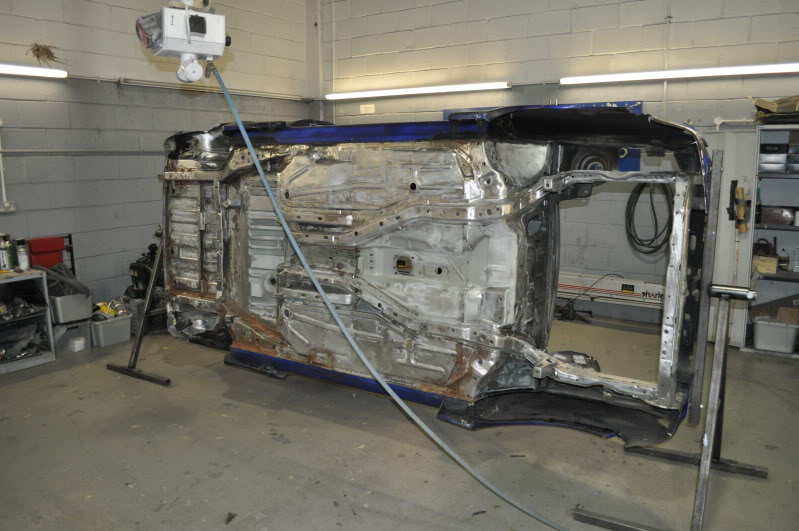
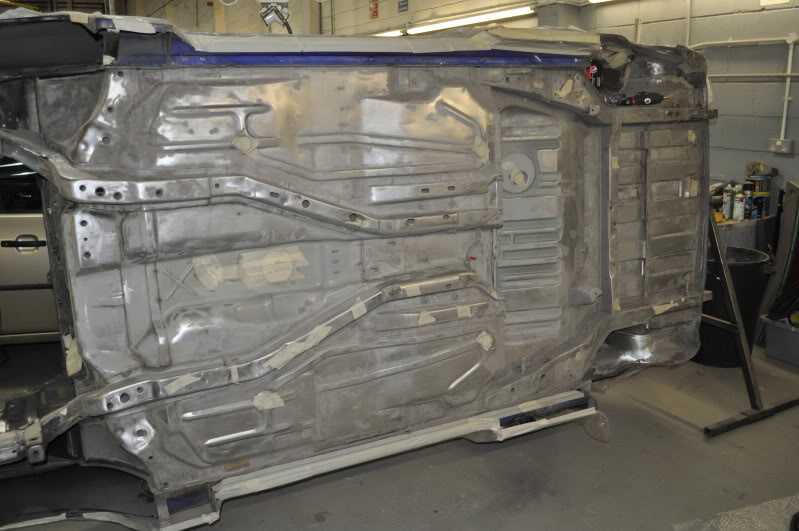
also my car spit arrived in work, which will allow me to have my car on its side
making it easier to prep the underneath
heres the block upside down on the engine stand (front breather blocked off)
standard zetec rods with arp bolts
the forged pistons
sump back on, you can see the oil return from the turbo on the sump
the back of the block, showing the breather pipe relocated here also the oil feed for the turbo
heres the van packed for the trip up to area six
you can also see the flywheel on its own
well the trip to see ian howell or AREA SIX
went really well, stripped the engine further and discussed plans
confirmed if parts were what i was told they were, such as cams being his spec etc
The overall plan is to freshen the engine up to a very standard
heres some of the things being done to the engine
- new valve guides as some of the originals had wear meaning the valve had play in the head
- new tappets , again signs of wear
- clean the valves up
- rehone the bores, possibly a rebore if needed depending on what ian's machine shop say
- crank is being polished
- all new bearings for the bottom end
- head having a fresh skim
- block is also having a fresh skim
- acid dipping the block
- adding an oil drain to the sump
- putting the whole engine back together with all new seals, gaskets, water pump etc
- also timing it up
decided to build the bottom end to a good spec incase i want more power in the future
so i'm having new forged pistons and steel rods with arp bolts (ian's spec of course)
so awaiting what happens with the bores first before the pistons and rods can be oredered
discovered the head has been machined for cossie plugs which is a good thing as they have a much wider range of spark plugs for the cossie lump, which means we can choose a better suited plug which runs at a certain temperatures which is suited to certain boost/power.
ian also had a look at my loom which i was dreading as it looked a nightmare, much to my suprise he disconnected the bits i did'nt need and helped me lable all the connectors
the loom went from this
to this, much happier
the parts with the green and yellow tape are not needed as their either diagnostic ports
or parts from the fiesta turbo loom which basically just are not used
i plan to tidy the loom up later on, but before i cut anything i want to make sure the engine runs first
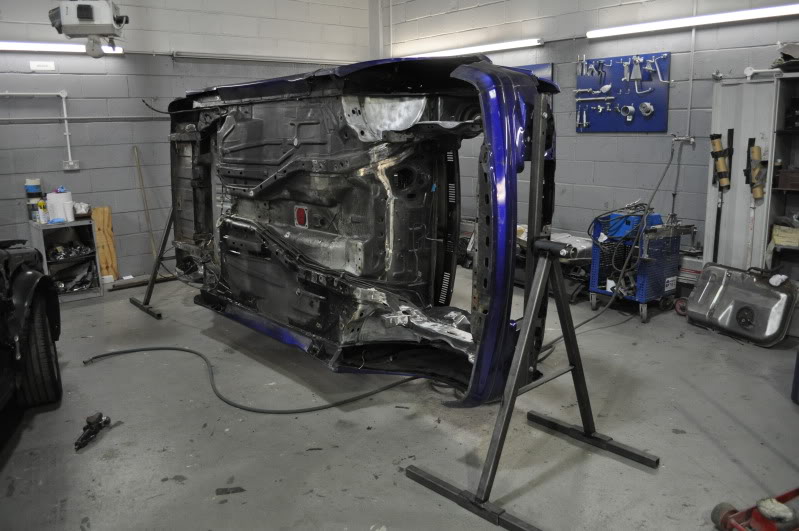
also my car spit arrived in work, which will allow me to have my car on its side
making it easier to prep the underneath
19-03-2010, 06:56 AM
#43
PassionFord Regular
Thread Starter
Join Date: Aug 2003
Posts: 457
Likes: 0
Received 0 Likes
on
0 Posts
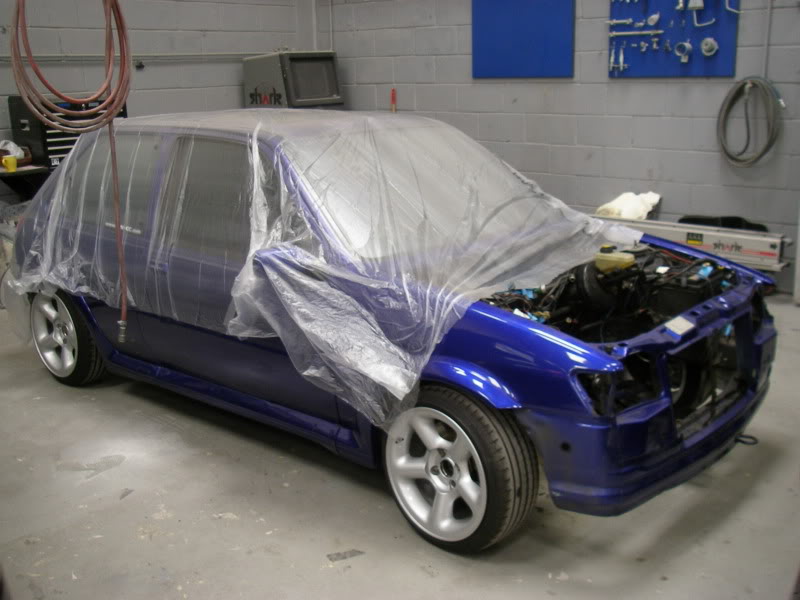
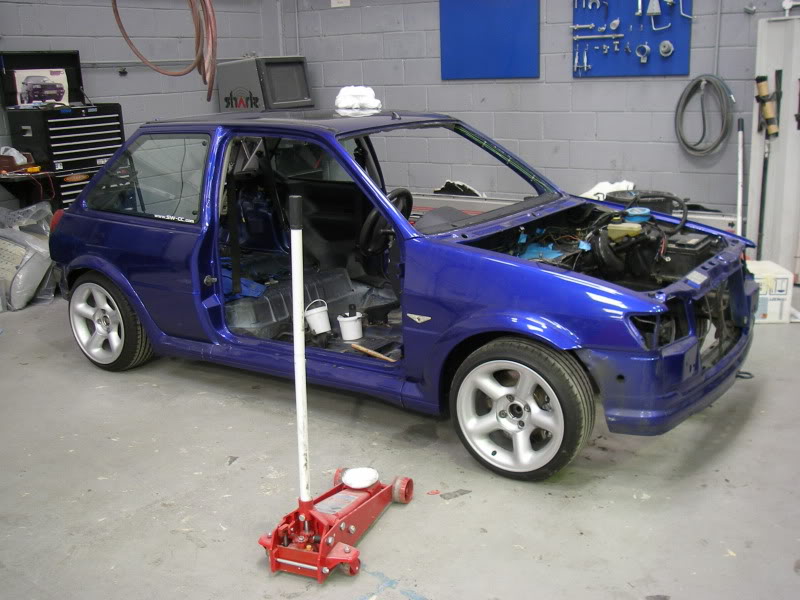
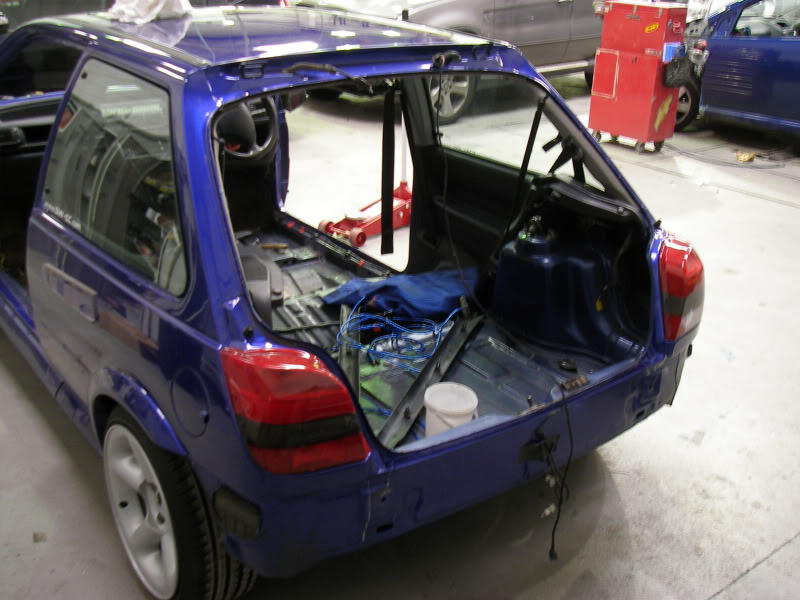
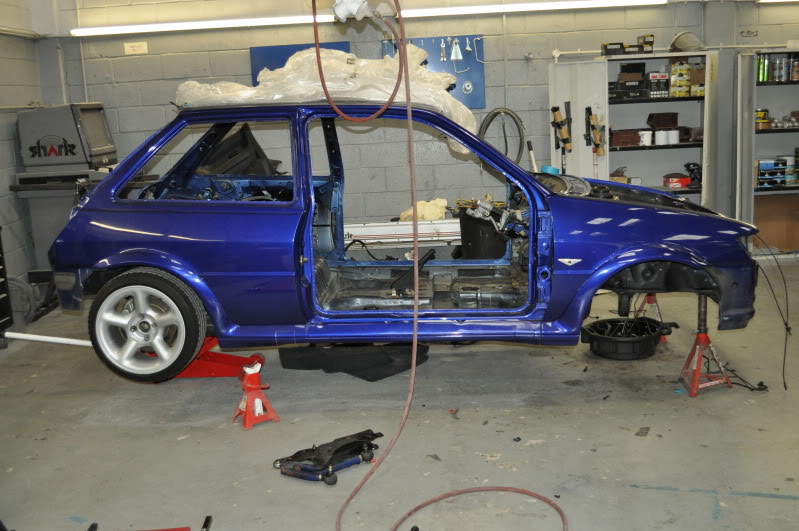
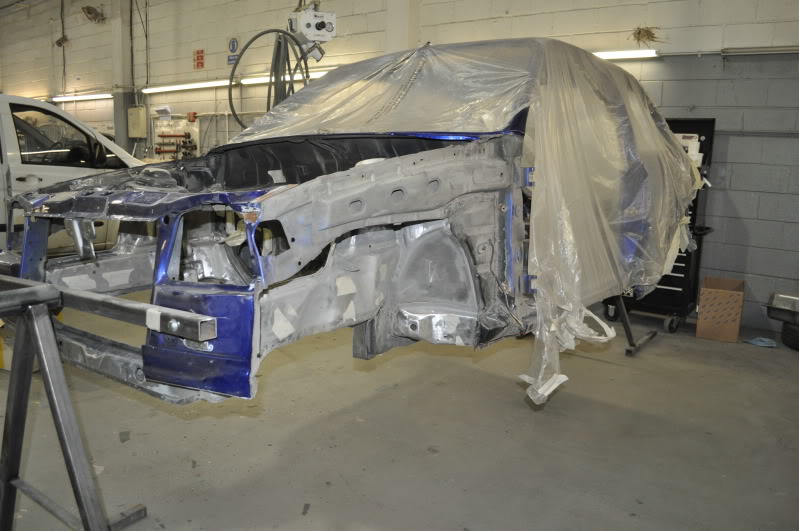
right so my plans are to have the fiesta bay stripped and painted
also got a few other plans aswell such as relocating the battery to the boot to make more room in the engine bay
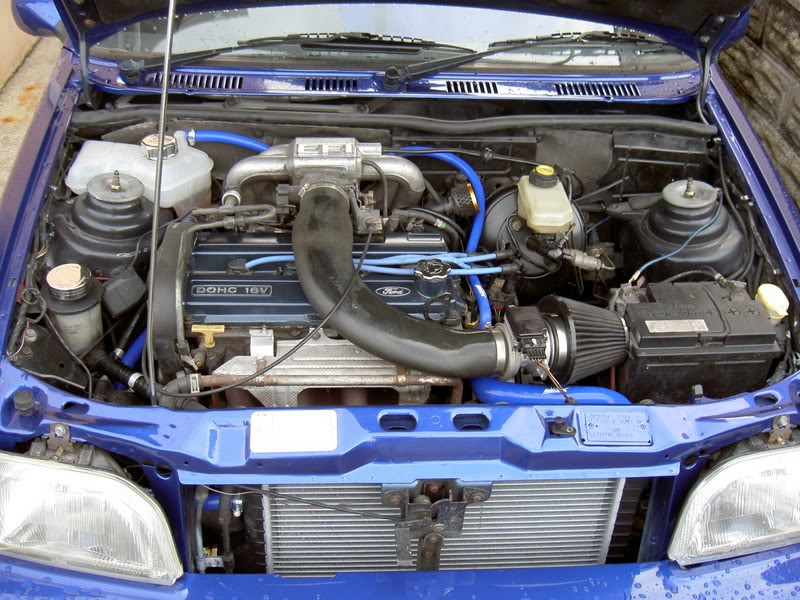
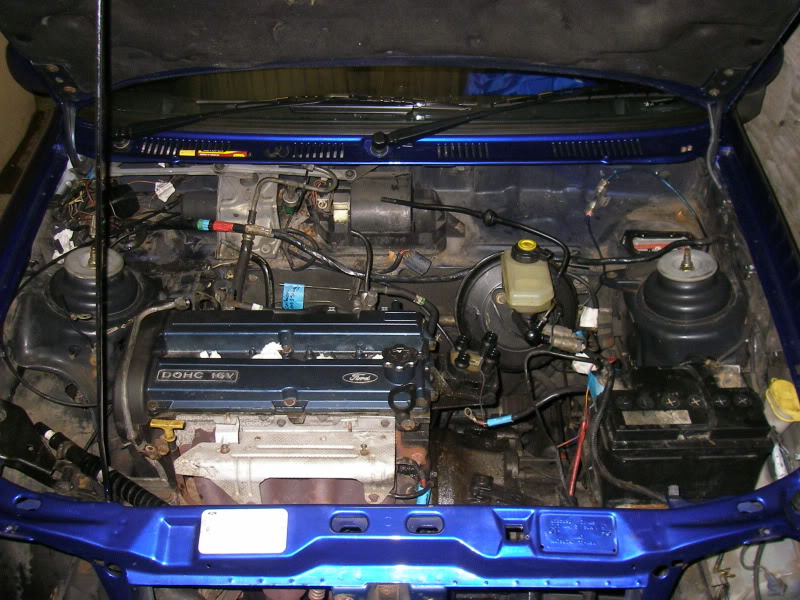
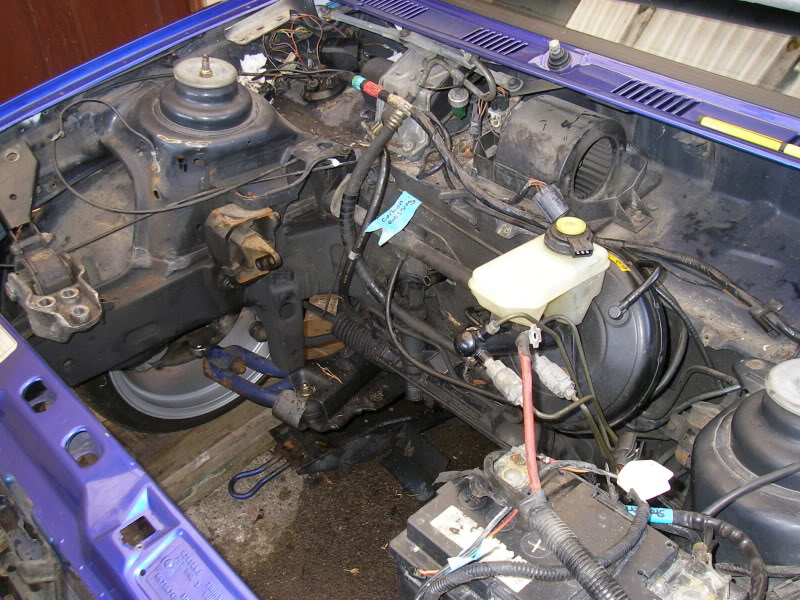
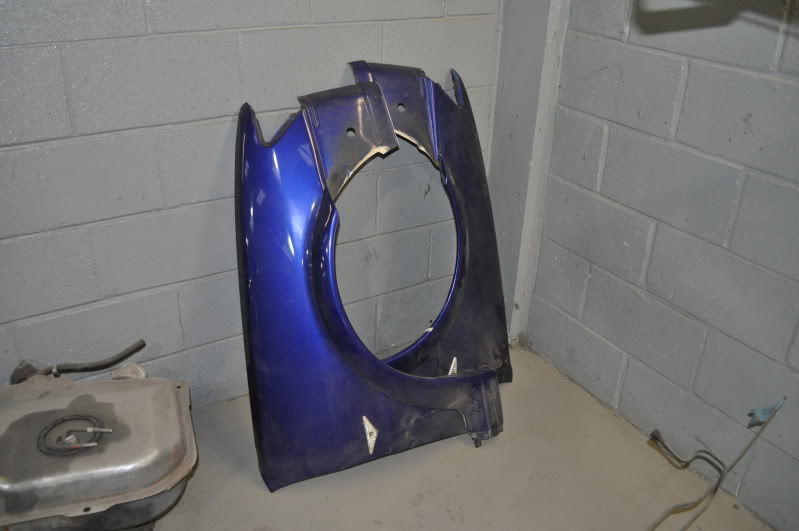
so the old engine
originally a 1.8 16v 105 ps engine
rs1800 130ps spec throttle body, cams, ecu, maf sensor
only thing i was missing from the rs1800 was the 'HO' inlet manifold (high output - stamped on the back)
but still made 129bhp the last time it was on the rollers, i think it could of been more with the proper inlet
heres a pic
so the stripping began
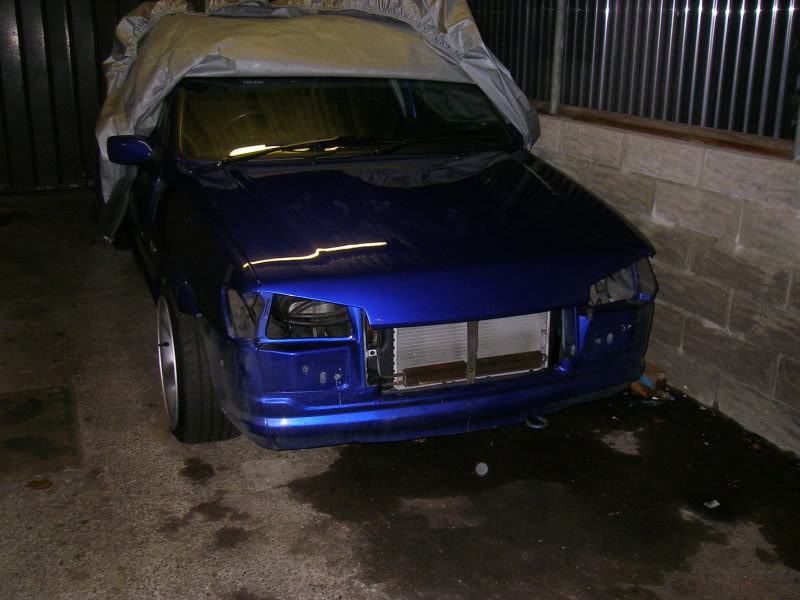
beefy cossie wheels
inlet off, rear firewall out, engine loom out
rad out, thermo stat off, power steering rad out
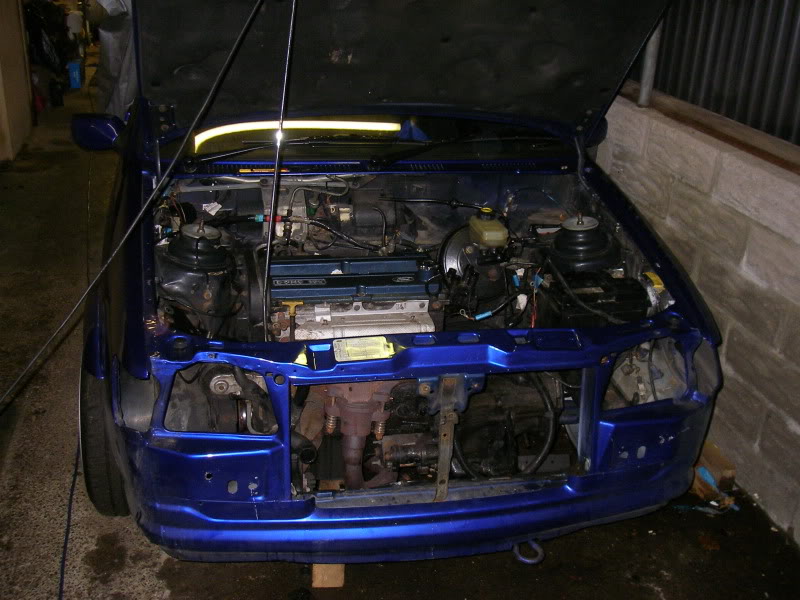
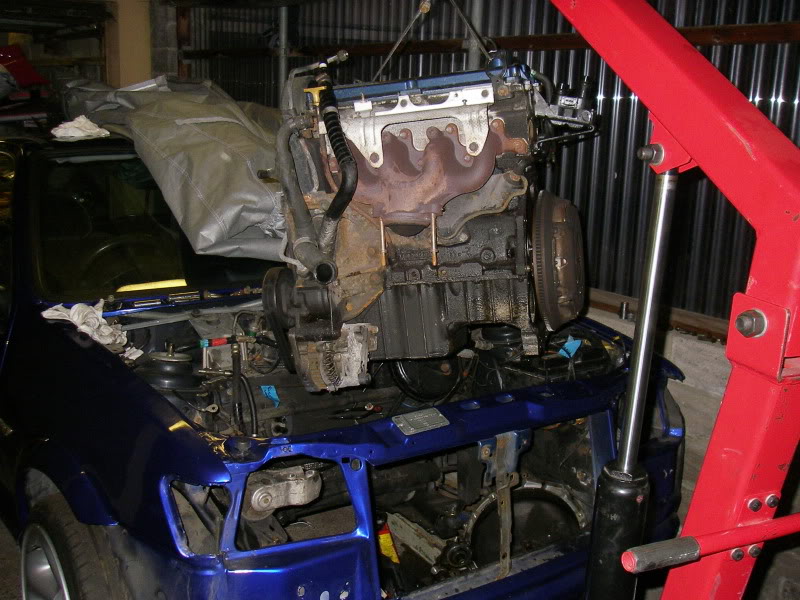
so the engine was ready to come out,
was very happy to see this come out, its been a good engine to me but
its time to move on to better things
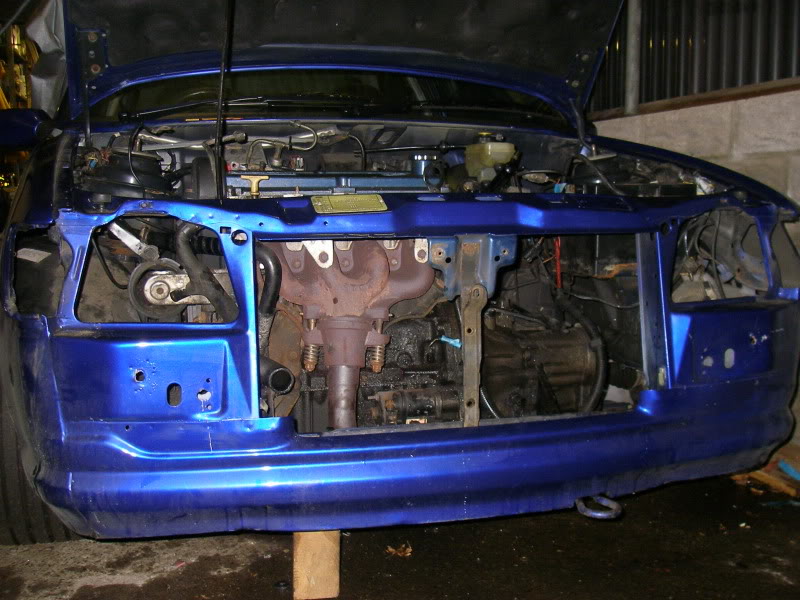
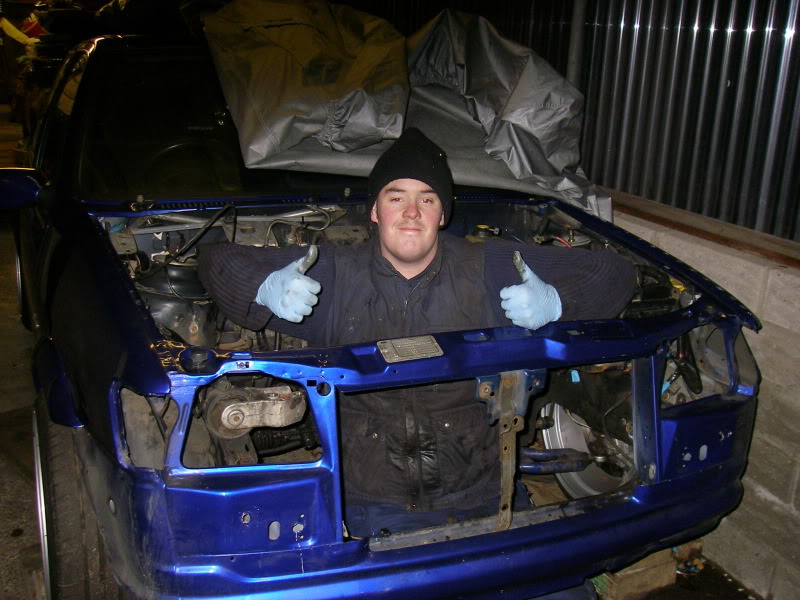
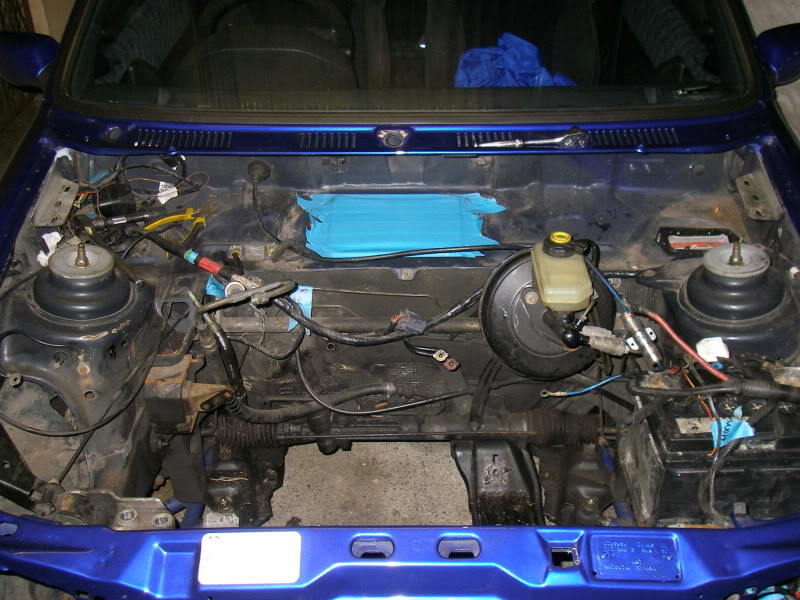
always wanted to have the legendary photo in the engine bay
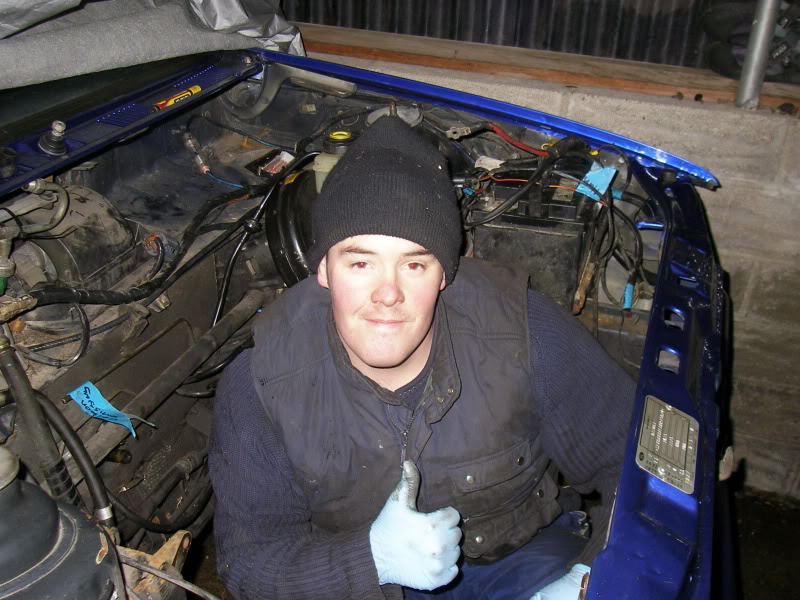
my old man was helping me at times, so had to get a picture with him haha

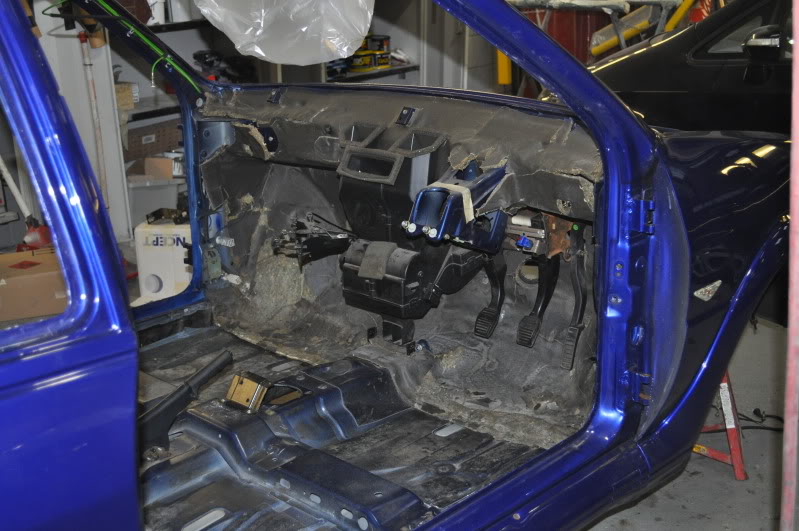
alot more room, but still lots to take out, but wanted to leave it so that i can still steer etc
as i have to move the car for the next stage
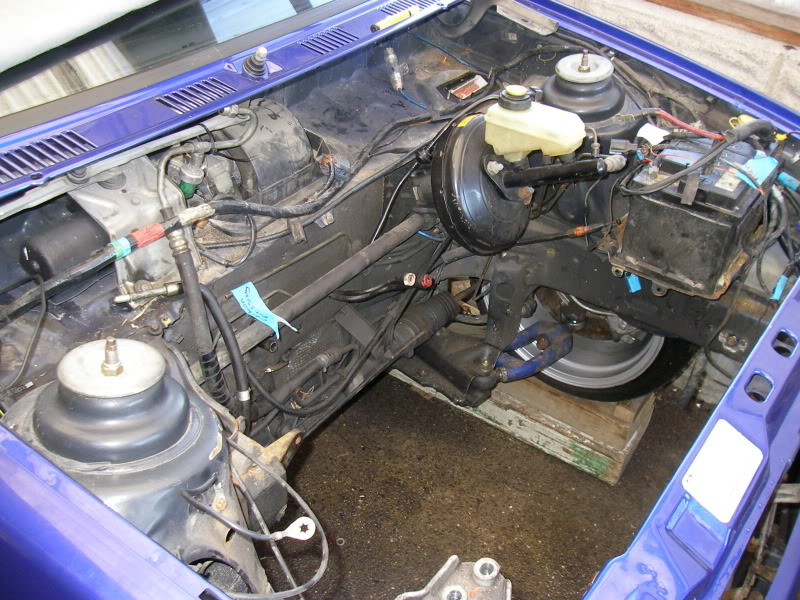
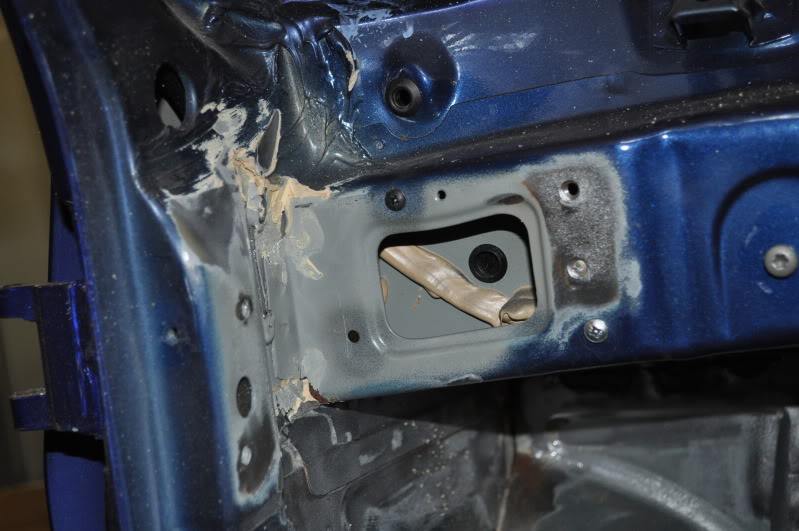
wiper linkage and motor out, heater fan unit out
taped up the hole so nothing falls inside the heater unit for now
also got a few other plans aswell such as relocating the battery to the boot to make more room in the engine bay
so the old engine
originally a 1.8 16v 105 ps engine
rs1800 130ps spec throttle body, cams, ecu, maf sensor
only thing i was missing from the rs1800 was the 'HO' inlet manifold (high output - stamped on the back)
but still made 129bhp the last time it was on the rollers, i think it could of been more with the proper inlet
heres a pic
so the stripping began
beefy cossie wheels
inlet off, rear firewall out, engine loom out
rad out, thermo stat off, power steering rad out
so the engine was ready to come out,
was very happy to see this come out, its been a good engine to me but
its time to move on to better things
always wanted to have the legendary photo in the engine bay
my old man was helping me at times, so had to get a picture with him haha
alot more room, but still lots to take out, but wanted to leave it so that i can still steer etc
as i have to move the car for the next stage
wiper linkage and motor out, heater fan unit out
taped up the hole so nothing falls inside the heater unit for now
19-03-2010, 06:57 AM
#44
PassionFord Regular
Thread Starter
Join Date: Aug 2003
Posts: 457
Likes: 0
Received 0 Likes
on
0 Posts
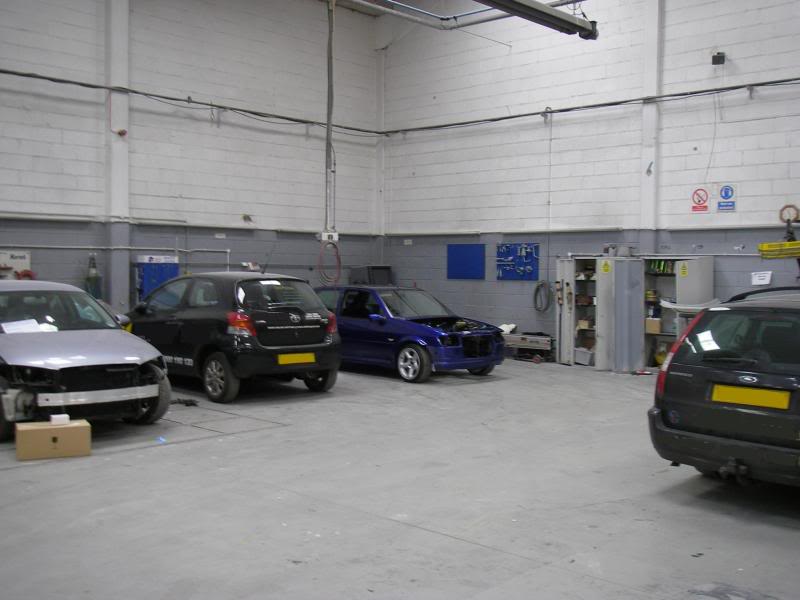
so i was up early to make room at work for the fiesta
was bloody cold as you can see my breathe
while i'm on the subject of the weather, i definutely did'nt pick the best week to take the engine out
as its been freezing everynight this week and even started snowing at one point.
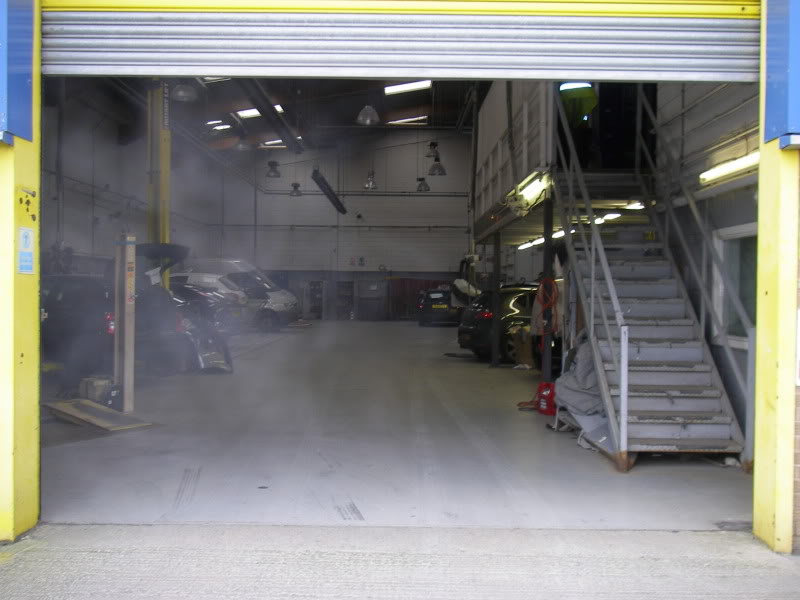
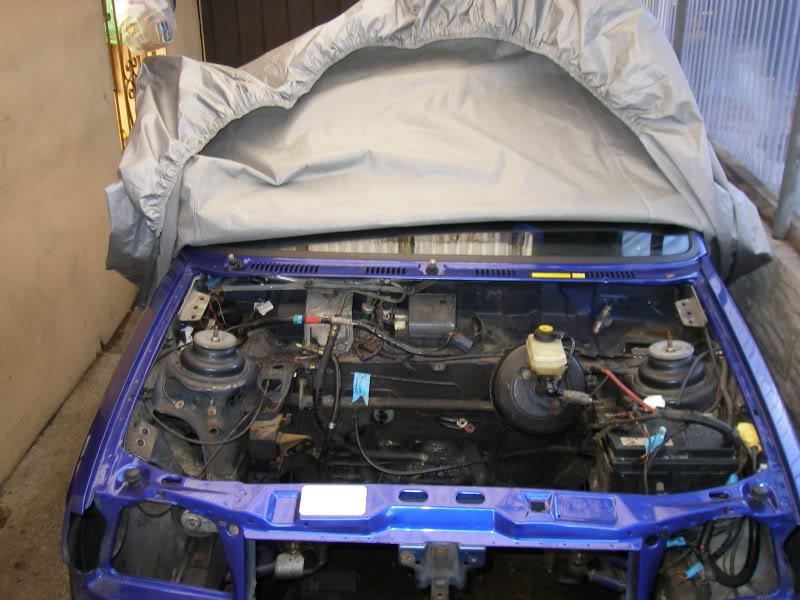
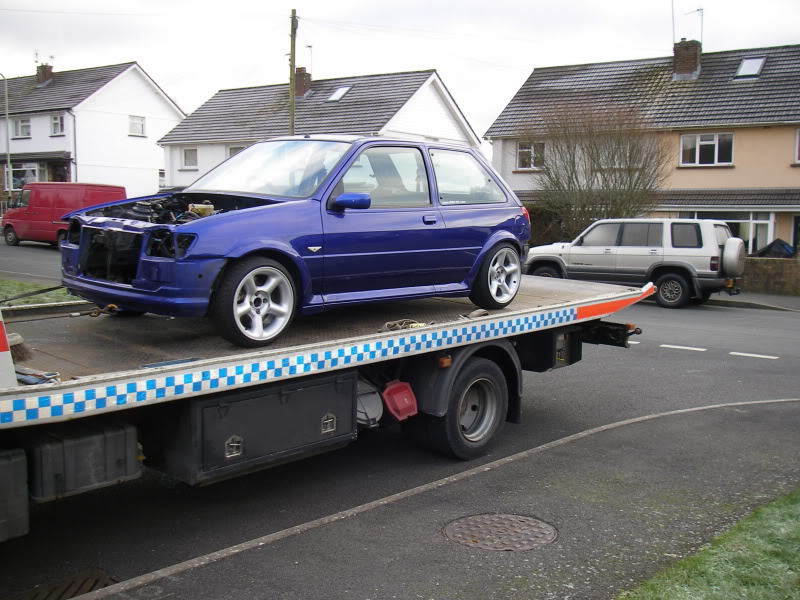
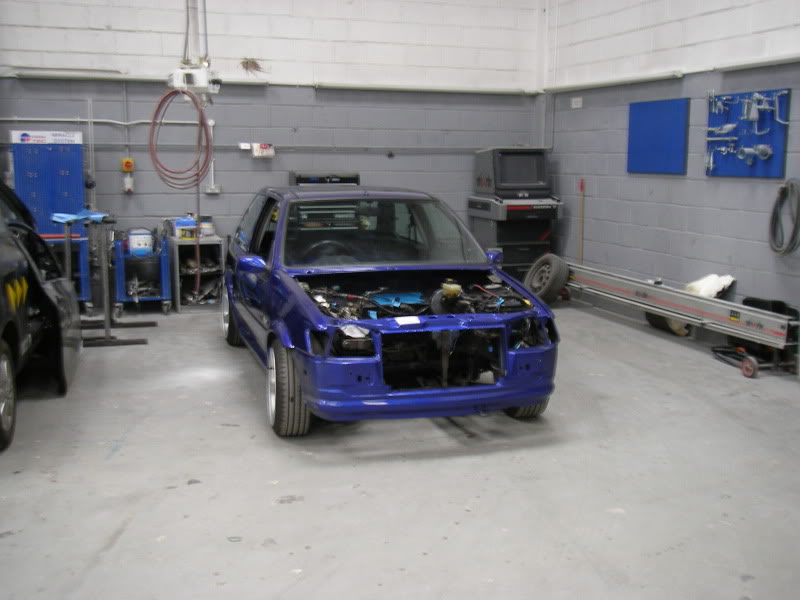
new home for a while
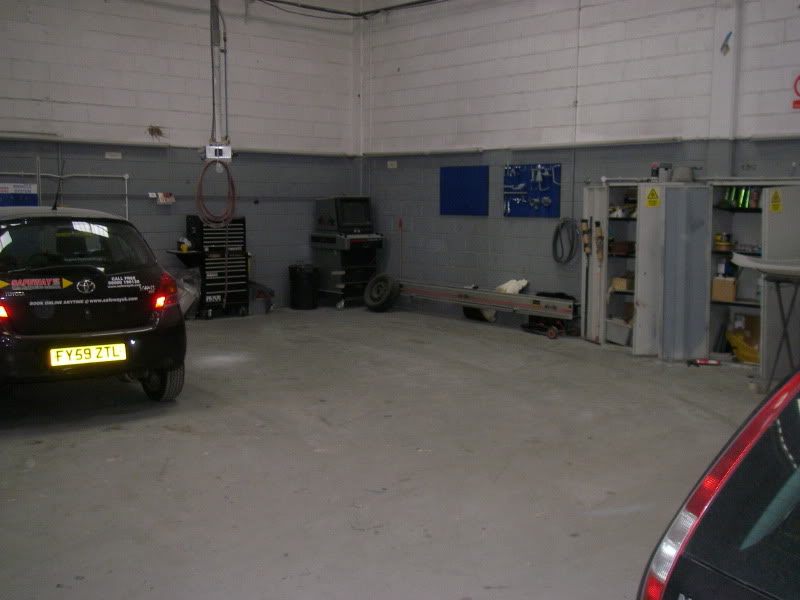
later on i had the car picked up from the house
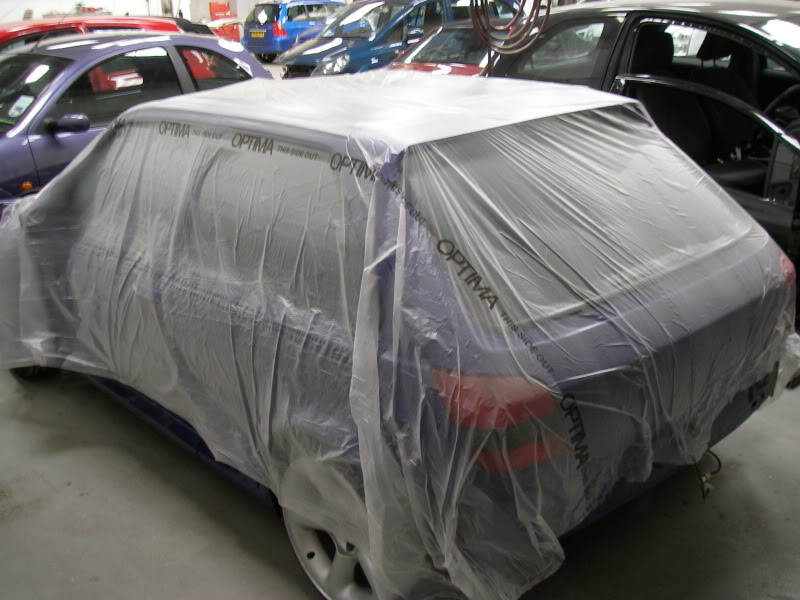
much better with more space, warmth, tools etc
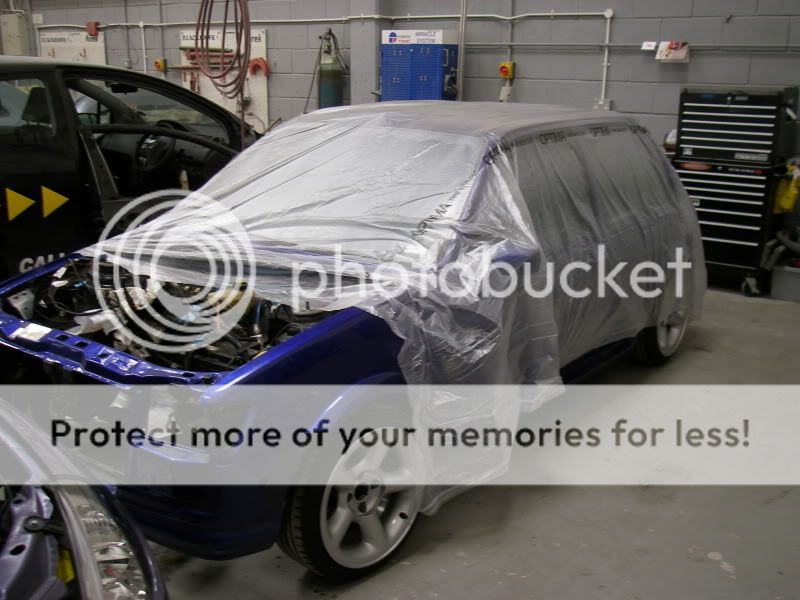
cover over the top as its a dusty place
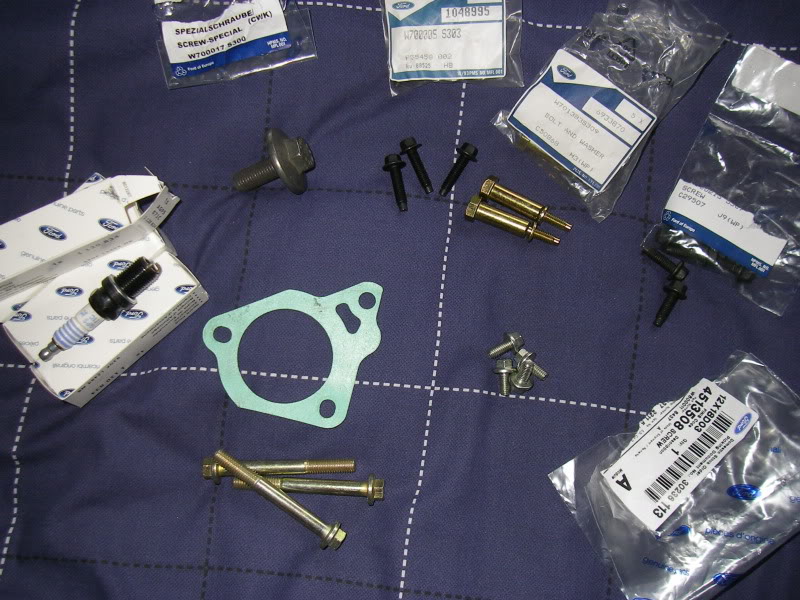
more parts including the following
-cossie spark plugs (ian told me which ones to get)
-thermostat housing bolts
-thermostat gasket
-crank pulley bolt (still waiting on a new crank pulley)
-waterpump pulley bolts
-timing belt cover bolts
was bloody cold as you can see my breathe
while i'm on the subject of the weather, i definutely did'nt pick the best week to take the engine out
as its been freezing everynight this week and even started snowing at one point.
new home for a while
later on i had the car picked up from the house
much better with more space, warmth, tools etc
cover over the top as its a dusty place
more parts including the following
-cossie spark plugs (ian told me which ones to get)
-thermostat housing bolts
-thermostat gasket
-crank pulley bolt (still waiting on a new crank pulley)
-waterpump pulley bolts
-timing belt cover bolts
19-03-2010, 07:01 AM
#45
PassionFord Regular
Thread Starter
Join Date: Aug 2003
Posts: 457
Likes: 0
Received 0 Likes
on
0 Posts
right i've got quite alot of parts ready for this new engine
aswell as the engine itself,
so let the pics begin
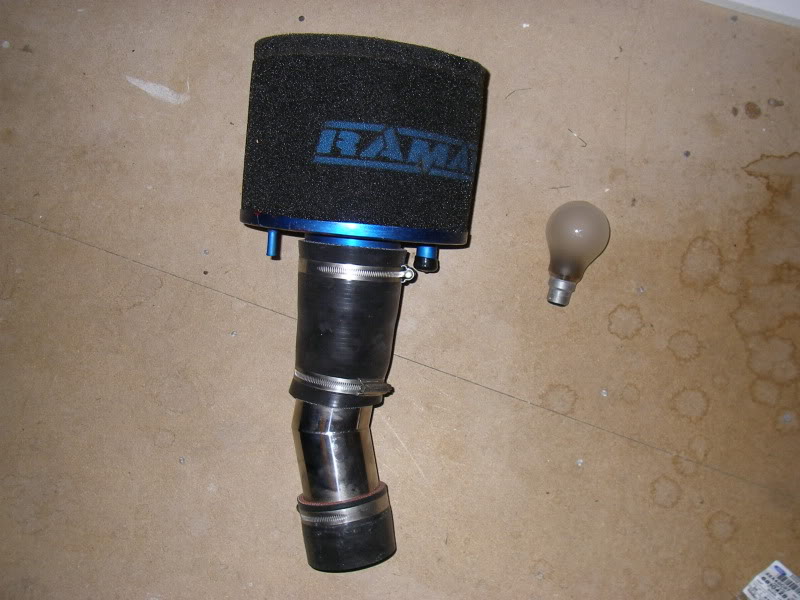
Cossie group A airfilter ( bulb was the only thing i could find, to help show the size)
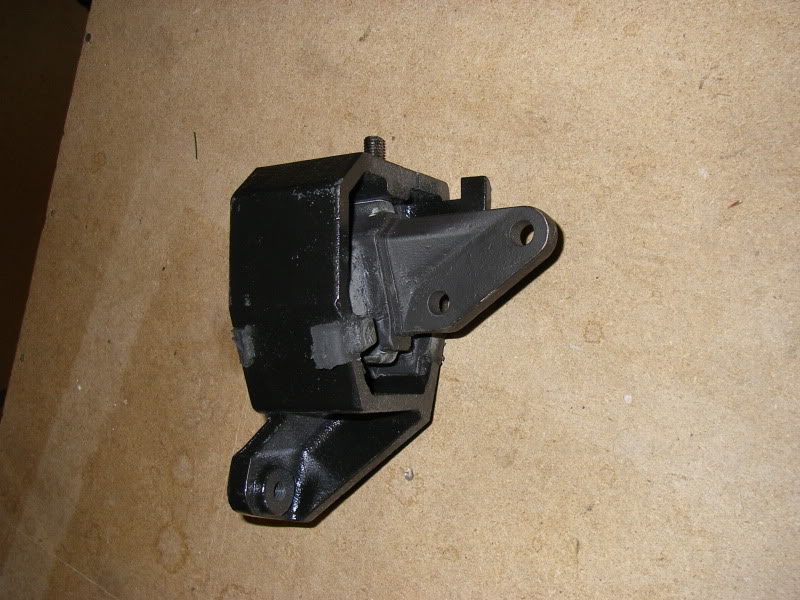
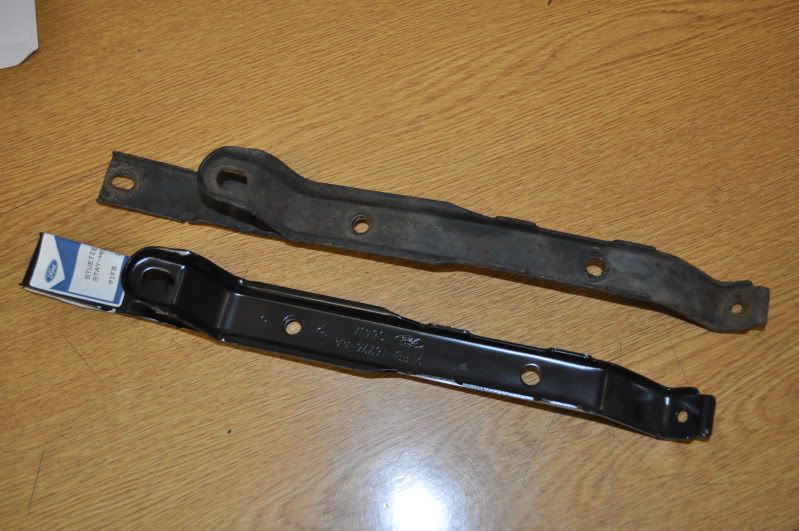
brand new ford rear engine mount
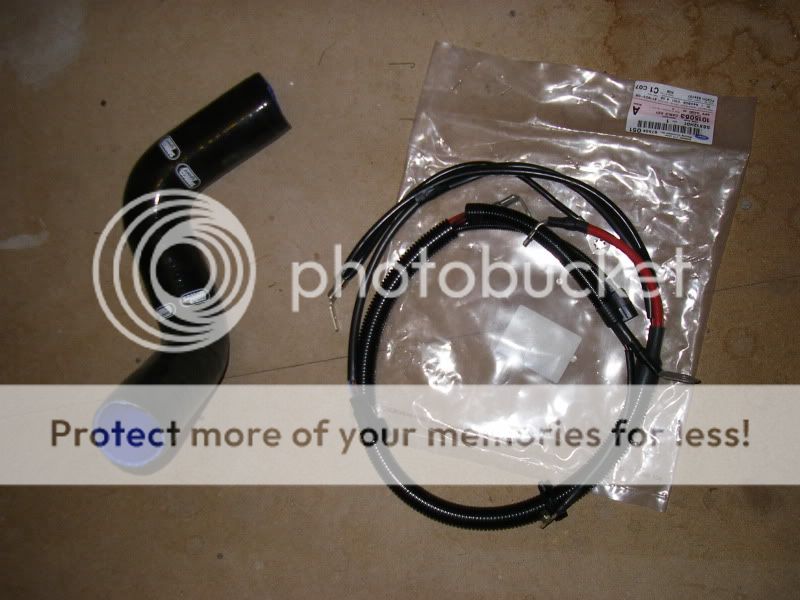
series two escort turbo lower boost pipe (samco)
new fords loom for between the alternator/starter/battery
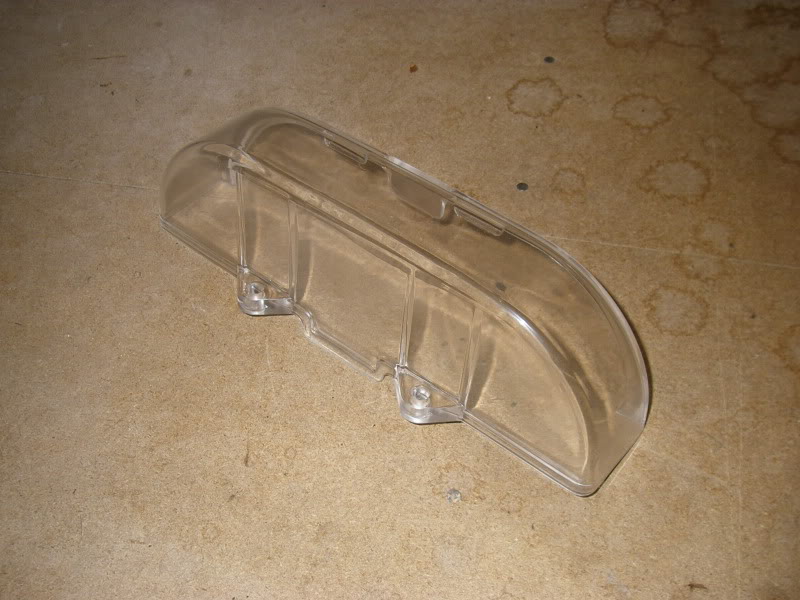
clear zetec top timing belt cover to go with the other new timing belt covers
(to show my vernier pulleys)
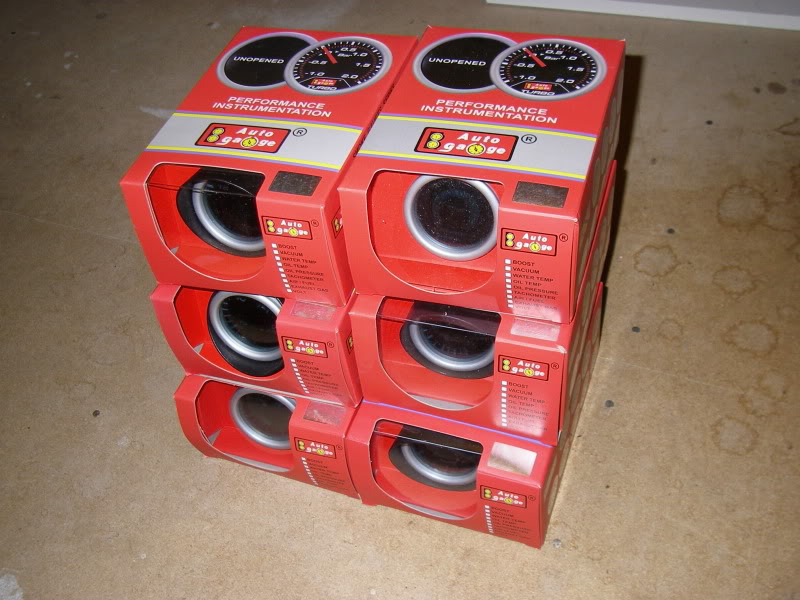
gauges, oil temp, oil pressure, water temp, boost, air/fuel ratio and volts
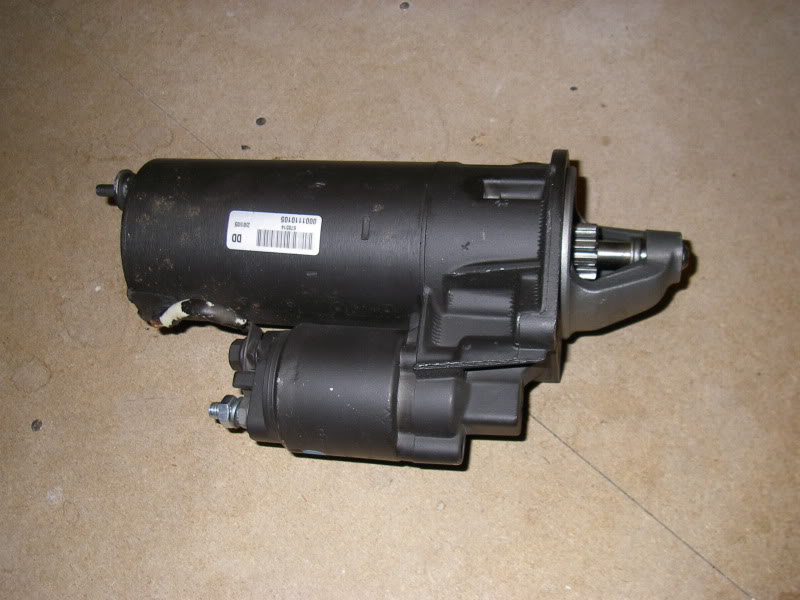
newly refurbed starter motor
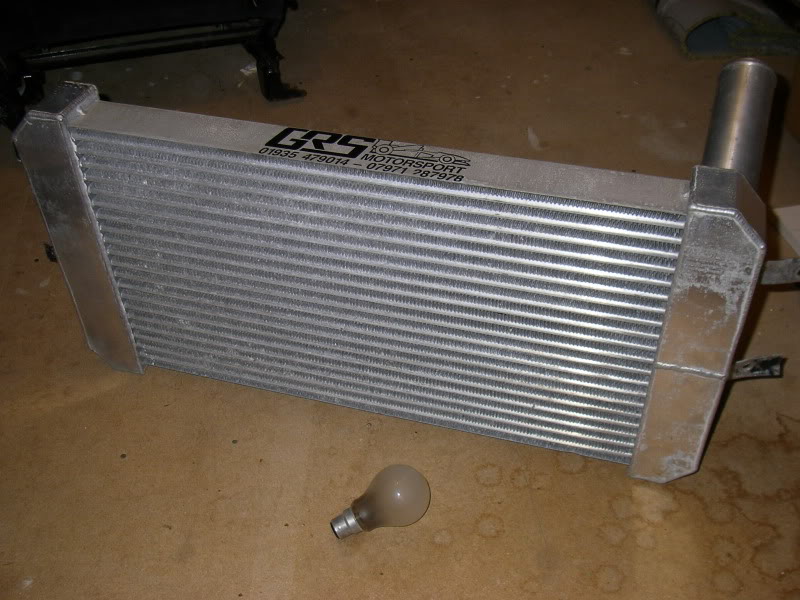
fiesta turbo GRS intercooler
planning to have this pressure checked and re-polished
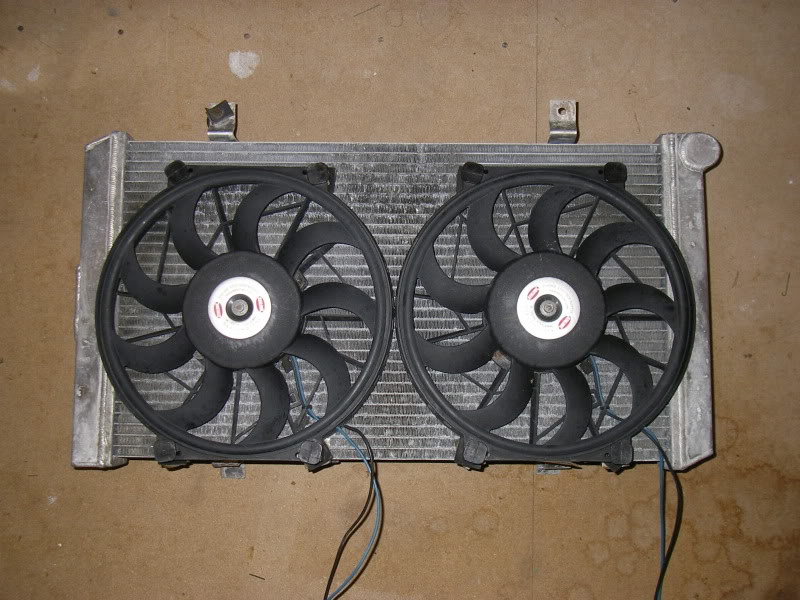
grs alloy rad with kenlowe slim fans
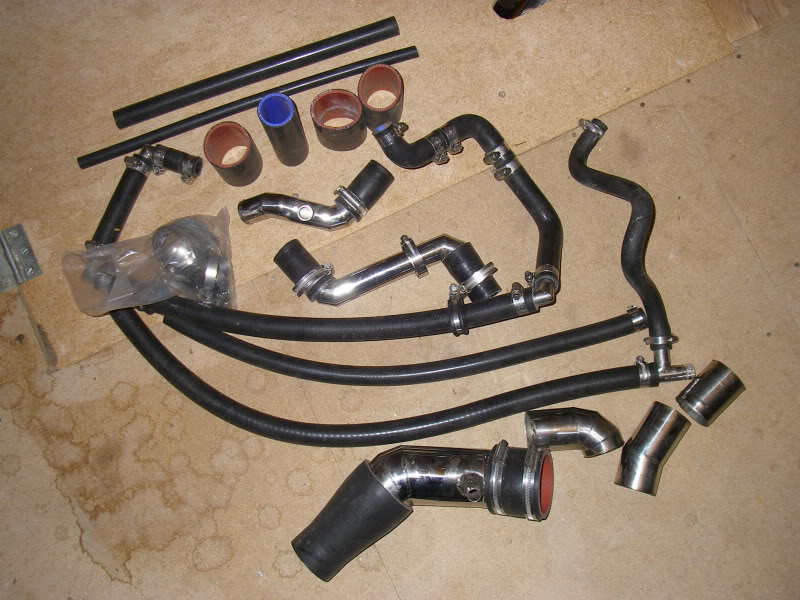
when i bought the engine i had a few extra bits aswell, silicone hose, metal pipework etc
(custom pipework from the throttlebody to the intercooler is at the bottom middle)
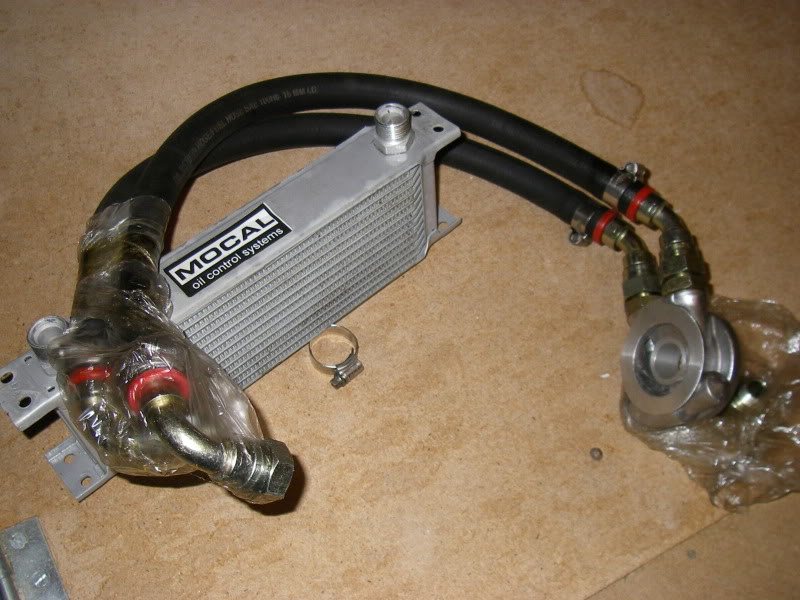
13 row mocal oil cooler
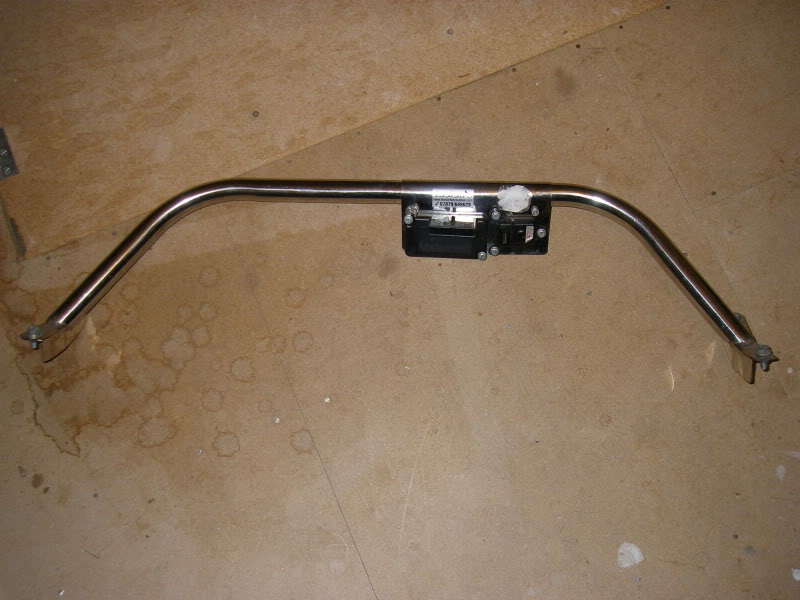
front strut brace with bracket holding the edis module and map sensor
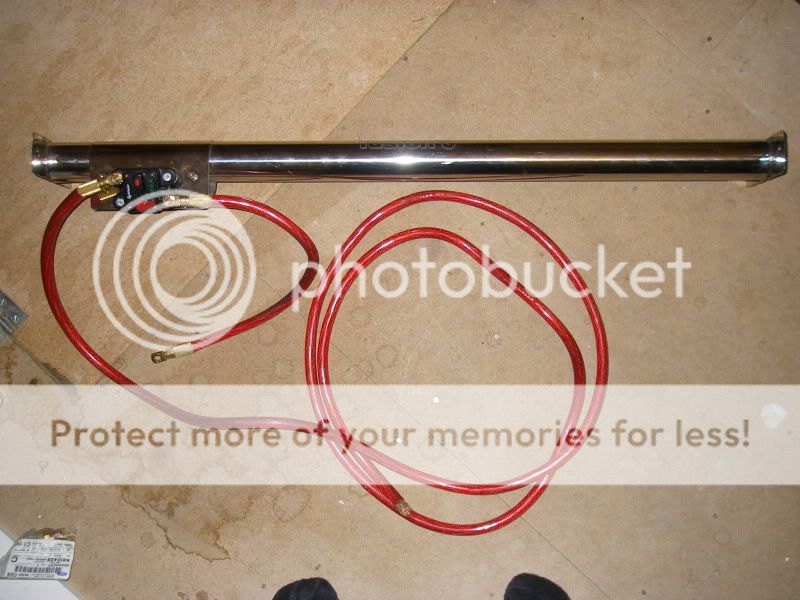
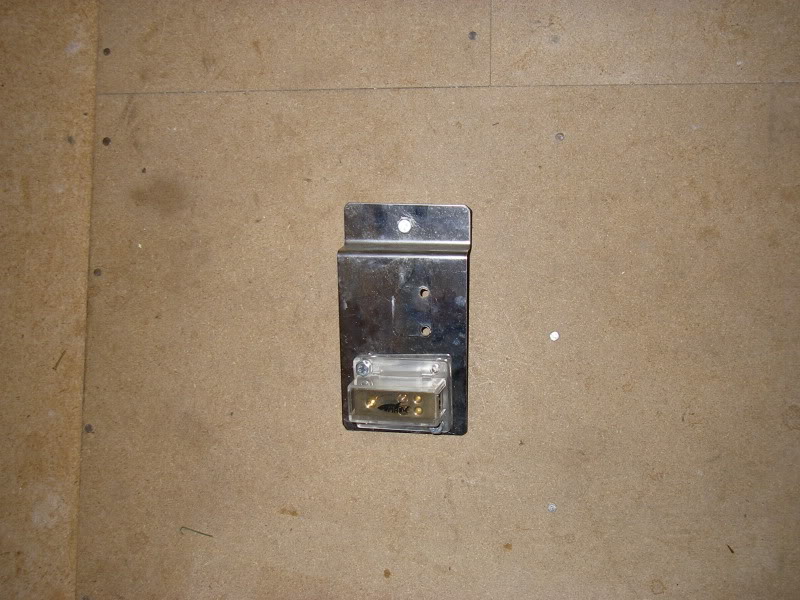
rear strut brace with bracket holding a battery kill switch as i plan to move the battery to the boot
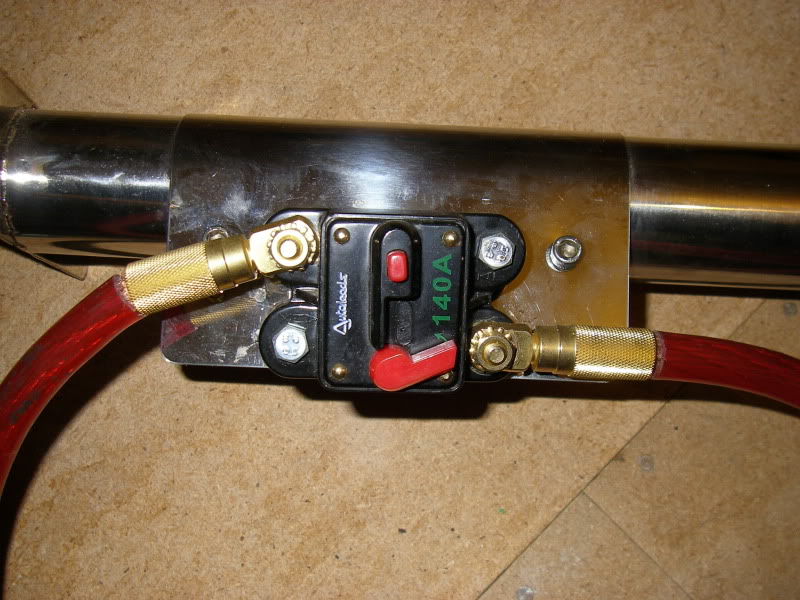
close up of the kill switch
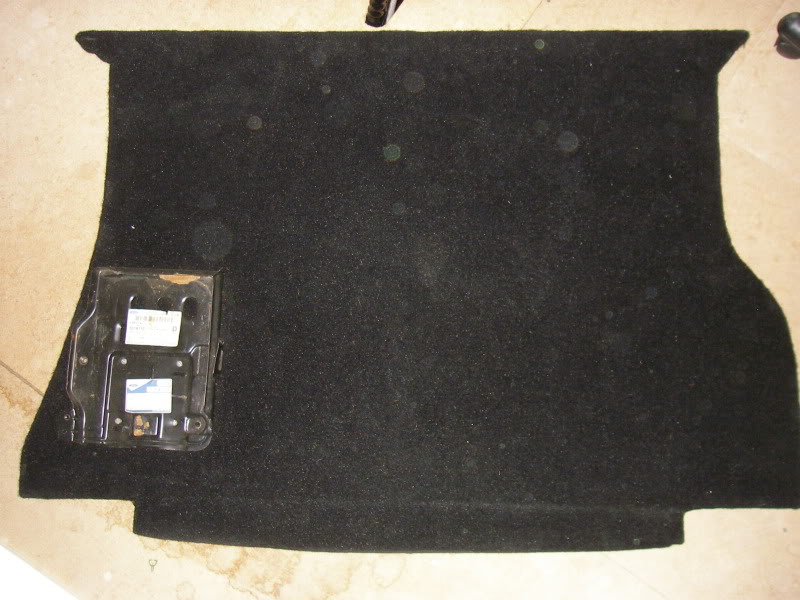
false floor with ford battery tray to hold the battery in the boot securely
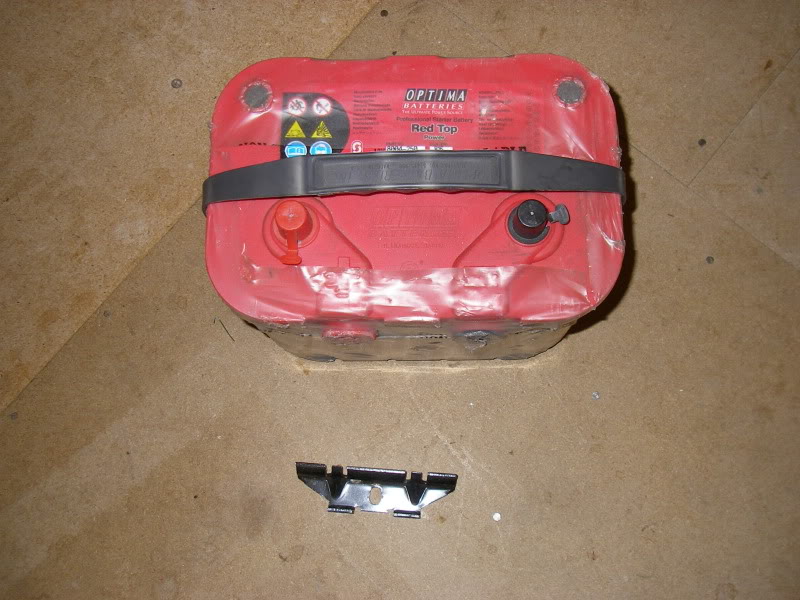
sealed optima redtop battery for the boot and the ford battery clamp to hold it on the battery tray
distribution block on a bracket for the engine bay, basically needed to relocate the battery
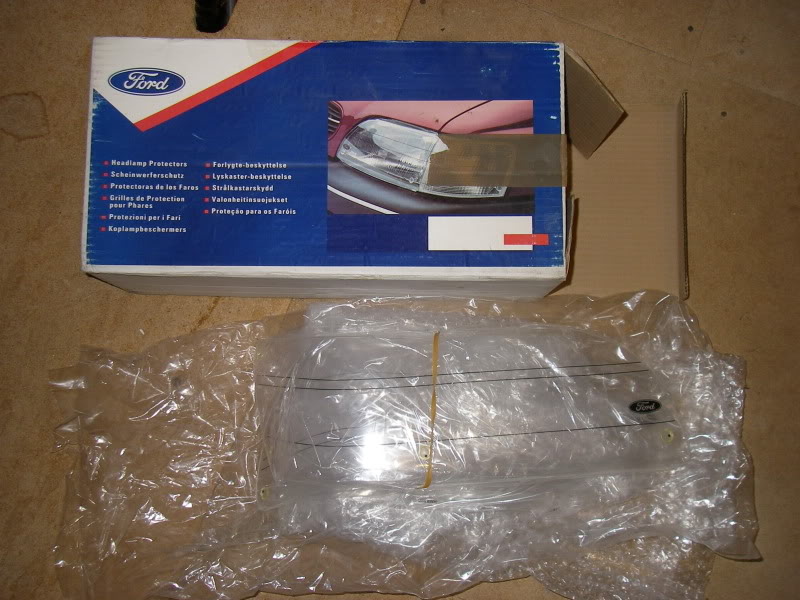
some rare brand new original ford headlamp protectors
not sure wether to use these or not
aswell as the engine itself,
so let the pics begin
Cossie group A airfilter ( bulb was the only thing i could find, to help show the size)
brand new ford rear engine mount
series two escort turbo lower boost pipe (samco)
new fords loom for between the alternator/starter/battery
clear zetec top timing belt cover to go with the other new timing belt covers
(to show my vernier pulleys)
gauges, oil temp, oil pressure, water temp, boost, air/fuel ratio and volts
newly refurbed starter motor
fiesta turbo GRS intercooler
planning to have this pressure checked and re-polished
grs alloy rad with kenlowe slim fans
when i bought the engine i had a few extra bits aswell, silicone hose, metal pipework etc
(custom pipework from the throttlebody to the intercooler is at the bottom middle)
13 row mocal oil cooler
front strut brace with bracket holding the edis module and map sensor
rear strut brace with bracket holding a battery kill switch as i plan to move the battery to the boot
close up of the kill switch
false floor with ford battery tray to hold the battery in the boot securely
sealed optima redtop battery for the boot and the ford battery clamp to hold it on the battery tray
distribution block on a bracket for the engine bay, basically needed to relocate the battery
some rare brand new original ford headlamp protectors
not sure wether to use these or not
19-03-2010, 07:04 AM
#46
PassionFord Regular
Thread Starter
Join Date: Aug 2003
Posts: 457
Likes: 0
Received 0 Likes
on
0 Posts
well the week before christmas i've been doing the odd hour on the fiesta after work
when i've had time,
so thought i'd post up some progress on the stripping
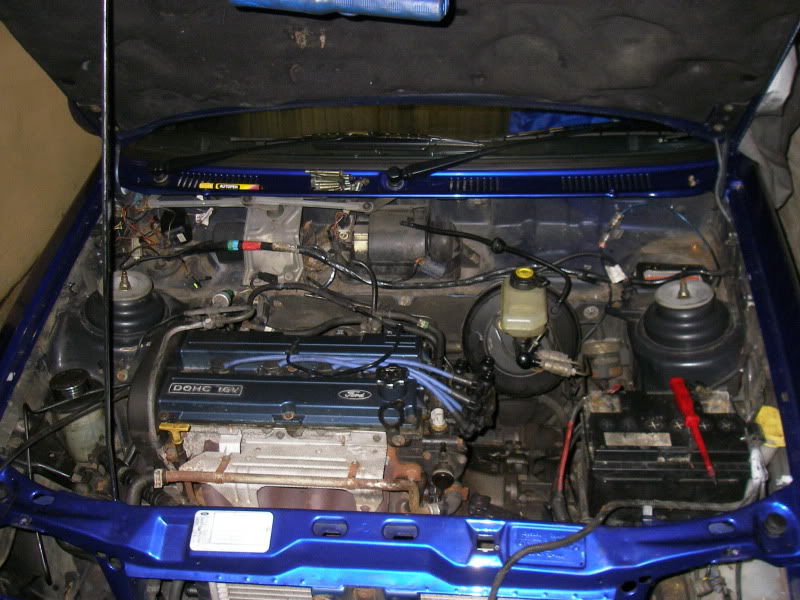
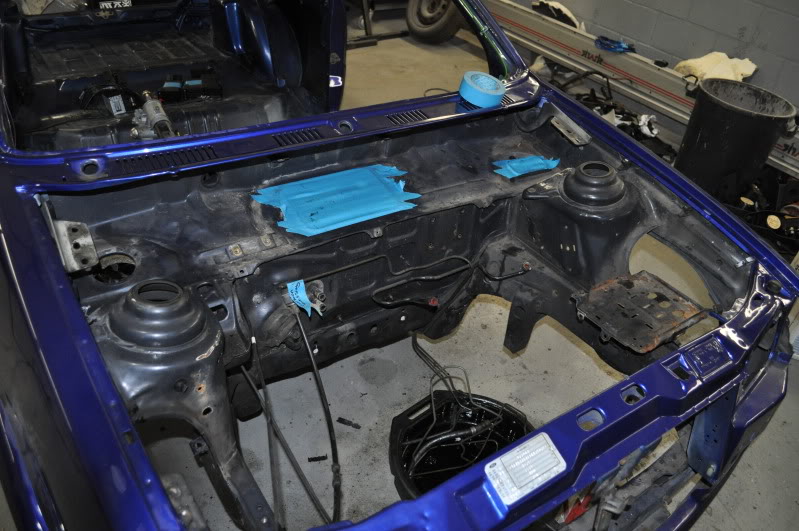
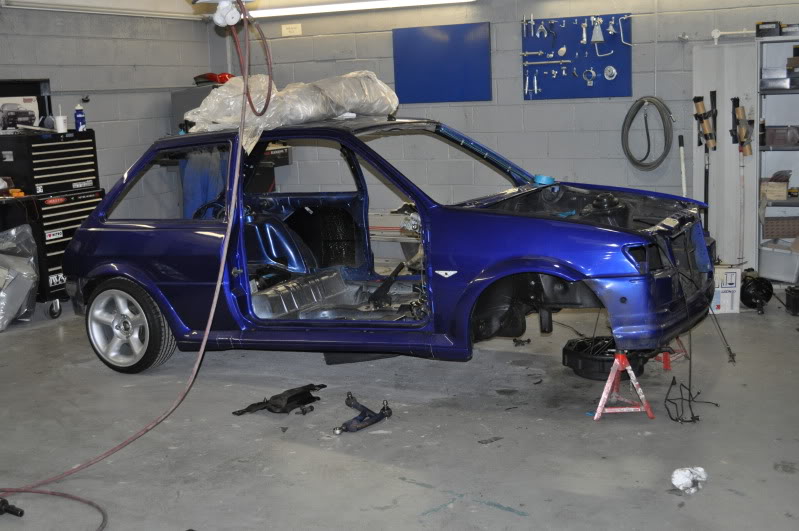
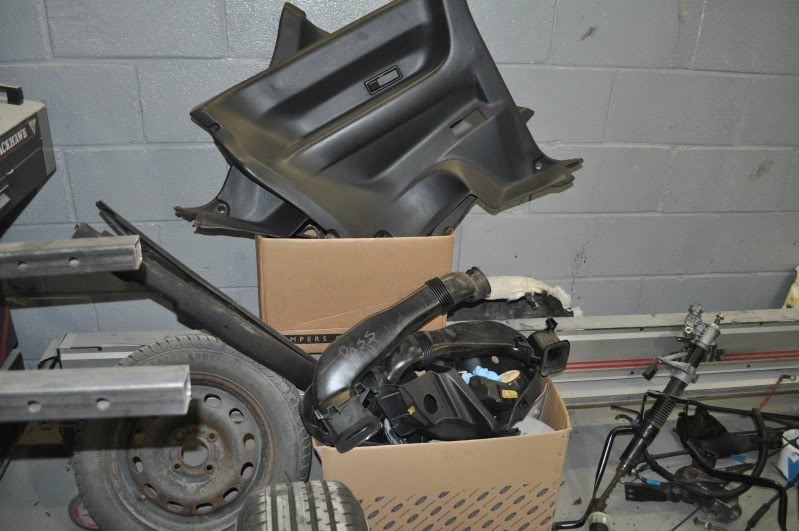
engine bay looking a little more bare
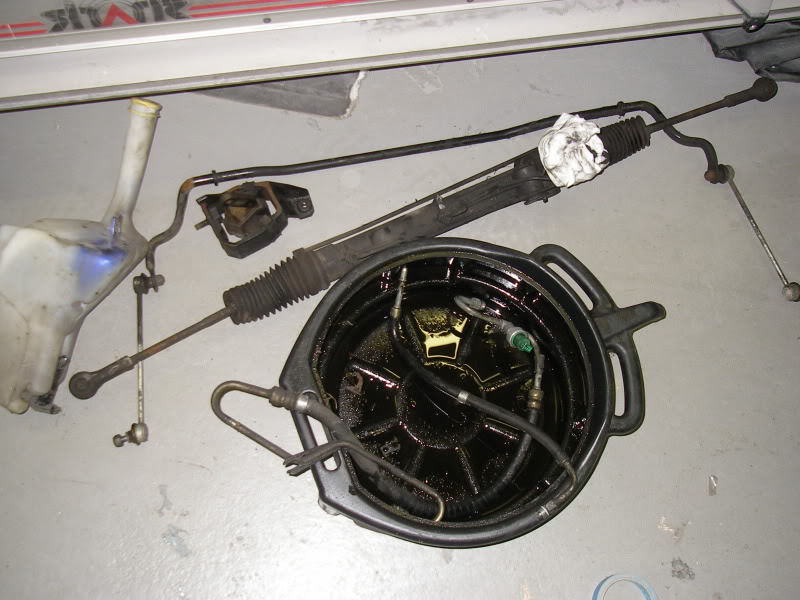
some parts removed from the bay,
winscreen washer bottle, power steering rack and pipes, anti roll bar complete, rear engine mount
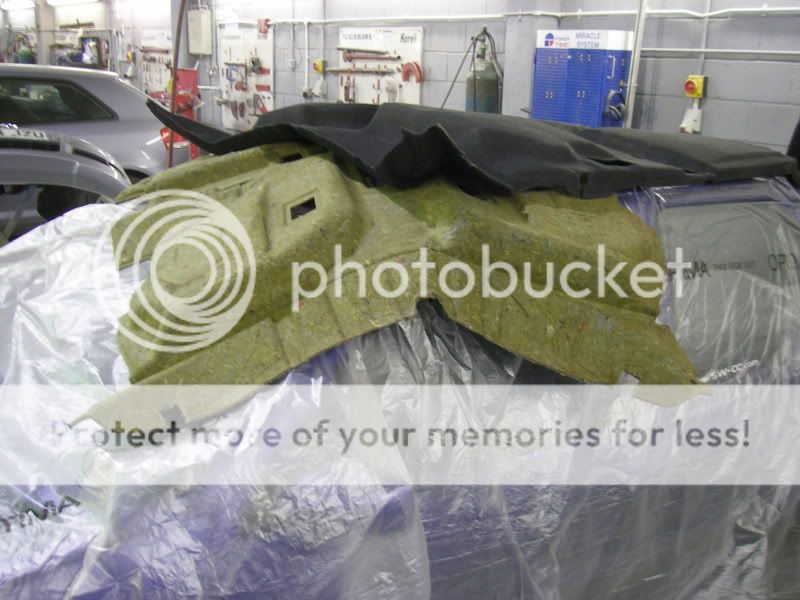
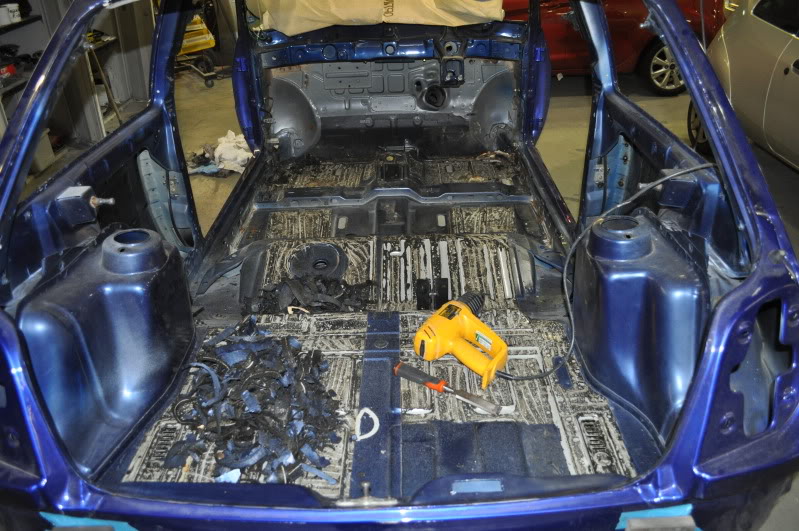
got the carpet and near new underlay out
(i had brand new last time the car was put back together after the bodywork)
trying to make the car as light as possible for the car spit
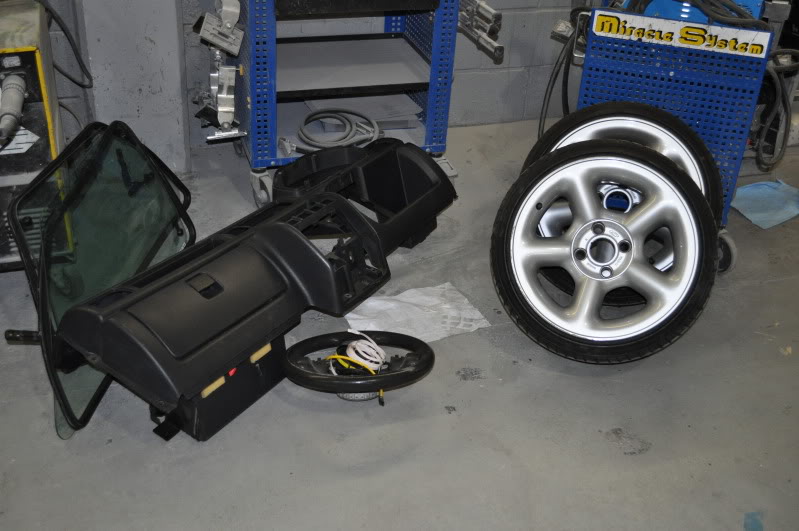
so doors off, windscreen out, tailgate off etc
also put my car spit together ready
loom out, battery out
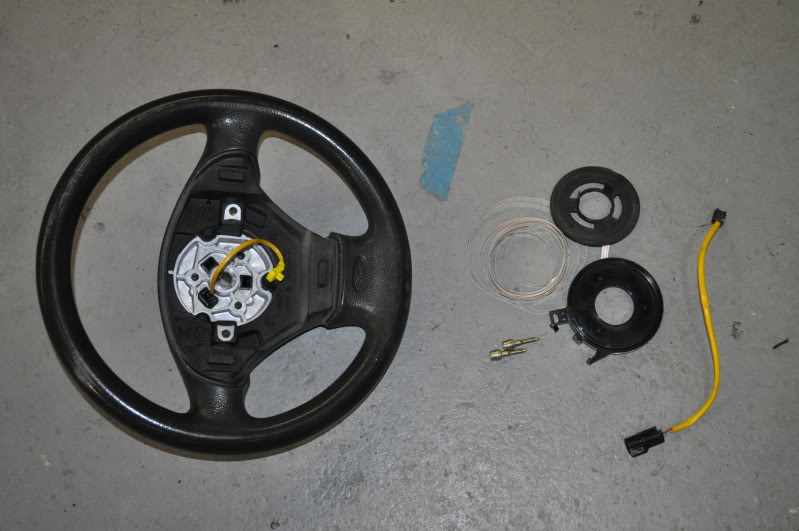
steering wheel off and whats left of my clockspring
rear quarter trim,seat belts and opening 1/4 glass taken out
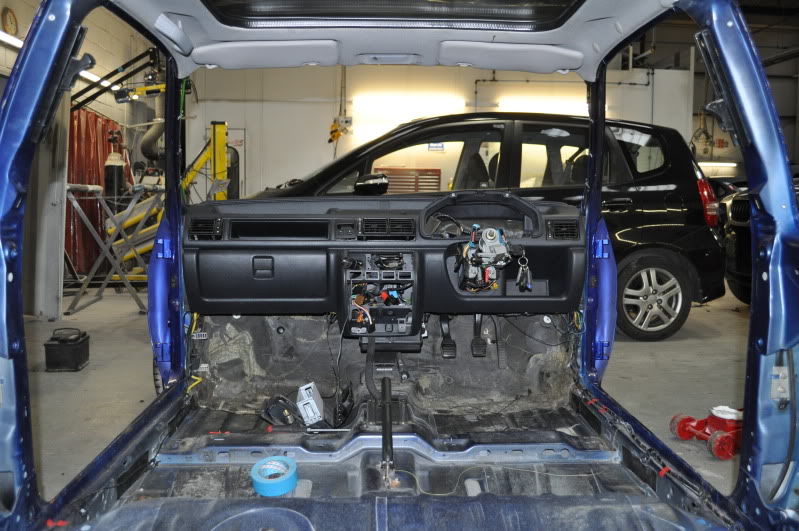
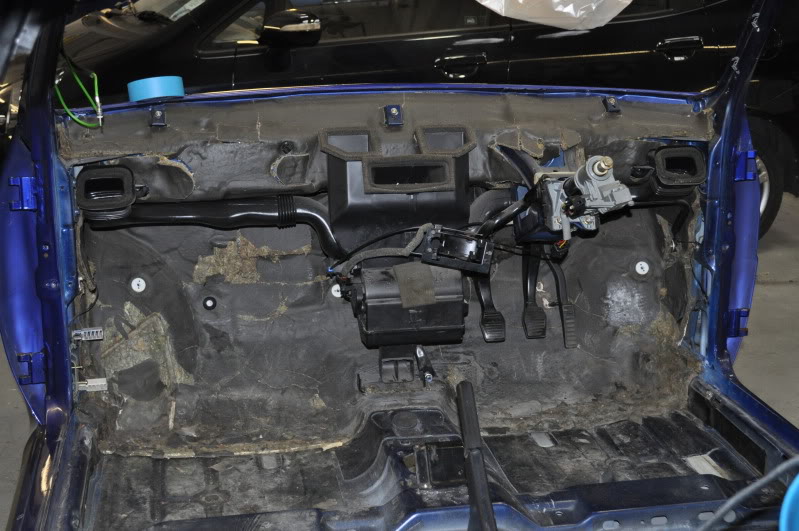
dash nearly ready to come out
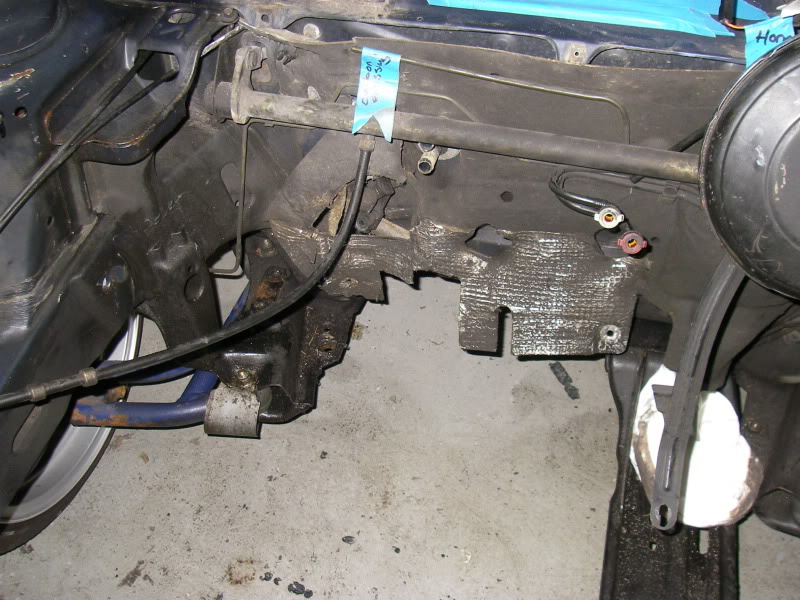
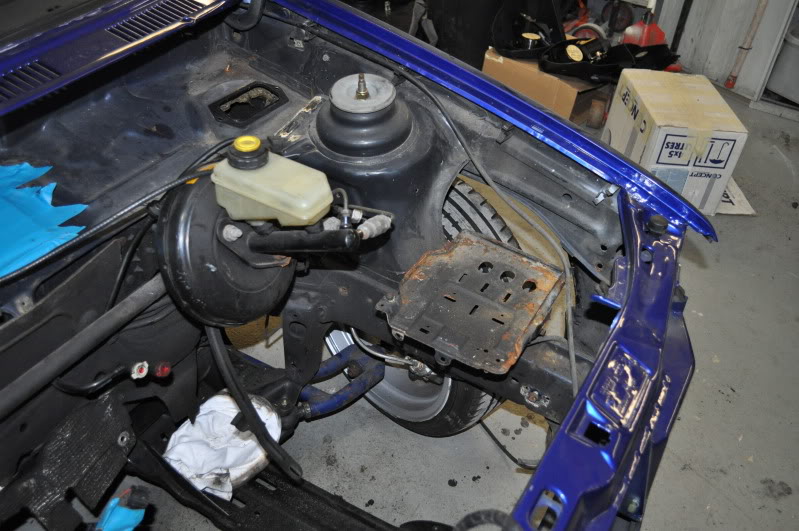
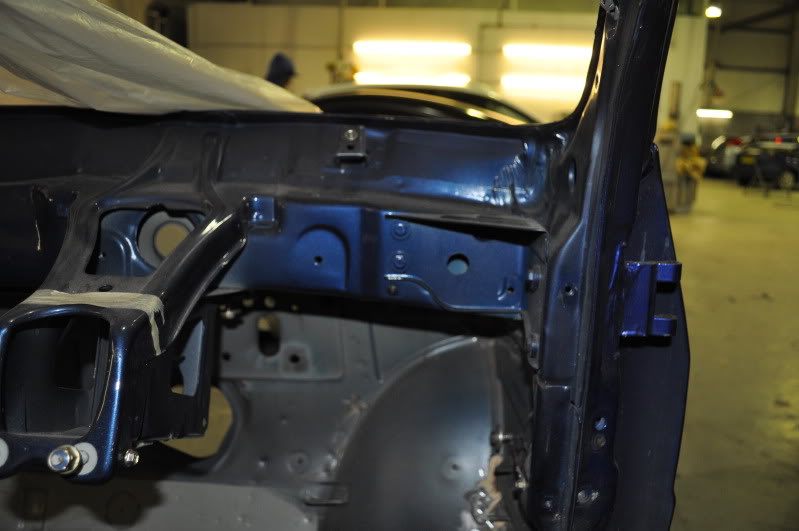
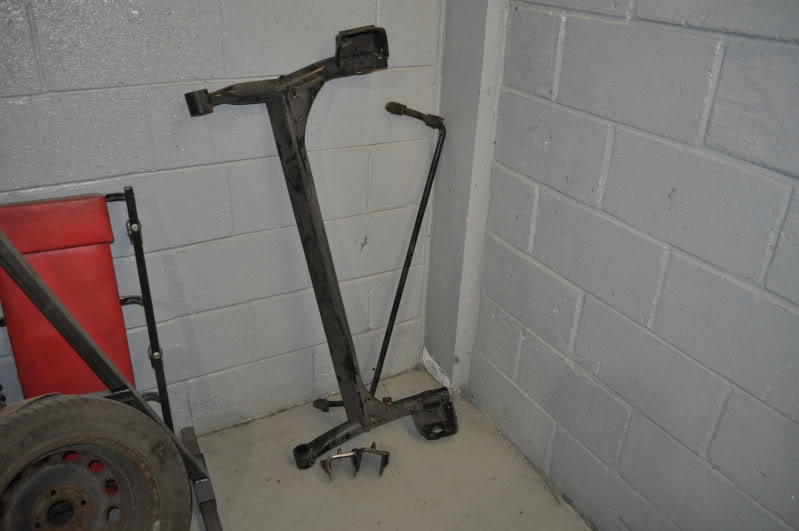
engine bay stripped alot more with brake servo out, brake bar and firewall stuff
front lower arms and brackets off
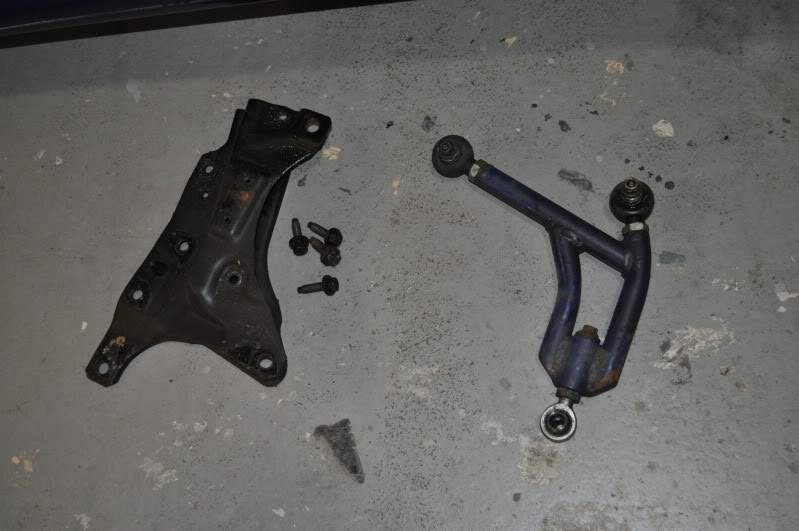
front suspension off
front arch looking empty, you can see previous attempts with smooth hamerite but will all be coming off
dash out, what a mess lol
airbag ecu, fuel filter bracket and windscreen washer hose
dash, wheels and quarter glass
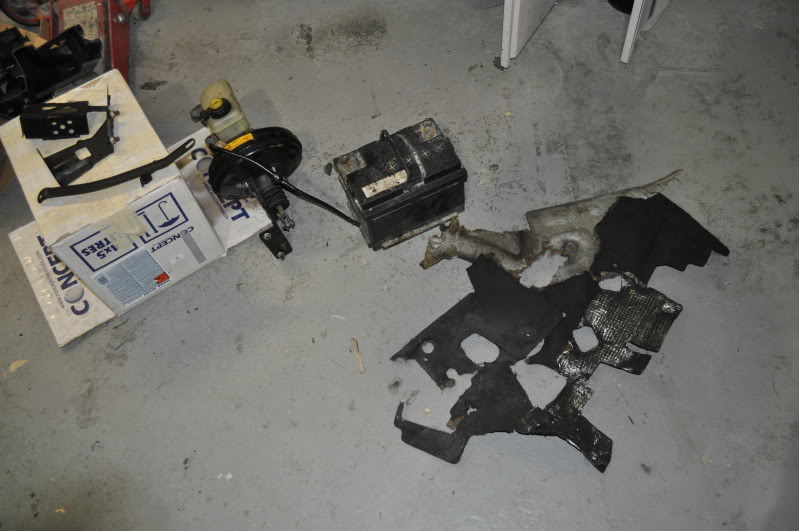
brake servo and master cylinder, battery and whats left of the firewall/sound deadening infront of the bulkhead
and how i left it
when i've had time,
so thought i'd post up some progress on the stripping
engine bay looking a little more bare
some parts removed from the bay,
winscreen washer bottle, power steering rack and pipes, anti roll bar complete, rear engine mount
got the carpet and near new underlay out
(i had brand new last time the car was put back together after the bodywork)
trying to make the car as light as possible for the car spit
so doors off, windscreen out, tailgate off etc
also put my car spit together ready
loom out, battery out
steering wheel off and whats left of my clockspring
rear quarter trim,seat belts and opening 1/4 glass taken out
dash nearly ready to come out
engine bay stripped alot more with brake servo out, brake bar and firewall stuff
front lower arms and brackets off
front suspension off
front arch looking empty, you can see previous attempts with smooth hamerite but will all be coming off
dash out, what a mess lol
airbag ecu, fuel filter bracket and windscreen washer hose
dash, wheels and quarter glass
brake servo and master cylinder, battery and whats left of the firewall/sound deadening infront of the bulkhead
and how i left it
19-03-2010, 07:06 AM
#47
PassionFord Regular
Thread Starter
Join Date: Aug 2003
Posts: 457
Likes: 0
Received 0 Likes
on
0 Posts
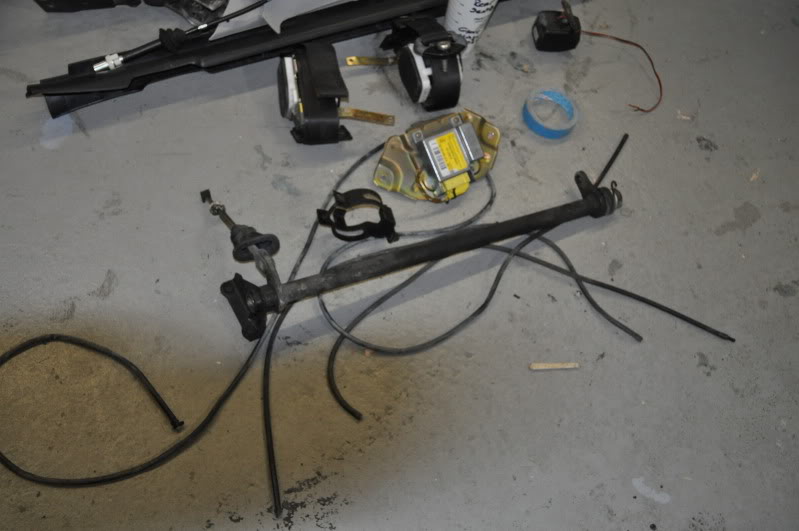
all the loom is out
heres the mess of wires with just the fuel pump still connected
as the tank needs to be dropped to gain access
steering column is out
less the side air vent pipes and steering column
the parts piles are getting bigger, aswell as my garage, the attic, the conservatory and now work lol
the last time this car is going to touch the floor on its own wheels for a while
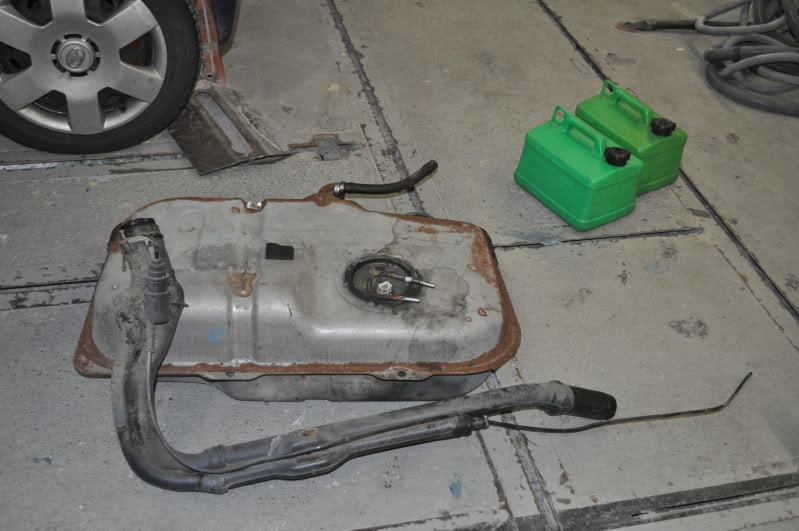
down with the fuel tank, and filler kneck
still emptied 1 and a half green petrol cans from the tank even though the red EMPTY light was on
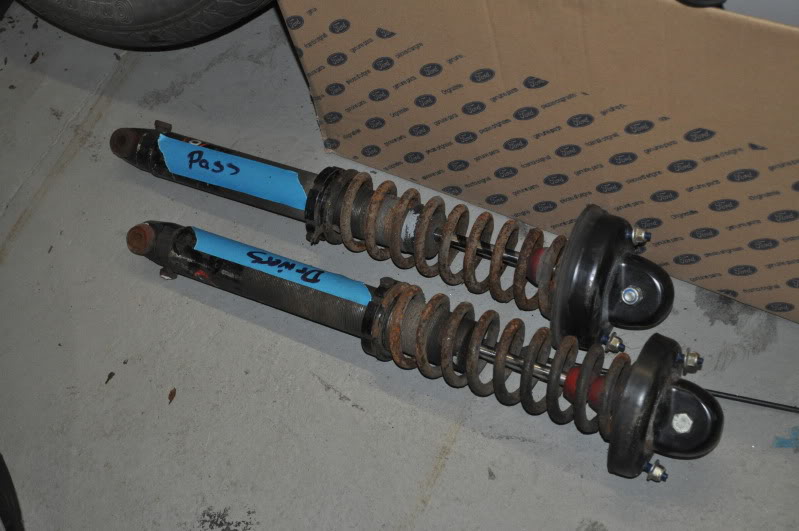
rear coilovers off
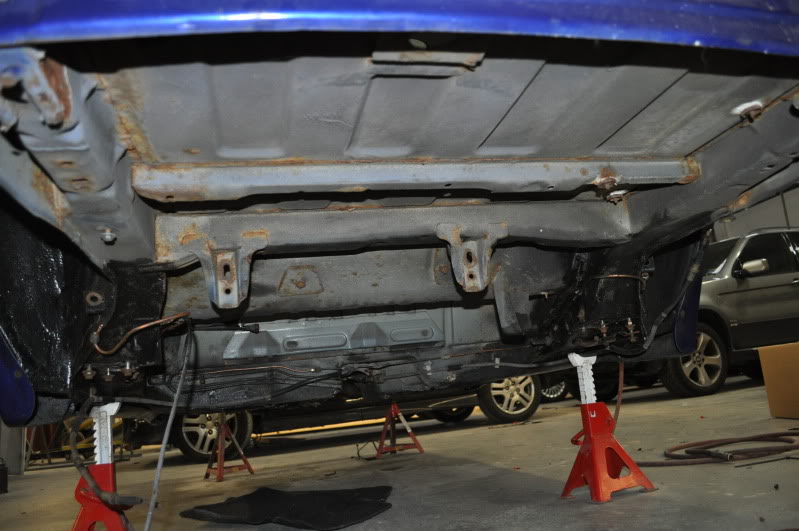
rear beam off

not looking too bad, i've seen alot worse
how i left it at the end of the day
heres the mess of wires with just the fuel pump still connected
as the tank needs to be dropped to gain access
steering column is out
less the side air vent pipes and steering column
the parts piles are getting bigger, aswell as my garage, the attic, the conservatory and now work lol
the last time this car is going to touch the floor on its own wheels for a while
down with the fuel tank, and filler kneck
still emptied 1 and a half green petrol cans from the tank even though the red EMPTY light was on
rear coilovers off
rear beam off
not looking too bad, i've seen alot worse
how i left it at the end of the day
19-03-2010, 07:10 AM
#48
PassionFord Regular
Thread Starter
Join Date: Aug 2003
Posts: 457
Likes: 0
Received 0 Likes
on
0 Posts
been trial fitting the ends of the car spit
the front end is lovely and solid as its basically on the chassis leg ends
but the rear is bolted to the rear panel and had alot of movement when bolted up
so tried bigger washers which made an improvement
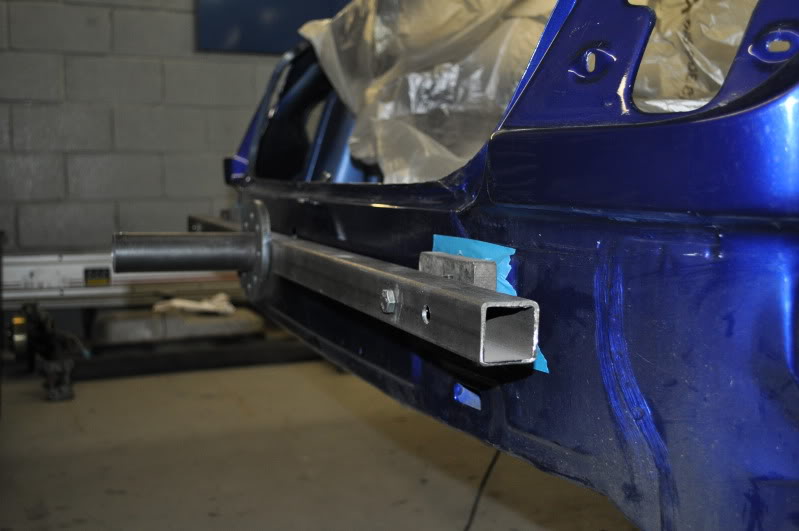
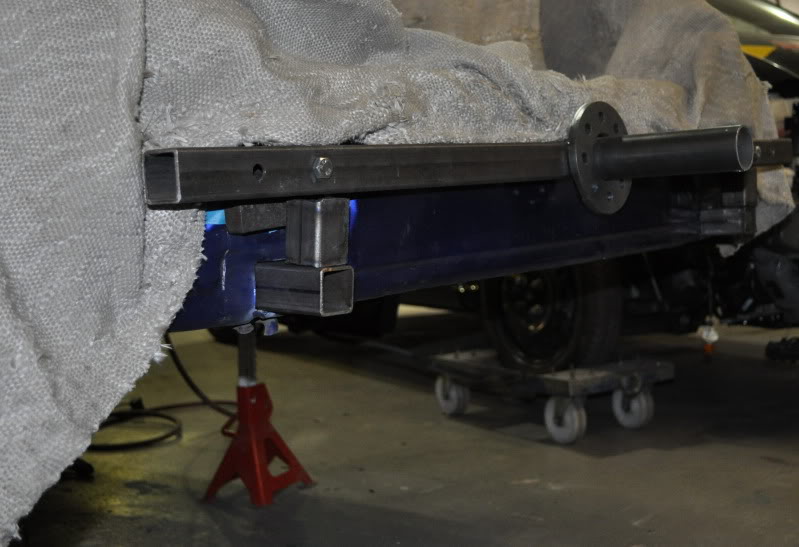
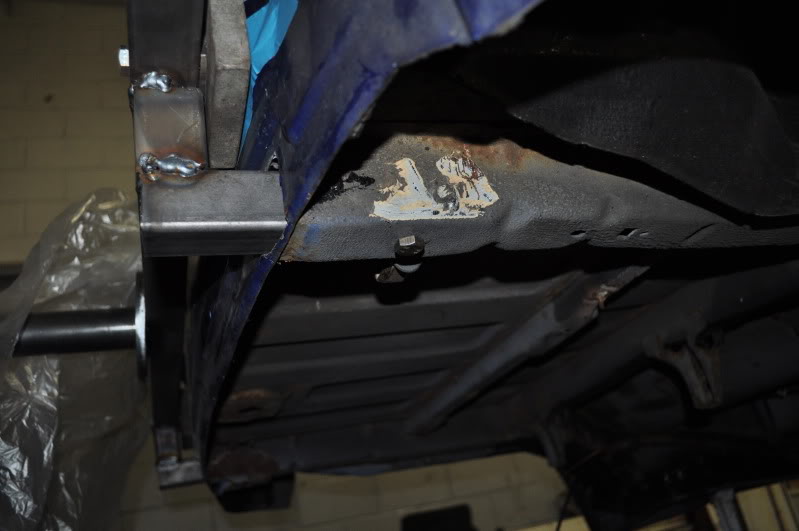
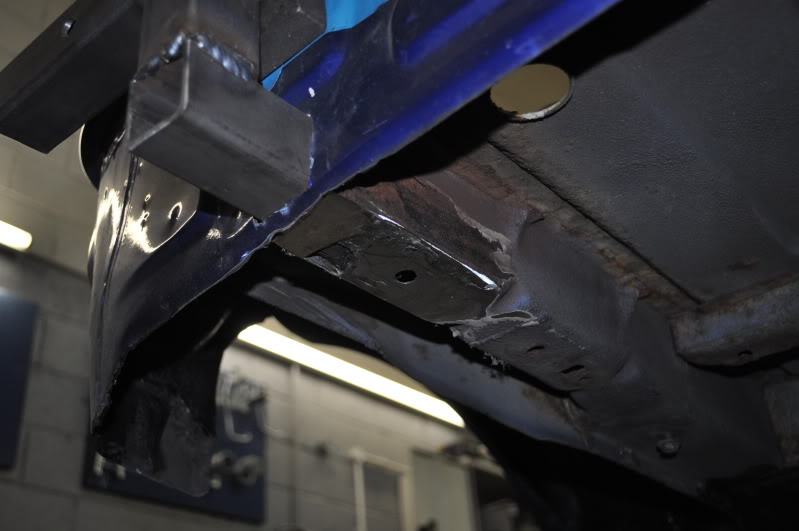
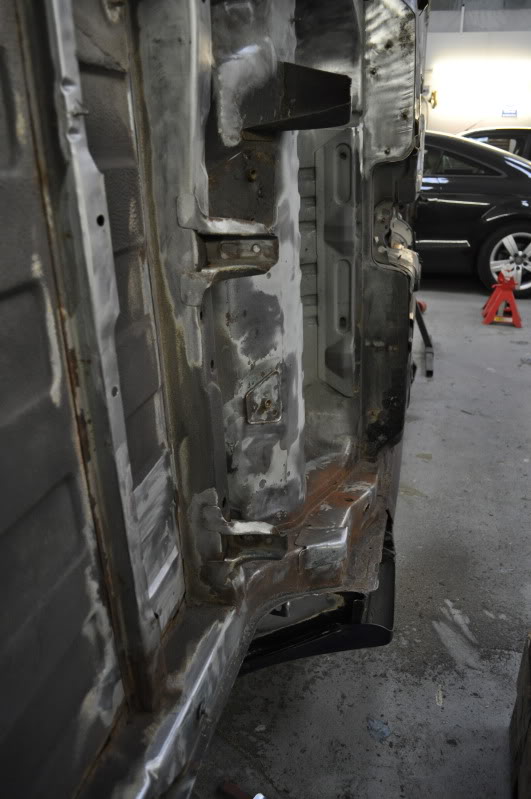
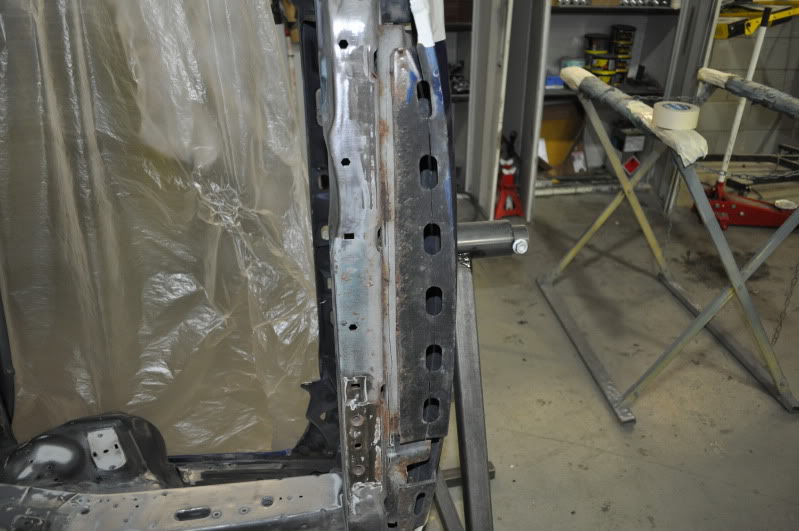
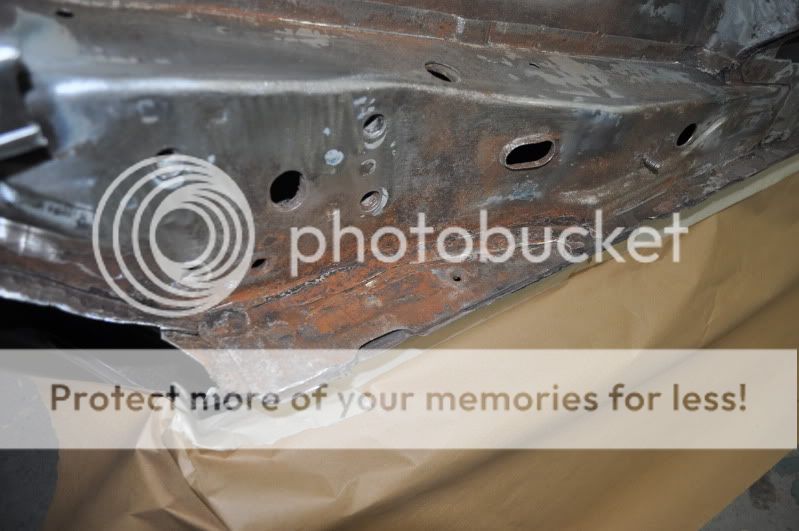
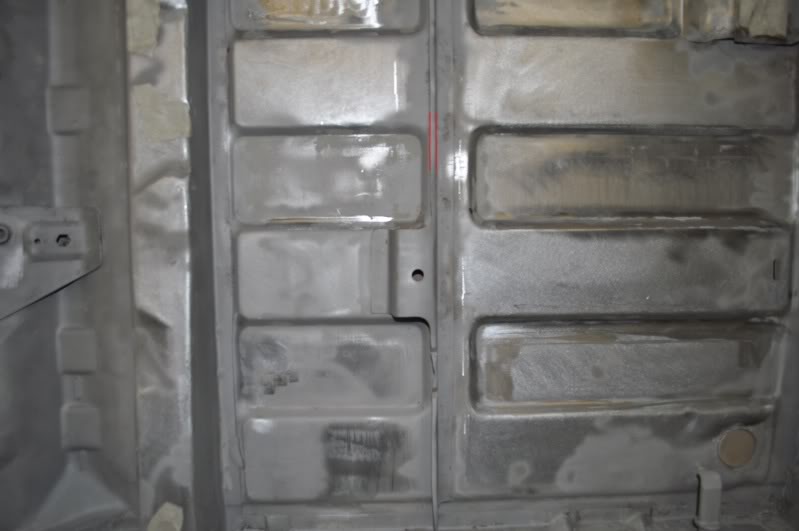
so looking to strengthen the back as i dont want to damage anything,
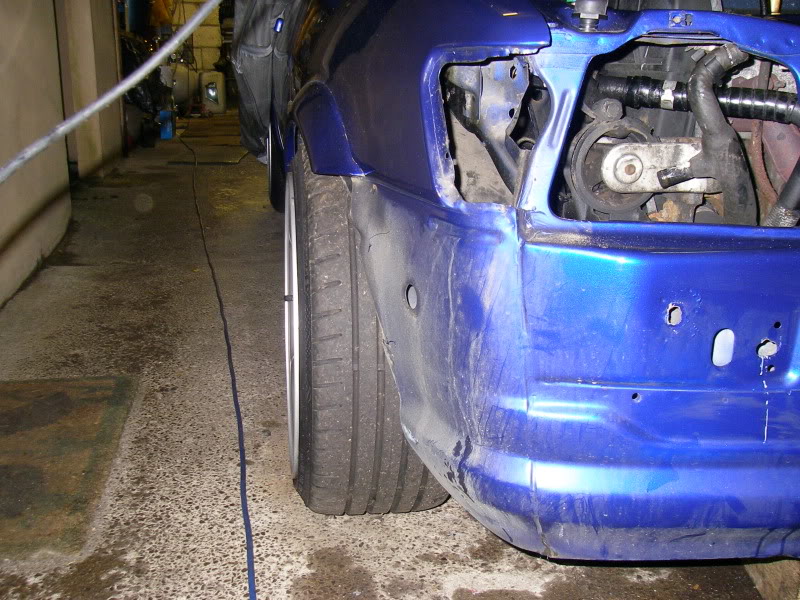
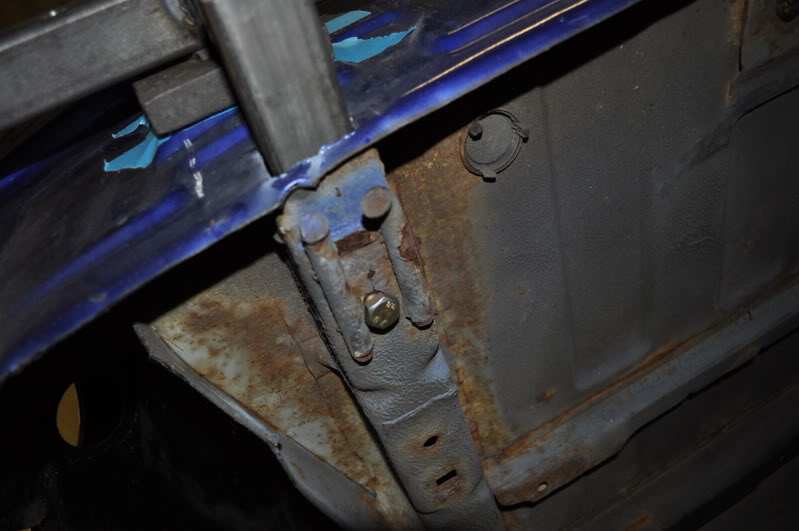
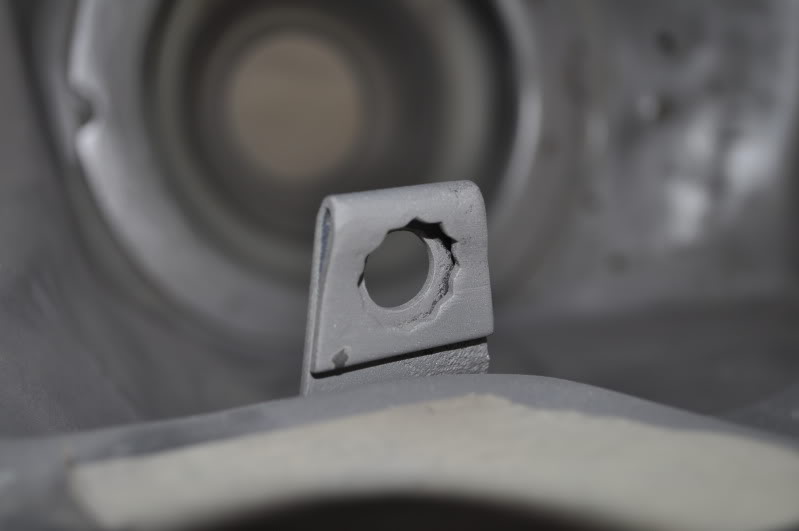
noticed the hole below the bumper mount
looking underneath, the hole is part of the rear chassis leg
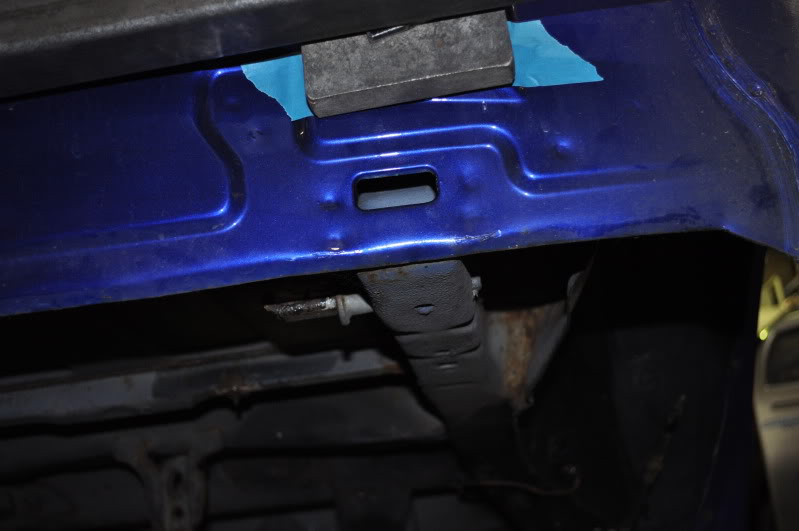
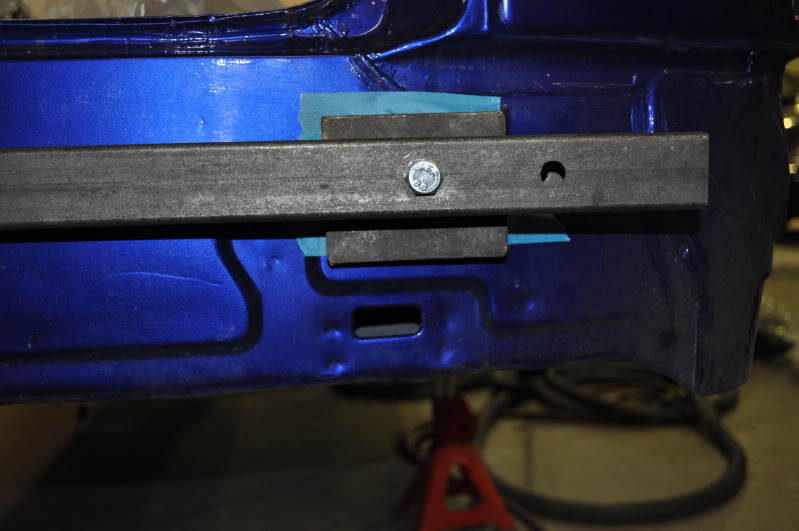
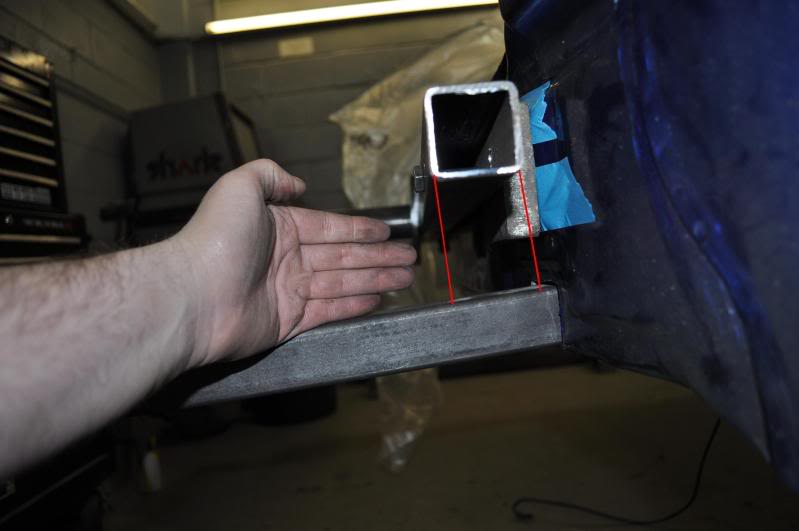
so i opened up the hole with a belt sander and trial fitted a piece of boxed steel bar
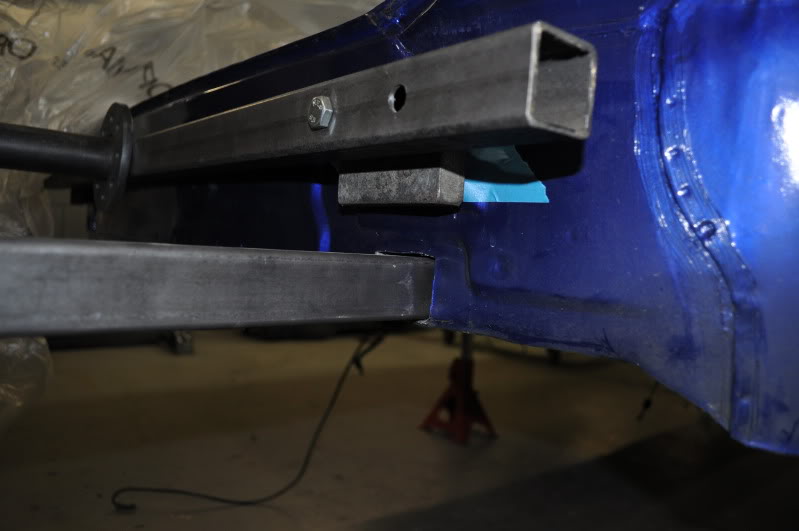
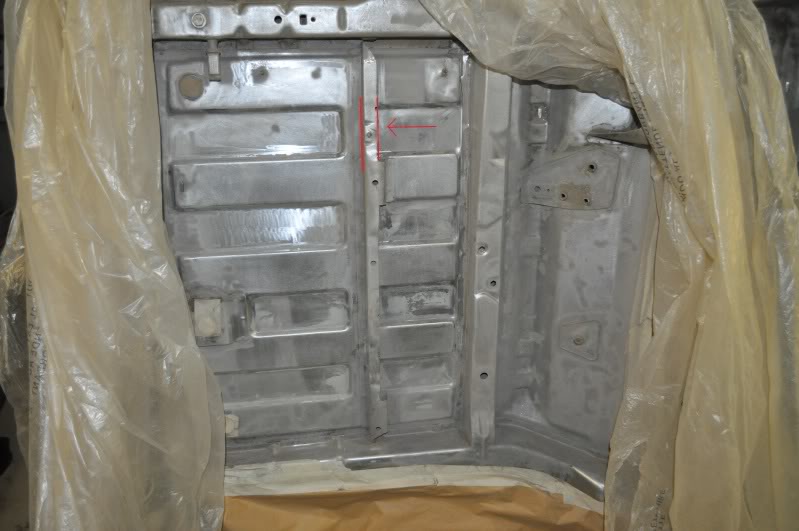
so the plan is to use an existing hole in the rear chassis leg to bolt the metal bare securely
and weld another piece of box section steel to make it all secure
i've used red lines to show where the other piece of steel would go
this should really firm it up
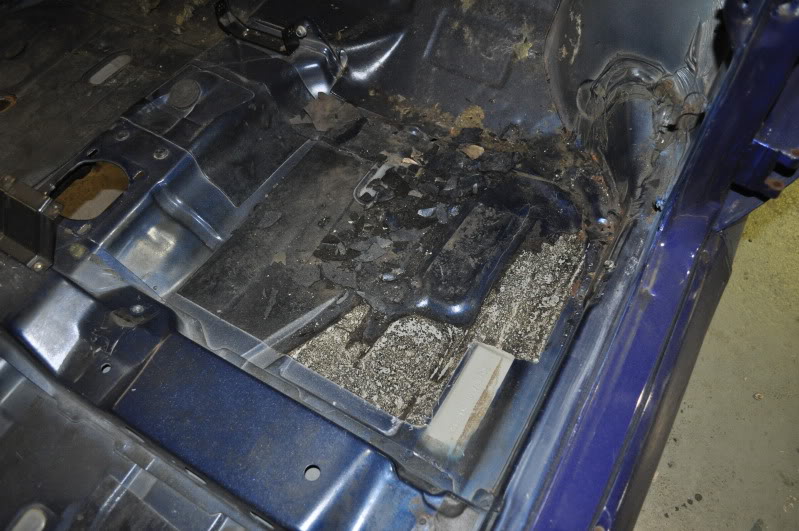
as i plan to seam weld the most of the front end of the car,
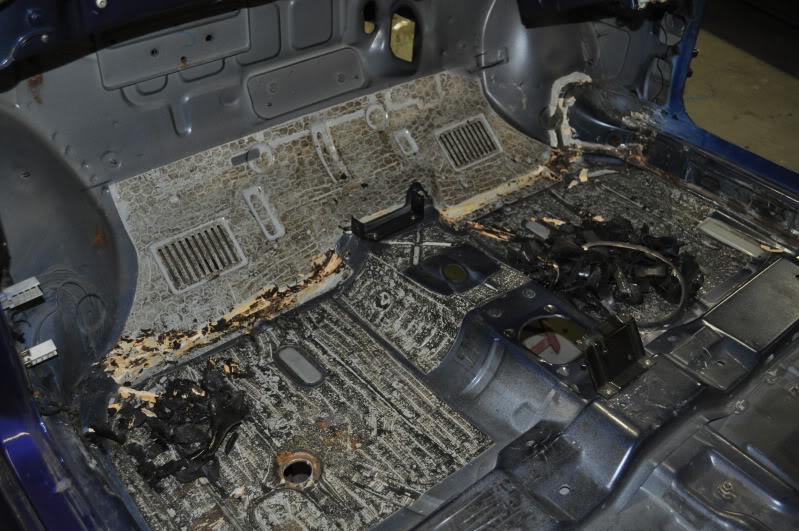
the factory sound proofing inside the shell needs to be removed, lucky with the cold wether its coming off quite easy with a hammer and chisel
and i've come across a problem,
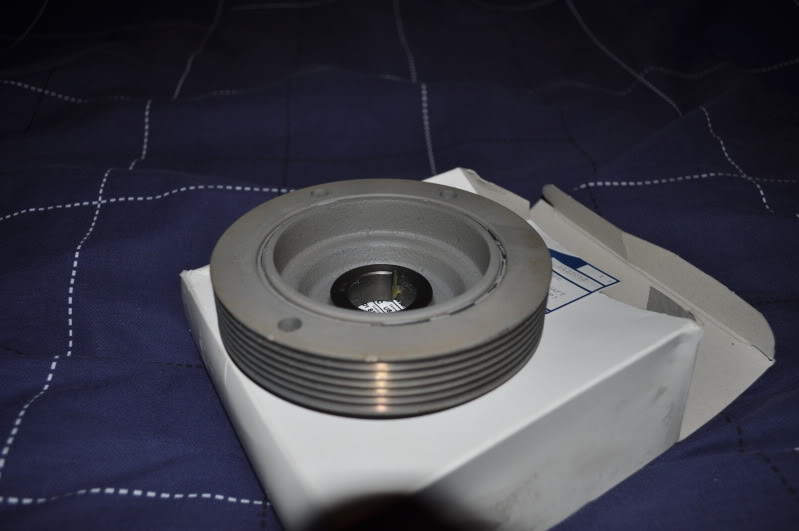
ordered a brand new fords crankshaft pulley as everything else on the engine is brand new
it arrived in a horrible primer, as all the other pulleys come in a smooth black finish i wanted them to be all the same.
so after ringing around other dealers to find out theirs are the same
even a good mate clark the other side of the country searched his dealership to find them with the same primer finish
so i'll probably have to paint it myself

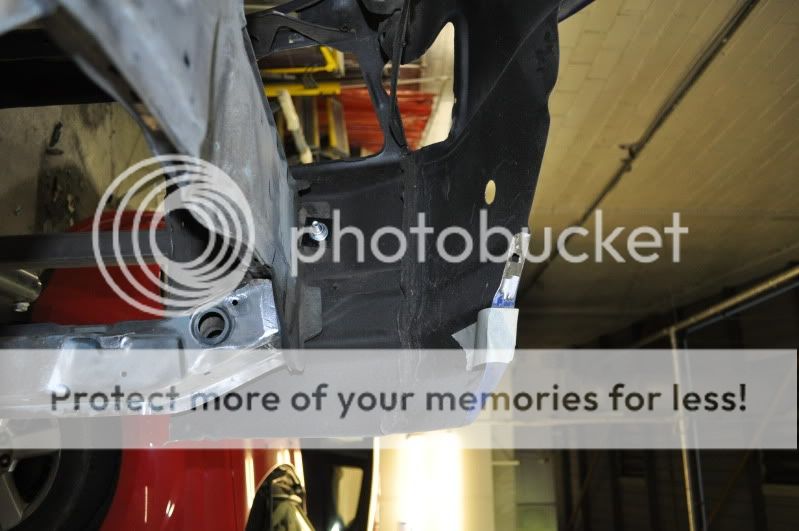
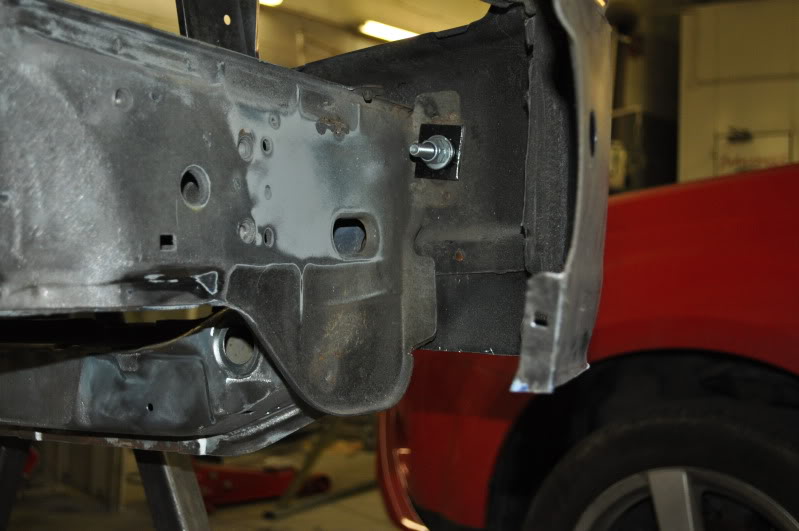
tonight with the good help of a work mate adrian,
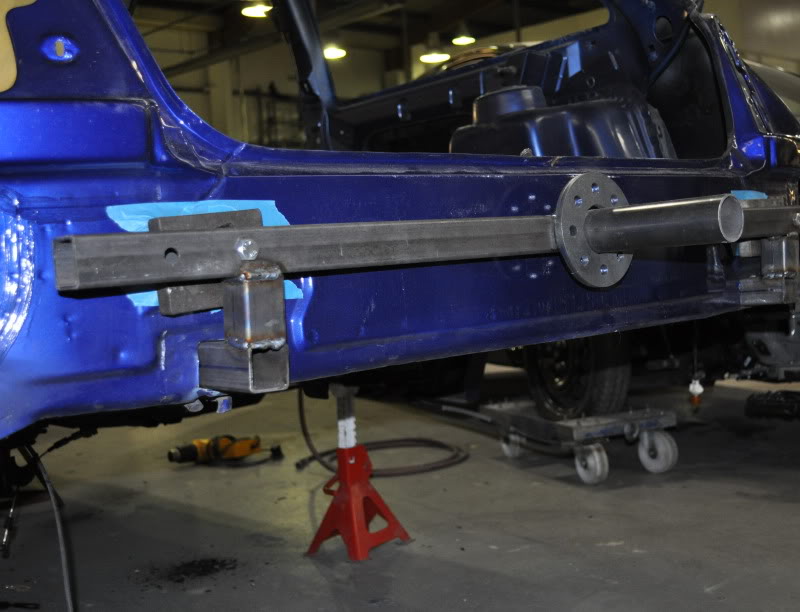
the jig was sorted at the rear of the car to make it more secure and solid,
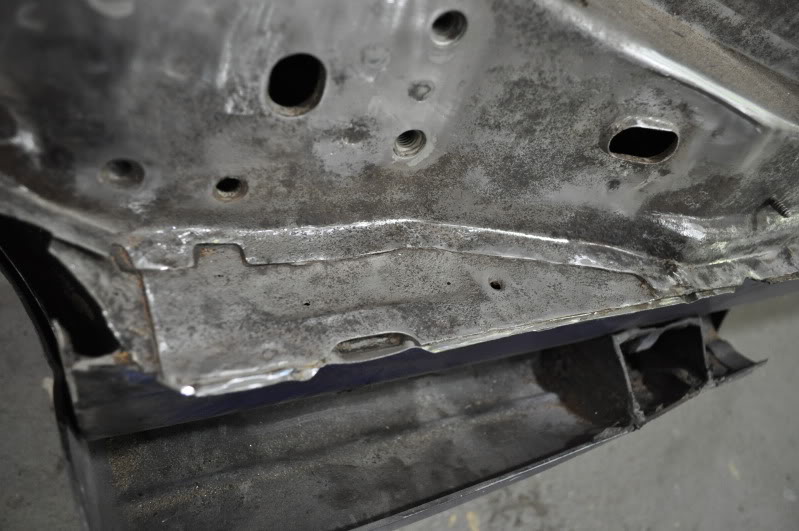
as we started before
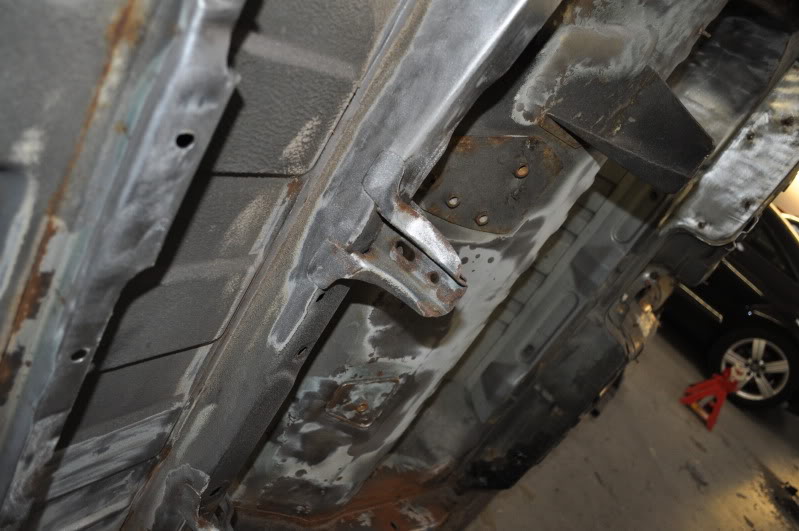
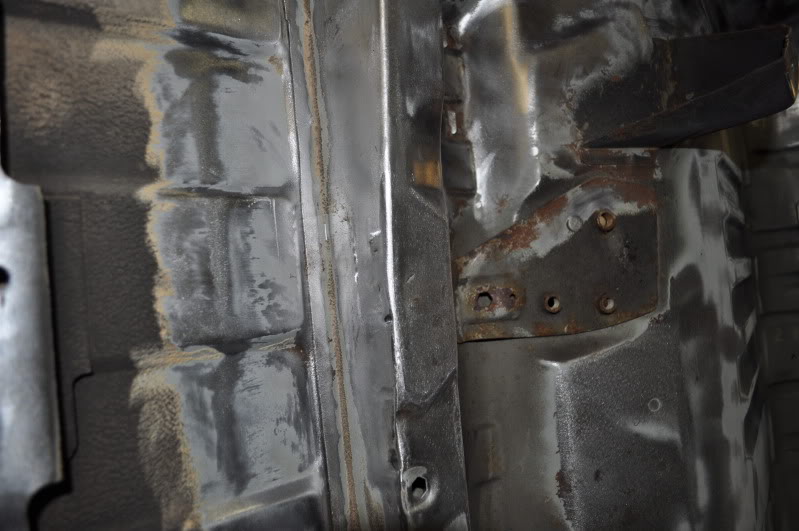
after the hole being opened up with a belt sander to reveal the inside of the rear chassis leg
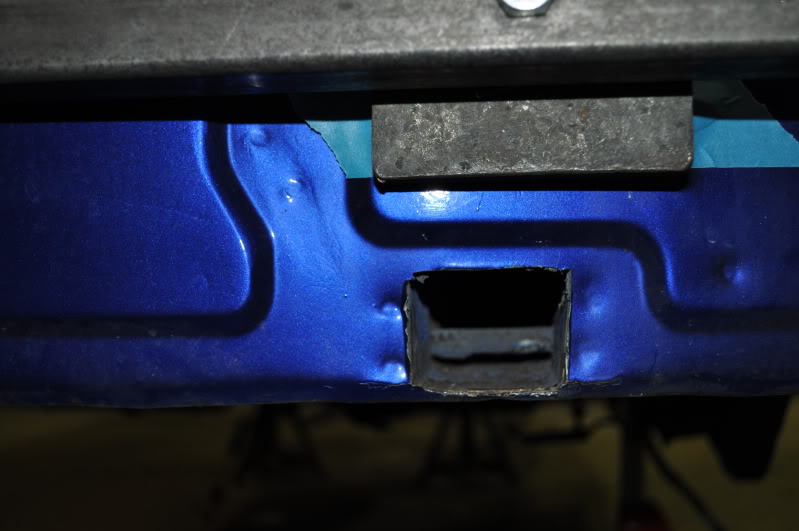
dimensions were taken, metal cut to size, and placed fire mat's over the car appropriately as we're about to weld
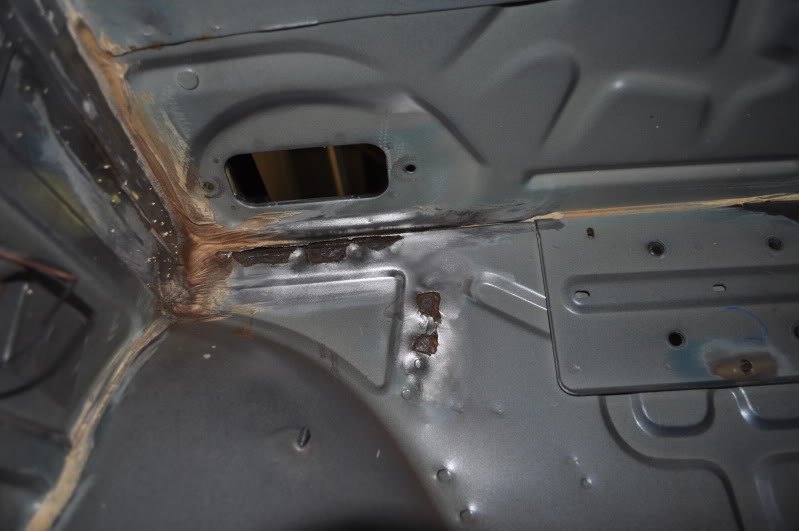
a close up of eveything ready to weld
job done, nothing pretty to look at but does the job we want!!
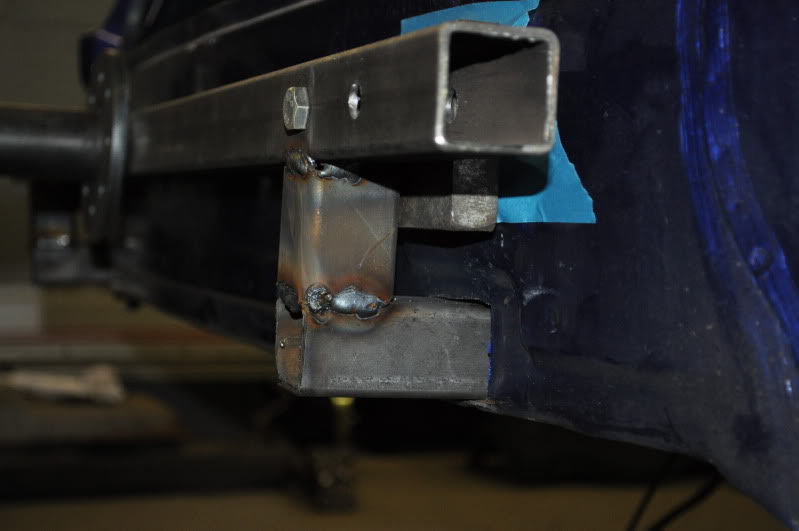
a nut was tacked inside the new tube before welding to the jig,
so that the metal tube is tight inside the chassis leg,
using existing factory holes in the rear leg the nut and bolt work well
heres the jig connected to the front, which did'nt need any modifications

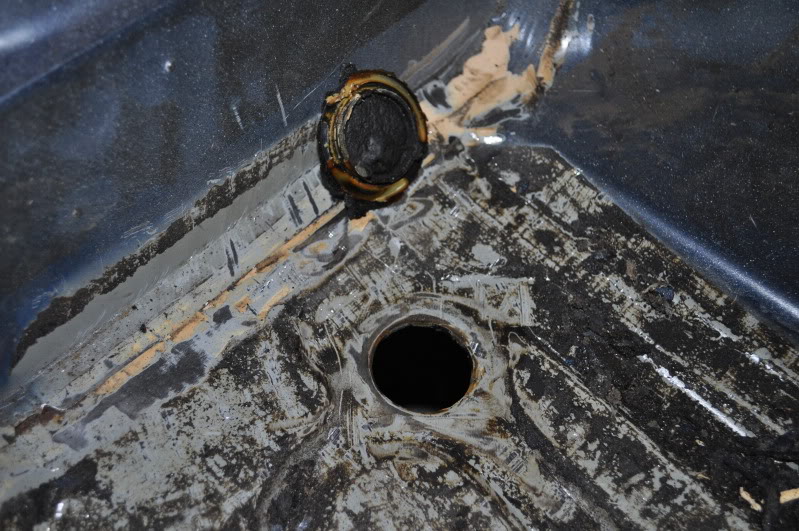
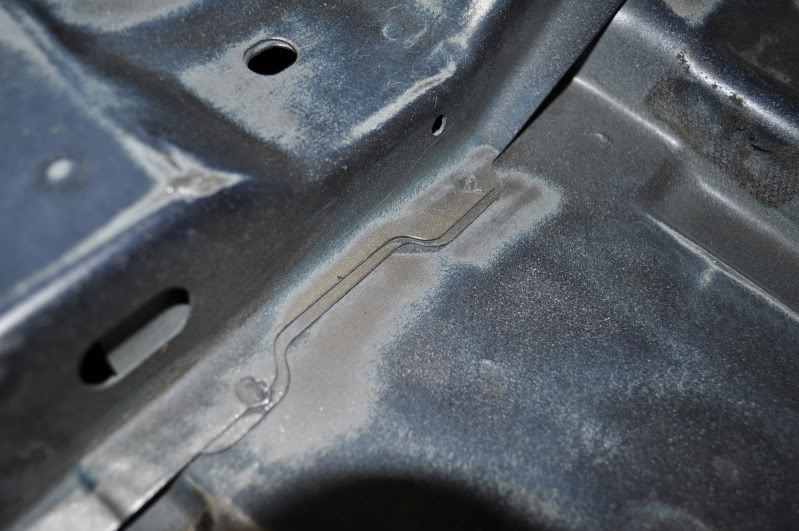
stripped back alot more sound deadening and even the seam sealer (will go more into that another time)

heres a close up of the floor plug i've removed, as one was a little loose when removing the factory sound deadening, so i plan to remove them all and weld them up!
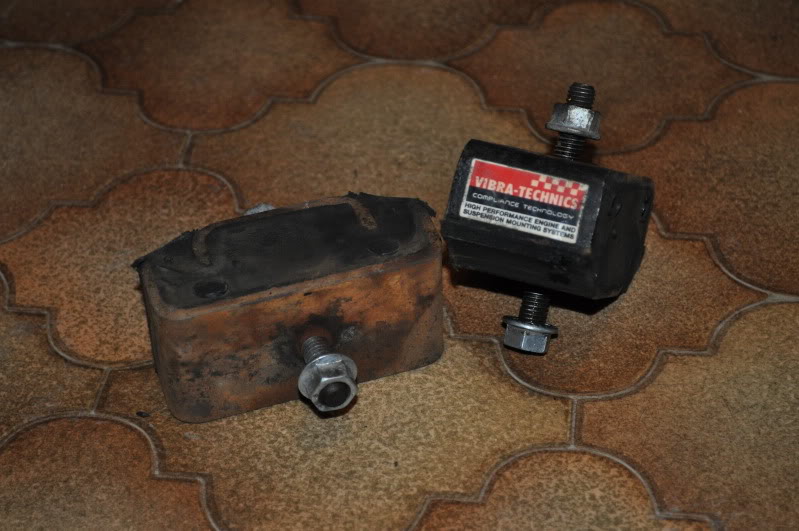
my last engine had a small oil leak which i never got around to sorting, but it had blown all over the engine bay
so alot of things are quite dirty,
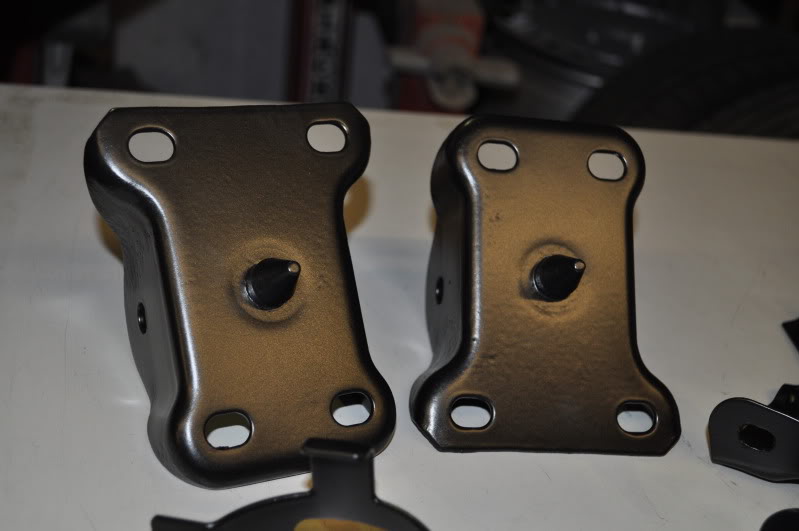
using a parts sink cleaner i cleaned up my vibratechnic uprated gearbox mounts, gave them a good clean
will probably rub the metal surfaces back and give a lick of paint to freshen up
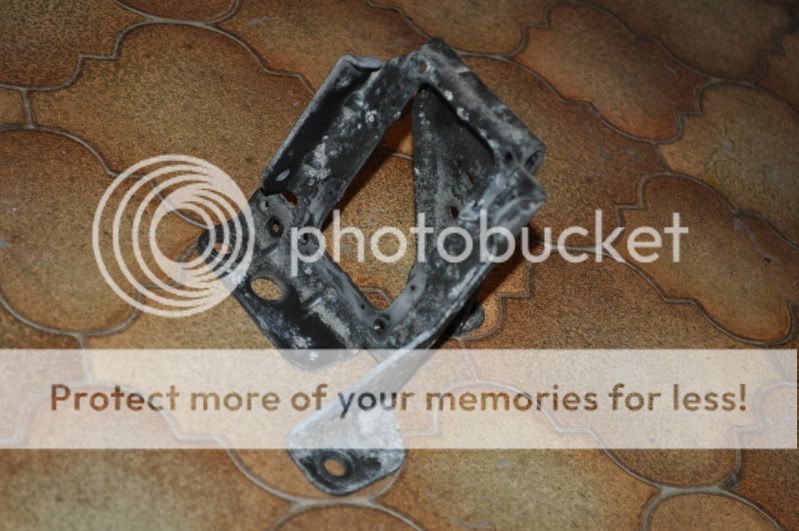
also cleaned up the coilpack bracket, not sure why its gone a funny colour, but its clean and one of the many things i plan to have shot blasted and then powder coated
my vernier pulleys arrived, which accurately allow the cams to be advanced or retarded
and also look nice ha
got hold of an msd coilpack (has a higher voltage and not supposed to be used with standard leads)
so on the search for a set of them, unfortunately its an american product so the seach is'nt going to be easy
got myself a new header tank aswell
my new crank pulley which i'm going to have painted black to match the water pump pulley

the front end is lovely and solid as its basically on the chassis leg ends
but the rear is bolted to the rear panel and had alot of movement when bolted up
so tried bigger washers which made an improvement
so looking to strengthen the back as i dont want to damage anything,
noticed the hole below the bumper mount
looking underneath, the hole is part of the rear chassis leg
so i opened up the hole with a belt sander and trial fitted a piece of boxed steel bar
so the plan is to use an existing hole in the rear chassis leg to bolt the metal bare securely
and weld another piece of box section steel to make it all secure
i've used red lines to show where the other piece of steel would go
this should really firm it up
as i plan to seam weld the most of the front end of the car,
the factory sound proofing inside the shell needs to be removed, lucky with the cold wether its coming off quite easy with a hammer and chisel
and i've come across a problem,
ordered a brand new fords crankshaft pulley as everything else on the engine is brand new
it arrived in a horrible primer, as all the other pulleys come in a smooth black finish i wanted them to be all the same.
so after ringing around other dealers to find out theirs are the same
even a good mate clark the other side of the country searched his dealership to find them with the same primer finish
so i'll probably have to paint it myself
tonight with the good help of a work mate adrian,
the jig was sorted at the rear of the car to make it more secure and solid,
as we started before
after the hole being opened up with a belt sander to reveal the inside of the rear chassis leg
dimensions were taken, metal cut to size, and placed fire mat's over the car appropriately as we're about to weld
a close up of eveything ready to weld
job done, nothing pretty to look at but does the job we want!!
a nut was tacked inside the new tube before welding to the jig,
so that the metal tube is tight inside the chassis leg,
using existing factory holes in the rear leg the nut and bolt work well
heres the jig connected to the front, which did'nt need any modifications
stripped back alot more sound deadening and even the seam sealer (will go more into that another time)
heres a close up of the floor plug i've removed, as one was a little loose when removing the factory sound deadening, so i plan to remove them all and weld them up!
my last engine had a small oil leak which i never got around to sorting, but it had blown all over the engine bay
so alot of things are quite dirty,
using a parts sink cleaner i cleaned up my vibratechnic uprated gearbox mounts, gave them a good clean
will probably rub the metal surfaces back and give a lick of paint to freshen up
also cleaned up the coilpack bracket, not sure why its gone a funny colour, but its clean and one of the many things i plan to have shot blasted and then powder coated
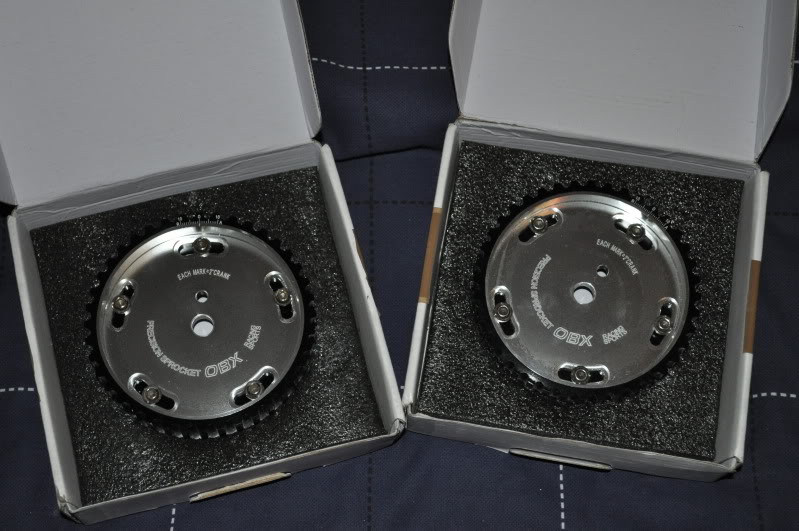
my vernier pulleys arrived, which accurately allow the cams to be advanced or retarded
and also look nice ha
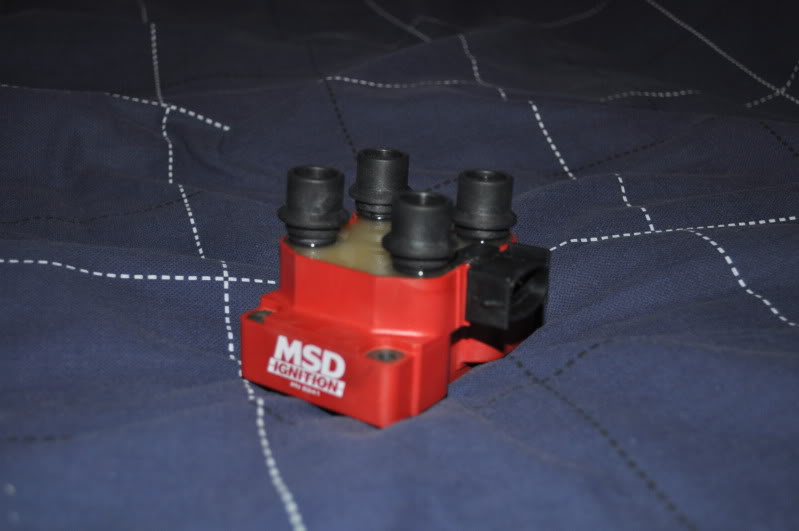
got hold of an msd coilpack (has a higher voltage and not supposed to be used with standard leads)
so on the search for a set of them, unfortunately its an american product so the seach is'nt going to be easy
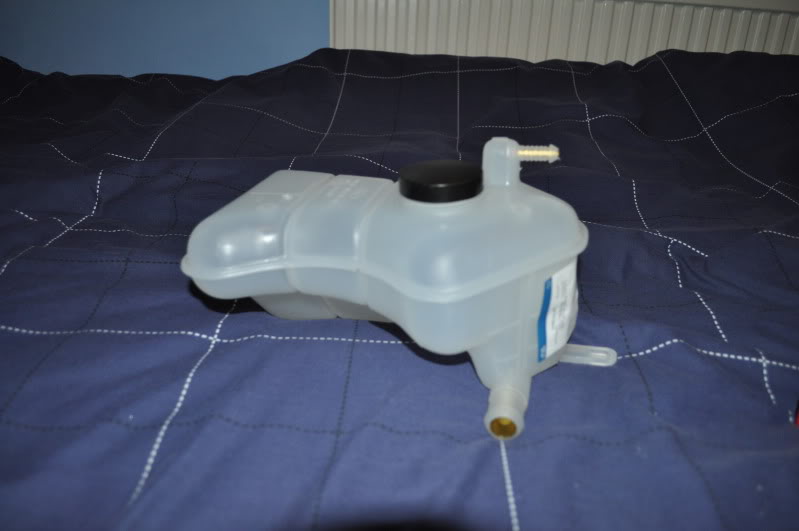
got myself a new header tank aswell
my new crank pulley which i'm going to have painted black to match the water pump pulley
19-03-2010, 07:12 AM
#49
PassionFord Regular
Thread Starter
Join Date: Aug 2003
Posts: 457
Likes: 0
Received 0 Likes
on
0 Posts
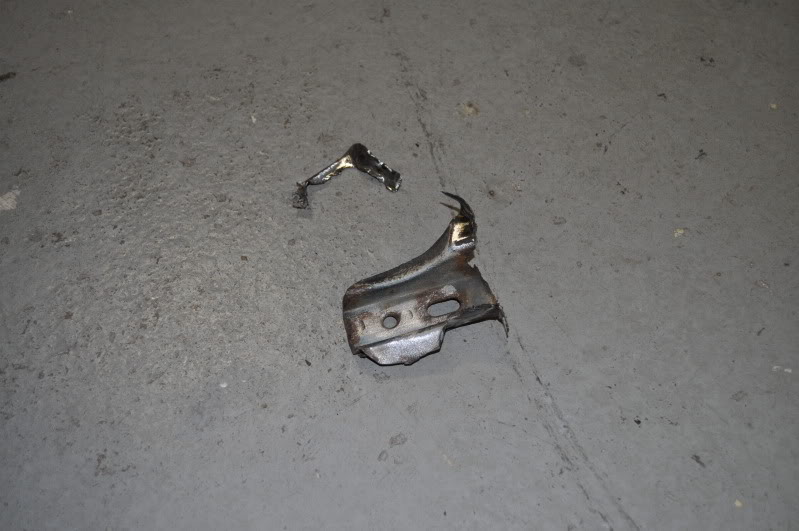
ok so had to remove the remains of the rear towing eye to be able to tighten the bolt which holds the spit in the rear chassis leg,
the towing eye was chopped to be able to fit the zetec s rear bumper years ago
hour and a half later of grinding as the welds are all the way through
but allows me to bolt up tight now
been cracking on with stripping the sound proofing
suprising how heavy that lot is

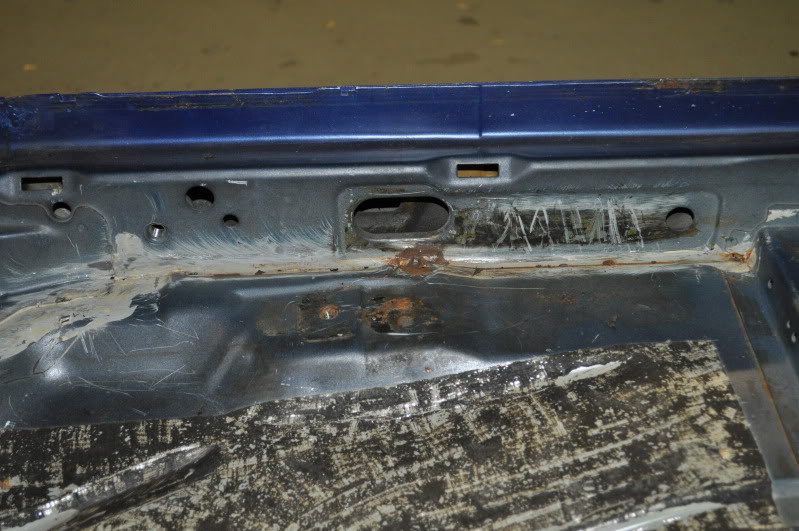
bulkhead panel now soundproofing free aswell,
so when seam welding underneath i dont have to worry about anything melting,
also with the age of the car it could be hiding rust
alot of the seam sealer has looked like this

until you strip it back to find small scabby bits like this
the towing eye was chopped to be able to fit the zetec s rear bumper years ago
hour and a half later of grinding as the welds are all the way through
but allows me to bolt up tight now
been cracking on with stripping the sound proofing
suprising how heavy that lot is
bulkhead panel now soundproofing free aswell,
so when seam welding underneath i dont have to worry about anything melting,
also with the age of the car it could be hiding rust
alot of the seam sealer has looked like this
until you strip it back to find small scabby bits like this
19-03-2010, 07:18 AM
#50
PassionFord Regular
Thread Starter
Join Date: Aug 2003
Posts: 457
Likes: 0
Received 0 Likes
on
0 Posts
ok so all the soundproofing is gone but some remains left to get rid of
bang and the dirt is gone........................
also made a start on the engine bay
heres the old rusty battery tray
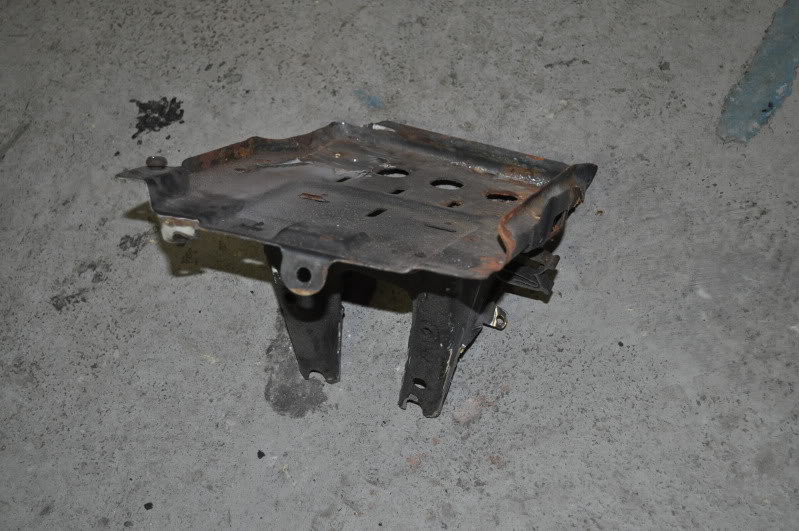
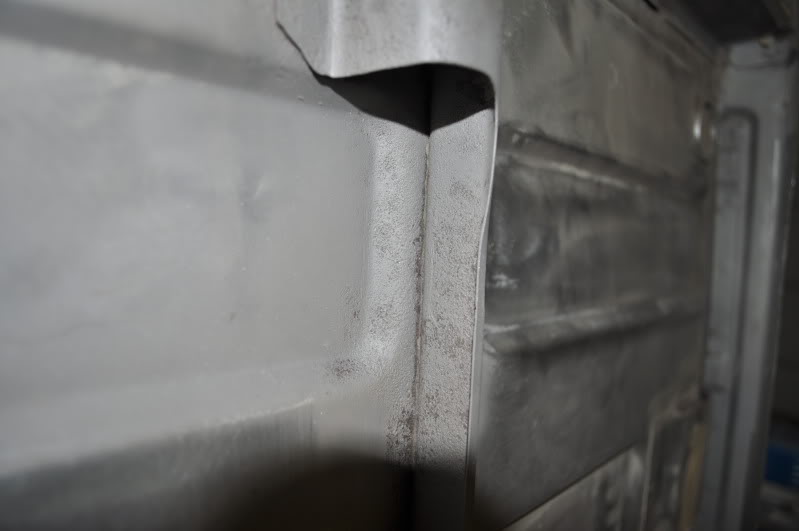
and where it used to live, to tidy things up i planned to trim the metal back to the red line
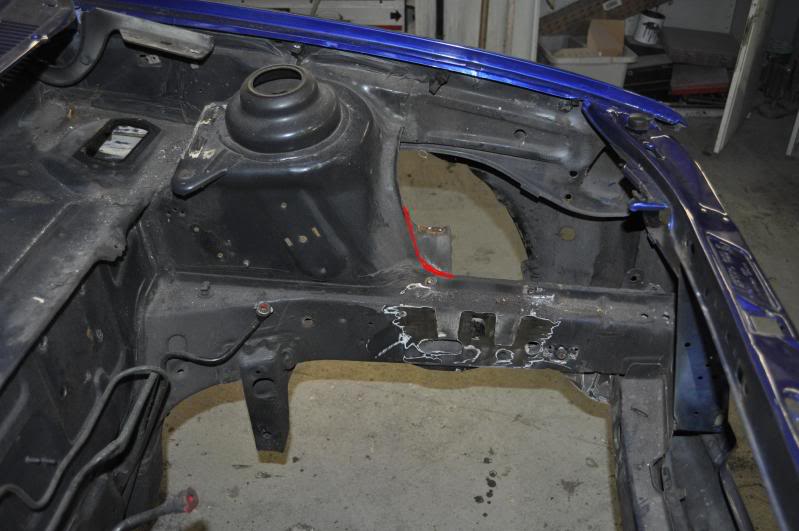
also decided to remove the bracket which holds the wheel jack
where it used to live
and after a bit of tidying will all come together soon hopefully
i plan to have alot of parts sand blasted and powdercoated
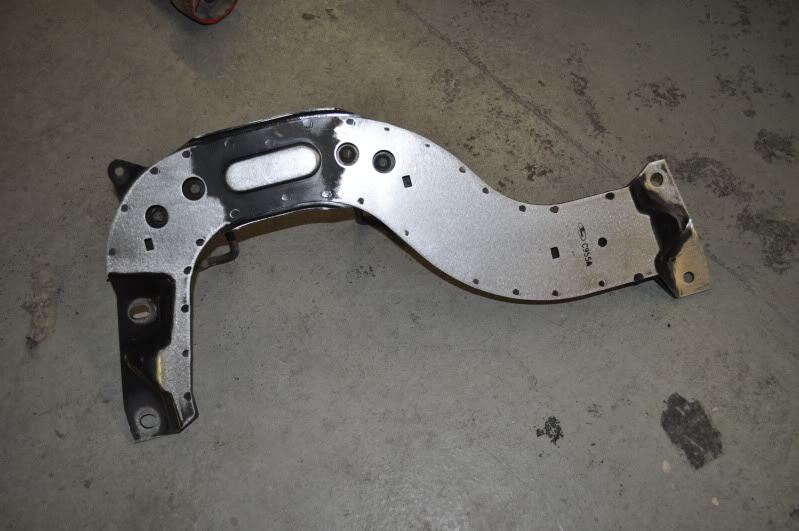
noticed the lower crossmemeber had alot of deep scratches etc
so spent a small amount of time with the DA to smooth it all out for a better finish later on
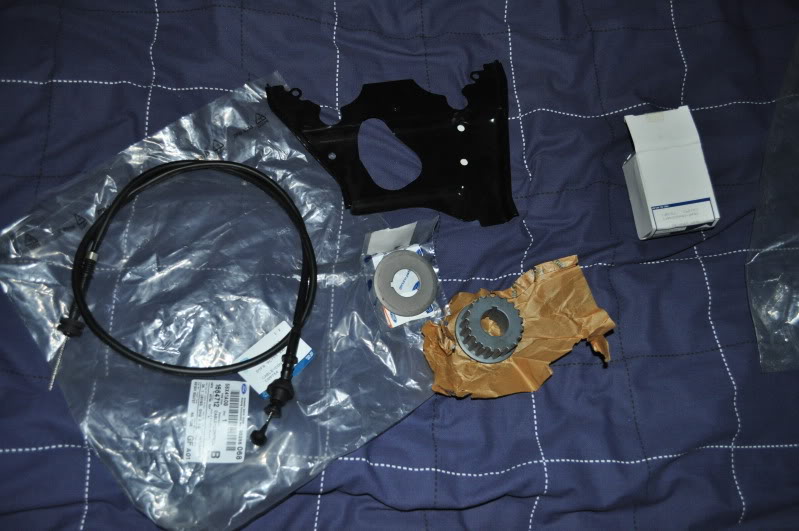
few more bits i've been buying
- fiesta turbo throttle cable as the one specific for my car is no longer available from fords
so with the helpfull advice of people on fiestaturbo.com i found out theres a small difference in size but would be fine
- the rear timing belt cover which bolts to the block and main bottom pulley with guide as ian had trouble getting my lower pulley off
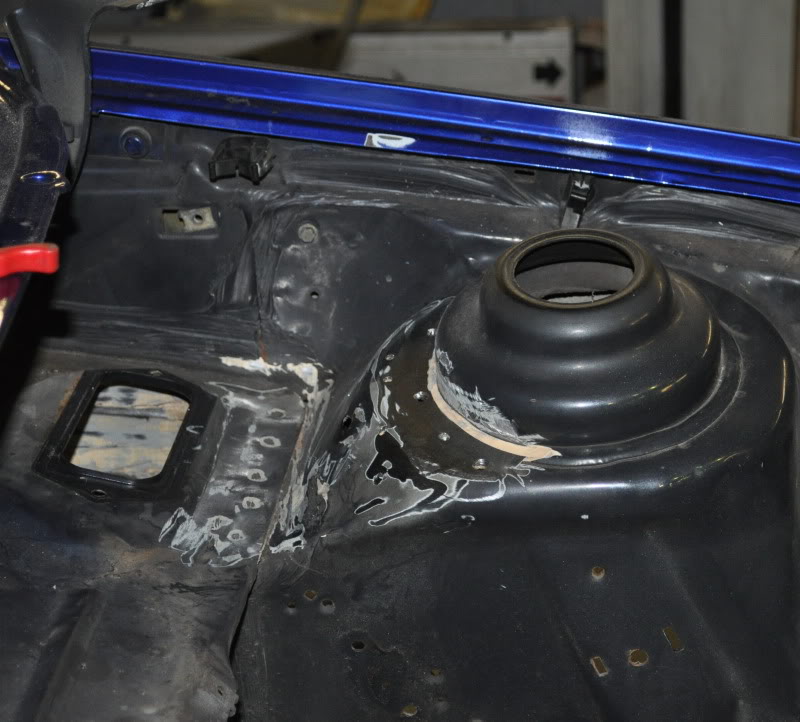
well some bad news
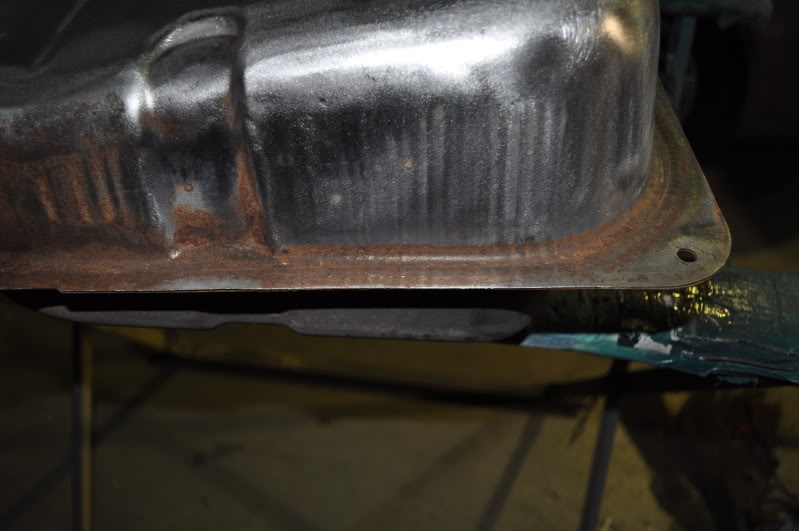
well the fuel tank was'nt looking brilliant as it had alot of rust

so decided to see if it could be saved, DA'd the top surface and alot of rust went and started to look good
but the rust on the sides was going nowhere
so i've decided to look for a new fuel tank
once again fords have come up top trumps again and its no longer available
so going to have to do some research as i dont fancy a patent copy fuel tank as i've heard a few bad stories
bang and the dirt is gone........................
also made a start on the engine bay
heres the old rusty battery tray
and where it used to live, to tidy things up i planned to trim the metal back to the red line
also decided to remove the bracket which holds the wheel jack
where it used to live
and after a bit of tidying will all come together soon hopefully
i plan to have alot of parts sand blasted and powdercoated
noticed the lower crossmemeber had alot of deep scratches etc
so spent a small amount of time with the DA to smooth it all out for a better finish later on
few more bits i've been buying
- fiesta turbo throttle cable as the one specific for my car is no longer available from fords
so with the helpfull advice of people on fiestaturbo.com i found out theres a small difference in size but would be fine
- the rear timing belt cover which bolts to the block and main bottom pulley with guide as ian had trouble getting my lower pulley off
well some bad news
well the fuel tank was'nt looking brilliant as it had alot of rust
so decided to see if it could be saved, DA'd the top surface and alot of rust went and started to look good
but the rust on the sides was going nowhere
so i've decided to look for a new fuel tank
once again fords have come up top trumps again and its no longer available
so going to have to do some research as i dont fancy a patent copy fuel tank as i've heard a few bad stories
19-03-2010, 07:19 AM
#51
PassionFord Regular
Thread Starter
Join Date: Aug 2003
Posts: 457
Likes: 0
Received 0 Likes
on
0 Posts
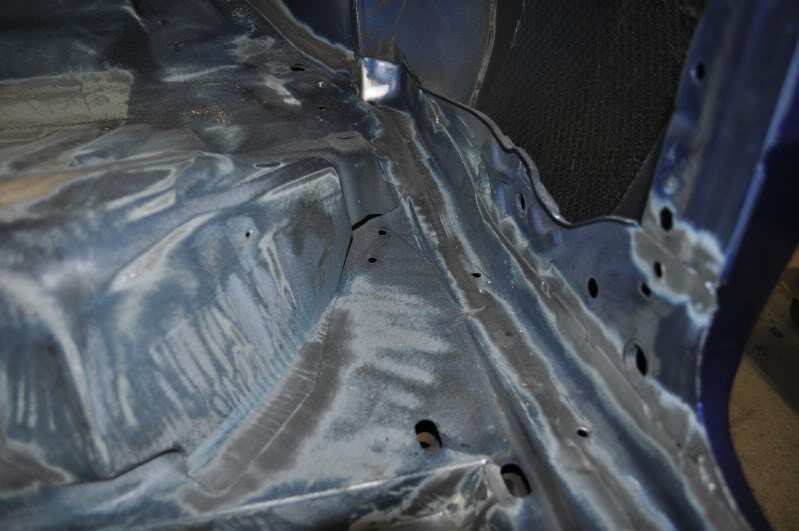
ok so as i've been strupping either sound proofing or seam sealer off
the obvious has happened and i've come across rusty sections
the plan is to cut it out, new steel plate welded in with a finish that does'nt look out of place
regardless if its covered by carpet
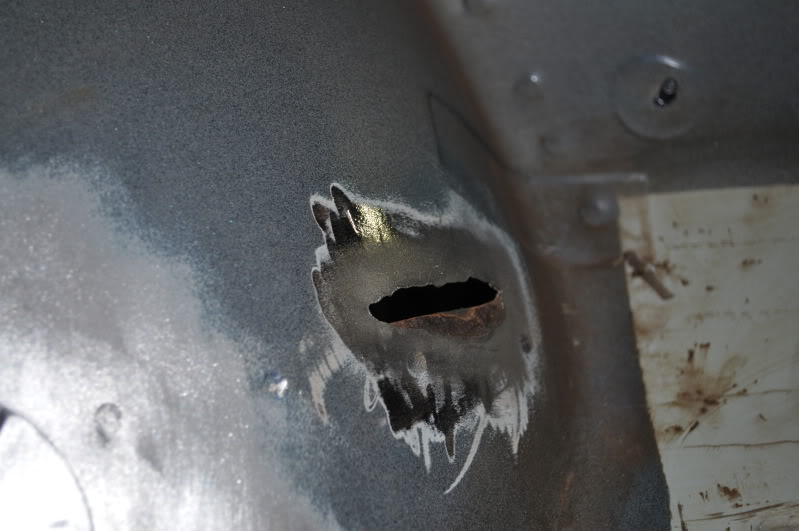
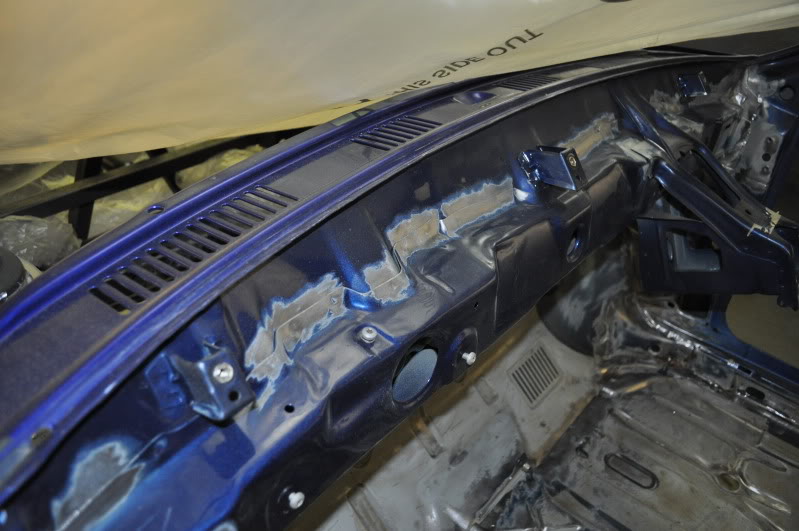
so the first obvious hole is the passenger front inner arch
the passenger top of the bulkhead, normally hidden by the dash
been stripping more seams in the engine bay

on this support inside the shell, just under the windscreen was two supports
just incase they were hiding any signs of rust they were taken off
support taken off, more access to strip seam sealer and prepare panel joins for seam welding
rear beam stripped down as i want this shot blasted clean and powder coated black
i gave the rear beam plates which bolt to the shell a quick sanding with the DA
as there was a few layers of paint, so wanted to make sure its clean
before and after
heres the top bulkhead support with seams back to bare metal for seam welding
the obvious has happened and i've come across rusty sections
the plan is to cut it out, new steel plate welded in with a finish that does'nt look out of place
regardless if its covered by carpet
so the first obvious hole is the passenger front inner arch
the passenger top of the bulkhead, normally hidden by the dash
been stripping more seams in the engine bay
on this support inside the shell, just under the windscreen was two supports
just incase they were hiding any signs of rust they were taken off
support taken off, more access to strip seam sealer and prepare panel joins for seam welding
rear beam stripped down as i want this shot blasted clean and powder coated black
i gave the rear beam plates which bolt to the shell a quick sanding with the DA
as there was a few layers of paint, so wanted to make sure its clean
before and after
heres the top bulkhead support with seams back to bare metal for seam welding
19-03-2010, 07:21 AM
#52
PassionFord Regular
Thread Starter
Join Date: Aug 2003
Posts: 457
Likes: 0
Received 0 Likes
on
0 Posts
how the inside is looking now, with nearly every seam i plan to weld back to bear metal
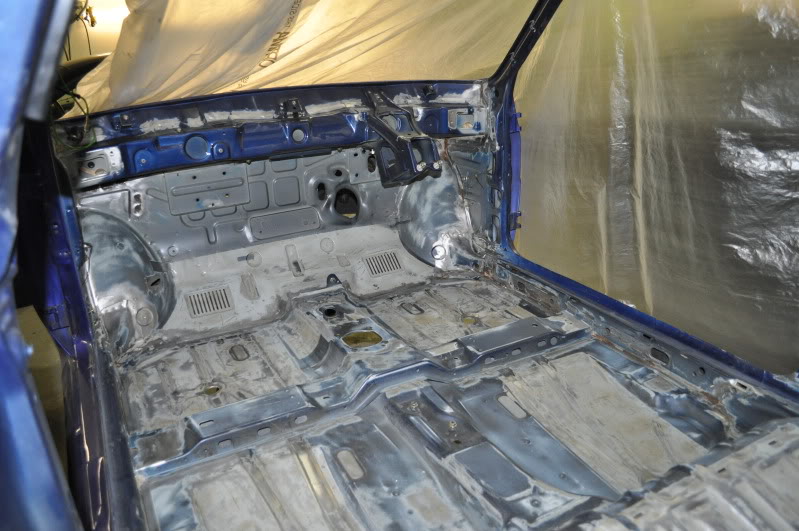
been stripping the rear arches back aswell
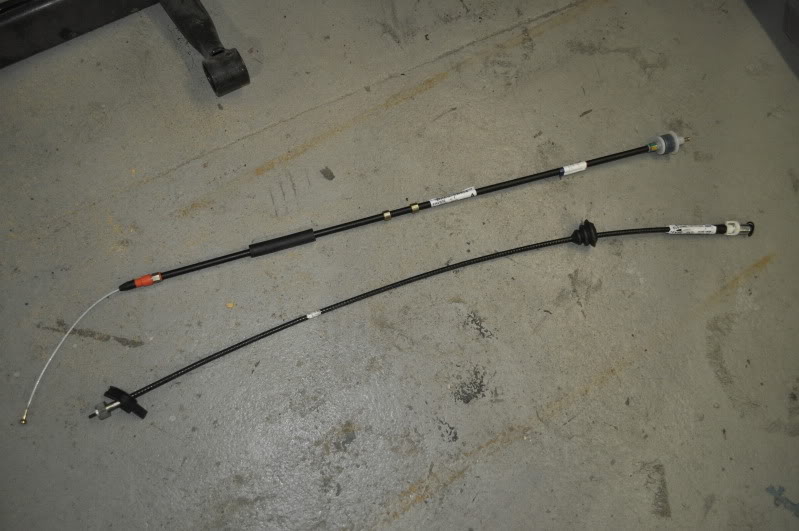
new clutch cable and speedo cable
my new FRST fuel tank arrived
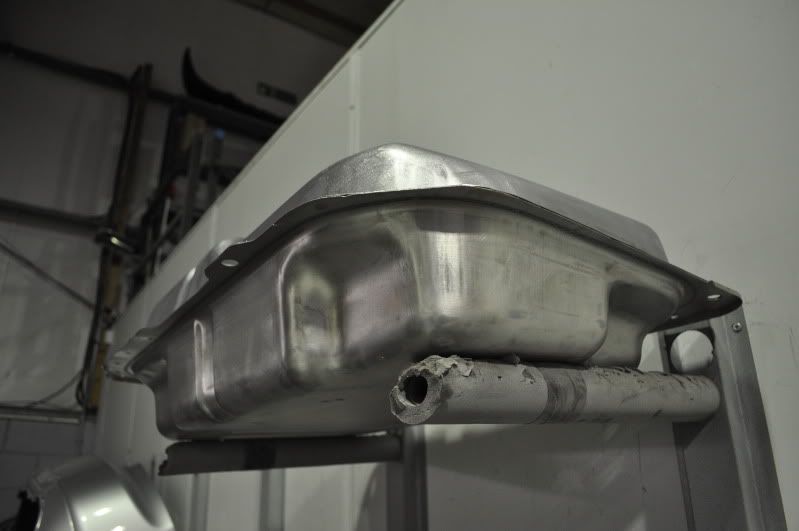
heres the underneath, seems to be zinc plated or something
anyway i plan to have it all silver
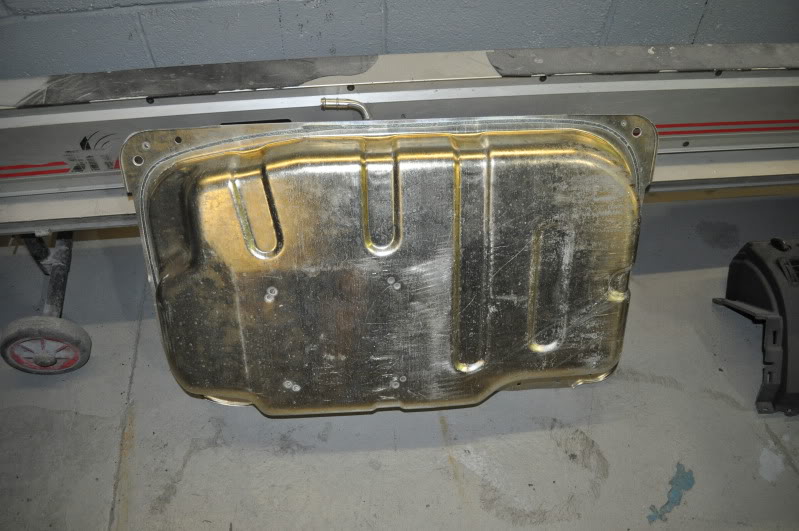
the top of it, the ford label shows it was made in 2008
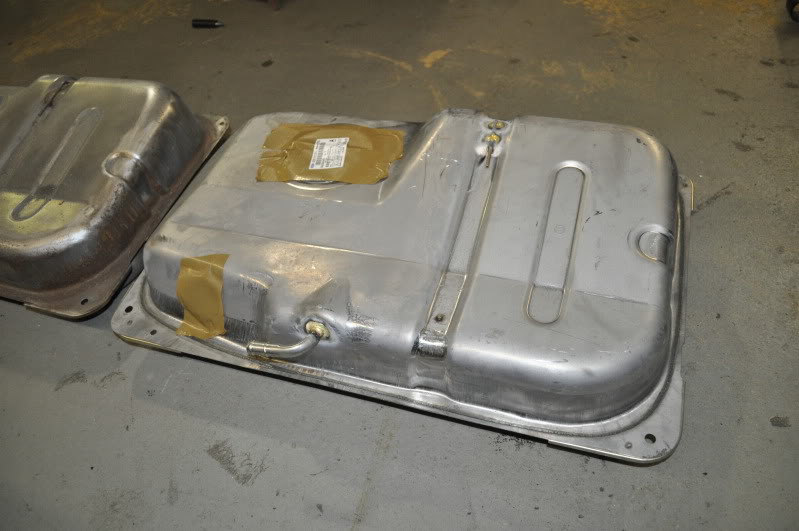
and next to the old rusty tank
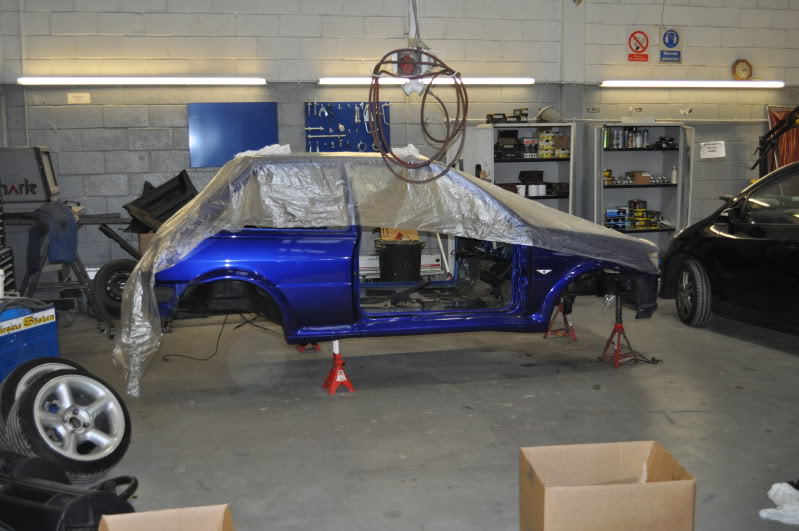
ok time for an update which is a bit different
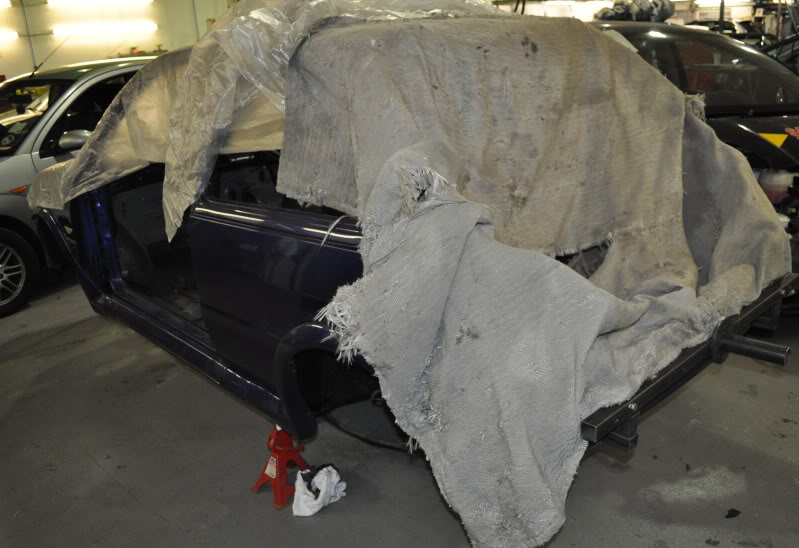
connected the front end of the car-spit
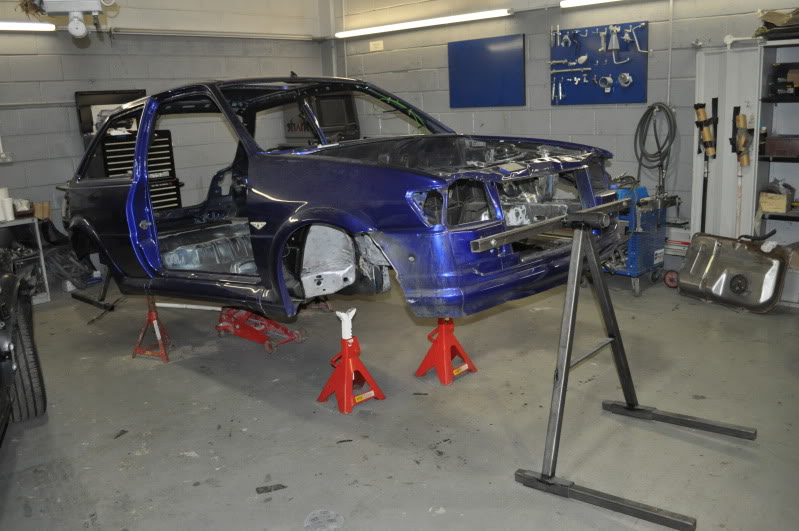
in the end after playing with the jacks with no joy as they would'nt go high enough,
i got the engine crane out and lifted it up high enough so that the car is now on the spit 100%
its very wierd being that high off the floor
you can see how much higher i needed the car from the gap
between the axel stands/jacks and the car
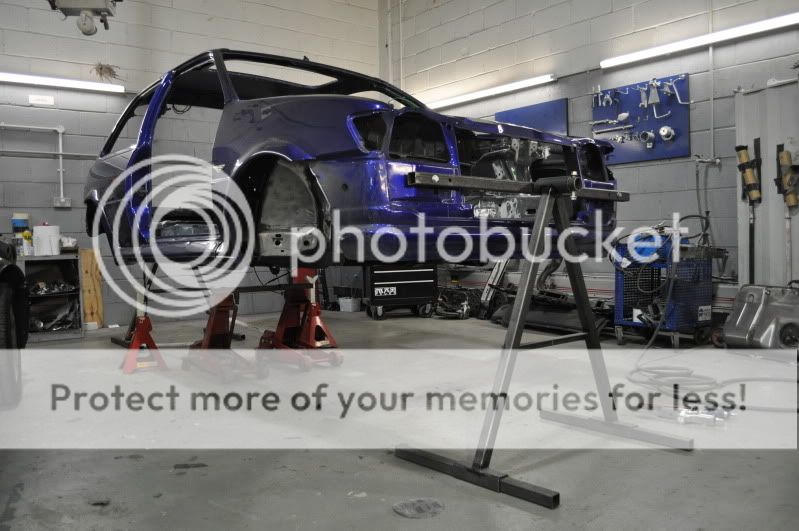
after a clear up

something i've been wanting to do for ages

cheesy moment for the memories!!
something you don't get a chance to do everyday
been stripping the rear arches back aswell
new clutch cable and speedo cable
my new FRST fuel tank arrived
heres the underneath, seems to be zinc plated or something
anyway i plan to have it all silver
the top of it, the ford label shows it was made in 2008
and next to the old rusty tank
ok time for an update which is a bit different
connected the front end of the car-spit
in the end after playing with the jacks with no joy as they would'nt go high enough,
i got the engine crane out and lifted it up high enough so that the car is now on the spit 100%
its very wierd being that high off the floor
you can see how much higher i needed the car from the gap
between the axel stands/jacks and the car
after a clear up
something i've been wanting to do for ages
cheesy moment for the memories!!
something you don't get a chance to do everyday
19-03-2010, 07:23 AM
#53
PassionFord Regular
Thread Starter
Join Date: Aug 2003
Posts: 457
Likes: 0
Received 0 Likes
on
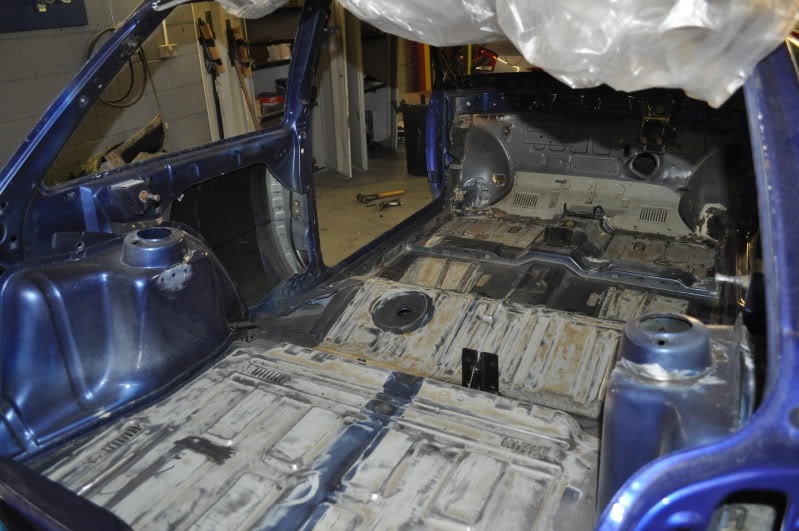
0 Posts
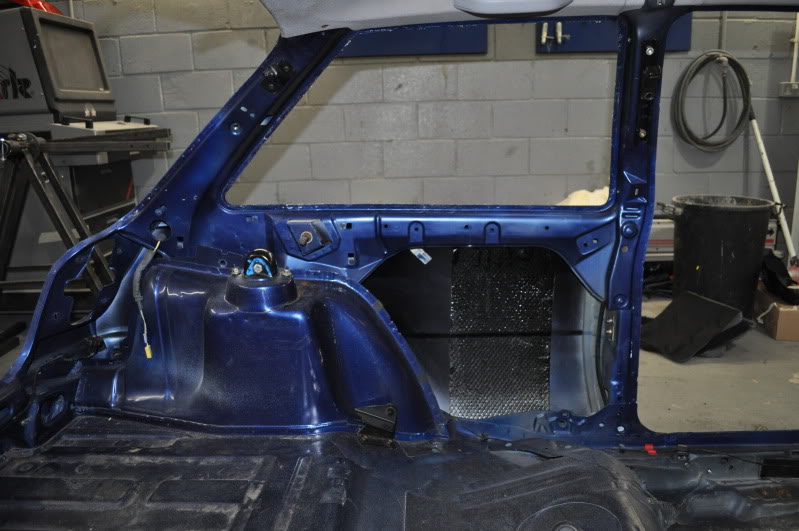
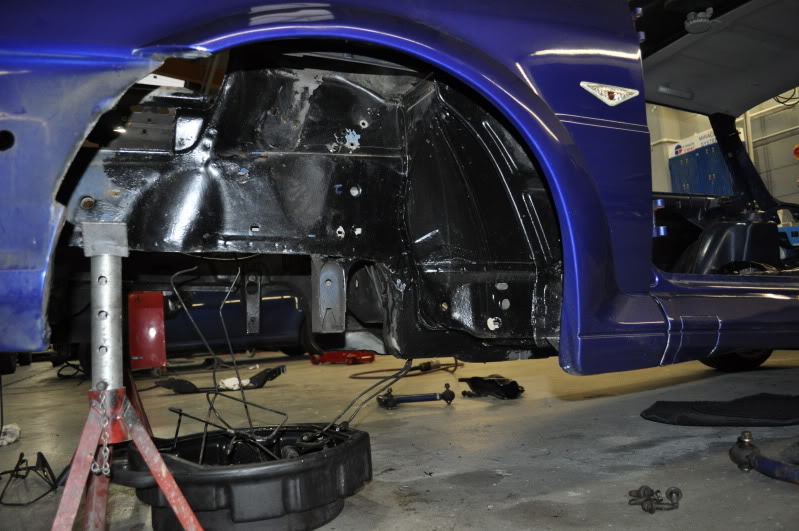
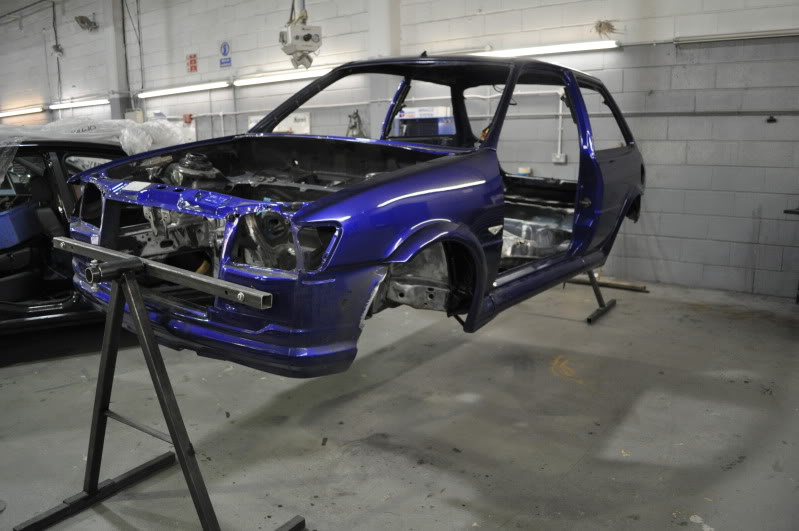
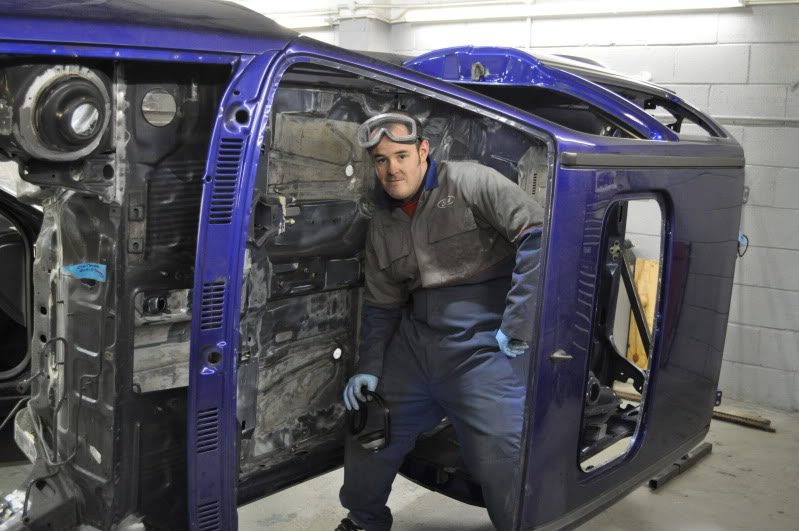
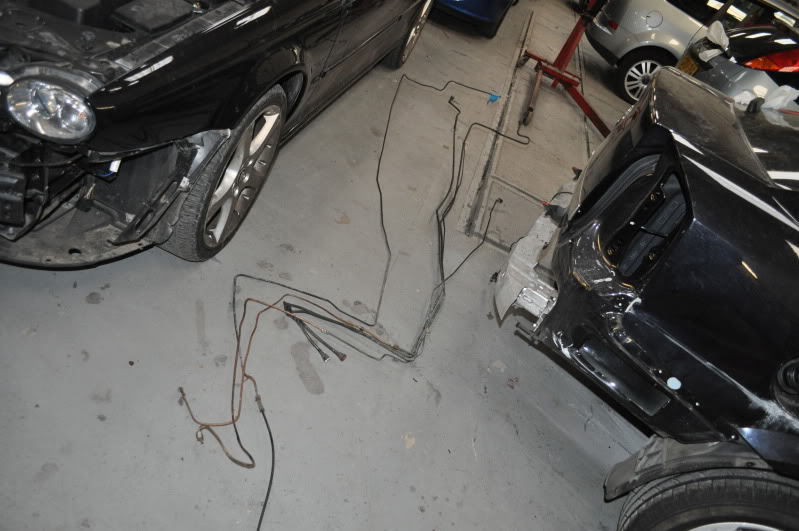
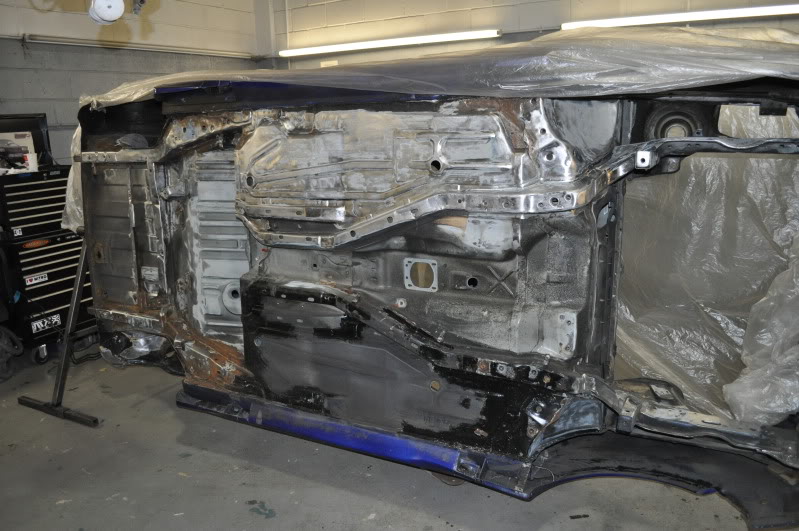
more progress of the fez on its side
first thing to do with the better access was to remove the brake lines to the rear and the fuel lines
under the boot floor is the spare wheel carrier
i've not used it for years and was taken off some time ago
so while i'm here i thought i'd remove the brackets
one bracket gone
much better
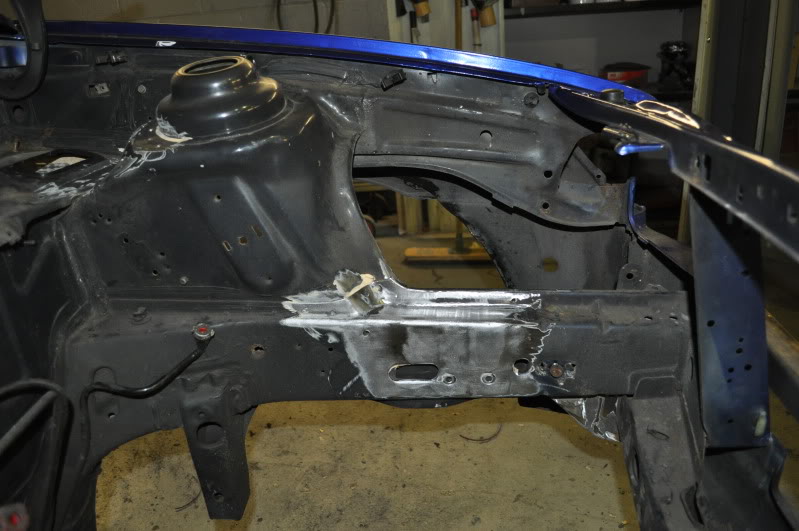
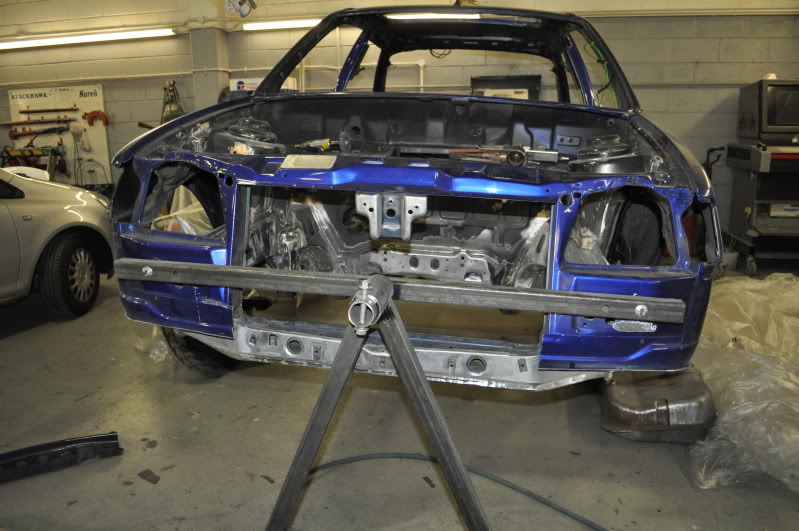
overall progress of the stripping the underneath so far
done some panel modification to for the new alloy rad/intercooler setup
the front panel needs cutting to allow for my big GRS intercooler
so marked out where i want to cut for now, left a bit incase of any accidents and cutting too much
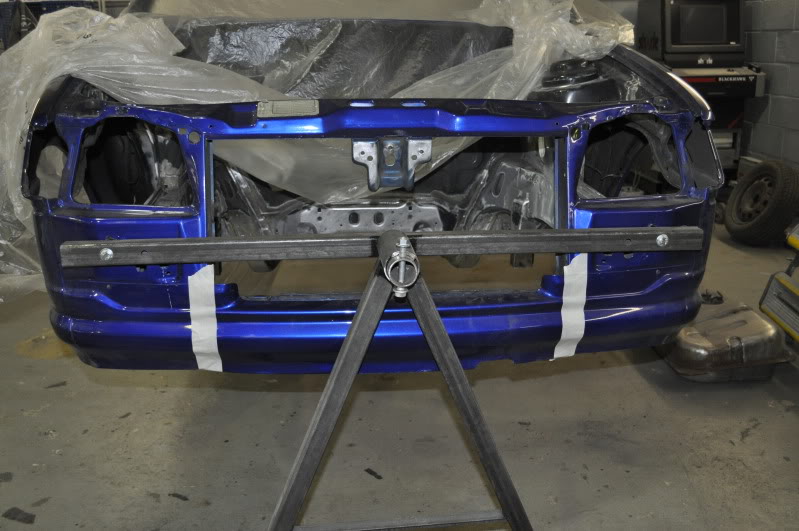
front panel cut out
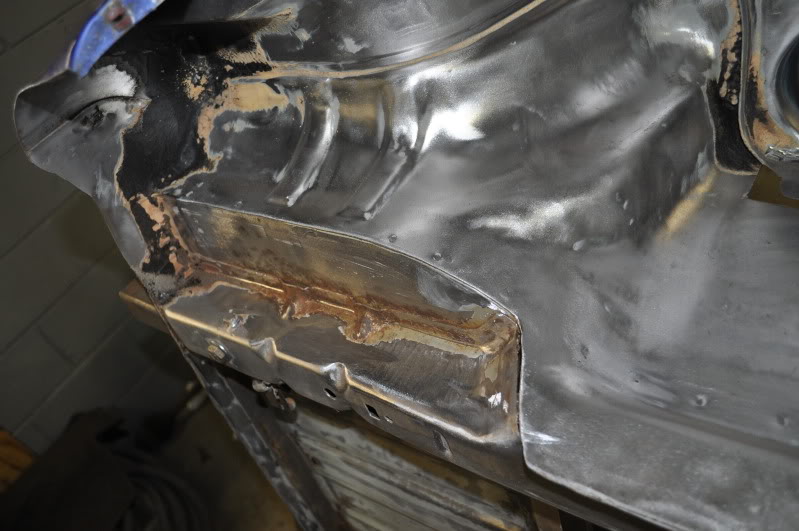
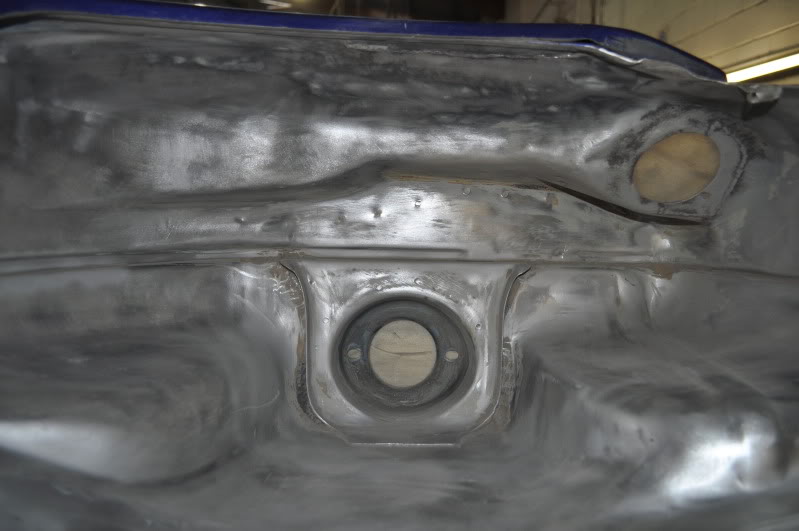
heres underneath the front panel before trimming, lots of surface rust in places
and here it is now after taking it back to metal, much better

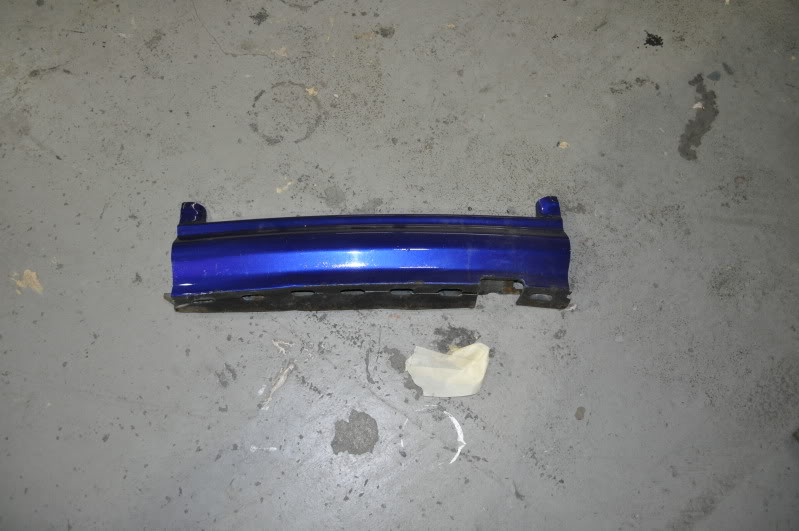
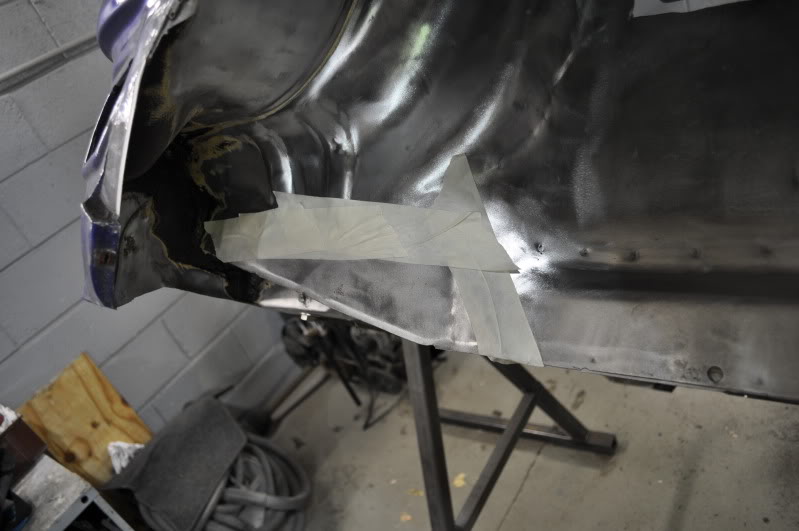
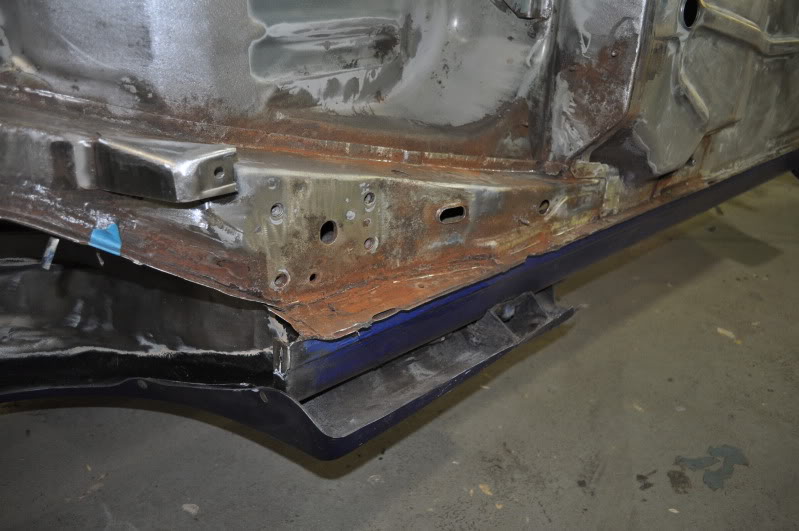
along the bottom of the front valance panel (or whats left of it) had small signs of rust
so i decided to trim this back as its hidden by the bumper anyway
i used masking tape as a guide
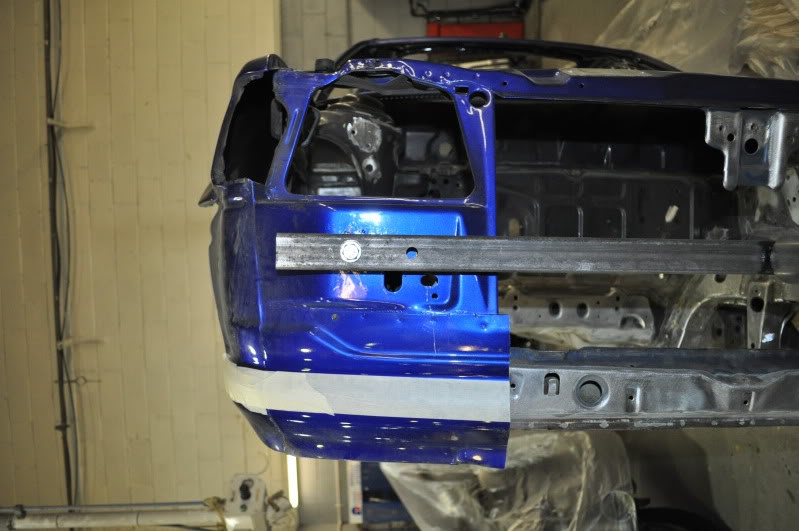
even with the piece trimmed above the edge of the maskin tape
i can still bolt the edge of the front bumper inside the wing
job done

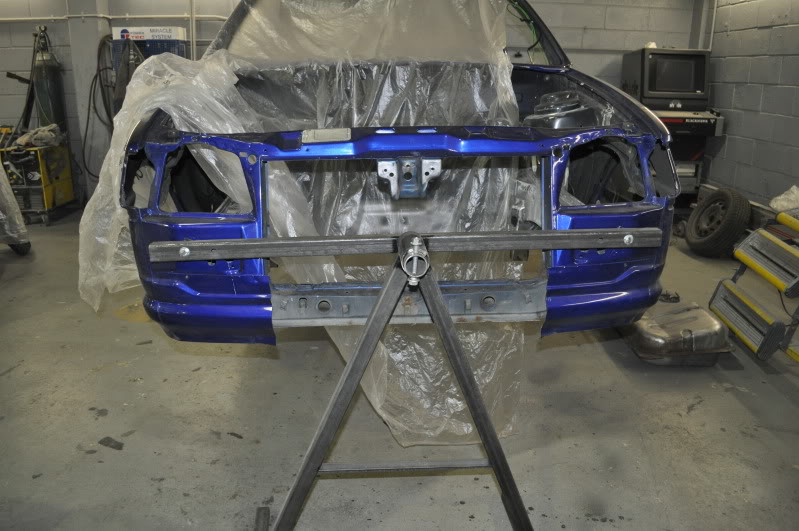
and how the front end looks now
gave me better access to the main front crossmember aswell and makes no difference when all built up as the bumper covers the lot and i've less chance of rust coming back
first thing to do with the better access was to remove the brake lines to the rear and the fuel lines
under the boot floor is the spare wheel carrier
i've not used it for years and was taken off some time ago
so while i'm here i thought i'd remove the brackets
one bracket gone
much better
overall progress of the stripping the underneath so far
done some panel modification to for the new alloy rad/intercooler setup
the front panel needs cutting to allow for my big GRS intercooler
so marked out where i want to cut for now, left a bit incase of any accidents and cutting too much
front panel cut out
heres underneath the front panel before trimming, lots of surface rust in places
and here it is now after taking it back to metal, much better
along the bottom of the front valance panel (or whats left of it) had small signs of rust
so i decided to trim this back as its hidden by the bumper anyway
i used masking tape as a guide
even with the piece trimmed above the edge of the maskin tape
i can still bolt the edge of the front bumper inside the wing
job done
and how the front end looks now
gave me better access to the main front crossmember aswell and makes no difference when all built up as the bumper covers the lot and i've less chance of rust coming back
19-03-2010, 07:25 AM
#54
PassionFord Regular
Thread Starter
Join Date: Aug 2003
Posts: 457
Likes: 0
Received 0 Likes
on
0 Posts
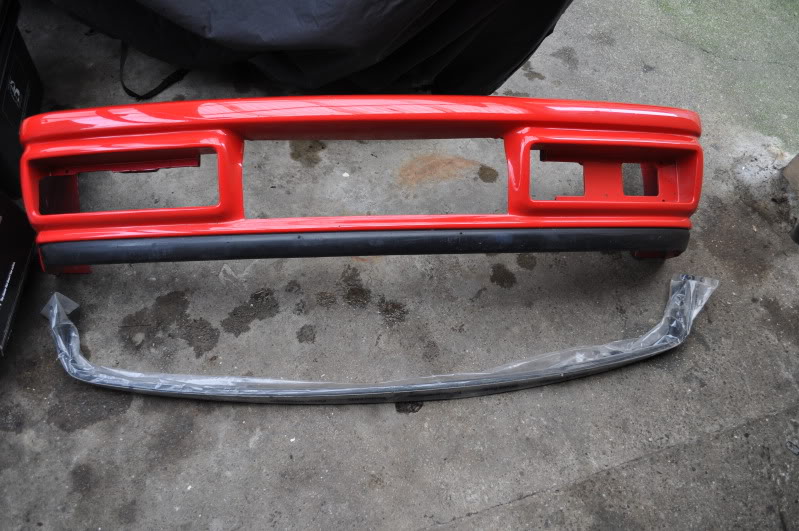
a while ago i got a bumper from a fiesta turbo with swage line smoothed like my current bumper
also its been cut for the big grs intercooler i have
also have a brand new lower rubber splitter ready to go on
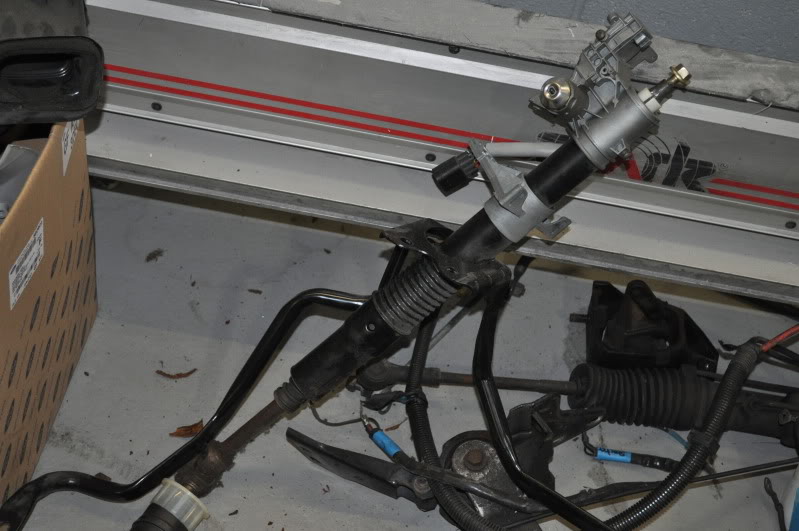
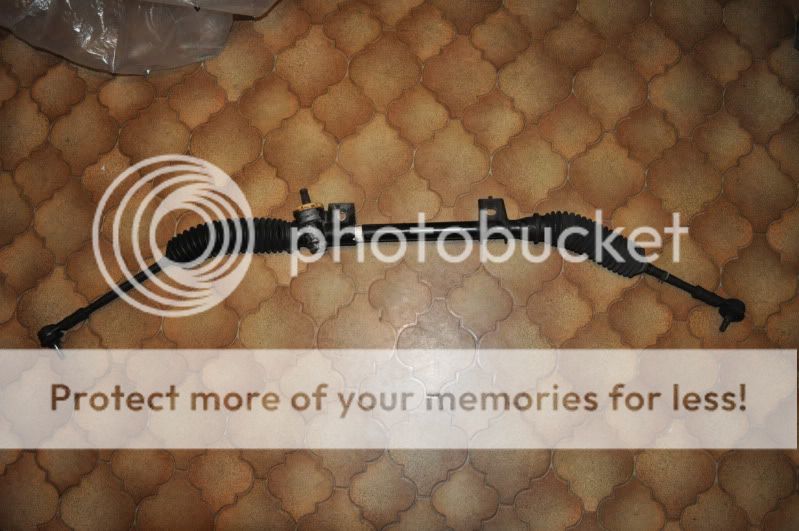
also as i plan to take the powersteering off,
i've got myself a fiesta turbo manual steering rack as its the only mk3 fiesta with the quickrack option
3.75 turns lock to lock
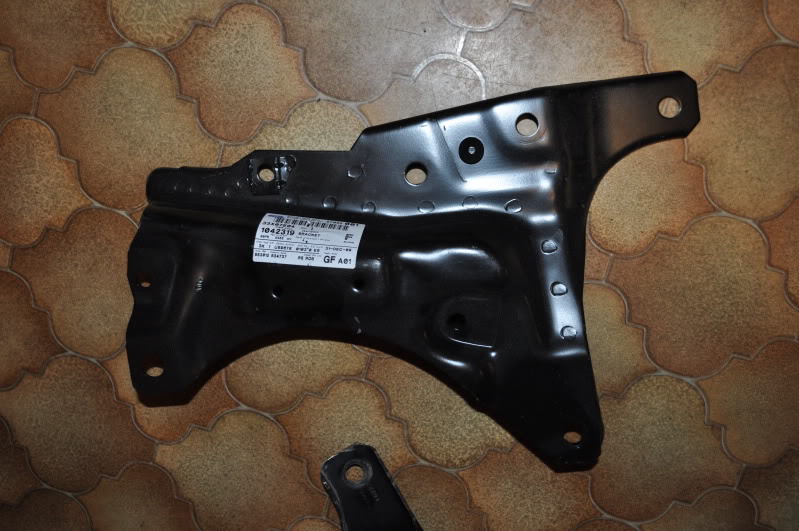
bought myself new lower arm carriers aswell, as mine had rusty seams which i did'nt think would be saved from shotblasting clean
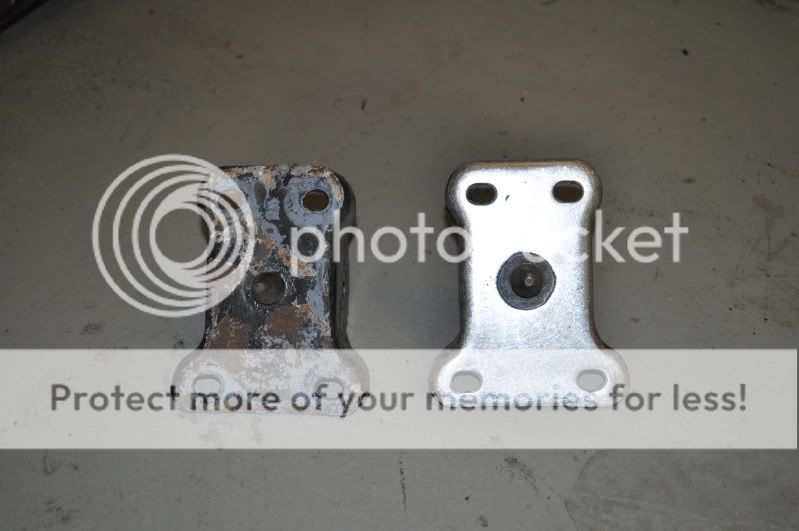
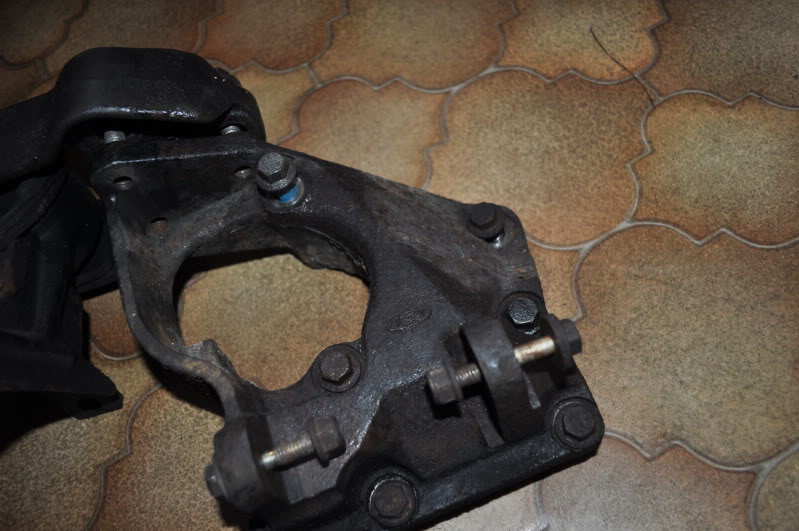
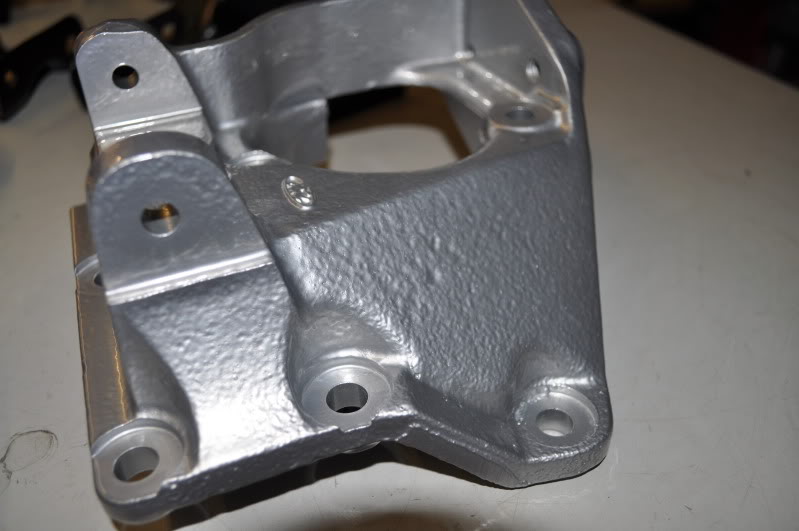
after two weeks of hunting i've sourced a front zetec engine mount from a non powersteering model
with this i'll be able to run a simple 3 pulley aux belt setup
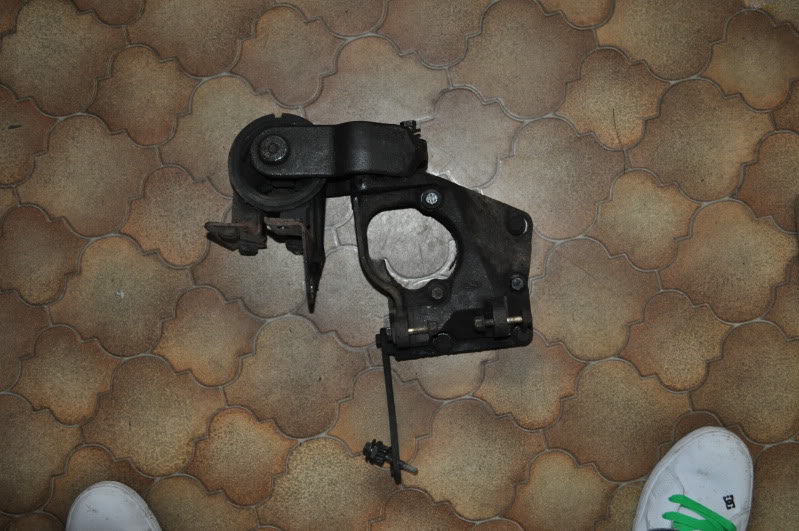
plan is to have this looking like new before bolting on the new engine
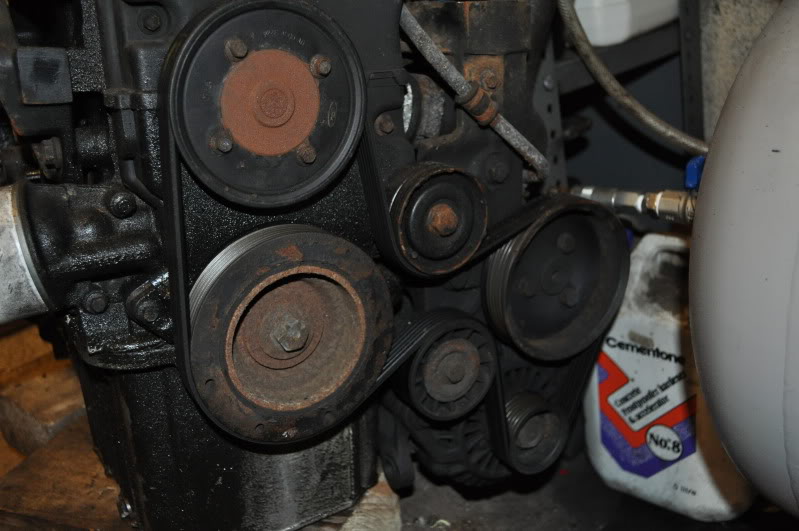
heres the current powersteering setup on my old engine i'm ditching for the new setup
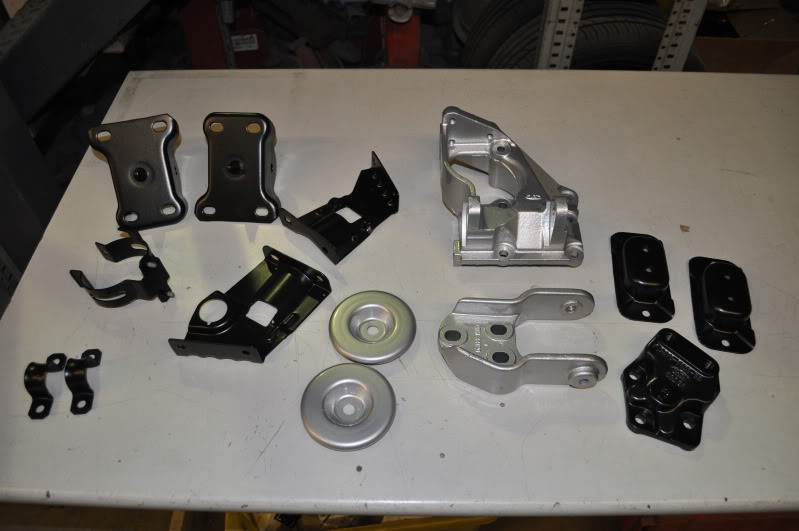
i'm slowly getting parts ready for powdercoating
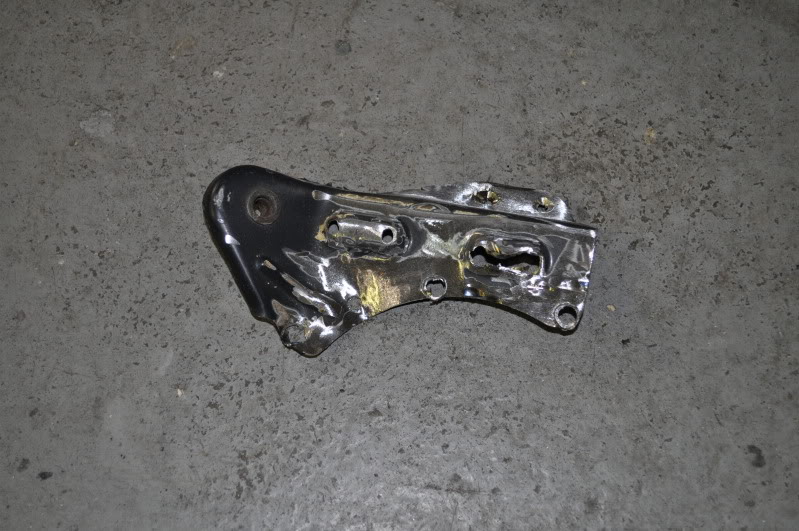
heres a few bits i've cleaned in work using the part washer sink,
(master cylinder brackets, front engine mount in bits, rear engine mount bracket)
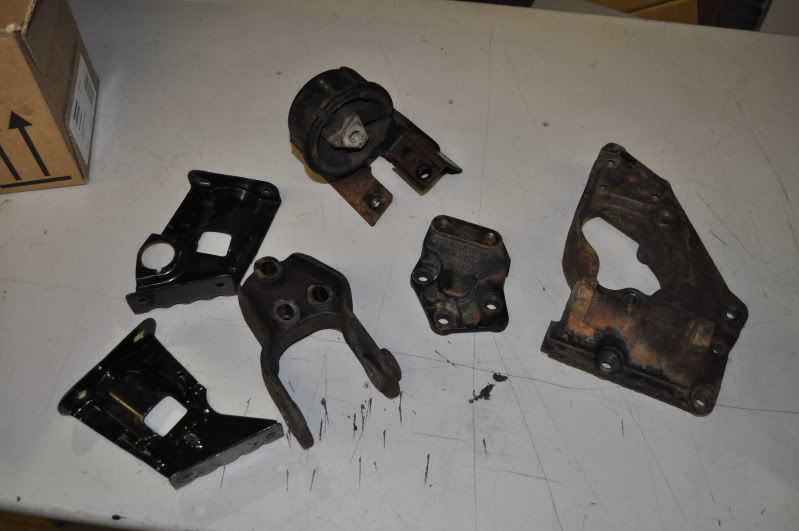
you can see the rust more now its been cleaned

bought a shotblasting kit for blasting clean a few scabby bits on the floor of the fiesta
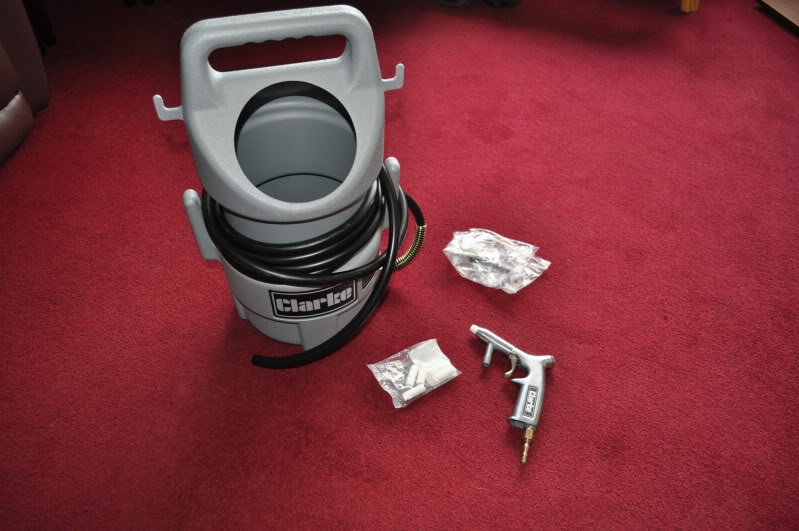
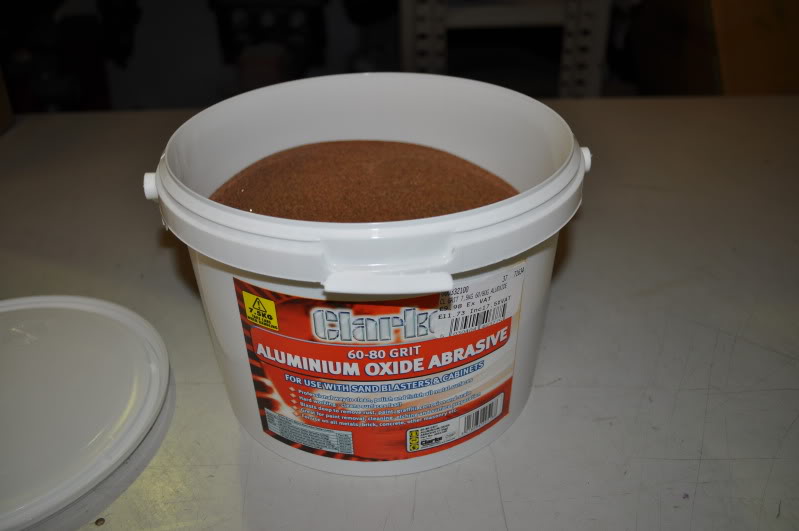
and some aluminium oxide to be used for blasting
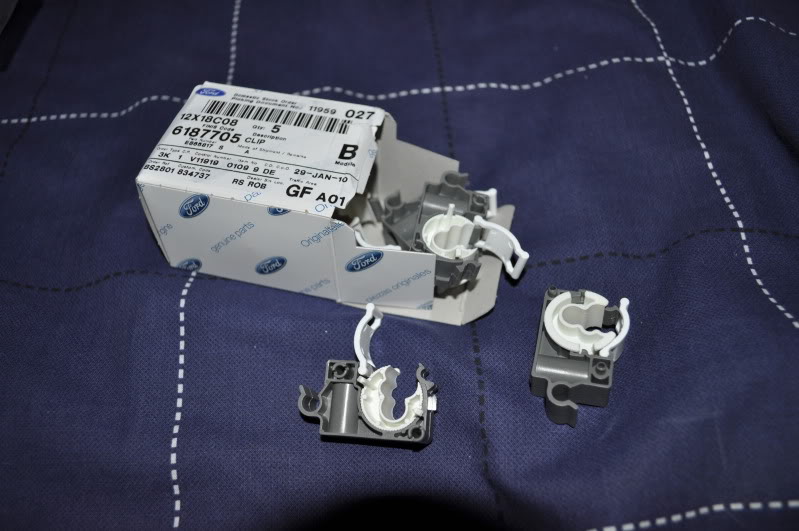
some new clips for under the car, they hold the fuel and brake lines
most of mine broke when taken off
recently sold my avo coilovers and zoo motorsport adjustable lower arms
i think it would be a shame to have everything new or looking new with rusty coilovers
so i plan to buy some new ones along with some adjustable lower arms from area six
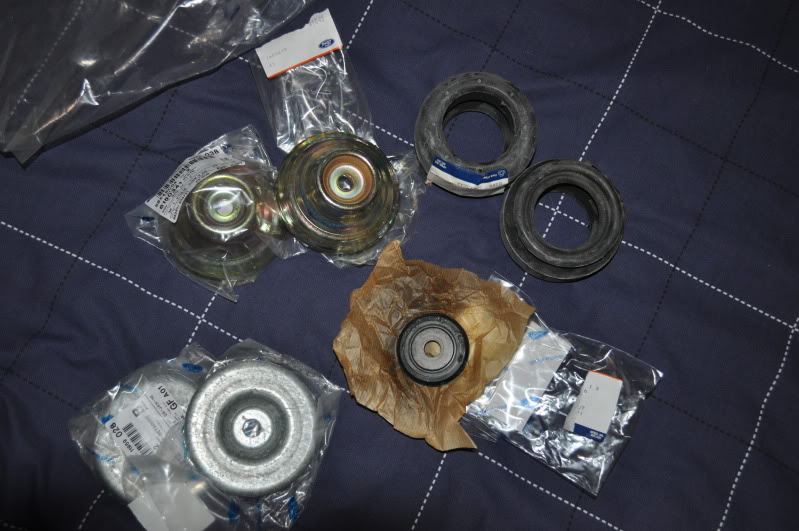
so bought a few things to freshen up the front suspension setup
top mounts, suspension cups, bearings etc
some more p
rogress
the underneath has been stripped back to metal in most places
been trimming metal back again
on the rear of the back wheelarches is a fold of metal which i planned to trim back
heres the view from under the piece i planned to cut off
as you can see plenty of surface rust to be sorted with not much access
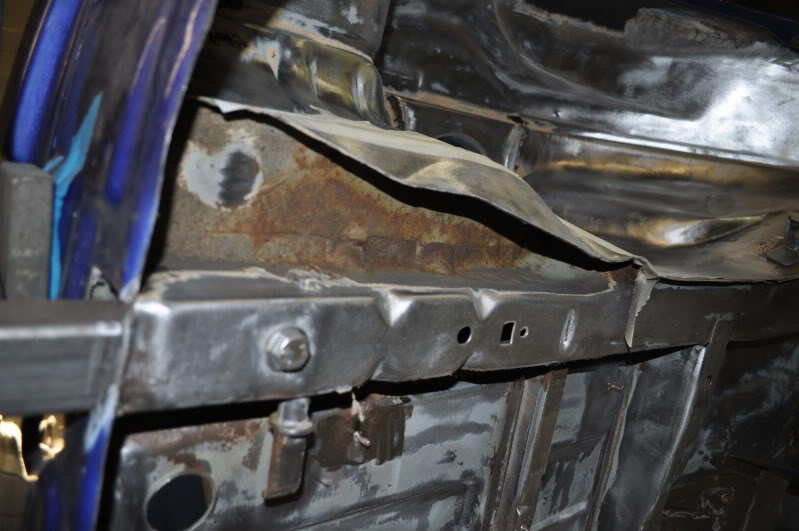
heres the piece cut off with the edges smoothed
had a quick tidy up of the rust, but will go back to finish that another time
heres some surface rust i plan to sort with the shot blasting
panels seem solid as i've tried my best to poke holes through as i'd rather sort it now properly
taken a few parts for powdercoating to a company called castle coatings,
very nice to deal with, chris said normally a week turnaround for shotblasting clean and then powdercoated
stripped my escort master cylinder back for painting as it had drips of brake acid and blobs from a previous paint job by the looks of it, taken the parts off, then blocked the holes ready for sanding
in the end it was completely sanded back to metal as there was small bits of rust starting under the two layers of paint and primer, all sanded out though thankfully
also its been cut for the big grs intercooler i have
also have a brand new lower rubber splitter ready to go on
also as i plan to take the powersteering off,
i've got myself a fiesta turbo manual steering rack as its the only mk3 fiesta with the quickrack option
3.75 turns lock to lock
bought myself new lower arm carriers aswell, as mine had rusty seams which i did'nt think would be saved from shotblasting clean
after two weeks of hunting i've sourced a front zetec engine mount from a non powersteering model
with this i'll be able to run a simple 3 pulley aux belt setup
plan is to have this looking like new before bolting on the new engine
heres the current powersteering setup on my old engine i'm ditching for the new setup
i'm slowly getting parts ready for powdercoating
heres a few bits i've cleaned in work using the part washer sink,
(master cylinder brackets, front engine mount in bits, rear engine mount bracket)
you can see the rust more now its been cleaned
bought a shotblasting kit for blasting clean a few scabby bits on the floor of the fiesta
and some aluminium oxide to be used for blasting
some new clips for under the car, they hold the fuel and brake lines
most of mine broke when taken off
recently sold my avo coilovers and zoo motorsport adjustable lower arms
i think it would be a shame to have everything new or looking new with rusty coilovers
so i plan to buy some new ones along with some adjustable lower arms from area six
so bought a few things to freshen up the front suspension setup
top mounts, suspension cups, bearings etc
some more p
rogress
the underneath has been stripped back to metal in most places
been trimming metal back again
on the rear of the back wheelarches is a fold of metal which i planned to trim back
heres the view from under the piece i planned to cut off
as you can see plenty of surface rust to be sorted with not much access
heres the piece cut off with the edges smoothed
had a quick tidy up of the rust, but will go back to finish that another time
heres some surface rust i plan to sort with the shot blasting
panels seem solid as i've tried my best to poke holes through as i'd rather sort it now properly
taken a few parts for powdercoating to a company called castle coatings,
very nice to deal with, chris said normally a week turnaround for shotblasting clean and then powdercoated
stripped my escort master cylinder back for painting as it had drips of brake acid and blobs from a previous paint job by the looks of it, taken the parts off, then blocked the holes ready for sanding
in the end it was completely sanded back to metal as there was small bits of rust starting under the two layers of paint and primer, all sanded out though thankfully
19-03-2010, 07:27 AM
#55
PassionFord Regular
Thread Starter
Join Date: Aug 2003
Posts: 457
Likes: 0
Received 0 Likes
on
0 Posts
small bits and bobs
got a non powersteering steering column and UJ
also a thermostat controlled sandwich plate for the oil cooler

gave the master cylinder a good sanding all over in the end, then gave a quick coat of spot primer for now
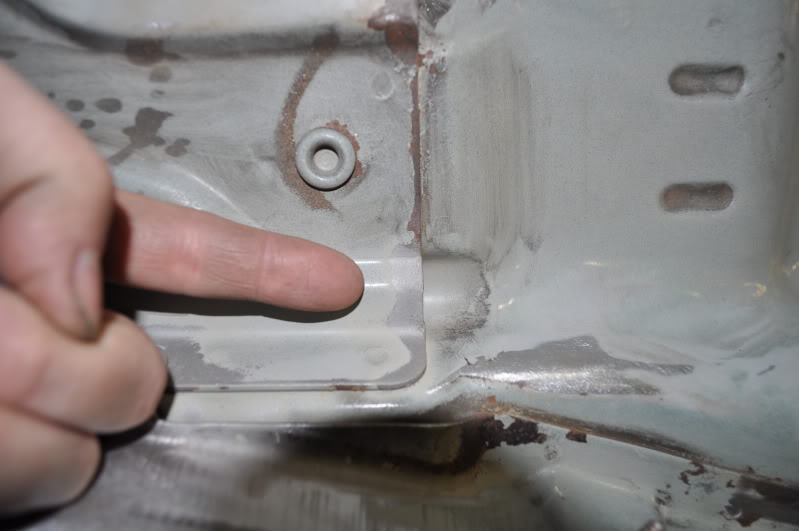
the shotblasting seems to be working
from this
to this
directly were my finger is pointing you can see its been blasted clean,
above it shows the small bits of rust etc
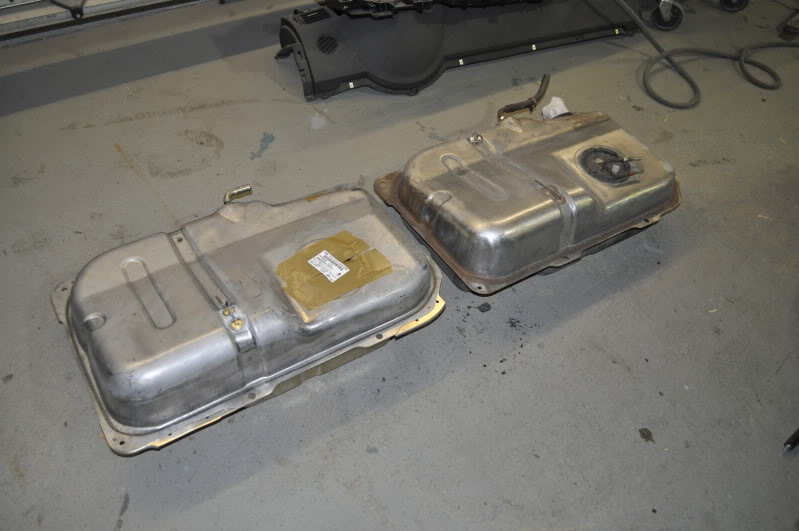
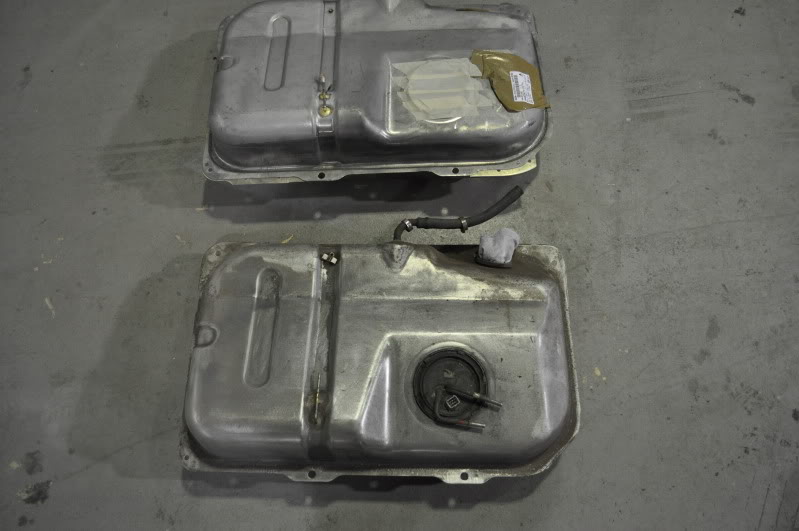
so been getting my fuel tank ready
new on the top, old on the bottom
you can see the small difference on the bottom right of each tank
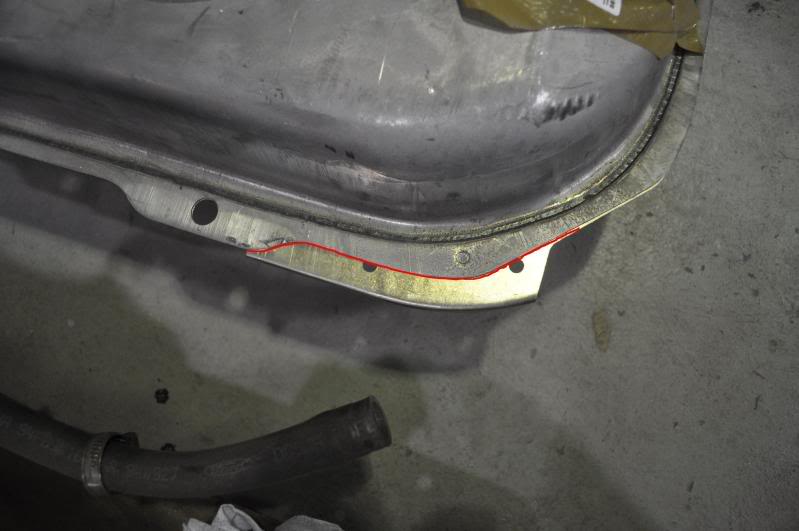
had a trial fit and was a bit tight on one corner
as the new tank had an extra piece as you can see marked with the red line below
so this was trimmed off
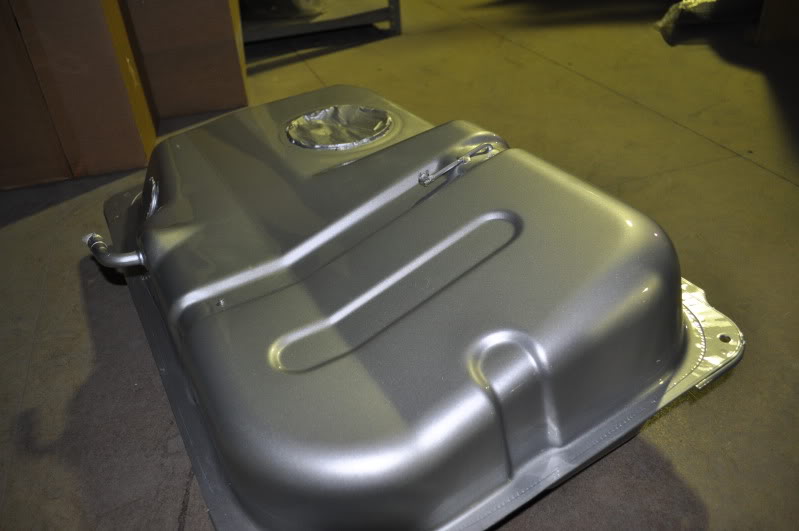
then DA'd the whole tank ready for metal primer
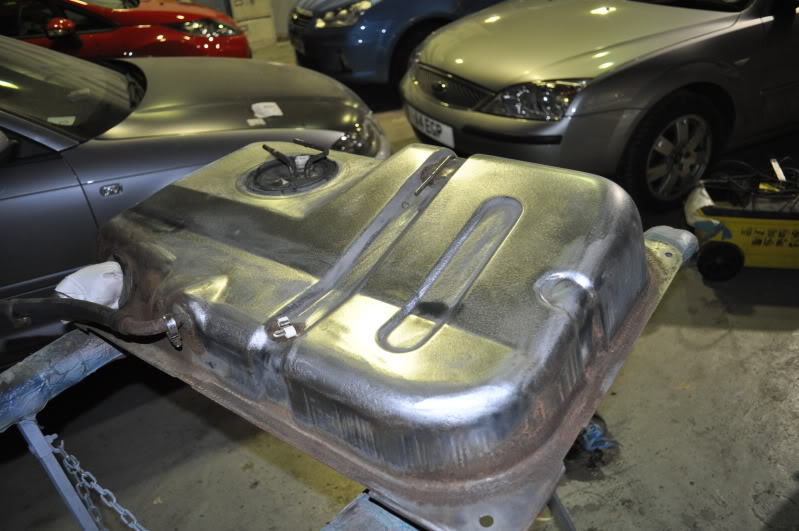
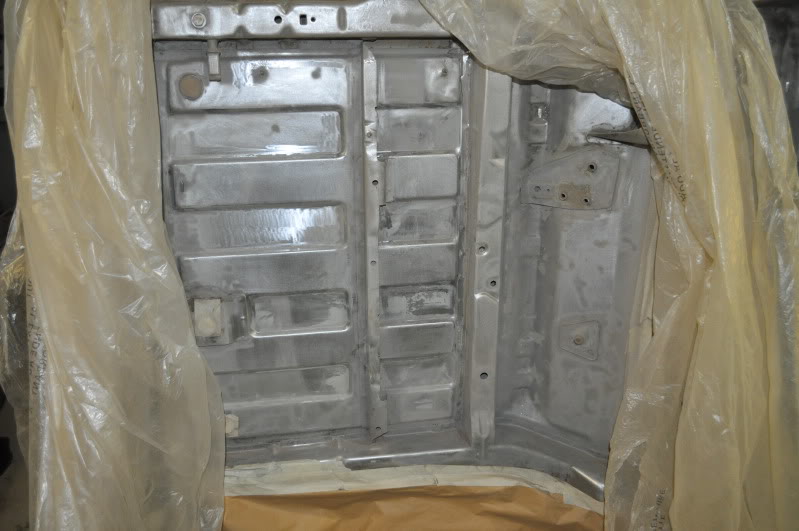
heres some pictures after i had it sprayed metallic silver in work (thanks lads)
i'm very happy with it

got a non powersteering steering column and UJ
also a thermostat controlled sandwich plate for the oil cooler
gave the master cylinder a good sanding all over in the end, then gave a quick coat of spot primer for now
the shotblasting seems to be working
from this
to this
directly were my finger is pointing you can see its been blasted clean,
above it shows the small bits of rust etc
so been getting my fuel tank ready
new on the top, old on the bottom
you can see the small difference on the bottom right of each tank
had a trial fit and was a bit tight on one corner
as the new tank had an extra piece as you can see marked with the red line below
so this was trimmed off
then DA'd the whole tank ready for metal primer
heres some pictures after i had it sprayed metallic silver in work (thanks lads)
i'm very happy with it
19-03-2010, 07:28 AM
#56
PassionFord Regular
Thread Starter
Join Date: Aug 2003
Posts: 457
Likes: 0
Received 0 Likes
on
0 Posts
after not being able to find this bonnet latch support before i went to the powdercoaters
i admitted defeat and ordered a new one instead, well found the old one........................ nevermind
new vs old
a progress picture of the shot blasting, its taking a while but well worth it!
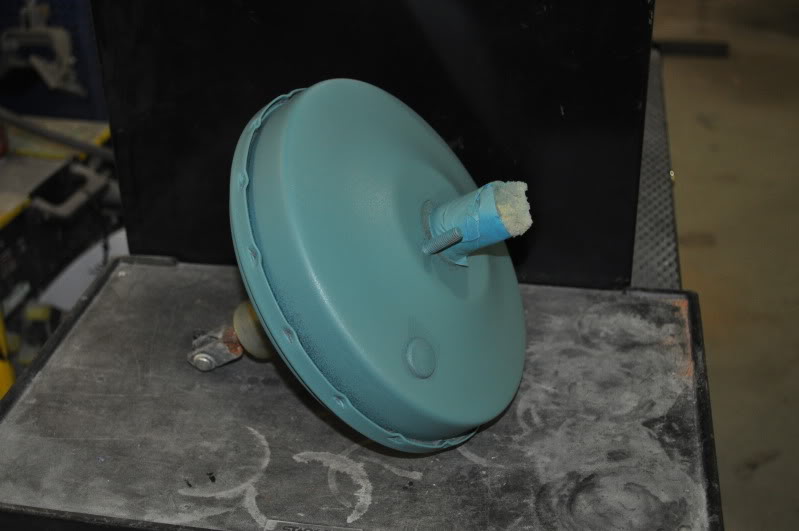
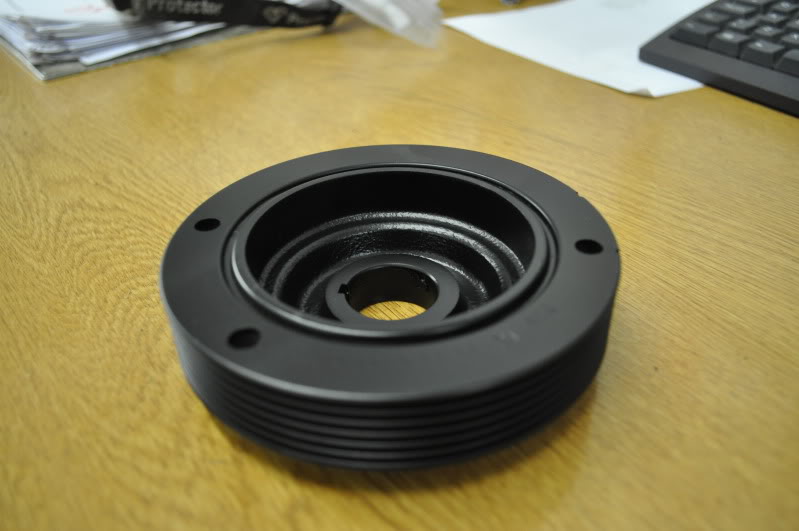
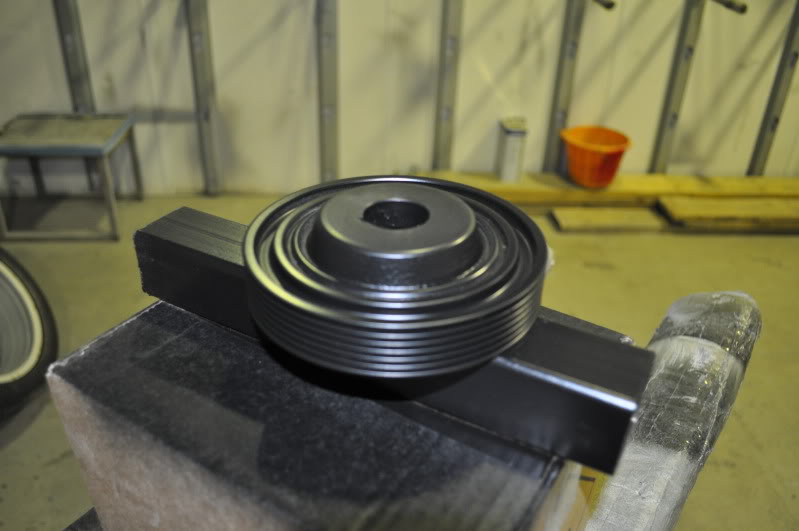
also prepped the zetec crank pulley which i could only get from fords in a horrid primer
so sprayed it myself satin matt black
from this
to this......................... chuffed with the outcome anyway
i admitted defeat and ordered a new one instead, well found the old one........................ nevermind
new vs old
a progress picture of the shot blasting, its taking a while but well worth it!
also prepped the zetec crank pulley which i could only get from fords in a horrid primer
so sprayed it myself satin matt black
from this
to this......................... chuffed with the outcome anyway
19-03-2010, 07:28 AM
#57
PassionFord Regular
Thread Starter
Join Date: Aug 2003
Posts: 457
Likes: 0
Received 0 Likes
on
0 Posts
yesterday afternoon i had some time off from working on the fiesta
i went to see a guy i've been recommended by a few mates
i'm sure a few of you will know who it is from the pictures
basically had a chat about options for my interior
was nice to meet someone else mad about fords
heres some pics of his awesome cars
an examples of his work
this is trimmed with vinyl to match his theme with the mk1 fiesta
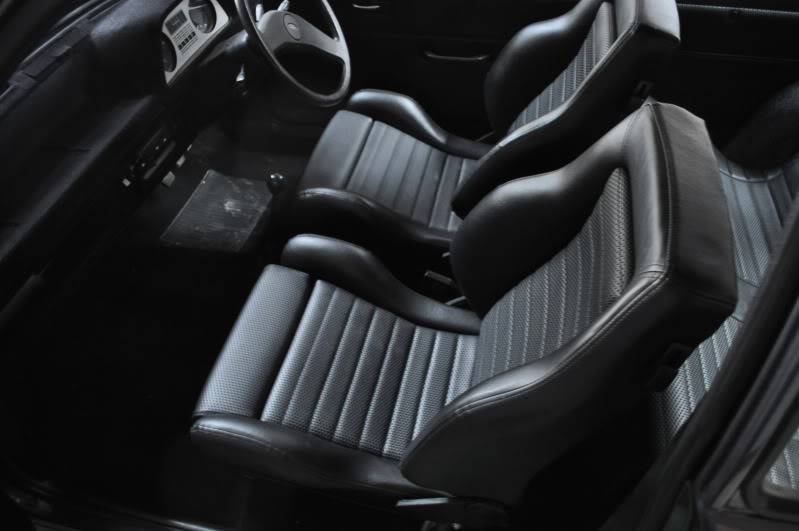
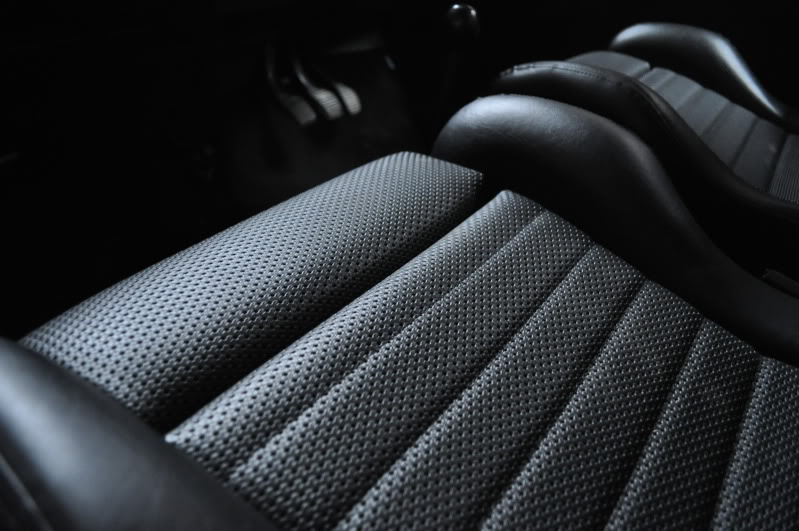
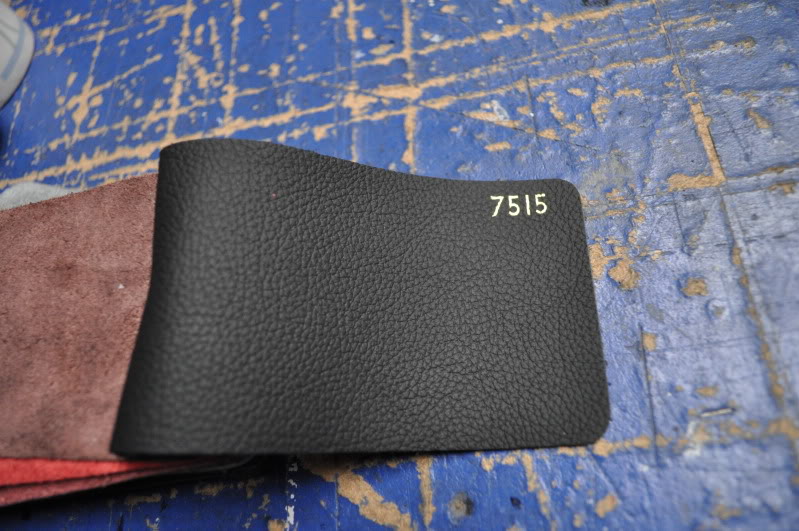
and the sample of nappa leather i'd be going for
black matt leather (as i dont like it to shiny)
i went to see a guy i've been recommended by a few mates
i'm sure a few of you will know who it is from the pictures
basically had a chat about options for my interior
was nice to meet someone else mad about fords
heres some pics of his awesome cars
an examples of his work
this is trimmed with vinyl to match his theme with the mk1 fiesta
and the sample of nappa leather i'd be going for
black matt leather (as i dont like it to shiny)
19-03-2010, 07:29 AM
#58
PassionFord Regular
Thread Starter
Join Date: Aug 2003
Posts: 457
Likes: 0
Received 0 Likes
on
0 Posts
well my powder coating has been delayed, so no pictures of that yet
but a few more parts arrived
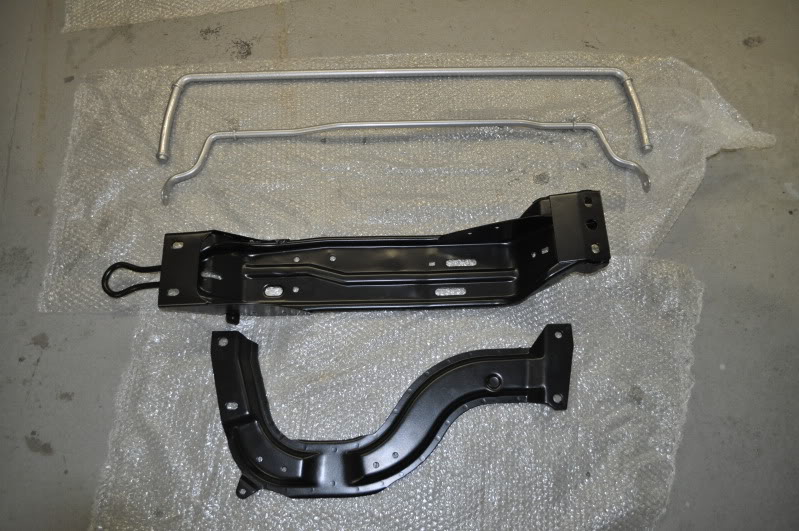
firstly parts for the rear suspension
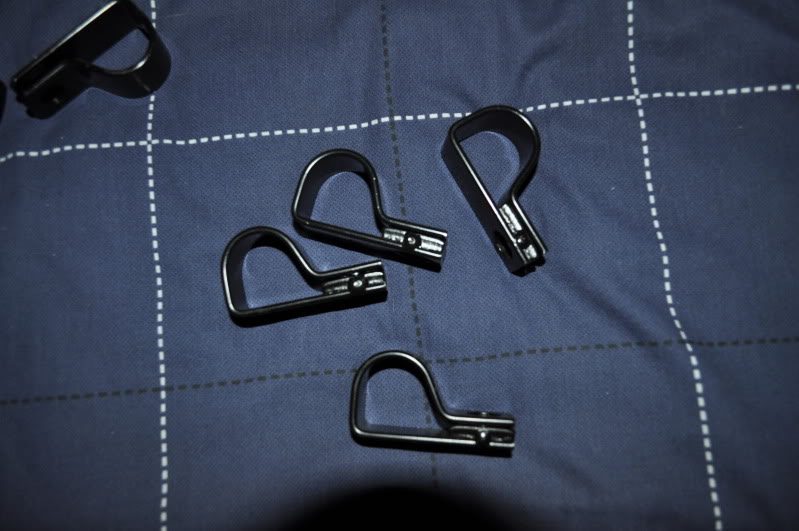
including rear anti roll bar brackets
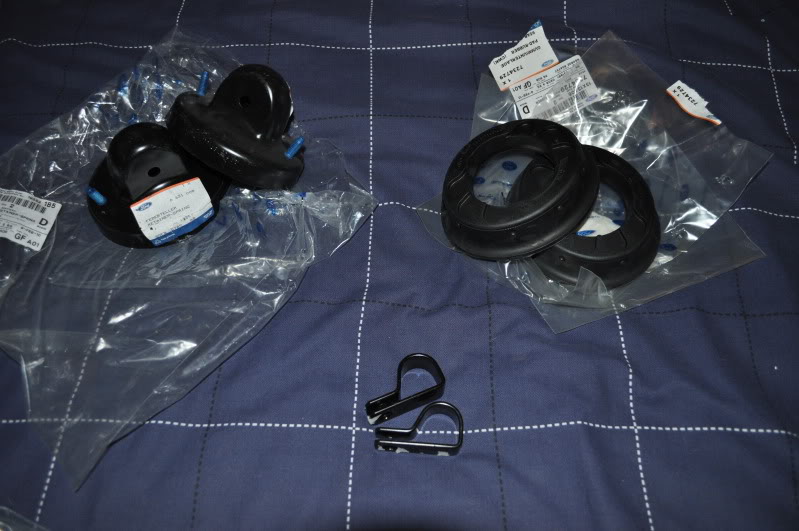
as theres two different types of clips for the anti rollbar
i even got my hands on the ones which are no longer available from fords
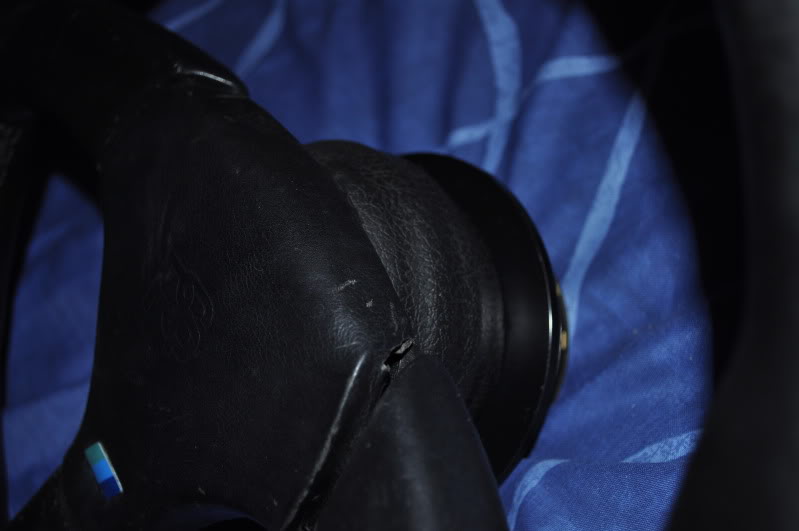
a while ago i got hold of a RS 4spoke steering wheel
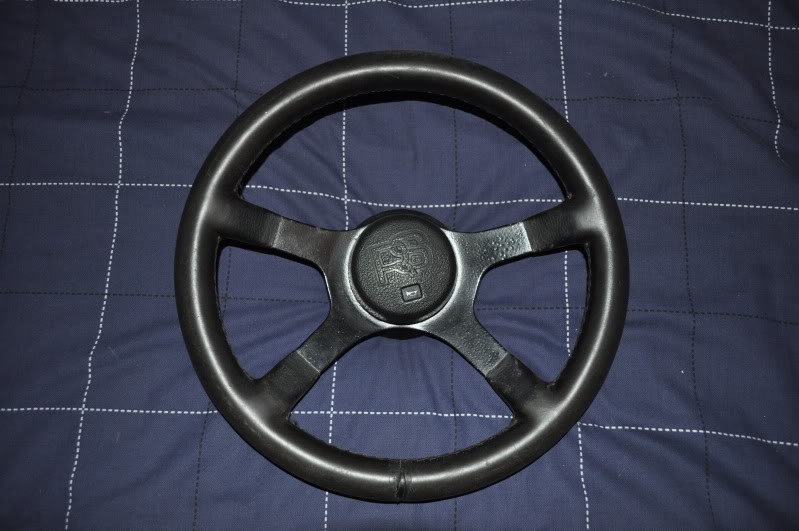
was a little worse than i thought, also the pictures did'nt show this
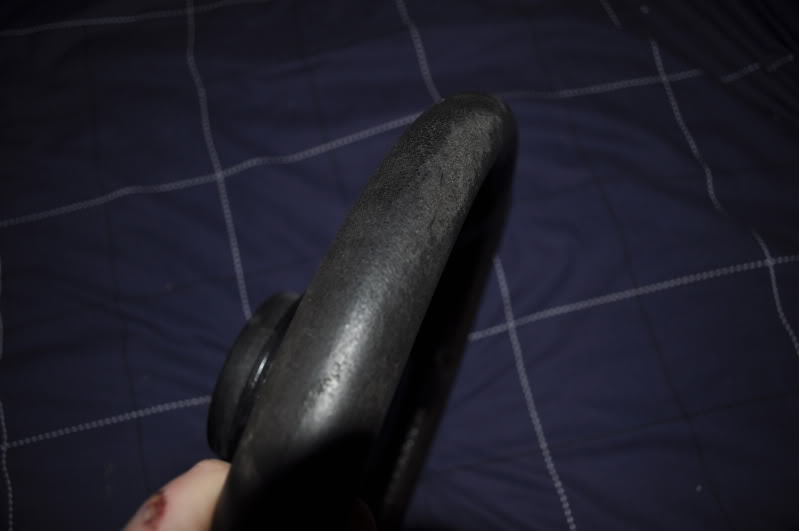
so ever since i've been looking for a better steering wheel, in the end i decided i wanted an RS accessory steering wheel
finally got hold of this on german ebay, very happy with the condition and its more rare than the other steering wheel
but a few more parts arrived
firstly parts for the rear suspension
including rear anti roll bar brackets
as theres two different types of clips for the anti rollbar
i even got my hands on the ones which are no longer available from fords
a while ago i got hold of a RS 4spoke steering wheel
was a little worse than i thought, also the pictures did'nt show this
so ever since i've been looking for a better steering wheel, in the end i decided i wanted an RS accessory steering wheel
finally got hold of this on german ebay, very happy with the condition and its more rare than the other steering wheel
19-03-2010, 07:30 AM
#59
PassionFord Regular
Thread Starter
Join Date: Aug 2003
Posts: 457
Likes: 0
Received 0 Likes
on
0 Posts
well collected some parts back from powdercoating,
very happy i am aswell
from this
to this
some more
and a quick update of how the underneath is looking
nearly finished the shot blasting thank god,
then on with the welding
repairs here and there
then SEAM WELDING
very happy i am aswell
from this
to this
some more
and a quick update of how the underneath is looking
nearly finished the shot blasting thank god,
then on with the welding
repairs here and there
then SEAM WELDING

 19-03-2010, 09:23 PM
#64
PassionFord Regular
Thread Starter
Join Date: Aug 2003
Posts: 457
Likes: 0
Received 0 Likes
on
0 Posts
thanks mate, been alot of ups and downs just hope its all worth it!!
thanks mate its going in the right direction anyway
yeah tell me about the spending, if i can get it new from factory i end up ordering it!
you got pm!
thanks mate its going in the right direction anyway
you got pm!
19-03-2010, 09:26 PM
#65
PassionFord Regular
Thread Starter
Join Date: Aug 2003
Posts: 457
Likes: 0
Received 0 Likes
on
0 Posts
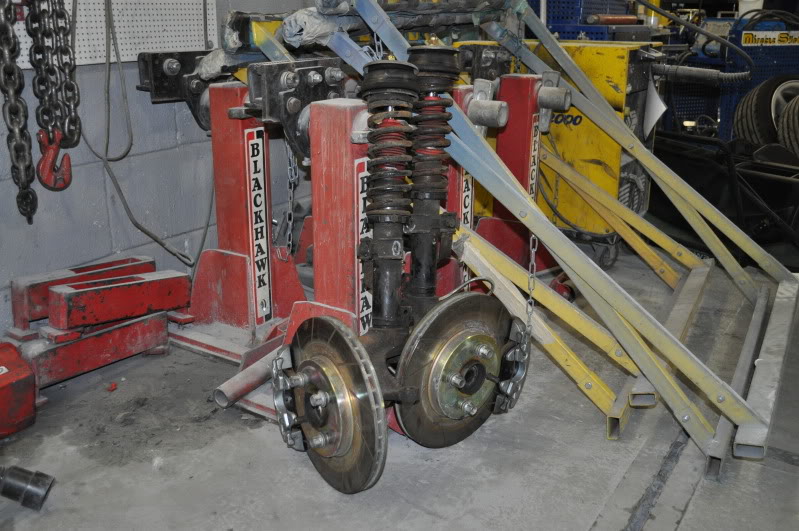
well time for an update on progress
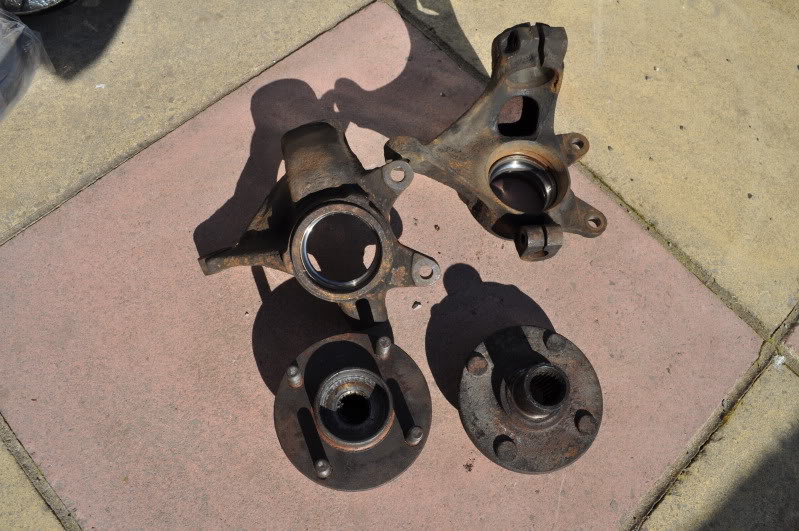
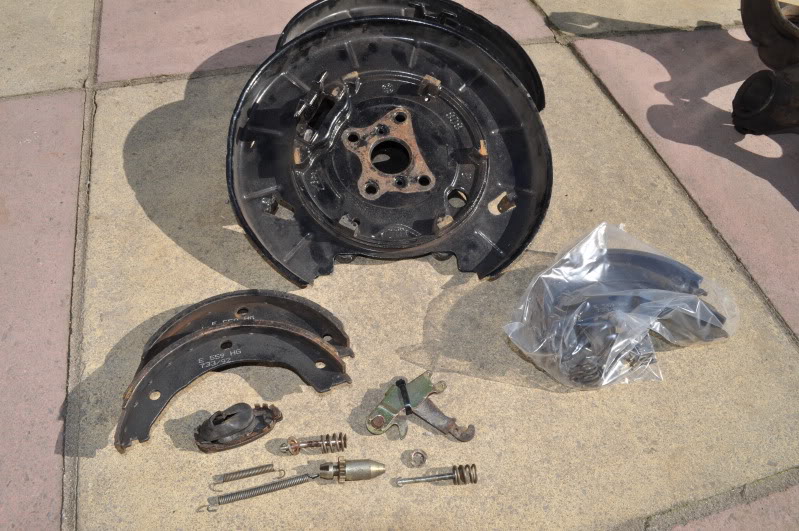
i've stripped the front knuckle, hub and rear disc brake setup ready for shotblasting clean and powdercoating
massive thanks to wolze for pressing the hub and bearings out for me aswell as dismantling the rear shoes
as its going to be powder coated he also mentioned it would be a good idea leaving only the outer race of the front bearings in the knuckle
as it leaves the bearing surface untouched from shotblasting etc
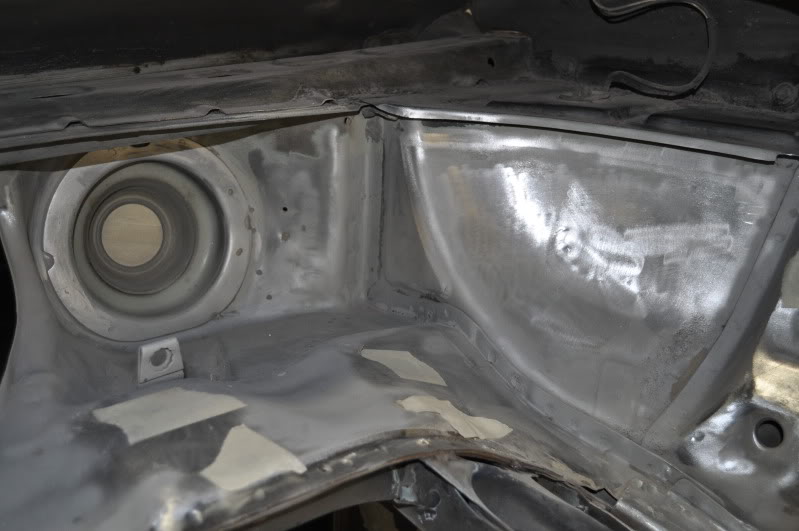
next as i'm still doing the fiddly bits underneath the shell
the rear support under the boot floor was quite wide and stopped me attacking the rust and grime under it
so i've highlighted to show how thick it is originally
you'll notice the difference in the width of what i've highlighted in red again
i took the top piece back and shaped it nicely around the welded supports in the middle so it does'nt look out of place
quite happy with the shaping of the corners, it gave me the access i needed to clean up
much better now the rust is gone, you'll notice the pitting because it was quite rusted
but not too bad because otherwise the shotblasting would of blown holes through it
the rear arch more or less done, few awkward bits of sealer left to scrape off
as its too awkward to get any air tools in there
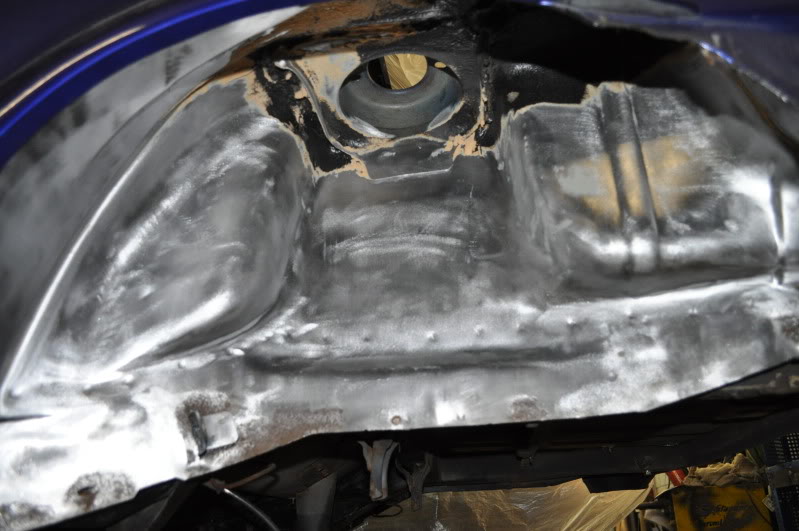
heres the front arch nearly done aswell, the masking tape is covering the factory holes to try and prevent the sand getting in,
even though it still finds a way, it gets everywhere!! !!
brake flexy fixing point looking free of rust aswell now
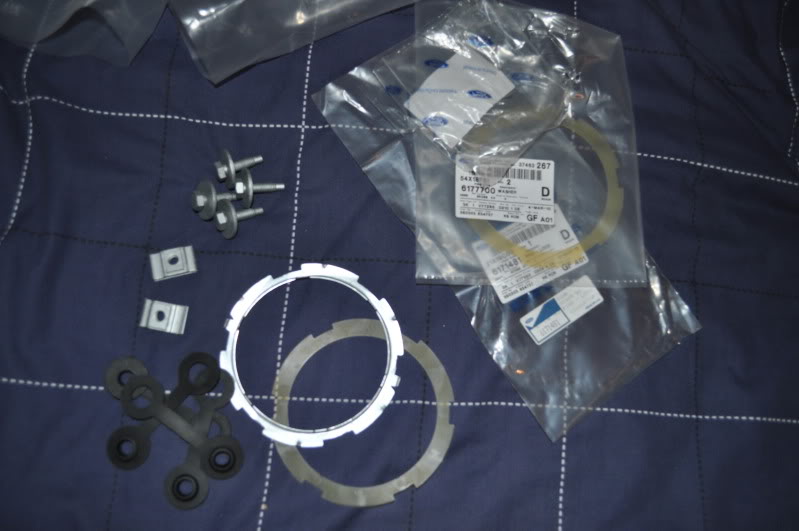
a few more parts came in for me, all for the fuel tank this time
including fuel pump/sender unit seal and lockring
springnut and bolts to secure the fuel tank in place
and insulators which were'nt on my car when stripping but ordered them anyway when i saw them on ECAT the fords parts system
i've stripped the front knuckle, hub and rear disc brake setup ready for shotblasting clean and powdercoating
massive thanks to wolze for pressing the hub and bearings out for me aswell as dismantling the rear shoes
as its going to be powder coated he also mentioned it would be a good idea leaving only the outer race of the front bearings in the knuckle
as it leaves the bearing surface untouched from shotblasting etc
next as i'm still doing the fiddly bits underneath the shell
the rear support under the boot floor was quite wide and stopped me attacking the rust and grime under it
so i've highlighted to show how thick it is originally
you'll notice the difference in the width of what i've highlighted in red again
i took the top piece back and shaped it nicely around the welded supports in the middle so it does'nt look out of place
quite happy with the shaping of the corners, it gave me the access i needed to clean up
much better now the rust is gone, you'll notice the pitting because it was quite rusted
but not too bad because otherwise the shotblasting would of blown holes through it
the rear arch more or less done, few awkward bits of sealer left to scrape off
as its too awkward to get any air tools in there
heres the front arch nearly done aswell, the masking tape is covering the factory holes to try and prevent the sand getting in,
even though it still finds a way, it gets everywhere!! !!
brake flexy fixing point looking free of rust aswell now
a few more parts came in for me, all for the fuel tank this time
including fuel pump/sender unit seal and lockring
springnut and bolts to secure the fuel tank in place
and insulators which were'nt on my car when stripping but ordered them anyway when i saw them on ECAT the fords parts system
19-03-2010, 09:27 PM
#66
PassionFord Regular
Thread Starter
Join Date: Aug 2003
Posts: 457
Likes: 0
Received 0 Likes
on
0 Posts
well i've kinda made a decision to sort every little thing i was never happy with
basically i'm looking to take the sideskirts and arches off due to bad fitment/second hand bodykit,
the front wings are coming off because it will give better access to seam weld the front chassis legs completely
aswell as shot blasting every part of the legs clean,
so i've managed to source some rare parts,
i picked up the first two bits last sunday, the other remaining parts will be coming later this week from somewhere else
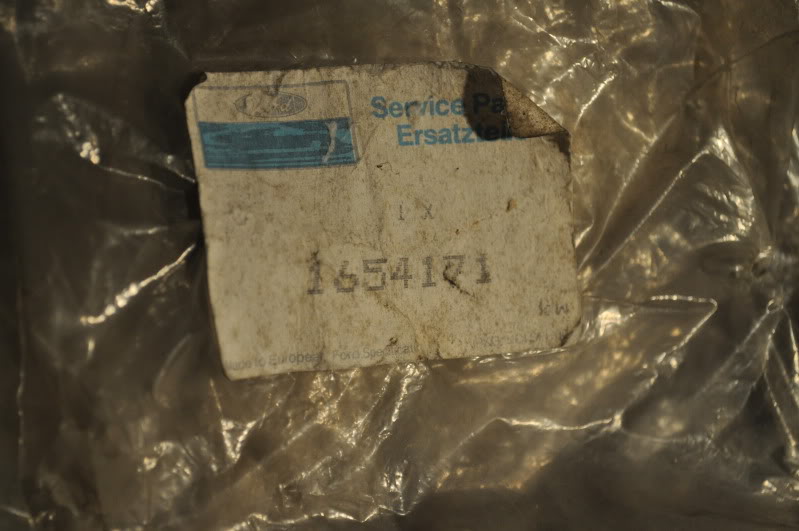
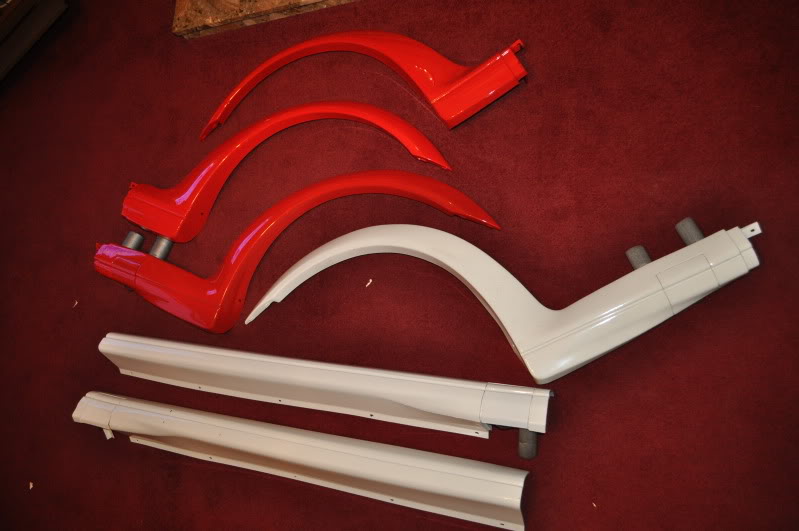
original ford xr2i / fiesta turbo sideskirt and arch pre-painted ford diamond white
still in the factory wrapping with part numbers etc until i took them out for pictures
they were made in 1990 going from another sticker on the kit
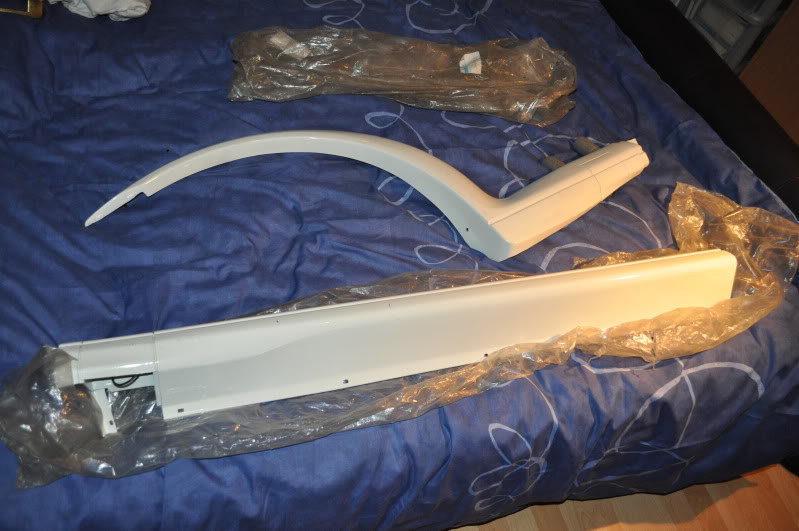
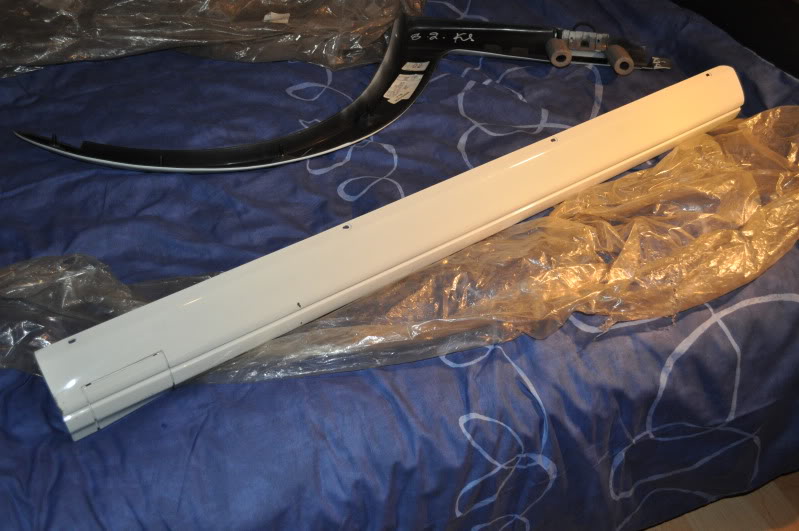
its really wierd having such old parts in factory condition
few more pictures for any old ford fans

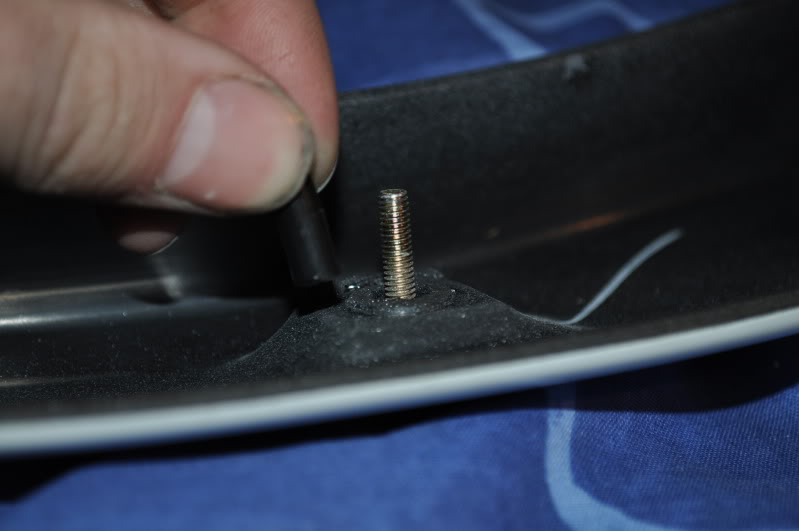
studs came with covers
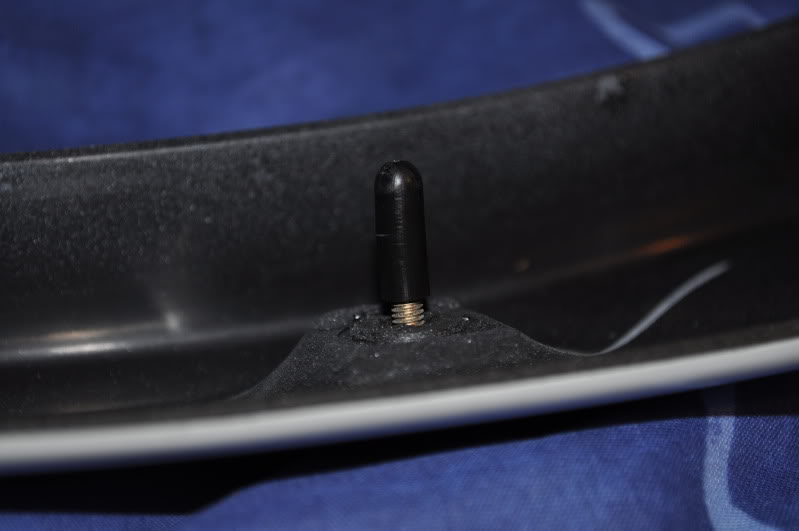
still like new
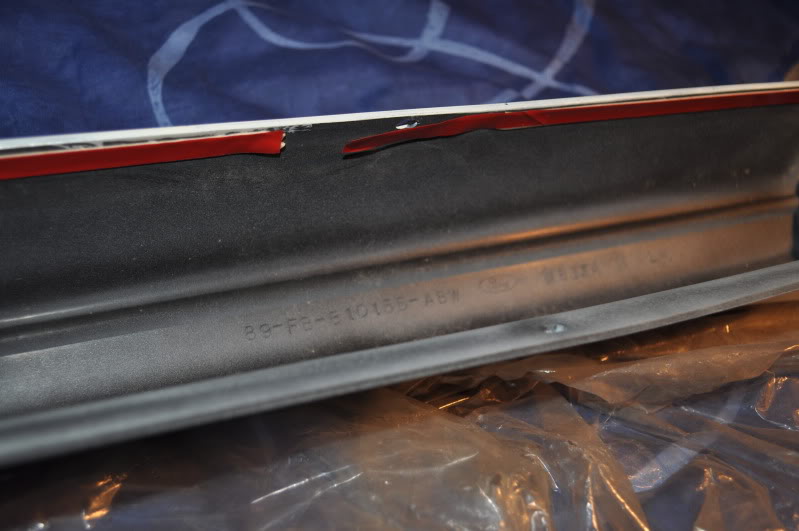
factory double sided tape and part numbers inside the sideskirt
so the rest of the bodykit pics to come, hopefully so more progress aswell
basically i'm looking to take the sideskirts and arches off due to bad fitment/second hand bodykit,
the front wings are coming off because it will give better access to seam weld the front chassis legs completely
aswell as shot blasting every part of the legs clean,
so i've managed to source some rare parts,
i picked up the first two bits last sunday, the other remaining parts will be coming later this week from somewhere else
original ford xr2i / fiesta turbo sideskirt and arch pre-painted ford diamond white
still in the factory wrapping with part numbers etc until i took them out for pictures
they were made in 1990 going from another sticker on the kit
its really wierd having such old parts in factory condition
few more pictures for any old ford fans
studs came with covers
still like new
factory double sided tape and part numbers inside the sideskirt
so the rest of the bodykit pics to come, hopefully so more progress aswell
19-03-2010, 09:30 PM
#67
PassionFord Regular
Thread Starter
Join Date: Aug 2003
Posts: 457
Likes: 0
Received 0 Likes
on
0 Posts
well to ensure the engine bay is fully seam welded,
also was'nt too happy with how the wings and front arches had been trimmed previously
so decided to take the front wings off, drilled the spot welds etc
also had some photo's from ian to show how the engine is looking,
although he's itching to finish it, but i'm not in a rush for it.
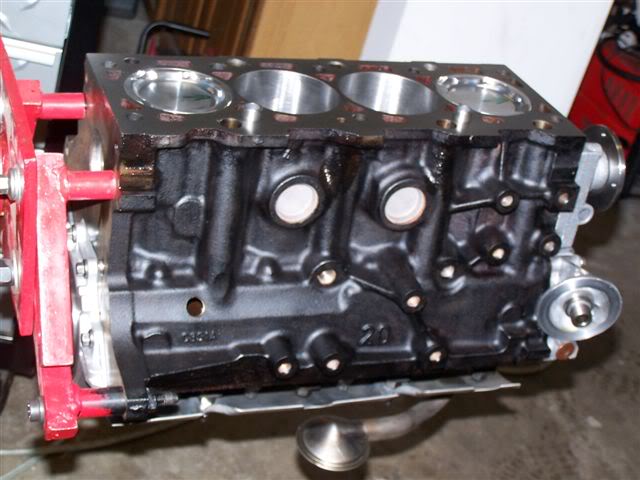
anyway i'm mega happy how things are looking
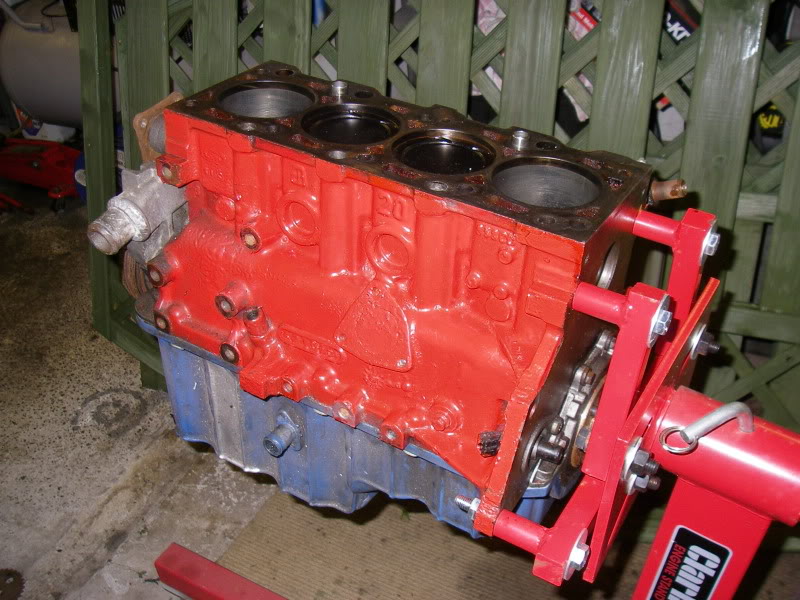
heres how the block looked before

after being acid dipped clean
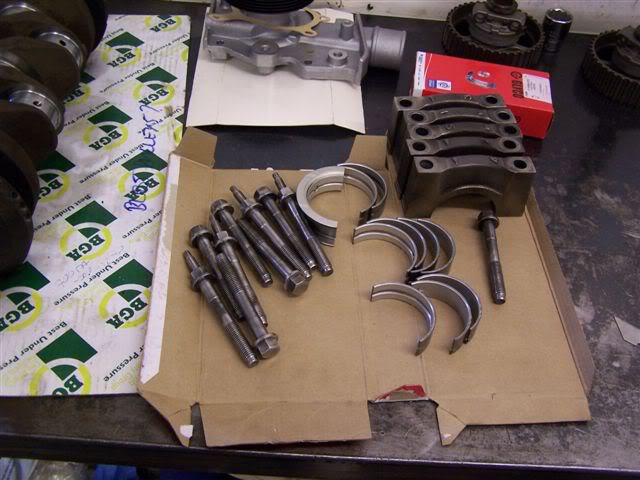
new bearings to go with the polished crank
heres the block after its first coat of black paint
also was'nt too happy with how the wings and front arches had been trimmed previously
so decided to take the front wings off, drilled the spot welds etc
also had some photo's from ian to show how the engine is looking,
although he's itching to finish it, but i'm not in a rush for it.
anyway i'm mega happy how things are looking
heres how the block looked before
after being acid dipped clean
new bearings to go with the polished crank
heres the block after its first coat of black paint
19-03-2010, 09:32 PM
#68
PassionFord Regular
Thread Starter
Join Date: Aug 2003
Posts: 457
Likes: 0
Received 0 Likes
on
0 Posts
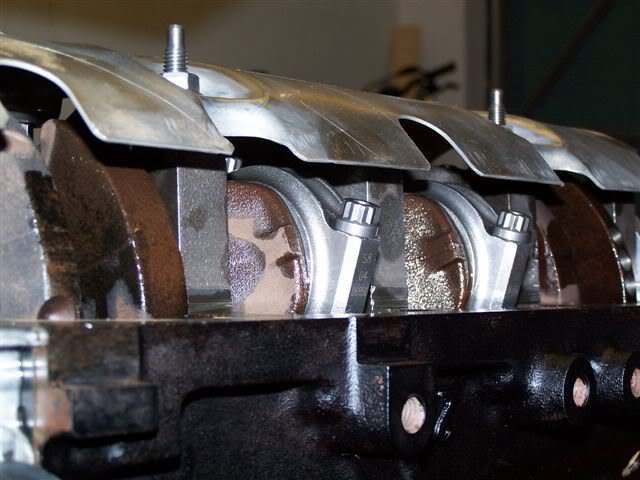
the new eagle steel rods in their new home
the head back together after being acid dipped clean, skimmed, new valve guides, recut seats + valves
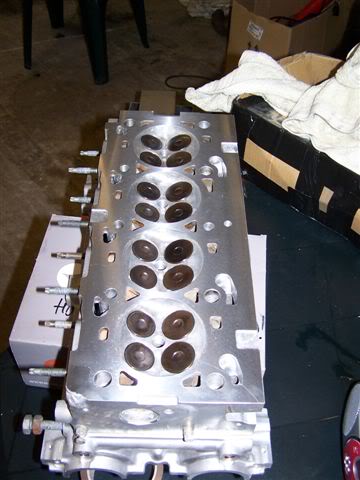
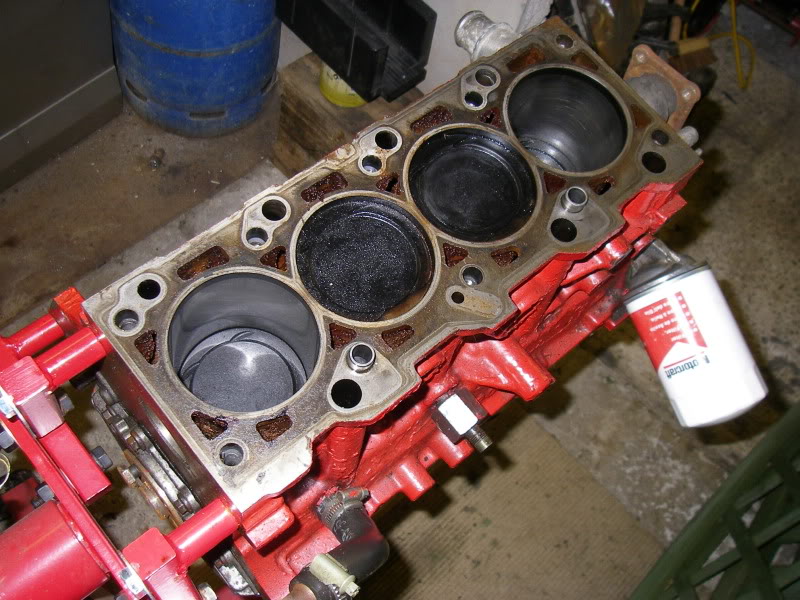
the block was rebored again aswell
original 2.0 zetecs have a bore of 84.8mm making them 1998cc or 2.0
then this block was rebored for the first set of forged pistons at 86mm making it 2047cc or 2.1 as most know
ian decided to have it bored out further for me to make it 87mm - 2098cc
then he ordered new forged pistons and rods with my new measurements
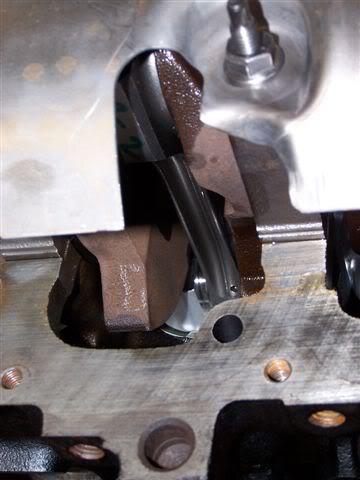
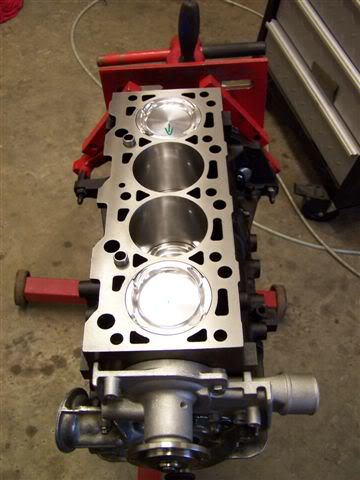
heres my favorite pictures showing the cp pistons, freshly decked block and bores after being bored out and then honed
i love the reflections in the bores

the head back together after being acid dipped clean, skimmed, new valve guides, recut seats + valves
the block was rebored again aswell
original 2.0 zetecs have a bore of 84.8mm making them 1998cc or 2.0
then this block was rebored for the first set of forged pistons at 86mm making it 2047cc or 2.1 as most know
ian decided to have it bored out further for me to make it 87mm - 2098cc
then he ordered new forged pistons and rods with my new measurements
heres my favorite pictures showing the cp pistons, freshly decked block and bores after being bored out and then honed
i love the reflections in the bores


 21-03-2010, 08:15 AM
#73
Advanced PassionFord User
great work mate and a great thread so far so keep up the good work , and iam 100% sure your engine is in the best hands thats for sure and i think it will make a solid 300bhp so should be a great all round car
cheers paul
cheers paul
21-03-2010, 08:27 AM
#75
Too many posts.. I need a life!!
iTrader: (1)
Join Date: Jan 2008
Location: Crawley, West Sussex
Posts: 974
Likes: 0
Received 0 Likes
on
0 Posts
Nice project there, loving the colour and the wheels, looks the tits! My computer shit the bed for about five mins trying to load all them pictures up lol
21-03-2010, 05:36 PM
#76
Advanced PassionFord User
Join Date: Oct 2005
Location: SUTTON IN ASHFIELD
Posts: 2,062
Likes: 0
Received 0 Likes
on
0 Posts
Mate seriously hats off to you thats some serious dedication and car love right there and a truely stunning job you're doing well done, Must admit i quite like the look of your 1.3 fiesta aswell
May i suggest that you never ever count your reciepts though as its clear to see where your money's going but well worth it woth a result like that,
Actually do work just pay you in parts???
Fantastic car mate
May i suggest that you never ever count your reciepts though as its clear to see where your money's going but well worth it woth a result like that,
Actually do work just pay you in parts???
Fantastic car mate
21-03-2010, 11:35 PM
#79
PassionFord Regular
Thread Starter
Join Date: Aug 2003
Posts: 457
Likes: 0
Received 0 Likes
on
0 Posts
thanks for all the nice comments, really appreciate it
was'nt expecting many on here
UPDATE
well i recieved the rest of my new skirts and arches kit,
also still brand new in ford packaging etc
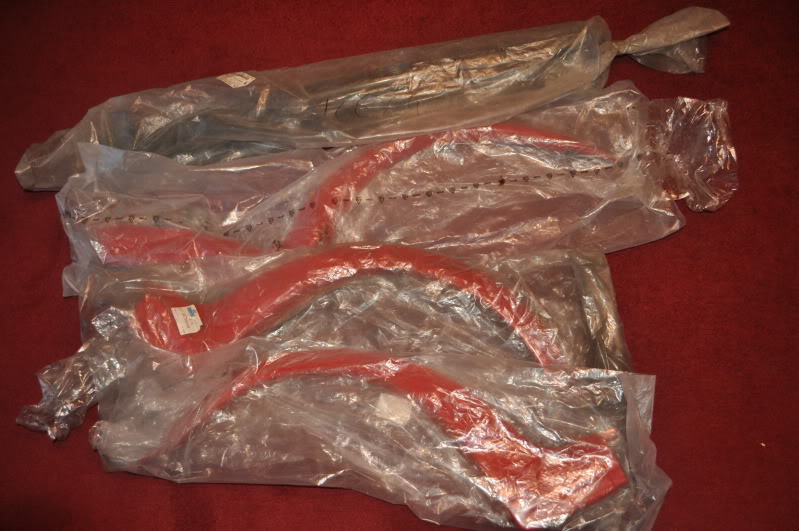
so i have a full kit now woohoo
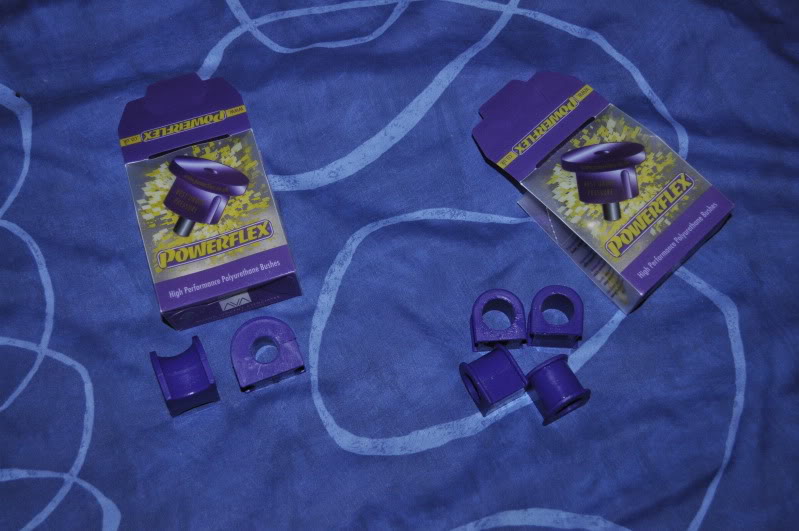
as i'm having new rose jointed lower arms and the rear beam bushes are powerflex,
i've been ordering more powerflex bushes
polybushes for the front and rear anti roll bar
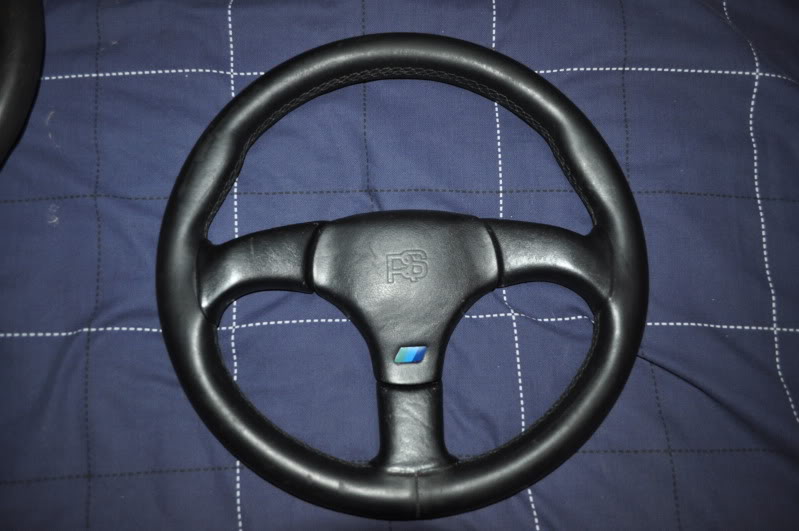
my new steering wheel was becoming a bit of a knightmare as it use's a different steering wheel boss to the more well known
rs 3/4 spoke steering wheels
after lots of searching, i've sourced myself the right boss
so i'm mega pleased!!
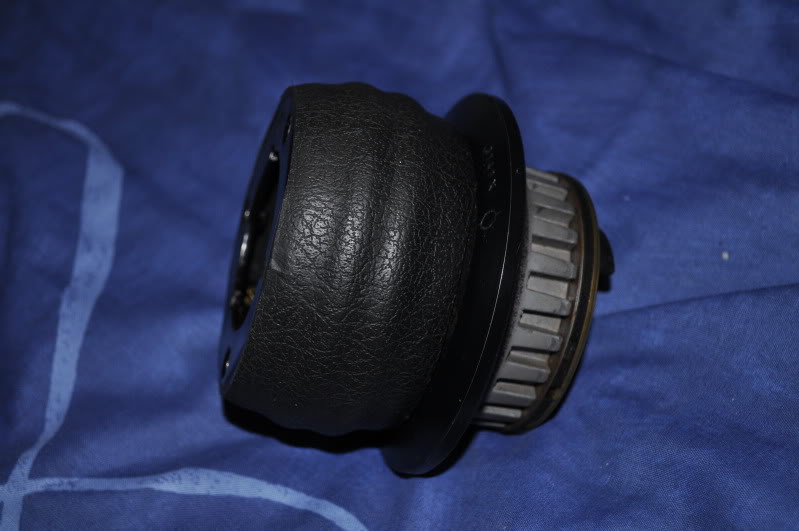
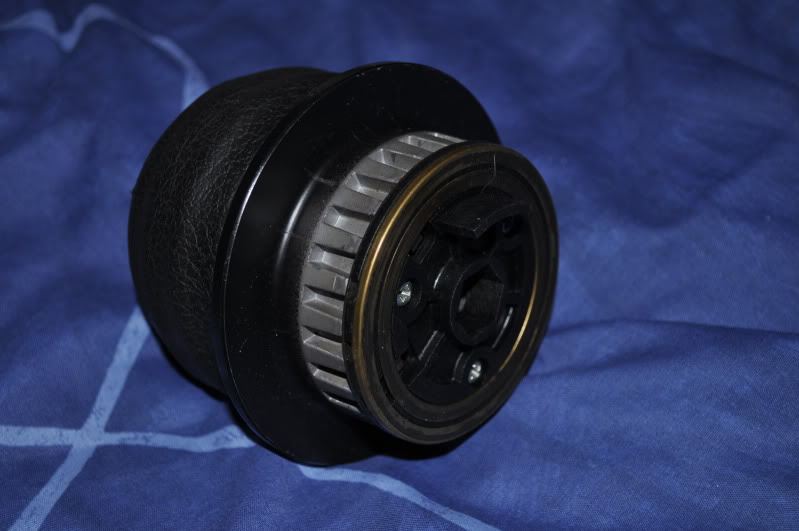
fitted to the steering wheel

was'nt expecting many on here
UPDATE
well i recieved the rest of my new skirts and arches kit,
also still brand new in ford packaging etc
so i have a full kit now woohoo
as i'm having new rose jointed lower arms and the rear beam bushes are powerflex,
i've been ordering more powerflex bushes
polybushes for the front and rear anti roll bar
my new steering wheel was becoming a bit of a knightmare as it use's a different steering wheel boss to the more well known
rs 3/4 spoke steering wheels
after lots of searching, i've sourced myself the right boss
so i'm mega pleased!!
fitted to the steering wheel
22-03-2010, 12:41 AM
#80
PassionFord Post Whore!!
Nice work . . .
If you want your 4 spoke retrimming give me a PM
If you want your 4 spoke retrimming give me a PM