Project Tango - Fiesta ITB'd Track Car, Caged and Carbon'd
 29-07-2010, 01:57 PM
#41
Regular Contributor
Thread Starter

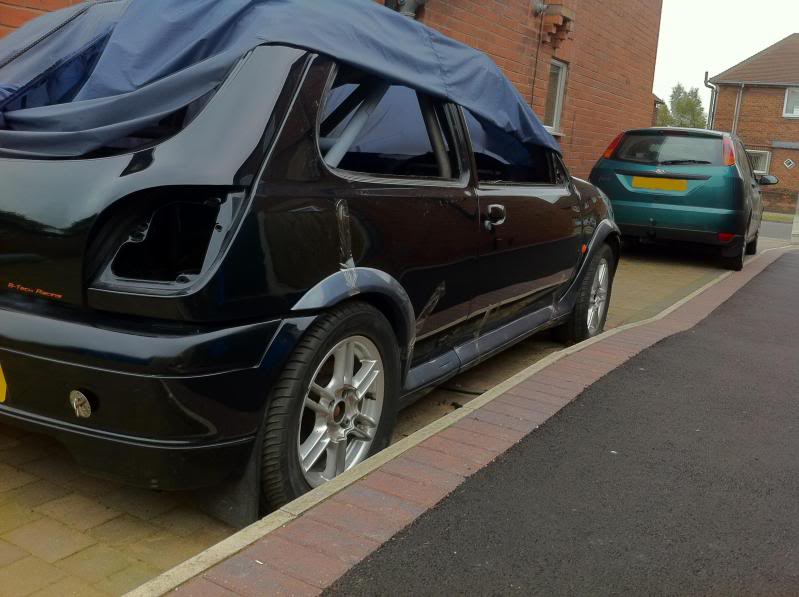
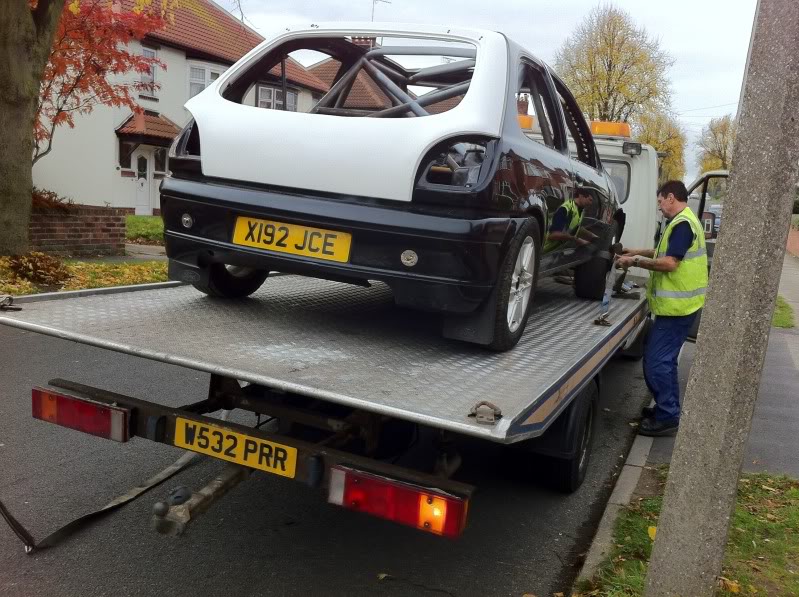
Dipping did cross my mind, but time and cost factors have meant I've had to leave it.
Should be going in for paint over the next few weeks, then the real fun can begin!!

Should be going in for paint over the next few weeks, then the real fun can begin!!

 Love it!
03-08-2010, 06:46 PM
Love it!
03-08-2010, 06:46 PM
#43
Regular Contributor
Thread Starter
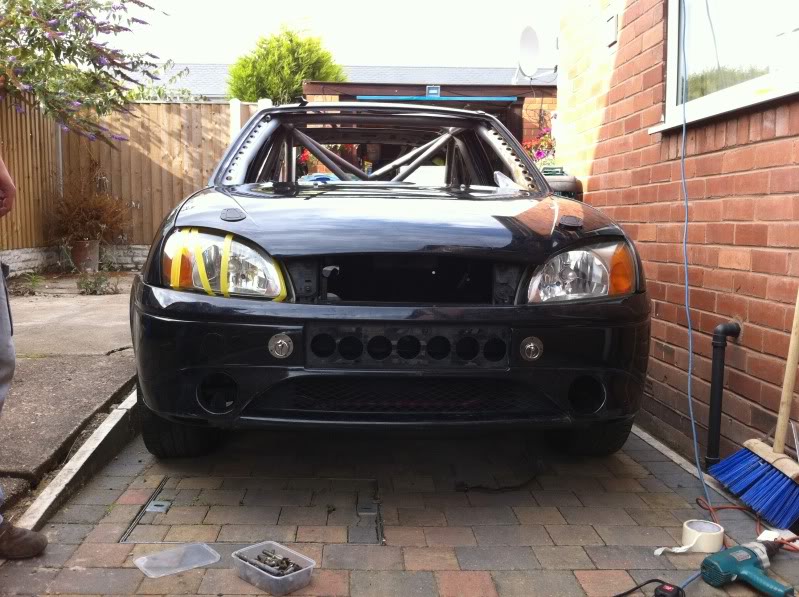
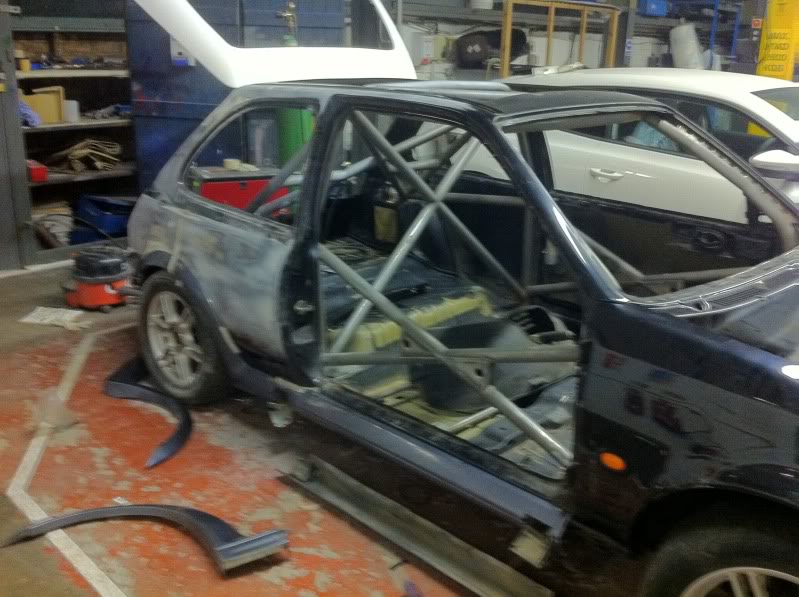
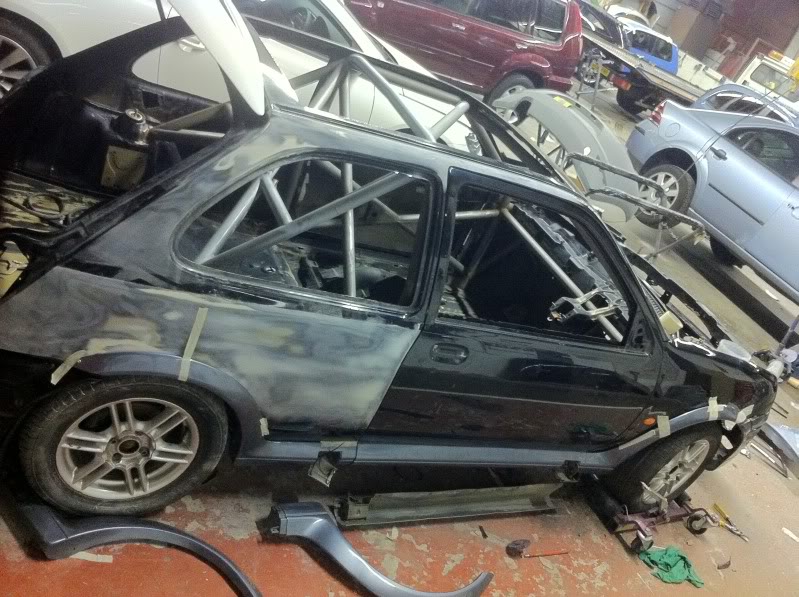
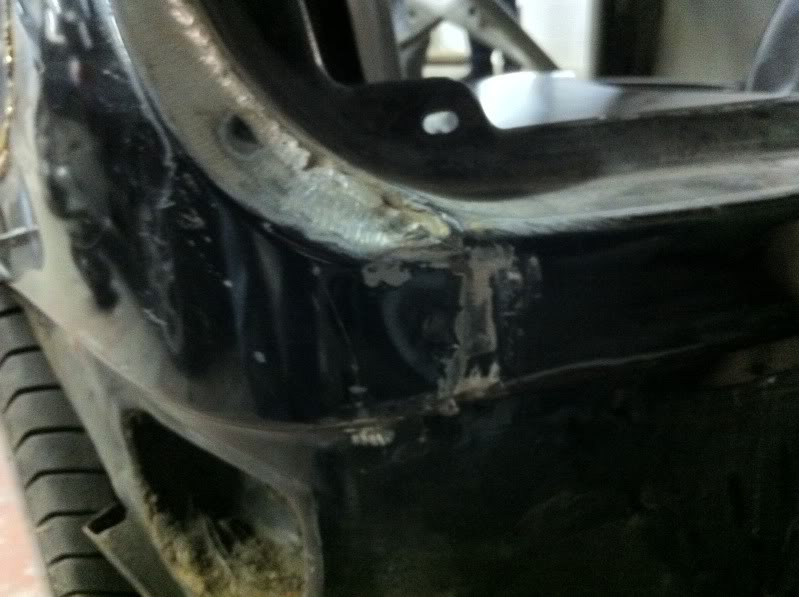
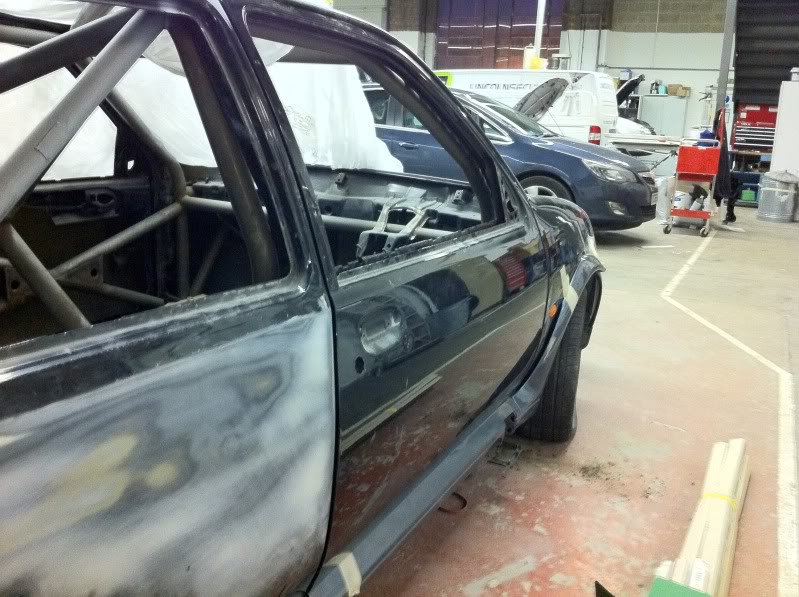
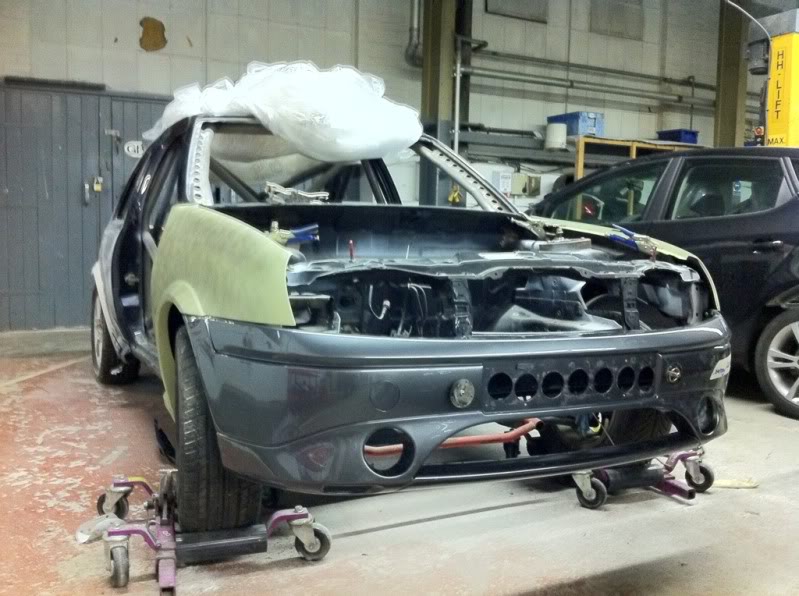
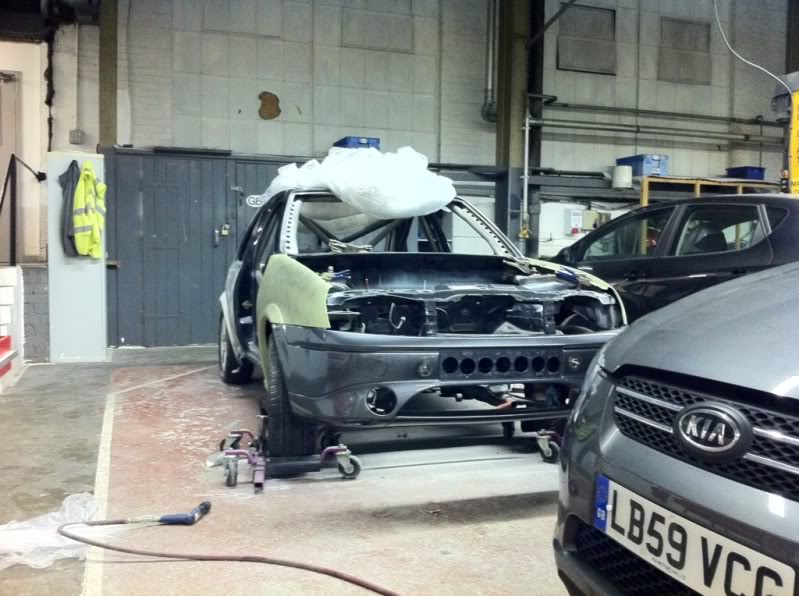
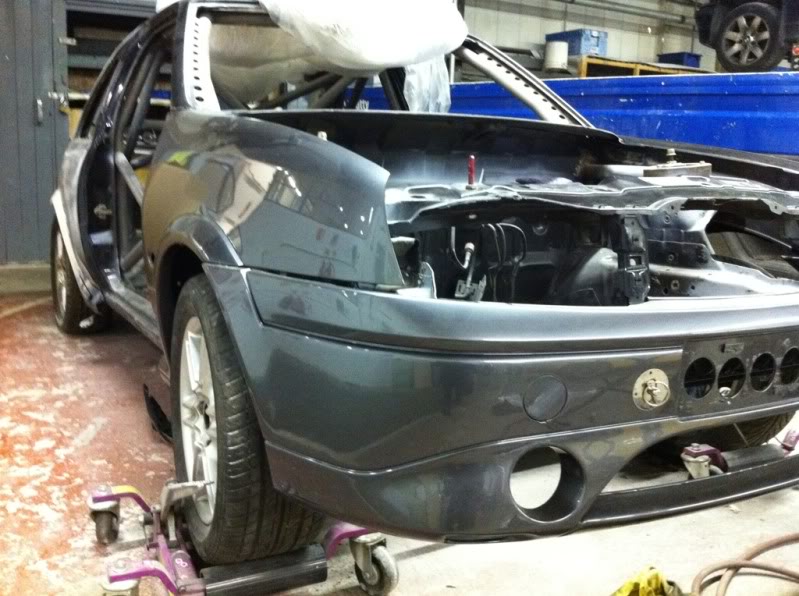
Got some more work done on the car today, only a few minor bits, but made it look more "car like" which put a smile on my face
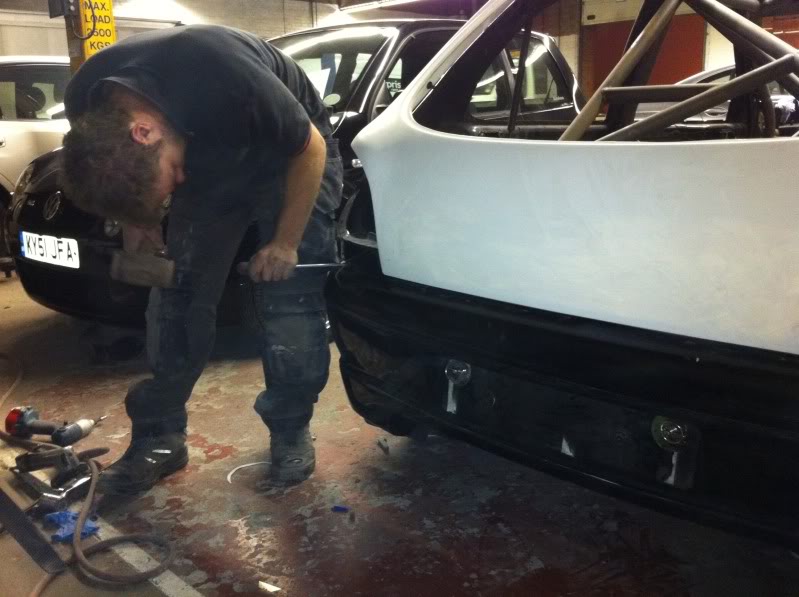
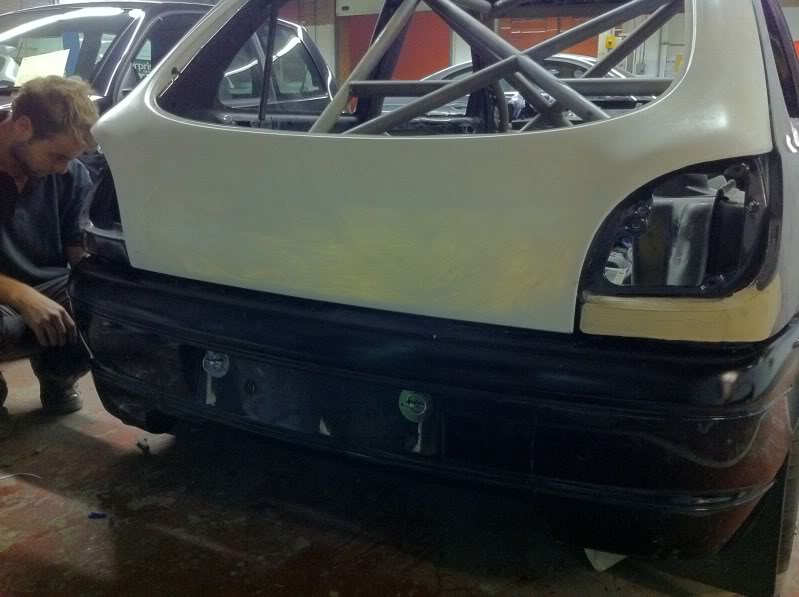
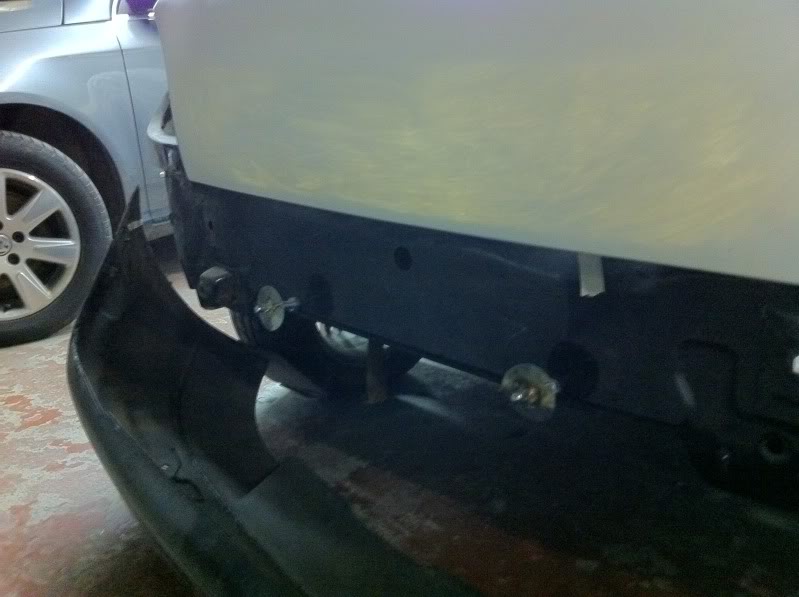
I had the help of Mr Tom from B-Tech Racing today, so after he had finished dribbling over the cage, we made a start on a quick release for the front bumper:
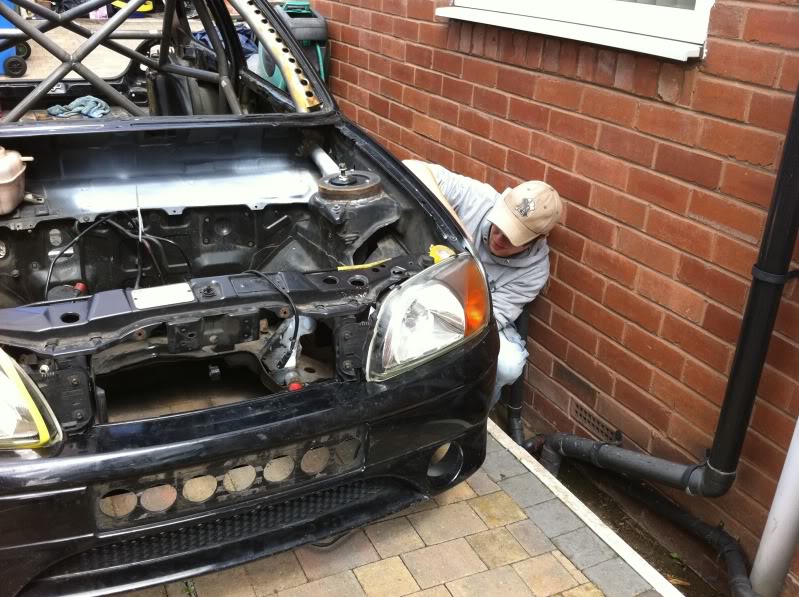
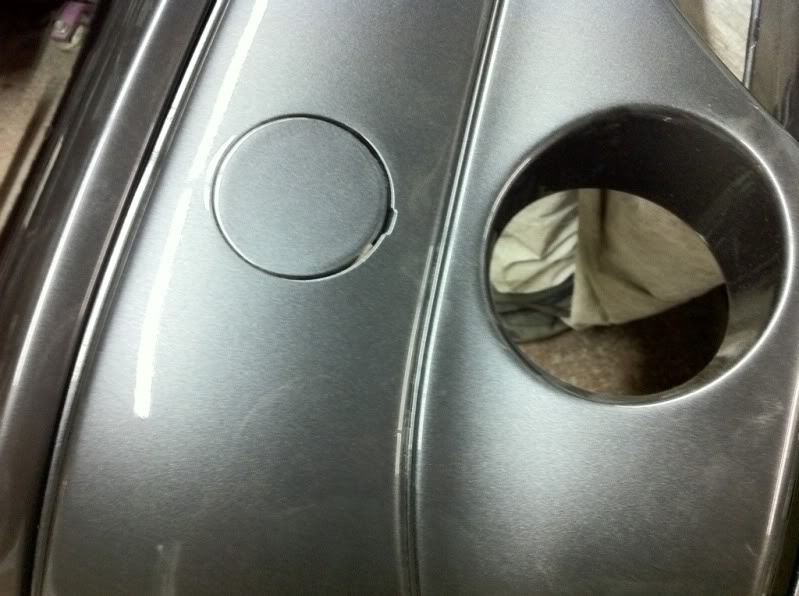
I decided to use bonnet pins to do the job, not keen on the "bling factor" of them, so will be getting them powder coated at some point, but thats not a big priority for me at the minute.
Prior to fitting, then in progress:
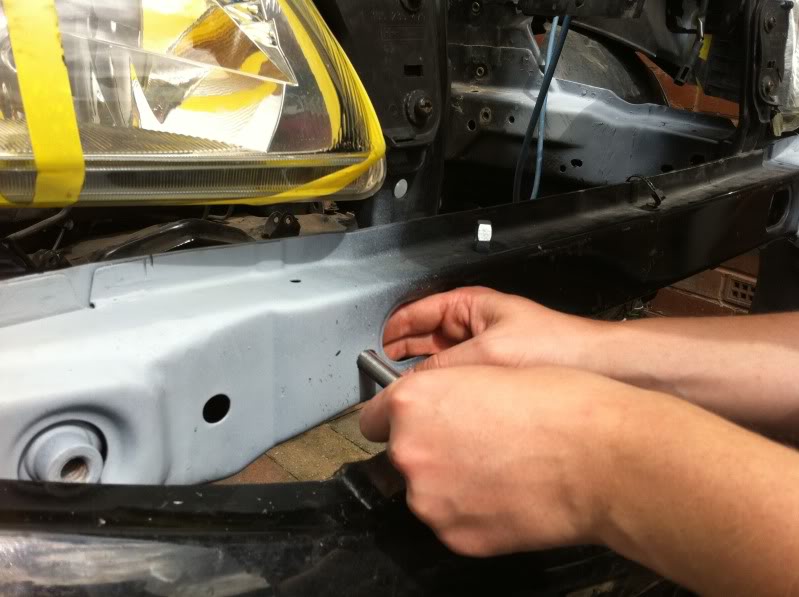
And done:
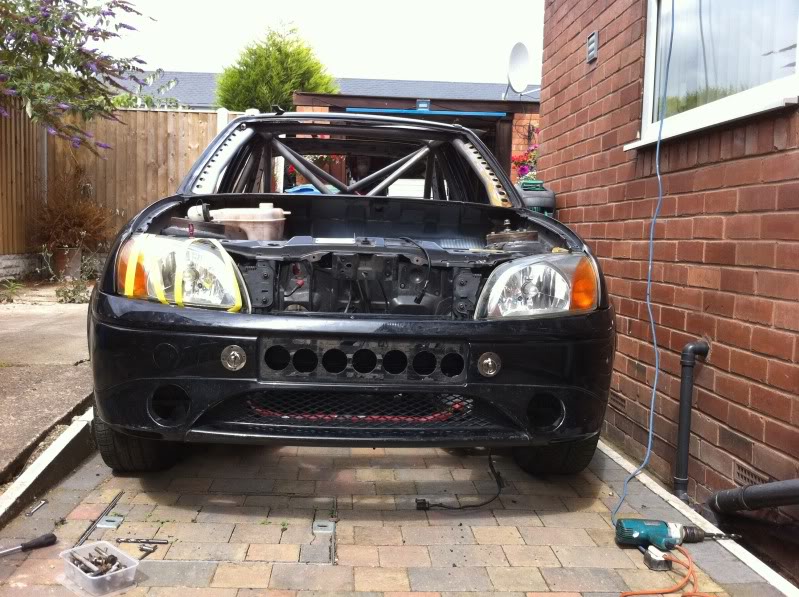
So all I need to get the front bumper off now, is remove 2 8mm bolts from the arches and release the pins.... 30 second job!
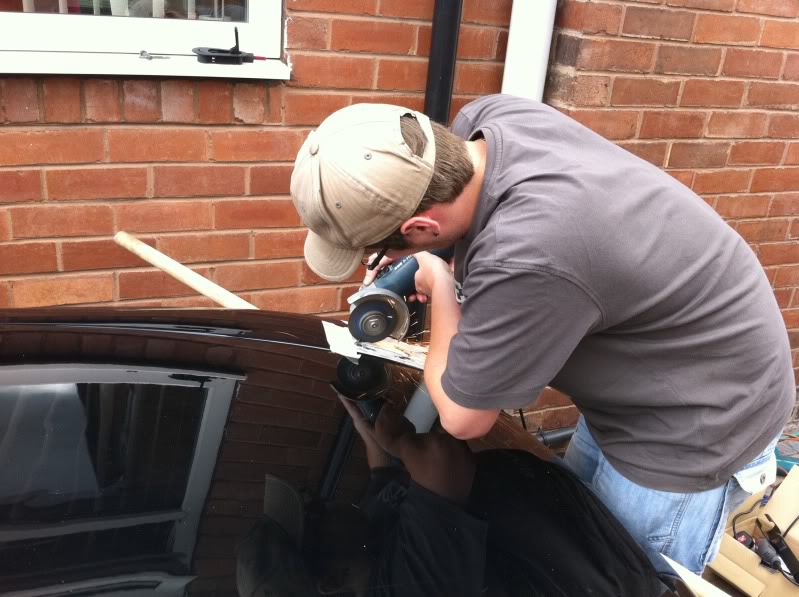
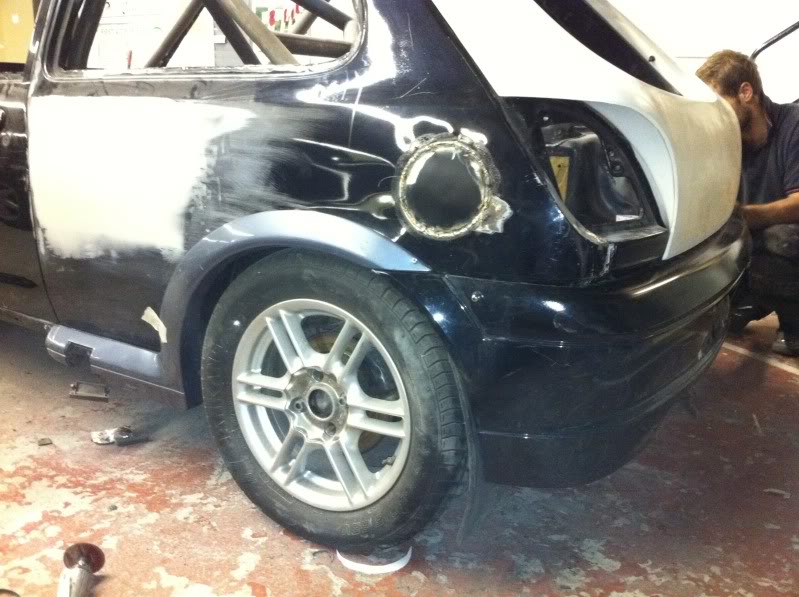
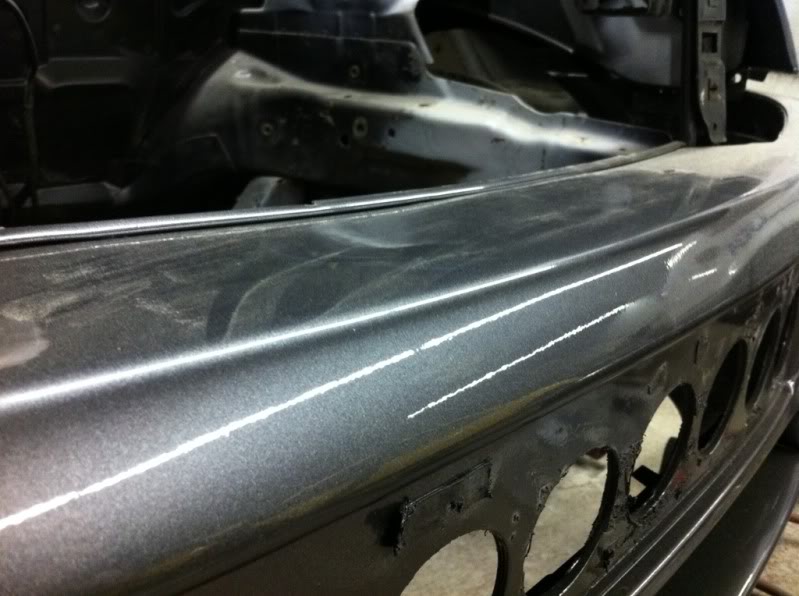
Next job on the list was to "de-skin" and lighten the bonnet, so set about it with a wood saw between skin and bonnet to remove the bonding, then took a grinder around the edge, to remove the skin:
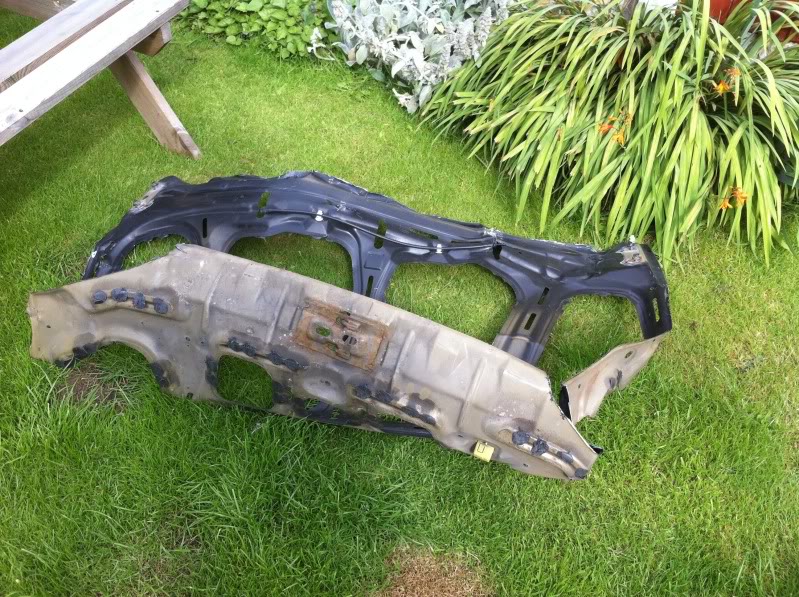
Pretty neat job if I do say so myself. Then left the bonnet looking like this:
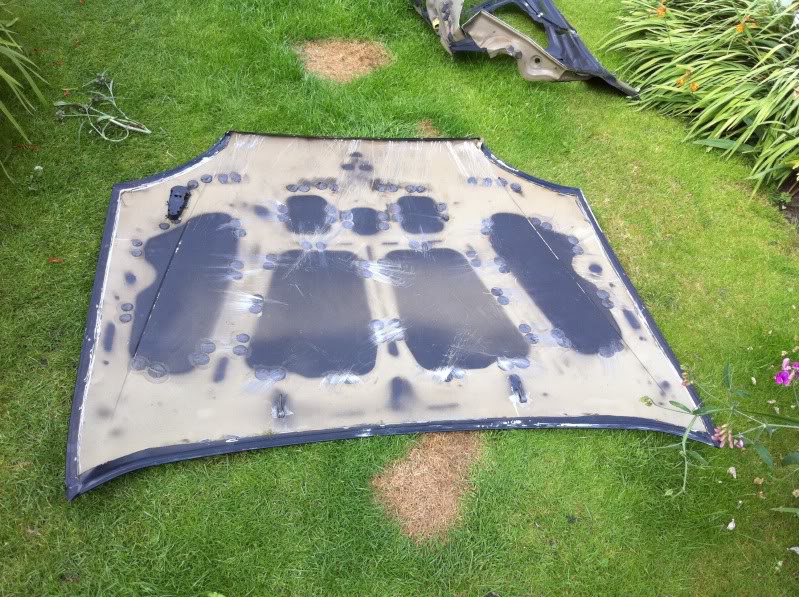
It is now pretty flimsy, but it'll be held down secure, so not overly concerned about it, I'll more than likely go for a carbon or fibreglass replacement at some point.
I had the help of Mr Tom from B-Tech Racing today, so after he had finished dribbling over the cage, we made a start on a quick release for the front bumper:
I decided to use bonnet pins to do the job, not keen on the "bling factor" of them, so will be getting them powder coated at some point, but thats not a big priority for me at the minute.
Prior to fitting, then in progress:
And done:
So all I need to get the front bumper off now, is remove 2 8mm bolts from the arches and release the pins.... 30 second job!
Next job on the list was to "de-skin" and lighten the bonnet, so set about it with a wood saw between skin and bonnet to remove the bonding, then took a grinder around the edge, to remove the skin:
Pretty neat job if I do say so myself. Then left the bonnet looking like this:
It is now pretty flimsy, but it'll be held down secure, so not overly concerned about it, I'll more than likely go for a carbon or fibreglass replacement at some point.
03-08-2010, 06:53 PM
#44
Regular Contributor
Thread Starter
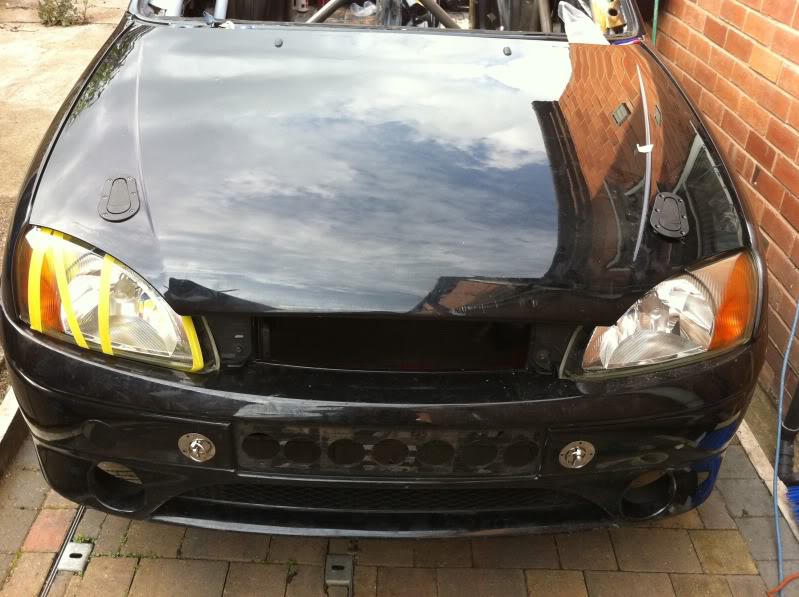
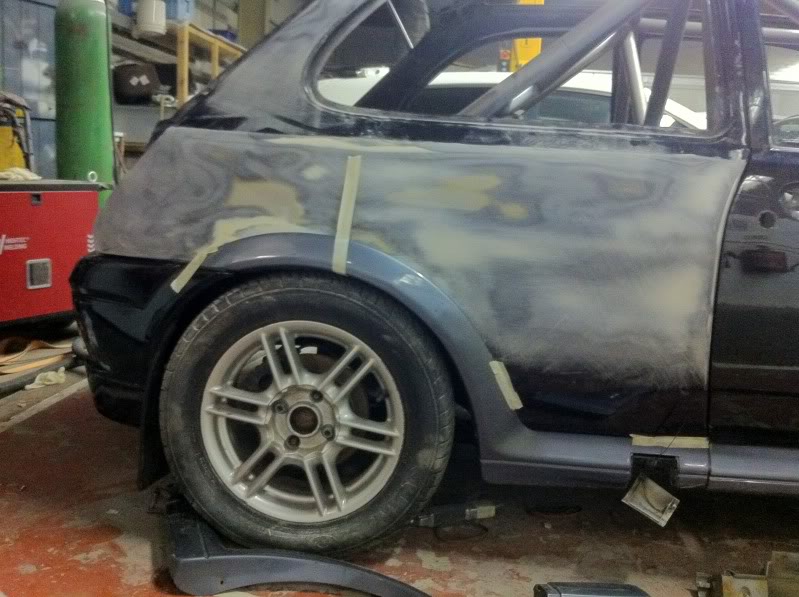
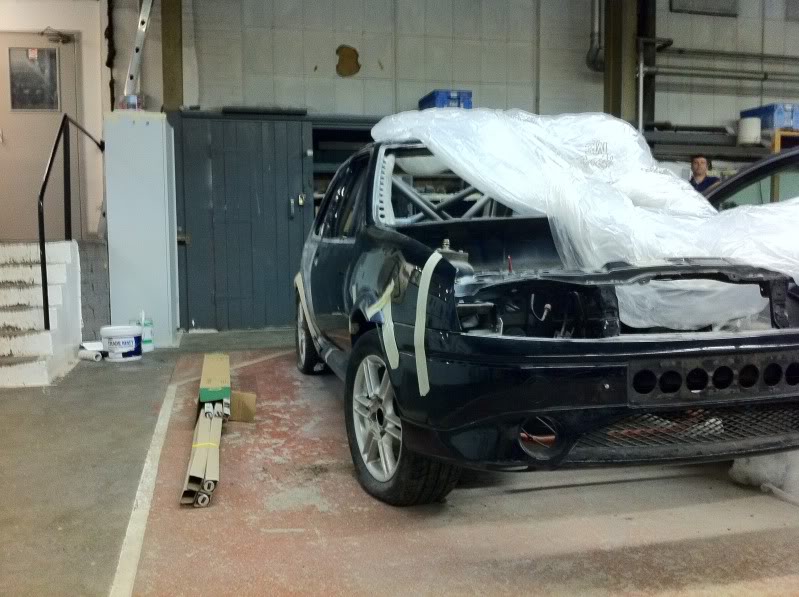
Next up we tackled fitting the aerocatches to the front of the bonnet:
All fitted in place and secure for the moment:
I have still got to figure out how to secure the rear of the bonnet, I may go for a second set of aerocatches, if I can pick a set up cheap enough.
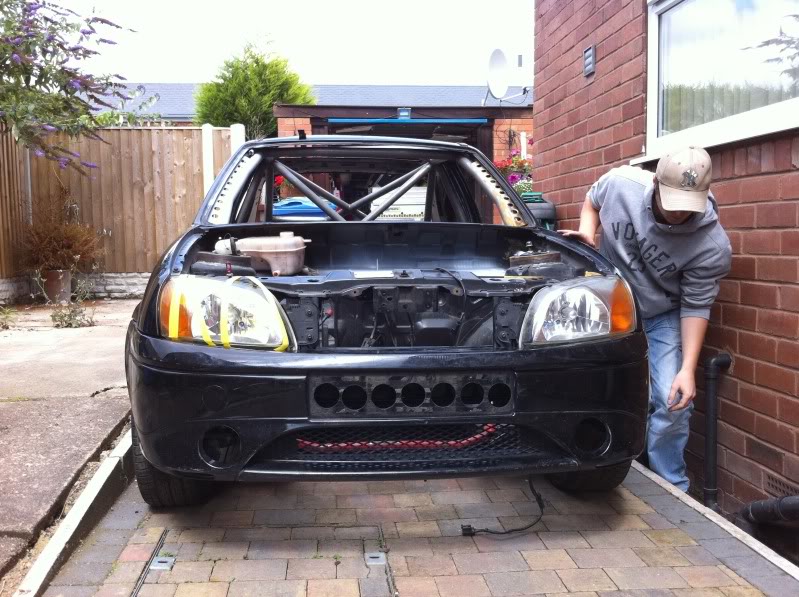
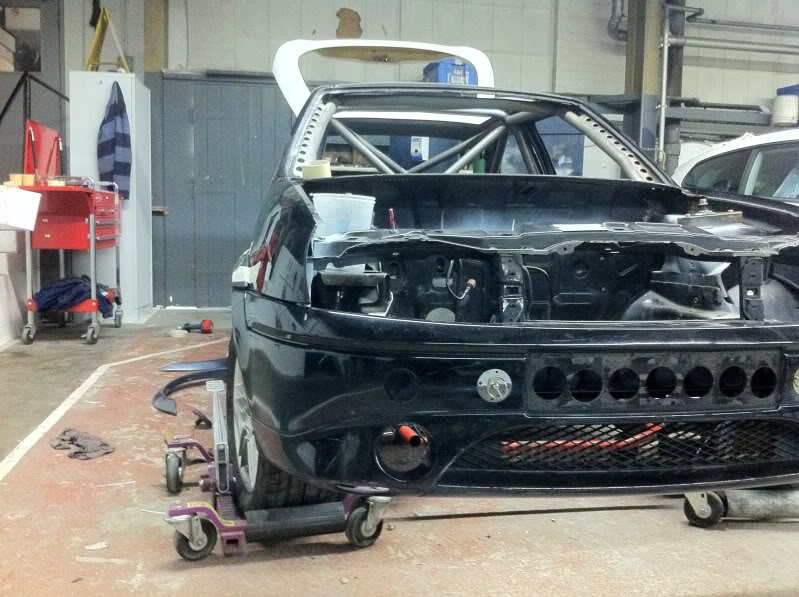
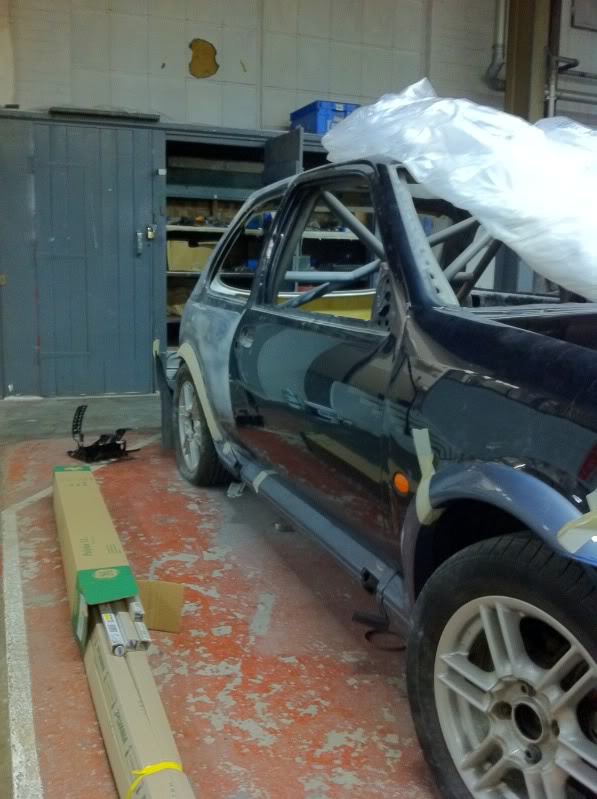
I was pretty impressed at this point, as the car looked "semi-car-like" and here is how it stood:
And to finish off the day, we took to playing with the dash to get it to fit, there isnt much left of it at all now, as alot was chopped to get it in:

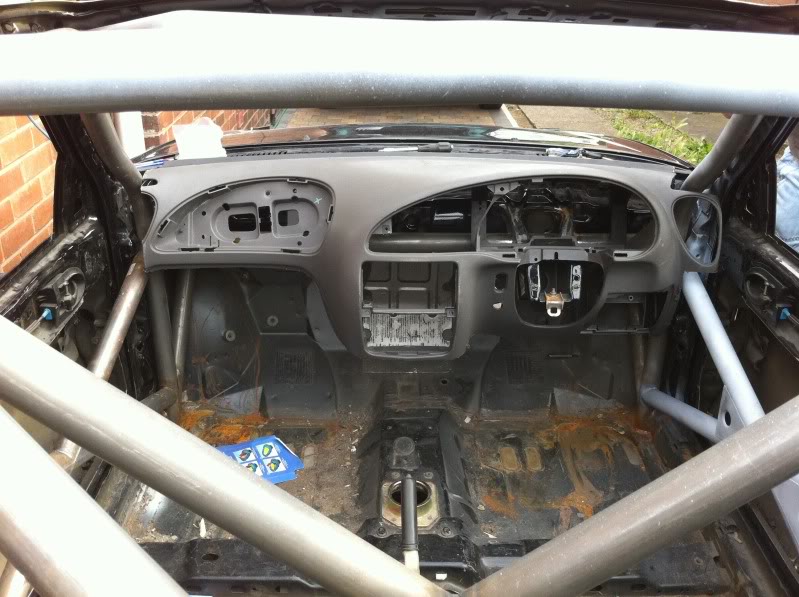
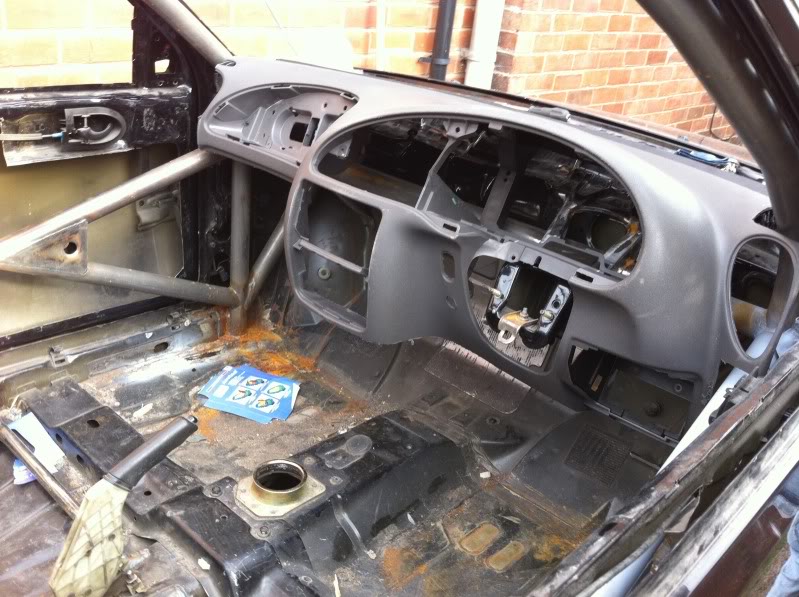
There is still alot of tidying to do with it, as it's only a quick modification to get it in place, but will get it finished over the next week or so.
Thanks for looking!
All fitted in place and secure for the moment:
I have still got to figure out how to secure the rear of the bonnet, I may go for a second set of aerocatches, if I can pick a set up cheap enough.
I was pretty impressed at this point, as the car looked "semi-car-like" and here is how it stood:
And to finish off the day, we took to playing with the dash to get it to fit, there isnt much left of it at all now, as alot was chopped to get it in:
There is still alot of tidying to do with it, as it's only a quick modification to get it in place, but will get it finished over the next week or so.
Thanks for looking!
26-10-2010, 07:36 PM
#45
Regular Contributor
Thread Starter
Car should be off for paint in the next fortnight, so this is where we are at:
I've offered up the carbon roof, and looks so good!


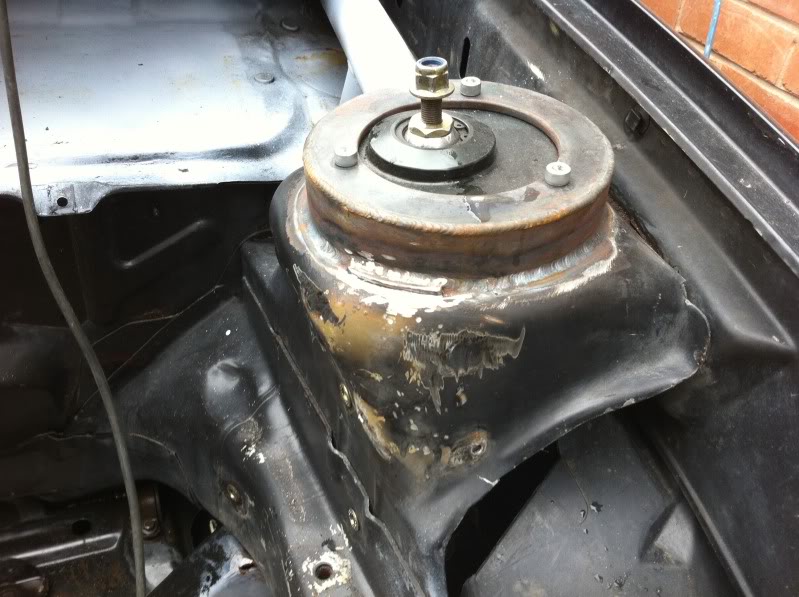
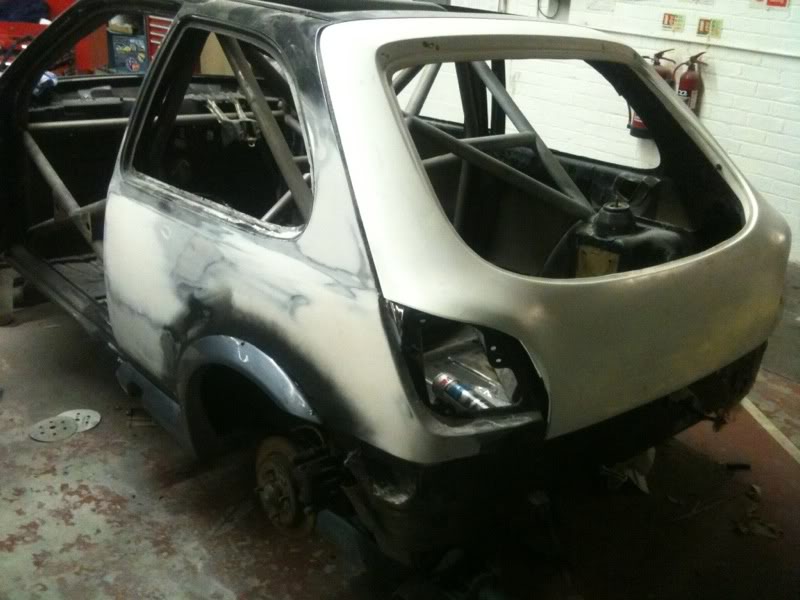
Took off alot of brackets like on the rear and engine bay, it wont needs bits like rear seat belts or an airbox, so little bit of weight loss:
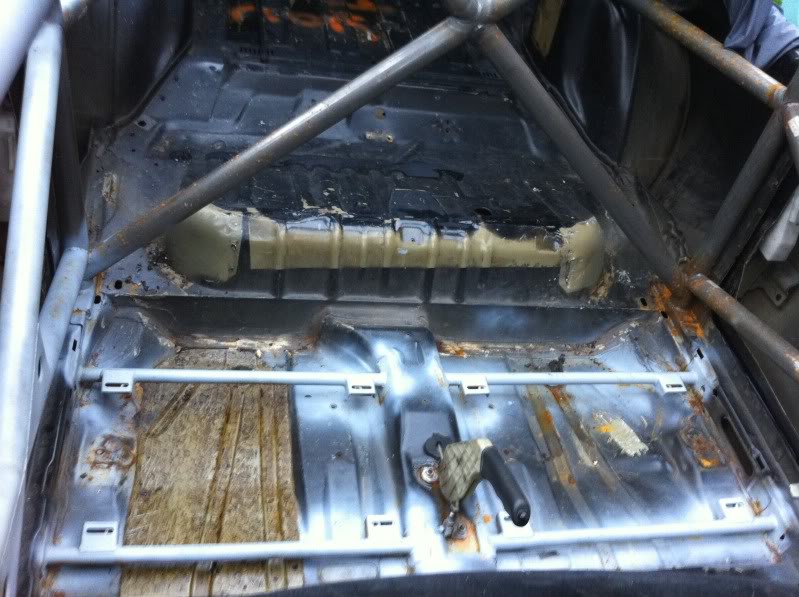
Got the last of the sound deadening out, and cleaned up the floor:
TBC
I've offered up the carbon roof, and looks so good!
Took off alot of brackets like on the rear and engine bay, it wont needs bits like rear seat belts or an airbox, so little bit of weight loss:
Got the last of the sound deadening out, and cleaned up the floor:
TBC
26-10-2010, 07:39 PM
#46
Regular Contributor
Thread Starter
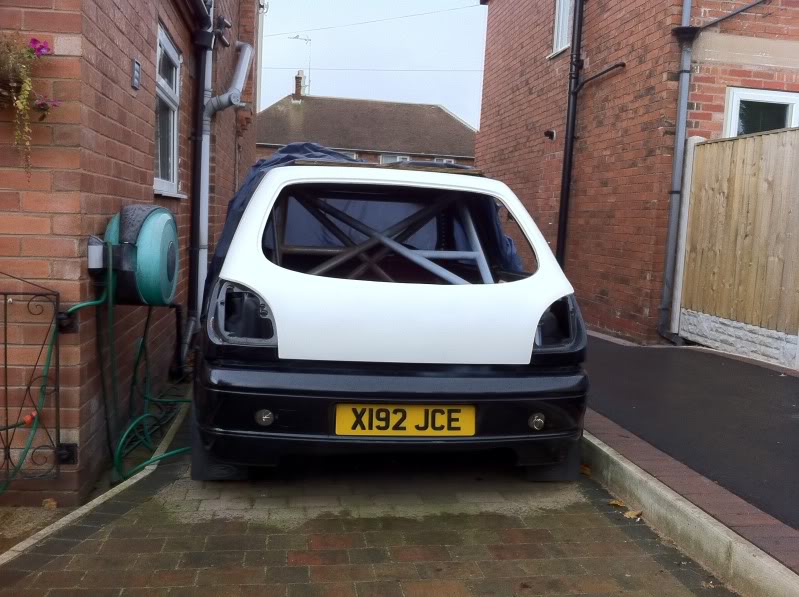
Also recieved a parcel, it might upset the purists, but I like it:
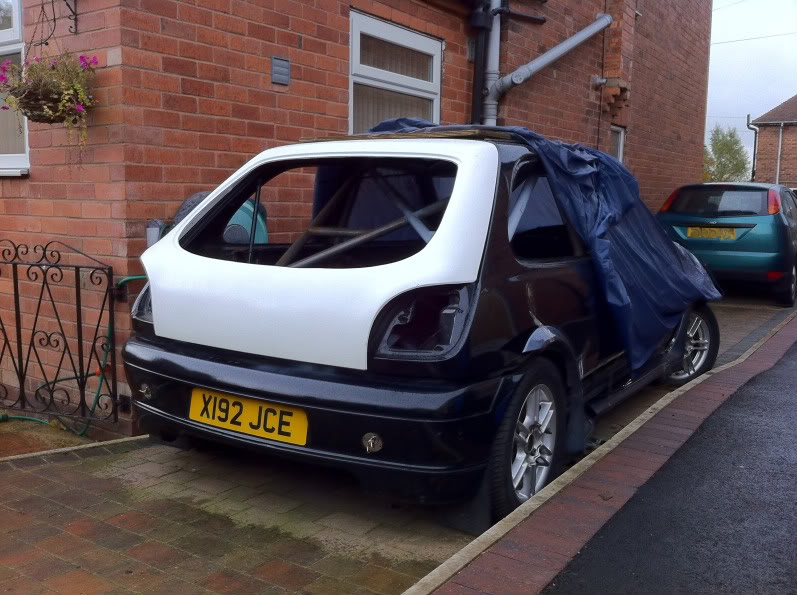
And also got a fibreglass bootlid made, and fitted that:
All thats left is to tidy up a few loose ends, and my painter will be getting it collected, ready for its full respray, inside and engine bay included.
And also got a fibreglass bootlid made, and fitted that:
All thats left is to tidy up a few loose ends, and my painter will be getting it collected, ready for its full respray, inside and engine bay included.
08-11-2010, 07:16 PM
#48
Regular Contributor
Thread Starter
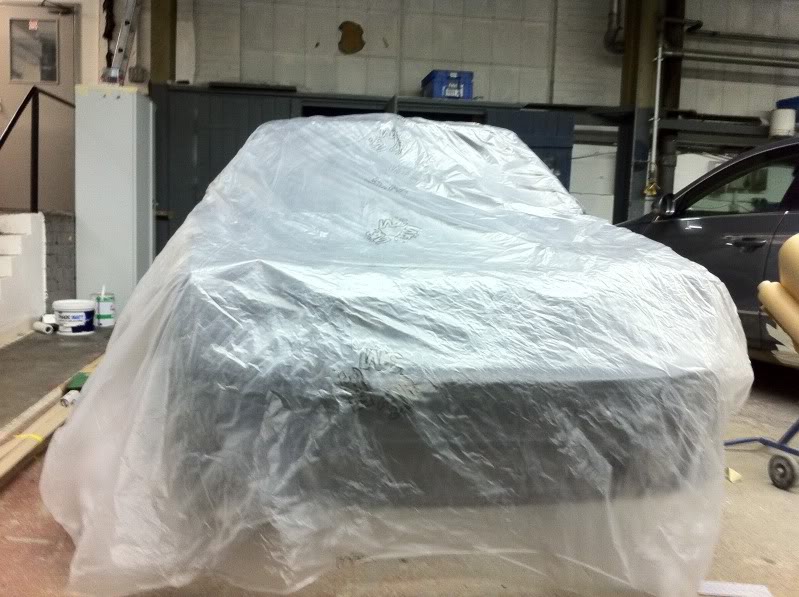
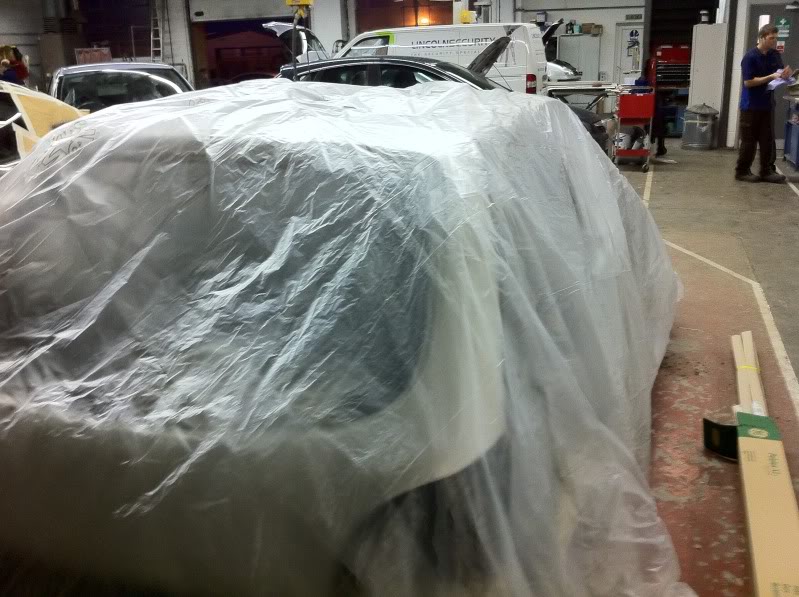
Car went to the body shop last week for its new coat, looking forward to getting it back.
Off it went:
24 hours later I went up, and great progress already:
Arches temp in place:
Front bumper flared to work with arches:
And one of it all in place:
I should be going back up end of this week to have a look at some other bits, my painter has got some great ideas for what else to do, to make it differnt, but not OTT.


 21-11-2010, 05:05 PM
#54
Regular Contributor
Thread Starter
Progress has been a bit slow as of late, but here's a little bit more to keep you entertained!
I had ordered some new wheels a few weeks ago, been looking for a well price set of these for ages, as they are the best wheel suited to these cars in my opinion, so cue a set of TD Pro Race 1.2's, 15" flavour:
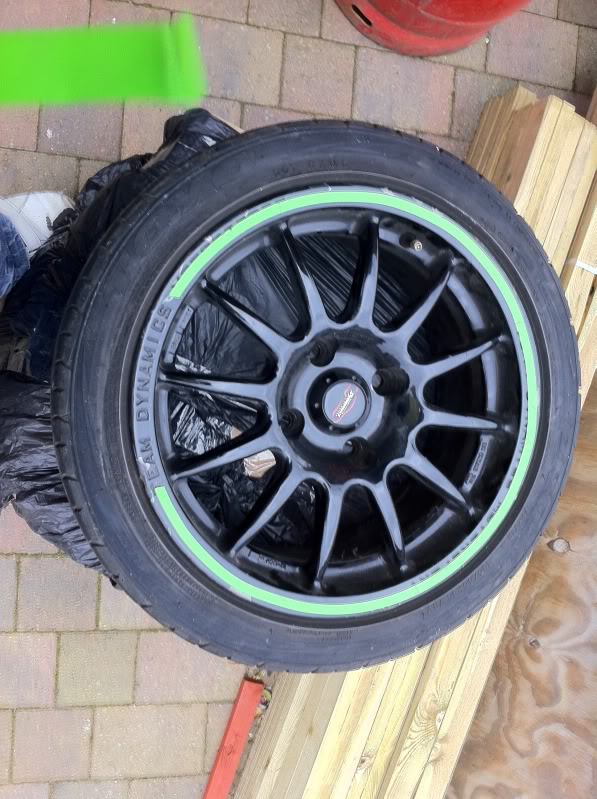
Dont worry though, the gash rim tape will be going, and wheels do need a refurb, may powdercoat them, or just paint them, not decided yet. Tyres are Toyo Proxxie 4's I think, still a decent amount of tread on them, so will be fine for shakedown and MOT, then when I come across a set of Road Legal Slicks, they will be going on.
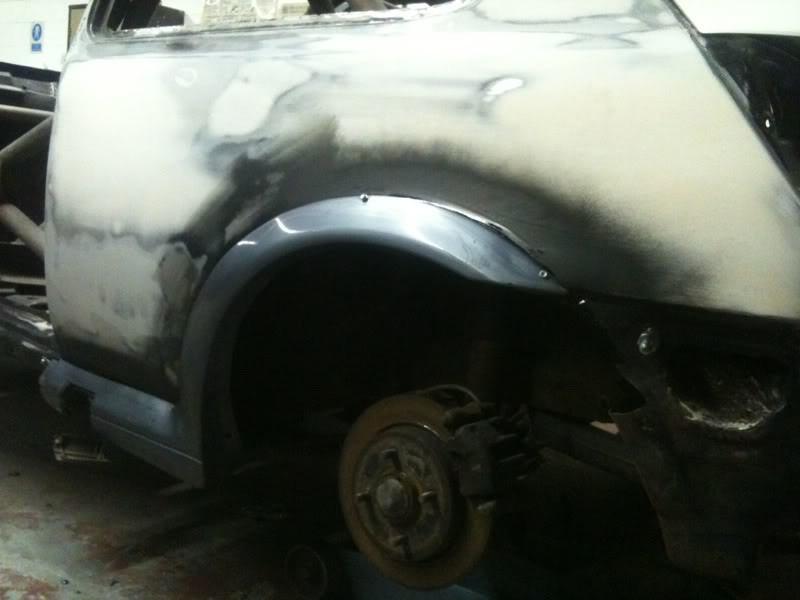
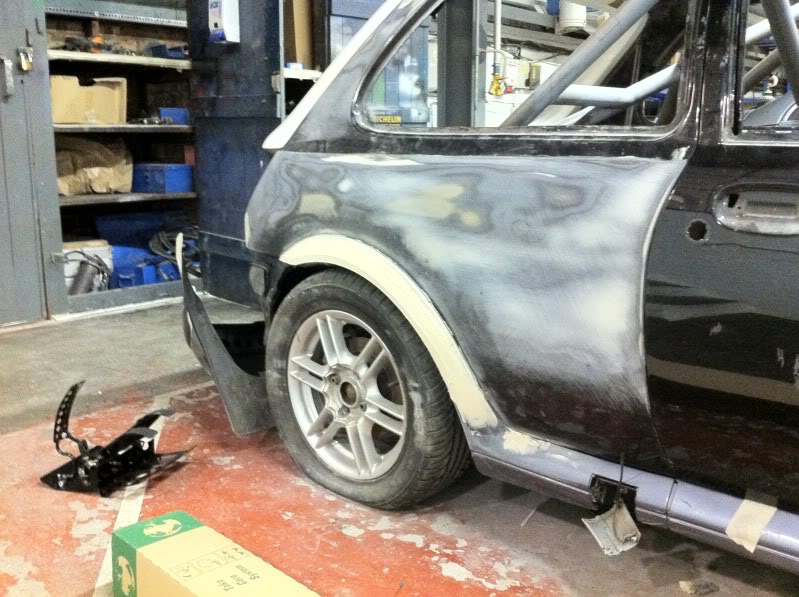
I also went down to the bodyshop last week, not a massive amount of progress has been made, as the guy doing it works for VW, so has other work on aswell as mine, but paint has been ordered Will be going this colour:
Nothing to over the top, but will look awesome with the carbon fibre acents, inside will be Ford Frozen White.
Developments at the bodyshop are this so far:
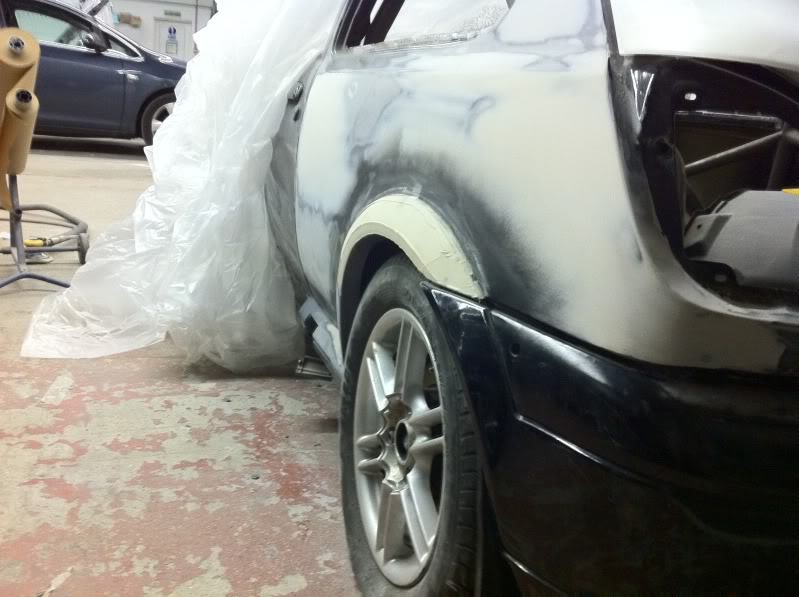
Rear aches now secured in place and rear bumper has been secured, needed to use a second set of pins, bit fits a treat now:
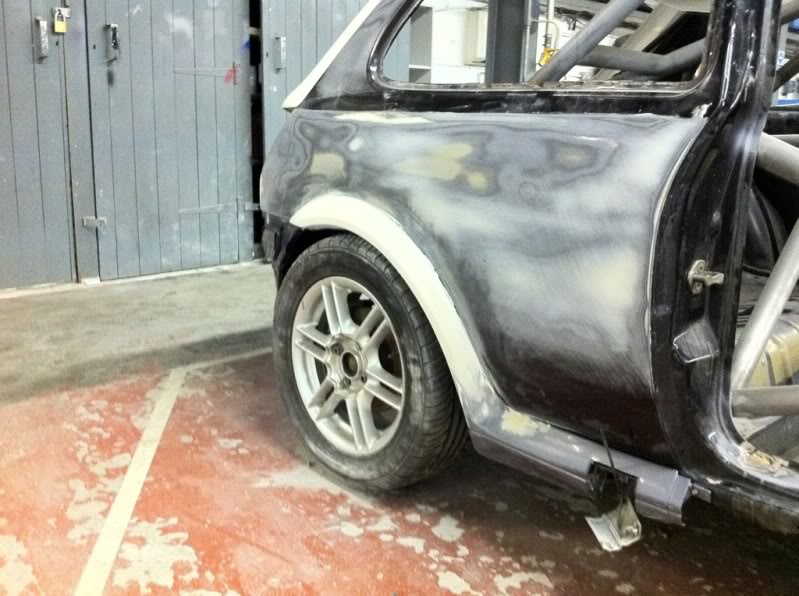
The car has also previously had a rear quarter at some point, and was badly fitted, this was revealed when grinding the welds down, the new quarter was laid over the top, rather than having it fully removed:
My painter will be sorting this out, he is a self proclaimed perfectionist, so wont settle for anything less! Bit drastic looking, but rear bumper now fits much better after this:
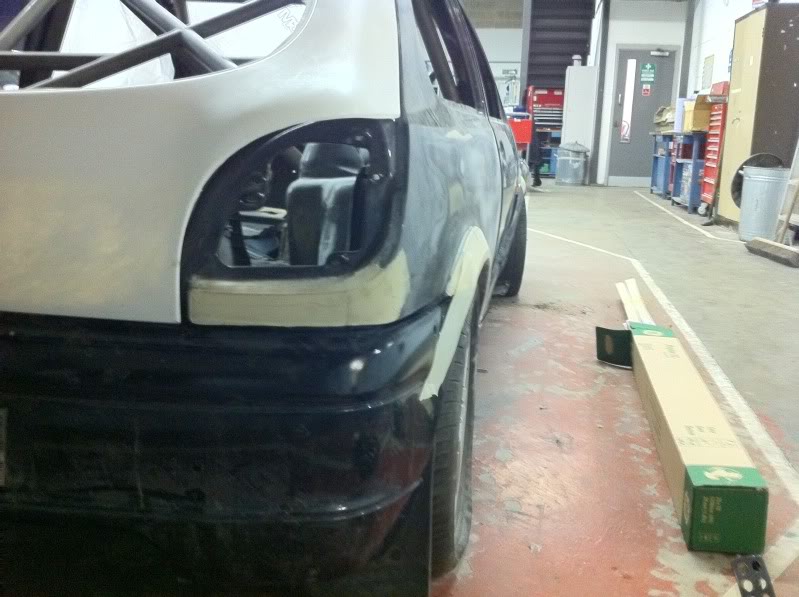
Rear pins have also been moved to the numberplate recess now, as they would not hold the bumper in the correct position and it sagged, however it does look much cleaner, I told him to take bodywork up as a career!
And finally the botched quarter, paint was always very flat, and has had to have a decent skim of filler, is only one skim thick mind, but shows how badly out it was too. Note welded up fuel filler, this is going to be relocated to the inside of the car, a neat mod!
Thats about it for now, I have been told it should be in primer by the end of this month, and back with me for Xmas, but I'm not in too much of a rush, need to get some money back together, to start saving for wiring and brake/fuel lines!
Thanks for reading.
I had ordered some new wheels a few weeks ago, been looking for a well price set of these for ages, as they are the best wheel suited to these cars in my opinion, so cue a set of TD Pro Race 1.2's, 15" flavour:
Dont worry though, the gash rim tape will be going, and wheels do need a refurb, may powdercoat them, or just paint them, not decided yet. Tyres are Toyo Proxxie 4's I think, still a decent amount of tread on them, so will be fine for shakedown and MOT, then when I come across a set of Road Legal Slicks, they will be going on.
I also went down to the bodyshop last week, not a massive amount of progress has been made, as the guy doing it works for VW, so has other work on aswell as mine, but paint has been ordered
Will be going this colour:Nothing to over the top, but will look awesome with the carbon fibre acents, inside will be Ford Frozen White.
Developments at the bodyshop are this so far:
Rear aches now secured in place and rear bumper has been secured, needed to use a second set of pins, bit fits a treat now:
The car has also previously had a rear quarter at some point, and was badly fitted, this was revealed when grinding the welds down, the new quarter was laid over the top, rather than having it fully removed:
My painter will be sorting this out, he is a self proclaimed perfectionist, so wont settle for anything less! Bit drastic looking, but rear bumper now fits much better after this:
Rear pins have also been moved to the numberplate recess now, as they would not hold the bumper in the correct position and it sagged, however it does look much cleaner, I told him to take bodywork up as a career!
And finally the botched quarter, paint was always very flat, and has had to have a decent skim of filler, is only one skim thick mind, but shows how badly out it was too. Note welded up fuel filler, this is going to be relocated to the inside of the car, a neat mod!
Thats about it for now, I have been told it should be in primer by the end of this month, and back with me for Xmas, but I'm not in too much of a rush, need to get some money back together, to start saving for wiring and brake/fuel lines!
Thanks for reading.
22-11-2010, 04:54 PM
#55
PassionFord Post Whore!!
iTrader: (3)

Join Date: Jun 2003
Location: Maldon, Essex!
Posts: 4,186
Likes: 0
Received 0 Likes
on
0 Posts
Excellent project mate,i just took the time to read through whole thread. Will look superb in that colour. Cant wait to see it straight out of the paintshop.
23-11-2010, 04:51 PM
#56
PassionFord Post Whore!!

Join Date: Jan 2005
Location: Westhoughton Bolton
Posts: 4,186
Likes: 0
Received 0 Likes
on
0 Posts
looking really good but why is your kit being held in with what looks like wood screws?! hope thats not how its going to be held in permantly.
23-11-2010, 05:44 PM
#57
Regular Contributor
Thread Starter
They are pannel screws, they are just in place to secure the kit on while it is being prepared. They will be bonded on once all fitted correctly and in place.
 23-11-2010, 07:36 PM
#60
Regular Contributor
Thread Starter
Cheers James!
Yes you could say it is slightly different now, certainly in a good way. I'll update with some more pictures once there have been developments in the body shop.
Yes you could say it is slightly different now, certainly in a good way. I'll update with some more pictures once there have been developments in the body shop.

 06-12-2010, 06:07 PM
#62
Regular Contributor
Thread Starter
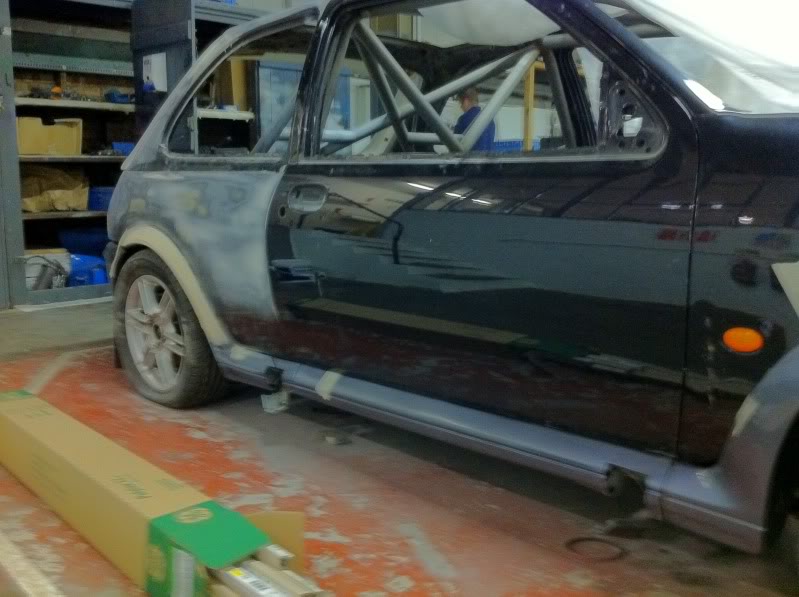
Rear arches now in place:
Also could be spending some more money on it over the next few days, havent been able to get to the bodyshop for a while due to the weather, hopefully get in by the end of this week!
Also could be spending some more money on it over the next few days, havent been able to get to the bodyshop for a while due to the weather, hopefully get in by the end of this week!
06-12-2010, 07:36 PM
#63
I've found that life I needed.. It's HERE!!

im putting the rs kit on mine.. but im a long way off so im glad to see its been done to get my hopes back up will keep an eye on this as im just waiting till new year to get mine fully stripped for paint underside first.
 13-12-2010, 04:48 PM
#65
Regular Contributor
Thread Starter
Time for a little bit more of a pictoral update, as I've just got back from the bodyshop:
As I walked into the shop, car was sat there under covers:
Was told by my painter it was due in for primer on the arches today, but another job came in before, gutted!
Rear arches are now bonded with a light skim of filler, they are still due to be flatted back, so filler is just temporary at the moment:
The front arches have also been lined up, they dont fit perfect, but they are by no means far off fitting, they just require a small amount of filler to fit properly:

Wings are due to be removed over the next few days, and then replacements fitted, and have been modified so will be bolt on/bolt off, even with the RST skirts fitted:
Continued....
As I walked into the shop, car was sat there under covers:
Was told by my painter it was due in for primer on the arches today, but another job came in before, gutted!
Rear arches are now bonded with a light skim of filler, they are still due to be flatted back, so filler is just temporary at the moment:
The front arches have also been lined up, they dont fit perfect, but they are by no means far off fitting, they just require a small amount of filler to fit properly:
Wings are due to be removed over the next few days, and then replacements fitted, and have been modified so will be bolt on/bolt off, even with the RST skirts fitted:
Continued....
13-12-2010, 04:52 PM
#66
Regular Contributor
Thread Starter
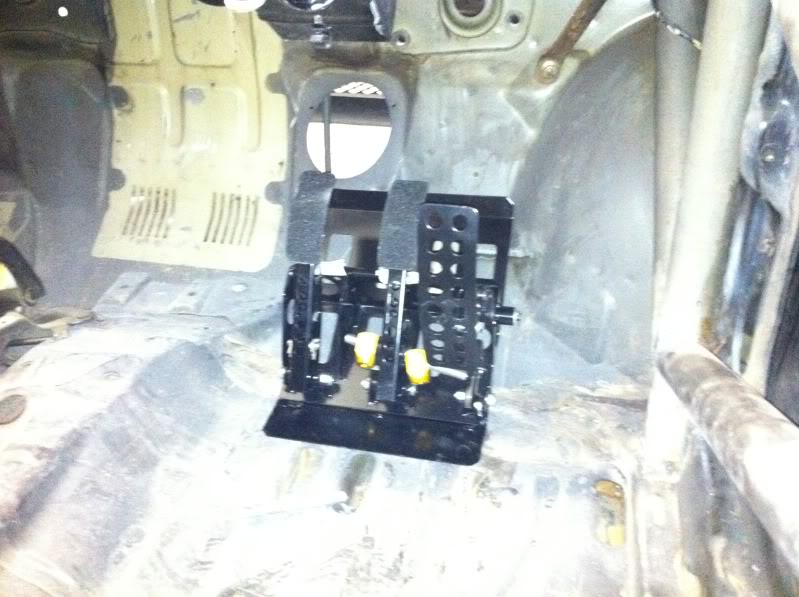
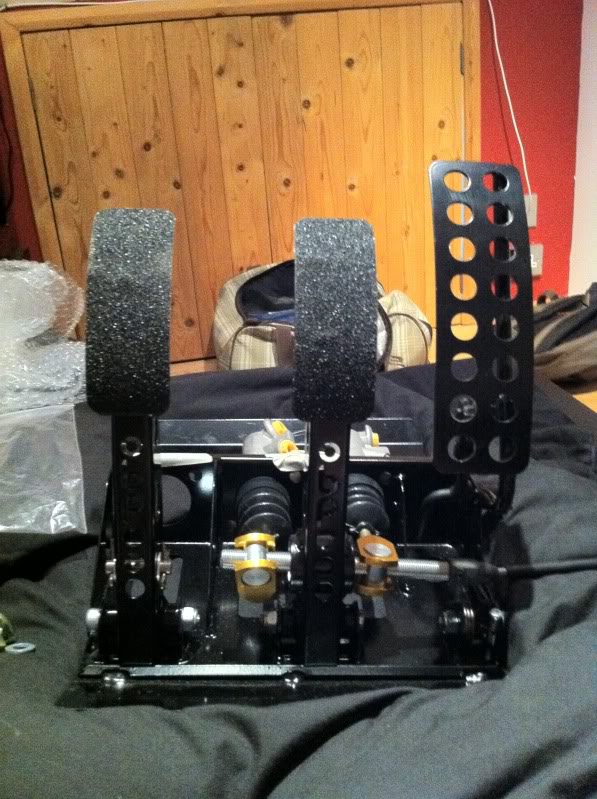
Also offered up my new Optimum Balance Products pedal box and bias assembley, looks to be a straight forward fit, couple of slight alterations and should be in, as its currently sitting on the standard acelerator pedal stop:
And a few more random shots of it:
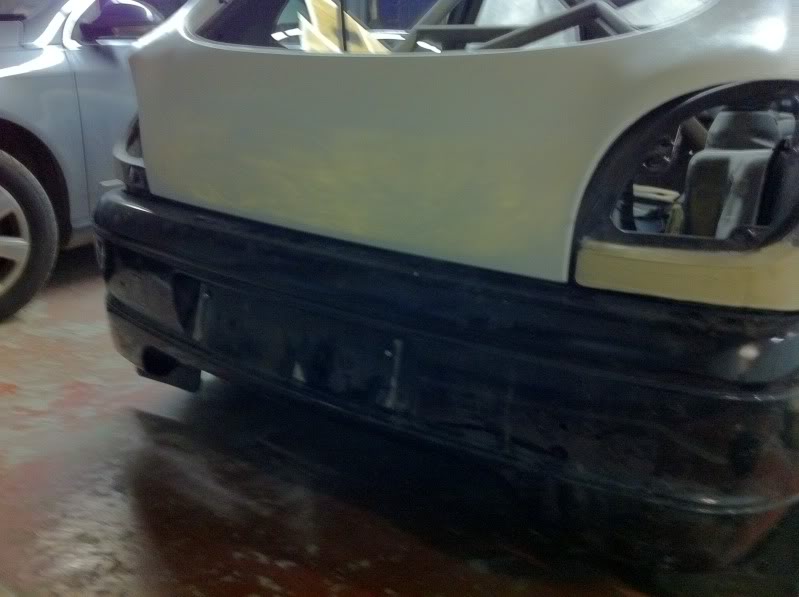
Modified rear bumper mounts:

And finally, the first shot of the paint, still to be thinned down, but looks epic!
I'm in the process of putting the pedal box together, so will stick a few pics up of that shortly.
Thanks for reading.
And a few more random shots of it:
Modified rear bumper mounts:
And finally, the first shot of the paint, still to be thinned down, but looks epic!
I'm in the process of putting the pedal box together, so will stick a few pics up of that shortly.
Thanks for reading.
13-12-2010, 05:28 PM
#67
Regular Contributor
Thread Starter
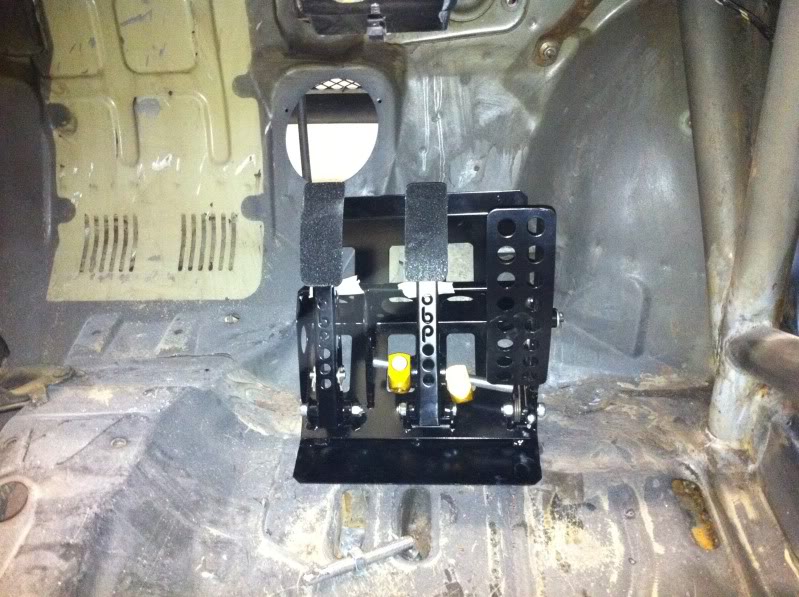
Just been tinkering with my bias box too, thought I'd share the pictures.
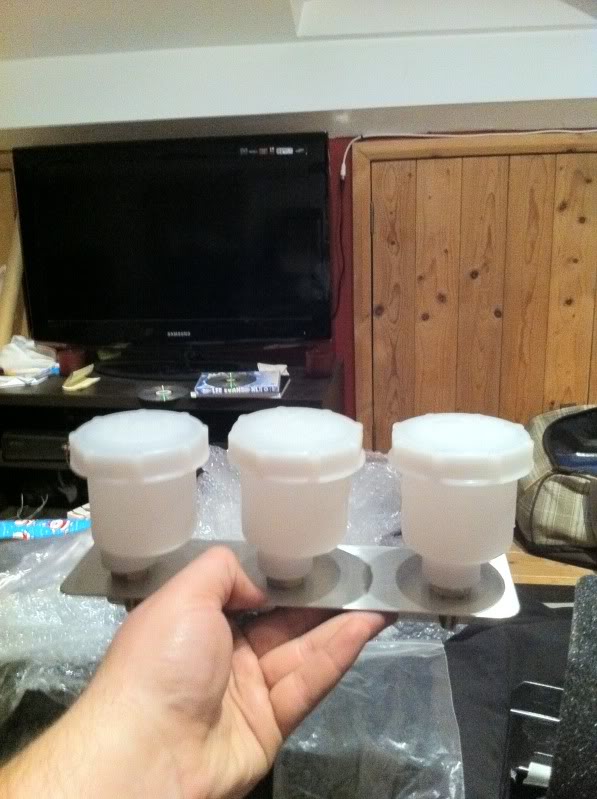
First up, 3 resovoirs, mounted onto support bracket:
Bias box and remote in dash adjuster:
Close up of in dash adjuster:
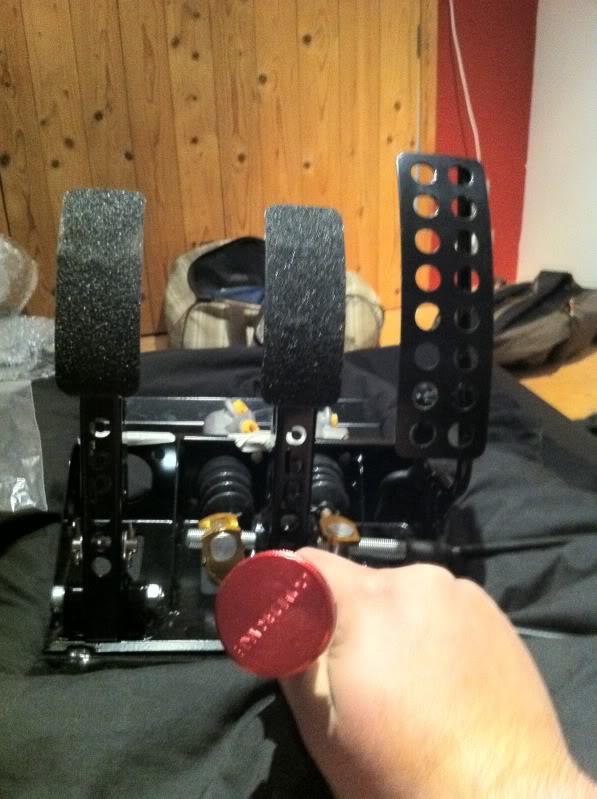
Pedal box with brake master cylinders fitted:
Rear of bias box:
Hope you like, and to make my day even better, I have just paid a deposit on more items from Performance Trim!!
Its been a good day
First up, 3 resovoirs, mounted onto support bracket:
Bias box and remote in dash adjuster:
Close up of in dash adjuster:
Pedal box with brake master cylinders fitted:
Rear of bias box:
Hope you like, and to make my day even better, I have just paid a deposit on more items from Performance Trim!!
Its been a good day
22-12-2010, 09:53 PM
#69
Regular Contributor
Thread Starter
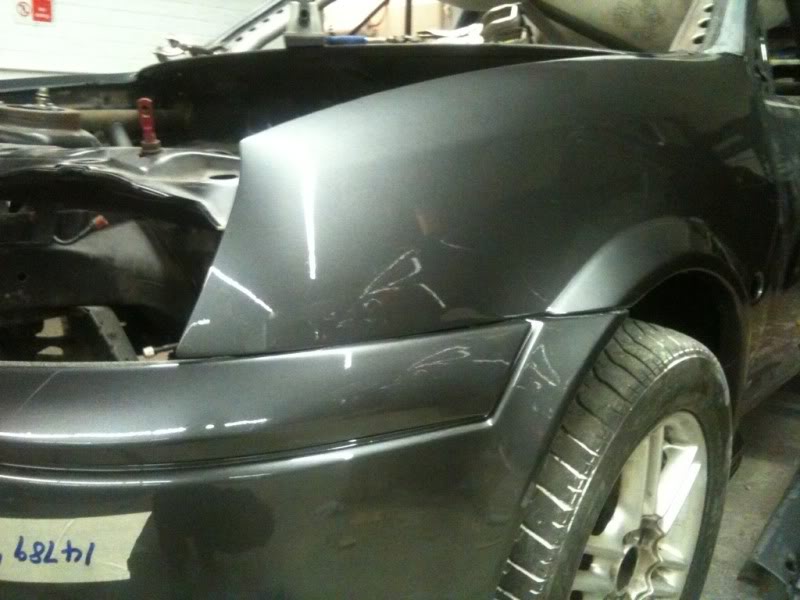
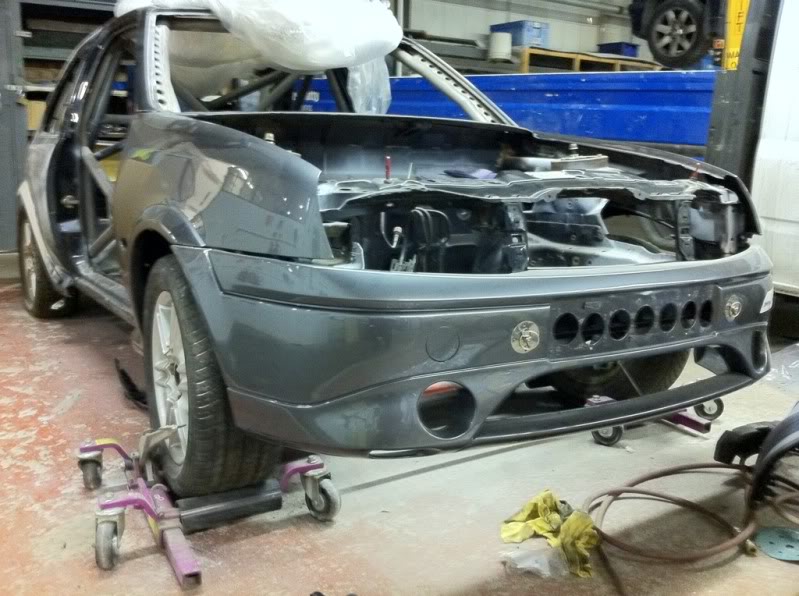
Well, time for another update. Bret had said he got alot done, and he wasnt kidding, walk in today, car has no wings:
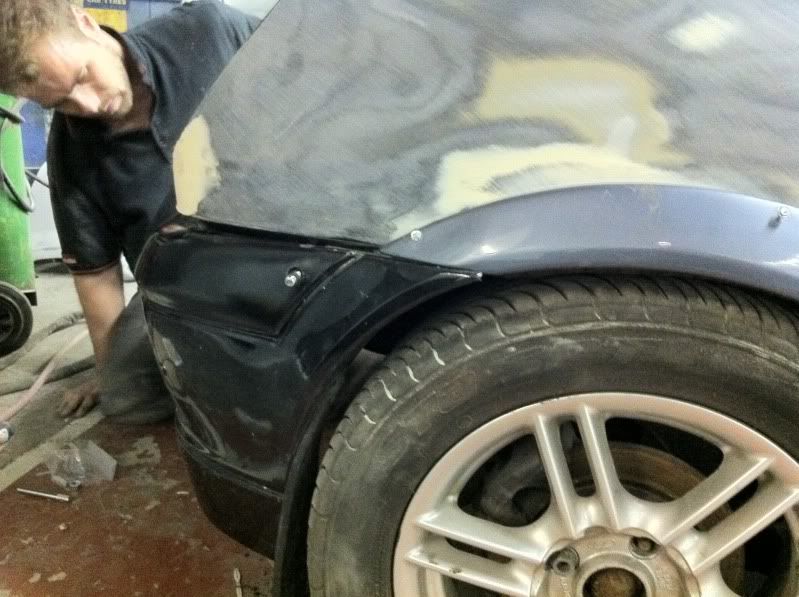
Old ones were in abit of a sorry state, had been filled numerous times and for the cost of replacements, it made alot of sense. Not only had they been fitted, arches had been trimmed, bonded, filled and high build primer applied, just needed flatting back to get that perfect finish:
It's been decided, that front wings will be a bolt on affair, 3 on the top, 2 underneath, and one at the front so can be removed fairly quickly, should they need to be, another fantastic idea from Bret.
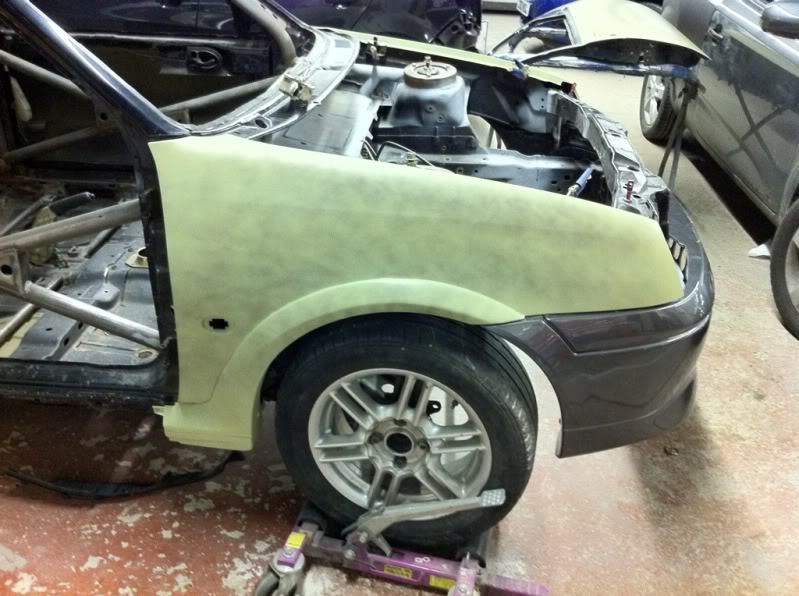
With them fitted in place, it now made it much clearer as to how much wider it has made the front:
Before:
And after:
Old ones were in abit of a sorry state, had been filled numerous times and for the cost of replacements, it made alot of sense. Not only had they been fitted, arches had been trimmed, bonded, filled and high build primer applied, just needed flatting back to get that perfect finish:
It's been decided, that front wings will be a bolt on affair, 3 on the top, 2 underneath, and one at the front so can be removed fairly quickly, should they need to be, another fantastic idea from Bret.
With them fitted in place, it now made it much clearer as to how much wider it has made the front:
Before:
And after:
22-12-2010, 09:57 PM
#70
Regular Contributor
Thread Starter
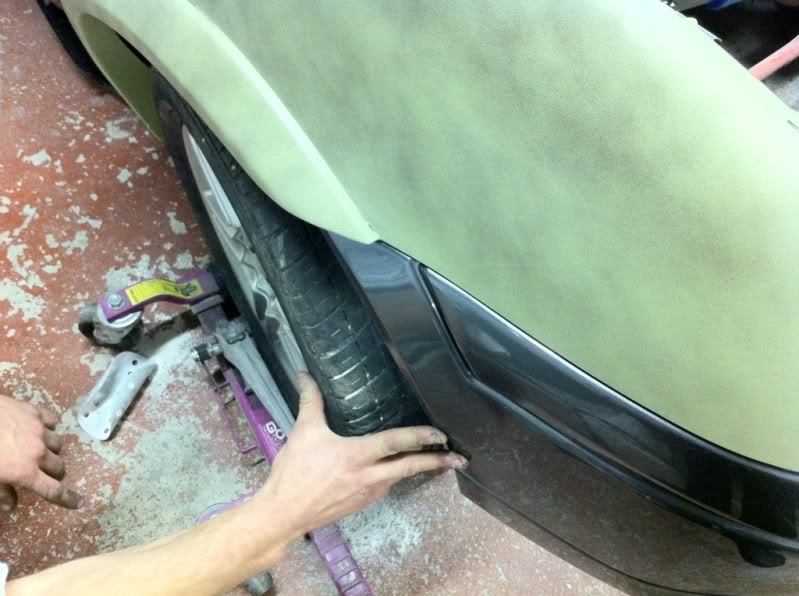
The car now has a much more aggerssive stance to it, I personally love it!
And a few of the rears now finished and ready for primer:
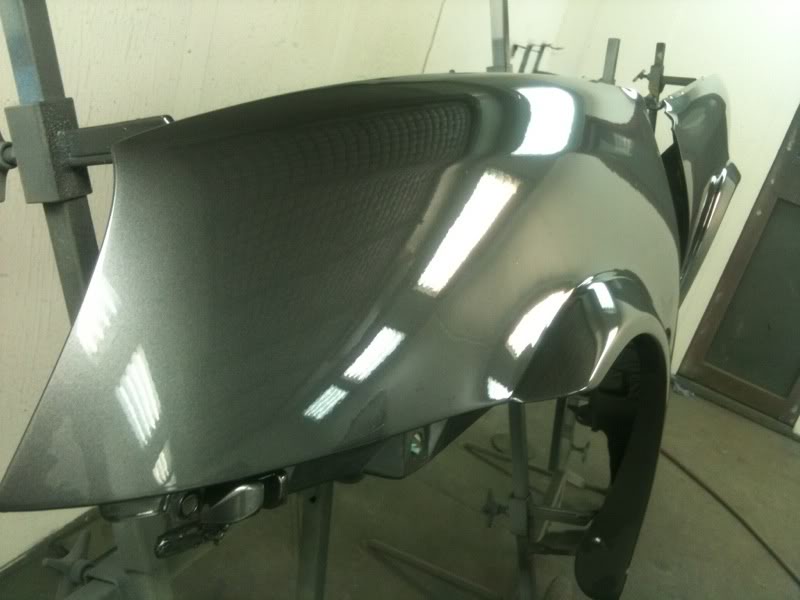
My highlight mind was seeing the (What I thought was finished) bumper in its full colour:
The finish is flawless, and then I get told that its not the finished paint, it was a quick paint just so I could see the colour, my jaw nearly hit the floor as I couldnt spot any problems with it at all! Bret is a perfectionist when it comes to painting mind.
Thats it for now, been told car will hopefully be painted inside and engine bay, by around the start of the new year............ Things are moving on quickly, I'm so excitied to see the next stage of the build.
And a few of the rears now finished and ready for primer:
My highlight mind was seeing the (What I thought was finished) bumper in its full colour:
The finish is flawless, and then I get told that its not the finished paint, it was a quick paint just so I could see the colour, my jaw nearly hit the floor as I couldnt spot any problems with it at all! Bret is a perfectionist when it comes to painting mind.
Thats it for now, been told car will hopefully be painted inside and engine bay, by around the start of the new year............ Things are moving on quickly, I'm so excitied to see the next stage of the build.
28-12-2010, 07:14 PM
#72
Regular Contributor
Thread Starter
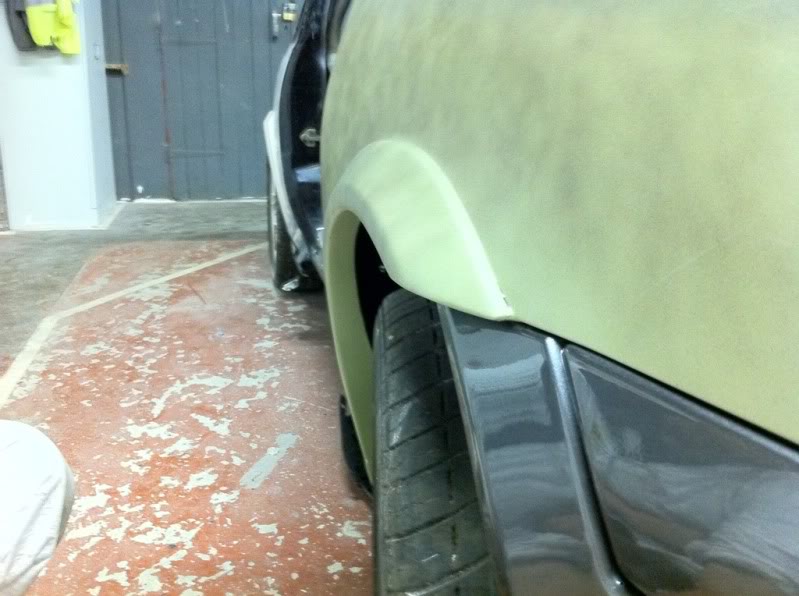
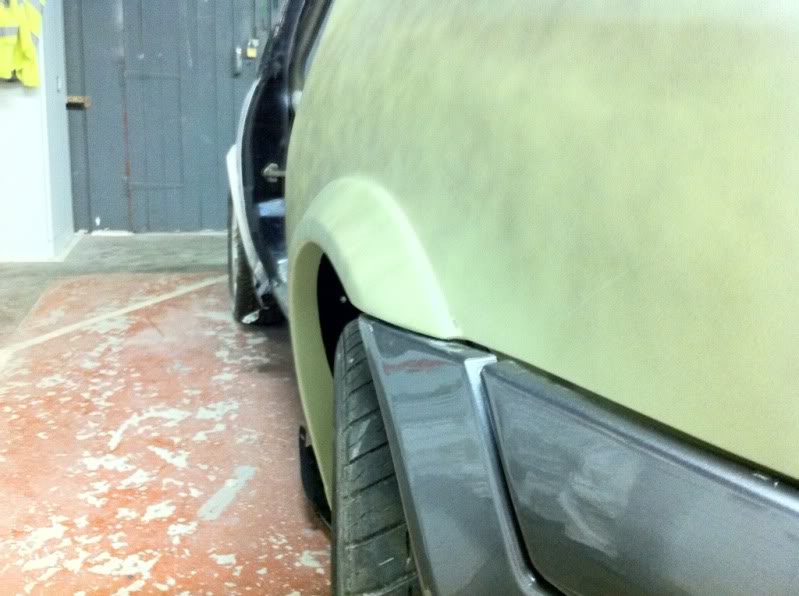
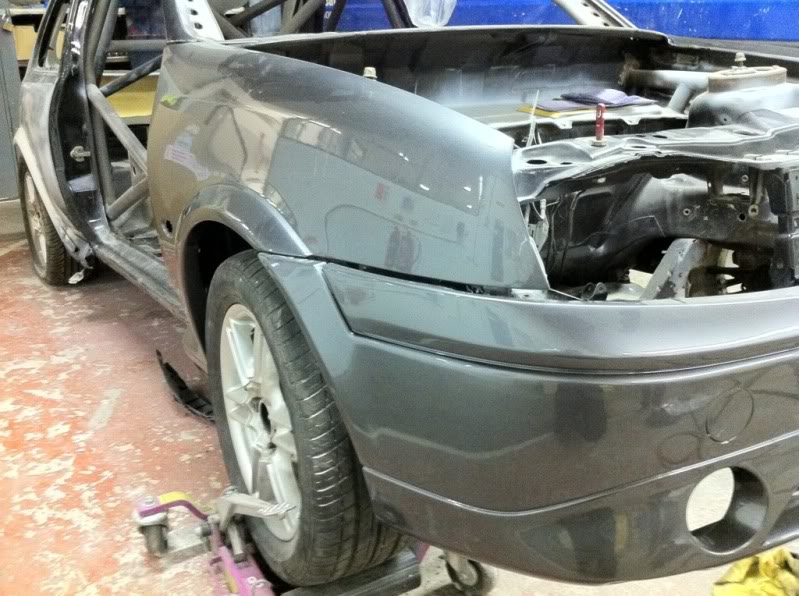
Front arches flatted and ready for primer:
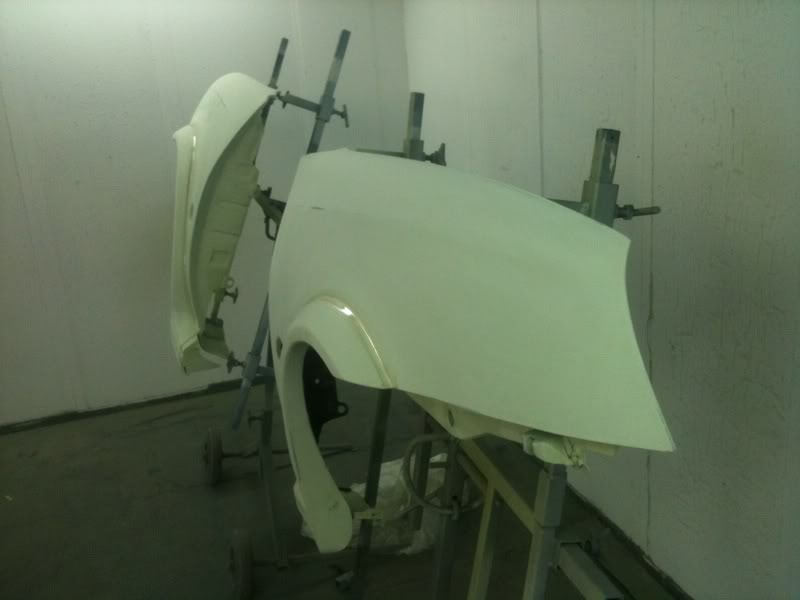
Both in the booth and with first coat of paint:
Finished:
Fitted:
And with bumper:
Awesome.
Huge thanks to Bret (Crewyb) for all his hard work.
Cheers Dan!
Hopefully get down again next week to get some more shots, been told it might be painted inside by the end of next week.
Both in the booth and with first coat of paint:
Finished:
Fitted:
And with bumper:
Awesome.
Huge thanks to Bret (Crewyb) for all his hard work.
Cheers Dan!
Hopefully get down again next week to get some more shots, been told it might be painted inside by the end of next week.

 07-01-2011, 08:57 PM
#79
Regular Contributor
Thread Starter
Just thought I'd share a spec list with you guys, not a boast list, just didnt realize myself how much I'd got for it:
Engine
Ford Zetec-SE 1.6 with standard internals
ShawSpeed Ported head with larger exhaust valves
Jenvery direct to head throttle bodies
Big trumpets
Pico 330cc Injectors
Pipercross sausage filter
ShawSpeed SS4 cams
Piper Valve Springs
ShawSpeed spec big end bolts
Omex 600 ECU
Mikeanics Custom Map
166bhp @ 7686rpm
120.6lb/ft @ 4729rpm
Transmission
FRP gearbox with Barra uprated diff
ShawSpeed lightened flywheel
Helix organic clutch
Suspension
ShawSpeed eccentric top mounts
Area 6 camber adjustable lower arms
Powerflex rear beam bushes
Powerflex anti roll bar bushes
Leda competion height and damning adjustable coilovers
Fiesta manual steering rack
Brakes
Hi-Spec Billet 4 280mm 4 pots front
Focus 2.0L 258mm rear
OBP bias adjustable pedal box with in dash adjuster
ABS removed
Goodridge braided hoses
Wheels and Tyres
15" Team Dynamics Pro Race 1.2
Toyo 195/45/15 tyres
Body
Fiesta Zetec-S Bodyshell
ShawSpeed installed Custom Cages multipoint weld in roll cage
Mazda 121 rear spoiler with integrated brake light
Fiesta RS Turbo front and rear arches with side skirts
Custom Fibreglass smoothed boot
Plastics4Performance perspex windows
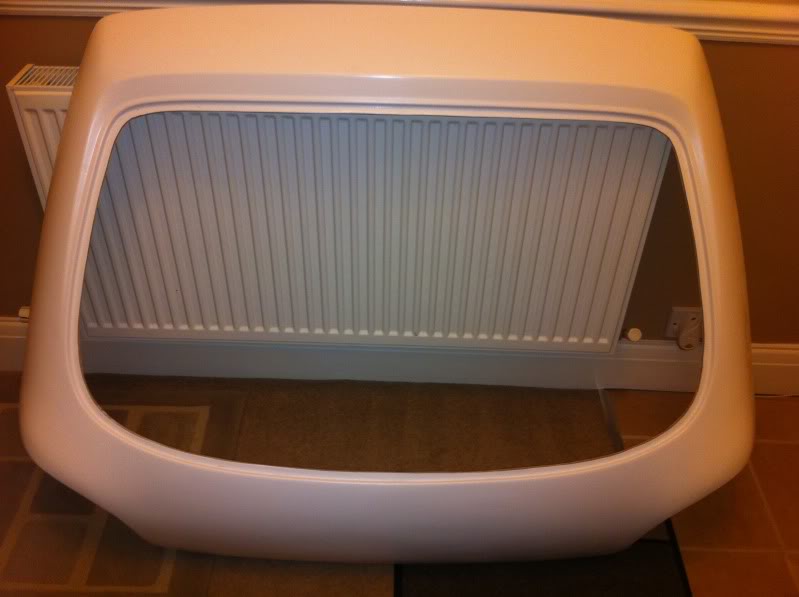
Performance Trim replacement Carbon Fibre roof skin
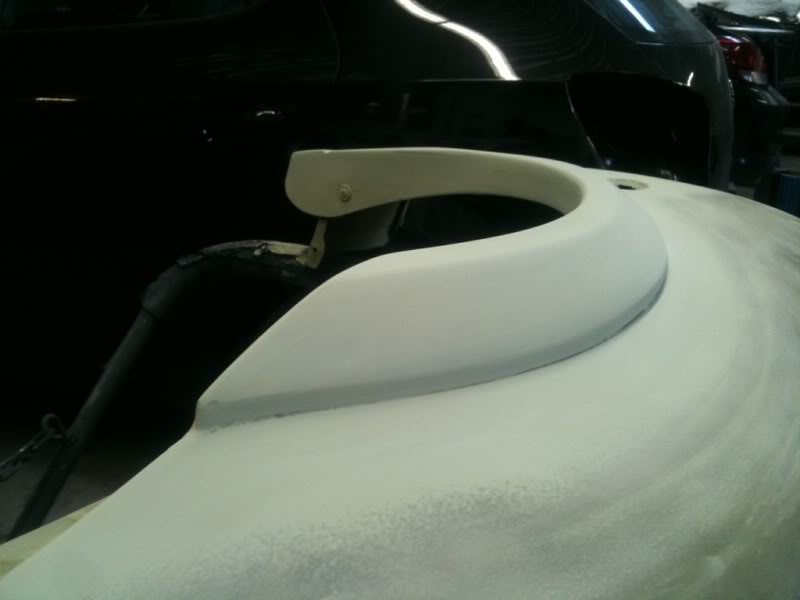
Performance Trim replacement Carbon fibre road spec bonnet
Front aerocatches
Custom VW grey exterior respray
Custom all red rear lights
Lightened front and rear bumpers with quick release body pins
Interior
ShawSpeed custom weld in seat mounts
Sparco Pro 2000 Carbon Fibre drivers seat
Sparco Rev 2 Carbon Fibre passenger seat
TRS Magnum orange 6 point harnesses
Lightweight dash based on standard Fiesta dash
AutoFlock flocked dash and interior parts
Performance Trim Carbon Fibre front and rear door cards
OMP leather steering wheel
All excess mountings and trim removed including seats and door pannels
Standard stereo removed
Airbags removed
Heater system removed
I'm sure there will be bits I've missed and still lots more to sort out, order and fit, but it's pretty comprehensive spec!
Engine
Ford Zetec-SE 1.6 with standard internals
ShawSpeed Ported head with larger exhaust valves
Jenvery direct to head throttle bodies
Big trumpets
Pico 330cc Injectors
Pipercross sausage filter
ShawSpeed SS4 cams
Piper Valve Springs
ShawSpeed spec big end bolts
Omex 600 ECU
Mikeanics Custom Map
166bhp @ 7686rpm
120.6lb/ft @ 4729rpm
Transmission
FRP gearbox with Barra uprated diff
ShawSpeed lightened flywheel
Helix organic clutch
Suspension
ShawSpeed eccentric top mounts
Area 6 camber adjustable lower arms
Powerflex rear beam bushes
Powerflex anti roll bar bushes
Leda competion height and damning adjustable coilovers
Fiesta manual steering rack
Brakes
Hi-Spec Billet 4 280mm 4 pots front
Focus 2.0L 258mm rear
OBP bias adjustable pedal box with in dash adjuster
ABS removed
Goodridge braided hoses
Wheels and Tyres
15" Team Dynamics Pro Race 1.2
Toyo 195/45/15 tyres
Body
Fiesta Zetec-S Bodyshell
ShawSpeed installed Custom Cages multipoint weld in roll cage
Mazda 121 rear spoiler with integrated brake light
Fiesta RS Turbo front and rear arches with side skirts
Custom Fibreglass smoothed boot
Plastics4Performance perspex windows
Performance Trim replacement Carbon Fibre roof skin
Performance Trim replacement Carbon fibre road spec bonnet
Front aerocatches
Custom VW grey exterior respray
Custom all red rear lights
Lightened front and rear bumpers with quick release body pins
Interior
ShawSpeed custom weld in seat mounts
Sparco Pro 2000 Carbon Fibre drivers seat
Sparco Rev 2 Carbon Fibre passenger seat
TRS Magnum orange 6 point harnesses
Lightweight dash based on standard Fiesta dash
AutoFlock flocked dash and interior parts
Performance Trim Carbon Fibre front and rear door cards
OMP leather steering wheel
All excess mountings and trim removed including seats and door pannels
Standard stereo removed
Airbags removed
Heater system removed
I'm sure there will be bits I've missed and still lots more to sort out, order and fit, but it's pretty comprehensive spec!
07-01-2011, 09:01 PM
#80
Regular Contributor
Thread Starter
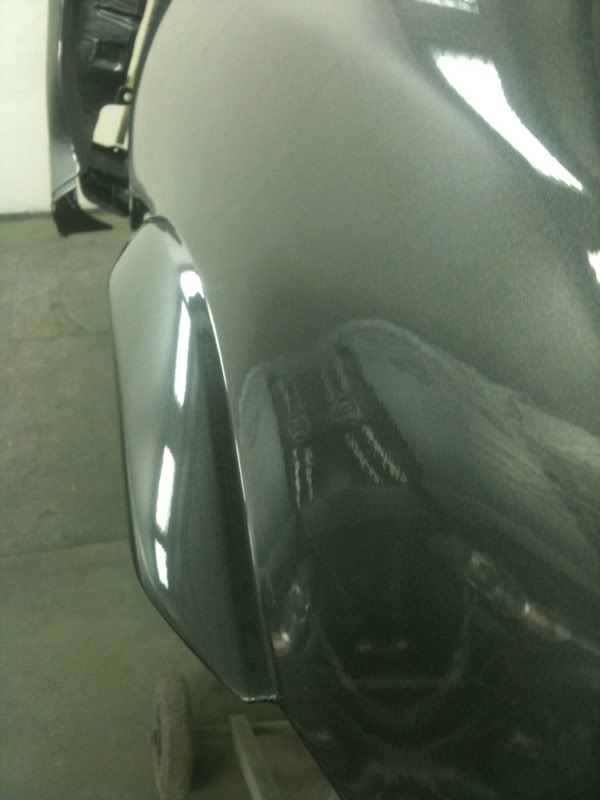
Popped to the 'shop today and thought I'd share the pictures, nothing new, just a chance to see the wings done and fitted more than anything:
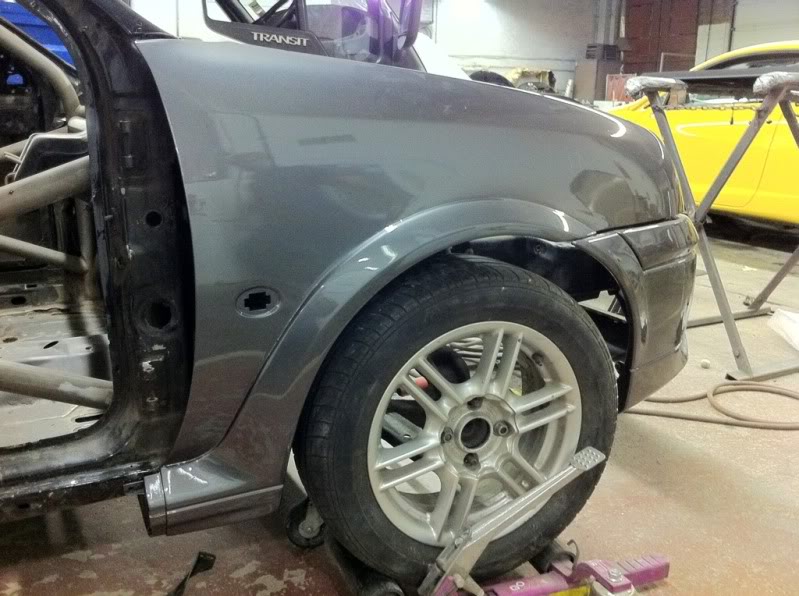
Also tried to get some other shots of the colour, as the colour travel is huge, goes from very light grey to a very deep and dark grey dependant on the light:
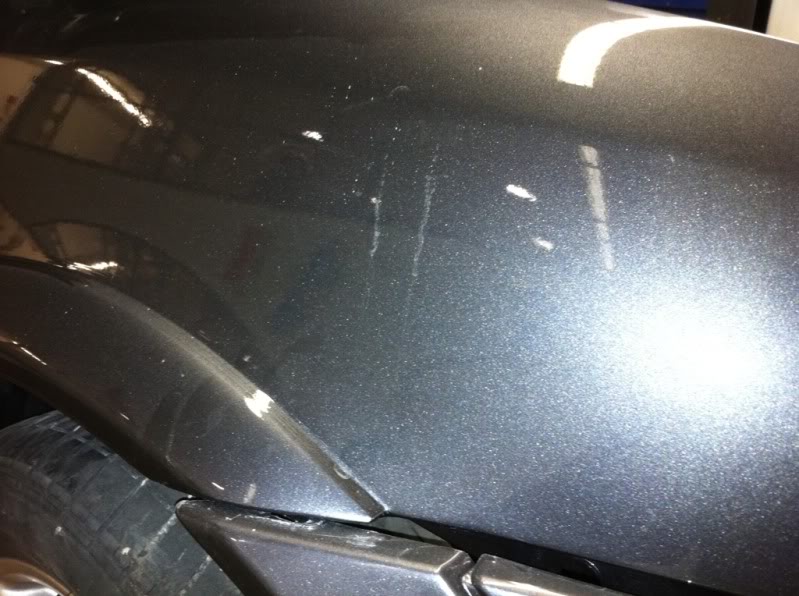
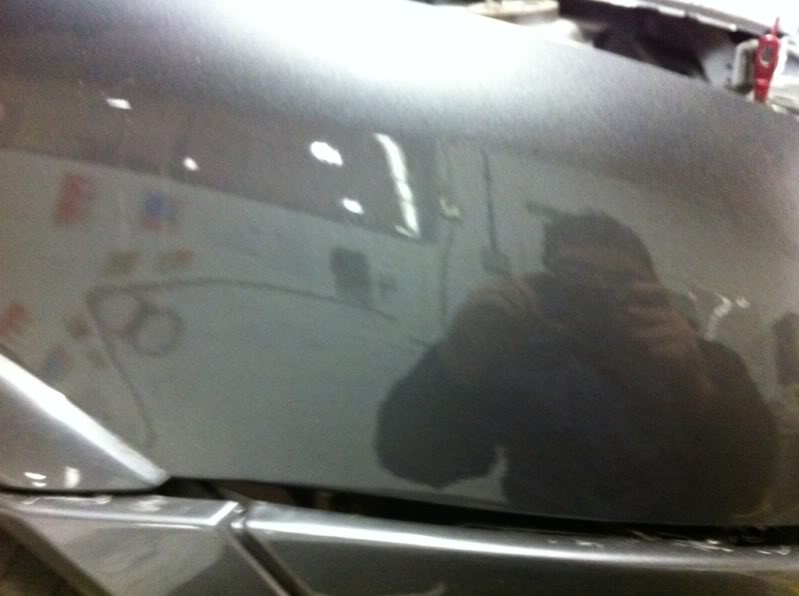
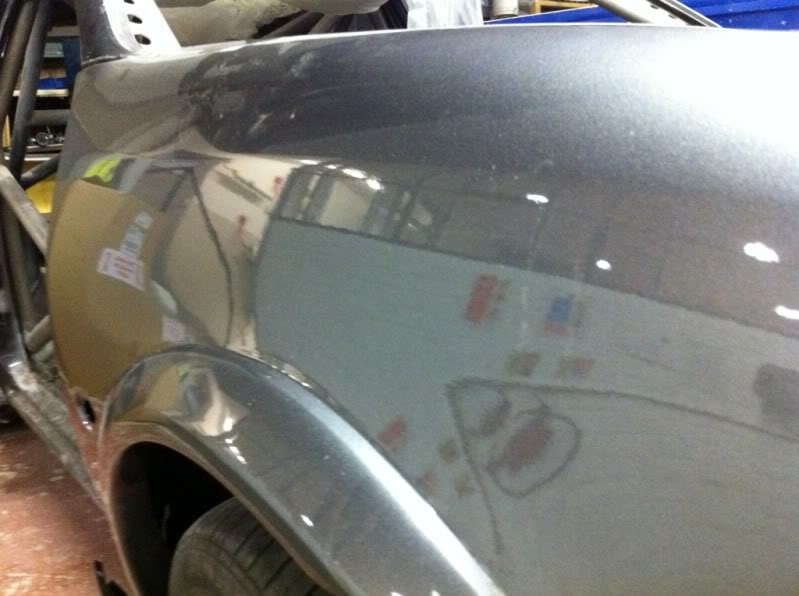
And a final shot situe, not long left, been told inside may be done by end of next week time permitting:
Also tried to get some other shots of the colour, as the colour travel is huge, goes from very light grey to a very deep and dark grey dependant on the light:
And a final shot situe, not long left, been told inside may be done by end of next week time permitting: